Once a document or contract is built (see Building Document Templates), sending it for signature is where you control who signs, how they sign, and how they receive it. This guide covers adding recipients and multiple signers, signing order, signature types, email and SMS delivery, public signing links, document expiration, and redirecting signers to a page after they sign. All of this is managed from Payments → Documents & Contracts.
A document can go to more than one person, and each person can have their own signature fields.
Signers are recipients who have at least one signature field assigned to them. They must complete their assigned fields before the document is considered done.
CC recipients are contacts added to the document without any signature field. They receive a copy to view but have nothing to sign.
You can also add one of your own team members as a Signer on the document, for example when a practice representative needs to countersign a treatment agreement alongside the patient.
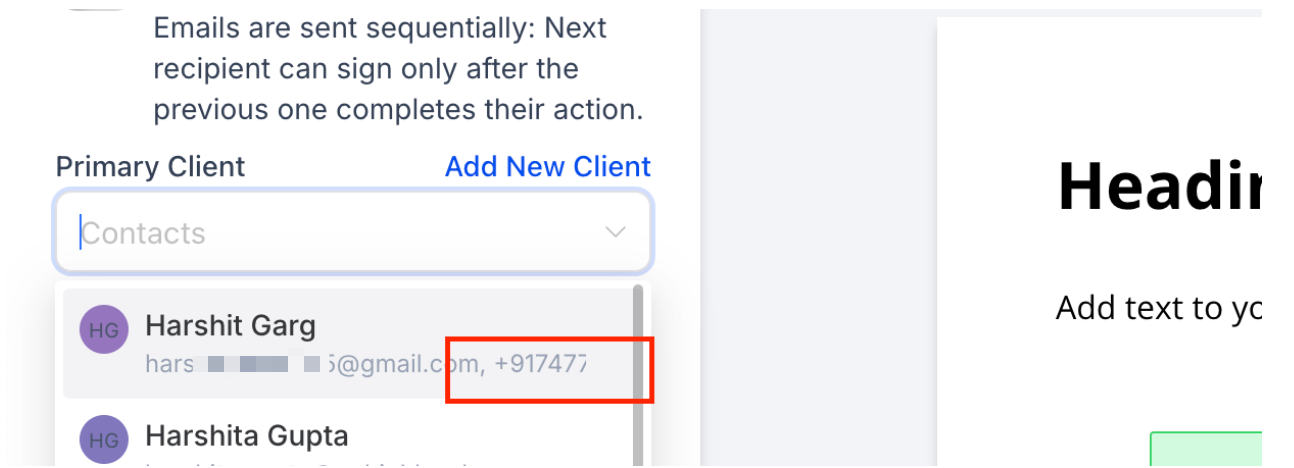
When you create or send a document, add each recipient in the Recipients section, then assign signature fields to the people who need to sign. Anyone left without a signature field is automatically treated as a CC recipient.
The first recipient you add becomes the Primary Recipient. This matters for two reasons:
Any custom fields on the document (patient name, address, and similar merge fields) pull from the Primary Recipient's contact record.
If automatic invoice creation is enabled, the invoice generated after signing is billed to the Primary Recipient.
If a specific person, such as the patient responsible for payment, needs to be the Primary Recipient, add them first before adding co-signers or witnesses.
Once every Signer has completed their portion (and CC recipients have had a chance to view it), Aesthetix CRM generates a combined signed PDF along with a signature certificate. The certificate logs each signer's IP address, approximate location, and the date and time they viewed and signed, which is useful to keep on file for consent forms and other documents that may need an audit trail.
Before sending a multi-signer document, double-check that every Signer has the correct number and placement of signature and date fields. A missing field will prevent that signer from completing the document.
By default, all Signers receive the document at the same time. If you need signatures collected in a specific sequence, such as a patient signing a consent form before a provider countersigns it, you can turn on signing order.
In the recipients list, toggle Signing Order on to enforce a sequence, or leave it off to send to everyone at once.
With signing order enabled, drag and drop recipients into the order you want. Each Signer is emailed only after the person ahead of them has finished.
With signing order disabled, every Signer is notified at the same time and can sign in any order.
If a Signer further down the list doesn't complete their portion, the document stays in a Pending status. You can resend a reminder, or cancel and reassign the fields if needed.
You can control which signature methods recipients are allowed to use across every document sent from your account. This is a single account-wide setting, not a per-document one.
Draw: signers must draw their signature by hand (mouse, trackpad, or touchscreen).
Type: signers type their name and it renders in a script font.
Both: signers can choose either method.
To set it:
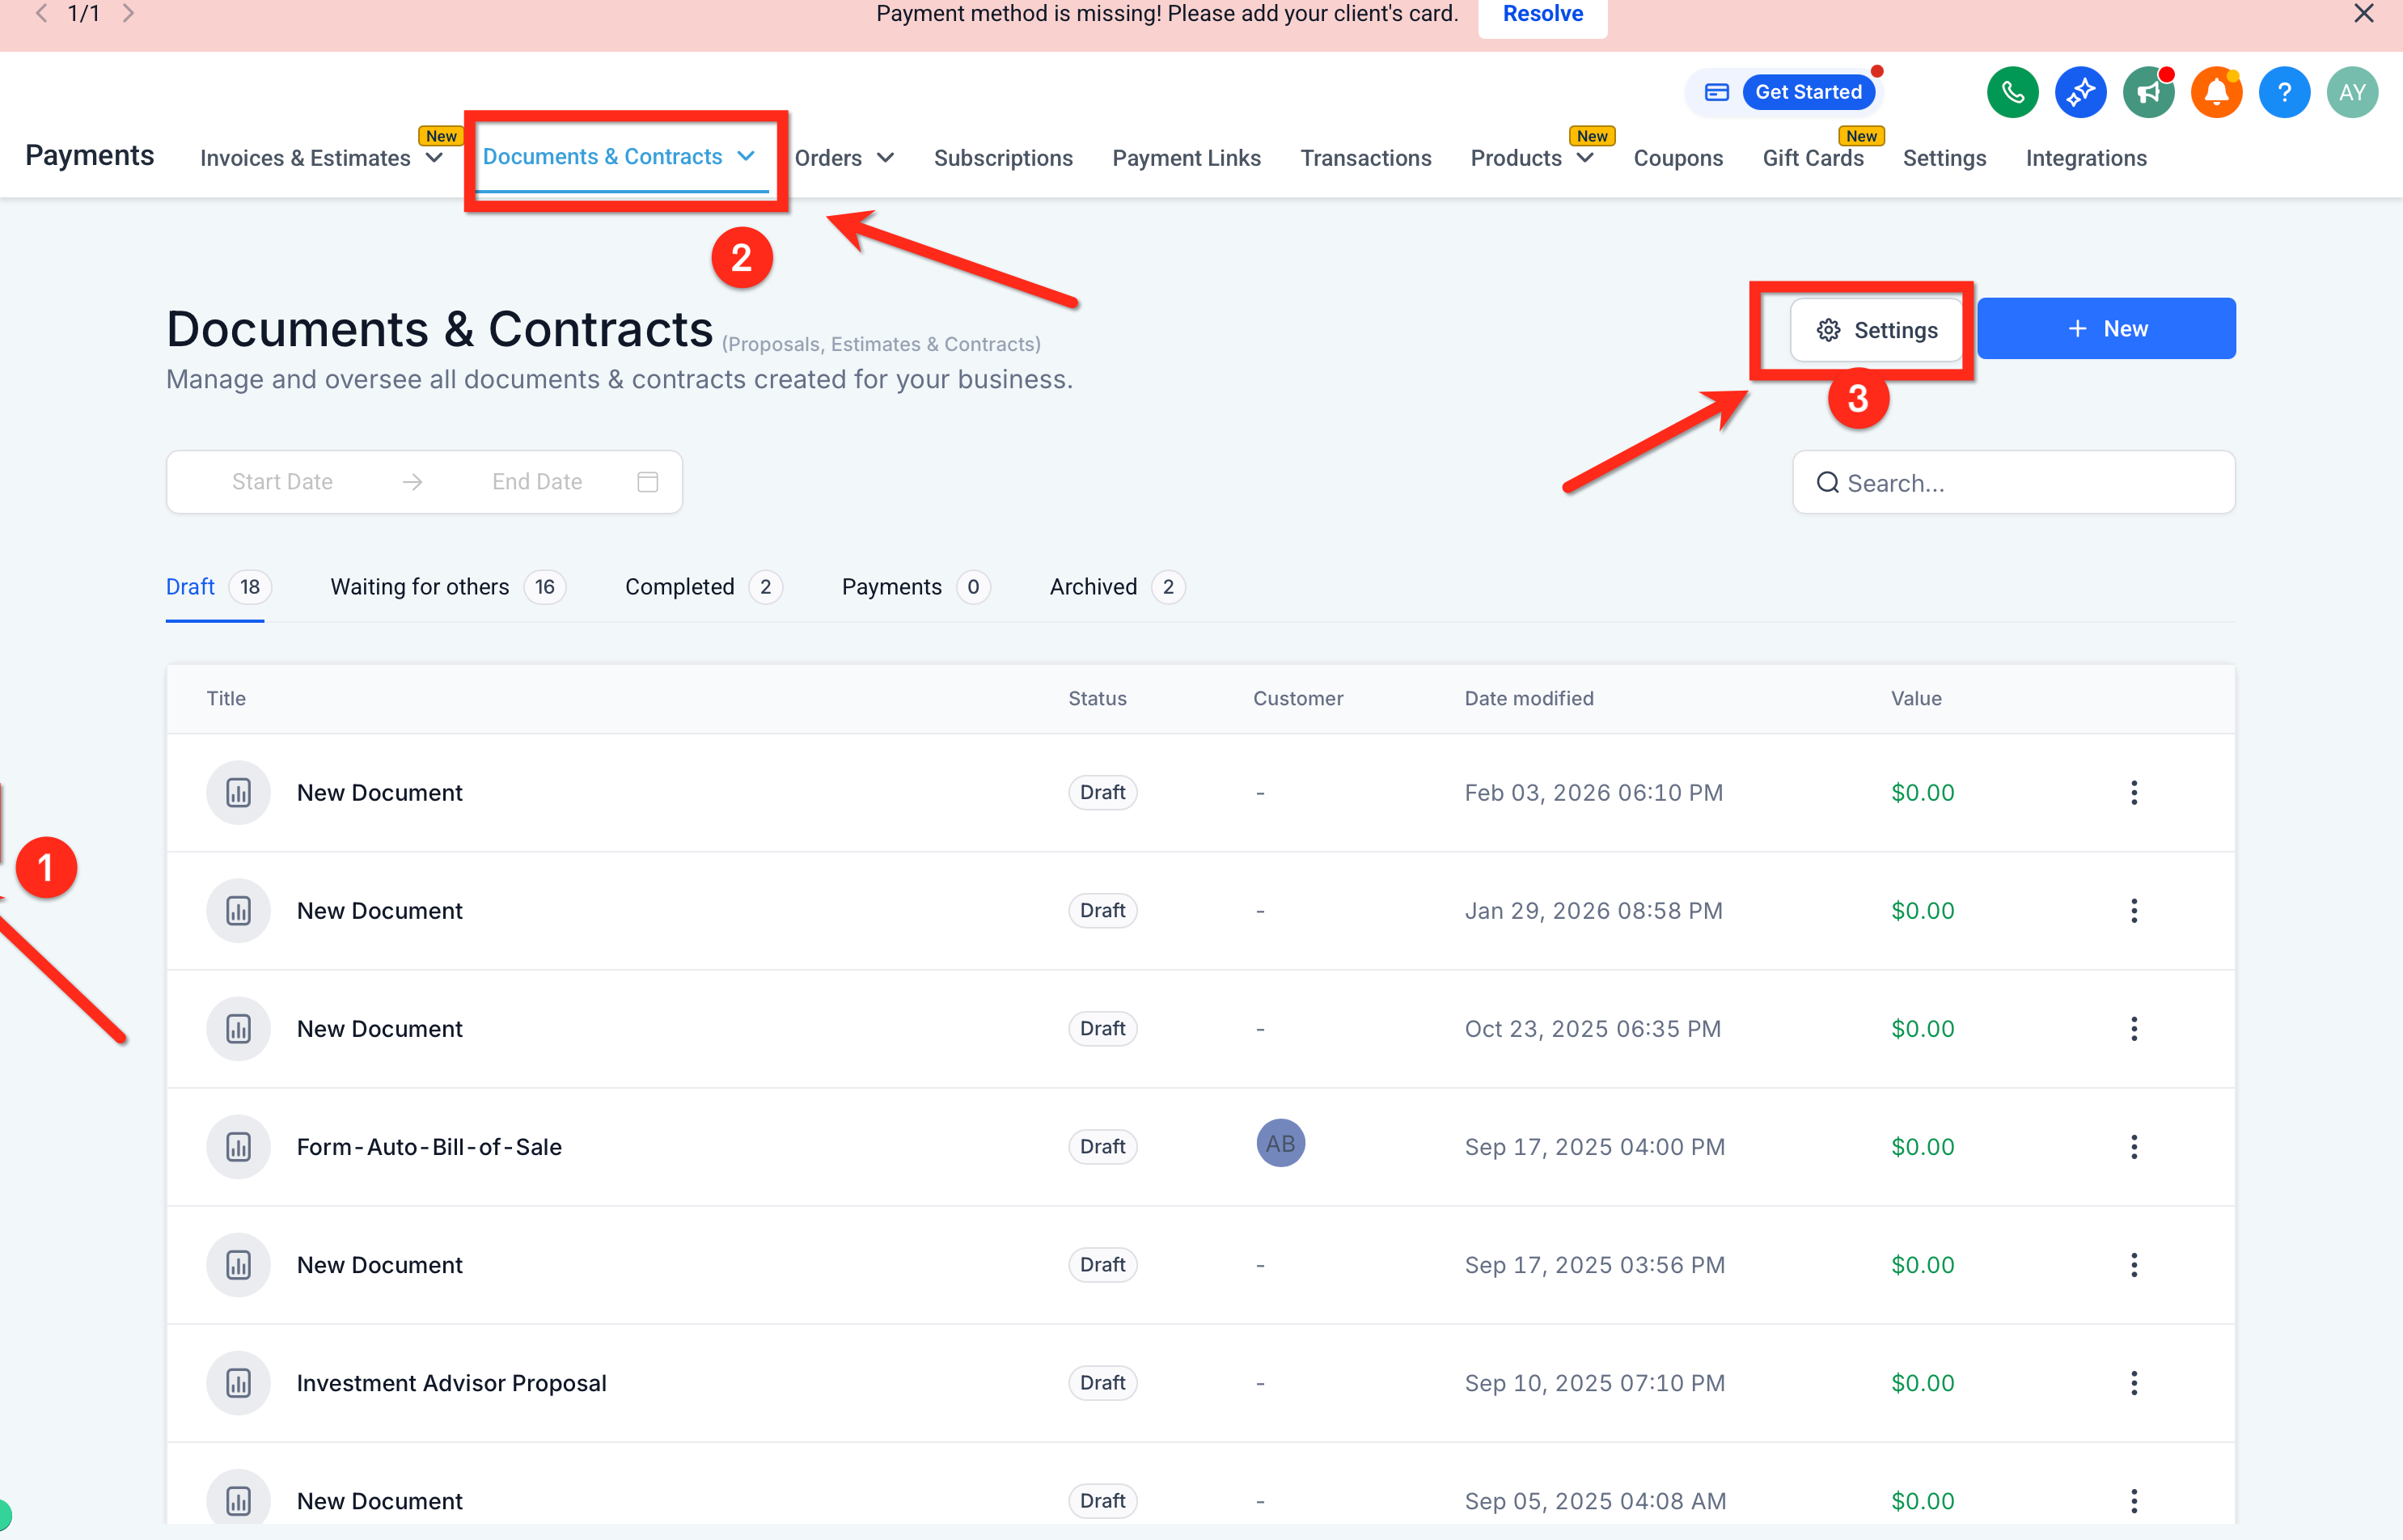
Go to Payments → Documents & Contracts.
Click Settings in the upper right, then open Document Settings.
Scroll to Control Signature Settings and choose Draw, Type, or Both.
Click Save.
If you tighten this setting after a document has already been sent, anyone who already has the signing page open should refresh it to see the updated options. The signature method a recipient chooses has no effect on tracking: viewed, signed, and completed statuses, and any workflow triggers tied to those statuses, work the same either way.
You can deliver a document by email, SMS, or both at once. SMS delivery is a good option when you want a document, such as a same-day consent form, to get noticed faster than an email might.
SMS is sent from your practice's Aesthetix CRM phone number. Because it's a text message to a patient's mobile number, normal SMS consent and opt-out rules apply the same way they do for any other text your practice sends.
Set your default delivery method:
Go to Payments → Documents & Contracts → Settings → Customer Notifications.
Under Document received, choose Email, SMS, or both, and pick the templates to use for each.
Under Document signed, do the same for the confirmation sent once a document is completed. Note that the Document Signed notification always follows this global setting; it cannot be overridden per document. Document Received can be overridden when you send an individual document.
Save your changes.
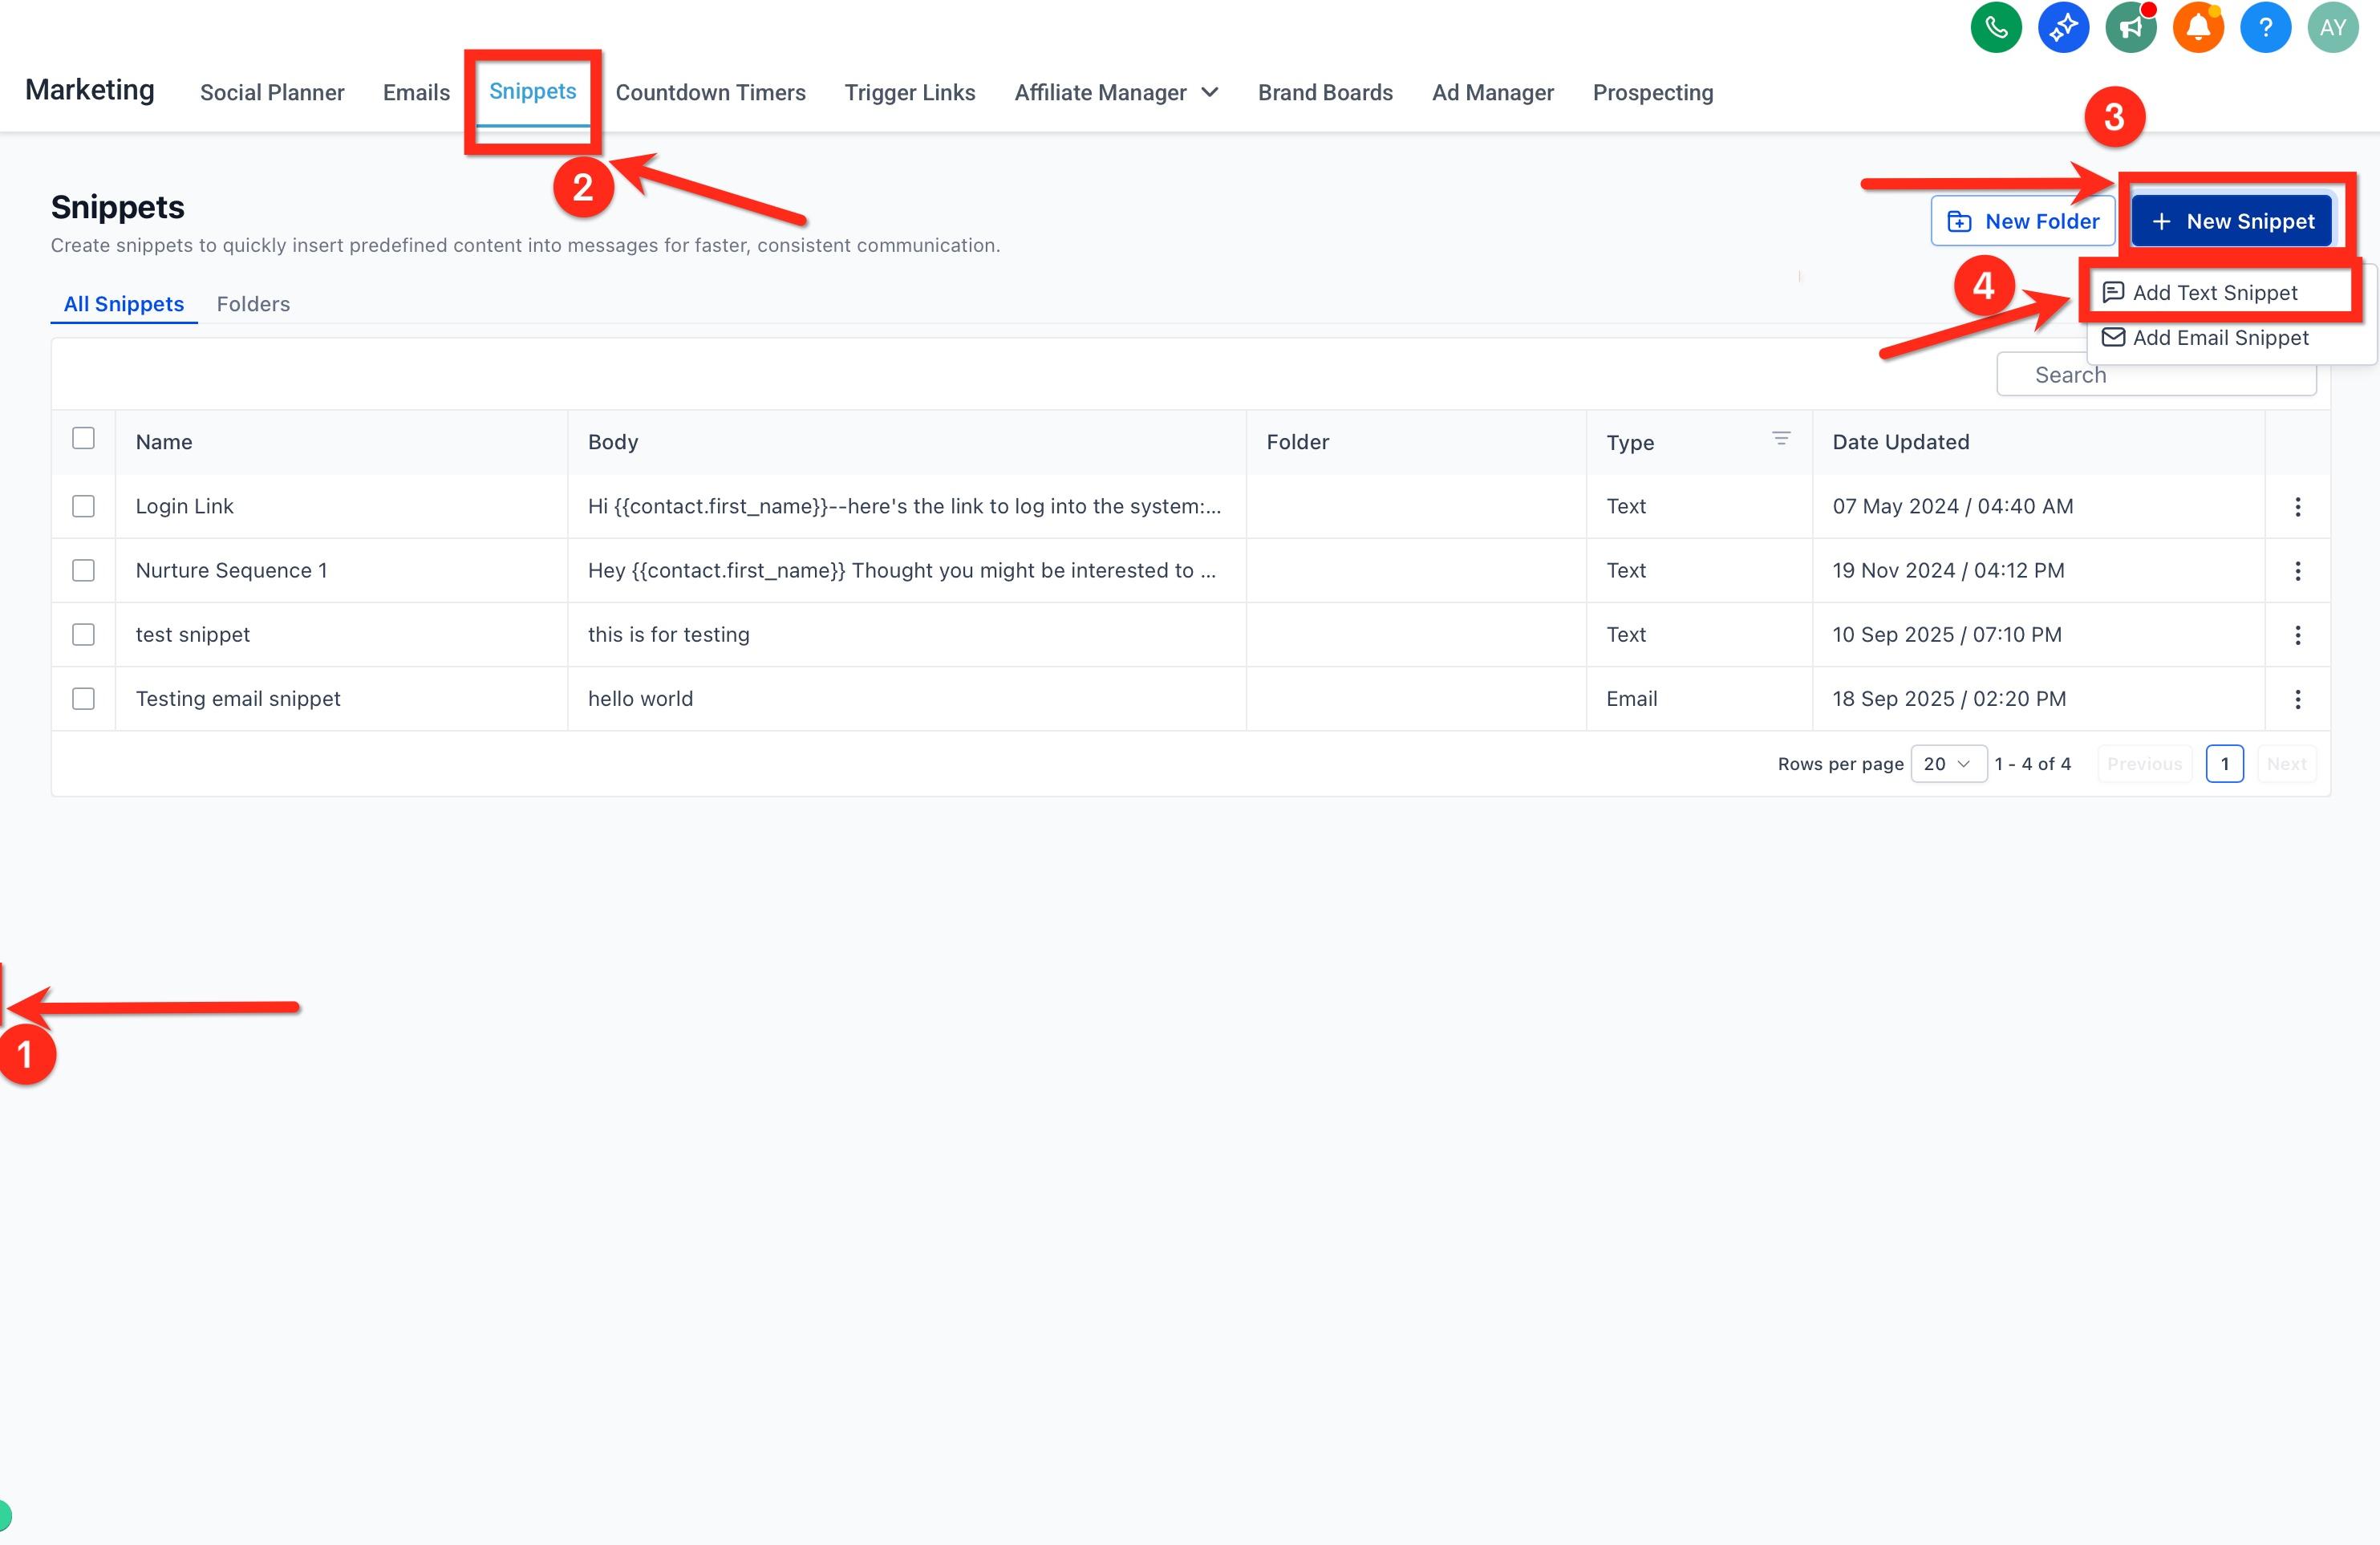
Create a reusable SMS message: Go to Marketing → SMS Templates, create a new text template, and write a short, clear message (for example, "Your document is ready. Please review and sign using the link provided."). Merge fields can be used to personalize it. Save it so it's available whenever you send a document by text.
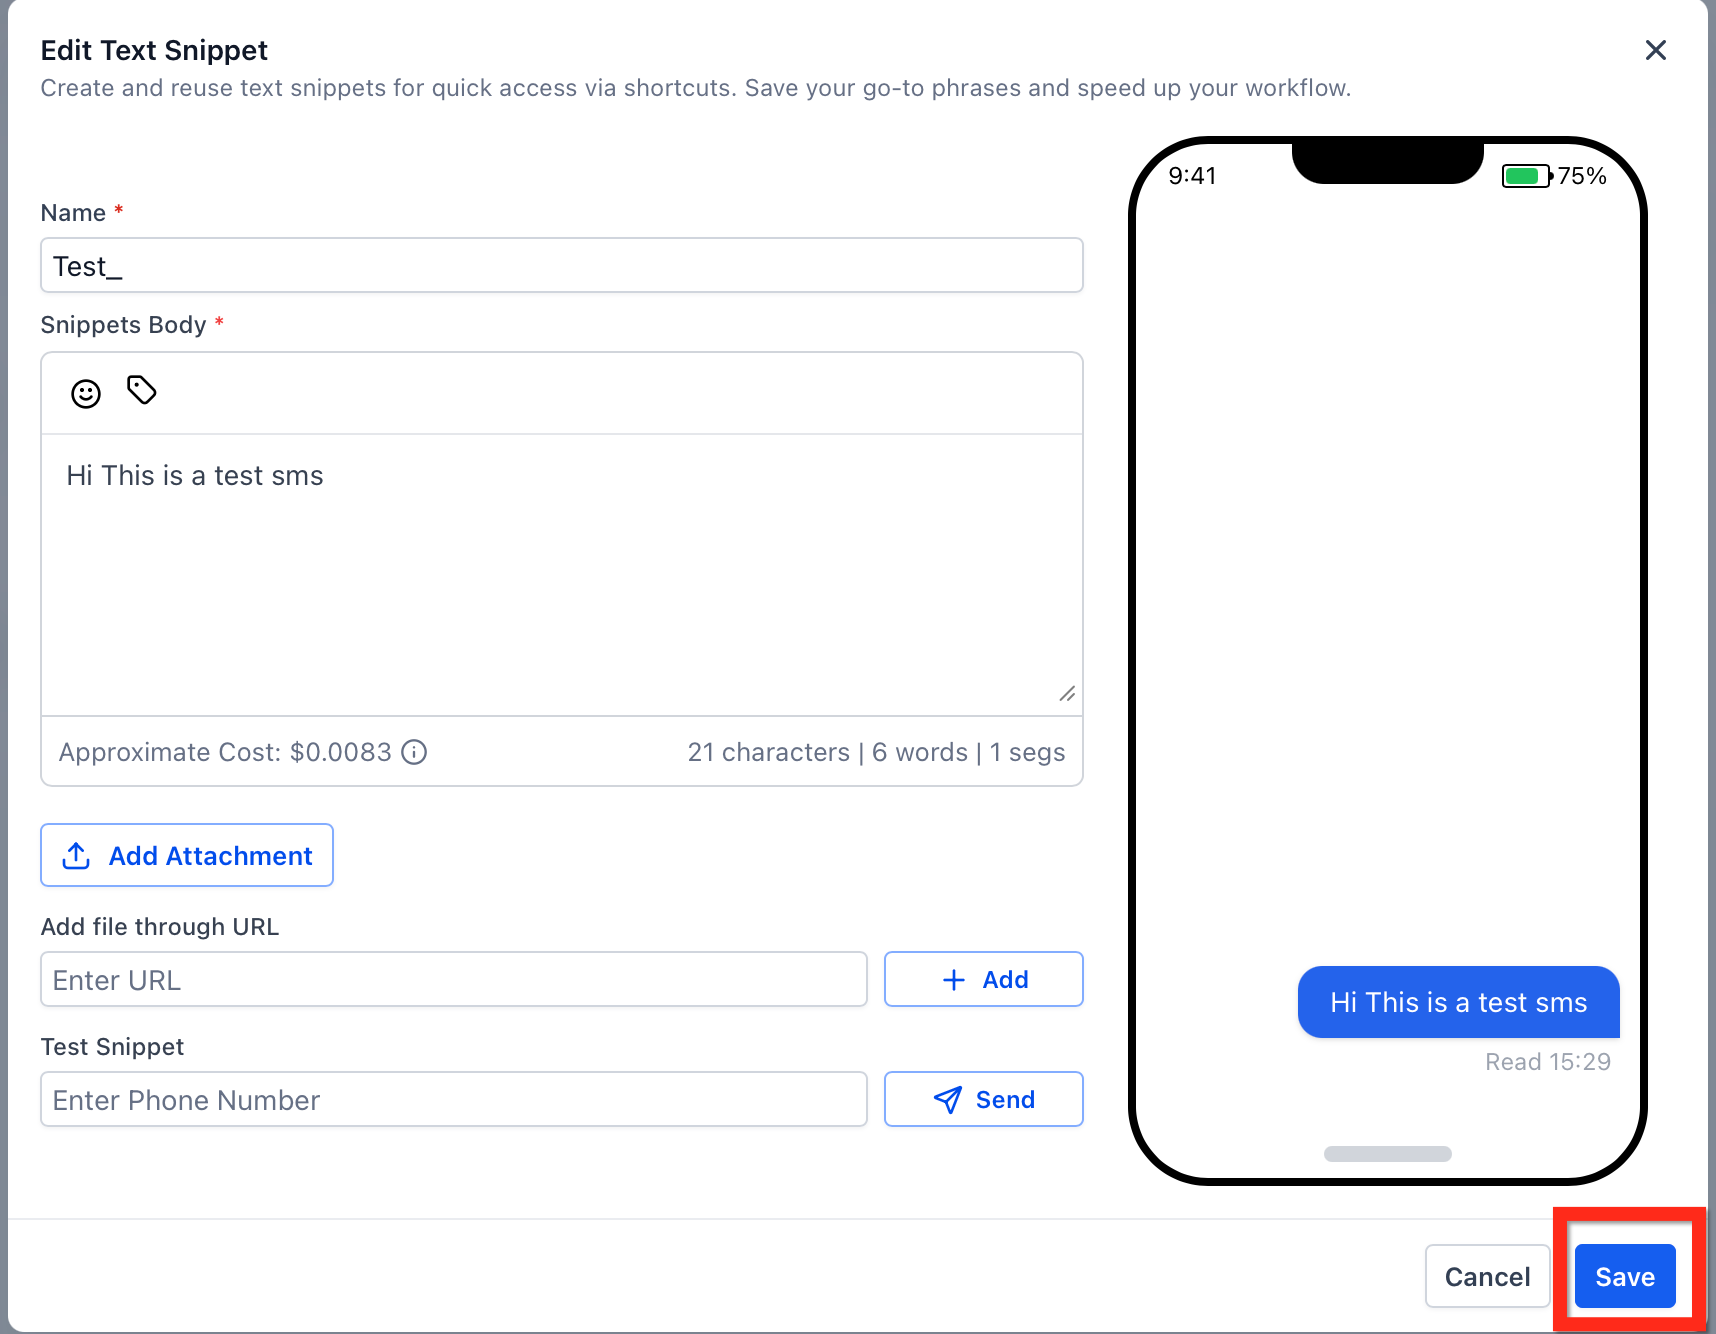
Sending an individual document: Open the document, click Send, and choose Email, SMS, or Email + SMS. If you choose SMS, pick the SMS template to use, confirm the recipient's phone number is correct, and send.
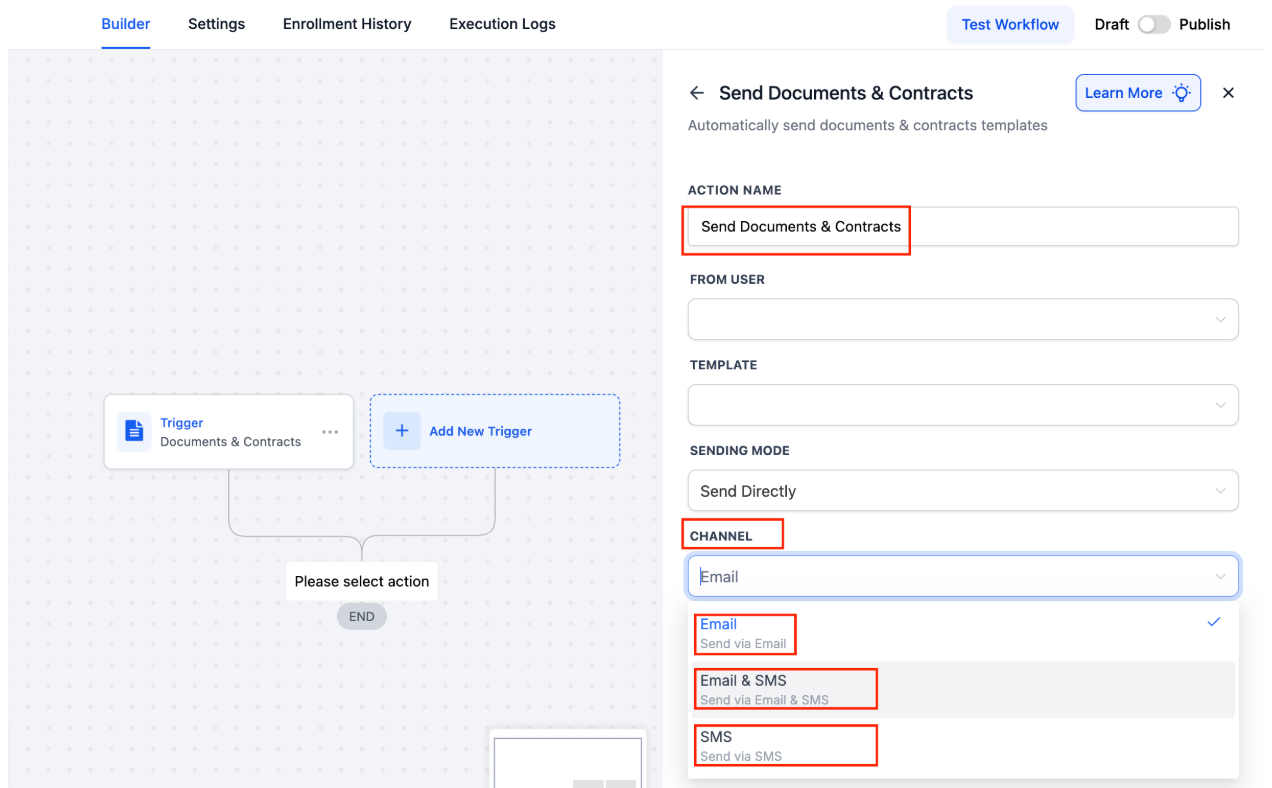
Sending through a workflow: Add a Send Document action to a workflow (see Automating Documents with Workflows), select the document template, and choose the delivery channel. The workflow uses your saved SMS template and default settings automatically. Standard SMS length limits apply, and longer messages may be split into multiple texts.
Sometimes you want a document signed quickly without creating a contact first, such as a general waiver you hand out at an event or post to your website. Public Document Links let anyone with the link open, review, and sign without you adding them as a recipient in advance.
To use it:
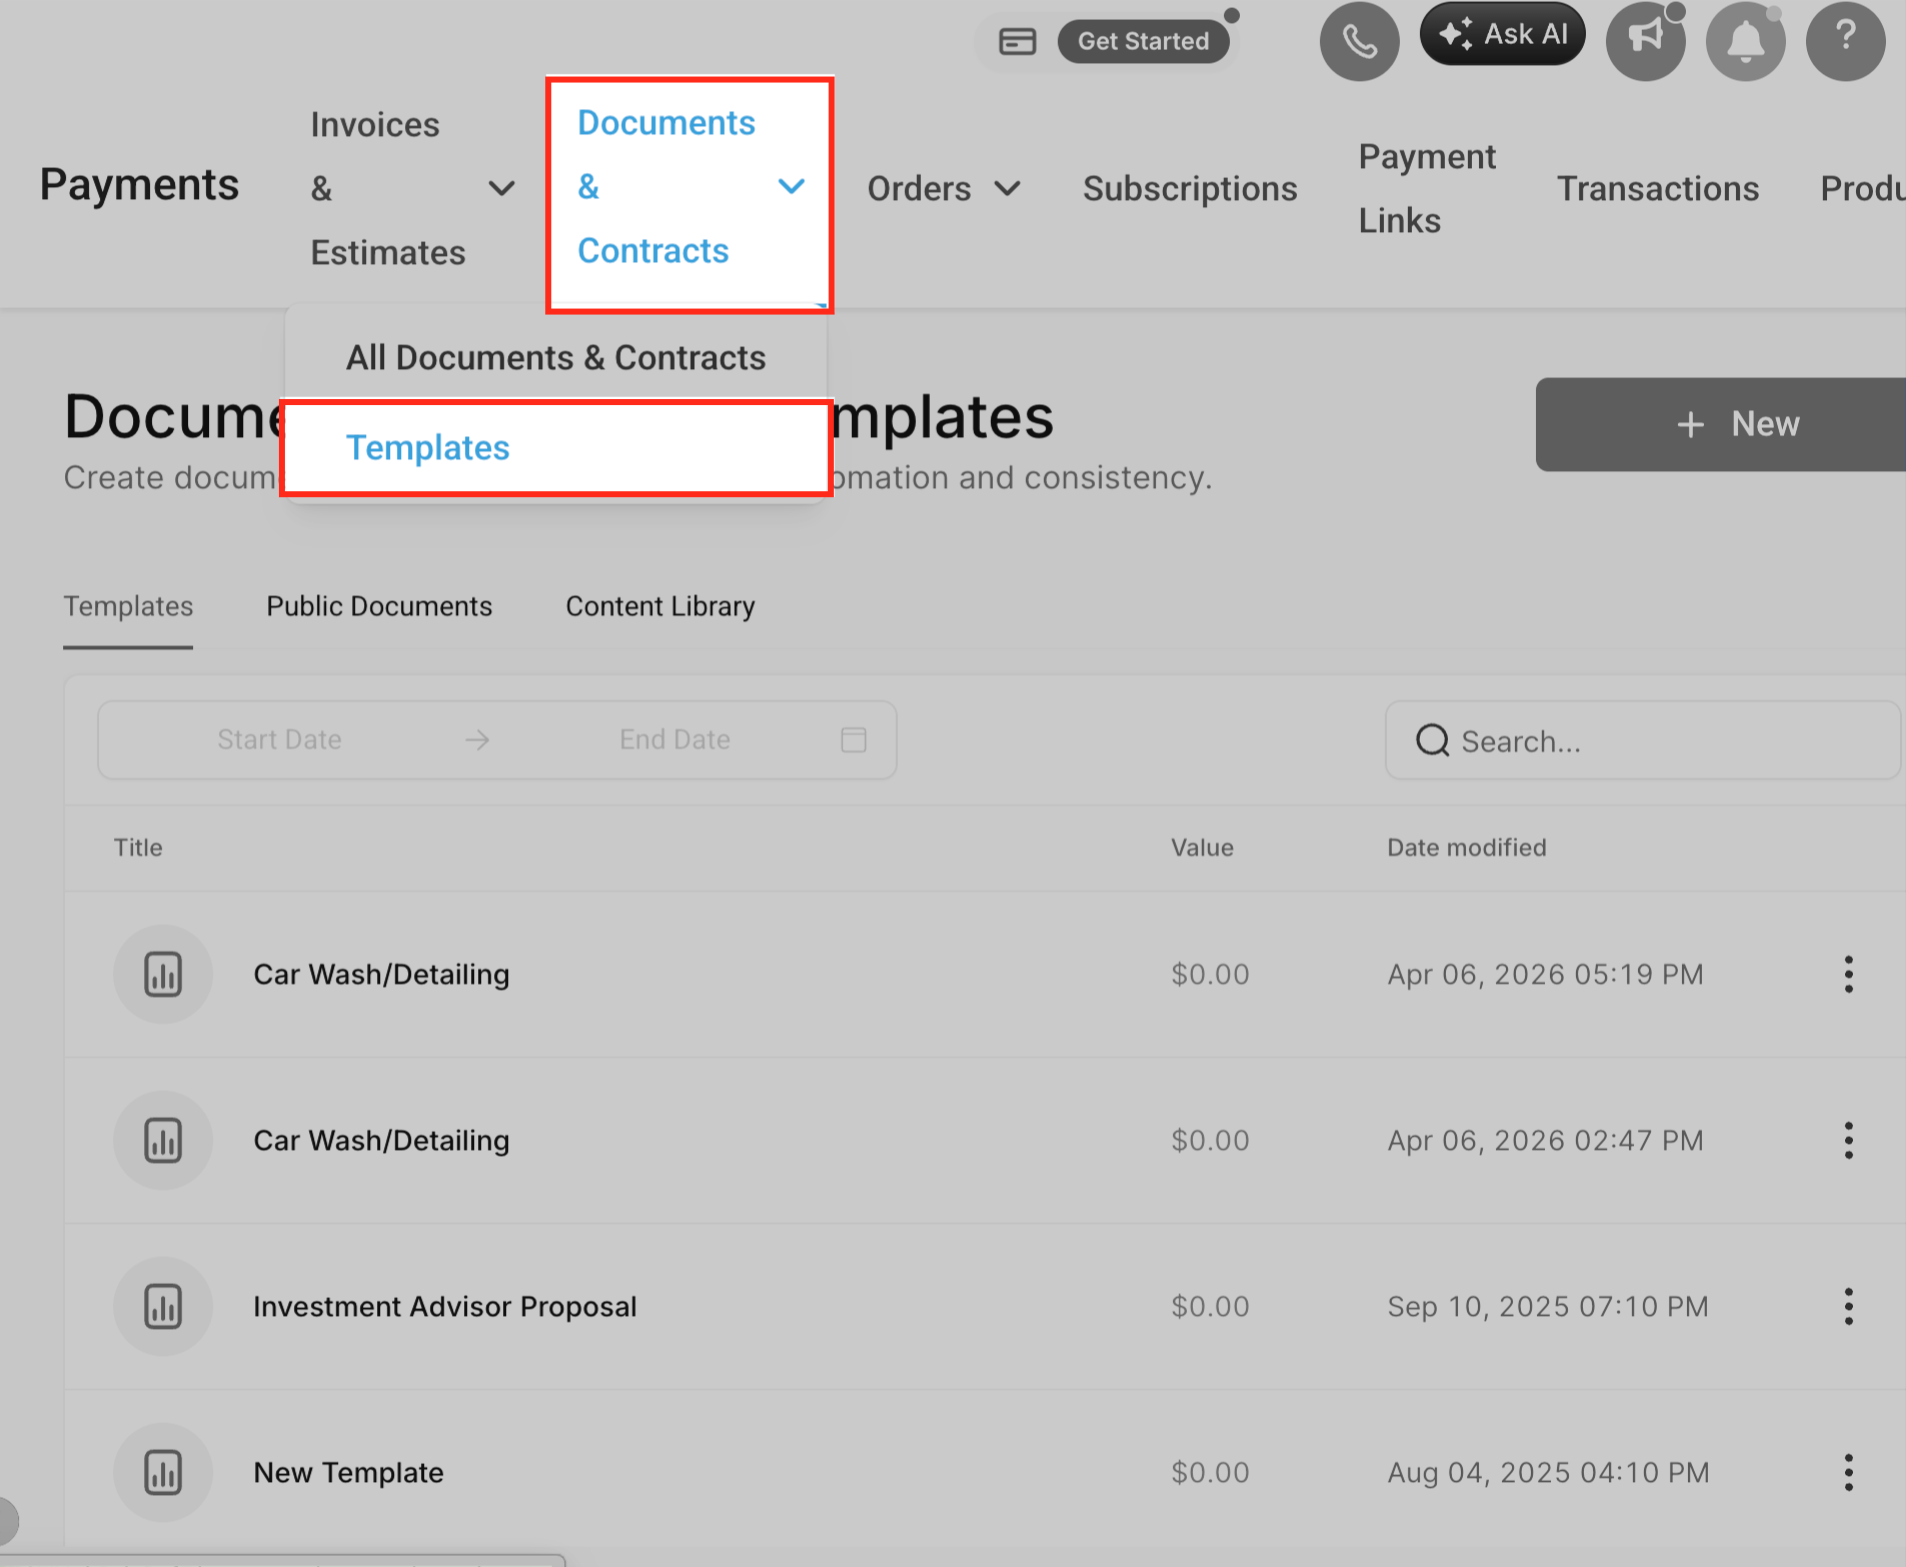
Go to Payments → Documents & Contracts → Templates.
Create or open a template, then choose to publish it as a public document.
Copy the generated link and share it however you like: email, text, QR code, or a link on your site.
When someone opens the link, they enter their name and email, then sign. A signed copy is emailed to them automatically.
View or download every response from the document's Responses section.
When you're done collecting signatures, unpublish the document to close the link. There's no limit on how many people can sign through one public link while it's active.
Public links work independently of templates used in workflows, so you can keep using the same template both ways.
You can set a deadline after which a document can no longer be signed, which is useful for time-sensitive agreements like a promotional package or a limited-time financing offer.
Go to Payments → Documents & Contracts → Settings → Document Settings.
Scroll to Expiration Settings and turn the toggle on.
Enter the default number of days after which documents expire. This can be overridden on an individual document.
Optionally enable a reminder notification sent to recipients one day before expiration.
The countdown starts when the document is sent and runs on your practice's timezone, not the recipient's. Once a document expires, its status changes to Expired, signing is disabled, and anyone who tries to open it sees a message that it has expired. You can resend a fresh document if needed, but you cannot change the expiration date on one that's already been sent. There is no automatic notification to the recipient after expiration beyond that on-page message, so a reminder notification beforehand is worth turning on for anything time-sensitive.
You can send signers to a specific page right after they finish, such as a thank-you page, your scheduling link, or an upsell for a related service. The same setting applies if the document includes a payment and the signer completes it.
Global redirect (applies to every document):
Go to Payments → Documents & Contracts → Settings → Document Settings.
Toggle on Redirect to a Custom URL.
Enter the destination URL and choose whether it opens in the same tab or a new one.
Save.
Per-document redirect (overrides the global setting for that document only):
Open the document or template you're editing.
Go to its Settings → Document Settings.
Toggle on redirection, enter the URL, and choose same tab or new tab.
Save.
A document-level redirect always takes priority over the global one. Use the Preview option before sending to confirm the redirect behaves as expected.
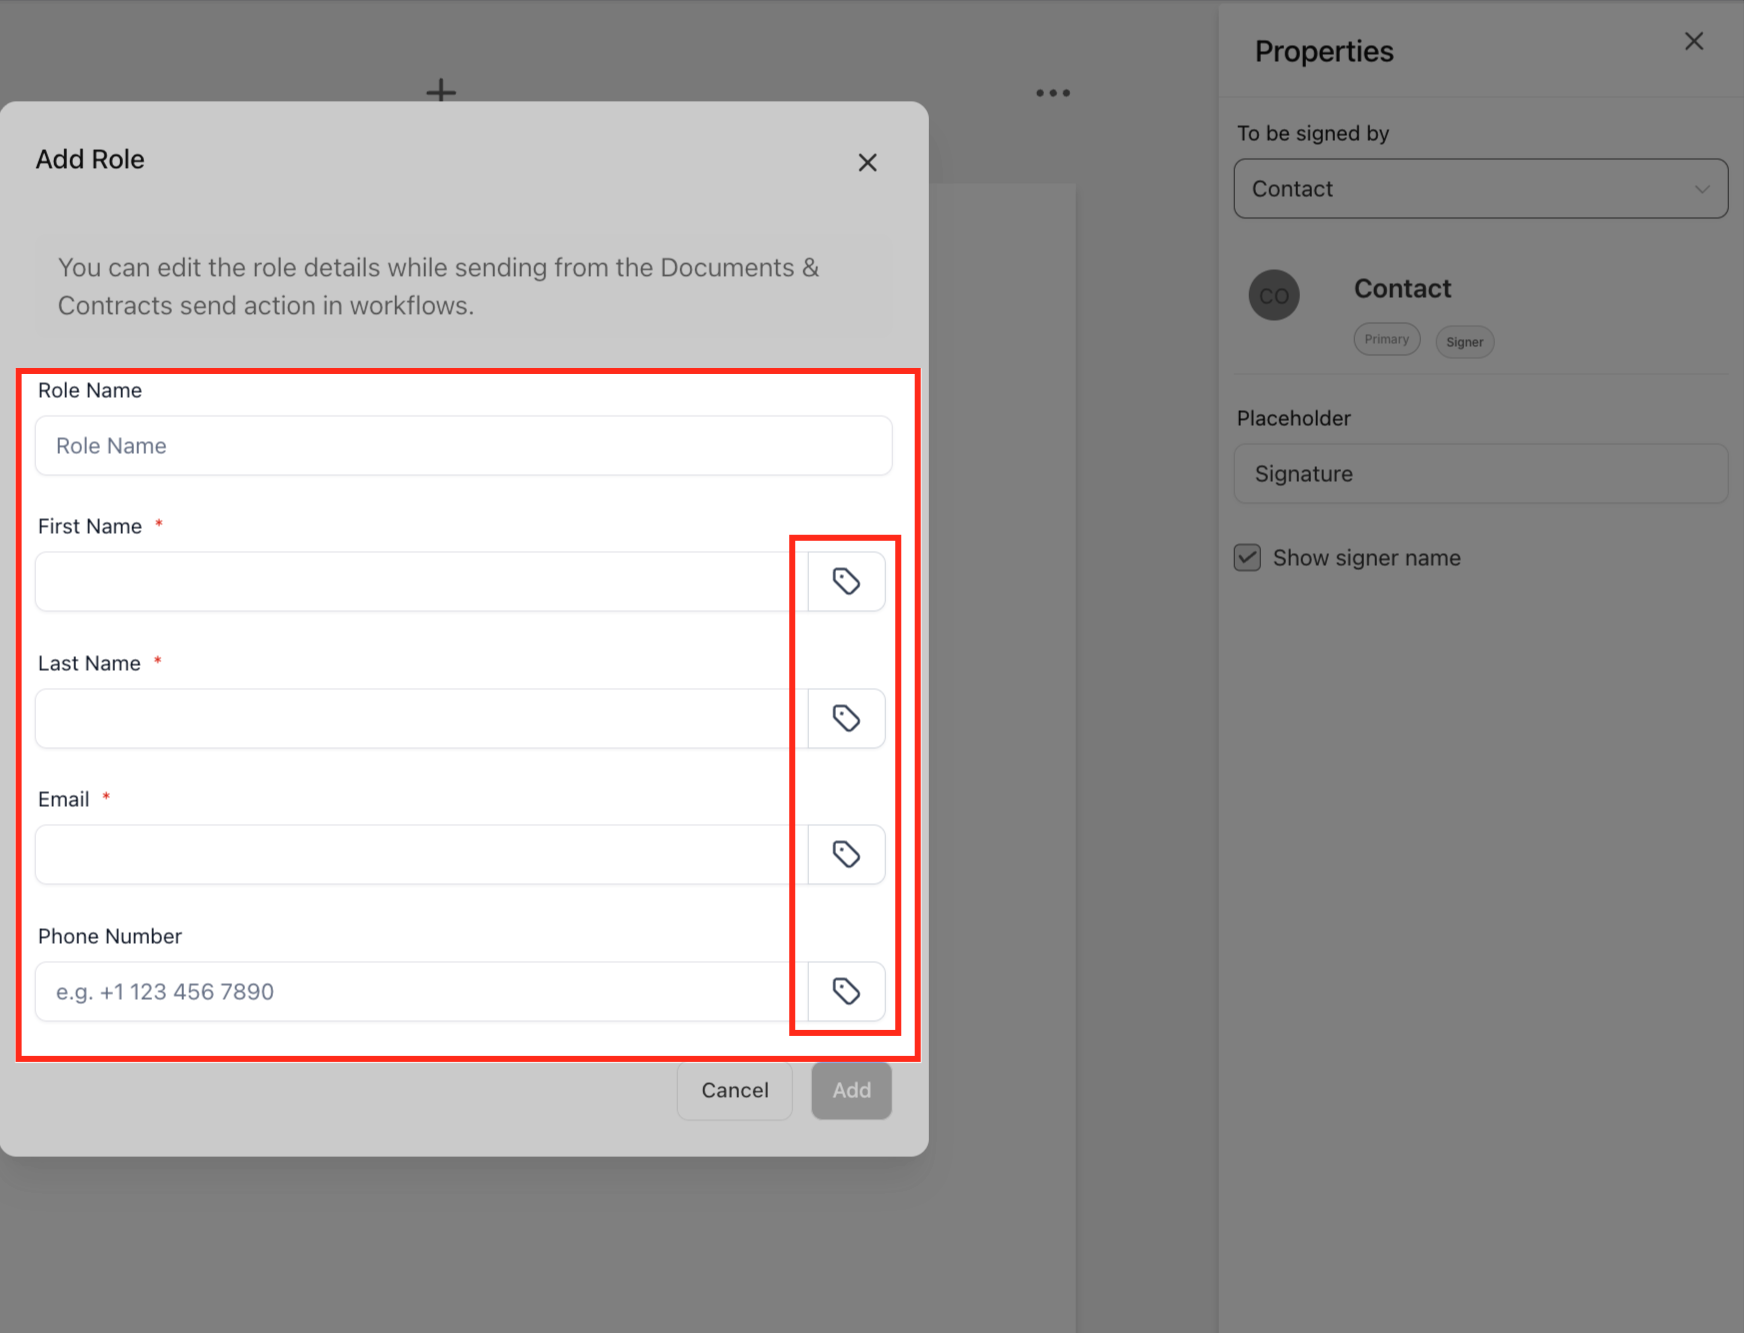
For agreements that always involve the same set of roles, such as a patient and a guarantor, or a patient and a witness, you can define those roles once on a template and have Aesthetix CRM fill in and route each signer automatically every time the document is sent through a workflow. This is set up in the template (see Building Document Templates) and triggered from a Send Document workflow action (see Automating Documents with Workflows). In short:
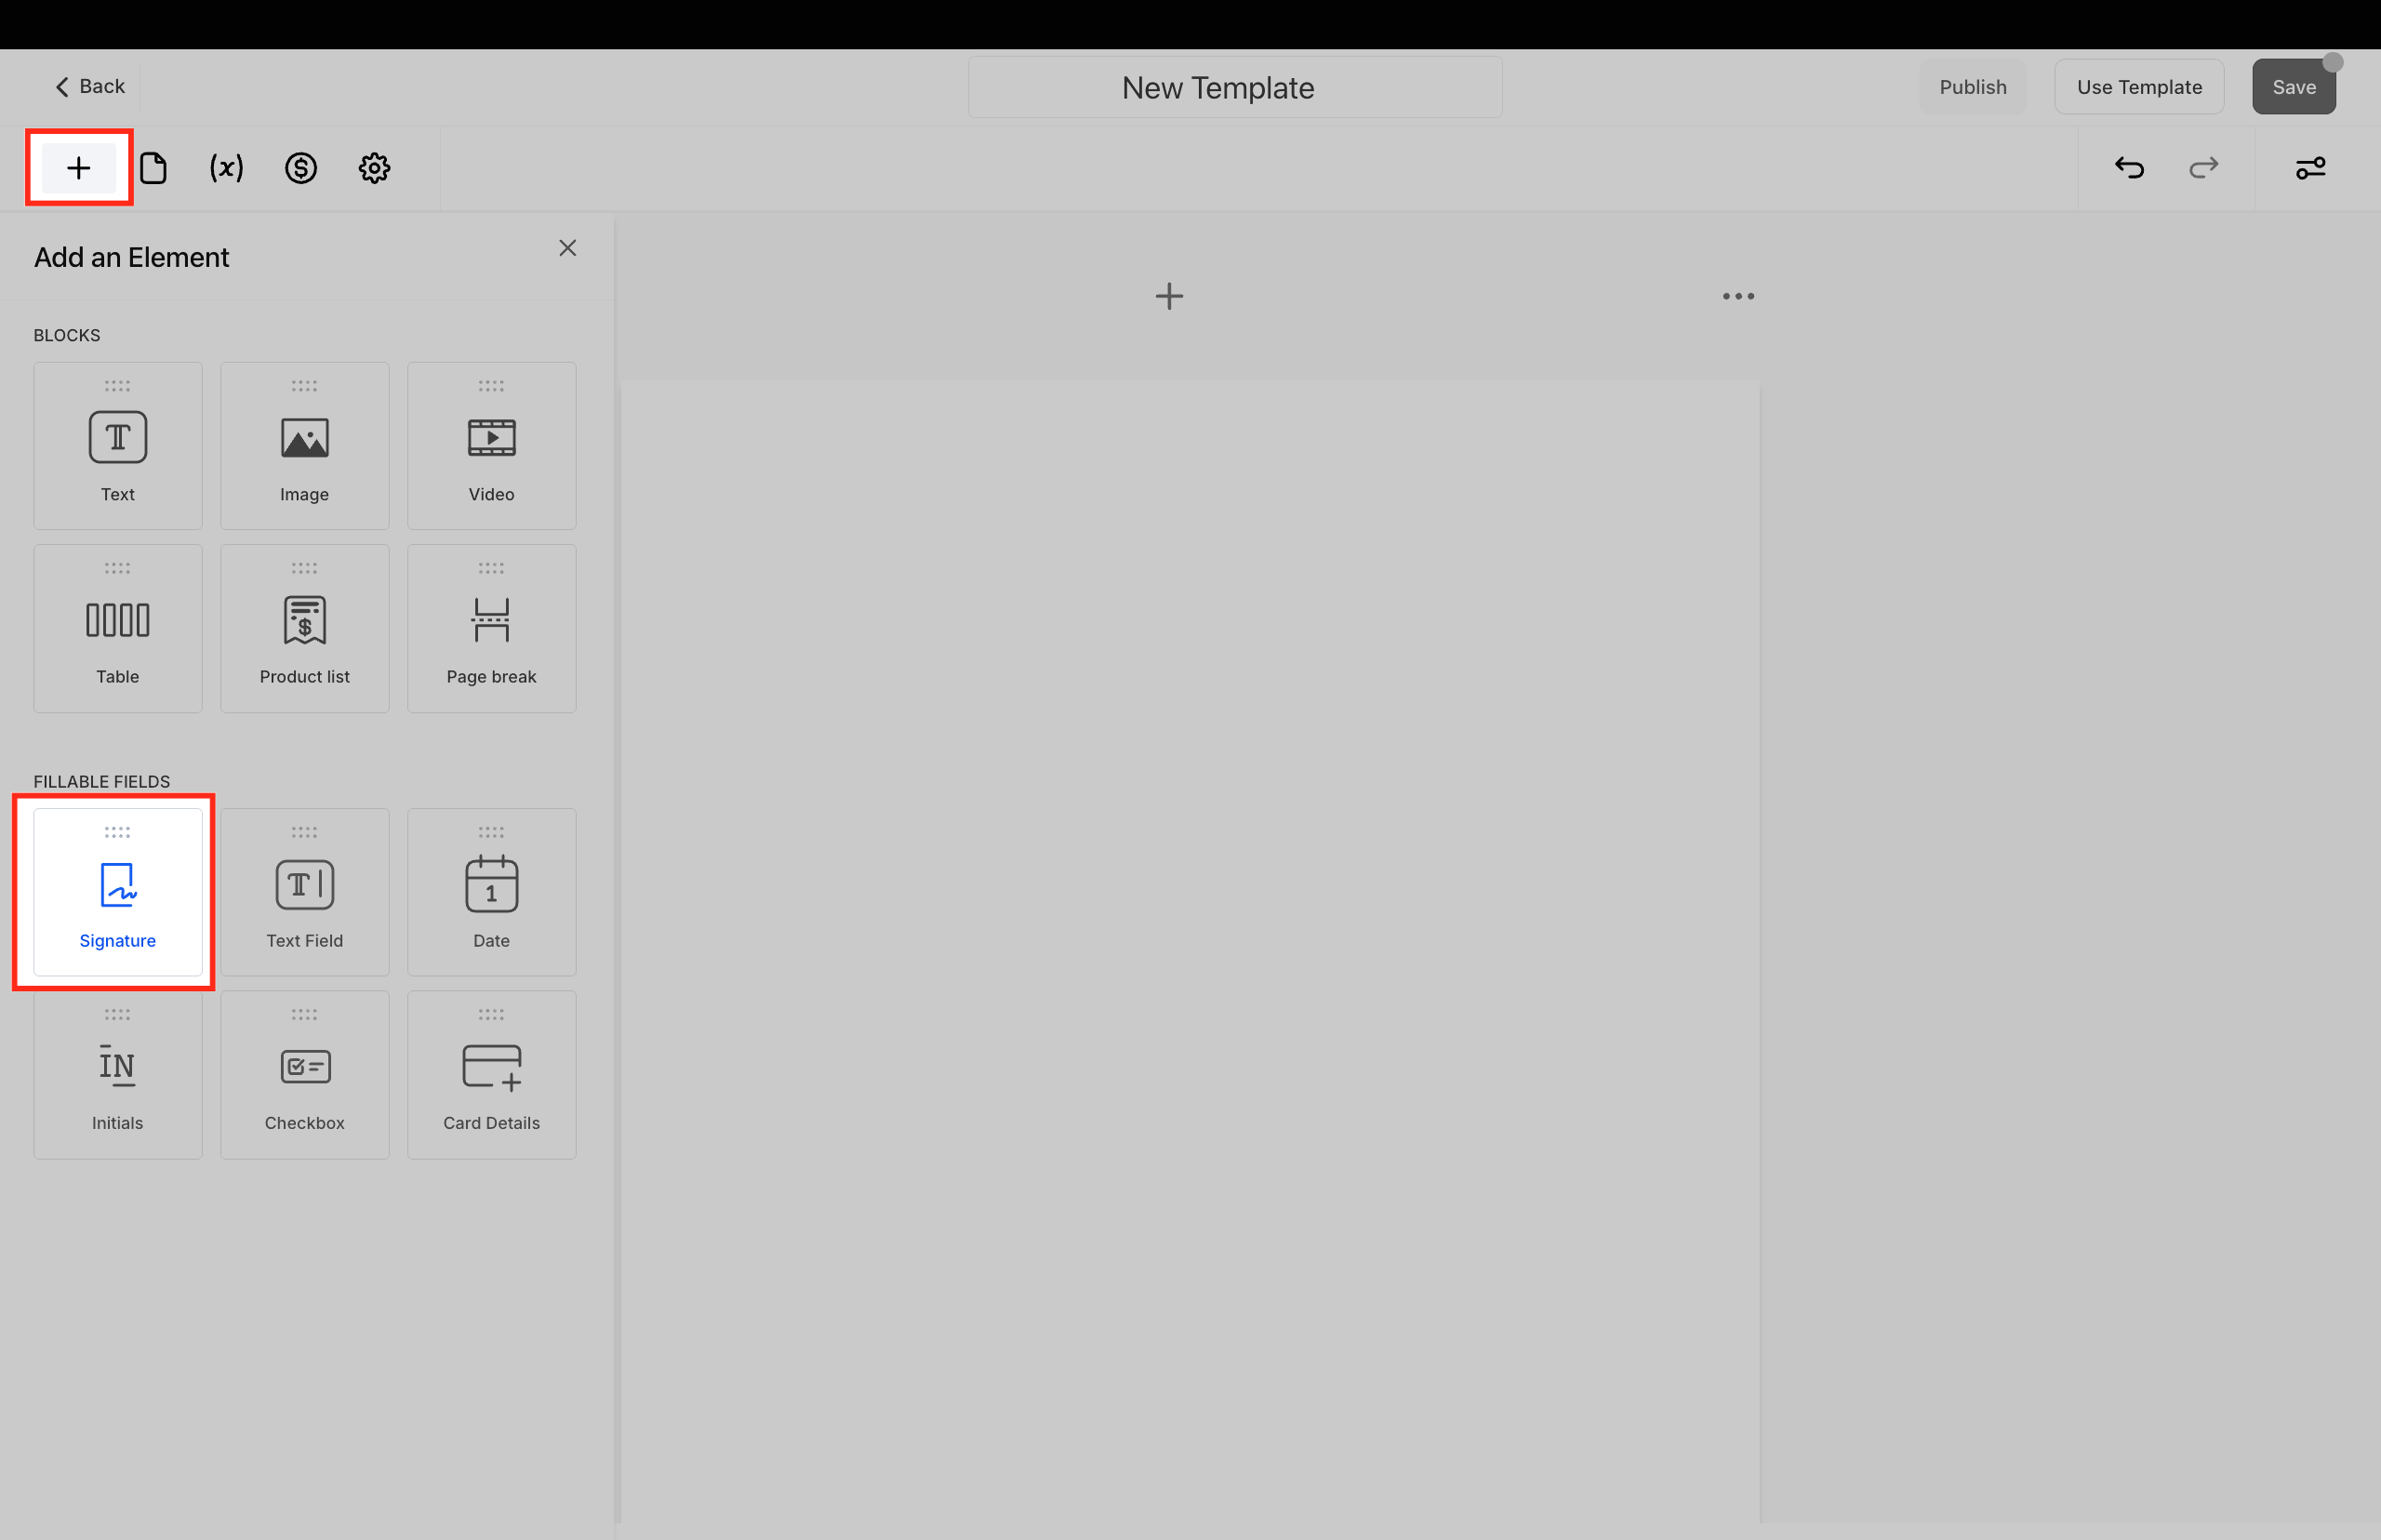
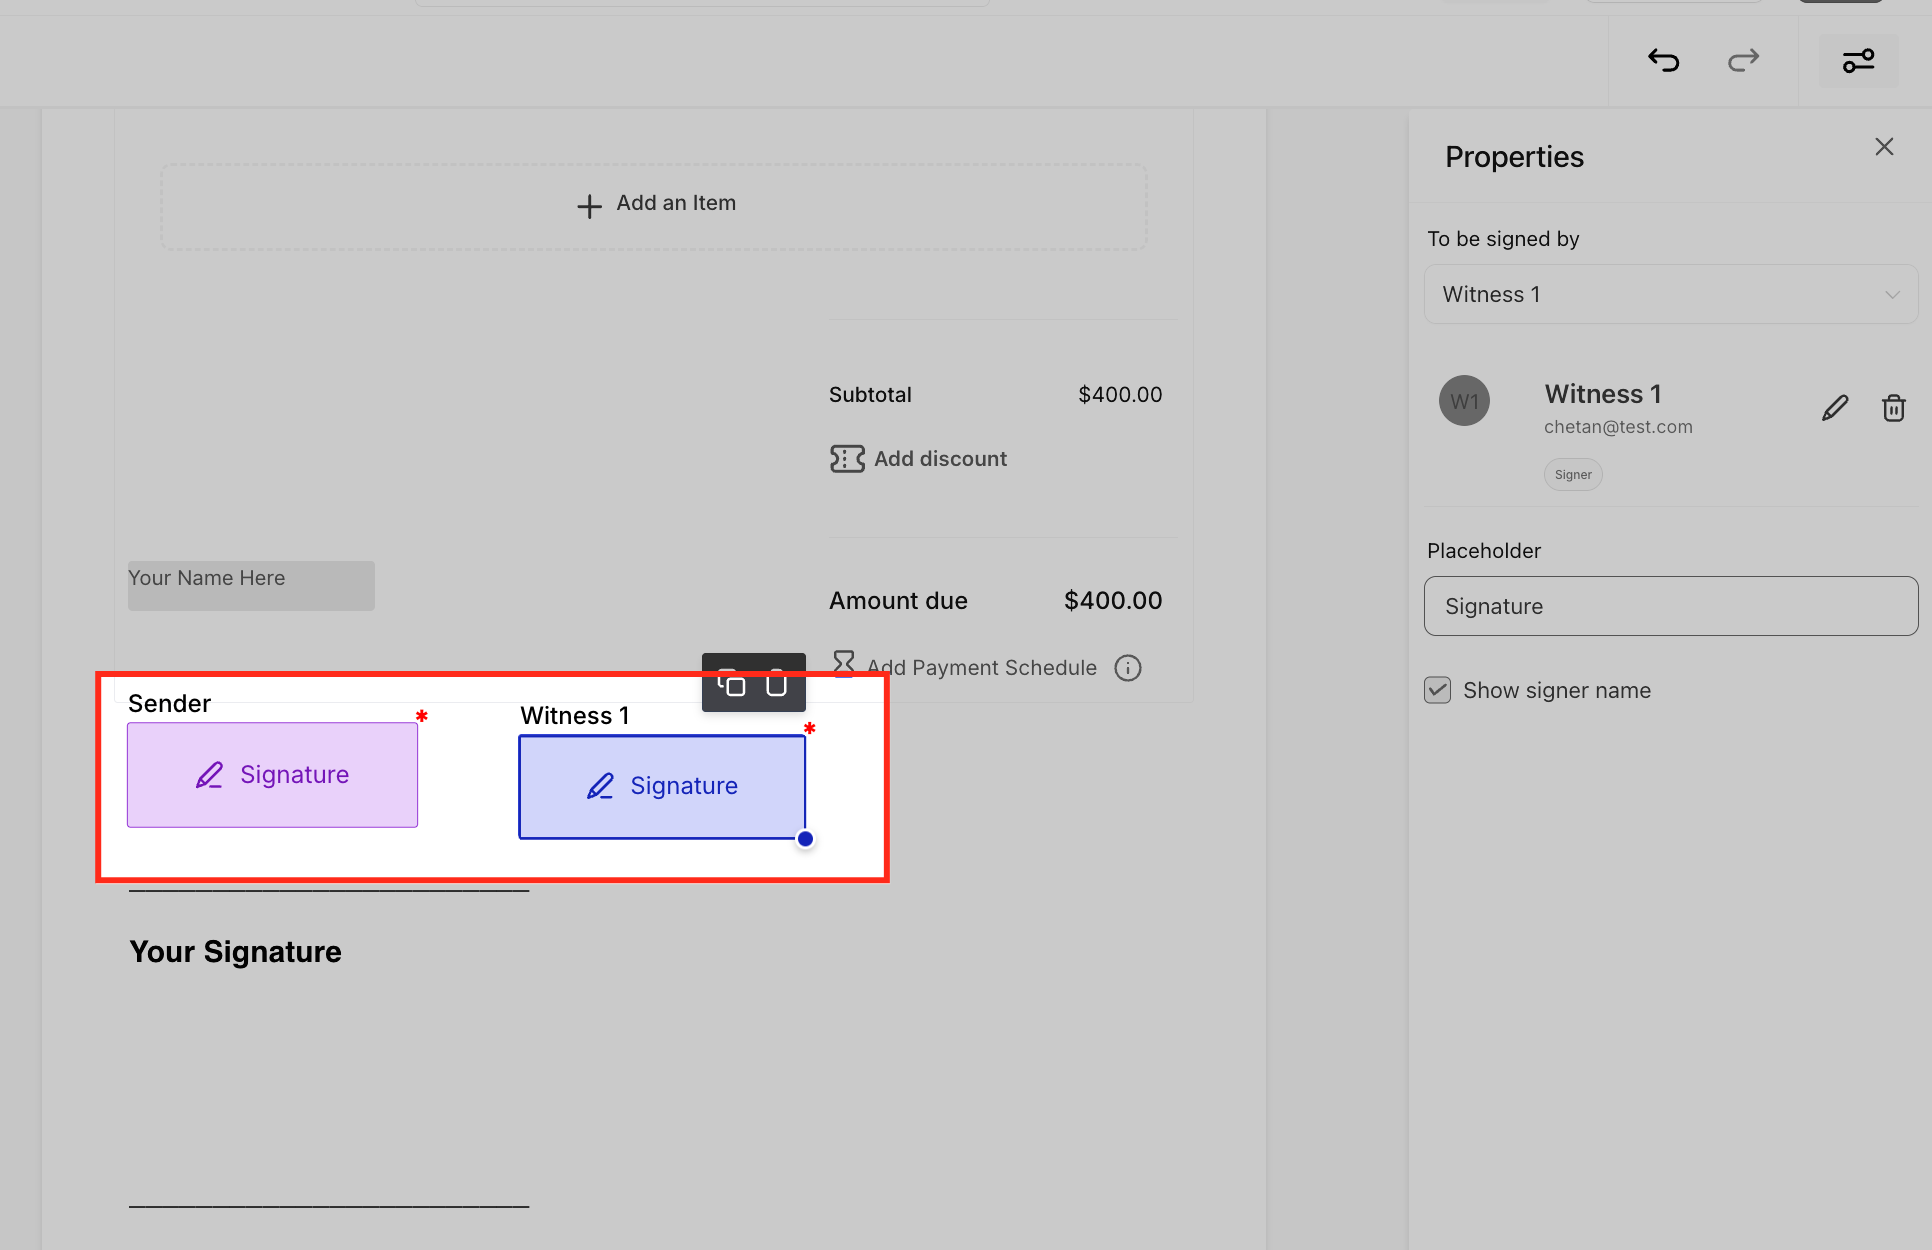
A template can define up to 6 signer roles (for example Patient, Guarantor, Witness), each with its own signature fields.
One role must be the "Contact" role: the person who enrolls in the workflow and triggers the send.
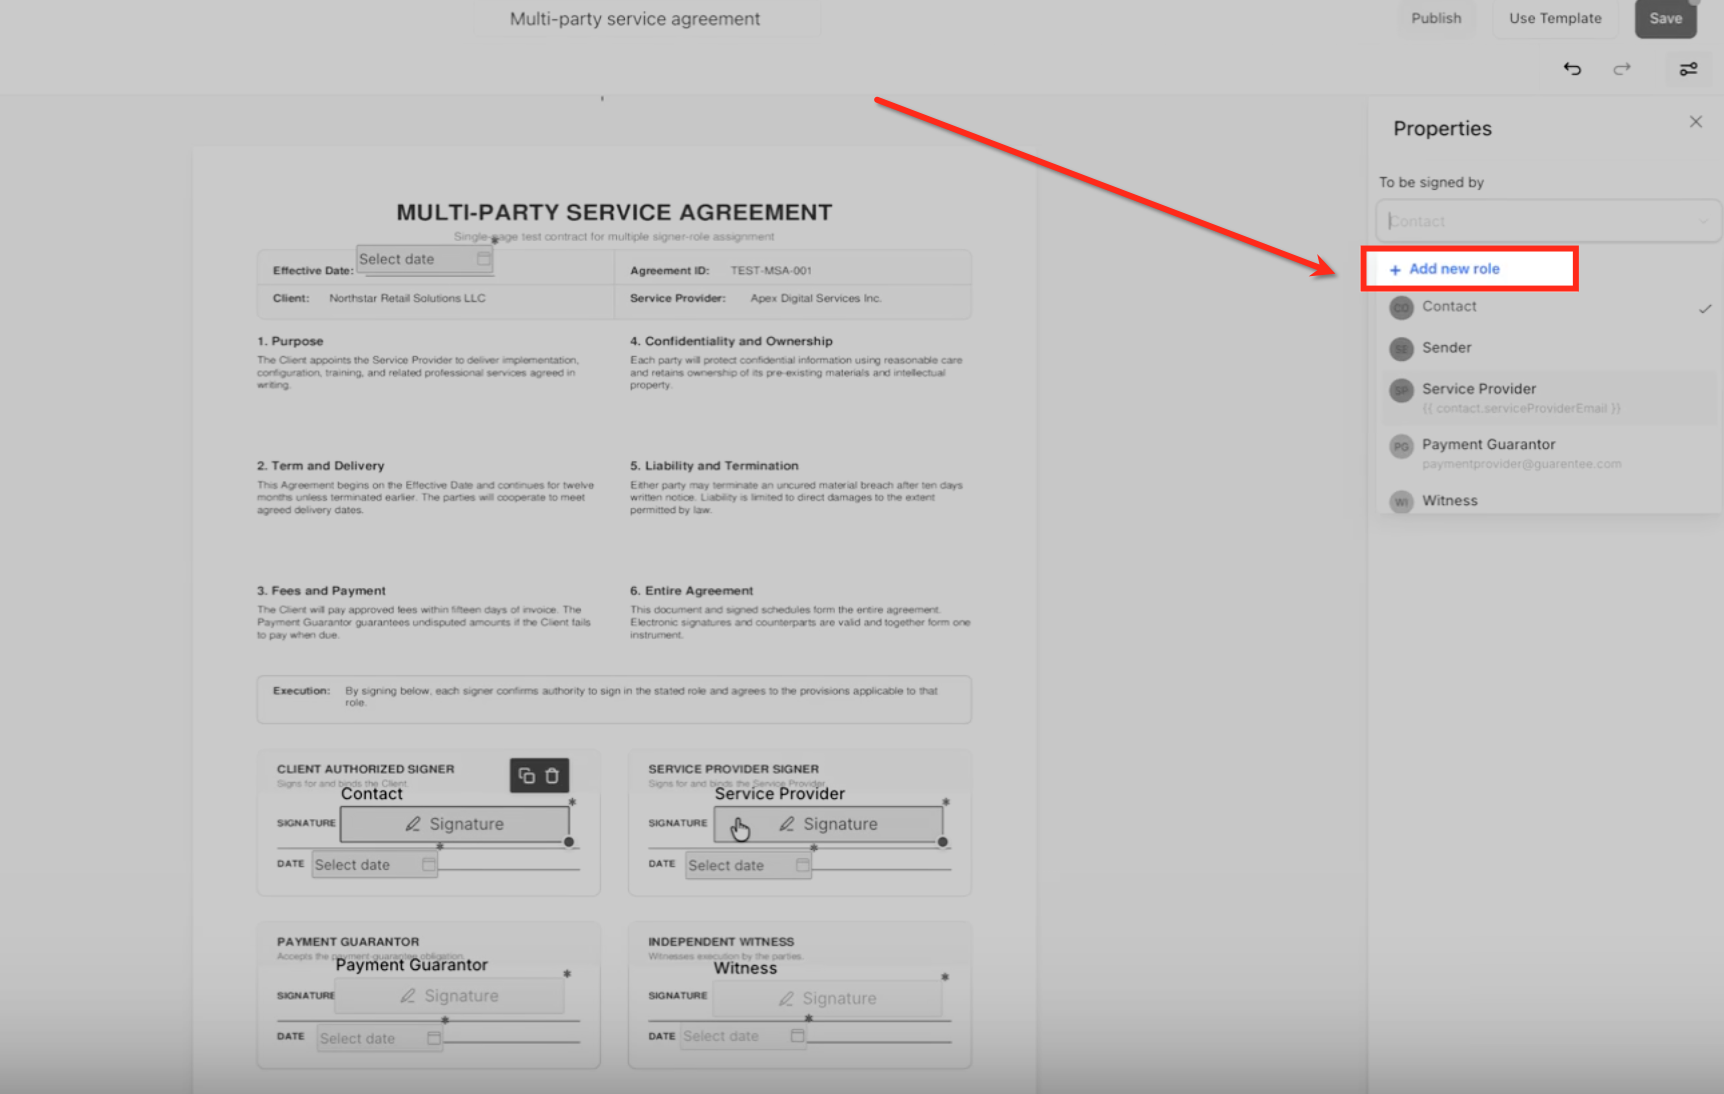
Each role's name, email, and phone can be a fixed value or pulled from a custom field, so the same template works across many different patients without editing it each time.
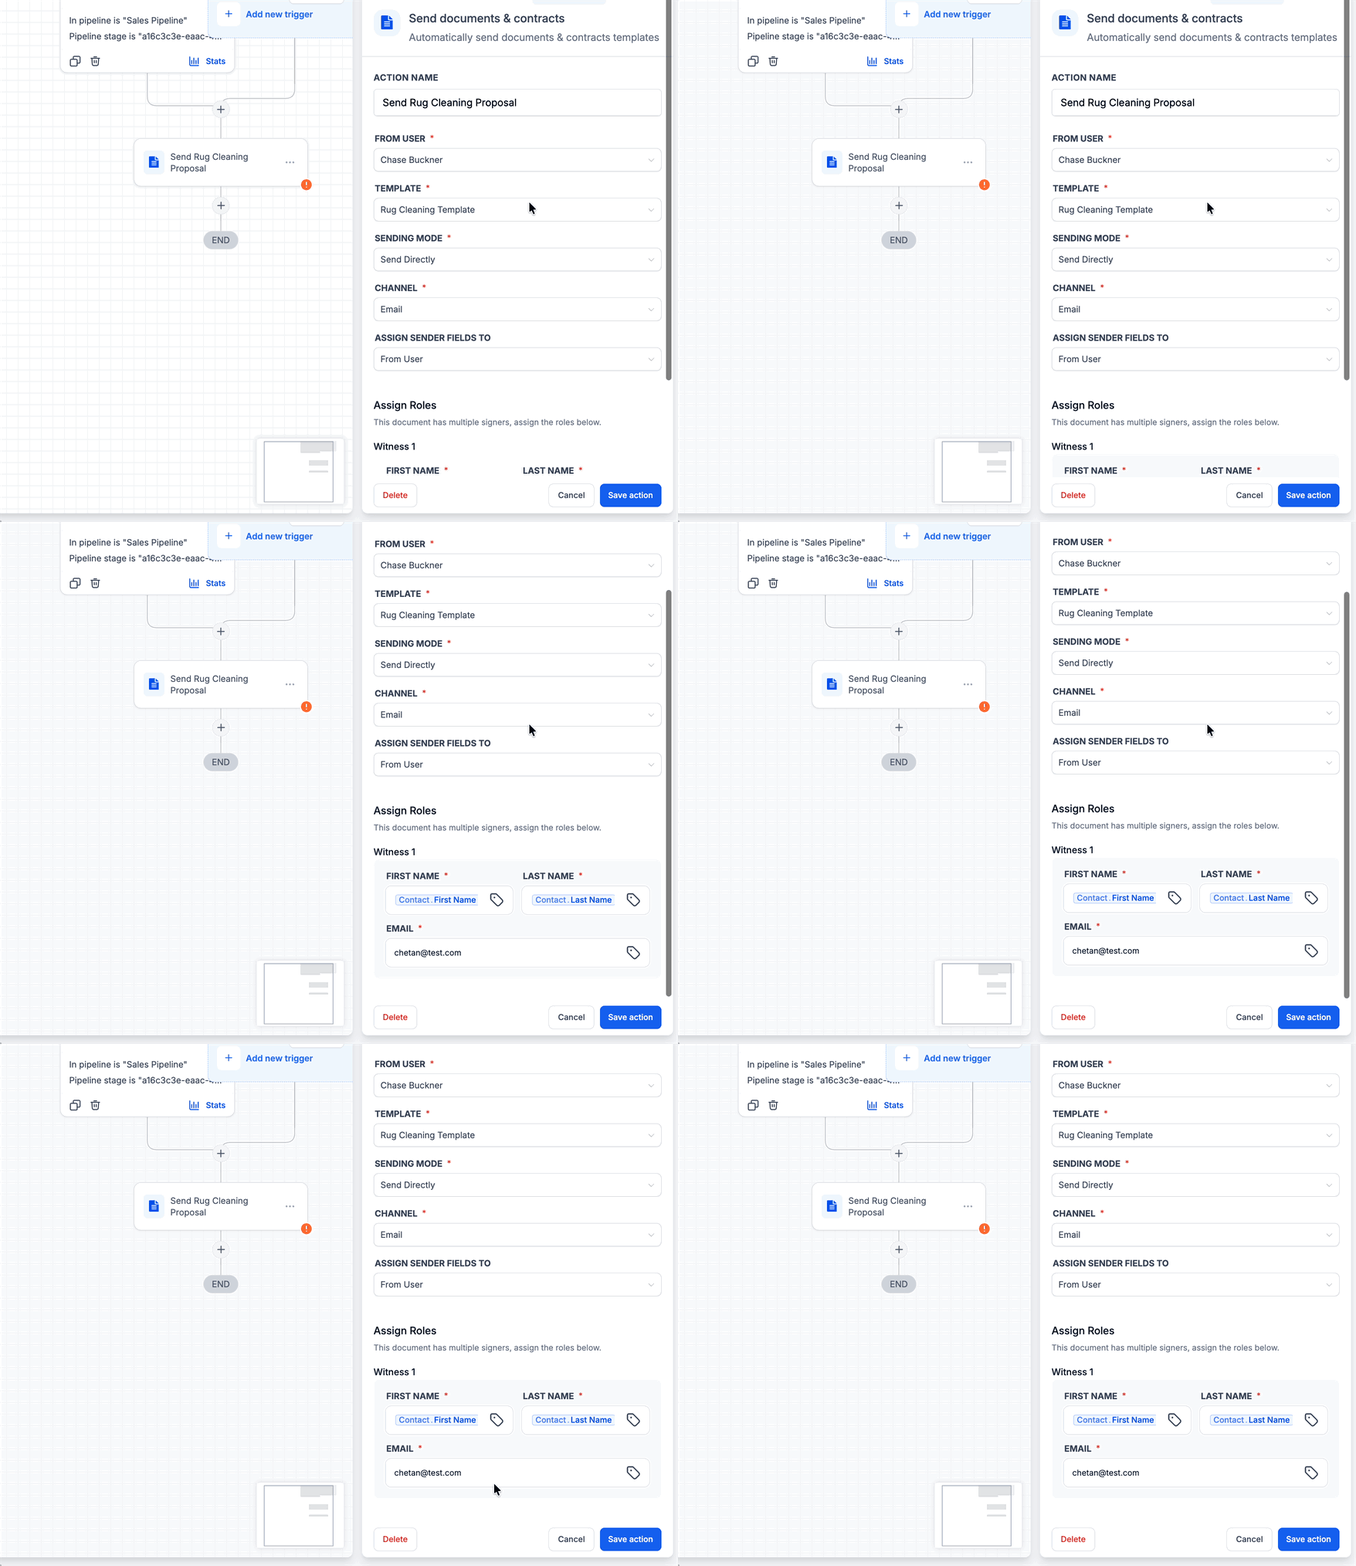
When the workflow runs, you can override any role's details for that one send without touching the template.
Signers are routed in the order the roles were defined and each gets a unique signing link.
This is the fastest way to avoid re-entering co-signer or witness details every time you send the same type of multi-party agreement.
Can I send a document to more than one signer? Yes. Add each recipient in the Recipients section and assign signature fields to anyone who needs to sign. You can also add your own team member as a signer.
What's the difference between a Signer and a CC recipient? A Signer has at least one signature field assigned and must complete it. A CC recipient has no signature field and only receives a copy to view.
Who becomes the Primary Recipient, and why does it matter? The first recipient you add. Custom fields on the document pull from their contact record, and if automatic invoicing is on, the invoice after signing is billed to them.
Can I control whether signers sign at the same time or in a specific order? Yes. Toggle Signing Order on and drag recipients into the sequence you want. With it off, everyone is notified and can sign at the same time.
Which signature types can recipients use? You choose Draw, Type, or Both for your entire account in Document Settings. This applies to every document sent from your account.
Can I send a document without adding a contact first? Yes, using a Public Document Link. Publish a template, share the link, and anyone can open it, enter their name and email, and sign.
Can documents be sent by text message? Yes. Choose Email, SMS, or Email + SMS when sending, individually or through a workflow. SMS is sent from your practice's Aesthetix CRM phone number.
What happens if a document expires before it's signed? Its status changes to Expired and it can no longer be signed. You can turn on a reminder notification one day before expiration, and you can resend a new document if needed.
Can I send someone to a specific page right after they sign? Yes. Set a redirect URL globally in Document Settings, or on an individual document to override the global setting for that one document.
Can I automatically send a document to multiple signers without re-entering their details each time? Yes, using multi-role signing. Define up to 6 signer roles on the template, then send it through a Send Document workflow action, which auto-populates and routes each role.
