AI Studio is an AI-powered builder that creates websites, landing pages and other interactive experiences from plain-language prompts. In Aesthetix CRM you open it from the AI Agents folder in the left sidebar, then choose AI Studio. This feature may not be enabled on every account yet.
Protect patient privacy: AI features are not approved for processing Protected Health Information (PHI). Do not type patient names, health history, treatment details, photos or any other PHI into AI Studio prompts, uploaded files, project content or any database an AI Studio app uses. Use realistic but fictional examples when you describe a page.
AI Studio is a conversational builder. It can generate layouts, copy, images and multi-page experiences from one prompt, then lets you refine the result with follow-up instructions. It can create a single page or several connected pages in one project, applies a consistent look across the pages, and writes content based on your prompt and the goal of the page. If you do not supply images, it can generate visuals for hero sections and supporting areas. If you upload images and clearly ask it to use them, it places them in the page.
AI Studio is not limited to standard sites. It can also build interactive front-end experiences such as multi-step surveys, custom calendar booking flows, branded forms and other client-facing pages.
Examples of what you can ask for:
A consultation landing page that uses a live website URL as inspiration for layout and structure
A treatment menu site built around your uploaded branded photos
An injector-training signup page with a registration form
A booking page connected to one of your calendars
A product page or storefront for retail skincare
A website with content, visuals and calls to action already in place
AI Studio and Agent Studio are different tools. AI Studio builds websites, pages and web assets from prompts. Agent Studio is a visual builder for AI agents that respond to events, talk to people and automate tasks. See the Agent Studio guides for agents.
Faster creation: Start with a prompt instead of building every section by hand.
Natural editing: Ask for changes in plain language and the project updates.
Visual refinement: Click elements in the live preview to change text, images, icons, spacing, colors and layout without code.
Flexible inspiration: Use templates, URLs, screenshots and uploaded images to guide the result.
Safe iteration: Version history and restore let you try changes with confidence.
Built-in organization: Manage projects, folders, recent work and starred items from one place.
Production path: Preview, publish and connect a custom domain when you are ready.
Log in to your Aesthetix CRM account.
In the left sidebar, open AI Agents.
Click AI Studio.
Access is controlled with user permissions. Account admins and owners can give each team member one of two levels:
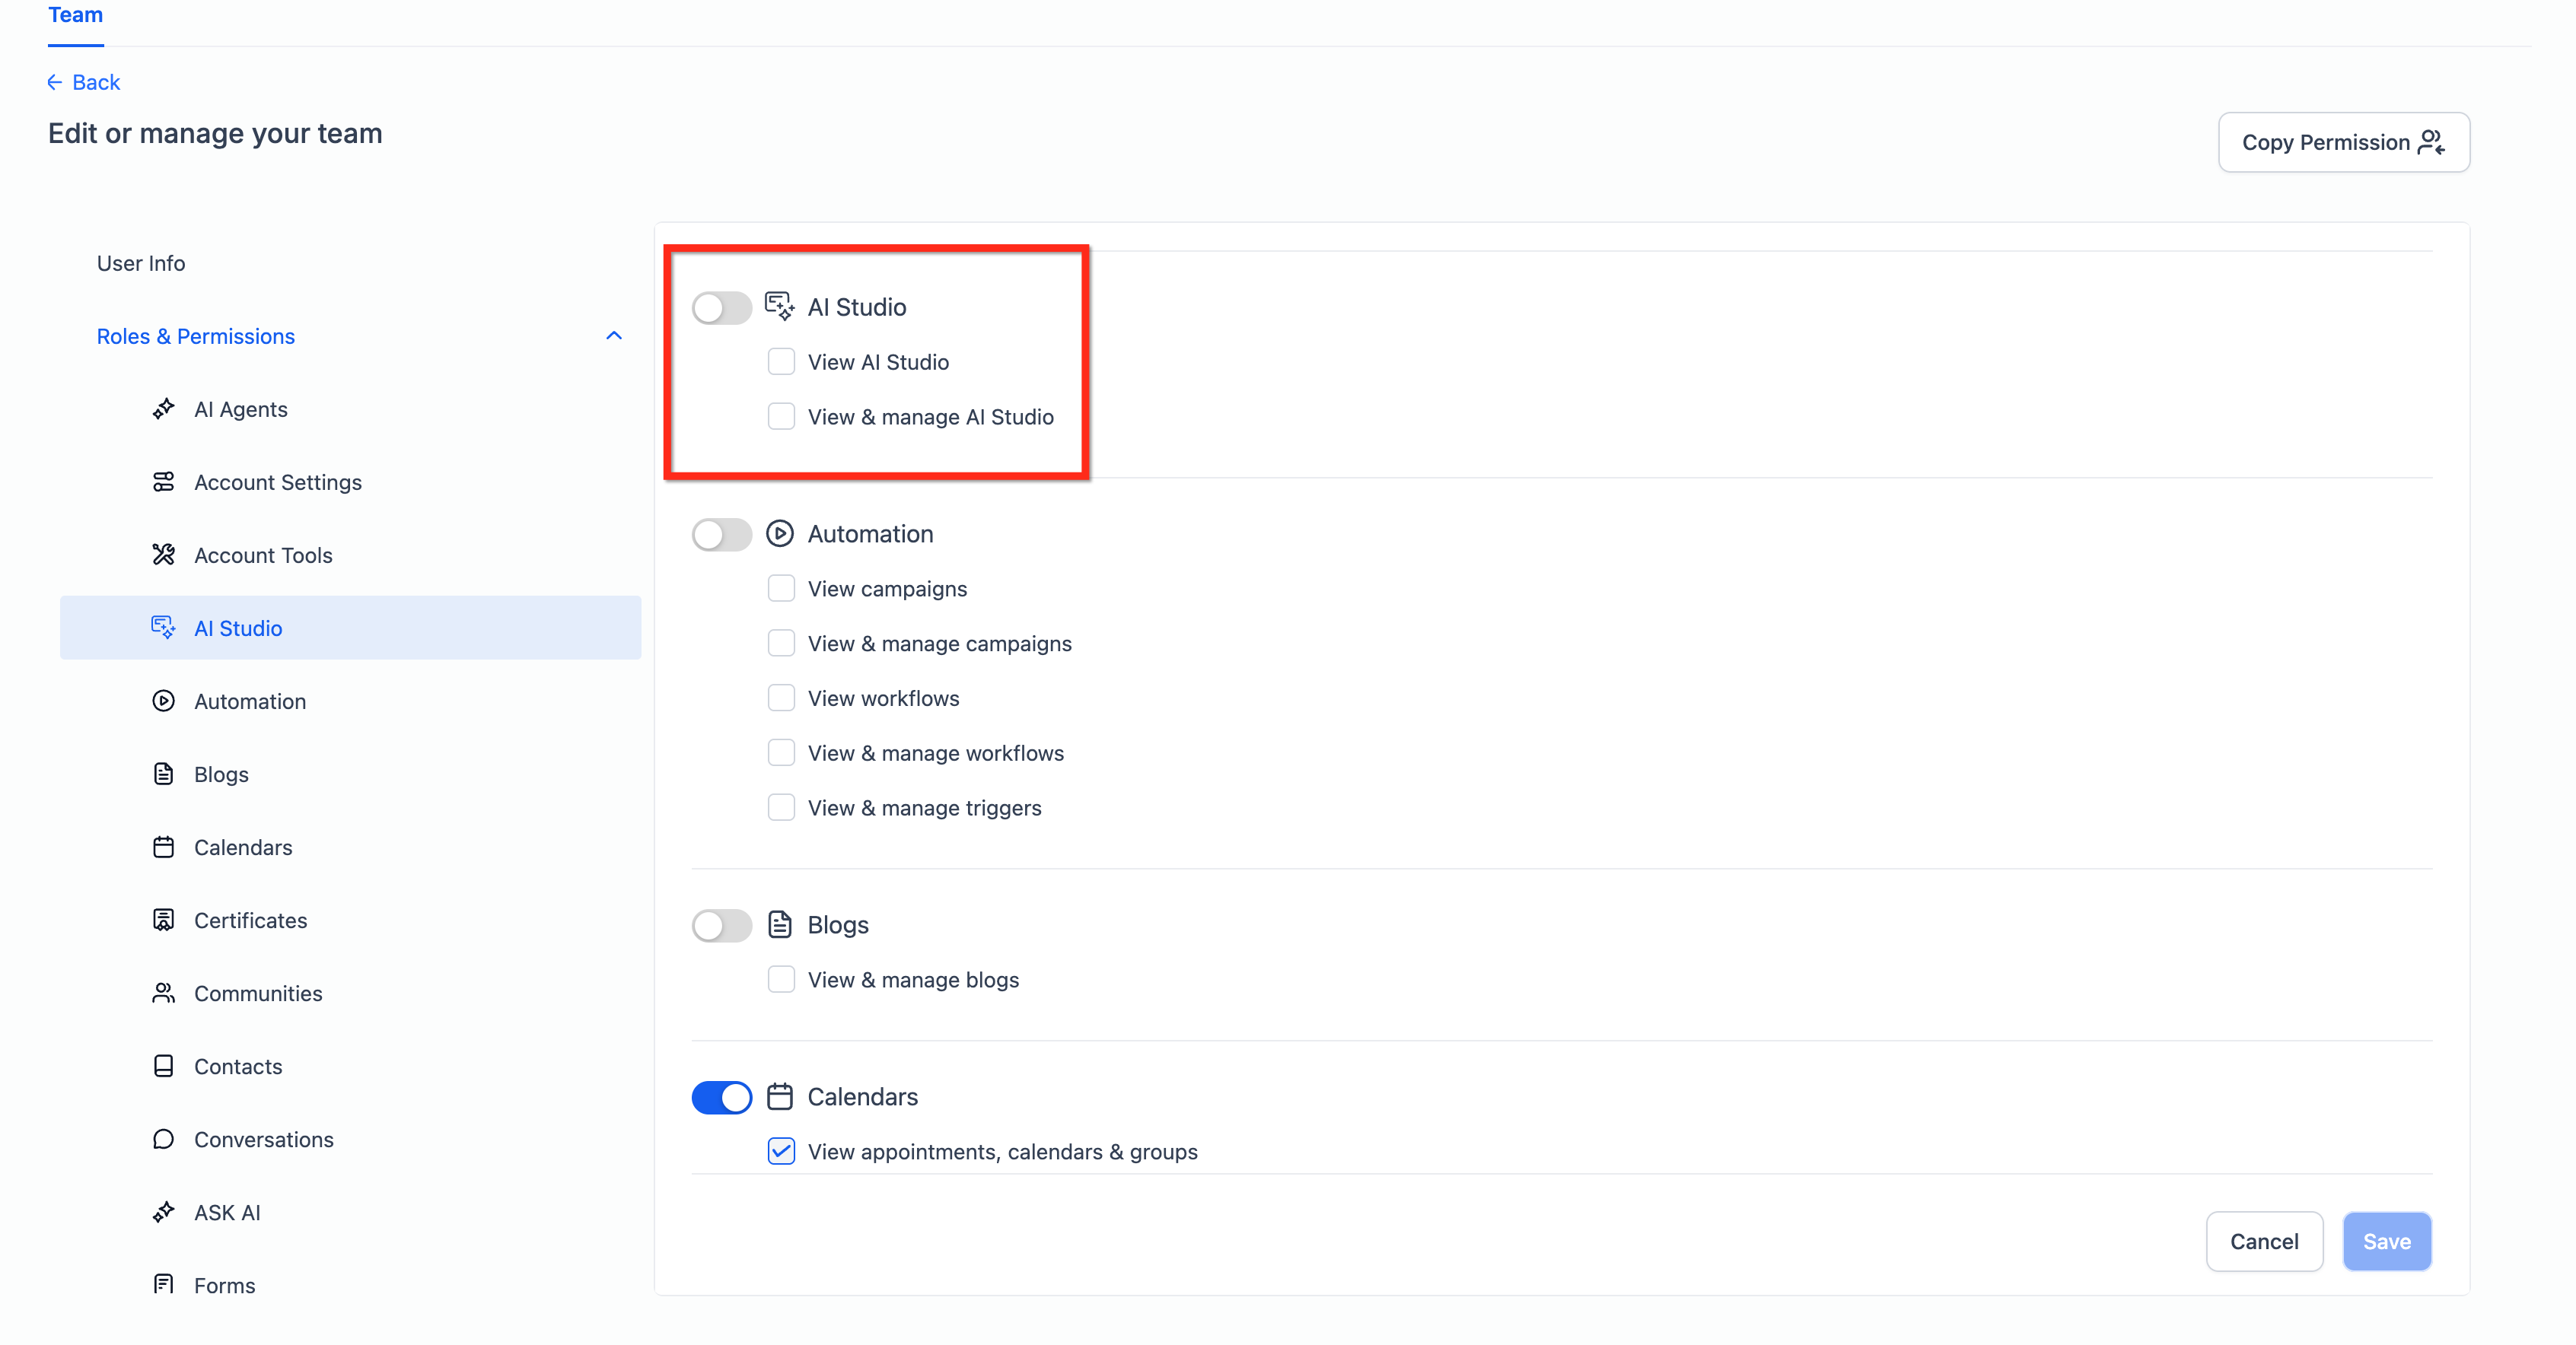
Permission | What it allows |
|---|---|
View AI Studio | Read-only access to AI Studio |
View & Manage AI Studio | Full read and write access to AI Studio |
AI Studio usage is metered. See the guide AI Studio Pricing and Usage for how usage windows, limits and notifications work.
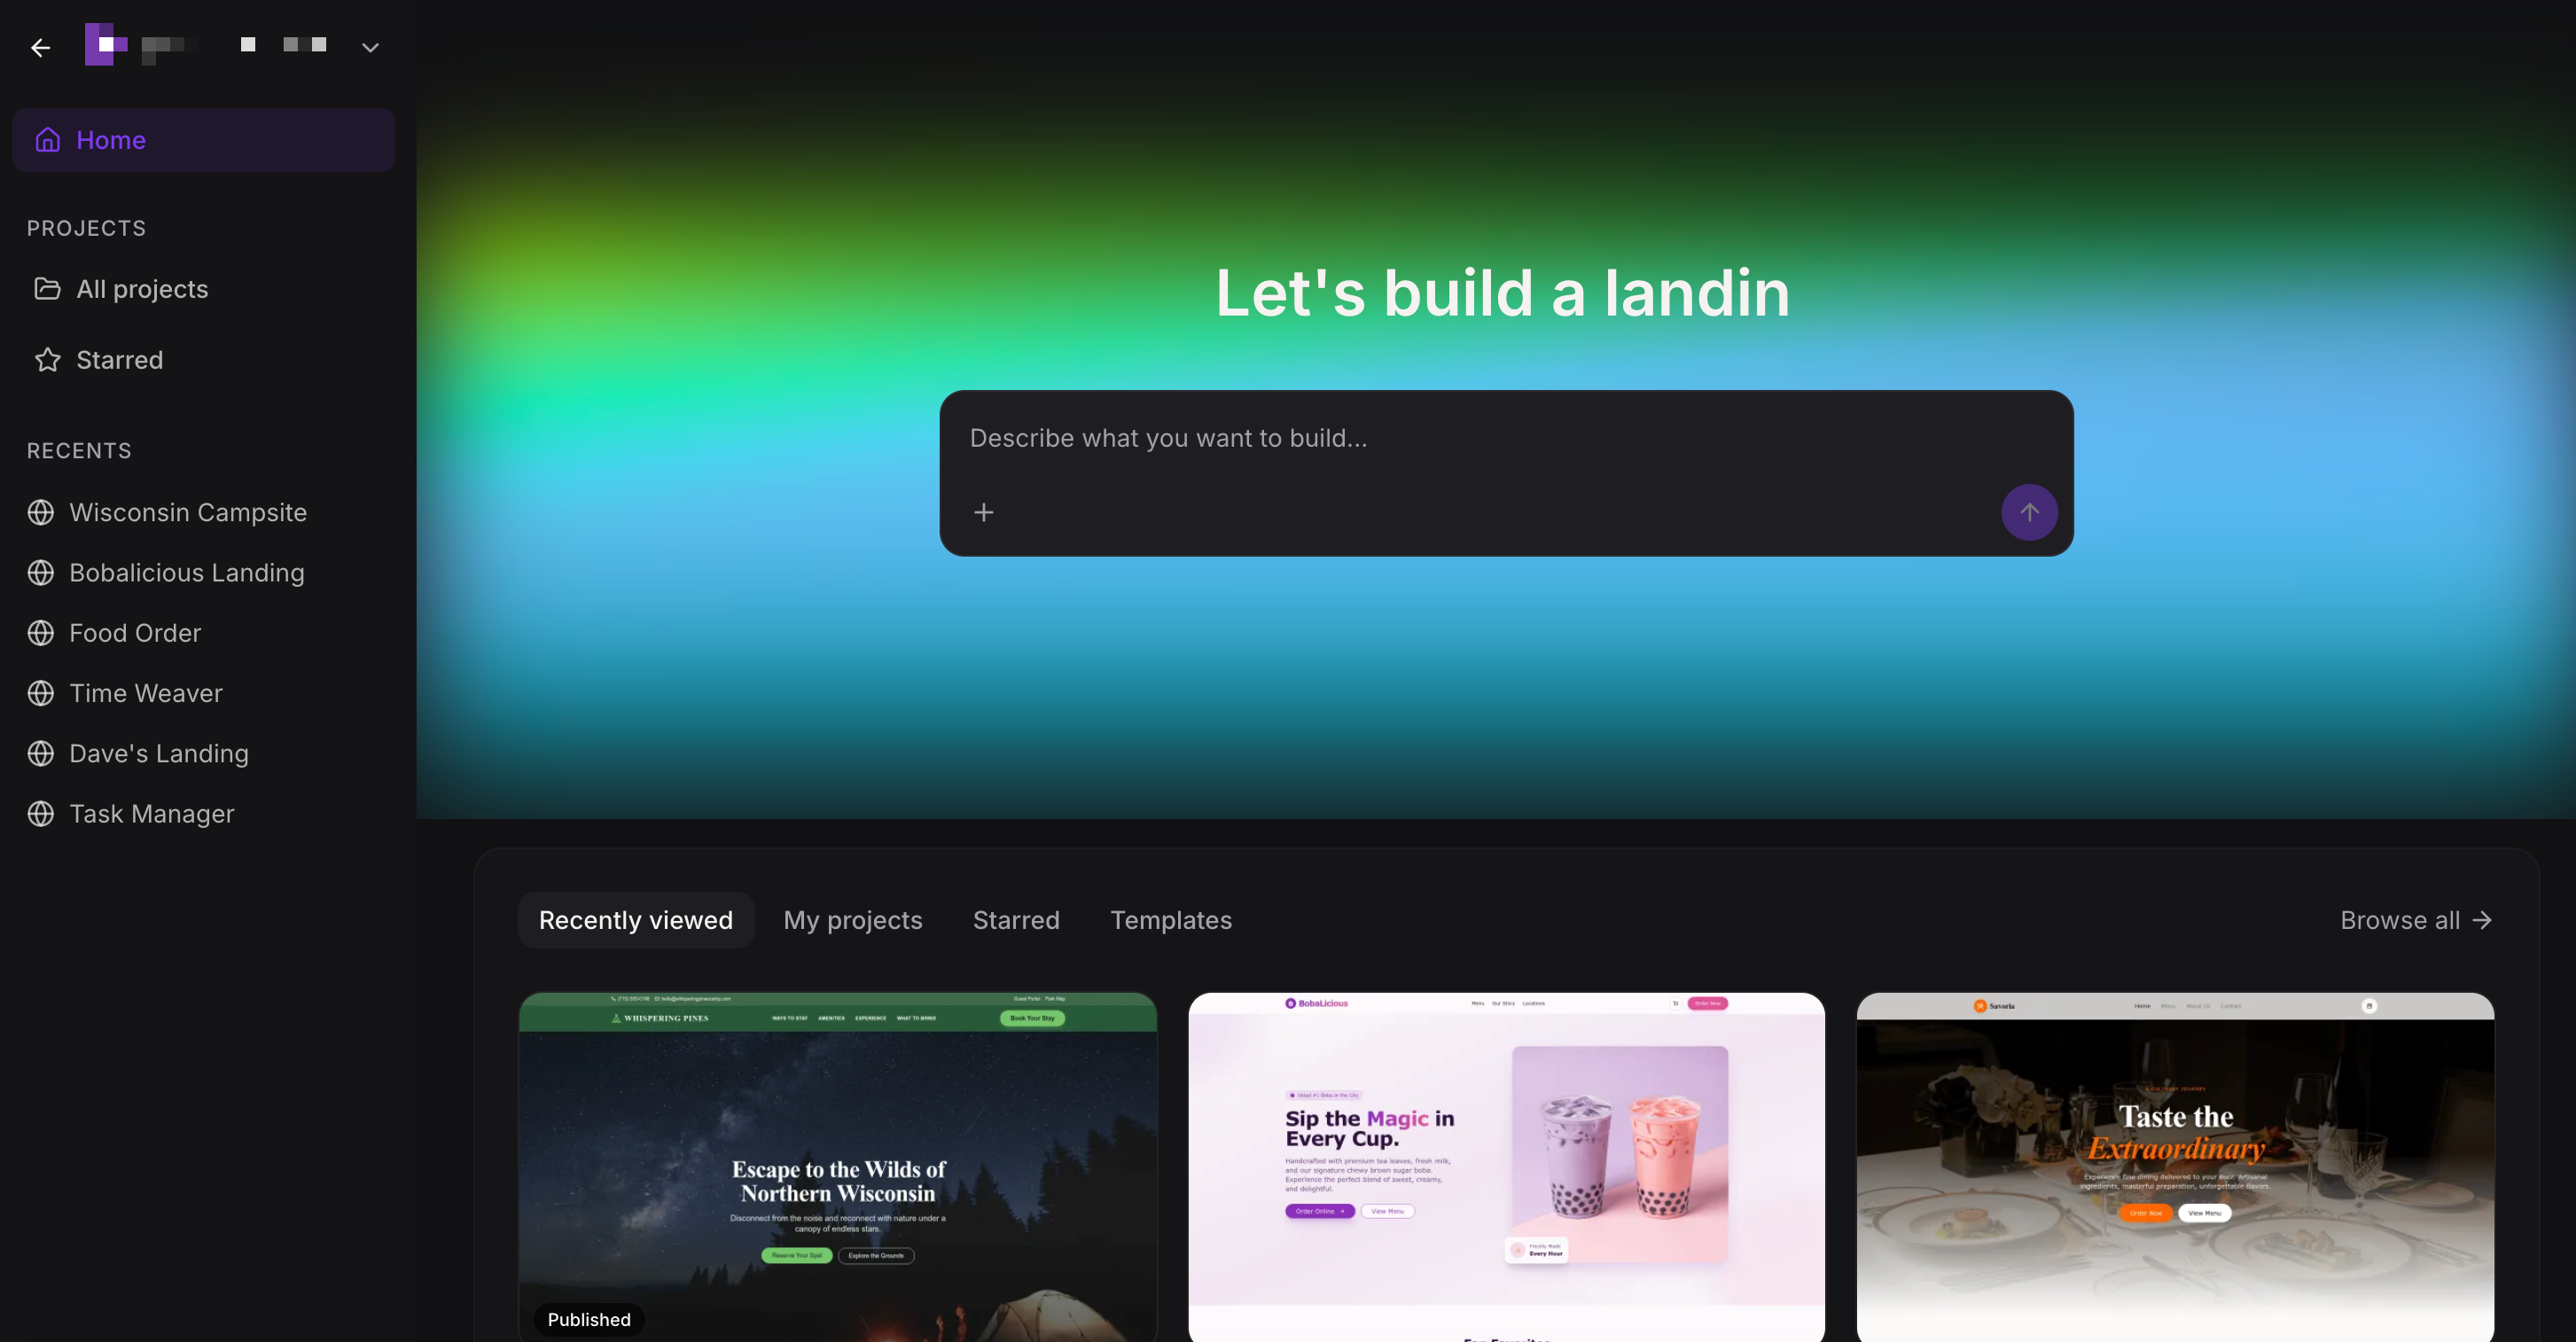
The home screen is where you start new projects, reopen past work and manage everything you have built. It contains:
A description box where you type what you want to build
Tabs: Recently Viewed, My Projects, Starred and Templates
Template options such as landing pages, dashboards, ecommerce storefronts, portfolios and blogs
A left sidebar with project access and recent work
From the home area you can start a new project, open an existing one, rename a project, move a project to a folder or delete a project.
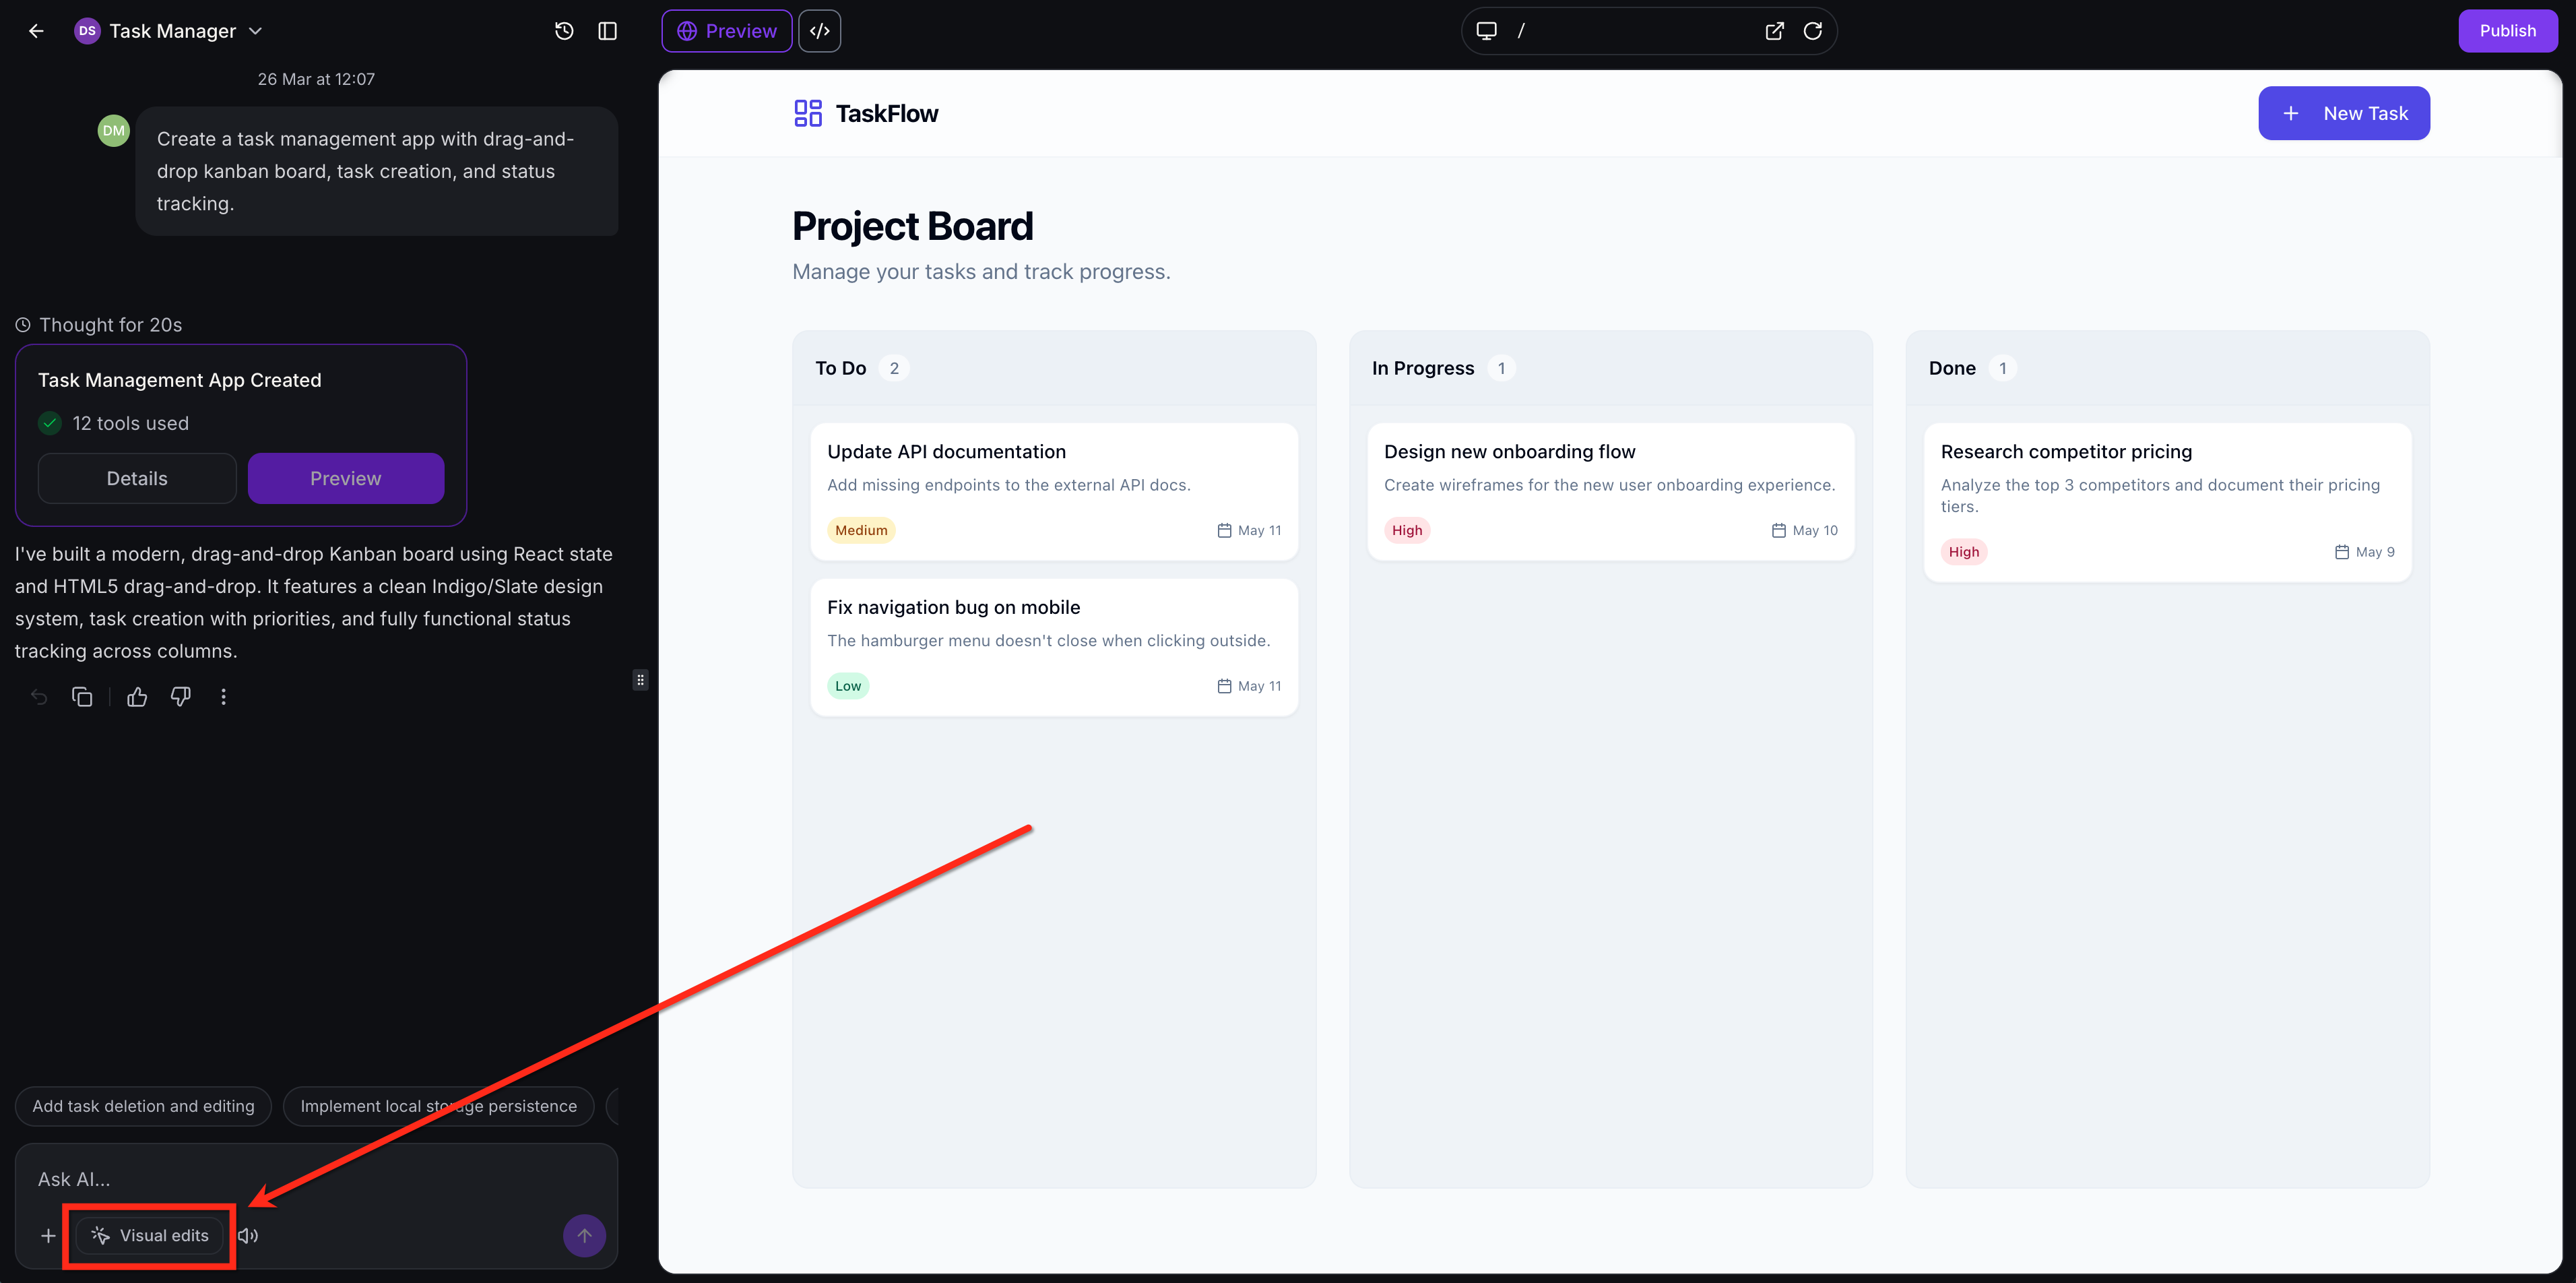
Inside a project the builder gives you the chat and prompt area, a live preview, a Preview and Code switch, a Visual Edits button at the bottom left of the prompt area, a Version History control, a Publish button at the top right and a More menu in the top bar (Analytics, Payments, Chat Widgets and other project tools).
You can begin with whatever input you already have: an idea, a template, a website reference or an image. The goal is the same, a strong first draft quickly.
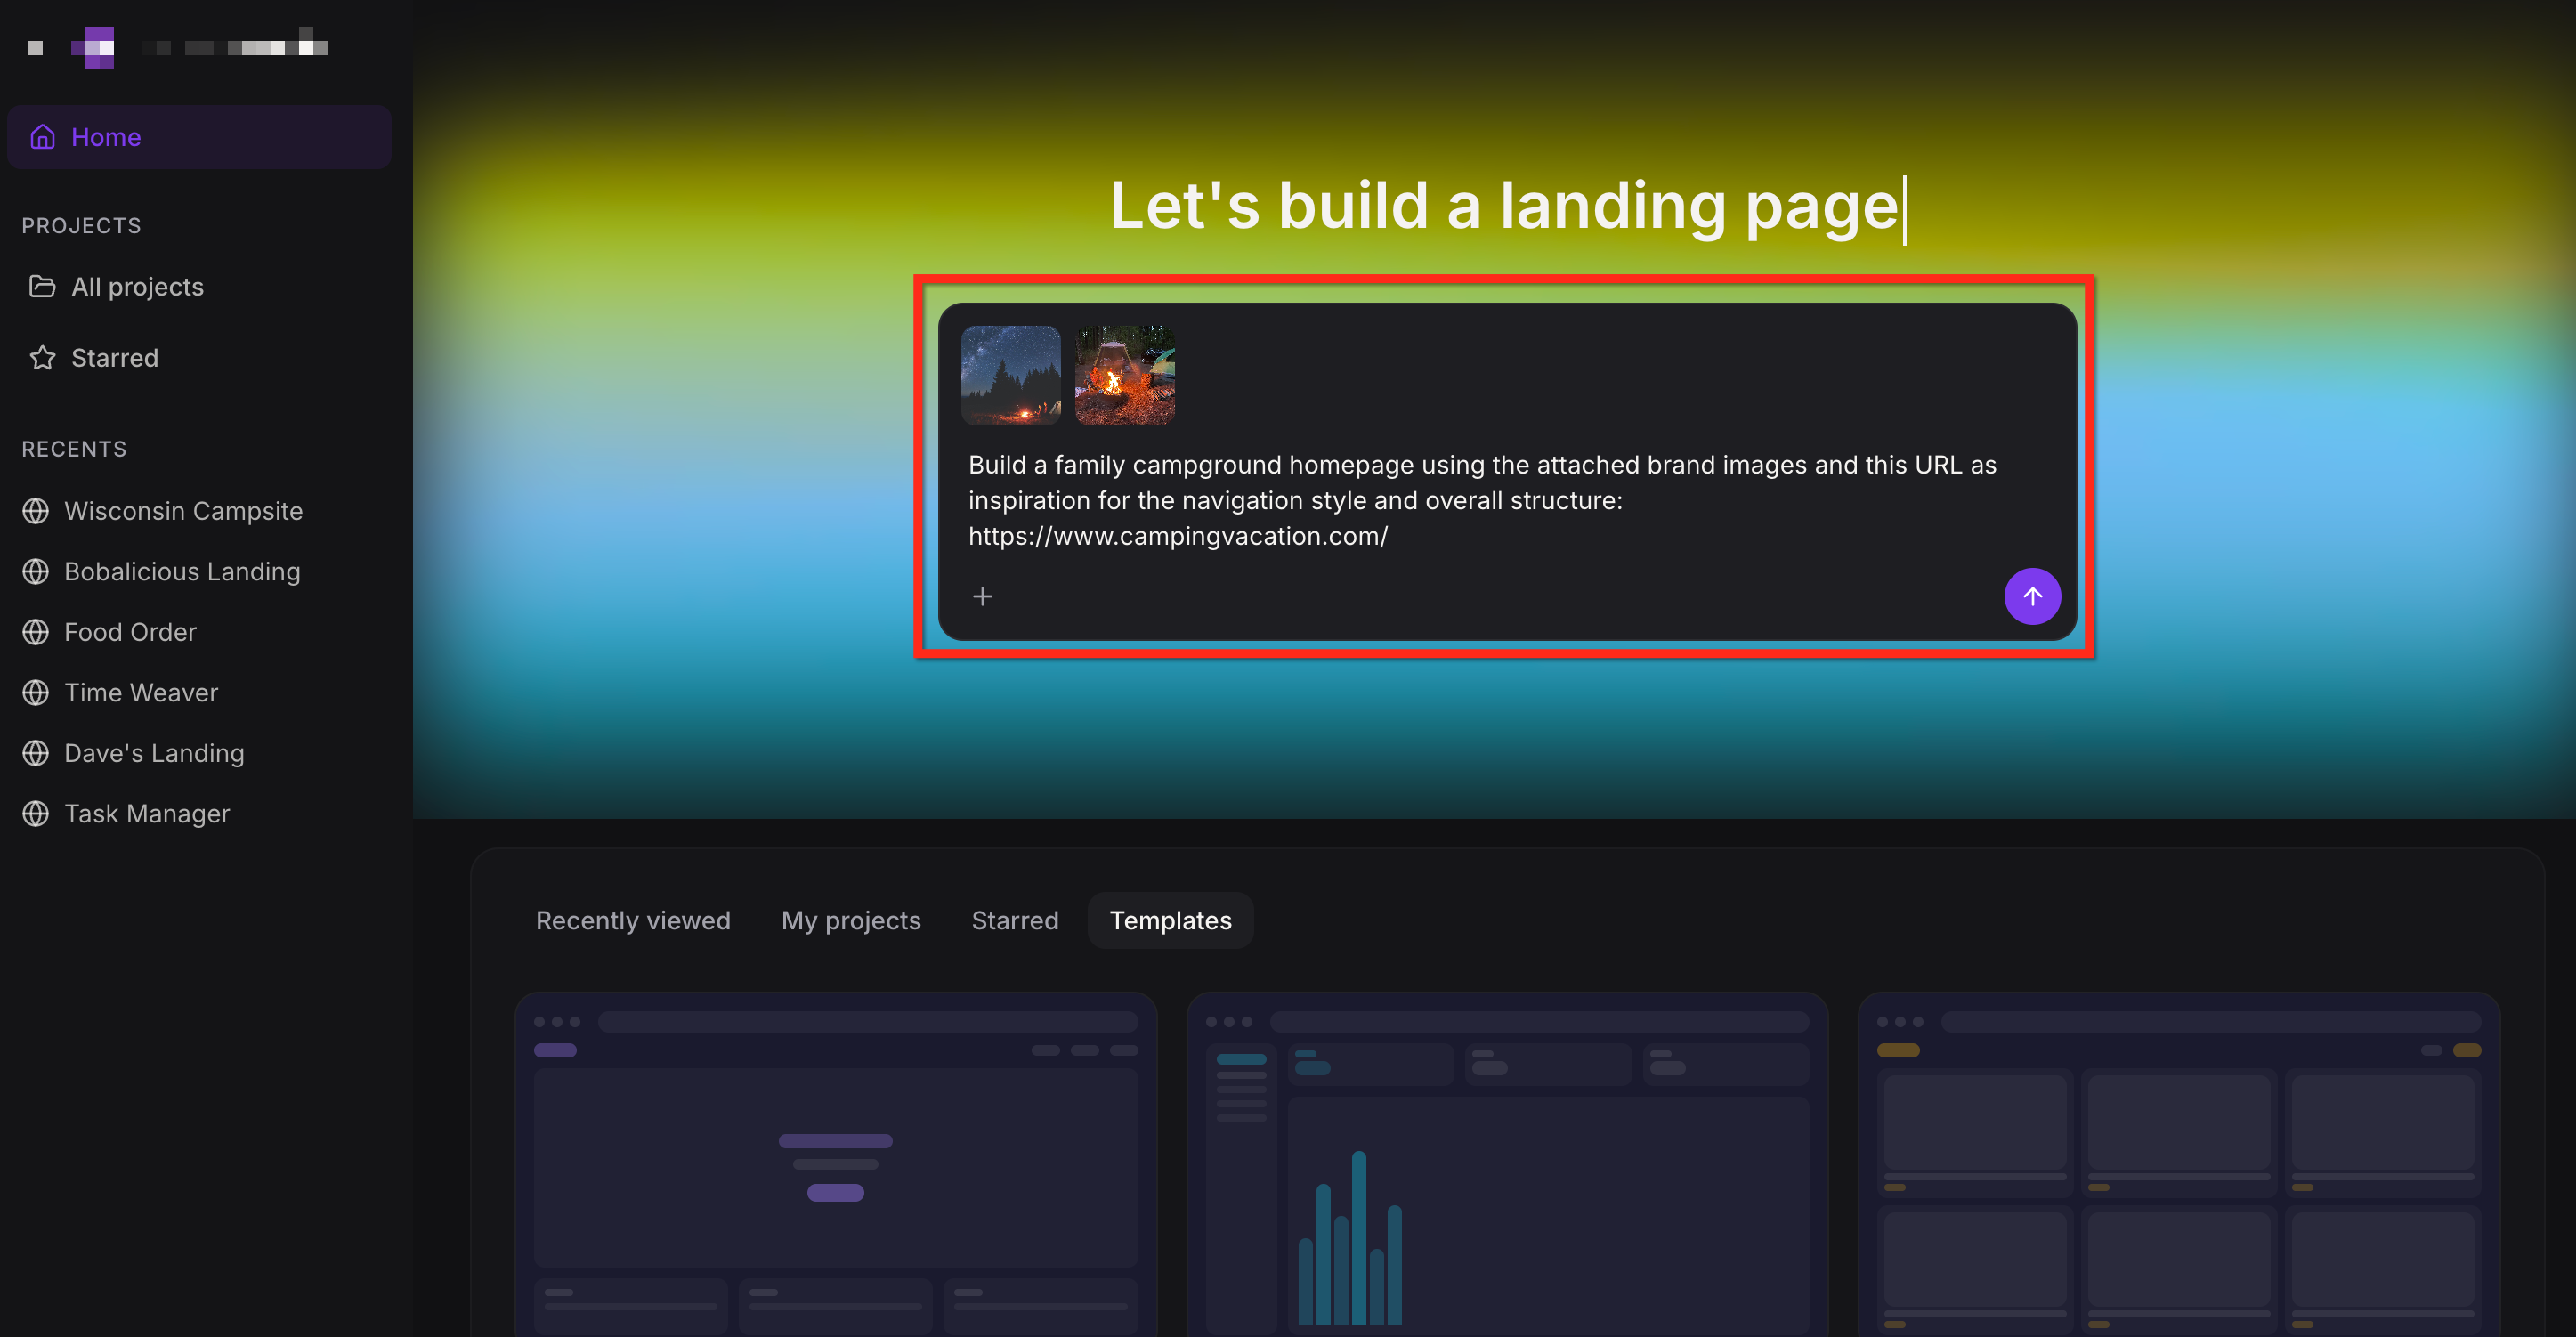
Type a description of what you want. The more detail you give, the better the first version. Alongside the prompt you can attach files, images or a live URL for structure, layout or style inspiration.
Prompt-writing tips:
State the business type, the page goal and the one action you want visitors to take (book a consultation, request a quote, register for an event).
Name the sections you want: hero, treatment list, before-and-after policy note, team, testimonials, FAQ, contact.
Describe the look: calm and clinical, warm and luxurious, bold and modern.
Attach brand images only when you want them used, and say so clearly in the prompt.
Do not include patient information or real clinical details.
Example prompts:
"Create a consultation landing page for a medical aesthetics practice with a hero, three featured treatments, a short FAQ and a consultation request form."
"Build a treatment menu website for a med spa using the attached brand images. Include pages for injectables, skin rejuvenation and body contouring."
"Create a signup page for a two-day injector training course with a registration form and a schedule section."
"Build a homepage using this URL as inspiration for the navigation style and overall structure."
"Create a boutique skincare shop page using the attached screenshot as visual direction for the hero, spacing and typography."
You do not need a perfect prompt. When a request is broad or missing design details, AI Studio asks follow-up questions before it builds. For "build a website for my business" it may ask what kind of business it is, what the main conversion goal should be and which design direction fits your brand. Questions can use simple choices, visual options, sliders or free text.
It may ask you to choose:
Color palette: Pick from curated swatches without needing hex codes.
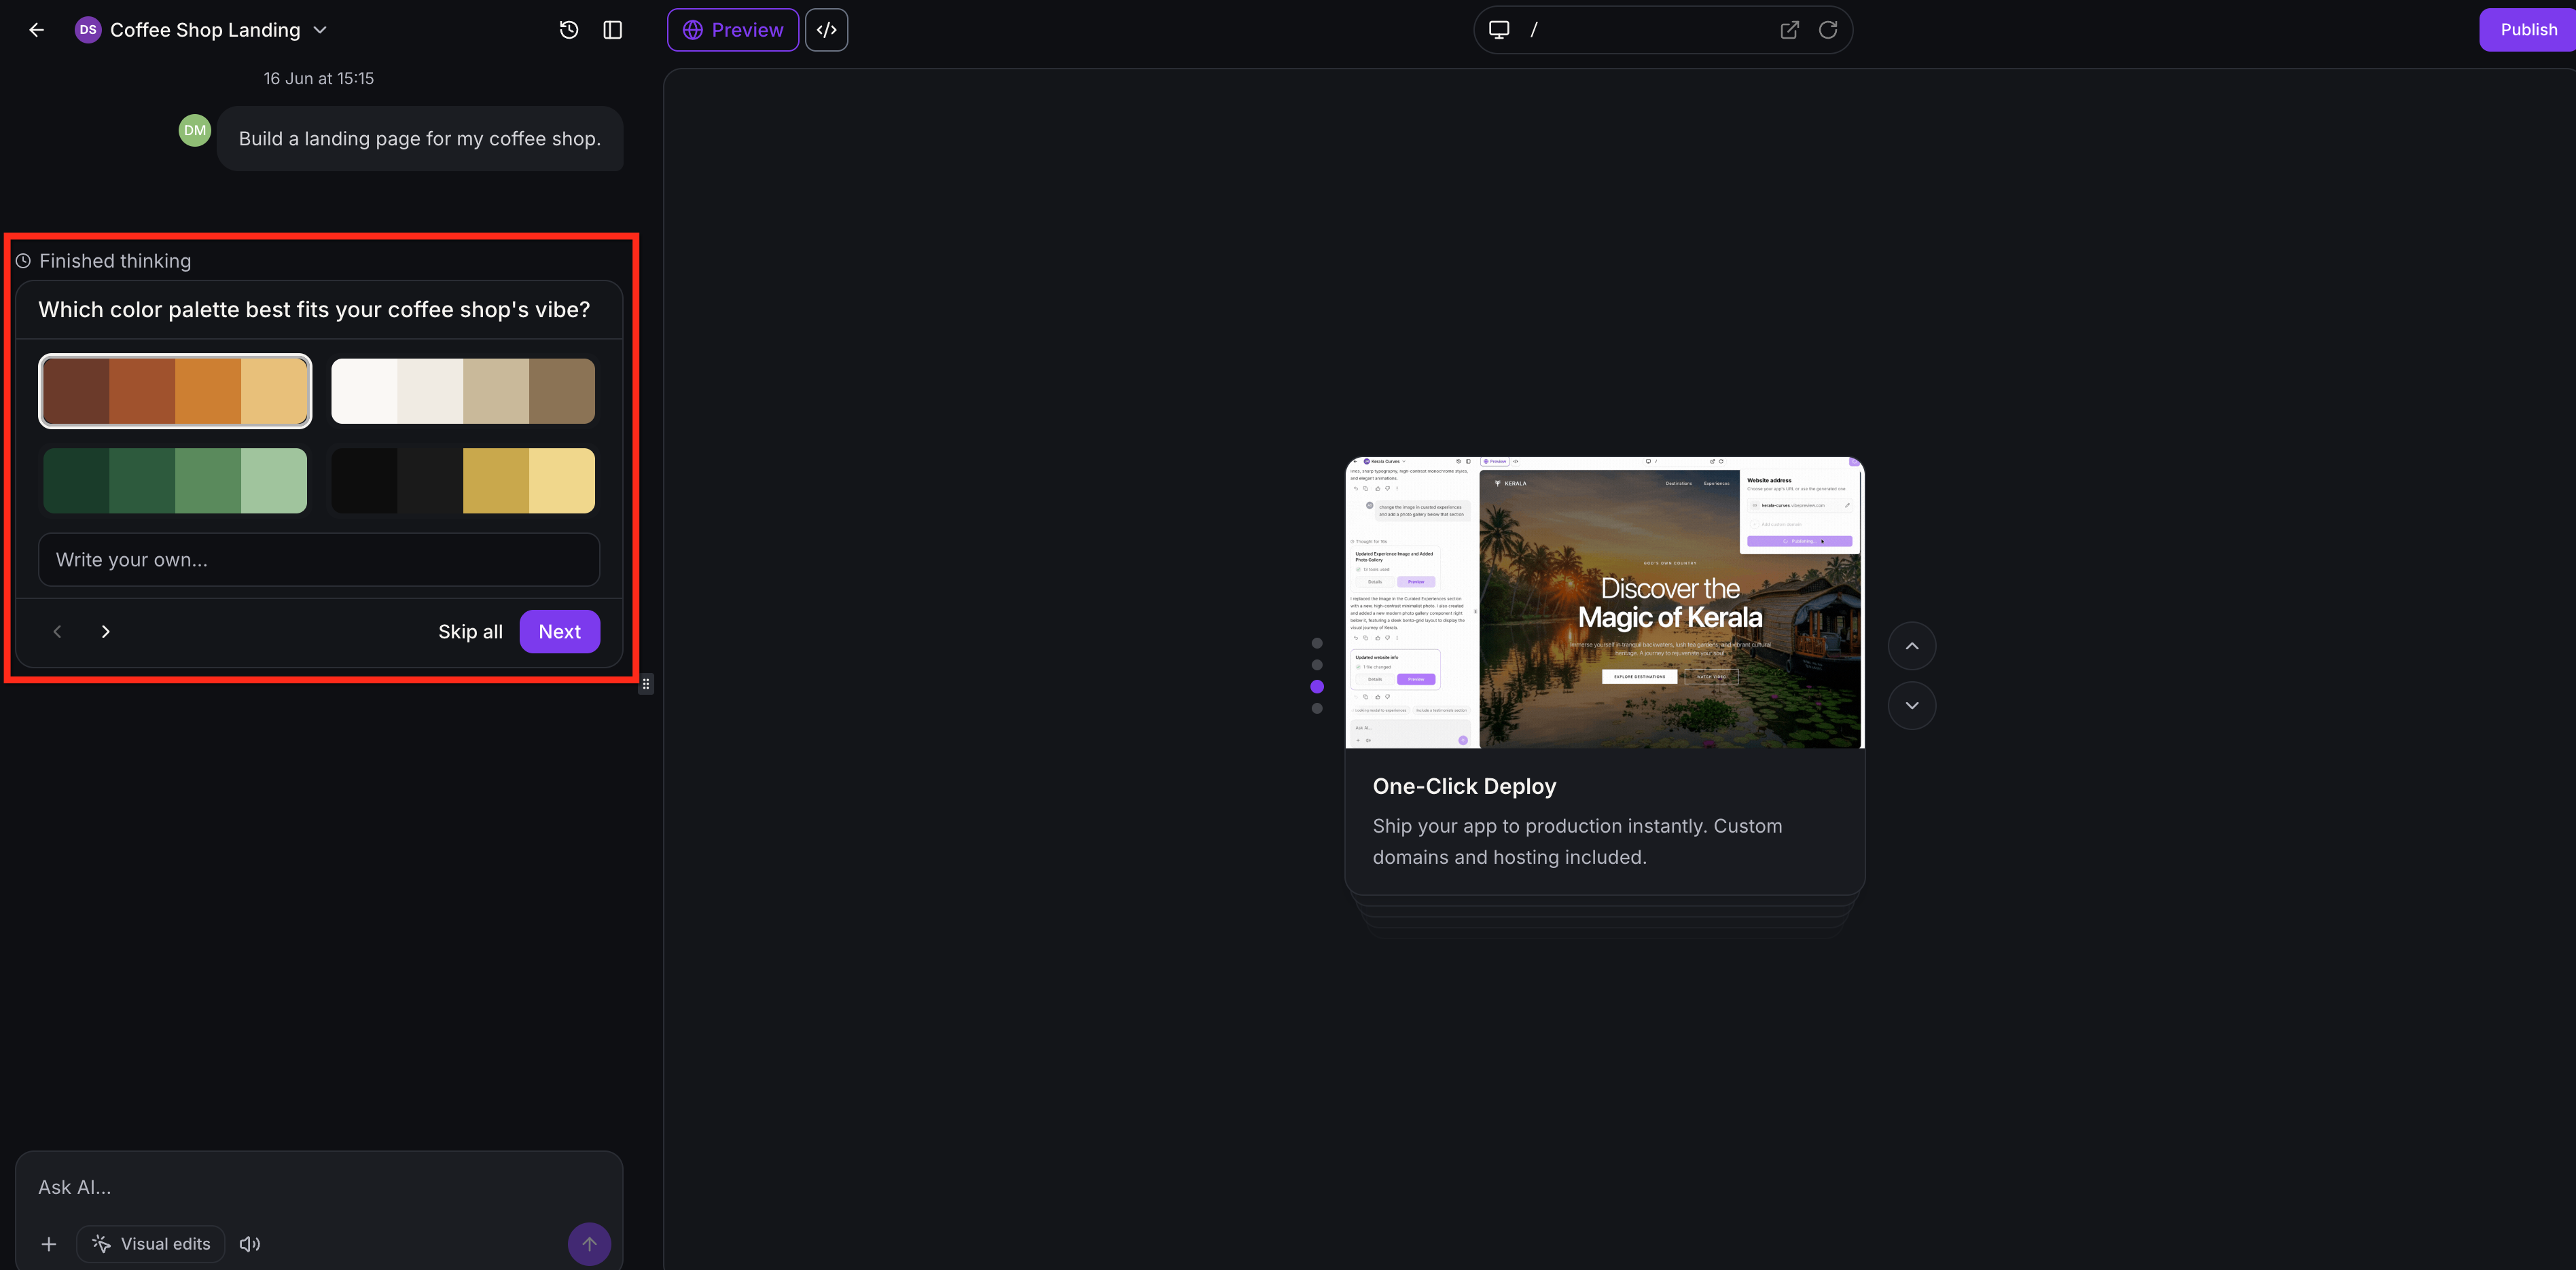
Typography style: Choose font pairings with a personality such as modern, clean, premium, creative, editorial or energetic.
Layout direction: Pick from grid-based, split, editorial, gallery-style or section-based layouts.
Conversion goal: Choose the main action, such as booking a call, selling a product or collecting leads.
These questions appear only when they help. If your prompt already gives clear style direction, AI Studio builds right away. You can review your answers before submitting, skip individual questions or click Skip all to let AI Studio choose sensible options.
Templates give you a familiar structure. Available types include Landing page, Dashboard, Ecommerce Storefront and Portfolio (the Templates tab also shows blog options).
On the AI Studio home screen, click the Templates tab.
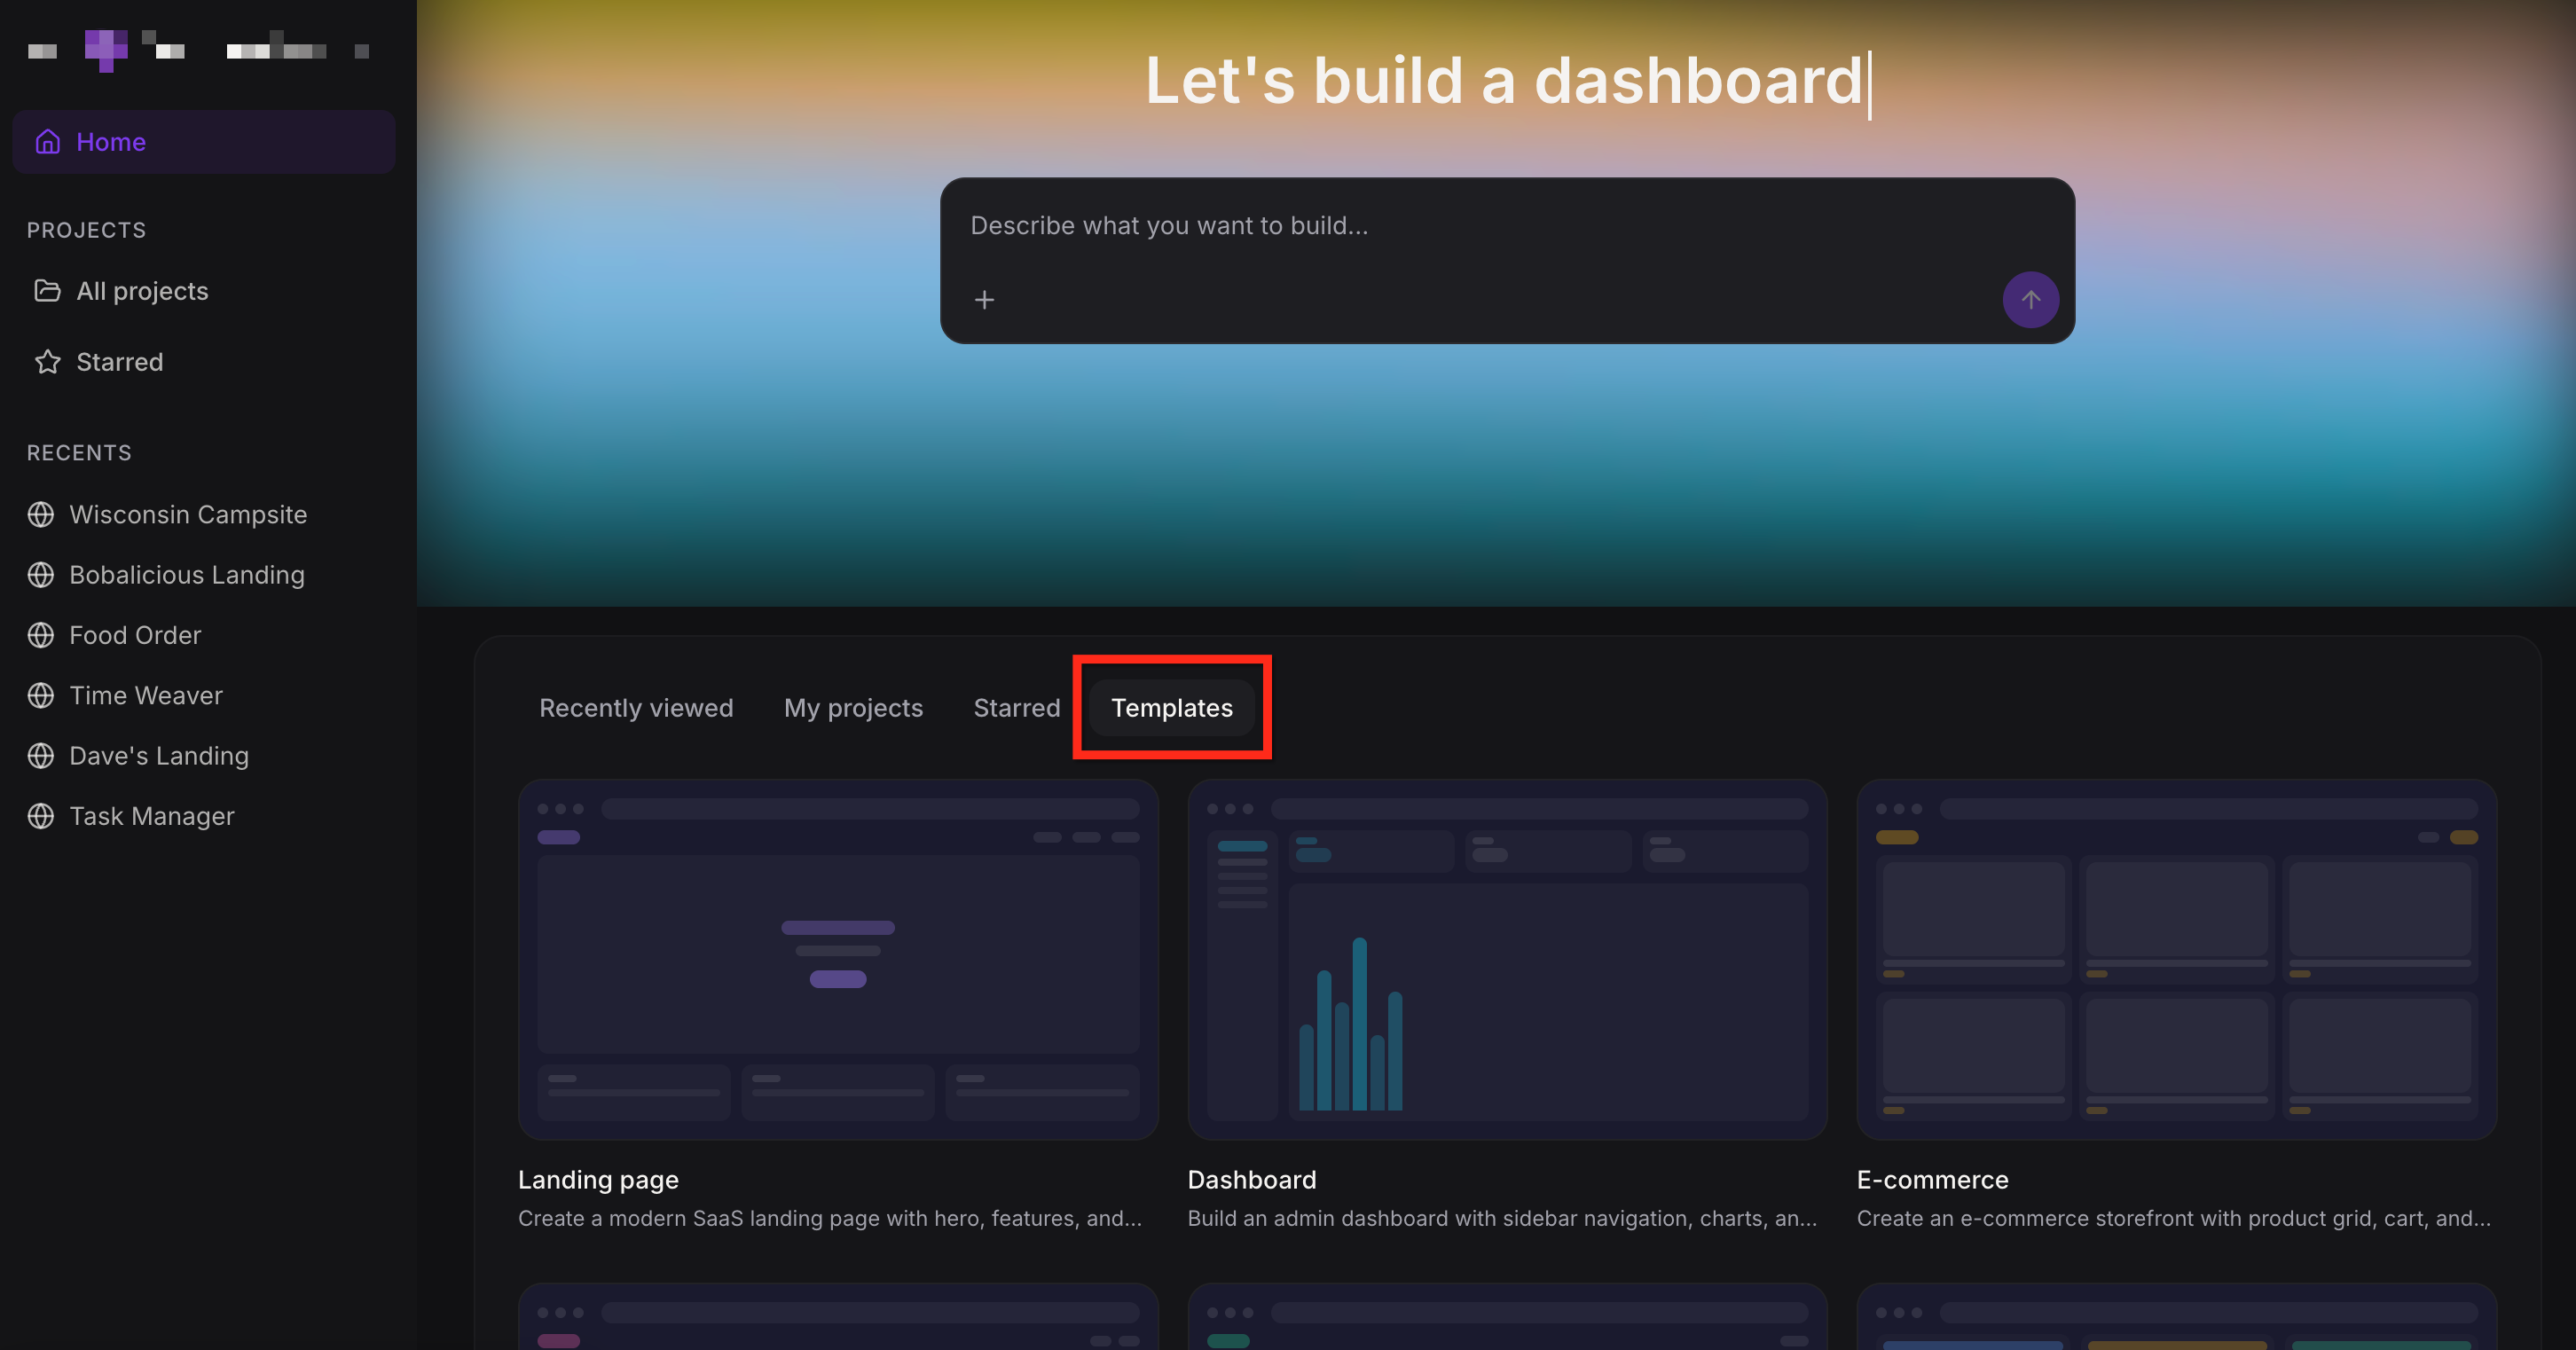
Select the template you want.
Refine it with follow-up prompts.
AI Studio works best as a conversation. You are not locked into the first version. After generation you can keep prompting to:
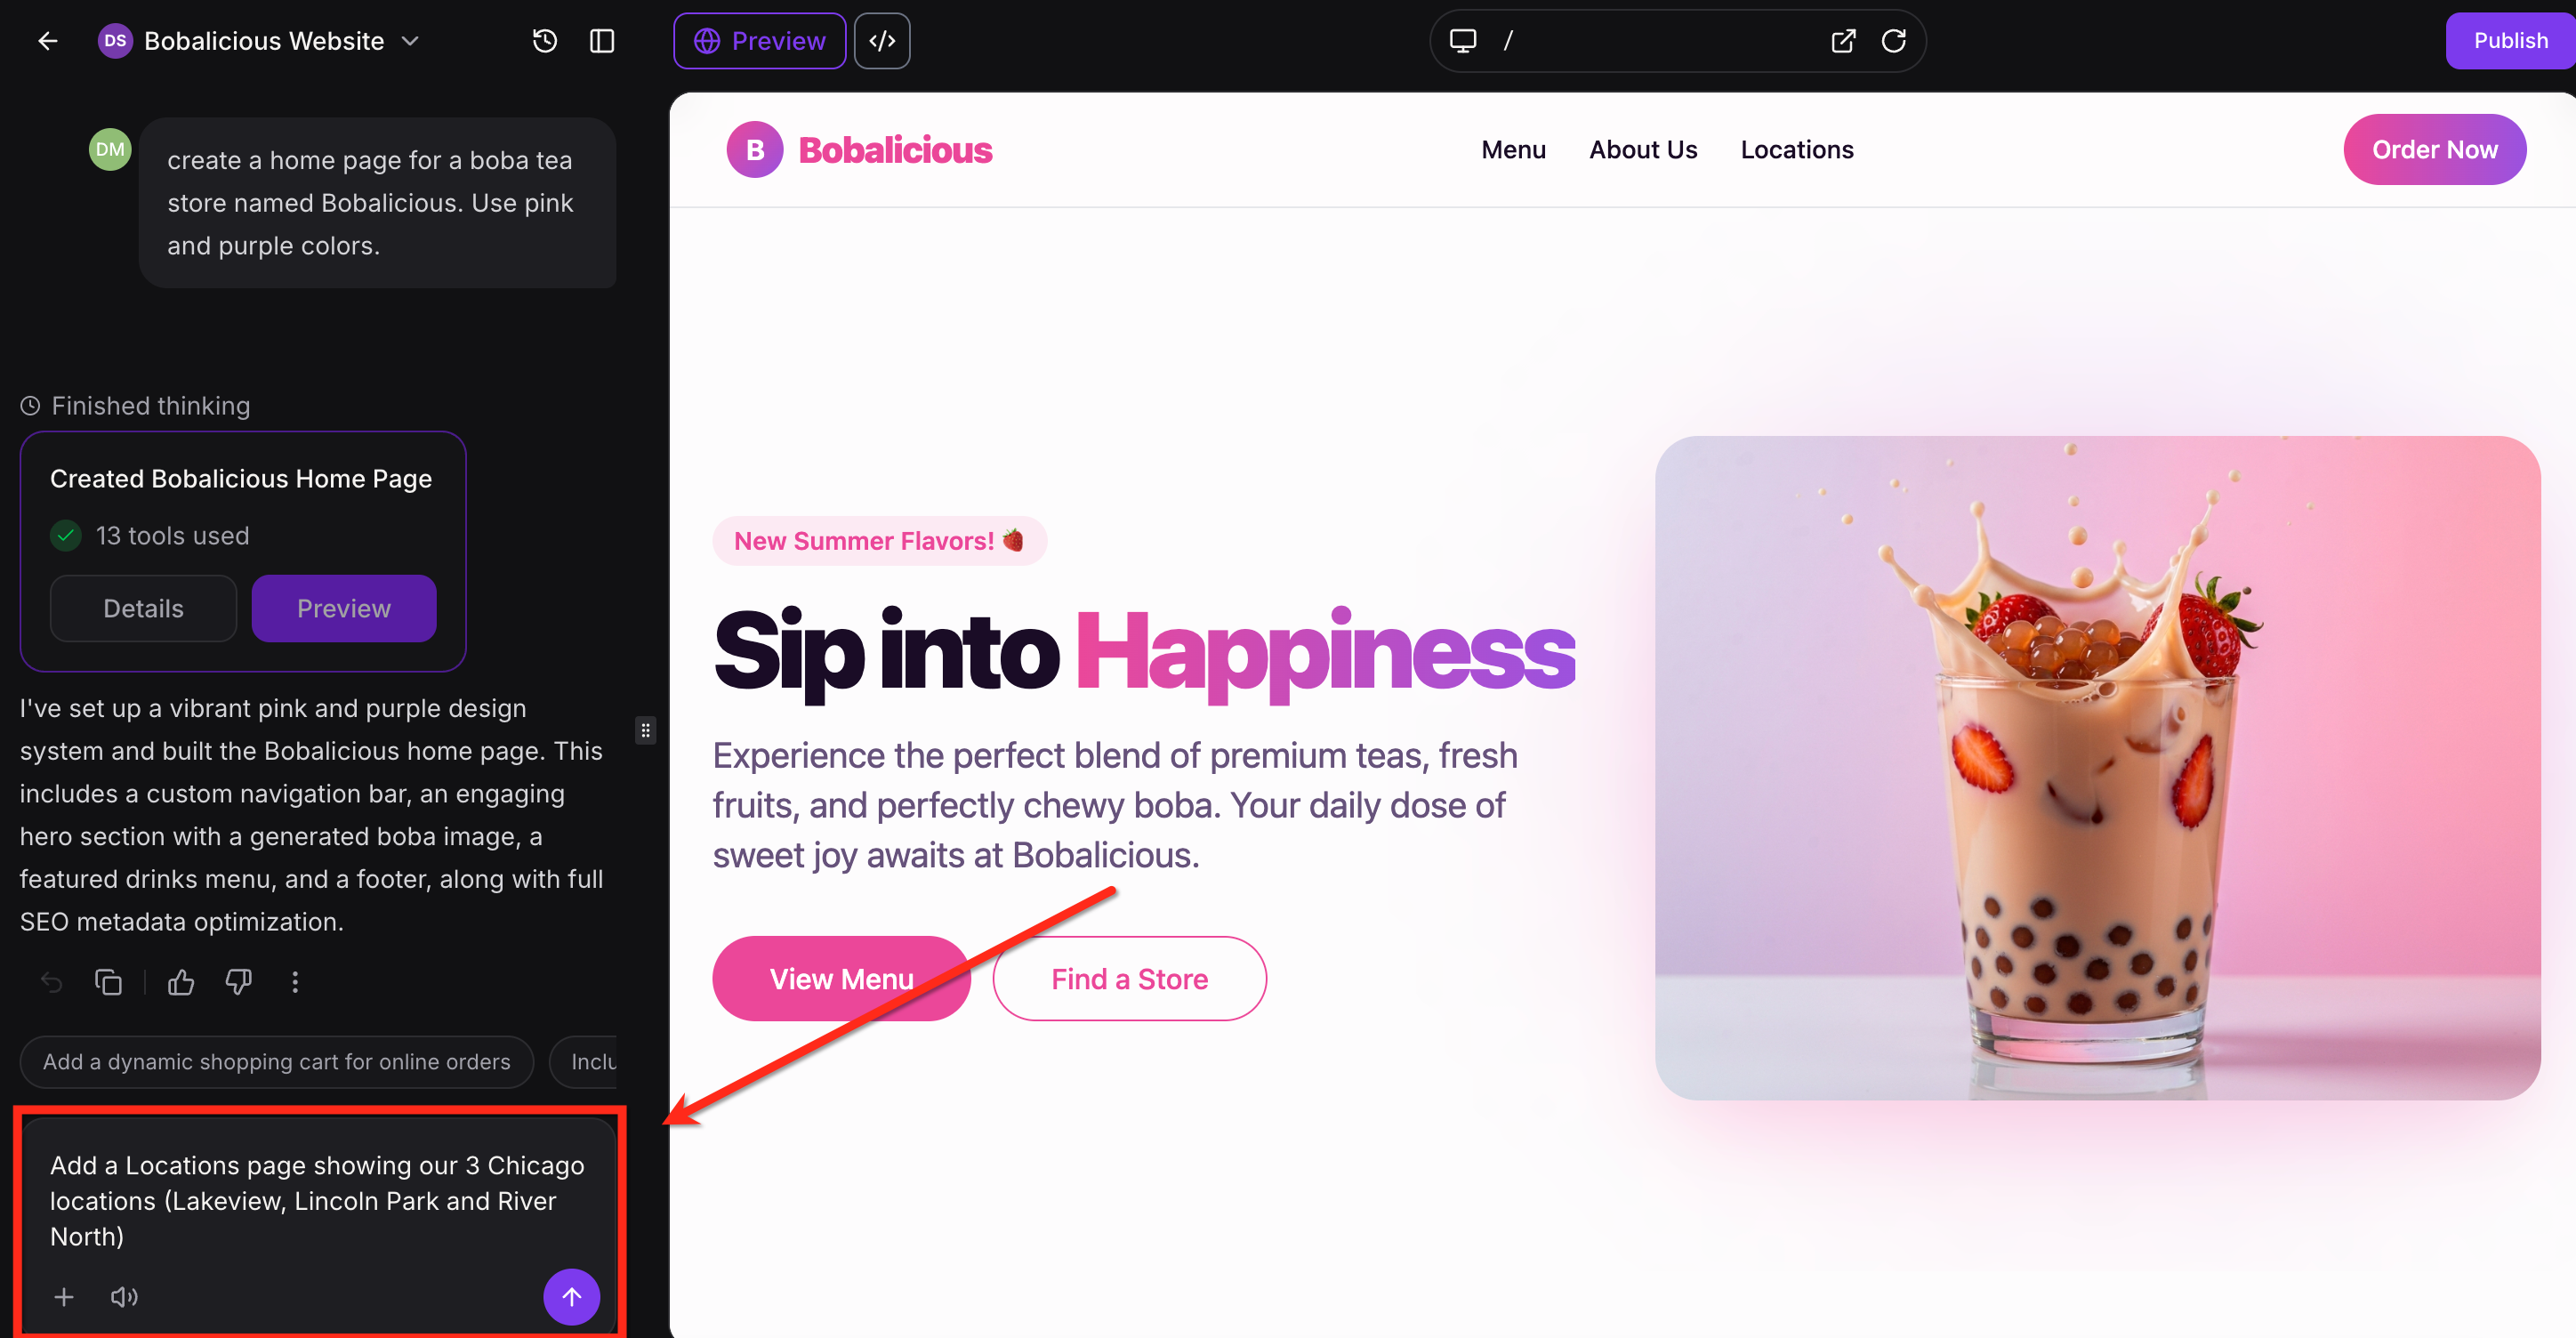
Change colors or styling
Rewrite headlines or body copy
Add a contact form or booking section
Use a reference URL or screenshot for one section
Example follow-up prompts:
"Change the colors to use light green instead of orange."
"Add a Contact page."
"Make the top navigation similar to the reference URL."
"Add a testimonial section similar to the attached screenshot."
"Change the hero visual to the attached image."
There are three ways to change a project:
Method | Best for |
|---|---|
Chat prompts | Large changes, new sections, new pages, copy rewrites |
Visual Edits | Small polish on text, buttons, images, icons, colors and spacing without code |
Code Editor | Precise, developer-level control over the project files |
See the guide AI Studio Visual Edits and Code Editor for both of the hands-on methods.
AI Studio includes built-in SEO tools. Because AI Studio sites are fast, modern web apps, they can be harder for search engines and crawlers to read by default. SEO support makes your content easier to index without changing how the site looks or performs. With SEO enabled you can improve crawling and indexing, make shared links show the correct title, description and preview image, generate a sitemap, and make content easier for AI search tools to read. See the guide on AI Studio SEO for the full steps.
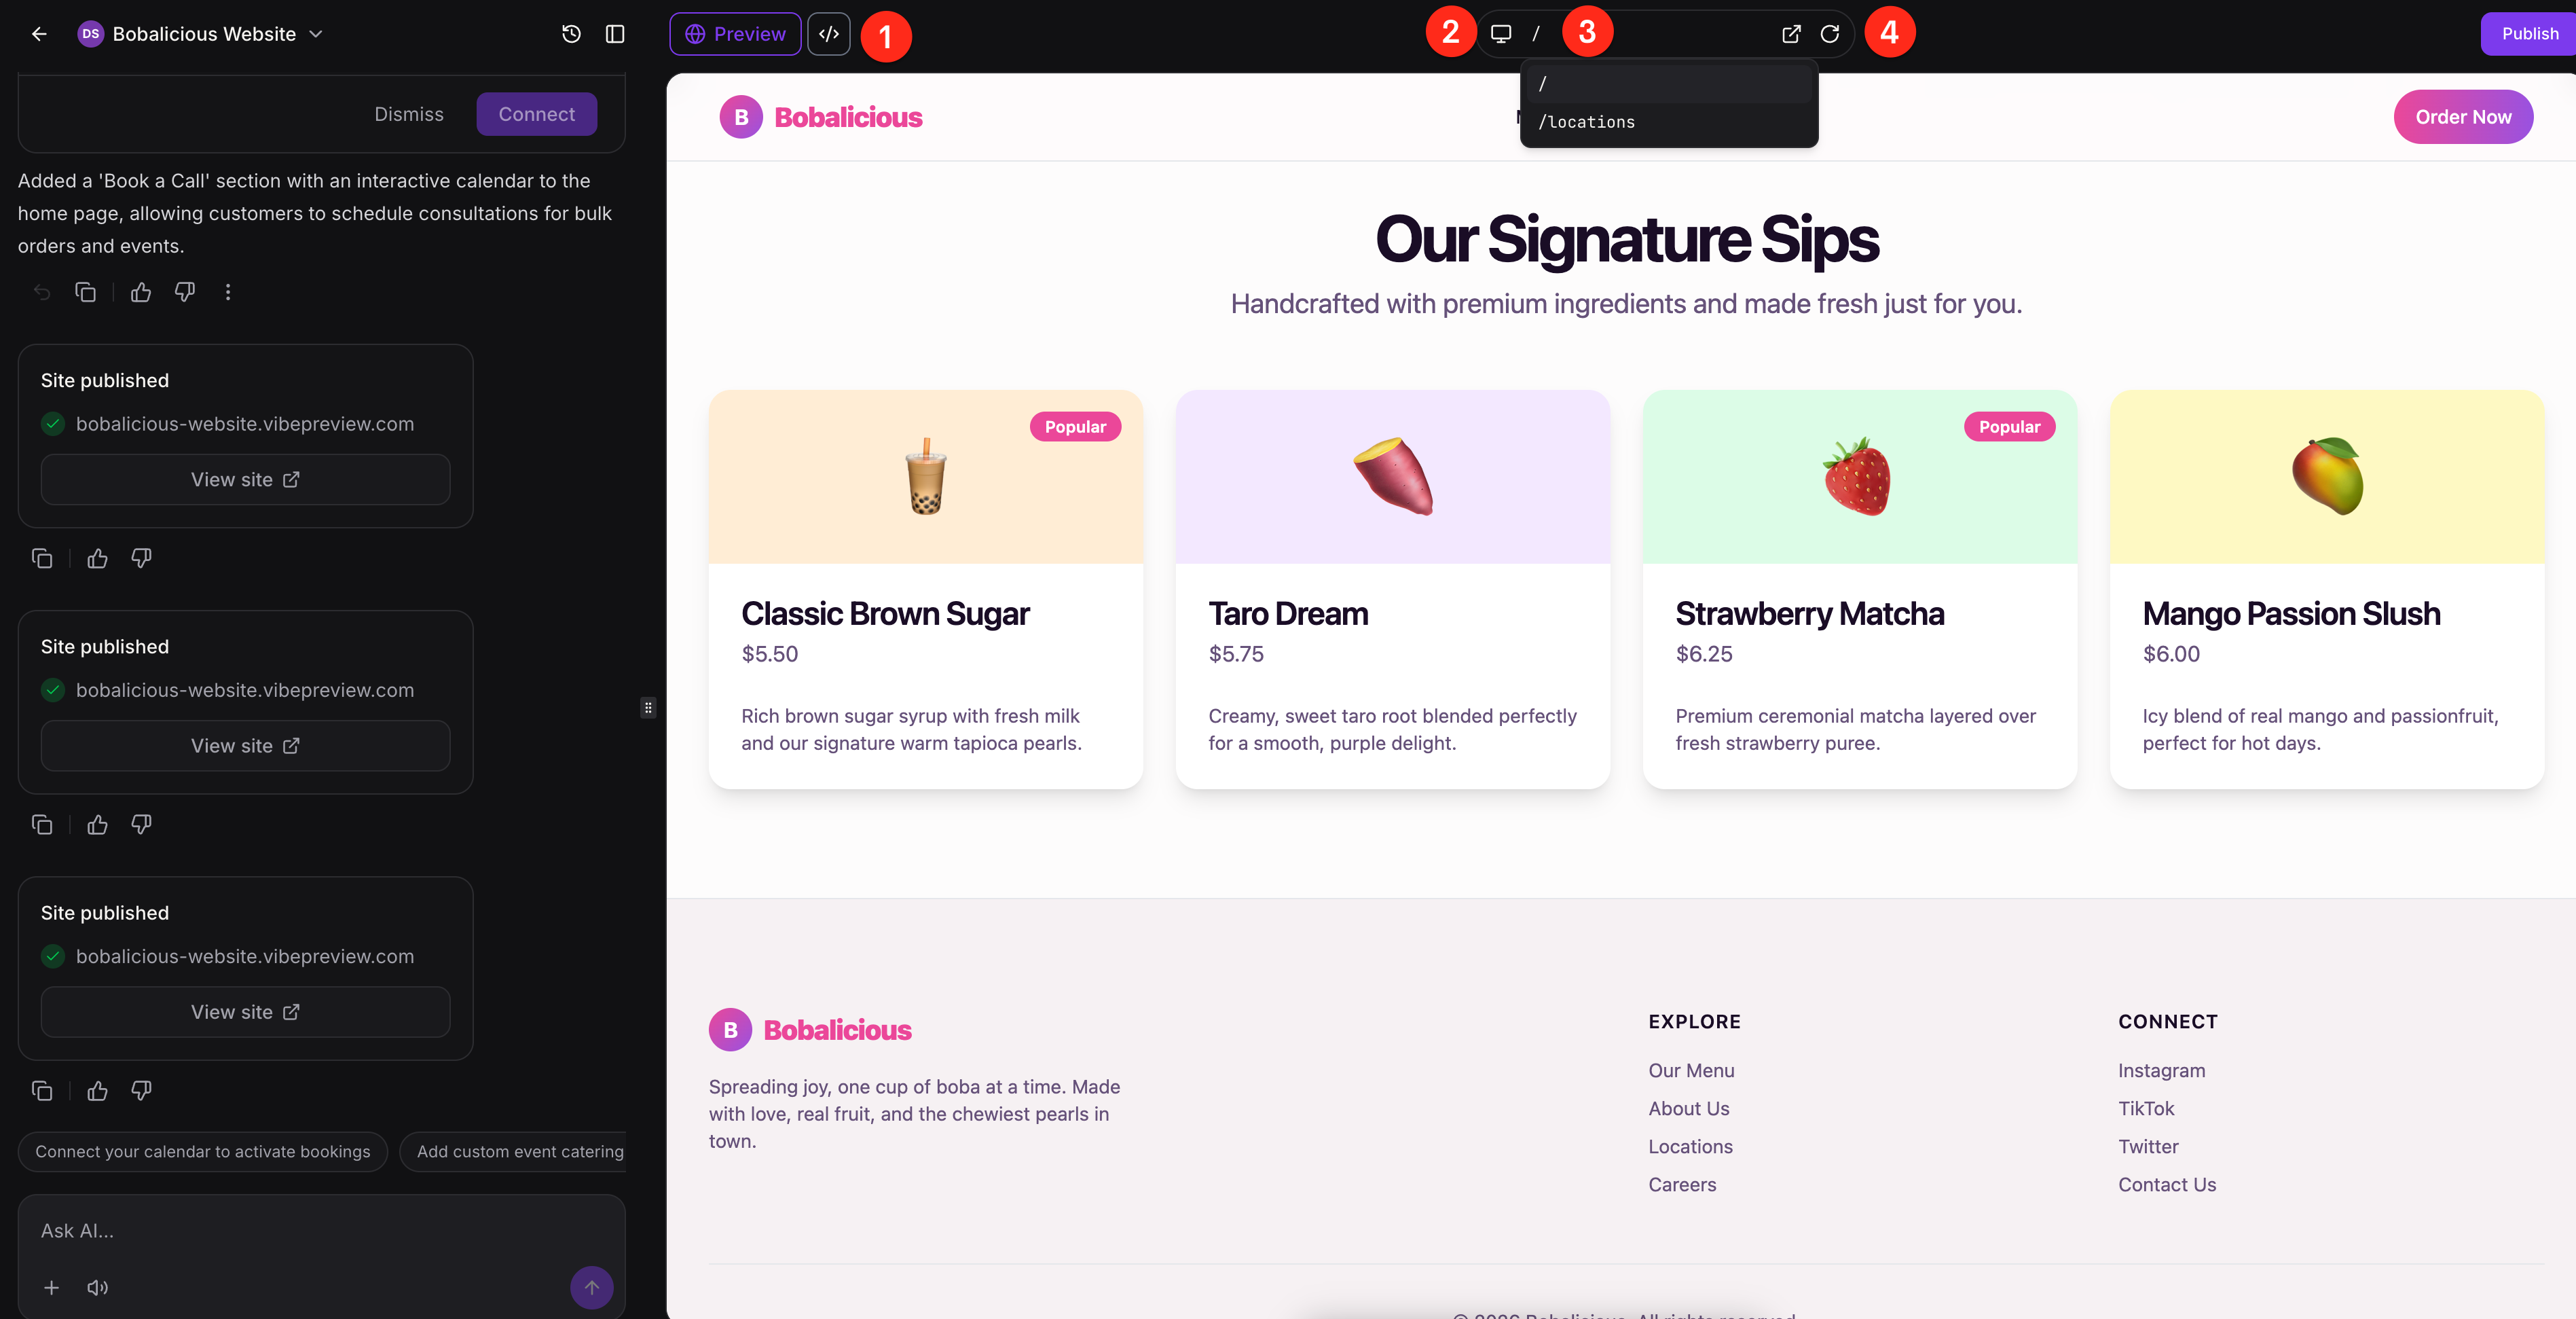
Inside the editor you can:
Switch between Preview and Code view.
View the project in desktop, tablet and mobile modes. Click the computer icon at the top of the preview to change modes.
Use the page dropdown to switch pages in a multi-page project.
Open the selected page in a new tab or refresh the preview after changes.
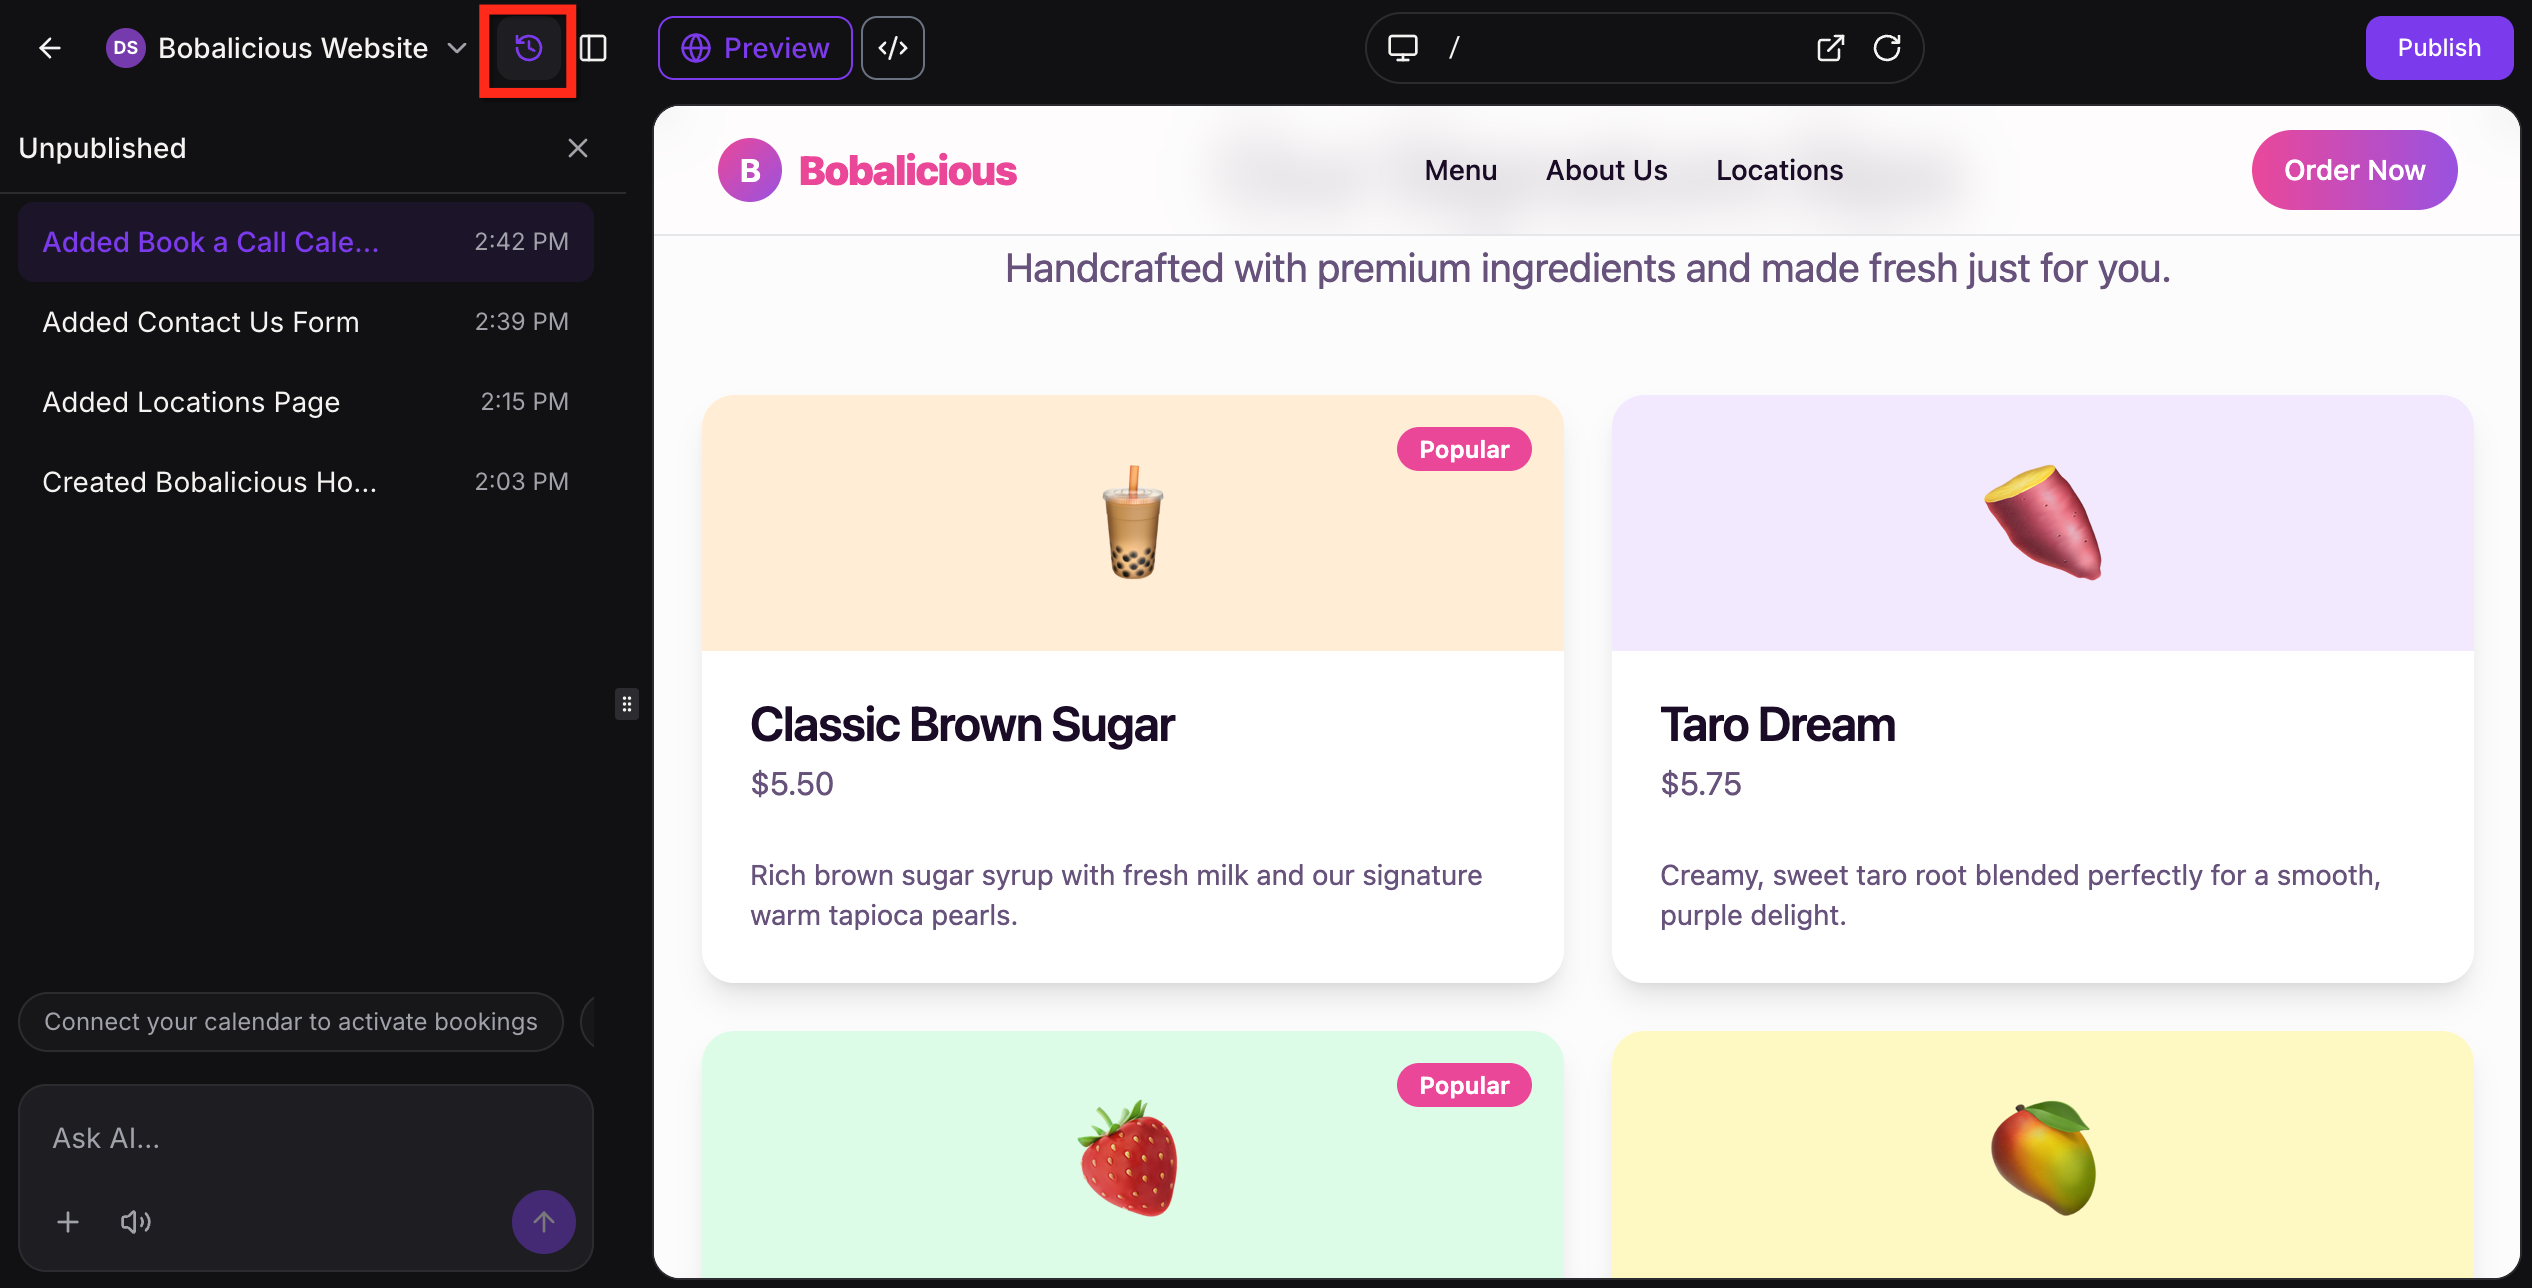
Each AI-generated change creates a version you can return to. From version history you can open earlier versions, preview an earlier version, bookmark a version and revert to an earlier version. Use it to compare changes, undo a result you do not like or return to a version that matched your goal. Click the Version History button inside the project to open it. Saving code in the Code Editor also creates a version.
AI Studio builds the front-end of forms and booking sections, then guides you through connecting them to your account. They are not connected automatically. Ask AI Studio to connect them, or click Connect when prompted in the chat.
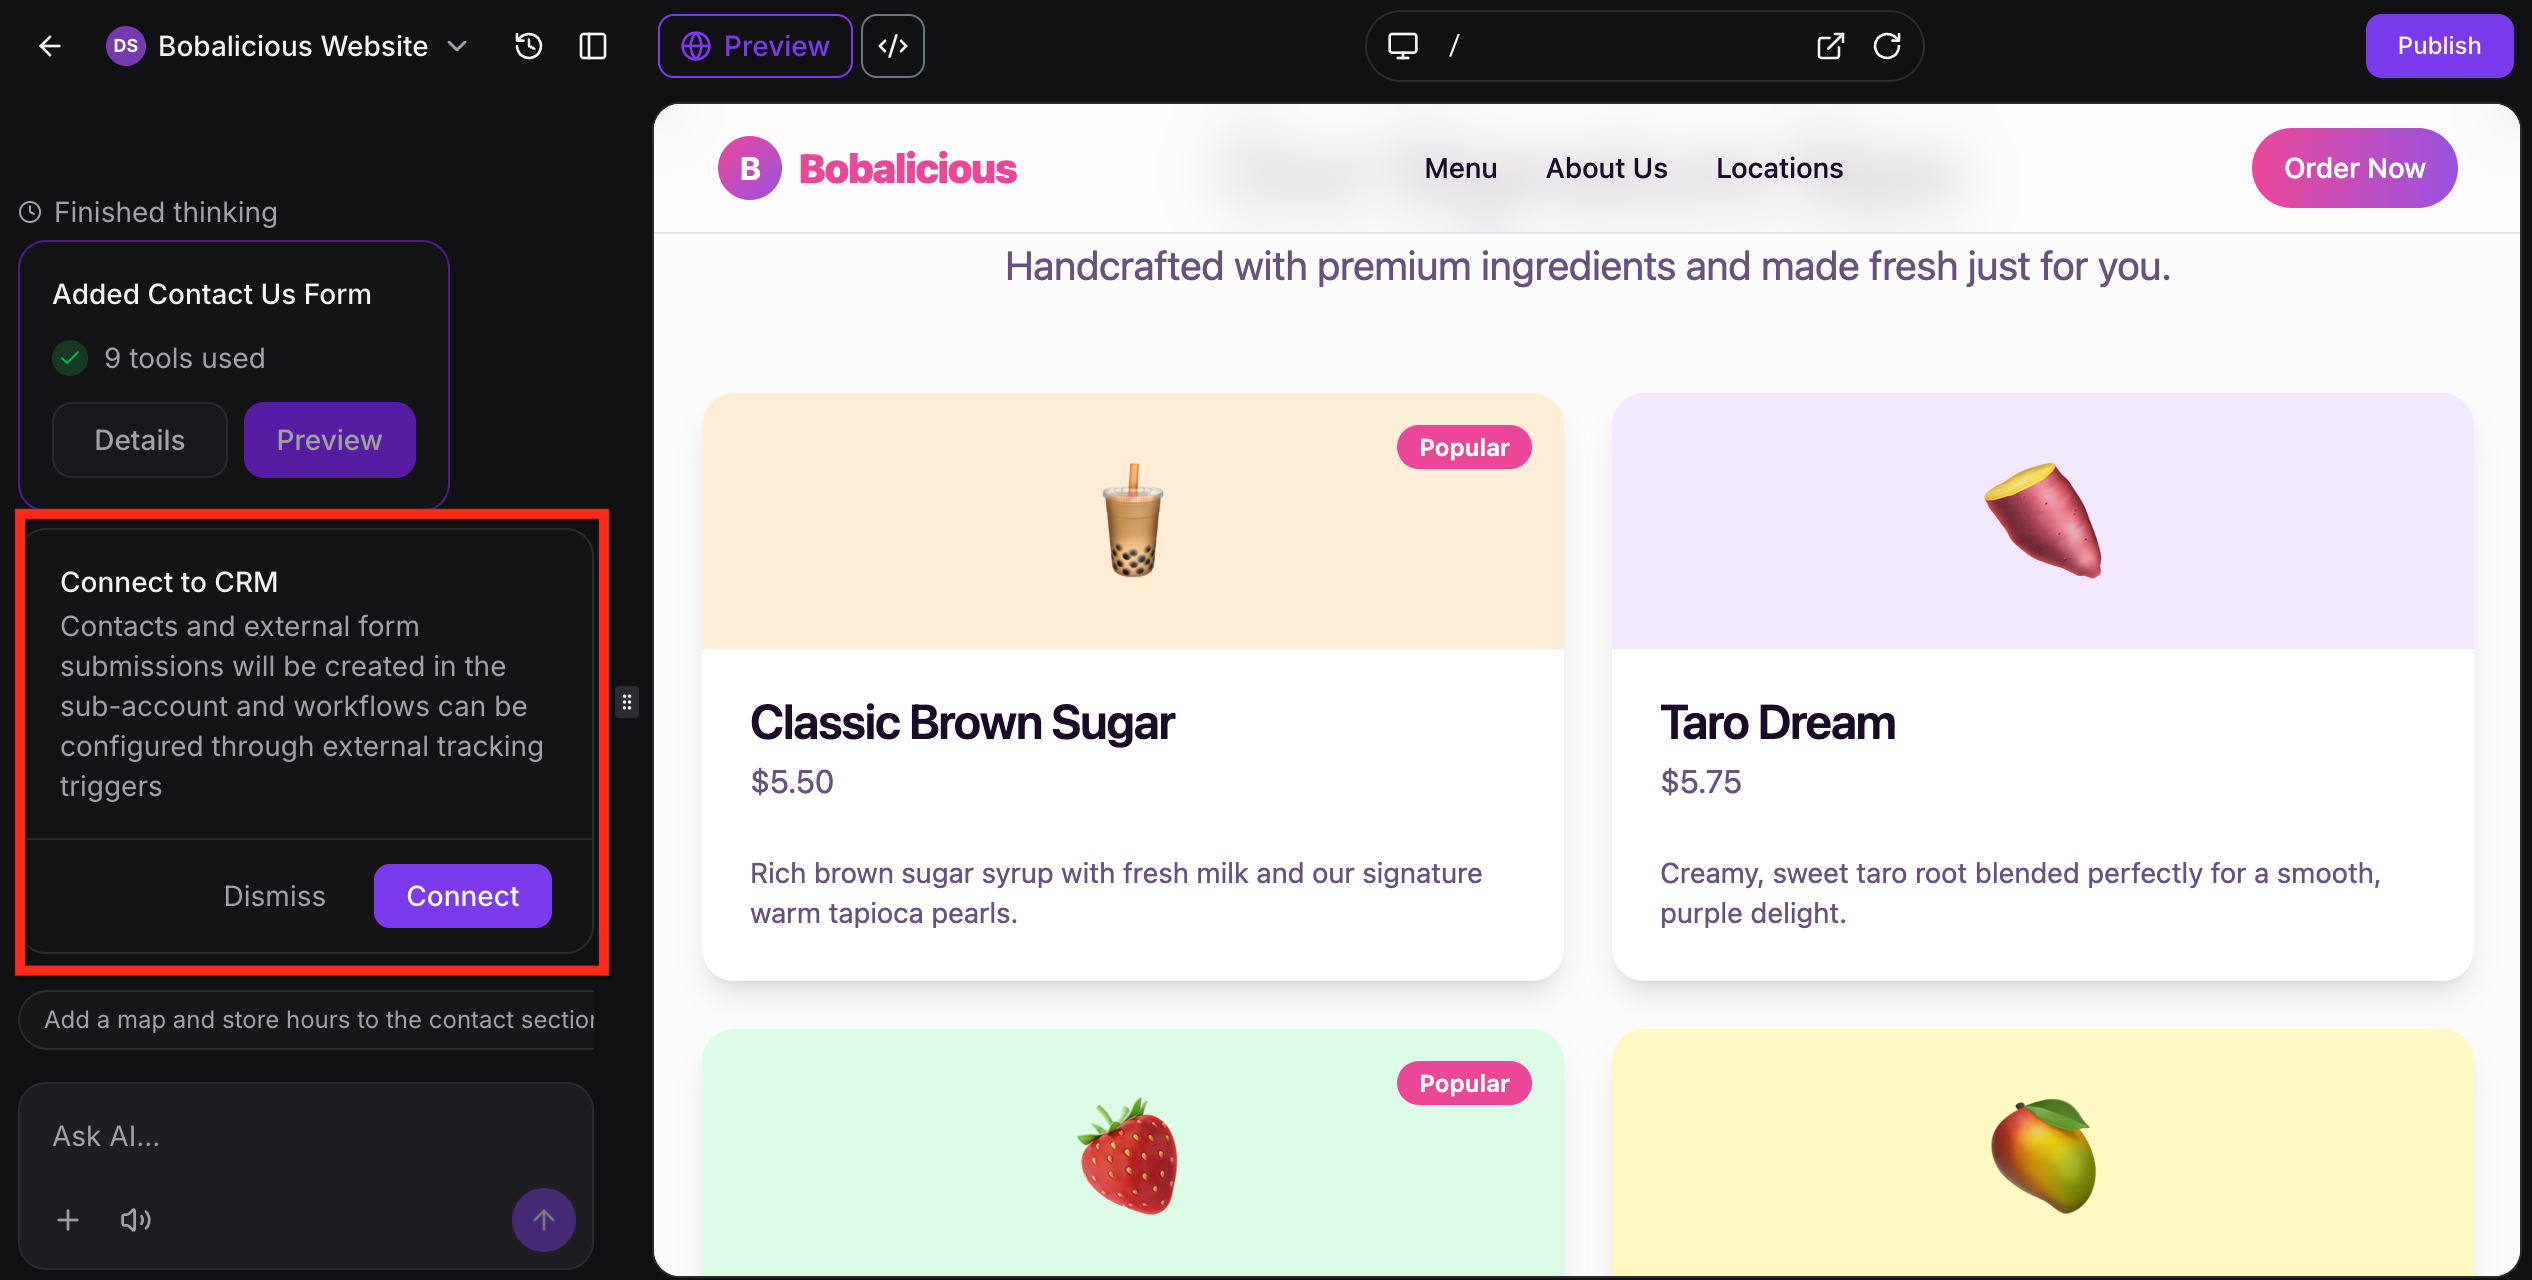
Forms: A connected form creates or updates contacts and captures submissions. Submissions land in your account, not inside the AI Studio project.
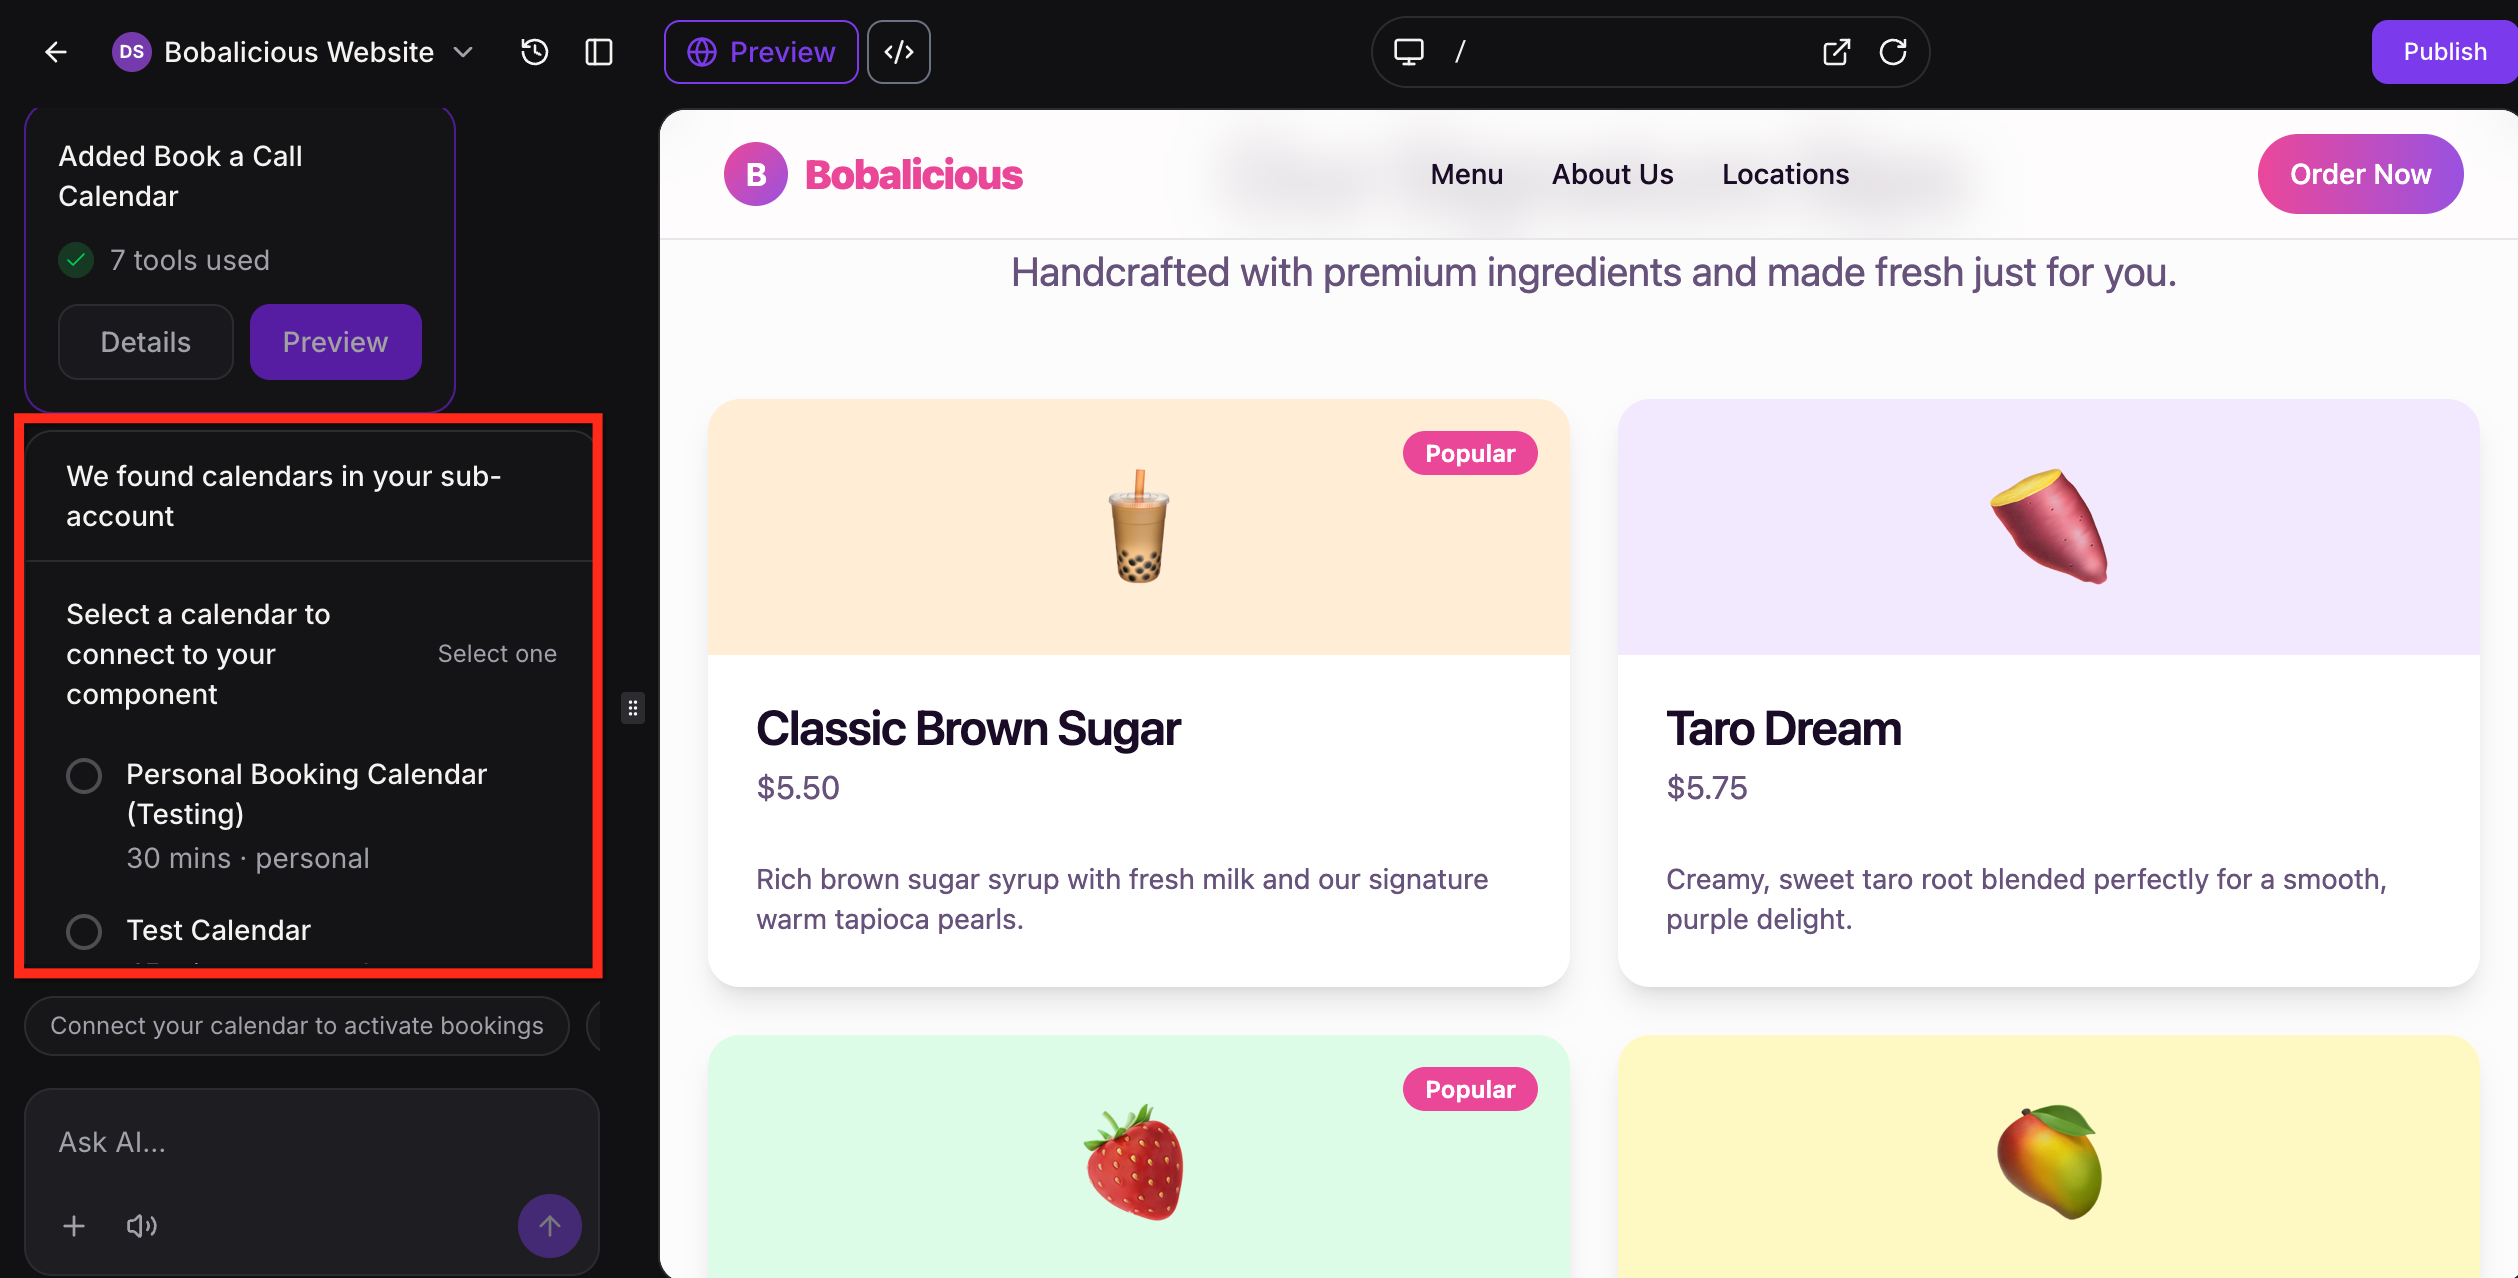
Calendars: AI Studio detects the calendars in your account and asks you to choose one for the booking section.
Calendar caution: Booking from an AI Studio page works only with native Aesthetix CRM calendars. It does not work with EMR calendars. If your practice books through an EMR, send visitors to your EMR booking link instead of using an AI Studio booking section.
When a build needs an account-specific choice, such as picking a calendar or form, AI Studio pauses the current request and shows a selection card in the chat. After you choose, the same request continues without starting over.
See the guide AI Studio Forms, Calendars, Workflow Trigger and Analytics for the full steps.
Publishing makes the project available at a live URL. The flow starts with a preview URL, then lets you connect a custom domain and choose the main URL visitors should use. After a site is published you can keep editing. Edits stay in draft until you publish again, so the live version does not change by accident.
When a project is connected to a domain, the project lives in AI Studio, the domain connection appears in Domain Hub (Settings > Domains & URL Redirects) and the published page appears on that domain.
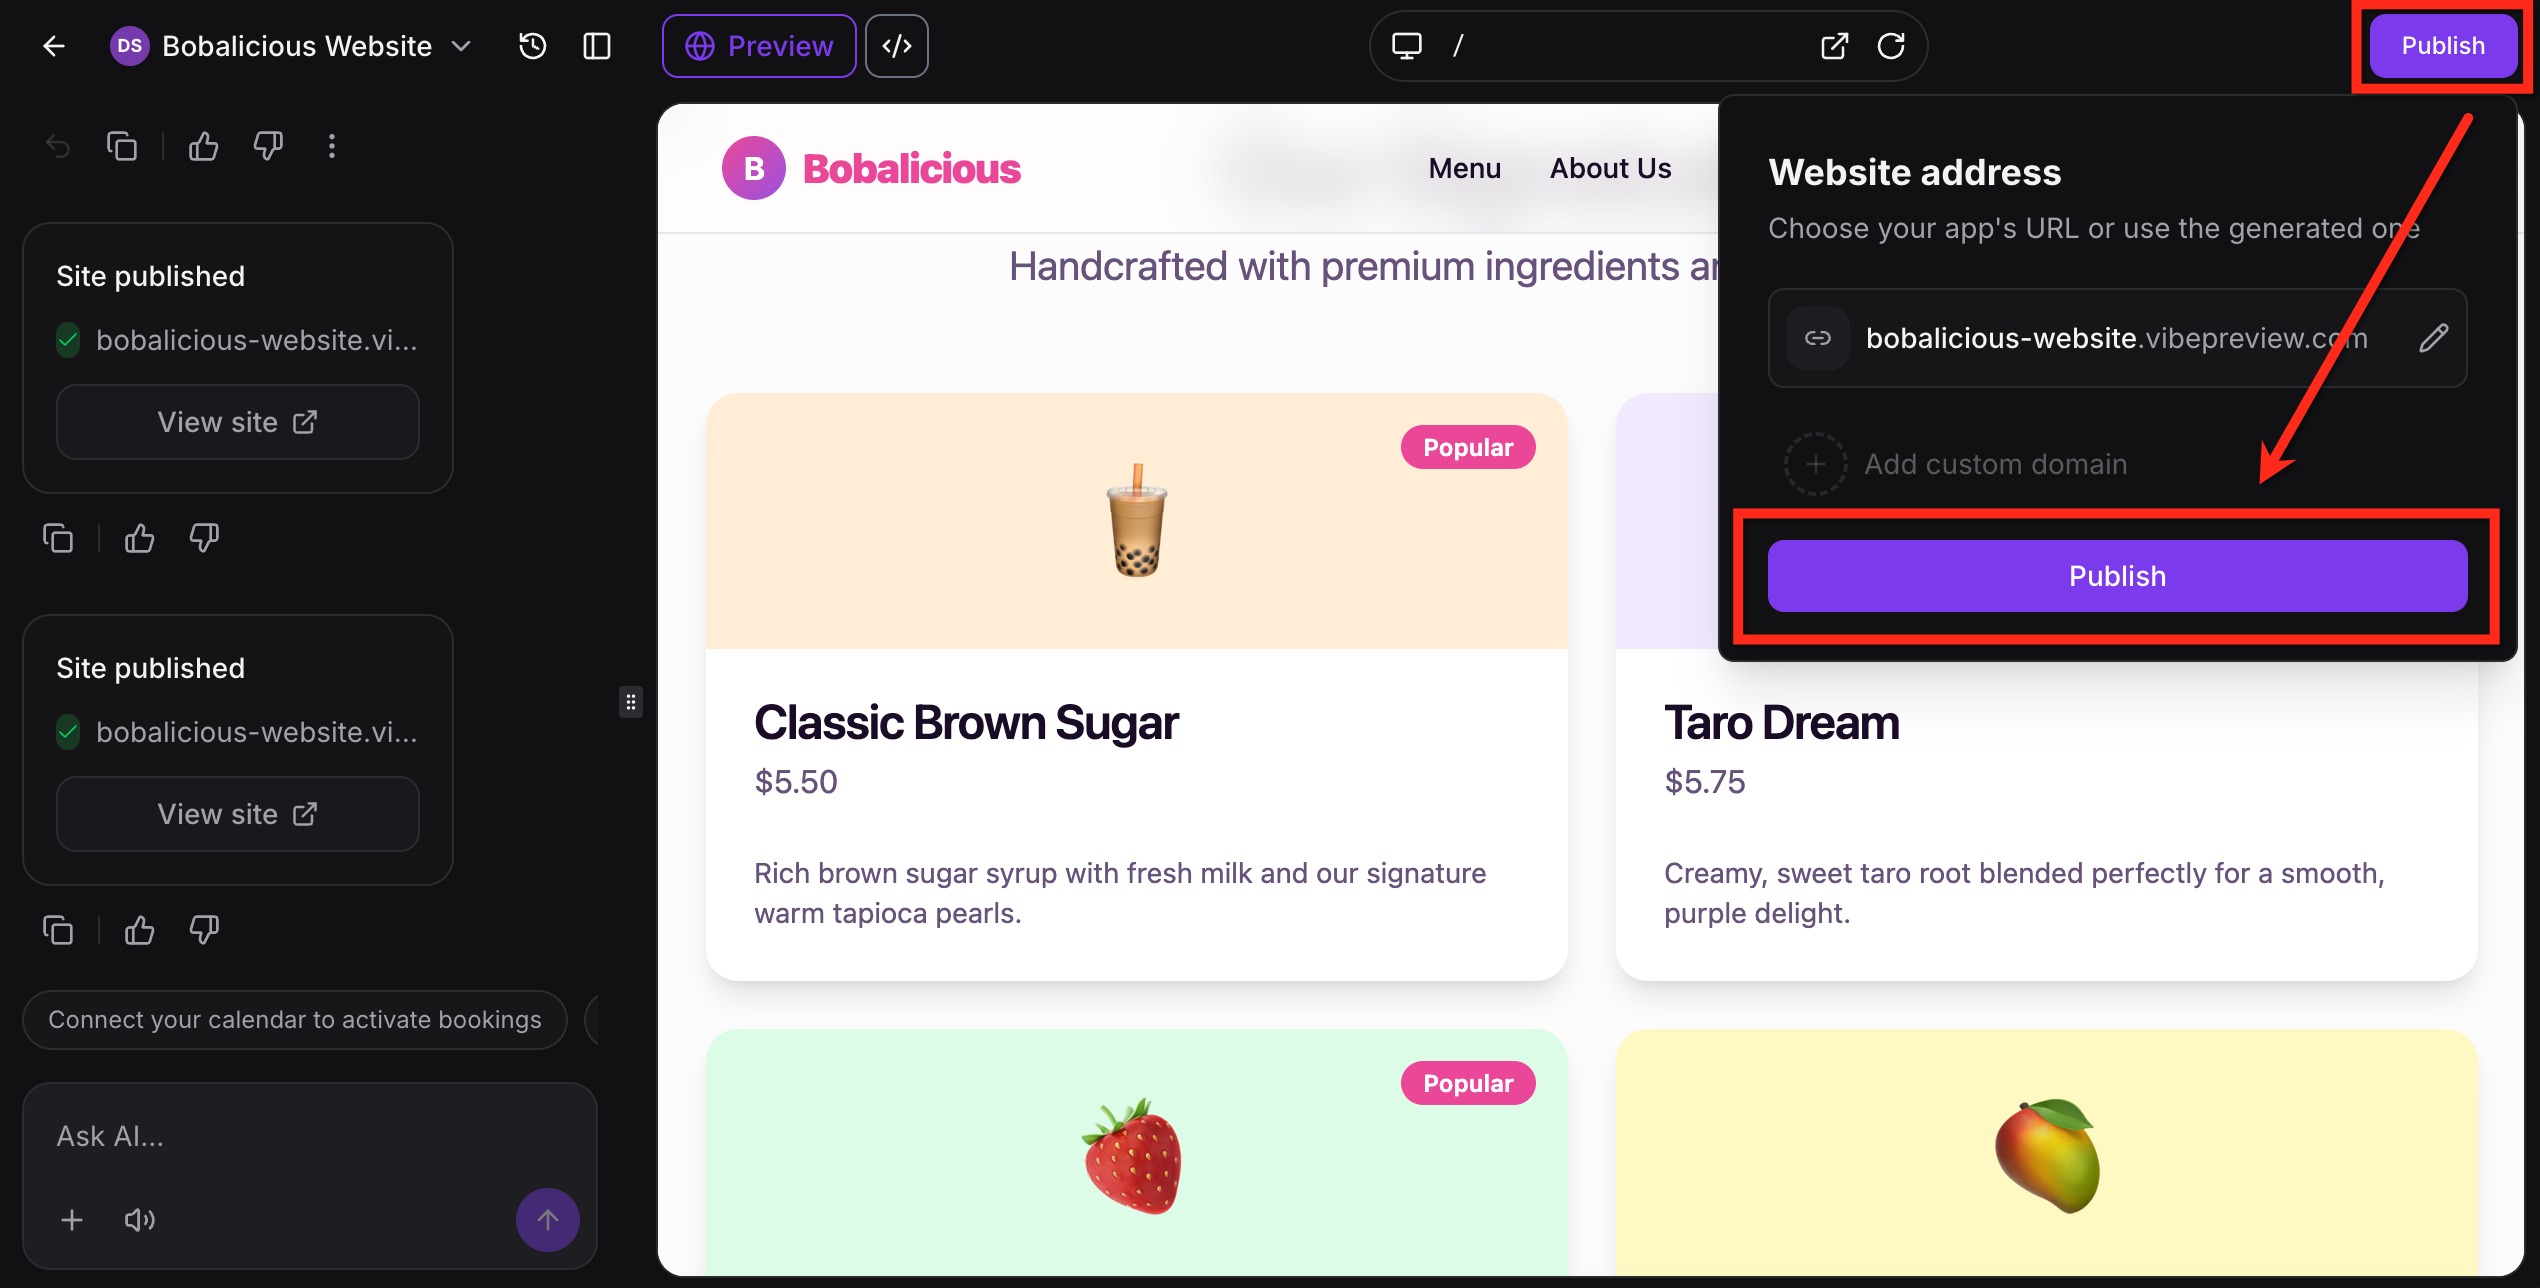
Click Publish at the top right. Update the URL if needed, then click Publish again.
Update the icon, name, description and social image, then click Apply Changes.
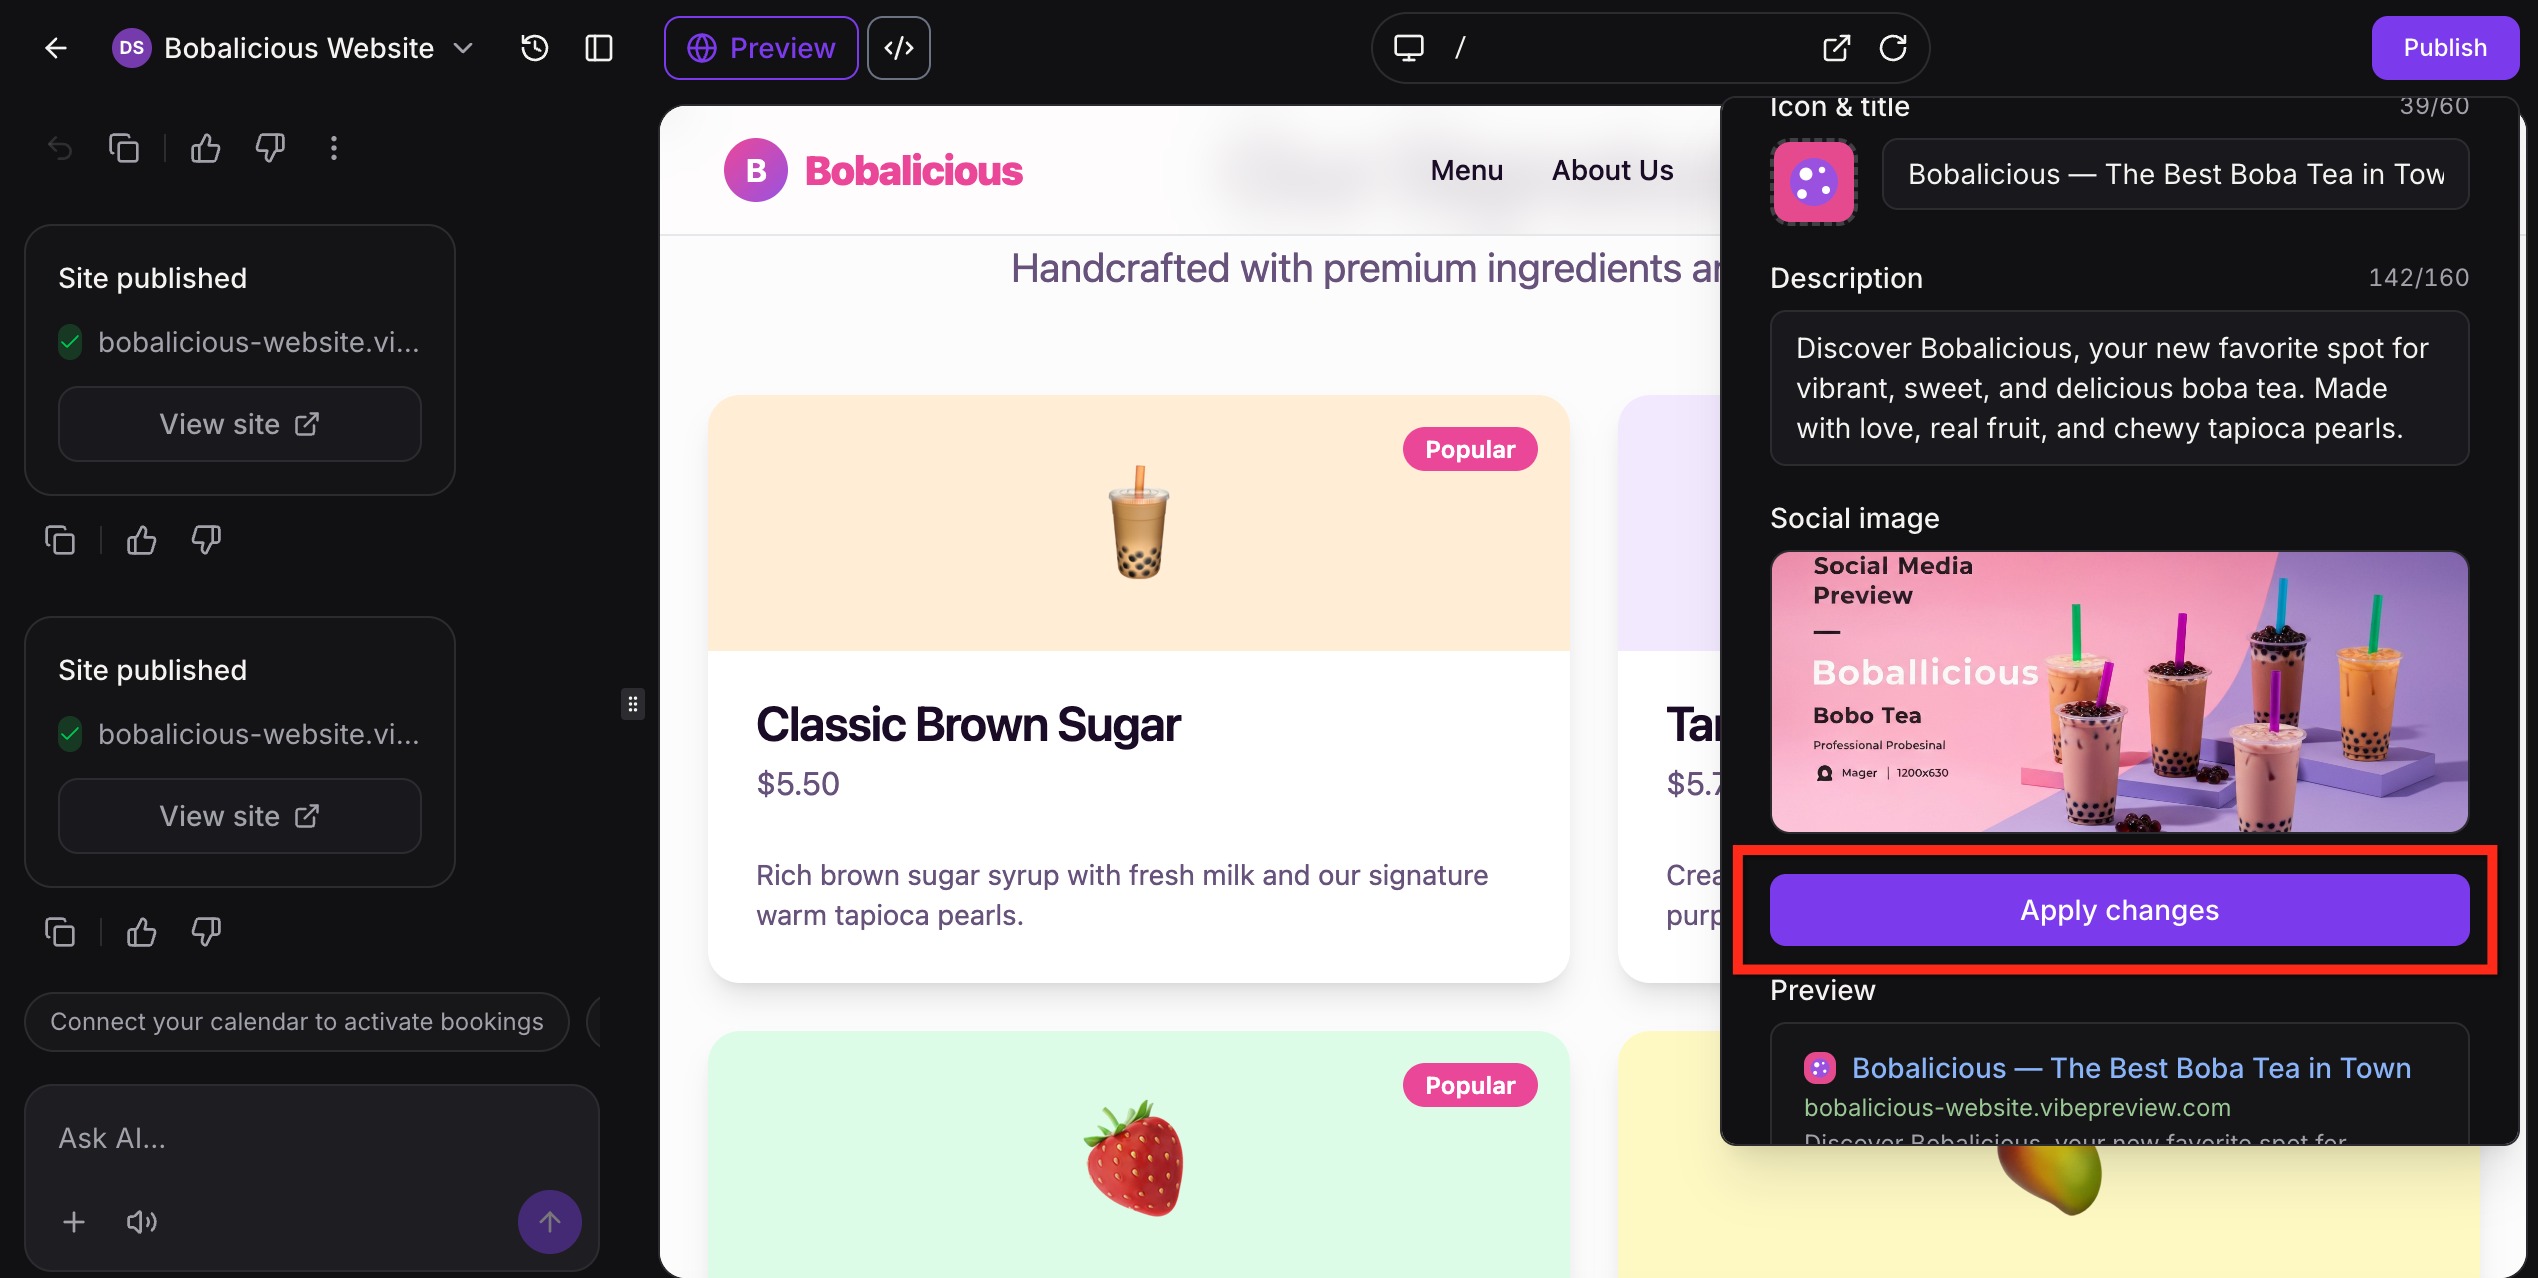
Click Publish.
You cannot connect a custom domain until the project has been published to a preview domain.
Click Publish, then select Add Custom Domain.
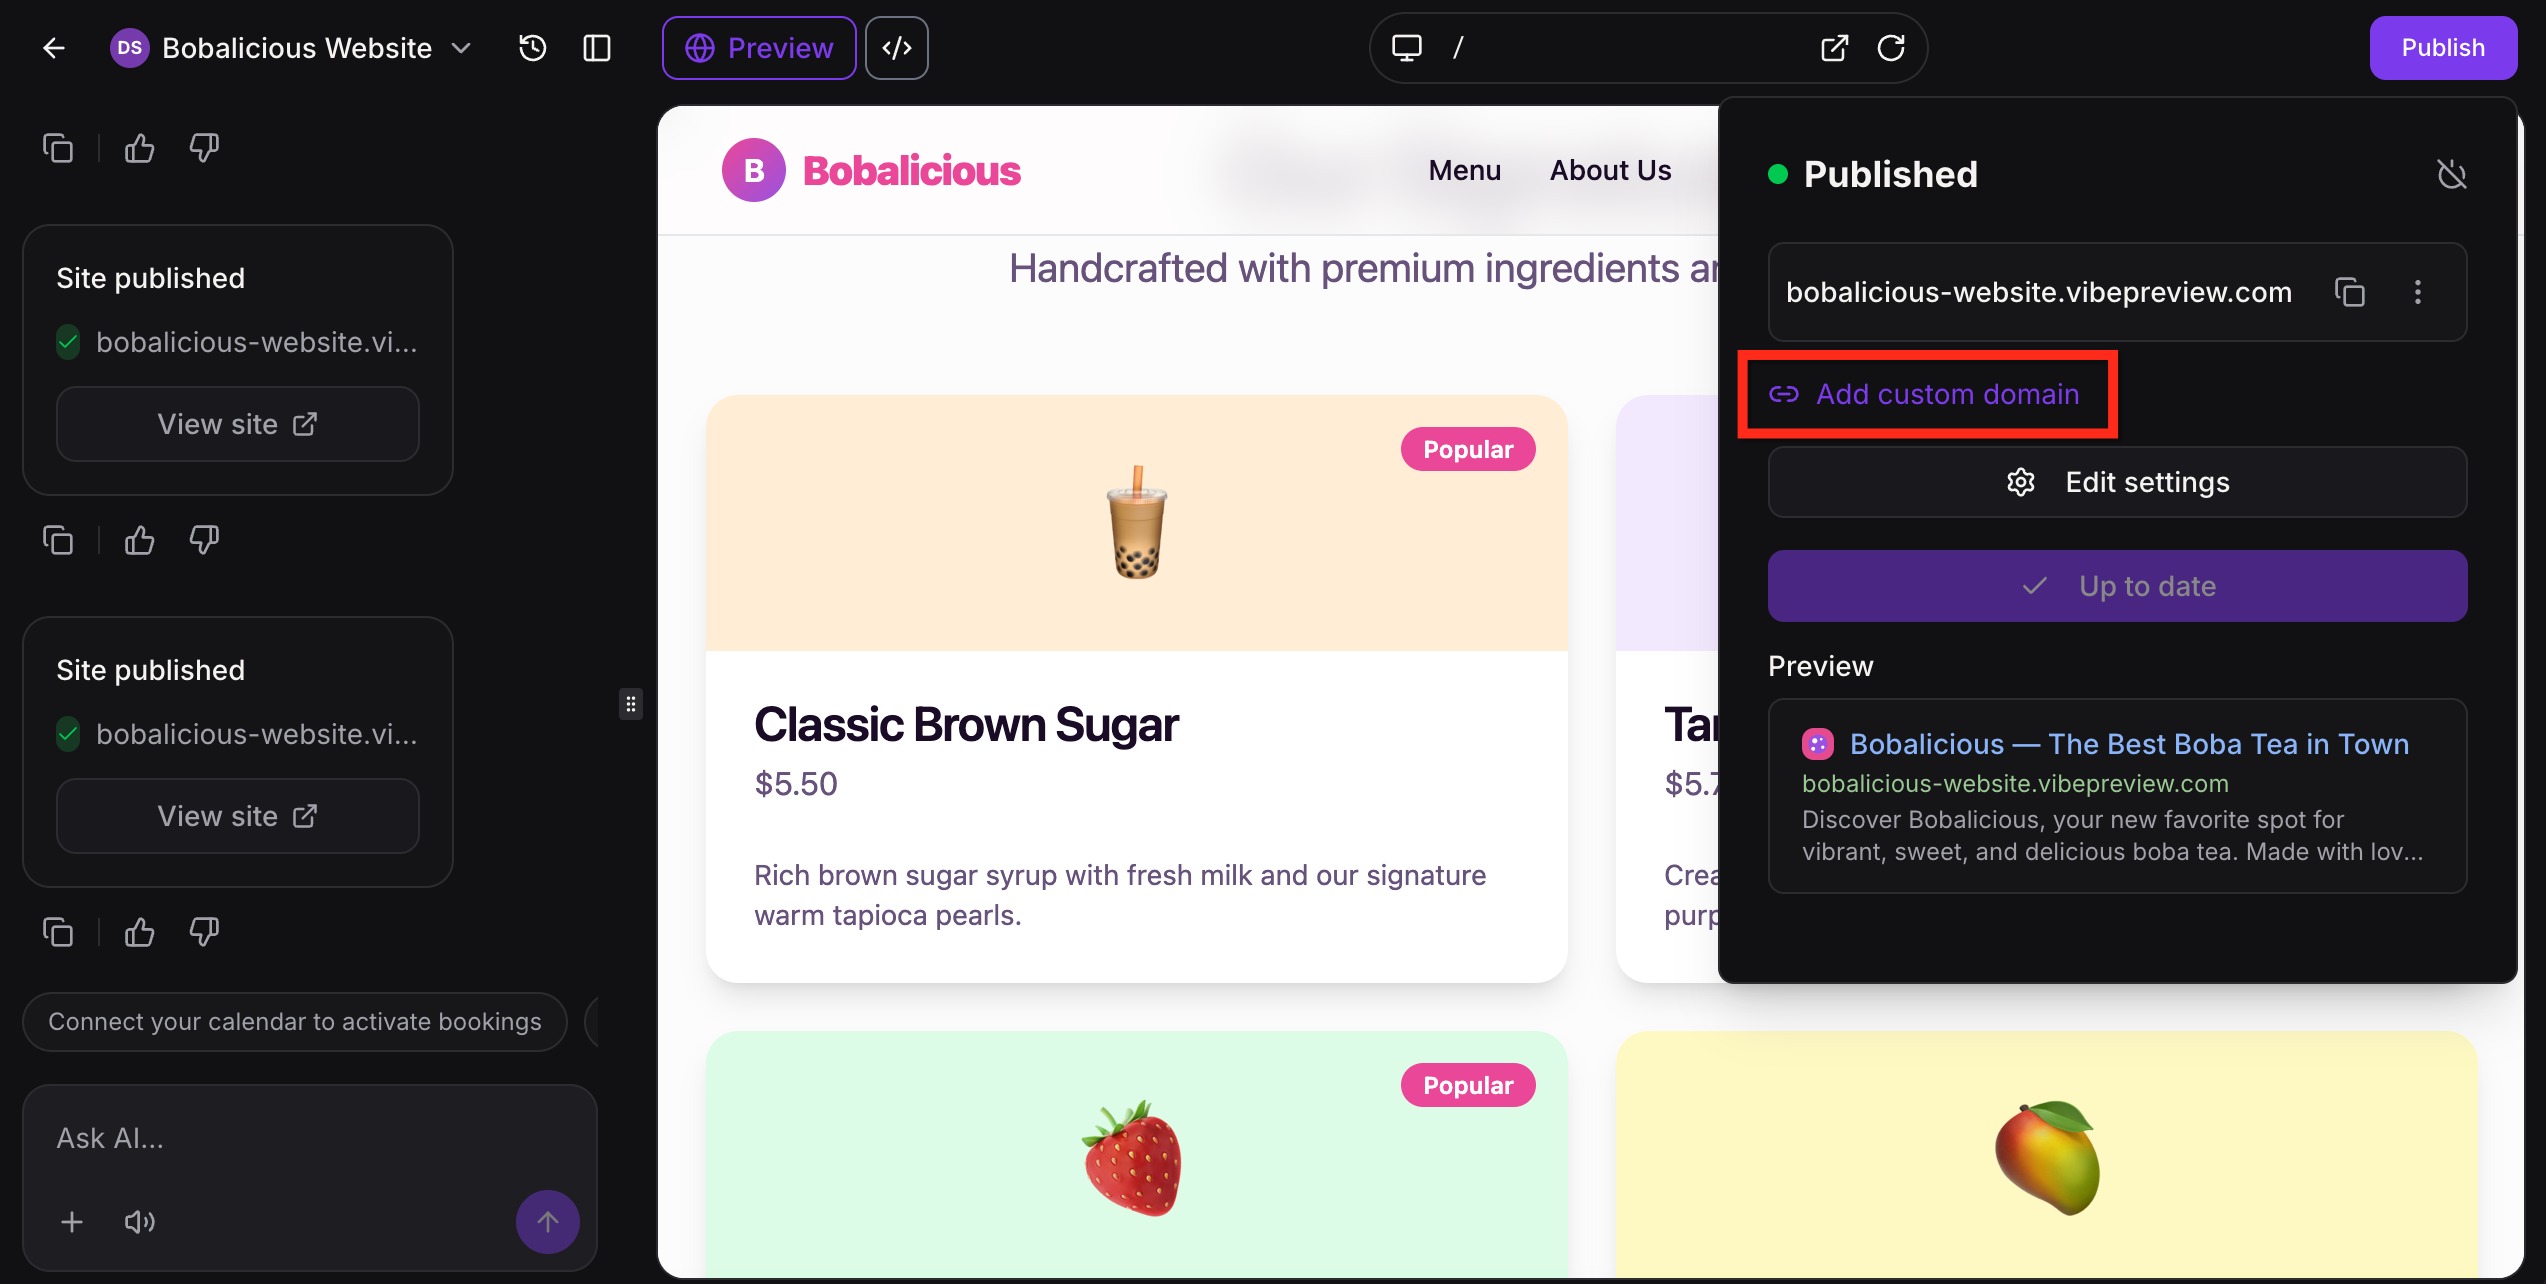
Enter the domain. If you enter an apex domain (example.com) or the www version, an option appears to also add the other version and set up a redirect. Connecting both root and www is recommended. Leave it selected to connect both in one setup, or clear it to connect only what you typed. This option does not appear for other subdomains such as blog.example.com.
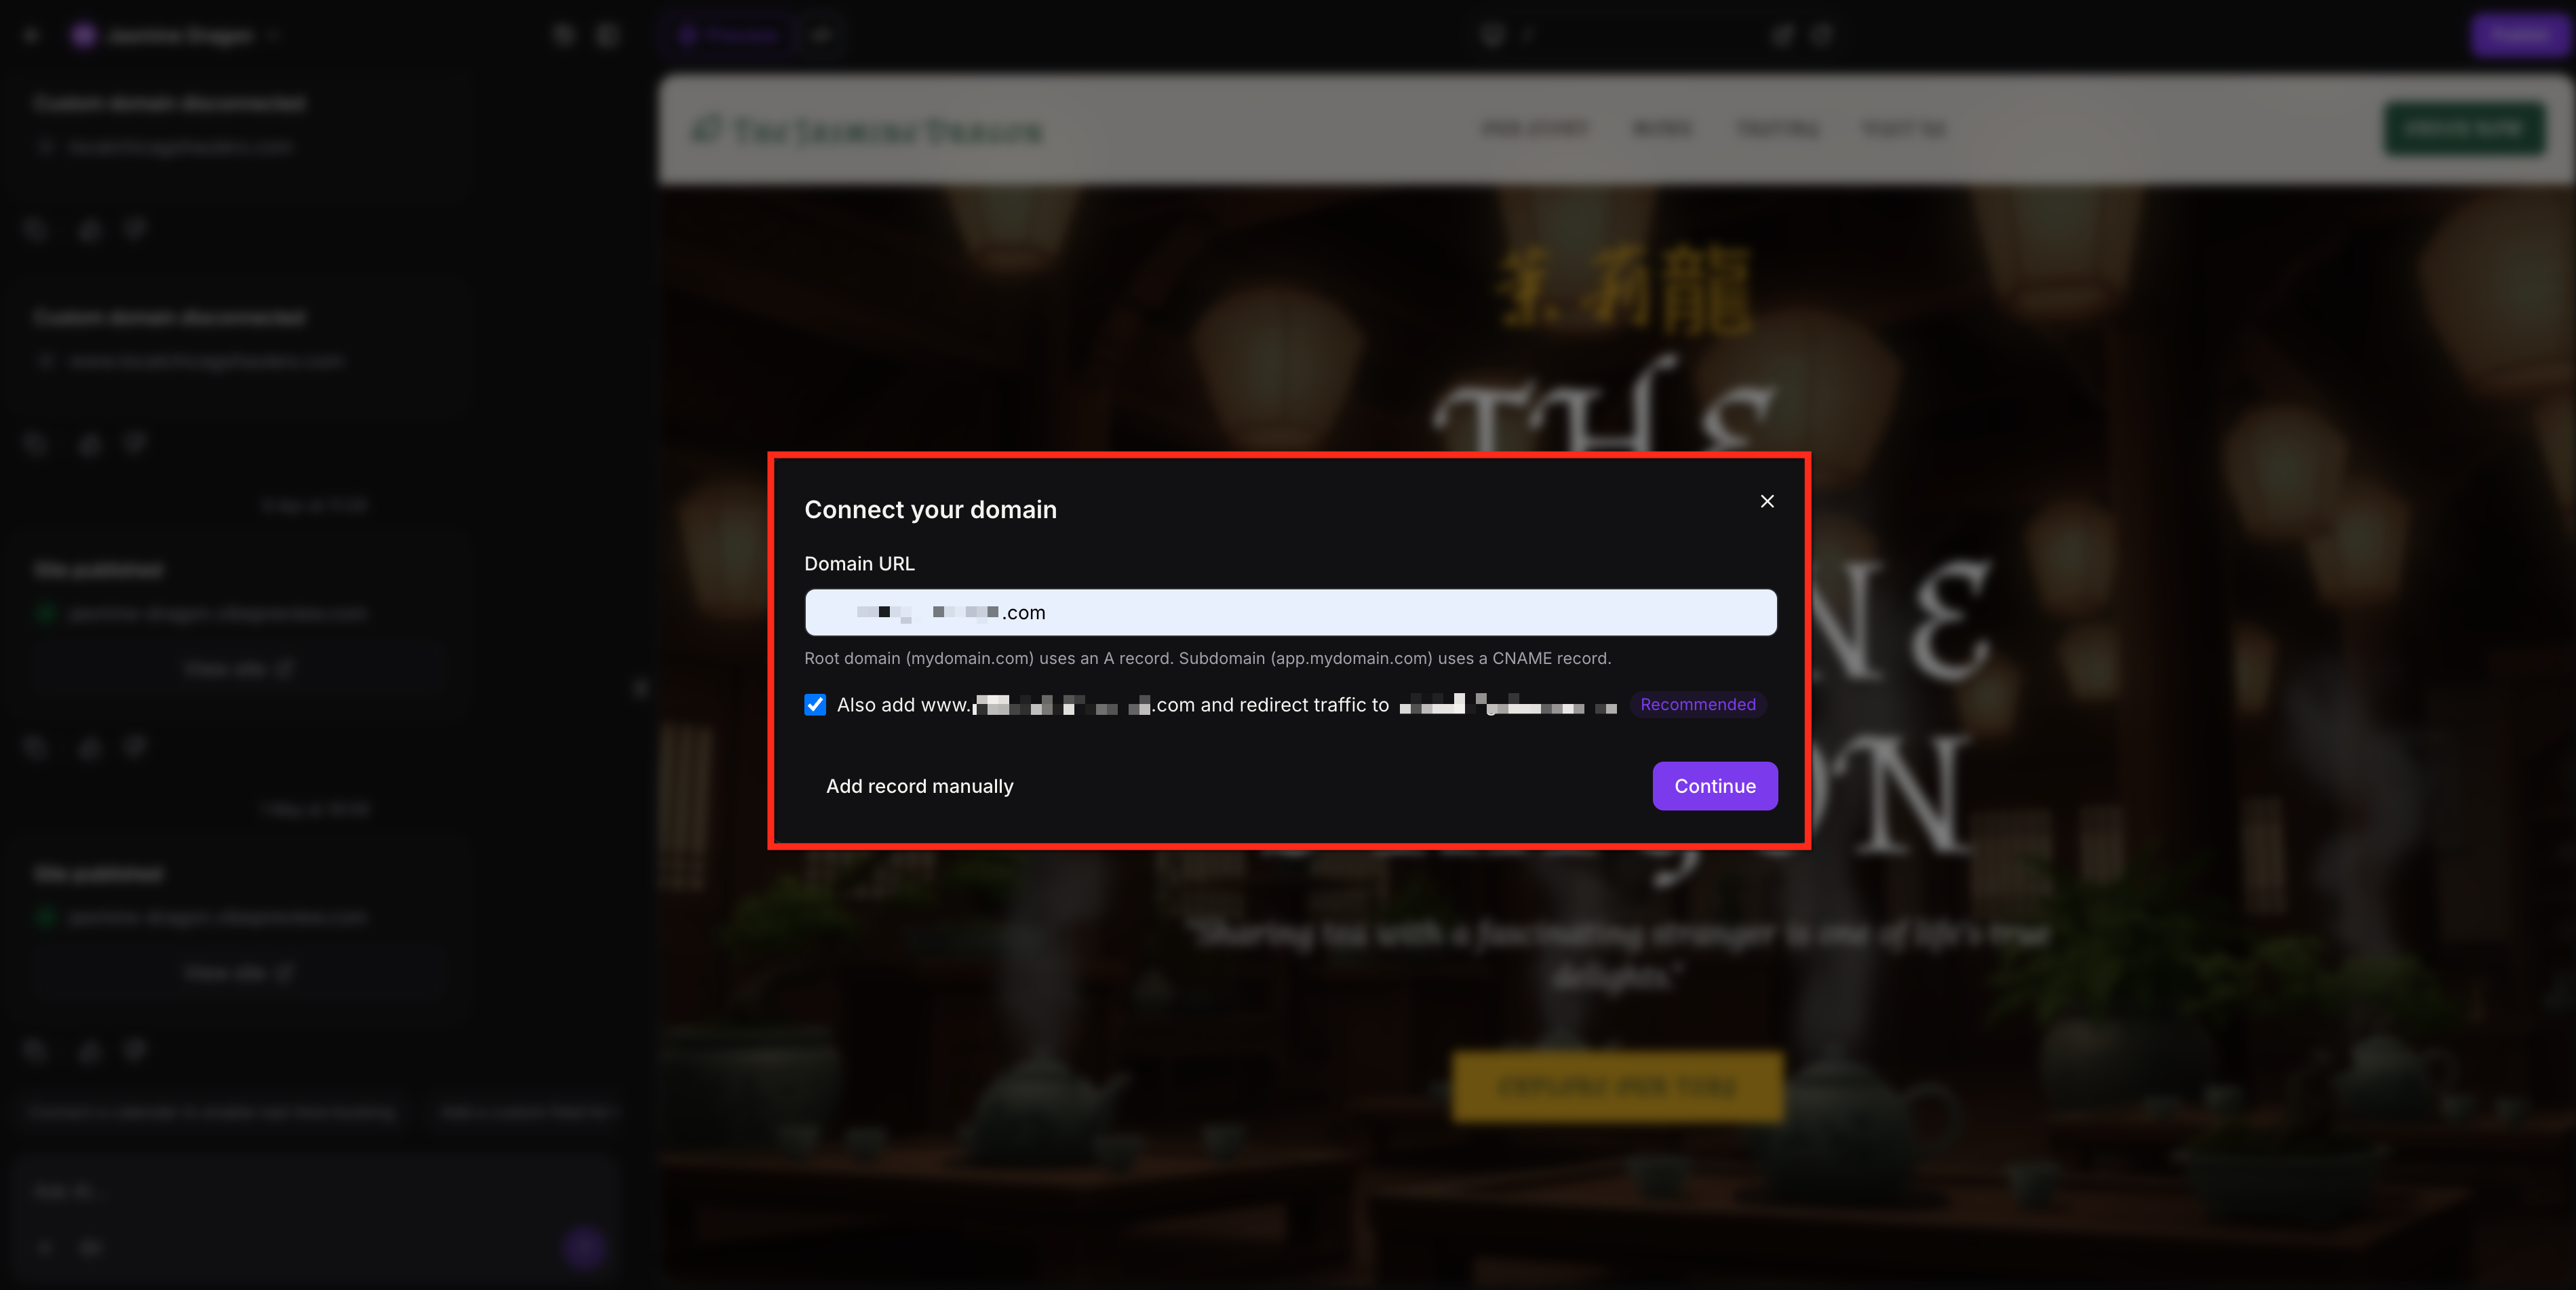
If the domain is already managed in your account, setup continues in the flow. If conflicting records are found, review the warning and affected records before clicking Add Records.
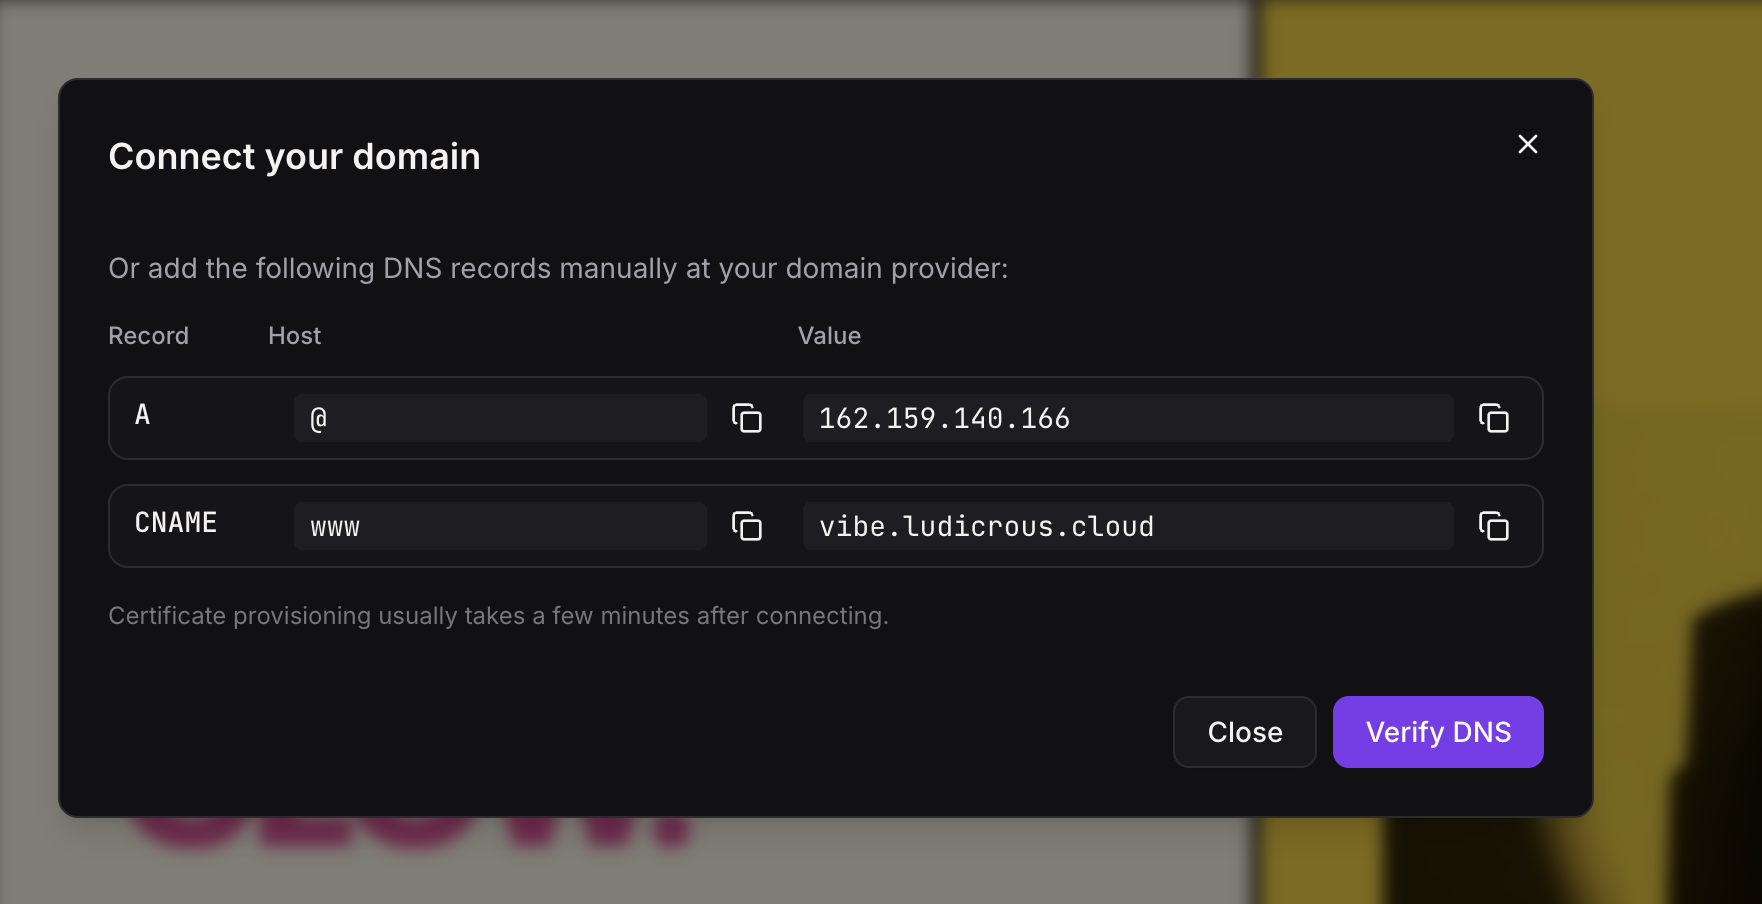
If the domain is not managed in your account, add the DNS records shown, then click Verify DNS. If you chose both apex and www, you add and verify two records in the same flow.
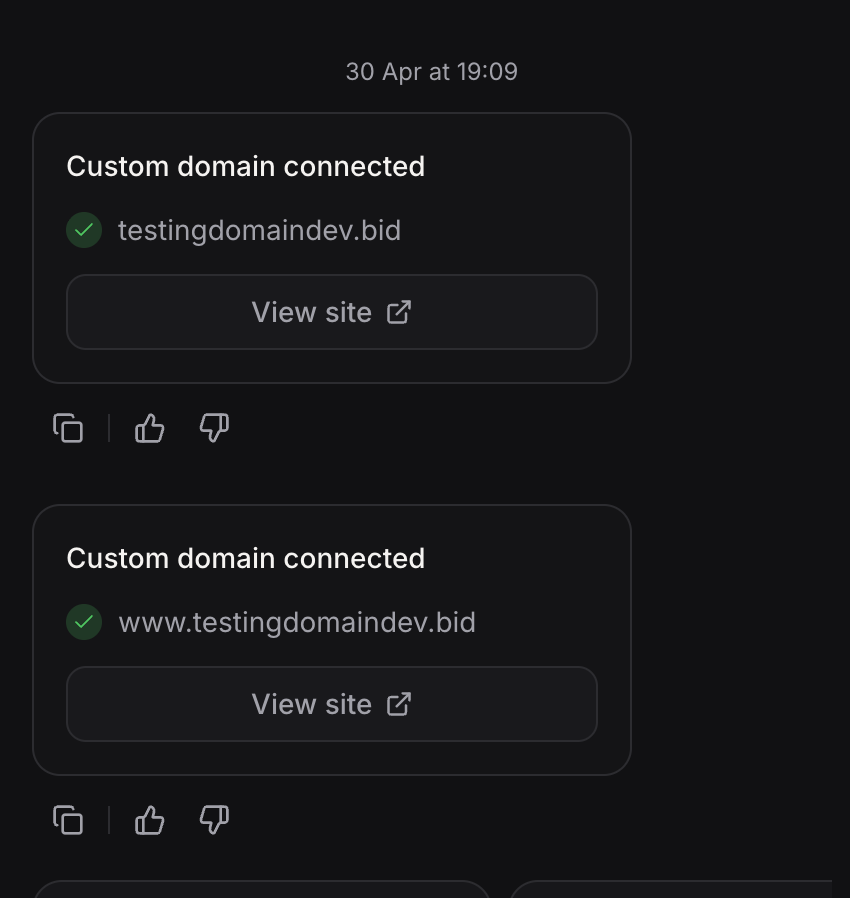
When setup finishes, the chat shows the connected domain and a View site option.
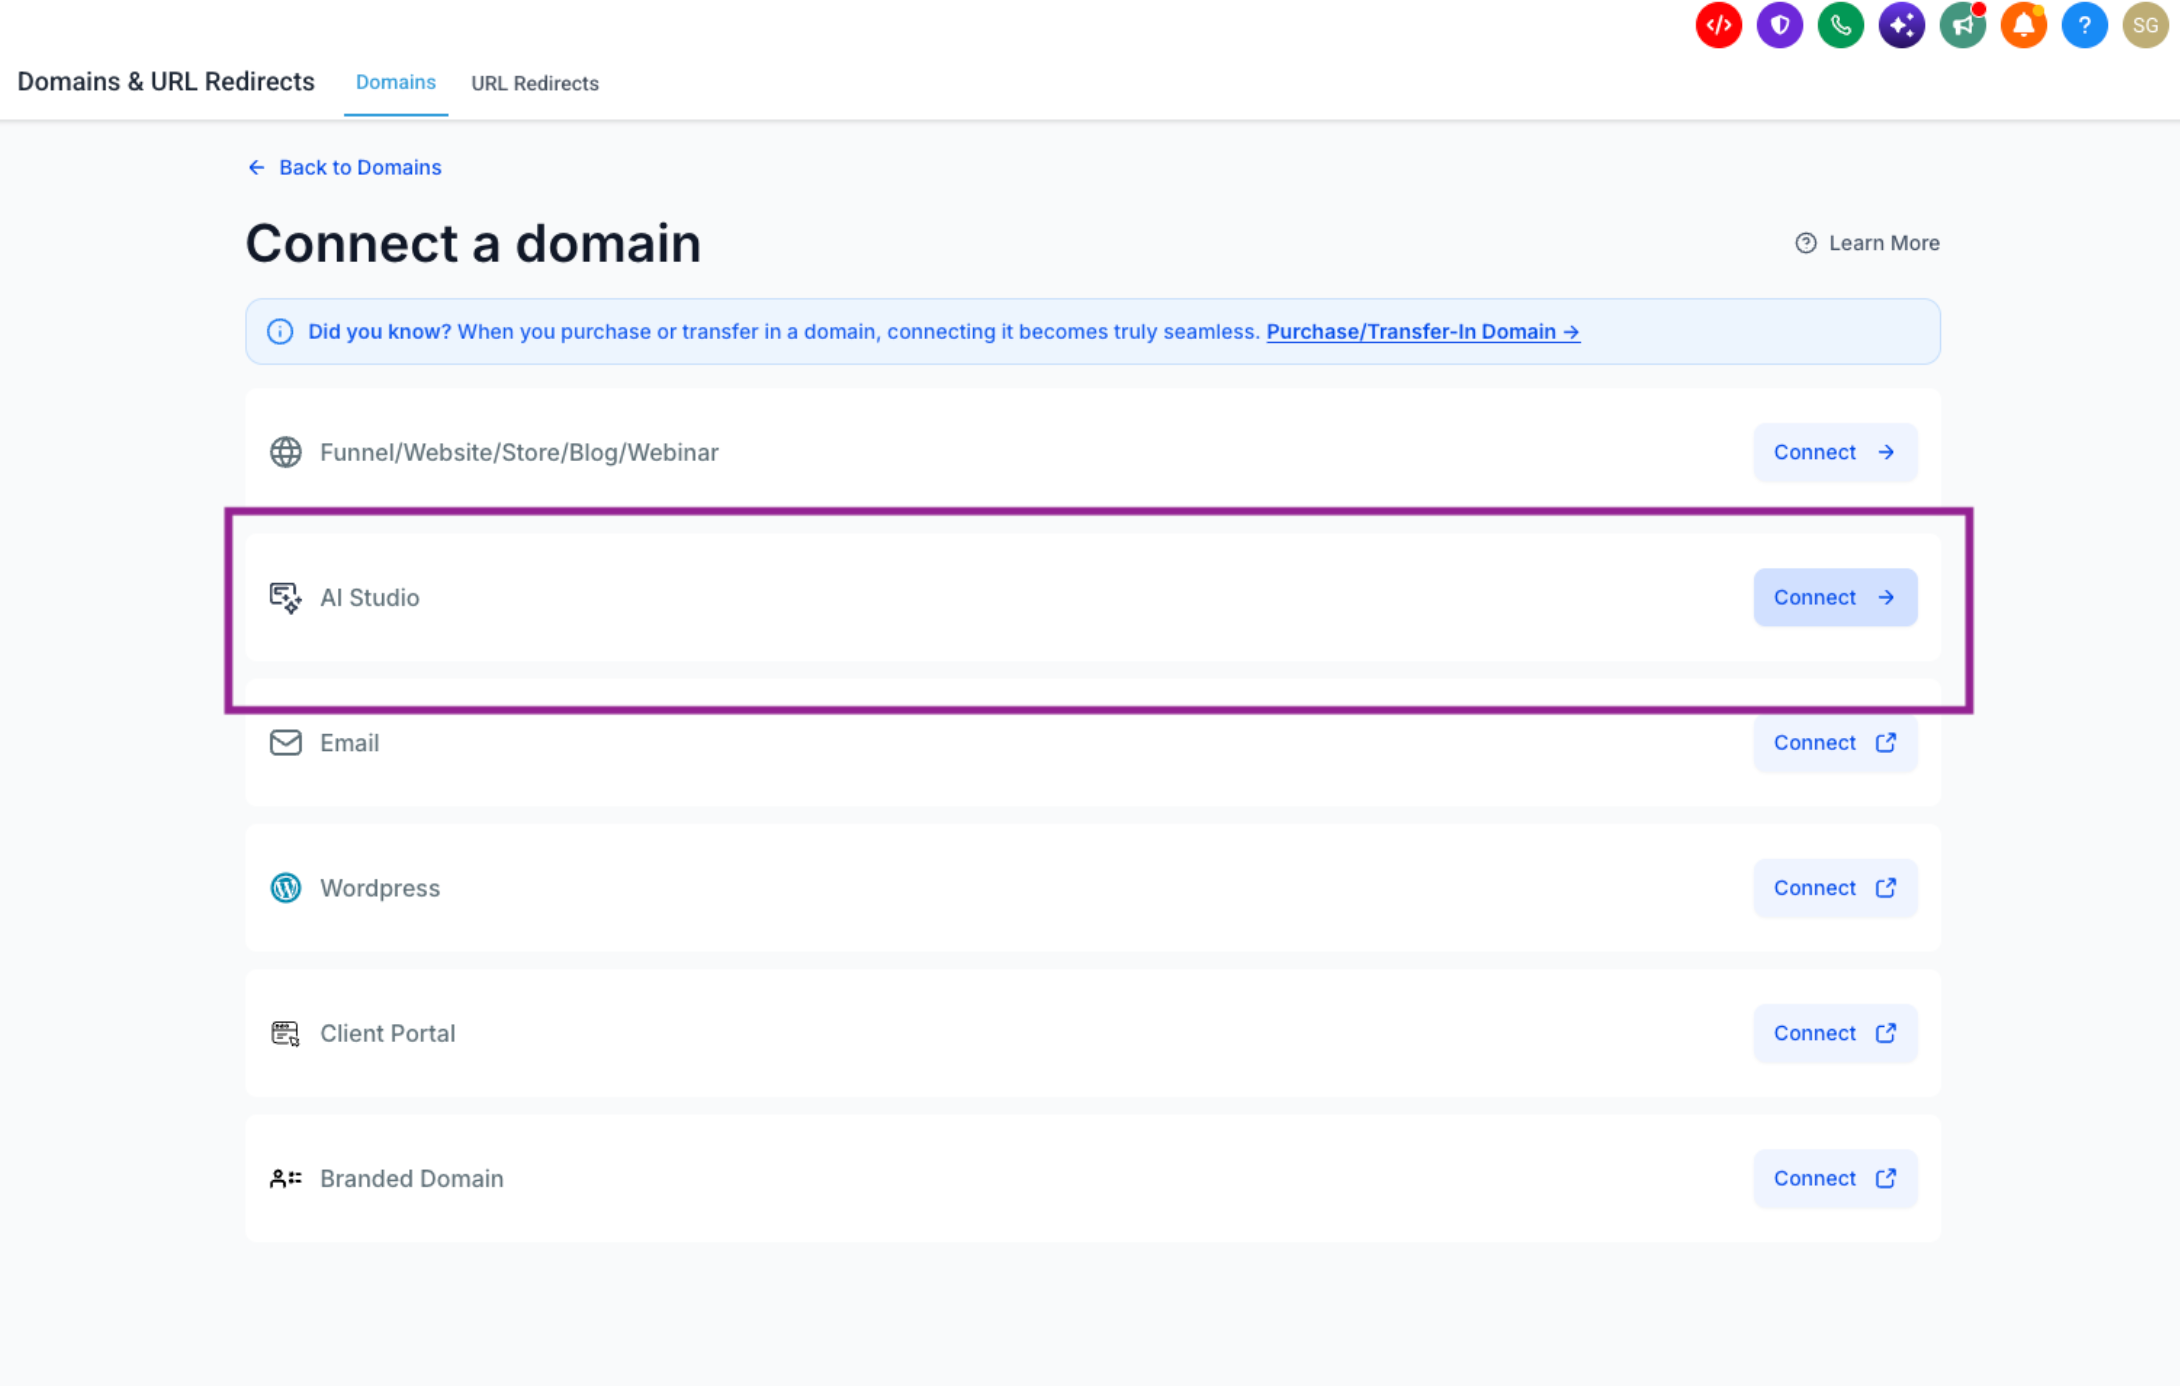
You can also start from Domain Hub, which is useful when you want to finish DNS before opening AI Studio.
Go to Settings > Domains & URL Redirects.
Click + Connect a domain.
Under What will this domain be used for?, find AI Studio and click Connect.
Enter the domain or subdomain.
Complete the guided DNS setup and verification.
After DNS verifies, select the AI Studio project under Link domain with AI Studio.
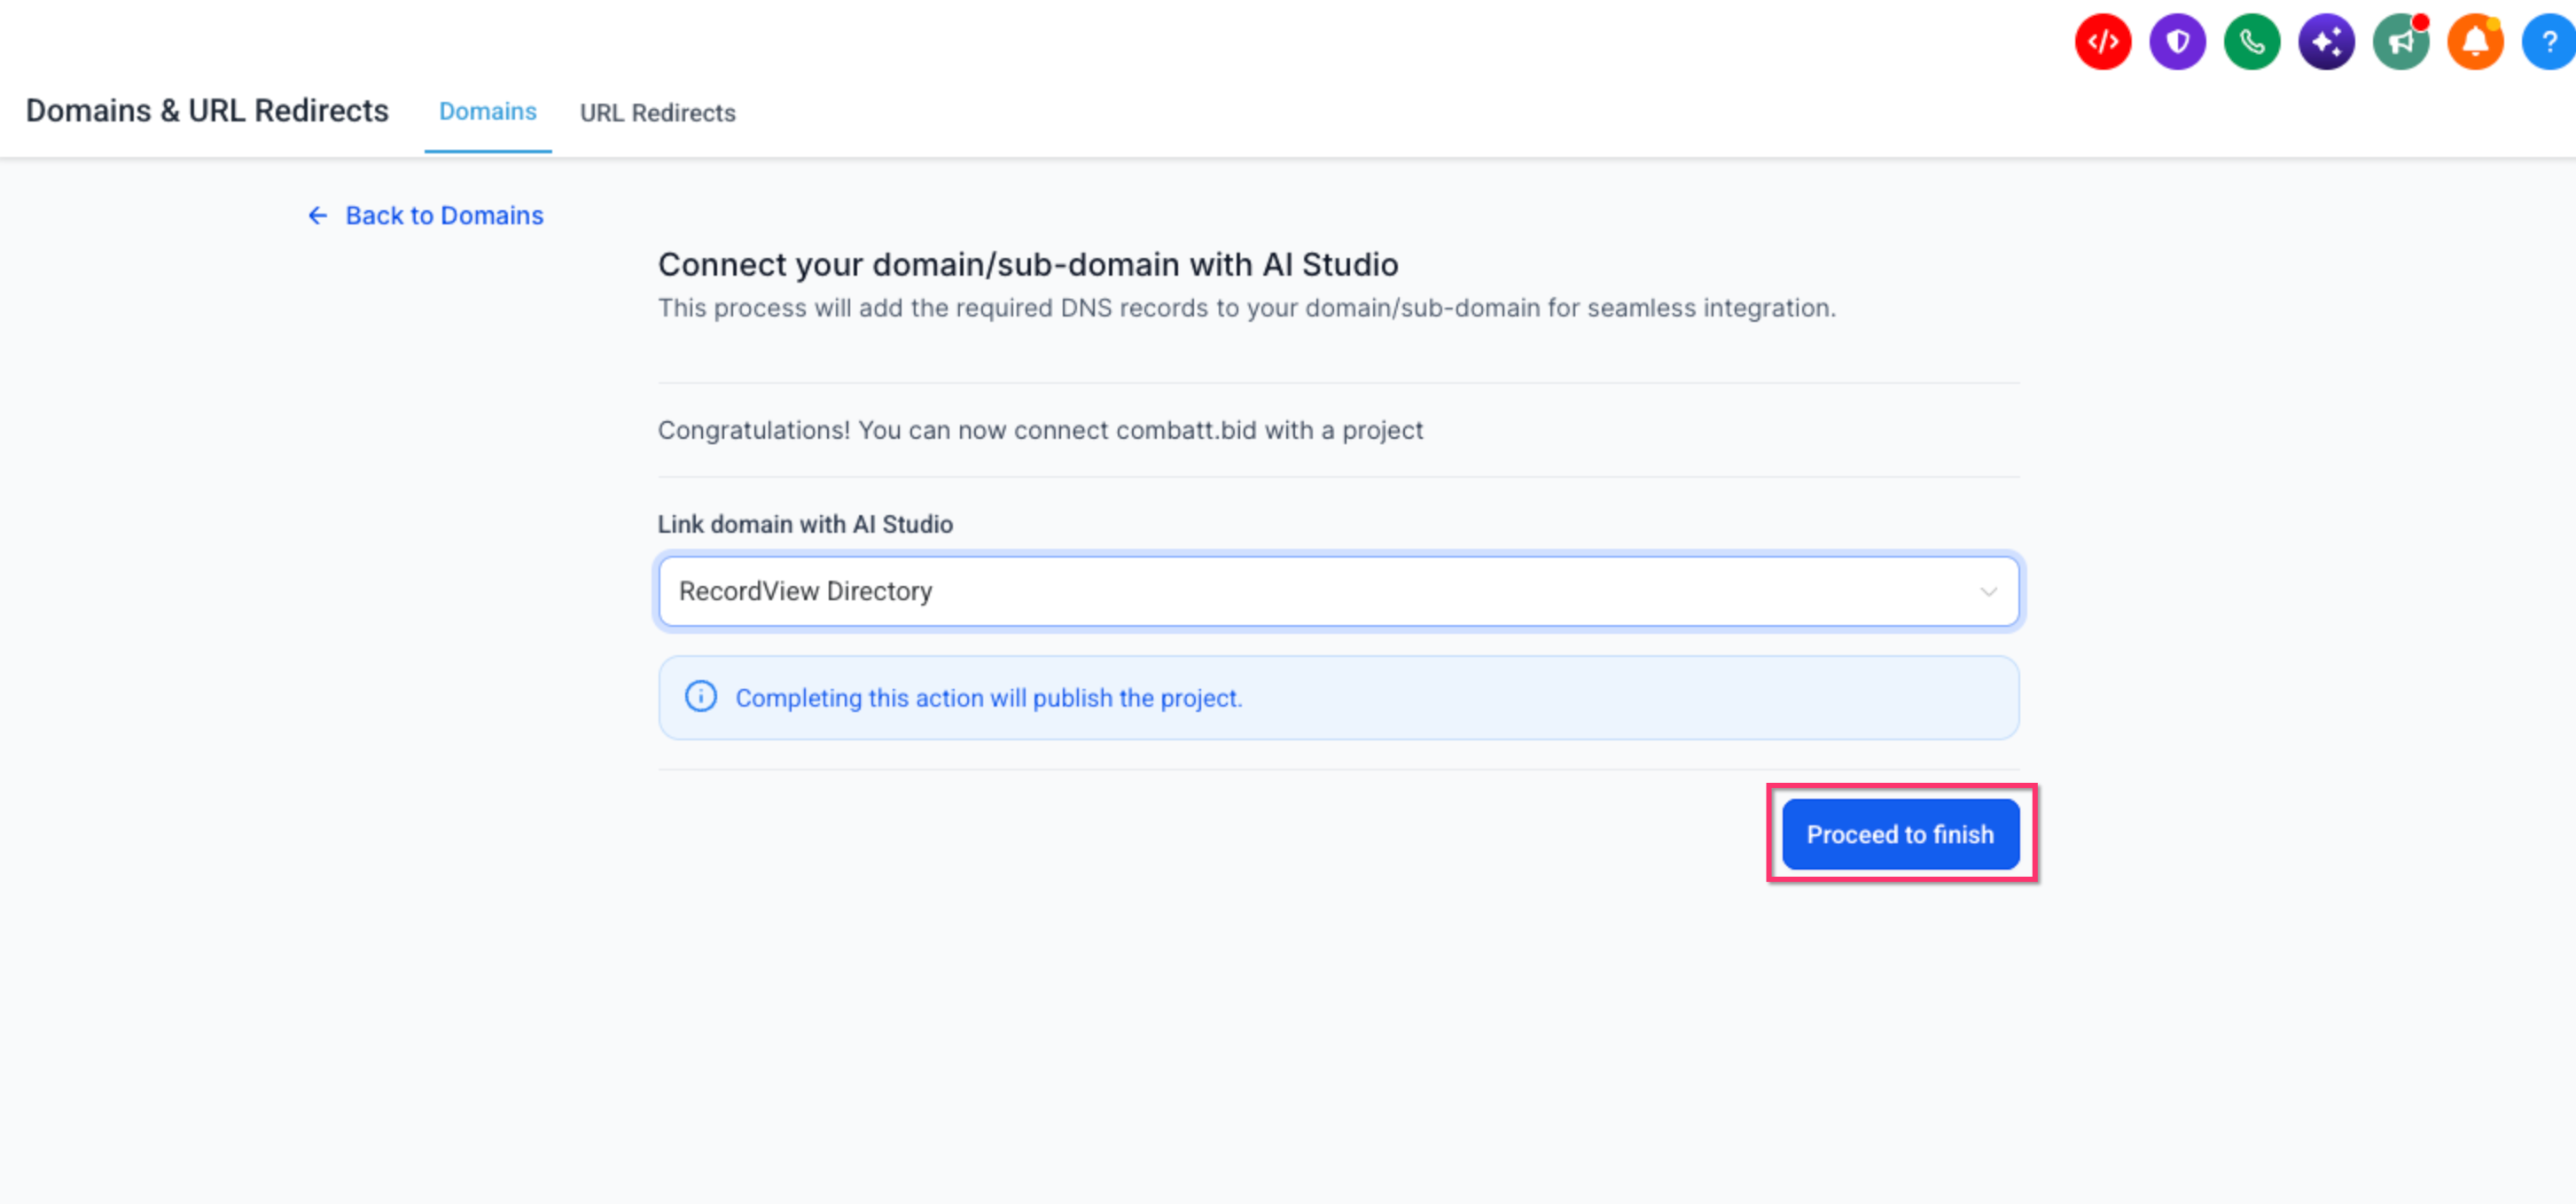
Click Proceed to finish.
Notes for this flow:
If you connect a root domain, the www companion is included automatically.
If the selected project is not published yet, finishing the connection publishes it first.
If the project already has a primary domain, adding another domain does not replace it.
If the domain is already connected to a different AI Studio project, the process stops before changing either project.
The primary URL is the main live address. Other connected URLs automatically 301 redirect to it. If you connected both apex and www during setup, the domain you typed becomes the primary (canonical) URL. If a primary URL is already set, it stays unchanged.
Click Publish, then click the three-dot menu next to the URL you want as primary.
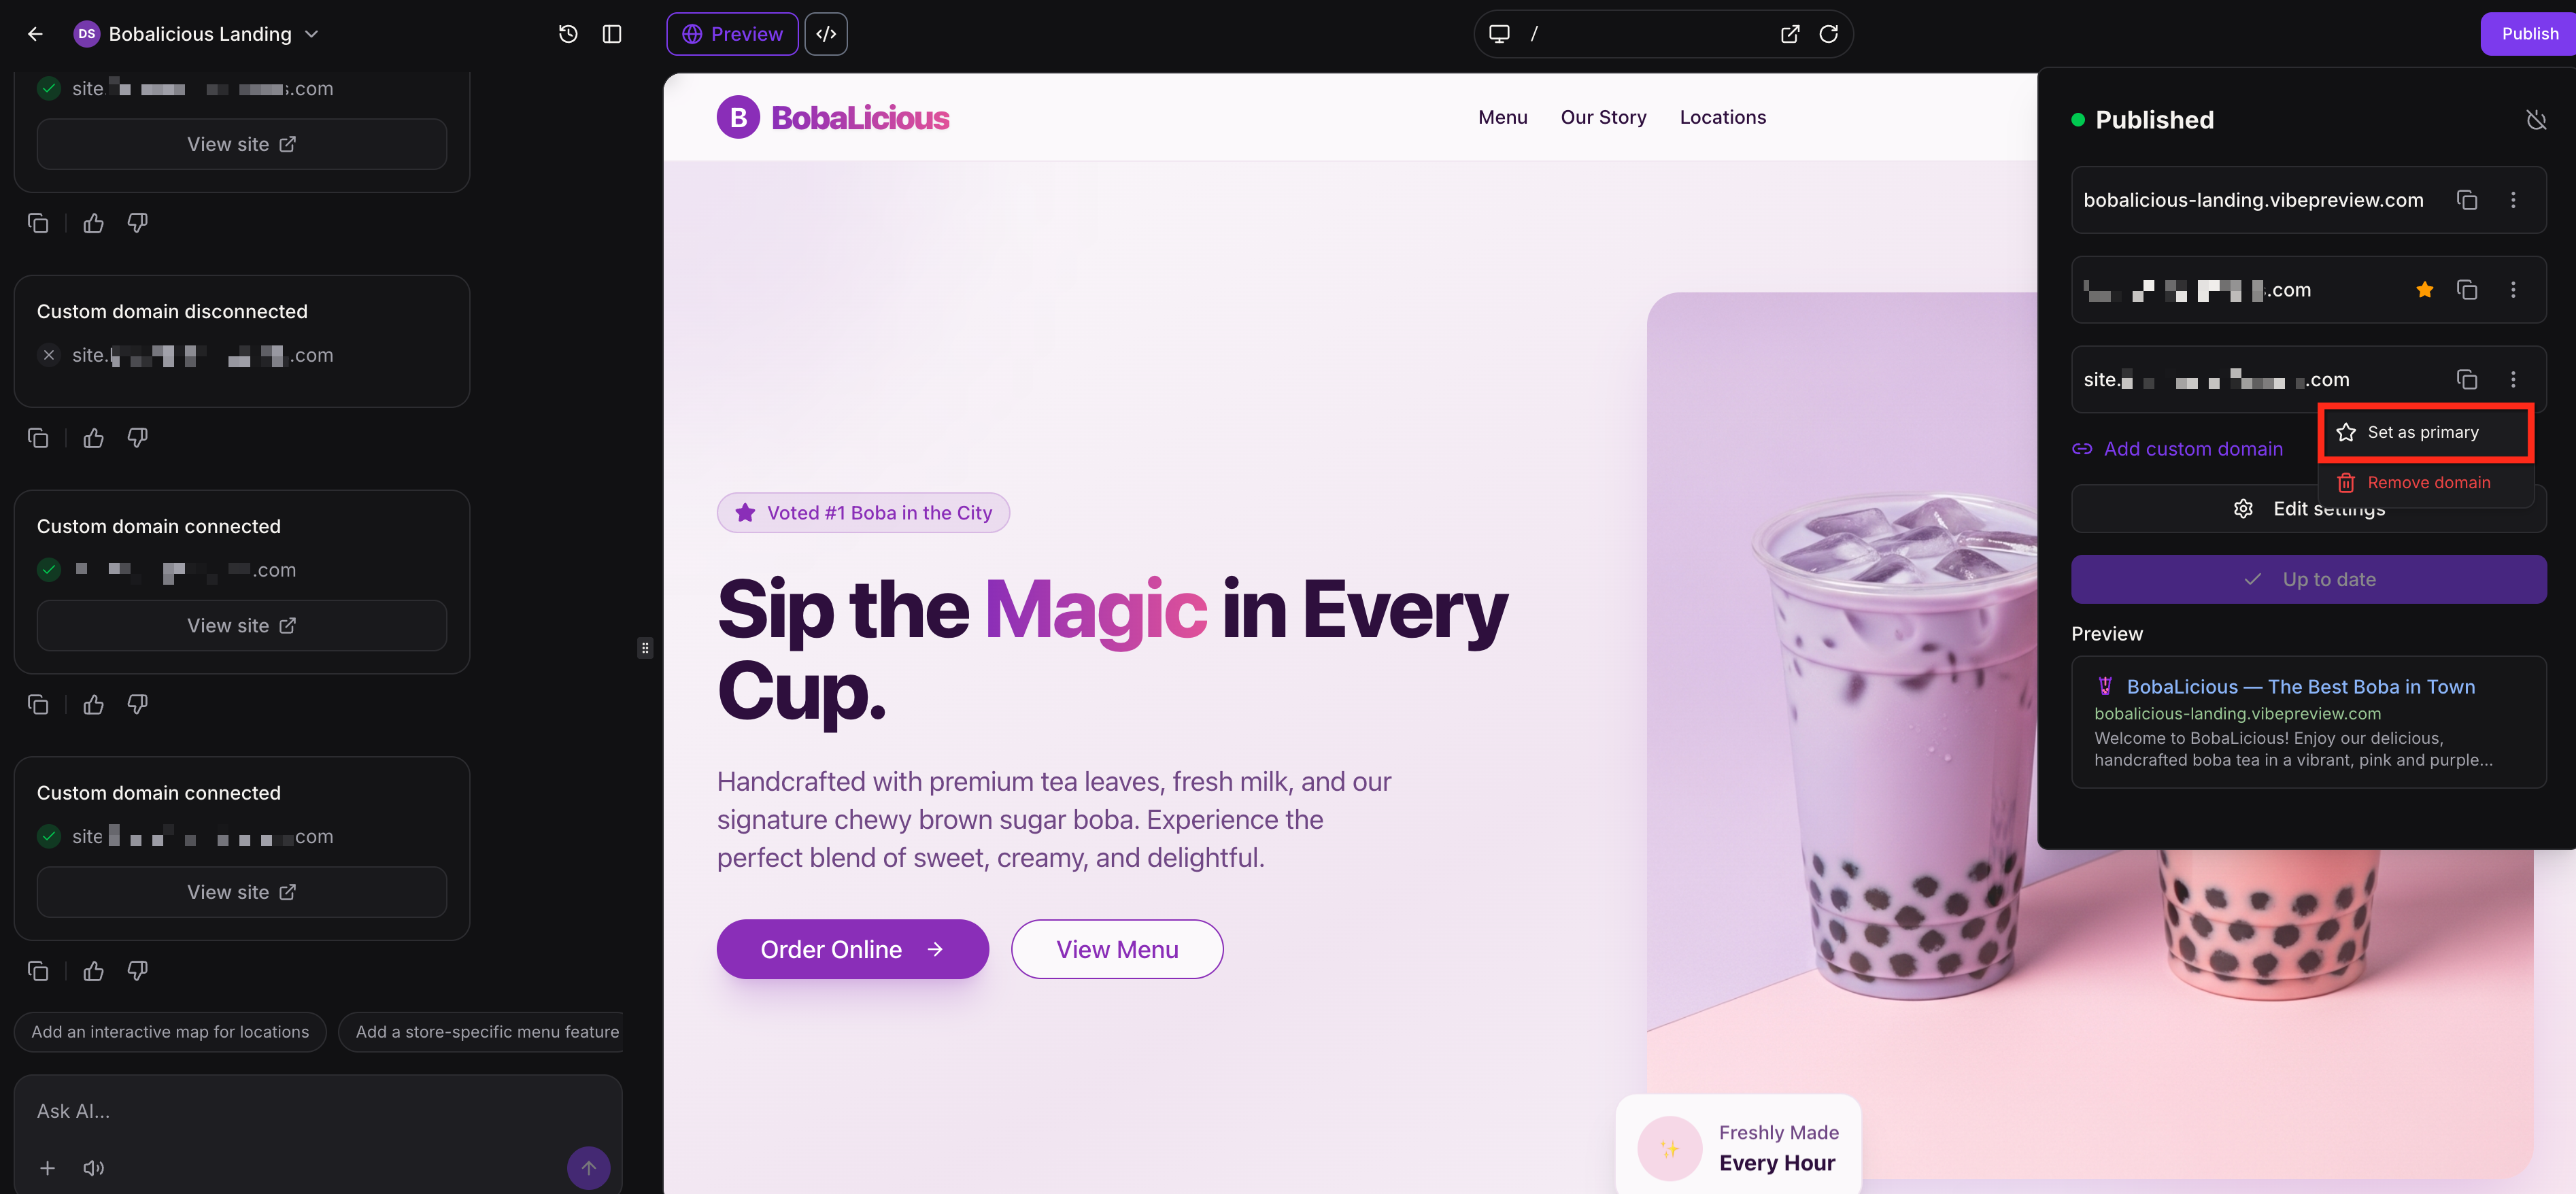
Click Set as primary.
Cloning lets you reuse a successful project without rebuilding it. Within your account you can duplicate a project, place the copy at the root level or inside an existing folder, and choose whether to keep chat activity and version history.
Click the three-dot menu on the project and select Clone.
In the Clone project window, enter the new project name and choose the target folder (or leave it at the root level).
Turn Include project history on or off. With History copies chat activity and version history. Without History creates a clean copy with no chats or versions.
Click Clone.
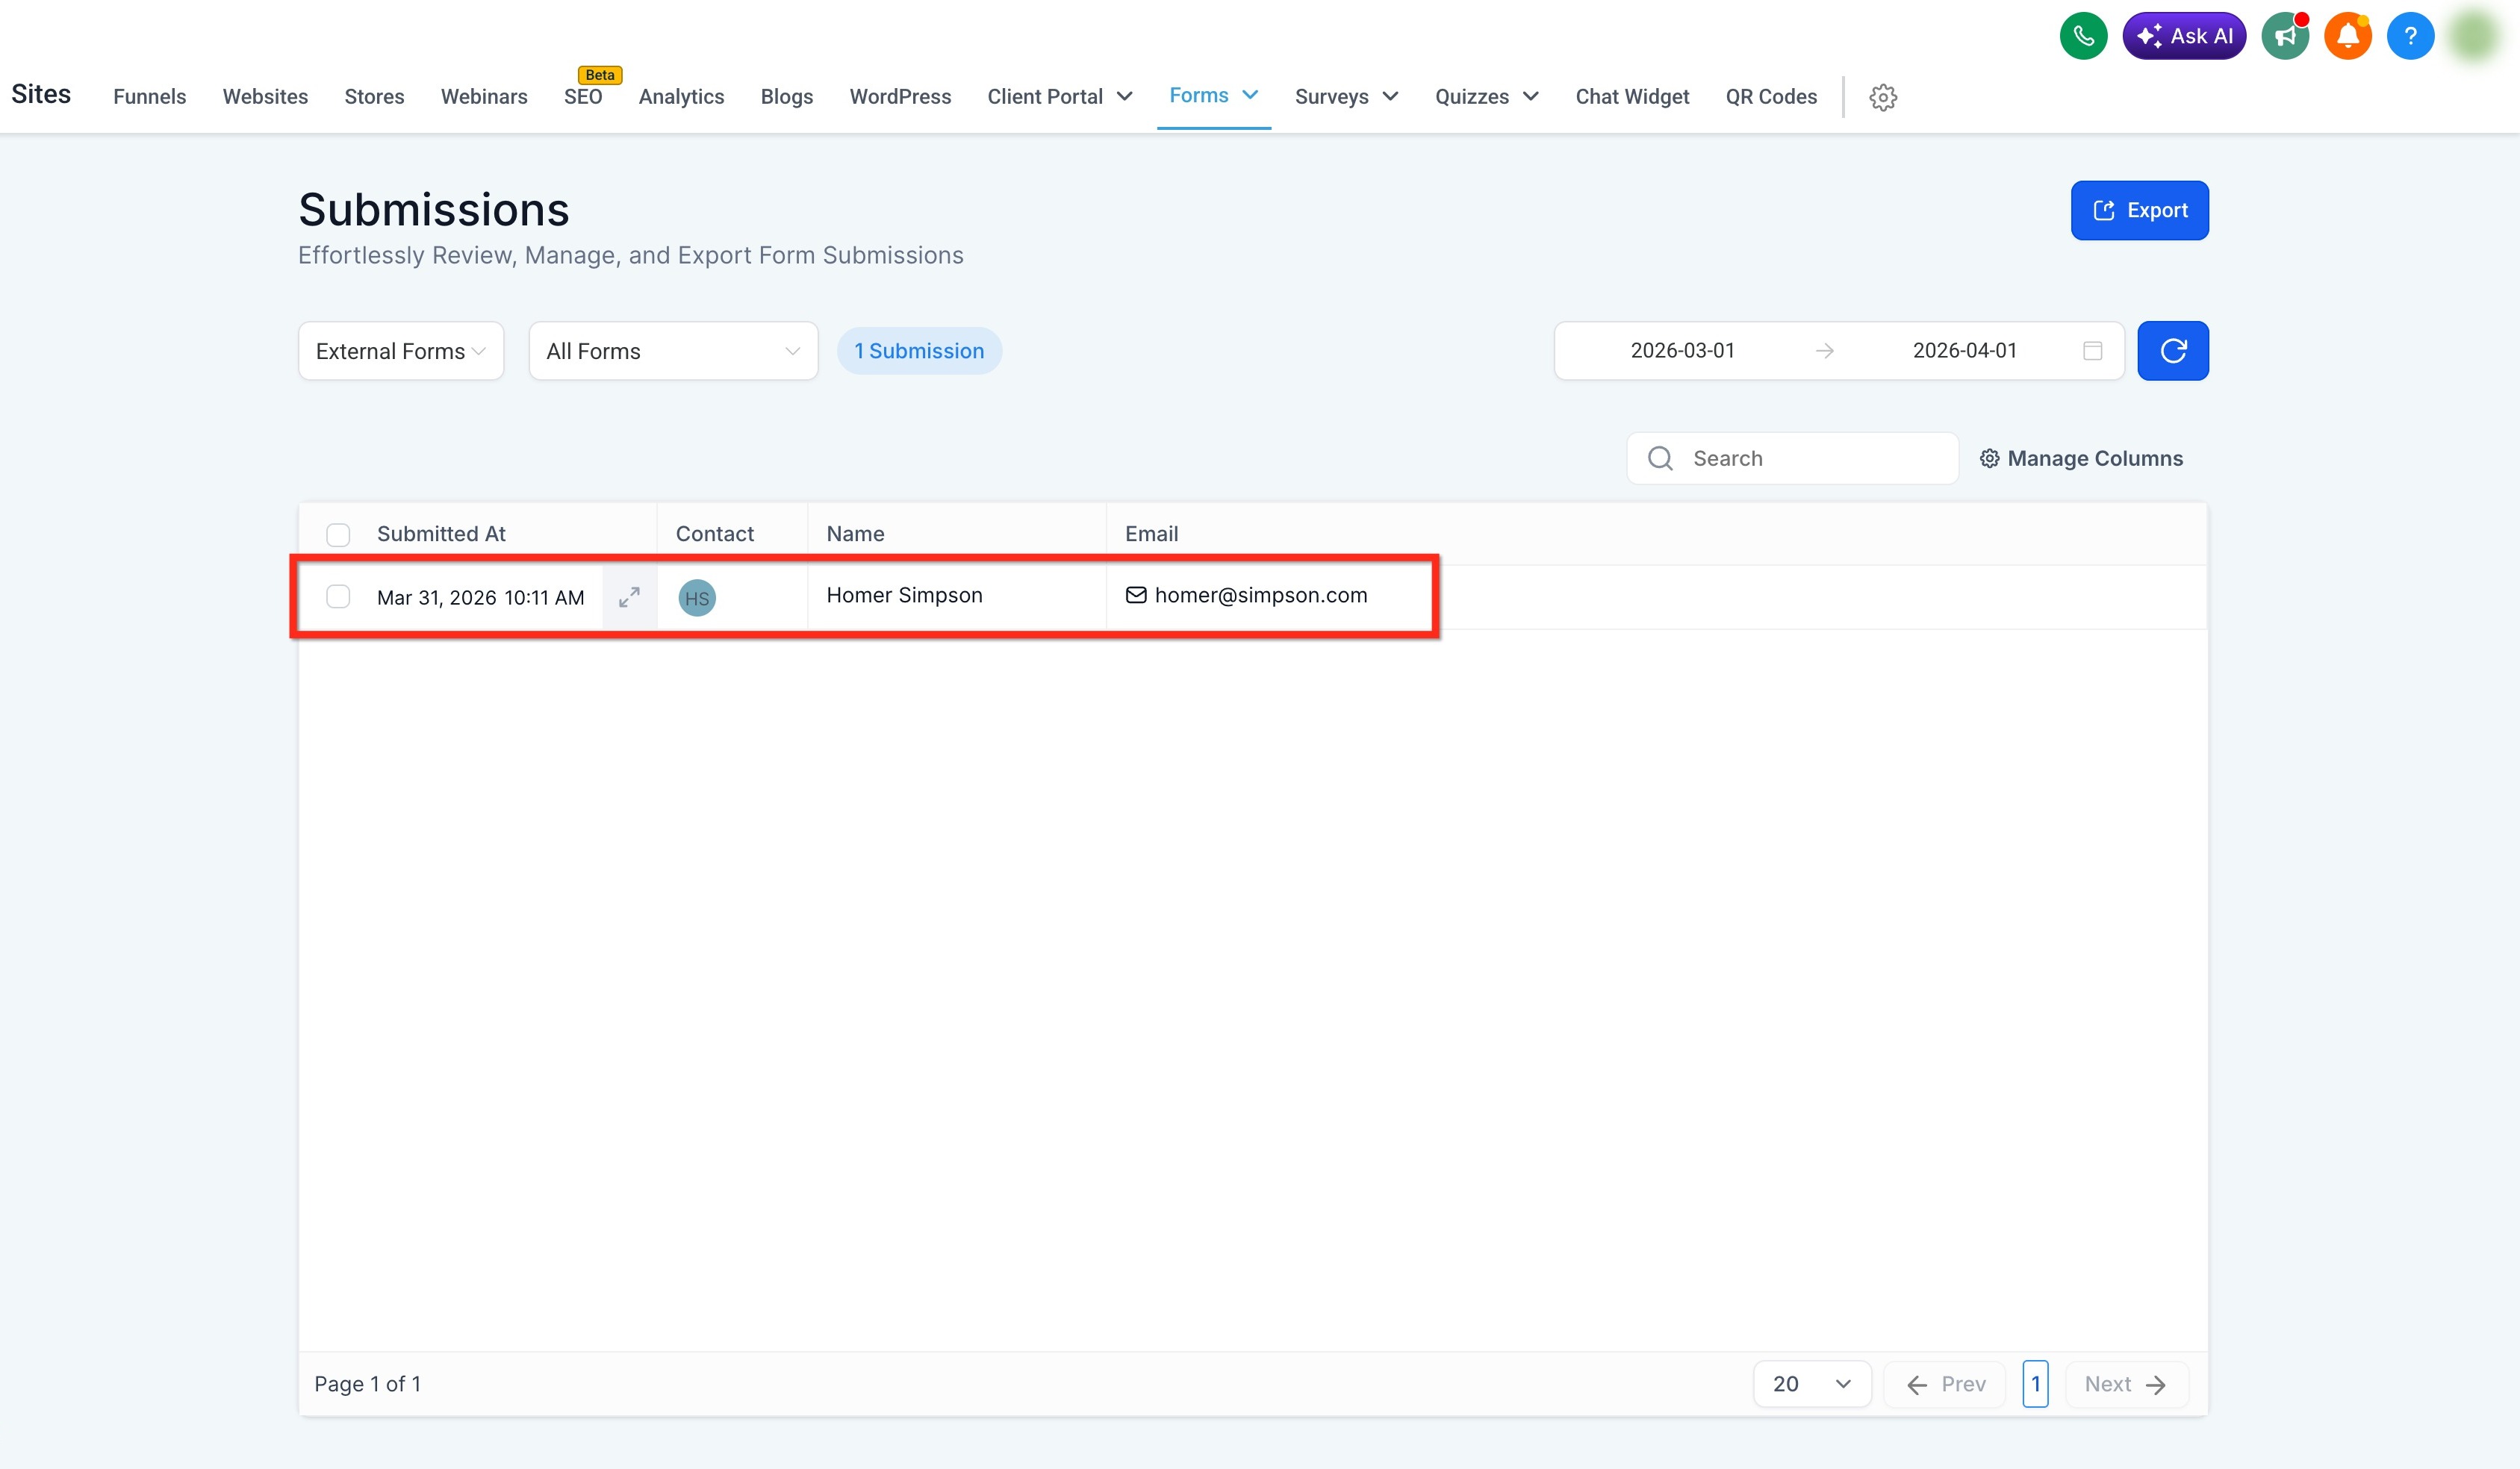
Connected form submissions go into your account, not into the AI Studio project. You can view them in Contacts and under Web Tools > Forms > Submissions > External Forms. Submissions can also start workflows. The recommended method is the AI Studio Form Submitted trigger in Marketing > Workflows, described in the guide AI Studio Forms, Calendars, Workflow Trigger and Analytics.
AI Studio projects live inside AI Studio. They cannot be moved or copied into the standard Websites or Landing Page Builder.
URL and image-based recreation is inspiration for structure, layout and style, not an exact one-to-one copy.
Forms and calendars need a connection step before they work with your contacts and scheduling.
AI Studio can only guide, not guarantee, the exact look of the first draft. Refine with follow-up prompts.
When you ask AI Studio to fix a problem, it can investigate the running project before changing anything. It can inspect behavior, review project information, test functionality and external resources, and use the results to find the cause. For example it can detect an outdated preview, check whether an external resource is reachable or investigate an application error. If the project environment becomes stale or unresponsive, it can try to recover it, and after a fix it can check the result. You do not run these steps manually. Just ask it to build, change or fix your project.
Symptom | What to try |
|---|---|
Preview looks outdated | Refresh the preview, or ask AI Studio to check why the preview is stale |
Build error after a change | Click Details, then Try to fix, or restore an earlier version |
Form does not send data | Confirm you completed the Connect step, then publish and test |
Booking section shows no times | Confirm a native calendar is connected and has availability |
Custom domain will not connect | Publish to the preview domain first, then verify the DNS records |
Unwanted change from a prompt | Open Version History and revert |
Is AI Studio only for websites and landing pages?
No. It can also build multi-step surveys, branded forms, booking flows and other interactive customer-facing experiences.
Do I need to move an AI Studio project into Websites or the Landing Page Builder before publishing?
No. Publish directly from AI Studio. You can build multiple connected pages in one project, then publish and connect a domain from there, or connect the domain from Settings > Domains & URL Redirects.
Can I copy an AI Studio project into Websites or the Landing Page Builder?
No. AI Studio projects stay in AI Studio and cannot be copied into the standard builders. You do not need to move the output.
Can I preview on mobile before publishing?
Yes. Click the computer icon at the top of the preview to switch between desktop, tablet and mobile views.
Can I connect a domain without opening AI Studio first?
Yes. Go to Settings > Domains & URL Redirects > + Connect a domain > AI Studio, finish DNS verification, then select the project the domain should serve.
How is AI Studio usage charged?
Usage is metered and limited per usage window. See AI Studio Pricing and Usage for how limits, notifications and pay-per-use work.
Can I put patient information into AI Studio?
No. AI features are not approved for PHI. Keep prompts, uploads, forms content and project data free of patient details.
Will edits go live as soon as I make them?
No. After the first publish, edits stay in draft until you click Publish again.
Can I reuse a project for another location or campaign?
Yes. Use Clone from the project menu, and choose whether to include chat and version history.
