Managed Agents are AI agents you build by describing the work in plain language instead of drawing a flowchart. You create and edit them in Aesthetix CRM under AI Agents > Agent Studio > Managed Agents. Each agent follows a draft, test, and publish lifecycle, and can use Knowledge Bases, CRM actions, triggers, and media generation.
HIPAA caution: AI features in Aesthetix CRM are not approved for processing Protected Health Information (PHI). Do not put PHI (patient names tied to treatments, diagnoses, medical history, photos, or lab results) into agent instructions, prompts, files, memory, or Knowledge Bases. Use general practice information such as services, pricing, hours, and policies. Test with made-up data only.
Your user must have permission to access and manage Managed Agents.
Set up and test anything the agent will rely on: Knowledge Bases, workflows, forms, surveys, and calendars.
If the agent will book appointments, it must use a native Aesthetix CRM calendar. AI appointment booking does not work with EMR calendars. Appointments that sync from your EMR cannot be booked by the agent.
For Facebook lead form triggers, connect the Facebook Page for lead sync, and have a Page administrator accept Meta's Lead Ads Terms of Service.
The channels and events an agent can use depend on the triggers and integrations configured in your account.
The Unified Workspace (one screen for agent discovery, testing, conversations, activity, and configuration) is a Labs feature. This feature may not be enabled on every account yet. Accounts without it continue to use the standard Managed Agents interface.
Account-based resource selection reduces invalid picks, but it does not guarantee the agent works correctly. Always test before publishing.
A clear prompt gives the builder the context it needs to produce a useful draft. Describe the agent's role, the channels it supports, the Knowledge Bases it should use, the CRM actions it is allowed to take, and how it should behave. You can also start from a prebuilt use case.
In the left sidebar, click AI Agents, then click Agent Studio.
Open the Managed Agents tab.
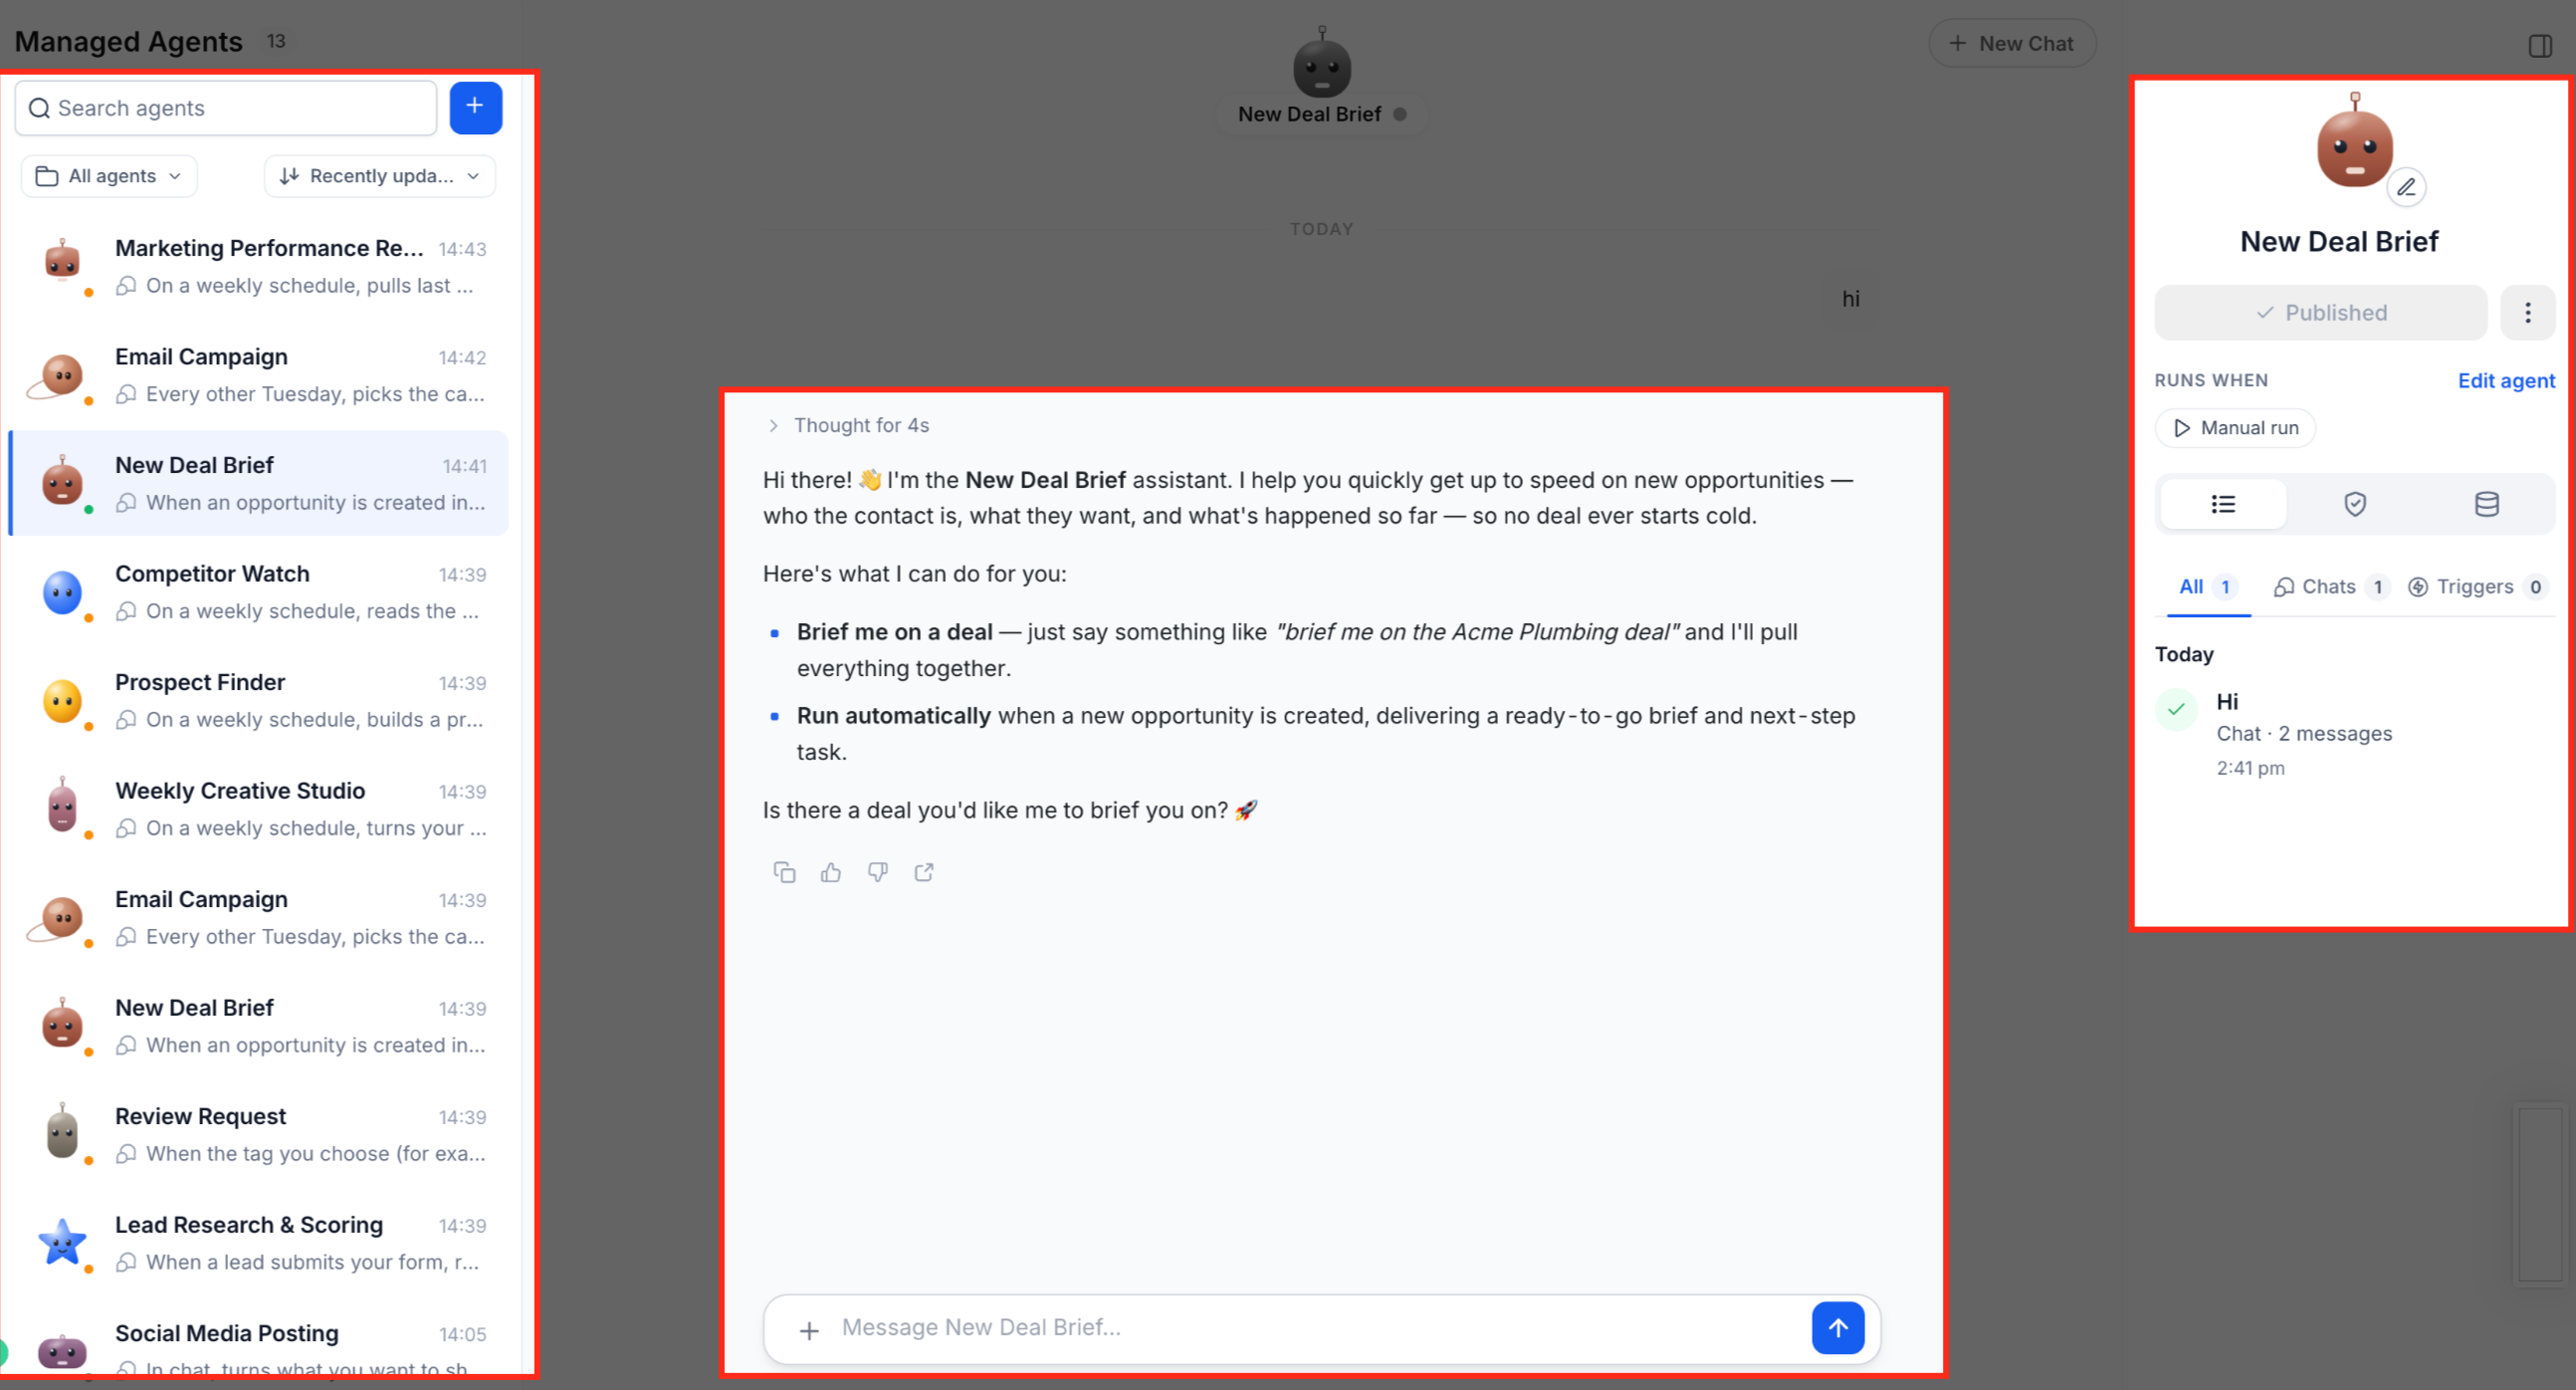
Click + Create Agent.
Describe the agent's goal, channels, Knowledge Bases, and permitted CRM actions, or choose a prebuilt use case.
Submit the description. The builder generates a draft with proposed behavior, triggers, and actions.
Refine the draft with follow-up messages, for example "Make the tone more formal" or "Limit posts to three per week per platform."
Example prompt for a practice:
Create a Consultation Follow-Up Assistant that, when someone submits our Book a Consult form, sends a friendly text asking which treatment they are interested in, uses our Services Knowledge Base for pricing and hours, and creates a task for the front desk. Never give medical advice.
You can also describe Facebook lead form or survey triggers in natural language, then pick from the Pages, Lead Forms, or surveys that exist in your account. You never need to look up IDs.
If you type a question instead of a creation request, the builder answers the question and does not create an agent by accident.
Knowledge Base answers: ground responses in documents, rich-text content, tables, CSVs, and crawled web content.
CRM actions: update contact fields and tags, trigger workflows, and create tasks, notes, or appointments, according to the agent's instructions and available tools.
Media generation: generate images, audio, and video; edit existing PNG images; save generated assets to Media Storage.
Agent Studio, courses, and ad reporting: list Managed Agents, retrieve an agent's details, and run a Managed Agent; enroll contacts in courses or revoke enrollment, list enrollments, and check progress and completions; retrieve Facebook and Google Ads reporting rows.
Computer: browser tasks on websites. See the Managed Agents Using Computer guide.
These capabilities use your existing permissions and stay scoped to your account. No new permissions are introduced. Common uses include social media assistance, Knowledge Base support, community moderation, email campaigns, and routine CRM tasks. Managed Agents can also make external API calls and use other available tools.
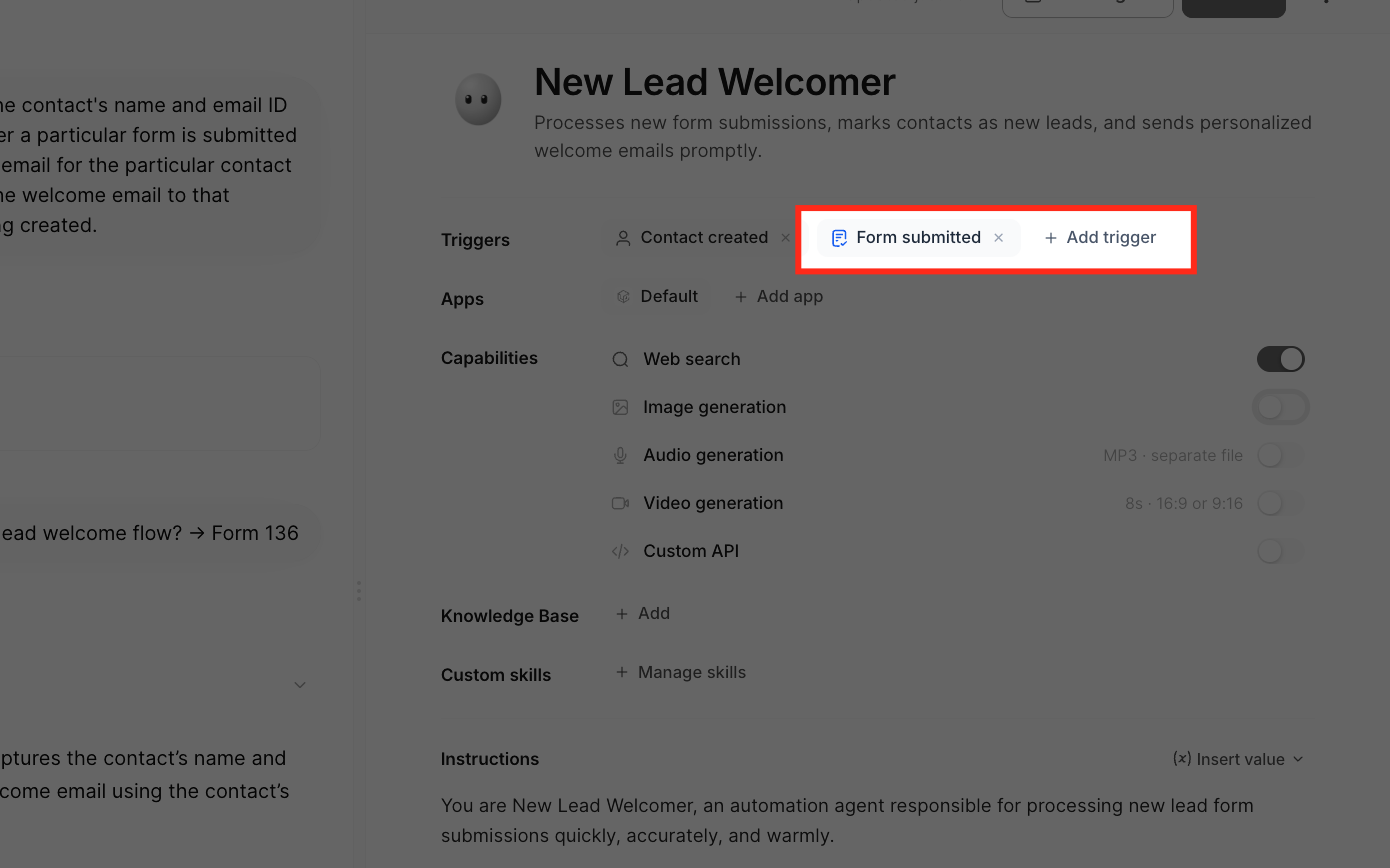
Triggers start an agent when an event happens, so you do not have to begin each task by hand. You can add multiple triggers to one agent.
Trigger | What it does |
|---|---|
Tag Changed | Runs the agent when a contact gains or loses a tag you specify. |
Form Submitted | Runs the agent after a specific form is submitted. A form file-upload field can pass a submitted PNG image to the agent. |
Chat Interface | Starts agent conversations through supported chat channels. |
Facebook Lead Form | Runs the agent when a contact submits a lead form on a selected Facebook Page. The agent receives the contact and the submitted answers. |
Survey Submitted | Runs the agent when any selected survey receives a response. The agent receives the survey name and answers. |
Other supported events can include schedules, appointments, and contact or opportunity events. See the Managed Agents Triggers Reference guide for every trigger and its settings.
To add a trigger, open the agent, find Triggers, click + Add Trigger, search or browse (Contacts, Tags, Opportunities, Appointments, Forms & Surveys, Communications, Scheduled, plus Recently Used and Popular), choose a trigger, set it up in the side panel, and click Save. Closing the panel or clicking Cancel discards unsaved changes. In the Trigger Picker, press Cmd+K or Ctrl+K to focus search, the Up and Down arrows to move, Enter to select, and Esc to close. A trigger marked Added is already configured; a grayed-out trigger is not available with the current configuration. Existing agents keep working without reconfiguration.
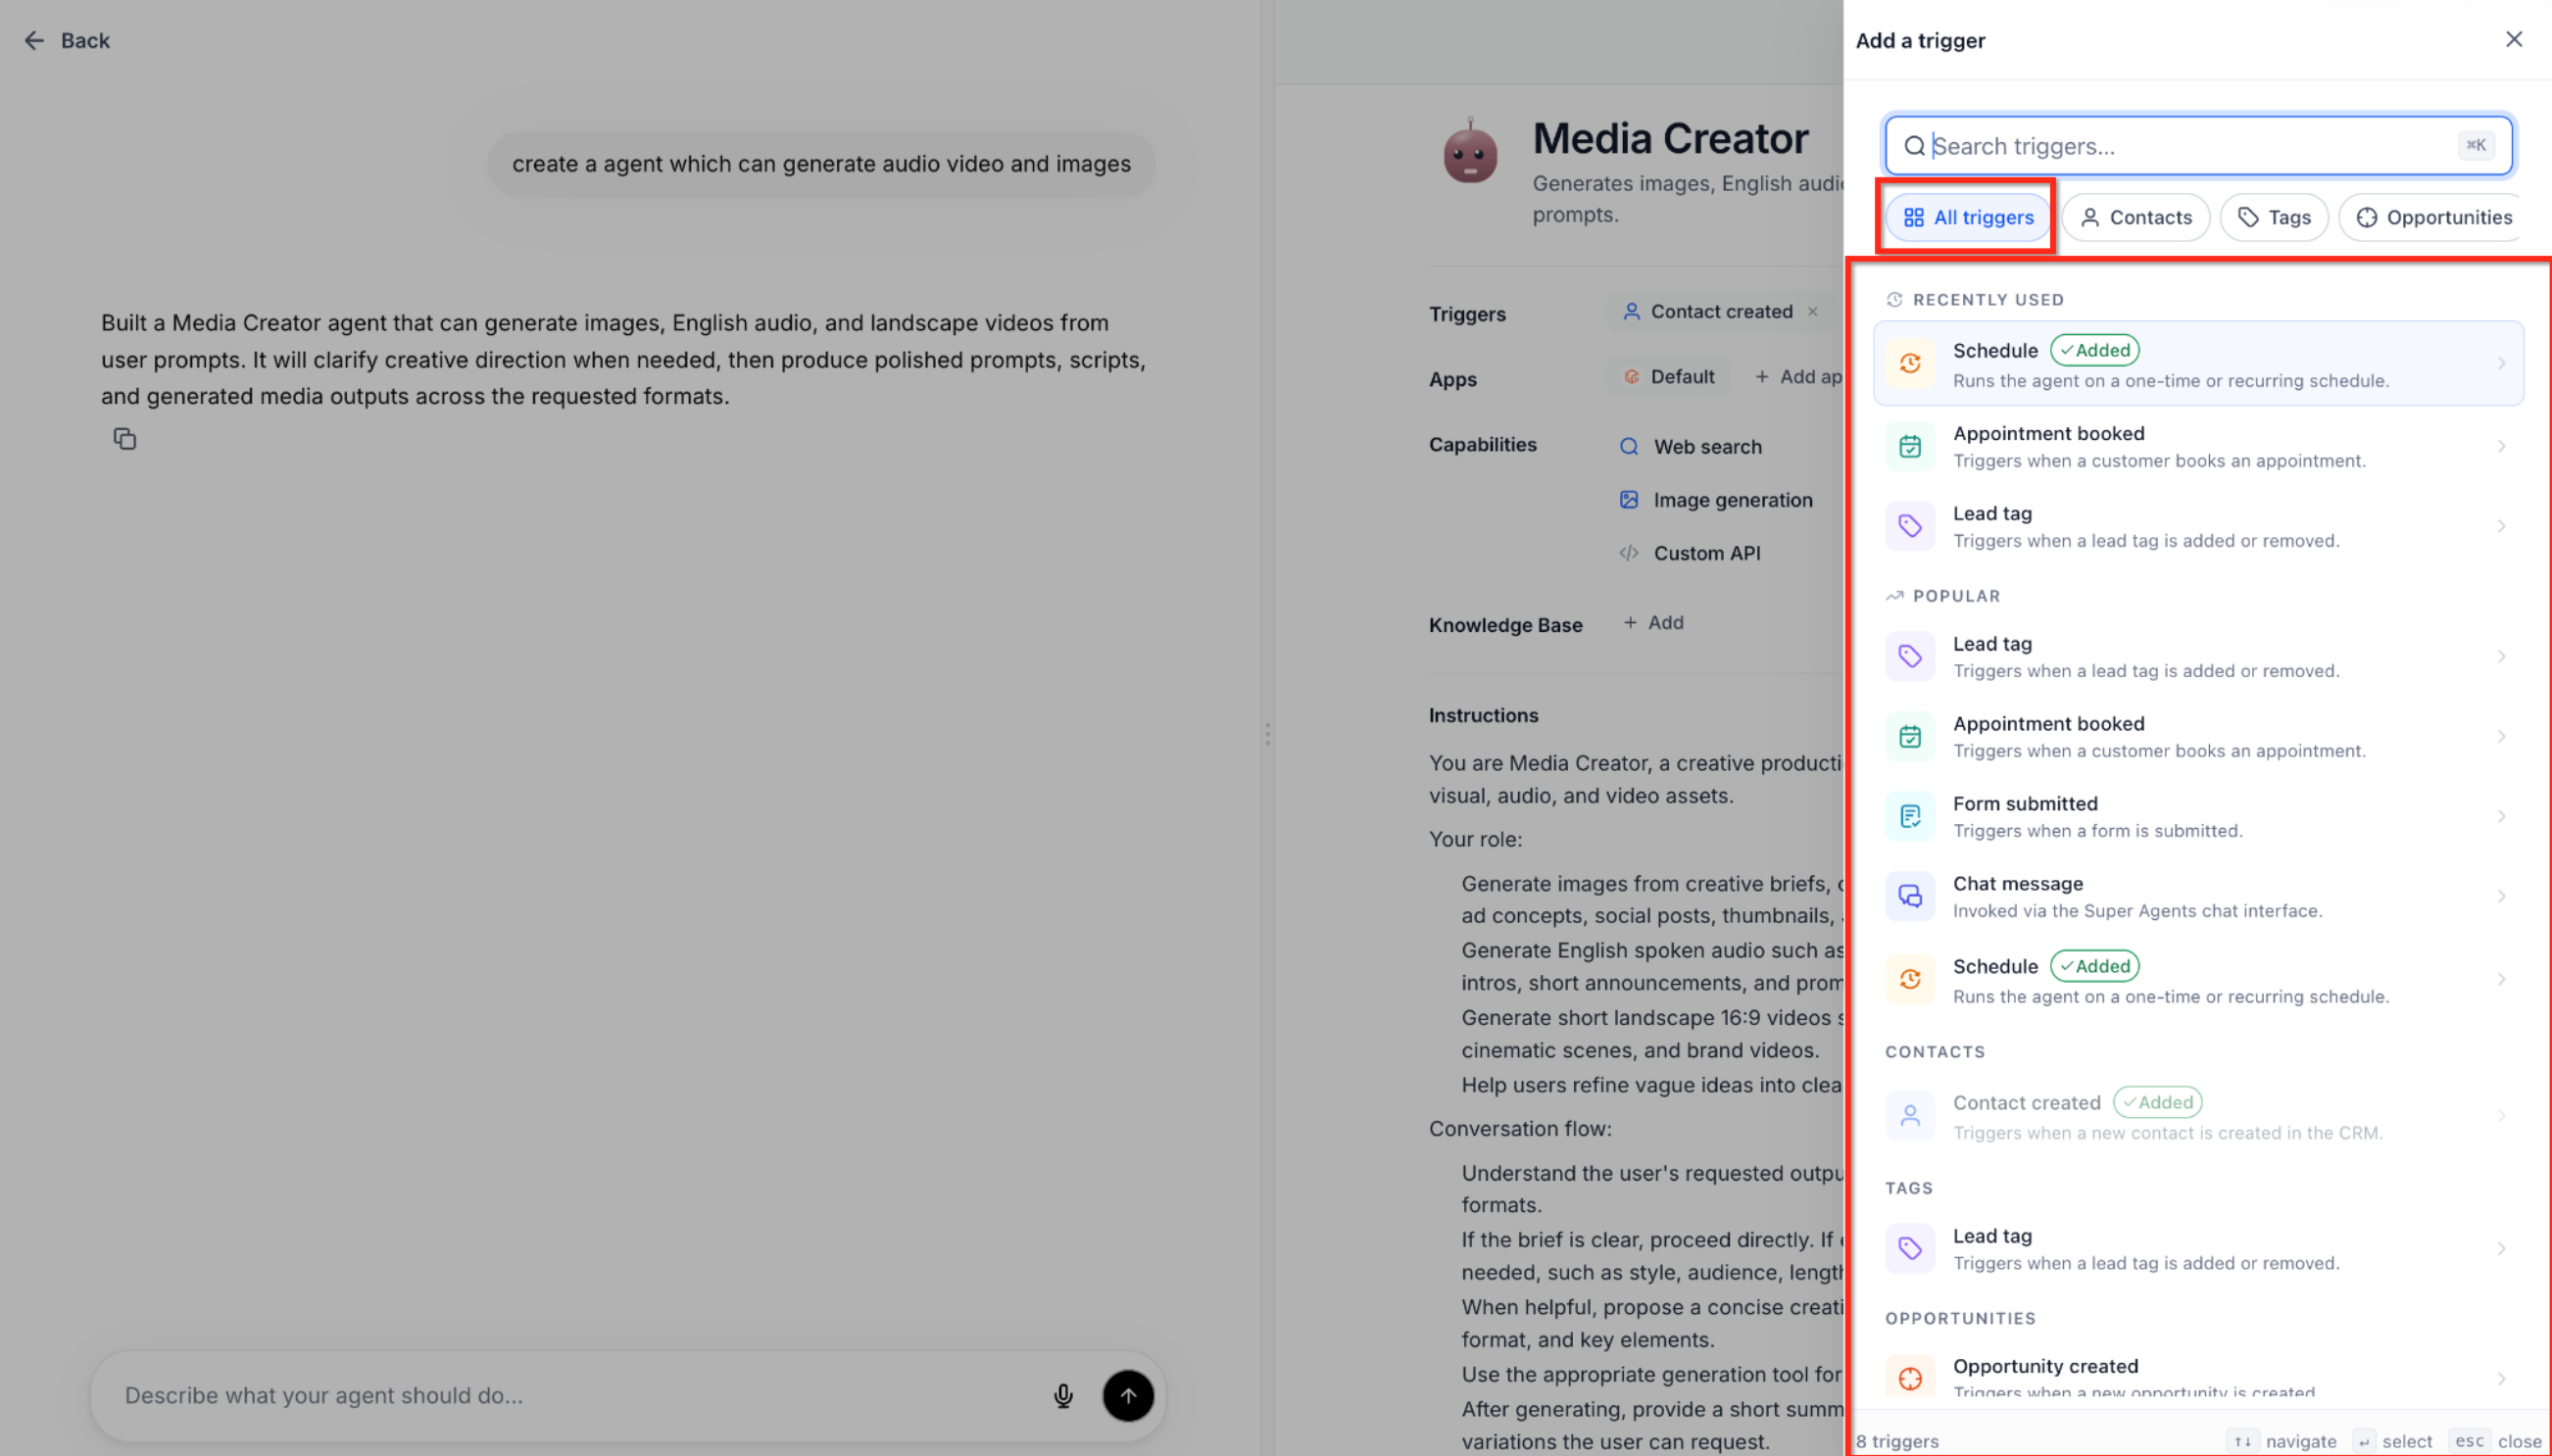
For a Facebook lead form trigger, choose Facebook lead form under Communications, pick the Page, and either keep the Page-level selection (all its Lead Forms) or select specific forms. Form search is limited to the selected Page. For a survey trigger, choose Survey submitted under Forms & Surveys and select one or more surveys. When you publish, the builder checks that the selected Page, forms, and surveys still exist and that the Page and form combination can trigger the agent.
The guided builder lets you create and edit a Managed Agent by conversation, watch changes appear in a live configuration panel, and fine-tune fields directly. It is available for Managed Agents with no extra setup.
Feature | What it does |
|---|---|
Targeted edits | Changes only the setting you ask about and leaves unrelated settings alone. |
Guided clarification | Asks which resource you mean instead of guessing. |
Intent recognition | Tells questions apart from change requests so a question never edits the agent. |
Live configuration panel | Shows instructions, triggers, tools, skills, and Knowledge Bases updating as the builder works. |
Inline editing | Lets you edit supported fields directly in the panel. |
Smart cascades | Keeps related instructions in sync when a trigger, plugin, or Knowledge Base changes. |
Account-based resources | Picks from the forms, calendars, pipelines, Knowledge Bases, and connected apps that exist in your account. |
You can change one thing without regenerating the whole agent. Examples:
"Make this agent's tone friendlier without changing its existing triggers or Knowledge Base."
"Add a trigger for the Contact Us form."
"Make the agent's responses shorter."
"Update the instructions to ask for an email address before creating a task."
When a request is missing information or ambiguous, the builder asks a focused question. For example, if your account has more than one form named Contact Us, "Add a trigger for the Contact Us form" prompts the builder to ask which one.
Request | Builder behavior |
|---|---|
"What can this agent do?" | Explains the agent's capabilities without changing anything. |
"Make the tone friendlier." | Updates the relevant instructions. |
"Improve this agent." | Asks for clarification before changing anything. |
"Add a trigger for the Contact Us form." | Selects the matching form, or asks which one if several match. |
"Use the Support Knowledge Base." | Uses the resource if it exists, or asks if it cannot identify it. |
The panel shows the agent's current configuration as the builder processes each request.
Instructions: the agent's behavior and communication guidelines. These stream into the panel as they are written.
Triggers: the events that start the agent.
Tools: the actions and integrations it can use.
Skills: specific tasks it can perform.
Knowledge Bases: the information it can reference.
Other elements fill in as the builder resolves them. You can edit supported fields inline rather than sending another request.
When you change a trigger, plugin, or Knowledge Base, the builder updates the instructions that depend on it and preserves everything else. For example, "Replace the current Knowledge Base with the Support Procedures Knowledge Base" swaps the Knowledge Base and adjusts the related instructions. Changing a trigger can update the instructions about when and why the agent runs. Smart cascades apply to triggers, plugins, and Knowledge Bases. Review the updated configuration before you publish.
Go to AI Agents > Agent Studio and open the Managed Agents tab.
Create a new Managed Agent, or open an existing one for editing.
In the composer, describe what to create or change, for example "Add a form submission trigger for the Demo Request form without changing the existing tools or Knowledge Base."
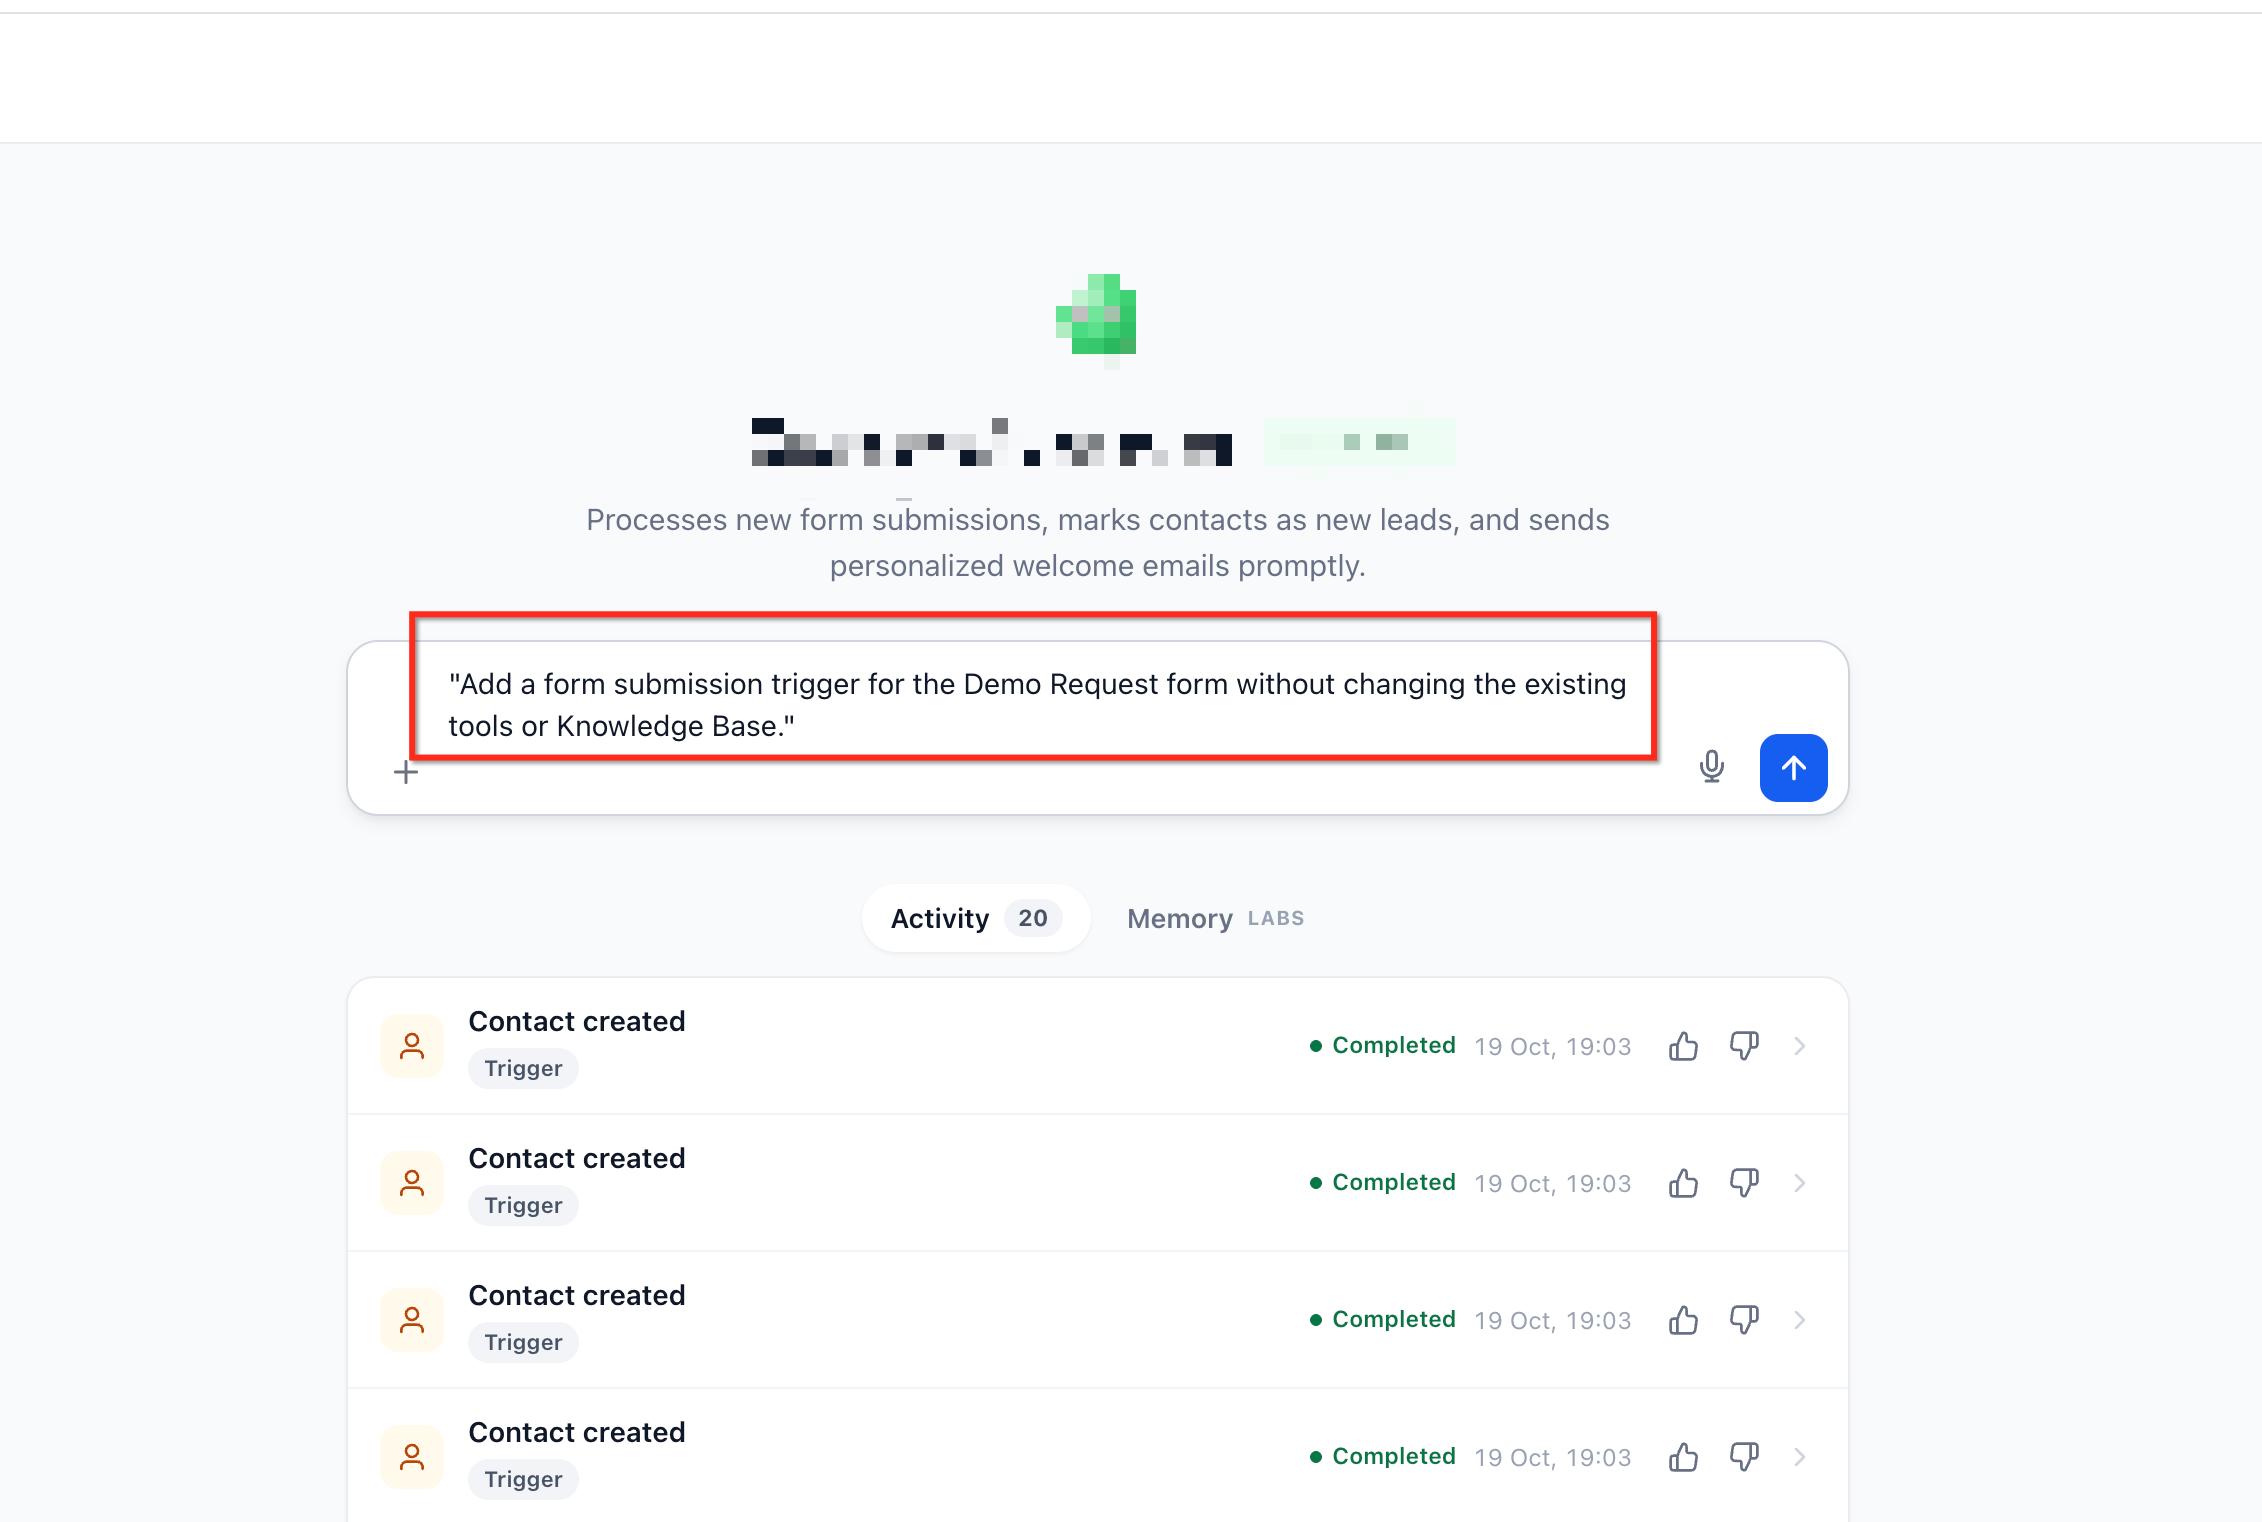
If the builder asks a clarifying question, select the right resource or provide the missing detail.
Watch the live configuration panel. Check the instructions, triggers, tools, skills, and Knowledge Bases, and adjust inline if needed.
Use Test to confirm the change works and that unrelated settings are unchanged.
Click Publish when the configuration is ready.
Instructions are the agent's job description. Write them so someone new could follow them.
State the role and the goal. "You are the consultation assistant for our practice. Your goal is to get interested leads booked for a consult."
List what the agent may do and what it may not. Name each CRM action allowed, and set boundaries such as requiring human approval for suggested changes.
Give a tone. Friendly, professional, concise.
Point to the source of truth. Name the Knowledge Base to use for pricing, hours, and policies.
Say what to do when unsure. For example, hand off to staff and create a task.
Add safety rules. Never provide medical advice, never diagnose, and never ask for or repeat health details.
Keep PHI out. Do not paste patient information into instructions.
Instructions for booking should state that the agent books only on a native Aesthetix CRM calendar.
Custom Values are reusable placeholders that pull information from your account into the agent's instructions. Instead of typing a booking link, email, or phone number, you insert a reference that fetches the current value each time the agent runs. You can change the stored value without republishing the agent.
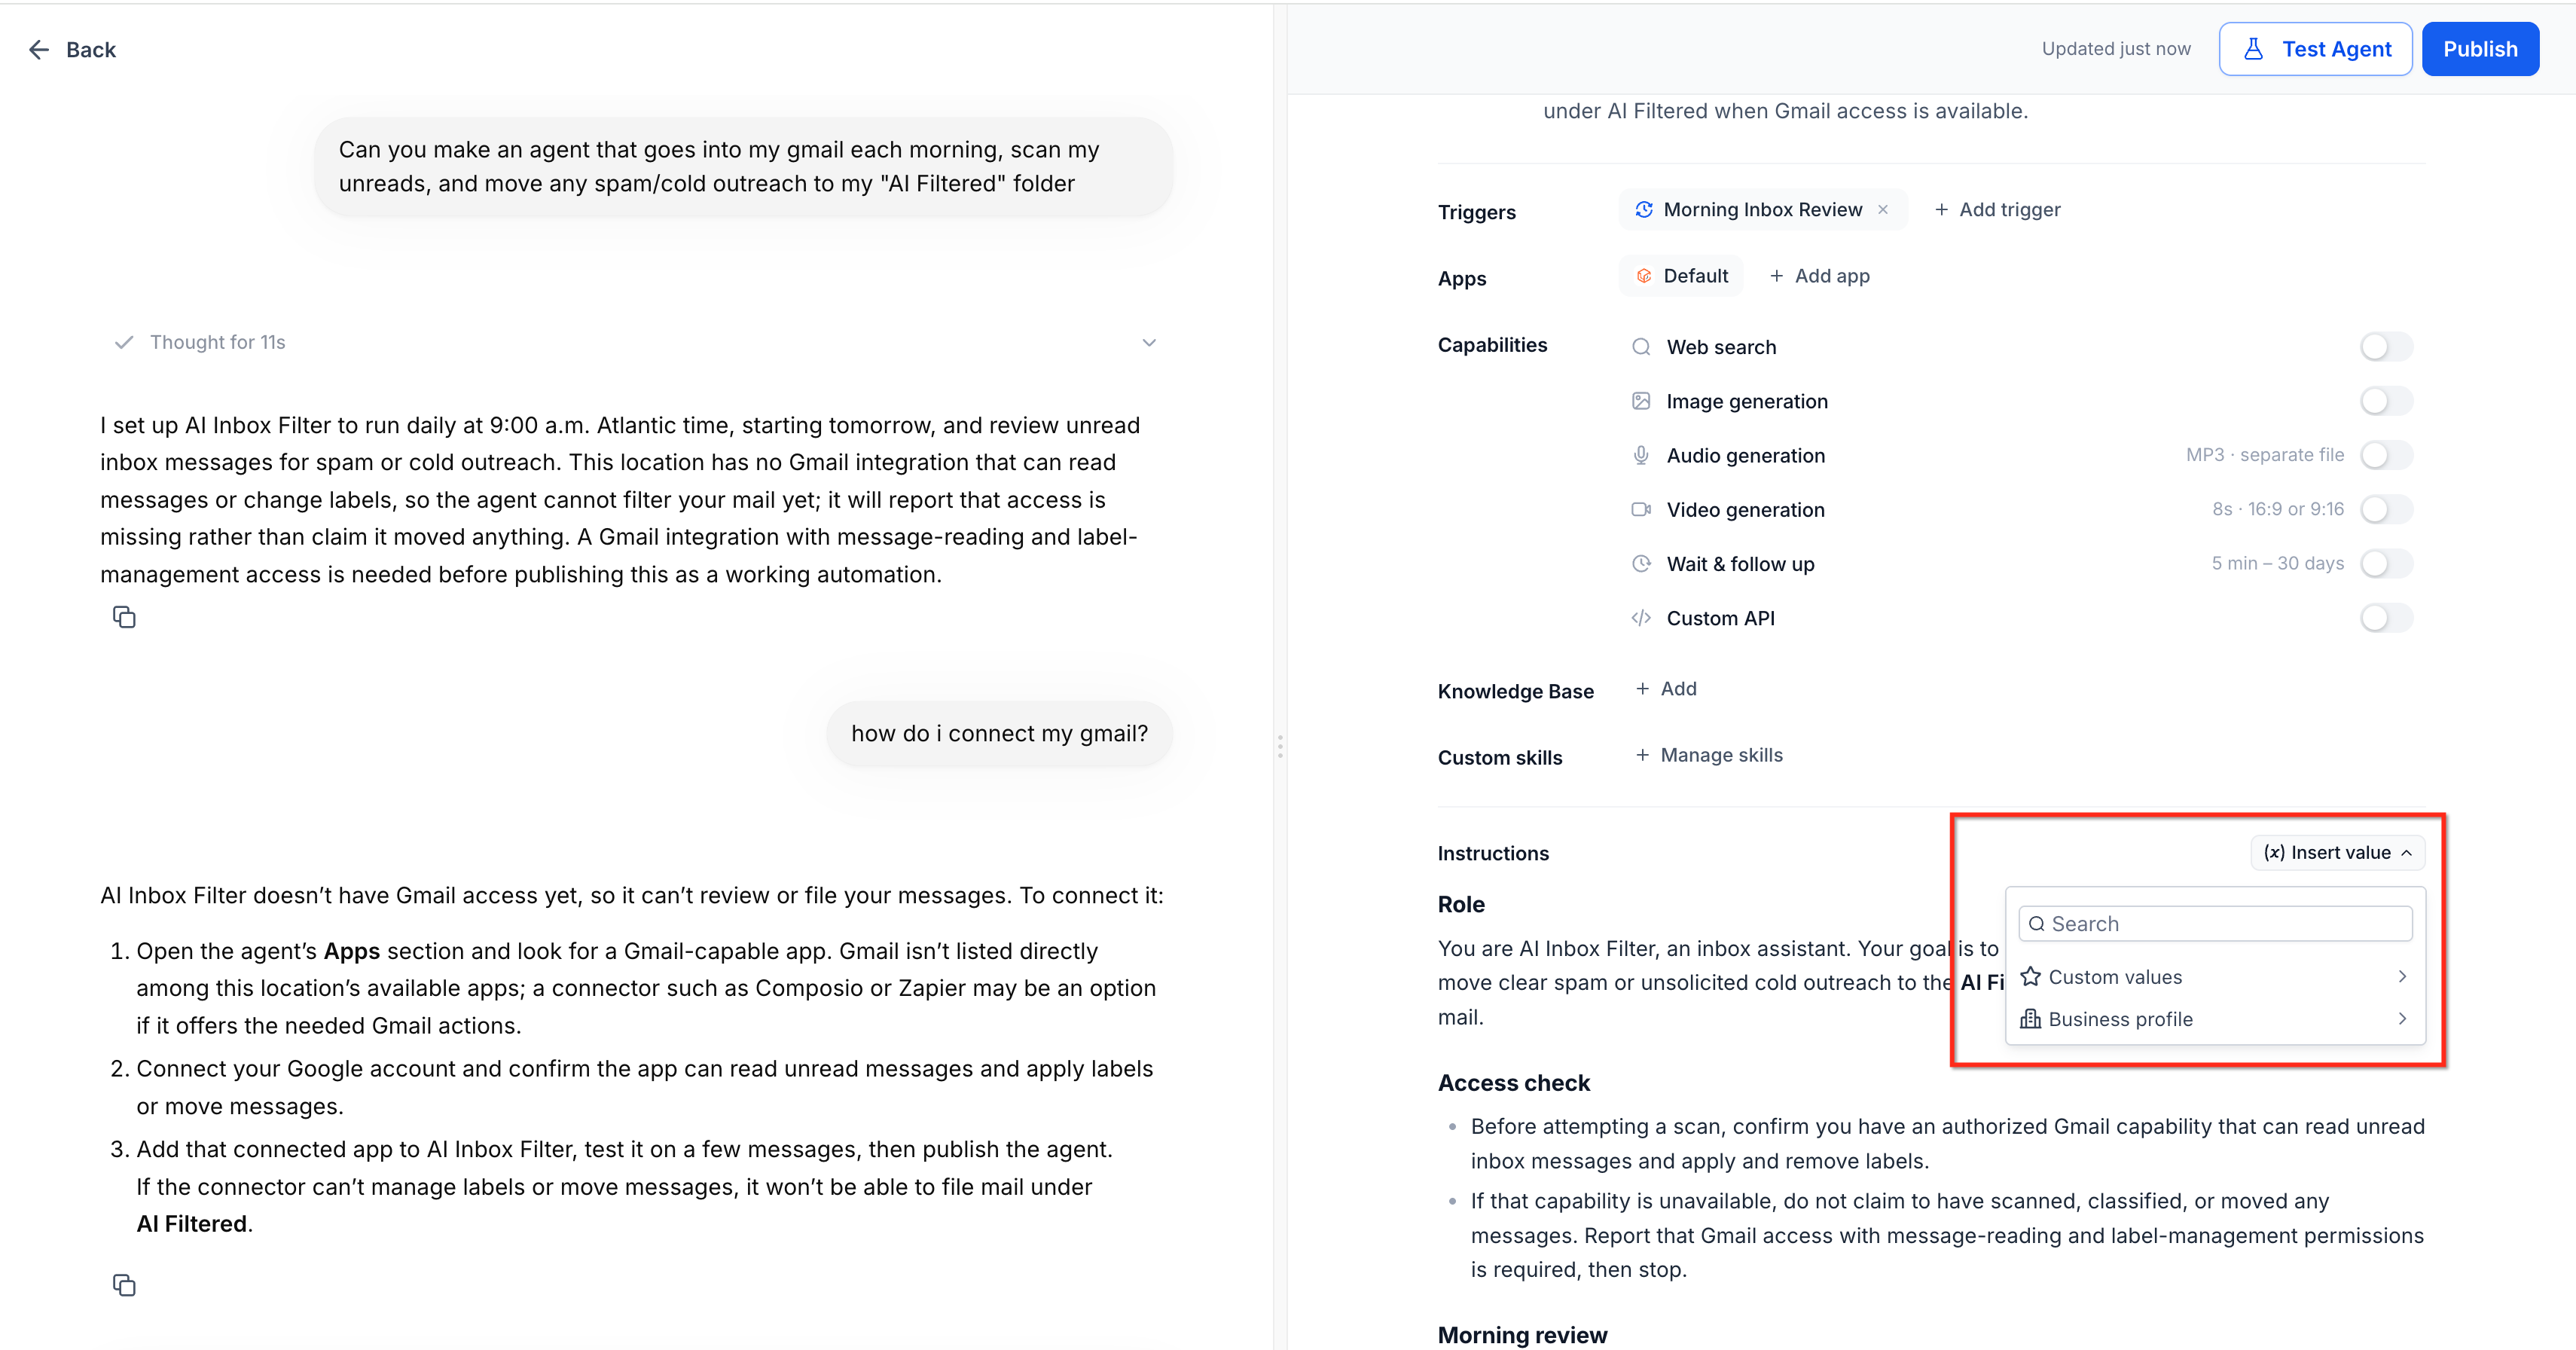
Click Insert value in the Instructions header to open two searchable categories:
Custom values: saved values such as booking links, support email addresses, and other reusable text. Manage them under Settings > Custom Values.
Business profile: business name, email, phone, website, address, owner details, and other supported information. Manage them under Settings > Business Profile.
Inserted values appear as pills showing their names. Hover over a Custom Value pill to see its stored value. The pill is placed at the cursor position. Date and time placeholders are not included in the Insert value picker.
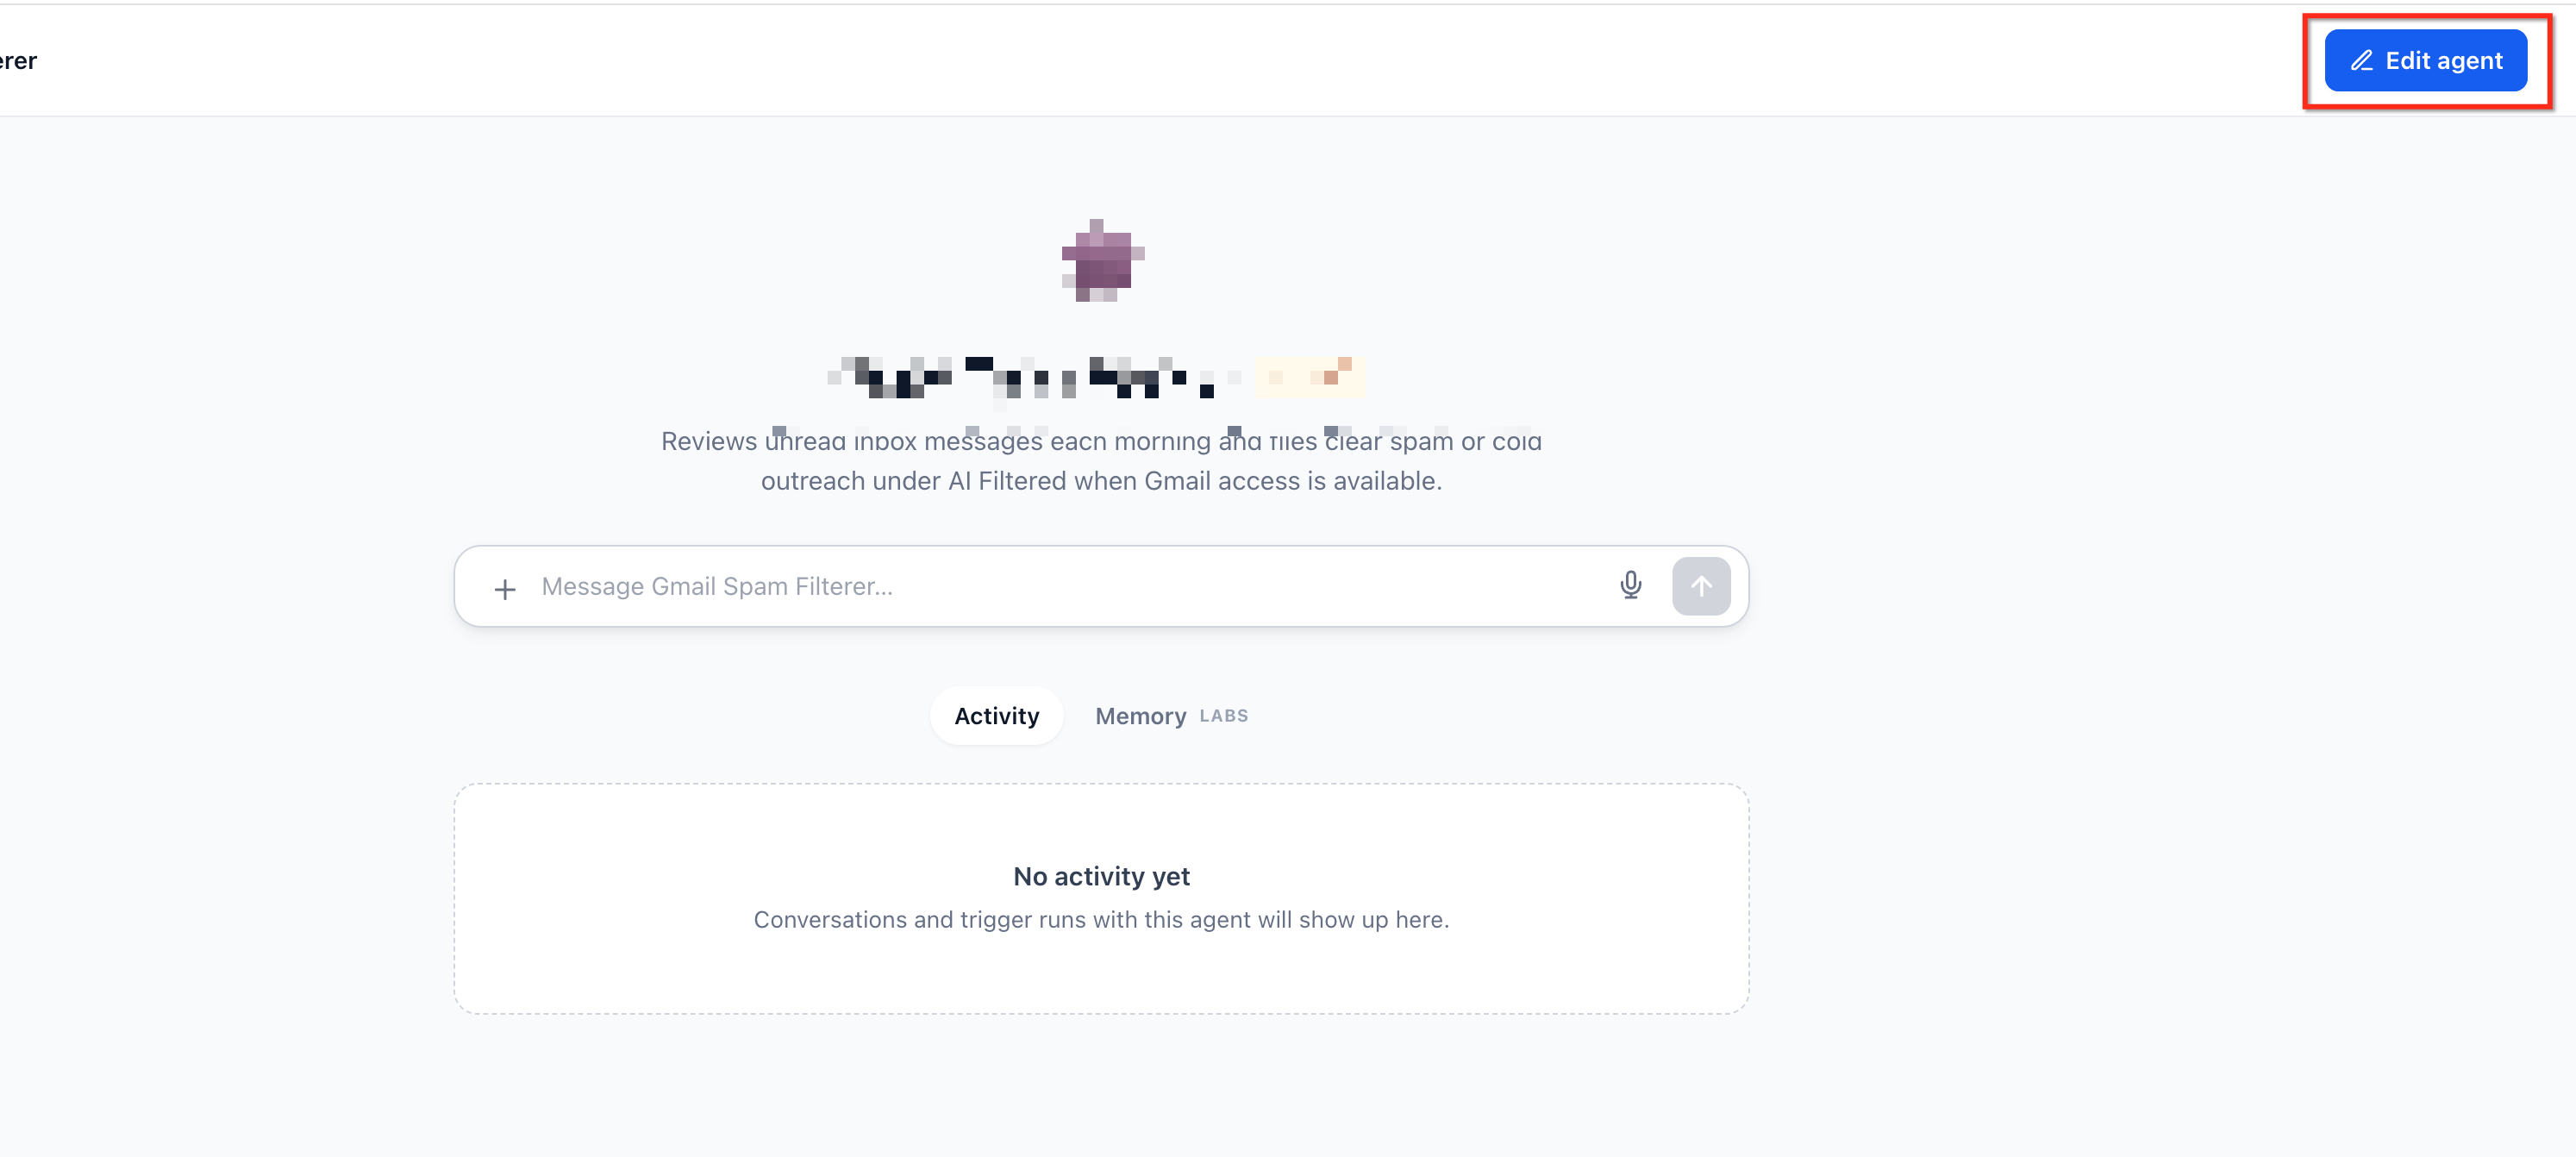
Go to AI Agents > Agent Studio and open a Managed Agent (click Edit Agent on a saved agent to change it).
In the Instructions editor, place the cursor where the value should appear.
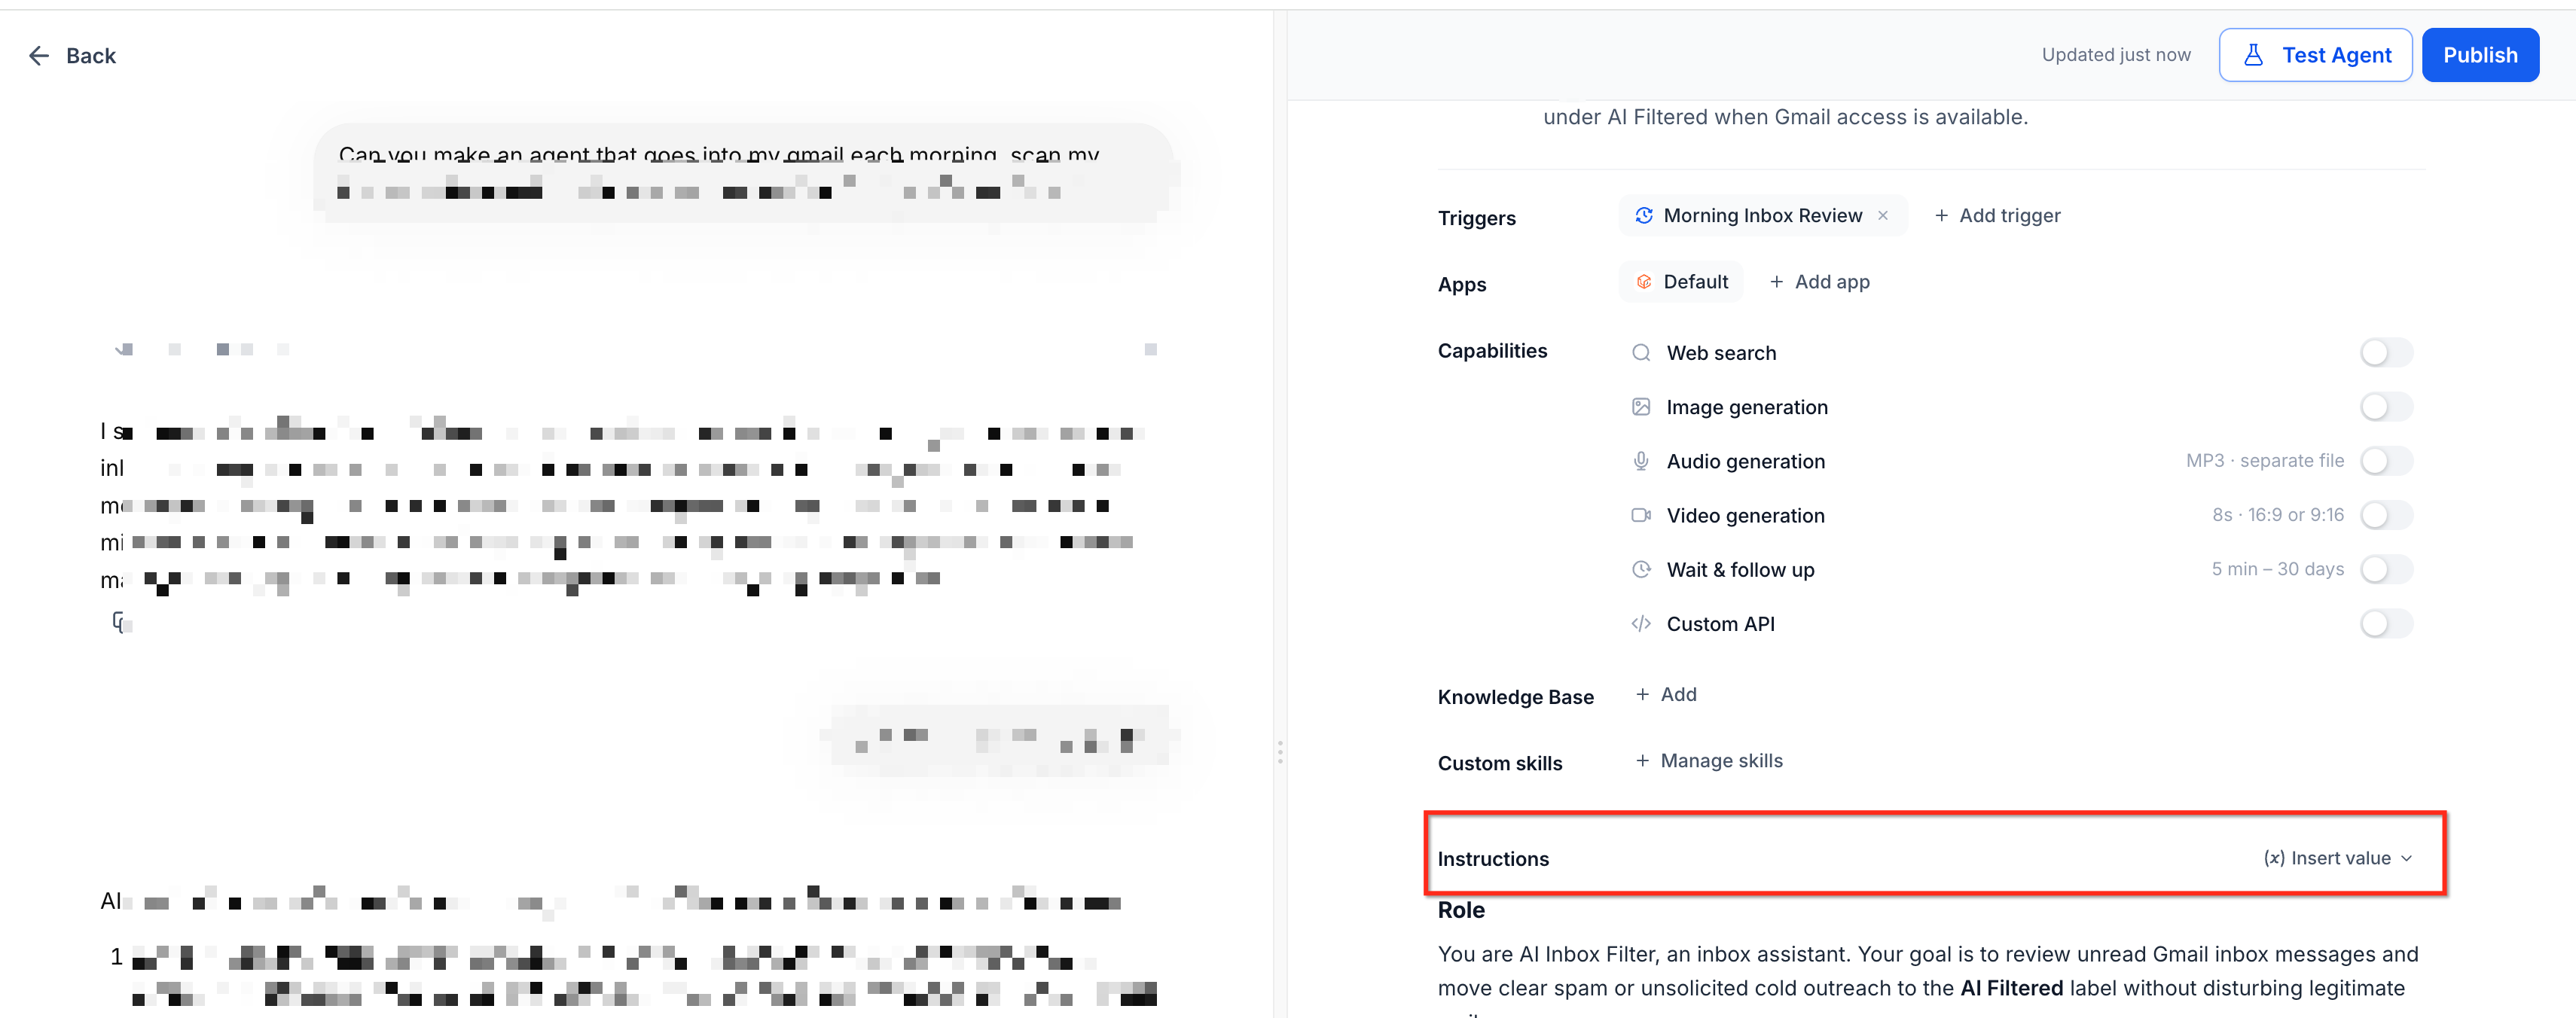
Click Insert value.
Search under Custom values or Business profile and select the value.
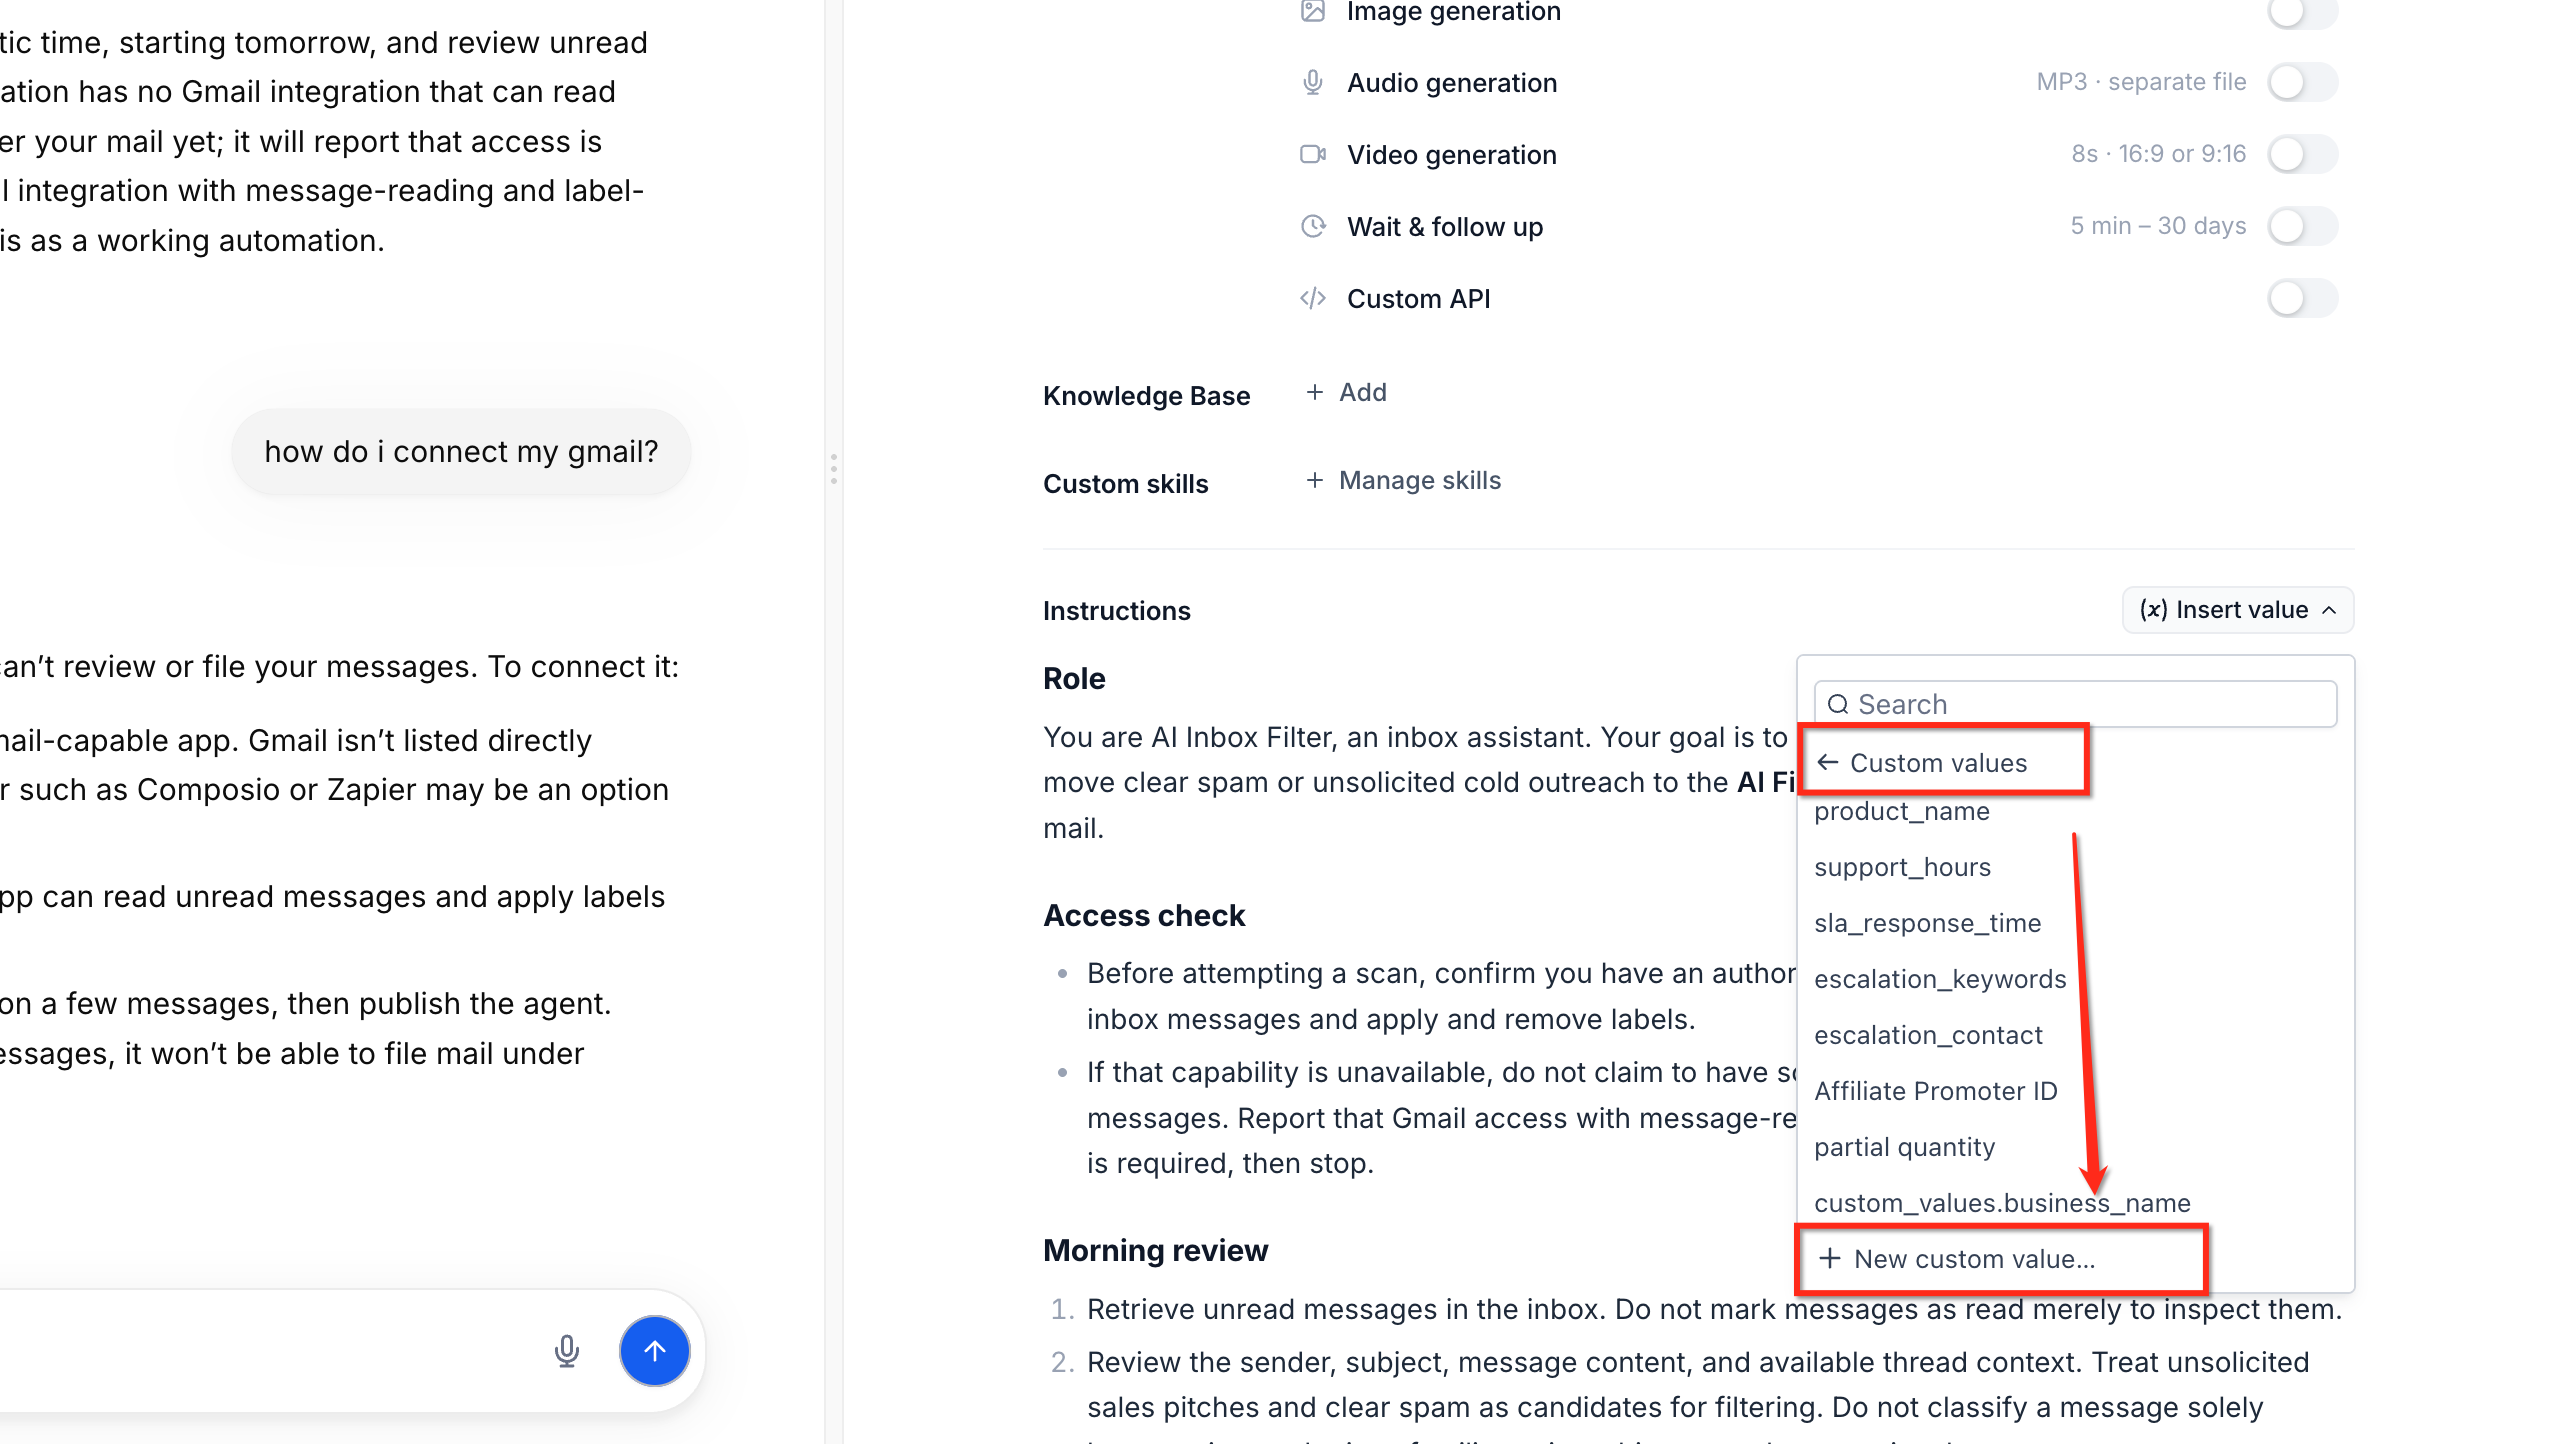
To create a new one, select New custom value.... This creates and inserts it in one step without leaving Agent Studio.
Review the pills and resolve any Not set in this account warning.
Click Publish.
If you use a custom navigation menu, Custom Values appear under the CRM tab.
Managed Agents check that every referenced Custom Value exists in your account.
A value that does not exist displays a Not set warning, and fields appear below the instructions where you can enter the missing information.
When you click Publish with missing values, Set custom values to publish opens. Enter the values and click Save and publish to create them and publish in one step.
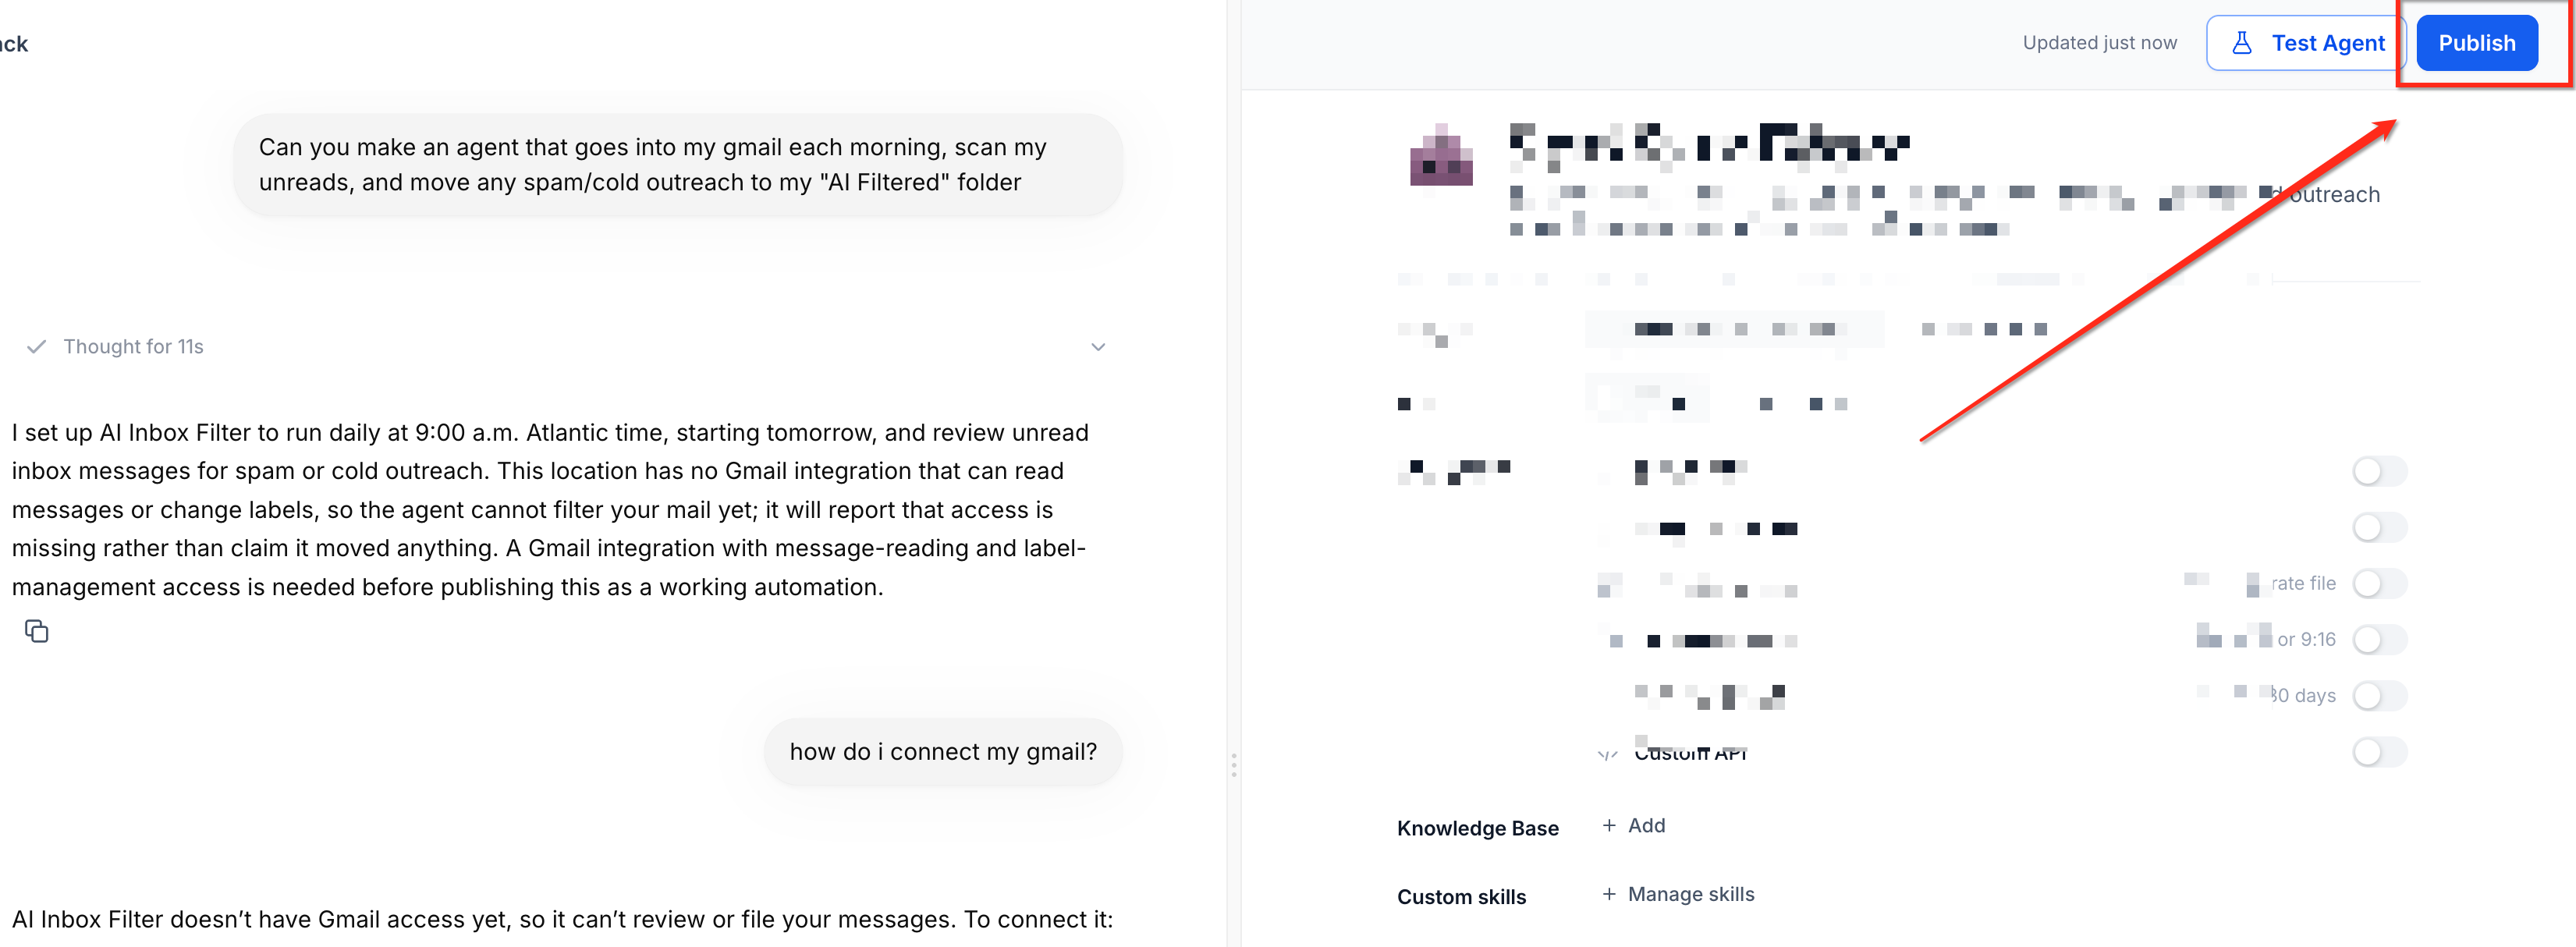
Publishing through the API also checks for missing values and returns an error that names each one.
Text meant to stay literal, such as Dear {{name}},, is preserved and not removed.
When you ask the builder to use a saved link or business detail, it looks for a Custom Value with a matching name. If one exists, it uses it. If not, it uses the details you gave or asks you. It never invents a Custom Value that does not exist.
The agent reads the current stored values every time it runs. To change one, edit it under Settings > Custom Values (or Settings > Business Profile), save, and the next run uses the new value. Republishing is not required.
Standard Custom Values and Business Profile details cost the same as typing the same text directly, and support prompt caching. Date and time placeholders change on every run, can increase costs, and are not in the Insert value picker.
Turn on the media types the agent needs, then choose their settings.
Open the agent and select Capabilities.
Turn on Image generation, Audio generation, or Video generation.
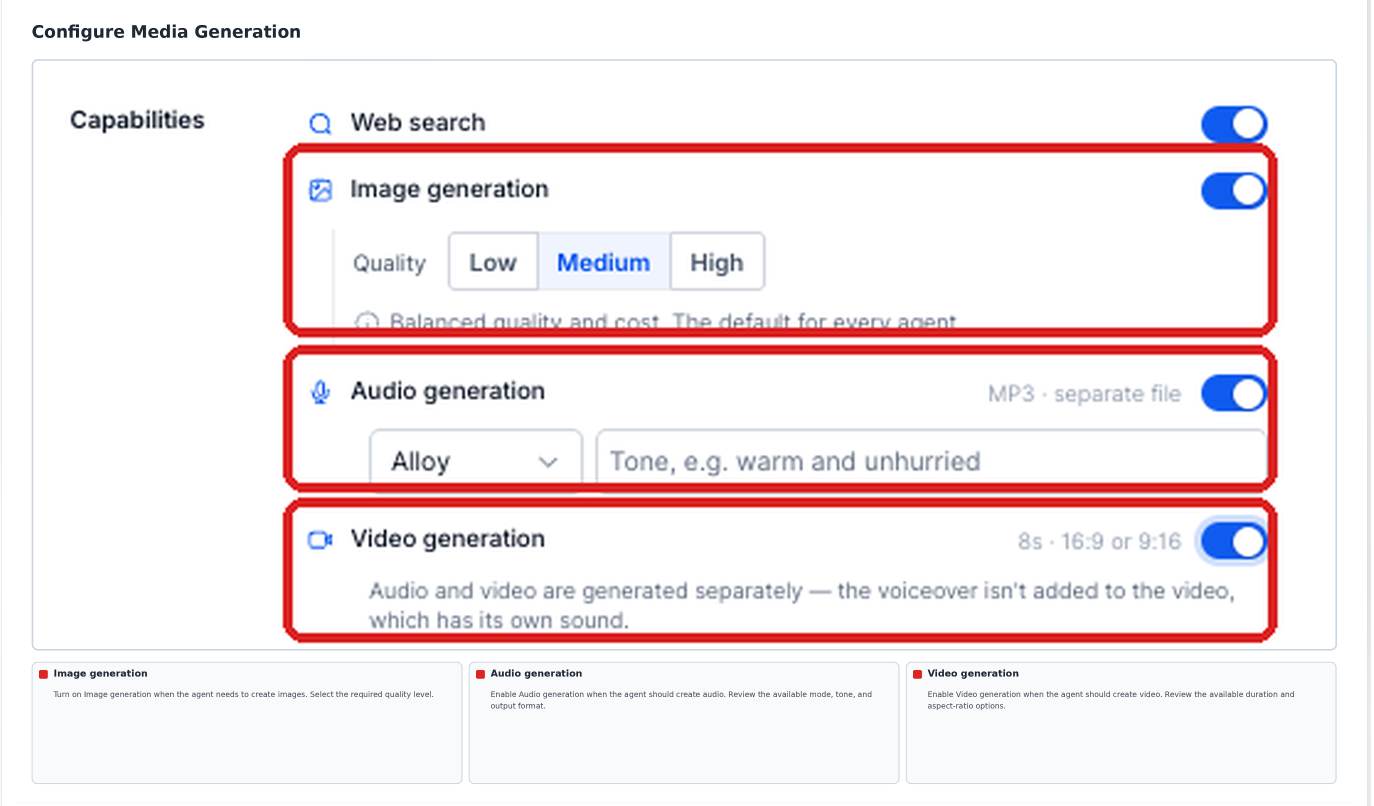
Choose Low, Medium, or High quality. Medium is the default.
Say the shape in your prompt. Supported ratios are 1:1, 4:5, 2:3, 3:2, 9:16, 3:4, 4:3, 5:4, 16:9, and 21:9. You can also say vertical, widescreen, square, or banner. With no shape, the agent makes a square image.
Each new request creates a new image unless you explicitly ask to edit an existing one.
To edit an existing PNG, describe the change. Stay in the same conversation to keep refining the most recently edited image without supplying it again.
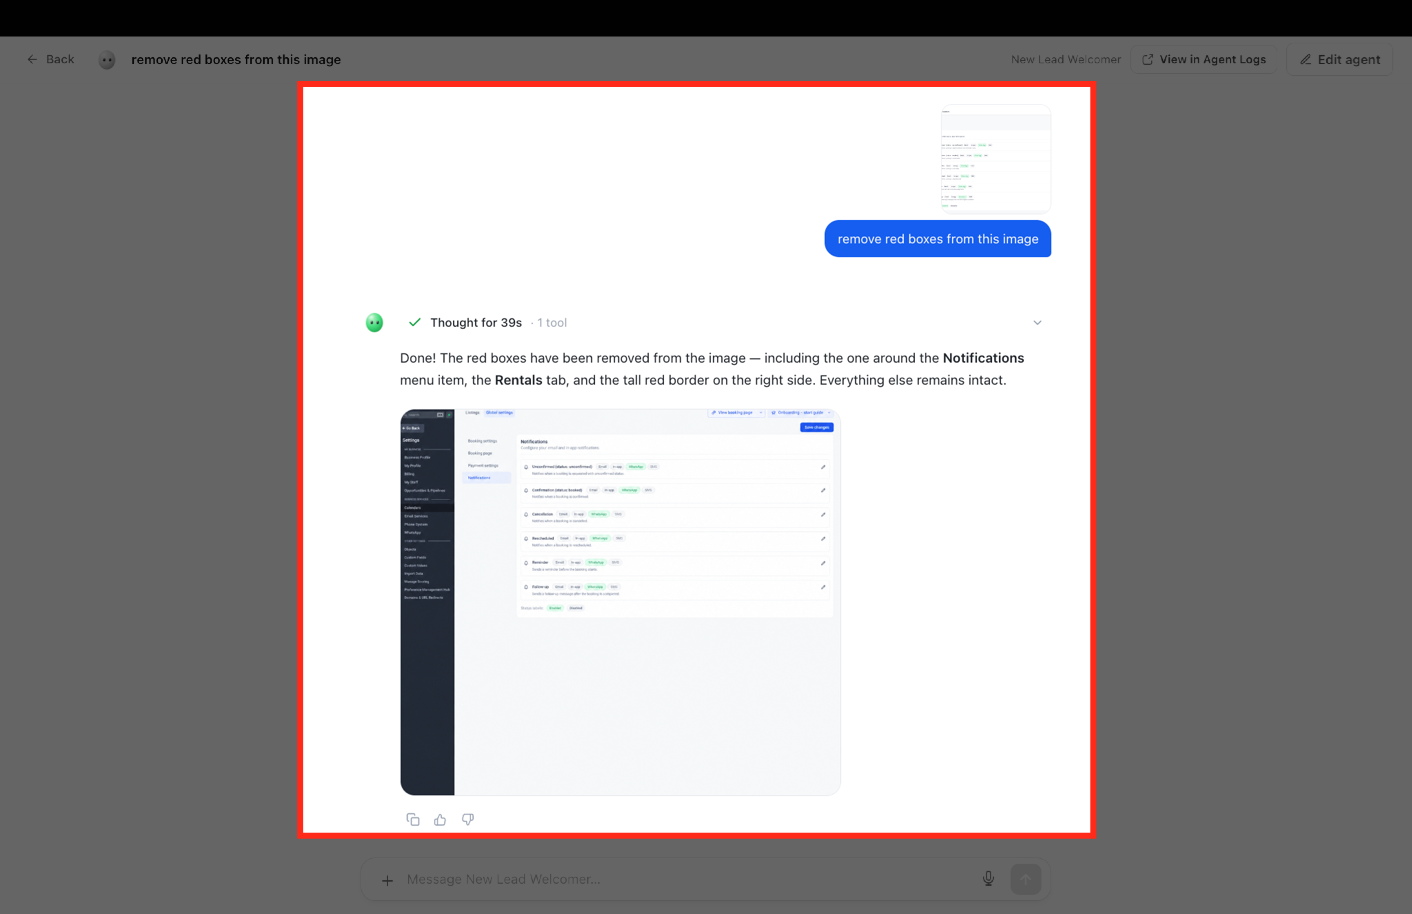
Generated and edited images stay available in the conversation for later requests.
Example: Generate a 9:16 vertical image of a spa treatment room for an Instagram story.
Pick a supported voice and use the Tone field to describe how it should sound. Write the source text in the language the agent should speak.
Managed Agents generate eight-second videos in a 16:9 aspect ratio. Audio and video are generated separately. All generated media is saved to Media Storage for reuse. When media generation is on, triggered runs can create media even when no chat session is active.
Generated media must never include patient photos or PHI. Follow your practice's before and after photo consent rules.
Open the agent's testing panel and run realistic requests that use its Knowledge Base, CRM actions, and instructions.
For web-search answers, check the Sources and open the citations.
If media generation is on, test a sample asset.
Refine through chat-based editing and test again.
Change the status from Draft to Published to make the agent available for live events.
After launch, watch agent performance and activity, keep Knowledge Bases current, and use the Knowledge Base Retrieval Tester to confirm important content can be retrieved.
See the Managed Agents Testing, Publishing, Unpublishing and the Activity Feed guide for the full process.
How is a Managed Agent different from a Flow Agent?
A Managed Agent is created through conversational instructions. A Flow Agent uses a visual canvas that you wire by hand. Use Managed Agents for new agents. Existing Flow Agents keep running and stay available for editing.
Do I need to turn on the guided builder improvements?
No. Targeted edits, clarifying questions, the live panel, and smart cascades are available on Managed Agents with no extra setup.
Can I ask the builder a question without changing my agent?
Yes. The builder tells questions apart from change requests and answers without editing the configuration.
Will changing a trigger or Knowledge Base overwrite all my instructions?
No. Smart cascades update only the related instructions and keep everything else.
Do I need to republish after I change a Custom Value?
No. The agent reads the stored value on its next run.
What happens if a form or resource the builder needs cannot be found?
The builder asks you to clarify instead of using an invalid or invented resource. Check that the resource exists in your account.
What happens if my Knowledge Base changes after I publish?
The agent can use the updated content on its next run once it is indexed. Check important changes with the Knowledge Base Retrieval Tester.
How do I stop an agent from making unwanted CRM changes?
Write explicit boundaries in the instructions, such as requiring human approval for suggested changes, then test and review the agent's actions before publishing.
Can the agent book appointments on my EMR calendar?
No. AI appointment booking works only with native Aesthetix CRM calendars.
Can I put patient details in the instructions or Knowledge Base?
No. AI features are not approved for PHI. Use general practice information only.
