The Facebook Lead Ads integration captures leads directly from Facebook and Instagram ads and syncs them automatically into Aesthetix CRM. Instead of exporting leads by hand, contact details flow straight into your account so your team can follow up fast. For a practice running lead ads across more than one location page, you can connect multiple Facebook pages and keep clear attribution for where each lead came from.
Benefits of the integration include:
Automated lead capture, with no manual data entry from Facebook.
Improved lead quality, since every lead lands in one place with full context.
Enhanced lead management and a complete view of each contact's interactions.
Efficient follow-up, so you can prioritize based on lead quality and behavior.
Higher conversions and ROI from your Facebook ad spend.
Connecting multiple Facebook pages also unlocks lead sync across all connected pages with source attribution, conversations across pages using Facebook and Instagram chat, workflow automation across pages, and review management across pages.
Before connecting, make sure the following are in place. Most connection problems trace back to missing access or permissions.
Access: you must have access to the Facebook page you are creating lead ads for. See Facebook's help on how to give someone a role on your page.
Ownership: the same user should own both the page and the ad account. For business-level integrations, the page owner and the ad account owner must match.
Permissions: you should have admin or full-control (Manage) permissions on the page, and appropriate ad account permissions. The person connecting the page to Aesthetix CRM must be an admin of the Facebook Business page and have Lead Access permission, which is a Facebook requirement for reading lead data.
Ad account check: confirm the page is connected to the correct ad account in your Ad Account settings.
Lead access: confirm you have lead access. When you assign lead access on Facebook, you will see LeadConnector in the list of CRM systems. LeadConnector is our underlying integration provider, so this entry is expected and safe; assign it so leads can flow into Aesthetix CRM.
To confirm the connecting user is present in your business, open Business Manager, then Users, then People. If the person has been added, they appear in the center of the page.
When you create custom fields in Aesthetix CRM for use with a Facebook Lead Ad, use one of the supported field types so mapping works correctly:
TEXT
LARGE_TEXT
NUMERICAL
PHONE
MONETARY
SINGLE_OPTIONS
DATE
DROPDOWN (single)
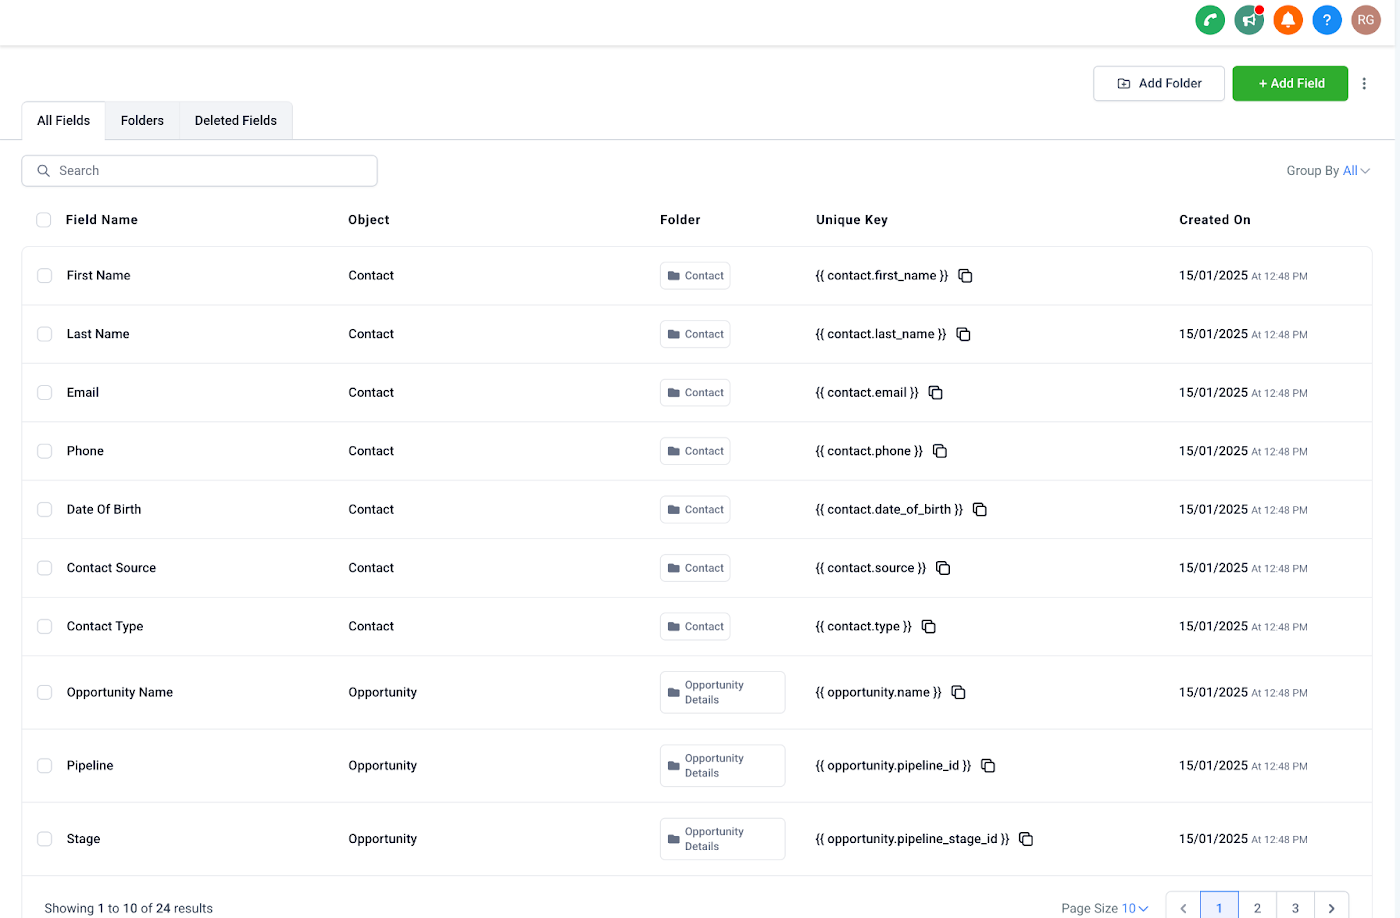
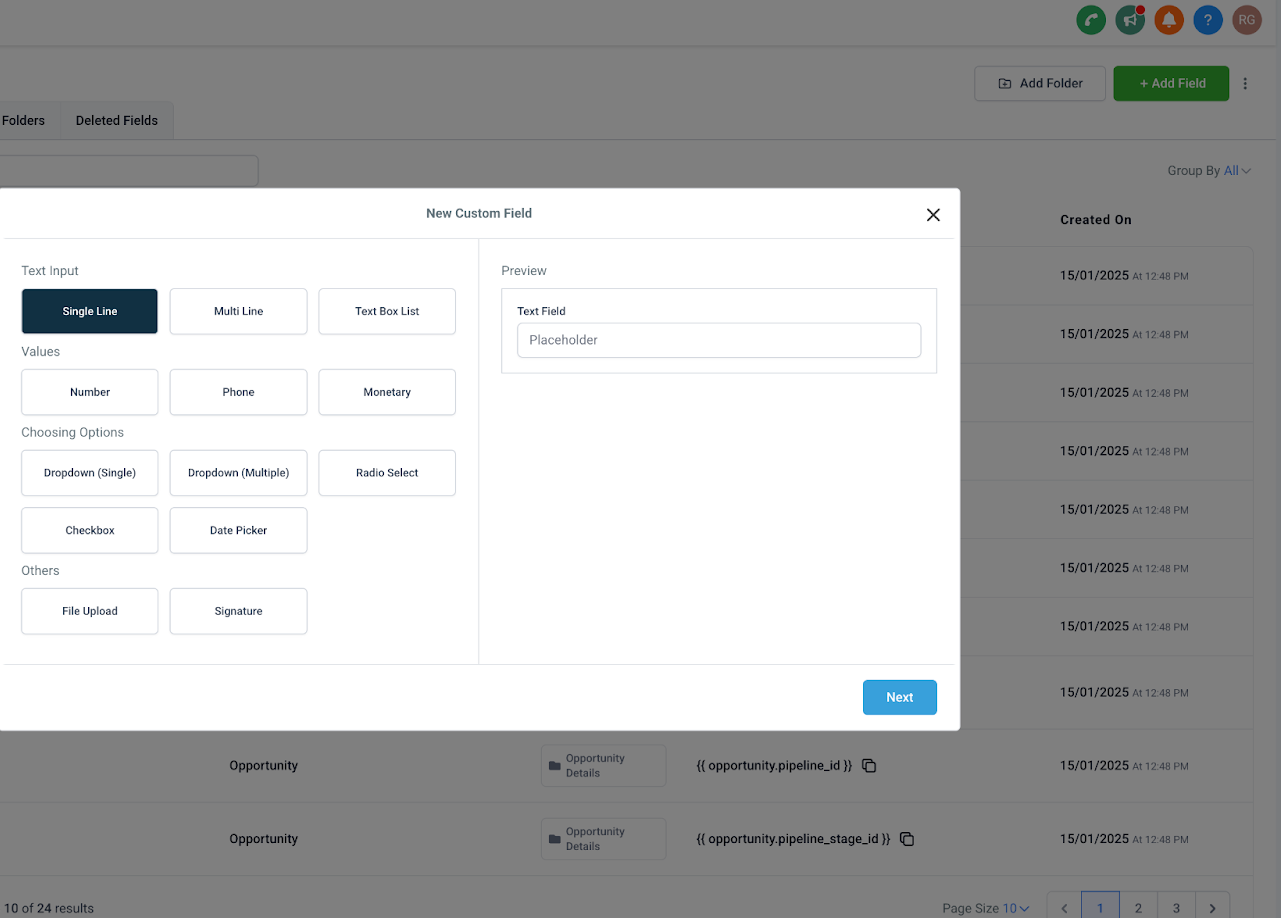
We recommend not renaming field names in your Facebook form settings after the fact, since changed names can break the mapping on the Aesthetix CRM side.
Only the user who integrates the Facebook page can select which pages to connect, and that user needs full access to the page in Facebook.
In your account, go to Settings, then Integrations.
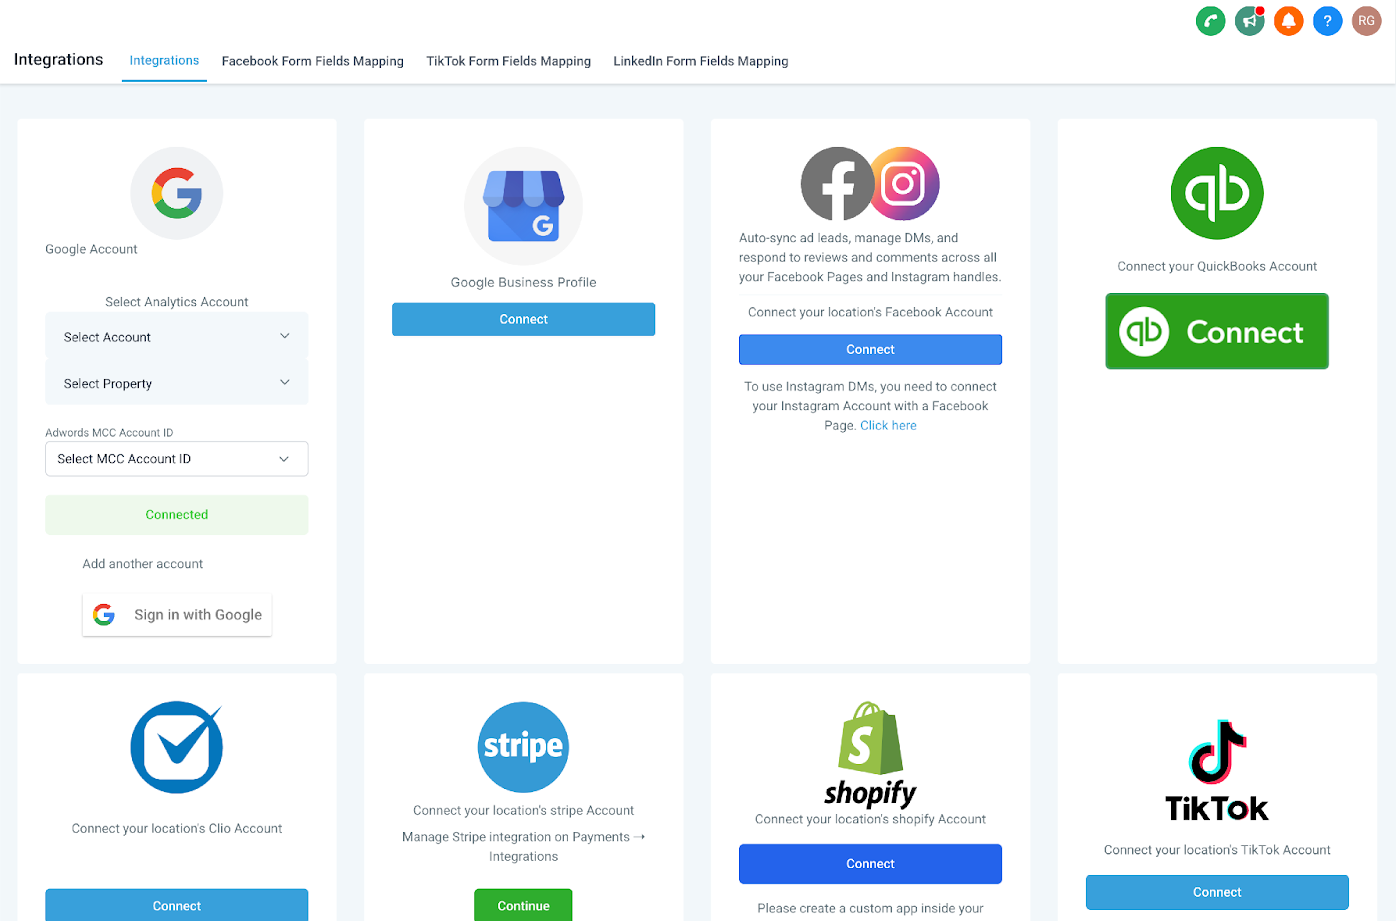
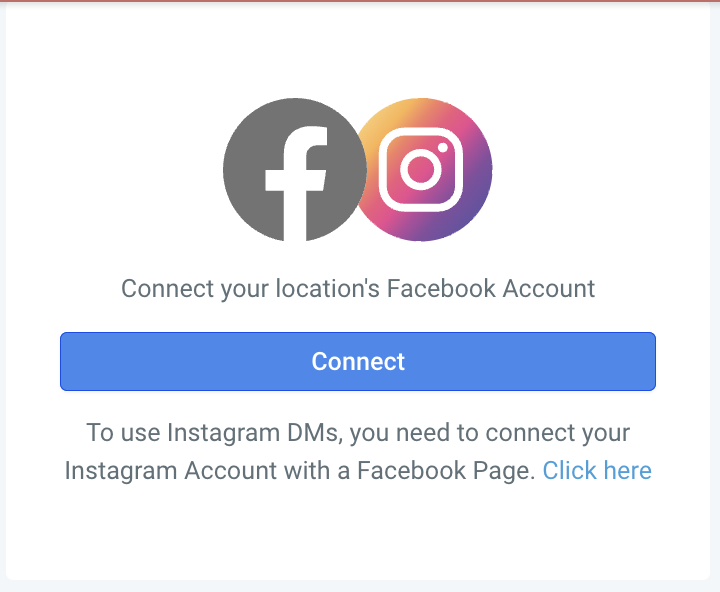
Click Connect under Facebook.
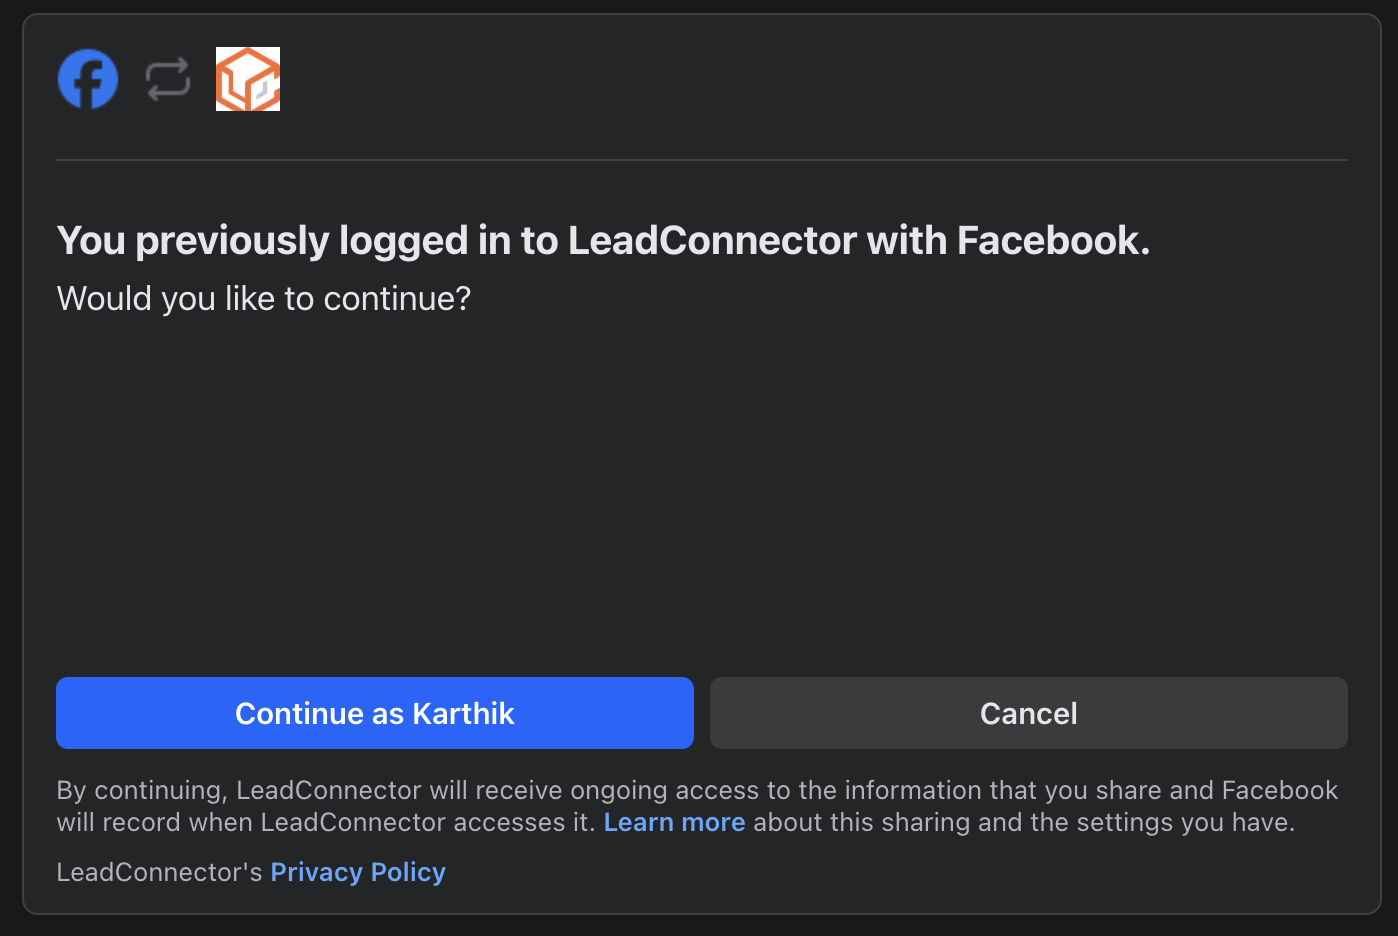
Log in to your Facebook account and allow the necessary permissions. During login you may see a consent screen mentioning LeadConnector, which is our underlying advertising and lead provider and is expected and safe to approve.

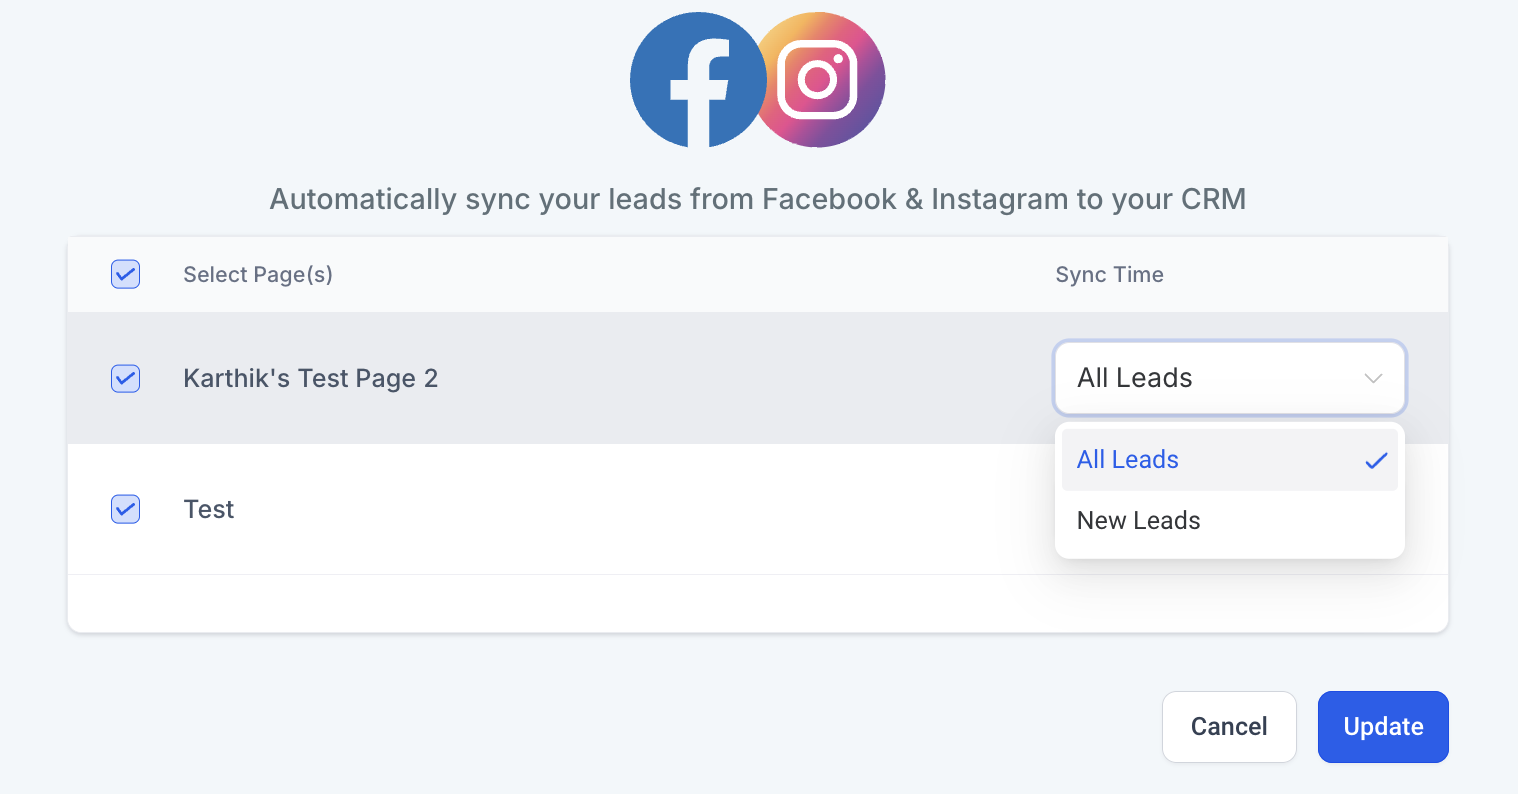
Select the pages under the account that you want to connect to Aesthetix CRM. If the multiple-pages feature is enabled in Labs, you can select more than one page here, and you may choose to sync new leads only or also sync the previous 90 days of leads.
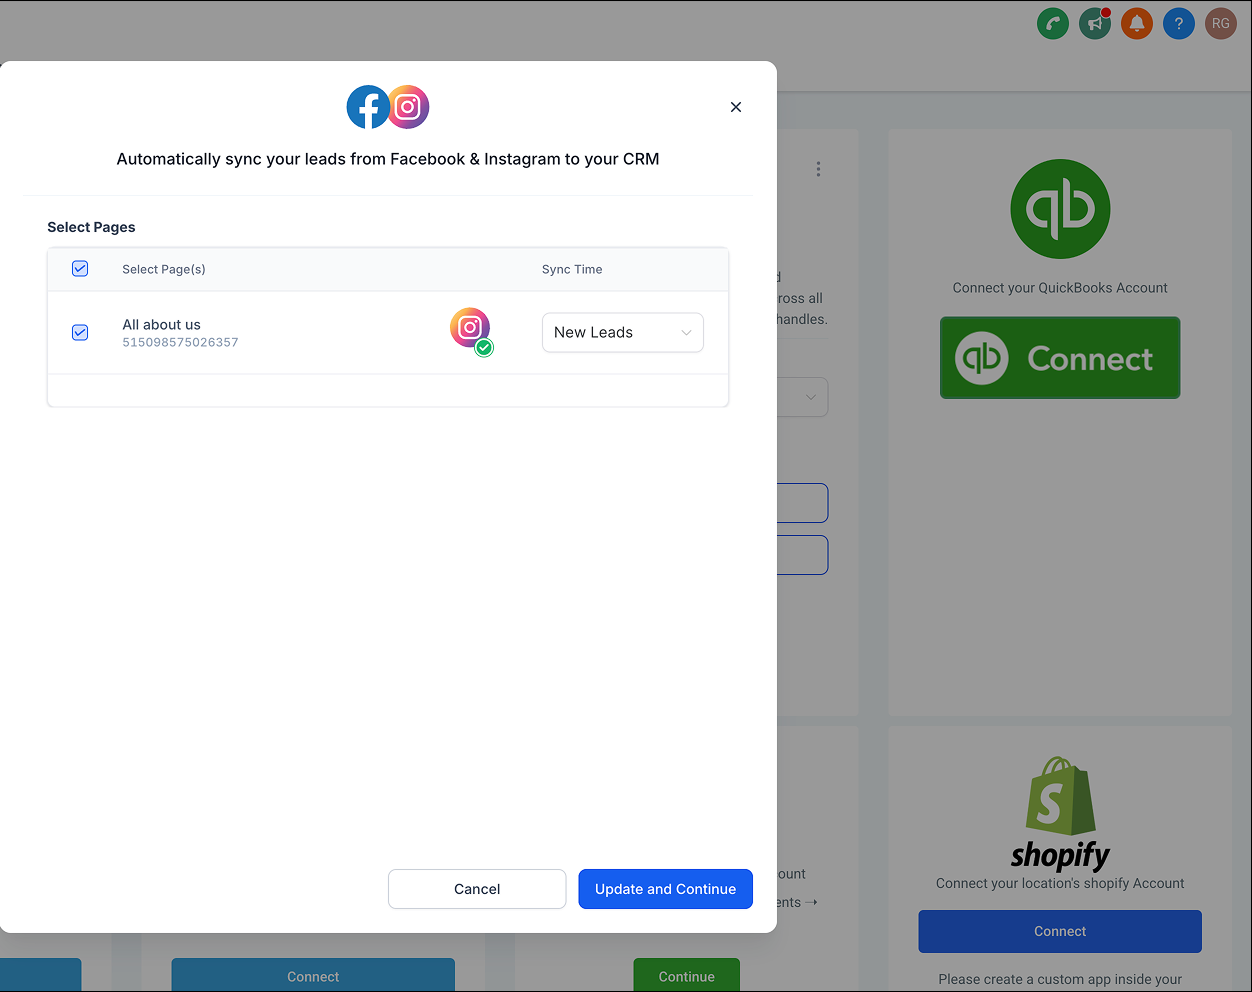
Once your pages are connected, set up the form and map its fields to your Aesthetix CRM fields, and you are ready to go.
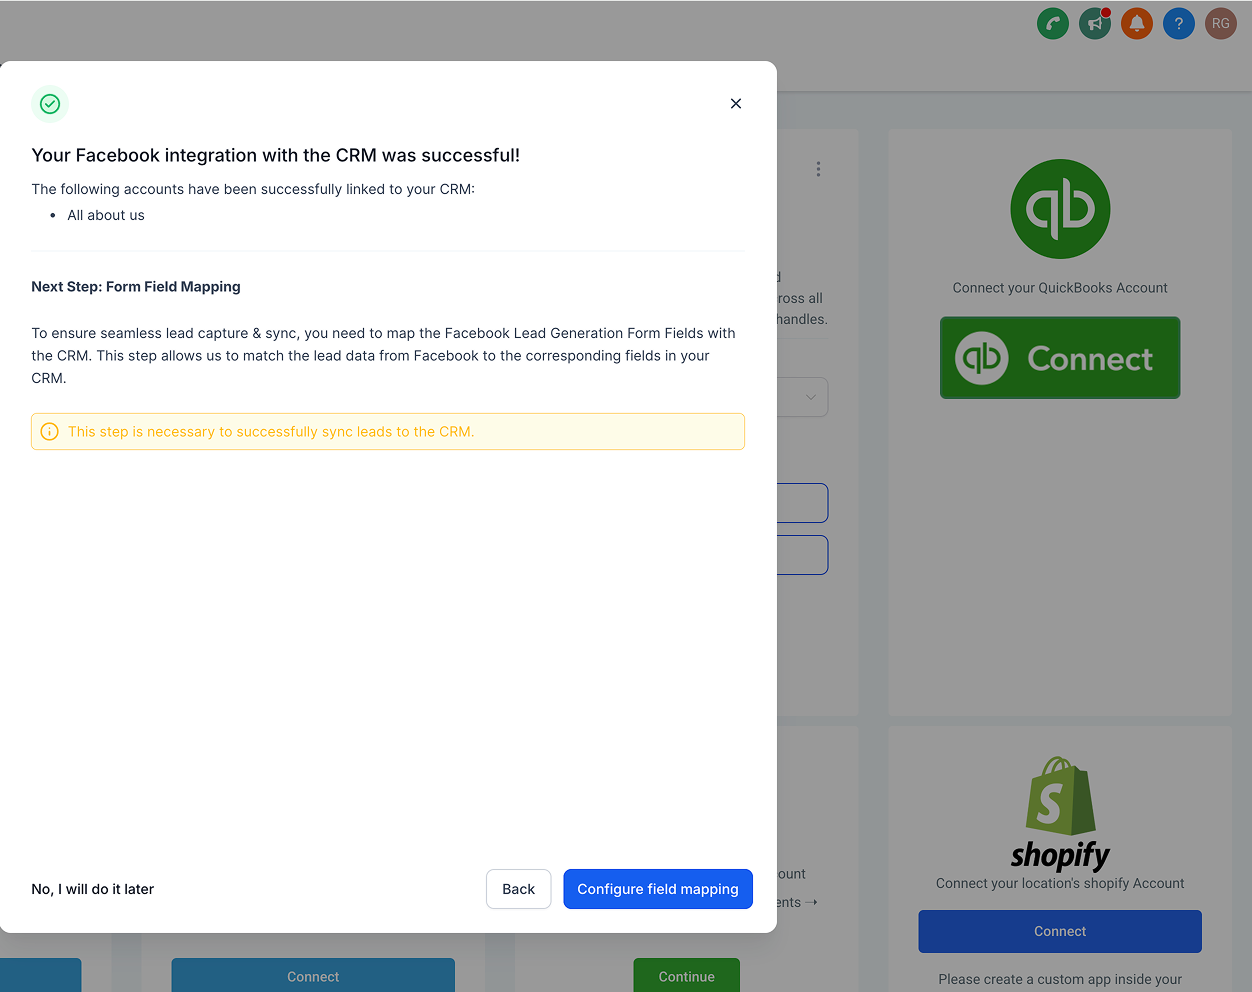
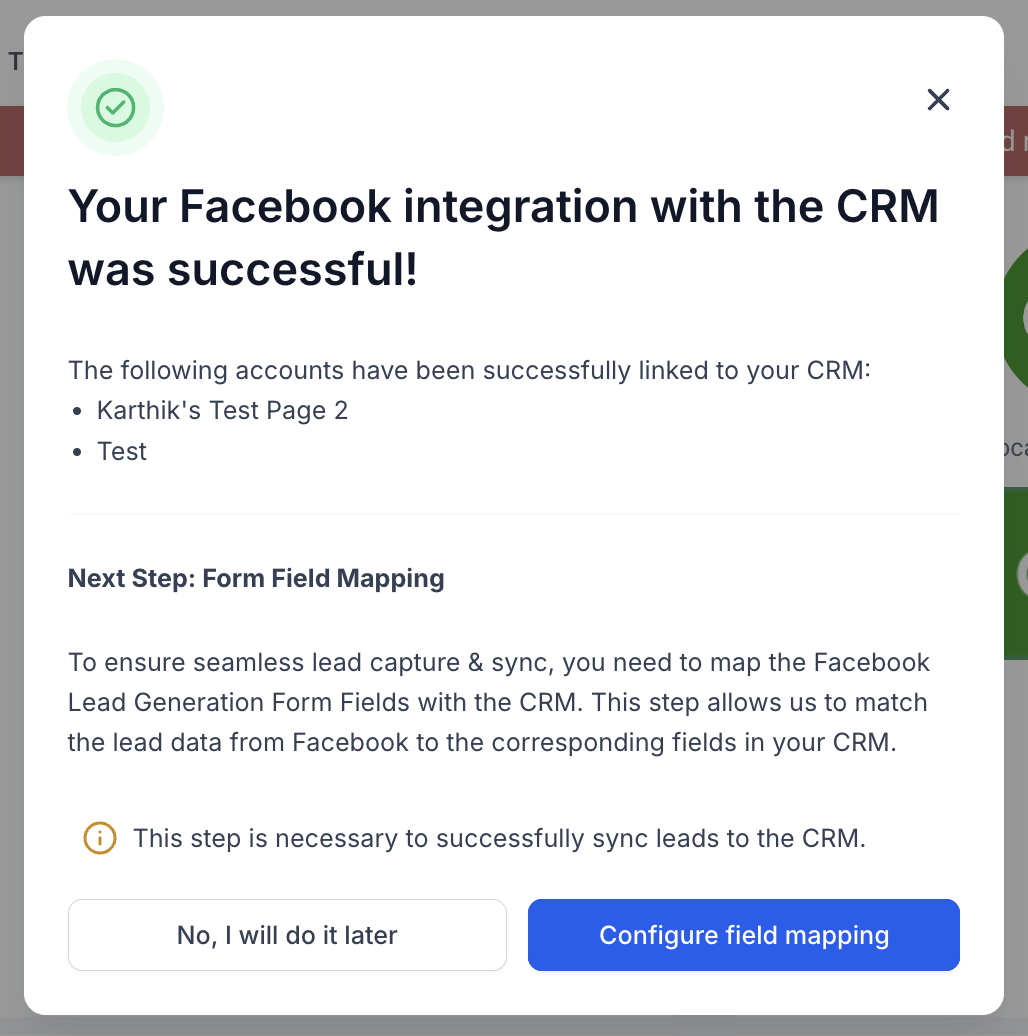
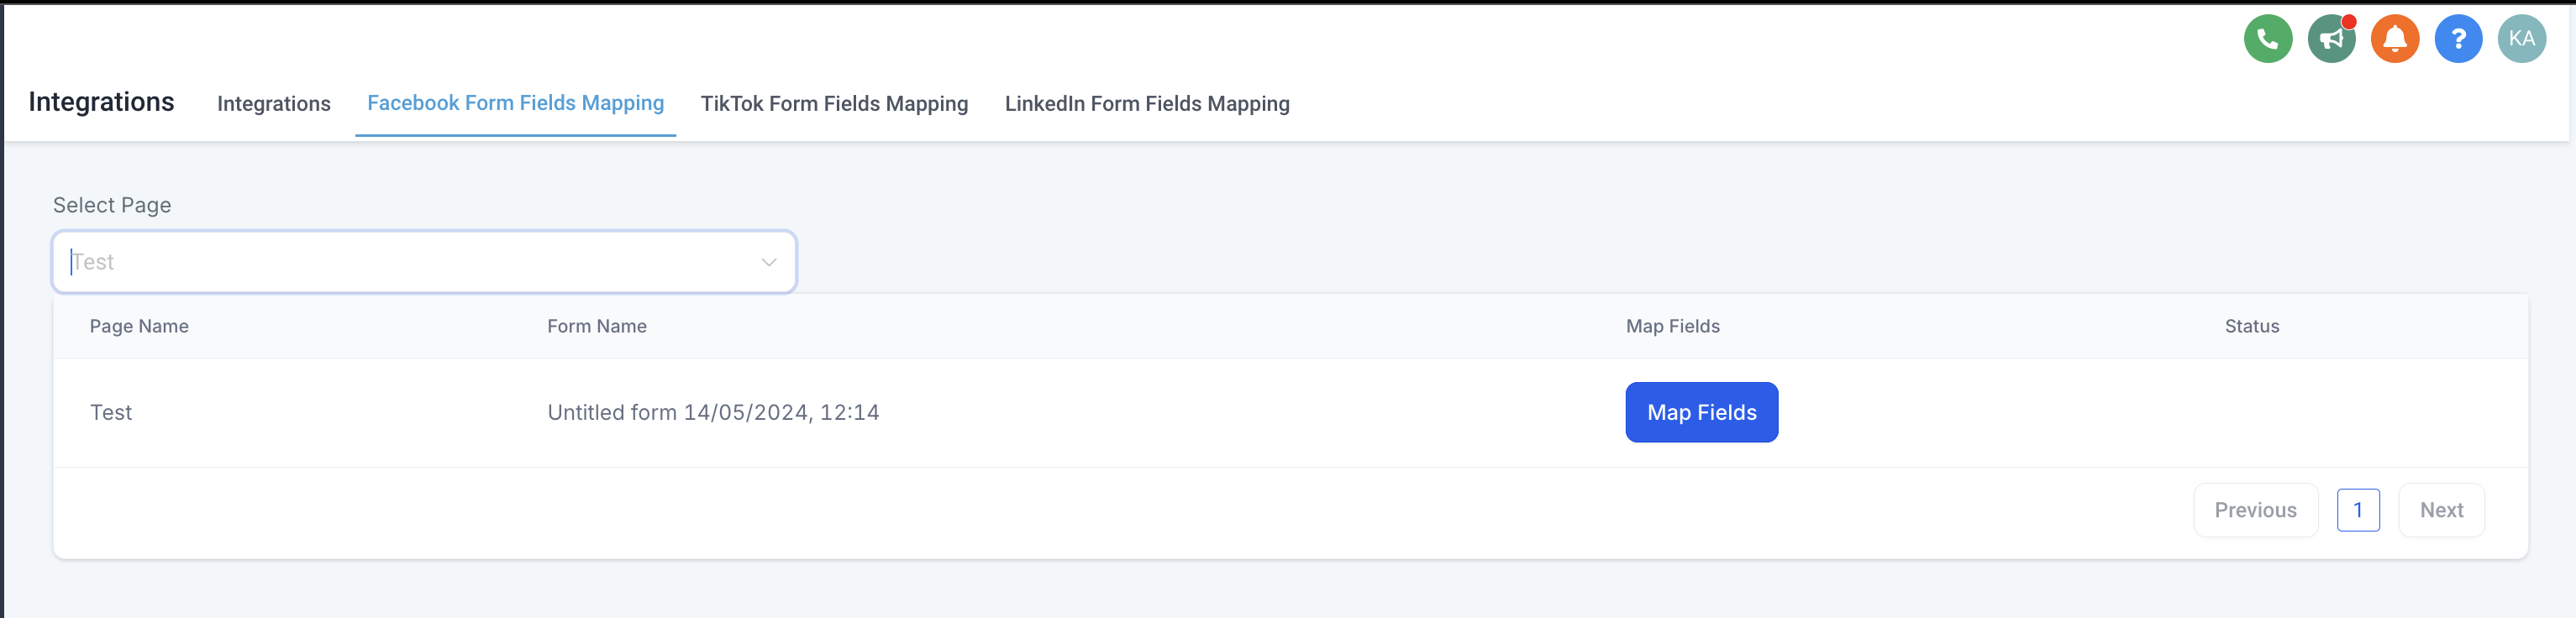
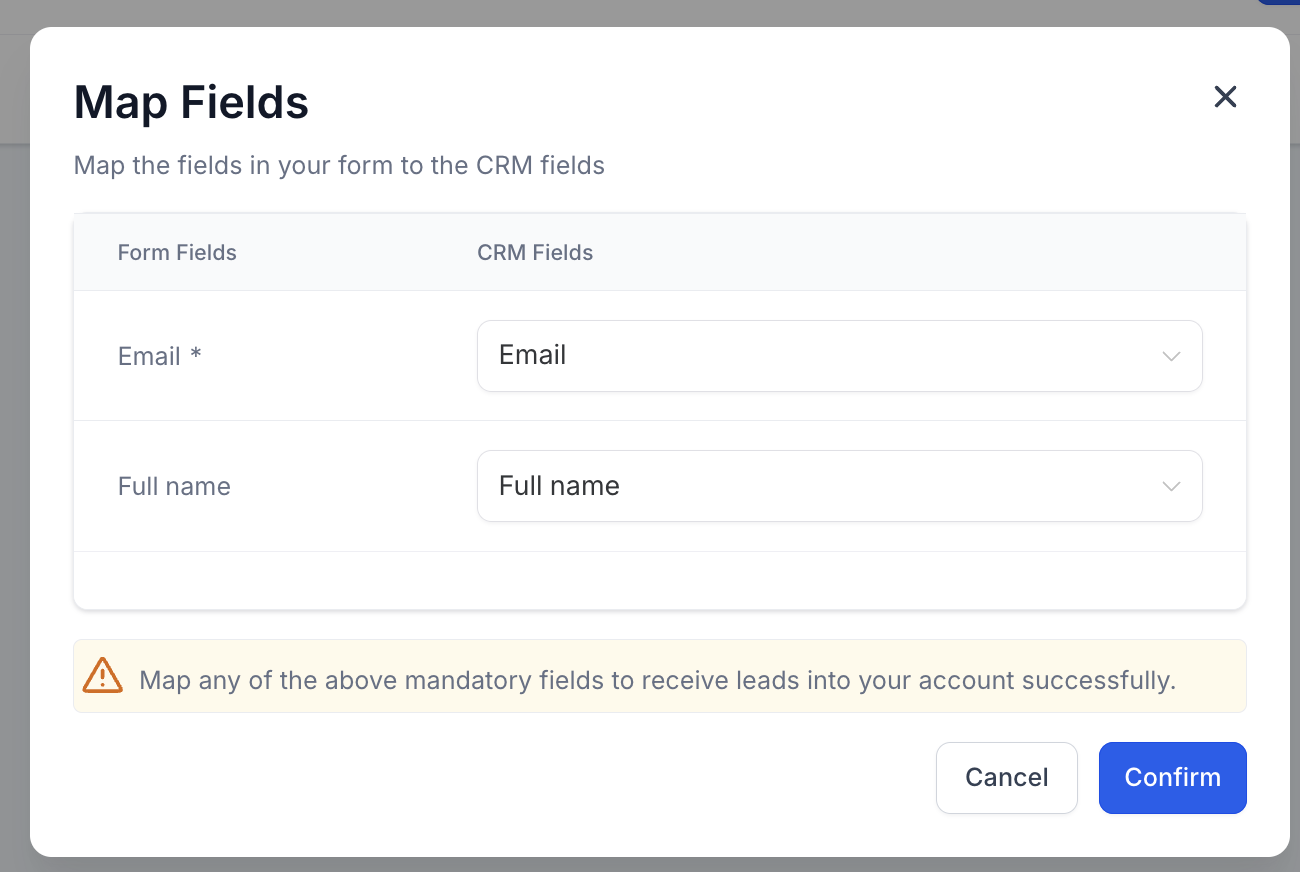
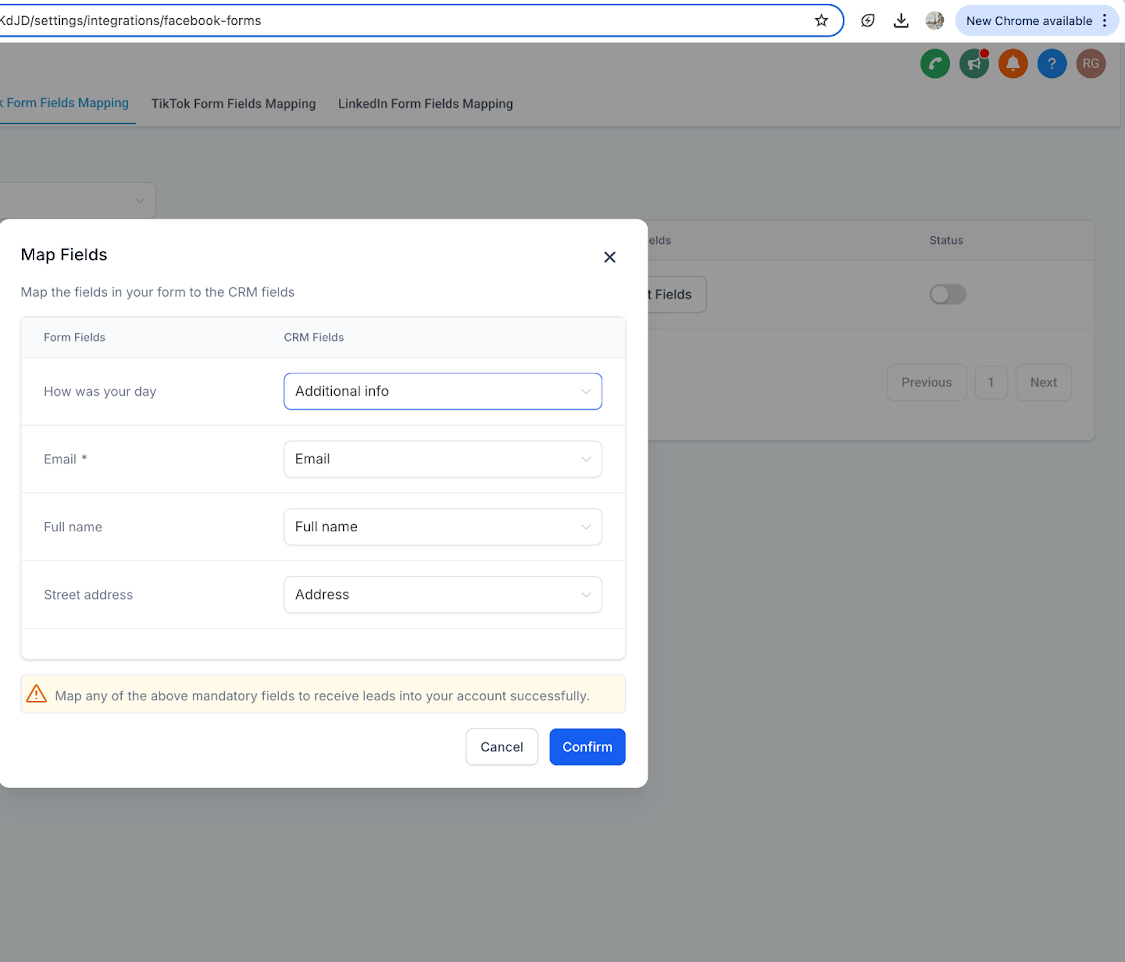
For detailed field mapping, see the "Facebook Lead Ads Field Mapping" guide. To route new leads into nurtures or notify your team when a form is submitted, use the Facebook Lead Form Submitted trigger in Workflows.
To change which pages are linked:
Go to Settings, then Integrations.
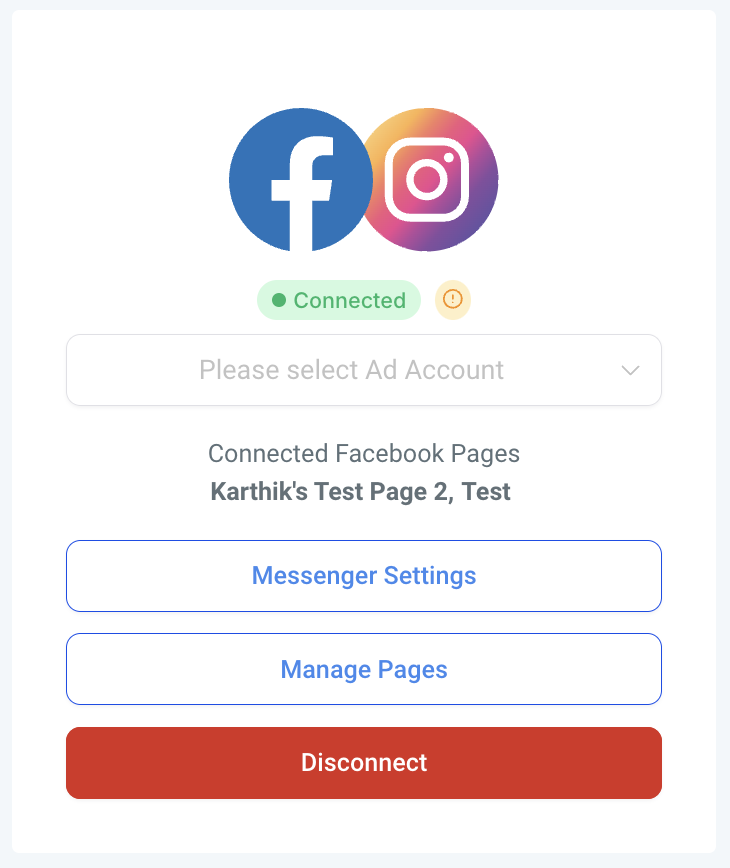
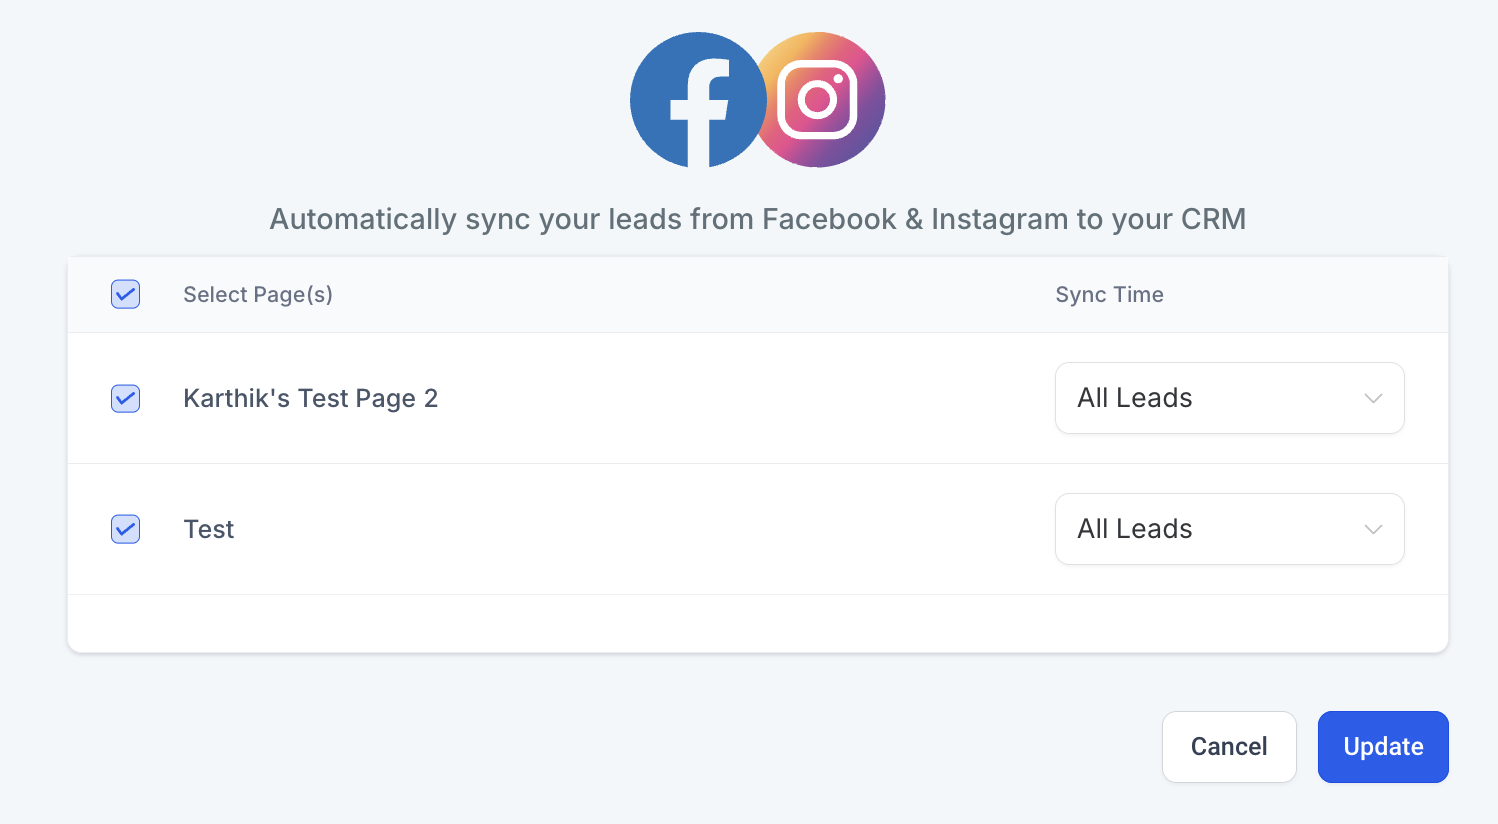
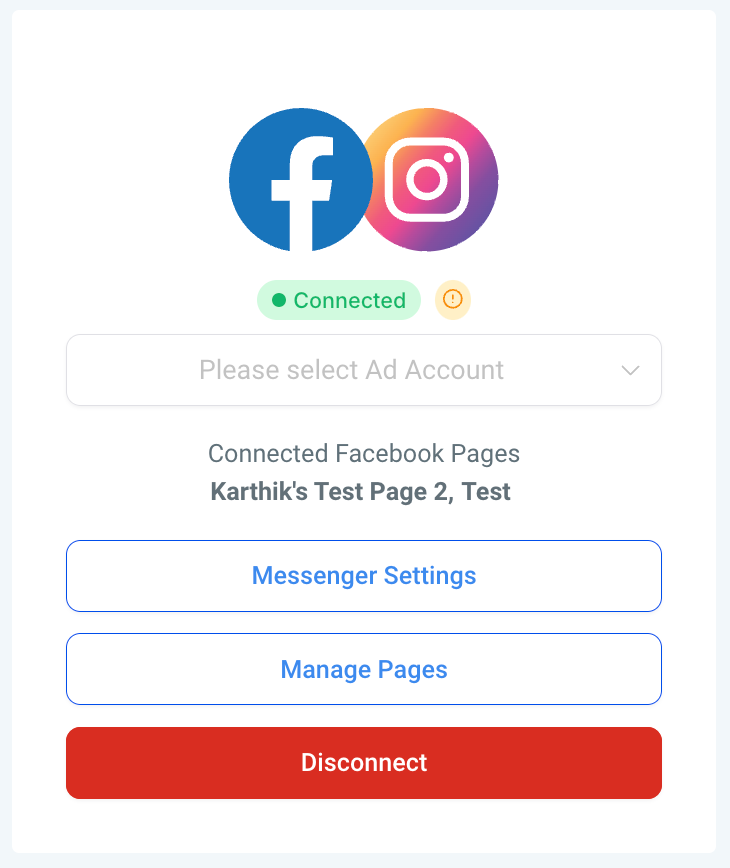
On the Facebook card, click Manage Pages.
Select or unselect the pages you want to link, then click Update. For example, if you no longer want one page integrated, unselect it here.
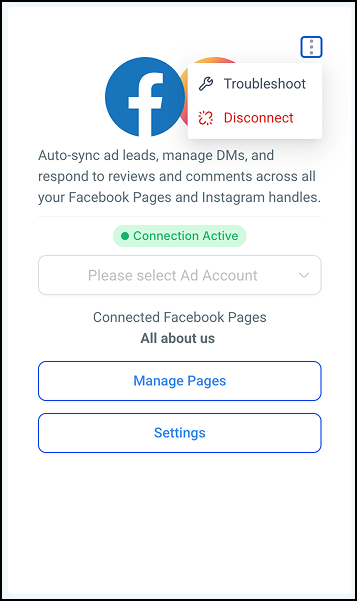
To control messaging on connected pages:
Go to Settings, then Integrations.
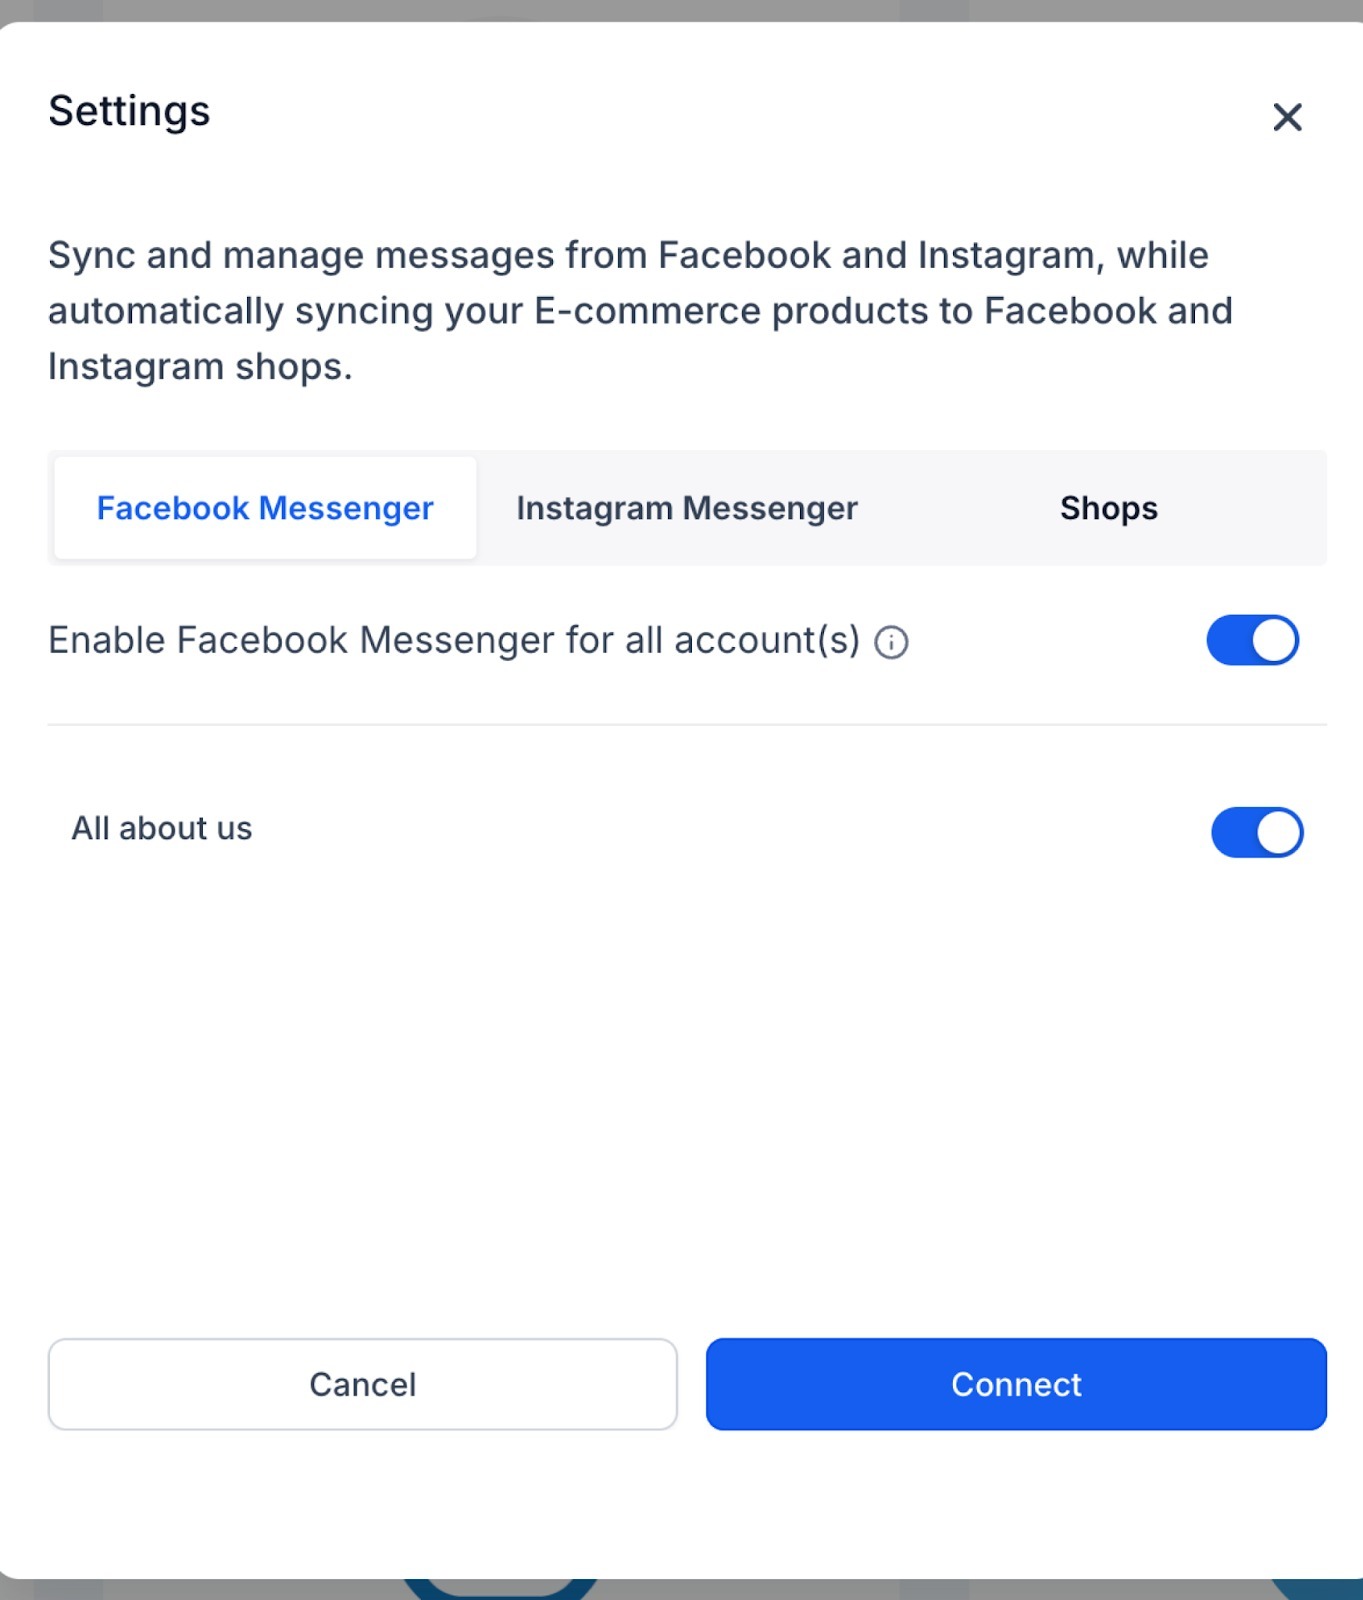
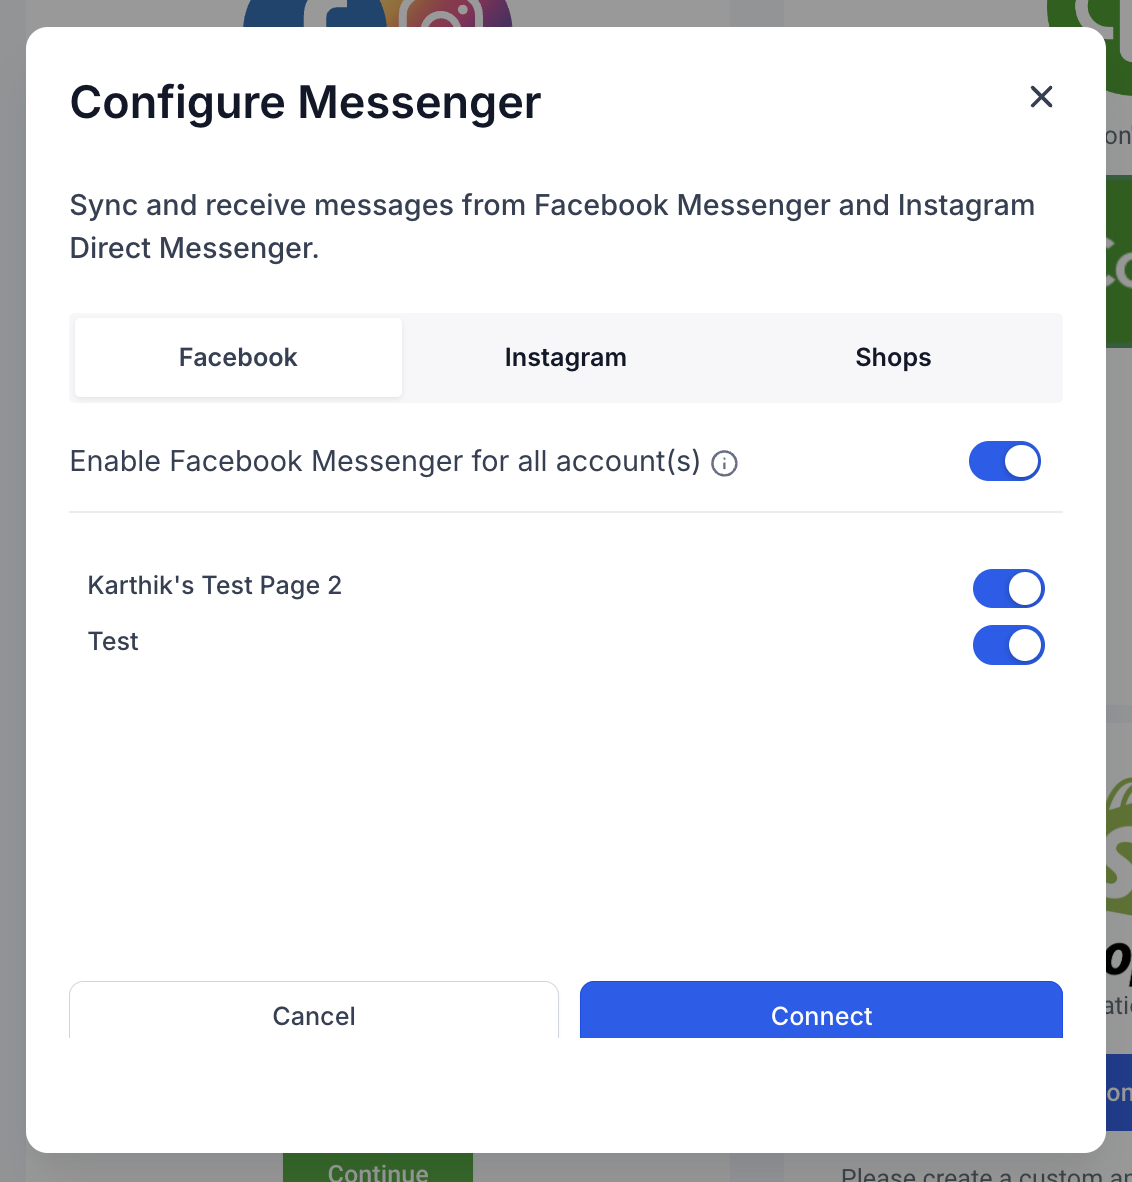
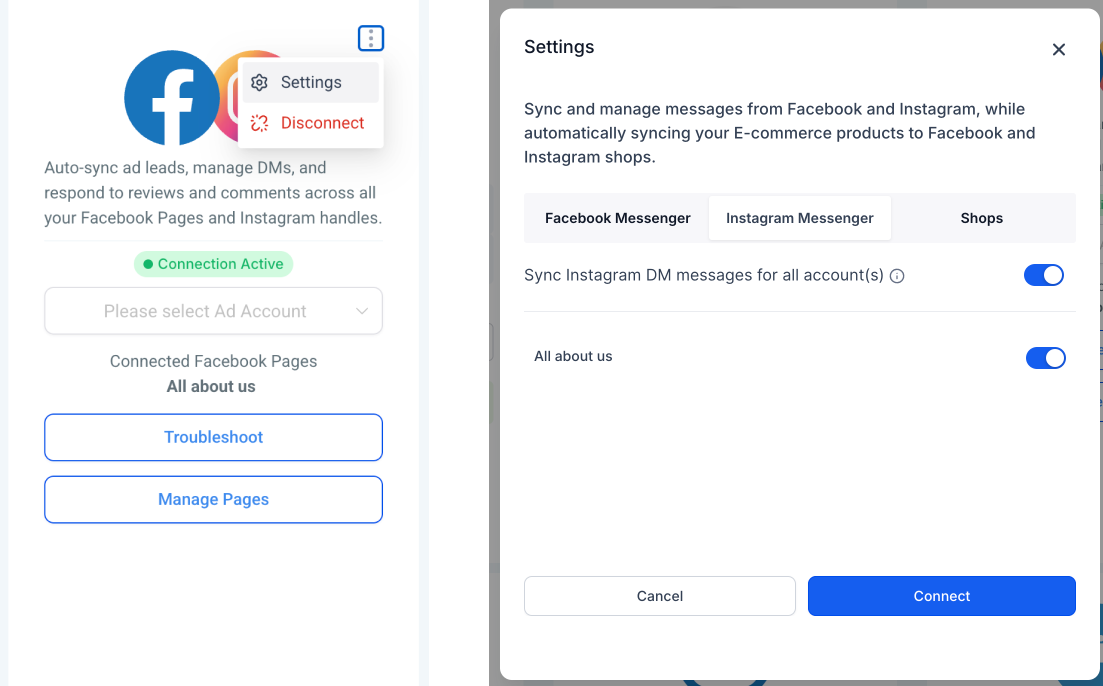
On the Facebook card, open Settings from the menu.
Enable Facebook Messenger and Instagram messaging for the connected page. If you do not want to use a page for messaging, disable the setting on that page.
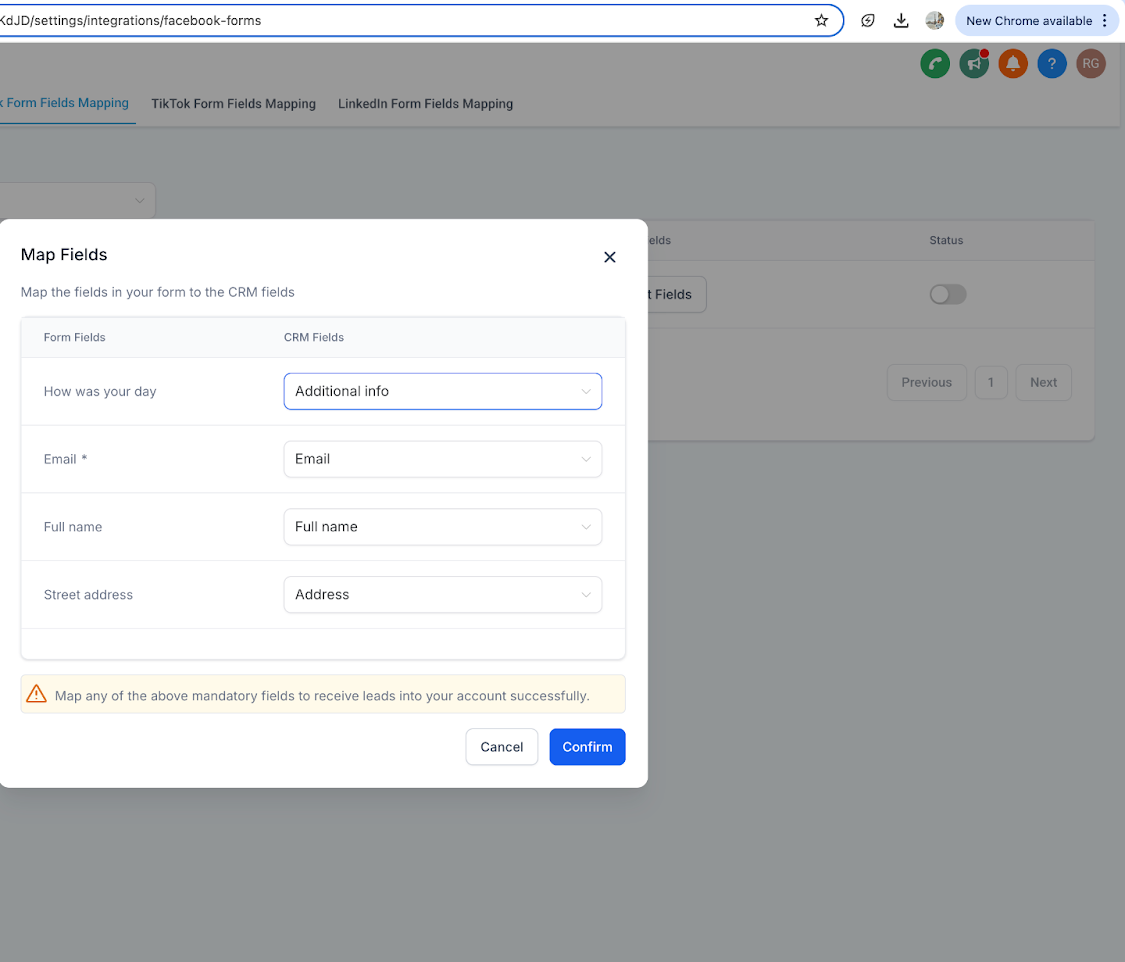
To review or update your lead form mappings:
Go to Settings, then Integrations.
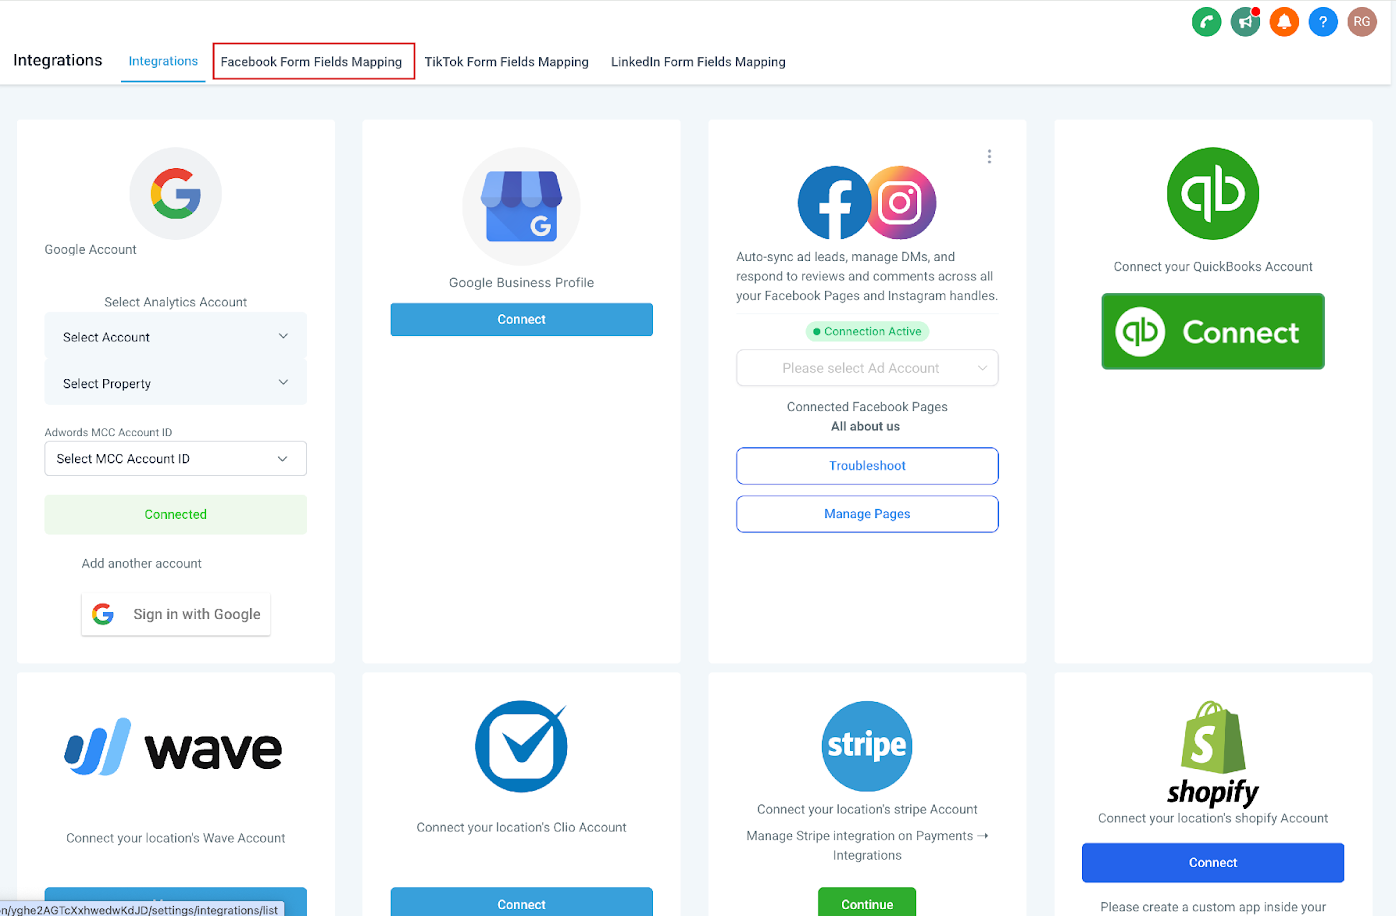
At the top of the screen, open Facebook Form Field Mapping.
Find the form you want to edit, then update its mapping or deactivate it.
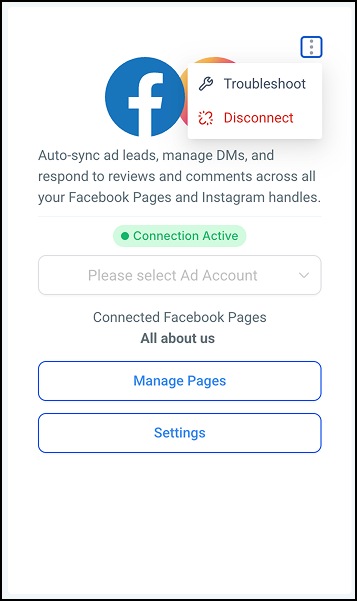
Go to Settings, then Integrations.
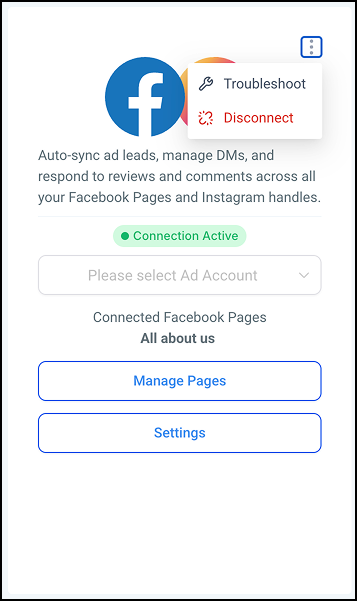
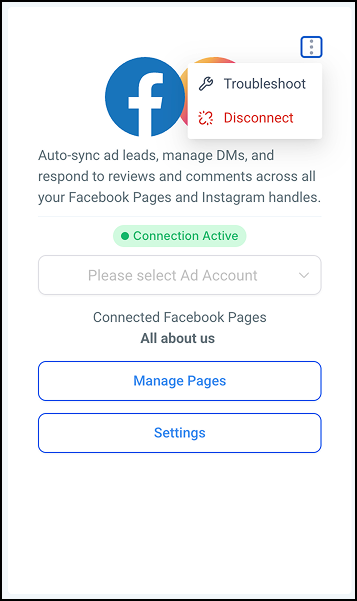
On the Facebook card, click the three dots.
Click Disconnect.
The Manage Pages list shows only Facebook pages linked to the connected Facebook account. For a page to appear:
Your Facebook account must be connected to the pages you are trying to connect.
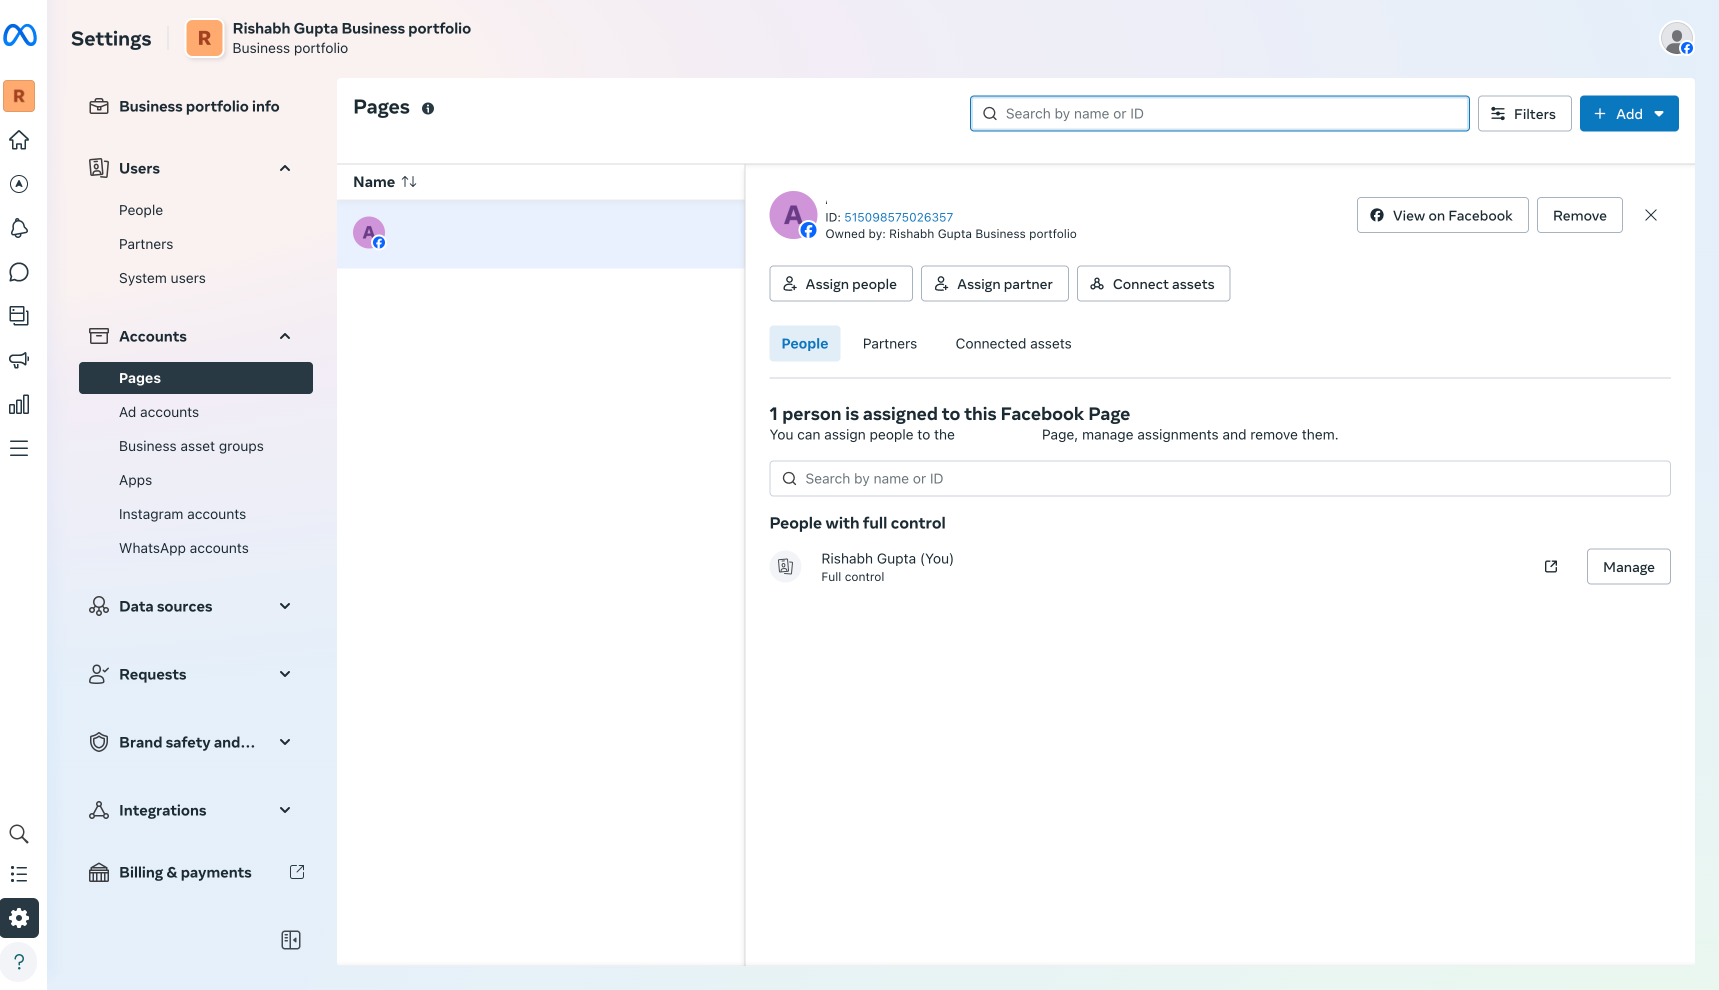
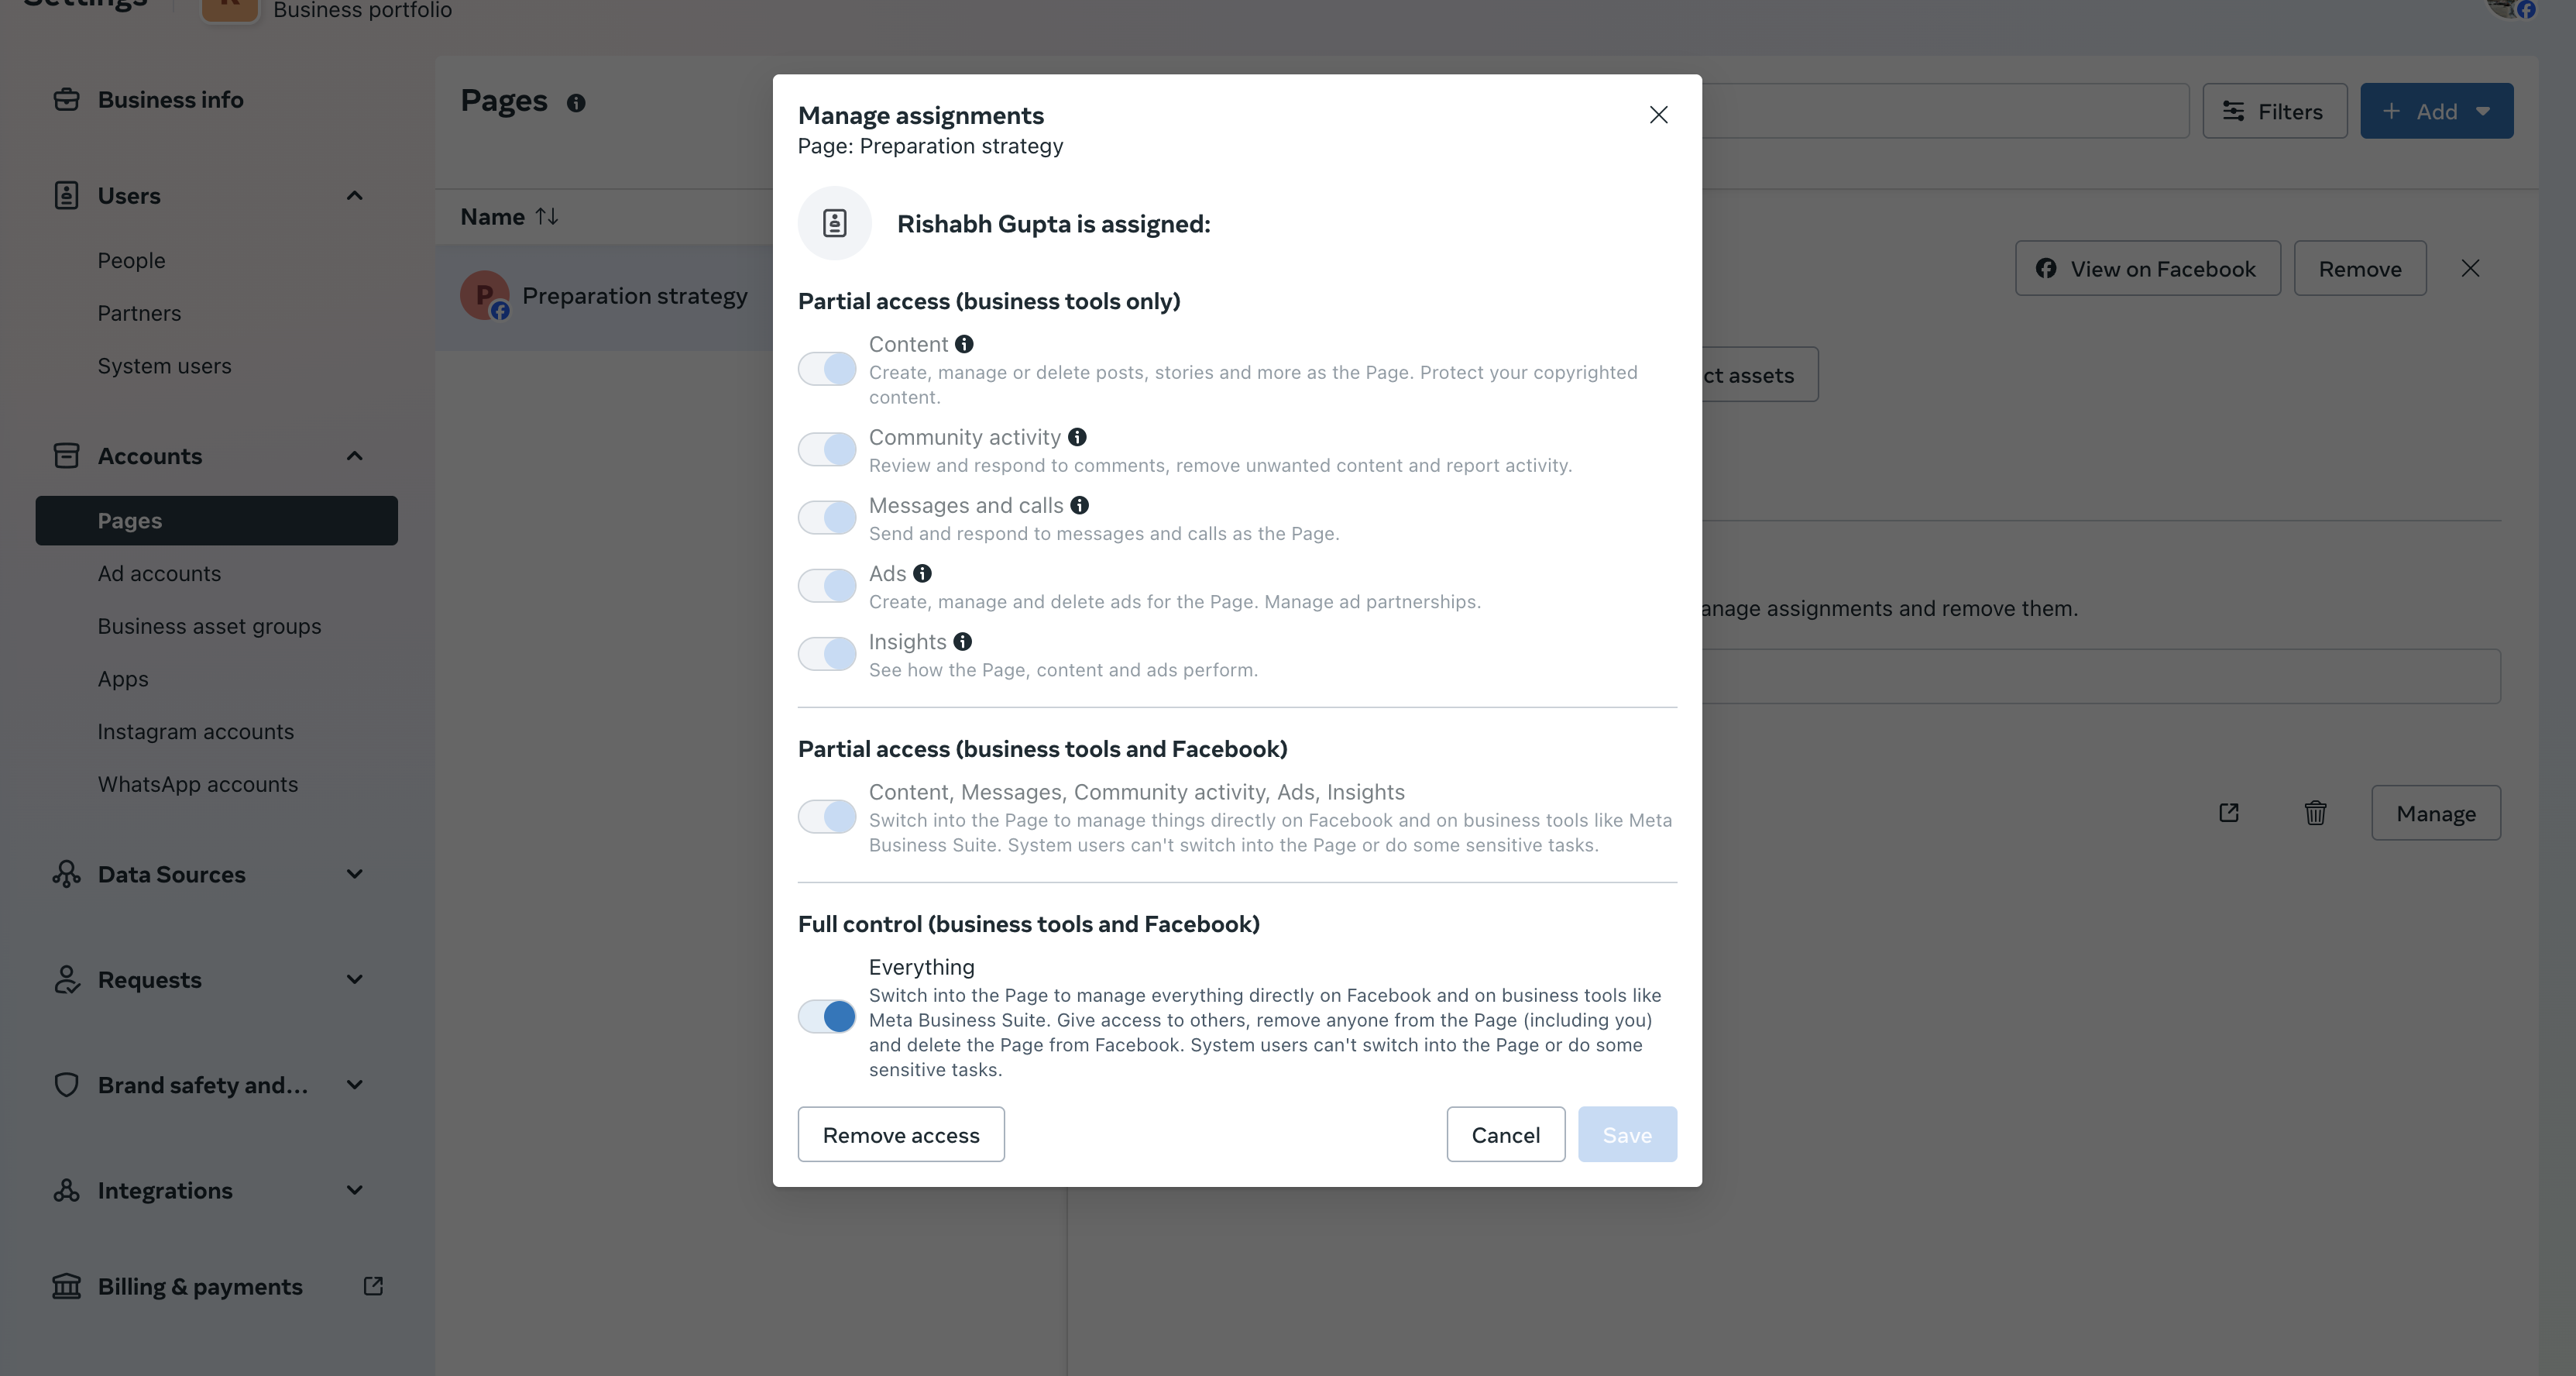
Your Facebook account must have admin (full control) access to the page, confirmed at https://business.facebook.com/latest/settings.
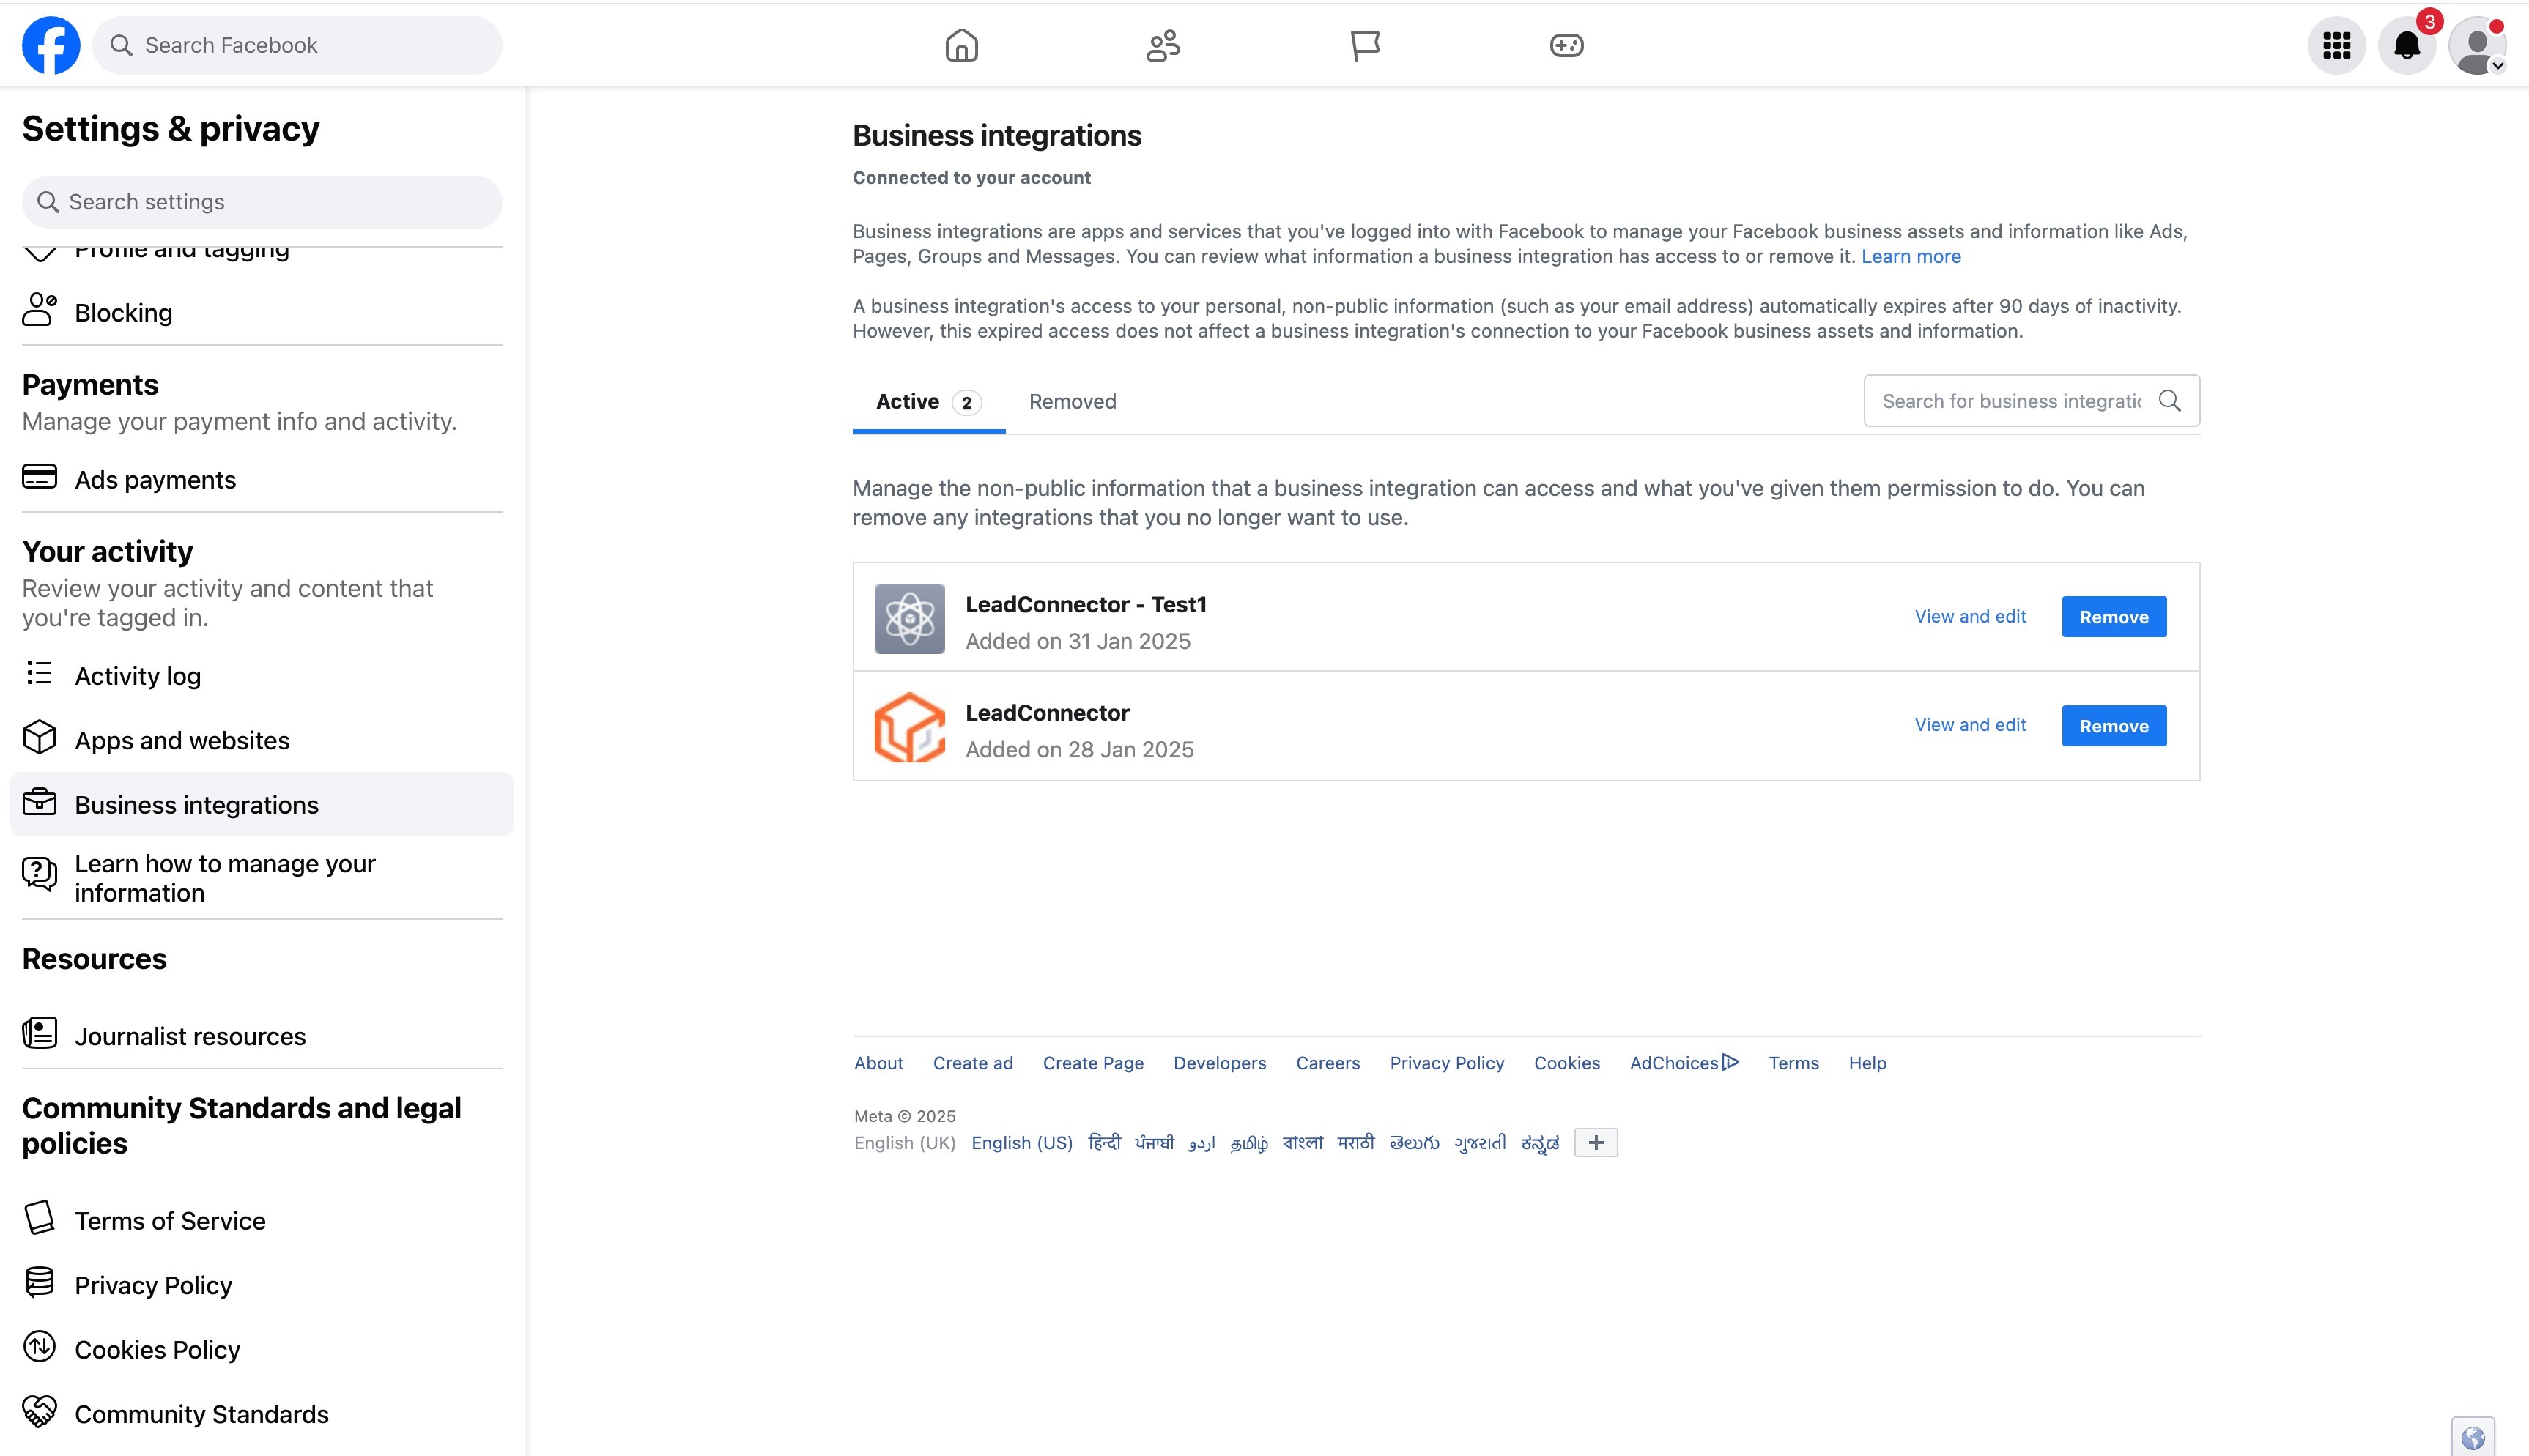
LeadConnector must have access to the page. Confirm this by clicking the view and edit option next to LeadConnector at https://www.facebook.com/settings?tab=business_tools&ref=settings.
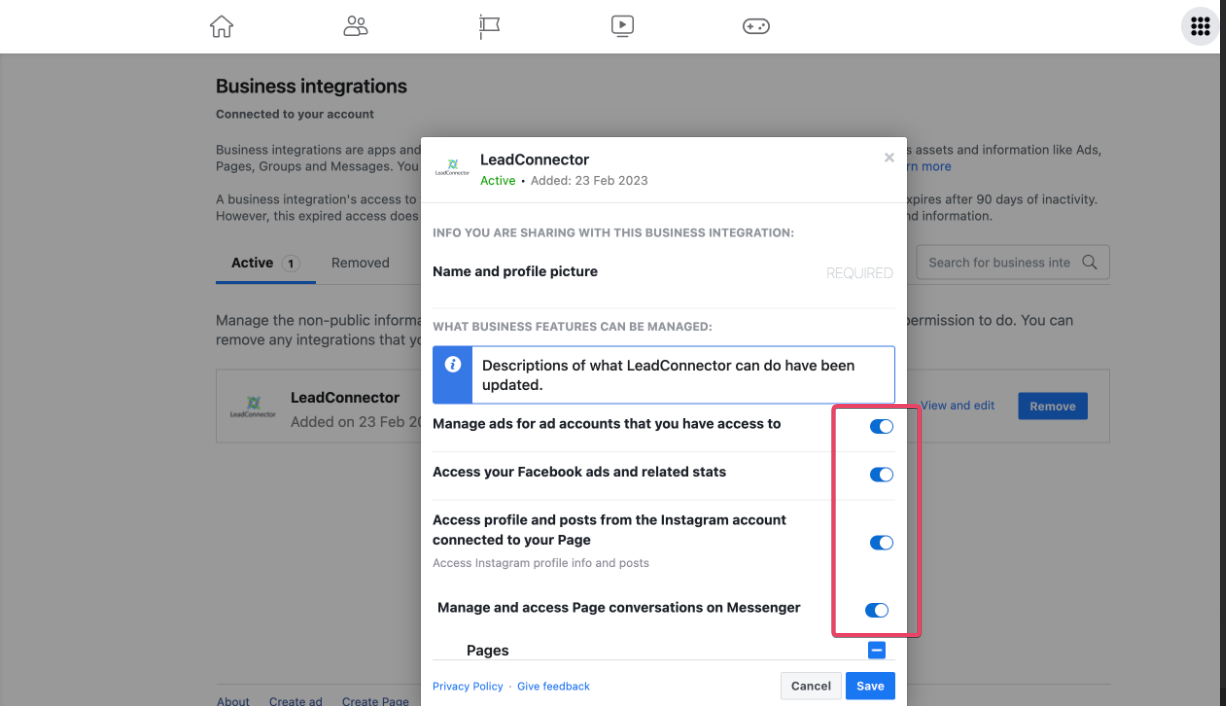
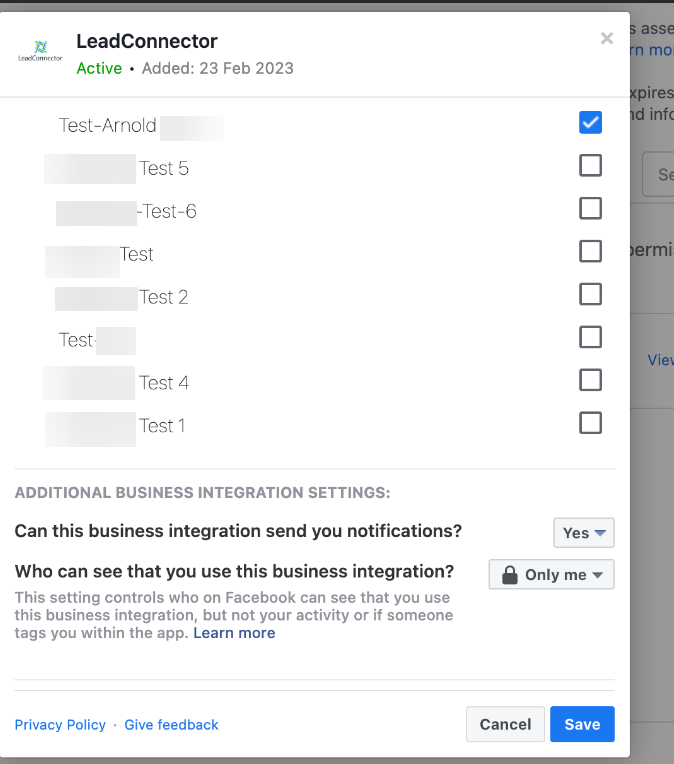
If all of the above are set, you will be able to see and select the page you want to connect.
Confirm you have full access control of the Facebook page.
In your account, go to Settings, Integrations, then Facebook Form Field Mapping, and check that the form selected in Ad Manager is enabled in its status.
Confirm LeadConnector can access your page at https://www.facebook.com/settings?tab=business_tools&ref=settings. Check that LeadConnector is connected with your Facebook account.
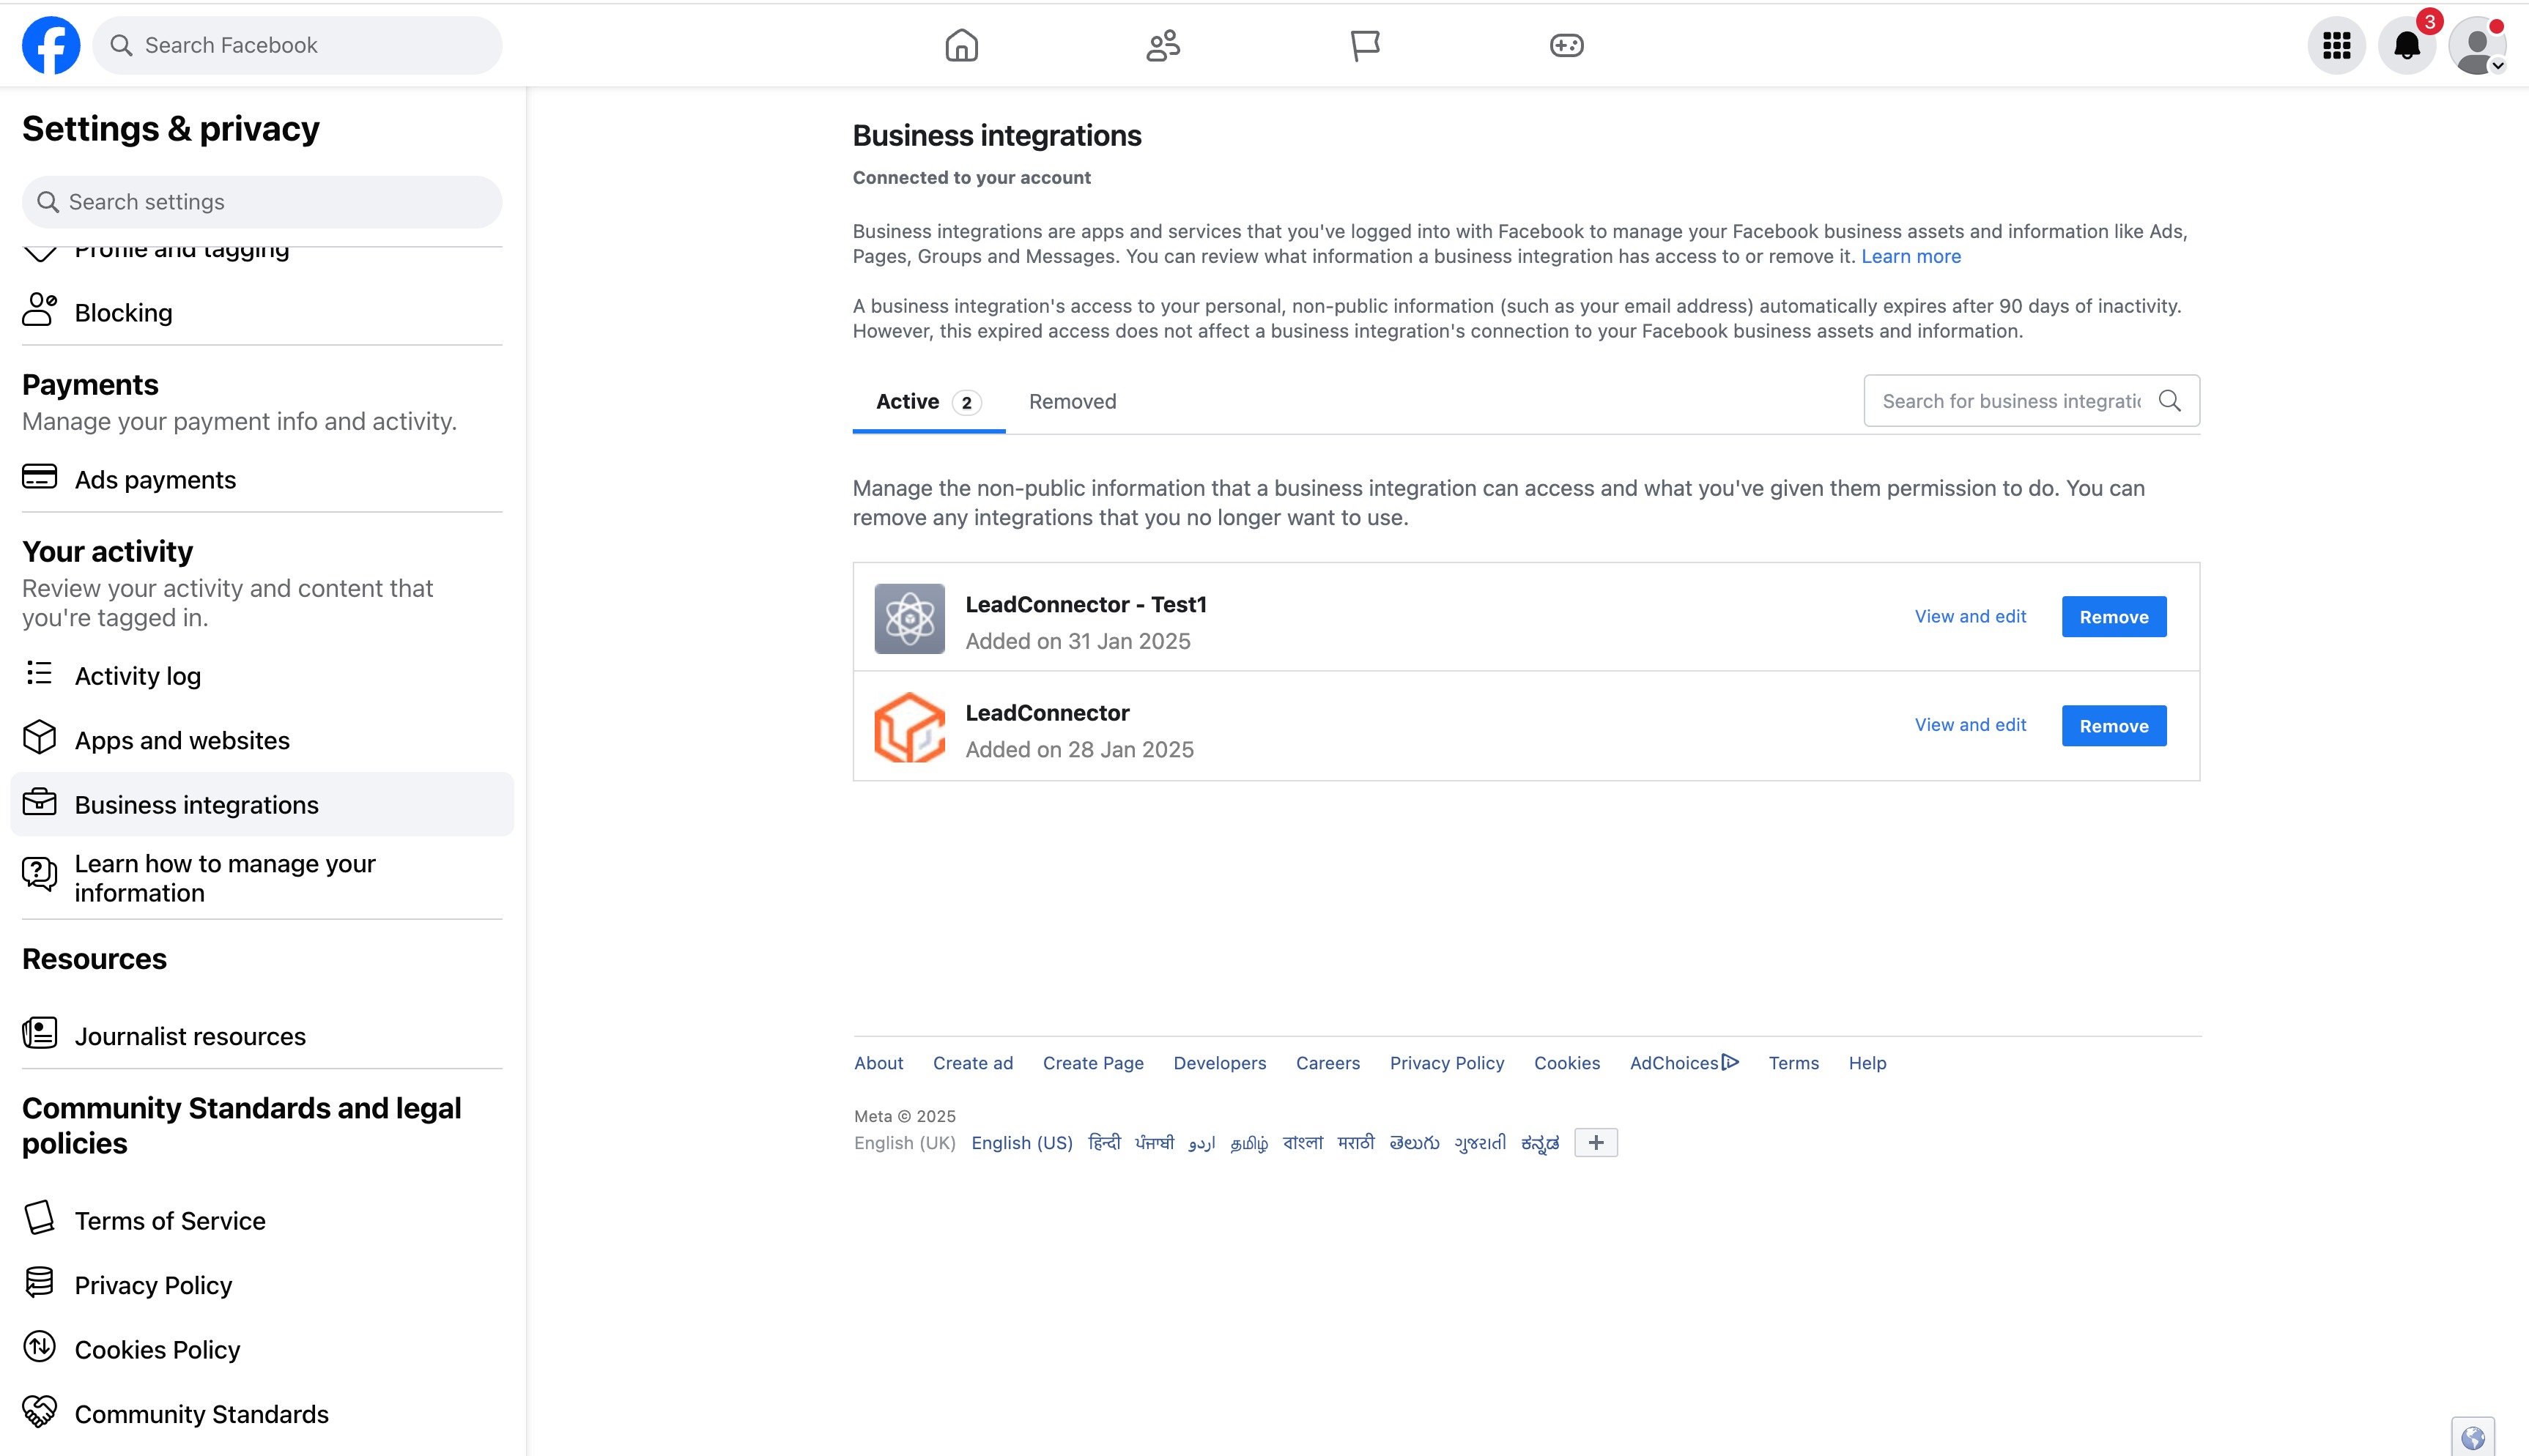
Check that LeadConnector has all required permissions, including page access and lead access.
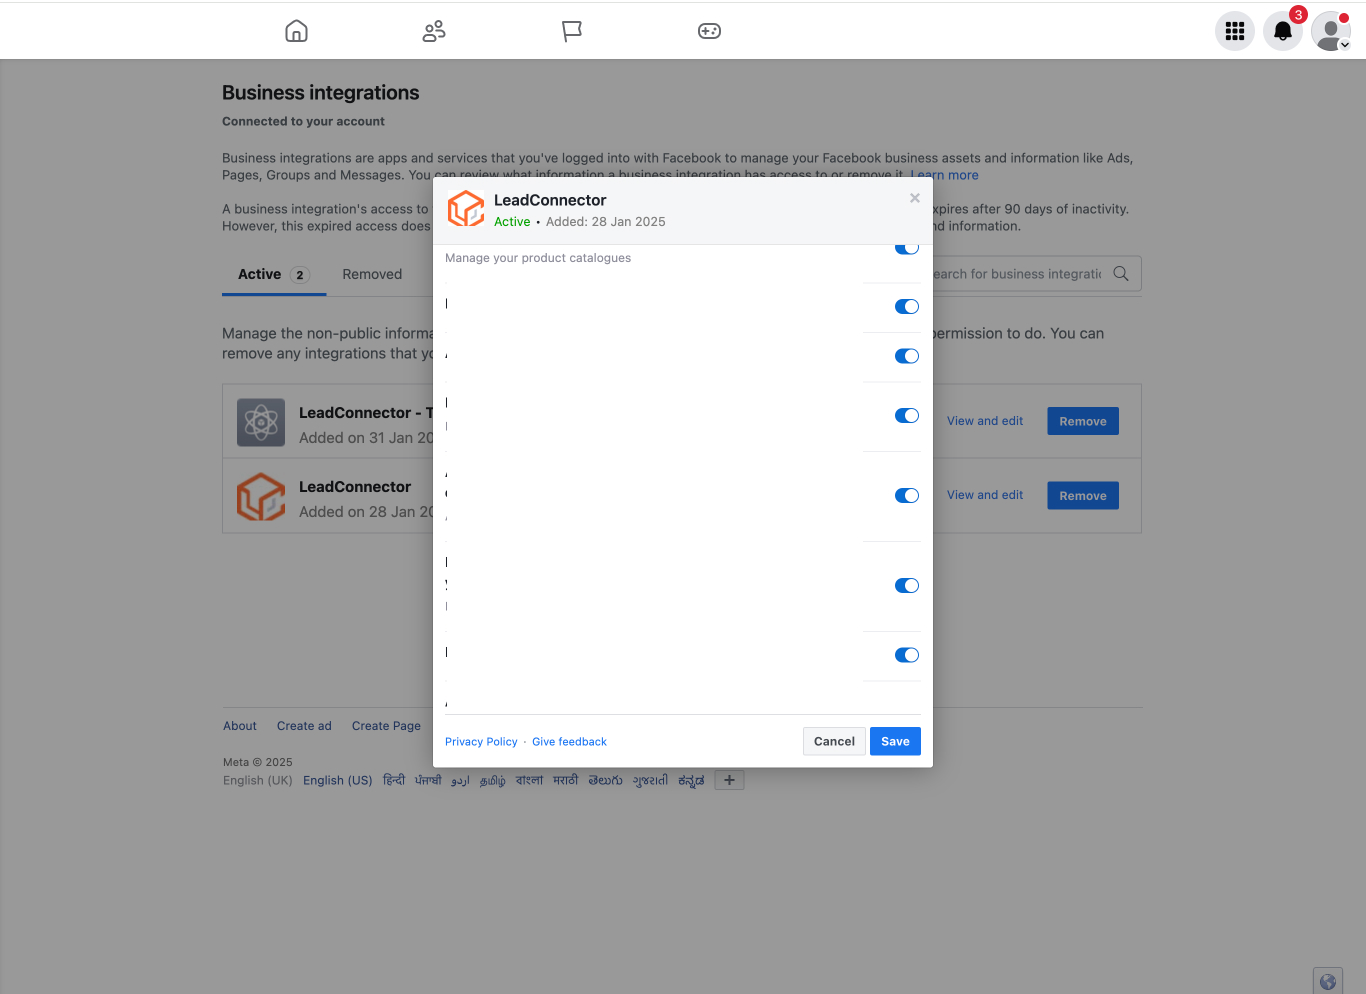
Use Facebook's Lead Ads Testing Tool (developers.facebook.com/tools/lead-ads-testing) to confirm leads are being added. Select the page to fetch the lead from, select the form to test, and check that App ID 390181264778064 (our integration app) is present. If it is not, assign lead access manually as described below.
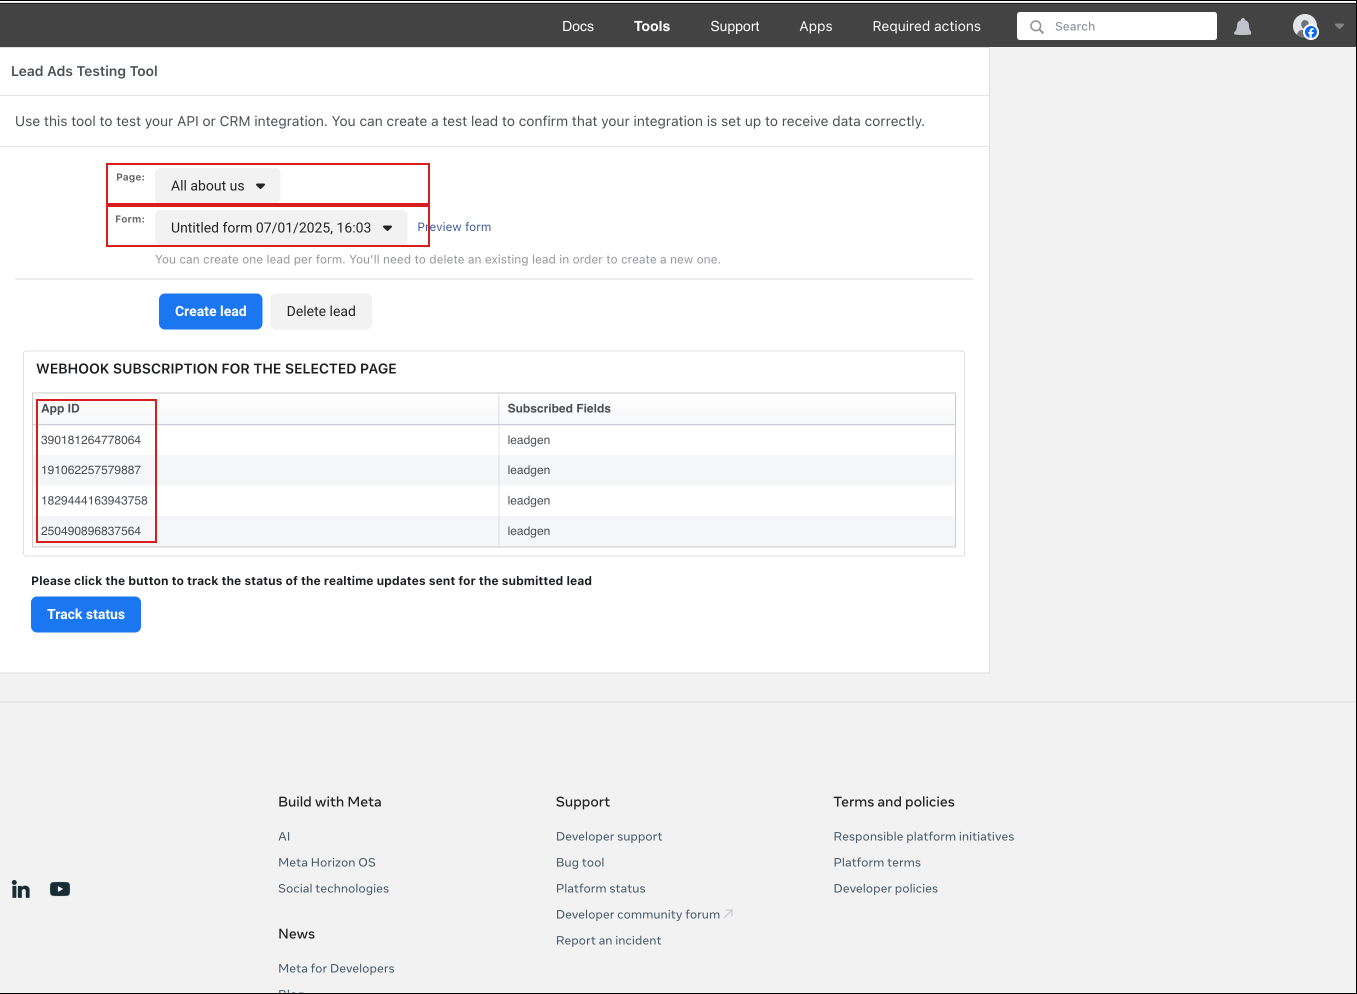
If LeadConnector access has been revoked or the App ID does not appear, assign lead access on Facebook manually: go to Business Suite (or Business Settings if you do not have Business Suite access), choose your business account, click Settings, then More Business Settings. Click Integrations in the left menu, then Leads Access, then Assign CRMs. Check the circle next to LeadConnector and click Assign.
If you received an email titled "Important: Facebook connection has expired," the Facebook integration for your account has become disconnected. Common causes include:
A user changed their password.
The Facebook token naturally expired.
A user de-authorized the app.
A user logged out of Facebook.
A user changed page permissions or added or removed a user.
Someone logged in from a different country without using a VPN.
To reconnect:
Select the account named in the email.
In the left sidebar, click Settings.
Click Integrations.
On the Facebook card, click Connected to disconnect the broken integration, then click Connect again to reconnect.
In the popup, continue as yourself, select the Facebook page you want to connect, then click Connect Page.
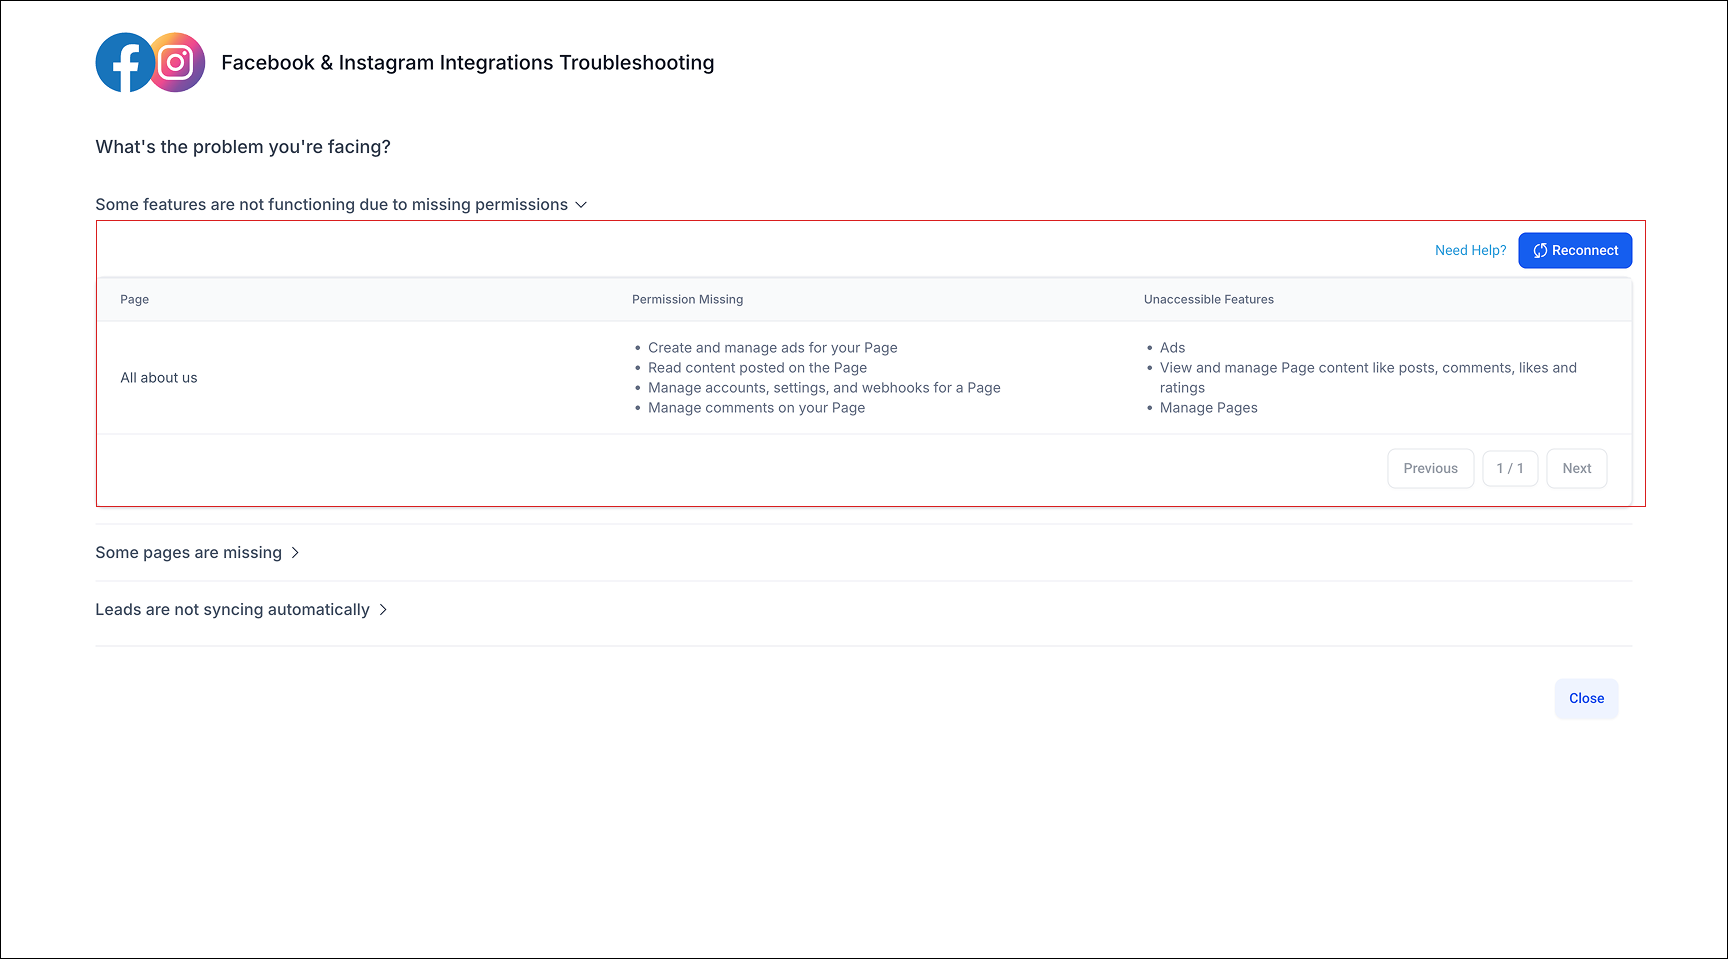
To find missing permissions, go to Settings, Integrations, then Troubleshoot on the Facebook card, then Missing Permission. This lists all missing permissions along with the features they affect.
To enable them, go to https://www.facebook.com/settings?tab=business_tools&ref=settings and enable the missing permissions.
You can also perform basic troubleshooting and manually sync leads: go to Settings, Integrations, then Troubleshoot on the Facebook card, where you can find missing permissions and manually sync leads.
Confirm your Instagram account is connected to the Facebook page at https://business.facebook.com/latest/settings. If it is not, connect it, then continue.
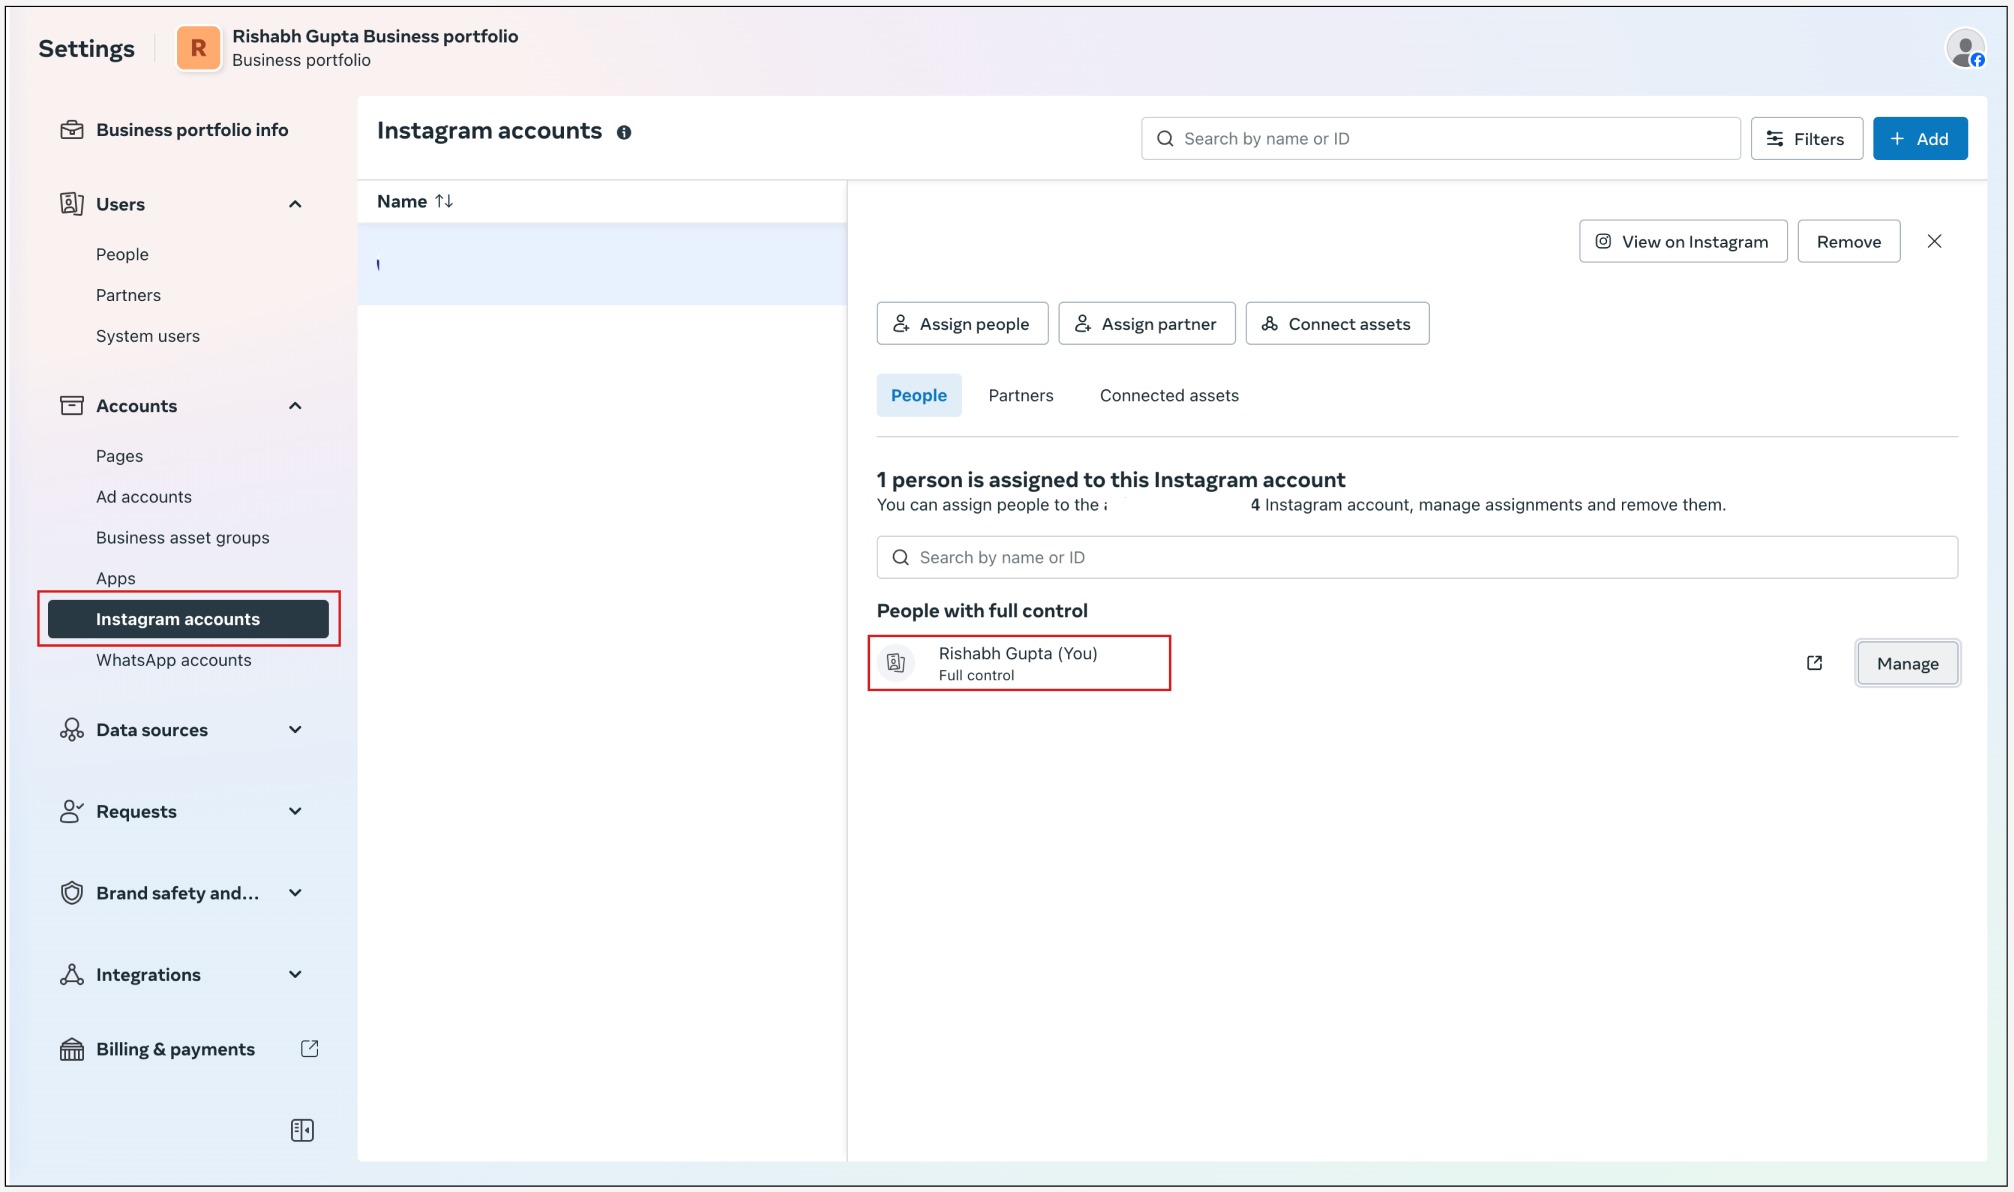
Confirm message access is enabled and the user is added with full control access.
In your account, go to Settings, Integrations, then Settings on the Facebook card, and make sure Instagram and Facebook messaging are enabled.
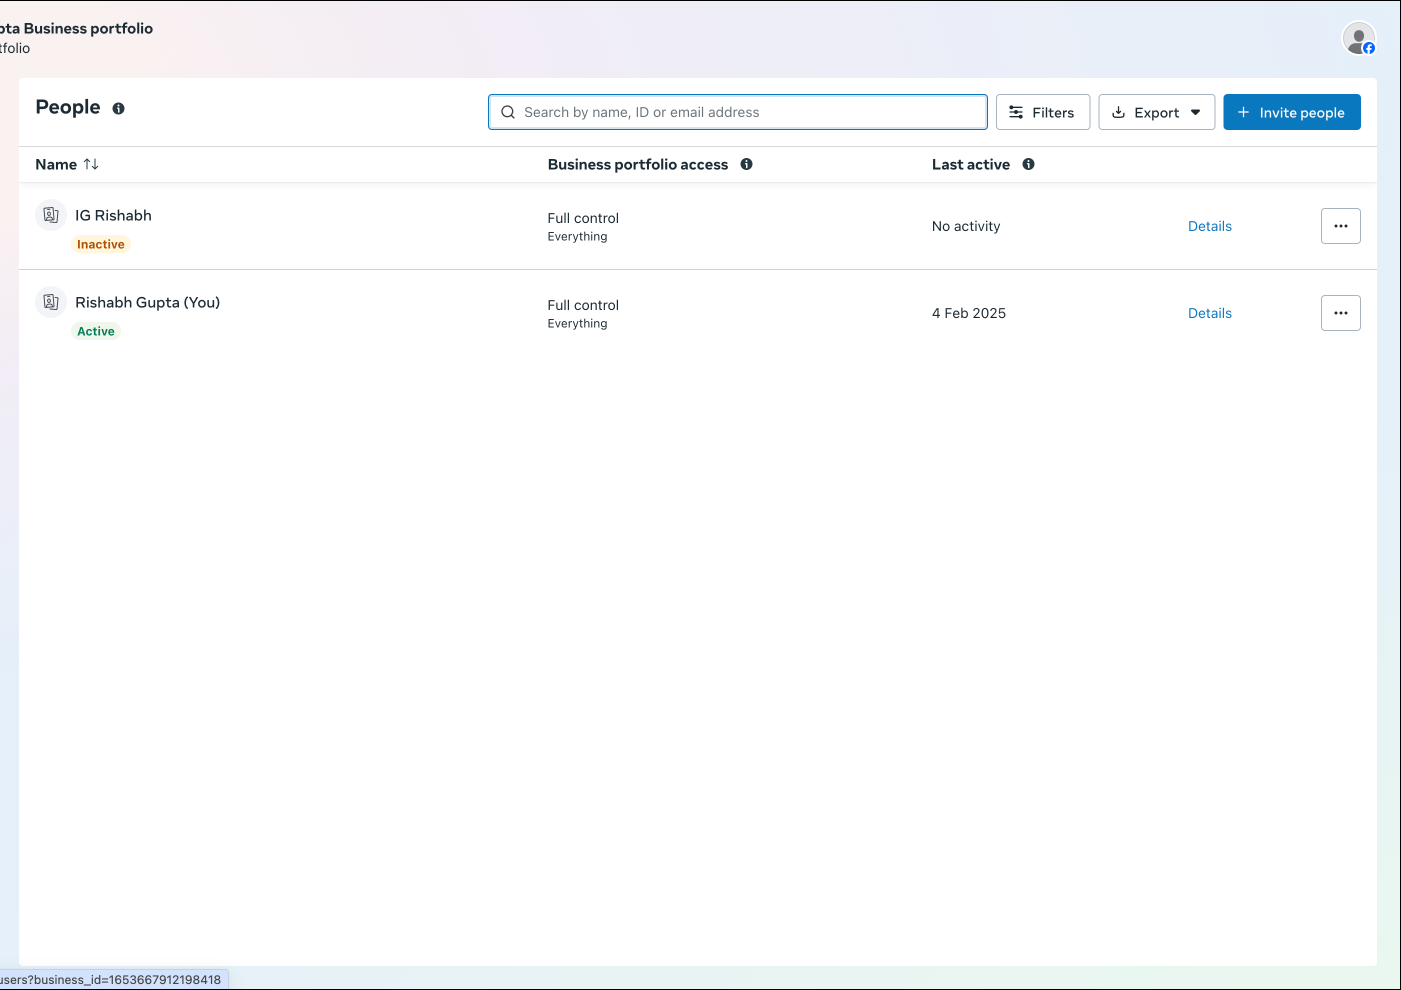
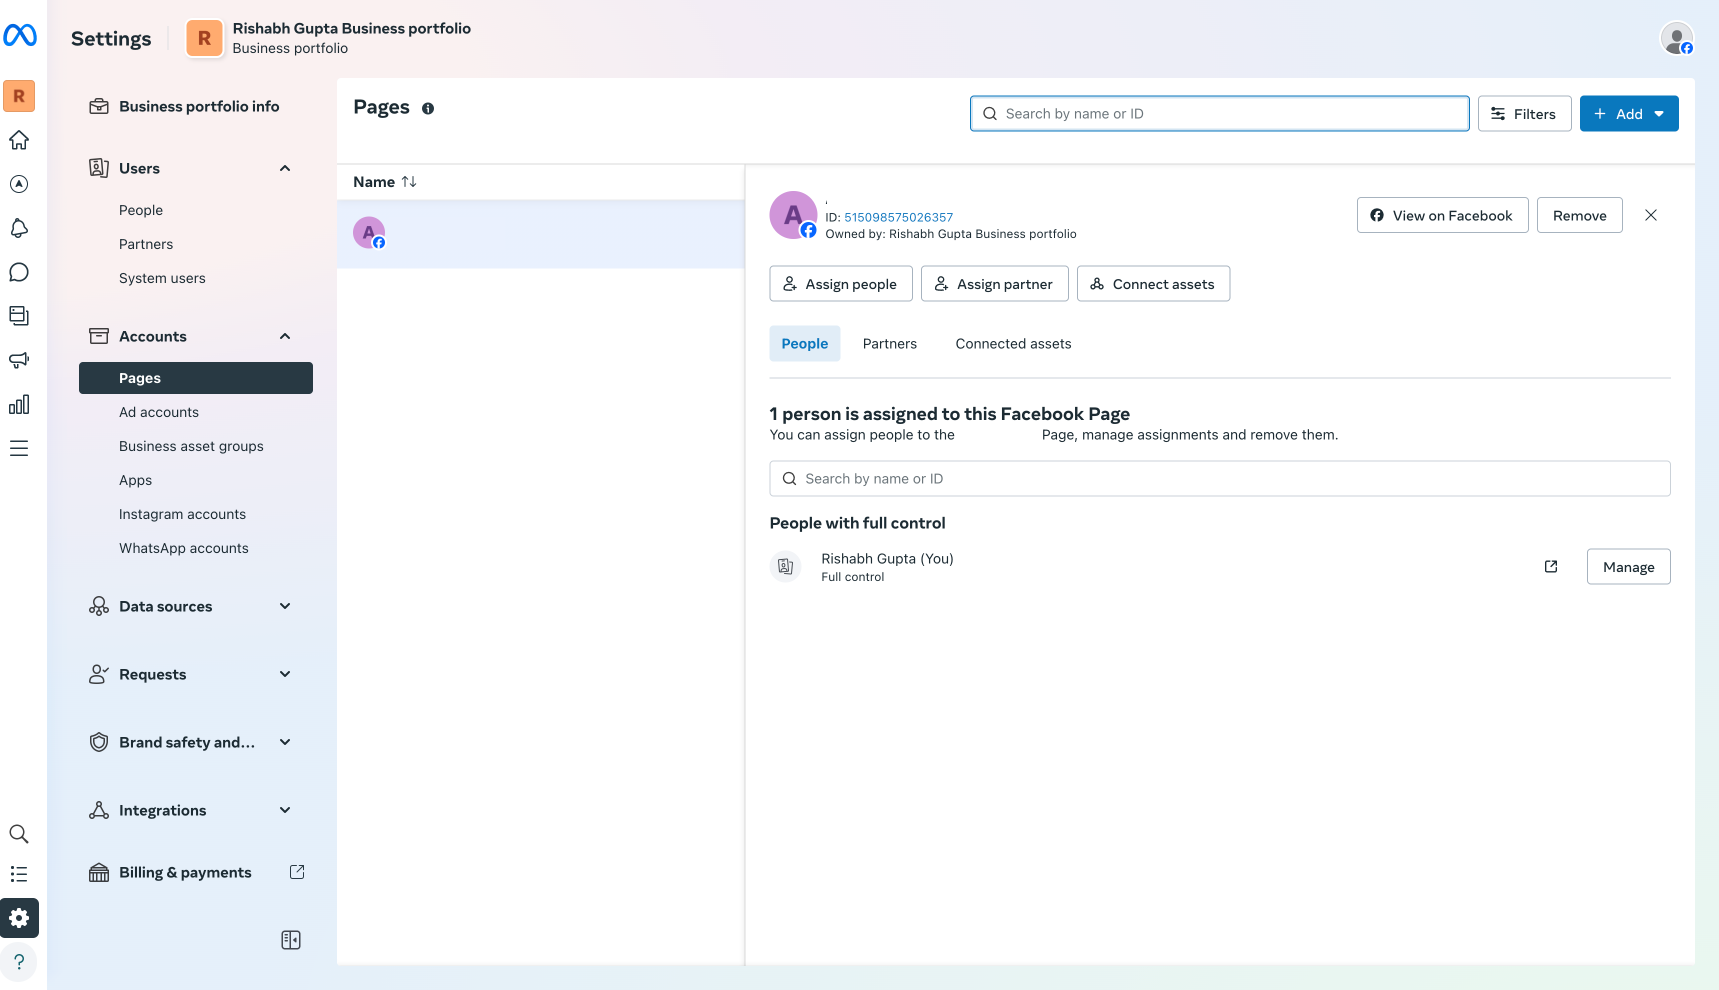
Verify the following at https://business.facebook.com/latest/settings:
Under Users, then People, confirm the user is added and has full control in the business portfolio.
Under Accounts, then Pages, confirm the user is added in People and has full control access.
Under Integrations, then Lead Access, verify LeadConnector is connected under CRM.
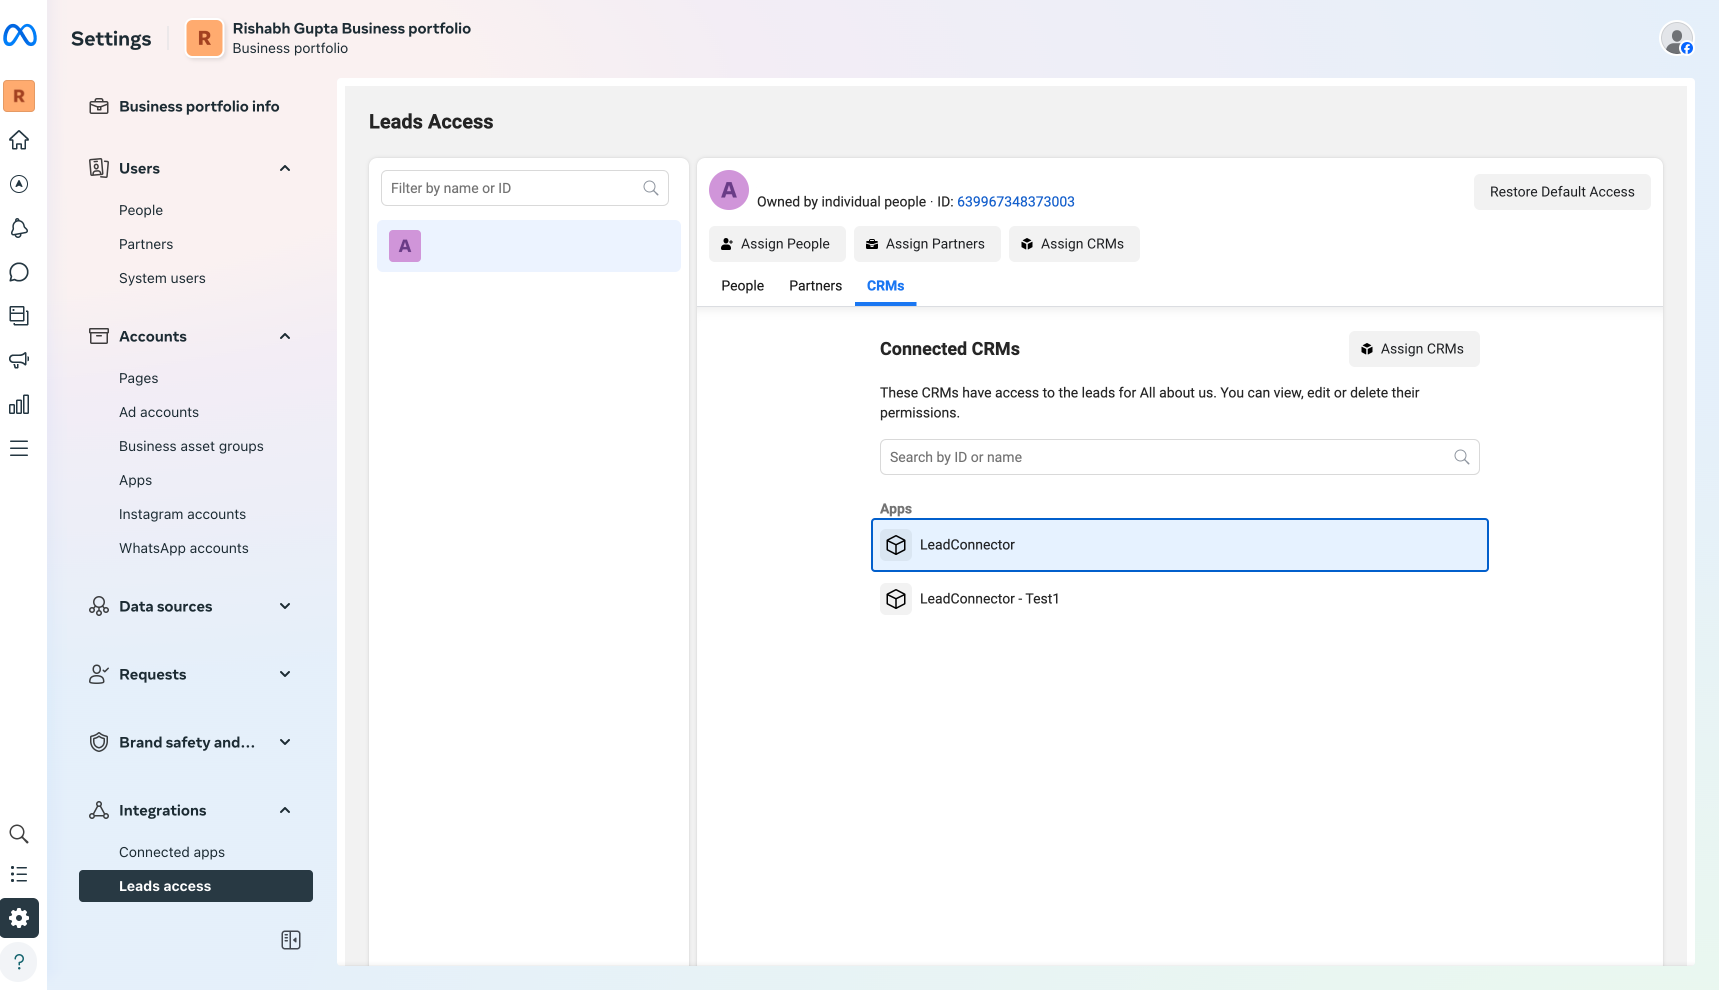
Why do I see LeadConnector when assigning lead access on Facebook?
LeadConnector is the underlying provider that powers the Facebook integration for Aesthetix CRM. Seeing it on Facebook's Lead Access, business tools, and OAuth consent screens is expected and safe. Assign it so leads can flow into your account.
Who is allowed to connect a Facebook page?
Only a user with full (admin) access to the page can connect it, and that same user must have Lead Access permission on Facebook to read lead data.
Can I connect more than one Facebook page?
Yes. Enable the multiple-pages feature in Labs, then select multiple pages during connection. You can sync new leads only or also sync the previous 90 days of leads.
My lead ads are not reaching my account. What should I check first?
Confirm you have full control of the page, that the form is enabled in Facebook Form Field Mapping, that LeadConnector has page and lead access, and use Facebook's Lead Ads Testing Tool to confirm App ID 390181264778064 is present. If it is not, assign lead access to LeadConnector manually.
Why did my Facebook connection break?
Tokens expire or connections break when a password changes, the token naturally expires, the app is de-authorized, a user logs out, page permissions change, or someone logs in from a different country without a VPN. Reconnect from Settings, Integrations.
Which custom field types are supported for lead forms?
TEXT, LARGE_TEXT, NUMERICAL, PHONE, MONETARY, SINGLE_OPTIONS, DATE, and single DROPDOWN.
Should I rename fields in my Facebook form settings?
No. Renaming fields in Facebook form settings can break the mapping to your Aesthetix CRM fields.
How do I stop using a page for messaging without disconnecting it?
Open Settings on the Facebook card and disable messaging for that specific page, leaving lead sync and other pages intact.
How do I manually sync leads or find missing permissions?
Go to Settings, Integrations, then Troubleshoot on the Facebook card. There you can see missing permissions and their affected features, and manually sync leads.
