Web Chat lets your practice talk with website visitors in real time through a chat widget on your site. When someone messages you from your website, that message lands directly in the Inbox, right alongside your SMS, email, and other channels. Your team can open the thread, reply instantly, assign it to the right staff member, and close it out without ever switching tools.
For patients weighing a consultation or asking about a treatment, an immediate answer builds trust and keeps them engaged. This guide explains how Web Chat works, how to set up the chat widget, and how your team responds to and manages conversations in the Inbox.
Note: The widget setup screen labels the chat type as "Live chat." Selecting it configures the Web Chat channel that routes website messages into your Inbox.
Web Chat enables visitors on your website to start a conversation instantly. When a visitor sends a message through the chat widget, that message is routed directly to the Inbox in your account.
Inside the Inbox, Web Chat messages appear in real time. Your team can open the thread, respond immediately, assign the conversation, or manage it just like any other channel. Because everything is centralized, your staff never has to jump between platforms to keep up with website inquiries.
Instant communication: Respond to website visitors in real time instead of waiting on email or delayed SMS replies.
Seamless workflow: All chats appear in the Inbox alongside email, SMS, and your other communication channels.
Improved patient experience: Faster response times lead to higher engagement and greater satisfaction.
Centralized messaging: Manage every interaction in one place without switching between tools.
Before you can chat with visitors, the chat widget must be created, configured, and installed on your website.
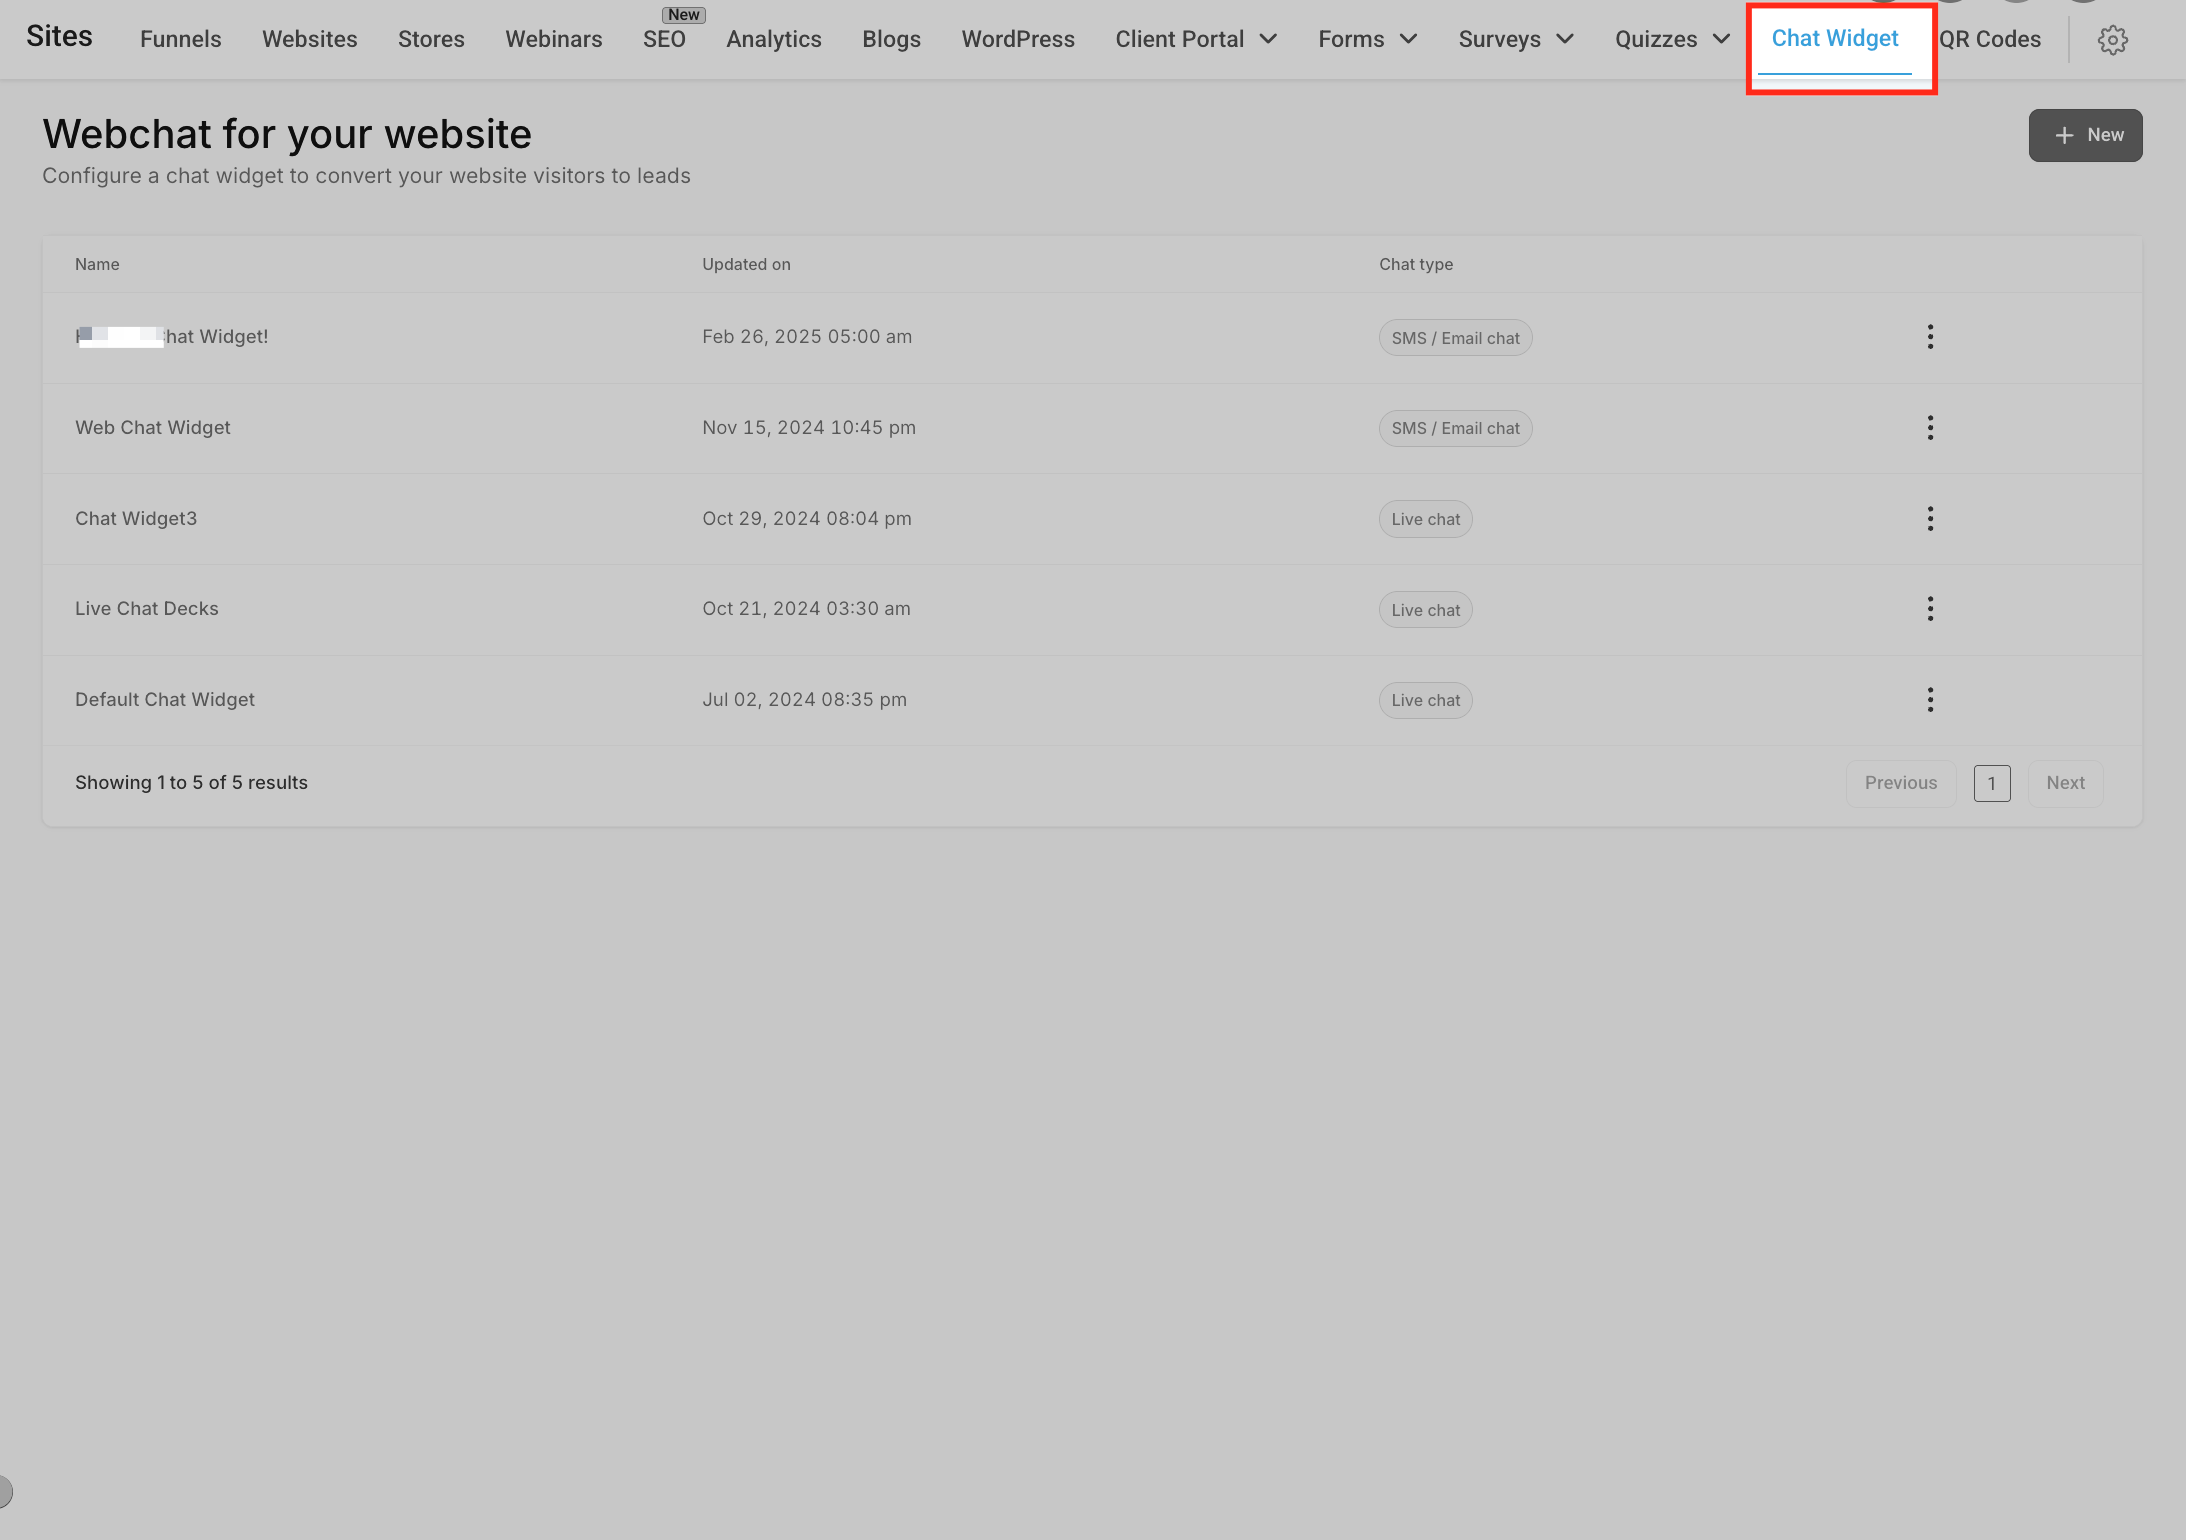
Go to Sites → Chat Widget and click + New to create a new chat widget.
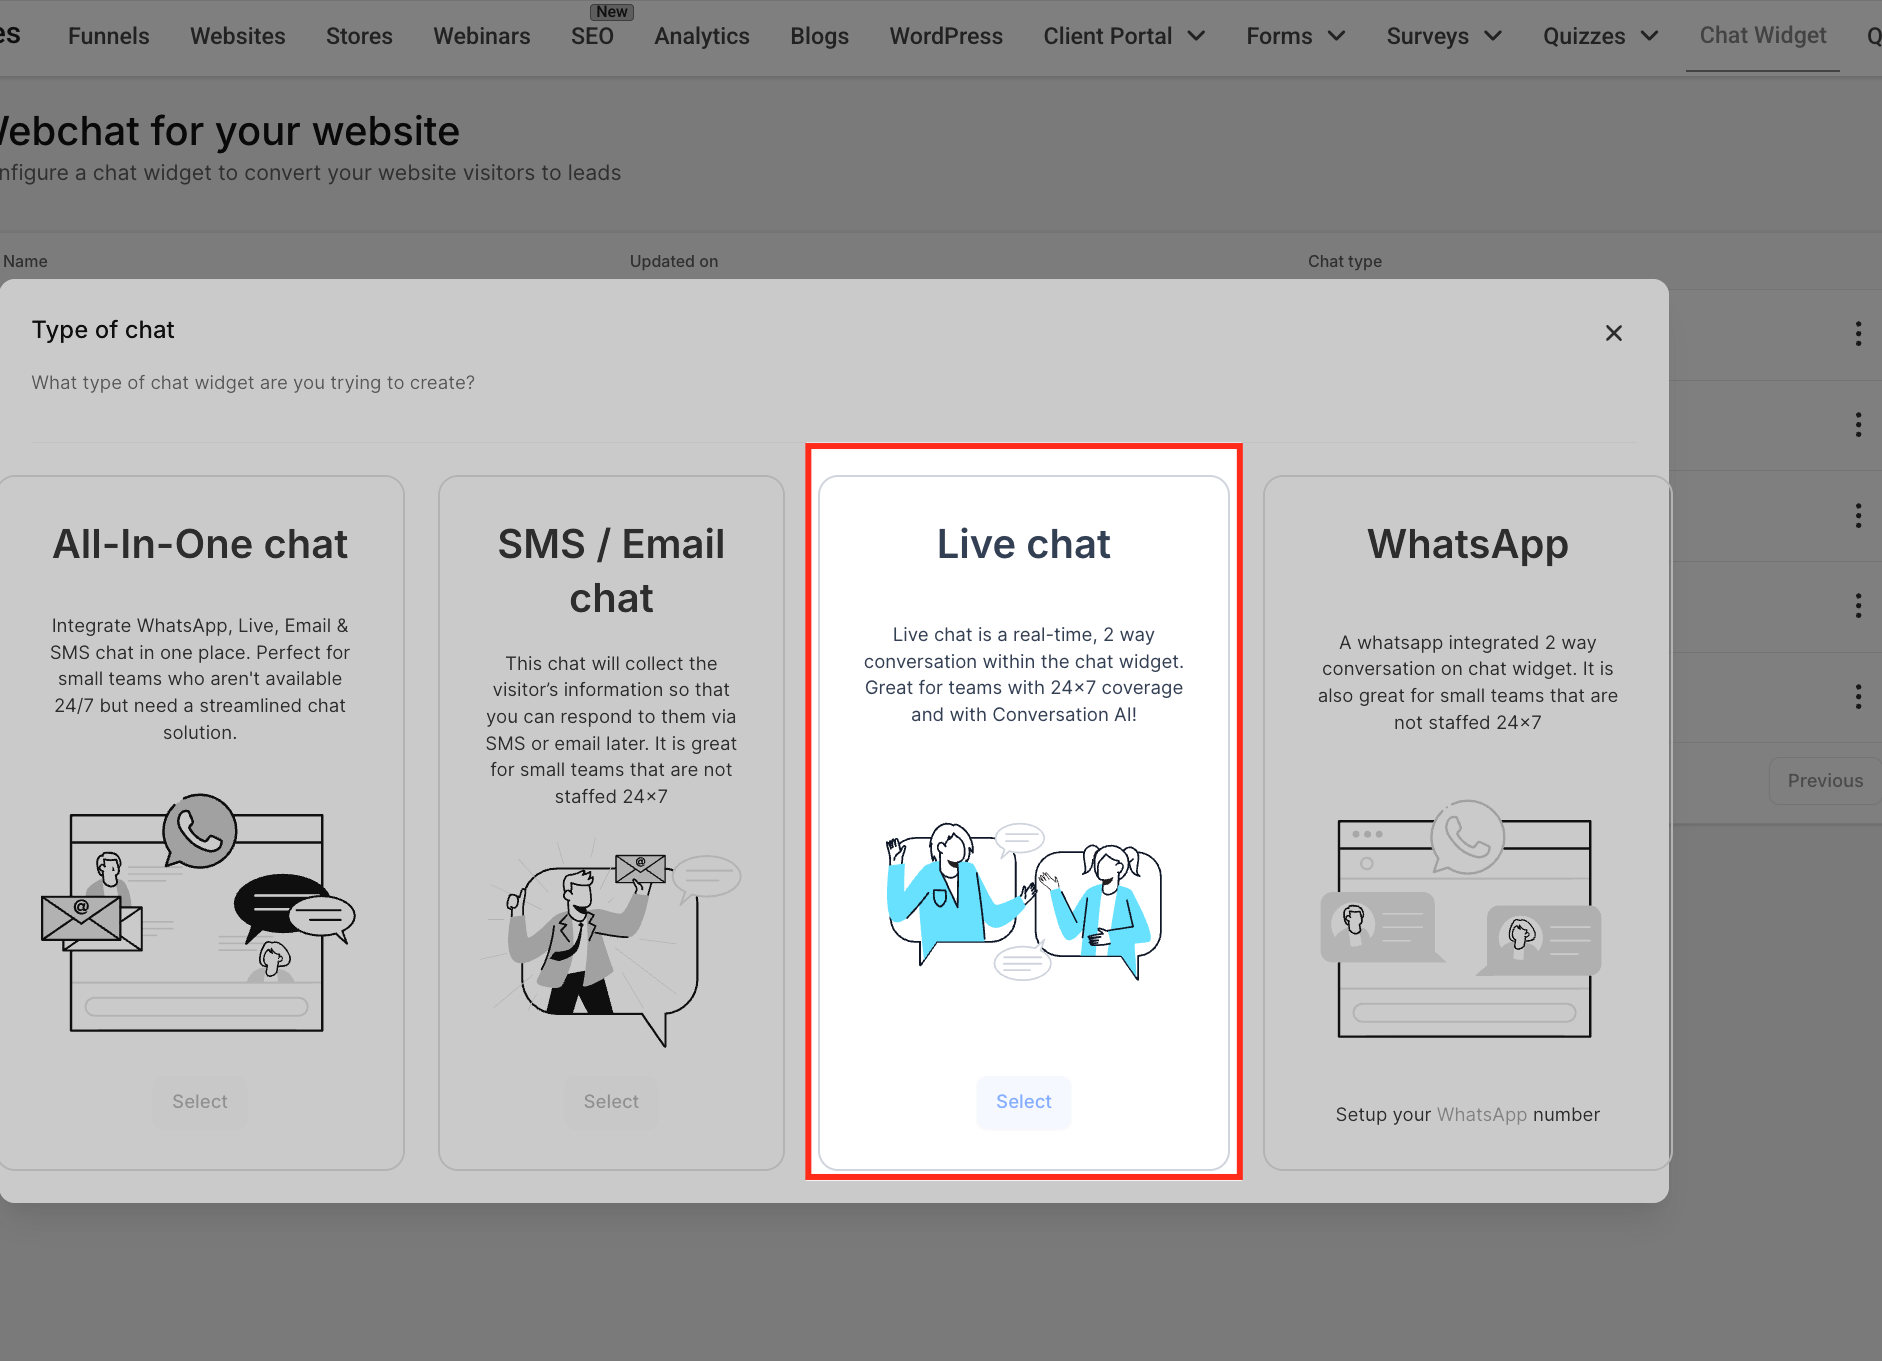
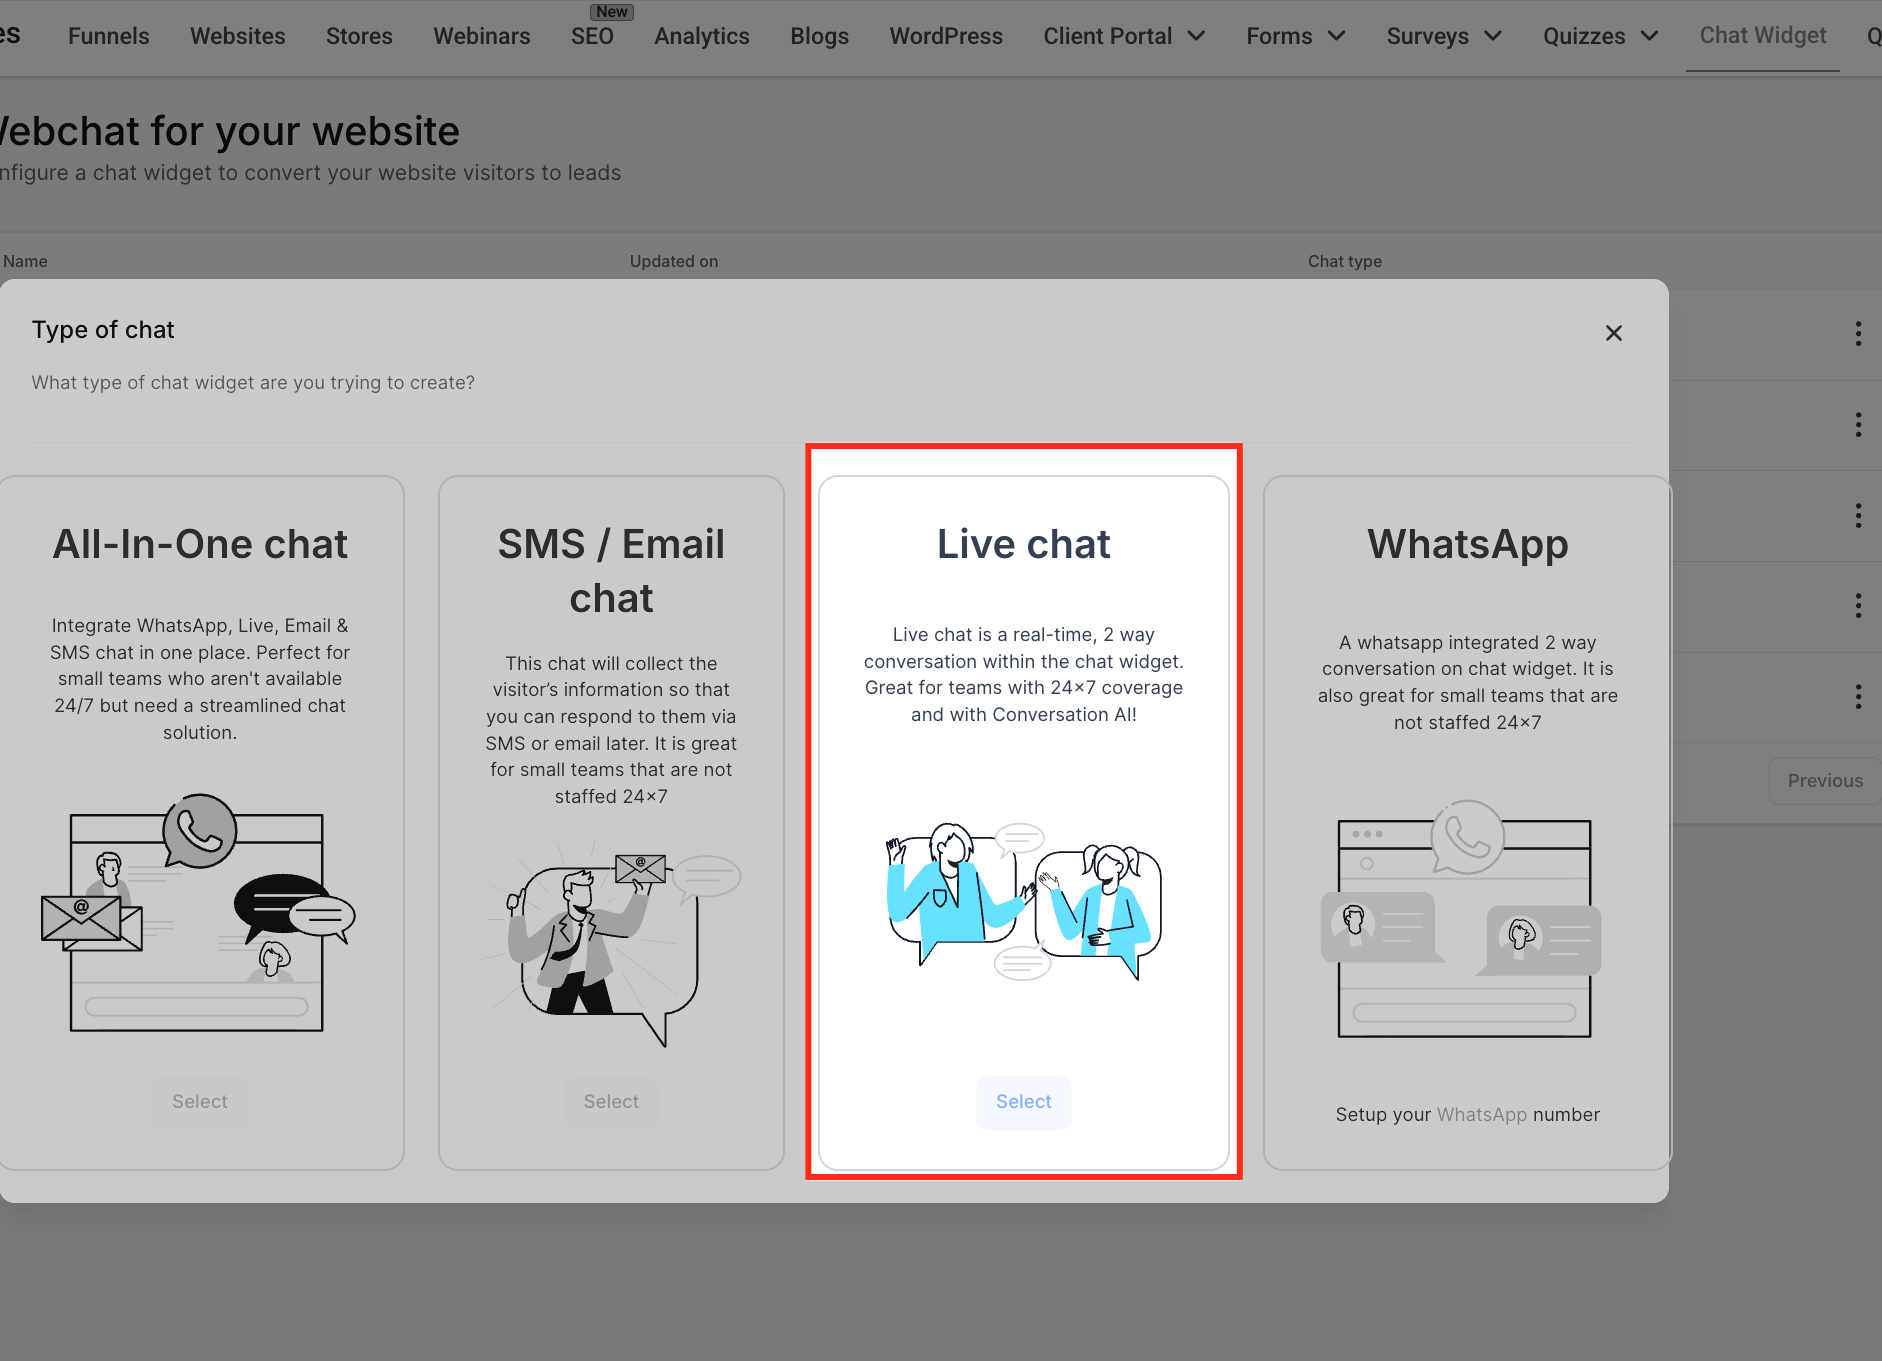
To enable real-time messaging in the Inbox, set the chat type to Live chat. Although the setup screen displays "Live chat," this option configures the Web Chat channel that routes website messages into your Inbox.
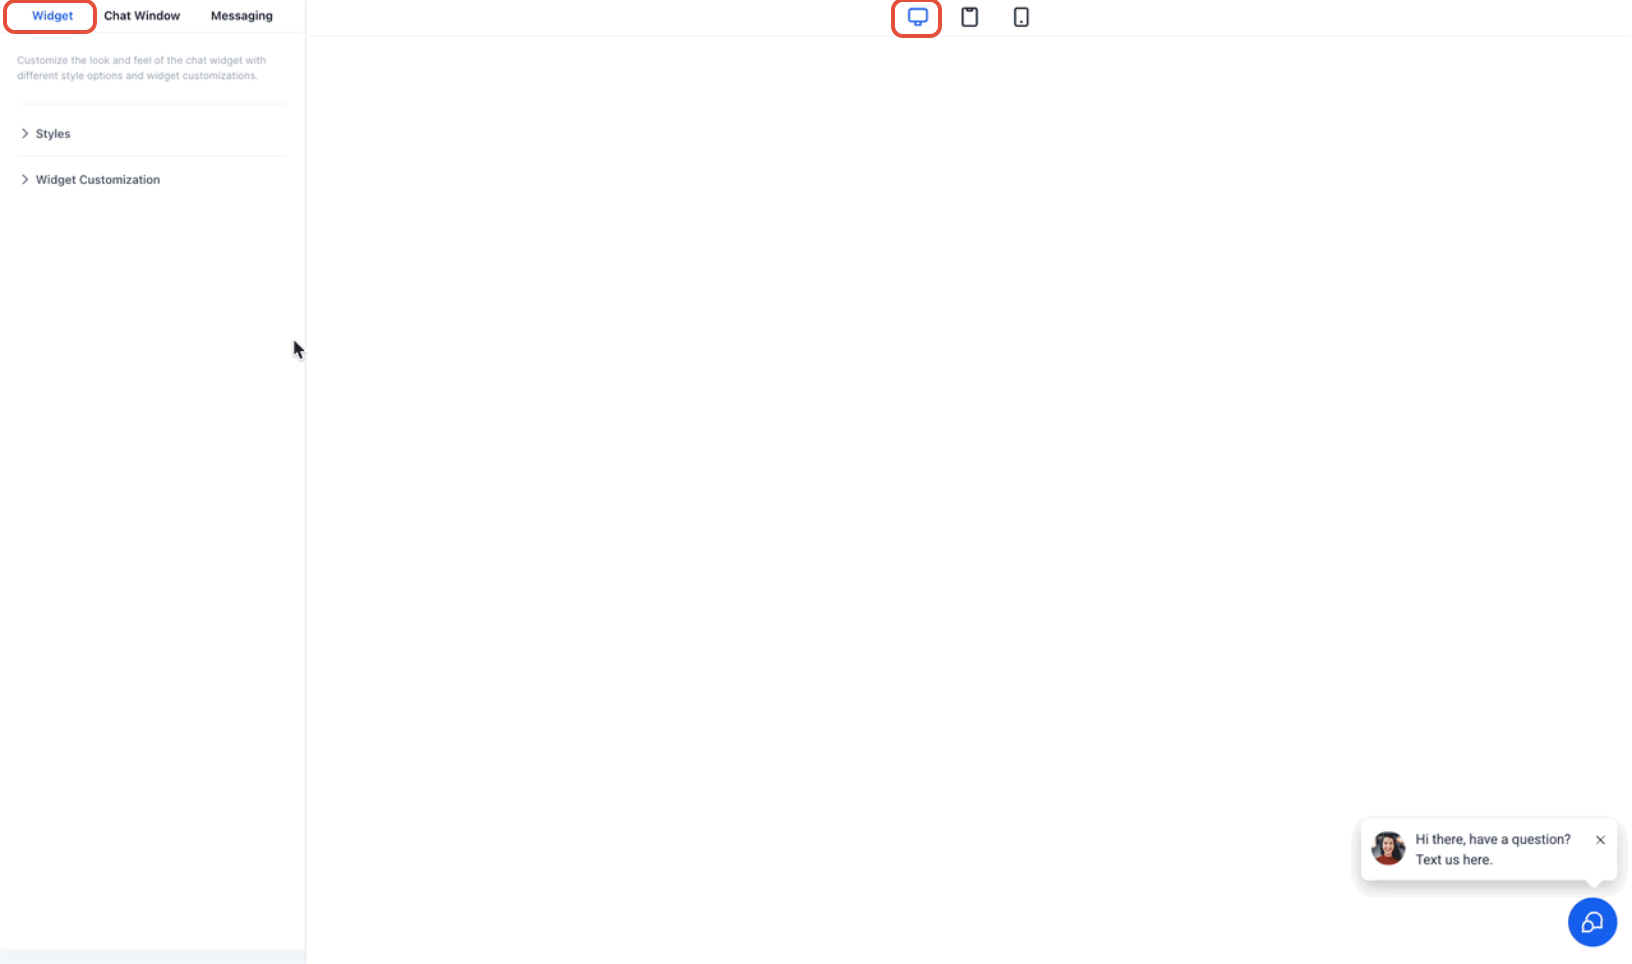
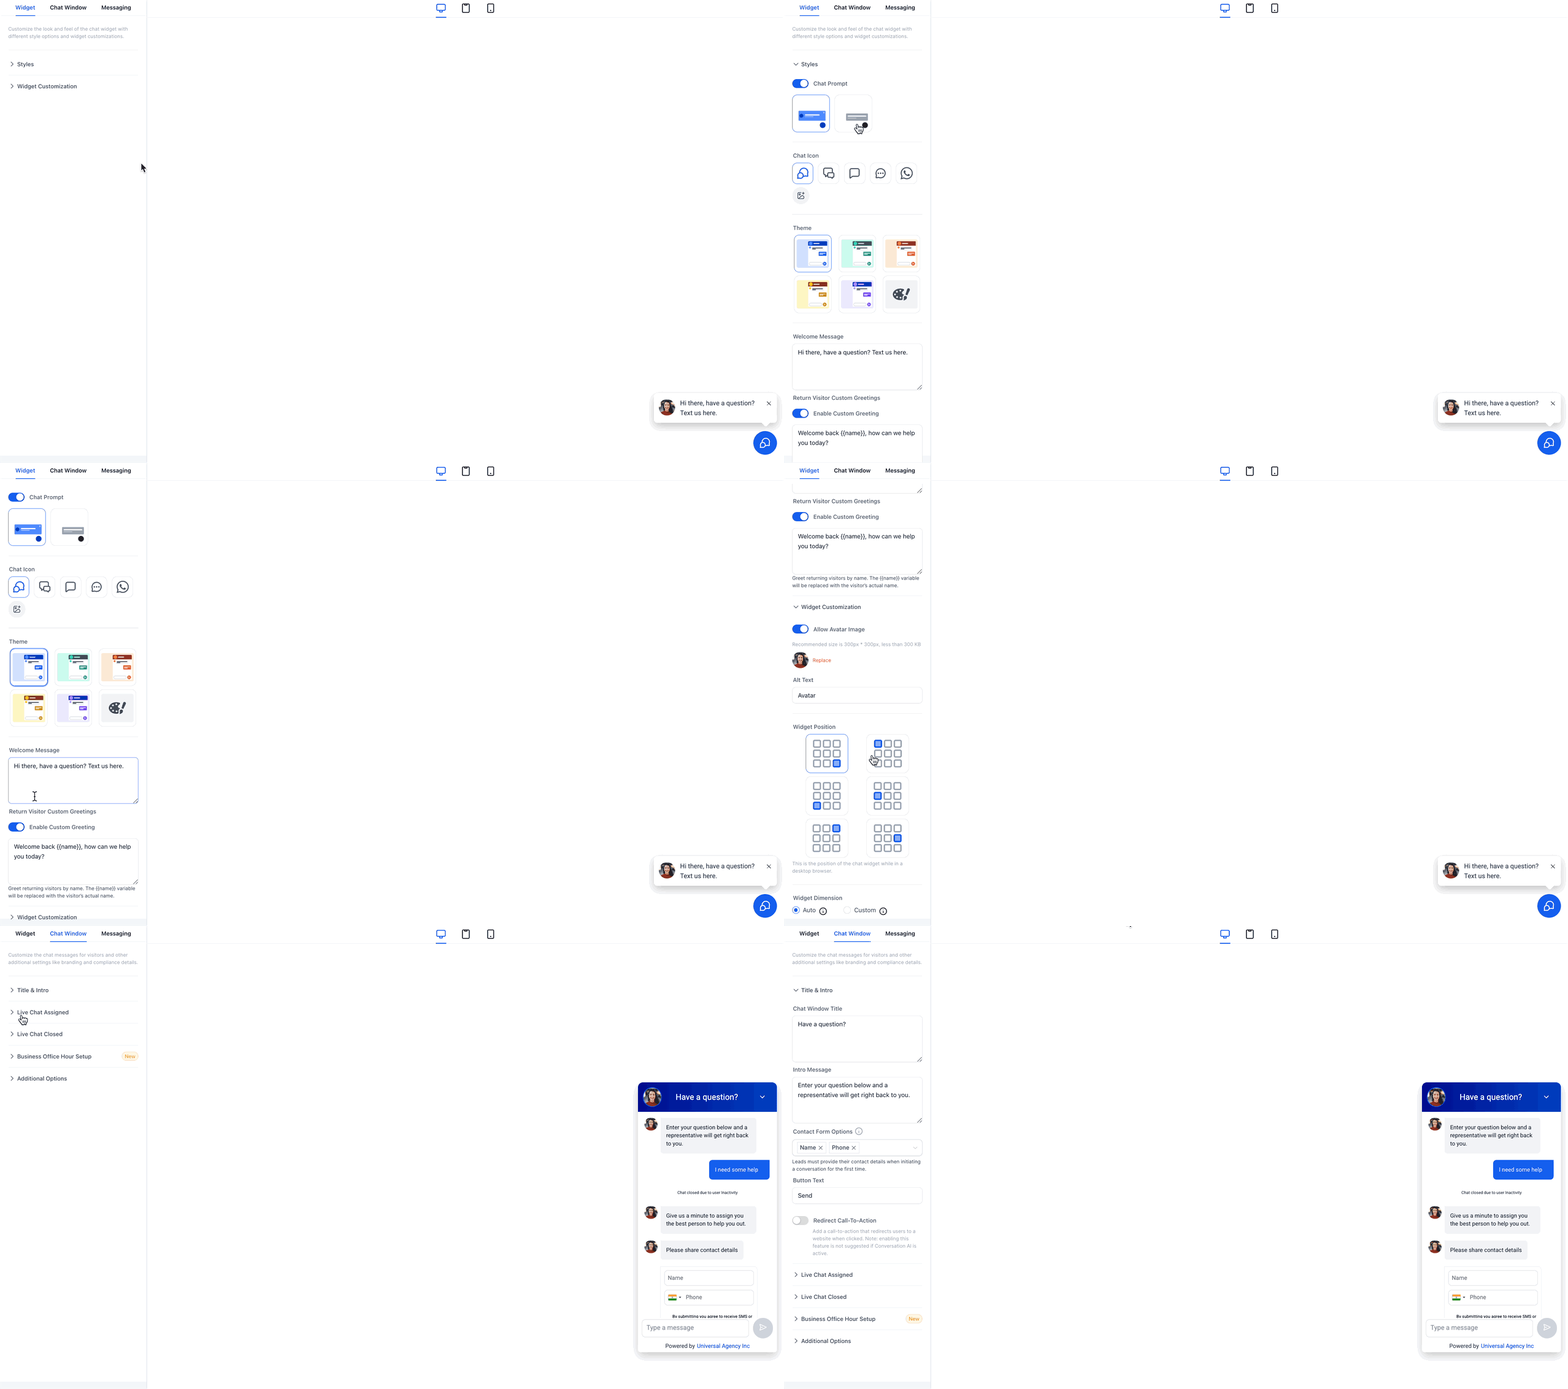
For a smooth chat experience, configure these essential settings inside the chat widget:
Intro message: A short greeting that appears before the chat starts.
Agent avatar and branding: Personalize the chat window to match your practice.
Inactivity fallback message: If no team member responds within a set time, an automated message collects the visitor's contact details.
Chat timeout message: If the visitor stops responding, the system closes the chat and notifies them.
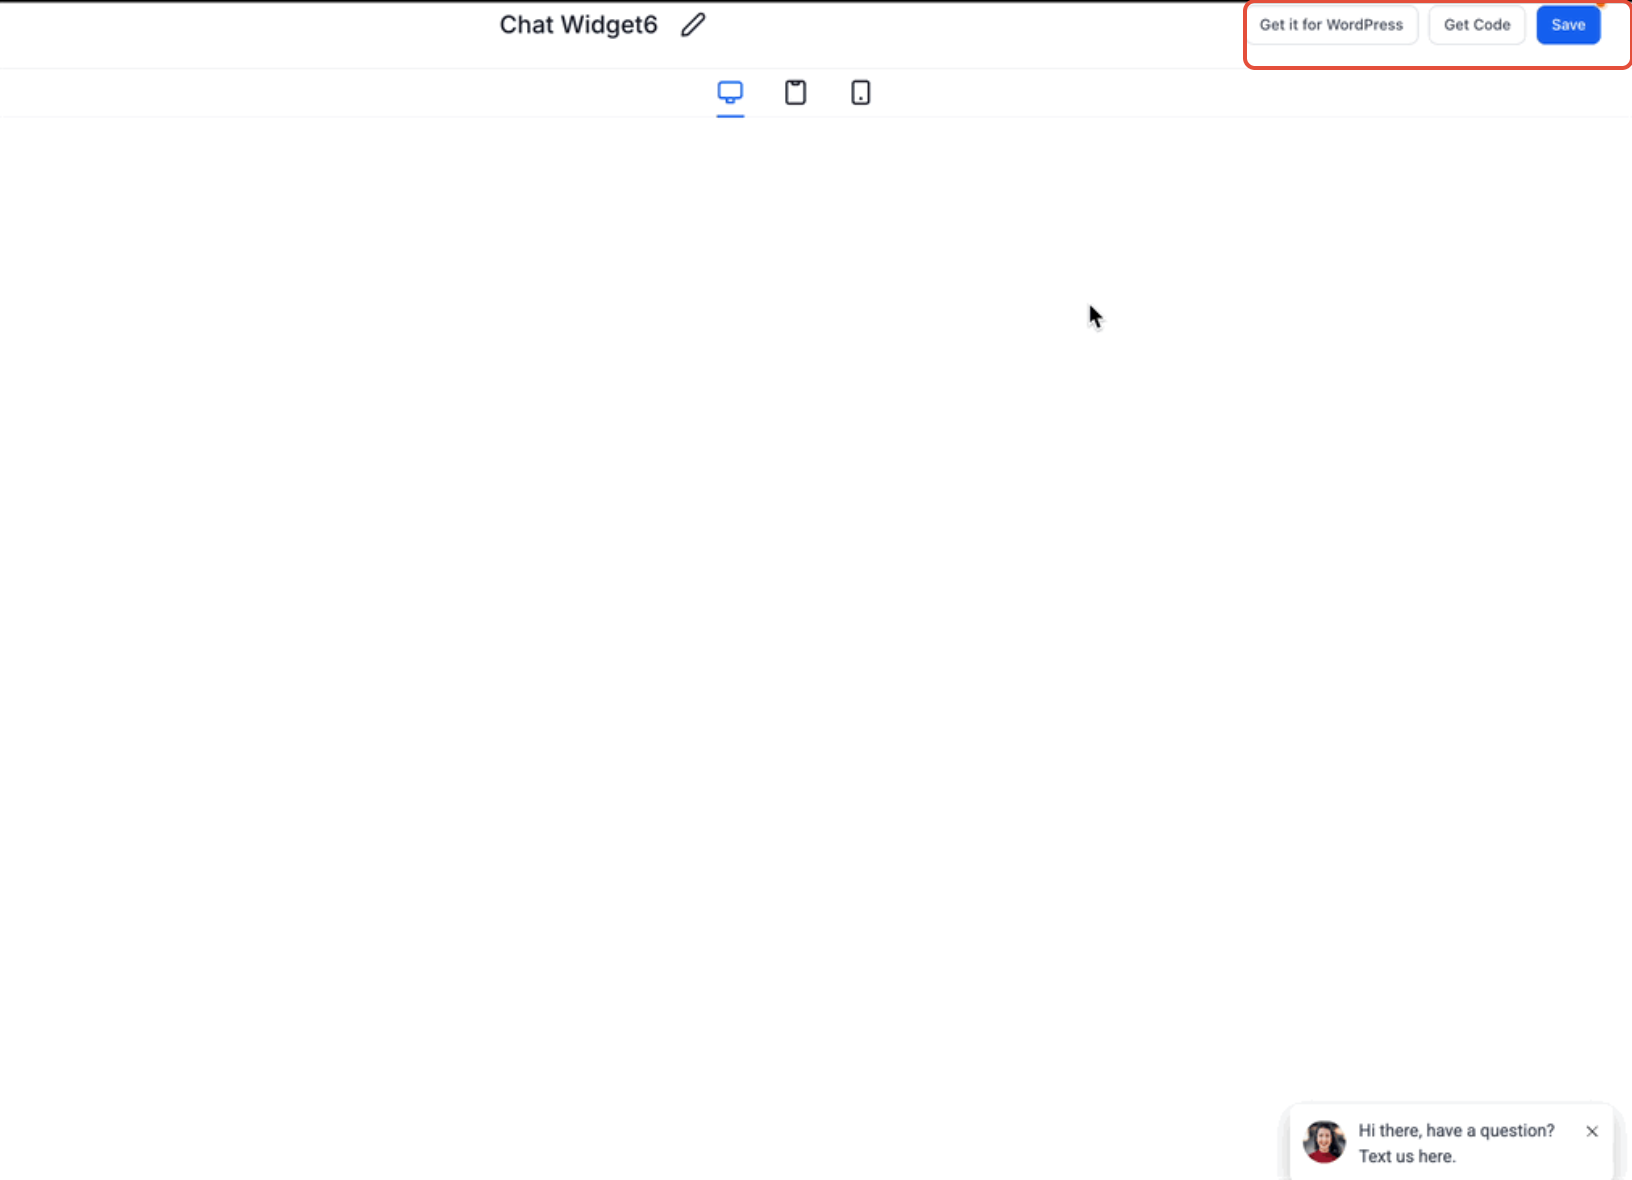
Once configured, save the widget and copy the installation code into your website's footer or body section. If you use WordPress, install the plugin to enable the widget.
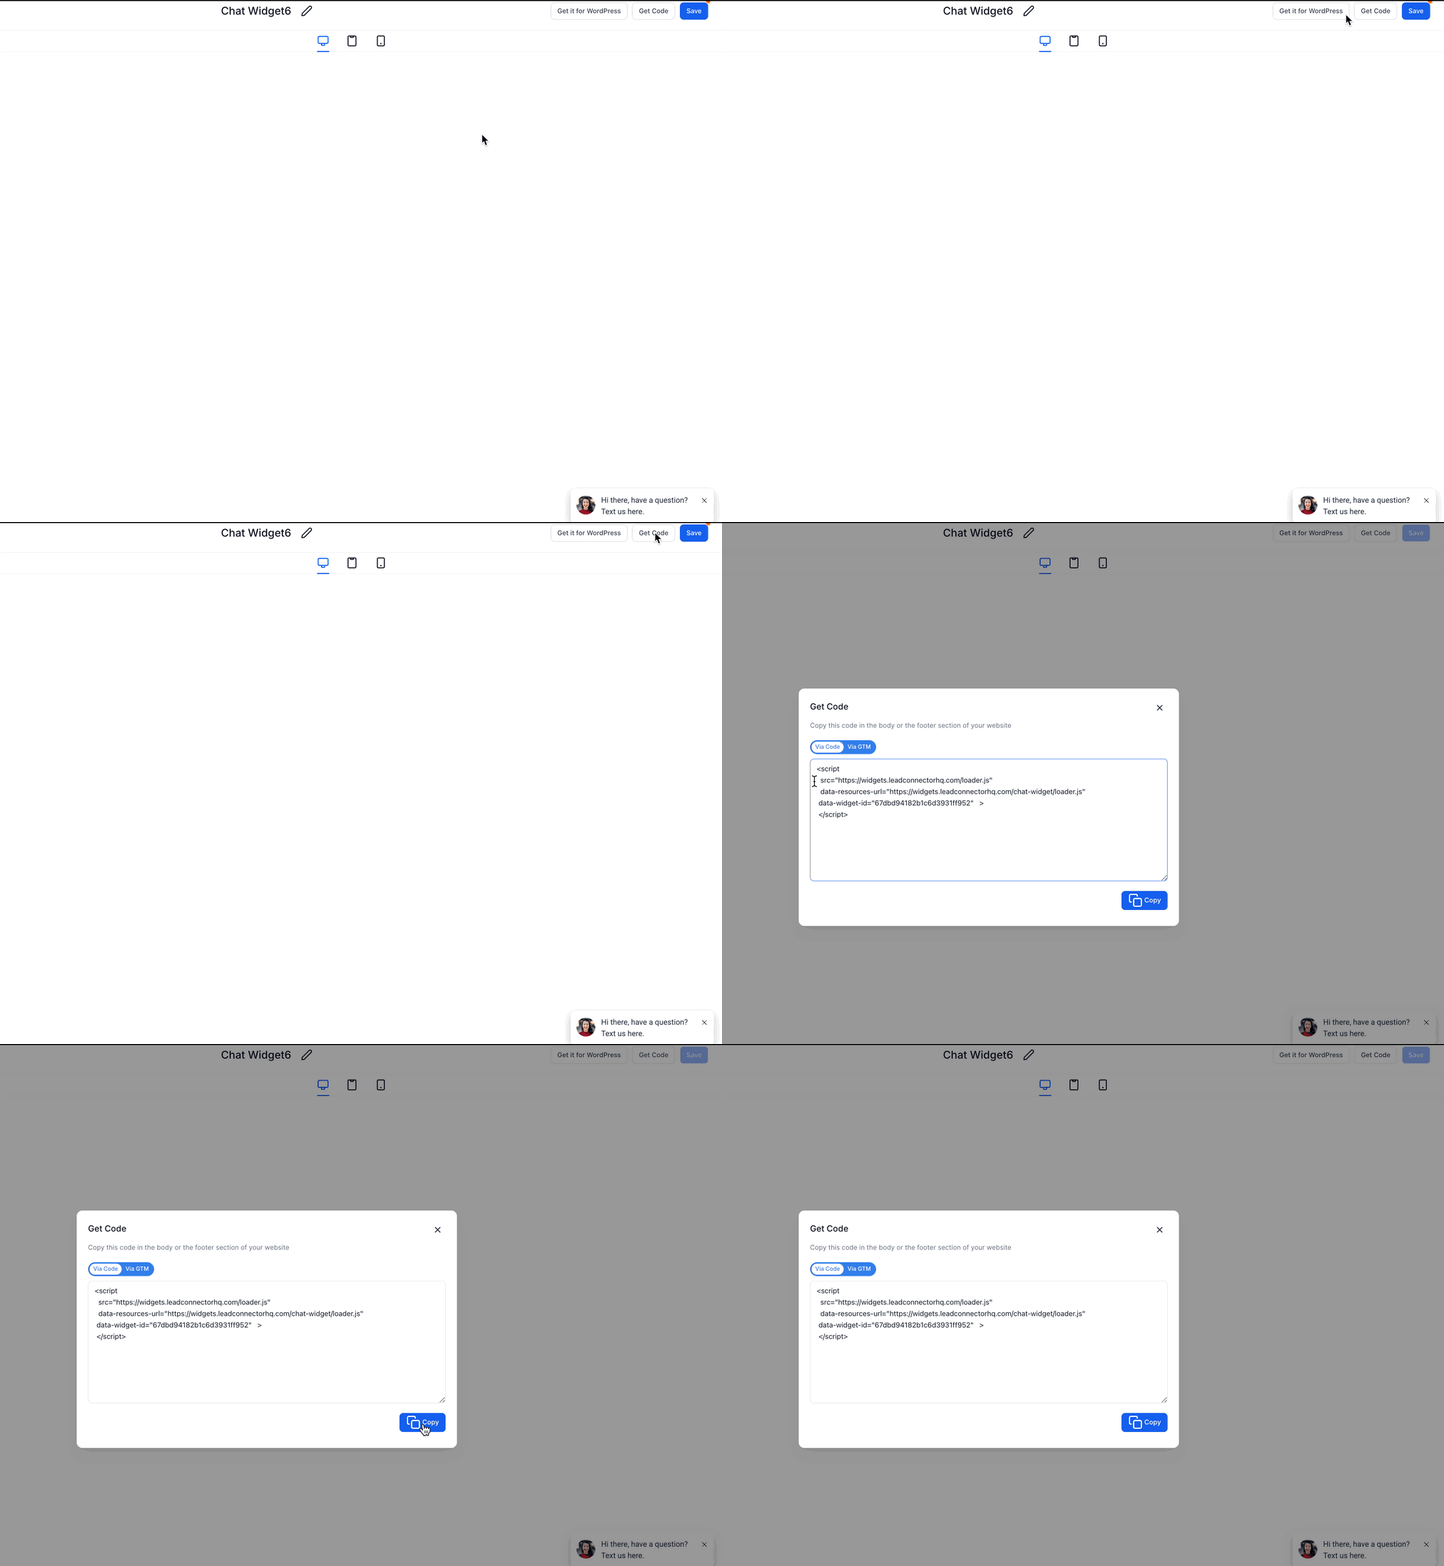
After installation, visitors can begin sending Web Chat messages from your website.
Once Web Chat is enabled, visitors can send messages from the widget and your team responds directly from the Inbox.
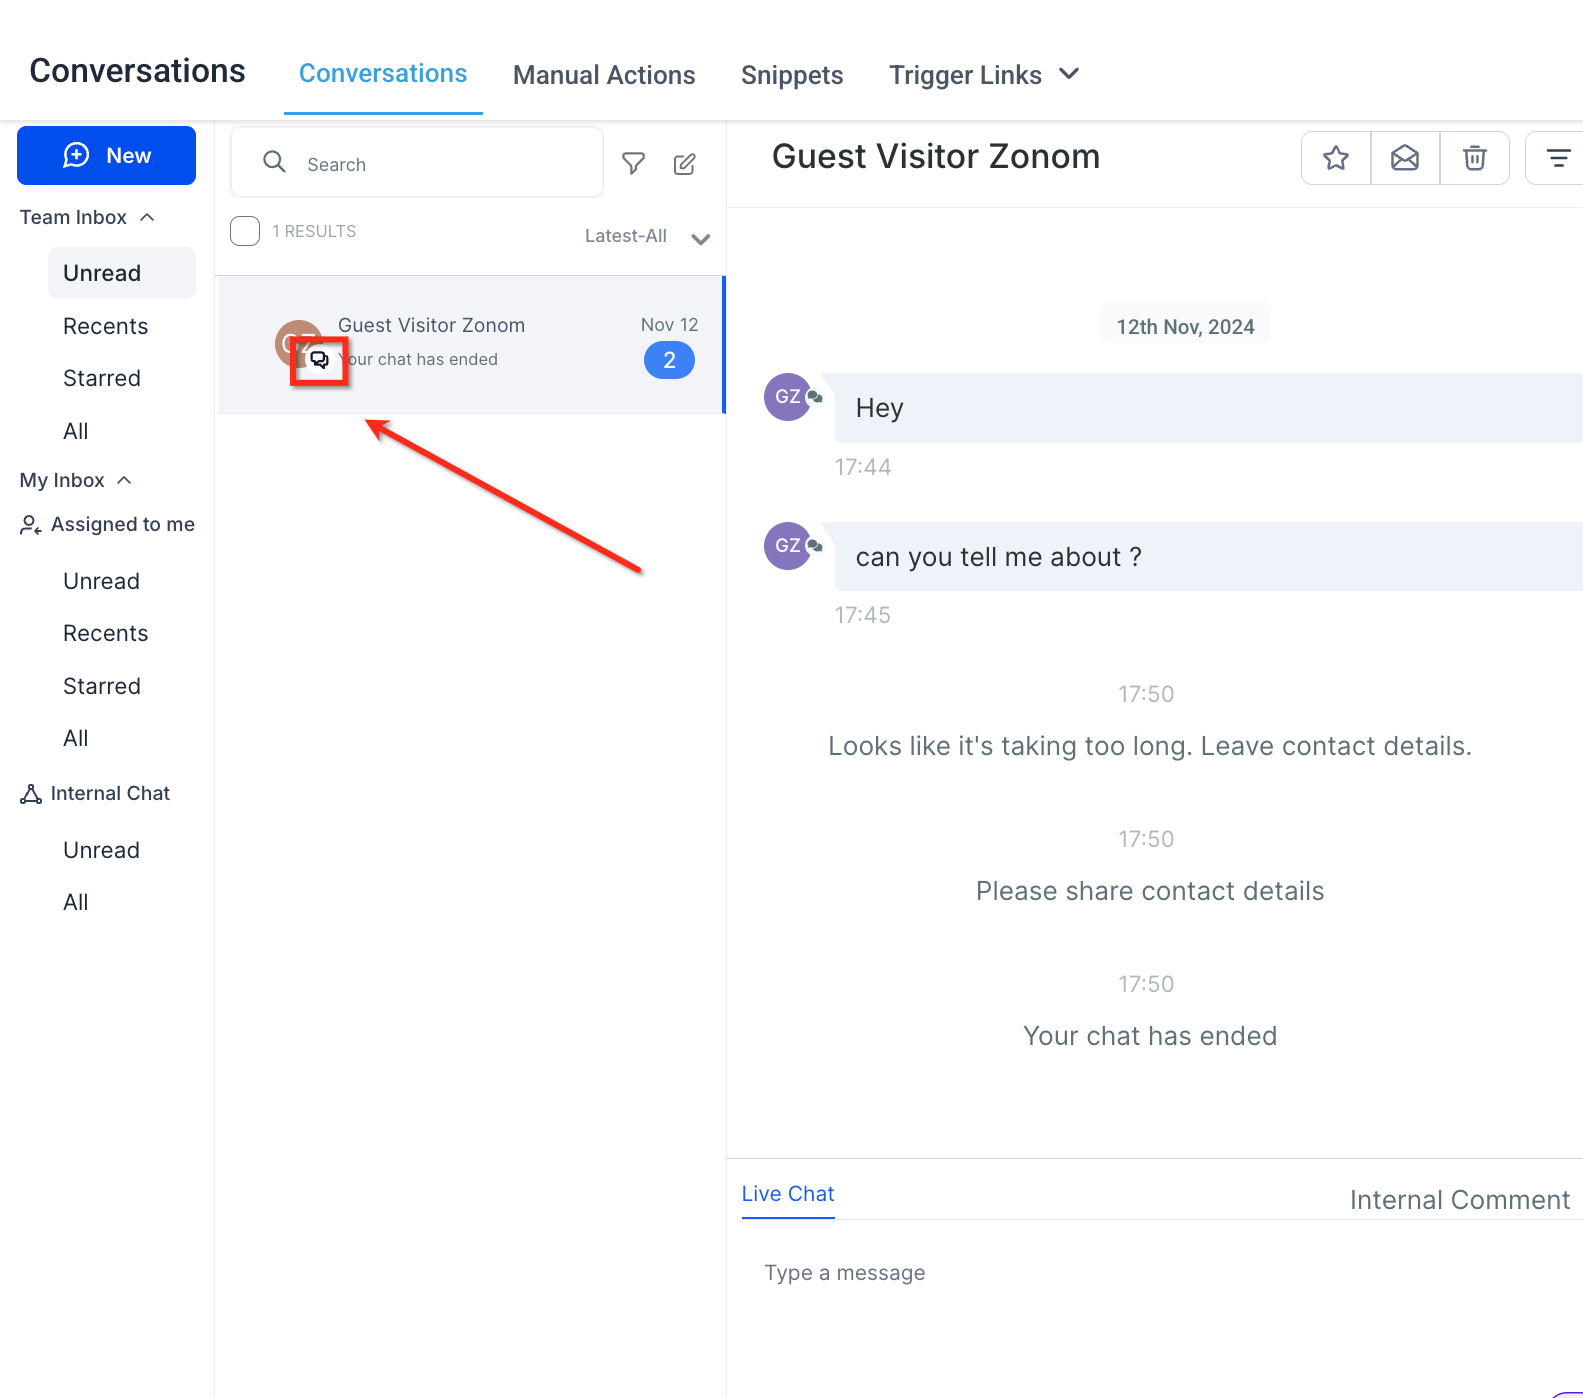
When a visitor sends a message, it appears instantly in the Inbox. You can identify Web Chat conversations by the chat icon. Click a chat to open the thread, view the message, and send responses in real time.
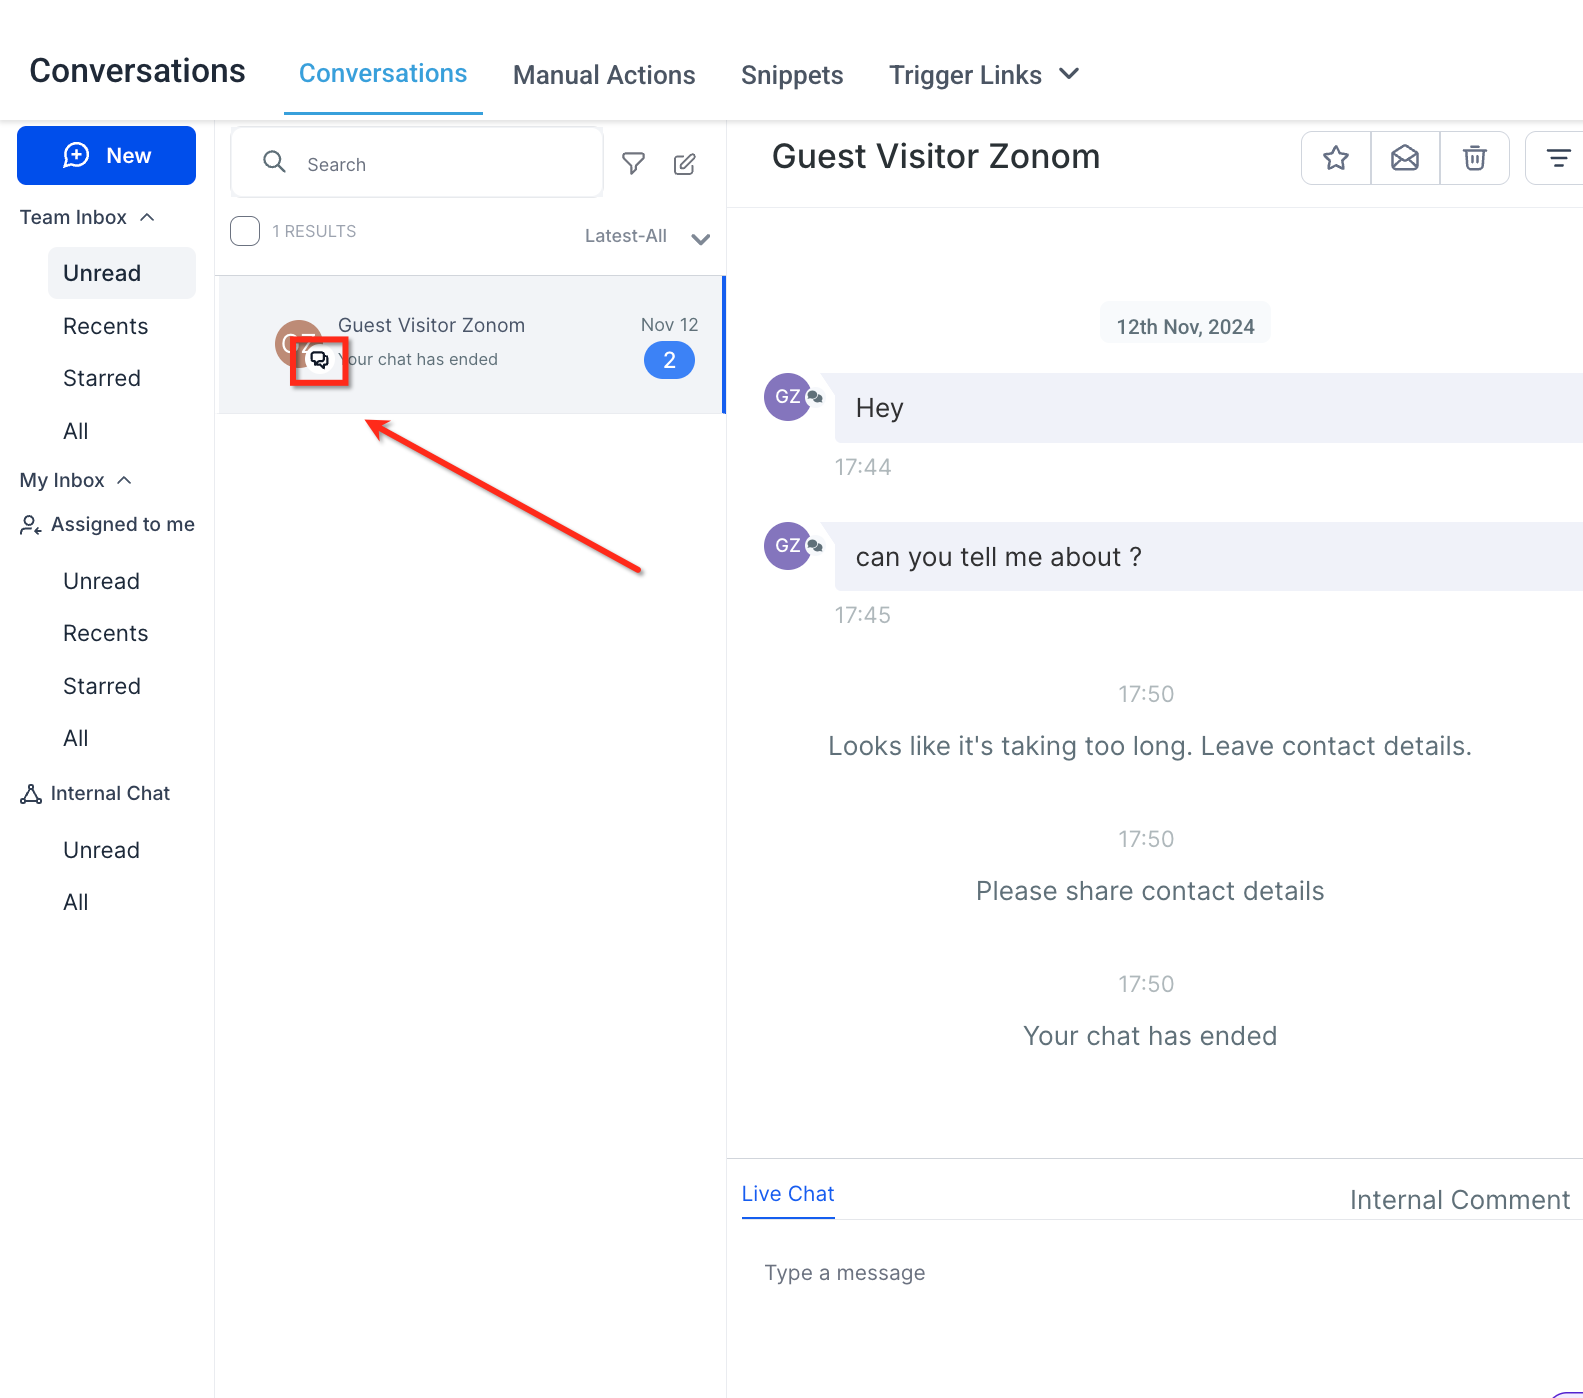
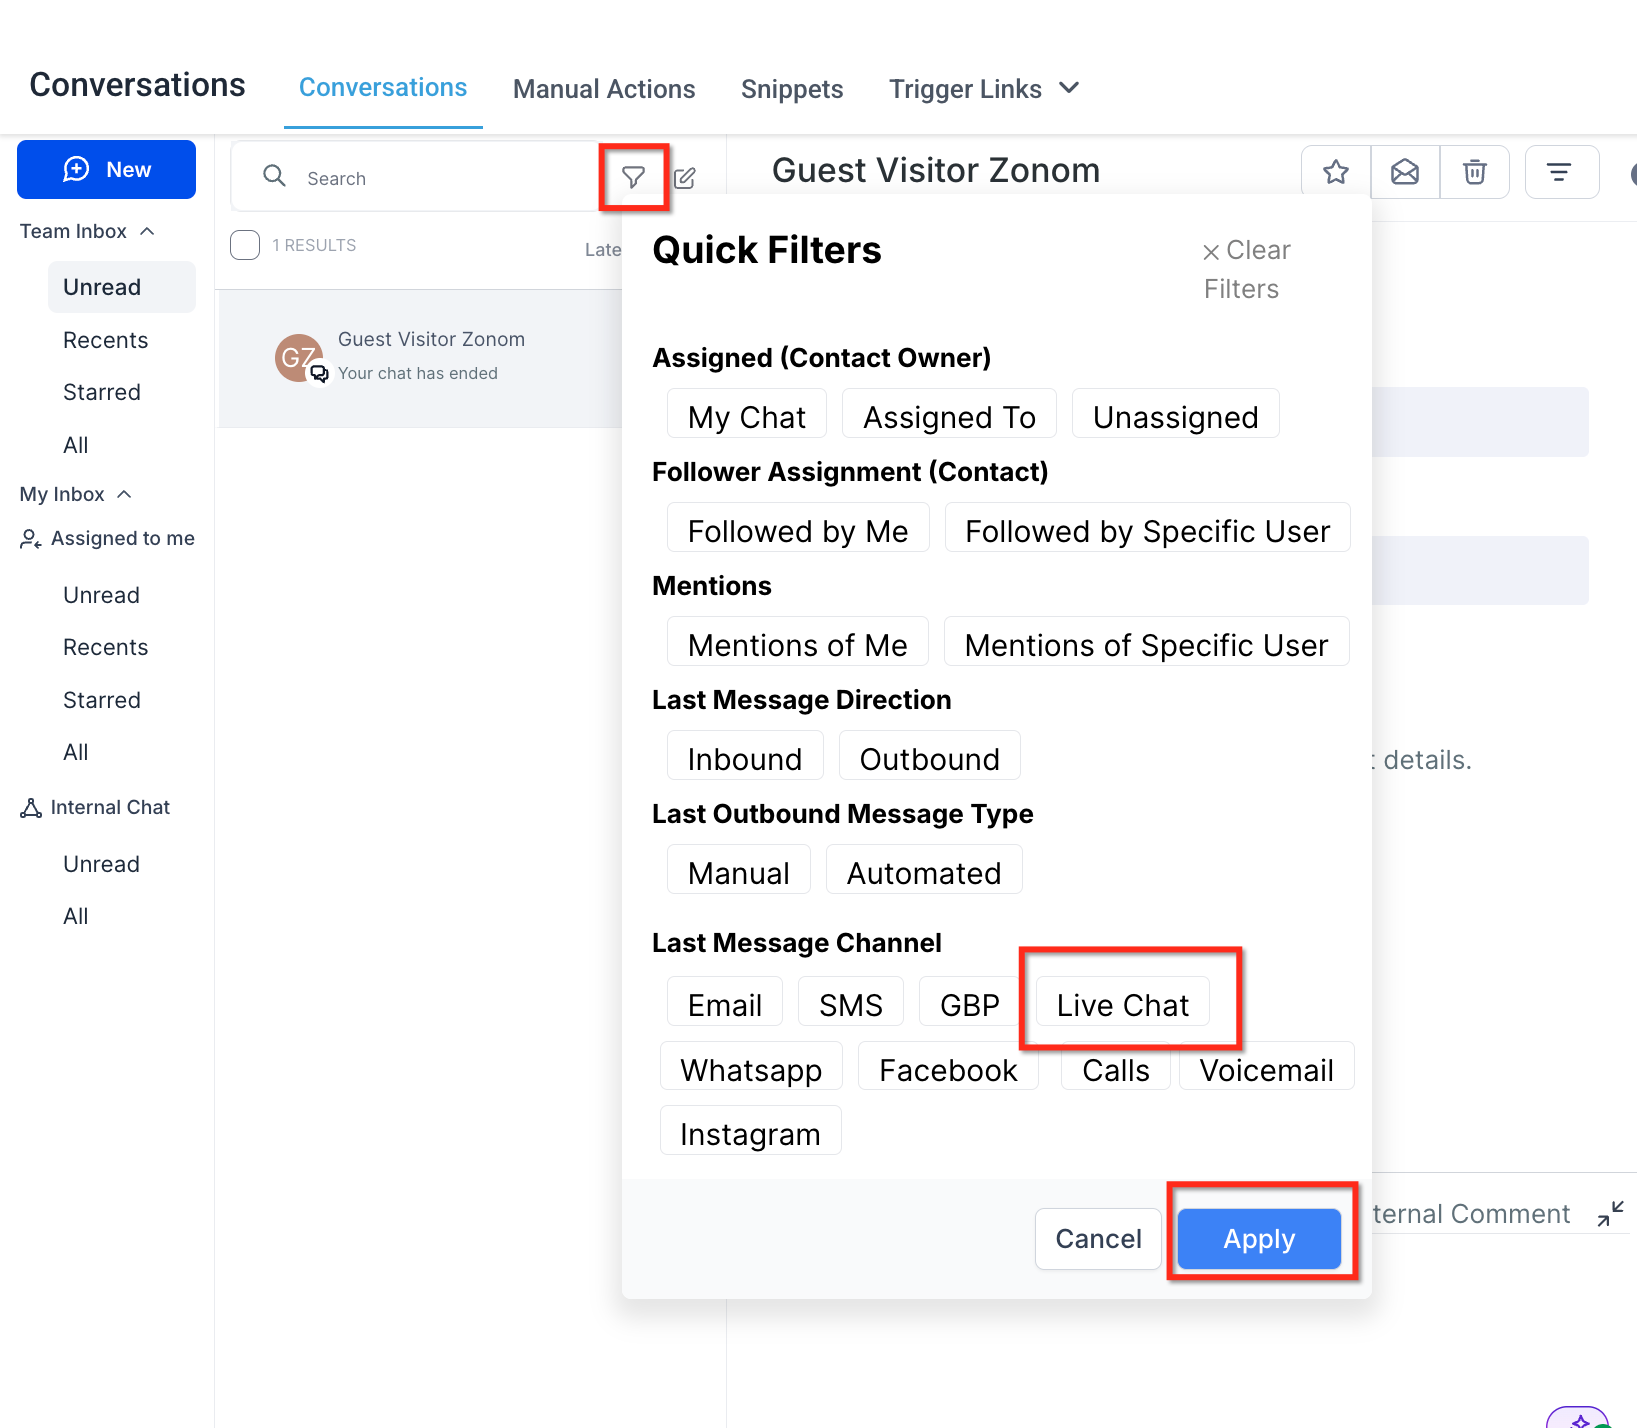
To focus only on Web Chat messages, use the filter option inside the Inbox. Under Last Message Channel, select Live Chat and apply the filter. This displays only Web Chat conversations originating from your website, making it easier to manage real-time interactions separately from SMS and email.
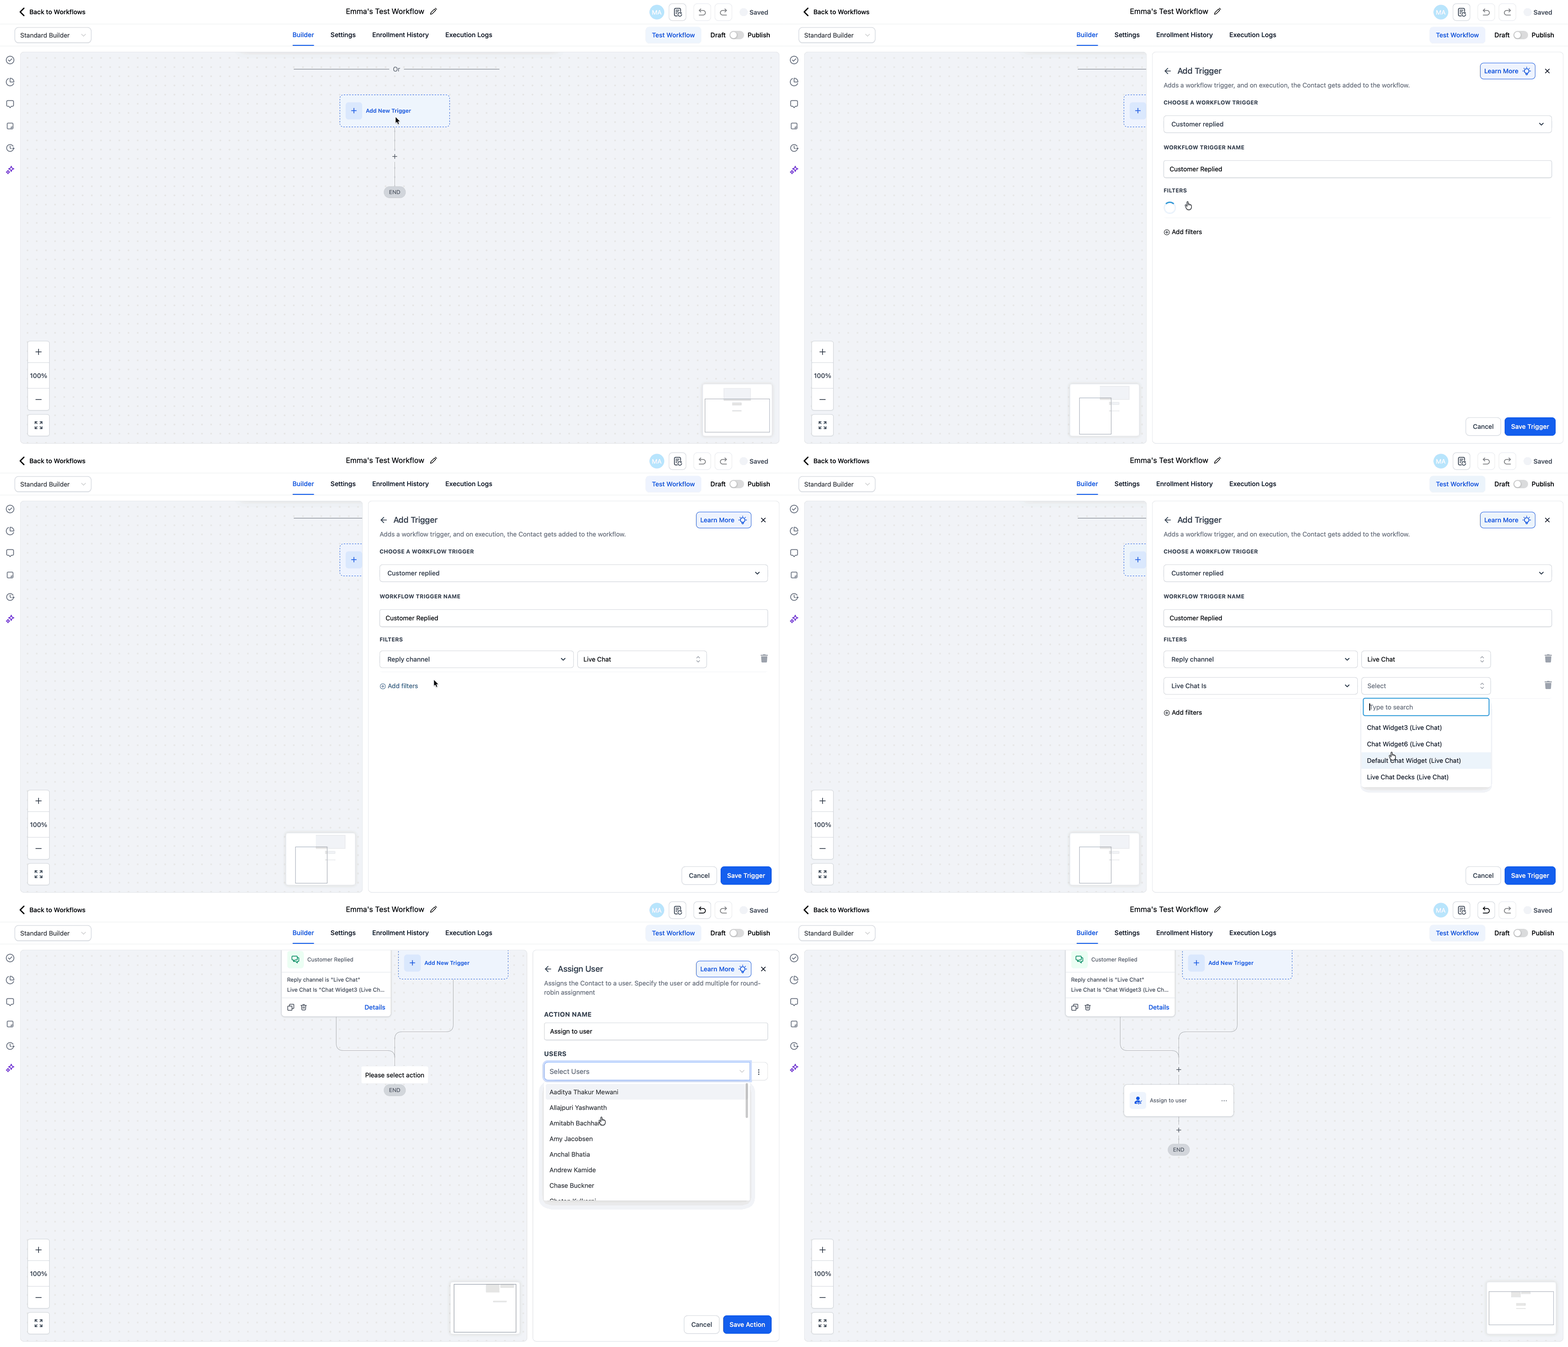
Chats can be assigned manually or automatically to team members using workflows or ownership rules. Below is a suggested workflow that routes chats from a chosen chat widget directly to a designated staff member.
Create a new workflow → Go to Automations → Workflows → click + New Workflow.
Add trigger → Click Add New Trigger → select Customer Replied or New Chat Message.
Add filters → Under trigger filters, set Channel = Live Chat, then add another filter Chat Widget is → and choose the desired widget from the dropdown.
Add action → Click + below the trigger → choose Assign to User.
Select user → In the action settings, pick the specific team member you want the chat assigned to.
Save and publish → Click Save, then toggle from Draft → Publish.
Use the End Chat option when a conversation is complete. You can also set an inactivity period in your chat widget configuration so a chat closes automatically when the visitor is inactive for a certain length of time.
How do I make sure Web Chat messages appear in the Inbox?
Install and enable the chat widget on your website, then set the chat type to Live chat under Sites → Chat Widget. Messages will automatically route to the Inbox. Without this setup, messages will not appear.
Why does the setup screen say "Live chat" if this is Web Chat?
The widget setup currently uses the label "Live chat," but selecting it configures the Web Chat channel that routes website conversations into your Inbox.
What happens if no one responds to a Web Chat message in real time?
If no team member responds within the fallback inactivity time configured in the widget settings, an automated message prompts the visitor to leave their contact details. This lets the conversation continue later by email or SMS, even when live support is unavailable.
Can Web Chat conversations be assigned to specific team members?
Yes. Conversations can be assigned manually or routed automatically to team members using workflows and assignment rules, so the right person handles each chat.
Can I filter to view only Web Chat conversations?
Yes. Use the filter option inside the Inbox and select Live Chat under the message channel filter. This displays only Web Chat conversations, separate from SMS and email.
How do I close a Web Chat conversation?
Use the End Chat option when the conversation is finished. Chats can also close automatically based on the inactivity settings configured in your chat widget.
