WhatsApp gives your practice a direct, familiar channel for reaching patients, and pairing it with automation lets you respond the moment someone messages you. Using the WhatsApp action inside your workflows, you can send free-form replies, deliver pre-approved templates, wait for a patient to respond, branch on how they reply, and respect opt-out requests, all without staffing every conversation by hand.
Workflows live under Marketing → Workflows. If you are new to building automations, review the Automation & Workflows collection first, then return here to add WhatsApp to your sequences.
Note: Automated WhatsApp sends still require patient consent. Only message patients who have opted in to receive communication from your practice, and always honor opt-out requests.
This automation listens for a patient replying on WhatsApp and answers them automatically.
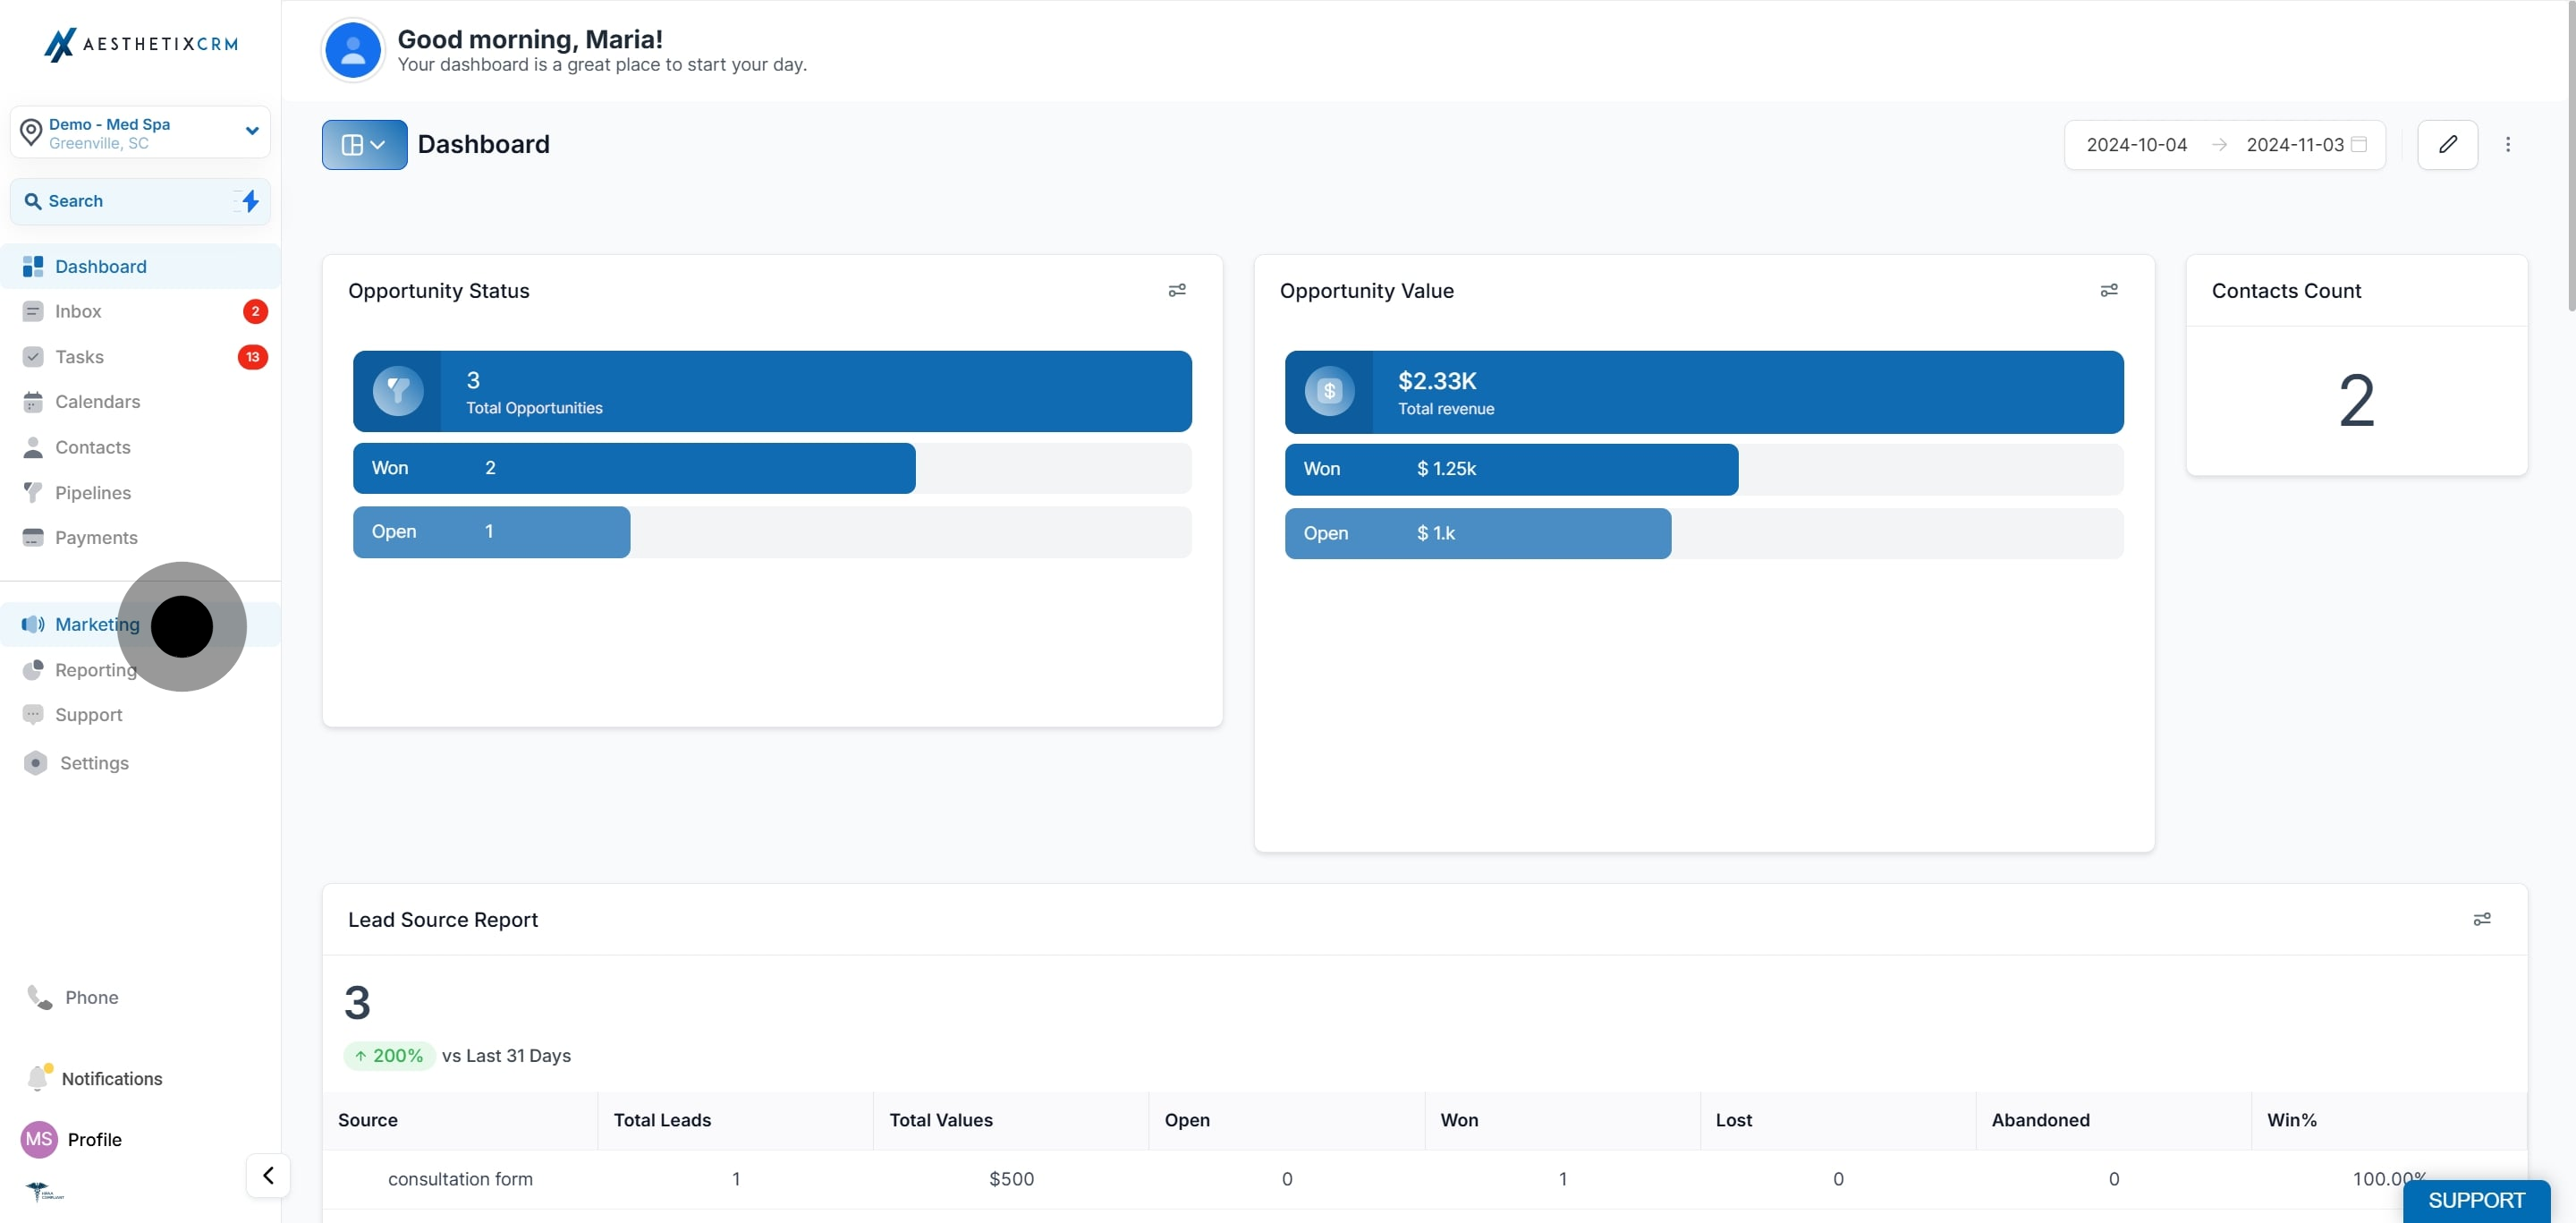
From the left menu, click Marketing.
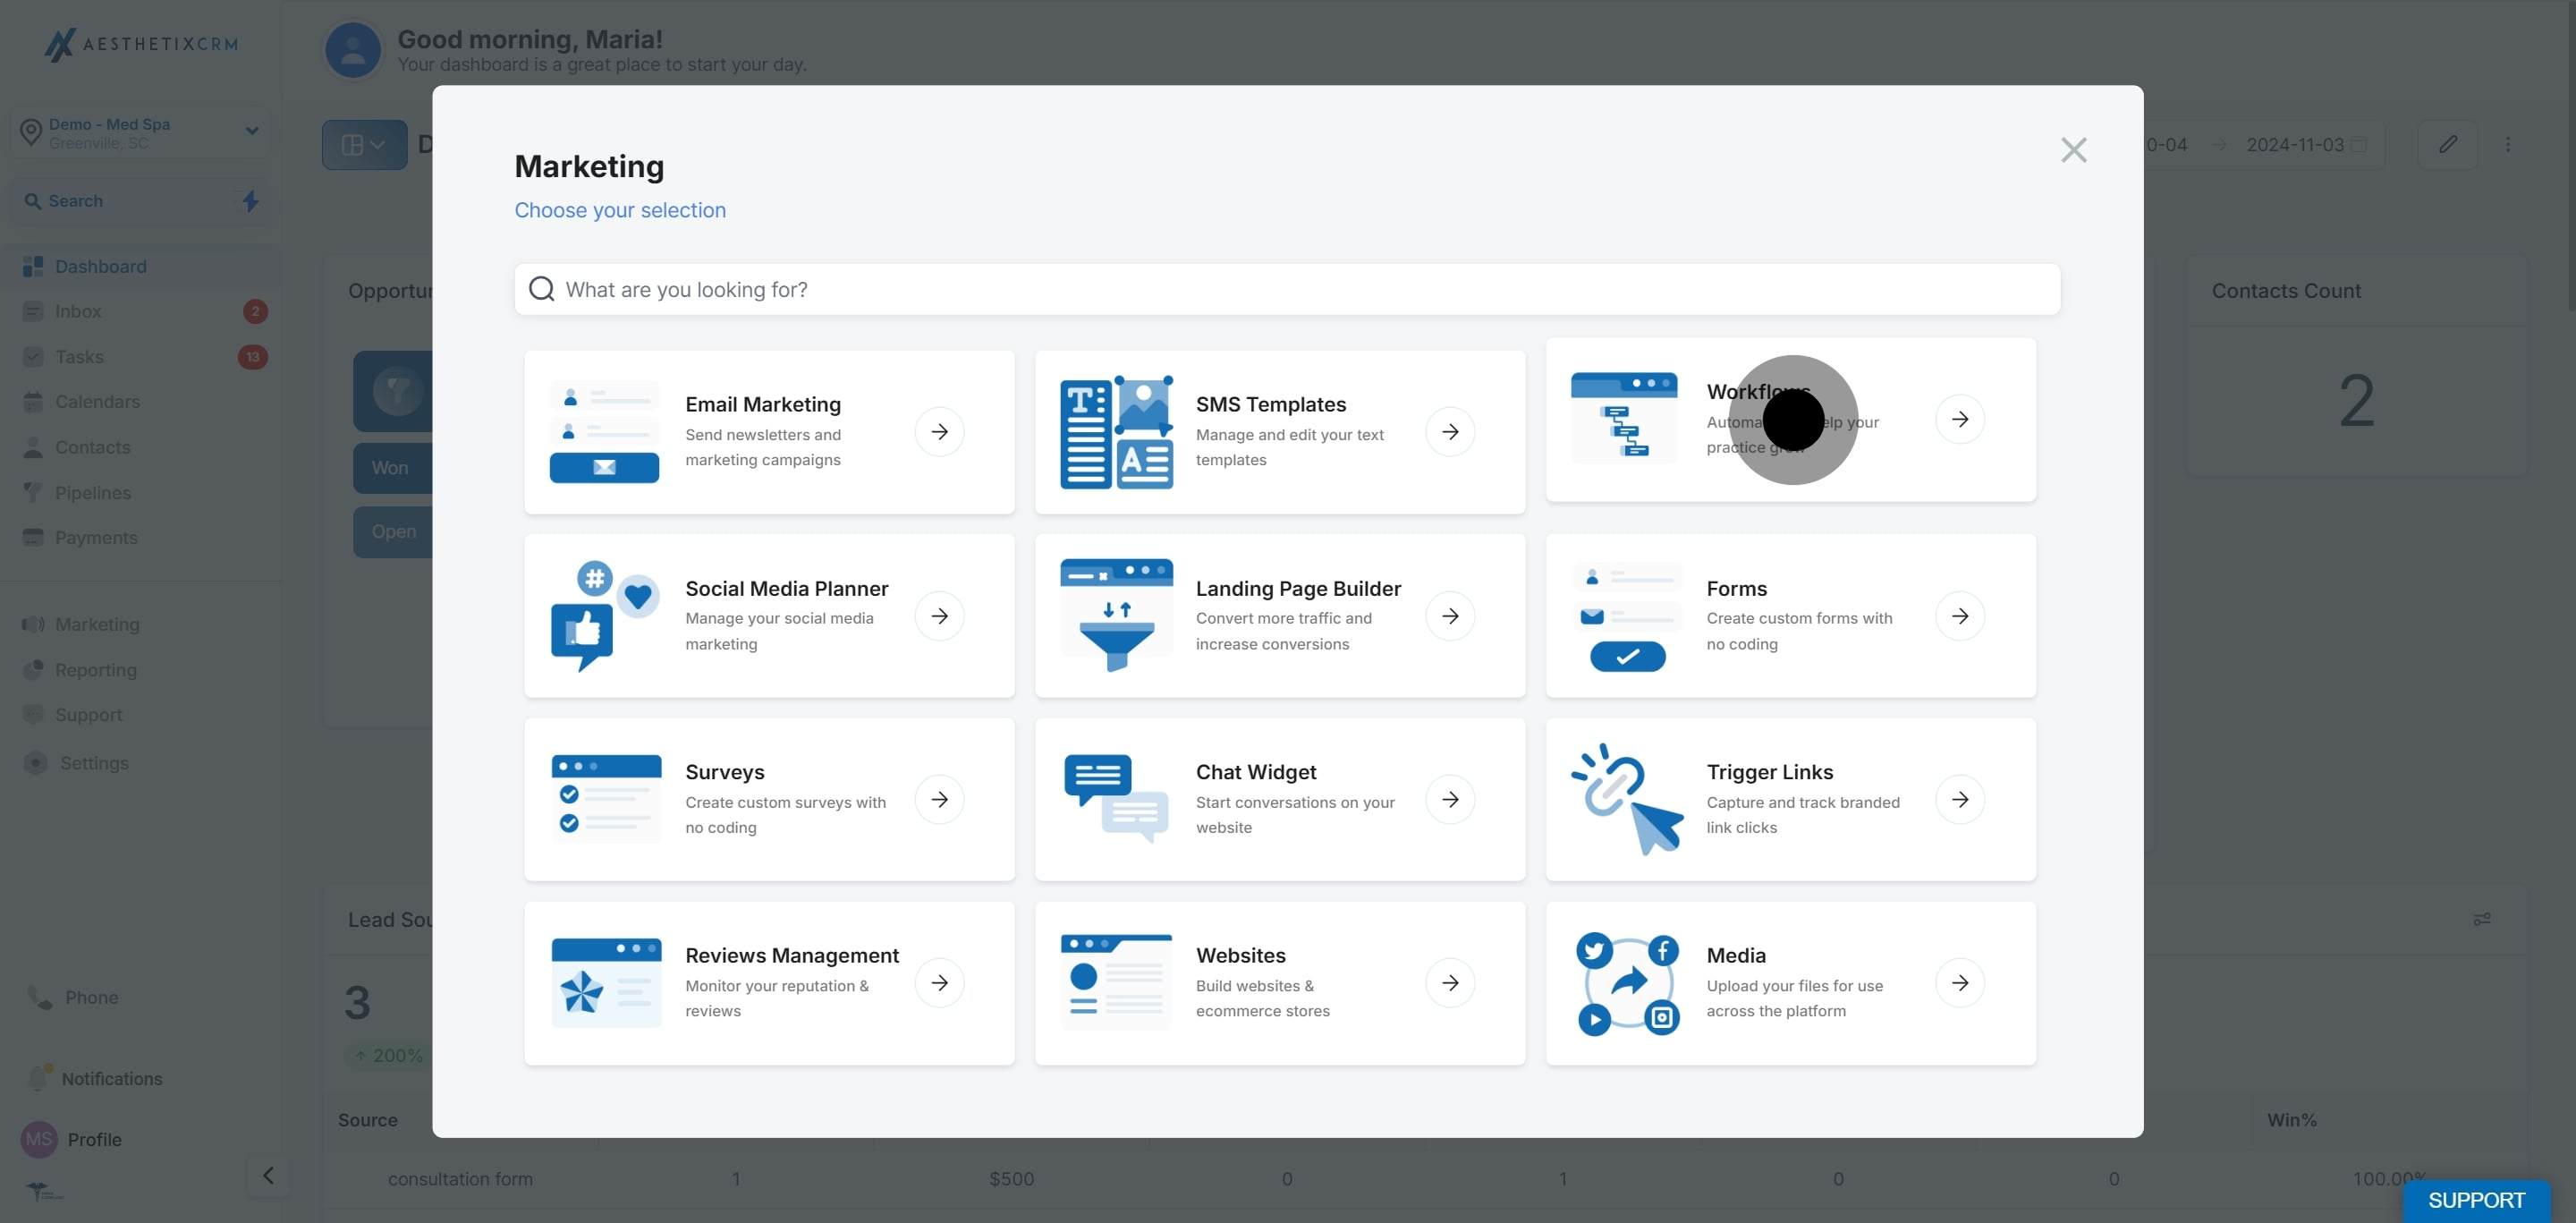
Click Workflows.
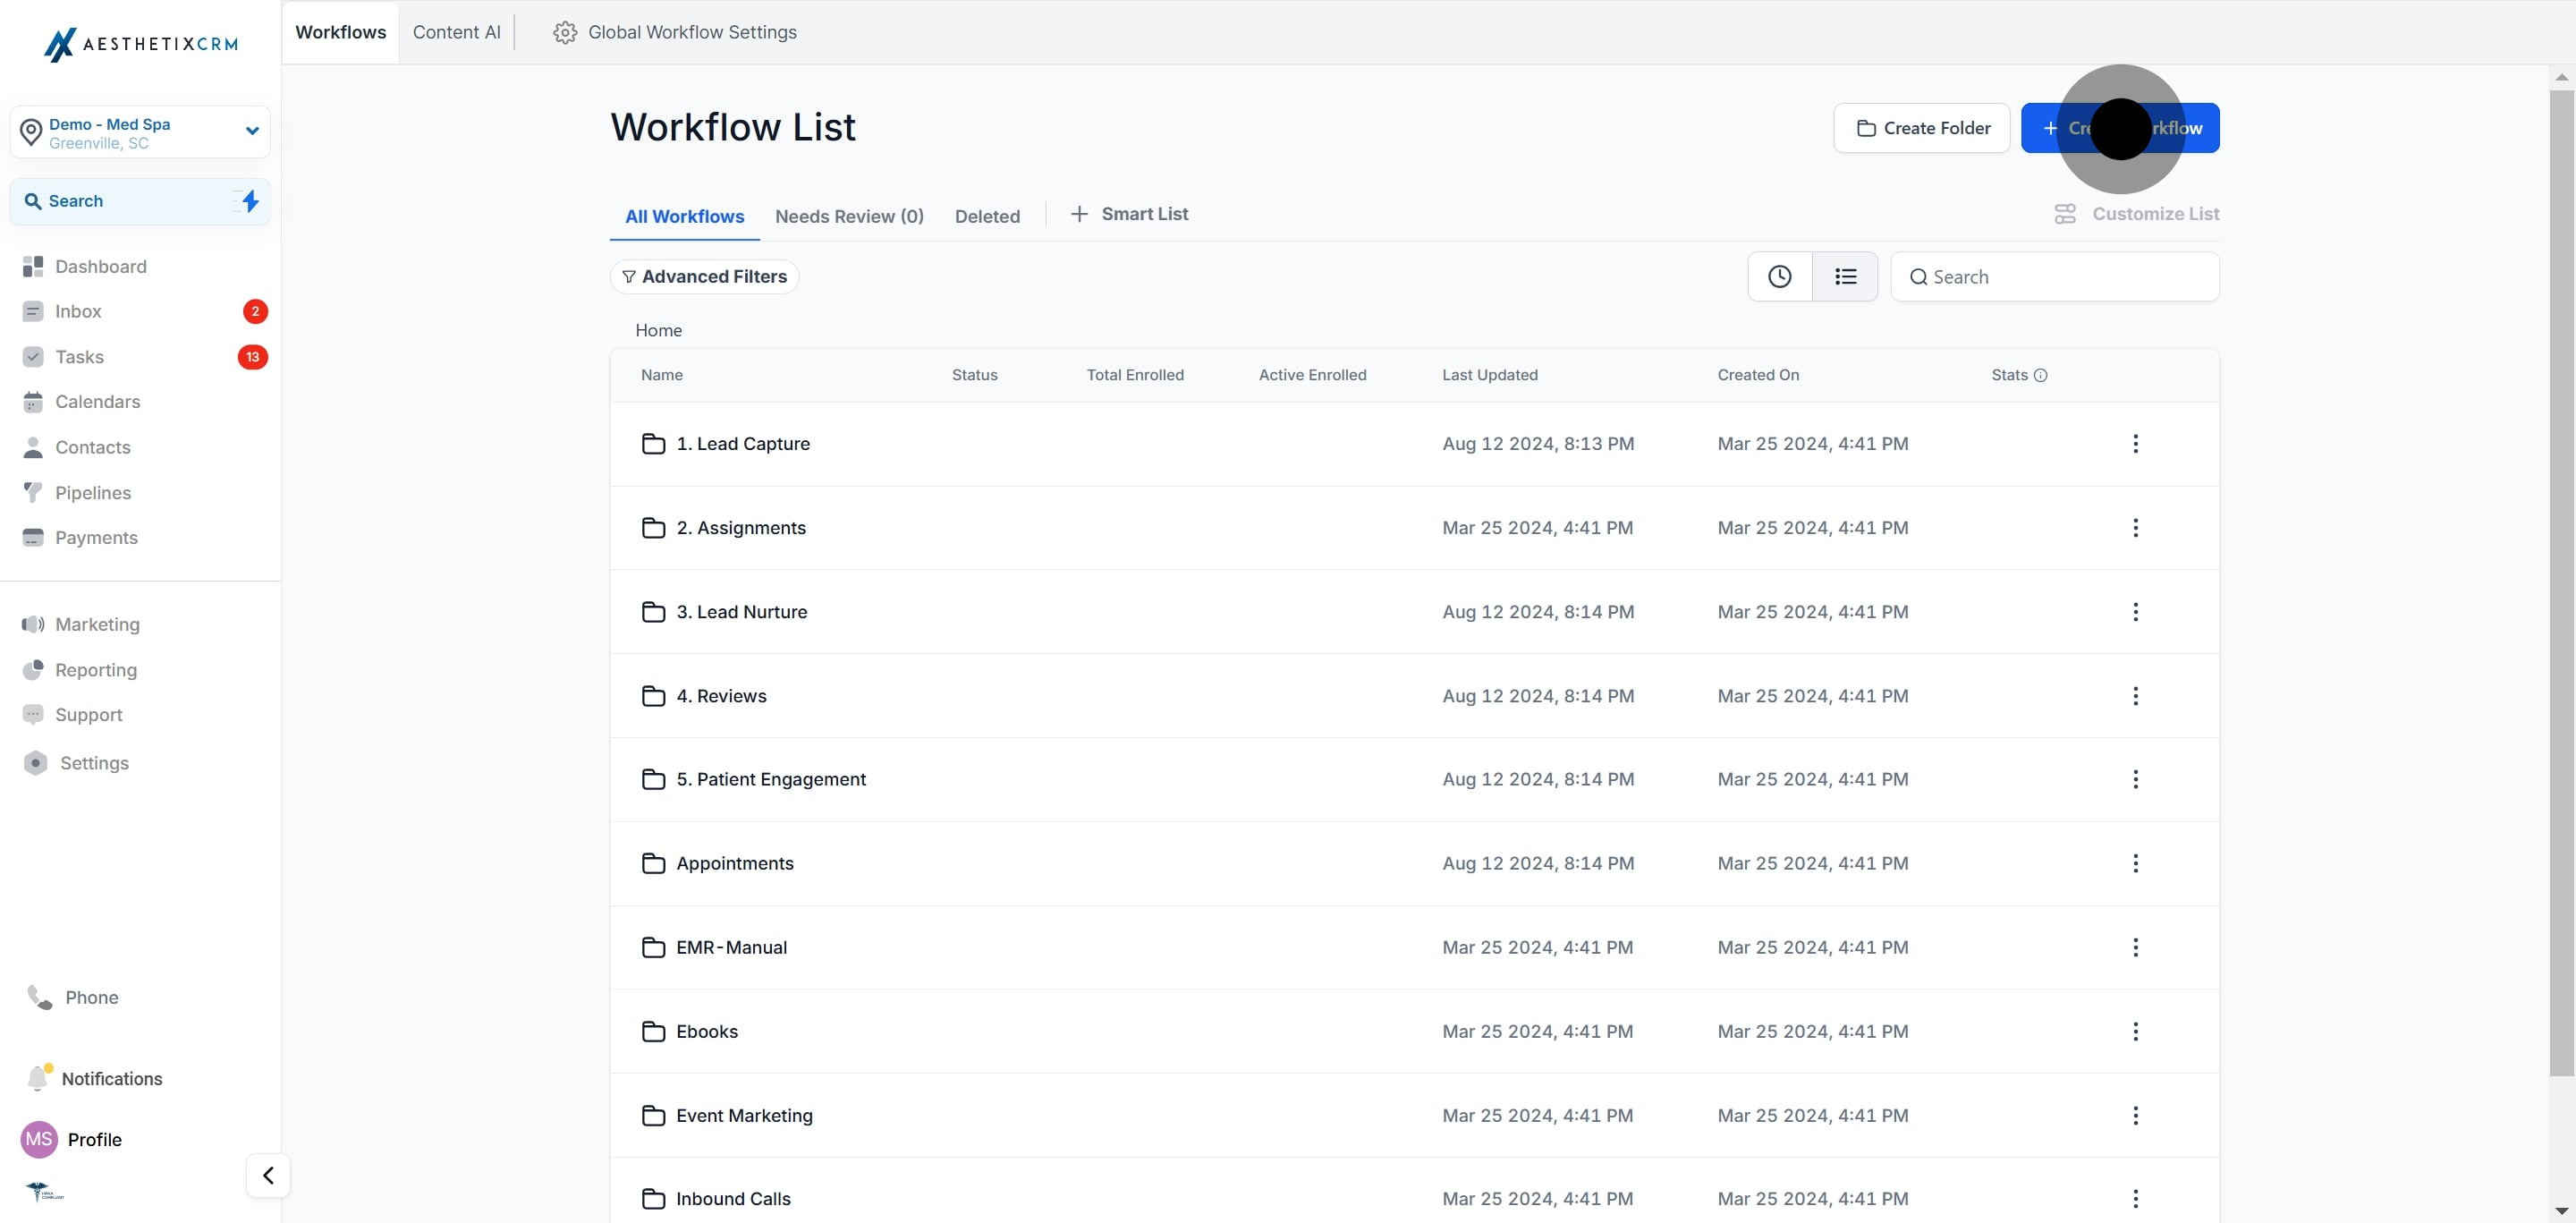
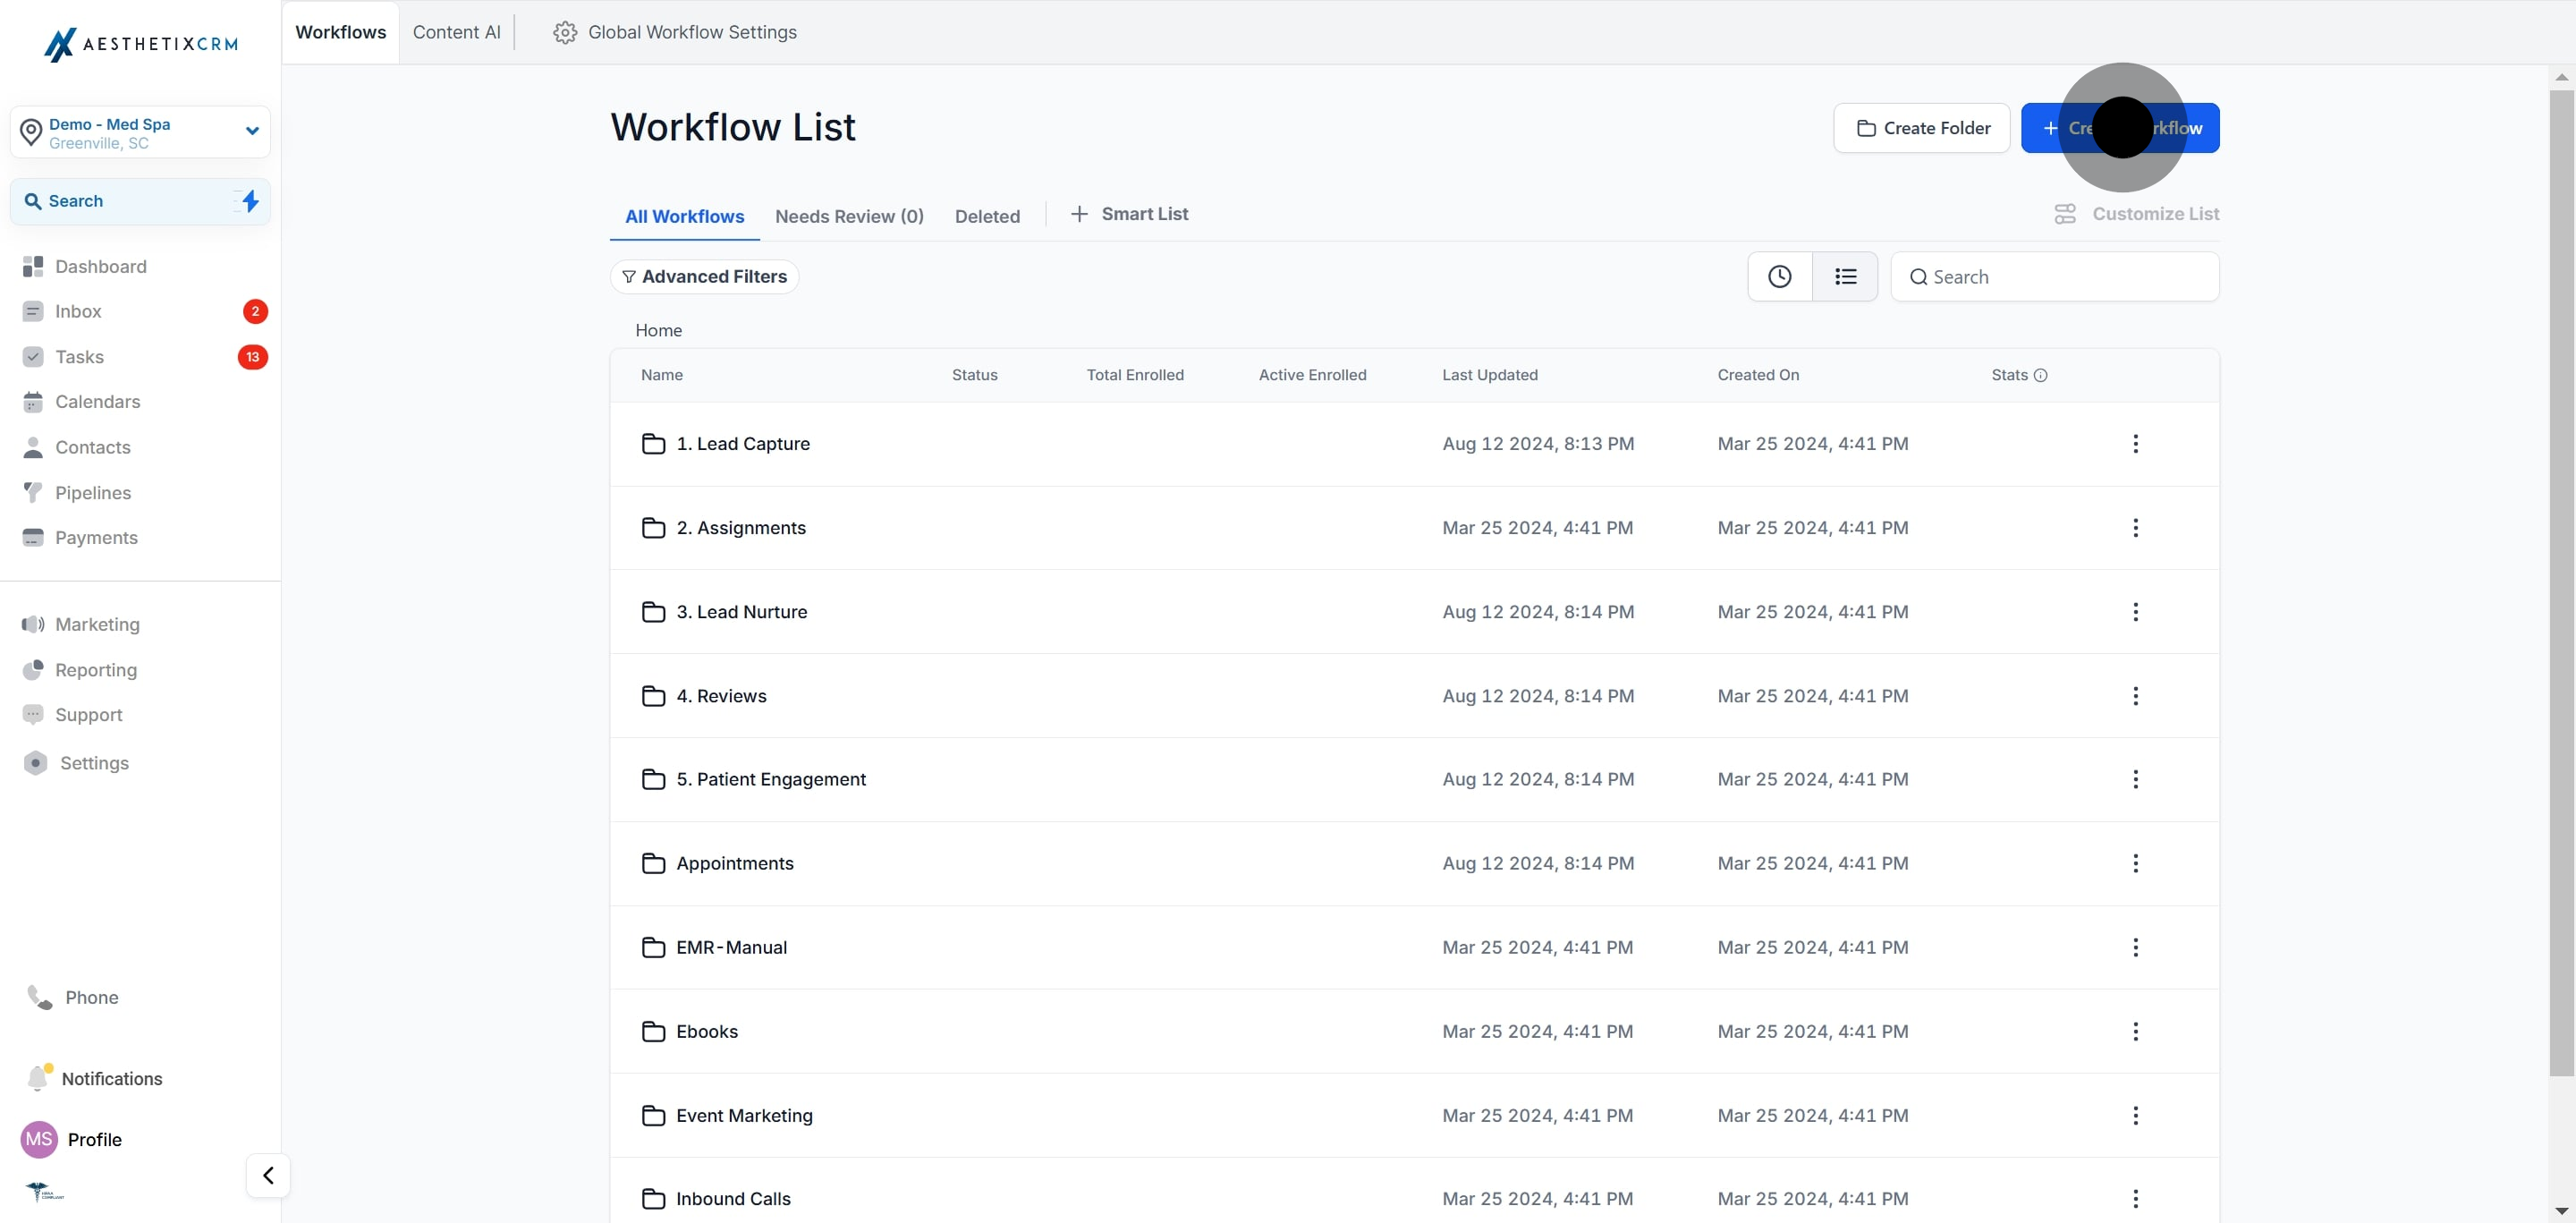
Click Create Workflow.
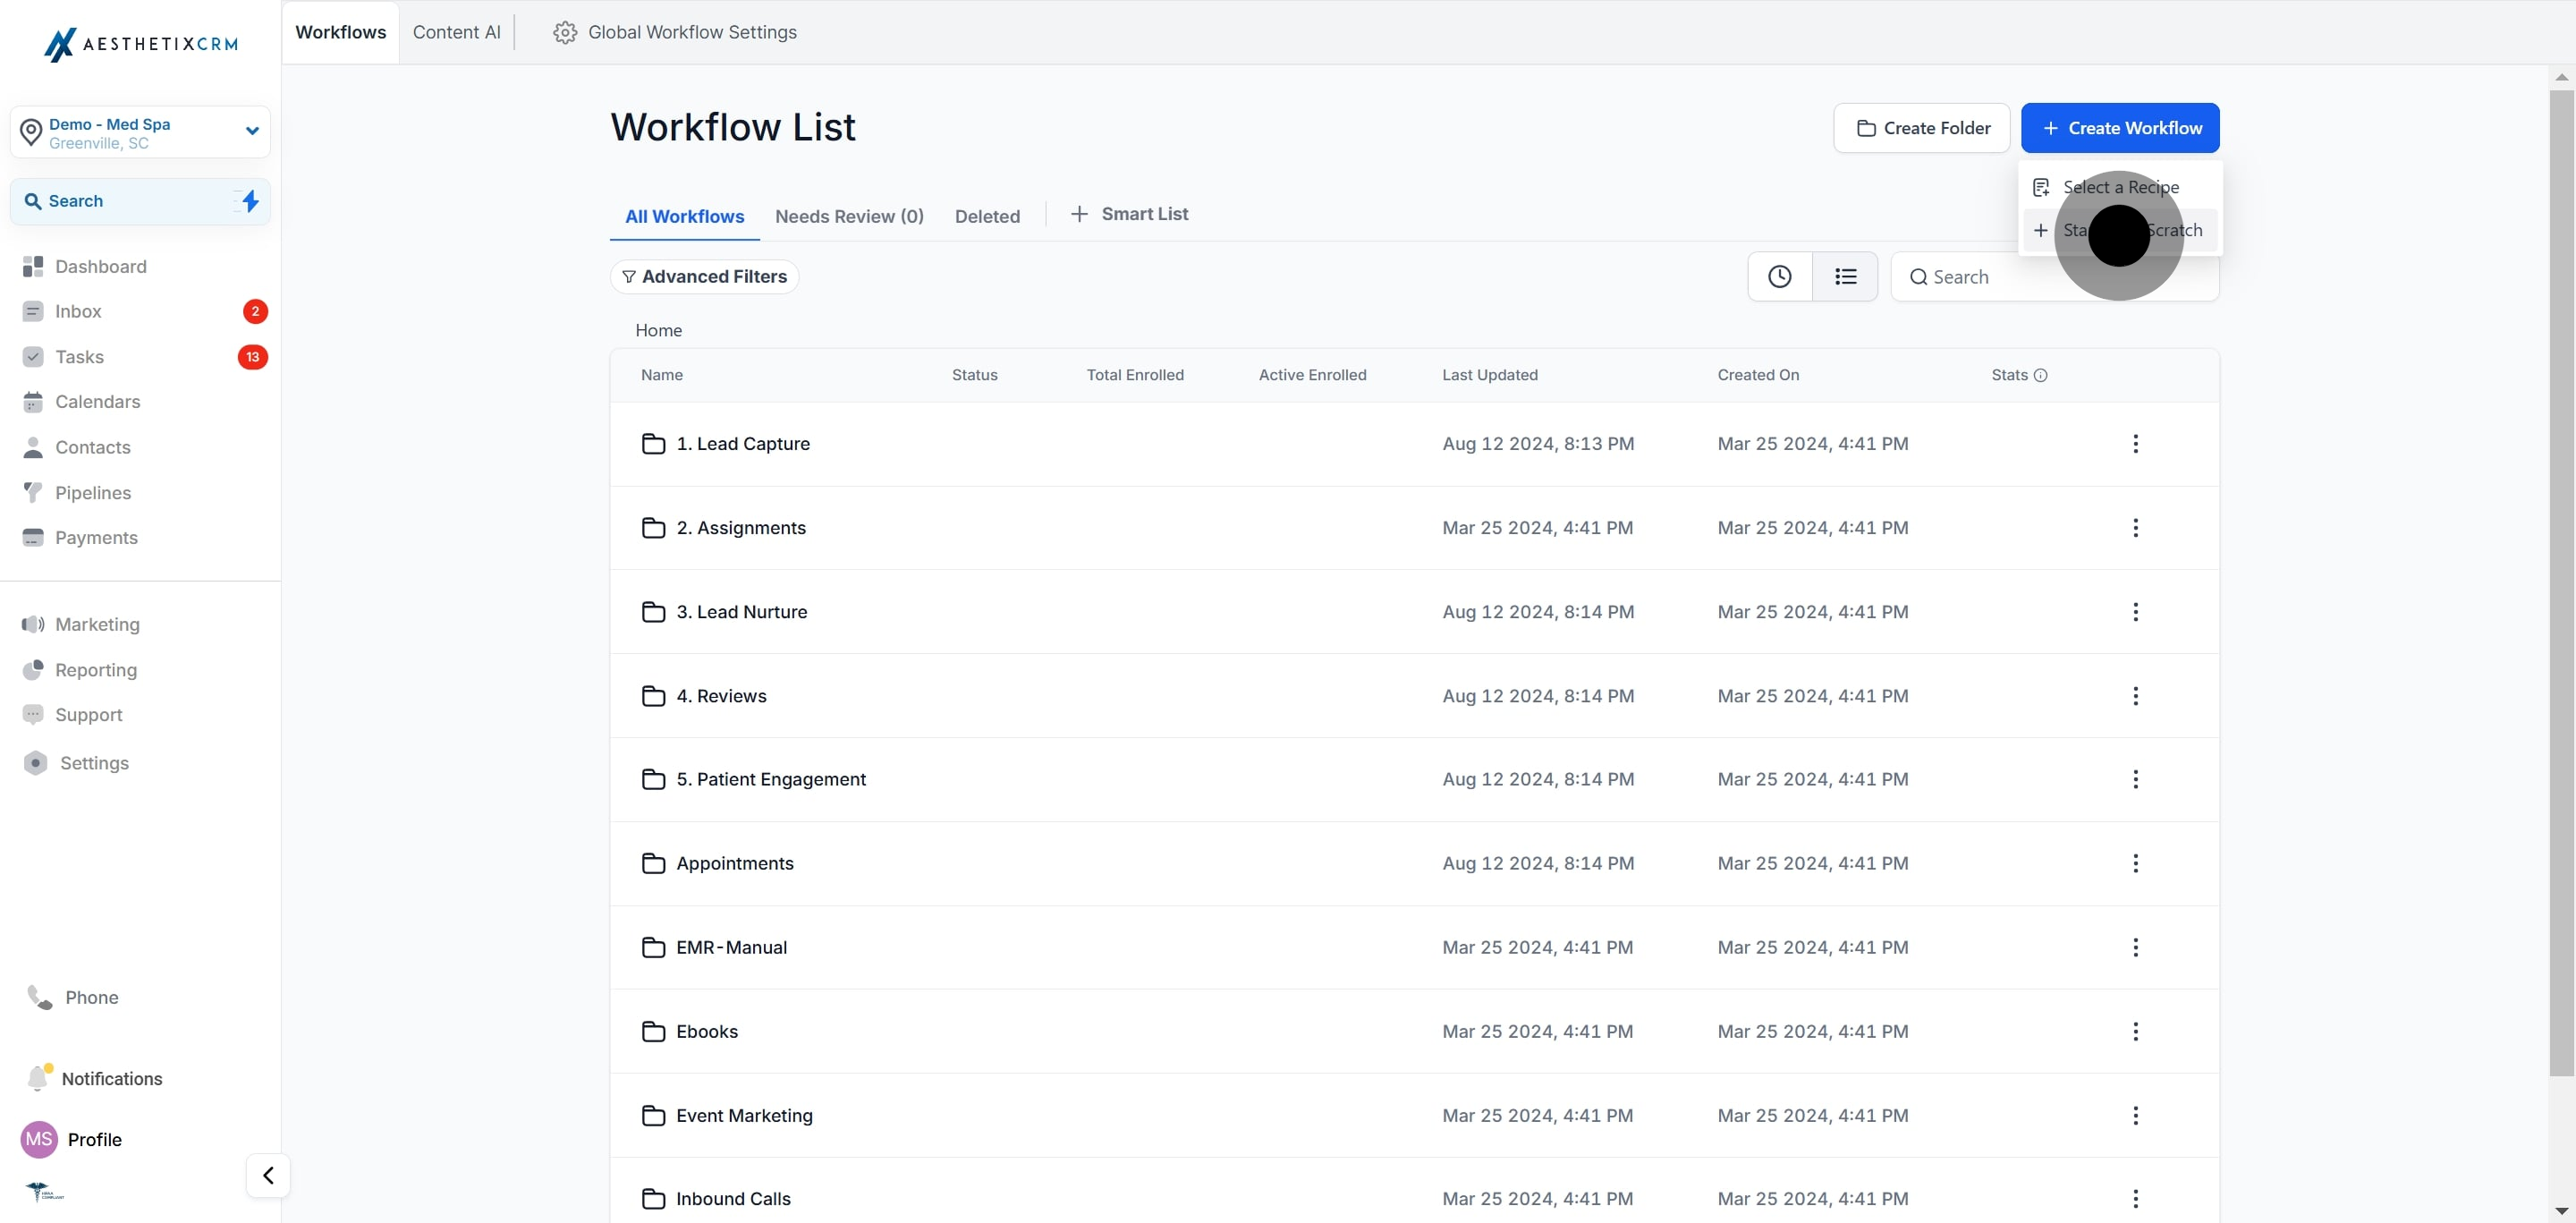
Click Start from Scratch to build a custom automation.
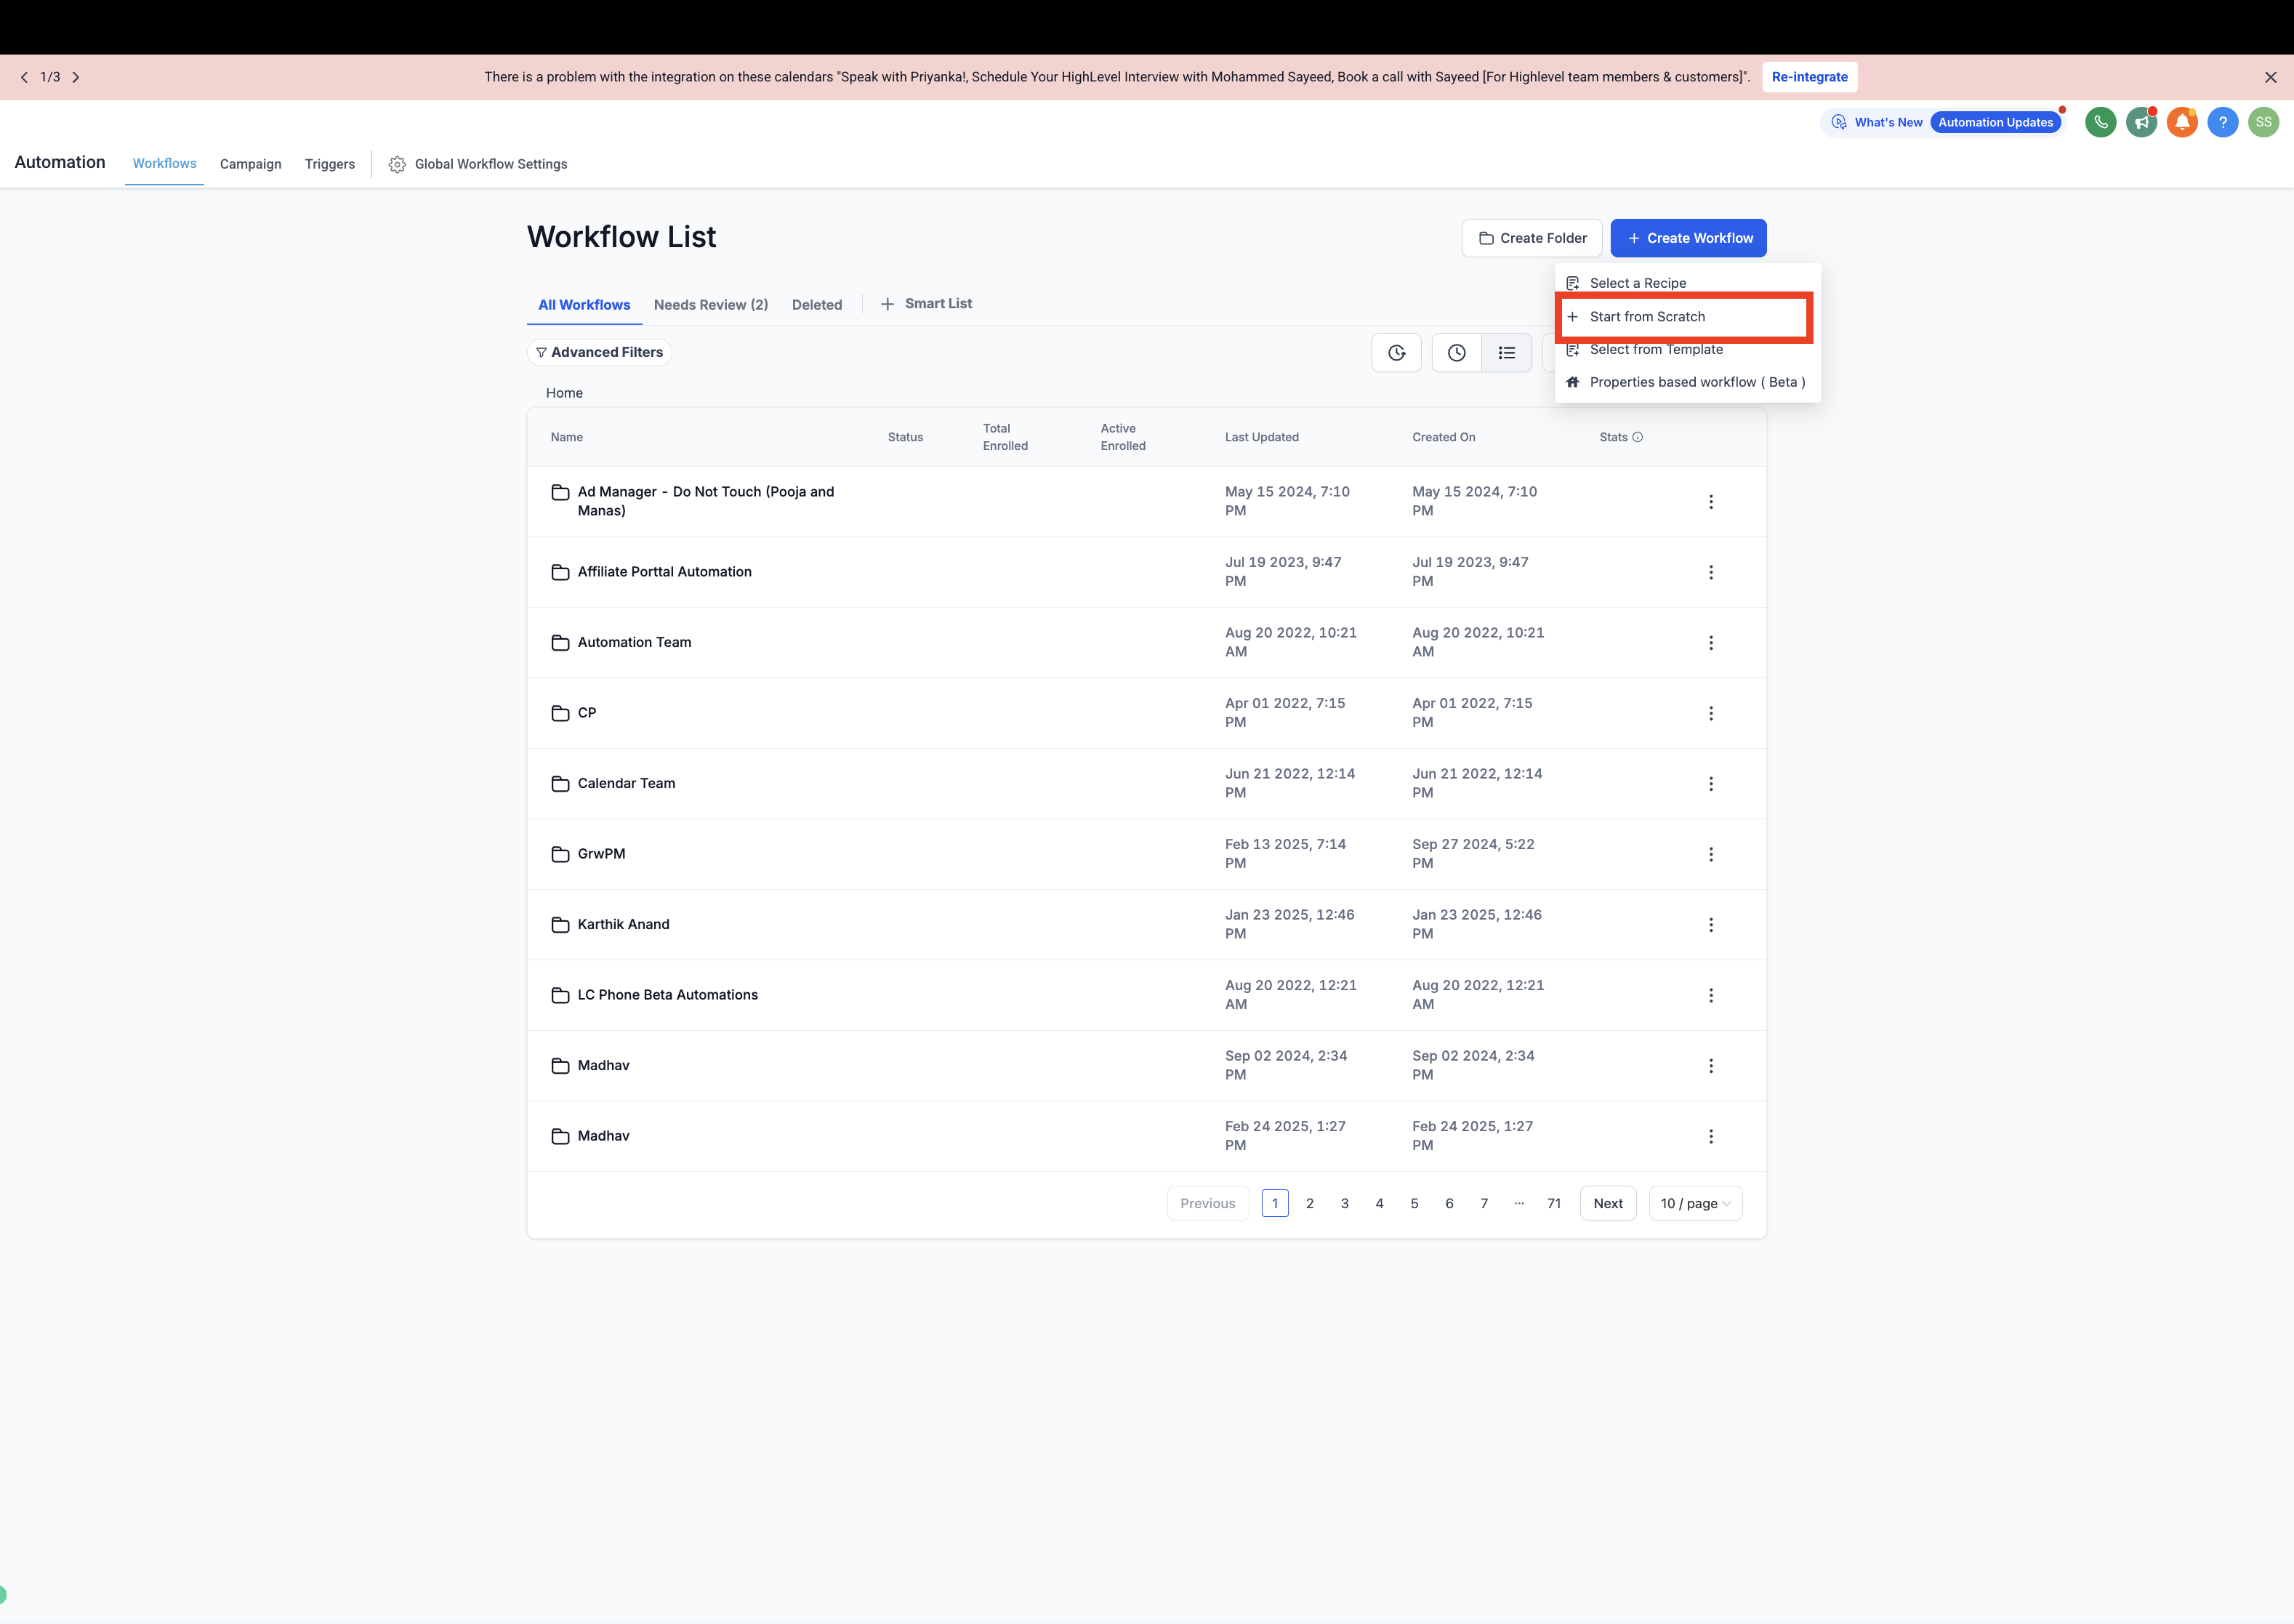
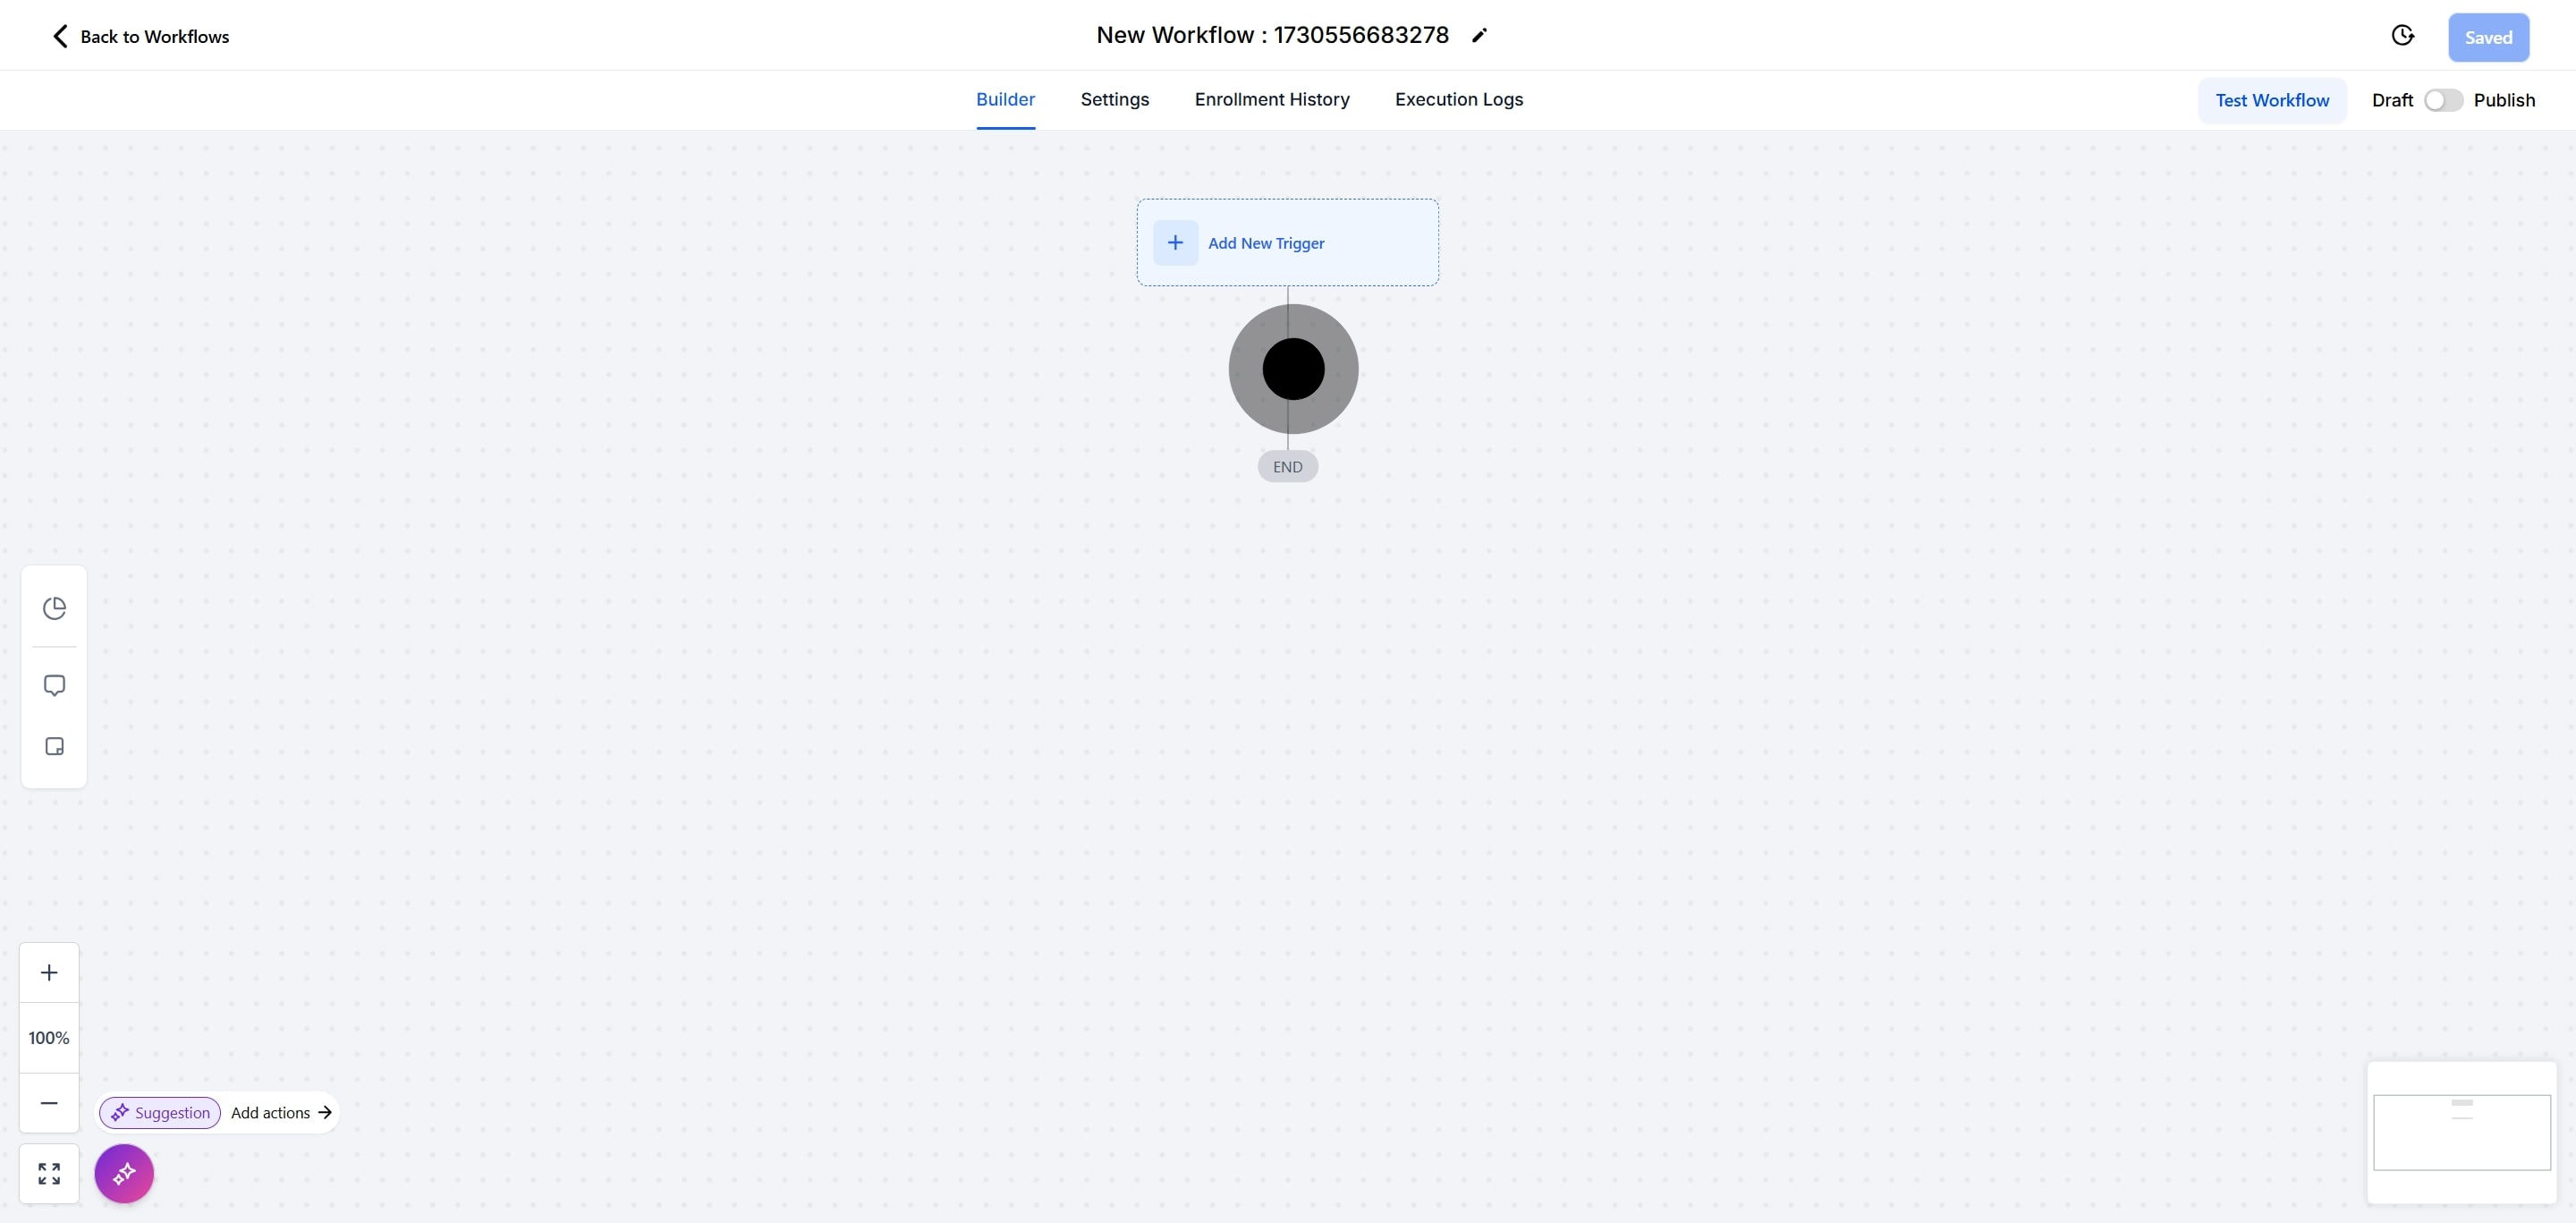
Click Add New Trigger.
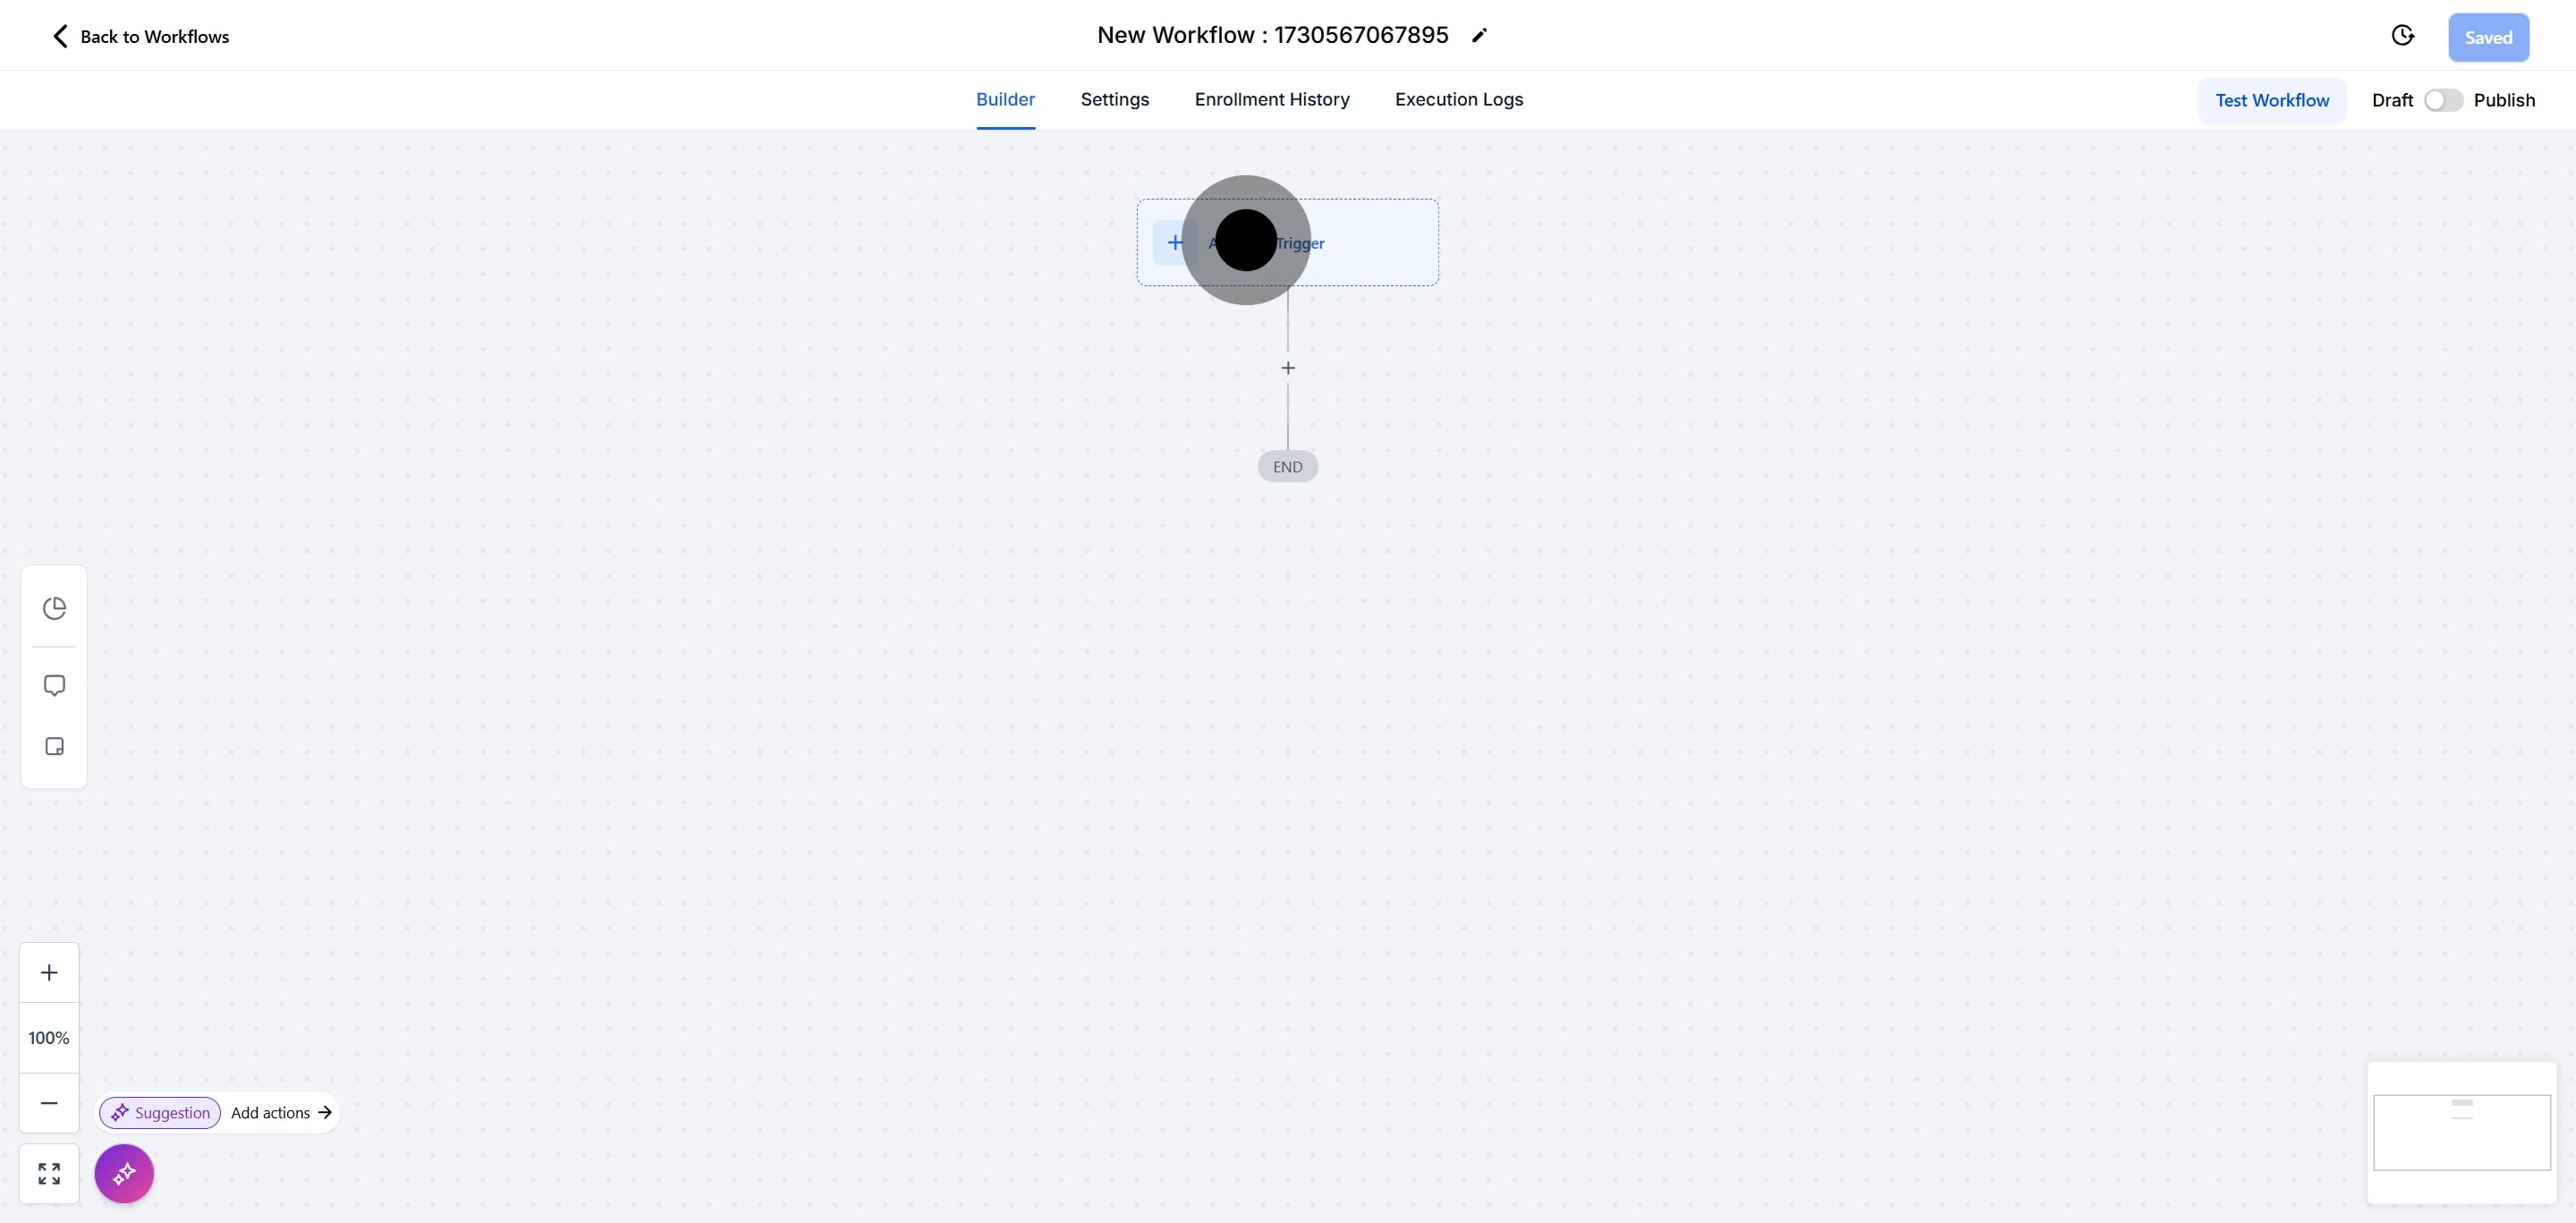
Search for and select Customer Replied.
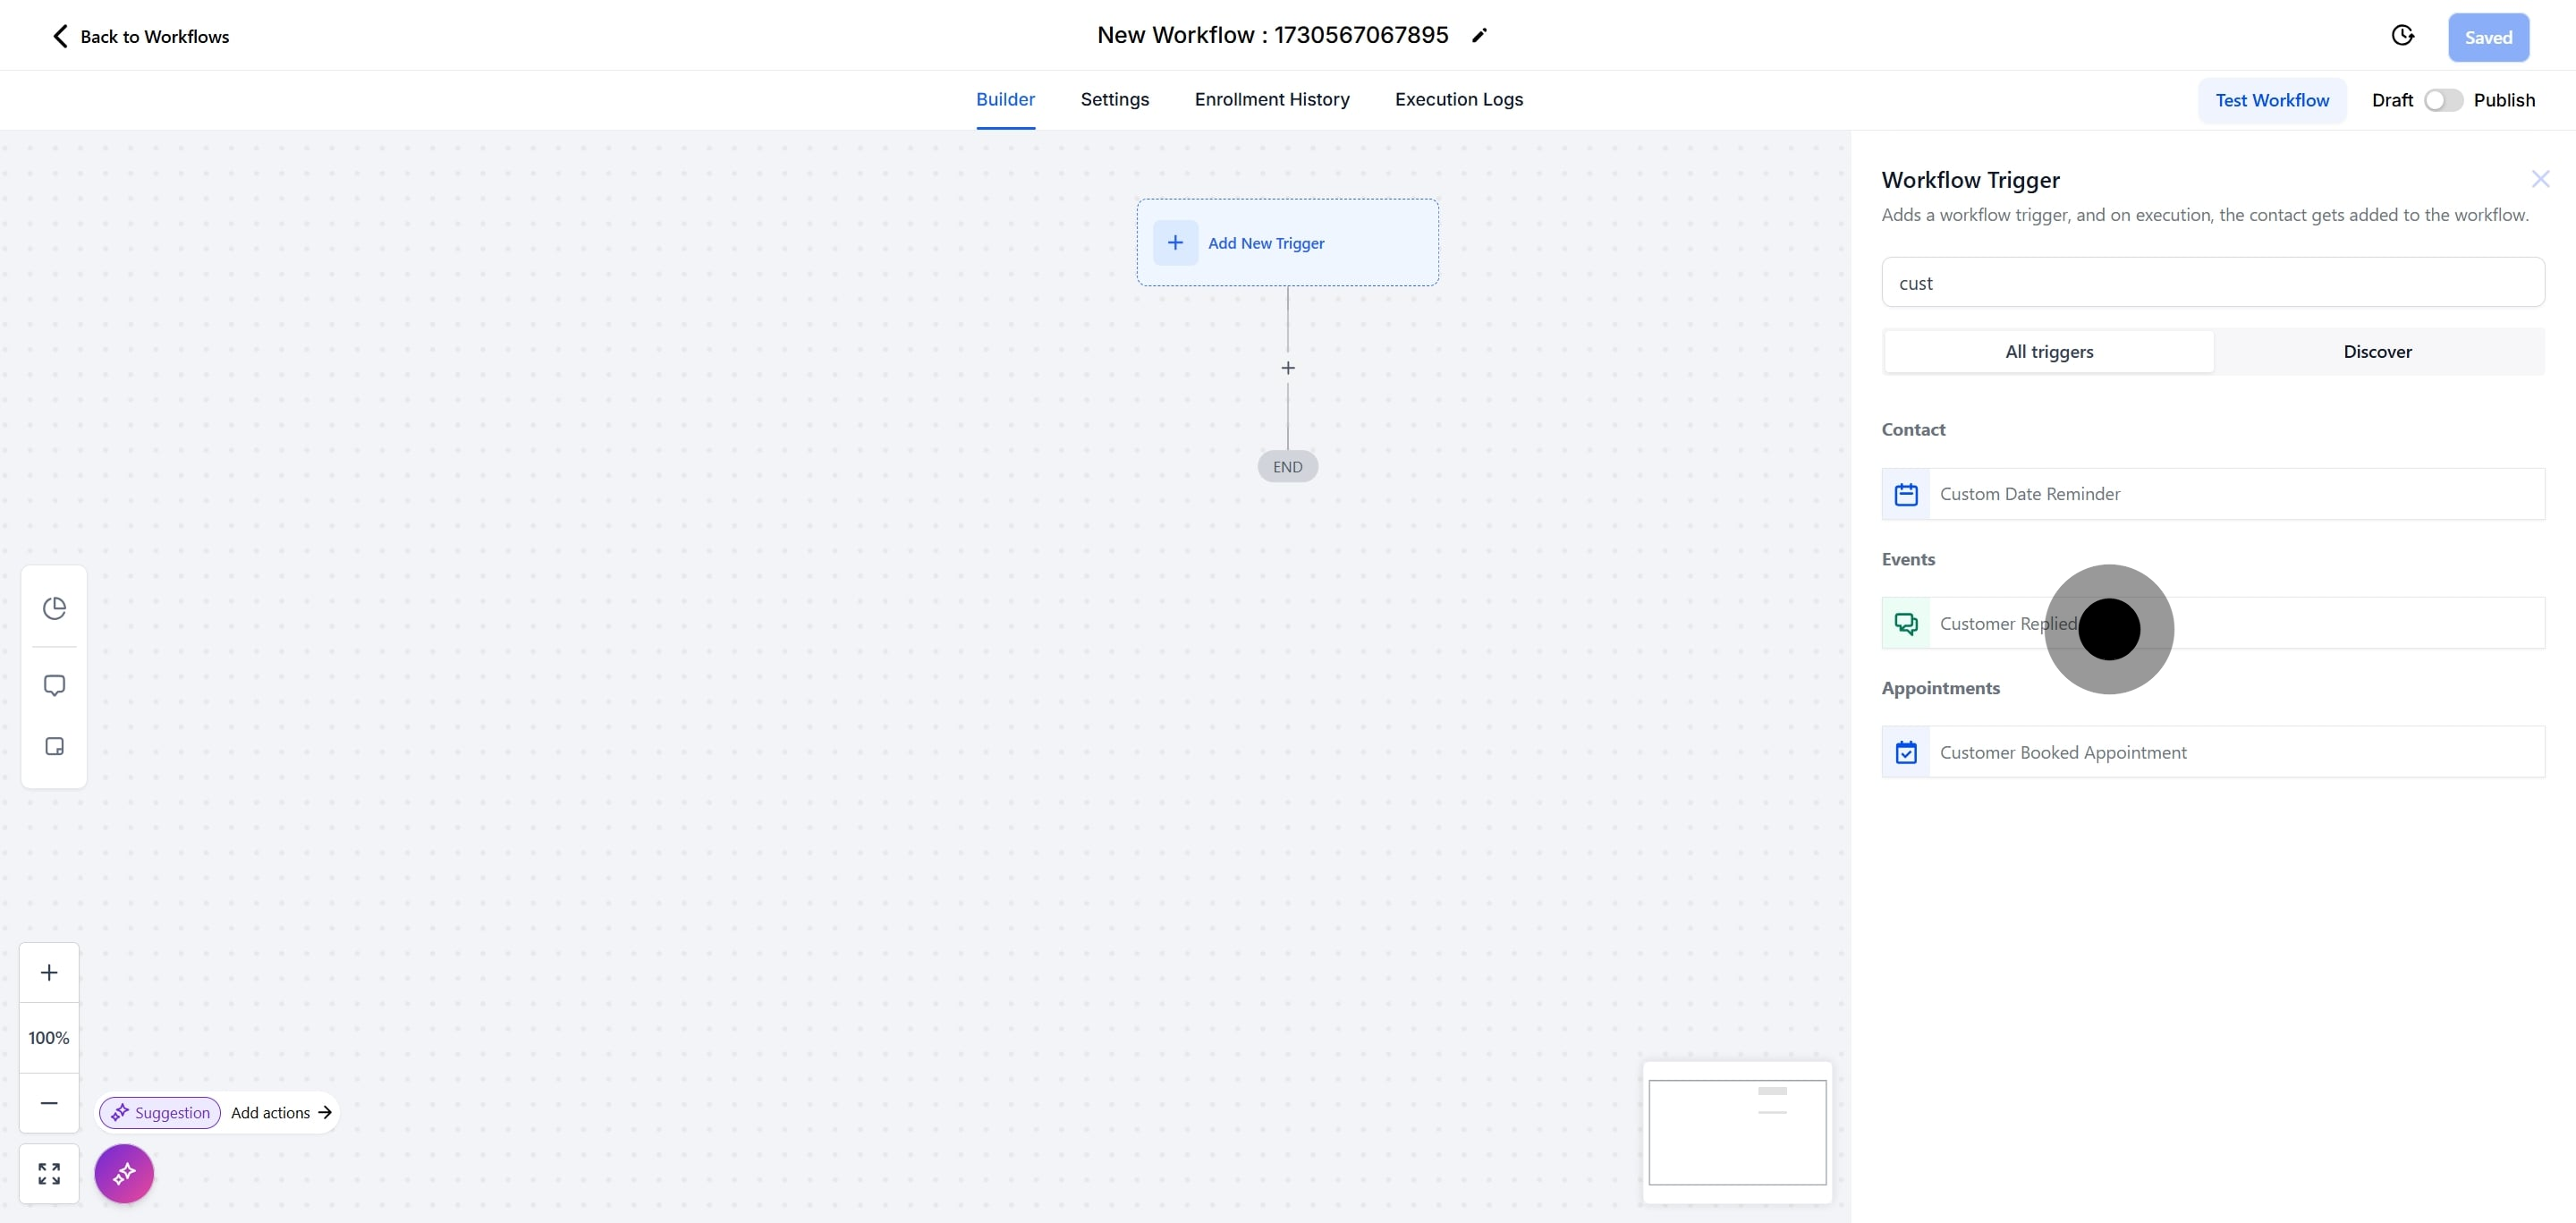
Click Add filters so the automation only runs for WhatsApp replies.
Click Reply Channel.
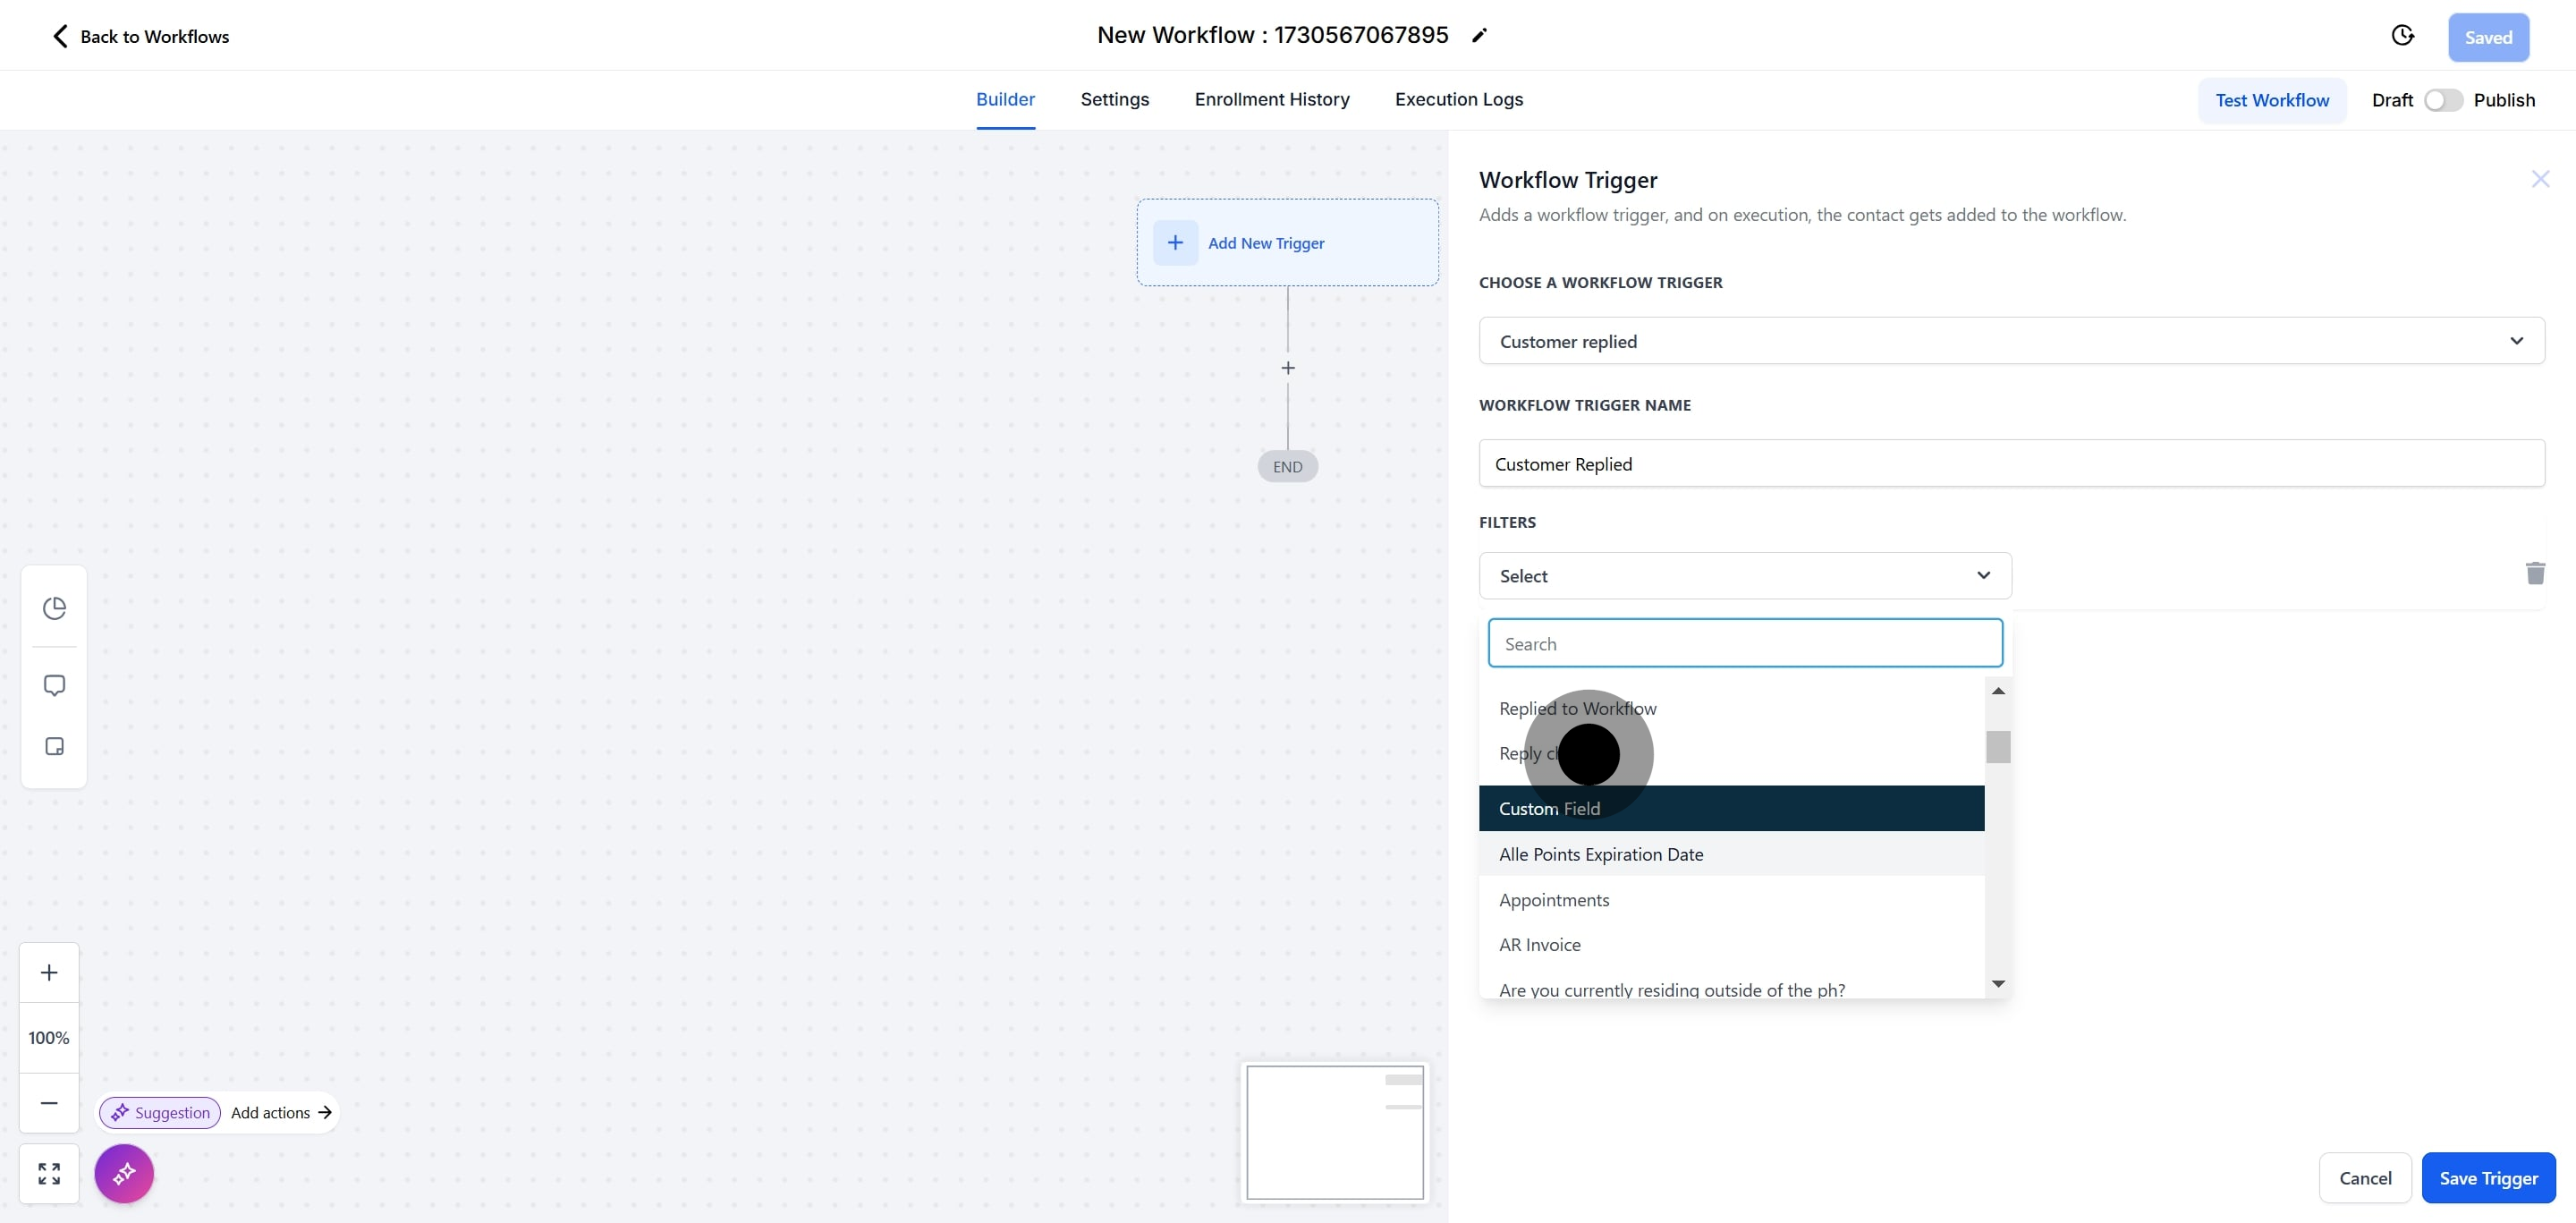
Click Select.
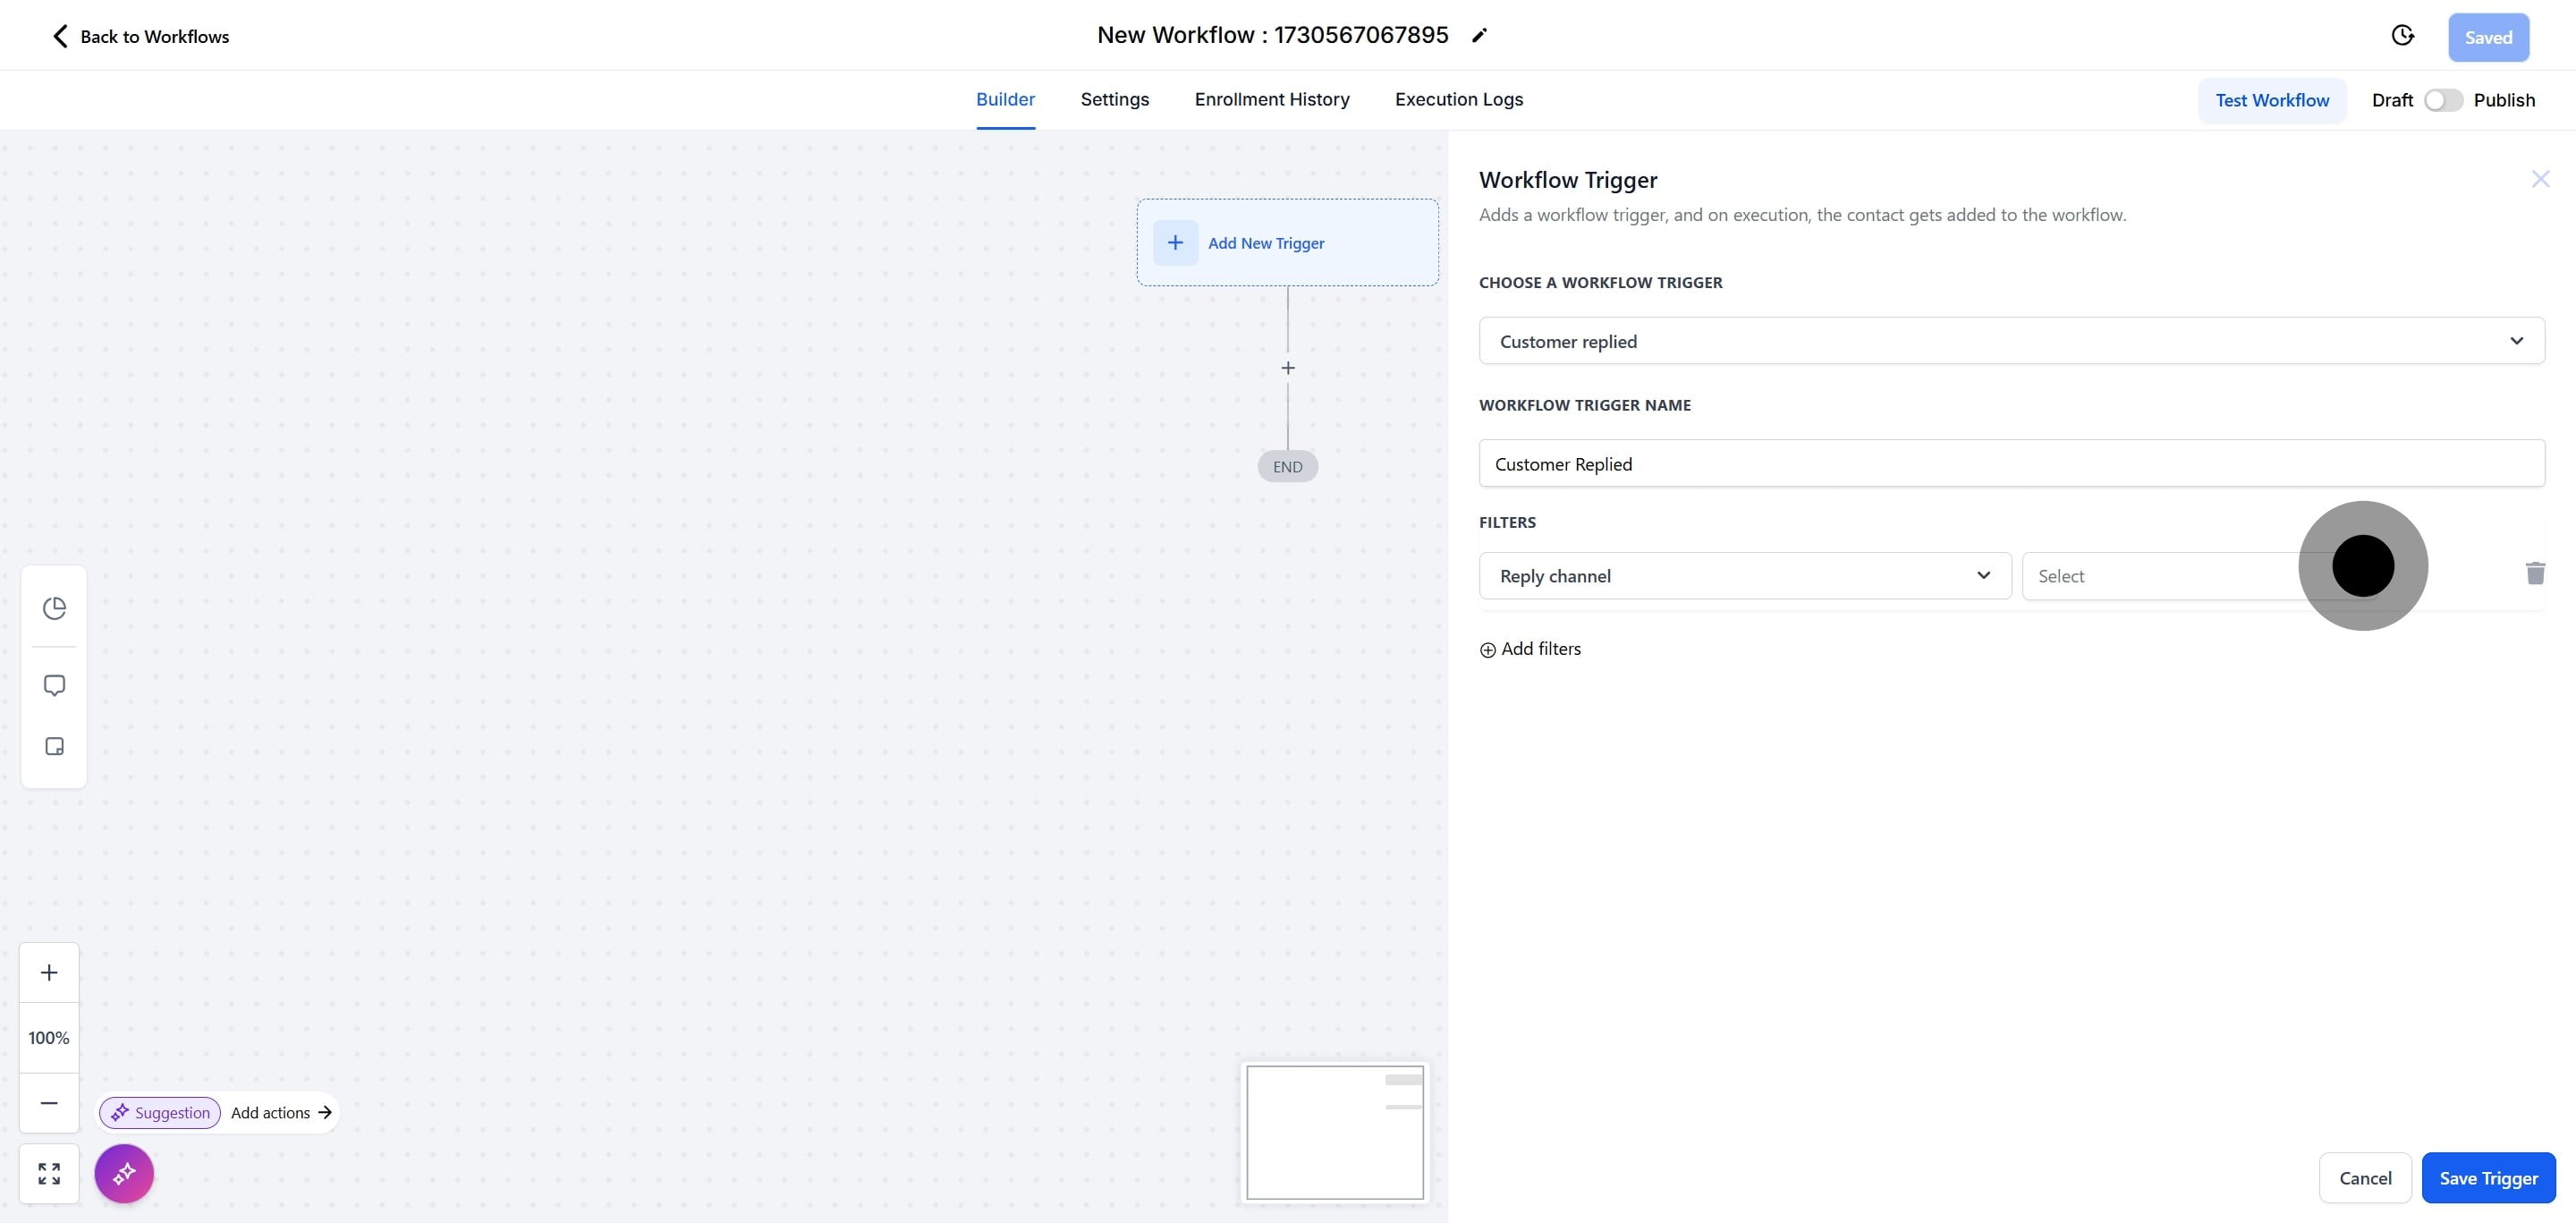
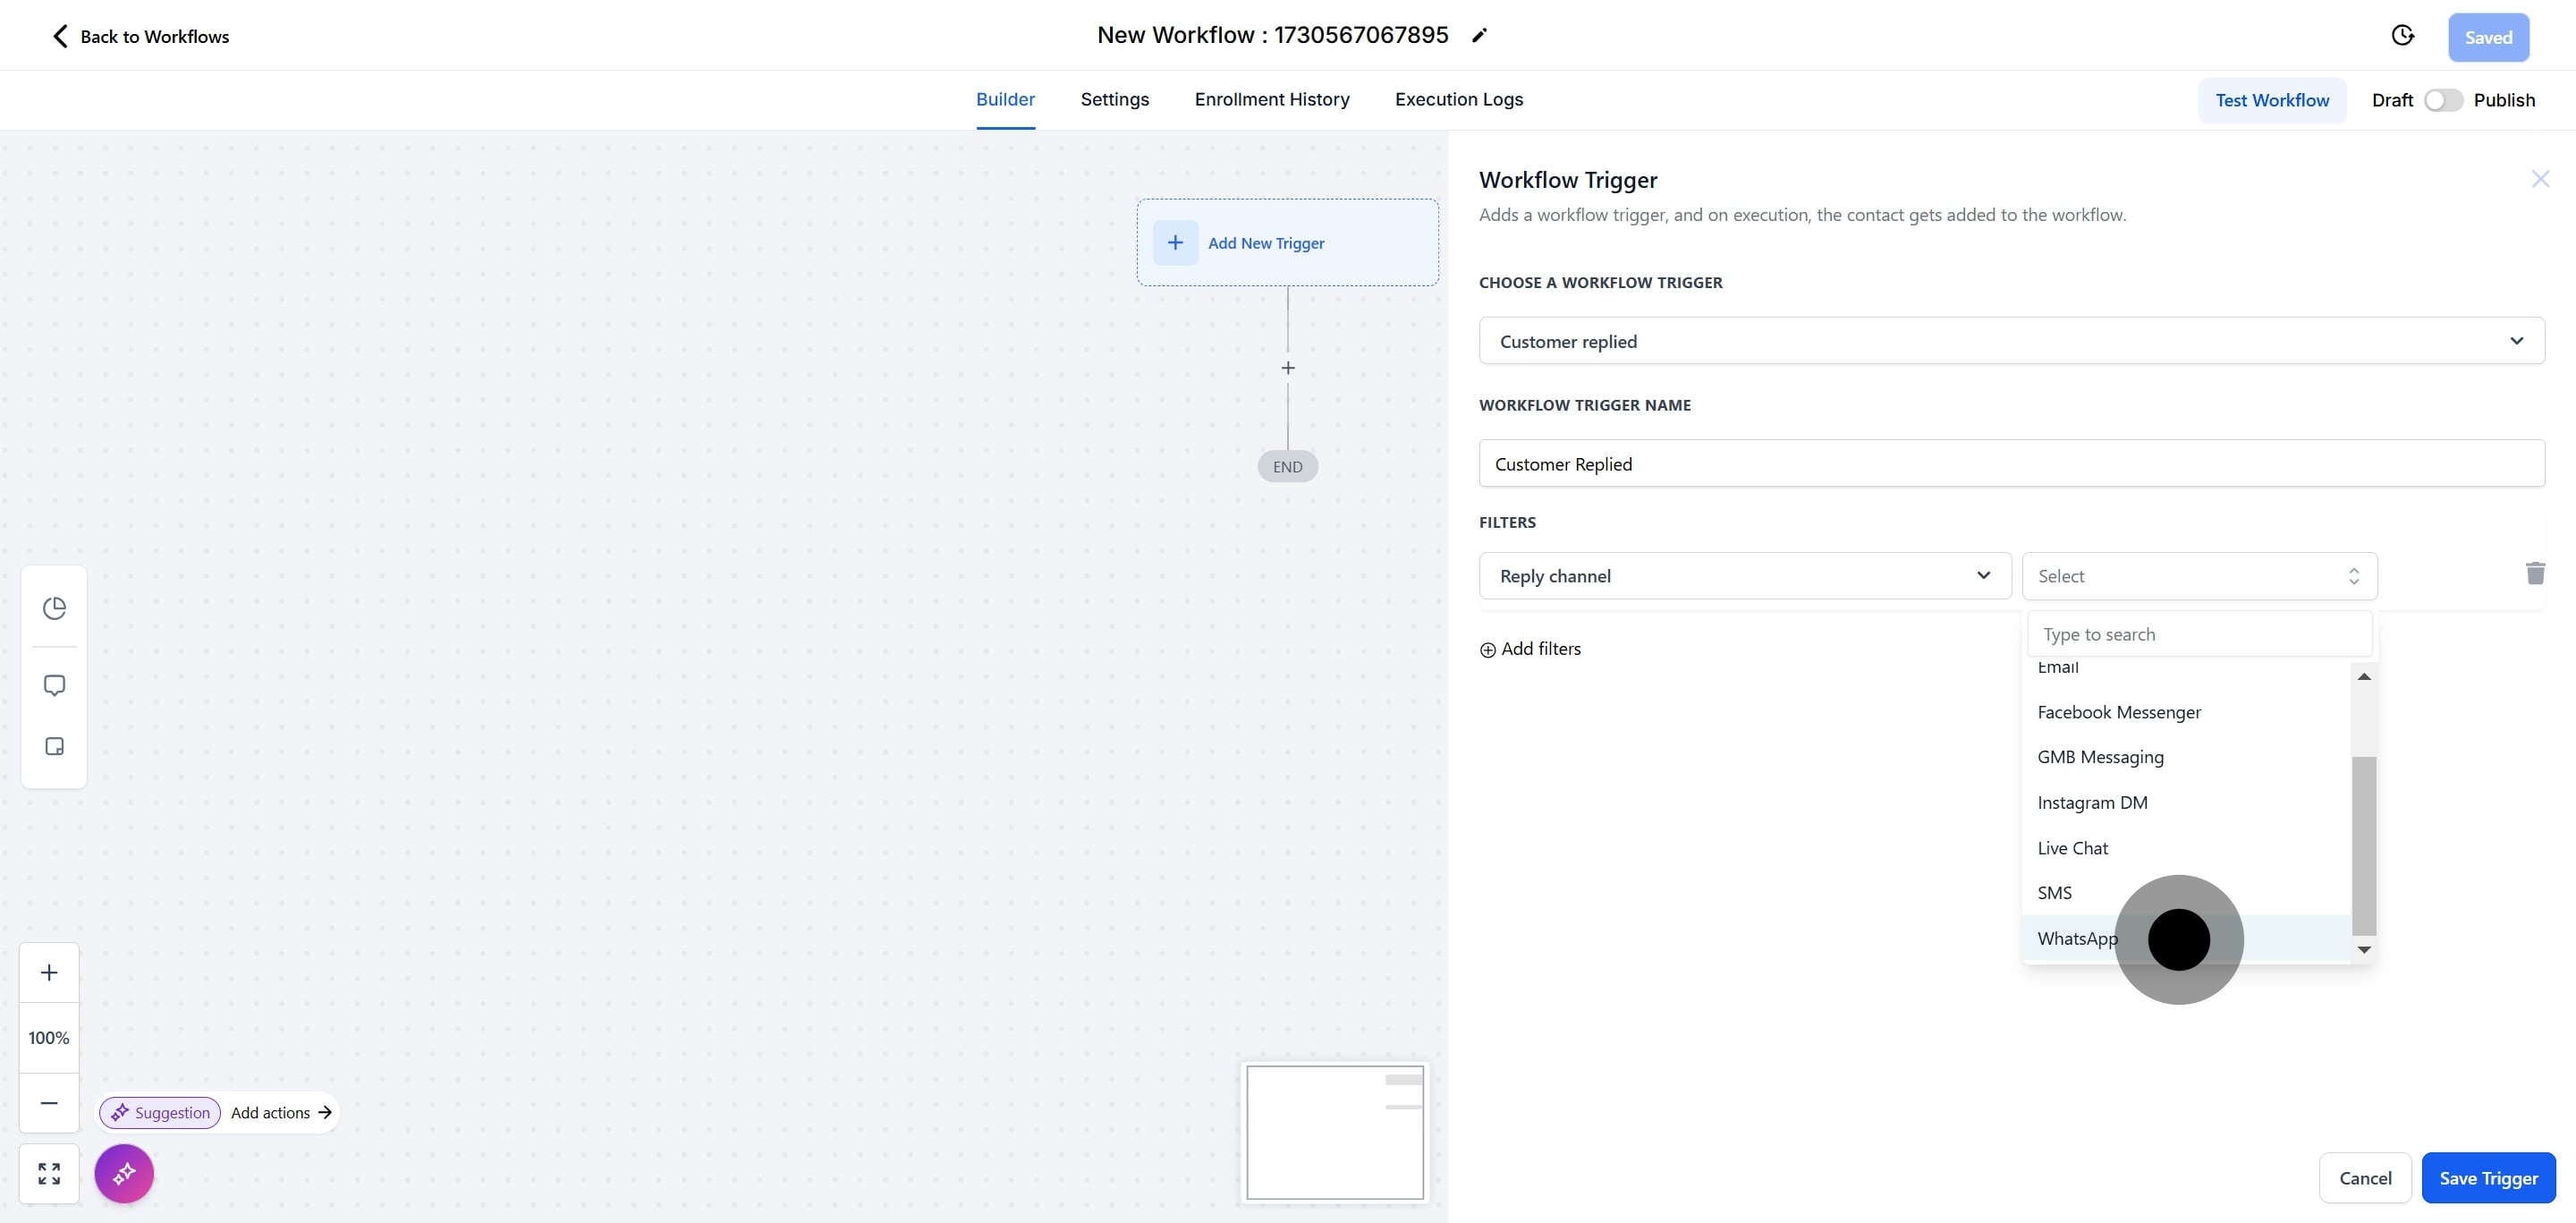
Select WhatsApp as the reply channel.
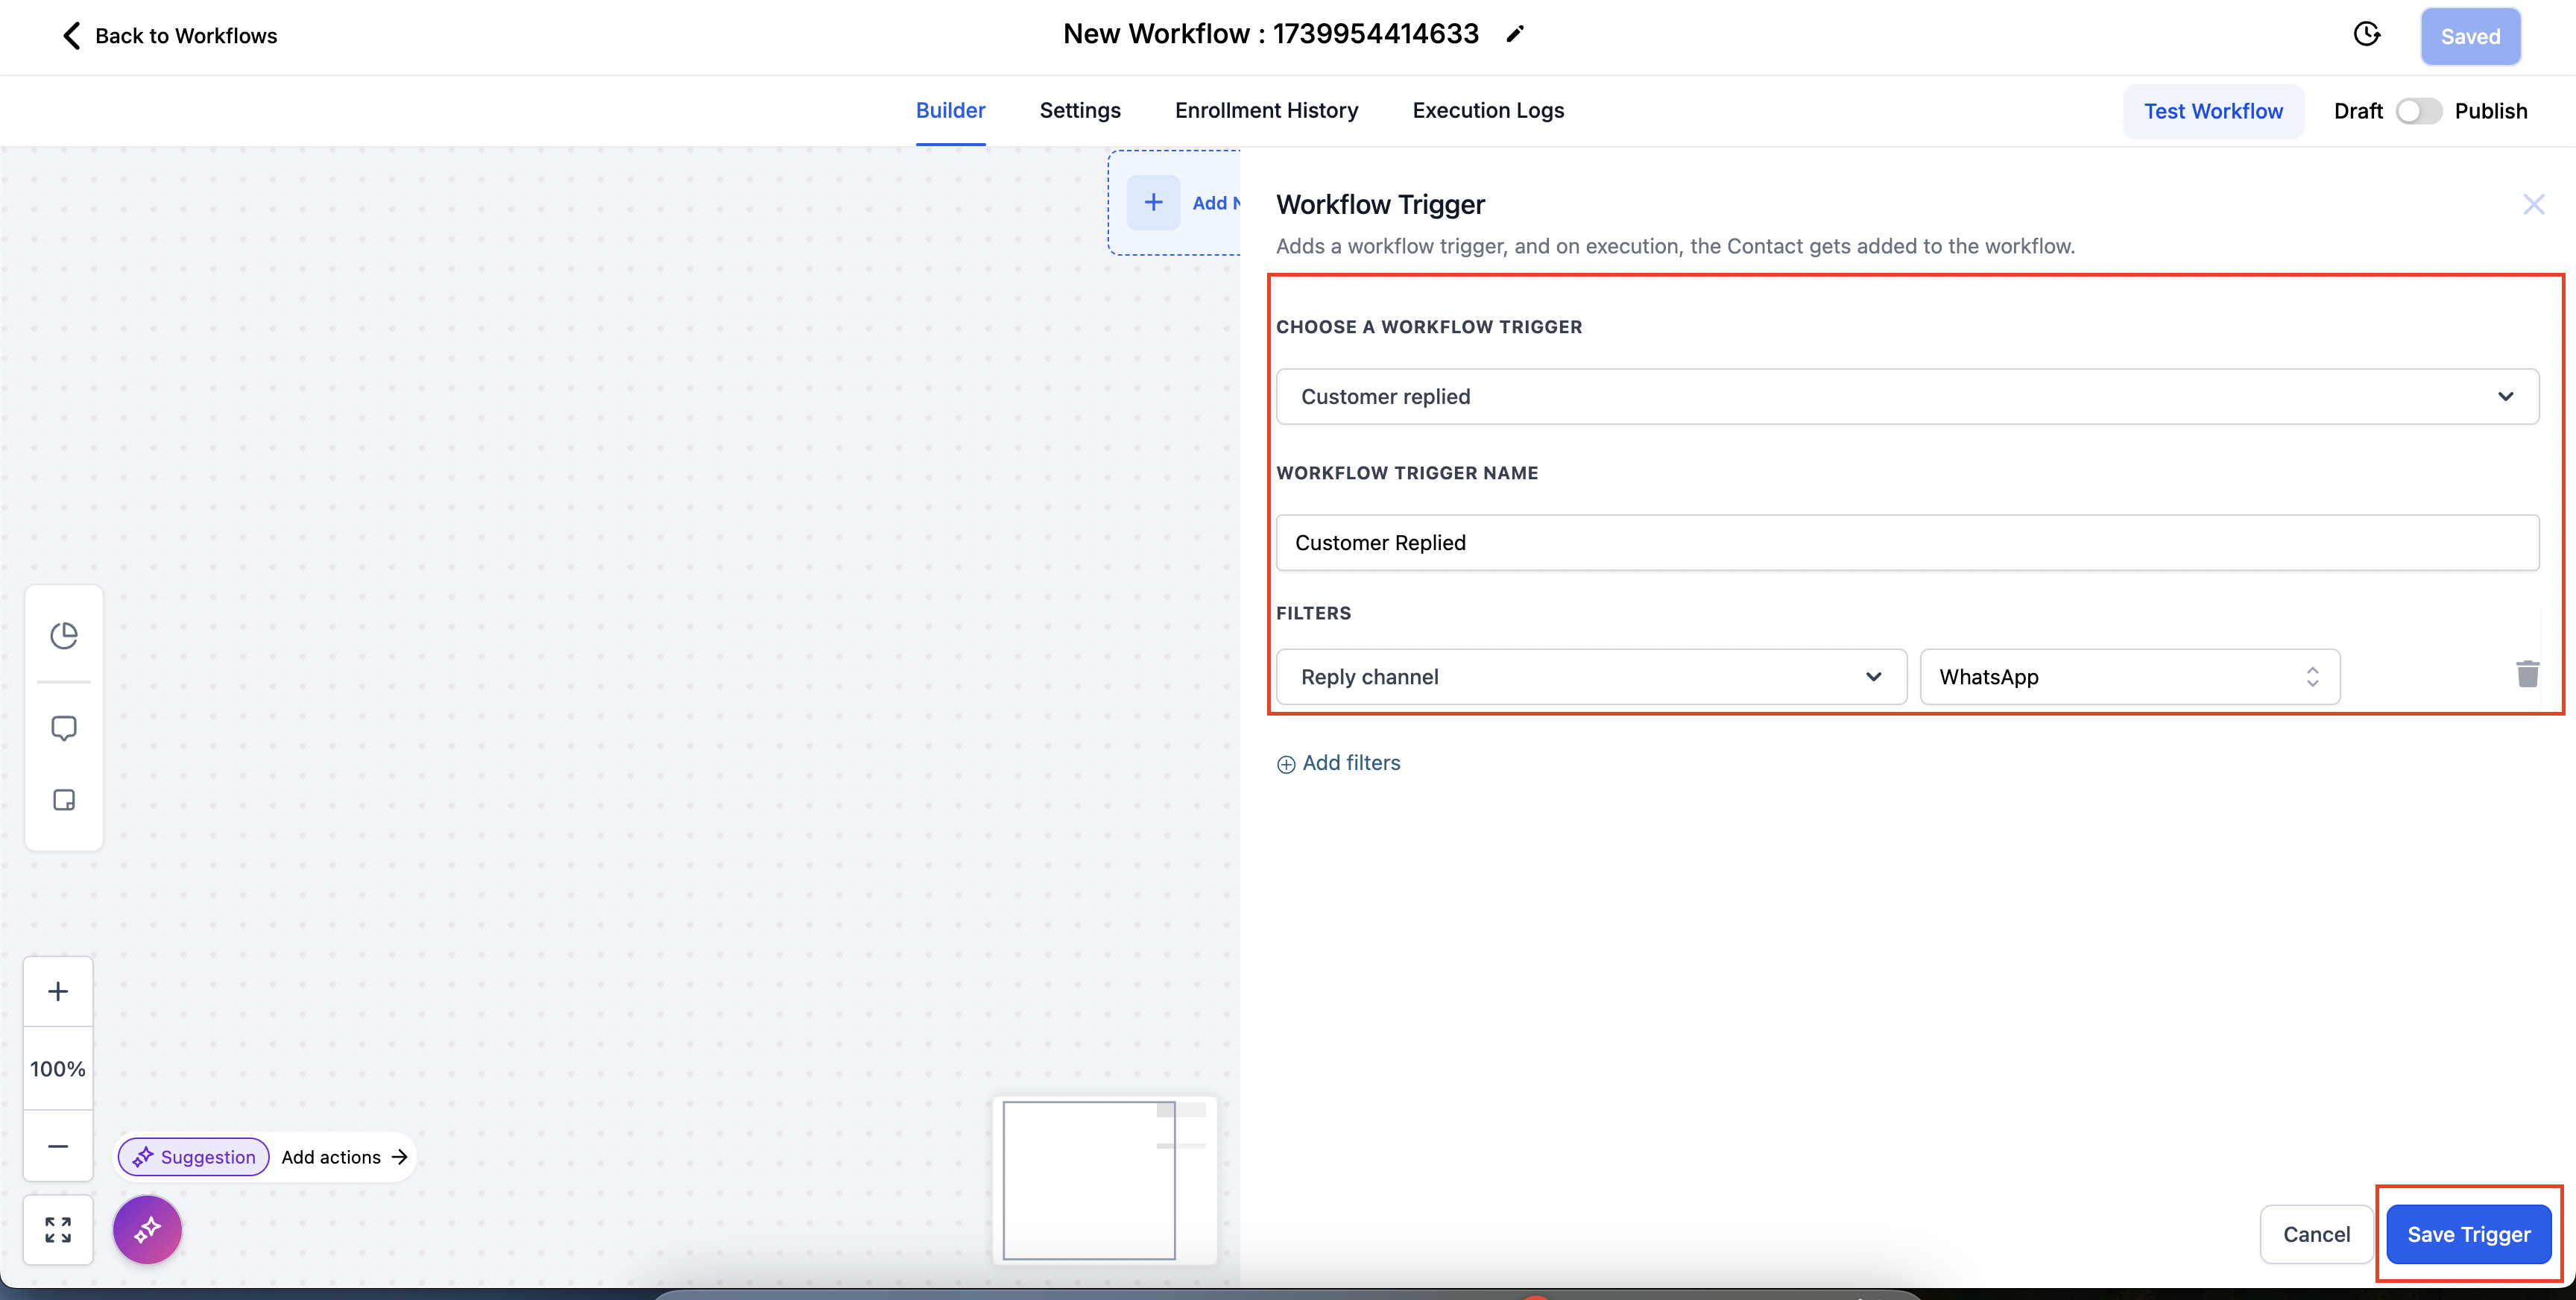
Click the plus (+) button to add an action.
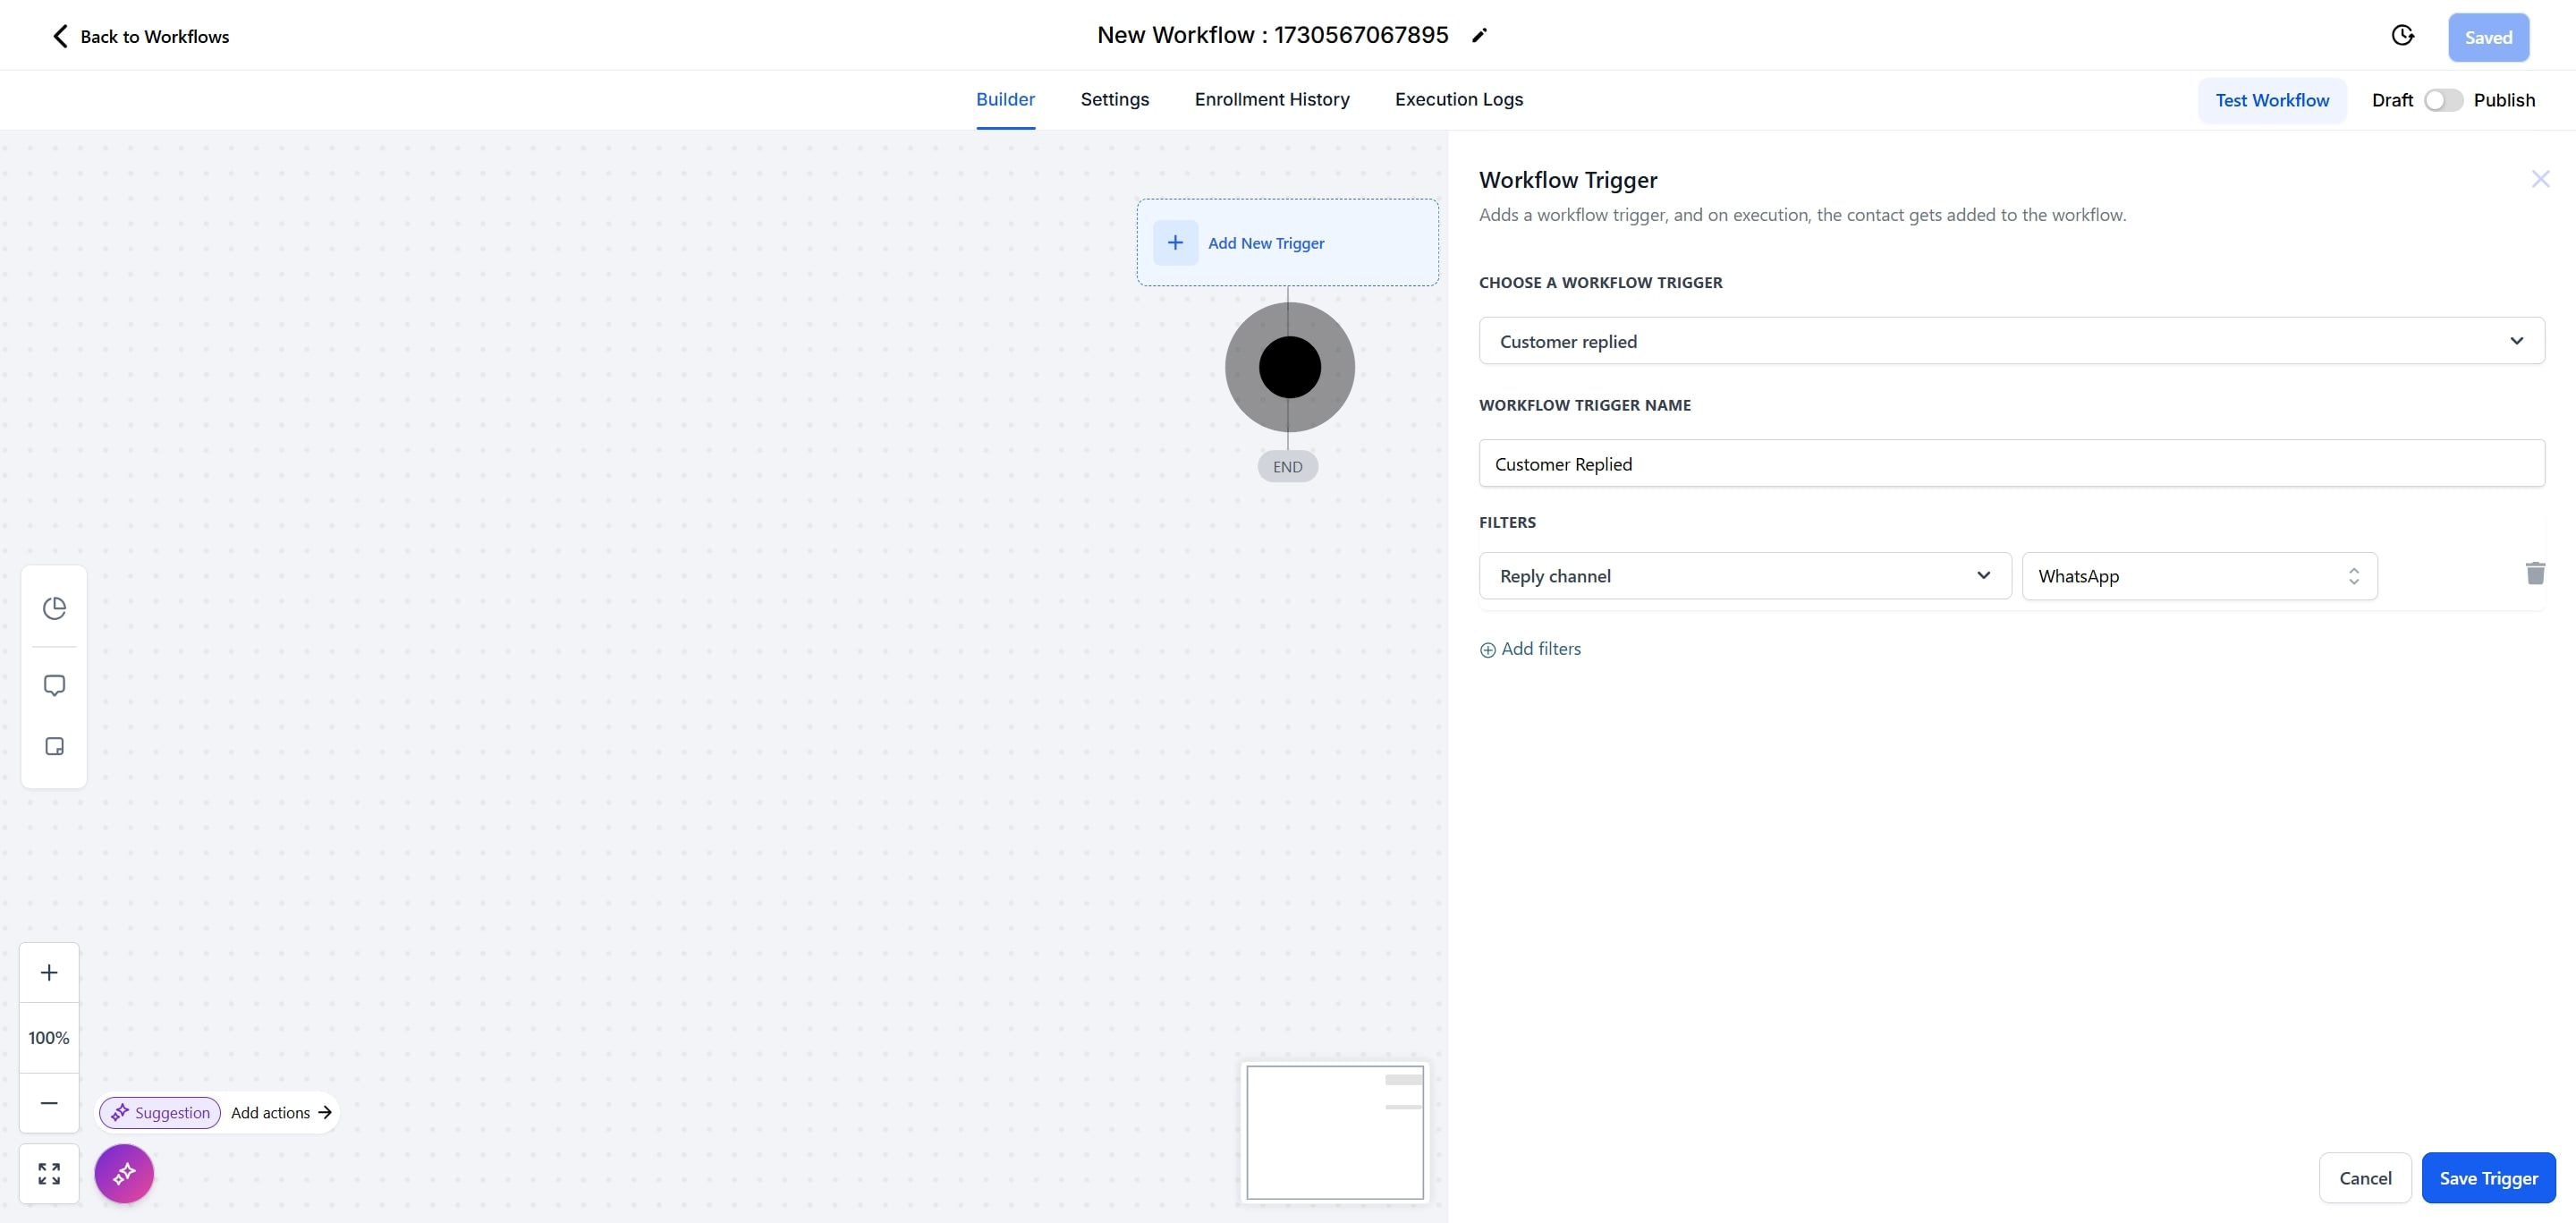
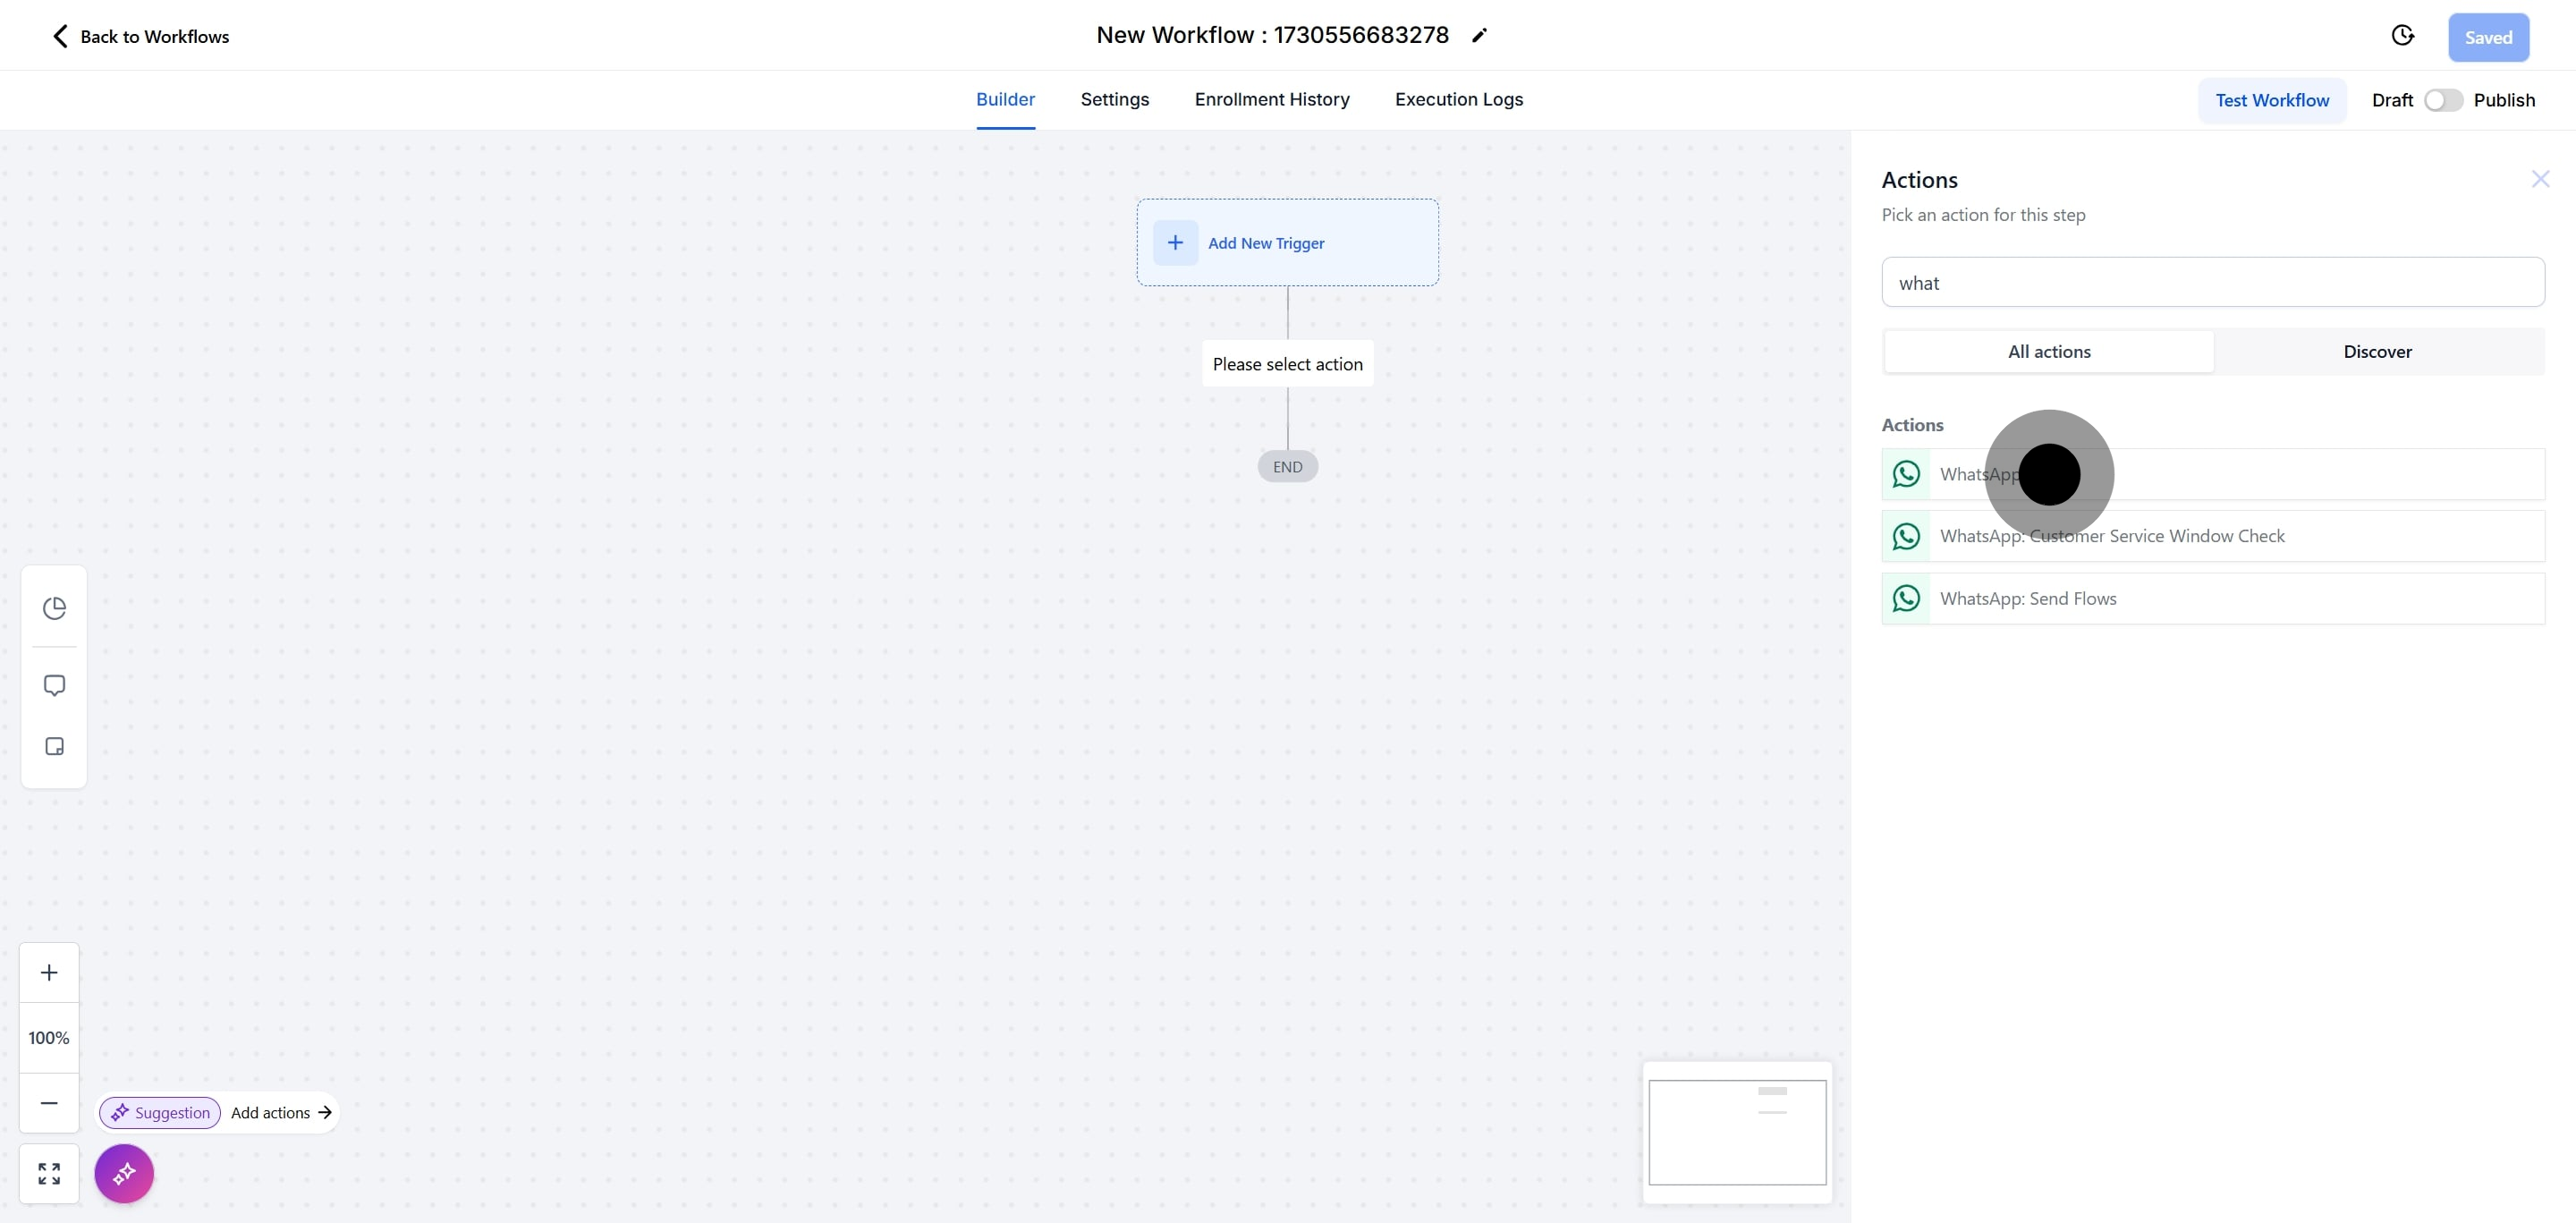
Select WhatsApp as the action type.
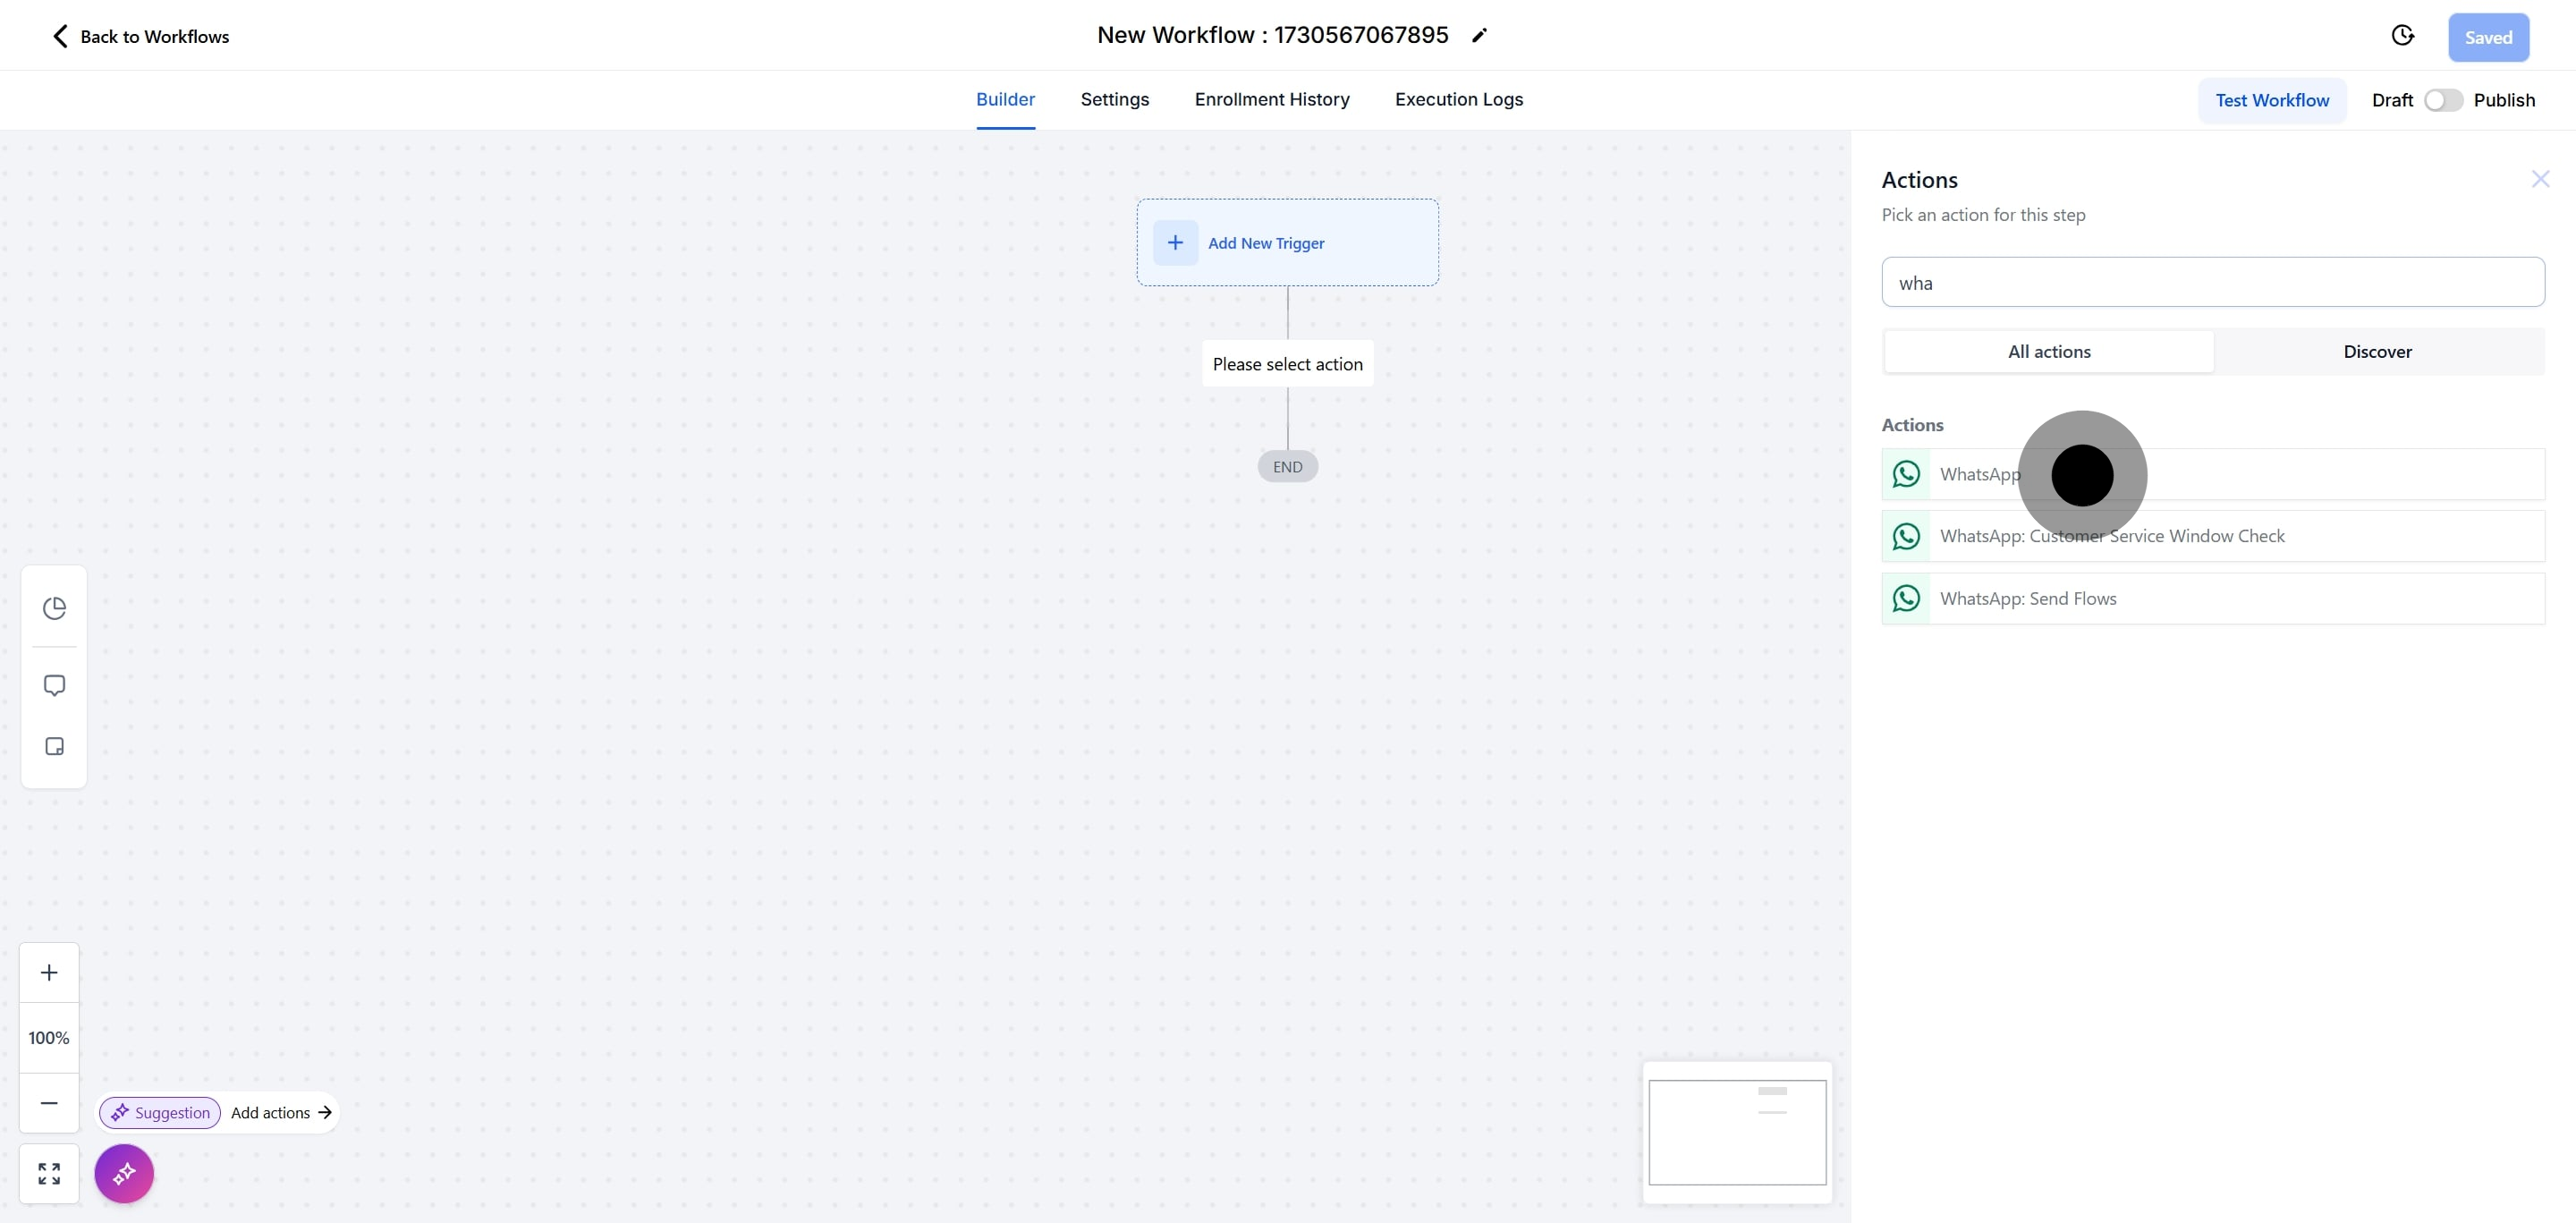
Select None - Manual Text to write a free-form message you want to send patients when they message you on WhatsApp.
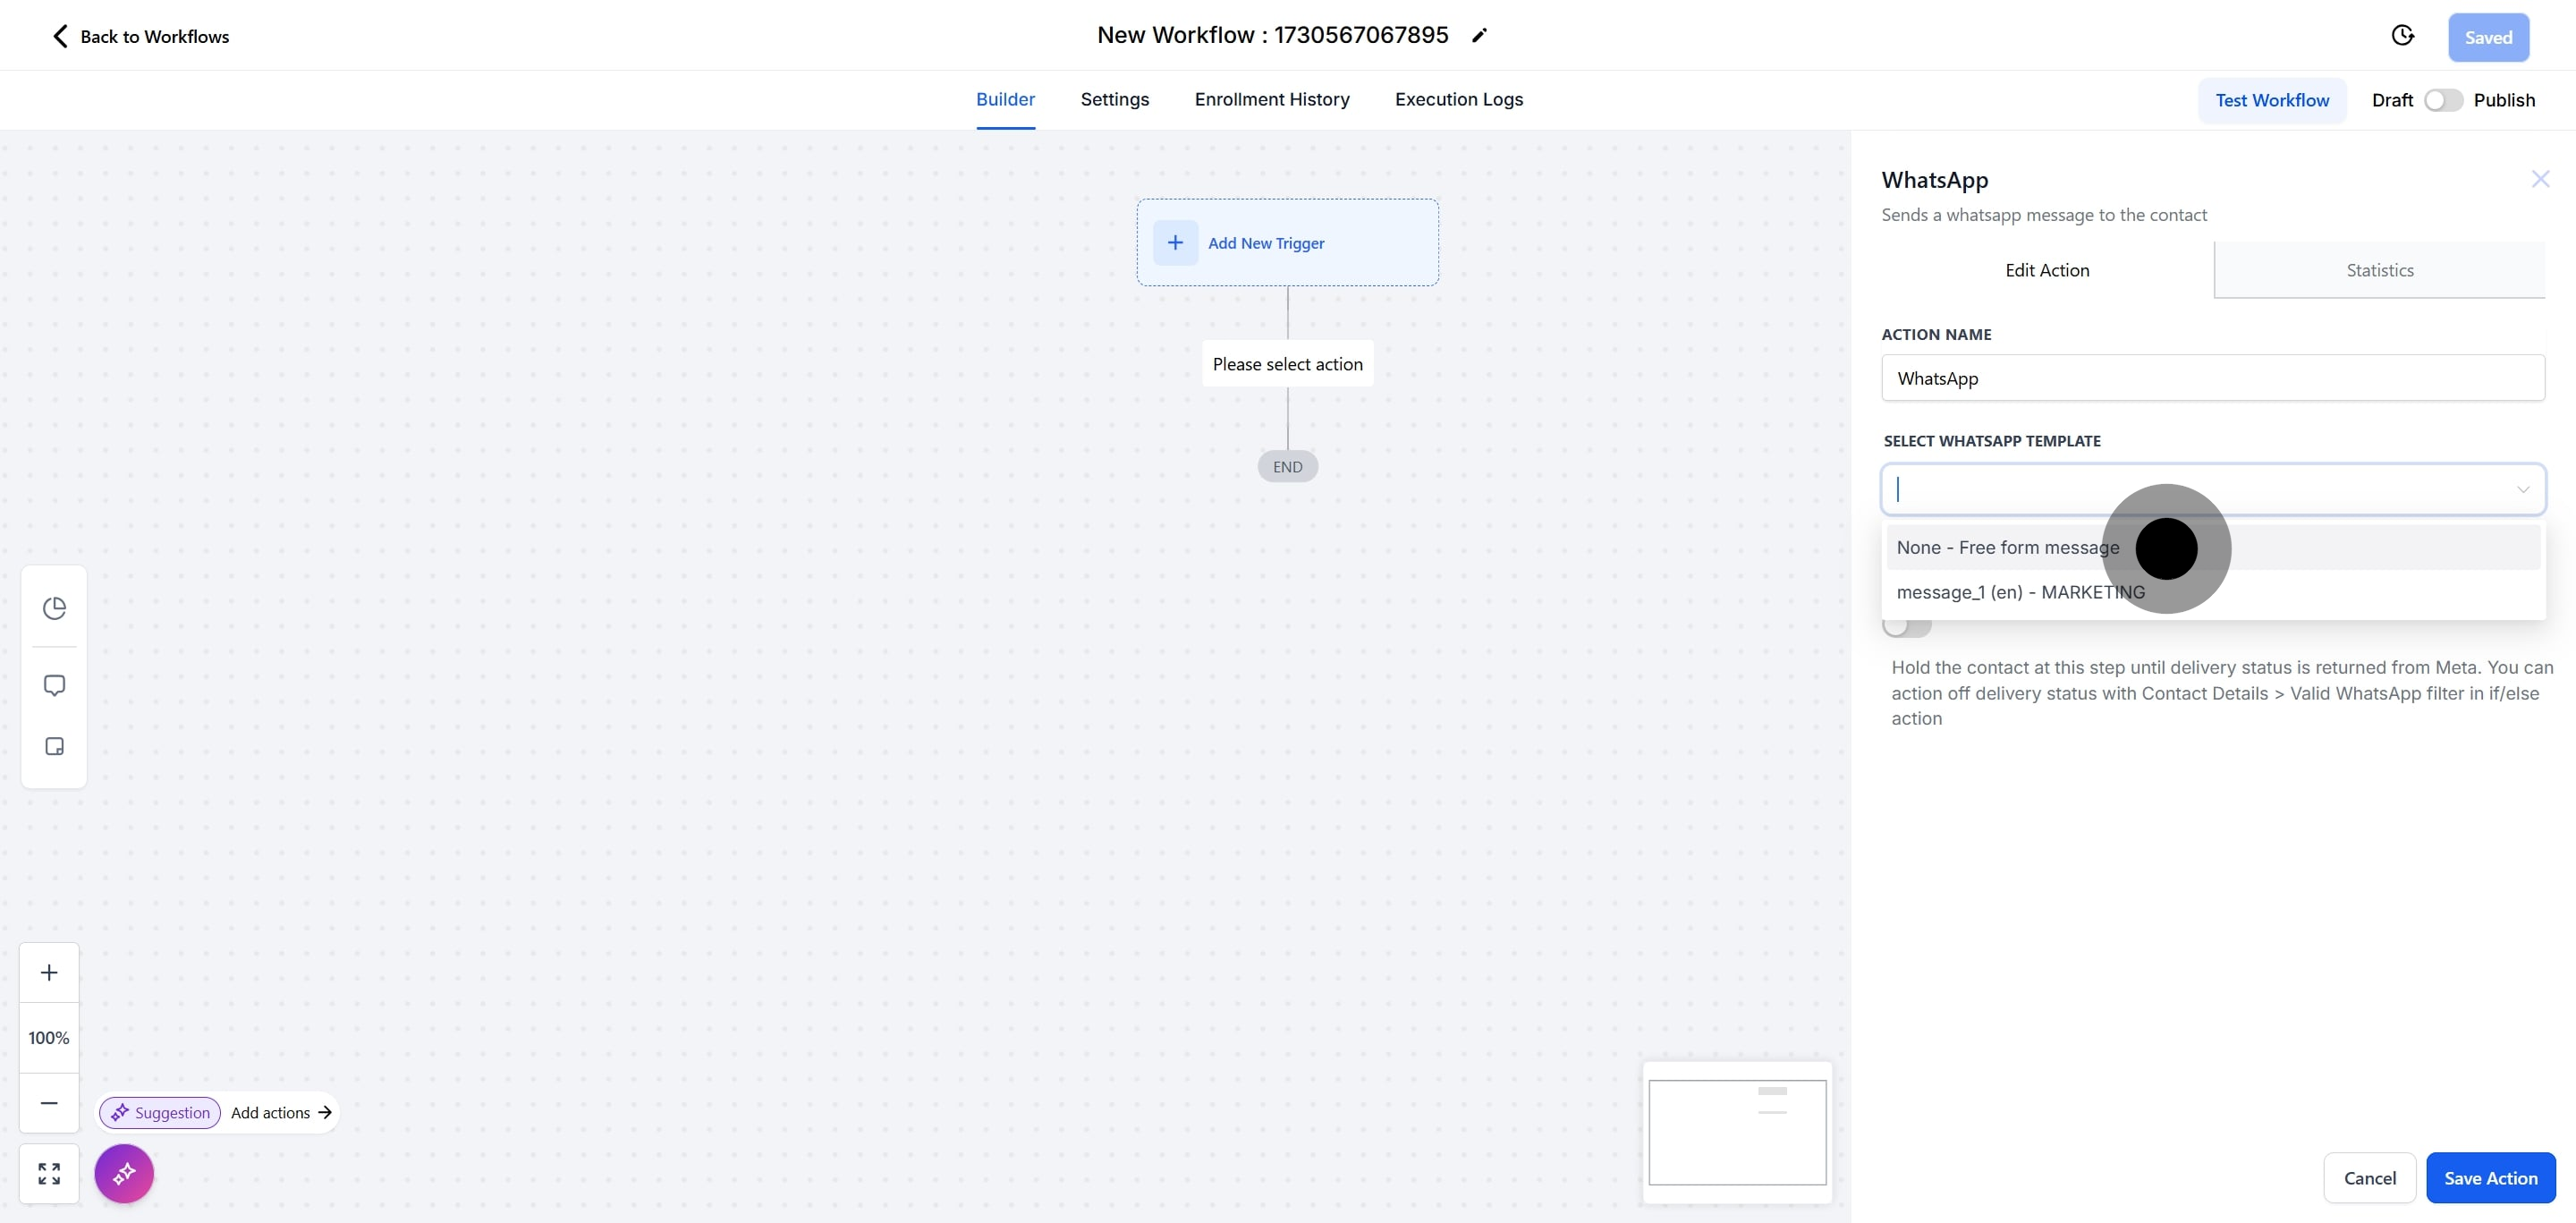
Add the message you want sent.
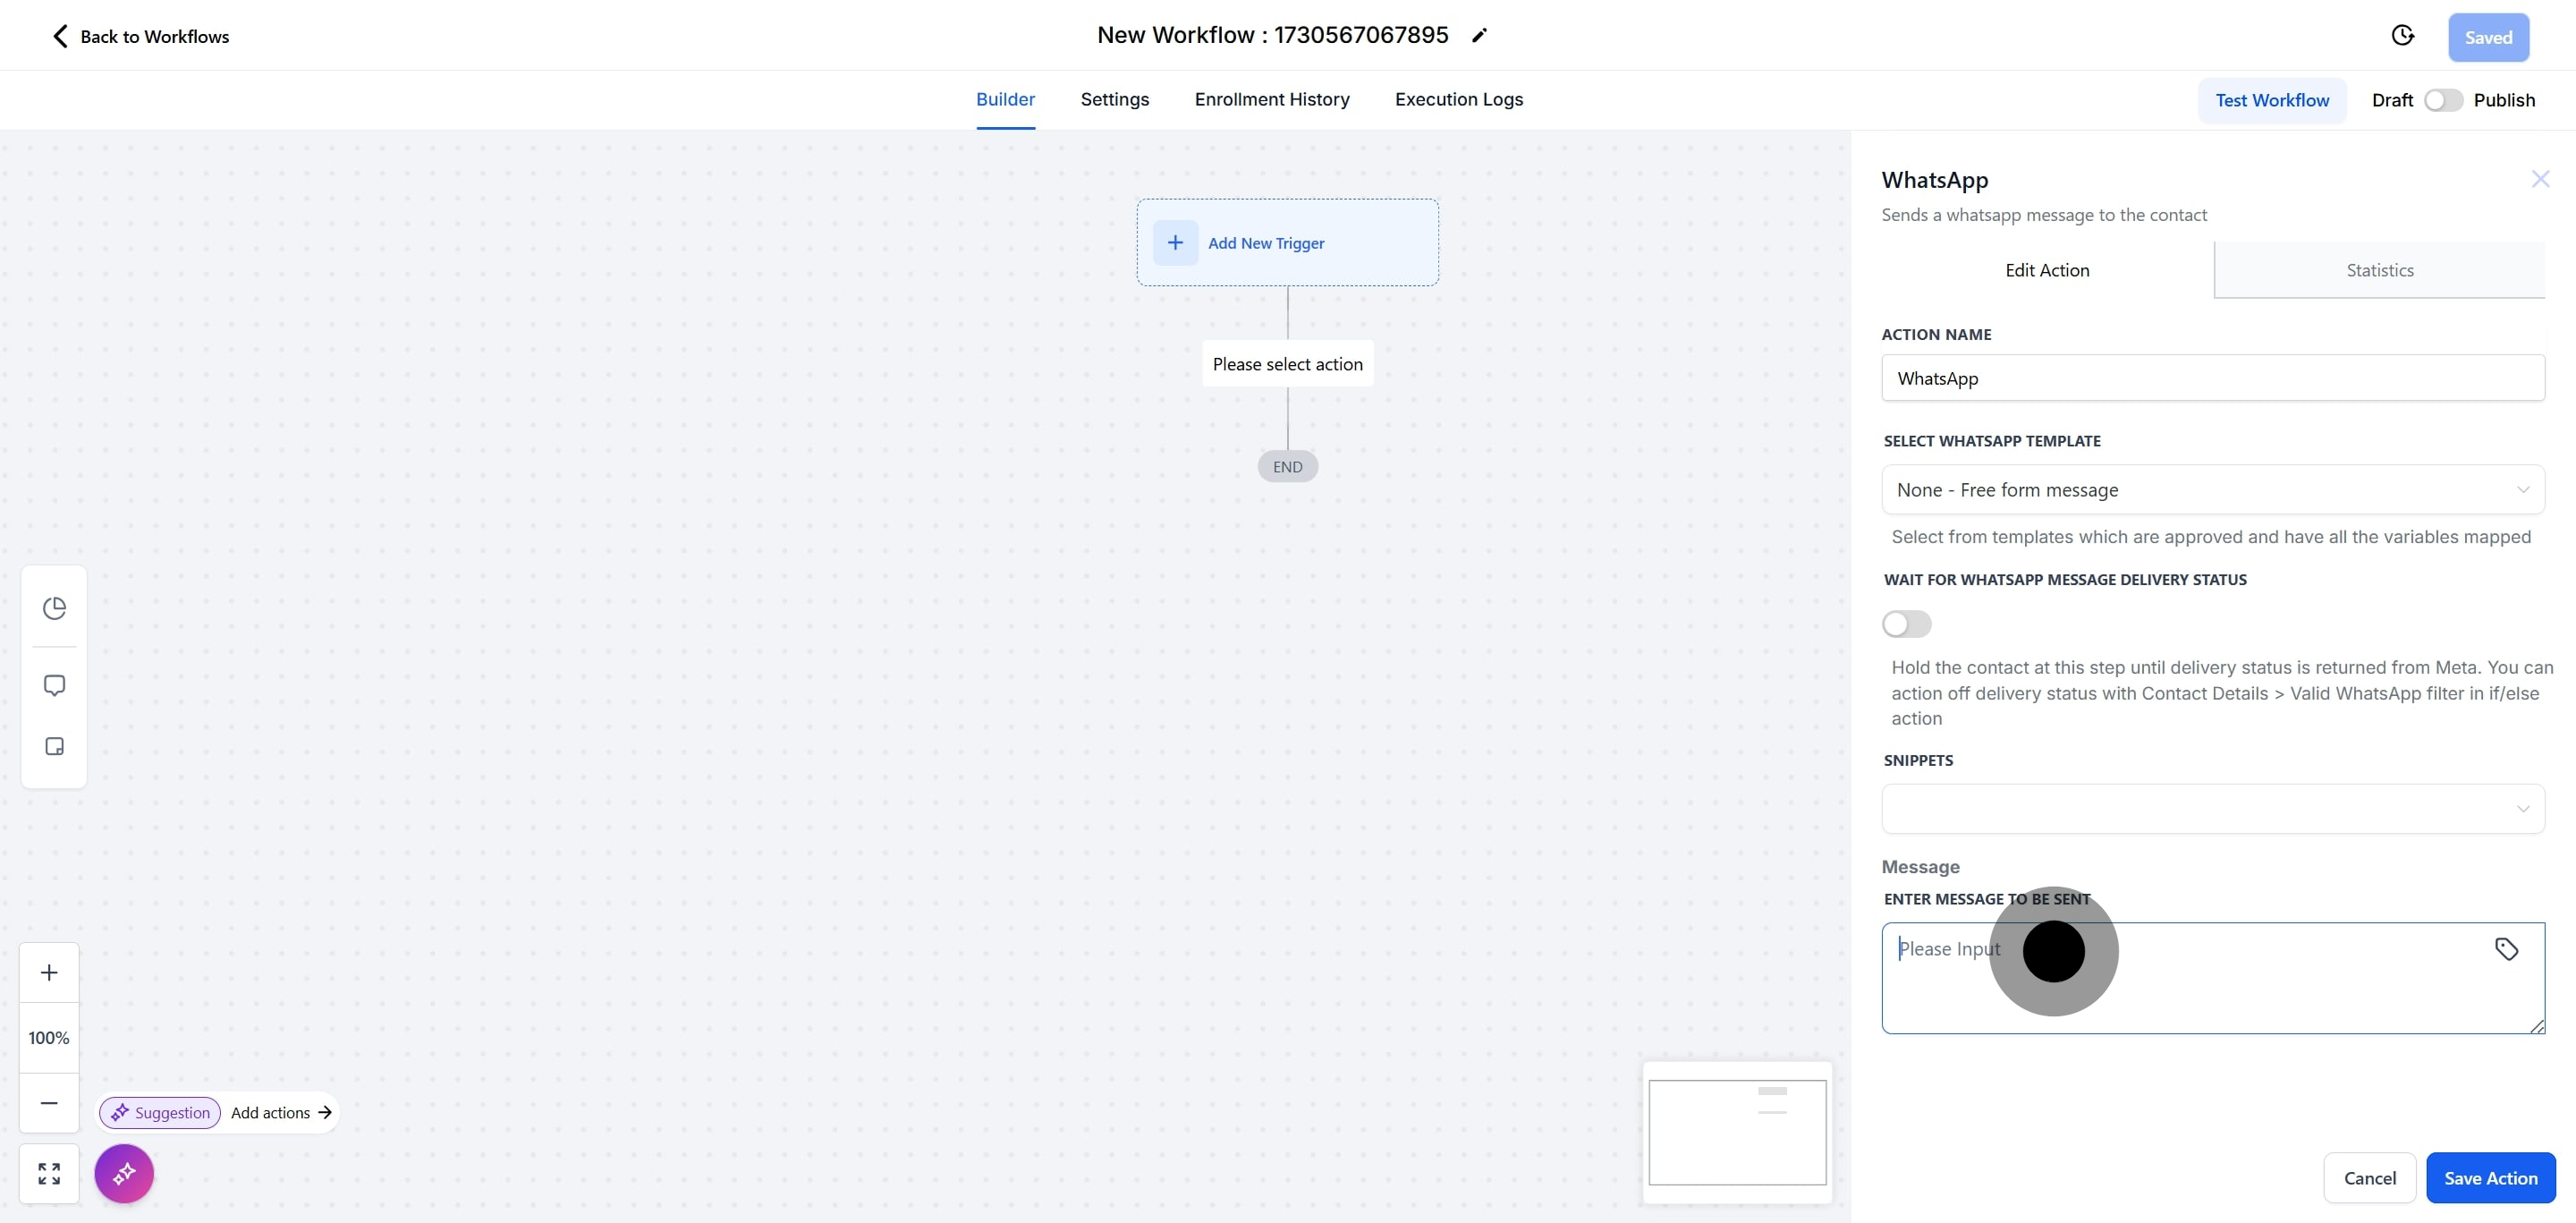
Click Save Action, then Publish and Save to activate the workflow.
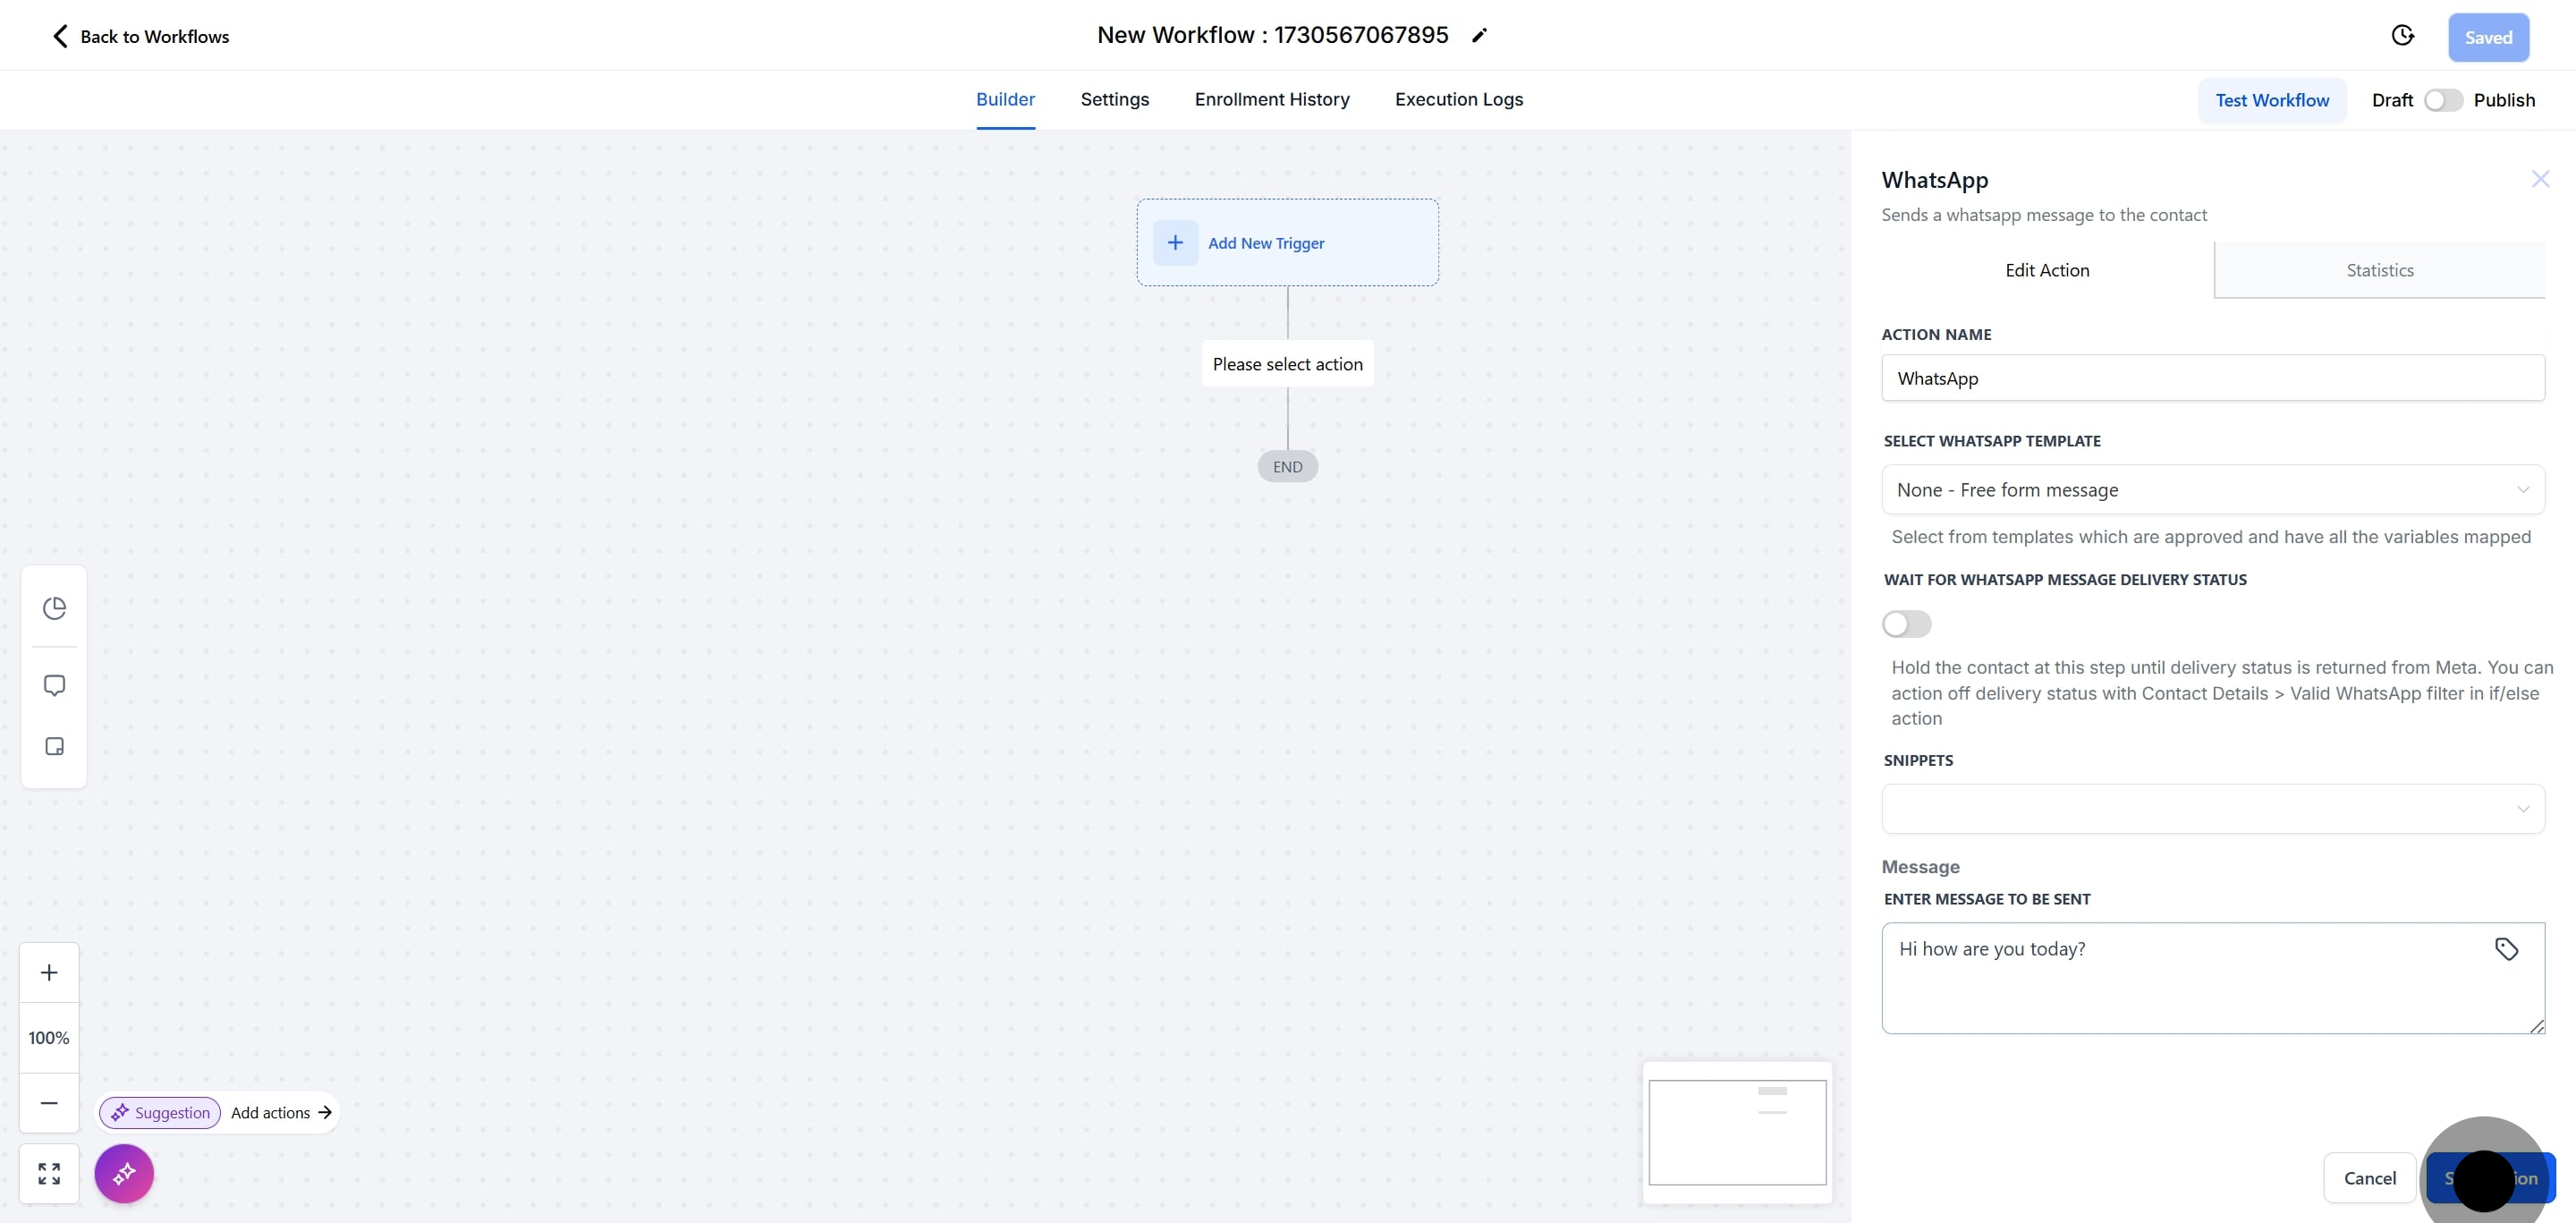
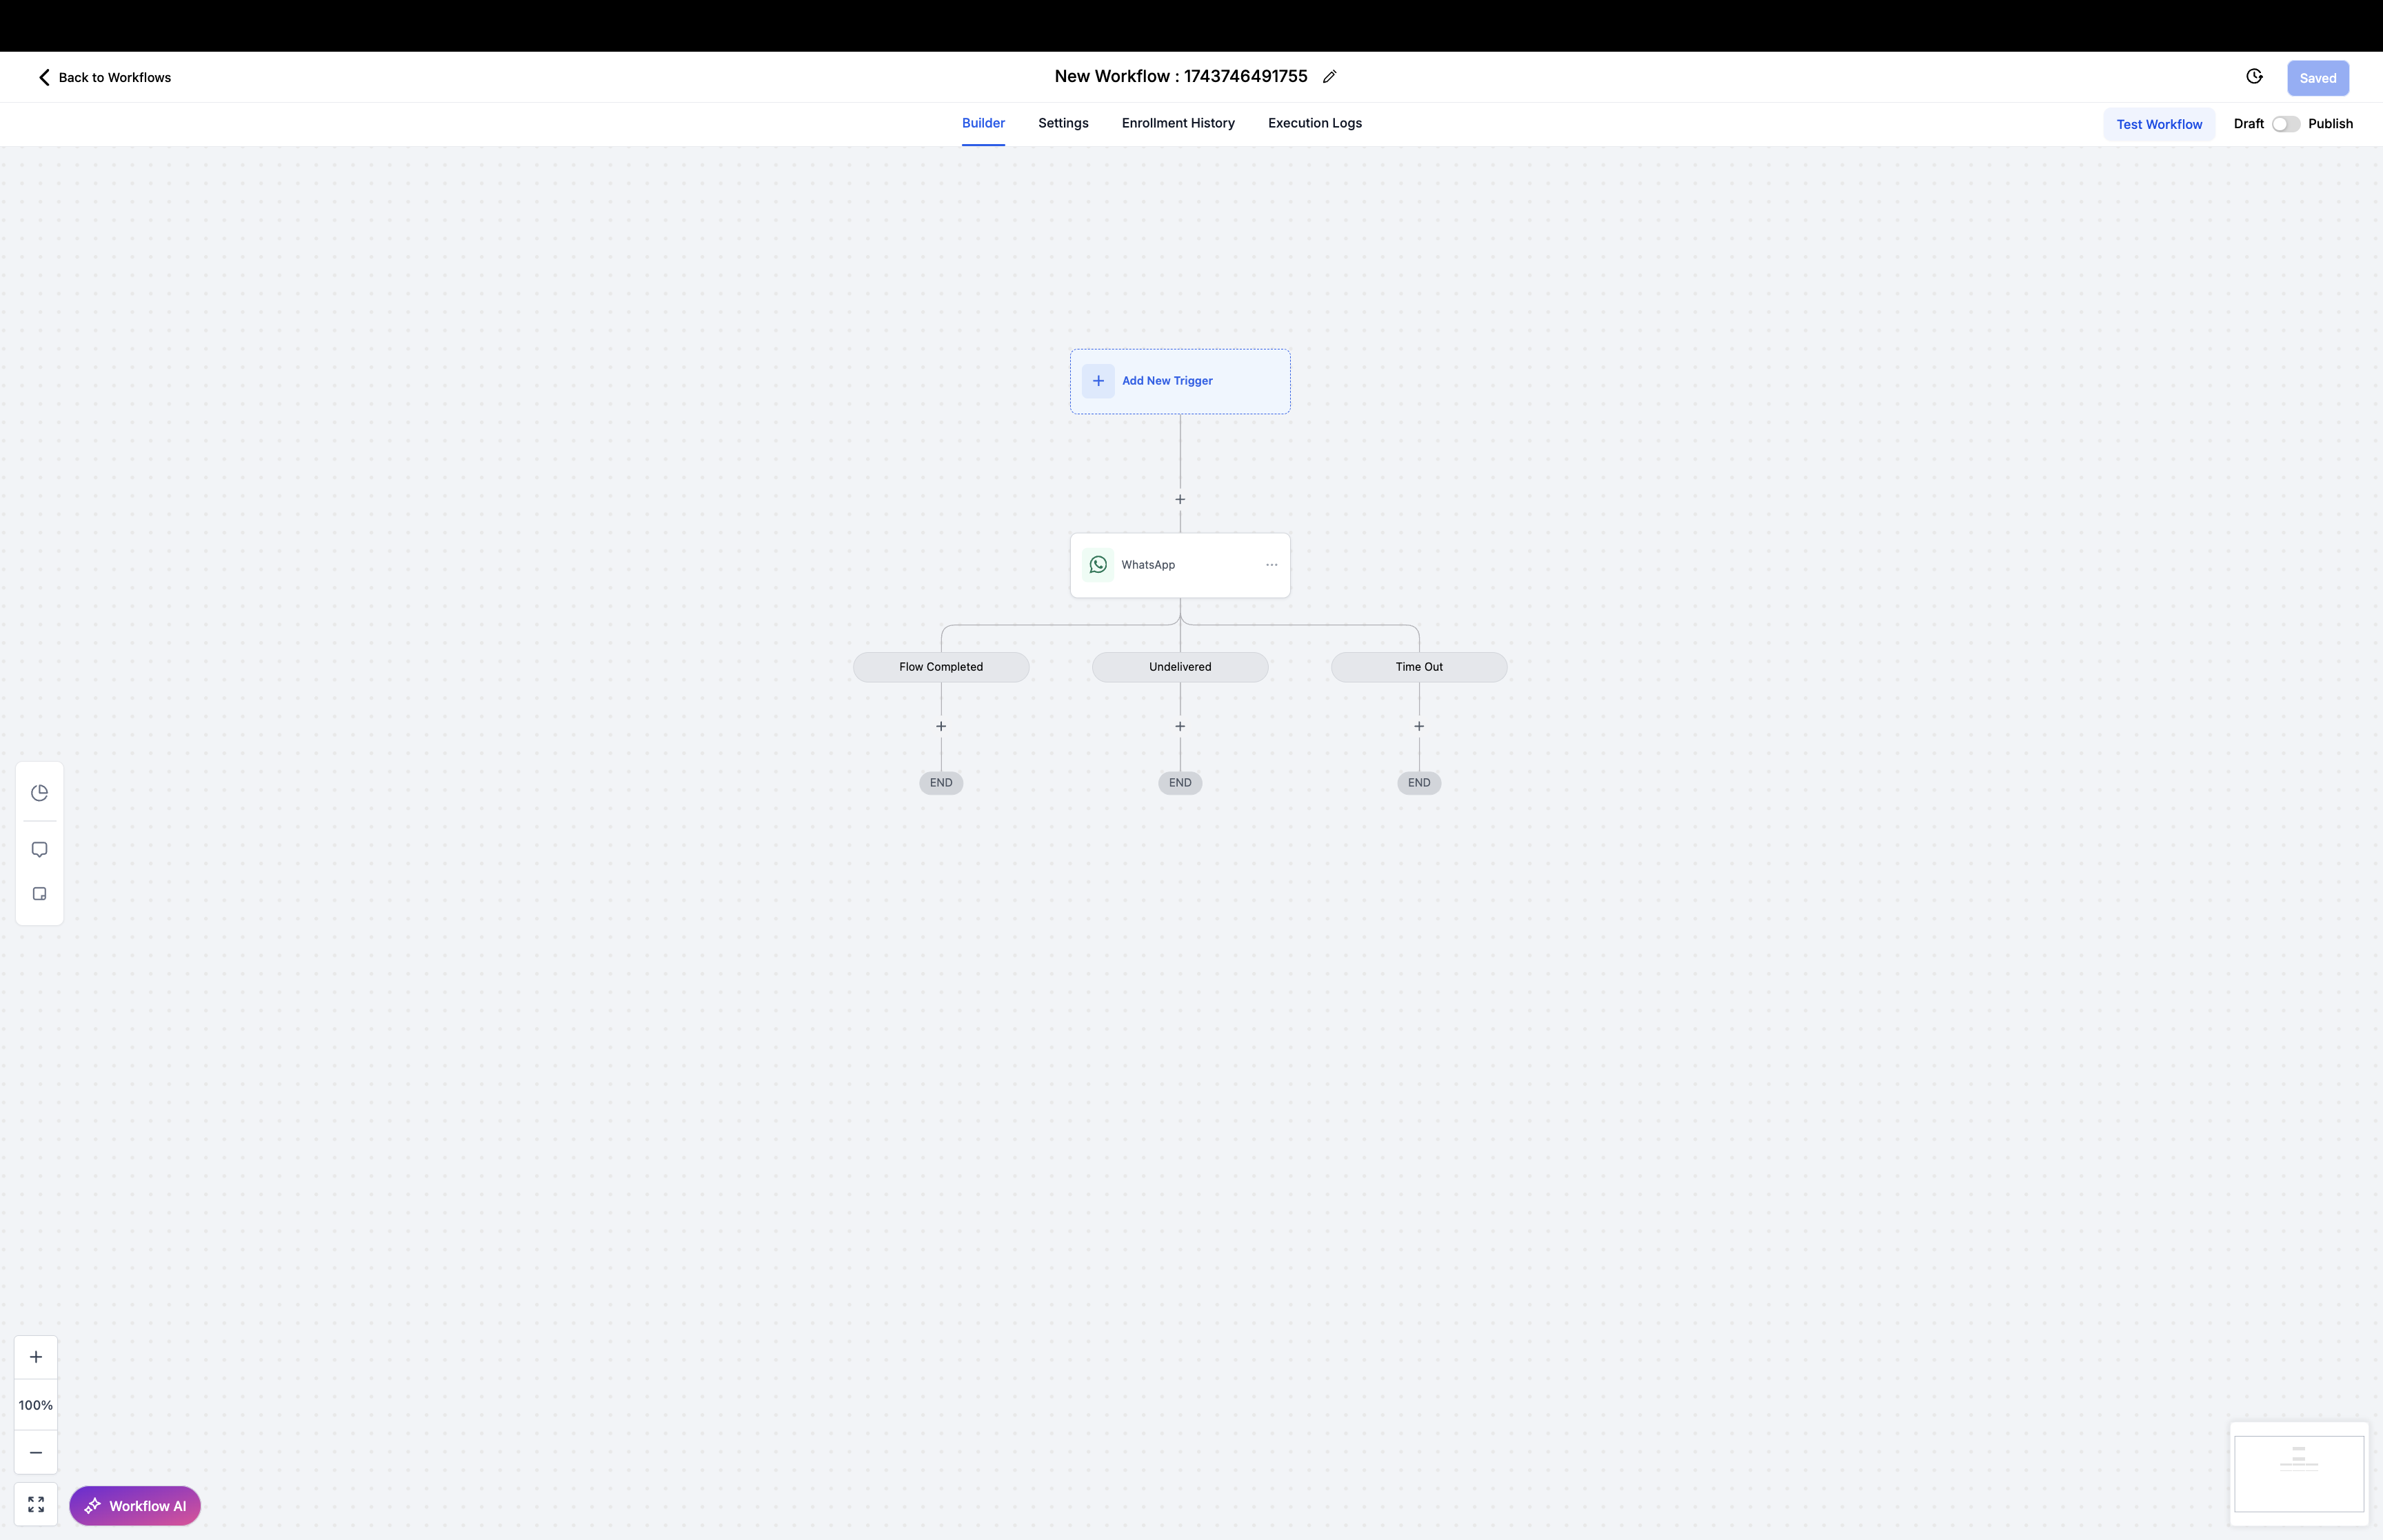
Note: You can also send pre-approved WhatsApp message templates instead of manual text for standardized messaging. Automating responses keeps communication with your patients timely and professional while streamlining your front desk.
Instead of a free-form reply, you can send a pre-approved WhatsApp template, including one with media such as an image, PDF, or video.
Click Marketing.
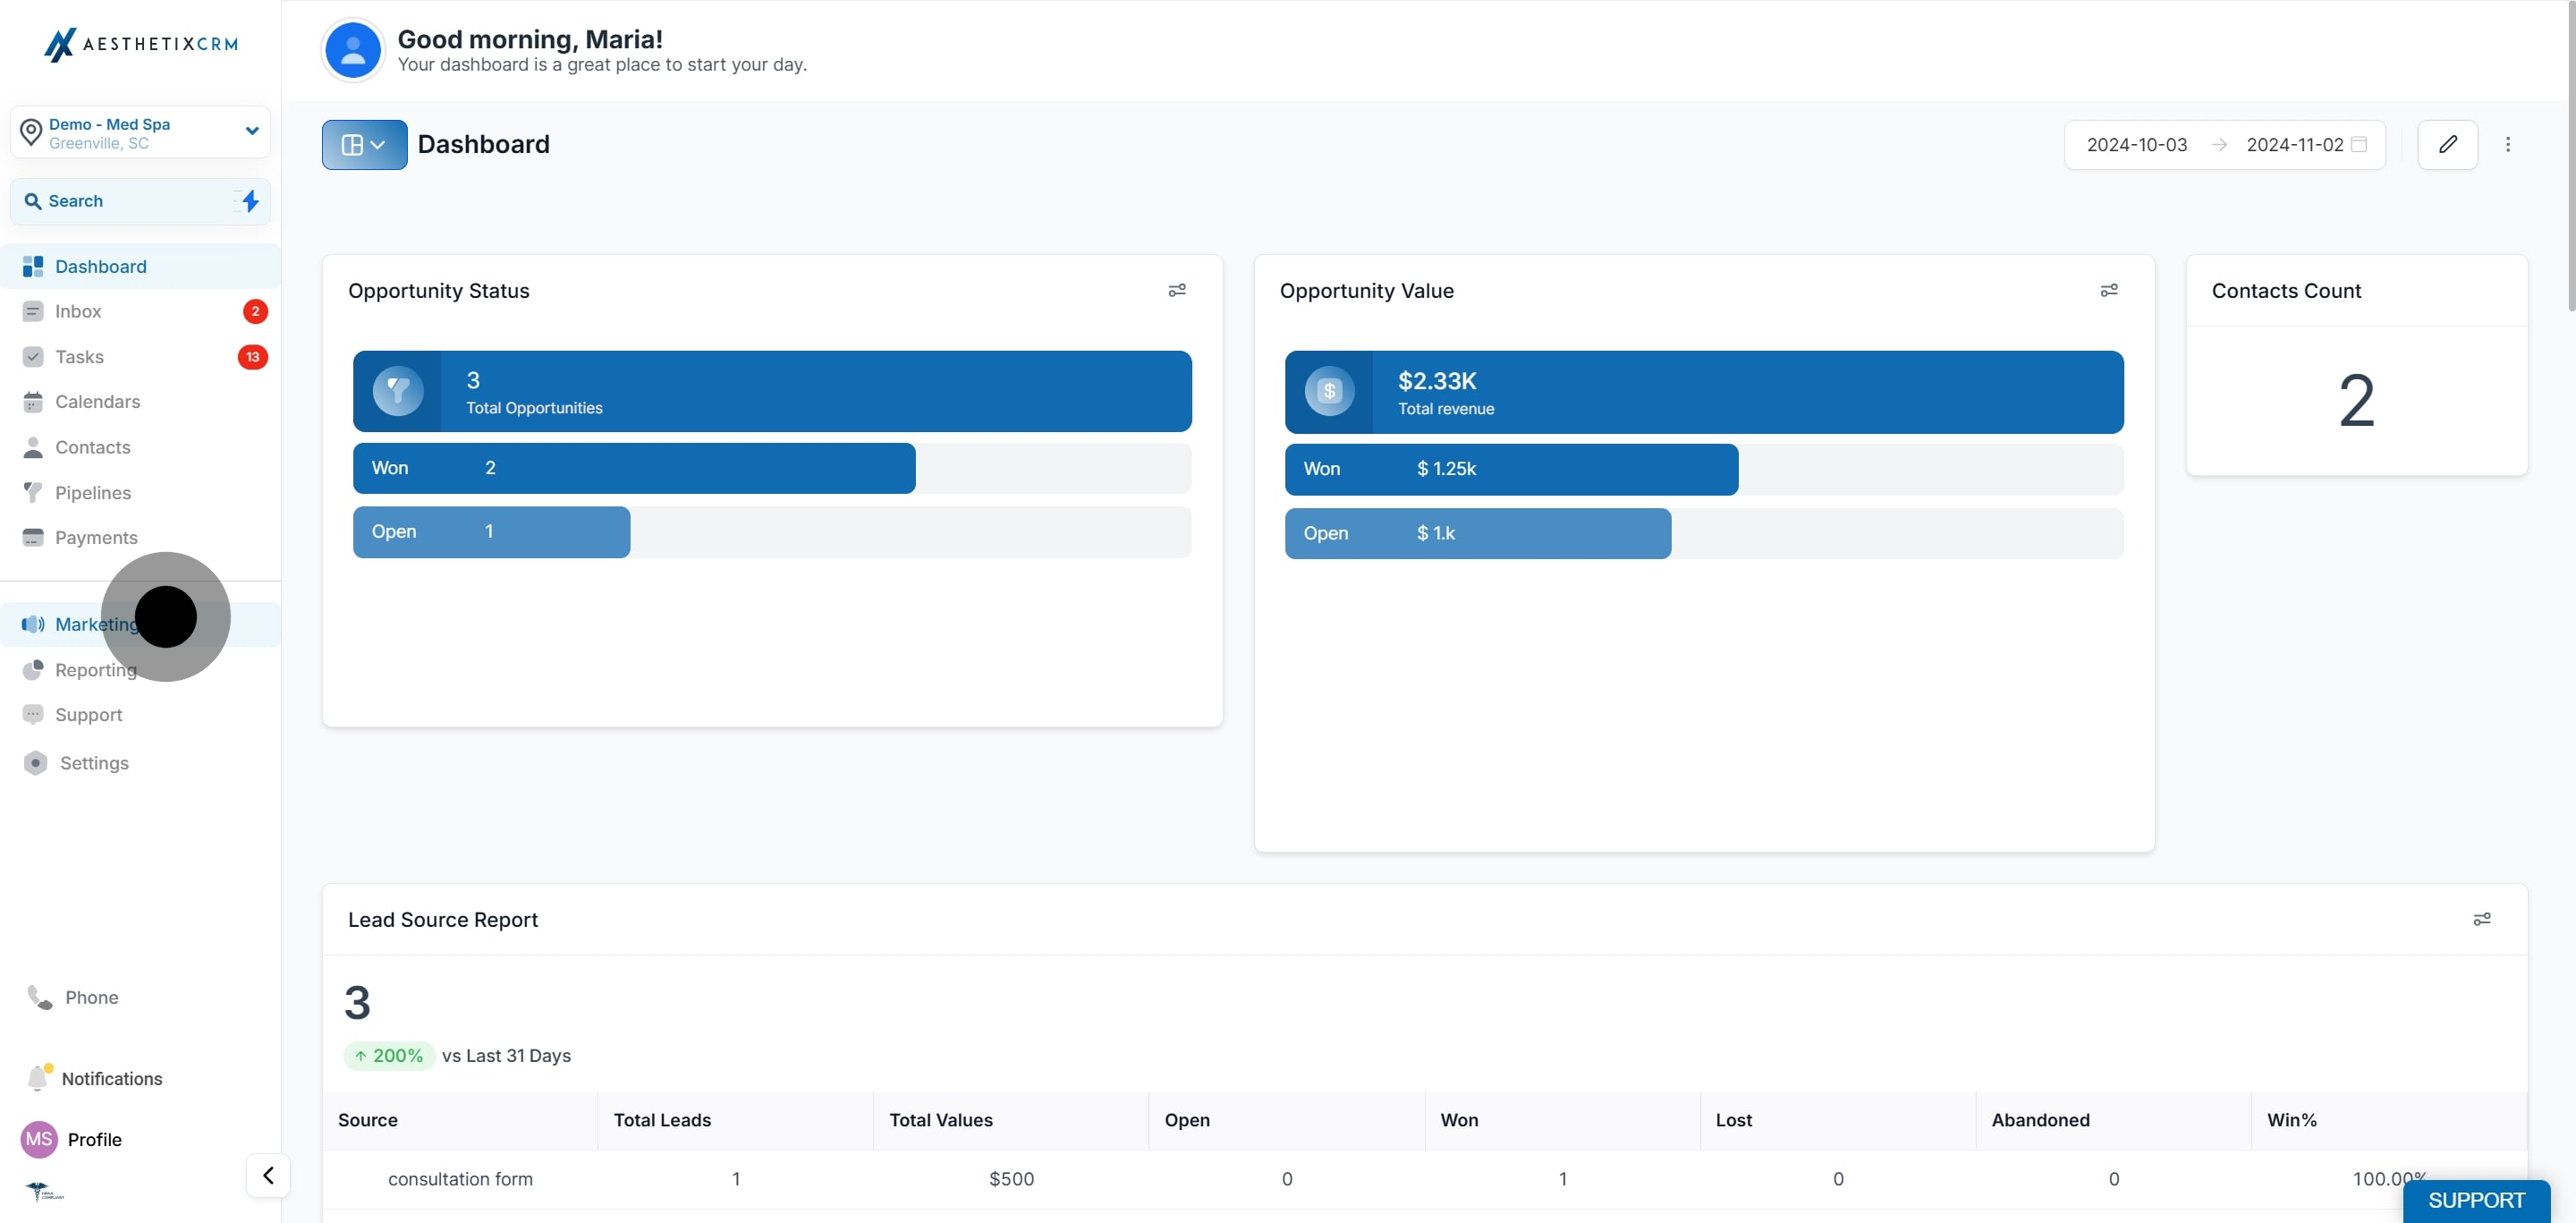
Click Workflows.
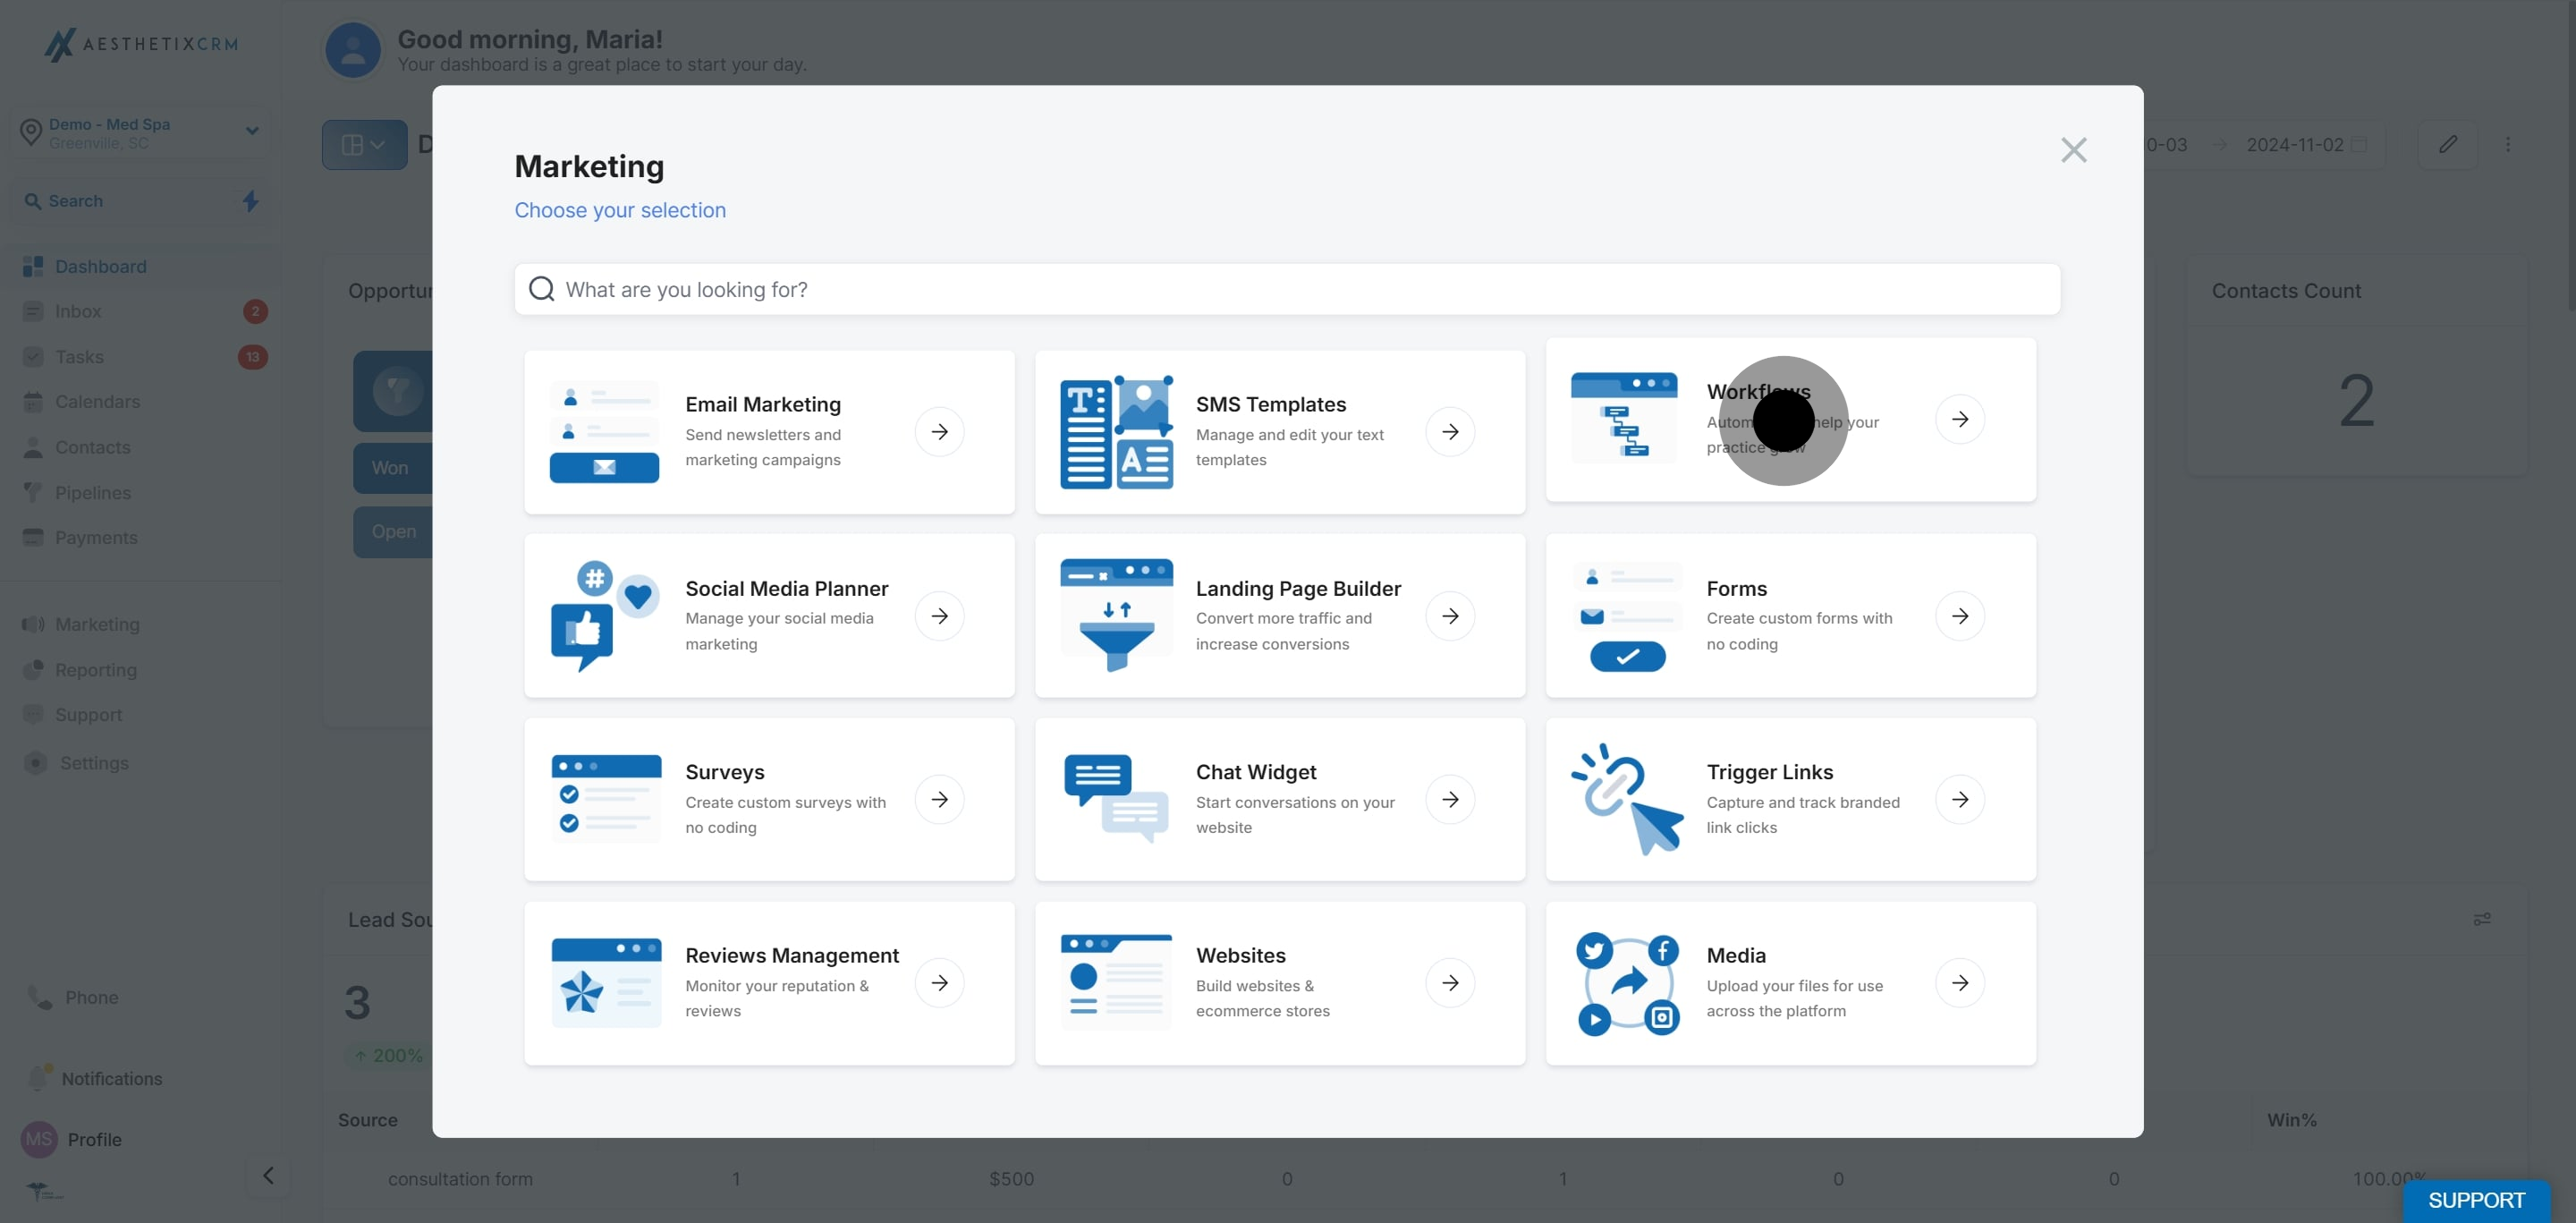
Click Create Workflow, then Start from Scratch.
Add the desired action.
Click the WhatsApp action.
Open the message type selector.
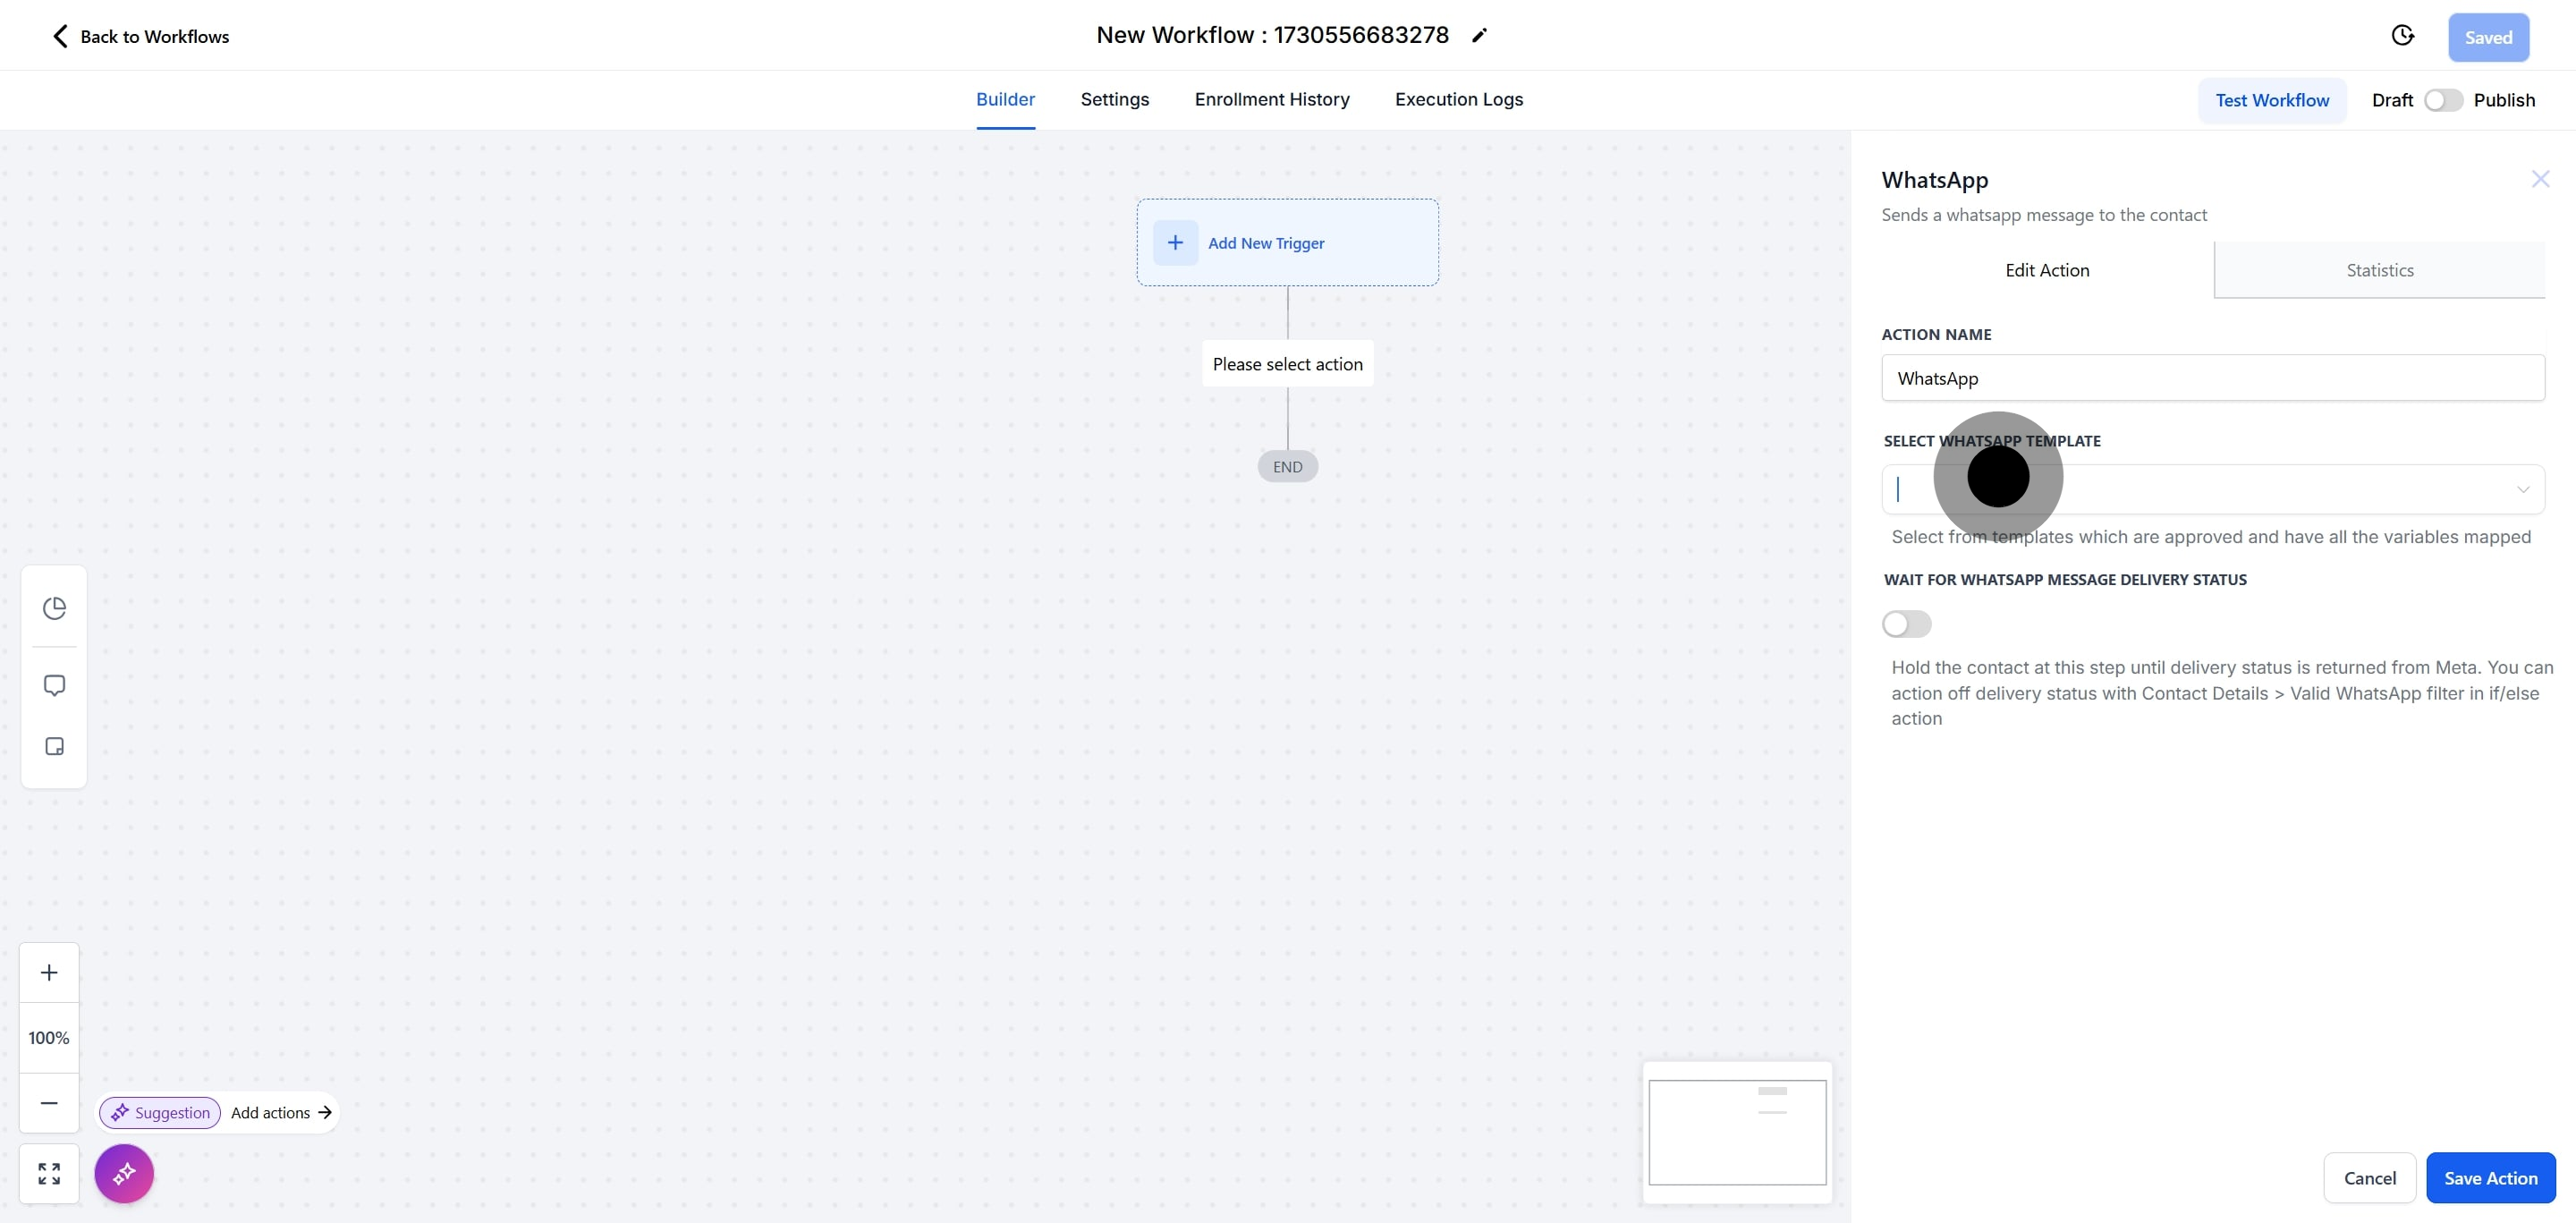
Select WhatsApp Template, then choose the template you want to send. You can update the URLs for any image, PDF, or video inside the message configuration, even when they are part of an approved template, so you can reuse templates without extra approval steps.
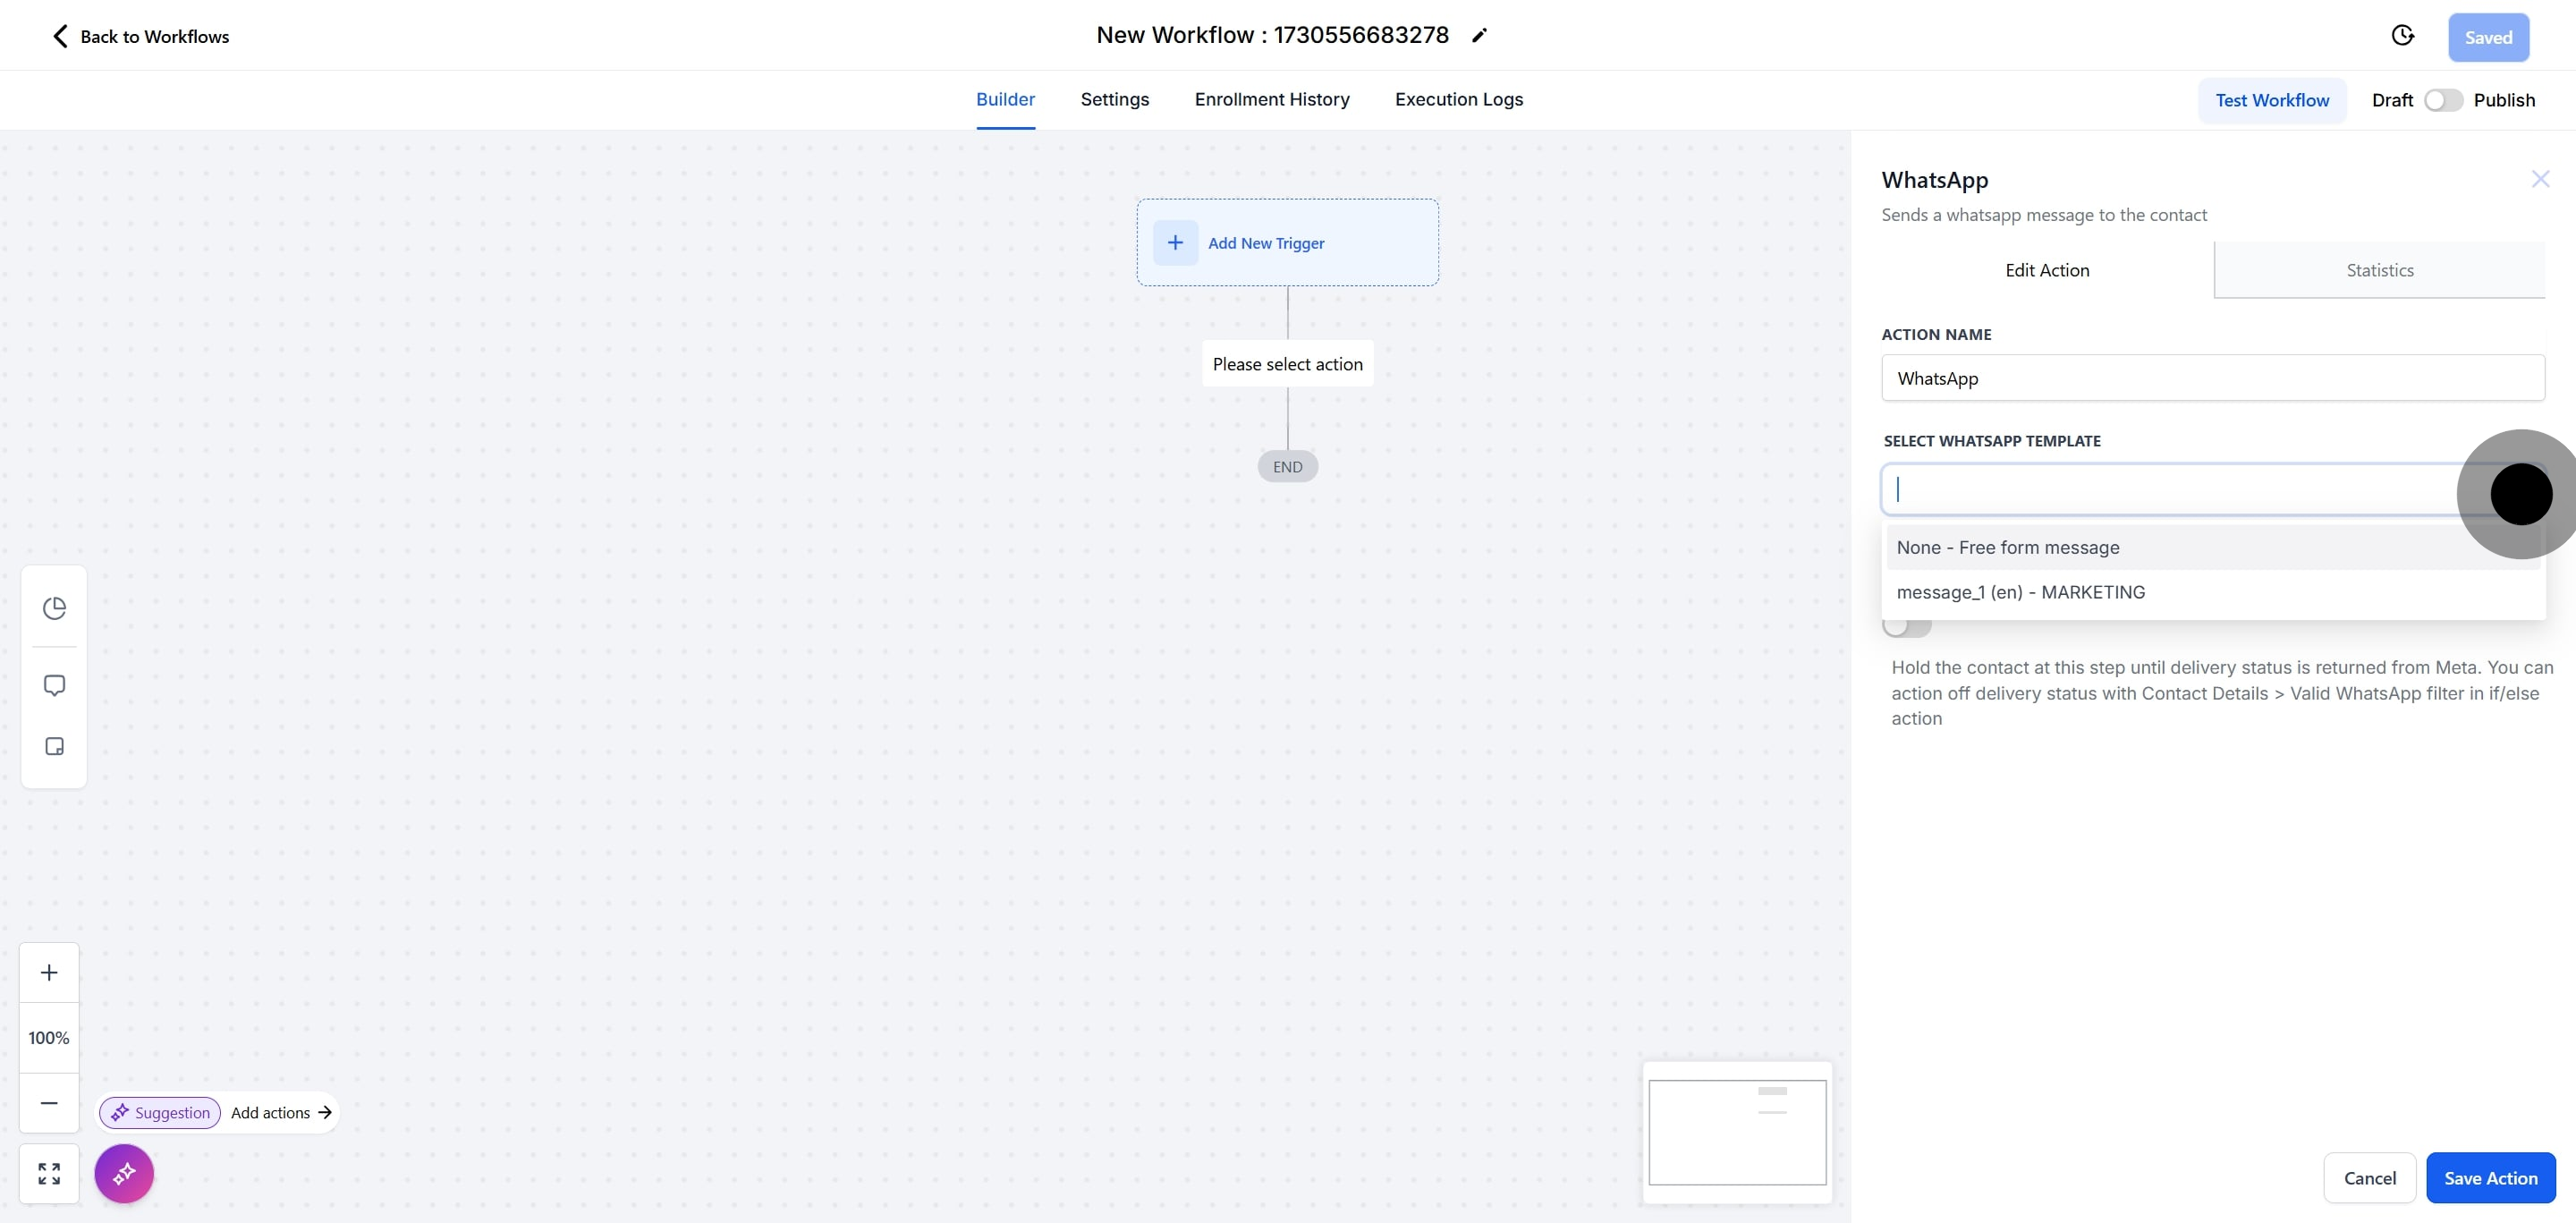
Click Save Action, then Save Workflow.
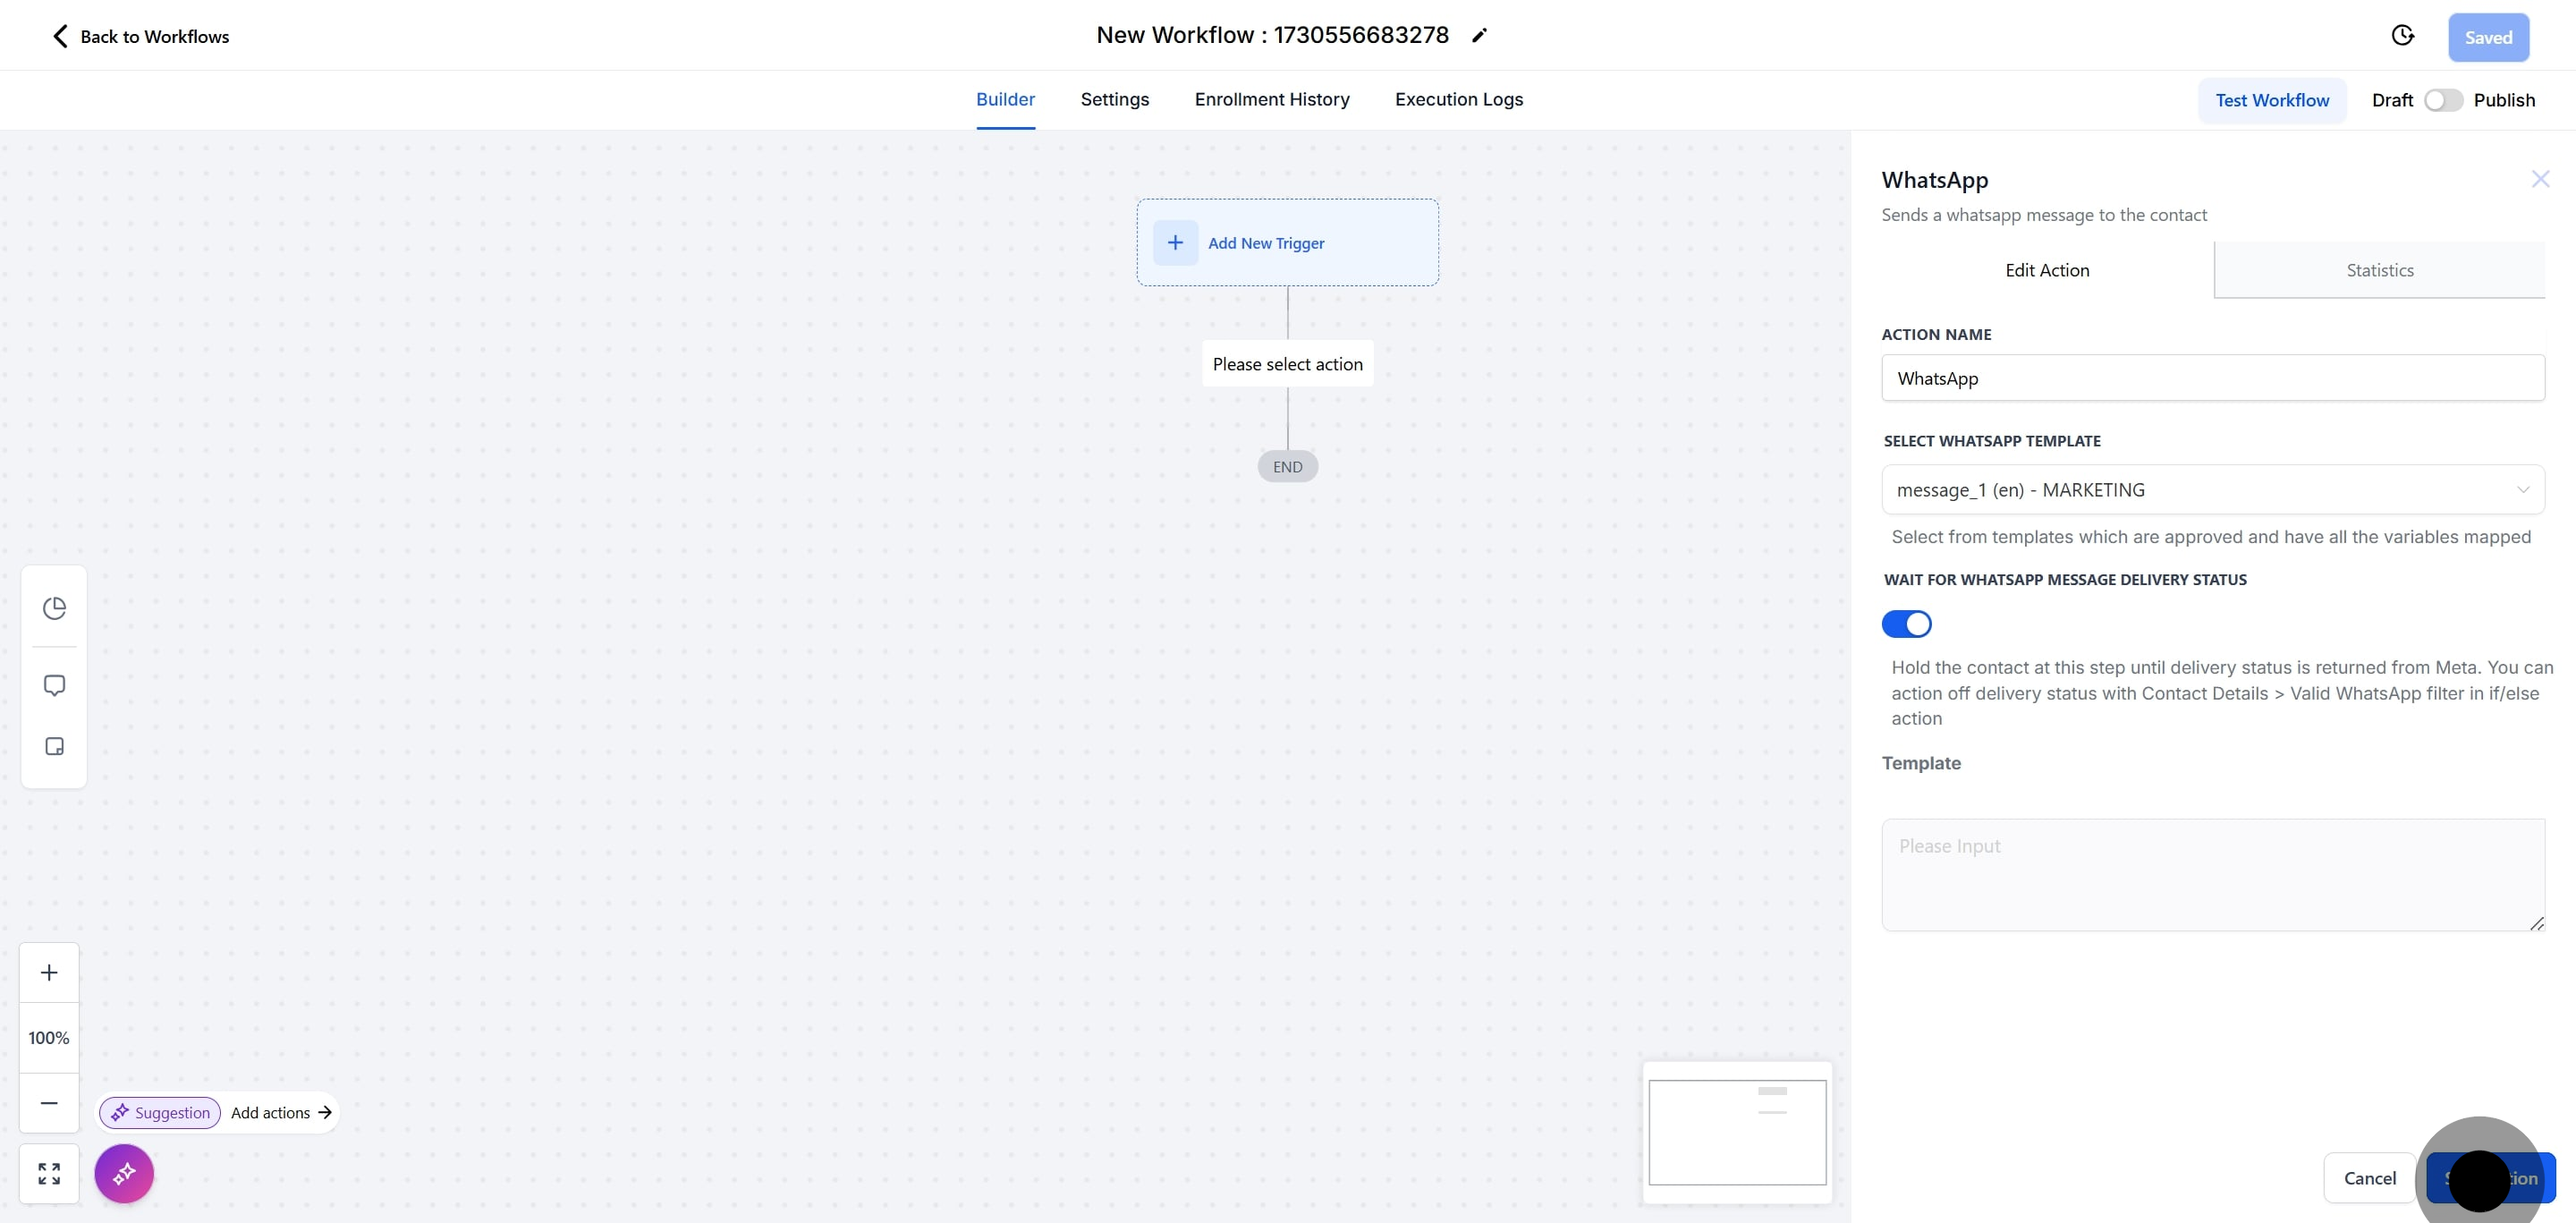
The WhatsApp action is a next-generation way to automate conversations. With dynamic branching, media flexibility, and advanced messaging controls, you can build chat flows that adapt in real time, with no code or manual conditions required.
Smart Branching automatically creates logic branches based on quick-reply button responses.
Media Flexibility lets you change PDF, video, or image URLs directly in the action setup.
Versatile Messaging lets you choose free-form messages, templates, or WhatsApp Flows.
Branch Toggle keeps workflows simple by disabling reply-based branches when not needed.
Timeout Actions define what happens if the patient does not respond in time.
Wait-for-Reply Logic pauses the workflow until a reply is received (only after delivery).
Auto Deliverability Handling tracks delivery for you, so there is no need to build if/else conditions.
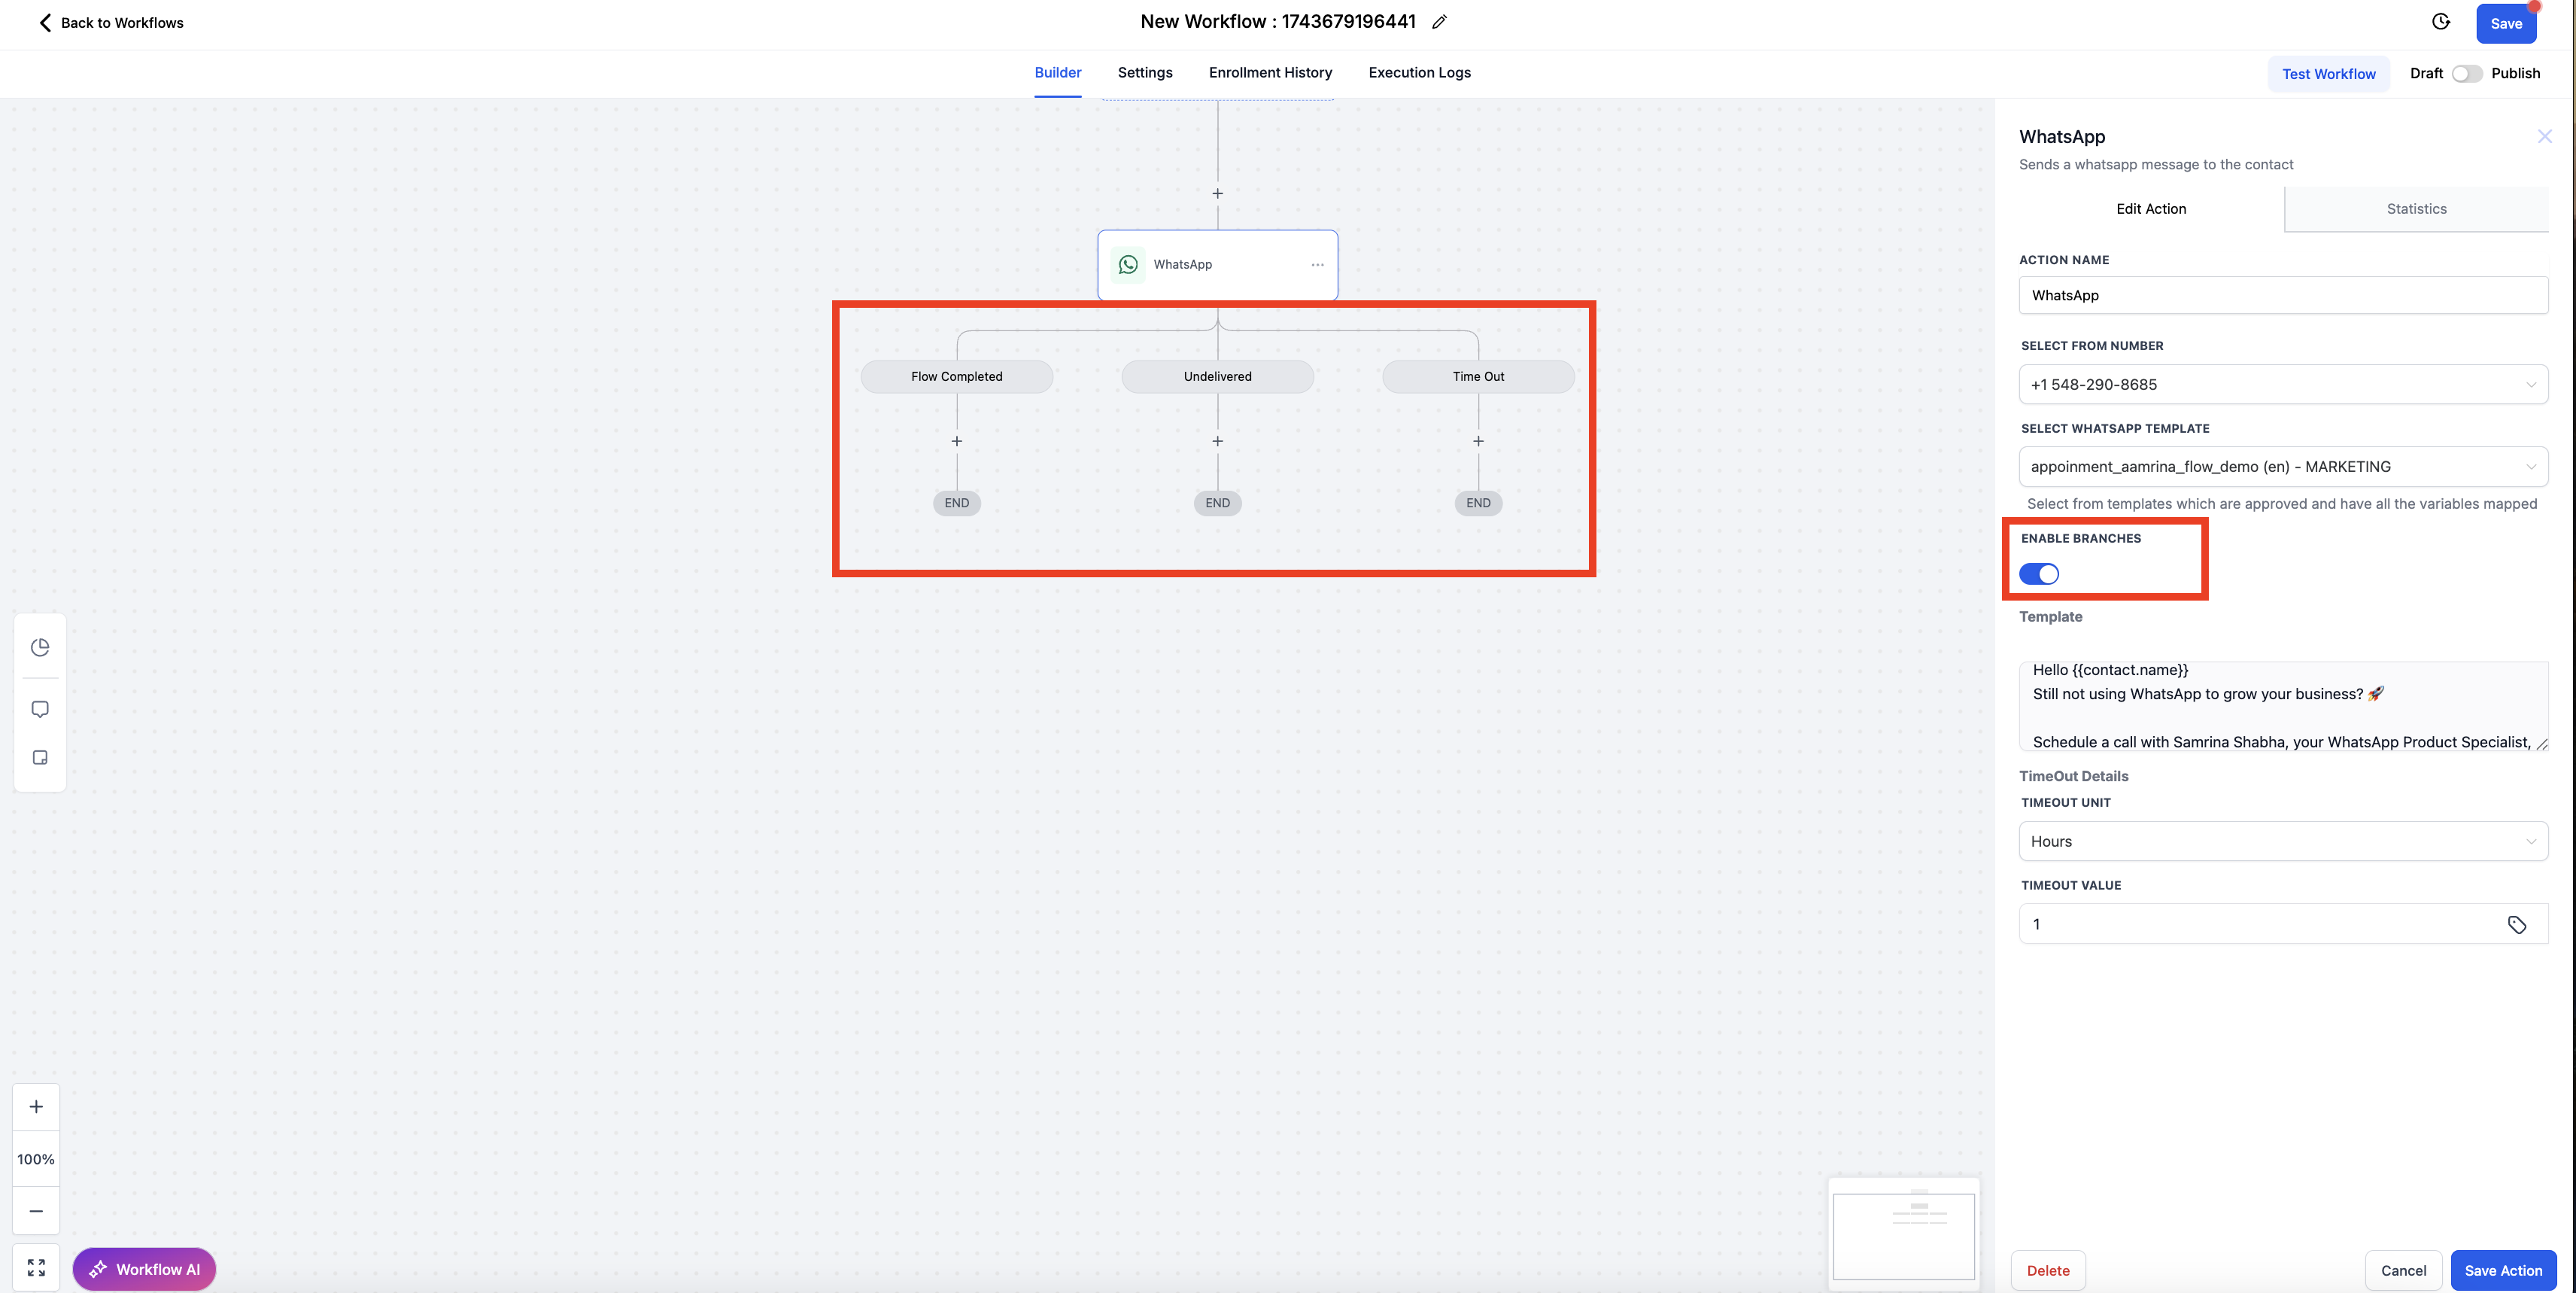
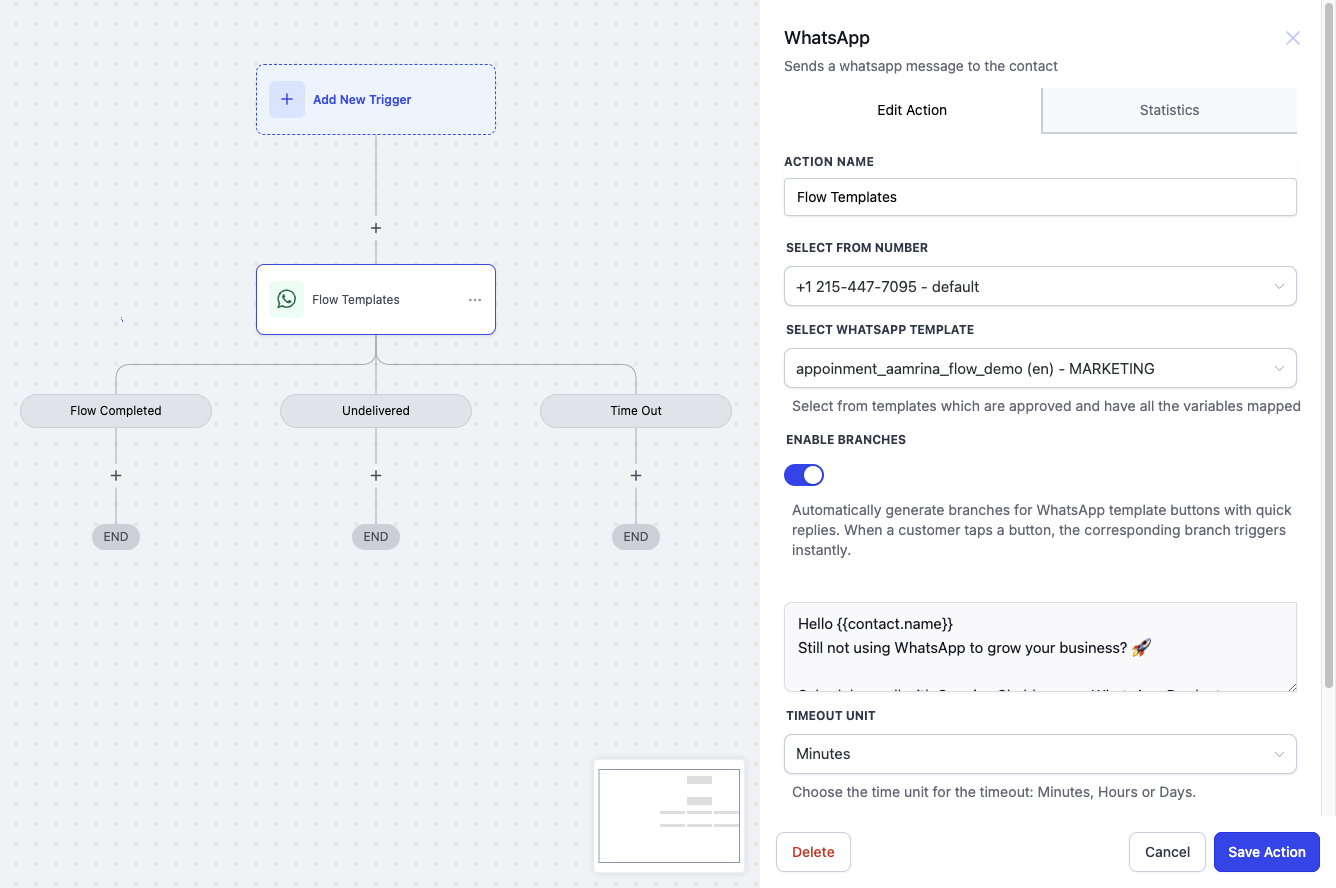
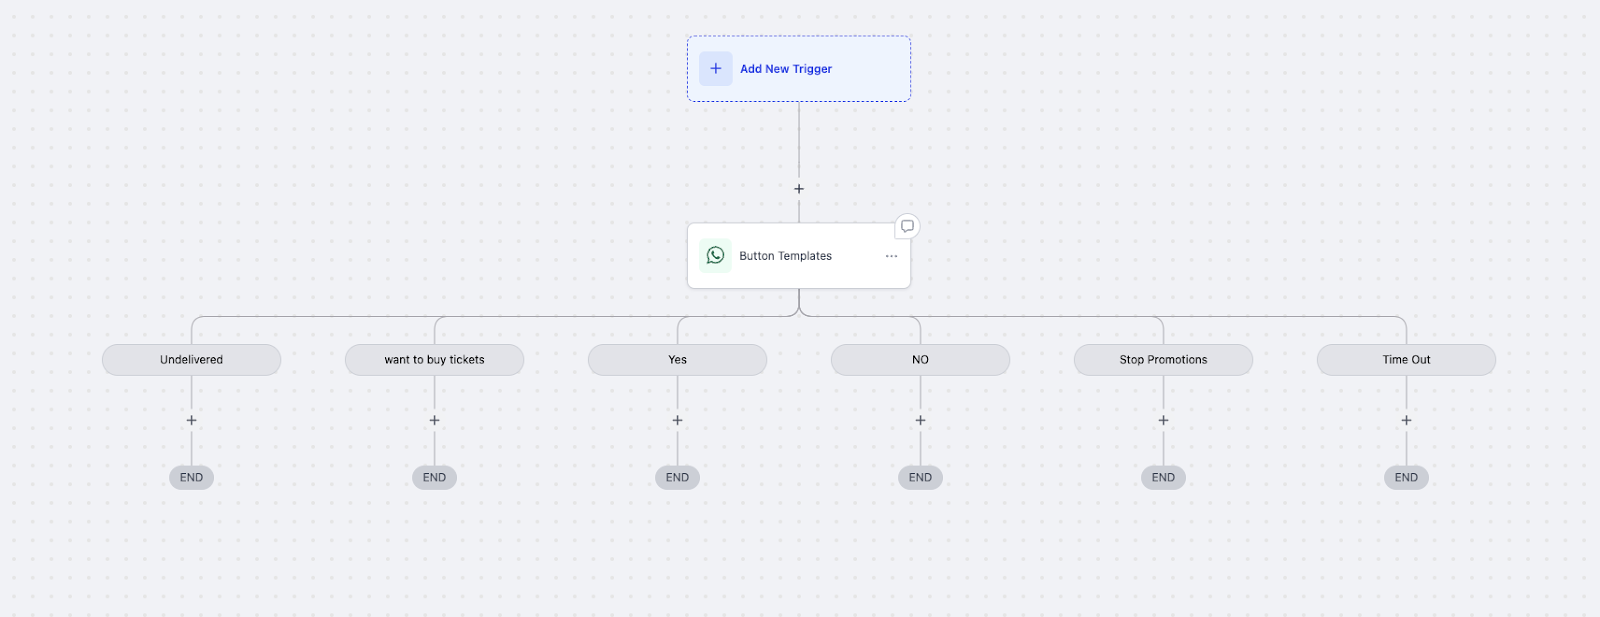
When you use WhatsApp flows or templates with buttons, enabling branches adds powerful logic. When your template includes reply buttons, a branch is created automatically for each response, so you do not have to build conditions or filters by hand:
Flow Completed fires when a patient completes the WhatsApp flow.
Undelivered triggers if the message fails (for example, the patient is unreachable).
Timeout activates when the patient does not respond in time.
Use these branches to send fallback messages, alerts, or next steps based on how the patient behaves.
Create a WhatsApp template. Use the Messaging → Templates area to build or select a template, then add buttons, media, or Meta Flows based on your goal.
Add the WhatsApp action to your workflow. From the workflow builder, add the WhatsApp action and choose your message type: template, free-form, or flow-enabled.
Configure smart logic. Select reply buttons (if any) to auto-generate branches, add a timeout duration and fallback paths, and enable or disable wait-for-reply options.
Monitor logs. View logs to see which path each patient takes, such as delivered, replied, or timeout.
React to silence or replies with precision:
Timeout triggers a follow-up or fallback action after a set period of no response.
Wait-for-Reply pauses the workflow entirely until the patient responds, which is useful for high-engagement flows.
Choose which connected number sends your WhatsApp messages.
Note: Only phone numbers with a connected status appear in the dropdown for selection.
Click the + icon in the workflow to add a new action.
In the Action section, search for WhatsApp and click it.
From the dropdown, select the phone number you want to use for sending WhatsApp messages.
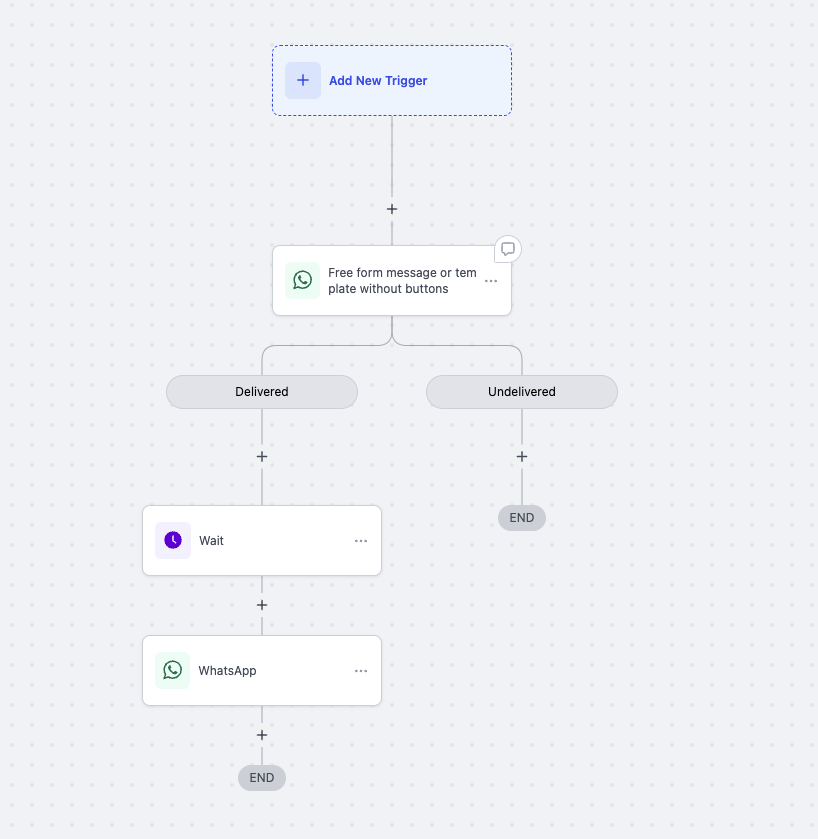
You can send an initial WhatsApp message and then wait for the patient's reply before moving to the next step. This creates more natural, responsive conversations inside your automated workflows.
Go to Marketing → Workflows → Create Workflow → Start from Scratch.
Select Add New Trigger and search for Contact Created.
Click the plus (+) button to add an action, then select WhatsApp.
Choose WhatsApp Template, then select the template you wish to send.
Click the + button and select Wait.
Set Wait For → Contact Reply, then set Reply To → WhatsApp, and click Save Action.
Click the + button, set the Action Name to WhatsApp, and set Select WhatsApp Template to None - Manual Text.
Note: You can send free-text messages at no additional cost because a Free Entry Point Conversation is open once the patient has replied to you.
Click Save Action, then Publish the automation and click Save.
Based on specific patient actions, such as sending "STOP", you can set Do Not Disturb for all channels or specifically for WhatsApp. This lets you respect patient preferences and manage your communication channels responsibly.
Go to Marketing → Workflows → Create Workflow → Start from Scratch.
Select Add New Trigger → Customer Replied.
Select Add filters, set Reply Channel → WhatsApp and Contains Phrase → STOP, then click Save Trigger.
Click the + button, search DND, and select Enable/Disable DND.
Select Enable DND for specific channels, set Channels → WhatsApp, and click Save Action.
Note: You can enable DND for all channels by selecting Enable DND for all channels instead.
Beyond messaging patients, you can also receive internal notifications through WhatsApp, giving your team real-time updates in a channel they already check throughout the day. This adds WhatsApp as an optional delivery channel, alongside In-App, Email, and SMS, for the user alerts your CRM already generates.
Internal notifications are for your team, not patients. Each user chooses which events trigger a WhatsApp message, so you get fast awareness without needing to stay logged in to the app.
Faster response times: Real-time alerts shorten the gap between an event and your follow-up.
Better accountability: Mentions, assignments, and reminders help the right owner act without missing updates.
Flexible channel mix: Choose WhatsApp, In-App, Email, and SMS per event to fit each user's workflow.
Broader coverage: Stay informed even when you are away from your inbox or desktop.
Granular control: Enable only the events you care about to avoid notification fatigue.
WhatsApp alerts cover the same event groups found in your Notification Preferences:
Conversation: new messages, mentions, and assignments.
Tasks: new or updated tasks, reminders, and daily summaries.
App & Integrations: reviews posted, purchases completed, calendar disconnects, and more.
You can enable a different set of channels, including WhatsApp, for each sub-category individually.
Open notification settings. Go to Settings → My Profile → Notifications.
Turn on the WhatsApp channel. Scroll to Notification Channels and toggle WhatsApp to On.
Choose your events. In each category (Conversation, Tasks, App & Integrations), enable WhatsApp for the specific events you want to receive.
Does the Do Not Disturb (DND) setting affect other communication channels or just WhatsApp?
You can configure DND to apply to all channels or just WhatsApp. This gives you control over whether you want to stop the patient from receiving communications across all methods or only on the specific channel where they asked to be left alone.
What is the difference between "None - Manual Text" and selecting a template?
"None - Manual Text" lets you write a free-form message within the 24-hour window. Selecting a template is for sending pre-approved messages, which is useful for starting conversations outside the 24-hour window or for specific marketing or support purposes.
Can I combine WhatsApp with other channels like SMS or Email in one workflow?
Yes. Workflows are flexible, so you can combine WhatsApp with other communication channels to create comprehensive automation sequences.
Can I send WhatsApp messages outside the 24-hour window?
Yes. You can use approved WhatsApp templates after the initial 24-hour window for outreach or follow-up messages. Keep in mind that these template-based messages incur additional charges.
What is a Free Entry Point Conversation, and how is it different from a regular conversation?
A Free Entry Point Conversation is triggered when a patient clicks a "Click to WhatsApp" ad or a Facebook call-to-action button. It lasts 72 hours, compared to the standard 24-hour window, and during that extended window you can send both free-form and template messages.
What happens if a patient replies with something other than what I configured for the Wait-for-Reply step?
The workflow keeps waiting until the patient sends a reply that matches what you set up. To handle unexpected responses, add additional branches to your workflow with alternative conditions.
How do I select the number for sending WhatsApp messages?
Click the + icon in the workflow to add a new action, search the Action section for WhatsApp and select it, then choose the phone number from the dropdown.
Why don't I see my phone number in the dropdown?
Only phone numbers connected under the Phone Number tab appear in the dropdown. Make sure your WhatsApp number is correctly linked in that section.
Can I add multiple phone numbers for WhatsApp messaging?
Yes. If you have multiple WhatsApp numbers connected, you can select the preferred number from the dropdown when setting up the workflow.
What happens if a message is not delivered?
The WhatsApp action tracks delivery and routes the patient down the appropriate branch automatically, with no manual setup required.
Do I need Meta Flow setup to use templates?
Only if your template includes a flow. You can also send basic templates or free-form messages without it.
How do I disable smart branching?
Turn off the Branch Replies toggle in the action settings to use the WhatsApp action like a basic notifier.
Can I receive internal team notifications through WhatsApp?
Yes. Go to Settings → My Profile → Notifications, turn on the WhatsApp channel under Notification Channels, and choose which events send a WhatsApp alert. These internal notifications keep your team informed of conversations, tasks, and app events without staying logged in, and they are separate from the patient-facing messaging you build in workflows.
