Nothing builds trust with prospective patients faster than seeing a real face and hearing a real voice. Video Testimonials lets your practice collect authentic patient video reviews and publish them on your website, directly from Aesthetix CRM. You create branded Video Collectors, send requests by Email, SMS, or WhatsApp, manage responses in one place, and display them in your Review Widgets. This guide walks you through setup, sending, management, and display.
Video Testimonials is a Reputation feature that lets you collect patient video reviews using shareable, branded "Video Collectors." Your patients can record or upload a video from desktop or mobile, no app required. Collected videos can then be reviewed internally and showcased on your site using the Review Widget.
Authenticity: Real faces and voices build trust far faster than text-only reviews.
Frictionless capture: Patients record or upload from any modern device, no app required.
Brand control: Customize collector branding (logo, background, text, accent, and button colors) to match your practice's visual identity.
Flexible distribution: Share a direct link or send via Email, SMS, or WhatsApp.
Centralized management: View and download every submission in the Responses tab.
Easy showcasing: Add videos to your existing Review Widget, with layout options and per-collector filtering.
Performance guardrails: Each video is capped at 2 minutes 30 seconds to keep files lightweight and watchable.
Follow these steps to create a video collector.
Log in to your account.
Go to Reputation → Video Testimonials.
Click the + Create Collector (or Create a Collector) button.
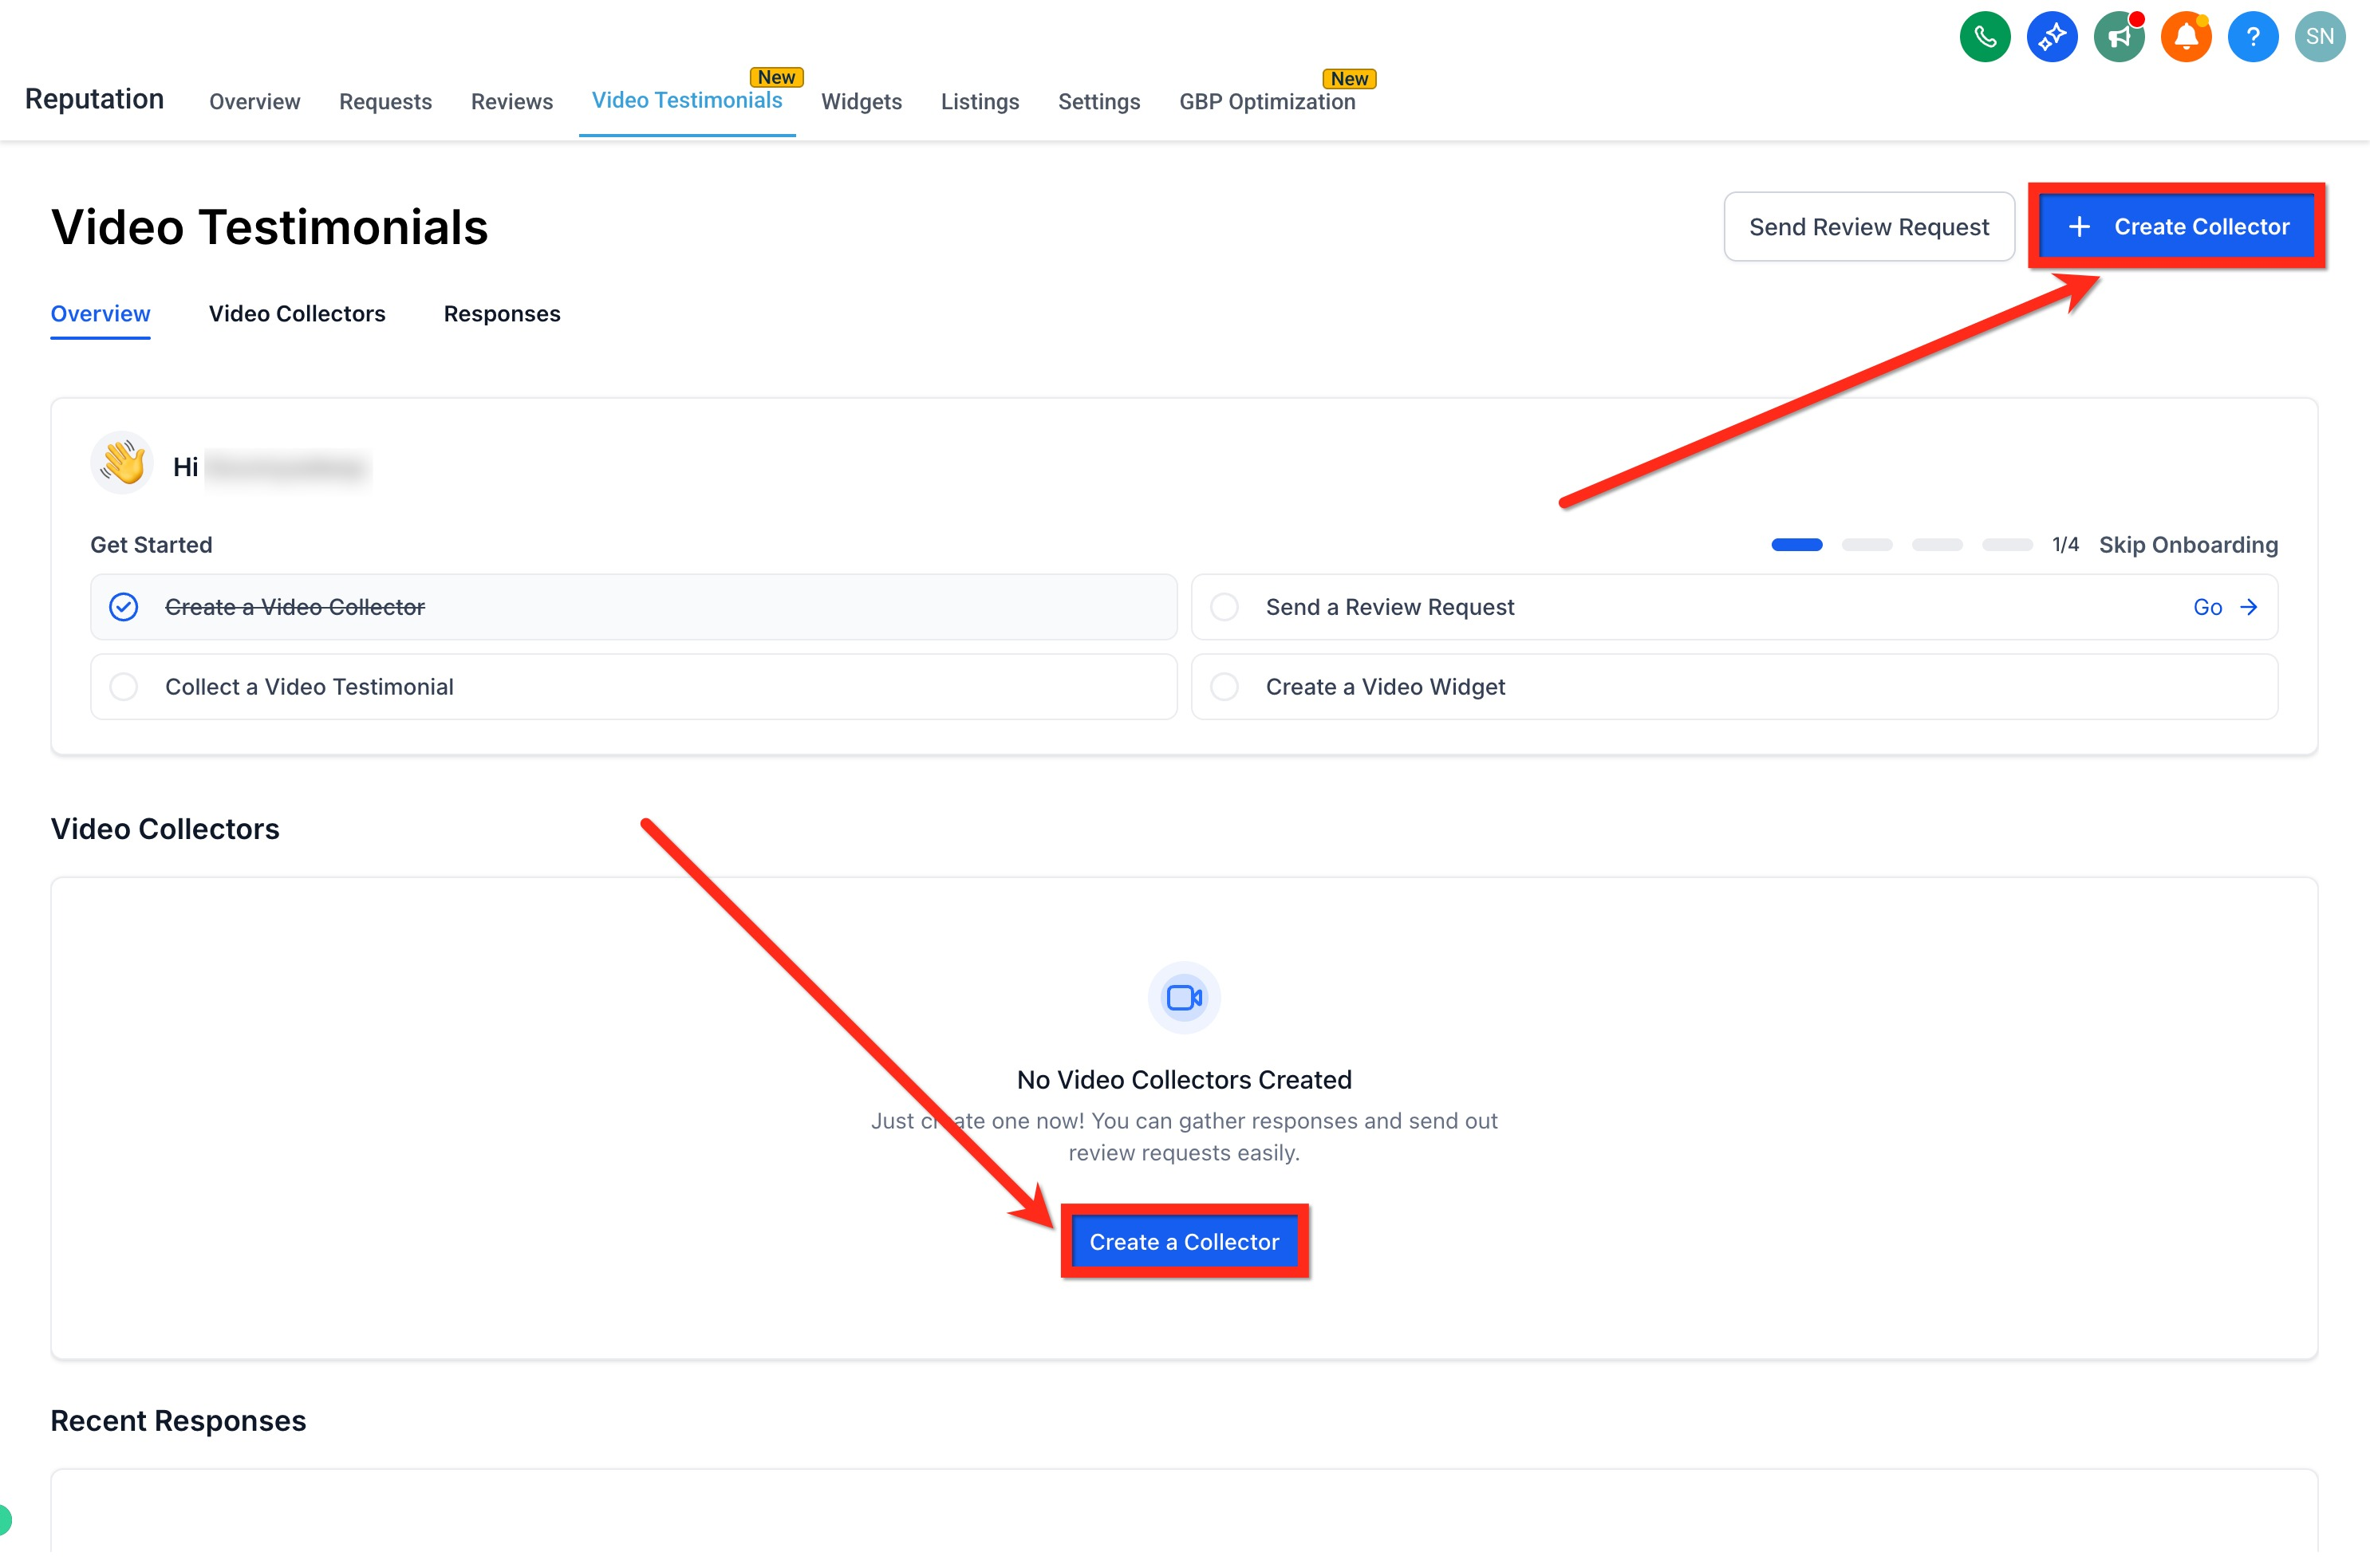
Add a Public Collector Title.
Enable or disable the Spokesperson Image: make your collector personal with a friendly face from your practice. This can be you or a colleague.
Add the Spokesperson details.
Add the How It Works section: a short description of how everything works.
Add a Welcome Message: a short message from your collector's spokesperson.
Add up to 3 questions.
Order them for a guided flow.
After your questions, respondents are asked to identify themselves, or to confirm their info when it's been preloaded with a personalized link.
Add a Headline.
Add a Message.
Add a Headline.
Add a Message.
Add the Spokesperson's Email.
Enable and add your logo.
Enable or disable White Background Behind Logo.
Set the background, text, secondary text, accent, and button colors.
Click Save.
Click Preview to see exactly what your patient will see when they open the collector to record their video review.
From Video Testimonials → Collectors, locate your collector.
Click Copy Link and share it by email, chat, social, or QR code.
Click Send Review Request or the share icon on the collector.
Select a Contact.
Select Email, SMS, or WhatsApp.
Use Override Video Link to choose which collector to include.
Select the default Email/SMS/WhatsApp template or a pre-made custom template.
Click Send Review Request.
Open Reputation → Video Testimonials → Responses.
Click any submission to view the video.
Click Download to save the original file locally.
Go to Reputation → Widgets.
Create or edit a Review Widget.
Select the Review Type as Video Testimonials.
Choose the Video Testimonial Source as the collector you want to display.
Choose the widget type, number of reviews, override video link, and enable or disable Powered by.
Click Save.
The Video Testimonial Received workflow trigger starts a workflow the moment a patient submits a new video through any of your Video Collectors. Use it to notify your team, follow up with the patient, route testimonials by collector, or feed testimonial details into other automations, instead of checking the Responses tab manually.
Instant notifications: Alert your front-desk or marketing team as soon as a new testimonial is received.
Automated follow-up: Send a thank-you email or SMS the moment a patient submits their testimonial.
Consent-aware automation: Route testimonials differently depending on whether the patient granted marketing consent.
Collector-specific automation: Run separate workflows for separate collectors, for example one for general testimonials and another for a specific campaign.
Downstream access: Use the submitted video link and patient details in later workflow steps, such as notes, tasks, or webhooks.
Go to Automation → Workflows.
Open an existing workflow or click + Create Workflow to start a new one.
Inside the Workflow Builder, click Add Trigger.
Search for and select Video Testimonial Received.
Give the trigger a descriptive name, such as "Video Testimonial Received" or "Marketing-Approved Testimonials."
Optionally, click Add Filters to narrow which submissions enter the workflow:
Marketing Consent: fires only for testimonials where the patient did, or did not, grant marketing consent. Useful for building separate paths based on consent status.
Video Collector: fires only for testimonials submitted through a specific collector. Useful when you run separate collectors for different campaigns, locations, or providers.
Click Save Trigger, then add your workflow actions underneath it, for example an internal notification, a note, a task, or a thank-you email.
Test the workflow with a sample submission before switching it from Draft to Publish.
Once the trigger fires, the following details are available as custom values (merge fields) in notifications, notes, emails, and other workflow actions:
Custom Value | Description |
|---|---|
Reviewer Name | Name the patient provided when submitting the testimonial. |
Reviewer Email | Email address provided during submission. |
Reviewer Phone | Phone number provided during submission. |
Marketing Consent | Whether the patient granted marketing consent for the testimonial. |
Submitted At | Date and time the testimonial was submitted. |
Collector Name | The Video Collector the testimonial was submitted through. |
Video Link | Link to the submitted video. |
For example, an internal notification action could read:
New Video Testimonial Received Reviewer: {{Reviewer Name}} Collector: {{Collector Name}} Marketing Consent: {{Marketing Consent}} Video: {{Video Link}}
Notify the team immediately: Trigger an internal notification the moment a testimonial is submitted so your marketing or front-desk team can review it.
Route marketing-approved testimonials: Filter on Marketing Consent so only testimonials cleared for marketing reach your promotion workflow.
Separate automations by collector: Filter on Video Collector to run a different follow-up for each campaign or provider.
Log testimonials automatically: Use the custom values to create a note or task with the reviewer's name, collector, submission date, and video link, so nothing has to be copied over by hand.
Do patients need to install an app to record a video?
No. They can record or upload directly from desktop or mobile using the collector link.
What's the maximum video length?
Up to 2 minutes 30 seconds per submission.
How many questions can I add to a collector?
Up to three questions in the Questionnaire step.
Can I create more than one collector?
Yes. You can create unlimited collectors, and you can clone existing ones.
Where do I find submitted videos?
Go to Reputation → Video Testimonials → Responses to view and download them.
Can I show only certain videos on my site?
Yes. Use the per-collector filter in the Review Widget to display videos from a specific collector.
Which channels support sending the collector link?
Email, SMS, and WhatsApp via Send Review Request.
Can I trigger a workflow automatically when a new testimonial comes in?
Yes. Use the Video Testimonial Received trigger, found under Automation → Workflows, to start a workflow the moment a testimonial is submitted.
Can I run a different workflow for each collector?
Yes. Add the Video Collector filter to the Video Testimonial Received trigger and select the collector you want the workflow to watch.
Can I filter workflows by marketing consent?
Yes. Add the Marketing Consent filter to build separate automation paths depending on whether the patient granted marketing consent.
What patient information is available in the workflow?
Reviewer name, email, phone, marketing consent, submission time, collector name, and the video link are all available as custom values once the trigger fires.
Note: Keep each video short and personal. Sending a request soon after a great appointment, while the experience is fresh, tends to yield the most enthusiastic patient testimonials.
