A steady stream of fresh reviews is one of the fastest ways to earn trust with prospective patients. Aesthetix CRM lets you send review requests to patients by text, personalize each message to match your practice's voice, and automatically repeat the request on a schedule until the patient clicks. This guide walks you through enabling SMS review requests, building templates from scratch or from a pre-built design, adding images, and setting up recurring follow-up sequences.
SMS review requests automate how your practice asks patients for public reviews by text. Aesthetix CRM can send a personalized message after a patient's visit, repeat it on a schedule until the patient clicks your review link, and direct them to the right review destination. Because you control the template content, timing, and cadence, every message feels tailored to the patient while staying on-brand.
Custom SMS templates give you complete control over the look, feel, and personalization of your requests. You can:
Personalize messaging: Tailor each SMS with custom fields (merge fields) and language that reflects your practice's voice.
Add dynamic images: Include an uploaded image or a dynamic image URL that updates with patient-specific data for more eye-catching requests.
Choose your design approach: Start from a pre-built template or build one entirely from scratch.
Manage templates easily: Quickly create, edit, duplicate, and assign templates by adjusting the name, message, custom fields, and image.
Automate follow-ups: Assign your preferred templates to each stage of a recurring review-request sequence.
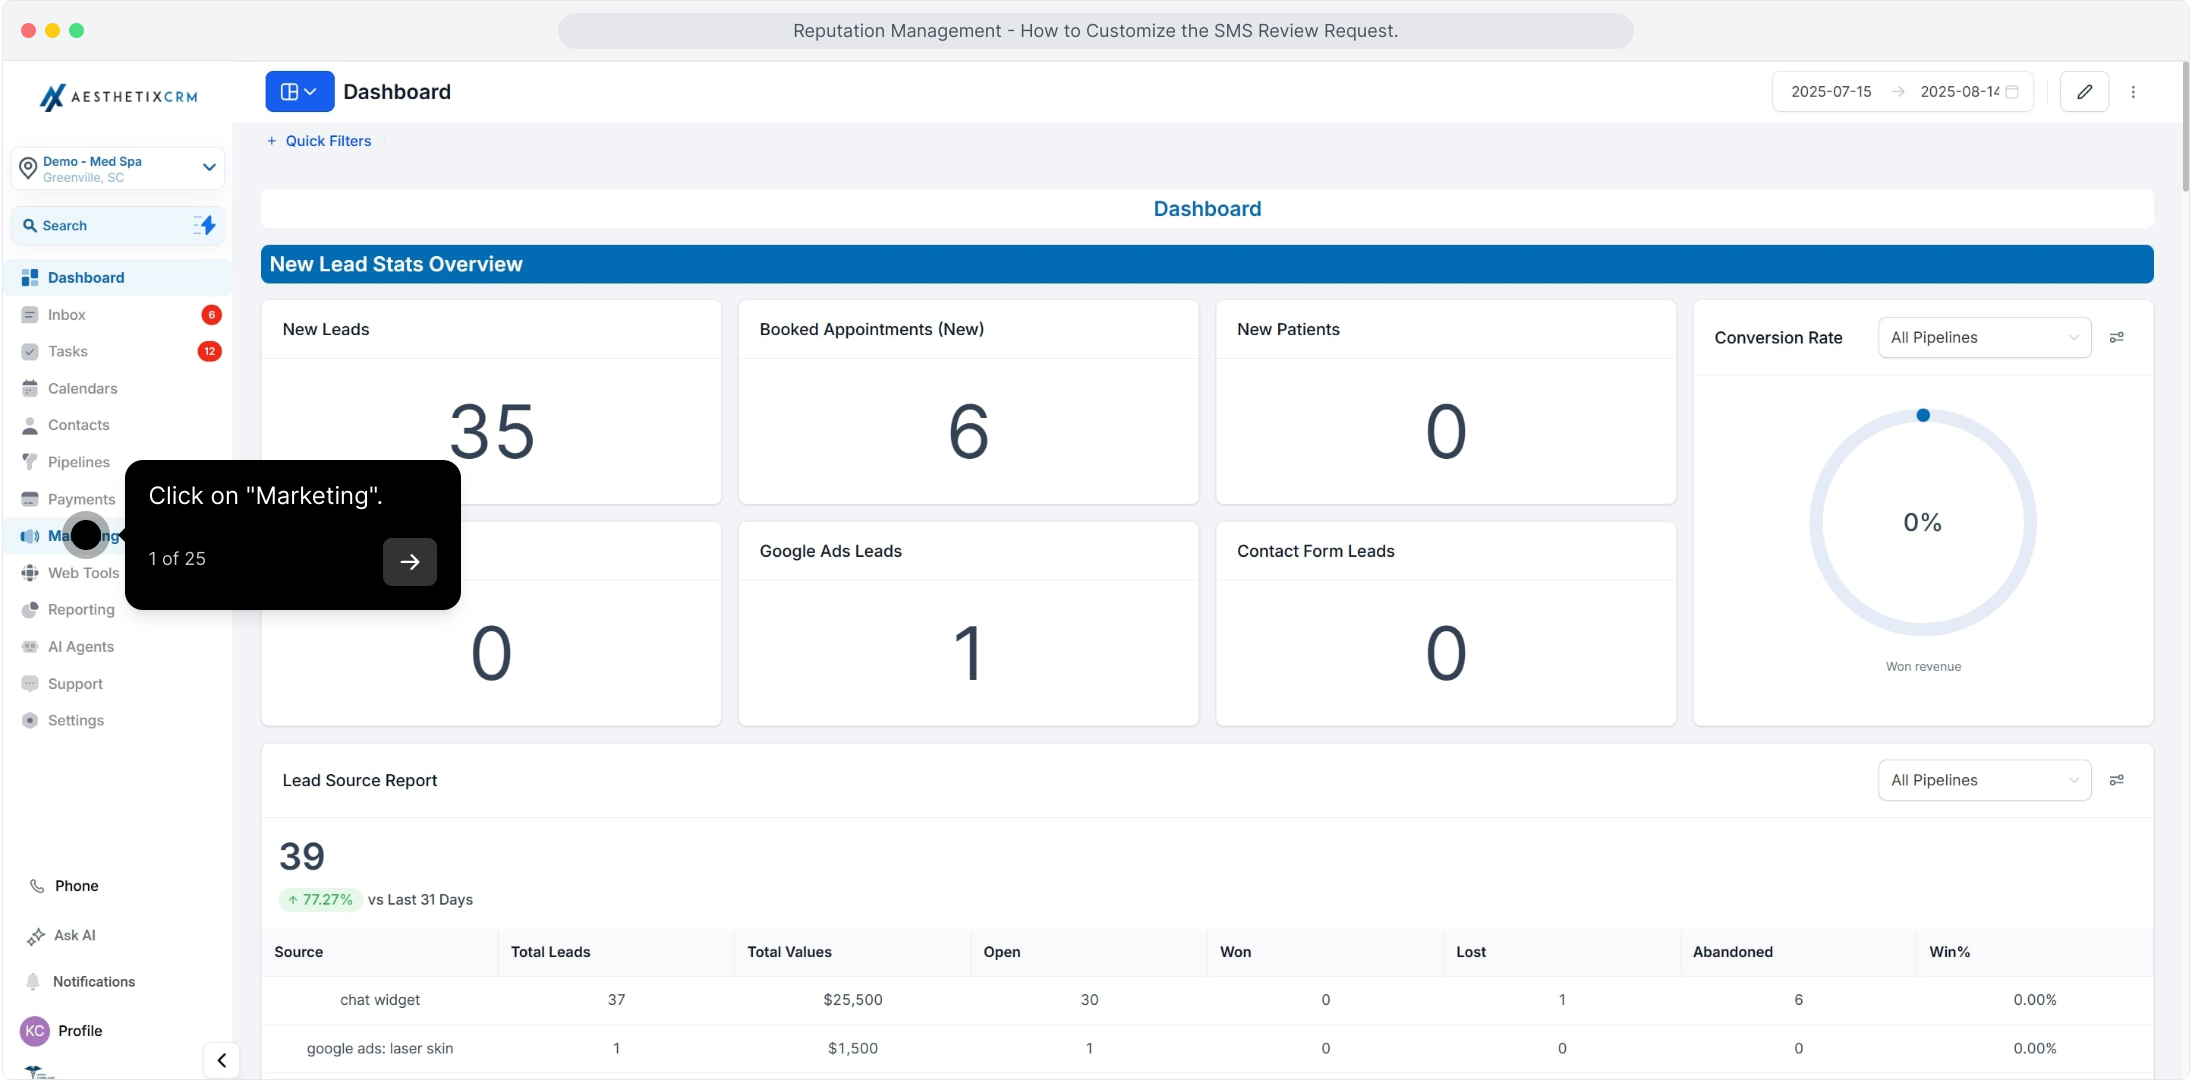
From the left-hand menu, click Marketing.
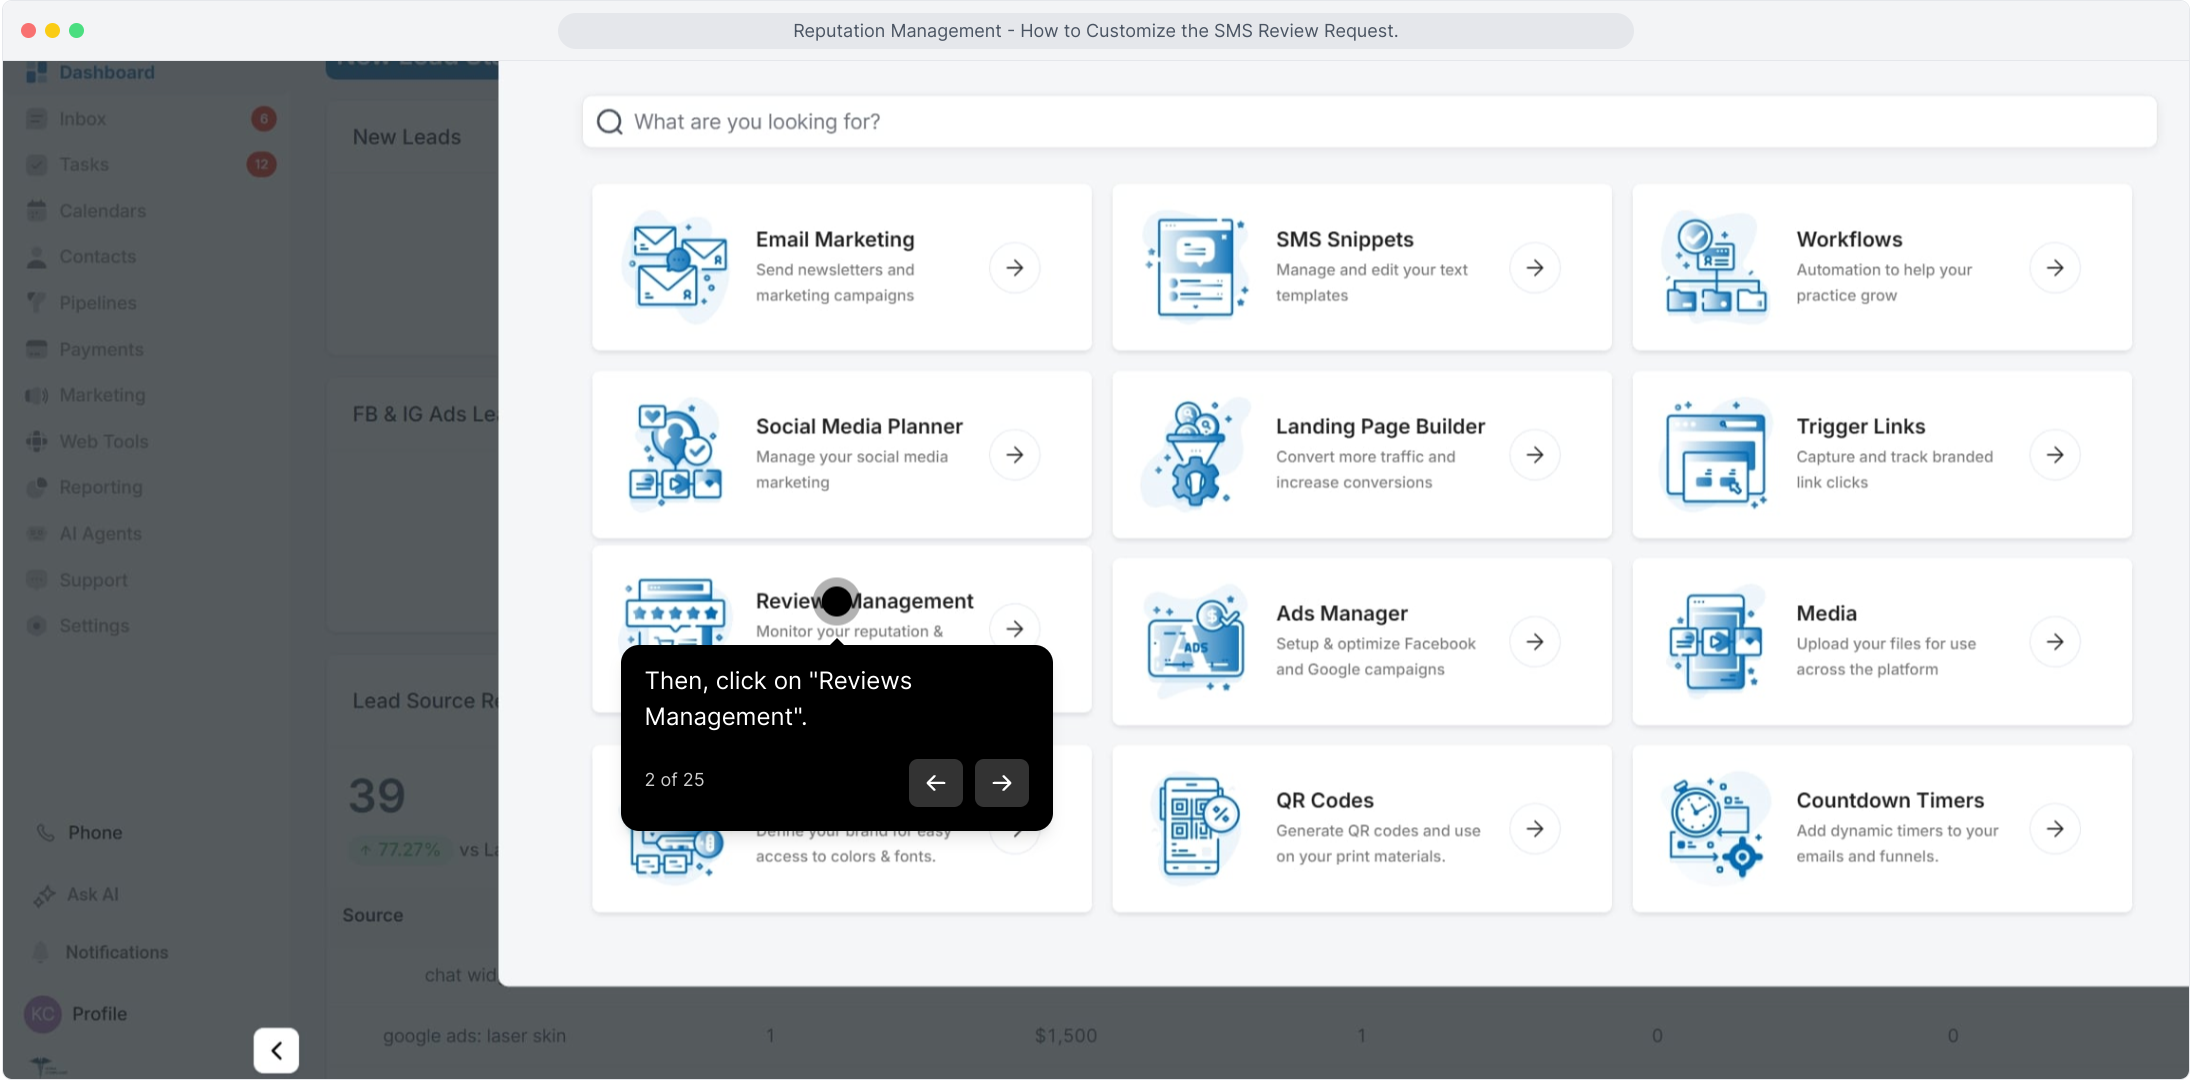
Click Reviews Management (Reputation).
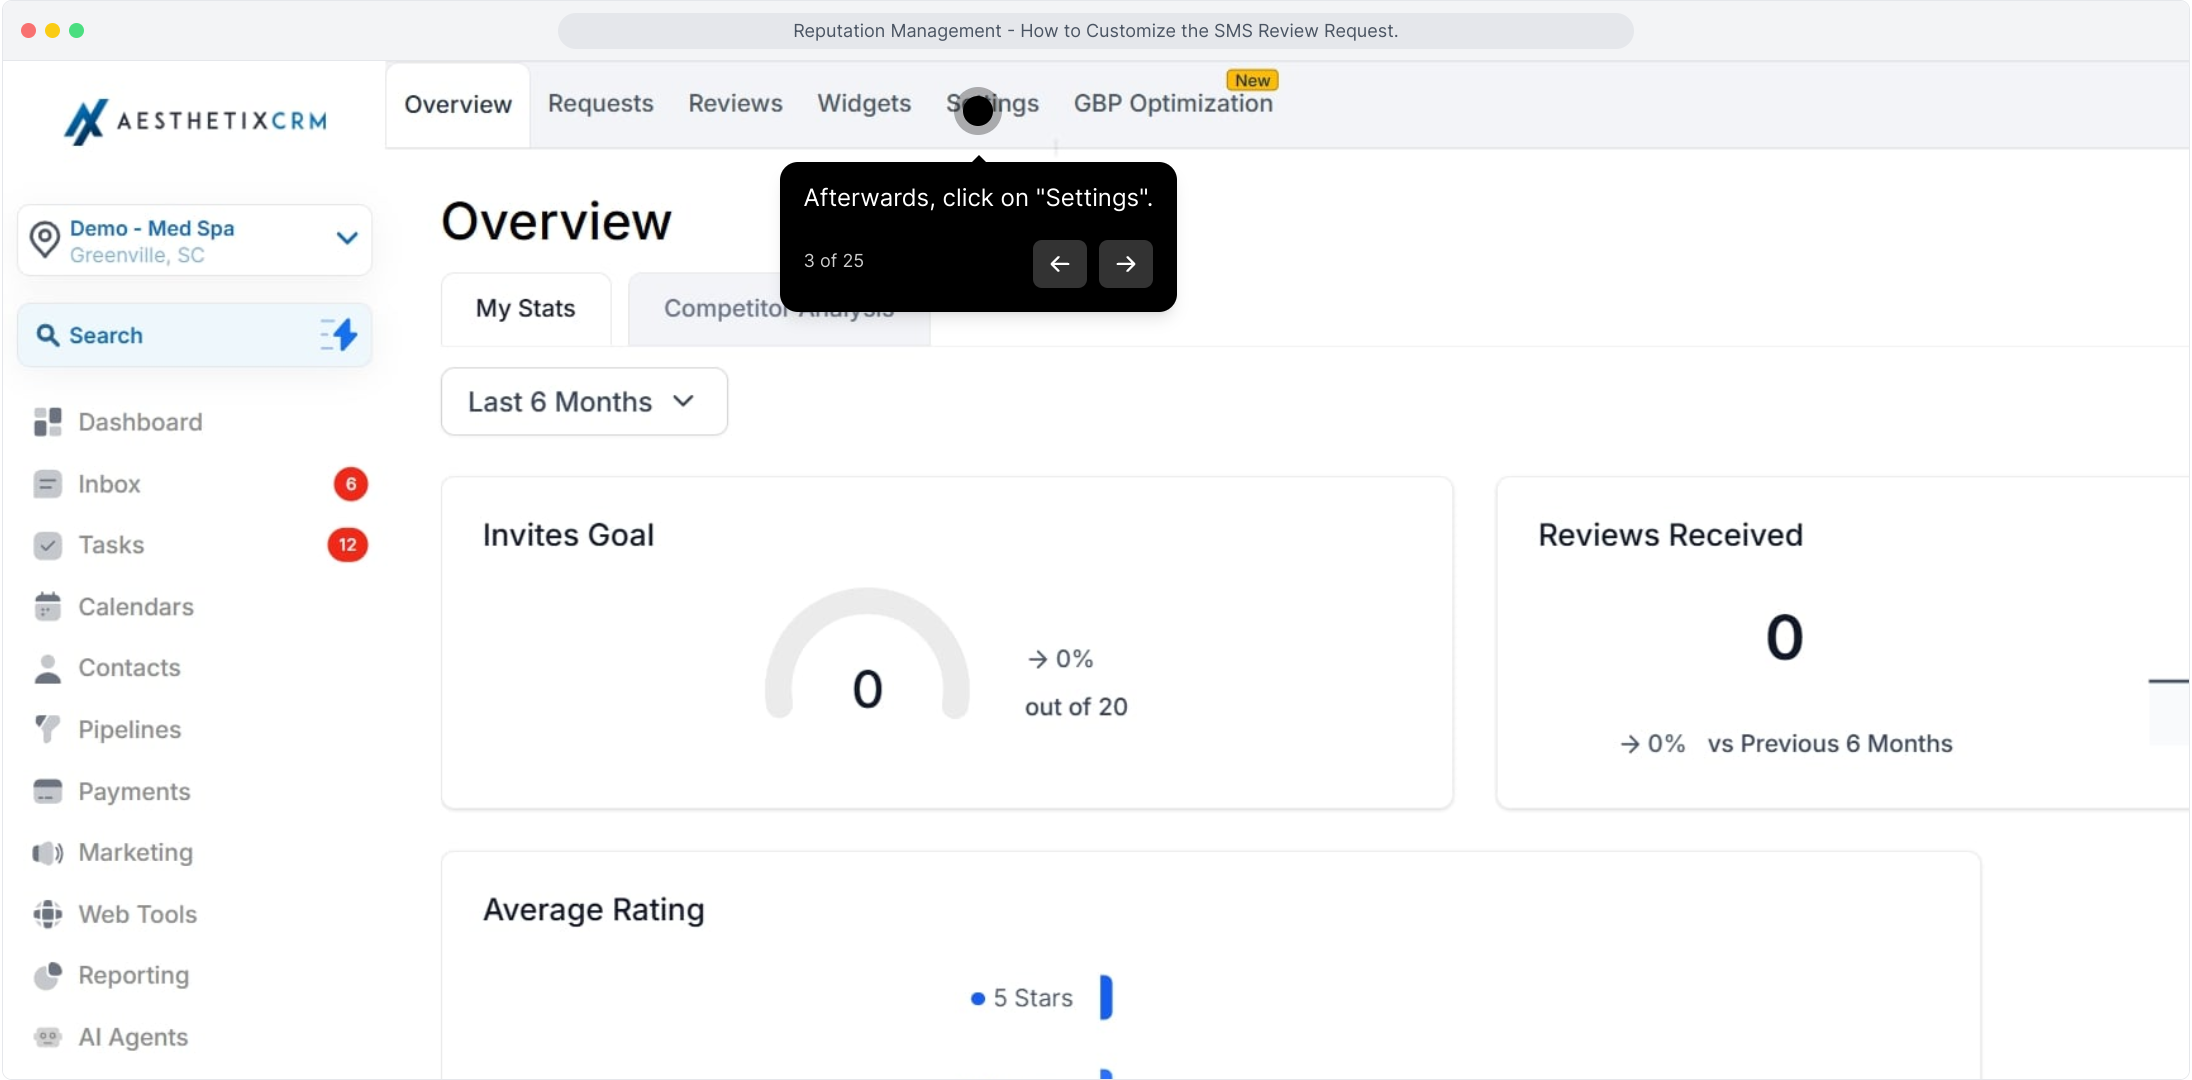
Open the Settings tab.
Before you build your messages, set the Review Link: the URL inserted into every request. Go to Reviews Management → Settings → Review Link.
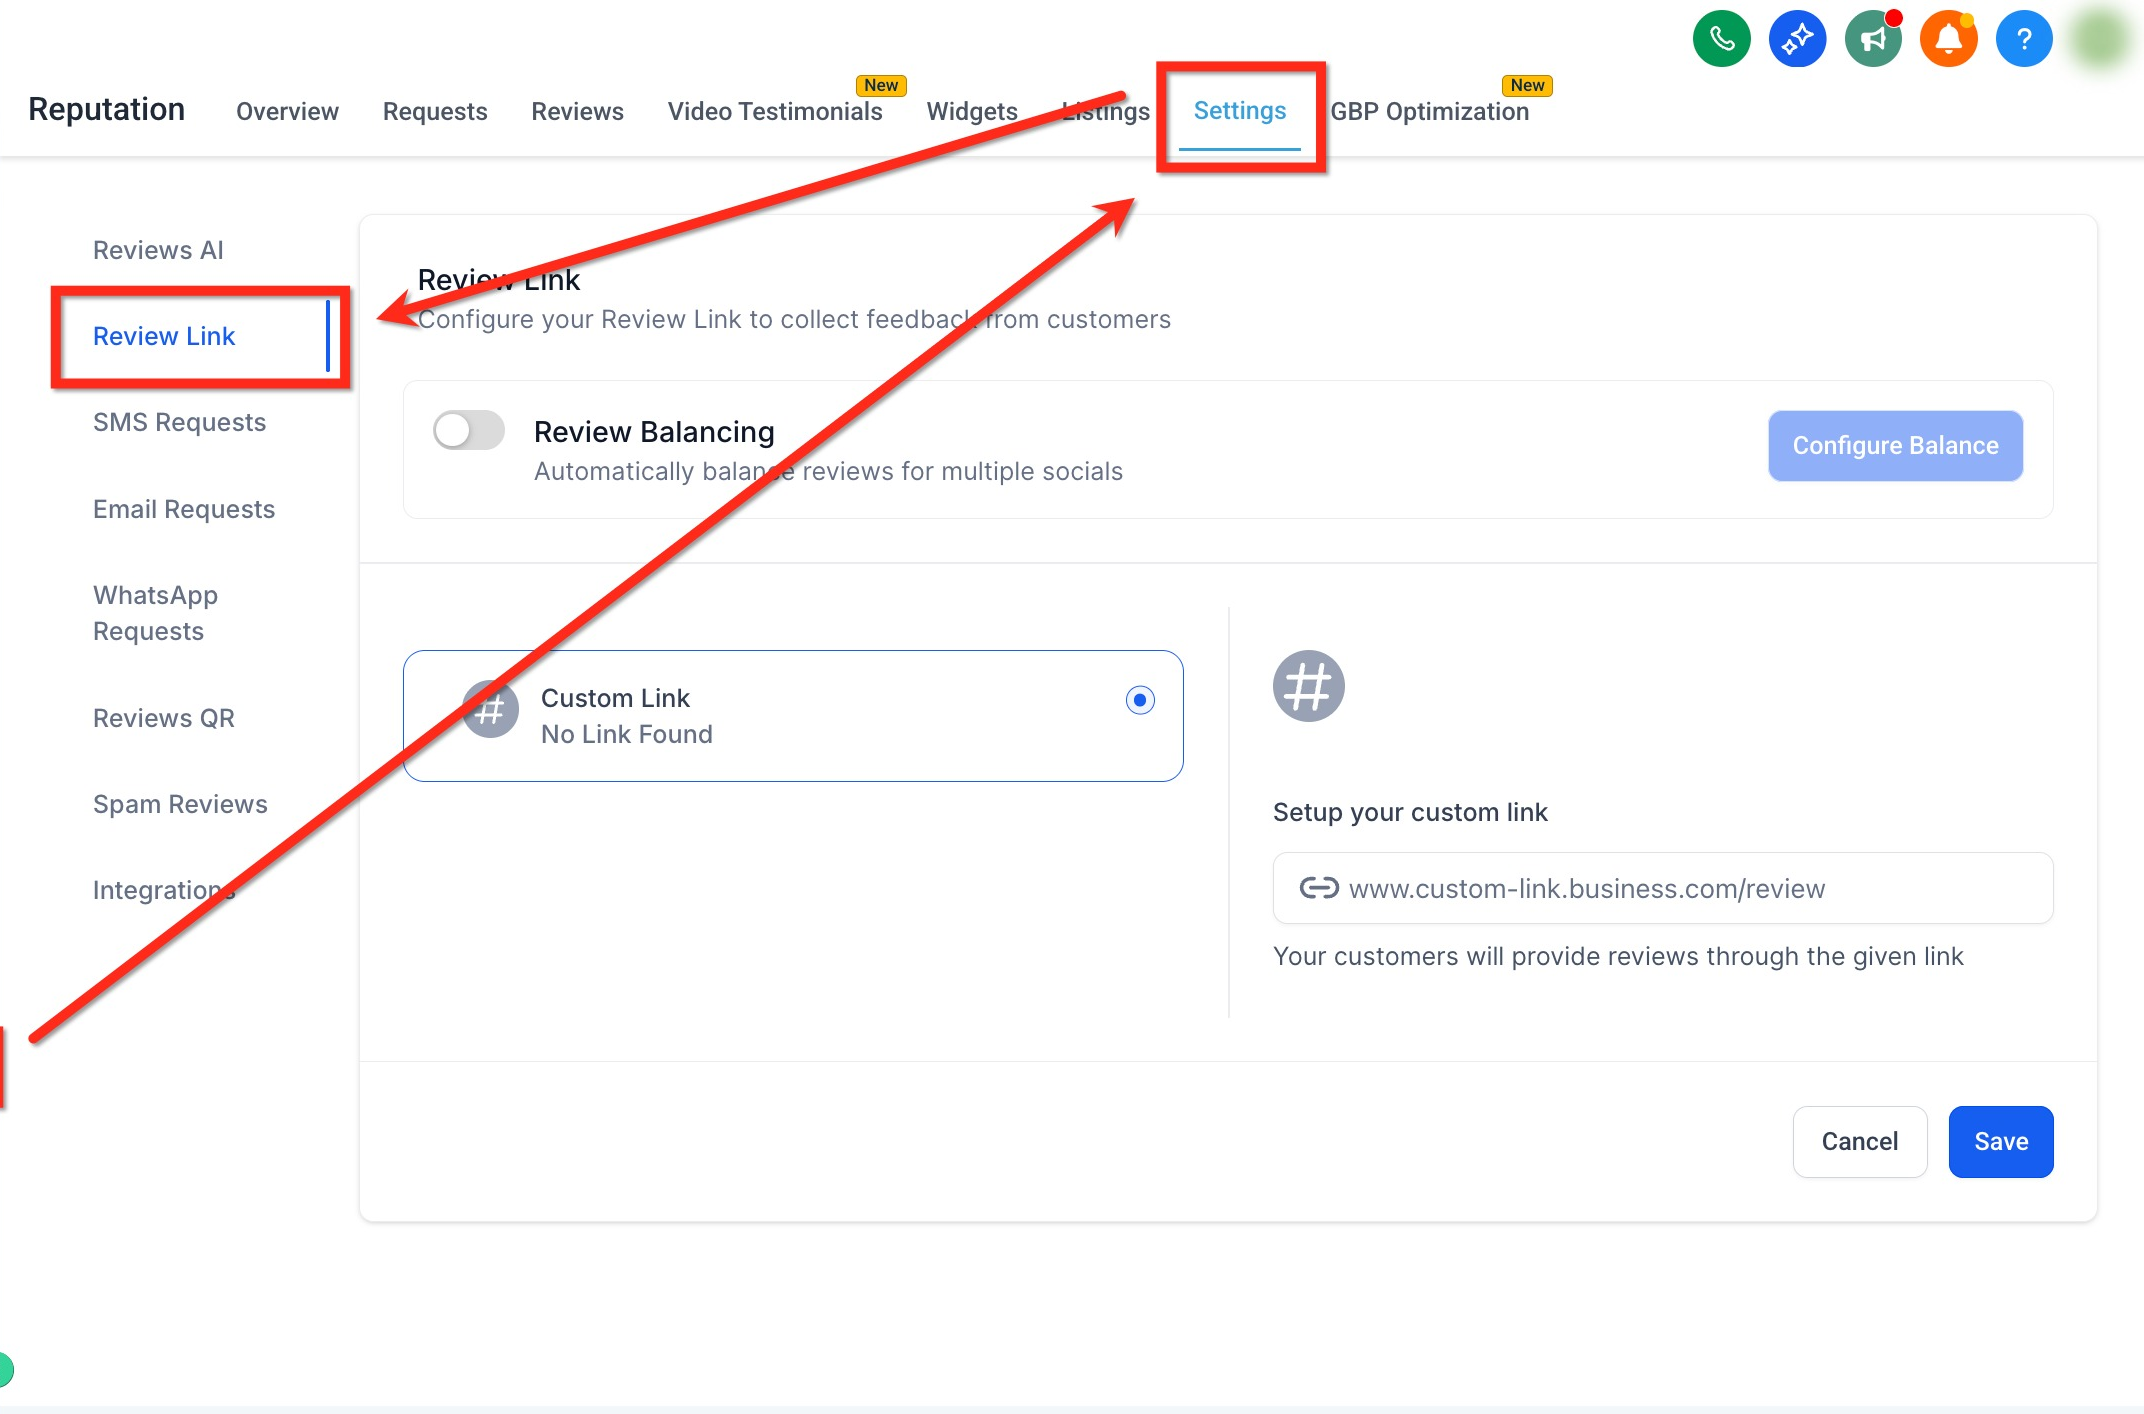
You can let Aesthetix CRM balance reviews across supported platforms, or send everyone to a single destination:
Review Balancing: Toggle on to automatically distribute review traffic across your configured platforms (such as Google).
Get Reviews on Google: Connect your Google Business Profile to route traffic to your Google listing.
Custom Link: Select this and paste a specific URL to send all patients to a single page.
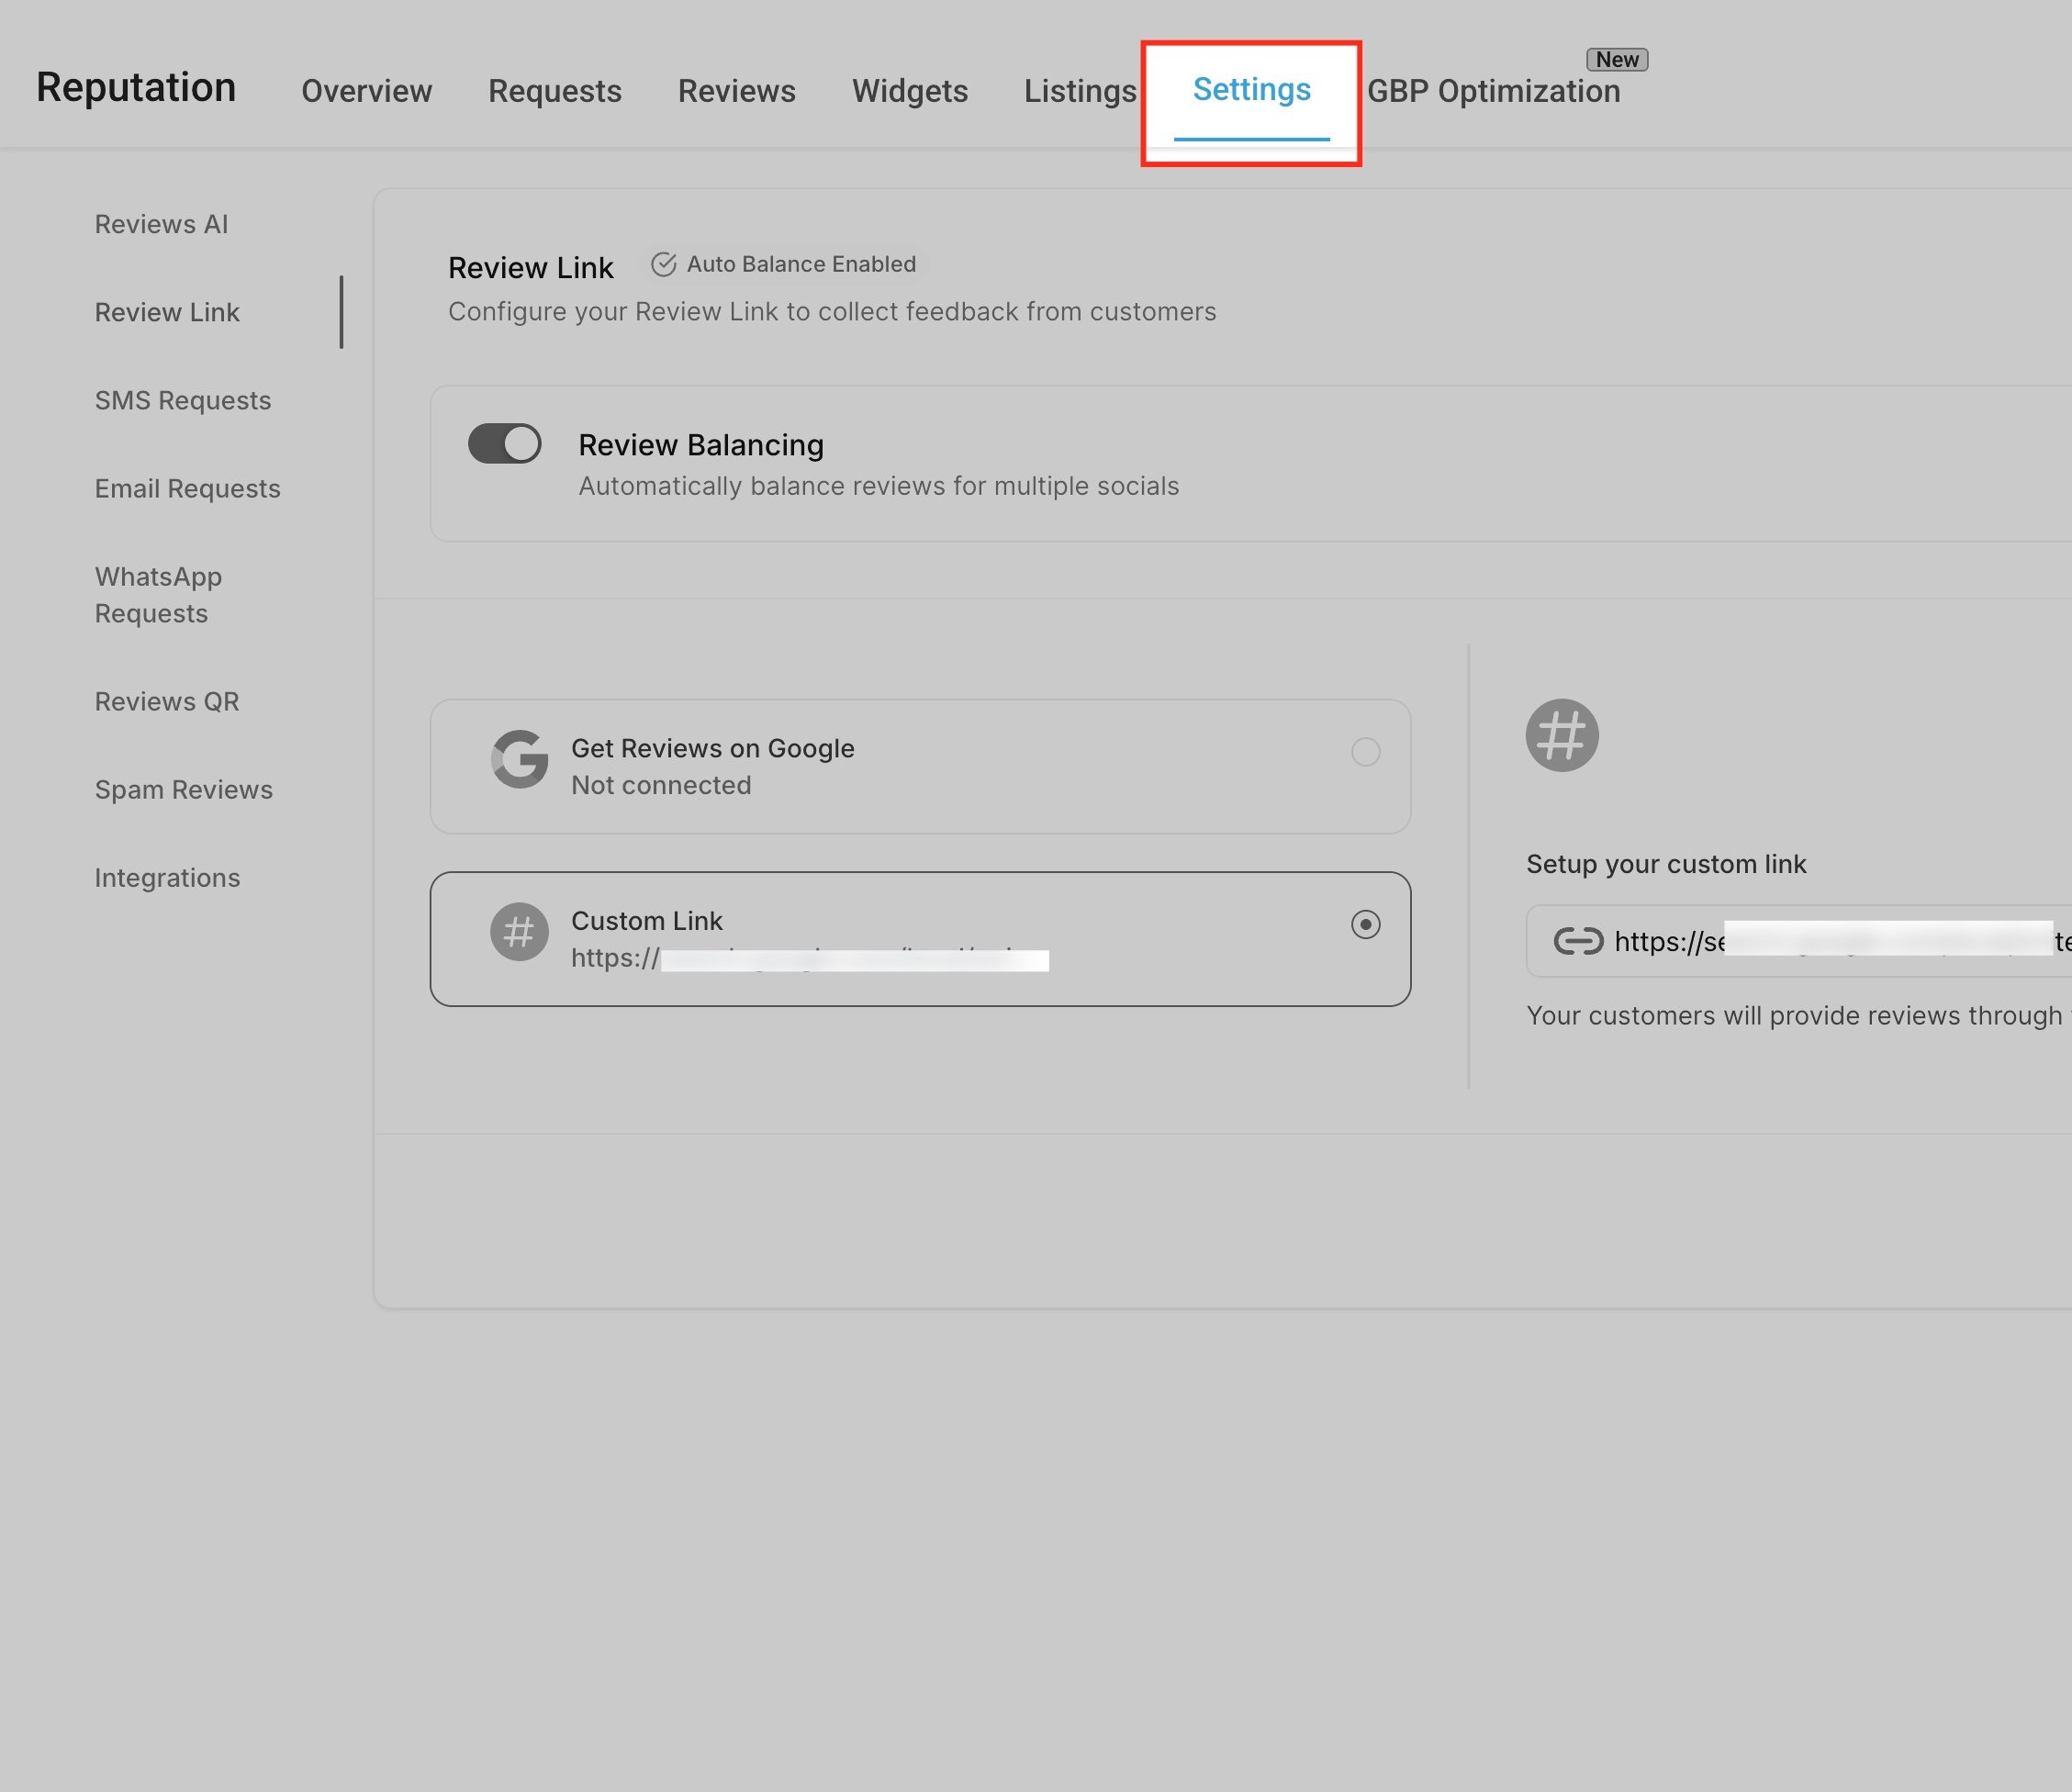
Note: If you use a Custom Link, confirm it opens directly to your review form. If you use Balancing, make sure your integrations are connected.
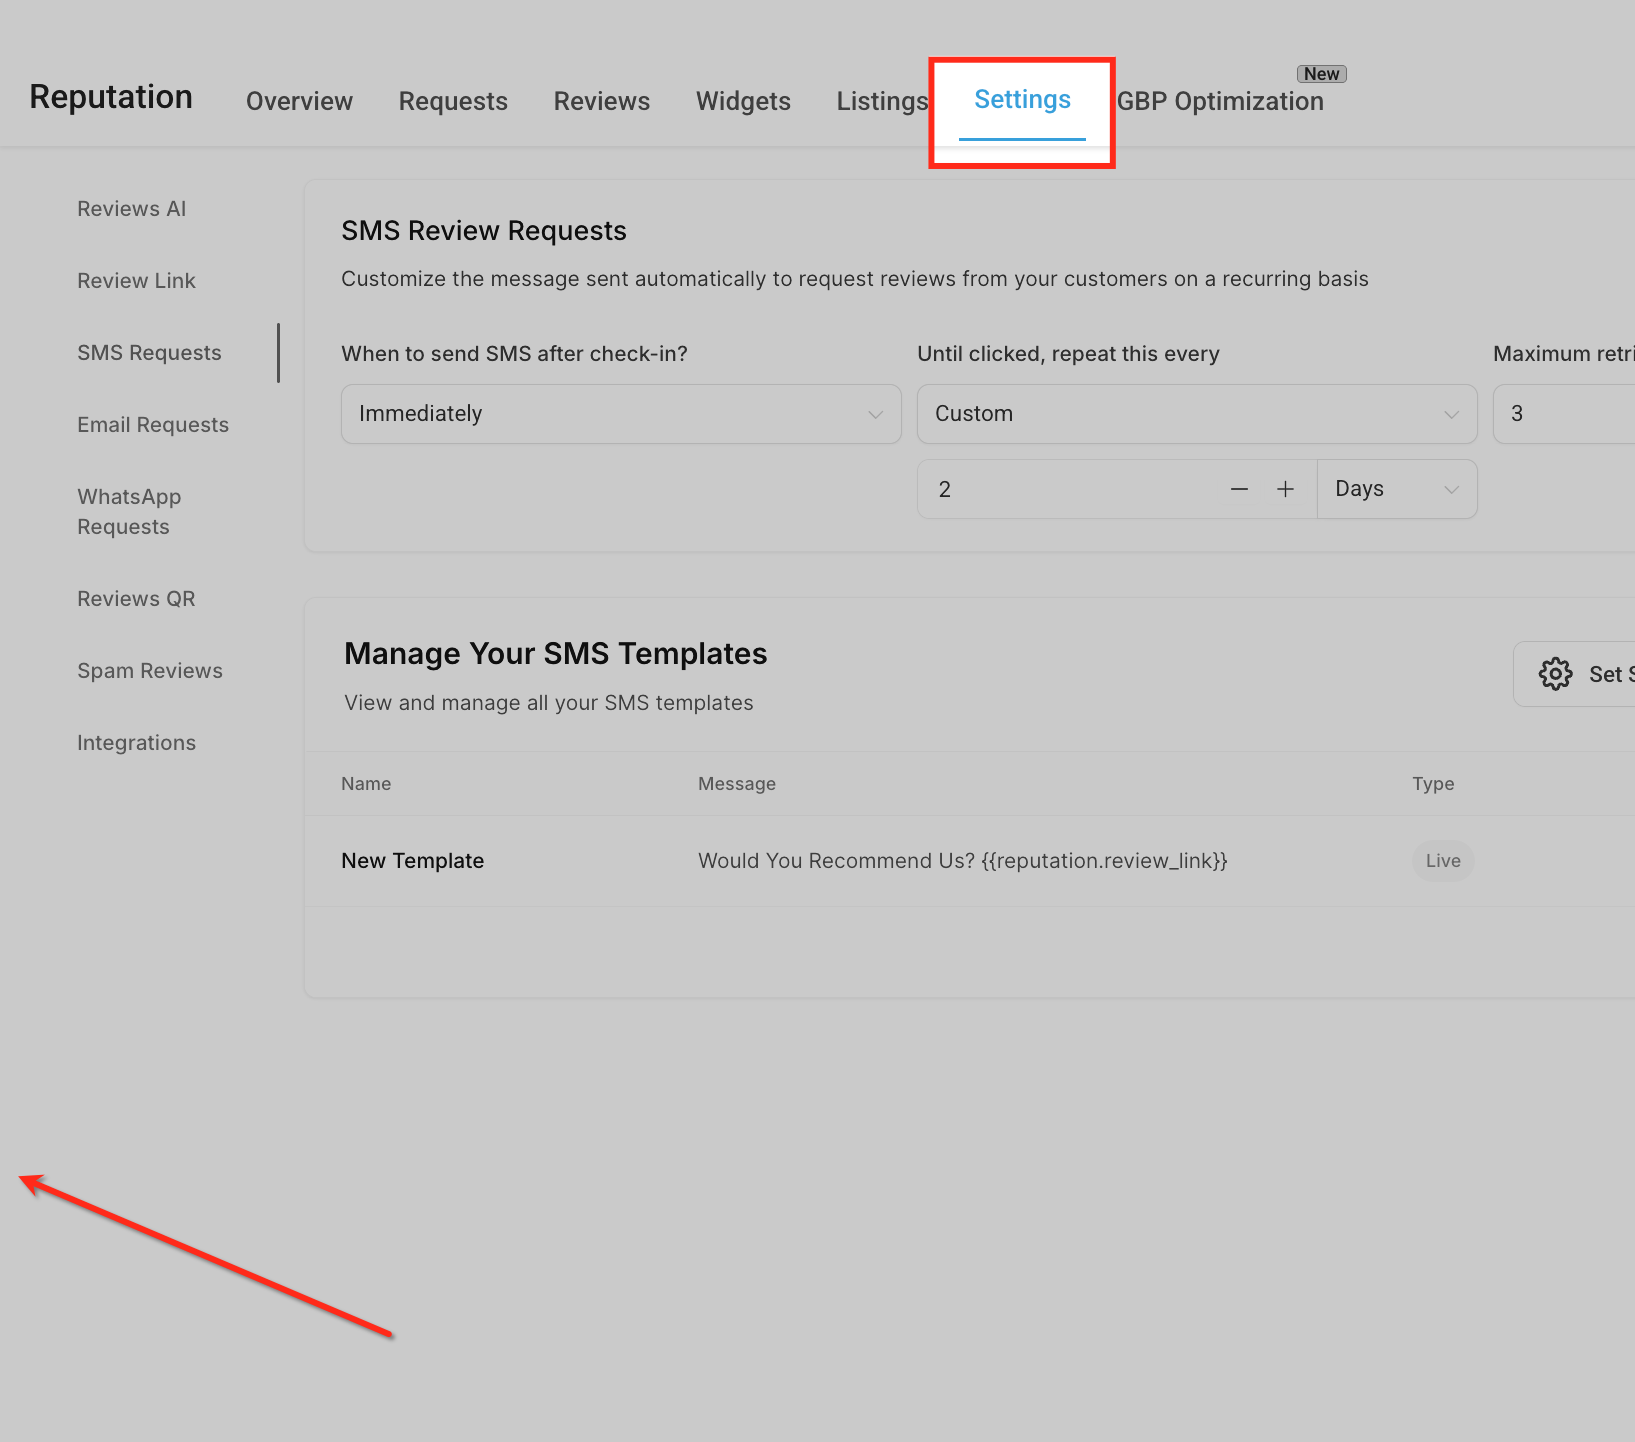
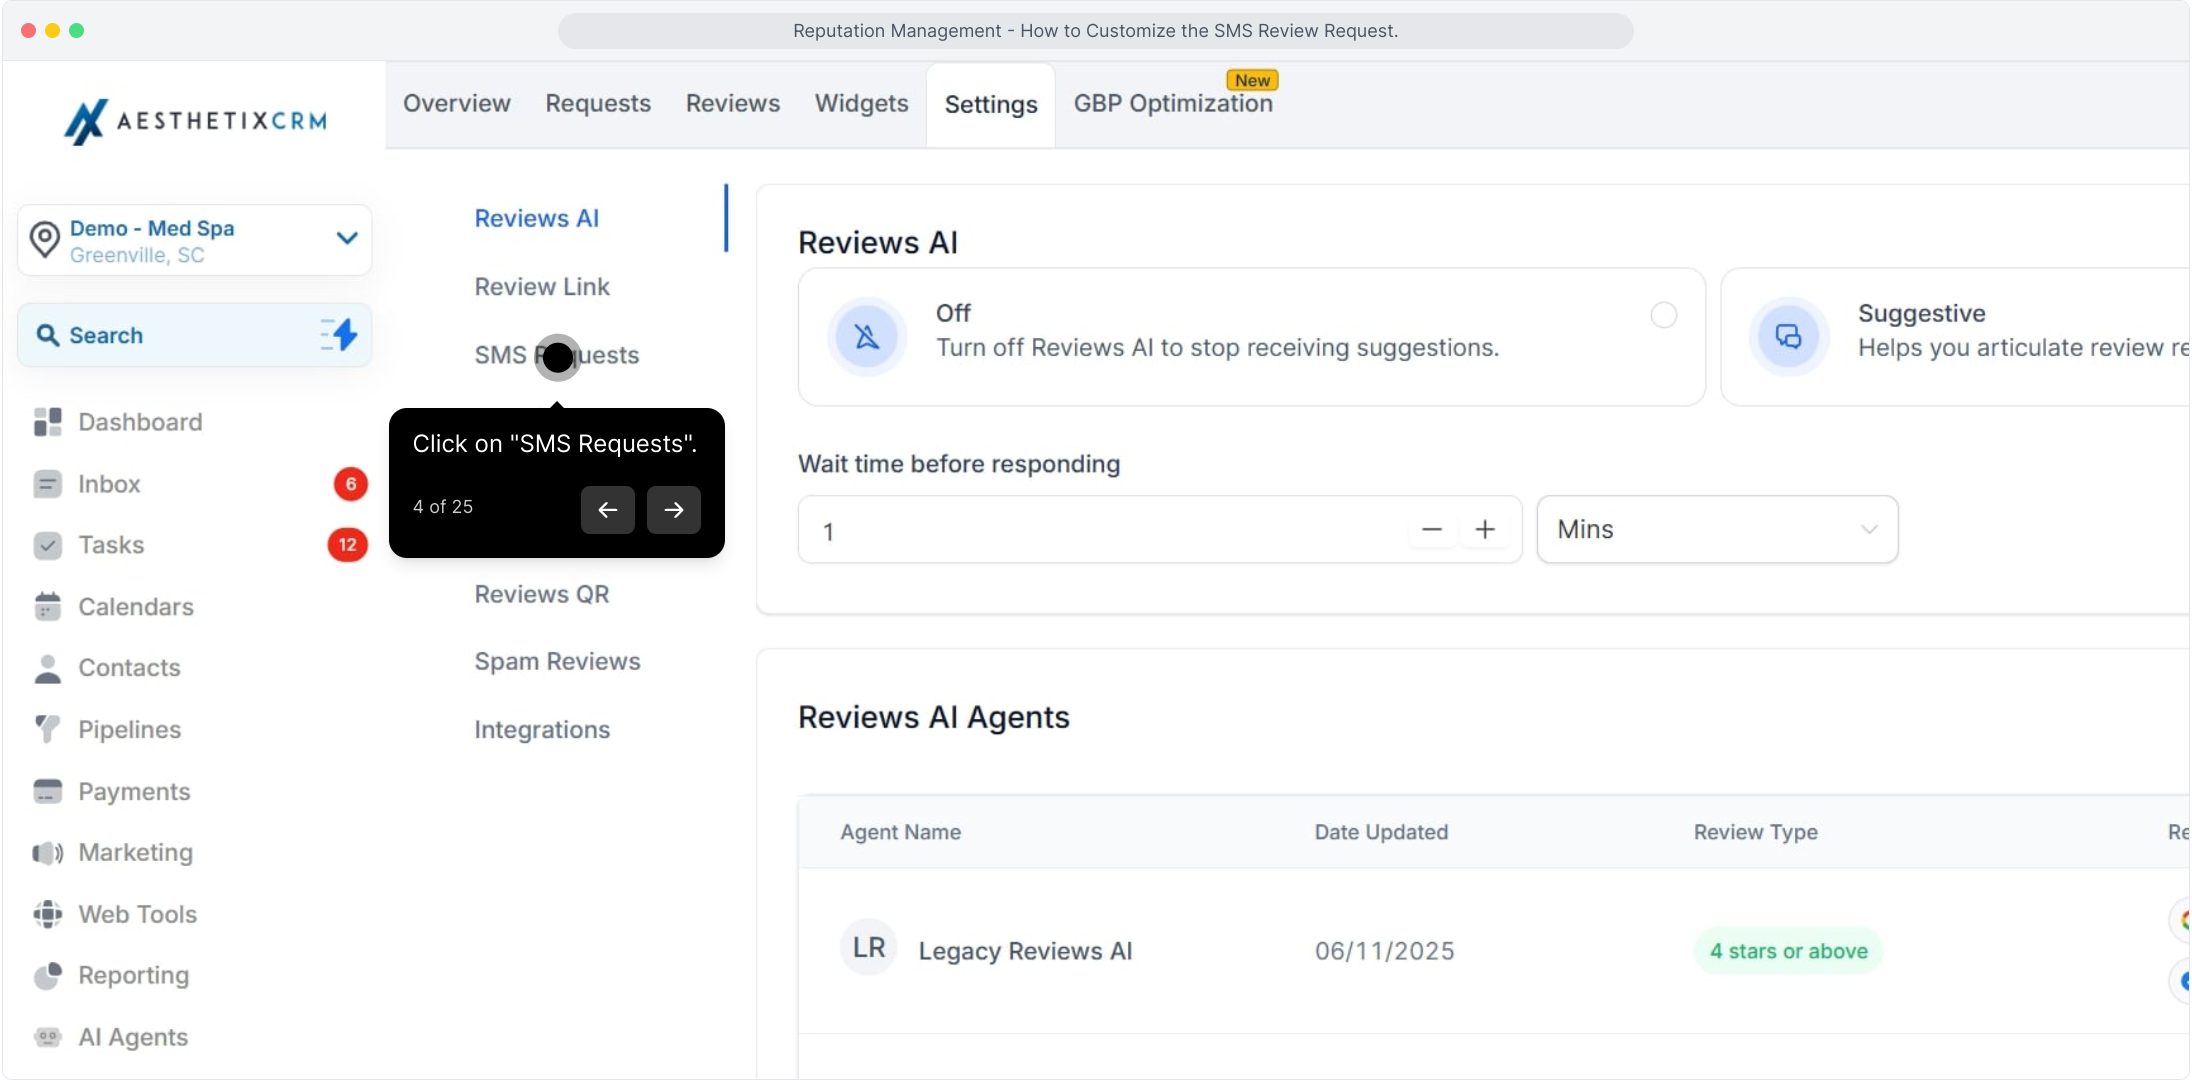
In the left-hand menu under Settings, click SMS Requests. This section contains all options for scheduling, customizing, and managing your recurring SMS review-request templates.
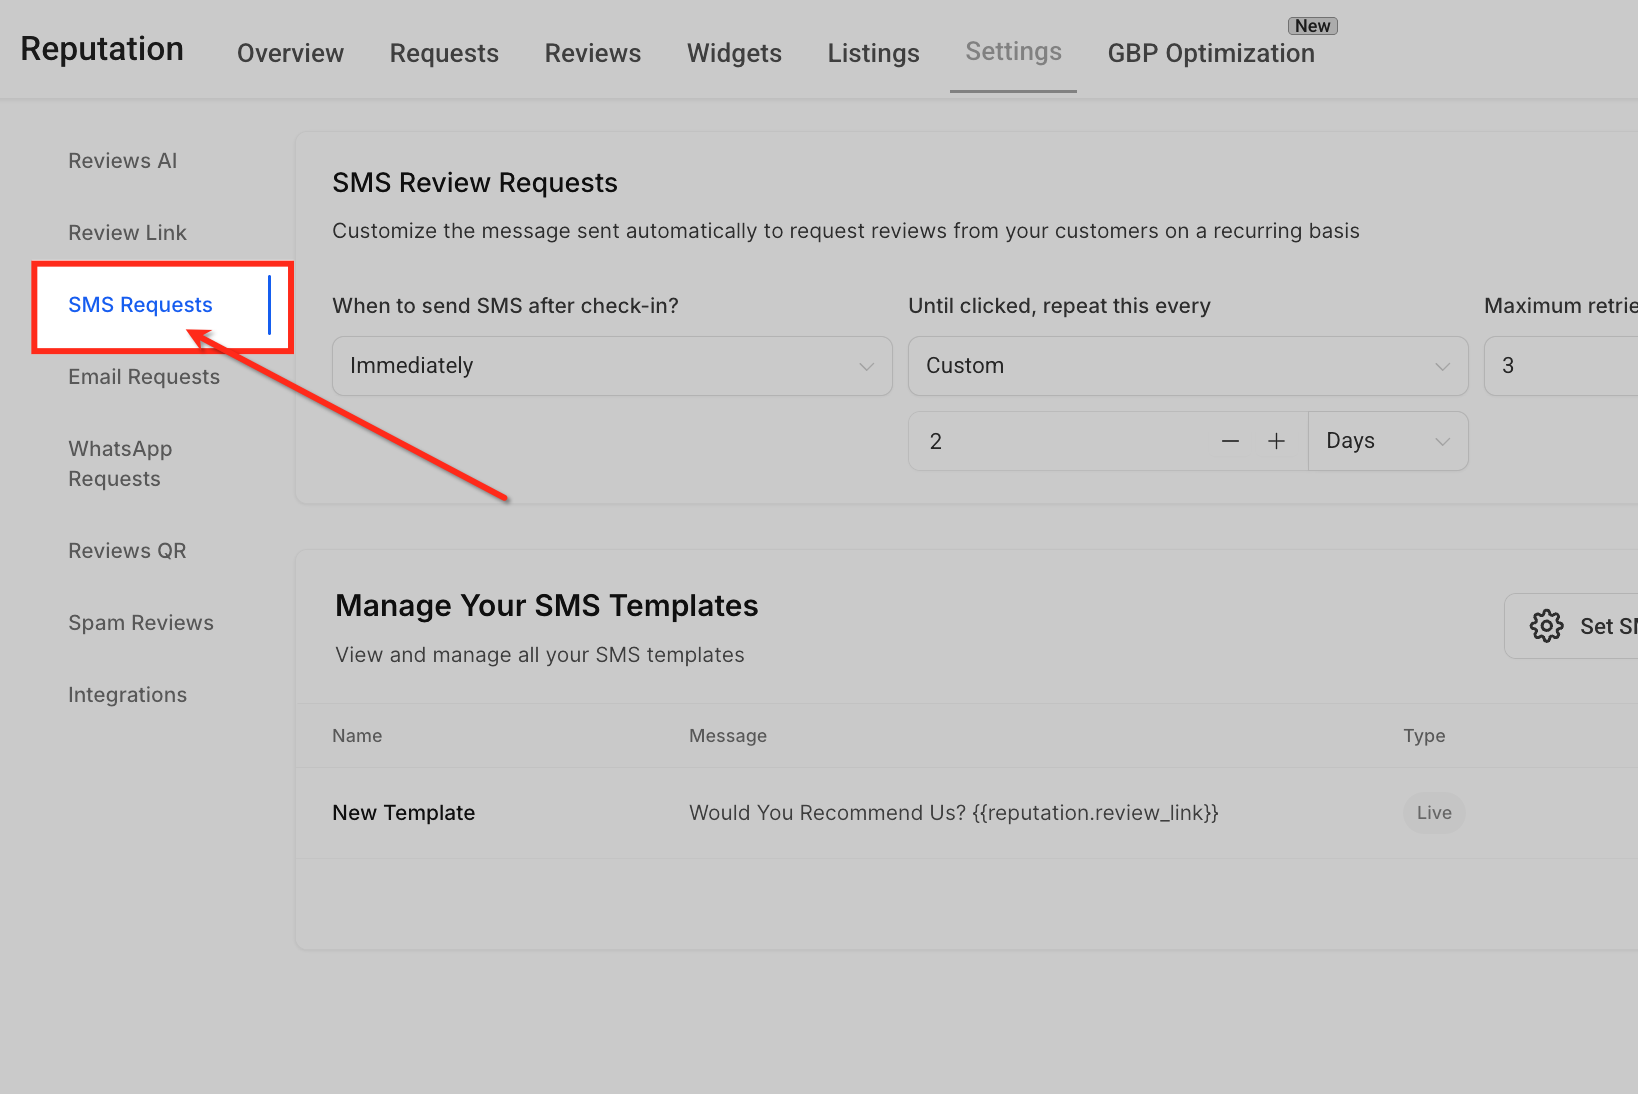
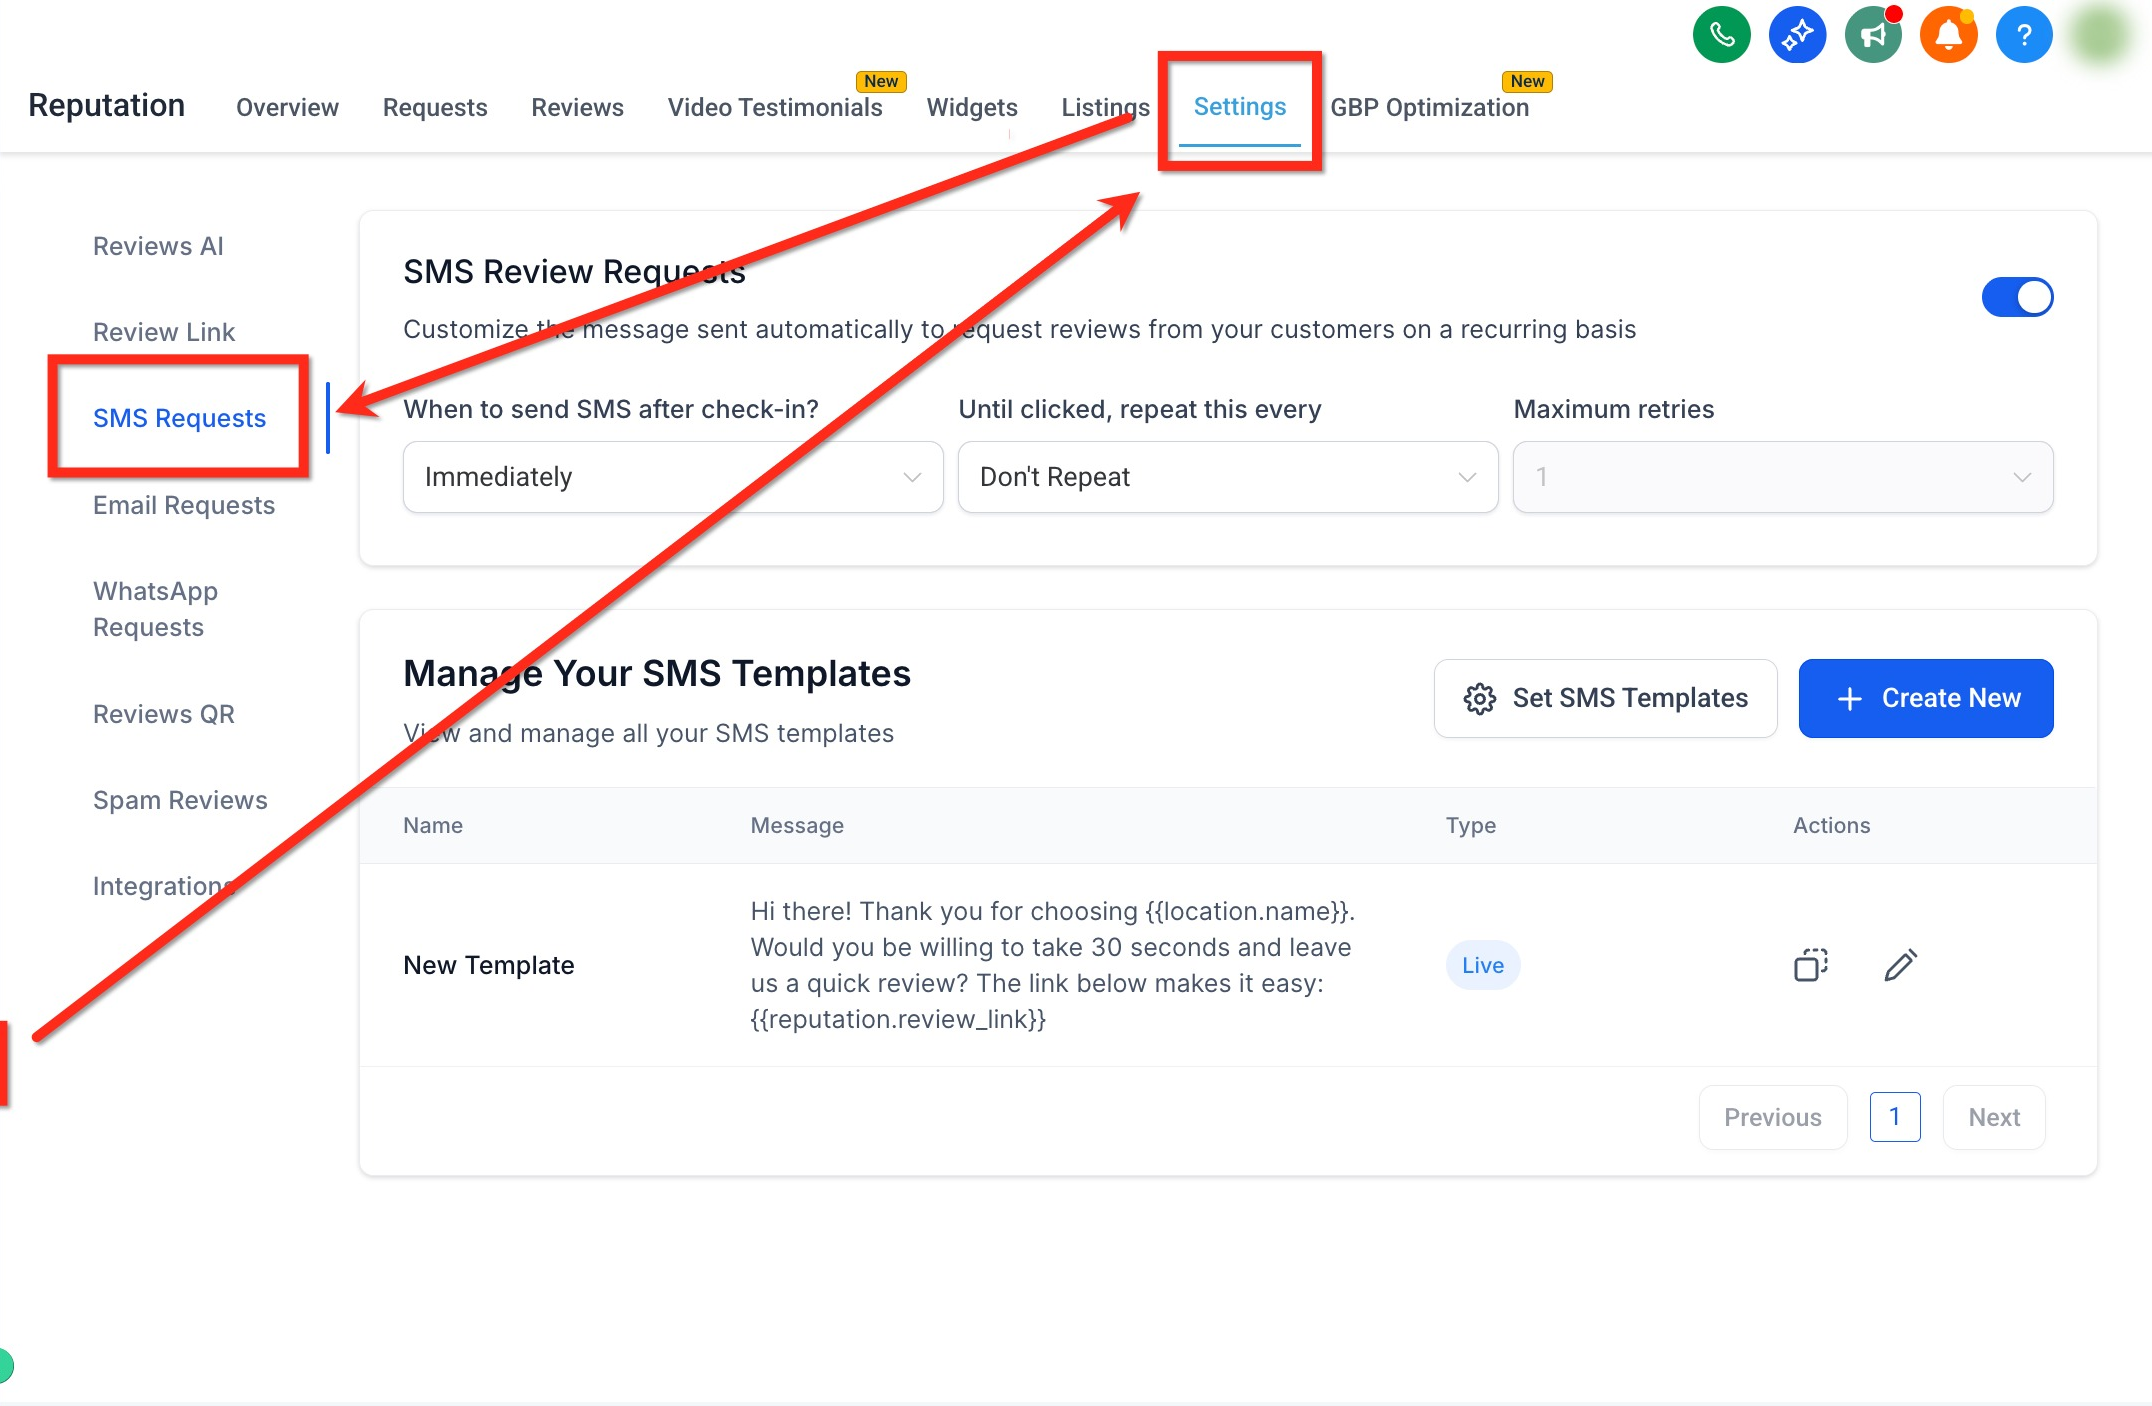
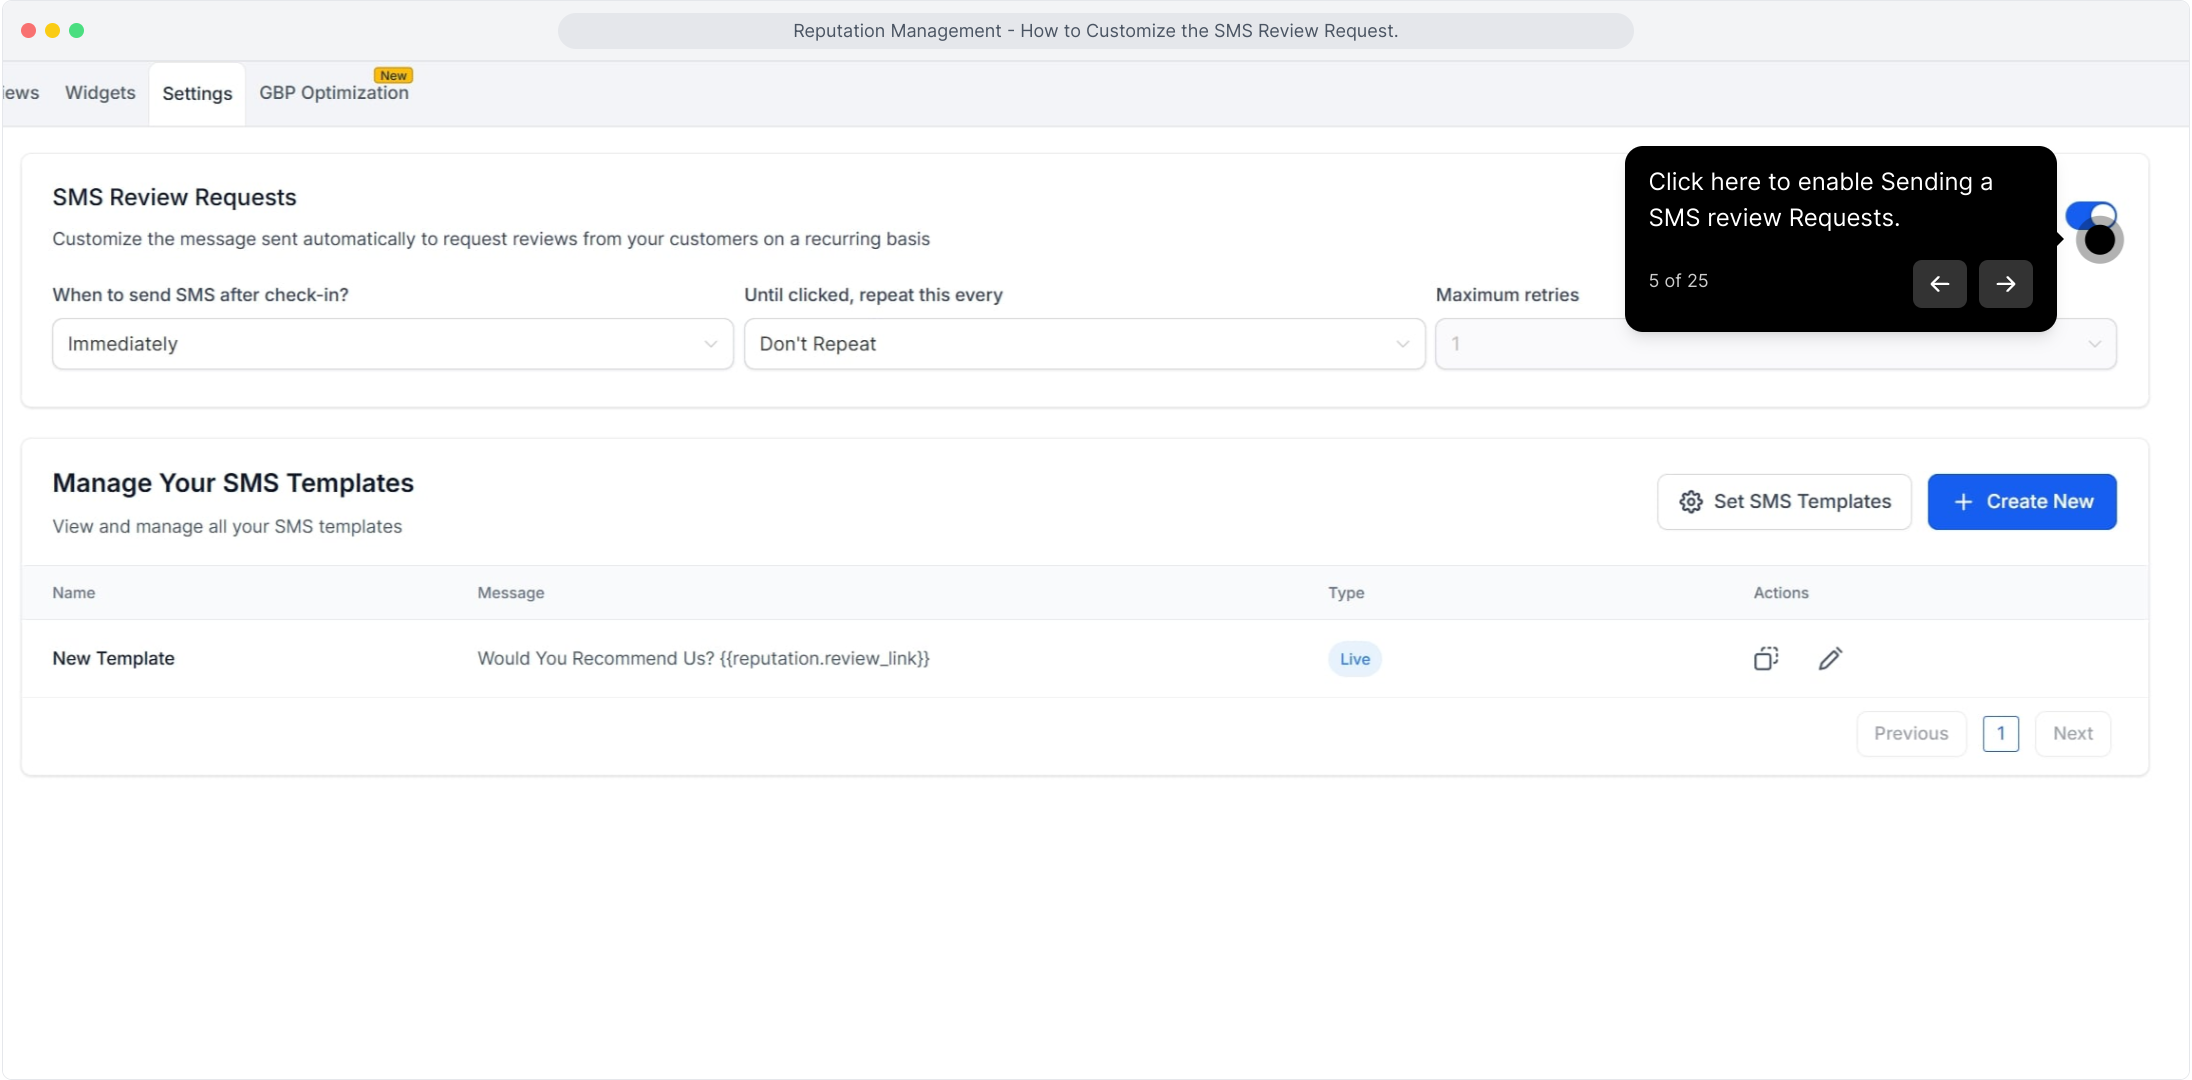
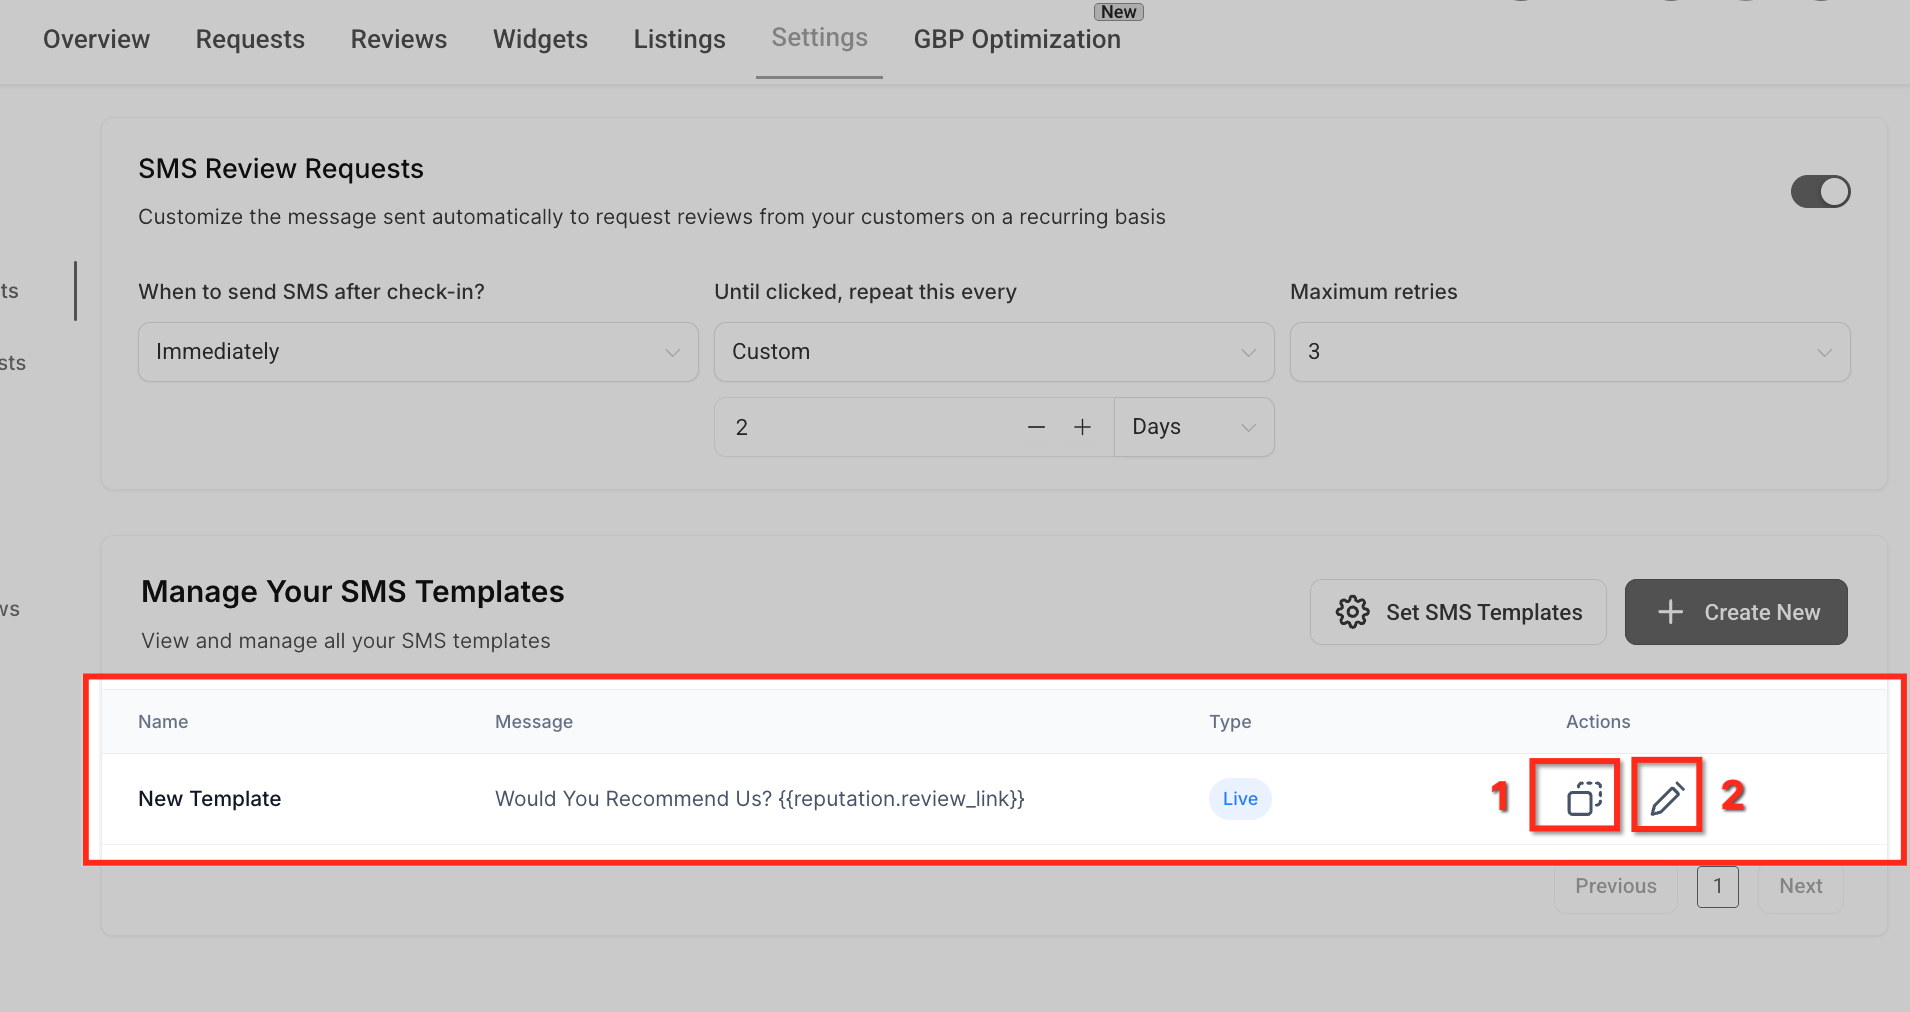
Turn on the SMS Review Requests toggle in the top right to activate template management. This setting allows you to create and customize SMS templates for recurring review requests. If the toggle is off, template creation and editing are disabled.
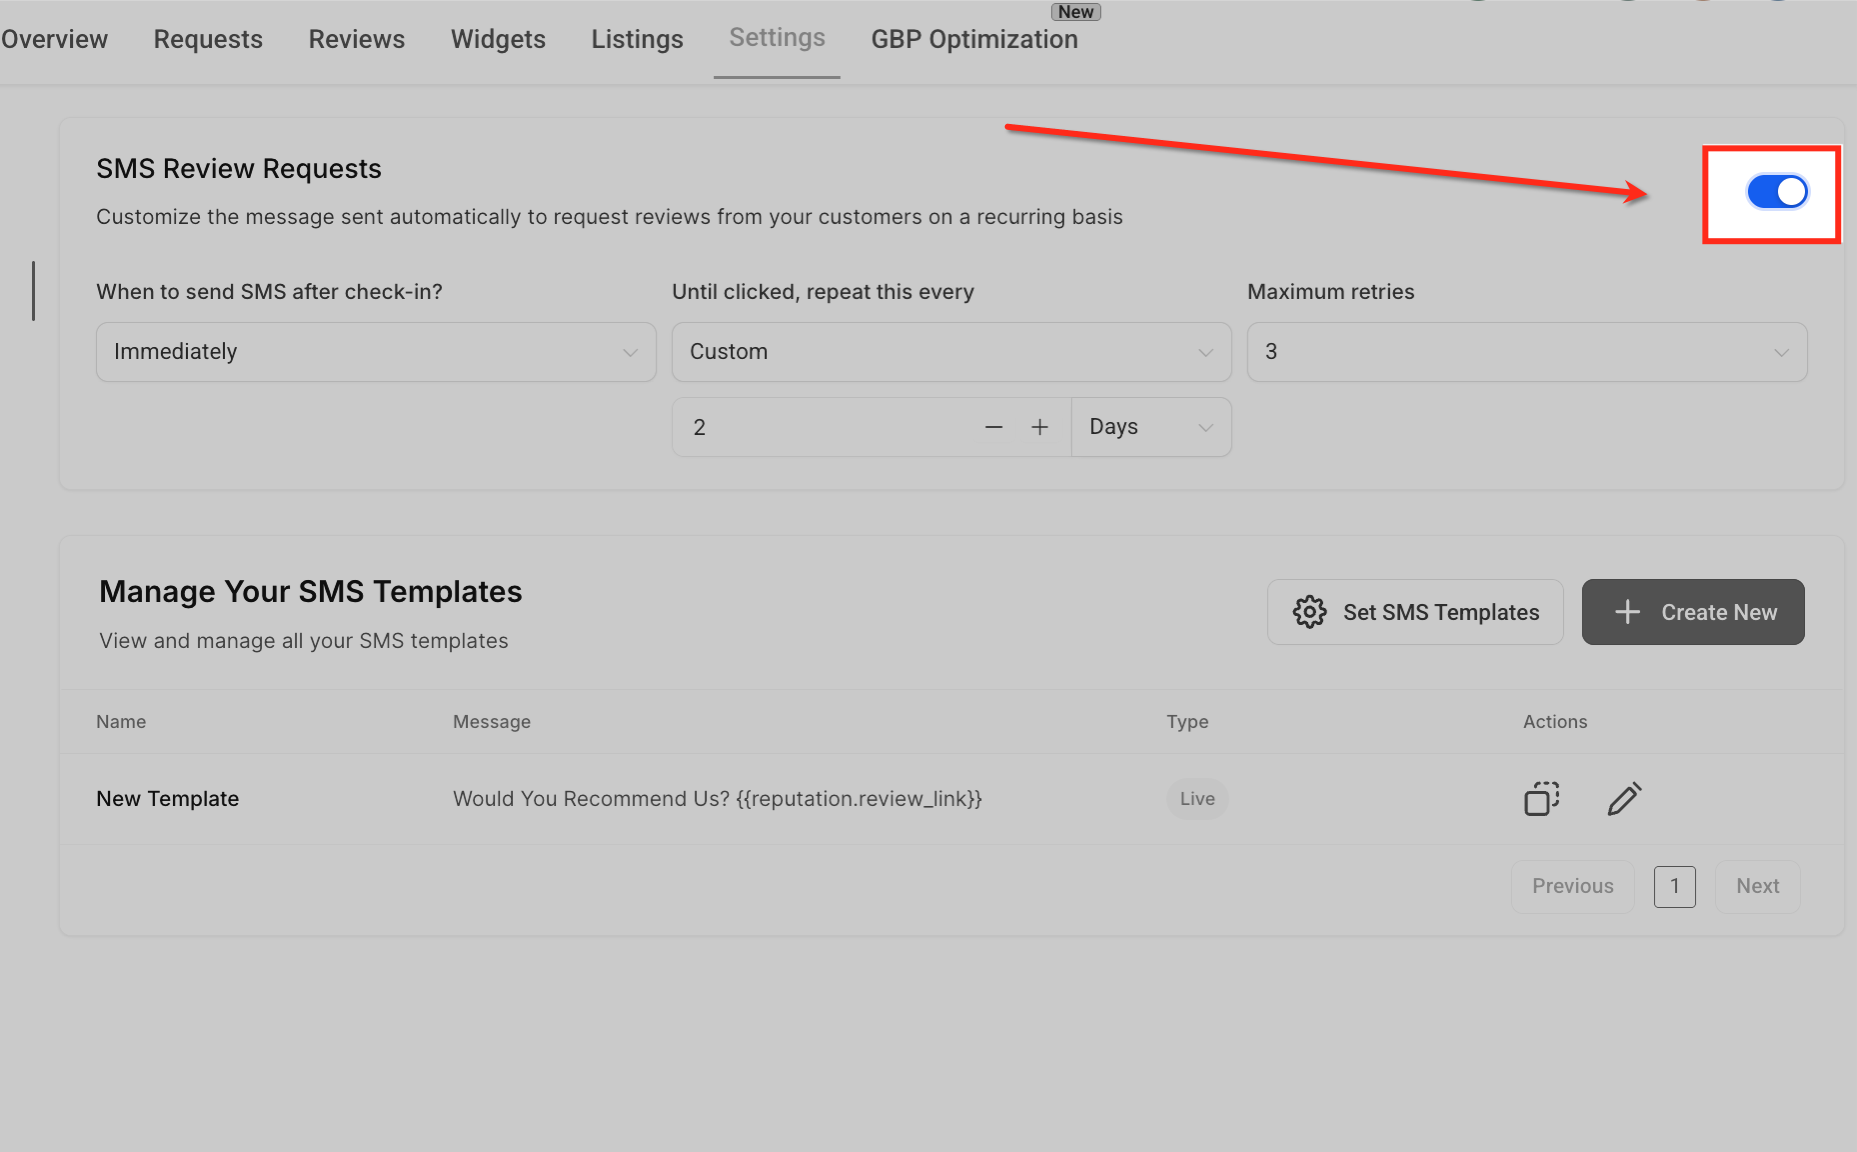
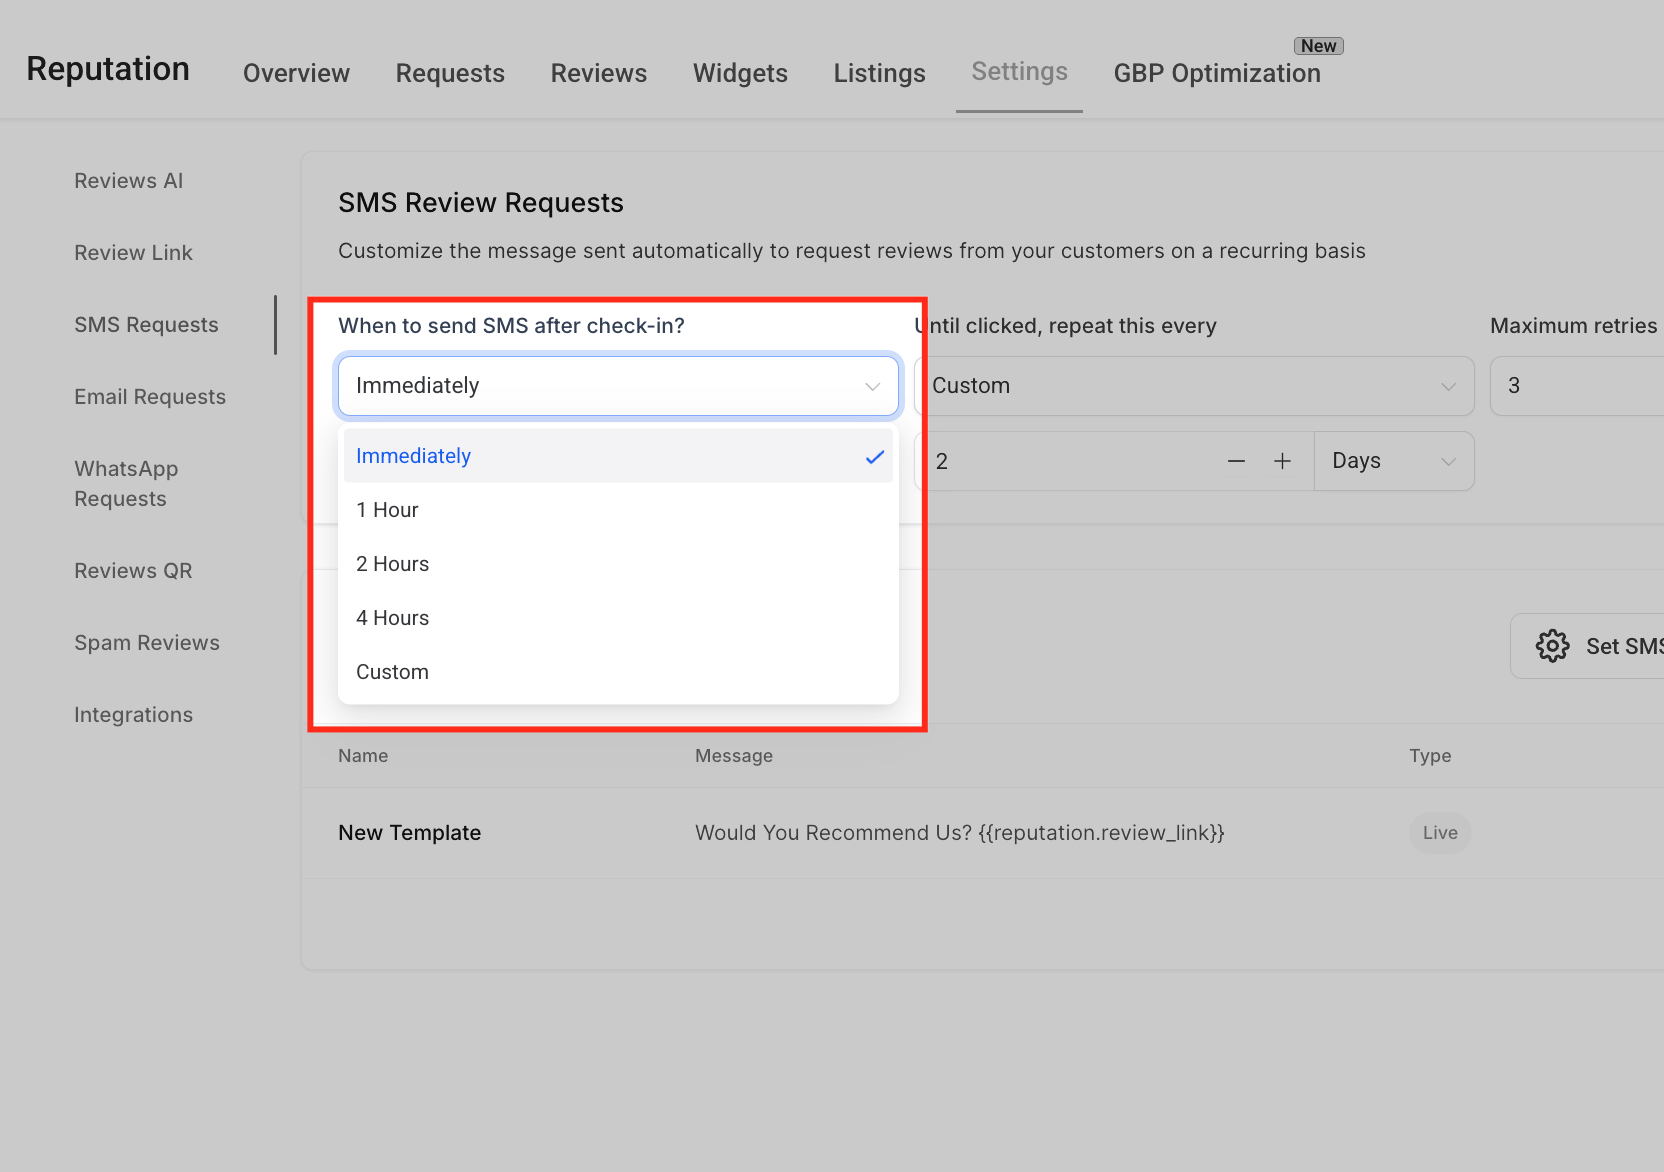
Once enabled, set how and when your requests send:
When to send SMS after check-in? Choose how soon the first review request goes out after a patient's visit, Immediately, 1 Hour, 2 Hours, 4 Hours, or a Custom delay that fits your follow-up strategy.
Default sender number: Choose the phone number that sends your SMS review requests. Select it from the default sender dropdown, then finish configuring your timing, repeat interval, and retry settings.
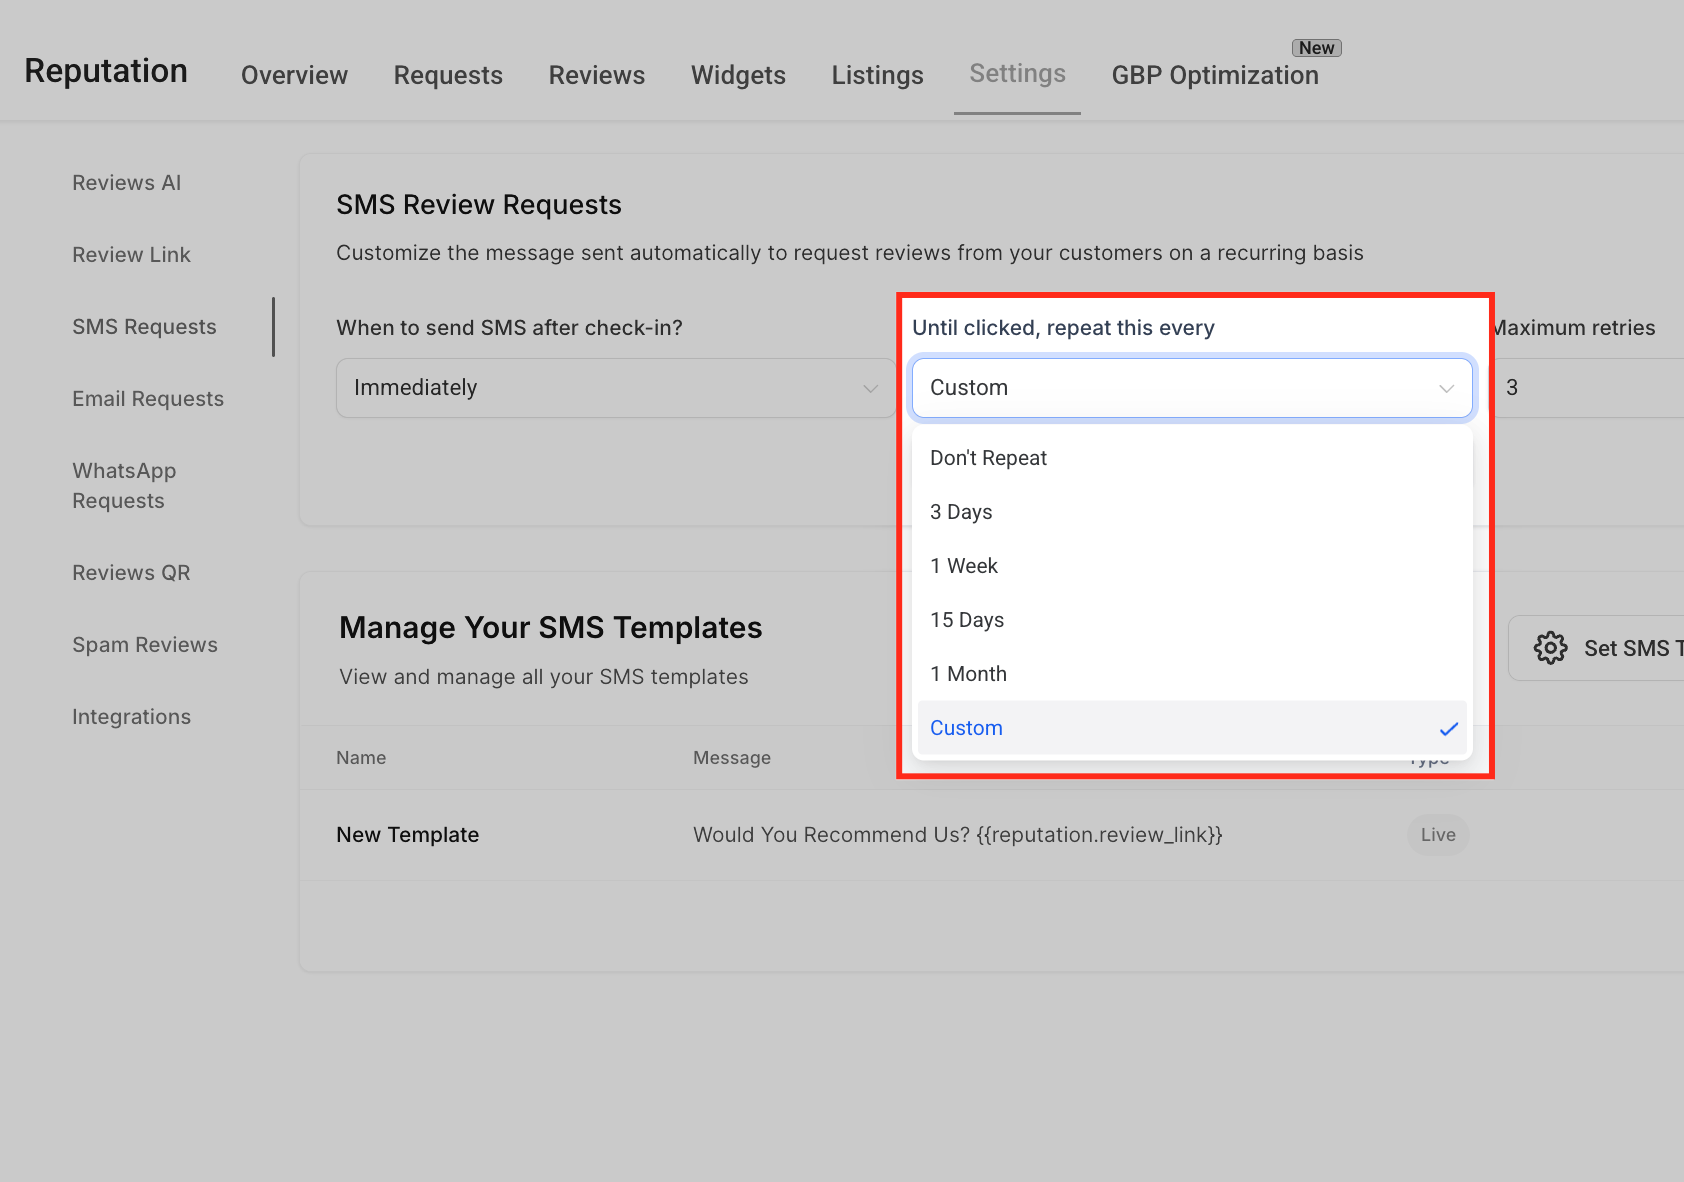
Until clicked, repeat this every: Choose how often the request is resent until the patient interacts with it. Options include fixed intervals like 3 Days, 1 Week, or 1 Month, or a Custom interval for more flexibility.
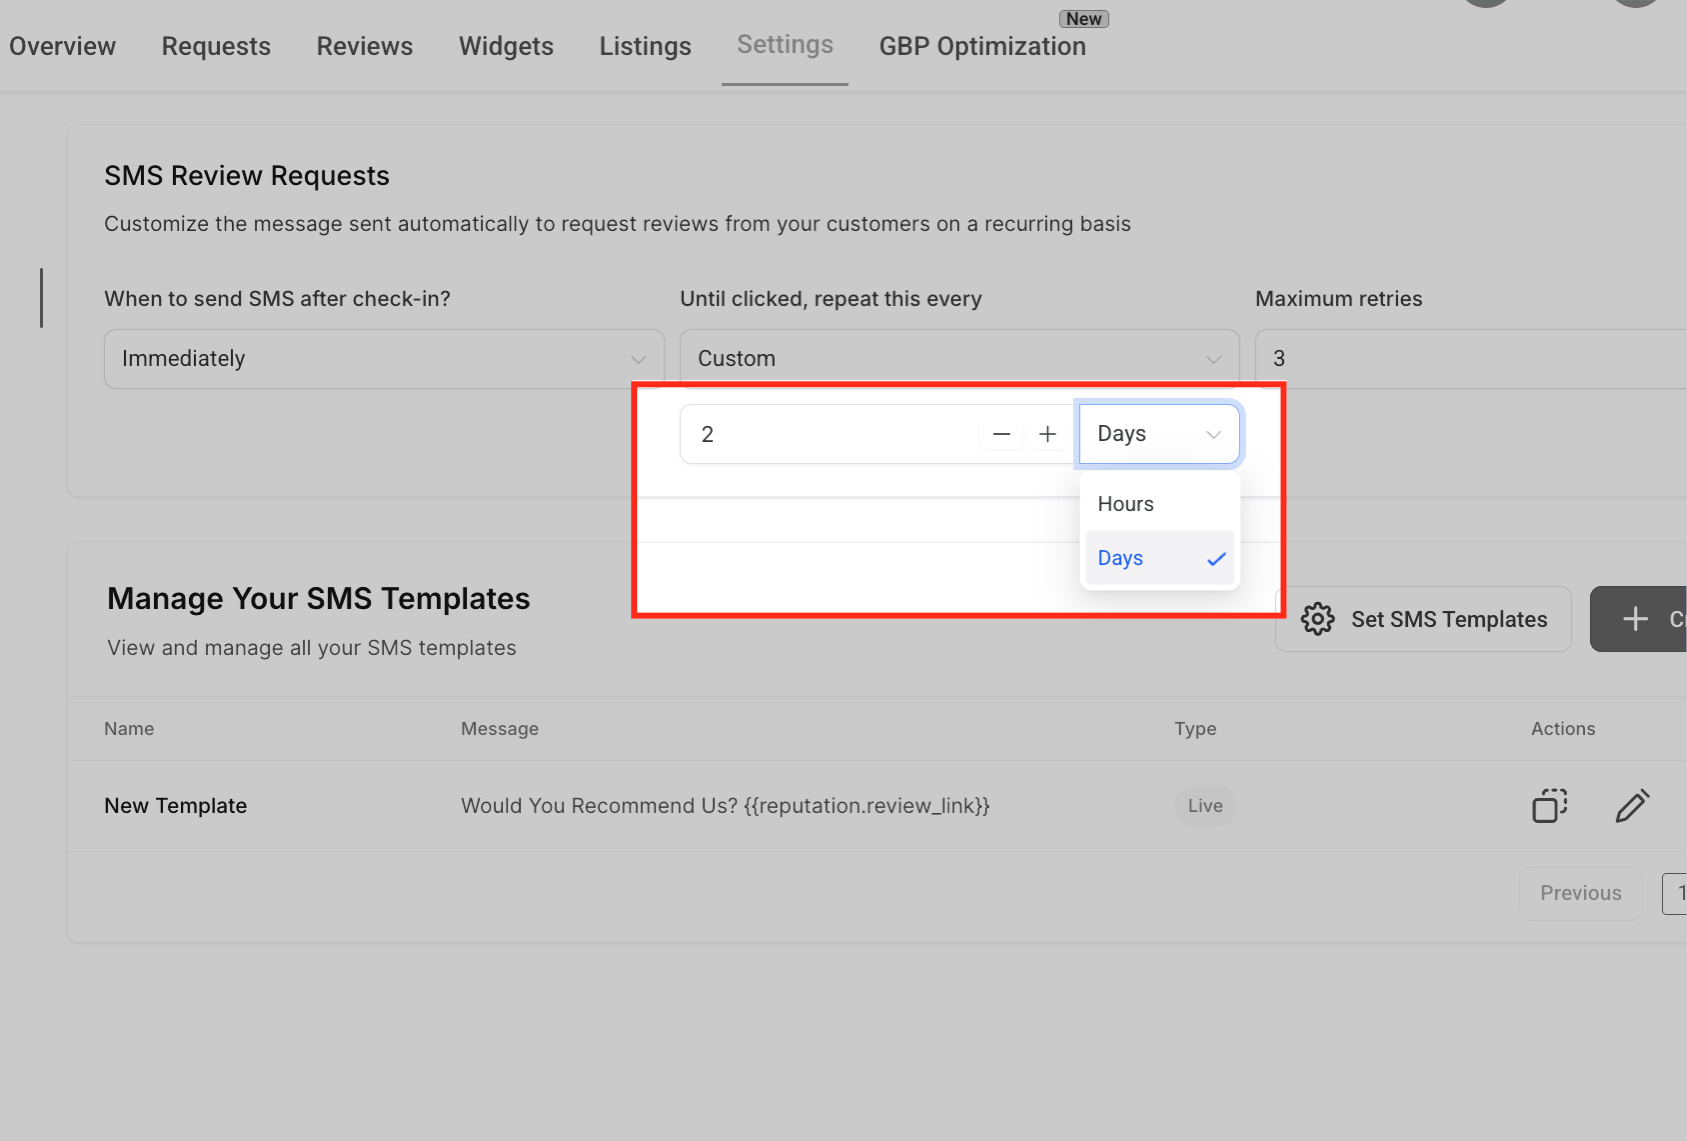
Custom repeat interval: If you selected Custom, set the exact number and unit of time. Use the plus/minus buttons to adjust the number, and choose Hours or Days to match how often you want follow-up messages sent.
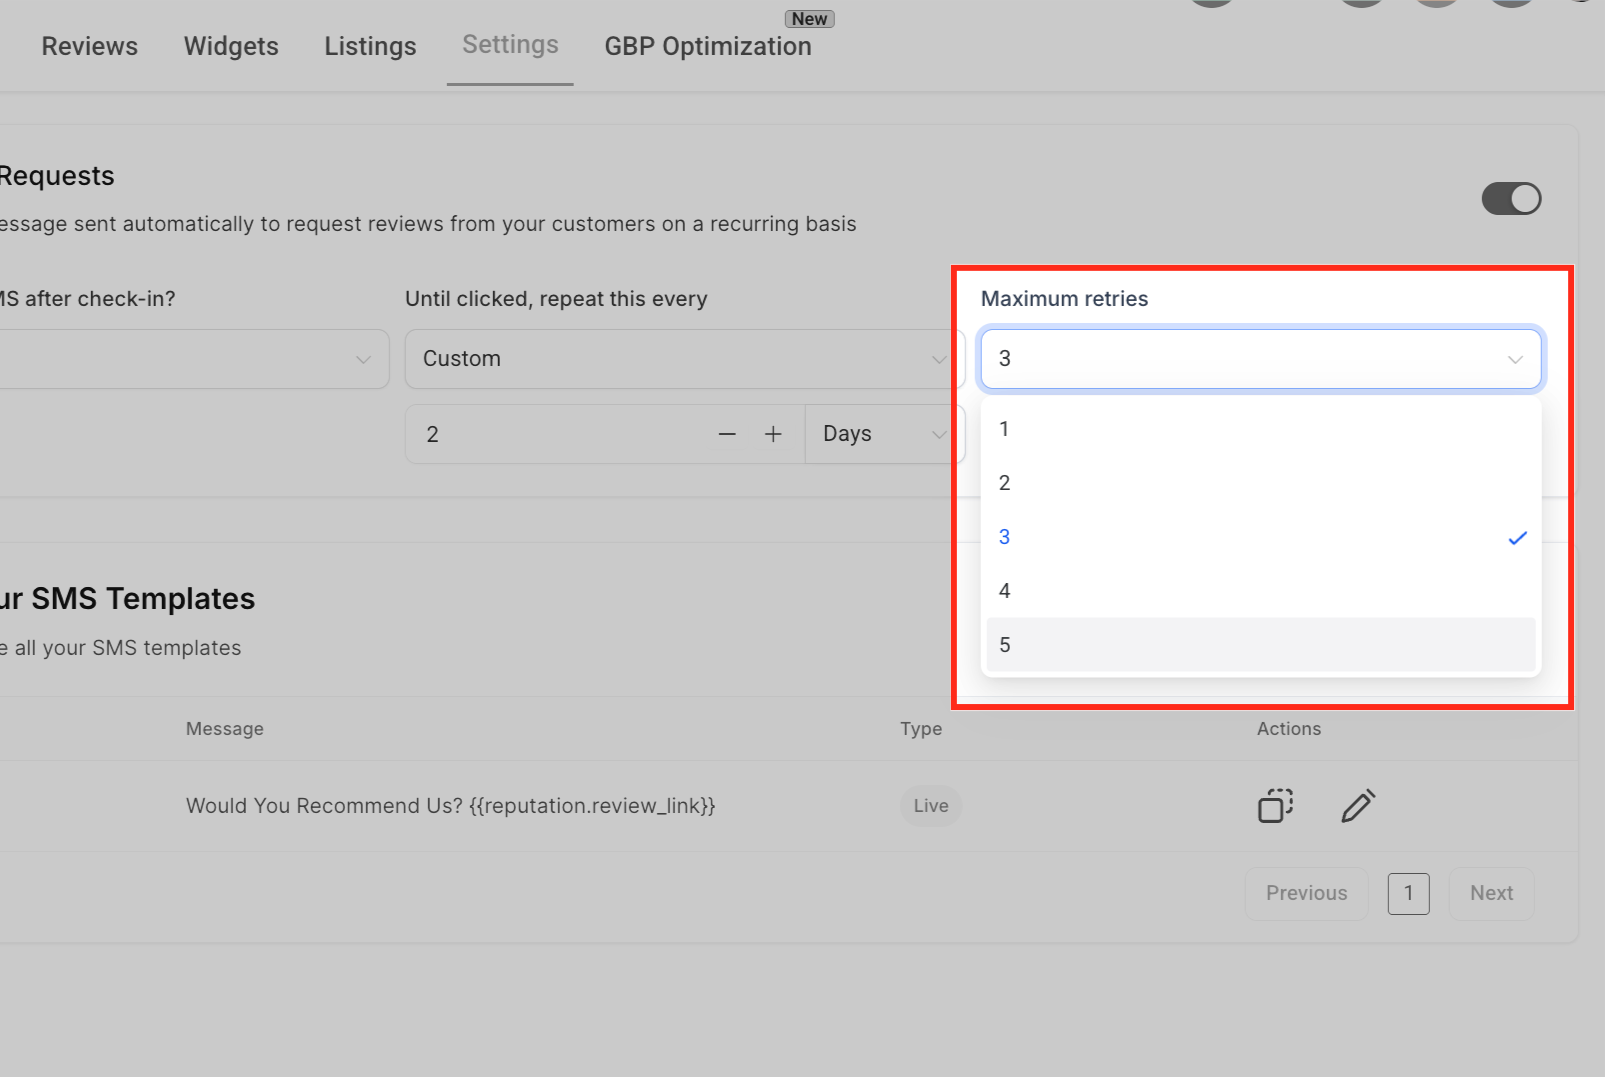
Maximum retries: Choose how many times the system should resend the request if there's no interaction, between 1 and 5 retries, depending on how persistent you want your follow-up to be.
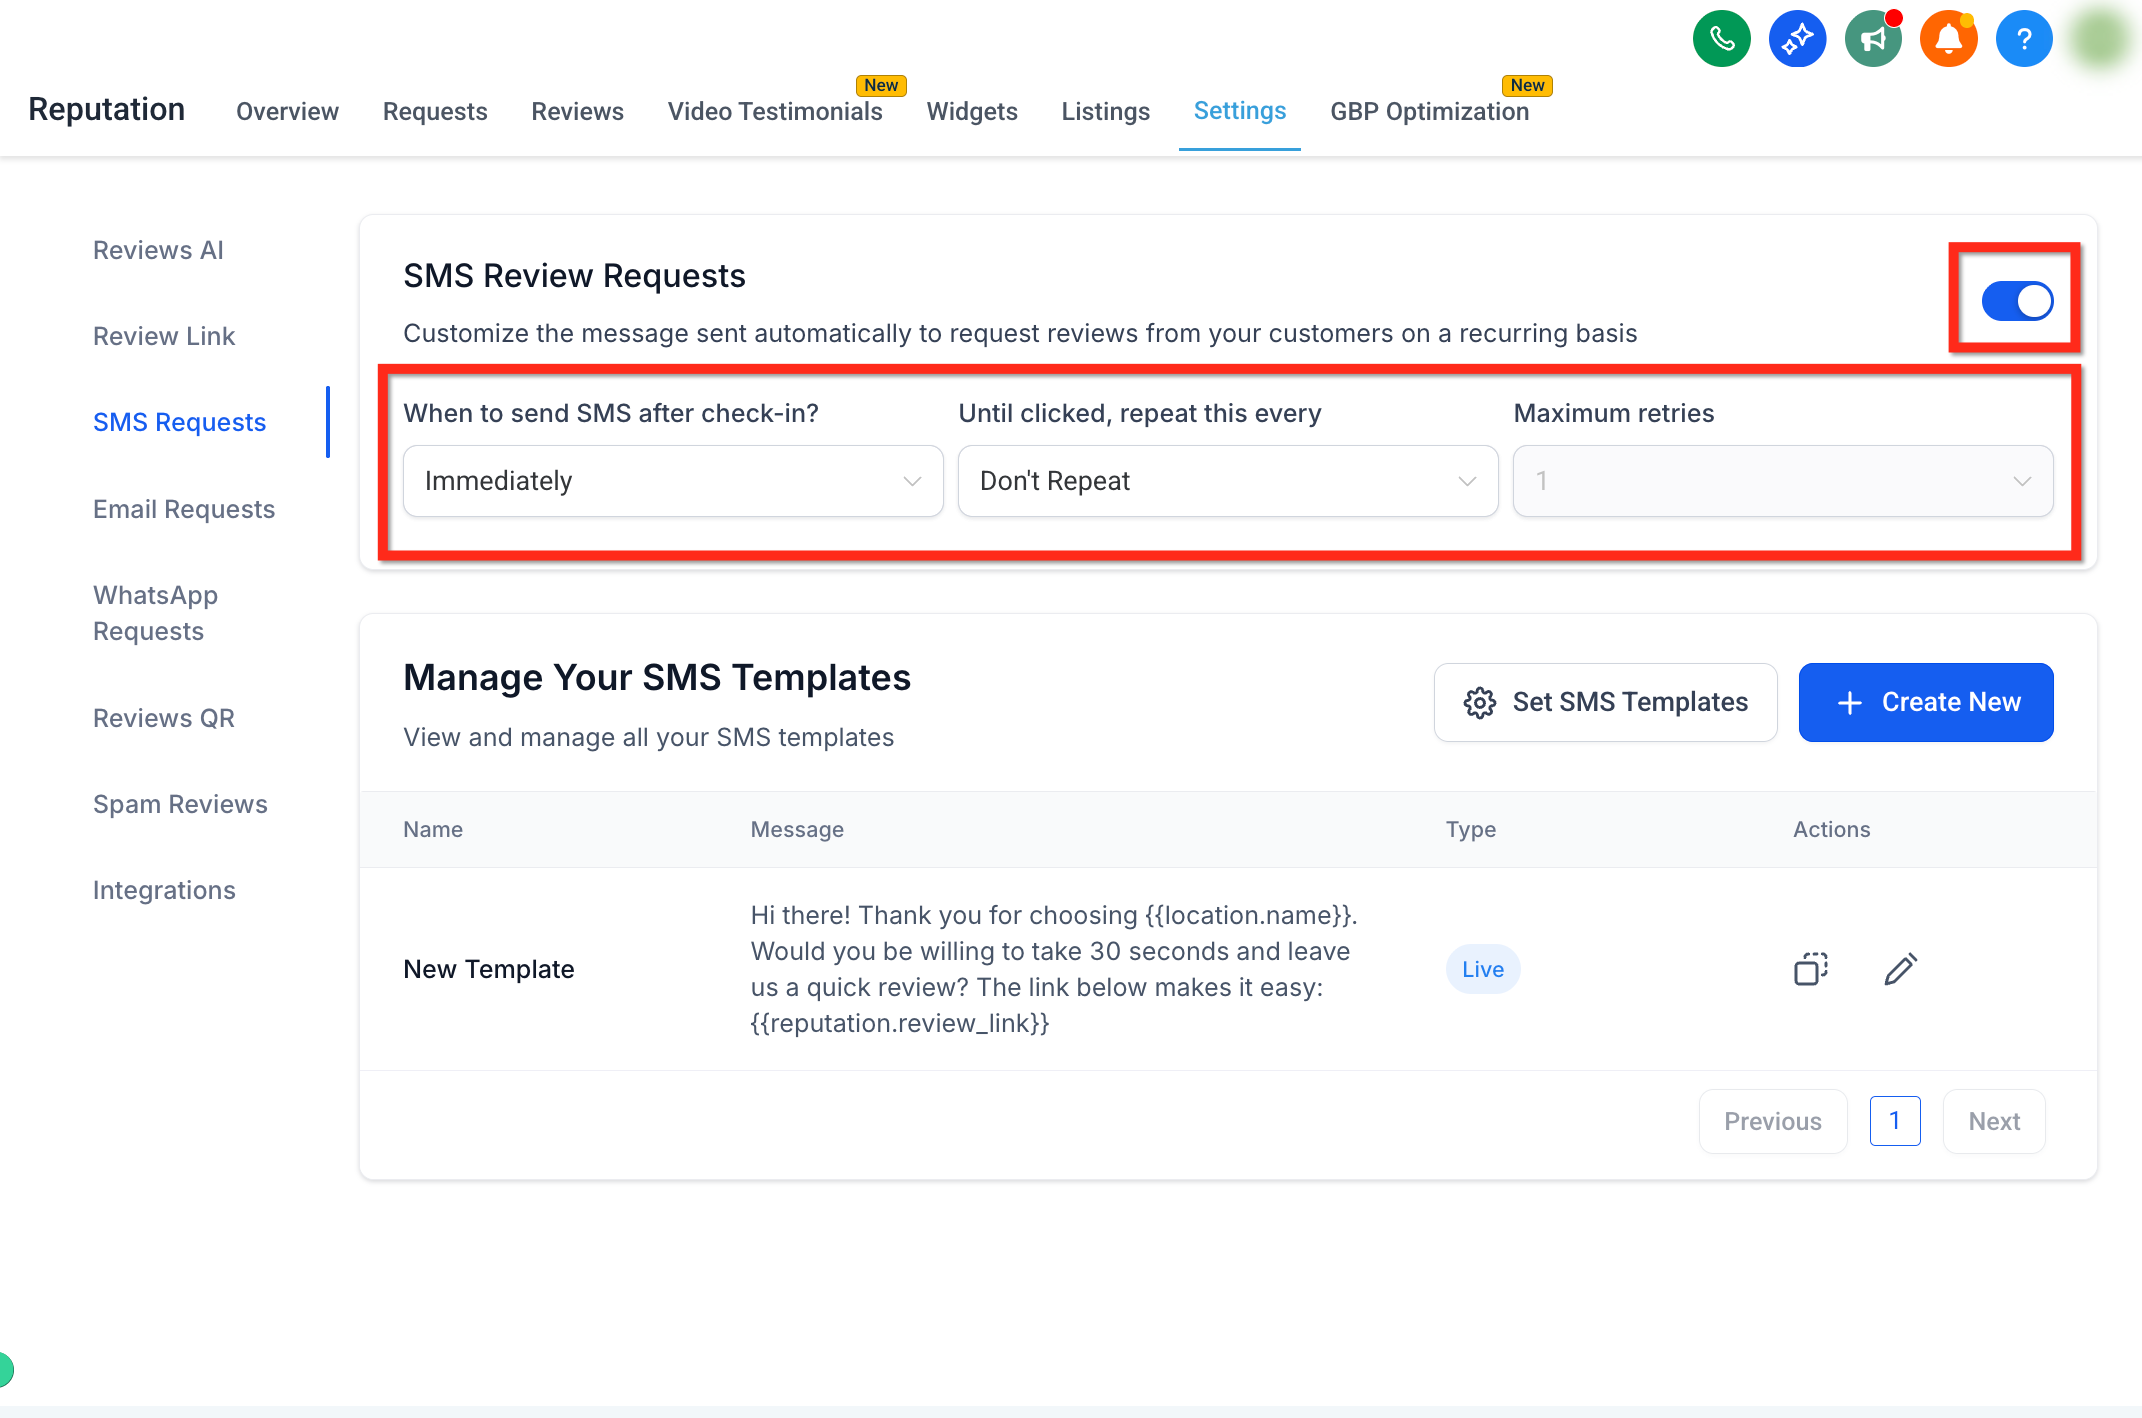
Note: "After check-in" refers to when the review request is triggered, either manually (from a contact record or from Reviews Management → Requests) or automatically via a Workflow using the Review Request action. The timing you select here determines how long after that trigger the SMS sends.
Turning on SMS requests isn't enough on its own, you also need to tell Aesthetix CRM which template to use for the initial send and for each retry stage. This selection controls exactly what patients receive at each step.
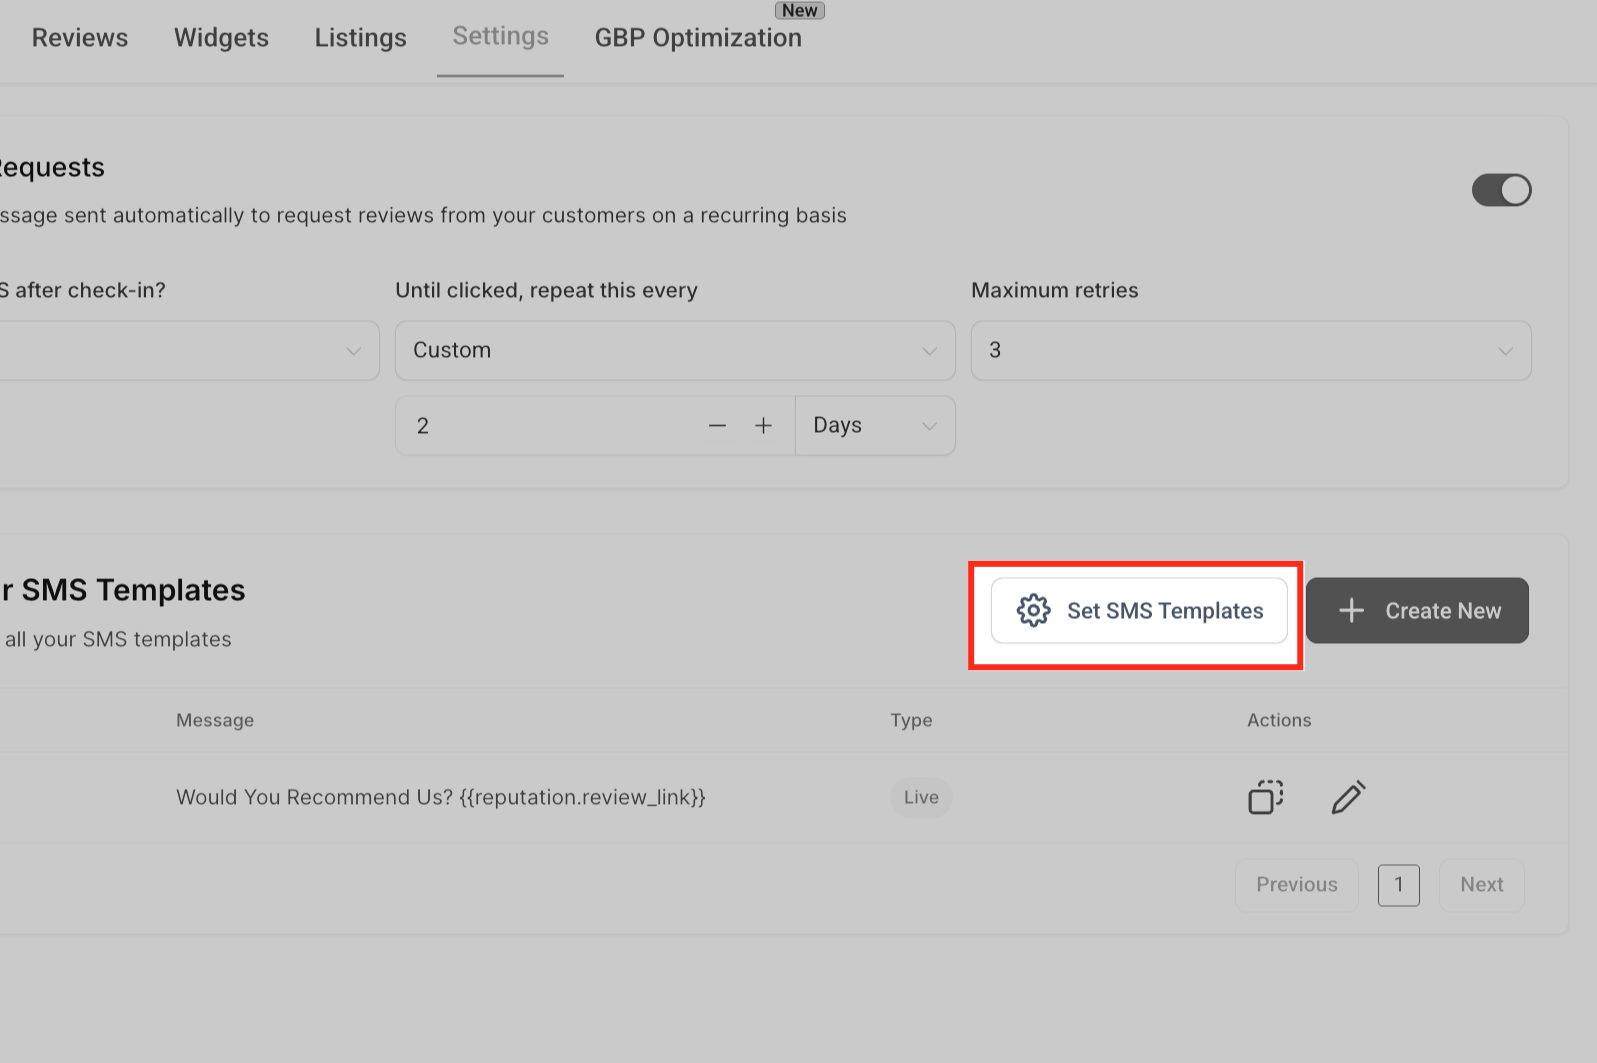
Click Set SMS Templates to open the assignment window.
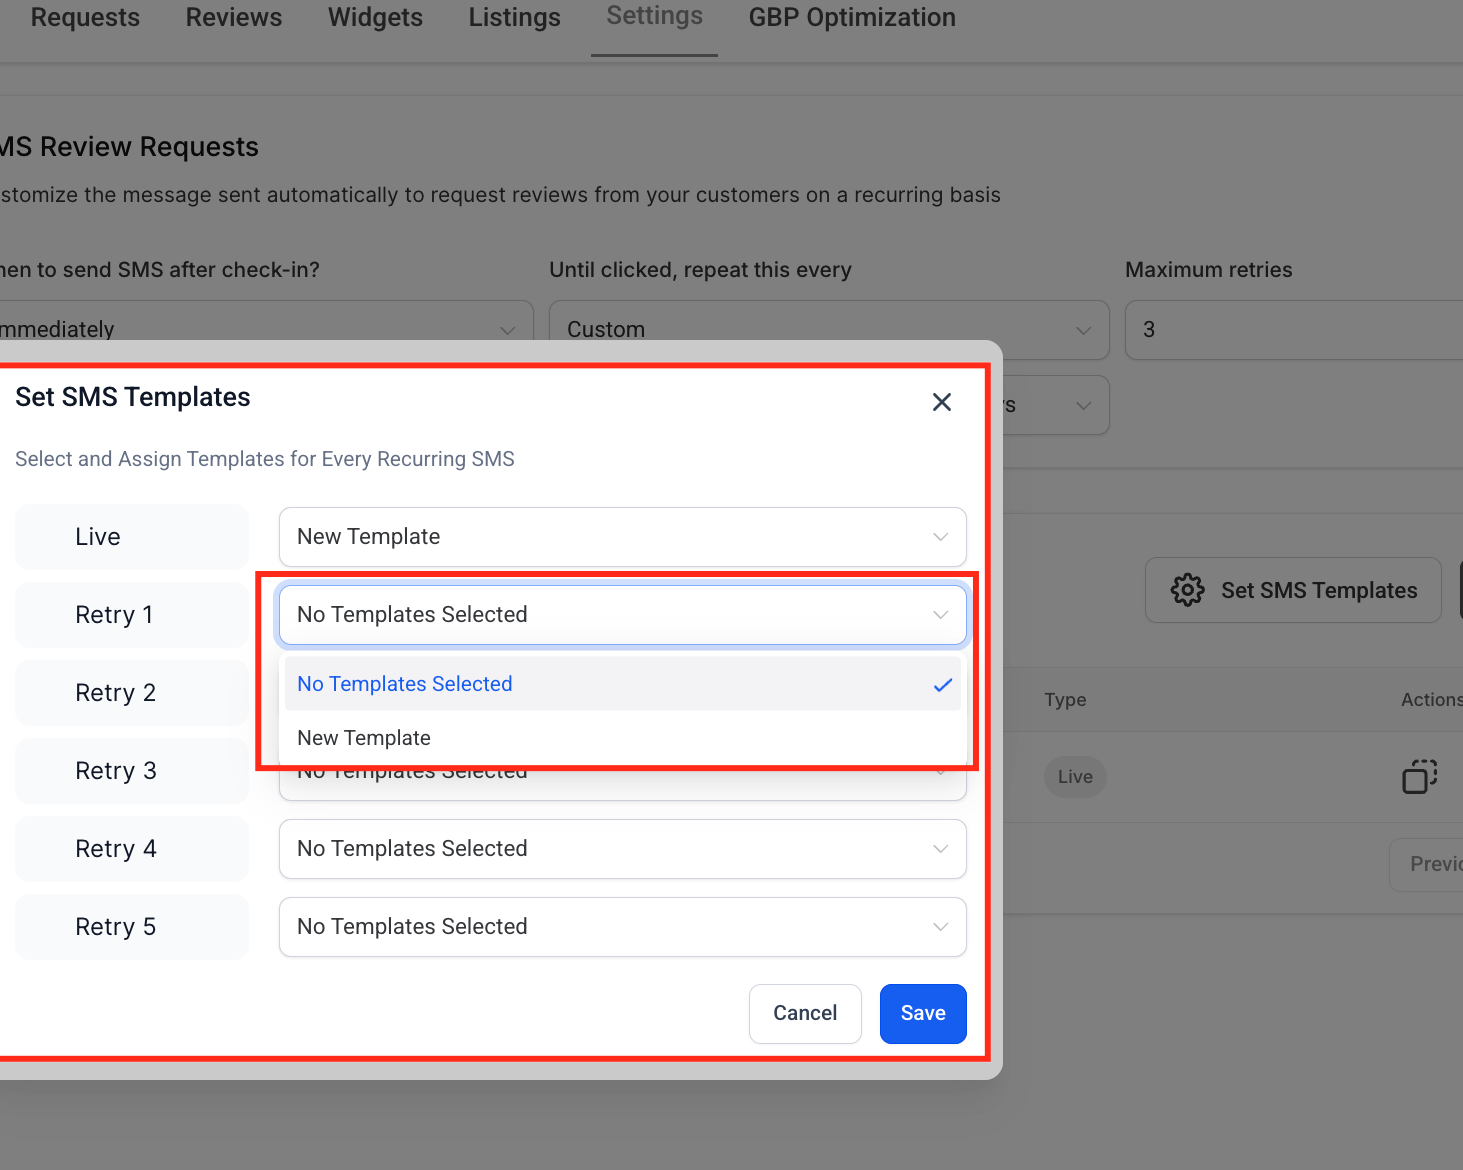
In the Set SMS Templates window, choose a template for each retry stage in your recurring sequence. You can assign the same template to multiple retries or use different messages to vary your follow-up. When you're done, click Save to apply the changes.
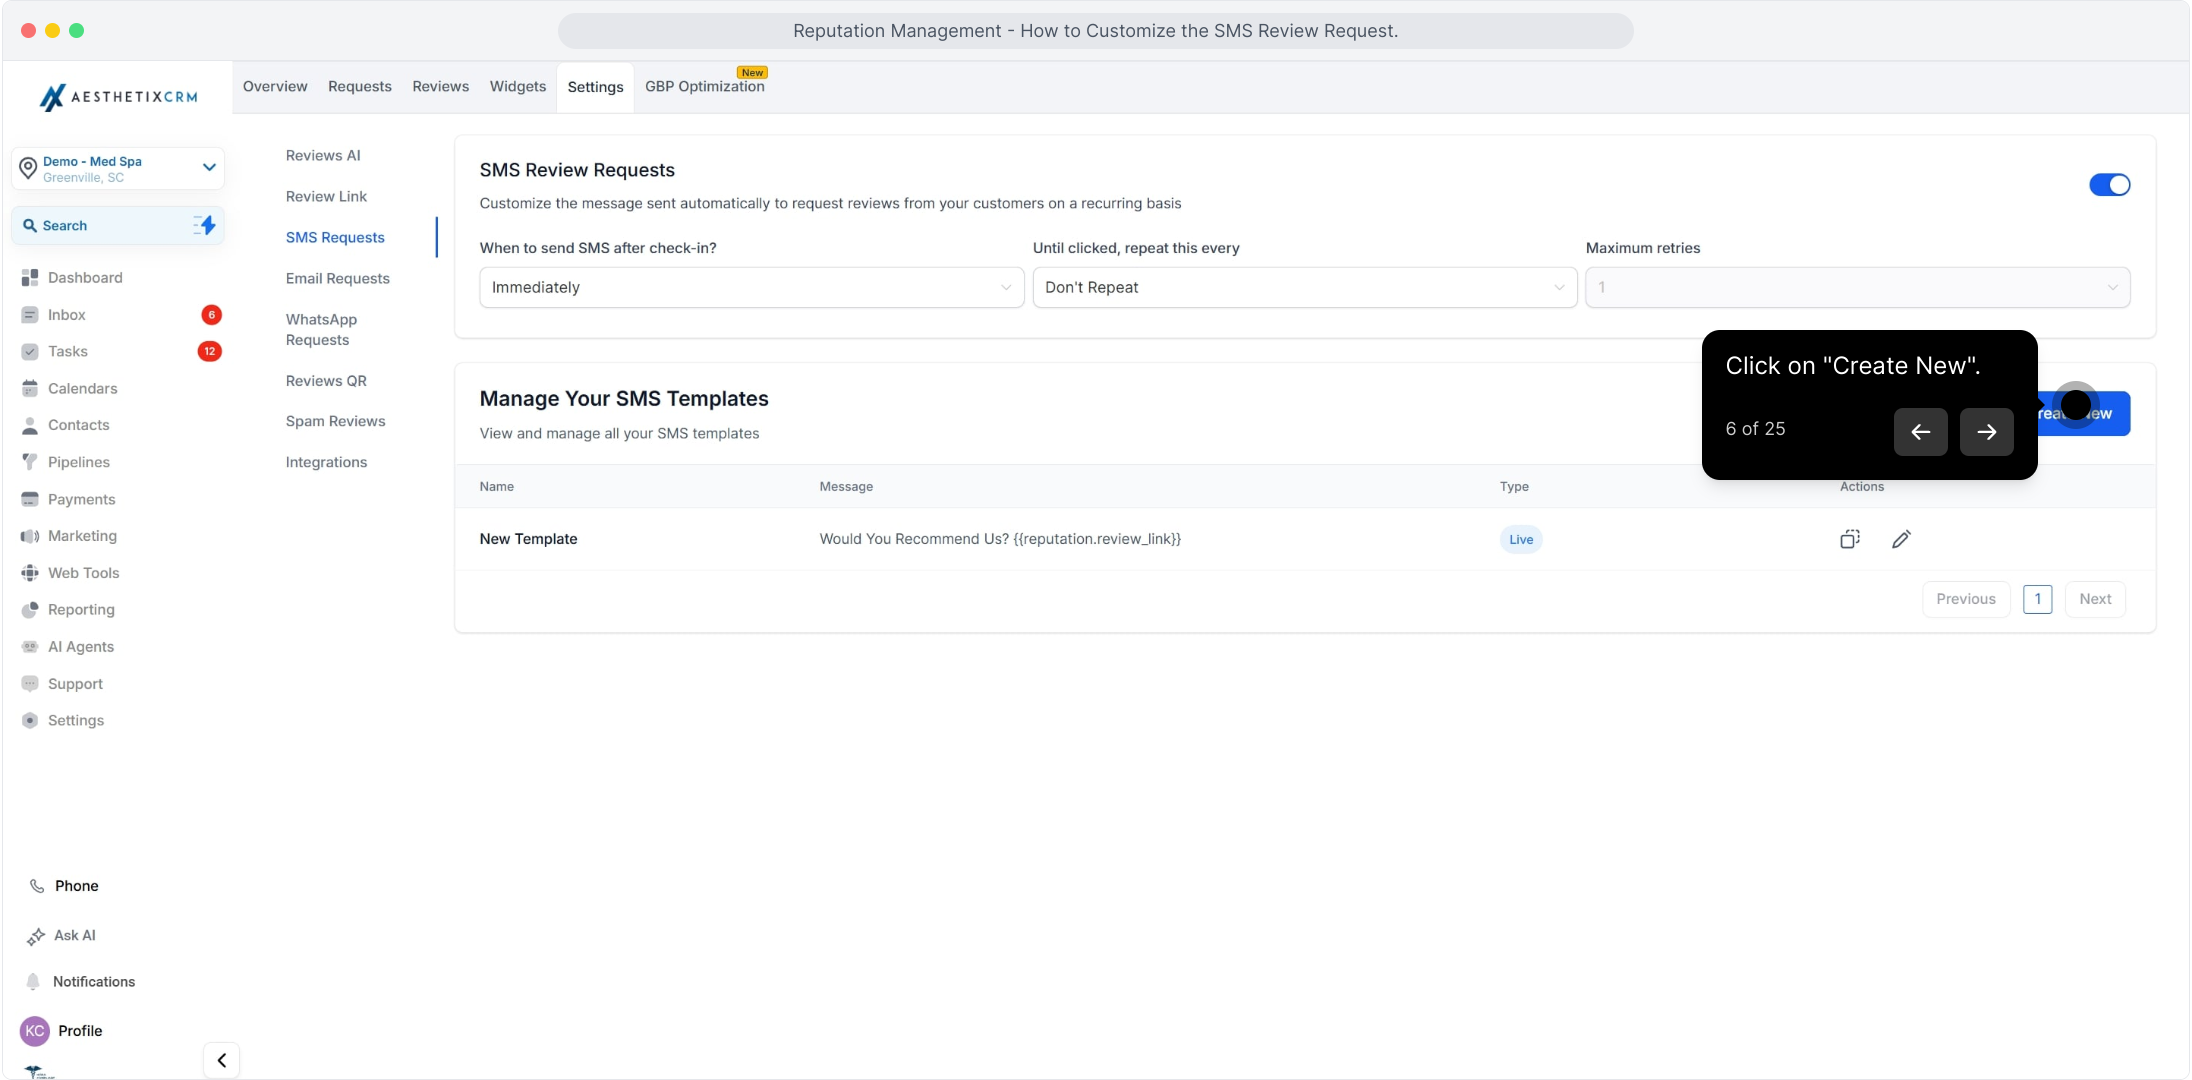
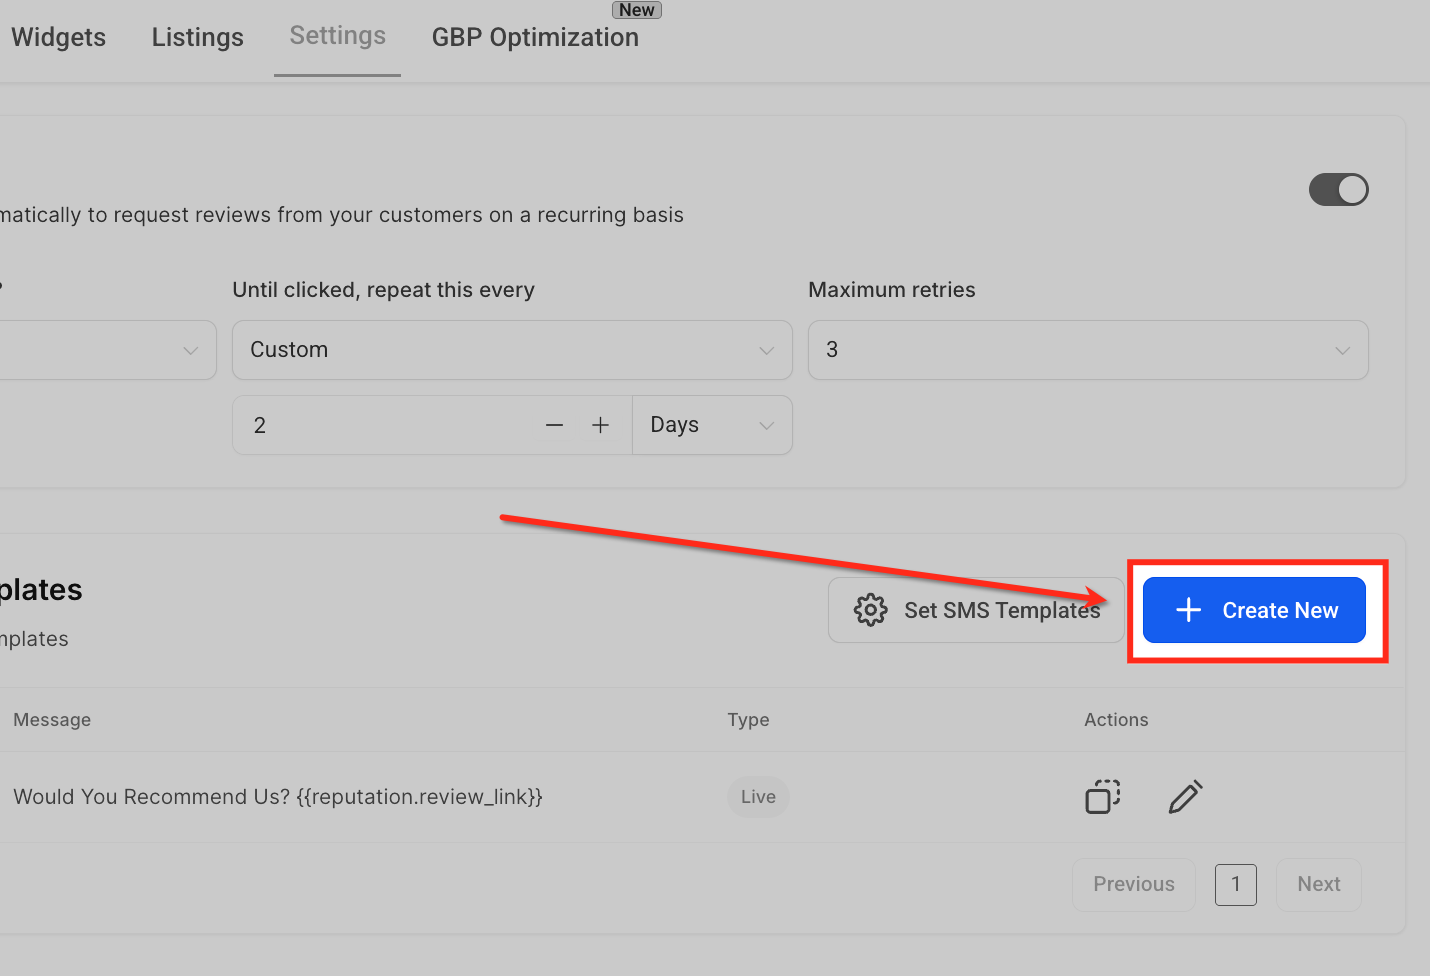
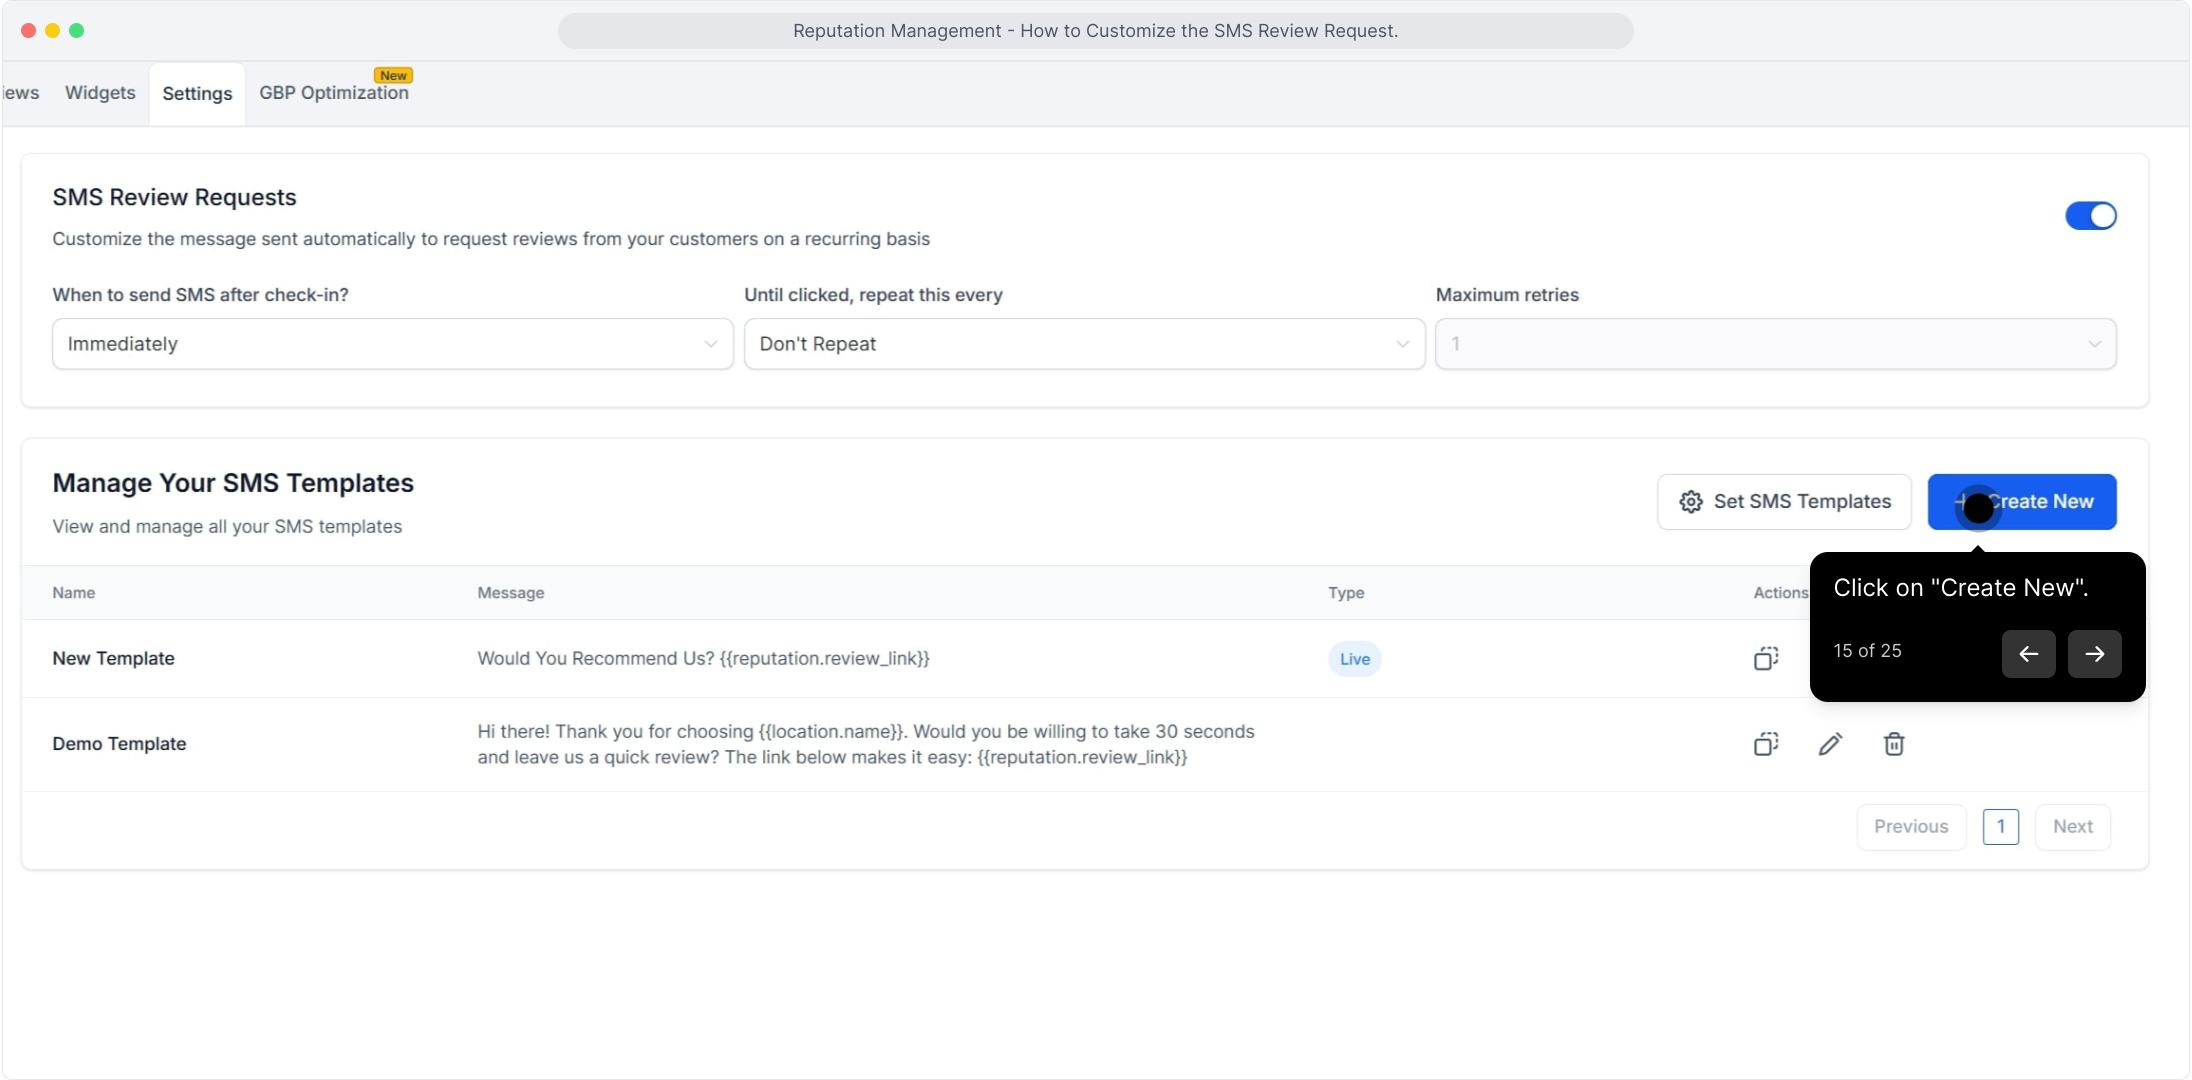
Click Create New.
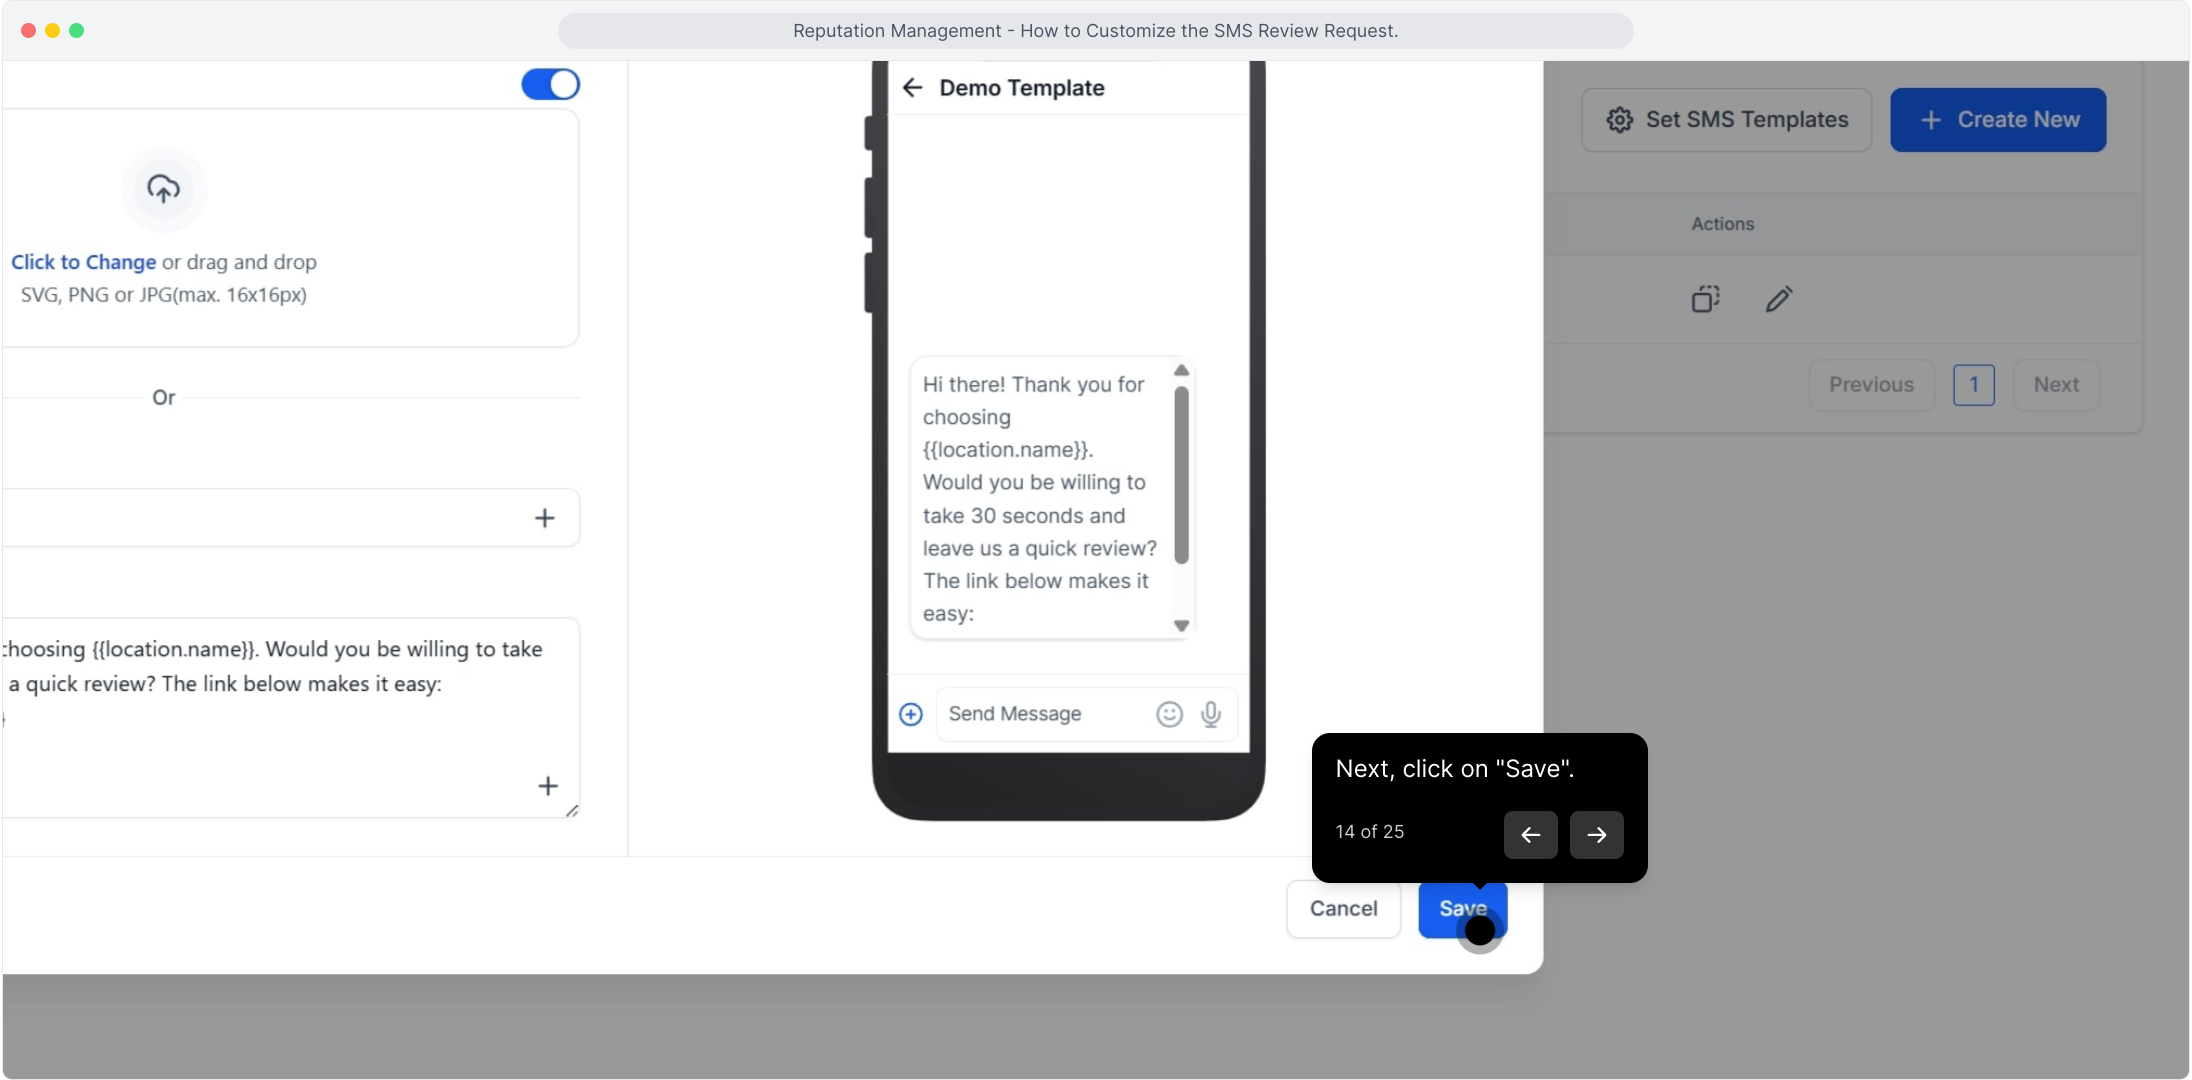
Click Save.
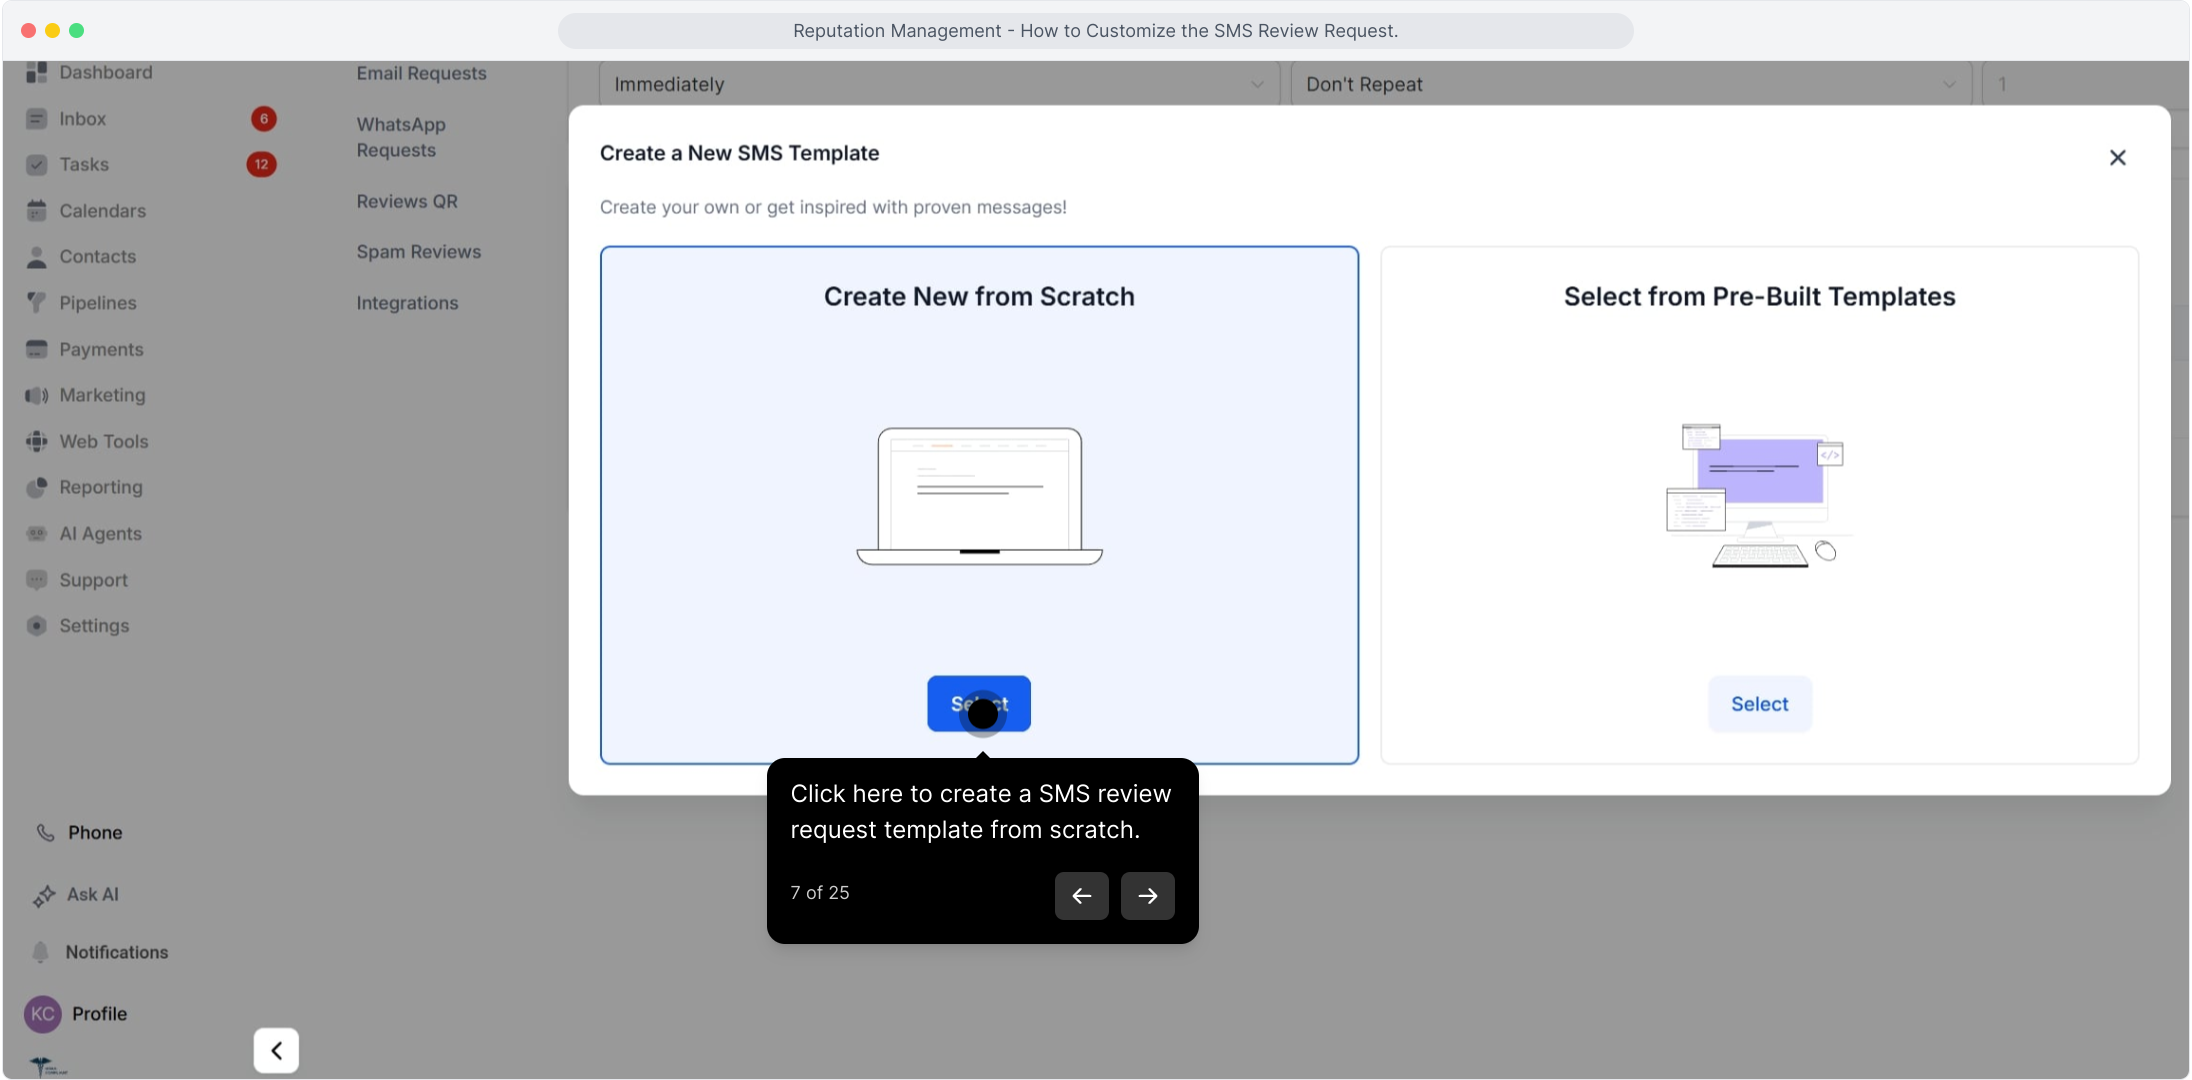
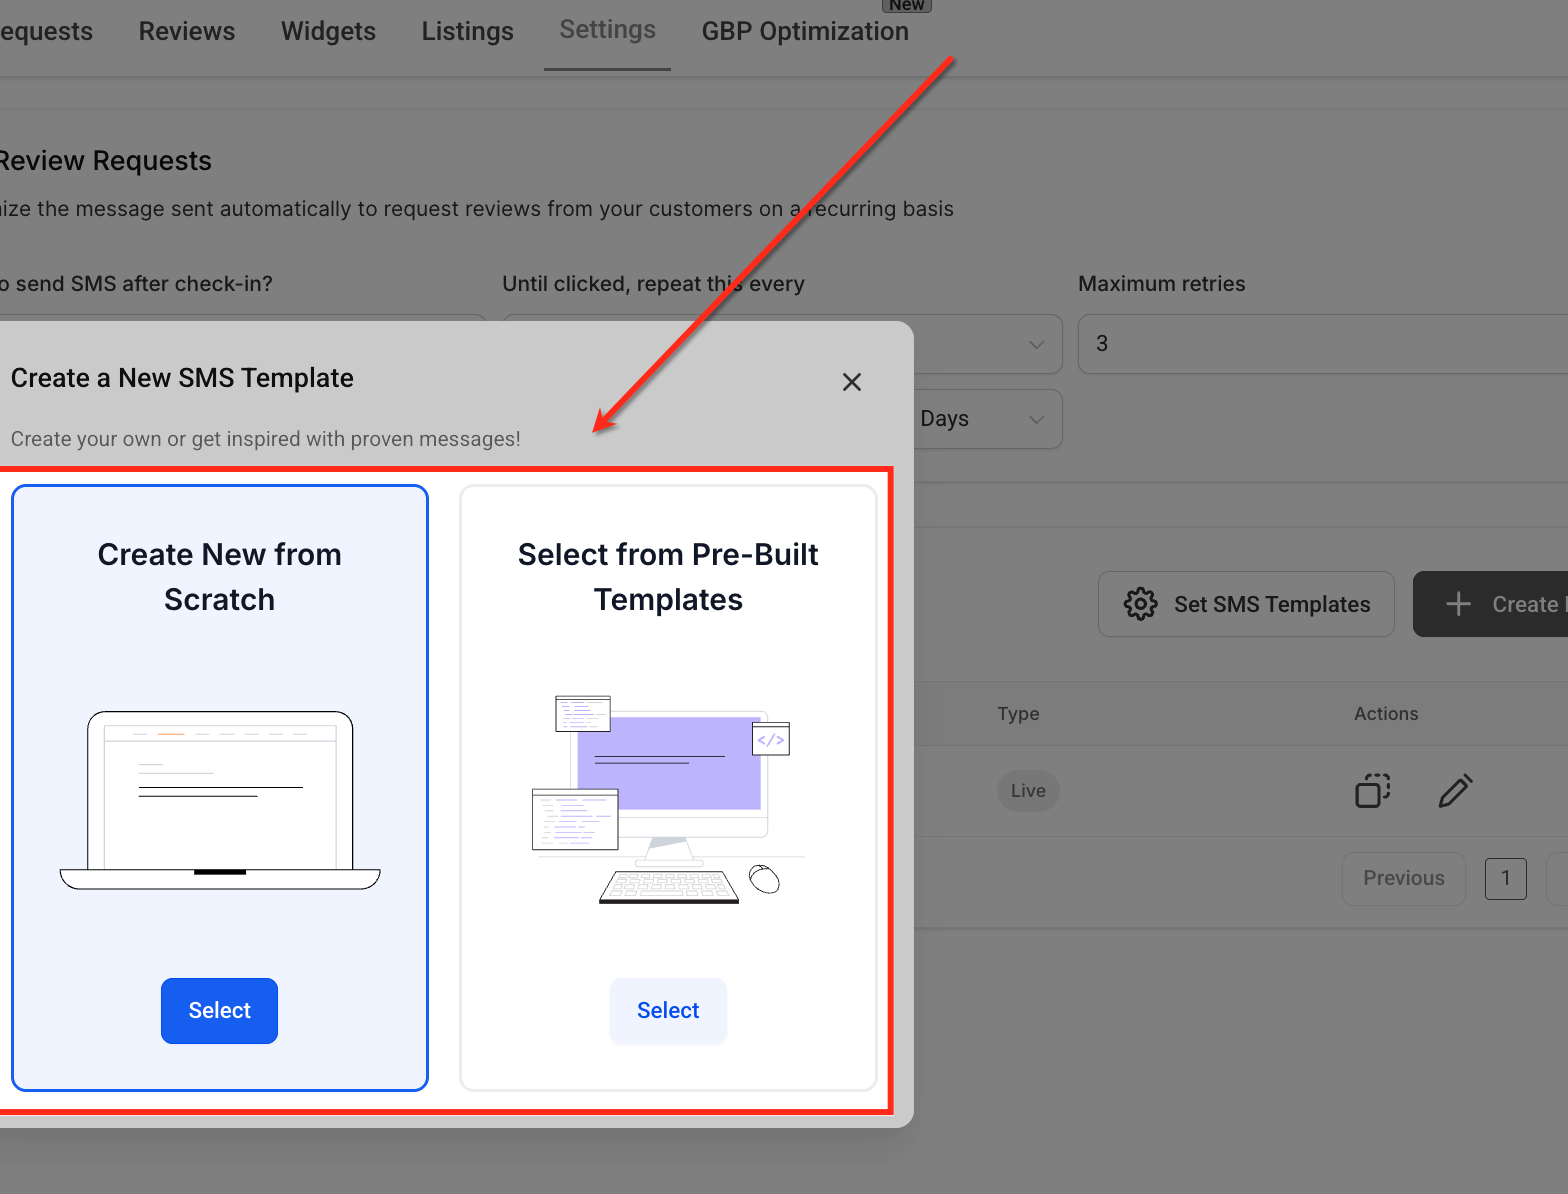
Choose Create New from Scratch to fully customize your message.
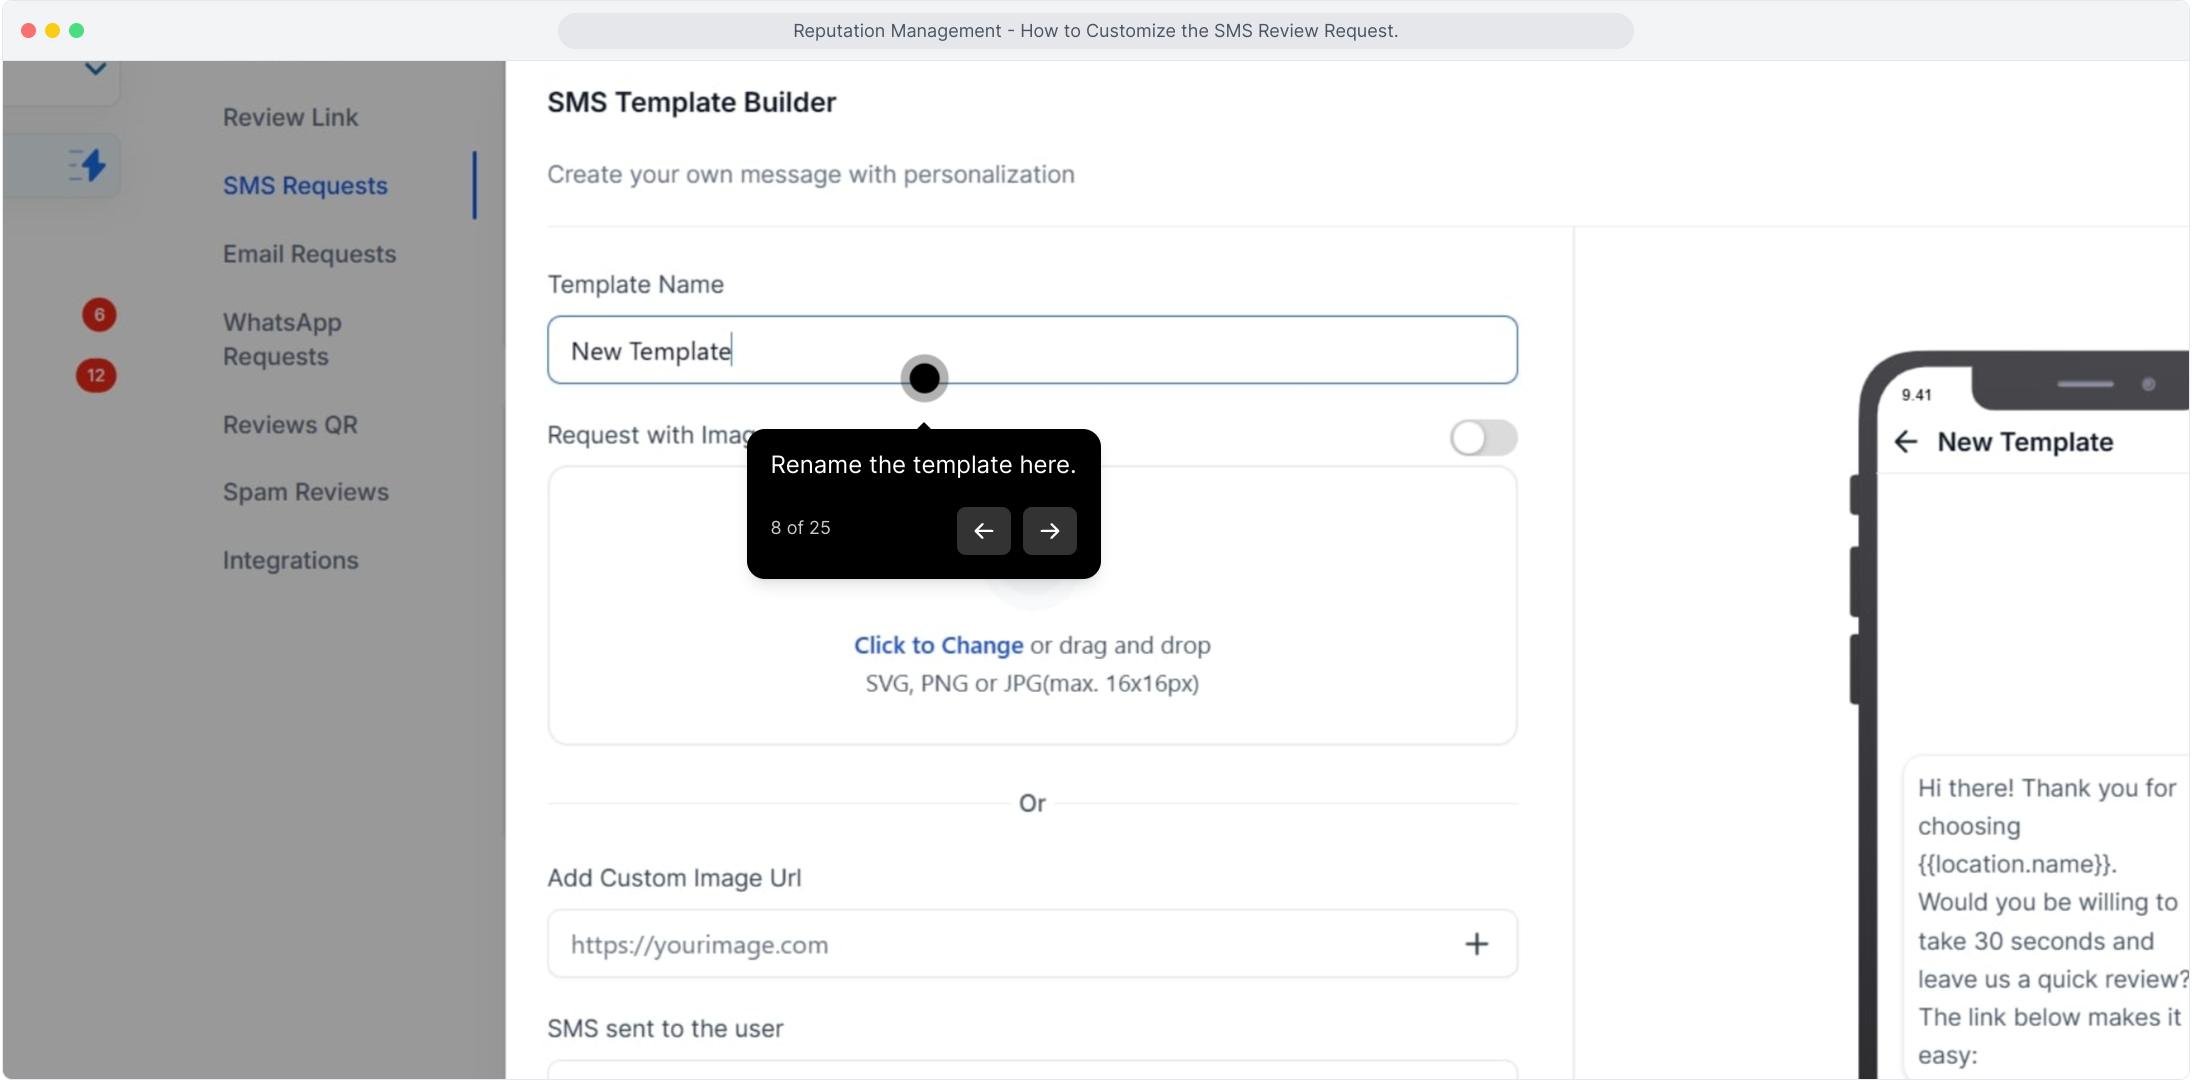
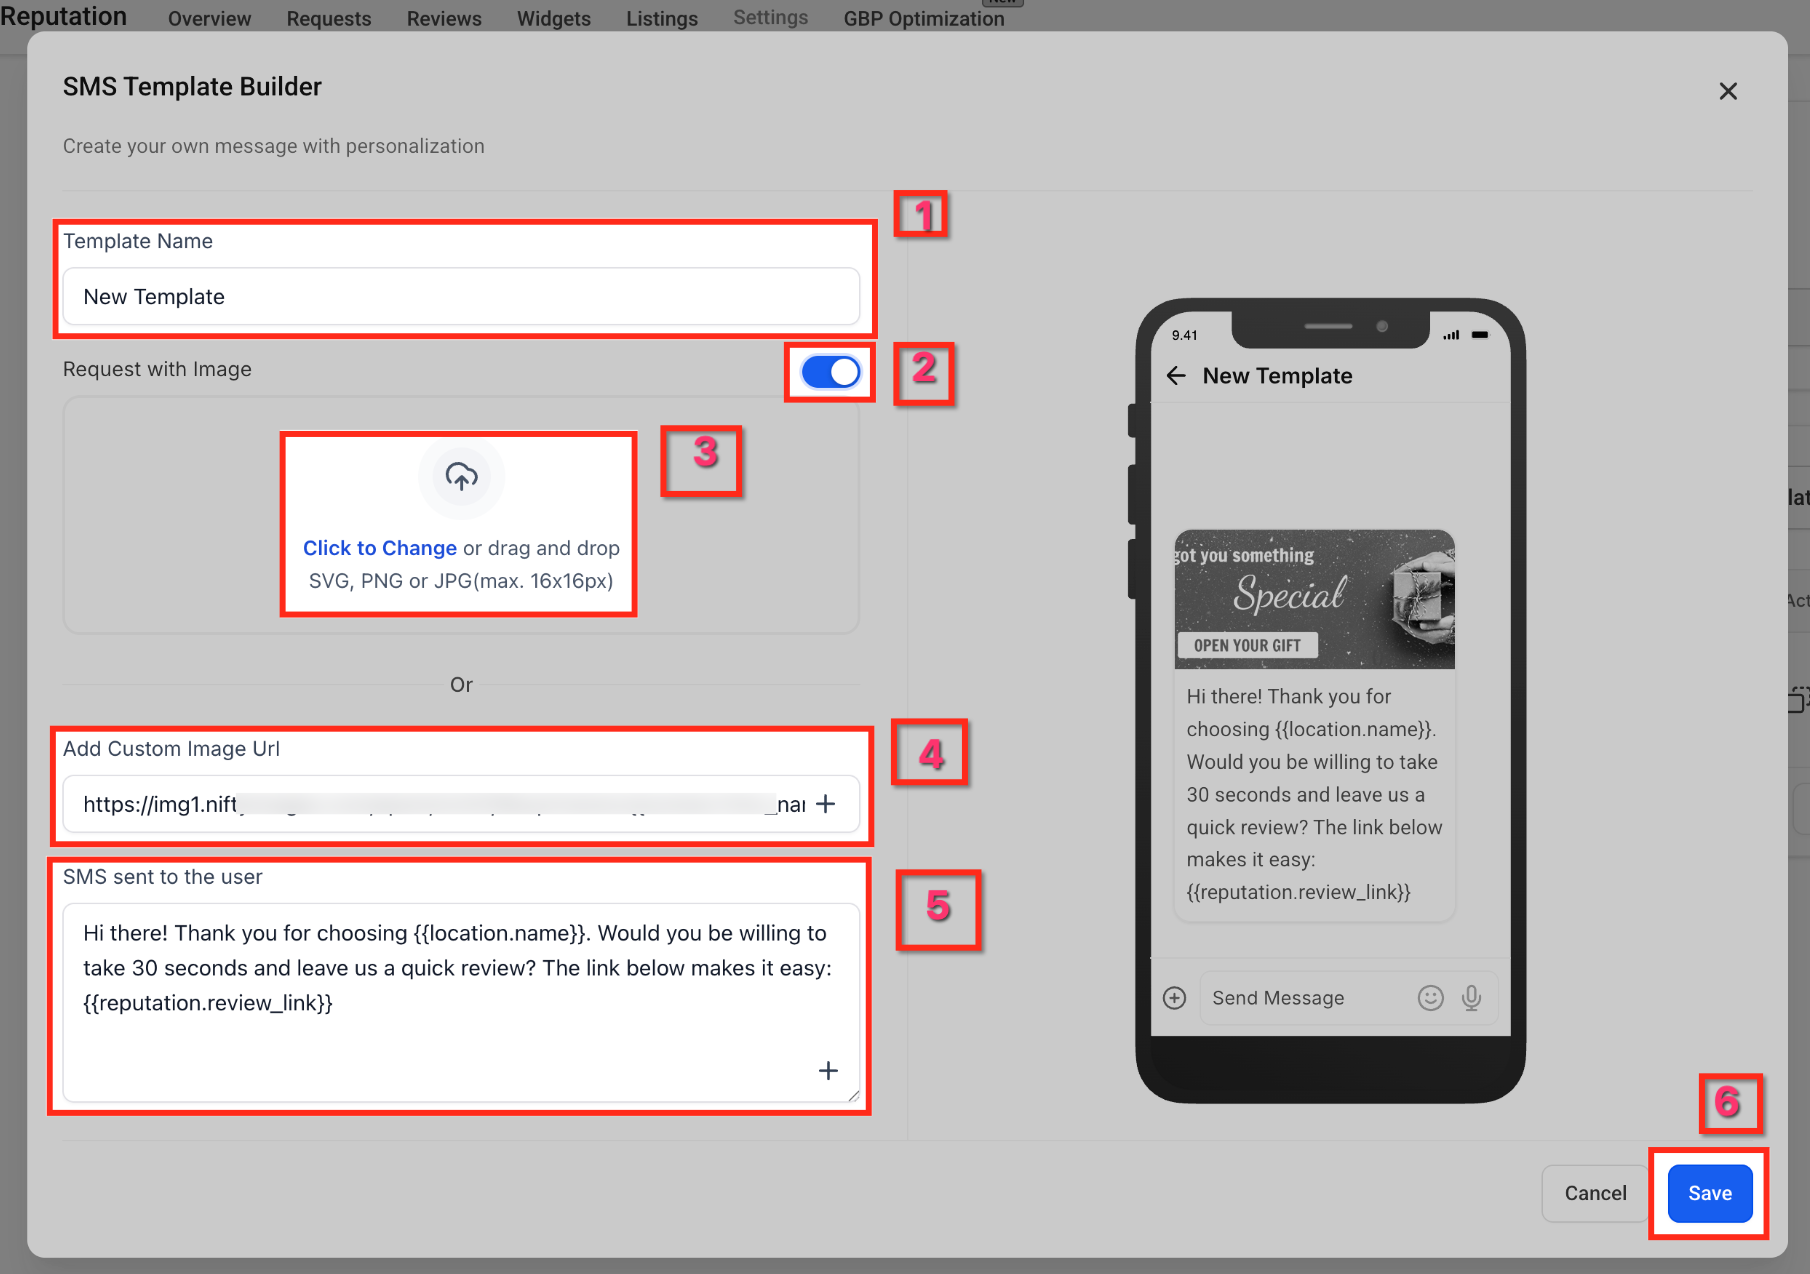
In the SMS Template Builder, enter a clear, descriptive Template Name so you can easily identify it later.
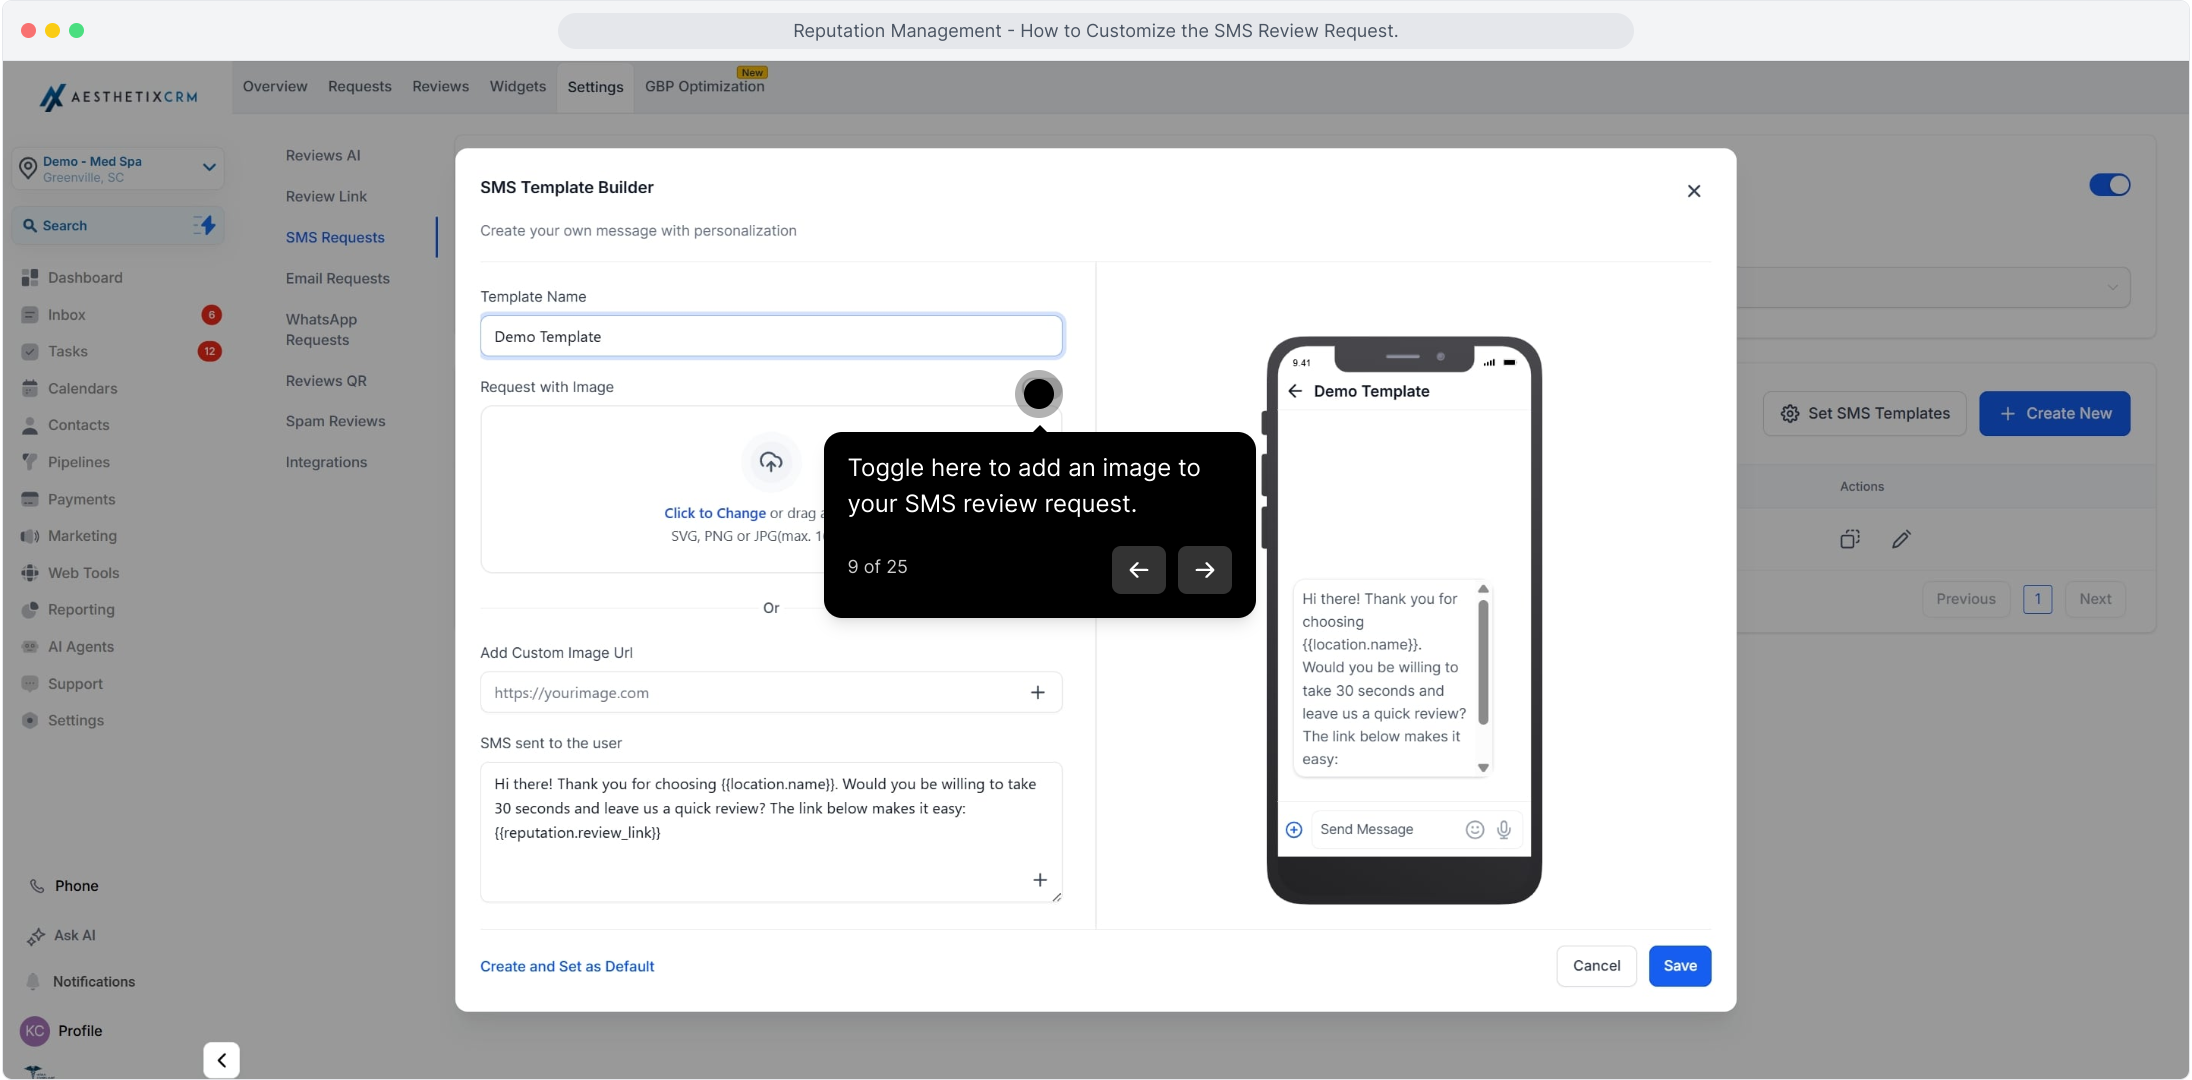
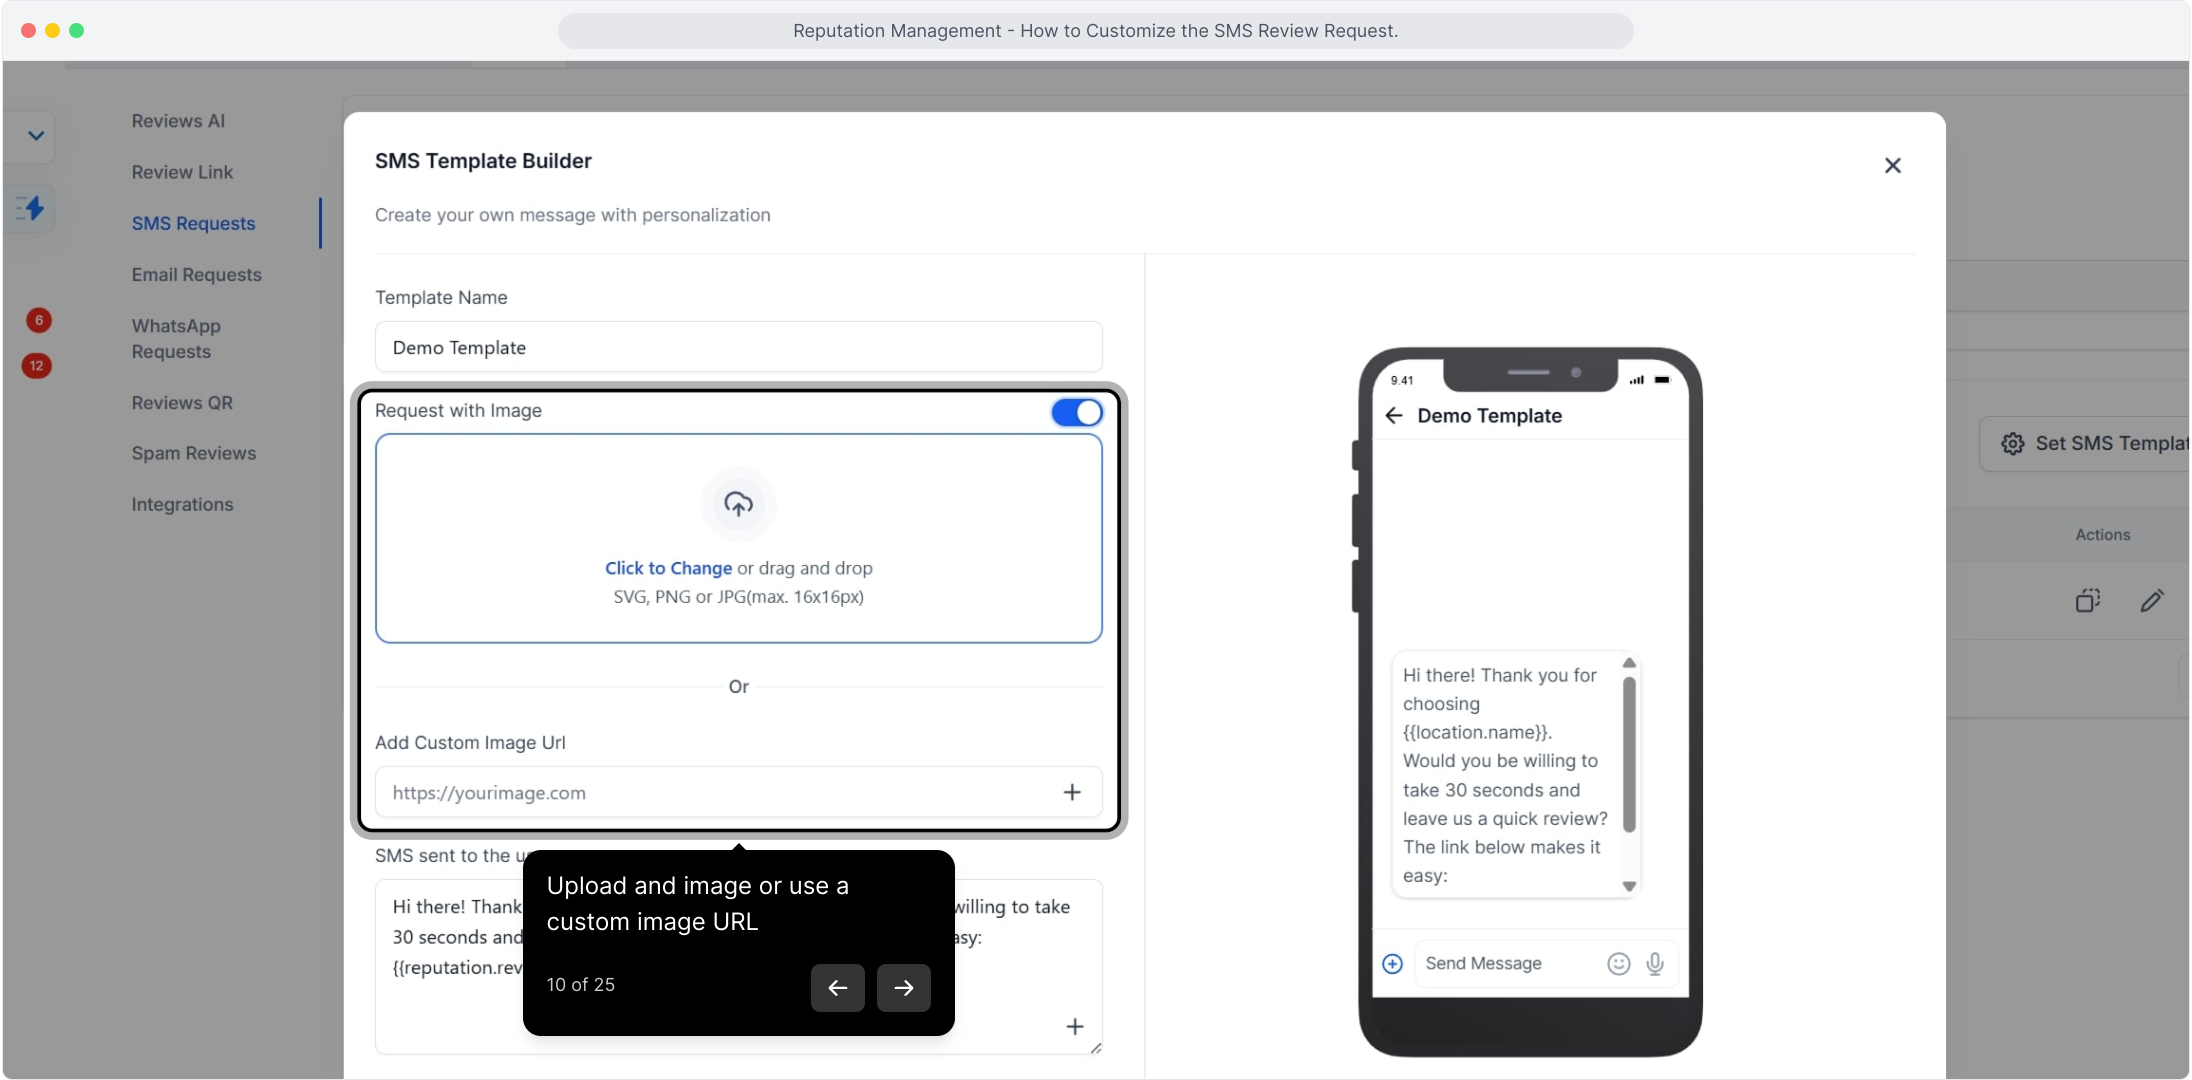
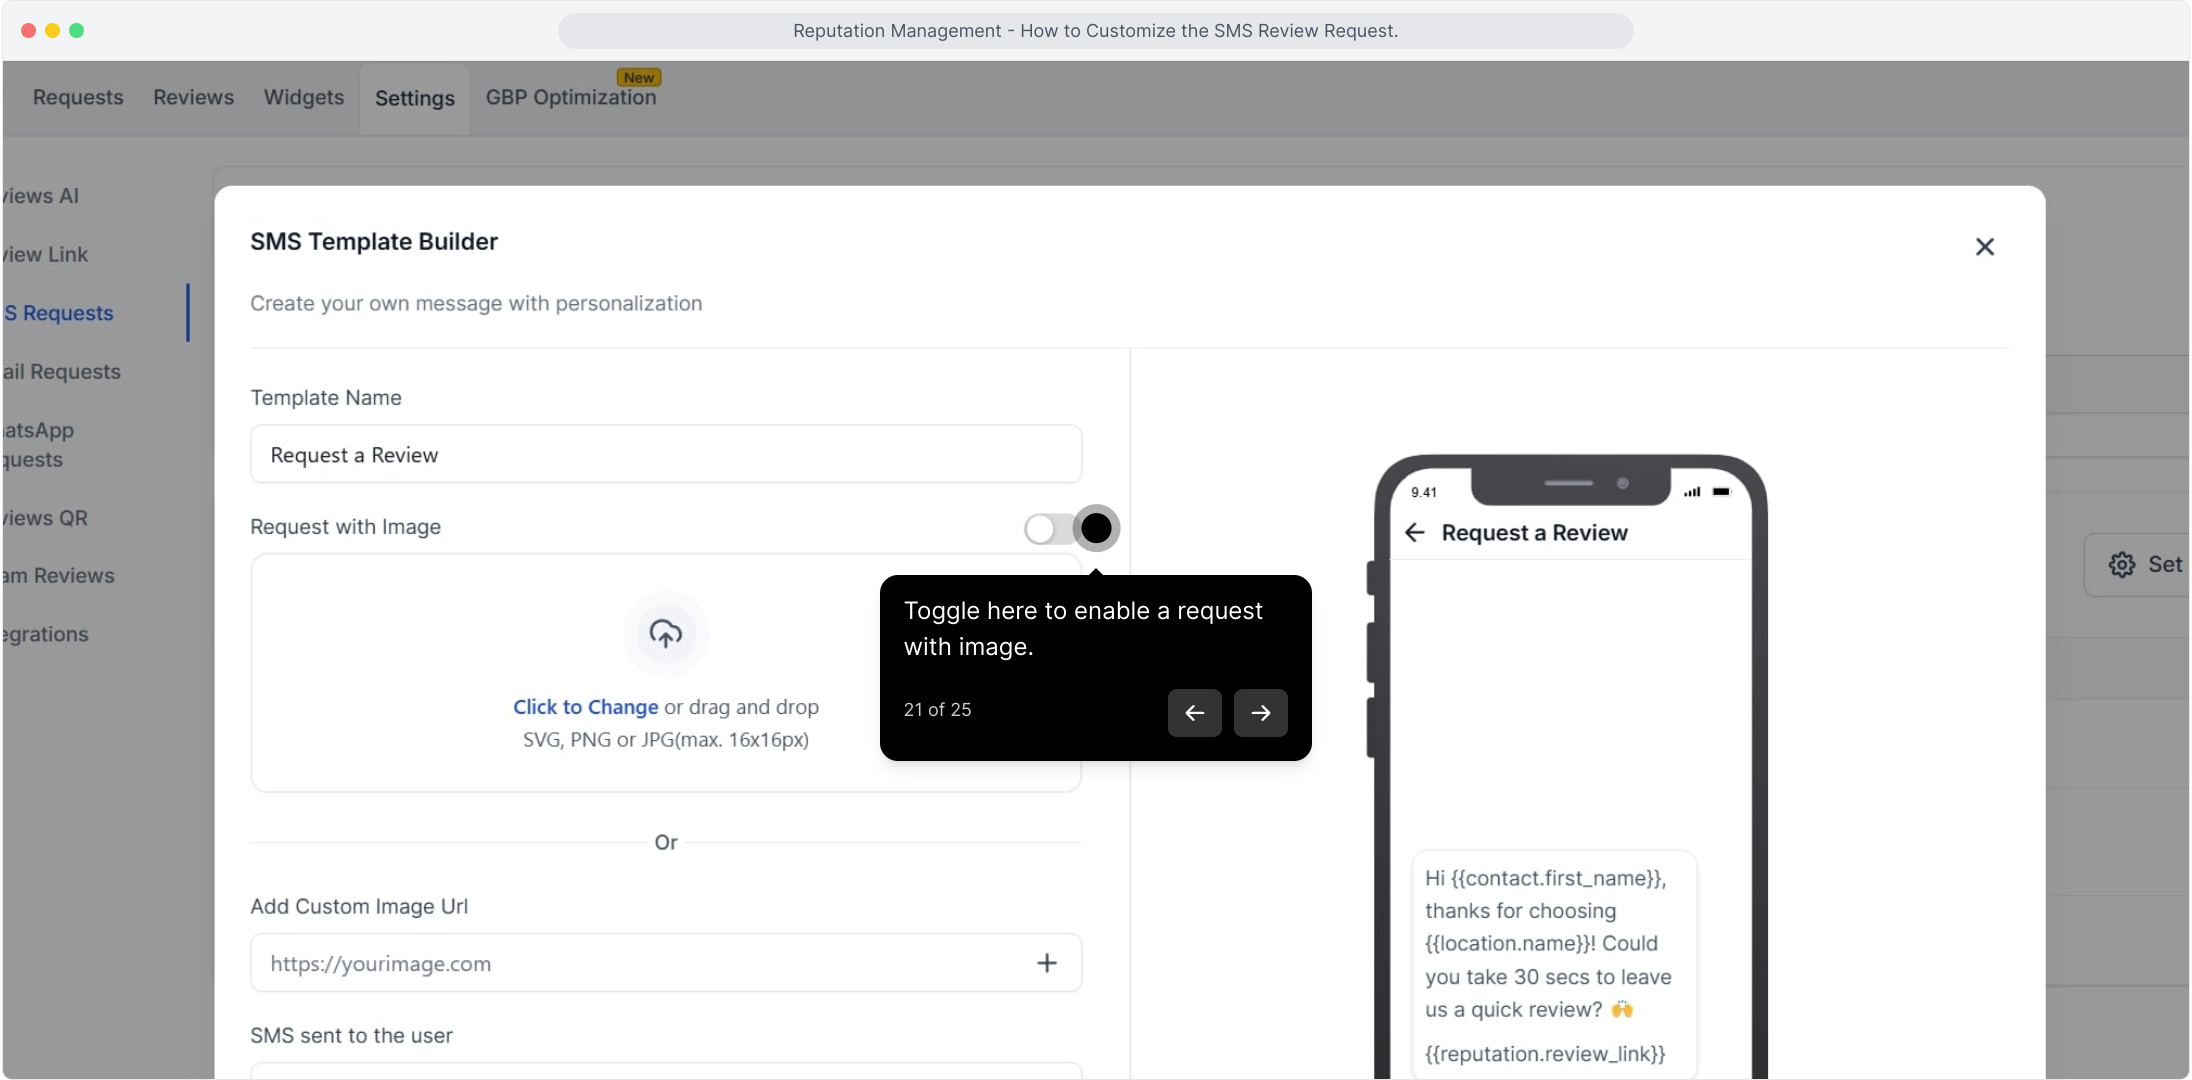
Toggle Request with Image on if you want to include an image in your message.
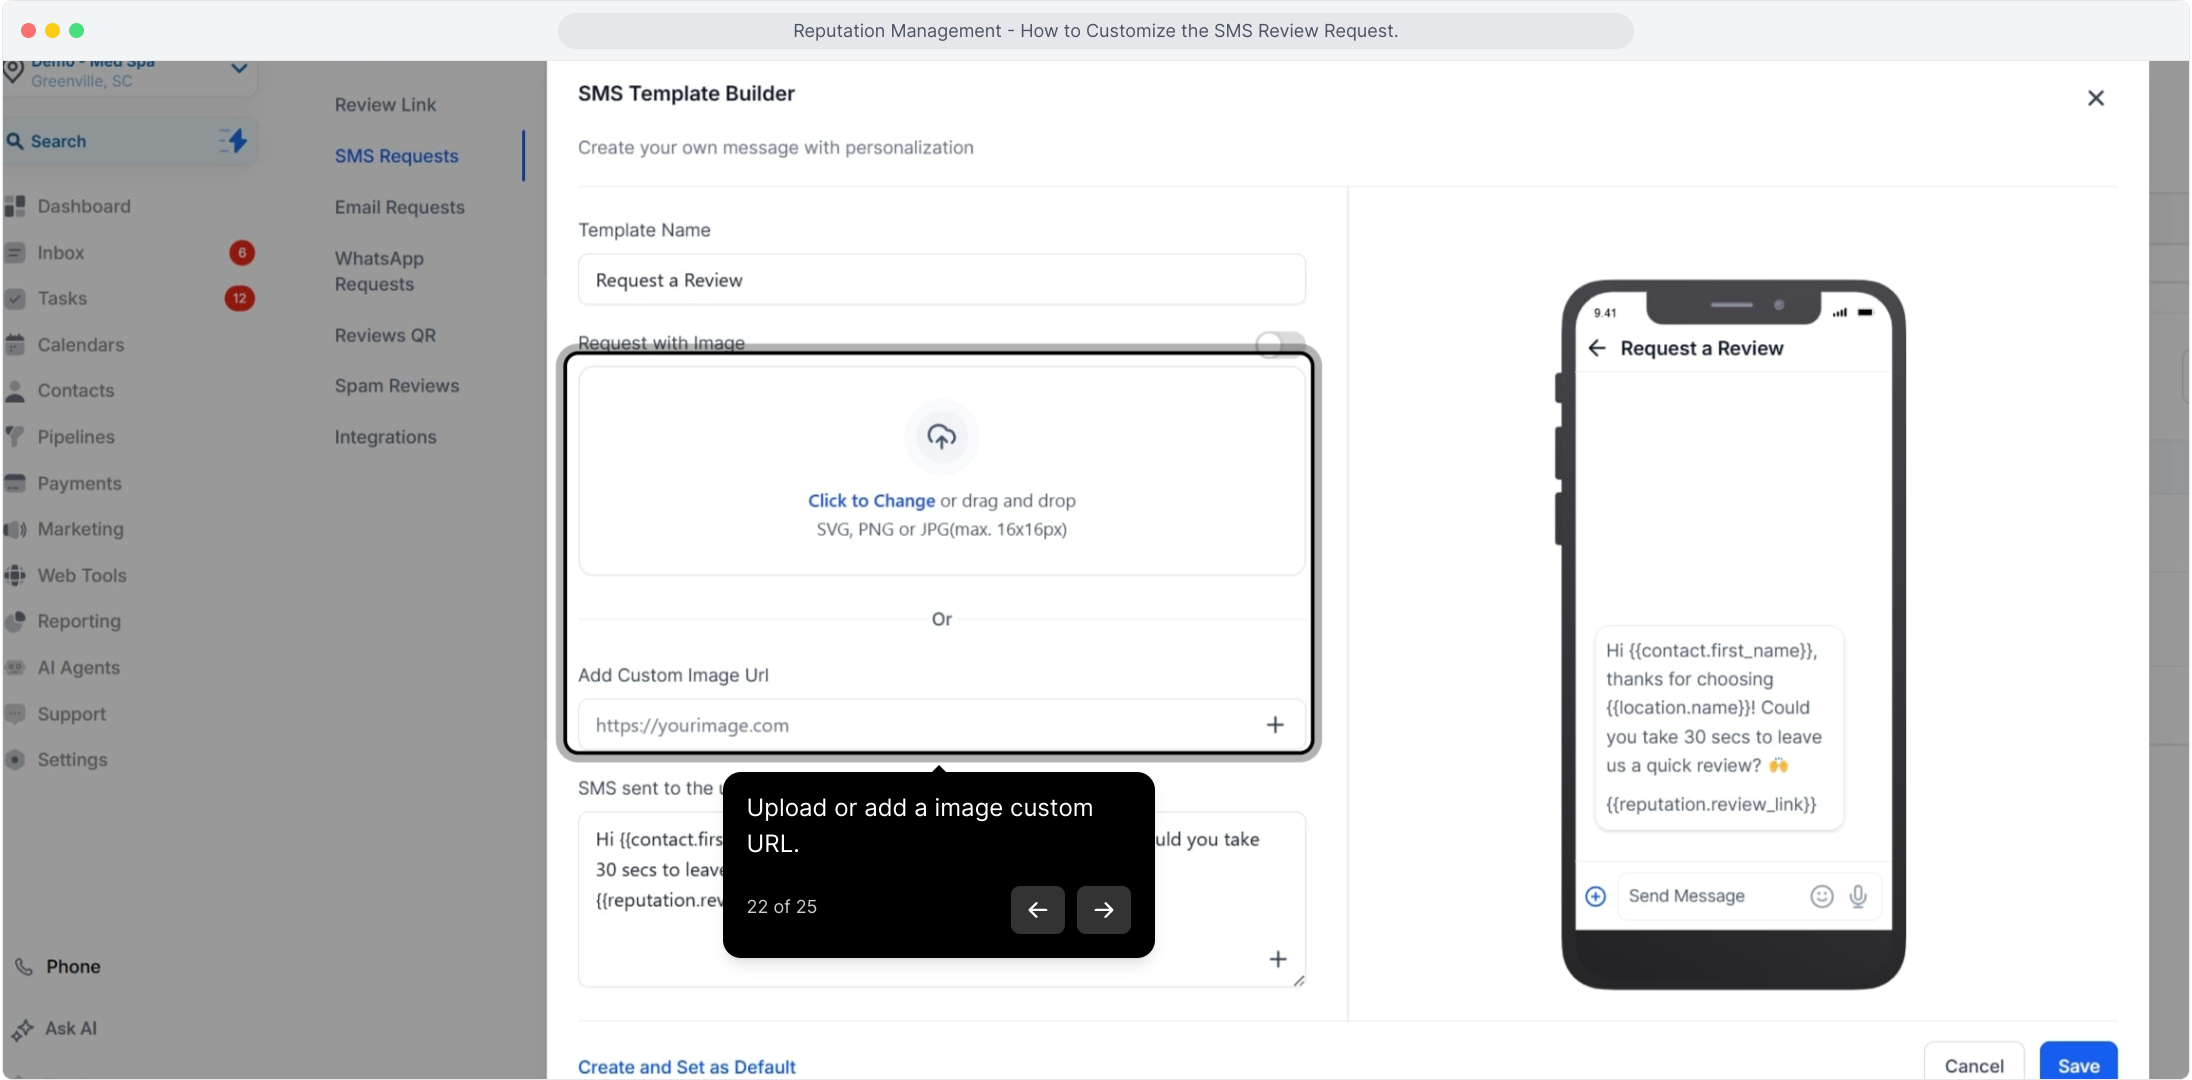
Upload an image (SVG, PNG, or JPG) or paste a custom image URL. A dynamic image link, one that changes based on patient-specific data, lets you personalize the visual for each recipient.
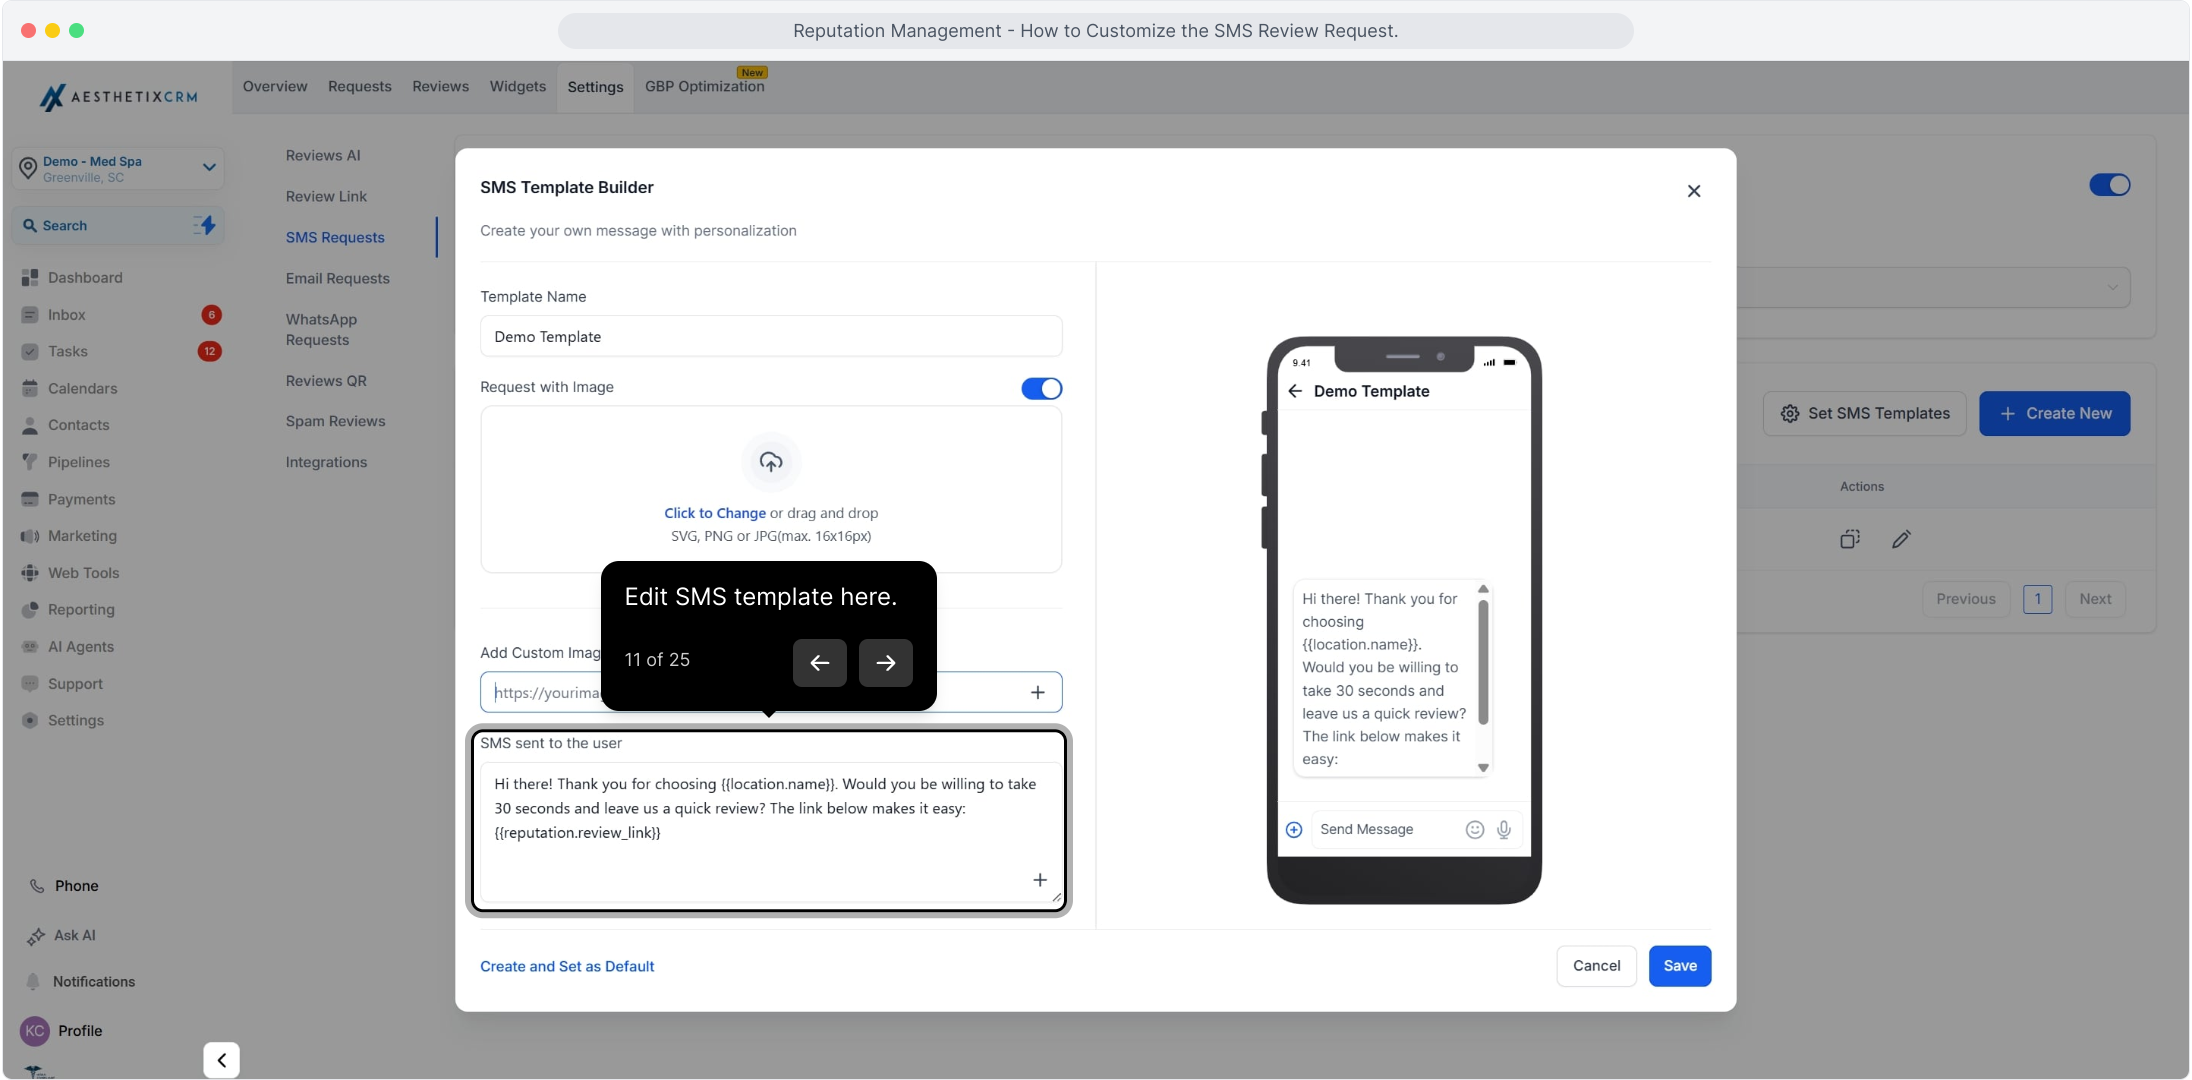
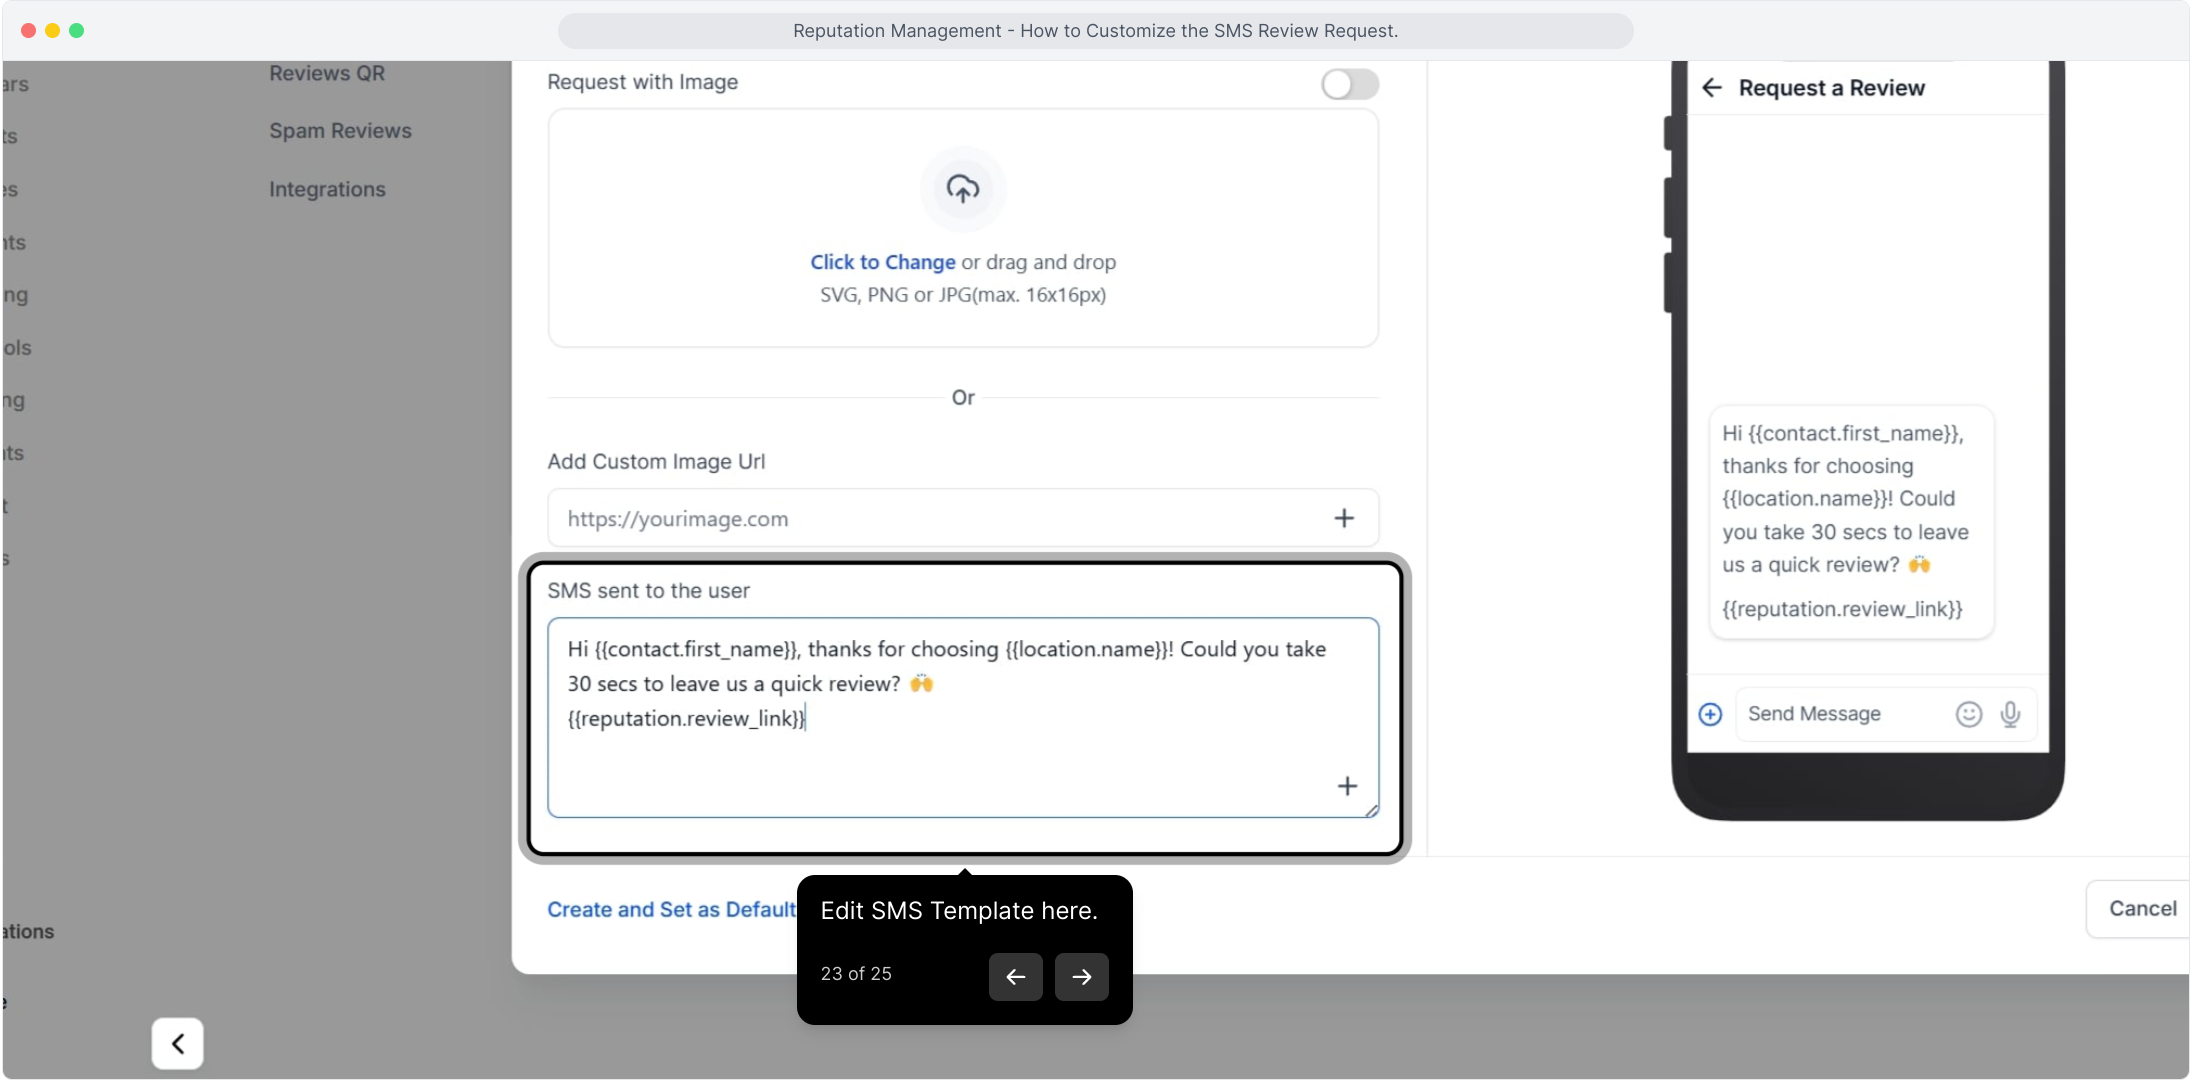
Write your message. Insert the review-link token {{reputation.review_link}} so each patient receives your configured review link.
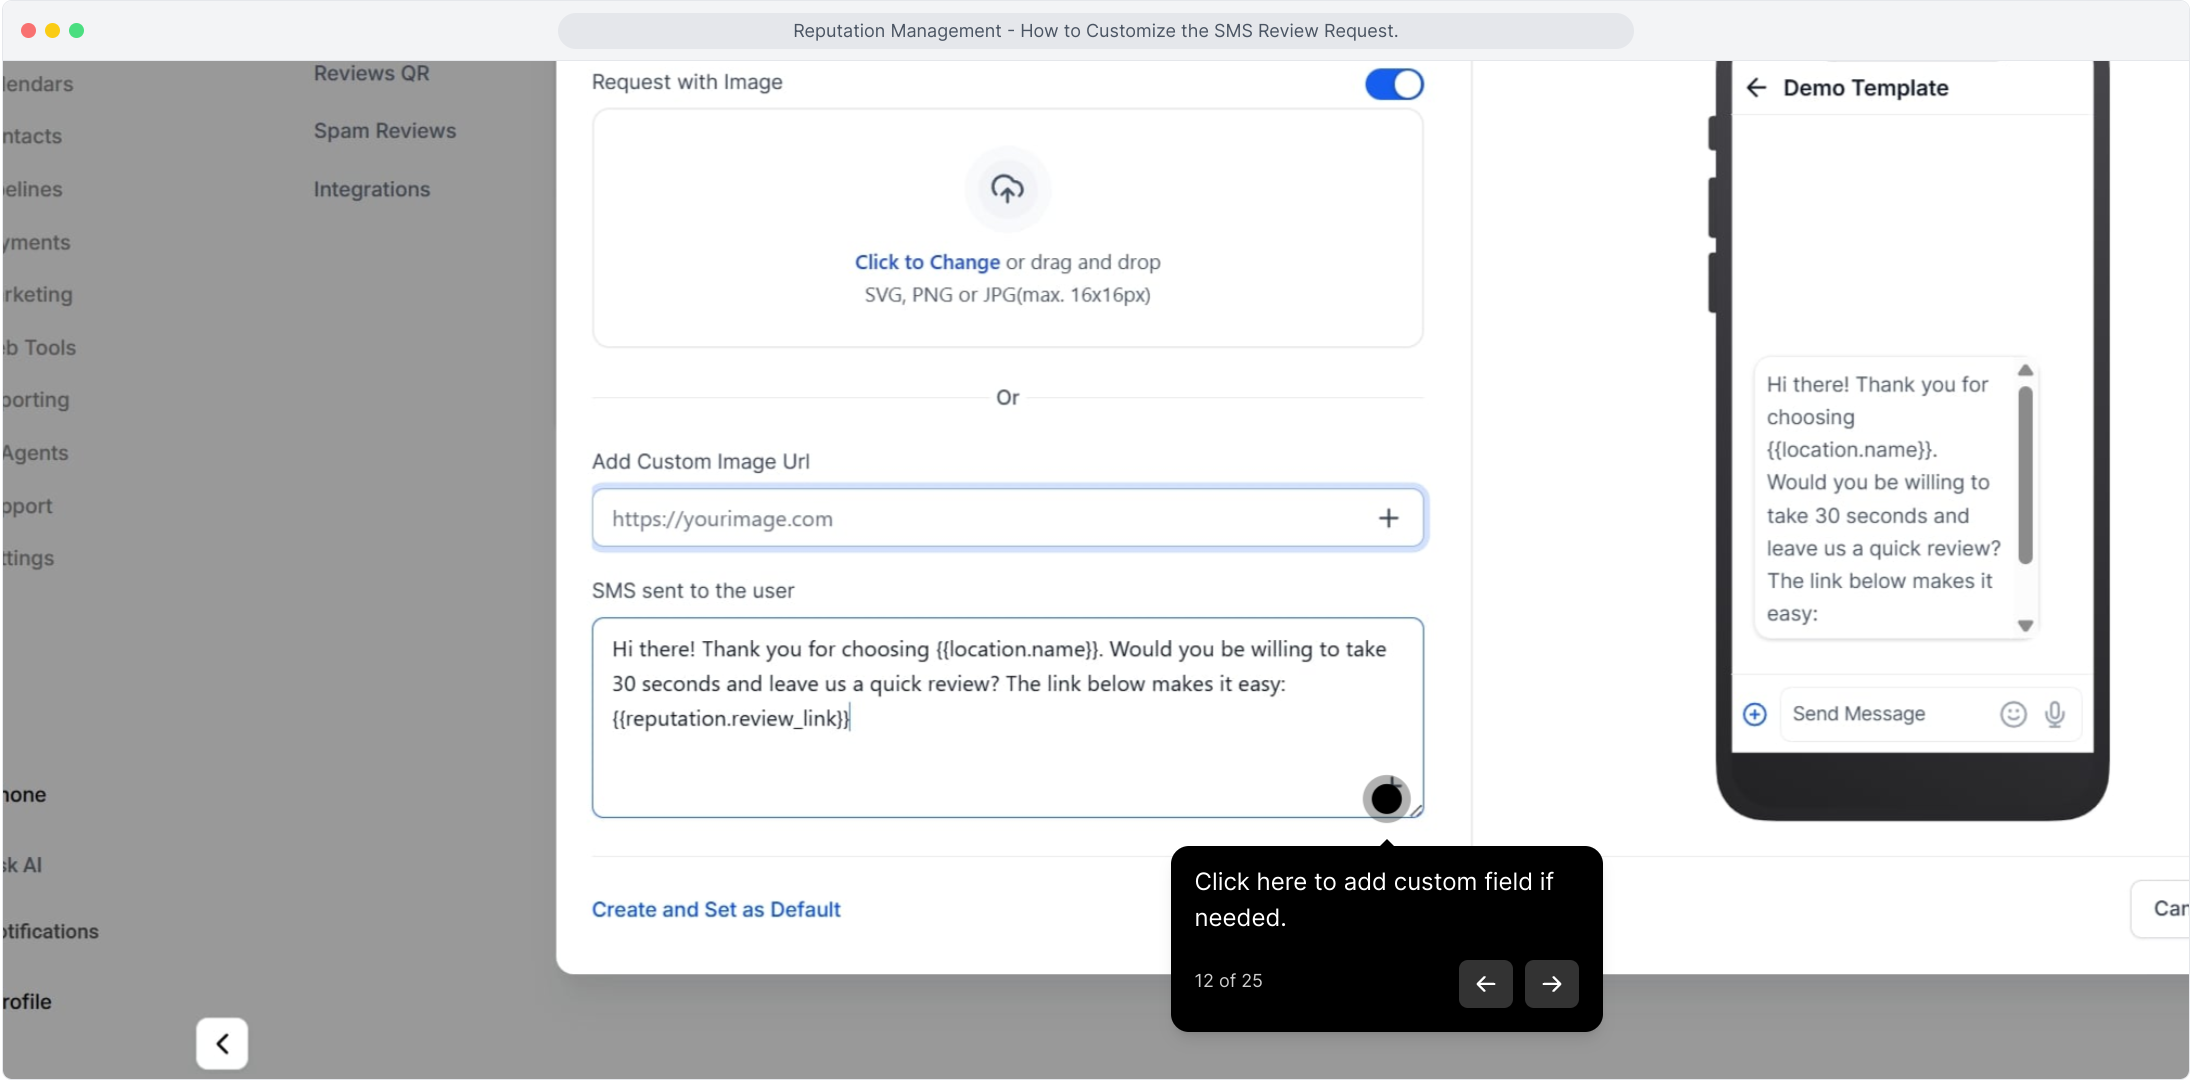
Add a custom field (merge field), such as {{contact.first_name}}, to personalize the text.
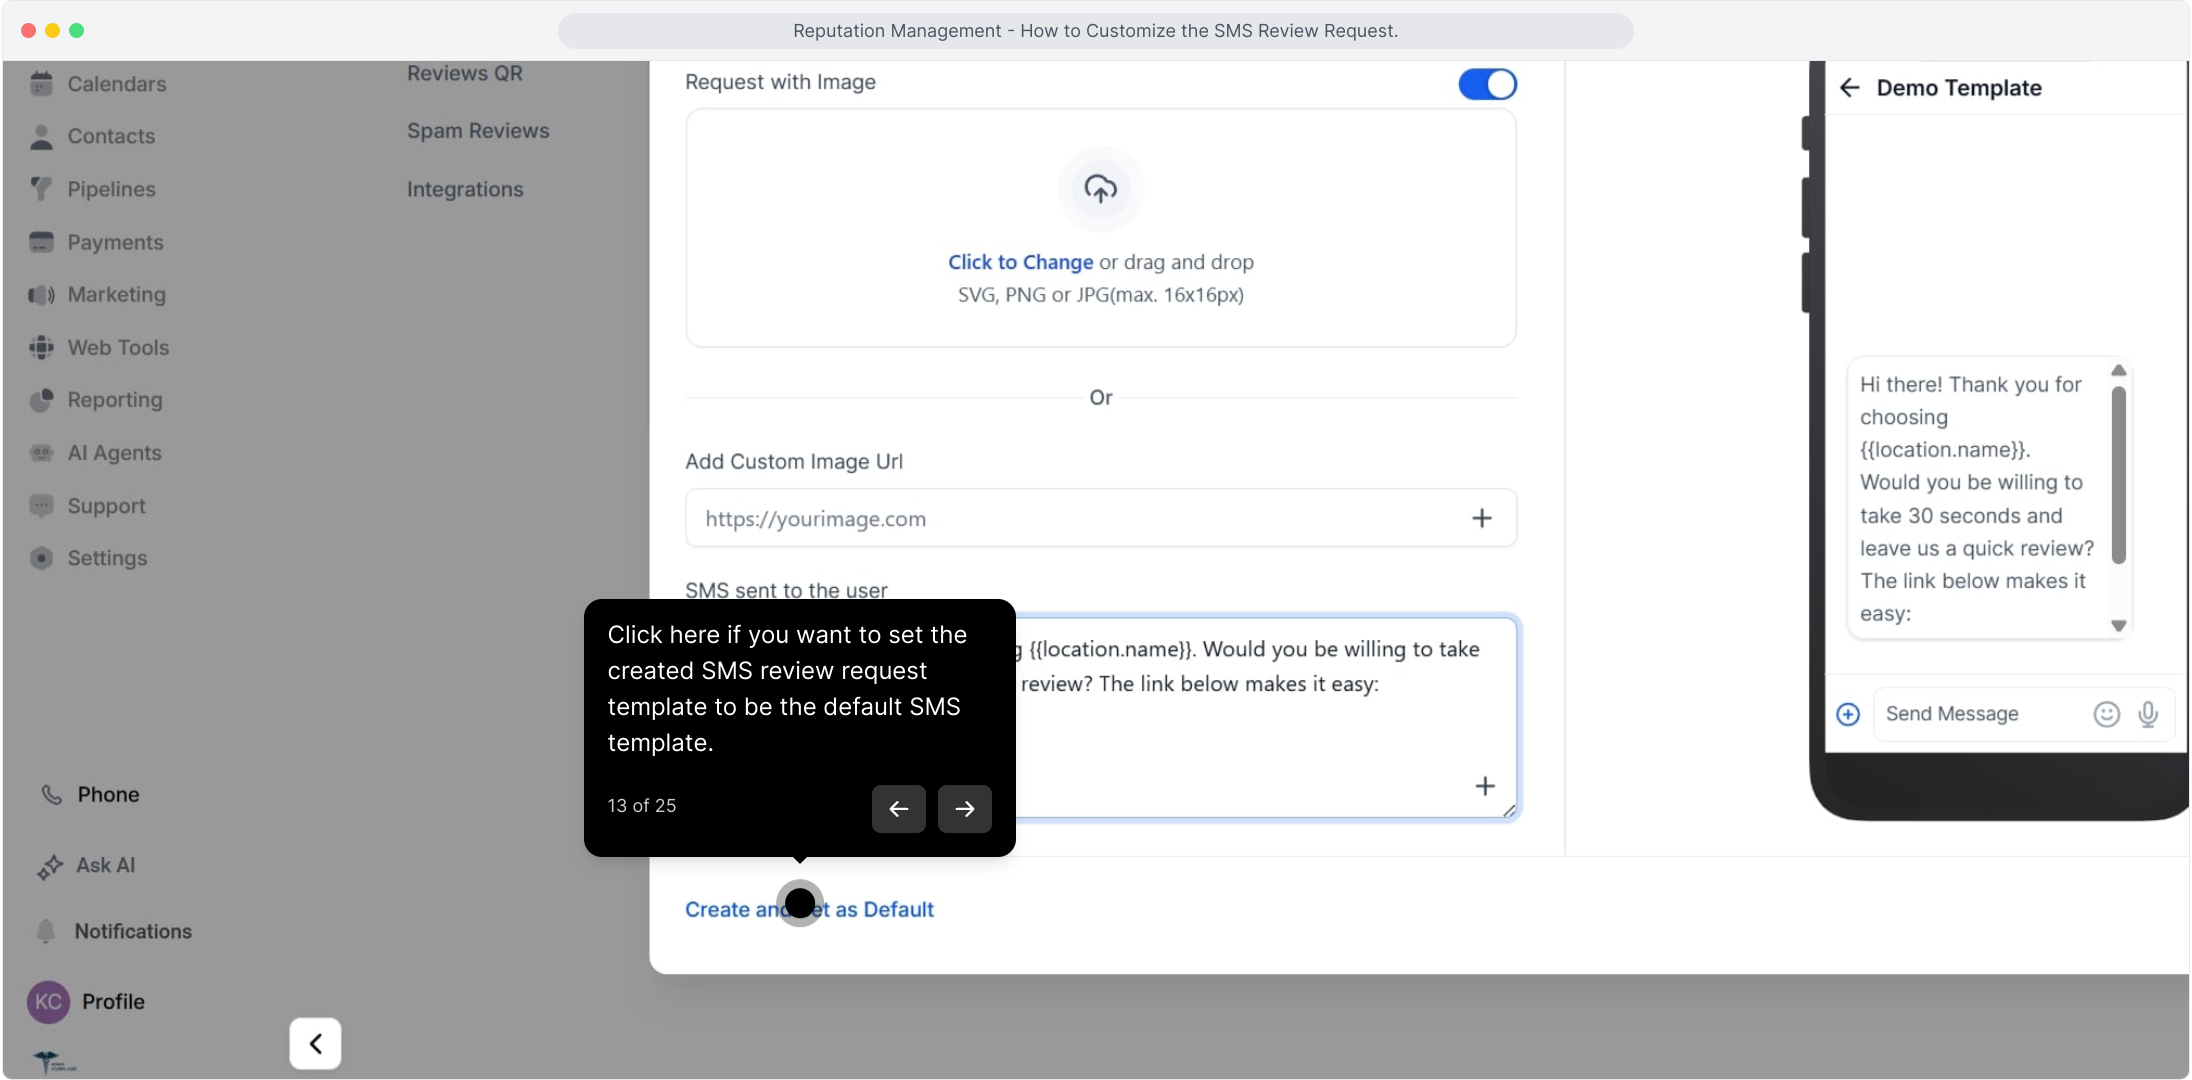
If you'd like this to be the default template, set it as the default here.
Click Save.
Note: If you enable Request with Image, the message may send as MMS and incur different carrier fees. Confirm rates with your messaging provider.
Click Create New.
Click Save.
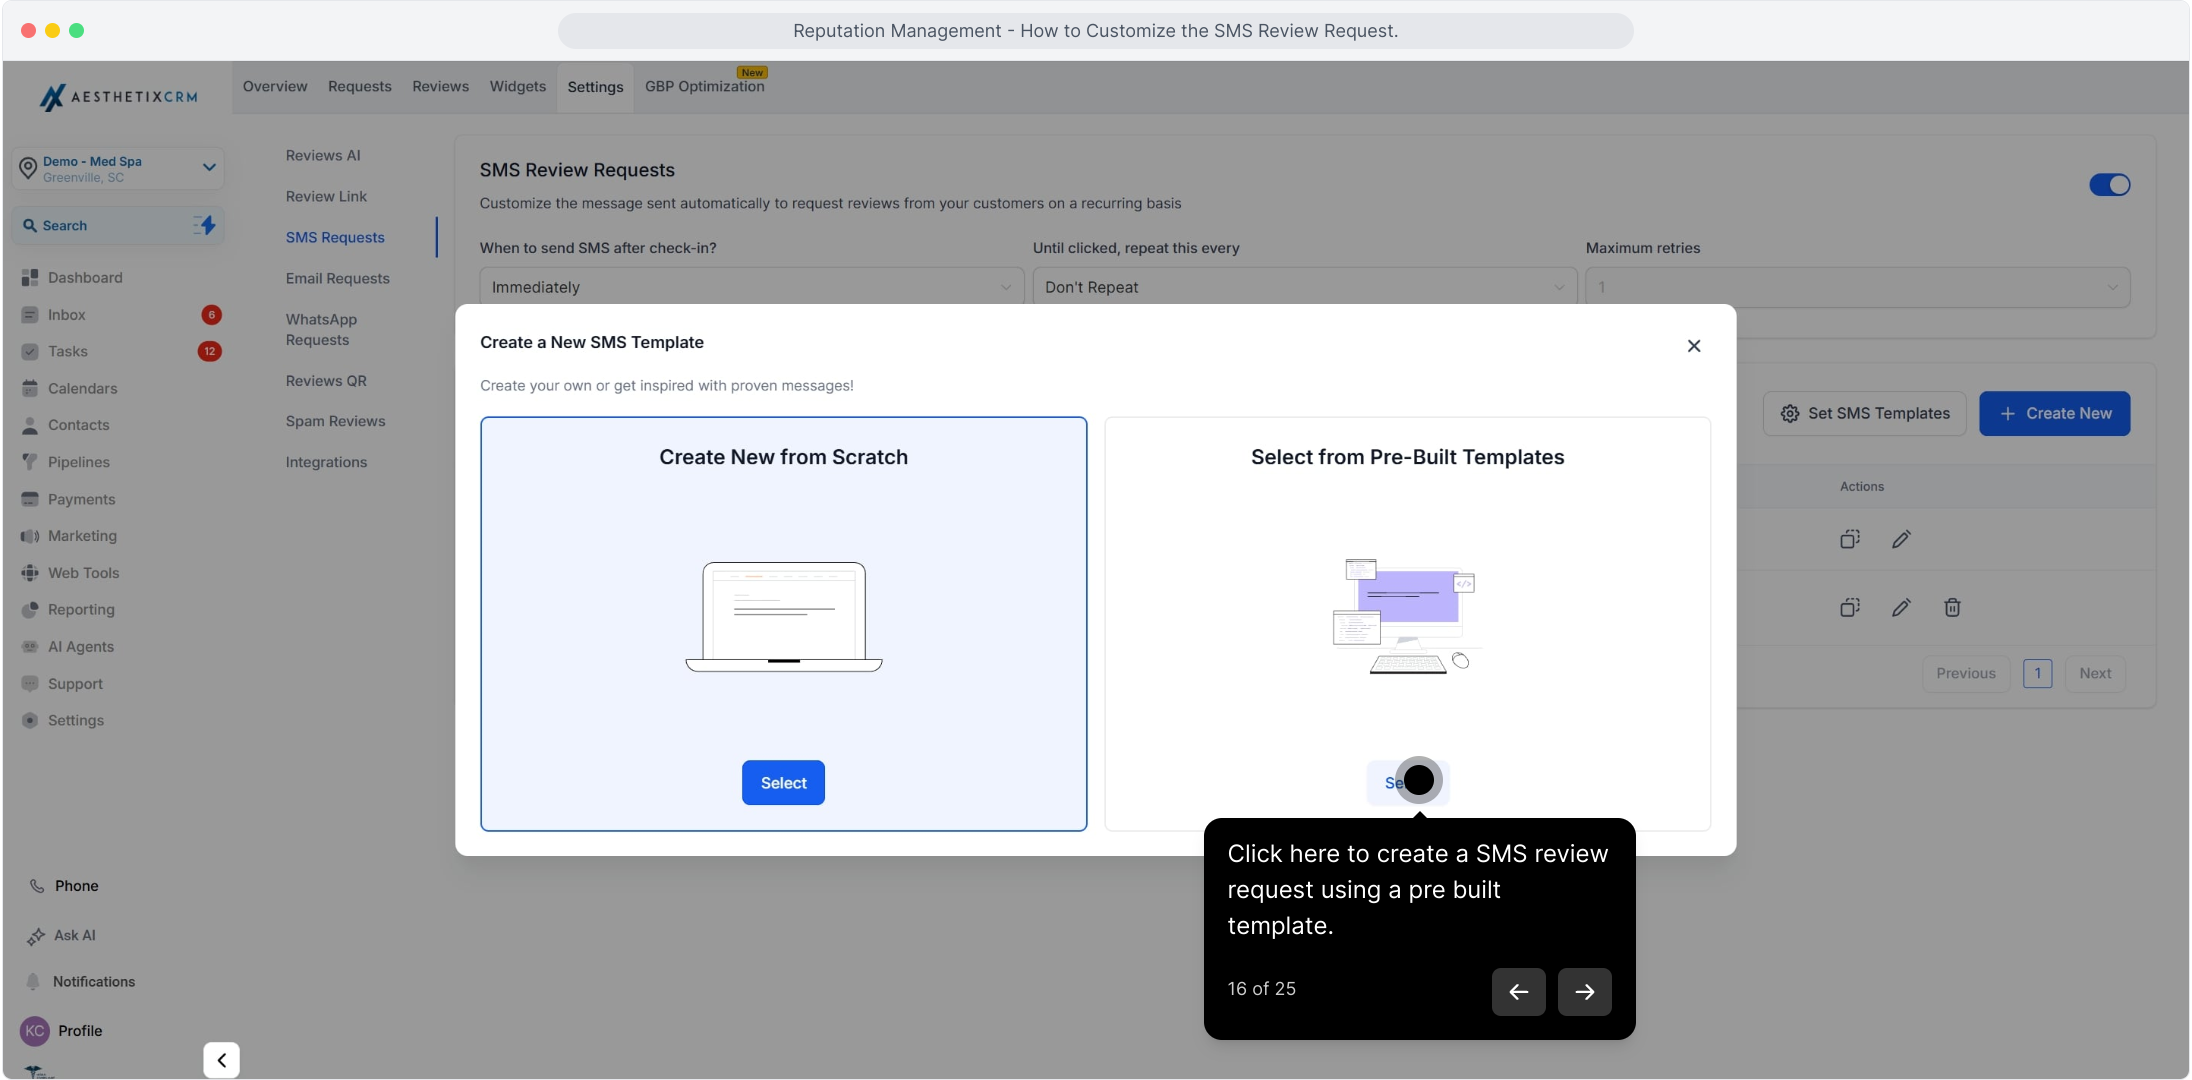
Choose Select from Pre-Built Templates to use an existing design as your starting point.
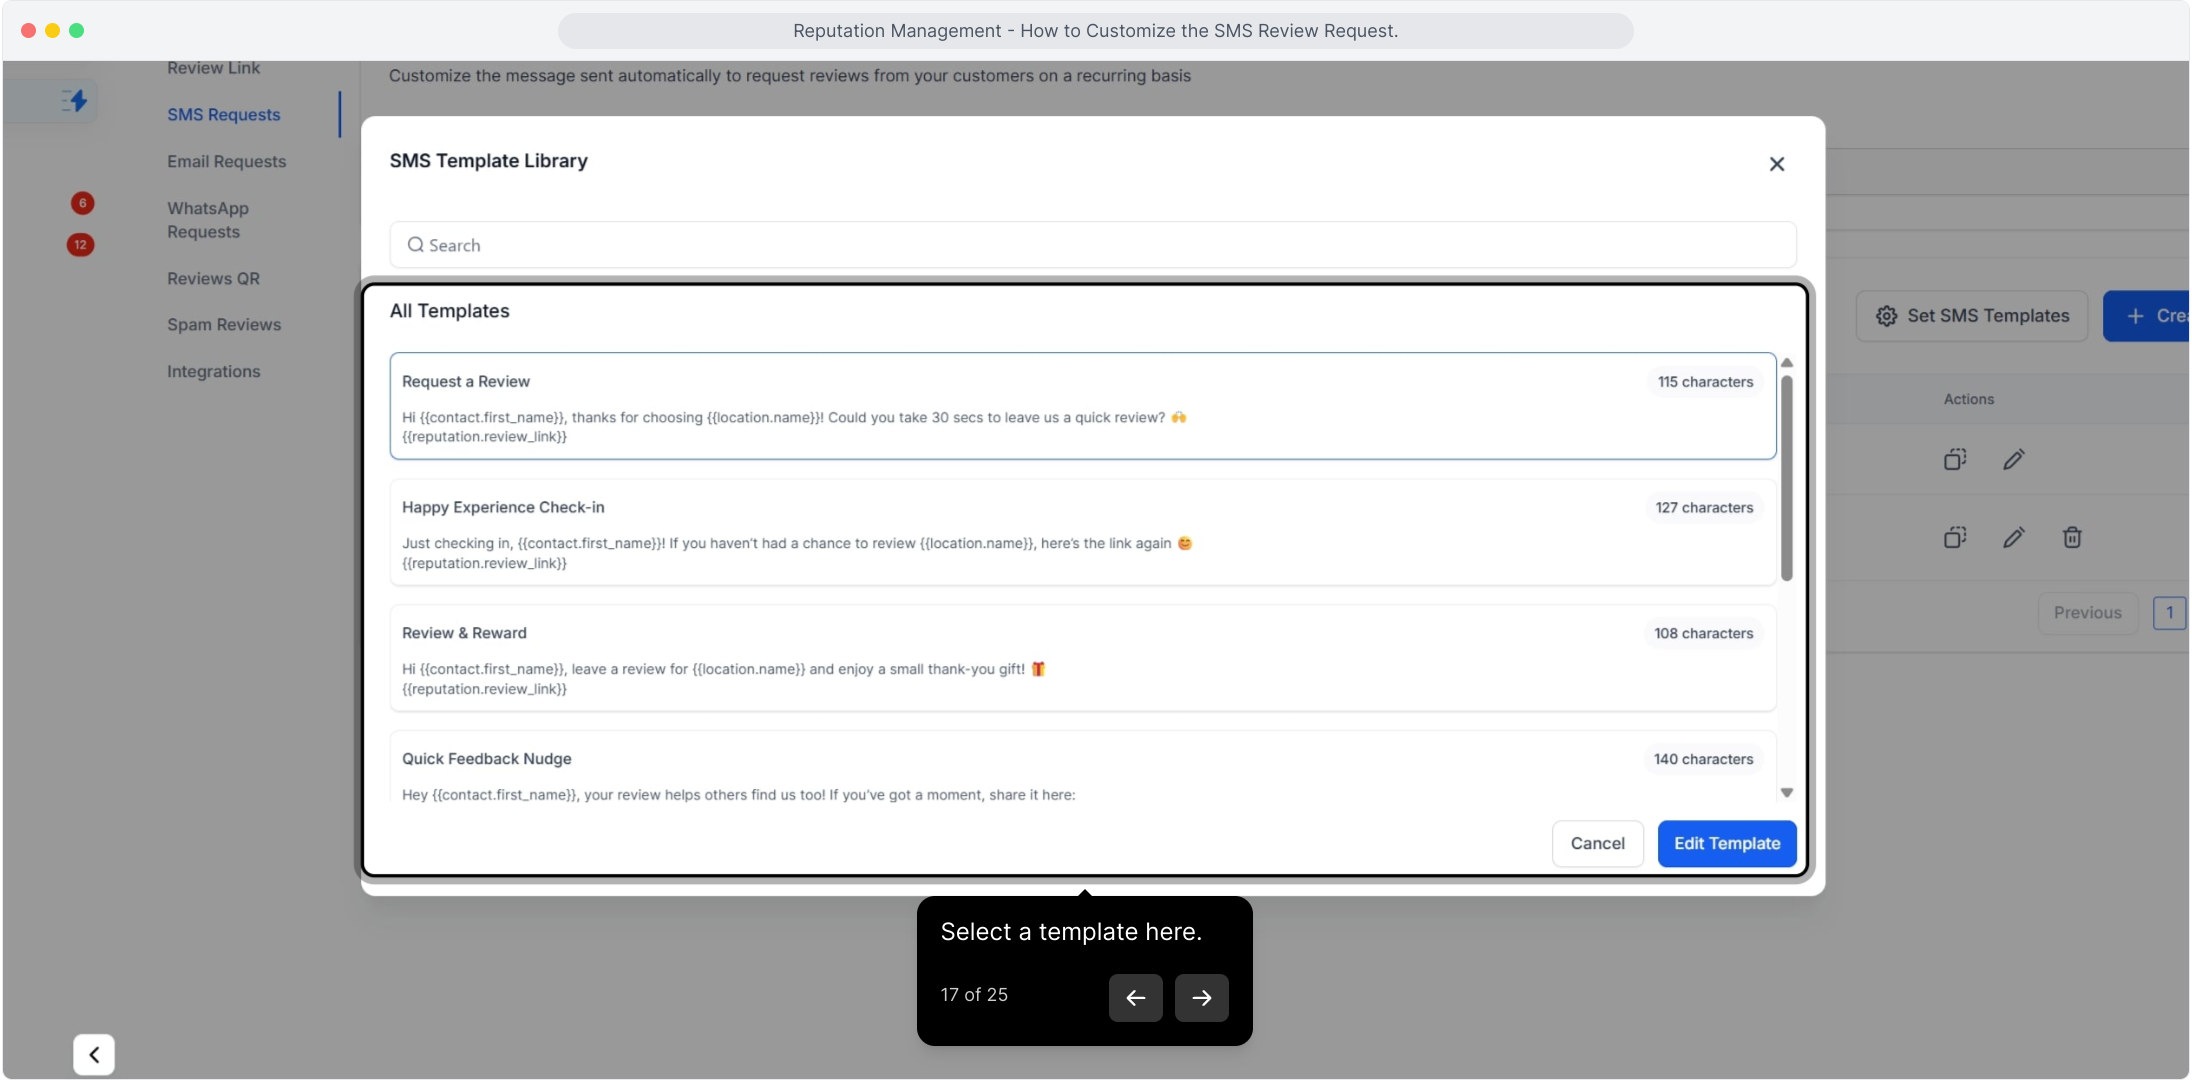
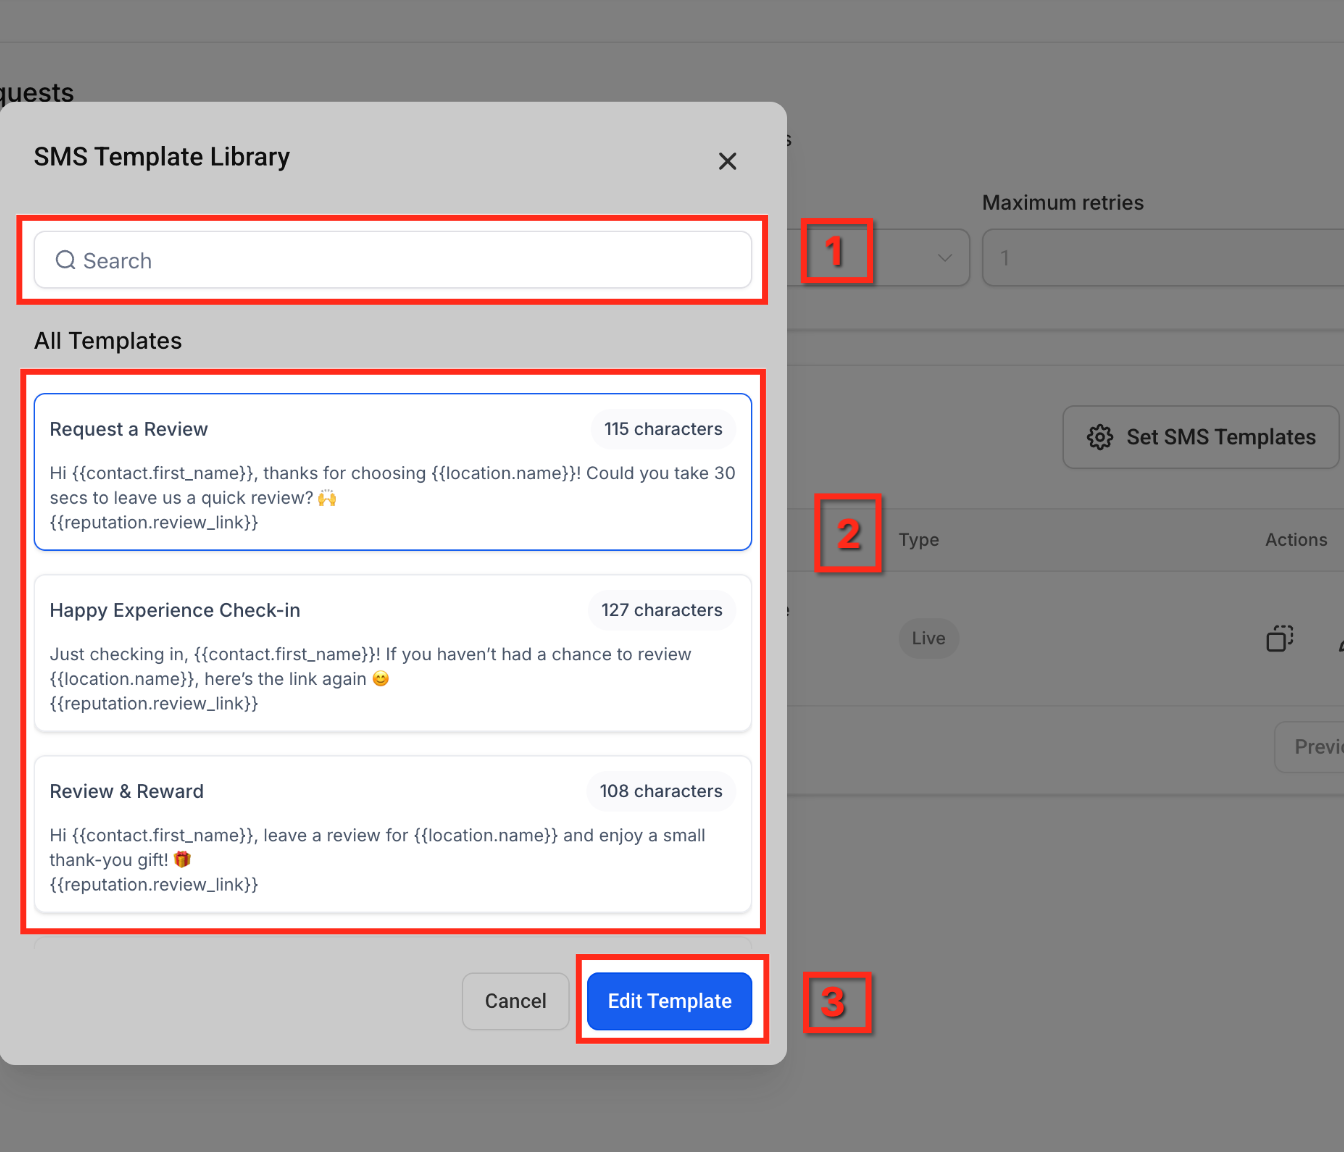
In the SMS Template Library, select a ready-made template, for example, Request a Review (note the visible character count for reference).
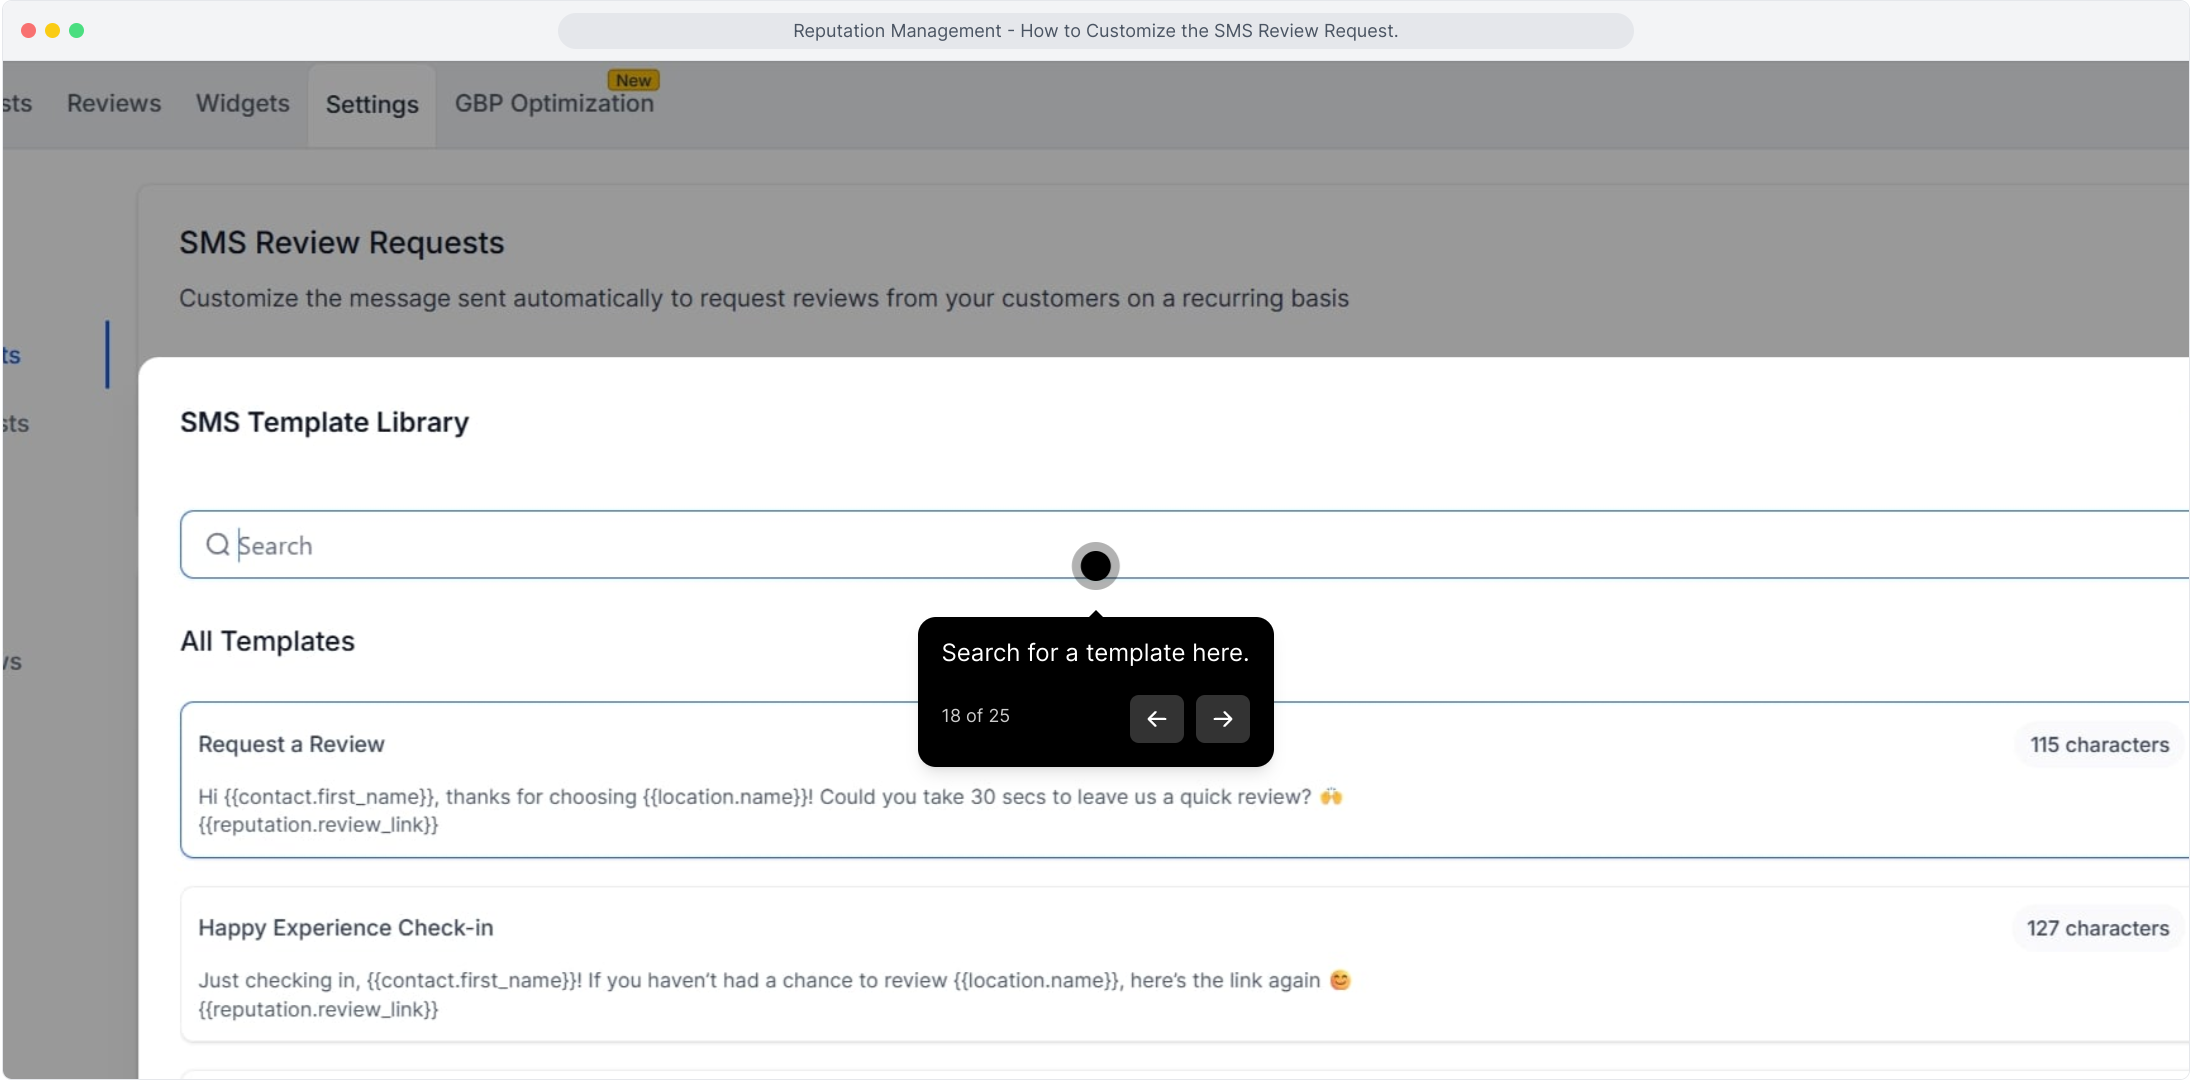
Use the search bar to quickly find a template by name or keyword.
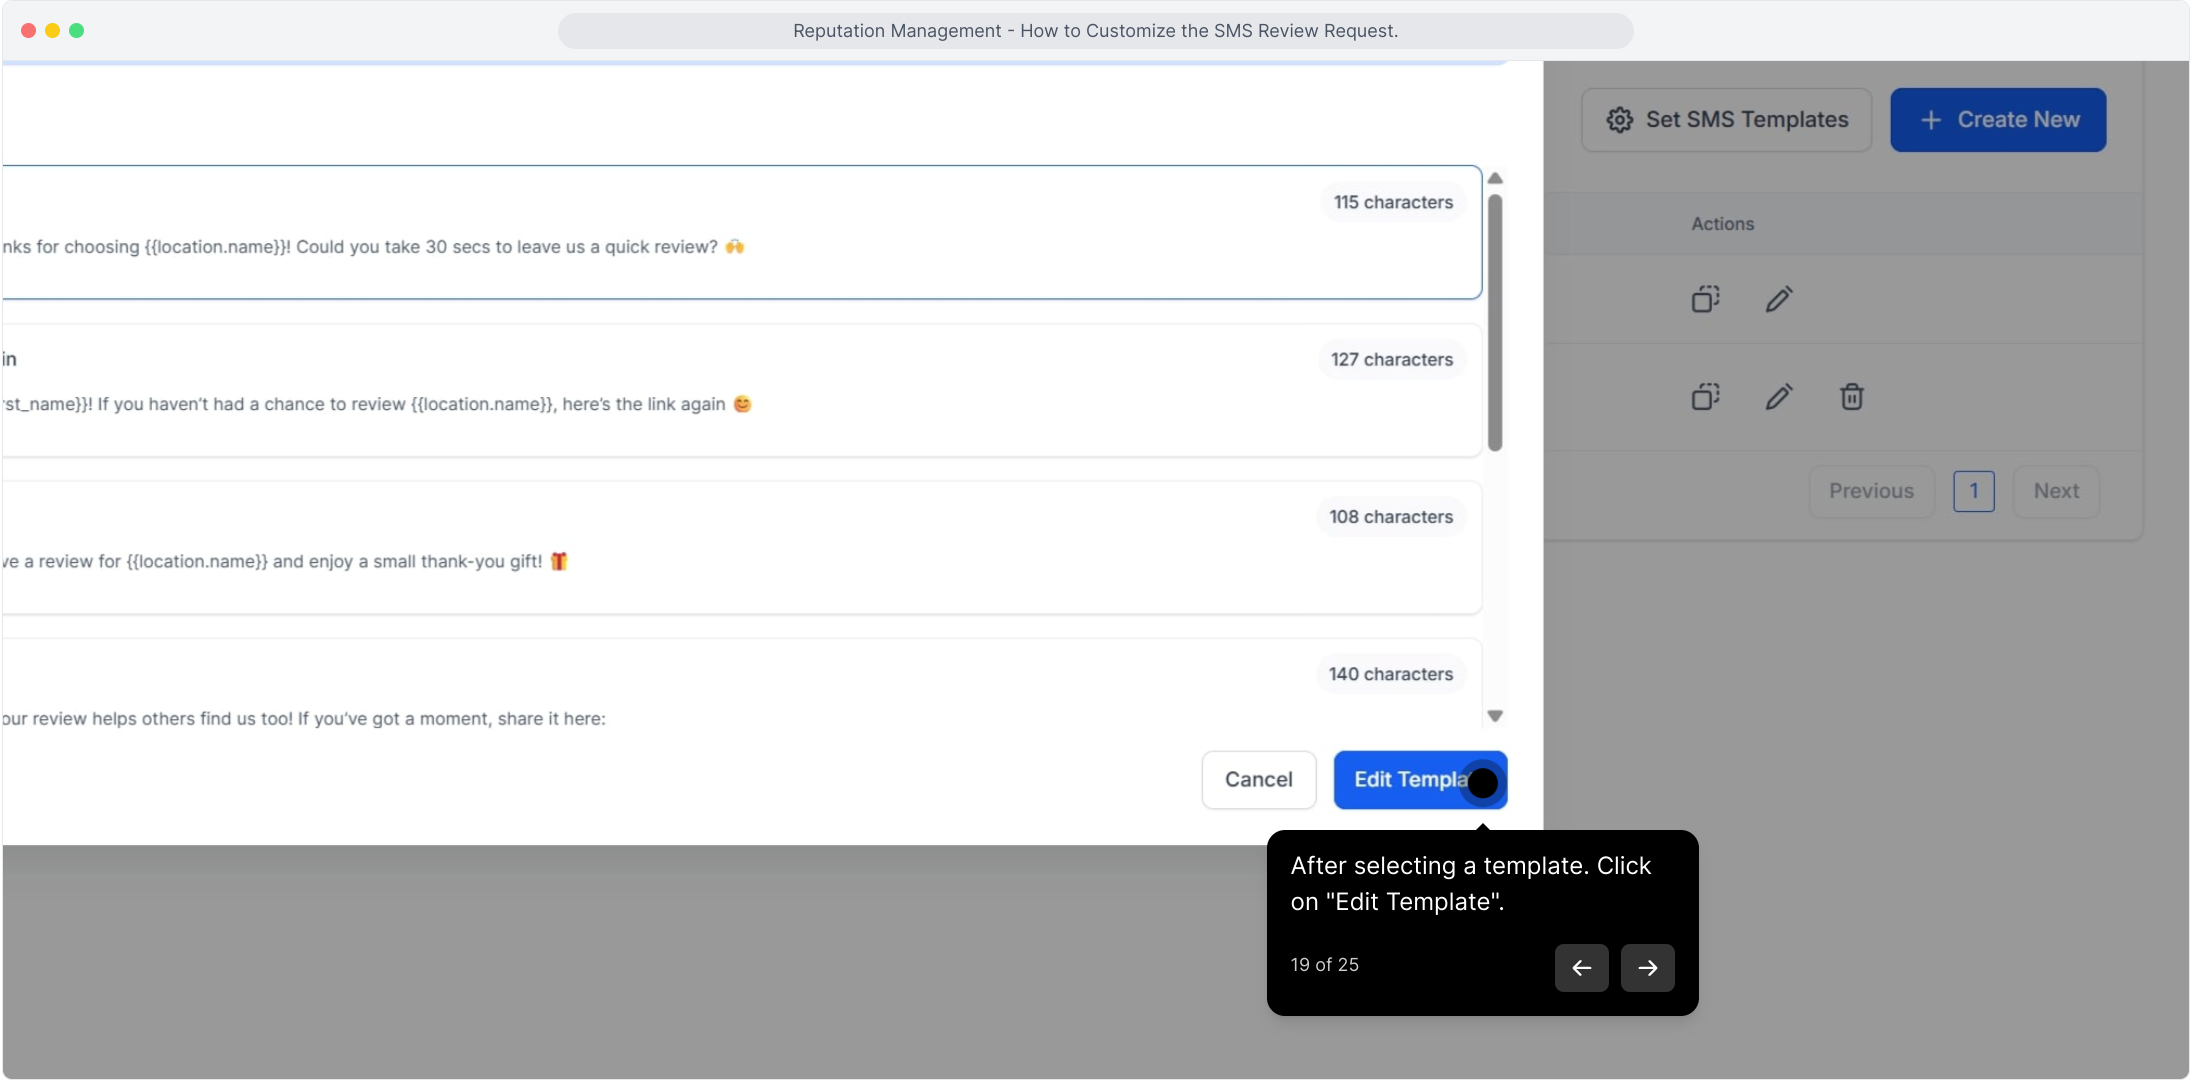
After choosing a template, click Edit Template to customize its copy, tone, and personalization before saving.
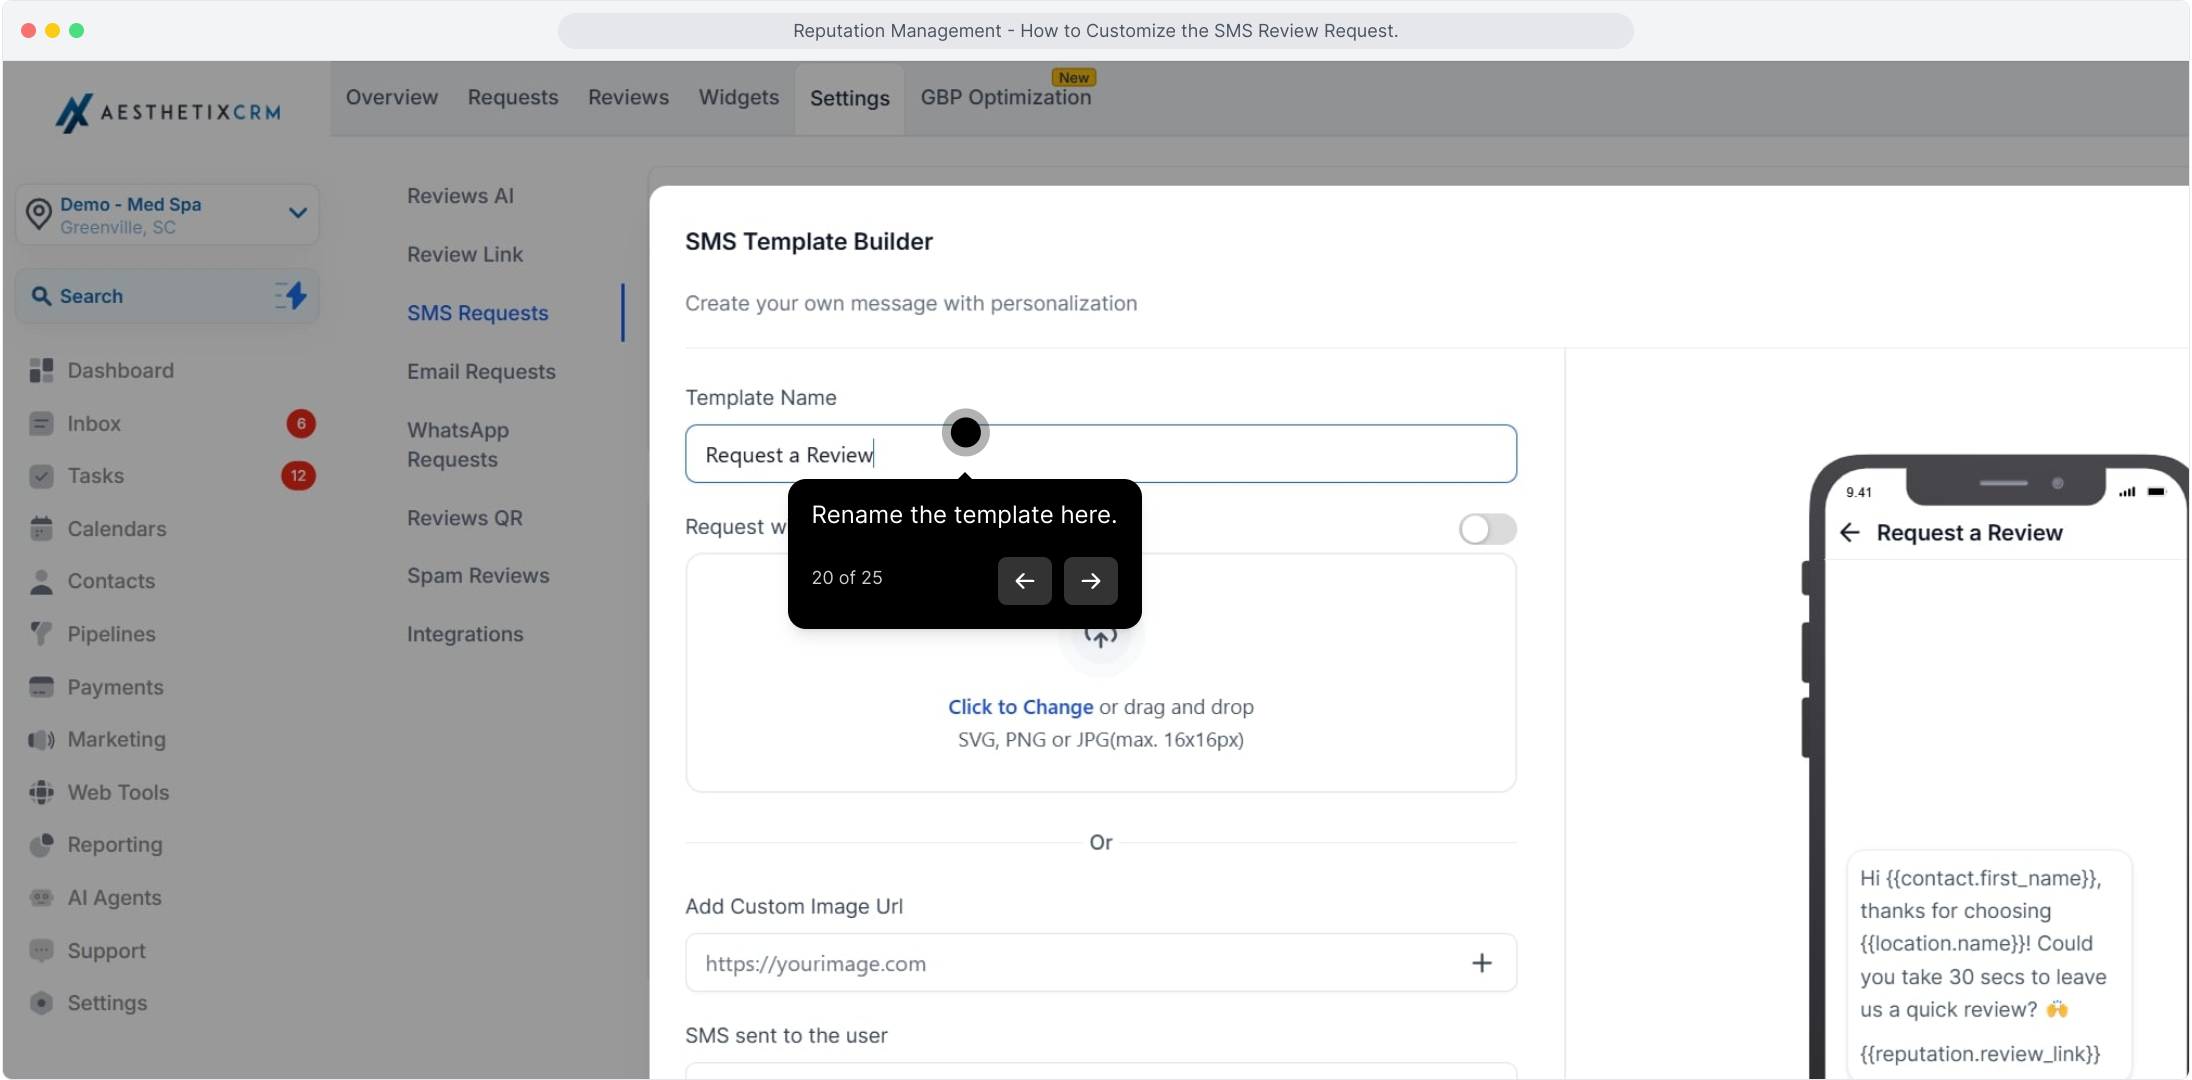
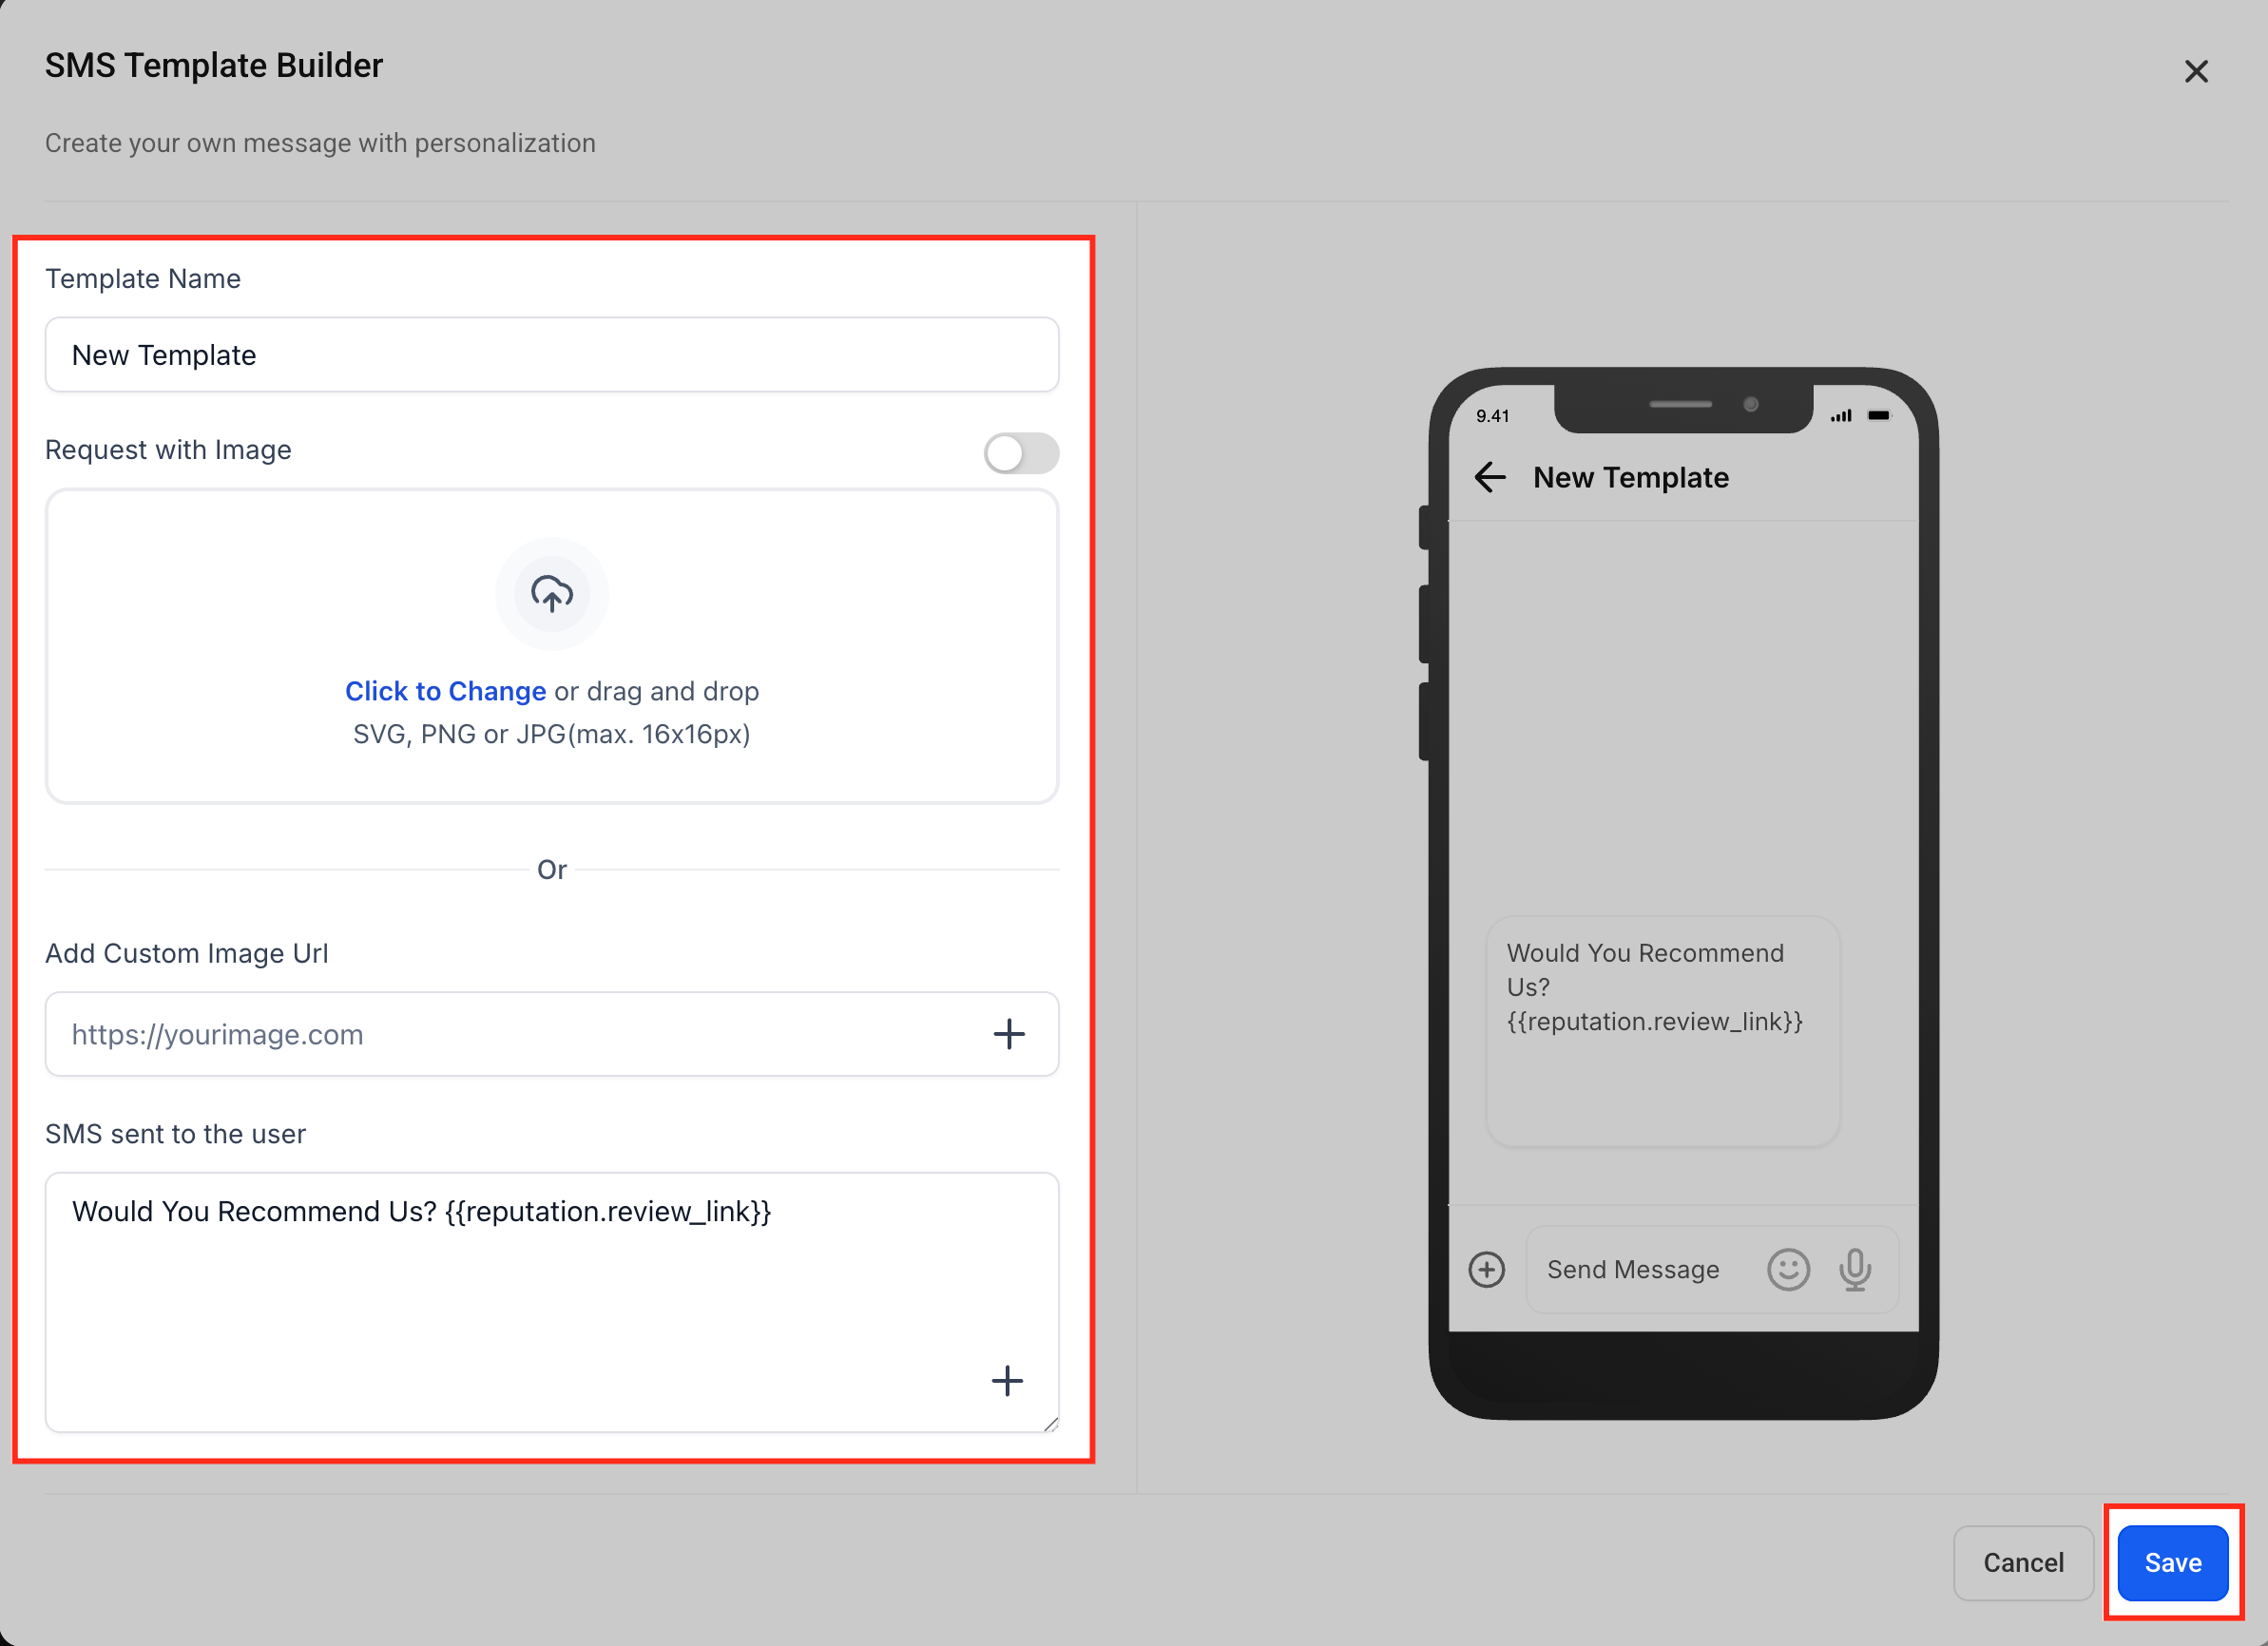
Rename the template so it's easy to identify later.
Toggle Request with Image on to include an image.
Upload an image or add a custom image URL.
Edit the SMS message, keeping the {{reputation.review_link}} token so your review link is included. Check the live phone preview as you go.
Add a custom field to personalize the message.
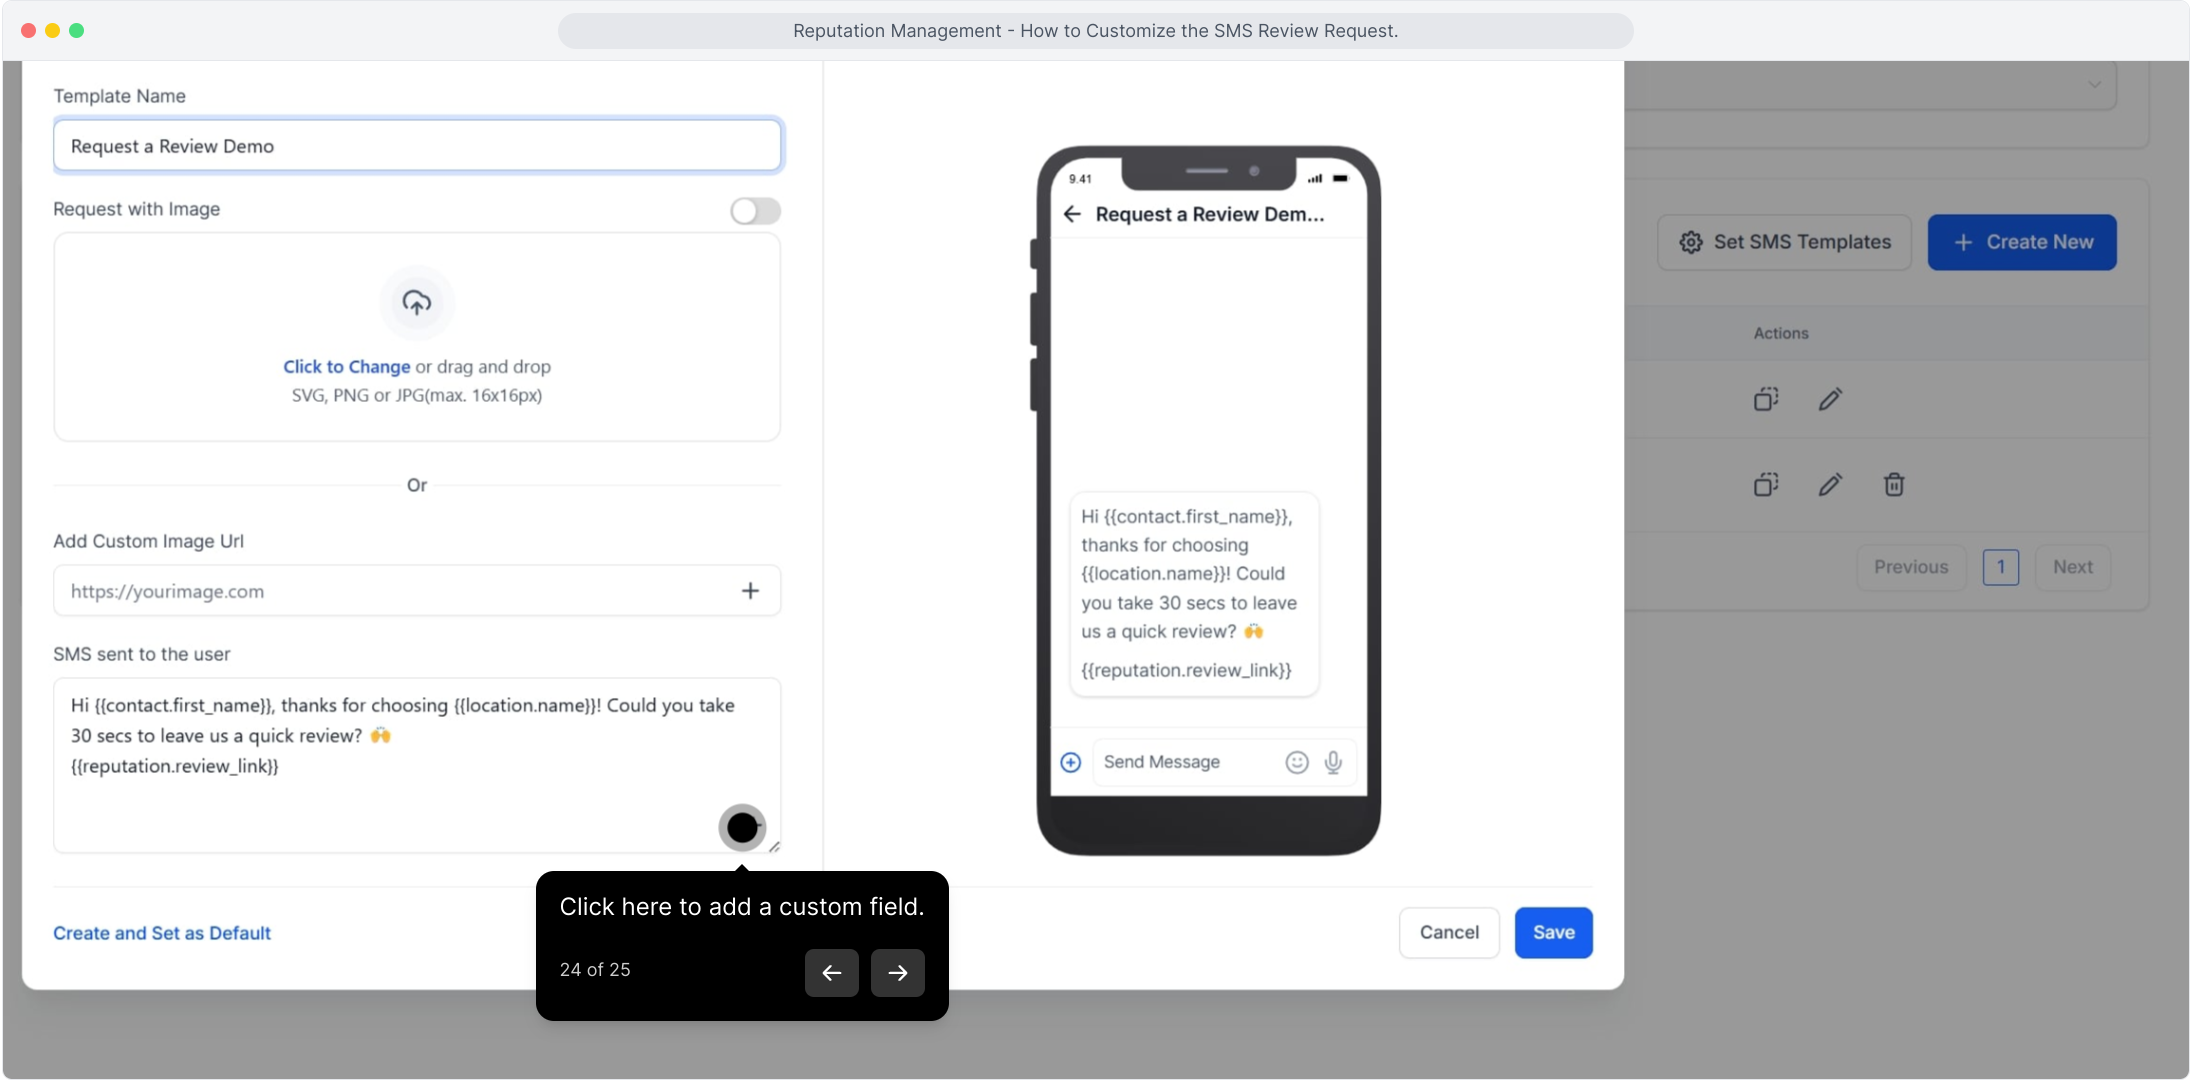
Click Save.
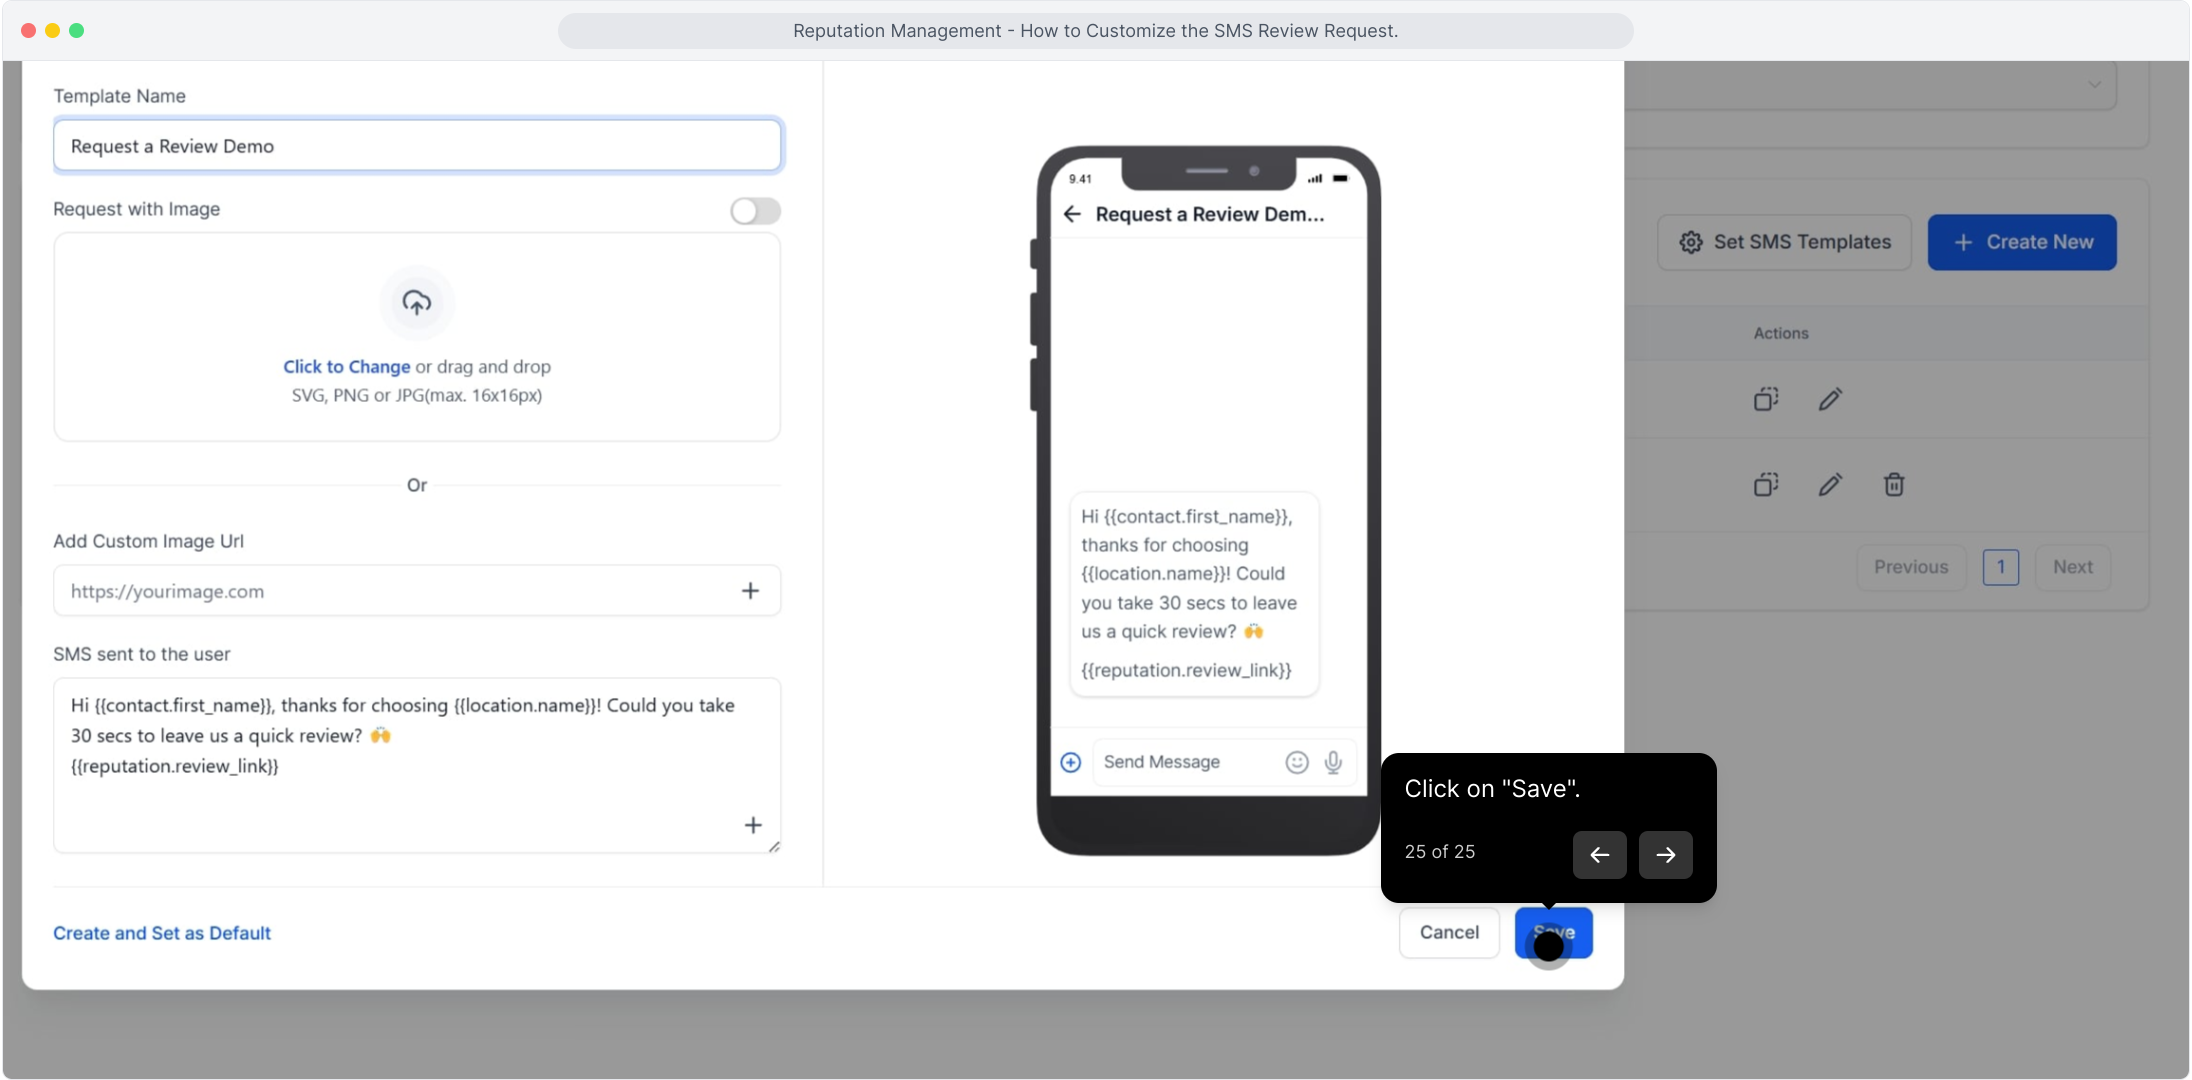
In the Manage Your SMS Templates section, you can work with your saved templates:
Duplicate a template: Click the copy icon to create a duplicate of an existing template. The duplicate is separate from the original, so you can refine or modify it without changing the original's content or settings.
Edit a template: Click the pencil icon to open the template in the editor and update its content, images, or personalization.
If you'd like a condensed walkthrough of the full flow, here are the key steps in order:
Set your Review Link. From the left sidebar, click Reviews Management, then open the Settings tab. In Review Link, either enable the Review Balancing toggle or select the Custom Link option and paste your URL.
Enable SMS Requests. Open Reviews Management → Settings → SMS Requests and toggle the switch in the top right to activate automated review texts. Set when to send after check-in, choose the repeat interval and maximum retries, then use Create New or Set SMS Templates to manage your messages.
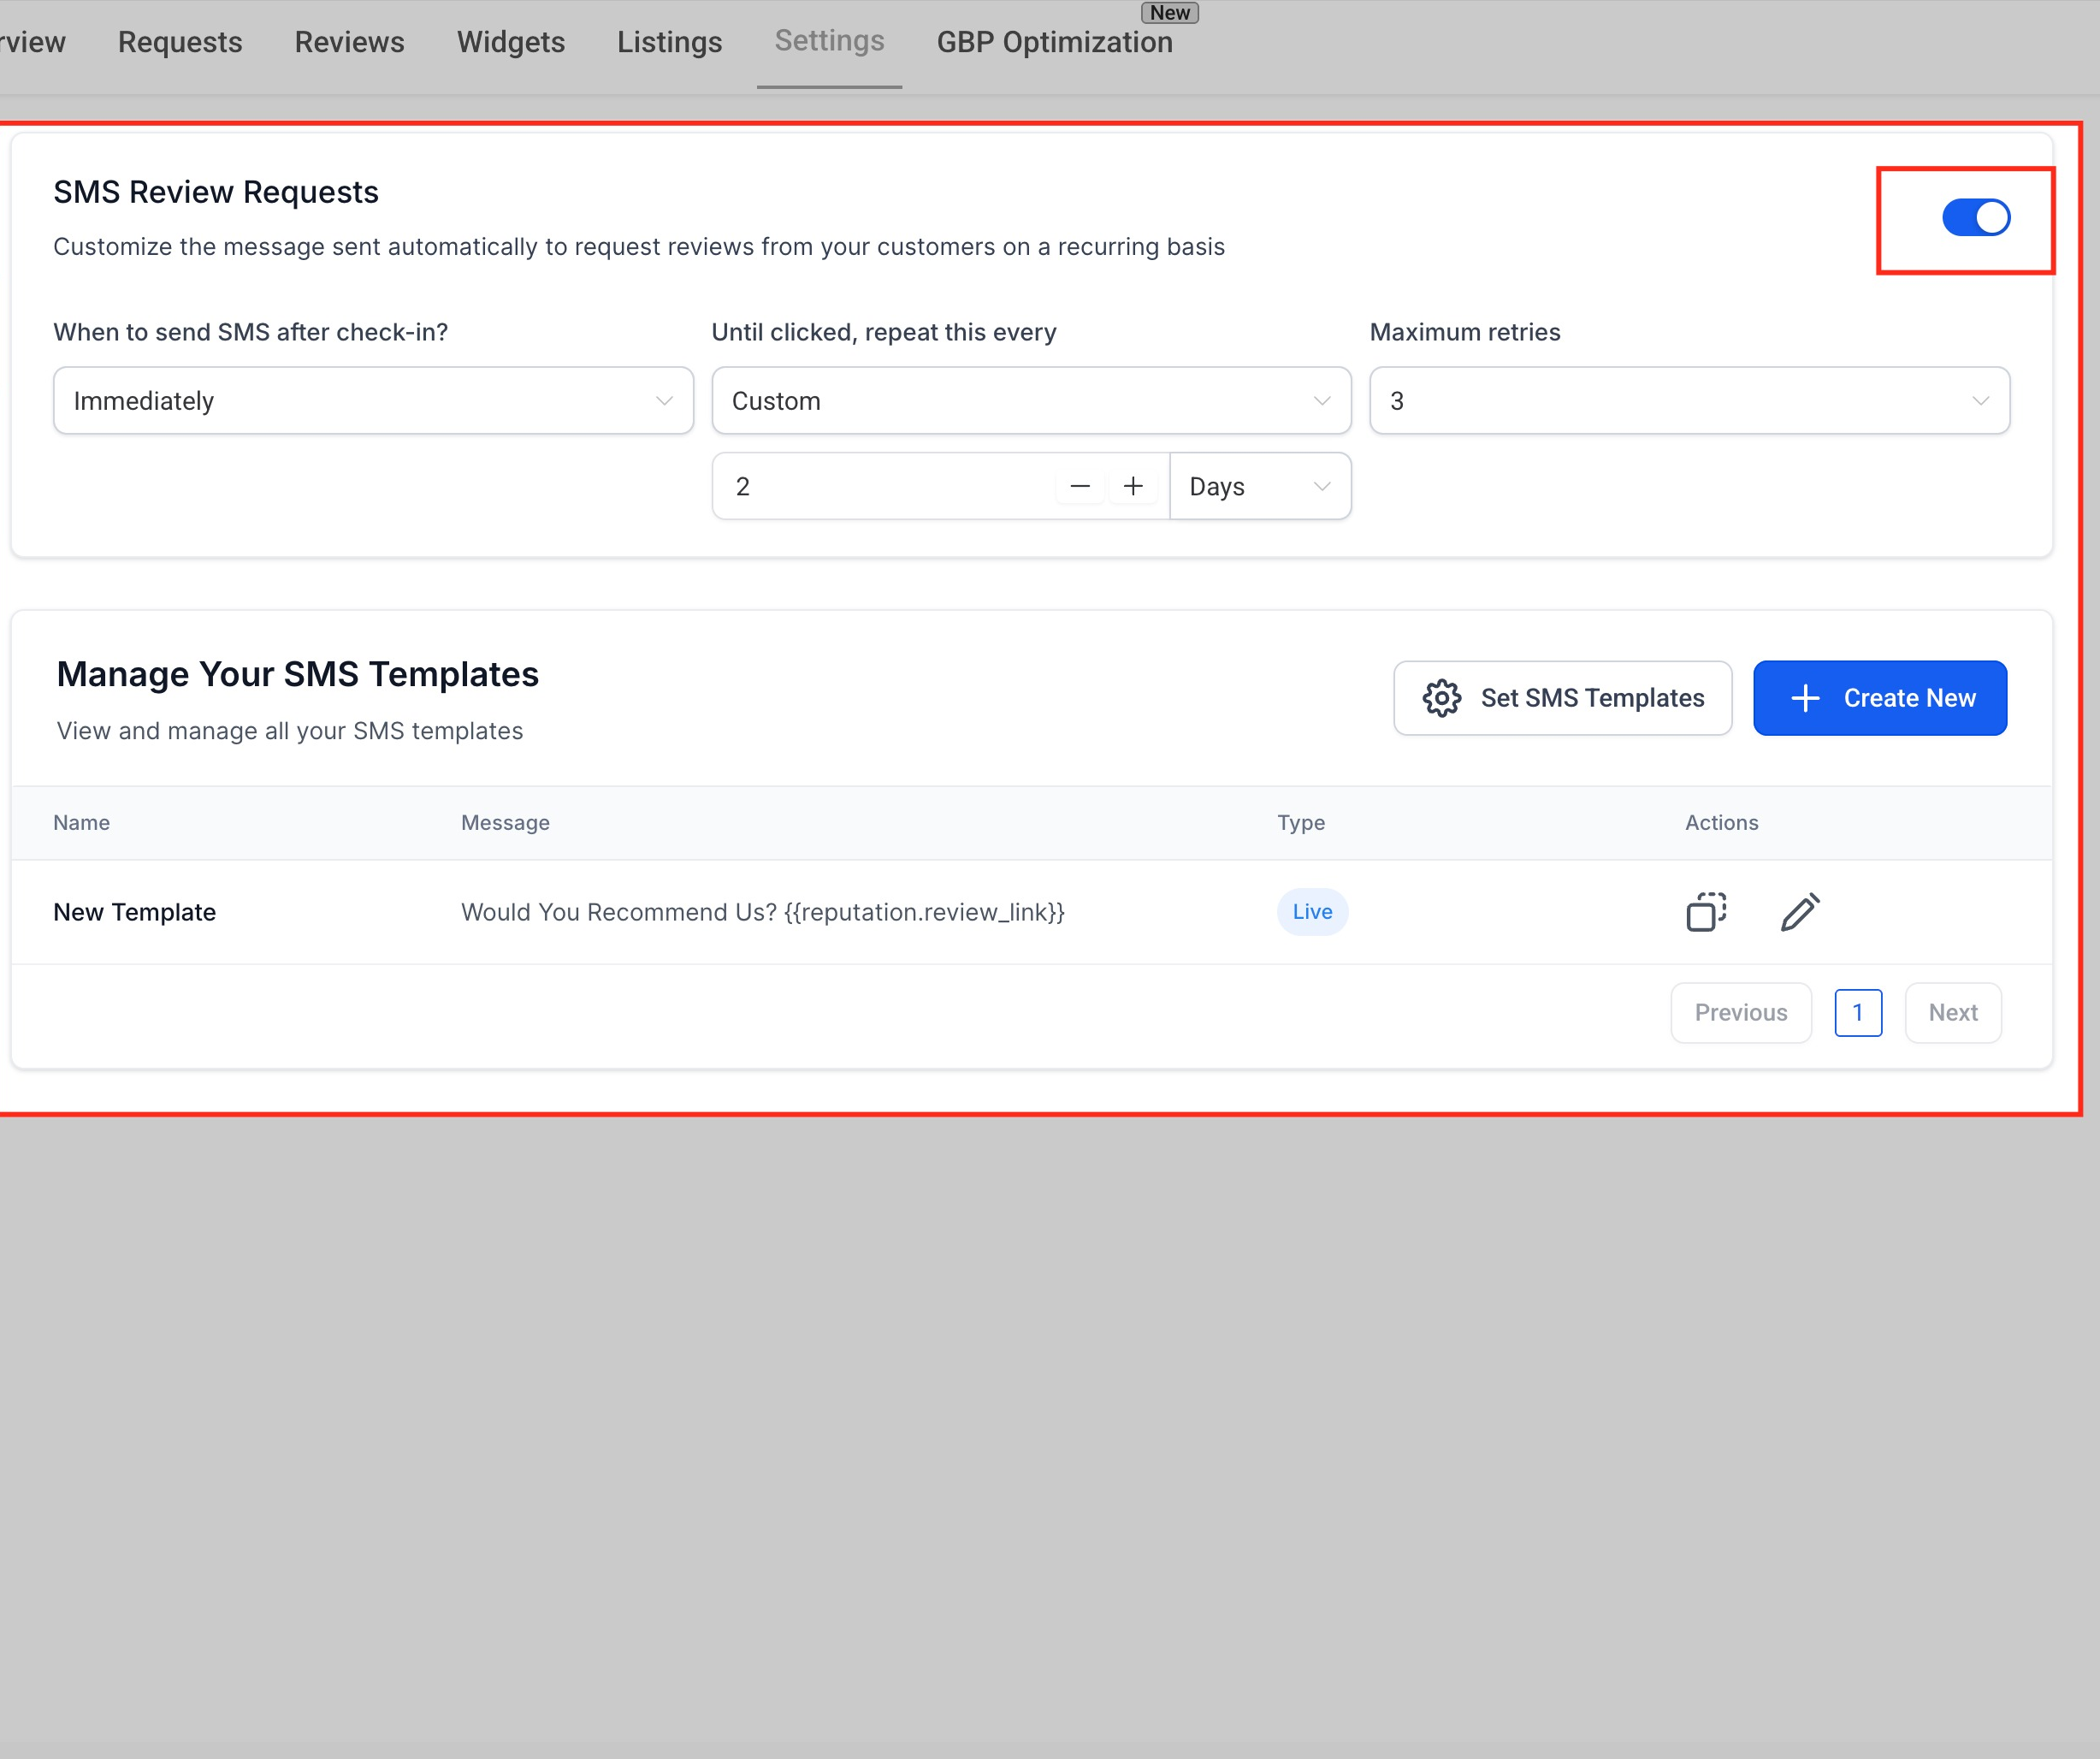
Add an SMS template. Click Create New to build a new SMS review request, or use the pencil (edit) icon to modify a template. Templates you create or edit appear in the list and can be assigned to the live or retry sequence.
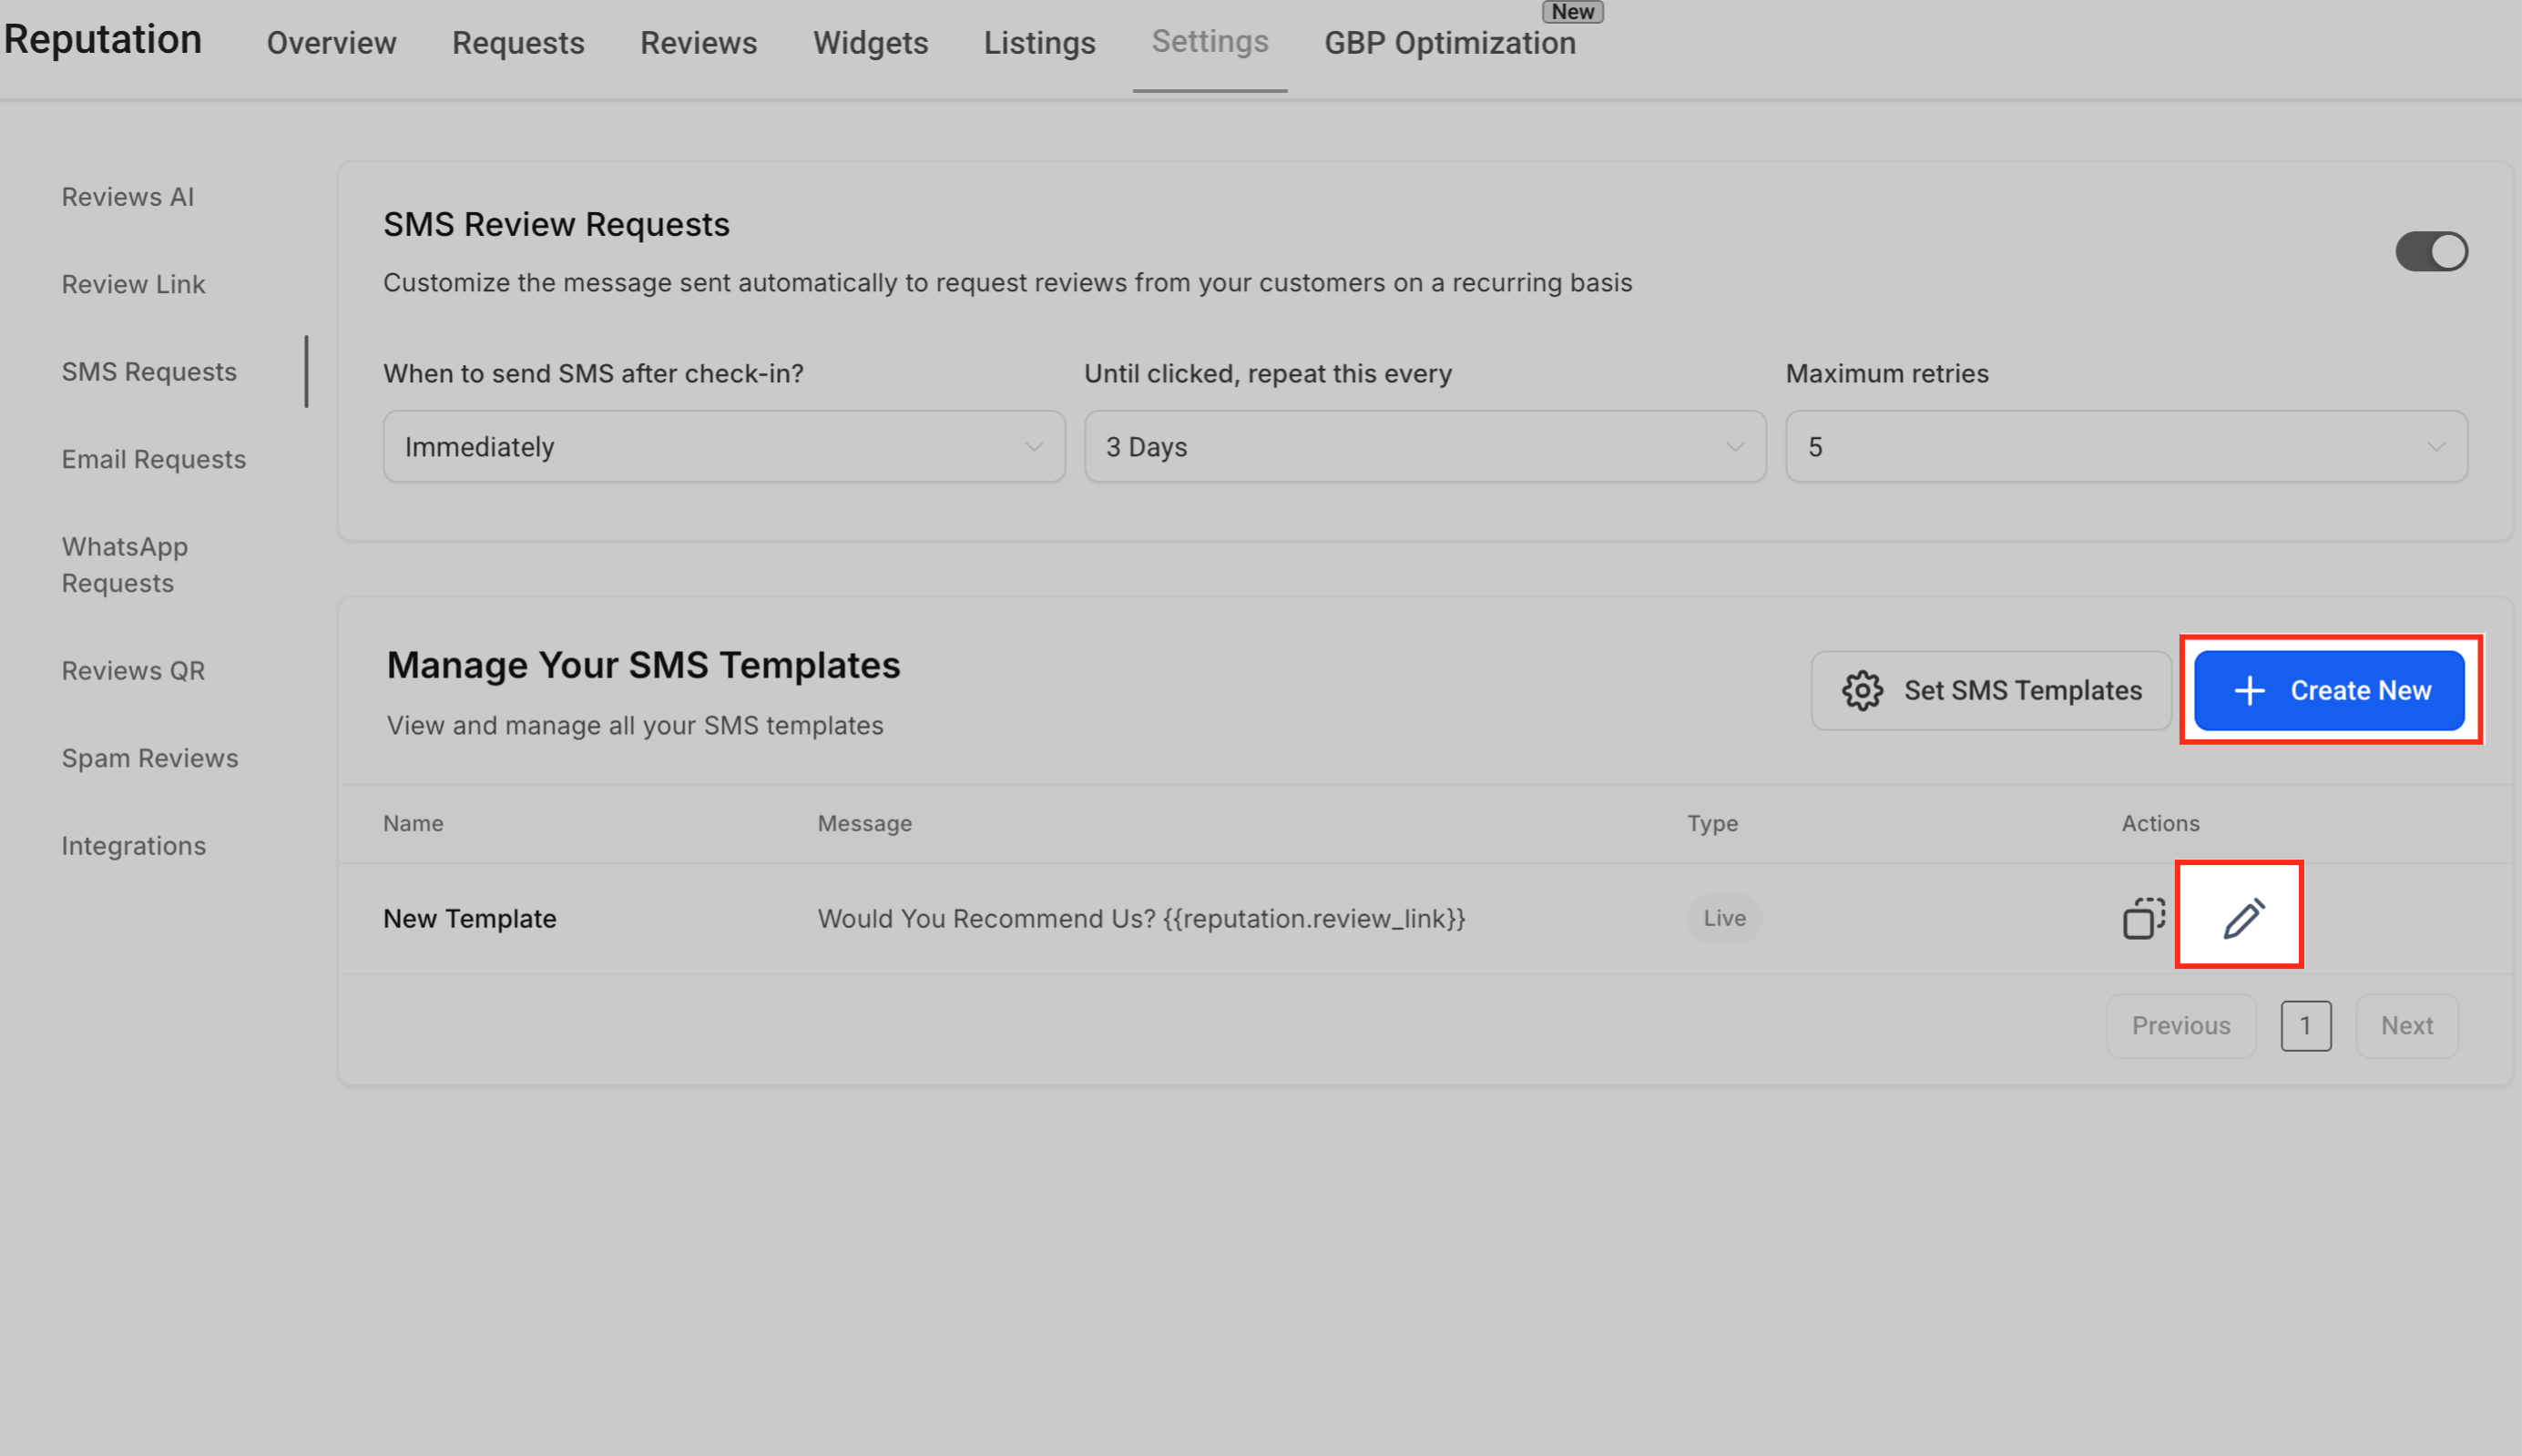
Choose the template type. After clicking Create New, pick Create New from Scratch for full control or Select from Pre-Built Templates to move faster, then click Select under your choice.
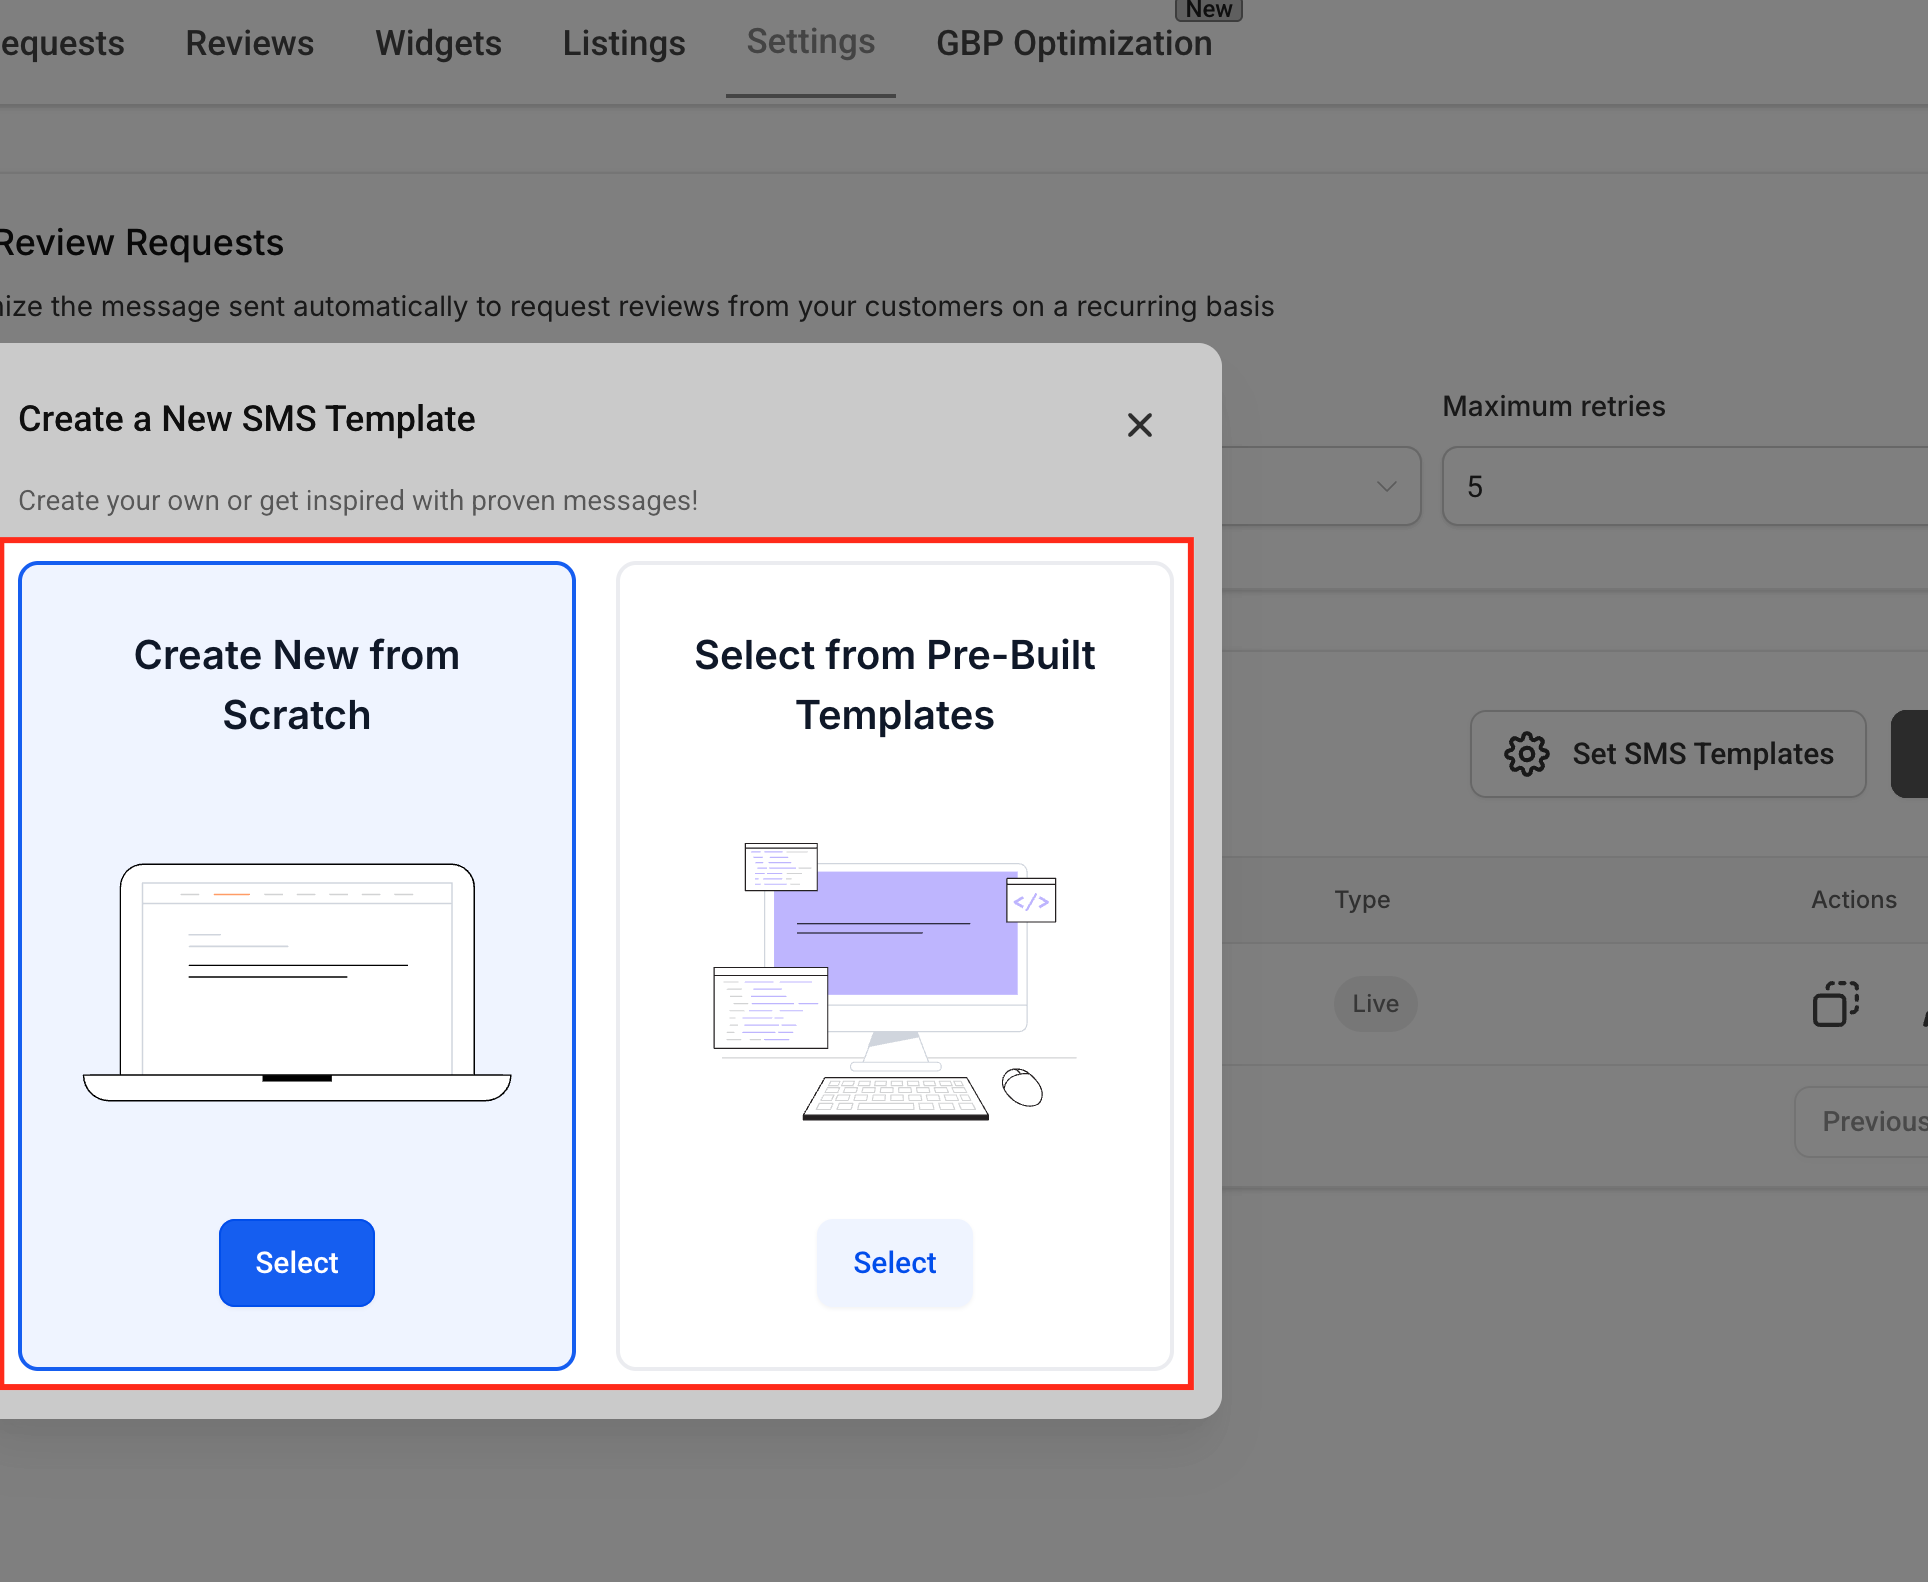
Pick a pre-built template. From the SMS Template Library, select an option such as Request a Review (note the visible character count). Click Edit Template to open it for customization, keeping the {{reputation.review_link}} token.
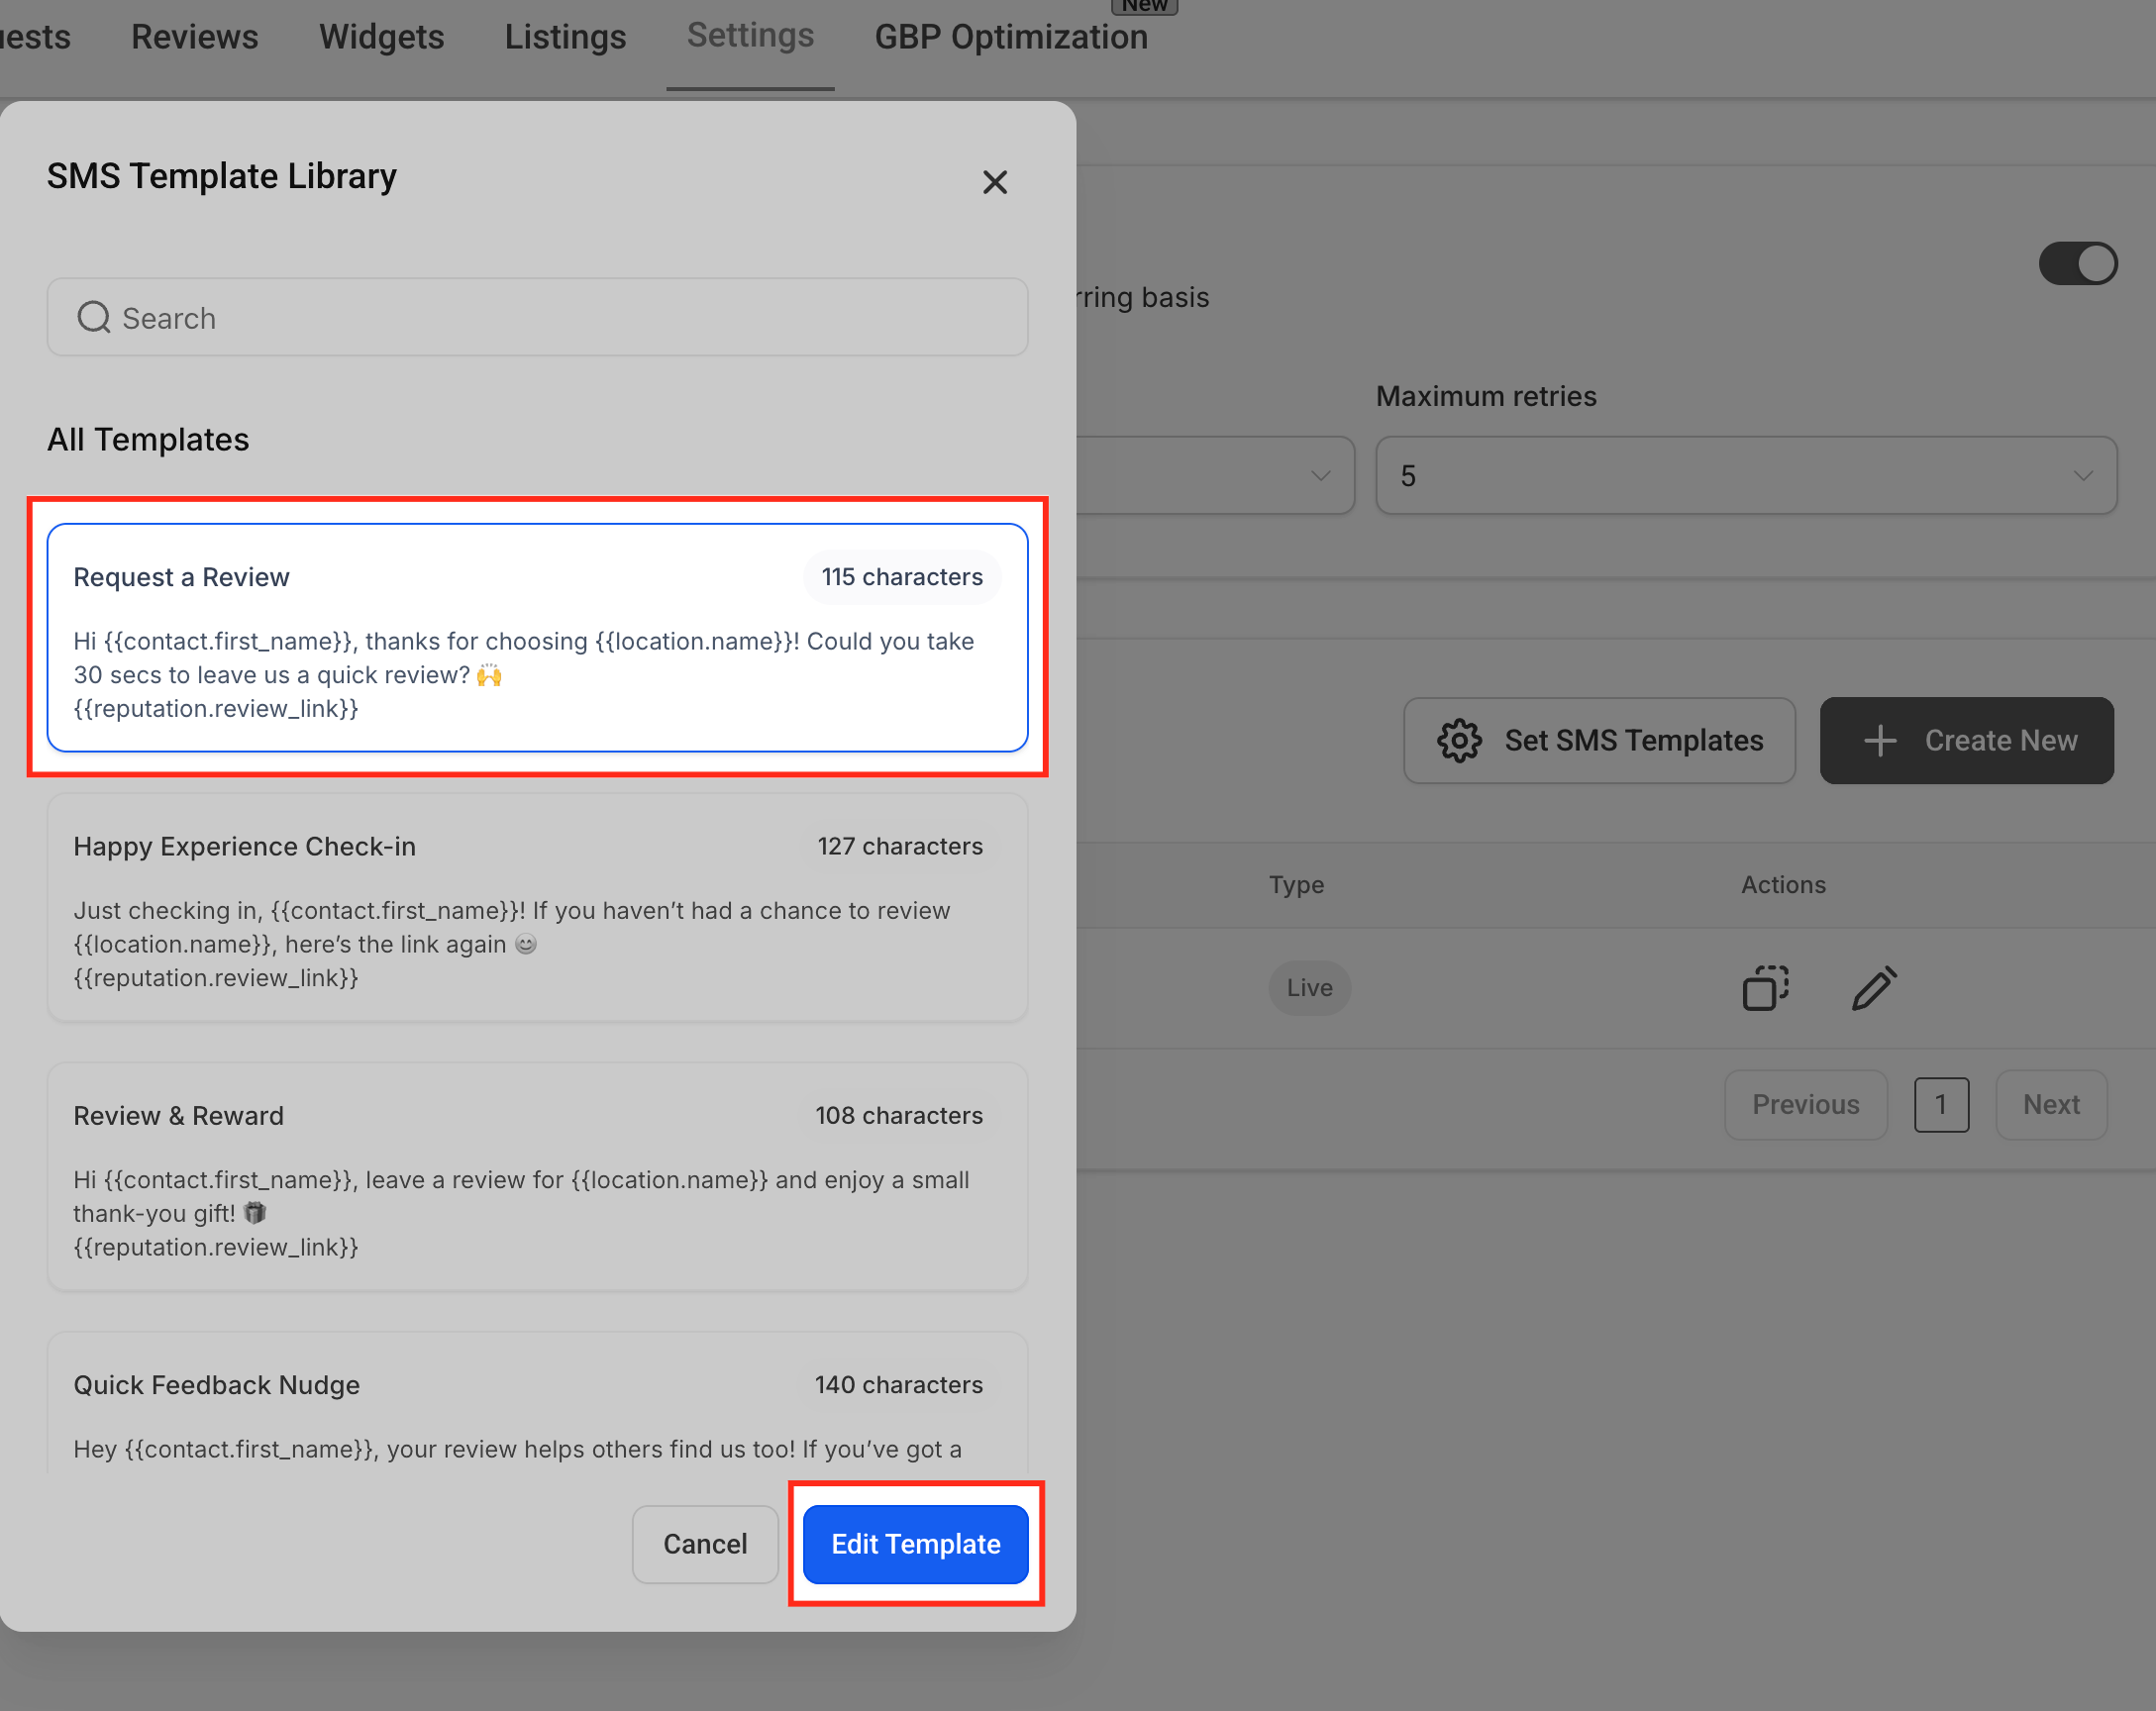
Customize and save. Enter a Template Name, optionally enable Request with Image to upload or link an image, and write your message using {{reputation.review_link}}. Check the live phone preview on the right, then click Save.
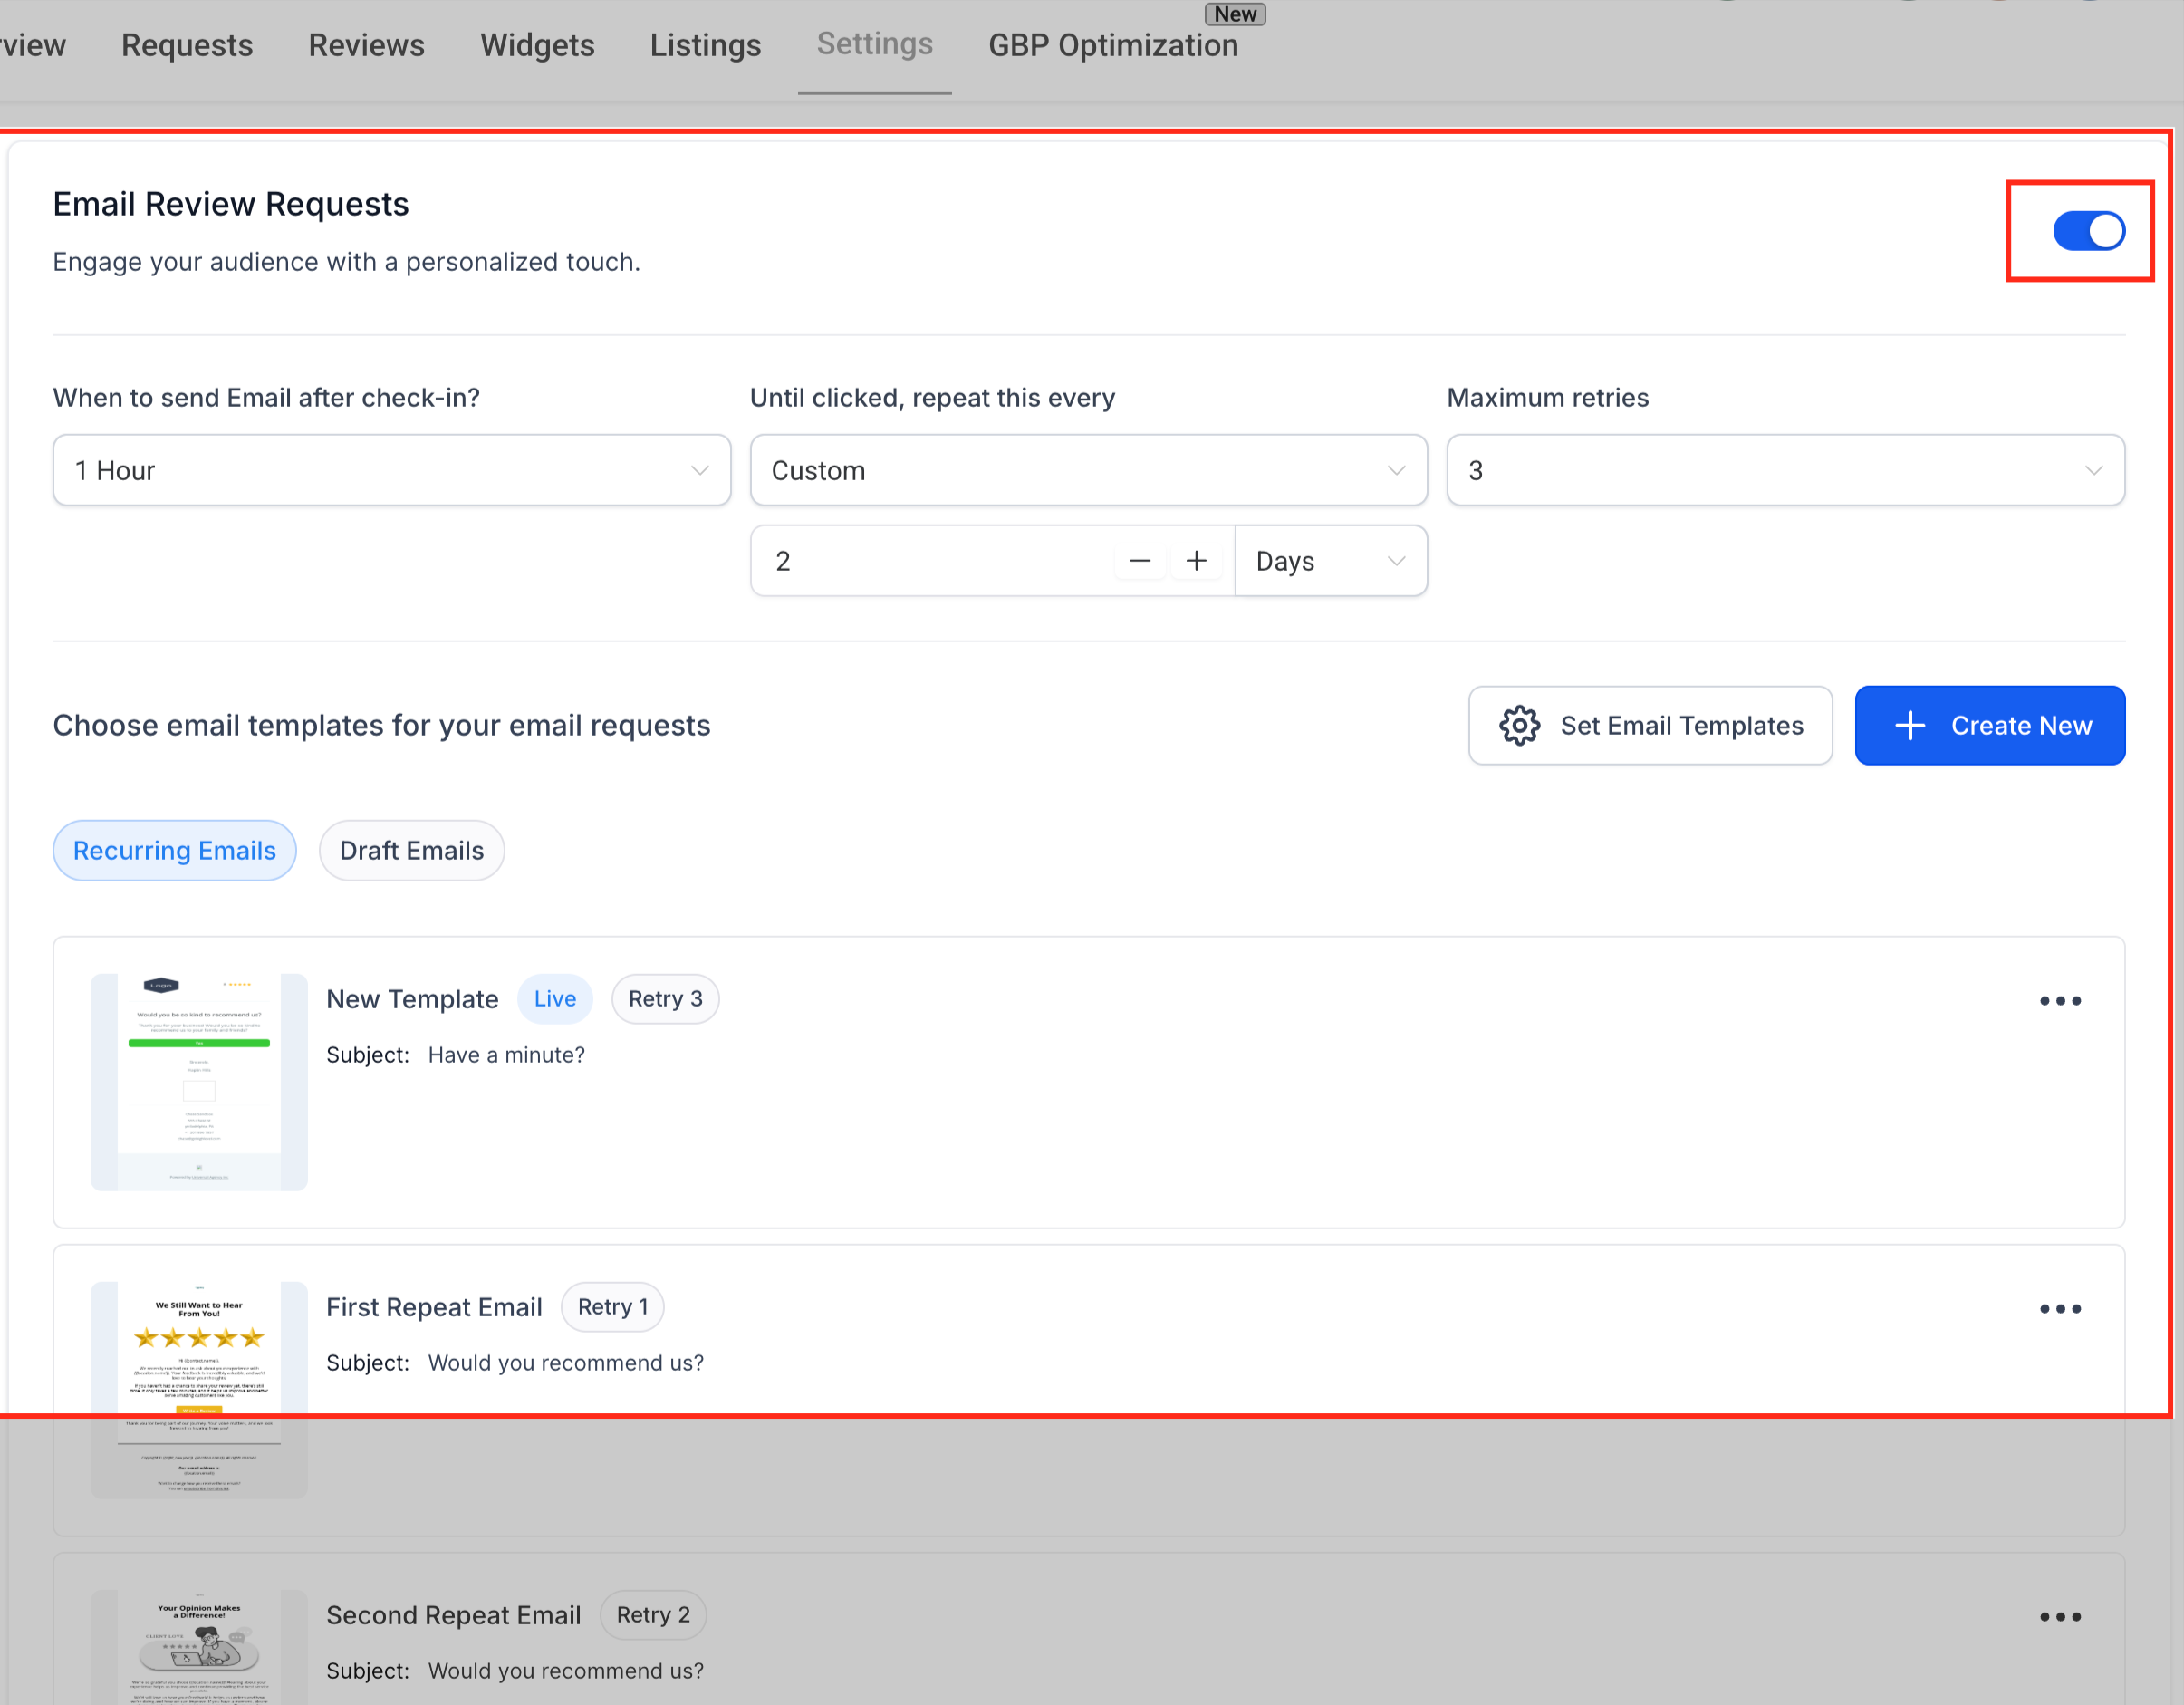
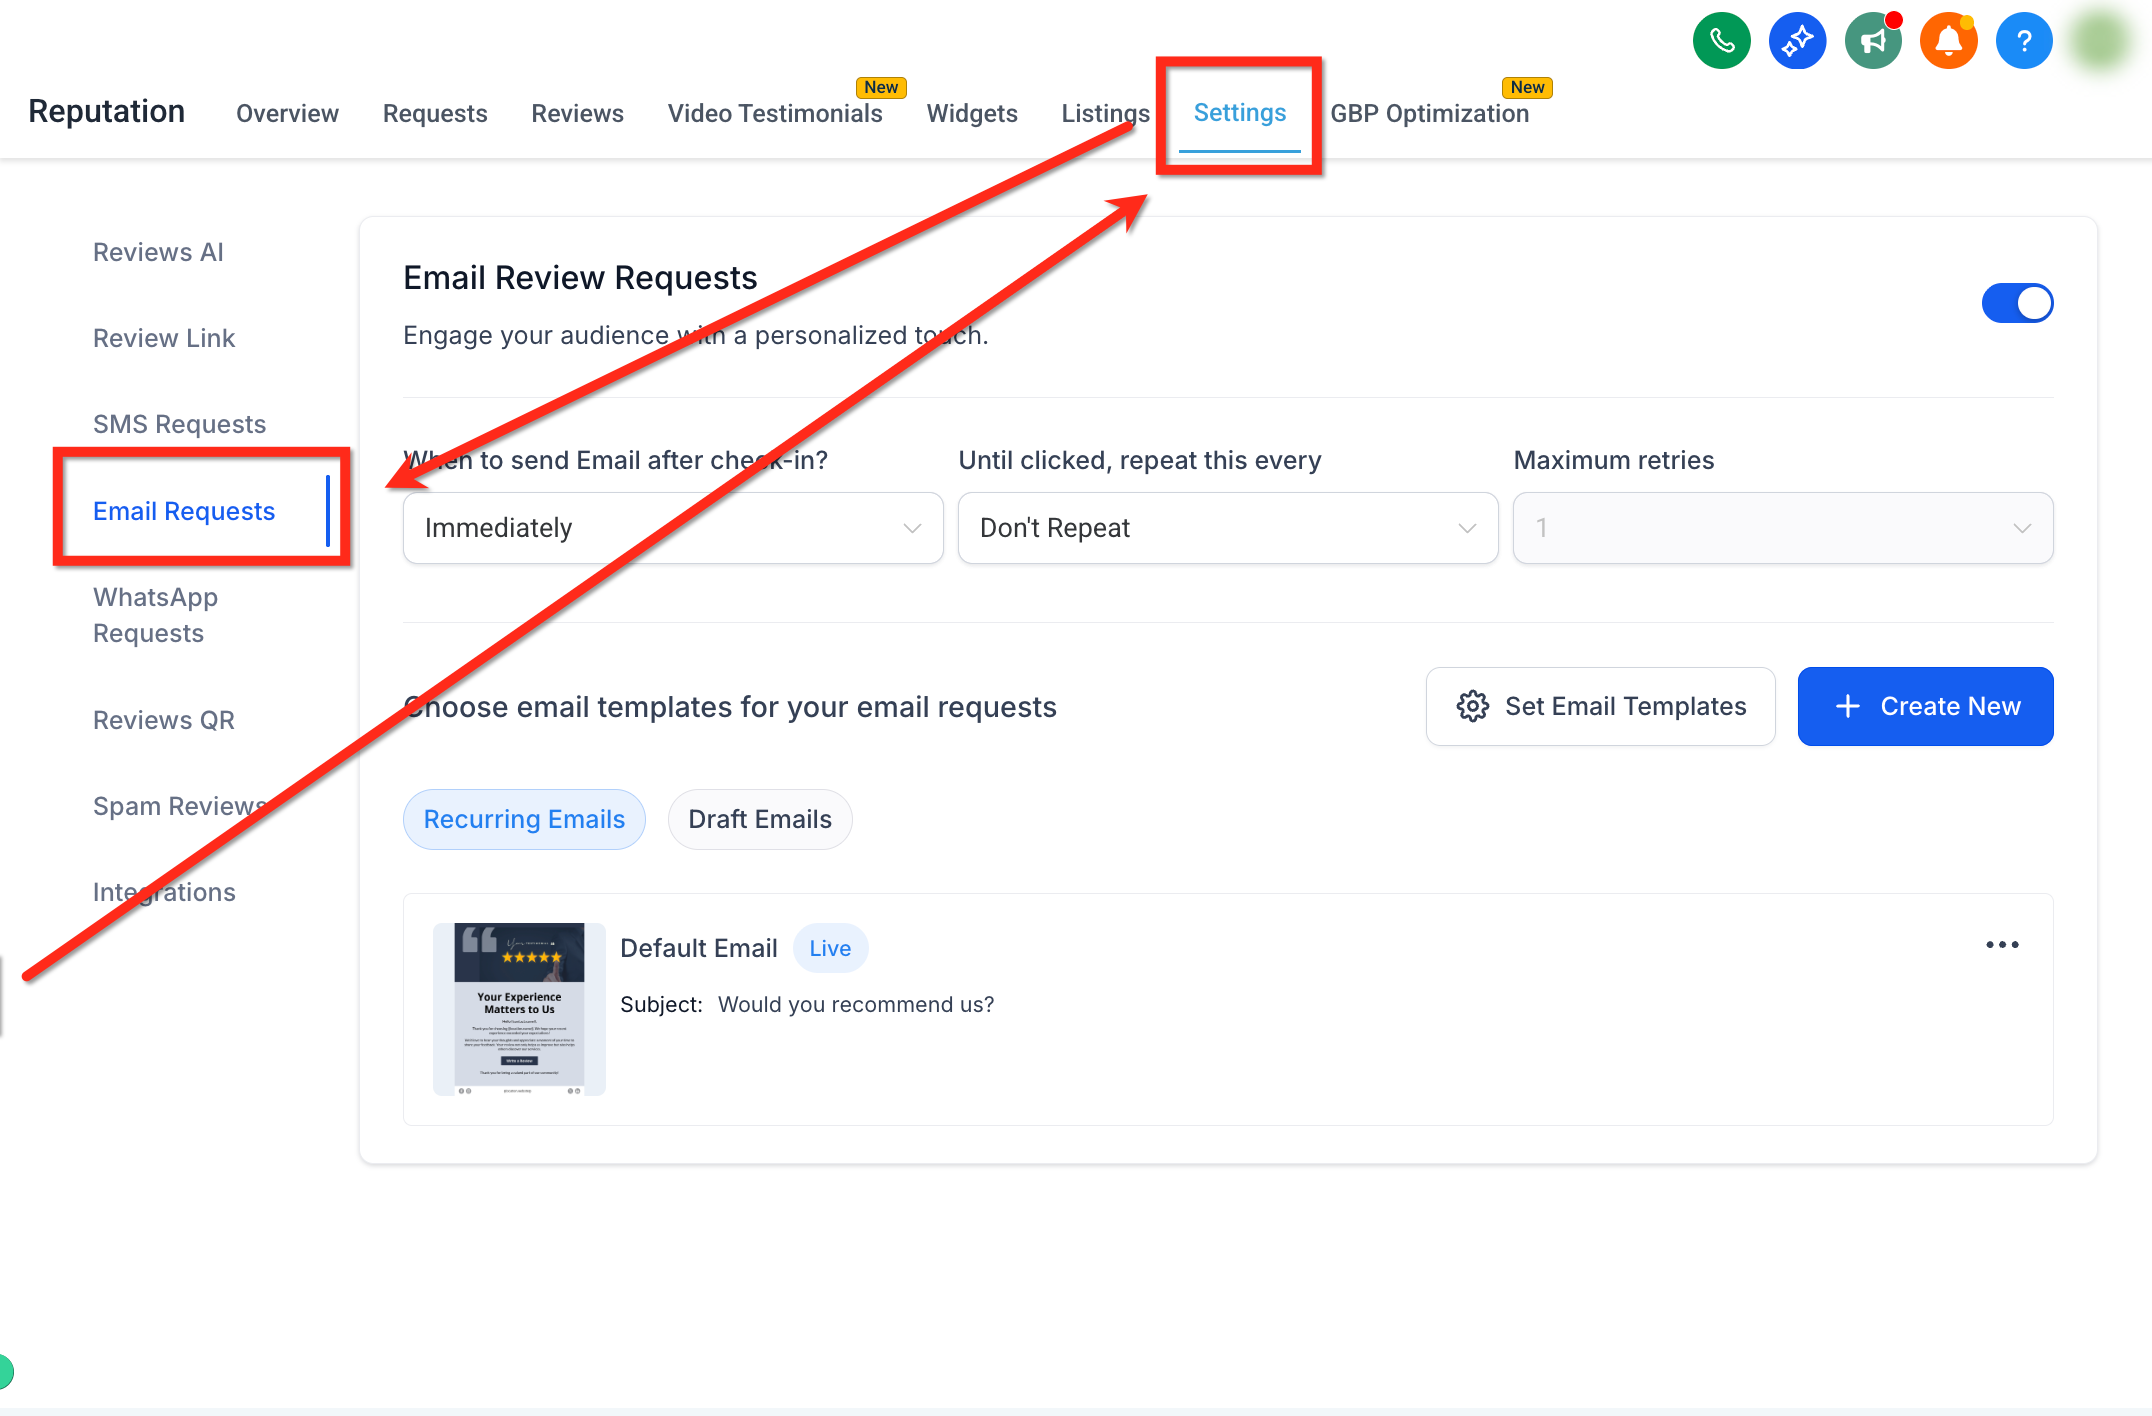
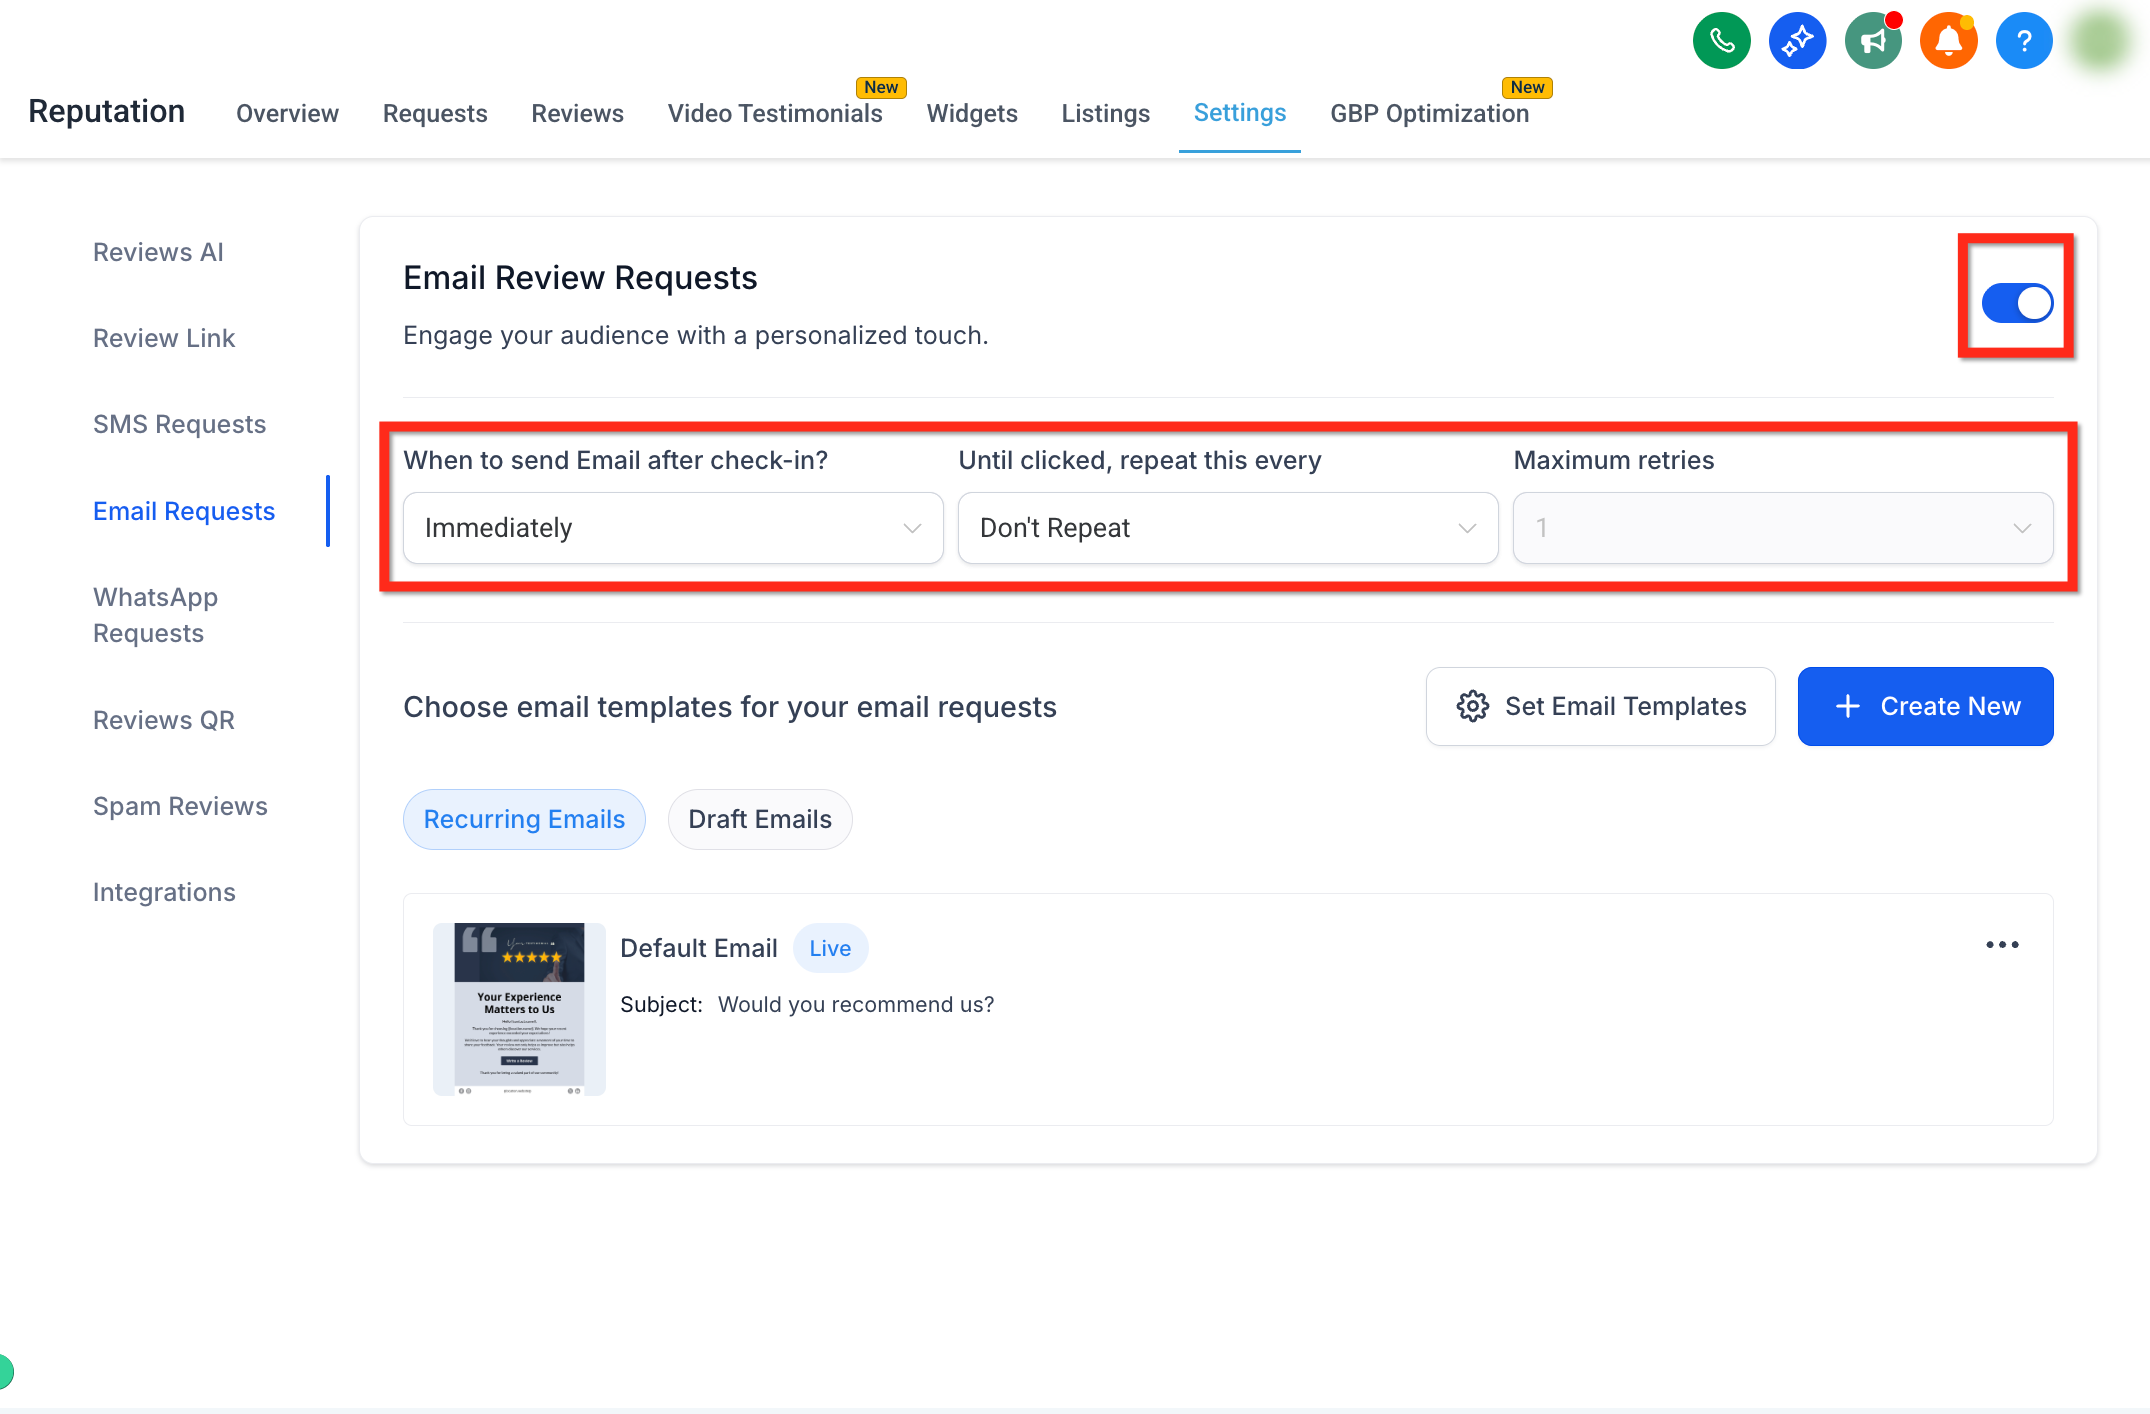
You can also request reviews by email, which allows richer branding, images, and multiple review destinations. Turn on the feature, set timing and retries, then create or import templates in the drag-and-drop editor. Go to Reviews Management → Settings → Email Requests.
Enable Email Review Requests: Turn on the top-right toggle.
When to send Email after check-in? Choose the initial delay (for example, 1 Hour).
Until clicked, repeat this every: Set the repeat interval (supports Custom with a number and Days).
Maximum retries: Choose how many follow-ups to send.
Default sender email: Choose which mailbox sends your review requests from the Default sender email dropdown, then finish configuring timing, retries, and templates.
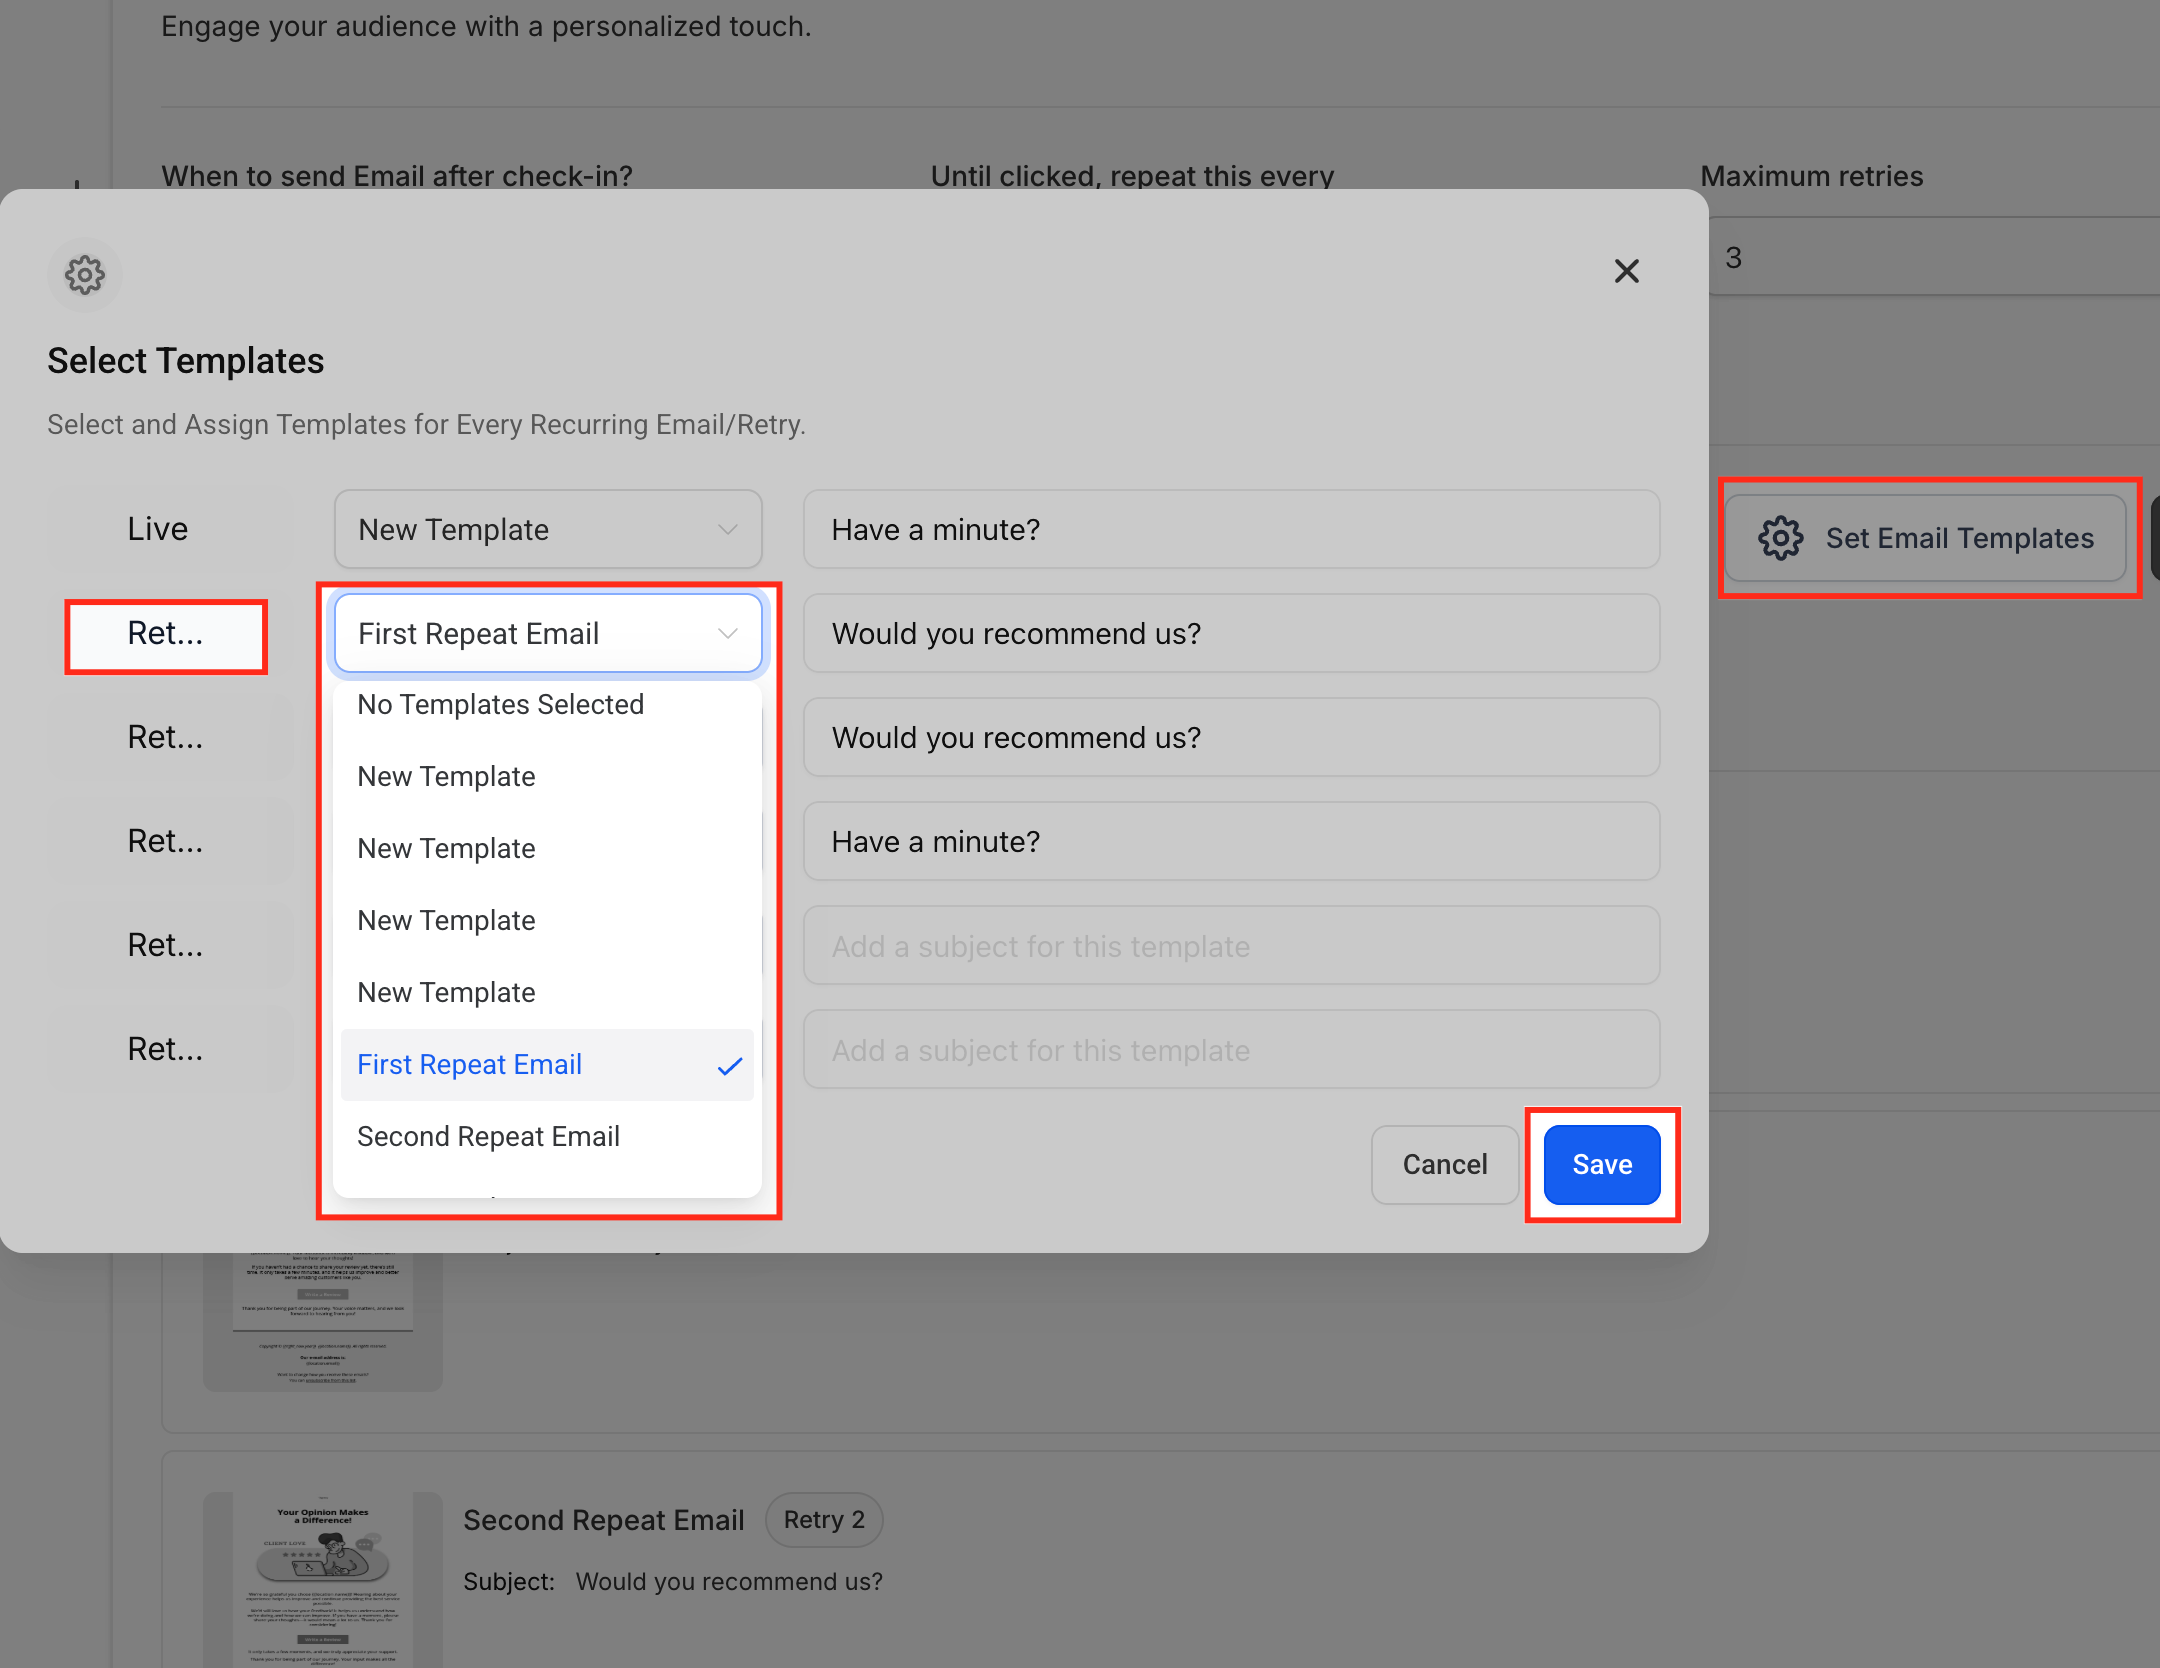
Assign the email sequence. Click Set Email Templates to choose which template sends first (Live) and which ones power each Retry slot from the left-side dropdowns. Review or edit the subjects on the right, then click Save to apply the sequence.
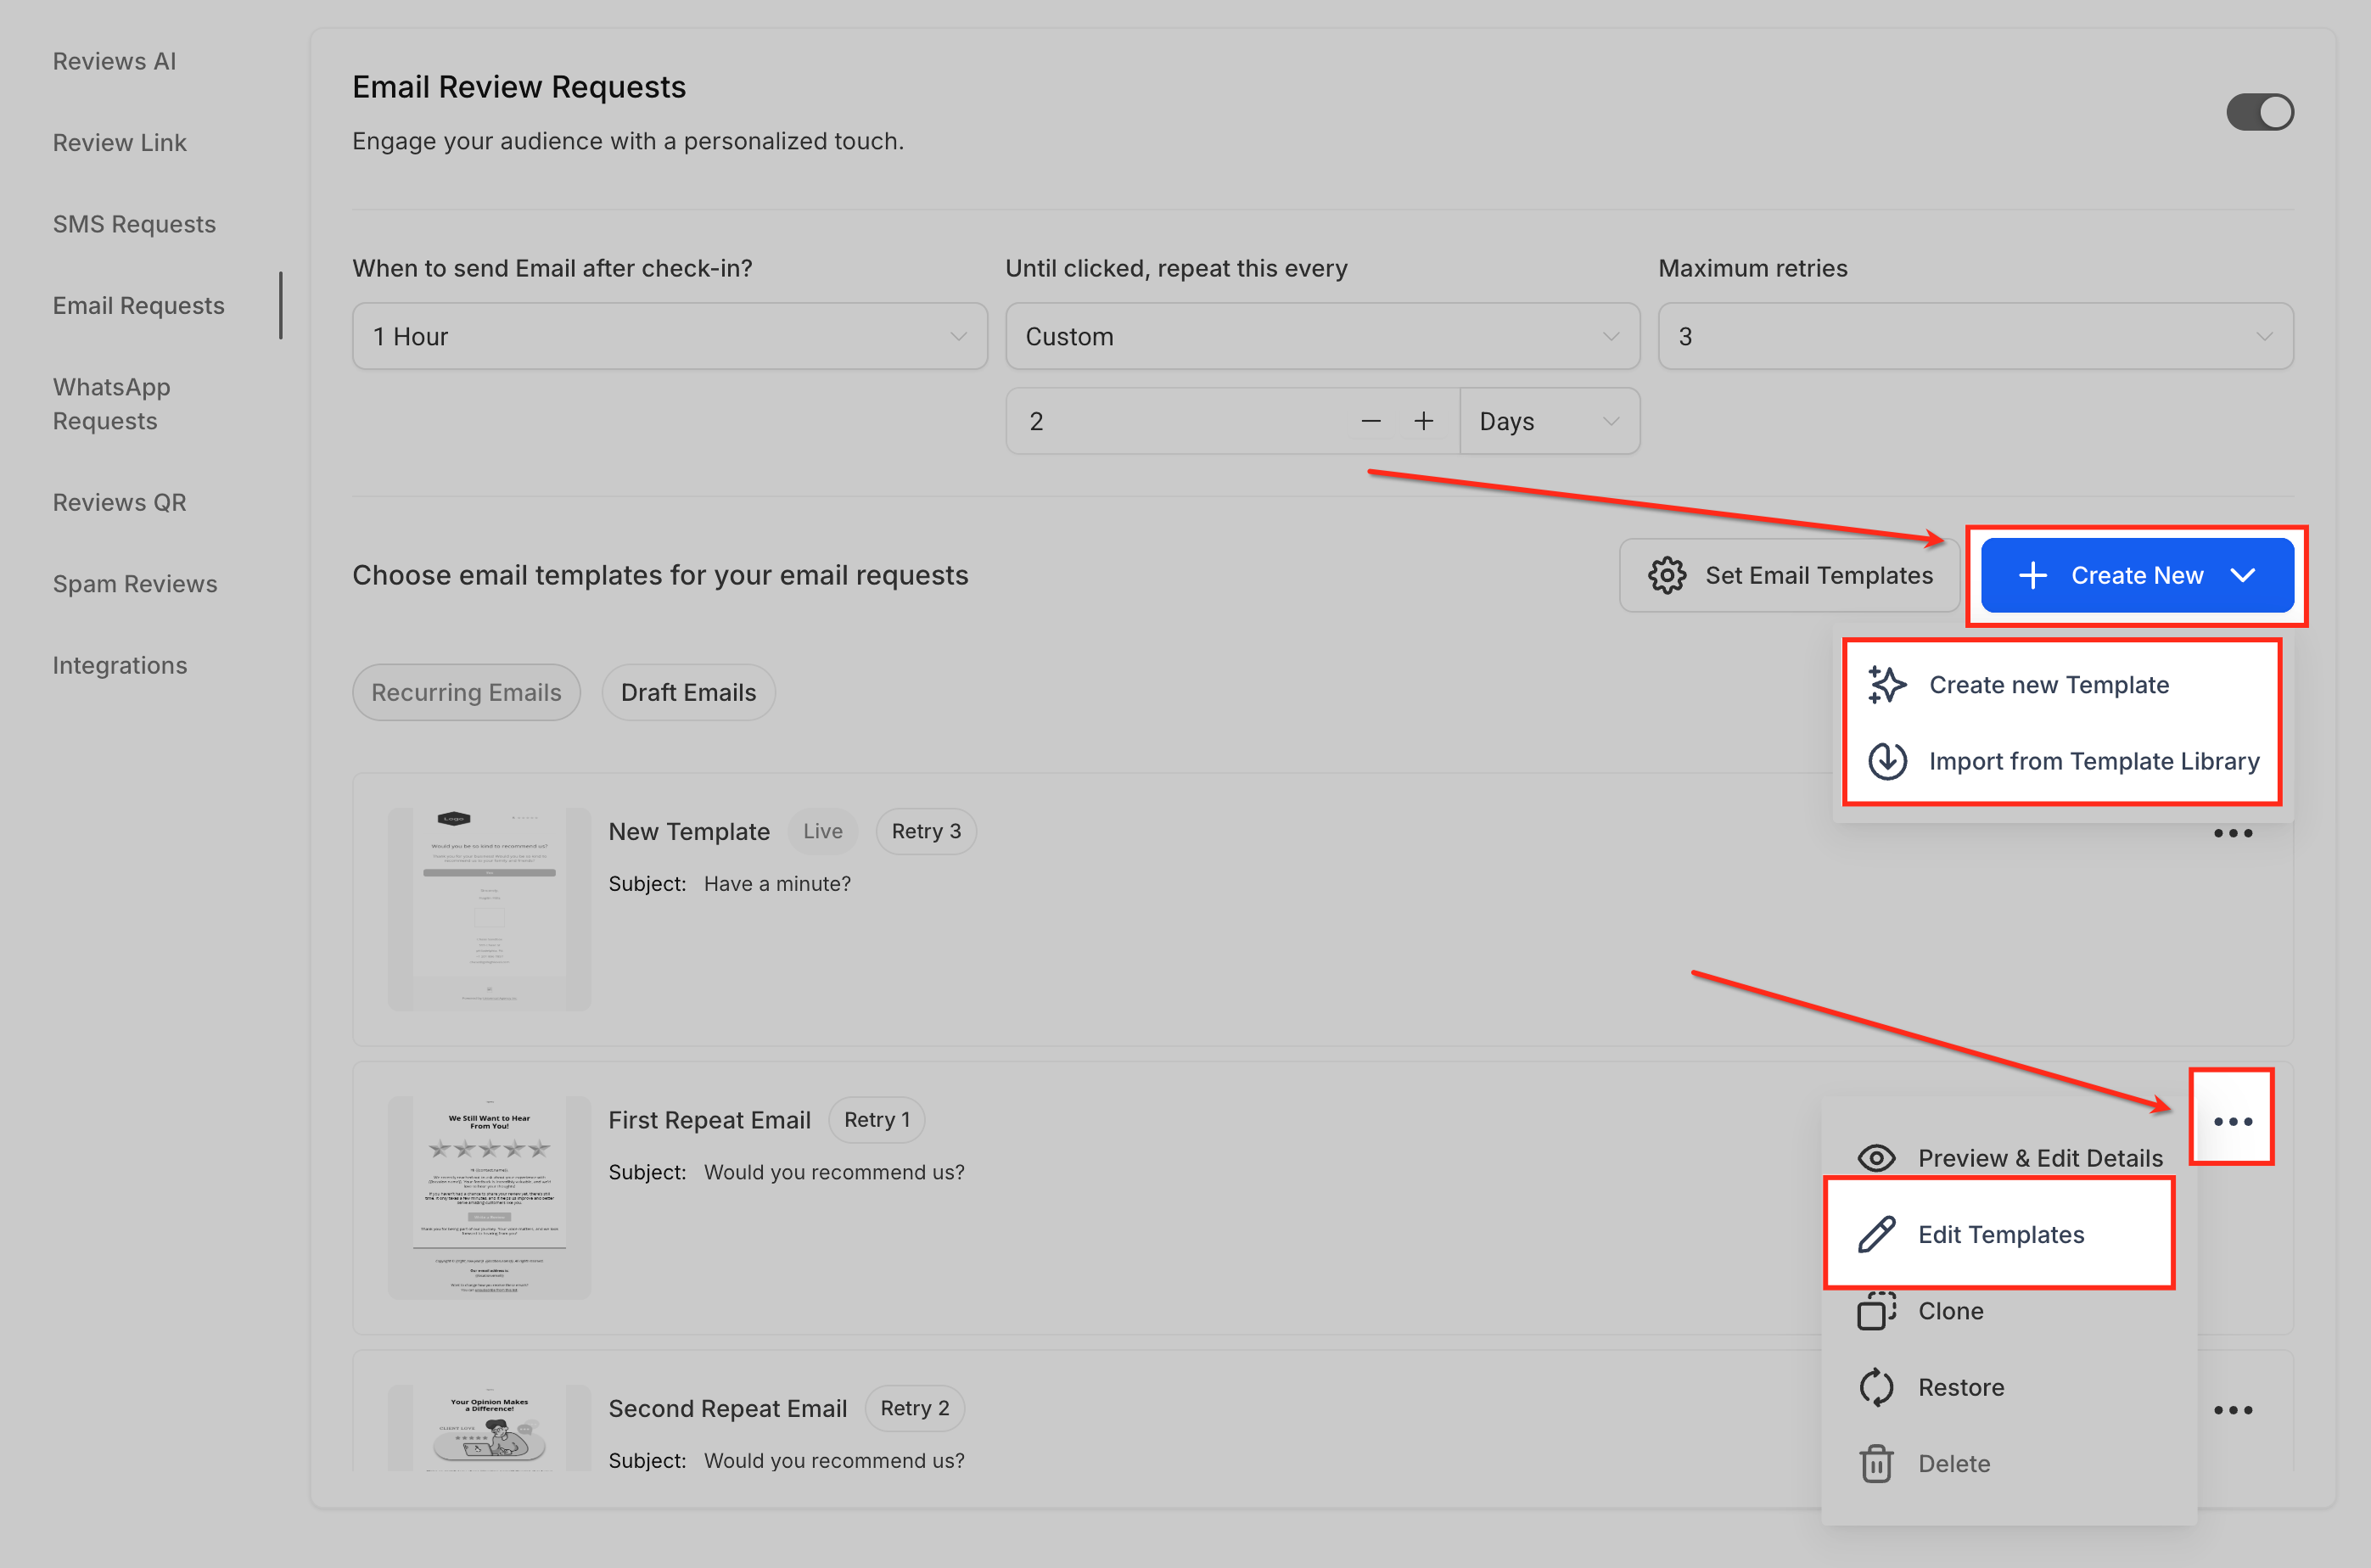
Create or import an email template. Use Create New to Create new Template or Import from Template Library. To modify an existing design, click the ⋯ menu on a template card and choose Edit Templates; you'll assign these later via Set Email Templates.
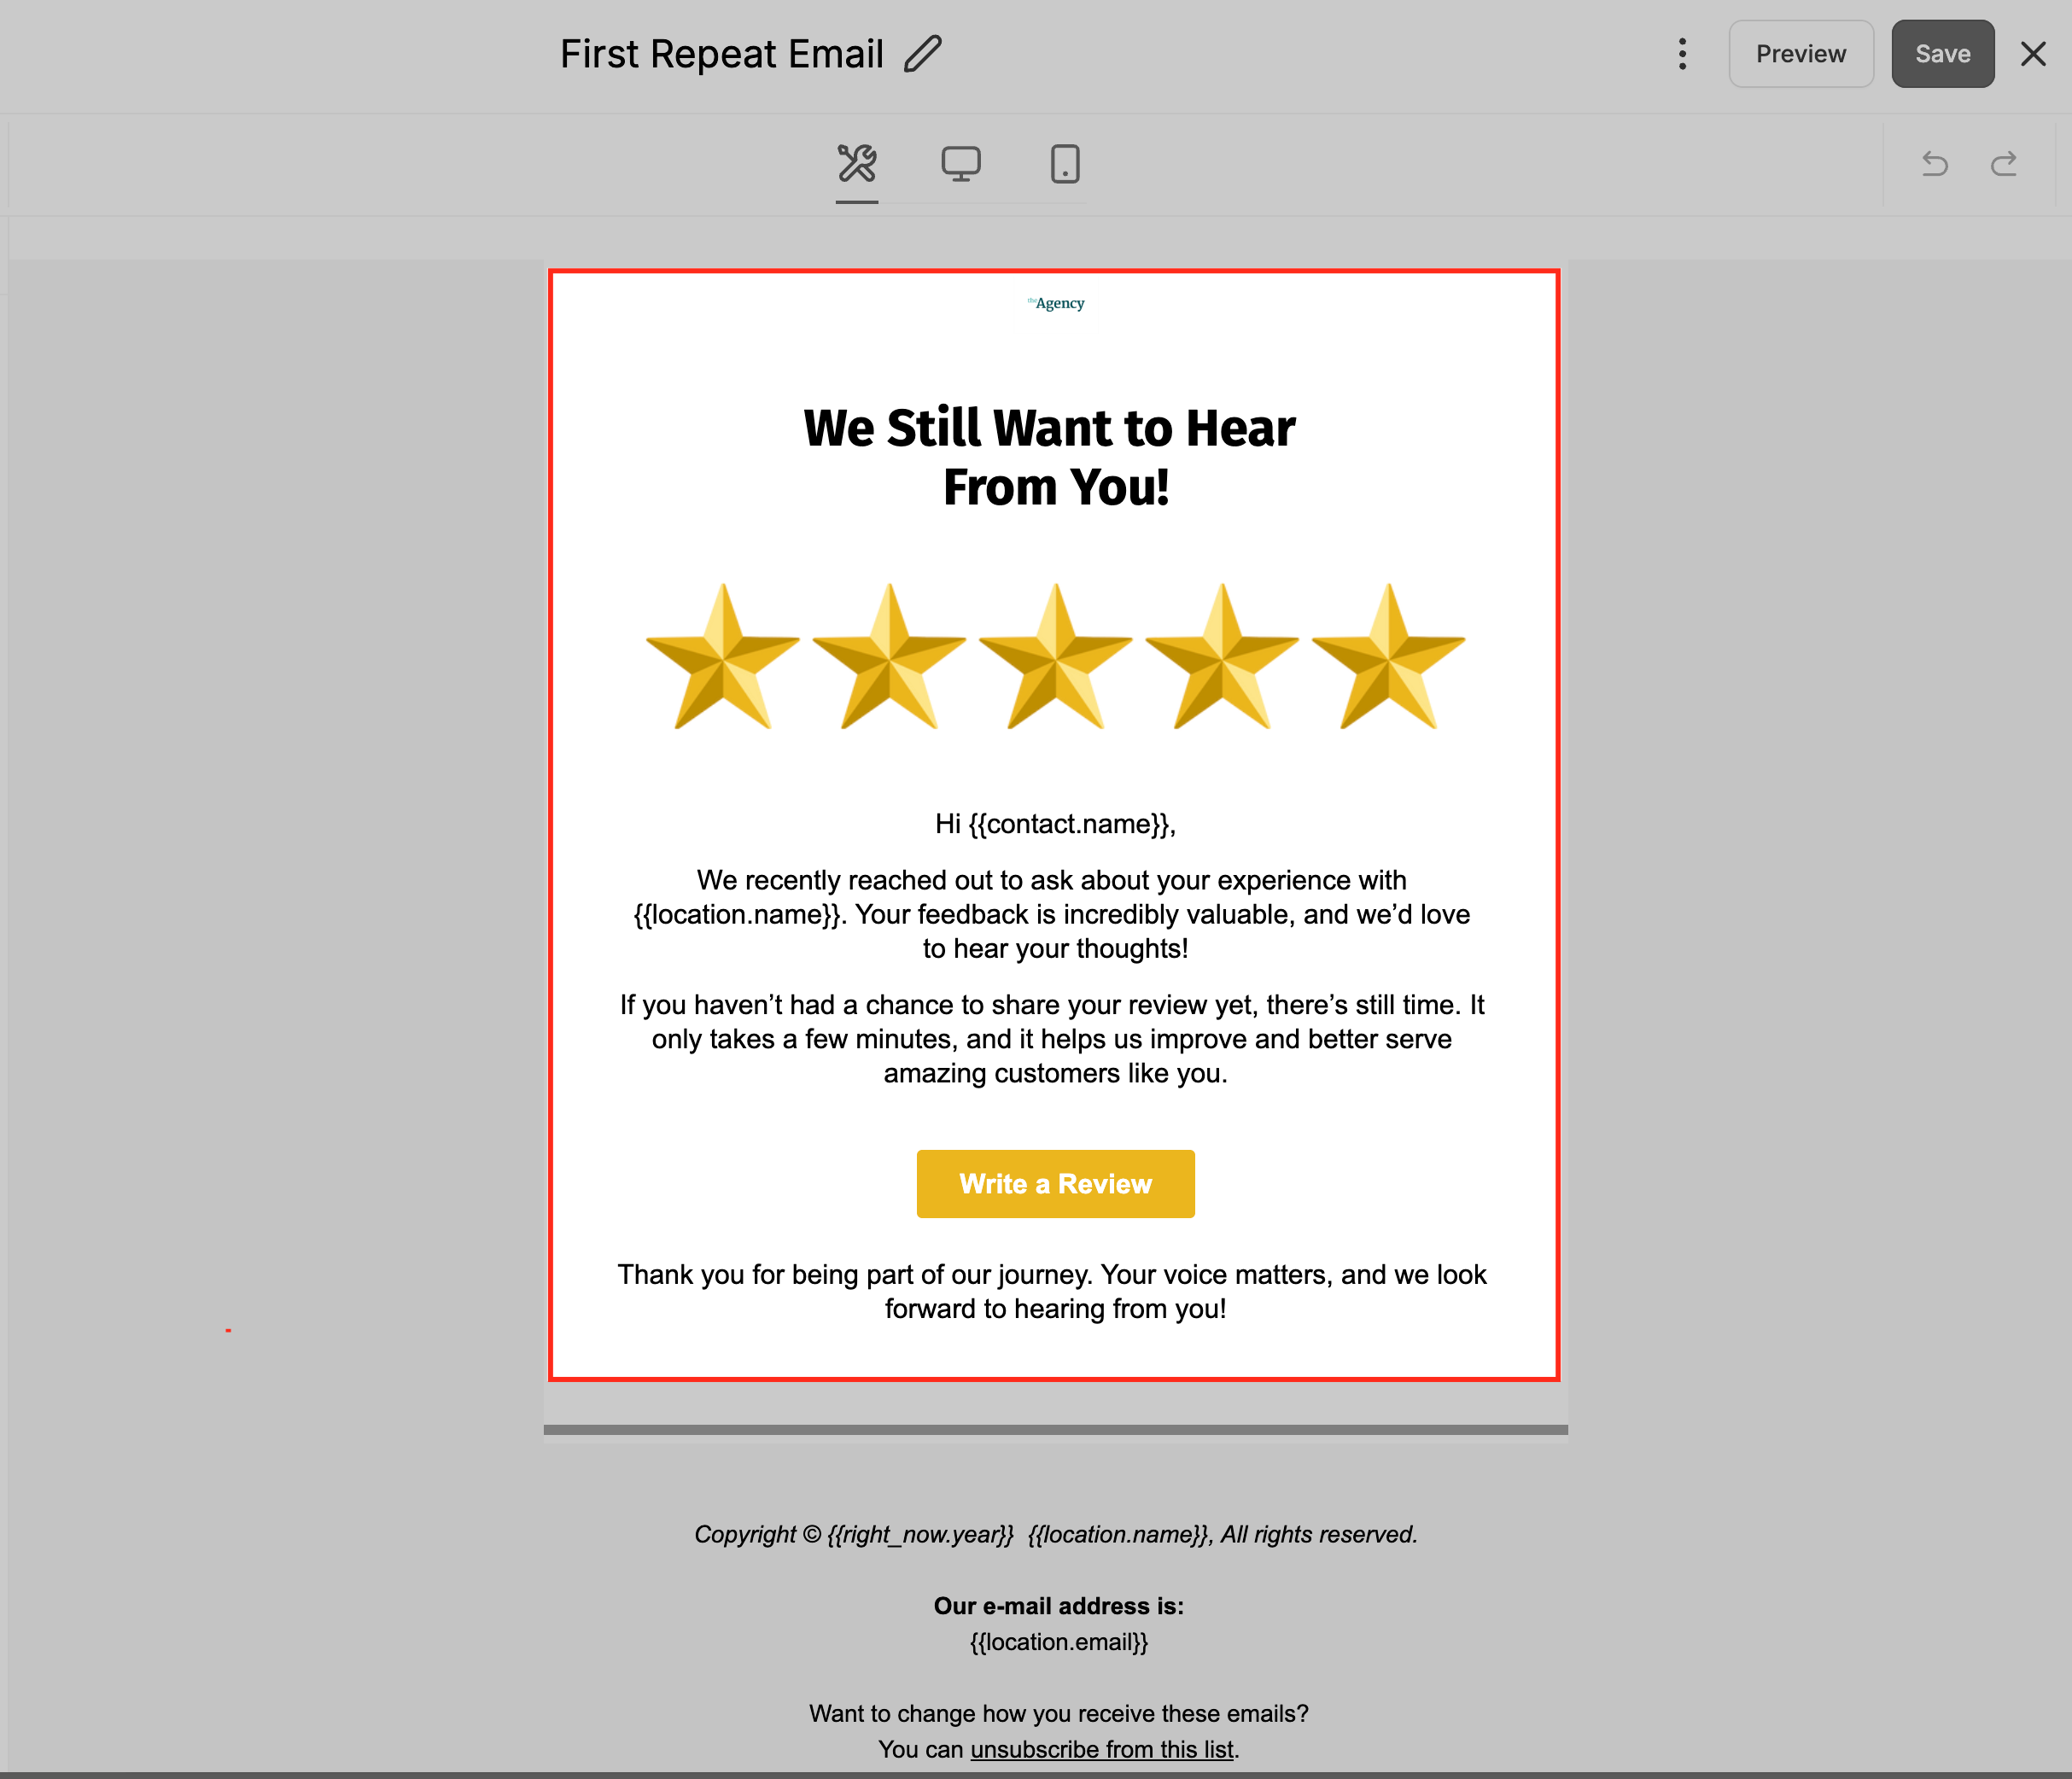
Design the email content. Use the drag-and-drop email builder to add text, images, and buttons from the Elements panel. Drag the Review Link element into your layout so the CTA opens your configured review URL, then click Save.
Can I use different SMS templates for each retry in a recurring sequence?
Yes. In the Set SMS Templates window, you can assign a specific template to each retry stage (Retry 1, Retry 2, and so on). This lets you vary your follow-up messages for better engagement while keeping every message within the same recurring sequence.
What's the difference between "Request with Image" and "Add Custom Image URL"?
Request with Image lets you upload a static image file (SVG, PNG, JPG) that appears in your SMS. Add Custom Image URL lets you insert a link to a hosted image, this can be a dynamic URL that changes based on patient-specific data, allowing for more personalized visuals.
If I choose "Custom" for the repeat frequency, can I use hours instead of days?
Yes. When you select Custom in the "Until clicked, repeat this every" setting, you can choose the exact number of hours or days between messages. Use the plus/minus buttons to set the number, then select your preferred time unit.
Can I duplicate an existing template and edit it without affecting the original?
Yes. In the Manage Your SMS Templates section, click the copy icon next to a template to create a duplicate. The duplicate is separate from the original, so you can edit it freely.
Which token should I use for the review URL?
Use {{reputation.review_link}}. It automatically uses the Review Link you configured under Reviews Management → Settings → Review Link.
Can I choose which phone number or email address sends review requests?
Yes. Set the default sender number under Reviews Management → Settings → SMS Requests and the default sender email under Reviews Management → Settings → Email Requests. These control which number or mailbox patients see your review requests come from.
What happens after a patient clicks the review link?
The repeat schedule stops for that patient once the click is detected, preventing additional retries.
Does adding an image to an SMS change the cost?
It may send as MMS, which can carry different carrier pricing. Check your messaging provider's rates.
Can I automate requests without sending them manually?
Yes. Add the Review Request action in a Workflow to trigger sends automatically, for example, after an appointment status change.
