SSO (Single Sign-On) magic links give your clients instant, secure access to individual Client Portal apps, such as Courses, Communities, or Affiliates, without entering login credentials. This guide walks you through creating magic links, embedding them as custom menu items in the portal, controlling who sees them, and streamlining navigation for a polished client experience.
SSO magic links are unique, authenticated URLs that let clients open a Client Portal app without typing a username or password. When a client clicks their personalized link, they're logged in instantly and taken to the right destination, a course dashboard, a community space, or an affiliate portal.
These links are app-specific and contact-specific, so each person receives secure access to exactly the portal experience you've granted them.
Note: One-click magic-link sign-in lets clients reach the portal without a password.
Magic links reduce friction, save time, and increase client satisfaction. Key advantages include:
One-click login: Instant access with no username or password.
Faster onboarding: Clients can start using their app right away.
Fewer support tickets: Removes login headaches like forgotten passwords.
Improved navigation: A smoother, more direct sign-in experience.
Multi-app convenience: Ideal for setups that combine apps like Courses, Communities, and Affiliates.
Higher engagement: Easier access encourages repeat visits and ongoing interaction.
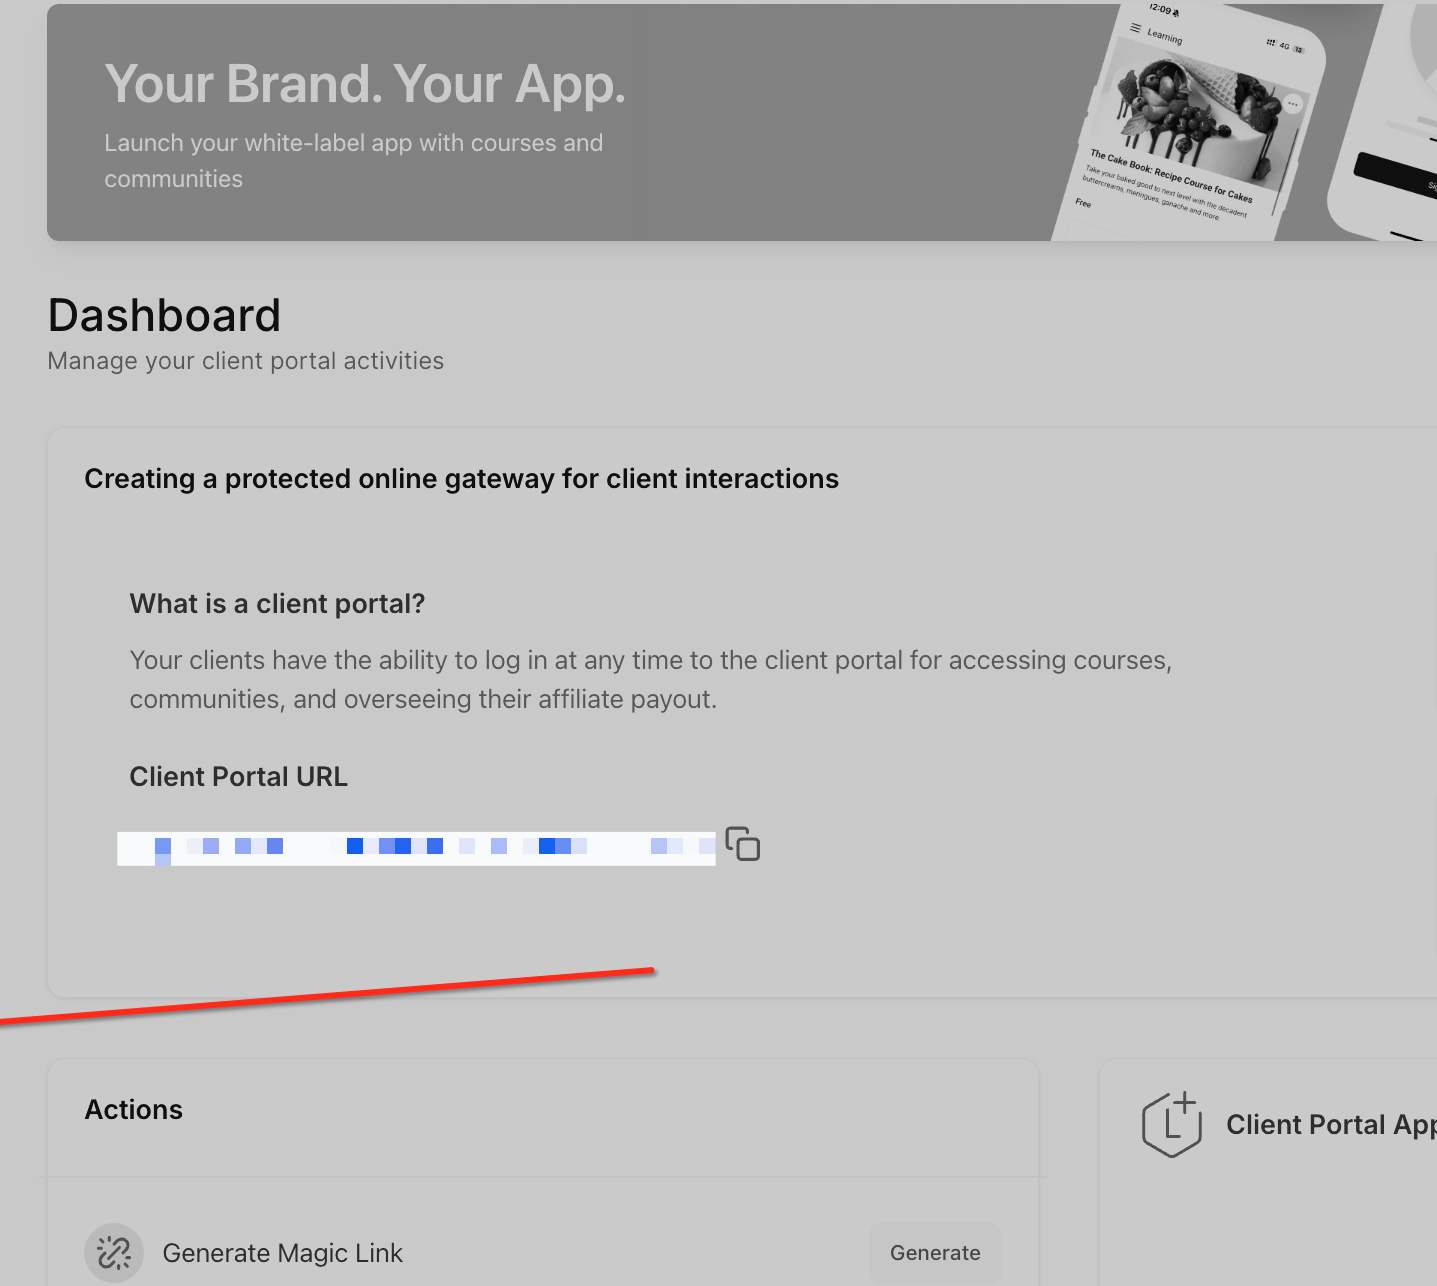
You can create magic links from the Client Portal dashboard and share them with contacts for direct access to specific apps.
Navigate to the Web Tools → Client Portal tab from the left-hand menu to reach your Client Portal dashboard. This area is where you manage your client-facing apps and create secure login experiences.
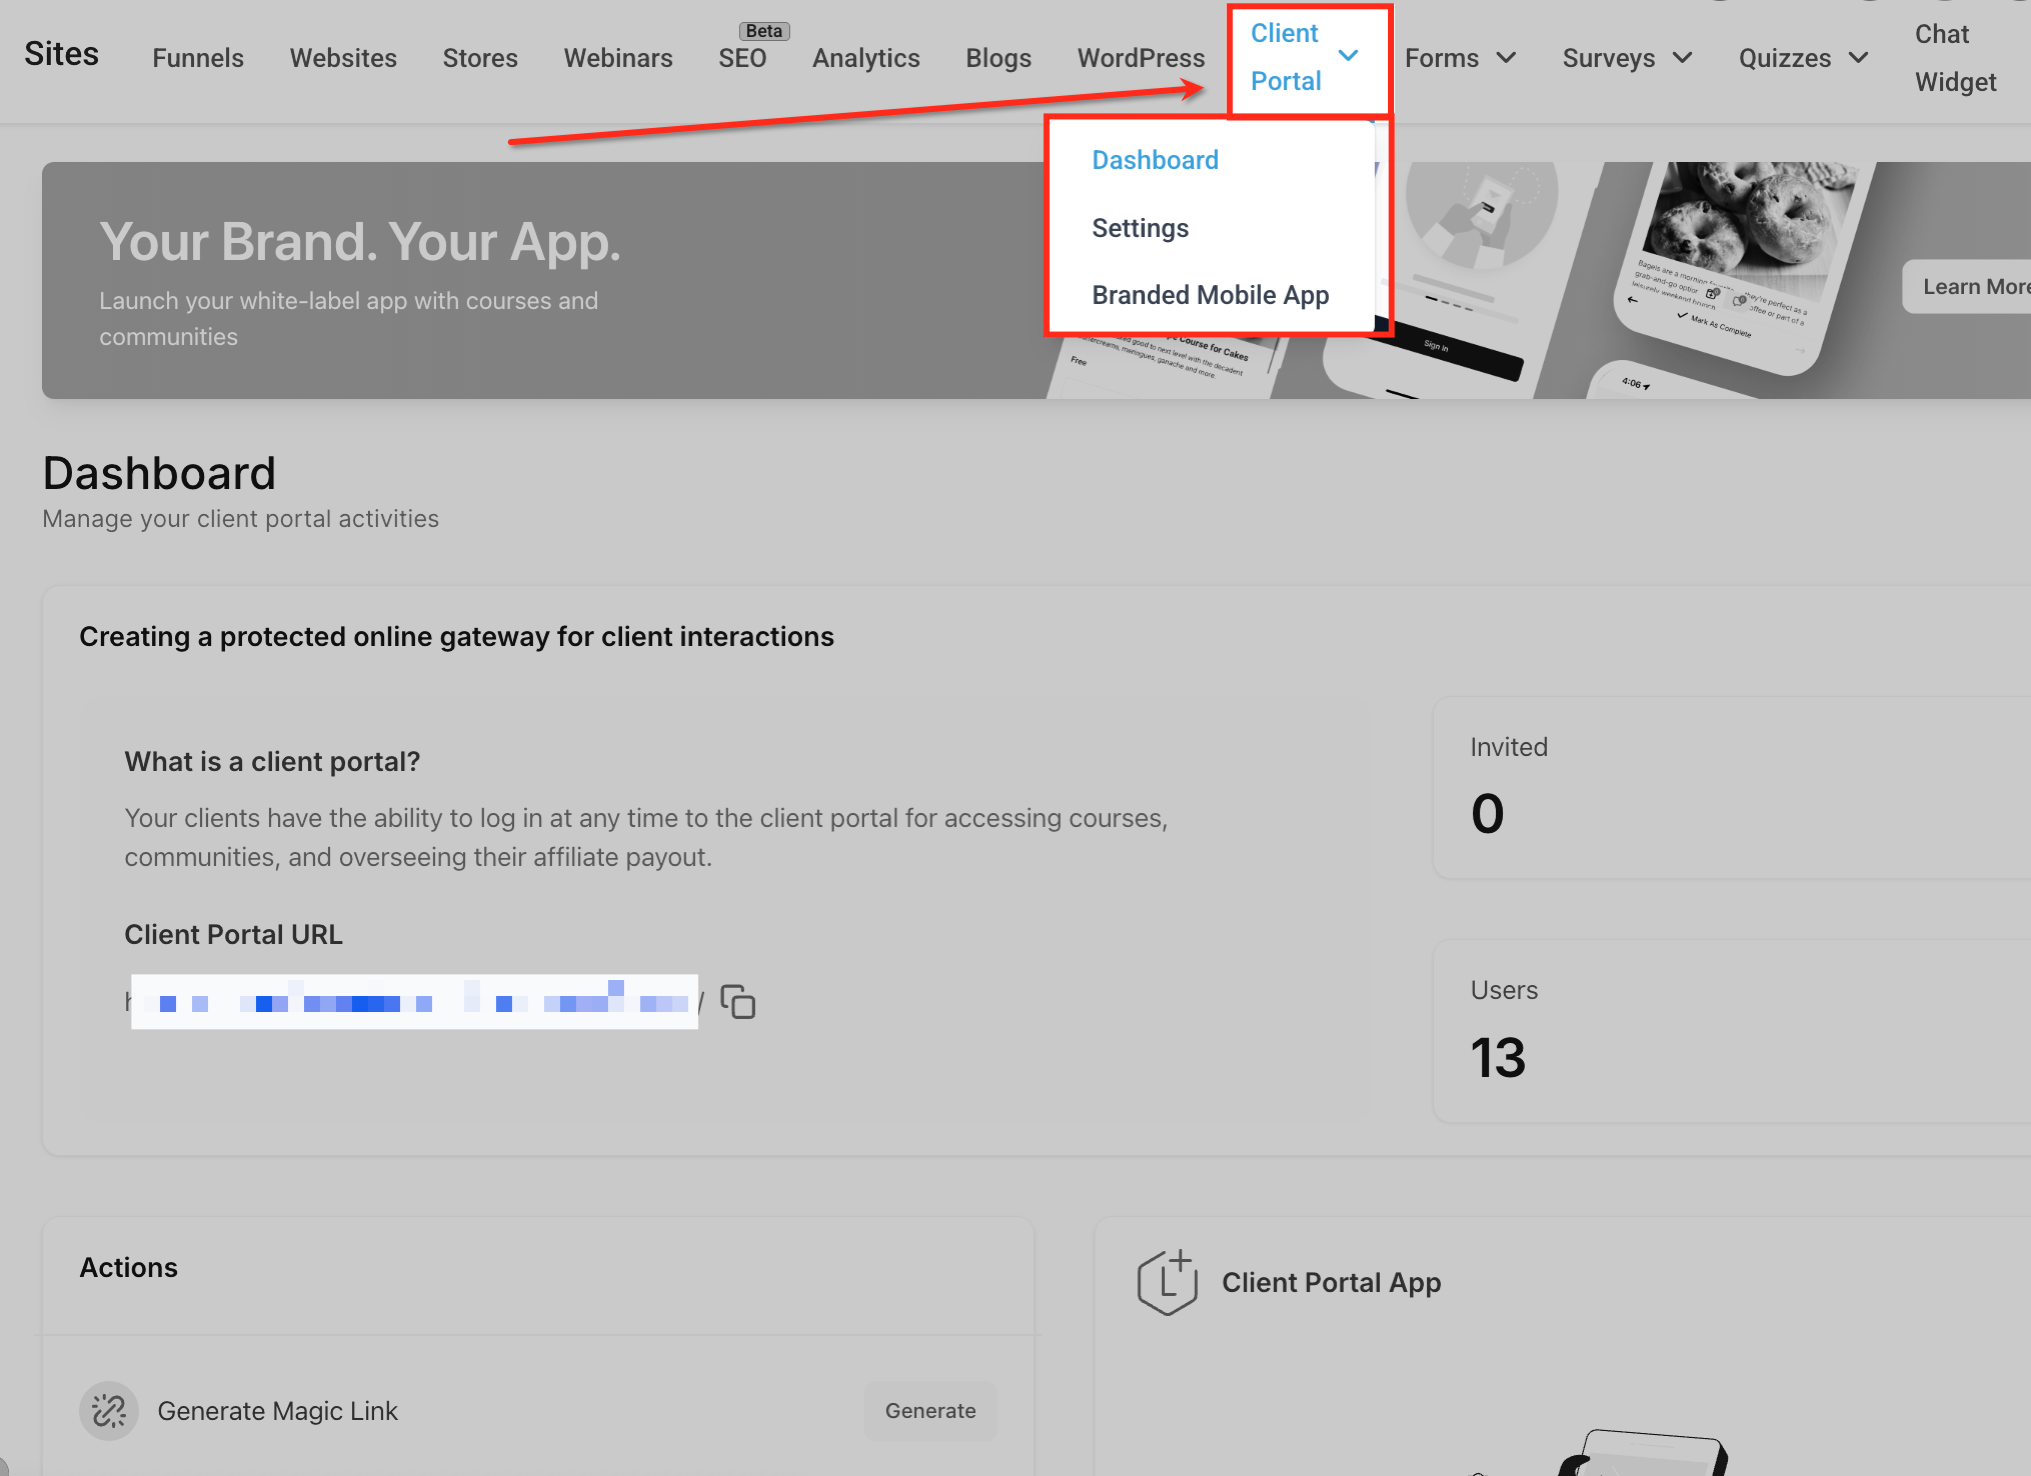
Within Web Tools, click the Client Portal dropdown at the top and select Dashboard. This opens the portal management tools, including magic link generation and app settings.
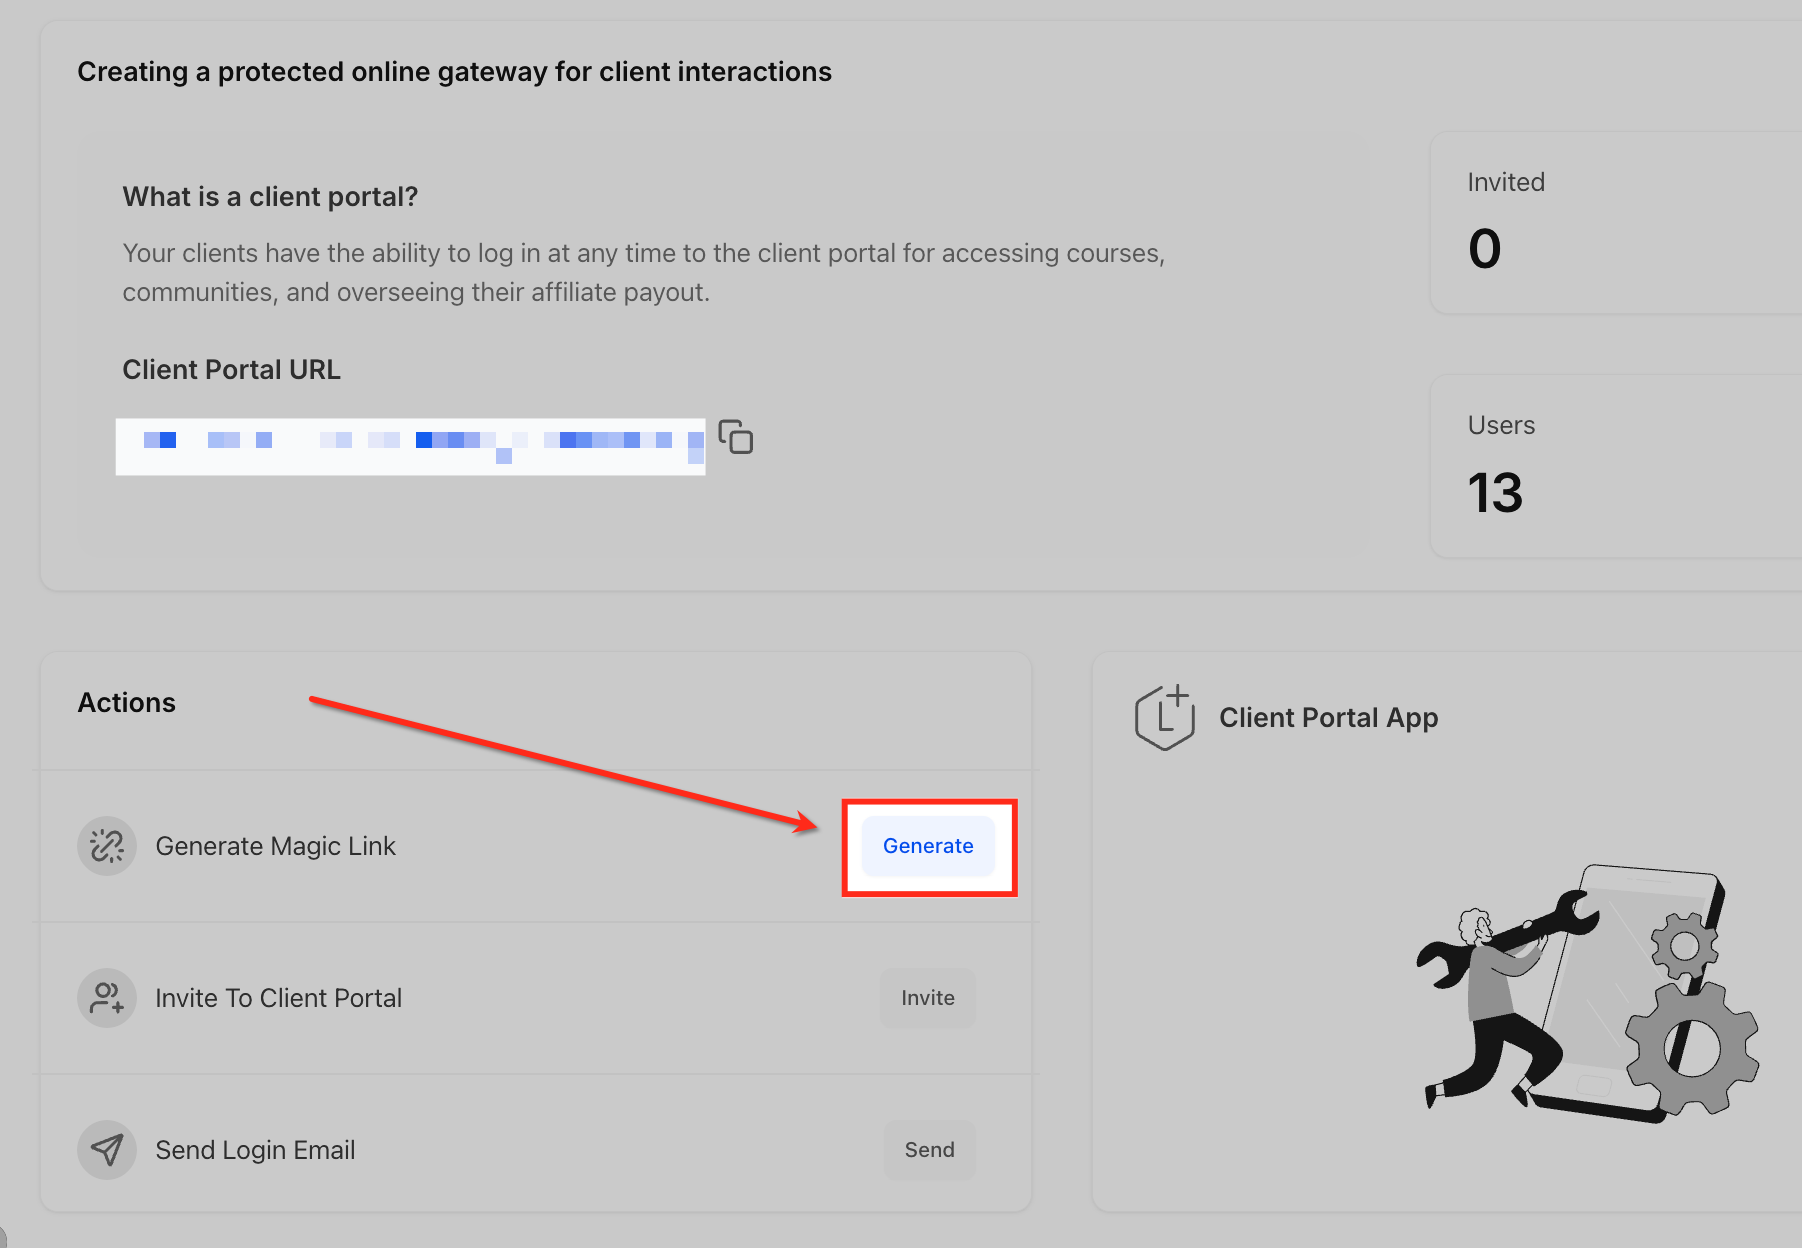
In the Actions panel, click the Generate button next to "Generate Magic Link." This starts the process of creating a secure, one-click login for a specific contact and app.
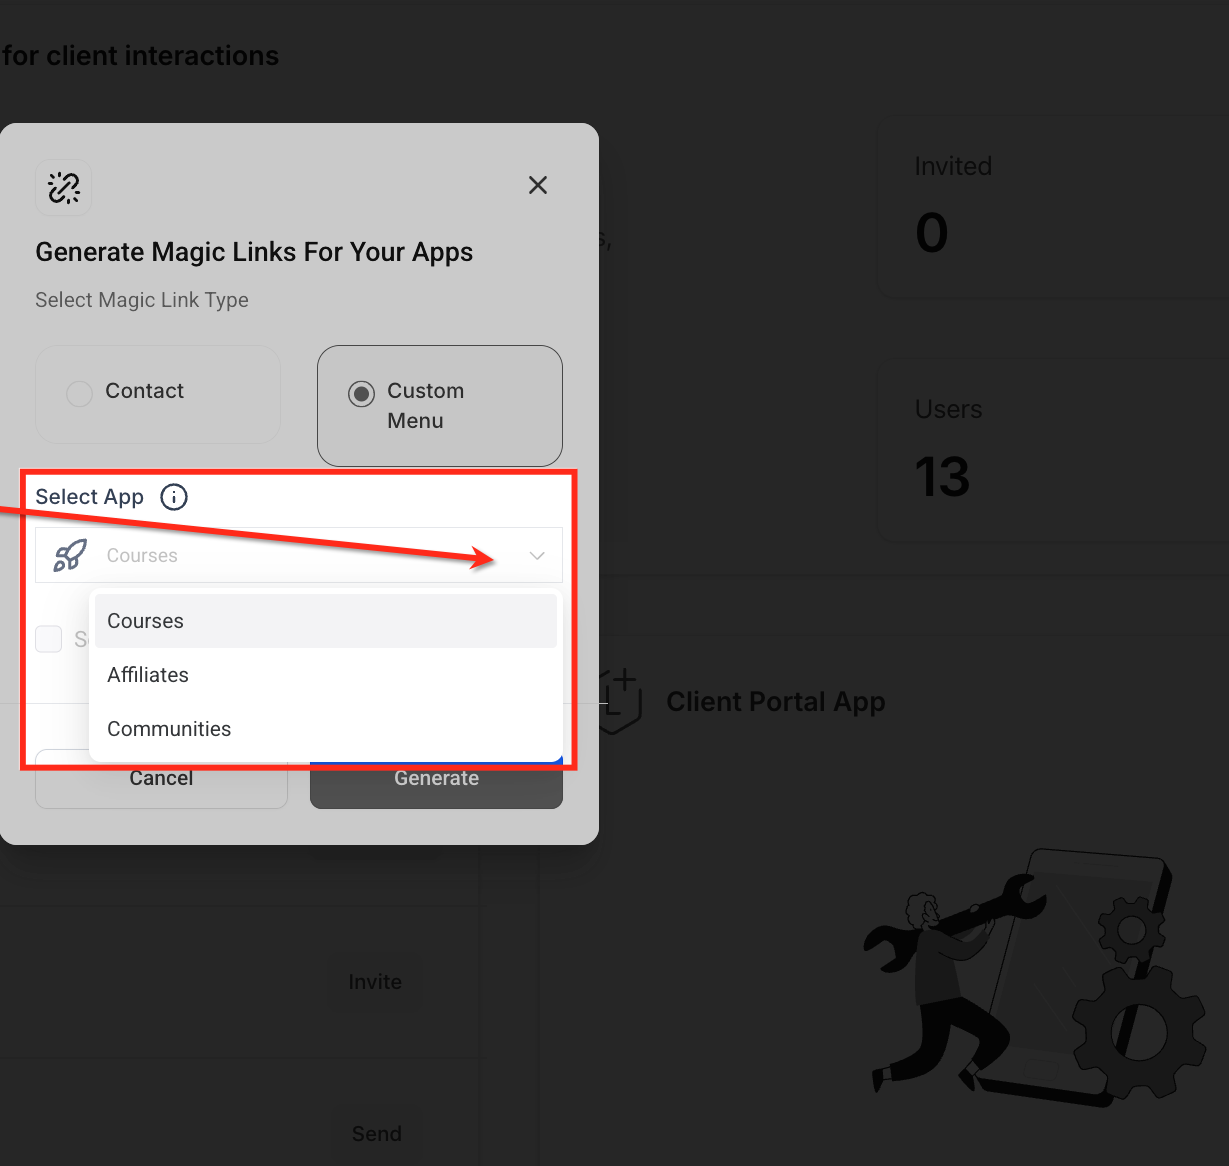
Choose Custom Menu to generate a reusable magic link intended for portal navigation. This type of link is ideal for embedding directly in your portal's sidebar.
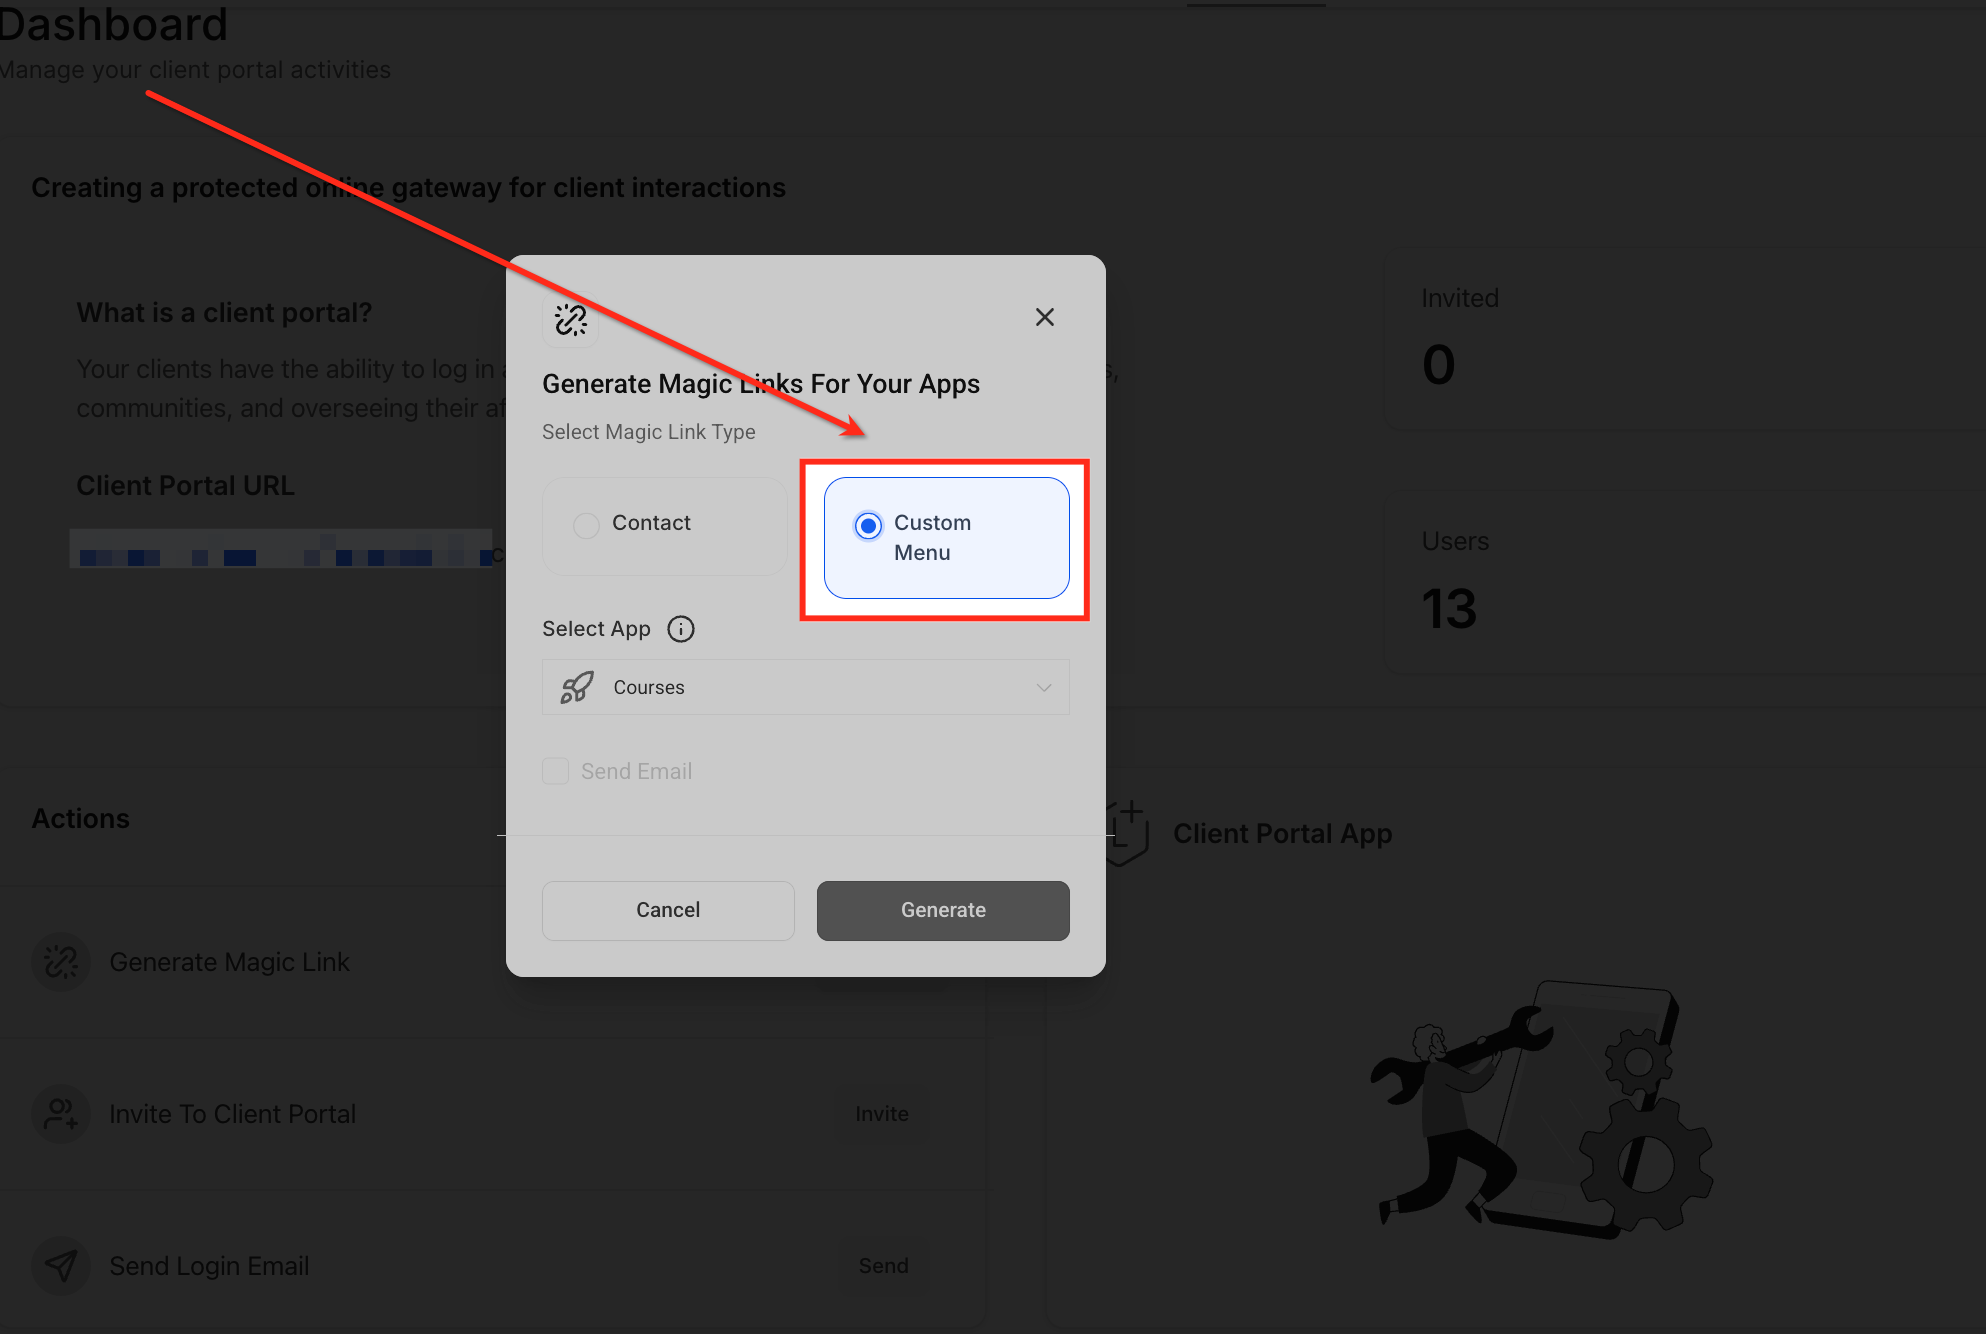
Use the dropdown under Select App to choose which Client Portal app the magic link should open, Courses, Affiliates, or Communities. This sets the destination when the link is used.
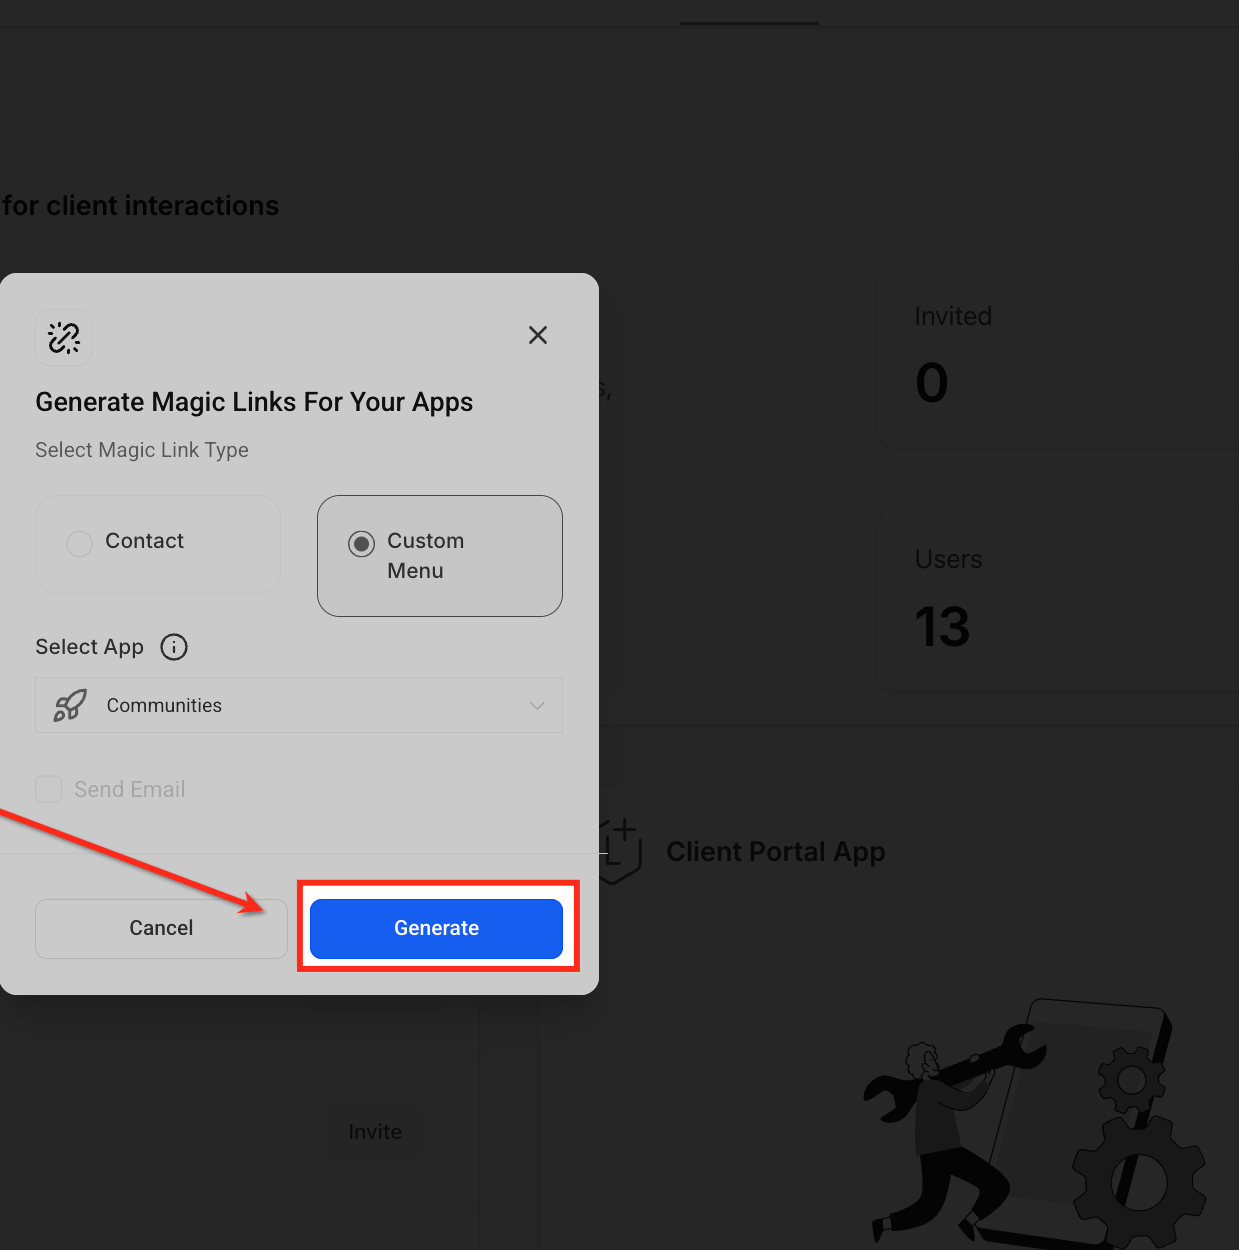
Once you've selected the app, click the Generate button. This instantly creates a secure, one-click login URL that you can embed or share.
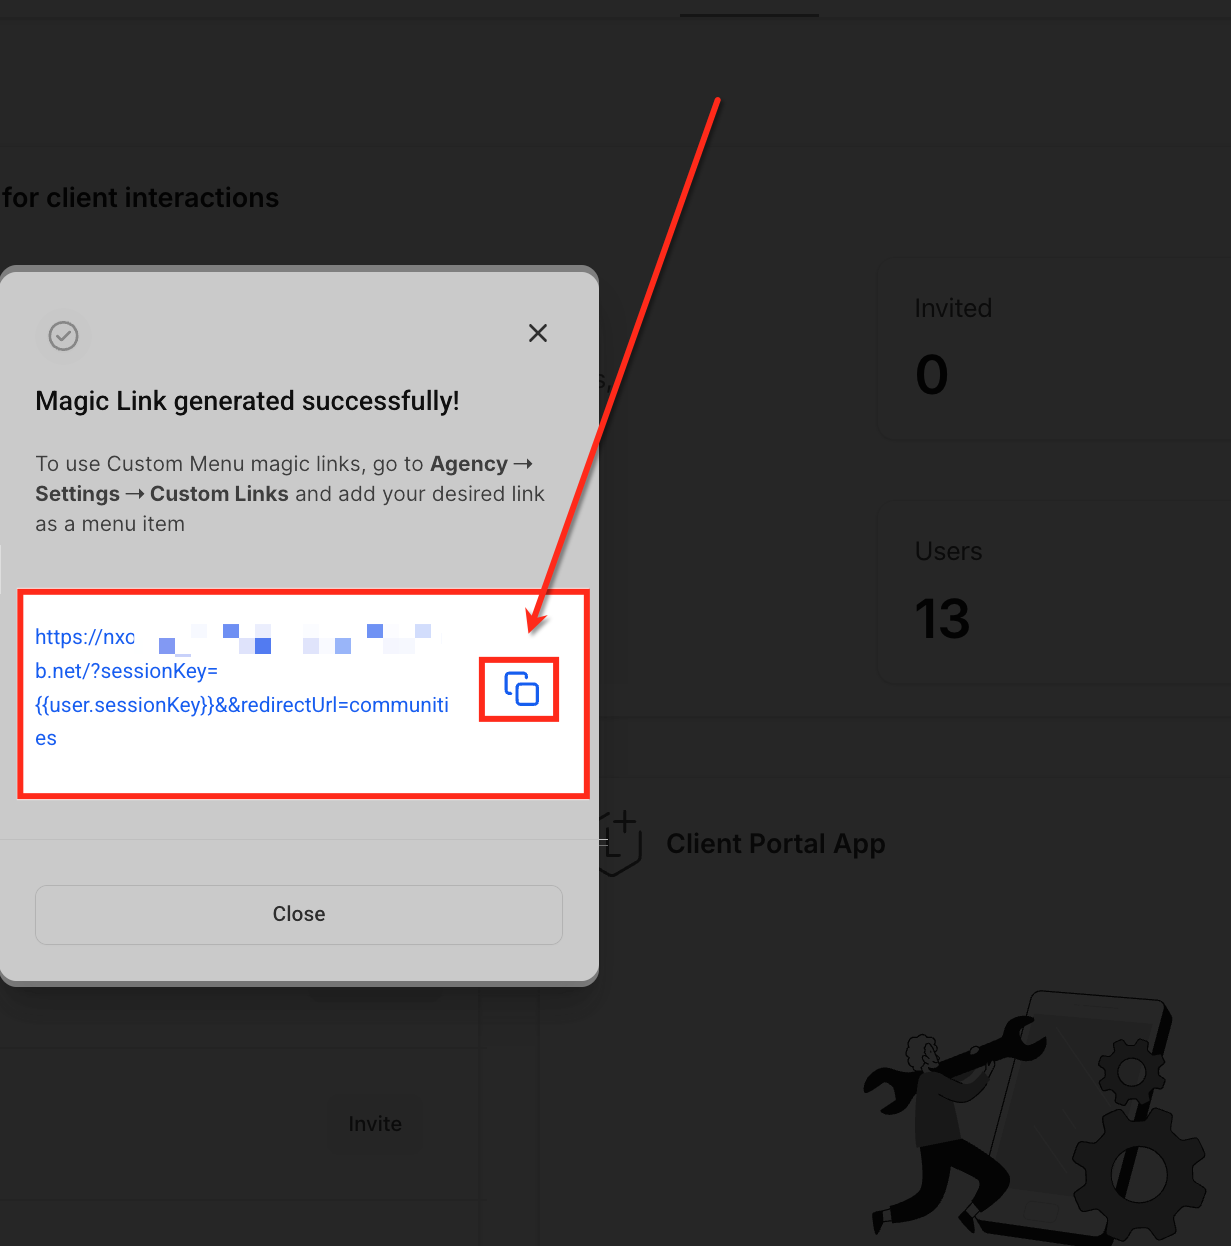
After the link is generated, click the copy icon to save it to your clipboard. You can now paste this secure SSO link wherever you need it, such as in emails or custom menu items, for seamless client access.
You can embed magic links as custom menu items inside the Client Portal for even quicker access. To add a magic link as a menu item, follow these steps.
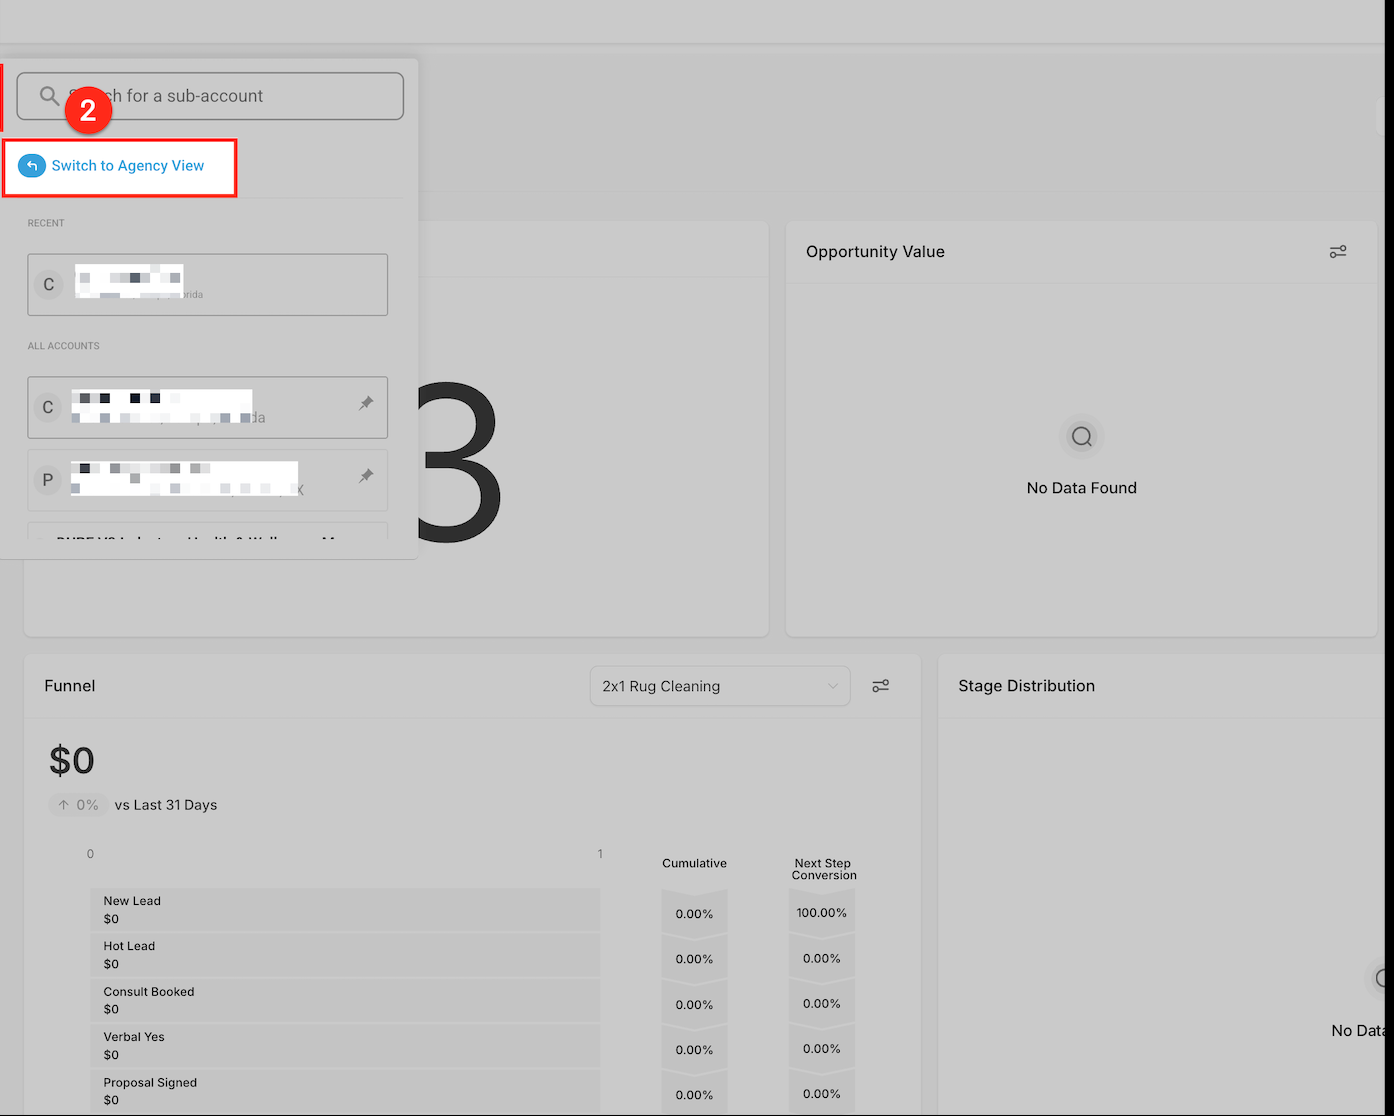
From the sub-account dashboard, click the dropdown beside the account name and select Switch to Agency View. This lets you manage global settings like custom menu links across all sub-accounts.
Once you're in Agency View, scroll to the bottom of the left-hand sidebar and click Settings. This is where you configure platform-wide preferences, including custom menu links.
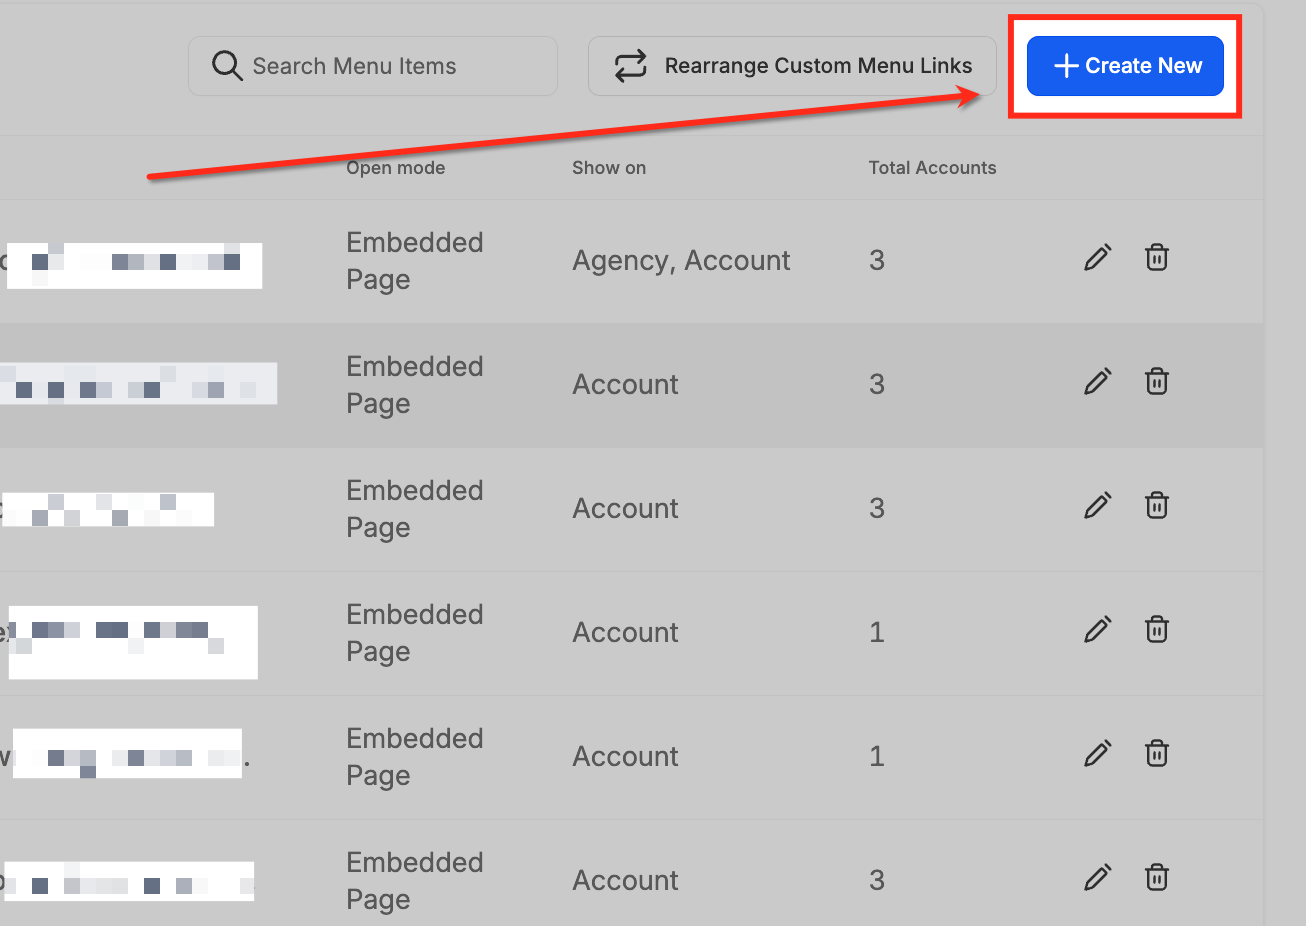
In the Settings panel, scroll down and click Custom Menu Links. This section lists all existing menu links and is where you create and manage new ones for the agency and sub-accounts.
Click the + Create New button in the top-right corner of the Custom Menu Links section to begin creating a new menu link.
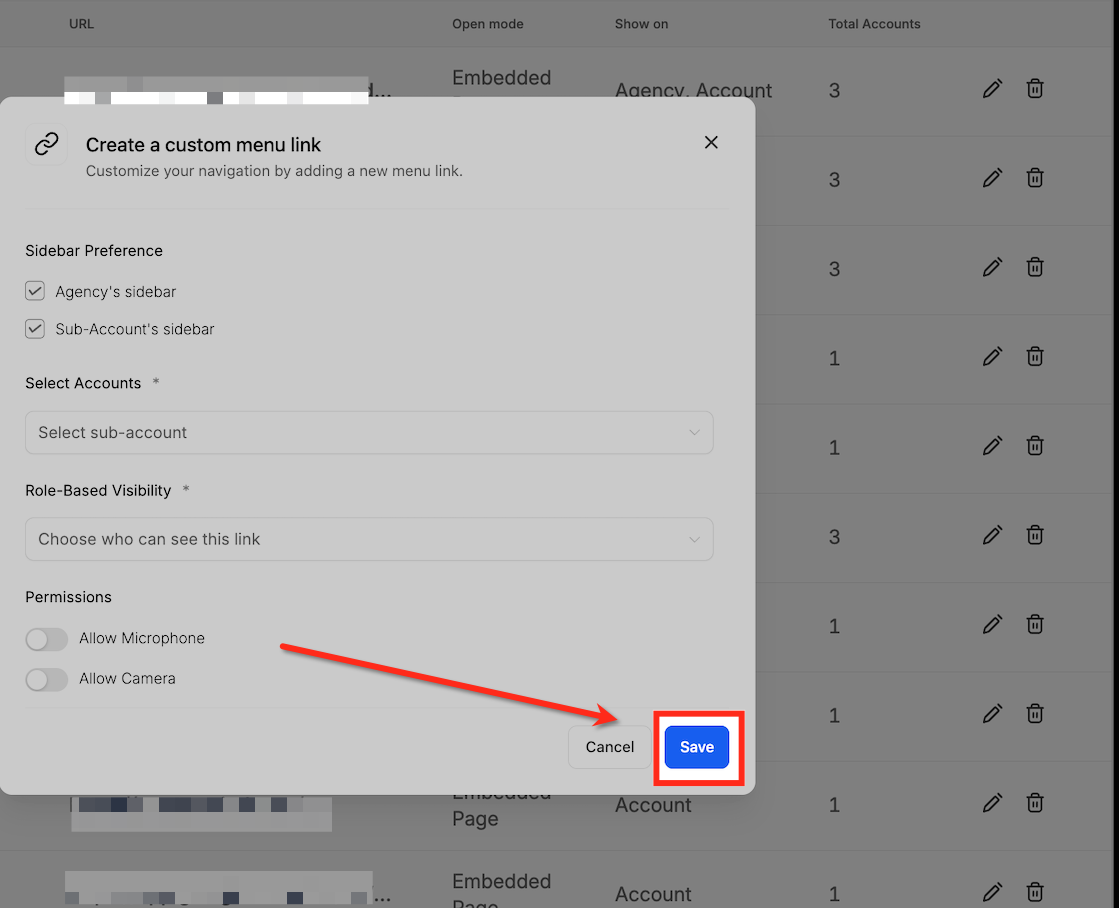
Fill in the required fields:
Link Icon: Choose an icon identifier (for example, vr-cardboard).
Link Title: Name the menu item (for example, "Test Link").
URL: Paste the full magic link you generated earlier.
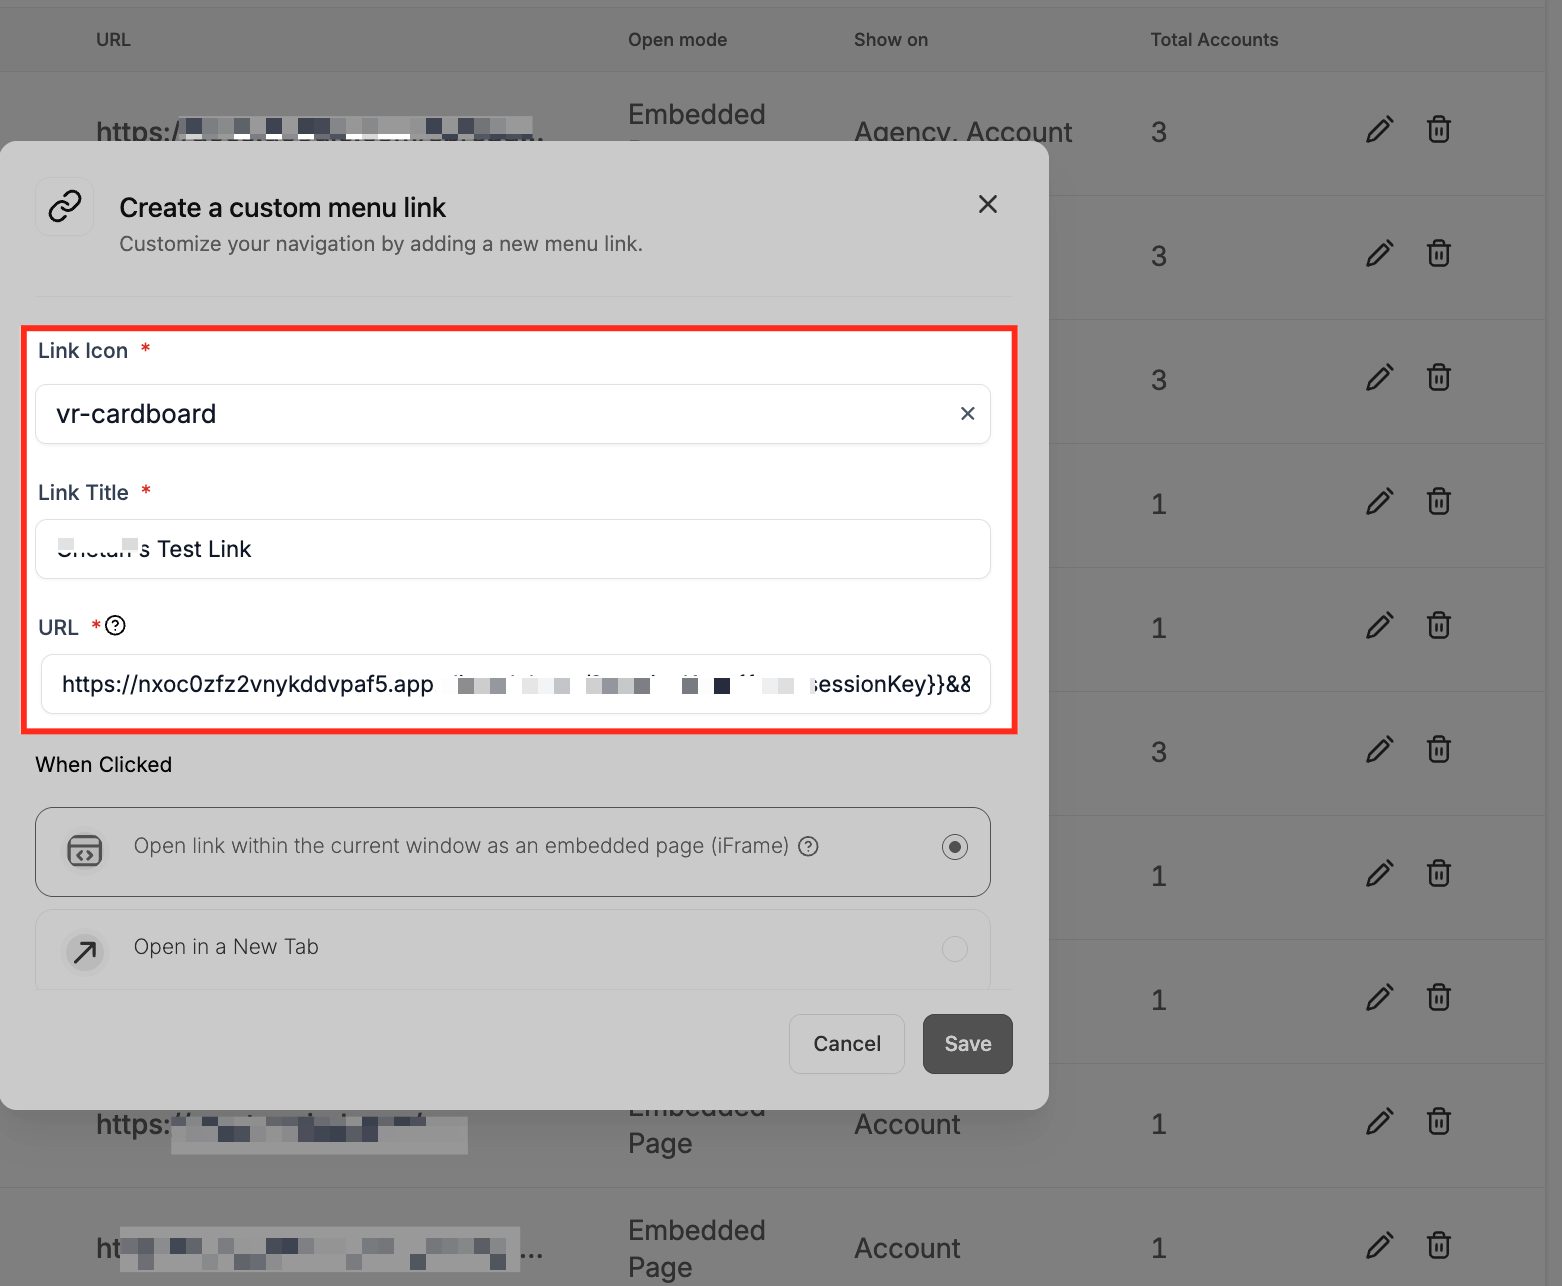
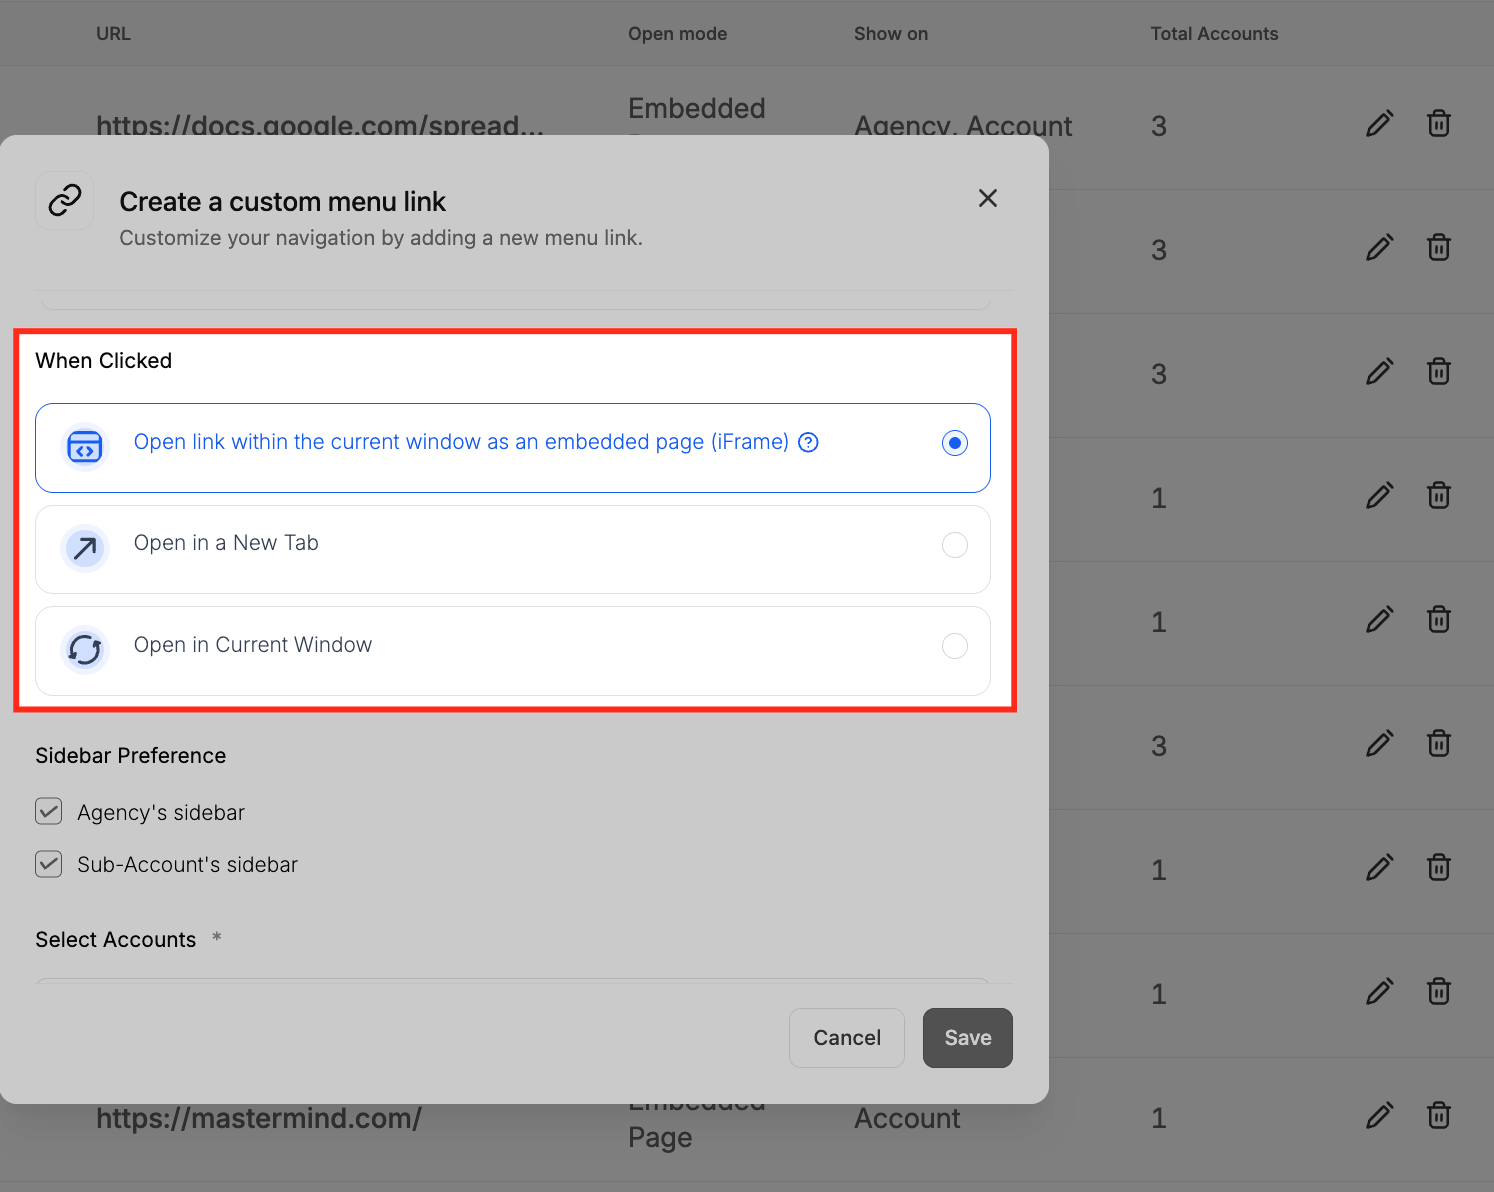
Select how the link opens when clicked. You can display it inside the current window as an embedded iFrame, open it in a new tab, or load it in the same window.
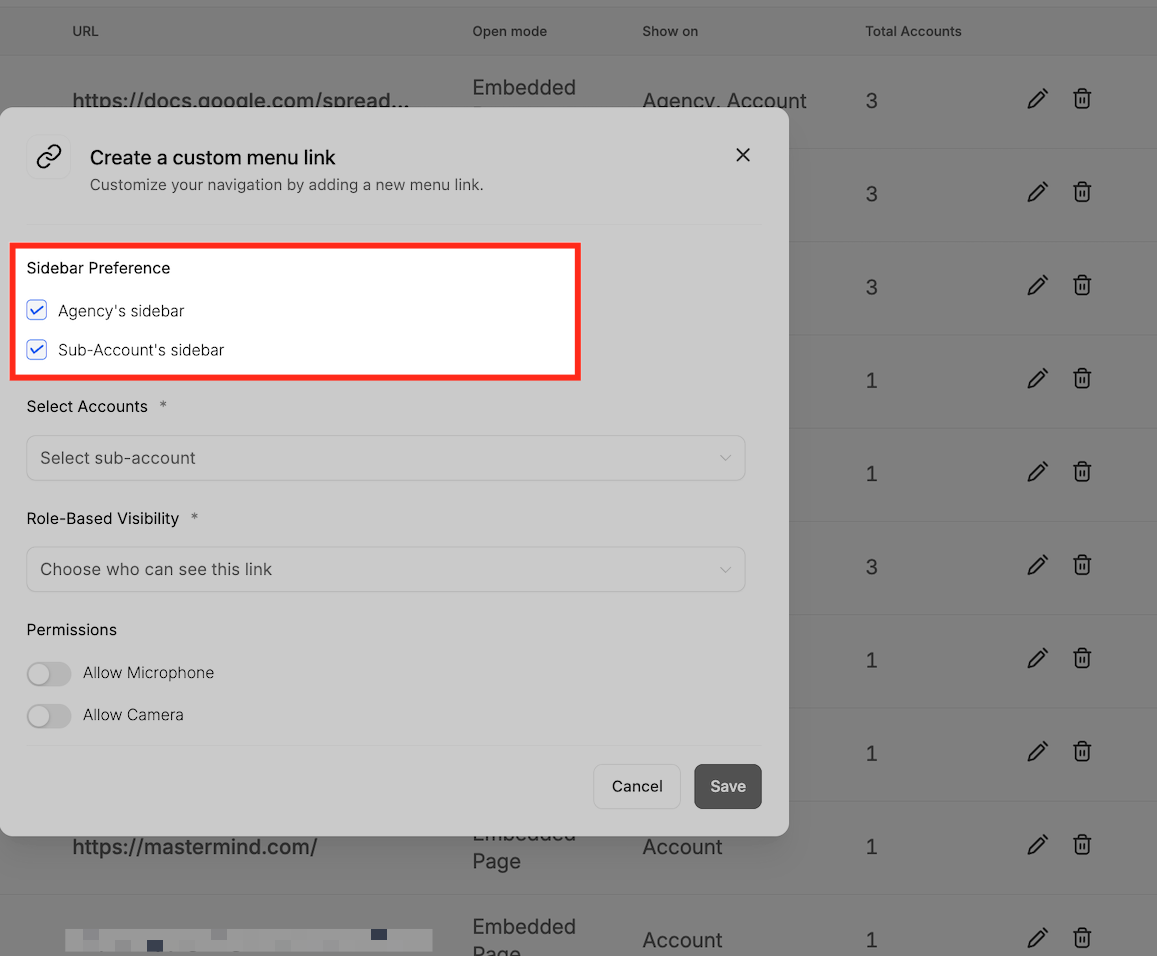
Choose where the custom menu link appears. You can show it in the agency's sidebar, the sub-account's sidebar, or both for easier navigation across user levels.
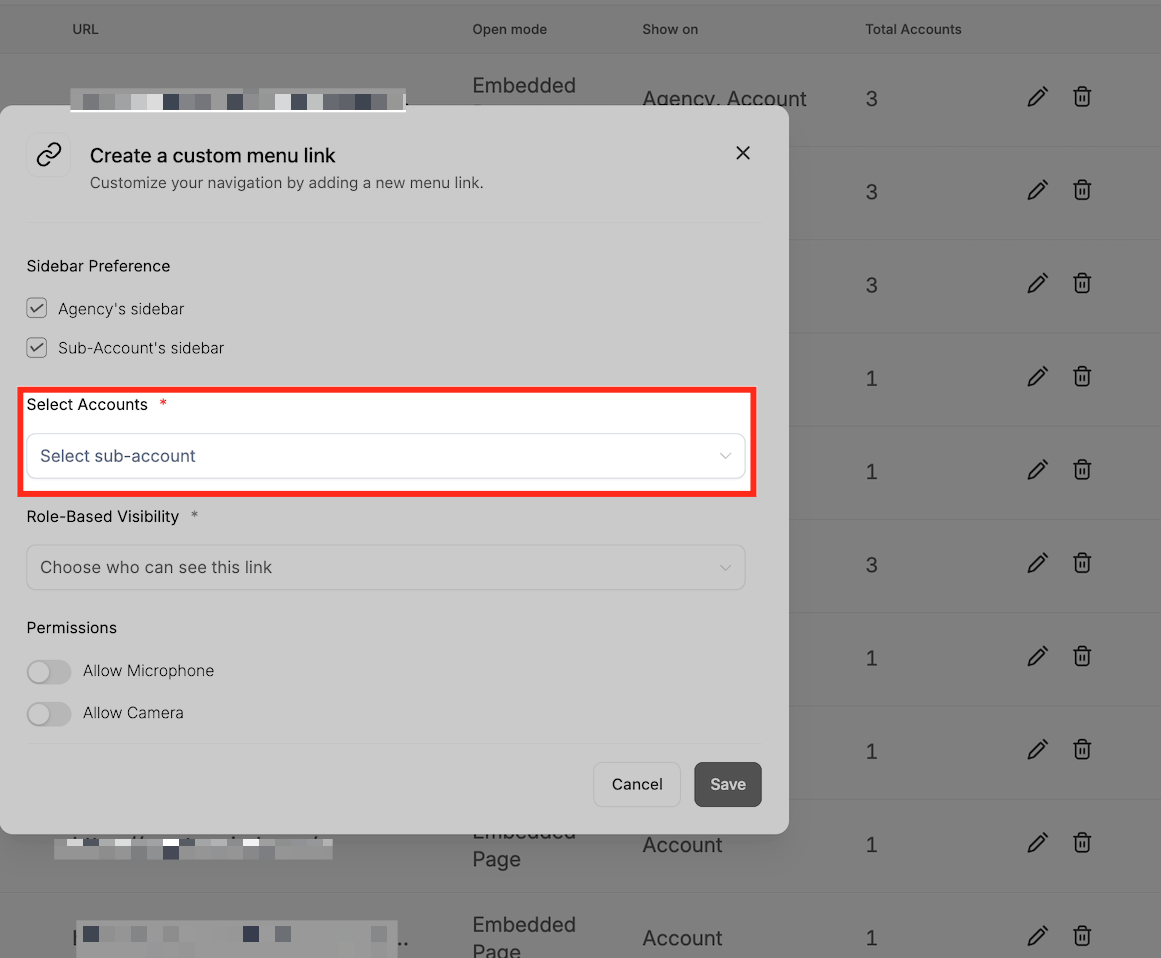
Assign the custom menu link to one or more sub-accounts. Only the selected accounts display this link in their navigation sidebar.
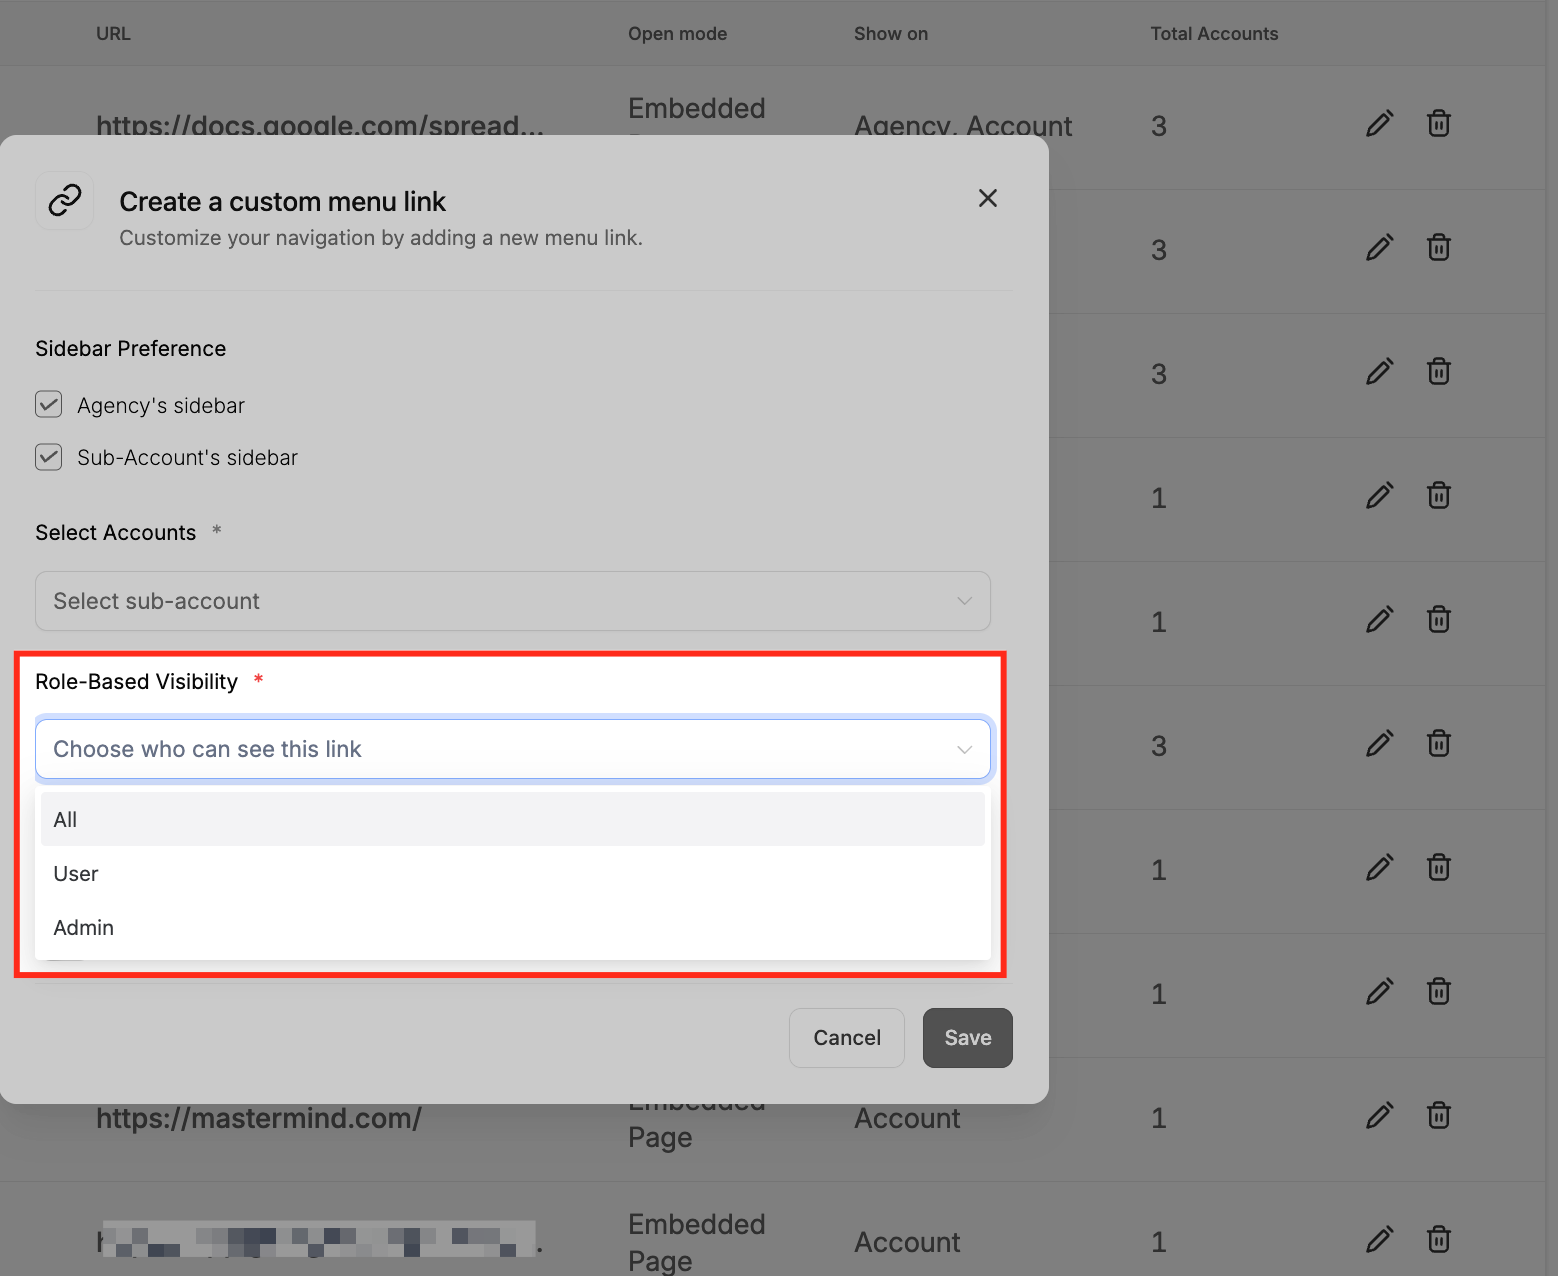
Choose who can access this custom menu link based on user role. You can limit visibility to Admins, Users, or make it available to everyone within the assigned sub-accounts.
Grant microphone and camera access to the custom menu link if the embedded content needs those capabilities, ideal for video conferencing or recording tools.

Once you've configured all options, URL, sidebar visibility, selected accounts, role-based visibility, and any needed permissions, click Save to finalize the custom menu link. This adds the magic link to the designated sidebar(s), making it easy to reach based on the rules you defined.
Do magic links work for all Client Portal apps?
They work with Courses, Communities, and Affiliates.
Are magic links secure?
Yes. Each link is unique to the contact and app, granting only the access that's needed.
Can I use magic links in automations or emails?
Yes. You can insert the link in automated messages, onboarding emails, or custom buttons.
Do users need to be logged into the portal first?
No. Clicking the magic link logs them in and redirects them automatically.
Can I regenerate a magic link?
Yes. Simply repeat the generation process to create a new link.
