The Inbox is where all of your client, patient, and prospect conversations come together across every channel. As your message volume grows, sorting through everything manually becomes a drain on your time. Aesthetix CRM gives you a full set of tools to surface exactly the conversations you need: quick filter buttons for instant access, a search field for finding specific keywords, advanced rule-based filters, starred conversations for high-priority messages, bulk actions for managing many conversations at once, and Views for saving your favorite filter combinations so you never have to rebuild them.
This guide walks through each of these tools so you can keep your Inbox organized and stay focused on what matters most.
Everything in this guide starts from the Inbox, your conversation hub in Aesthetix CRM.
Step 1: Open your Inbox. Navigate to the Inbox section from the main menu to see all of your conversations in one place.
Quick filter buttons sit at the top of your conversation list and let you instantly narrow what you see with a single click. They are the fastest way to focus your Inbox without building any rules.
Step 1: Tap Unread to make sure you haven't missed anything. This shows only conversations that still need your attention.
Step 2: Switch to Recents to view your latest interactions in the order they came in.
Step 3: Press Starred to review your favorites — the conversations you've manually flagged as important.
Step 4: Hit All to display every conversation available, clearing the quick filter.
Quick filters can also break your conversations down by ownership and channel:
Step 5: Open the My Chat category to focus on conversations assigned to you.
Step 6: Use "Assigned to" to view messages that belong to another user.
Step 7: Choose "Unassigned" to display unclaimed conversations that still need an owner.
Step 8: Select a channel under "Last Message Channel" to show only conversations whose most recent message came in through that platform.
Quick filters also cover conversation type, assignee, last message type, last message direction, and last outbound message action (Manual or Automated). They work in combination with sorting, so any filters you apply are respected when you reorder your list.
When you already know what you're looking for, search is the quickest path to a specific conversation.
Step 1: Navigate to the Inbox section if you aren't already there.
Step 2: Use the Search field to enter a keyword. The Inbox surfaces conversations that match what you type, helping you jump straight to the message you need.
Beyond the quick filter buttons, the Filters panel gives you rule-based control over exactly which conversations appear. Filters determine which conversations are displayed based on specific conditions, helping you stay organized, prioritize work, and focus on the most relevant conversations without manually searching through the Inbox. They work alongside inbox tabs, sorting options, and bulk actions to give your team full control over how conversations are viewed and managed.
Focused Inbox Views: View only conversations that match specific criteria such as assigned users, mentions, or tags.
Improved Team Efficiency: Reduce noise and help team members focus on conversations that require action.
Advanced Logic Support: Combine multiple rules using AND / OR logic for precise filtering.
Scalable Inbox Management: Manage large volumes of conversations without manual sorting.
Step 1: Click the Filters icon (the three horizontal lines) to open the Filters panel on the right side of the screen.
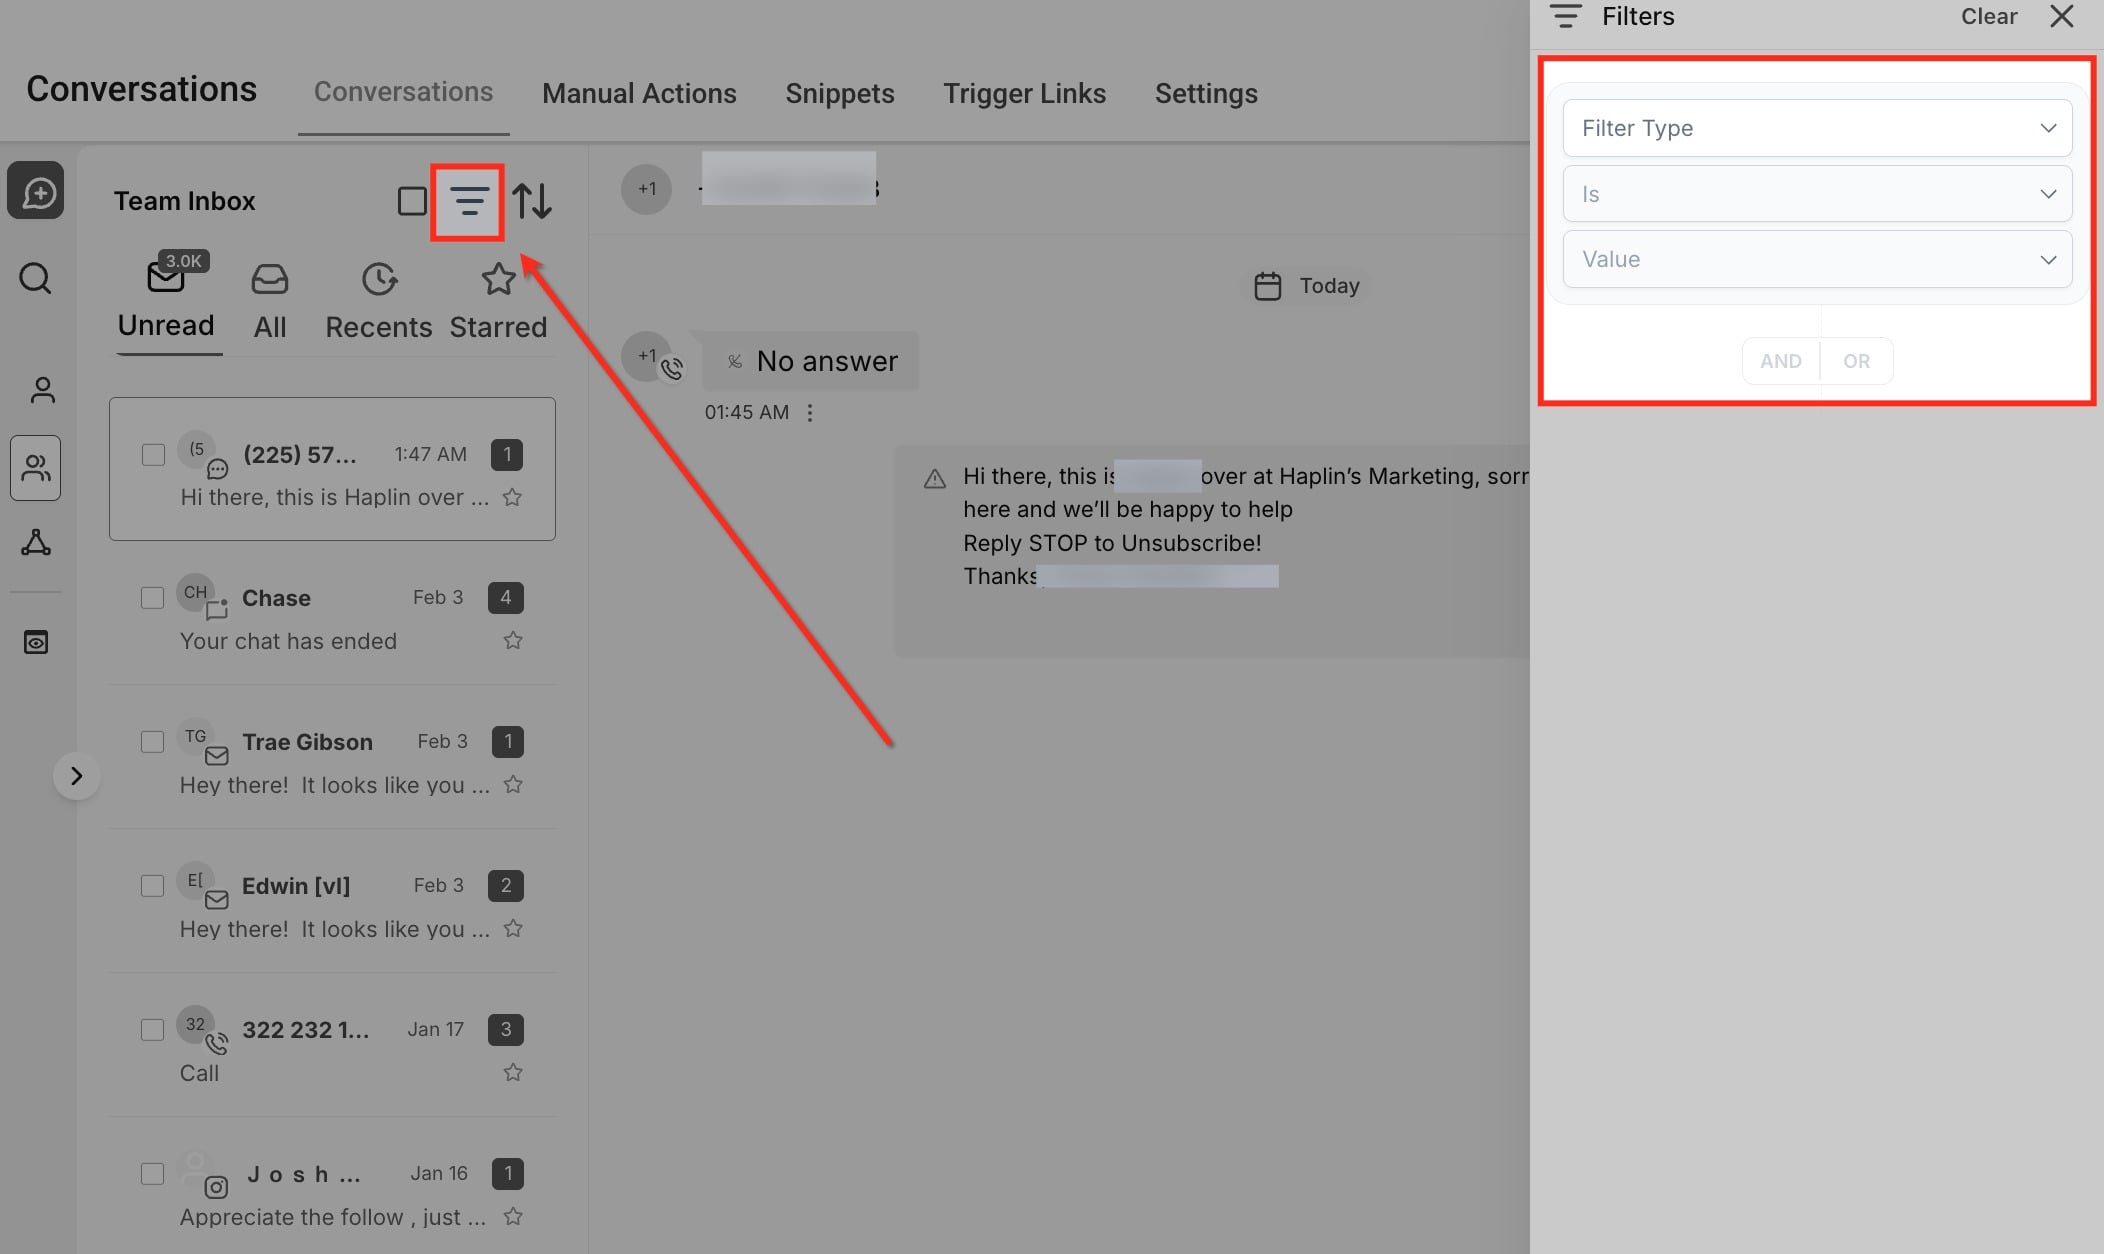
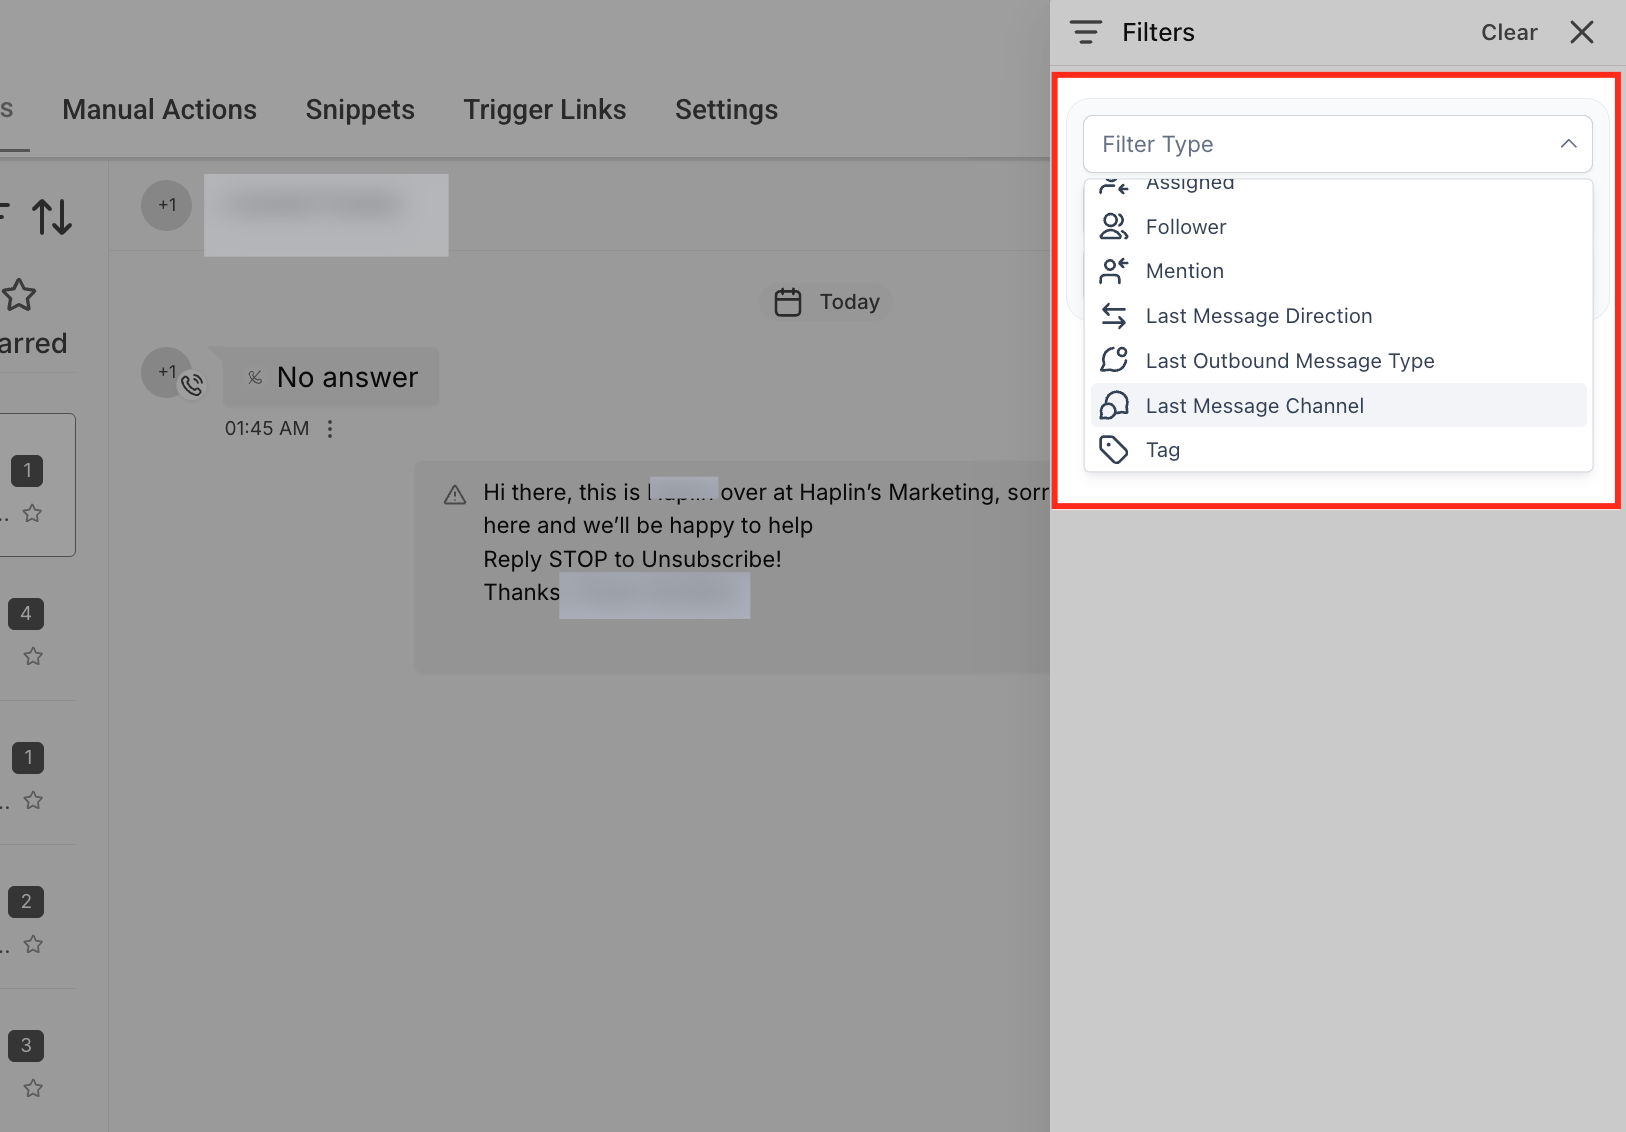
The Filter Builder lets you define detailed rules that control which conversations appear in the Inbox. Available filter types include:
Filter By Assigned: Filters conversations based on the user assigned as the conversation owner. This helps team members quickly view conversations they are responsible for, or identify unassigned conversations that need ownership. You can choose Logged In User in the user dropdown to make the filter apply to the currently logged-in team member — useful for shared Views.
Filter By Follower: Filters conversations where a specific user is added as a follower. Followers gain visibility into the conversation without being the primary owner, making this useful for collaboration and oversight. You can choose Logged In User to dynamically filter conversations where the currently logged-in user is a follower.
Filter By Mention: Filters conversations where a user has been mentioned using an @mention. This is helpful for locating conversations that require attention or were explicitly flagged for a specific team member.
Filter By Last Message Direction: Filters conversations based on whether the most recent message was Inbound (from the contact) or Outbound (sent by a user or automation). This helps identify conversations waiting for a response versus those already replied to.
Filter By Last Outbound Message Type: Filters conversations based on whether the most recent outbound message was sent Manually by a user or Automated through workflows or campaigns. This is useful for tracking human engagement versus automation. (Applies to messages sent after May 9, 2023.)
Filter By Last Message Channel: Filters conversations by the communication channel used for the most recent message, such as SMS, Email, Calls, Voicemail, Live Chat, WhatsApp, Facebook, Instagram, or Google Business Profile. This allows teams to focus on specific channels, and you can select multiple channels at once.
Filter By Tag: Filters conversations associated with specific contact tags. Tags help categorize contacts and conversations, making it easier to segment and manage conversations based on custom labels.
Filter Condition determines how the selected filter type is evaluated. Common conditions include:
Is: Includes conversations that match the selected value.
Is not: Excludes conversations that match the selected value.
Filter Value defines the exact user, tag, channel, or attribute used in the filter. Value fields support searchable dropdowns and allow selecting one or multiple values depending on the filter type.
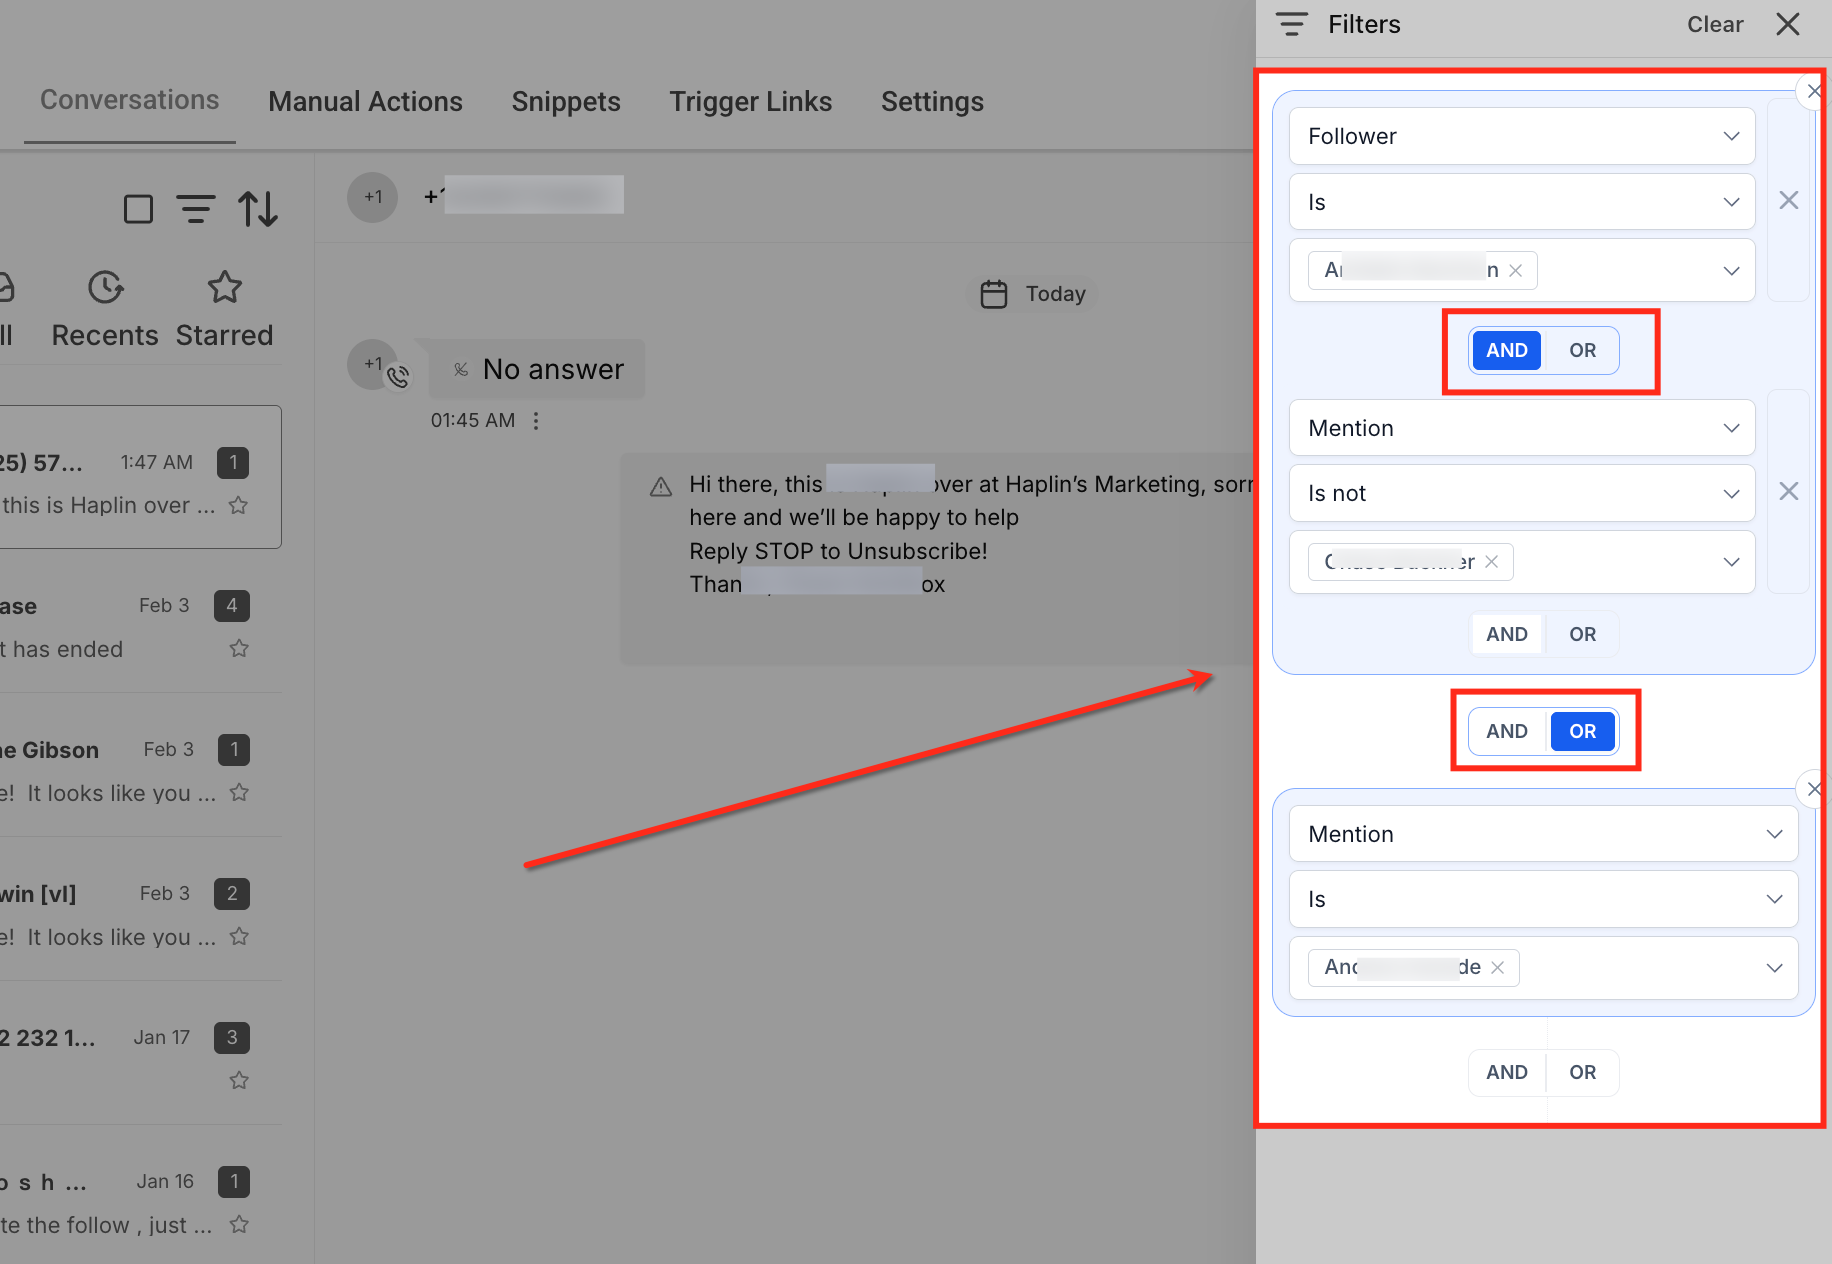
AND / OR logic controls how multiple filter rules interact with each other.
Logic Within a Filter Group: When multiple rules exist within the same group, logic toggles determine how they are evaluated. With AND, all rules must be true. With OR, any rule can be true.
Logic Between Filter Groups: When multiple filter groups are created, additional AND / OR toggles define how entire groups interact. This allows advanced logic such as combining assignment, mentions, and tags in a single filter setup.
Step 1: Select the Filter option to open the panel and add the rules you want.
Step 2: Choose your categories — for example, refine by the Assigned category to view conversations by owner.
Step 3: Add a channel by selecting Last Message Channel to narrow further.
Step 4: Click Apply to update your Inbox and view the filtered results.
Sorting arranges your conversations in whatever order is most convenient, and it works in combination with any filters you've applied.
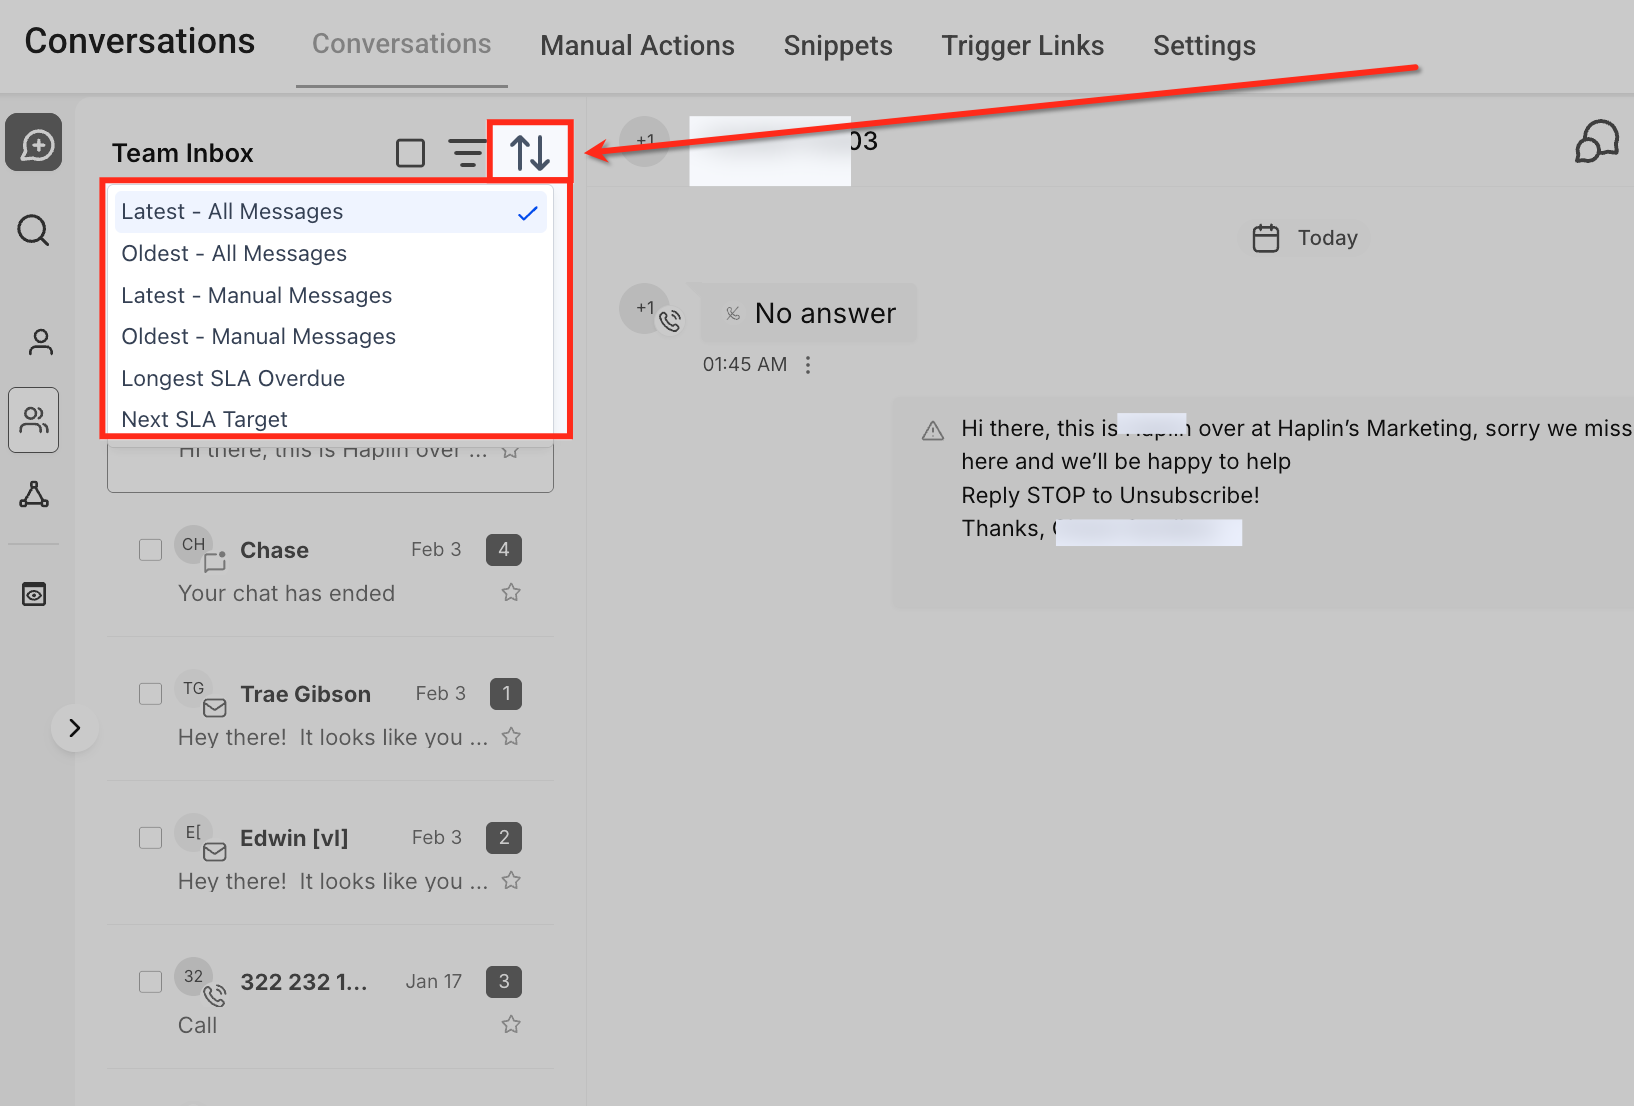
Step 1: Click the Sort icon (the up/down arrows) to open the sorting dropdown. Available sorting options include:
Latest All Messages: Displays conversations with the most recently sent or received message at the top, regardless of whether the message was manual or automated.
Oldest All Messages: Displays conversations with the oldest last message at the top, helping surface conversations that may have been inactive the longest.
Latest Manual Messages: Sorts conversations based on the most recent manually sent message by a user, excluding automated messages from workflows or campaigns.
Oldest Manual Messages: Sorts conversations by the oldest manually sent message, making it easier to find conversations that have not received recent human interaction.
Longest SLA Overdue: Prioritizes conversations that have exceeded their SLA by the longest duration, helping teams address the most critical response delays first.
Next SLA Target: Sorts conversations by the closest upcoming SLA deadline, allowing teams to proactively respond before SLAs are breached.
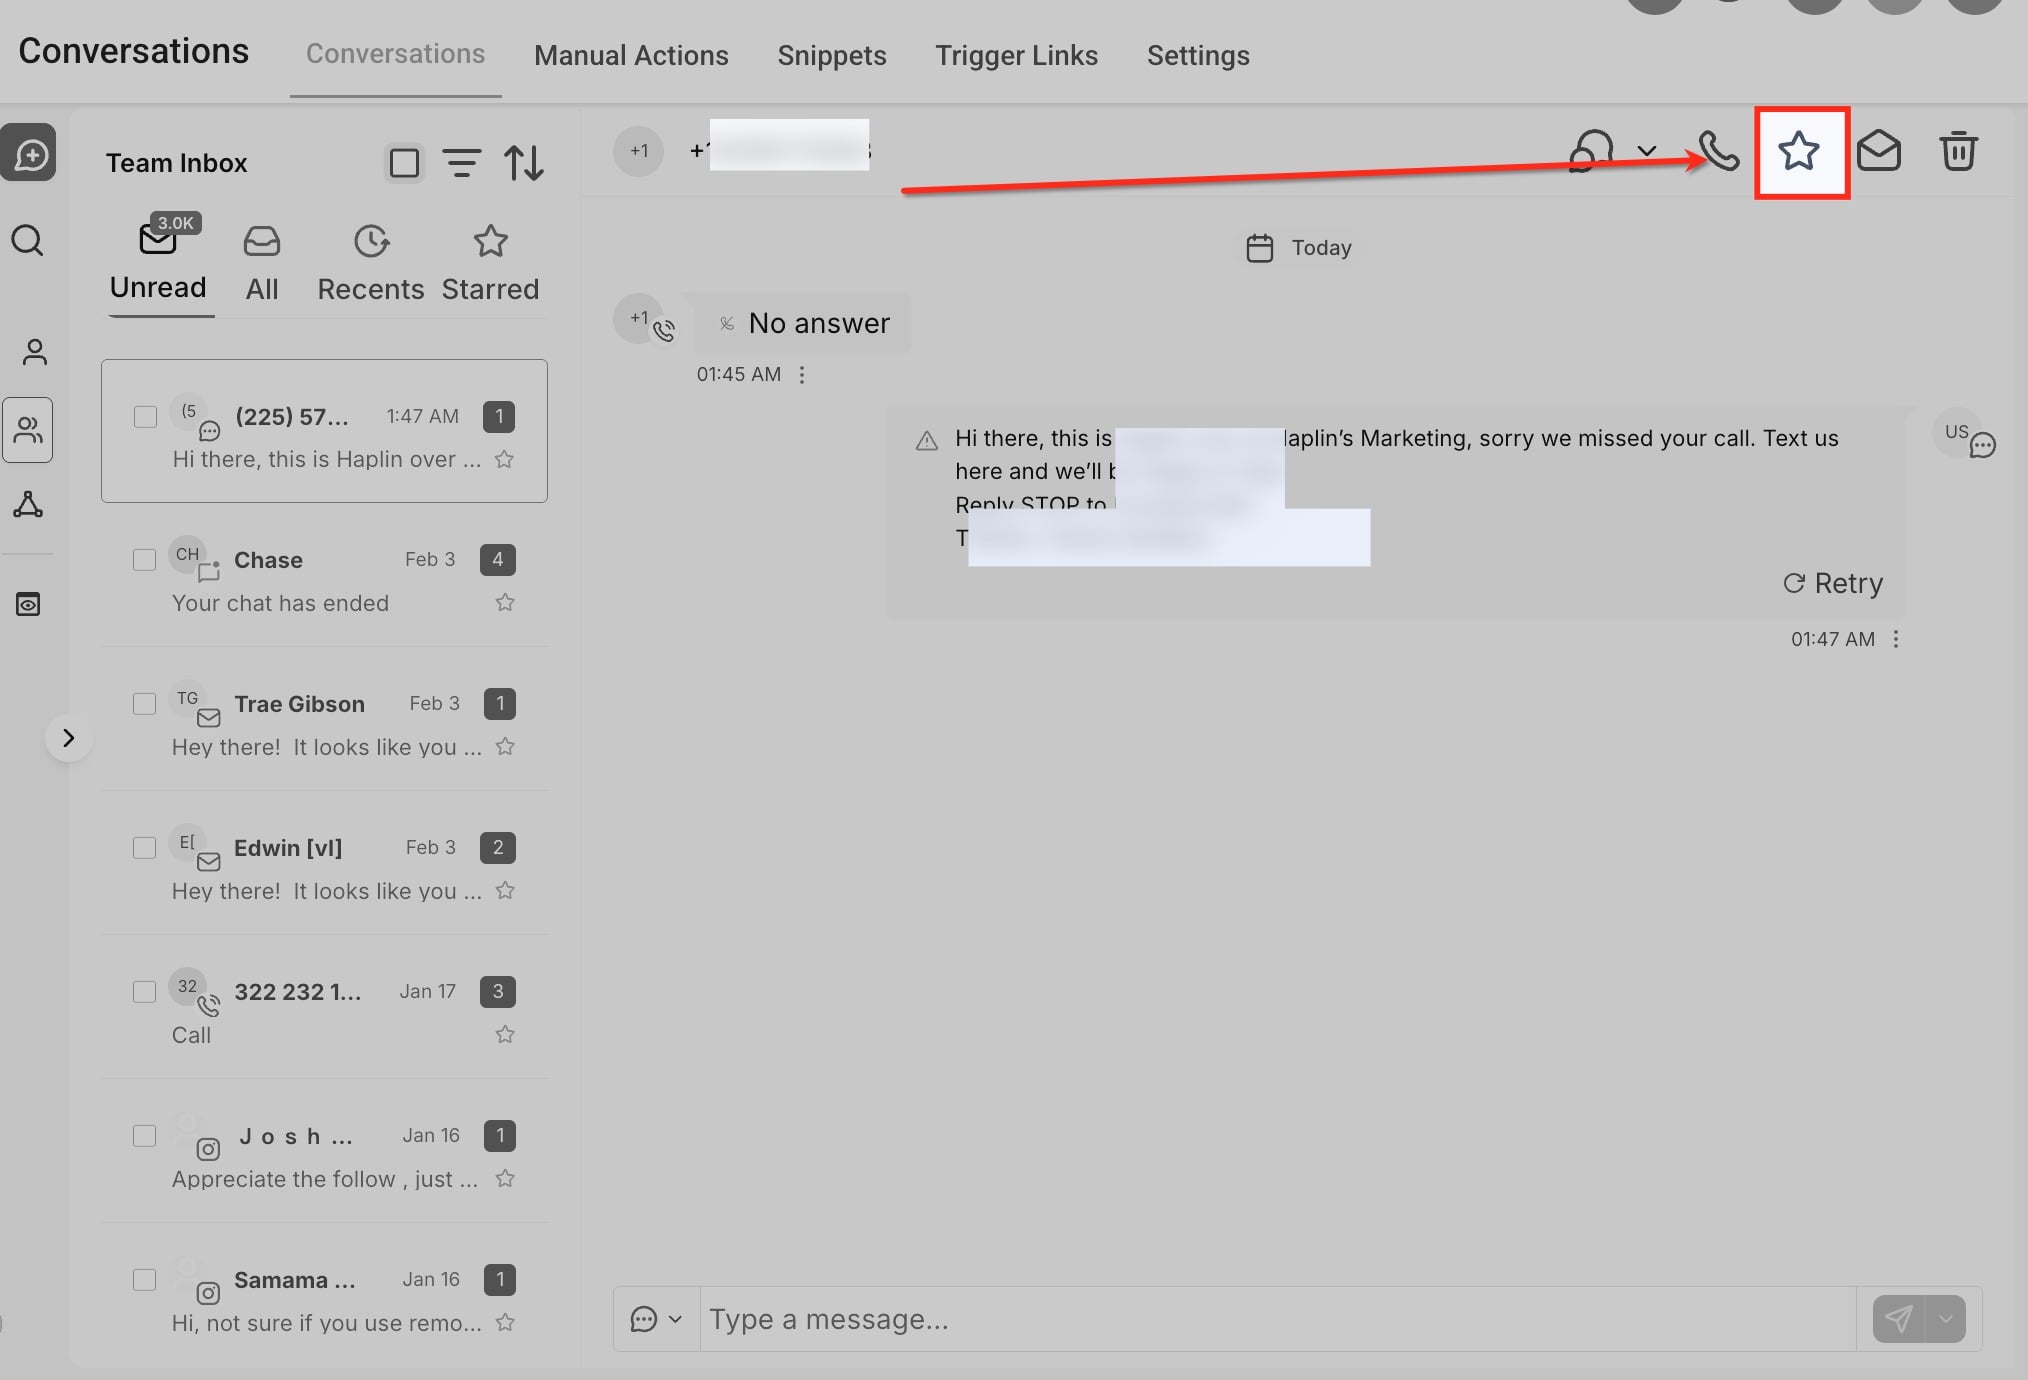
Starring is a simple, effective way to highlight and revisit important messages, helping you keep track of high-priority interactions with ease. The star icon appears in both the conversation list and within individual conversation views.
Step 1: Head to your Inbox.
Step 2: Find and select the message you'd like to open.
Step 3: Mark the message as starred by clicking the star icon in the upper-right corner of the conversation preview window. Starred conversations can then be accessed anytime using the Starred quick filter.
Step 4: Unstar when it's no longer a priority by clicking the star icon again to remove it from your starred items.
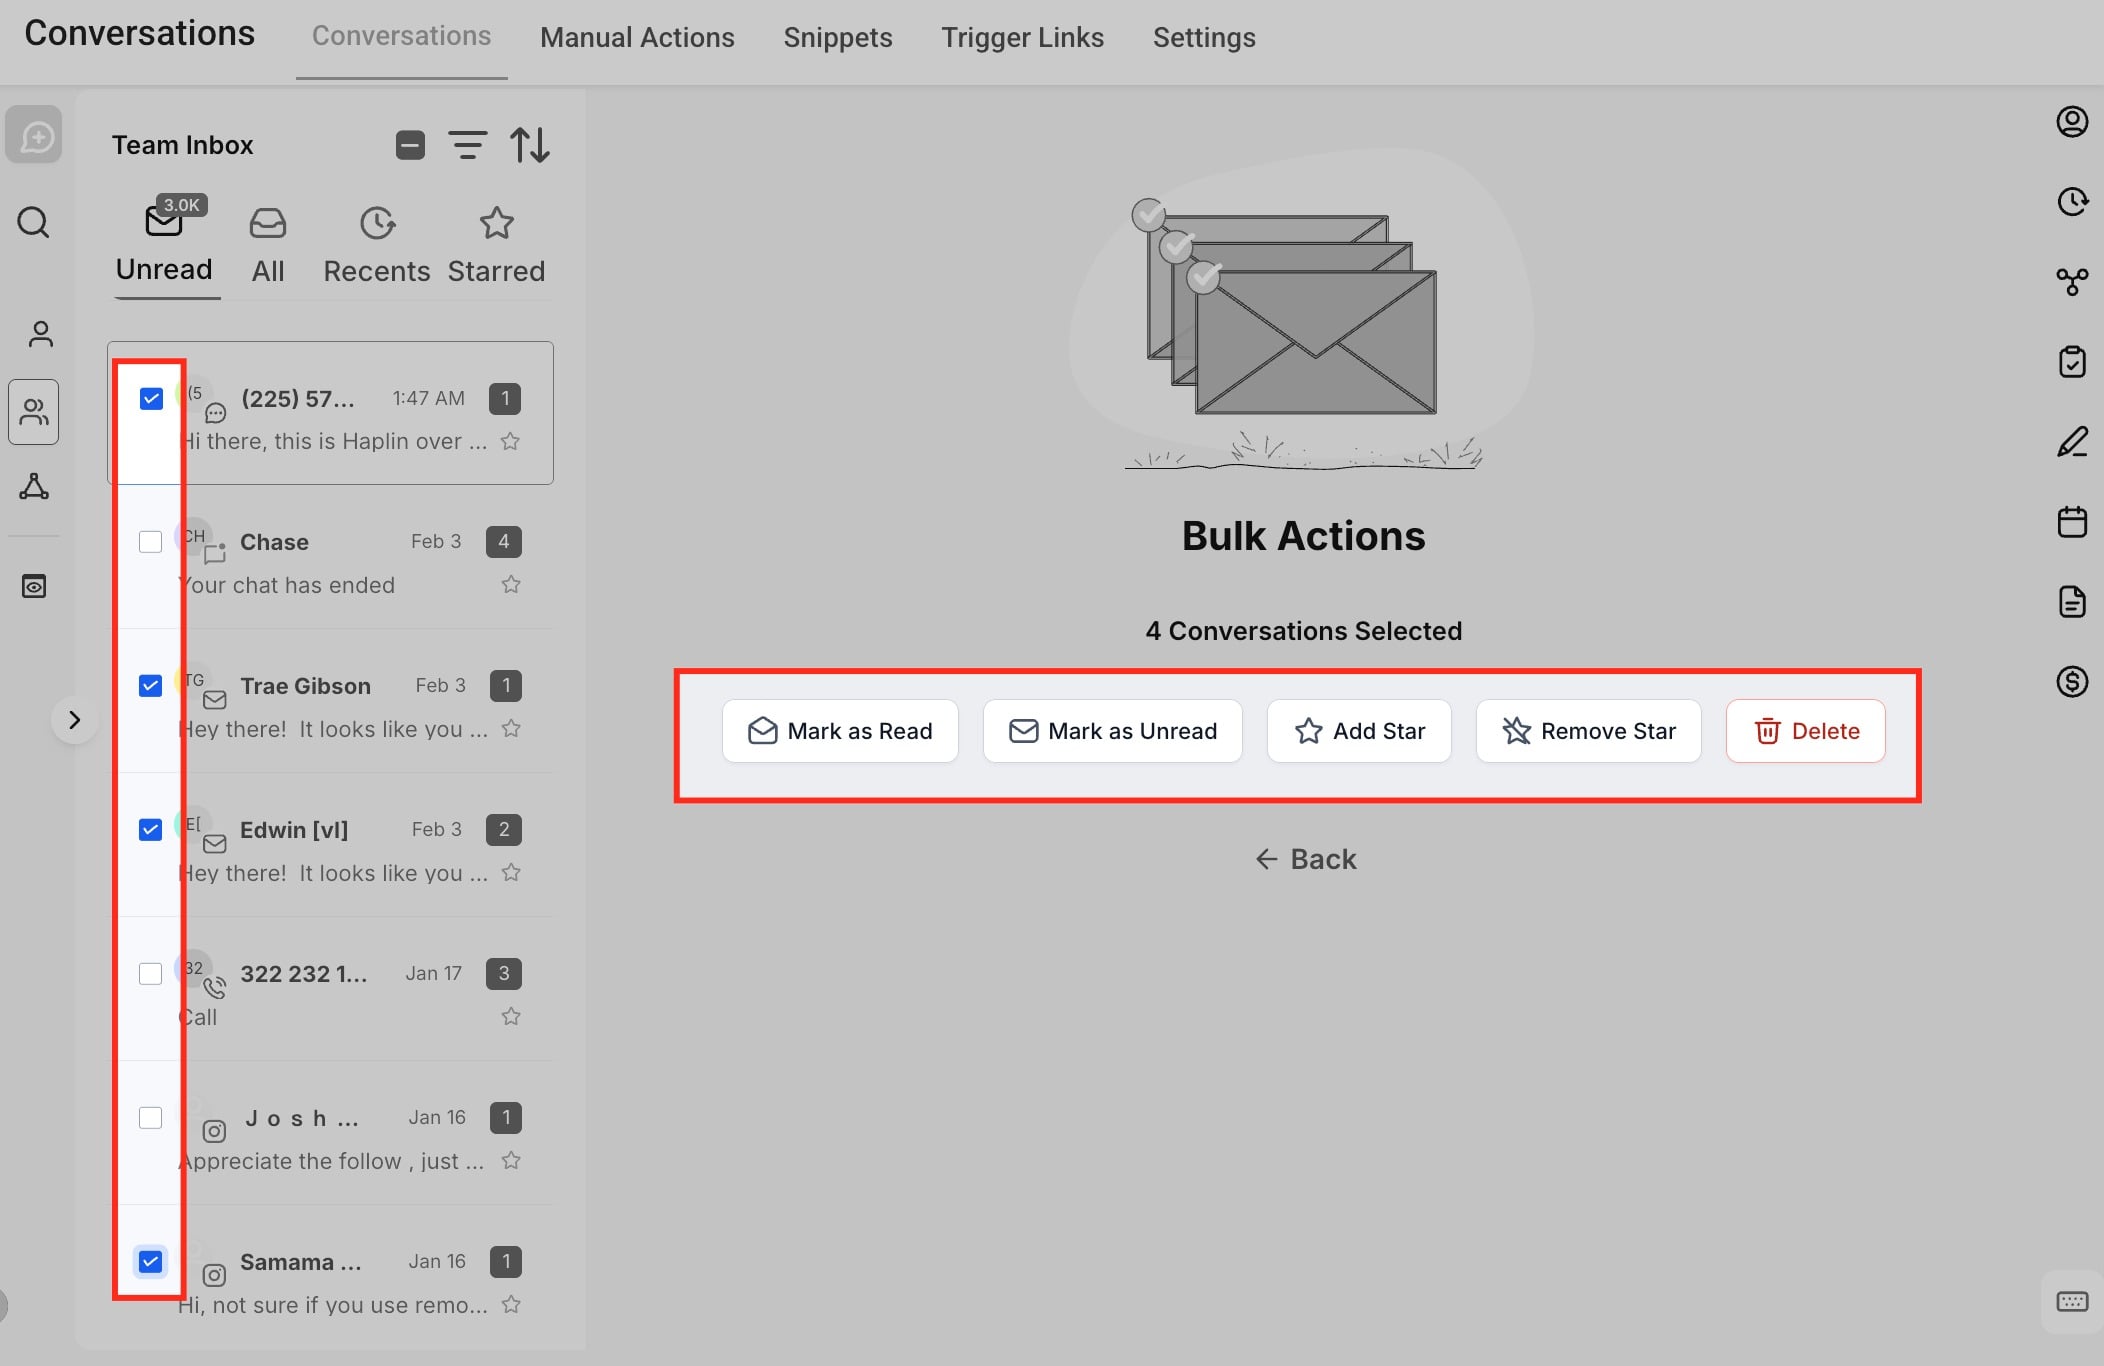
Handling a high volume of conversations is much easier when you can act on many at once. Bulk actions let you manage multiple conversations simultaneously, up to 100 conversations at a time.
Step 1: Use the selection checkboxes. Each conversation in the Inbox includes a checkbox on the far left. Selecting a single conversation applies actions to that conversation only; selecting multiple conversations activates bulk actions. A select-all option appears when multiple conversations are available.
Step 2: Use the Bulk Actions toolbar, which appears automatically once one or more conversations are selected. Available actions include:
Mark as Read: Marks selected conversations as read.
Mark as Unread: Returns conversations to the unread state.
Add Star: Flags conversations as important.
Remove Star: Removes the starred status.
Delete: Permanently deletes the selected conversations.
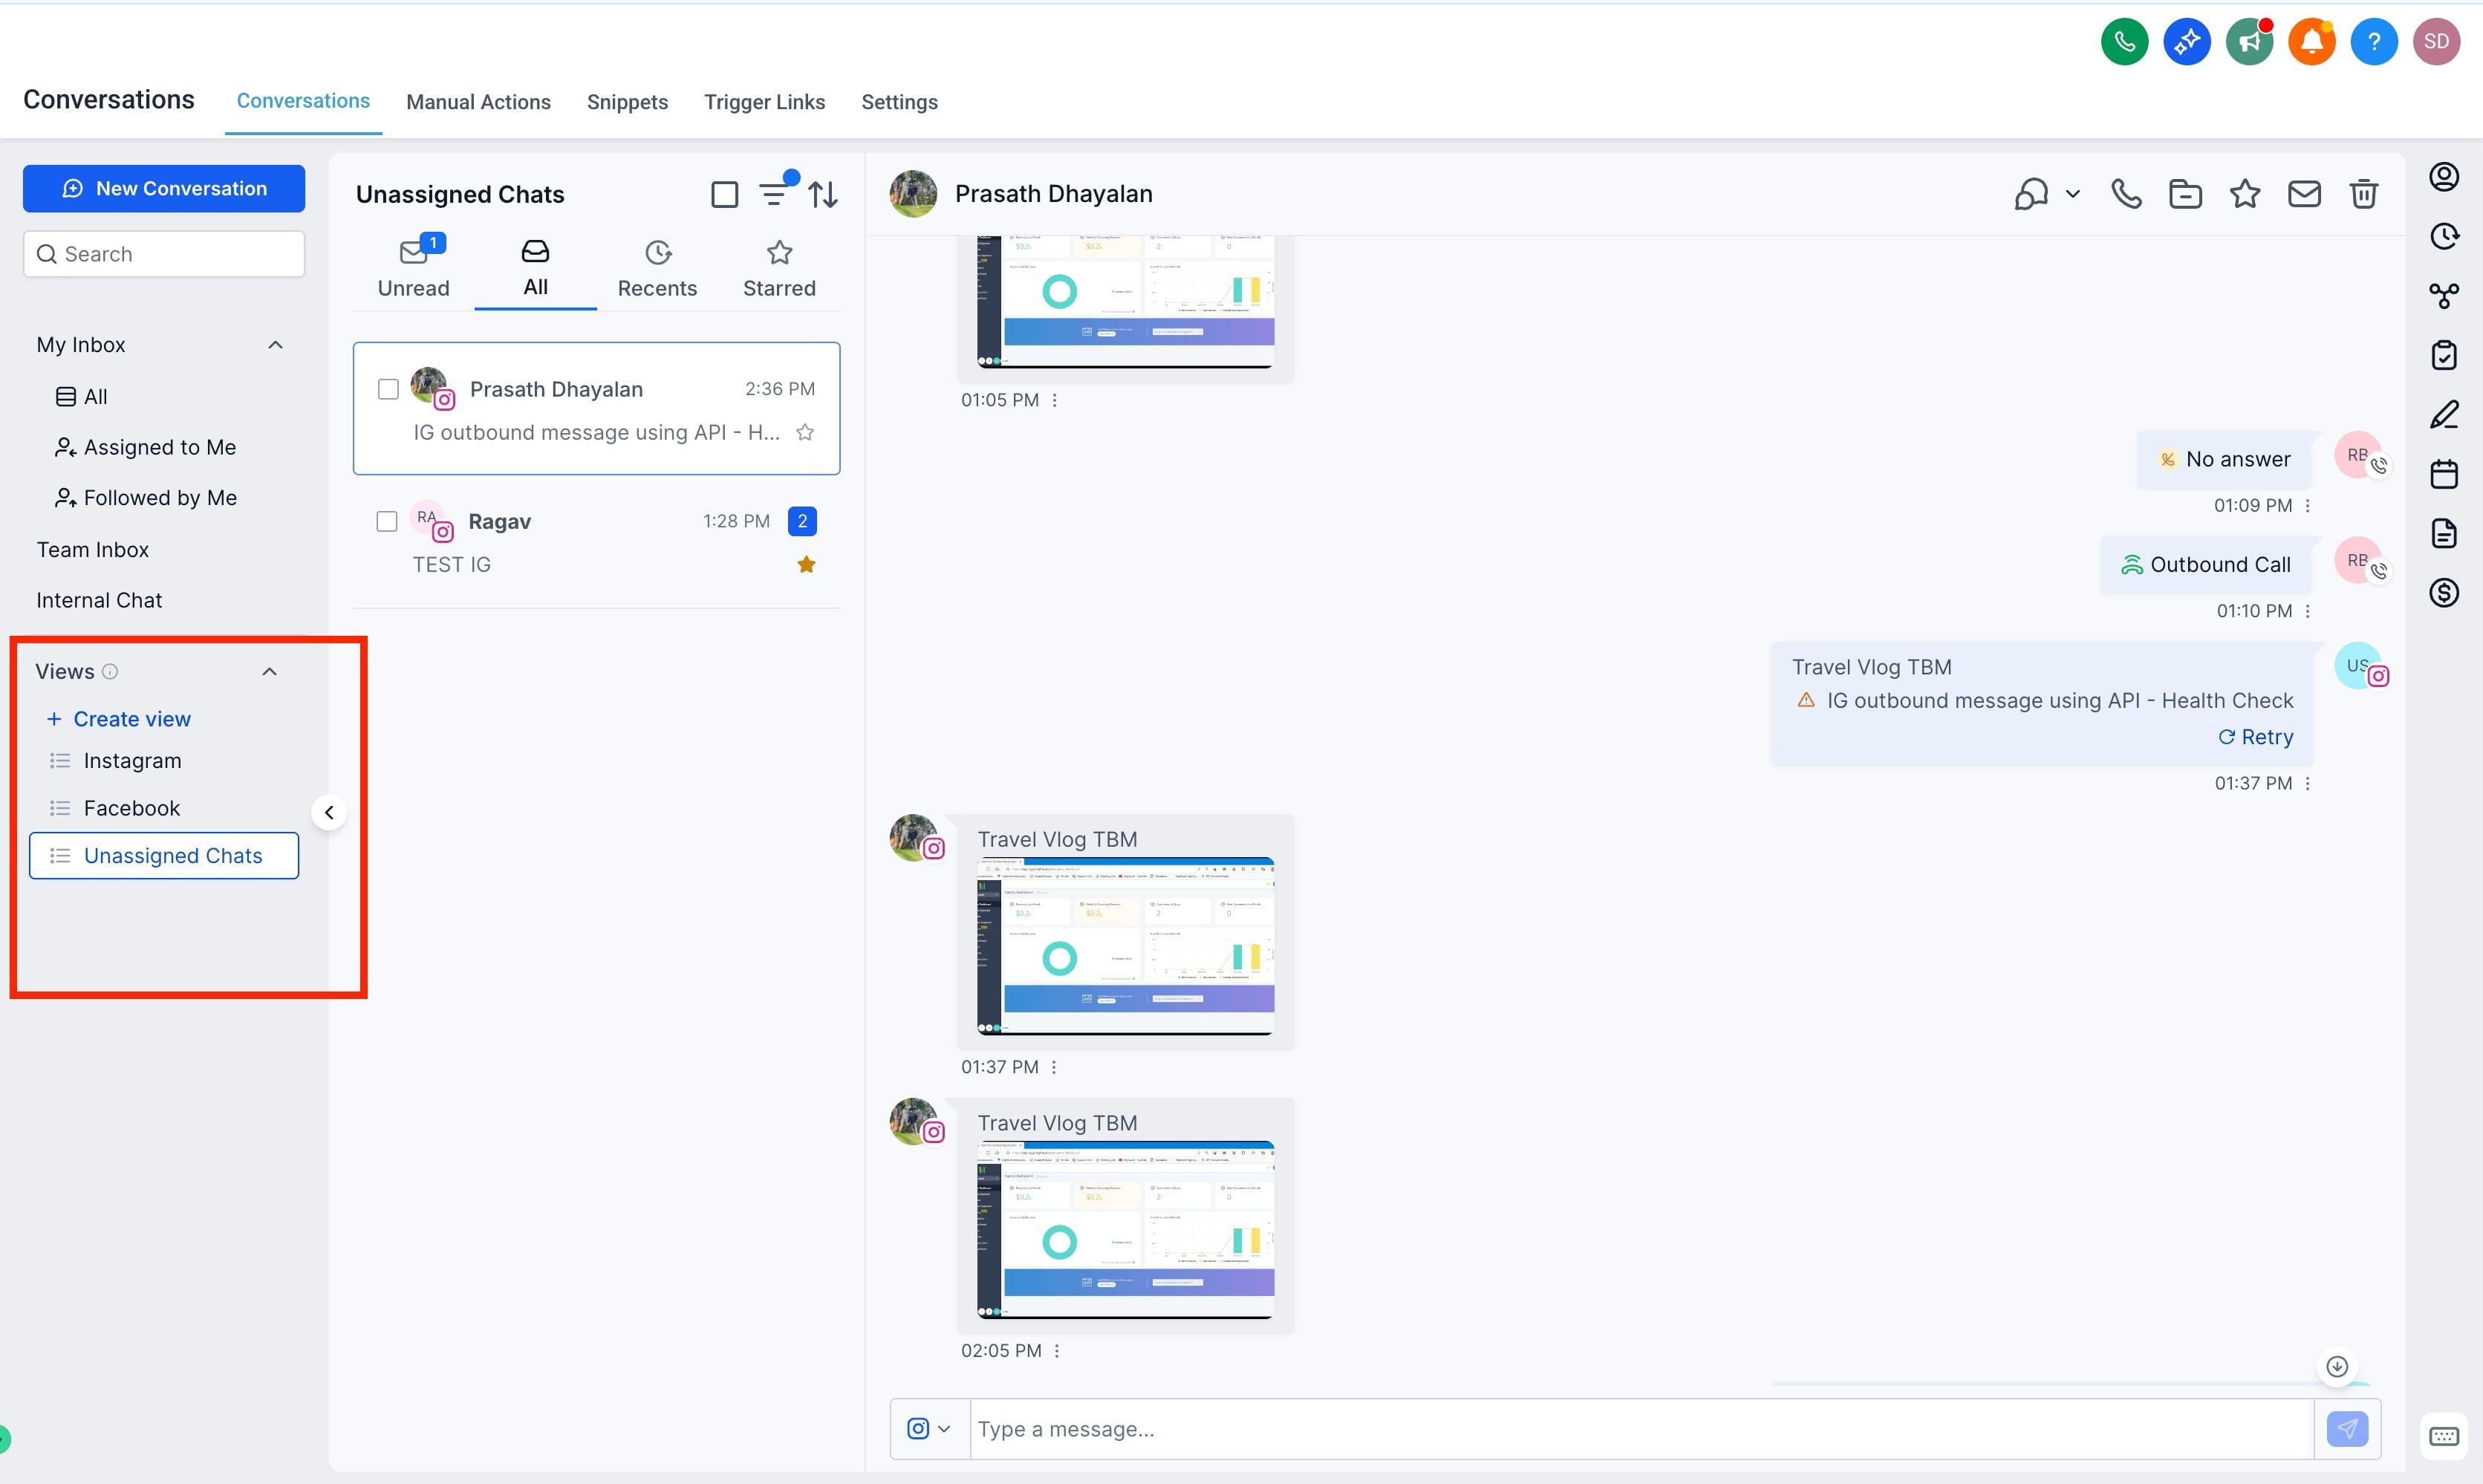
If you regularly check the same sets of conversations, Views let you save your most-used filter combinations as reusable, one-click destinations — so you can switch focus instantly without rebuilding filters every time. Views are ideal for cases like unassigned conversations, conversations from specific channels, or high-priority chats based on specific tags.
Step 1: Open the Views section in the Inbox panel and click + Create View.
Step 2: Add your filters and name the view. Once created, the view is added to the Inbox panel and displays all conversations matching the applied filters.
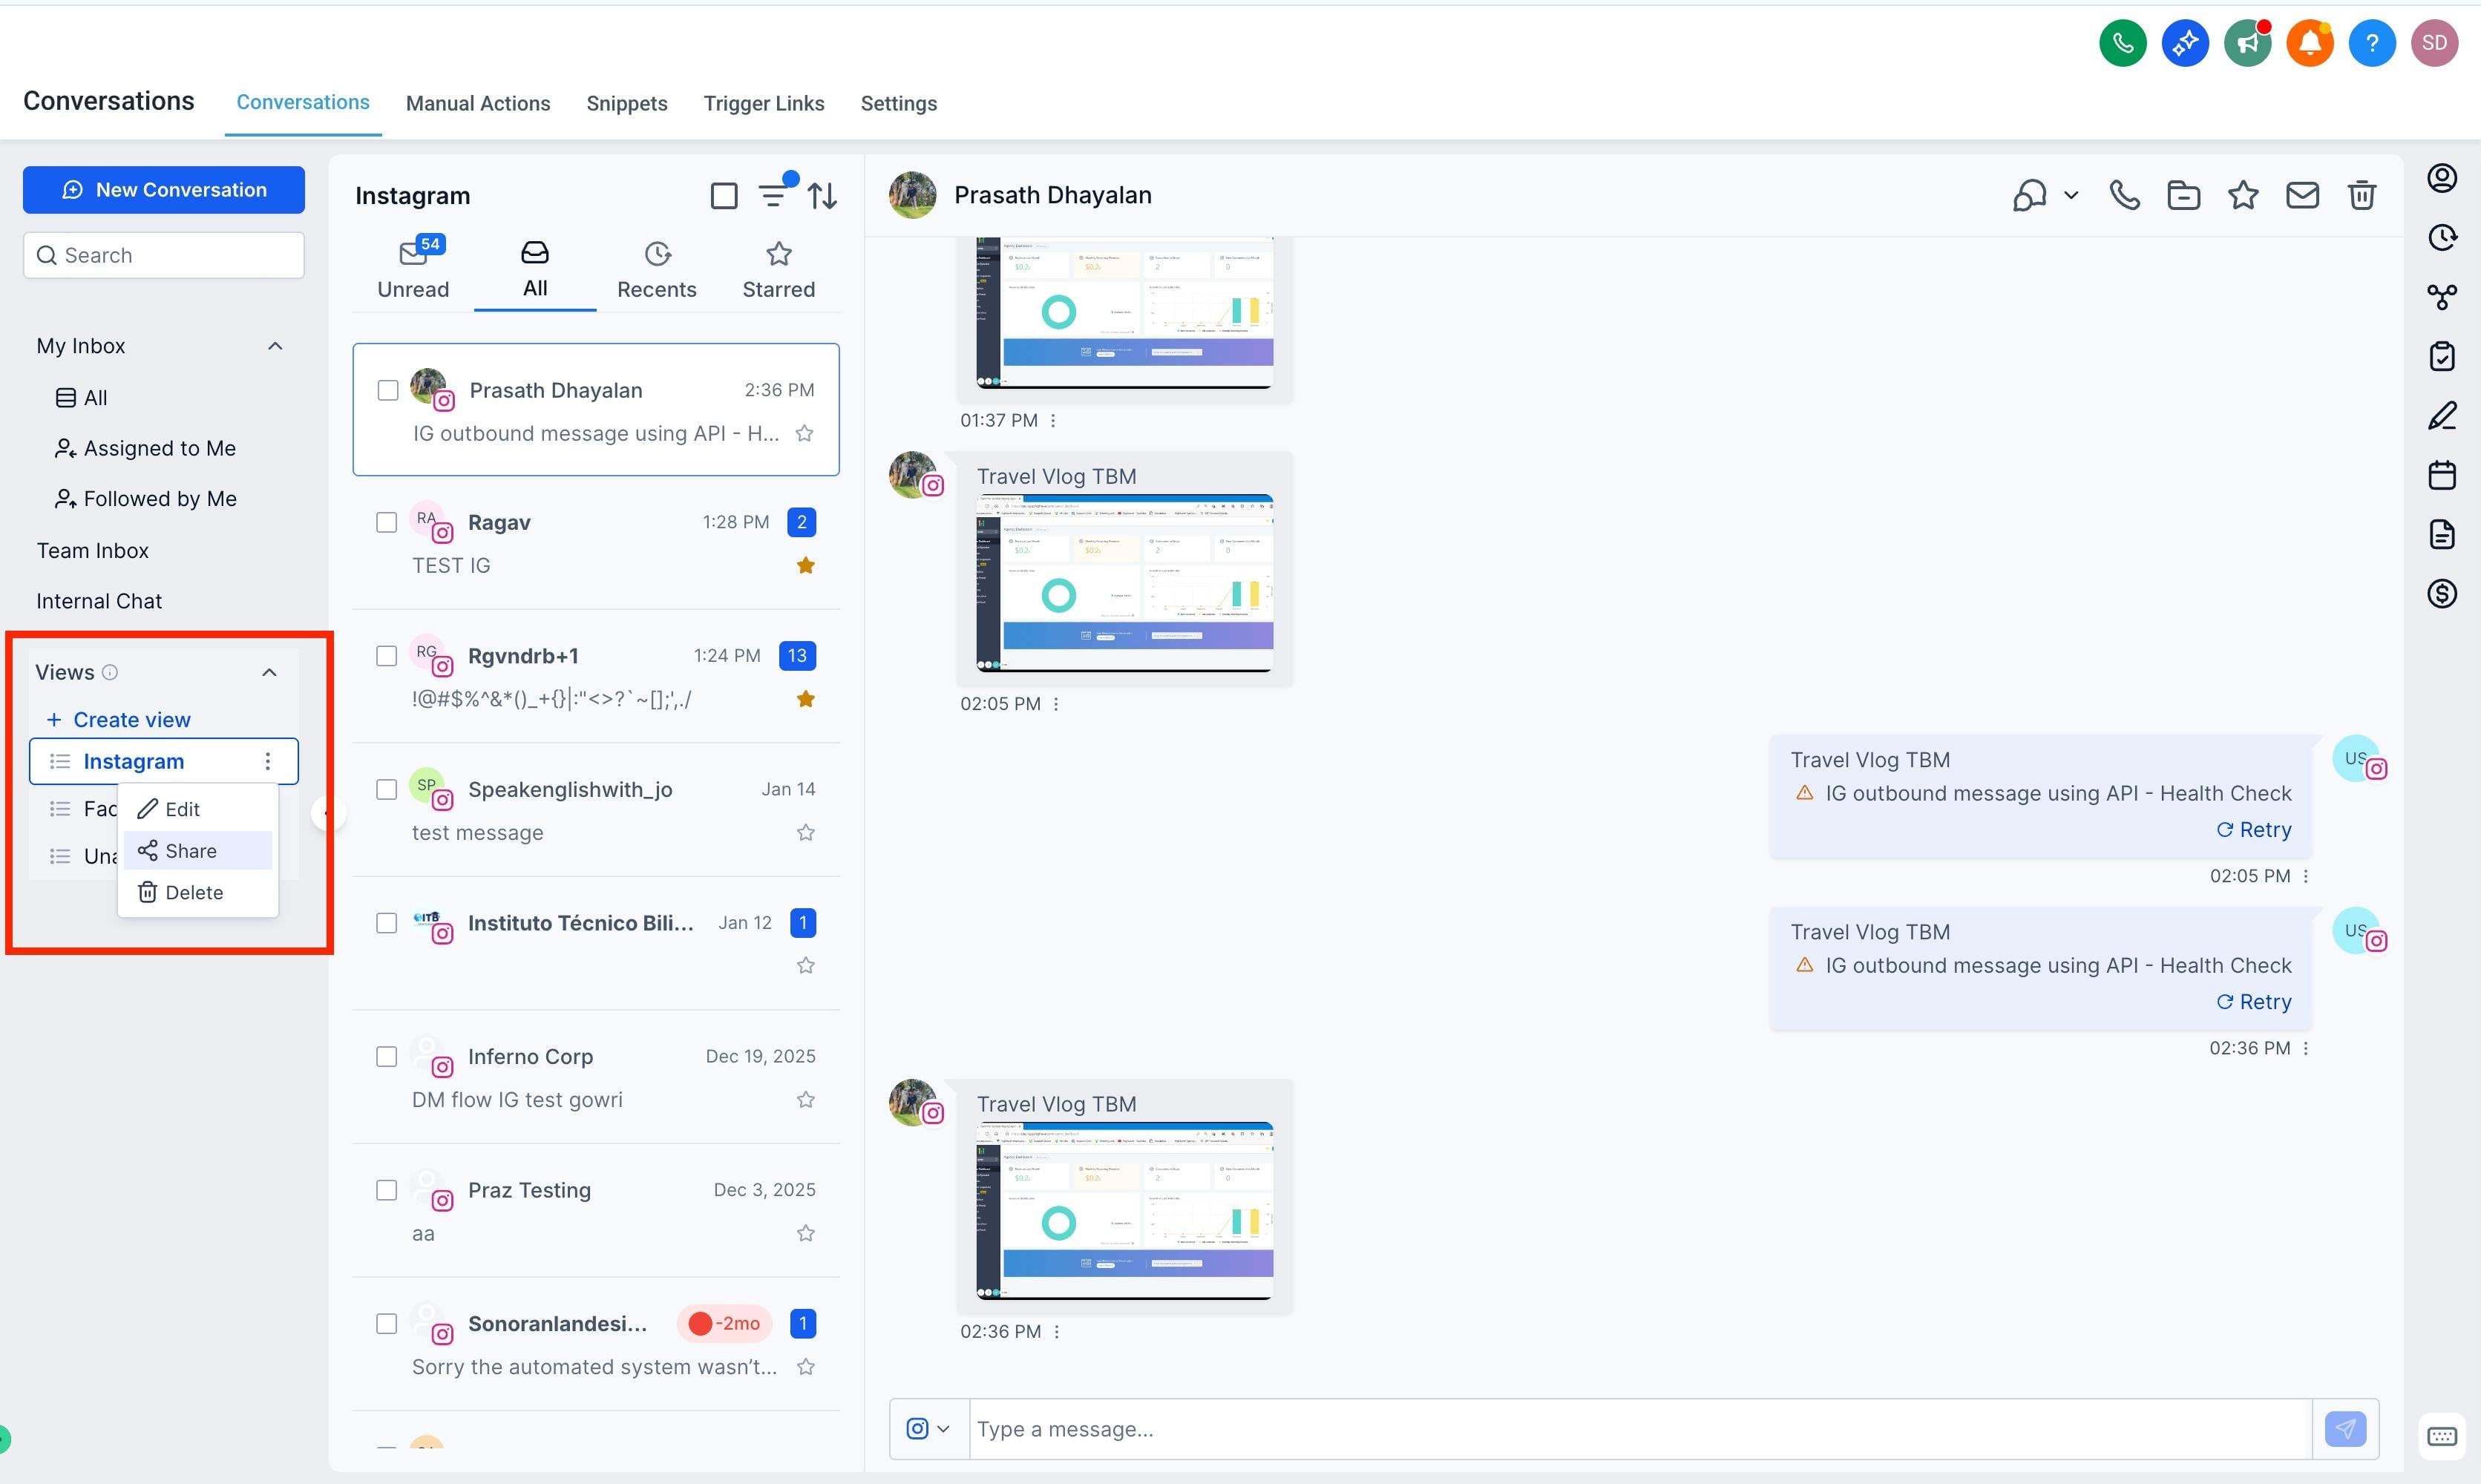
Step 3: Share the view if needed. Views are visible only to the user who created them by default. Admins can share views with other users from the view menu, helping teams stay aligned while managing conversations.
Once your Views are set up, you can quickly switch between commonly used filter combinations, stay focused on high-priority or unassigned conversations, reduce repetitive filtering, and keep your team aligned with shared views.
Do filters update in real time?
Yes. The Inbox updates instantly when filters are applied, removed, or modified.
Can I save filter combinations?
Yes. Use Views to save your most-used filter combinations as reusable, one-click destinations in the Inbox panel. Quick filters applied on the fly are session-based and need to be reapplied, but any combination you save as a View is always available.
What is the difference between the Assigned and Follower filters?
Assigned refers to the primary owner of the conversation, while Follower includes users added for visibility or collaboration.
Can I use multiple channels in a single filter?
Yes. The Last Message Channel filter supports selecting multiple channels at once.
Does deleting conversations using bulk actions permanently remove them?
Yes. Deleted conversations cannot be recovered.
Who can see the Views I create?
By default, a View is visible only to you. Admins can share a View with other users from the view menu so the whole team can use the same saved filters.
