Most med spas manage care one patient at a time, but some relationships are organizational: a corporate-wellness account that sends dozens of employees for treatments, a multi-location group practice, or a referring partner whose staff you want to track together. Aesthetix CRM gives you two structures for this kind of business-to-business data. Companies let you group individual contacts under a single organization so you can see collective activity in one place. Custom Objects let you track specialized record types that do not fit the standard contact, opportunity, or appointment model, along with the relationships between them.
These are more advanced features. Most day-to-day med spa work lives in Contacts and Opportunities. Reach for Companies and Custom Objects when you need to organize patients by the business they belong to, or when you need to model data the standard records cannot hold.
The Company Object lets you create a new kind of record called a "Company," and then categorize contacts underneath it. Instead of managing individual patient records with no shared context, you get a consolidated view of an organization: its details, the contacts tied to it, and the activity happening across the whole group.
A Company can also act as a simple way to organize a list of contacts. Assign a group of contacts to one company and you can monitor their collective activity together. For a med spa, the company might be a corporate-wellness client whose employees all book treatments, a multi-location group you serve, or a vendor or referral partner you want to keep grouped.
A company record can store:
Company name
Phone number
Email address
Website
Address details (street address, city, state, postal code, country)
Description
Custom business attributes (created through custom fields)
This structure improves organization, segmentation, and reporting at the business level rather than only the individual level.
Companies are most useful when you connect contacts to them. Once contacts are grouped under a company, you can track their shared activity and manage the relationship at the organization level.
Currently, the way to add contacts to a Company is to open the company, then search for and add each contact from its Contacts view.
Go to the Company tab and select the company you want to add contacts to.
Click Contacts inside that company.
Select a contact to add.
Click Apply.
The contact is now added to the company. You will see confirmation that one contact was successfully added.
To add contacts in larger quantities, you can select several at a time rather than adding them one by one.
Inside the company's Contacts view, click Add Contacts.
Select multiple contacts to add.
Click Apply.
All selected contacts are now grouped under the company.
To disassociate a contact from a company, open the company, switch to its Contacts view, find the contact, and remove it.
Click the trash icon next to the contact you want to remove.
When asked to confirm, click Yes.
Kindly note: Removing a contact from a company does not delete the contact from your contacts list. It only removes the company association from that contact's Company tab and takes them off the list of contacts connected to that company.
You can create companies, edit their details, and delete them directly from the Company tab under Contacts.
To create a company:
Navigate to Contacts.
Click the Company tab.
Select New Company (also labeled Add Company).
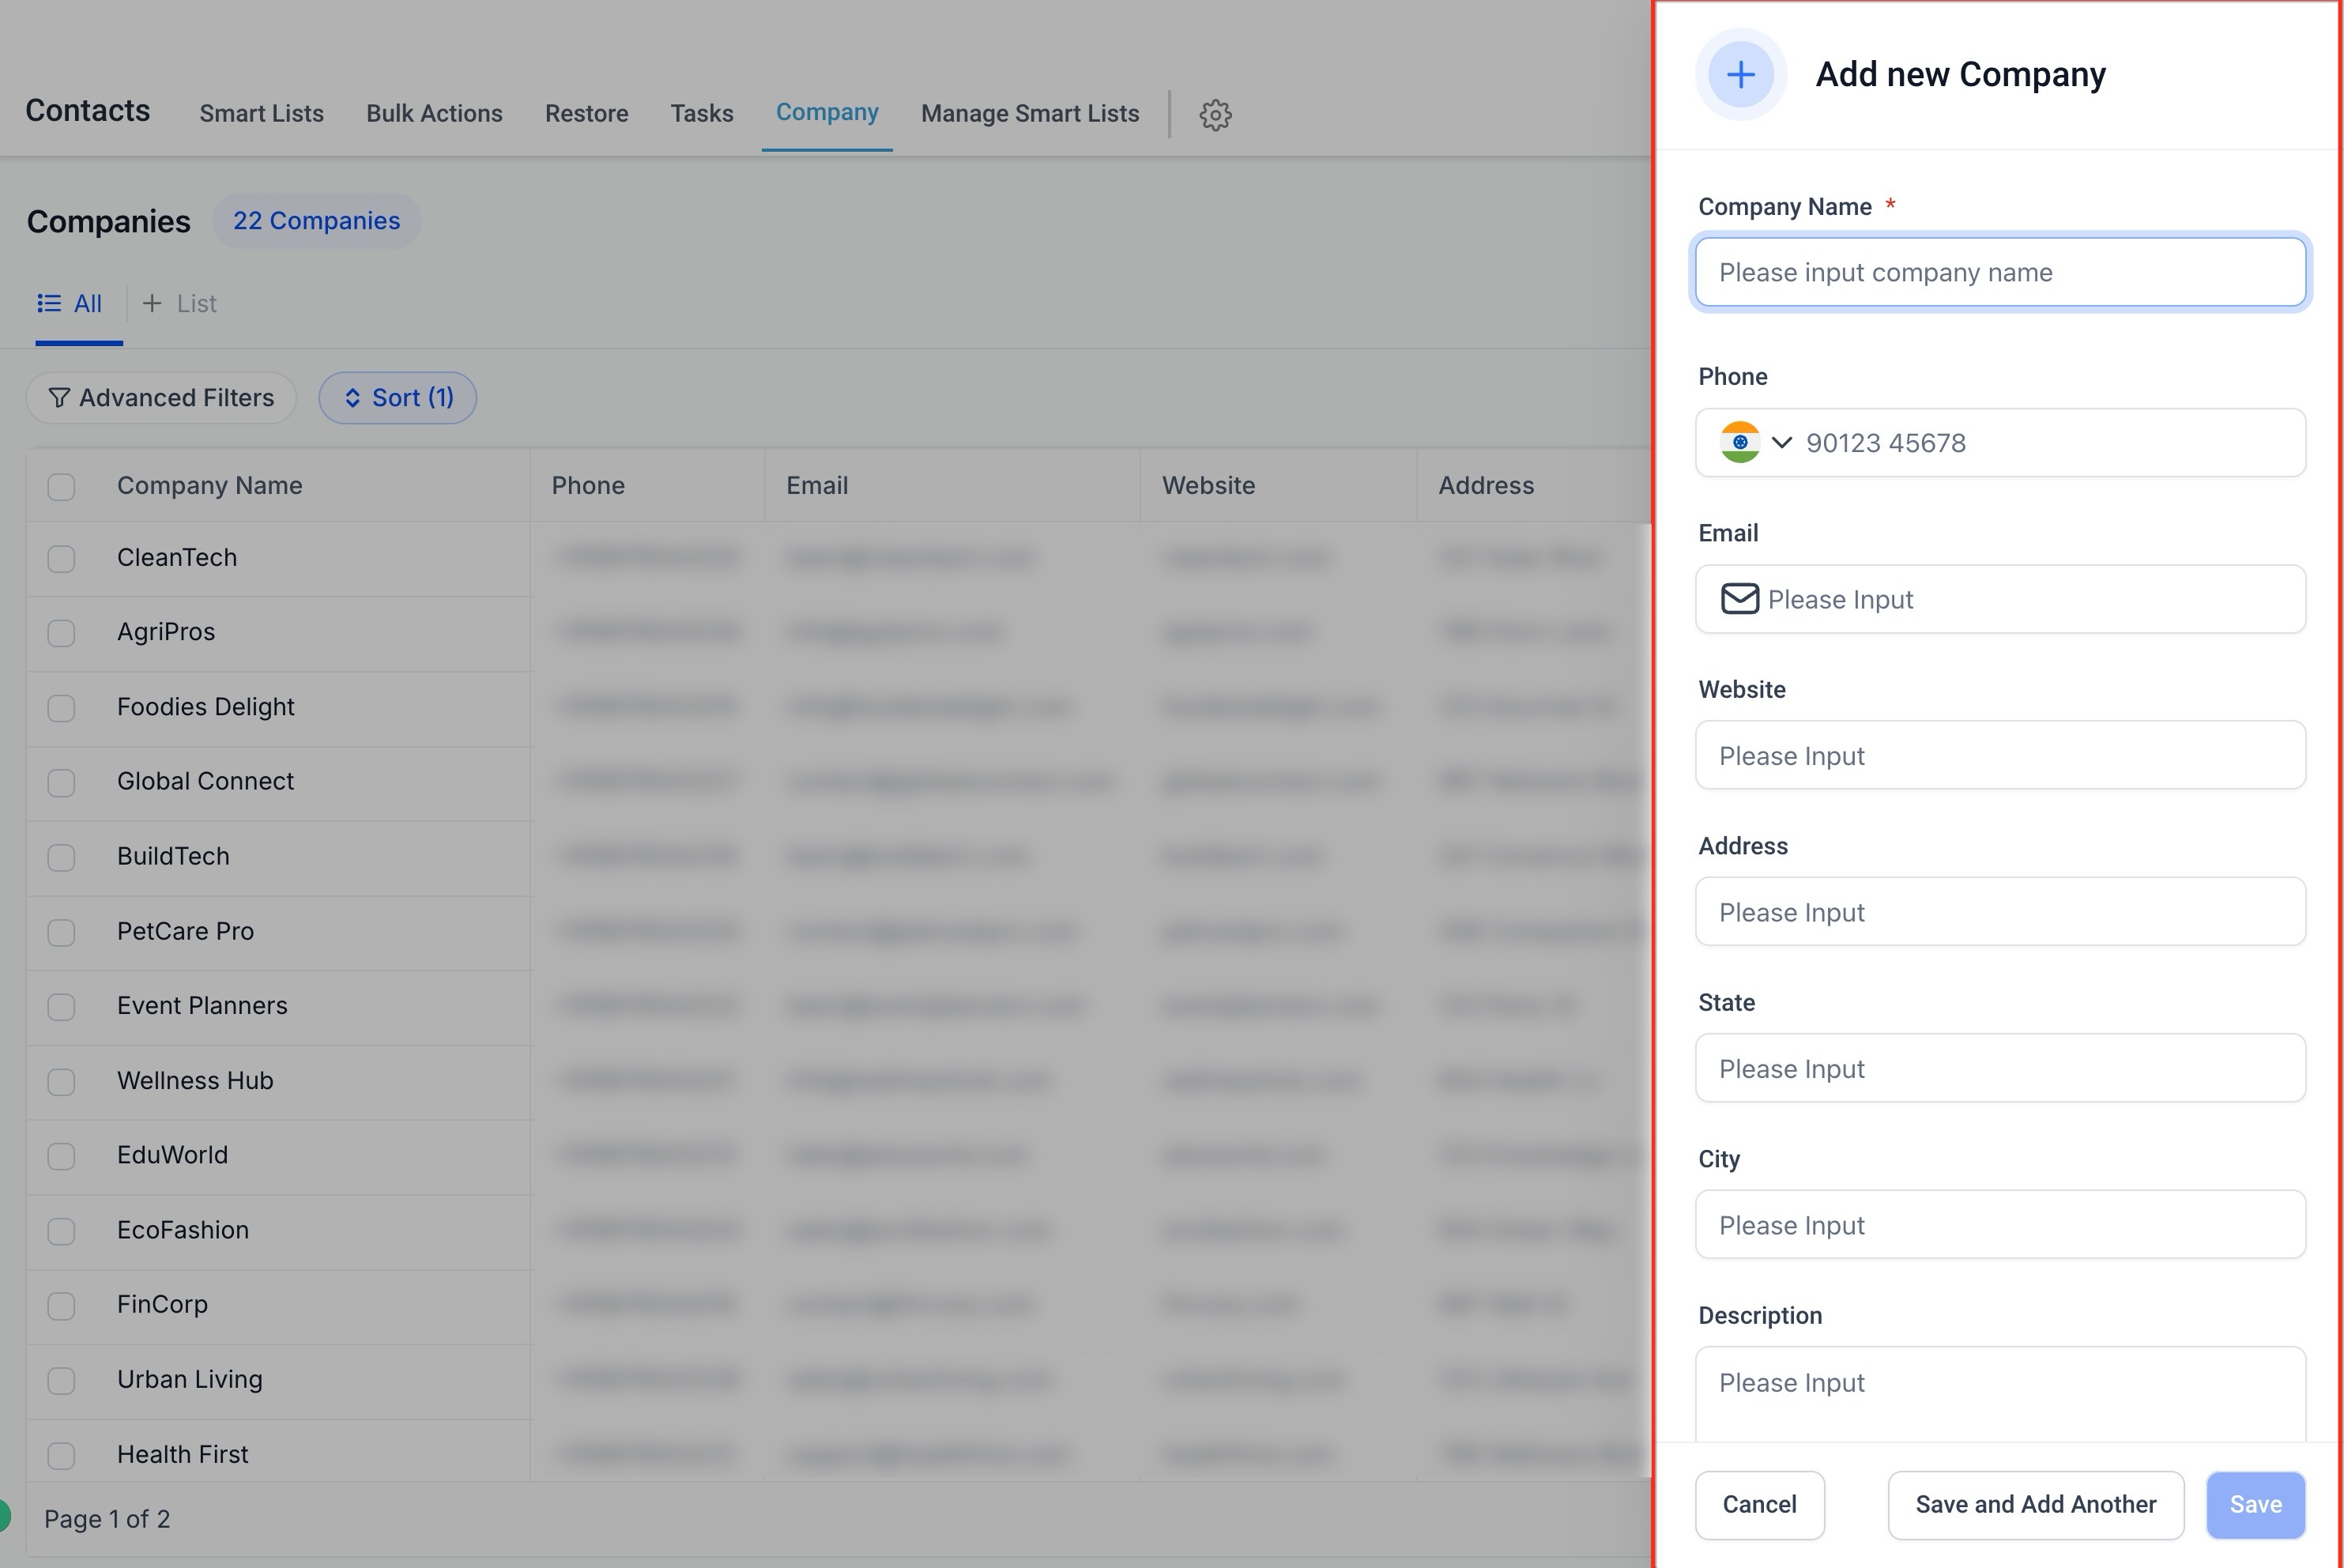
When creating a company, the following fields are available. Only the company name is required.
Company name (required): an open text field.
Phone number: optional.
Email: optional.
Website: optional.
Description: optional.
Street address: optional.
City: optional.
State: optional.
Postal code: optional.
Country: optional.
Validation note: Only required fields are validated. The phone and email fields are checked for correct format, but the system does not confirm whether the number or address is real.
To finish, fill in the company name and any optional details (phone number, email address, website URL, description, street address, city, state, postal code, country), then click Add Company (or Save). The new company appears in your list of added companies.
To modify an existing company:
Go to the Company tab.
Click the three dots next to the company.
Select Edit Company.
Edit or update the details.
Click Update.
To delete a company:
Go to the Company tab.
Click the three dots next to the company.
Select Delete Company.
Click Yes to confirm the deletion.
Kindly note: Deleting a company does not remove its associated contacts from your contact list. It only removes the company data from the Company tab of those contacts.
Custom fields let you capture additional company-specific data tailored to your practice, such as:
Industry type
Revenue range
Number of employees
Internal classifications
Service categories
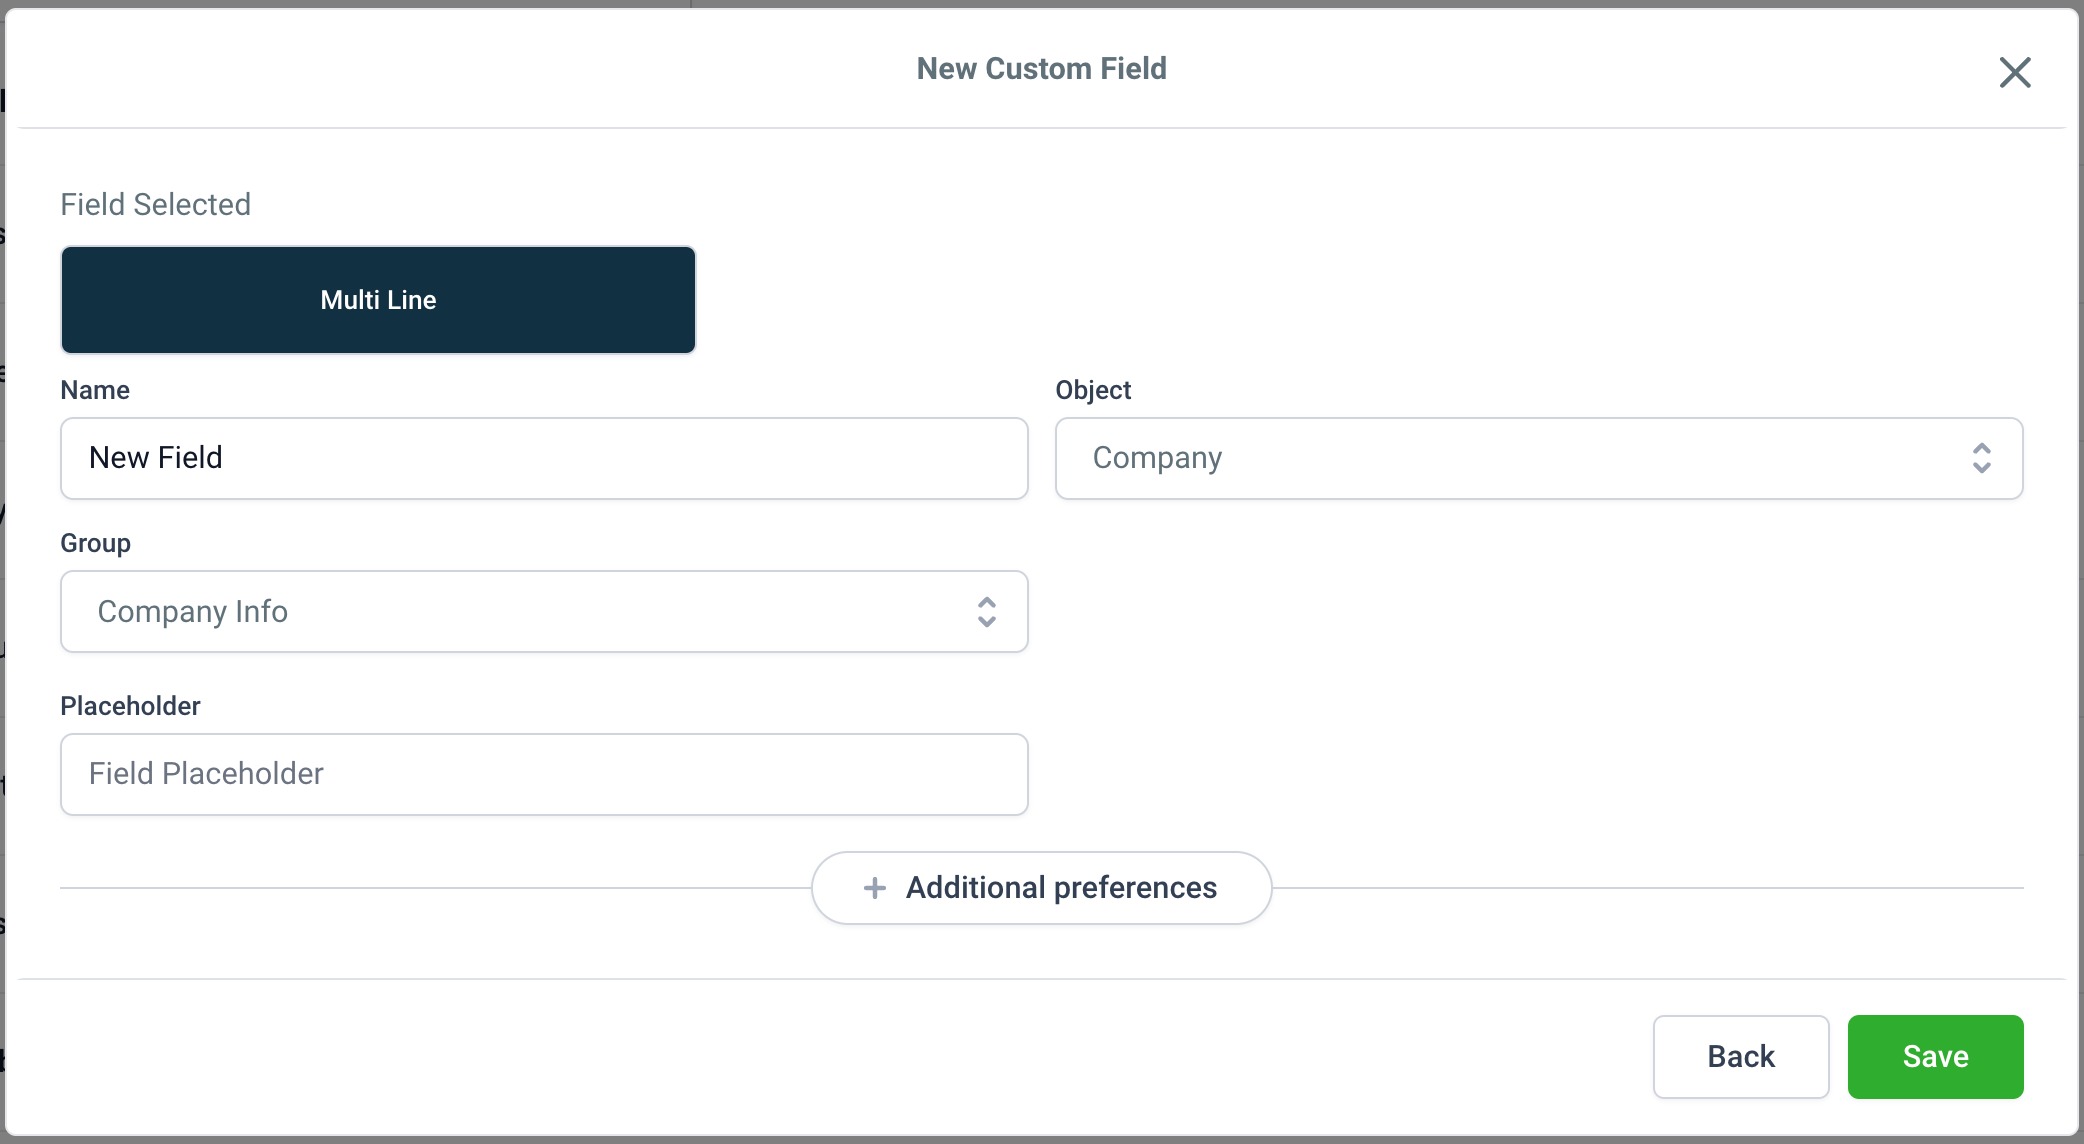
To create a custom field:
Click Manage Fields.
Select Add Field.
Choose the field type.
Enter the field name.
Assign it to the Company object.
Click Save.
Custom fields let you personalize how company data is tracked and segmented. For example, a med spa serving corporate-wellness clients might add an "Account Tier" or "Contract Renewal Date" field.
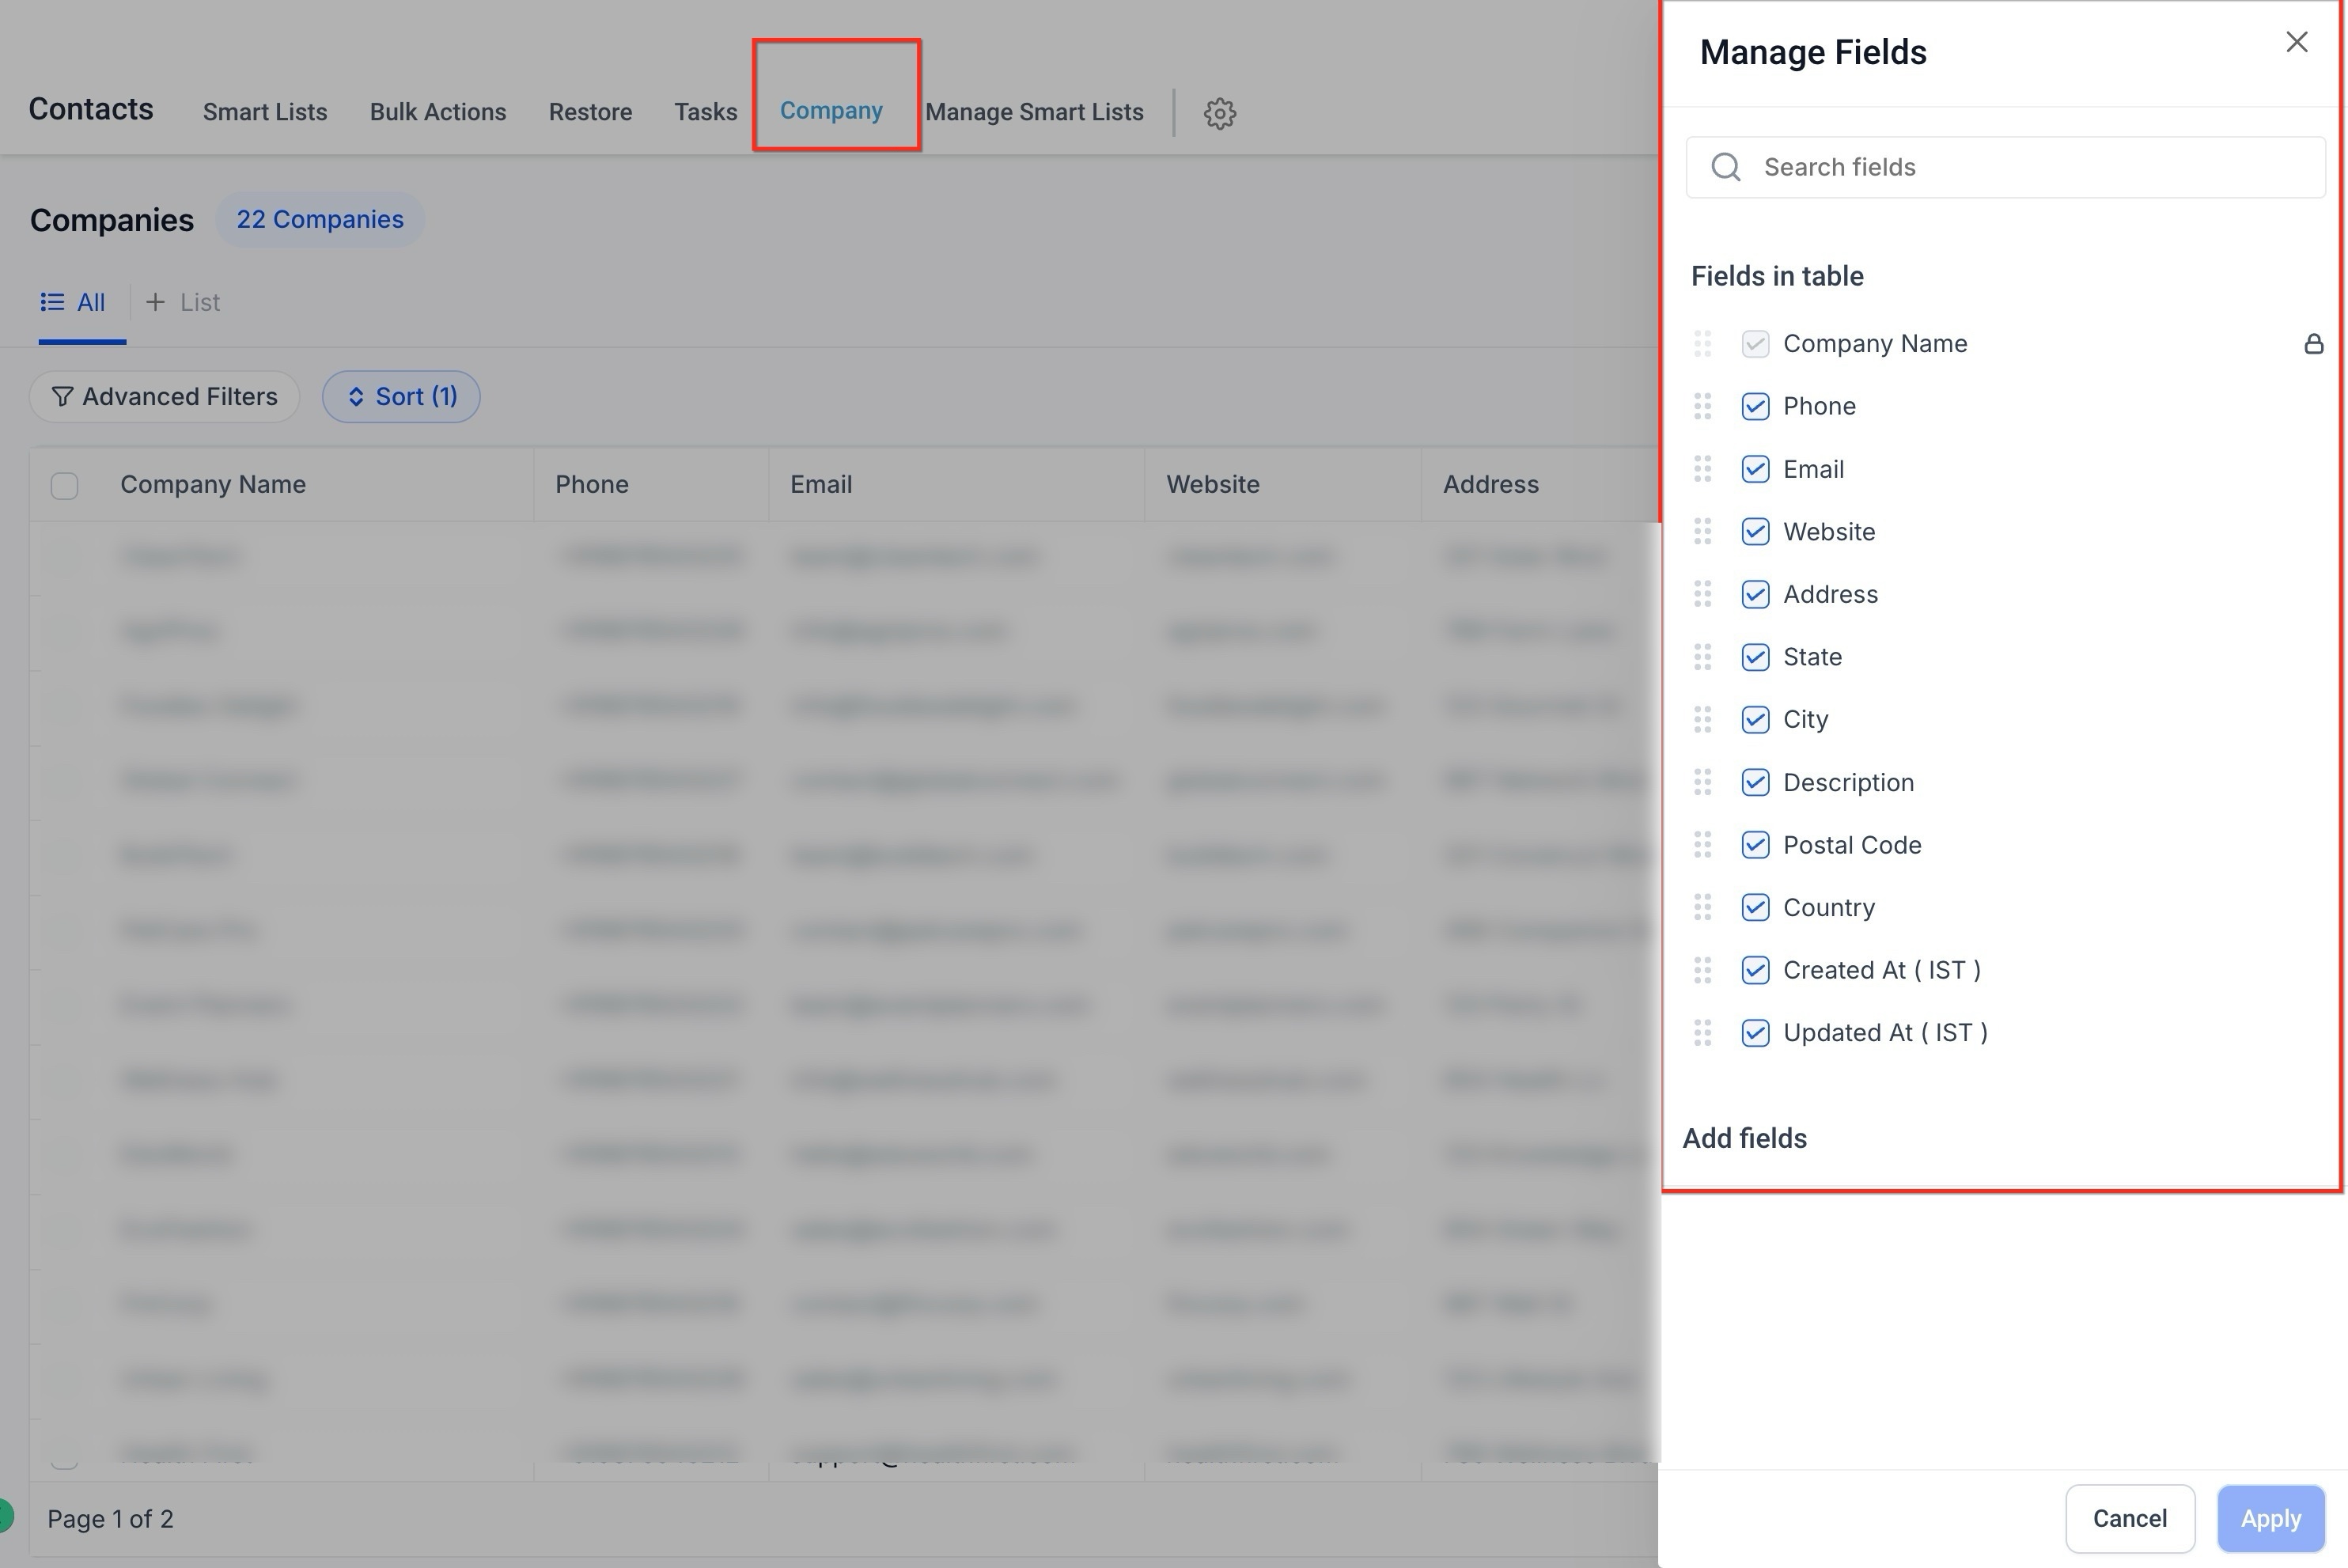
The Companies list view can be customized to display only the fields that matter most to your team.
To customize your list view:
Click Manage Fields.
Select or deselect columns.
Click Apply.
You can control the visibility of fields such as website, state, city, description, and any custom fields. This keeps your working view cleaner and more efficient.
As your company list grows, advanced filters, sorting, and search keep records easy to find.
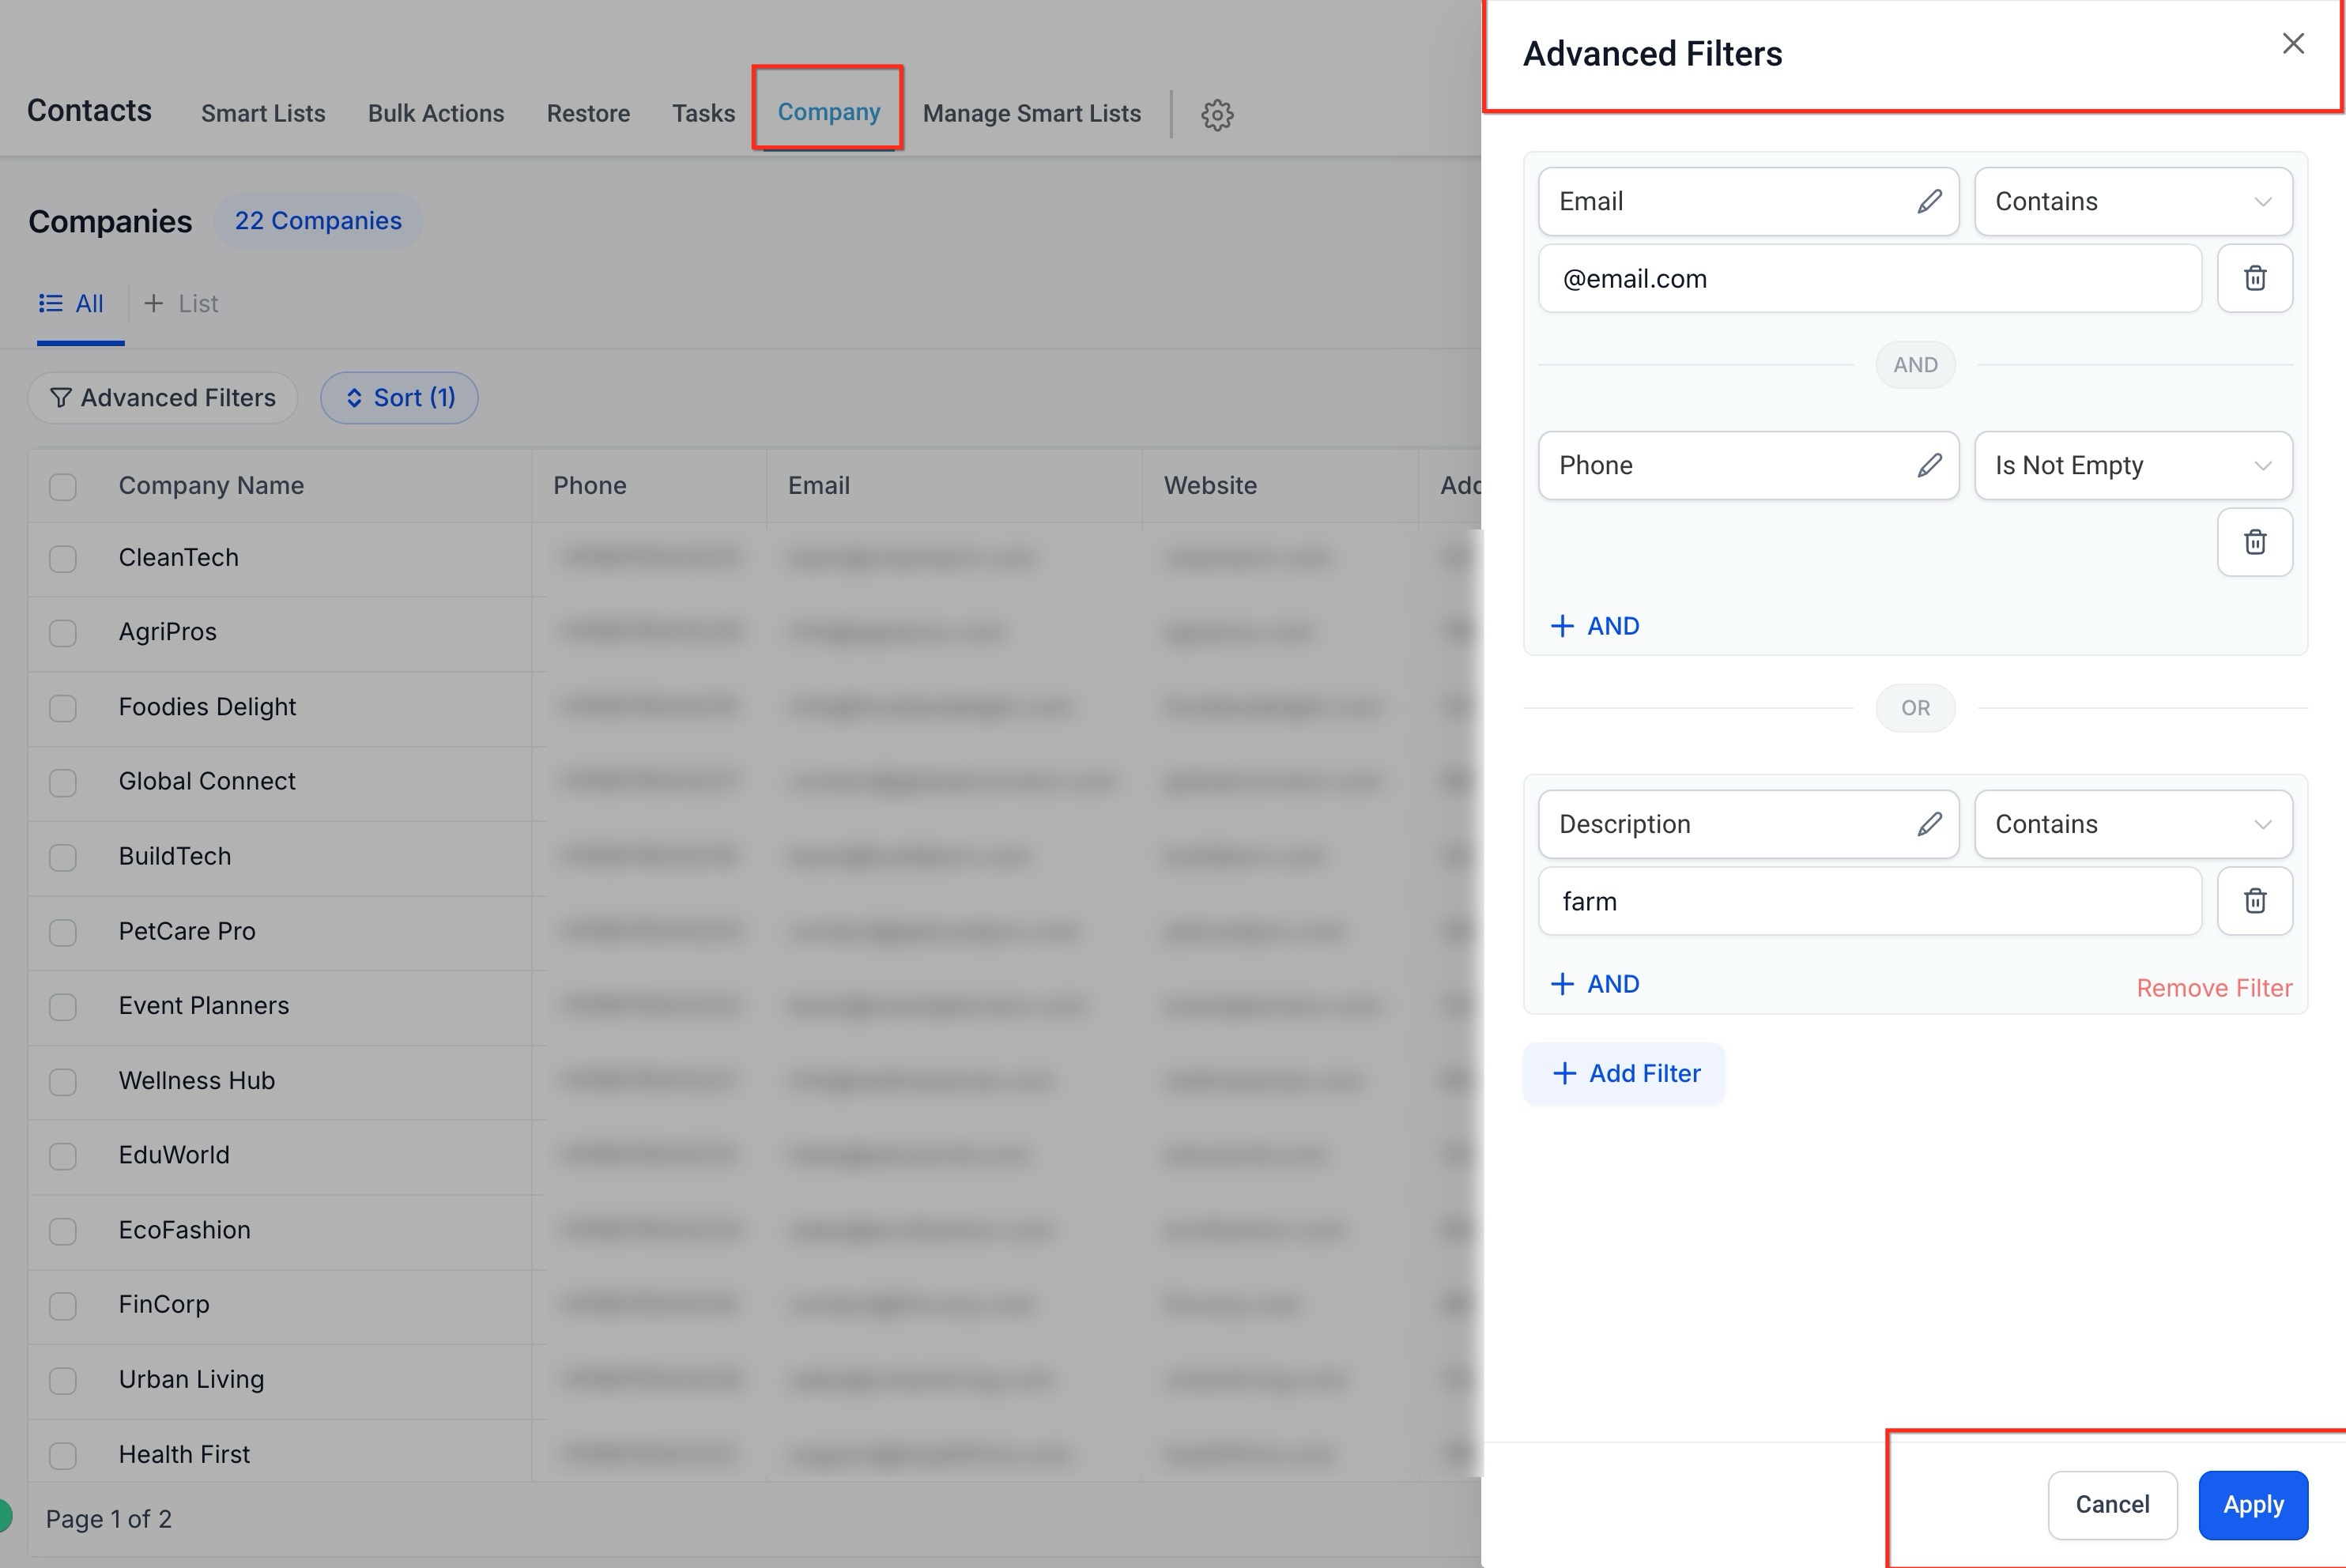
Advanced filters narrow down company records based on specific conditions. You can filter by:
Standard fields (email, phone, city, state)
Custom fields
Multiple AND / OR conditions
This lets you quickly find companies in a specific region, businesses with missing phone numbers, companies matching industry criteria, or companies with certain descriptions.
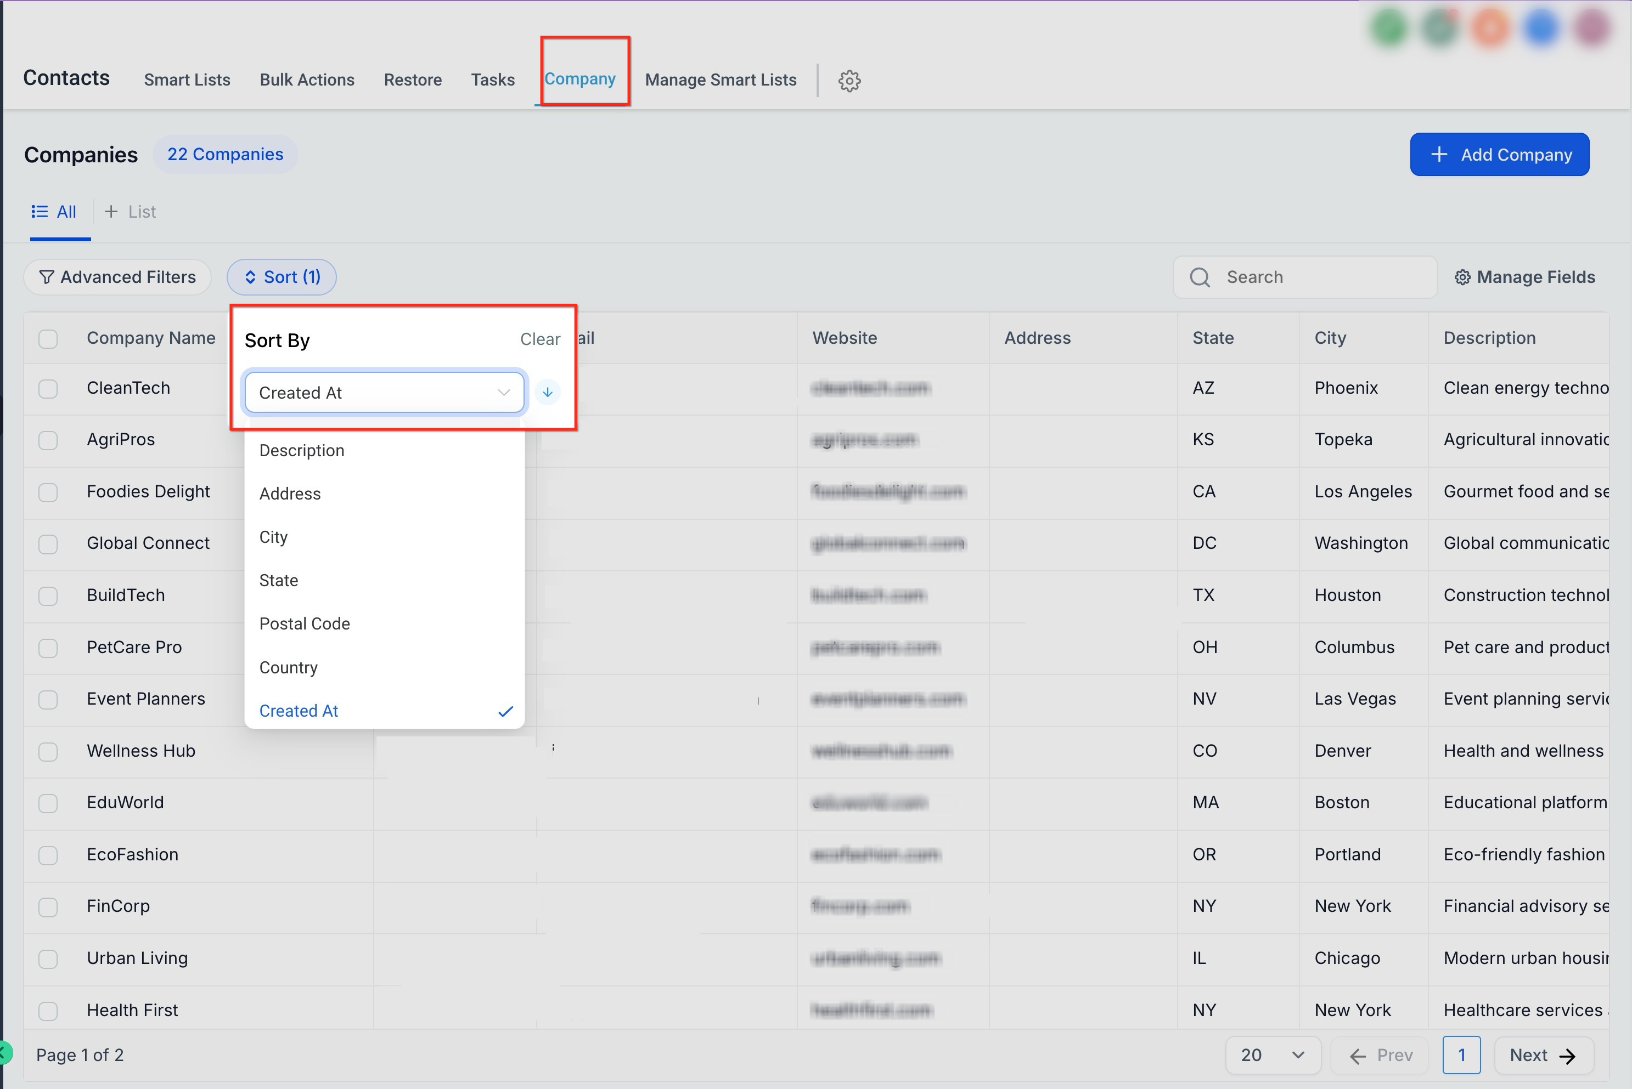
Sorting helps you organize records for quick review. You can sort by:
Company name
Created date
Address
City
State
Postal code
Custom fields
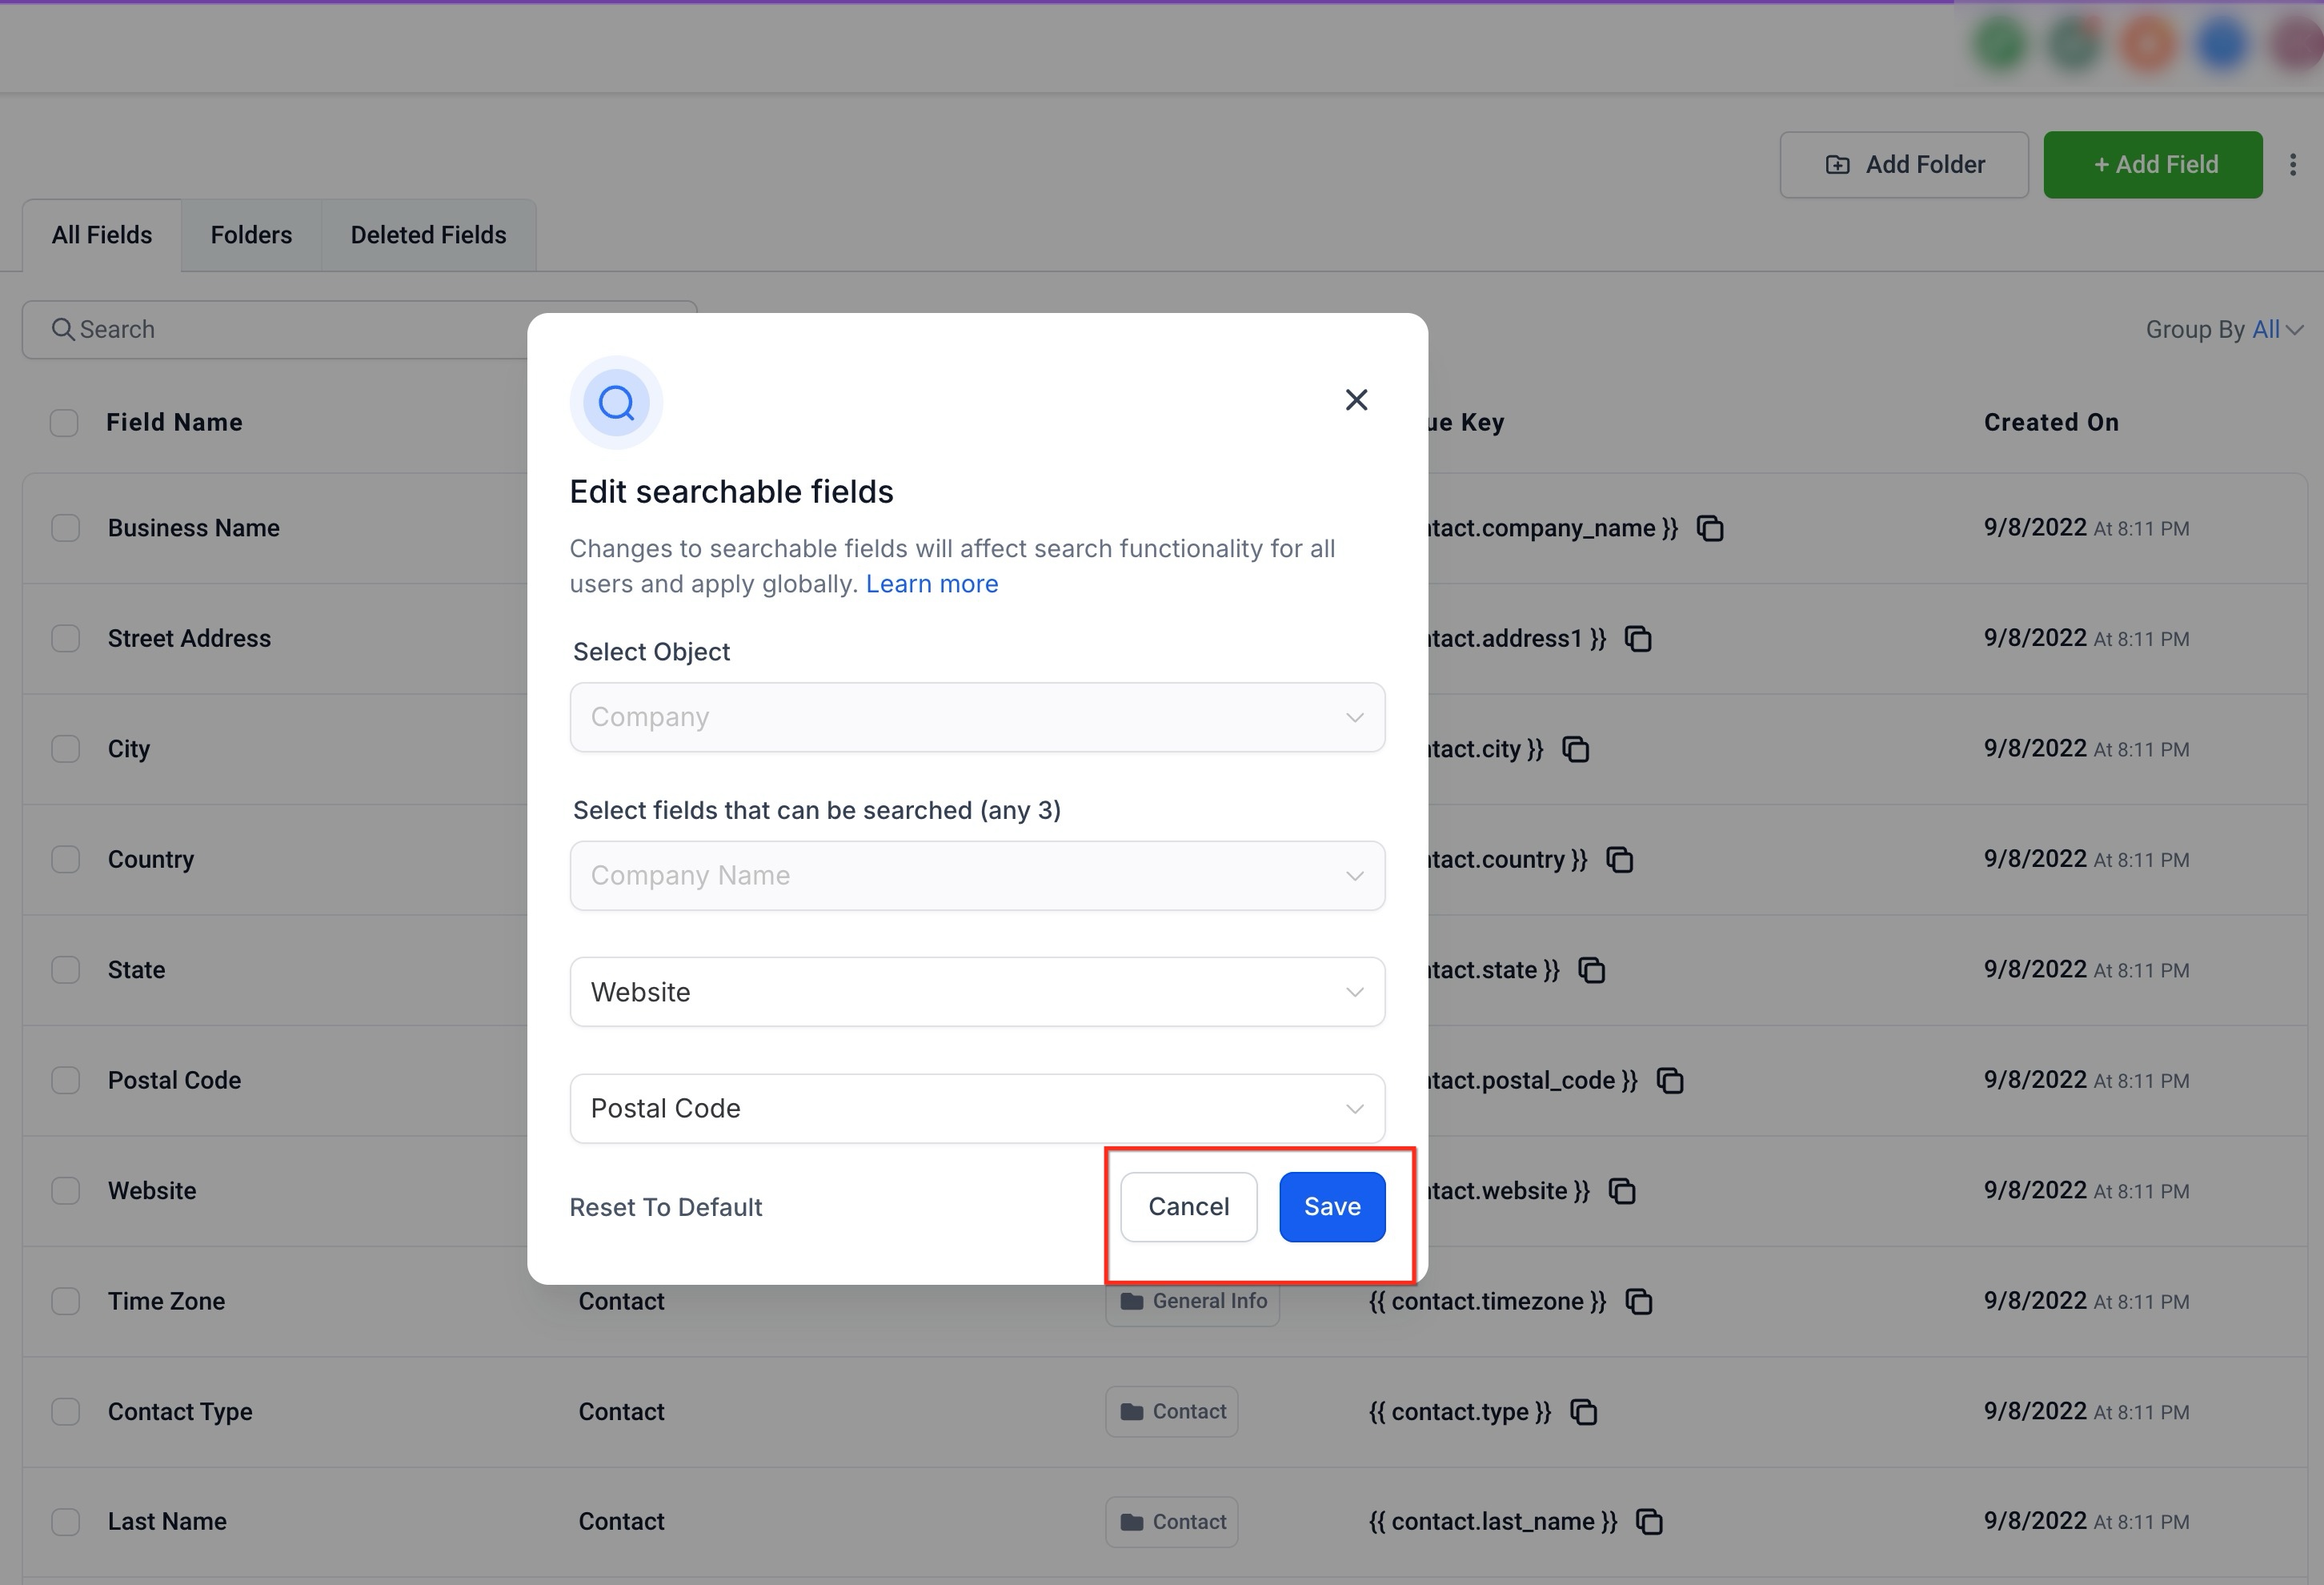
The search function lets you quickly locate company records. Search supports:
Company name
Phone number
Email address
Address fields
Custom fields (when configured as searchable)
This ensures information remains easy to find even as your database grows.
Custom Objects let you store and organize record types beyond the standard contacts, opportunities, and appointments. A Custom Object is a record type you define to model data unique to your practice and the relationships between those records.
Where Companies are a single, ready-made object for grouping contacts under an organization, Custom Objects are flexible structures you can use for specialized tracking that the standard records cannot hold: for example, equipment or devices, treatment packages, membership programs, or partner agreements. All associations between Custom Object records are many-to-many, allowing flexible relationships between records.
Custom Object availability depends on your plan and permissions. Some accounts have full creation and configuration access, while others can use existing objects with certain limitations. This structure lets you manage records, relationships, and data efficiently while keeping advanced structural changes controlled.
Open Settings from your dashboard.
Navigate to Custom Objects.
Select an object to view its available records and details.
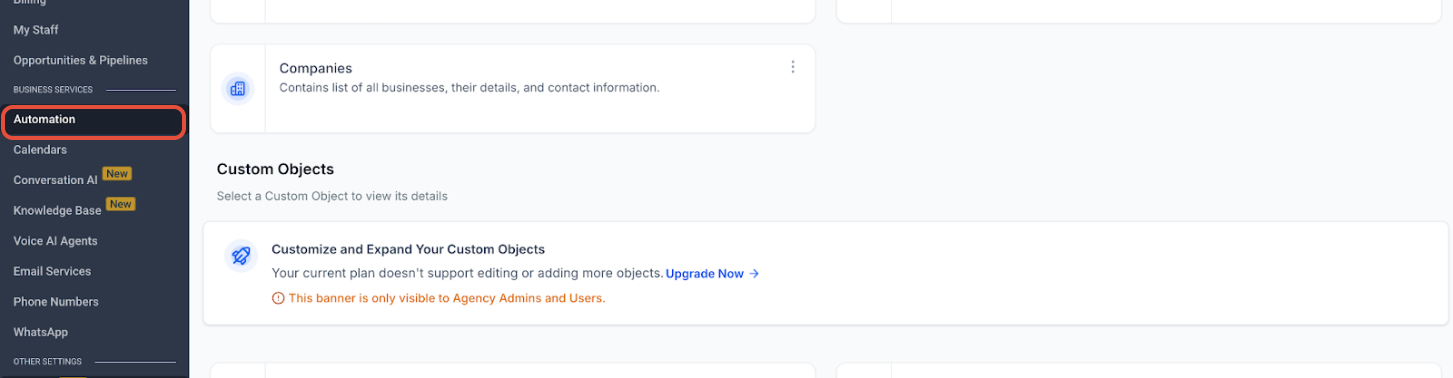
If advanced functionality is restricted on your plan, a banner appears indicating that creating or editing object structures is not available. Review the message, and if you need full access to create or modify Custom Objects, follow the upgrade prompt or contact support.
Once access is available:
Existing Custom Objects appear in your account.
You can begin working with records, fields, and associations.
Future snapshot functionality will allow importing ready-made objects.
Allowed actions:
View and use existing Custom Objects
Add and edit records
Create and manage fields within objects
Manage associations between records
Restricted actions (without full access):
Creating new Custom Objects
Editing object structure (such as display names or icons)
Modifying system-level configurations
If a feature is restricted, a prompt will guide you toward the access needed to unlock it. If you need help accessing Custom Objects, understanding feature limitations, or expanding your access, contact support.
You can import company and Custom Object records in bulk from a CSV file rather than creating each record by hand. This is the fastest way to load an existing list, for example a roster of corporate-wellness accounts or a catalog of equipment records.
To import records:
Open the relevant area: the Company tab for companies, or Settings → Custom Objects for a Custom Object.
Choose the Import option for that object.
Upload your CSV file.
Map each column in your file to the matching field on the company or Custom Object (for example, map a "Business Name" column to the Company name field).
Review the mapping and confirm the import.
Before importing, make sure your CSV has a clear header row, that required fields (such as company name) are populated, and that your column values match the format of the fields they map to. After the import runs, review the records to confirm they came in as expected.
Bulk delete gives you a faster way to remove multiple Custom Object, Company, or Task records at once, without deleting each record one at a time. This is especially helpful after imports, cleanup projects, deduplication work, or large-scale data resets. Eligible deleted records can be restored from the Bulk Actions page within 60 days, reducing the risk of accidental data loss.
Bulk delete is available for:
Custom Object records
Company records
Task records
For Custom Objects, bulk delete works from the Custom Objects list view using multi-select checkboxes. For Companies and Tasks, there is no 100-record cap, so you can delete larger groups without breaking the work into batches.
When a record is deleted:
The selected record is deleted.
Relations connected to the deleted record are removed.
Associations connected to the deleted record are removed.
Association labels connected to the deleted record are removed.
Related records themselves are not deleted.
For example, deleting a Company record does not delete the contacts, opportunities, or other records related to that company. The related records remain, but the association between the deleted company and those records is removed.
Before confirming a bulk delete:
Review any filters applied to the list view.
Confirm the selected records are the ones you intend to delete.
Export important data before large cleanup actions when needed.
Make sure your team understands that relations, associations, and association labels are removed when records are deleted.
Review the Bulk Actions page after deletion to confirm job progress and completion.
Restore eligible deletion jobs within 60 days if records were deleted by mistake.
Open the relevant area: Custom Objects, Companies, or Tasks.
Go to the list view for the records you want to delete.
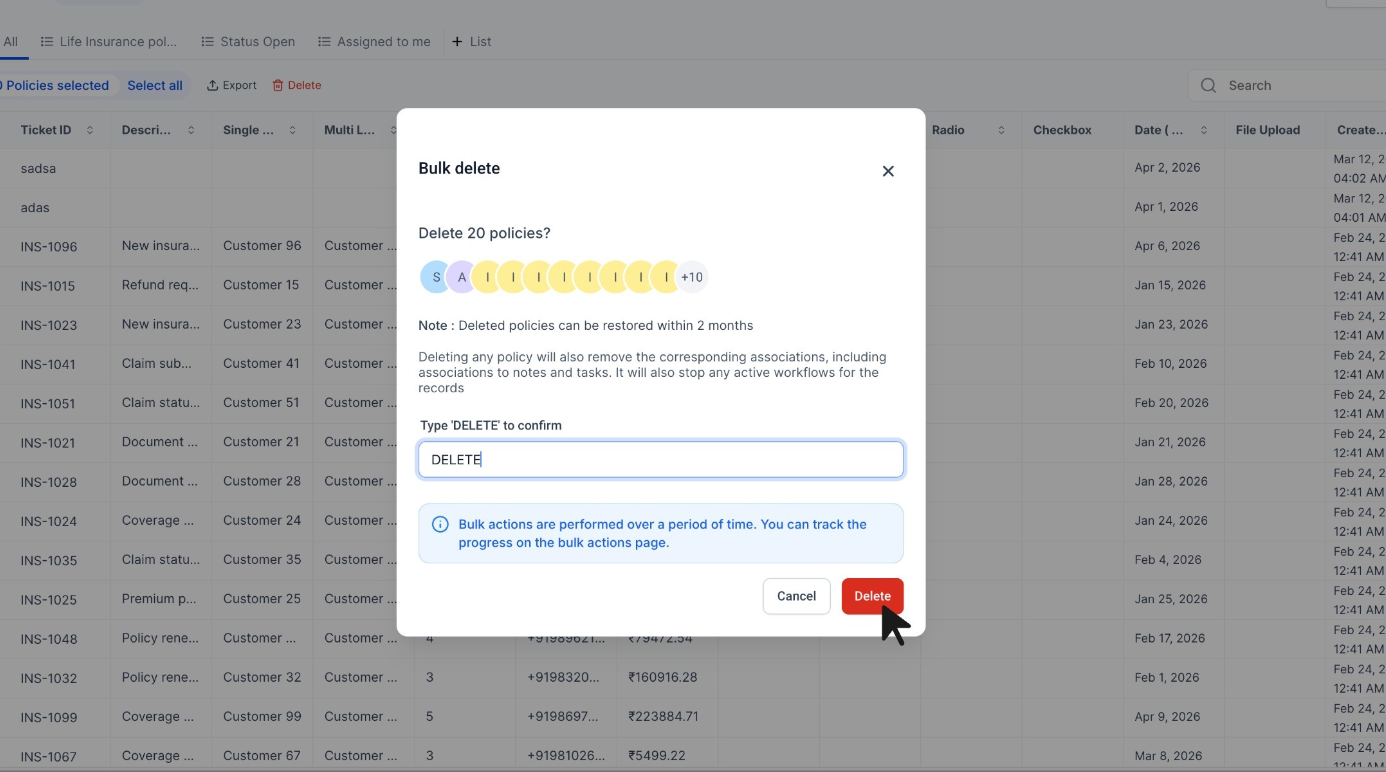
Use the checkboxes to select the records you want to remove.
Click Delete.
Review the confirmation message carefully.
Confirm the deletion.
Go to the Bulk Actions page in your account.
Review the deletion job to check progress, completion status, and stats.
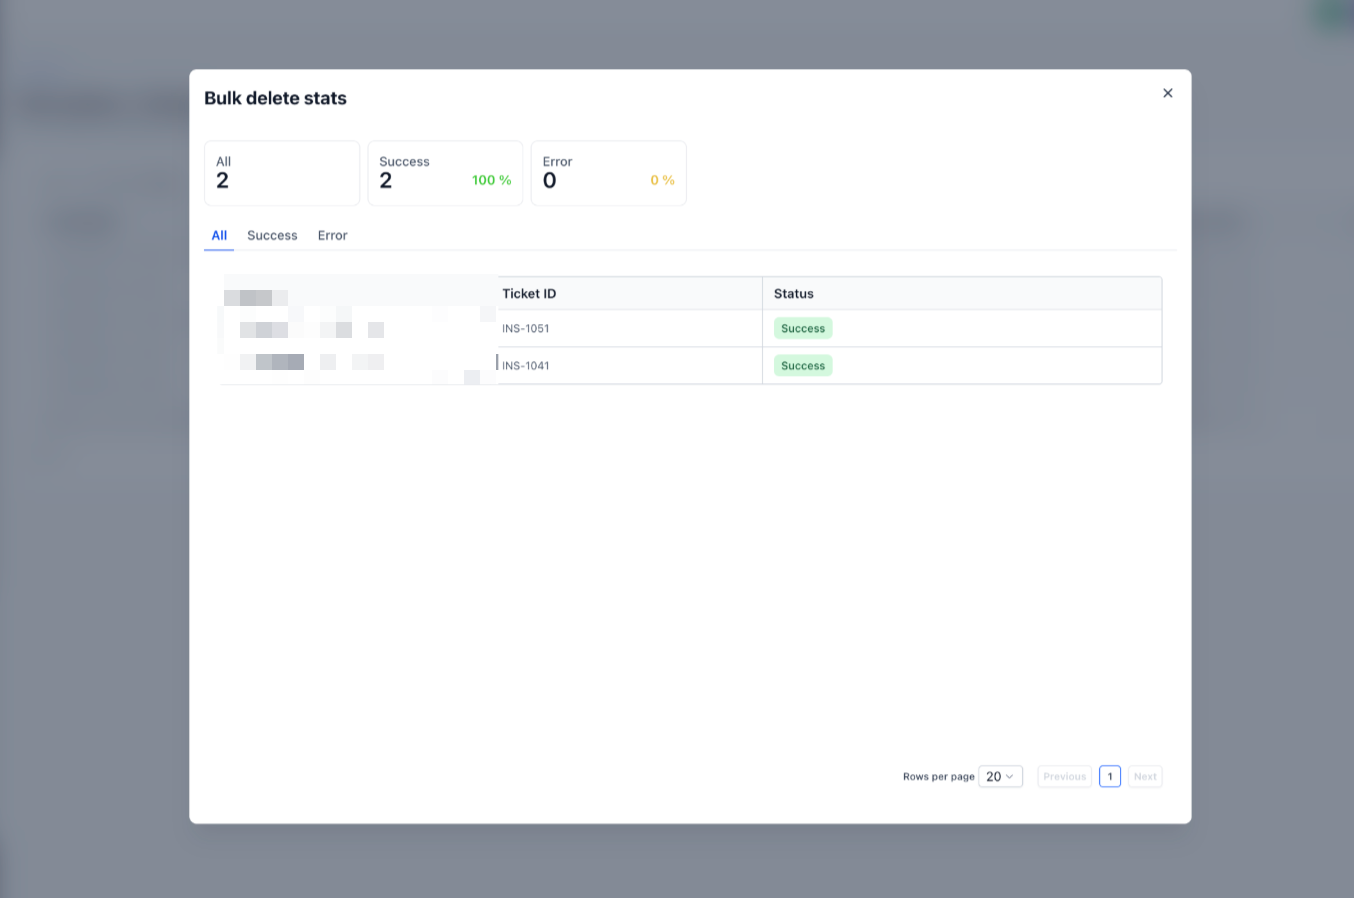
The Bulk Actions page keeps a record of supported bulk deletion jobs, so you can restore eligible deleted records within the 60-day recovery window.
Go to Bulk Actions in your account.
Locate the deletion job for the records you want to restore.
Click the three-dot menu for the deletion job.
Click Restore.
Review the confirmation message.
Confirm the restore action.
Monitor the restore progress from the Bulk Actions page.
Can I link multiple contacts to one company? Yes. Multiple contacts can be associated with the same company record.
Does deleting a company also delete its contacts? No. Deleting a company only removes the company data from the Company tab of its contacts. The contacts themselves stay in your contact list.
What is the difference between a Company and a Custom Object? A Company is a ready-made object for grouping contacts under an organization. A Custom Object is a record type you define for specialized data the standard records cannot hold, with many-to-many relationships between records.
Can I create Custom Objects on my current plan? It depends on your access level. Some plans allow full creation and structural editing, while others let you use and manage existing objects but not create new ones. If creation is restricted, a prompt will guide you.
Can I still use Custom Objects without full access? Yes. You can use existing objects and manage their records, fields, and associations even when structural editing is restricted.
Can I filter and search by custom fields? Yes. Custom fields can be used in advanced filters once created, and they are searchable when configured as searchable.
Can I bulk delete Custom Object records? Yes. Custom Object records can be selected from the list view using checkboxes and deleted in bulk.
Is there still a 100-record limit for bulk deleting Companies and Tasks? No. The previous 100-record cap for bulk delete on Companies and Tasks has been removed.
Where can I check the progress of a bulk delete? Go to the Bulk Actions page in your account to review progress, stats, and completion status.
Can I restore records after bulk deleting them? Yes. Eligible bulk-deleted records can be restored from the Bulk Actions page within 60 days.
Does deleting a record delete its related records too? No. Related records are not deleted. However, the deleted record's relations, associations, and association labels are removed.
What happens after the 60-day restore window ends? Records should be restored within 60 days from the Bulk Actions page. After that window, the deletion may no longer be recoverable from the restore option.
If you run into issues with Companies or Custom Objects, confirm the correct object (Company versus Contact) is selected when creating fields, make sure custom fields are saved, and refresh the page if filters or sorting do not update. If certain options are not visible, it may be a permissions or plan-access limitation. For help expanding Custom Object access or scoping a more advanced data setup for your practice, contact support or submit a Custom Build Request.
