The Voice AI Chat Widget lets website and funnel visitors hold a live, microphone-based conversation with your AI agent entirely inside the browser. Instead of dialing a phone number, the conversation streams in real time, creating a friction-free, voice-first experience that feels natural and immediate. It is perfect for med spas that want to greet visitors, share general information, and capture leads the moment interest is hot.
This article covers the Voice AI specifics of the widget: enabling it, configuring the voice agent, embedding it on your site, and how visitors interact. For the broader set of chat-widget styling and placement options, also see the Chat Widget collection.
Note on PHI: Don't enter protected health information (PHI) into the Voice AI Chat Widget. AI features aren't approved for processing PHI - use them for productivity, communication, scheduling, and engagement, not to store or process medical records. See the HIPAA Compliance guide for details.
The Voice AI Chat Widget works as a voice-only interaction mode within the existing Chat Widget framework. Visitors initiate a live voice session by clicking a microphone icon, and the AI agent responds conversationally in real time through their browser's microphone and speakers - no phone number, download, or call setup required.
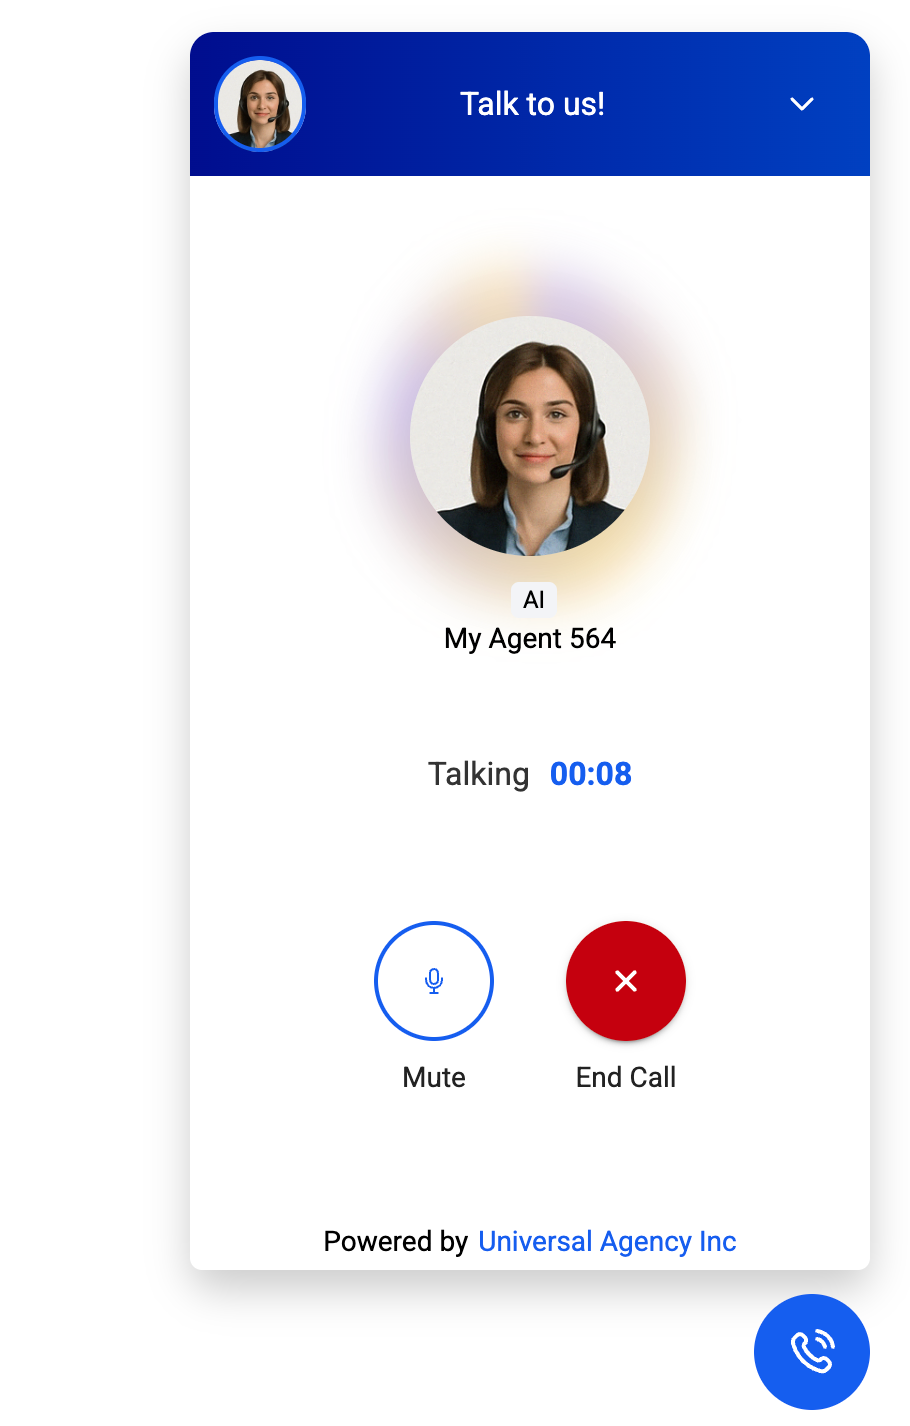
During a session, visitors can:
Start or end a voice conversation.
Mute or unmute the session as needed.
Provide their contact information and details verbally.
Restart a conversation at any time by disconnecting and calling again.
The AI agent uses the automations you have configured for your Voice AI agent to handle interactions. All existing Voice AI actions are supported, except Call Transfer, which is currently unavailable.
Zero friction: Visitors speak instantly without dialing a number or installing an app.
Human-like engagement: Natural speech keeps prospects talking longer and sharing more details.
Higher conversion: Real-time voice qualifies and books leads while interest is high.
Browser-based voice calling directly from the chat widget, with no outbound call or phone number required.
Configurable AI agent name to match your brand or business (for example, a friendly persona shown right in the widget).
Automatic call-recording notice displayed for transparency.
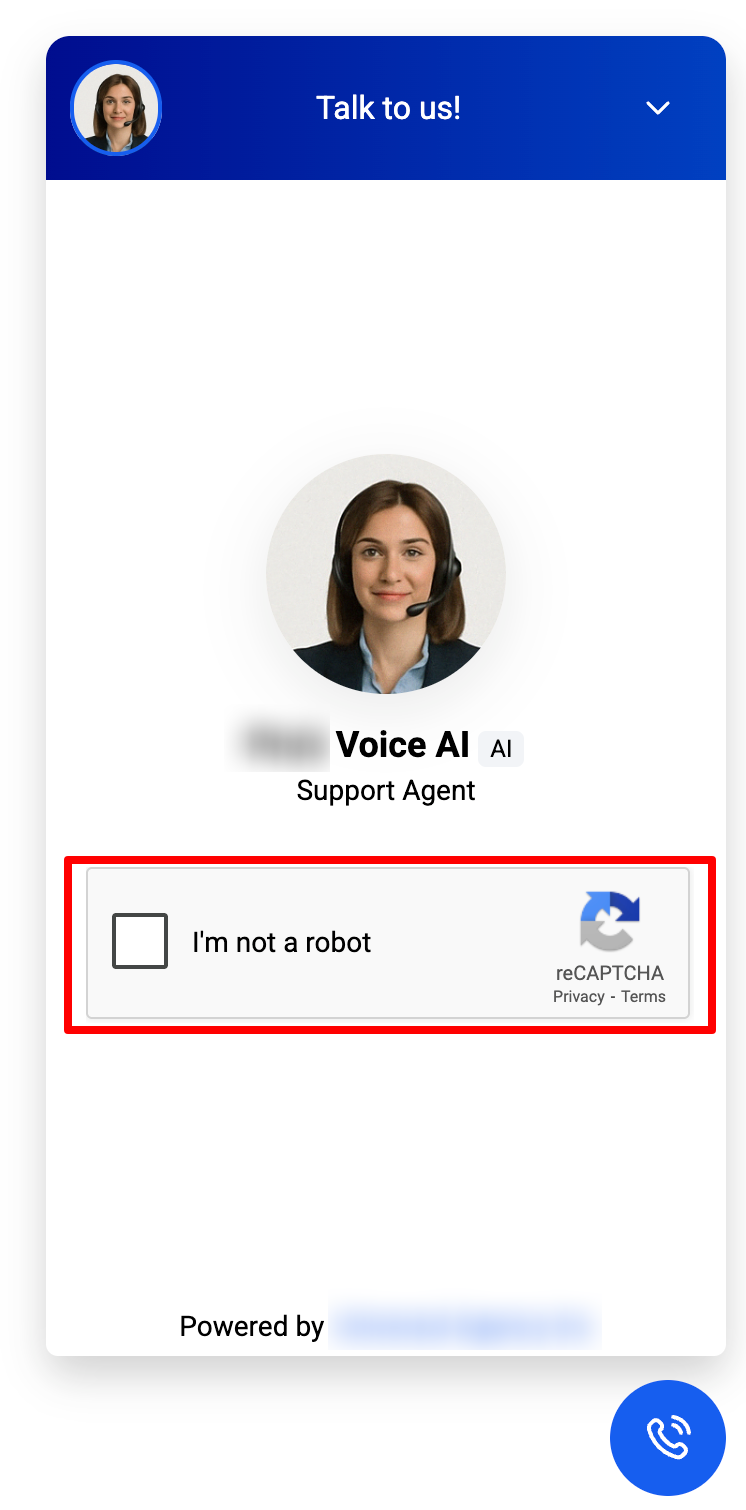
Built-in reCAPTCHA protection to prevent automated or repeated misuse.
Full compatibility with your existing Voice AI actions and workflows.
You can create up to 100 Voice AI agents, leaving room for experiments, production setups, and specialized workflows.
Because everything runs in the browser, there is no telephony setup, SIP trunk, or softphone to configure. You can embed the widget anywhere a normal chat bubble fits - websites, funnels, blogs, or the Client Portal.
You can currently create up to 100 Voice AI agents. The number of concurrent calls is capped at 20. Call #21 triggers a red banner letting the next caller know to try again shortly. Widgets in other locations are unaffected, as each location has its own 20-call limit. This safeguard prevents quality degradation when multiple visitors call at once.
The Voice AI Chat Widget is a Labs feature, so it must be turned on before the Voice AI chat type appears in the Chat Widget builder.
Navigate to Settings > Labs, then open the sub-account tab.
Find the Voice AI Chat Widget option.
Toggle the feature ON to enable it.
Once enabled, the Voice AI chat type becomes available in the Chat Widget builder. If you manage multiple accounts, you can choose to enable or disable it for specific sub-accounts.
A Voice AI agent must already exist before you can build a Voice AI chat widget. To configure the agent itself, go to AI Agents > Voice AI in your sub-account, then create or edit the agent's greeting, prompts/behavior, and any actions or workflows. Once your agent is ready, build the widget:
Go to Sites > Chat Widgets.
Open an existing widget or create a new one.
Under the Agent tab, select Voice AI Agent.
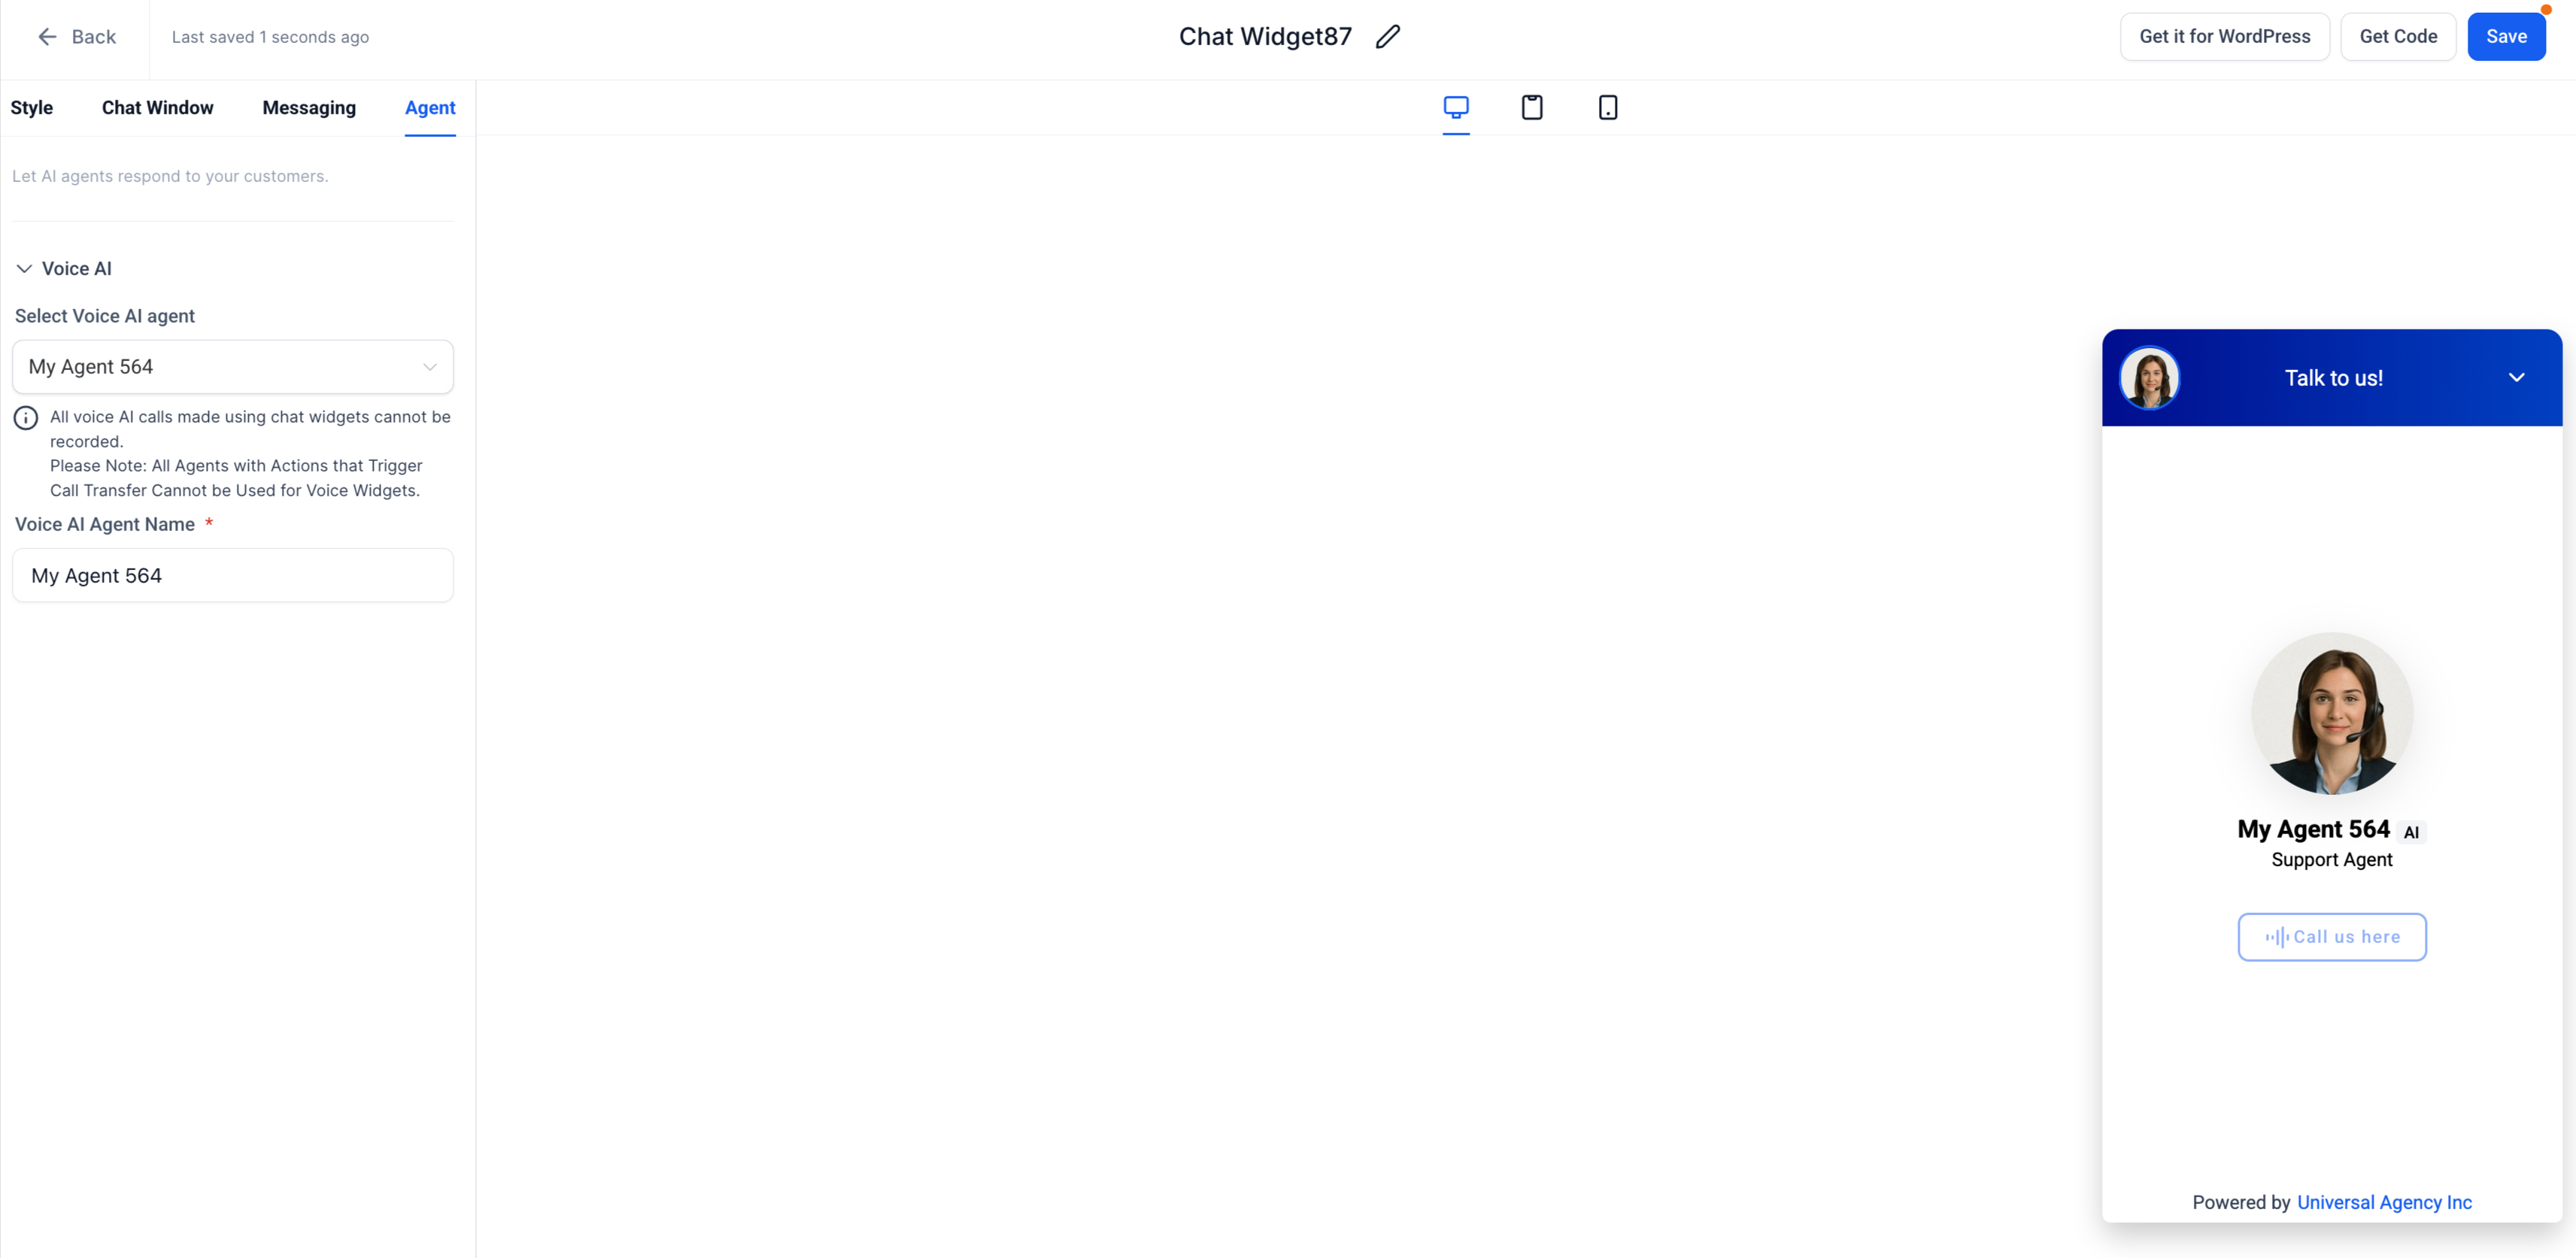
In the Voice AI Agent Name field, enter the name that will be displayed to visitors (for example, "Front Desk Assistant" or "Booking Helper"). This name appears on every voice reply, reinforcing trust and professionalism.
Click Save to apply your settings.
Note: You will not be allowed to create a Voice AI chat widget unless your Voice AI setup and agent creation are complete.
There are two ways to place the widget: as a floating bubble using a tracking-code script, or embedded inline within your page content using a Code Block.
In the Chat Widget builder, click Get Code.
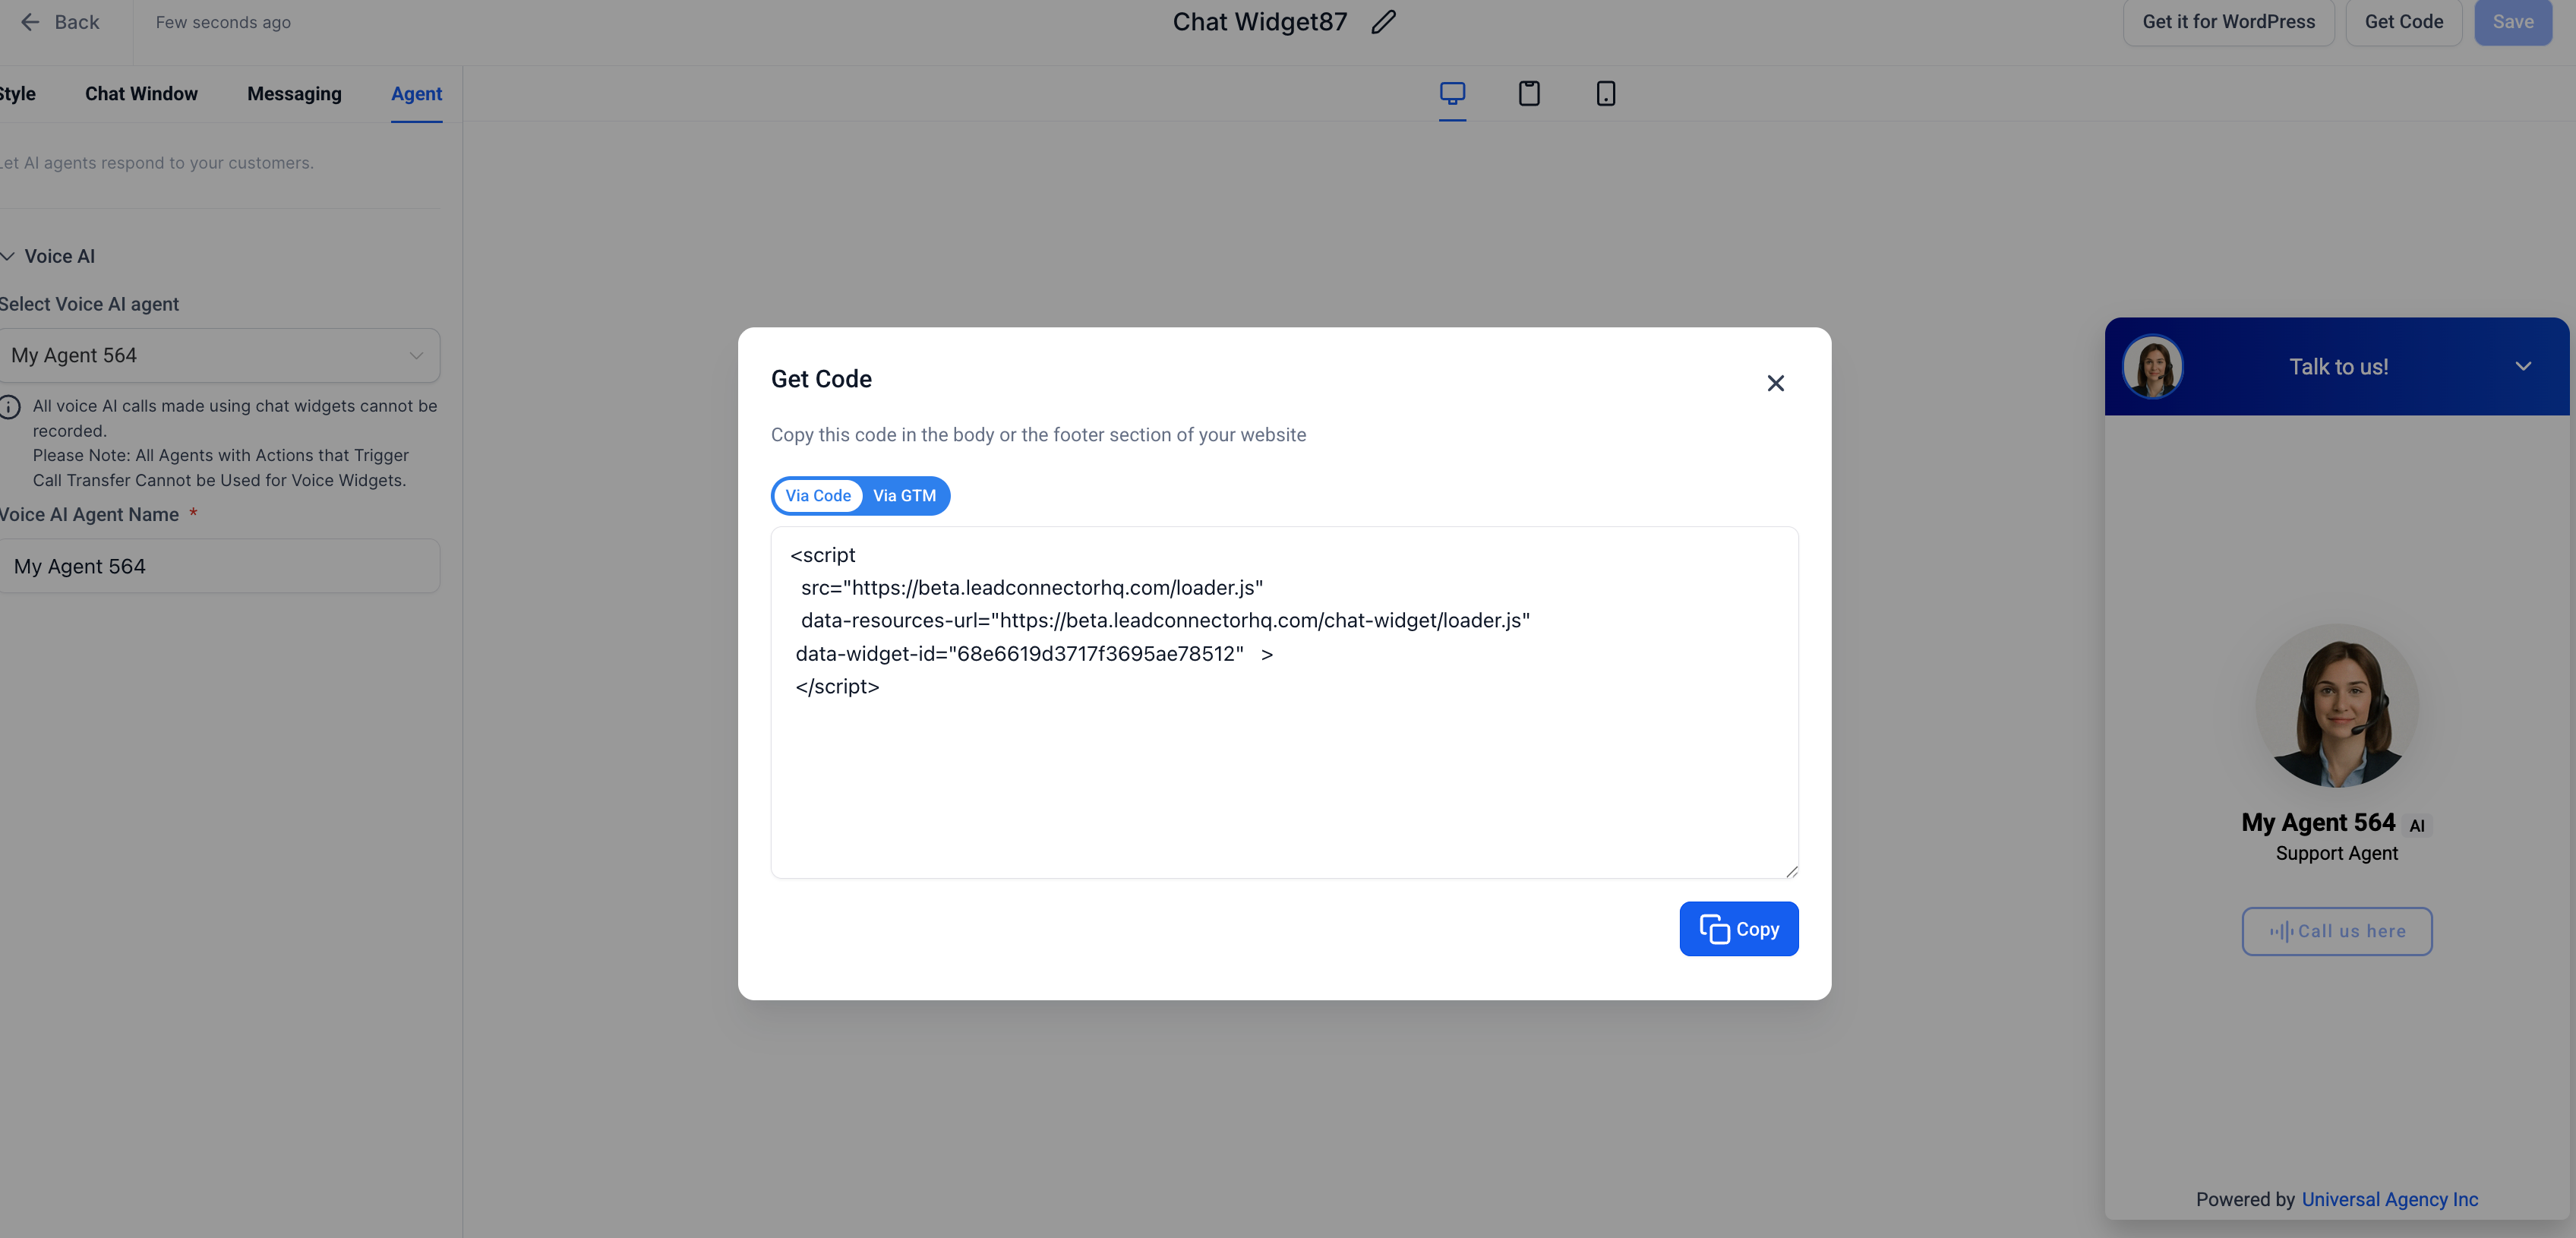
Copy the generated <script> tag.
Paste the code into the Tracking Code section, in the Header or Footer Tracking of the website or funnel where you want the widget to appear.
Publish or update the page. Once published, the Voice AI Chat Widget appears on your site.
For custom-coded sites, place the script in the <head> or footer section. For third-party platforms like Wix, Shopify, and Squarespace, use their custom-code embed feature. Always save and publish your changes, then test the widget by visiting your live site and starting a voice call.
An Embedded Voice AI Chat Widget appears inline within your website or funnel content instead of floating in the corner of the screen. This gives you more flexibility in how you present Voice AI on key pages, such as landing pages, lead-capture pages, service pages, or offer sections. Unlike the default Sticky placement, Embedded/Inline placement lets the widget become part of the page layout for a more seamless, on-brand visitor experience.
Benefits of embedded placement:
Inline placement flexibility: Add the Voice AI widget directly inside page sections instead of relying on a floating chat bubble.
More natural user experience: Make conversations feel like part of the website content rather than a separate overlay.
Cleaner page-design control: Align the widget with your funnel or website layout for a more branded experience.
Mobile-ready experience: The embedded widget is responsive by default for mobile visitors.
Flexible deployment options: Use multiple inline placements and combine embedded and sticky widgets on the same website or funnel.
Embedded Voice AI Chat works on funnels, websites, landing pages, custom HTML sites, and other supported pages where Chat Widgets can be installed. It is mobile responsive by default, so it adjusts automatically for smaller screens while remaining part of the page content.
To create an embedded widget:
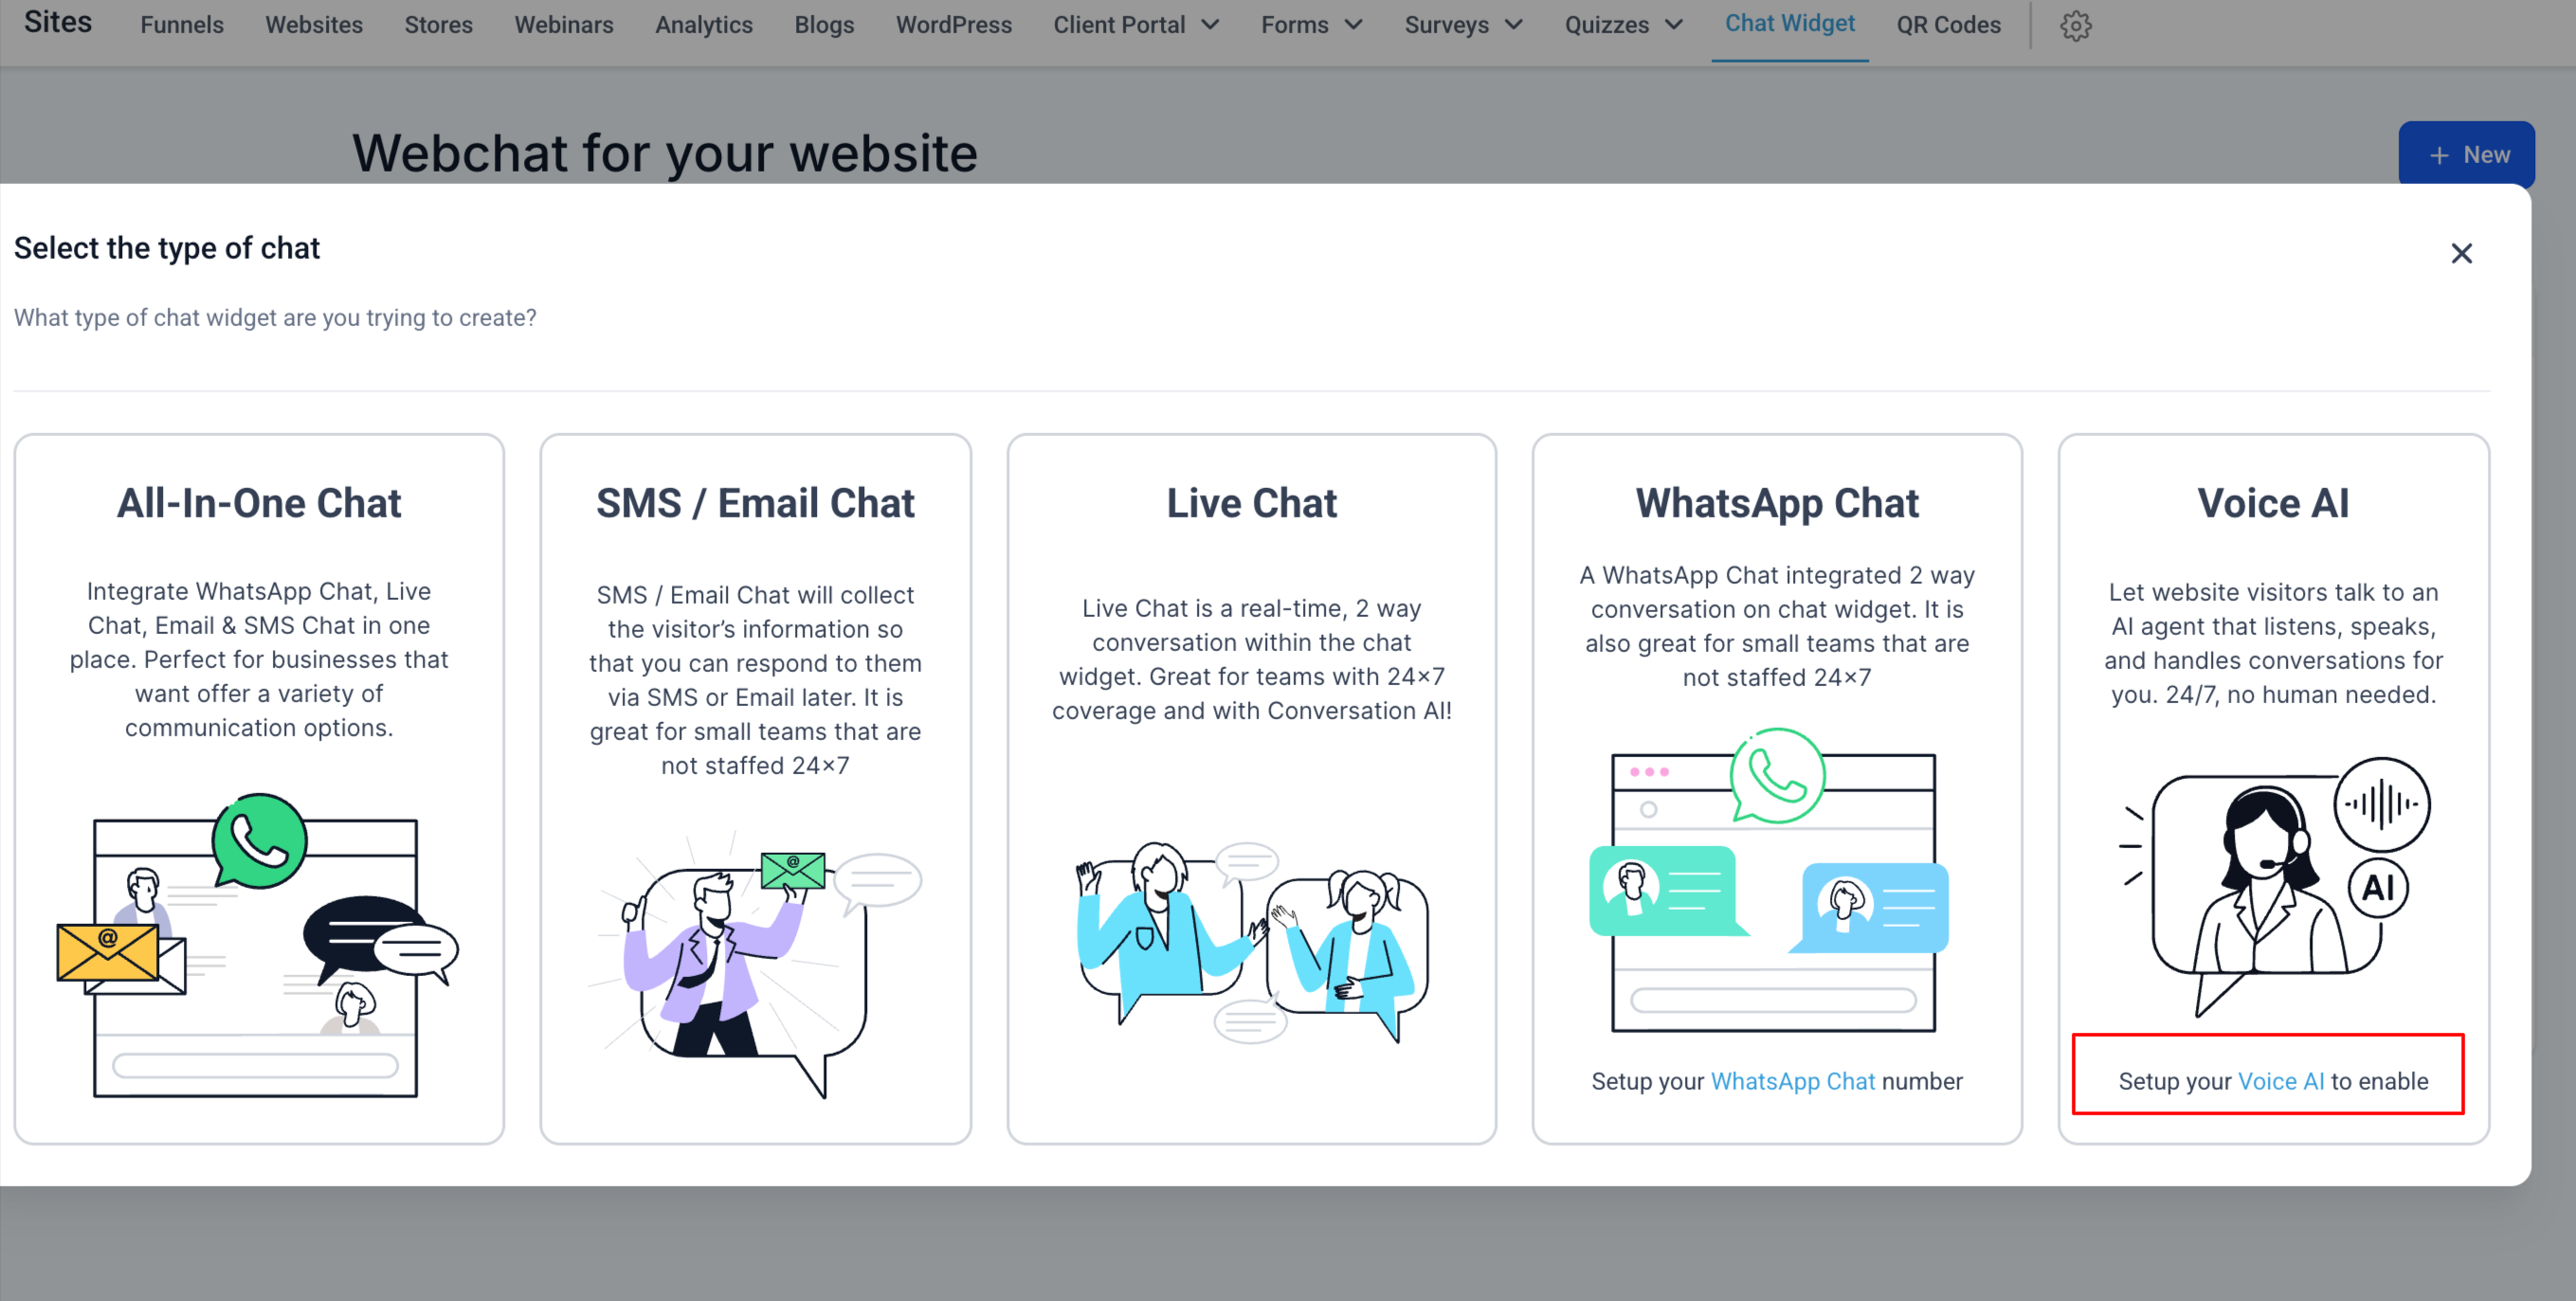
Step 1: Create a new Chat Widget. Go to Sites > Chat Widget, then click + New or open an existing widget.
Step 2: Select Voice AI Chat. Choose the Voice AI chat option.
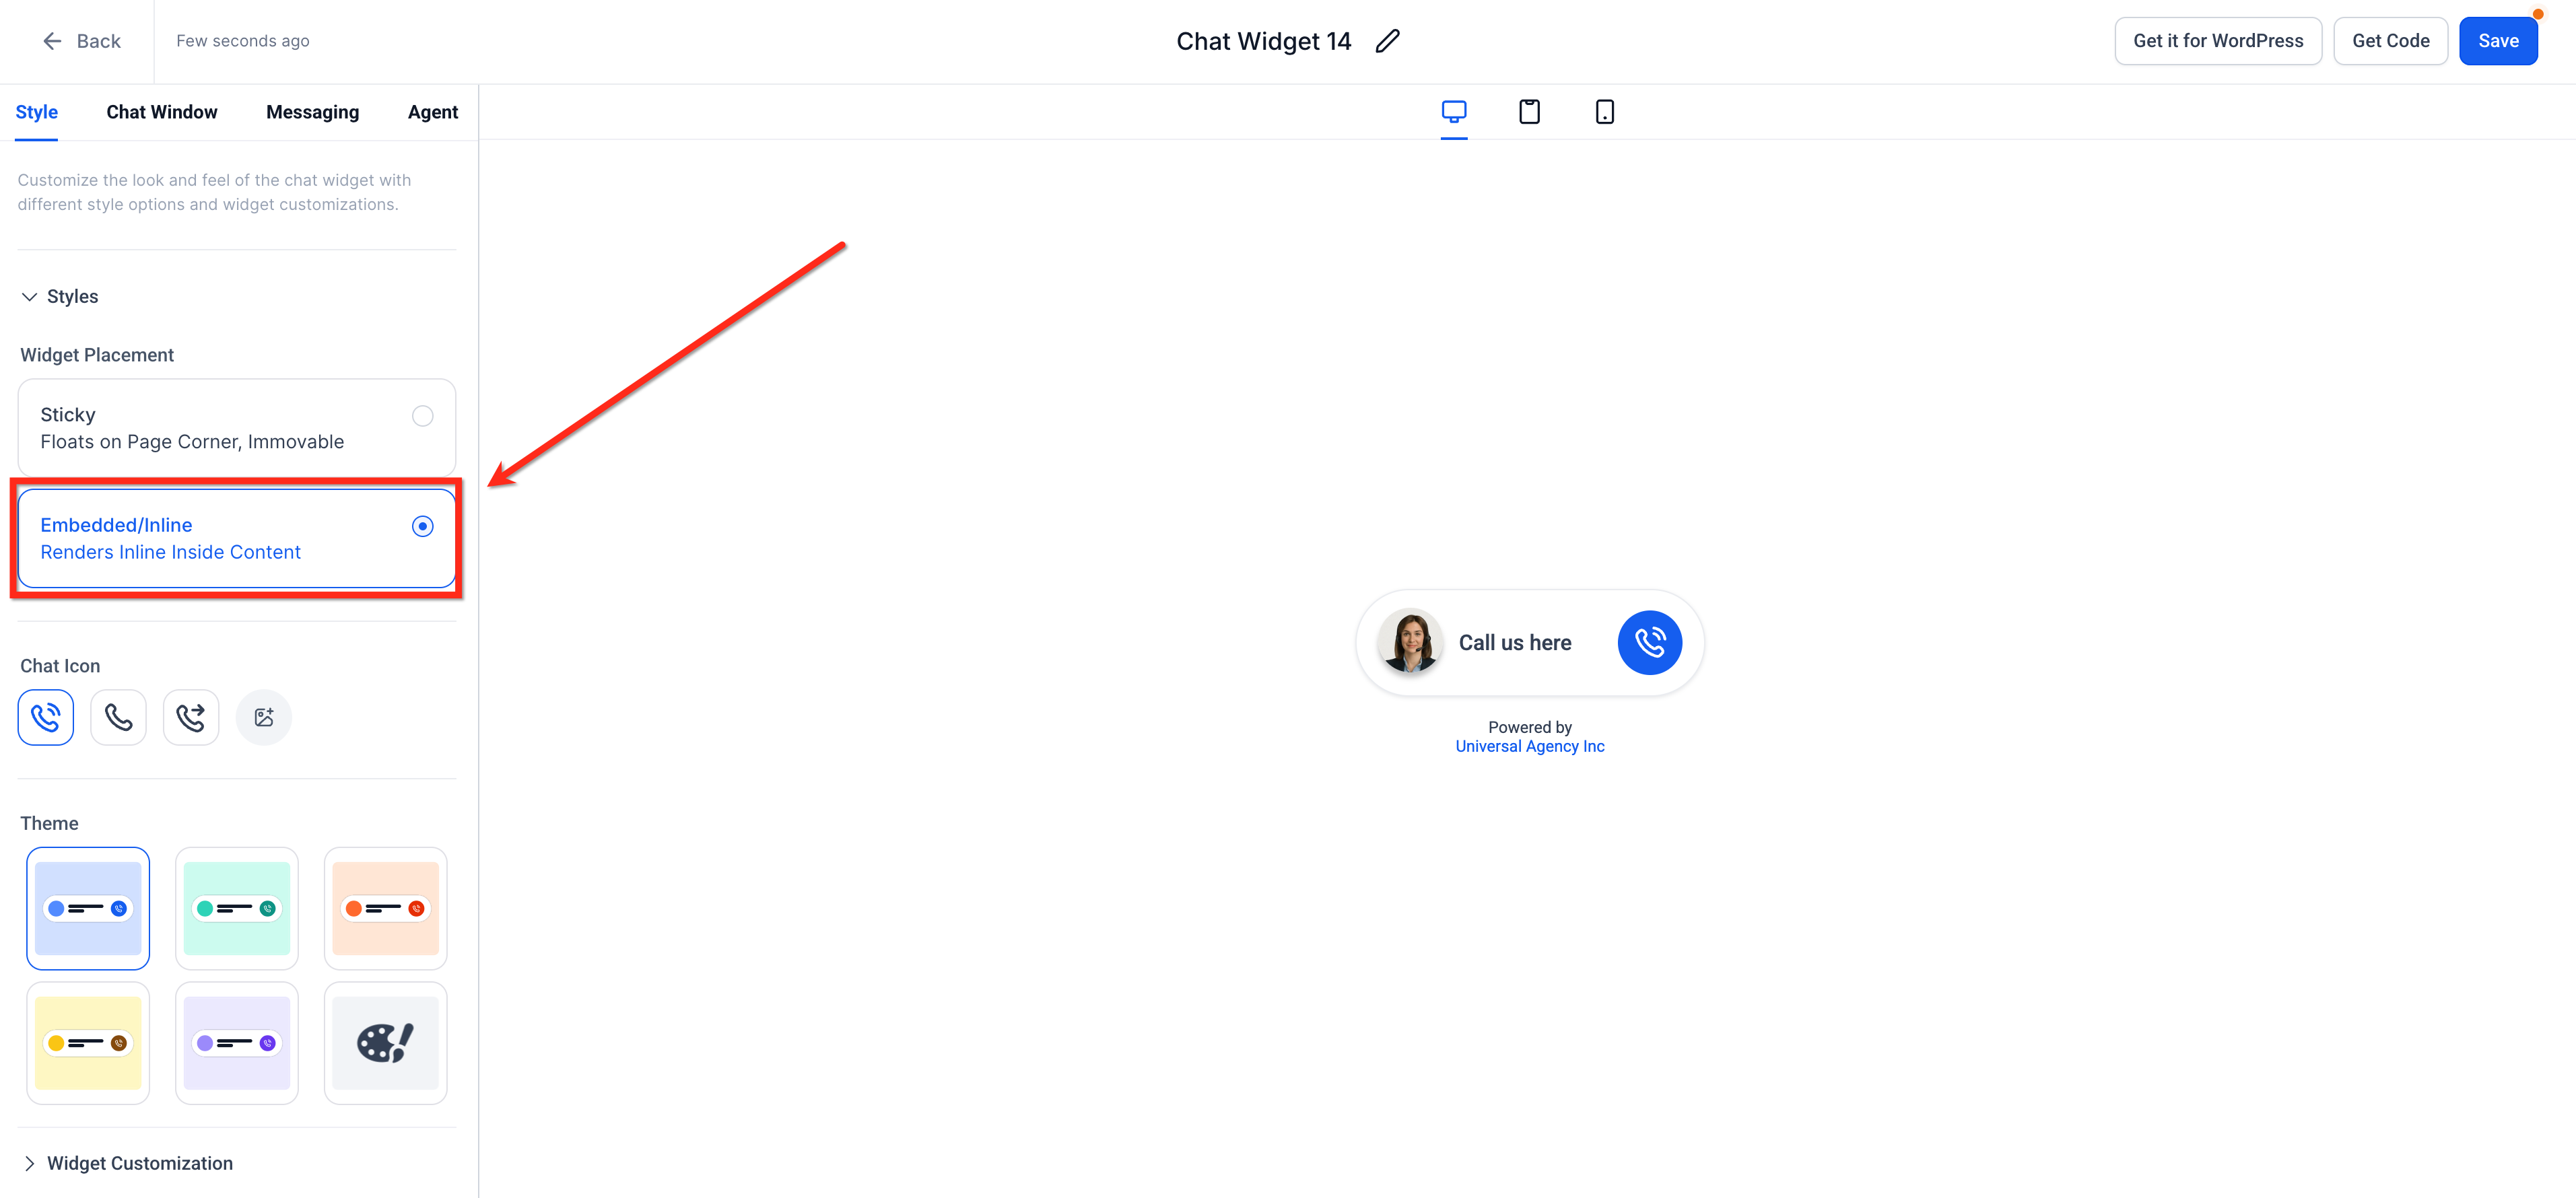
Step 3: Set widget placement to Embedded. Navigate to the Style tab. Under Widget Placement, choose Embedded / Inline (renders inside content). This ensures the widget appears within your page layout instead of floating on the screen.
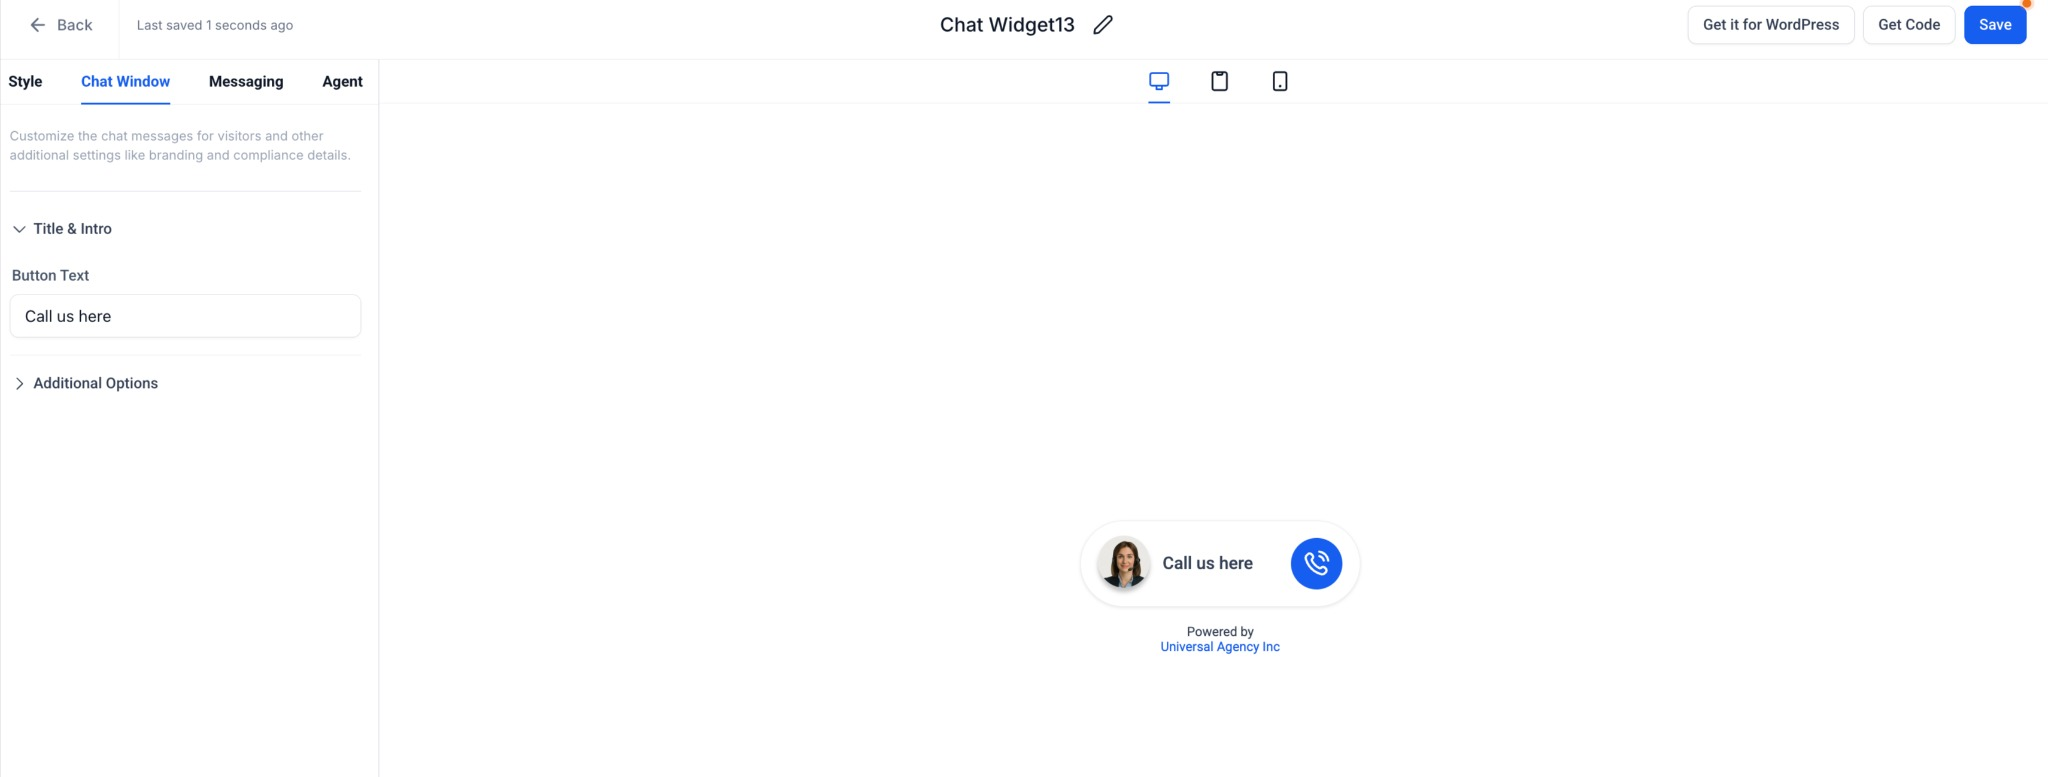
Step 4: Customize your widget. In the Chat Window tab, edit the Button Text (this appears below the avatar in the inline layout). For example, change "Call us here" to "Talk to our AI" or "Ask a Question." Optionally, open Additional Options to adjust branding elements like the business name or compliance footer. The preview updates in real time to show your embedded widget design.
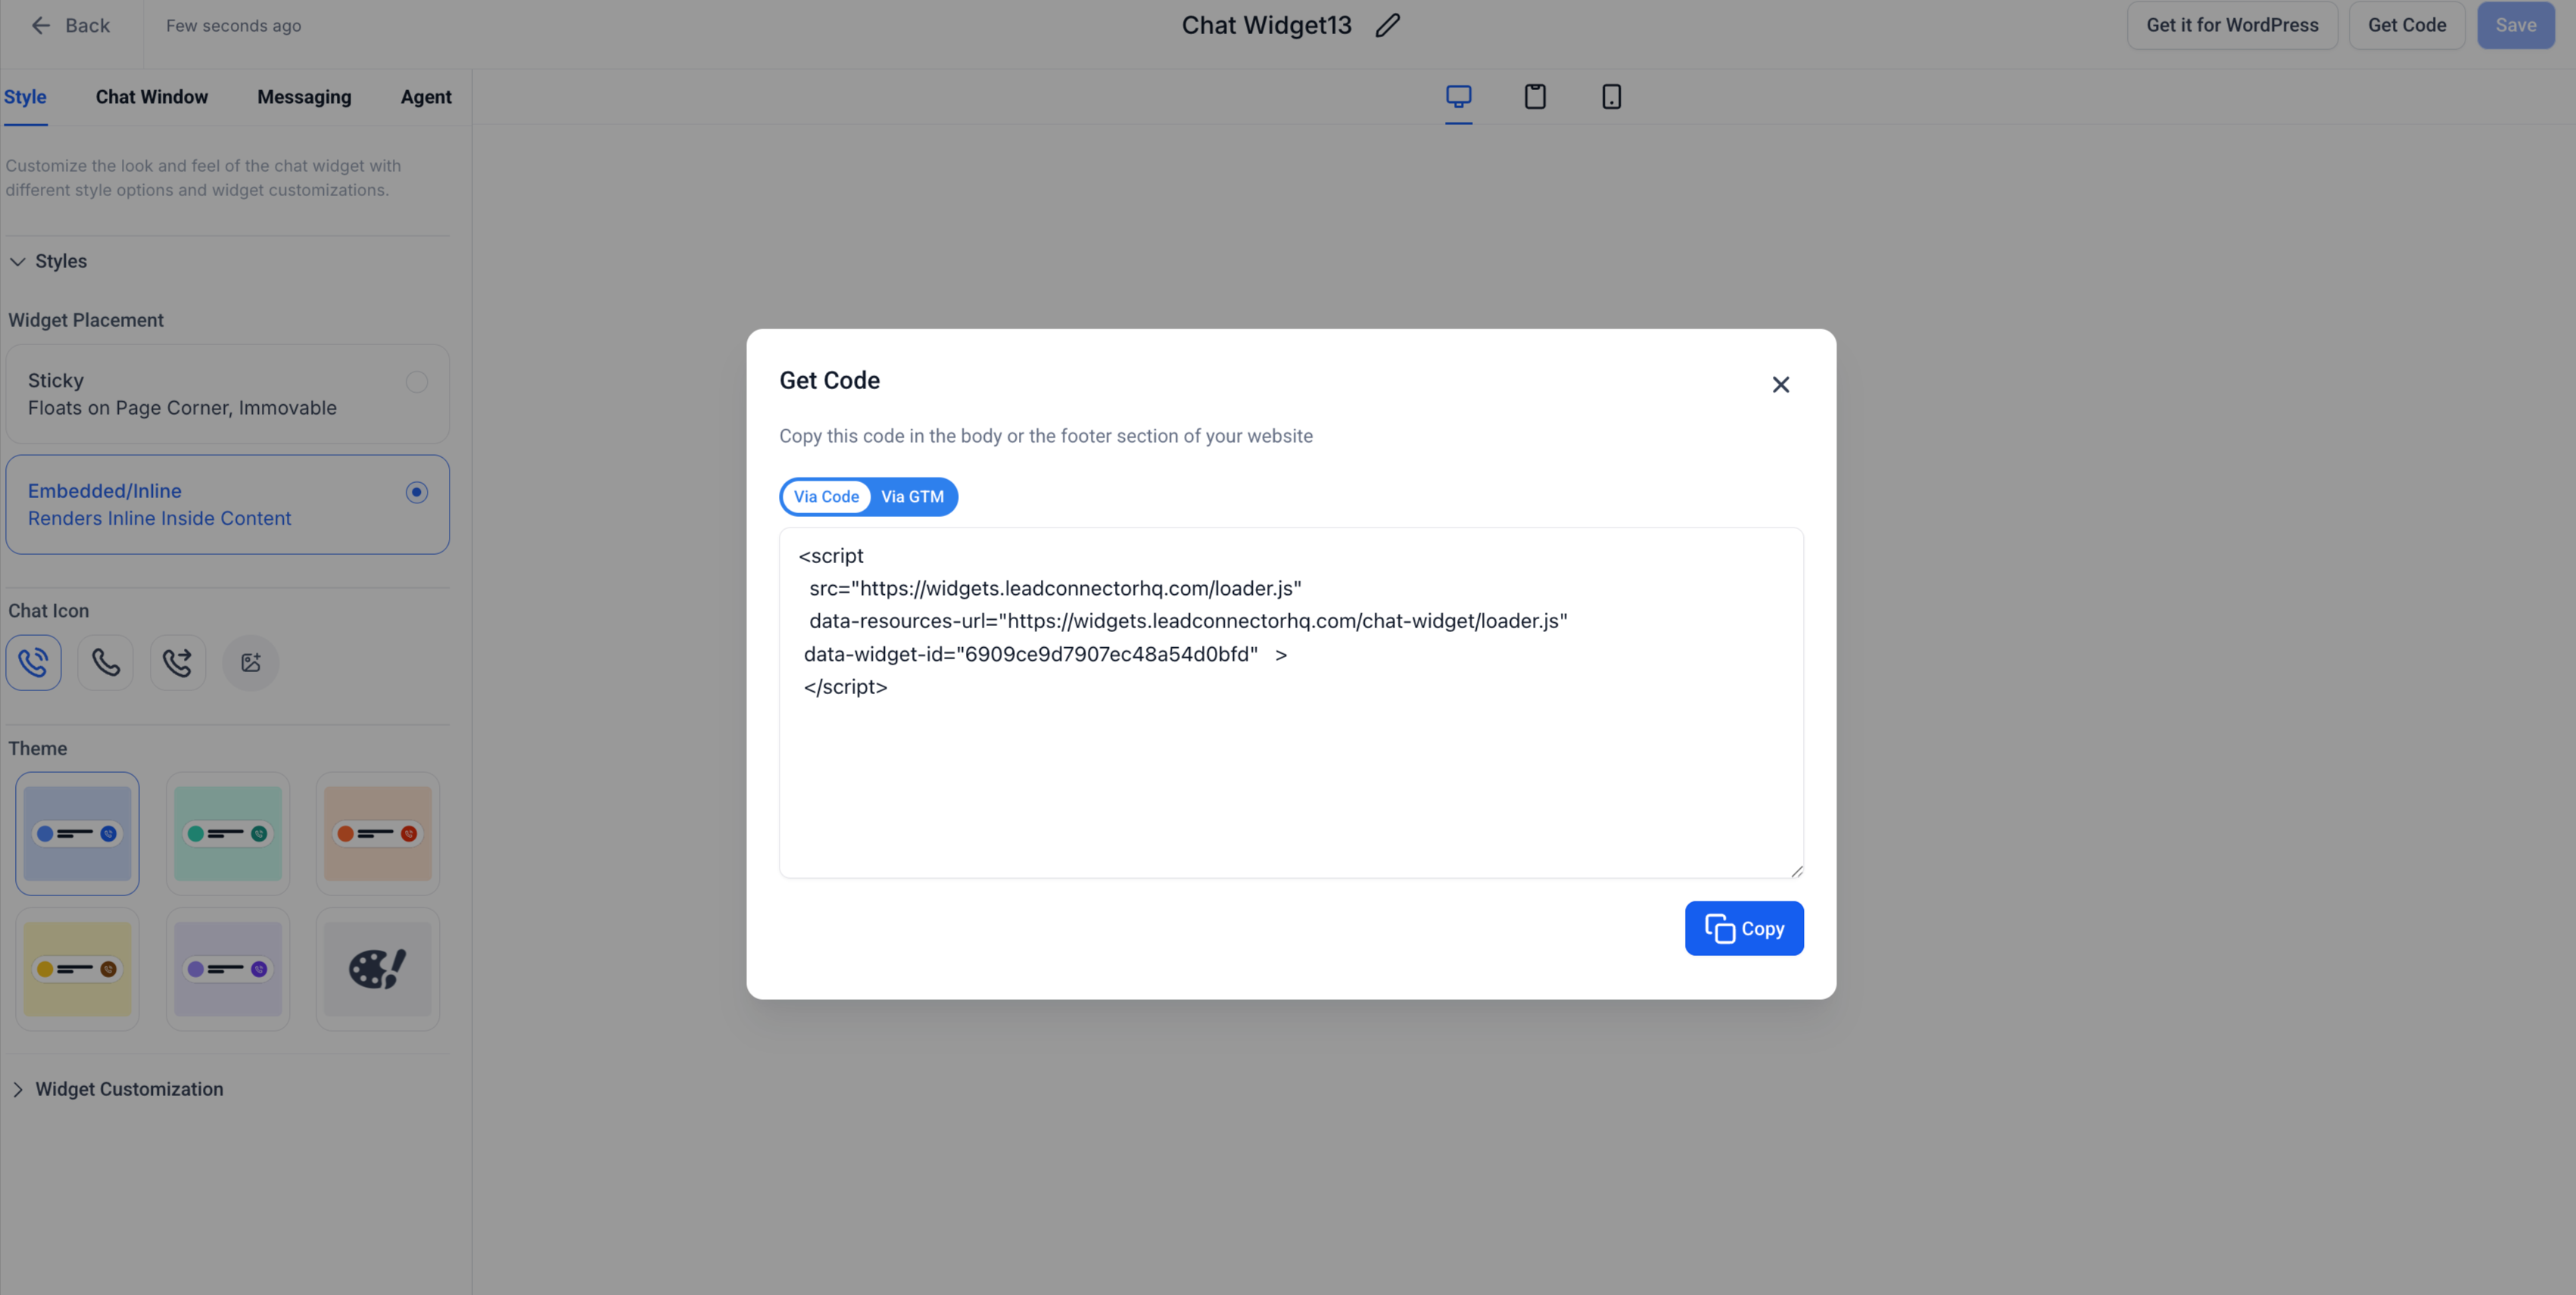
Step 5: Generate the embed code. Once your widget looks good, click Get Code (top-right). A pop-up window appears with your unique Embed Code Snippet. Click Copy to save it to your clipboard.
Step 6: Embed the widget on your website or funnel. You can place the widget anywhere on your site or funnel using a Code Block element. To embed in a funnel:
Go to Sites > Funnels and open the funnel page where you want to add the widget.
Click Edit Page.
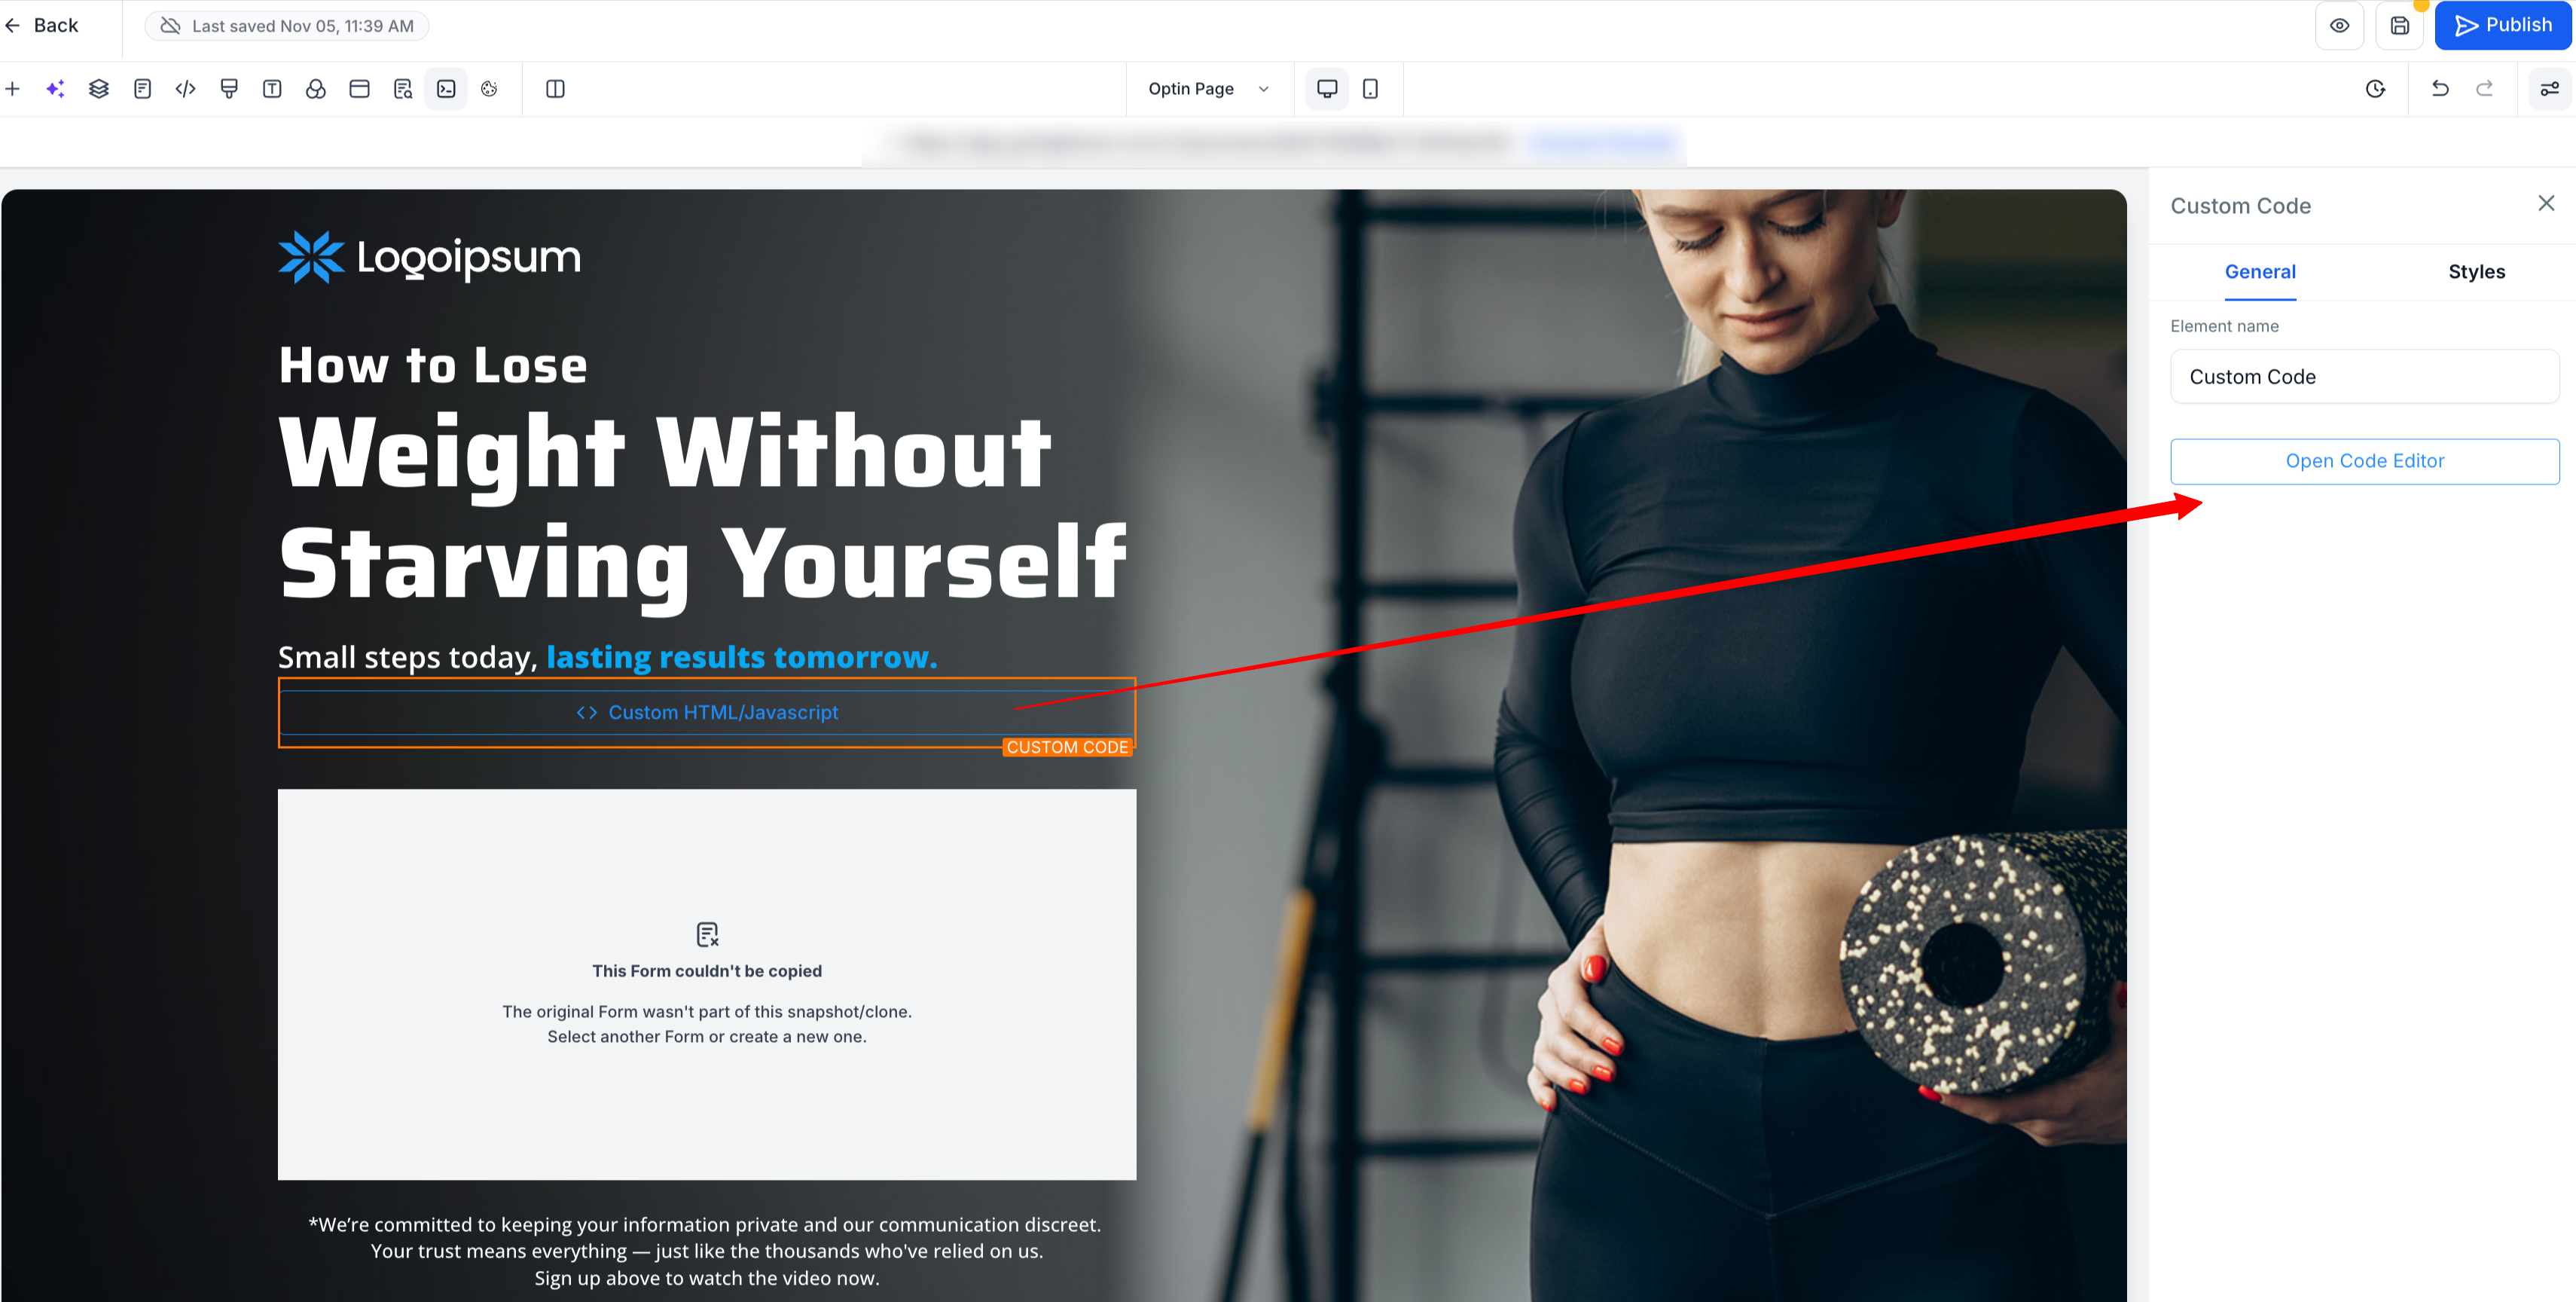
In the left sidebar, search for Code under Quick Add > Custom and drag the Code Element onto your page.
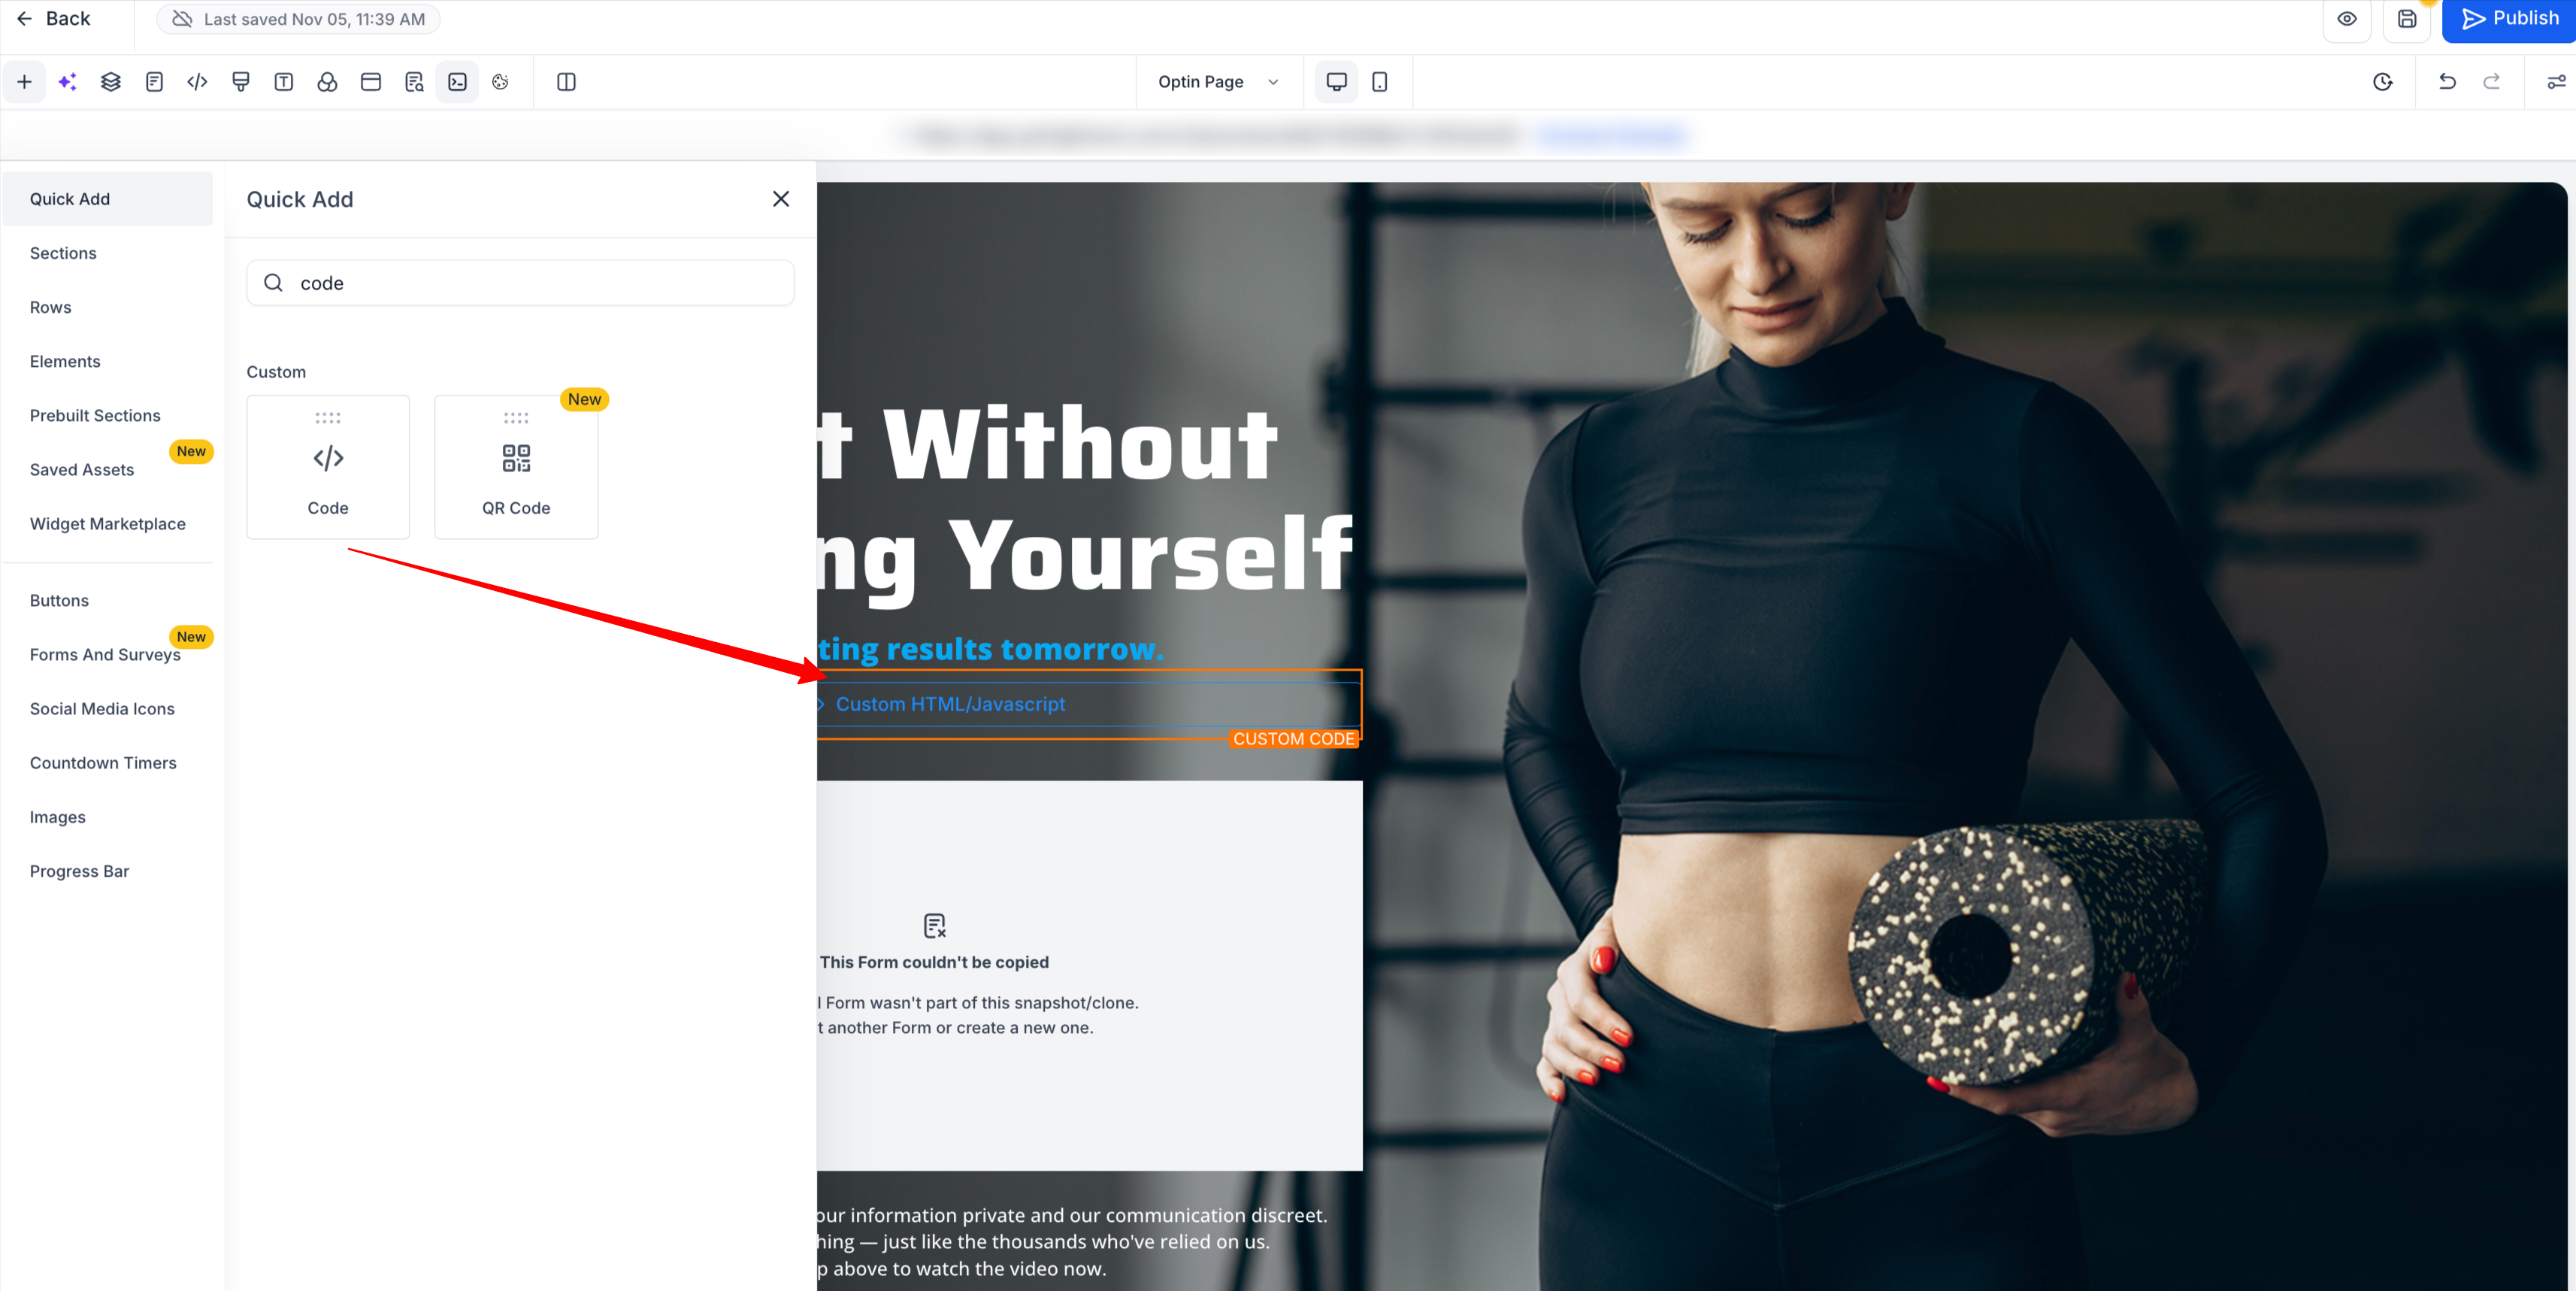
Click Open Code Editor.
Paste the embed code you copied from the Chat Widget builder.
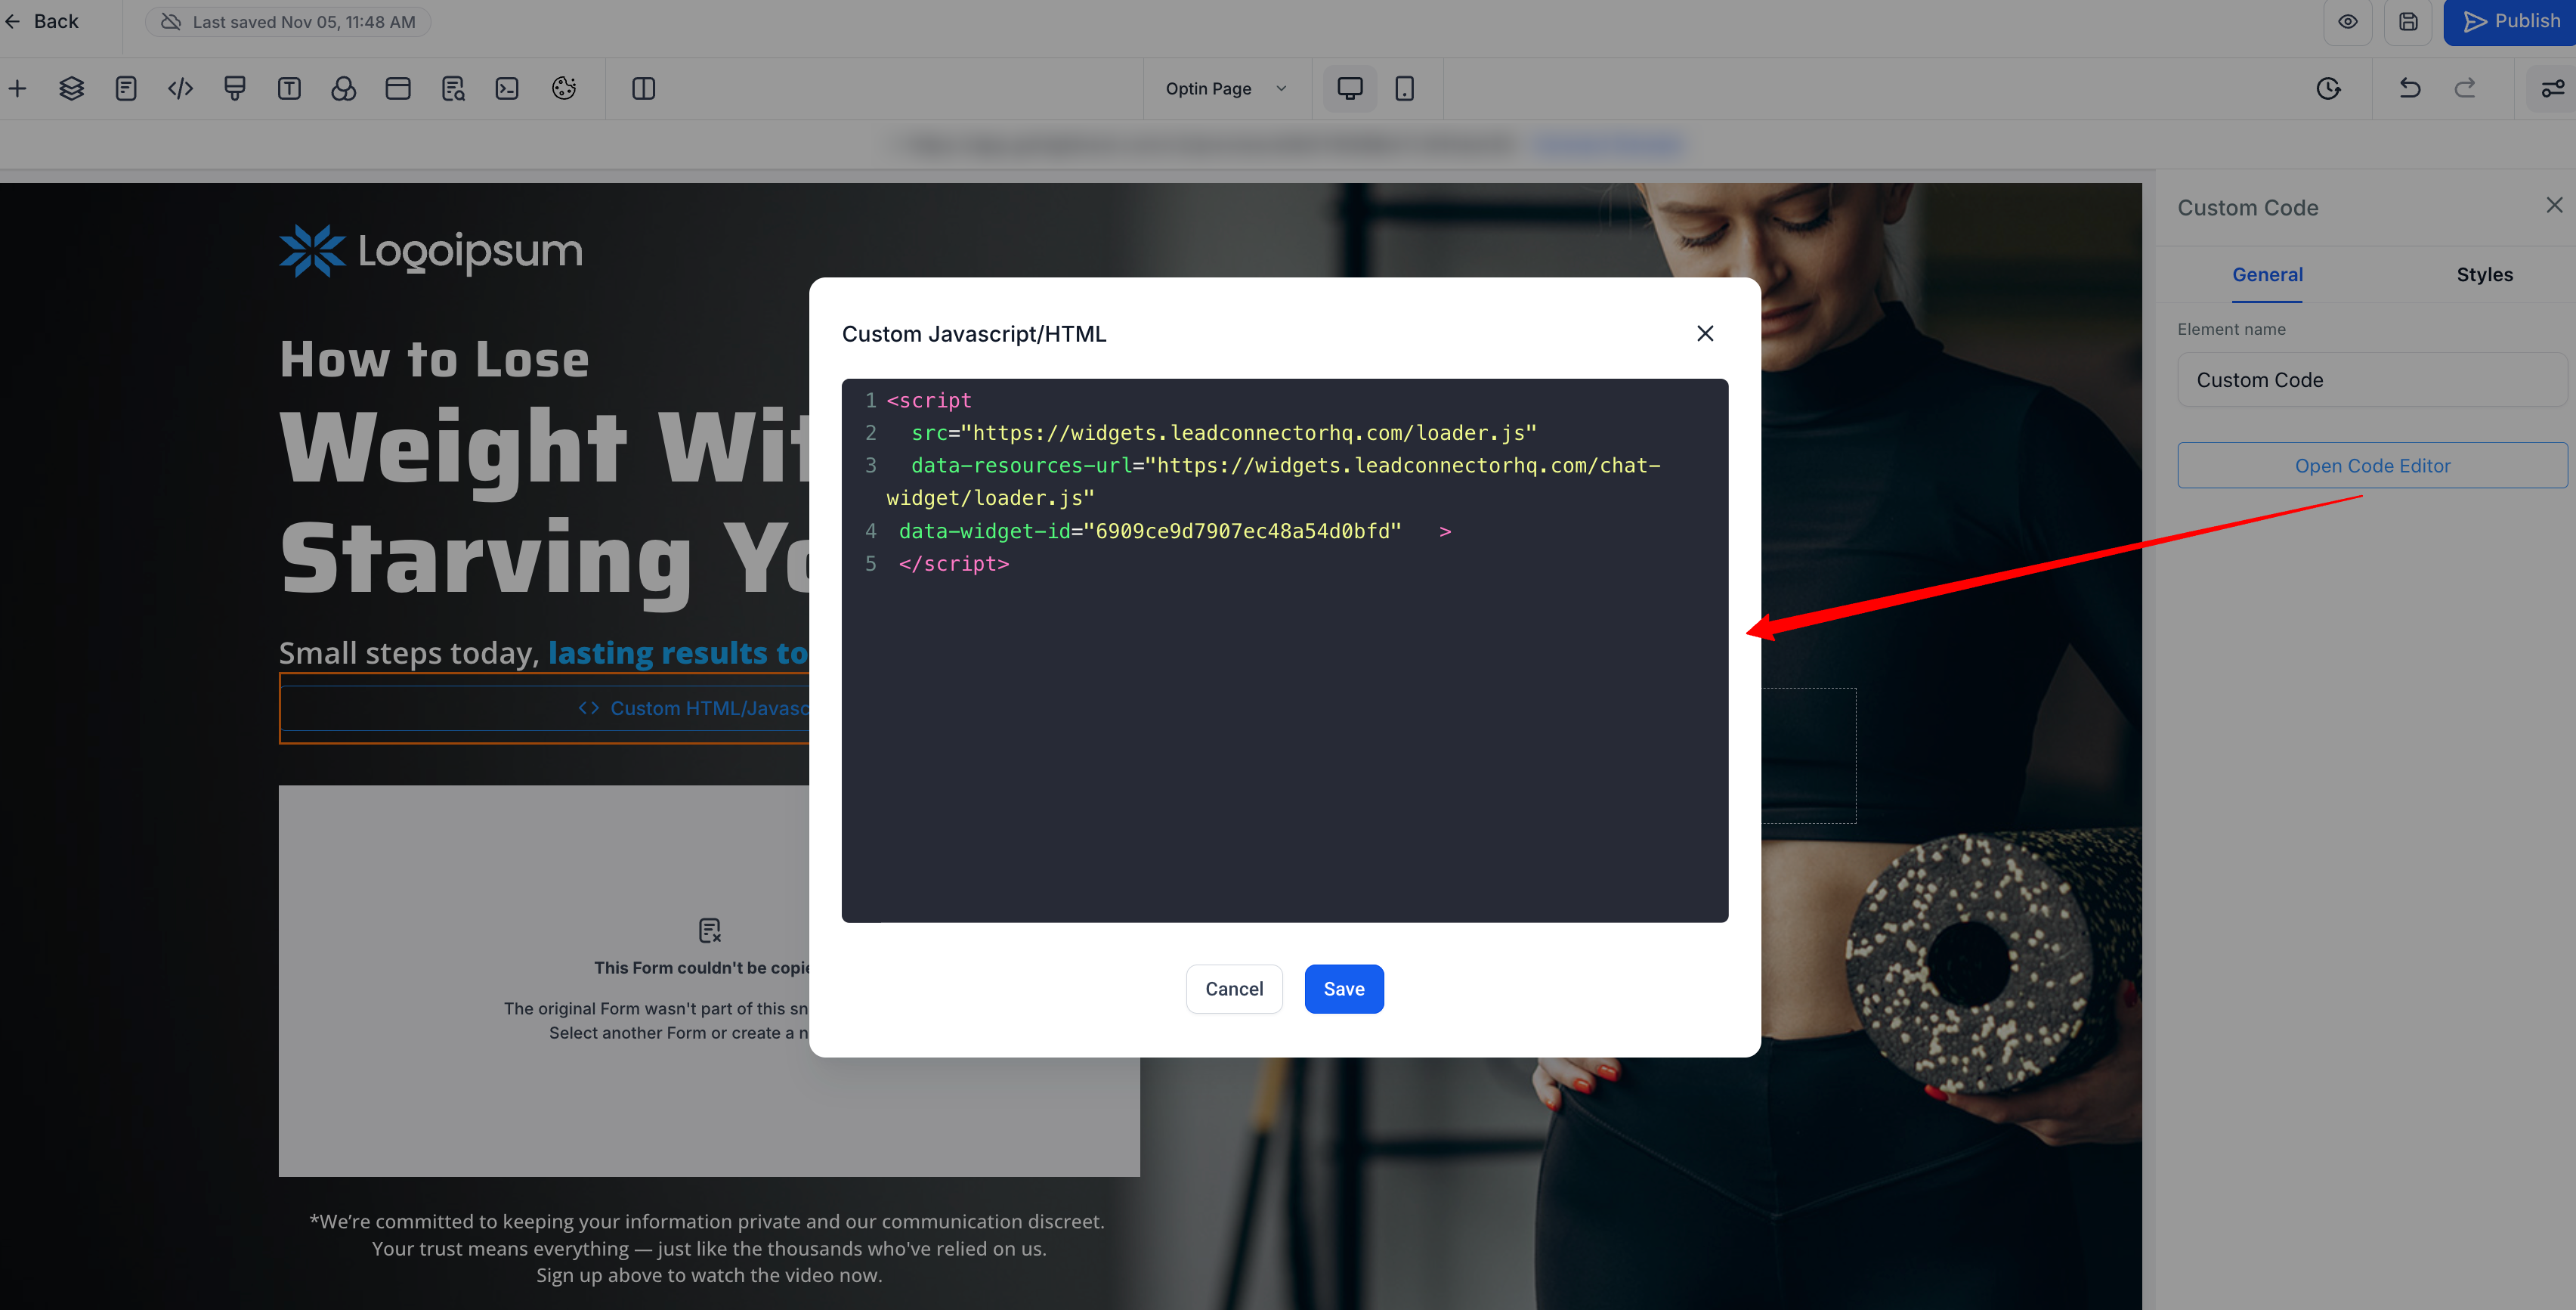
Click Save, then Publish your page.
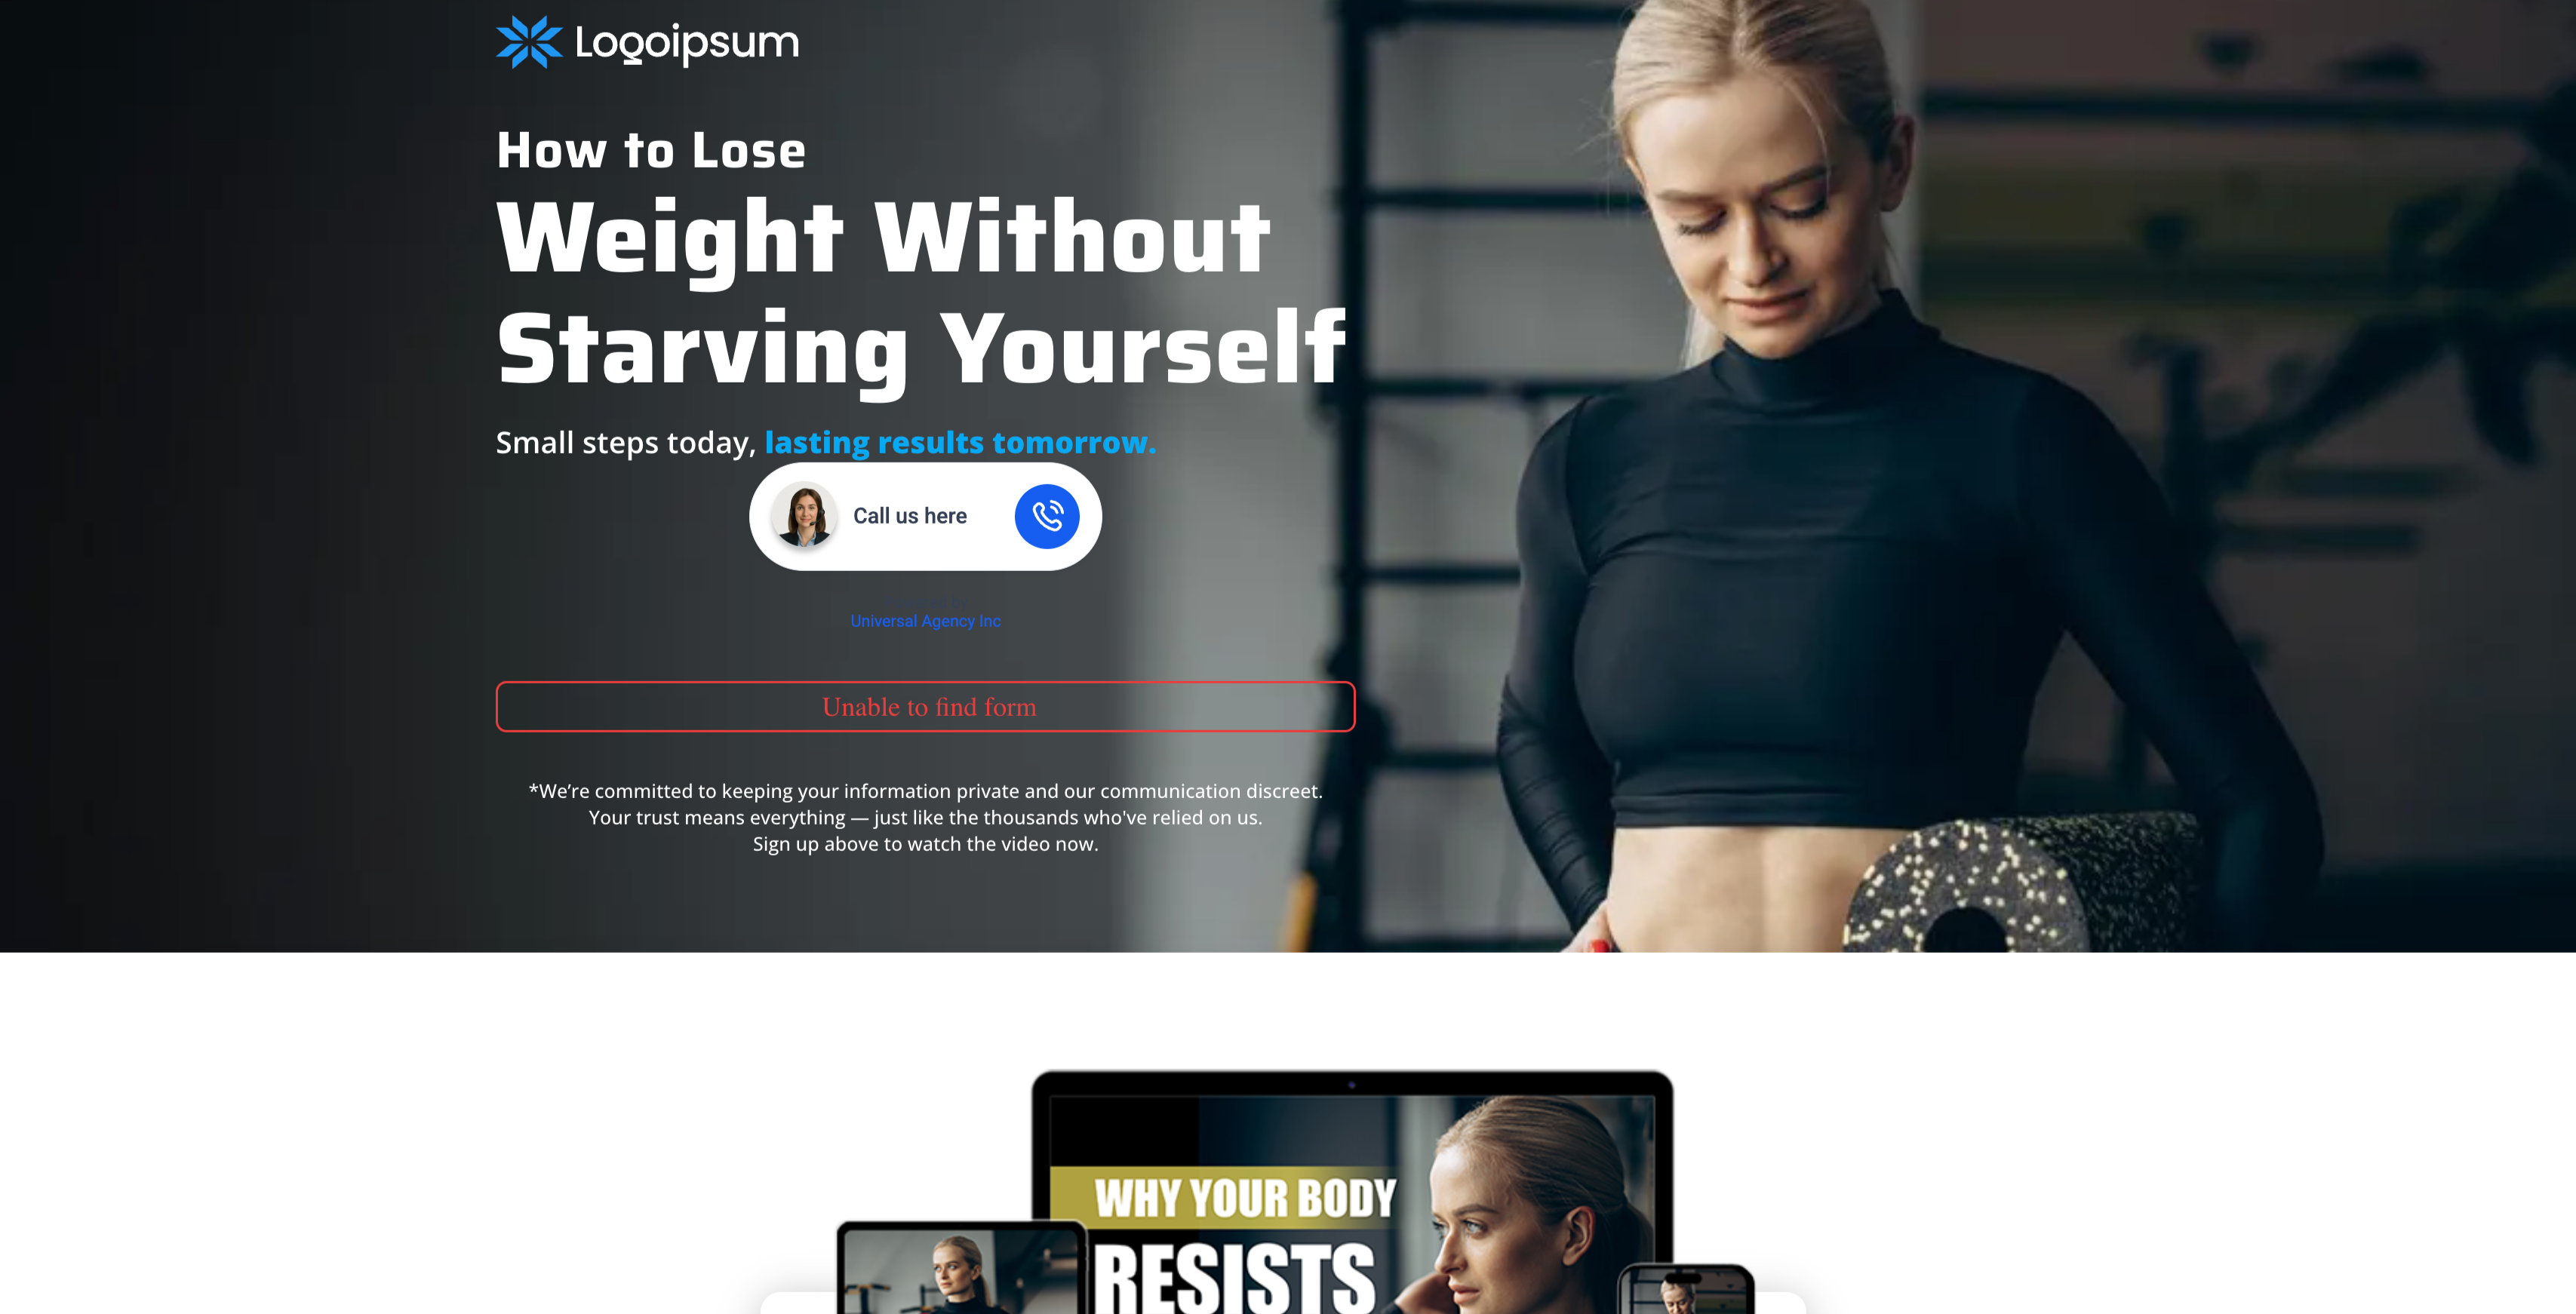
Once published, the Voice AI widget appears embedded inline just like any other content block.
Embedded behavior notes:
The embedded widget is fully mobile-responsive and resizes automatically on smaller screens.
You can have multiple embedded widgets on the same site or funnel, all linked to the same Voice AI agent.
You can use a mix of embedded and sticky widgets across different sections for maximum engagement.
Embedded/Inline placement is also available for Live Chat widgets, not just Voice AI.
Give your AI a friendly, on-brand identity by setting a display name in the widget builder. The chosen name appears on every voice reply.
From your location dashboard, go to Sites > Chat Widgets.
Click the widget to open the editor.
Navigate to the Agent tab and use the Voice AI Agent Name box to enter a new name.
Click the blue Save button in the upper-right corner to apply your changes.
When a visitor opens the chat widget:
They see a microphone icon indicating voice-chat capability.
Clicking the icon starts the live voice session.
The browser requests microphone access (visitors must grant permission).
The AI agent responds conversationally in real time.
Visitors can start, mute, or end the call as they prefer.
If the same visitor rapidly connects and disconnects 10 times within 60 seconds, the system triggers a reCAPTCHA challenge to confirm legitimate use.
The Voice AI Chat Widget includes built-in security and compliance mechanisms:
reCAPTCHA protection prevents misuse through repeated connect/disconnect activity.
A non-recording notice is displayed automatically. The widget surfaces a banner reading that voice AI calls made through chat widgets cannot be recorded, keeping expectations clear for both you and your visitors.
All conversations are handled within the browser, helping protect visitor privacy.
The feature follows standard browser permission protocols for microphone and speaker access.
reCAPTCHA protection automatically deploys a challenge when a visitor exhibits rapid connect/disconnect behavior, deterring automated bots and protecting system resources so genuine interactions proceed without disruption. The trigger condition is:
A visitor initiates a Voice AI Chat Widget call.
The same visitor rapidly connects and disconnects 10 times within 60 seconds.
After successfully passing the reCAPTCHA challenge, the visitor can continue using the widget.
This protection is always on for the Voice AI chat widget type, requires no manual configuration, and does not affect standard chat widget usage. The threshold of 10 rapid connect/disconnect cycles within 60 seconds is fixed and not currently configurable.
Issue | Possible Cause | Resolution |
|---|---|---|
Voice session not starting | Microphone permission not granted | Ask the visitor to allow microphone access when prompted. |
No audio output | Speakers muted or disconnected | Check audio settings and ensure device output is active. |
Widget not appearing | Script not installed correctly | Re-copy and reinsert the |
Frequent reCAPTCHA prompts | Rapid connection attempts detected | Slow down reconnection frequency to avoid triggering the system. |
Unable to record sessions | Feature not supported | Call recording is currently unavailable for this widget. |
Choose a clear, friendly agent name that fits your brand tone.
Add the Voice AI widget to high-intent pages, such as Contact, Pricing, Services, or Book an Appointment.
For embedded placement, position the widget near high-intent content such as forms, offers, booking areas, or support prompts.
Match the widget branding to the page for a more seamless appearance.
Test spacing and alignment so an embedded widget does not look cramped inside narrow sections, and review the mobile layout after publishing.
Test microphone permissions in different browsers to ensure smooth functionality.
Keep background noise minimal when training or testing your agent.
Keep intro and acknowledgment messages clear and action-oriented.
Monitor early usage to understand visitor behavior and adjust your agent and widget configuration as needed.
This example shows how to use the Voice AI Chat Widget to capture leads through voice, turning website visitors into qualified leads.
Enable the Voice AI Chat Widget in Labs.
Create or open a Chat Widget and select Voice AI Agent as the type.
Name the agent (for example, "Front Desk Assistant").
Configure your Voice AI flow to:
Greet the visitor.
Collect their name and contact details.
Confirm their interest (for example, a treatment inquiry or consultation request).
Save the lead in your CRM.
End the session politely.
Embed the widget on your Contact or Services page.
Expected experience: A visitor clicks the microphone icon, the AI agent greets them and asks questions, and the visitor answers verbally. The system captures and stores their details automatically - no form submission or manual input required.
Q: Do visitors need a phone number or an app download to use it?
No. Voice conversations happen in the browser using the visitor's microphone and speakers.
Q: Can I create a Voice AI chat widget without setting up a Voice AI agent first?
No. Your Voice AI setup and agent creation must be completed before you can create a Voice AI chat widget.
Q: How do I configure the bot used in the Voice AI Chat Widget?
The "bot" is your Voice AI agent. To configure it, go to AI Agents > Voice AI in your sub-account, then create or edit the agent settings (greeting, prompts/behavior, and any actions or workflows). Make sure the agent setup is complete before using it in the widget.
Q: Are calls recorded?
No. The widget displays a non-recording notice, and call recording is not supported for this feature. Calls are streamed only, which helps comply with privacy regulations.
Q: Do visitors have to grant microphone permission every time?
Most modern browsers remember permission after the first allow, but private/incognito sessions will ask again.
Q: Can I offer both text chat and Voice AI in one widget?
Not yet. Voice AI is currently a dedicated voice-only widget type. Use separate widgets (text vs. voice) if you need both.
Q: What happens if the visitor's connection drops?
The call ends gracefully. The visitor can click the microphone icon to reconnect; repeated drops trigger reCAPTCHA.
Q: Does Voice AI work on mobile browsers?
Yes. Safari (iOS 16+), Chrome, and Edge support in-browser audio as long as the visitor allows microphone access.
Q: Can I set different AI agents for different pages?
Yes. Create multiple Voice AI widgets - each with its own agent persona - and embed the appropriate script on each page.
Q: Where should I place an embedded widget on my page?
Good placements include hero sections, offer sections, lead-capture areas, service pages, and other high-intent areas where visitors are likely to engage.
Q: Why did some customization settings disappear after I selected Embedded/Inline?
Some controls are automatically hidden because they only apply to floating widgets. In Embedded/Inline mode, only the settings relevant to inline placement are shown.
Q: Can I use Embedded/Inline placement for Live Chat widgets as well?
Yes. Embedded/Inline support is available for Live Chat too.
