The Conversational AI Flow Builder is a visual tool for designing structured, goal-oriented conversations for your AI chat agent. It lets you map out how the bot interacts with contacts, captures information, and progresses through each step of a guided flow. It provides a rich visual interface for laying out your conversation logic.
Bots in Conversational AI can run inside the Flow Builder for these structured interactions, or be triggered through workflows, depending on how you set them up. The Flow Builder gives you the flexibility to define conversation logic, automate responses, and create multi-step experiences tailored to your med spa. Use it for productivity tasks like communication, scheduling, lead capture, and follow-ups so your team can work more efficiently.
Note on PHI: Don't enter protected health information (PHI) into the Conversational AI Flow Builder. AI features aren't approved for processing PHI — use them for productivity, communication, scheduling, and engagement, not to store or process medical records. See the HIPAA Compliance guide for details.
Navigate to AI Agents > Conversational AI > Create Bot > Create New Bot (Flow Based Builder).
The Conversational AI Flow Builder looks like the Automations Workflow builder, but it works differently in several significant ways. Those differences are called out in notes at the relevant point in this article.
Note: Flow-based bots behave differently depending on how they are configured. Use the Flow Builder when you want the bot to follow a structured conversation path inside Conversational AI. Use the Conversational AI workflow action when you want a workflow to ask a question, wait for a reply, branch on conditions, or continue automation from the Workflow Builder. This distinction matters when deciding whether the bot will run as part of a flow or be triggered externally via workflows.
On the Bot Settings tab:
Name the bot.
Set Bot Status to Auto Pilot.
Select or deselect communication channels such as SMS, Facebook, Instagram, WhatsApp, and Live Chat, depending on the channels enabled for the bot.
Set max messages to something like 100 (since this flow can handle long conversations).
Save the bot settings.
The main Bot Goals (personality, intent, and so on) are a global prompt that becomes part of every action in the flow.
On the Bot Goals tab, set the bot's tone by selecting one or more keywords (for example, friendly and confident).
Describe the personality and style of the bot using sentences and merge fields (for example, "You are a bot for {{ai.business_name}}.").
Describe the intent behind the conversation using sentences and merge fields (for example, "Your goal is to help users choose a goal like {{ai.goals}} and book an appointment.").
Describe additional information and business context using sentences and merge fields. This is a good place to provide explicit examples of how the bot should communicate (for example, avoid: "How may I assist you today?", use: "Hey, how's it going?").
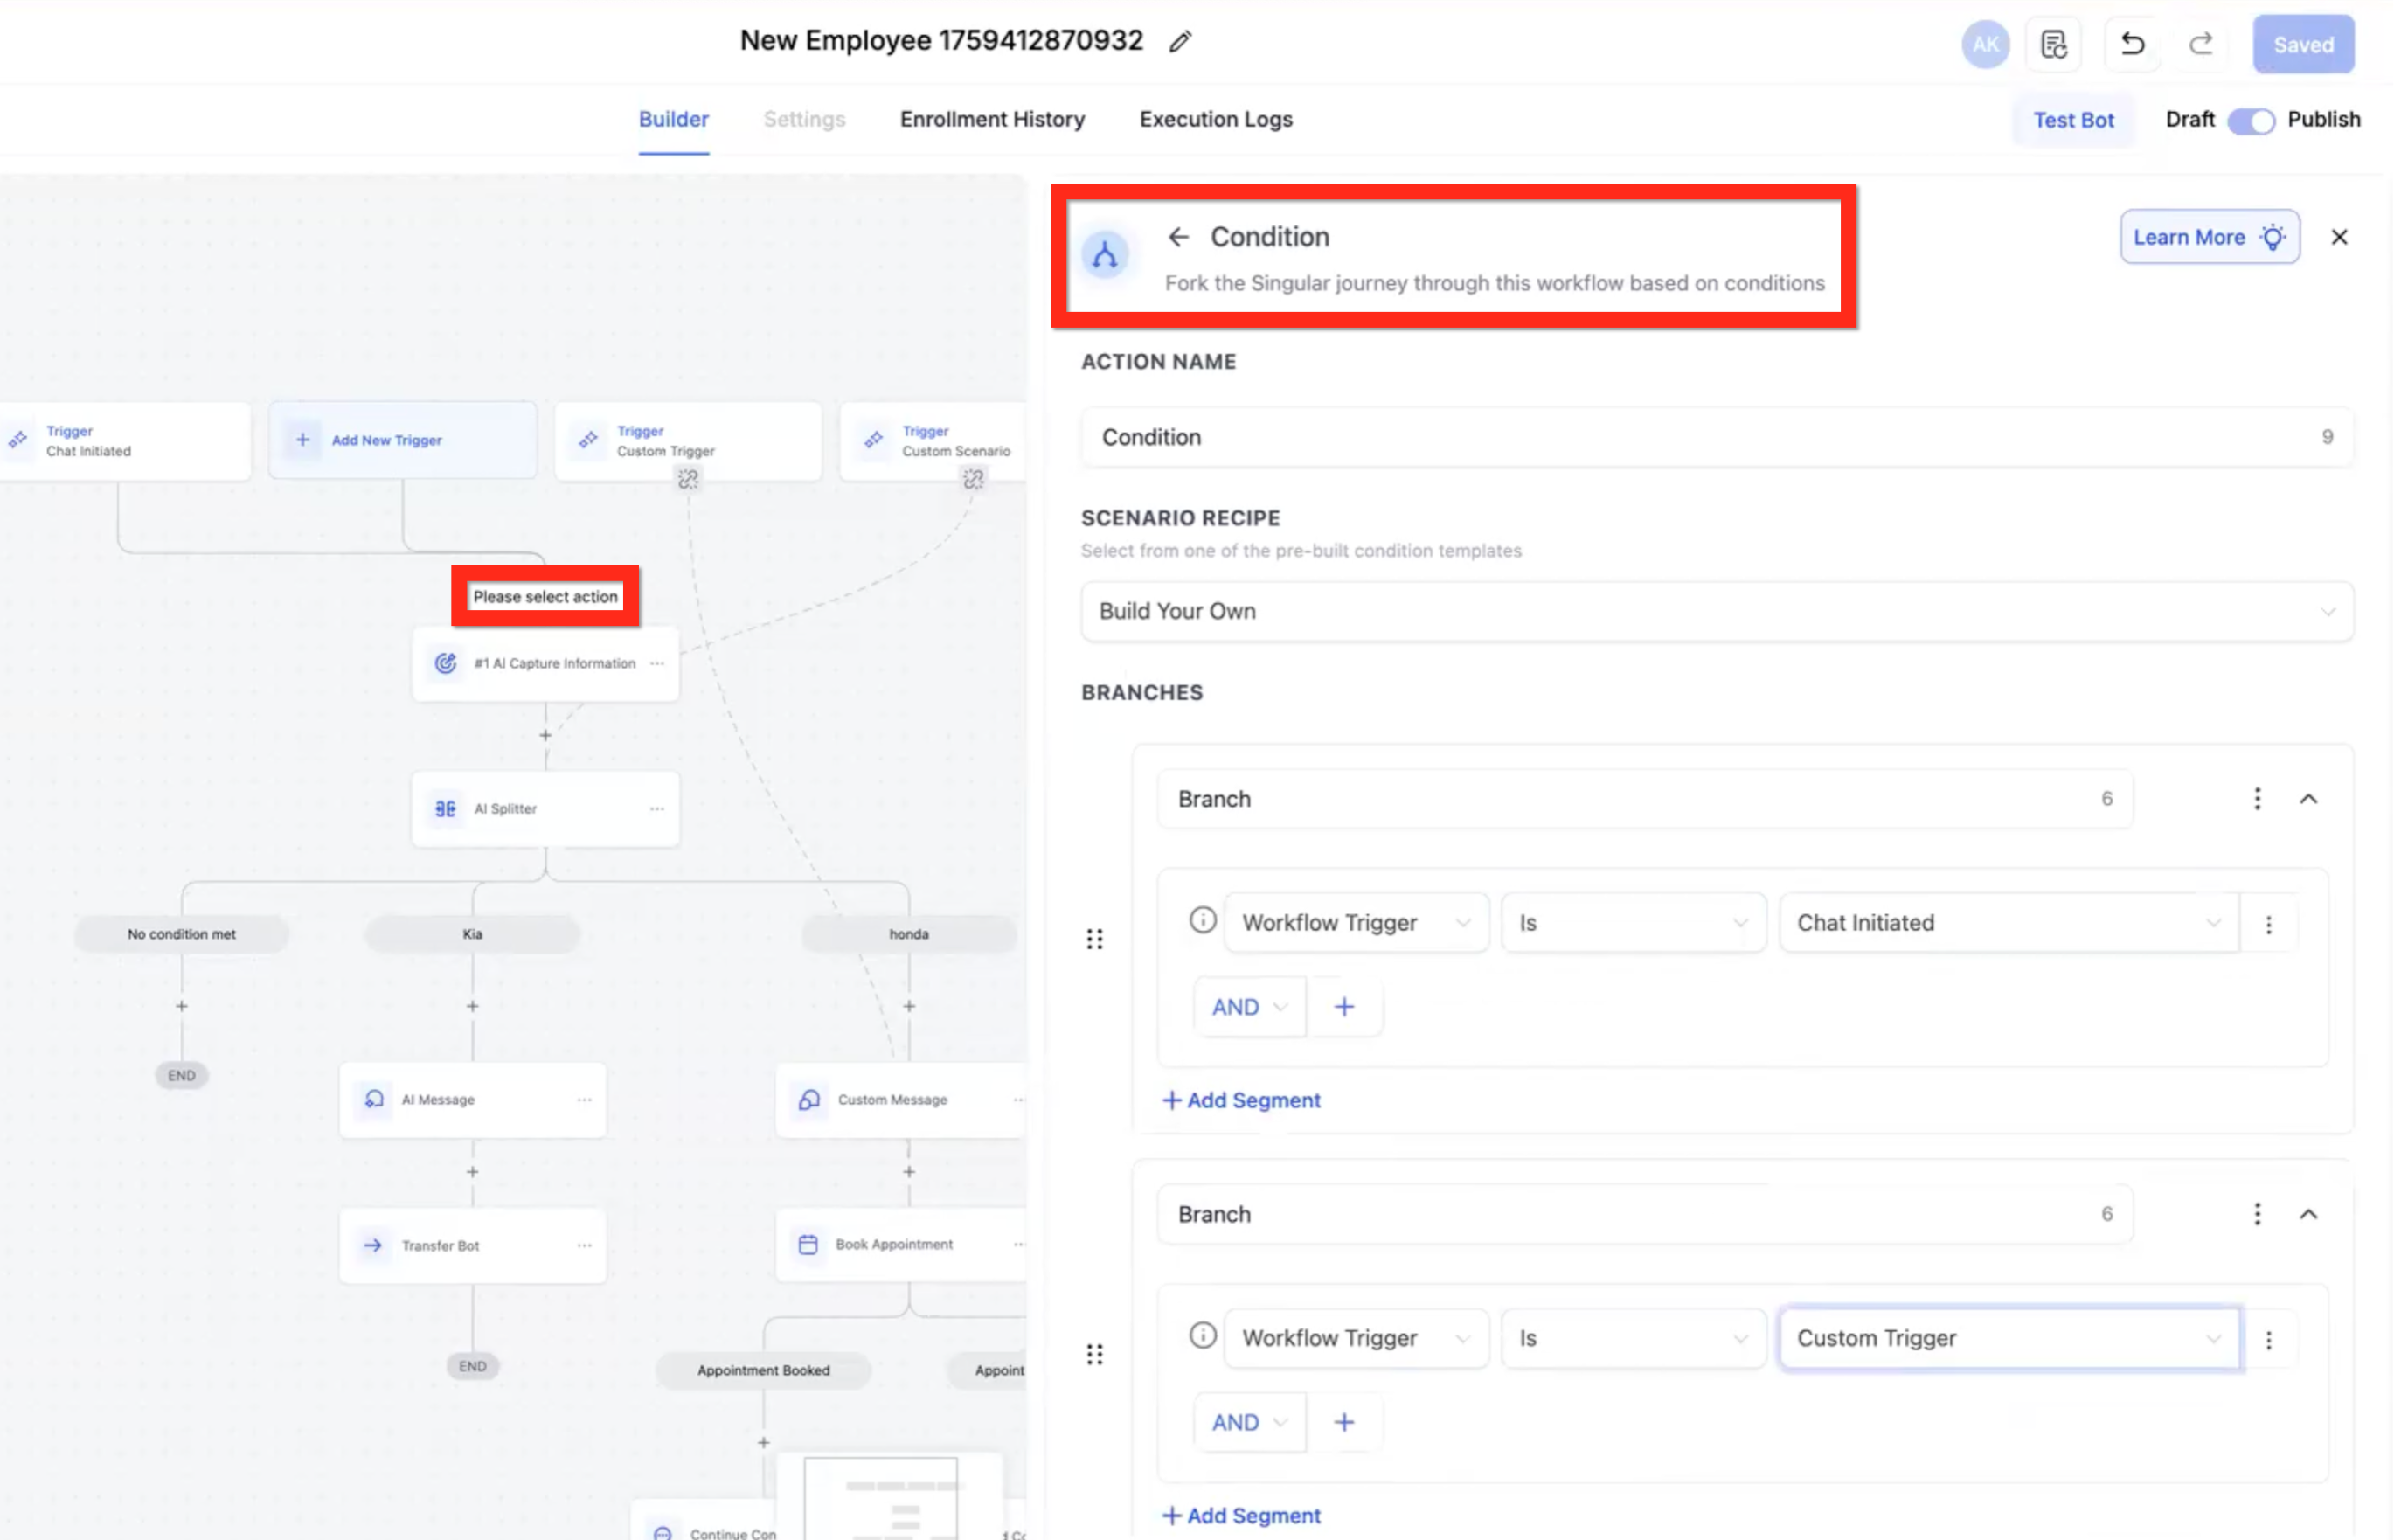
Specify unique conditions:
Stop Bot - Wherever the contact is in the flow, if they use vulgar language or say "stop," the flow will immediately stop.
Human Handover - When the bot doesn't know the answer or the contact asks for a human, the bot will immediately stop and notify a human.
Auto Followup - Coming soon.
Toggle Appointment Options:
Cancel - Allow the bot to cancel the appointment.
Reschedule - Allow the bot to reschedule the appointment.
Save the Bot Goals.
On the Bot Goals tab, click the Launch Flow Builder button.
You can tell you're in the AI Flow Builder, not the Automation Workflow Builder, because it says Back to Conversational AI and Test Bot instead of Workflow.
Note: Where the flow has
[END]nodes, that means the end of the objectives, not the end of the flow or chat. The chat will continue without any objective unless it's explicitly ended in one of several ways (for example, max messages, timeout, or an End Conversation action).
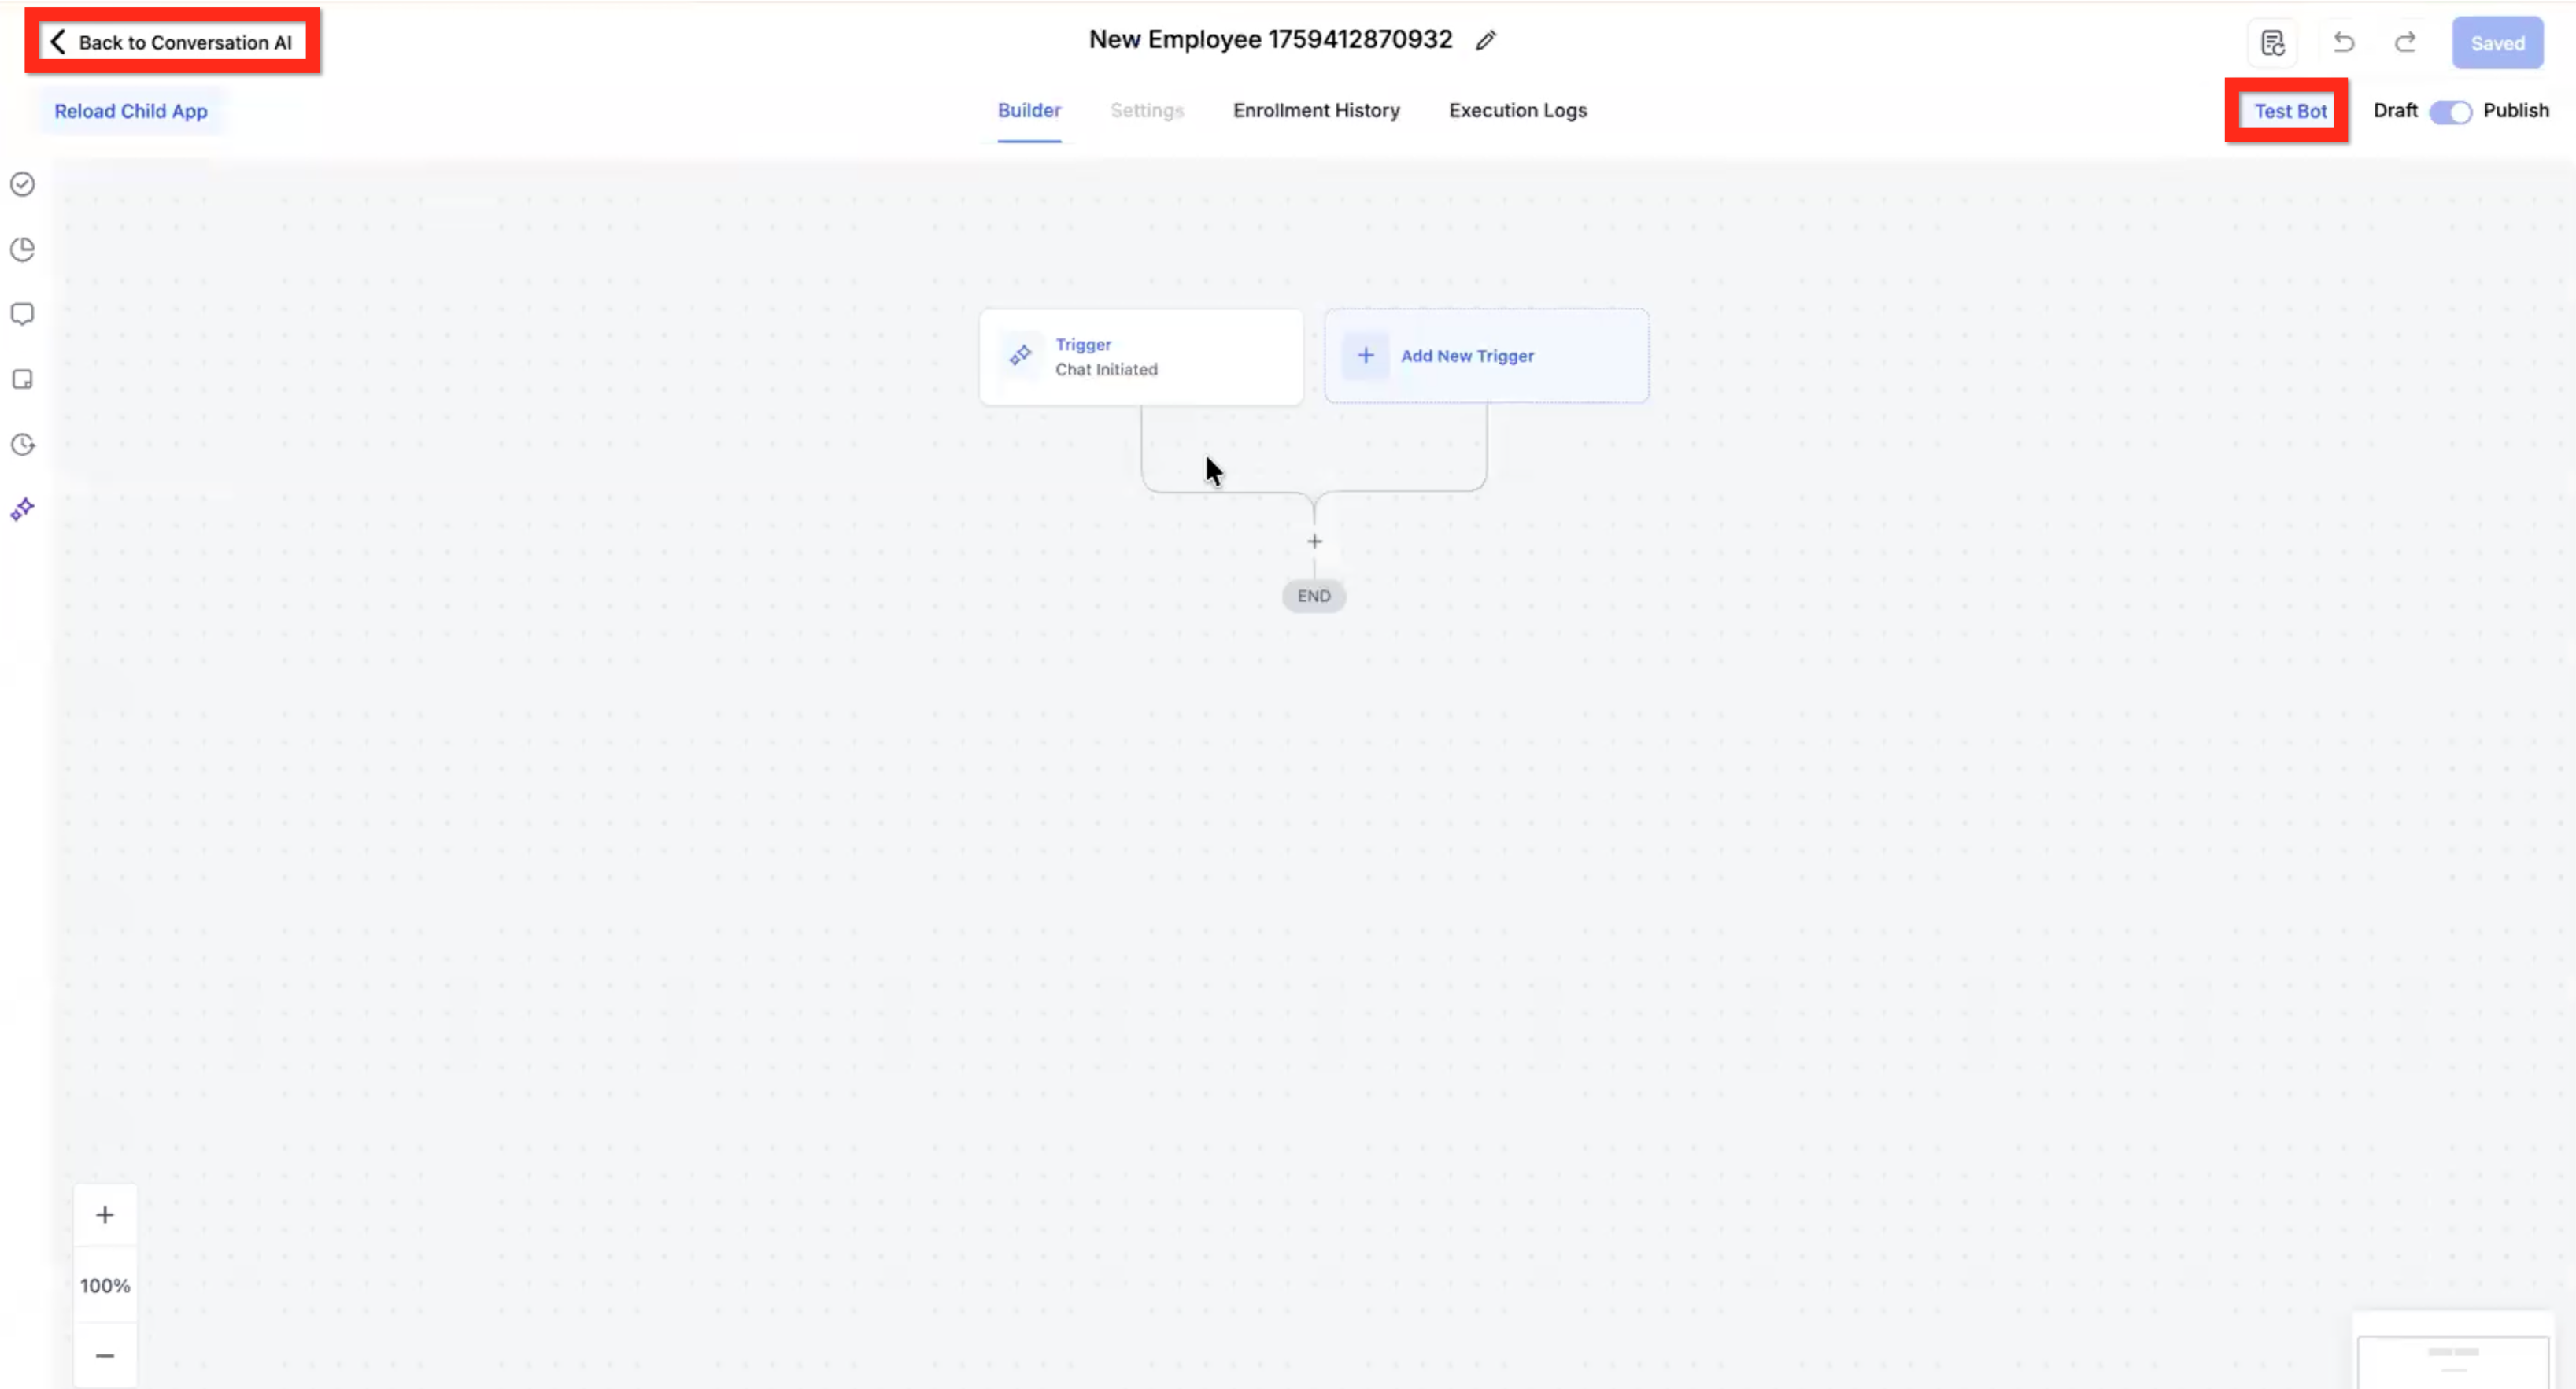
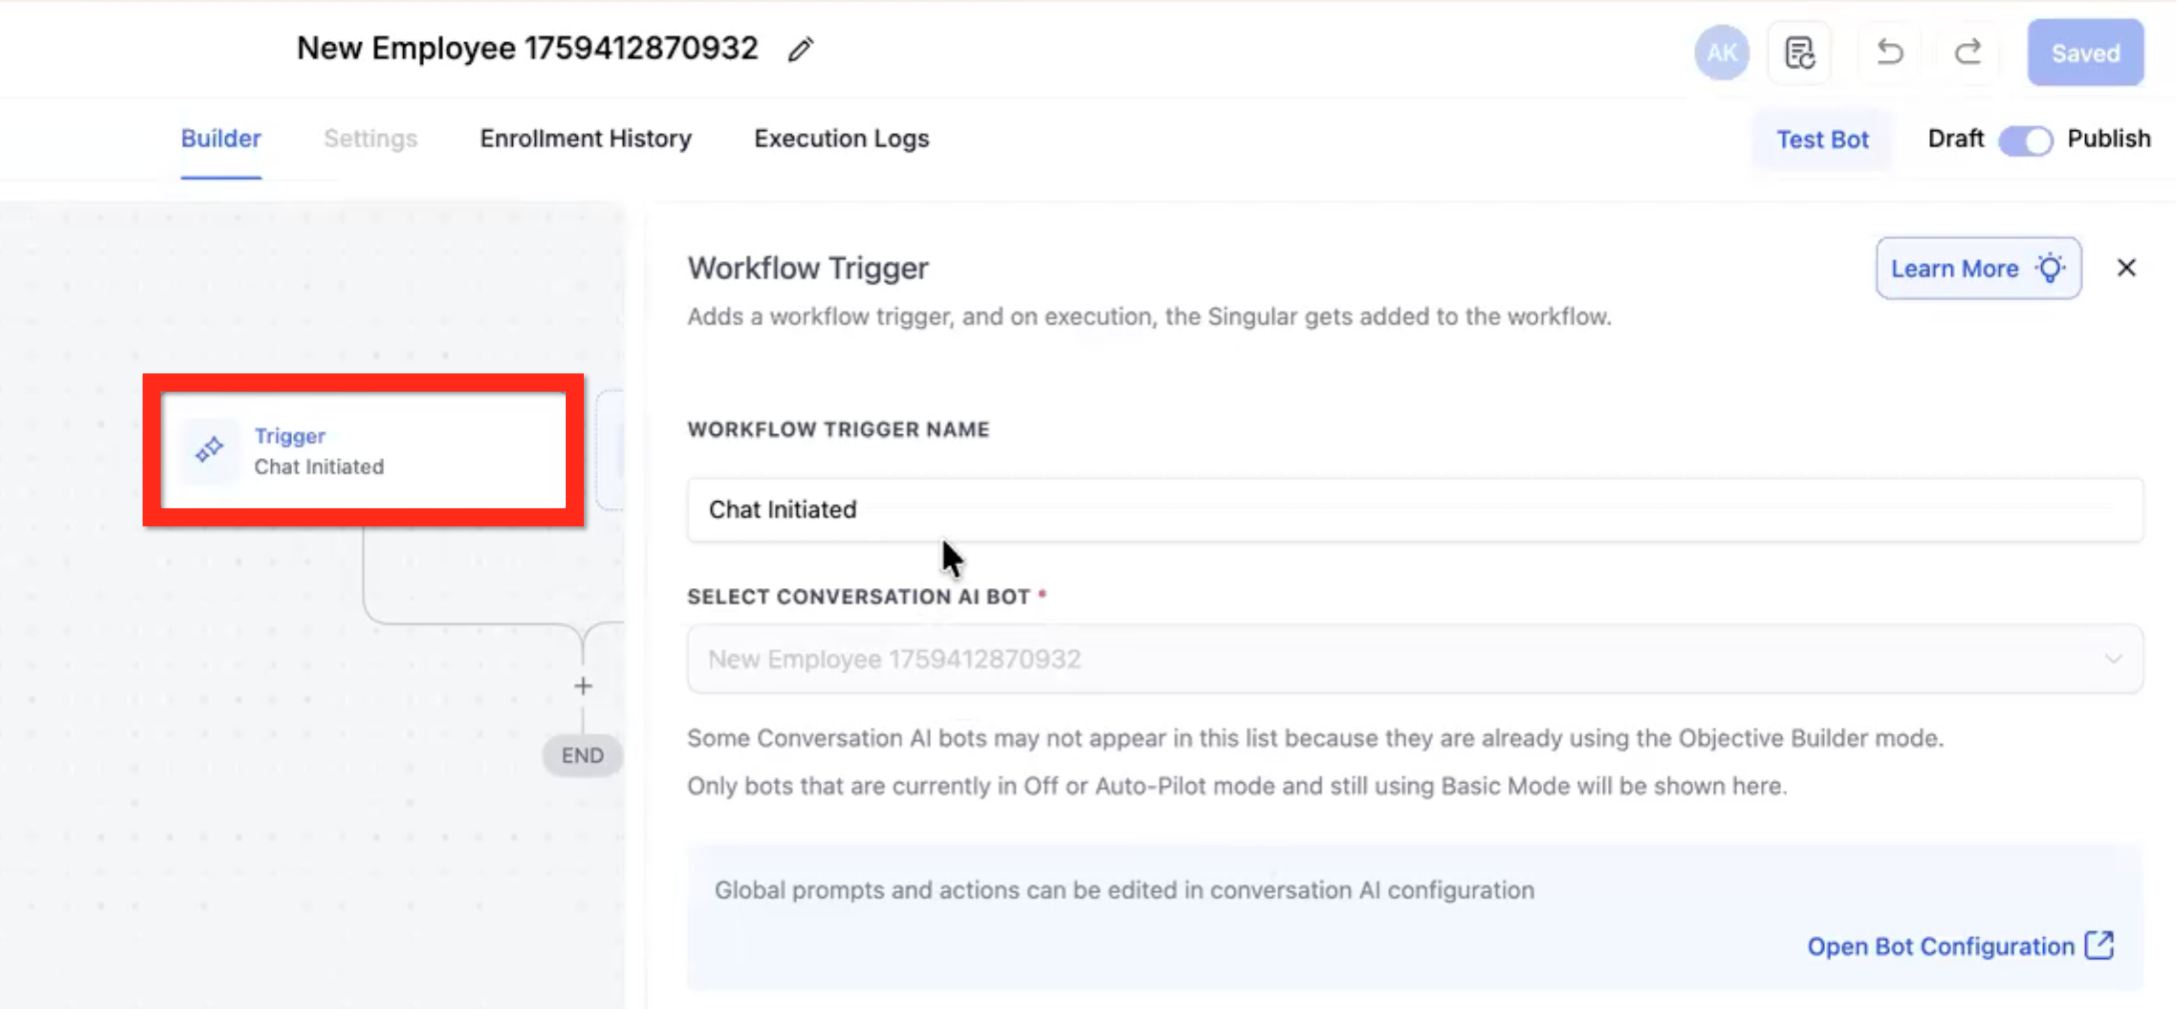
The default trigger is Chat Initiated. This trigger is the only way to start the flow.
Click the plus (+) to select an action. The available actions are the same as in the Workflow Builder, plus new AI Actions. Scroll to the AI Actions section:
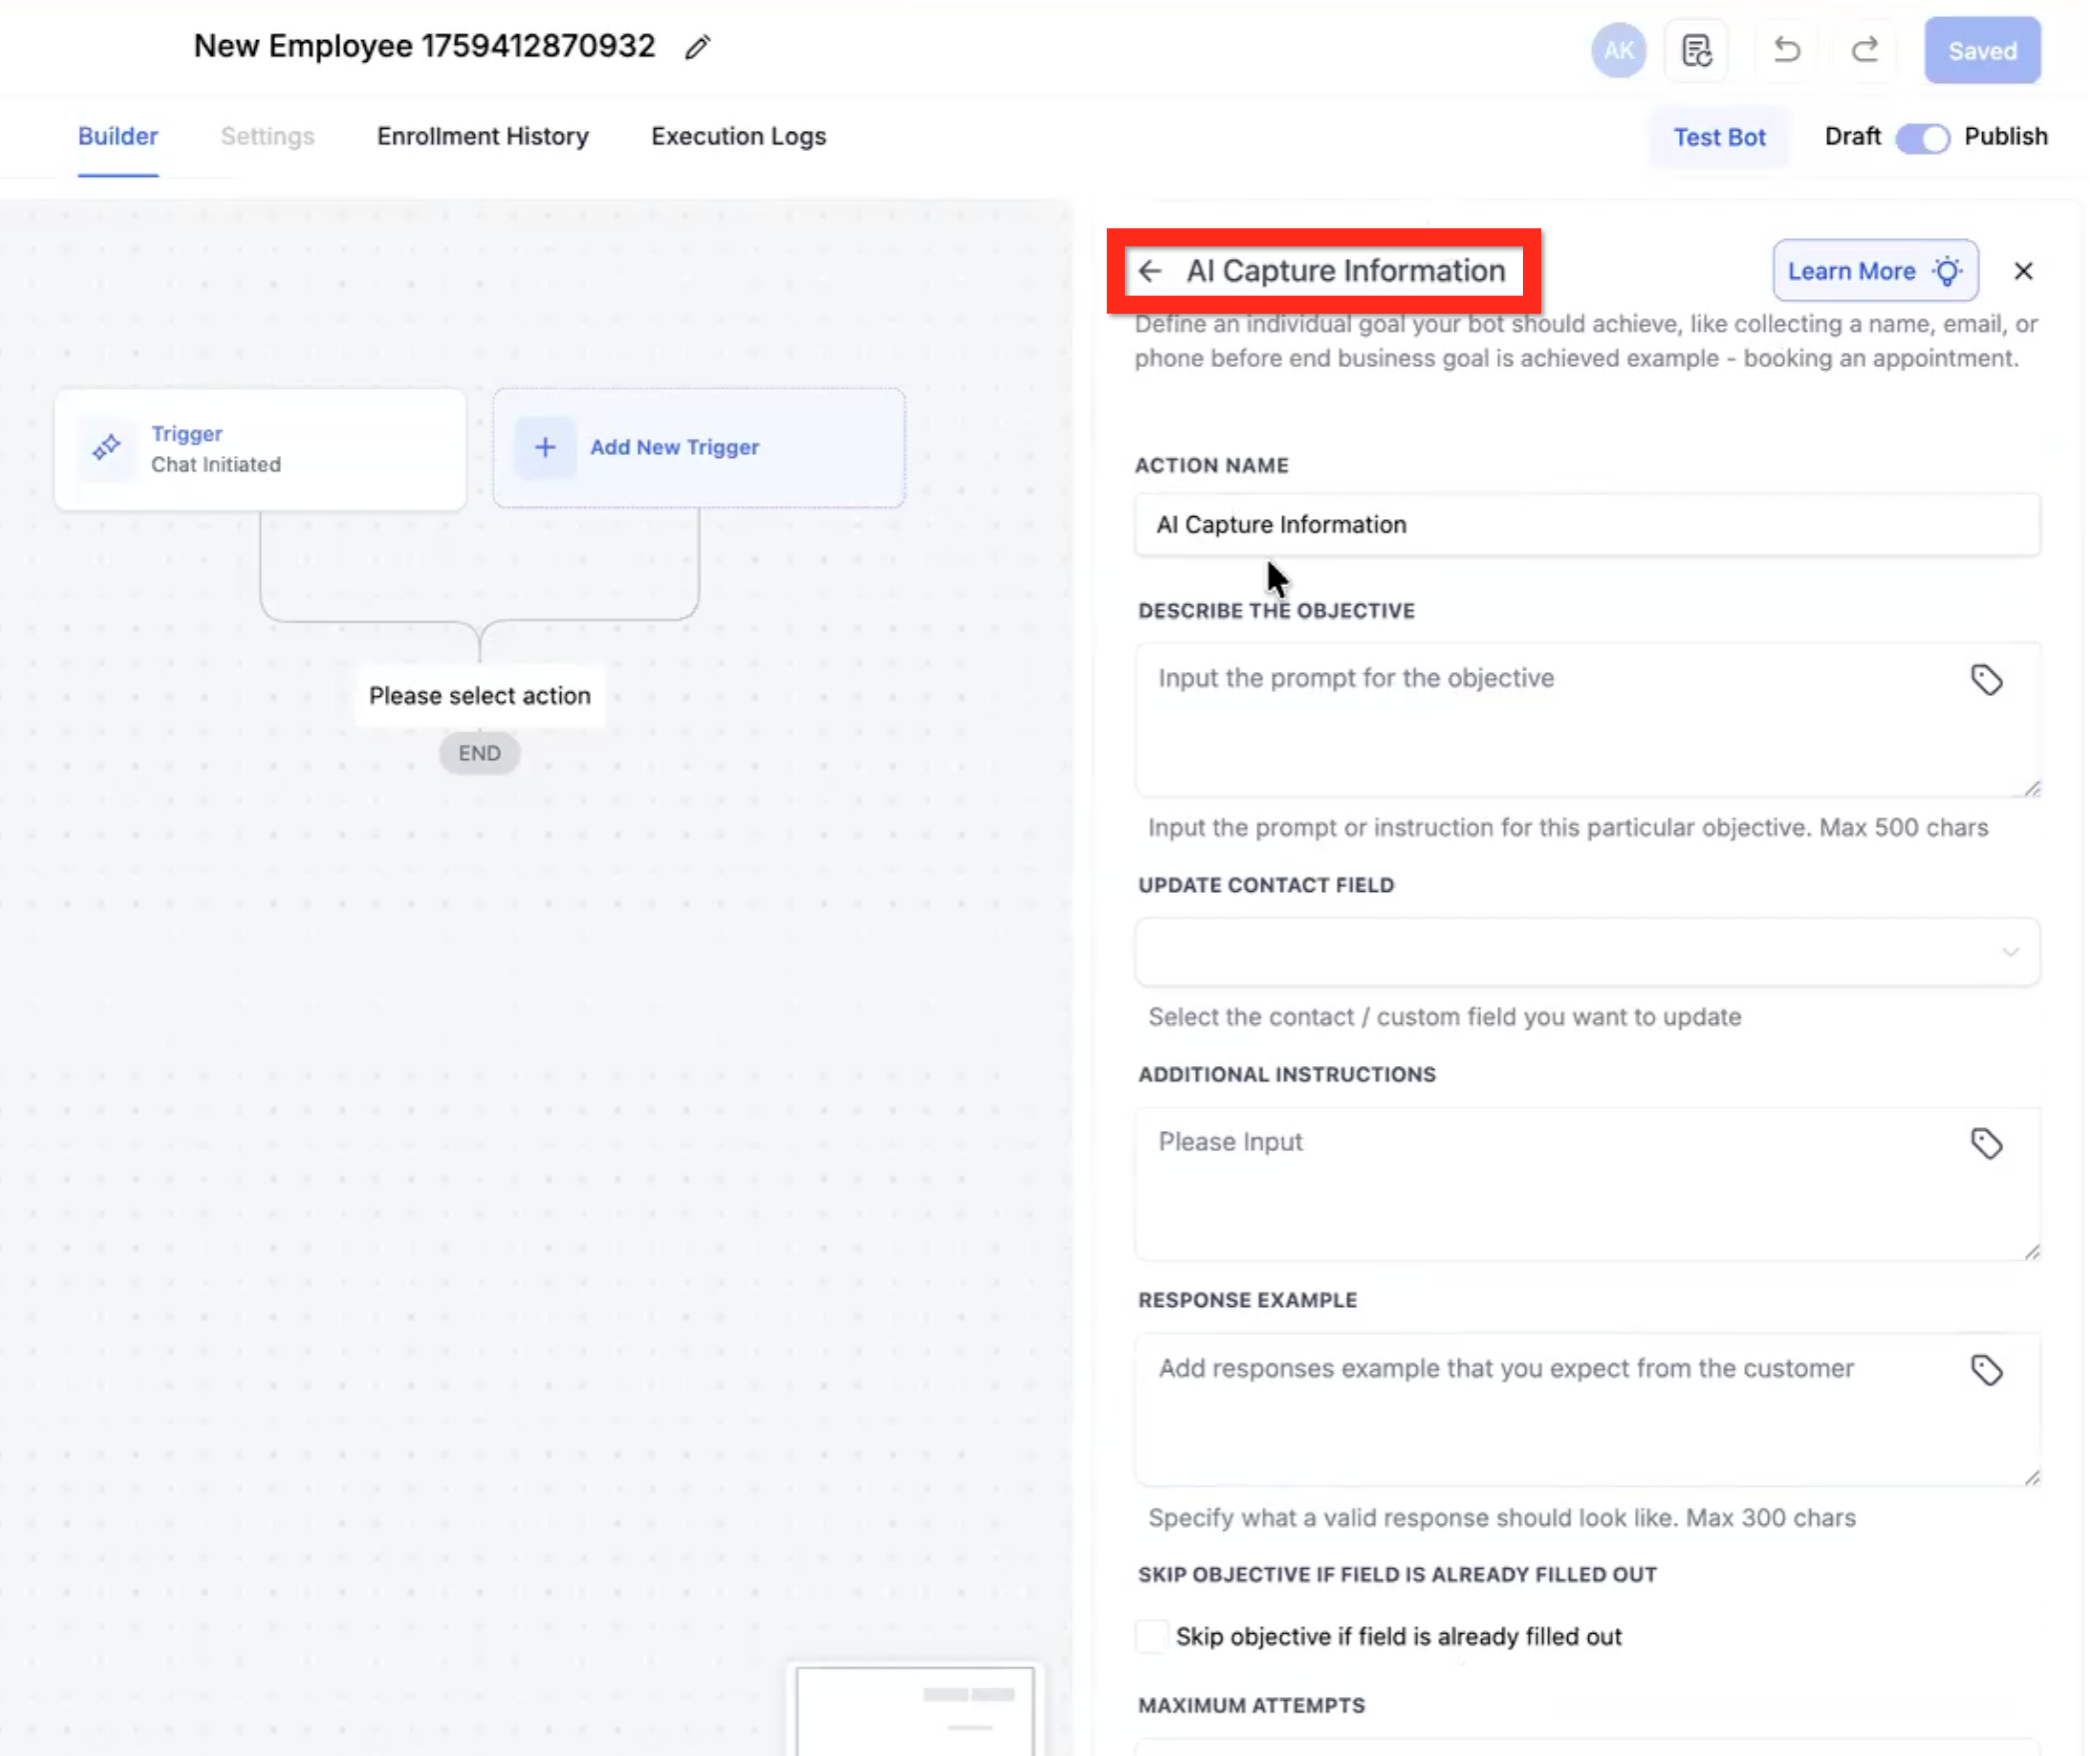
AI Capture Information (AI Capture & Qualification)
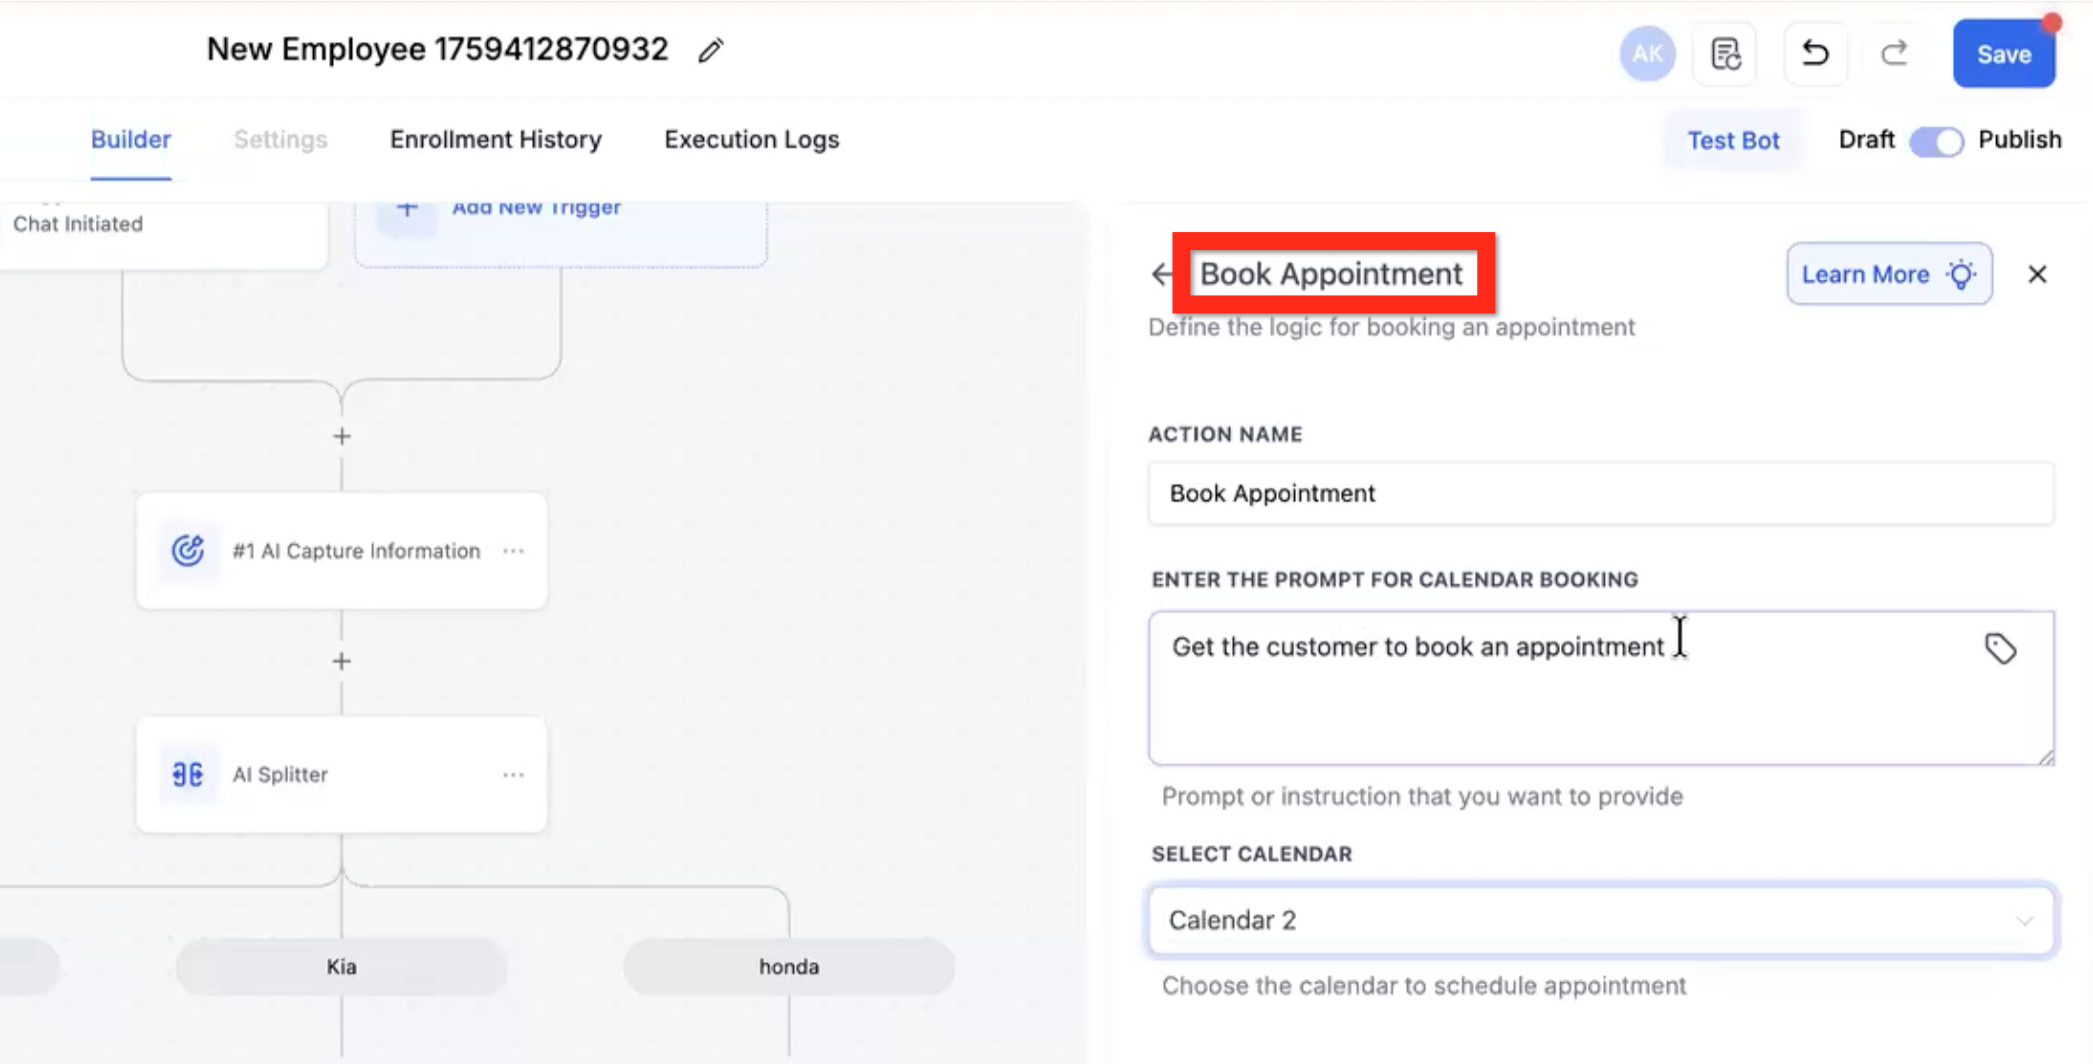
Book Appointment
End Conversation
AI Splitter
AI Message
Custom Message
Transfer Bot
Continue Conversation
Note: The Capture & Qualify action and the Book Appointment action will loop autonomously until they achieve their objective or an exit criterion is reached (for example, max attempts). The other message actions just send the one message without trying to achieve anything.

Describe the objective - Input the prompt or instruction for this particular objective (max 500 characters). Example: "determine the name of the user."
Update contact field (optional) - Select a contact field from the dropdown. Example: First Name.
Additional instructions - Describe supporting directions for the objective. Example: "Let the user know we can't move forward if their budget is less than $5,000, but do not reveal that number. Just say 'We cannot move forward at that budget,' without revealing the minimum budget threshold."
Response example - Specify an exact format. Example: "Specify USD currency: $#,###."
Skip objective if field is already filled out - If you used the Update Contact Field dropdown and that field is already filled out in the contact record, this objective will be considered already met and will be skipped. Example: if a contact comes from a Facebook form, their name and email will probably already be filled.
Maximum attempts - An integer. The bot will stop trying to fulfill the objective after this many of its own messages sent trying to fulfill it. Example: Max 2 — Bot: "What is your email address?", User: "No," Bot: "In case we get disconnected, what is your email address so I can reconnect?", User: "Don't worry about it," Bot: [moves on to the next objective].
Don't proceed to the next objective if criteria not met - This ends the conversation with a closing message. Example: "Thank you, but your budget is too low to be a good fit for us."
Add a tag - Add one or more tags to the contact as the last step in this objective. Example: [AI qualified].
Note: This action loops, attempting to meet its objective of booking an appointment across multiple messages, unless there is a clear exit criterion such as "I don't want to book."
Enter the prompt for calendar booking - Describe how to encourage the user to book an appointment.
Select calendar - Choose the appropriate calendar from the dropdown.
Appointment Booked - This branch is for a successful appointment creation.
Appointment not booked - This branch is for a failure that resulted in no appointment creation.
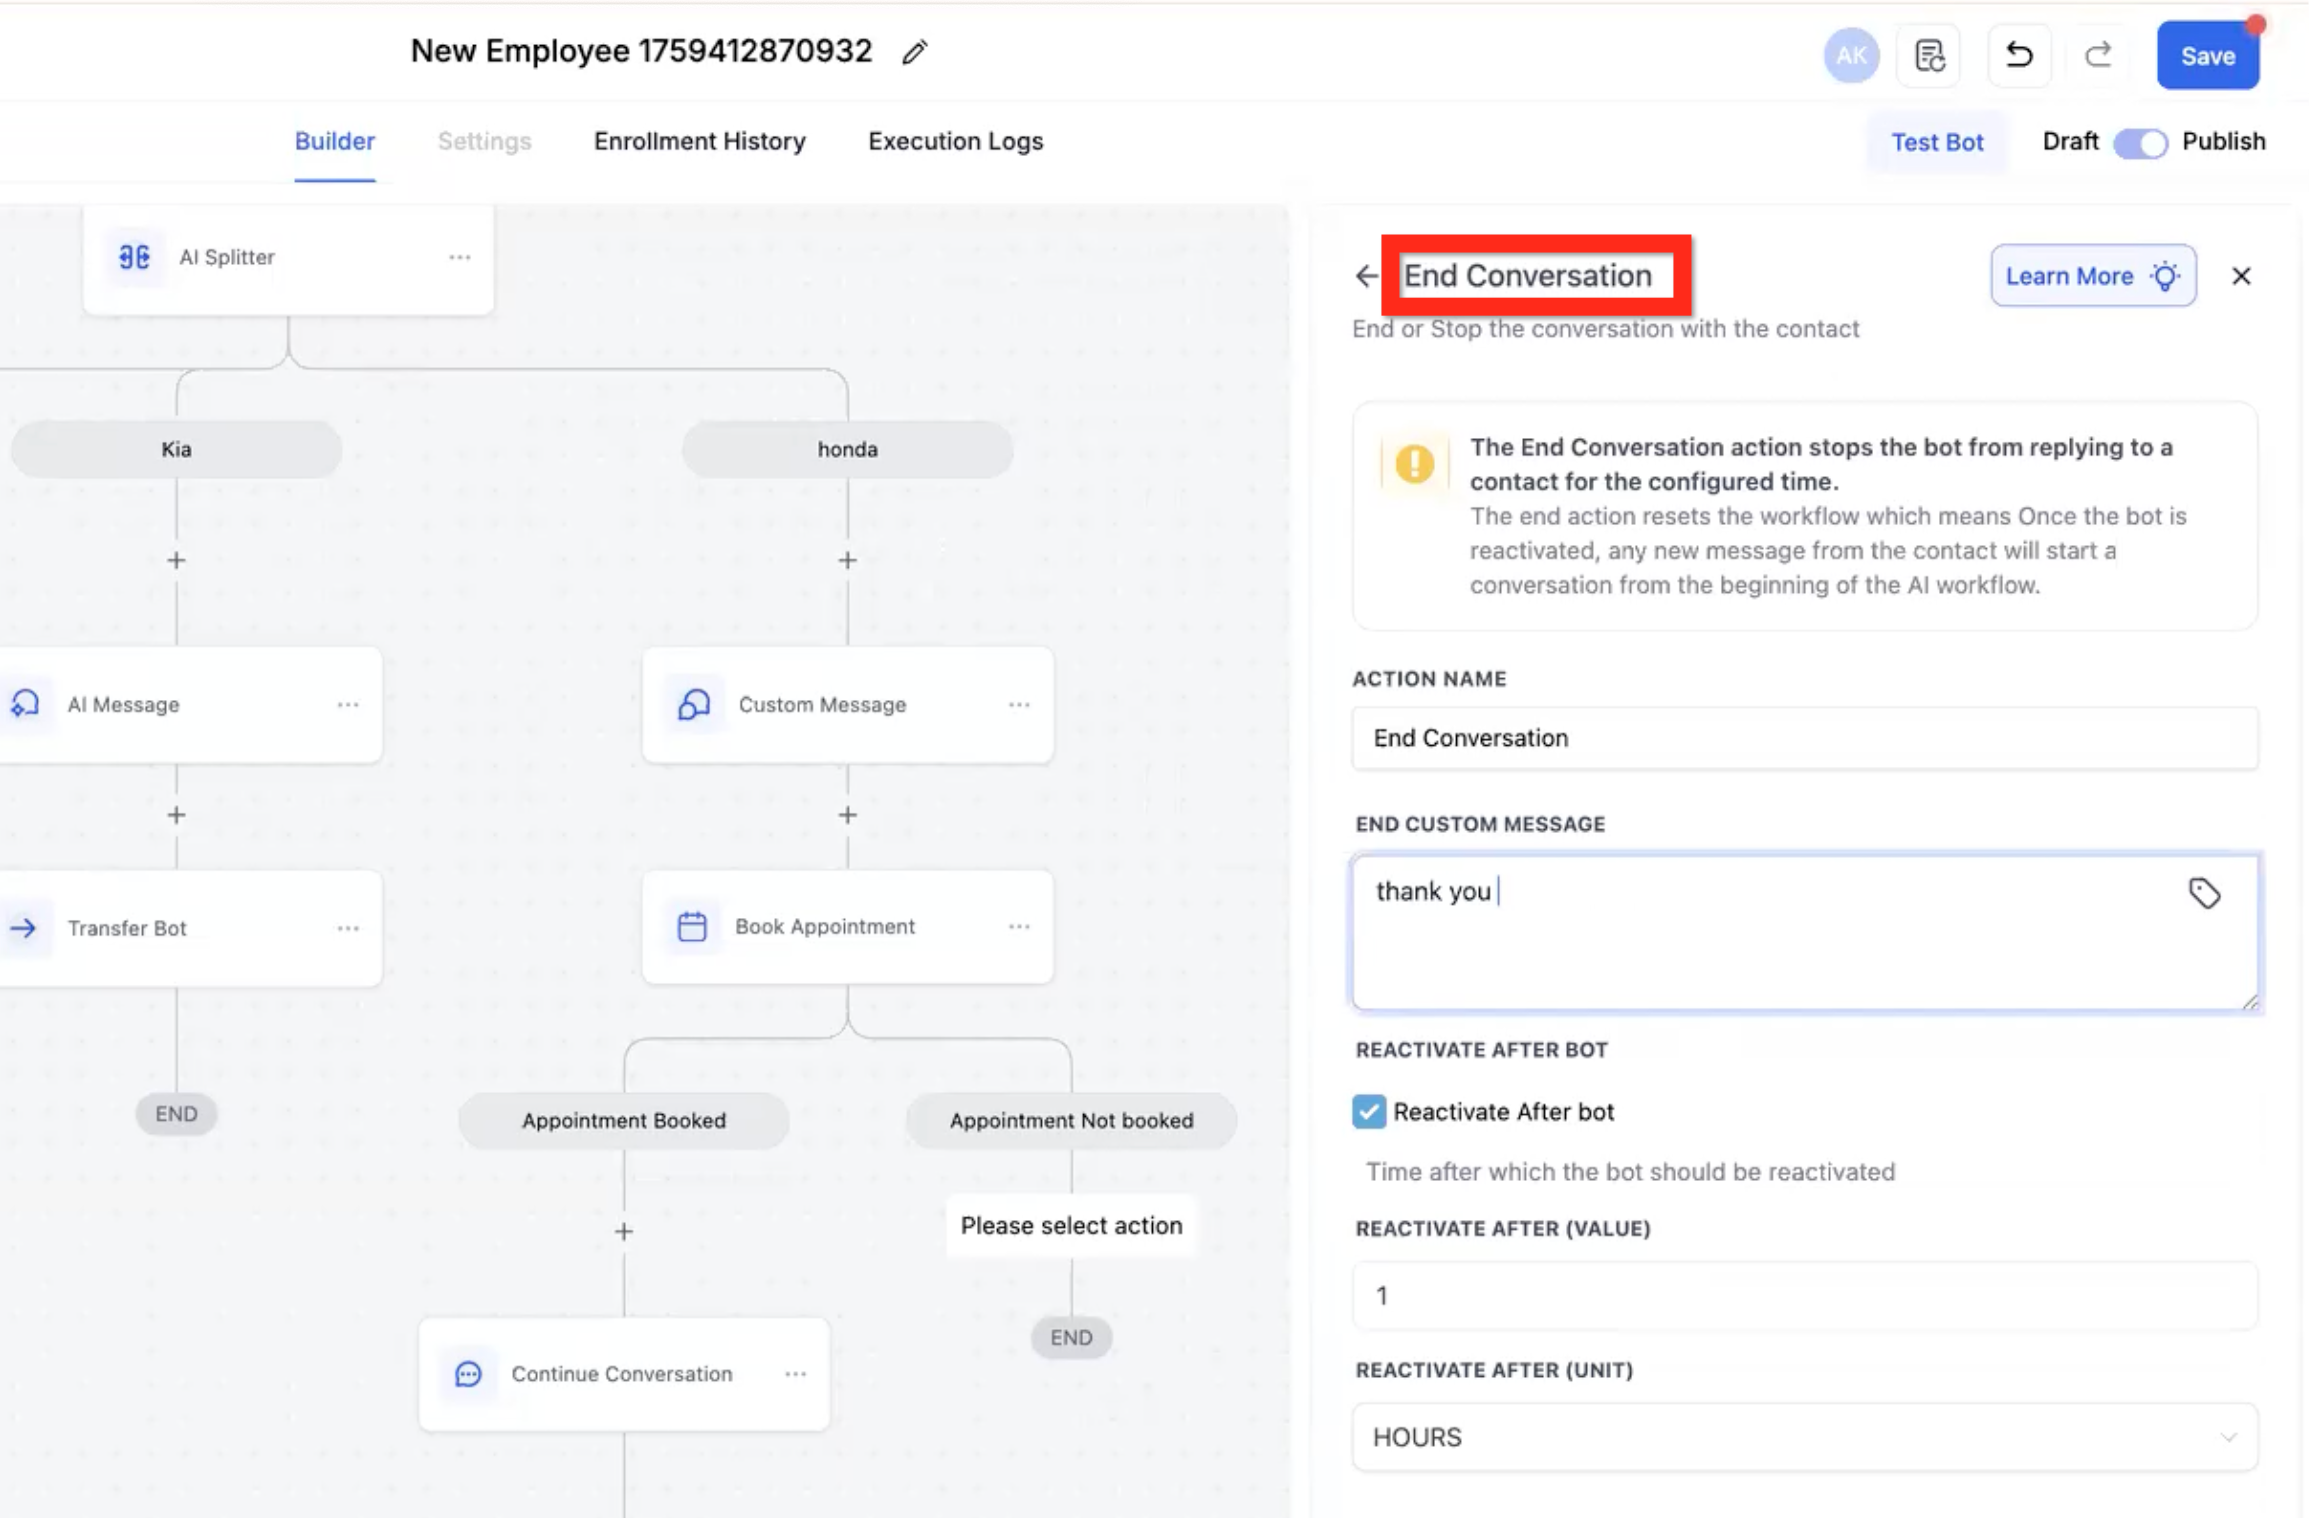
Note: By default, when the contact reaches an
[END]node in the flow, they stay there and any further interaction with the chat happens in that context. This action definitively ends the conversation, and it will not be continued.
End custom message - Define a literal message to send to the user. The AI will not modify it.
Reactivate after bot - Check to define that the bot should reactivate after a delay.
Reactivate after value - Specify the number of time units until the bot should reactivate.
Reactivate after unit - Specify the time unit (for example, hours).
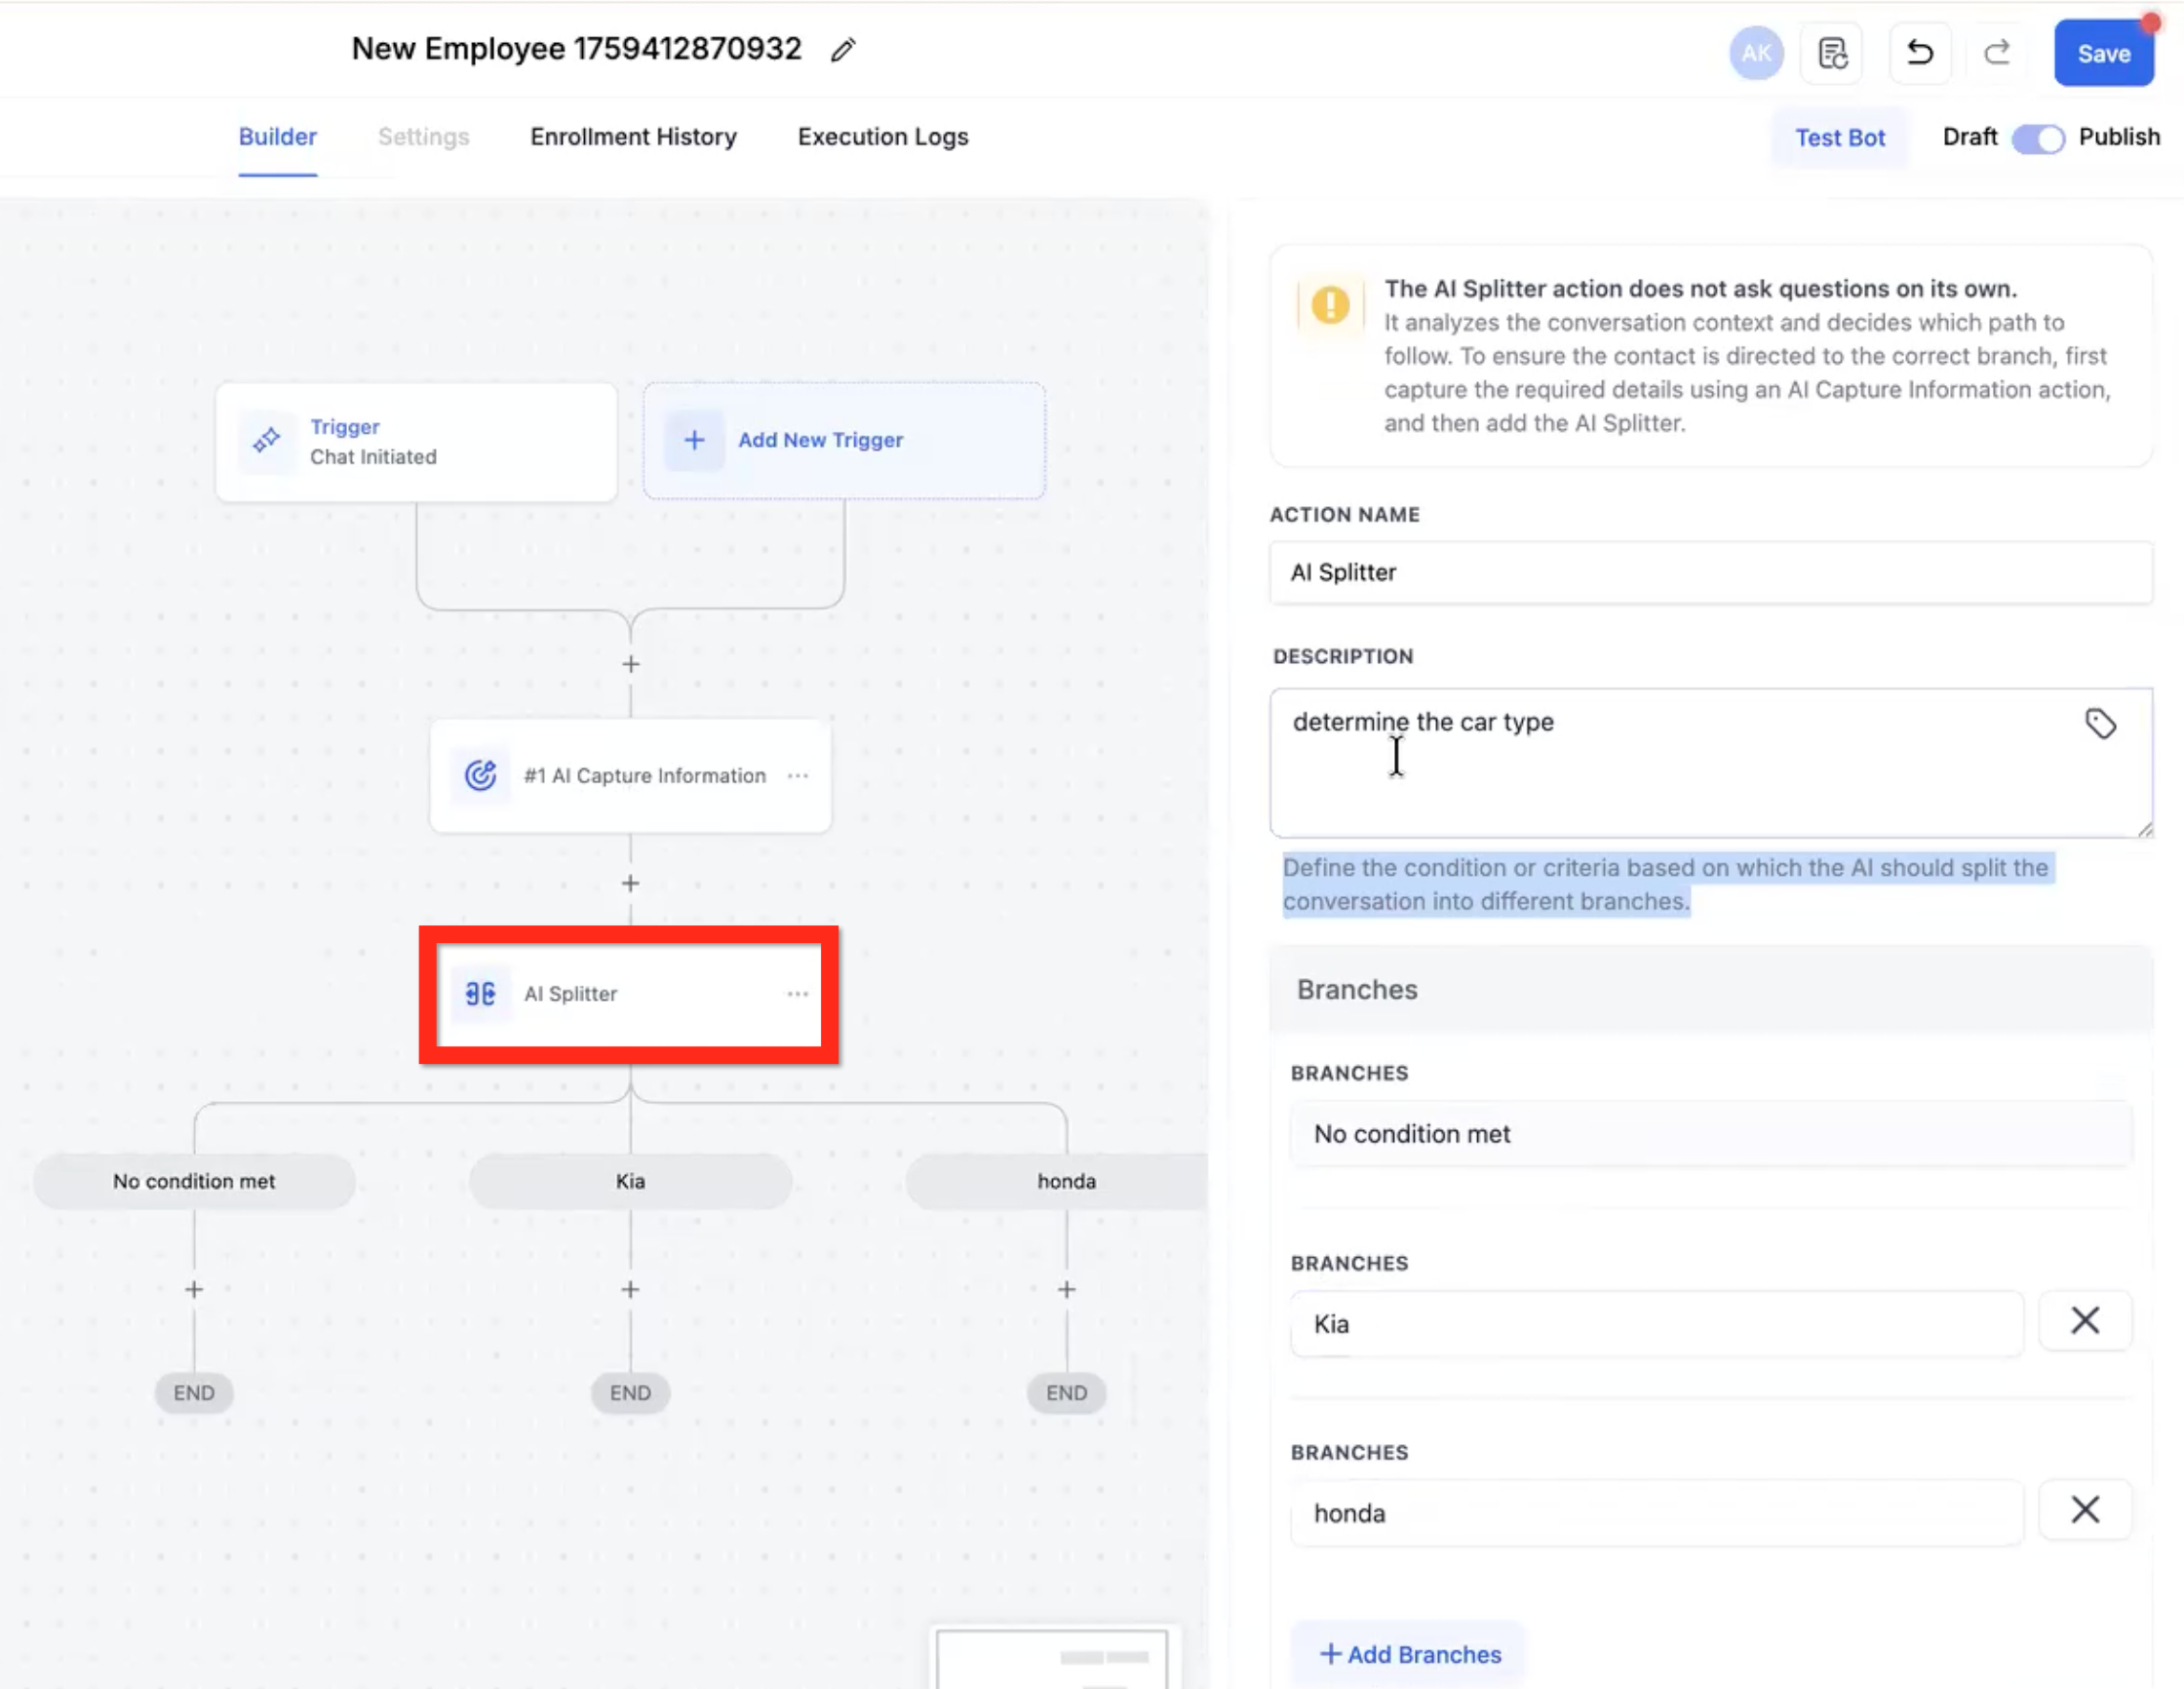
Note: The AI Splitter action does not send messages or collect information. It only analyzes previously collected information.
Description - Describe the branching logic. Example: "What type of treatment is the contact interested in?"
No condition met - This is the minimum default branch. It's a catchall in case no other branch clearly qualifies.
Branches - [option 1] [option 2] [option 3] [etc.]. These are the choices the AI will choose from.
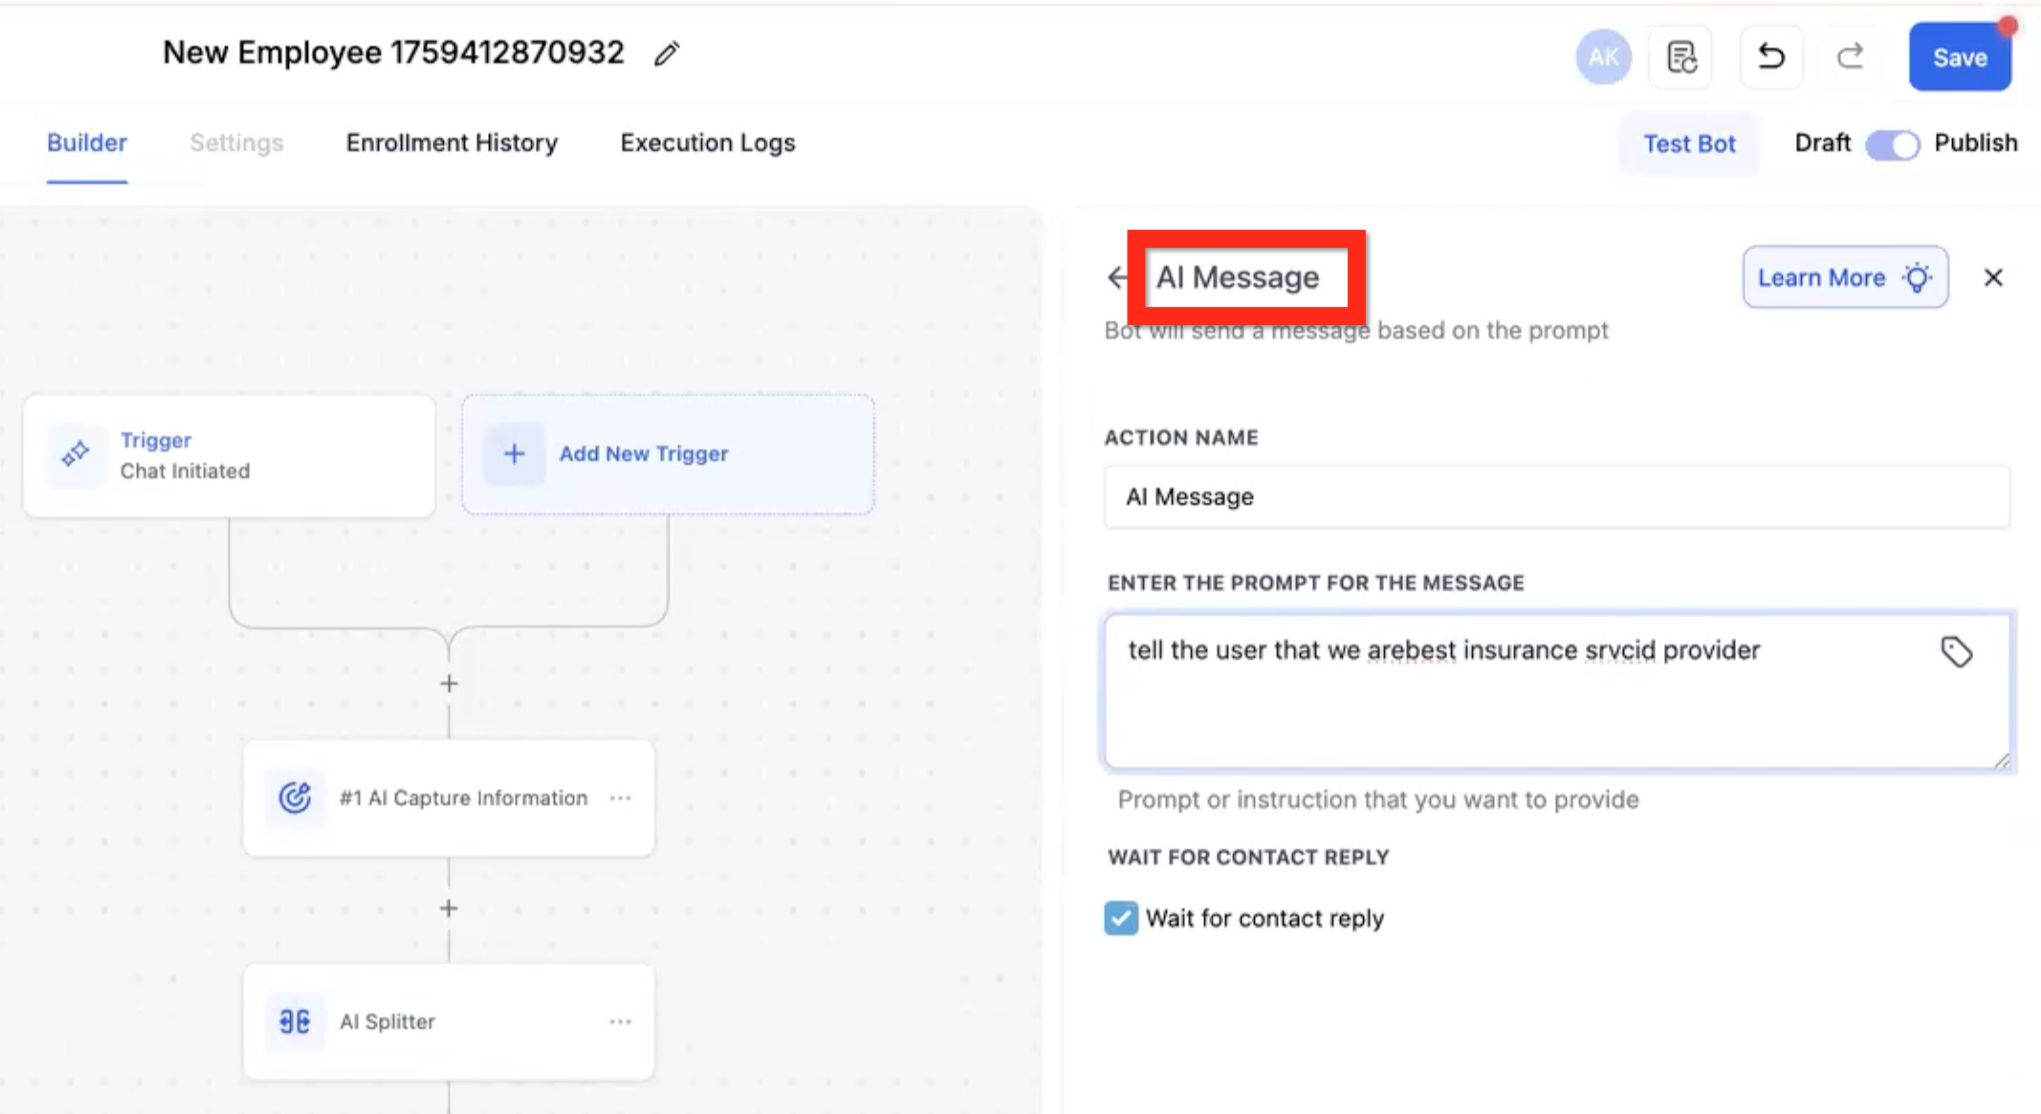
Note: This action is executed only once. It will not try to achieve an objective.
Enter the prompt for the message - Describe the type of message you want the AI to write and send (using all of the conversation context up to that point). Example: "Tell the user that we offer the best med spa services in the area."
Wait for contact reply - If checked, the flow will only move to the next step after a reply is received.
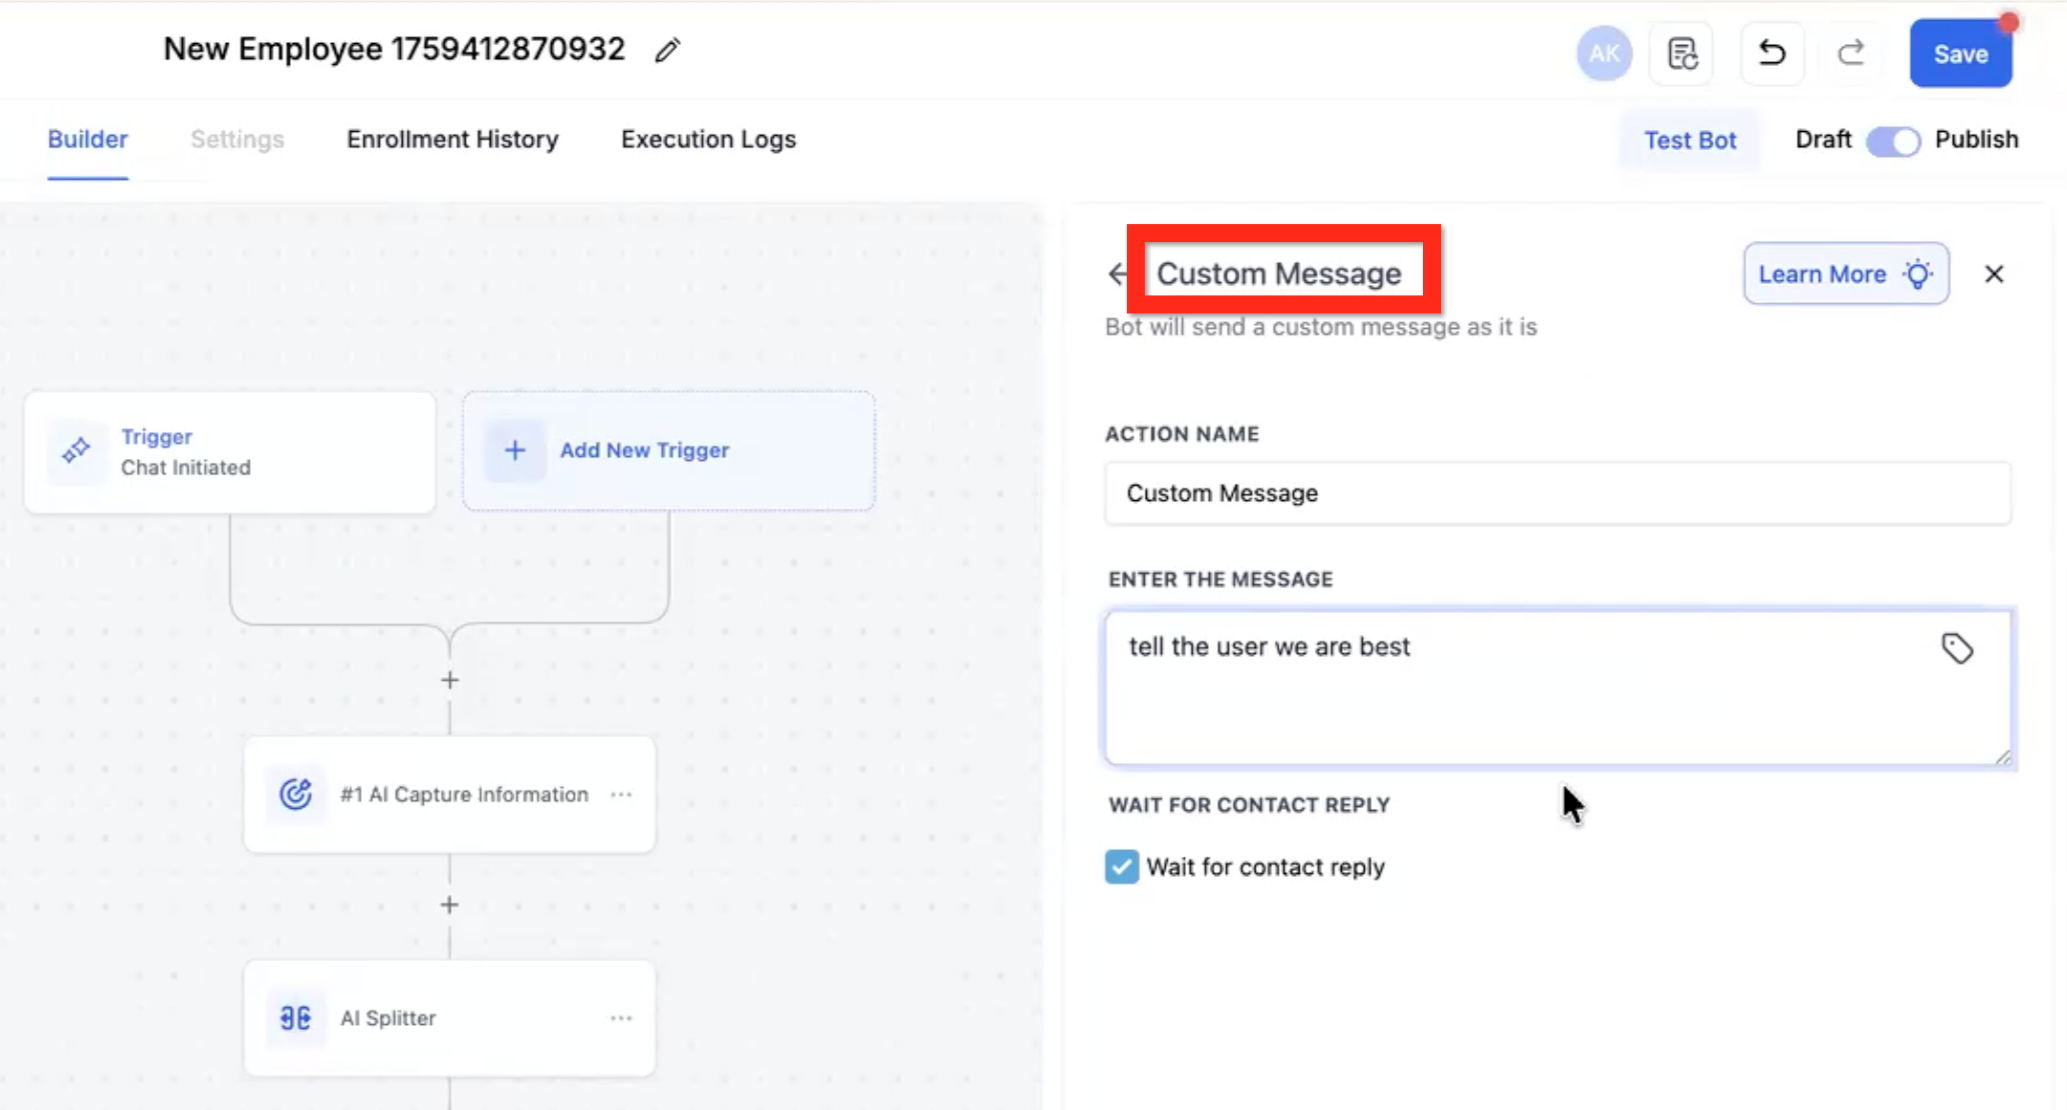
Note: This action is executed only once. It will not try to achieve an objective.
Enter the message - Write the literal message you want the user to see. No modifications will be made; it is delivered exactly as written. Example: "We were voted best med spa in 2024."
Wait for contact reply - If checked, the flow will only move to the next step after a reply is received.
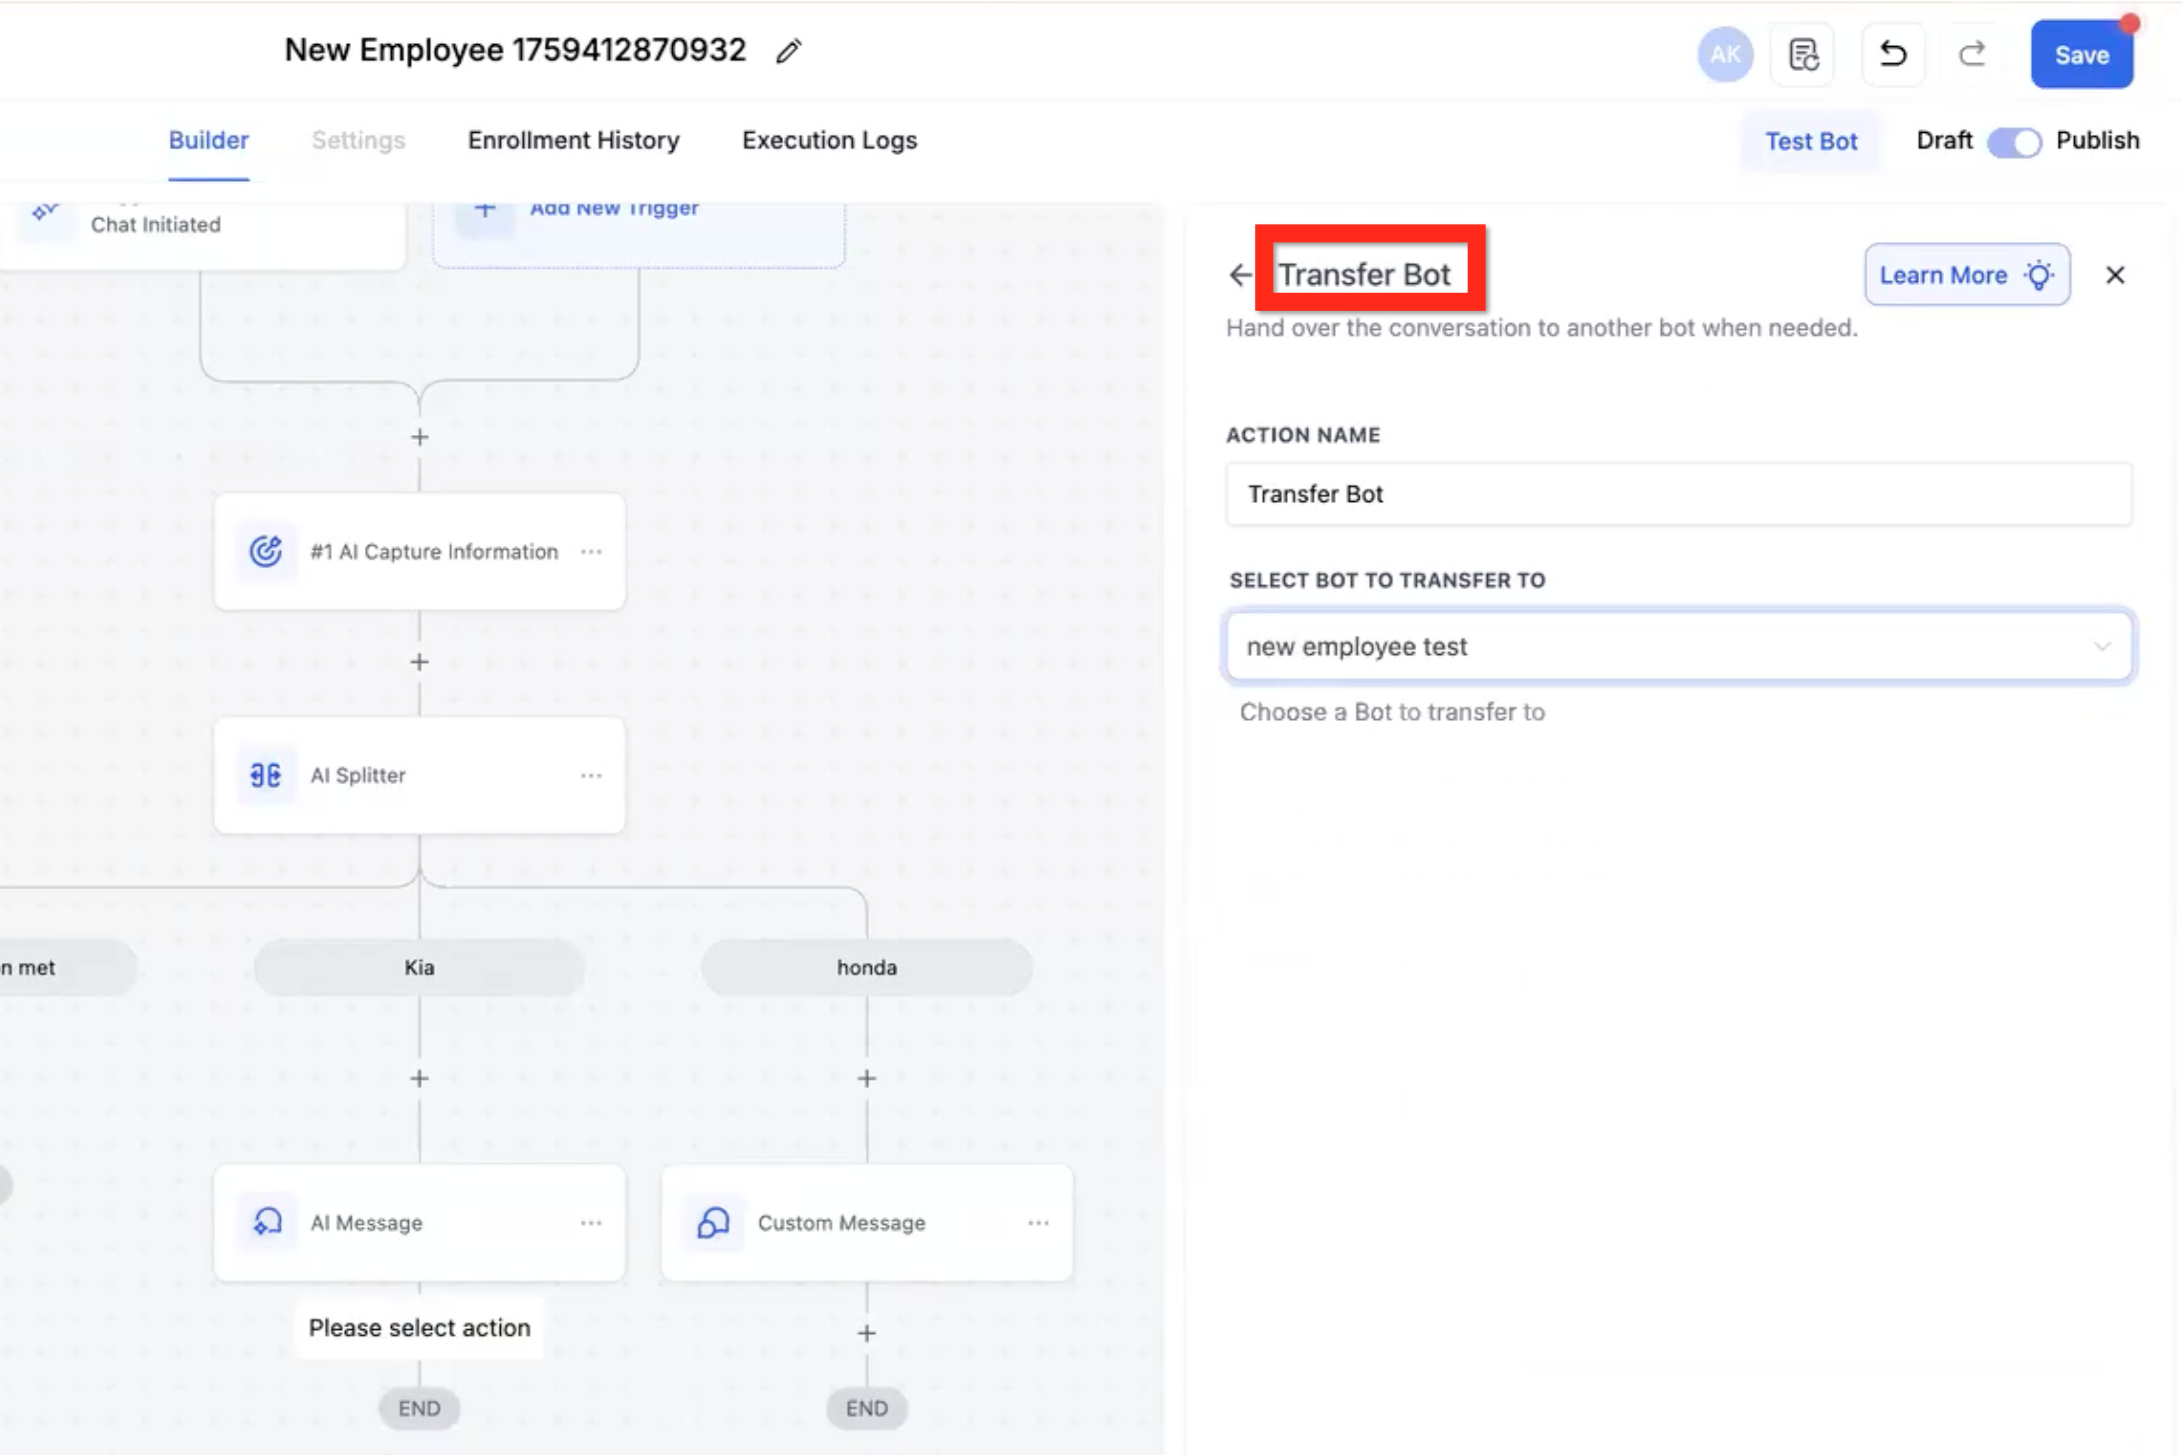
Note: This transfers the contact to a different bot and exits this flow; it will not return unless you have another transfer action elsewhere that sends the contact back. This is best used when you have several conversation paths that are similar but with crucial differences, so a single bot might get confused about the details if they're all in one context. This sends the conversation to a bot that only has the context of one conversation path.
Select bot to transfer to - Use the dropdown to select the appropriate bot. Example: Botox Consultation, Filler Consultation, Laser Consultation.
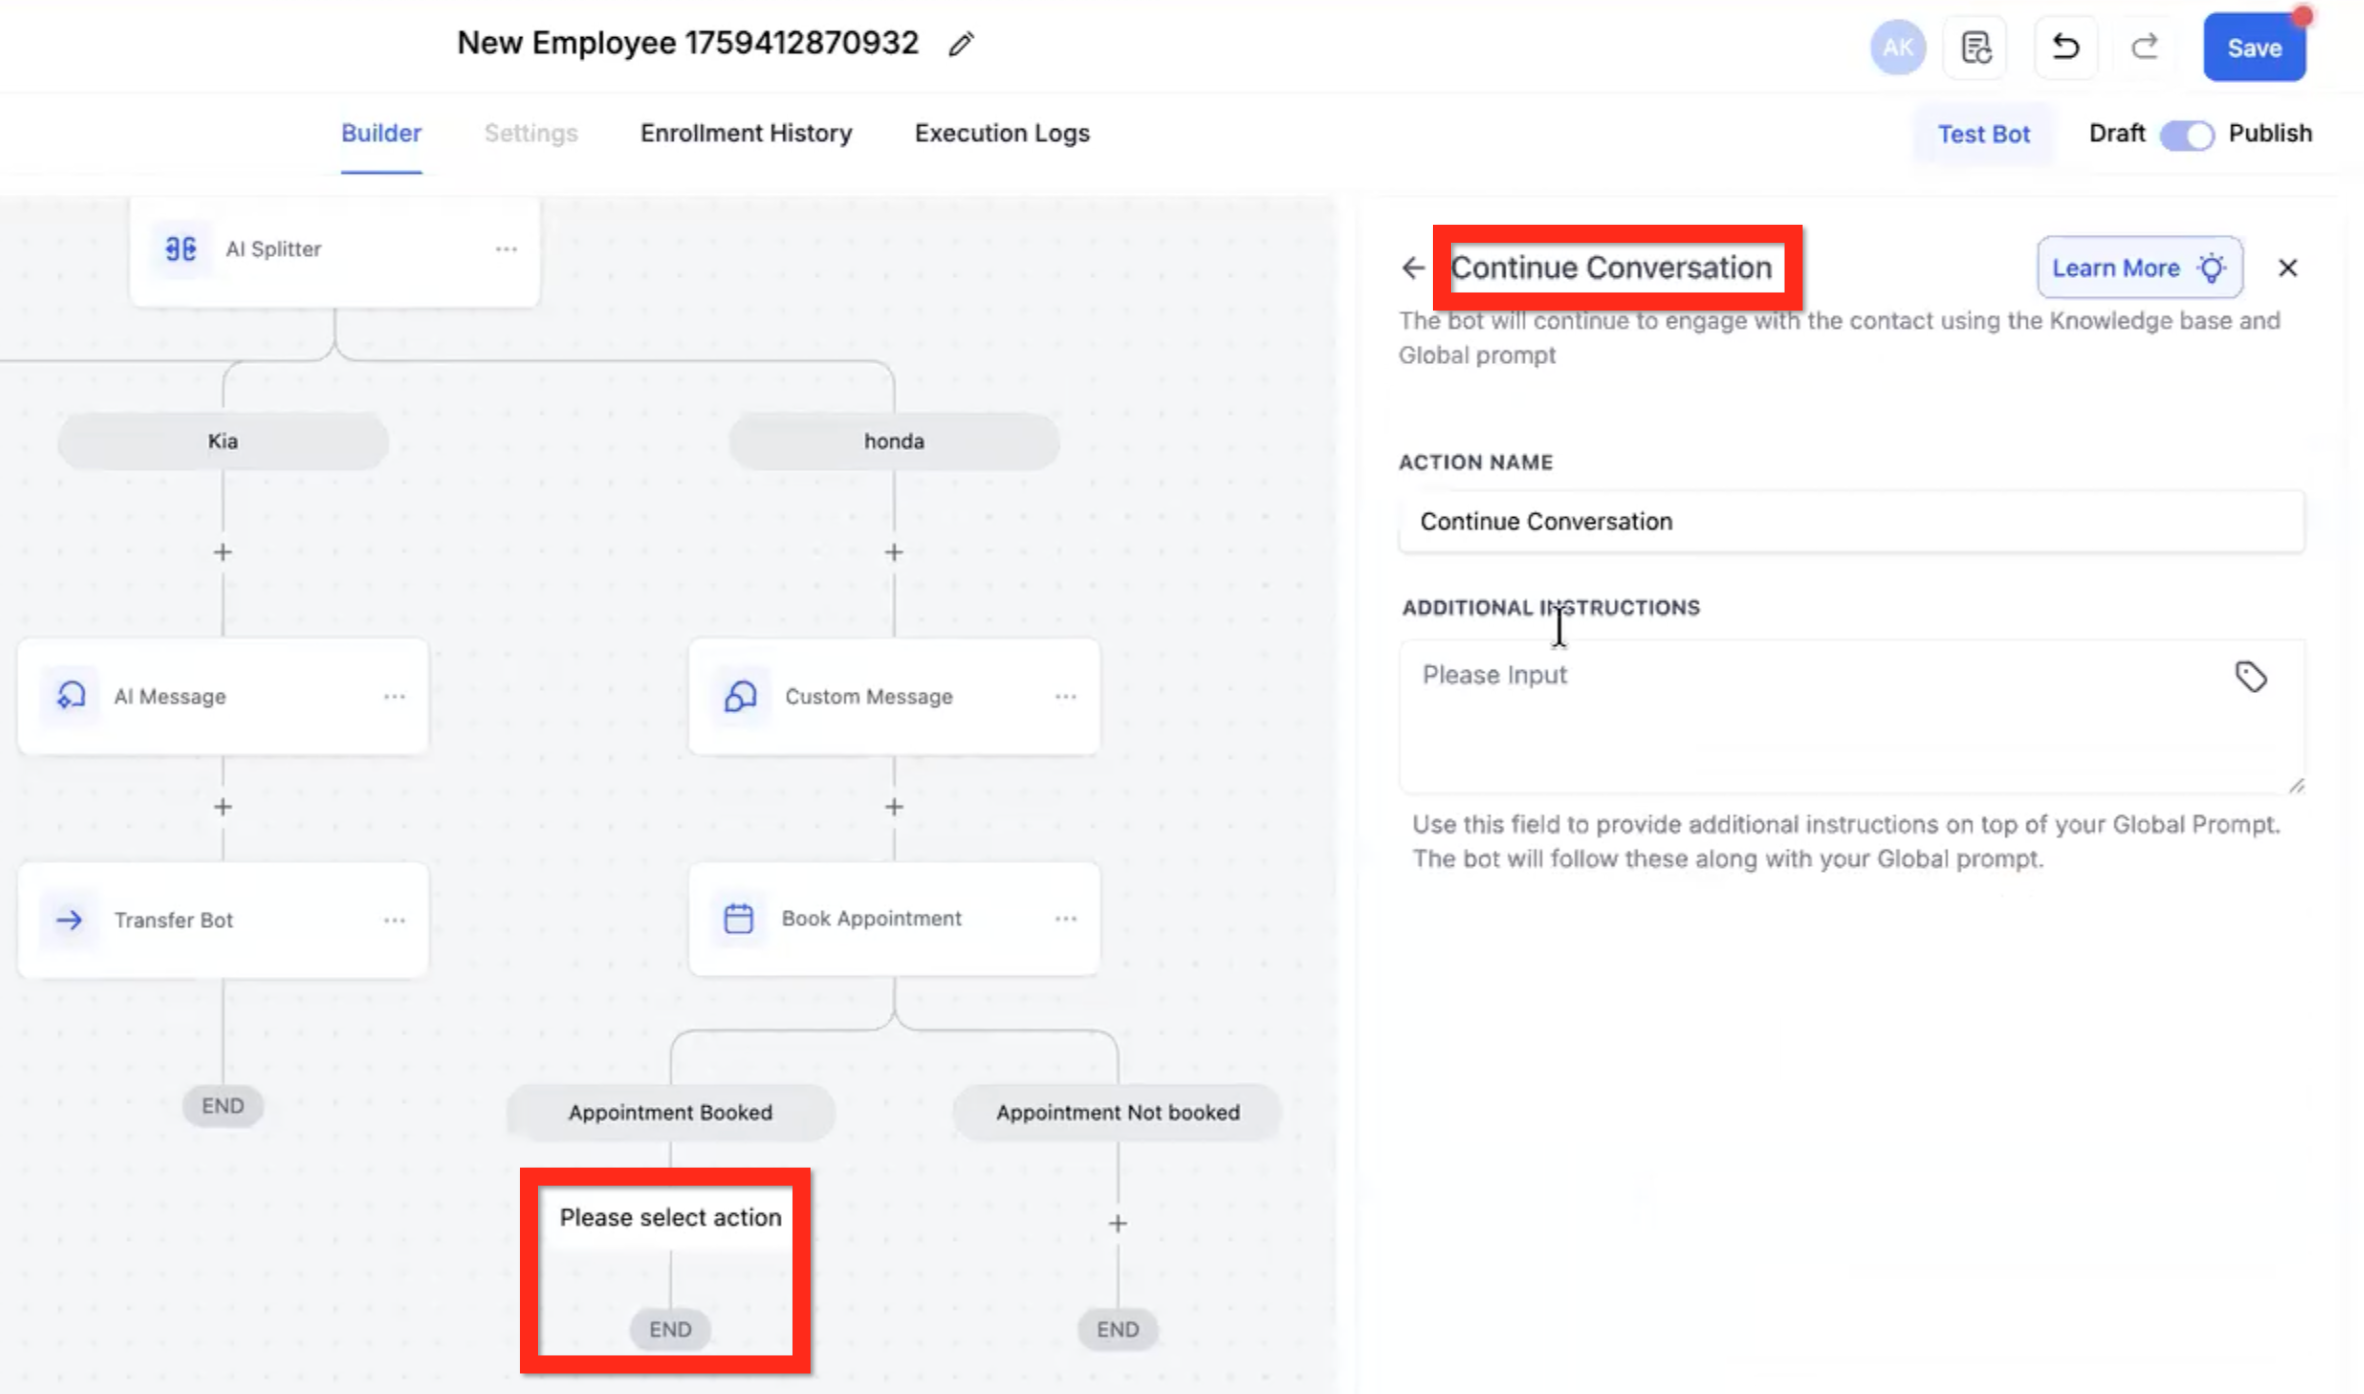
Note: By default, when the contact reaches an
[END]node in the flow, they stay there and any further interaction happens in that context but with no particular objective to achieve. This action lets you give the bot specific instructions on how to keep chatting if the user wants to.
Additional instructions - Define instructions for how to keep chatting with the user if they want to.
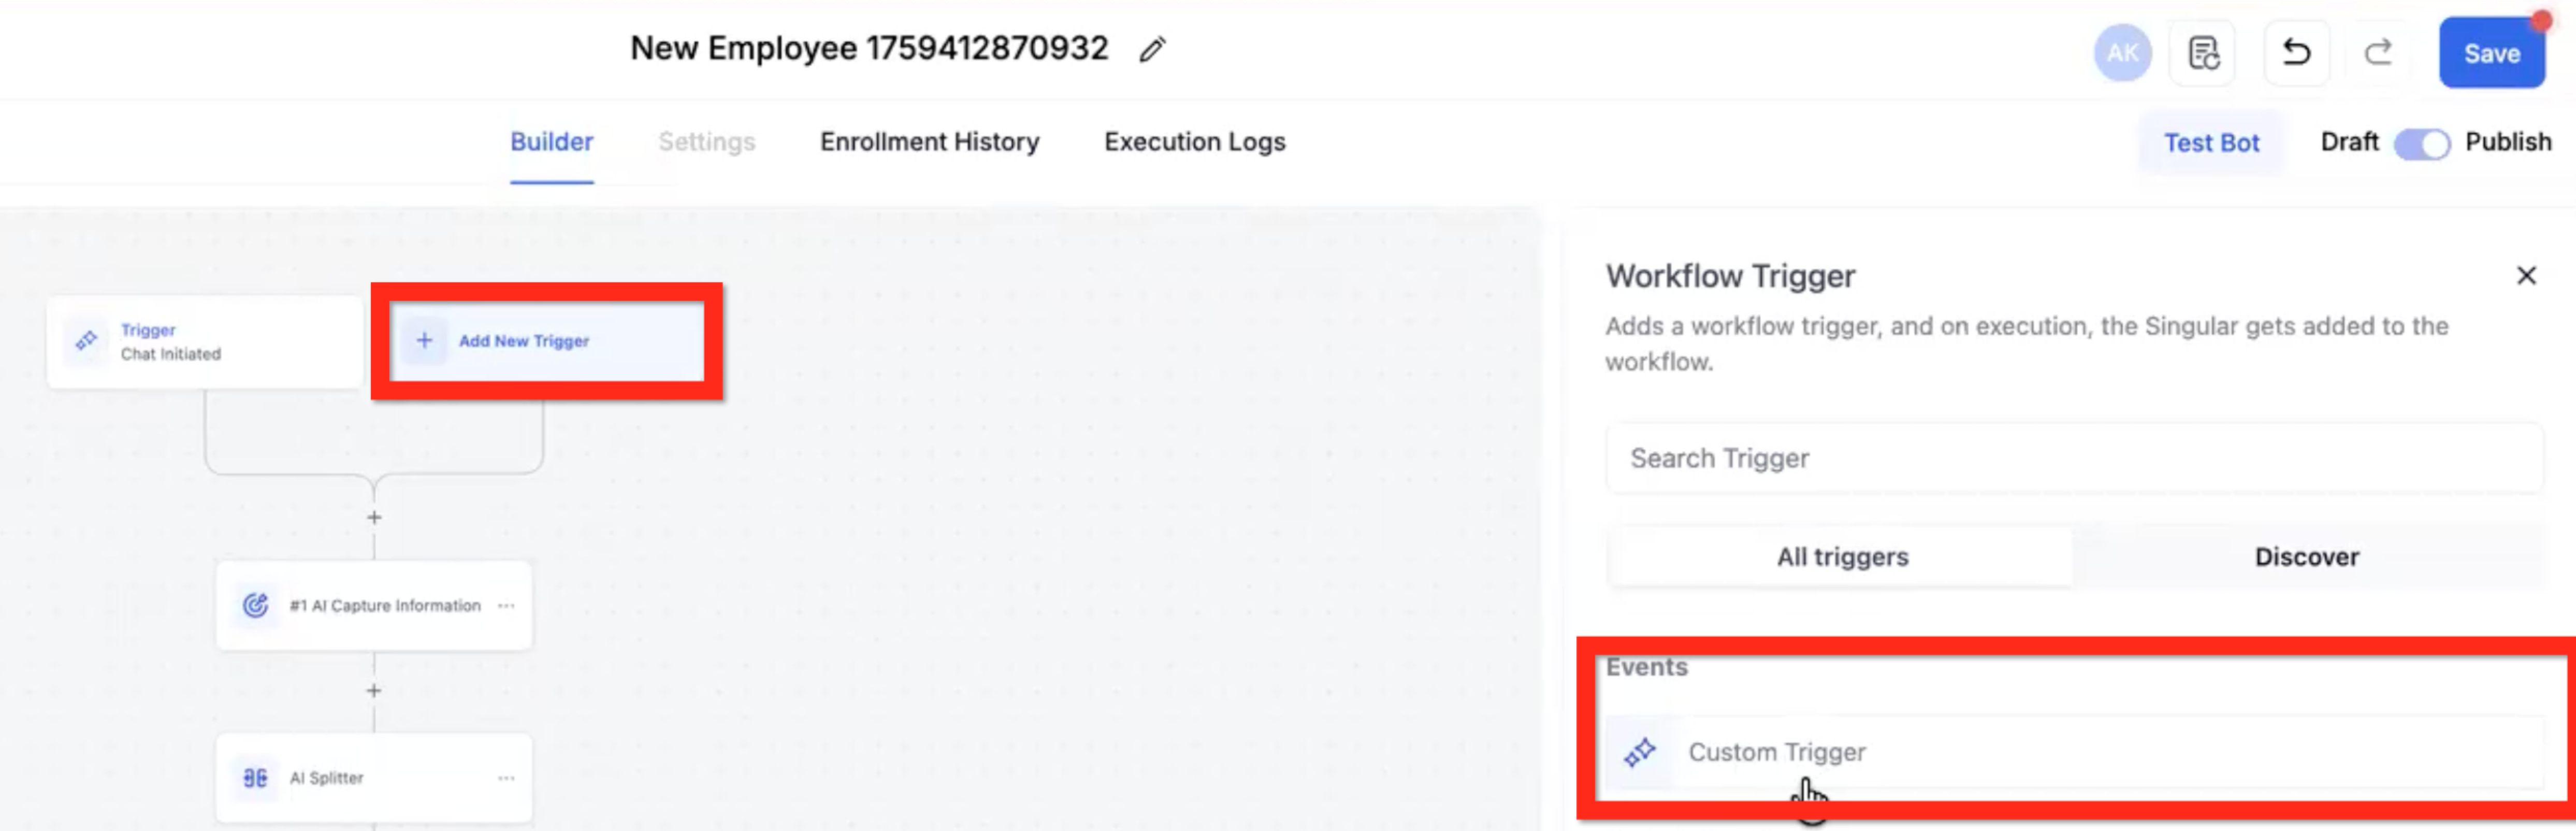
The default Chat Initiated trigger is the only way to start the flow. Custom Triggers cannot start the flow. Once the contact has reached one of the
[END]nodes in the flow, their messages can fire one of the Custom Triggers to move them to an earlier point in the flow.In the near future, Custom Triggers will be able to fire at any point during the flow (not just an
[END]node), and the Sensitivity setting will be applied.
Note: You can have up to 3 custom triggers.
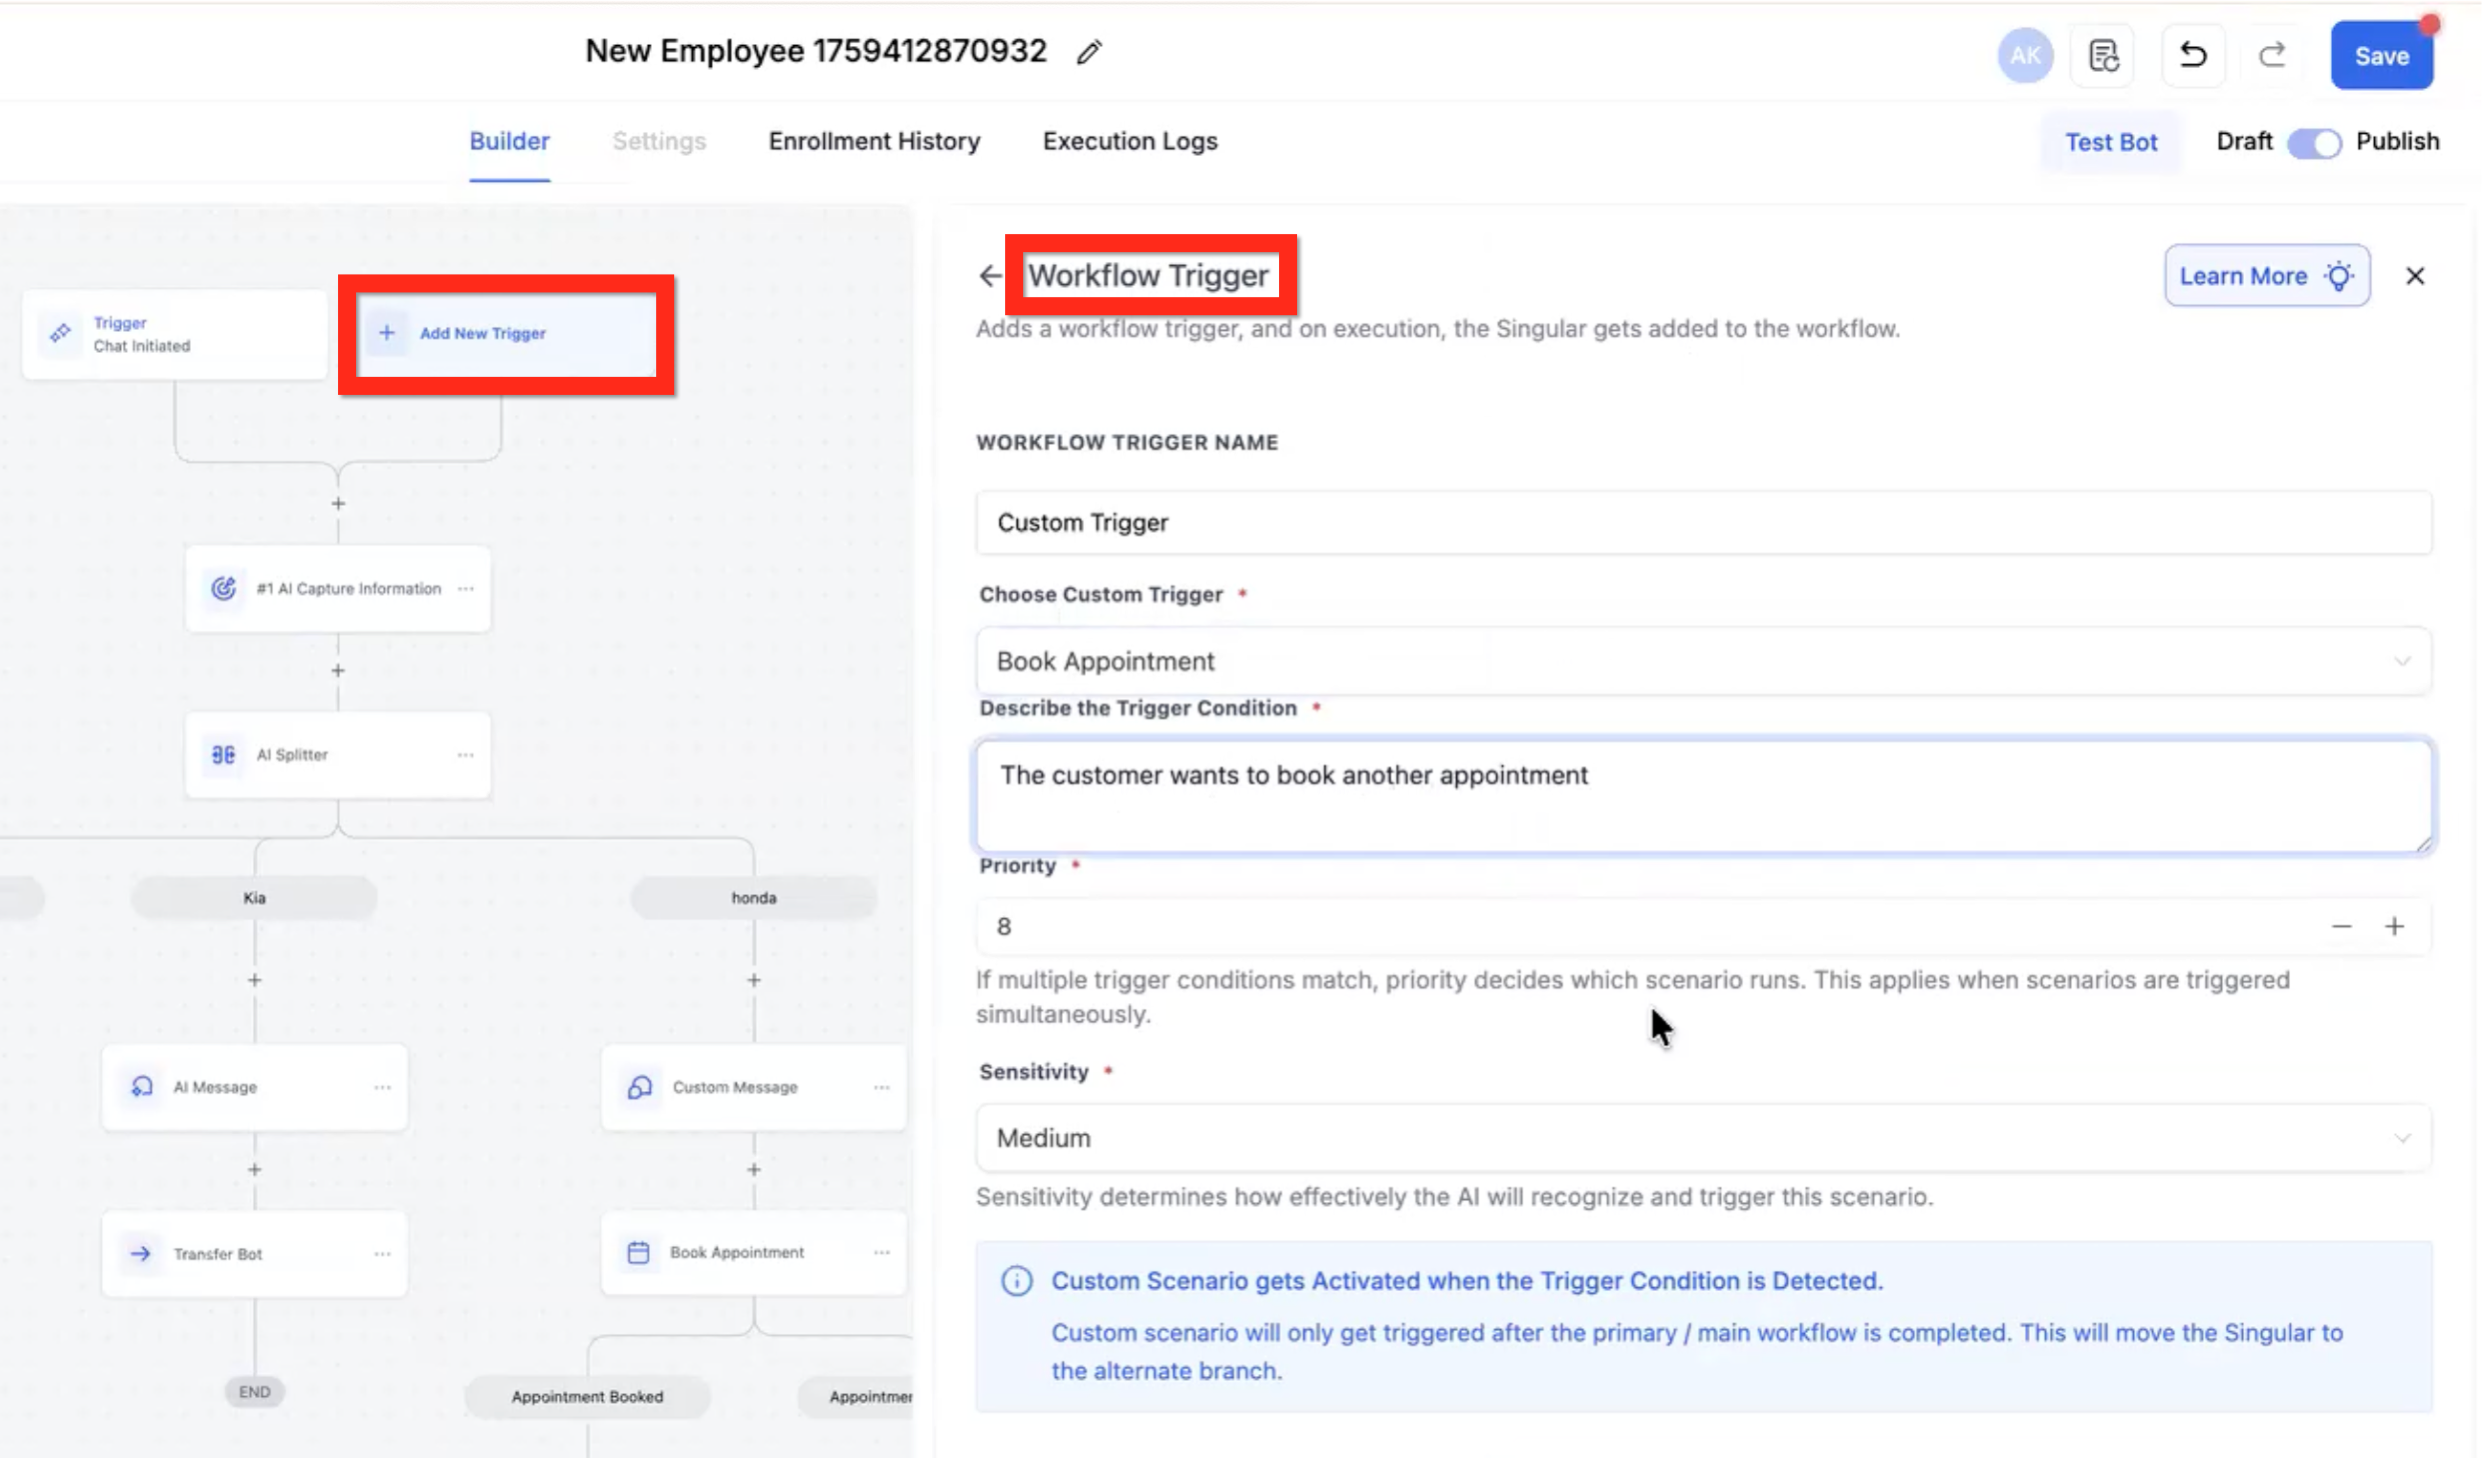
Choose Custom Trigger - Use the dropdown to select a pre-built custom trigger (for example, Book Another Appointment) or create your own.
Describe the trigger condition - Describe in words what the custom trigger condition is (different from the initial chat). Example: "The user wants to know about our treatments."
Priority - Select 1 to 10. This controls which custom trigger fires if more than one could fire at the same time. Higher numbers are higher priority.
Sensitivity - Select Low, Medium, or High. This controls whether the custom trigger fires in the middle of the flow.
Low = The AI is unlikely to break the current flow and move the contact to the trigger.
Medium = The AI will decide whether the contact breaks the flow.
High = The AI will almost always break the contact out of the current flow and move to the Custom Trigger.
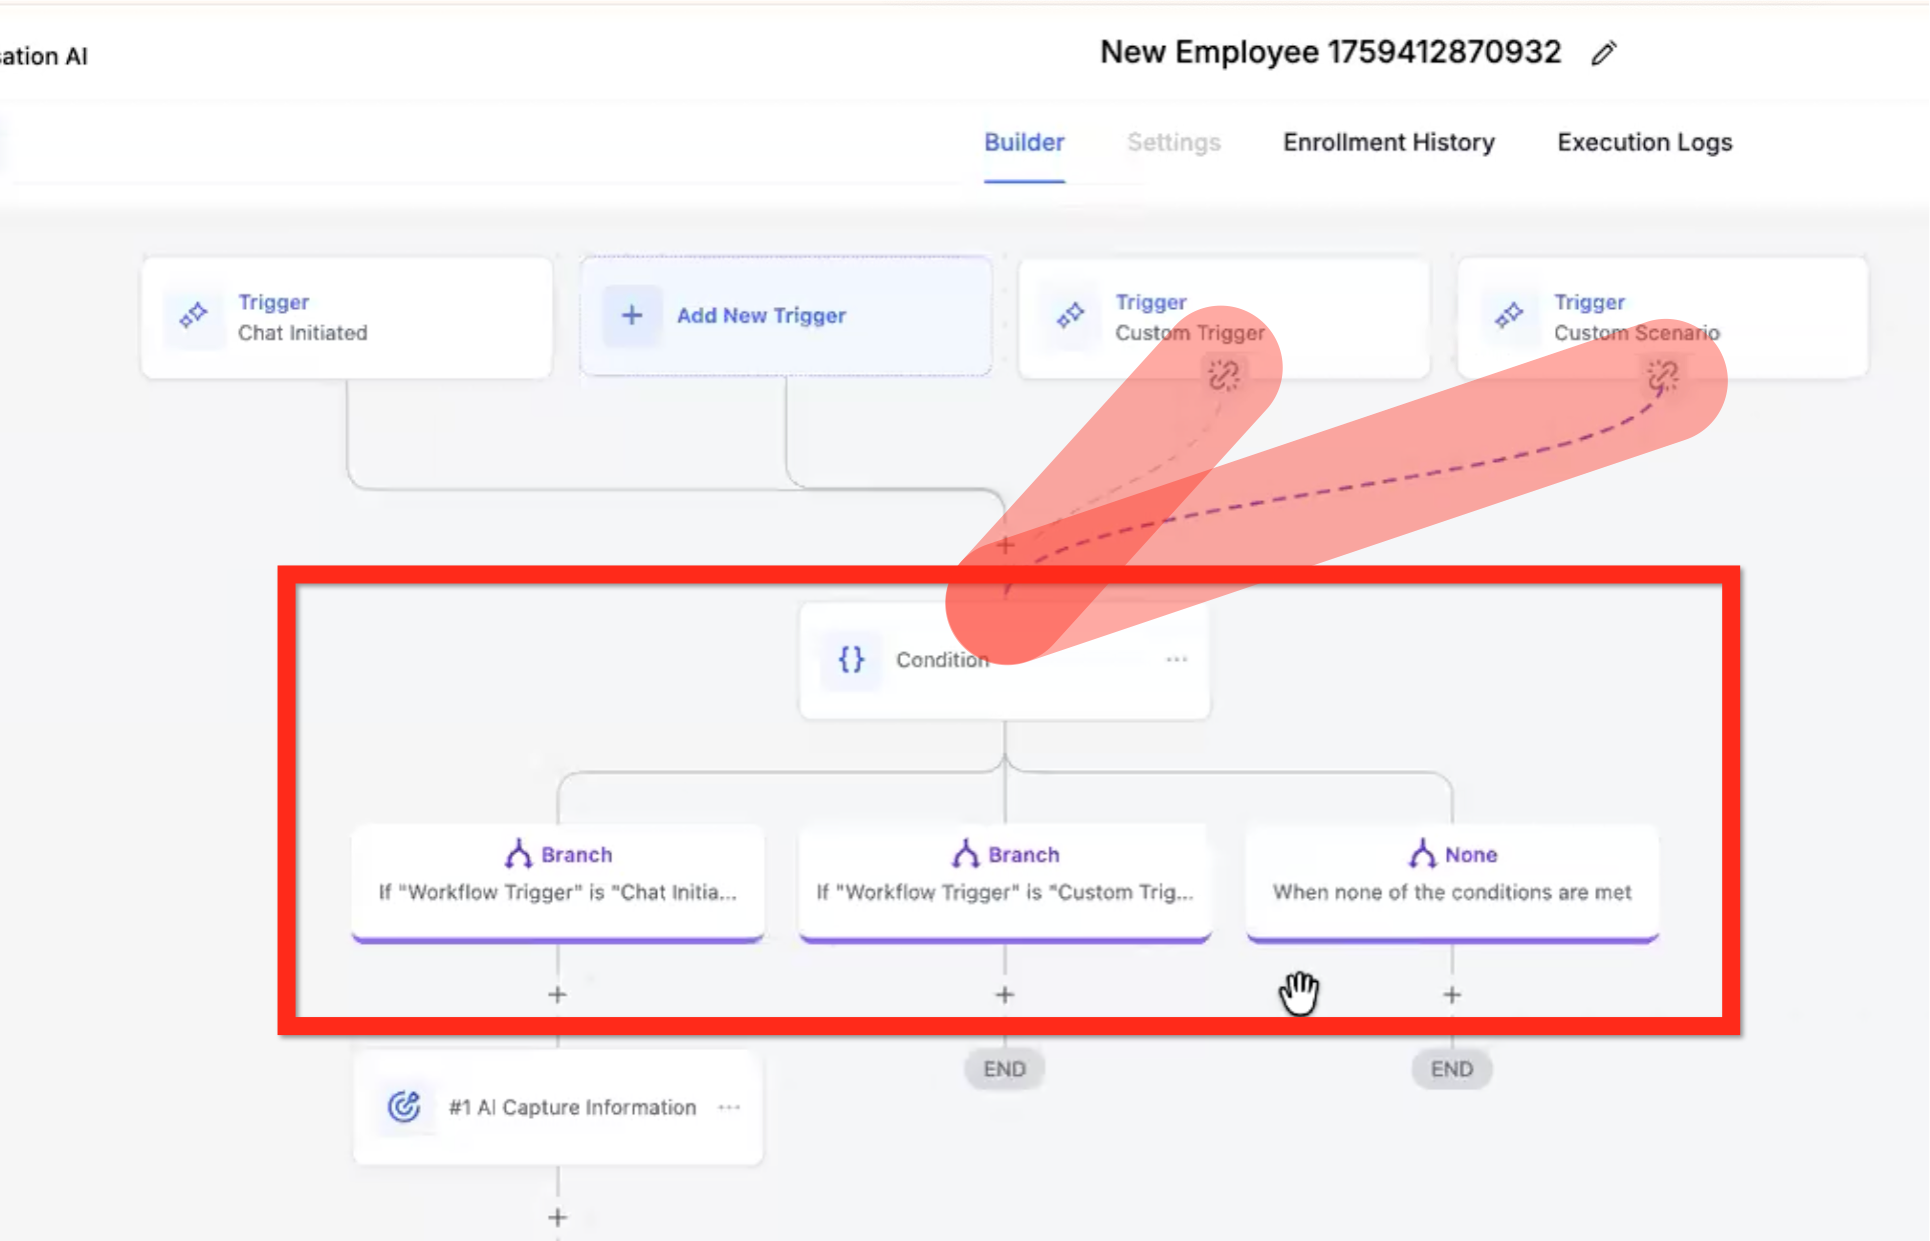
You can combine an If/Else with Custom Triggers to create a router. Reroute the Custom Triggers to flow into the If/Else Conditional and configure a path for each trigger.
Branch: Workflow Trigger Is Chat Initiated - Follow this path if the default Chat Initiated trigger was fired.
Branch: Workflow Trigger Is Custom Trigger 1 - Follow this path if Custom Trigger 1 was fired.
Branch: Workflow Trigger Is Custom Trigger 2 - Follow this path if Custom Trigger 2 was fired.
Branch: Workflow Trigger Is Custom Trigger 3 - Follow this path if Custom Trigger 3 was fired.
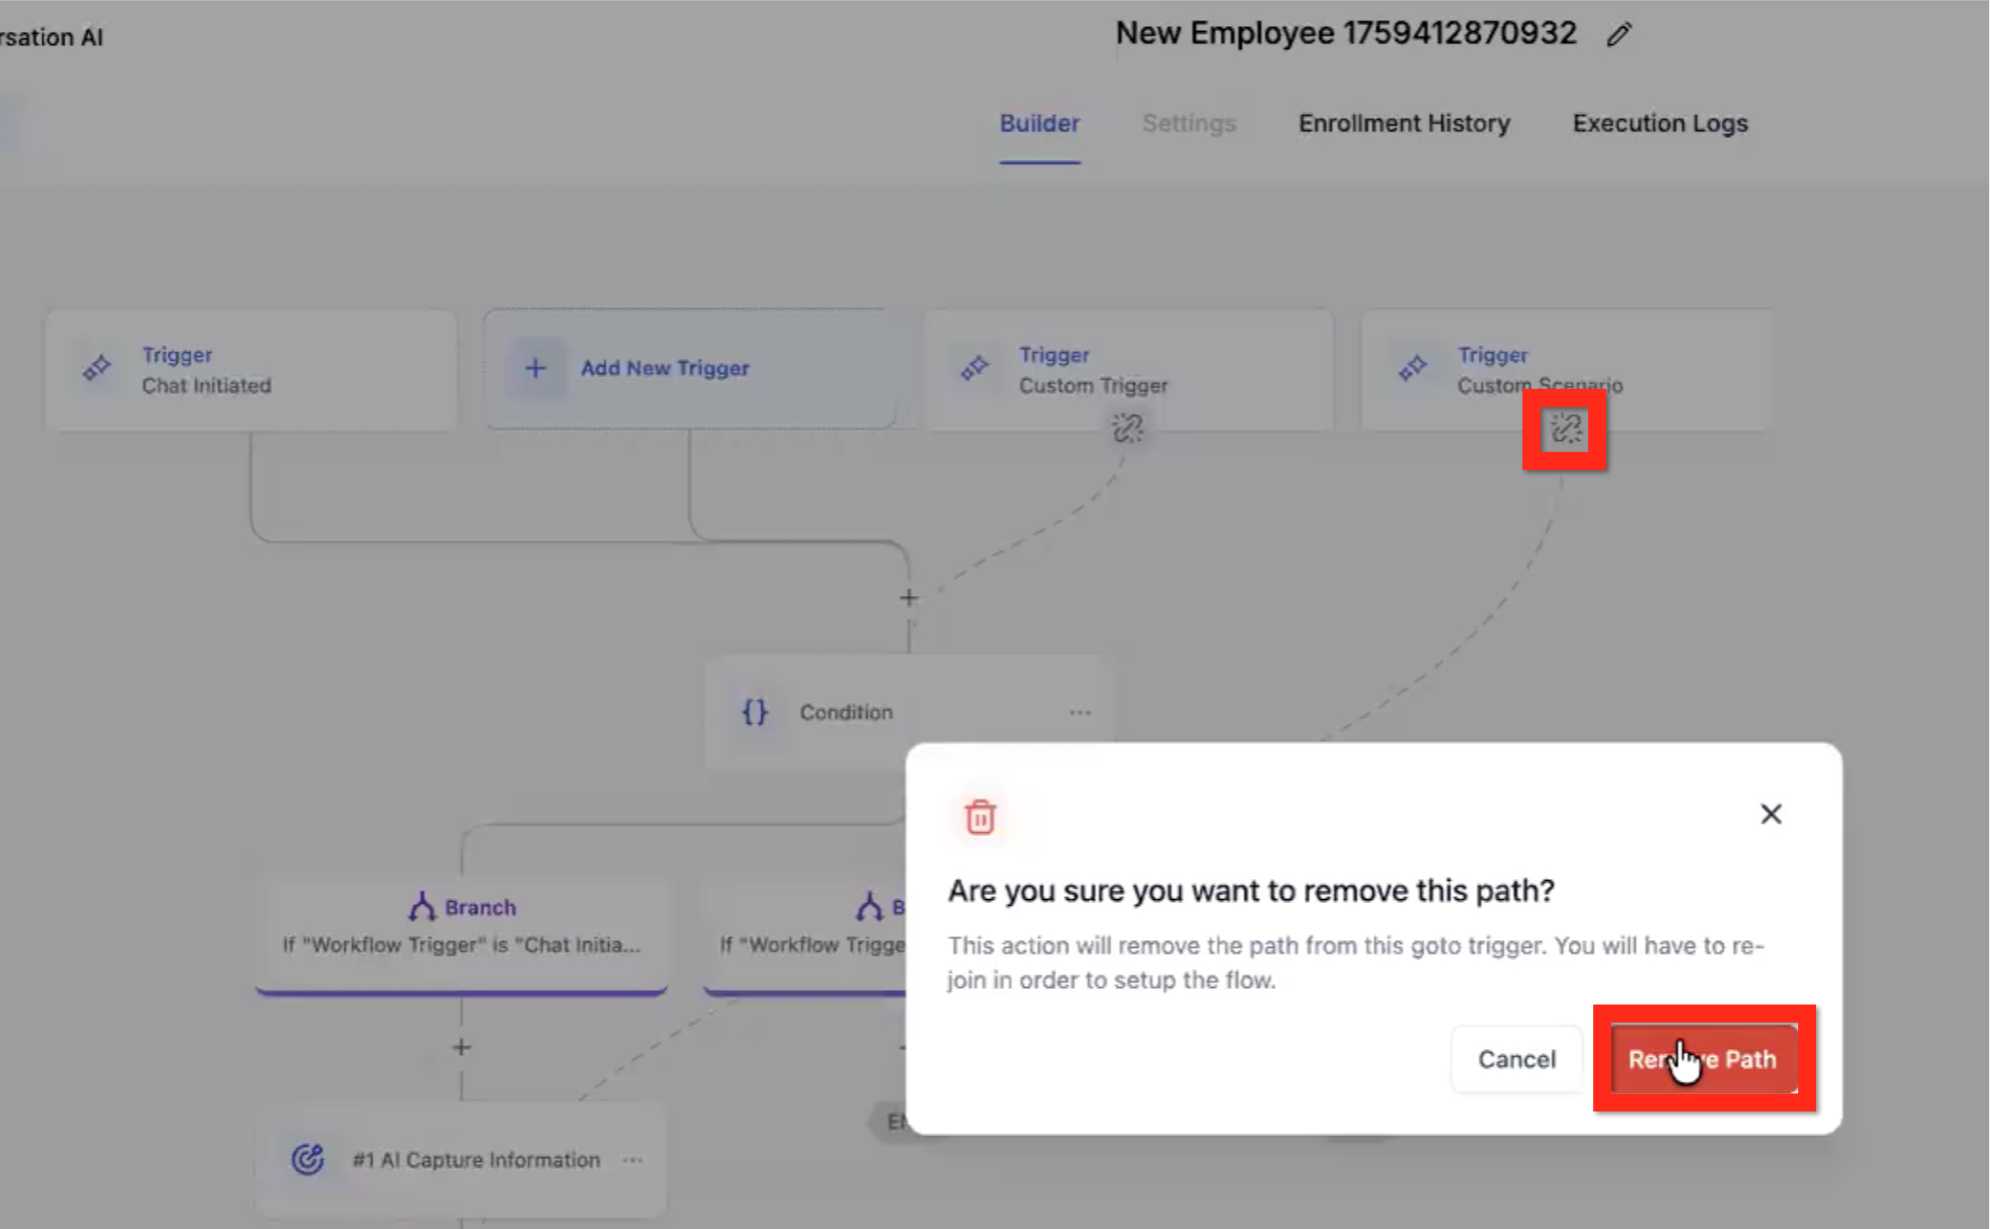
Click the break-link icon at the bottom of the Custom Trigger.
In the modal, click the Remove Path button.
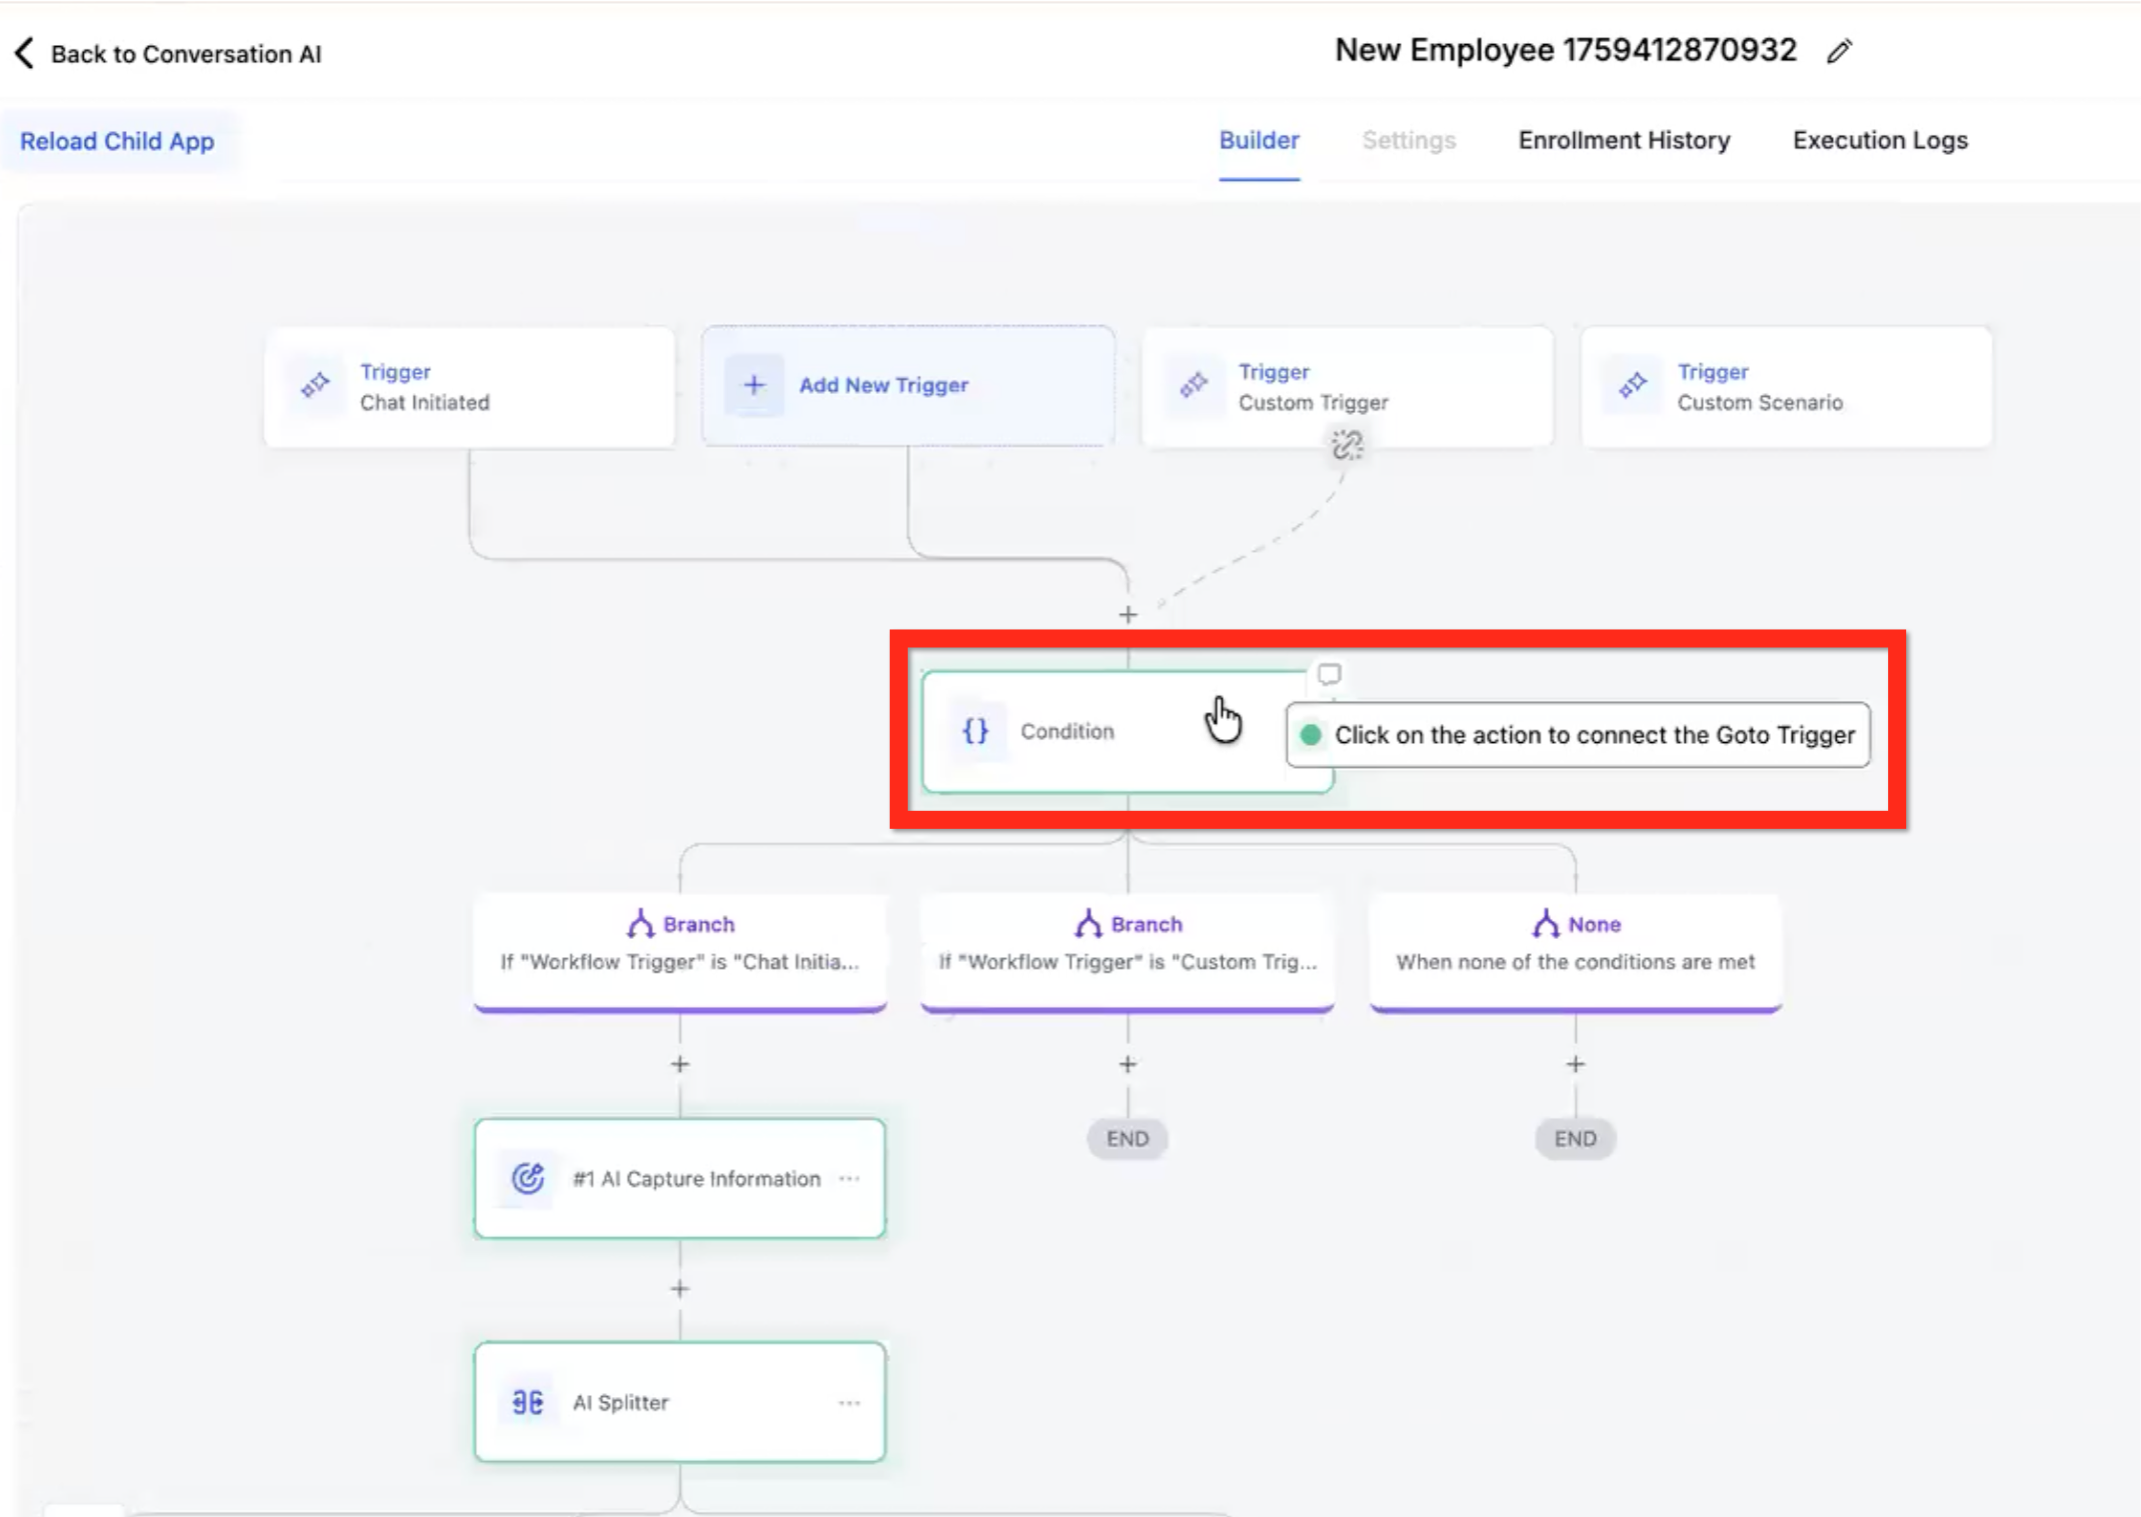
Click the action you want the new path to go to (acceptable options are highlighted in green).
Can a Flow Builder bot start from any trigger other than Chat Initiated?
Flow Builder bots start from Chat Initiated. Custom Triggers are used to route contacts after they meet the configured trigger condition.
Does reaching an [END] node stop the conversation completely?
No. An [END] node ends the current objective path, but the conversation can continue unless you use End Conversation or another stop condition such as max messages or timeout.
Which AI actions keep trying until the goal is completed?
Capture Information / Qualify and Book Appointment can loop until the objective is met or an exit condition is reached.
What is the difference between AI Message and Custom Message?
AI Message generates a response from your prompt and conversation context. Custom Message sends the exact text you write.
Can I send a contact from one bot to another inside the flow?
Yes. Use Transfer Bot to move the contact to another bot. The contact exits the current flow unless another transfer sends them back.
For current pricing, see the pricing page.
