Conversational AI does its best work when you pair it with Workflows. From inside a workflow you can have your AI agent send a message and wait for the contact's reply, route the conversation down different paths based on what they say, assign the right agent to the right contact, and automatically follow up when someone goes quiet. This guide walks through each of those building blocks, helping your team streamline communication, scheduling, and lead follow-up.
If you are new to building workflows, start with the Workflows overview, then come back here to add AI to your automations.
Note on PHI: Don't enter protected health information (PHI) into Conversational AI. AI features aren't approved for processing PHI — use them for productivity, communication, scheduling, and engagement, not to store or process medical records. See the HIPAA Compliance guide for details.
The Conversation AI action sends a single AI-generated message to a contact, waits for their reply, and then routes the workflow based on how they respond. It uses your agent's prompt settings and training to craft the message, and it supports branching so you can send each outcome down its own path.
Targeted outreach: Ask a specific question and wait for a direct reply from the contact.
Smart routing: Evaluate the contact's response against branches and conditions to guide next steps.
Prompt-aware replies: Combine Personality, Additional Instructions, the Question, training data, and conversation history for context.
Channel choice: Send on a selected channel (SMS, Facebook, WhatsApp, Live Chat, or Instagram).
Follow these steps to add the action to a workflow and configure it for consistent, predictable outcomes.
Log in to your account.
Go to Automations > Workflows.
Create a new workflow or open an existing one.
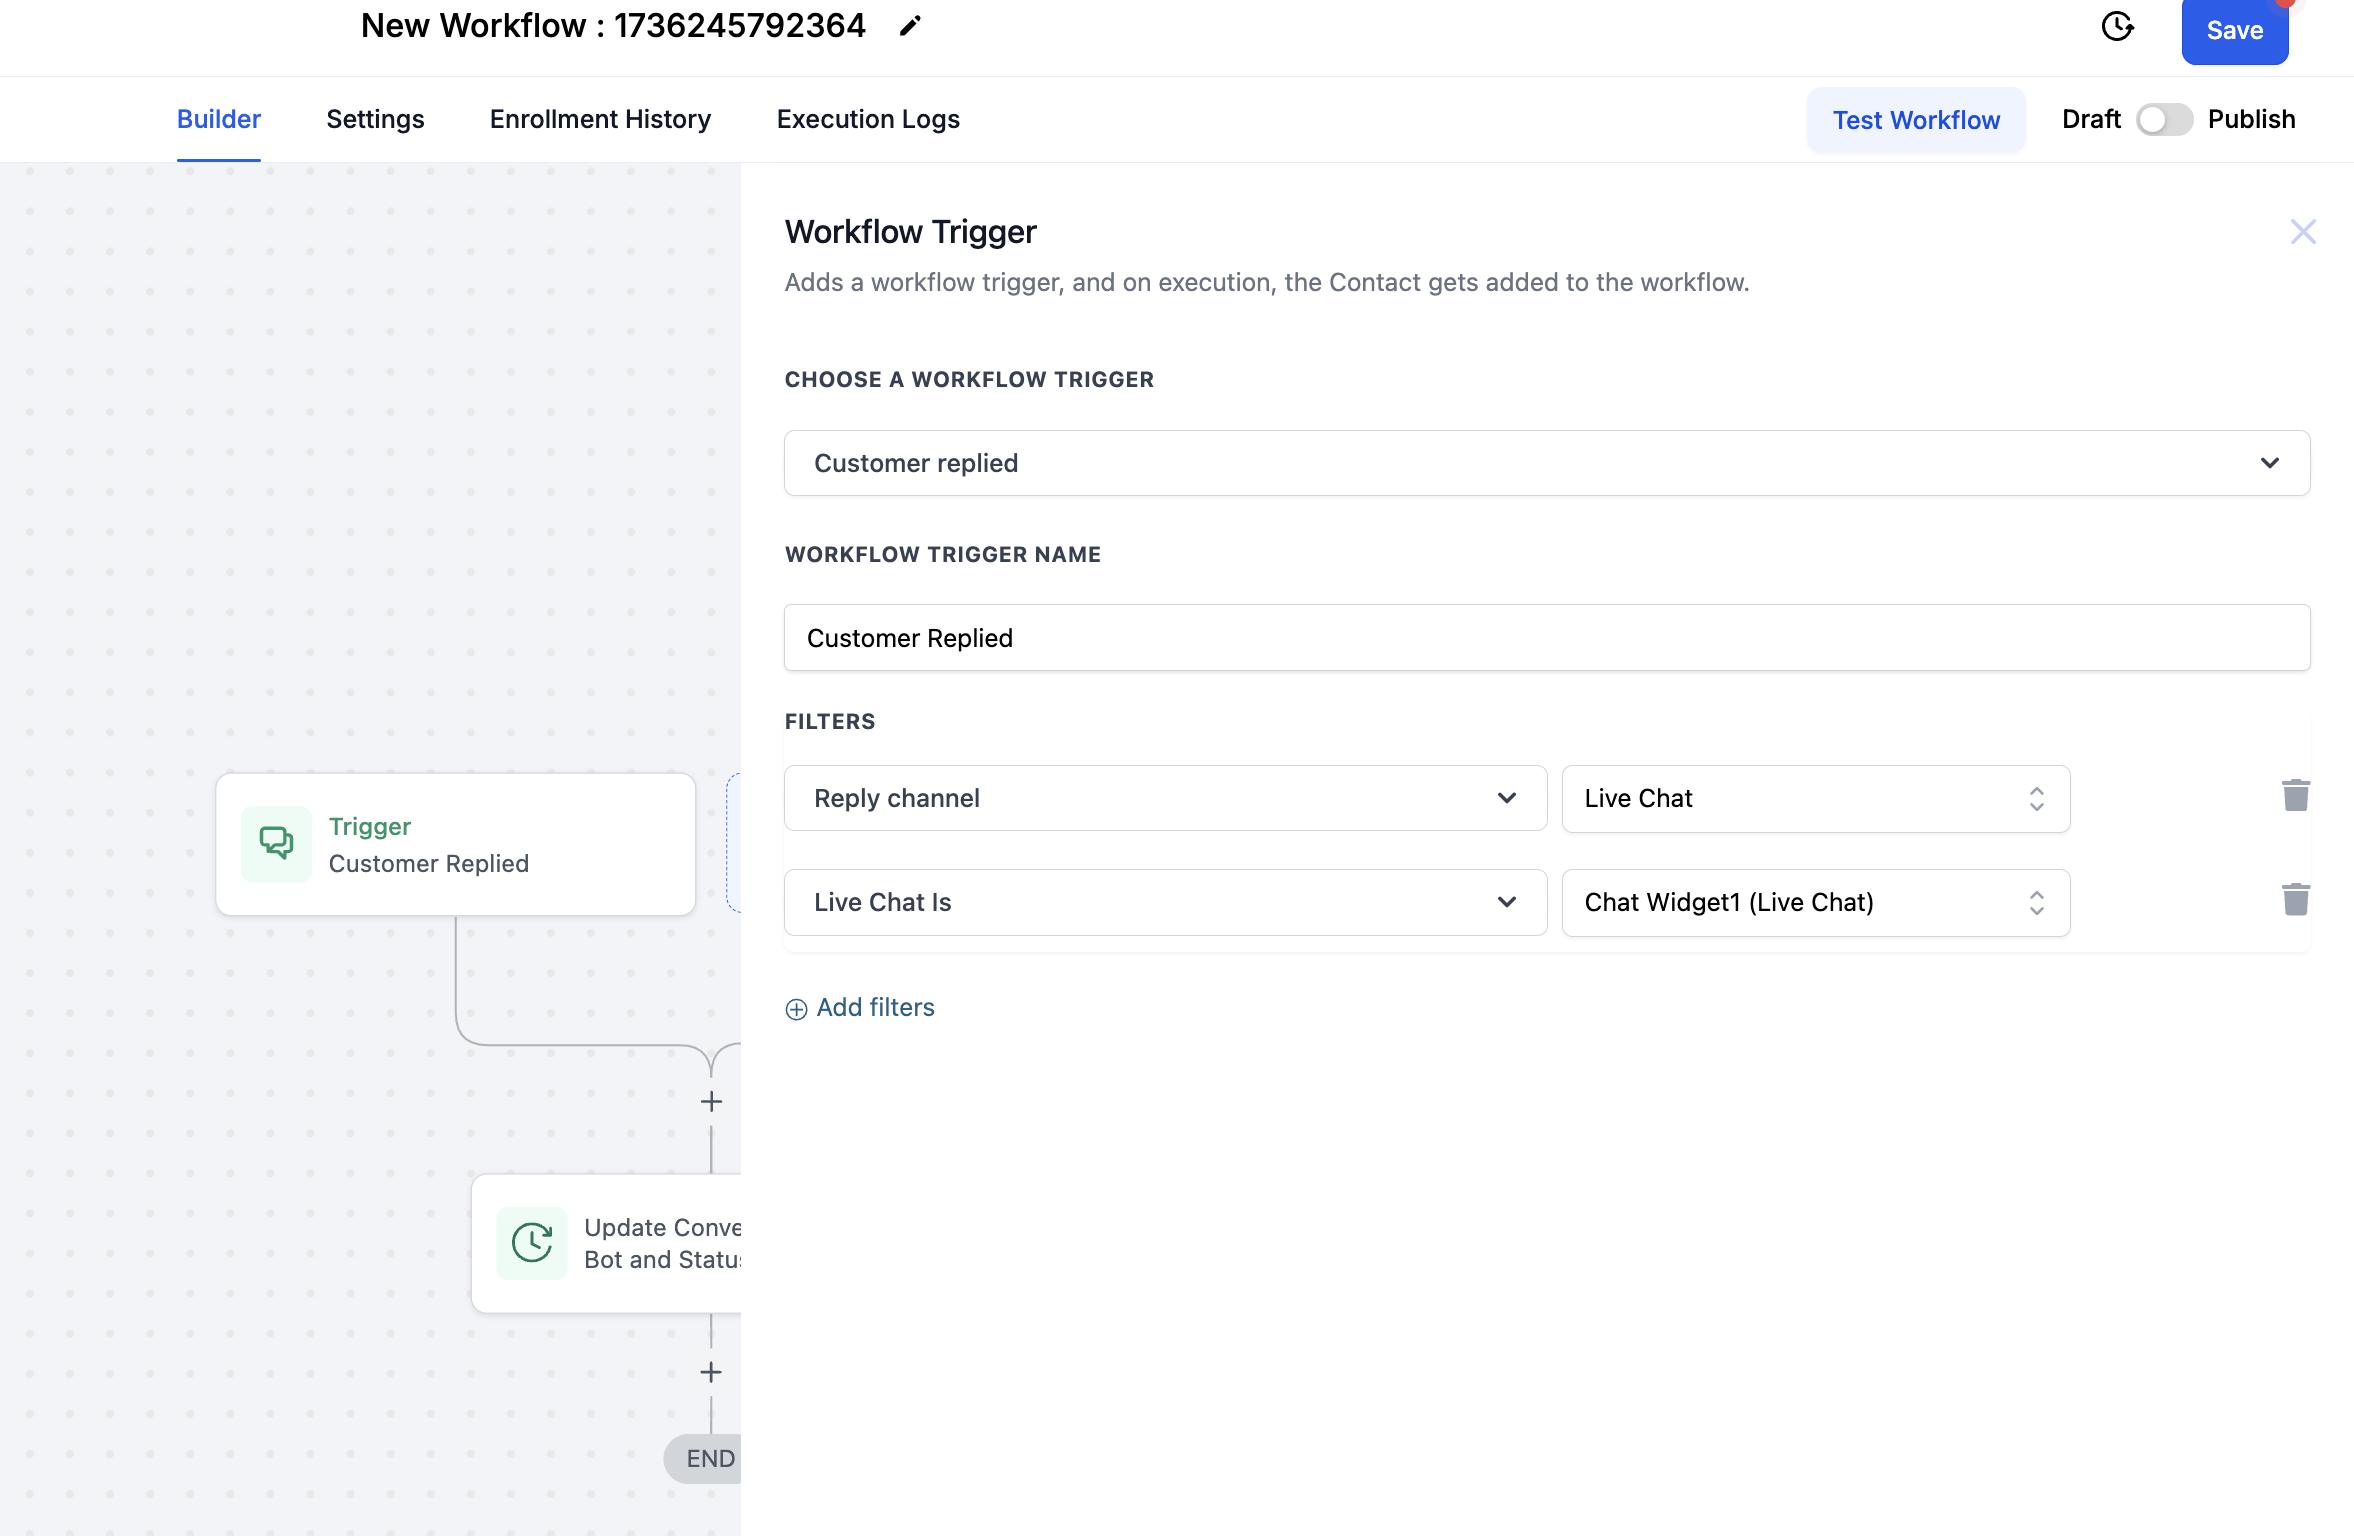
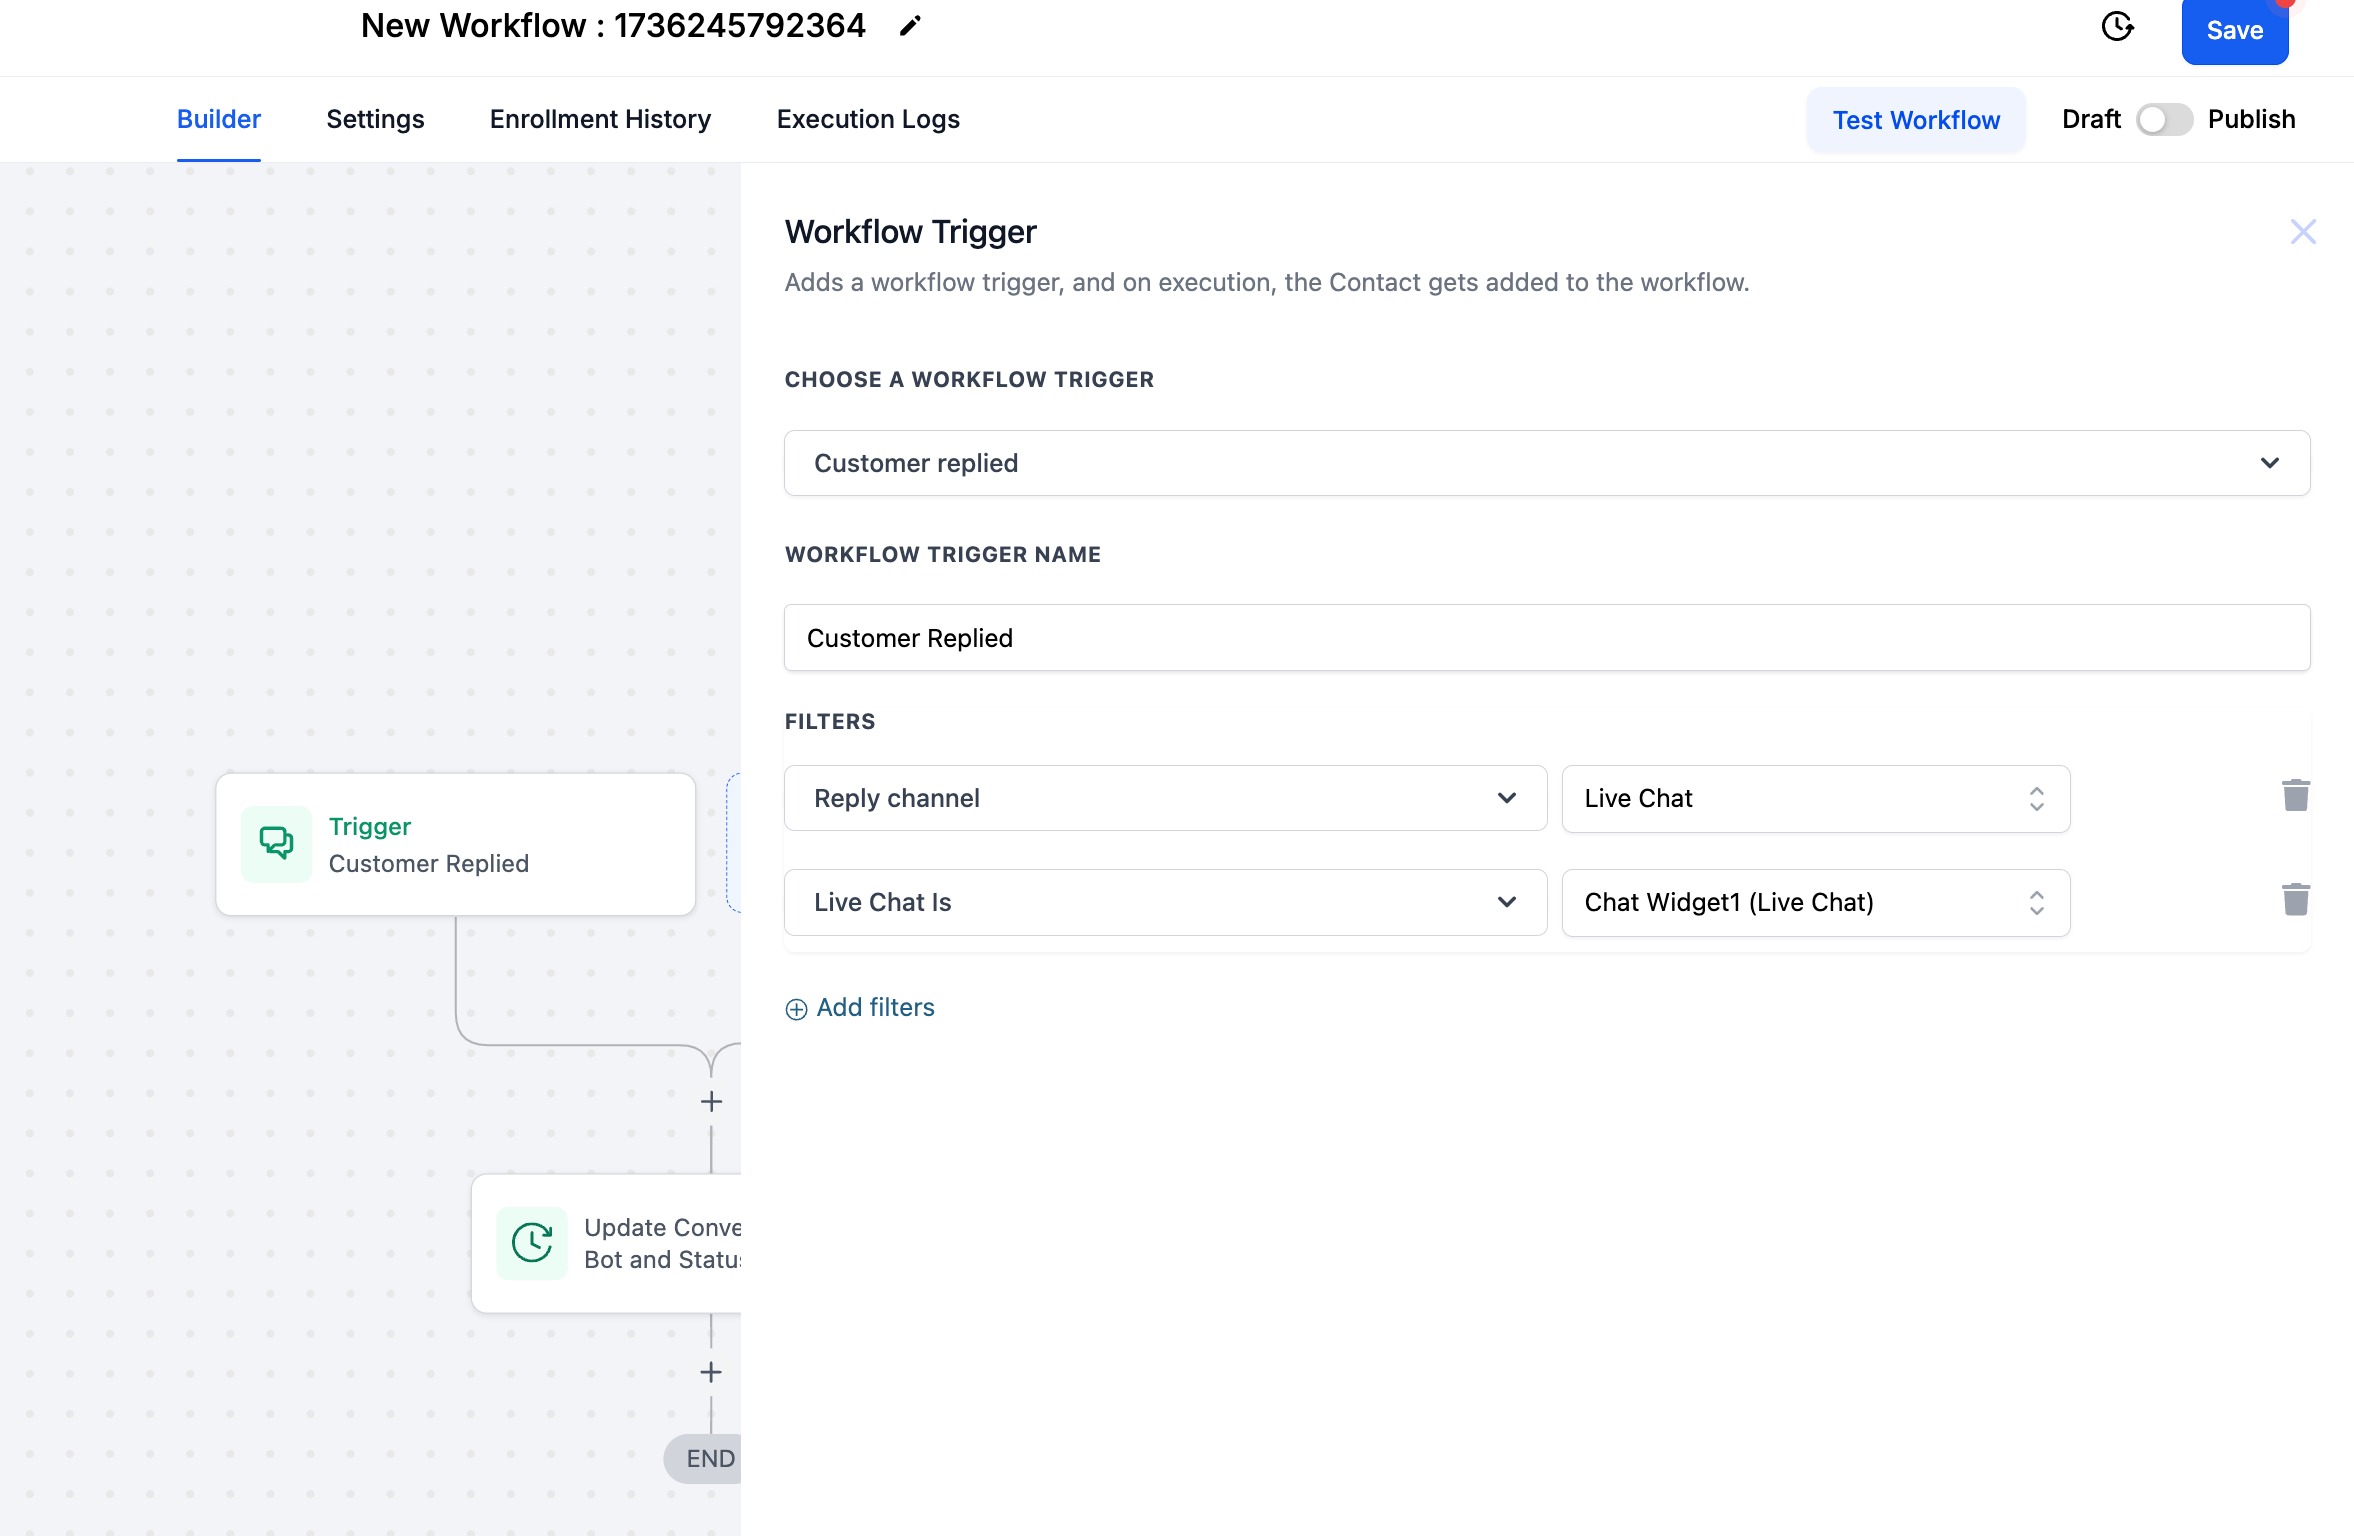
Click + Add New Trigger to add a trigger (for example, Customer Replied). If needed, set the Reply Channel (for example, SMS).
Click + to add an Action, search for Conversation AI, select the Conversation AI action, and name it.
Toggle Advanced Bot Configuration if you want to override the agent's defaults:
Personality — define the tone and style of the replies (for example, "Friendly and Professional").
Additional Instructions — goals, intents, and guidance, including how to handle sensitive topics. If left off, the action uses the agent's existing configuration.
In Question, enter the message the agent should send. You can use custom values to tailor the message dynamically to each contact.
Set Timeout (how long to wait for a reply) in minutes, hours, or days, so the workflow does not stall indefinitely.
Choose Channel (one per action): SMS, Facebook, Instagram, WhatsApp, or Live Chat.

Turn on Skip if answered to bypass this action when the question has already been answered manually, preventing redundant messages.
Set Bot responses limit (the maximum number of AI messages before the workflow routes to No Condition Met if nothing matches).
Set Wait time in seconds (a short delay before the agent replies so it can collect any incoming messages first).
Configure Branches & Conditions:
Time Out and No Condition Met are always present and cannot be removed.
Add additional branches and define clear matching conditions for each outcome.
Click Save Action.
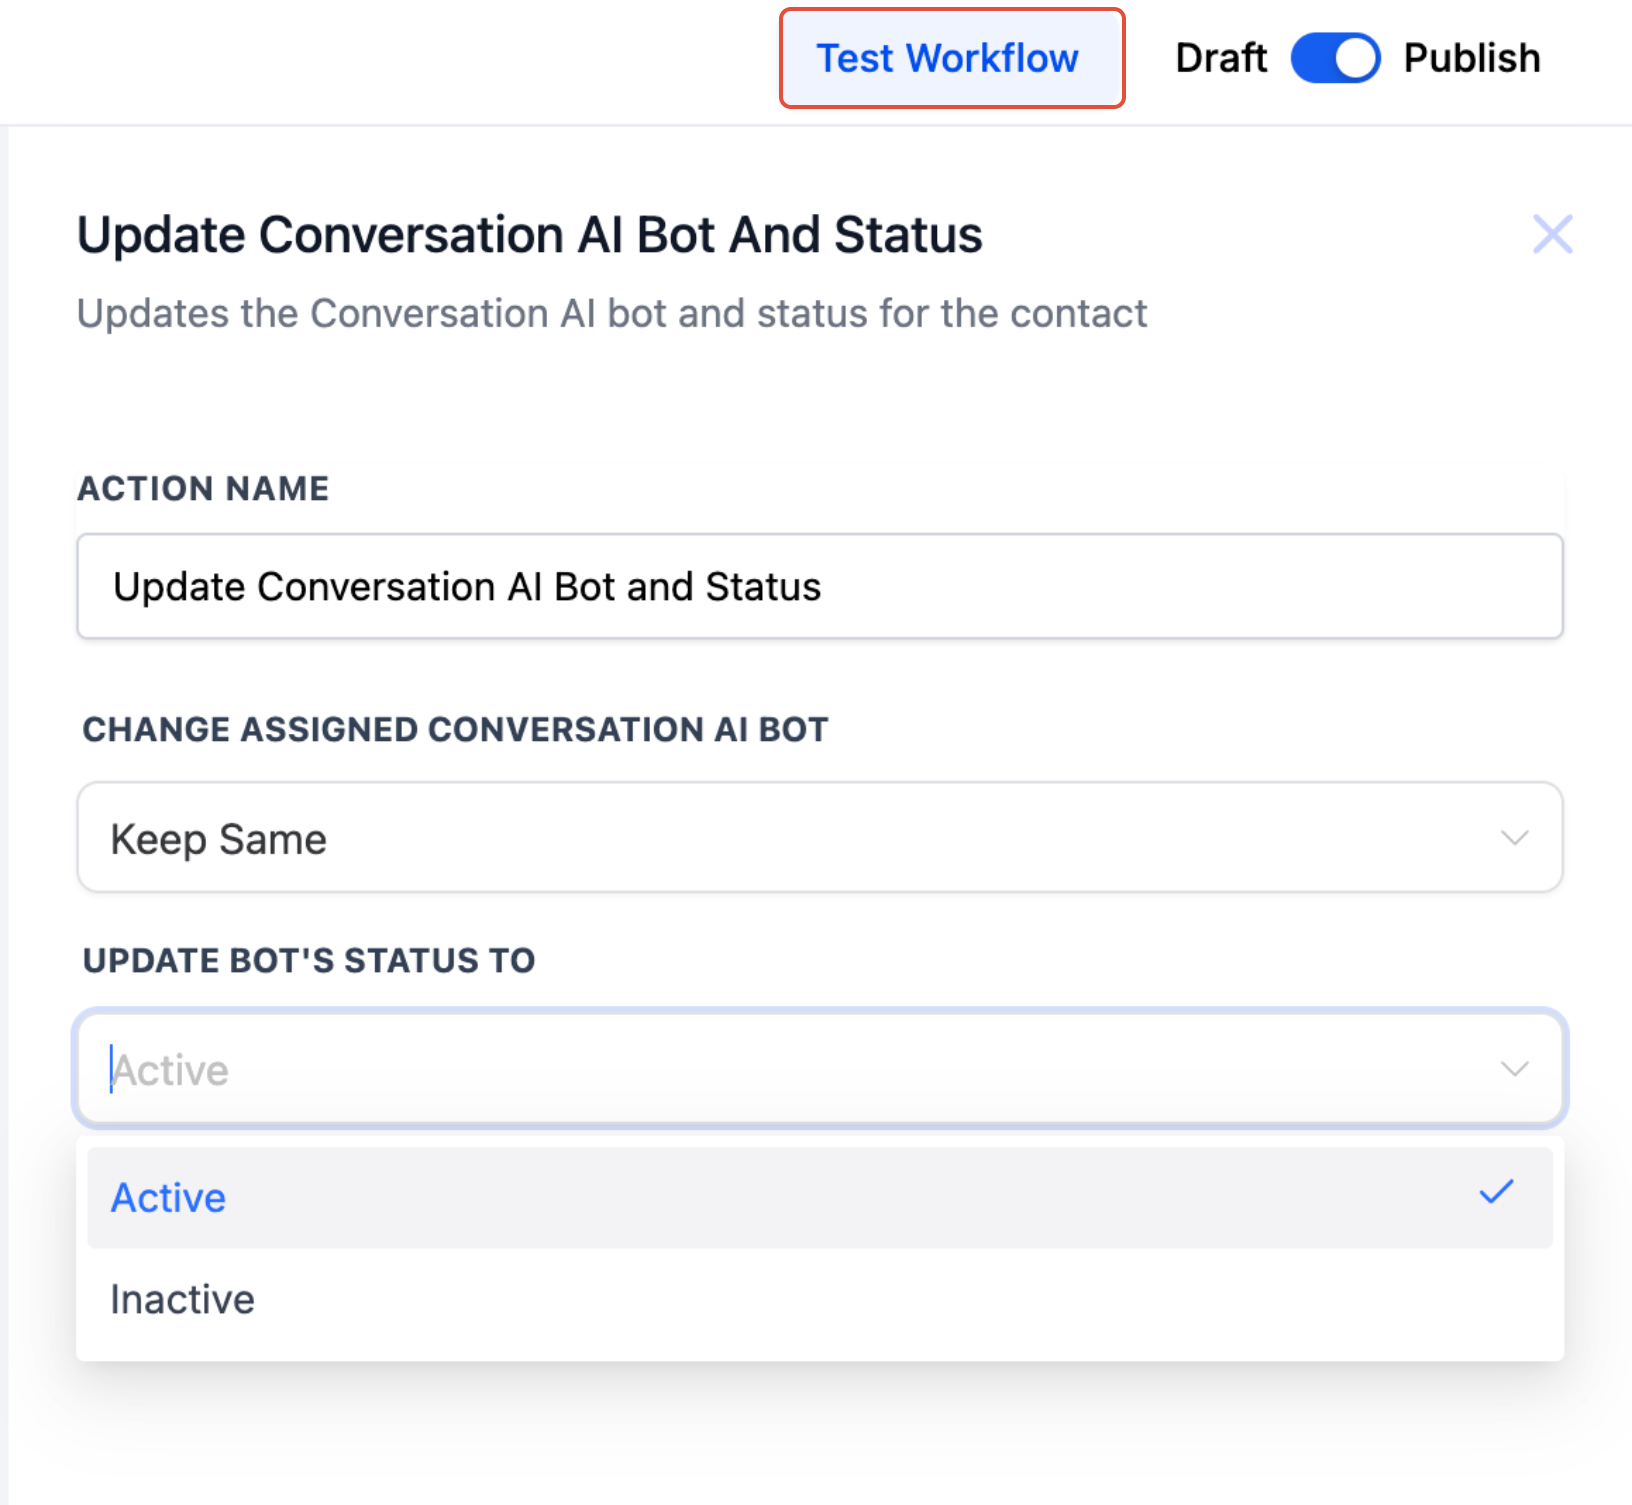
Use Test Workflow to validate the action before going live (optional but recommended).
Publish the workflow and Save.
Trigger: New Message Received
Condition: Message received from Facebook
Action: Conversation AI
Question: "How can I assist you today?"
Personality: Friendly and Professional
Channel: Facebook
Branches:
No Condition Met — the contact did not respond with a relevant query → send an automated follow-up message.
Time Out — the agent times out after 1 hour → notify a team member to follow up.
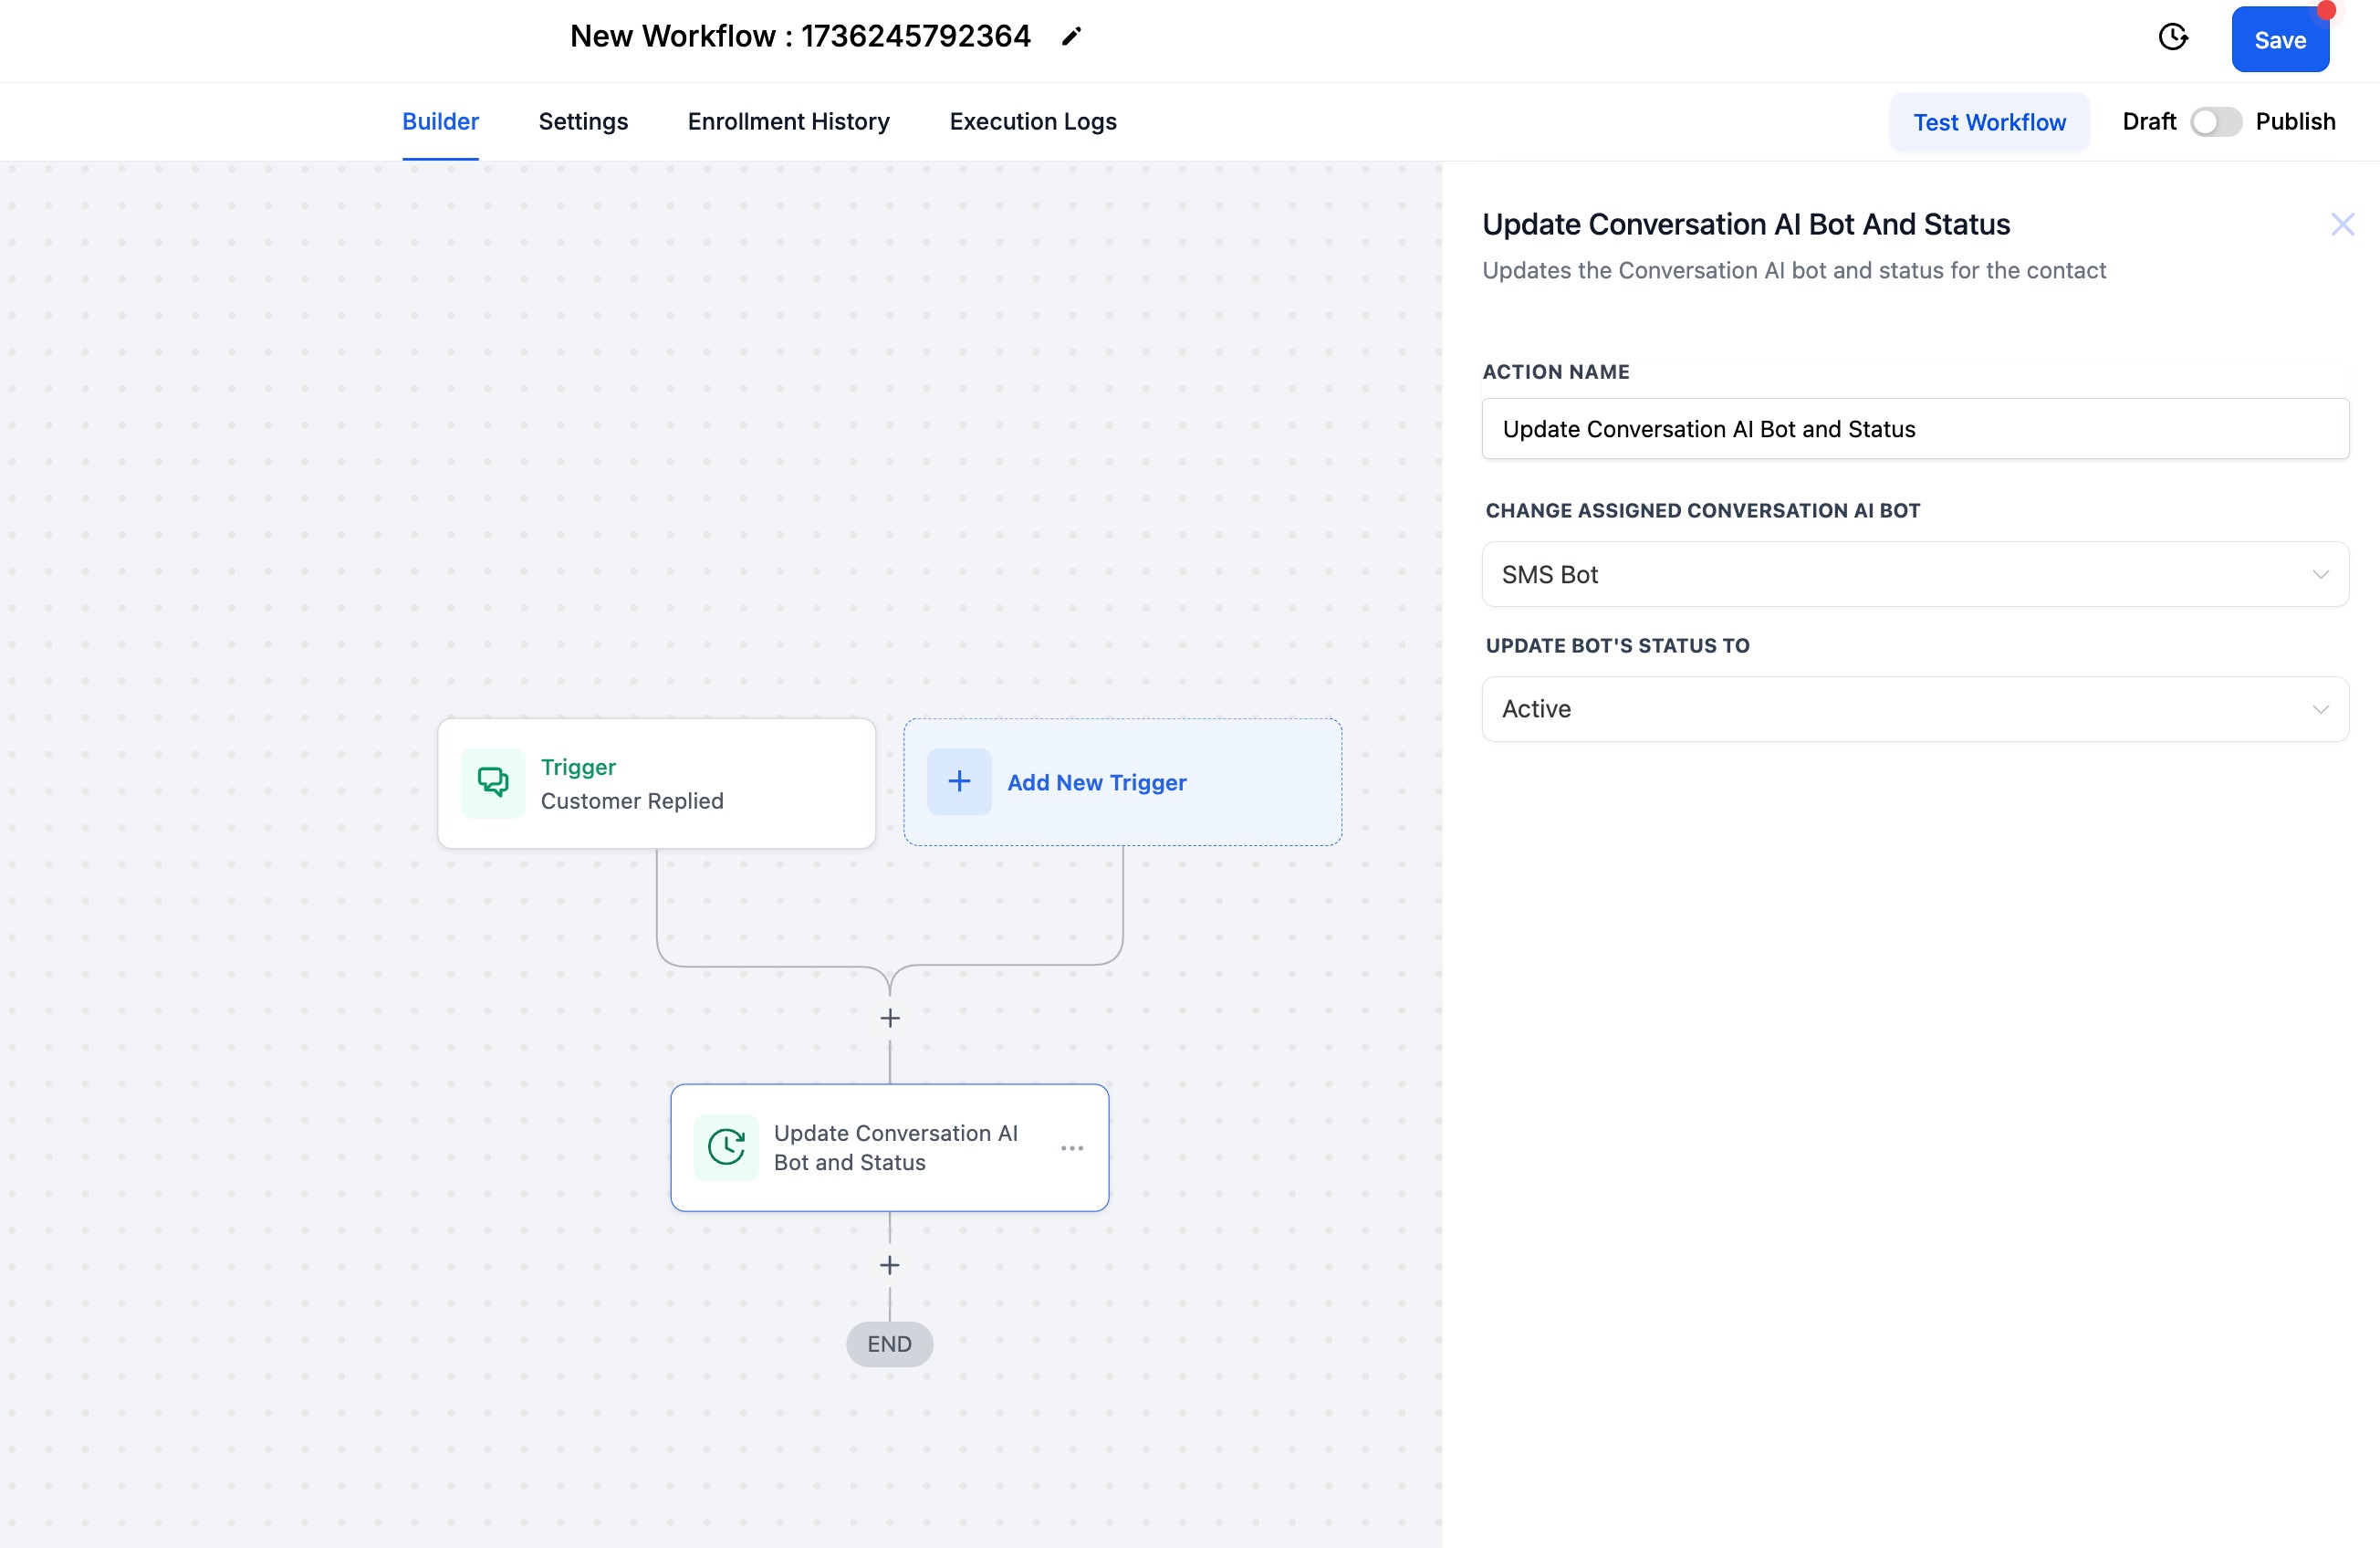
The Update Conversation AI Bot and Status action assigns a specific Conversational AI agent to a contact and sets that agent's status to Active or Inactive — all automatically, based on triggers and conditions. This gives you precise, per-contact control over which agent talks to whom and when, without manual updates.
Automated assignment: Assign agents without manual intervention.
Personalized experiences: Match agents to a contact's behavior or lifecycle stage.
Channel optimization: Route conversations to the correct agent per channel.
Improved efficiency: Reduce the manual management of conversations.
Scalable automation: Handle large volumes of interactions seamlessly.
Bot Assignment: Select a specific agent, or keep the current one.
Status Control: Set the agent to Active or Inactive.
Keep Same: Leaves the currently assigned agent unchanged — nothing changes and the existing agent continues to apply.
Step 1: Add the workflow action
Open your workflow.
Click to add a new action.
Select Update Conversation AI Bot and Status.
Step 2: Configure action settings
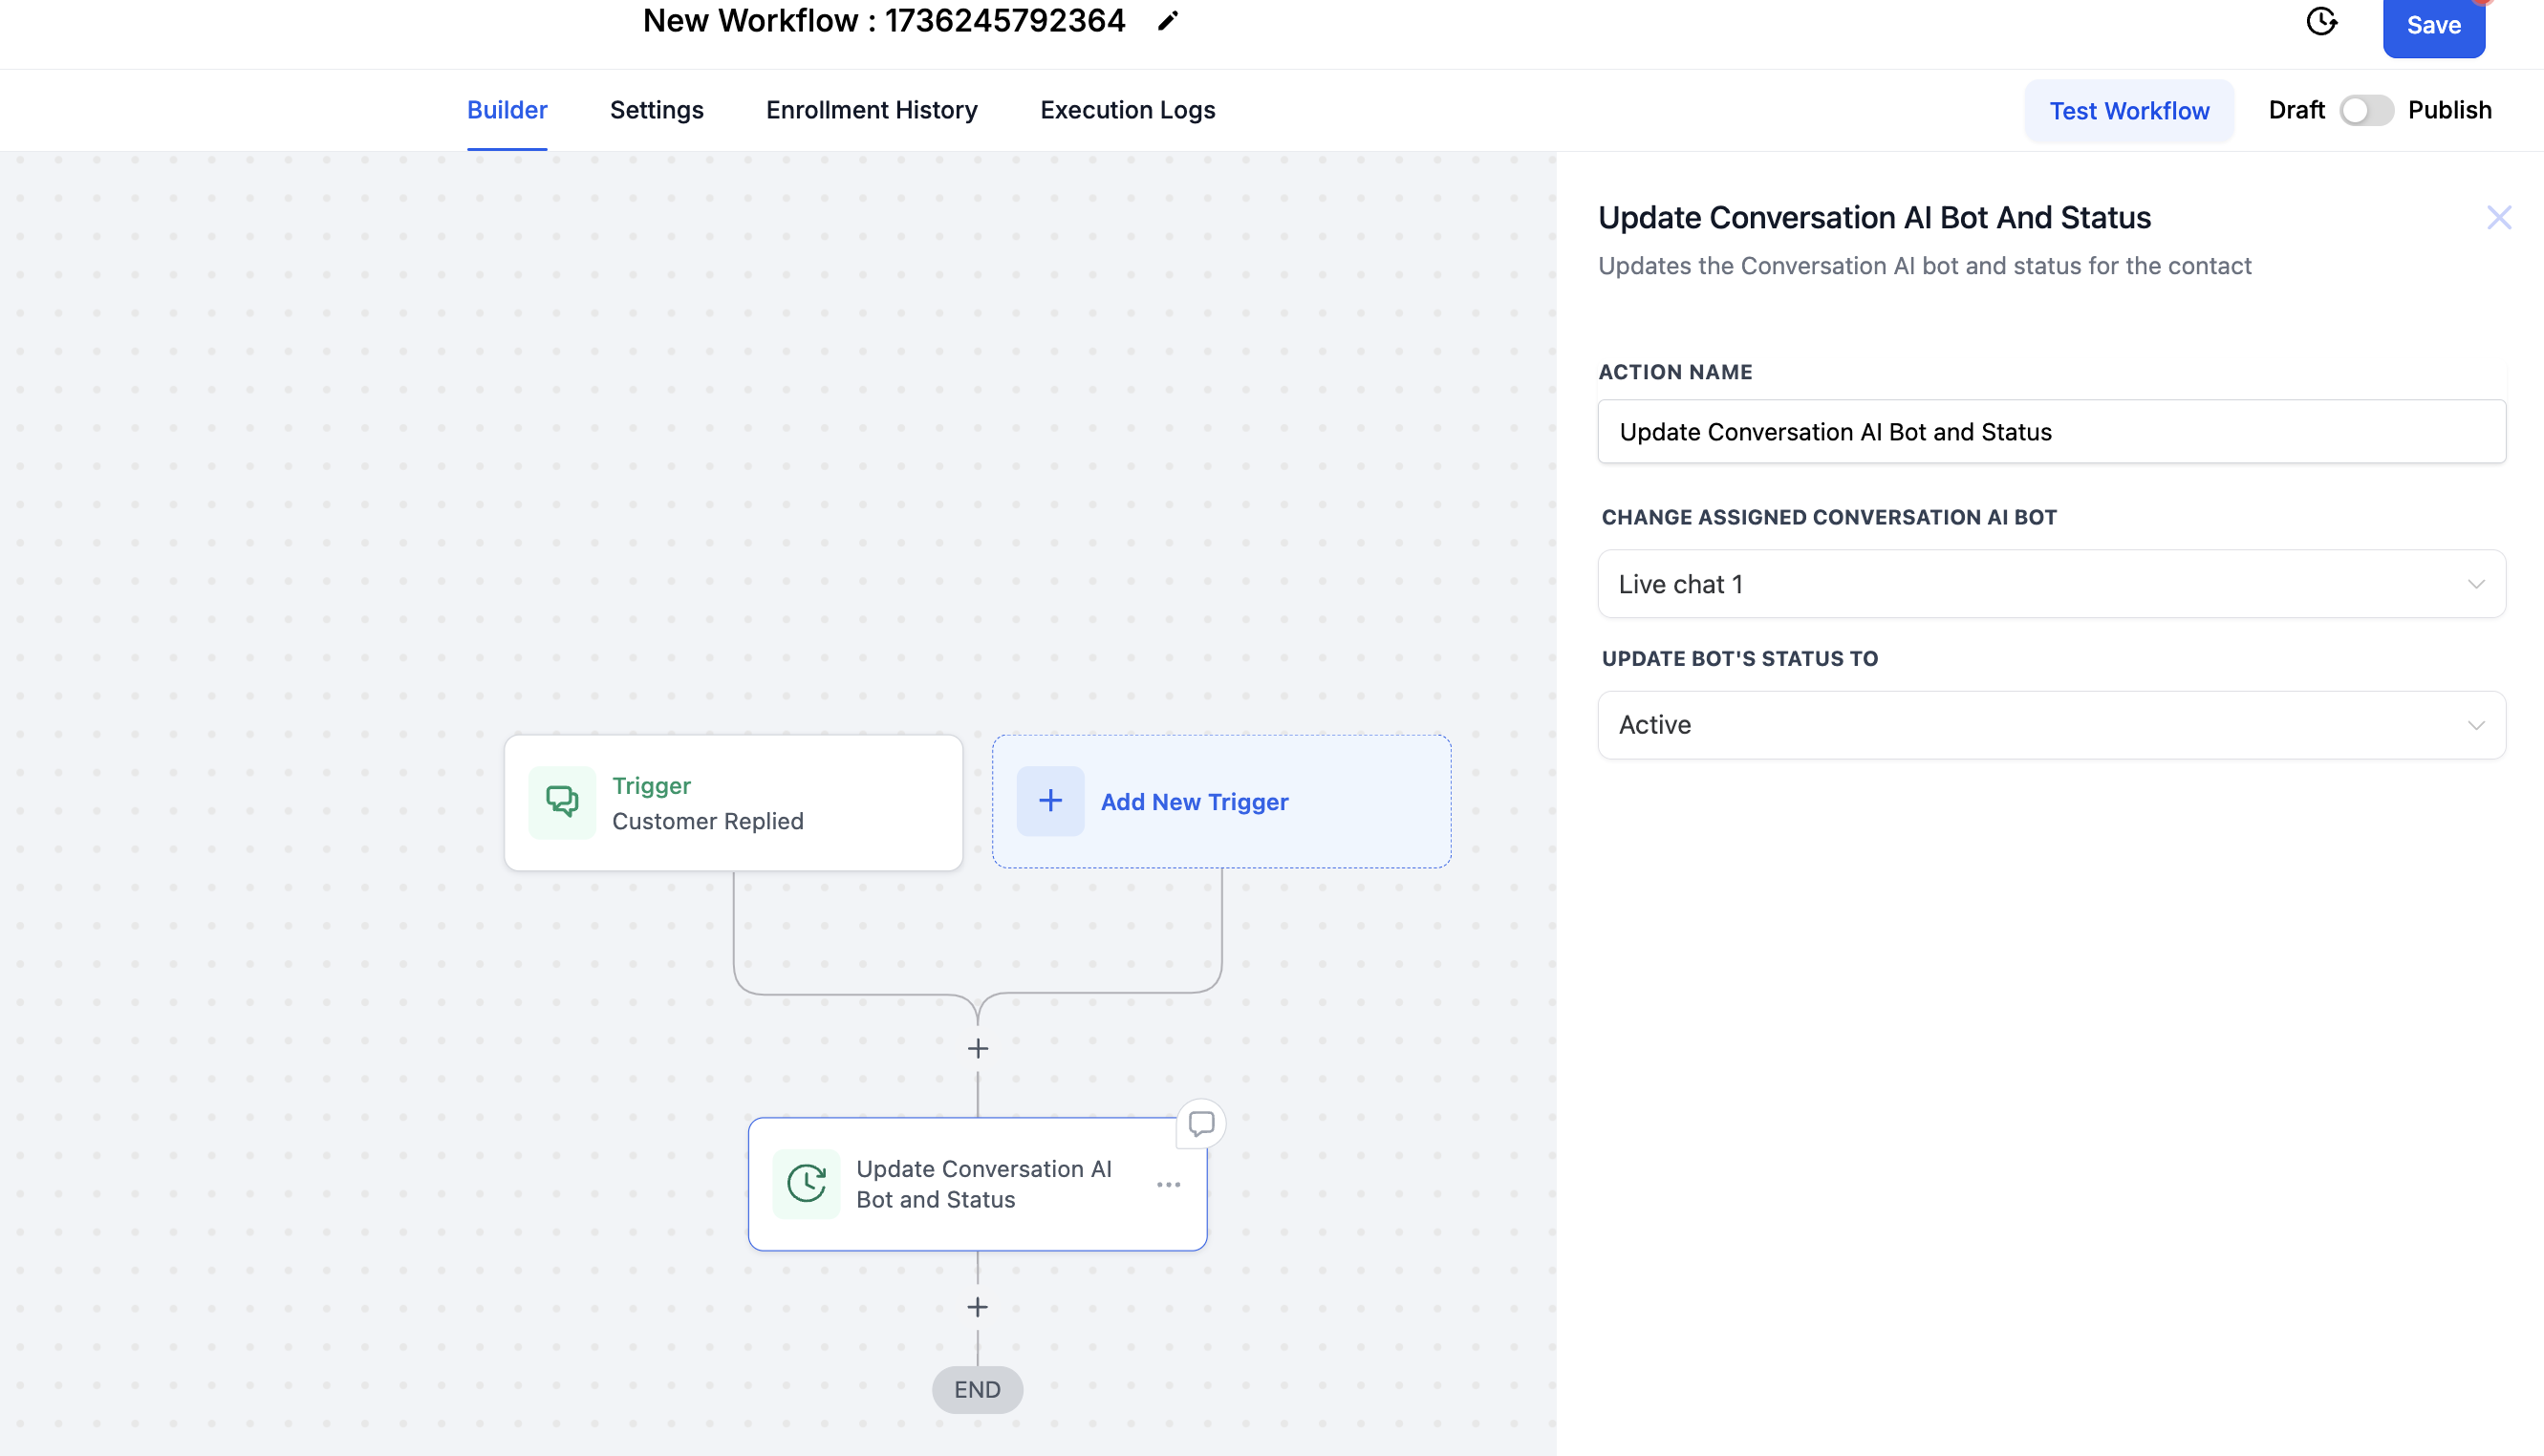
Enter or confirm the action name.
Locate the bot assignment and status fields.
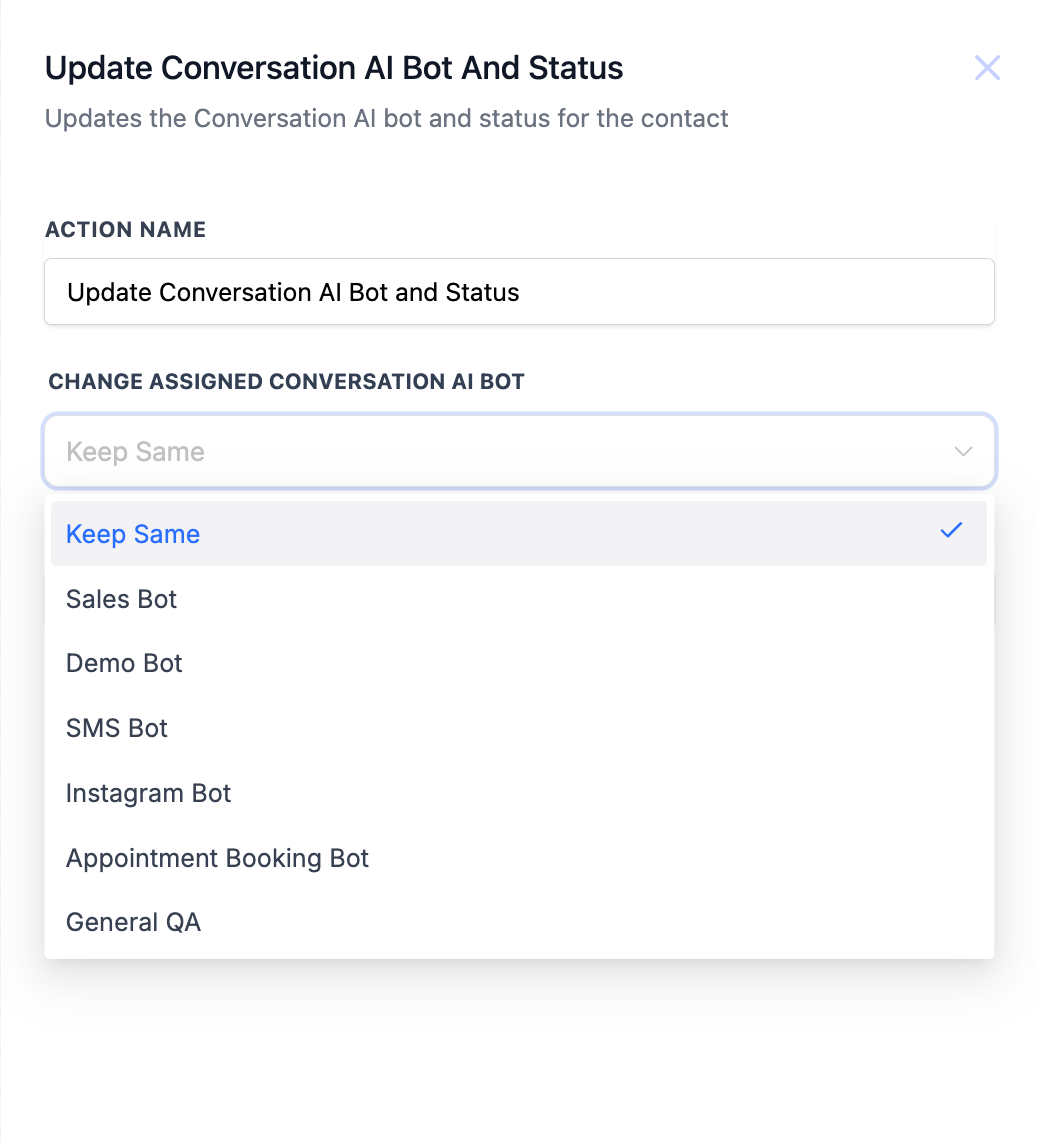
Step 3: Choose the bot assignment option

Select a specific agent from the list, or choose Keep Same to retain the current one.
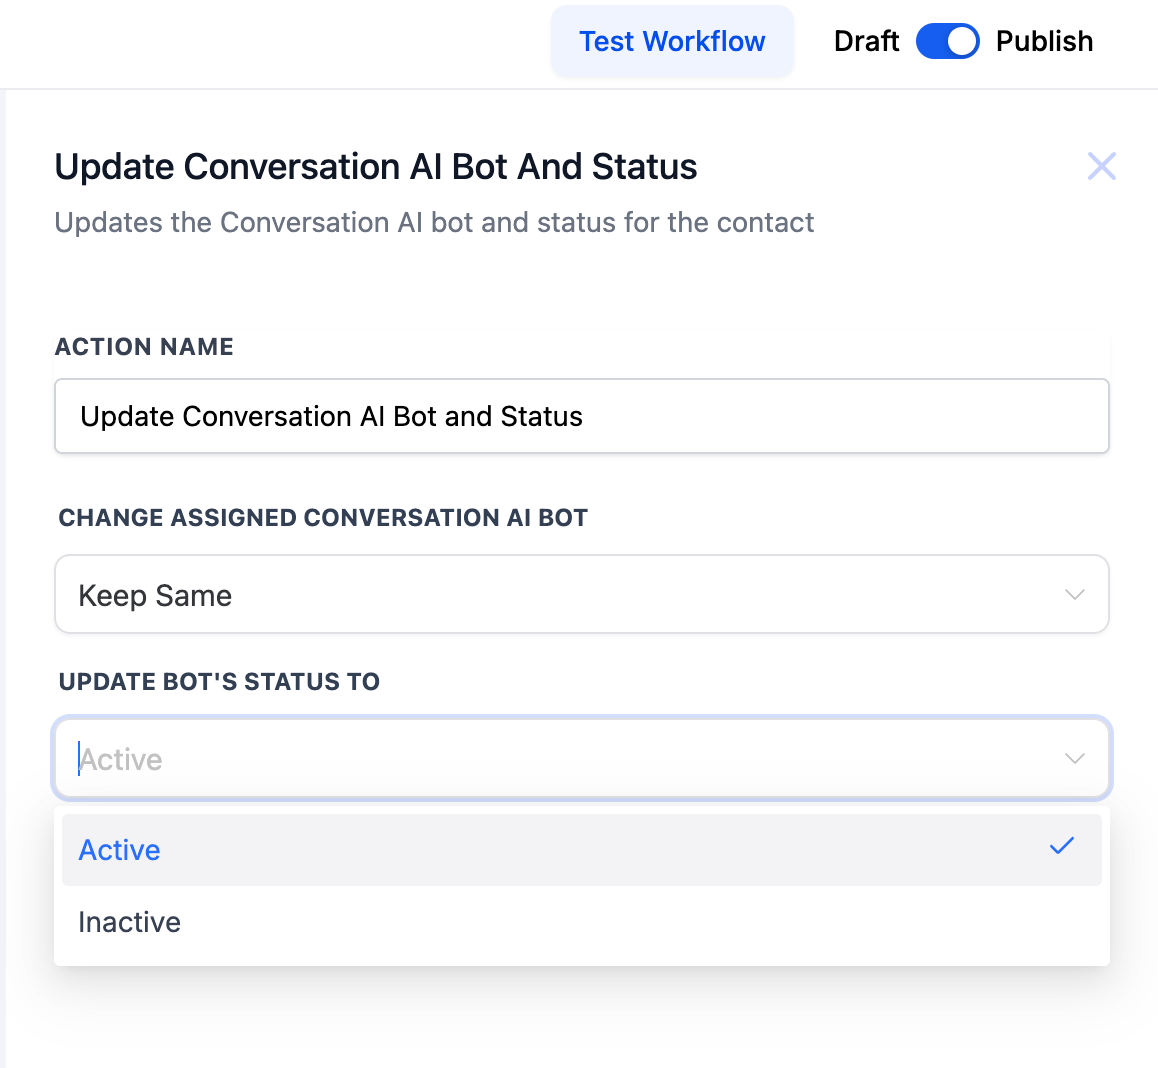
Step 4: Set the bot status
Choose Active to enable the agent, or Inactive to disable it.
Step 5: Save and apply the workflow
Click Save.
Publish the workflow to activate the automation.
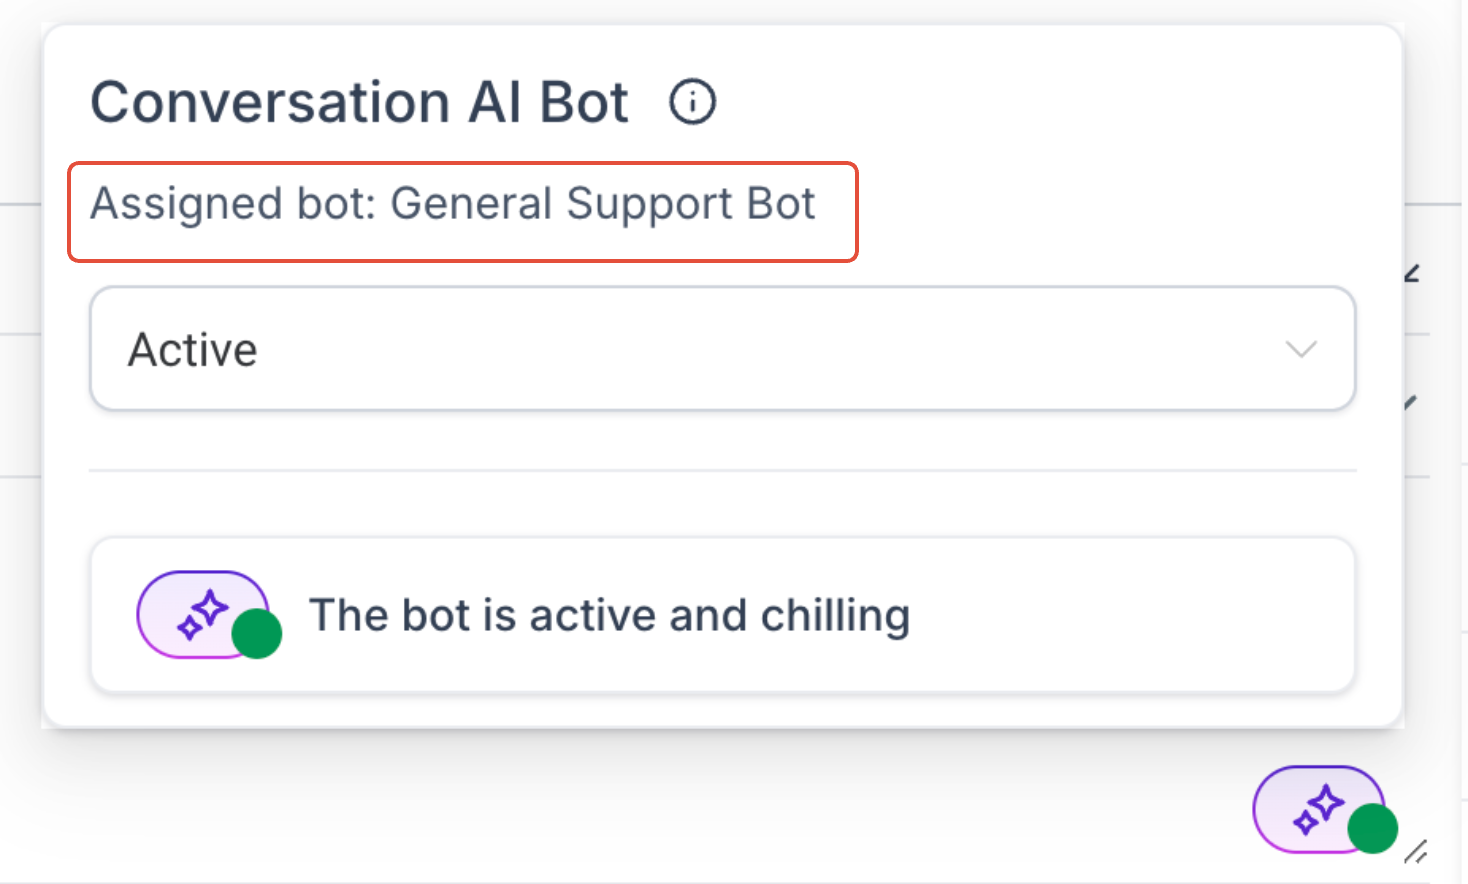
After an agent is assigned, you can see it on the contact in the Inbox conversation view.
Open a contact record.
Navigate to the conversation view.
View the assigned agent and its status.

Example 1: Assign a dedicated agent per communication channel
Different channels may need different agents for the best responses. For example, to assign a dedicated agent for SMS:
Create a workflow.
Select the trigger — for example, Customer replied via SMS.
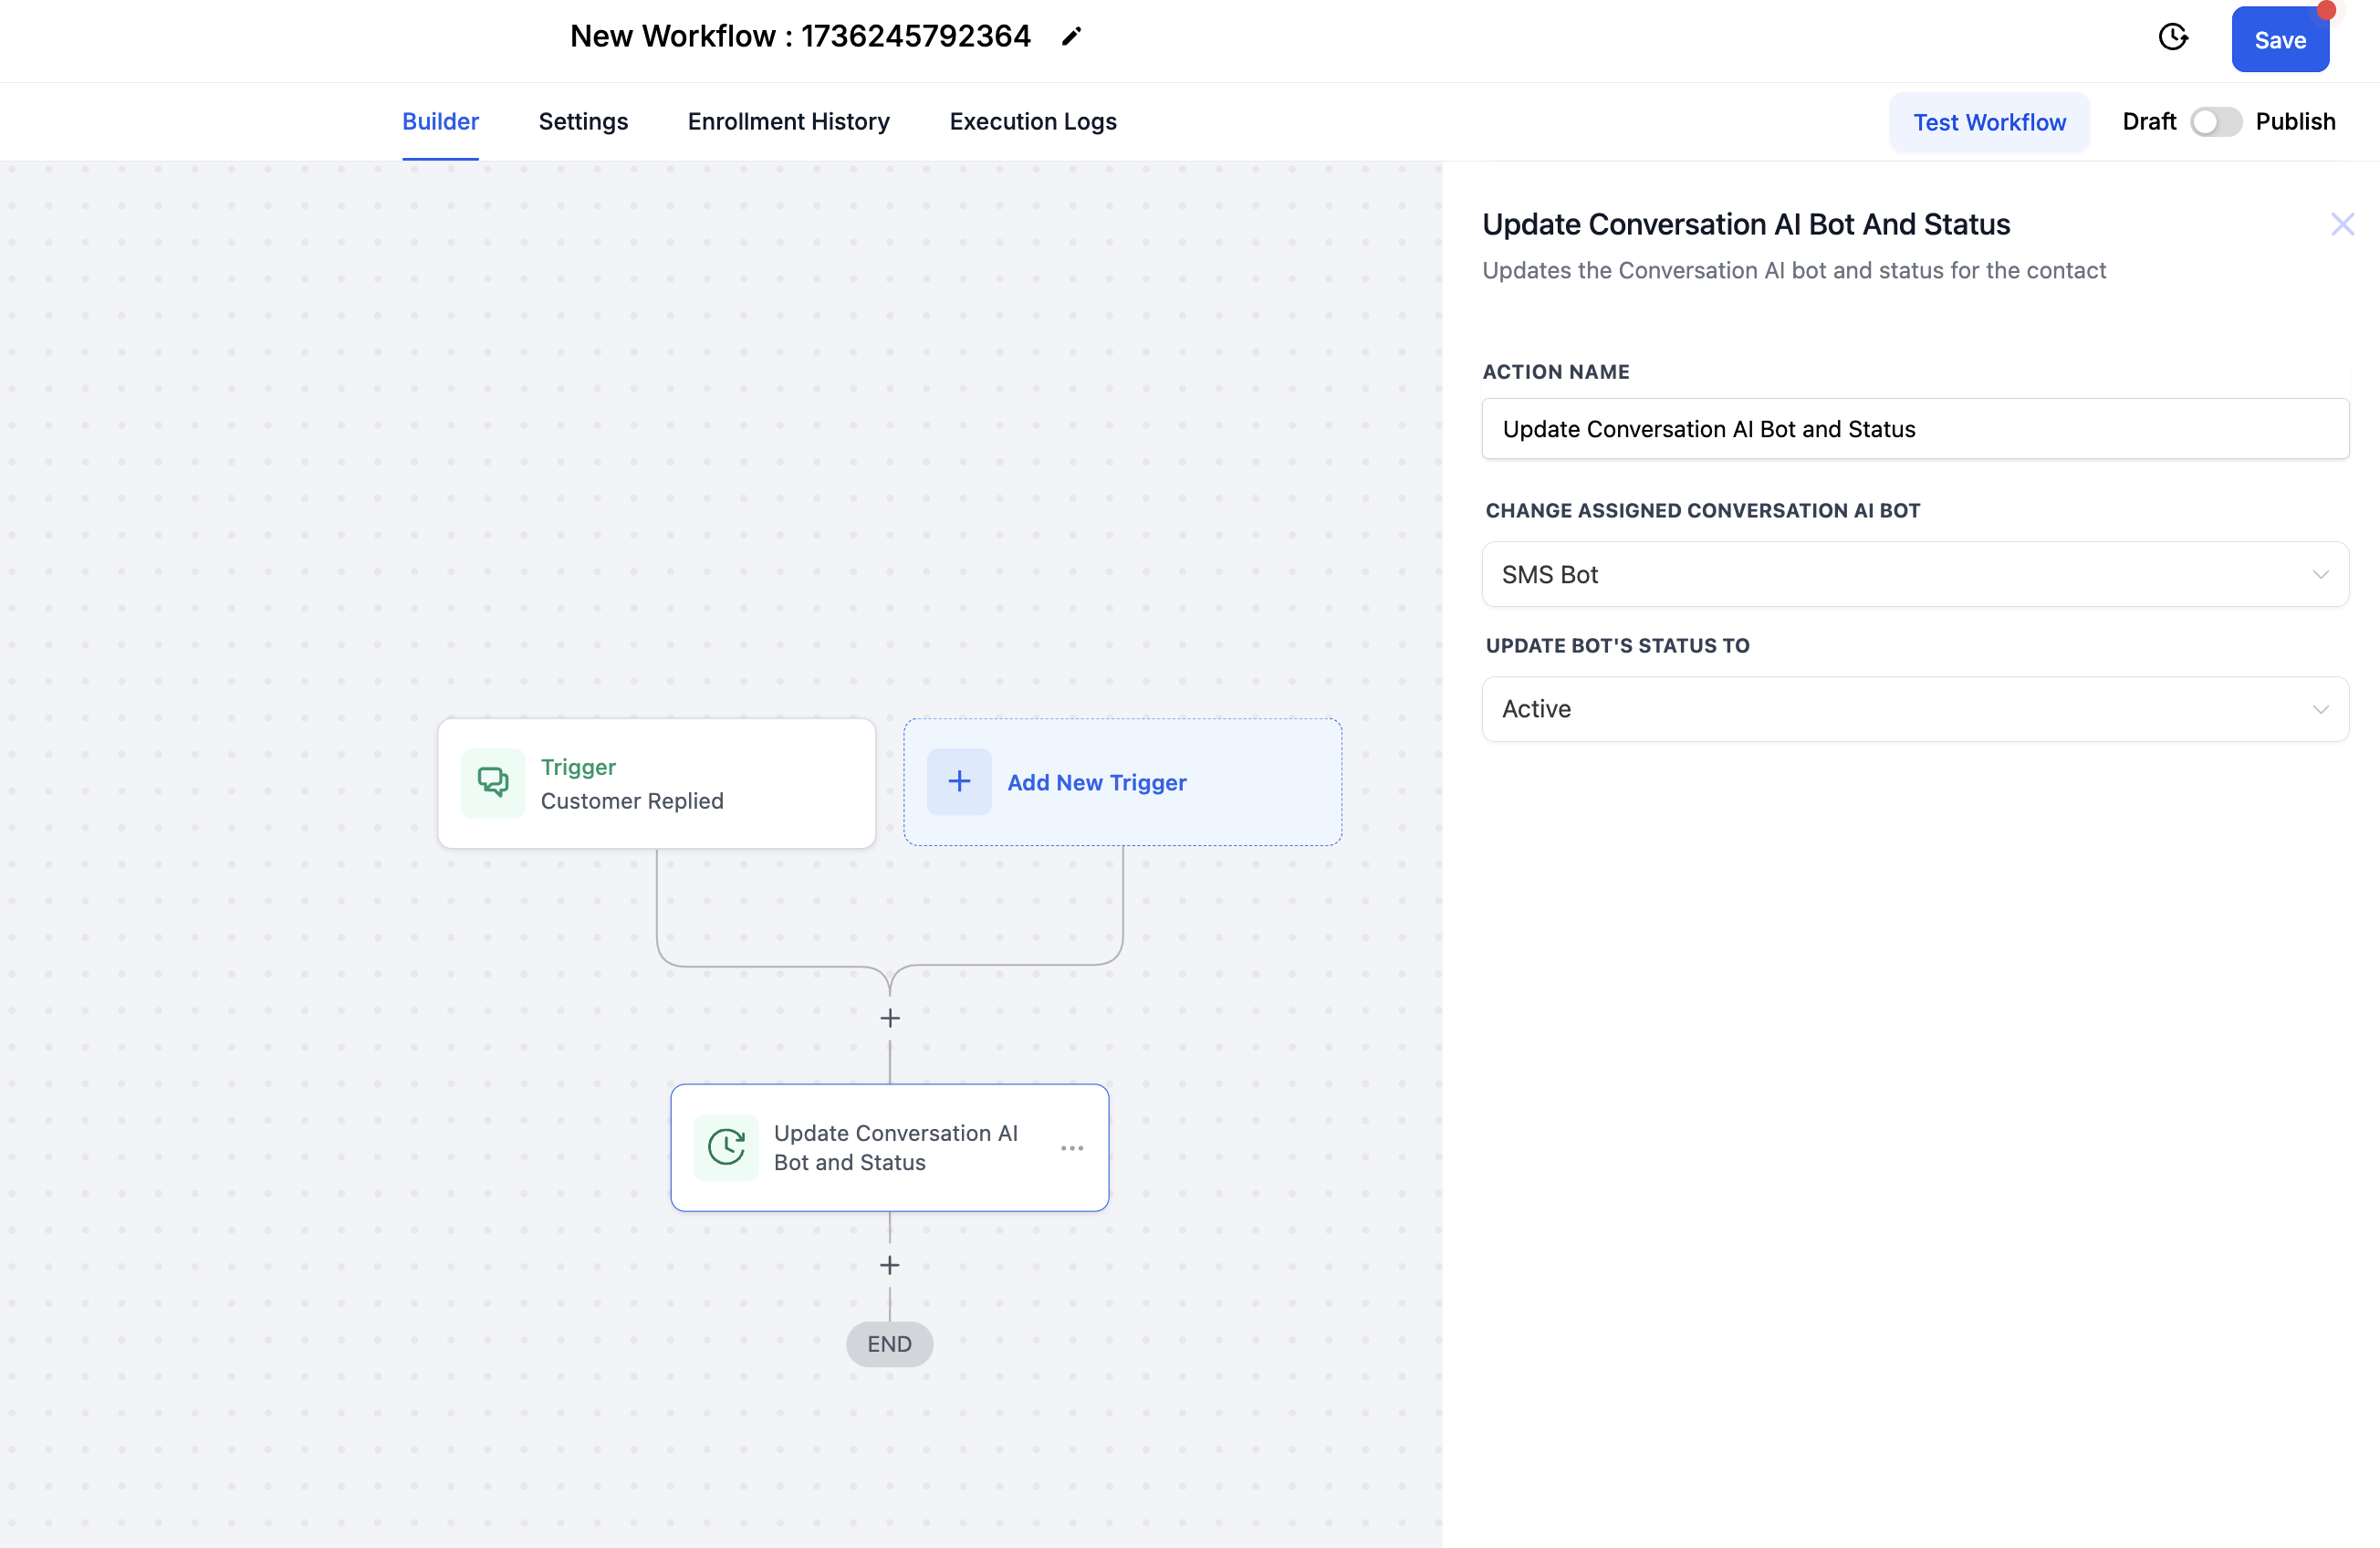
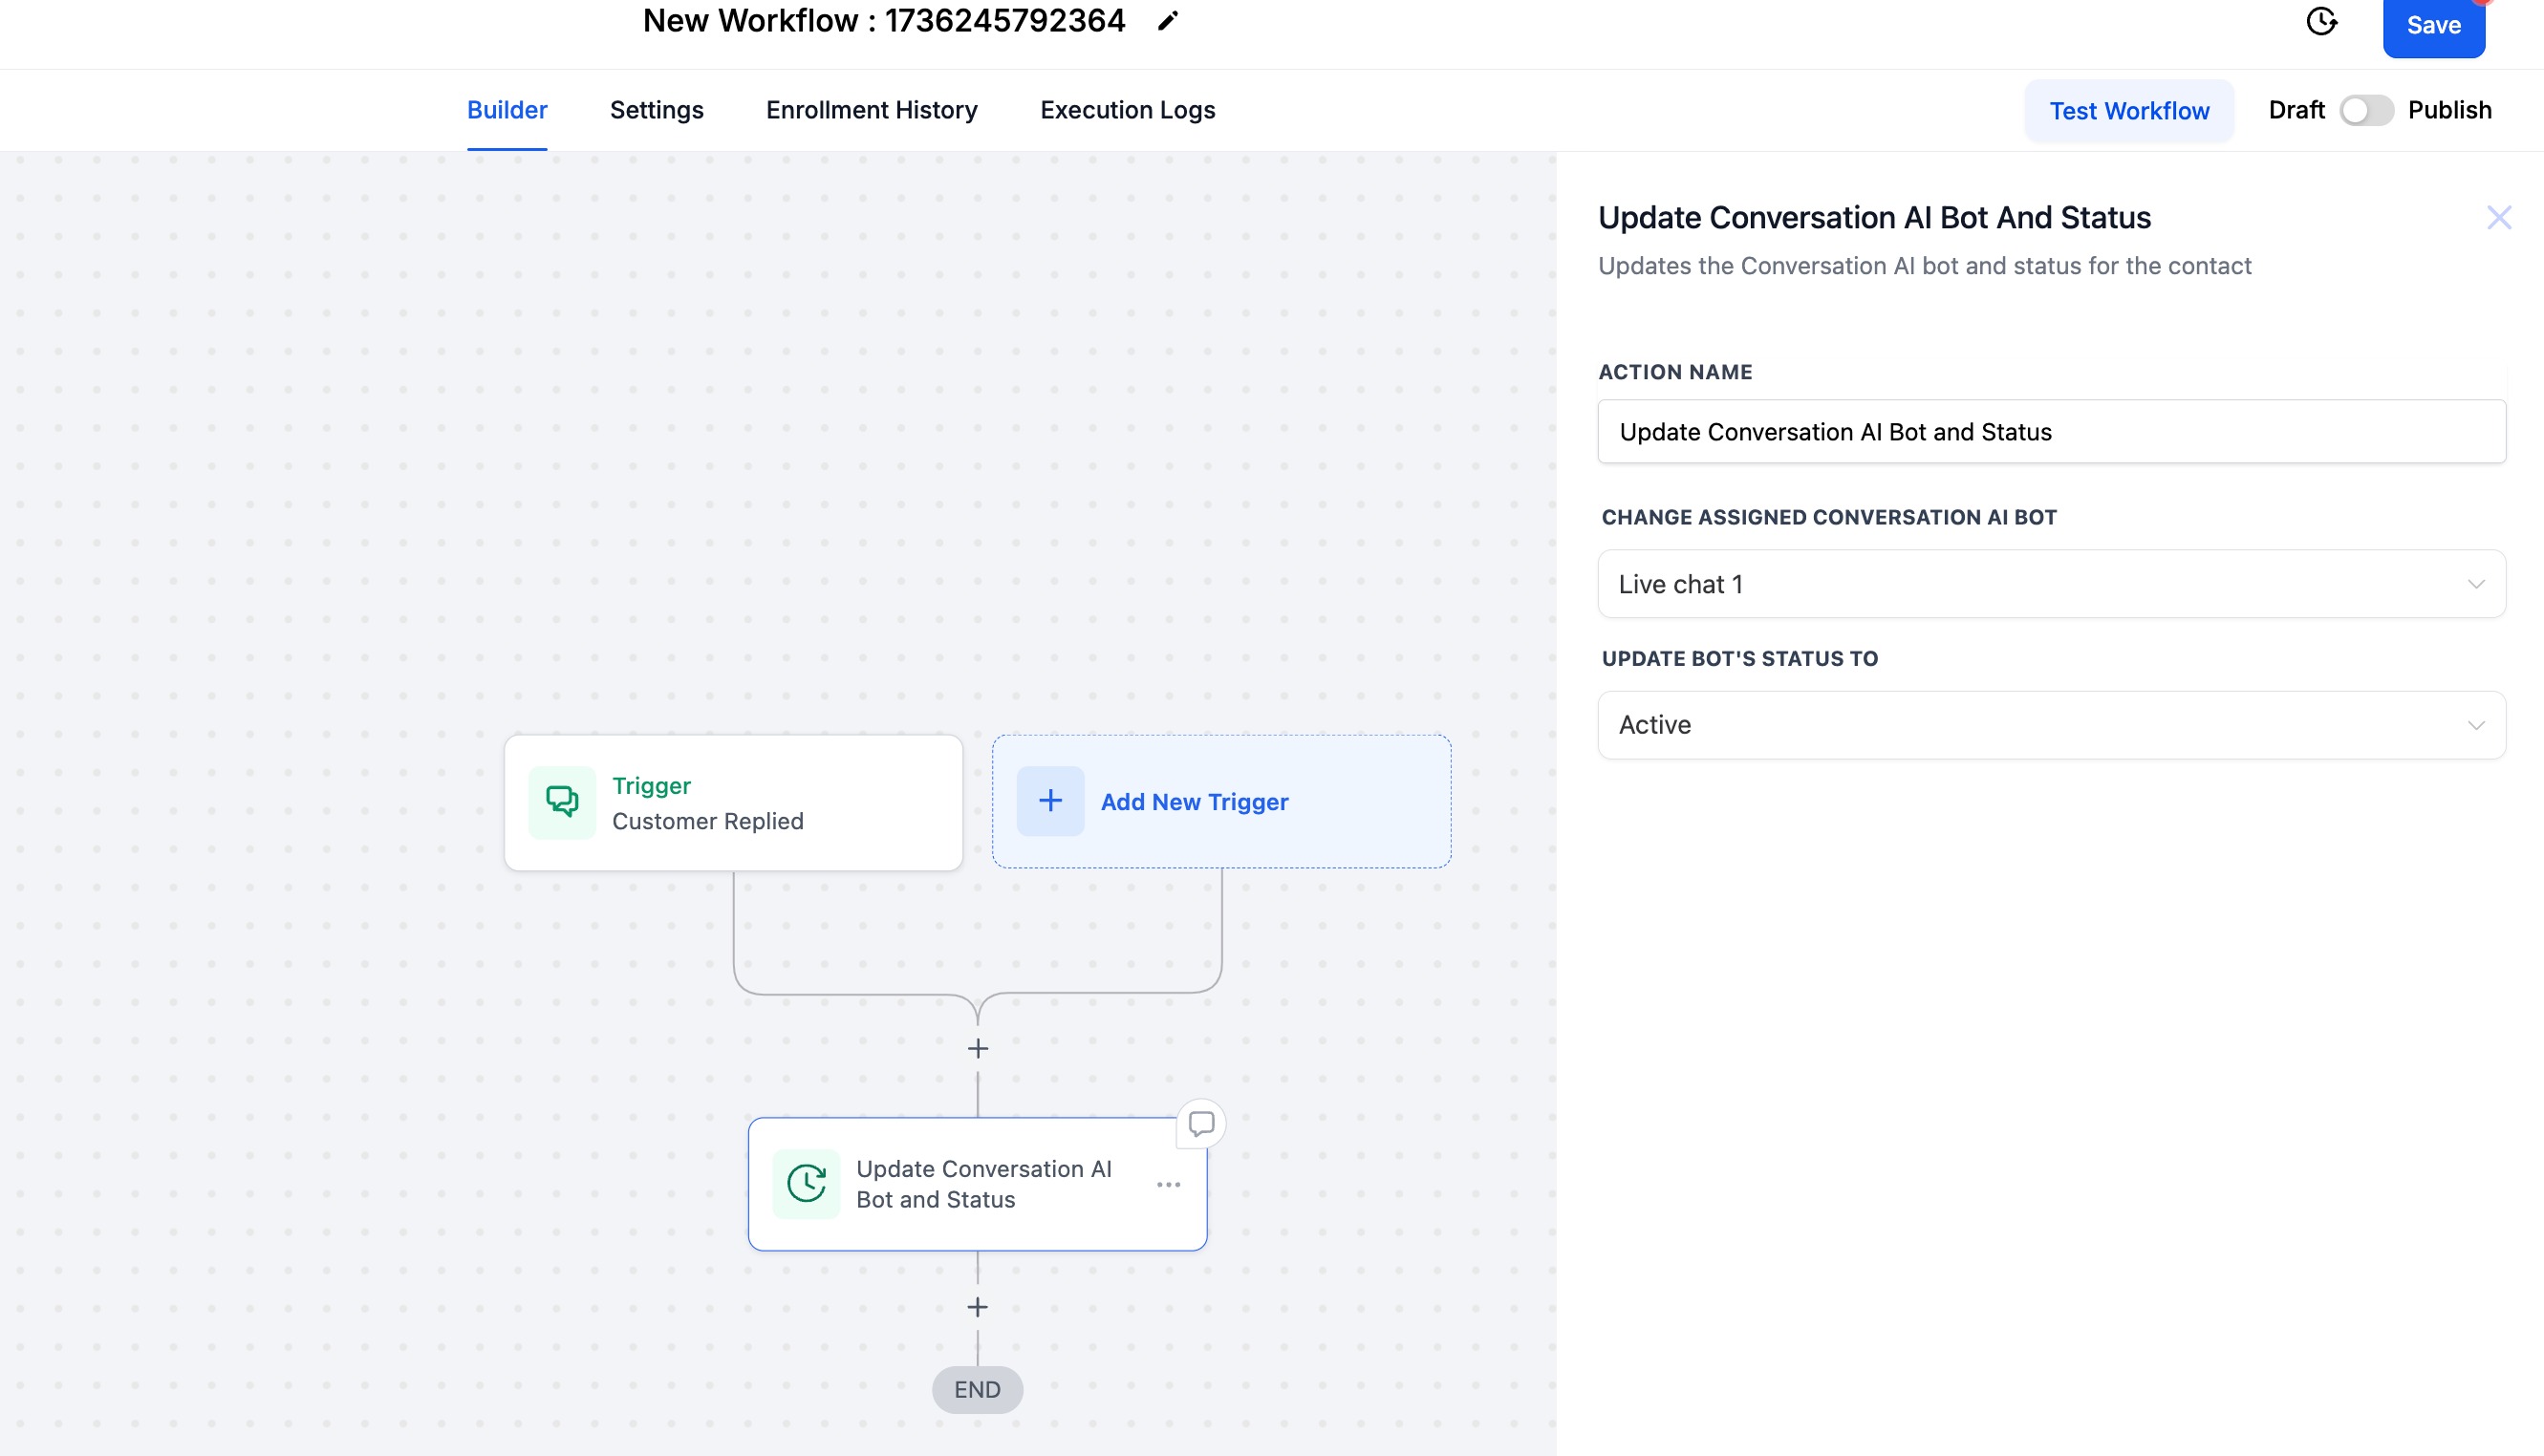
Add the action Update Conversation AI Bot and Status.
Choose the agent from the dropdown (for example, SMS Bot).
Set the status to Active.
Publish the workflow.
This ensures the SMS agent handles SMS-related interactions for a seamless experience. You can assign multiple agents for different Live Chat channels, with each agent dedicated to a specific channel.
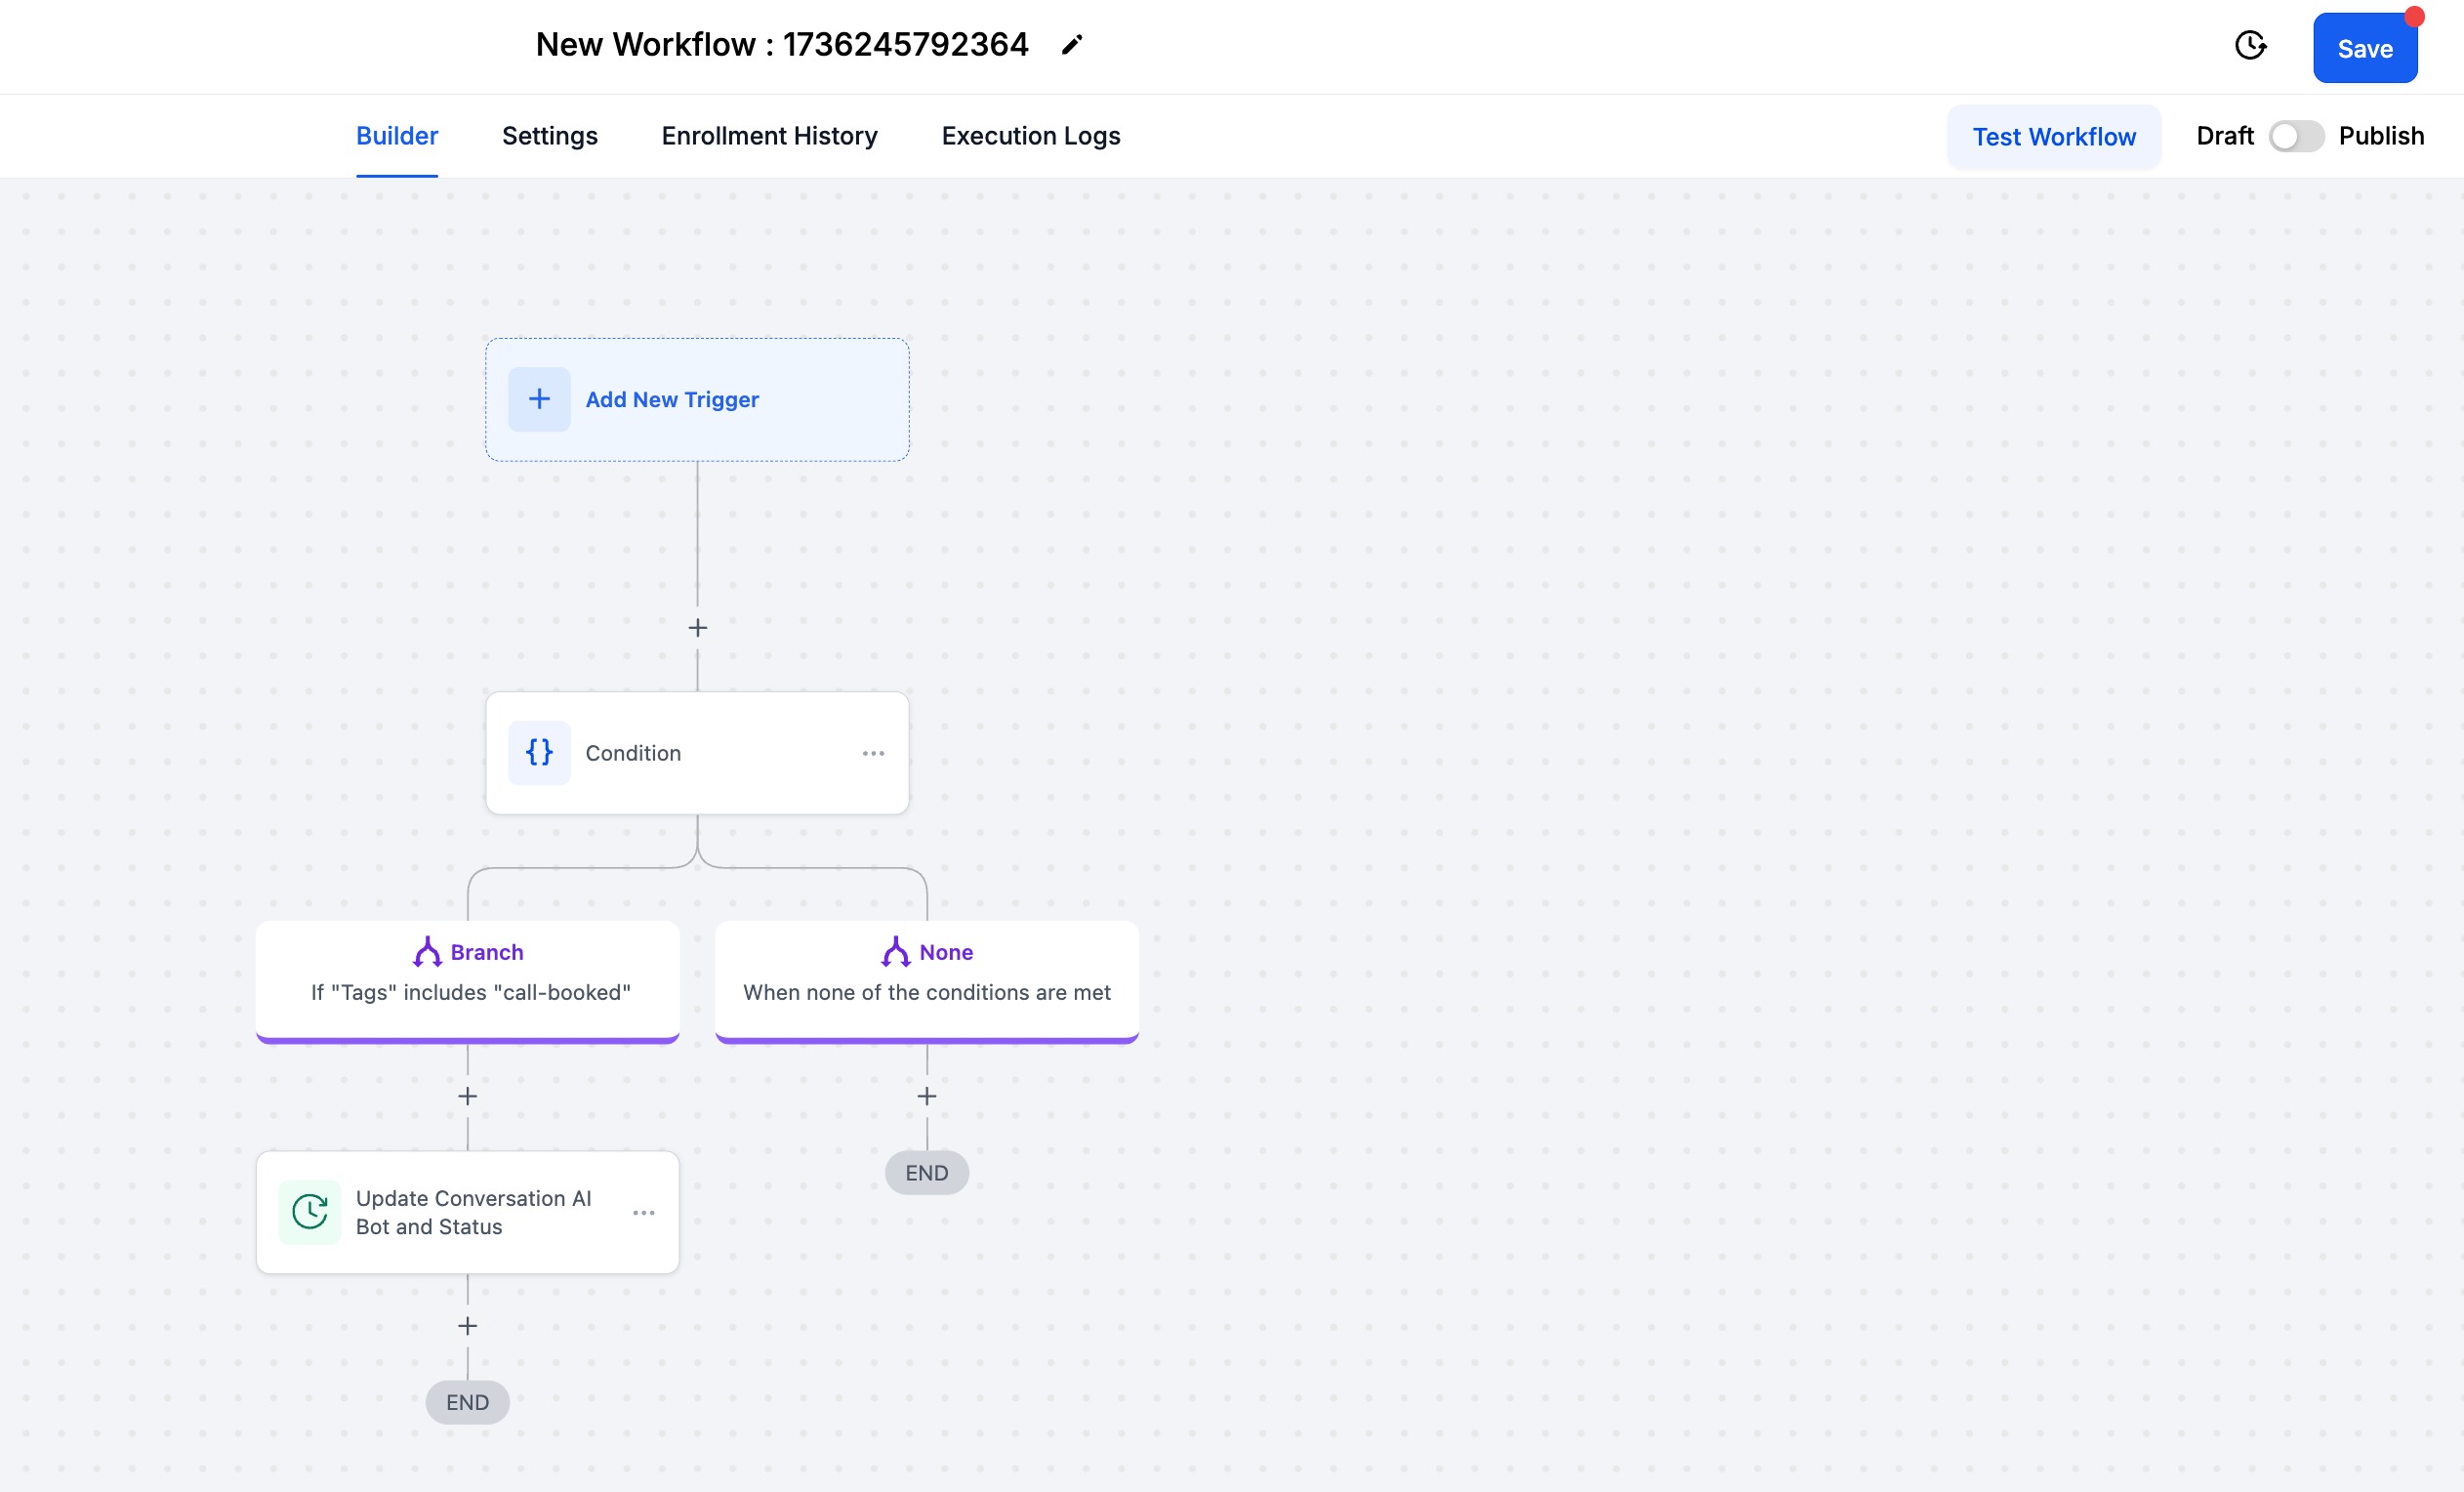
Example 2: Assign agents based on tags
Tags help segment contacts for more personalized interactions. To have an agent interact only with contacts that have a specific tag (for example, "Call Booked"):
Create a workflow.
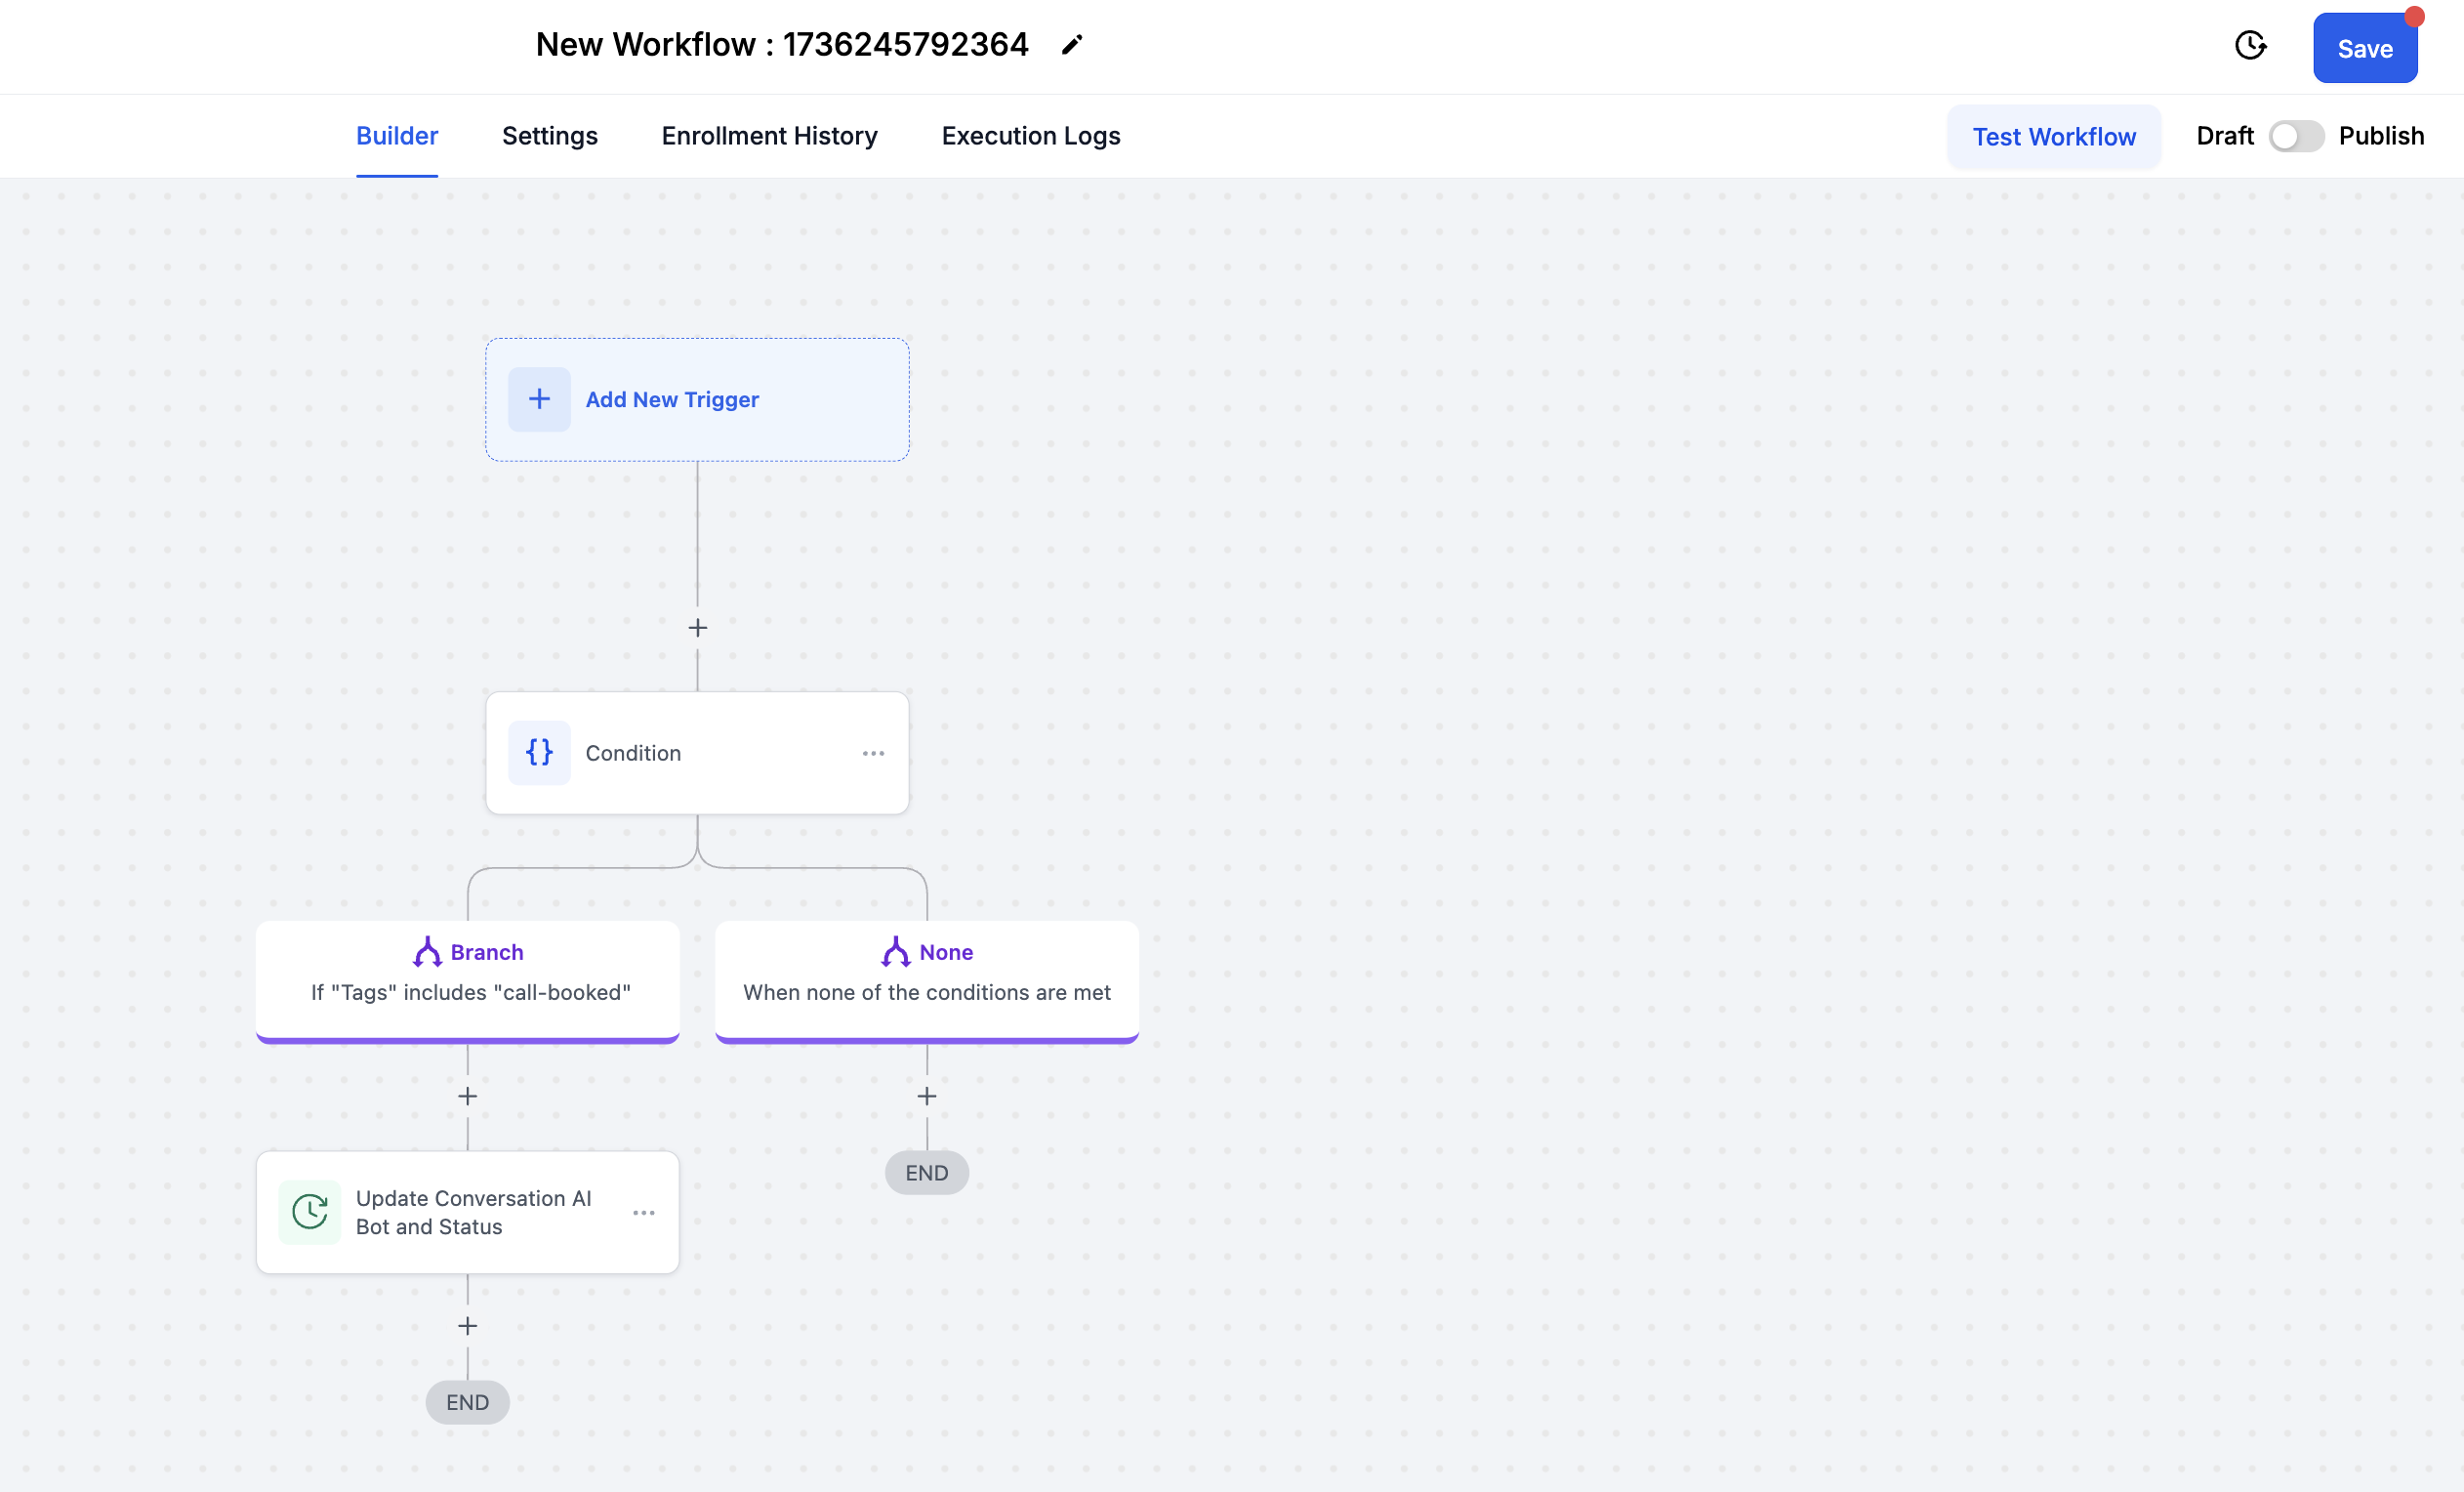
Select the trigger — for example, Contact added with Tag: Call Booked.
Add the action Update Conversation AI Bot and Status.
Select the agent to assign.
Set the status to Active.
Publish the workflow.
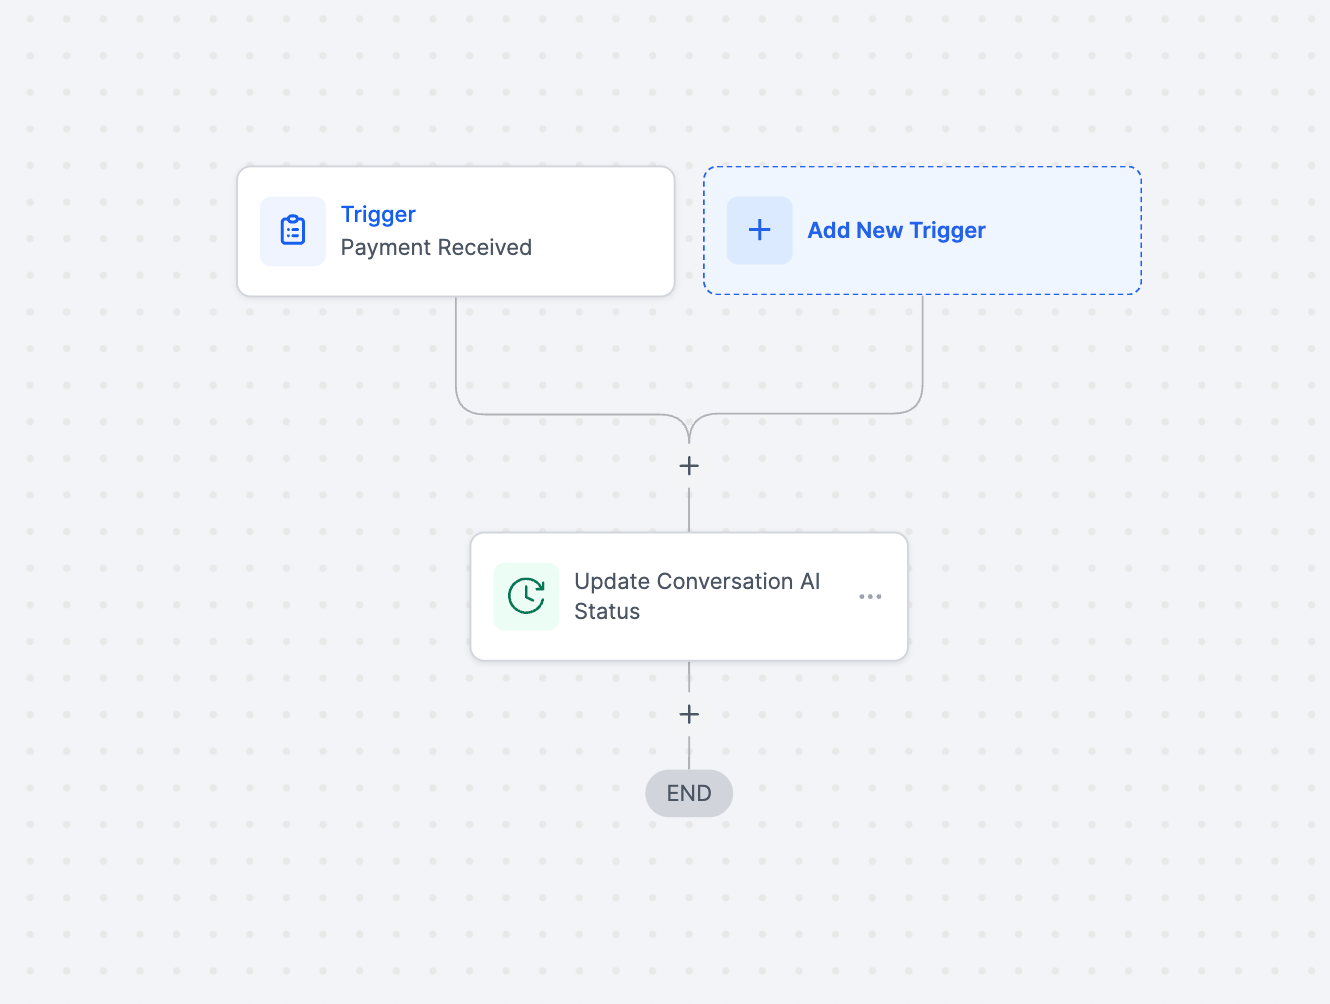
Example 3: Activate an agent based on payment status
Automation can ensure only qualified contacts receive specific agent interactions. To have an agent interact only with contacts who have completed a payment:

Create a workflow.
Add the trigger — for example, Payment Received.
Add the action Update Conversation AI Bot and Status.
Select the agent, such as Sales Bot.
Set the status to Active.
Publish the workflow.
This ensures only paying customers receive communications from the Sales agent.


Channel compatibility: Make sure the assigned agent has the corresponding channel enabled. For example, if you assign an agent to handle Facebook interactions, verify that the Facebook channel is enabled for that agent.
Branching logic: This action assigns an agent to a contact and immediately branches based on the workflow logic. It does not wait for the entire conversation to complete before branching.
The action executes immediately when triggered and does not wait for conversations to complete.
Multiple workflows can assign different agents dynamically based on evolving criteria.
The Trigger a Workflow feature lets your AI agent automatically start a workflow when a defined condition is met during a conversation. This streamlines operations and lets you achieve outcomes without spelling out every condition in the prompt itself.
In the agent's Bot Goals tab, click the Trigger a Workflow button to explore the details.
If you are creating a new agent, you must set or change the agent's name before you can access this feature.
Click Trigger a Workflow and set up the following fields:
Action Name: Assign a name that helps you identify the workflow later (for example, "Subscription Workflow").
Select a published workflow to trigger: From the dropdown, choose the workflow you want to trigger. It must already be published. This is the workflow that runs when the condition is met.
When to trigger a workflow: Provide a short description of the condition that should trigger the workflow. This helps the AI know when to activate it. For example:
"Customer wants to purchase the subscription"
"Customer wants to book an appointment"
Click Save to finalize the settings.
The agent will then trigger the selected workflow whenever the described condition arises during a conversation.
Craft effective trigger conditions. Write the description so the agent naturally leads the conversation toward the condition and the contact's response aligns with it. For example, if the condition is "Customer wants to book an appointment," structure the prompt so the agent asks "Would you like to book an appointment?" so the condition arises naturally.
Handle duplicate trigger conditions. If a contact's response matches multiple conditions at once (for example, updating contact info and triggering a workflow when they provide their date of birth), the AI decides which action to execute based on its prioritization.
Trigger from either the agent or the contact. A trigger condition can be activated by something the agent says or something the contact says, so workflows fire regardless of who leads the conversation.
Avoid duplicating published workflows. Do not set up a Trigger a Workflow action for a workflow that is already published with the same trigger in Workflow automation. Doing so runs the workflow twice and duplicates its actions.
Can I update contact fields from a workflow triggered by the AI agent?
Yes. Simply include the Update Contact Field action inside the workflow you select. This lets you enrich contact records as part of an automated follow-up process.
Auto Follow-Up lets your agent automatically send timely outbound messages to contacts who have gone inactive, asked to be followed up later, or stopped responding — without manual follow-up tasks or complex workflows. The AI recognizes common drop-off scenarios (a contact says they are busy, asks for a specific follow-up time, or simply stops replying) and schedules messages accordingly. Once the contact replies, the follow-up logic resets automatically.
Reduces manual workload: Automates repetitive follow-up outreach.
Boosts engagement: Sends timely, personalized follow-ups that keep conversations moving.
Minimizes lead leakage: Ensures every contact gets a follow-up so no lead is forgotten.
Supports custom messaging: Use AI-generated follow-ups or write the message yourself.
Integrates with workflows: Triggers actions like tagging contacts, assigning conversations, or notifying team members.
Preserves flow context: Lets Conversational AI restart stalled conversations from within the same flow, so contacts continue naturally without separate re-engagement workflows.
Respects business hours: Only sends follow-ups during the working hours you define.
Switches channels dynamically: Moves between channels (for example, Live Chat to SMS) to improve deliverability and reach.
Provides full visibility: Shows all scheduled follow-ups in the Response Info panel.
Language-adherent follow-ups: If a contact has a preferred language set, follow-ups send in that language automatically, with no extra setup.
Note: Do not trigger another follow-up through a workflow — this breaks the follow-up logic.
Log in to your account.
From the left-hand menu, click AI Agents.
Select Conversational AI.
Choose one of the following:
Create a new agent.
From the Agent List, click the three dots beside an existing agent's name and then click Edit.
Inside the selected agent, click Bot Goals in the top navigation.
Scroll down to Set Up Your Actions.
Click Auto Followup.
Each scenario defines when the agent should send follow-ups. There are three supported scenarios.
Scenario 1: Contact Stopped Responding
Toggle ON the Enable scenario button.
Add up to 5 follow-up sequences for this condition.
For each sequence:
Set the delay time in minutes, hours, or days.
Choose Let AI Send the Message to auto-generate a contextual message based on the conversation.
Or turn that off and enter a Custom message manually.
Trigger a Workflow (optional): Toggle ON to trigger an existing workflow and select it from the list — useful for adding tags, assigning the conversation to a team member, or sending a notification.
Click + Add Followup to add a new sequence.
Scenario 2: Contact Marked as Busy
For contacts who say something like "I'm in a meeting" or "driving":
Toggle ON the Enable scenario button.
Add up to 5 follow-up sequences for this condition.
Repeat the same configuration: set the delay time, choose an AI-generated or custom message, and optionally assign a trigger workflow.
Scenario 3: Contact Requested a Follow-Up
Toggle ON the Enable scenario button.
Add up to 5 follow-up sequences for this condition.
Repeat the same process: set the delay time (the first sequence is pre-set based on the contact's request), choose an AI-generated or custom message, and optionally assign a trigger workflow.
How cadence works: if you set the first follow-up to 5 minutes and the second to 15 minutes, the AI sends the first follow-up after 5 minutes of inactivity and the second 15 minutes later if the contact still hasn't replied. If the contact replies at any point, the cadence resets.
A. Set follow-up working hours
Note: This setting applies only to follow-up messages, not to the main AI agent conversations.
Click Follow-Up Settings.
Enable the Set Active Hours for Followup toggle.
Choose a Timezone: Contact or Business. Follow-ups are only sent during the active hours you specify, based on the selected timezone. If a contact's timezone can't be found, the business timezone is used.
Set the specific Active Hours when follow-ups should be sent (for example, 9 AM – 6 PM). For instance, a follow-up scheduled at 9 PM with working hours of 8 AM – 5 PM is deferred to the next day at 8 AM.
If disabled, messages are sent regardless of time.
Click Save.
B. Enable dynamic channel switching
Click Follow-Up Settings.
Enable Dynamic Channel Switching.
This lets the AI automatically switch to another available channel if the original one becomes inactive. For example, if a contact doesn't respond on Live Chat, the agent may follow up via SMS (if a phone number is available). On Facebook, Instagram, or WhatsApp, it switches to SMS if there's no response within 24 hours.
Click Save.
Click the global Save button to confirm and activate the follow-up actions for the agent.
Auto Follow-Up is also available in the Flow-Based Builder, letting Conversational AI visually re-engage contacts who go inactive, say they are busy, or request a follow-up later. When a contact stops replying inside a flow, Conversational AI detects the drop-off, schedules follow-up messages from the same flow, preserves conversation context, and resumes naturally once the contact replies — reducing the need for separate re-engagement workflows.
Supported actions for "Contact Stopped Replying Inside Workflow": AI Capture Information, AI Message, Custom Message, Book Appointment, and Continue Conversation.
Supported actions for "Contact Busy or Requested Follow-Up Time": AI Capture Information, AI Message, Book Appointment, and Continue Conversation.
All other Auto Follow-Up behavior — follow-up timing, smart detection, working hours, dynamic channel switching, Response Info visibility, and language-adherent follow-ups — remains the same.
Auto Follow-Up evaluates the conversation context before sending a scheduled message. If the conversation appears closed or a follow-up is no longer appropriate, the system skips or cancels it automatically — no extra setup required. Follow-ups are suppressed when the contact:
Is disqualified (for example, out of the service area).
Shows disinterest or opts out (for example, "Not interested," "Stop texting me").
Responds with anger or frustration (for example, "Leave me alone," "This is spam").
Ends with a soft closure that signals completion (for example, "Thanks for the chat," "Let me know if you need anything else").
A few additional behaviors to note: if an appointment is booked and the contact texts again, the agent will follow up; if the agent sent a booking link and the contact replies that they've already booked, follow-ups stop.
All scheduled follow-ups appear in the Response Info panel for each contact, giving you complete transparency and control over your automated outreach. You can easily track which follow-ups are pending and why, and maintain oversight of all automated communication.
Follow-up messages are not sent if the agent is inactive.
Avoid triggering agents via workflow actions during follow-ups.
Set realistic delay durations to avoid spammy behavior and the risk of contacts marking messages as spam.
Any reply from the contact resets the follow-up logic.
Why didn't Auto Follow-Up send a message I scheduled?
Auto Follow-Up may skip or cancel a scheduled message if the conversation context indicates a follow-up isn't appropriate — for example, the contact opted out, showed disinterest, was disqualified, or the conversation ended naturally.
What happens if a contact replies before the scheduled follow-up?
The follow-up schedule resets automatically and no further follow-up messages are sent for that conversation.
What are timezone-aware follow-ups?
They let you decide whether follow-up messages are sent based on your business timezone or the contact's local timezone.
What's the difference between Business Timezone and Contact Timezone?
Business Timezone: Follow-ups follow the working hours defined for your business location.
Contact Timezone: Follow-ups are scheduled using the contact's local time (when available), so they receive messages during their own working hours.
How do working hours apply when timezone awareness is enabled?
Follow-ups are only sent during the active hours you set (for example, 9 AM – 5 PM), applied based on whichever timezone you select: Contact or Business.
What happens if a contact's timezone isn't available?
The system defaults to your Business Timezone and honors your business working hours.
Can I customize the follow-up messages sent by the agent?
Yes. You can use AI-generated messages or write your own custom follow-up messages.
What channels does Auto Follow-Up support?
Auto Follow-Up works across Live Chat, SMS, Facebook, Instagram, and WhatsApp, with dynamic channel switching available as needed.
How do I prevent contacts from being overwhelmed by follow-ups?
Use realistic delay intervals and avoid sending too many follow-ups in a short period.
Where can I see all scheduled follow-ups?
All scheduled follow-ups are visible in the Response Info panel.
What happens if the agent is inactive?
No follow-up messages will be sent while the agent is inactive.
Do follow-up messages match the contact's language?
Yes. If a contact has a preferred language set, Conversational AI sends follow-ups in that language by default.
Can Auto Follow-Up be used inside the Flow-Based Builder?
Yes. Auto Follow-Up is available in the Flow-Based Builder for supported Conversational AI actions, so the agent can detect when a contact stops replying, schedule follow-ups from the same flow, and resume the conversation naturally once the contact replies.
What happens if the contact doesn't reply?
The workflow follows the Time Out branch.
What if no condition matches the contact's reply?
The workflow follows the No Condition Met branch.
Can I add more branches?
Yes. Create additional branches and add conditions to match more outcomes.
What information does the AI use to craft its message?
The AI uses the Personality, Additional Instructions, the Question, Training, and Conversation history.
Which channels are supported?
SMS, Facebook, WhatsApp, Live Chat, and Instagram can be selected.
What does "Keep Same" do in the Update Conversation AI Bot and Status action?
It keeps the currently assigned agent unchanged.
Why is my agent not responding?
Check that the agent is set to Active and supports the selected channel.
If you need help setting up AI automations or troubleshooting your workflows, open the Help Center or contact support for further assistance.
