A Guide to Automating Review Posts in Your Social Media Planner
Elevate your social media strategy with our insightful guide on automating review posts in your social media planner! This article walks you through the steps to seamlessly integrate customer reviews into your content calendar, saving you time while boosting your online presence. Learn how to select the right tools, customize your posts for maximum engagement, and schedule reviews to showcase your brand’s credibility. Perfect for marketers and businesses looking to enhance their social media efforts, this guide will empower you to leverage customer feedback effectively, driving trust and engagement without the hassle of manual posting!
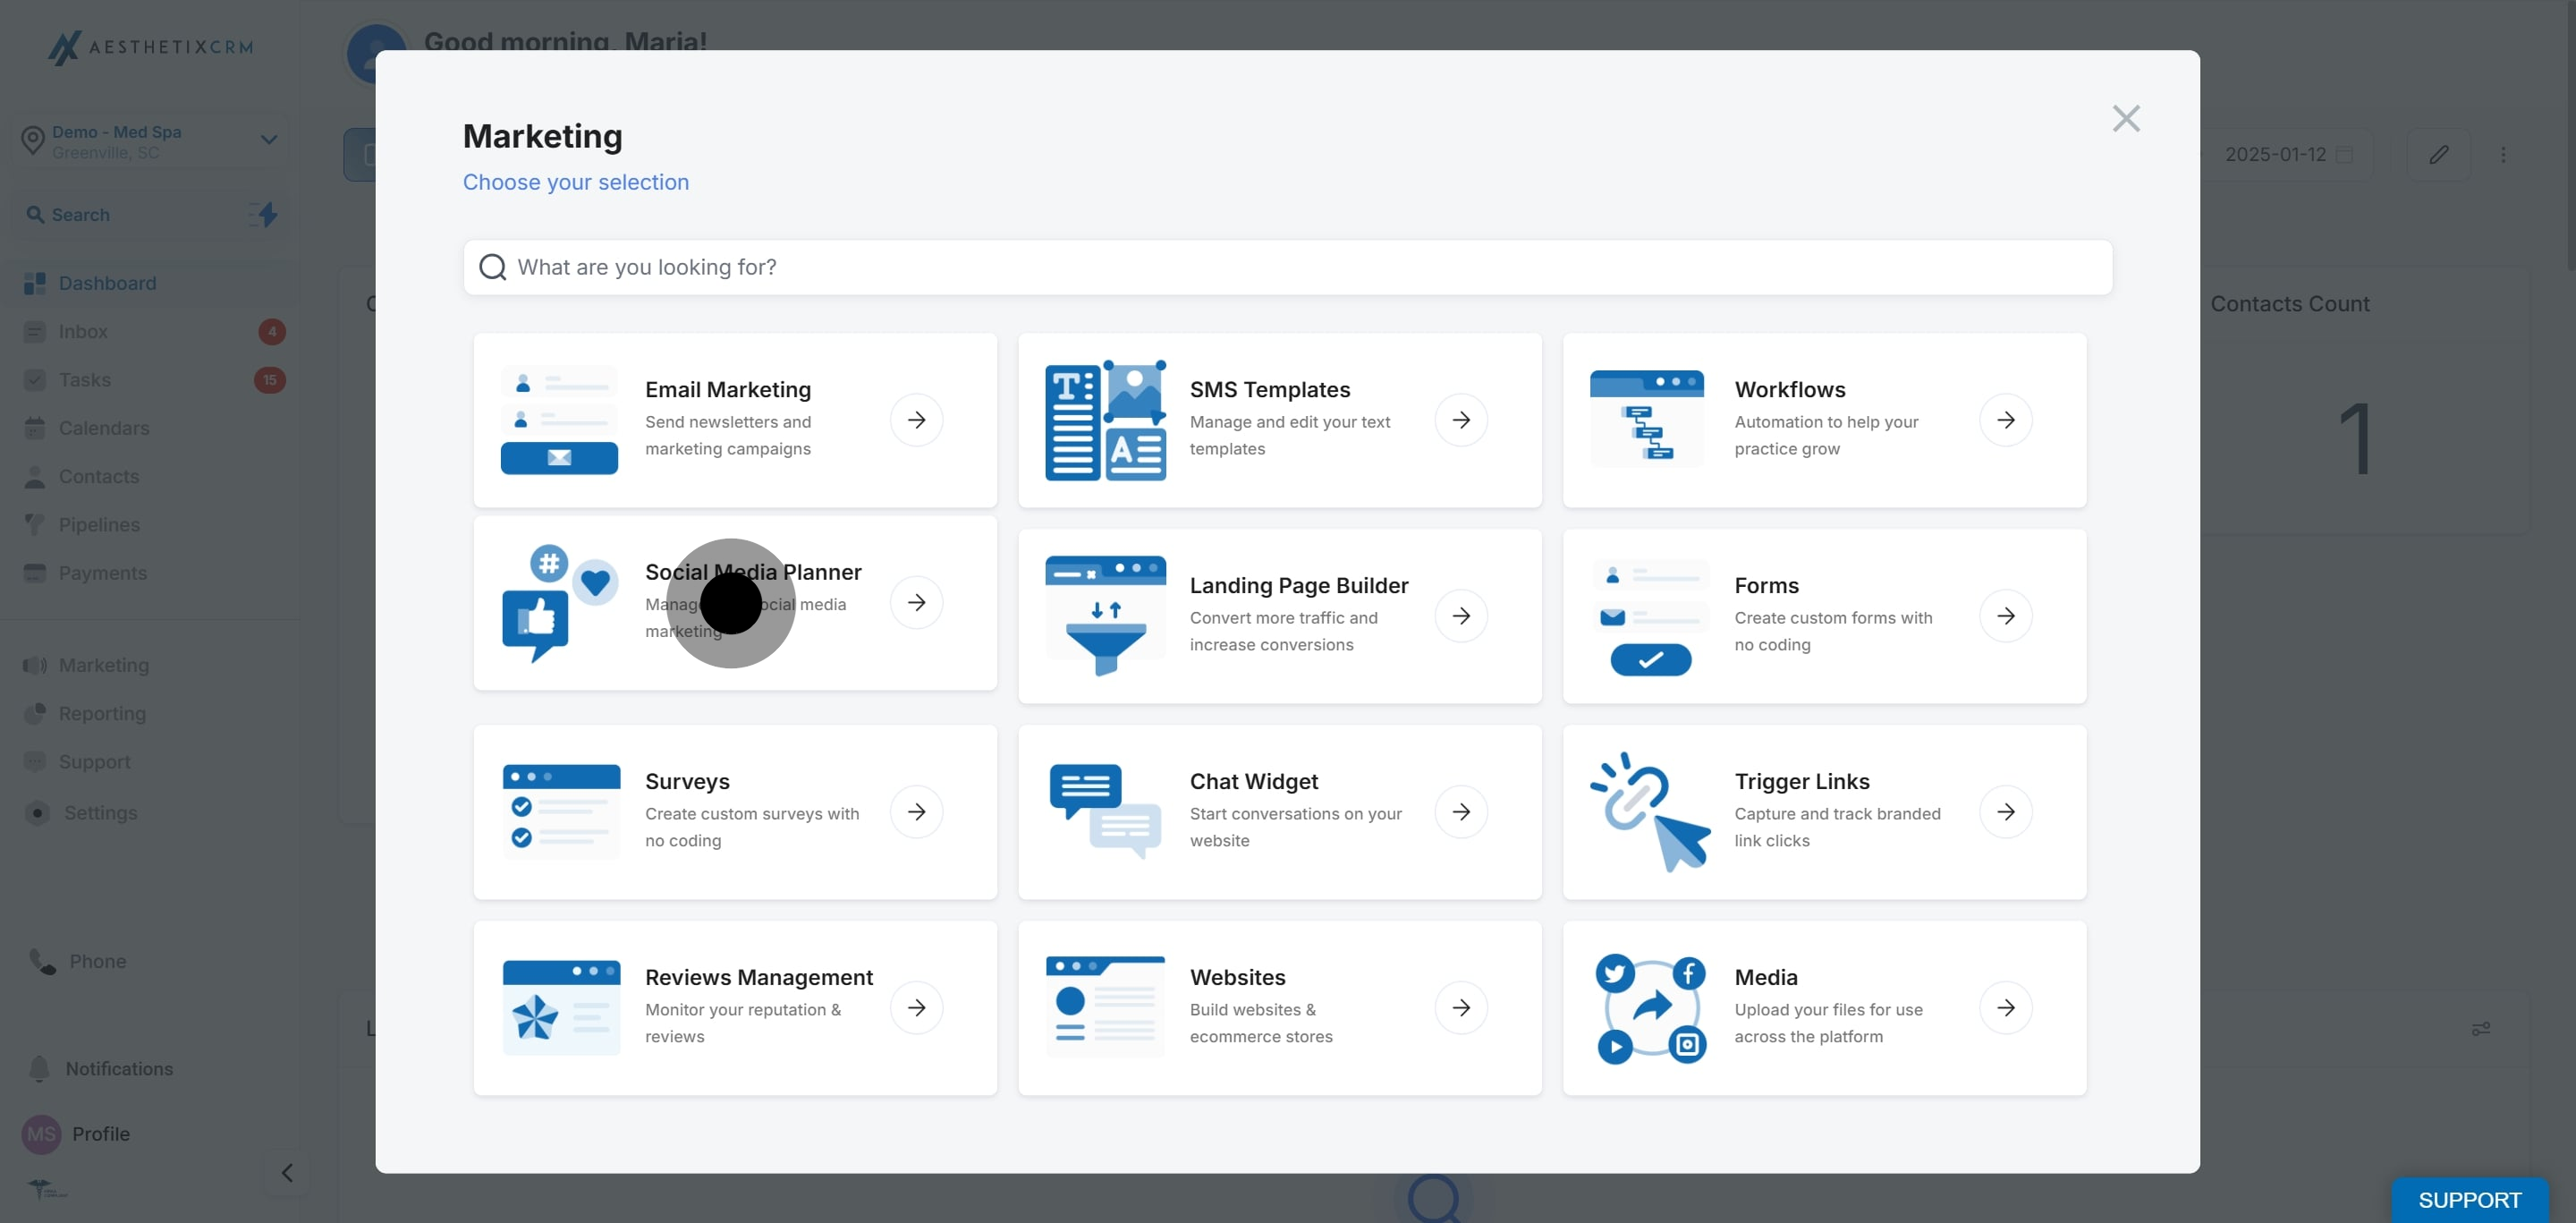
1. To begin, Navigate to Marketing.
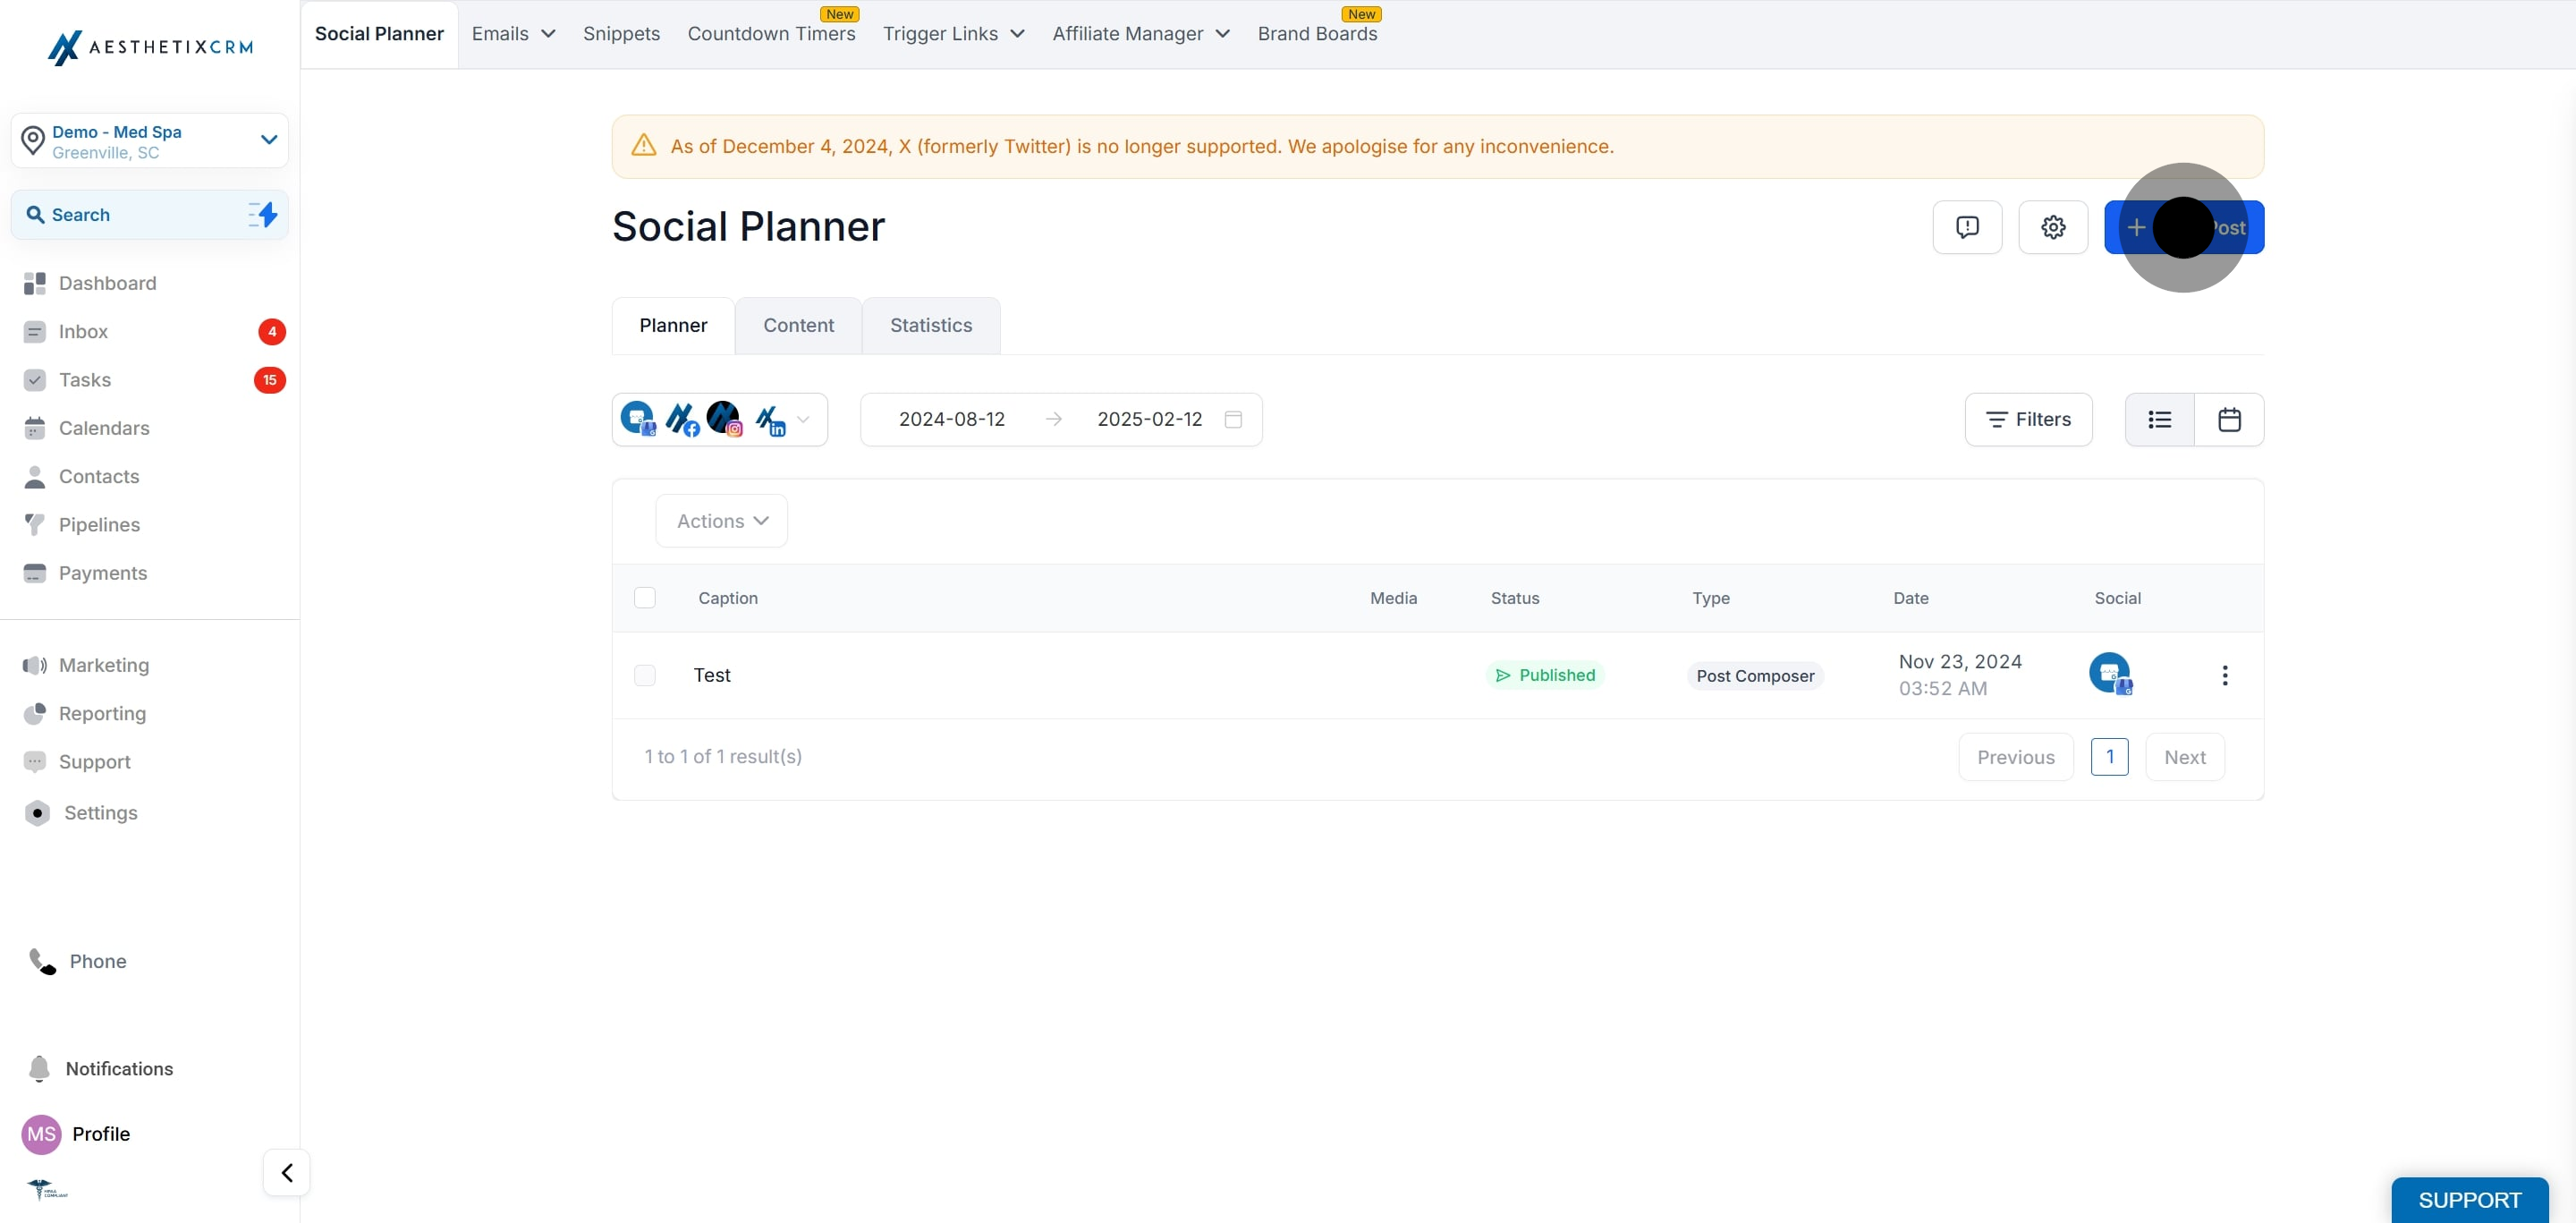
2. Click on "Social Media Planner".
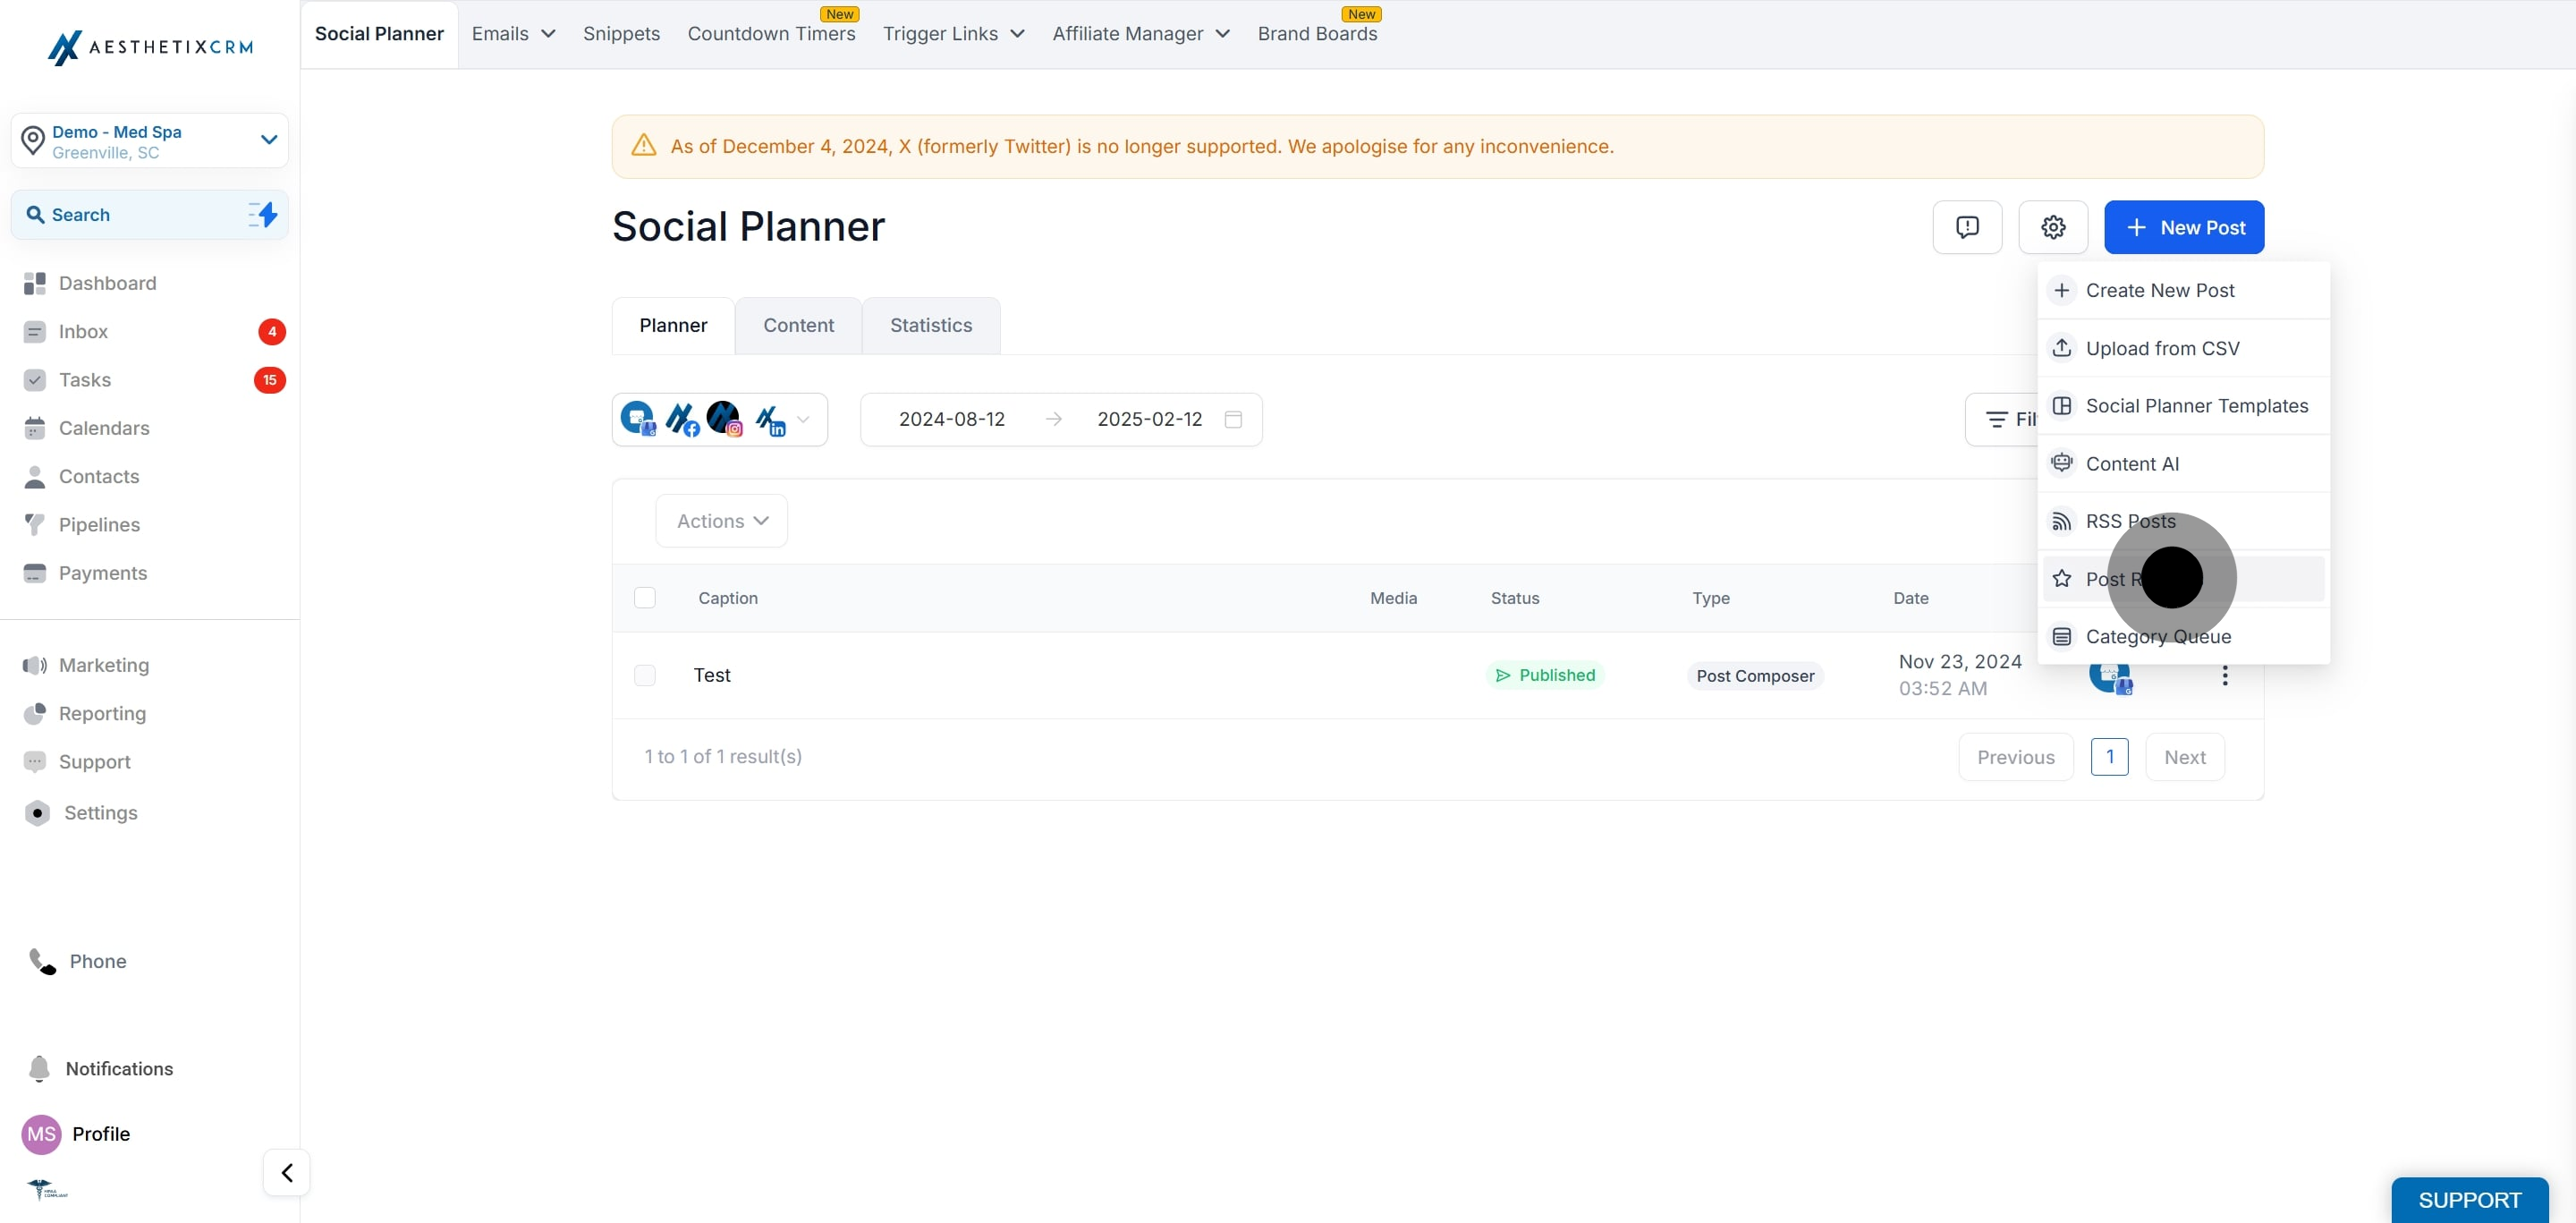
3. Following that, click on "New Post".
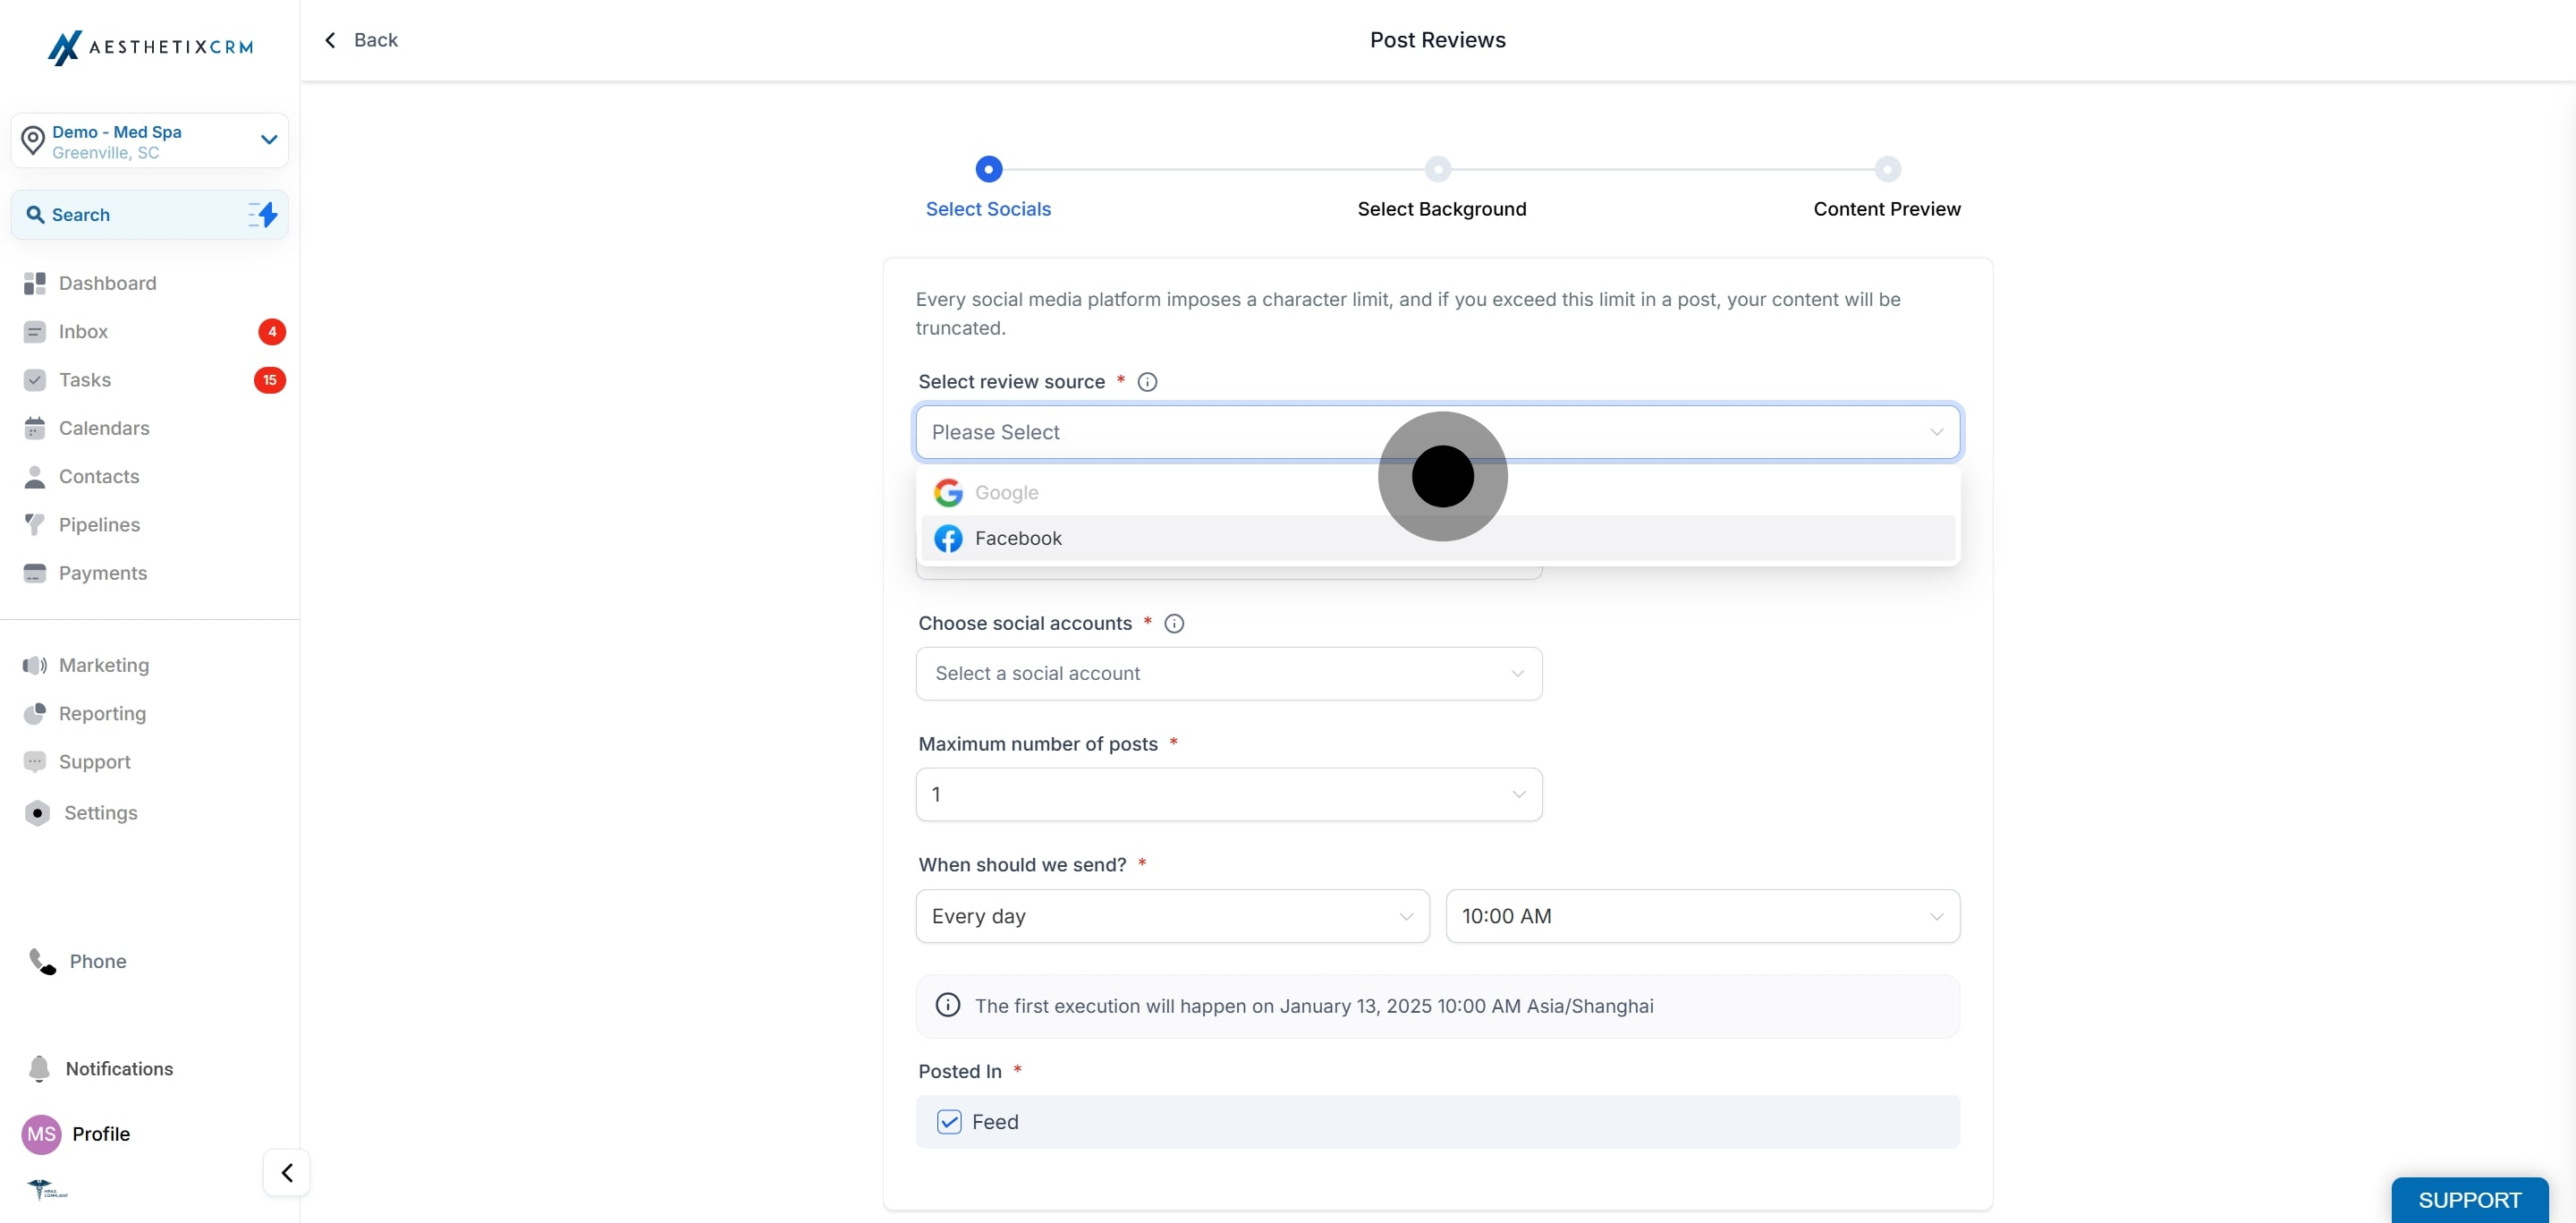
4. Afterwards, select Post Reviews.
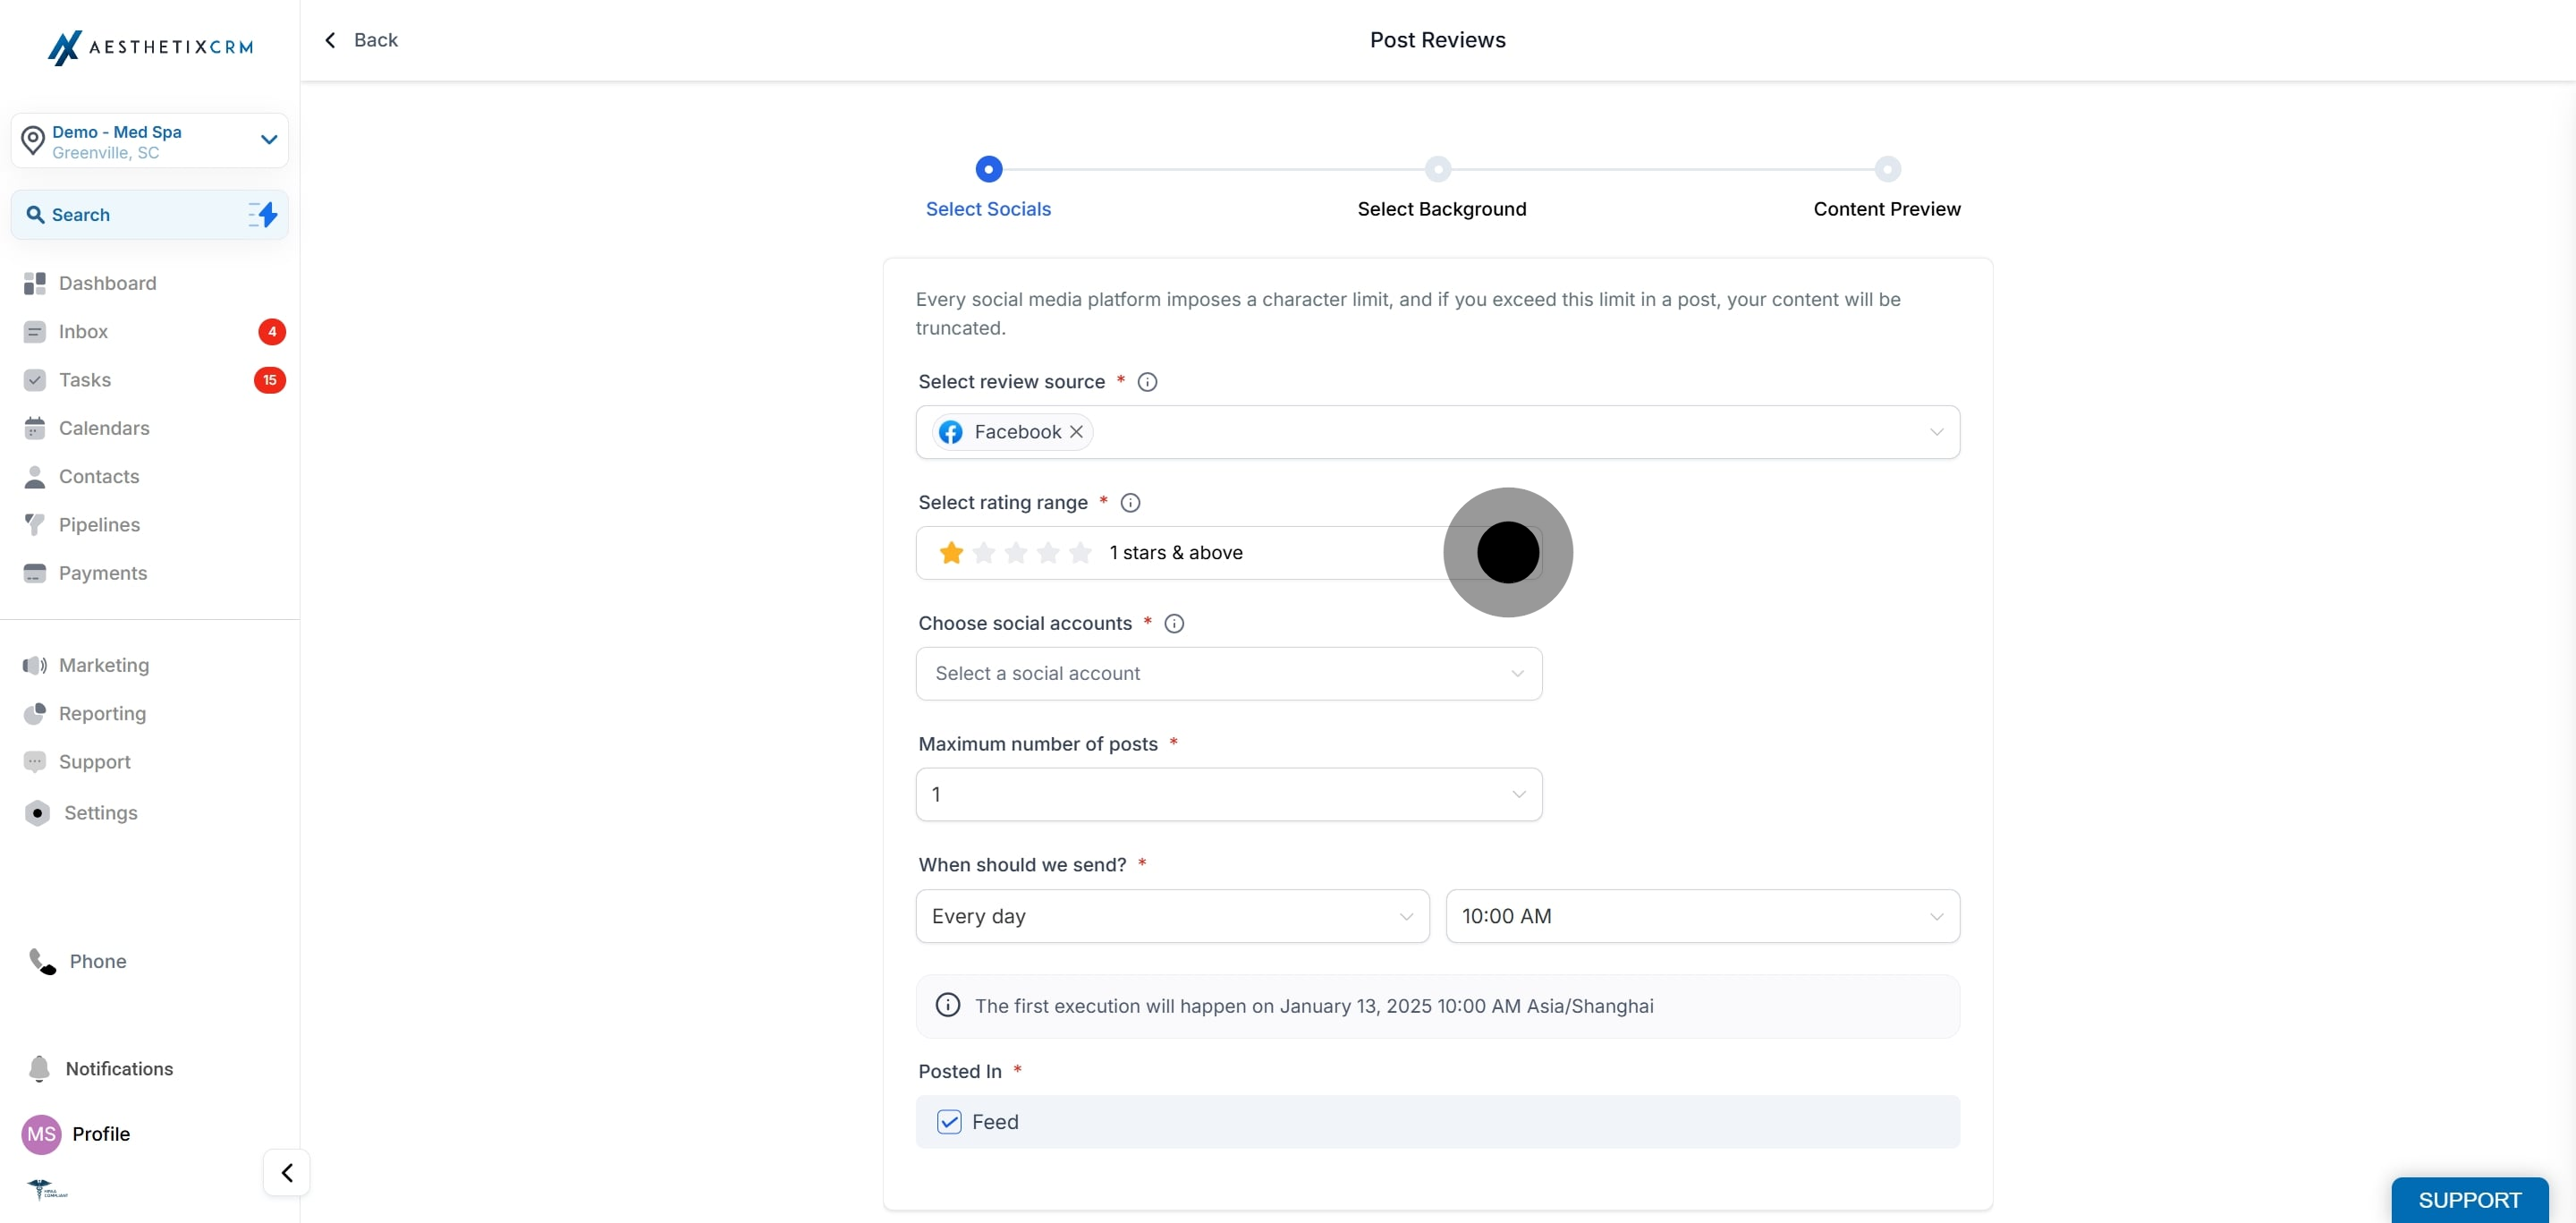
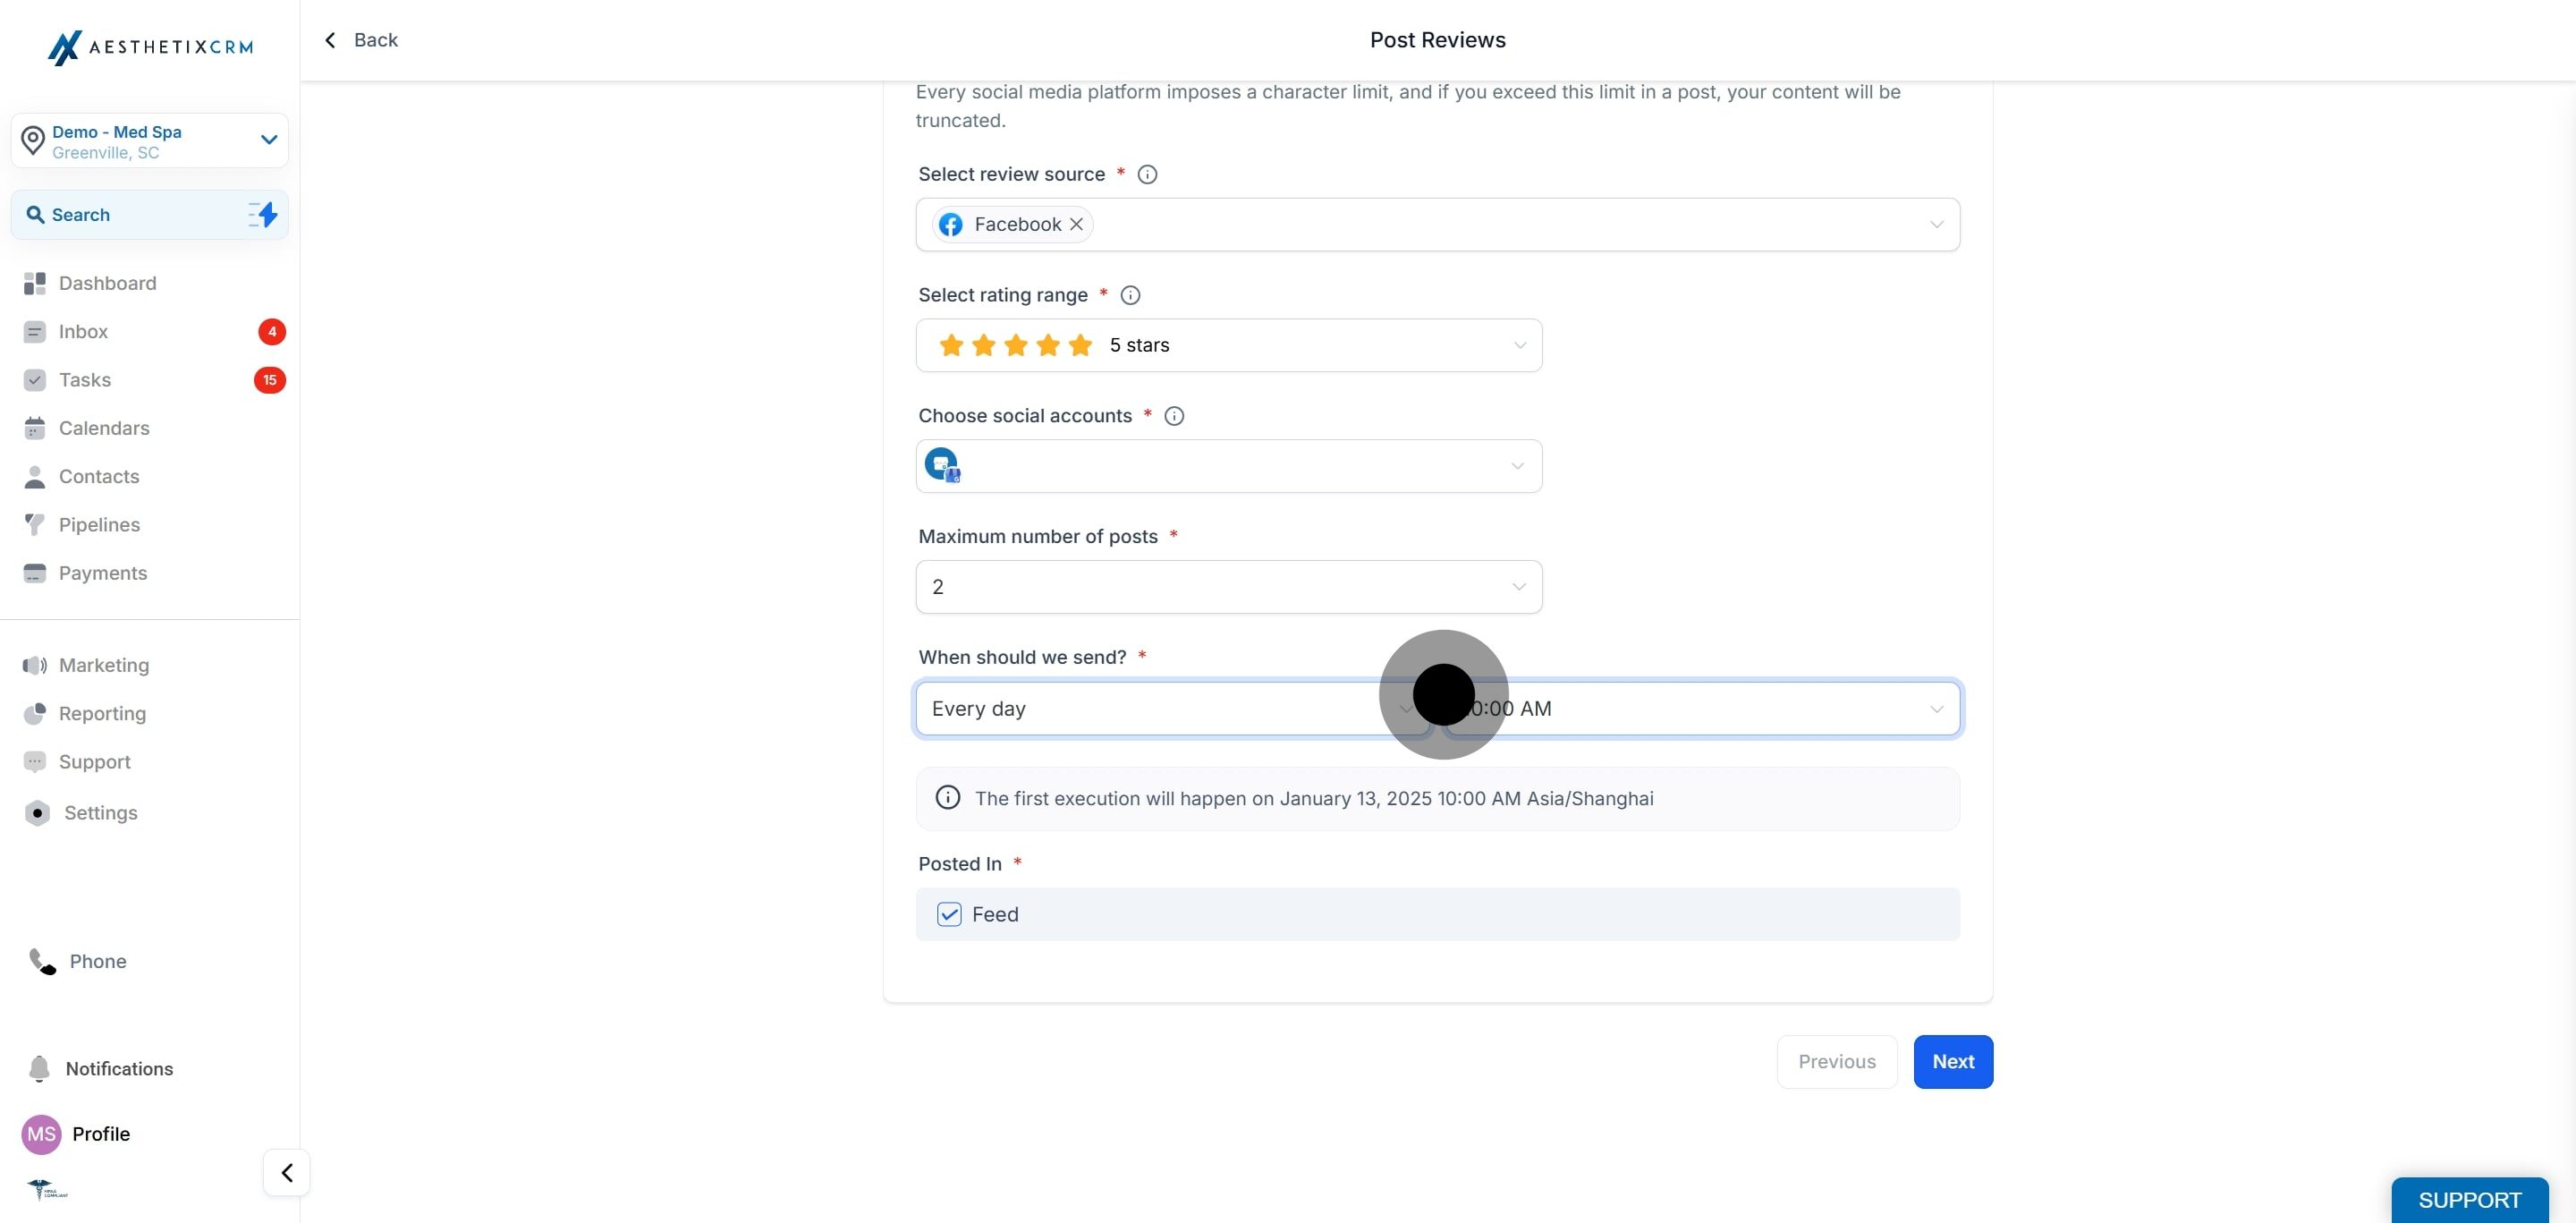
5. Select the platforms to pull reviews from (Facebook or Google). Note: Ensure you have integrated your Facebook Page or Google Business Profile.
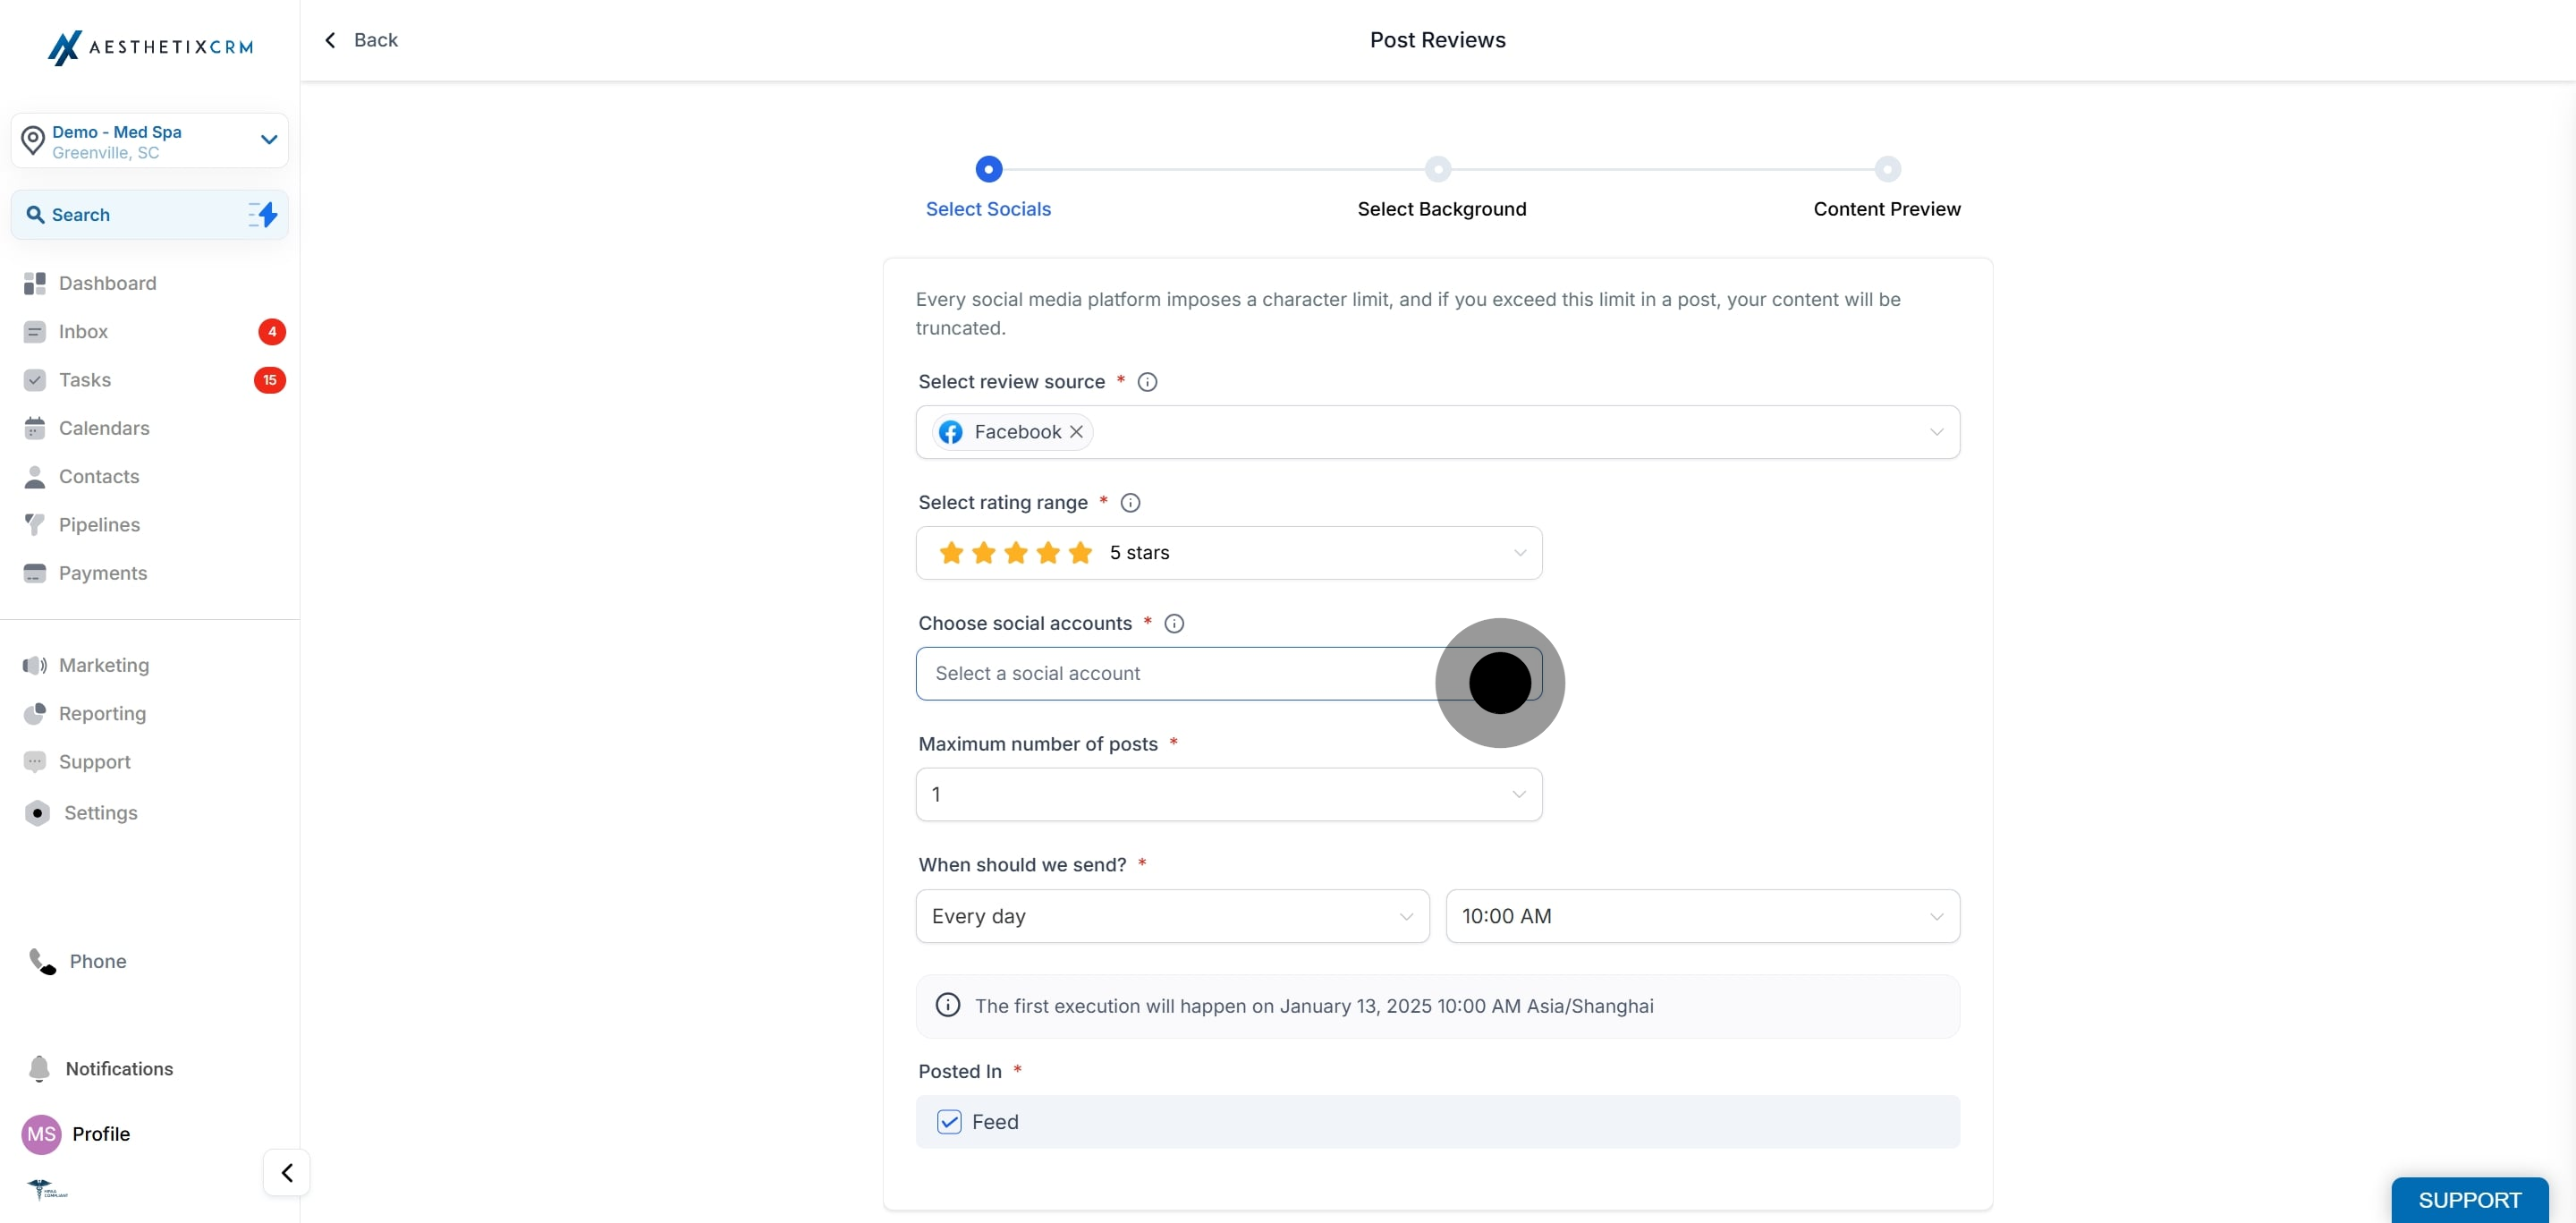
6. Next up, Specify the rating range.
7. Choose the account where the review will be posted.
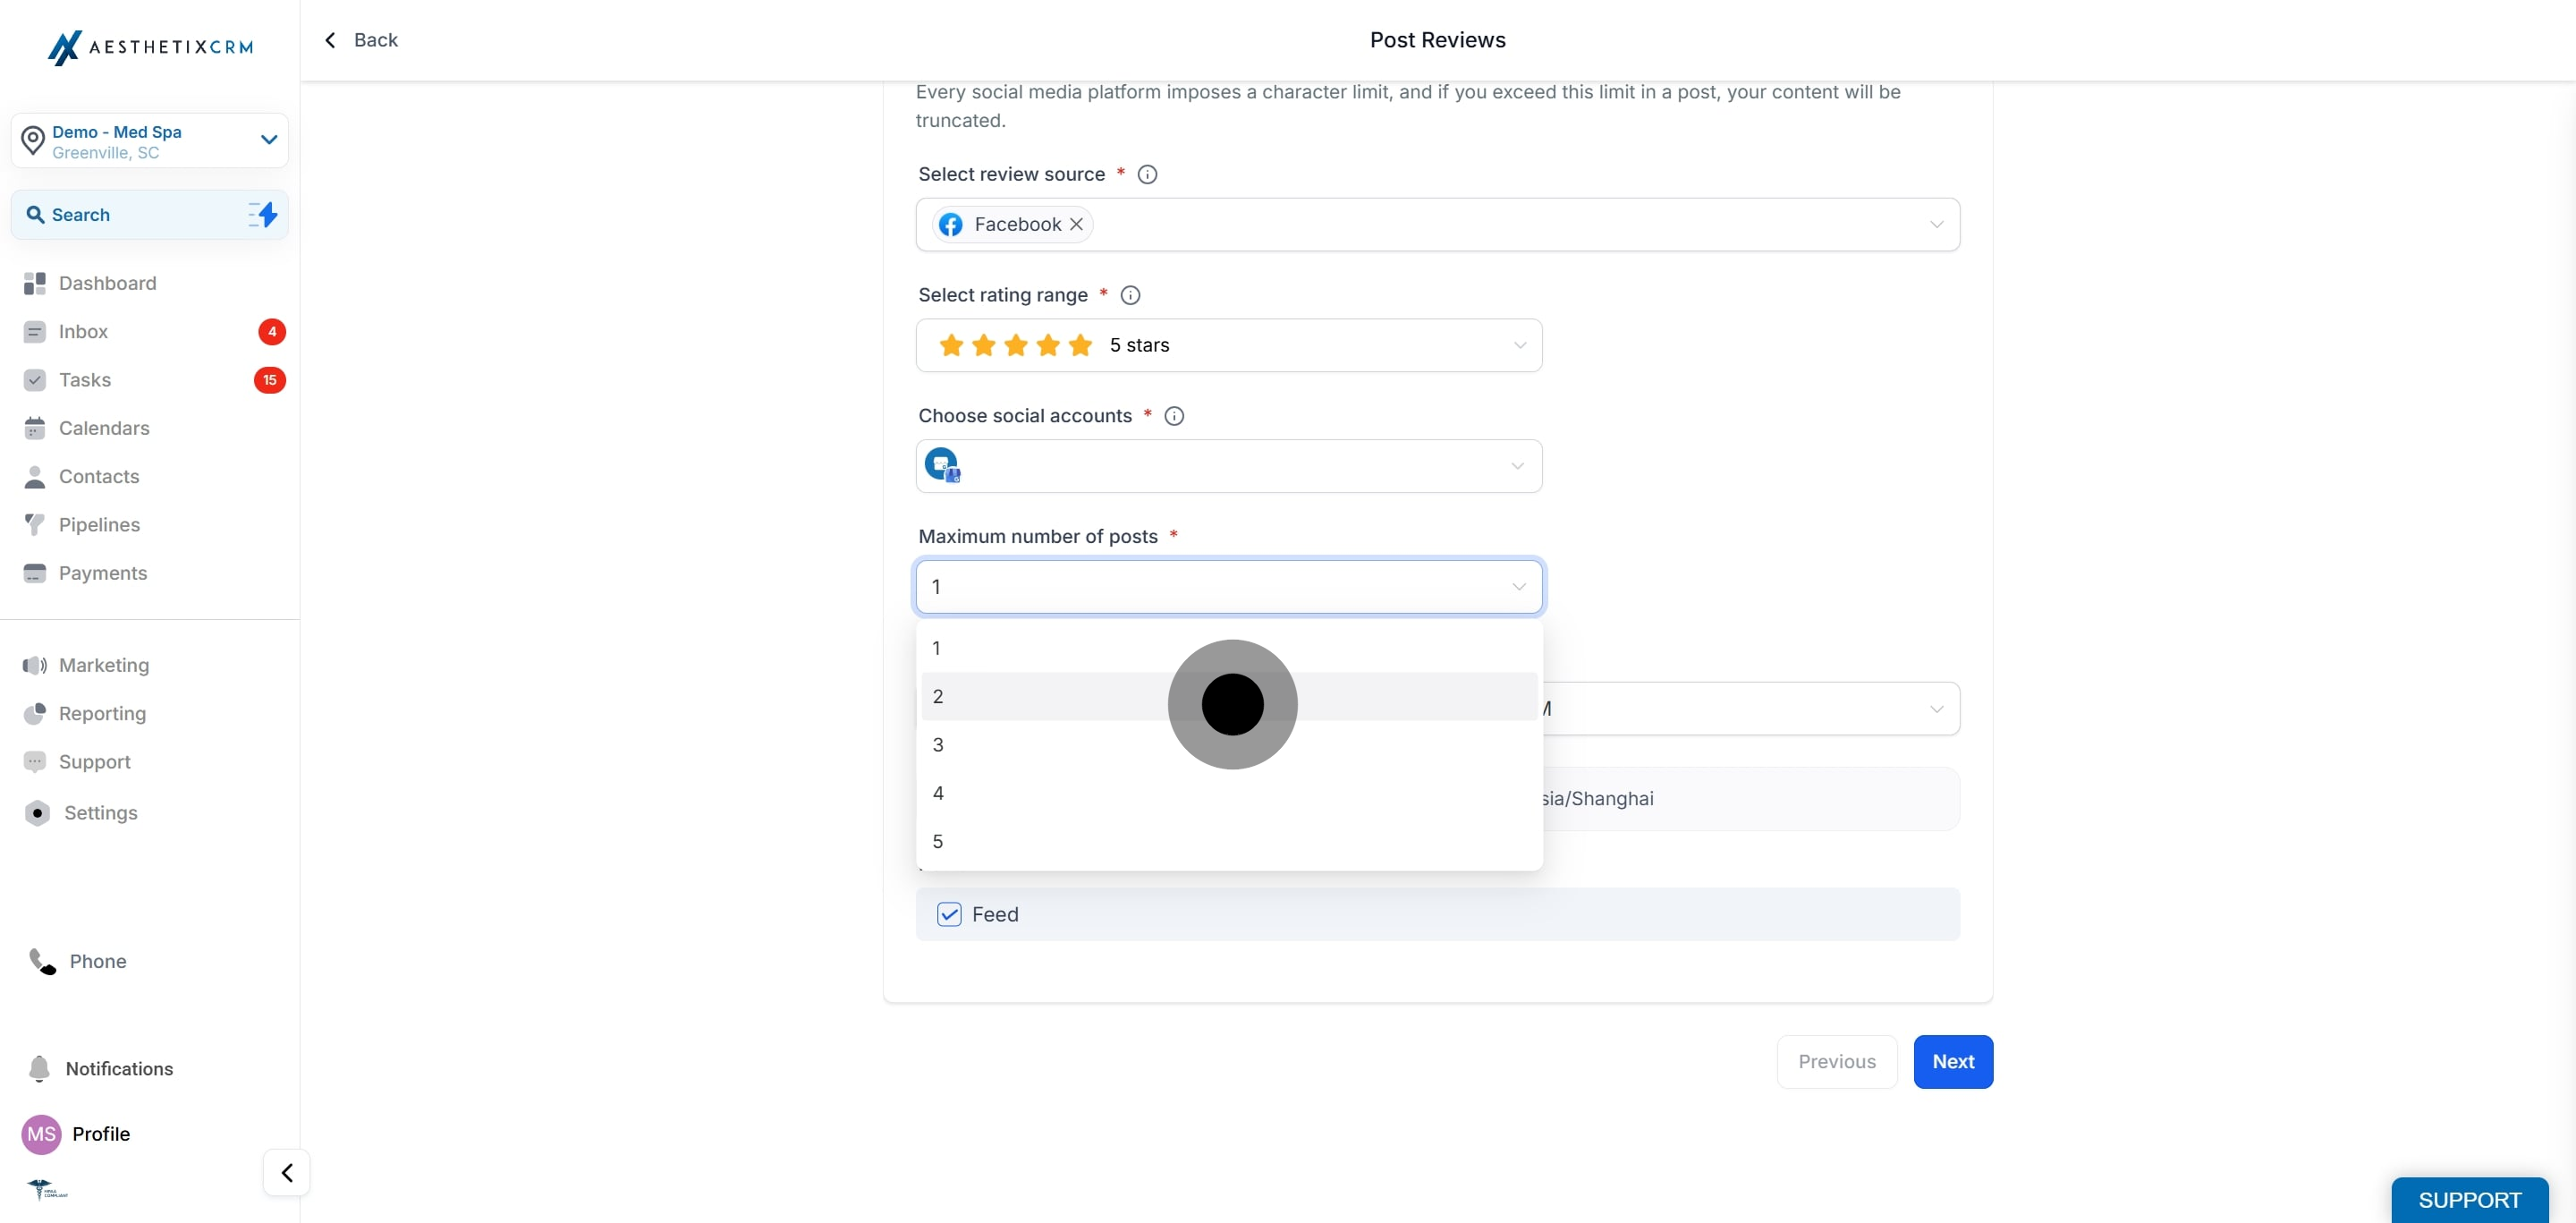
8. Select maximum number of posts.
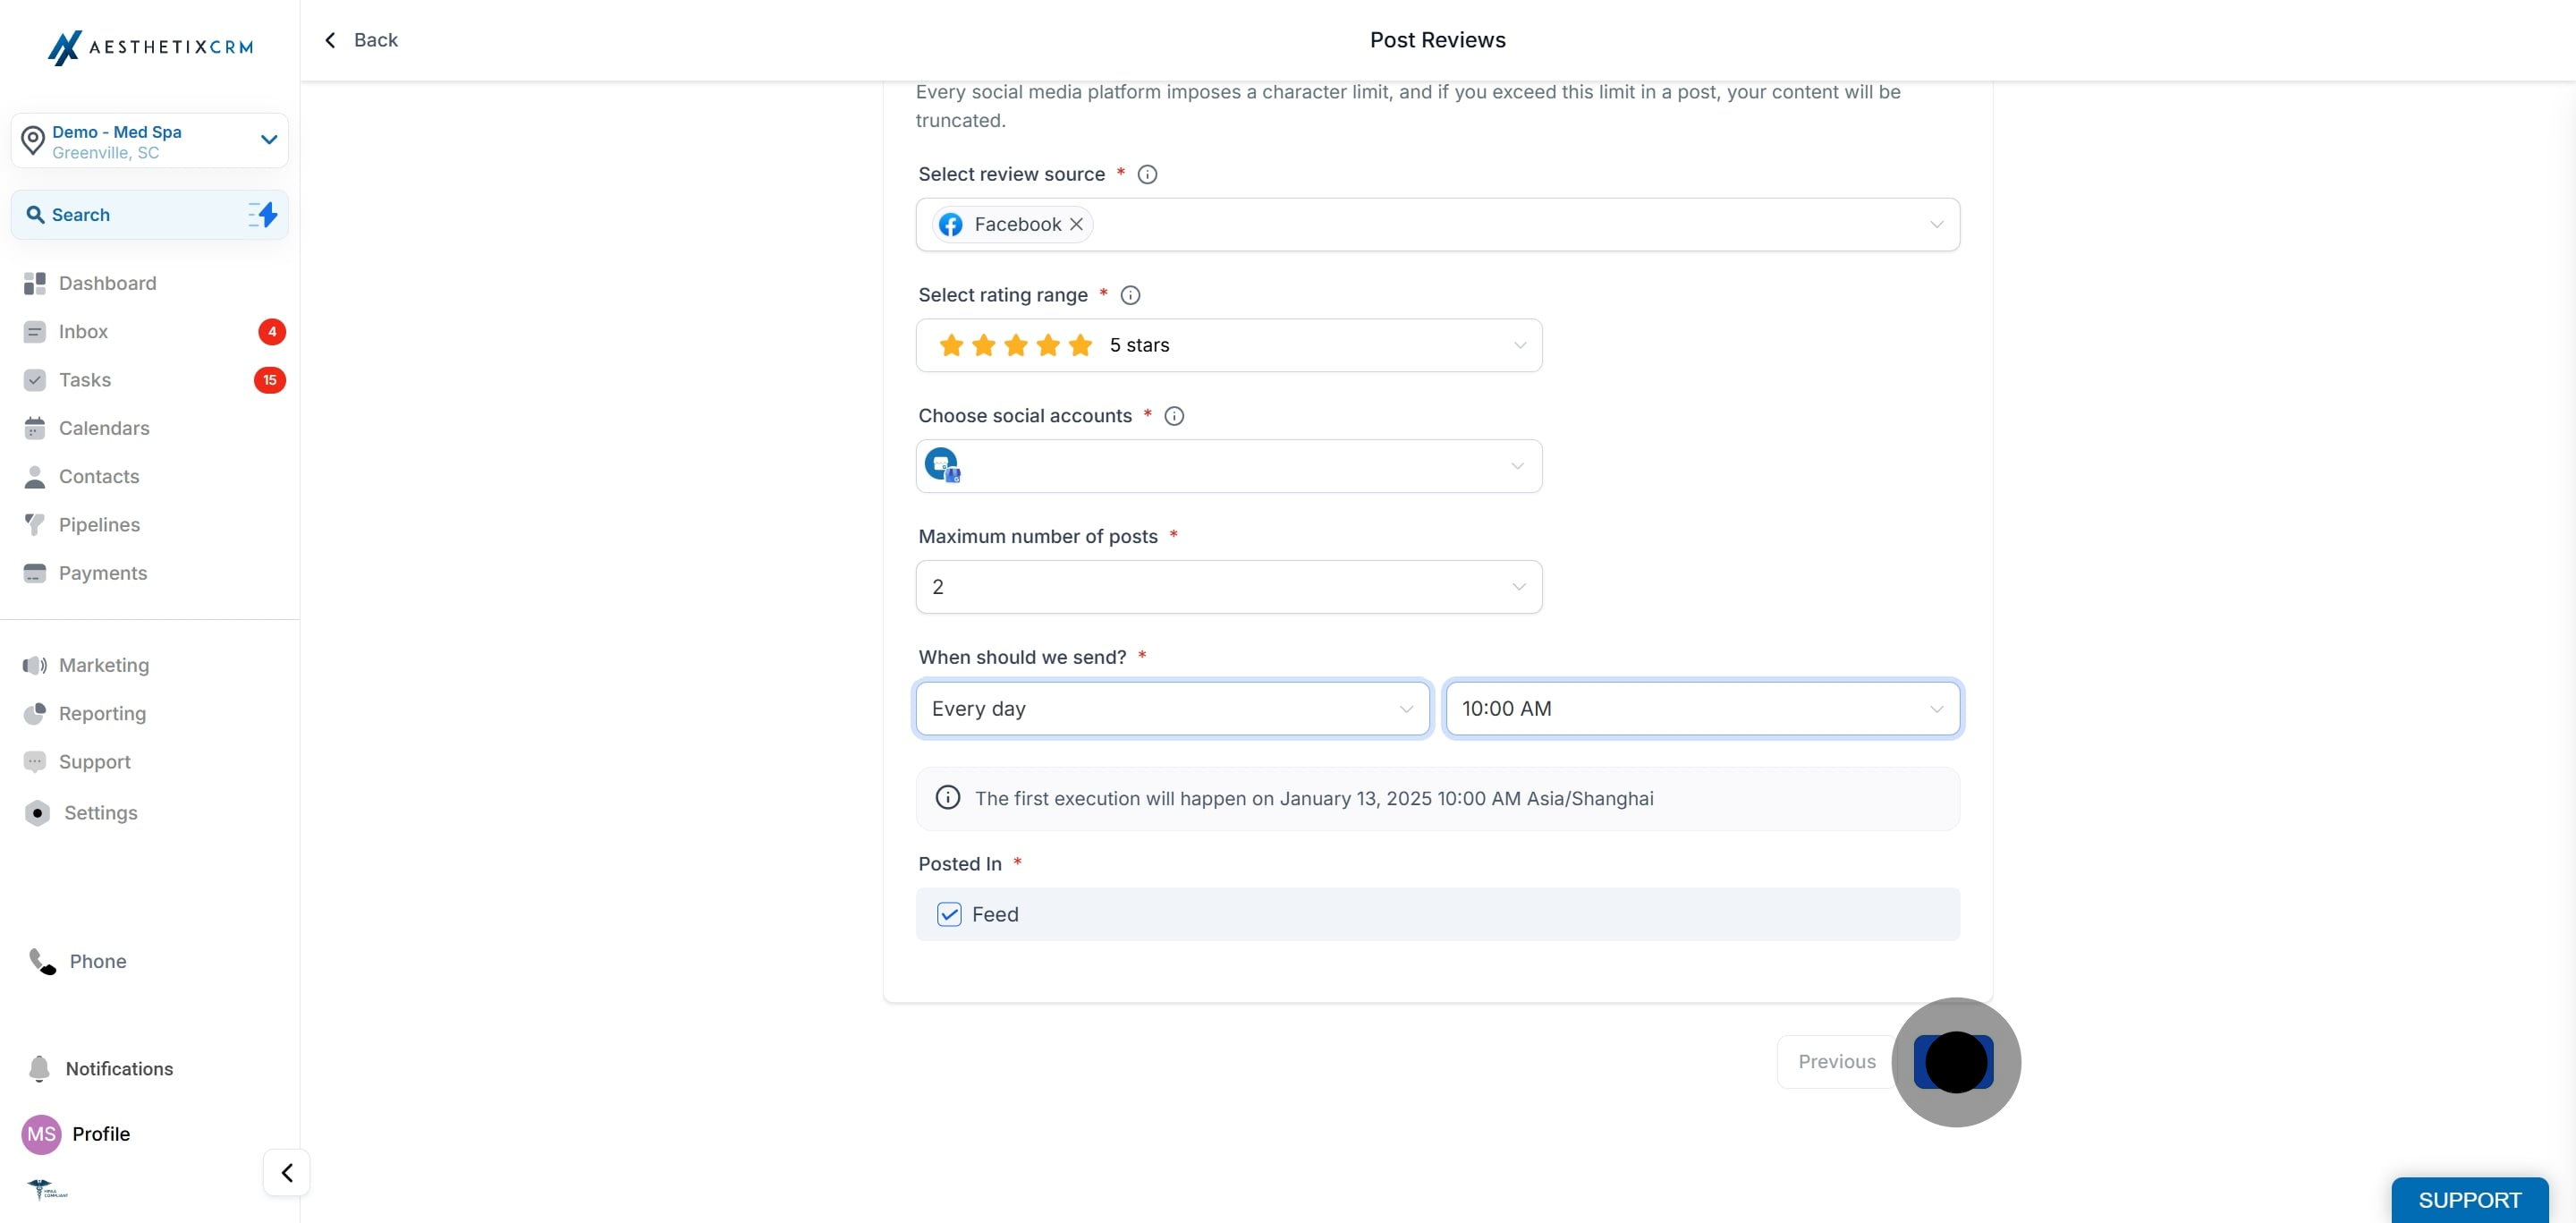
9. Set the date and time for the post.
10. Click Next.
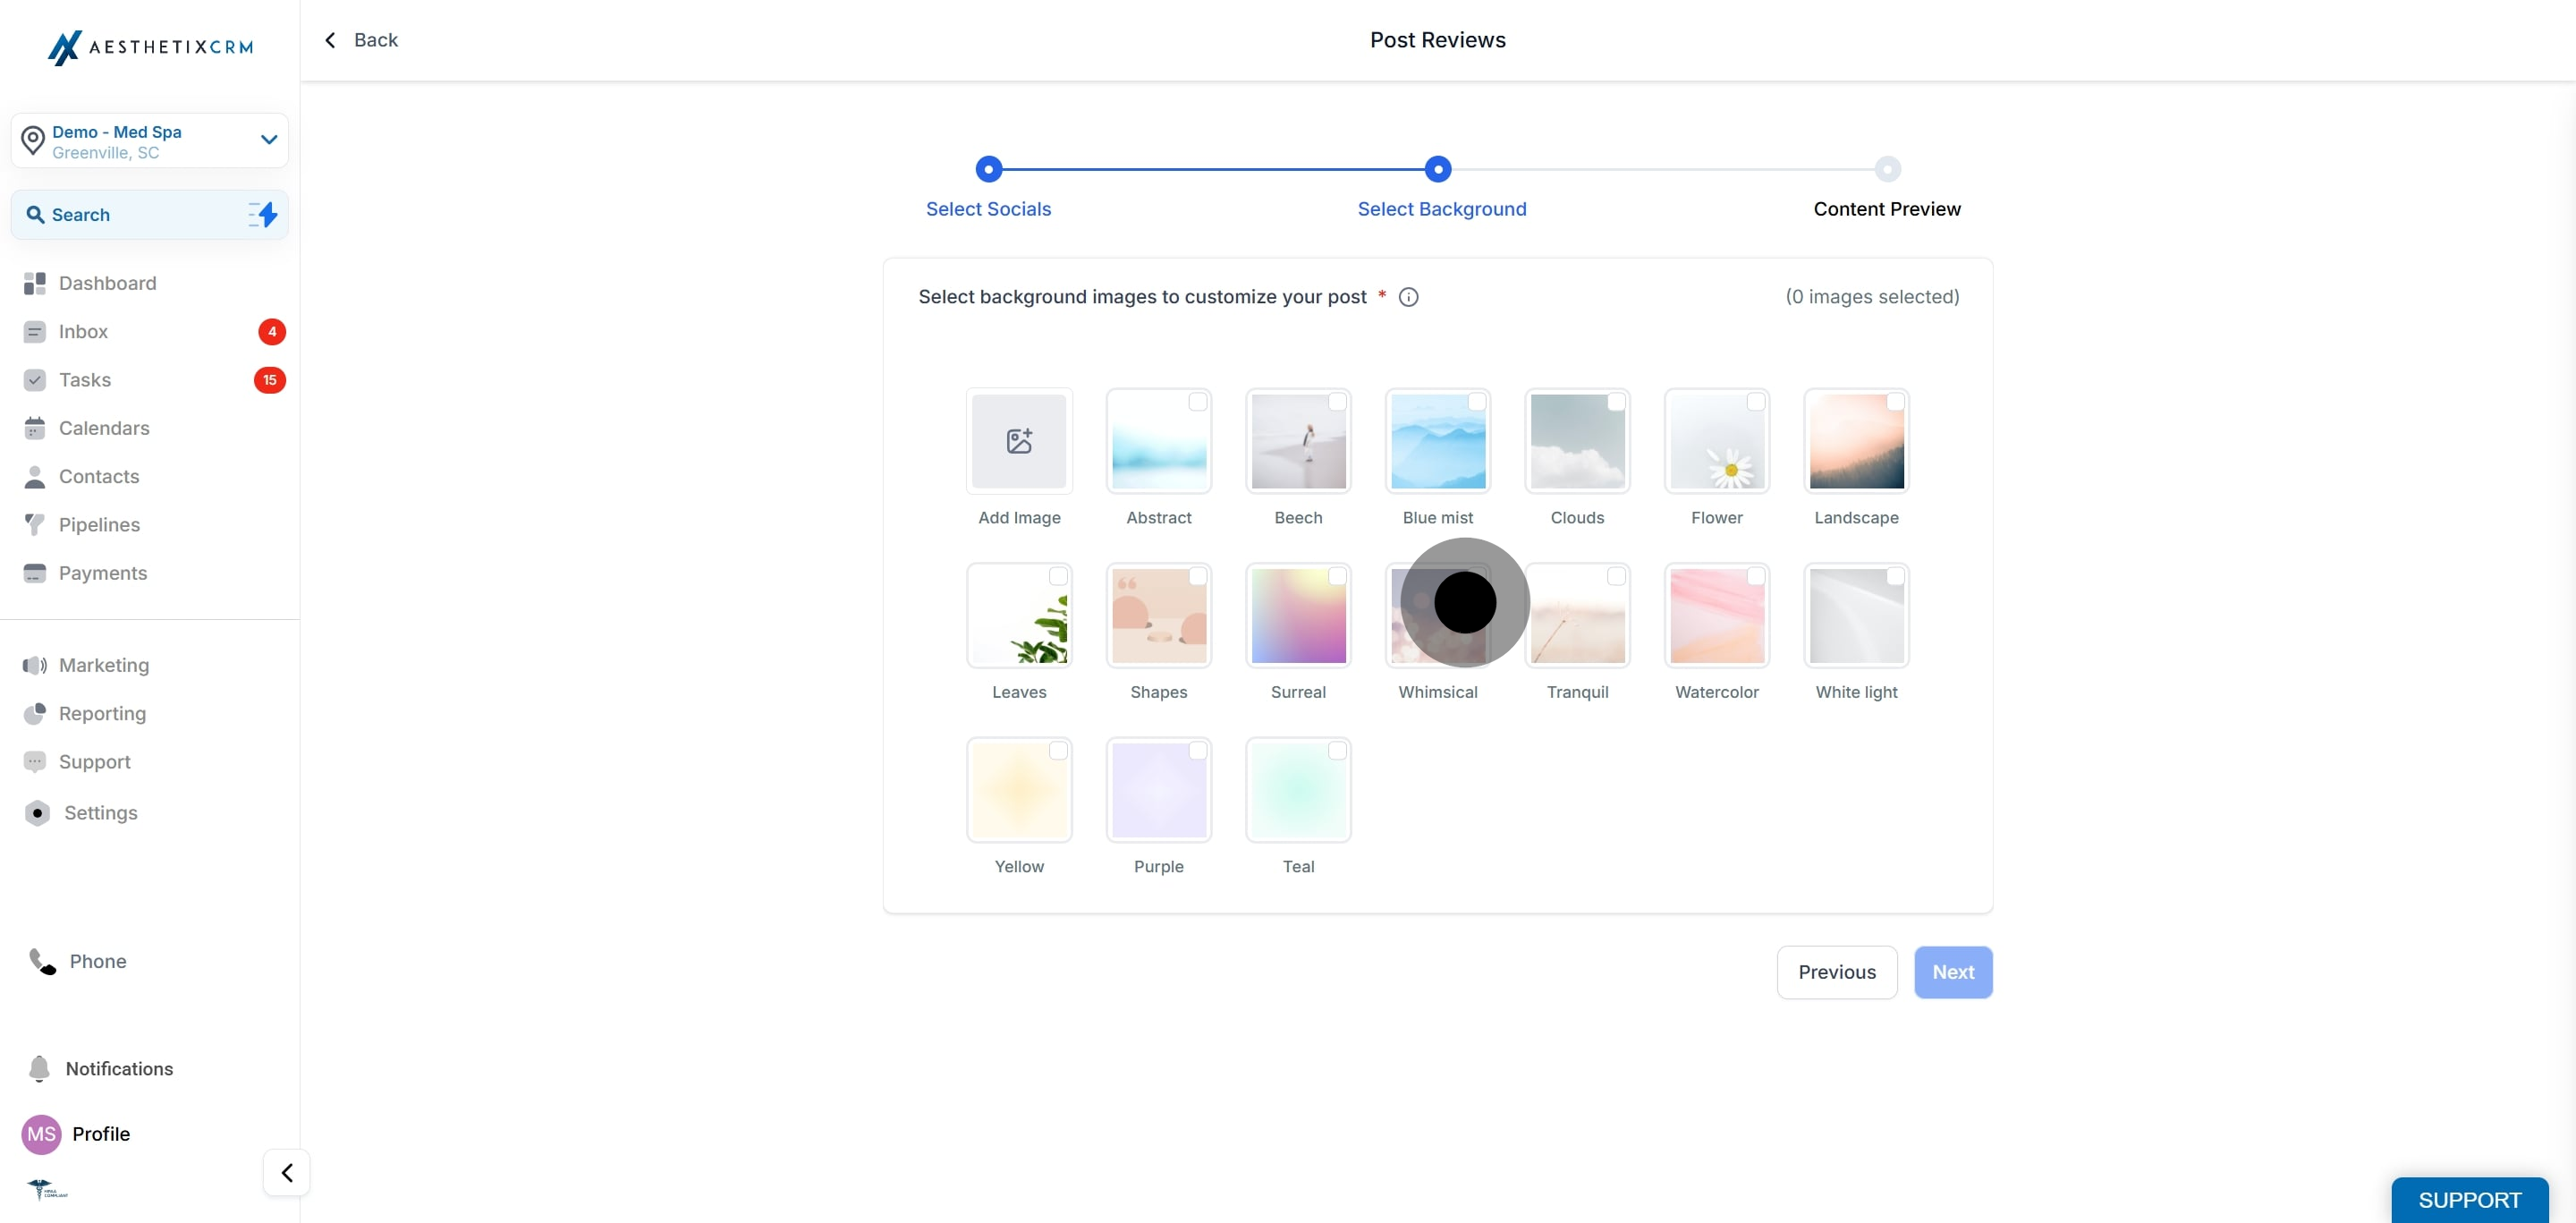
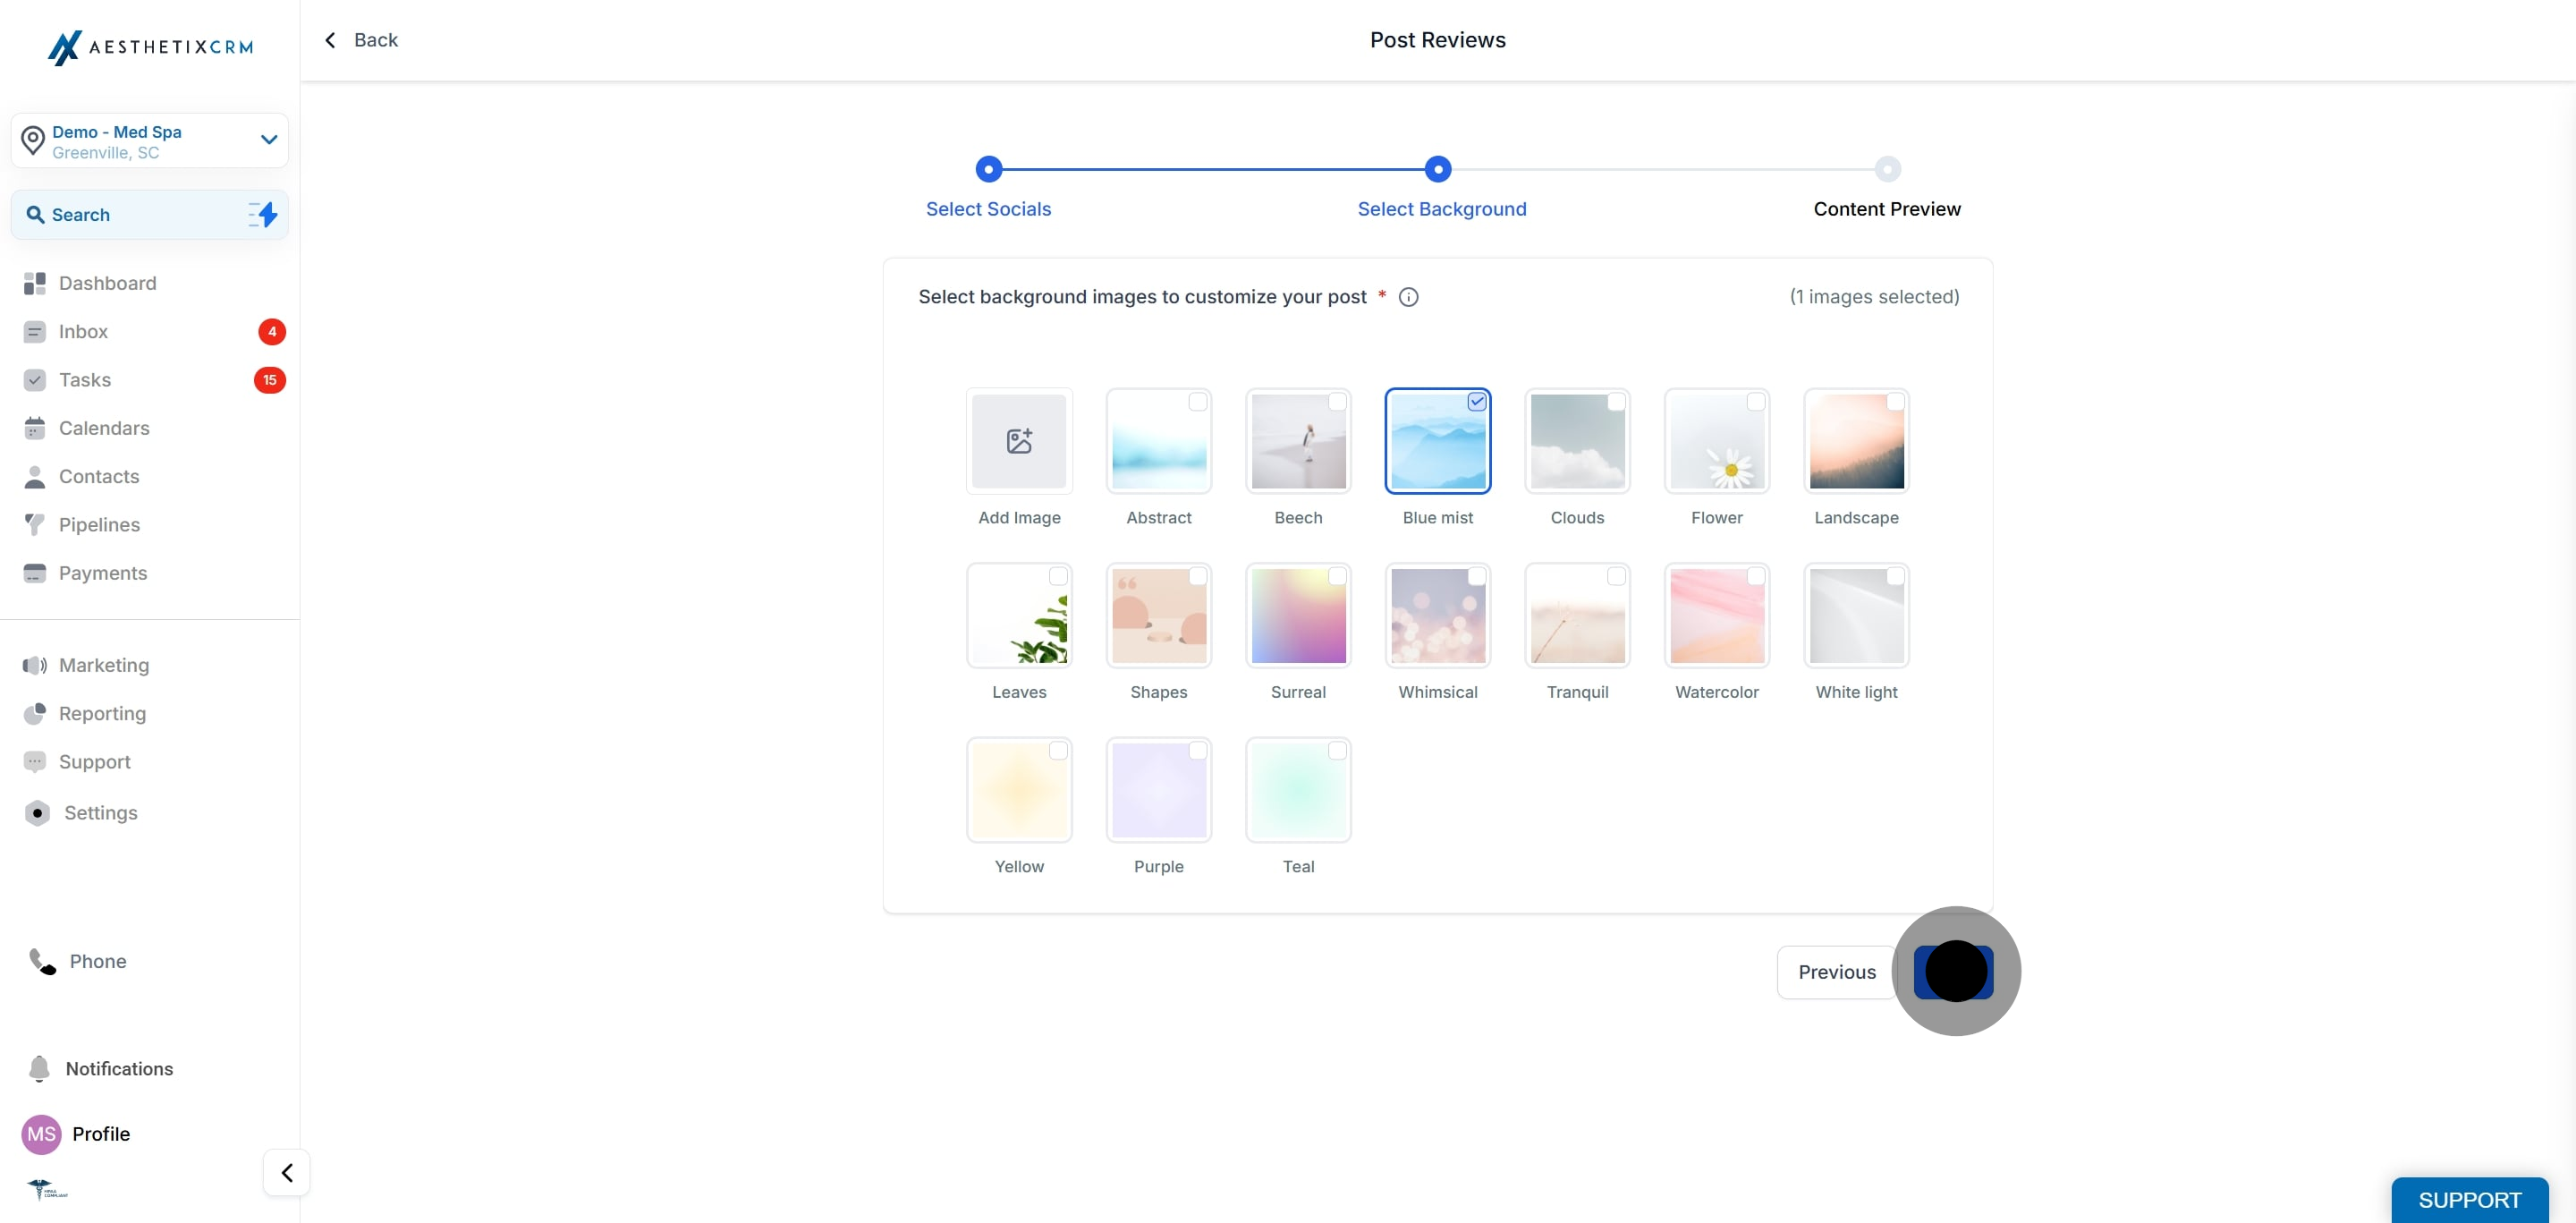
11. Upload or select multiple background images (JPEG/PNG, 1:1 ratio, max 5MB).
12. Click on "Next".
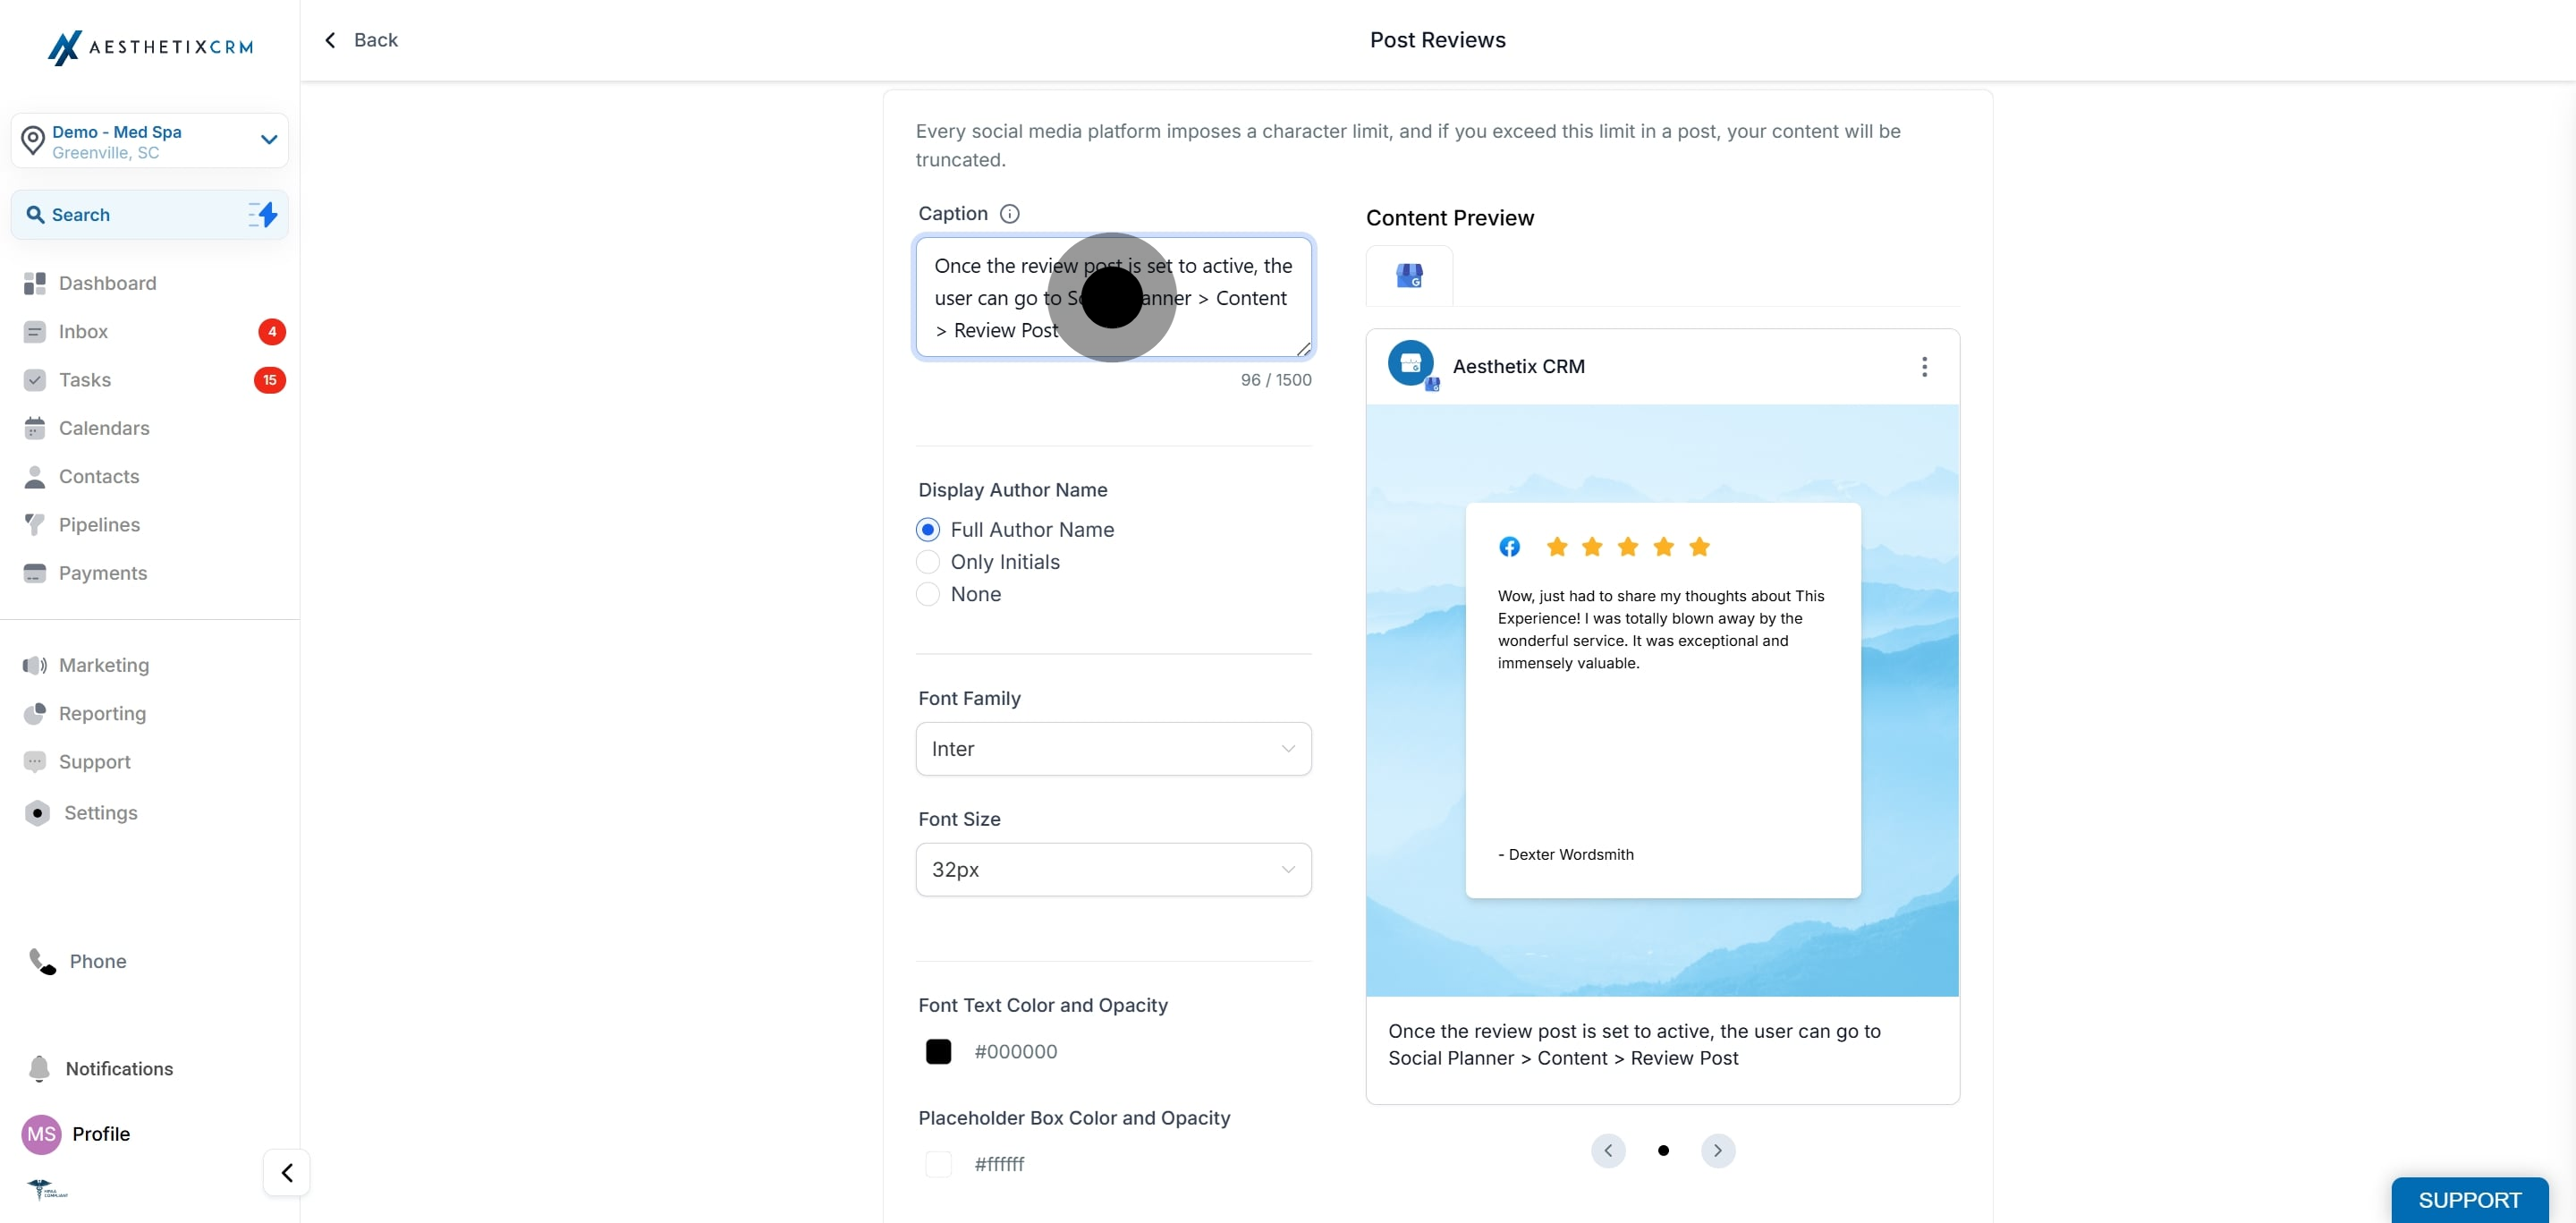
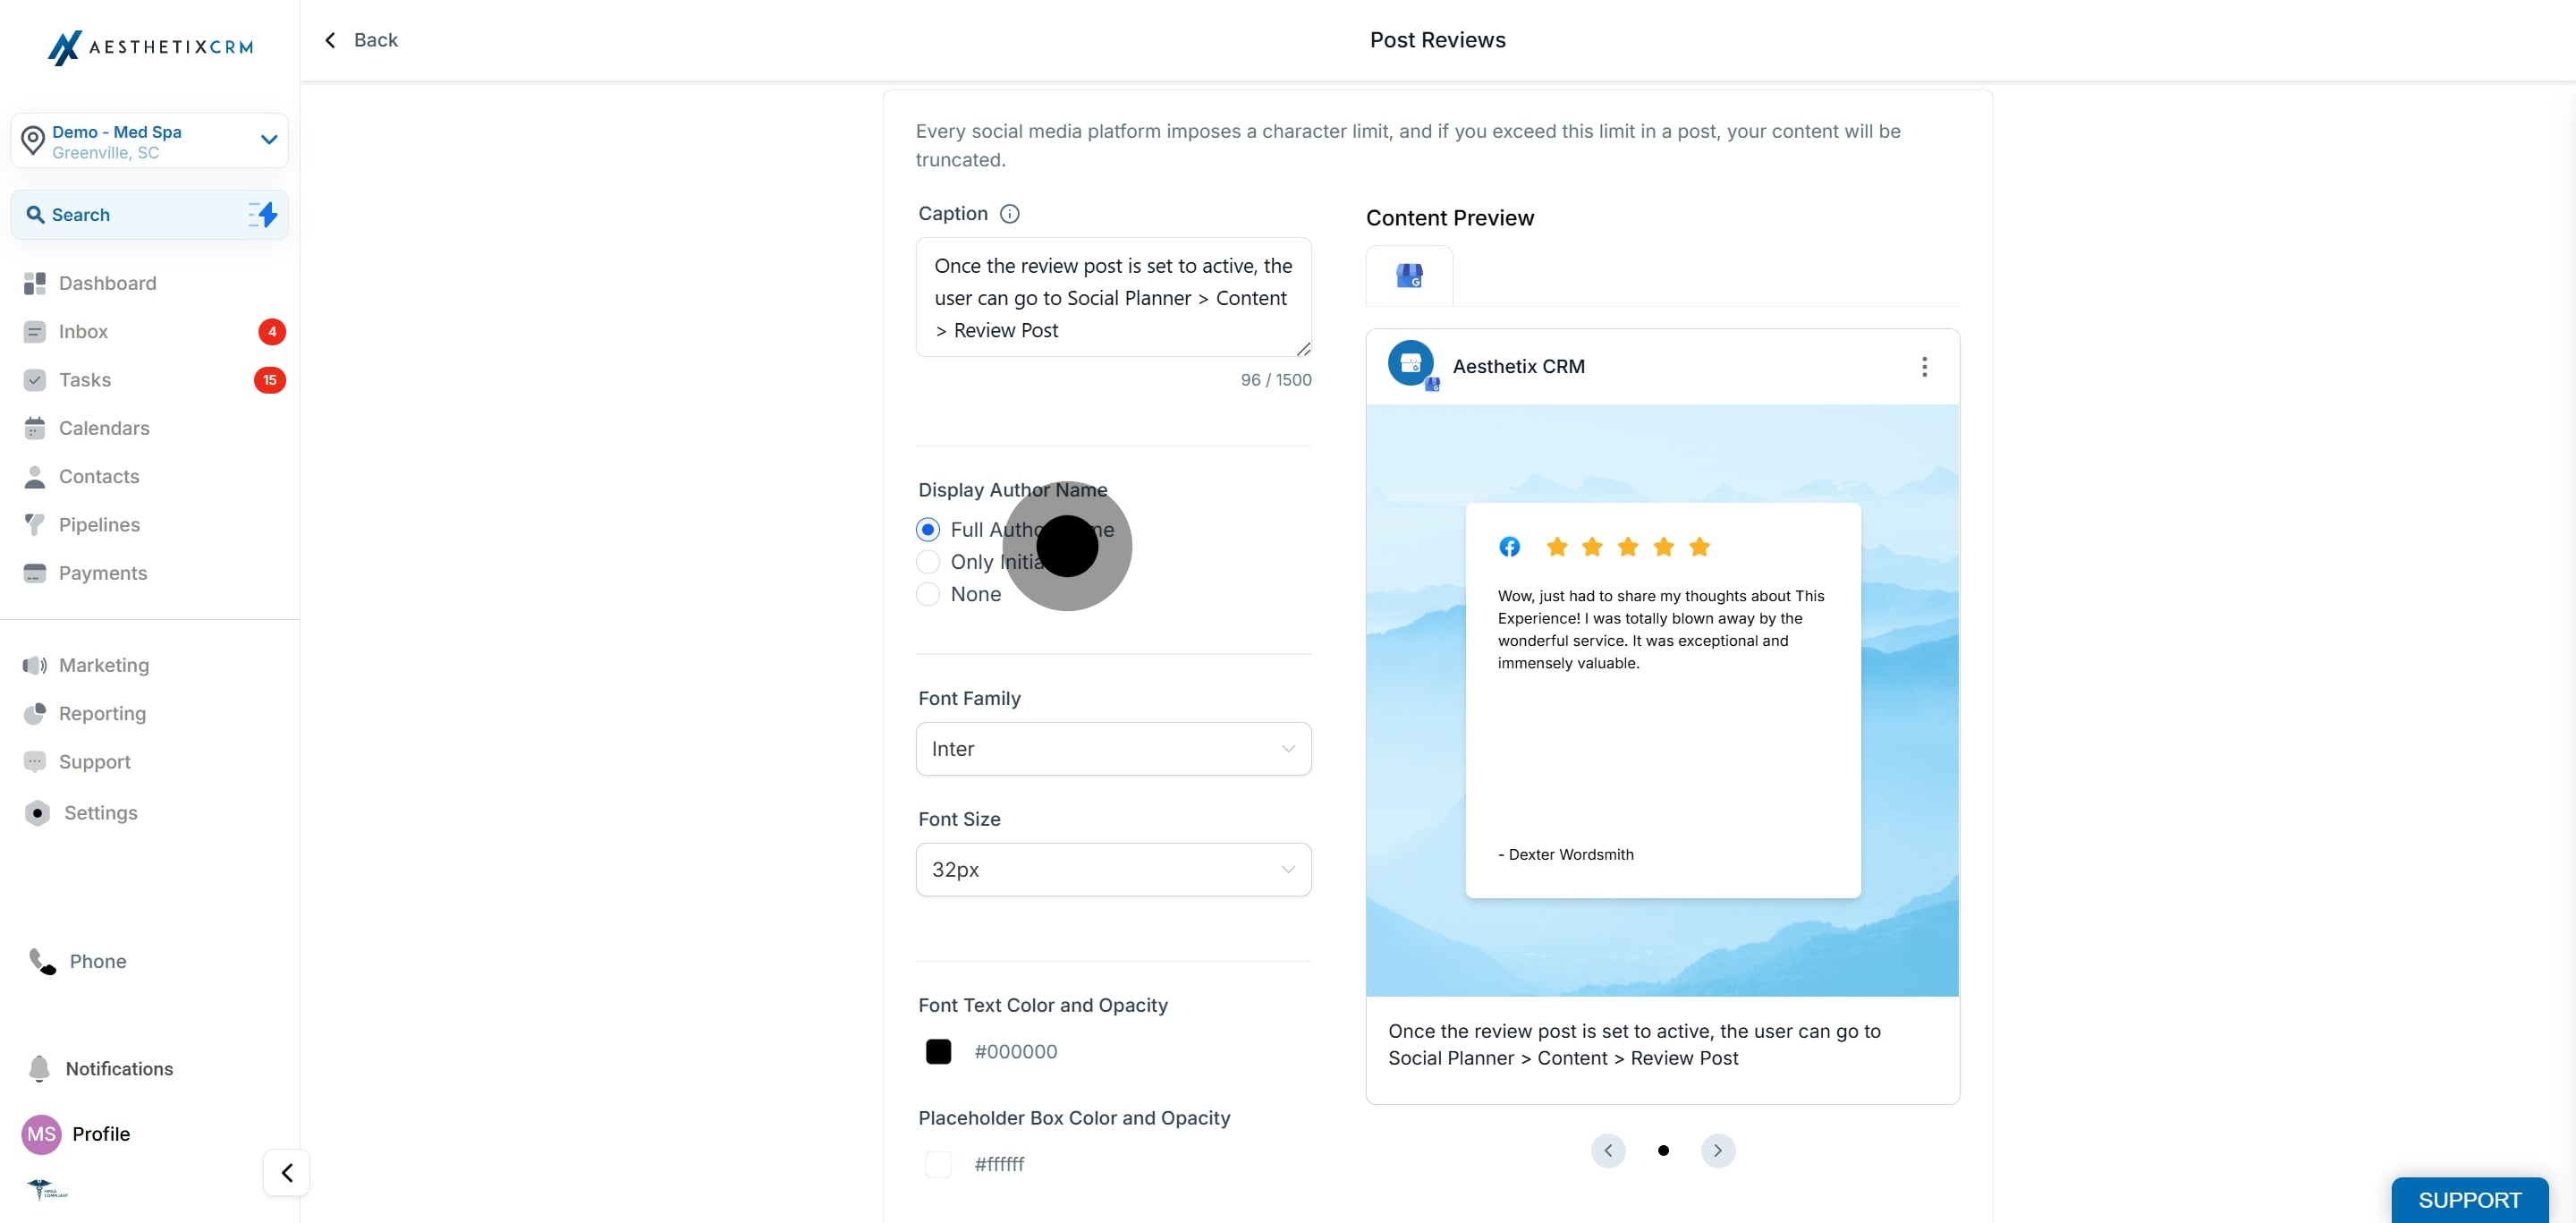
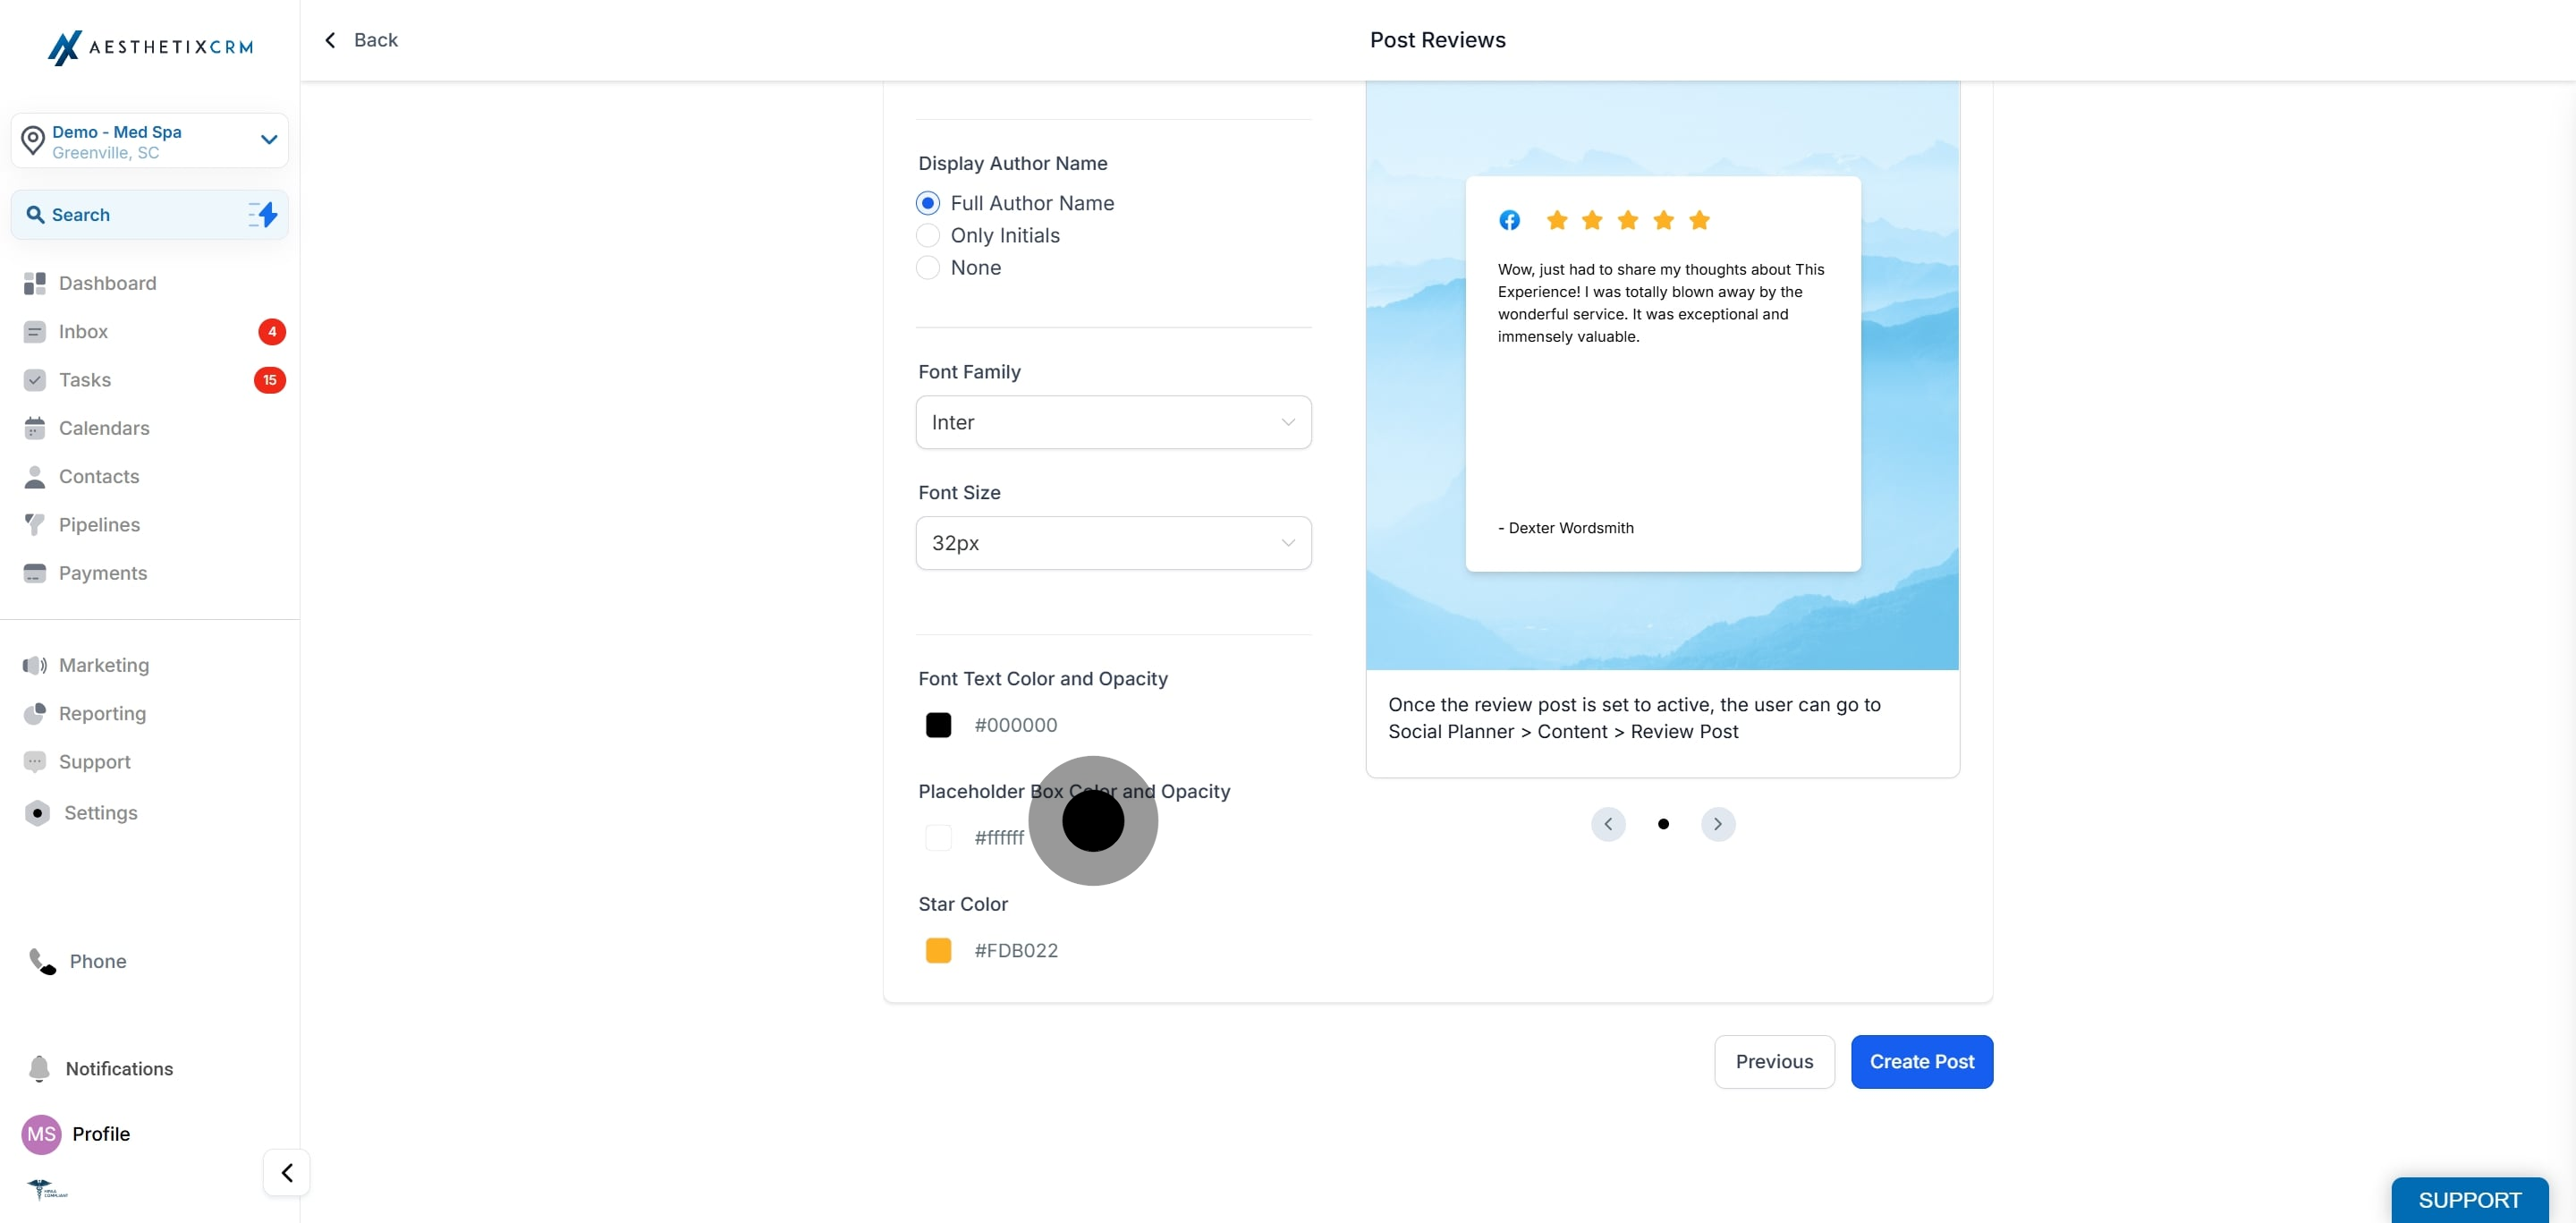
13. Add a custom caption or use the review content as the caption.
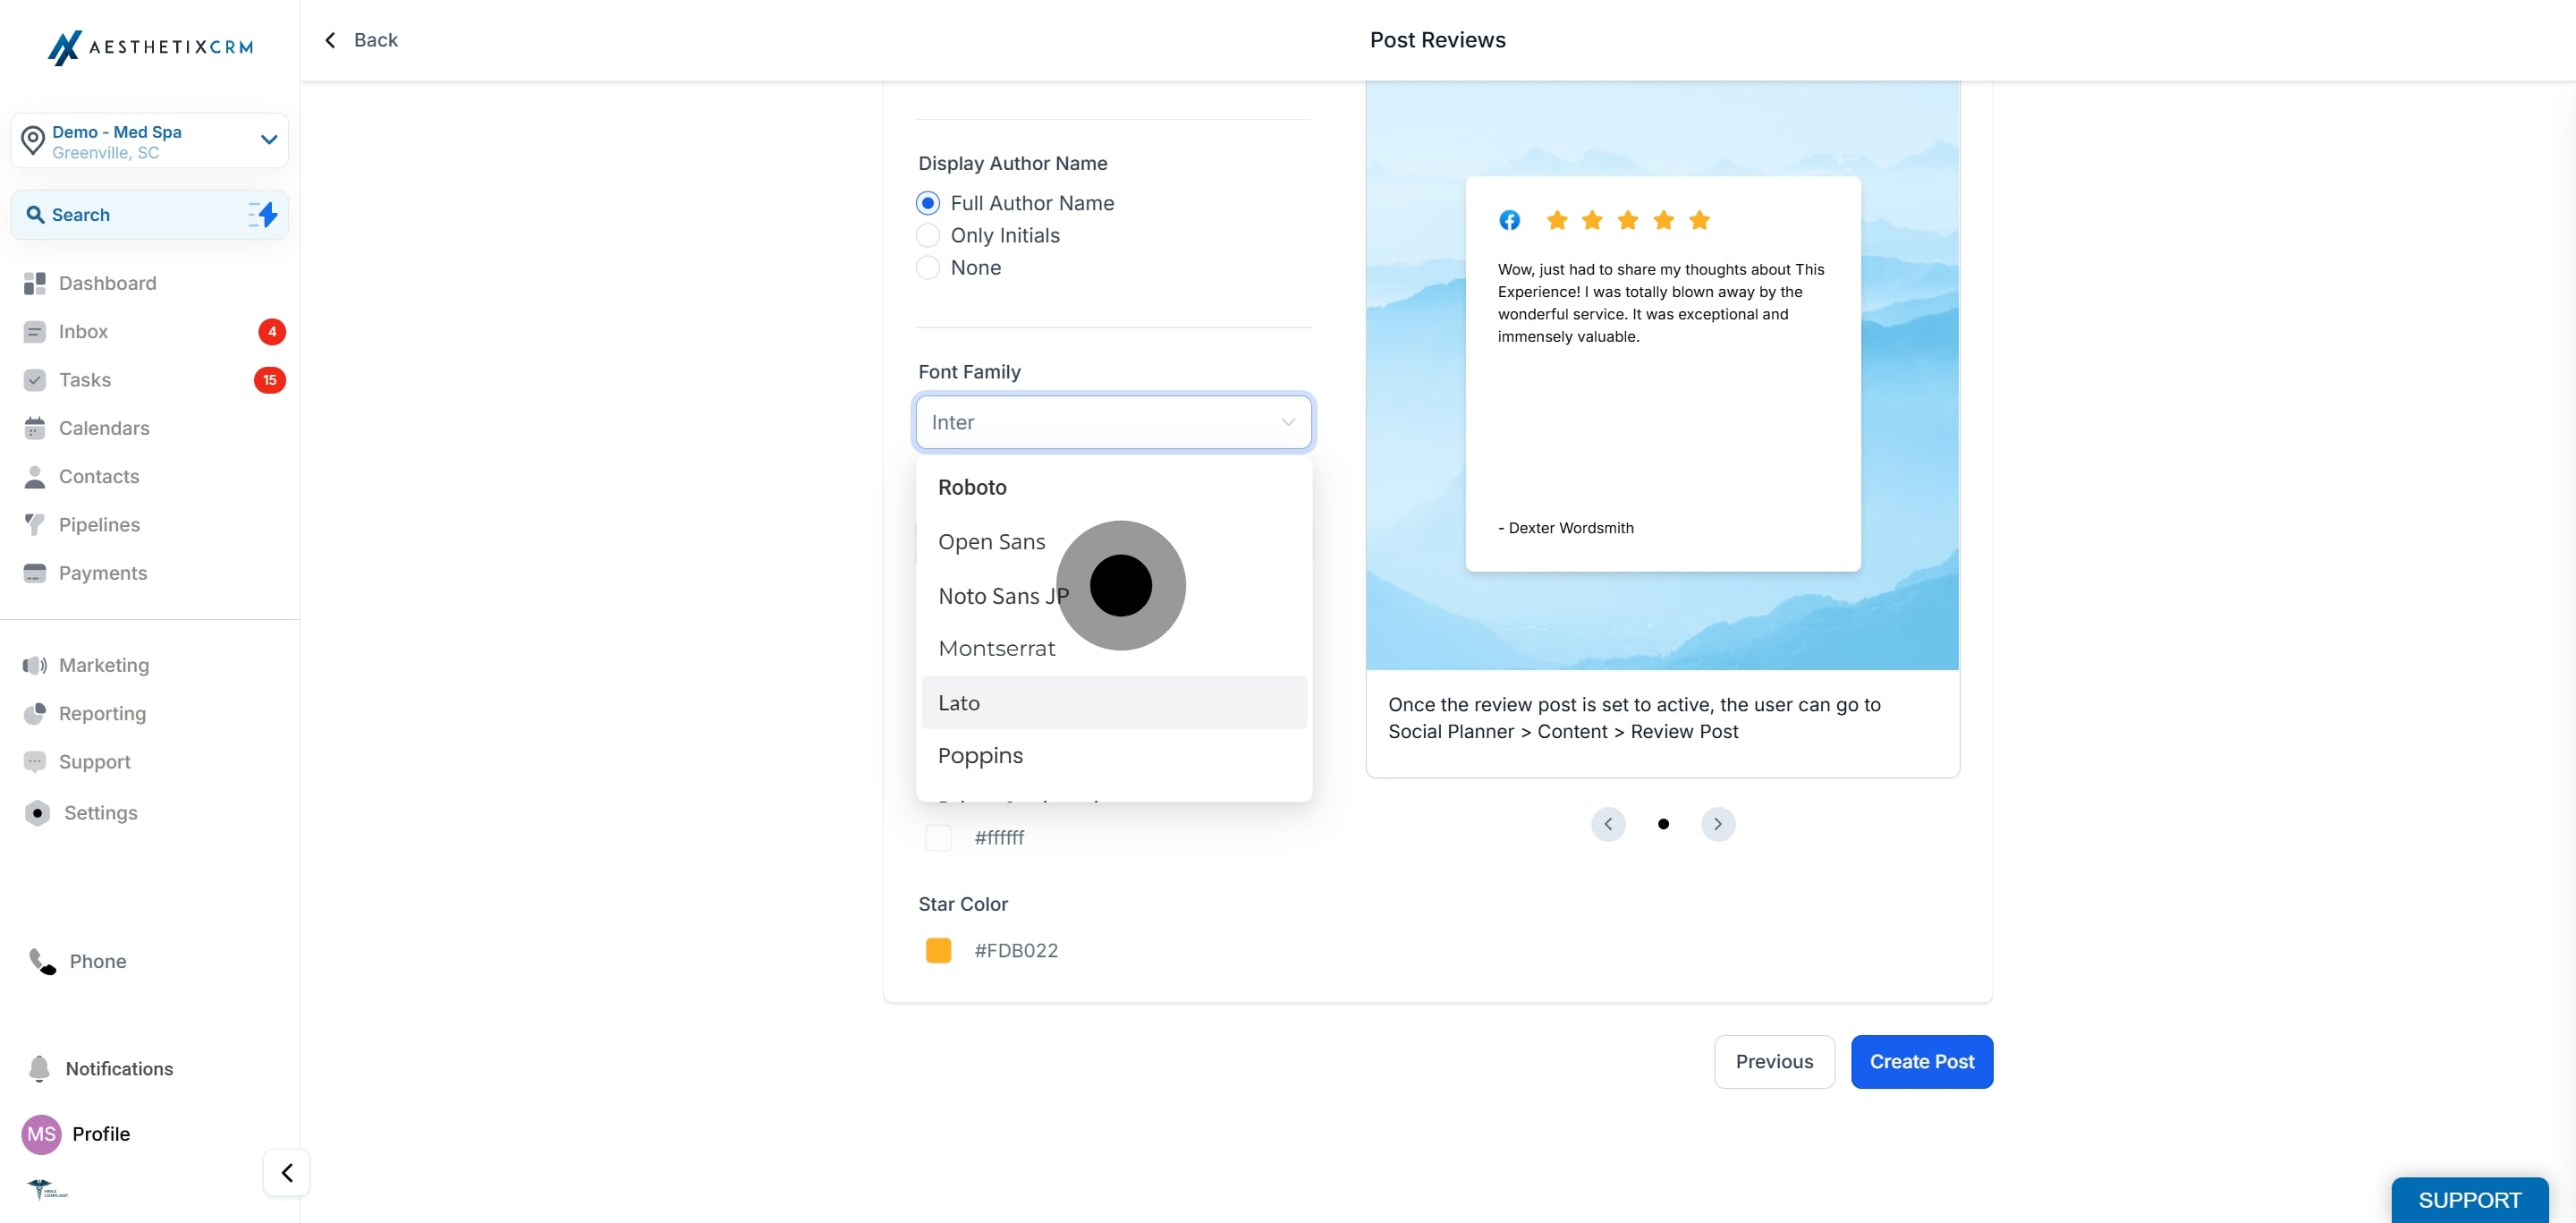
14. Choose how the customer’s name will be displayed (Full Name, First Name, or Initials).
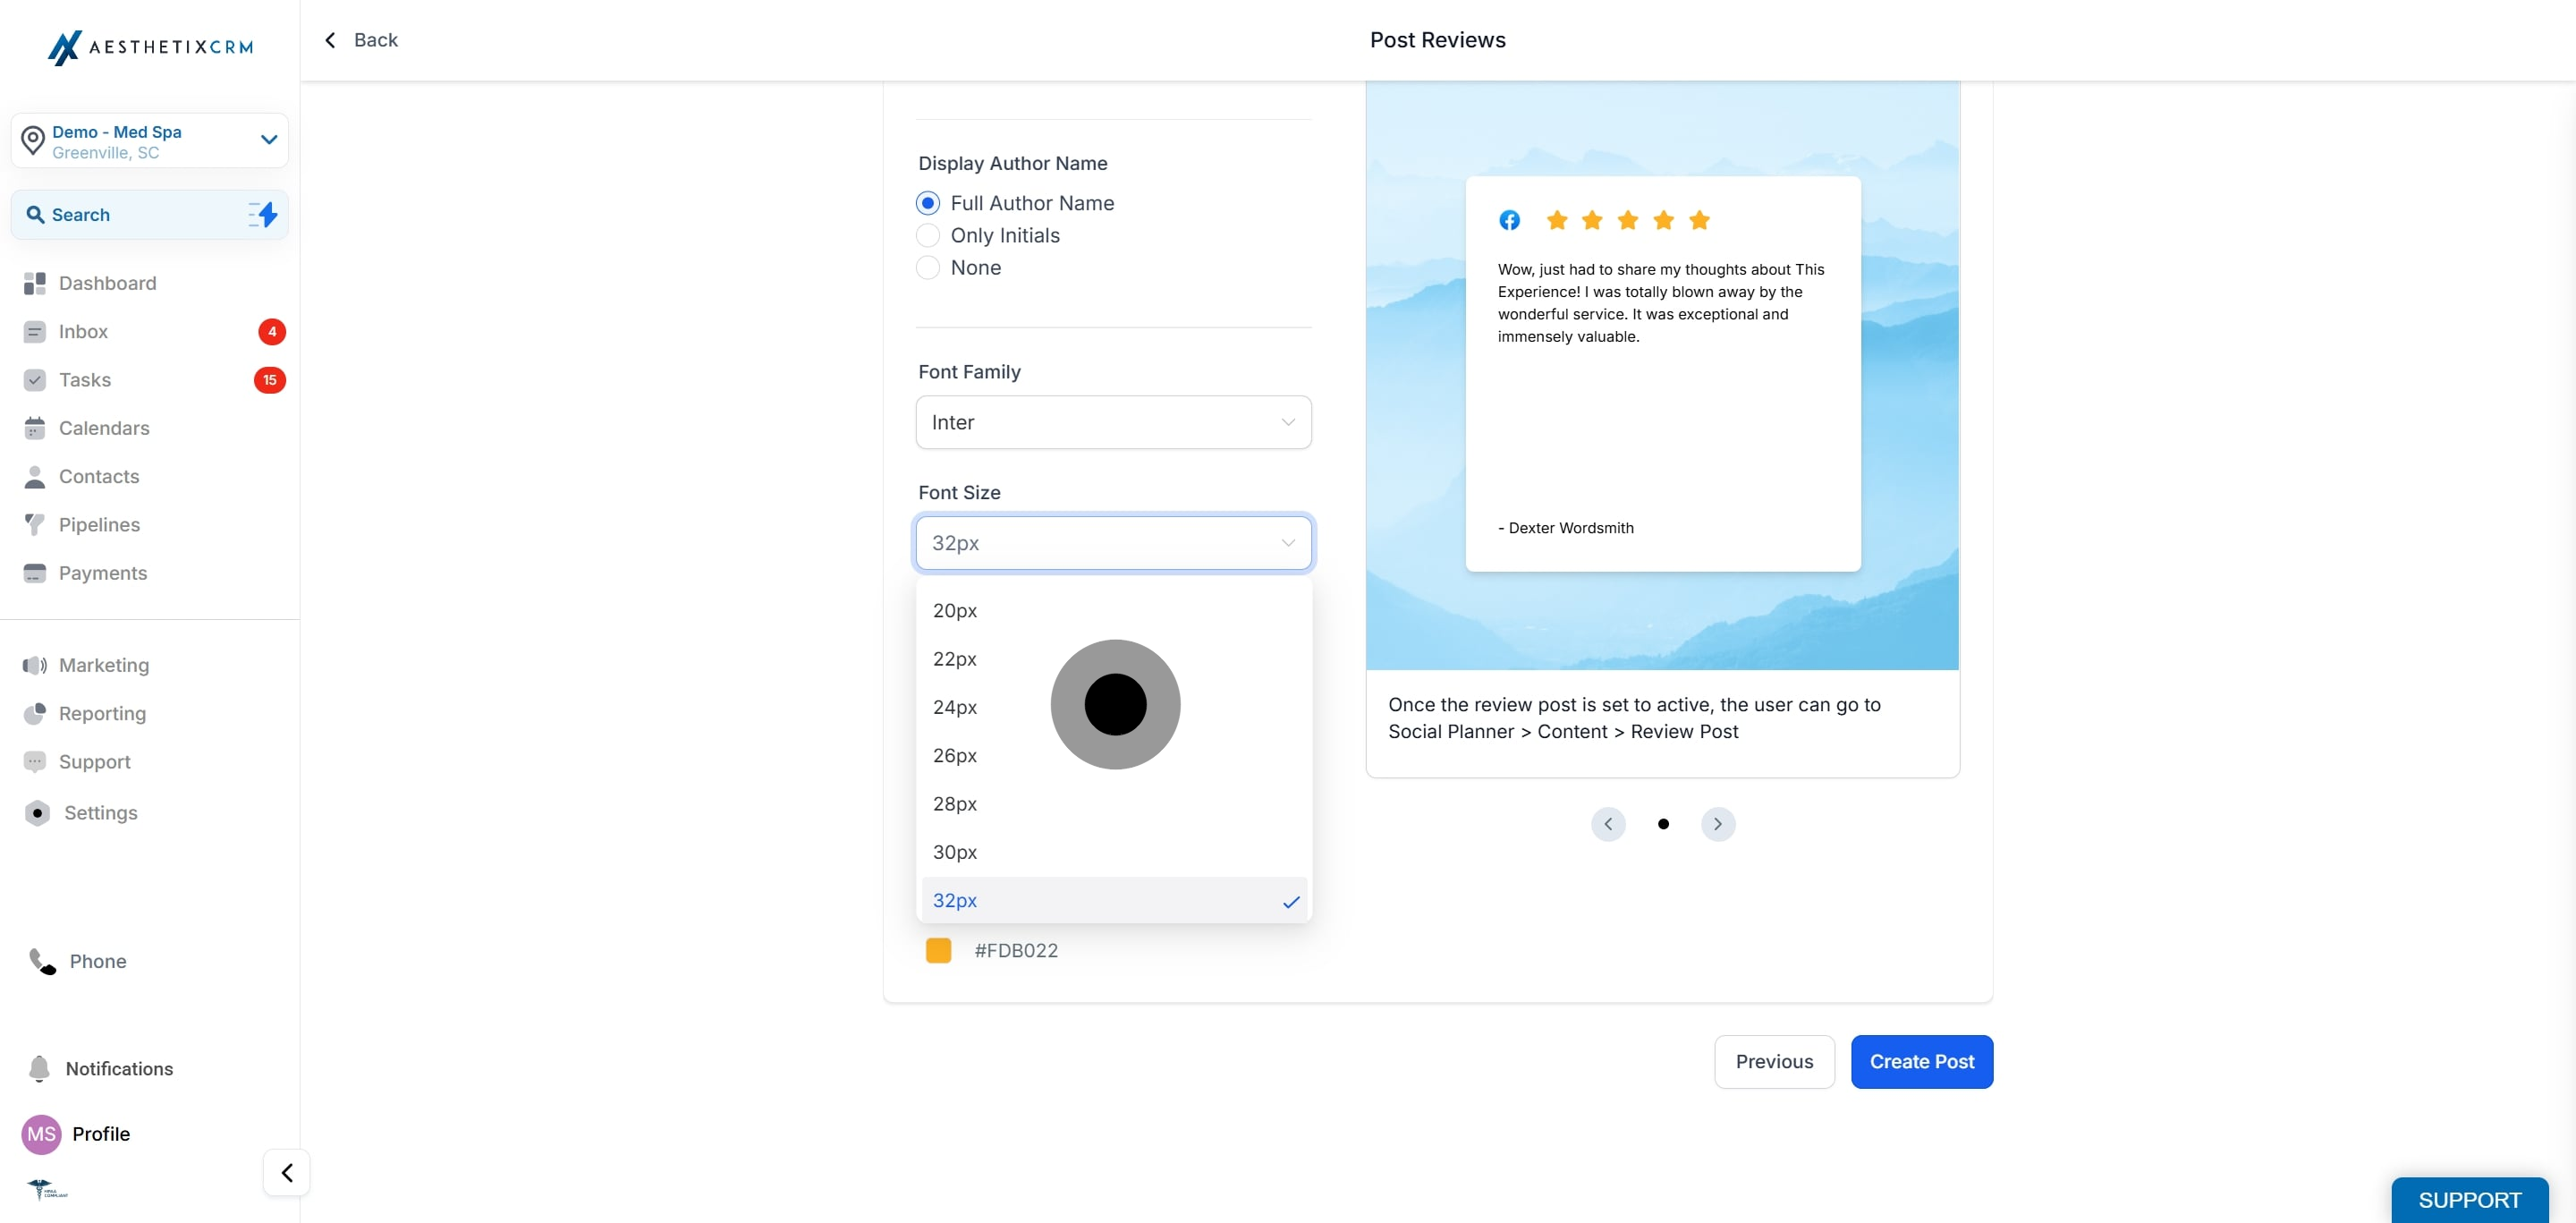
15. Now, choose a family font.
16. Select a font size.
17. Customize Font Color, Background Color, and Opacity.
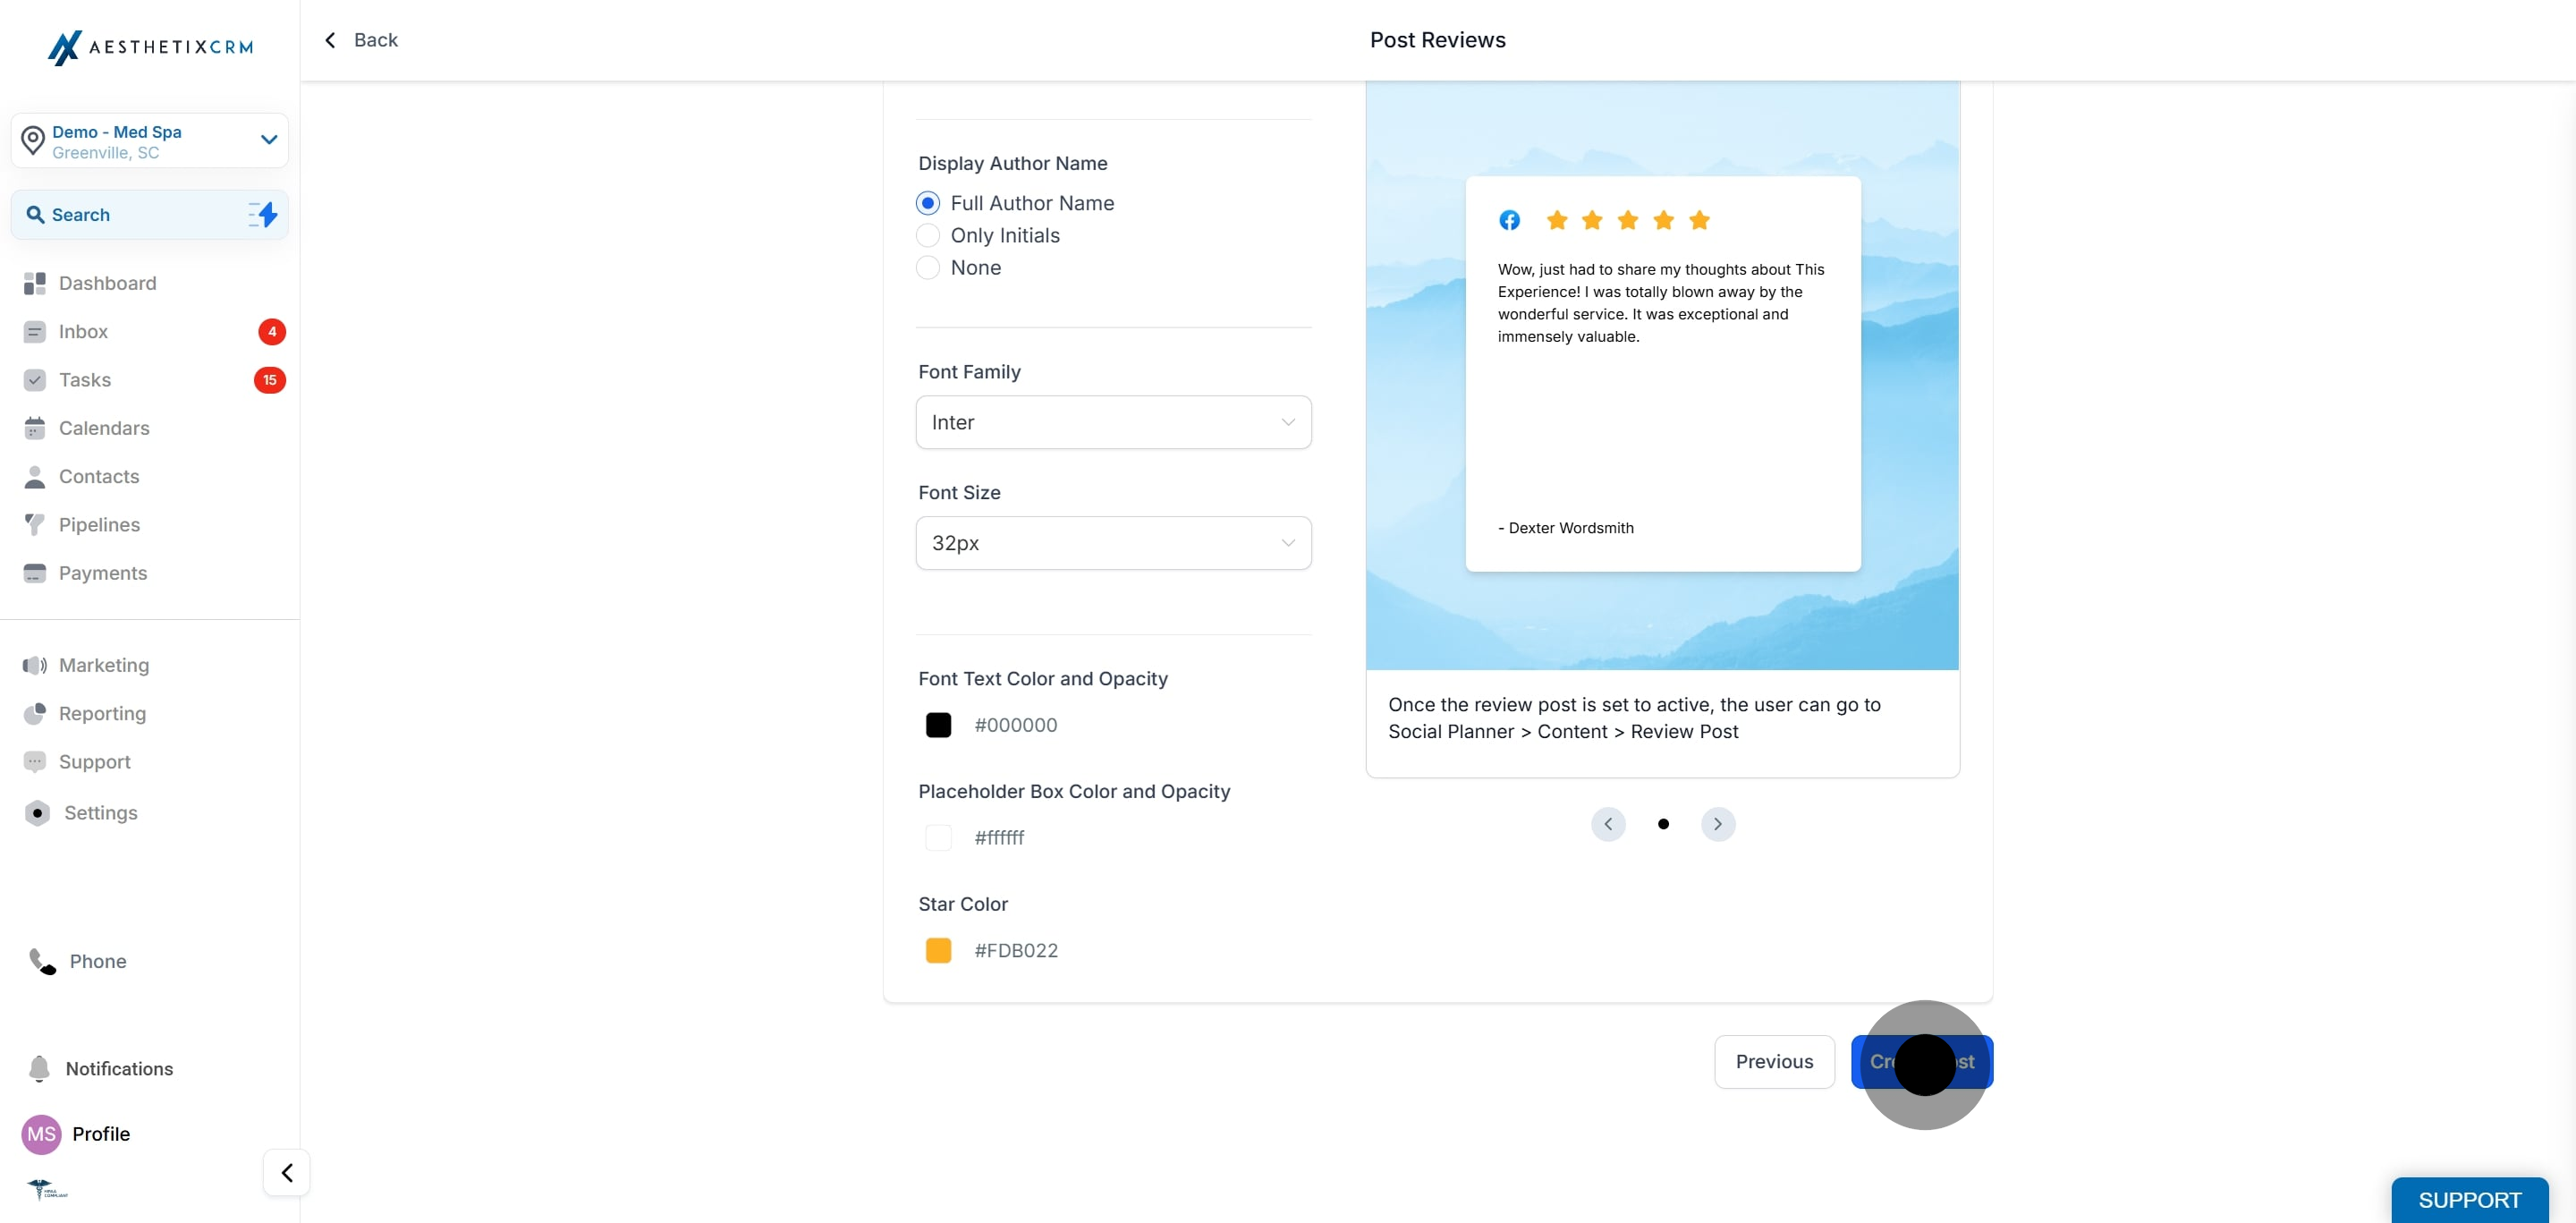
18. Once all edits are done, click Create Post.
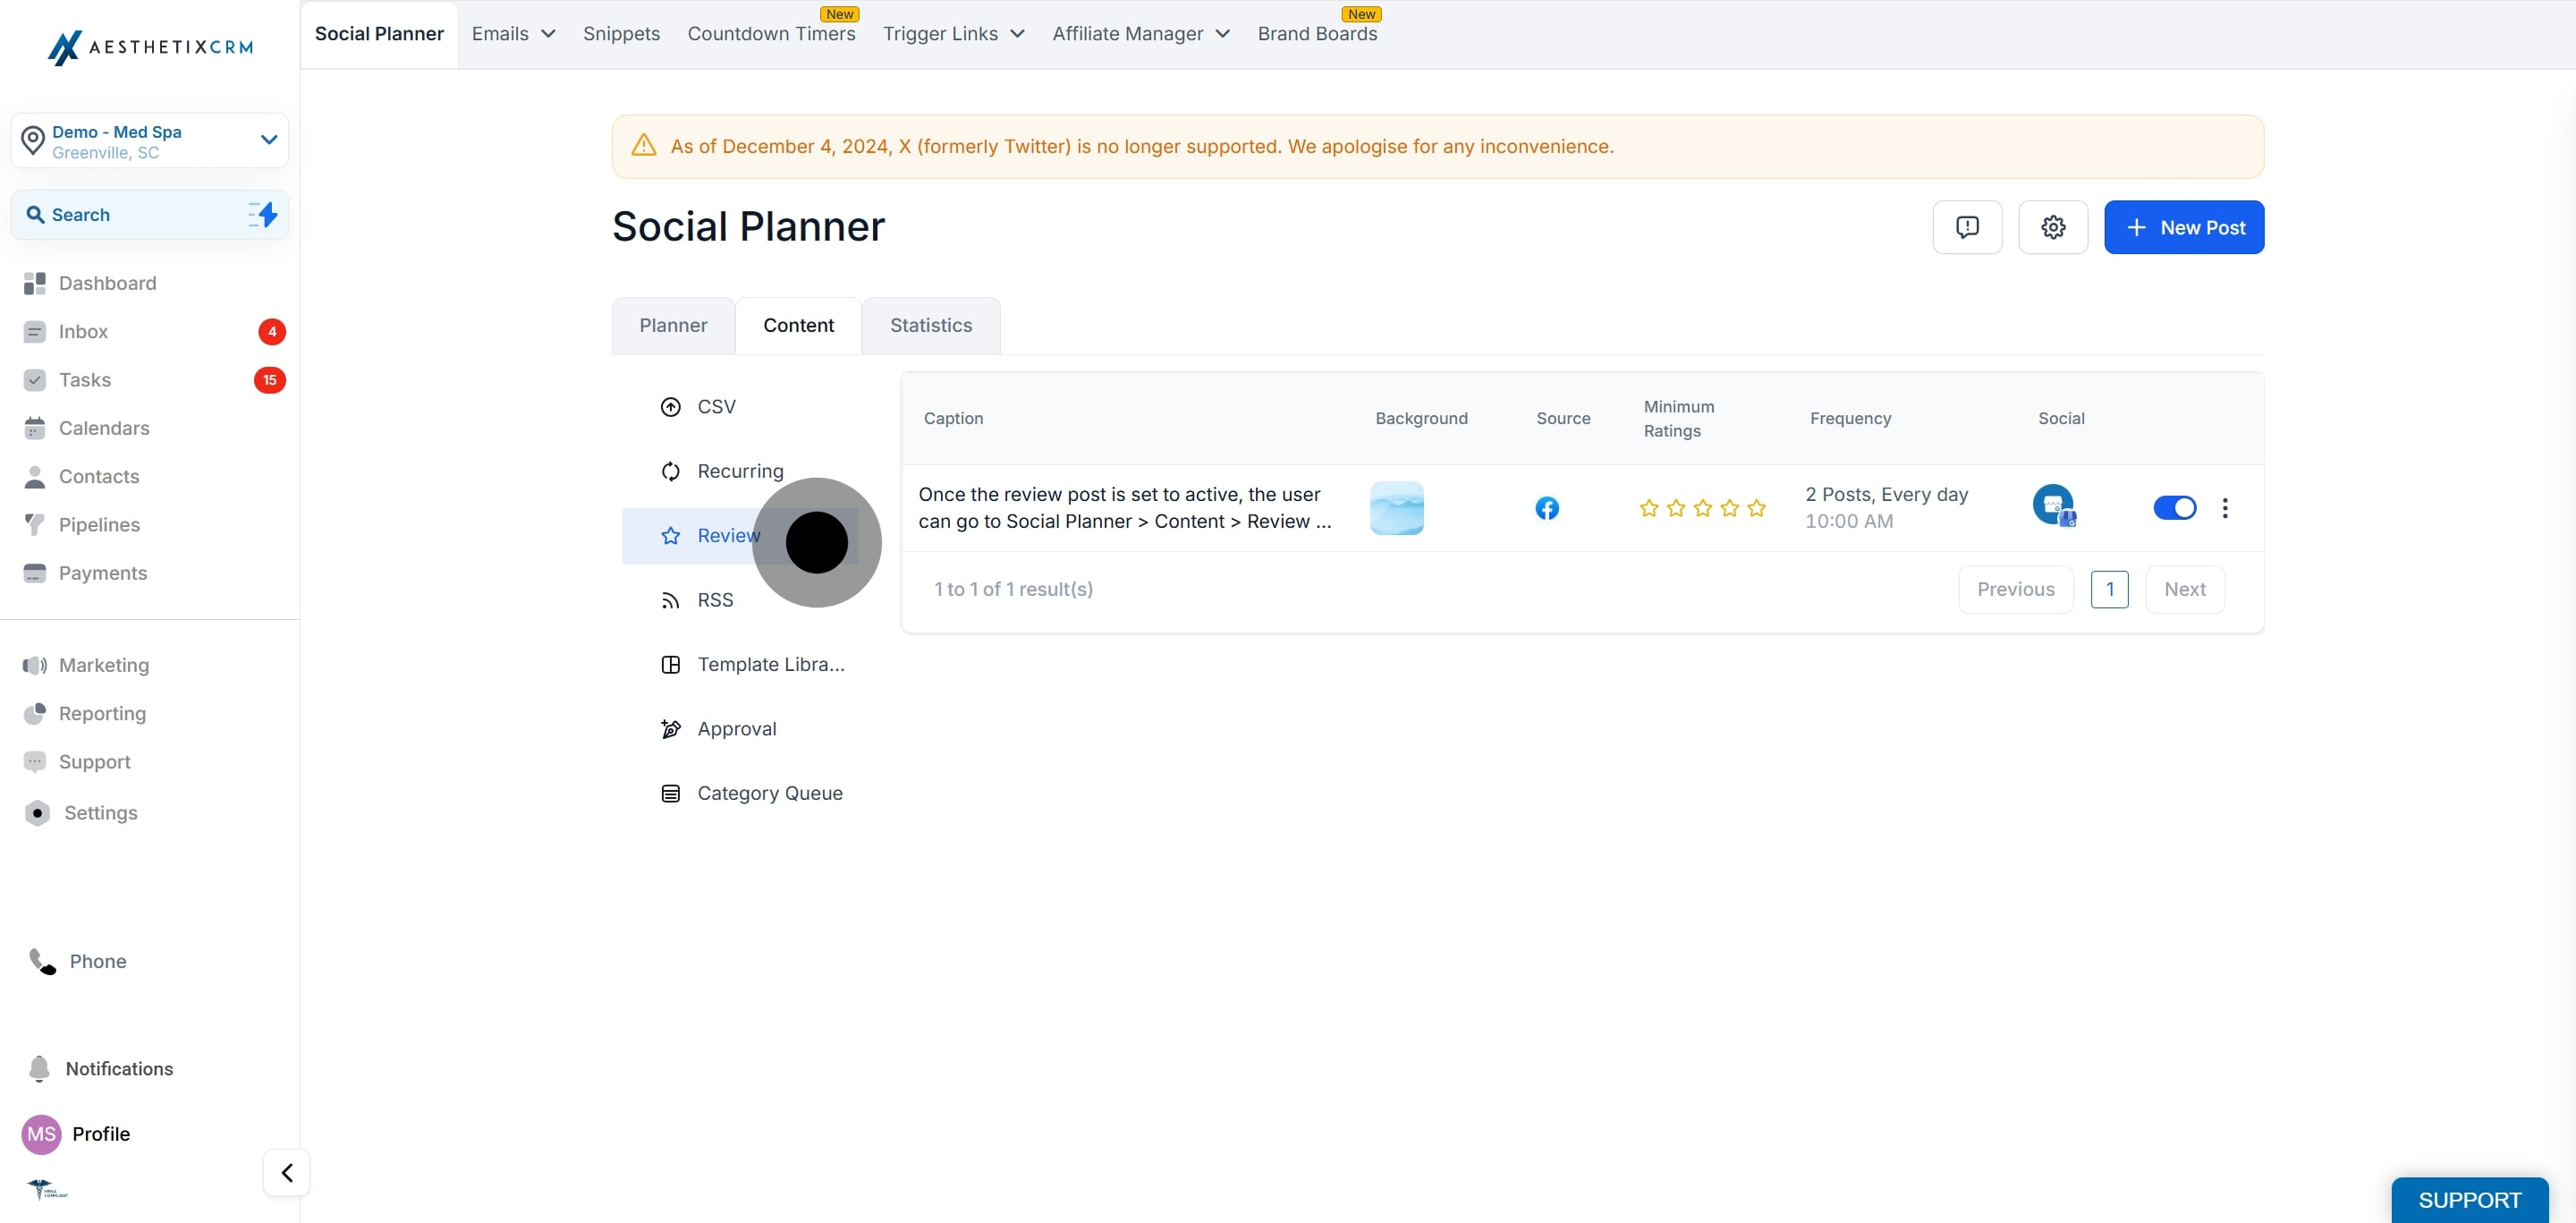
19. Once the review post is set to Active, you can manage it by navigating to: Social Planner > Content > Review Post.
Did this answer your question?
😞
😐
😁
A Guide to Automating Review Posts in Your Social Media Planner | Aesthetix CRM