Steps to Implement a Post Approval Flow

Establish a seamless content process with our step-by-step guide to getting started with a post approval flow! This article outlines the essential steps to create an efficient approval system for your content, ensuring quality and consistency before publication. Learn how to define roles and responsibilities, set up approval stages, and utilize tools that facilitate collaboration and feedback. Perfect for teams and organizations aiming to enhance their content management practices, this guide will help you streamline your workflow, reduce errors, and maintain a high standard for all your posts!


1. Go to Marketing.

1 To kick off, click on the element.

2. Select Social Media Planner.

2 Click on "Manage your social media marketing".

3. Choose the desired planner and click the three dots next to it and click "Edit"

3 Upload

4. Select the "Scheduled for Approval" option to submit the post for review.

4 Click on the element.

5. Specify the date and time for when the post should be scheduled.

5 Once that's done, click here.

6. Choose the user responsible for approving the post to be scheduled on the social calendar.

6 Click on "Grace Puyot".

7. Add an internal note to provide additional information or context for the approver.

7 Upload

8. Click Schedule and Send for Approval to complete the process.

8 Upload

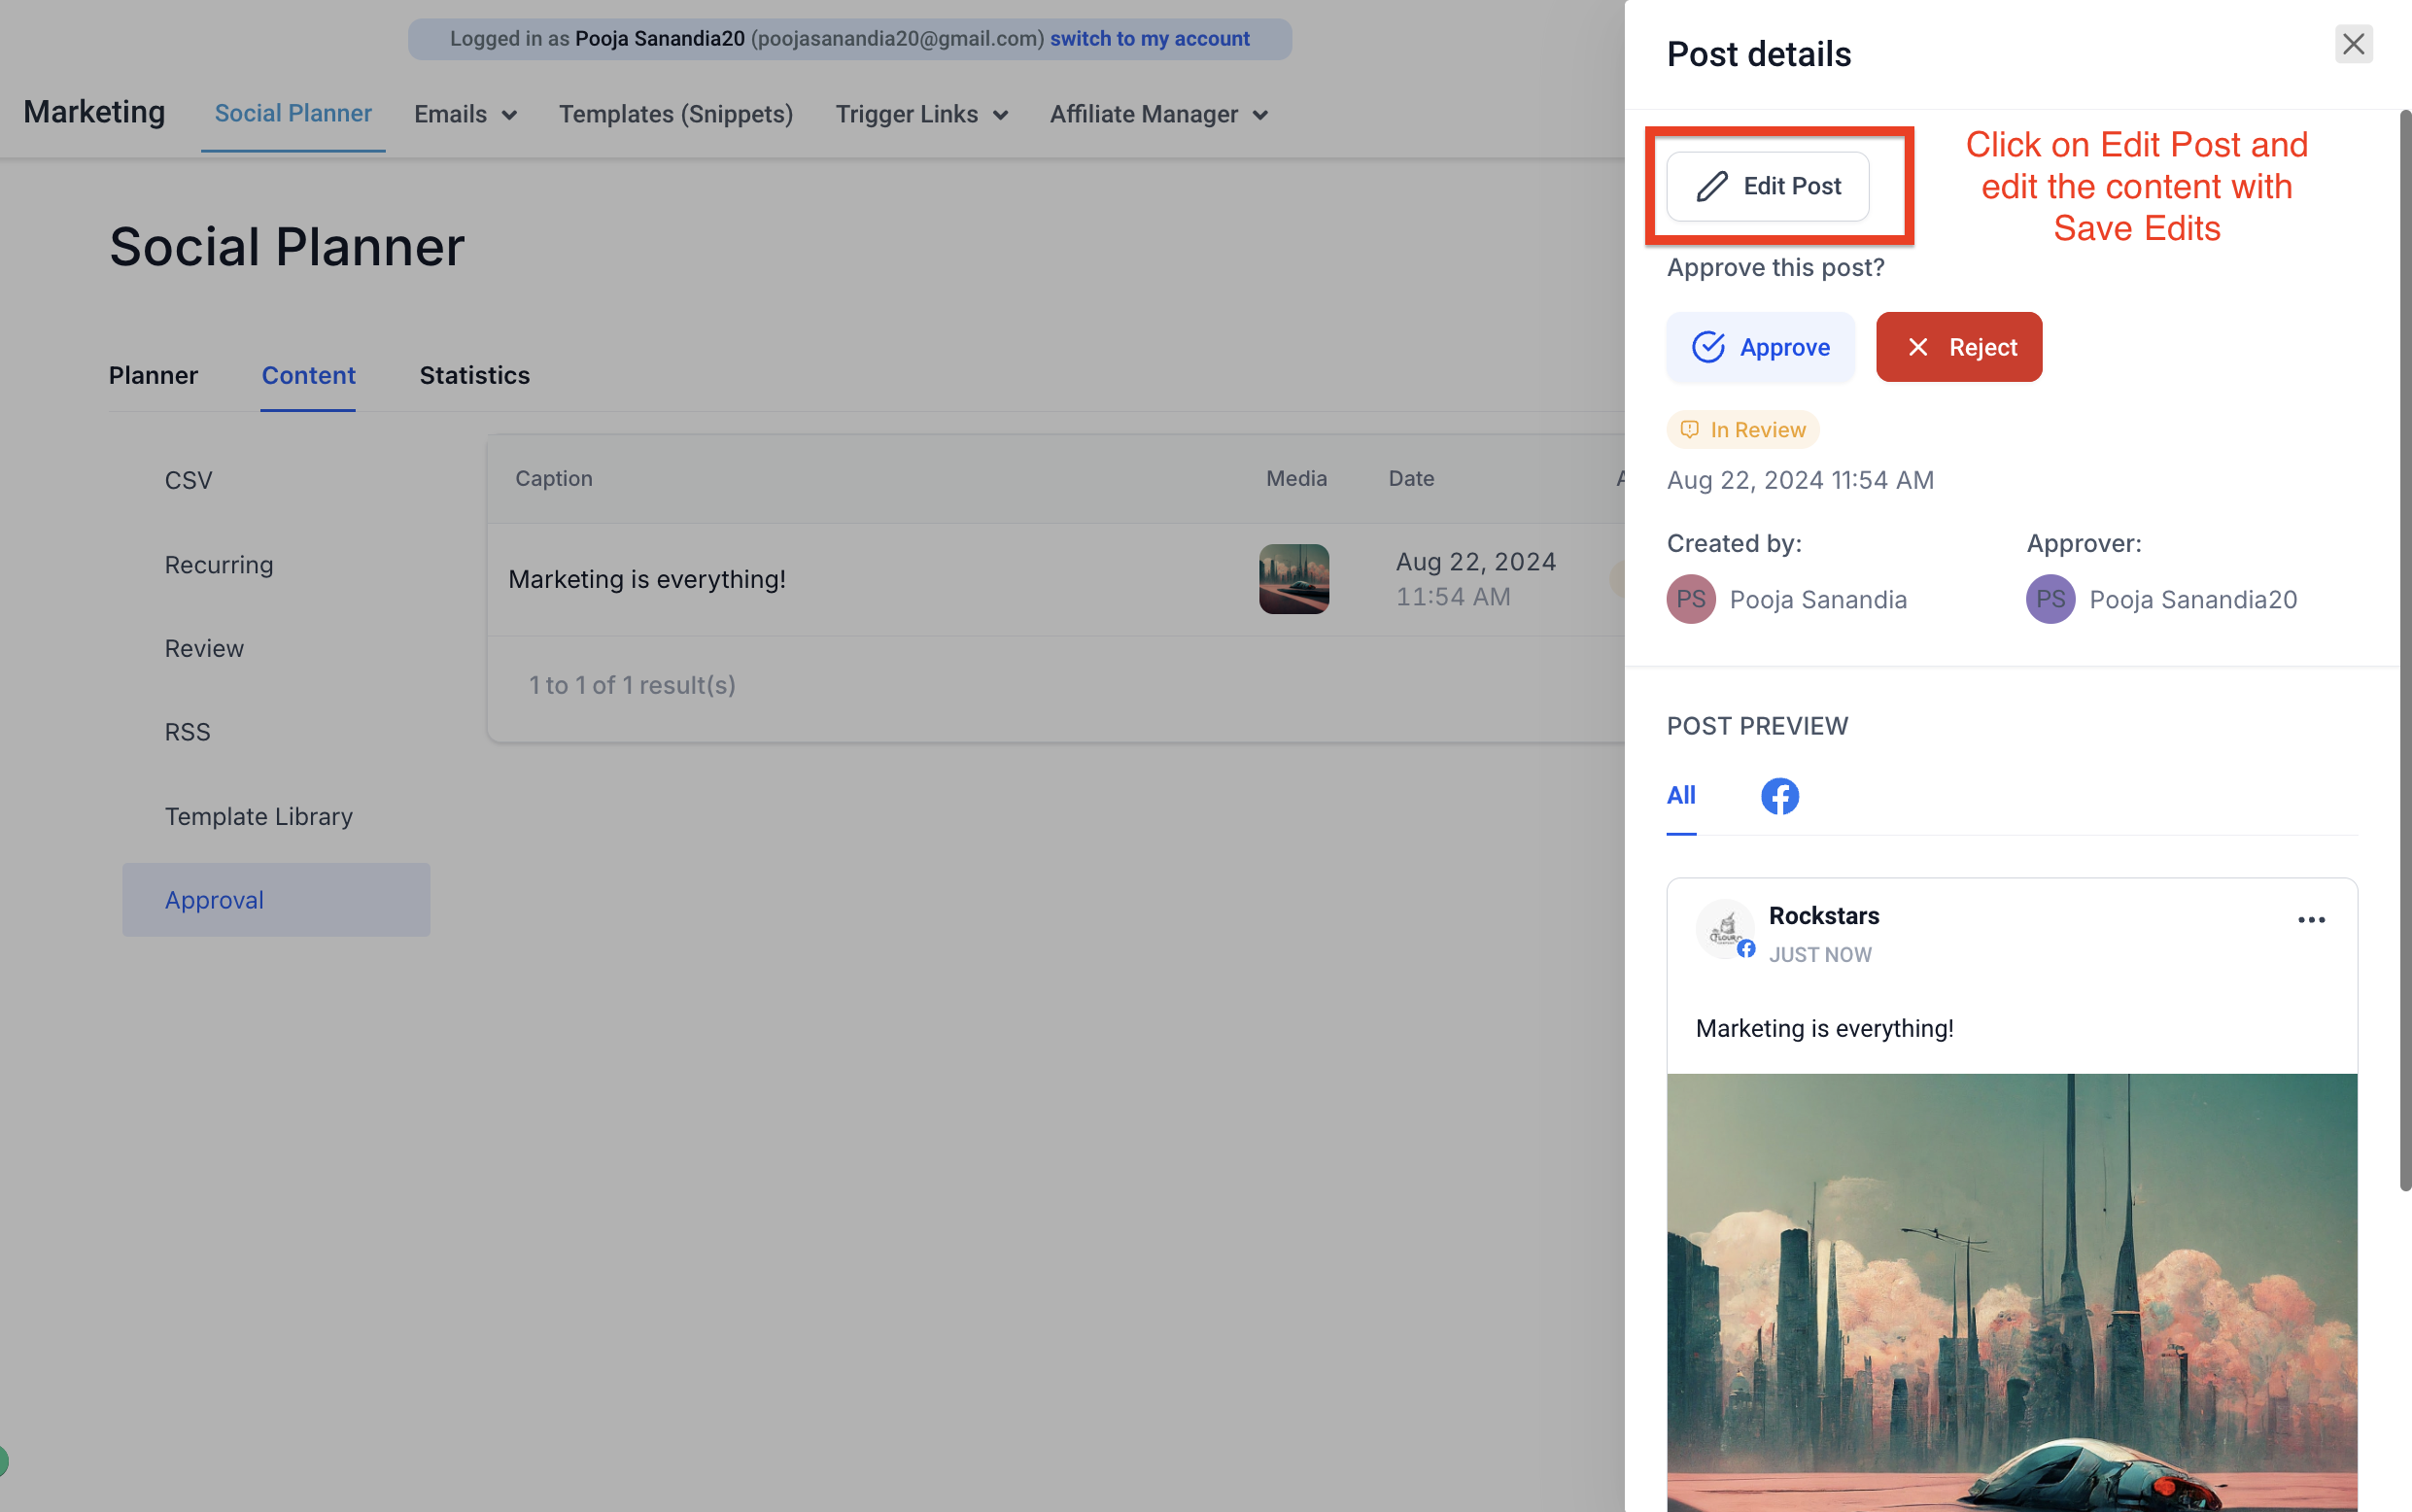
The reviewer can see the post in Content > Approval tab with the option to view, approve or reject. The view option will allow user to view the details of post than approve or reject. The reviewer team member can view option and it has option to edit the content too for approval flow by clicking "Edit" in view screen.

Once the post is approved, it will be scheduled in the social calendar. If the post is rejected, the user can view the comment sent by the reviewer.

Did this answer your question?
😞
😐
😁