Enabling Call Recording in Aesthetix CRM: A Step-by-Step Guide
Enhance your customer service and compliance capabilities by learning how to enable call recording in Aesthetix CRM. This guide provides detailed instructions to activate and configure call recording features, ensuring that all important conversations are securely documented. Ideal for users looking to improve training, quality assurance, and legal compliance through recorded interactions.
1. Click on "Settings".
2. Select "Phone Numbers" from the menu.
3. Select the phone number you want to enable call recording and click the three dots next to it.
4. After that, click on "Edit Configuration".
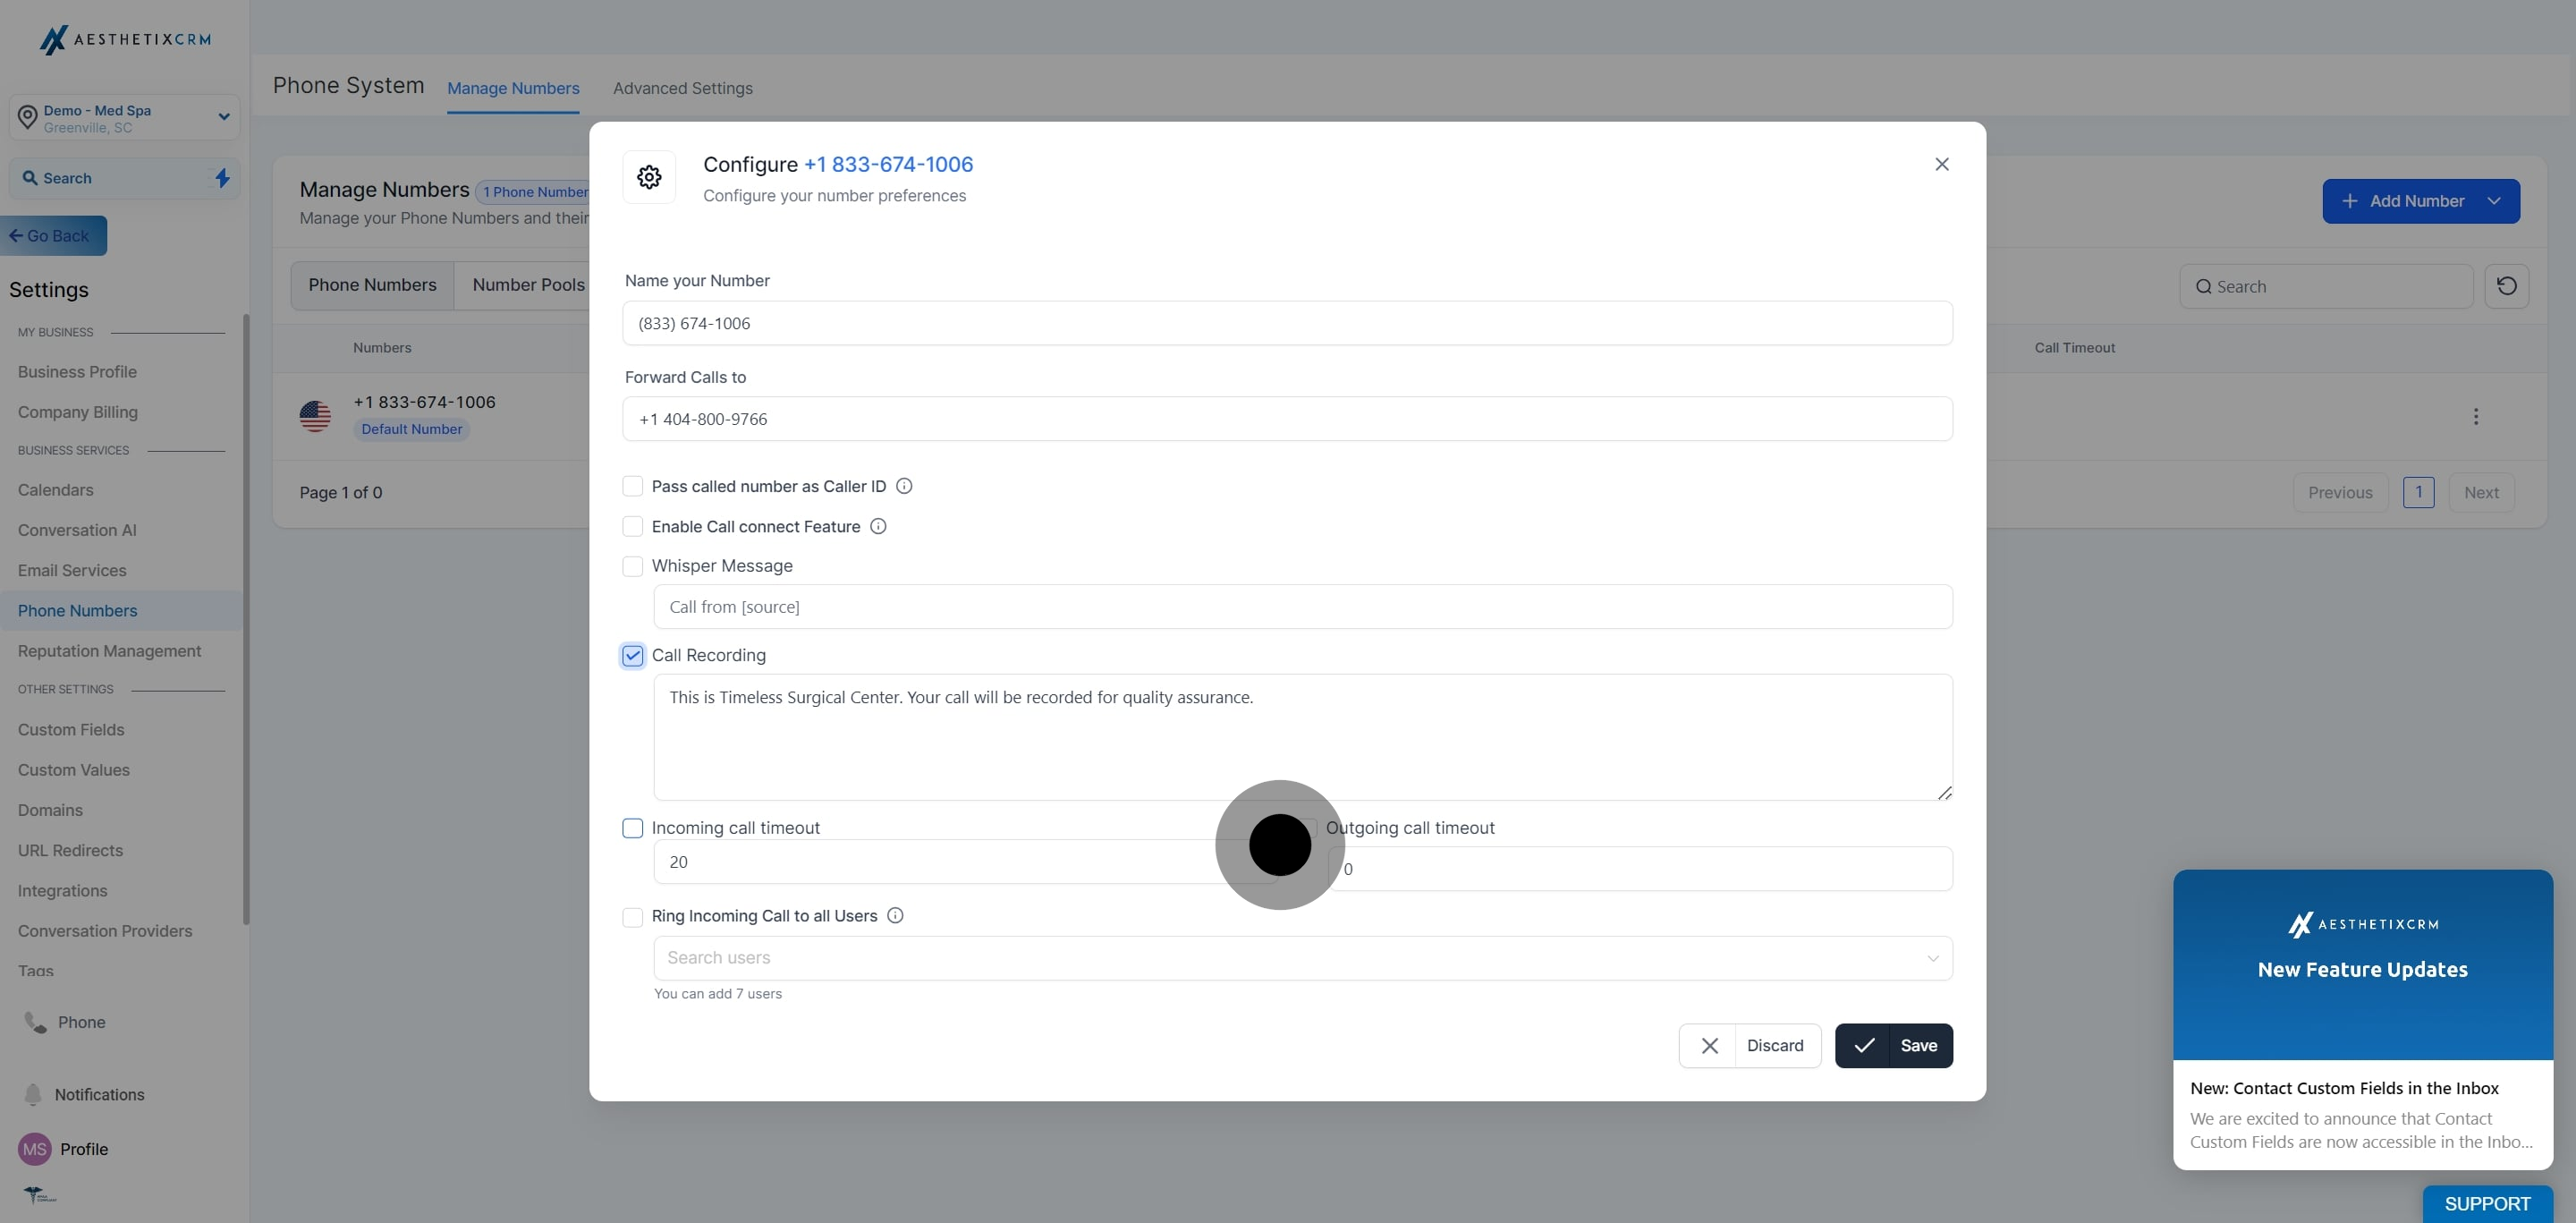
5. Check the box to enable Call Recording.
6. Check the boxes to enable Incoming Call Timeout and Outgoing Call Timeout.
7. Finally, click on "Save" to apply your changes.