Simplify your scheduling and enhance collaboration by learning how to create new groups within your Aesthetix CRM calendar. This guide offers step-by-step instructions to help you set up and manage calendar groups, making it easier to coordinate events, meetings, and tasks with your team. Ideal for users aiming to improve organizational efficiency and teamwork.
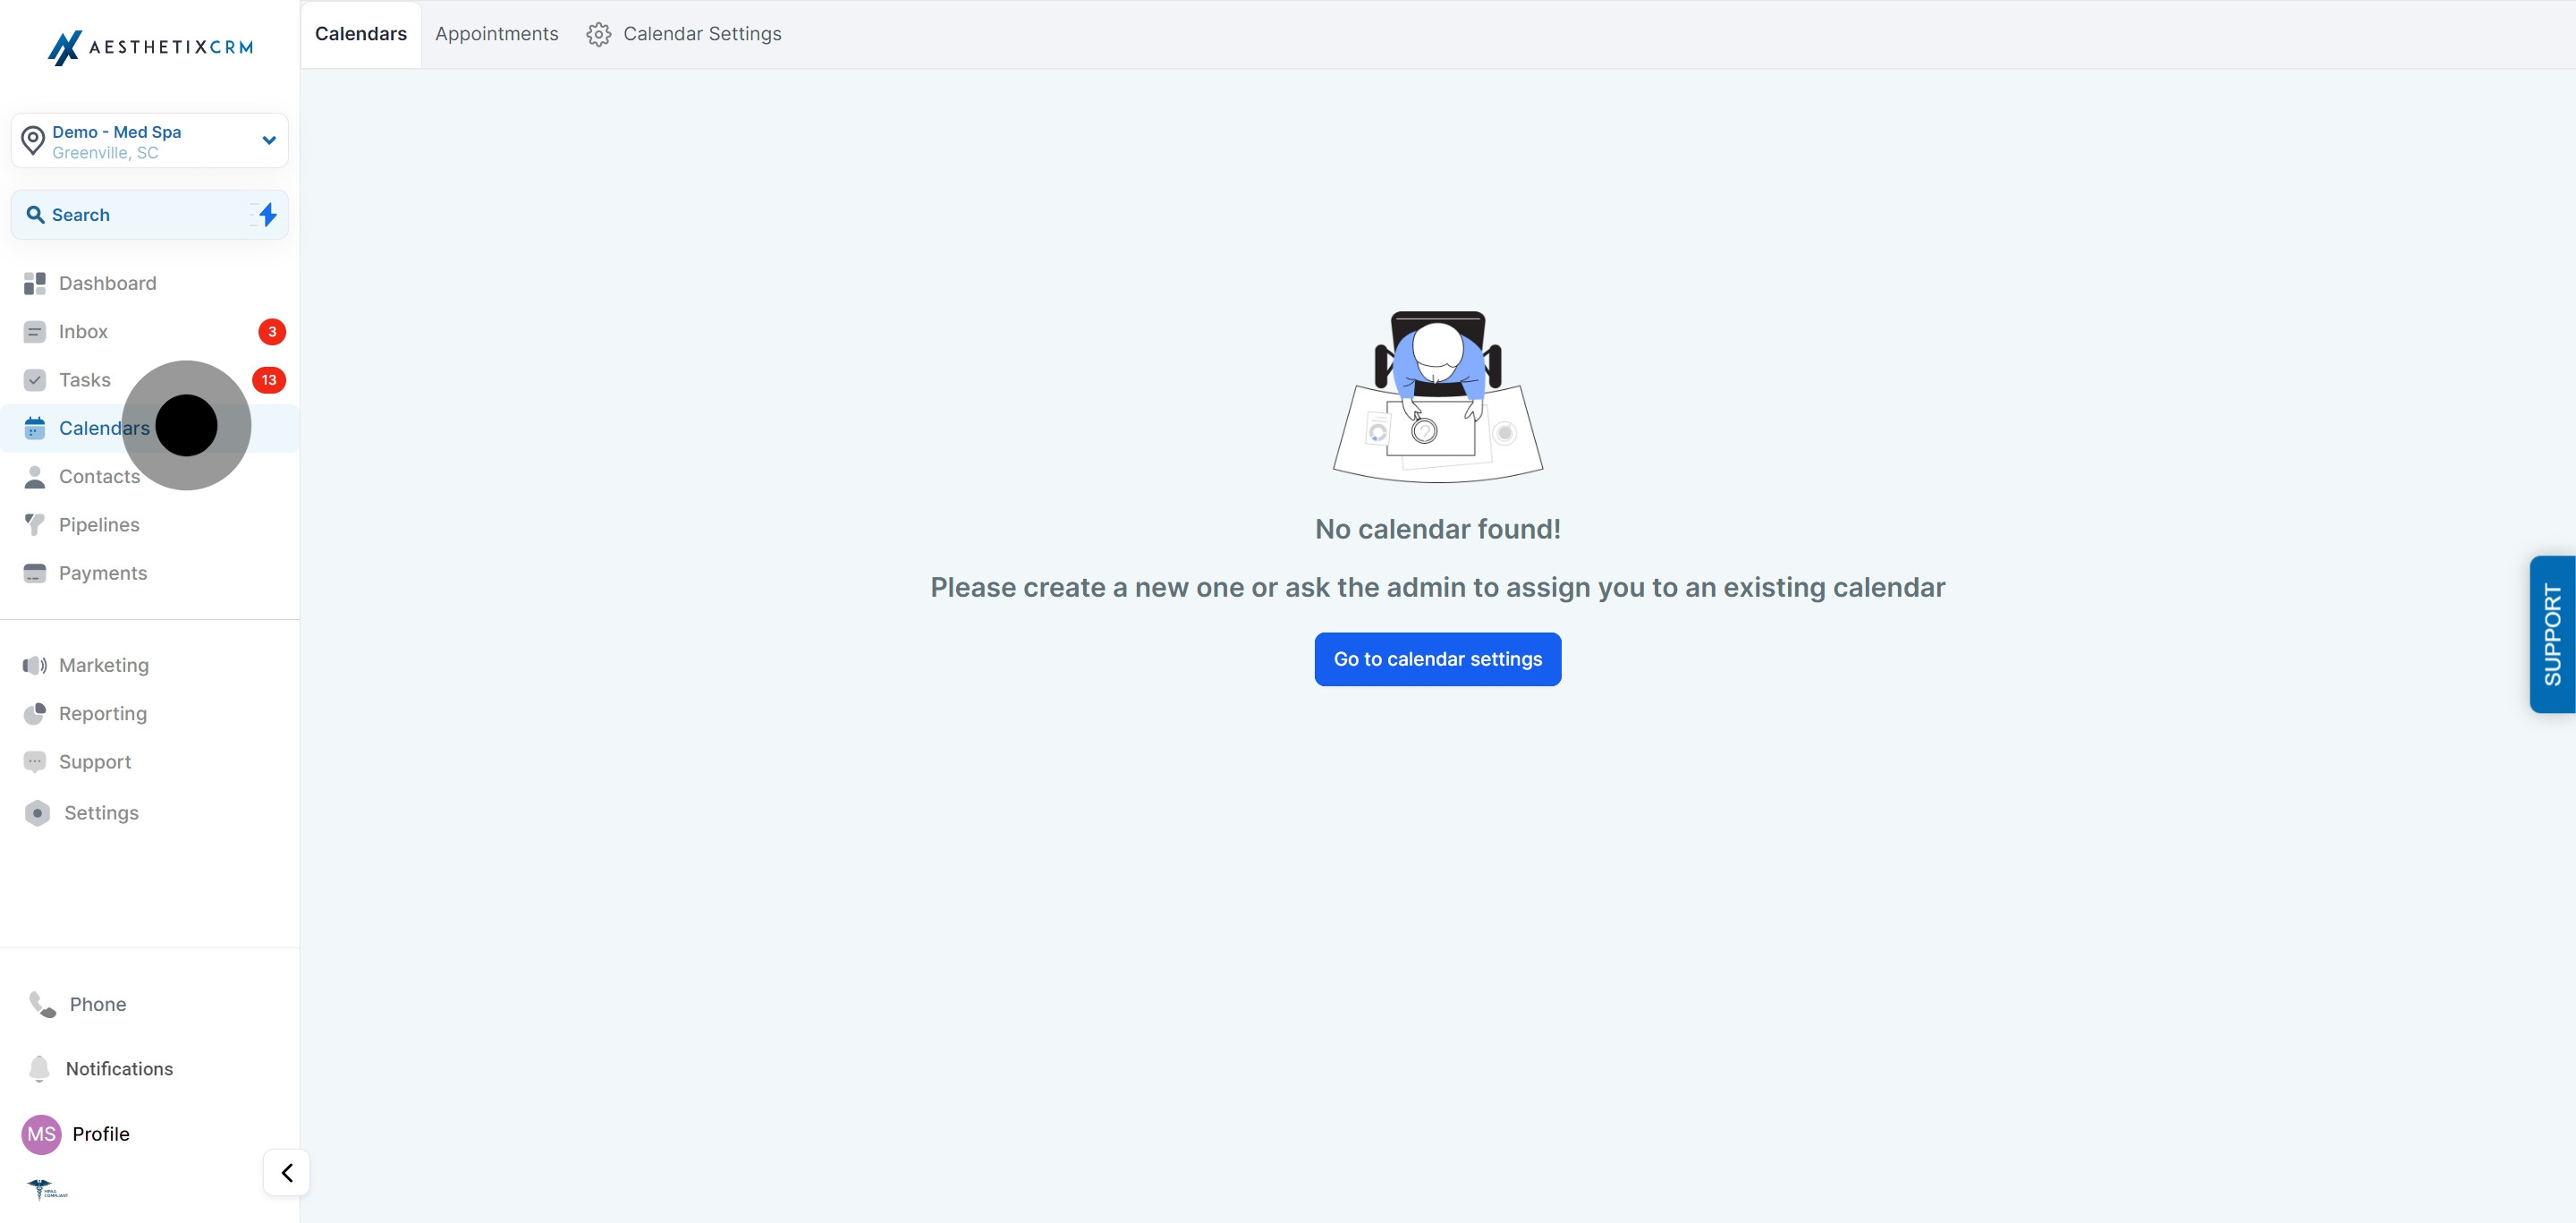
1. Click on "Calendar".
2. Navigate to "Calendar Settings" by selecting "Go to Calendar Settings".
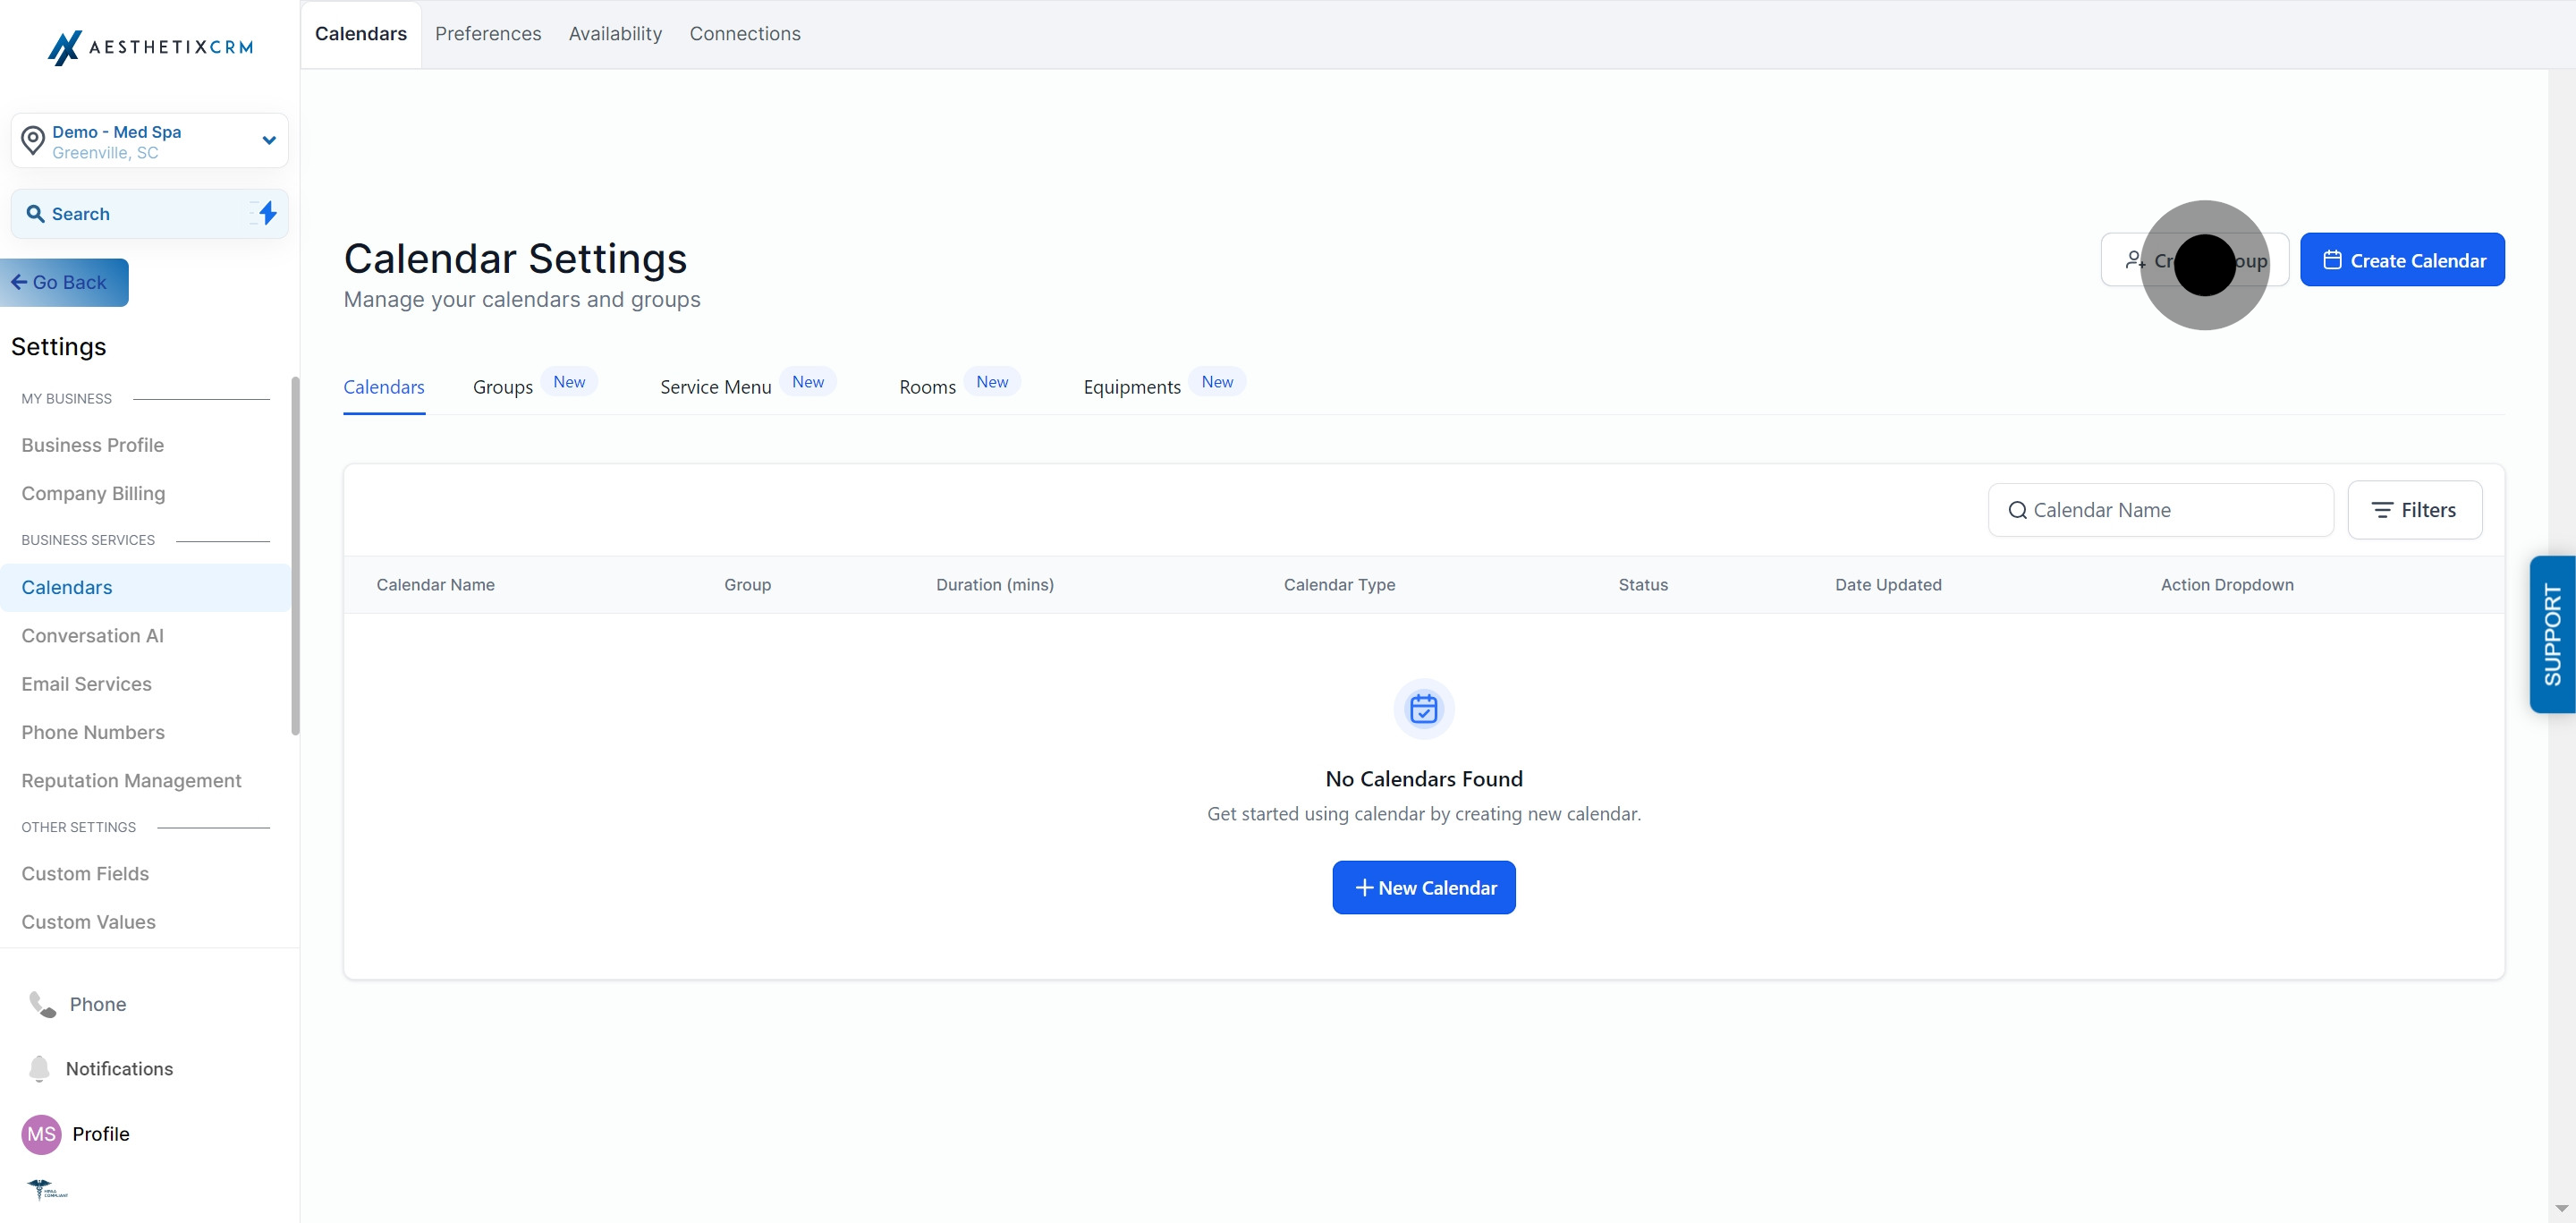
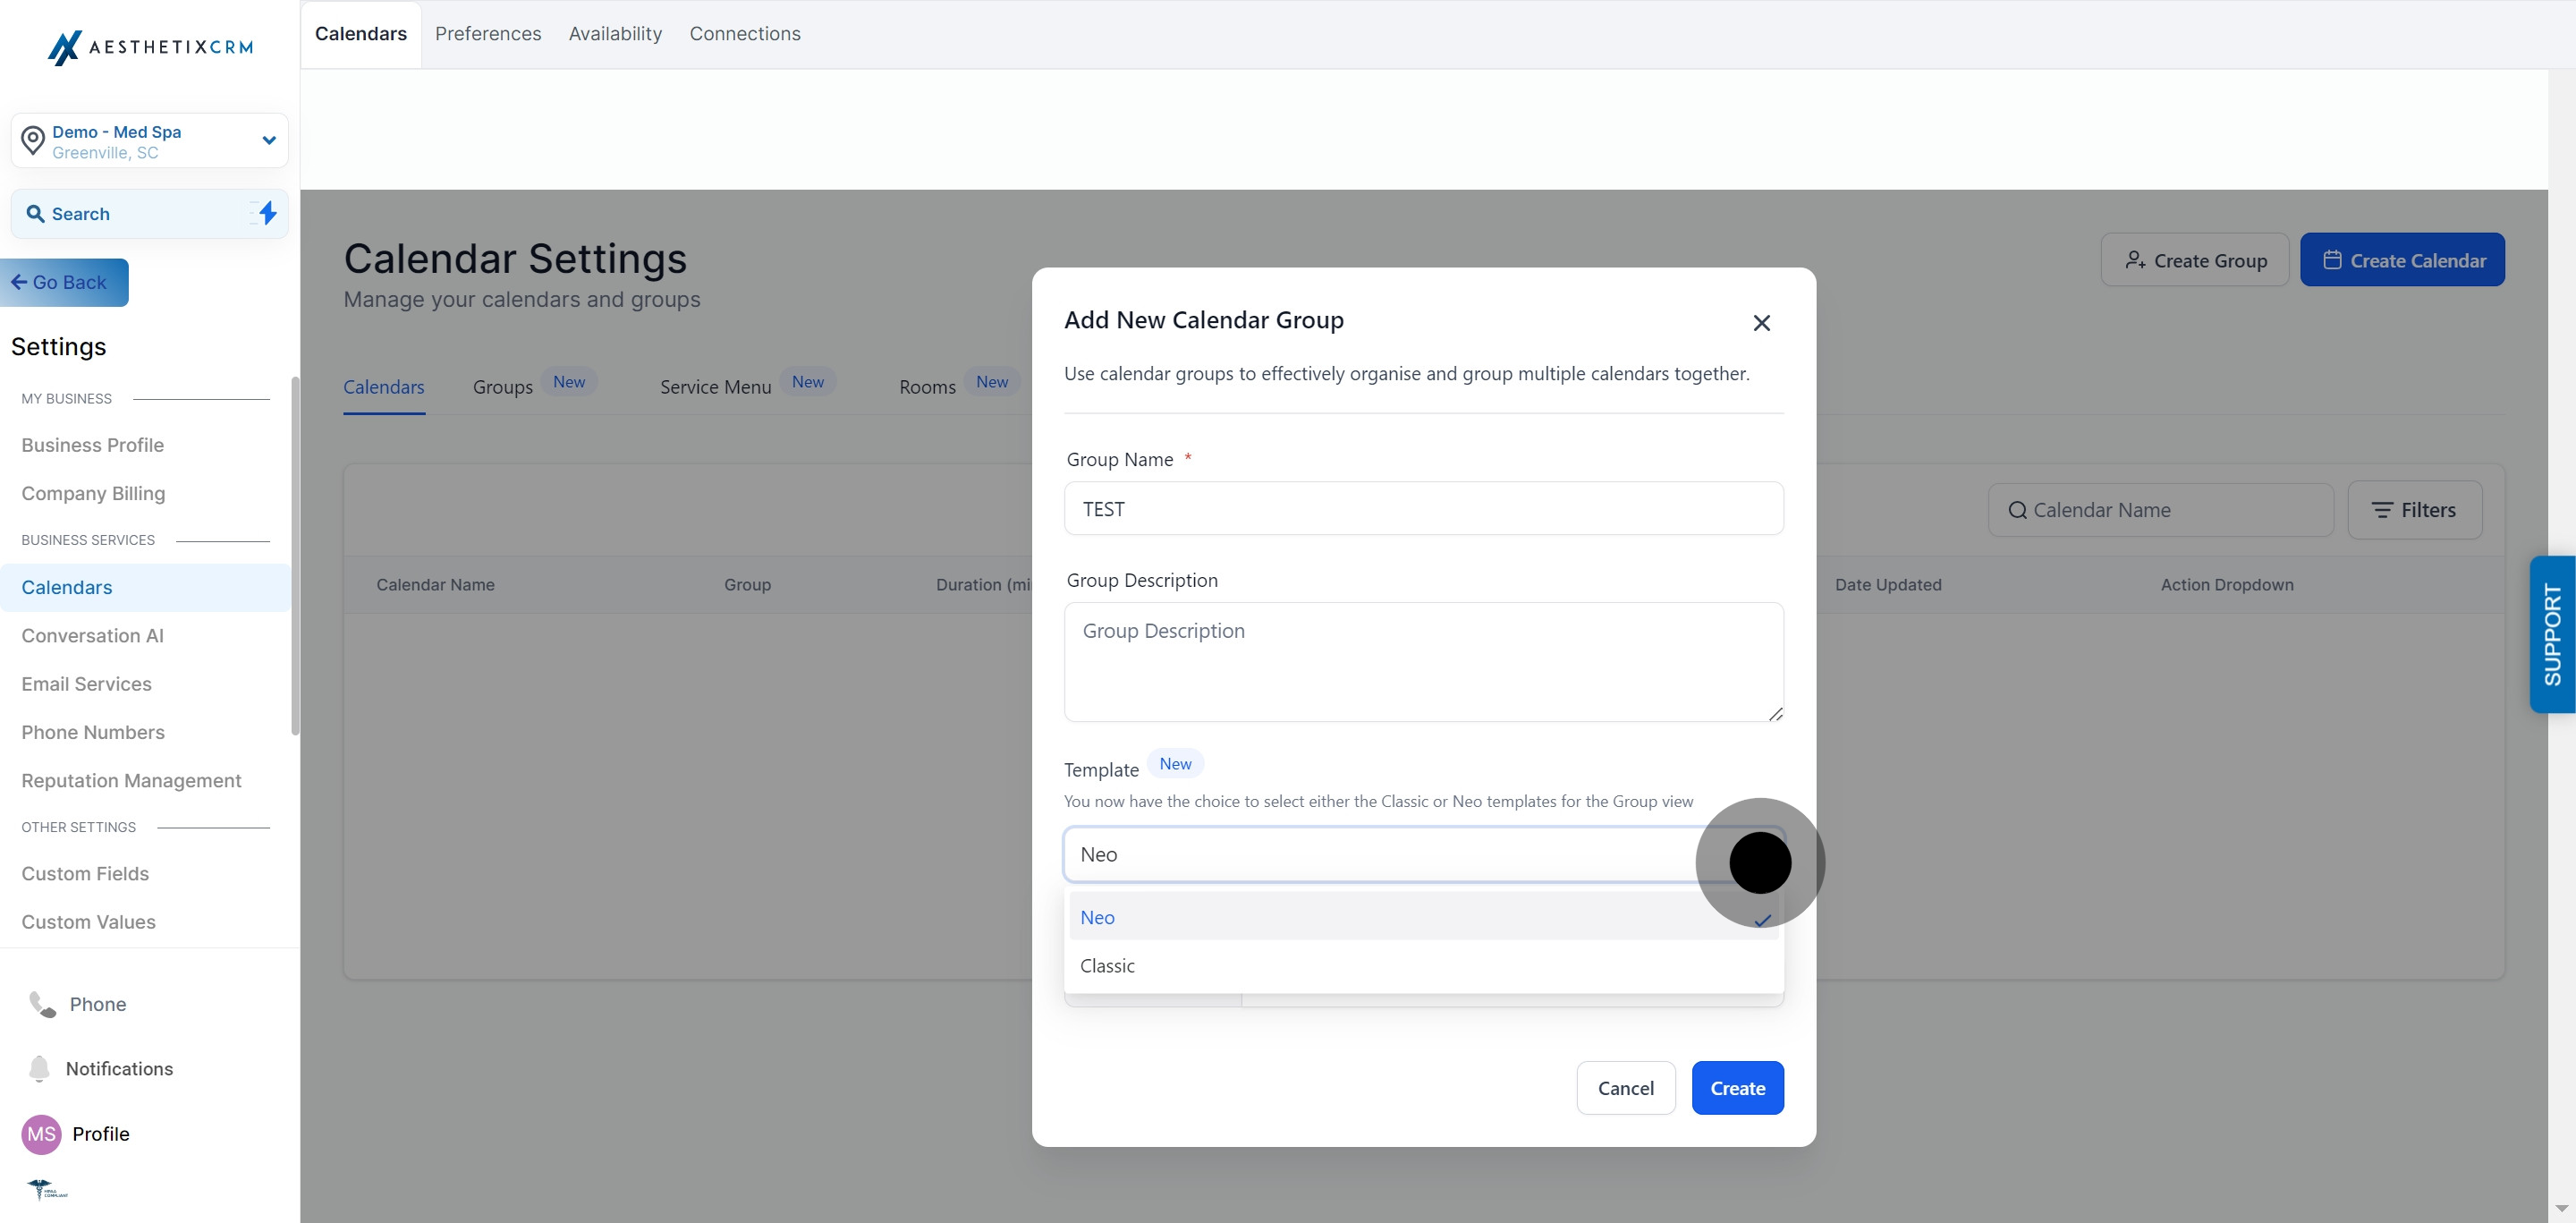
3. Click on "Create Group".
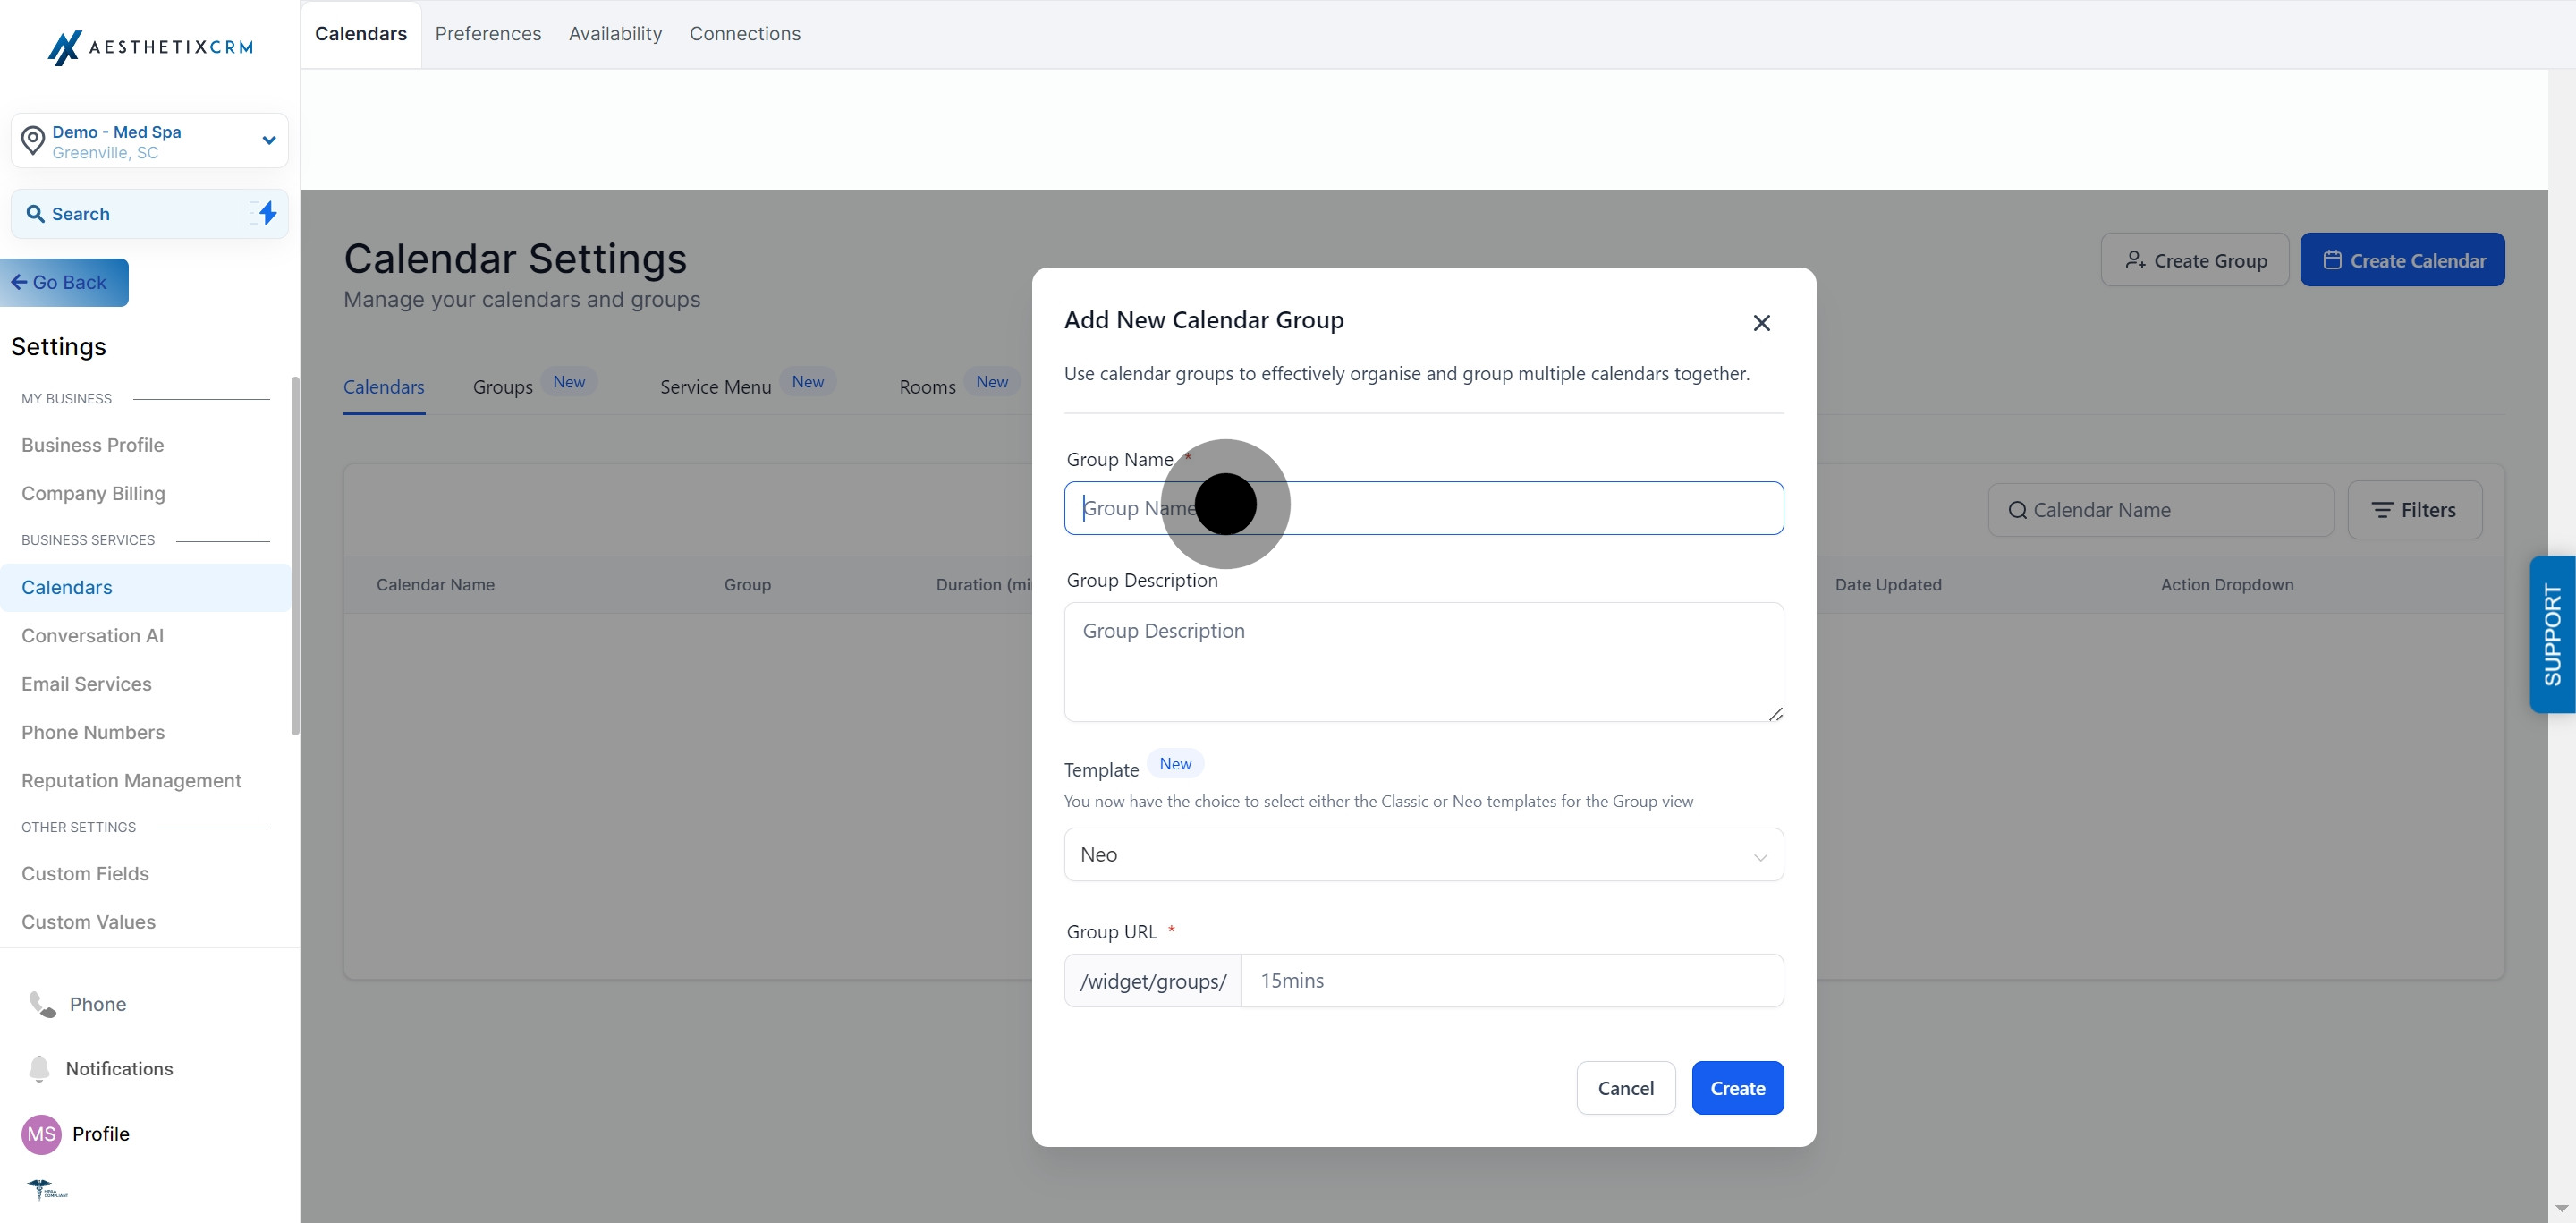
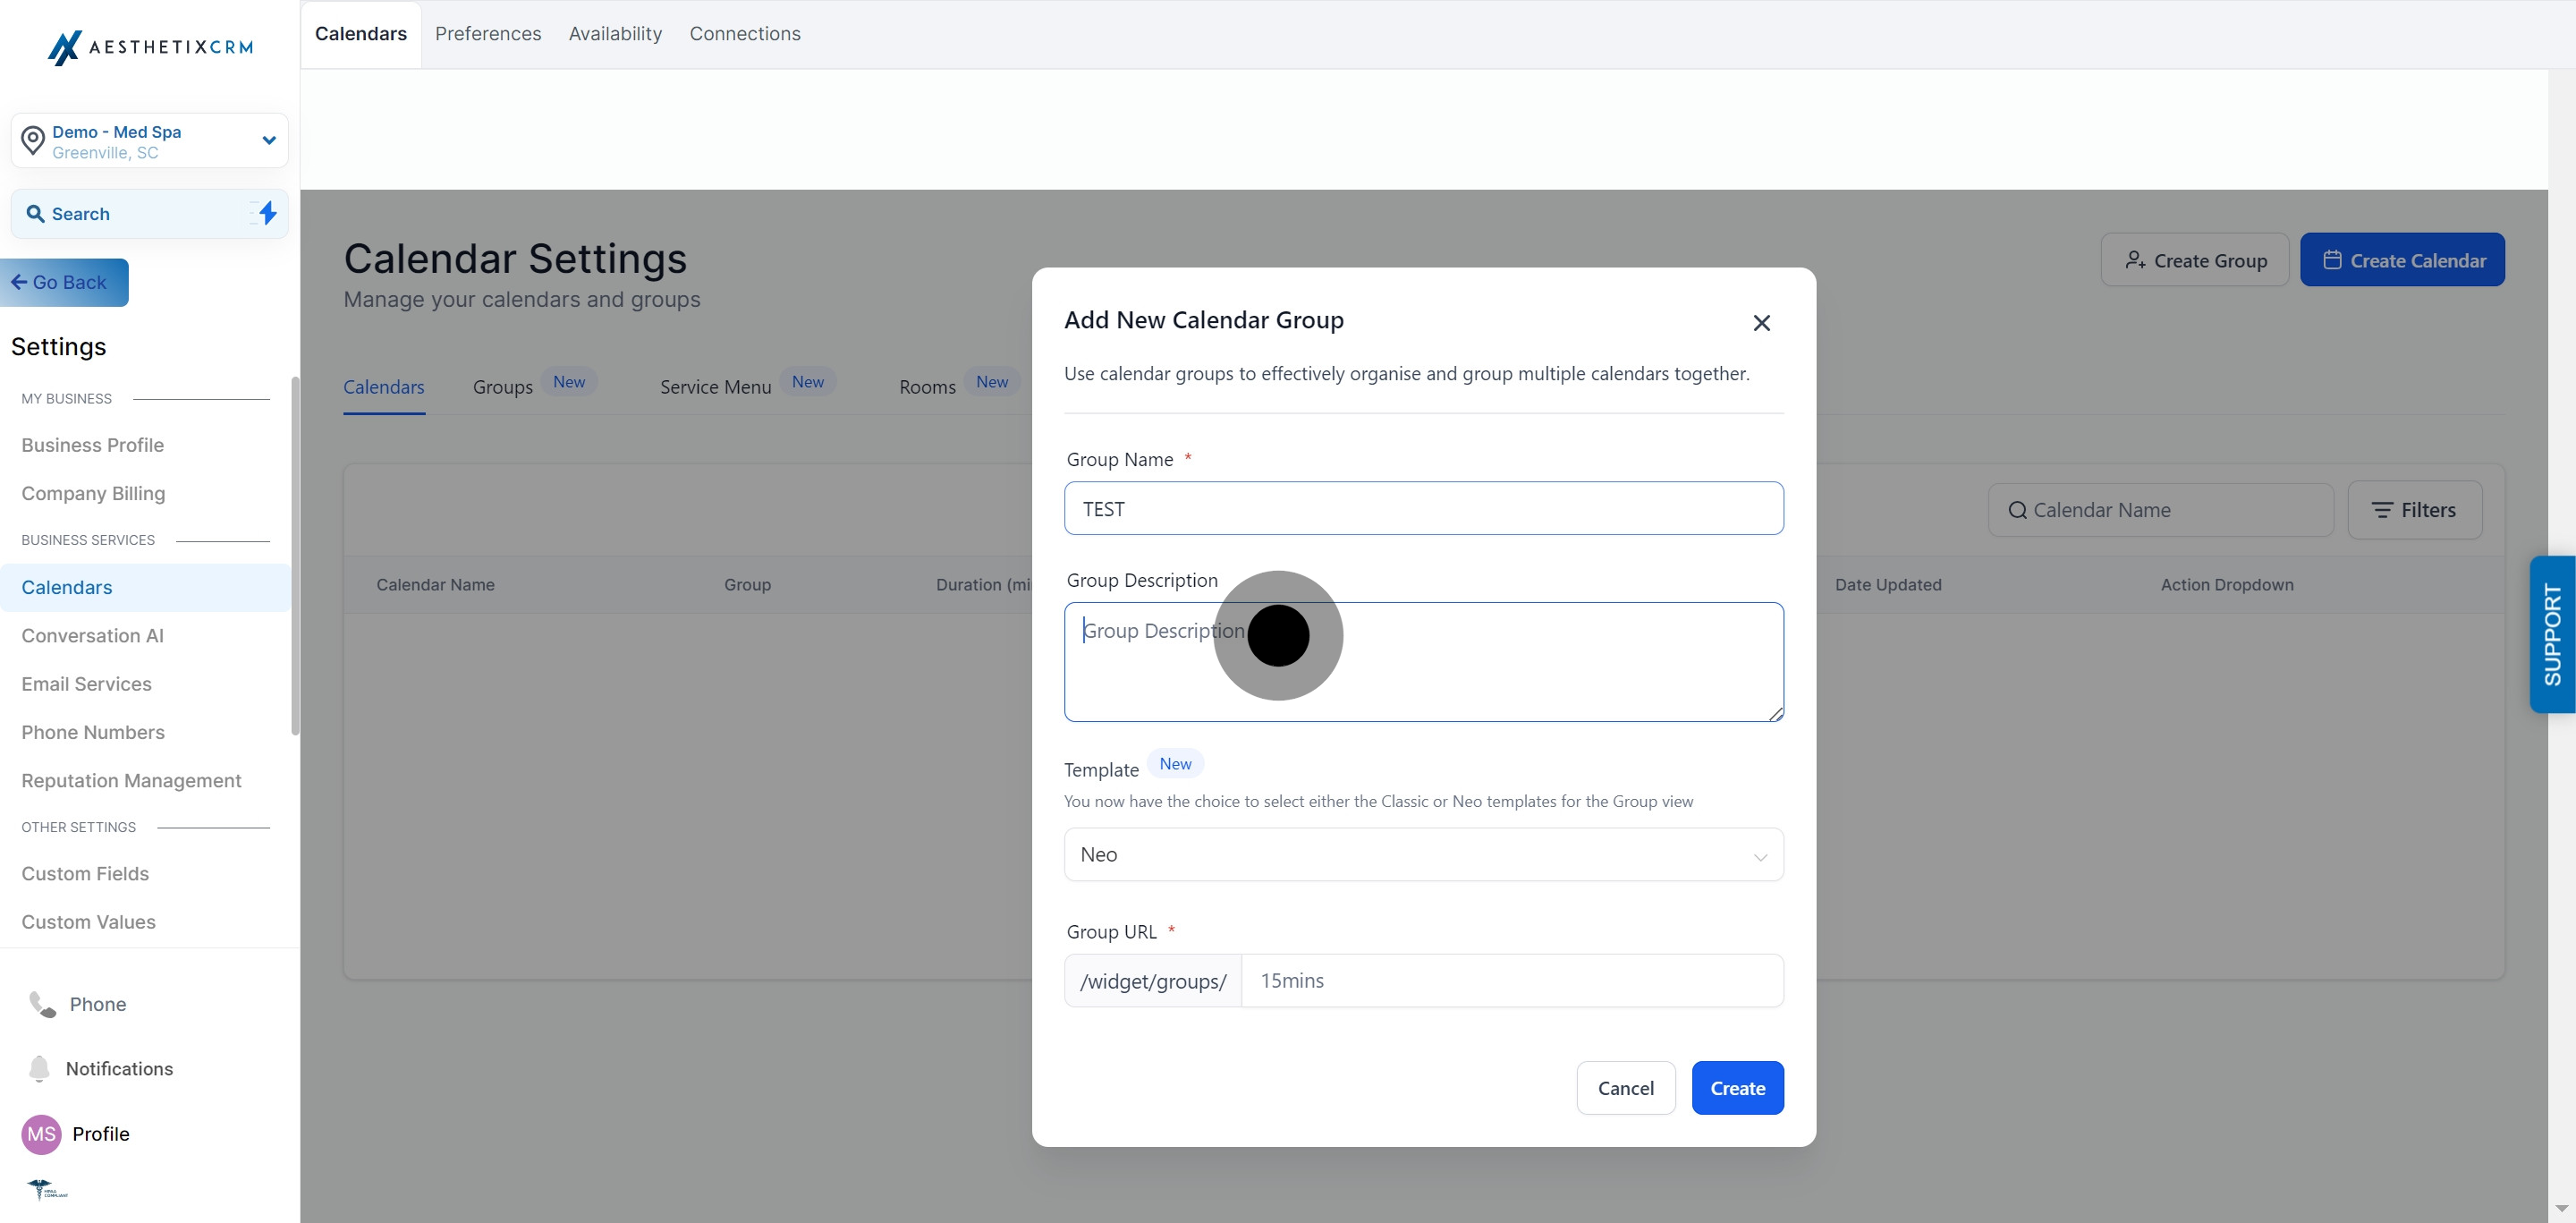
4. You can enter your group name in the designated field.
5. Write a description for your group discussion.
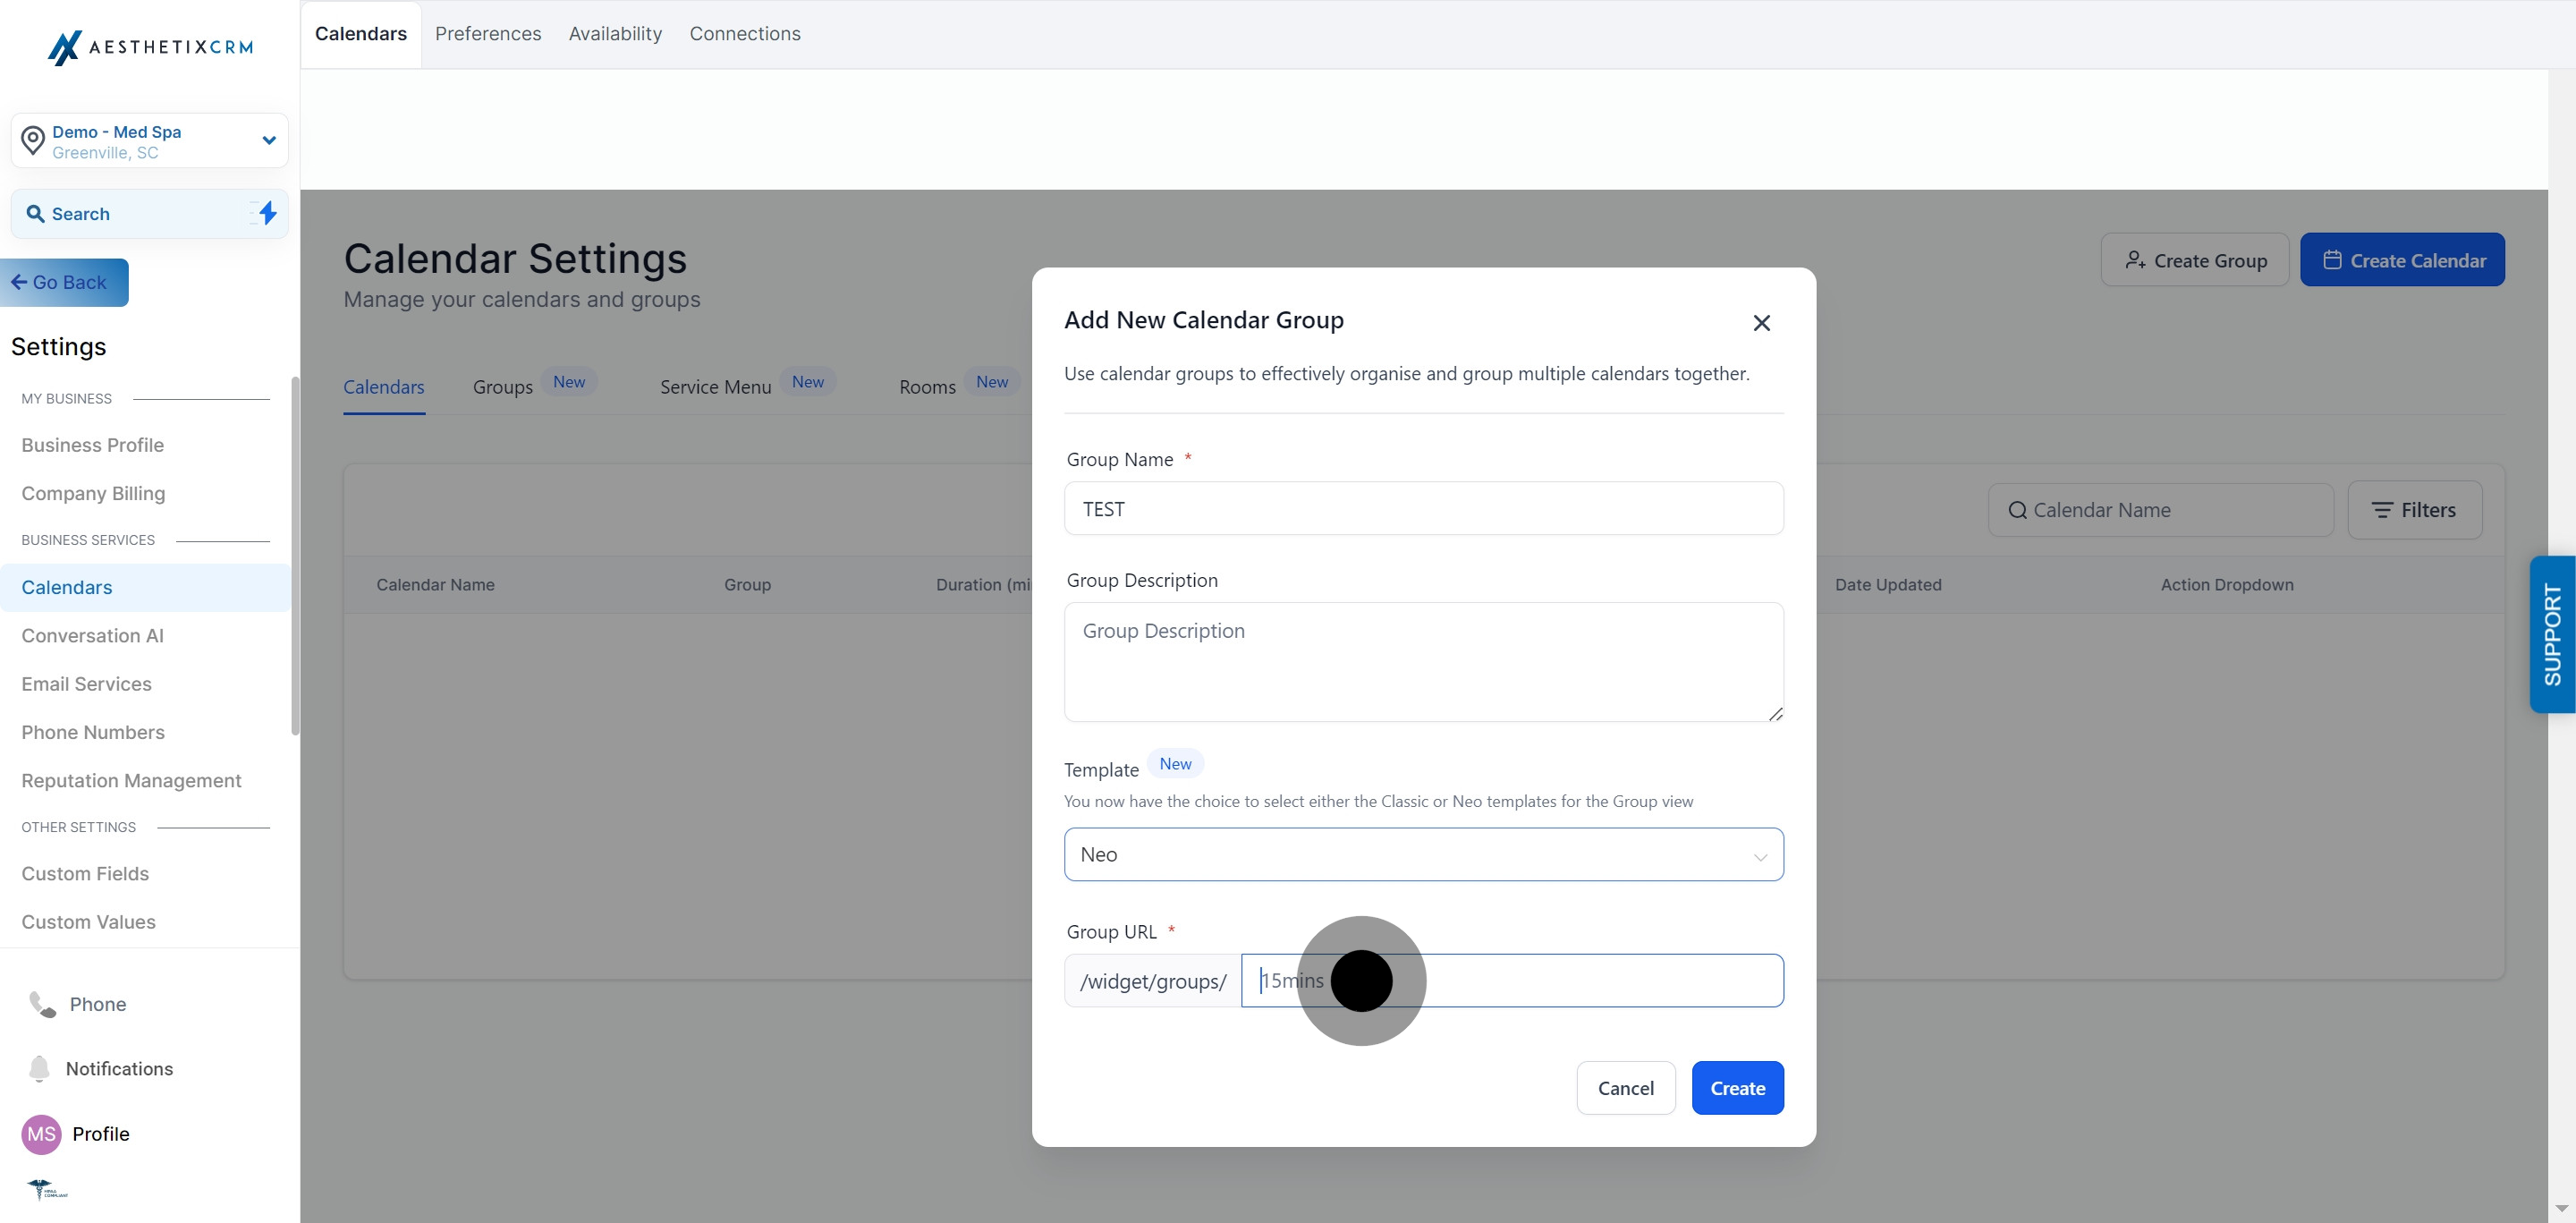
6. Select the desired template from the available options.
7. Input your group URL.
8. Finally, click "Create" to complete the process.