If you operate a subscription-based business selling products, it could be beneficial to send your customers an advanced invoice regularly, perhaps on a monthly basis.
This document is geared towards guiding you on how to create and effectively utilize a straightforward recurring invoice.
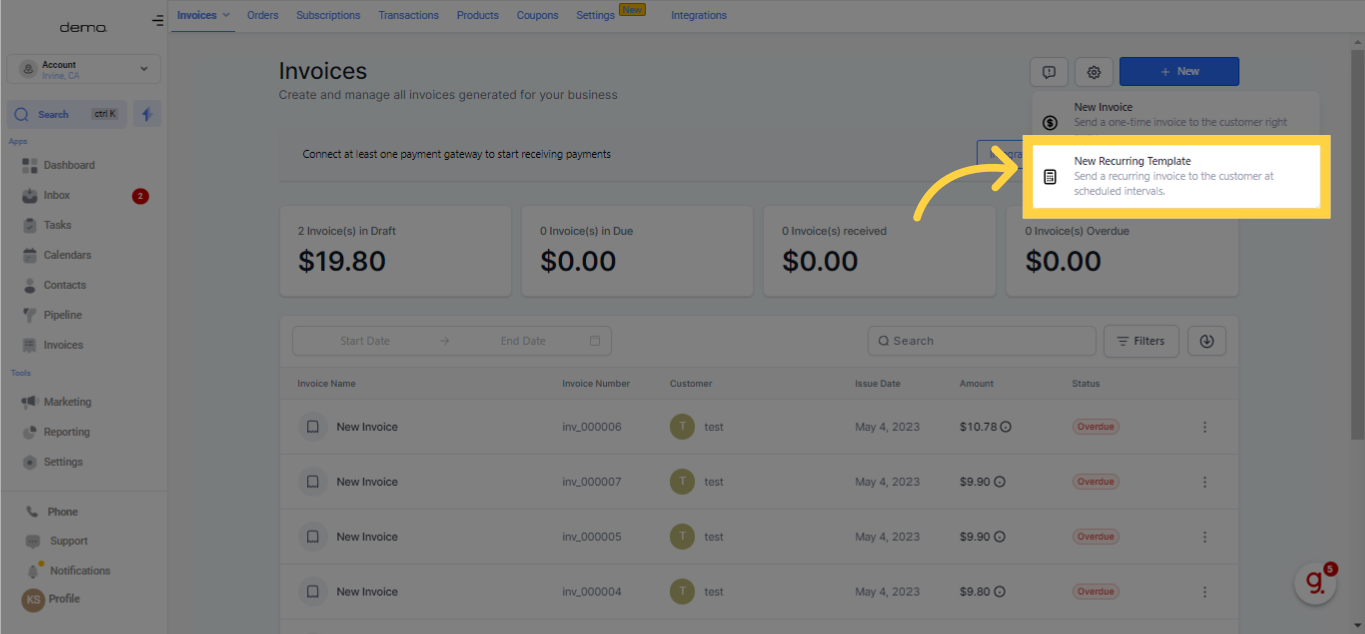
This action will redirect you to the Recurring Invoice Builder. Once you're within this section, you can select 'New Recurring Template' at the top of your interface to rename the template, should you decide to do so.
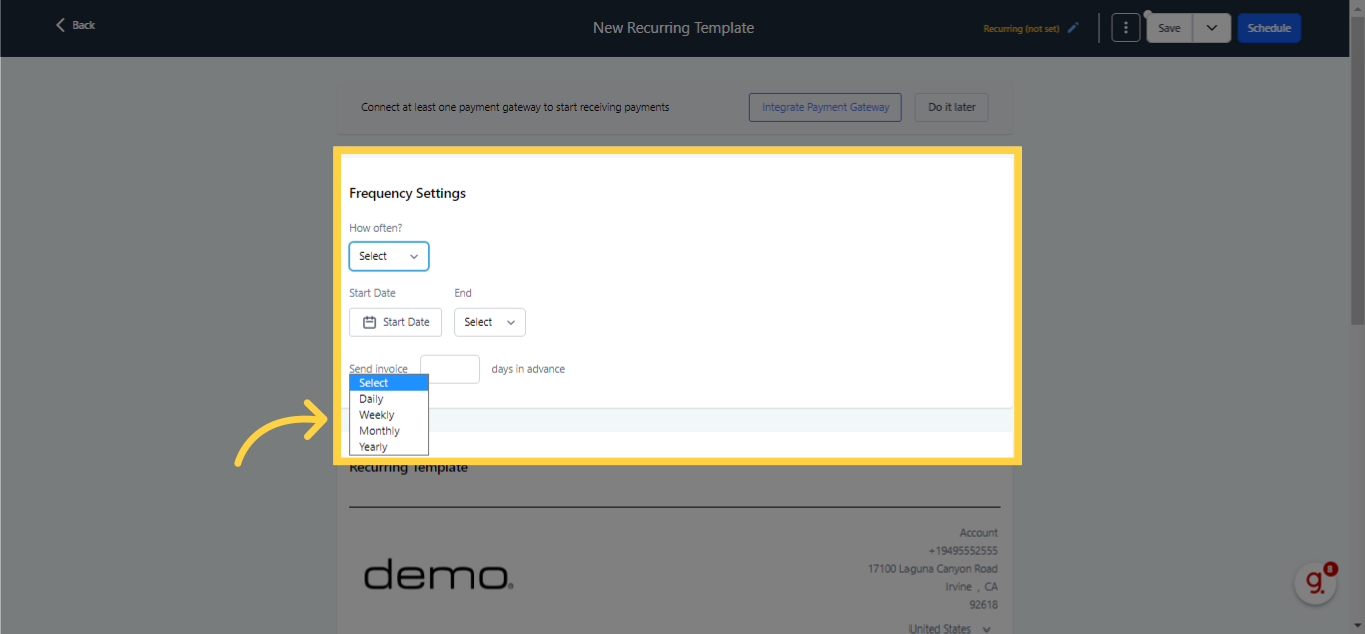
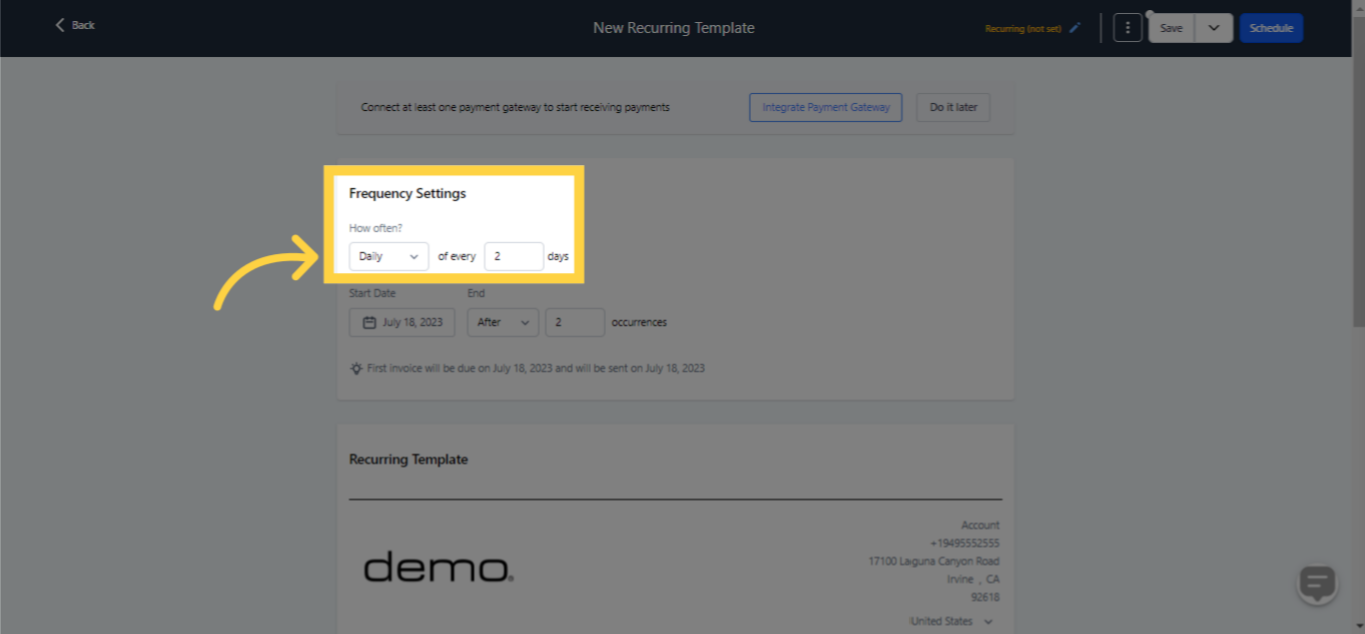
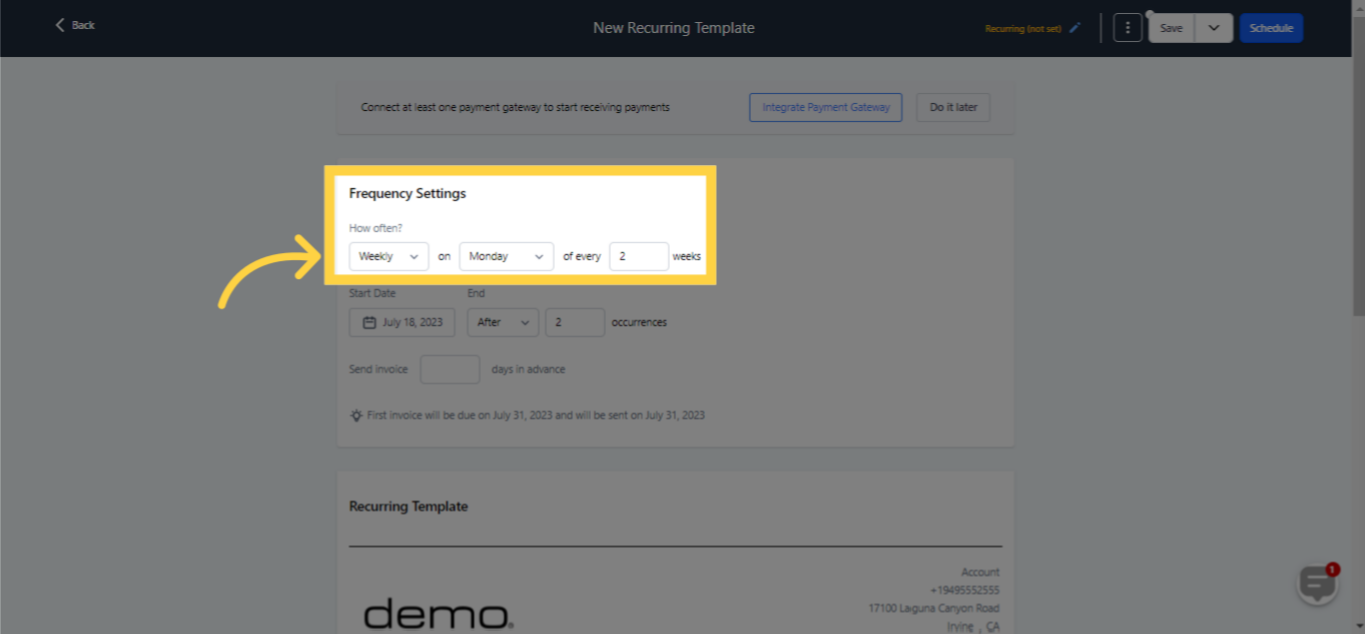
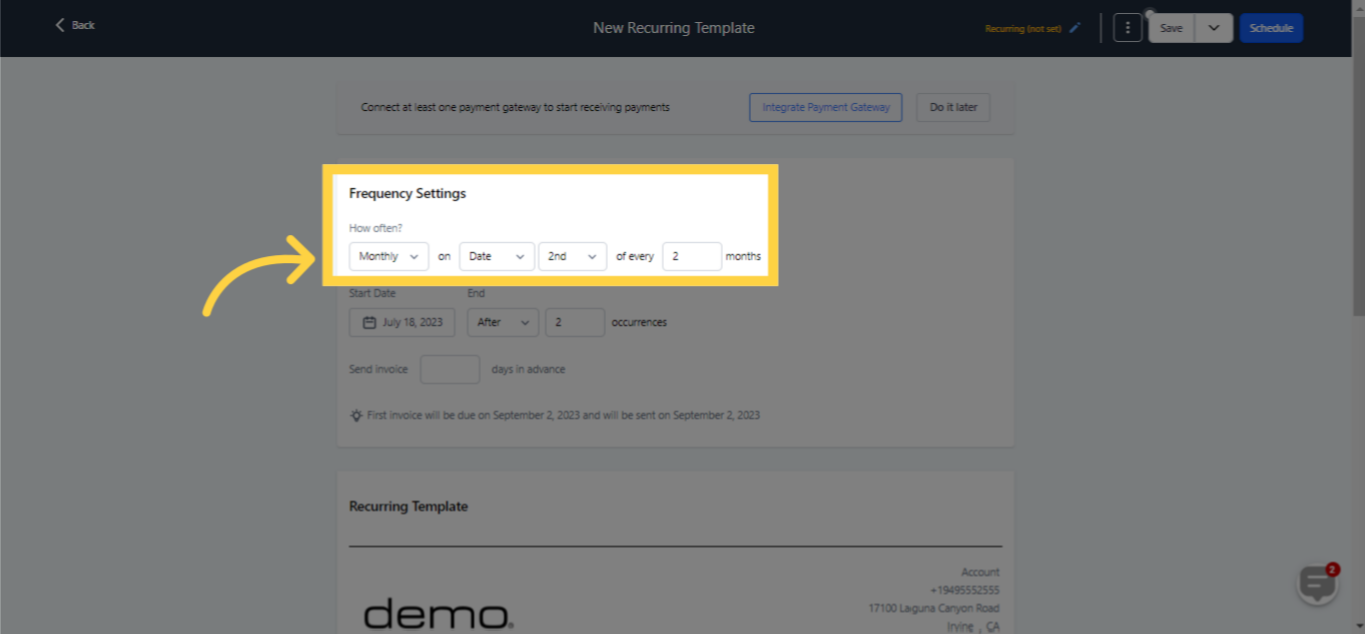
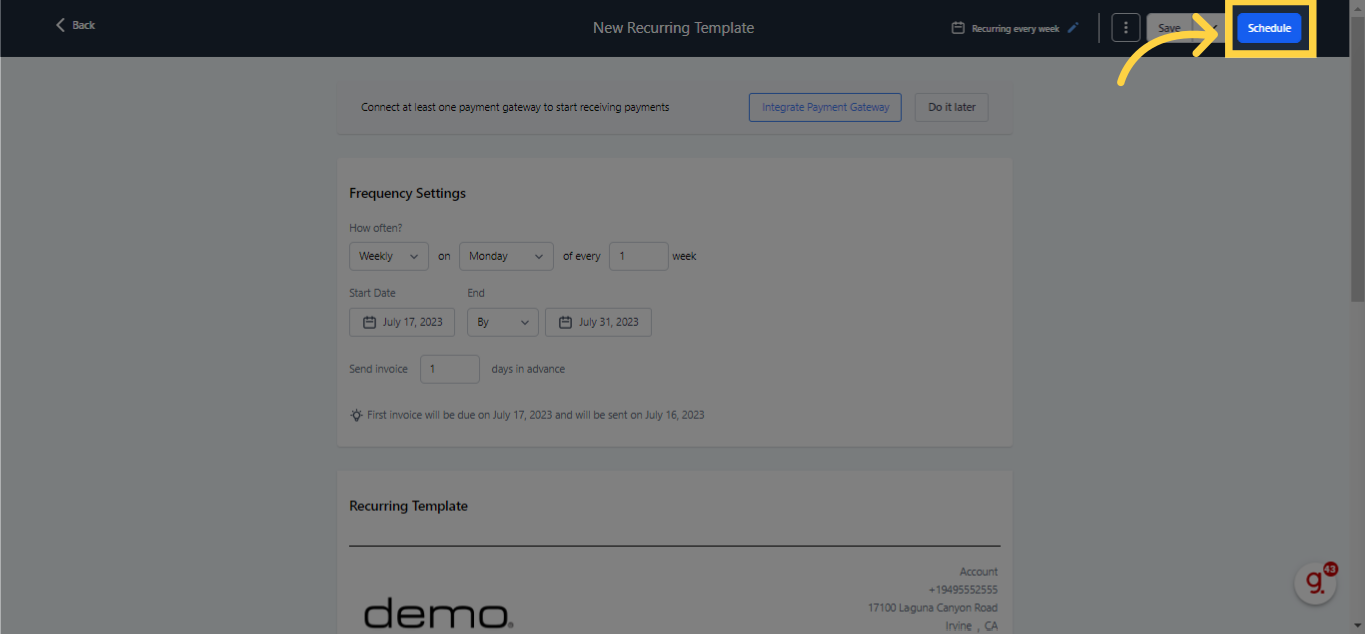
Tailor the Frequency Settings to set the regularity of invoice dispatch.
Choose whether you desire the invoices to be sent out Daily, Weekly, Monthly, or Yearly, and indicate the specific days or dates for their release.
There's also an option to dispatch invoices in timeframes of days, weeks, months, or years.
Choose whether you desire the invoices to be sent out Daily and indicate the specific days or dates for their release.
)
Choose whether you desire the invoices to be sent out Weekly and indicate the specific days or dates for their release.
)
Choose whether you desire the invoices to be sent out Monthly and indicate the specific days or dates for their release.
)
Choose whether you desire the invoices to be sent out Yearly and indicate the specific days or dates for their release.
)
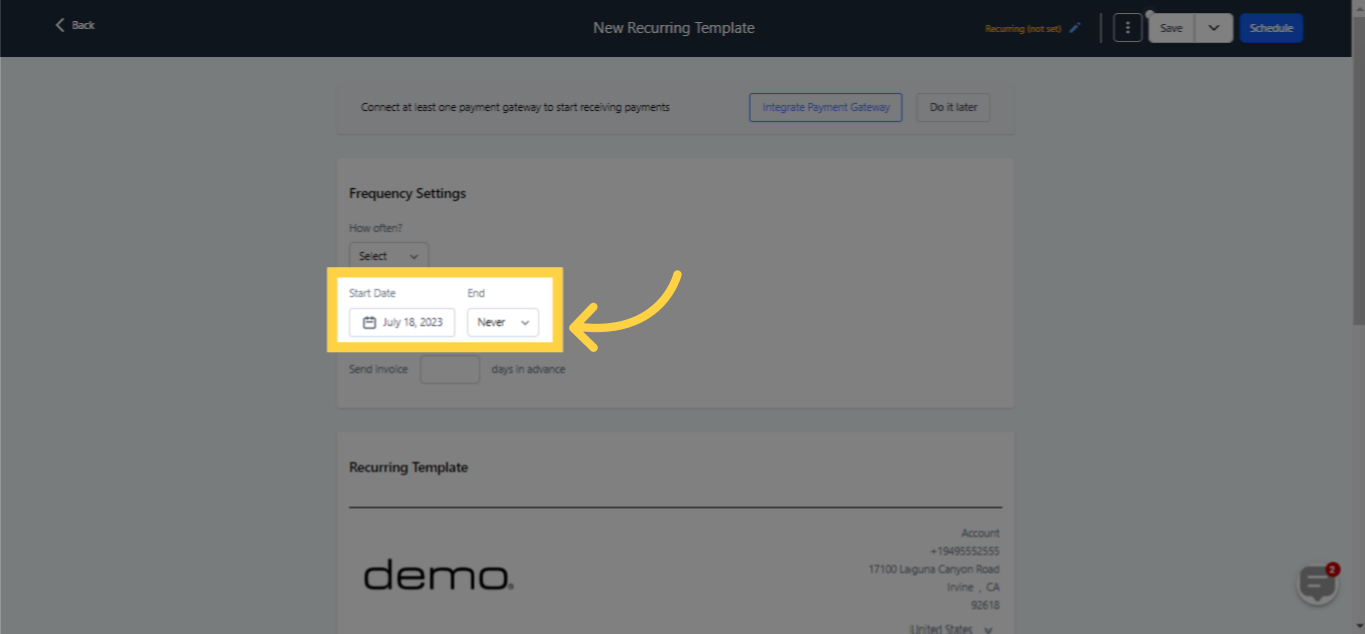
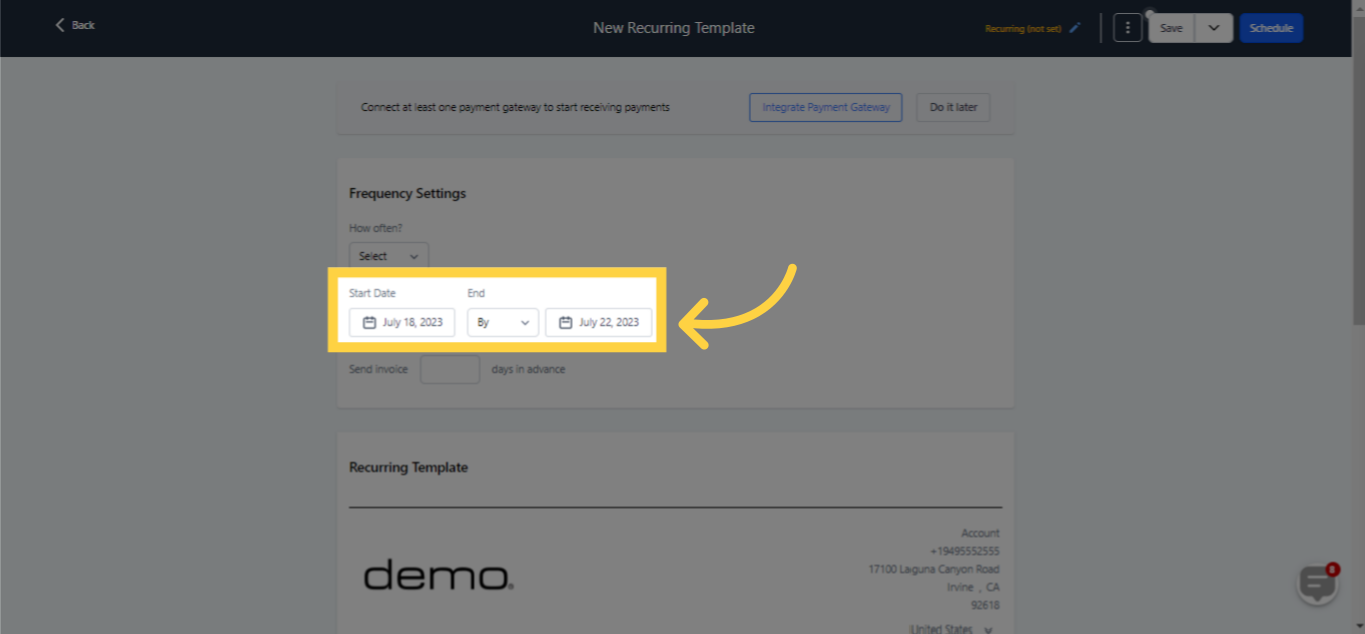
Choose the termination parameters for the cessation of invoice dispatch. You have three options: Never, By, and After.
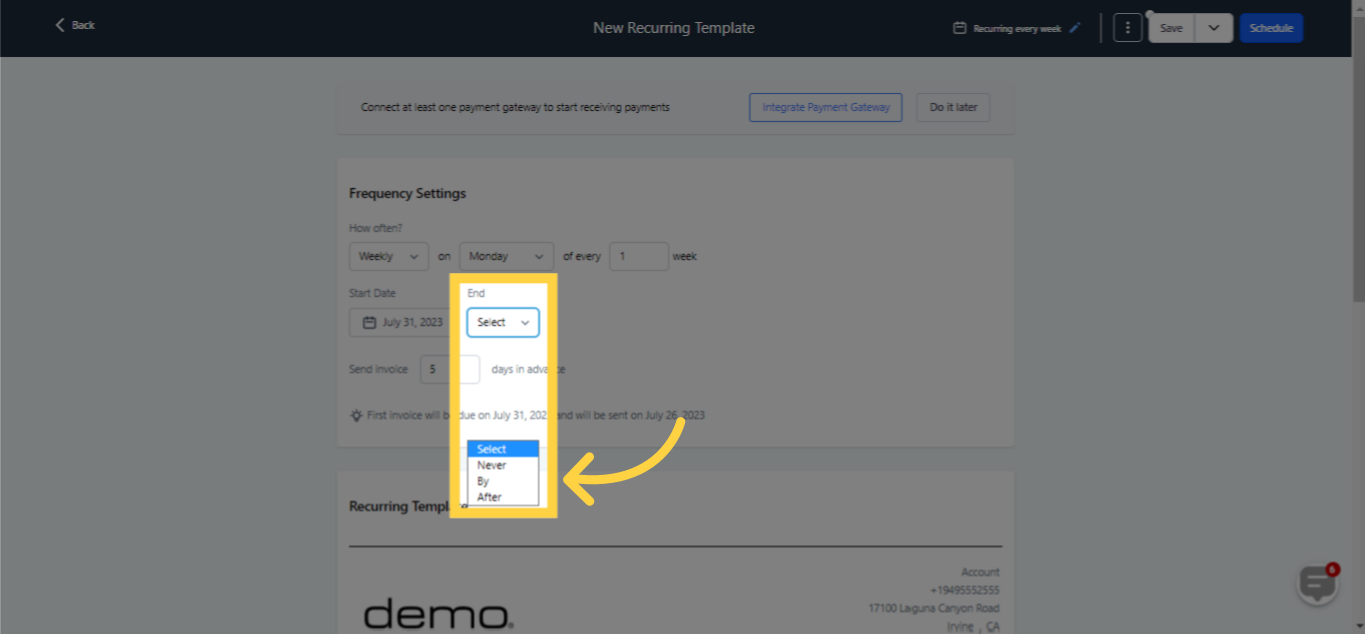)
Selecting 'Never' means invoices will continue to be sent indefinitely at your chosen frequency.
)
If you choose 'By', you need to define a date on which the invoices' dispatch will be halted. Beyond that date, no invoices will be dispatched, marking an end to the Recurring Invoice.
)
Opting for 'After' requires you to determine a date after which the invoices will cease to be dispatched. This permits the dispatch of invoices on that specified date, following which Recurring Invoices will be terminated. If no invoices are scheduled for dispatch on the chosen date, then no invoices will be dispatched, and the Recurring Invoice will be concluded.
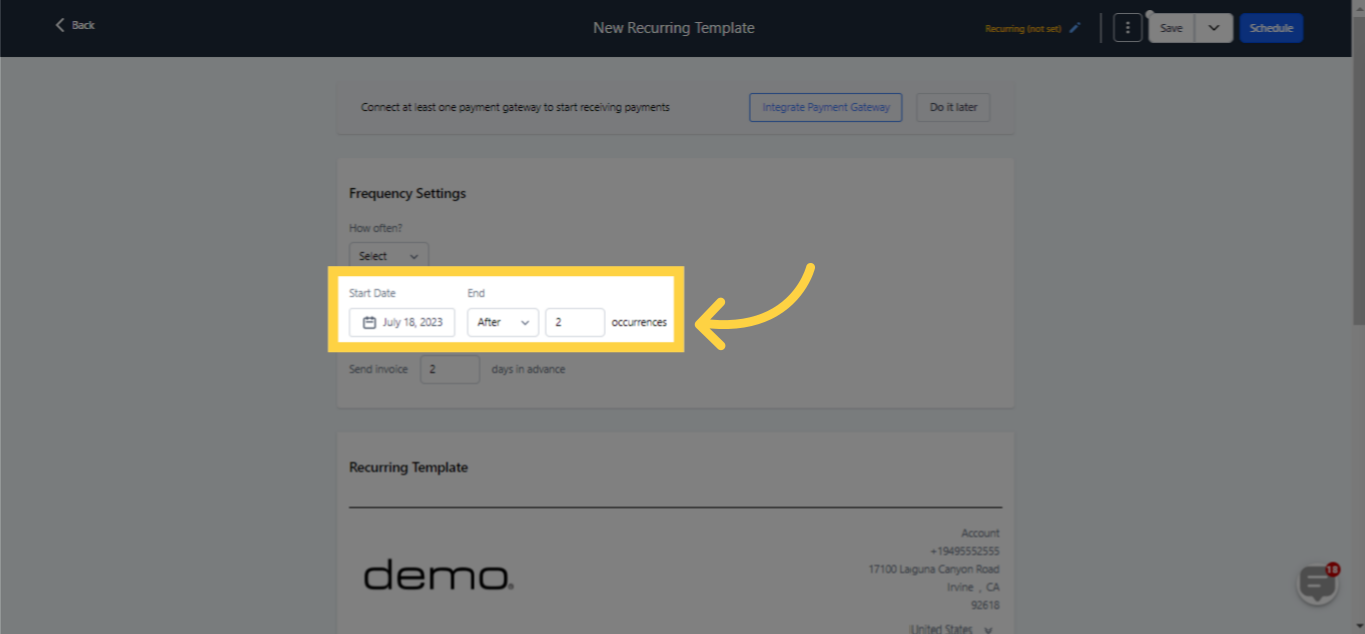)
Decide on the number of days ahead you would like invoices to be dispatched or leave this field empty if you prefer invoices to be dispatched on their due date.
You will come across several customization choices for your invoices.
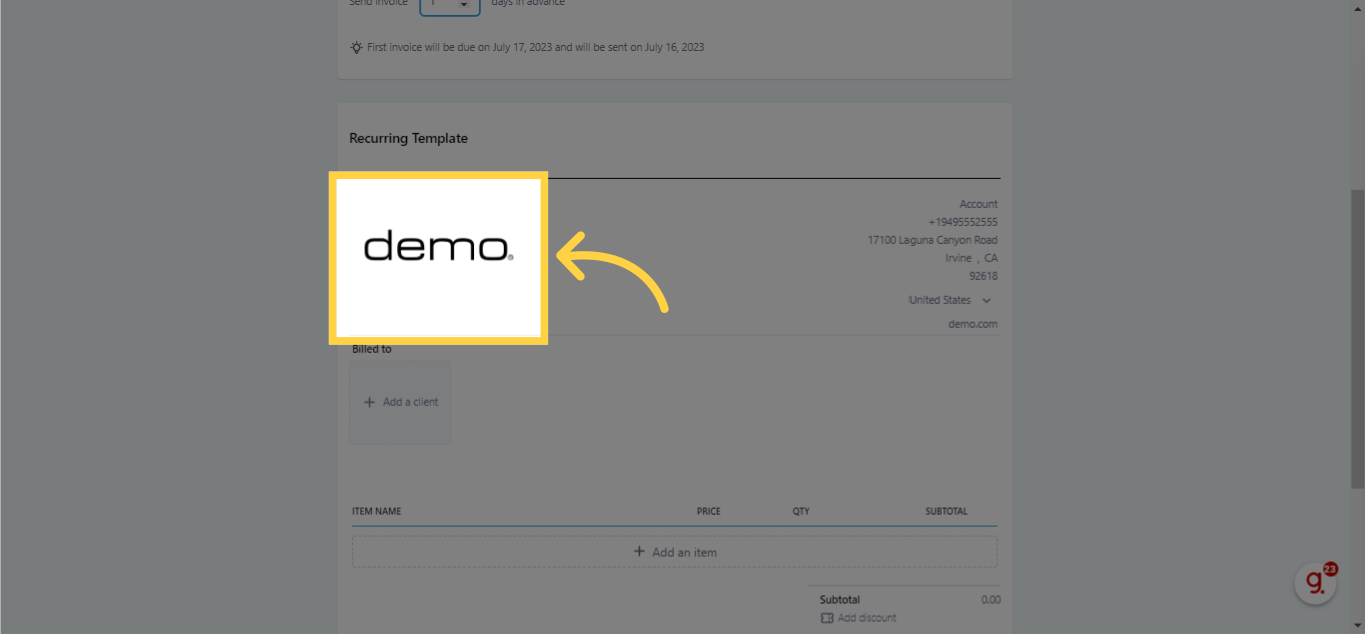
To upload your logo to the invoice, click on the blue box labeled 'Select a File'.
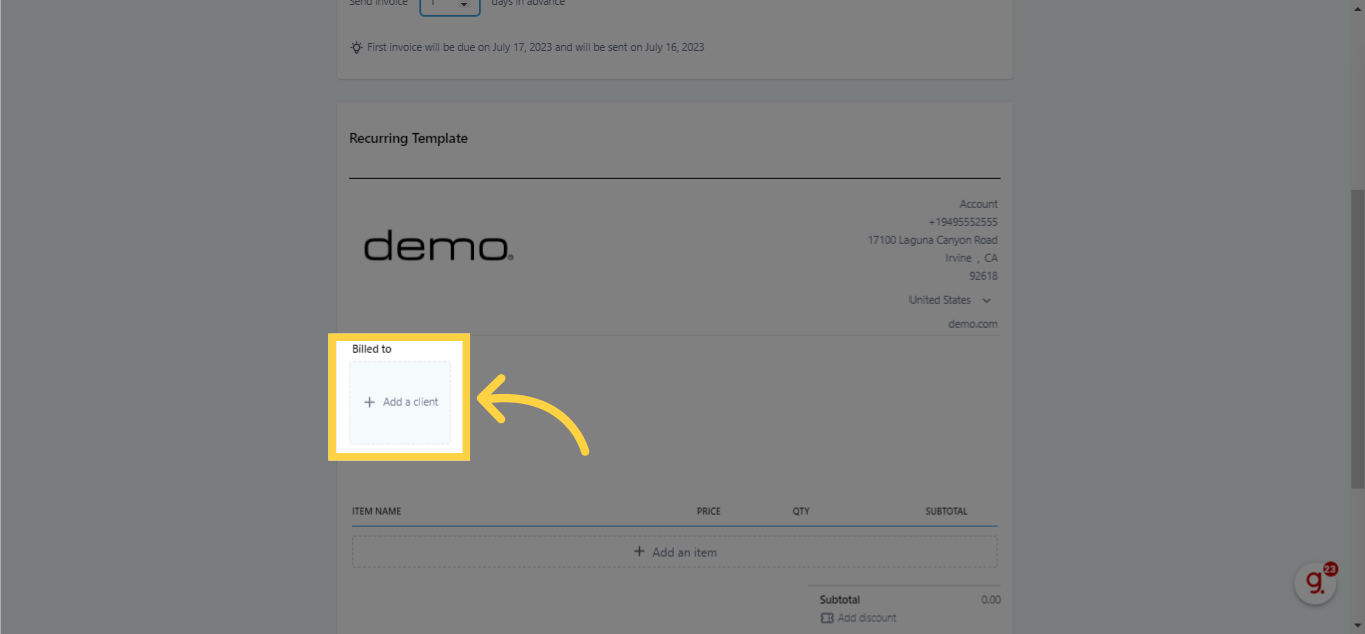
Click on '+ Add a Client' and choose an existing client from your list to whom you wish to send the invoice, or create a new client profile.
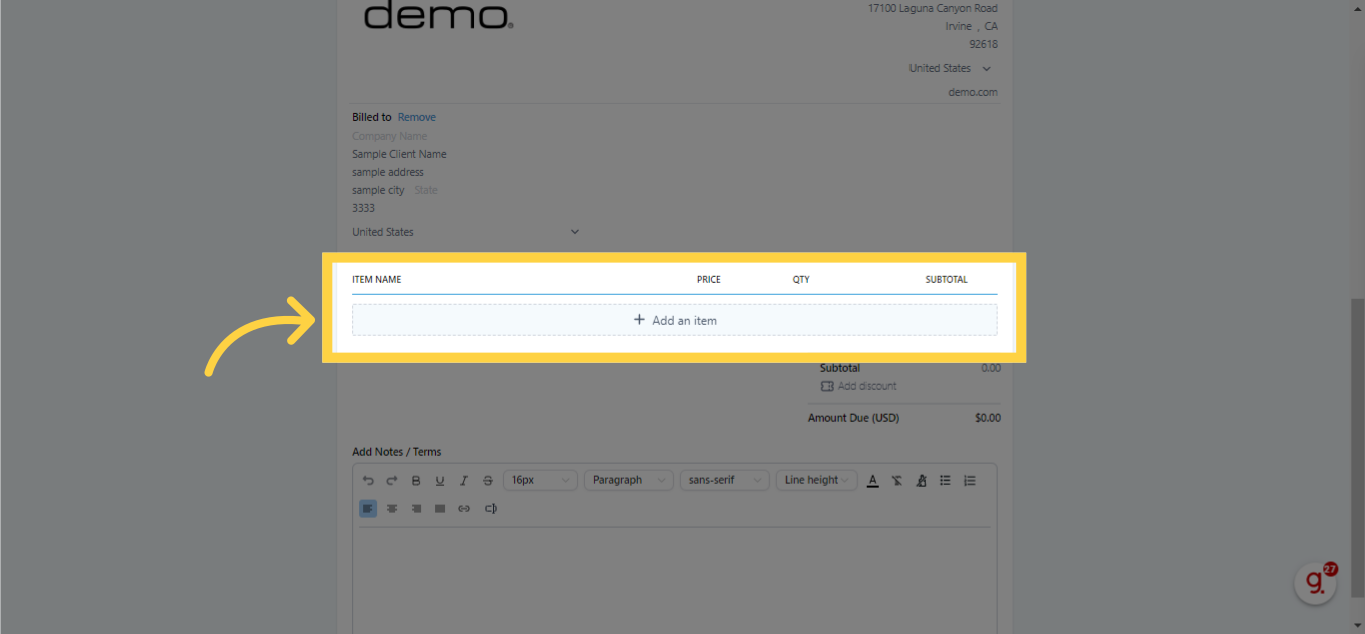
Click on '+ Add an Item' to select the product(s) for which your client will be invoiced.
Once the item is chosen, you can modify the price and quantity by clicking on these parameters as they become visible.
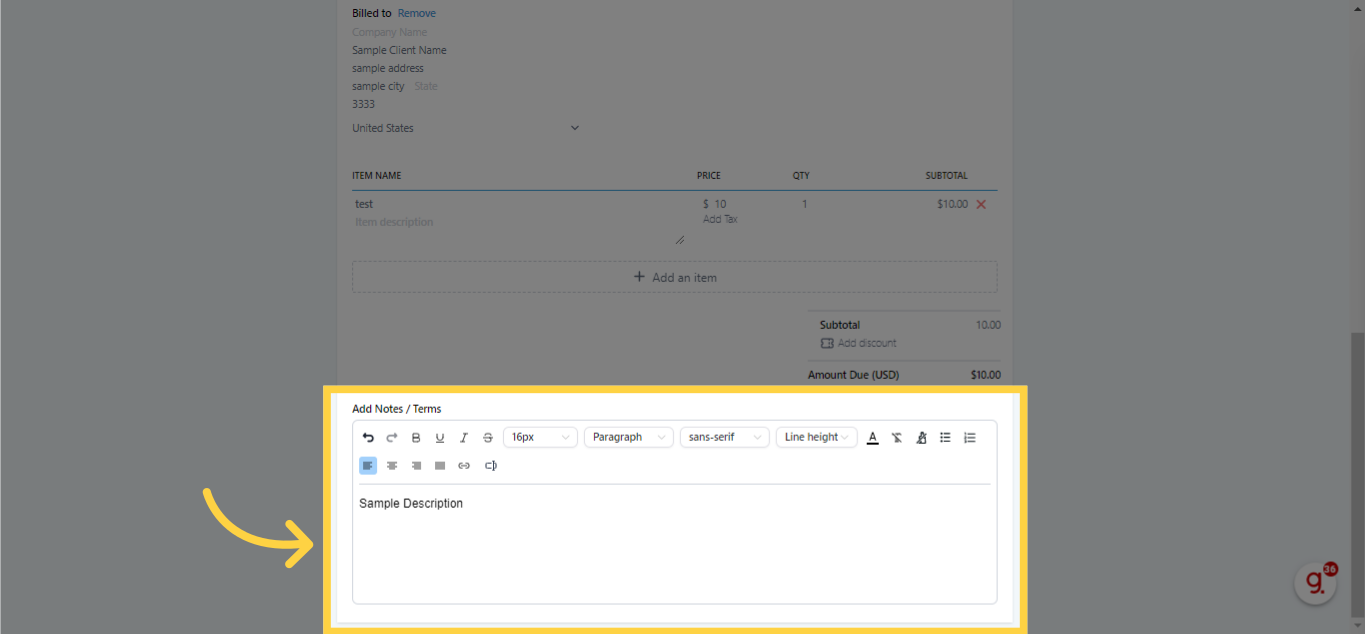
Lastly, click on 'Add Notes/Terms' at the lower part of the invoice section to include any notes or terms you want to be visible to your client on the invoice.
At the top right of the page, click 'Save'.
If you wish to save the Recurring Invoice but not schedule it yet, you can select 'Save' and then '< Back' in the top right corner, or click the drop-down arrow next to the 'Save' button and select 'Save and close'. Both these options will save your Recurring Invoice as a Draft.
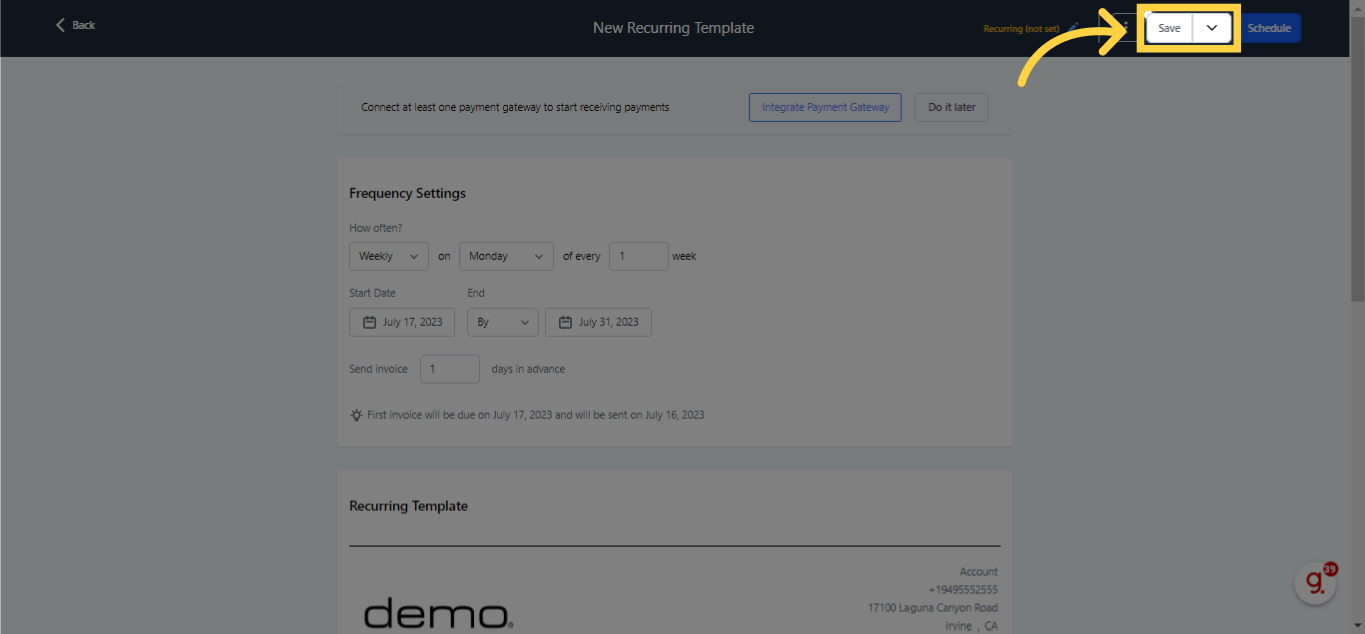
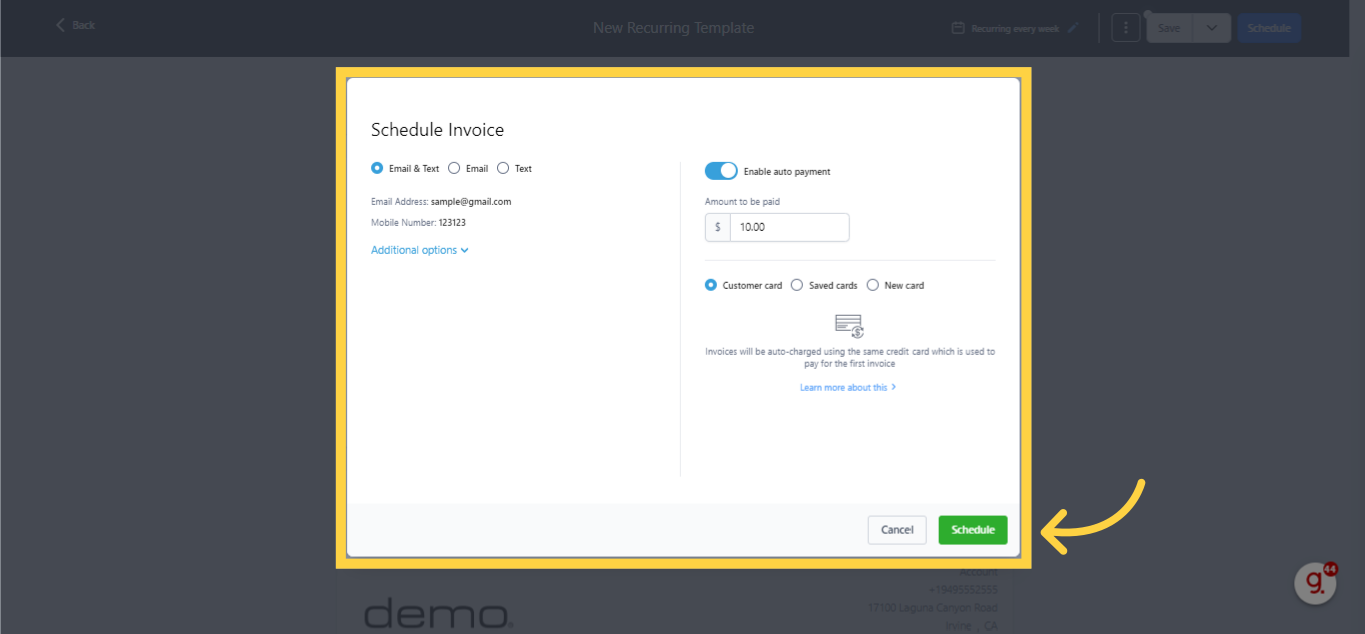
When you're prepared to finalize your Recurring Invoice, select 'Schedule' in the top right corner of your screen and press 'Schedule' again in the confirmation window that pops up.
IMPORTANT: Once your invoice is scheduled, you can no longer edit it. To make changes after scheduling, you will need to delete the Recurring Invoice and recreate it.
Within the confirmation window, you will also observe Auto Payment options. These can be configured either within this window or after your Recurring Invoice has been scheduled.
Your Recurring Invoice is now set up and ready. Your clients should start receiving their invoices automatically!
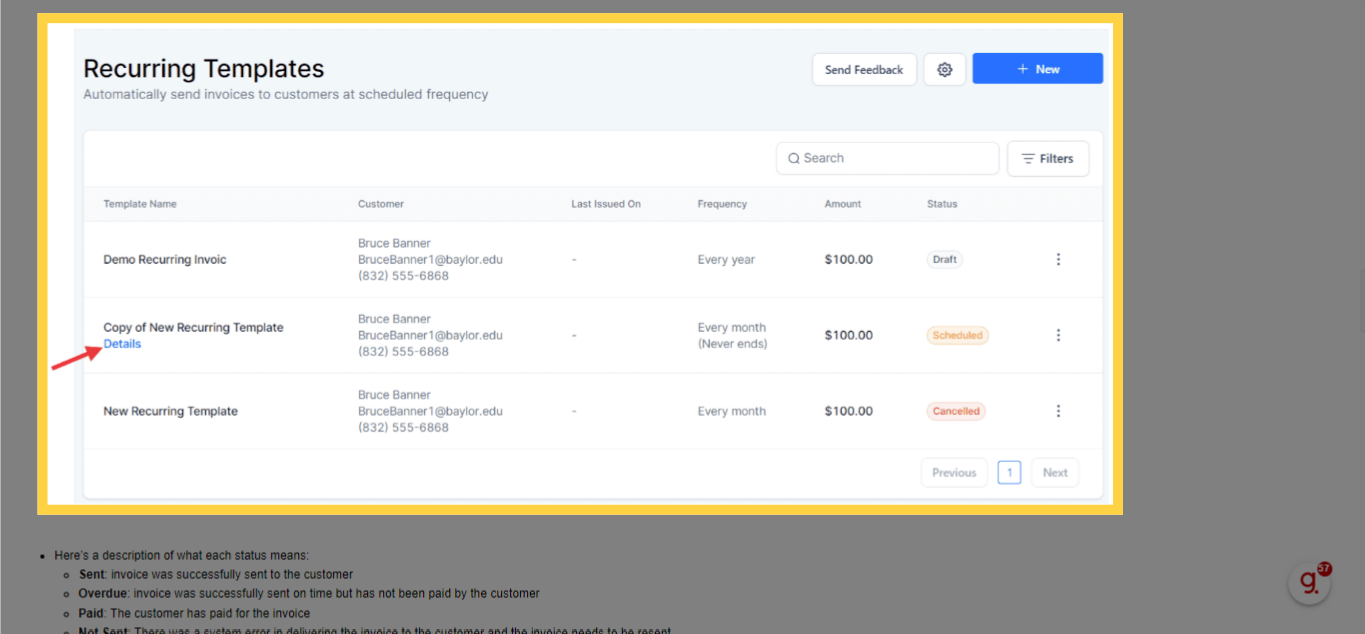
Select "Details" beneath the Template Name to inspect the status of the recurring invoice series. A popup window will emerge in the right panel, displaying the statuses of invoices such as sent, overdue, paid, or not sent.
Here's a breakdown of what each status signifies:
The invoice was successfully delivered to the customer.
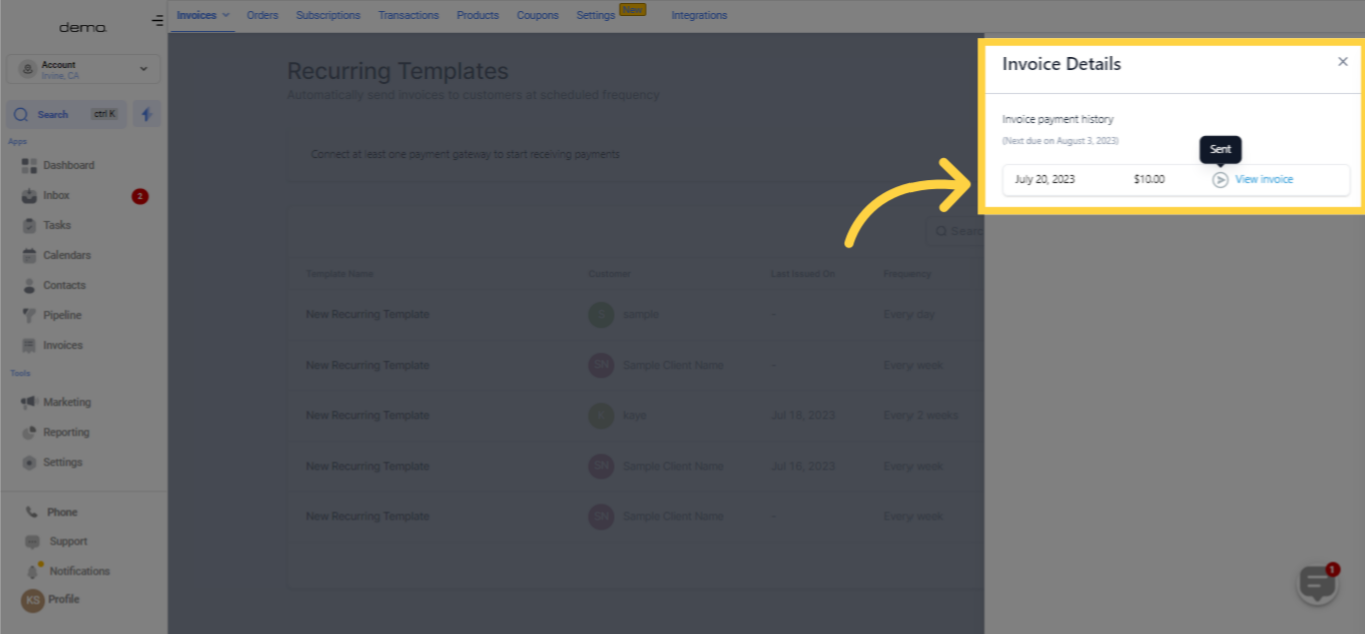)
The invoice was dispatched in a timely manner but the customer has not made payment yet.
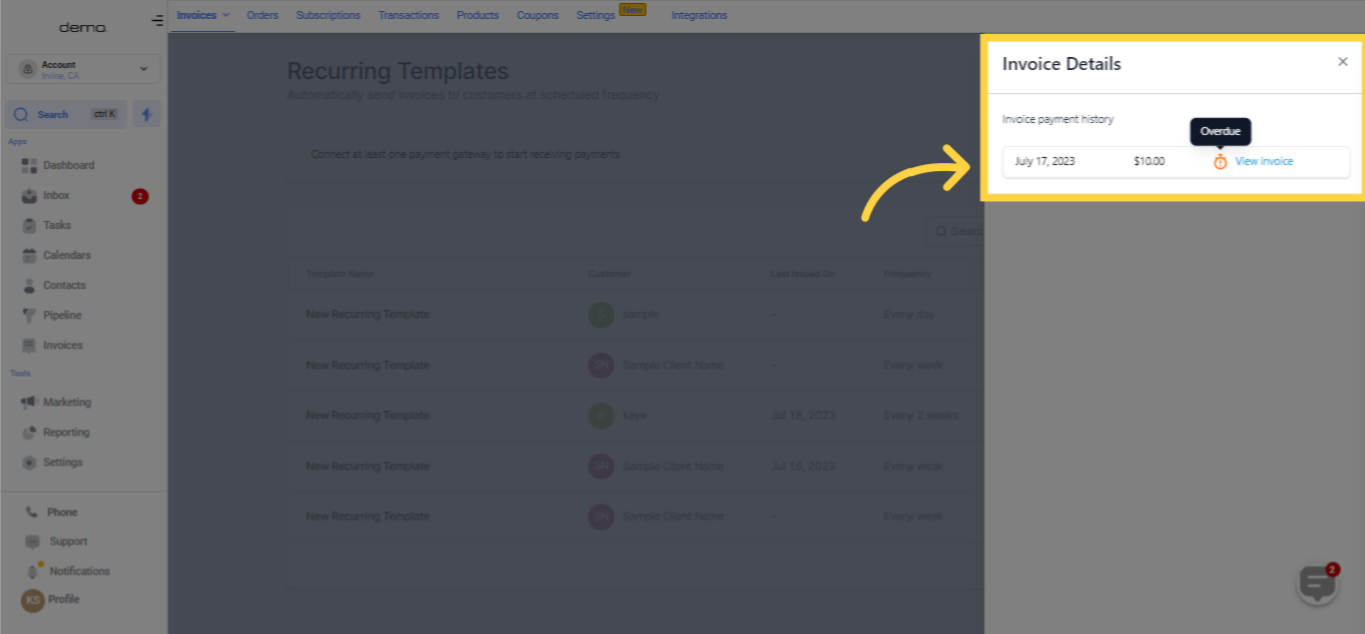)
The customer has settled the invoice.
A system error occurred while trying to deliver the invoice to the customer, necessitating it to be resent.
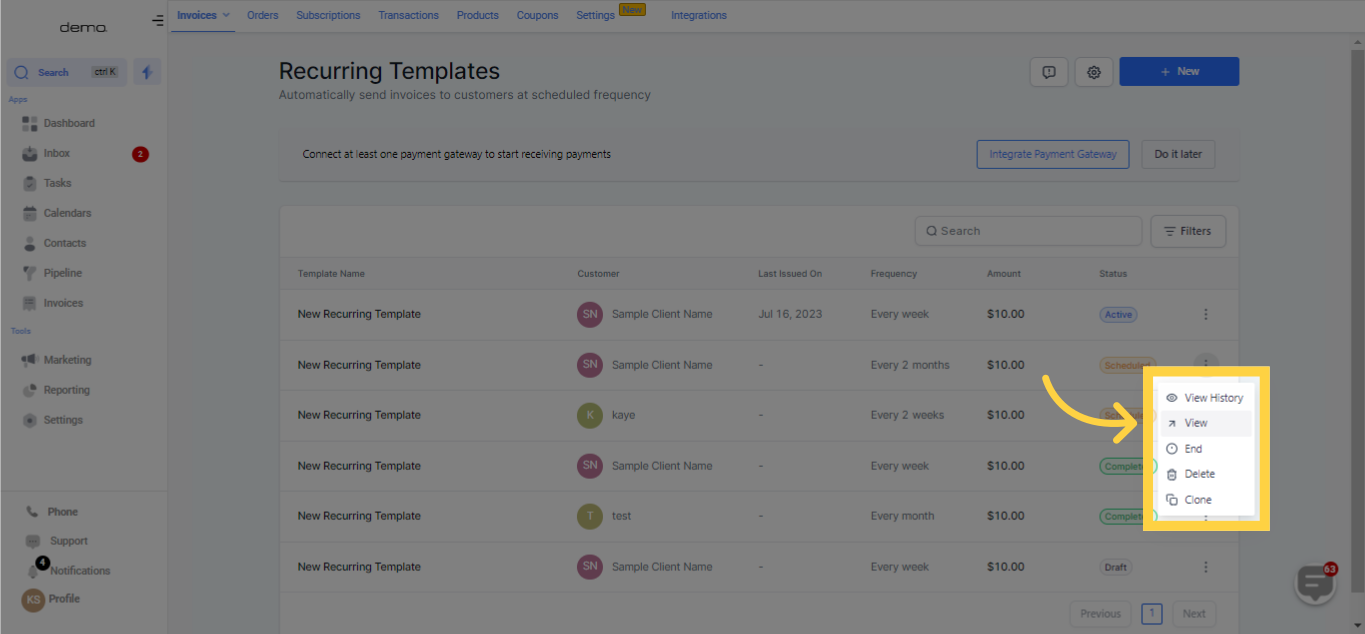
To proceed with this, select the three dots on the right of the Recurring Invoice line item while viewing your Invoice tab and click 'View'.
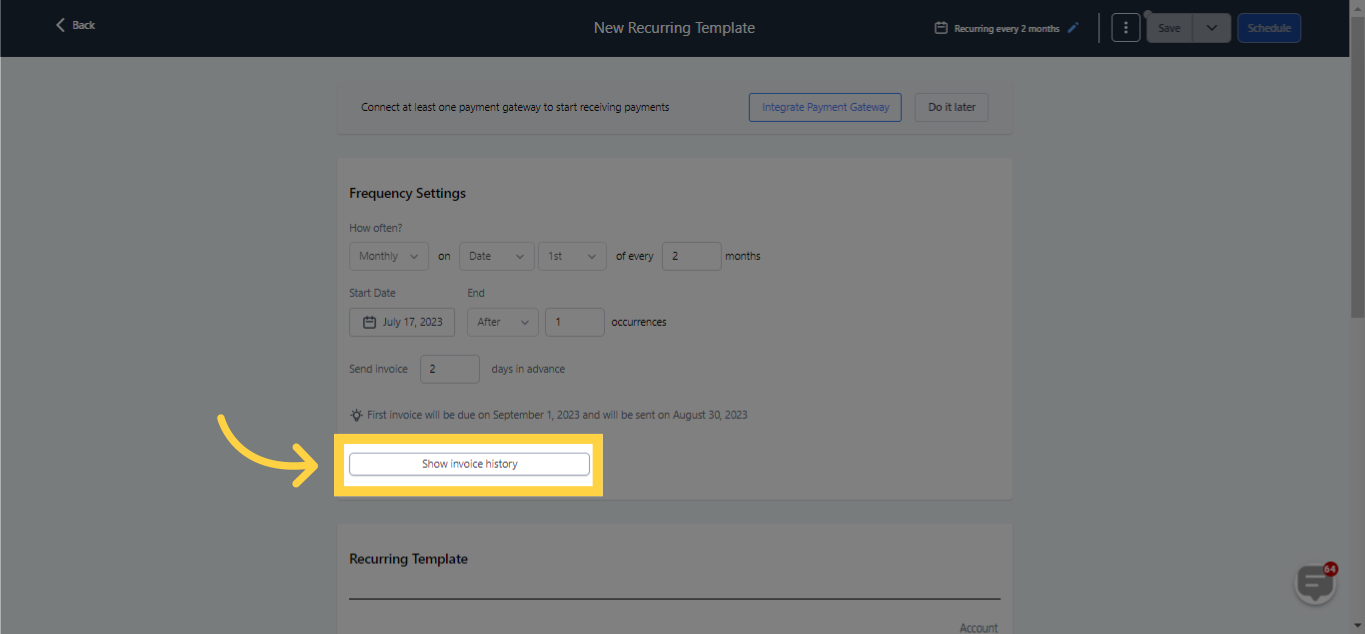
Note: Invoices that have been cancelled or completed may only be removed given that no invoice has been dispatched to the client. Moreover, upon deletion, recurring templates will no longer be visible in the list view.This action will lead you to the Recurring Invoice Builder. Once inside the Builder, you can opt for 'Show Invoice History' located at the bottom of the Frequency Settings. This will provide a view of the Invoice Statuses.
Expert Tip: The Recurring Invoice builder also allows the configuration of Autopayments, which can be set up both during and after the publication of your recurring invoice. This feature ensures the automatic charging of your client's credit card upon dispatch of their invoice.Active or scheduled recurring invoices can be cancelled or prevented from dispatching future invoices.
There are two methods to halt these invoices:
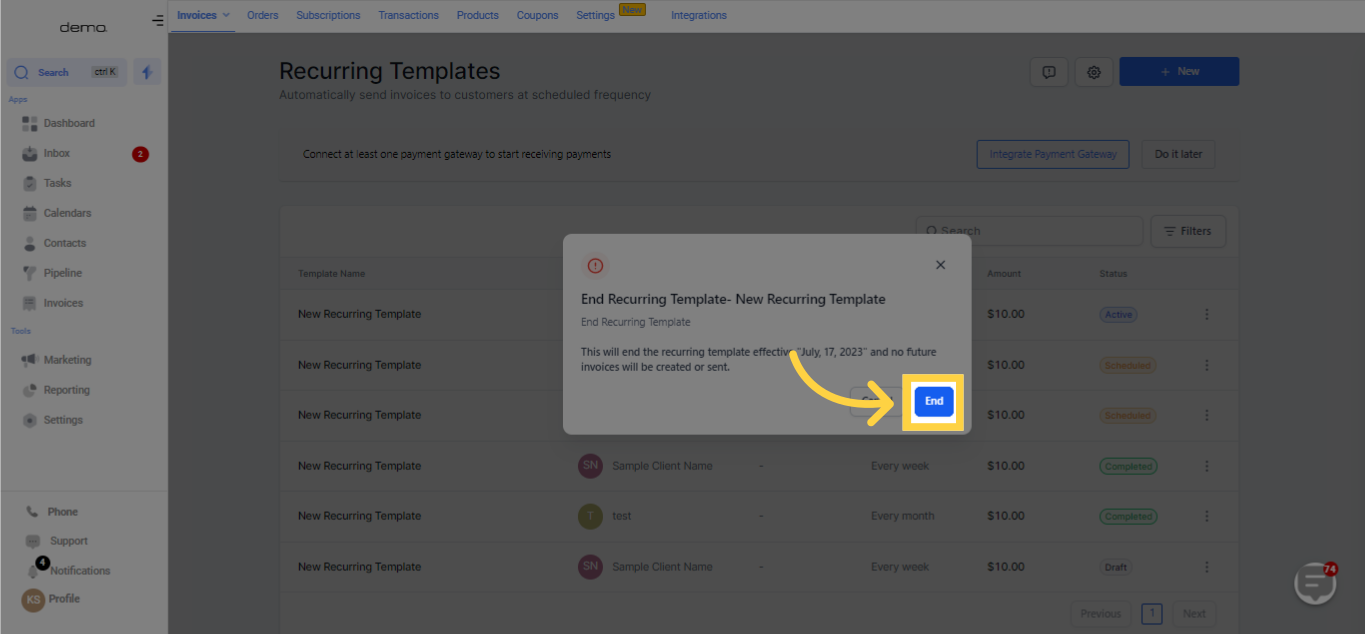
Choose the 'End' option from the 'Actions' dropdown on the Recurring Invoices page, and affirm the message in the popup window.
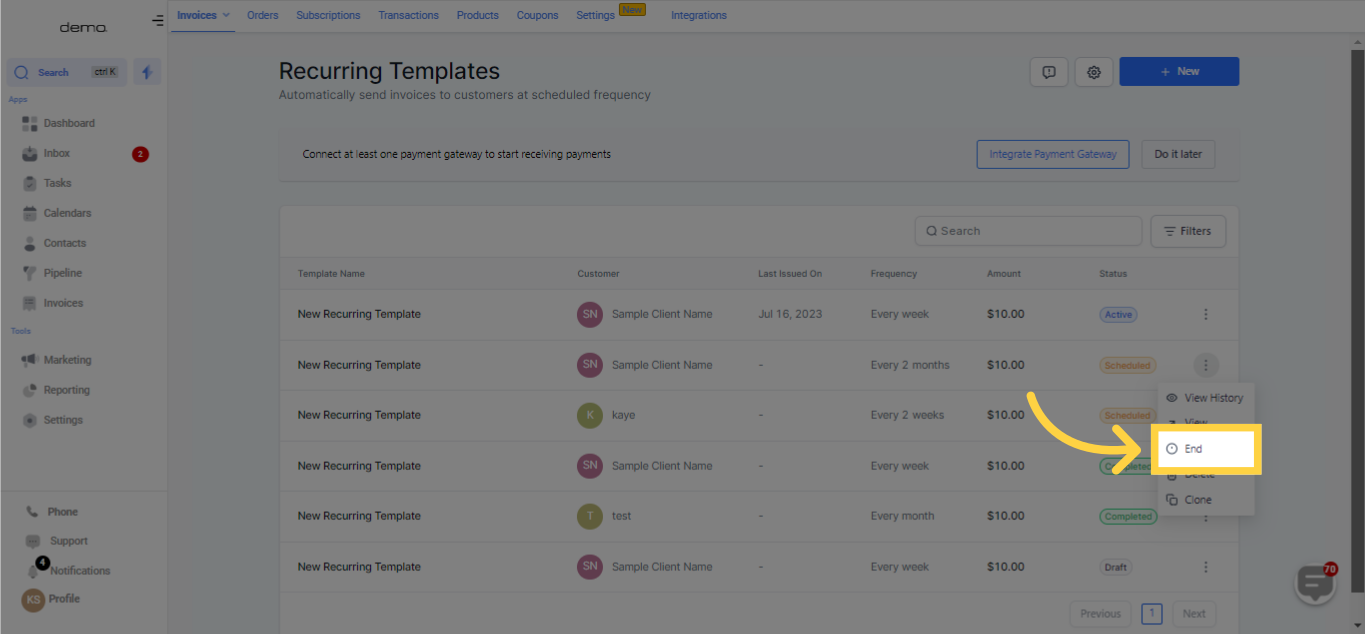
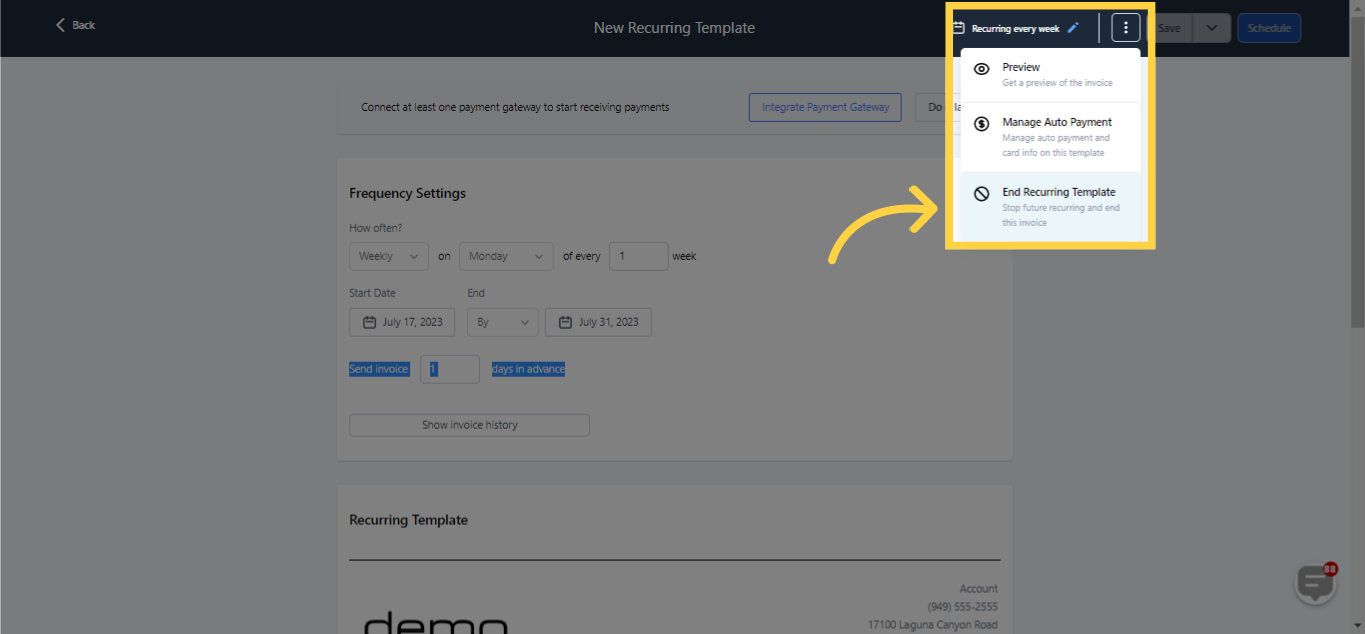
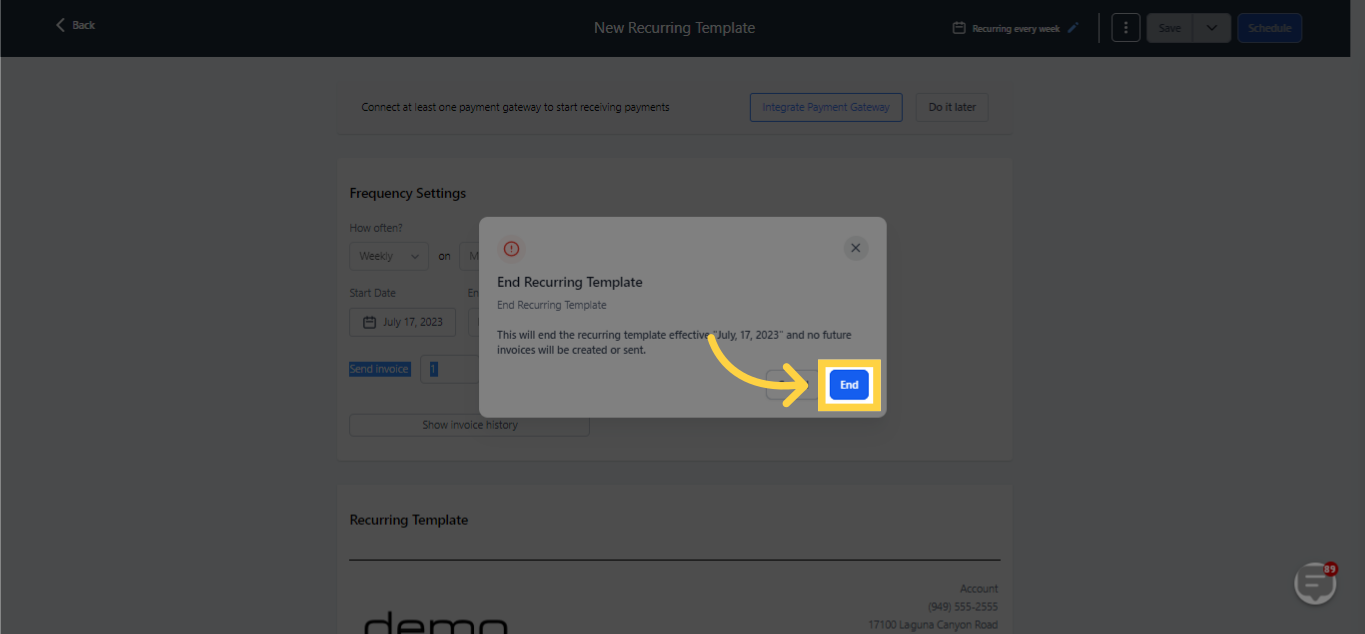
The other alternative method is via the builder. Select the 3-dot dropdown menu to terminate the recurring invoice and acknowledge the message in the popup window.
Additional Expert Tips:

The listing displayed on the Recurring Templates page denotes the recurring templates formulated by the user. These are generating and delivering individual invoices to the specified client based on the frequency settings defined individually for them. In essence, the list highlights the parental invoice creator, which generates and sends invoices as per the frequency settings and customer details input within.

You can set up various notifications for recurring invoices automatically by utilising Workflows.

Invoices marked as Cancelled or Completed can only be deleted if no invoice has been dispatched to the customer, or if the invoice was manually categorised as complete.

Recurring templates that have been deleted do not appear in the standard list view on your Invoices page.

Only one-time and recurring products qualify for recurring invoices. For recurring products, only the price of the recurring product is applied and the frequency must be set within the invoice frequency setting.