If you do not already have an Authorize Net account, please use the link below to create one:
To obtain Live and Sandbox API keys from Authorize.net, ensure that you are using a supported browser and are within one of the supported countries.
To access sandbox API keys, you need to log in to the sandbox Merchant Interface. To access Live API keys, you need to log in to the Live Merchant Interface. To learn more about the difference between Sandbox and Live Mode in Authorize.Net.
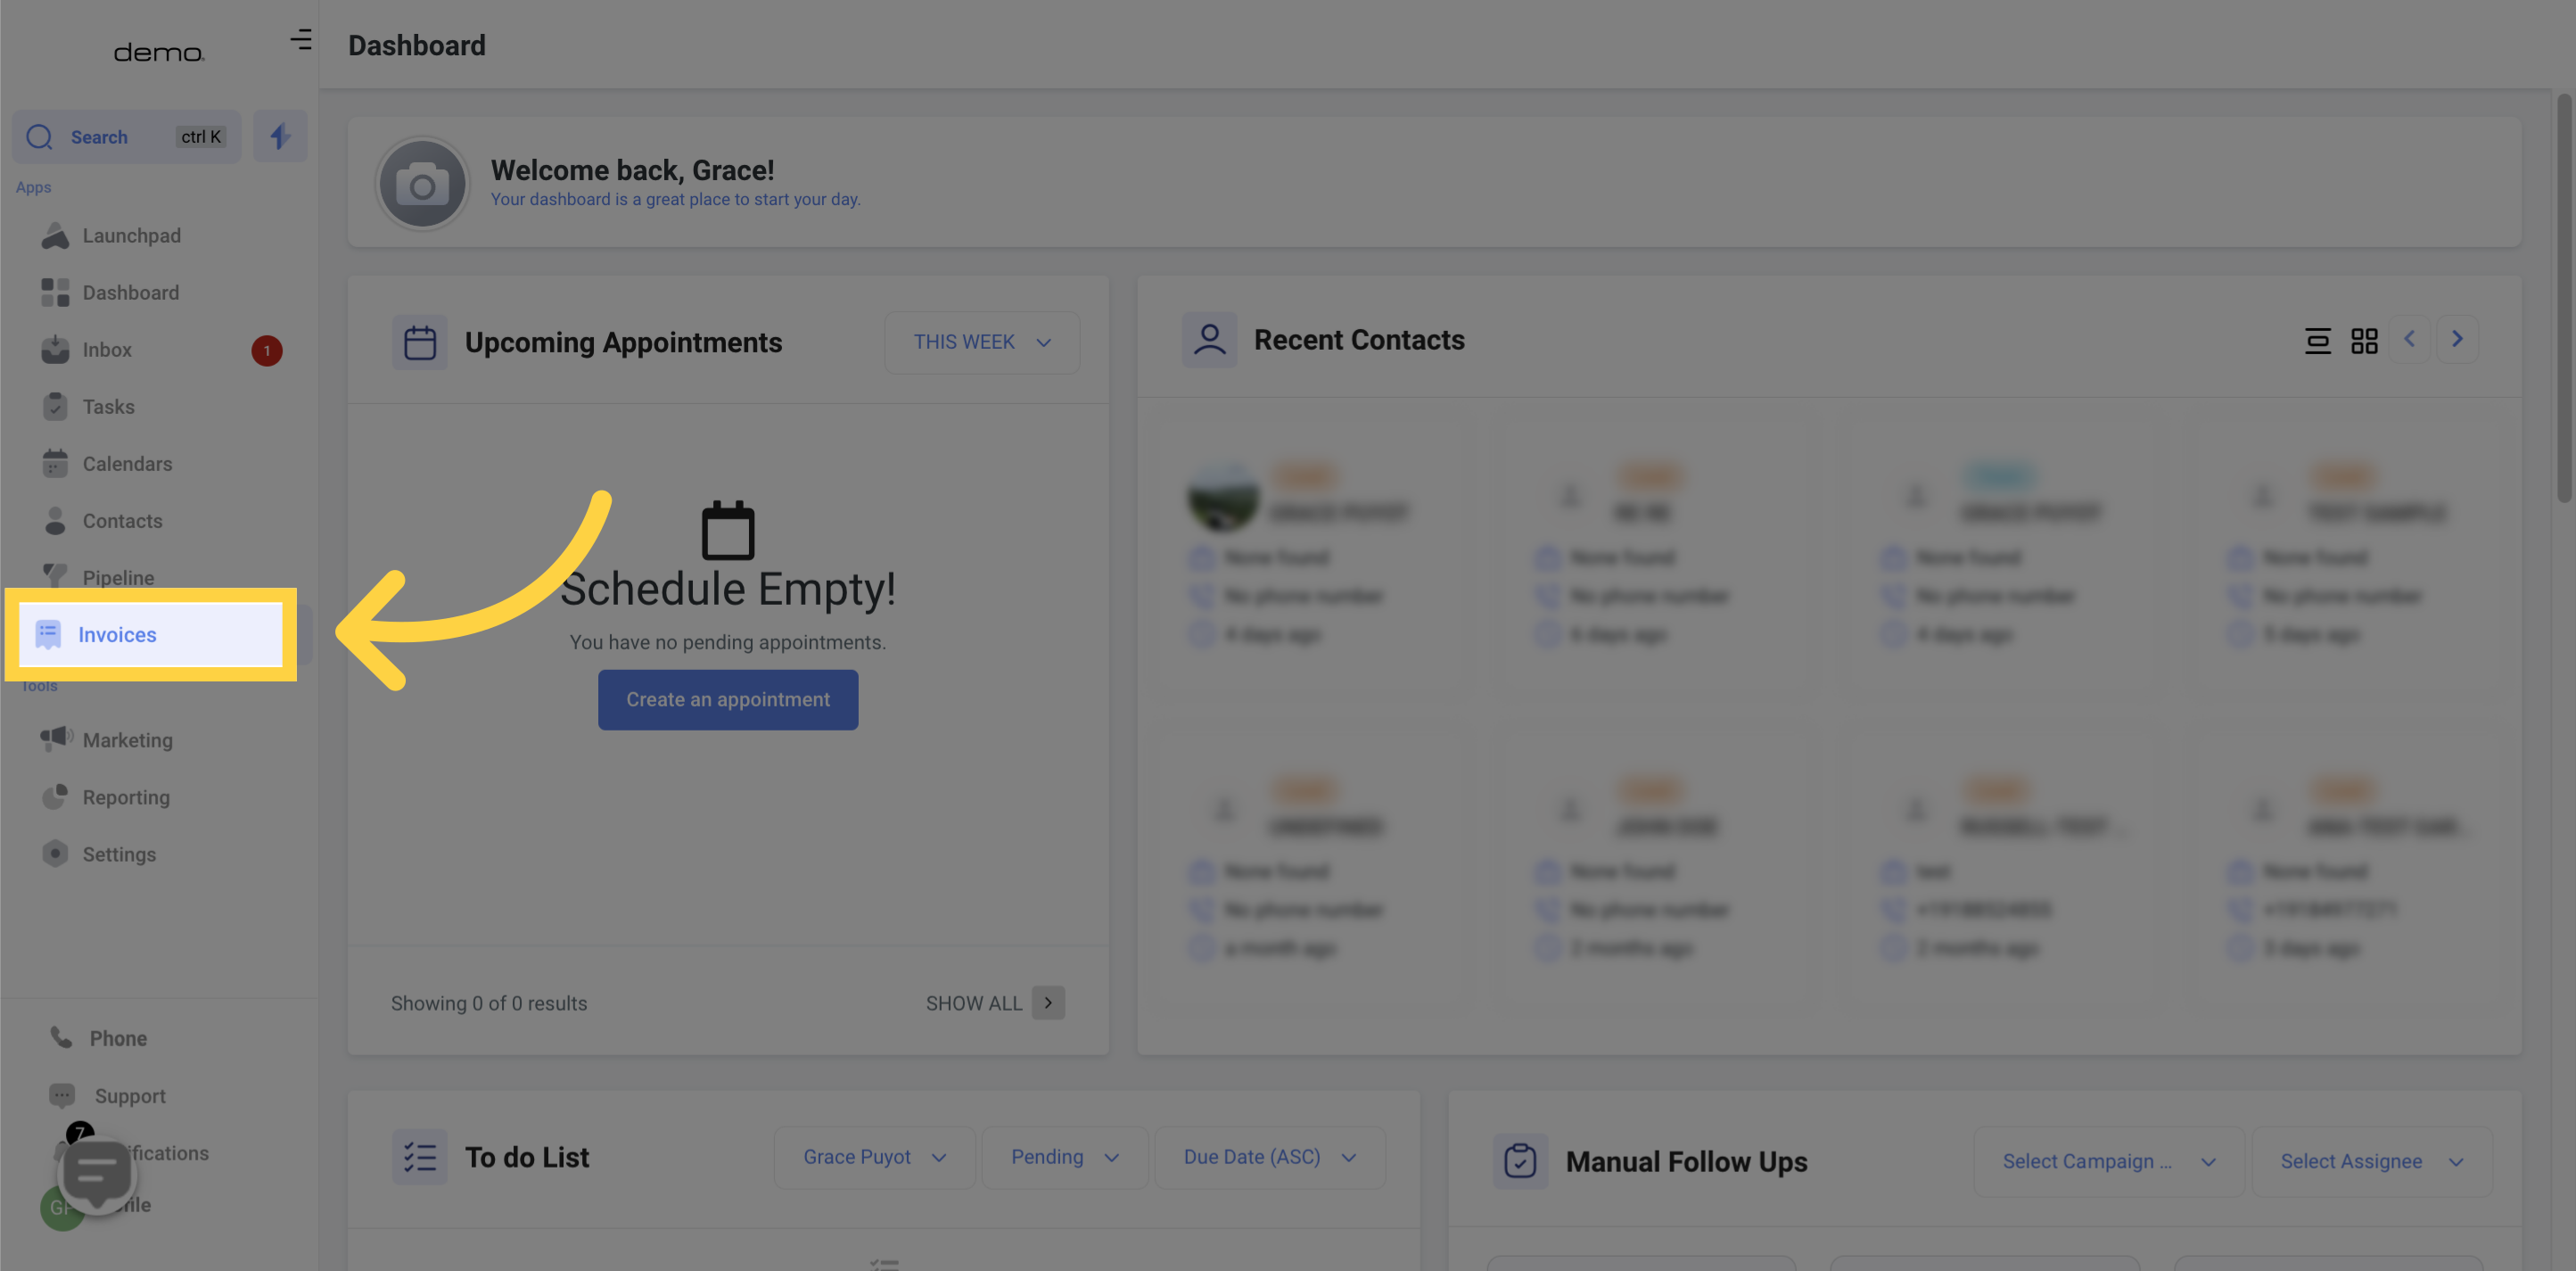
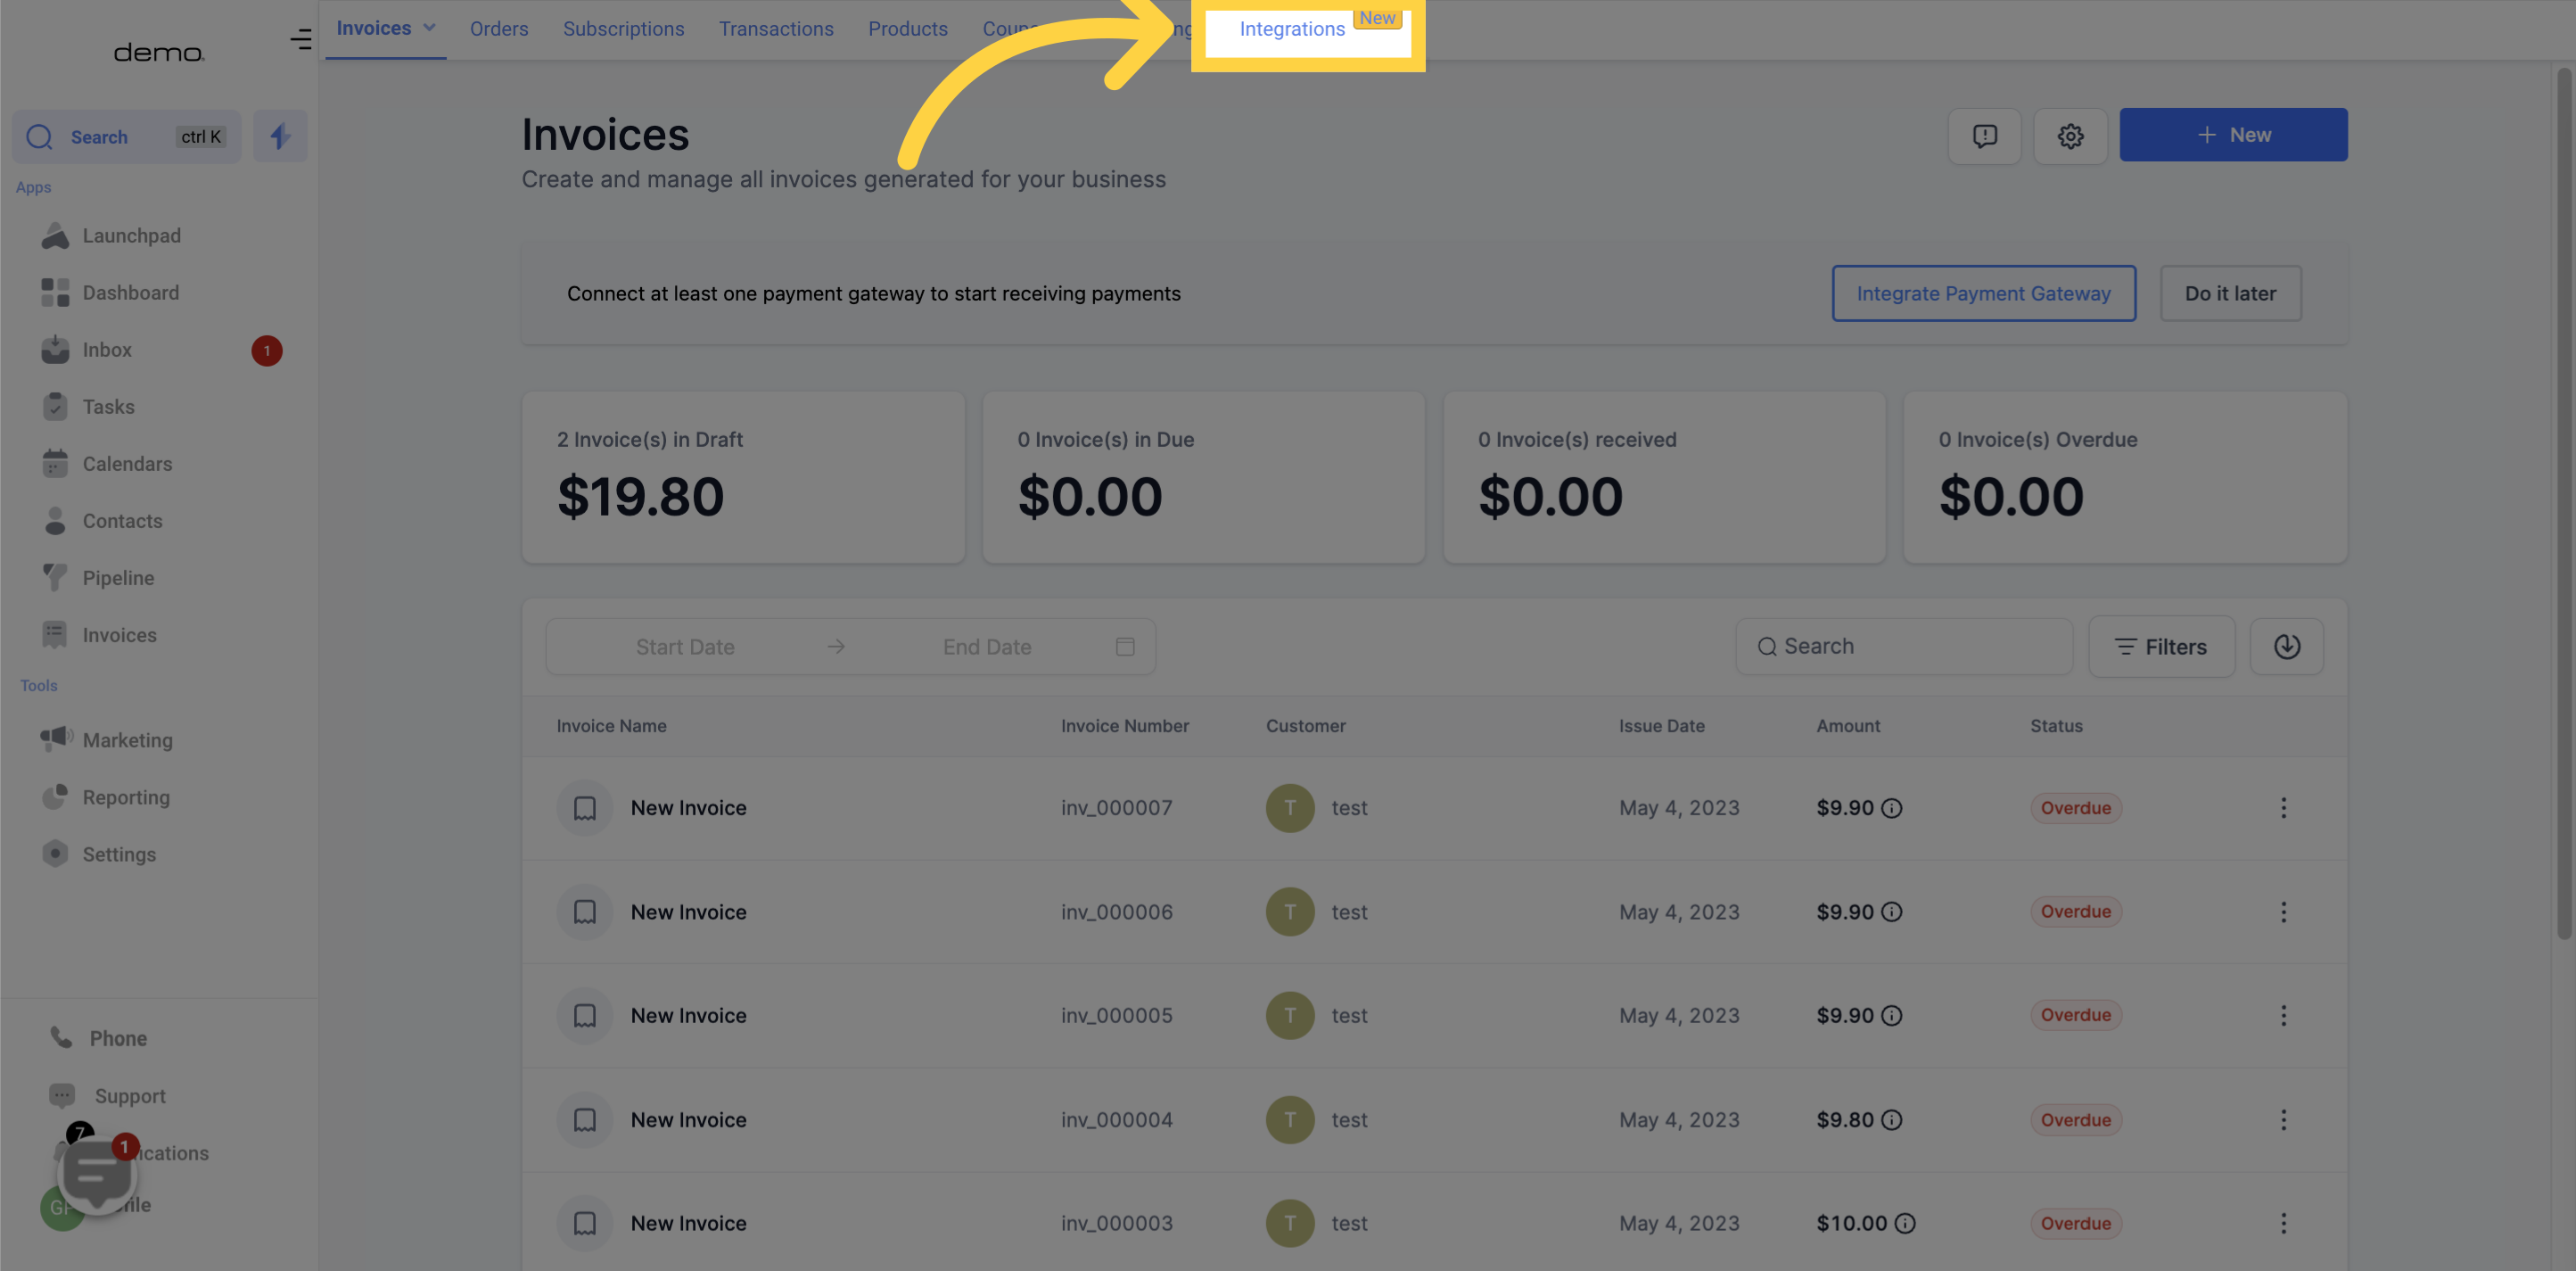
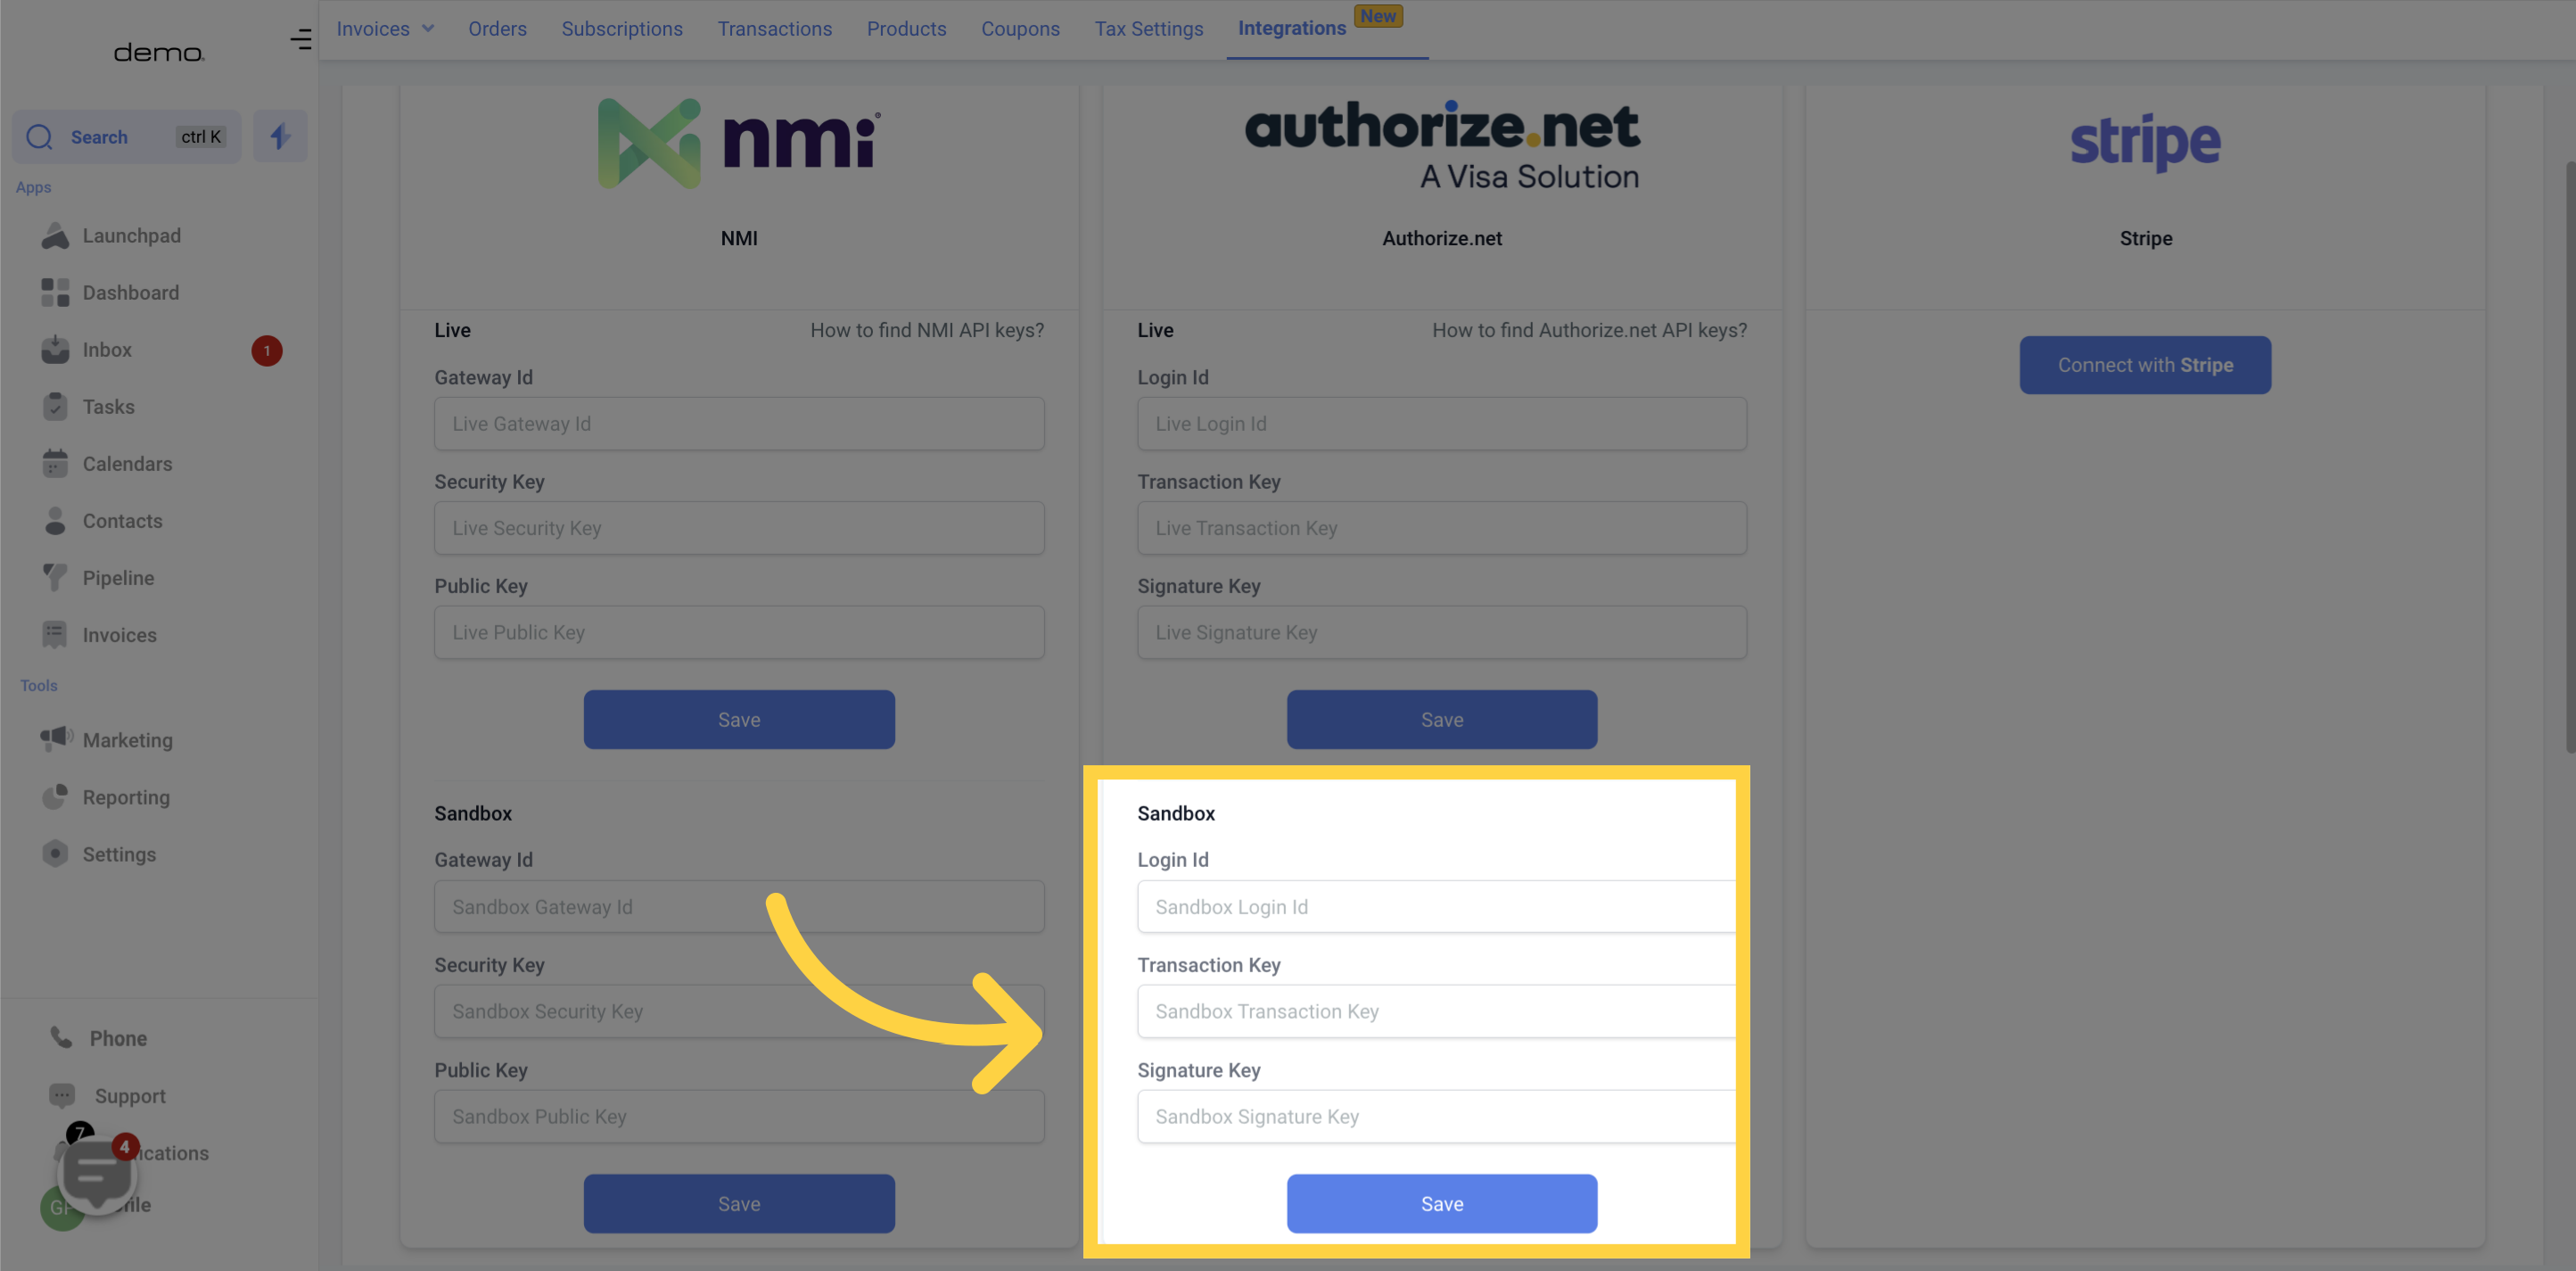
After obtaining the 3 API Keys from your Merchant Interface in Authorize.Net, navigate to Payments in Integrations and insert them. The Live API Keys should be entered in the corresponding Live fields.
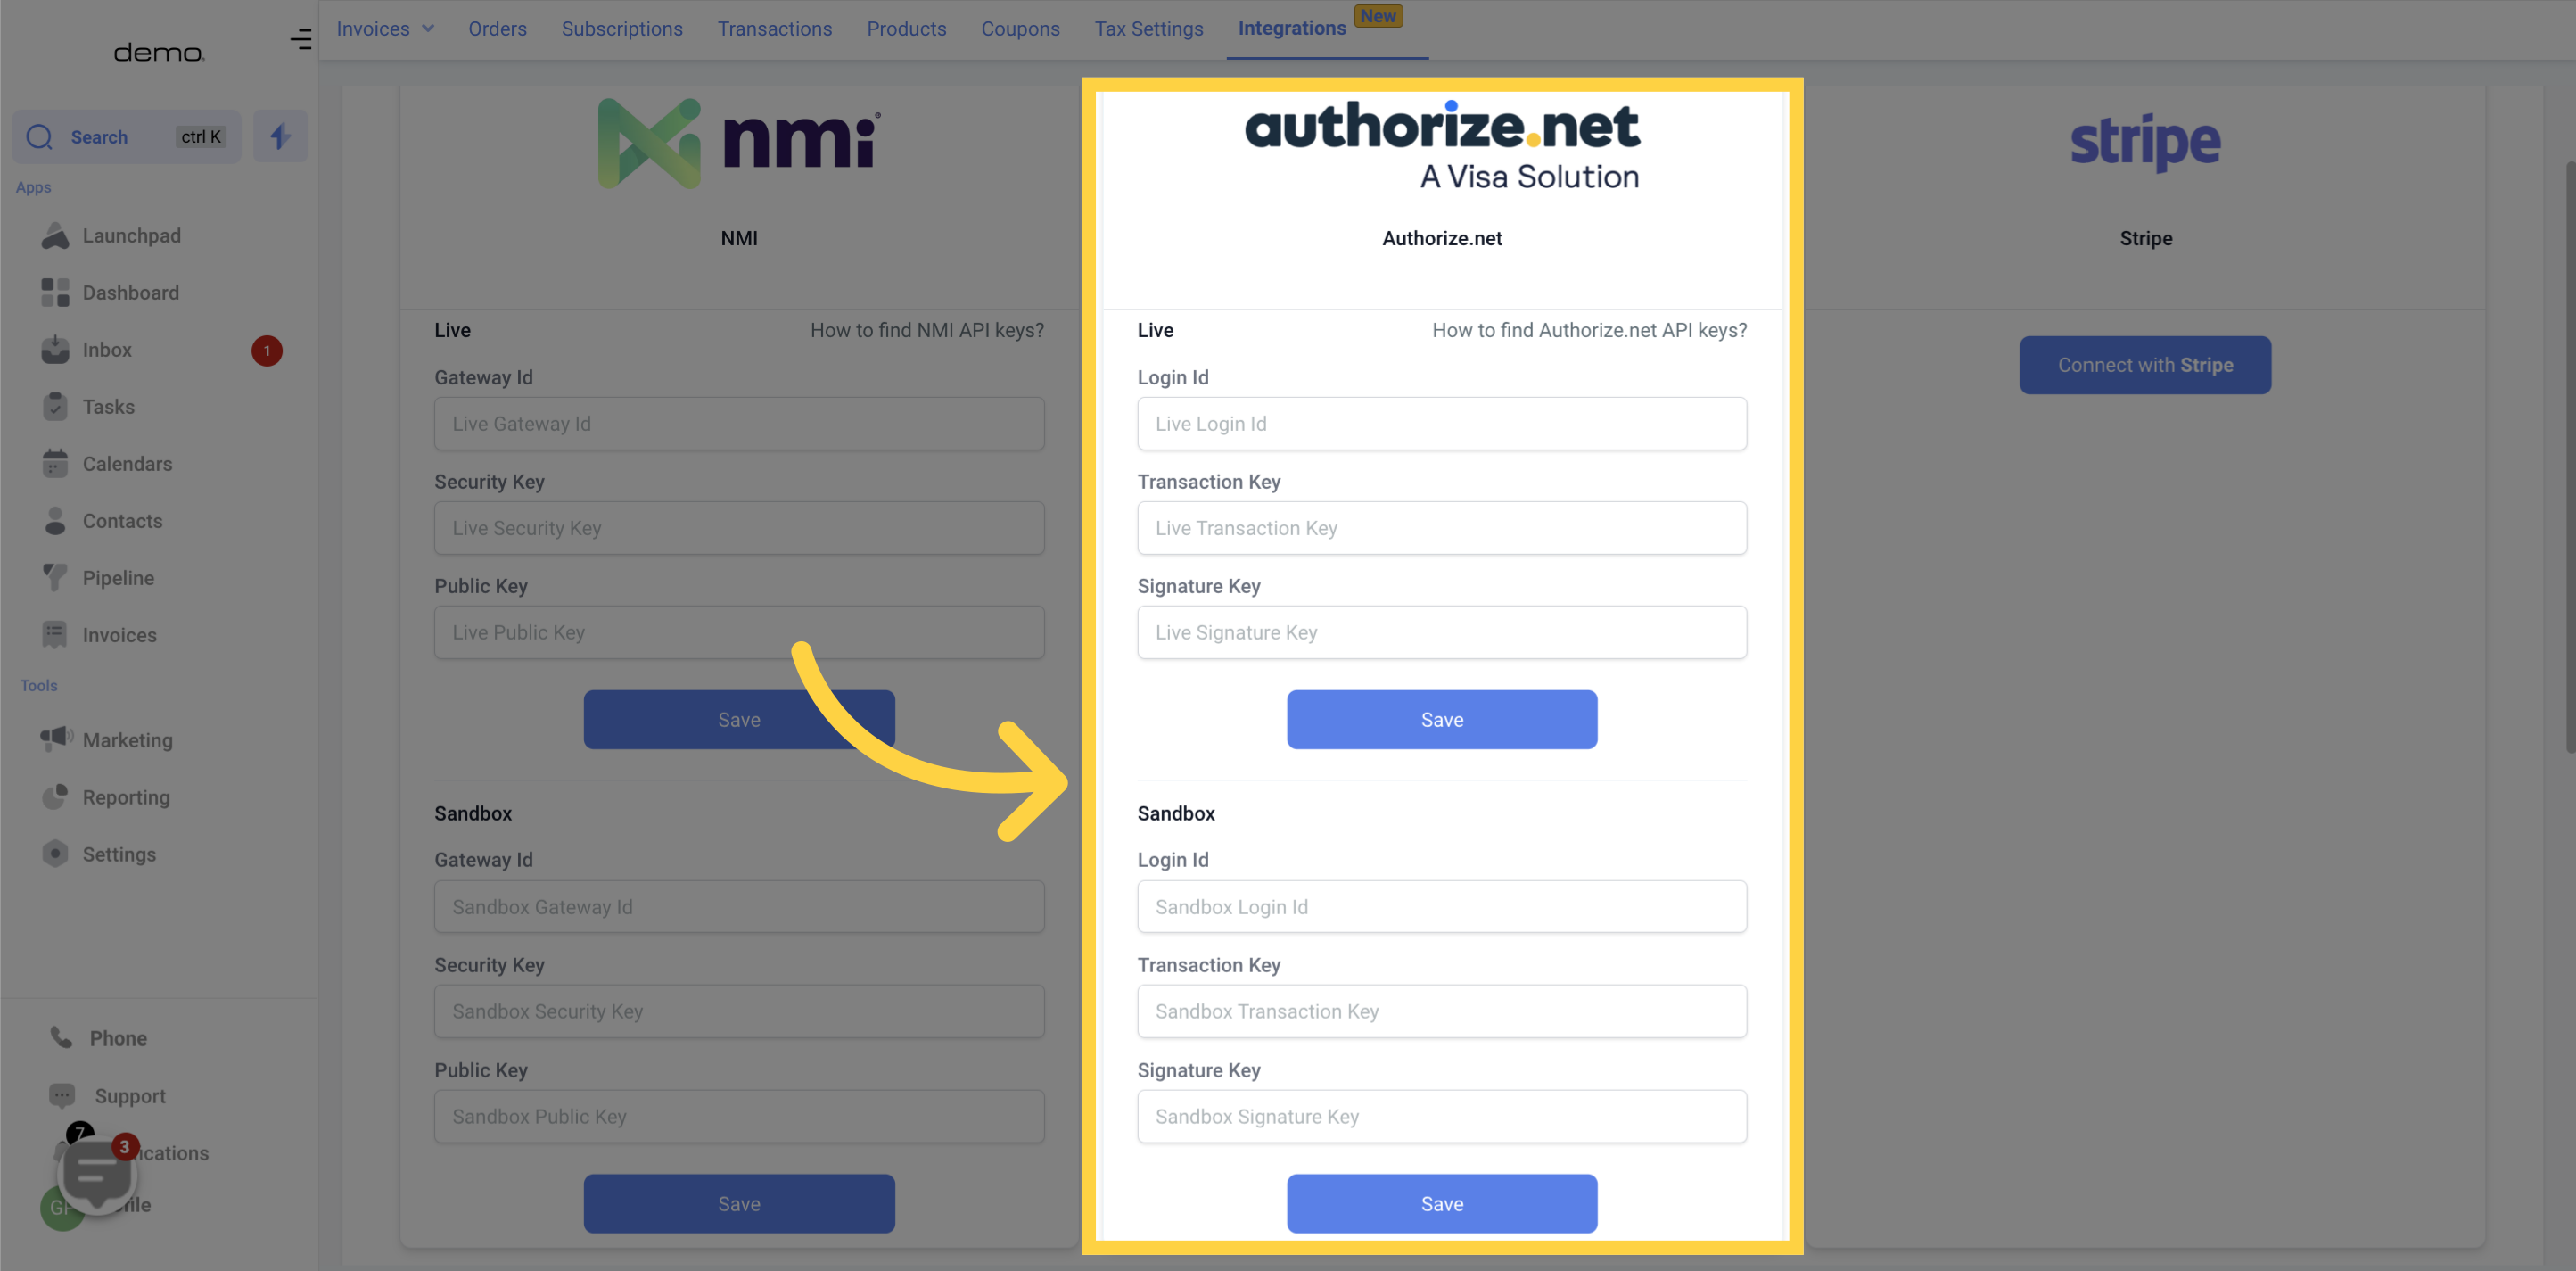
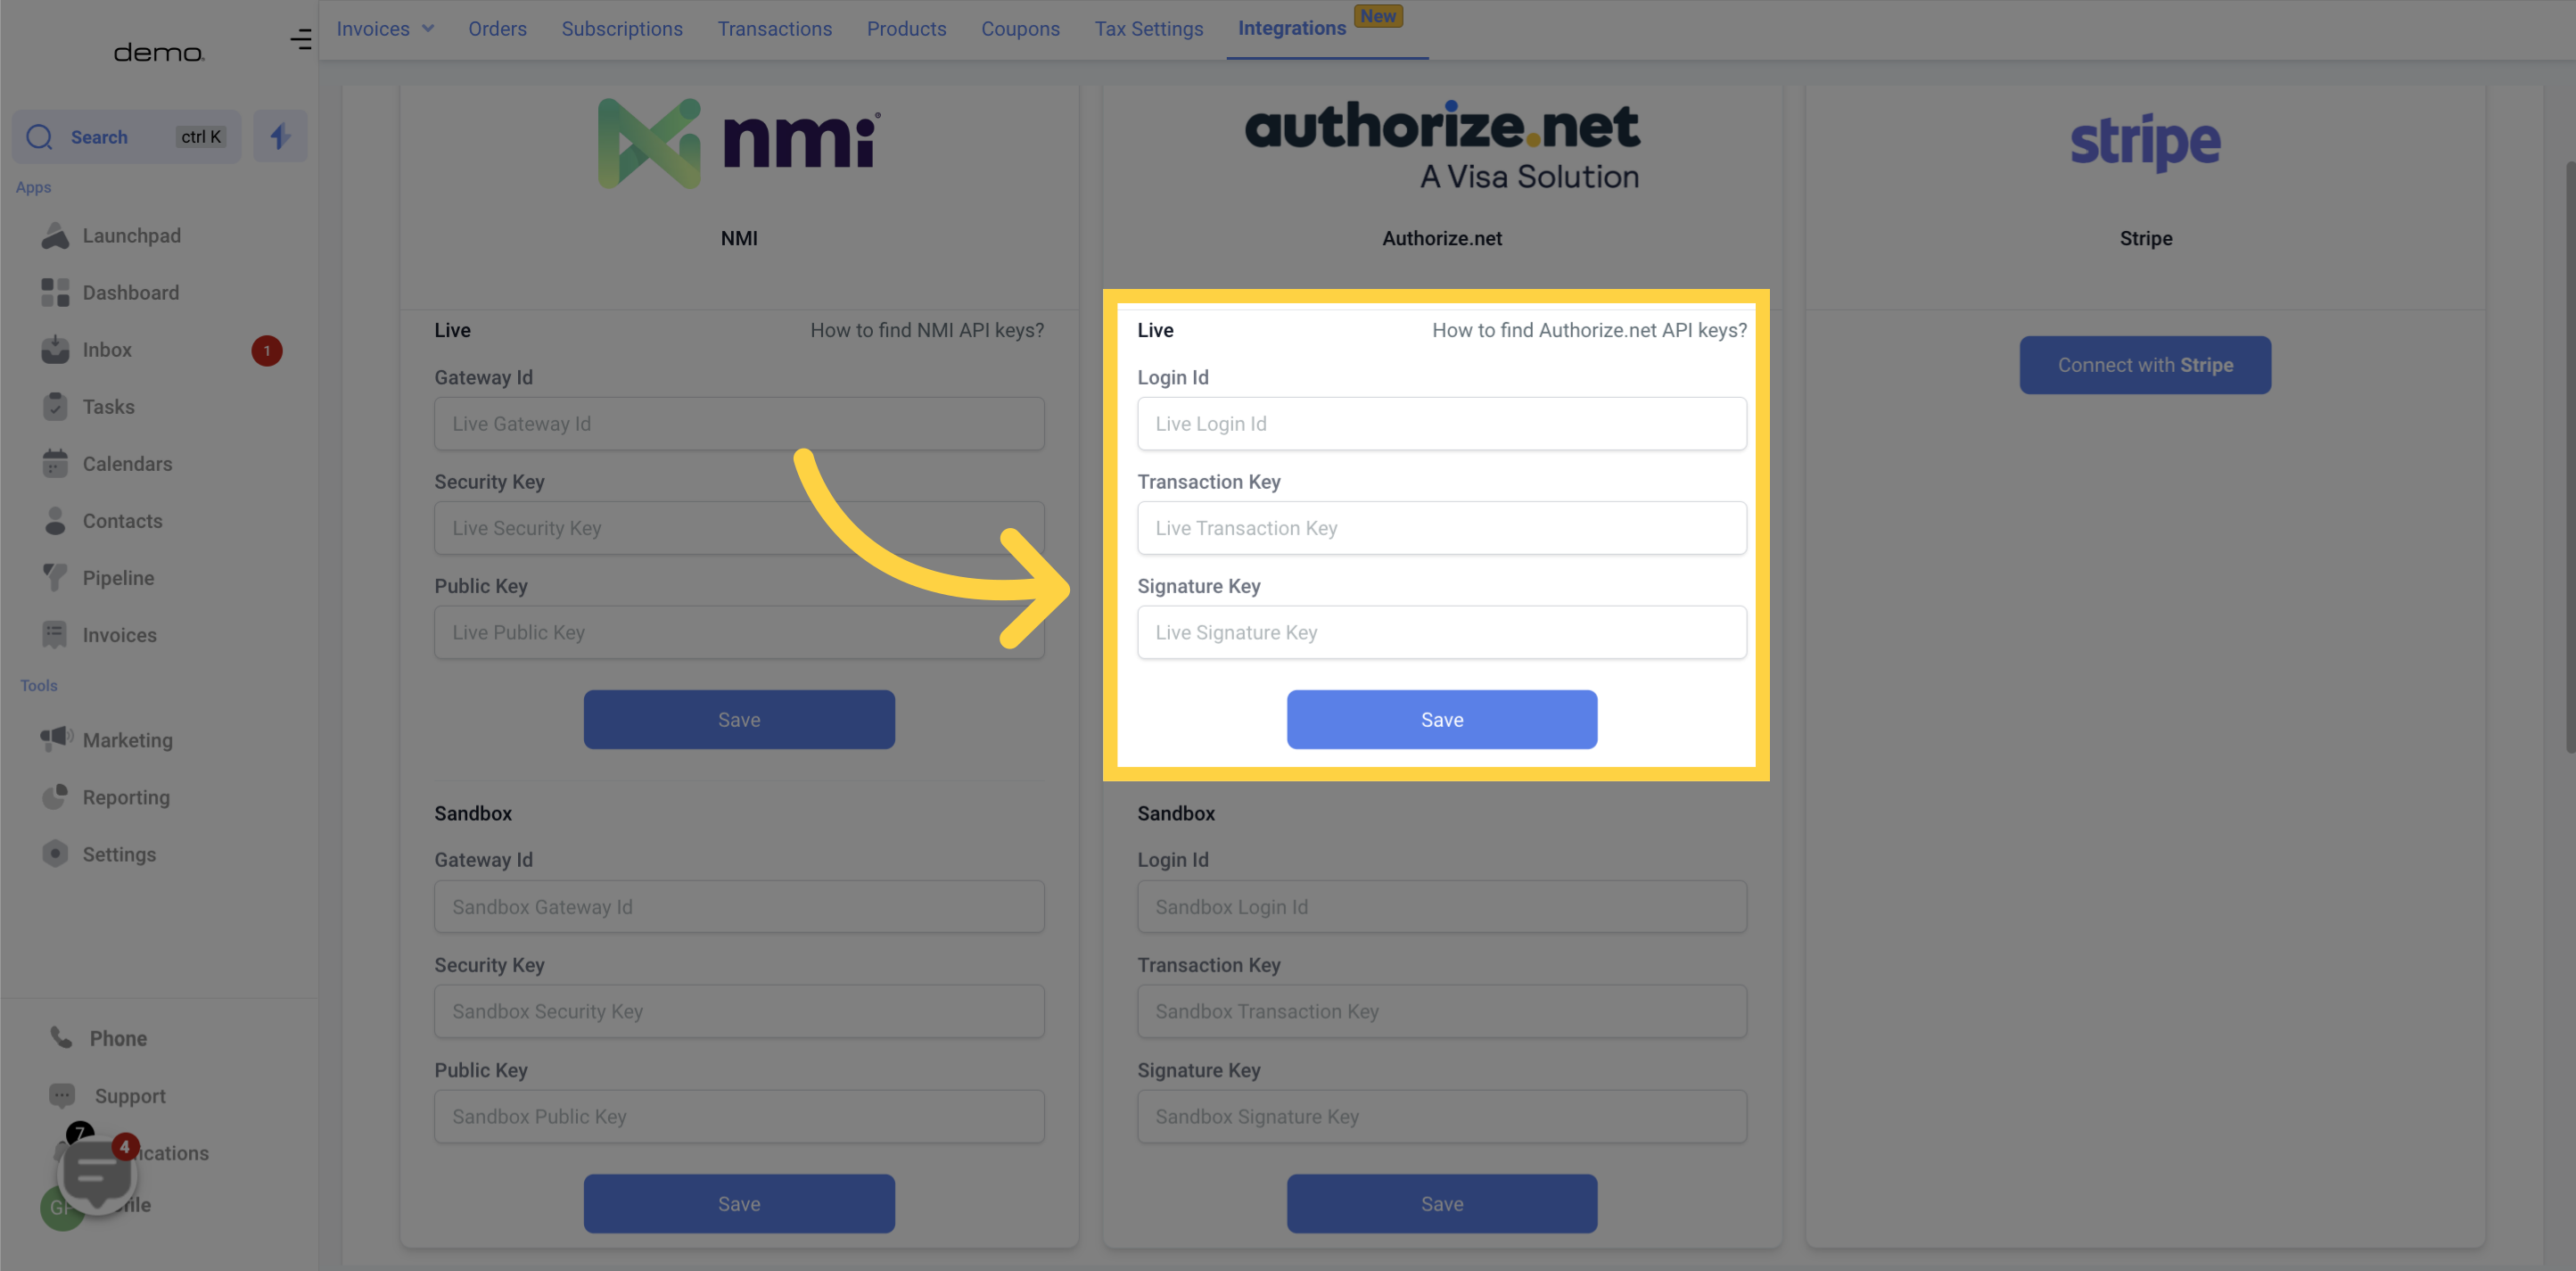
Provide the live credentials for the integration.
Provide the Sandbox credentials for the integration.
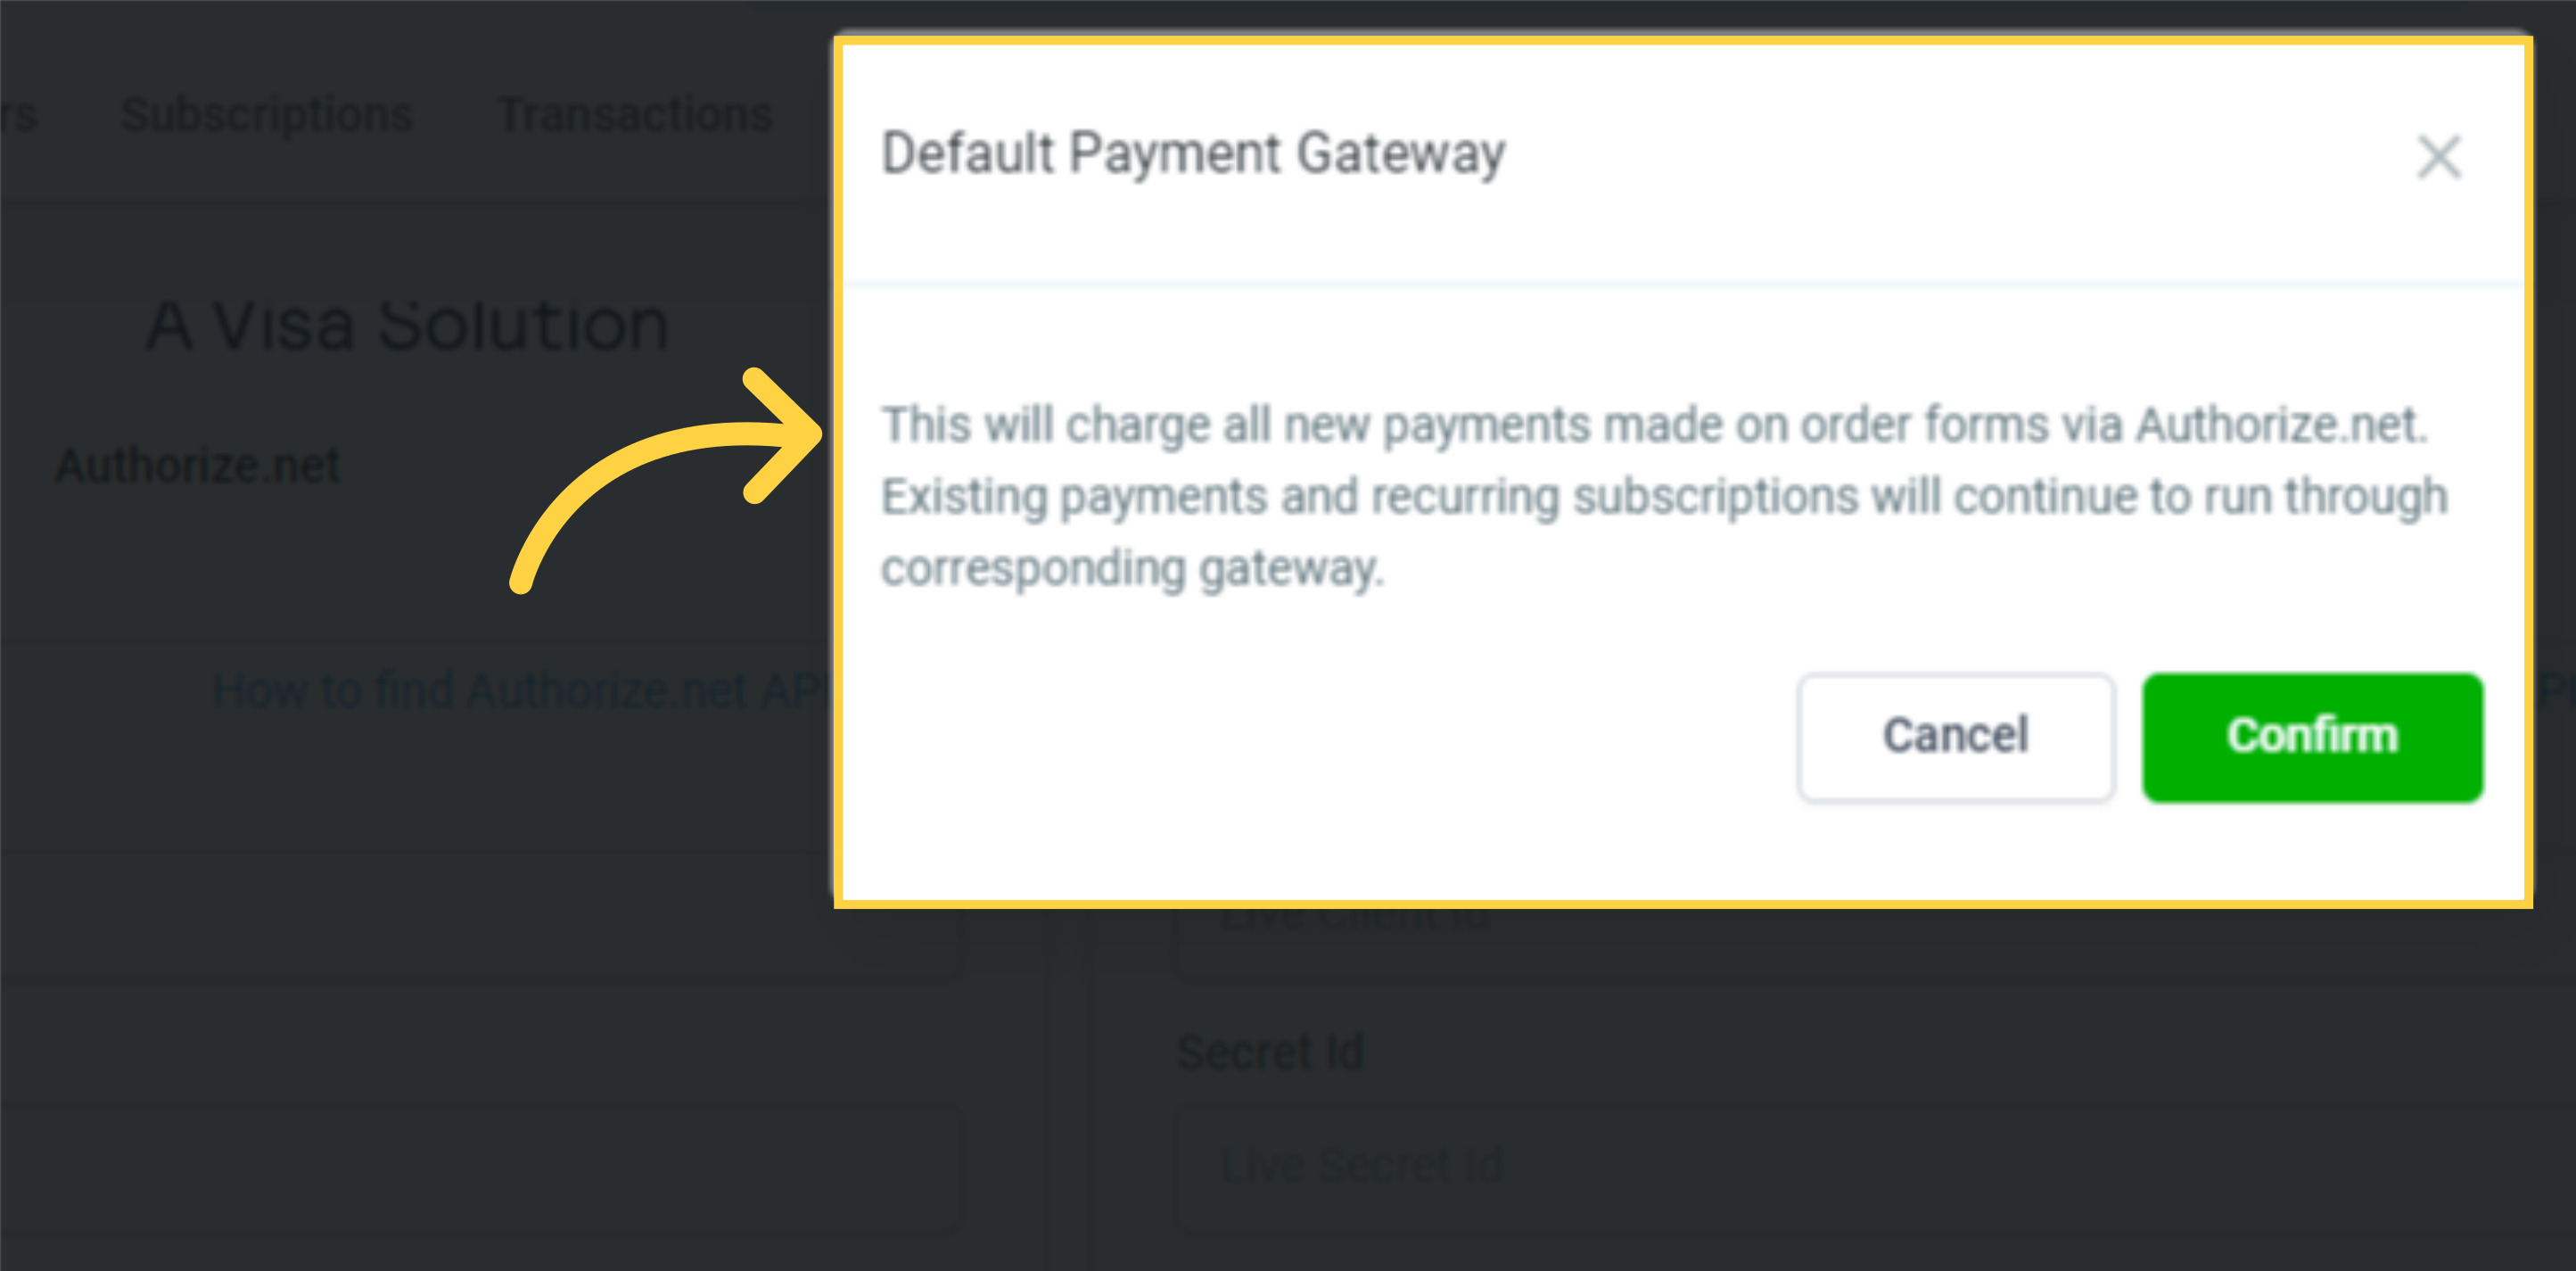
It will show you a quick prompt asking whether you want to make Authorize.Net your Default Payment Gateway.
Clicking on Cancel - will still integrate Authorize.Net, but it will not make it the Default Gateway. Clicking on Confirm - will integrate Authorize.net and make it the Default Payment Gateway.
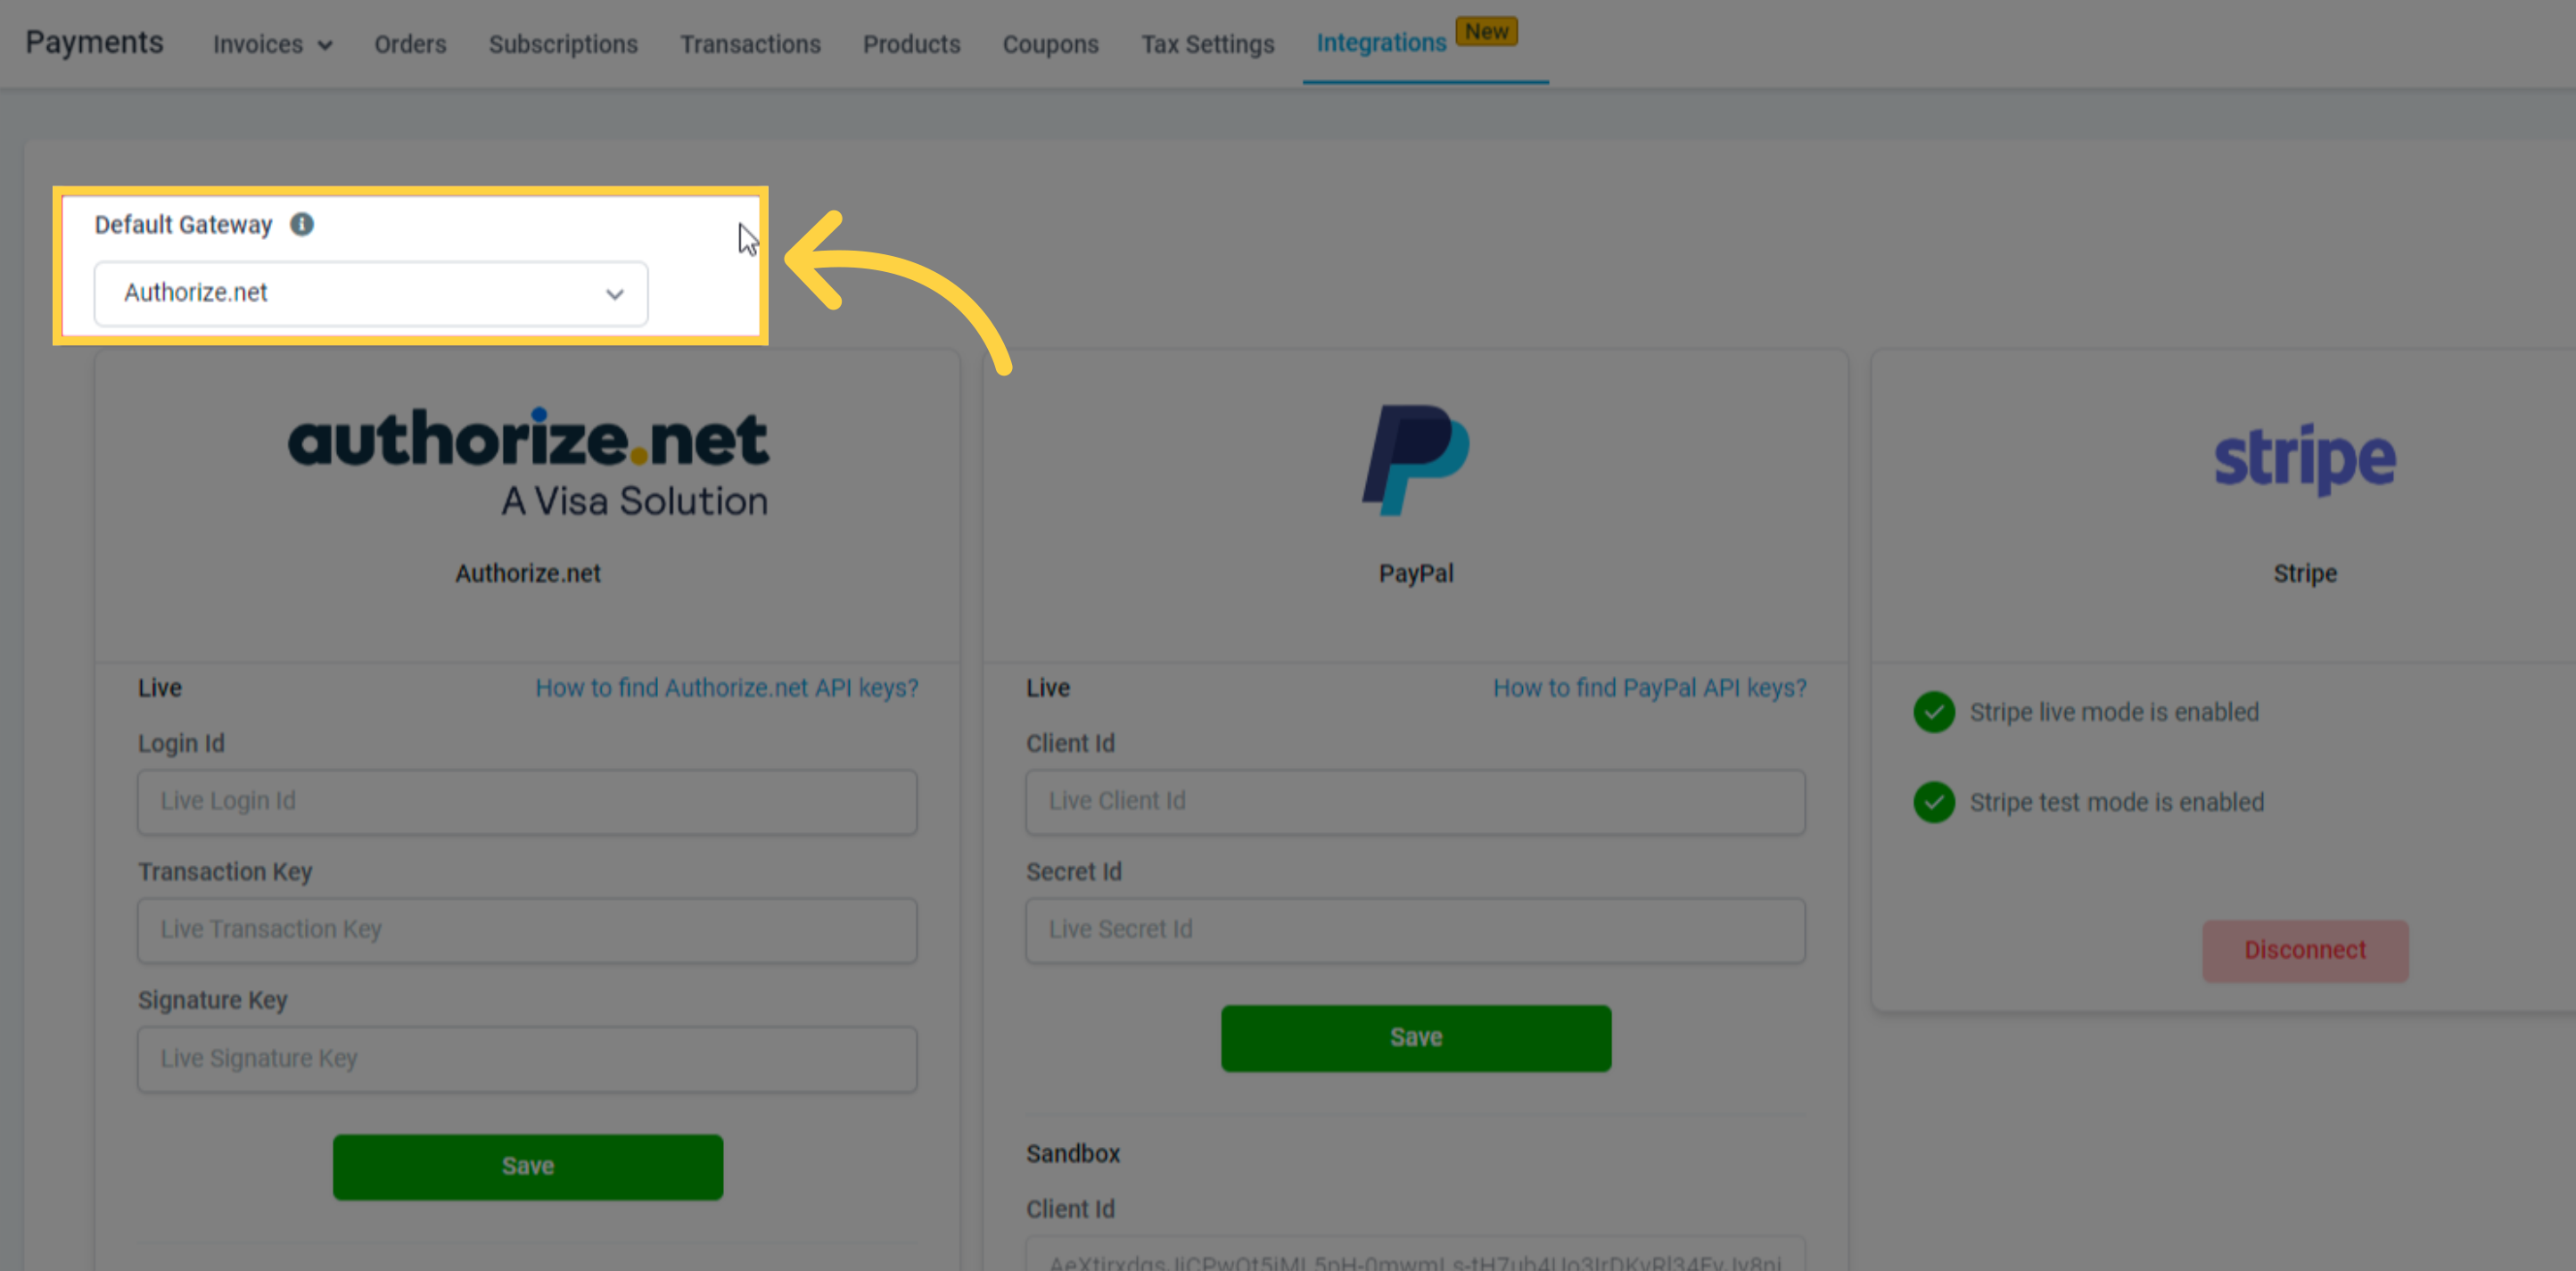
NOTE: Kindly be informed that disconnecting Stripe is not necessary to connect to Authorize.net. You can link both gateways through the integrations page. However, it is necessary to establish a primary gateway for payment processing since you connected two different gateways for this purpose. PayPal will still be operational alongside Authorize.net/Stripe in order forms, whichever gateway is designated as the default.