The Tickets page in the left sidebar is your support queue, and the ticket details page is where you work an individual request. Use the list to find, prioritize, and bulk-update tickets, and open a ticket to read the history, reply to the patient, add internal notes, and manage its properties.
The header has Settings and New ticket. Below it are your list tabs, filters, search, view controls, metrics, and results. You only see tickets within your access scope. If a ticket seems missing, check the active list, filters, and your permissions before assuming it was deleted.
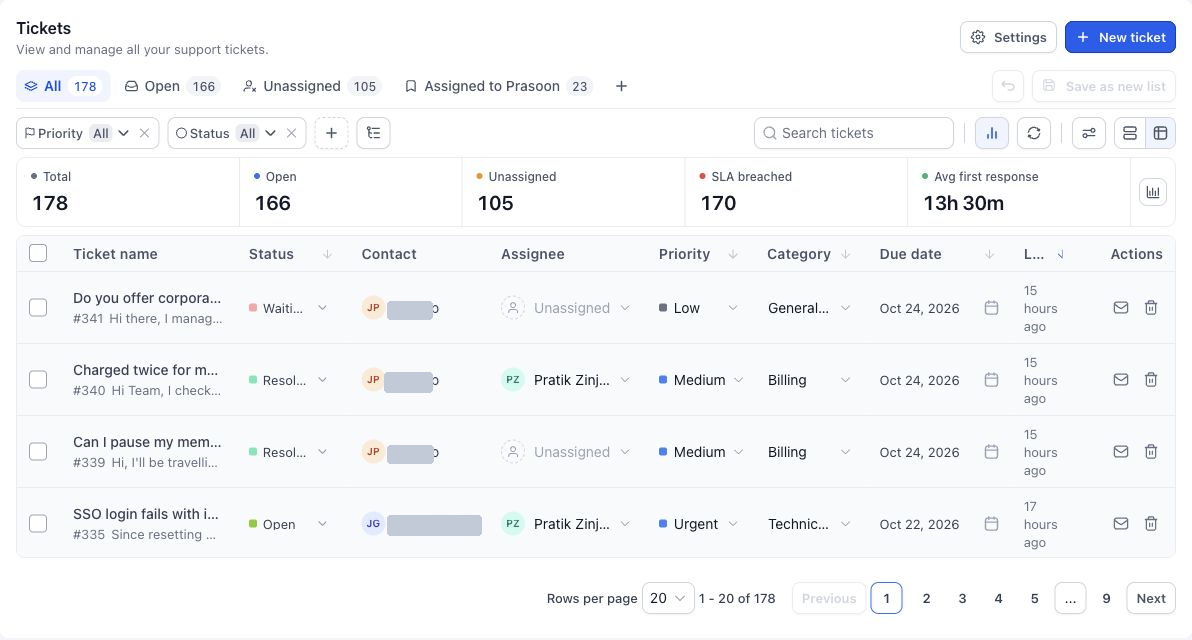
Use the List view and Card view controls above the results.
List view shows rows, which is best for comparing fields and selecting several tickets.
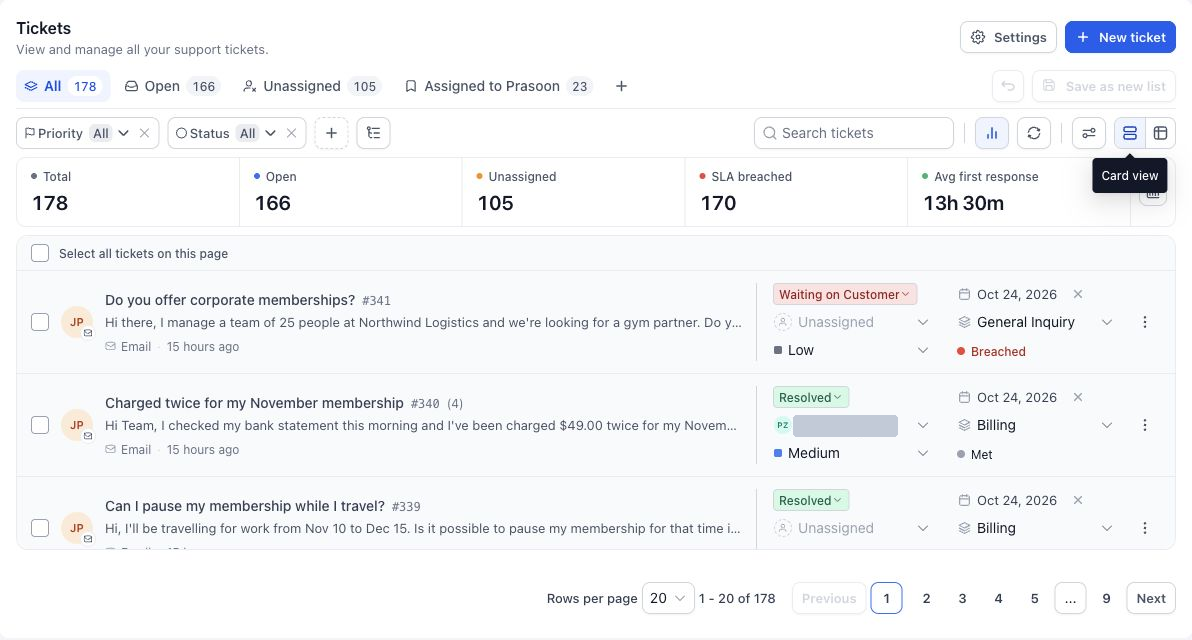
Card view gives each ticket more room for its summary and key properties, which is good for scanning.
Use Rows per page, page numbers, and Previous/Next to move through longer queues.
List | Purpose |
|---|---|
All | The full set of tickets you can access. |
Open | Tickets that are still active. |
Unassigned | Tickets that need an owner. |
Custom Smart Lists appear next to these tabs. A saved list is a view of existing tickets, not a container with copies.
Select the list to work in.
Enter a ticket name, contact name, or ticket ID in Search tickets.
Use the quick-filter chips, such as Priority, Status, or Assignee, to narrow results.
Use Add filter to bring in more quick-filter fields.
Clear the search or remove filters to broaden results again.
Search and filters work together. If you cannot find a known ticket, return to All and clear restrictions first.
Select Advanced filters beside the quick-filter controls.
Choose All of (every condition must match) or Any of (one match is enough).
Pick a field, operator, and value for each condition.
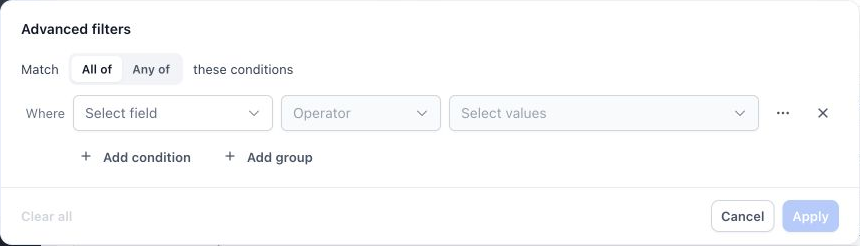
Use Add condition for another rule or Add group for a grouped set.
Select Apply.
Example: a group for Priority is High or Urgent, combined with Assignee is unassigned. Review the grouping so the result answers your question. Clear all removes advanced conditions, and Cancel closes the editor without applying.
Set up the filters, columns, and sort you want to reuse.
Select Save as new list, or the + beside the list tabs.
Enter a short, descriptive name, such as "My urgent tickets" or "Unassigned billing".
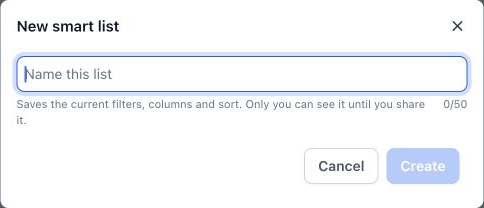
Select Create.
Select the tab to return to that view. Use the custom list's options menu to rename or delete it, as available to you. Deleting a Smart List removes only the saved view, not the tickets. Built-in lists are system views.
Switch to List view.
Open View options.
Choose the sort field and direction.
Select or clear the column checkboxes.
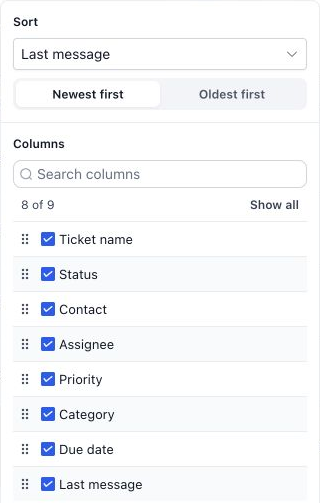
Drag the column handles to reorder.
Supported column headers also have sort controls. Check the direction shown. For deadline review, sort so the nearest due dates come first.
Use the field controls on a row or card to change Status, Priority, Category, and Assignee without opening the ticket. Open the details page for the full history or for fields not editable in the list. Use the envelope control in the row actions, or the ticket actions menu, to mark a ticket read or unread. Read/unread is separate from status. Editing controls depend on your access level.
Select tickets with their checkboxes. The header checkbox selects the current page.
To select every matching ticket, use the separate Select all [count] tickets control in the selection toolbar.
Check the selected count and choose an action.
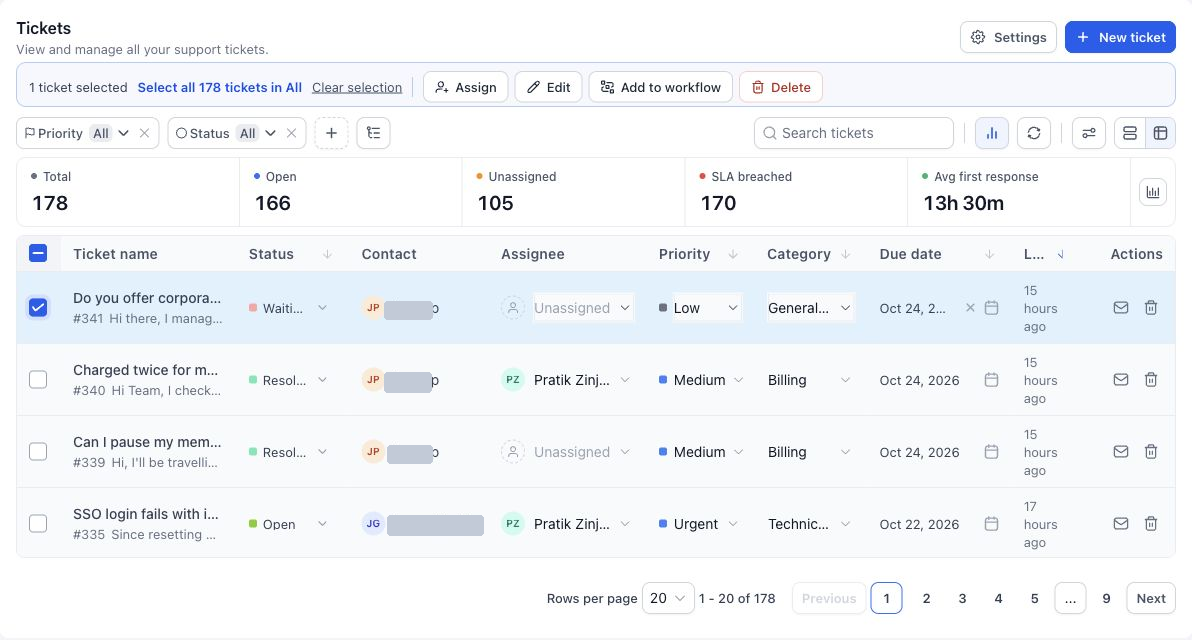
Review the dialog and confirm.
Action | How it works |
|---|---|
Assign | Choose the assignee and confirm. |
Edit | Choose a property, enter or select the new value, and confirm. Inputs follow the selected field. |
Add to workflow | Choose a published workflow and review enrollment before adding. |
Delete | Review the selected count and the confirmation carefully. Do not assume deleted tickets can be restored. |
Use Clear selection when done. If an operation reports failures, review the failed records and reasons instead of repeating the action on every ticket.
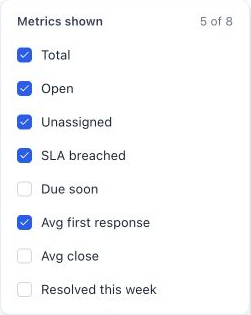
Use Metrics in the toolbar to show or hide the metrics strip, and Configure metrics at its end to pick the cards.
Metric | What it shows |
|---|---|
Total | Size of the ticket set you are viewing. |
Open | Active requests that need work. |
Unassigned | Requests with no owner. |
SLA breached | Tickets that missed a service target. |
Due soon | Tickets approaching a service deadline. |
Avg first response | Average time to first response for eligible tickets. |
Avg close | Average time to close for eligible tickets. |
Resolved this week | Resolutions in the current weekly measure. |
Read metrics alongside the active list, filters, permissions, and any time window shown. Use Refresh in the toolbar to update the list. A filtered view with no results does not mean you have no tickets.
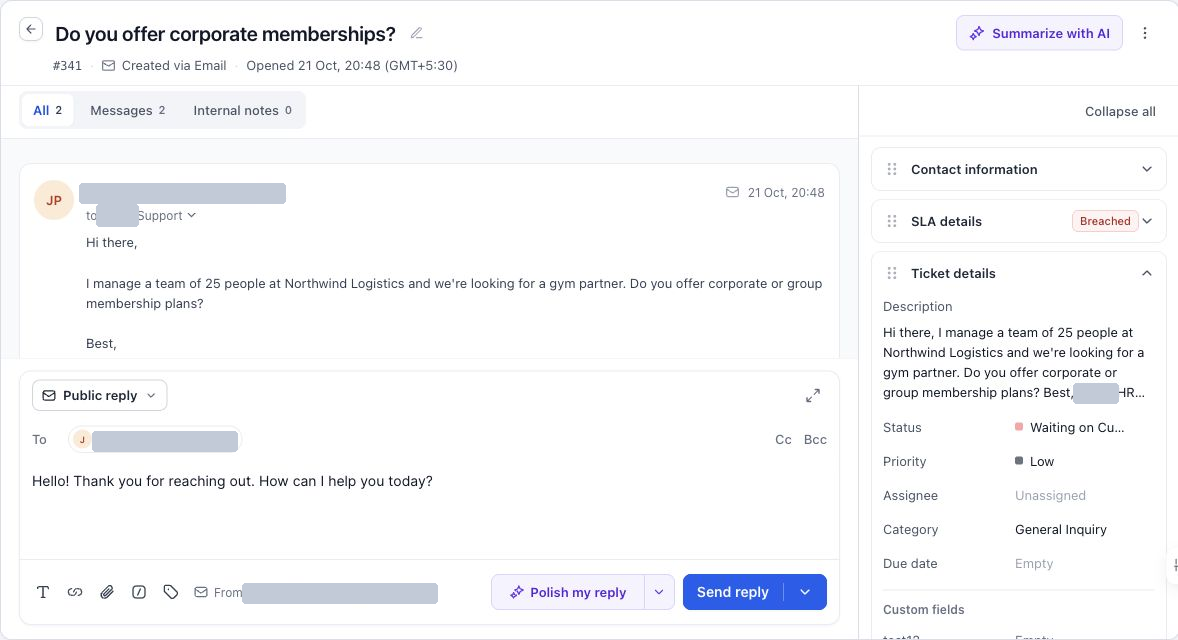
Select a ticket name in List or Card view, or open it from the Tickets panel on its contact record. The details page has three panels: top, main, and right.
Control | How to use it |
|---|---|
Ticket name | Read the subject. Use the rename control to make the internal name clearer. |
Ticket ID | Reference the request with your team or search for it later. |
Source and opened time | See how the ticket was created and when. |
Back | Return to the list. |
Summarize with AI | Show a short AI summary. See Use AI in Ticketing for Summaries and Suggested Replies. |
Ticket actions | Assign to me, Add to workflow, Mark as unread, or Delete, depending on access. |
Rename a ticket: select the name or rename icon, edit, and save. Use a name that captures the issue rather than "Help needed". Renaming is internal and does not change the email subject used for threading.
Ticket actions: Assign to me can be unavailable if your user is not an assignable member of your account. Add to workflow opens a picker of published workflows. Review the confirmation before using Delete.
All shows messages, internal notes, and activity together.
Messages shows customer-facing messages.
Internal notes shows team-only notes.
Use a message's email-details control to see sender and recipients, and open attachment controls to access files.
Select Public reply in the reply-type control.
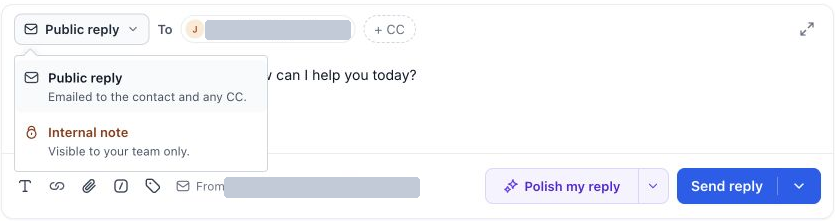
Check the To recipient and the From address.
Use CC to add recipients.
Write the response, using formatting, links, attachments, Fast Replies, or custom values.
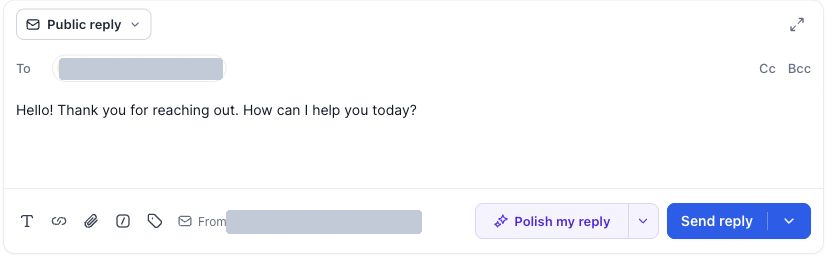
Review the text, recipients, and attached files.
Select Send reply.
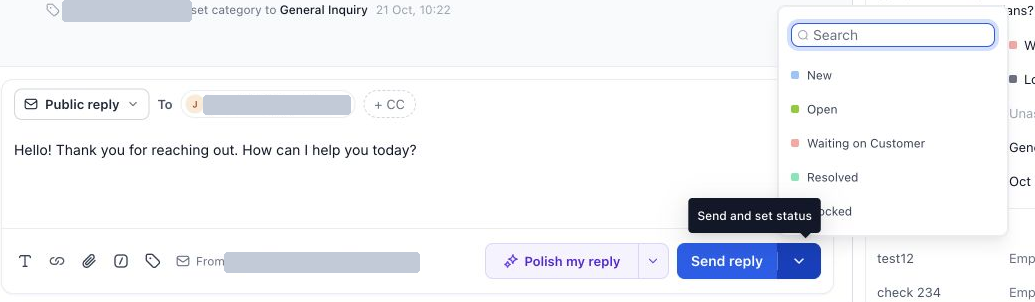
Public replies are emailed to the contact and CC recipients. Check the recipients each time. Use More send options beside Send reply to send the reply and set the status together, for example Waiting on Customer after asking a question, or a resolved status after a final answer.
Choose Internal note in the reply-type control, write what your teammates need, and post it. Use notes for findings, handoffs, and context. Notes are never emailed to the patient.
Tool | How it helps |
|---|---|
Text formatting | Organize a response with supported formatting. |
Insert link | Add a resource or help article. |
Attach files | Include files. Wait for uploads to finish and check the list. |
Fast replies | Insert a reusable message, or type / and search by title. |
Insert a custom value | Add a ticket or contact value, then check the resolved text. |
Open in a larger window | Expand the editor for longer replies. |
AI controls | Suggest or polish a reply, then review before sending. |
Select a section heading to expand or collapse it. Use the section handles to rearrange where supported, and Collapse all to reduce clutter.
Contact information: review the contact's details, and select View contact or the name to open the CRM record. A ticket's owner and status describe the request, not the contact's wider CRM ownership.
Ticket details: edit Status, Priority, Assignee, Category (and subcategory), Due date, and Custom fields, and review Reply information (customer and agent reply timing, recorded automatically). Complete any save control shown and confirm the new value.
SLA details: see the applied policy, targets, and state. A due date and an SLA target are separate. See Configure Ticketing SLAs and Business Hours.
Recent activity: the sequence of changes, useful to see who changed a property.
Attachments: files tied to the request. Check the filename and message context before downloading.
Linked tickets: select + Link a ticket and choose the related request. Linking connects tickets but does not merge their histories.
Open the contact.
Select the Tickets icon in the right-side toolbar.
Review the open count and ticket cards, or use Search tickets.
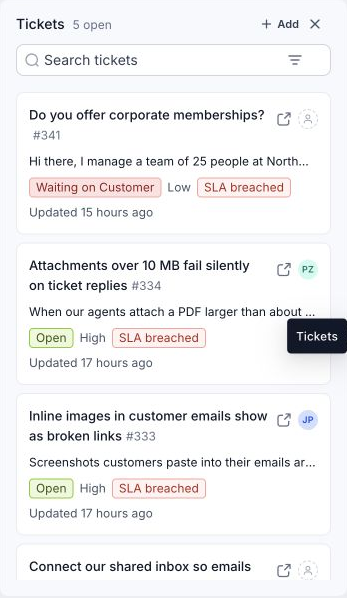
Select a ticket, or use Open in new tab.
Select Add to create another ticket for that contact.
Patients may put health details in messages and attachments. Open attachments only when needed, keep clinical content in your EMR, give ticket access only to roles that need it, and avoid replying with PHI by regular email. If a patient shares clinical details in a ticket, move the clinical part to the EMR and reply with a general message.
Issue | What to check |
|---|---|
A ticket is missing | The list, search, filters, and assigned-data permissions. |
A bulk action affected fewer tickets than expected | Whether you selected one page or the full set, and any reported failures. |
A saved view shows unexpected tickets | The saved conditions and current ticket values. |
A property cannot be edited | Permissions, and whether the field is editable in the current view. Open the details page. |
Metrics differ between users | Compare filters and access scope. |
The reply editor is unavailable | Your manage-tickets permission and whether the ticket is still loading. |
A public reply cannot be sent | The recipient, message, attachments, and email integration state. |
Assign to me is disabled | Whether your user is an assignable member of the account. |
An attachment is missing from a reply | Confirm the upload finished before sending. |
Does a Smart List duplicate tickets?
No. It saves a way of viewing existing tickets.
Does the header checkbox select every matching ticket?
No. It selects the current page. Use Select all [count] tickets for the whole matching set and verify the count.
Are internal notes sent to patients?
No. Only public replies are emailed.
Can I resolve a ticket while sending a reply?
Yes. Use More send options and pick a resolved status.
Does marking a ticket unread change its status?
No. Read/unread and status are separate controls.
Can I share a link to a ticket?
Yes. Copy the browser address. The recipient still needs access to your account and the ticket.
Does renaming a ticket change the email subject?
No. It is an internal change only.
Can I restore a deleted ticket?
Do not count on it. Confirm before deleting.
