These two features give attendees a better experience after they register. Wallet passes put the check-in ticket in Apple Wallet or Google Wallet. The Attendee App is a hub in the Client Portal (web and mobile) with tickets, schedule, networking, exhibitors, sponsors and notifications. Both are configured per event under Marketing > Events.
Attendees save their ticket to Apple Wallet on iPhone or Google Wallet on Android after registering. The pass contains:
Event name
Event date and time in the event timezone
Venue
Ticket type
Attendee name
The event check-in QR code (the same one staff scan, not a new code)
The event must be in-person. Online events do not use wallet passes or QR check-in. Online attendees use the join experience instead.
The attendee must complete a registration or ticket purchase.
Apple Wallet is used on iPhone, Google Wallet on Android. On other devices attendees use the Add to Wallet option; exact behavior on other devices is not documented.
Minimum iOS or Android versions and extra wallet-app requirements are not specified.
Post-registration page: after checkout, attendees choose the wallet option for their device and save the pass.
Ticket PDF: Apple Wallet and Google Wallet badges appear on the PDF ticket. Open the PDF, tap the right badge, and follow the device prompts.
Confirmation messages: you can add wallet links to the registration confirmation (email, SMS or WhatsApp).
Go to Marketing > Events and open the in-person event.
Open Settings > Notifications.
Under Attendee journey, find Registration confirmation (under WHEN THEY REGISTER) and click the pencil icon.
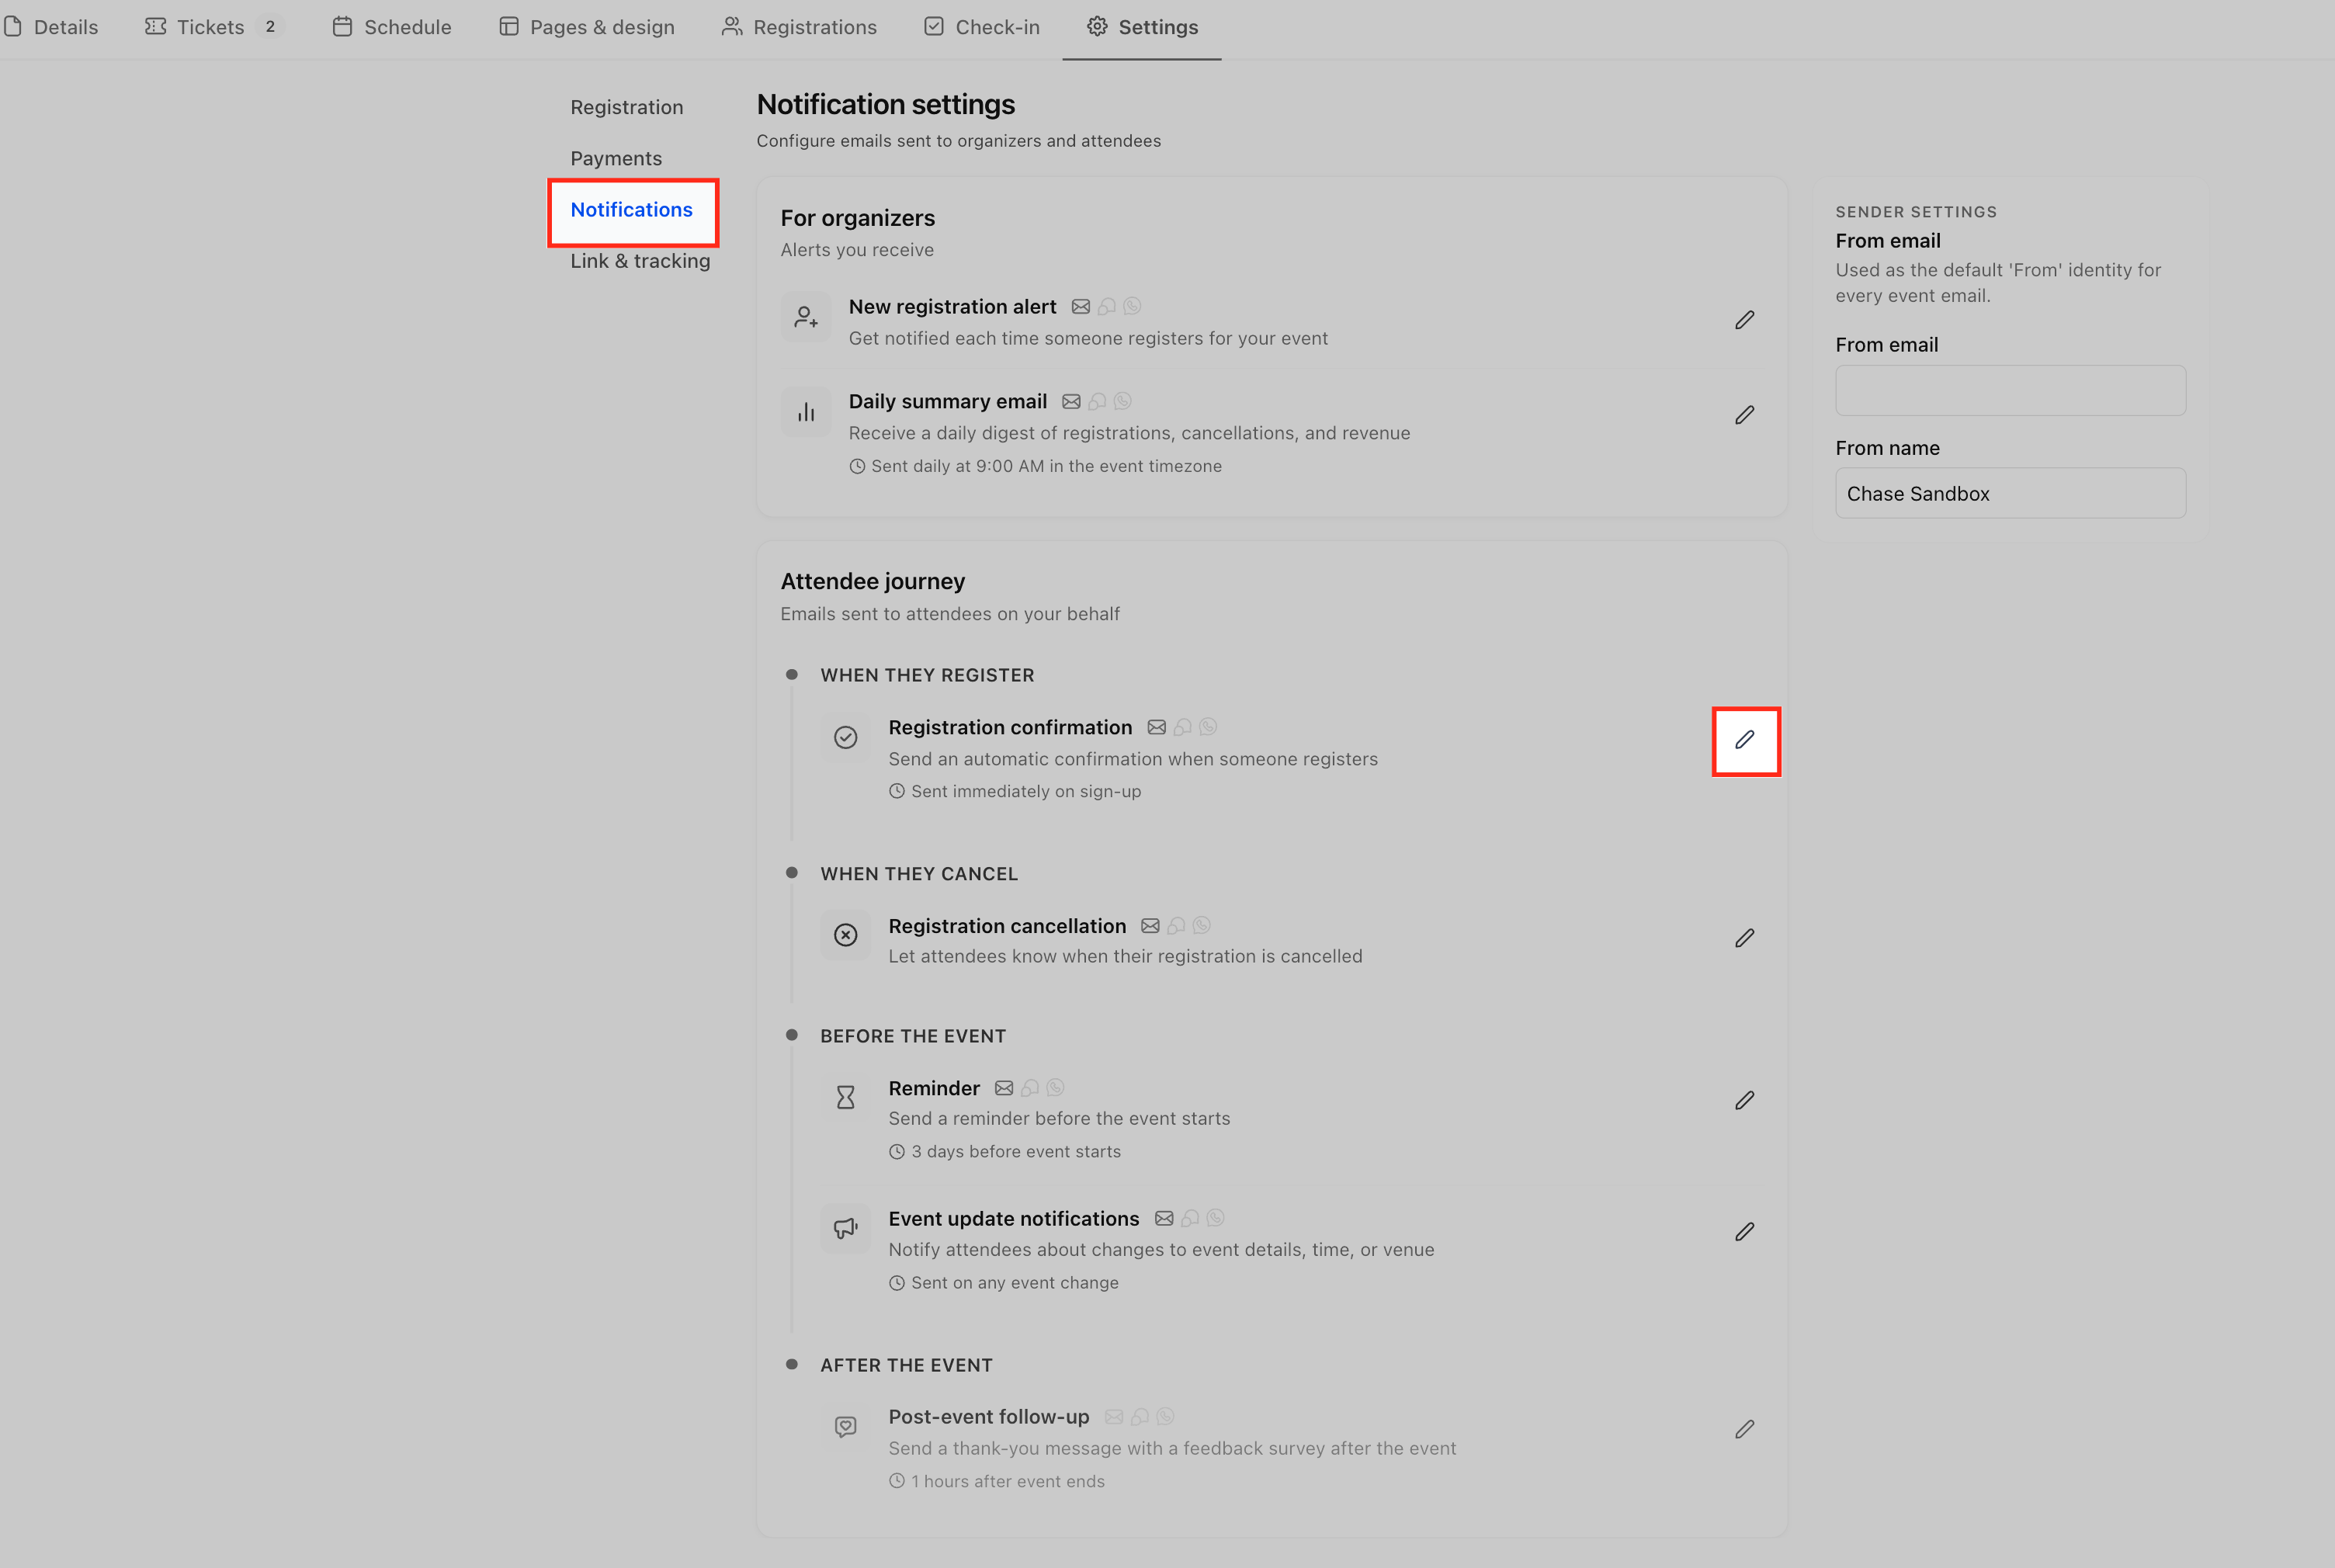
Choose the Email, SMS or WhatsApp tab.
Add the merge field {{event.ticket.wallet_links}} to the message.
Click Save in the top right.
To send the PDF ticket as well (with its wallet badges), keep Include PDF ticket in the email selected.
Each ticket gets its own wallet link and pass, so the right attendee name and ticket type appear on each one. If a buyer registers two attendees, they do not share one generic pass.
The Attendee App extends Events beyond registration. Attendees use their existing Client Portal account (no separate account) on web or the supported mobile experience. A branded mobile app is an optional extra, not required.
Go to Marketing > Events and select the event.
Open the Attendee App tab.
Enable Attendee app access.
If prompted, choose Upgrade Client Portal and complete the upgrade.
Enable Make this event discoverable if all portal members should be able to find the event. Turn it off to keep the event visible only to participating attendees.
Review sections, notifications and other settings.
Open the Client Portal to check the attendee view.
Existing registrants receive access automatically when you enable the app.
Discover and manage tickets
Browse ongoing, upcoming and past events, and filter by location.
Buy tickets, choose quantities and apply coupons.
Open tickets with QR codes for entry, download them, and see venue directions.
Save supported tickets to Apple Wallet on mobile.
Networking
Find attendees, speakers and exhibitors.
Send personalized connection requests or scan QR badges.
Continue in in-app chat.
Personal email addresses and phone numbers stay private.
Choose whether to appear in the attendee directory.
Connections persist across events from the same organizer.
Personal agenda
Browse sessions by date and search them.
Save sessions to My schedule.
See speaker information and session details.
You can restrict certain sessions to specific ticket types (for example VIP).
You can see how many attendees saved each session.
Exhibitors
Browse exhibitors by tier and bookmark booths.
Connect with representatives and capture leads through connections and badge scans.
Manage and export leads in the Exhibitor Center.
Sponsors and advertising
Show sponsors by tier.
Add home page and banner ads, rotate multiple ads in one placement, target ads by attendee role, and link them to sponsor sites.
Send registration confirmations and reminders through supported channels.
Create immediate or scheduled announcements, target them by participant role, and send attendees to a specific area when they open a notification.
Rename, reorder or hide event sections.
Add custom sections for venue maps, PDFs, images, embedded content and external links, and set each section's visibility.
Networking features expose names and profile details to other attendees. Use the directory visibility controls, keep profile prompts to professional information, and do not host patient discussions in chat. Patient-facing wellness events should avoid networking features unless you have a clear reason. Do not collect or display health details in sessions, sections or announcements. Keep clinical information in your EMR.
Does saving to a wallet create a new QR code?
No. The pass uses the same check-in QR code staff scan.
Can online event attendees use wallet passes?
No. Passes and QR check-in are for in-person events only.
Does each ticket in a group order get its own pass?
Yes. Each ticket has its own wallet link with the correct attendee name and ticket type.
Where do attendees get wallet links?
On the post-registration page, as badges on the ticket PDF, and in email, SMS or WhatsApp confirmations that include the wallet merge field.
What merge field adds wallet links?
{{event.ticket.wallet_links}}.
Do attendees need a separate account for the Attendee App?
No. They use their existing Client Portal account.
Can I hide an event from the general listing?
Yes. Turn off Make this event discoverable.
Can attendees control their visibility?
Yes. They choose whether to appear in the attendee directory.
Can I limit a session to VIP ticket holders?
Yes. Restrict sessions to specific ticket types.
Is a branded mobile app required?
No. The Client Portal on web and supported mobile works without one.
