The Pages & Design tab controls how your public event pages look to attendees. Open an event from Marketing > Events, then choose Pages & design. You can use the visual editor for sections, colors and typography, and the Custom CSS editor for pixel-level styling that matches your practice brand.
Pages & Design covers the event details page, the schedule page, and the checkout flow. Custom CSS applies to every public page type:
Page | What attendees see |
|---|---|
Details | Event information. |
Schedule | Session list and timings. |
Checkout | Registration or ticket purchase. |
Payment | Payment processing for paid events. |
Confirmation | Page shown after a successful registration or purchase. |
Leave Checkout | Page shown when someone exits checkout. |
Online Event | Page attendees use to join a virtual event. |
Open the event and select Pages & Design.
Choose the page to edit (details, schedule or checkout).
Customize page sections, colors, typography and templates.
In Checkout, set the page title and add form fields. First name, last name and email always stay required.
Use the mobile and desktop previews to review the result before publishing.
Keep checkout fields to what the event truly needs. Every extra field lowers completion rates and adds data you must protect.
Open the event, select Pages & design, and click the Custom CSS icon in the left toolbar.
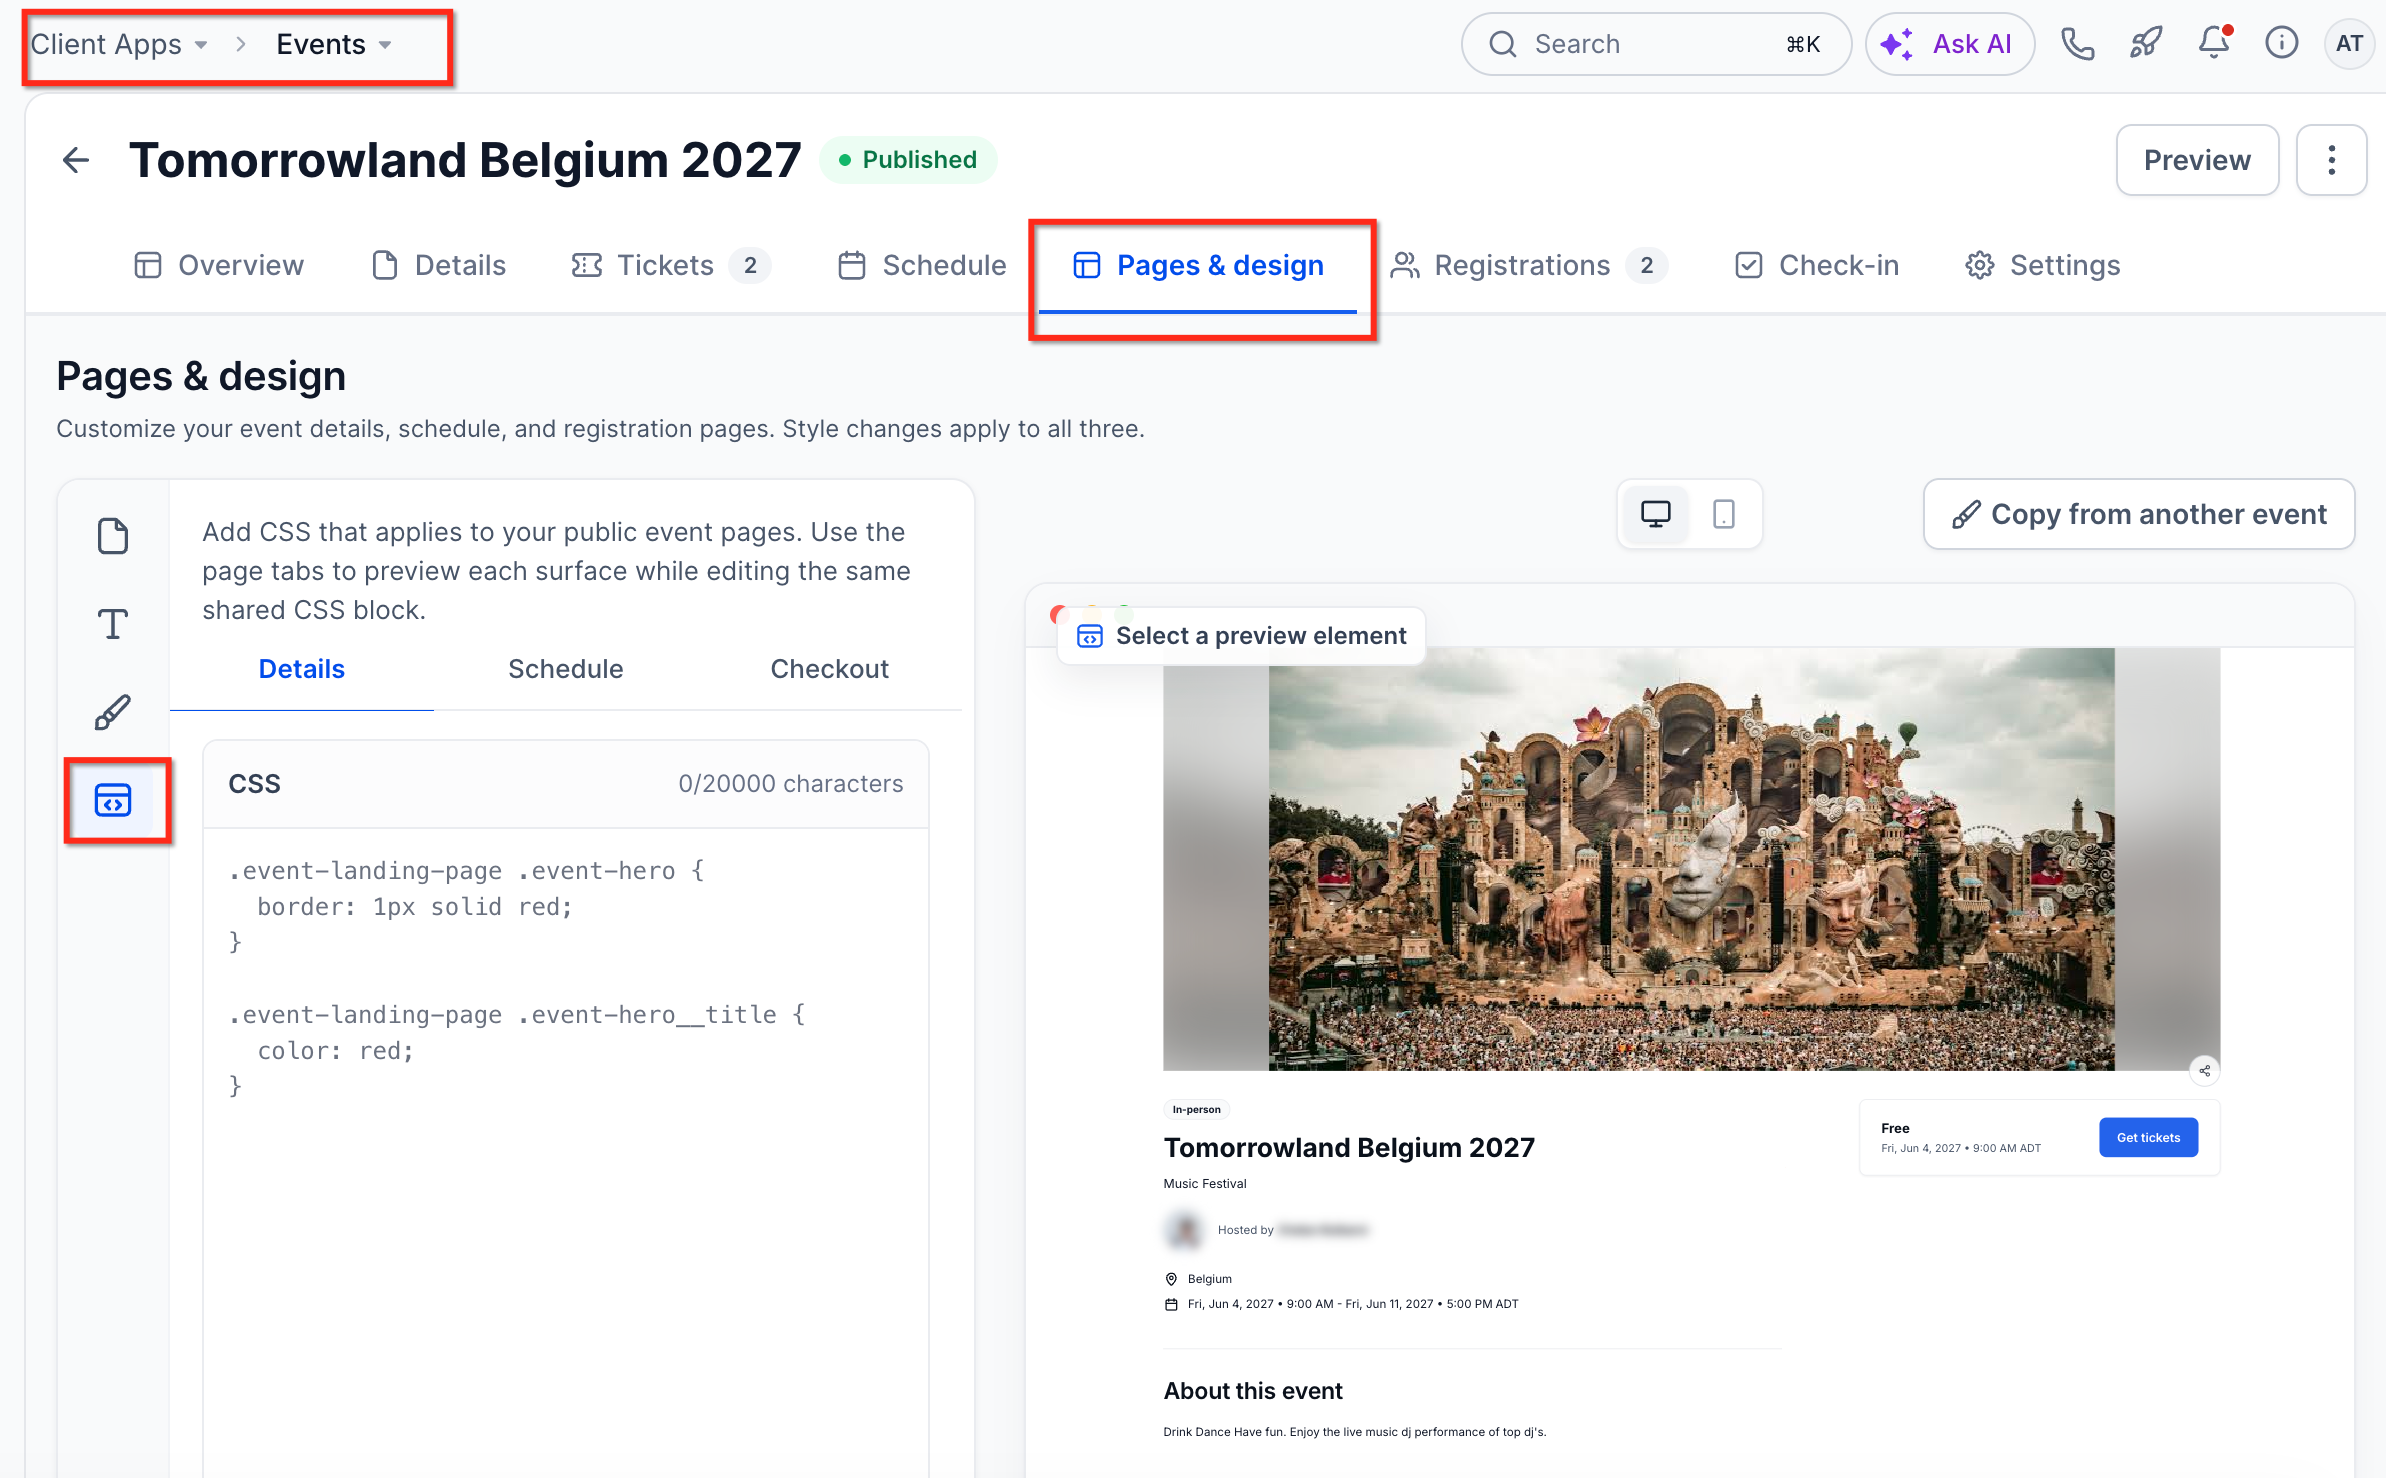
Select an element. Click any element in the page preview. A popup shows its CSS selector with options to copy the selector or insert a starter rule into the editor.
Write or insert CSS. Type your own rules, or use a quick style preset (below). Changes appear instantly in the preview pane.
Preview and save. Review the preview, then save. The styles apply to all public pages of that event.
Tip: click-to-select is the fastest way to find deeply nested elements without inspecting the page source.
After selecting an element, choose a preset to insert a working starter rule, then edit the values to match your brand.
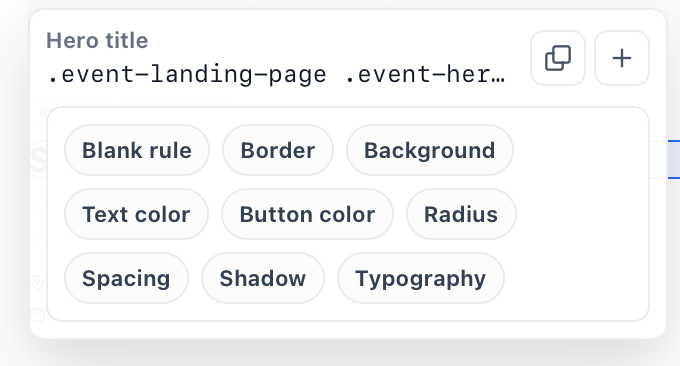
Preset | What it generates |
|---|---|
Border | Border width, style and color. |
Background | Background color or image. |
Text Color | Text color. |
Button Color | Button background and text color. |
Border Radius | Corner rounding. |
Spacing | Padding and margin. |
Shadow | Box shadow. |
Typography | Font family, size, weight and line height (works best on text elements). |
Per event: Custom CSS applies only to the selected event. Other events are not affected.
Responsive: CSS affects desktop and mobile. Use media queries such as @media (max-width: 768px) for mobile-only changes.
Conflicts: Your CSS loads after the default styles, so it usually wins. If a rule does not apply, use a more specific selector or add !important.
Removing styles: Delete the CSS and save to return to default styling.
Embeds: An embedded event page reflects the same design settings, so finish styling before you share the embed code.
Open the destination event and go to Pages & Design.
Click Copy from another event and select the source event.
Choose what to copy:
Design: colors, fonts, layout, Custom CSS.
Content & settings: page text, FAQ, checkout configuration.
Review the preview and click Apply.
When you duplicate an event, include Custom CSS under the Design options to carry its styling into the new draft. See Creating, Publishing and Duplicating Events. After copying, you can edit the CSS in the new event without changing the original.
To share CSS manually, copy the code from one event's Custom CSS editor and paste it into another's.
Page text, FAQ and custom form fields are visible to anyone who opens the event page. Describe your event in general terms and never add fields that collect health details. Keep clinical information in your EMR.
Does Custom CSS apply to all events in my account?
No. It is specific to each event. Use duplicate or Copy from another event, or paste the code manually, to reuse it.
Can I preview changes before saving?
Yes. The editor has a live preview that updates as you type.
Do I need to know CSS?
Basic knowledge helps but is not required. Click an element to get its selector and use the presets to generate starter code.
Why is my CSS rule not applying?
Another rule is probably more specific. Use a more specific selector or add !important.
How do I remove custom styling?
Delete the CSS in the editor and save. The pages return to default styling.
Will my CSS change the mobile layout?
Yes. It applies at all screen sizes. Use media queries to target small screens only.
Do presets work on every element?
Presets generate CSS from the selected element. Typography suits text; Border and Background suit most containers. You can always edit the generated code.
Can I remove the required first name, last name and email fields?
No. Those three checkout fields always remain required.
Is Custom CSS copied when I duplicate an event?
Yes, if you leave Custom CSS selected under the Design options when duplicating or copying from another event.
