Events lets you build standalone public event pages, collect free or paid registrations, and check guests in at the door. It lives under Marketing > Events in your account. Use it for patient education nights, open houses, injector training days, product launches, and similar gatherings. It is different from Event Calendars (class and group calendar bookings, covered in the Calendars collection) and from Event Marketing (promotion campaigns, covered in the Marketing collection).
Availability: Events is available on the Grow and Multi-Location plans.
Category | Option | What it does |
|---|---|---|
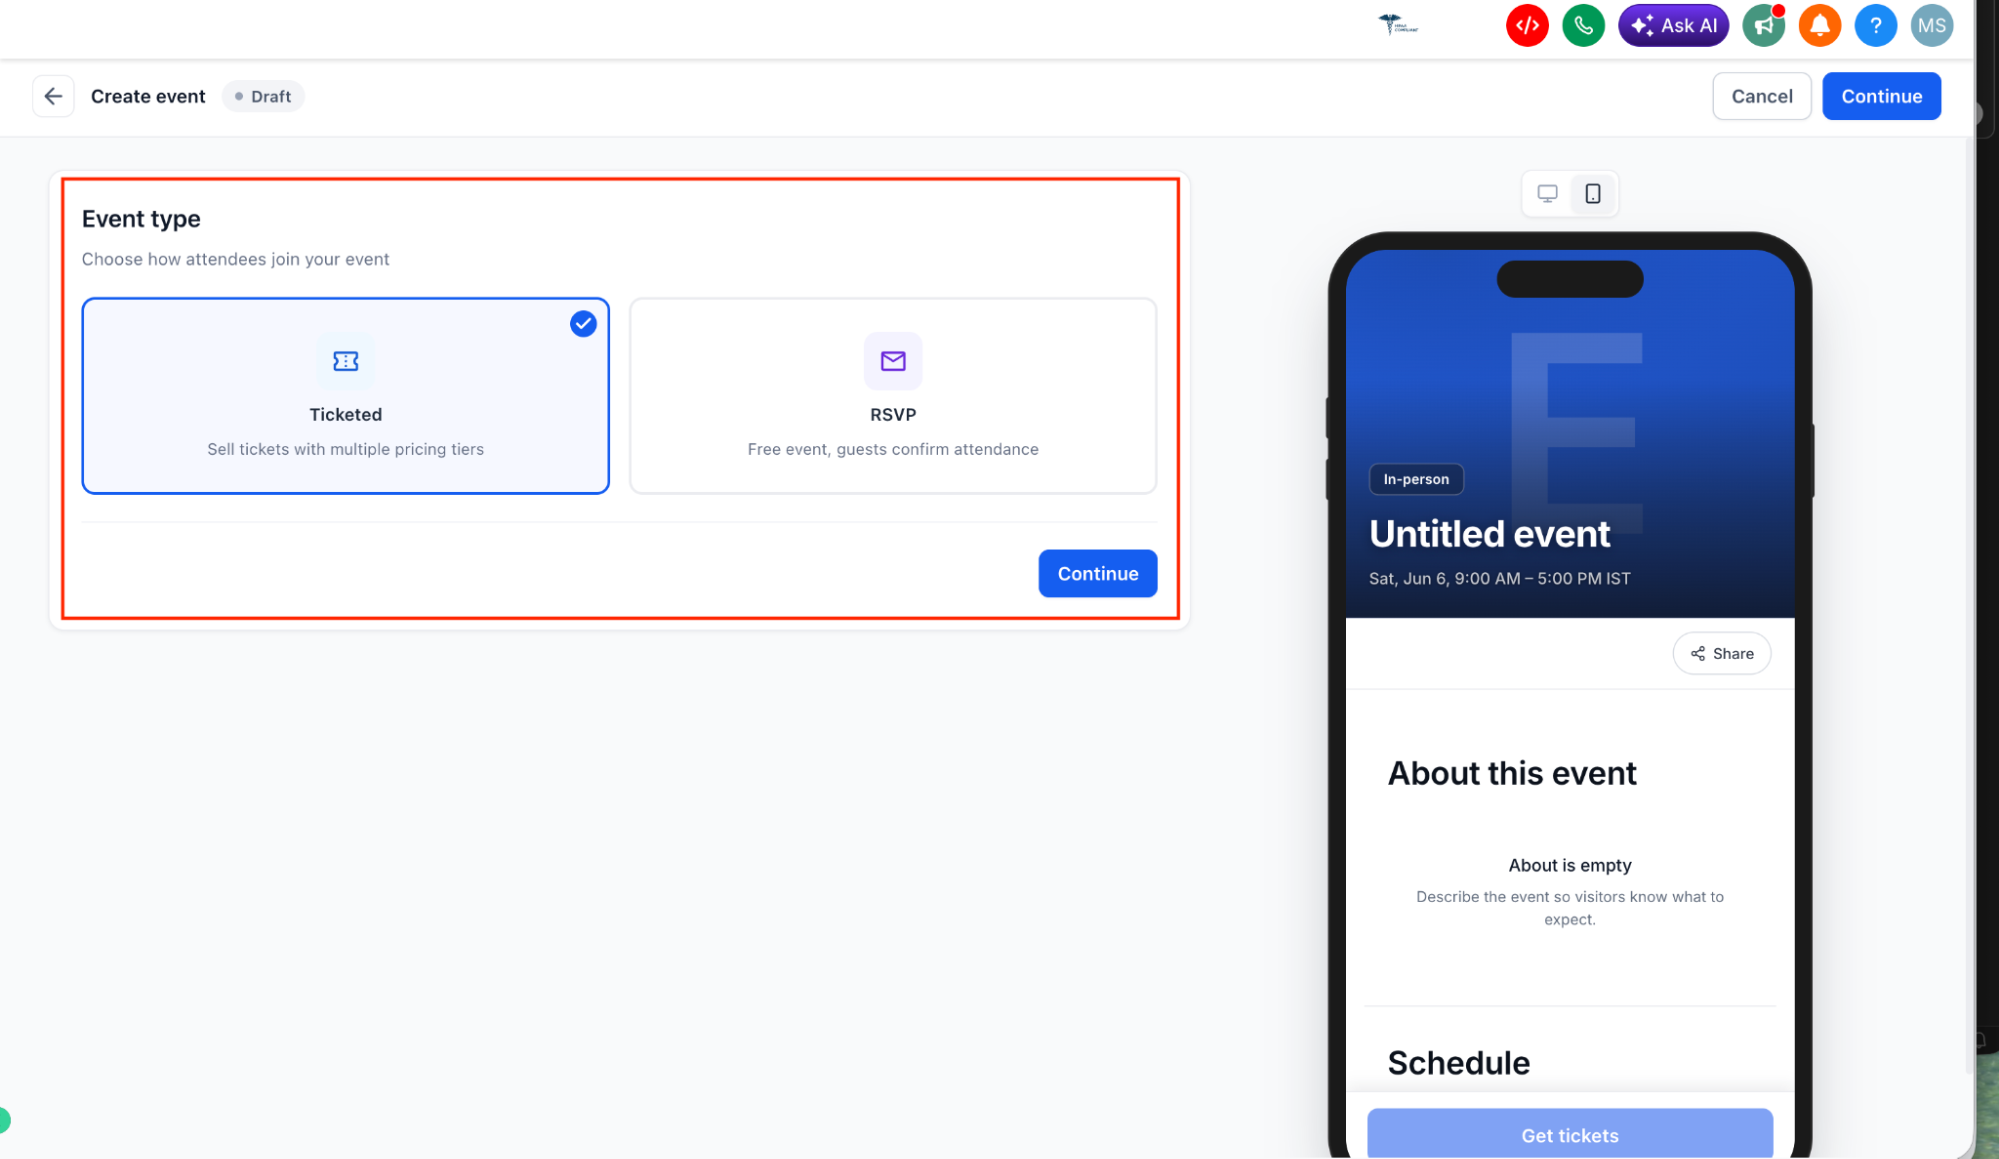
Event type | Ticketed | Offers free or paid tickets through a checkout flow. You can mix free and paid ticket types. |
Event type | RSVP | Collects free registrations with no payment step. |
Location | In-person | Shows a venue address, map and directions. QR check-in, wallet passes and the staff check-in app work for in-person events only. |
Location | Online | Provides joining instructions and a meeting link. |
Important: You cannot switch an event between Ticketed and RSVP after you create it. If you picked the wrong type, duplicate the event details into a new event of the correct type.
Go to Marketing > Events and click + Create Event. The dashboard lets you search and filter existing events by status.
Choose Ticketed (free or paid checkout) or RSVP (free registration).
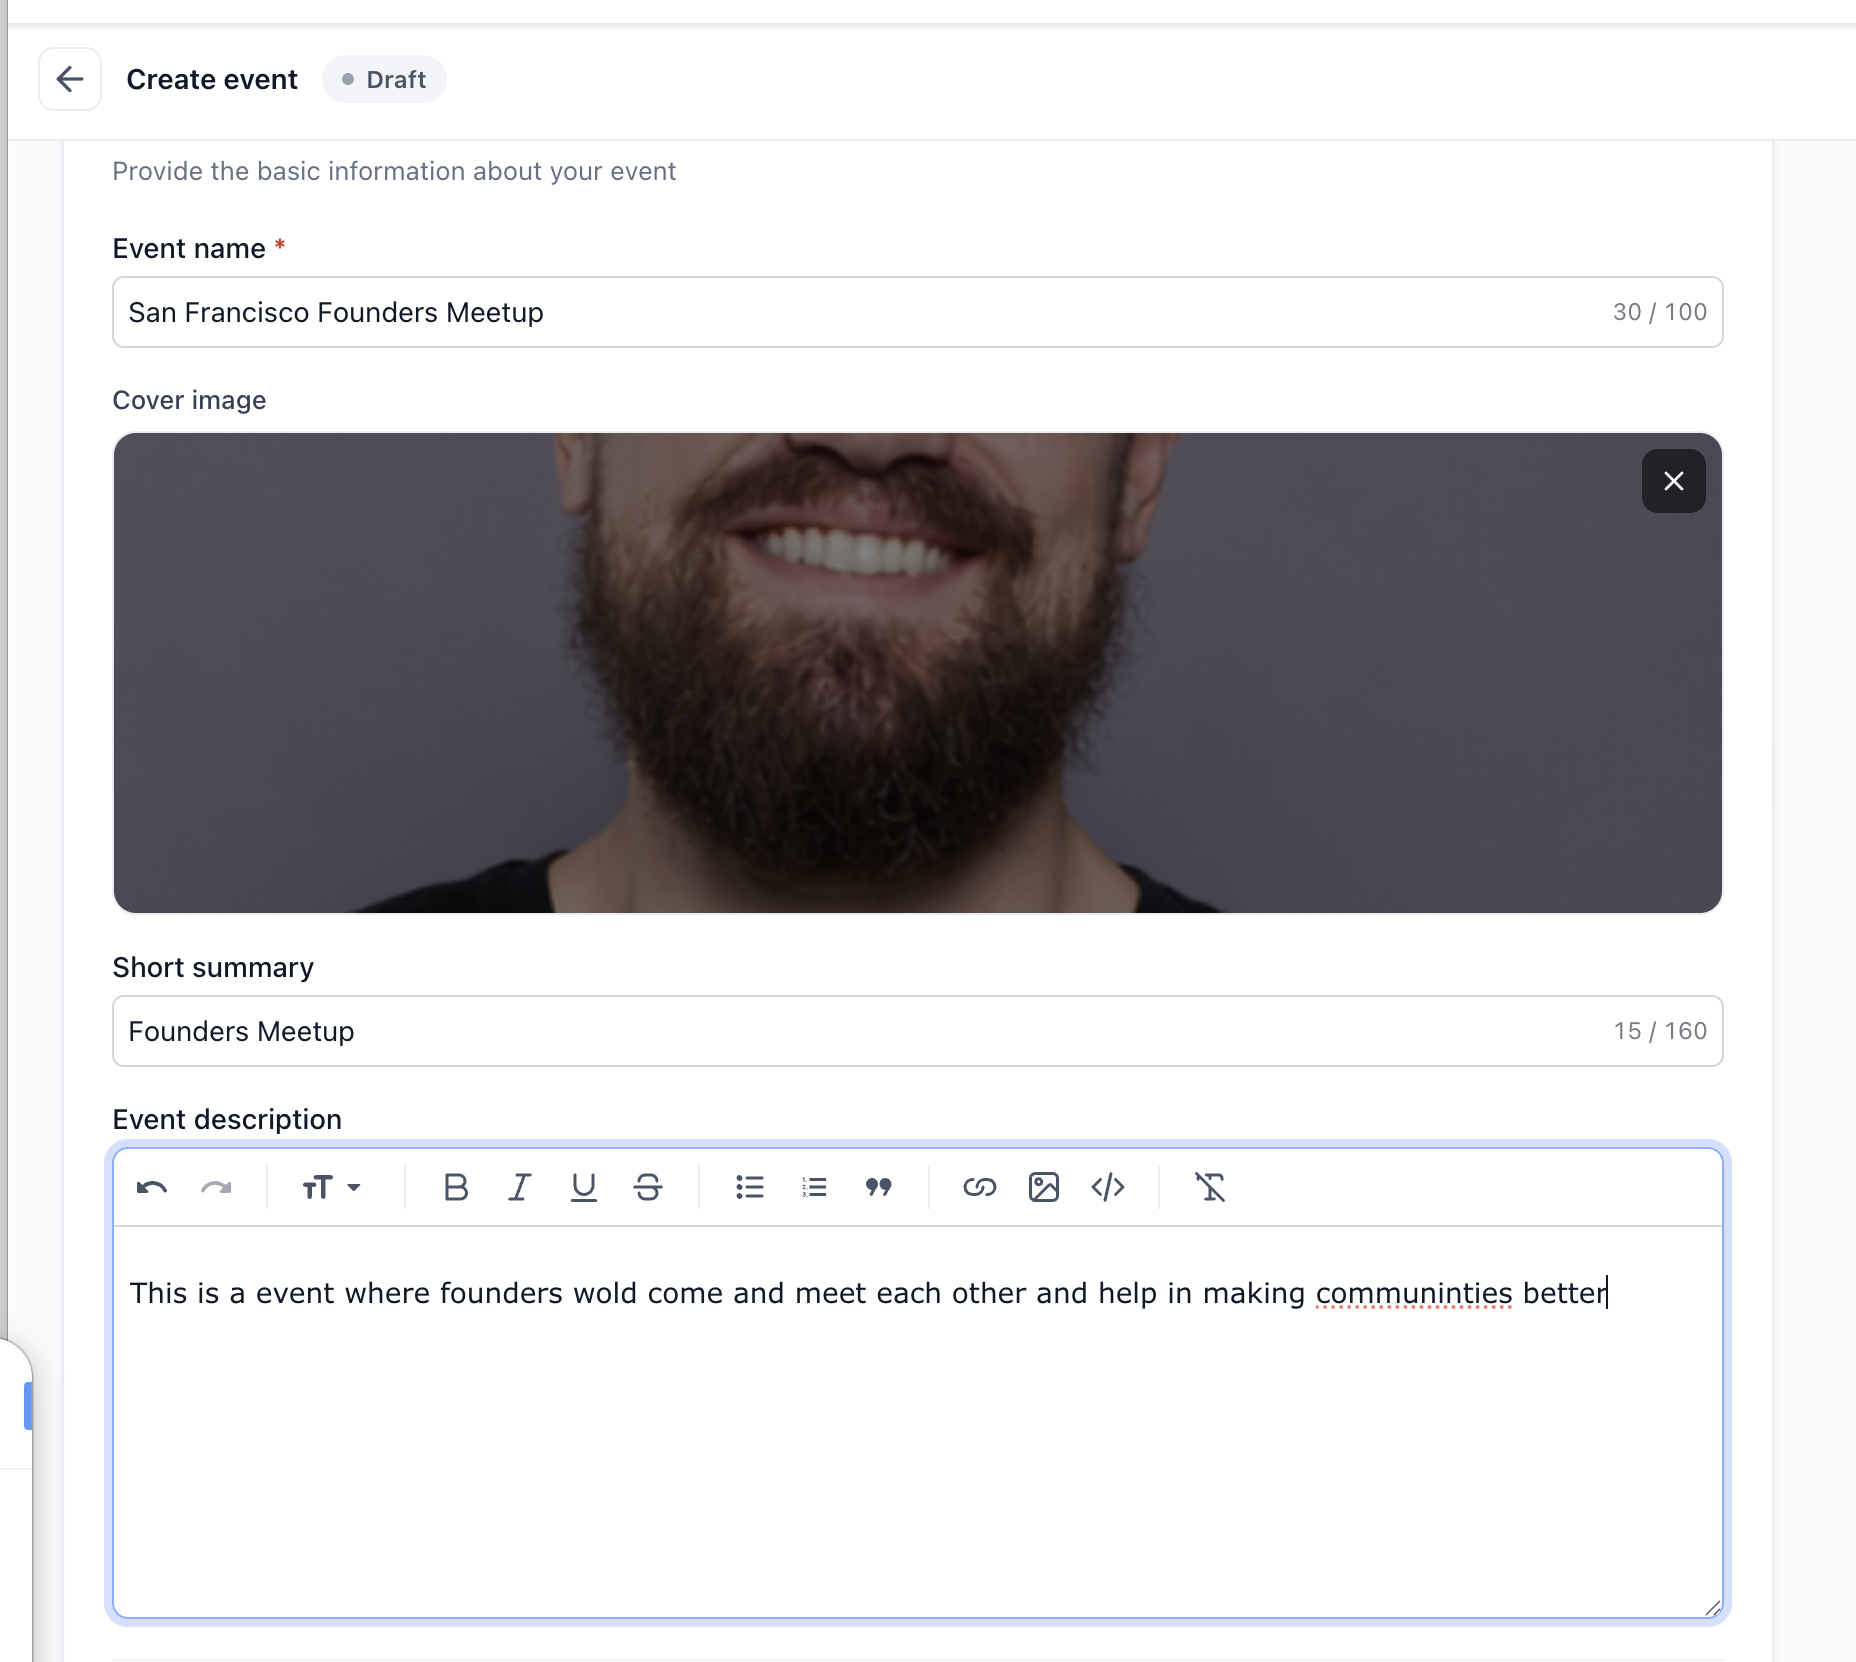
Enter the event details shown on the public page:
Event name: up to 100 characters.
Cover image: PNG, JPG or GIF, recommended 1920 x 1080 px, maximum 5 MB.
Short summary: up to 160 characters.
Description: formatted text, links, lists or images.
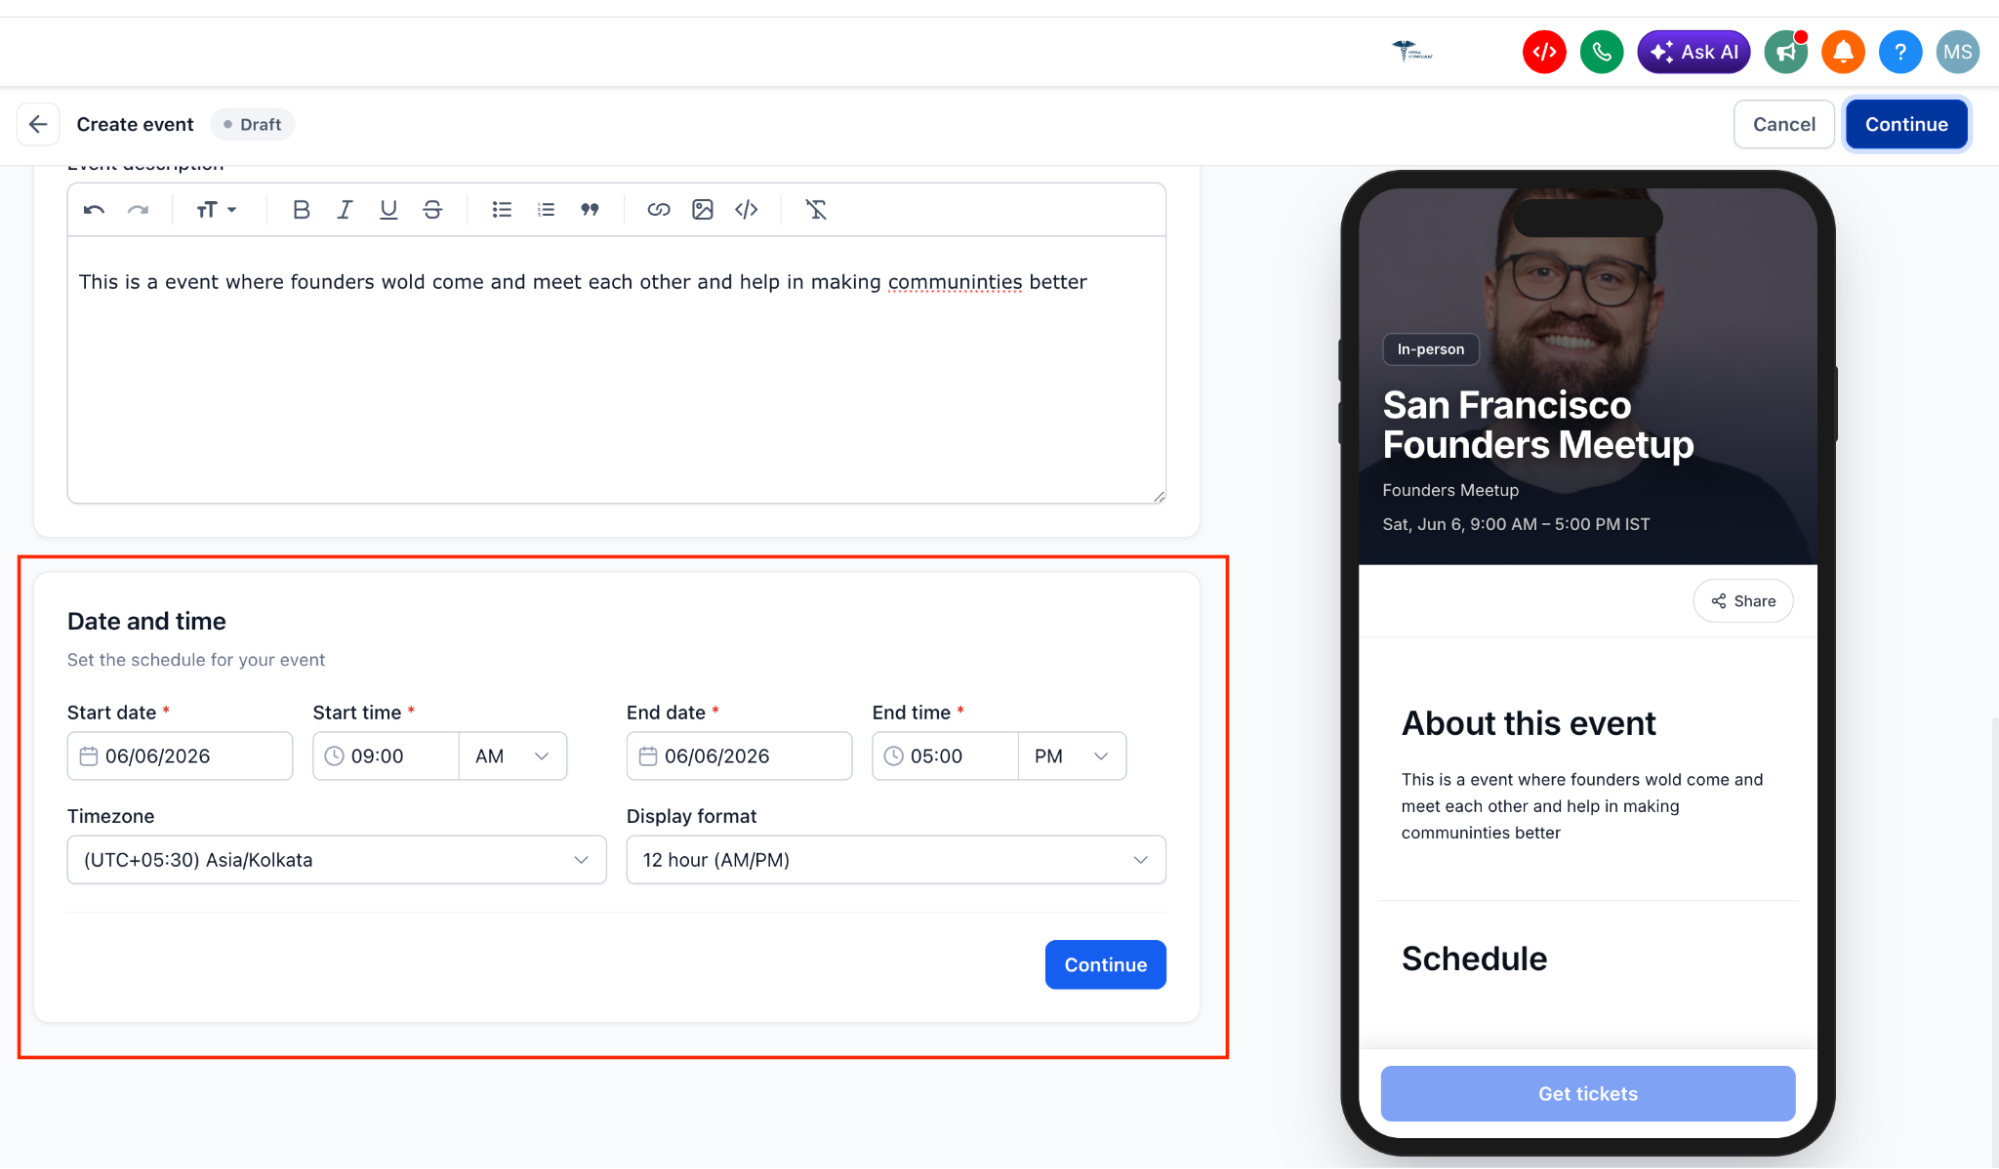
Set the start and end dates and times, choose the event Timezone, and pick a 12-hour or 24-hour Display format. Ticket sales, sessions and coupon periods all use the event timezone.
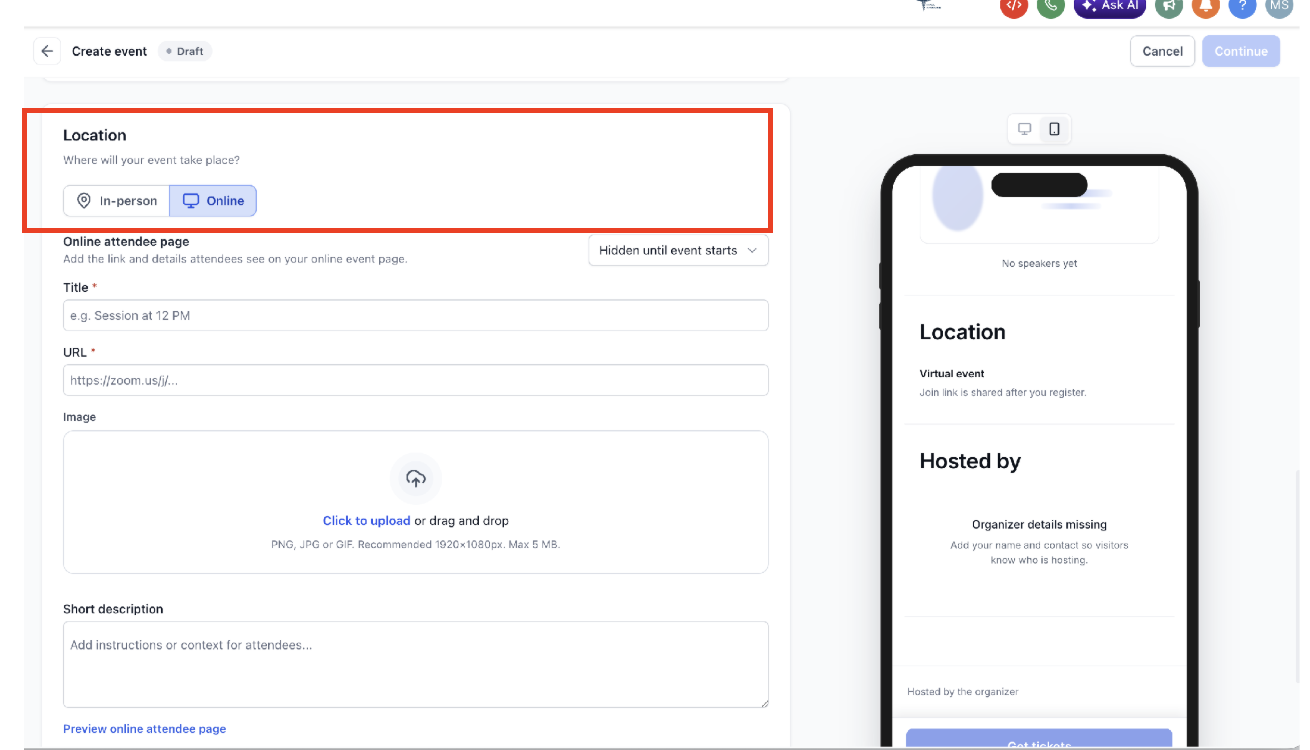
Set the location:
In-person: enter the physical address. The address and country appear on attendee pages, tickets, maps and notifications.
Online: add a session title, meeting URL, optional image and joining instructions. Keep the link hidden until the event begins, or use a Custom schedule to control when it becomes visible.
Enter the Organizer name and Email address (both required). Optionally add a website, phone number and organizer image (recommended 400 x 400 px, maximum 5 MB).
Click Create event. The event is saved as a Draft and is not public until you publish it.
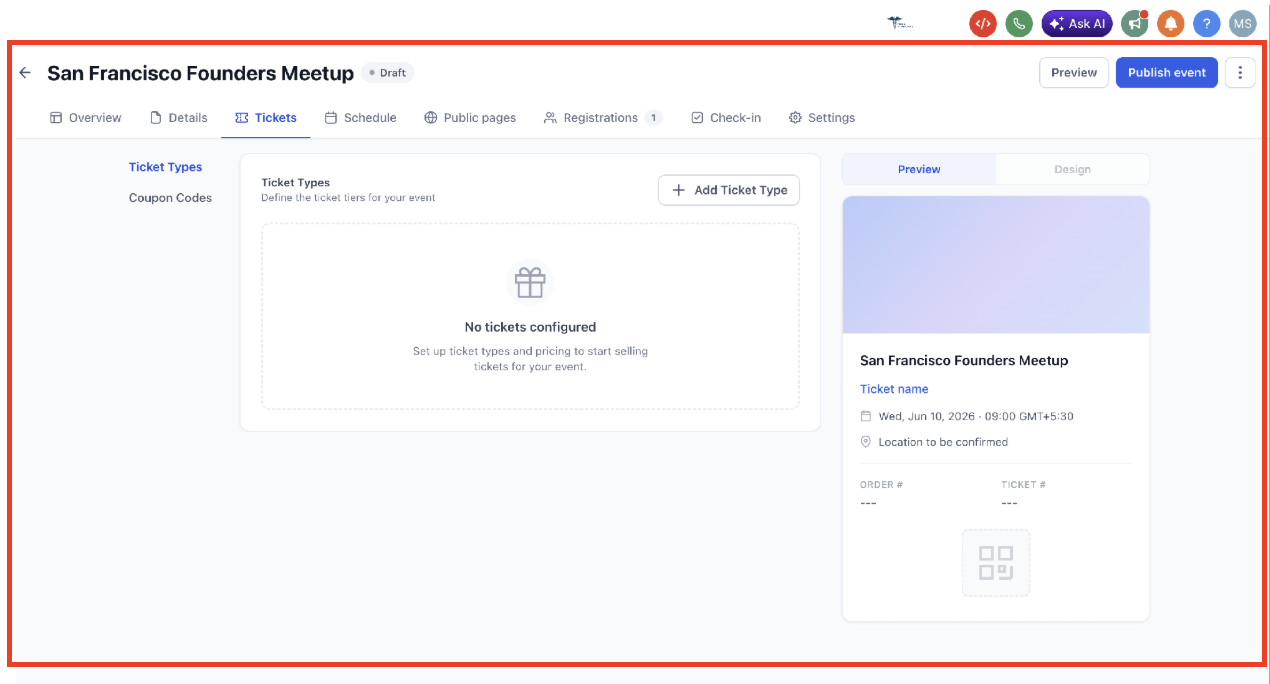
Open the event from Marketing > Events to reach its dashboard. Work through these tabs before you publish:
Tab | What to configure | Guide |
|---|---|---|
Tickets | Ticket types, pricing, quantities, sale periods, coupon codes | Events Tickets, Coupons, Schedule and Speakers |
Schedule and Speakers | Sessions and presenters | Events Tickets, Coupons, Schedule and Speakers |
Pages & Design | Public page sections, colors, fonts, checkout form, custom CSS | Customizing Event Pages and Custom CSS |
Settings | Registration, live mode, notifications, link and tracking | Described below and in Embedding, Sharing and Tracking Events |
Registrations | Attendee list, manual adds, refunds, check-in | Events Registrations, Manual Attendees and Group Orders |
Attendee App | Client Portal access, networking, sessions | Events Wallet Passes and the Attendee App |
Open Settings on the event and review each area:
Registration: the registration deadline (defaults to the event start), total capacity (enter 0 for unlimited), and check-in eligibility by payment status (see Events Check-In, Refunds and Cancellations).
Live mode: turn this on before you accept real payments. With Live mode off, the event runs in test mode so you can run test registrations safely.
Notifications: attendee and organizer emails, sender name and sender email.
Link & Tracking: the URL slug, Meta Pixel and event mapping, favicon (PNG or JPG up to 5 MB), and the embed code.
Taking payments? Paid tickets are processed through your connected payment provider. We recommend AX Pay, Aesthetix CRM's own payment provider, which offers better rates than Stripe. See the AX Pay Overview and Setup Guide for setup.
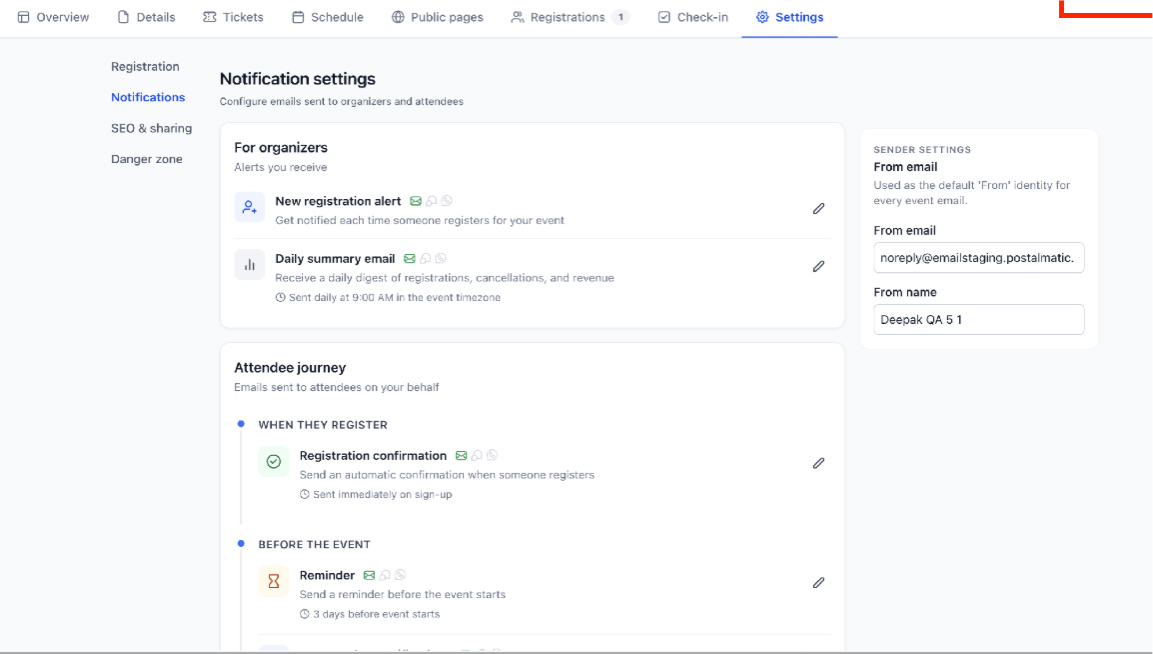
Under Settings > Notifications you control what attendees and your team receive:
Attendees: registration confirmation and reminder emails. Confirmations can also go by SMS or WhatsApp where enabled.
Organizers: a new-registration alert and a daily summary email. The daily summary is sent at 9:00 AM in the event timezone.
Sender: the From email and From name used on event emails.
When the event is ready, click Publish event. The public registration page becomes available.
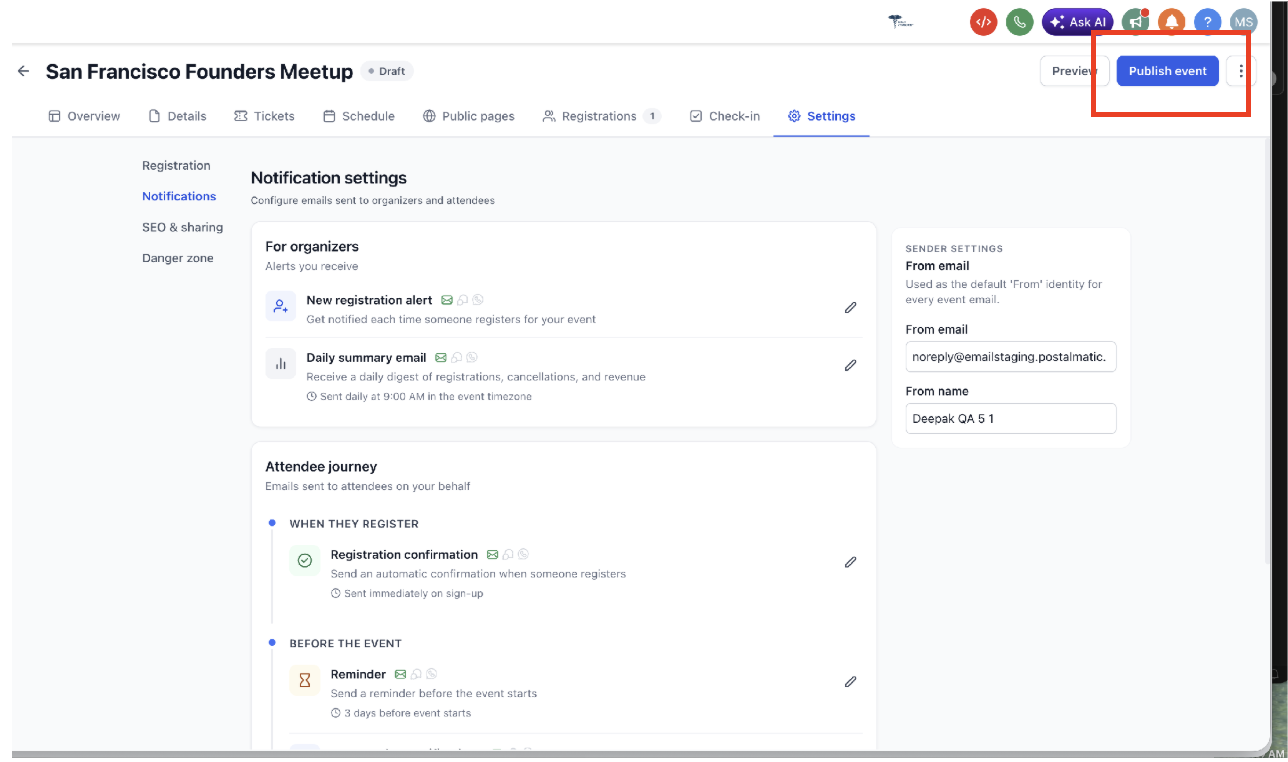
After publishing, open the event's three-dot menu to:
Share the event (link and embed code).
Duplicate it.
Unpublish it. The public page goes offline but registrations are kept.
Archive it.
Delete it permanently.
Unpublishing or canceling an event does not refund anyone. Process refunds manually from the Registrations tab (see Events Check-In, Refunds and Cancellations).
Duplication creates a new draft from an existing event so you do not rebuild common settings. The duplicate is never published automatically.
Go to Marketing > Events, hover over the event and click the three-dot menu, then Duplicate.
In the Duplicate Event window, set the new start date, start time, end date and end time.
Review what is always copied: event name and details, short summary and description, cover image, date and time, location, and organizer information.
Under Choose what to copy, select or deselect the optional elements:
Group | Optional elements |
|---|---|
Design | Colors, fonts, layout, custom CSS |
Content & settings | Page text, FAQ, checkout configuration |
Tickets & sessions | Ticket types and pricing, schedule, speakers (speakers come with the schedule) |
Click Preview and compare the Copying from and Your event after copy views side by side. Adjust your selections if needed.
Click Duplicate, then open the new draft to make final edits before publishing.
Not copied (reset for the new draft): registrations and attendees, orders and payments, coupons and promotions, and check-in records.
To clone one ticket type inside an event, or to copy design and content from another event without duplicating the whole event, see Events Tickets, Coupons, Schedule and Speakers and Customizing Event Pages and Custom CSS.
Events is translated into 13 languages: English, Spanish, French (Canada), French (France), Portuguese (Brazil), Portuguese (Portugal), German, Dutch, Italian, Danish, Norwegian, Finnish and Swedish. Translations cover organizer screens (creation, management, settings) and the attendee experience (registration, checkout, tickets, the attendee app), including labels, tooltips, validation messages and empty states. Any text without a translation shows in English.
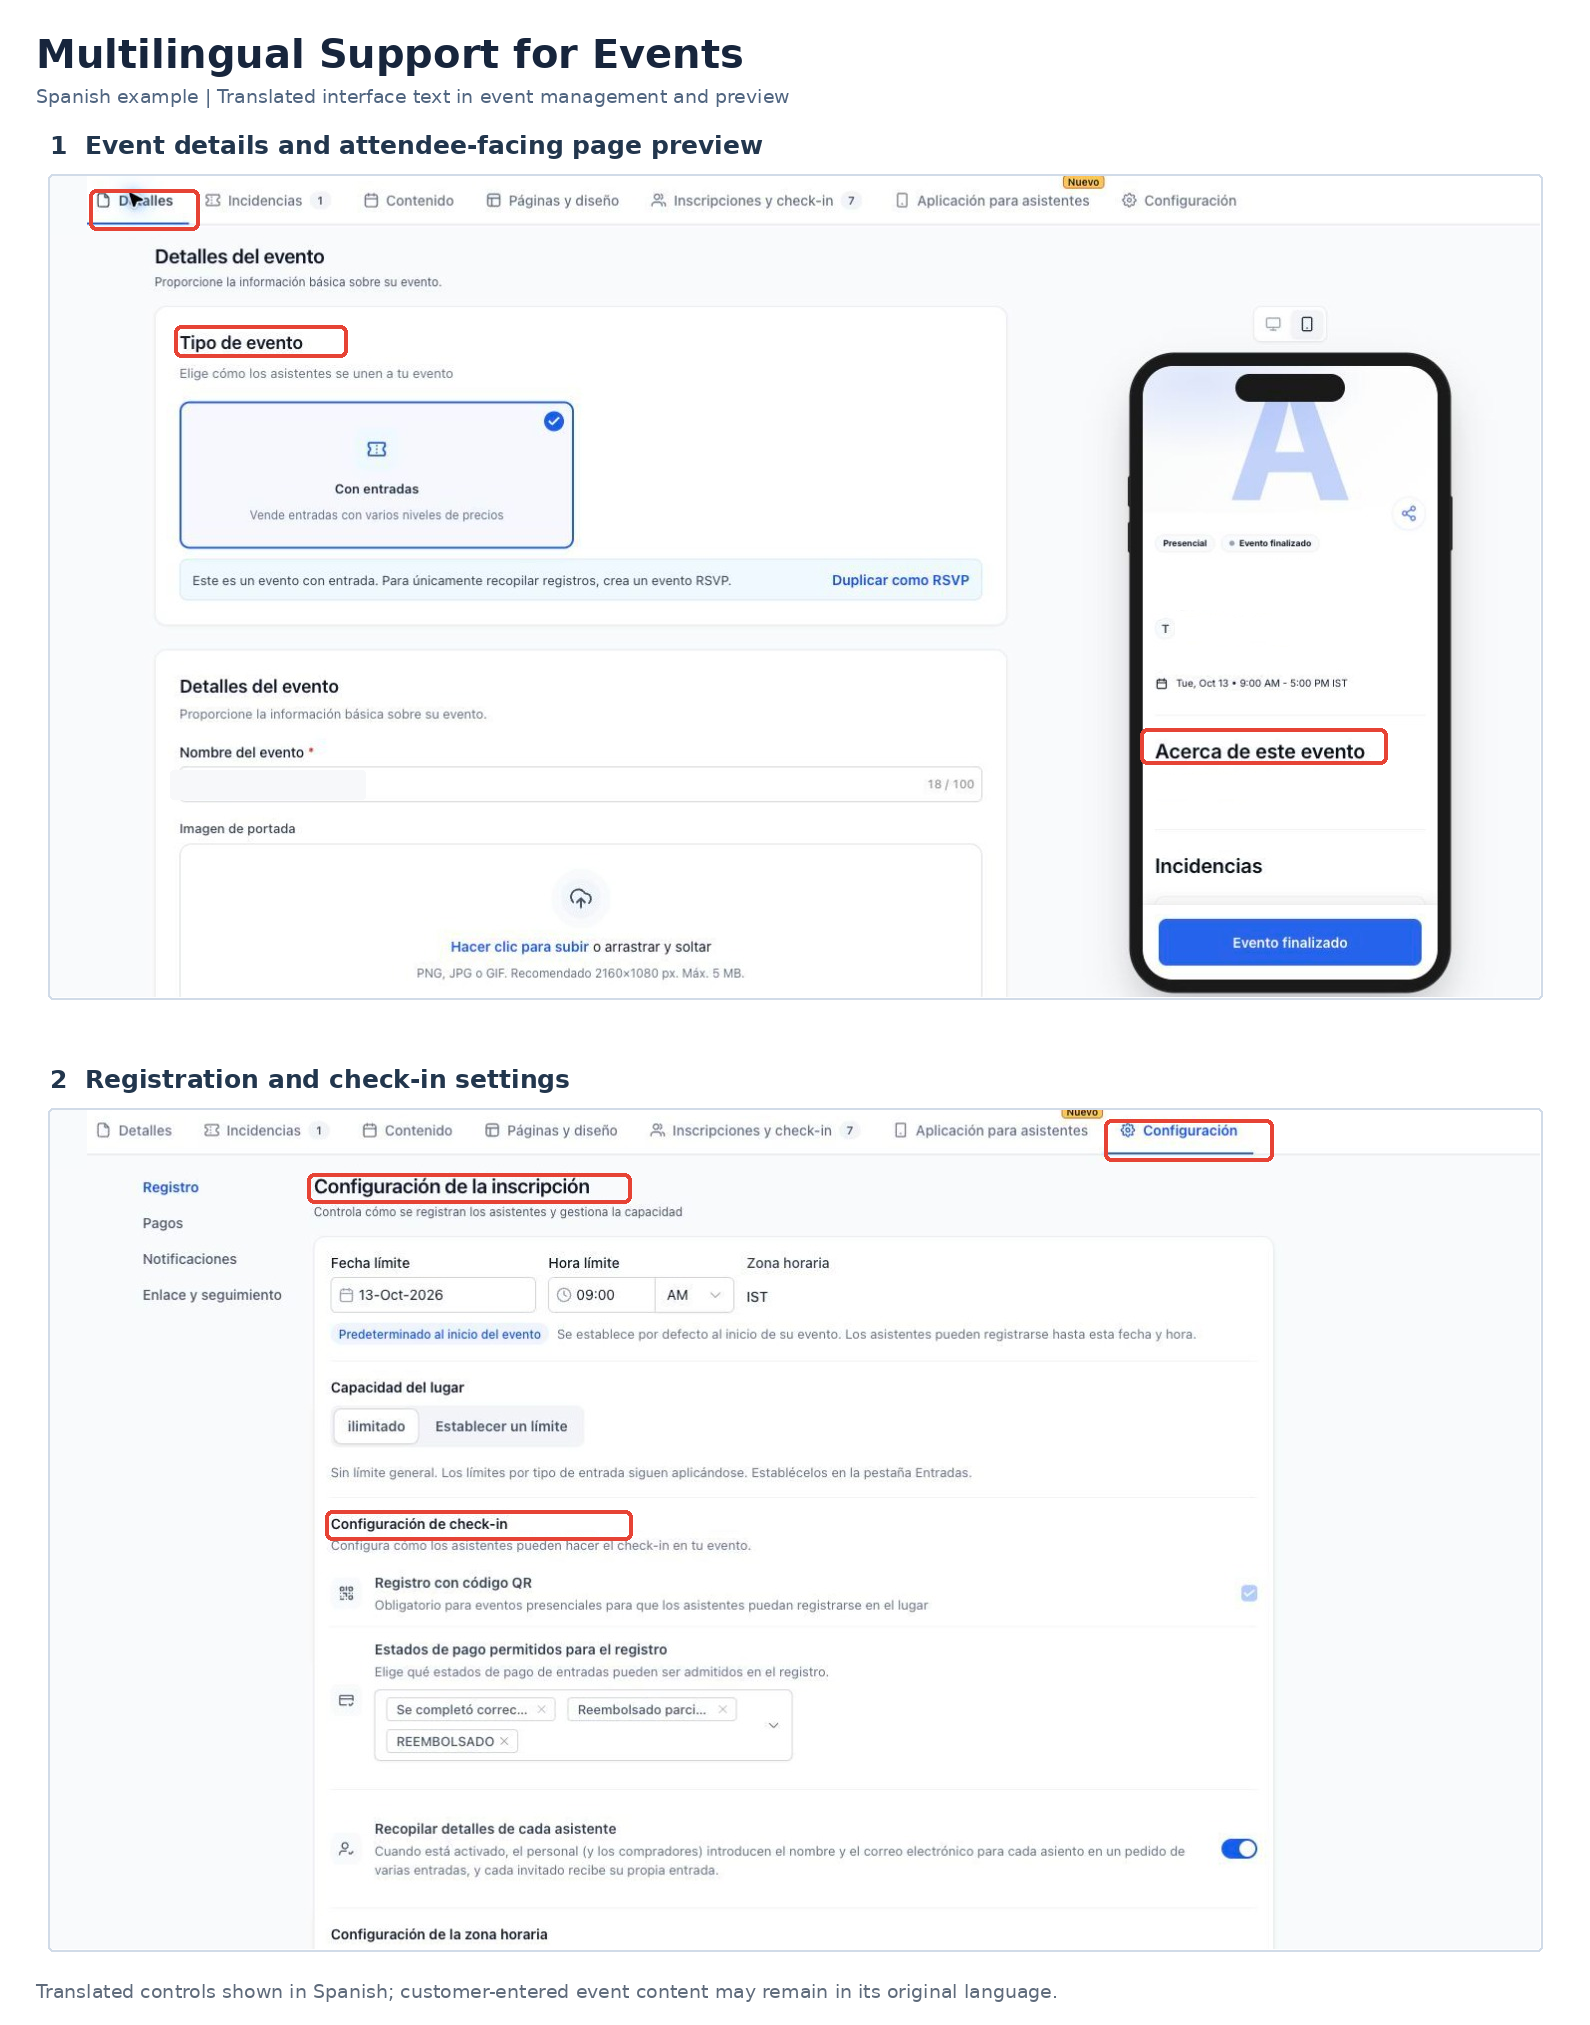
Set the language in Settings > Business Profile > Platform Language (account default) or Settings > My Profile > Platform Language (your personal preference).
Registration forms collect names, emails and any custom fields you add. Collect only what the event needs to run. Do not ask attendees for diagnoses, treatment history, medications or other health details in event forms, ticket names or descriptions. Health information belongs in your EMR, not in event registration data.
Which plans include Events?
Events is available on the Grow and Multi-Location plans. You will find it under Marketing > Events.
Can I change an event from RSVP to Ticketed later?
No. The event type is locked once the event is created. Create a new event of the right type, or duplicate the existing one and rebuild the ticket setup.
Why is my new event not visible to the public?
New events are saved as Drafts. Click Publish event to make the registration page available.
Does unpublishing or canceling an event refund attendees?
No. Refunds are always manual. Issue them from the Registrations tab.
How do I test an event without charging real cards?
Leave Live mode off in Settings. The event runs in test mode. Turn Live mode on before you accept real payments.
Can attendees transfer a ticket to someone else?
There is no self-service transfer. Edit the attendee details in Registrations, or cancel the original registration and manually add the replacement attendee.
When is the organizer daily summary sent?
It is sent at 9:00 AM in the event timezone.
Does duplicating an event copy registrations or payments?
No. Registrations, attendees, orders, payments, coupons and check-in records are never copied.
How is Events different from Event Calendars?
Events are standalone public pages with ticketing, schedules, speakers and attendee tracking. Event Calendars handle class and group bookings through calendars.
How do organizer payouts work?
Ticket payments go through your connected payment provider, and payout timing follows that provider's schedule.
