Quizzes in Aesthetix CRM can do more than collect answers: they can score each response, sort those scores into categories, and show every quiz taker a personalized result. That makes quizzes a great fit for skin assessments ("Your skin profile: Combination"), treatment-readiness surveys, or product recommendation tools ("Recommended: HydraFacial package"). Everything below lives in the Quiz Builder, under Sites > Quizzes.
Every answer choice in a quiz can carry a numeric score. When a patient completes the quiz, Aesthetix CRM totals up the scores from their selected answers and converts the total into a percentage.
Each question has a maximum possible score based on its type:
Single Choice / Dropdown: Only one answer can be selected, so the max score is fixed to whichever answer is worth the most.
Multiple Choice / Multi Dropdown: Multiple answers can be selected, so the max score is the sum of every option's value.
An answer's score can count toward:
Overall Score Only: Adds to the quiz's total score but not to any category.
Category-Specific Score: Adds to one category and to the overall score.
Multiple Categories: Adds to more than one category at once, if a single answer applies to several.
The final score for the quiz overall, and for each category, uses the same formula:
Final Score = (Selected Score / Max Score) x 100
Example: A skin-assessment quiz has an Overall max of 130 points, and three categories: Hydration, Sensitivity, and Aging Concerns, each with a max of 50. A patient selects answers totaling 90 overall, with 20 in Hydration, 20 in Sensitivity, and 10 in Aging Concerns.
Category | Selected Score | Max Score | Final % |
|---|---|---|---|
Overall | 90 | 130 | 69.23% |
Hydration | 20 | 50 | 40.00% |
Sensitivity | 20 | 50 | 40.00% |
Aging Concerns | 10 | 50 | 20.00% |
A few things worth knowing about how categories add up:
If an answer is assigned only to "Overall Only," it never counts toward a category.
If an answer is assigned to both a category and "Overall Only," it counts in both places.
Each category's score is calculated independently, but the Overall Score reflects the sum of everything selected.
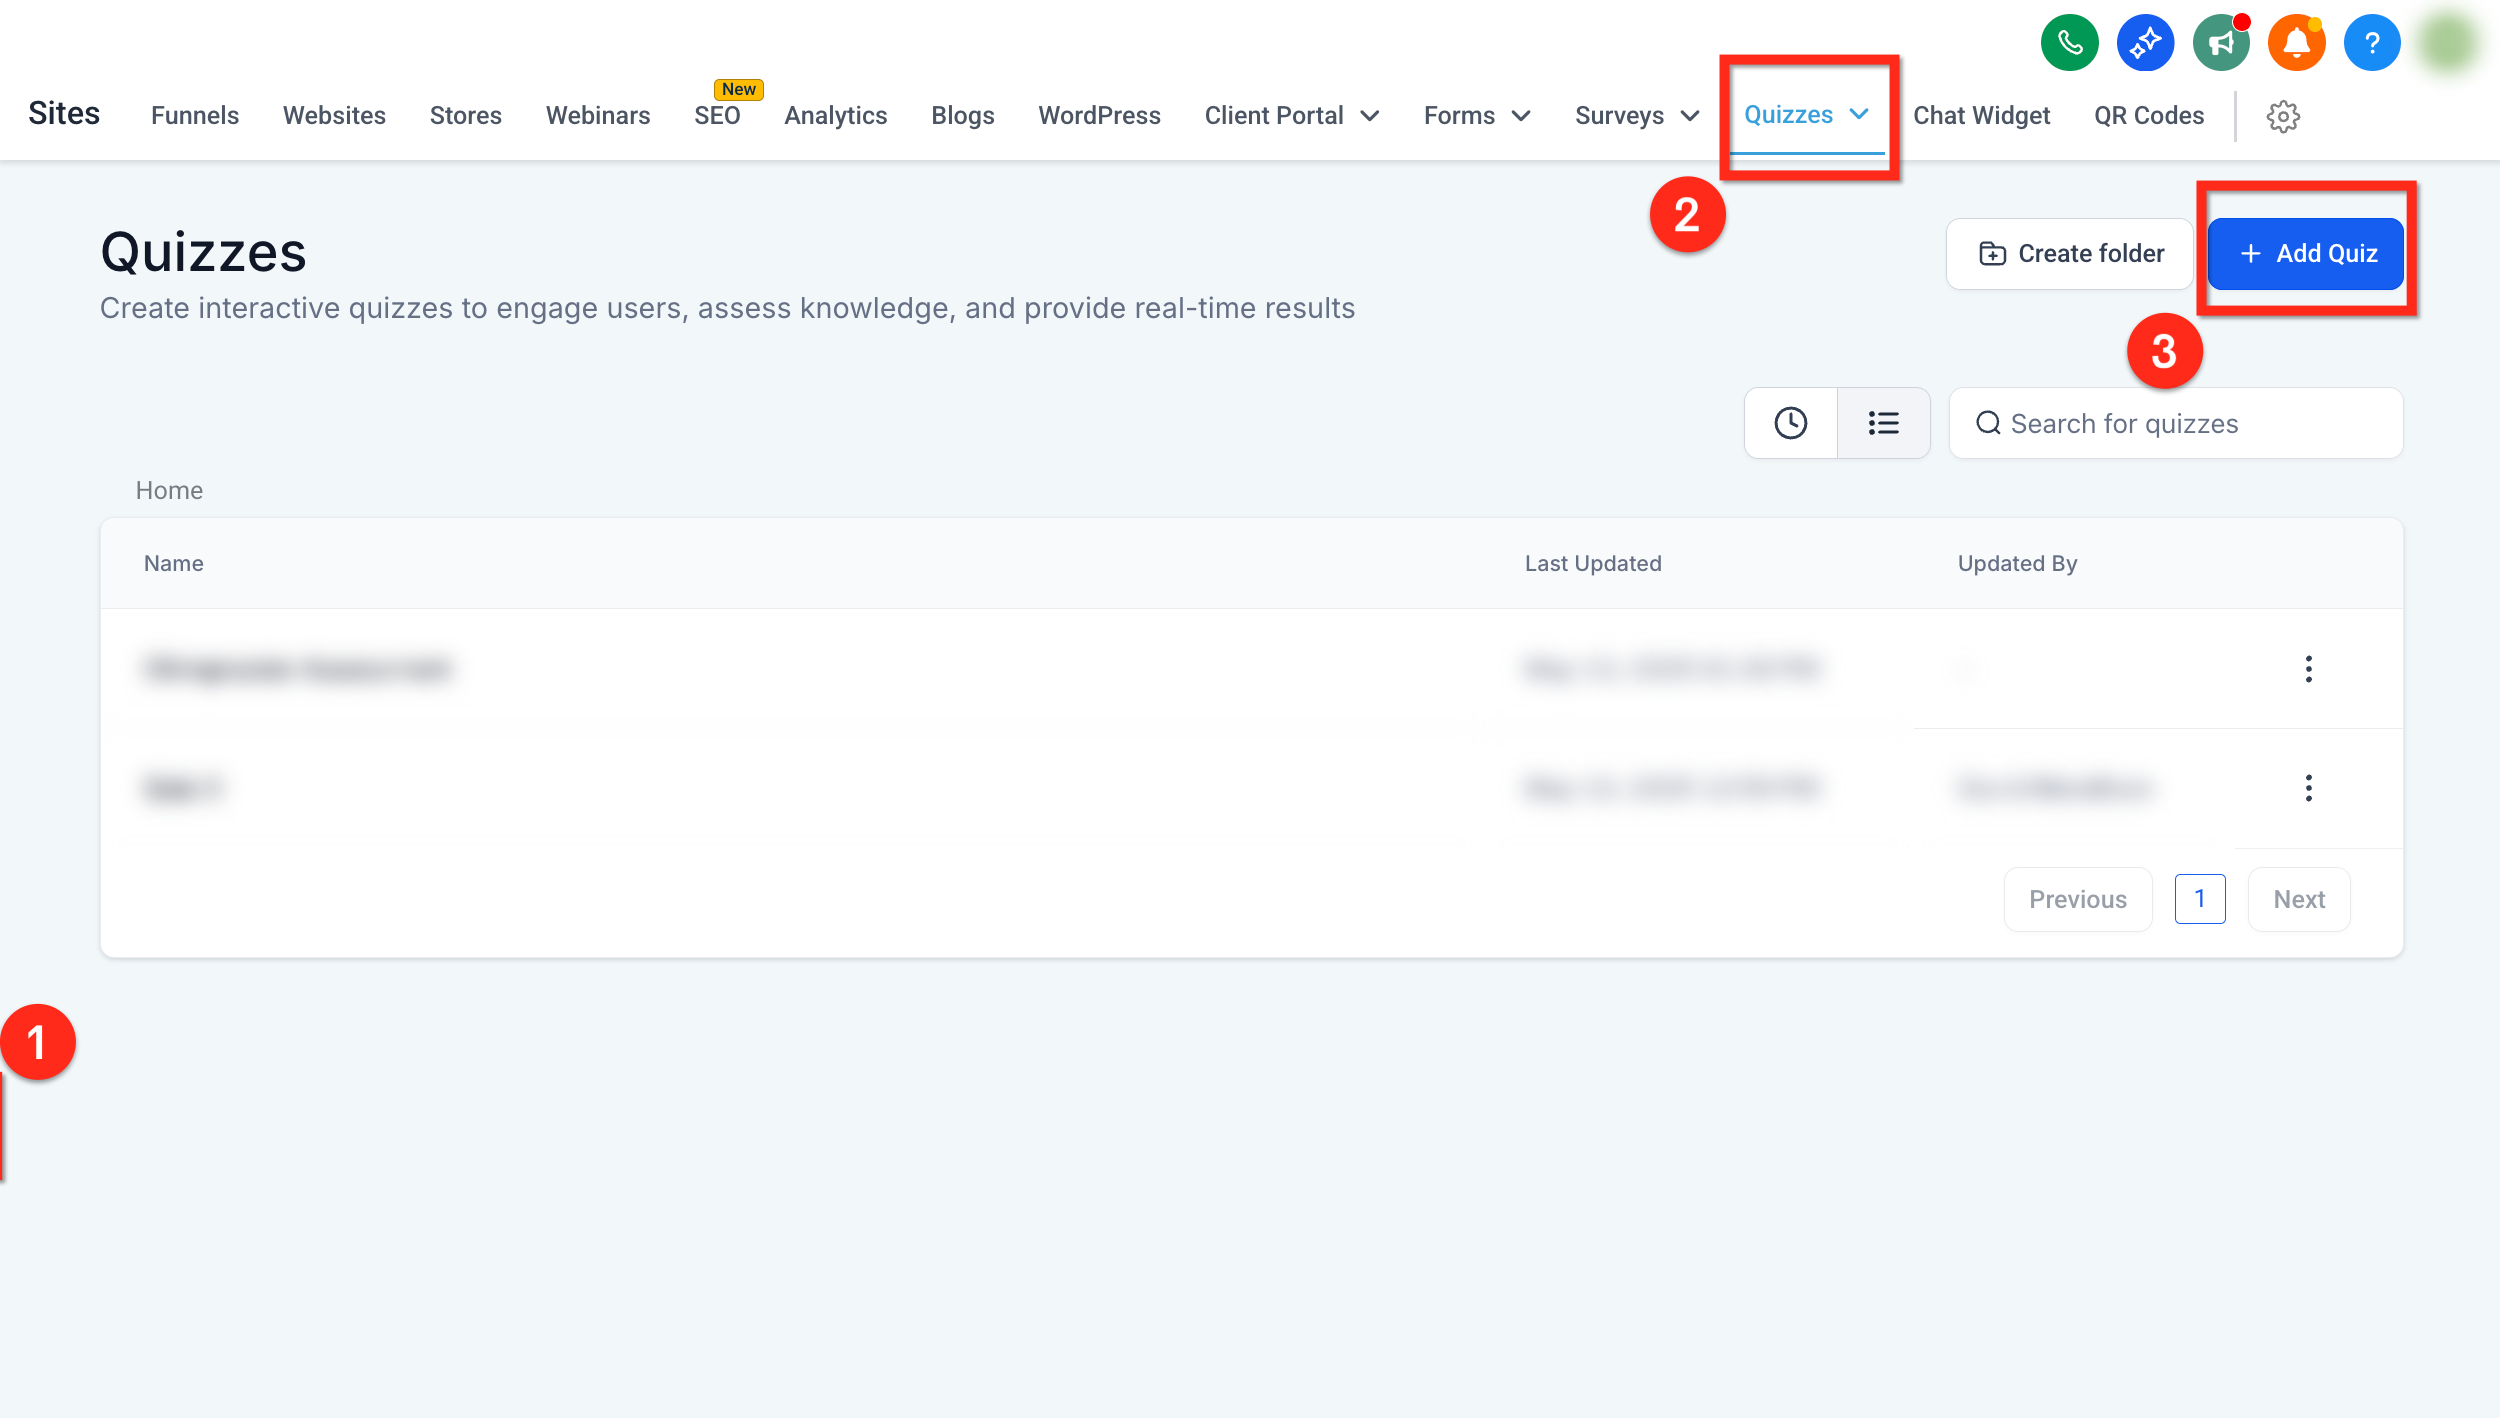
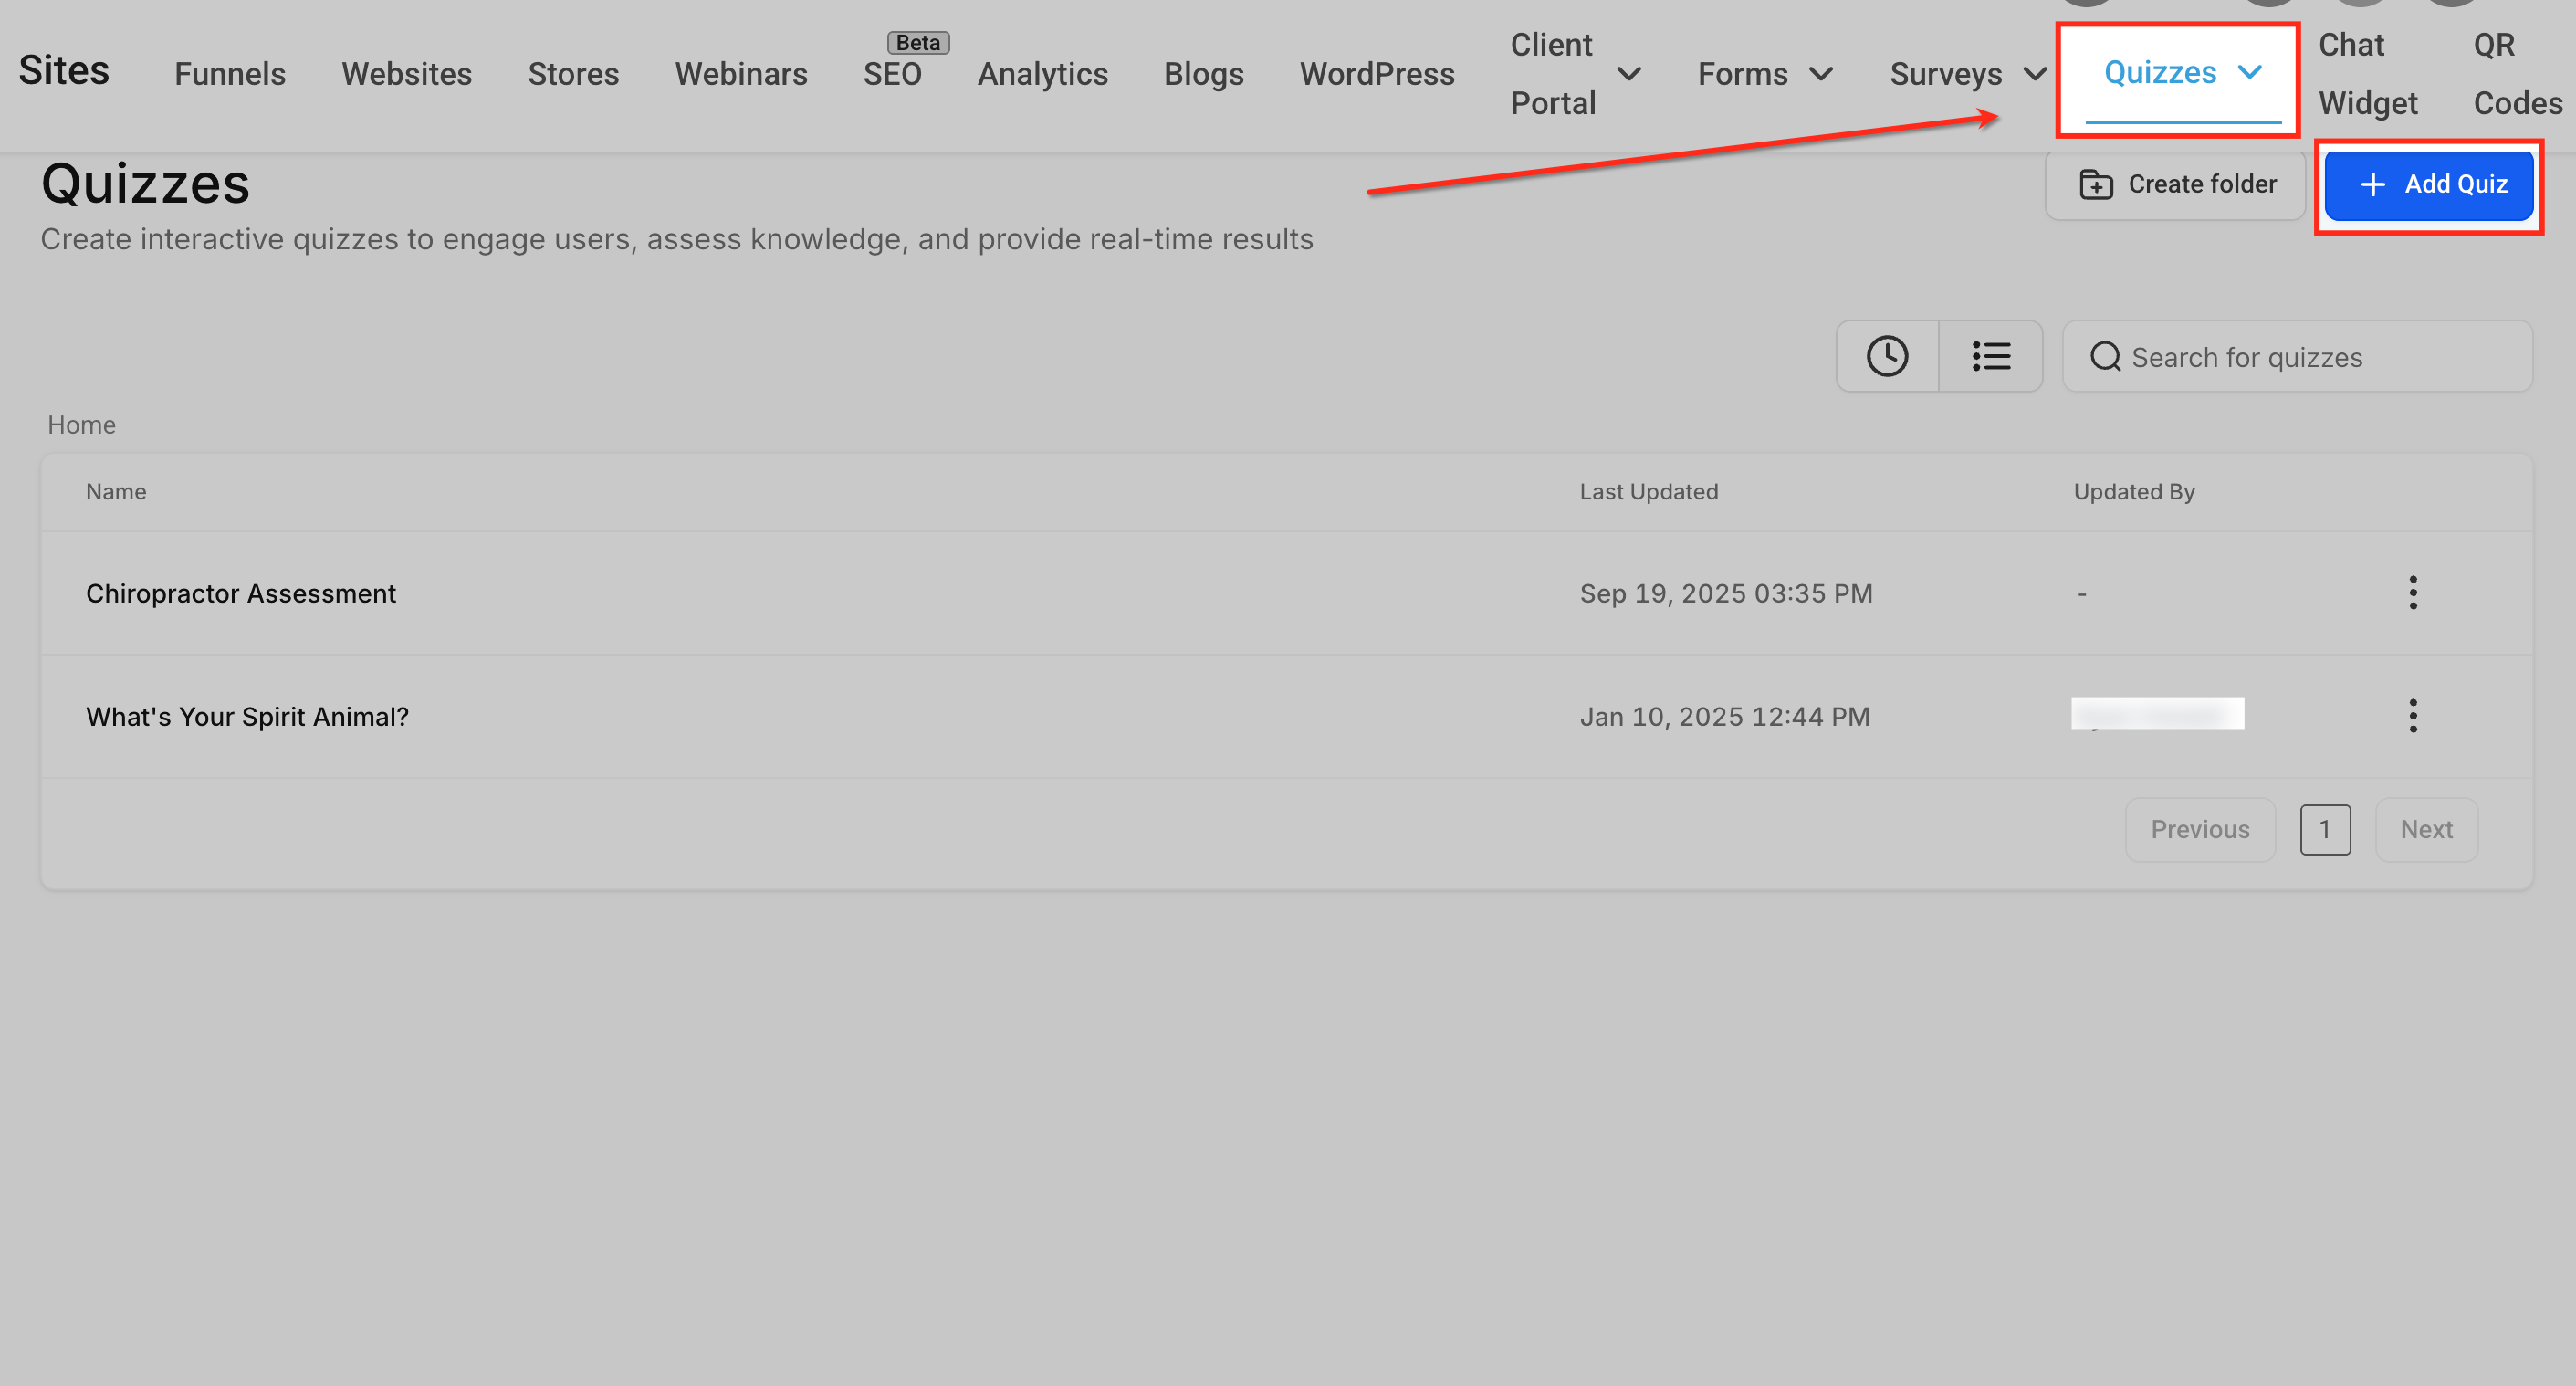
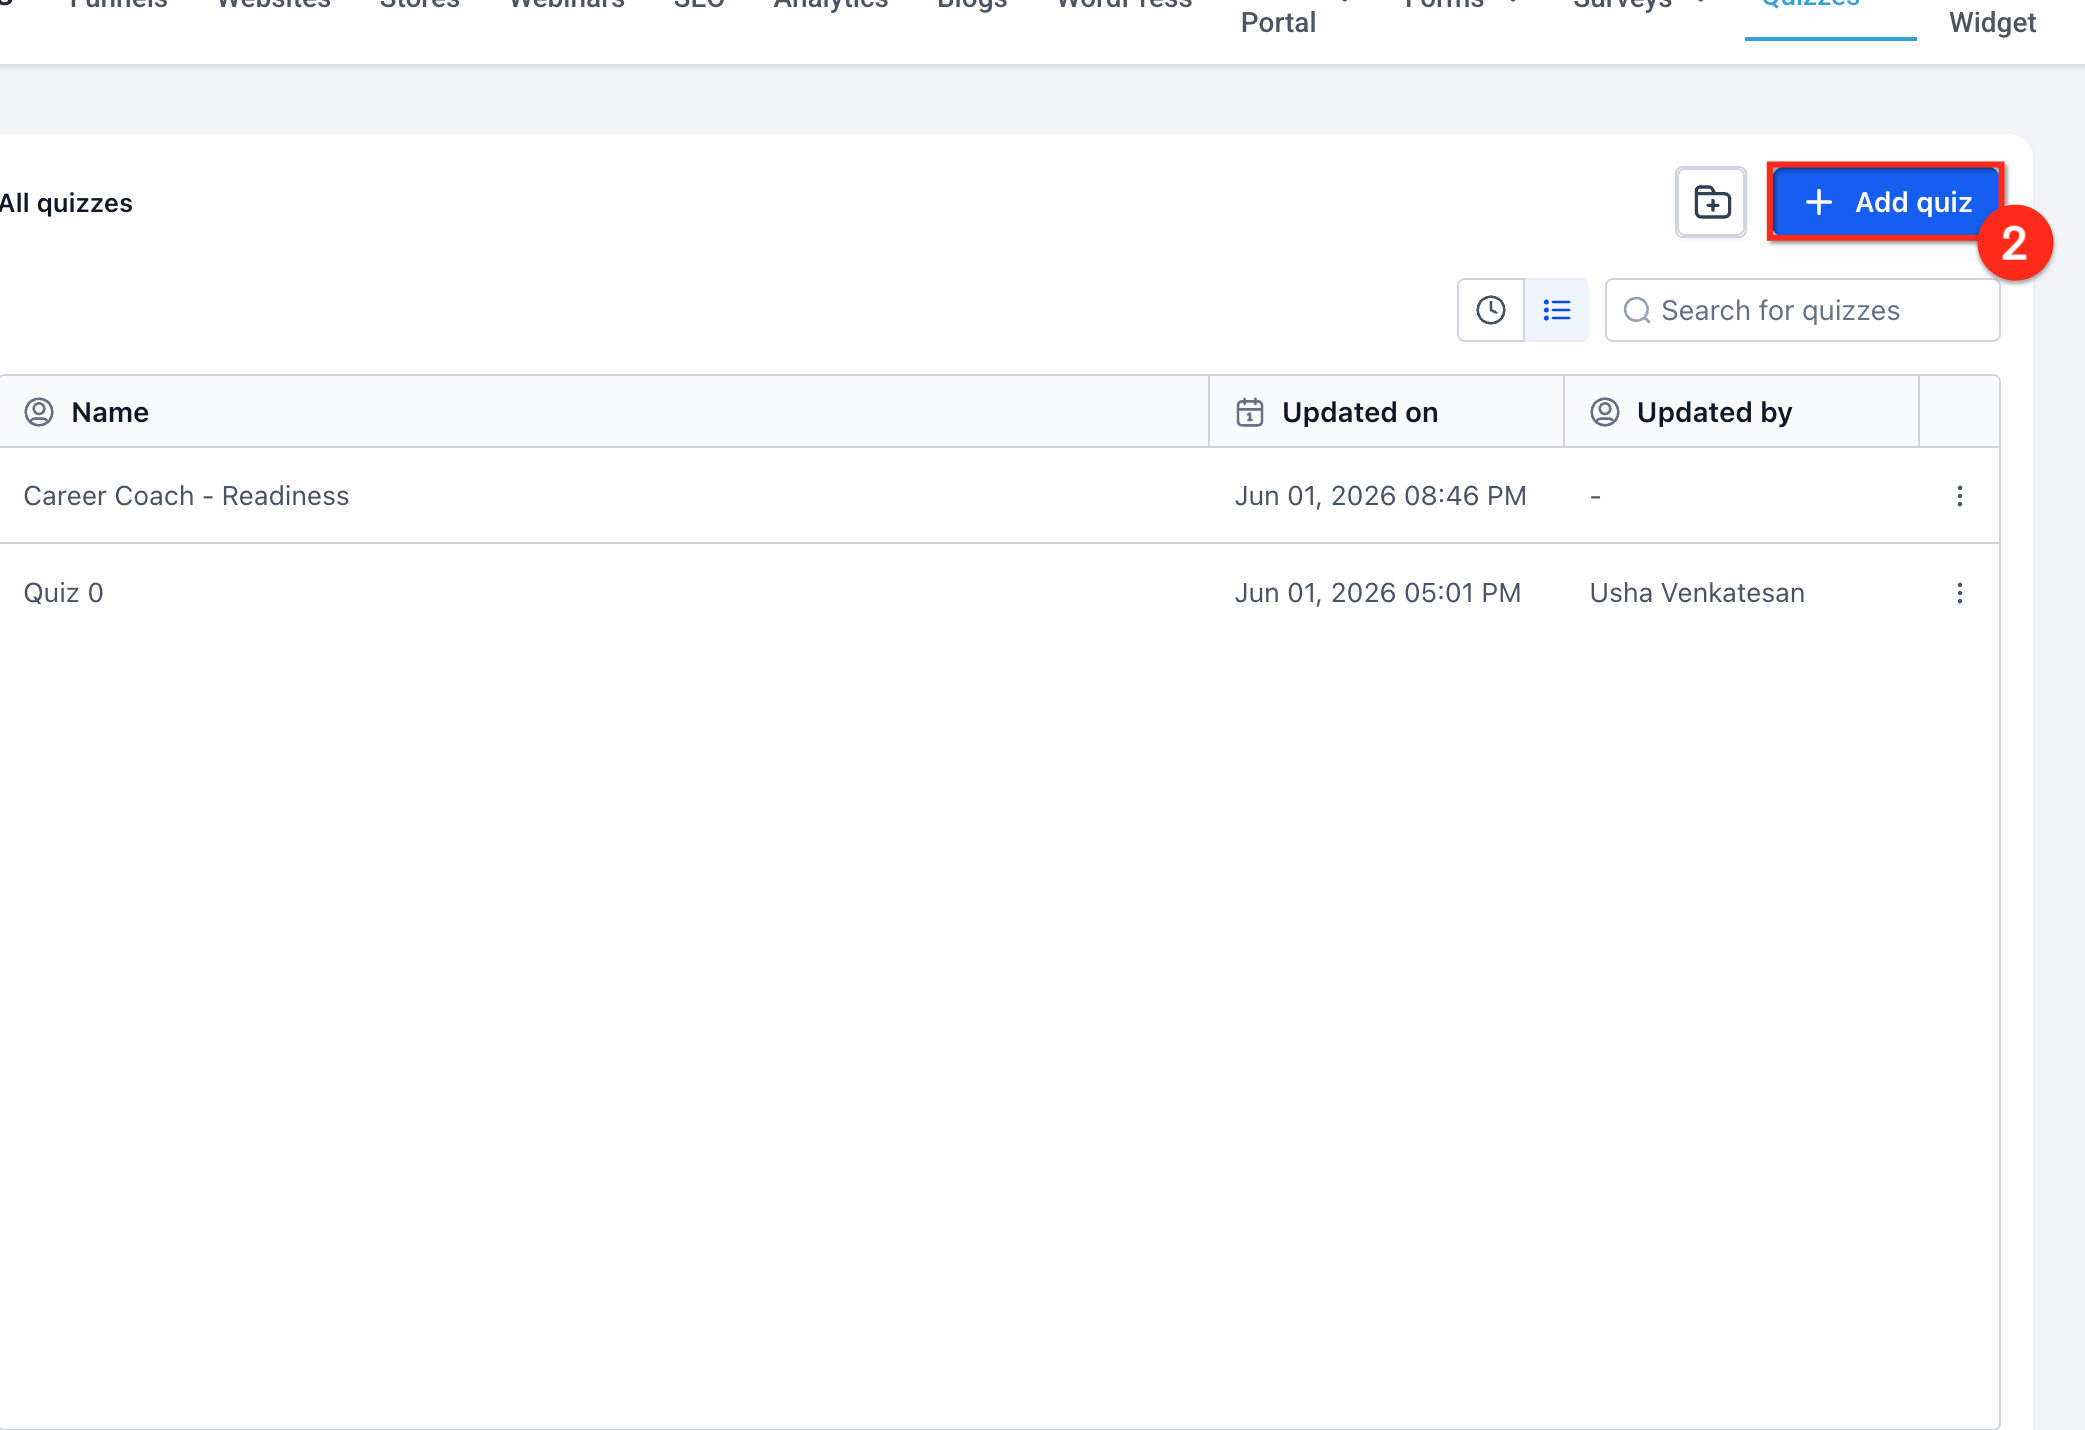
Log into your Aesthetix CRM account and go to Sites > Quizzes.
Select an existing quiz or click + New Quiz to create one.
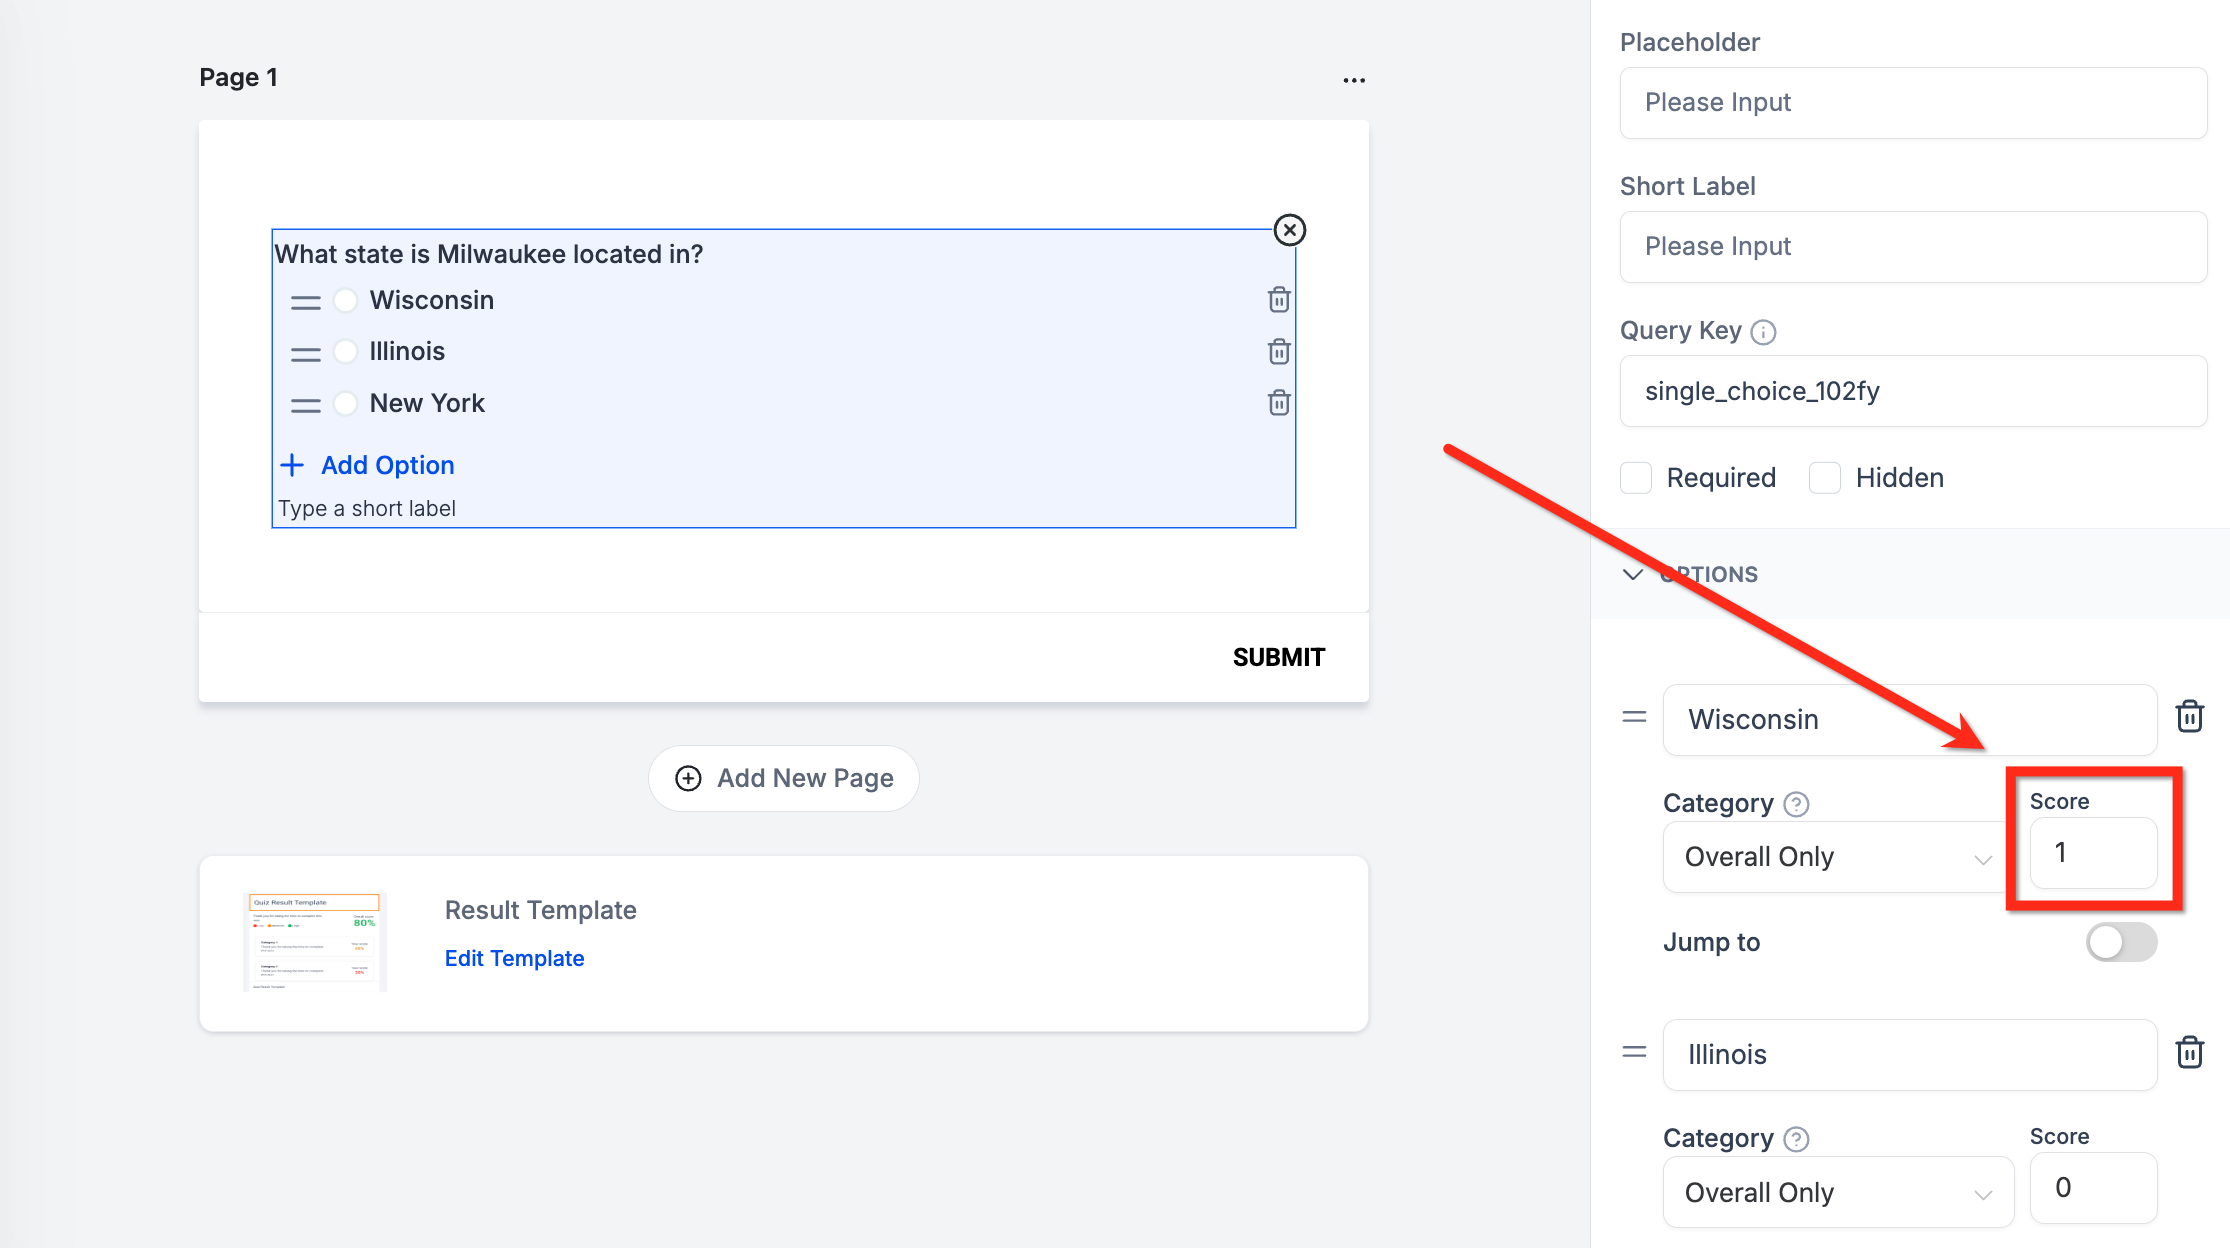
Click Add Question and choose a question type (Single Choice, Multiple Choice, Dropdown, etc.), then enter the question and its answer choices.
For each answer choice, assign a score value based on how much weight it should carry.
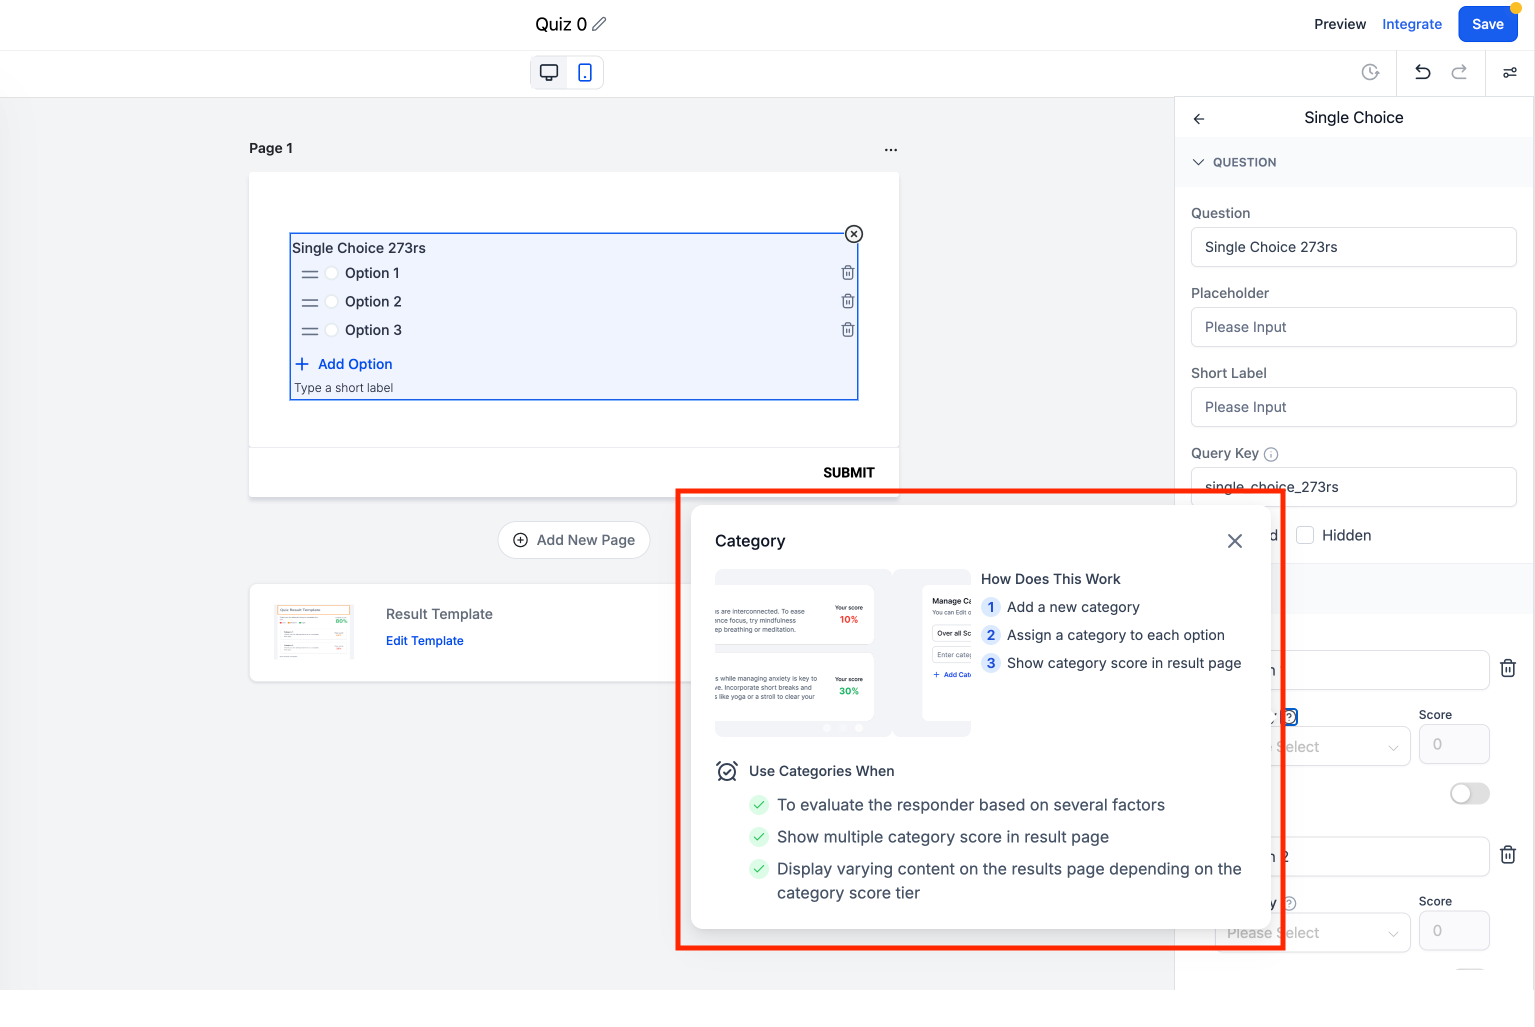
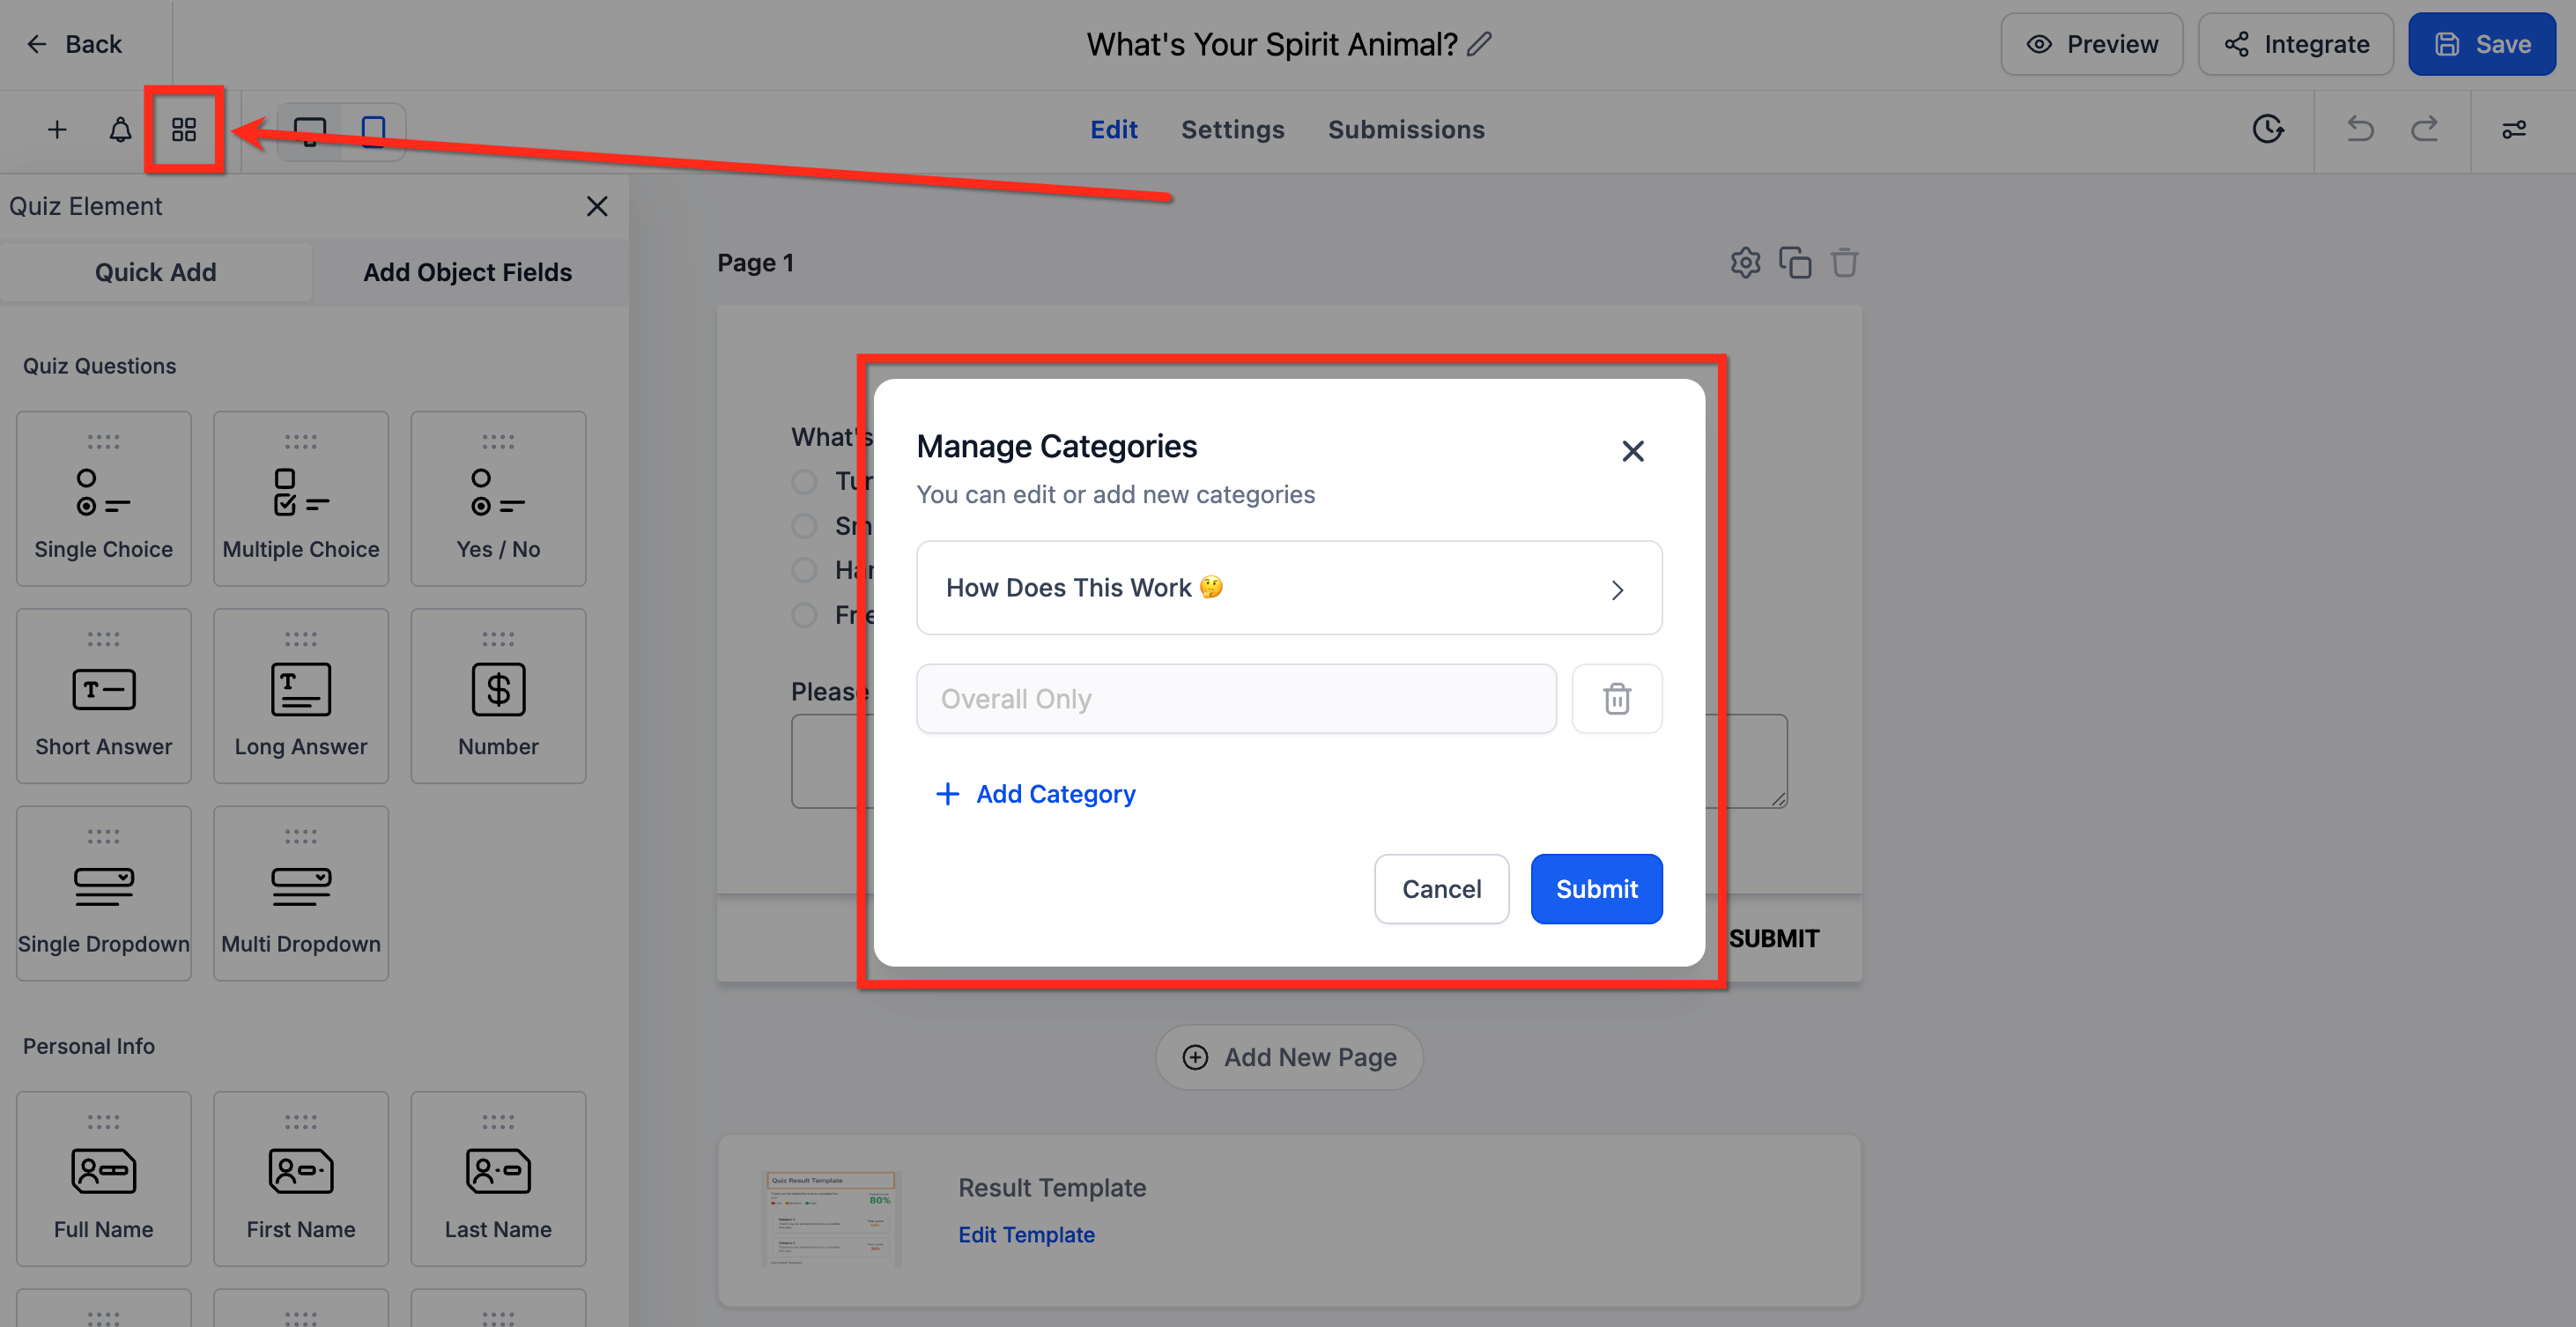
Create your score categories (for example, Hydration, Sensitivity, Aging Concerns, or whatever fits your assessment). When you create or edit a category, an in-product popover walks through how categories work, from setup to showing category scores on the result page. It's worth a quick read while you build.
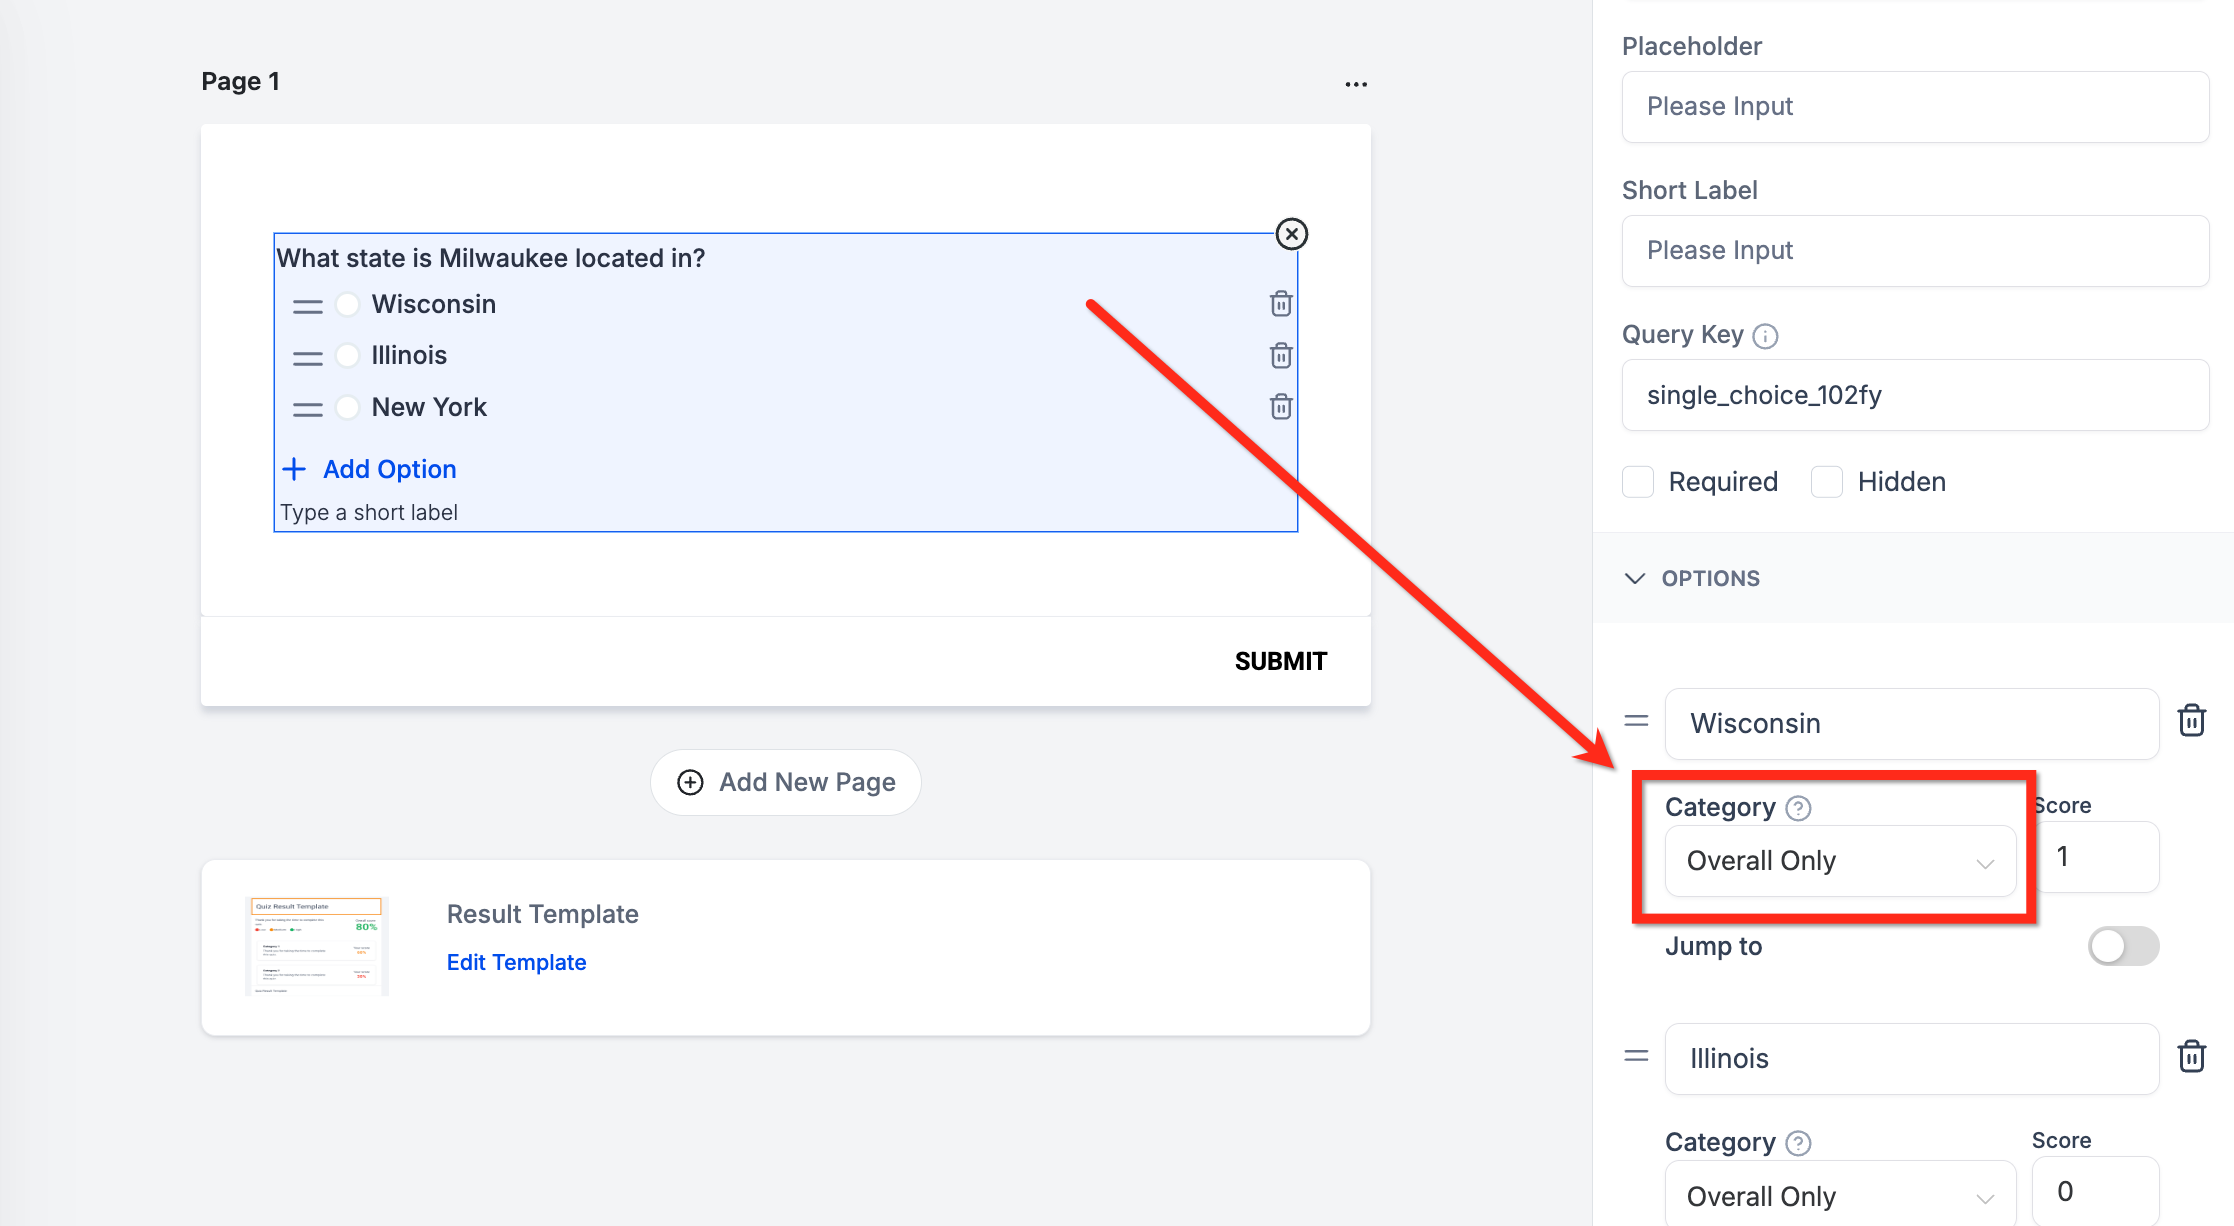
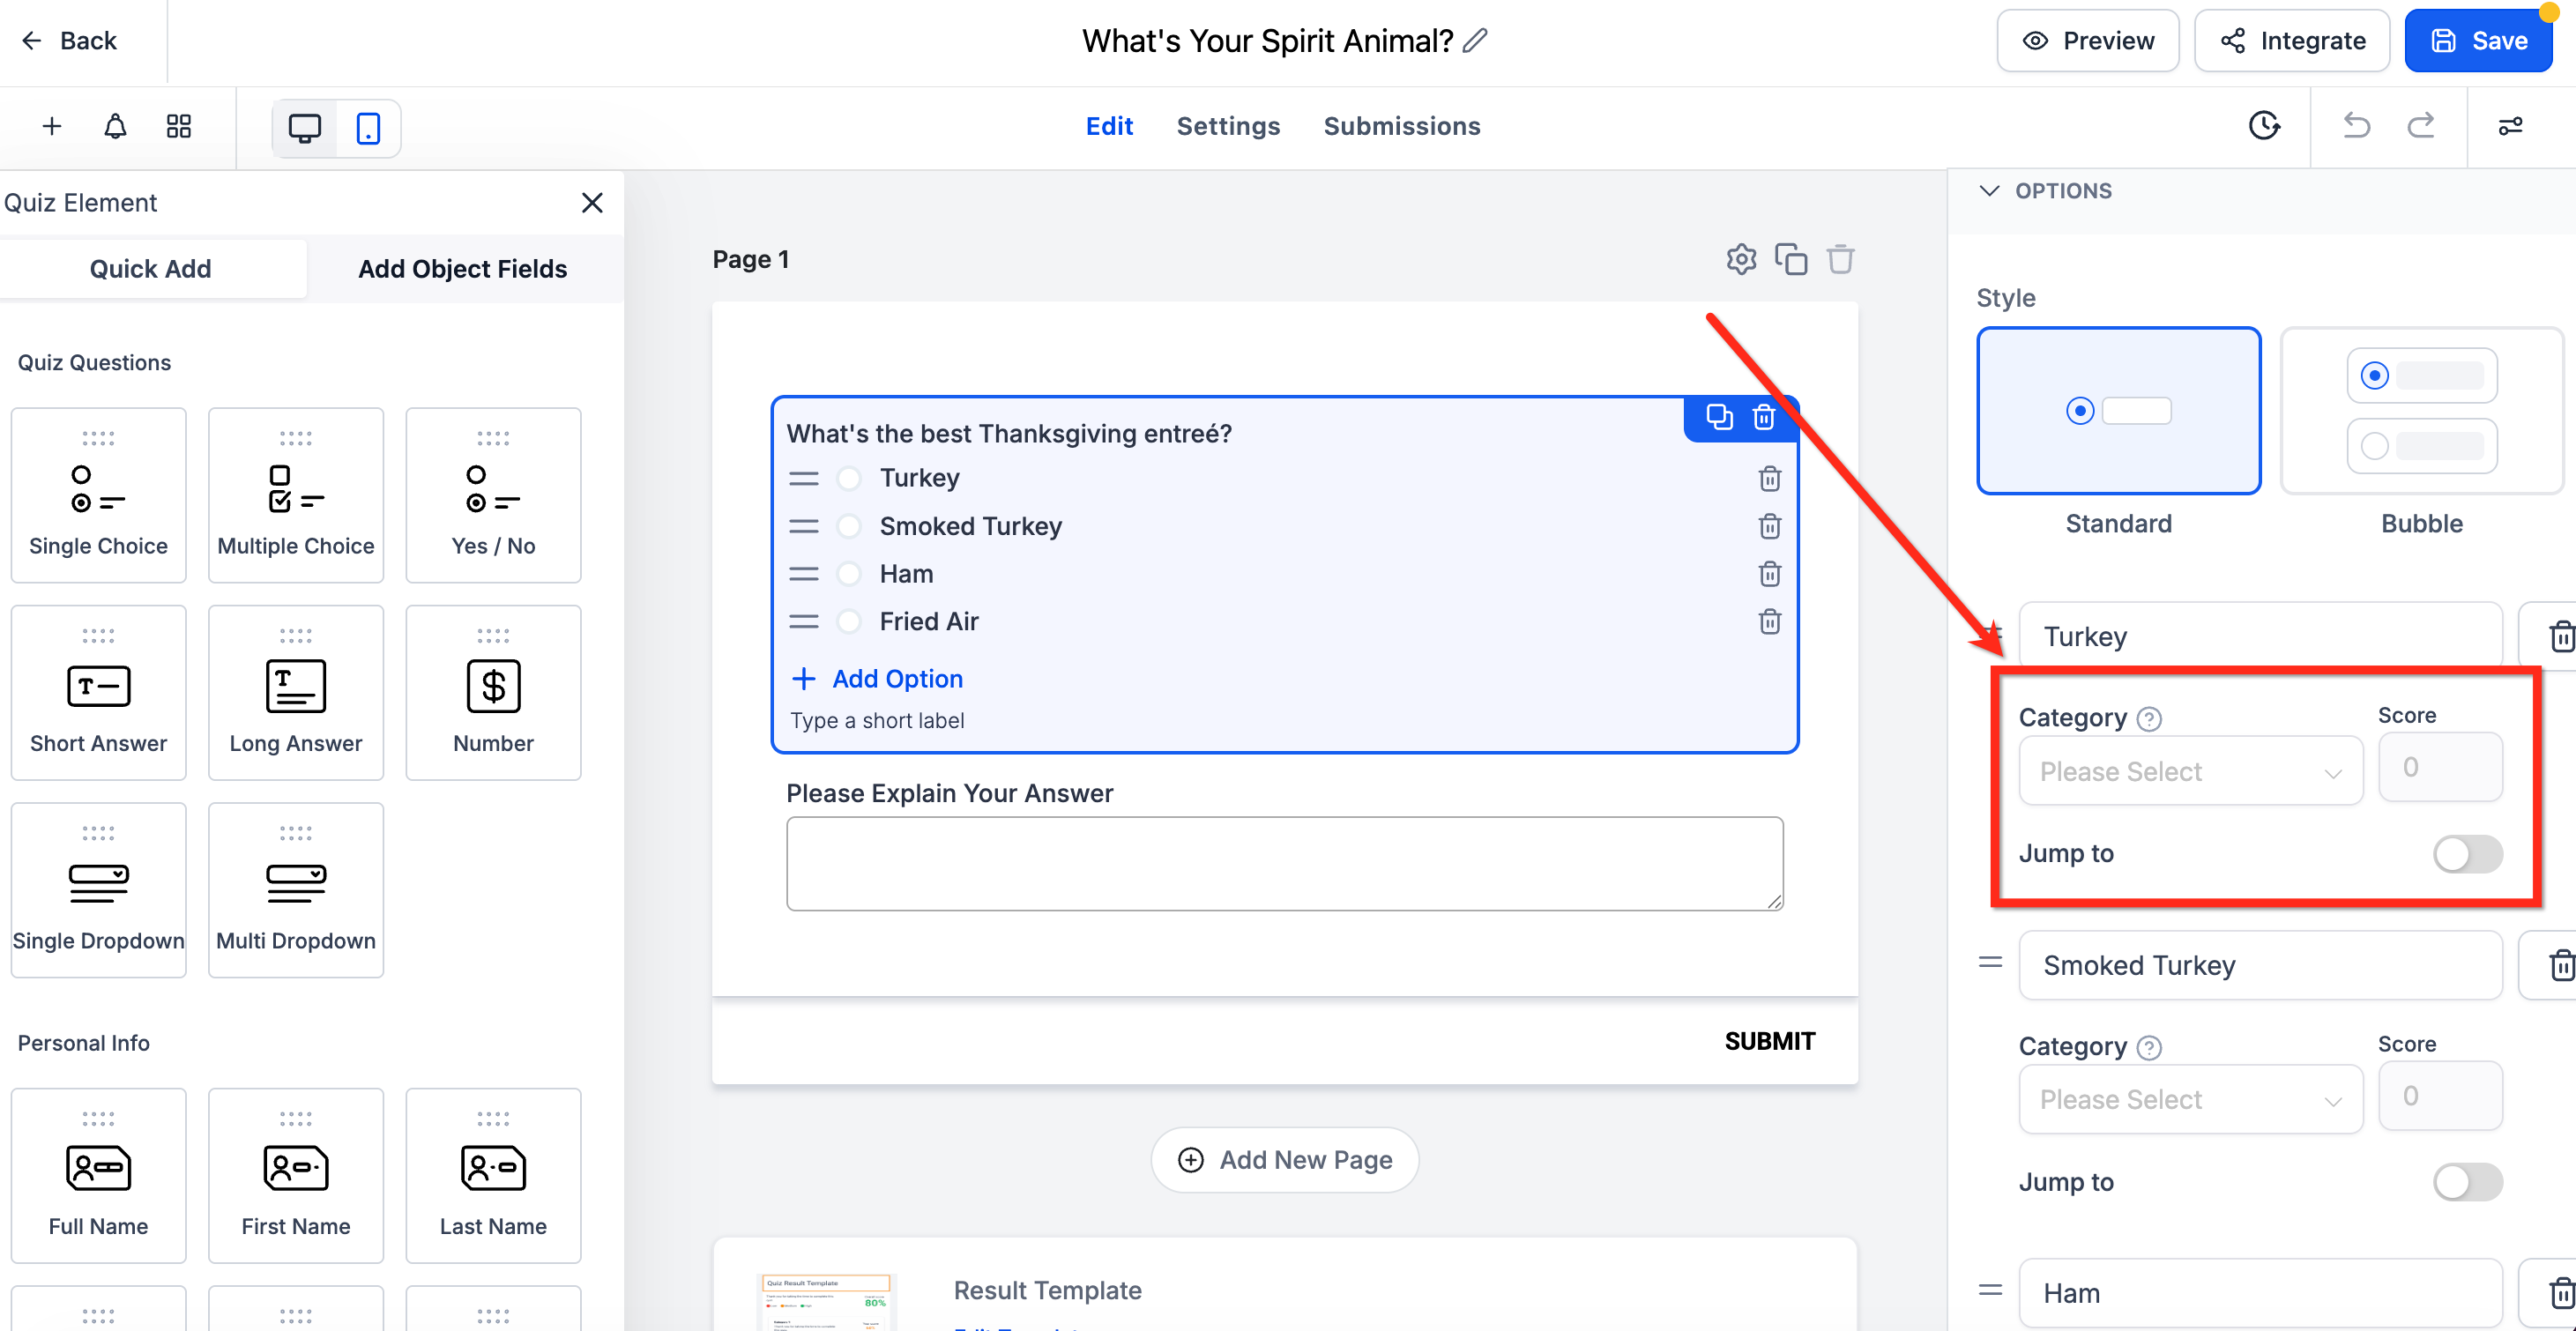
Assign a score to each answer, then assign that answer to the relevant category:
For Single Choice/Dropdown questions, assign a fixed score per answer.
For Multiple Choice/Multi Dropdown questions, assign a score per option; selected scores add up if a patient picks more than one.
If an answer applies to more than one category, select all that apply.
Click Save Quiz, then use Preview to run through the quiz yourself and confirm the scores calculate the way you expect.
Score tiers group results into labeled brackets, such as Low, Medium, and High, so every quiz result maps to a consistent range. Tiers make it possible to trigger different messages, CTAs, and automations depending on where a patient's score lands.
Each tier has four parts:
Color: Helps you visually identify the tier (red for low, yellow/orange for mid, green for high, for example).
Label: A name for the tier, such as "Needs a Consult," "On Track," or "Ready to Book."
From %: The minimum percentage for that tier.
To %: The maximum percentage for that tier.
The overall score range (0% to 100%) is fixed. You can only adjust how that range is divided into tiers, not expand or shrink it, and ranges should not overlap. Instead of 0-40, 40-80, 80-100, use clean boundaries like 0-39, 40-79, 80-100.
Example:
Tier Label | From % | To % |
|---|---|---|
Needs a Consult | 0 | 39 |
On Track | 40 | 79 |
Ready to Book | 80 | 100 |
If a patient's overall score comes out to 85%, they fall in the "Ready to Book" tier, and the result page can display a message like "Your score of 85% puts you in the Ready to Book range, let's get you scheduled."
Don't reuse category names as tier names. If a quiz category is "Hydration," don't also name a tier "Hydration." Tier names should describe a level of outcome (Beginner, Intermediate, Advanced), while category names describe a topic (Hydration, Sensitivity).
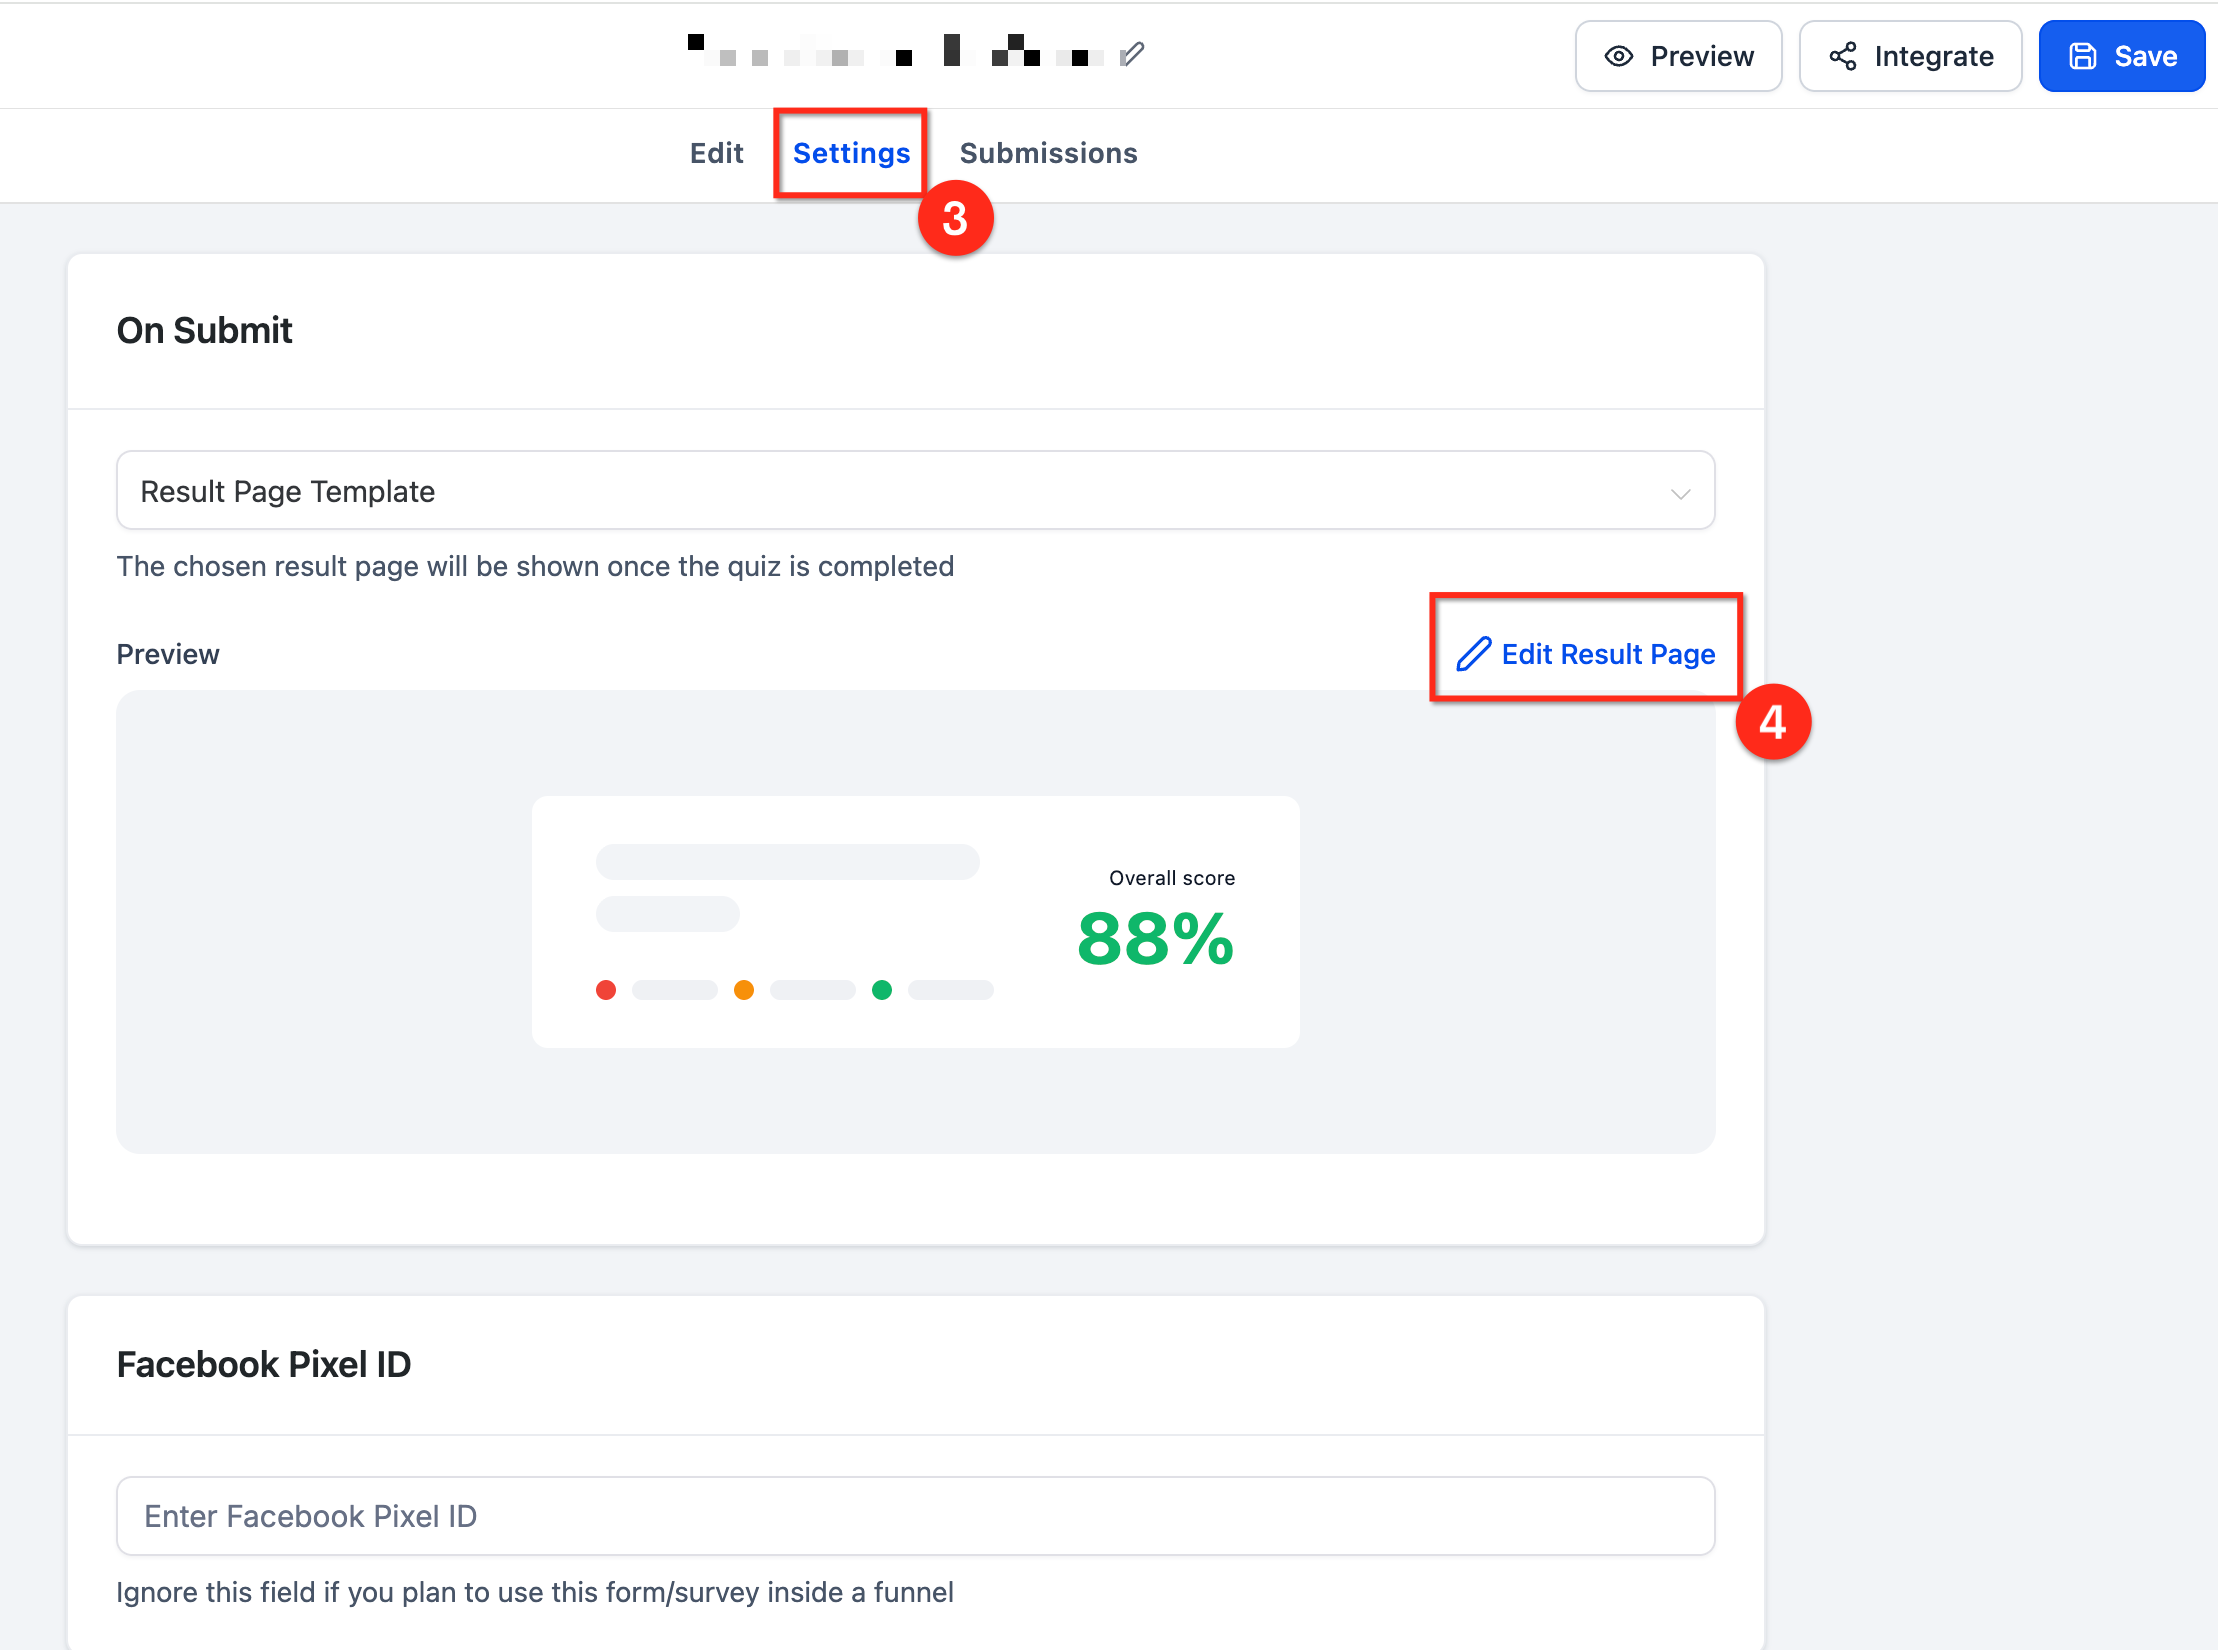
Open your quiz and go to the Result Page editor.
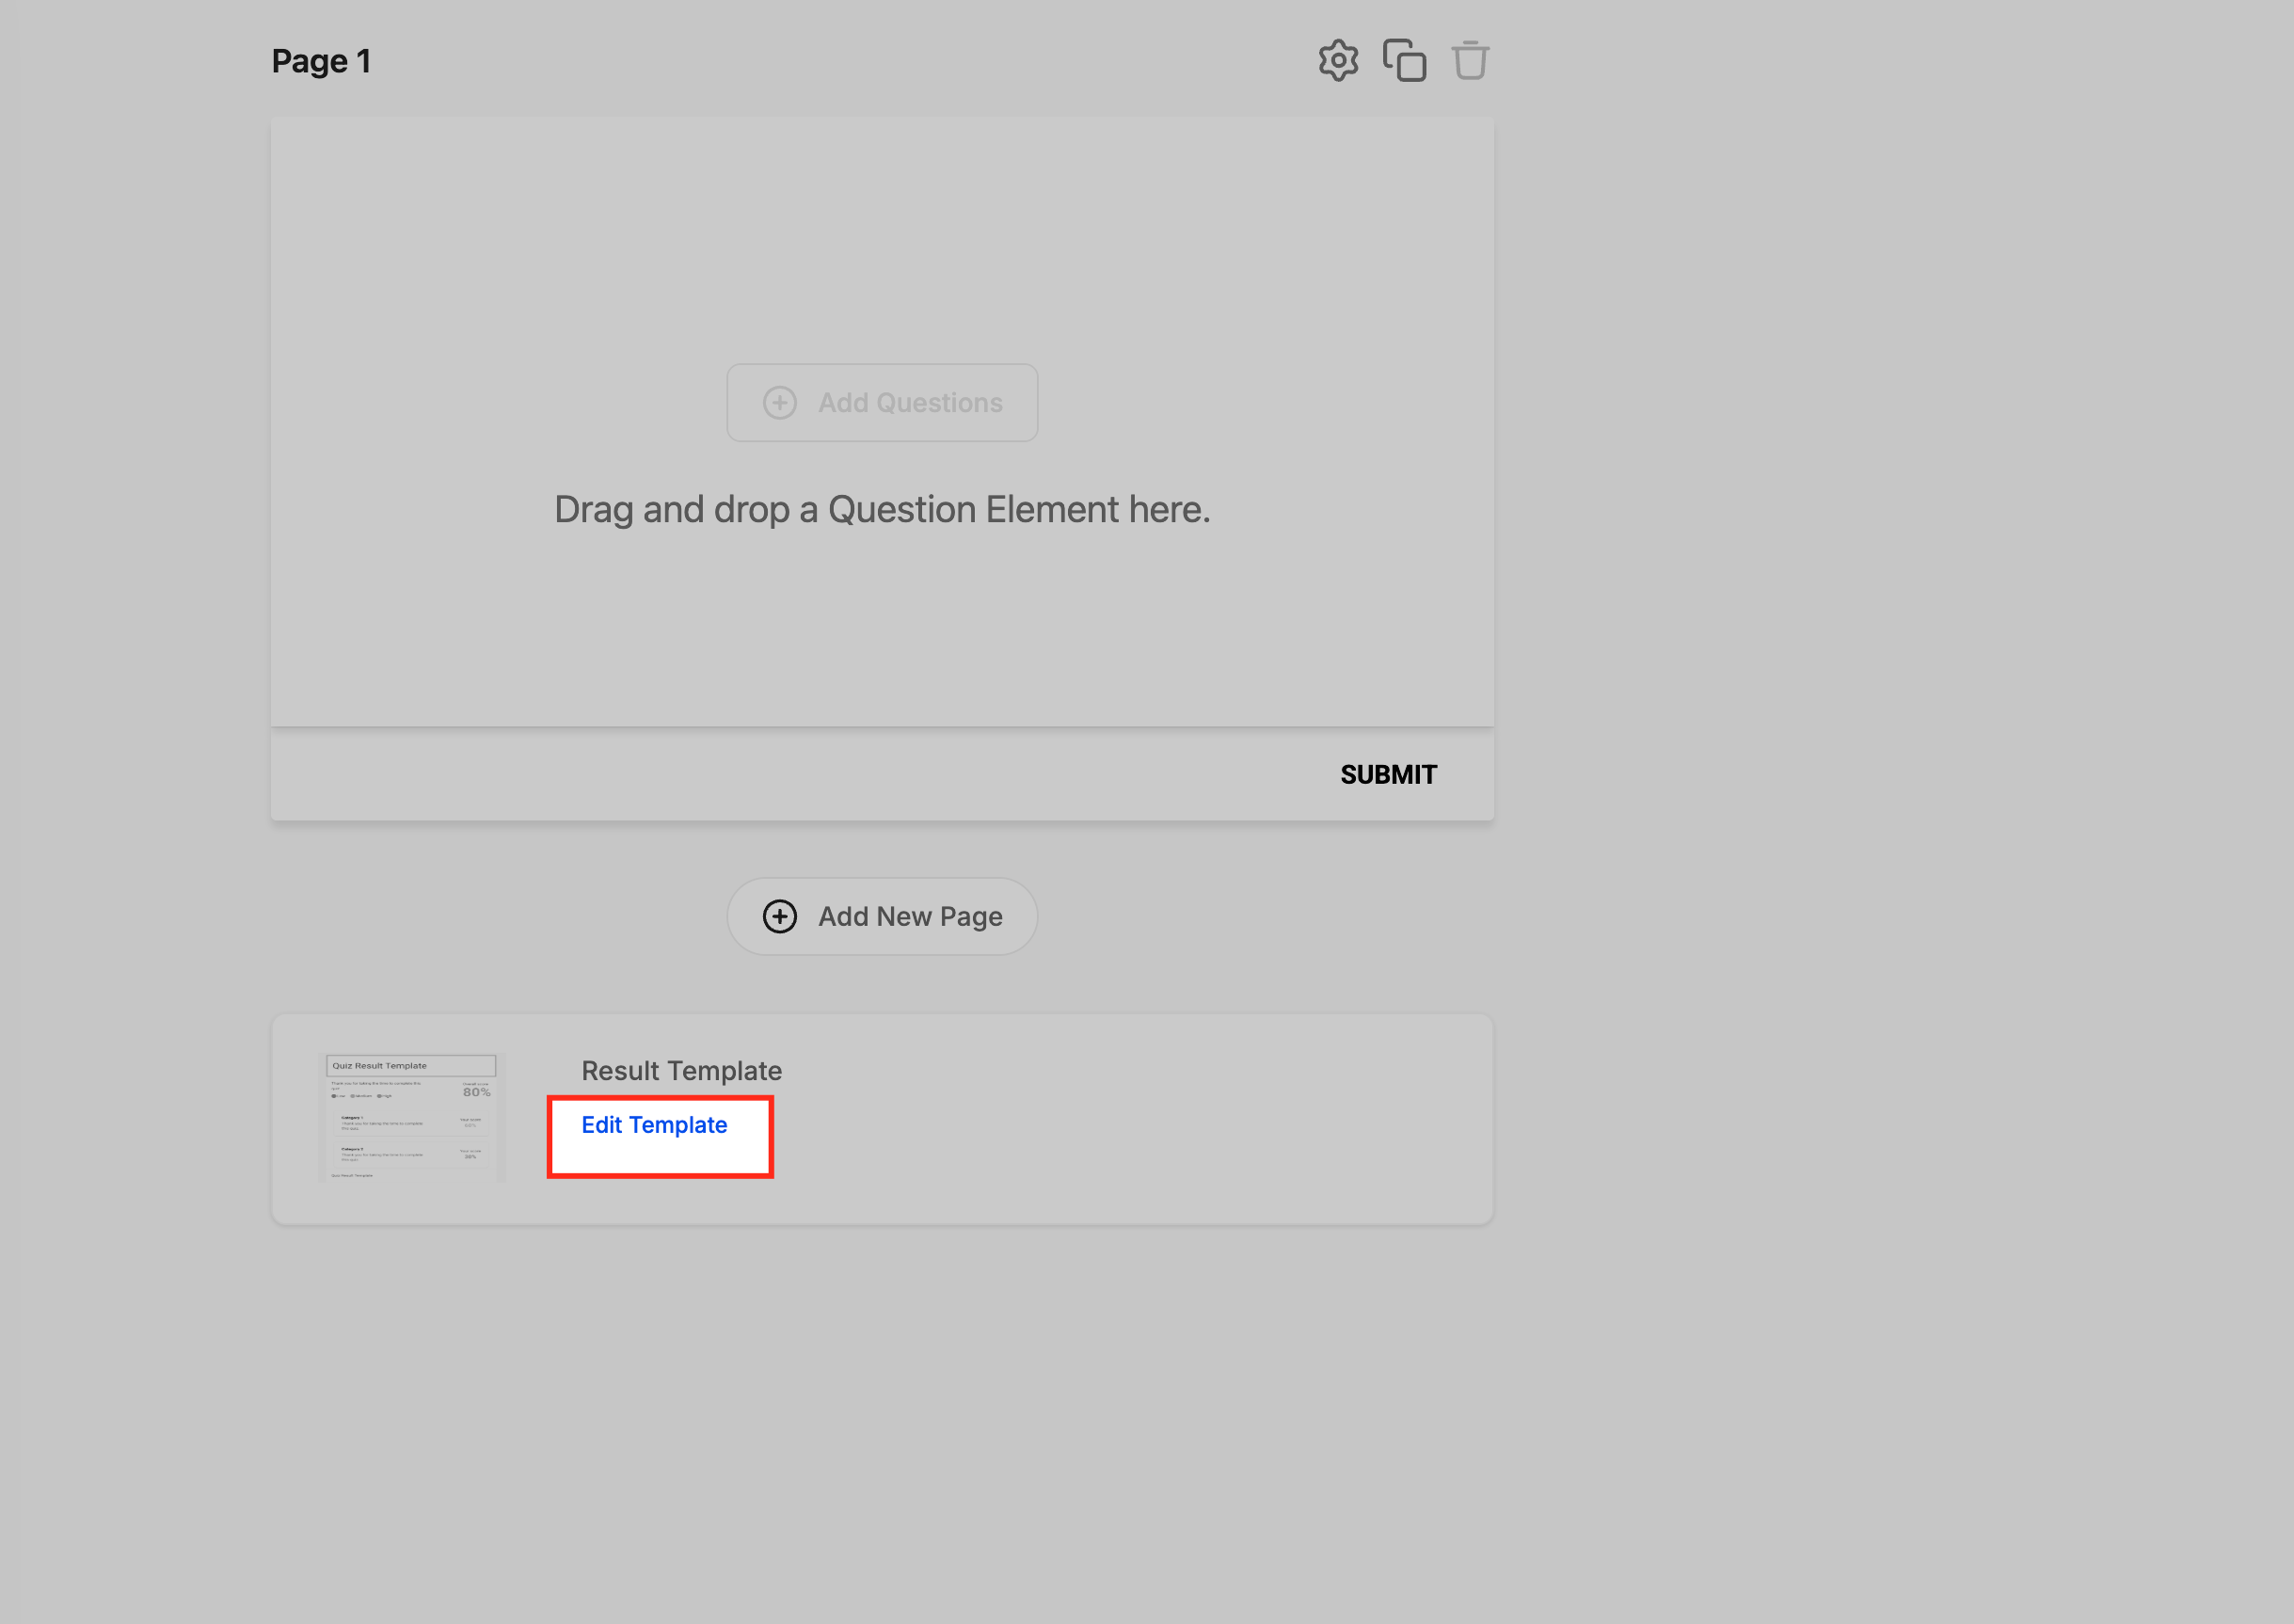
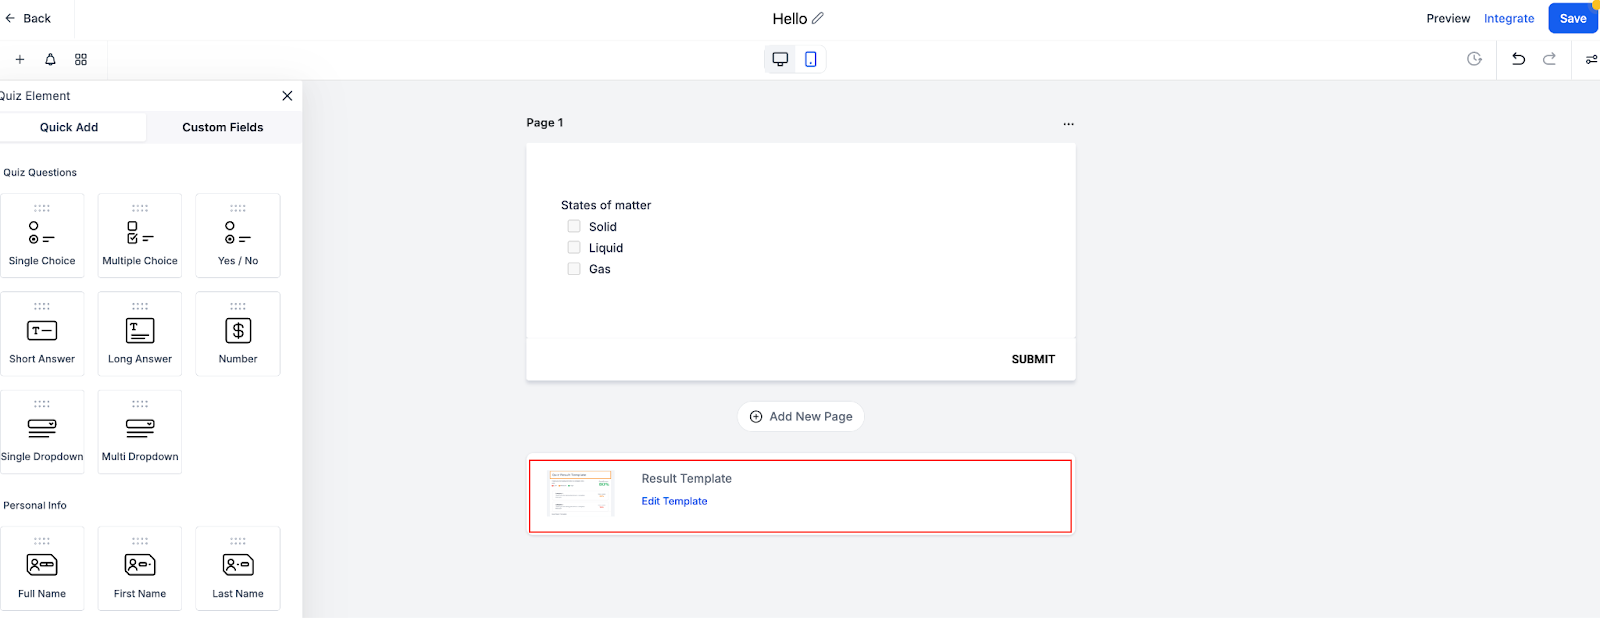
Locate the Result Template card at the bottom of the quiz builder and click Edit Template to open the Result Page customization view.
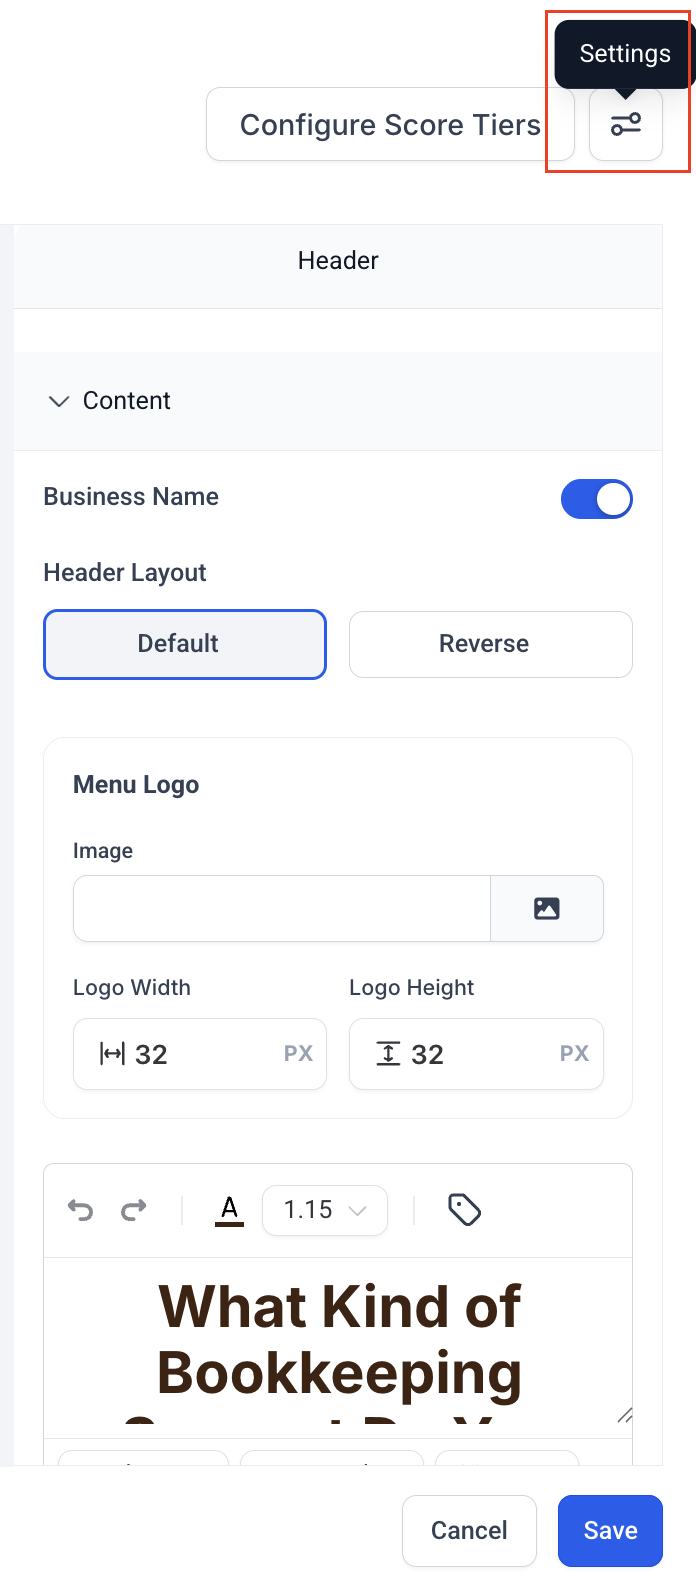
Click Configure Score Tiers in the top-right of the result page editor.
Set a color, label, and From/To percentage for each tier. Every range must fall between 0 and 100.
Click Save to apply the tiers globally to that quiz.
Tiers apply the same normalized 0-100 scoring scale across the whole quiz, so results, reporting, and automations stay consistent even as you add or remove questions later. Deleting a tier only affects future submissions; historical results stay intact.
If you want to store or act on a patient's score tier, turn on the related custom fields in the Result Page's Settings section:
Overall Score
Overall Score Tier
Category-Specific Score
Category-Specific Tier (for example, "Hydration Score Tier")
Once those fields are populated, they're available on the contact record, so you can use them in Workflows to branch follow-up by tier ("Ready to Book" gets a booking link, "Needs a Consult" gets a call from the front desk) or in email and SMS personalization. Quiz submission automation itself, including the Quiz Submitted trigger, lives in Workflows: build the quiz here, then build the follow-up sequence there.
Common uses for tiers and category tags:
Use Case | How It Helps |
|---|---|
Personalized recommendations | Show a different message or CTA depending on skin type, concern, or readiness level. |
Patient segmentation | Automatically tag patients by tier so follow-up messaging matches their result. |
Nurture campaigns | Send tier-based emails or texts using the stored custom fields. |
Progress tracking | Compare stored scores across multiple quiz attempts over time. |
Beyond tiers, you can show a different written message for each score range directly in the Overall Score or Category Score section of the result page.
Go to the Result Page in the quiz builder.
Define your score ranges (for example, Low: 0-40%, Medium: 41-70%, High: 71-100%).
Add a custom message for each range.
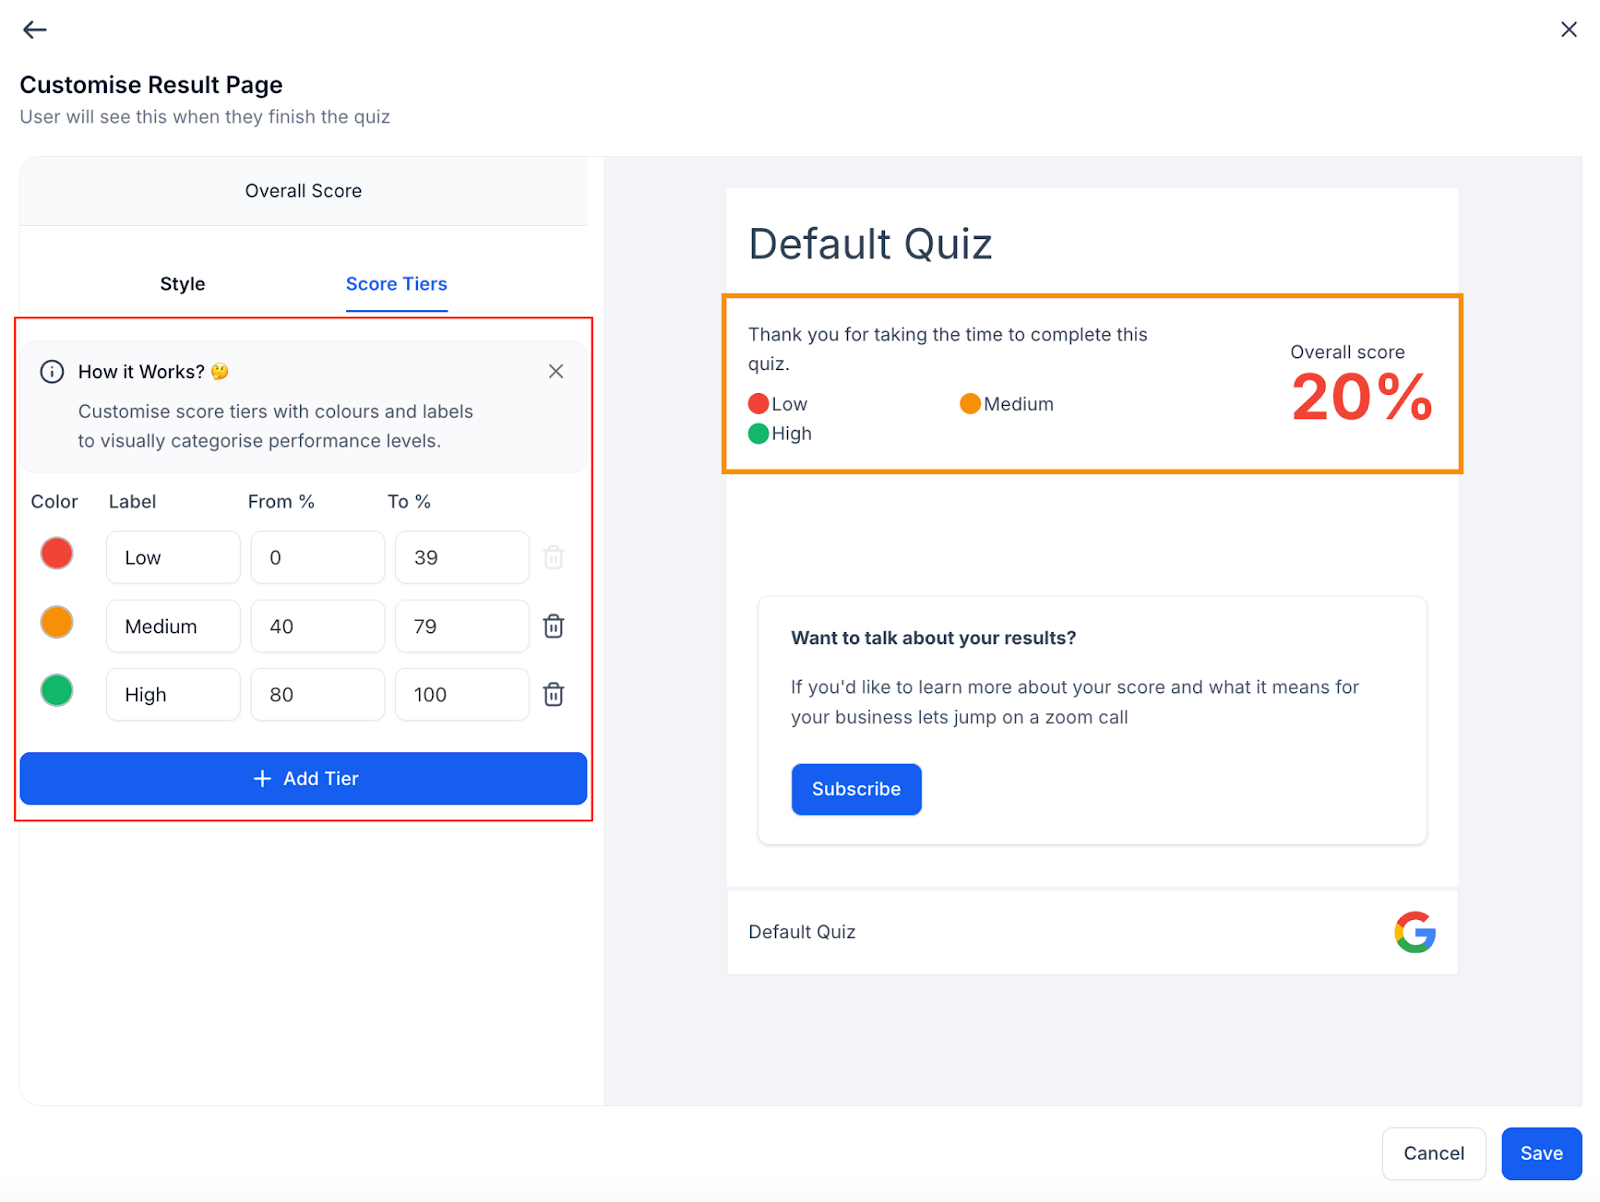
Optionally add a CTA, such as subscribe, book a call, or redirect to a funnel page.
Examples:
Low: "There's room for improvement here. Let's explore how we can help."
Medium: "You're on the right track. Here's how to optimize further."
High: "Awesome, you nailed this. Let's talk about next steps."
Best practices for dynamic messages:
Double-check category assignments if totals don't add up the way you expect.
Remember that "Overall Only" answers never affect a category score.
Always preview the quiz to confirm scoring and messaging before you publish.
Personality-style quizzes group questions into categories (styles, skin types, treatment paths) and, once submitted, highlight a single outcome: usually the category with the highest score, or the lowest if you want to flag a gap (for example, "your biggest skincare gap right now"). That outcome displays in the Individual Category section of the result page, where you can show the category name, its score, and a short explanation.
This approach is useful for:
Clear outcomes: One category is highlighted as the patient's "type," which is easy to interpret at a glance.
Deeper personalization: Custom fields and dynamic values let you segment results or show personalized content on the result page.
Richer storytelling: The rich text editor supports headings, lists, and links for a polished result write-up.
Automation-ready results: Pair results with Workflows to branch follow-up by category.
Higher engagement: Add images, explainer videos, and CTA buttons directly inside the result page.
Open a quiz, or create a new one, from Sites > Quizzes.
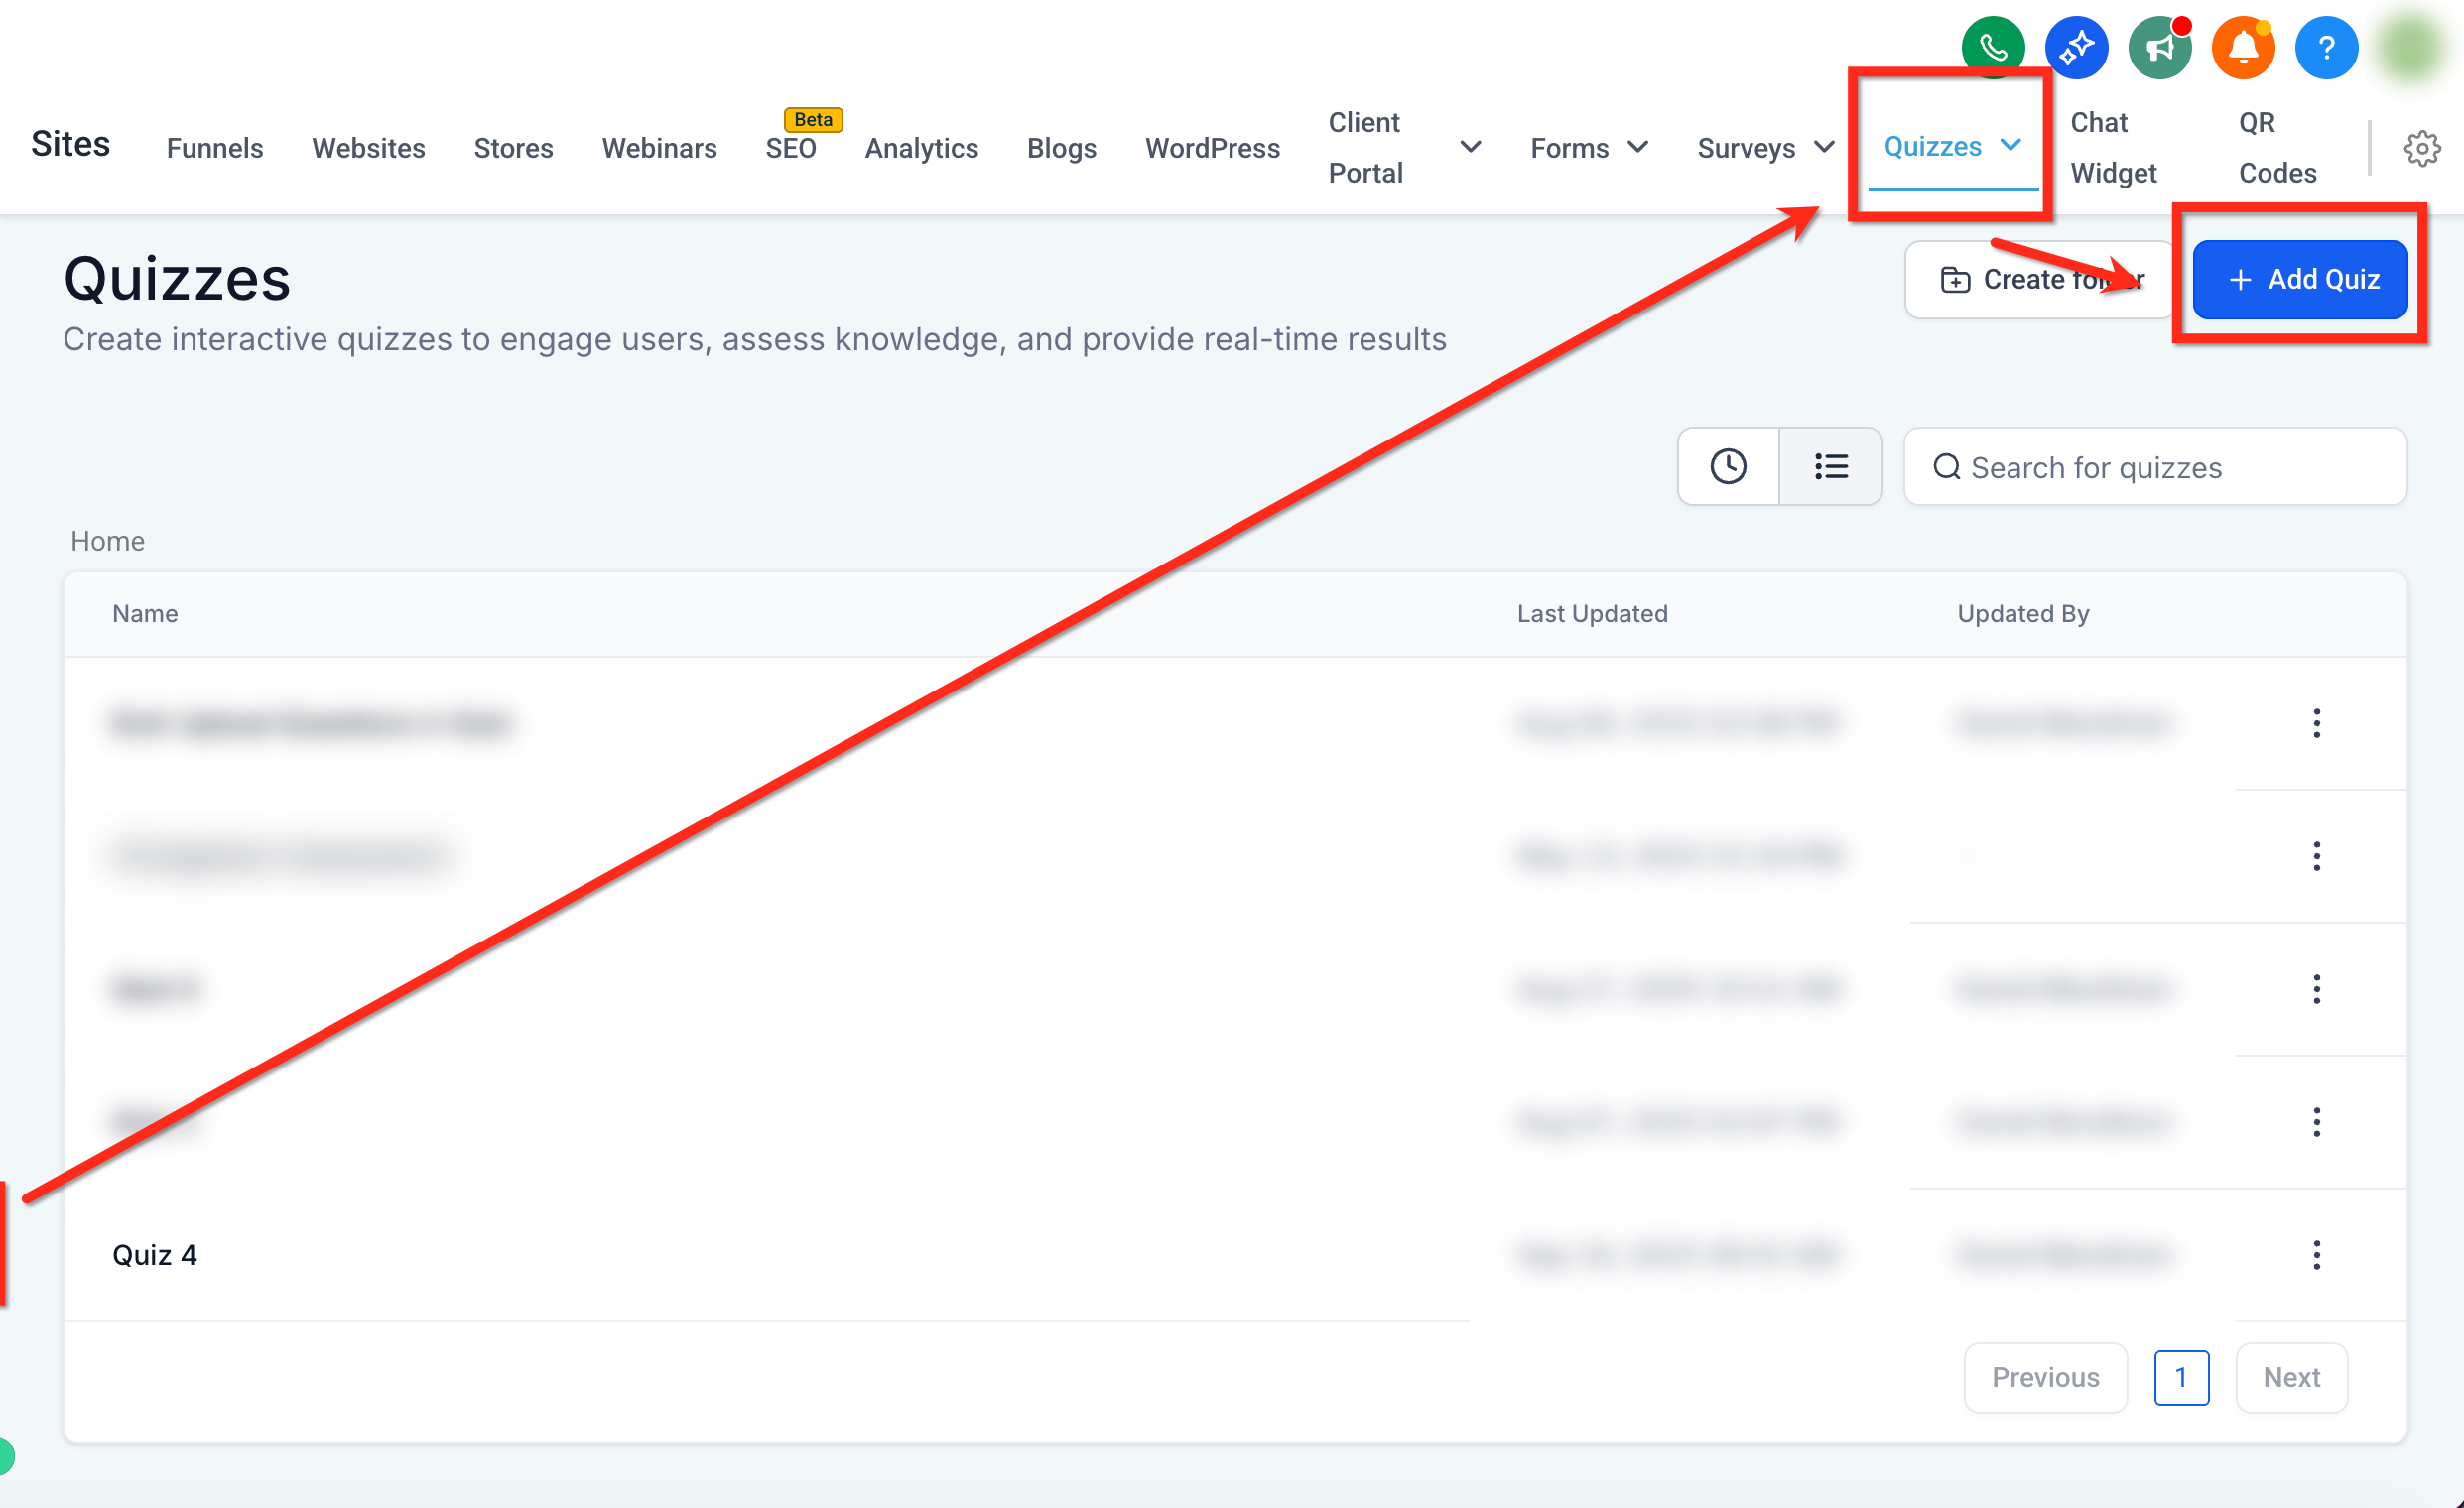
Click Manage Categories in the top-left of the builder and add your categories (skin types, treatment paths, personality styles, whatever fits your assessment).
In the quiz builder, open a question and use the Options panel on the right. Under each answer, assign a category and a score.
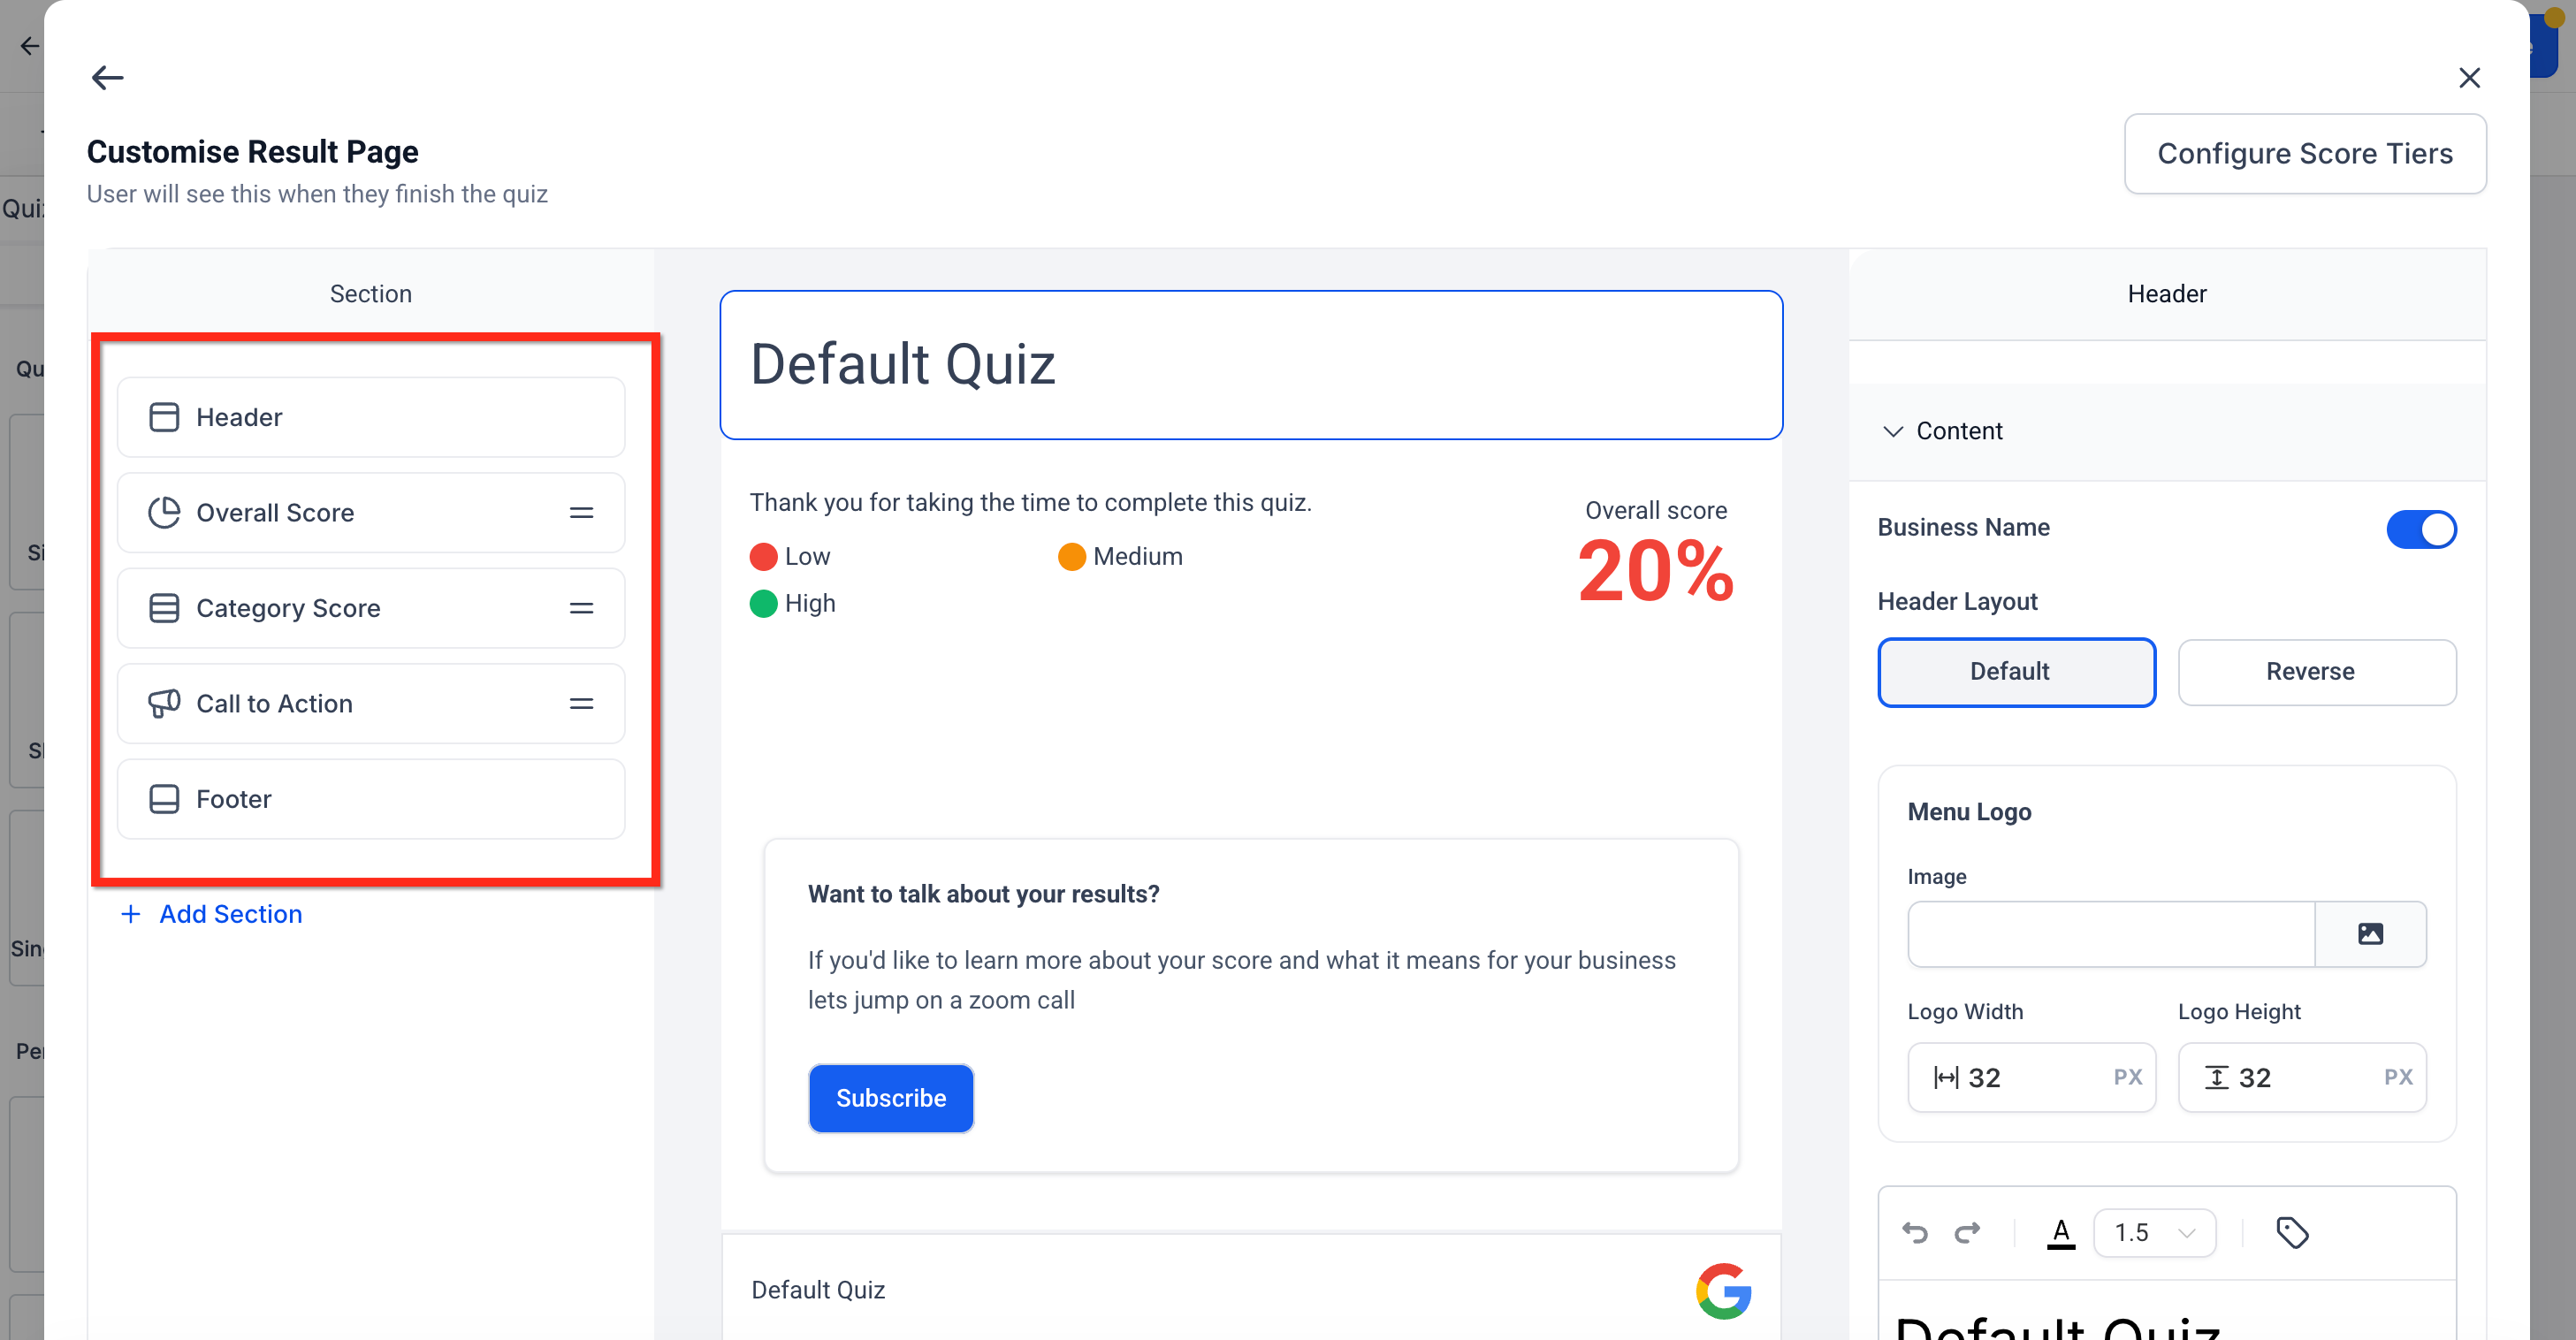
Move to the Result Page editor and build out the sections patients will see: Header, Overall Score, Category Score, Individual Category, Call to Action, and Footer (each is covered in detail below).
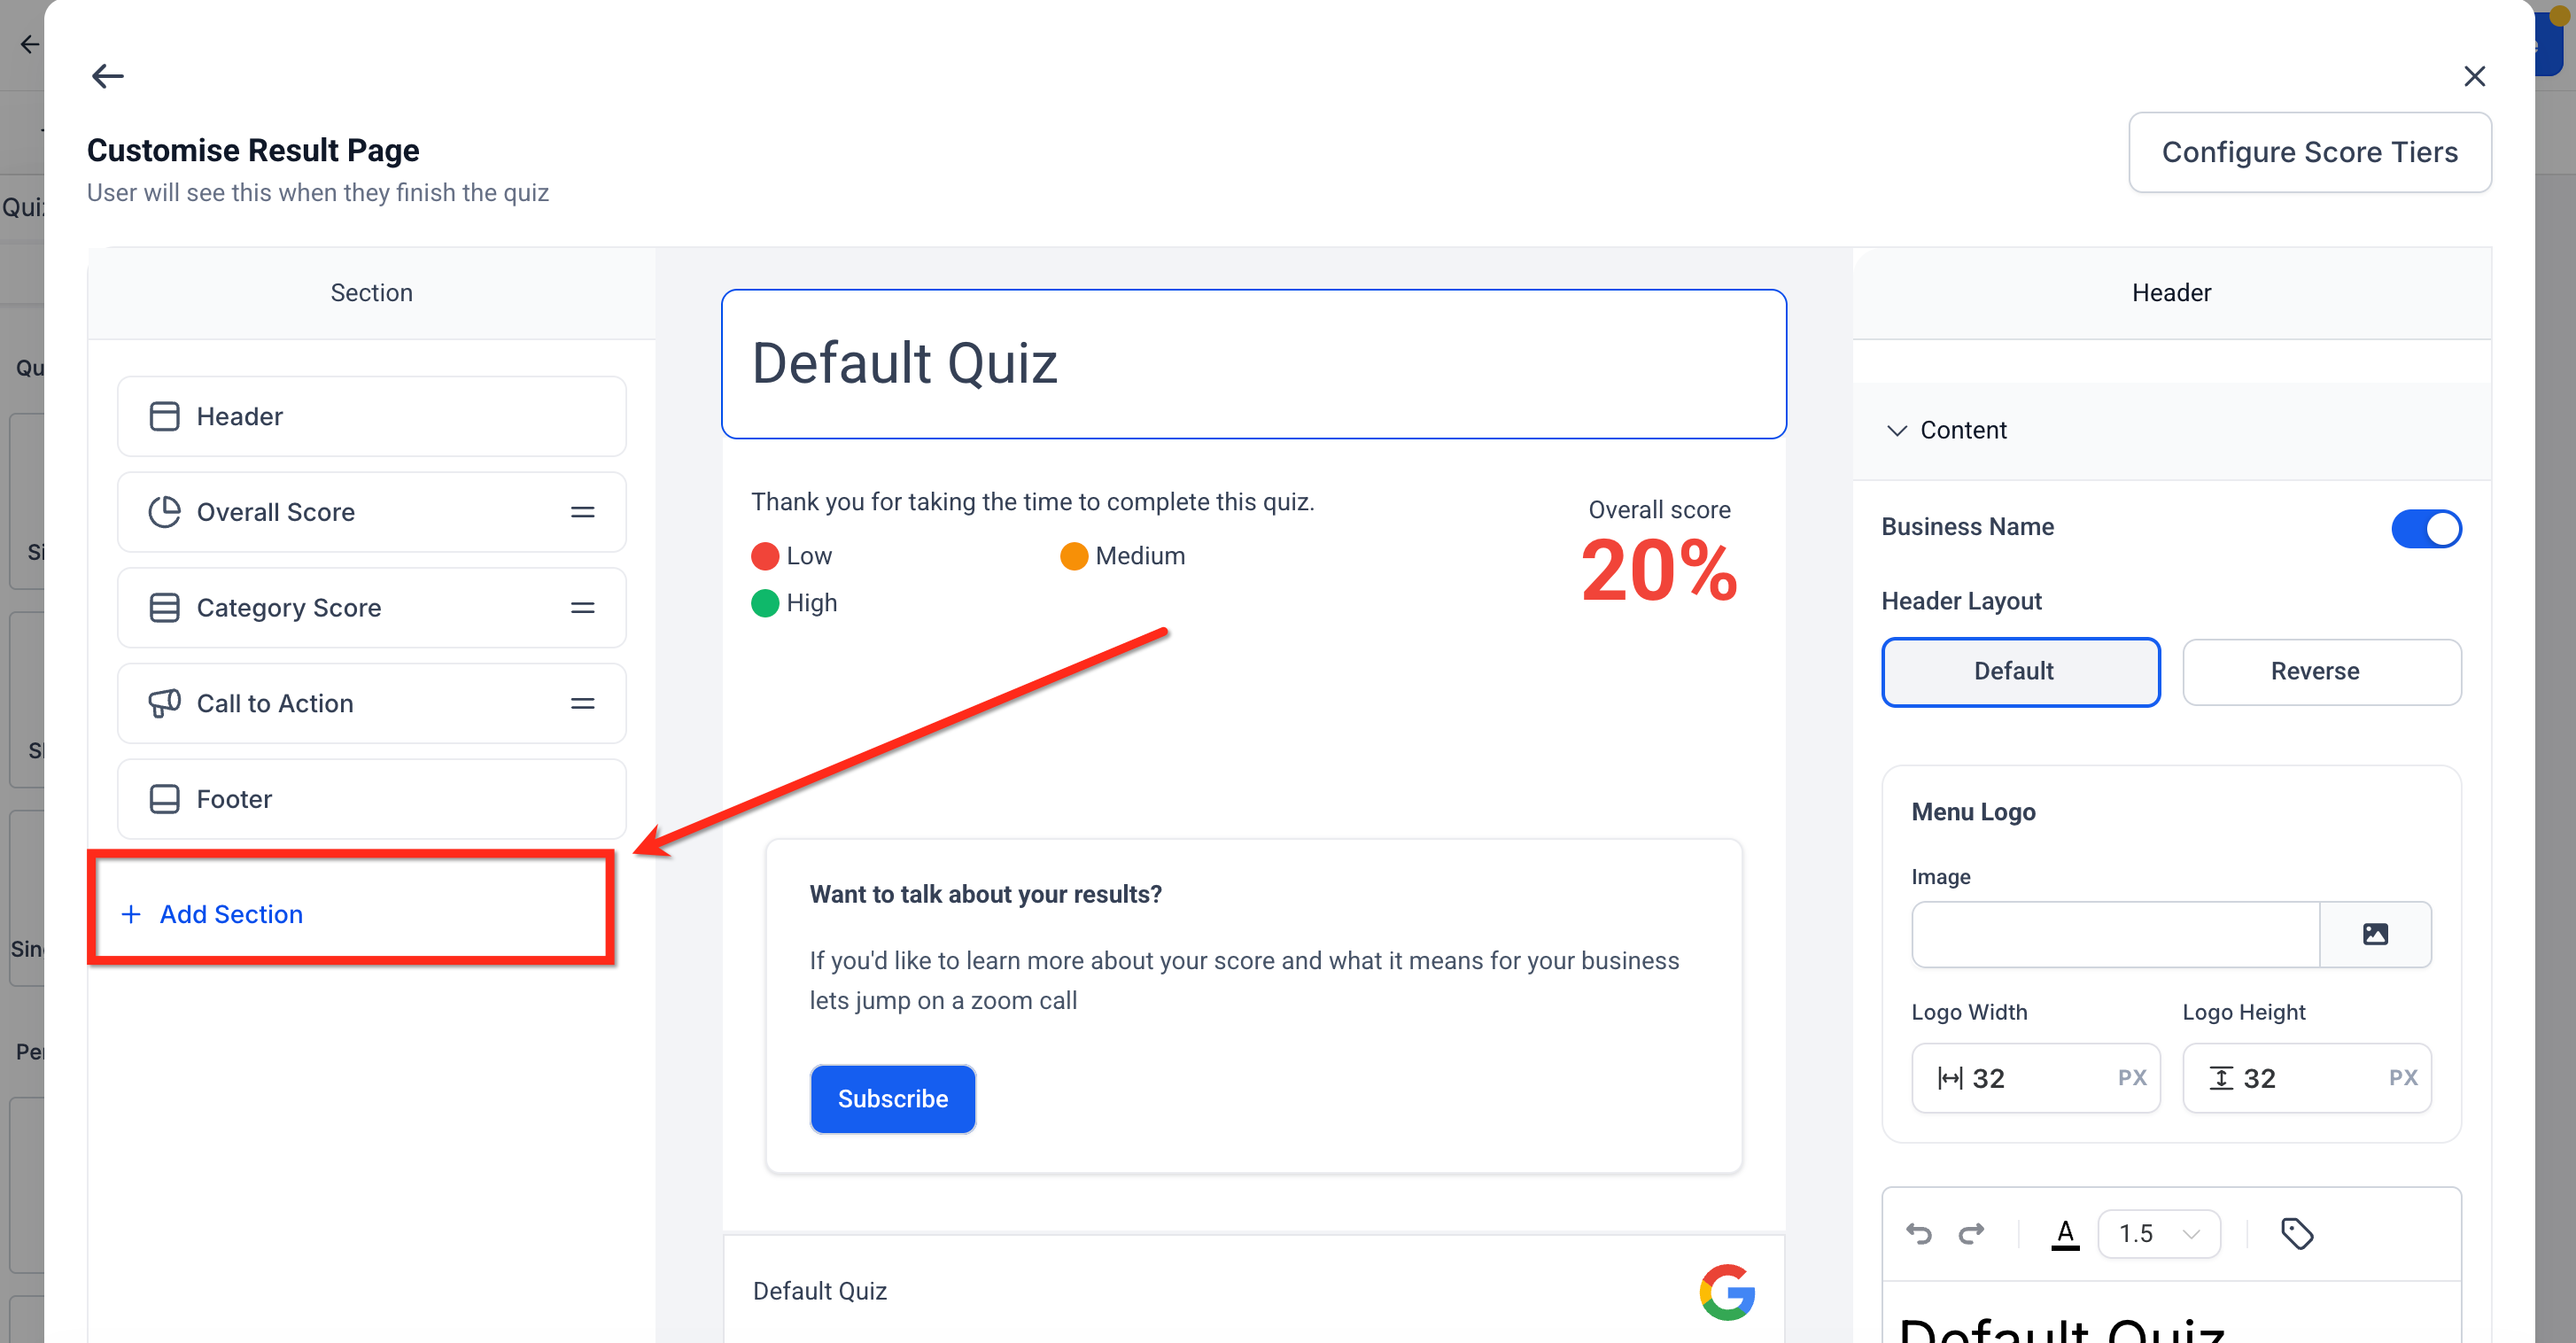
On the Result Page, click + Add Section.
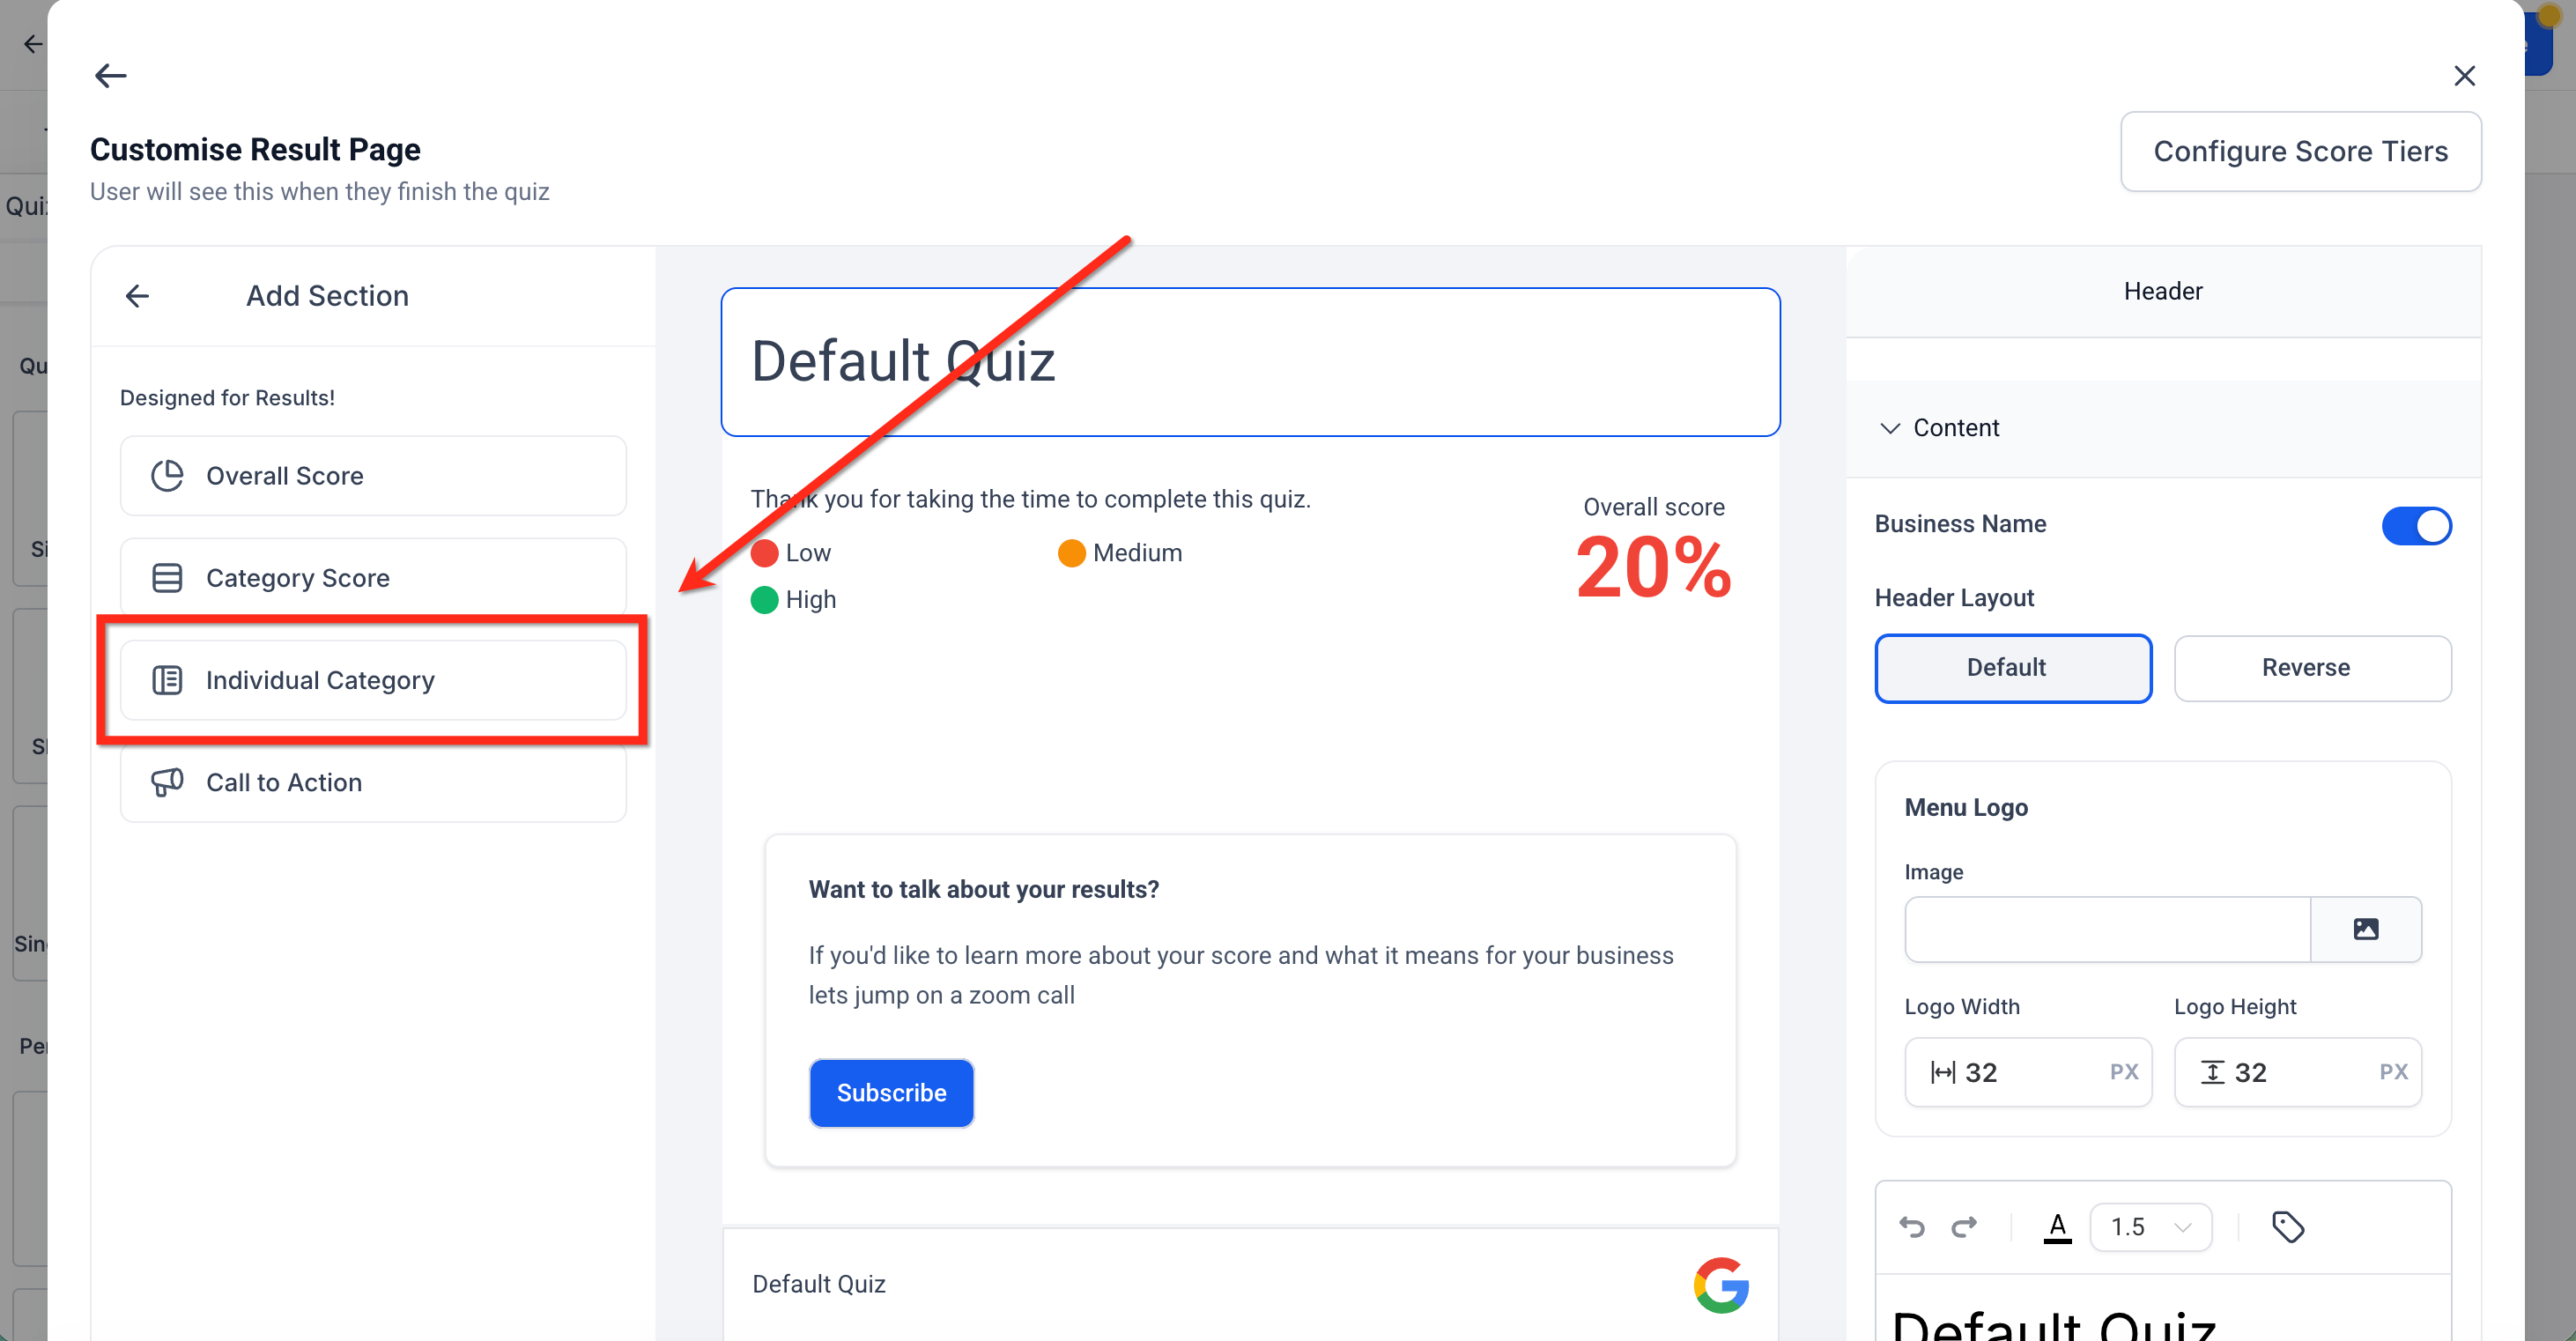
Choose Individual Category.
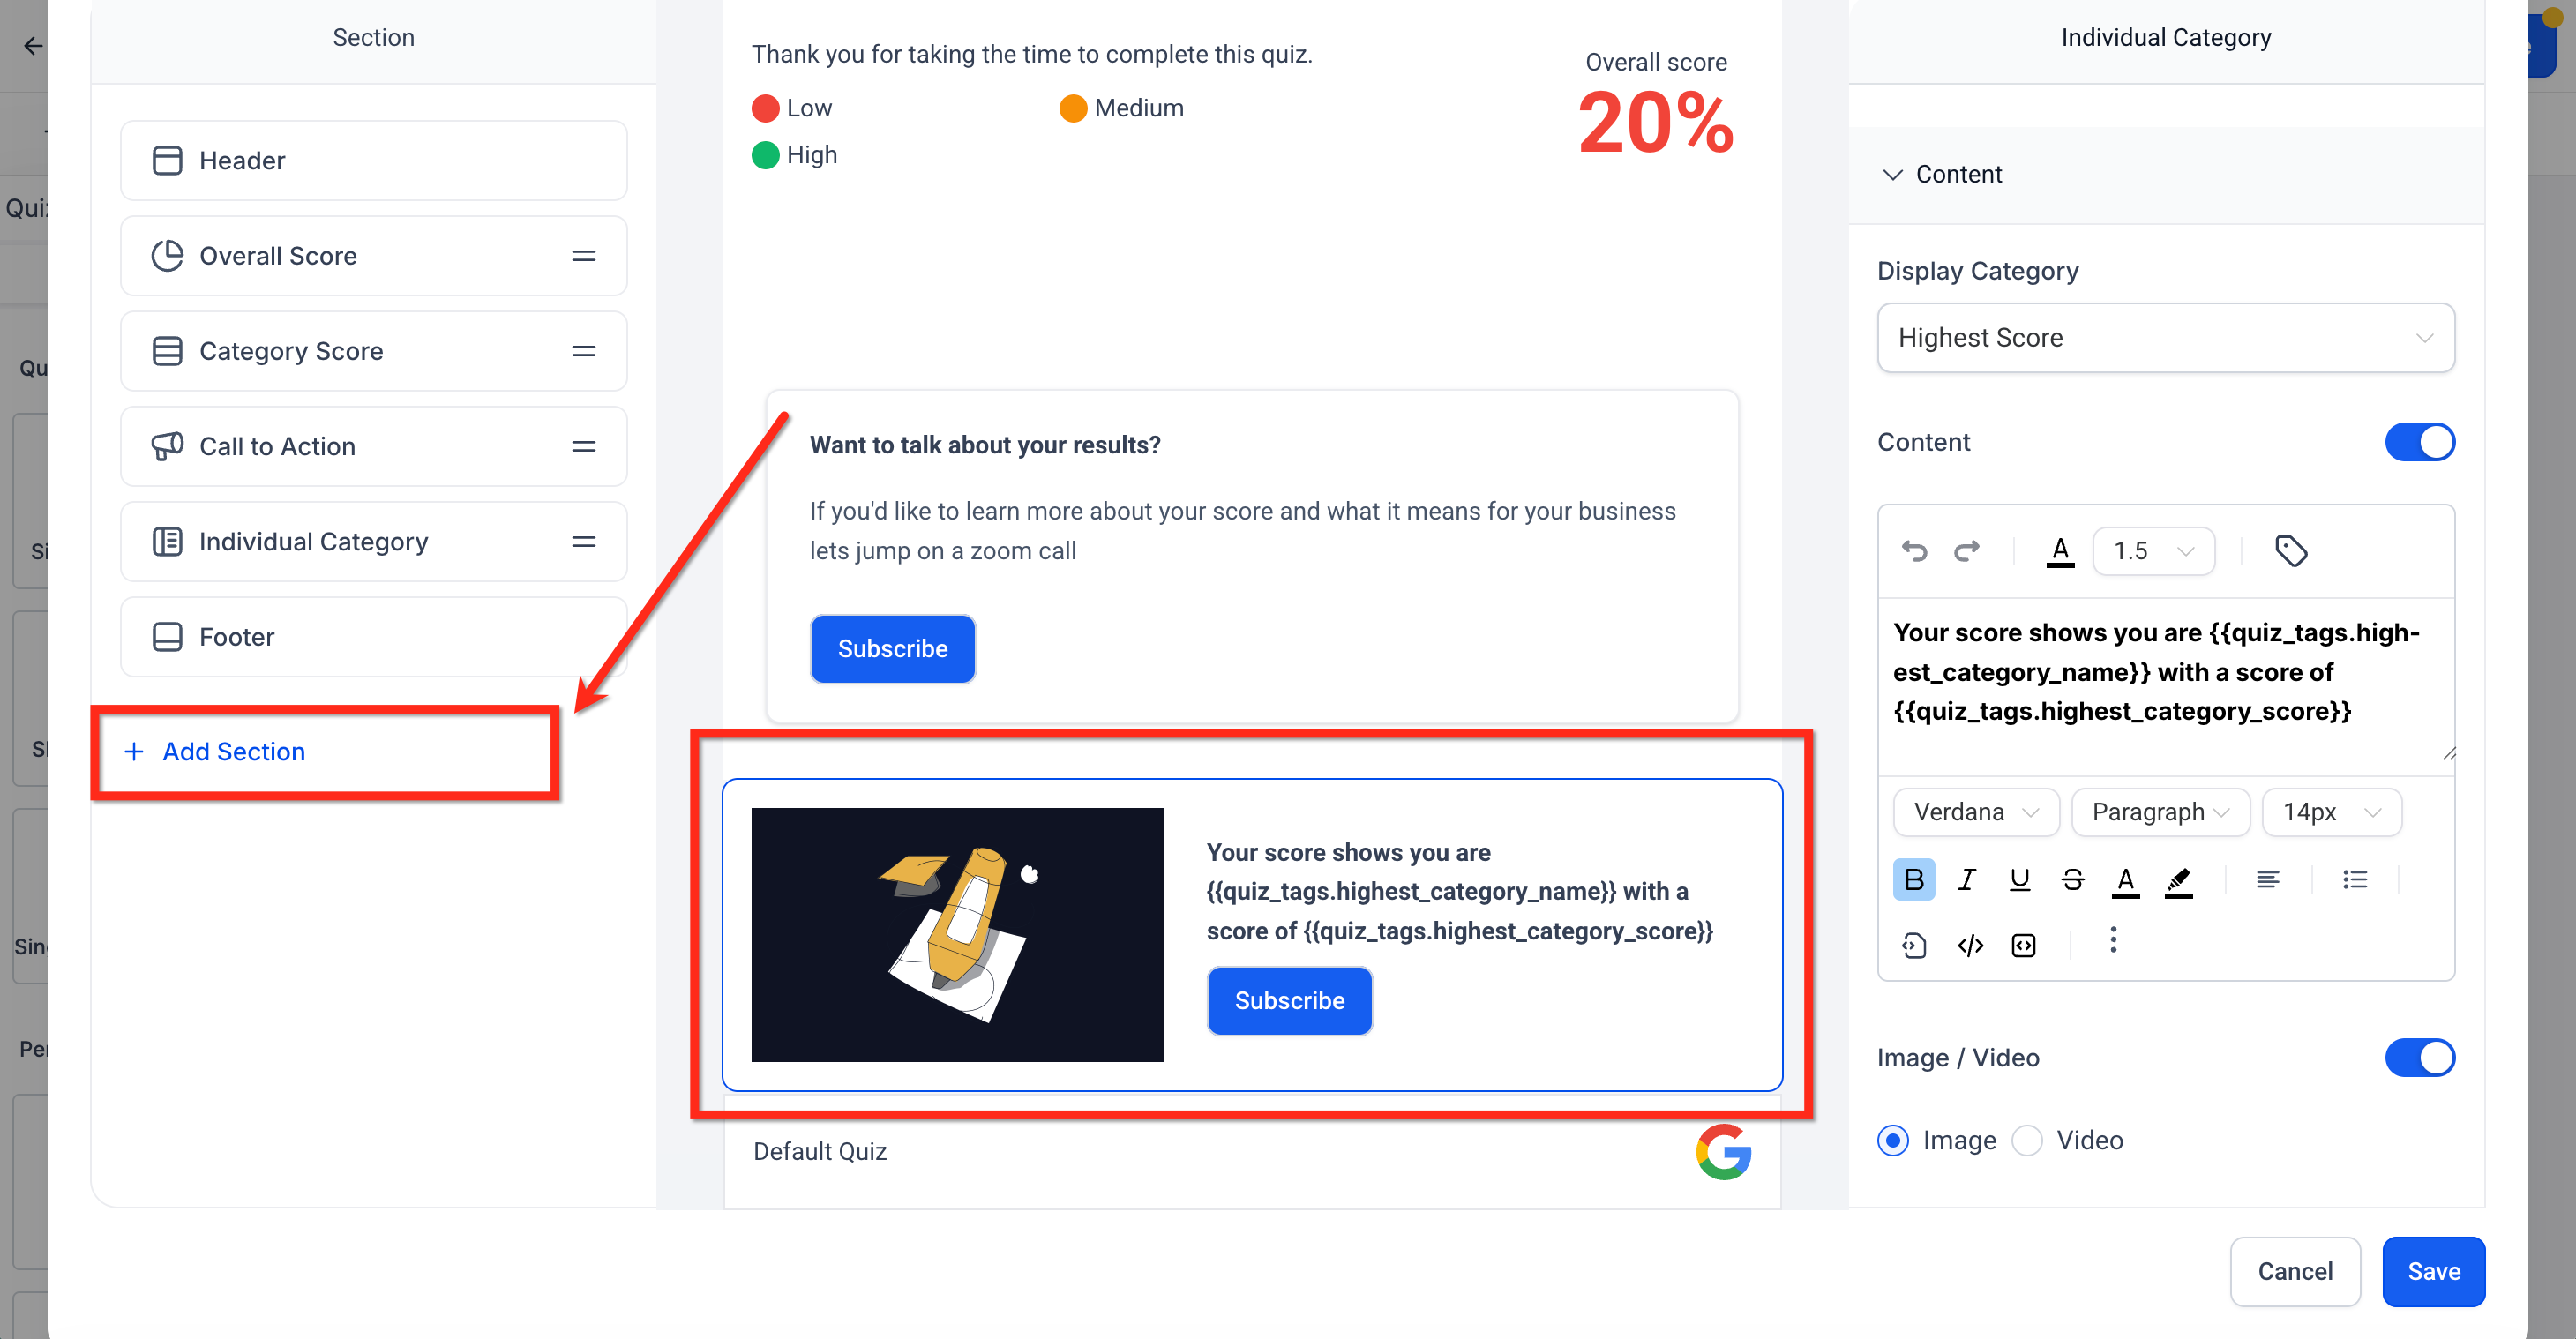
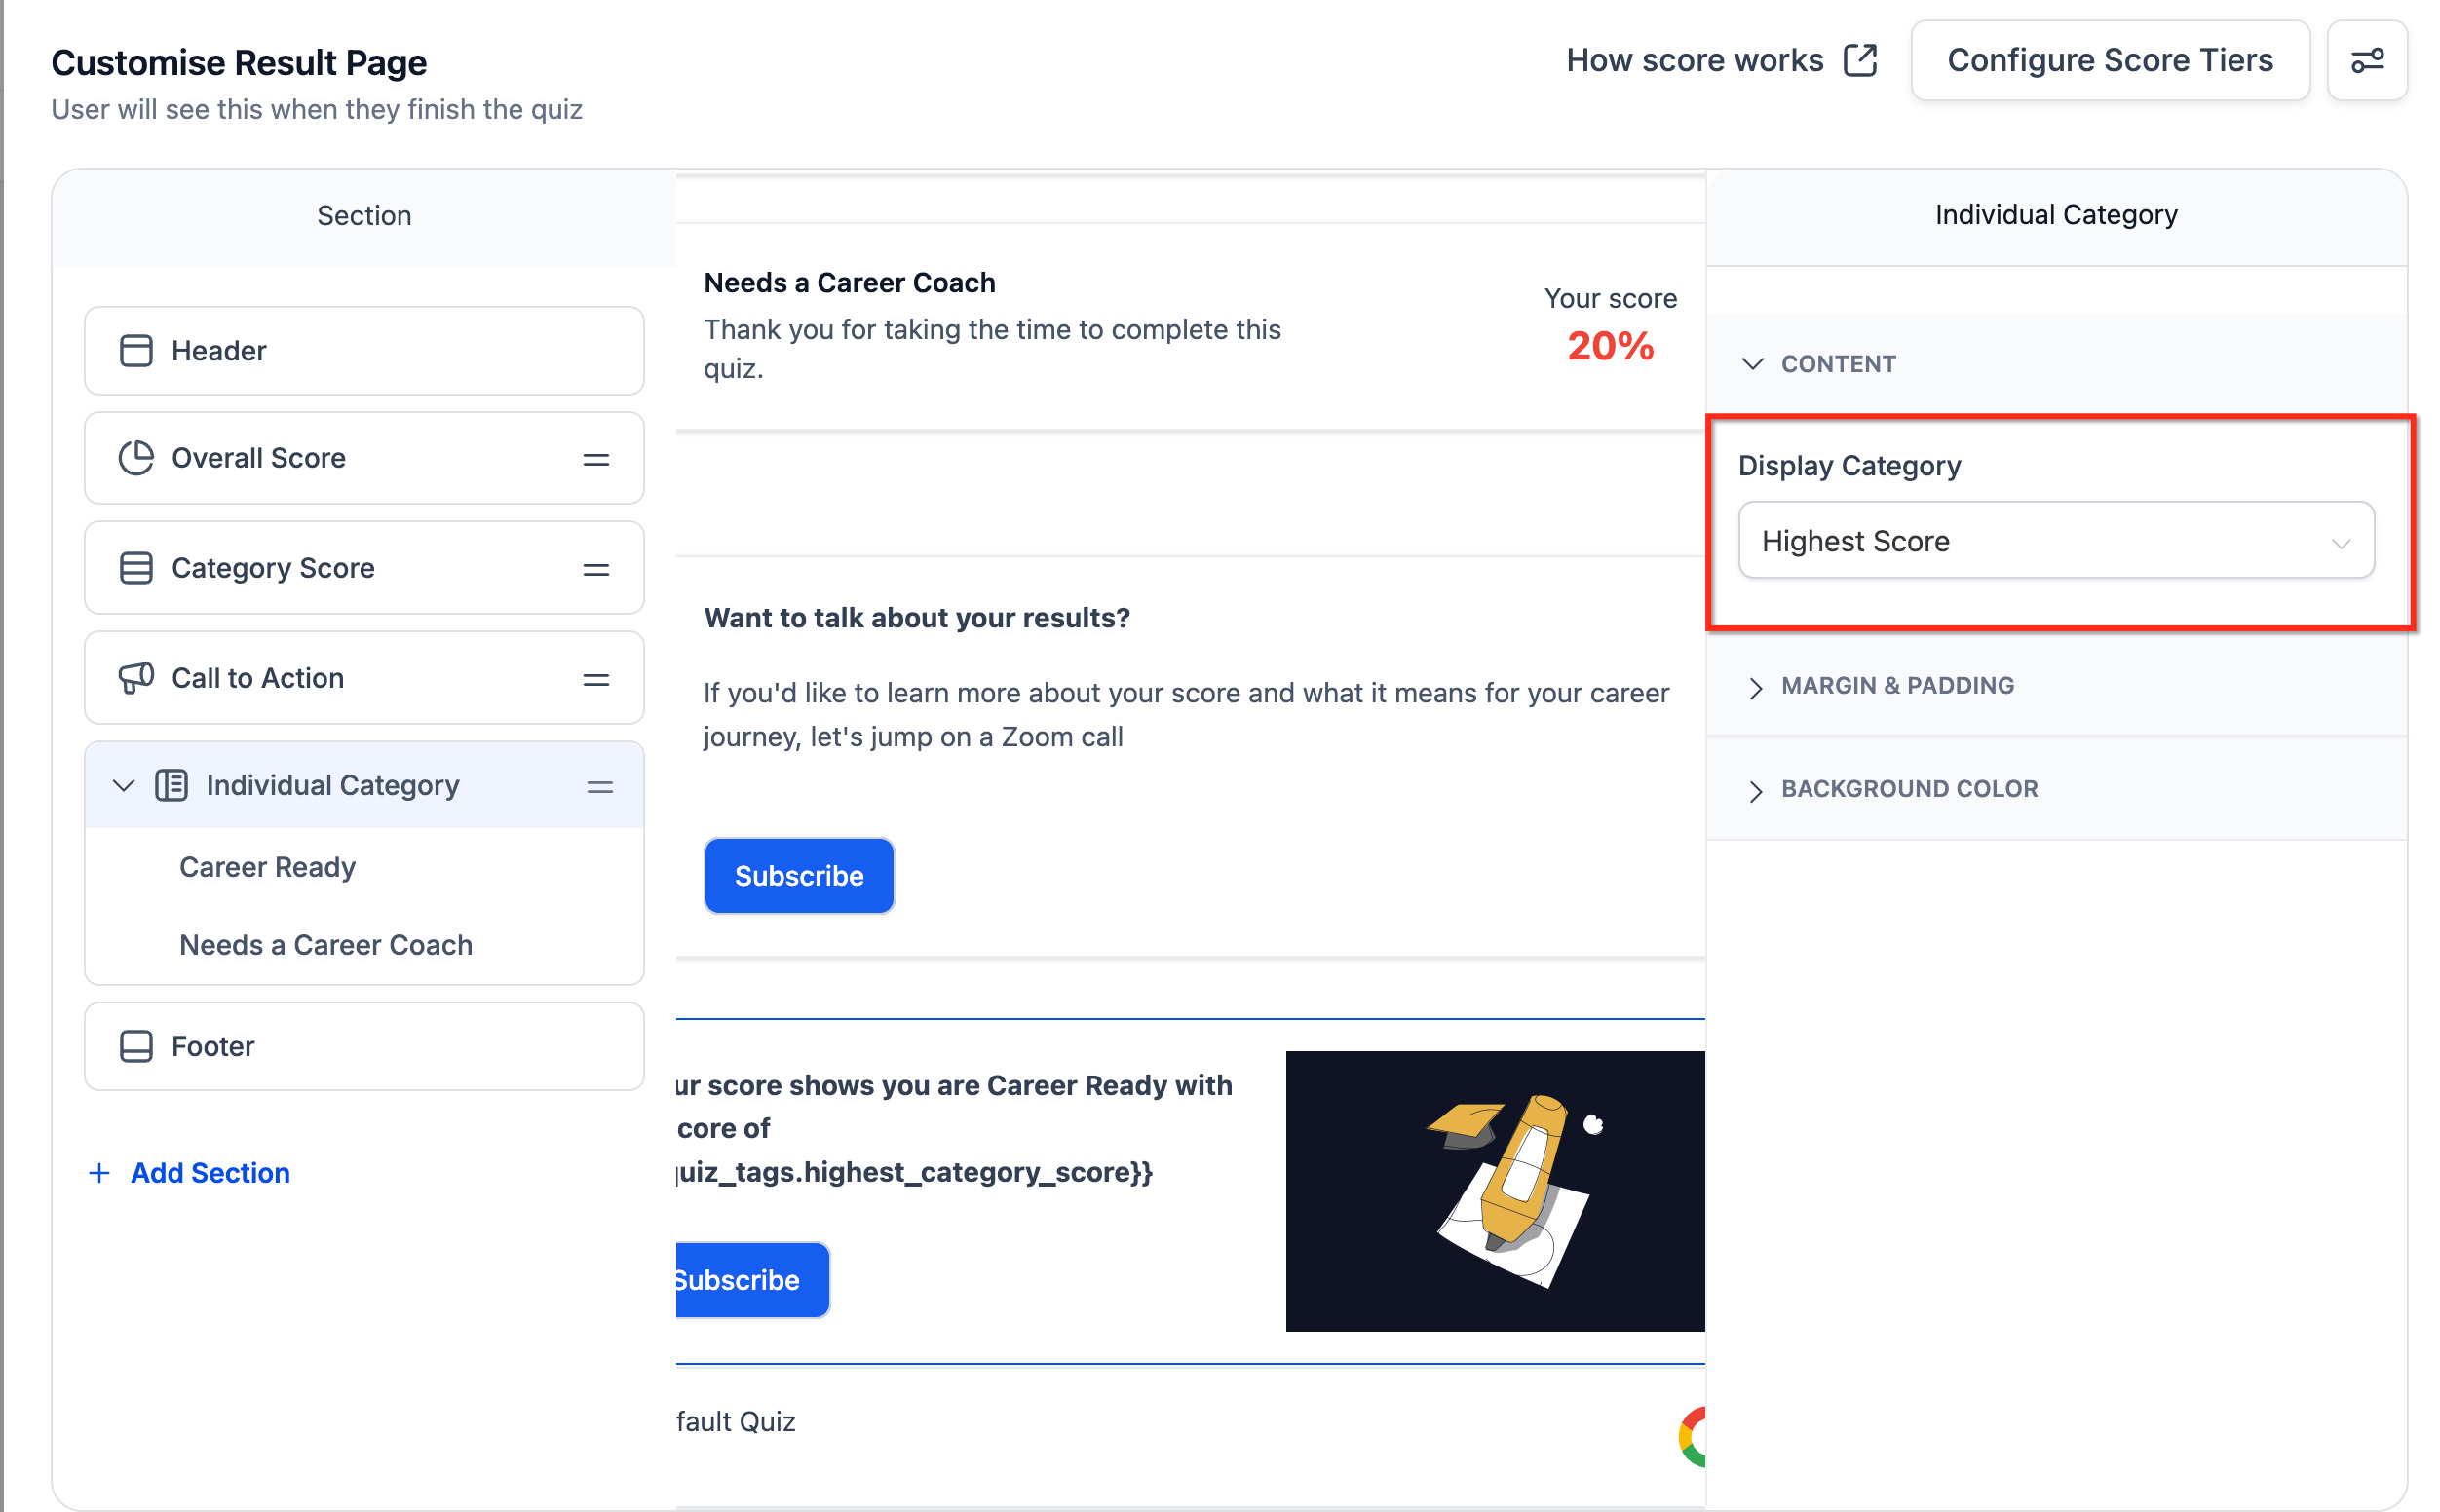
In the section settings, choose:
Highest Category: shows the category with the top score.
Lowest Category: shows the category with the bottom score.
Use the content editor to add text, and pull in dynamic tags where you want the category name or score to appear automatically:
{{quiz_tags.highest_category_name}}
{{quiz_tags.highest_category_score}}
{{quiz_tags.lowest_category_name}}
{{quiz_tags.lowest_category_score}}
Example setups:
Highest: "Your skin profile is {{quiz_tags.highest_category_name}} ({{quiz_tags.highest_category_score}}%)."
Lowest: "Your biggest opportunity right now is {{quiz_tags.lowest_category_name}} ({{quiz_tags.lowest_category_score}}%)."
Optionally, add score tiers on the Overall Score or Category Score sections (see Score Tiers above) so a message adjusts by range too.
Click Save, then use Preview to complete the quiz yourself and confirm scores calculate correctly, the right category shows as highest or lowest, and messages and CTAs appear where expected.
You can show both the highest and lowest category on the same result page: add two Individual Category sections, one set to Highest and the other to Lowest, or pair a Highest section with the Category Score section for the full breakdown. Personality scoring (Individual Category) and Overall Score percentages can also coexist on the same page.
Beyond a single Individual Category section, you can build out unique content for every category in a personality-style quiz, so each possible outcome gets its own tailored result experience instead of one generic message for everyone.
This is especially useful for skin assessments, treatment-readiness evaluations, and recommendation quizzes where the specific outcome should drive specific next steps (a "Combination Skin" result pointing to one product bundle, a "Sensitive Skin" result pointing to another).
Each Individual Category section can be configured independently with:
Custom text
Images
Videos
CTA button text
CTA links
To speed up setup, the first category you configure can serve as a starting template. Its layout carries over so you're not rebuilding the structure from scratch for every category, though the content itself should still be customized per category.
Open the Quiz Builder for your quiz.
In the left panel, click + Add Section.
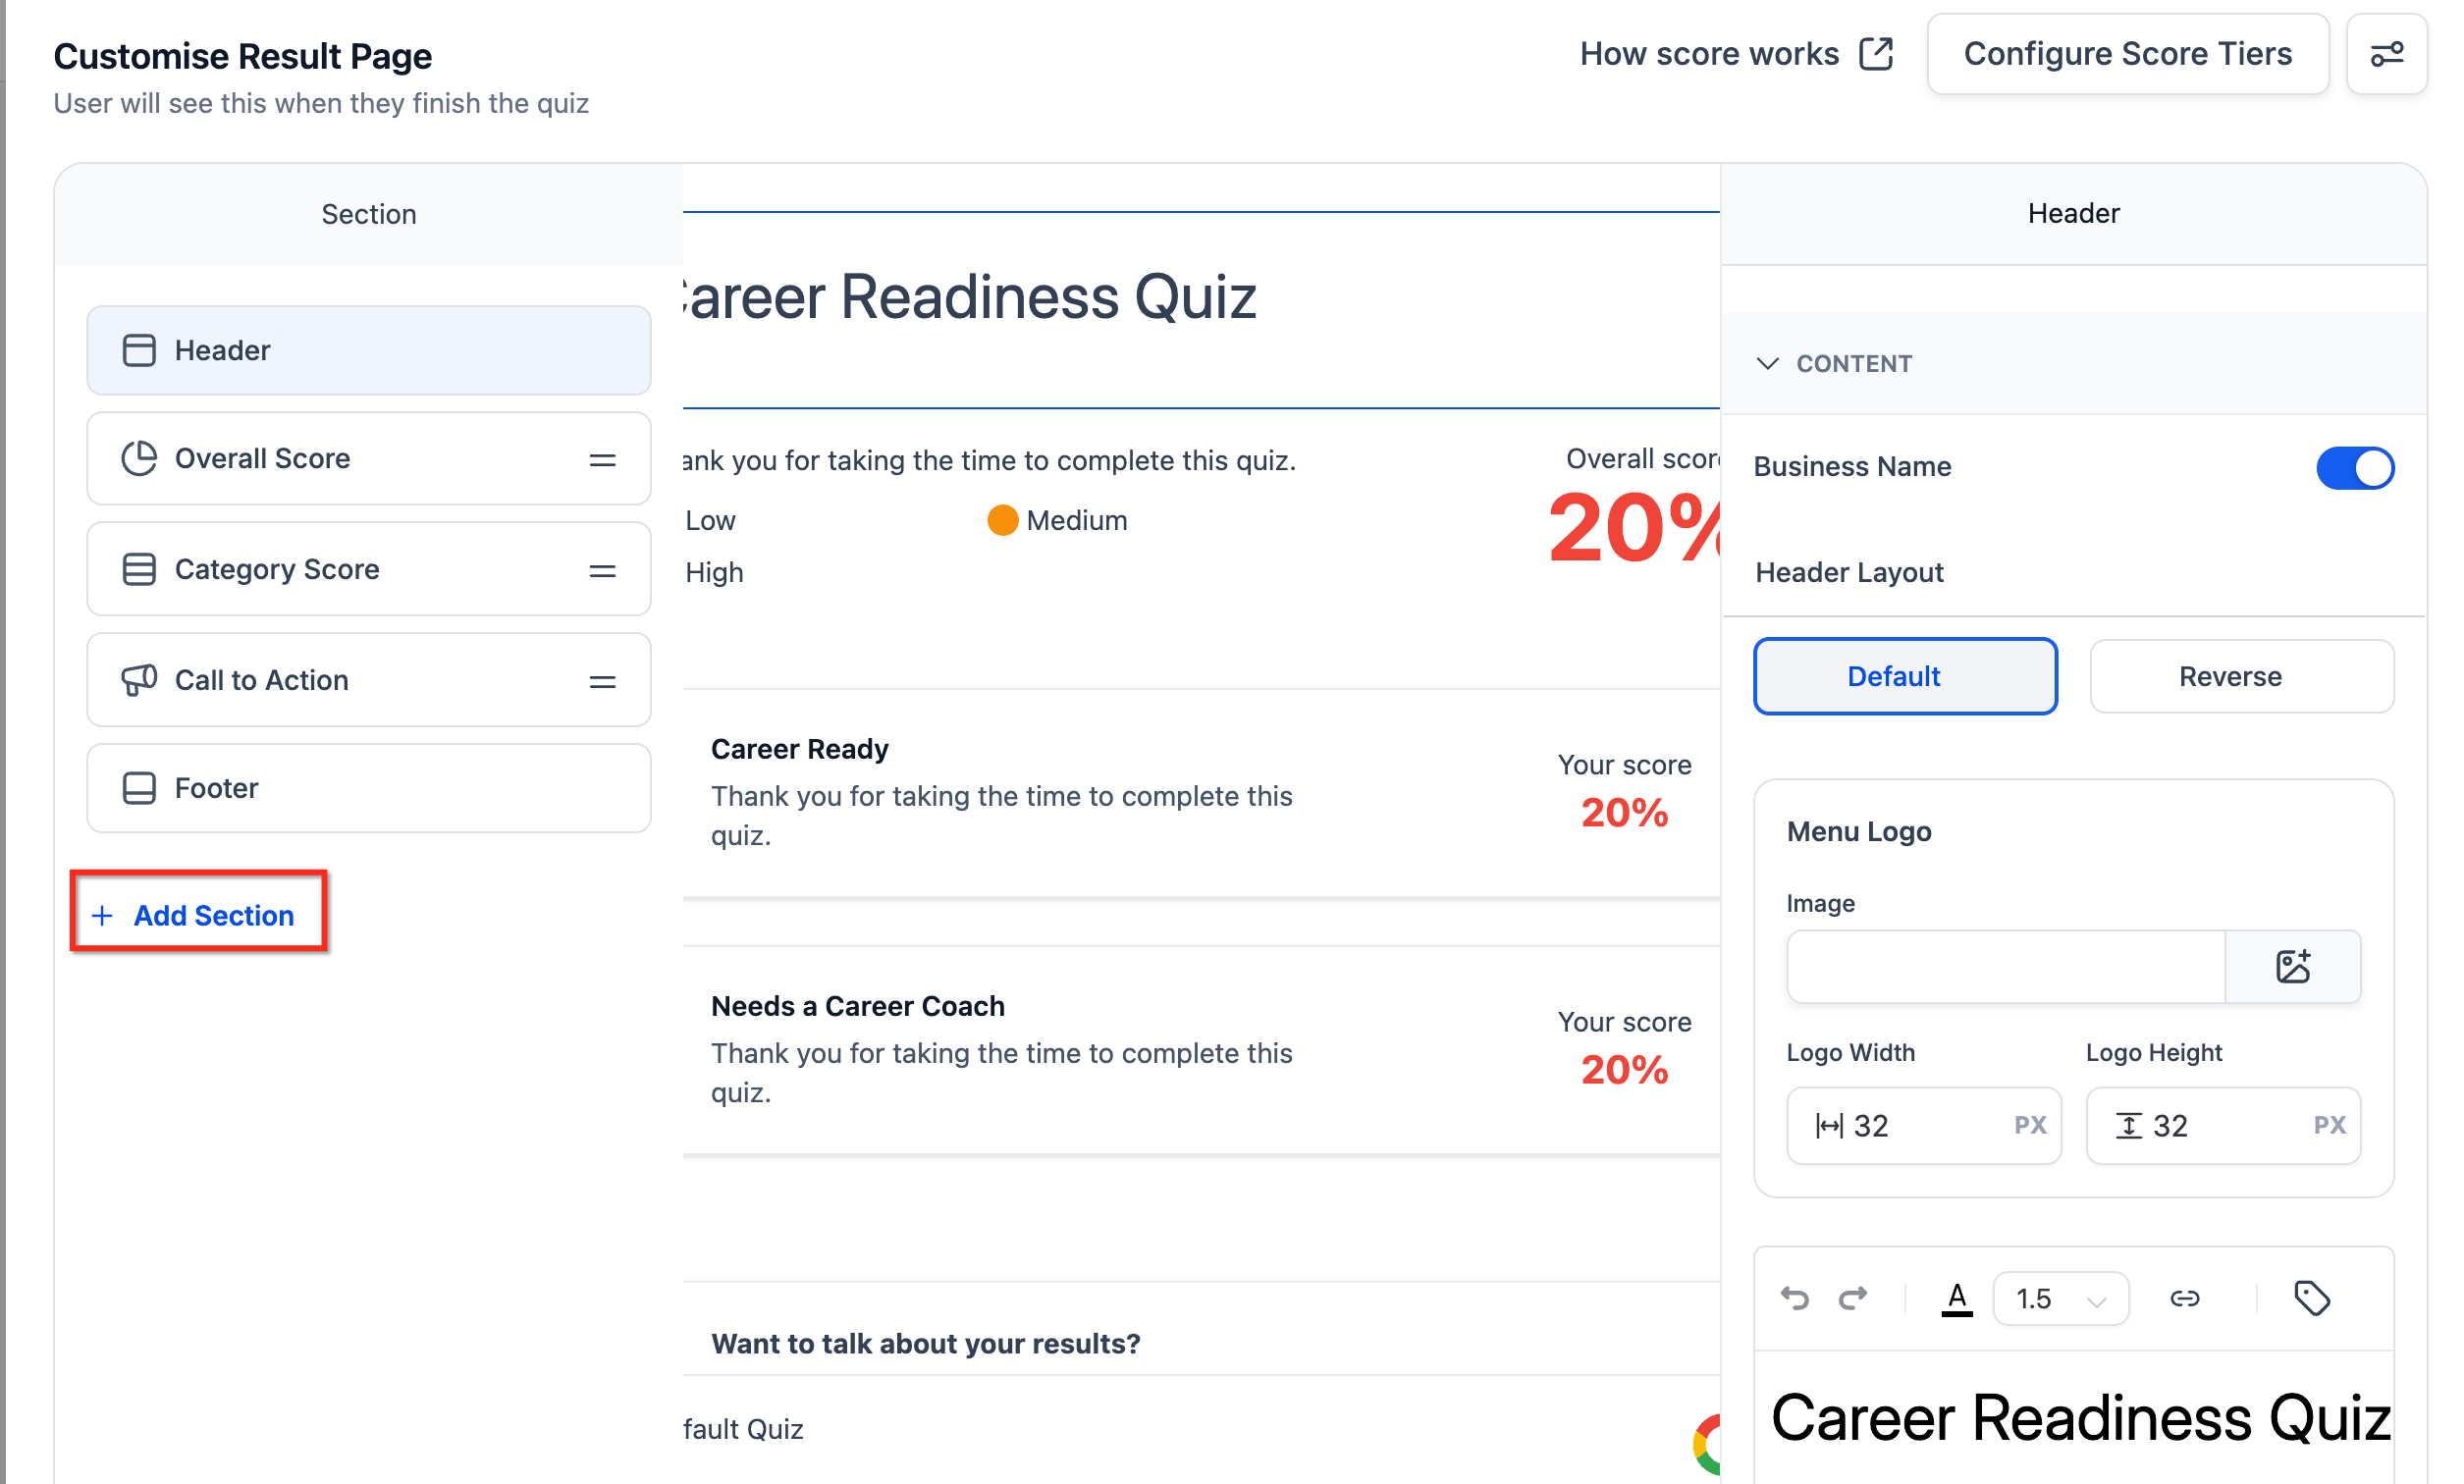
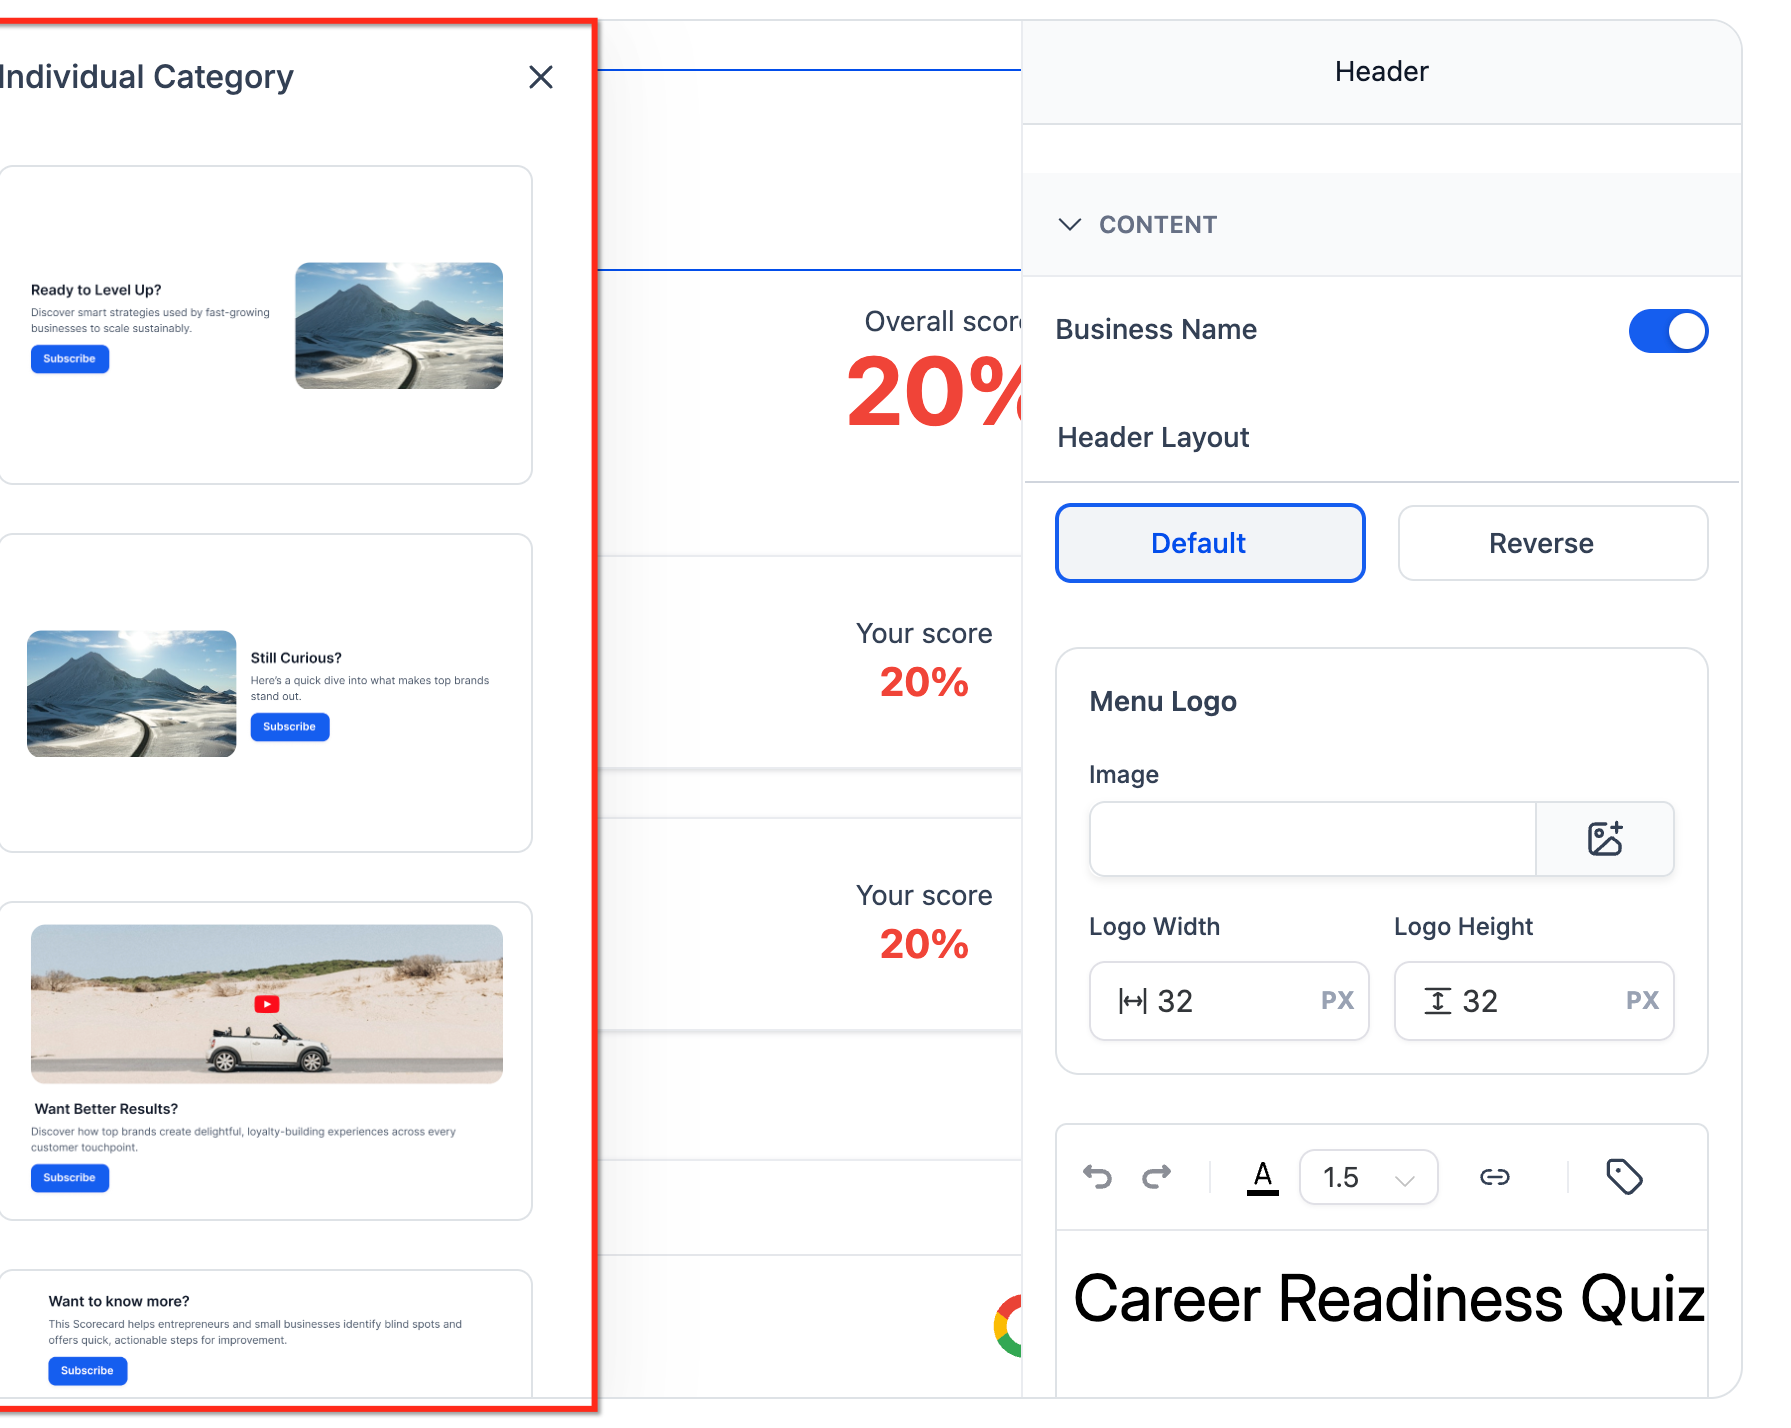
From the section picker, select Individual Category.
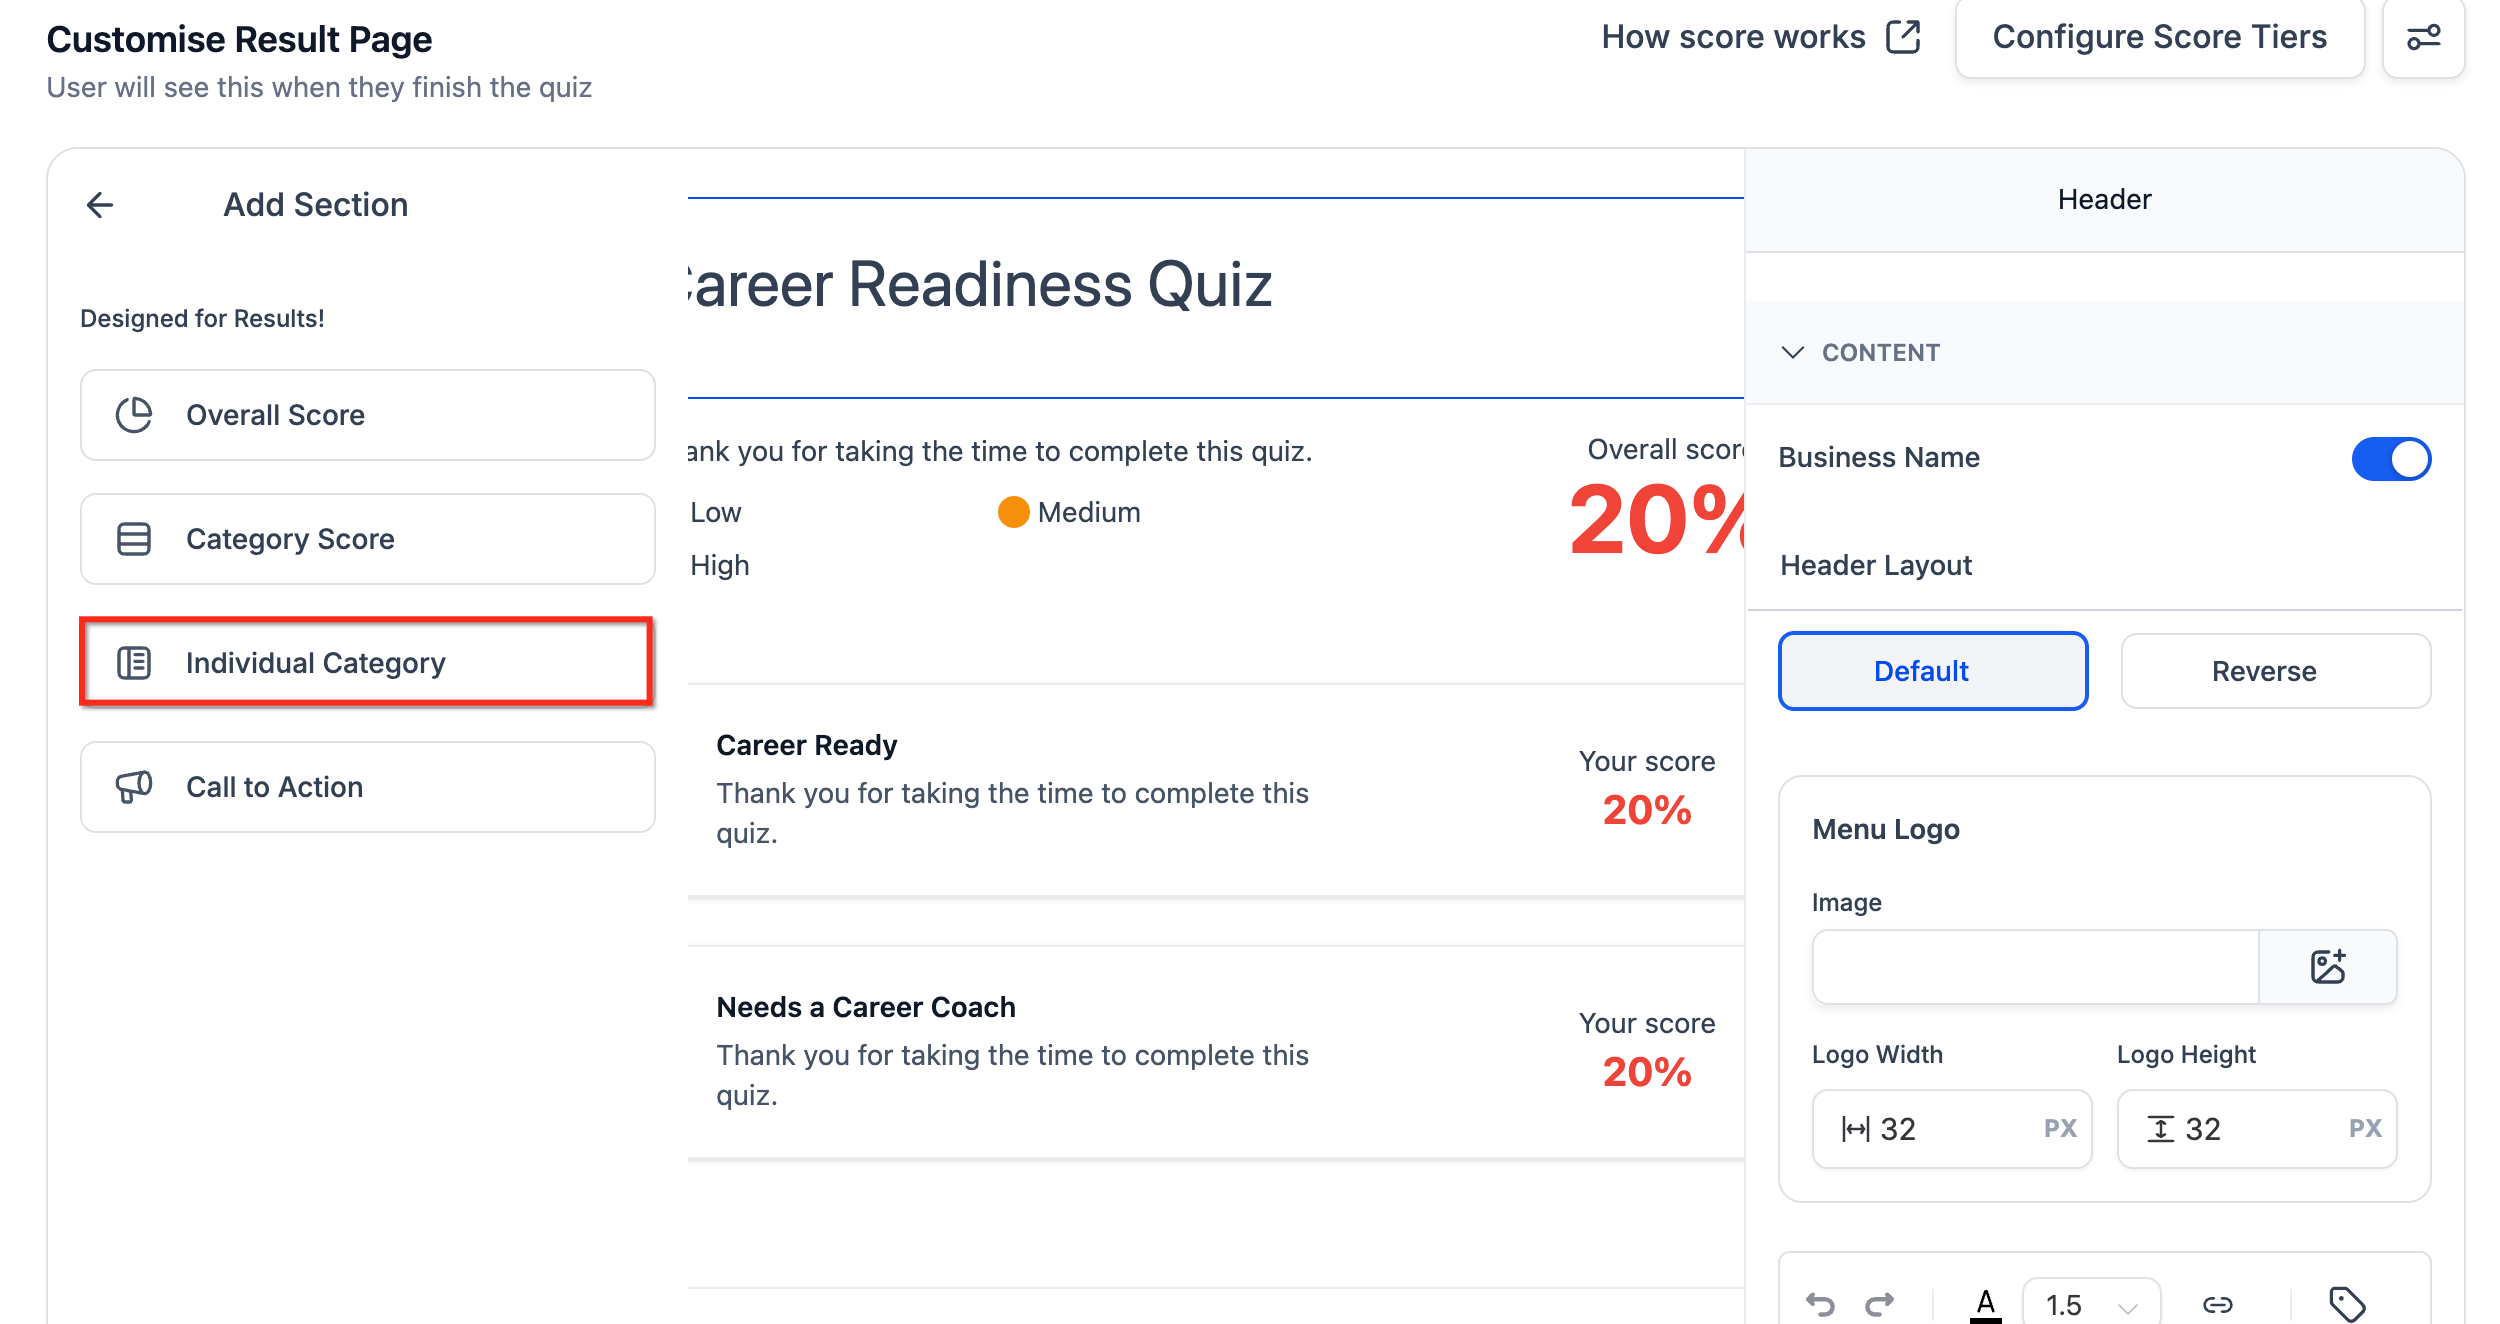
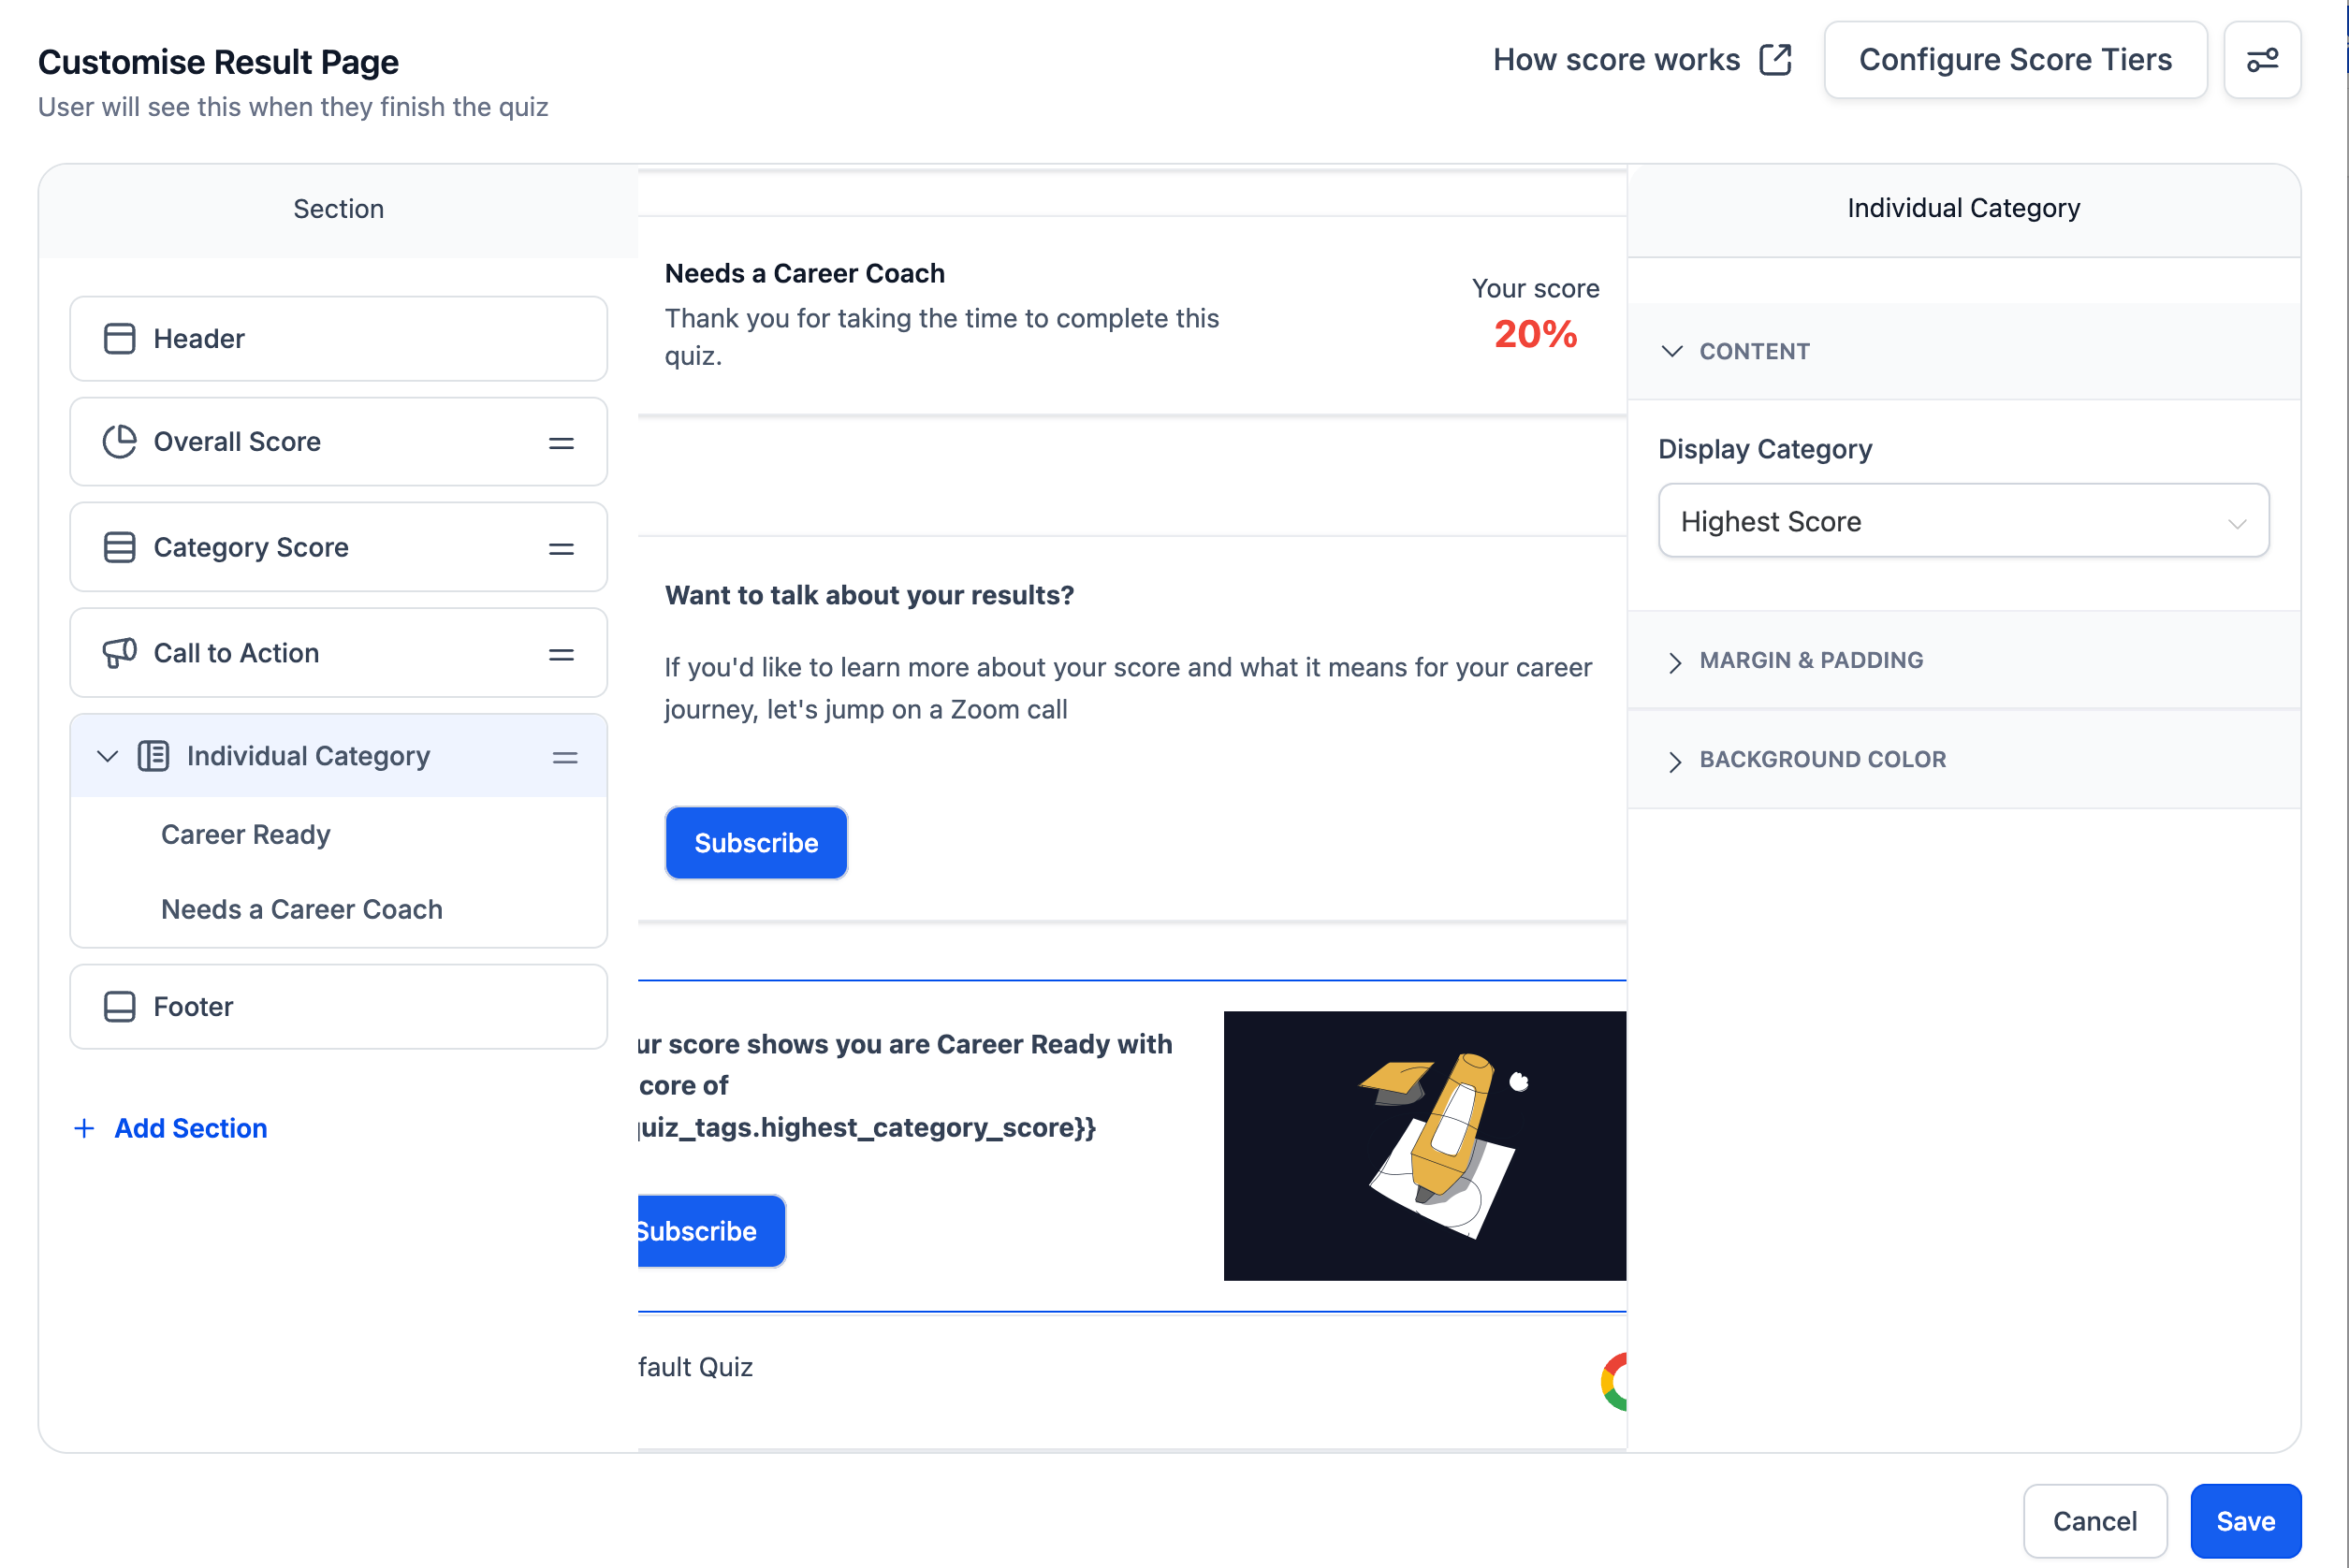
Click the newly added Individual Category section in the left panel to expand it.
Select the category you want to customize.
In the right panel, find Display Category and choose whether this content applies to the Highest Score or the Lowest Score outcome.
Customize the content for that category: text, images, videos, CTA text, and CTA links.
Repeat for every category you want to personalize.
Preview the result page to verify each outcome shows the right content.
Save and publish the quiz.
The Result Page is fully customizable. You can add or remove sections, reorder them, and style each one independently.
Header: The top of the result page. Show or hide your practice name, swap between default and reverse layout, upload a logo and set its size, edit the quiz title's font/size/color/alignment, adjust spacing, and set a background color. Example: your logo plus a custom title like "Your Skin Assessment Results."
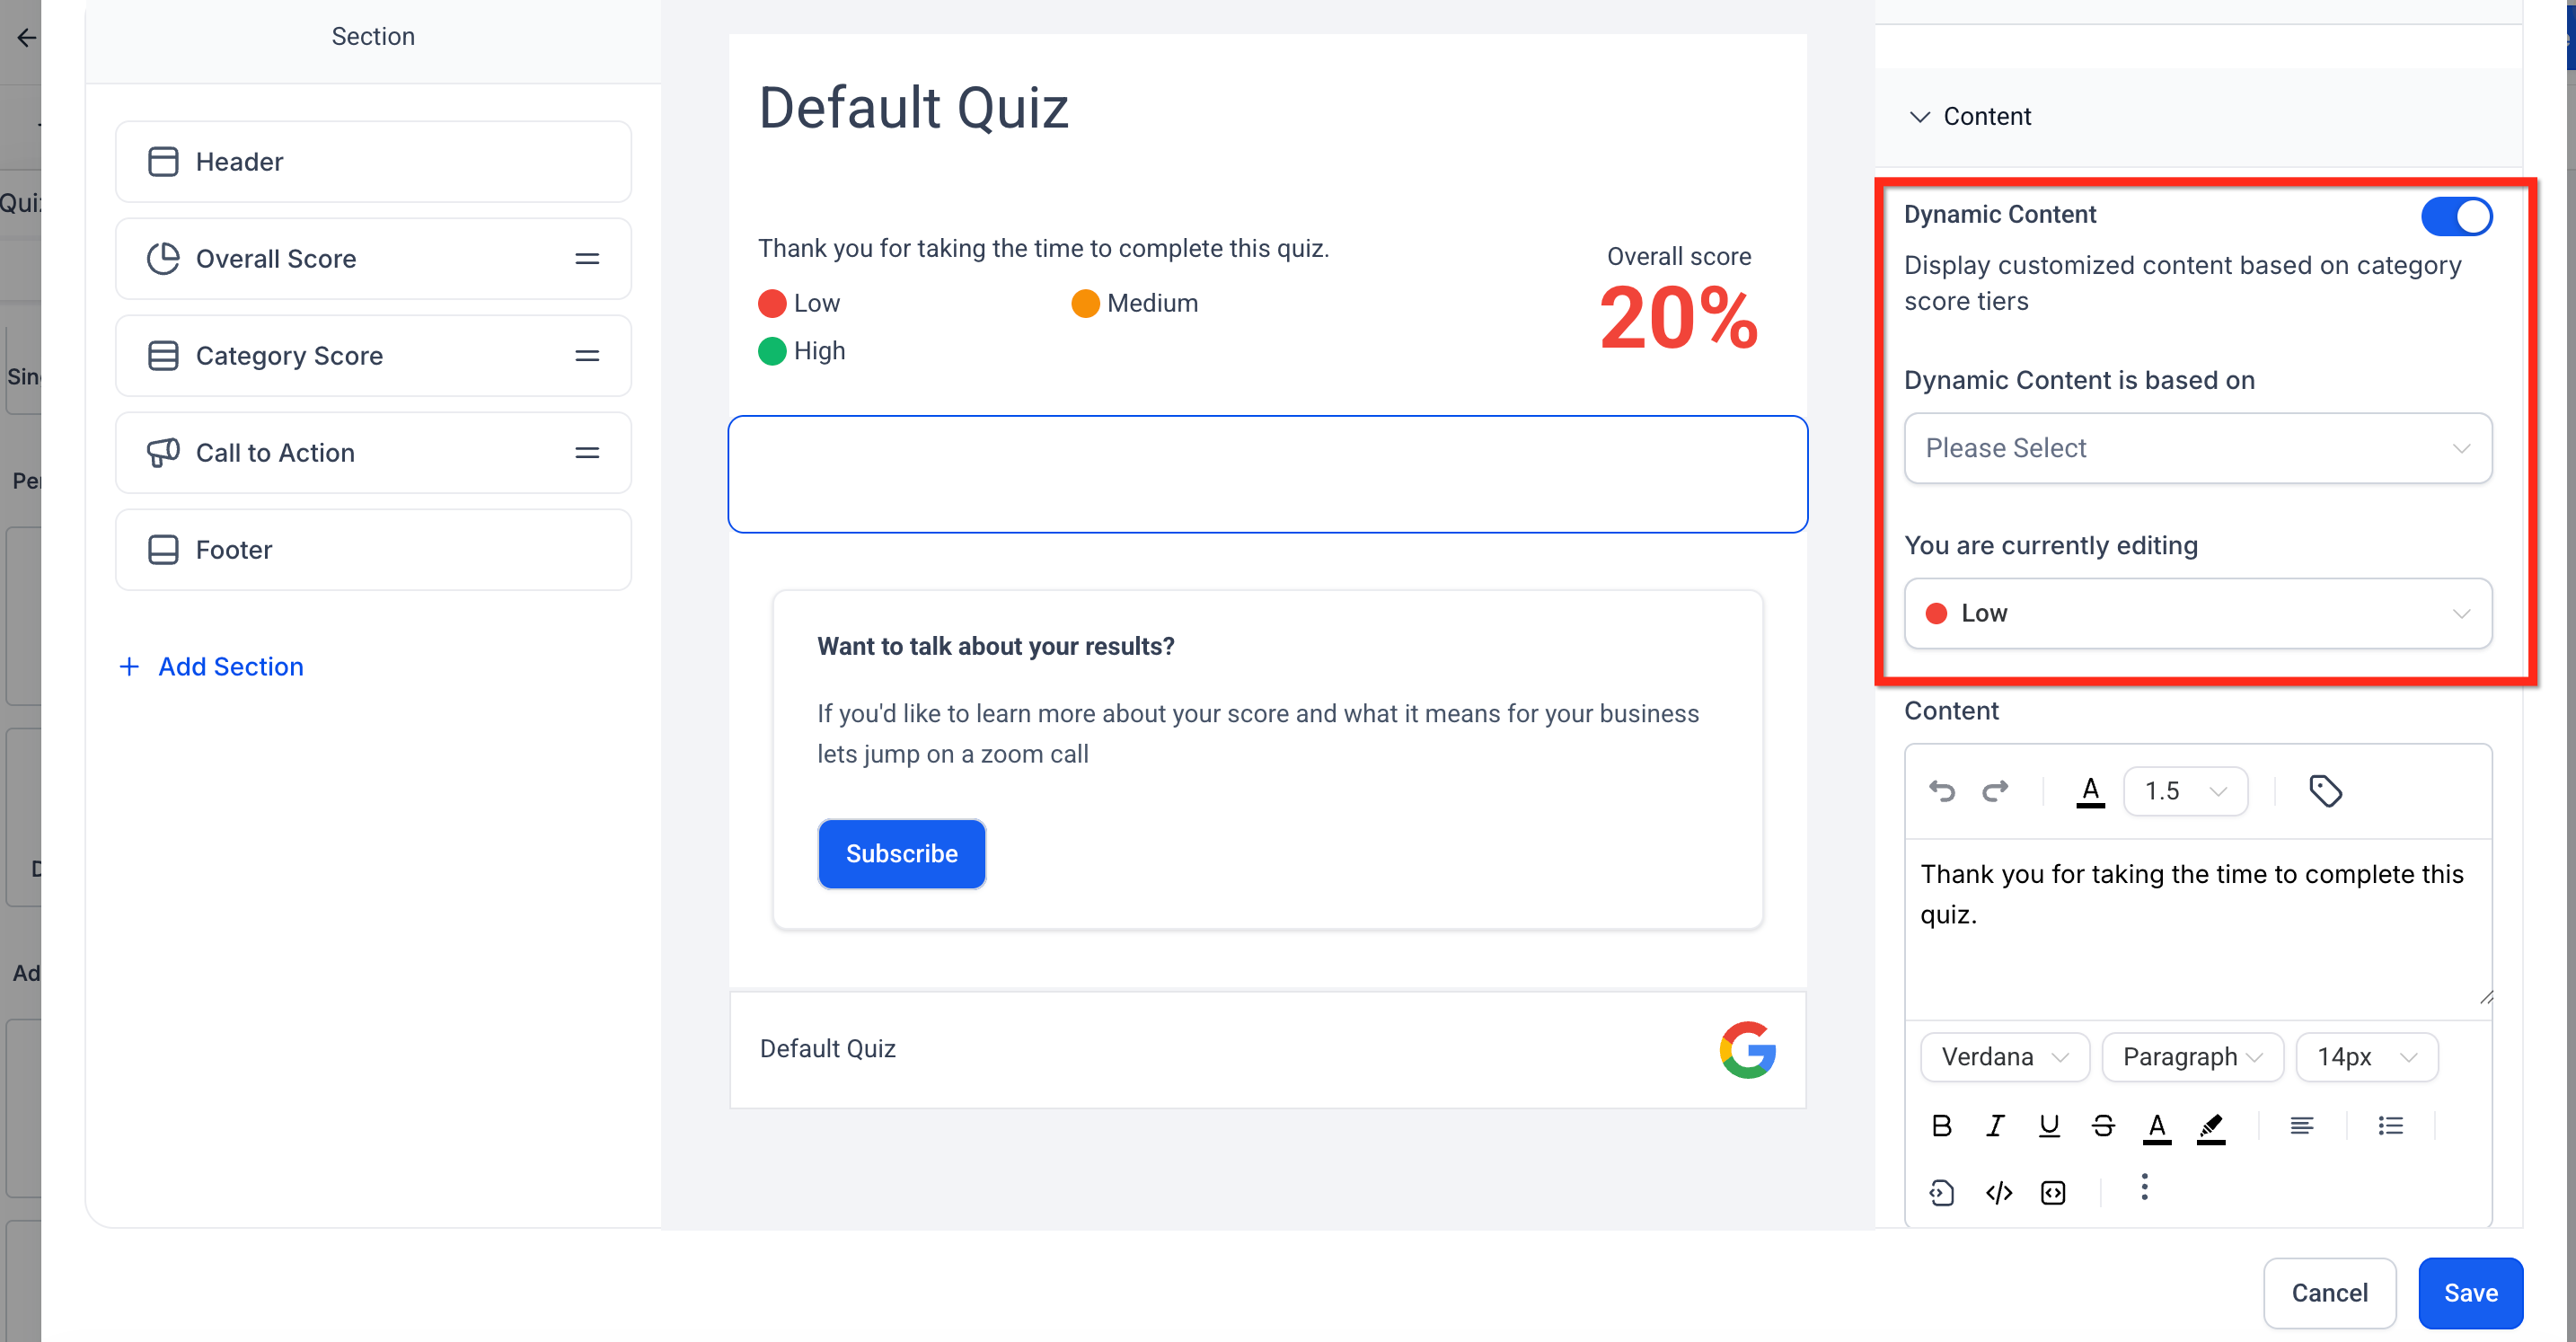
Overall Score: Summarizes total quiz performance. Turn on dynamic content to show different messages by tier, rename the section title (for example, "Your Skin Score"), show or hide the numeric score, choose the display format (percentage, actual score, or out of 10), choose score position, and add tailored text, images, or links per tier.
Category Score: Breaks down performance across every category. Rename the header (for example, "Your Skin Breakdown"), optionally enable dynamic content for per-category messaging, show or hide percentages, add explanatory text under each category, and choose how each category score displays (percentage, actual score, or out of 10) to match the Overall Score style.
Individual Category: Highlights a single category, either the highest or lowest scoring one, with its own dynamic tags, content editor, media, and CTA (see the two sections above for full setup).
Call to Action: Encourages the patient to take the next step. Add context text above the button, customize the button label ("Book a Consult," "See My Recommended Treatment"), link it to a funnel, booking calendar, or external resource, style the button, and use dynamic content to show different CTAs by score tier (stronger offers for higher scores, for example).
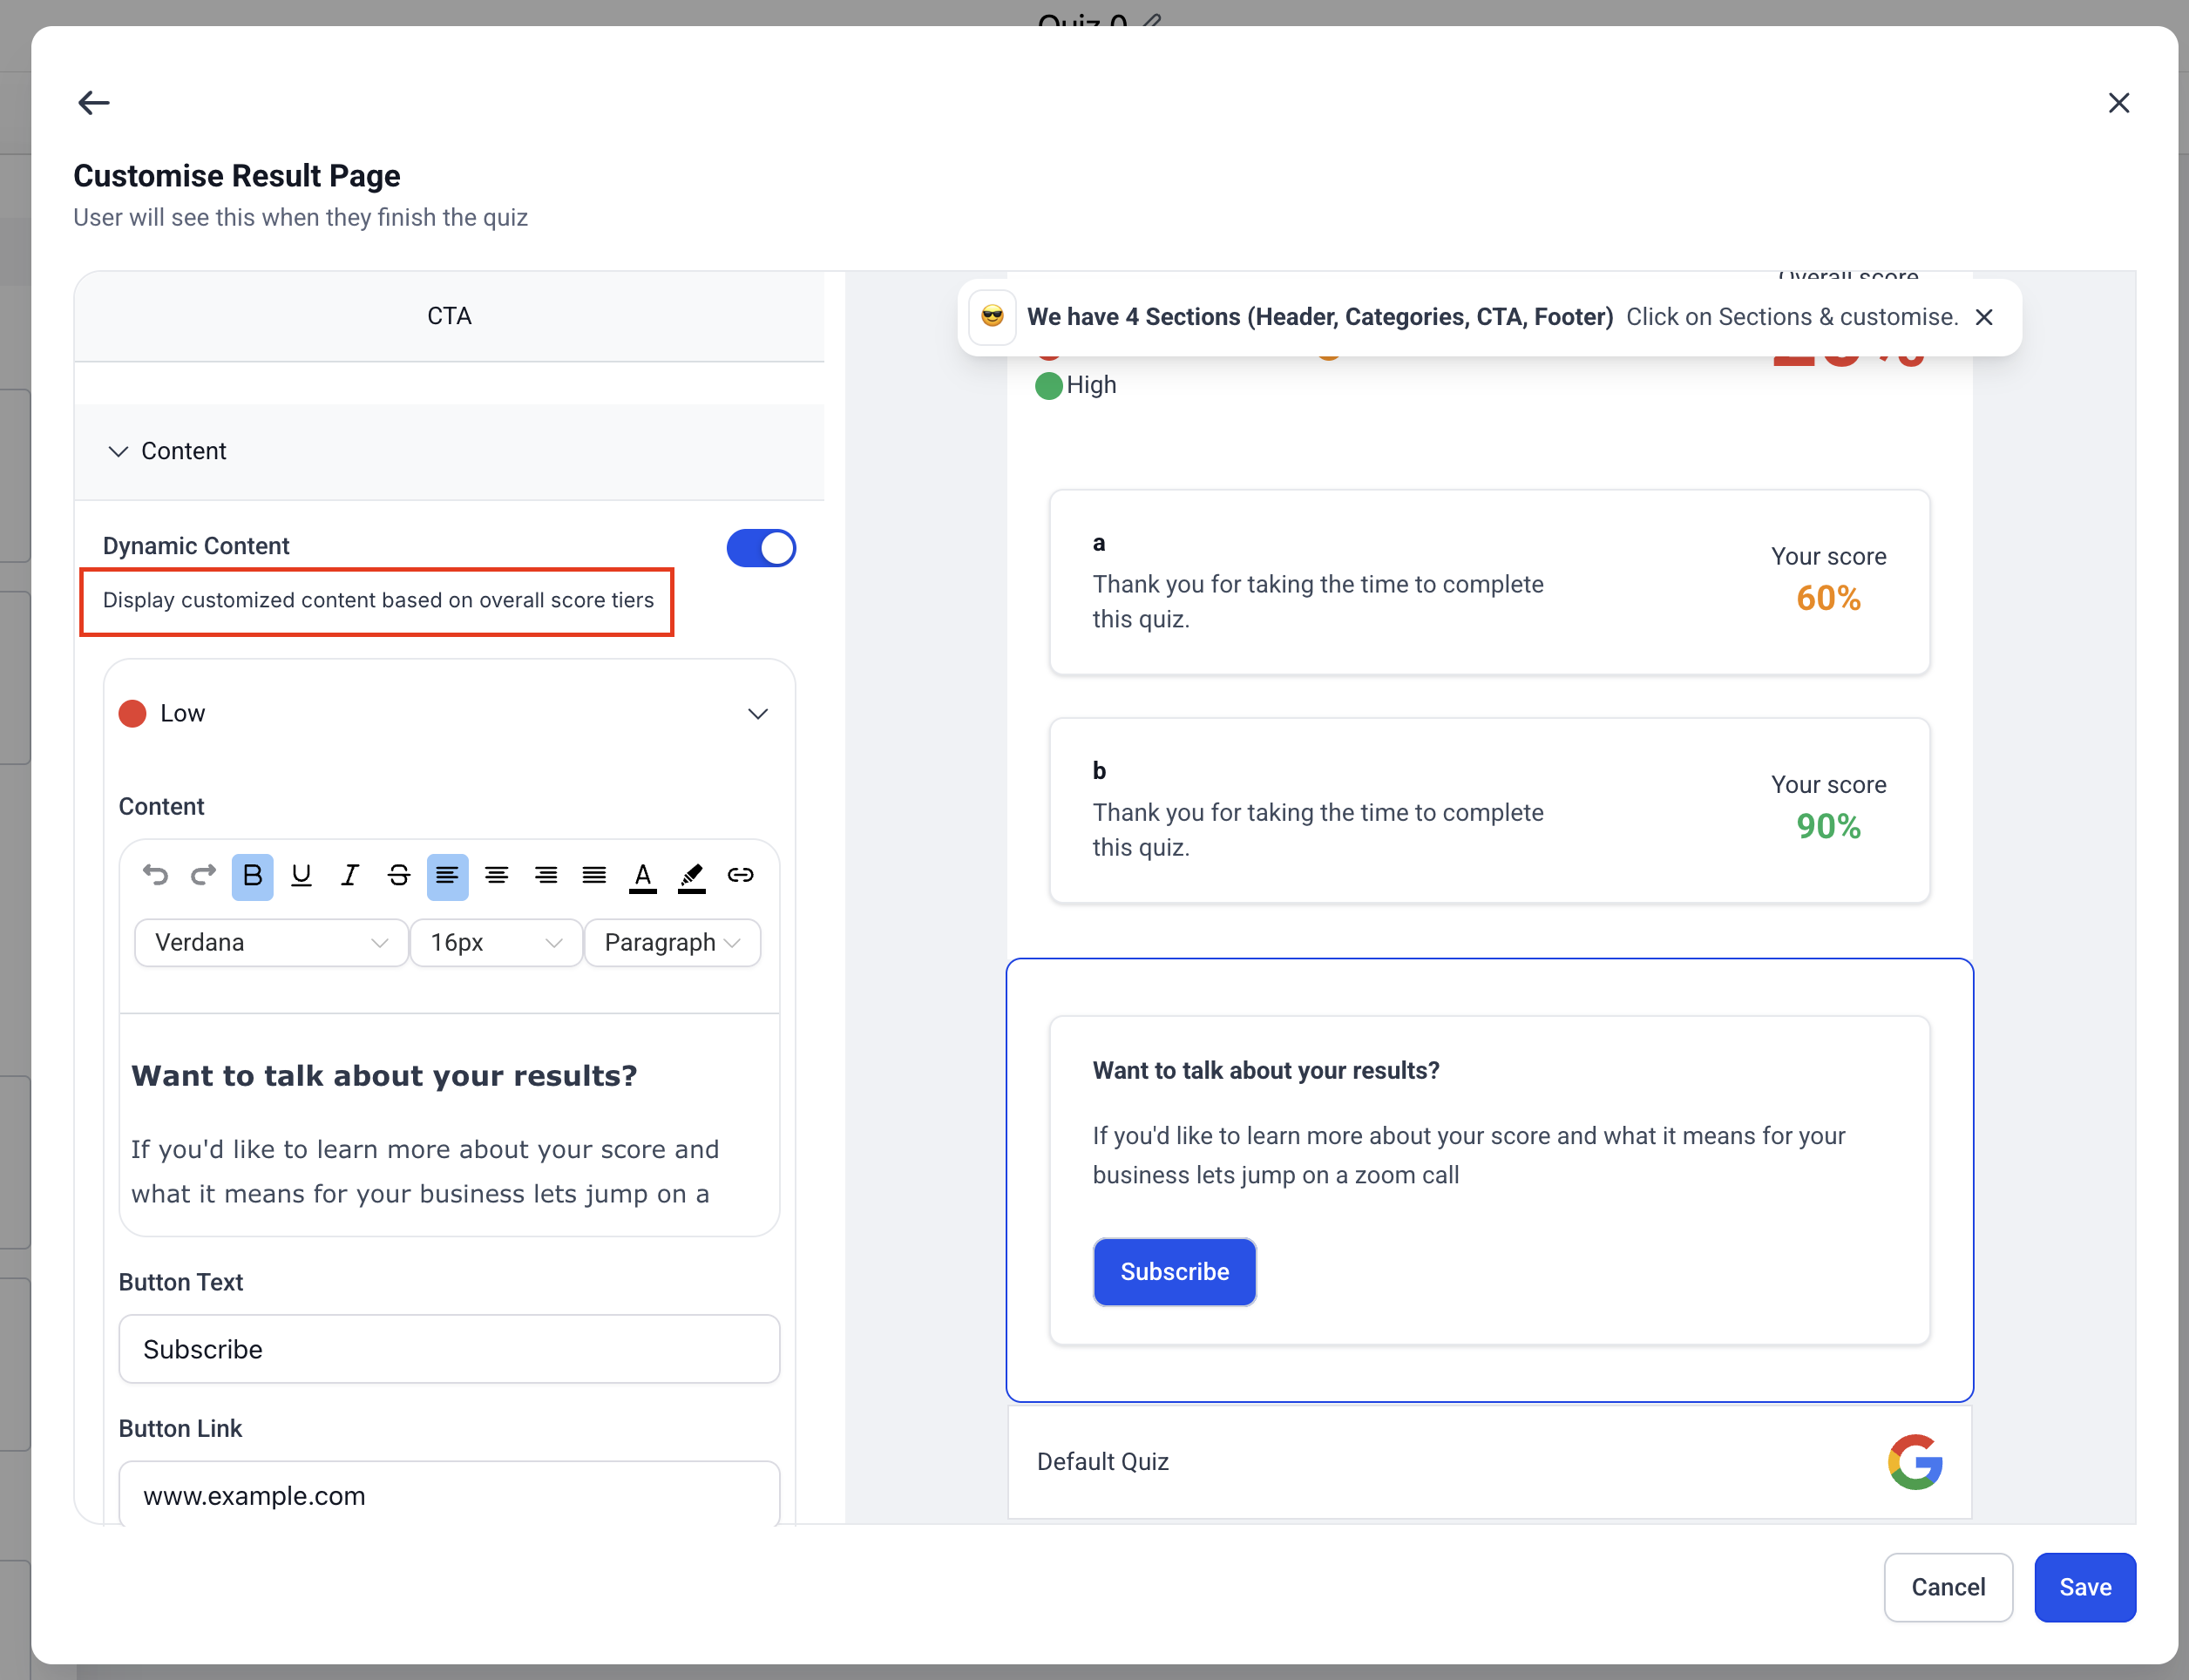
Footer: Closes out the result page. Add footer text (disclaimers, copyright), upload a small logo, insert links (privacy policy, terms), and style with spacing and background color.
The Result Page editor includes a left-hand Section Visibility panel listing every element on the page, so you can jump to any section, reorder the layout, or temporarily hide something without deleting it.
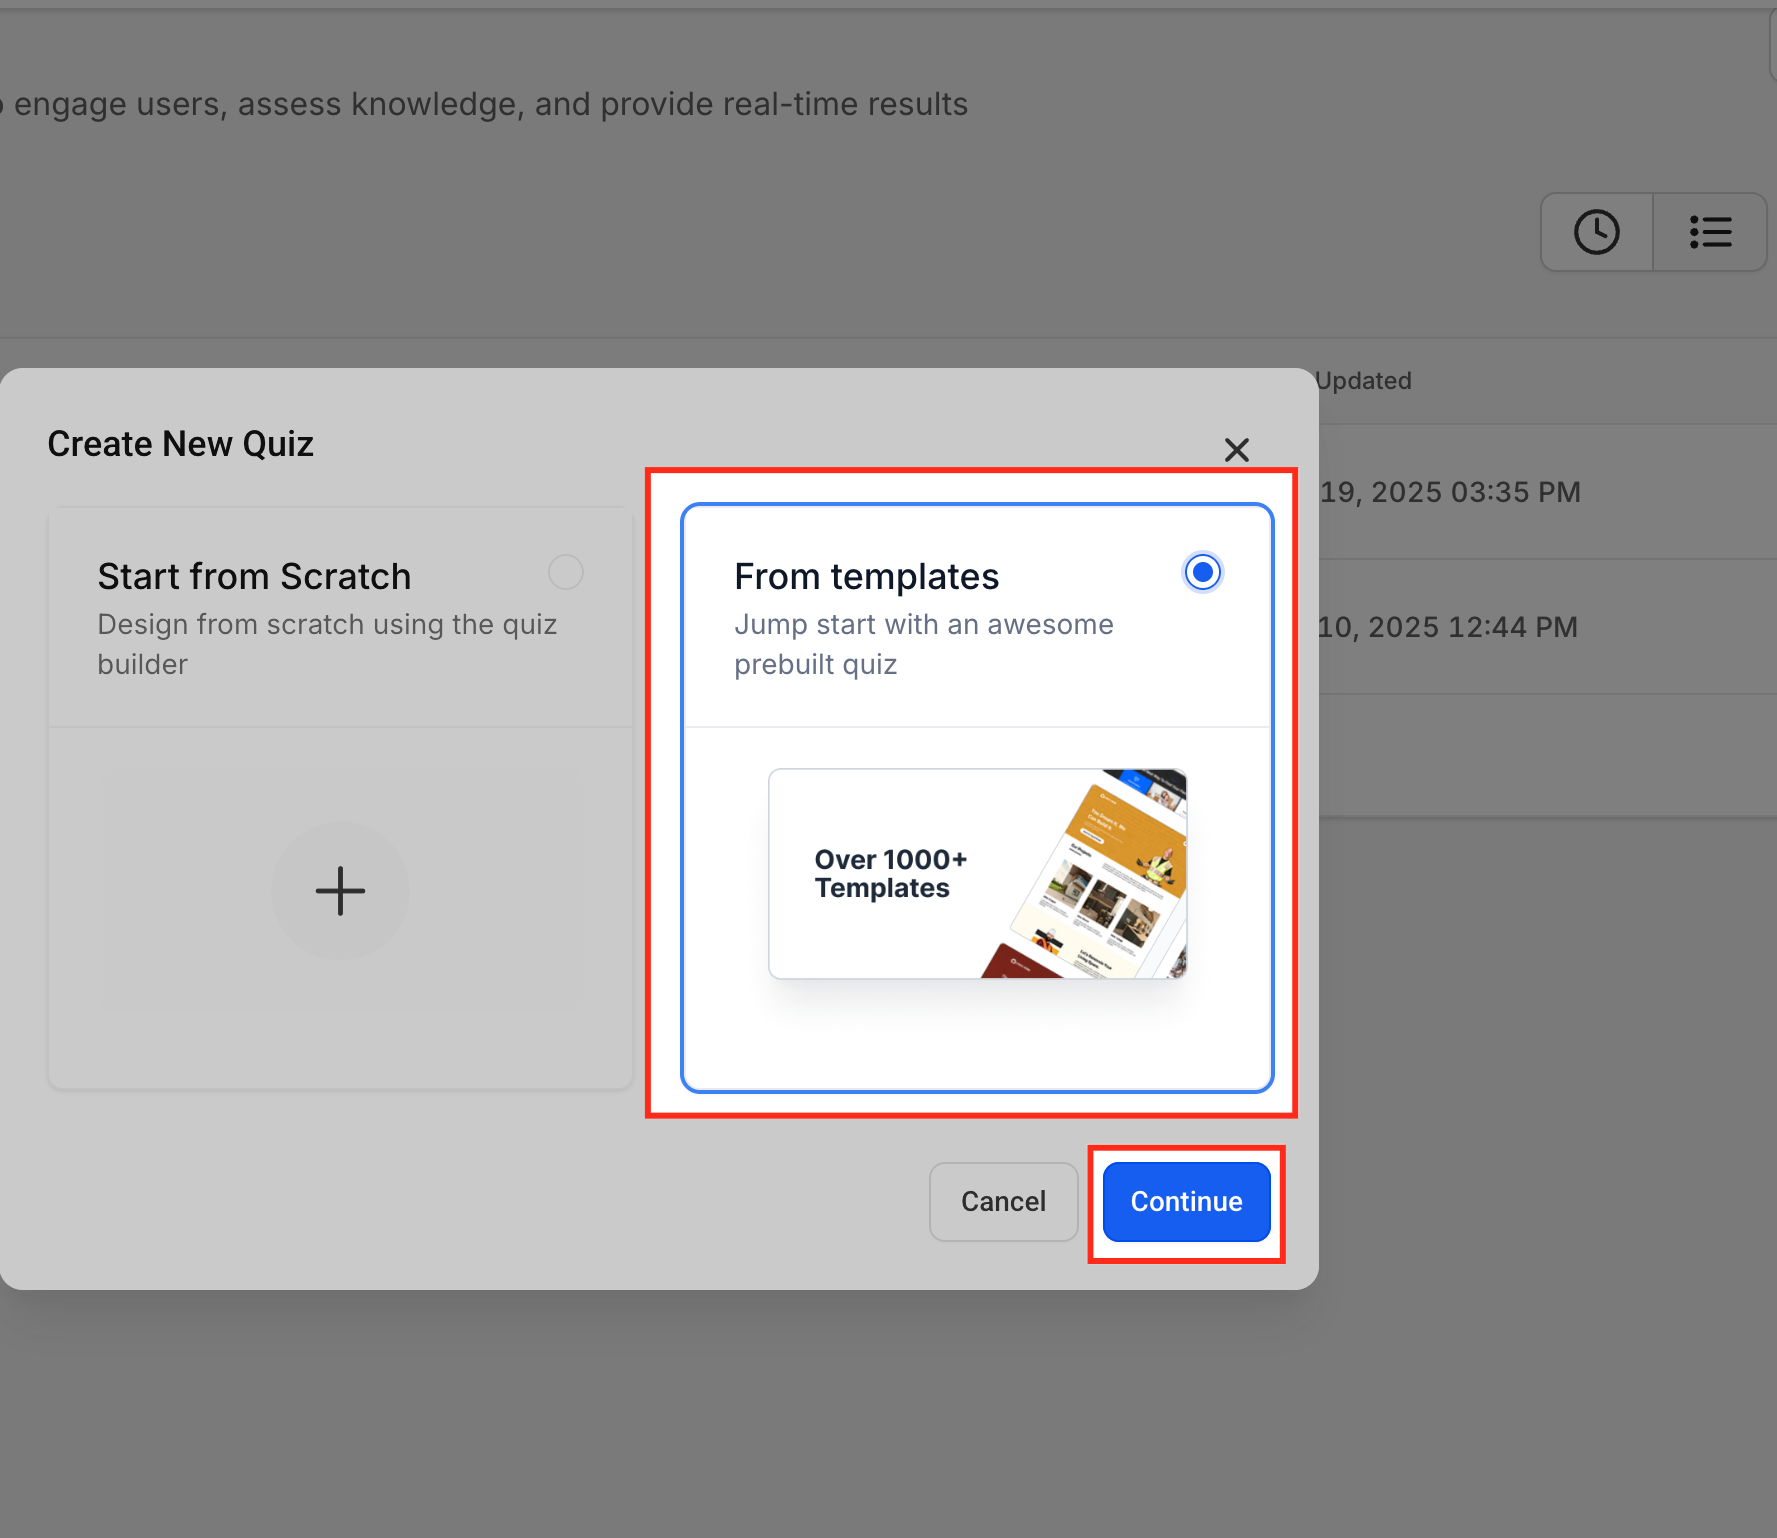
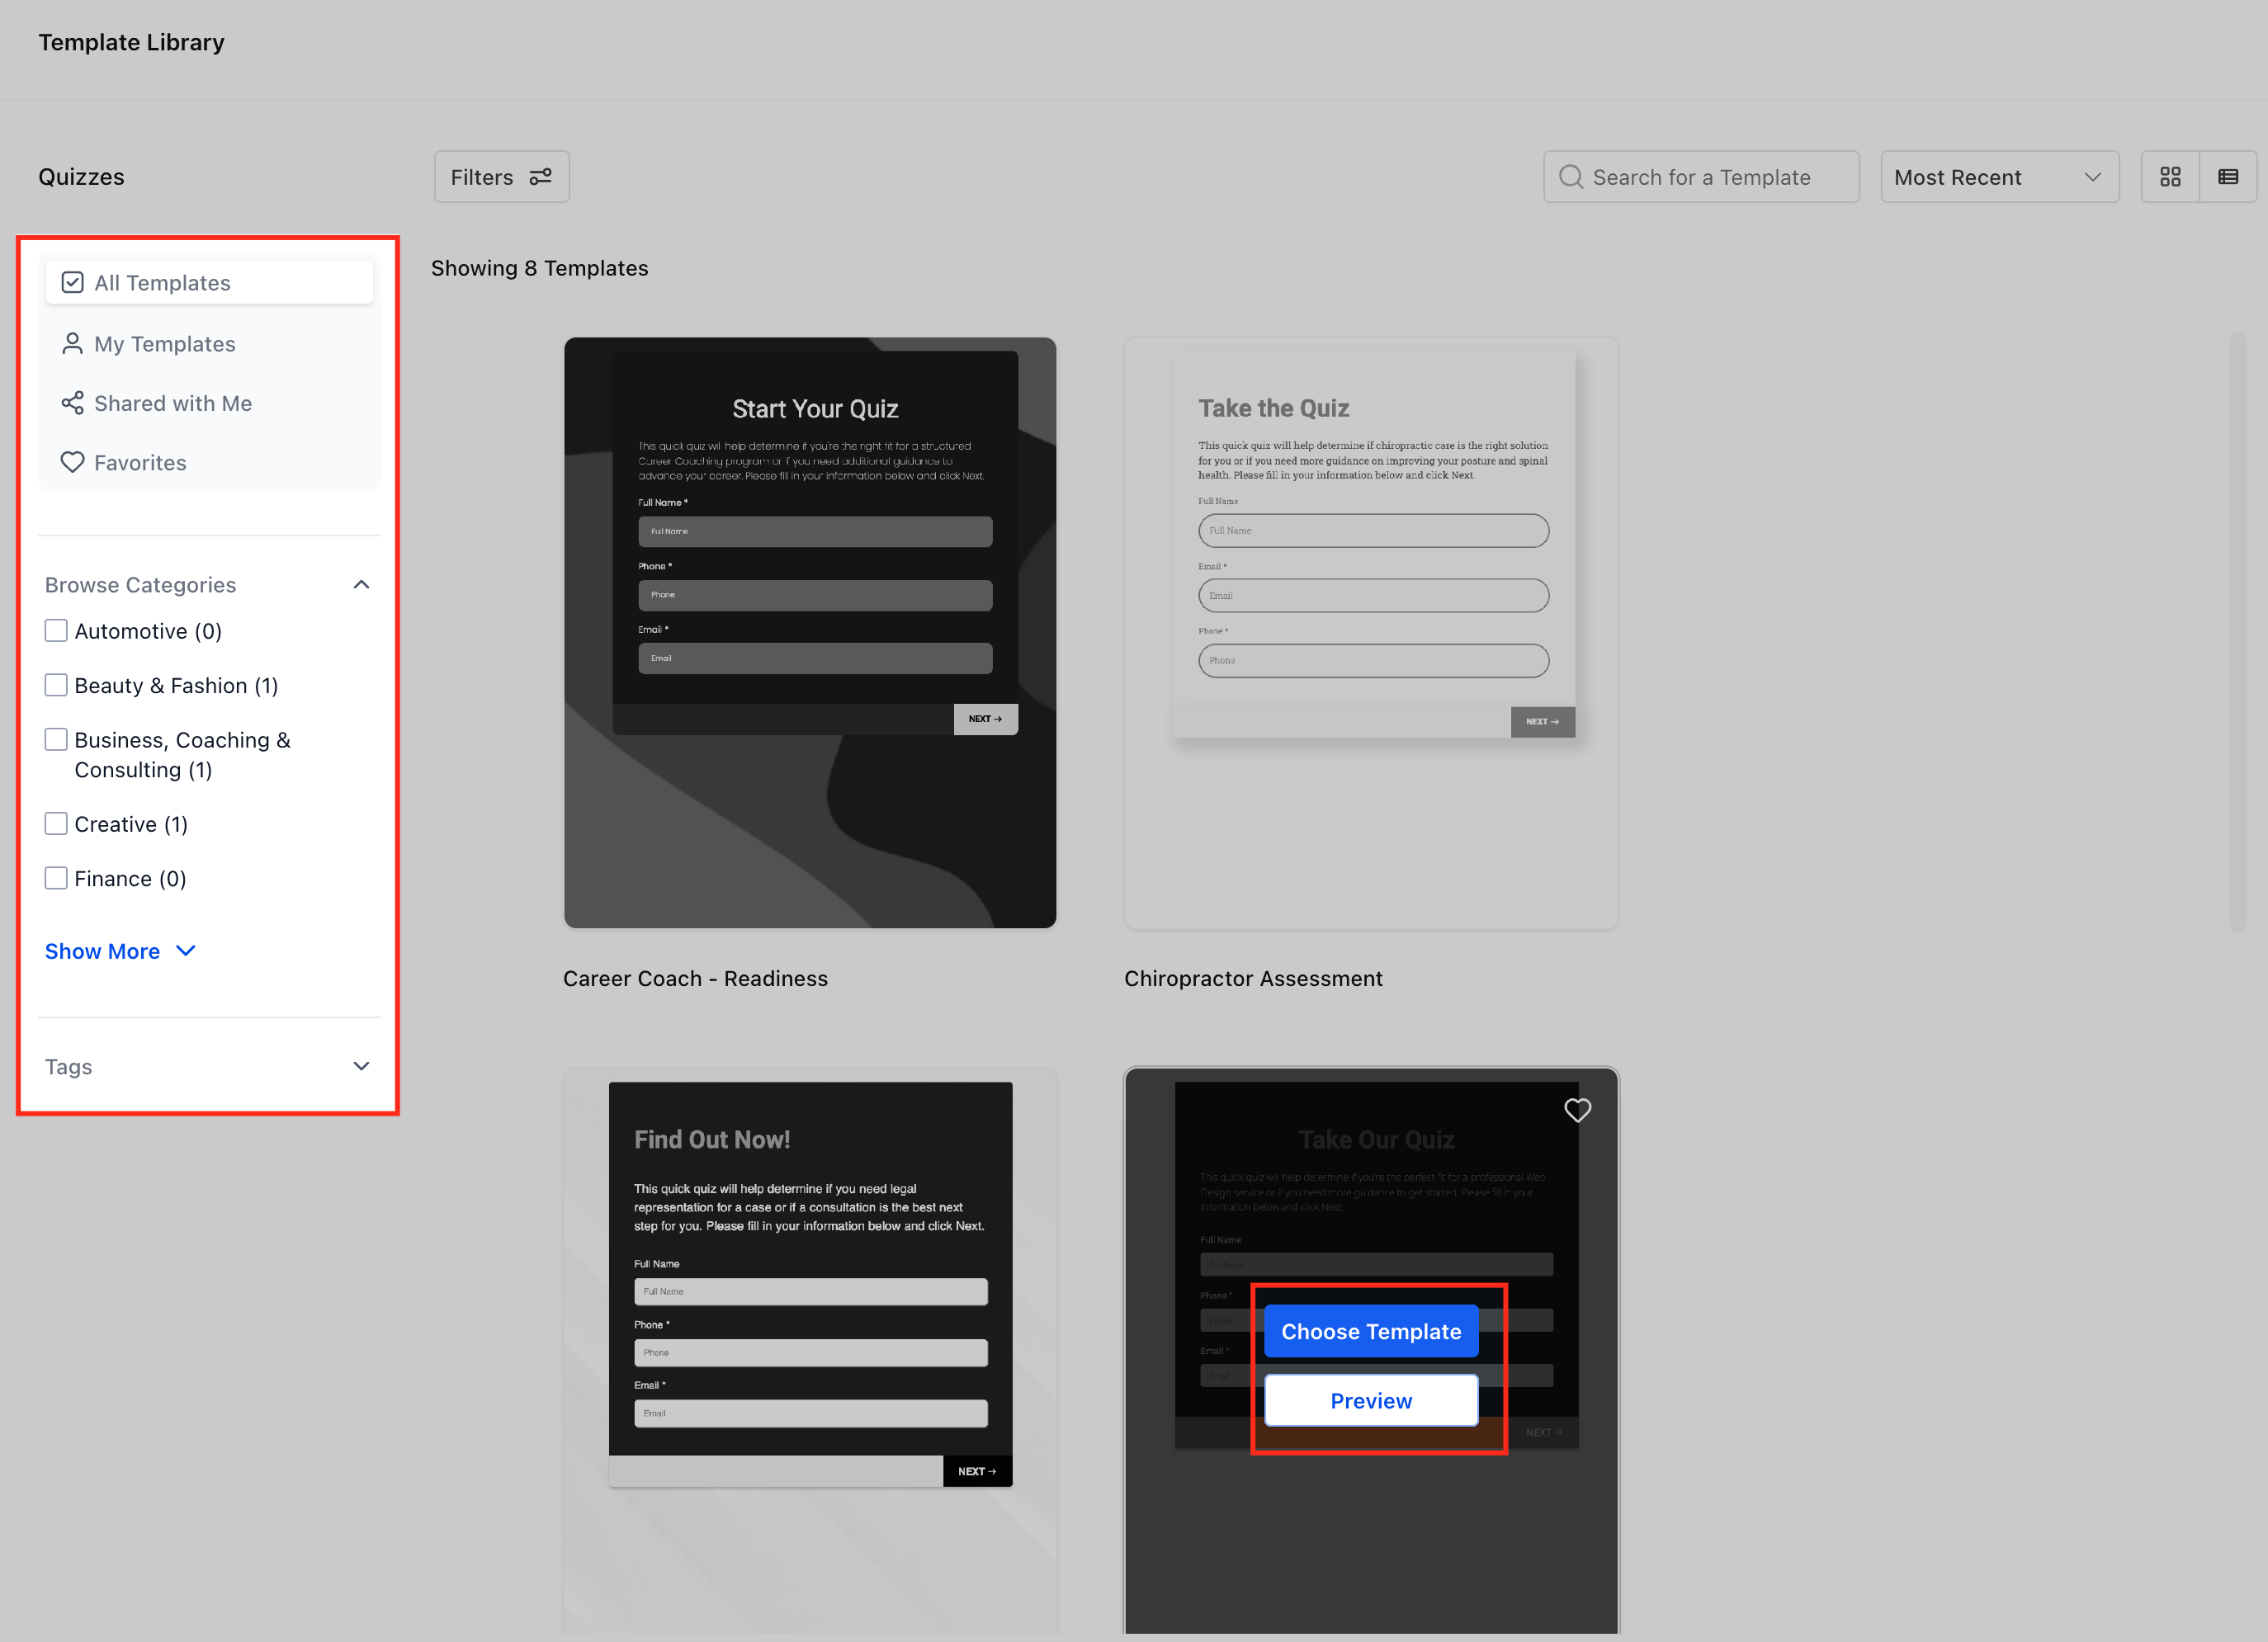
Templates speed up building: instead of assembling a section from scratch, insert a pre-designed block (Overall Score, Category Score, Call to Action, etc.) that already matches your quiz's design. Hover over a template and click Choose Template to apply it.
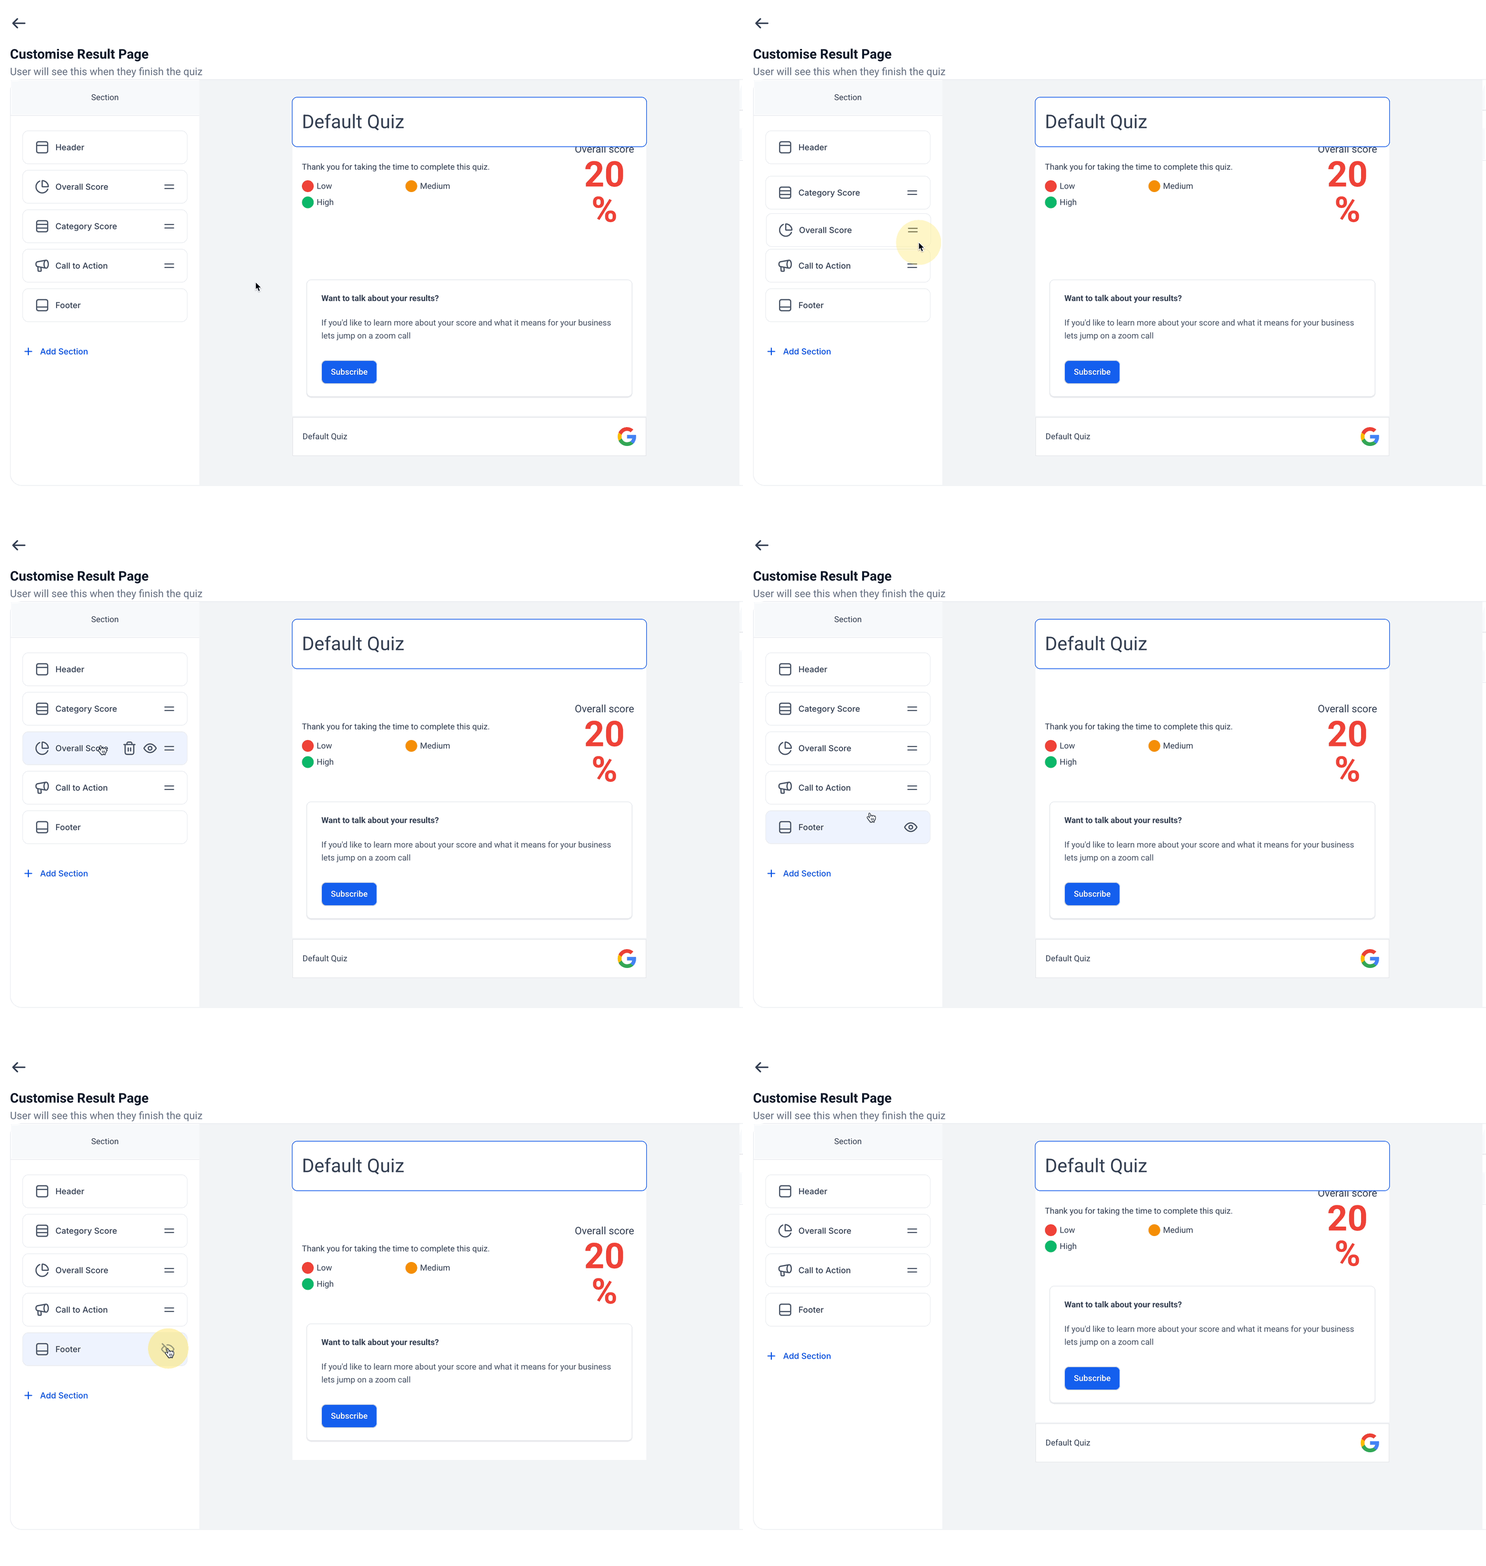
To reorder sections:
Hover over a section name in the panel to reveal the drag handle.
Click and hold the handle.
Move the section to the position you want.
Release to drop; the live preview updates instantly.
To hide or delete a section:
Click the eye icon to toggle visibility on or off. Hiding keeps the section's configuration intact but removes it from what patients see, and hidden sections are excluded from both display and scoring.
Click the trash icon to permanently delete it. Deleting only affects future quiz takers; historical submissions are unaffected.
Hidden sections appear grayed out in the panel.
Keep results simple by hiding sections you don't need.
Match each CTA to the outcome so patients take the right next step (a booking link for "Ready to Book," a call-me request for "Needs a Consult").
Preview often on both desktop and mobile to confirm layout and content.
Double-check scoring and category assignments if totals don't add up.
Test edge scores (for example, exactly 40% or 70%) to confirm they map to the correct tier.
Separate from the Result Page, the On Submit message controls the confirmation screen a patient sees immediately after submitting a form, survey, or quiz that doesn't route to a scored result page. Instead of a plain "thank you," you can design a branded confirmation with headings, images, and layout that adapts to desktop and mobile.
To customize it:
Go to Sites > Forms/Surveys/Quizzes > Builder.
Create a new item or edit an existing one.
Open the item and go to Settings > On Submit.
From the dropdown, select Message.
Use the rich text editor to write your headline and subtext, with text size, color, alignment, lists, links, images, and custom values as needed.
Under Message Styling, set background color, text weight, and corner radius.
Adjust margin and padding.
Toggle Background Blur on or off (only available when an image is set as the background).
Switch between Desktop and Mobile views and style each independently.
Use the Preview panel to check your work, then click Save.
You can use a Message or a Redirect as the default On Submit behavior, not both, though conditional logic can override with a different message or redirect when specific conditions match. Workflows triggered by a form, survey, or quiz submission run independently of whichever On Submit message is shown, so the confirmation screen and your follow-up automation don't depend on each other.
If your quiz collects any health-related information (skin concerns, medical history, current medications) tied to a patient's contact record, treat those answers the same as intake form data: don't surface sensitive details back to the patient in a shared or public-facing result message, and make sure only staff with a legitimate reason can view the raw submission on the contact record.
Do hidden result page sections affect quiz scoring? No. Hidden sections are excluded from both display and scoring, so hiding a section is safe if you just want a simpler page.
Can I change score tier labels after I've published the quiz? Yes. Labels are editable in the Score Tier configuration window at any time, though every range must stay between 0 and 100.
What happens to a quiz that was built before score tiers existed? Older quizzes are automatically migrated to the normalized 0-100 scoring system. It's worth double-checking your tier ranges after migration to make sure they still reflect what you intended.
Can Workflows trigger off a specific score tier? Yes. Use the Quiz Submitted trigger and filter by Overall Score Tier (or a category-specific tier) equal to Low, Medium, or High, or whatever labels you've set.
What happens to existing results if I delete a result page section later? Deleting a section only affects future quiz takers. Historical submission data stays intact.
Is drag-and-drop section reordering available on mobile? Section reordering currently works on desktop browsers. Mobile support is expected later.
Do I need a personality-style quiz to use Individual Category personalization? No, but it's designed for category-based results, where a patient's answers point to one specific outcome. If your quiz doesn't group answers into categories, this feature won't have anything to personalize around.
Where do I insert the dynamic quiz tags in a result message? Use the tag picker inside the Rich Text Editor on the result section to insert Quiz Tags (like highest/lowest category name and score), contact fields, custom values, or timestamp tags.
Can I show both a percentage score and a personality-style outcome on the same result page? Yes. Use the Overall Score section for the percentage and the Individual Category section for the personality-style outcome; both can appear on the same page.
My final scores don't look right. What should I check first? Confirm every answer option is assigned to the category you intended, remember that "Overall Only" answers never count toward a category total, and preview the quiz end to end to verify the math before publishing.
