Quizzes in Aesthetix CRM let you capture leads, segment prospective patients, score intent, and trigger automated follow-up based on how someone answers. They live under Web Tools → Quizzes and can be embedded on your website or funnel pages, or shared as a direct link.
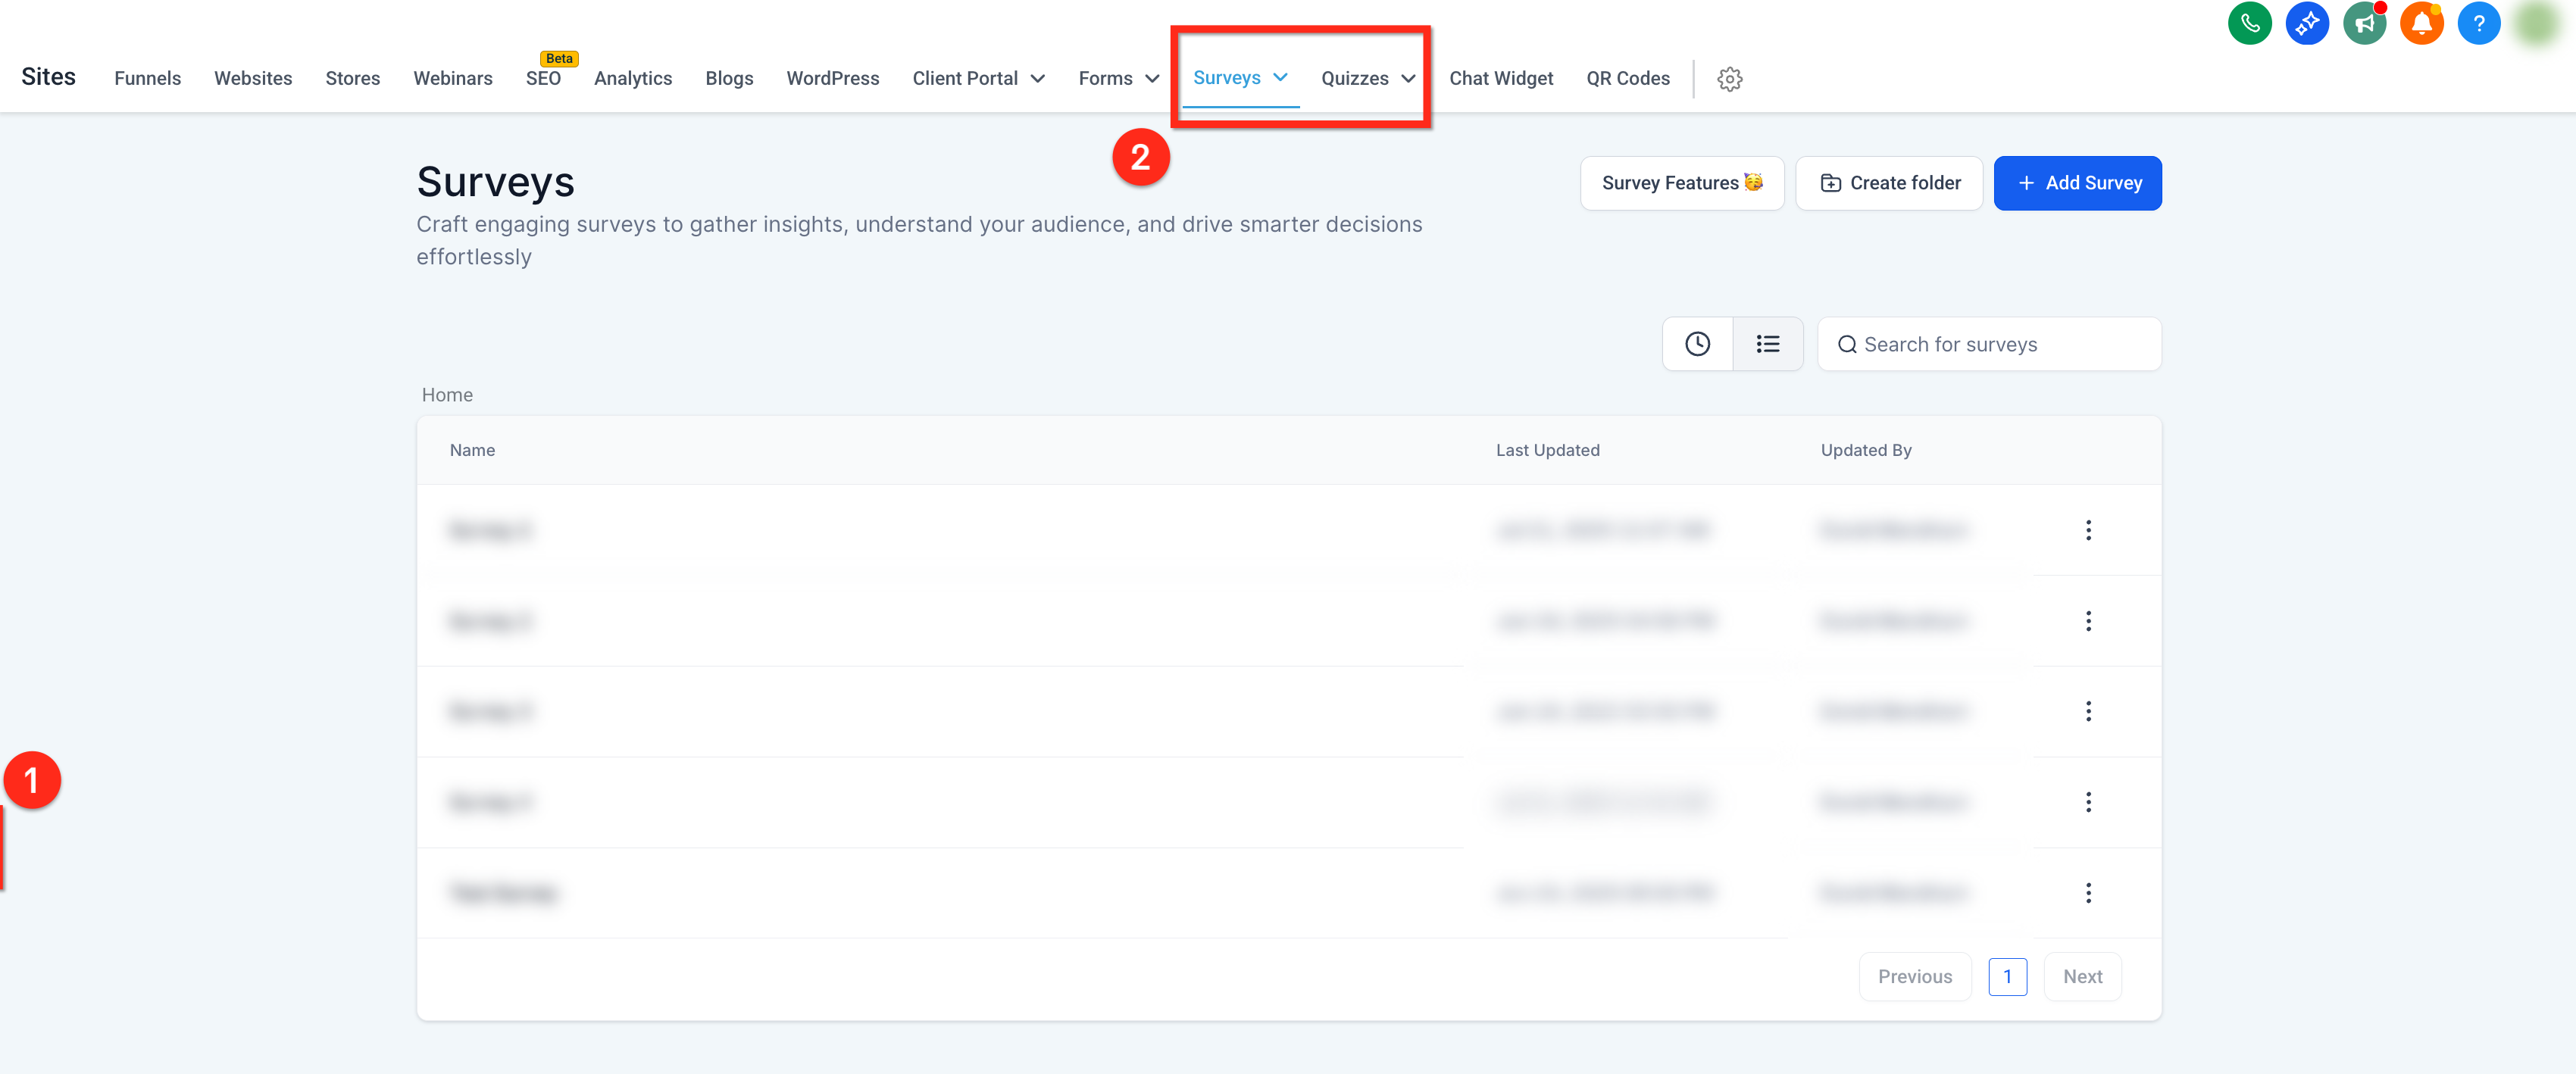
Navigate to Web Tools → Quizzes.
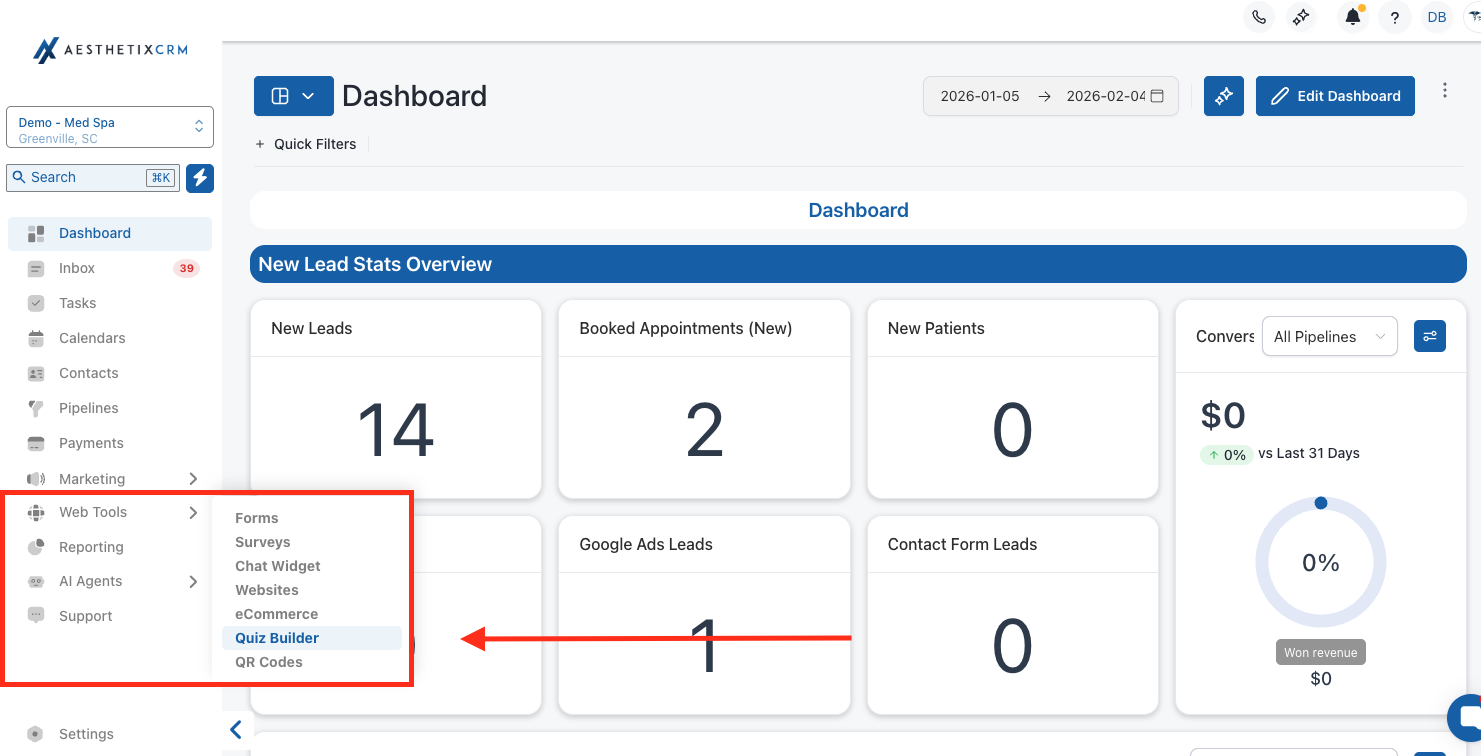
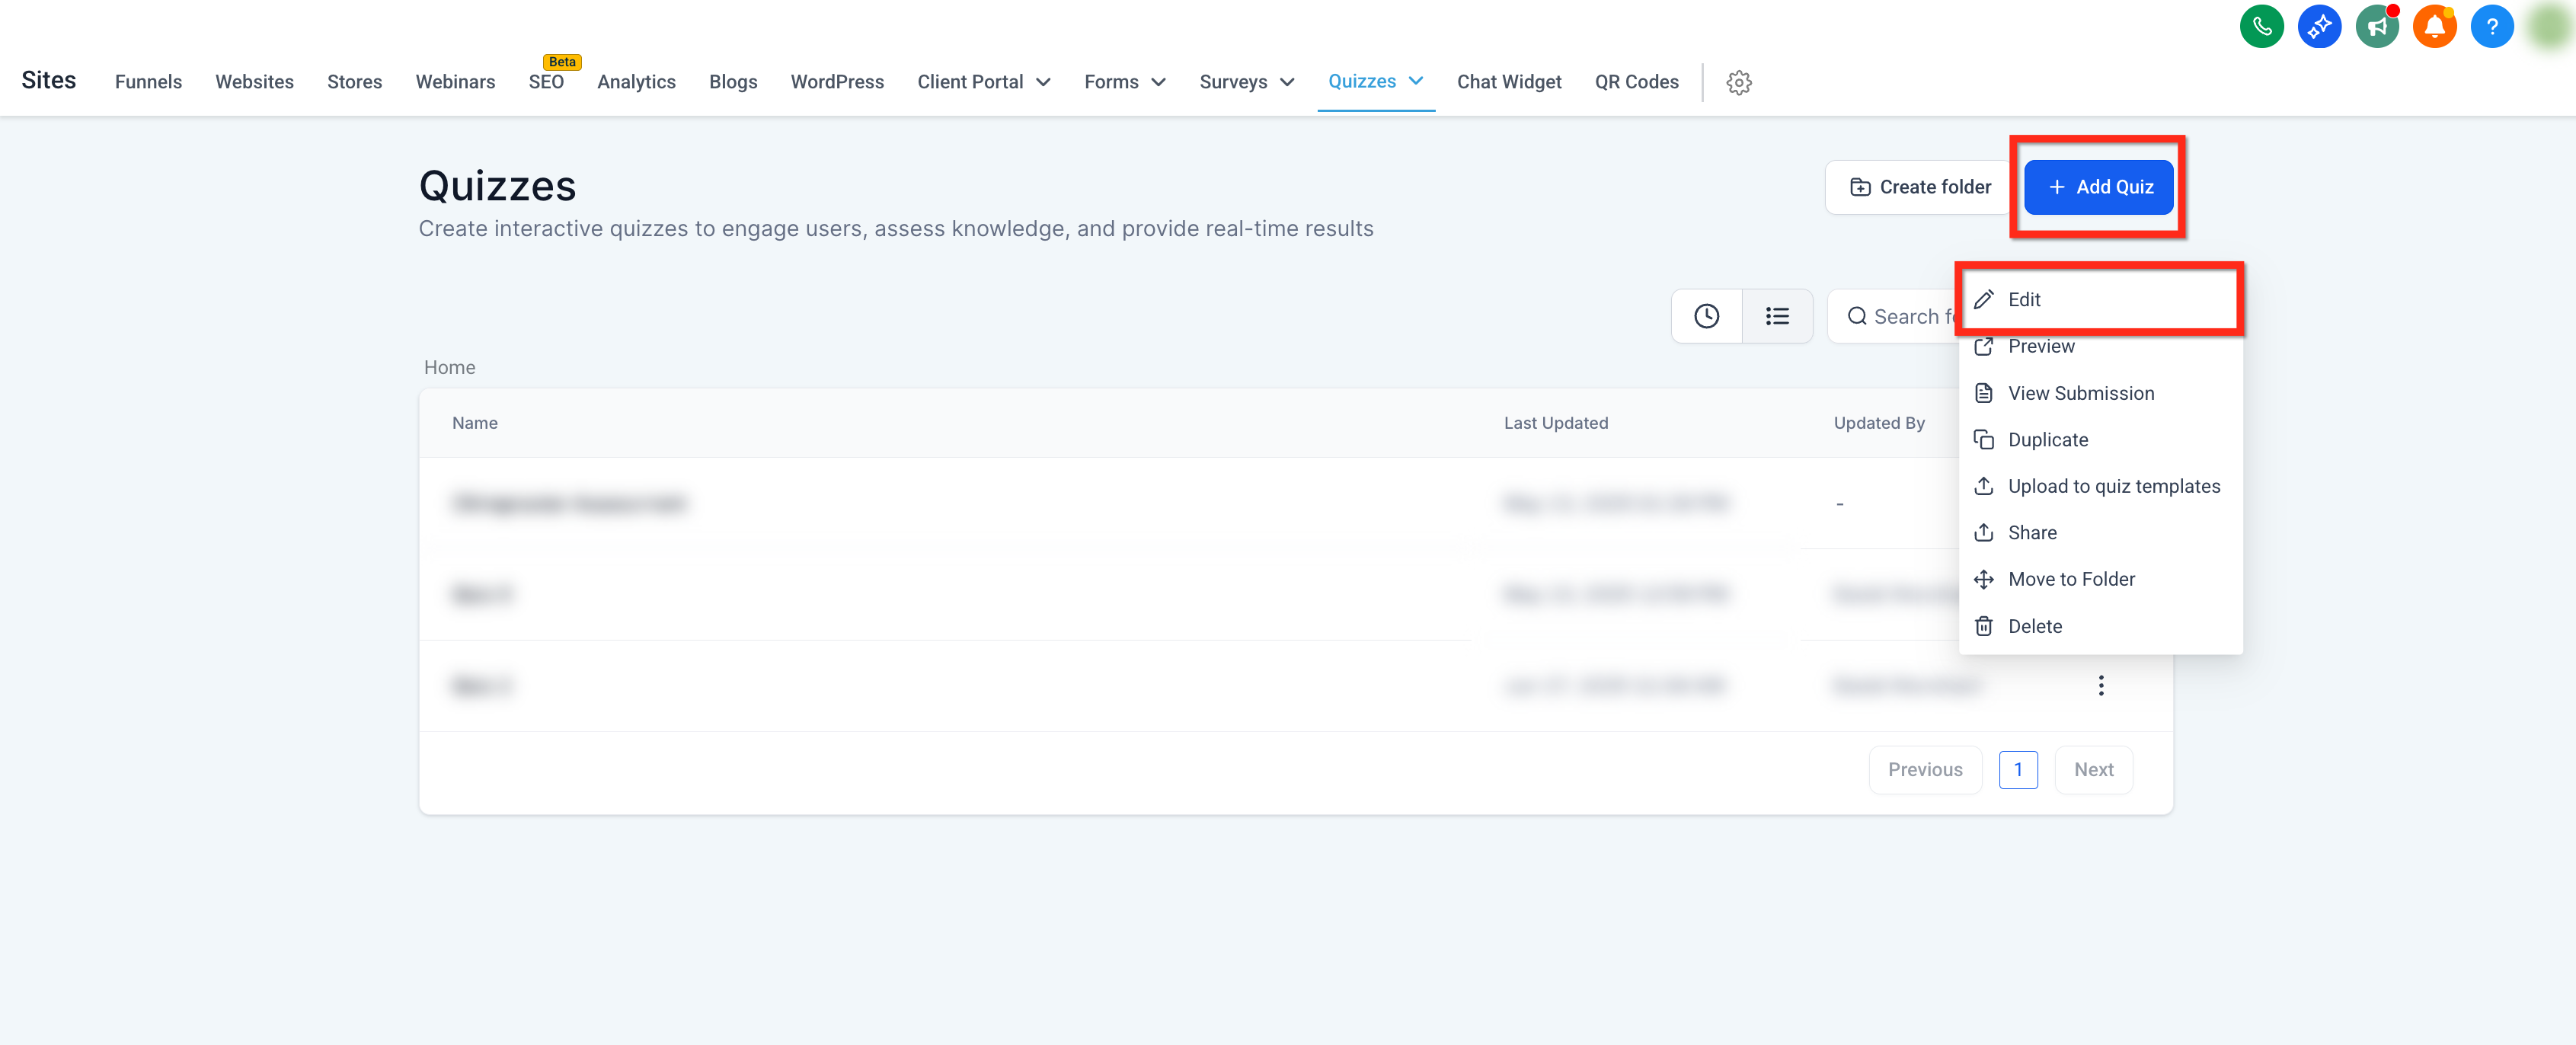
Click + Add Quiz.
Choose one of the following:
Start From Scratch to build a blank quiz.
Use a Template to start from a prebuilt layout.
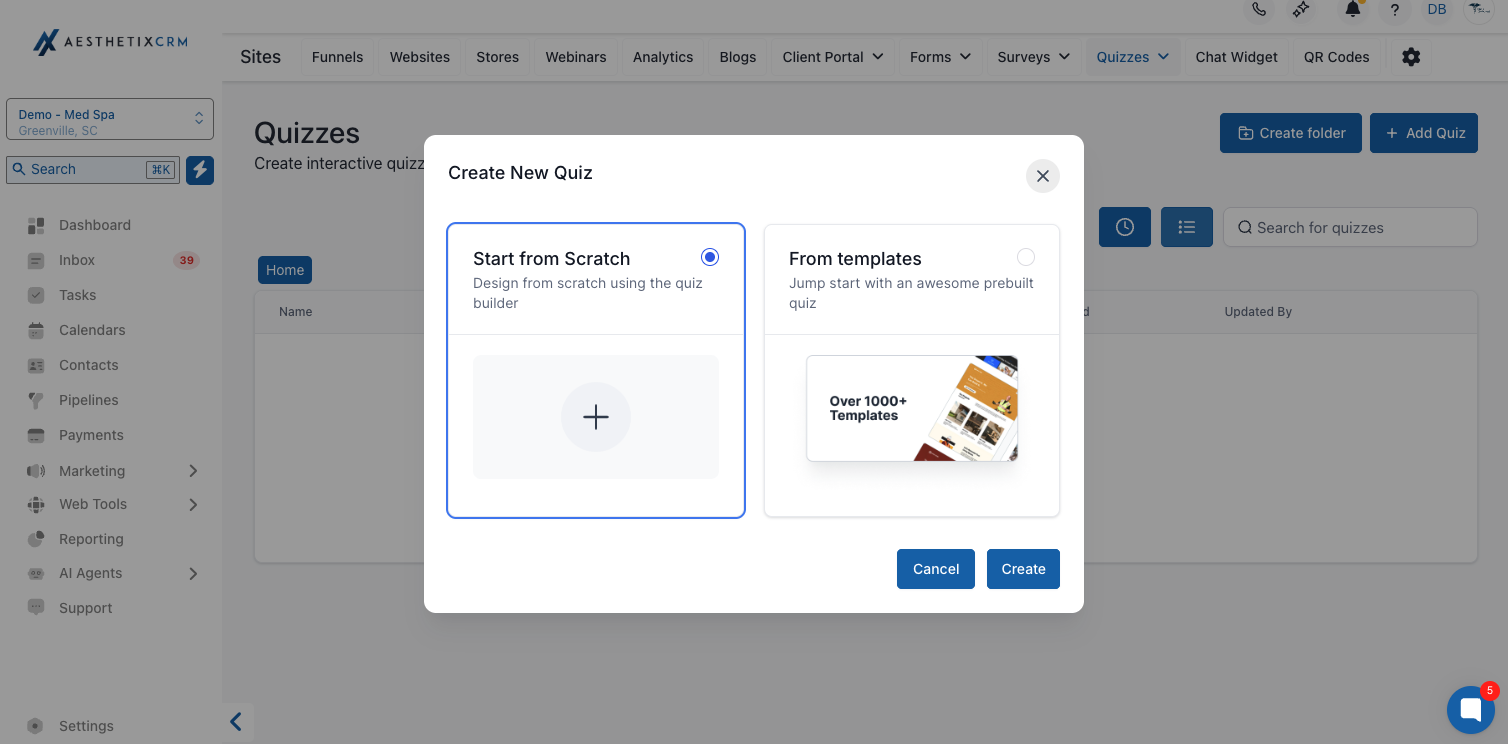
Enter a Quiz Name (used later for automation and reporting).
Click Save. You will now enter the Quiz Builder.
If you choose Use a Template, you'll land in the Template Library, a collection of pre-built quiz layouts organized by goal (lead generation, scoring, assessments, and more). Browse the available templates and click one to preview its structure before committing.
Once you find a layout you like, click Continue to open the quiz editor with that template already loaded. Every part of a template, questions, answers, outcomes, design, and logic, can still be edited, so it's a starting point, not a final draft. Using a template always starts a new quiz; it will never overwrite an existing one.
Top Bar: Back, Quiz Name, Preview, Integrate, Save
Center Canvas: Quiz pages and the Result Template
Left Panel: Quiz elements (questions, fields, content blocks)
Right Panel: Settings for the selected page or element
Quizzes are built using pages, and each page can hold multiple questions or fields. A recommended structure for a practice-facing quiz:
Page 1: Introductory questions (low friction, e.g. "What brings you in today?")
Page 2: Qualification questions (treatment interest, budget range, timeline)
Page 3: Contact information
Result Page: Recommendation and next steps
To add or manage pages:
Use the page controls in the builder to Add Page.
Drag pages to reorder them as needed.
Click a page to begin adding elements to it.
With a page selected in the canvas:
Click Add Element and choose a question or field type.
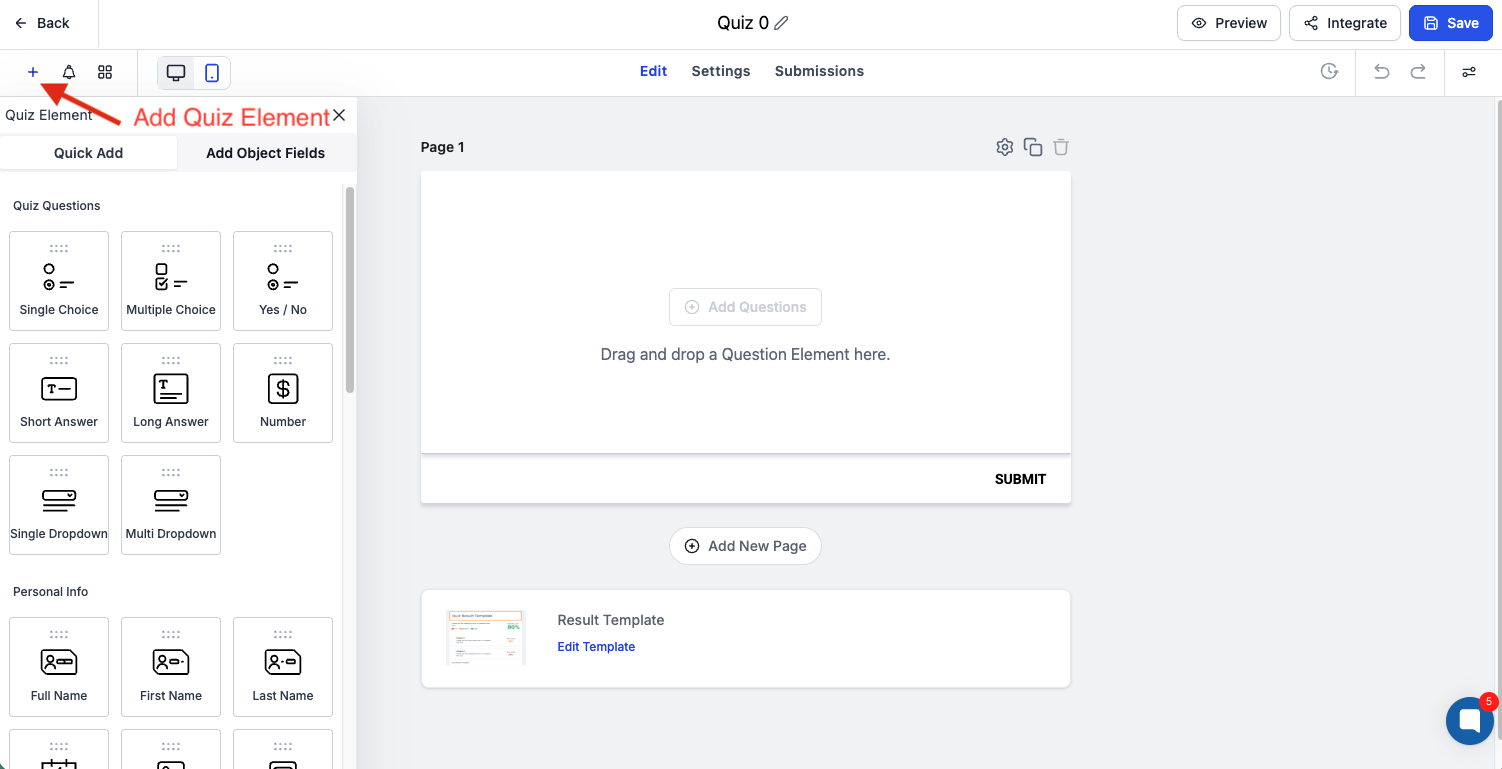
Common question types
Single Choice
Multiple Choice
Yes / No
Short Answer
Long Answer
Number
Dropdown (single or multiple)
Contact and compliance fields
First Name / Last Name
Phone Number
Captcha
Terms & Conditions Checkbox
Configure each element
With an element selected, use the right panel to:
Edit the Label
Enable Required
Set a Query Key (optional, used to prefill the field from a URL parameter)
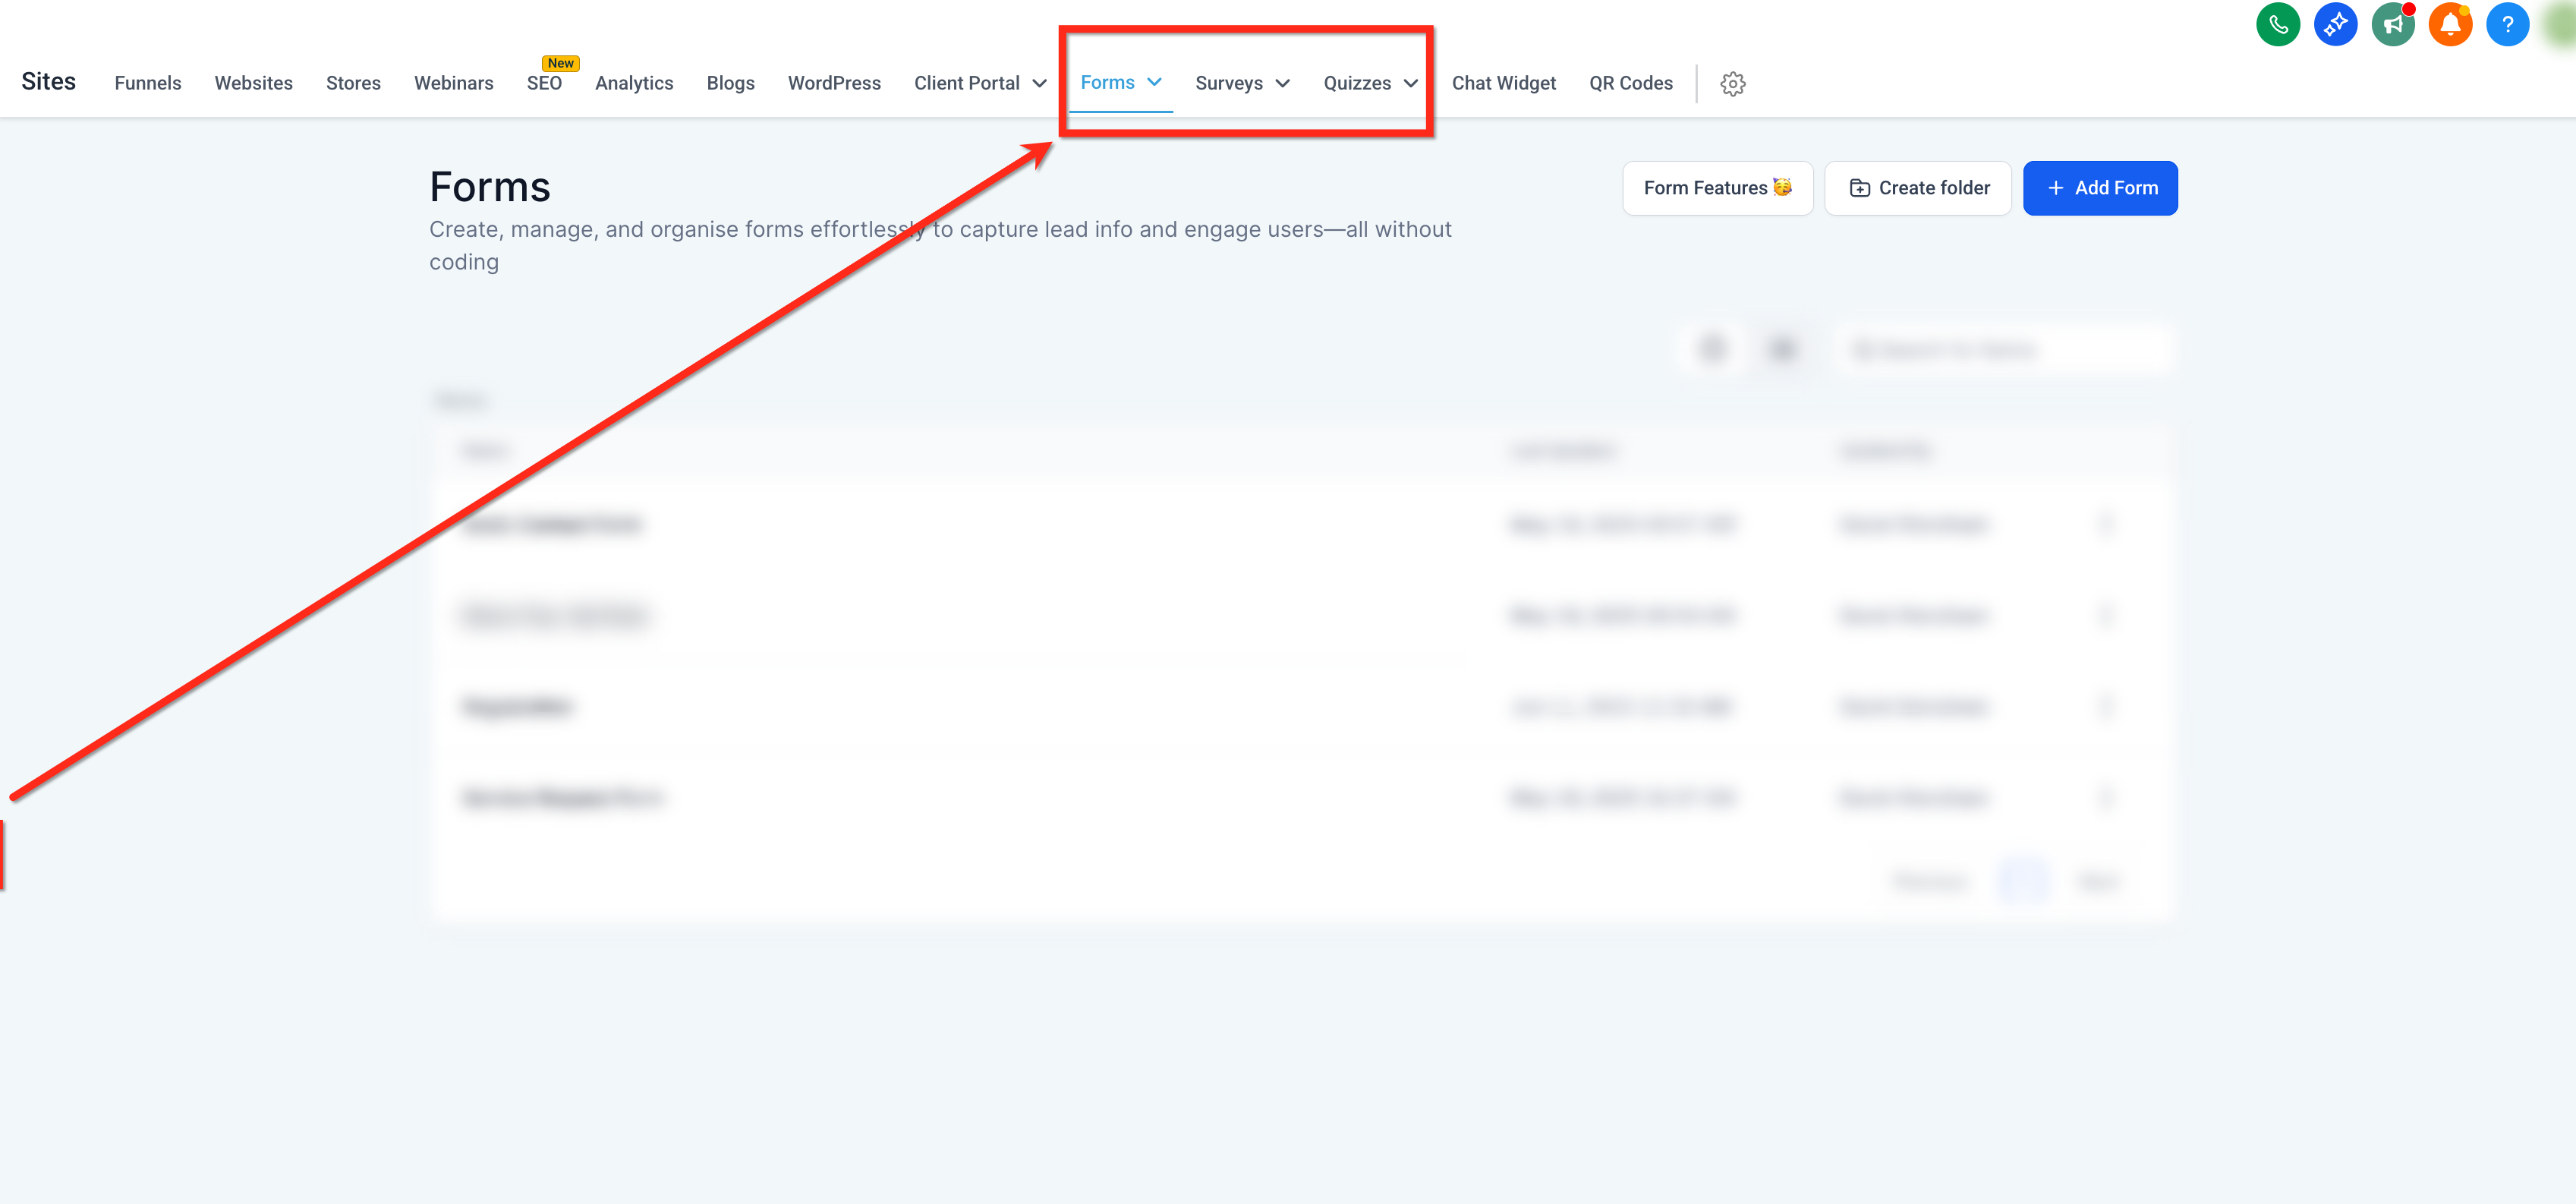
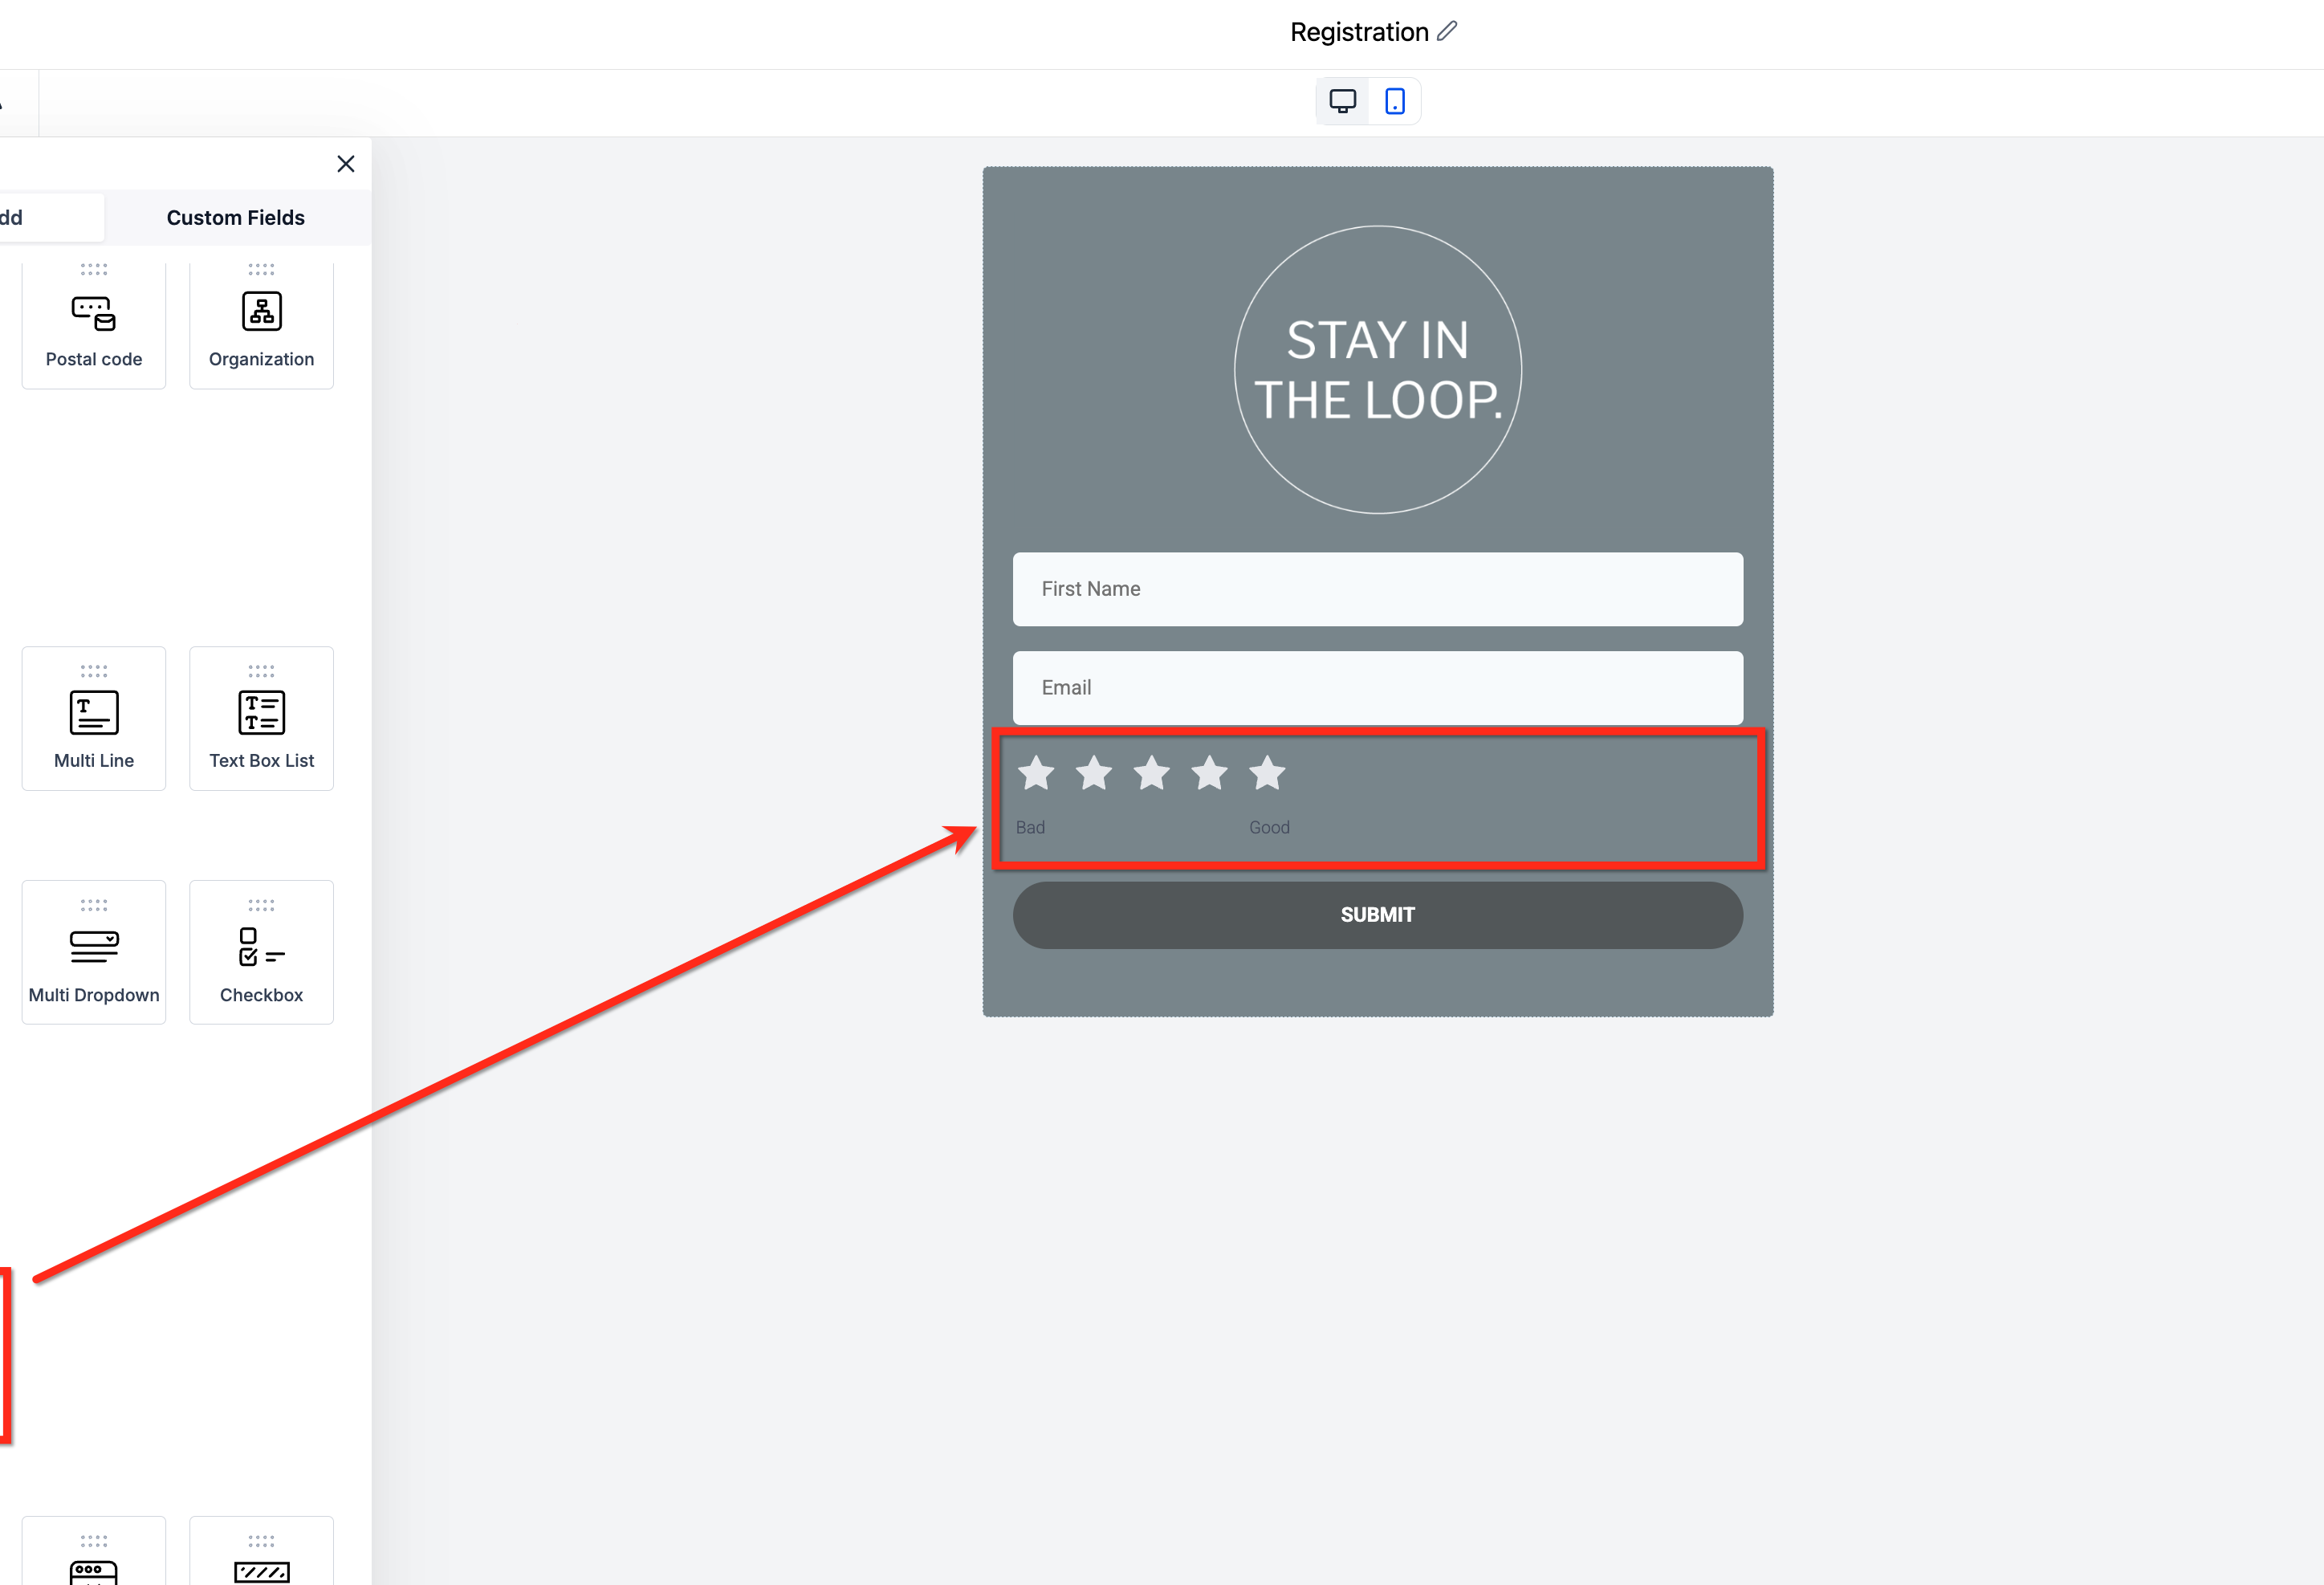
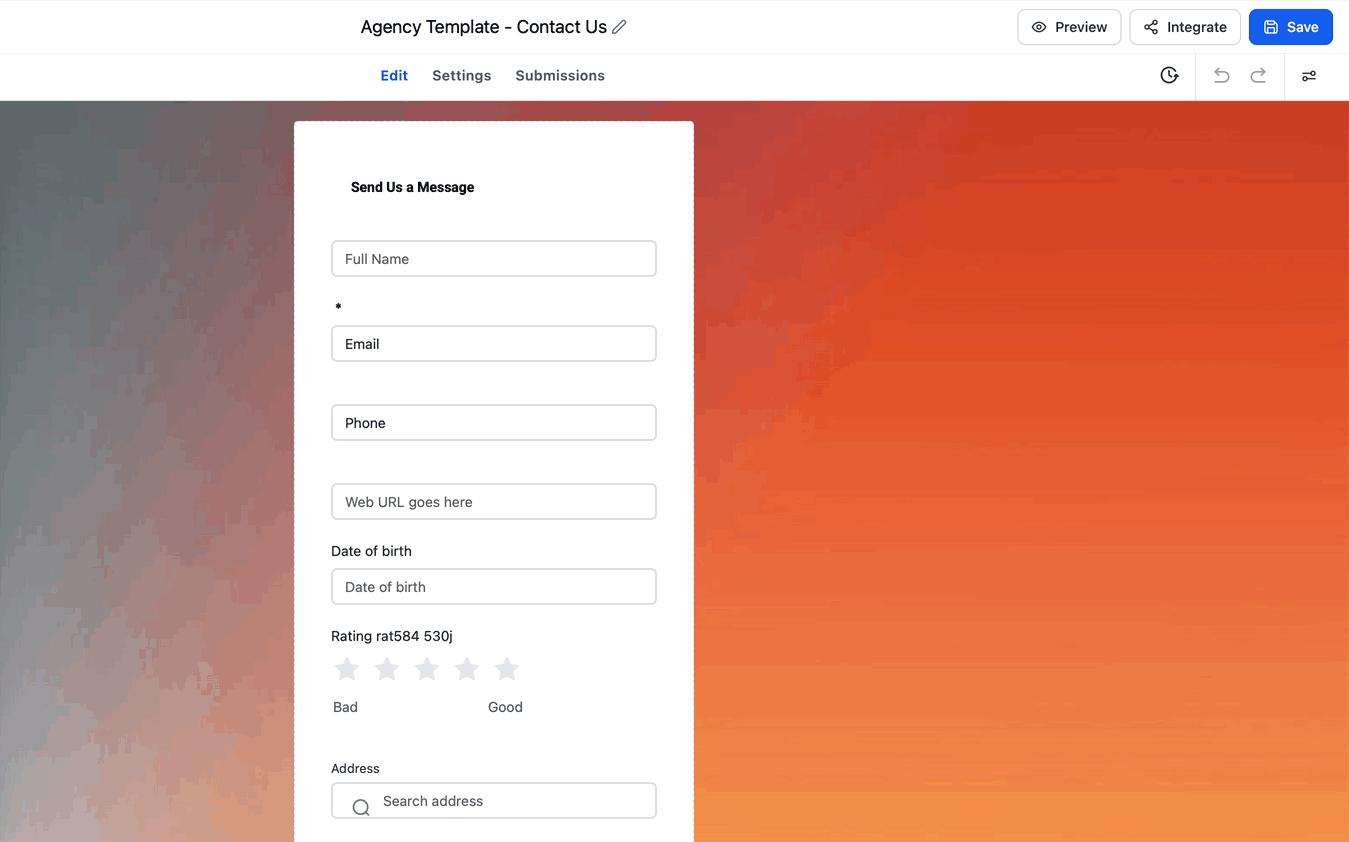
The Rating Element lets patients give visual feedback, star, heart, thumbs-up, flag, or light bulb icons, instead of typing an answer. It's a good fit for questions like "How would you rate your current skincare routine?"
Open the quiz in the builder.
Click Add Element, scroll to locate the Rating Element, and drag it into place on the page.
Click the placed element to open its settings on the right side of the screen, grouped into three sections:
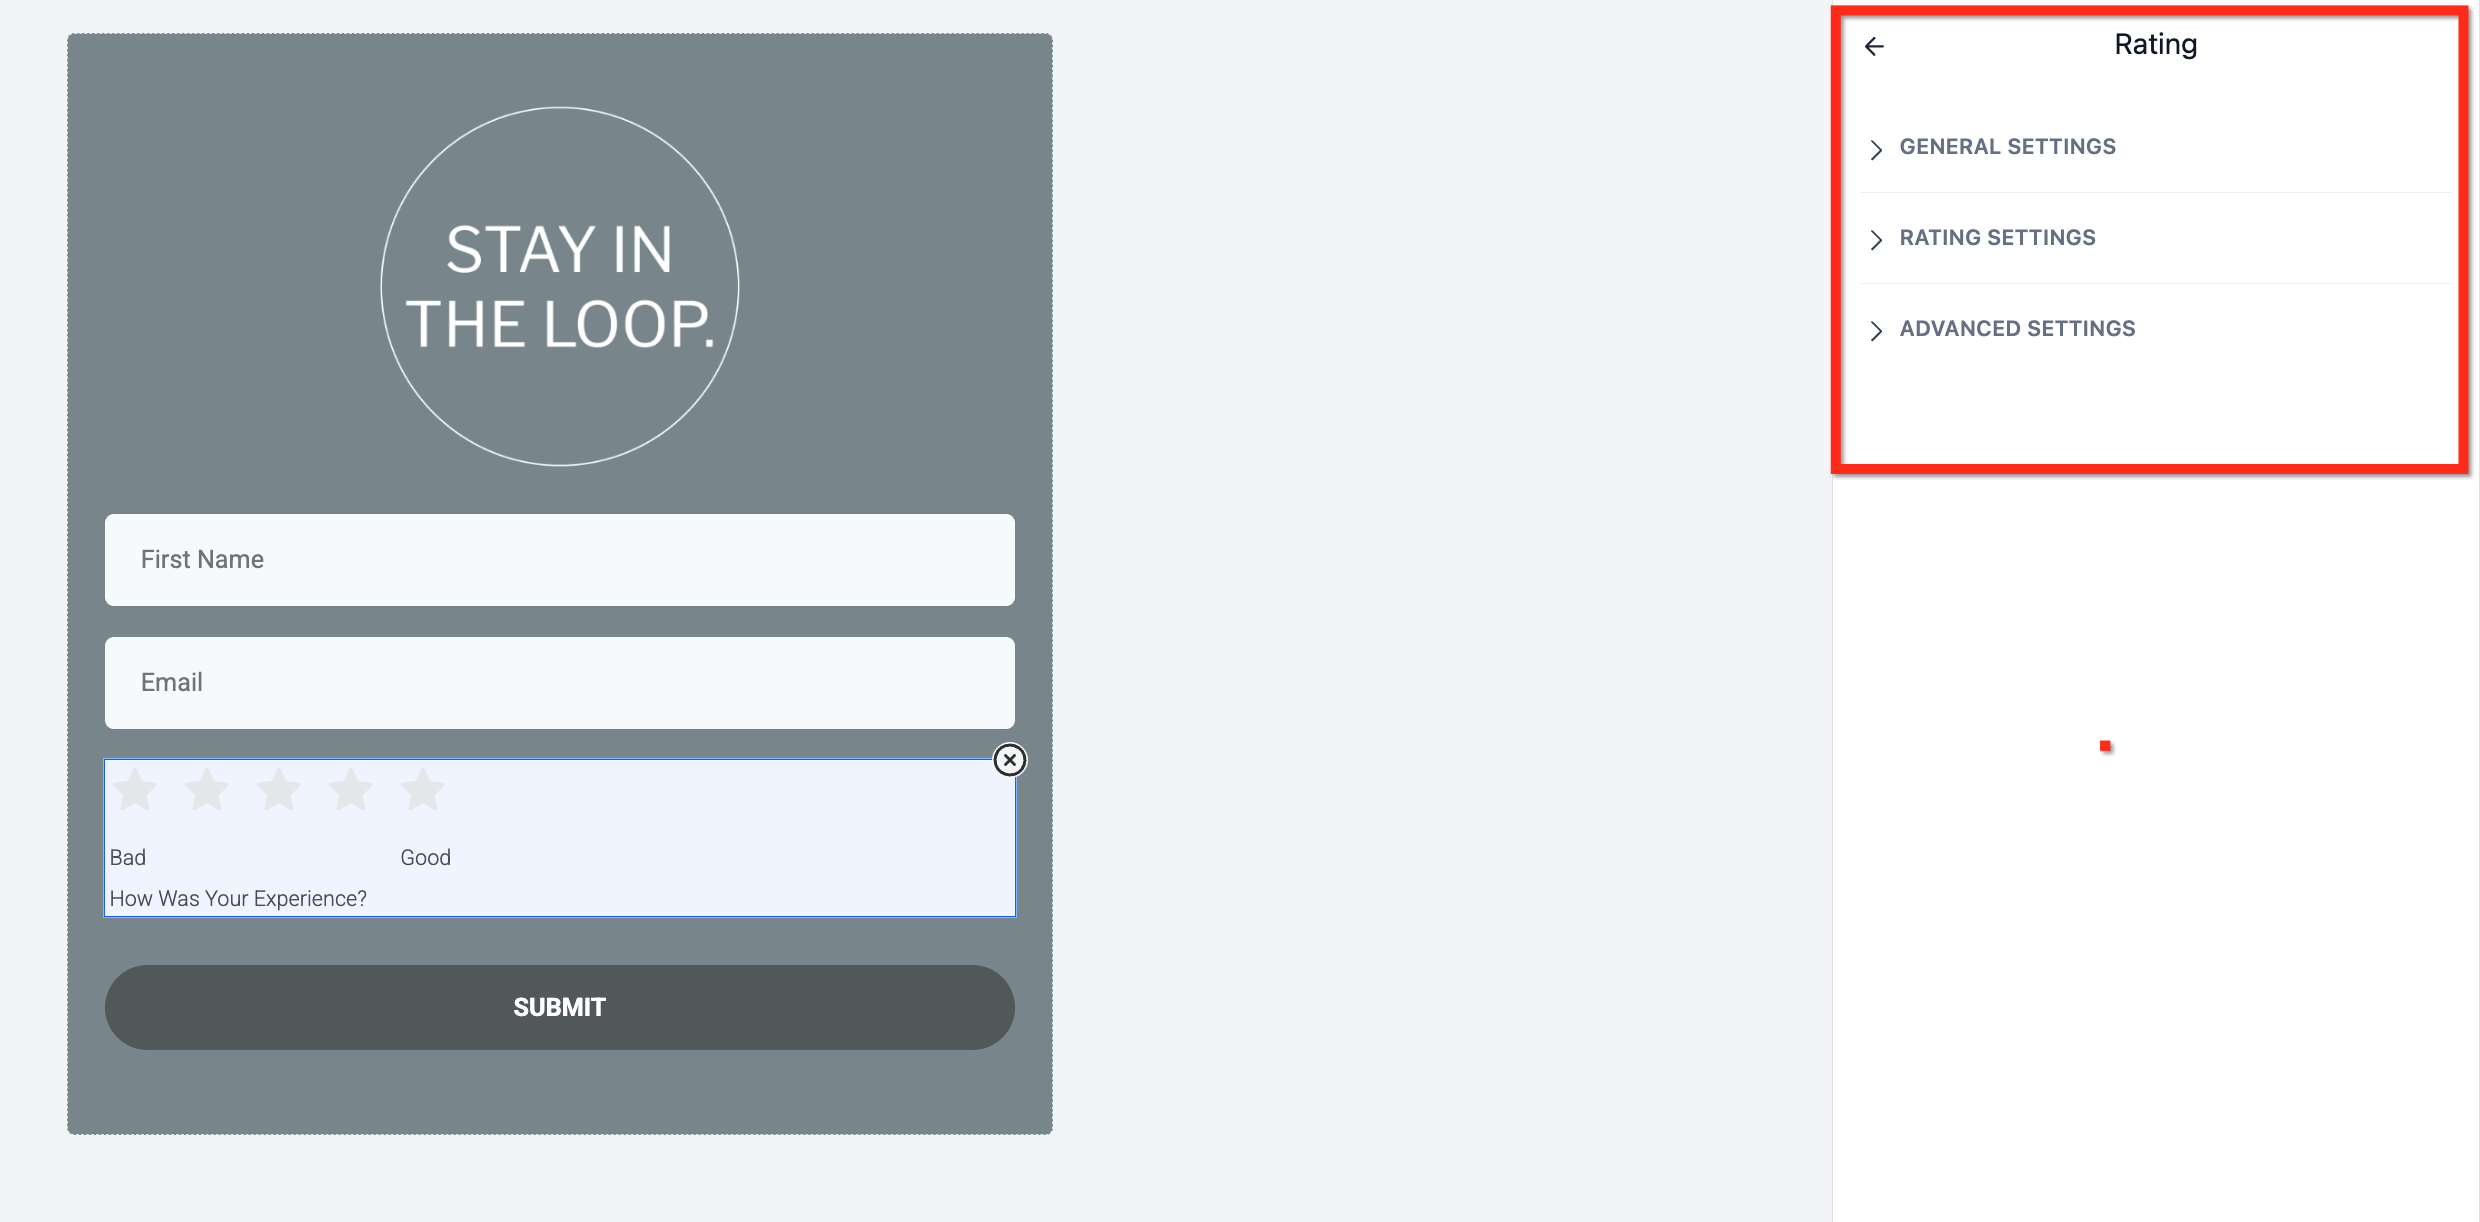
General Settings: label, field width, and whether it's required.
Rating Settings: icon type (stars, hearts, thumbs-up, flags, light bulbs), icon alignment, number of steps (1 to 10), lowest/highest labels (e.g. "Poor" to "Excellent"), icon colors, and data storage format: Absolute Value (raw score, e.g. 4), Percentage (e.g. 80%), or Fraction (e.g. 4/5).
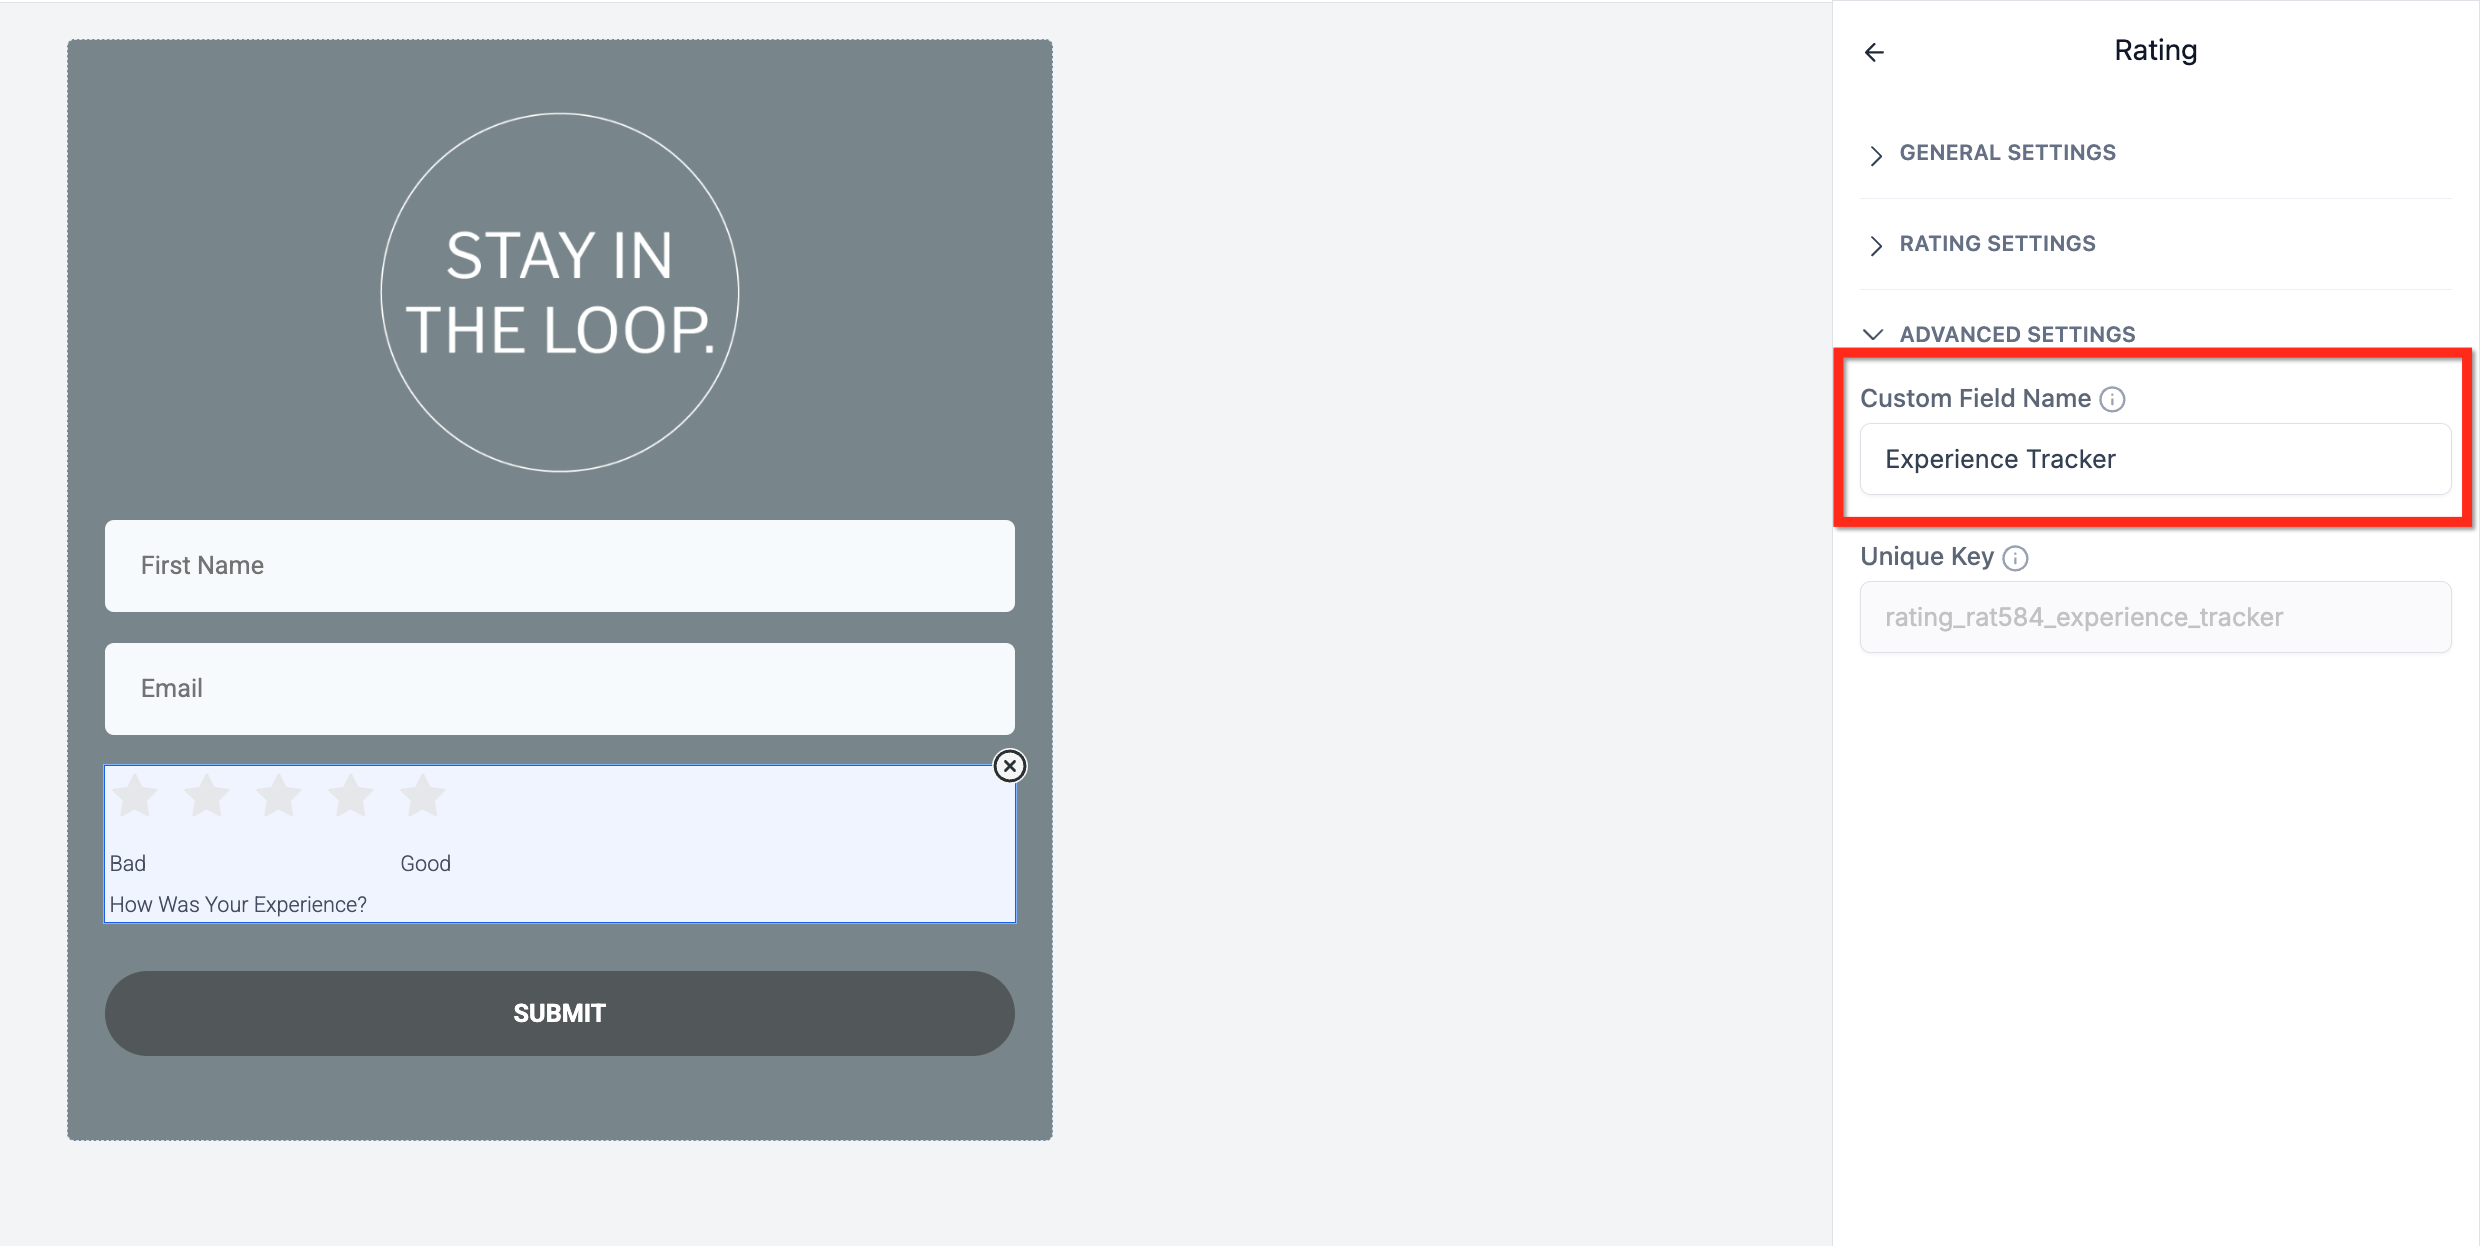
Advanced Settings: map the rating to a custom field on the contact record.
Click Preview to test the element. Hovering the icons highlights them in your chosen color, confirming the interaction works before you publish.
Custom field mapping
Mapping a Rating Element to a custom field stores the response on the contact record, which lets you use it to trigger automations, apply conditional logic, personalize follow-up, or segment your list.
Reviewing rating submissions
You can review ratings in the quiz's submission table, on the individual contact record, or in a PDF export of the submission, where the rating is also logged to the contact's timeline.
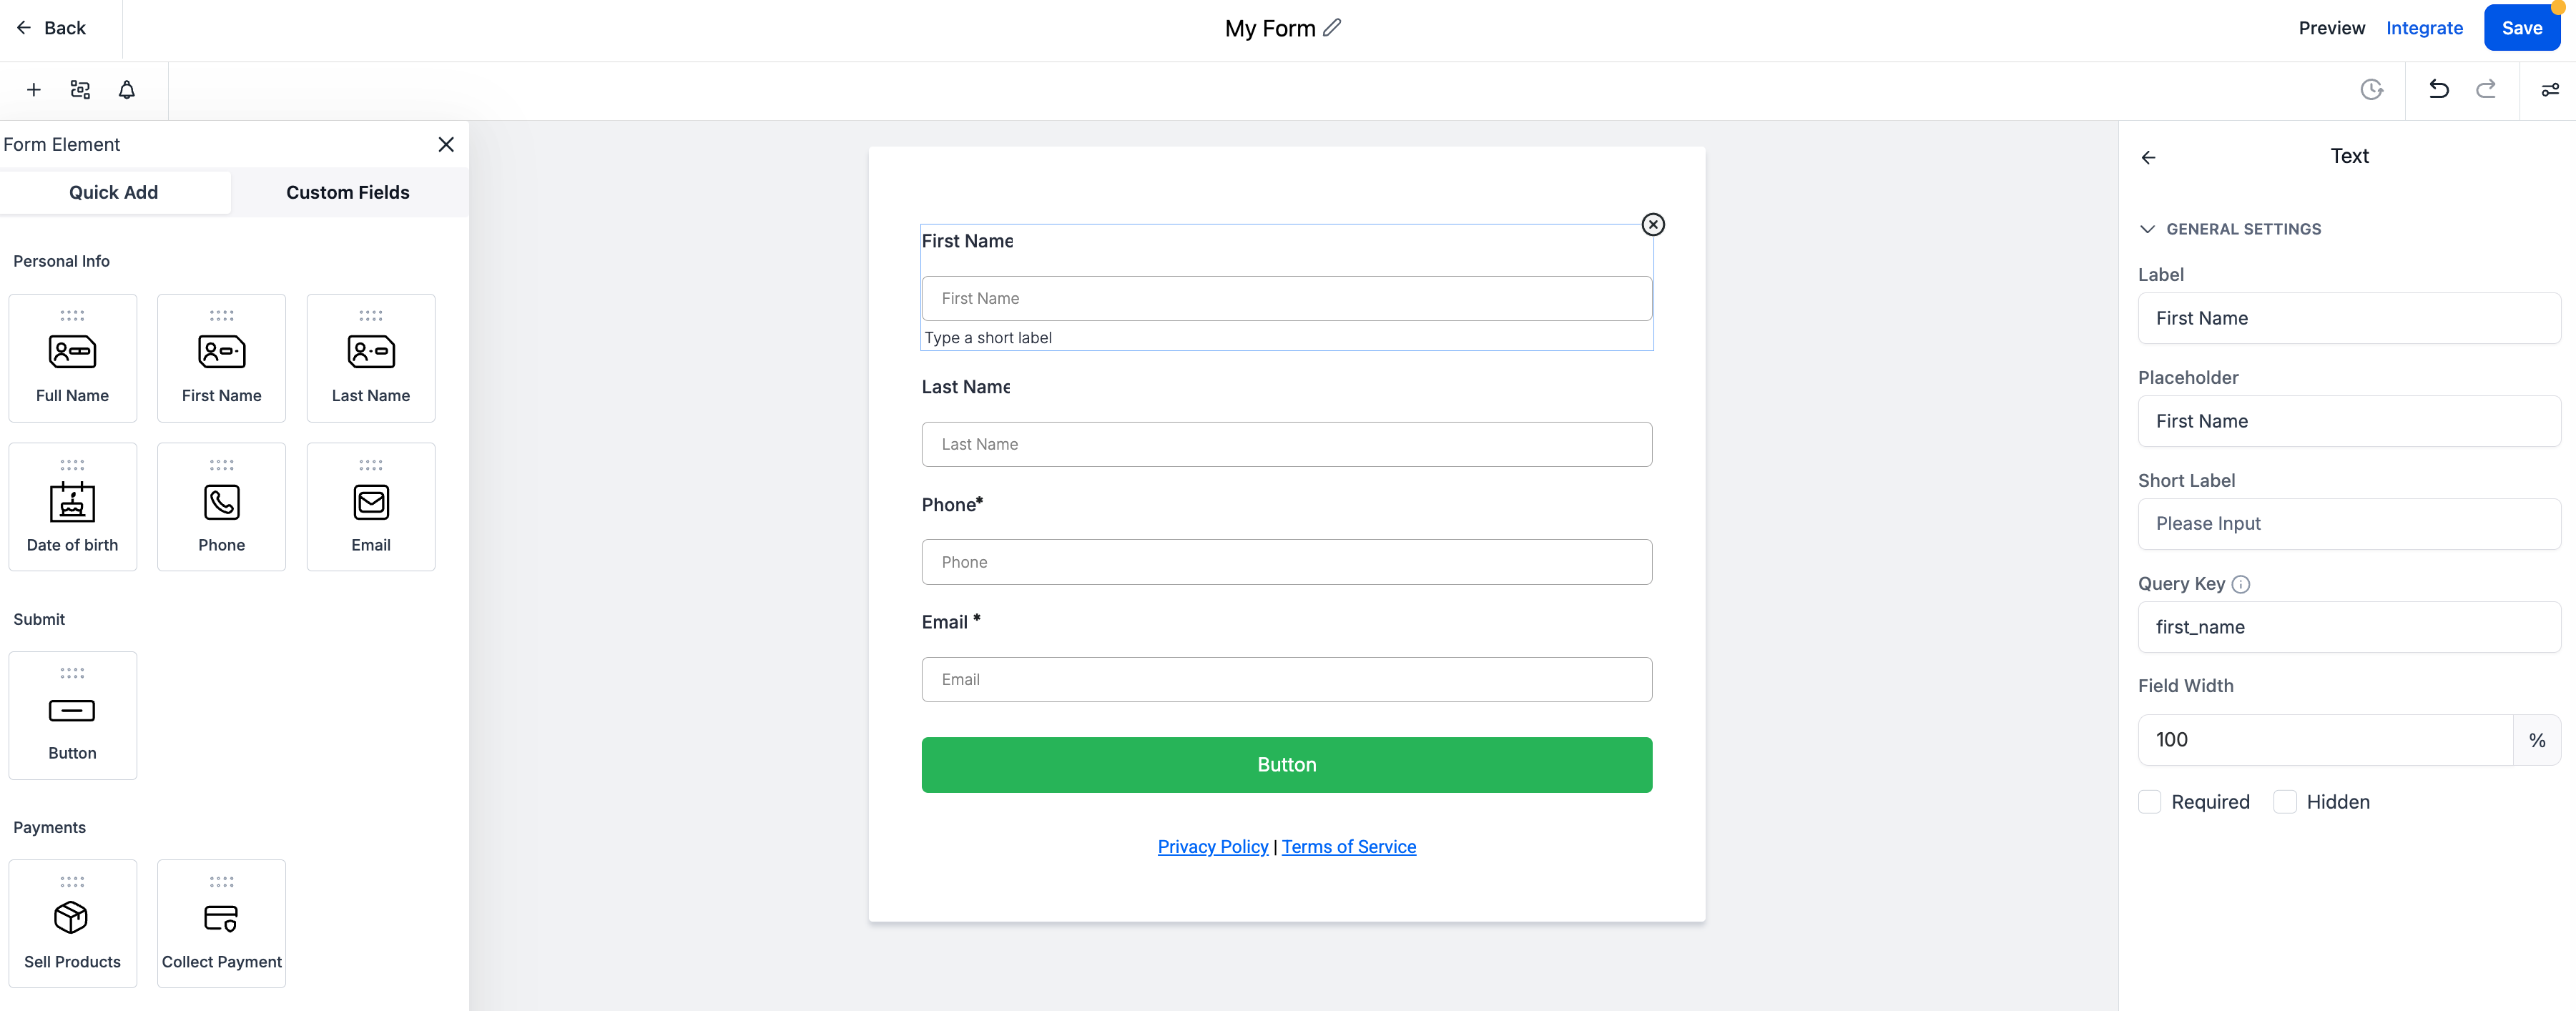
Instead of opening the right-hand settings panel for every small change, you can click directly on most text inside the builder preview and edit it in place: labels, placeholders, multiple-choice options, and button text all update instantly as you type.
Text elements, headings, and the Terms & Conditions block also support richer inline formatting, bold, italic, underline, size, and color, applied right where you're typing so you can preview the result immediately.
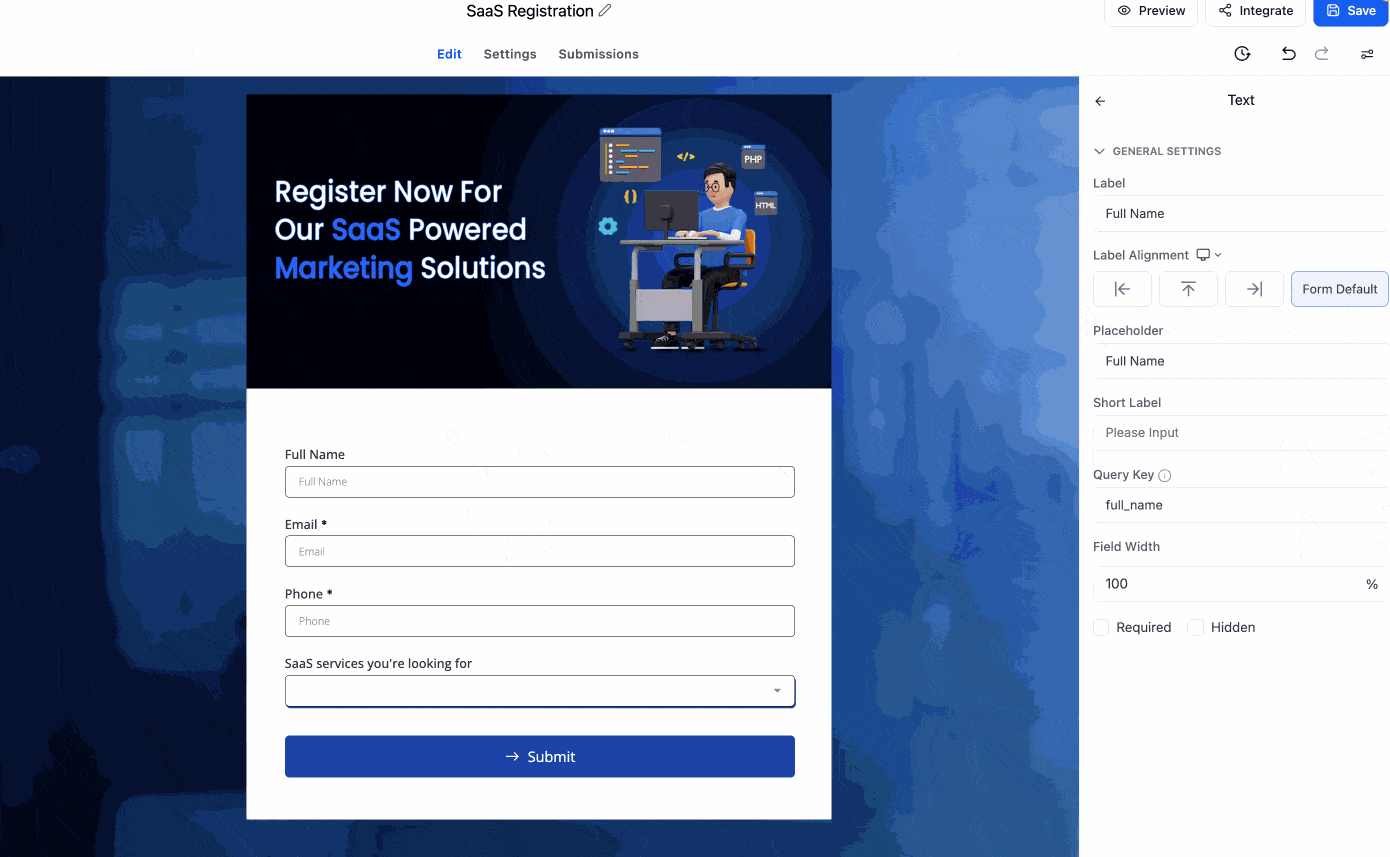
To use inline editing:
Open the quiz in the builder.
Click directly on the label, placeholder, dropdown option, radio option, or button text you want to change.
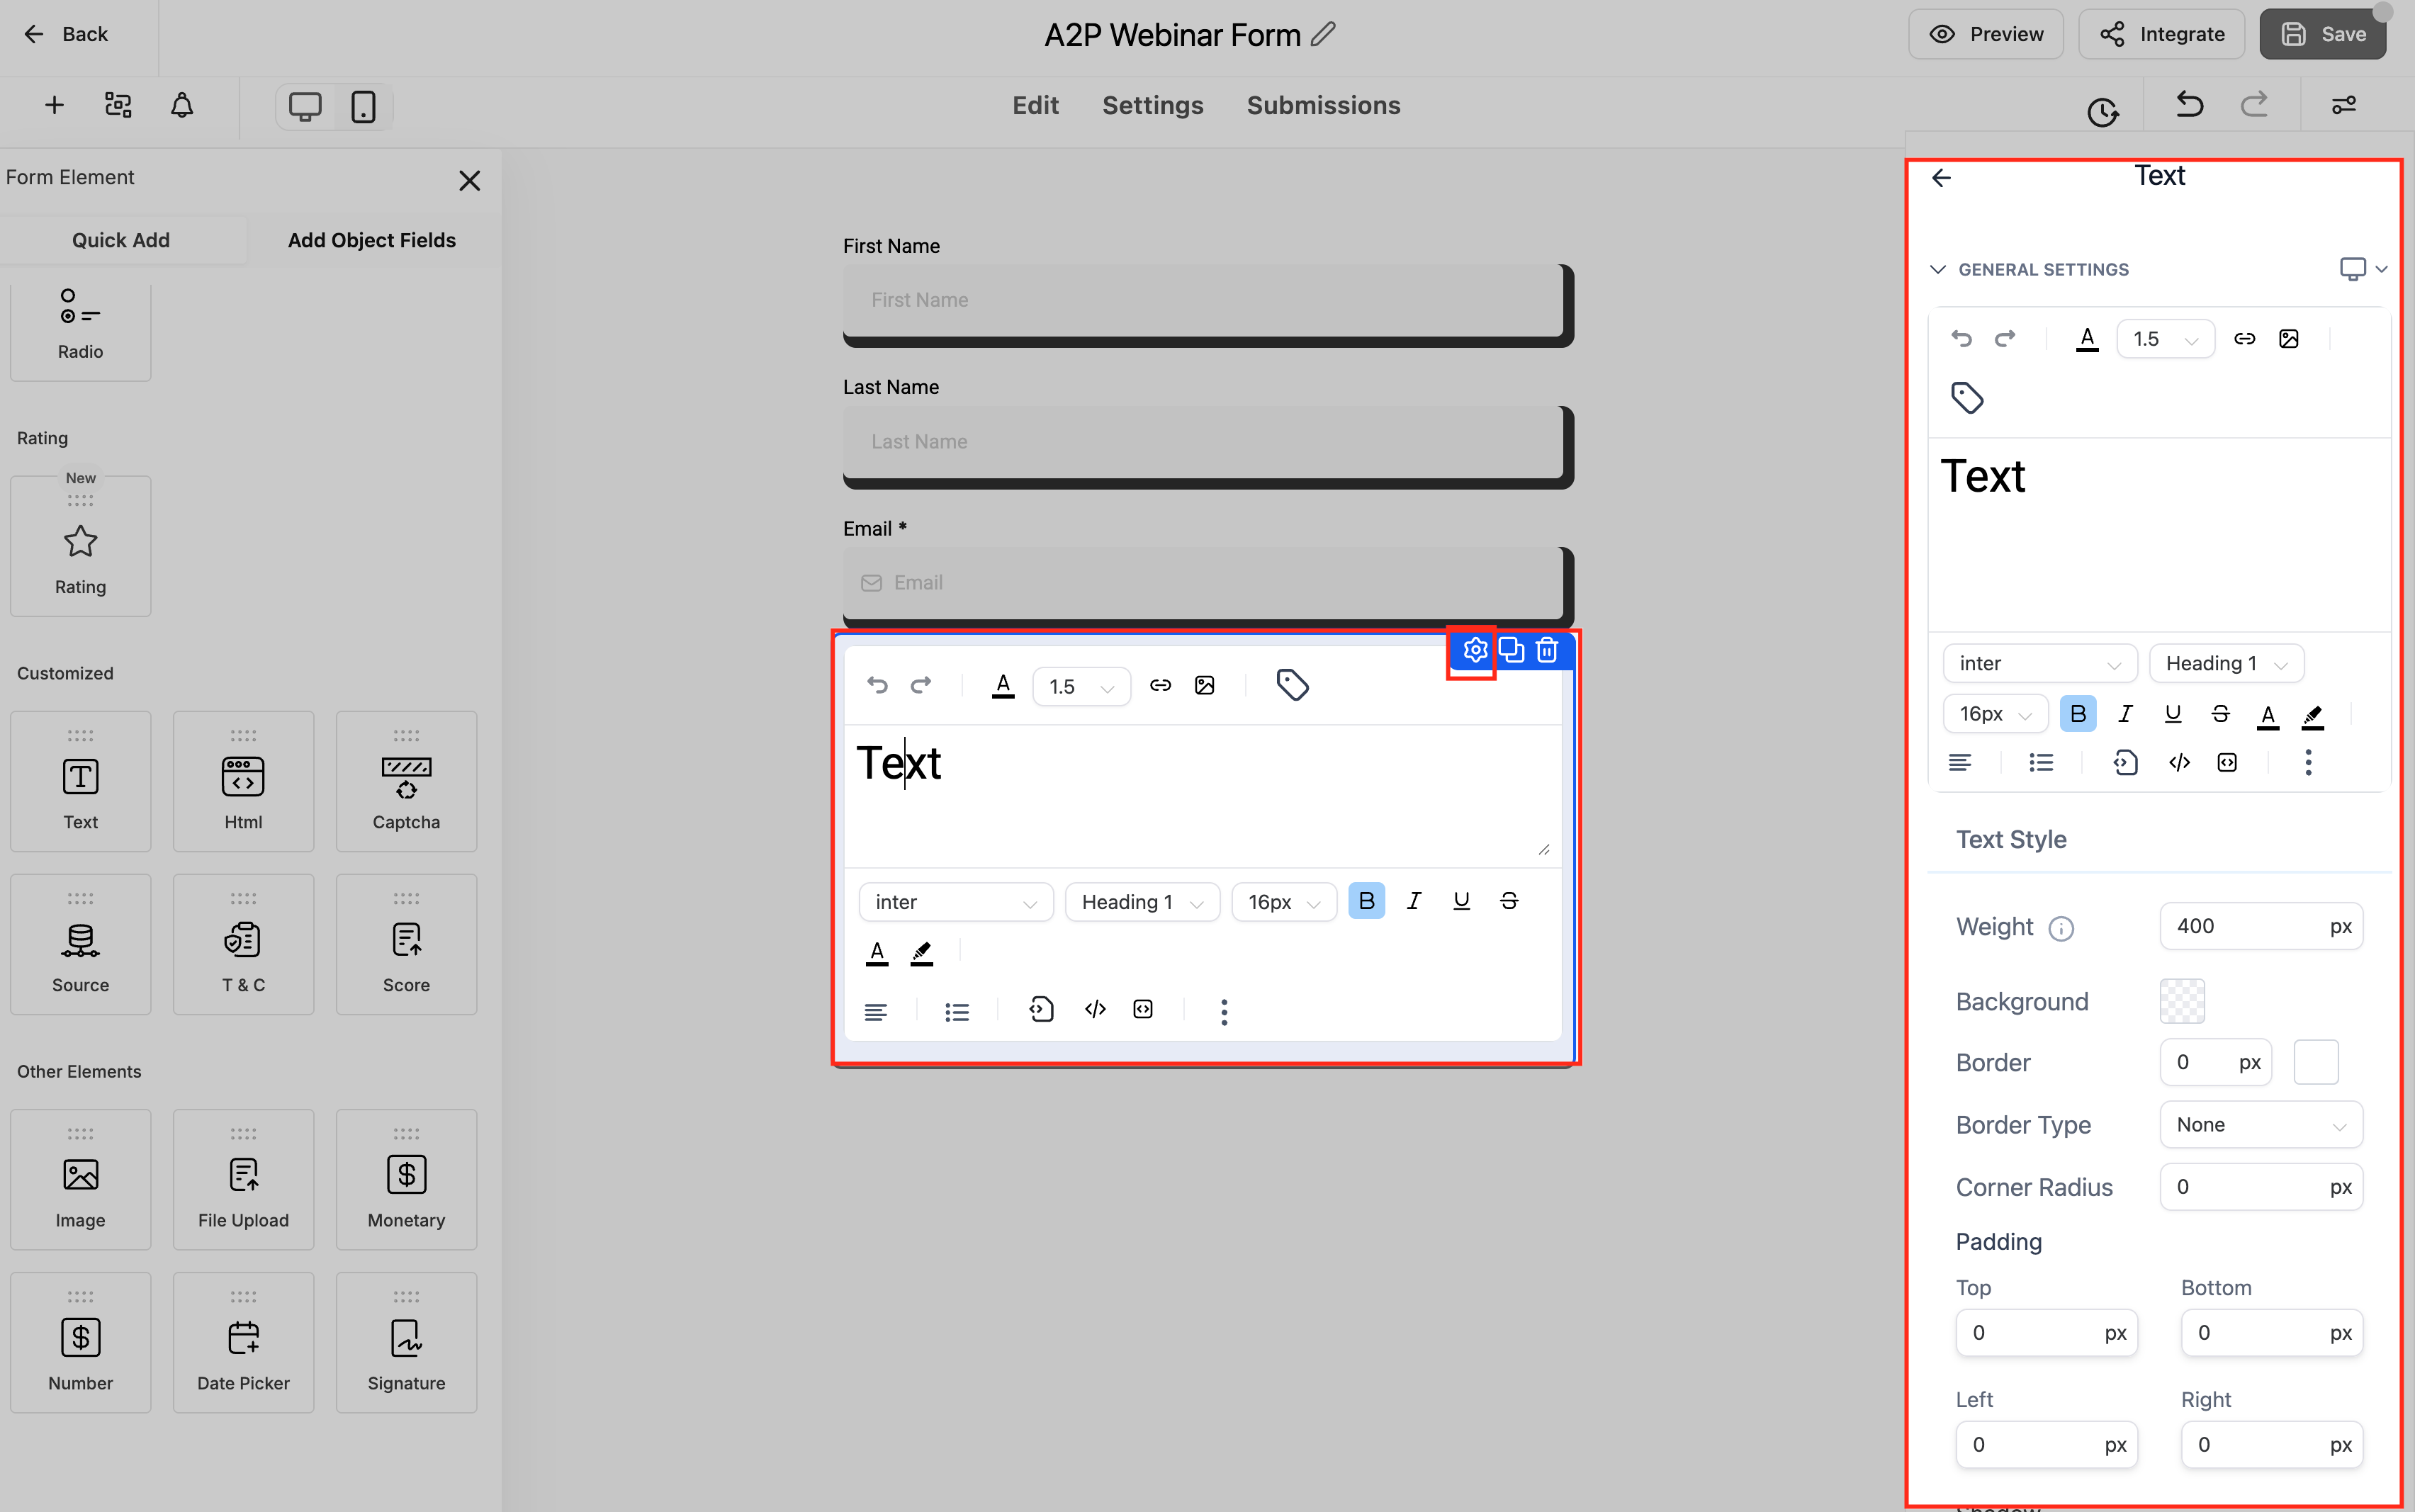
Type to replace the text; changes appear immediately in the preview.
Repeat for any other elements, then click Save to lock in your changes.
Inline editing is available by default, no setup required, and the full settings panel is still there for more advanced configuration whenever you need it.
Mobile-specific text
If you switch the builder to the mobile device view, you can enter separate copy for mobile, shorter headlines or alternate placeholders that fit a smaller screen, without touching your desktop text. Desktop and mobile content are stored independently so one never overwrites the other.
Cloning lets you duplicate a question, field, or entire slide you've already configured, styling, validation rules, and content included, so you can reuse it instead of rebuilding it.
Clone an element
Open the quiz in the builder.
Hover over the element you want to duplicate.
Click Clone (the two-rectangle icon). The copy appears directly below the original.
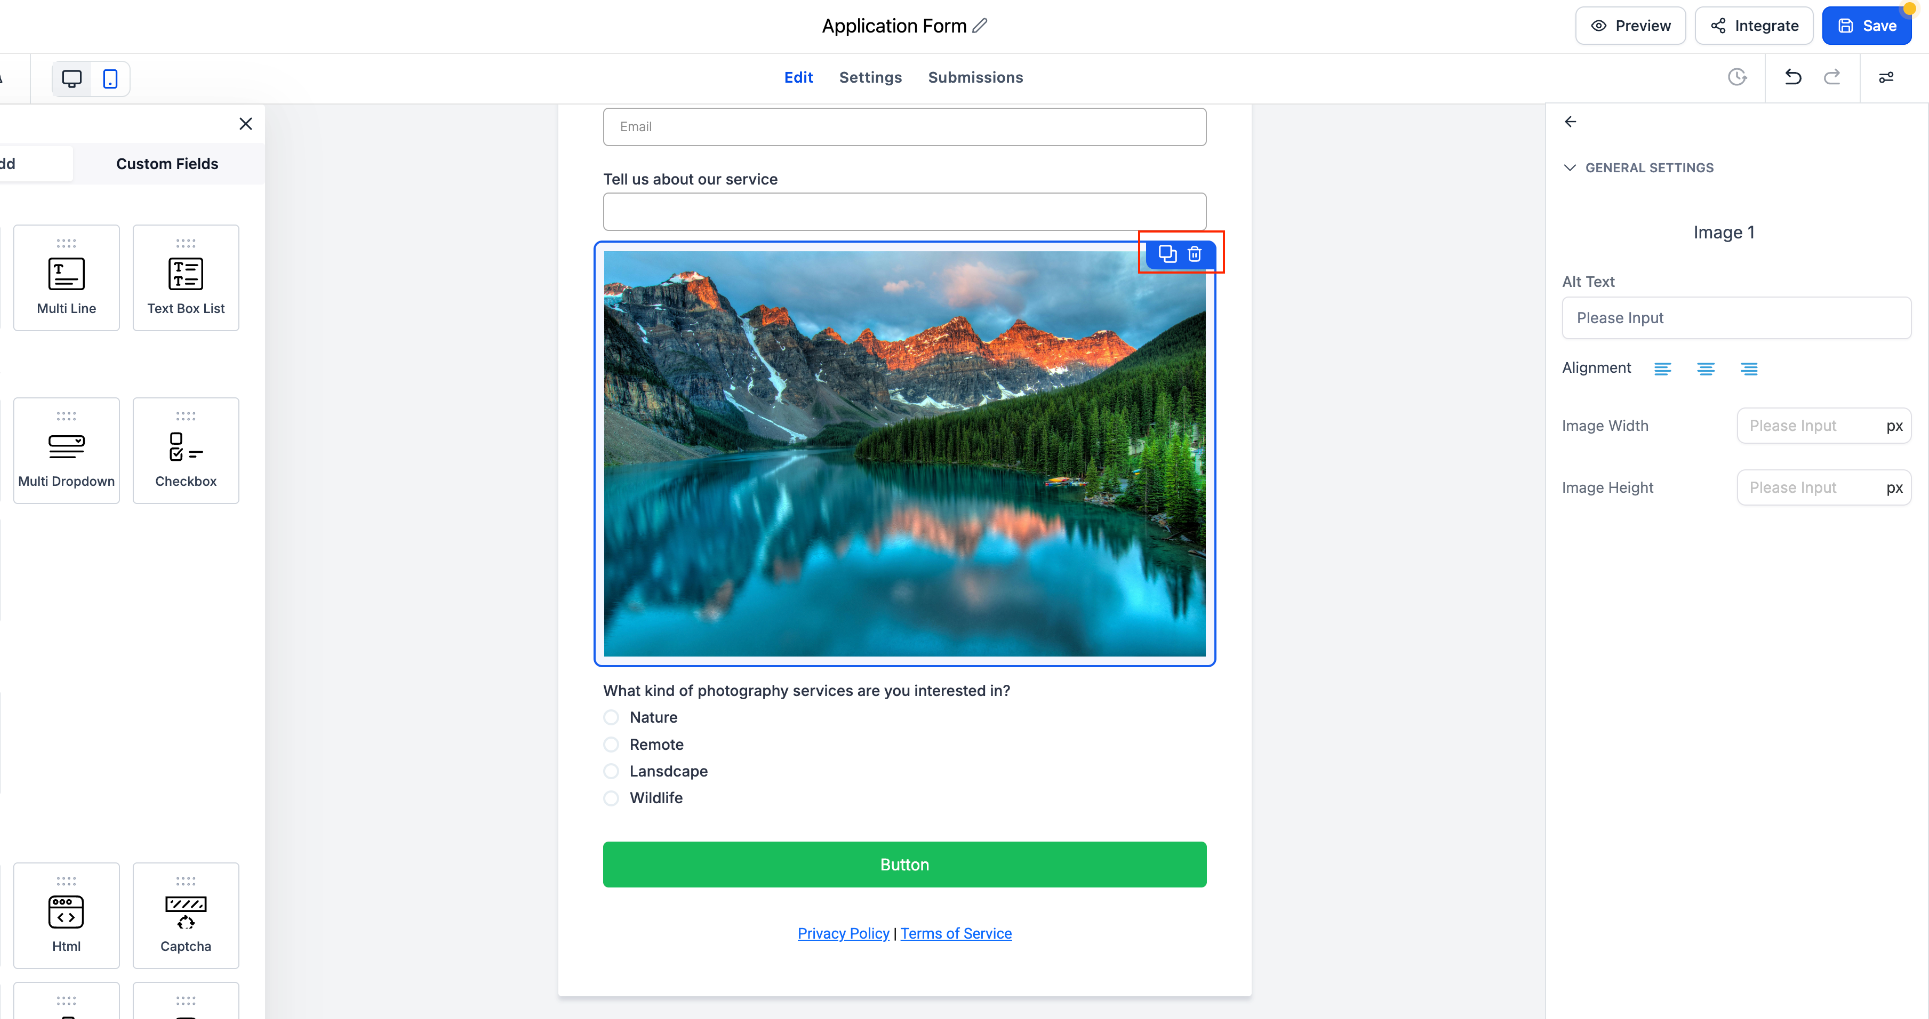
Click the new element and adjust it as needed. Editing the clone never affects the original.
Clone an entire slide
Move your cursor to the top-right corner of the slide.
Click Clone Slide. A full duplicate, including layout, design blocks, and question elements, is created.
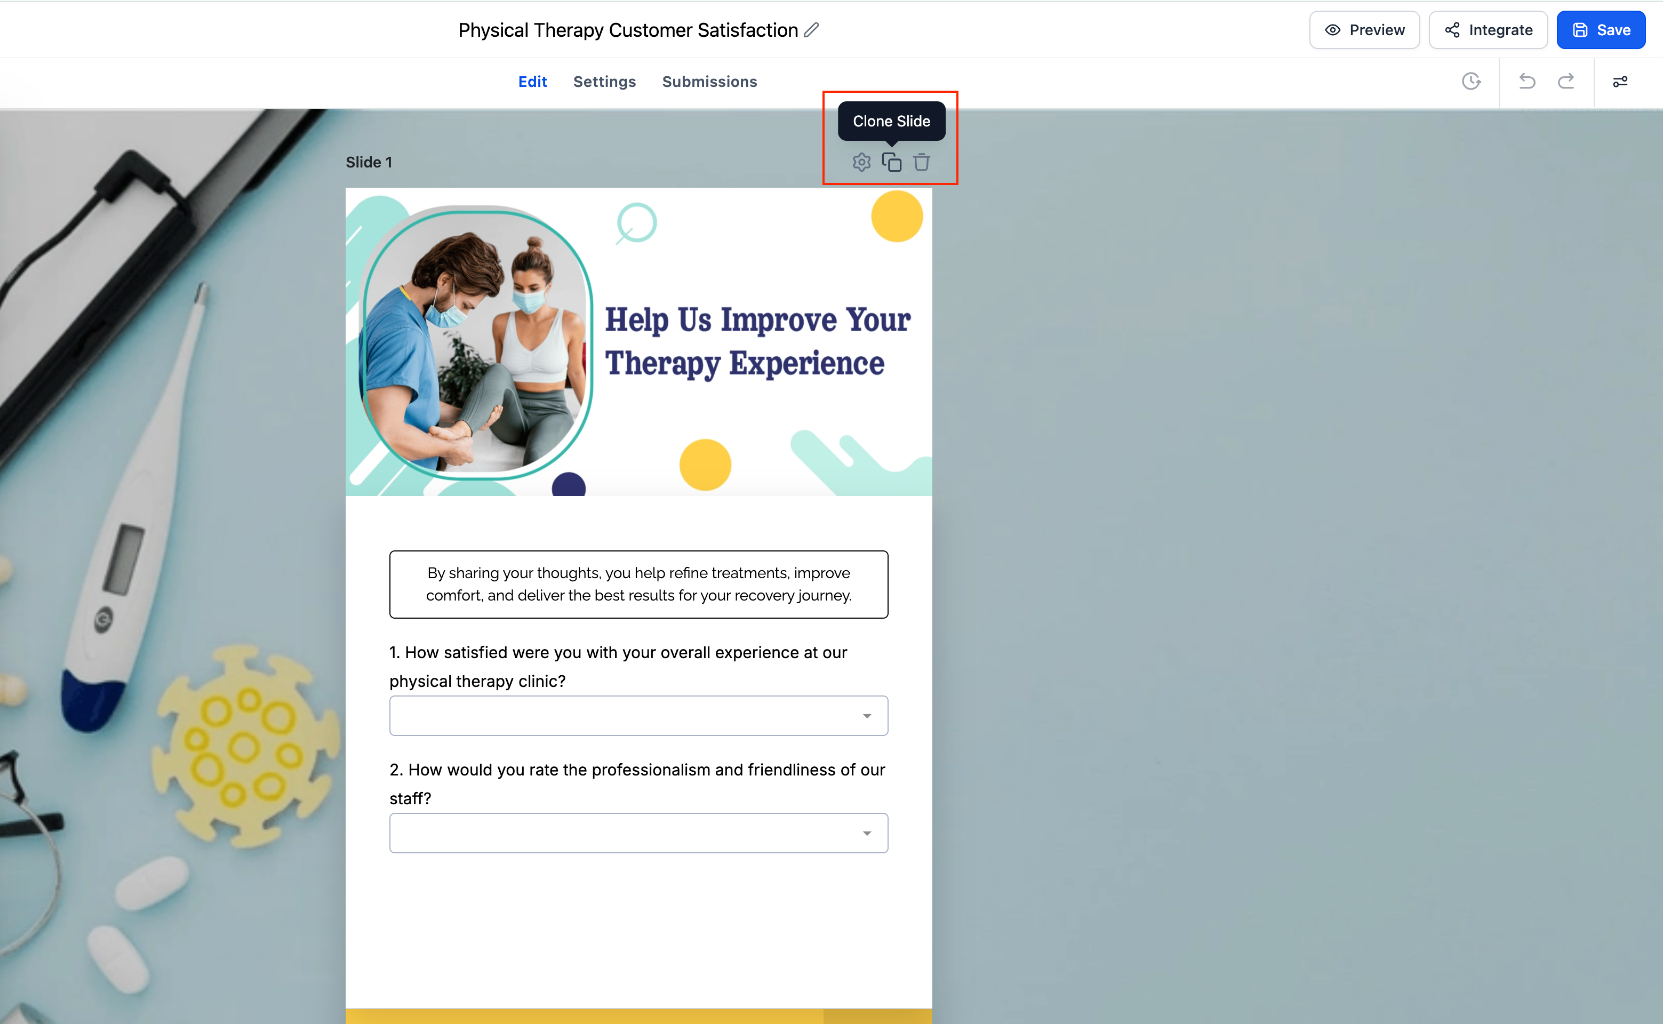
Make any changes needed to the new slide.
There's no limit to how many times you can clone an element or slide. To remove an accidental clone, hover it and click Delete.
Branching logic lets the quiz adapt based on how someone answers.
Select a multiple-choice or yes/no question.
In the element settings, locate Jump To or the conditional navigation option.
For each answer choice, select the page or step the quiz should jump to.
Save and preview the quiz to confirm the logic routes correctly.
Categories and scoring let you evaluate patient intent and display a dynamic result.
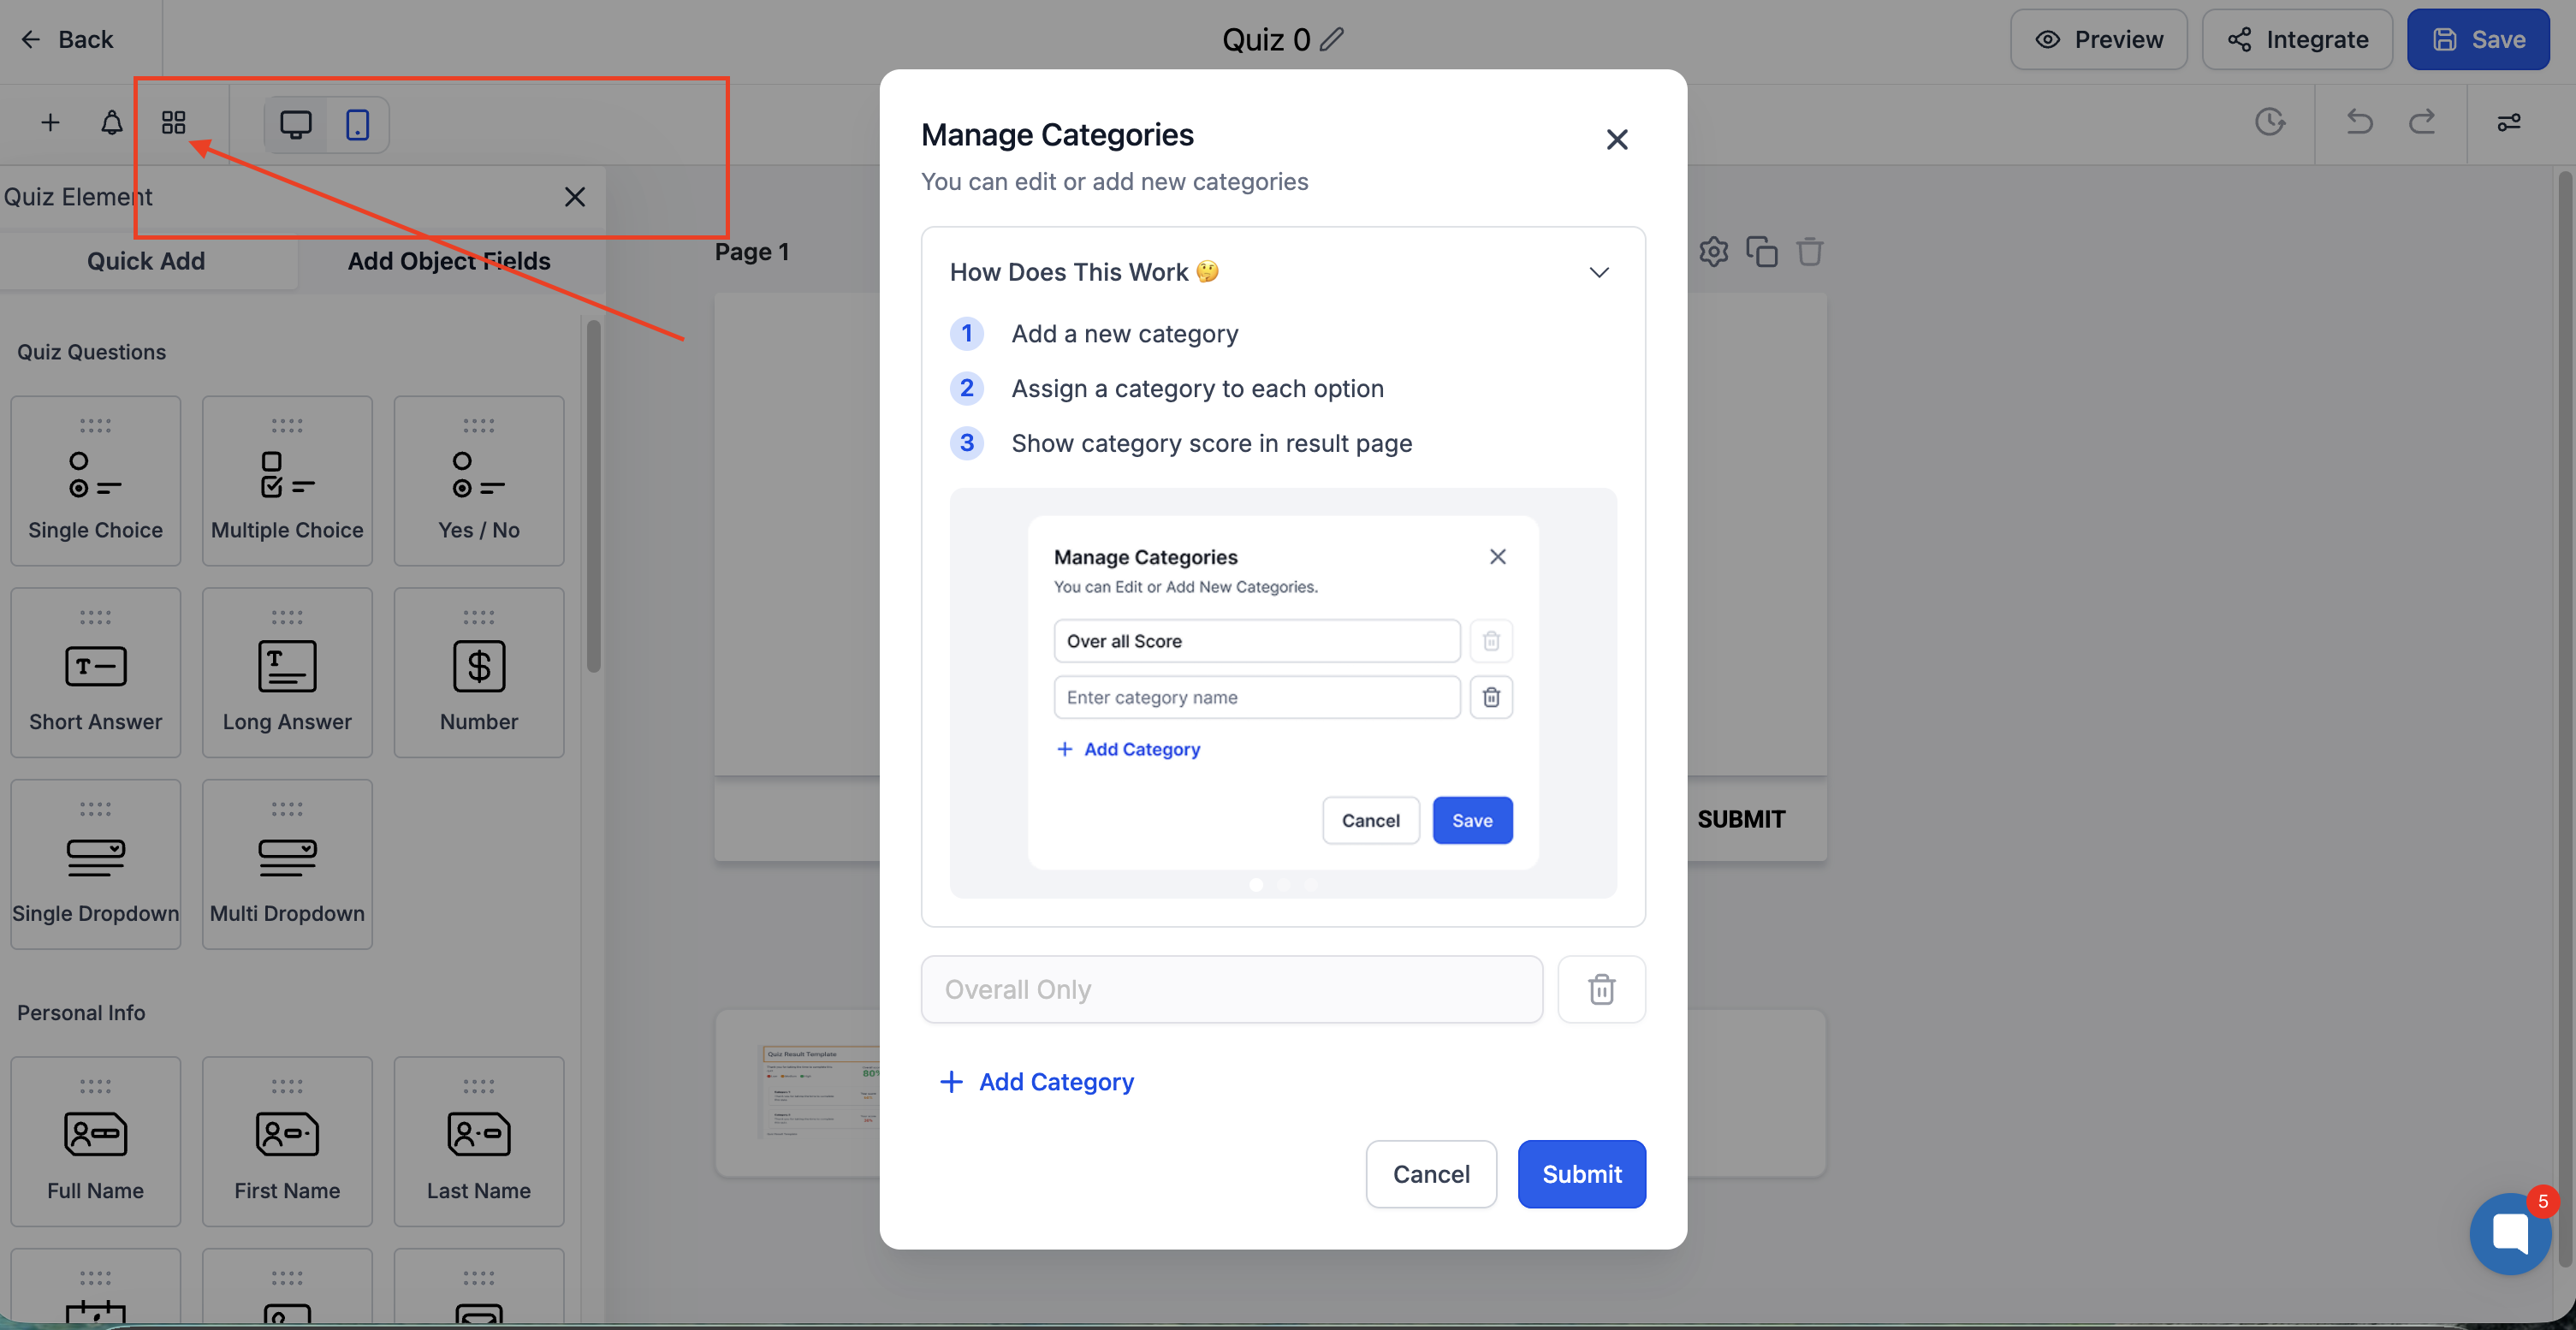
Create categories
Open the Categories / Scoring section.
Add categories (for example: High Intent, Medium Intent, Nurture).
Assign scores
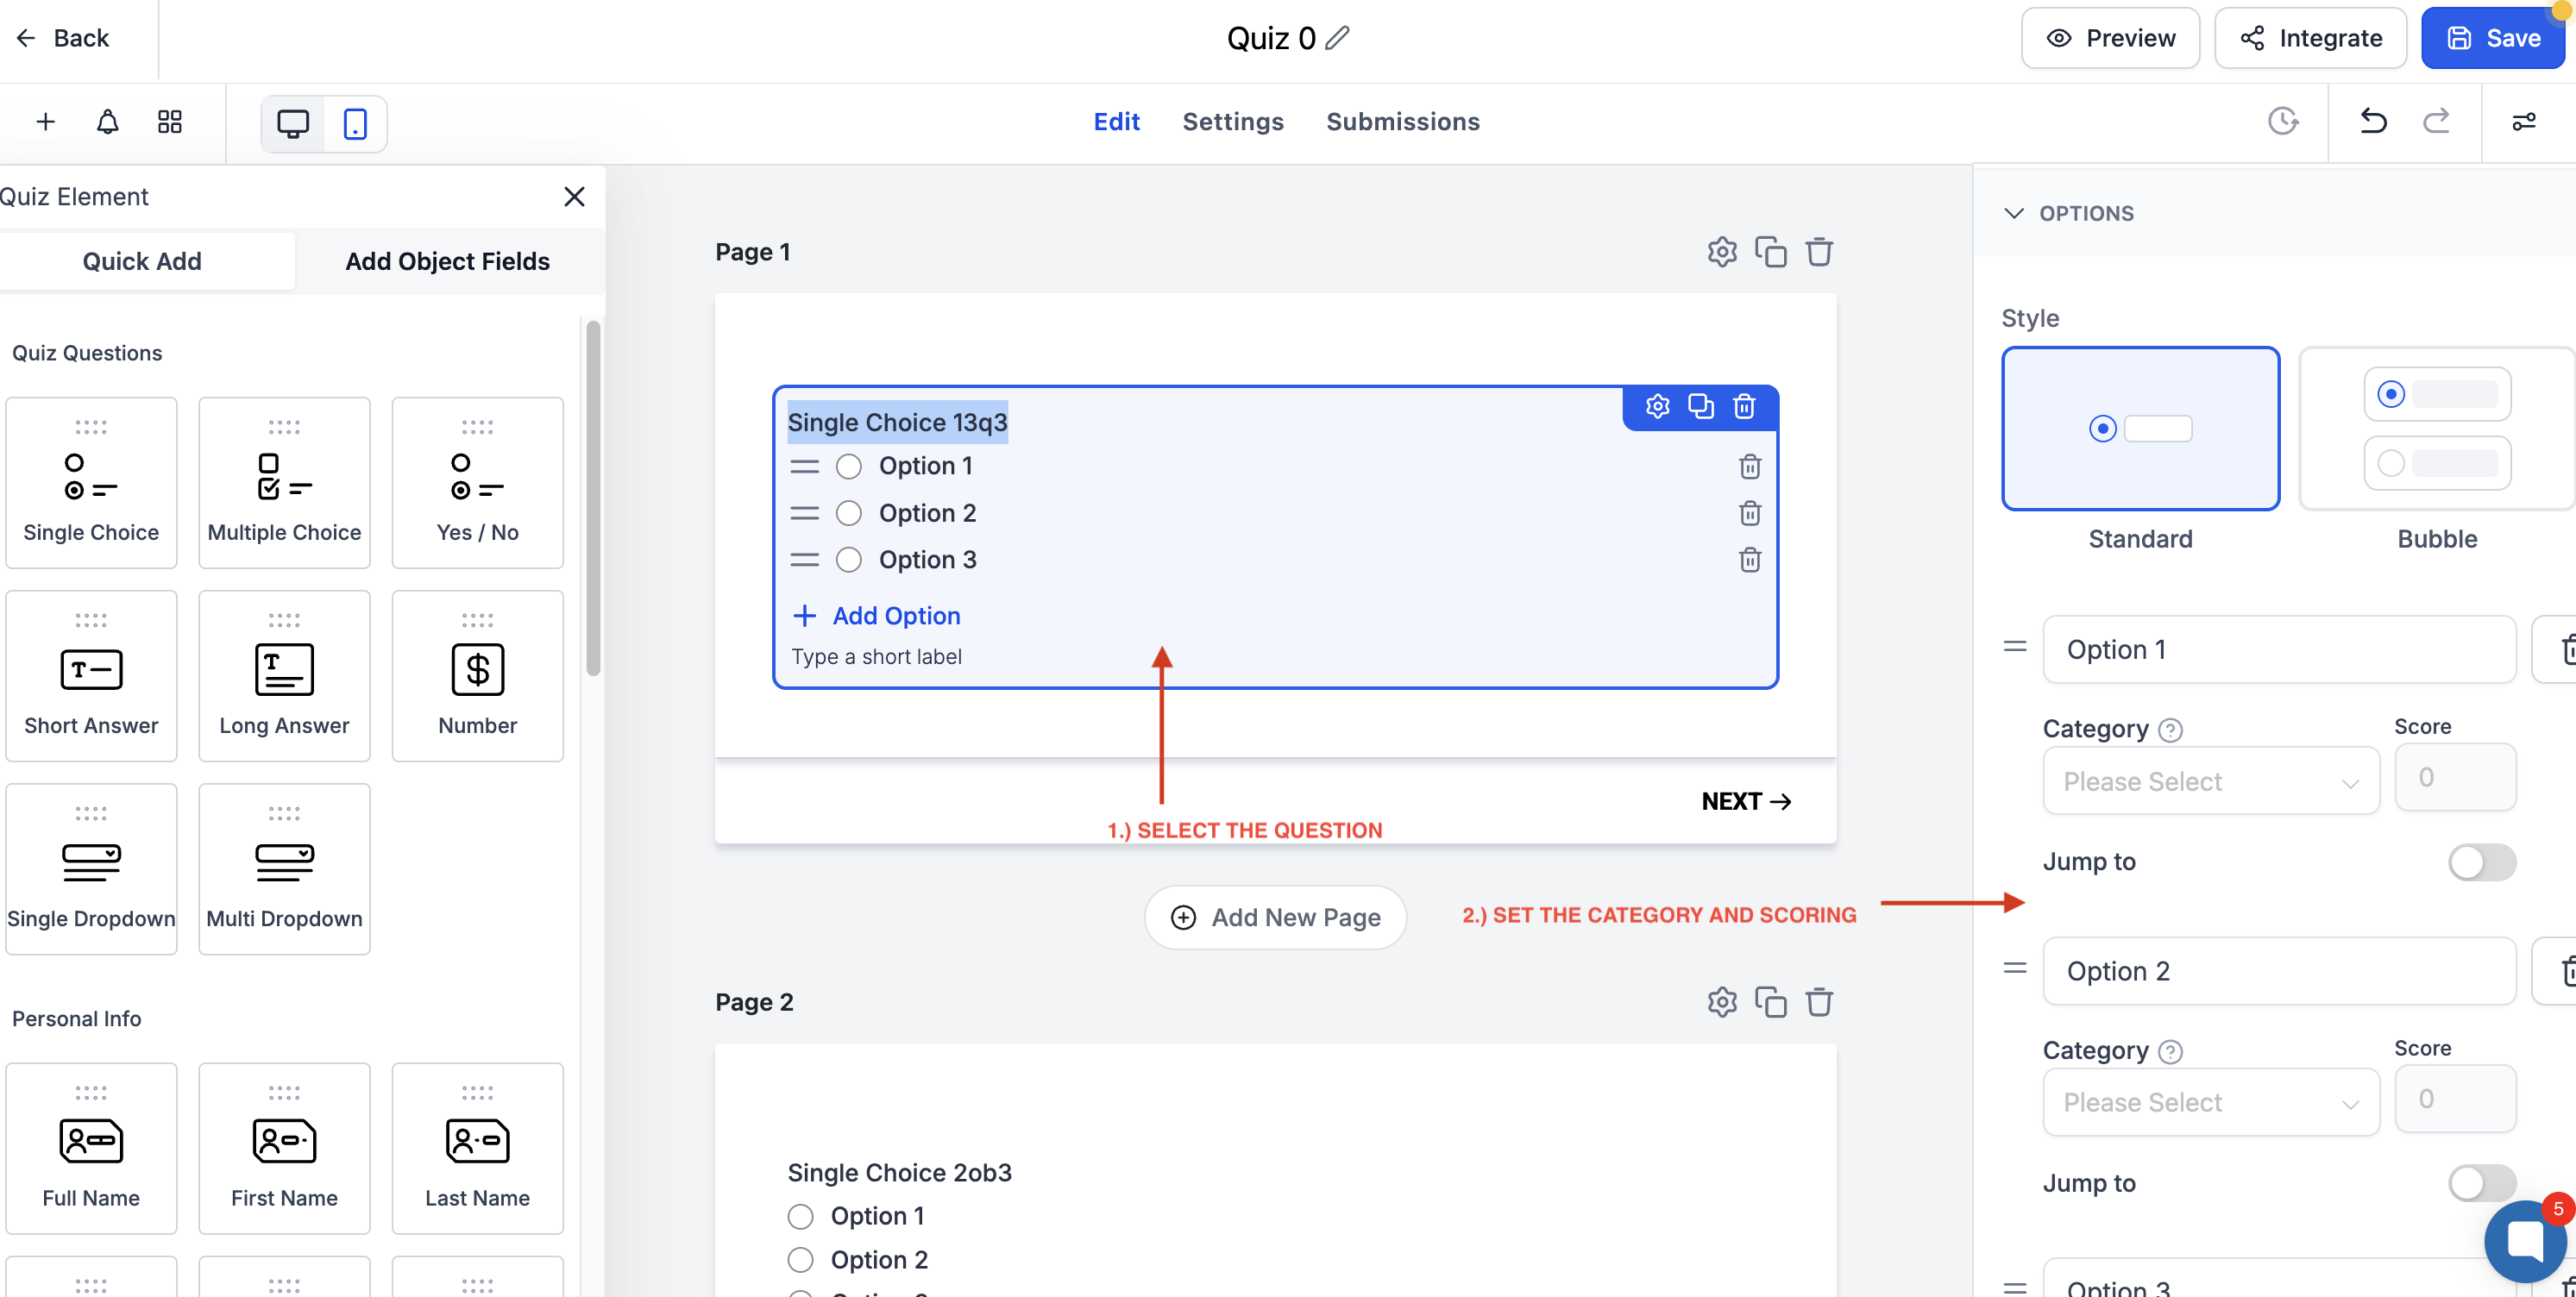
Select a question.
For each answer option, assign a Category and a Score Value.
Repeat for every scored question, then save the quiz.
After submitting, the patient sees the Result Page. Scroll to the Result Template section in the builder and click Edit Template to open it.
Configure score tiers
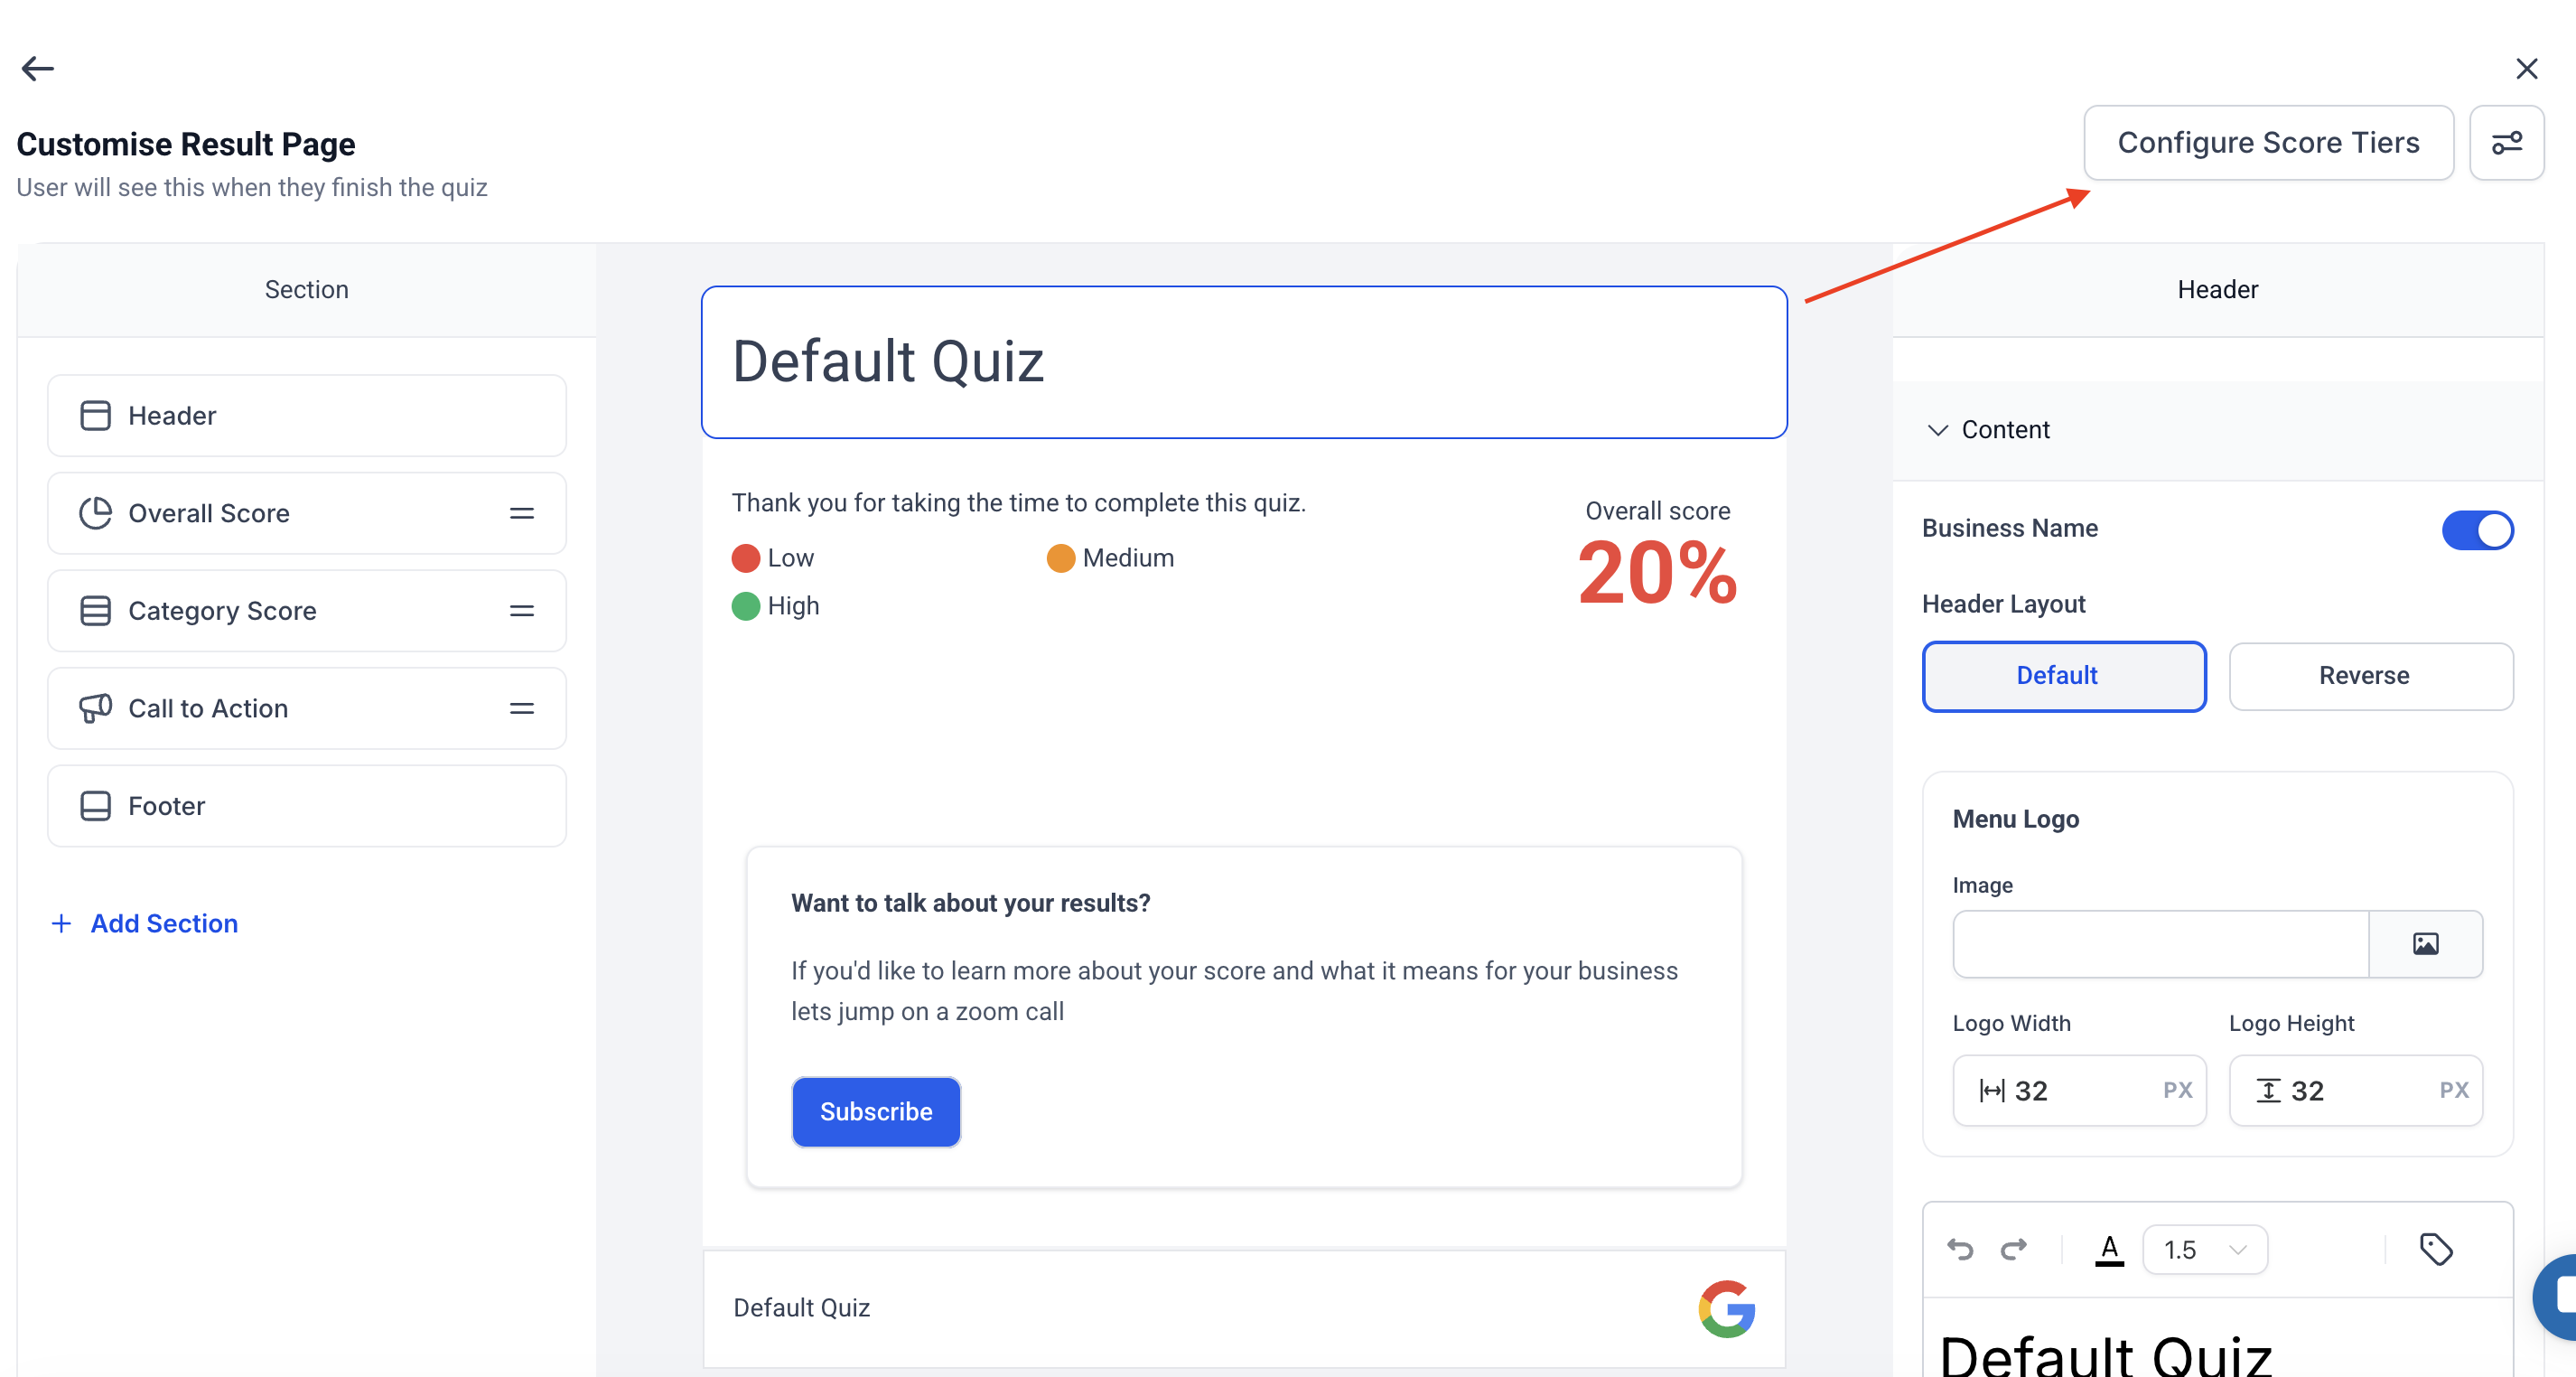
Open Score Tier Settings.
Define ranges, for example:
Low: 0-39
Medium: 40-79
High: 80-100
Save your changes.
Add result content
For each tier, you can include:
A headline or summary message
Recommendation text
A call-to-action button (e.g. Book Consultation)
Optional disclaimers or next steps
Add a call to action
Insert a CTA button on the result template.
Link it to a booking calendar, funnel step, or webpage.
Save the result template.
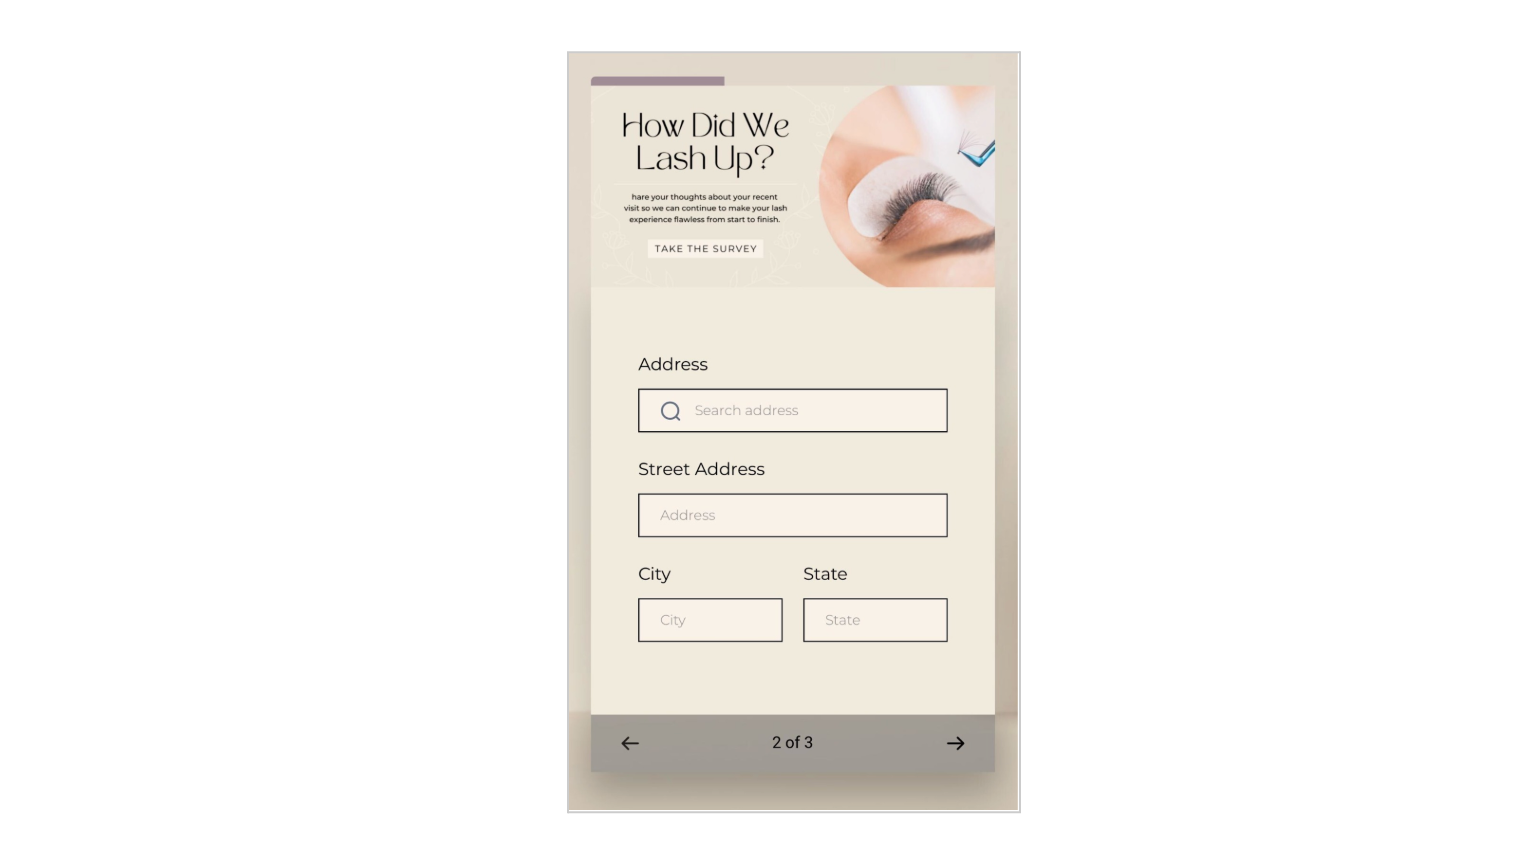
On multi-step quizzes, a mobile-only progress bar shows respondents how far along they are, which helps reduce drop-off before the last page. It stays hidden on desktop and on single-step quizzes, since there's nothing to show progress toward.
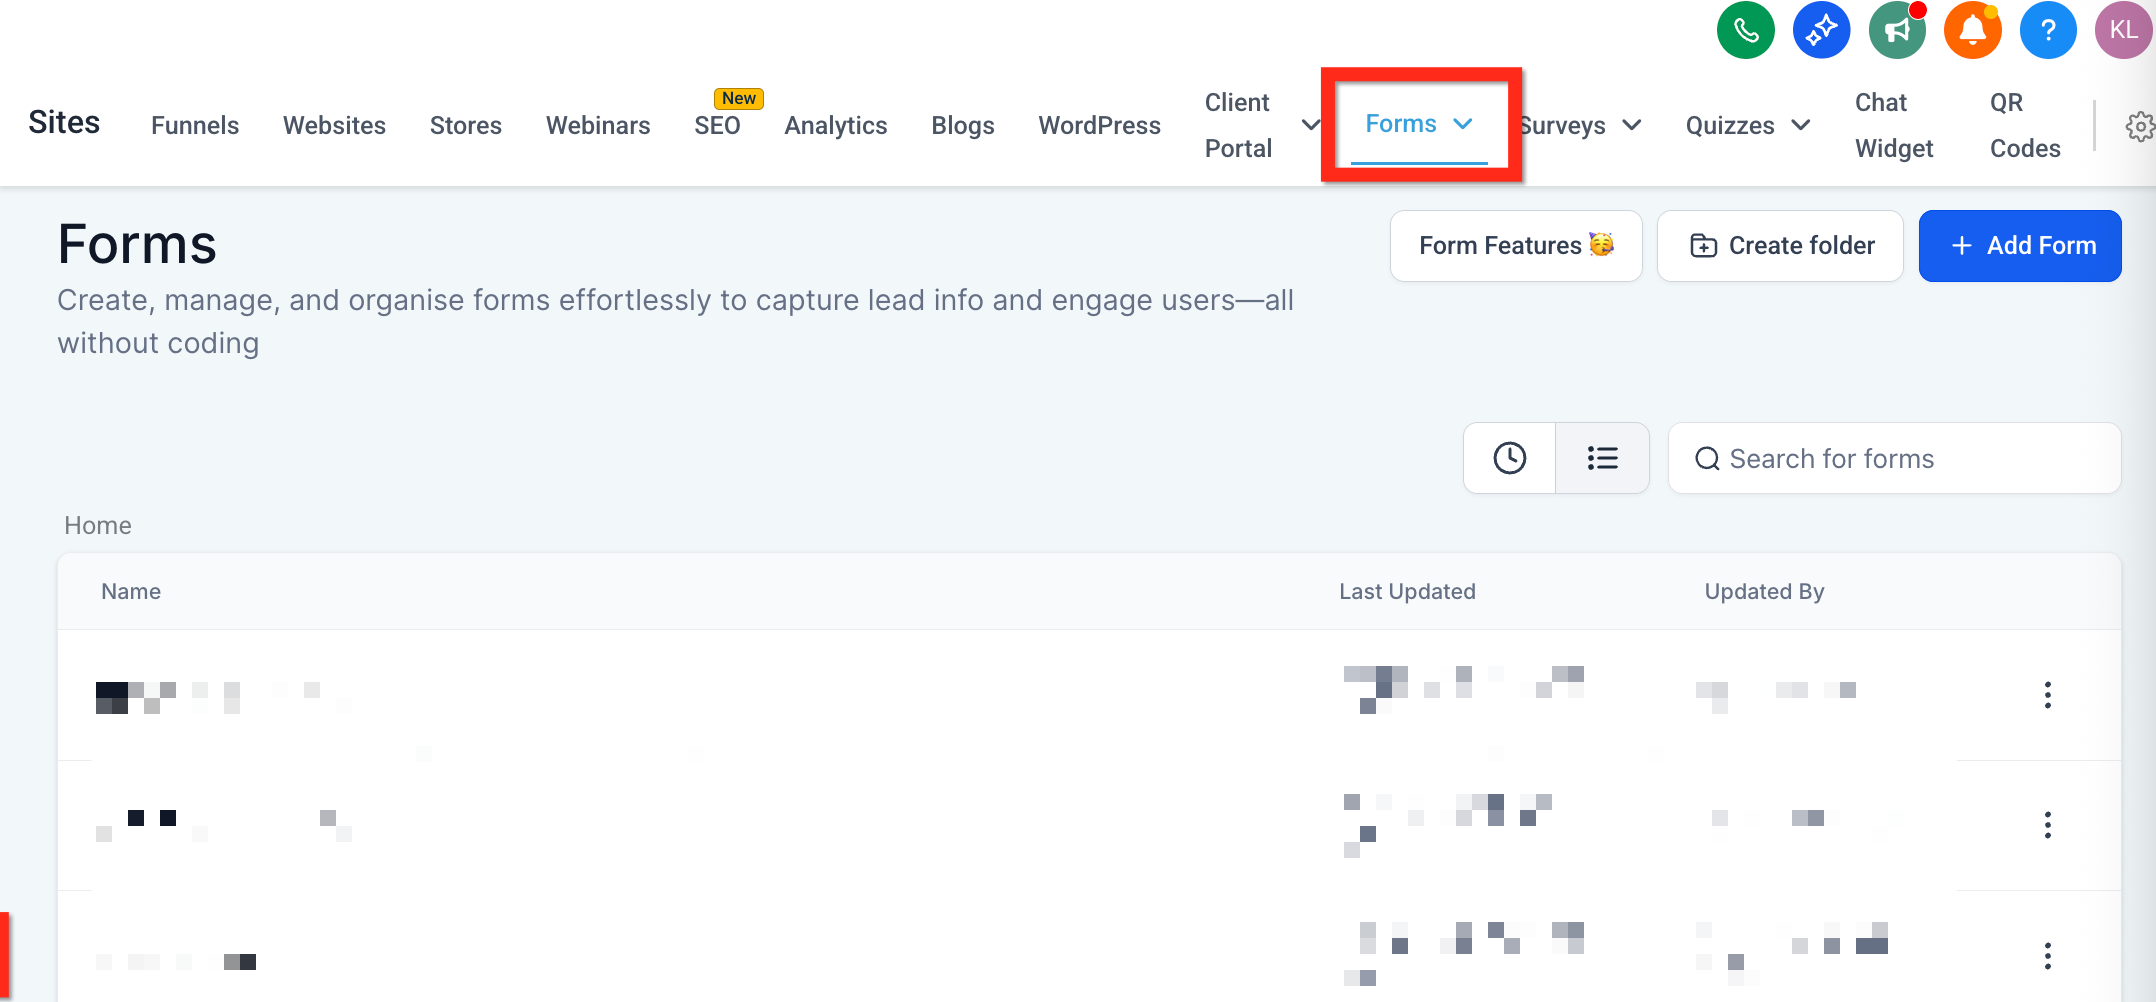
Navigate to Web Tools → Quizzes.
Open the quiz you want to edit (or create a new one).
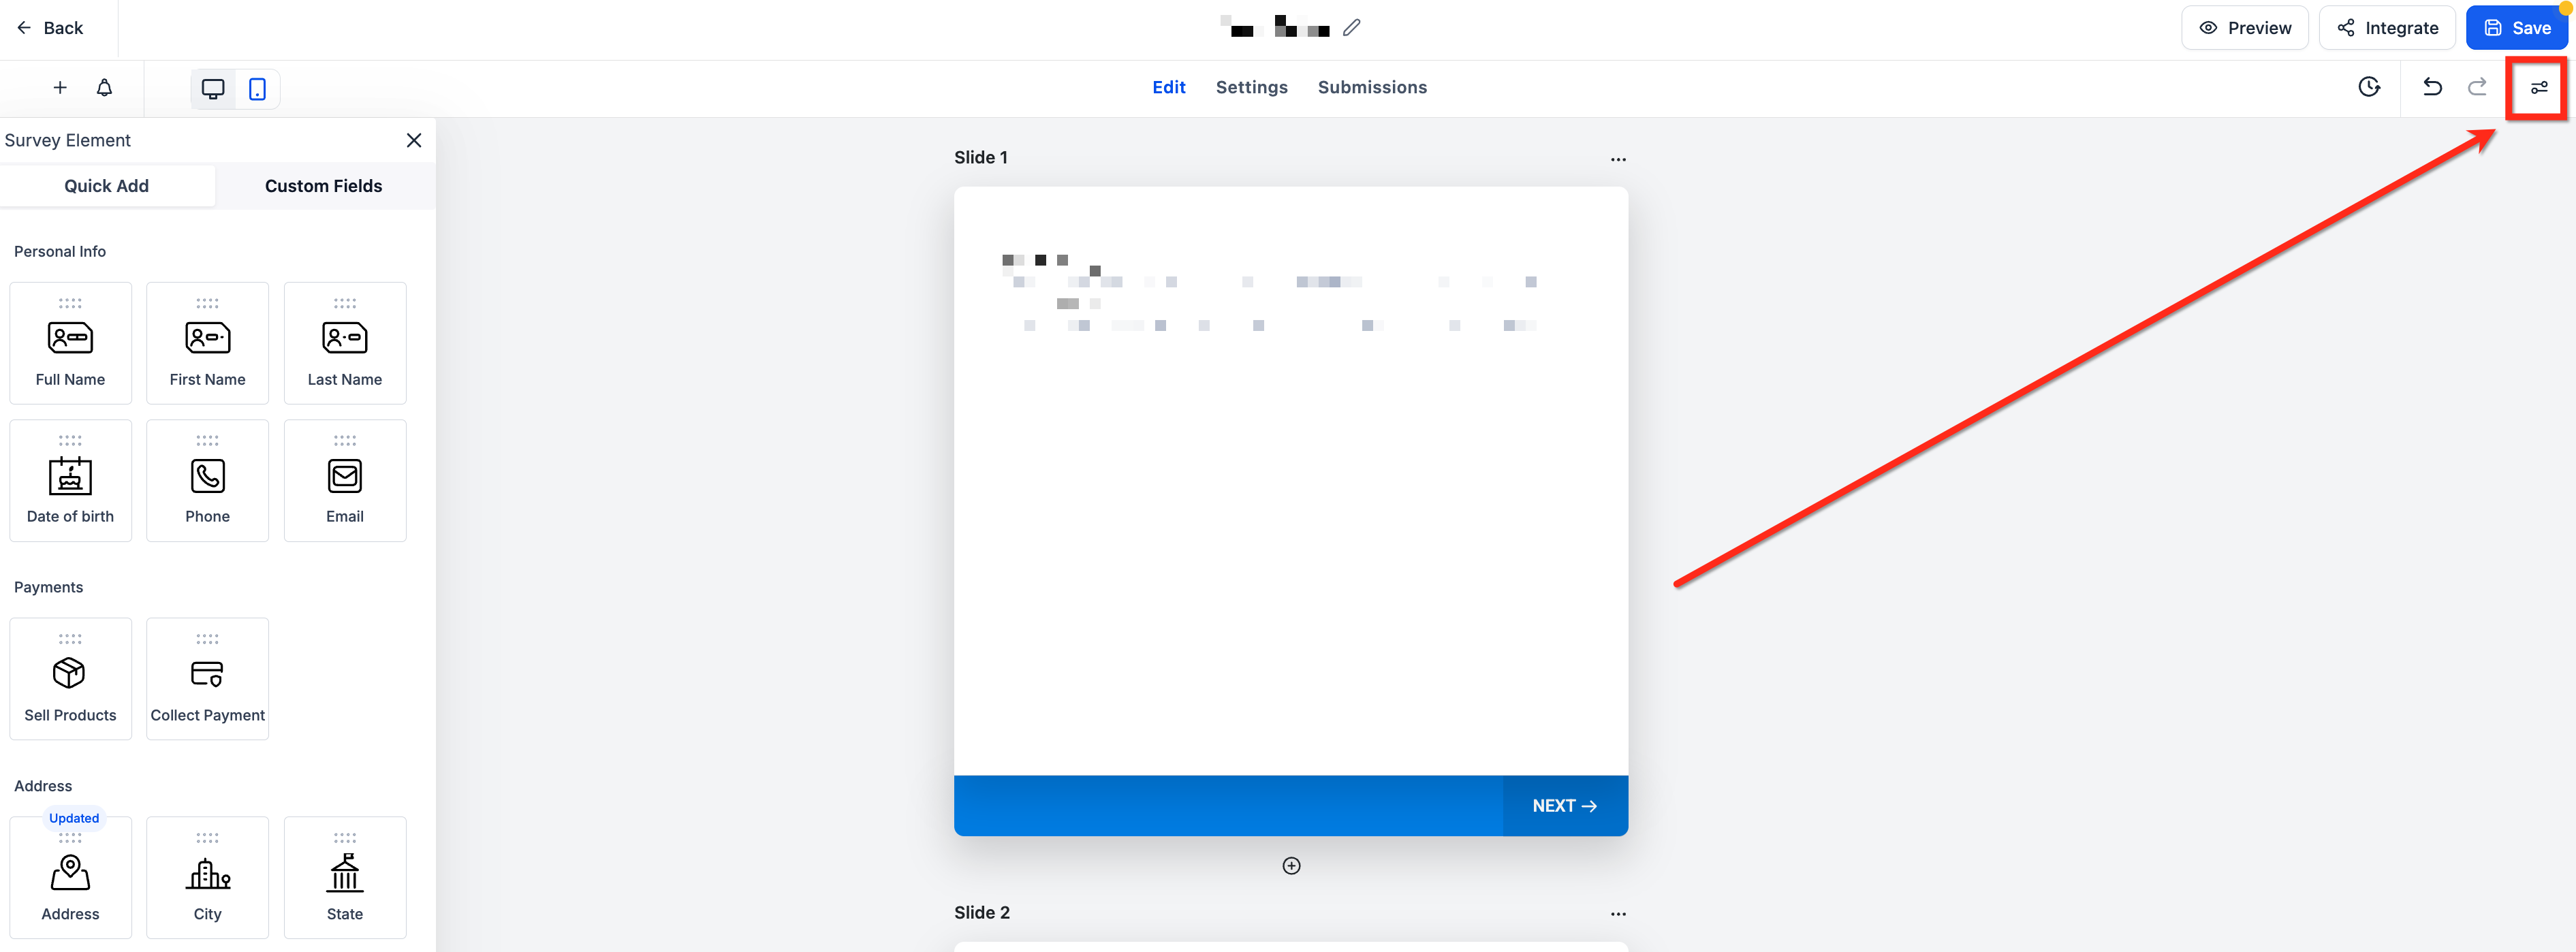
Click Styles & Options at the top-right of the builder.
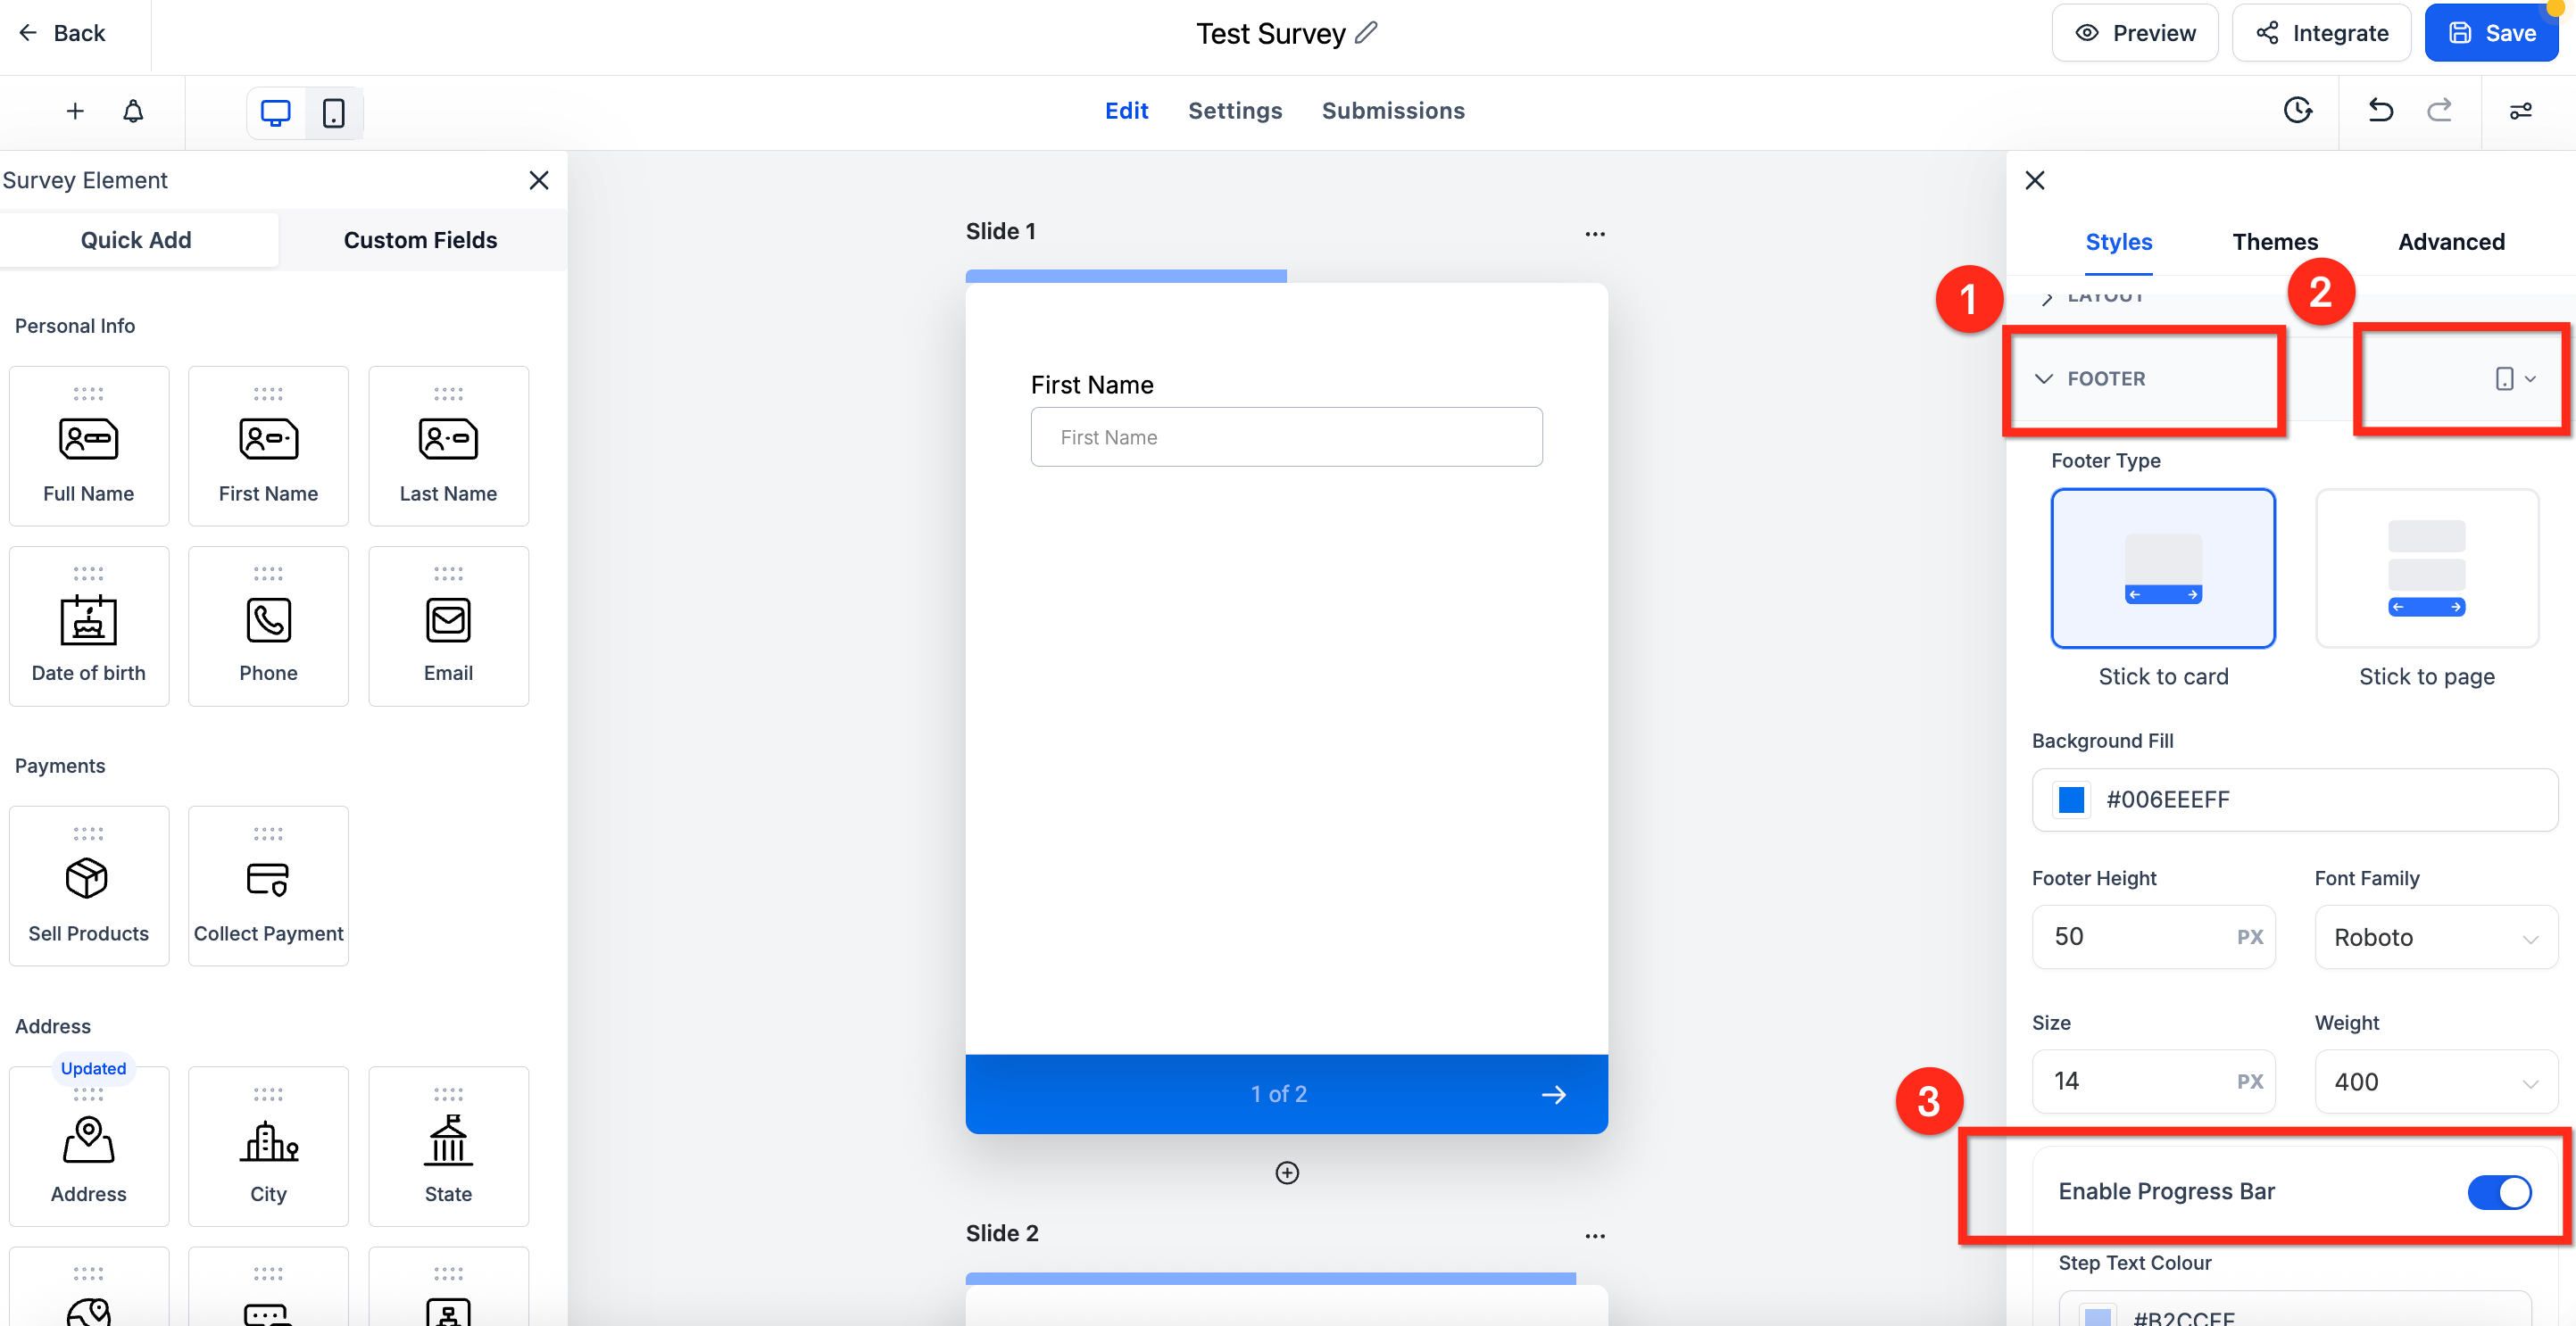
Scroll to the Footer section and expand it.
Use the device selector next to Footer to switch to Phone. The Progress Bar toggle is only selectable in this mobile view, not in desktop mode.
Toggle Enable Progress Bar on.
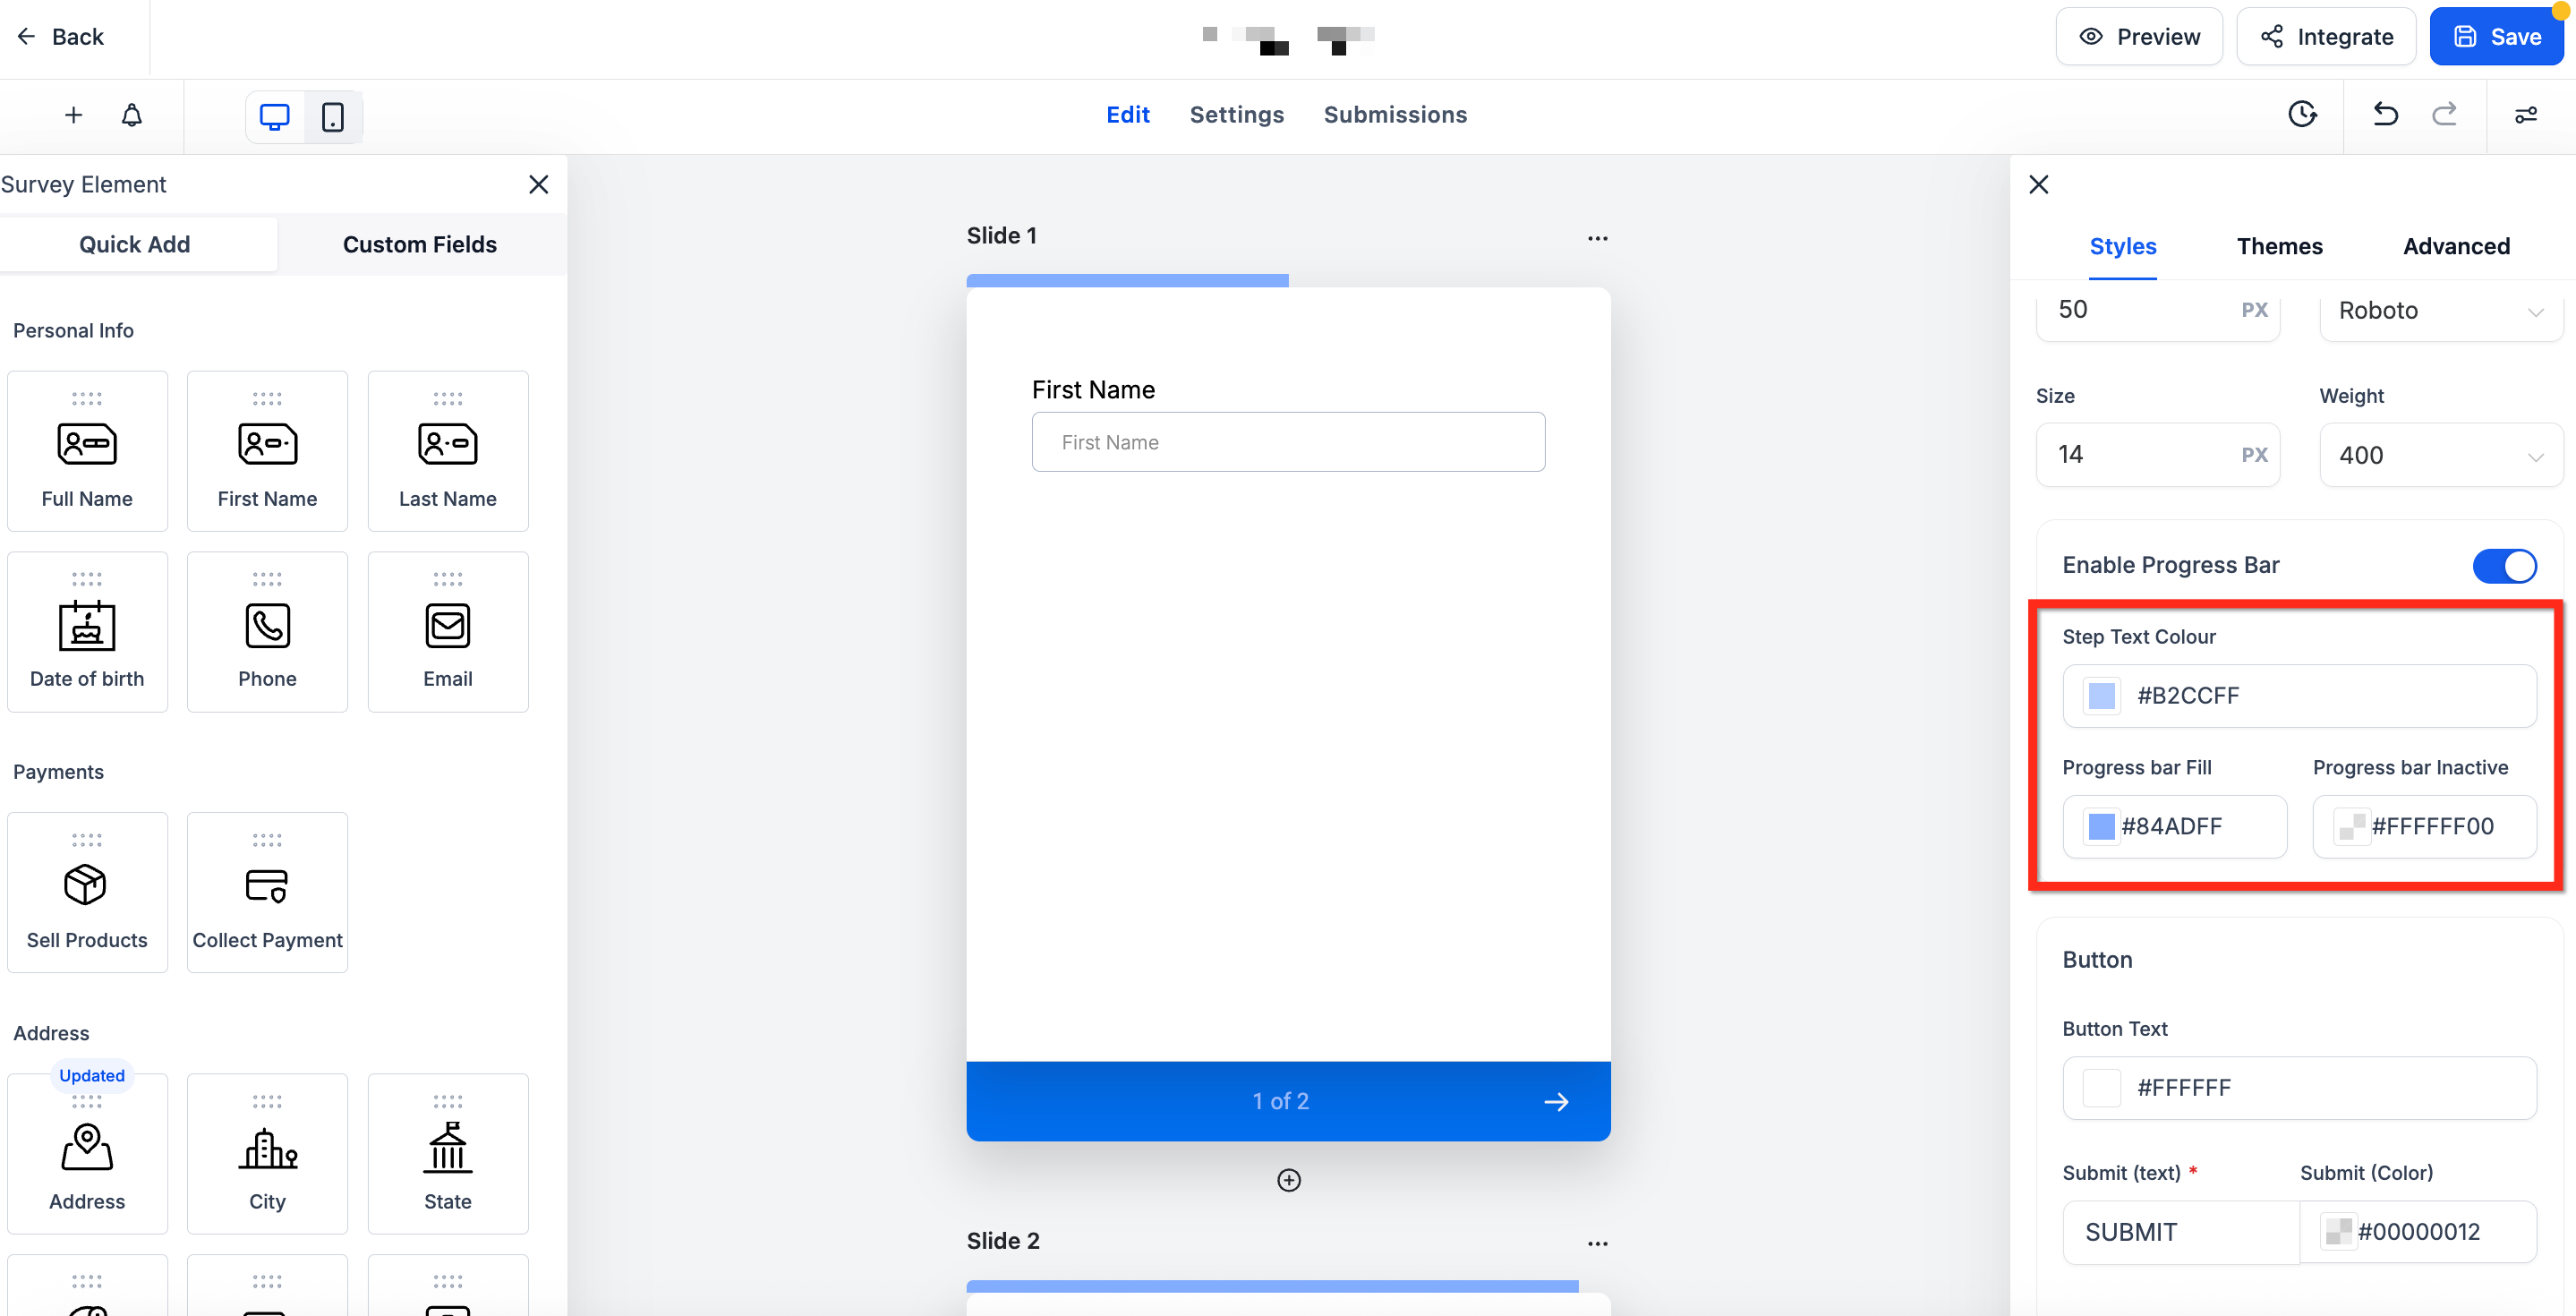
Set the Step Text Color (controls the step label, e.g. "1 of 3"), Progress Bar Fill (the filled portion), and Progress Bar Inactive color (the unfilled portion) to match your practice's branding, using HEX values for precision. Click Save.
The progress bar works with both "Stick to Card" and "Stick to Page" footer styles, and it's off by default, so you'll need to enable it individually on each multi-step quiz you want it to appear on.
The Mobile Editor lets you style how a quiz looks on phones independently of its desktop design, so you're never forced to compromise between the two.
Open the quiz from your builder dashboard.
Click the device toggle at the top of the screen to switch to Mobile View.
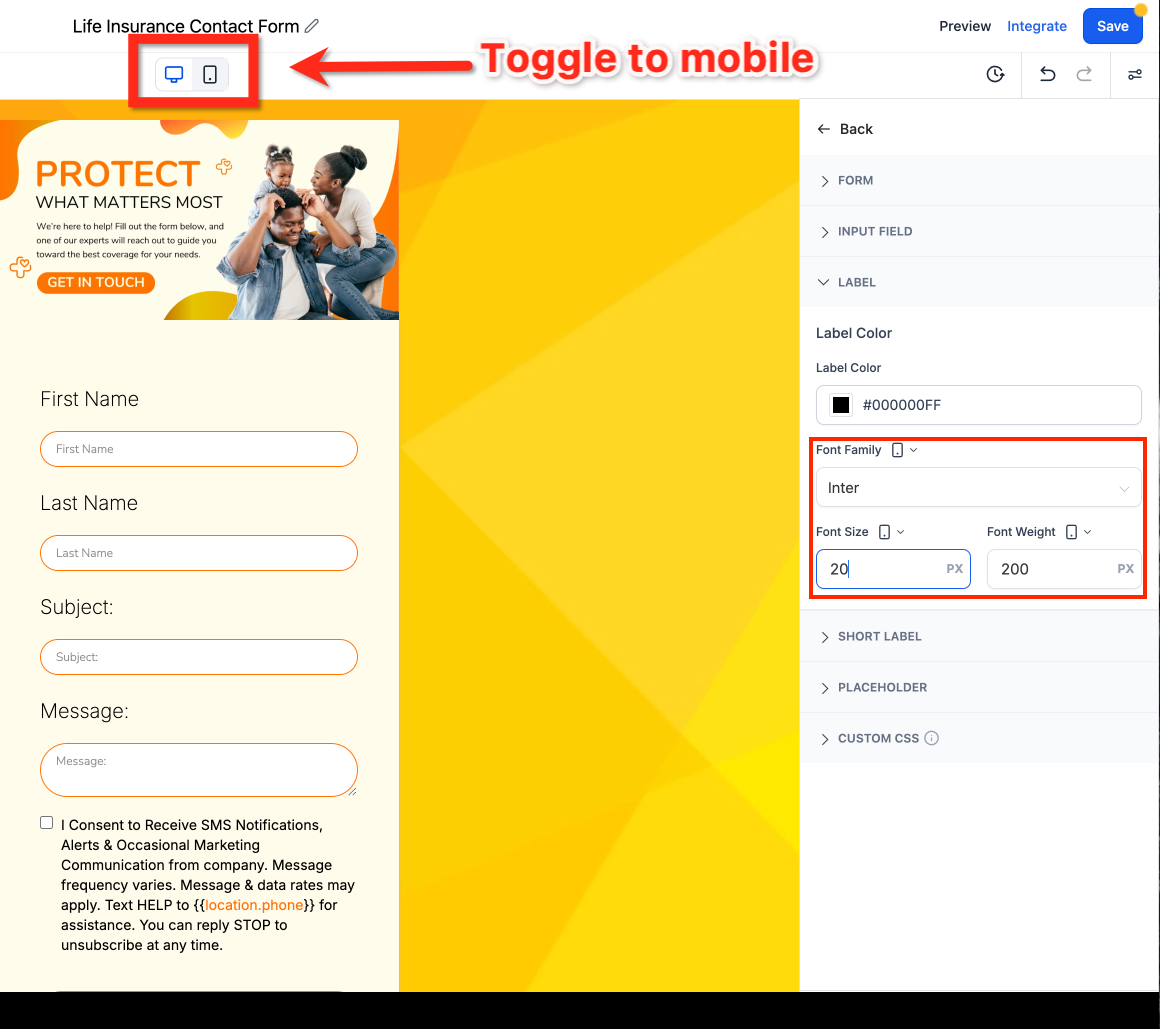
In Mobile View, the right-hand panel offers mobile-specific settings:
Layout Style: choose your preferred mobile layout.
Mobile Header Image: upload an image specifically for mobile headers.
Mobile Background Image: upload a mobile-specific background image.
Font Settings: adjust font family, size, and weight independently for Labels, Short Labels, and Placeholder Text.
Once you're satisfied, click Save, then Preview to test the mobile design before publishing.
Styles set in Mobile View never overwrite Desktop, and vice versa, each device has its own style panel for properties like background color, padding, border, and font weight. You can even set top and bottom padding to a true 0px on mobile without affecting the desktop layout.
Mobile header and background images
Because mobile users scroll vertically, tighter, portrait-style images tend to look cleaner than a desktop image simply scaled down (which often crops or distorts). Upload separate header and background images sized for small screens.
Mobile font styling
Text sized well for desktop can feel cramped or oversized on a phone. Adjust font family, size, and weight independently for Labels, Short Labels, and Placeholders so the quiz stays easy to read on any screen.
In the Quiz Builder, open Notifications.
Configure:
Internal Notification: an email sent to your team when a quiz is submitted.
Auto-Responder Email: sent to the person who took the quiz.
Customize the sender details and message content for each.
Save your notification settings.
Click Save.
Click Integrate.
Choose one of the following:
Embed Code: paste it into a website or funnel page (see the Funnels & Websites collection for embedding steps).
Direct Link: share it via email, SMS, ads, or social media.
Once a quiz is live, use Workflows to act on the responses automatically. Create a new workflow with the Quiz Submitted trigger, filter by quiz name, score, or category if needed, and add actions such as sending an SMS or email, creating or updating an opportunity, assigning a team member, or creating a task. Full detail on trigger and action configuration lives in the Workflows collection.
If your quiz asks about symptoms, conditions, or treatment history, that information becomes part of the patient's record once it's tied to their contact. Only route it into workflows, notifications, or team members who need it for care or follow-up, and avoid pasting quiz responses into channels outside Aesthetix CRM.
Before sending a quiz live, confirm:
All pages and questions display correctly
Branching logic routes to the right pages
Scores and categories calculate as expected
Contact information saves to the contact record
Workflows trigger correctly on submission
The result page CTA link works
Can I customize a quiz after starting from a template? Yes. Once you click Continue on a template, everything is editable, including questions, answers, styles, logic, and the result page.
Will using a template affect my existing quizzes? No. Starting from a template always creates a new quiz and never overwrites one you've already built.
Is inline editing available for every element type? It works across text fields, dropdowns, checkboxes, radio buttons, buttons, headers, and paragraphs. More advanced settings still require the right-hand settings panel.
Do I need to turn on inline editing? No. It's available by default; just click any editable text in the builder preview.
Does cloning work for both single elements and full slides? Yes, elements can be cloned in quizzes, forms, and surveys, but full slide cloning is only available in quizzes and surveys, not standalone forms.
Will the mobile progress bar show up on desktop? No. It's mobile-only. Desktop visitors see the standard quiz layout without a progress bar.
What happens if my quiz only has one step? The progress bar stays hidden automatically, since there's no multi-step progress to display.
Can I use different images on mobile than on desktop? Yes. Upload separate header and background images through the Mobile Editor; they apply only to the mobile view and leave your desktop design untouched.
Can the Rating Element feed into automations? Yes, once it's mapped to a custom field, the rating value can be used as a trigger or condition inside a workflow.
What if I change a score tier or rating scale after people have already responded? Existing responses were recorded under the old ranges, so changing tiers or scales afterward may make earlier results interpret differently. It's best to finalize scoring before you publish.
