The Certificate Builder lets you design and issue certificates and badges that recognize learners for completing your courses, hitting skill milestones, or reaching any achievement you define. You'll find it in Courses > Memberships, under the Credentials tab.
The Credentials tab is the home for both credential types:
Certificates confirm that a learner finished a course or category.
Badges are smaller digital icons you can award for individual milestones, whether or not a full course was completed.
Both are built and edited in the same drag-and-drop canvas, so the steps below apply to certificates and badges alike unless noted.
Log into your Aesthetix CRM account.
Click Memberships in the left-hand menu.
Click the Credentials tab.
In the top-right corner, click + Create.
Choose Create Certificate or Create Badge from the dropdown, depending on what you want to design.
You'll be prompted to either:
Start with a blank canvas, or
Pick a template from the built-in library.
Select a template (or the blank option) and click Create to open the editor.
Instead of starting from a blank canvas or a template, you can describe the certificate you need in plain language and let Certificate AI generate a complete, editable design for you. Certificate AI can assemble both content and visual elements, such as text, frames, signatures, QR codes, and other elements supported by the builder. Once it generates a design, you can keep refining it in the Certificate Builder before you preview, save, or send it.
Certificate AI is currently in Beta, so the experience and generation quality may continue to change.
A clear prompt gives Certificate AI more to work with and usually means less editing afterward. Include the purpose of the certificate along with any other details that matter to the final design, such as:
The certificate purpose or occasion
Preferred style or theme
Organization name
Recipient information
Signer requirements
Orientation preference
Important wording
QR verification requirements
Any other design or content preferences
For example, you could describe a certificate for completing a training program and specify the colors, orientation, organization name, and signer requirements you want. If Certificate AI needs more information to finish the design, such as whether you want a portrait or landscape layout, it will ask a follow-up question before generating.
If you'd rather not write a prompt from scratch, the Certificate AI starting screen offers ready-made quick prompts for common use cases:
Course completion
Milestone achieved
Event participation
Training completed
Selecting a quick prompt gives you a starting design that you can expand and customize like any other Certificate AI result.
The builder supports standard A4 and US Letter sizes, or you can set a custom canvas size to match your printing or display needs.
Click Layout to choose between Portrait or Landscape orientation, then select a frame for that orientation from the frame options. To remove a frame, click the same frame again.
Switching orientation after you've already started editing can disrupt your layout, so it's best to settle on Portrait or Landscape before you build out the rest of the design.
The editing toolbar auto-hides while you move or rotate an element so it doesn't block the canvas.
Use the move icon to reposition small or tightly packed elements more easily.
Hover over an element to highlight it before you select it.
To resize a selected element, drag an edge or corner to the size you want.
Line and shape resizing is more reliable, with fewer corner markers cluttering the view.
On the left panel, click the Text tab.
Click + Add Text Box to insert text into your design.
Choose Heading, Subheading, or Normal Text.
Edit the text directly on the canvas.
Select any text element to style it:
Change the font family, size, and weight.
Change the text color.
Apply bold or italic.
Adjust line spacing.
Set alignment to left, center, or right.
You can also copy text from another source and paste it directly into a text box. Pasted content keeps its formatting clean, so you won't end up with broken styles carried over from the original source.
Click into a text box, or add a new one, and insert dynamic tags to auto-fill values from the patient's or learner's contact record, such as:
Full name, first name, or last name
Email, phone, or company name
Address, city, state, or country, plus other contact-level custom fields you've created
Only contact-level custom values that are actually present on the contact record will populate. If a field is blank on the contact, it will render blank on the certificate, so always preview the template before sending it out.
You're not limited to the standard contact fields either. Any custom field you've built at the contact level (for example, a treatment name or completion date) is available to pull into the design, which is useful for certificates tied to specific programs or protocols.
Click the Elements tab to add:
Lines
Shapes
Ribbons
Icons
Bases
Frames
Signature fields
Select any element to customize:
Fill color
Stroke color
Border type and width
Border radius
Element opacity
Click Upload Media from Library to use assets you've already saved.
Or paste an Image URL to import an external image directly.
Click Background to set how the certificate or badge looks behind your design elements:
Choose a solid color or a gradient background.
Upload an image as the background, or paste an image link to import one.
Use the opacity slider to adjust how strong the background color or image appears.
Click Patterns to use a built-in pattern as the background, then choose the pattern's color.
Ctrl + X: cut the selected element
Ctrl + C: copy the selected element
Ctrl + V: paste an element
Ctrl/Cmd + B: bold the selected text
Ctrl/Cmd + I: italicize the selected text
Ctrl/Cmd + U: underline the selected text
Arrow keys: nudge the selected element 1px at a time
Shift + Arrow: jump 10px for faster repositioning
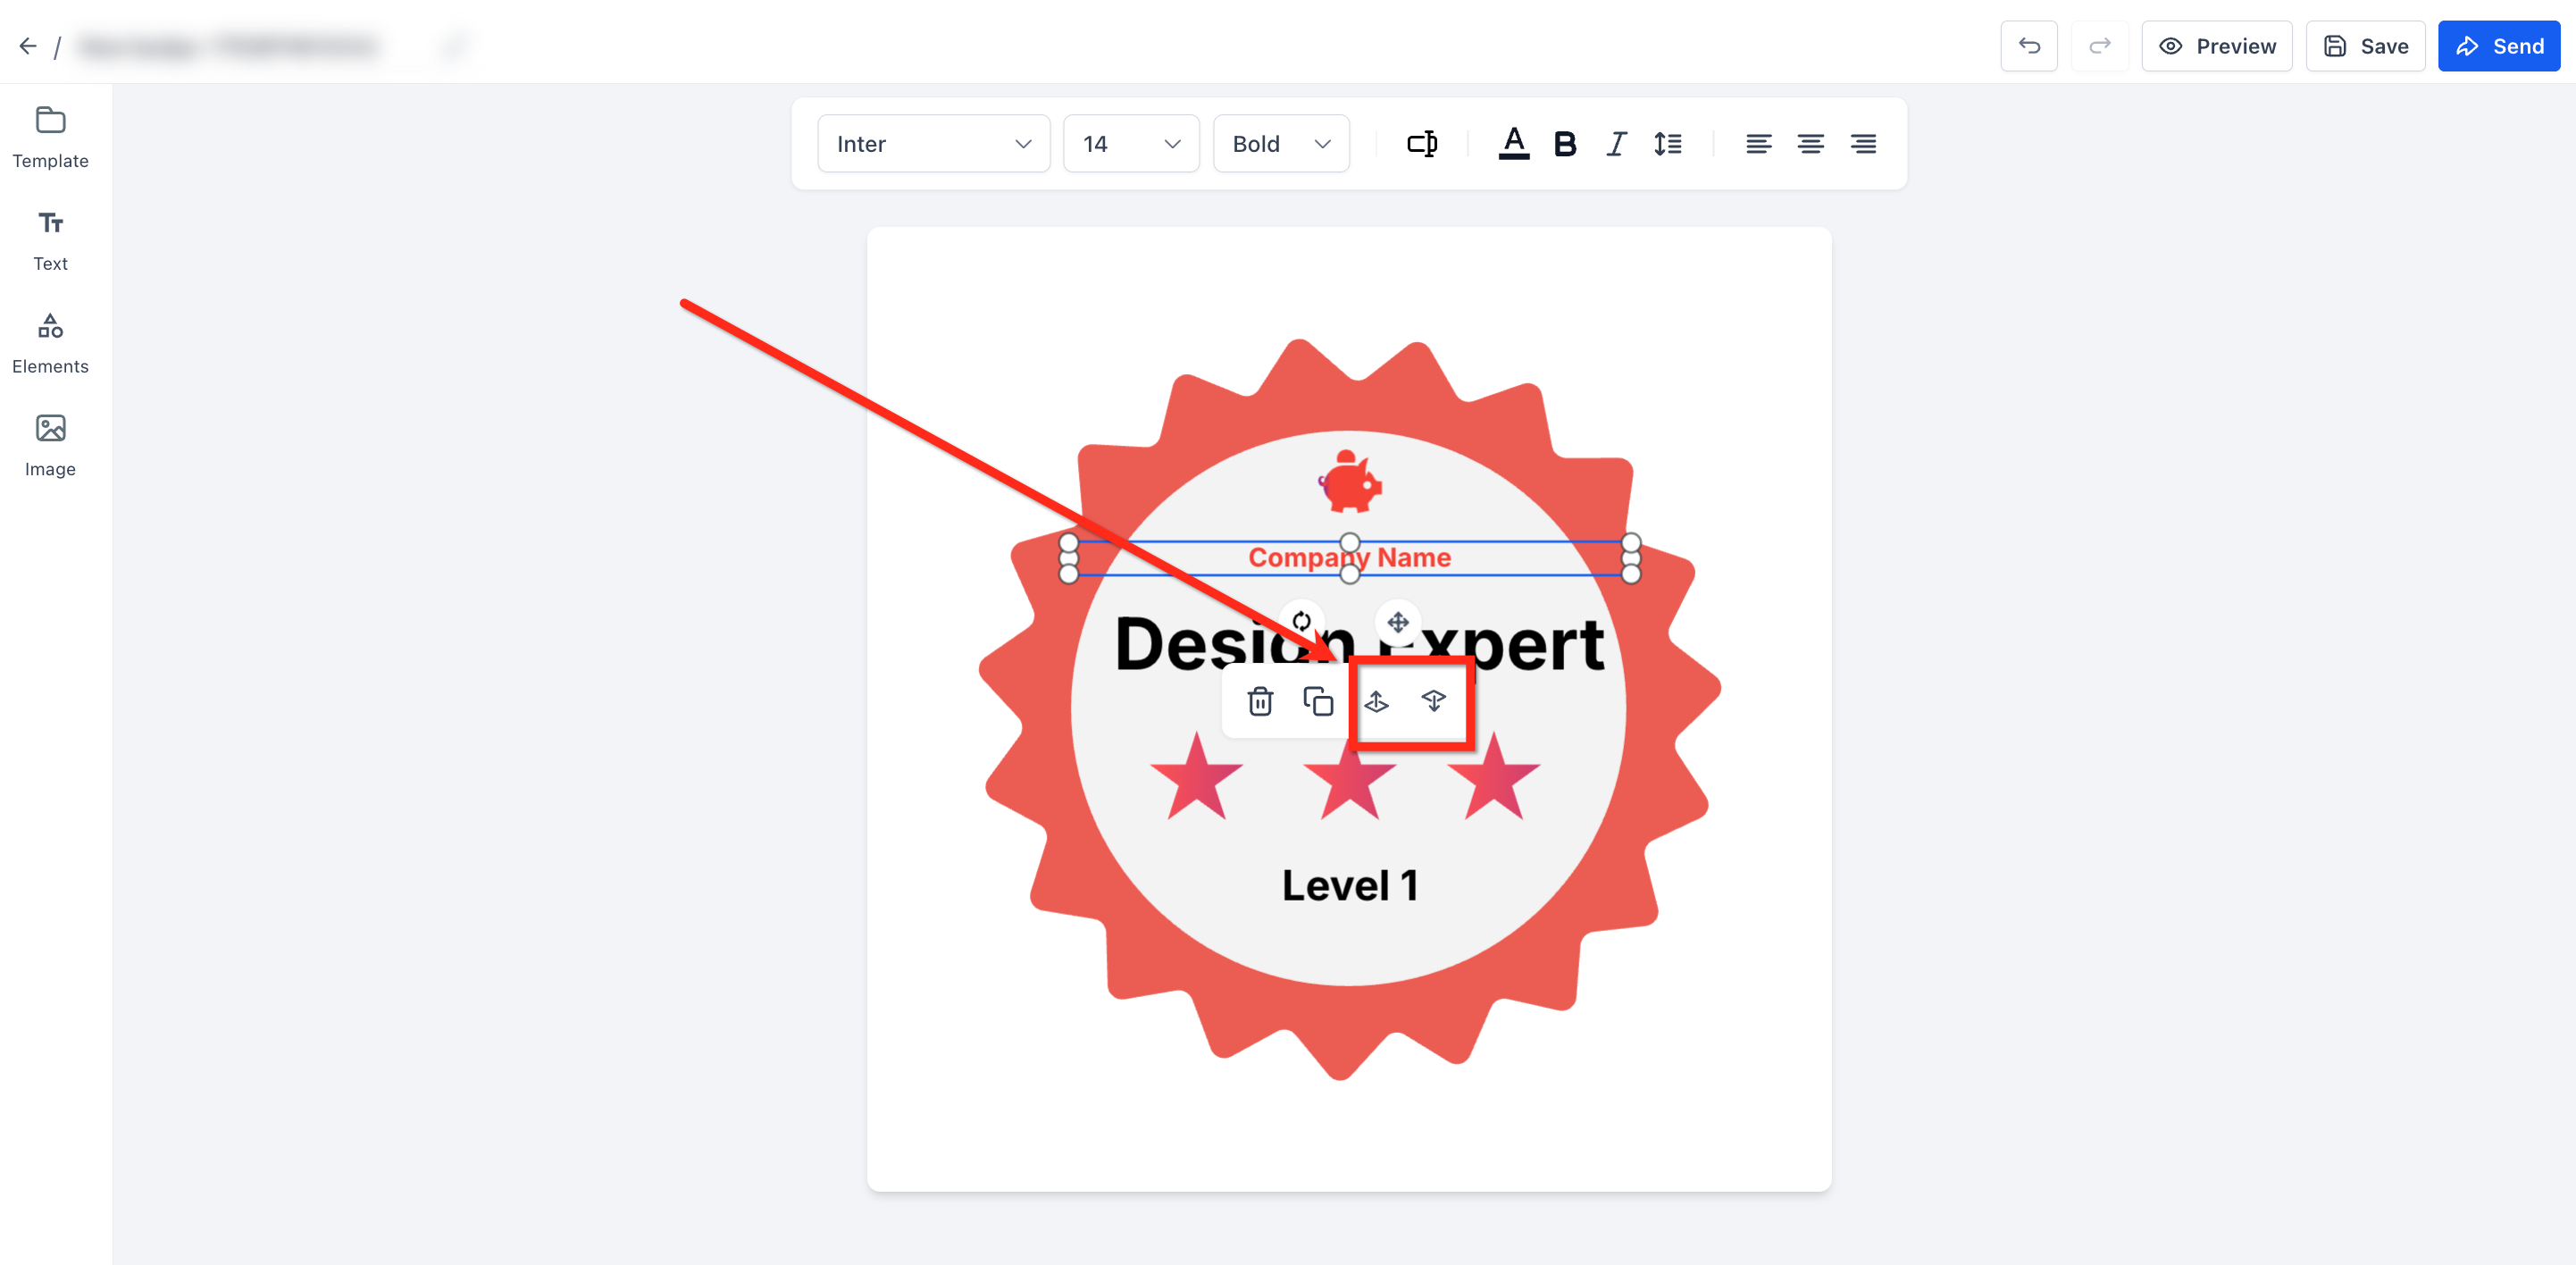
Bring Forward moves an element one layer up.
Send to Back moves an element one layer down.
Use layering to build multi-layered designs where text, ribbons, and icons overlap cleanly.
Click the Preview (eye) icon to see how the certificate or badge will look with real data filled in, then click Save to store it in your account. Badge template borders now match the final preview closely, so use Preview as your final check before saving.
The builder automatically saves your design progress every 60 seconds, so you don't have to remember to save manually. A blue dot appears whenever there are unsaved changes; once Auto-Save runs, the dot disappears. You can still click Save at any time to save manually, and Ctrl/Cmd + S works as a shortcut.
Click Send.
Add an instructor name.
Choose a previously saved recipient, or click Add New to enter a new contact.
Use the default email template, or click the edit icon next to the eye icon to select a saved email template.
Click the eye icon to preview the email, and edit the subject line if needed.
Click Confirm, then Send Email to deliver the badge.
Recipients can download and share their badges directly from the email they receive:
Badges export in high-resolution PNG format.
Recipients can share a certificate link.
Badges can be shared directly to social media platforms, which is a nice way for patients to spread the word about your practice's programs.
If you already design in Canva, you can bring those designs straight into the Credentials editor instead of rebuilding them from scratch.
Open the Credentials editor. Go to Memberships > Credentials, click Create, then choose either Certificate or Badge. This opens the editor with a blank canvas.
Open the Media Library. In the left sidebar, click Image, then click Import from Media Library. This opens the Media Storage window showing your current media files.
Connect your Canva account. In the top right of the Media Storage window, click Connect Canva and follow the prompts to authorize the connection. You only need to do this once; your Canva account stays connected for future imports.
Browse your Canva projects. Open the source dropdown on the left (it defaults to My Media) and select Canva. All of your Canva projects appear in the Media Storage window.
Import a project to your media library. Find the project you want, click the three-dot menu on its thumbnail, and select Import to media library. The project copies into your media library for use in the editor.
Insert the design. Select the imported project from your media library and click Insert media. Your Canva design is added to the canvas, where you can resize it, reposition it, or layer other elements on top of it.
Tips for Canva imports:
Updates you make in Canva later don't sync automatically. If you edit the original design in Canva, re-import it to pull in the changes.
Designs imported from Canva come in as flat images, so any text inside them isn't editable in the Credentials editor. Make text edits in Canva before importing.
Access to the Credentials module is controlled at the user permission level on your account, so you can decide which team members are allowed to create or edit certificates and badges.
Inside the builder itself:
Undo/Redo is available at any point, so you can experiment freely and backtrack if a change doesn't work out.
Use Ctrl/Cmd + Z to undo and Ctrl/Cmd + S to save, alongside the other keyboard shortcuts above, for a faster editing workflow.
You can trigger certificates and badges automatically instead of sending them one at a time, for example, issuing a certificate the moment a patient finishes a course, or awarding a badge after a quiz score threshold is met. That automation is built in Workflows using course-completion and quiz-result triggers, so set up your template here first, then head to Workflows to connect it to the trigger and action that fires it.
Can I create my own certificate or badge design from scratch? Yes. Choose the blank canvas option when creating a new certificate or badge, and you can fully customize every element from there.
Are badges only for course completions? No. Badges can be issued for any achievement you define, including skill milestones, individual lesson completions, or custom criteria that don't require finishing an entire course.
Can patients or learners share their badges on social media? Yes. Badges can be downloaded as high-resolution PNG files or shared directly to social platforms from the email they receive.
Is there a limit to how many certificate or badge templates I can create? No, there's no limit. Build as many templates as you need for different courses, programs, or achievement types.
Can I use my own graphics or logo in a certificate design? Yes. Upload custom graphics through the Image tab, or use the built-in Elements library for lines, shapes, ribbons, and icons.
Will custom fields always populate on a certificate? Only if the value exists on the contact record. If a custom field is blank for a given contact, it renders blank on the certificate, so always preview before sending.
Can I import a design I already built in Canva? Yes. Connect your Canva account from the Media Library inside the Credentials editor, then import any Canva project as an image you can insert and arrange on the canvas.
Do Canva imports update automatically if I edit the original design? No. Canva imports don't sync live. If you change the design in Canva afterward, you'll need to re-import it to pull in the update, and any text in the imported image won't be editable inside the builder.
Can I automatically issue a certificate or badge when someone completes a course? Yes. Set up the certificate or badge design here, then build the automation in Workflows using a course-completion or quiz-result trigger to issue it automatically.
Who on my team can access the Certificate Builder? Access is controlled through user permissions on your account, so you can grant or restrict the Credentials module per team member as needed.
Can I use AI to generate a certificate or badge design? Yes. Certificate AI, currently in Beta, turns a plain-language prompt into a complete, editable design that you can keep refining in the Certificate Builder before you save or send it.
What should I include in a Certificate AI prompt? Describe the certificate's purpose along with any details that matter, such as your preferred style, organization name, recipient and signer information, orientation, important wording, and QR code requirements. The more detail you include, the less editing you'll need afterward.
Can I set a custom certificate size or switch between portrait and landscape? Yes. Choose A4, US Letter, or a custom size, then set the layout to Portrait or Landscape and pick a frame for that orientation. Switching orientation after you've started editing can disrupt your layout, so choose it before you build out the rest of the design.
