Communities in Aesthetix CRM (found under Memberships > Communities) let you build ongoing patient groups, program cohorts, and internal team spaces around your practice's courses and content. This guide covers how to organize channels, publish and manage posts, feature important content, tag channels and events, send automatic newsletters, and push in-app announcement banners to your team.
A Communities group is made up of a few core pieces that work together:
Channels: Topic-based categories inside a group that keep conversations organized. Only group admins can create channels.
Posts: The main form of content inside a group. Members can build rich posts tied to a specific channel, including text, images, video, and attachments.
Home Timeline: A single feed that shows posts from every member across every channel in the group.
Comments and Likes: The core engagement tools, members can comment, attach media to comments, and like posts or comments.
Featured (Pinned) Posts: A way for admins and owners to push important content to the top of a channel or the Home Timeline.
Private Channels: Members-only channels for gated cohorts or paid programs.
Automatic Newsletters: Scheduled email digests that summarize community activity for members.
Announcement Banners: In-app banners that broadcast time-sensitive updates to your team inside Aesthetix CRM.
A few ways practices use this together:
Patient education program: Create a channel per treatment track (for example, "Weight Loss Program" or "Post-Op Recovery"). Post lesson content, embed videos, attach handouts, and let patients ask questions in the comments. The Home Timeline keeps everyone current on new lessons and discussion.
Internal team communication: Set up channels per department or location. Staff post updates, share protocols, and ask questions, with the Home Timeline giving leadership a single view across every team.
VIP or membership cohort: Use a private channel to separate a paid program or VIP group from your general community, then invite only enrolled patients.
Practice announcements: Post updates, promotions, or new-offering announcements to a general channel, and use comments and likes to gauge engagement.
Only group admins can create channels, and every post belongs to a channel.
Open your group and click Add Channel in the left sidebar.
A modal opens asking for the channel's name, description, and icon.
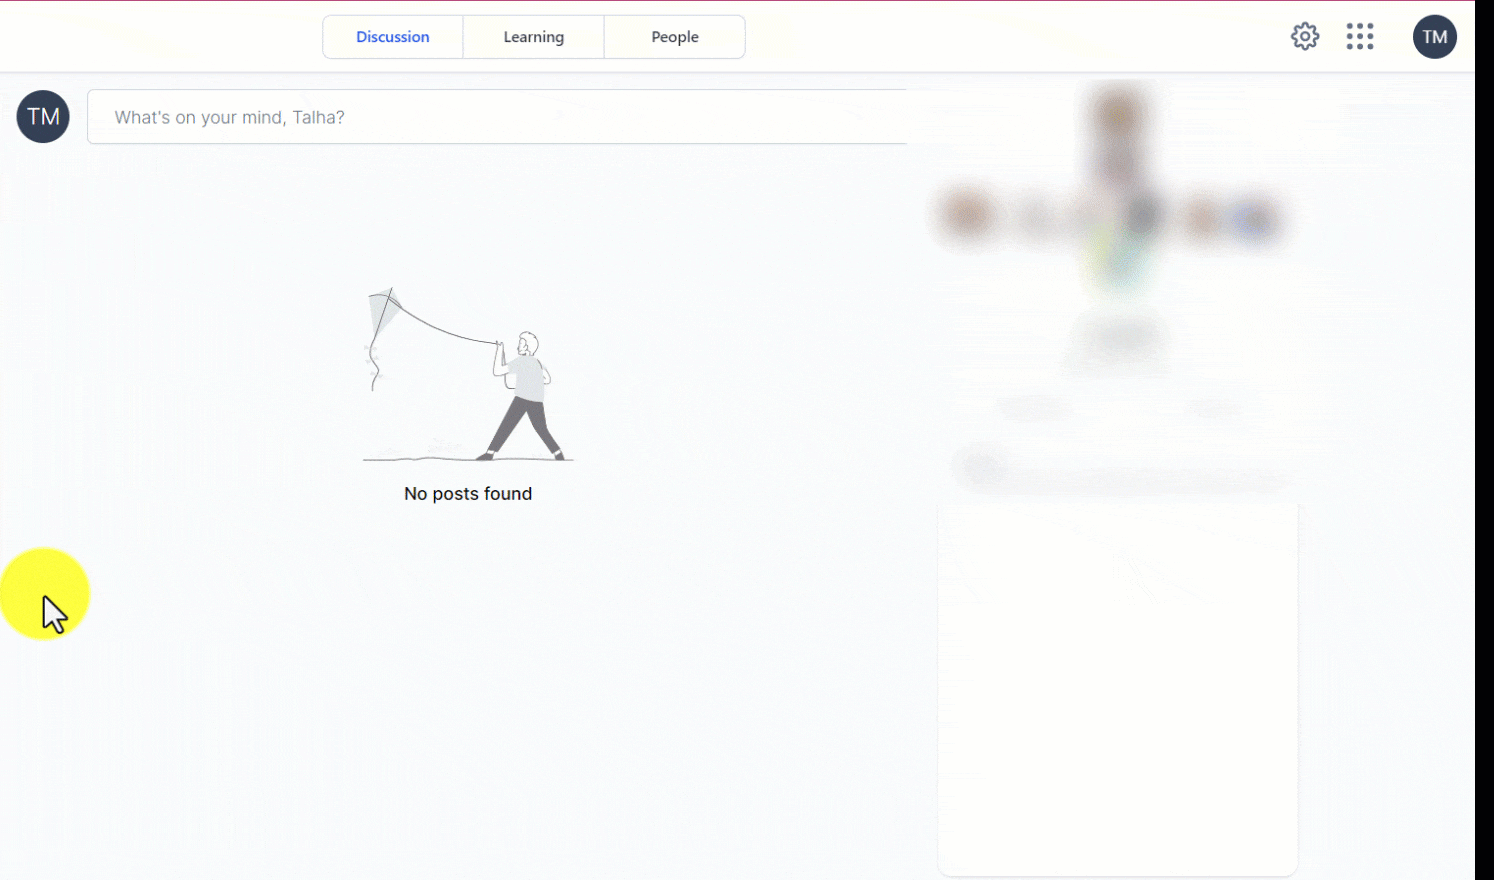
Channel Name: A short, clear name for the channel's purpose (for example, "Marketing Reports" or "Post-Op Care"). Limited to 15 characters, so keep it tight.
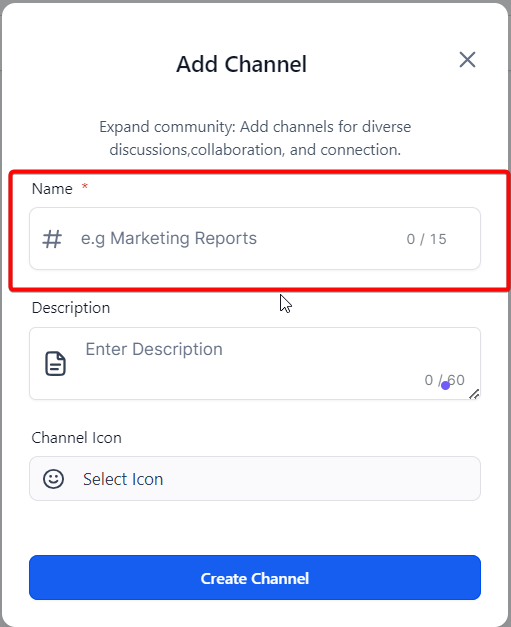
Channel Description: A one-line summary of what the channel is for, so members know what to expect before joining the conversation. Limited to 60 characters.
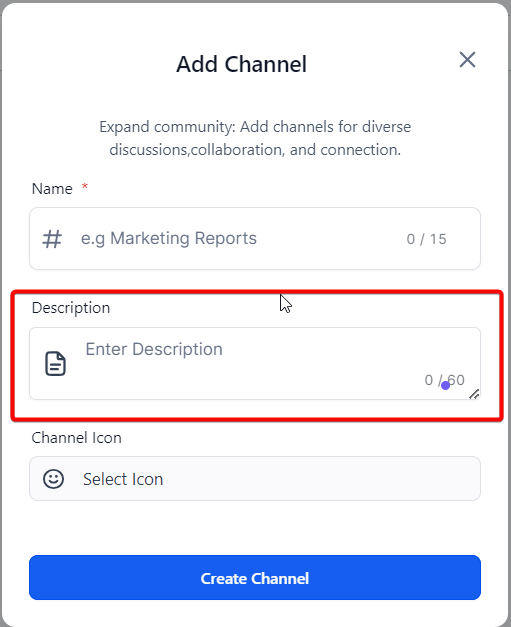
Channel Icon: Pick a distinctive icon that will display next to the channel name, making it easy for members to spot at a glance.
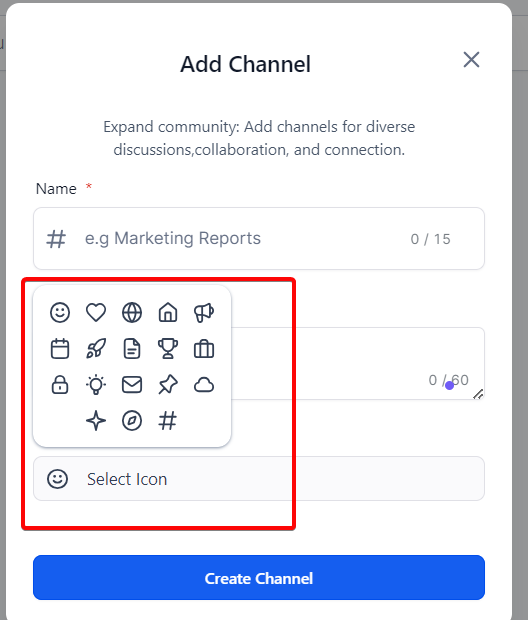
Once the name, description, and icon are set, click to create the channel.
Private channels restrict visibility and participation to approved members only, which is useful for gated cohorts, paid programs, or staff-only spaces. Keep a few rules in mind:
The group owner and the channel's creator are automatically added as channel managers, and a channel manager acts as the admin for that specific channel (general group roles like owner or admin don't carry extra weight inside a private channel).
The group owner cannot leave a private channel.
Private channels do not appear in the channel list to anyone who isn't a member.
To create a channel as private from the start:
Go to Memberships > Communities > Groups, then open the group.
Click + Add Channel.
Enter the channel name, and optionally a description and icon.
Toggle Make this Channel Private to on.
Click Create Channel.
To convert an existing public channel to private: Open the channel, click the Settings (gear) icon, open the Settings tab, click Make Channel Private, and confirm in the acknowledgement popup. Non-members will no longer see the channel in the list once converted.
To convert a private channel back to public: Open the channel, click the Settings icon, open the Settings tab, click Make Channel Public, and confirm. The channel becomes visible to every group member, and its existing post history stays intact.
To add or remove members from a private channel: Open the channel, click the Settings icon, open the Members tab. To add members, search and select them. To remove a member, find their name, click the three dots beside it, and choose Remove from Channel.
To set or change a channel's emoji or icon: Open the channel, click the Settings icon, click Edit beside the channel name, click the channel icon option, choose an emoji or icon, and click Save.
If you need to manage access to a private channel automatically (for example, granting access when a patient enrolls in a program or revoking it when a membership lapses), set that up as a trigger or action in Workflows rather than managing it by hand.
HIPAA note: If patients discuss treatments, symptoms, or personal health details inside posts or comments, that content can qualify as PHI. Keep clinical or sensitive discussions in private, access-controlled channels, and remind patients not to post identifying medical details in public or general channels.
Before creating a post, make sure the channel you want to post in already exists.
Navigate to the channel you want to post in.
Add a title that summarizes your post.
Write the post body with the context or discussion you want to start.
Attach videos, PDFs, images, or GIFs as needed, or embed a video from YouTube, Vimeo, Wistia, or Loom.
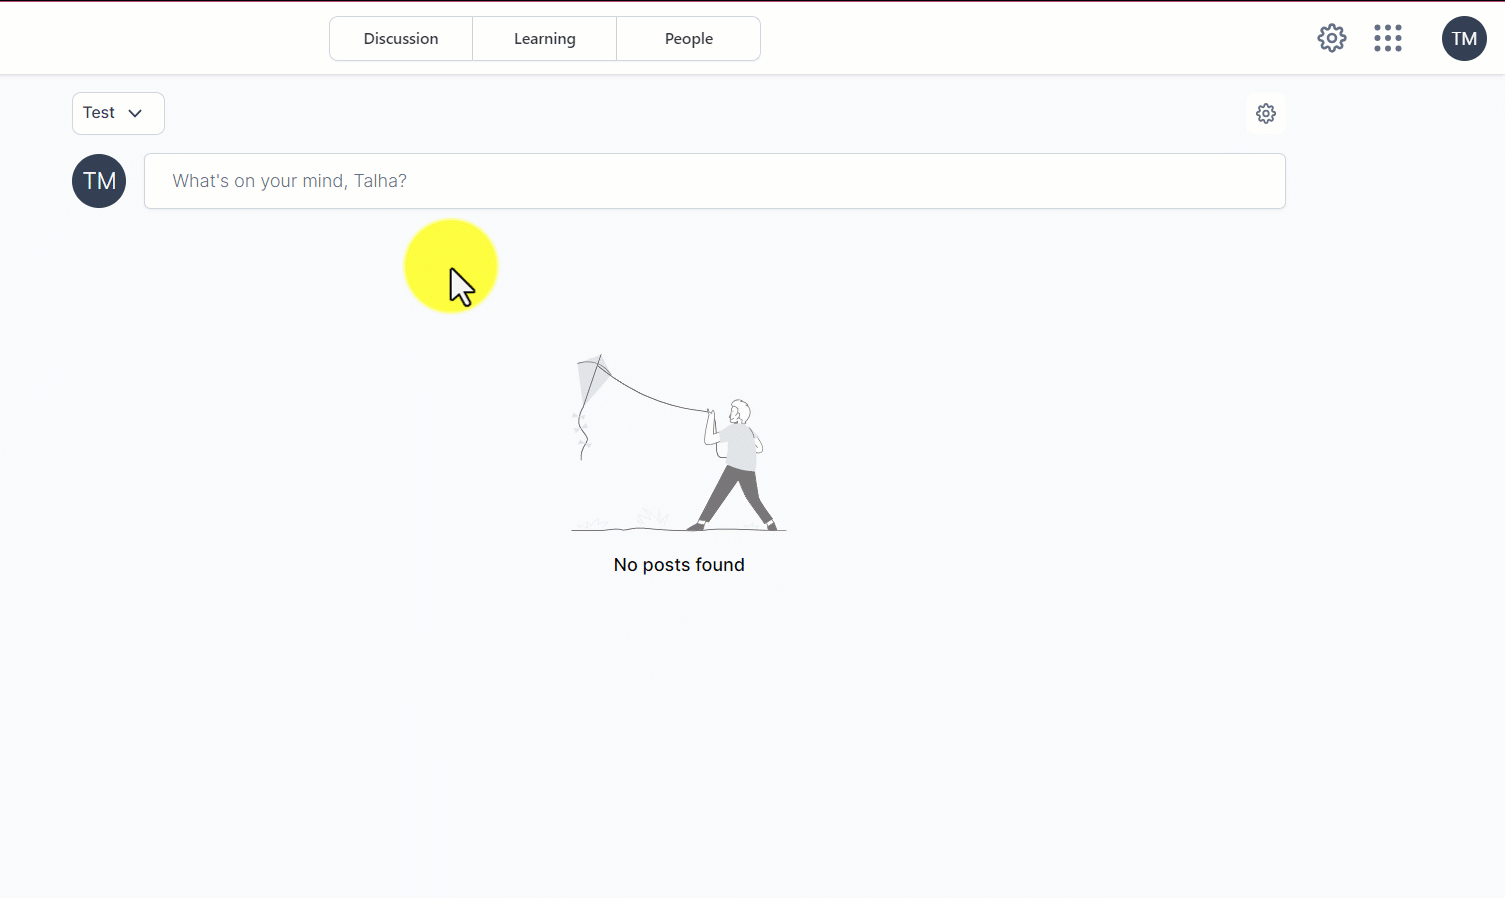
Keep it concise and descriptive so members know what the post covers before opening it.
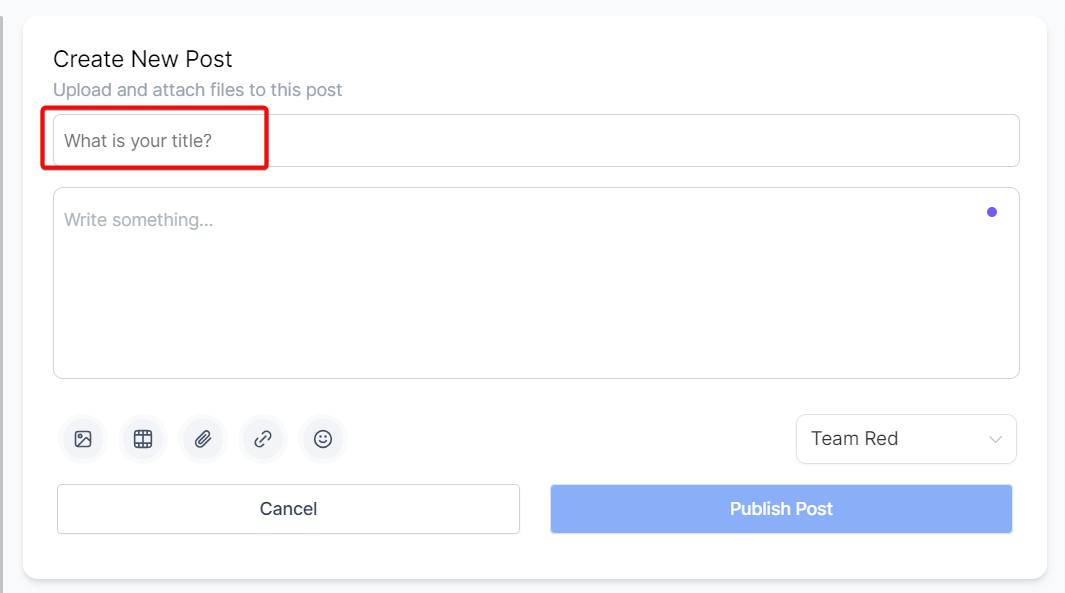
Write your main content here, whether it's an announcement, a question, or a discussion starter.
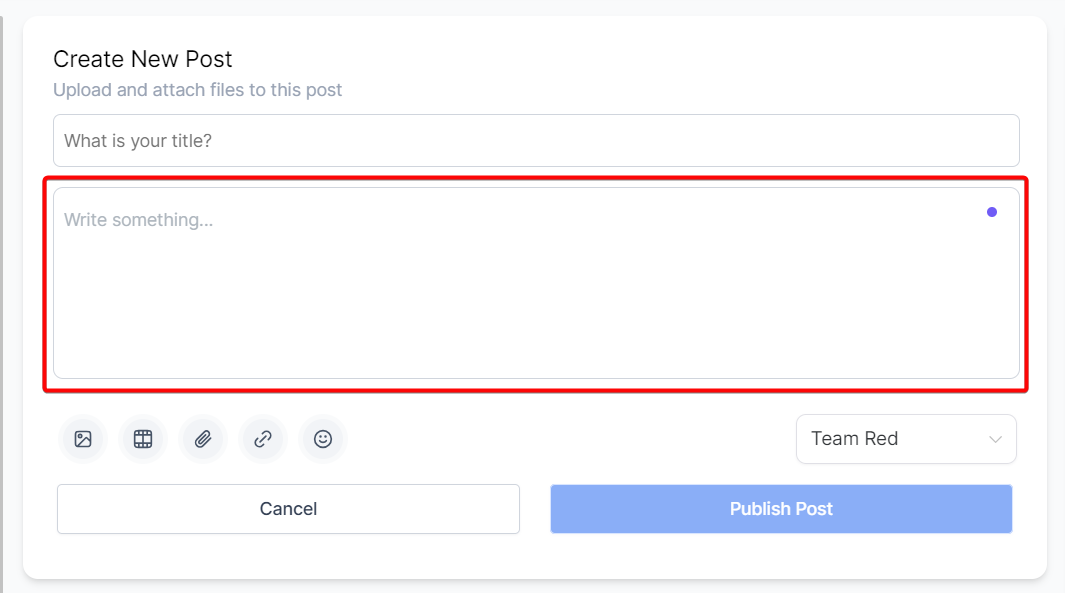
Click the upload button or drag and drop an image into the upload area. Supported formats are SVG, PNG, JPG, or GIF, with a maximum size of 800x400px.
Click the upload button or drag and drop an MP4 file to attach a video directly to your post.
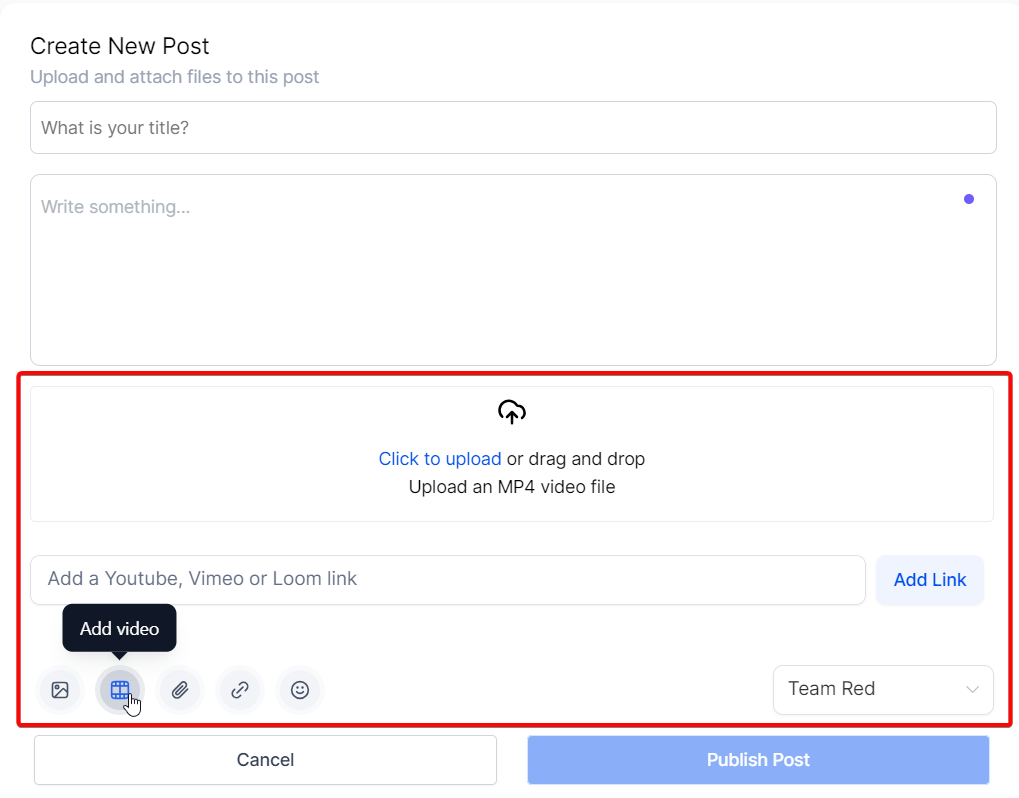
To attach a video hosted elsewhere instead of uploading a file:
The quickest way to add a YouTube or Loom video is to paste the share link directly into the post or comment text: an embedded video preview generates automatically, with no extra steps. For Vimeo or Wistia, or any time you want the video attached as its own post element instead of an inline link preview, attach it manually:
Find the video on its host platform and copy the public share link.
Open the post editor and click the video icon at the bottom of the post-creation area.
Paste the share link into the text field.
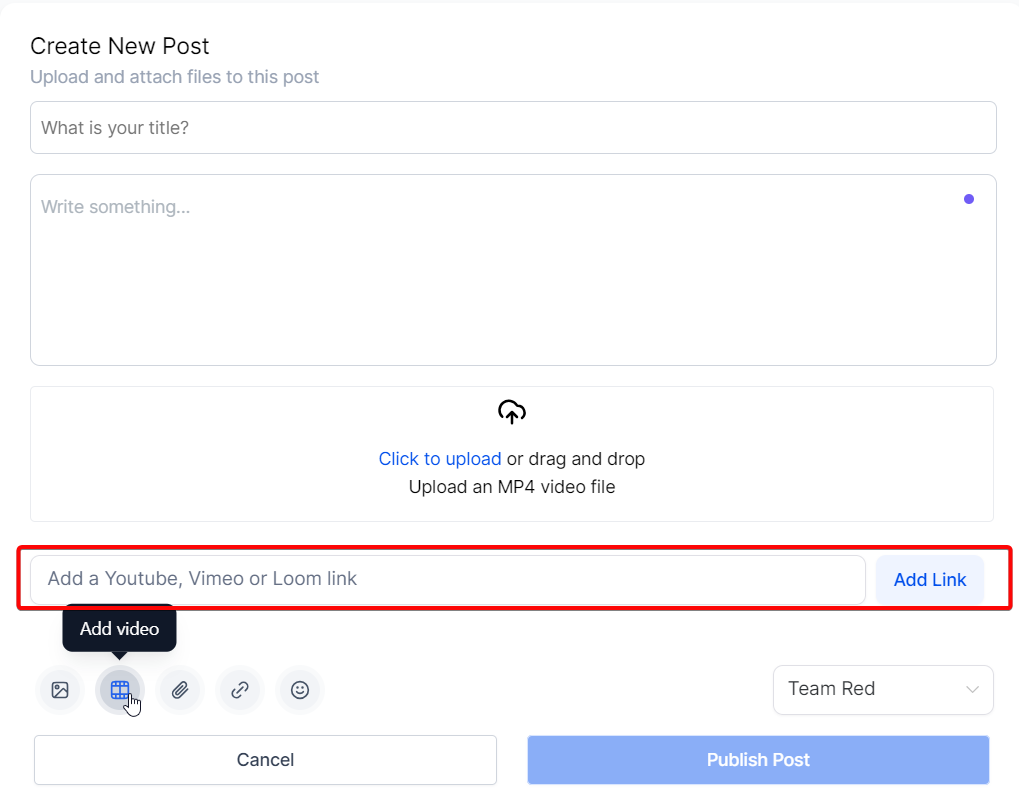
Click Add Link and the video will embed directly in your post.
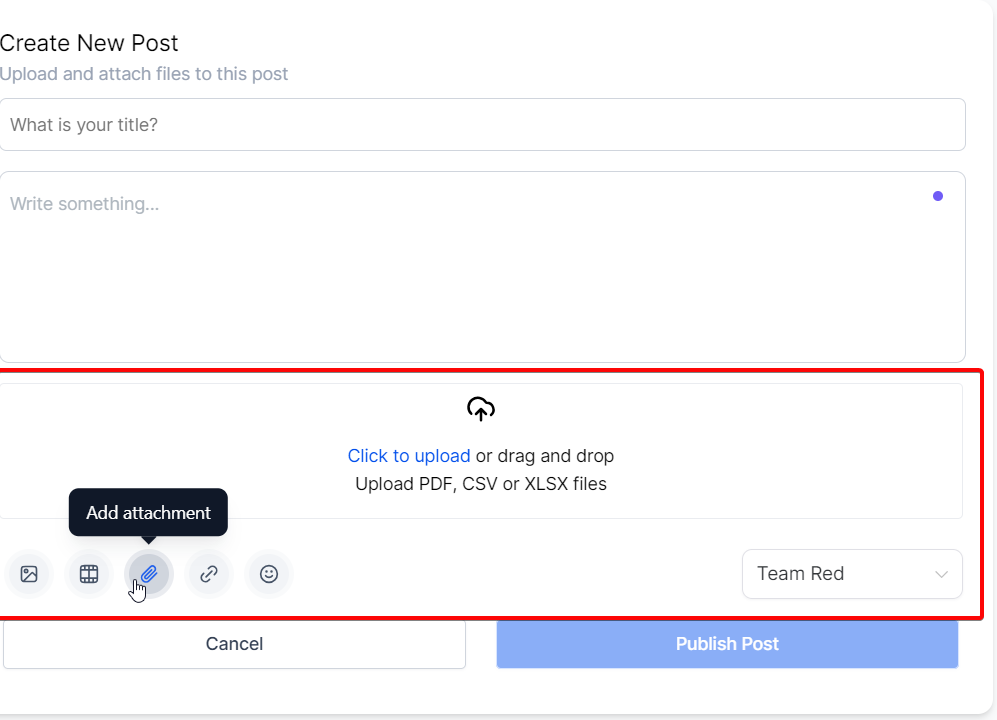
Supplement your post with files like PDFs, CSVs, or XLSX files. Click the upload button or drag and drop the file into the designated area.
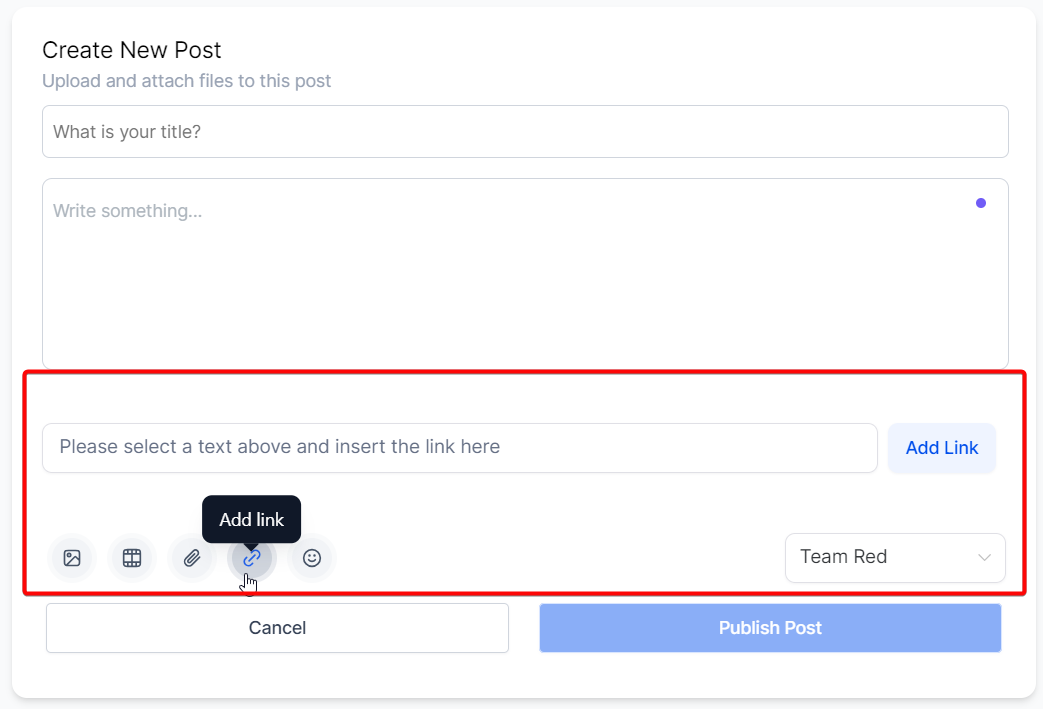
Highlight the text you want to hyperlink, paste the destination URL, and click Add Link to send readers to additional resources.
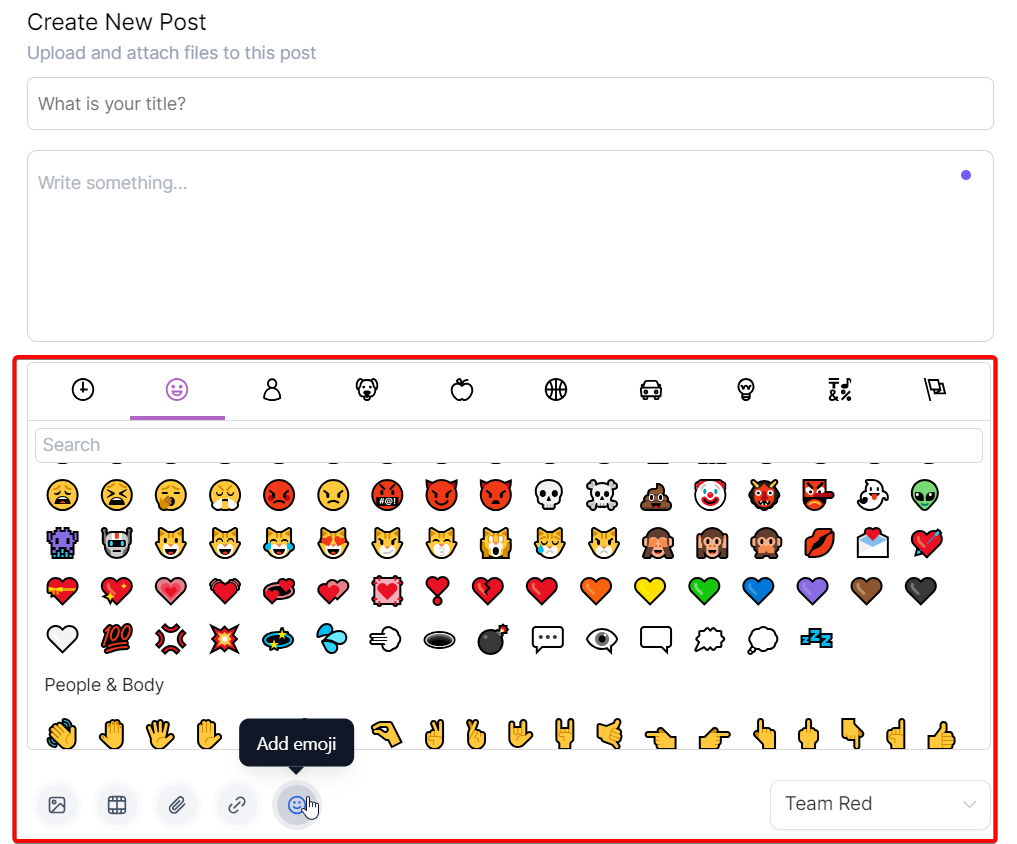
Search or browse the emoji library, organized into standard categories, to make your post more expressive.
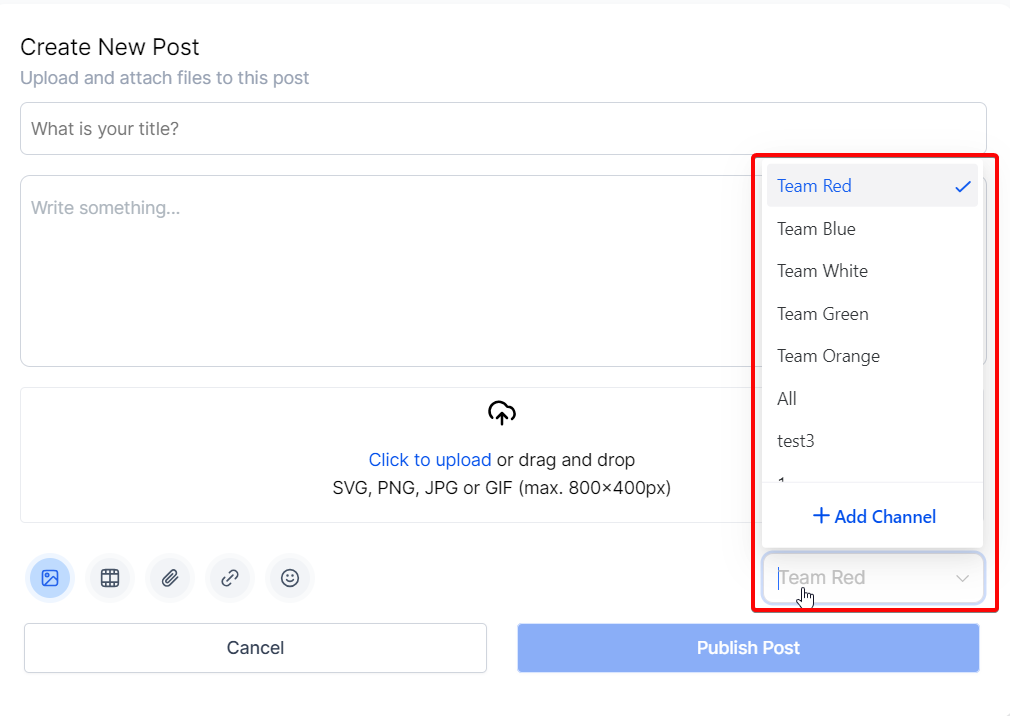
Use the channel dropdown to pick which channel the post belongs to, or create a new channel directly from this step.
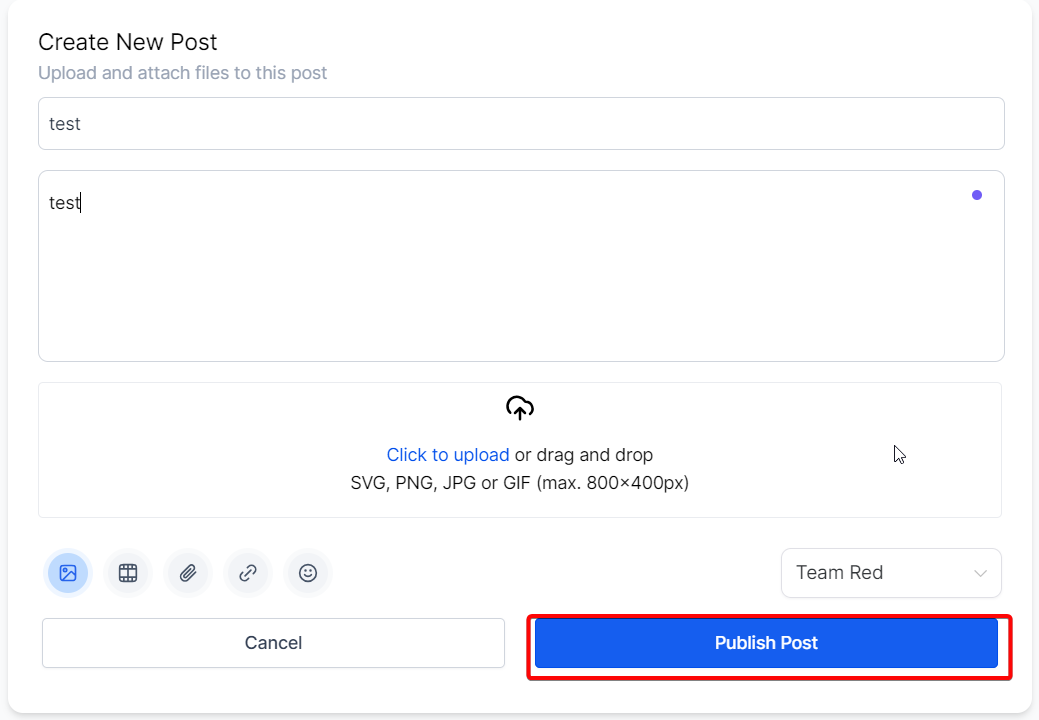
Once everything looks right, click Publish Post.
Instead of typing a long update, you can record a spoken voice note directly in the post or comment composer, or attach an existing audio file. A single post can include a recorded voice note, an uploaded audio file, or both.
To record a voice note in a post:
Open the post composer and add a title and description.
Click the microphone icon in the composer.
Speak your message. The composer shows a live waveform and recording duration while you record.
Use Pause to stop recording temporarily, Resume to continue, or Cancel to discard the recording.
Once you finish, the recording is added to the post as an audio attachment. Use the playback control to review it before publishing.
To attach an existing audio file instead: use the attachment controls in the post composer and choose the audio file you want to include. It appears alongside your other attachments and can be combined with a recorded voice note in the same post.
To add a voice note to a comment: open the comment field on a post, select the microphone icon, record your response, and send it. The voice note appears in the comment thread with its own playback control.
Recorded voice notes display with a waveform player, while uploaded audio files use a timeline-style player. Members can play audio back at 1x, 1.5x, or 2x speed, and playback automatically continues to the next audio item in the post or thread.
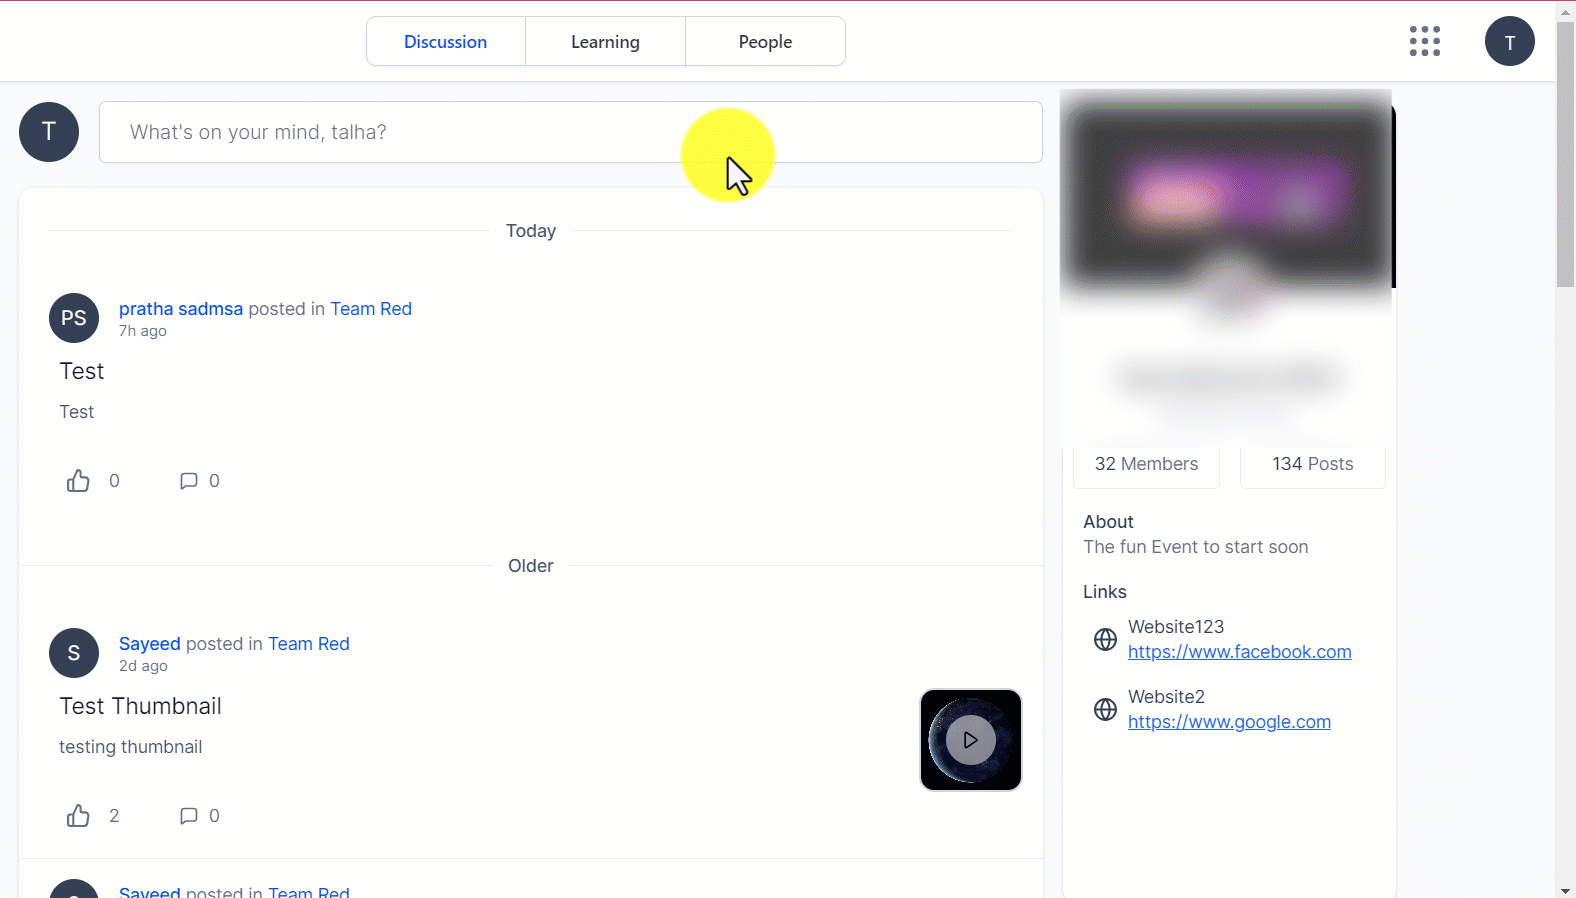
The Home Timeline is your group's activity hub: it displays posts from every member across every channel in one place. Check it regularly to stay current on the latest conversations without needing to visit each channel individually.
Posts can open in two different ways depending on how a member gets to them:
Modal view: When a member opens a post from inside the group, such as from the timeline or a channel, it opens in a modal window so they can review it without leaving the current page.
Full-page view: When a member opens a post from a direct link, such as one shared in an email notification, it opens in a dedicated full-screen page for focused reading.
Comments and likes are the primary way members engage with a post. Comments can include their own images, videos, and links.
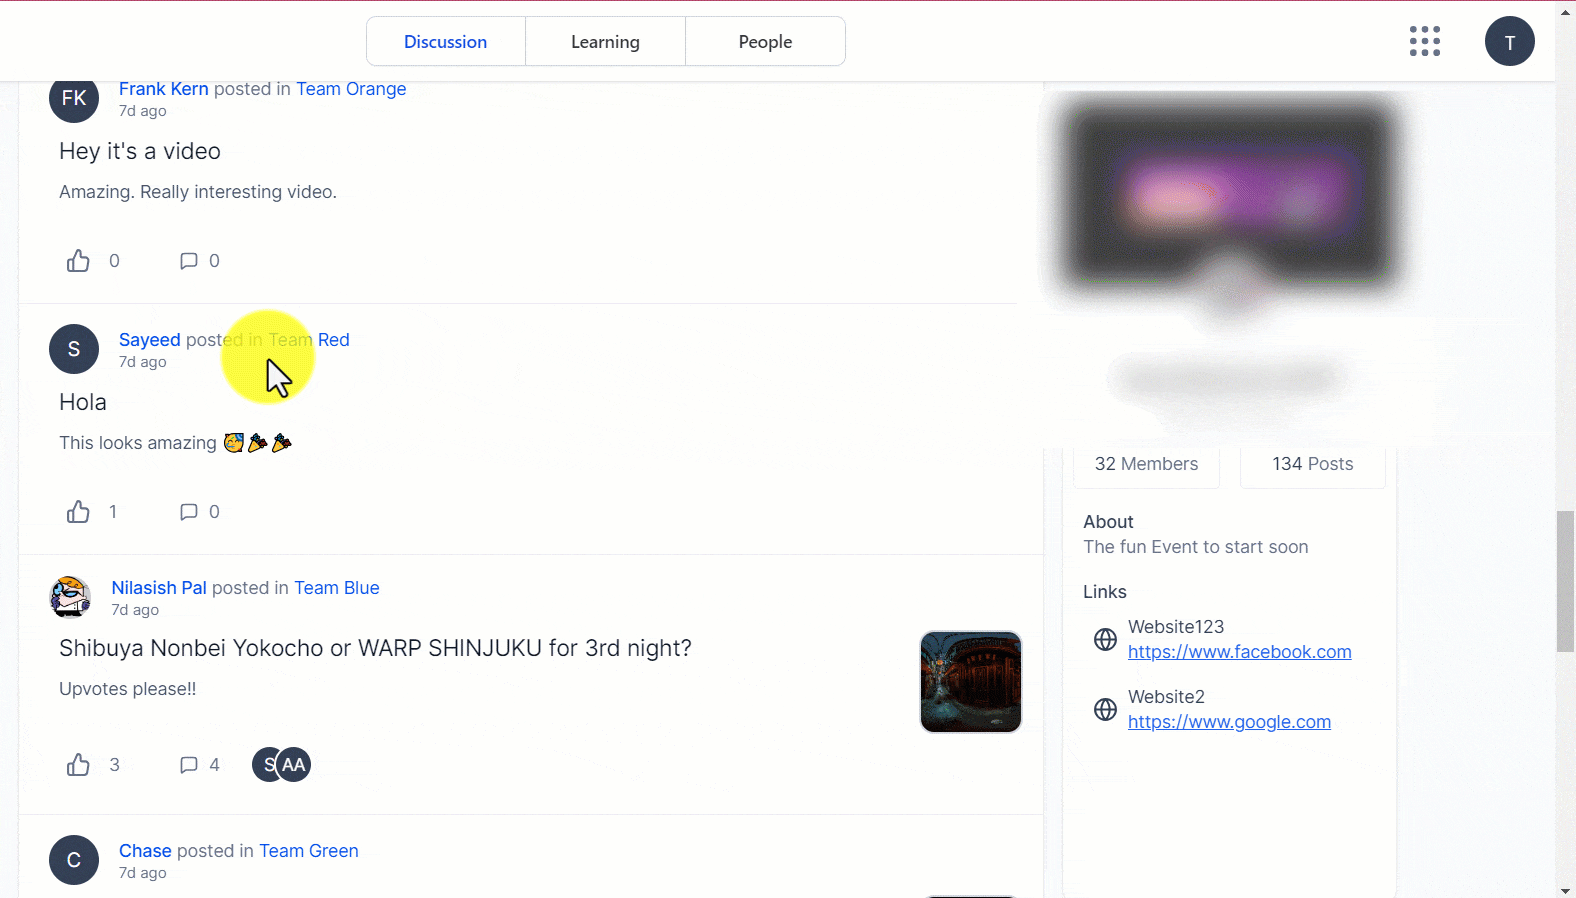
To comment on a post:
Open the post you want to comment on.
Use the comment section to write your reply.
Add attachments like images, videos, or links if useful.
Reply to a specific comment within the thread to keep a discussion organized.
Click the thumbs-up icon to like a post or comment.
Featuring a post pushes it to the top of a channel or the Home Timeline so it doesn't get buried, useful for practice announcements, program kickoffs, or anything you want every member to see first.
To feature a post:
Find the post you want to feature.
Click the three-dot menu on the post.
Select Pin.
Where featured posts appear:
Channel level: A post pinned inside a channel moves to the top of that channel's feed, so members see it first when they open the channel.
Home Timeline: A post pinned to the Home Timeline moves to the top of the main feed, so it gets attention even from members browsing across all channels.
To unpin a featured post: Locate the post, click the three-dot menu, and select Unpin. The post stays available in its original location, it just loses its featured placement.
Admins and post authors can move a post to any public or private channel they have access to.
Click the three dots in the top right corner of the post.
Click Move to Channel.
Choose the destination channel (public or private).
Click Move.
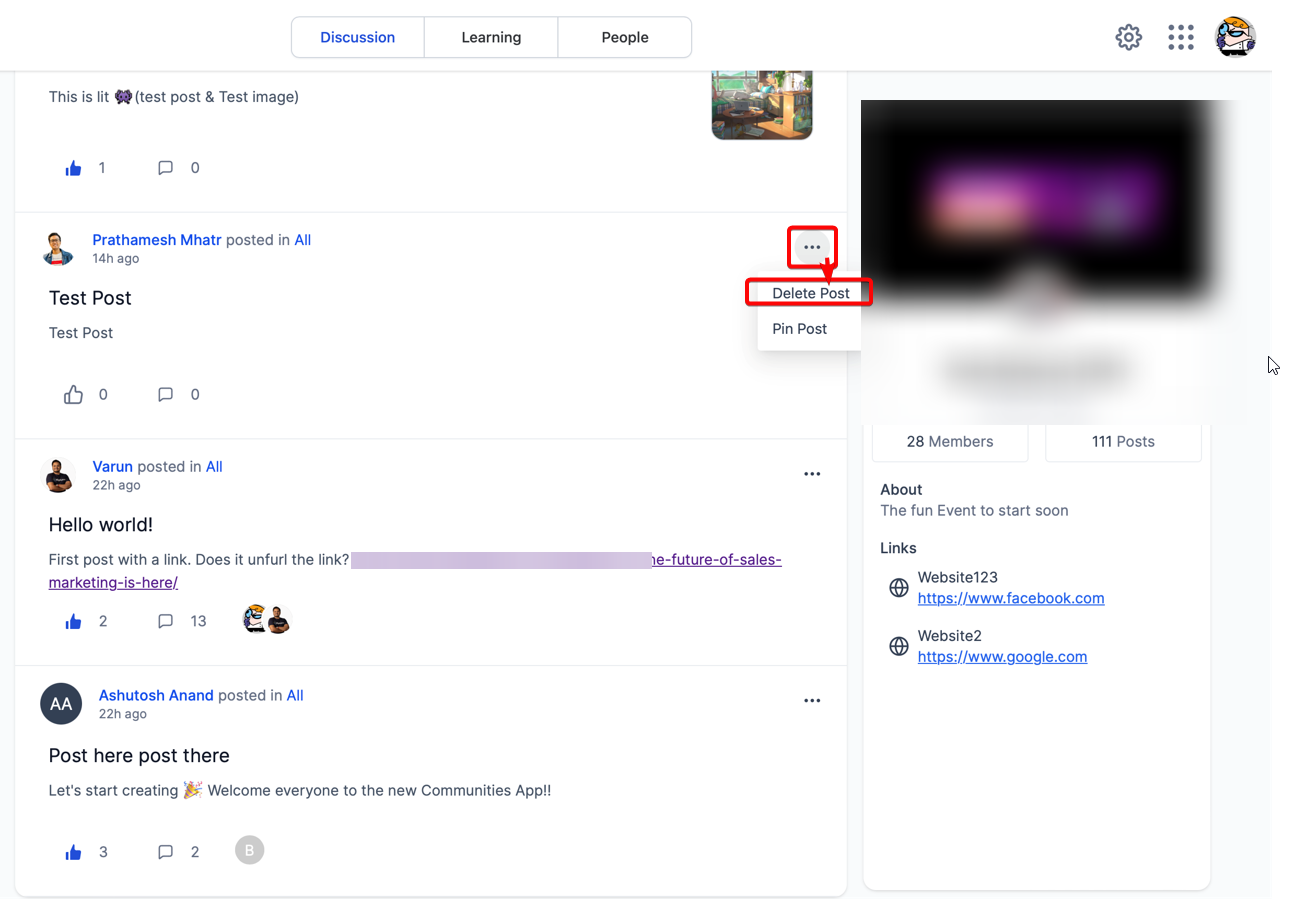
Admins and moderators can delete any post that violates the community's guidelines, and members can delete their own posts and comments.
Locate the post you want to delete.
Click the three-dot icon on the right side of the post.
Select Delete Post from the dropdown.
The post is permanently removed from the group.
Typing # inside a post or comment opens a picker of channels and events, letting you insert a clickable, permission-aware tag instead of typing out a plain reference. Readers can click the tag to jump straight to that channel or event (assuming they have access).
Who can tag: Anyone who can create a post or comment in the community.
What you'll see: The # picker only shows channels and events you personally have permission to access, so tags always respect existing privacy settings.
To tag a channel or event:
Go to Memberships > Communities > Groups and open the group.
Open a post or comment editor.
Type # to open the picker, then search or scroll to find the channel or event you want.
Press Enter or click to insert the tag.
Finish your message and click Publish.
Click the newly inserted tag to confirm it opens the right destination.
You can tag as many channels or events in one post as are relevant, though it's best to keep posts focused and readable. If a tagged event has already ended, the tag may open a read-only or ended view depending on the event's settings.
Pasting a supported link or mentioning an event in a post or comment automatically generates a rich preview card, so members can watch a video or see event details without leaving the conversation. No setup is required, the preview generates as soon as you paste the link or reference the event.
Link previews: paste a YouTube or Loom link into a post or comment and an embedded video player appears in the preview card, letting members watch without opening a new tab. The card also shows the linked content's title, description, and thumbnail.
Event previews: mention an event in a post and a preview card shows the event name, scheduled date and time, and current registration status, with a registration button members can use without visiting the Events page.
Rich previews work the same way in both posts and comments. To remove a preview, edit the post or comment and delete the link or event mention that generated it.
Go Live brings real-time video, audio, and chat into a group or channel so you can run interactive workshops, live Q&As, or announcements without leaving Communities. Choose between two modes:
Meeting Room Mode: an interactive, many-to-many live room with host controls, chat, emoji reactions, hand raise, screen share, and Grid or Speaker layouts. Good for coaching calls, workshops, or office hours.
Stream Software Mode: a broadcast experience that connects to external tools like OBS, Zoom, or StreamYard through a Stream Key and Server URL, while members watch and chat inside the community.
To start a Go Live session:
Go to Memberships > Communities > Groups and open the group.
Click the Go Live button (the red video camera icon) near the posting tab.
Add a title and description, and choose whether to keep the livestream as a post afterward and notify members that you're going live.
Choose the channel to publish the live session to.
Under Select video source, choose Meeting Room or Streaming software.
For Meeting Room, click Go Live and allow your browser to use your camera and microphone. For Streaming Software, copy the Server URL and Stream Key into your encoder's RTMP settings, then start the broadcast in your streaming software before going live in Aesthetix CRM.
Once you're live, members can join by clicking Join Stream. As host, you can mute or unmute participants, grant or revoke mic, camera, or screen share access, remove attendees, switch between Grid and Speaker views, and pin a participant to the stream. If you need to step away, choose Leave and assign another participant as host so the meeting continues, or End Meeting for All to close it immediately. If the host disconnects unexpectedly, the meeting stays active and host privileges automatically return once the original host rejoins.
In Stream Software Mode, your Stream Key stays the same across sessions so you don't need to reconfigure your encoder every time, though you can reset it if it's ever shared by mistake.
Automatic Newsletters send a recurring digest of community activity to members without any manual effort on your part. They're off by default, an owner or admin has to turn them on per group.
What gets included in a newsletter:
Active threads: The last thread a member interacted with, plus the freshest replies from others.
Top posts: Trending content from public channels so members don't miss what's popular.
Posts from followed members: Updates from any member a recipient follows.
Upcoming events: The most relevant upcoming events in the group.
Clickable cards: Every item links back to the original post, thread, or event.
Permissions honored: Members only ever see content they already have access to, private channel activity never leaks into a newsletter for non-members.
Scheduling options:
Daily: Pick a time and timezone for a newsletter to go out every day, ideal for active, high-volume communities. Example: daily at 8:00 AM Eastern.
Weekly or bi-weekly: Pick specific days along with a time and timezone, good for a consistent weekly digest. Example: every Tuesday at 10:00 AM.
Monthly: Pick a date (1 through 27, or the last day of the month) along with a time and timezone, best for summaries or longer-form recaps. Example: the 1st of every month at 9:00 AM.
To set up an automatic newsletter:
Go to Memberships > Communities > Groups.
Log in to the group where you're an owner or admin.
Go to Settings > Newsletter.
Choose your frequency: Daily, Weekly, Bi-Weekly, or Monthly.
Configure the time, day or date, and timezone based on the frequency you chose.
Click Save.
A couple of things worth knowing: the newsletter schedule is set at the group level and applies to all members, you can't send at different times to different people. Every newsletter email includes an "Update Preferences" link so members can unsubscribe or manage their own preferences, and you can change the schedule at any time from the newsletter settings.
Separate from community posts, Announcement Banners are in-app messages you can build to notify your team about important updates the moment they log in to Aesthetix CRM, useful for promoting a new community channel, a policy change, or a limited-time update without relying on email.
Key benefits:
Targeted communication: Choose where a banner shows up so the right audience sees it.
Flexible scheduling: Set a start date and end date so time-sensitive banners appear and disappear automatically.
Clear prioritization: Use Critical, Warning, or General priority levels to control which message takes precedence when more than one banner is active.
Preview before publishing: Review exactly how a banner will look before it goes live.
Draft and publish control: Save a banner as a draft while you're still working on it, then activate it when it's ready.
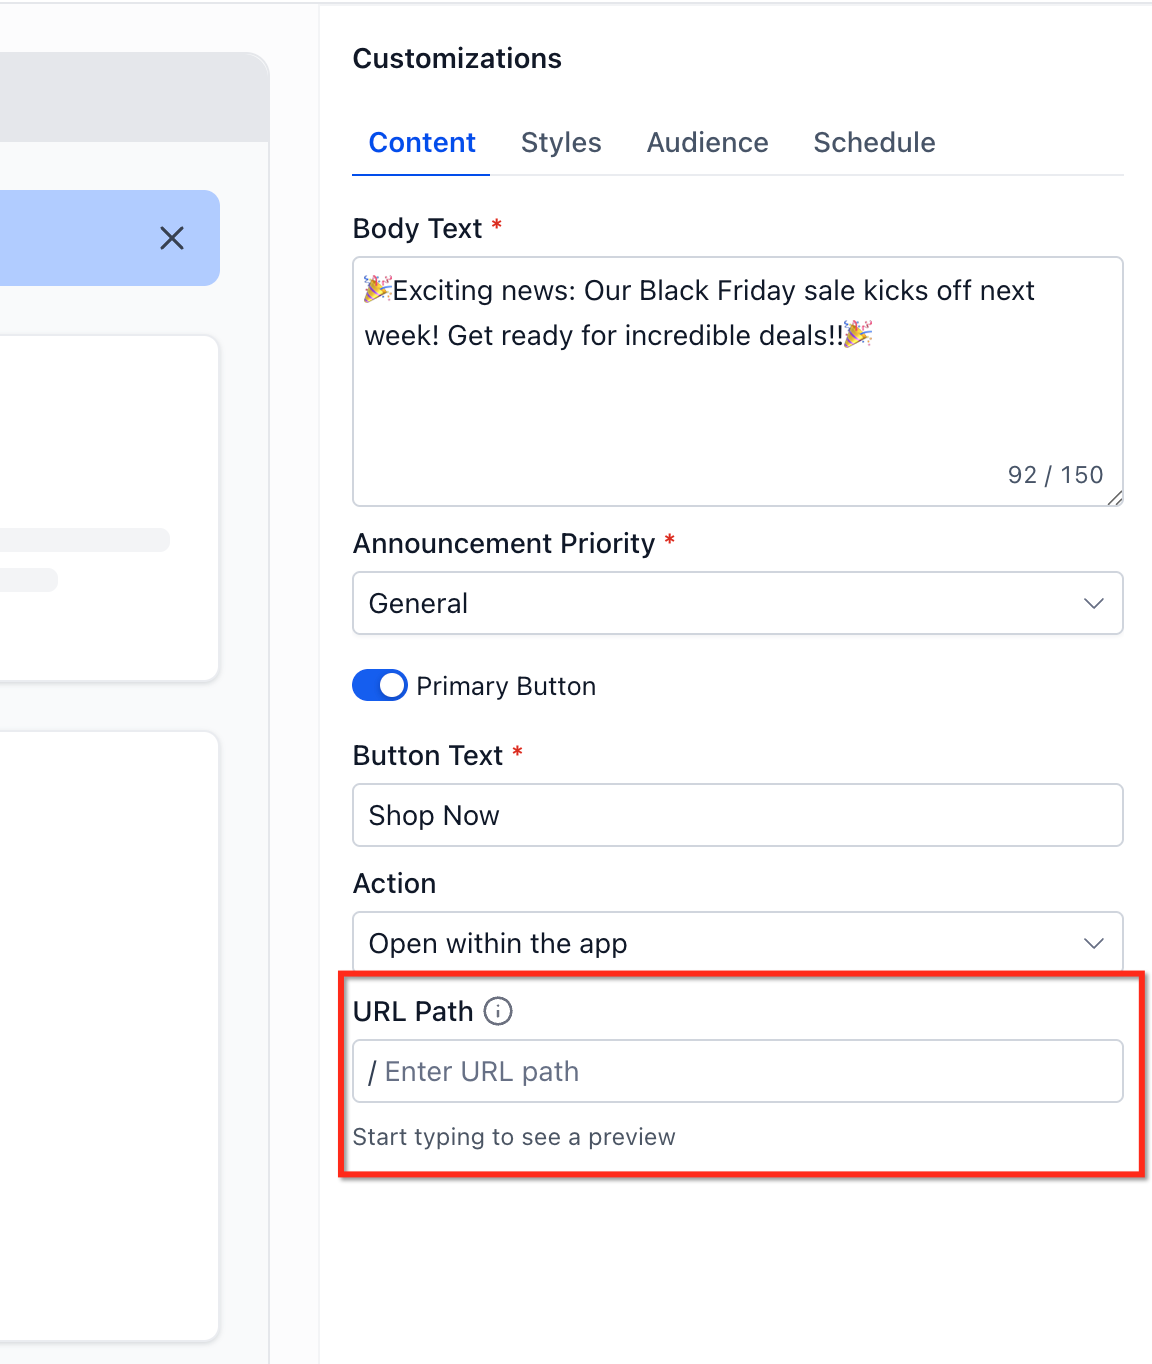
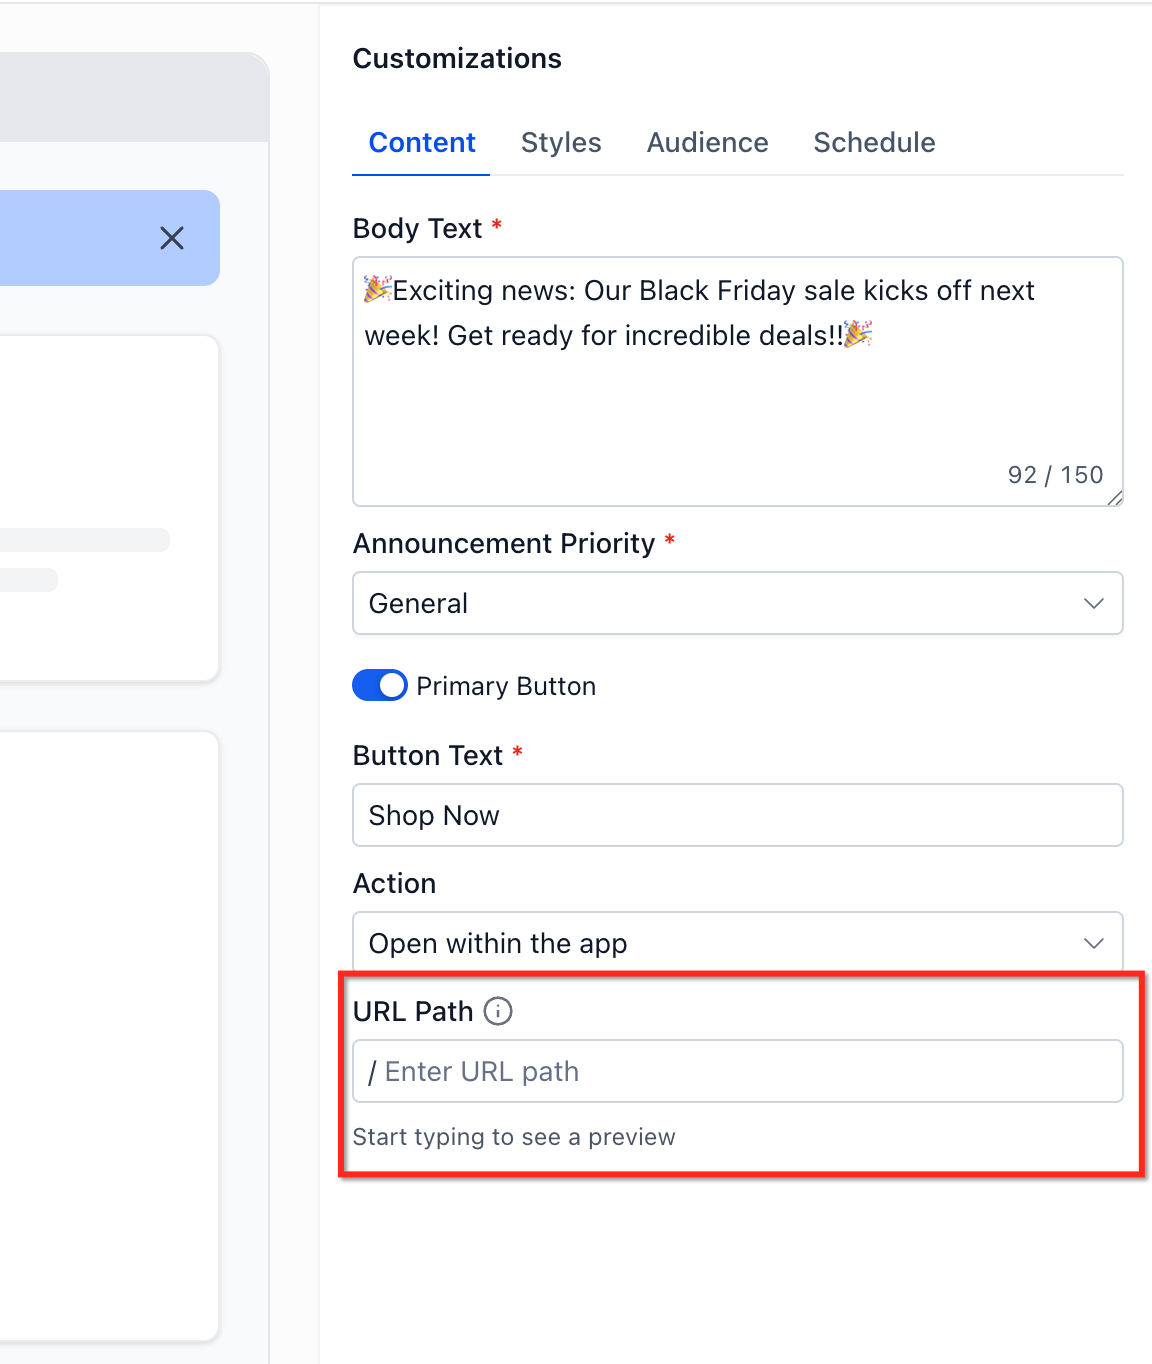
Action-oriented: Add an optional call-to-action button with a destination URL to send people to the next step.
Banner content and core settings:
Message Content: The main text explaining the update, alert, or action needed.
Priority: Critical, Warning, or General.
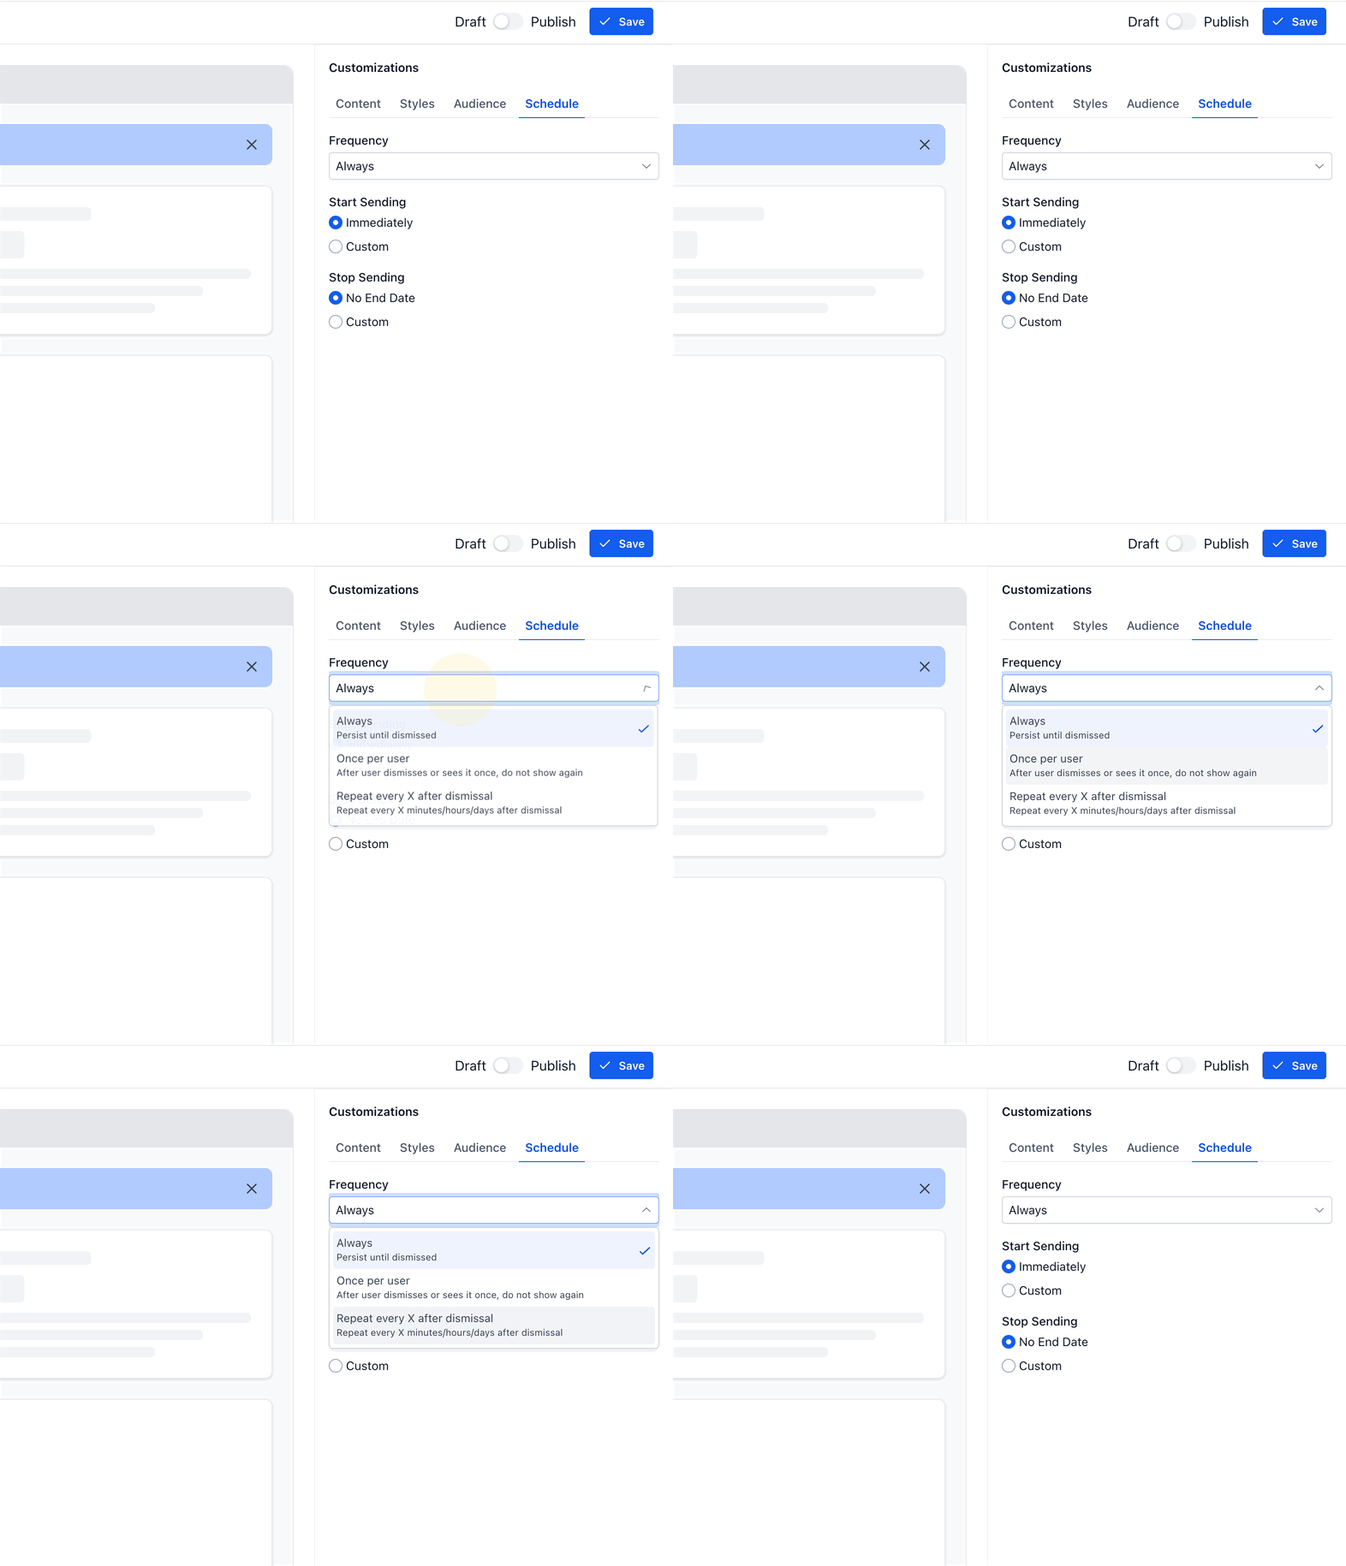
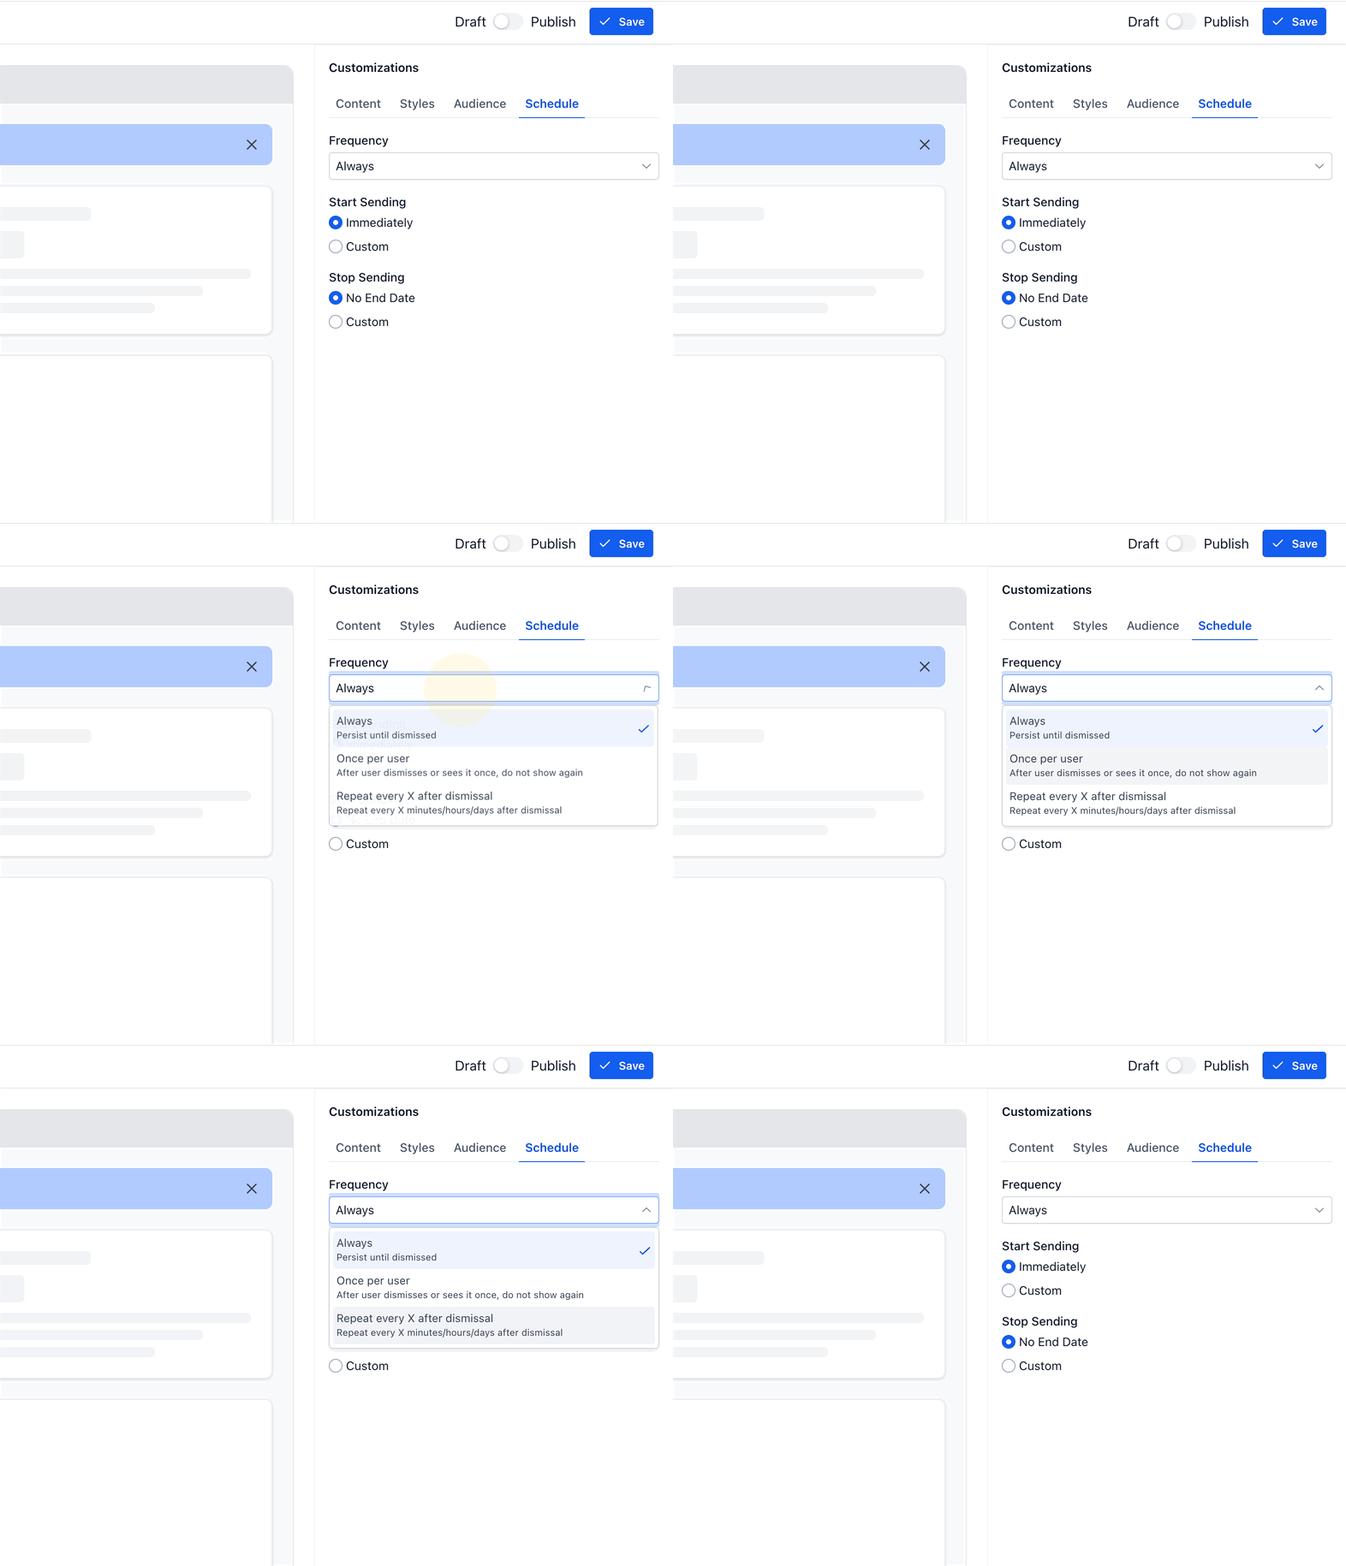
Frequency: How often the banner should show to eligible users.
Status: Draft while you're preparing it, Active once it's ready to display.
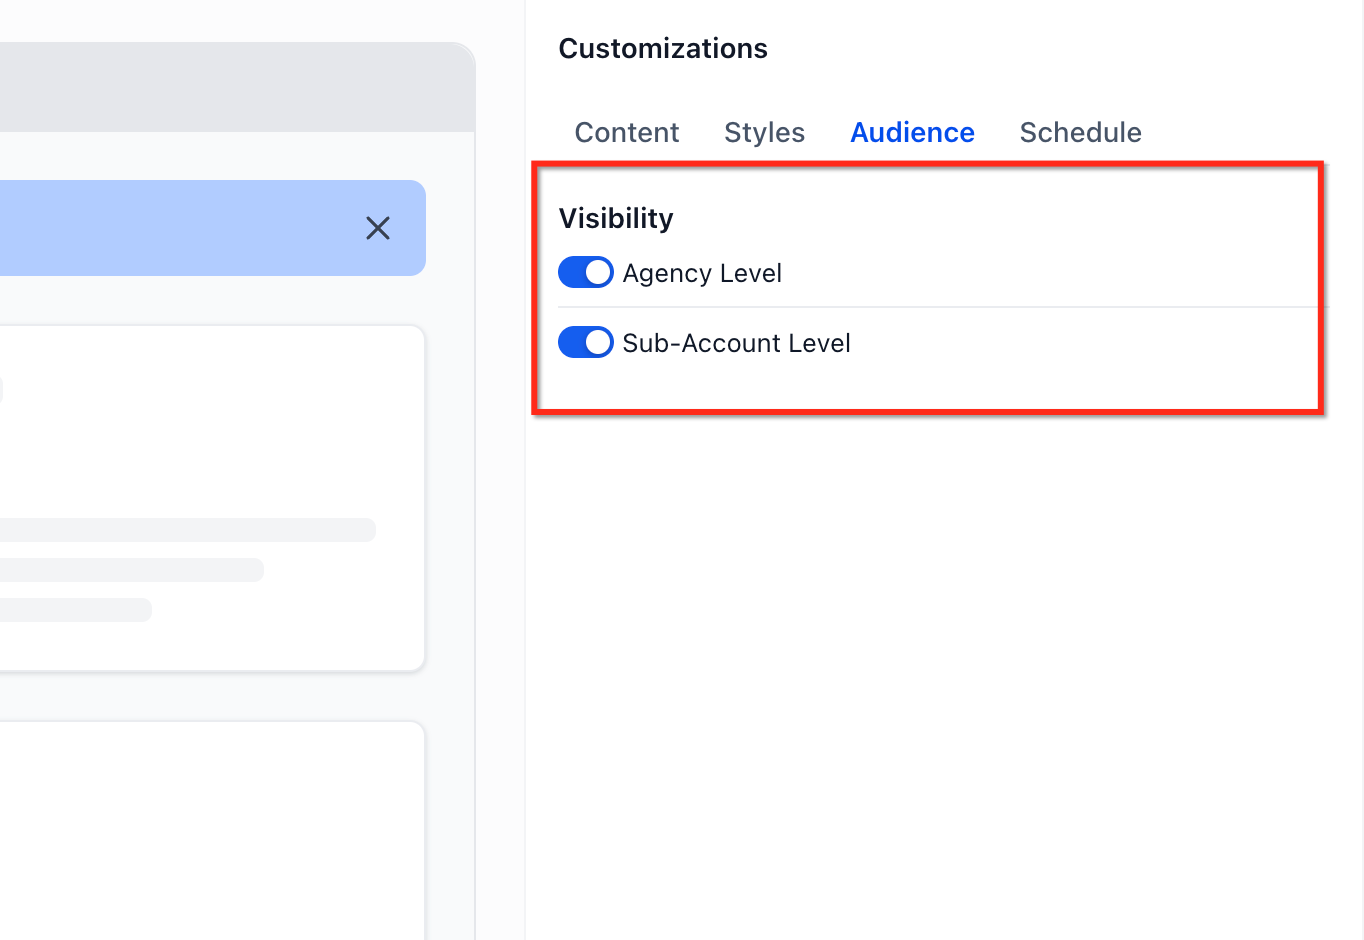
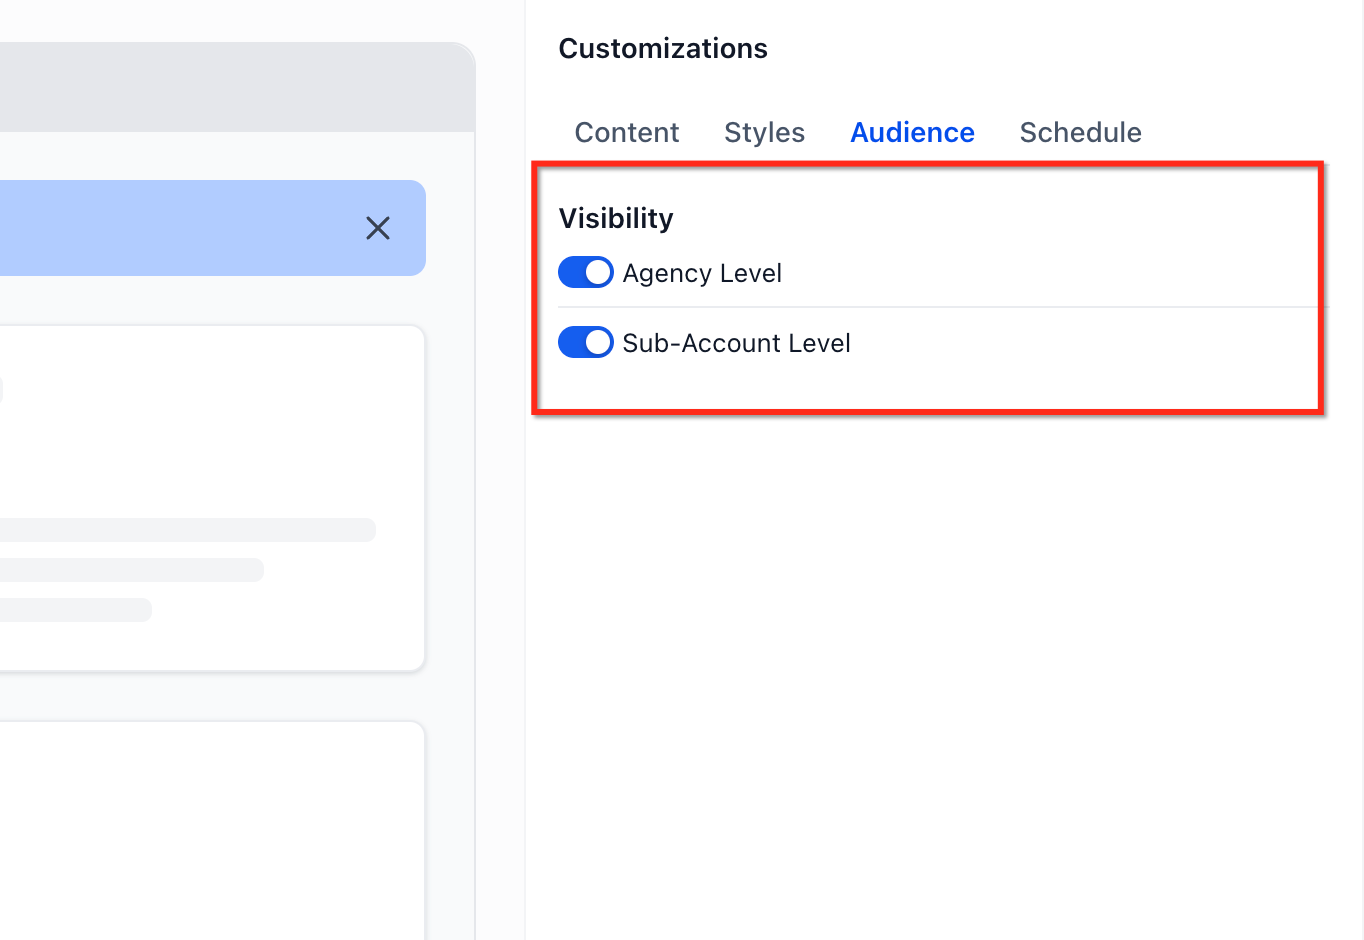
Visibility: Choose whether a banner appears in the admin view, the standard account view, or both, so you don't over-communicate to people the message doesn't apply to.
Scheduling: Set a start date (when the banner becomes eligible to show) and an end date (when it stops showing), so you're not manually turning banners on and off.
Priority levels, in order of urgency:
Priority | Best for |
|---|---|
Critical | Urgent, high-impact notices |
Warning | Important alerts that need visibility but aren't urgent |
General | Standard informational messages |
To set up an announcement banner:
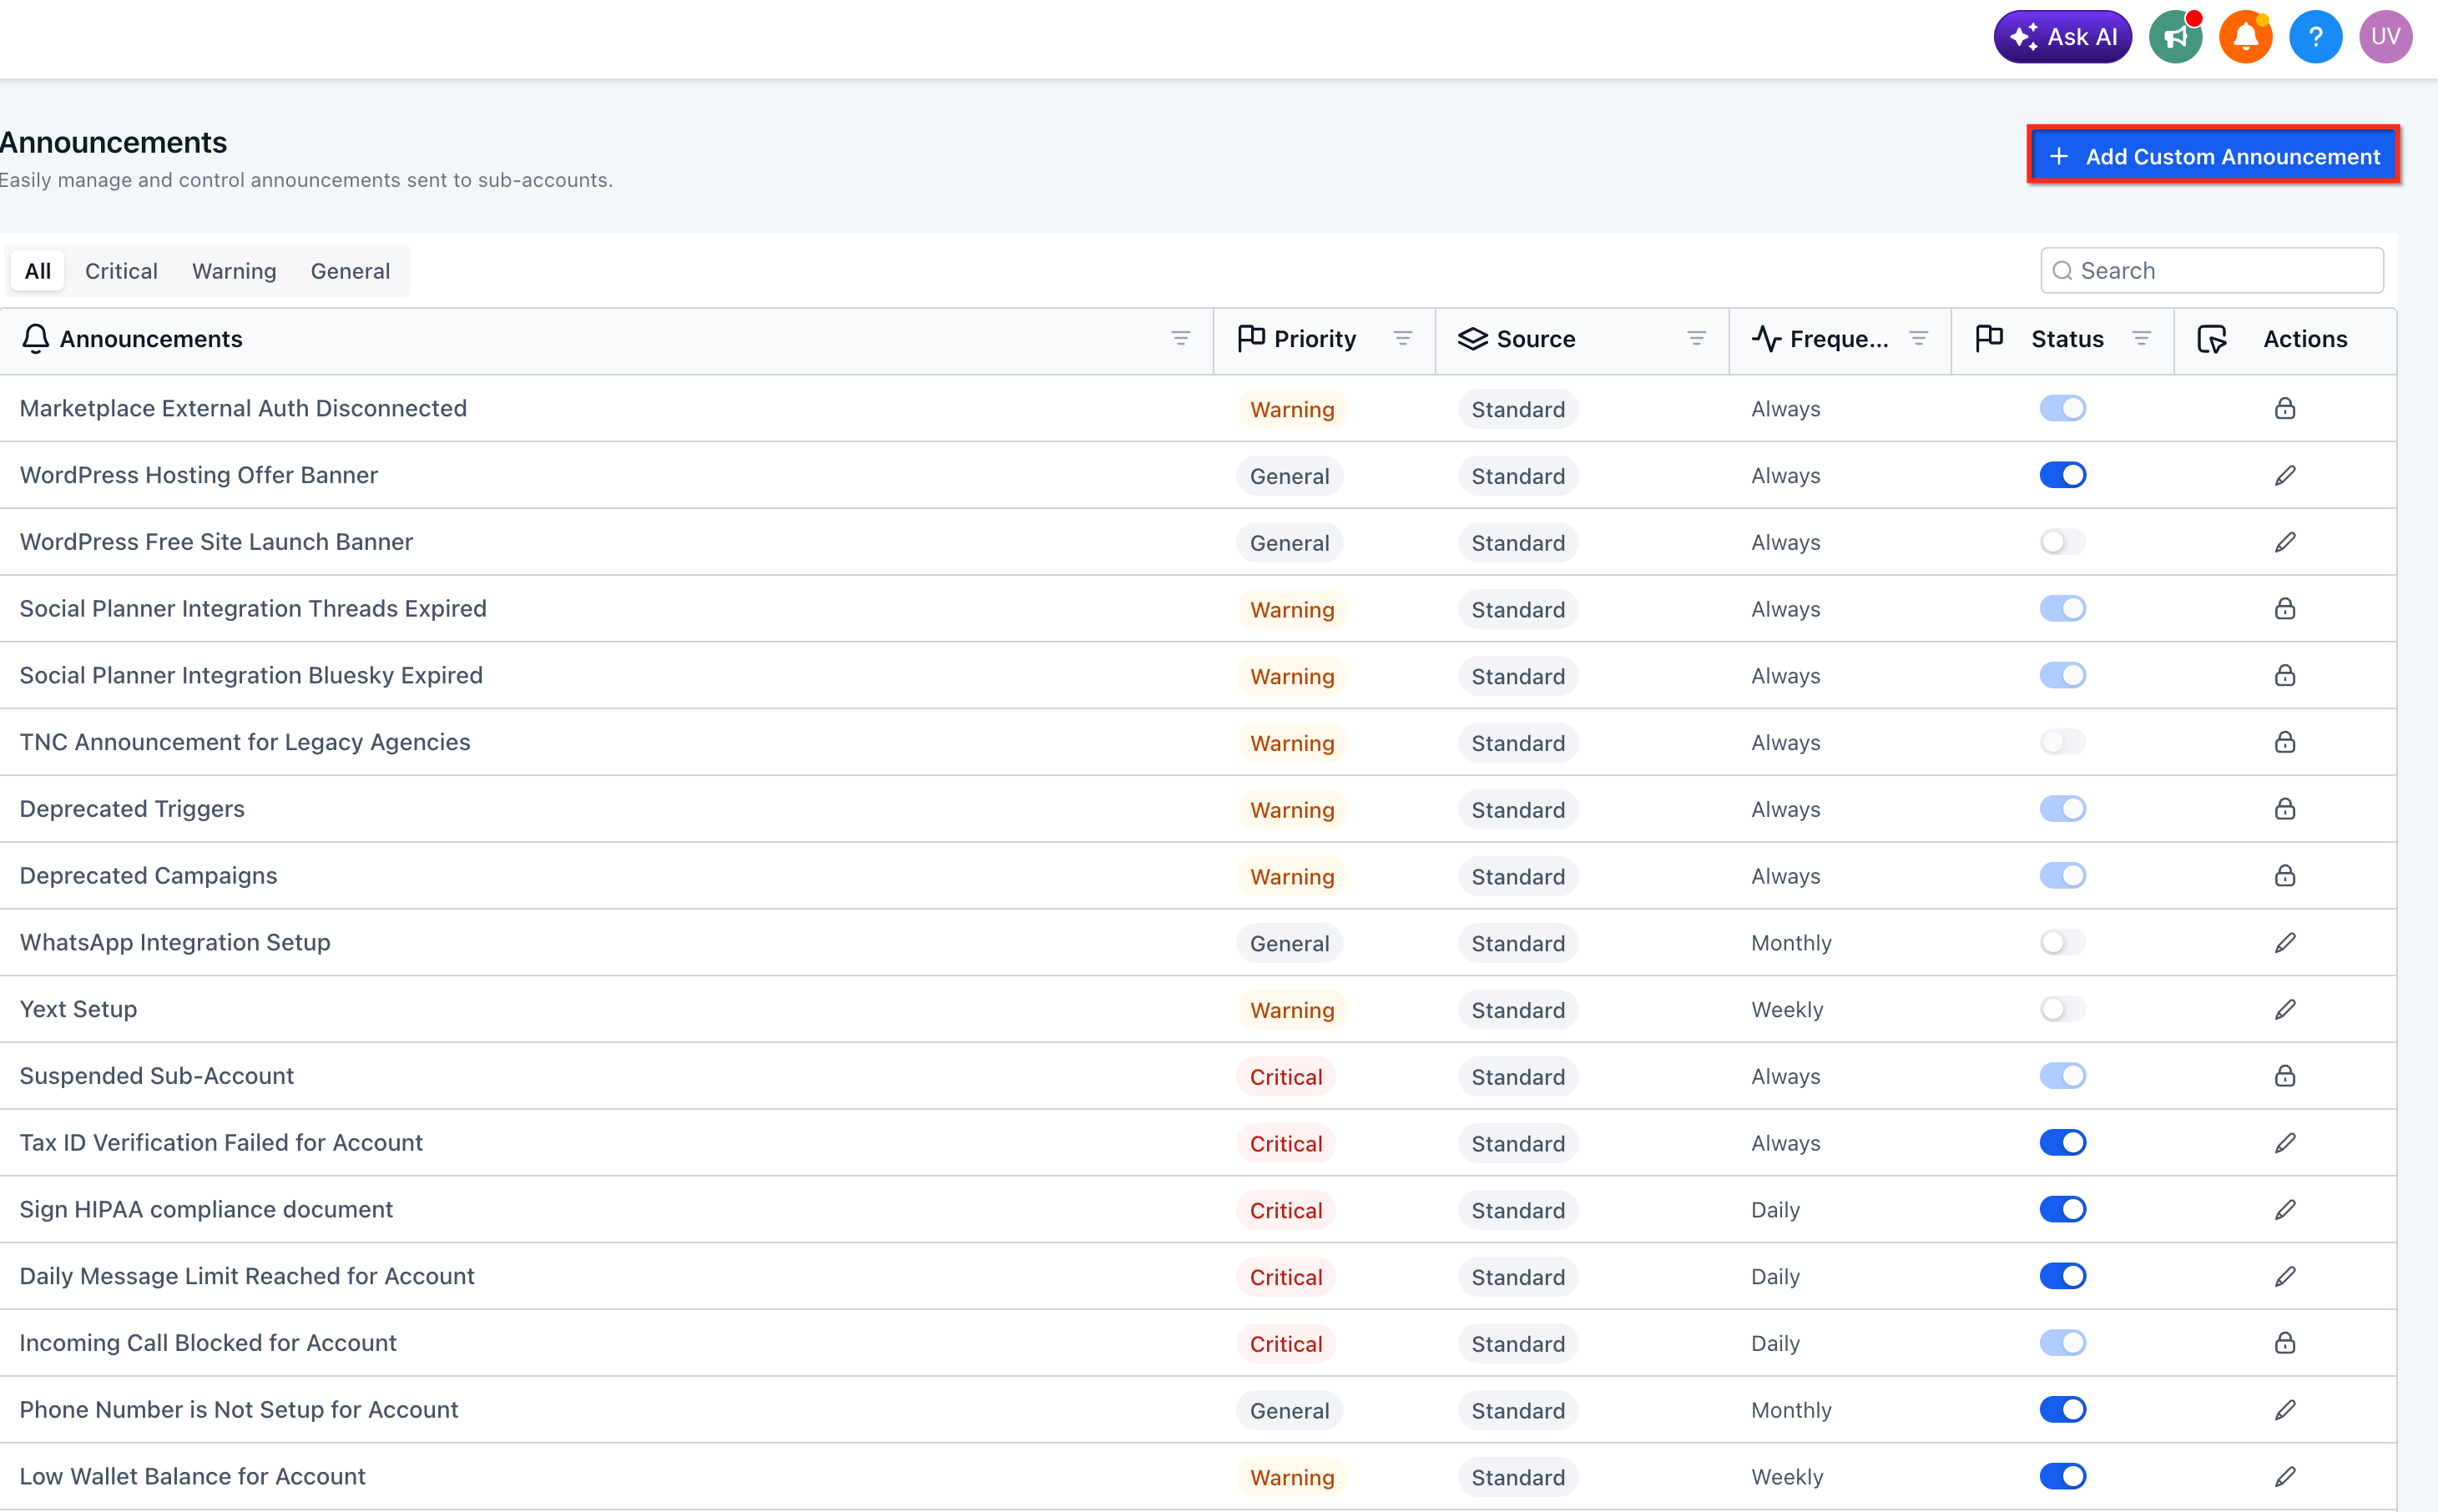
Navigate to the area where Announcement Banners are available and click Add Custom Announcement.
Add the message content for the announcement.
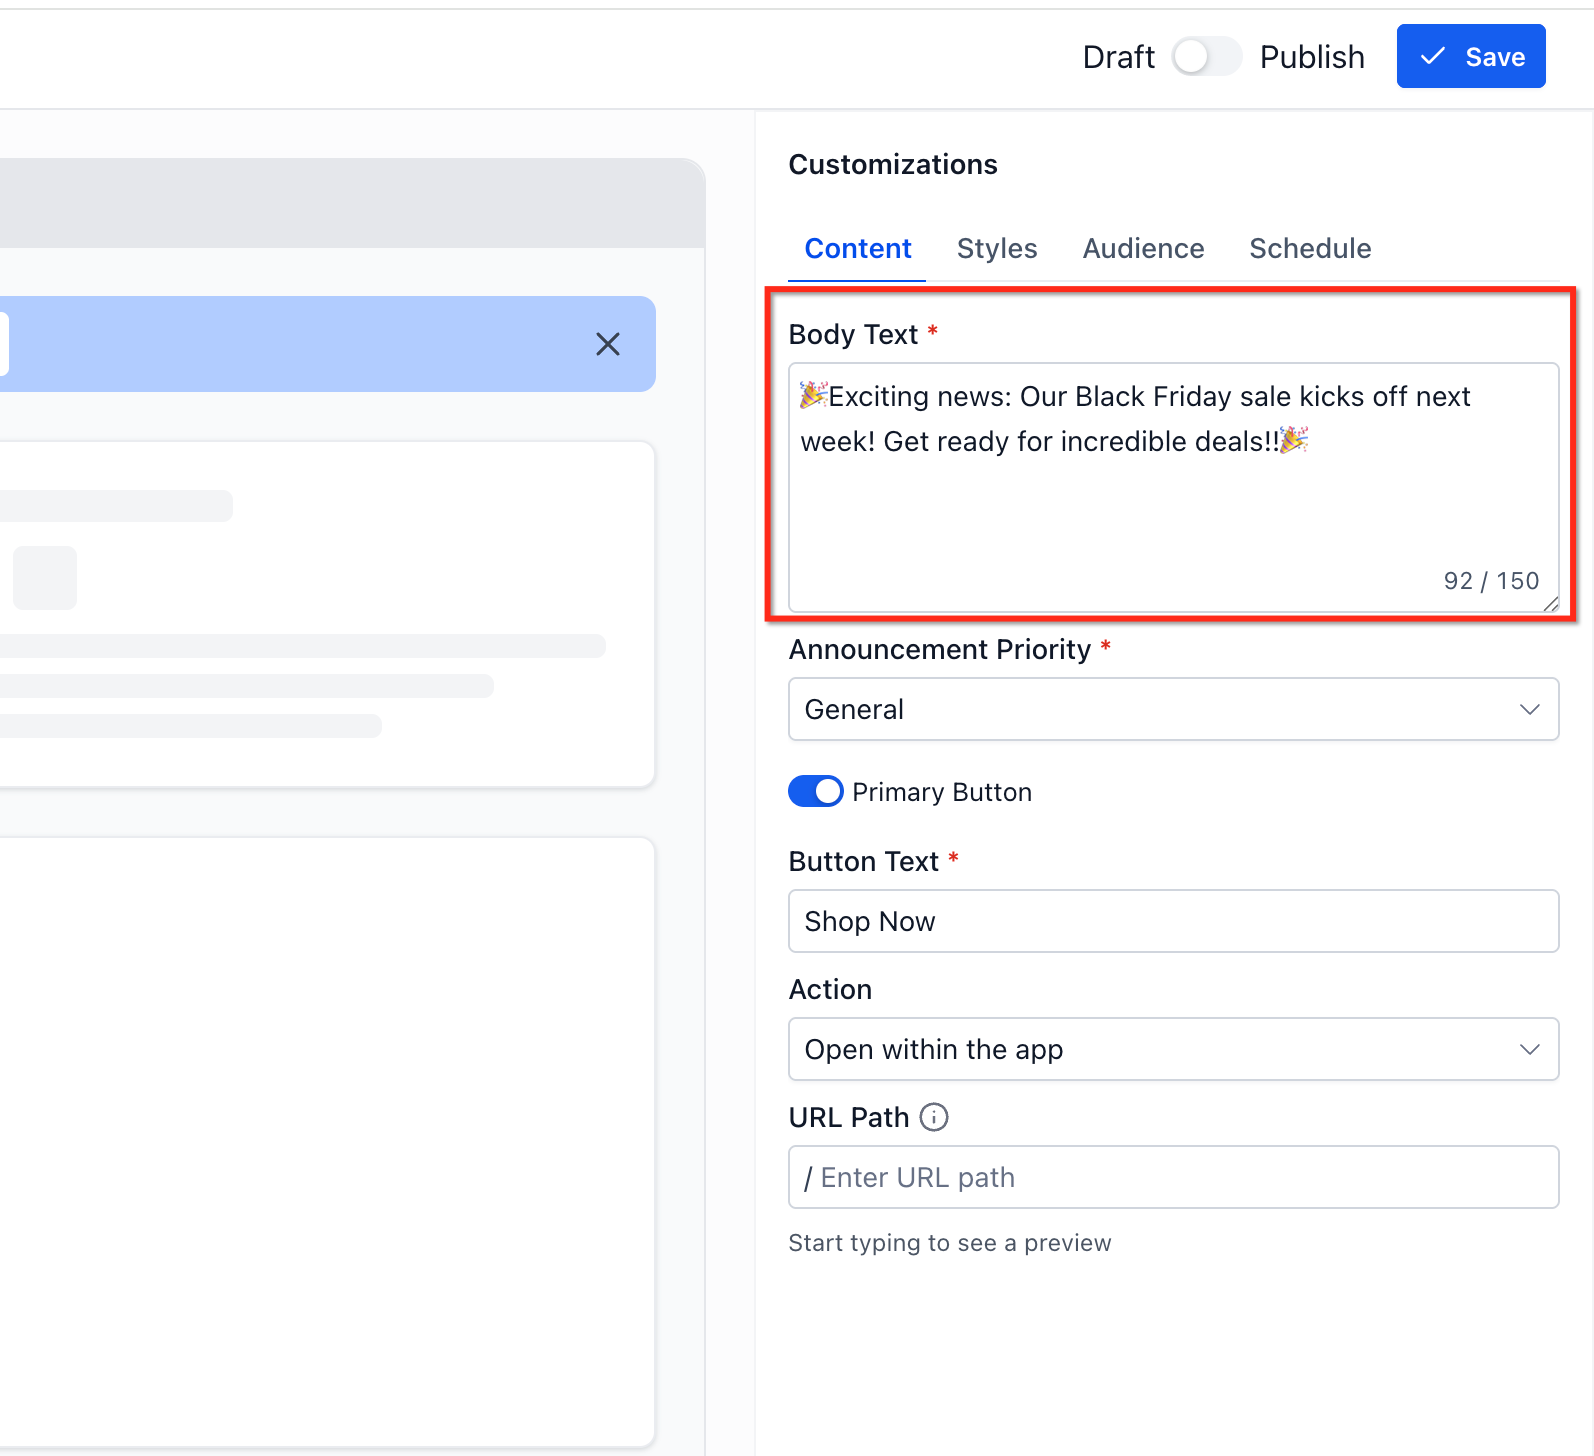
Choose the priority level: Critical, Warning, or General.
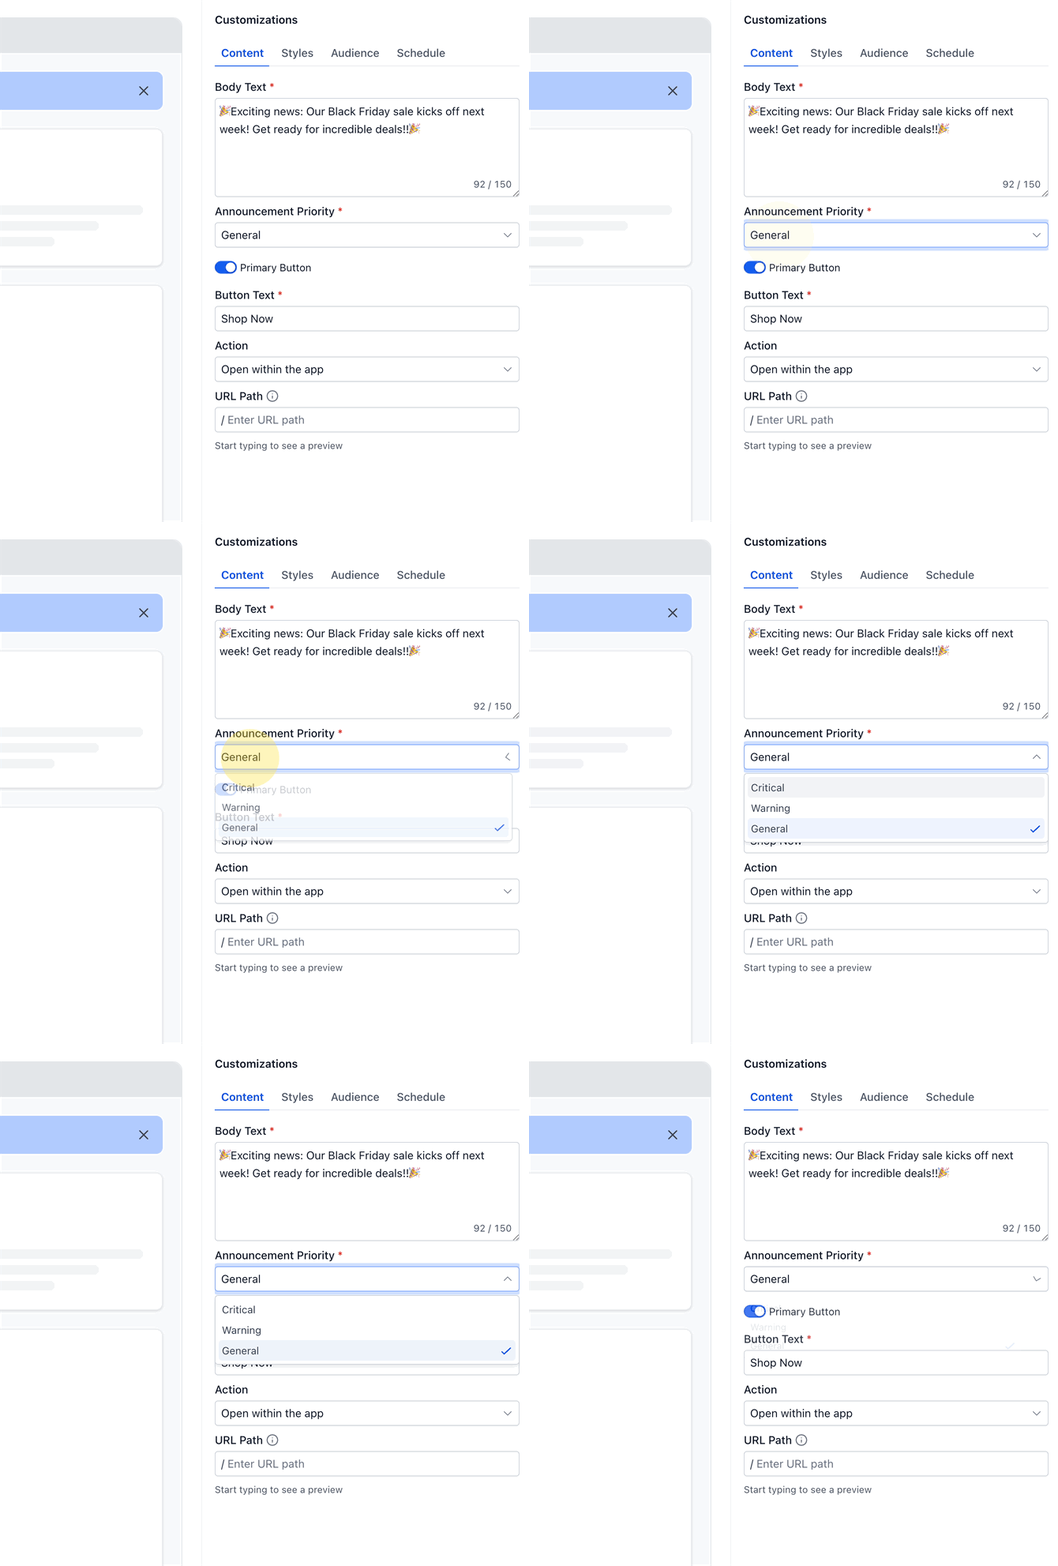
Set the frequency for how often the banner should appear.
Select where the banner should be visible.
Set the start date and end date for the schedule.
Optionally configure a destination URL and redirect behavior for a call-to-action button.
Review the banner in real-time preview.
Save as Draft if it still needs review, or set it to Active when it's ready to display.
Revisit the announcement later to update messaging, adjust scheduling, or change its status.
When configuring the call-to-action button's destination URL, you can also choose to open the link in a new tab, so team members stay in Aesthetix CRM while the linked page opens separately.
How many images can I attach to a single post? There's no hard limit, but keep the number of images per post reasonable so it loads quickly and stays easy to read.
Can I edit a post's title after it's published? Yes. Open the post, click the three-dot icon, and select Edit Post to change the title or content.
Is there a maximum size for video files I upload? There's no official published limit, but for best performance keep uploaded video files under 100MB. If a video is larger, embed it from YouTube, Vimeo, Wistia, or Loom instead of uploading the file directly.
Which video platforms support rich link previews? YouTube and Loom. Pasting a link from either platform embeds a video player directly in the preview card.
Do I need to turn on rich link or event previews? No. They generate automatically whenever you paste a supported link or mention an event, no configuration needed.
Can I use emojis in a post title? Yes, emojis are supported in titles. Use them where they add clarity, not where they clutter the message.
Who can see that a private channel exists? Only approved members and users with the right permissions for that specific channel. Private channels don't show up in the channel list for anyone else.
What happens to old posts if I make a private channel public? The channel becomes visible and joinable by any group member, and its existing post history stays intact and visible.
Do newsletters ever include private or restricted content? No. Members only ever see newsletter items they already have permission to view, private channel content stays private.
Can I schedule the same announcement banner for multiple areas? Yes. Set visibility to admin view, account view, or both, depending on who needs to see it.
What happens if I have two banners active at the same time? Priority settings determine which one takes precedence, use Critical, Warning, and General to control the order.
Can I tag more than one channel or event in a single post? Yes, add as many tags as are relevant, but keep the post focused so it's still easy to read.
What's the difference between a recorded voice note and an uploaded audio file? A voice note is recorded live in the composer and displays with a waveform player. An uploaded audio file is an existing file you attach, and it displays with a timeline-style player instead.
Can I control how fast a voice note plays back? Yes. Members can choose 1x, 1.5x, or 2x playback speed from the audio player.
What's the difference between Meeting Room and Stream Software modes in Go Live? Meeting Room is an interactive, many-to-many room ideal for workshops and coaching. Stream Software brings in a broadcast from an external tool like OBS or Zoom while members watch and chat inside the community.
Who can download a Go Live recording? Post authors and group admins can download recordings once processing finishes.
Do I need a new Stream Key every time I go live? No. Stream Software Mode uses a persistent Stream Key you can reuse for future sessions, and you can reset it any time if it's shared accidentally.
What should I do if a video attachment won't upload? Try reducing the file size or compressing the video before uploading again. If it's still too large, embed it from YouTube, Vimeo, Wistia, or Loom instead of uploading the file directly.
