The Client Portal gives your patients a single, secure place to log in and engage with your practice online: their course progress and certificates, community groups, and (if they're part of your referral program) their affiliate earnings. It's available out of the box for every account, and you configure it from Web Tools > Websites, using the Client Portal dropdown at the top of the page. This guide walks you through setting up your portal, branding it, inviting patients, and managing it from the Client Portal dashboard.
Note: The Client Portal is also the home for your memberships and courses. If you sell online courses or run a membership program, patients access that content through this same portal.
The Client Portal is a patient-facing hub that brings several parts of your practice together behind one login:
A centralized platform. Patients can access their membership courses and certificates, take part in community groups, and (if enrolled) track their affiliate referrals and commissions, all from a single account.
Custom domains. You can connect a custom domain to your portal for a more personalized, trustworthy touch.
A brandable interface. Apply your logo, favicon, and color scheme so the portal feels like a natural extension of your practice.
Improved communication and patient autonomy. Patients can view their own information and take action independently, without waiting on your team.
Easy invitations. Invite patients through the portal's connected apps or by sharing the portal URL directly.
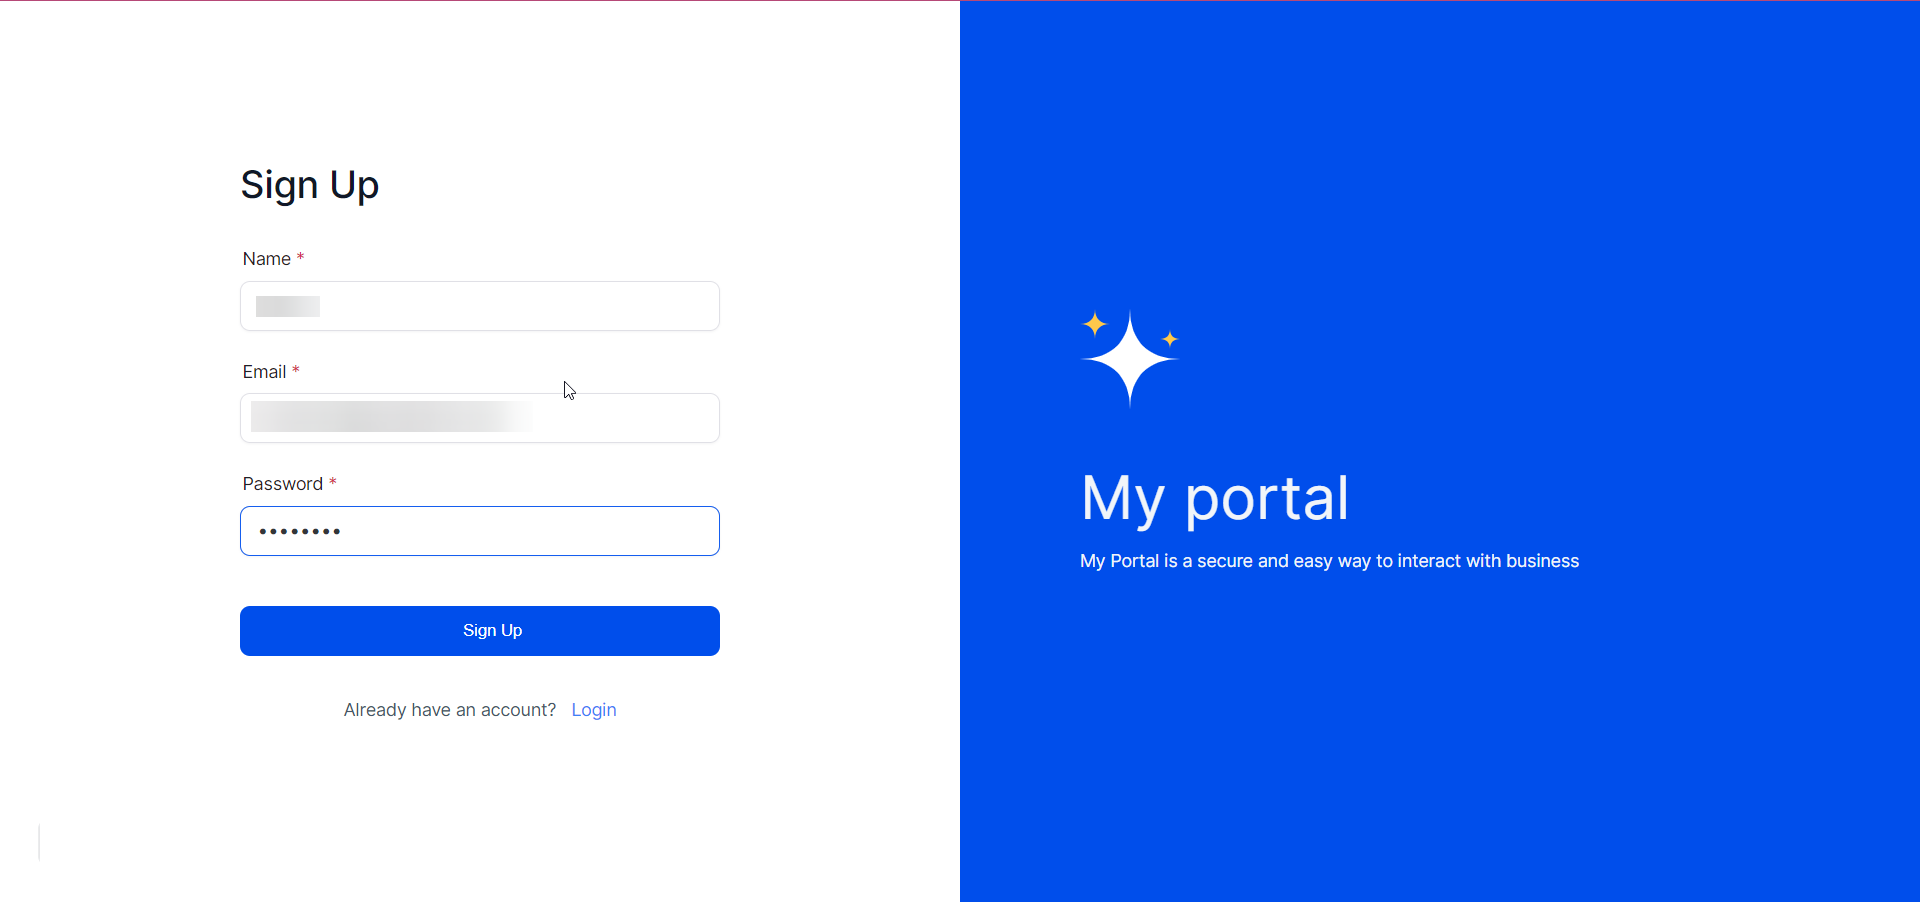
HIPAA note: The portal is built to hold account-level information like course progress, certificates, and referral activity, not clinical records. Avoid adding treatment details, diagnoses, or other PHI to portal branding, welcome messages, or community posts, since community content is visible to other members.
Online courses and certifications: Patients enrolled in a training or education program can access lessons, track progress, and download their completion certificates.
Membership and VIP programs: Give members one place to see exclusive content, treatment plans, and their history with your practice.
Community groups: Patients in the same program or membership tier can connect with each other inside your branded portal.
Referral and affiliate programs: Affiliates get one place to monitor referral links, commission rates, and earnings, which encourages them to keep promoting your practice.
Your Client Portal works immediately with a default web address, but connecting a custom domain reinforces your branding and makes the portal feel like part of your practice's own site.
To configure a custom domain:
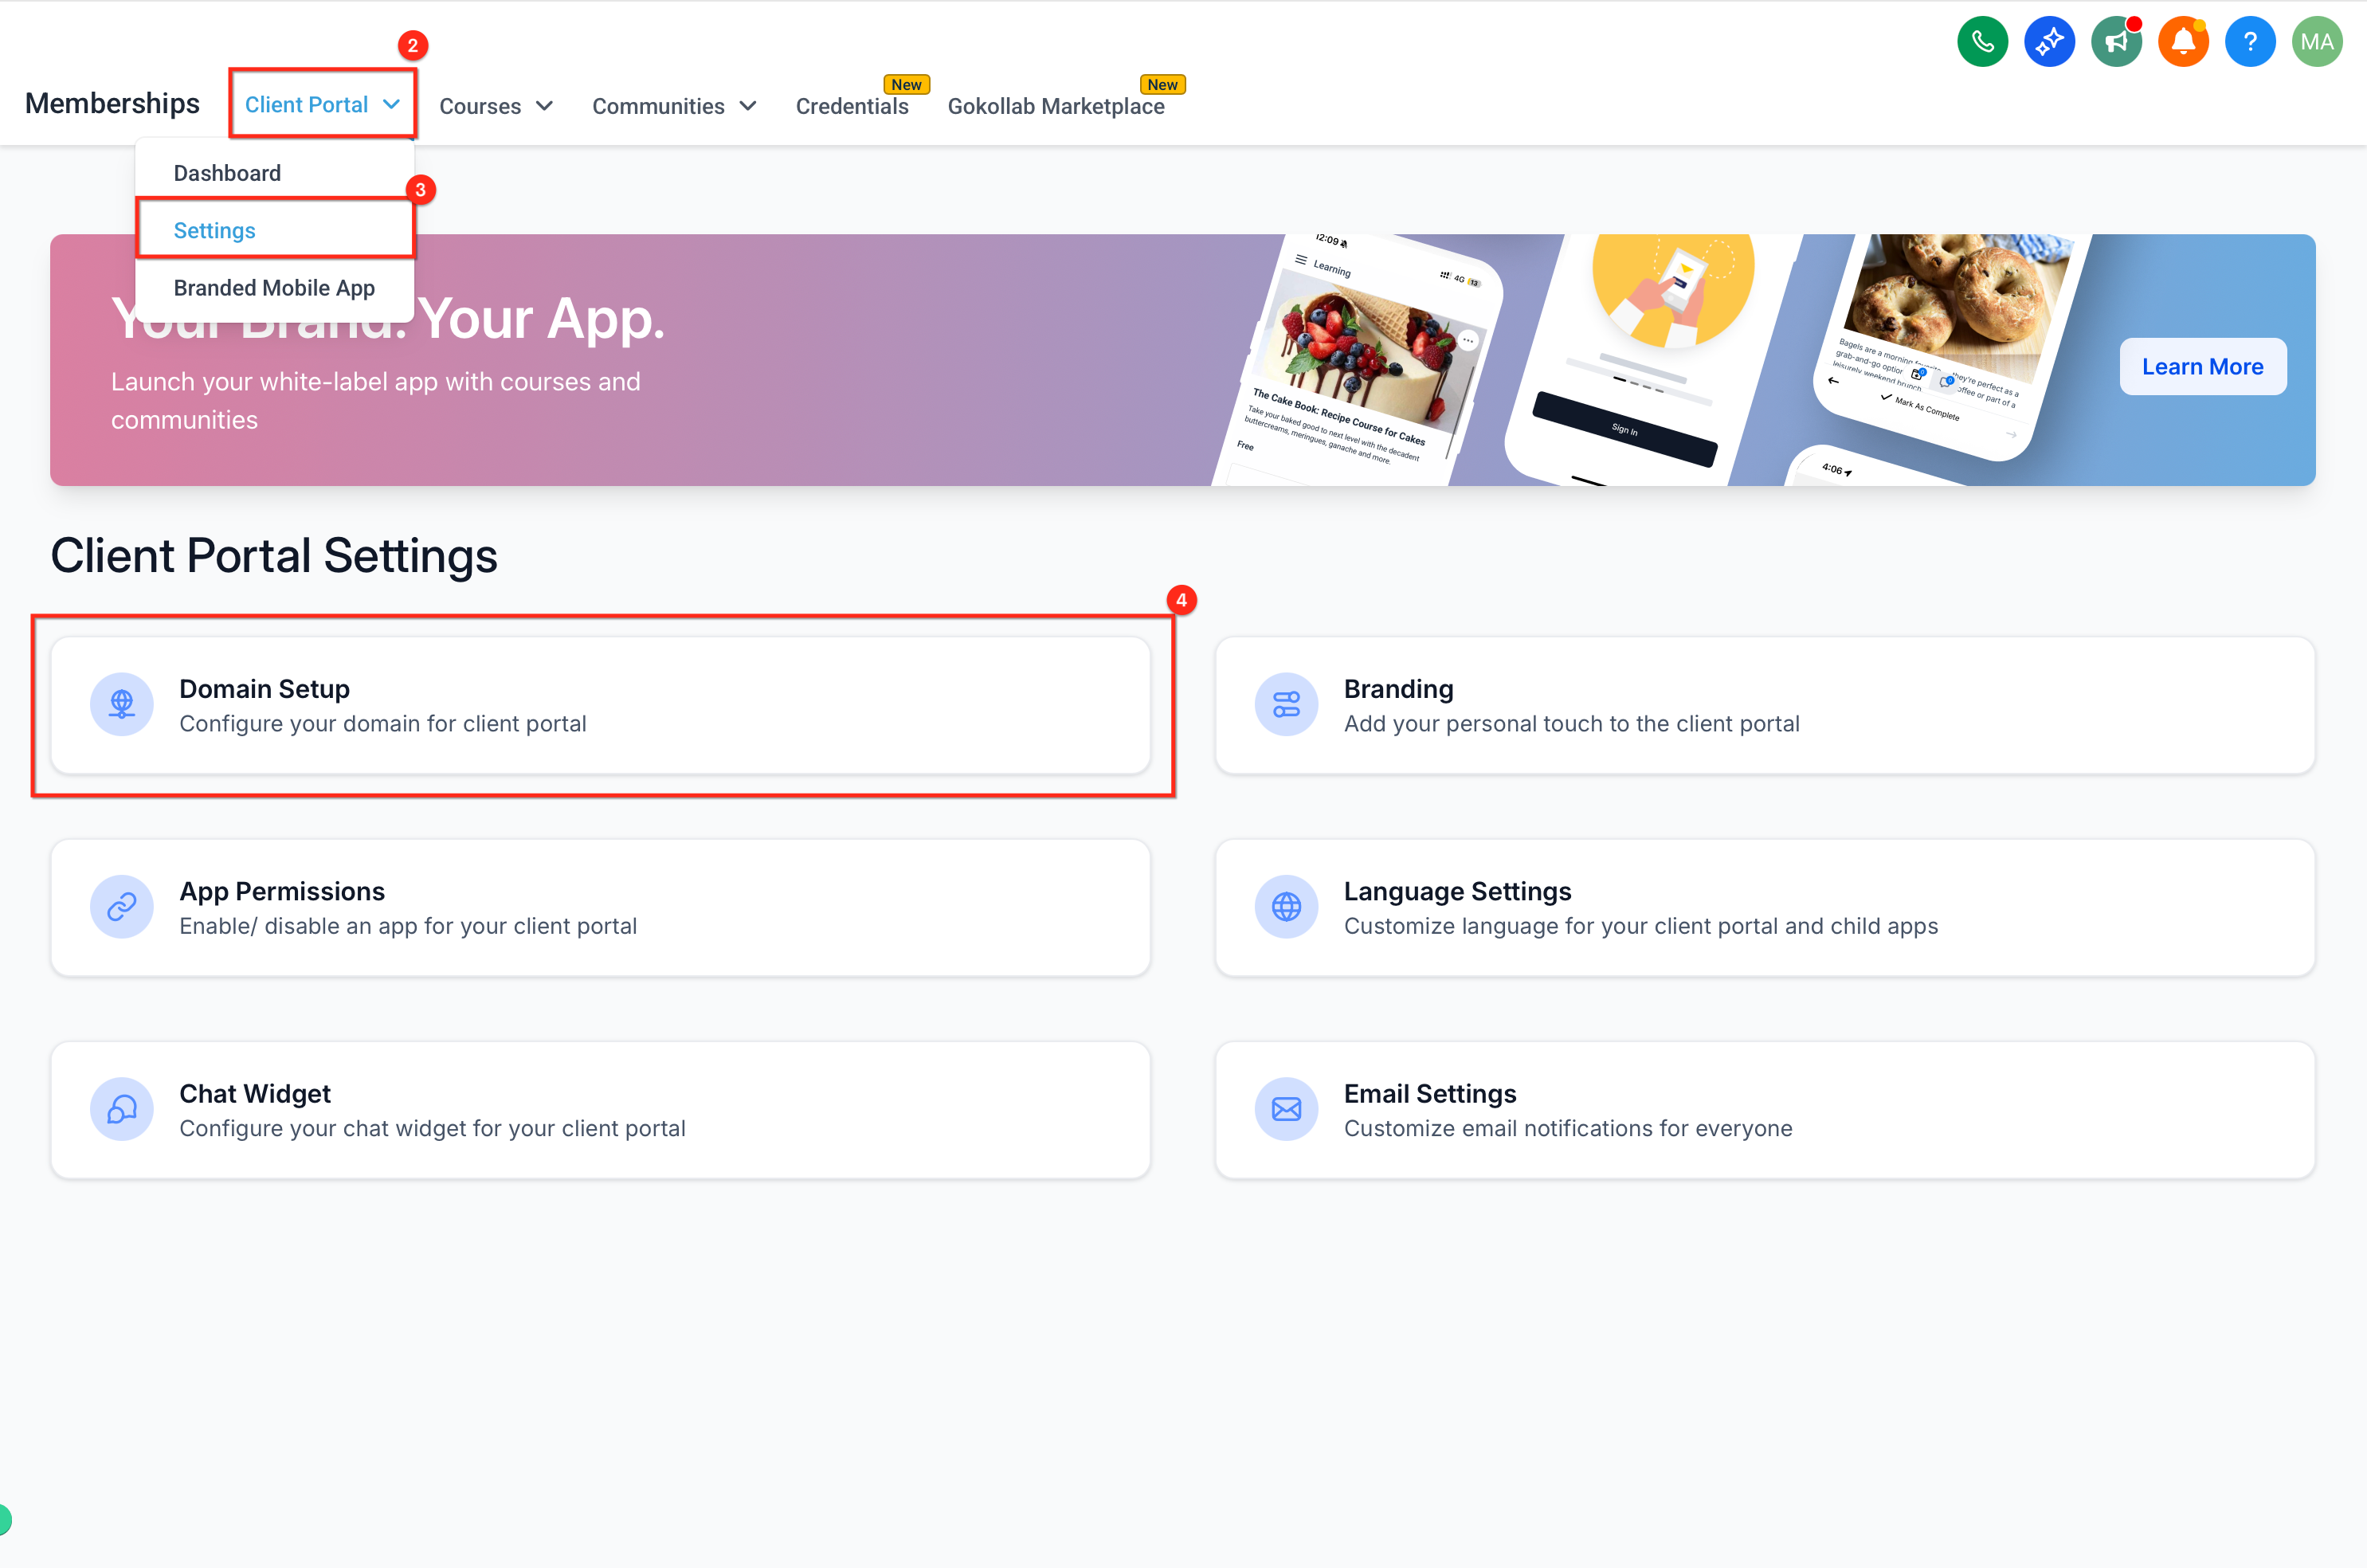
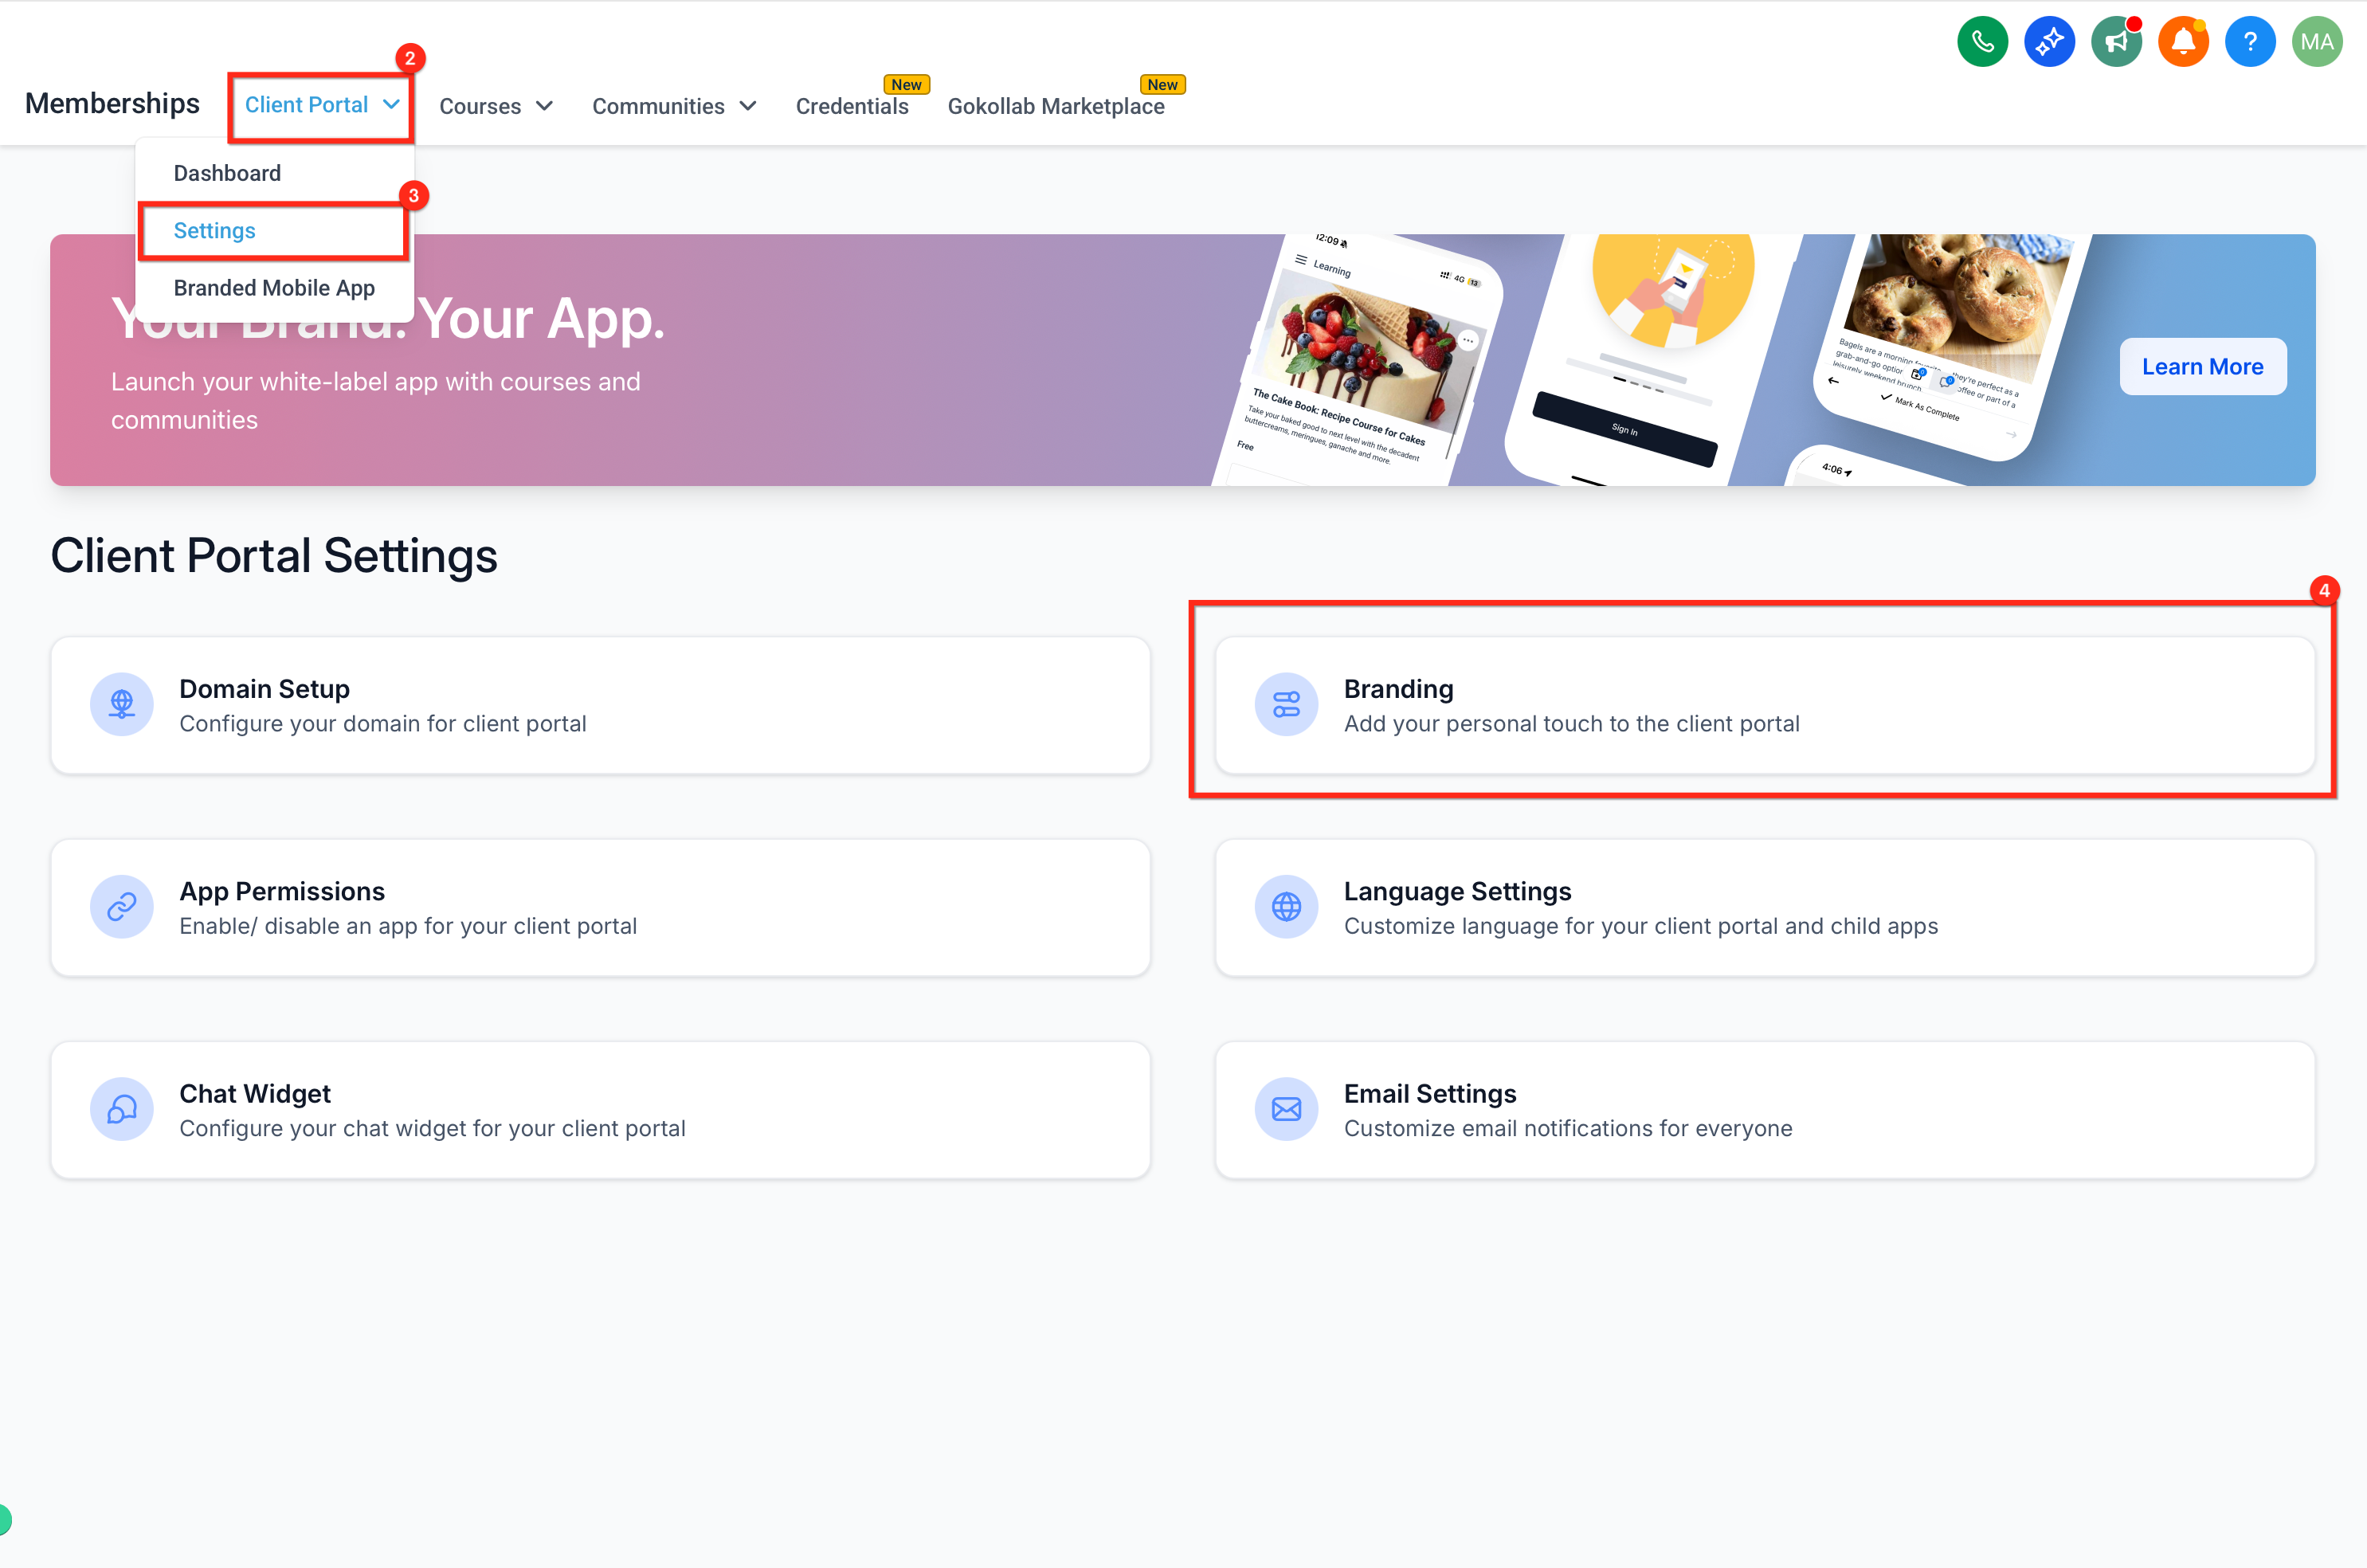
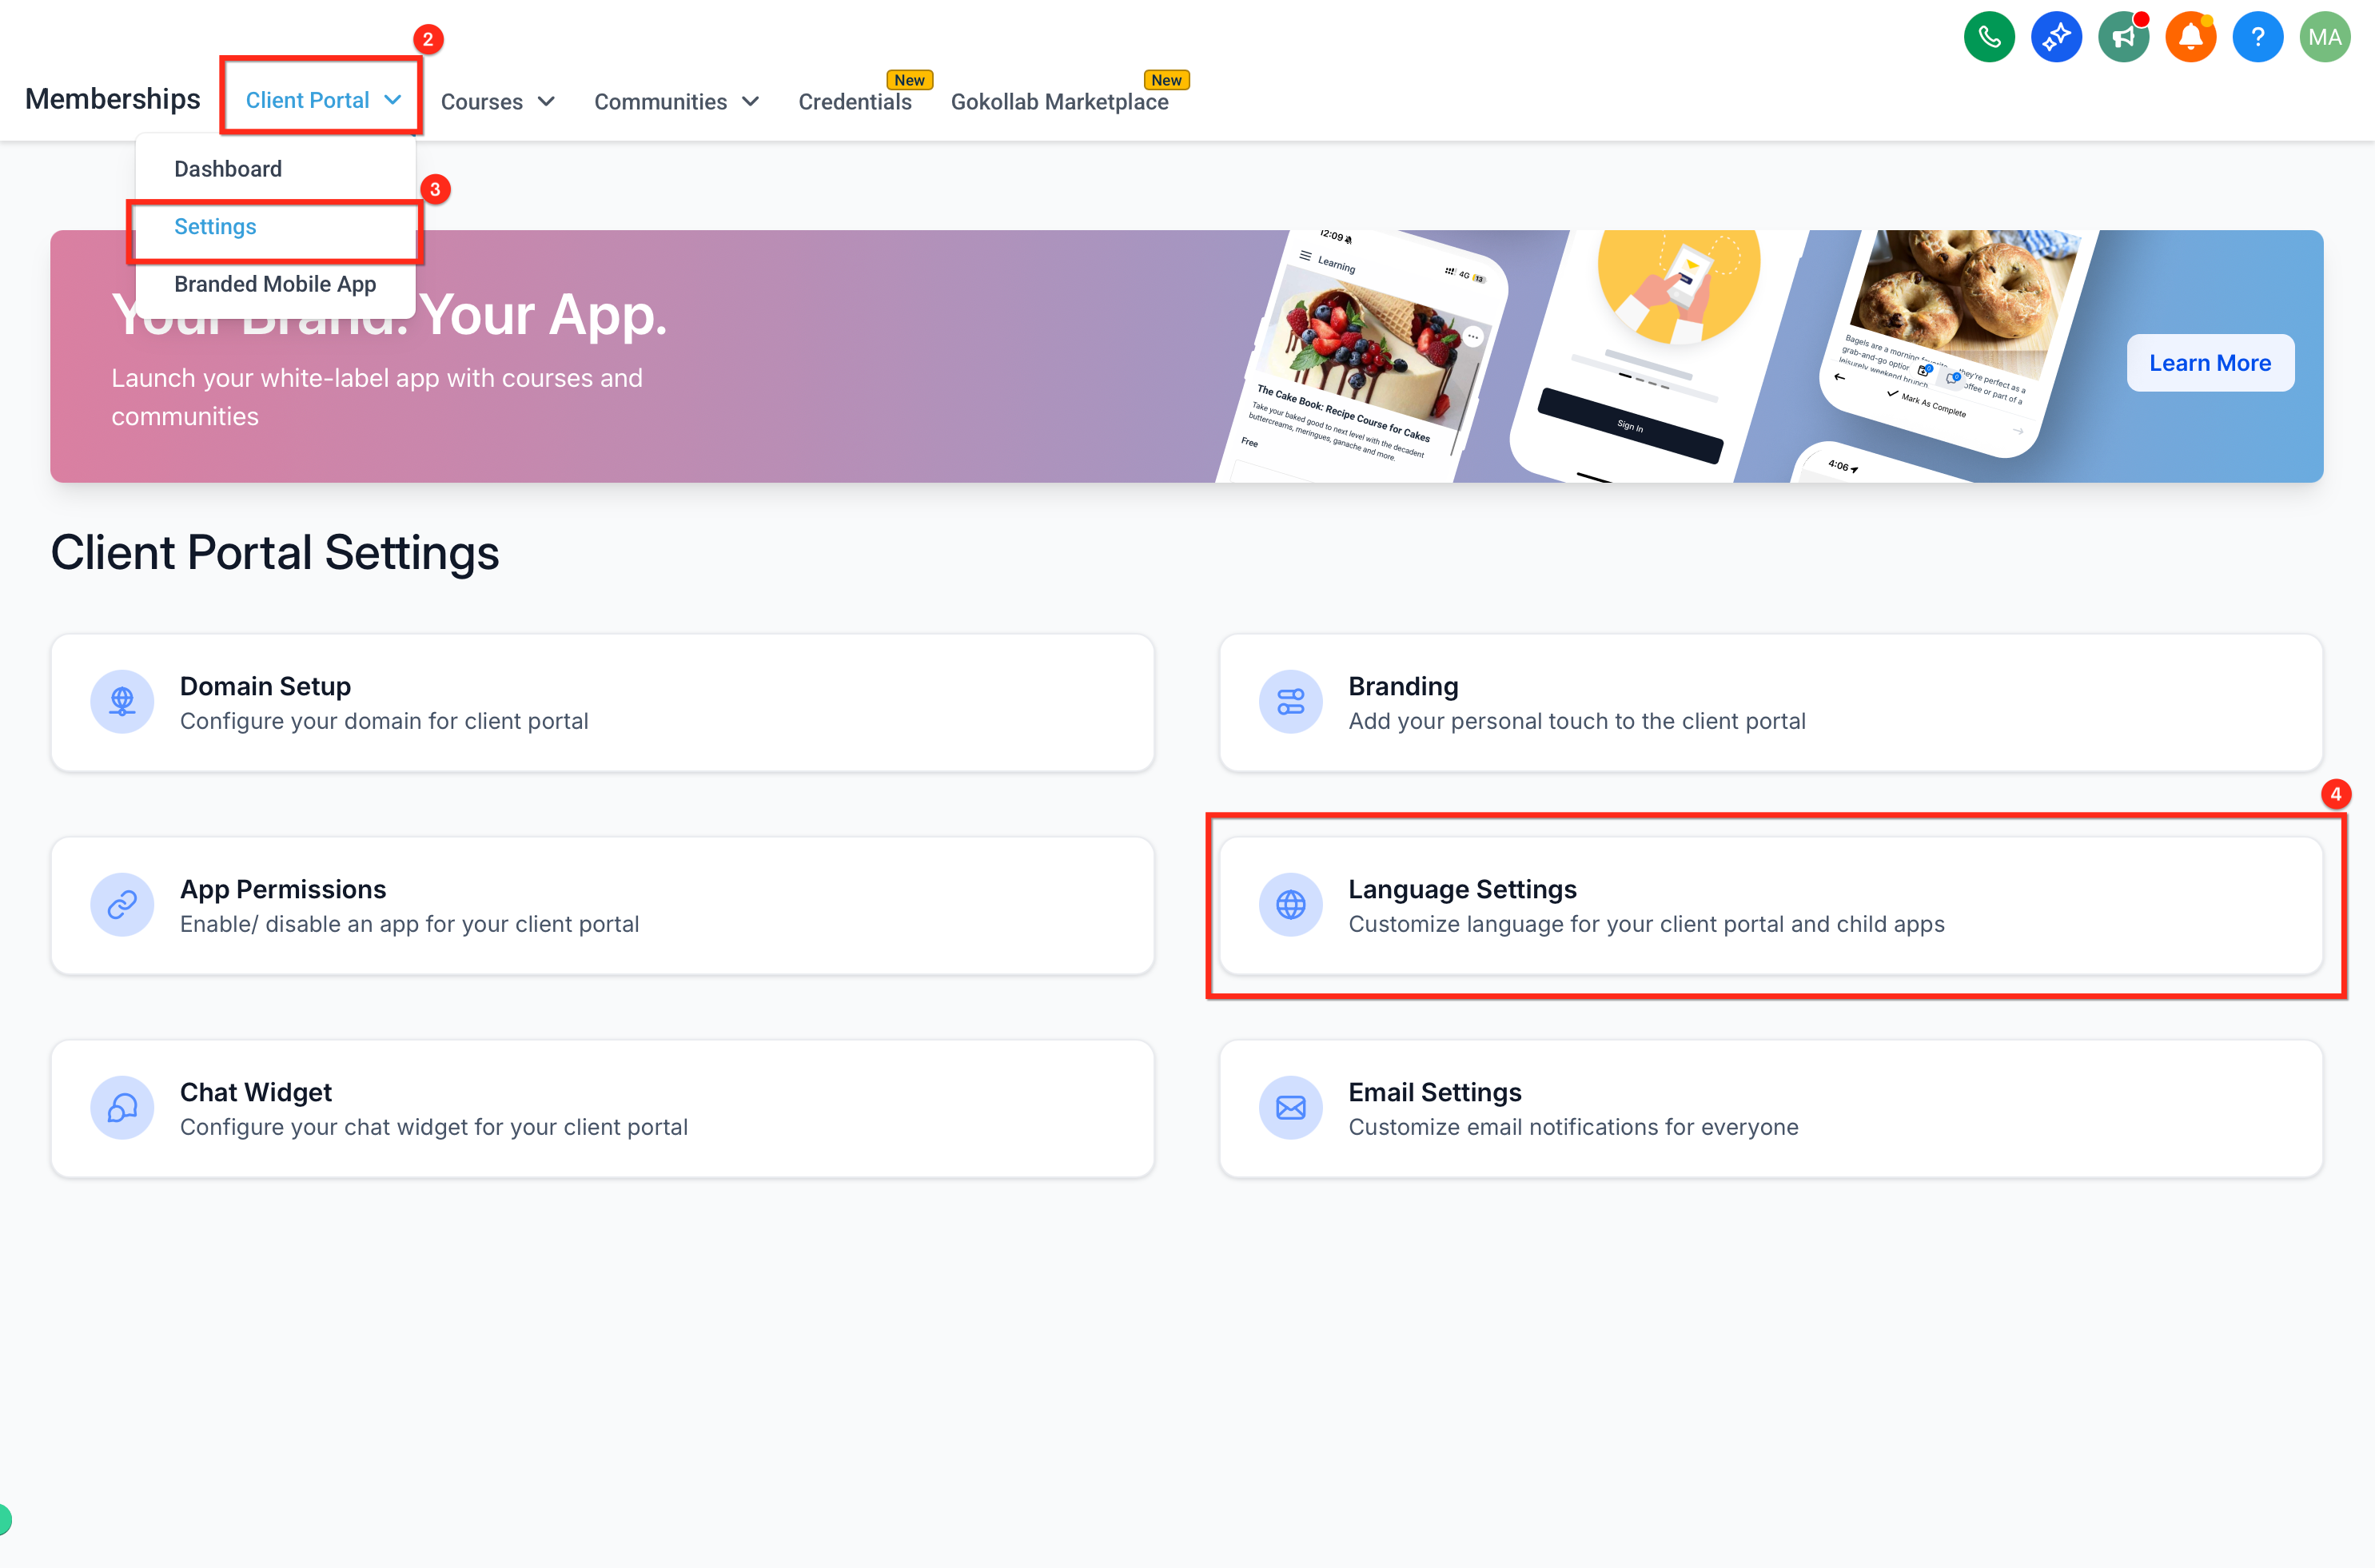
Go to Web Tools > Websites, open the Client Portal dropdown at the top of the page, and select Settings. Then open the Domain Setup area.
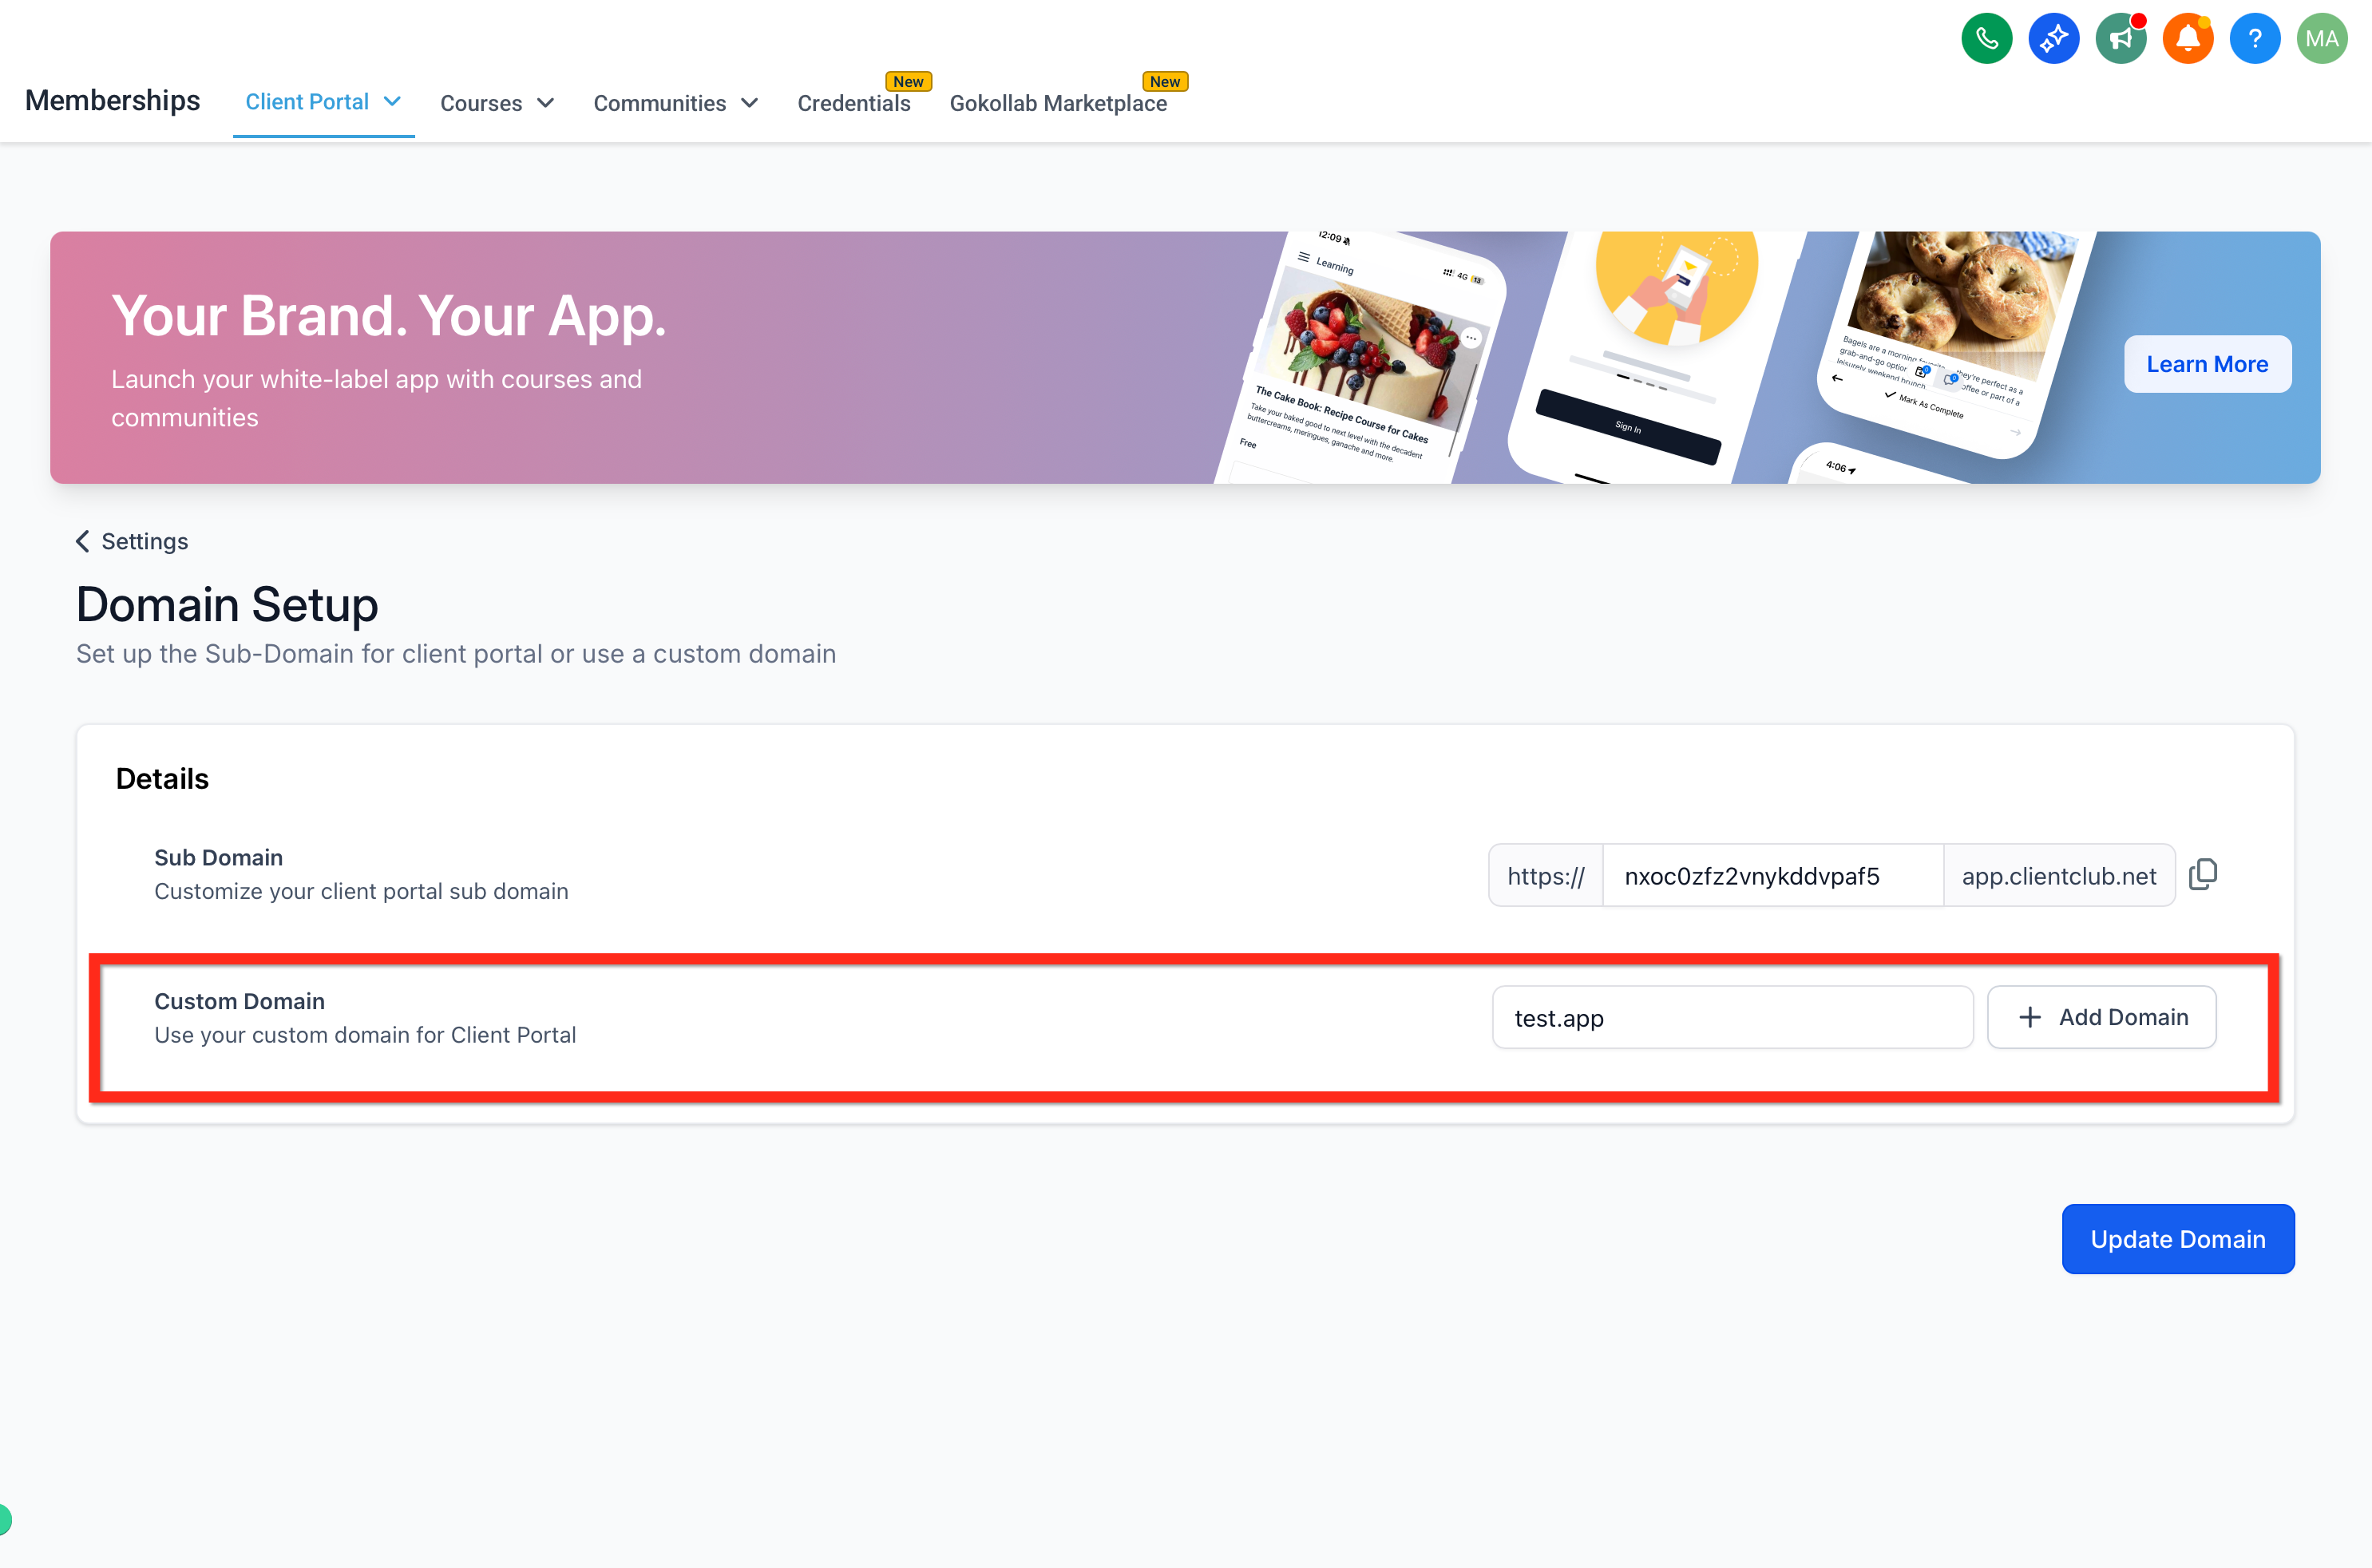
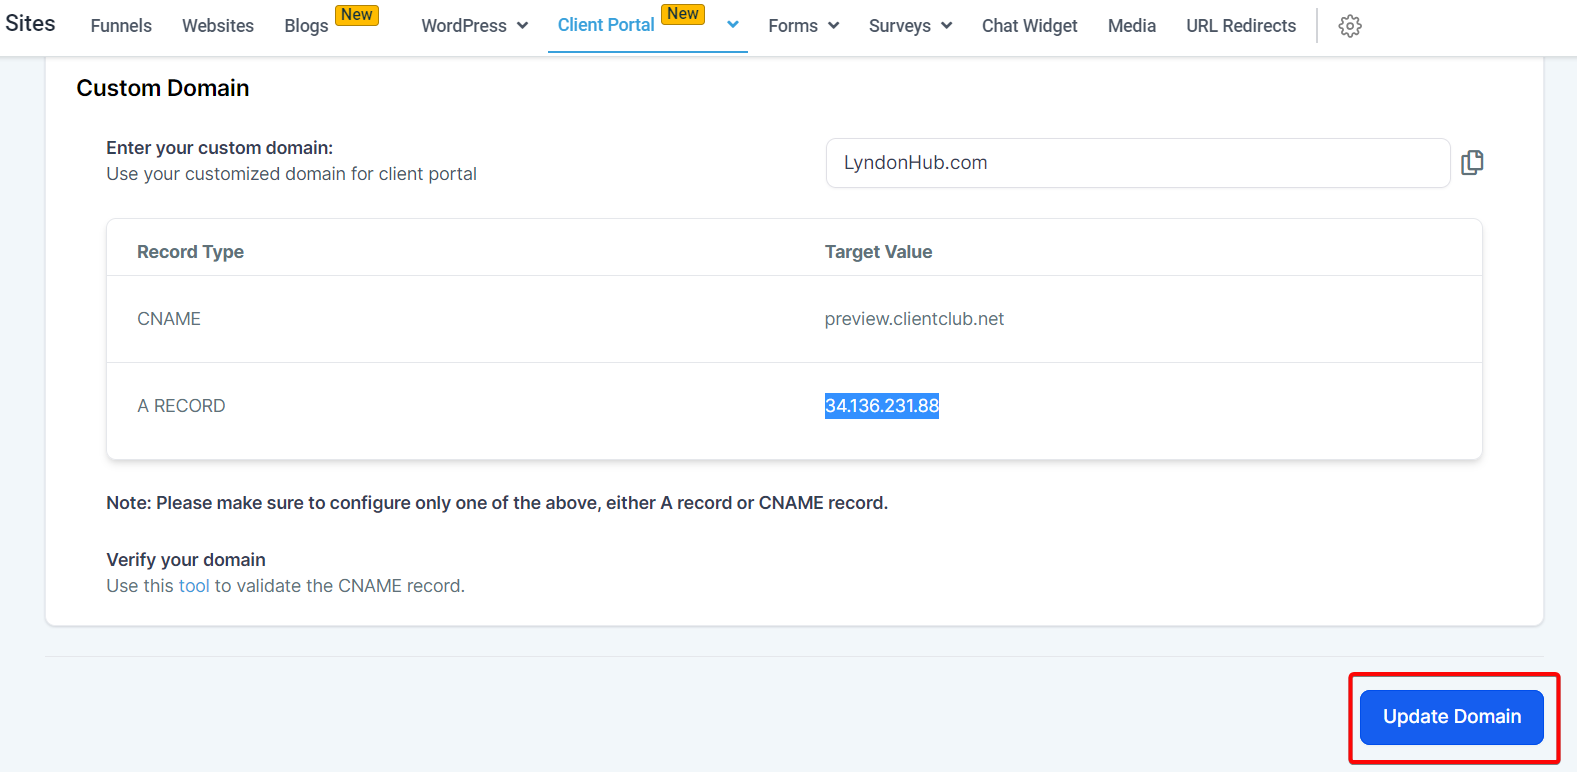
Select the Custom domain option and enter the domain name you want to use.
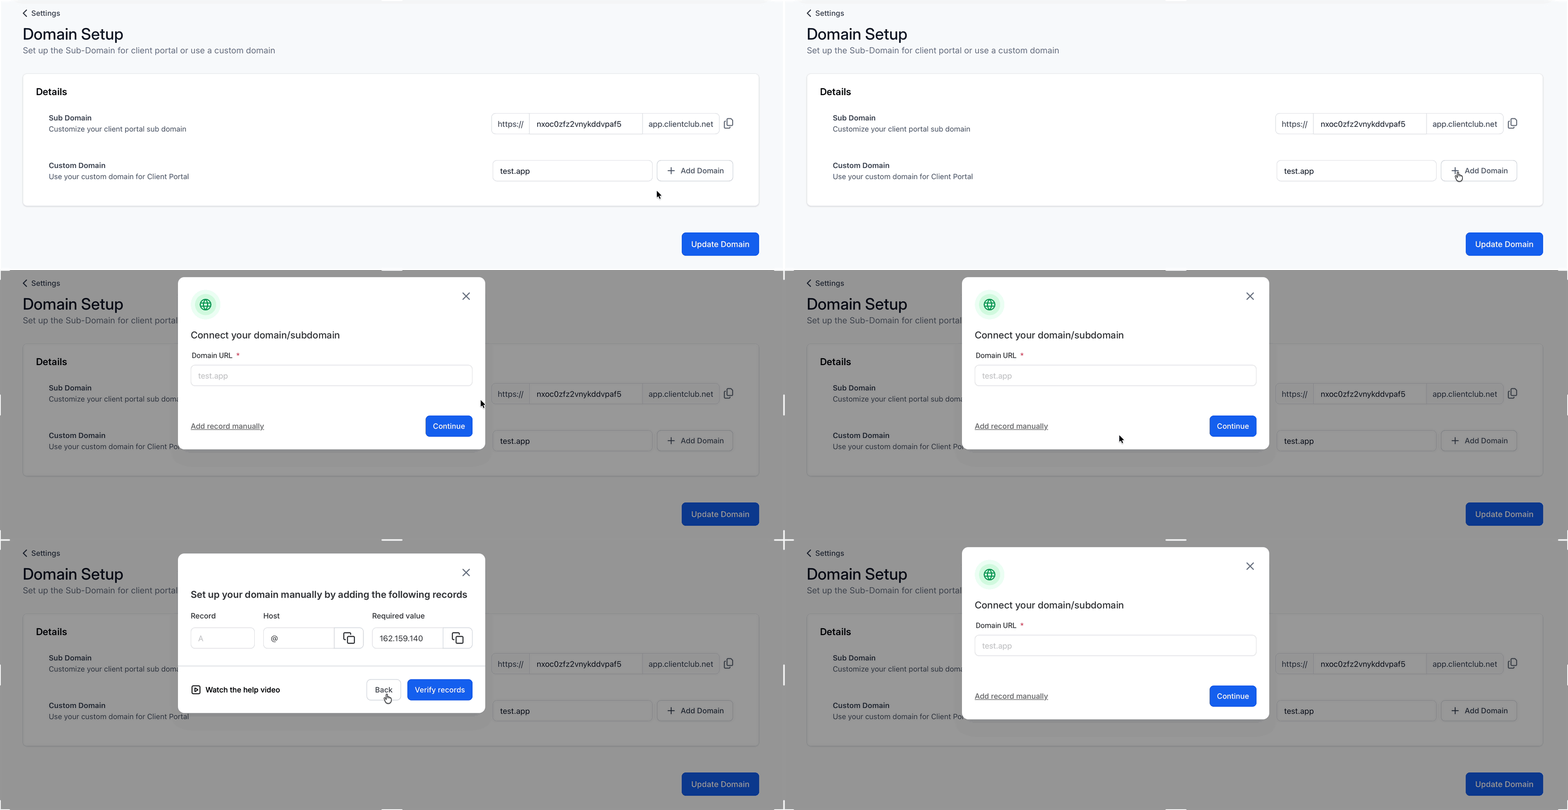
Before your domain will resolve correctly, make sure your domain registrar is pointed at the IP address or target server provided to you in Aesthetix CRM.
An A record maps your domain to a specific server IP address.
A CNAME record maps your domain (or subdomain) to another domain name.
To add either record:
Log in to your domain registrar's dashboard.
Navigate to the DNS settings.
Find the option to add a new record.
Choose the record type you need (A or CNAME).
Enter the value provided to you in Aesthetix CRM (the server IP for an A record, or the target domain for a CNAME record).
Save your changes.
Registrar steps vary slightly from provider to provider, so consult your registrar's own help documentation if you need provider-specific guidance.
Note: Replace any placeholder value with the actual IP address or target domain provided to you. Entering this accurately is essential to getting your domain connected correctly.
Once you've entered your DNS records, allow time for them to propagate (this varies by registrar), then click Update Domain back in Aesthetix CRM.
When you update your portal's subdomain or custom domain, visitors who still use the old address see a domain update notice with a link to the new one, and they're redirected automatically after 30 seconds.
Note: DNS propagation time depends on your record's TTL, your ISP's update frequency, and other factors outside our control. As a general rule, allow 24 to 48 hours for changes to fully propagate before troubleshooting further.
If your account is still on an older Memberships setup, migrating to the Client Portal gives you a more unified experience for courses and memberships, with settings that are easier to find and follow.
To start the migration:
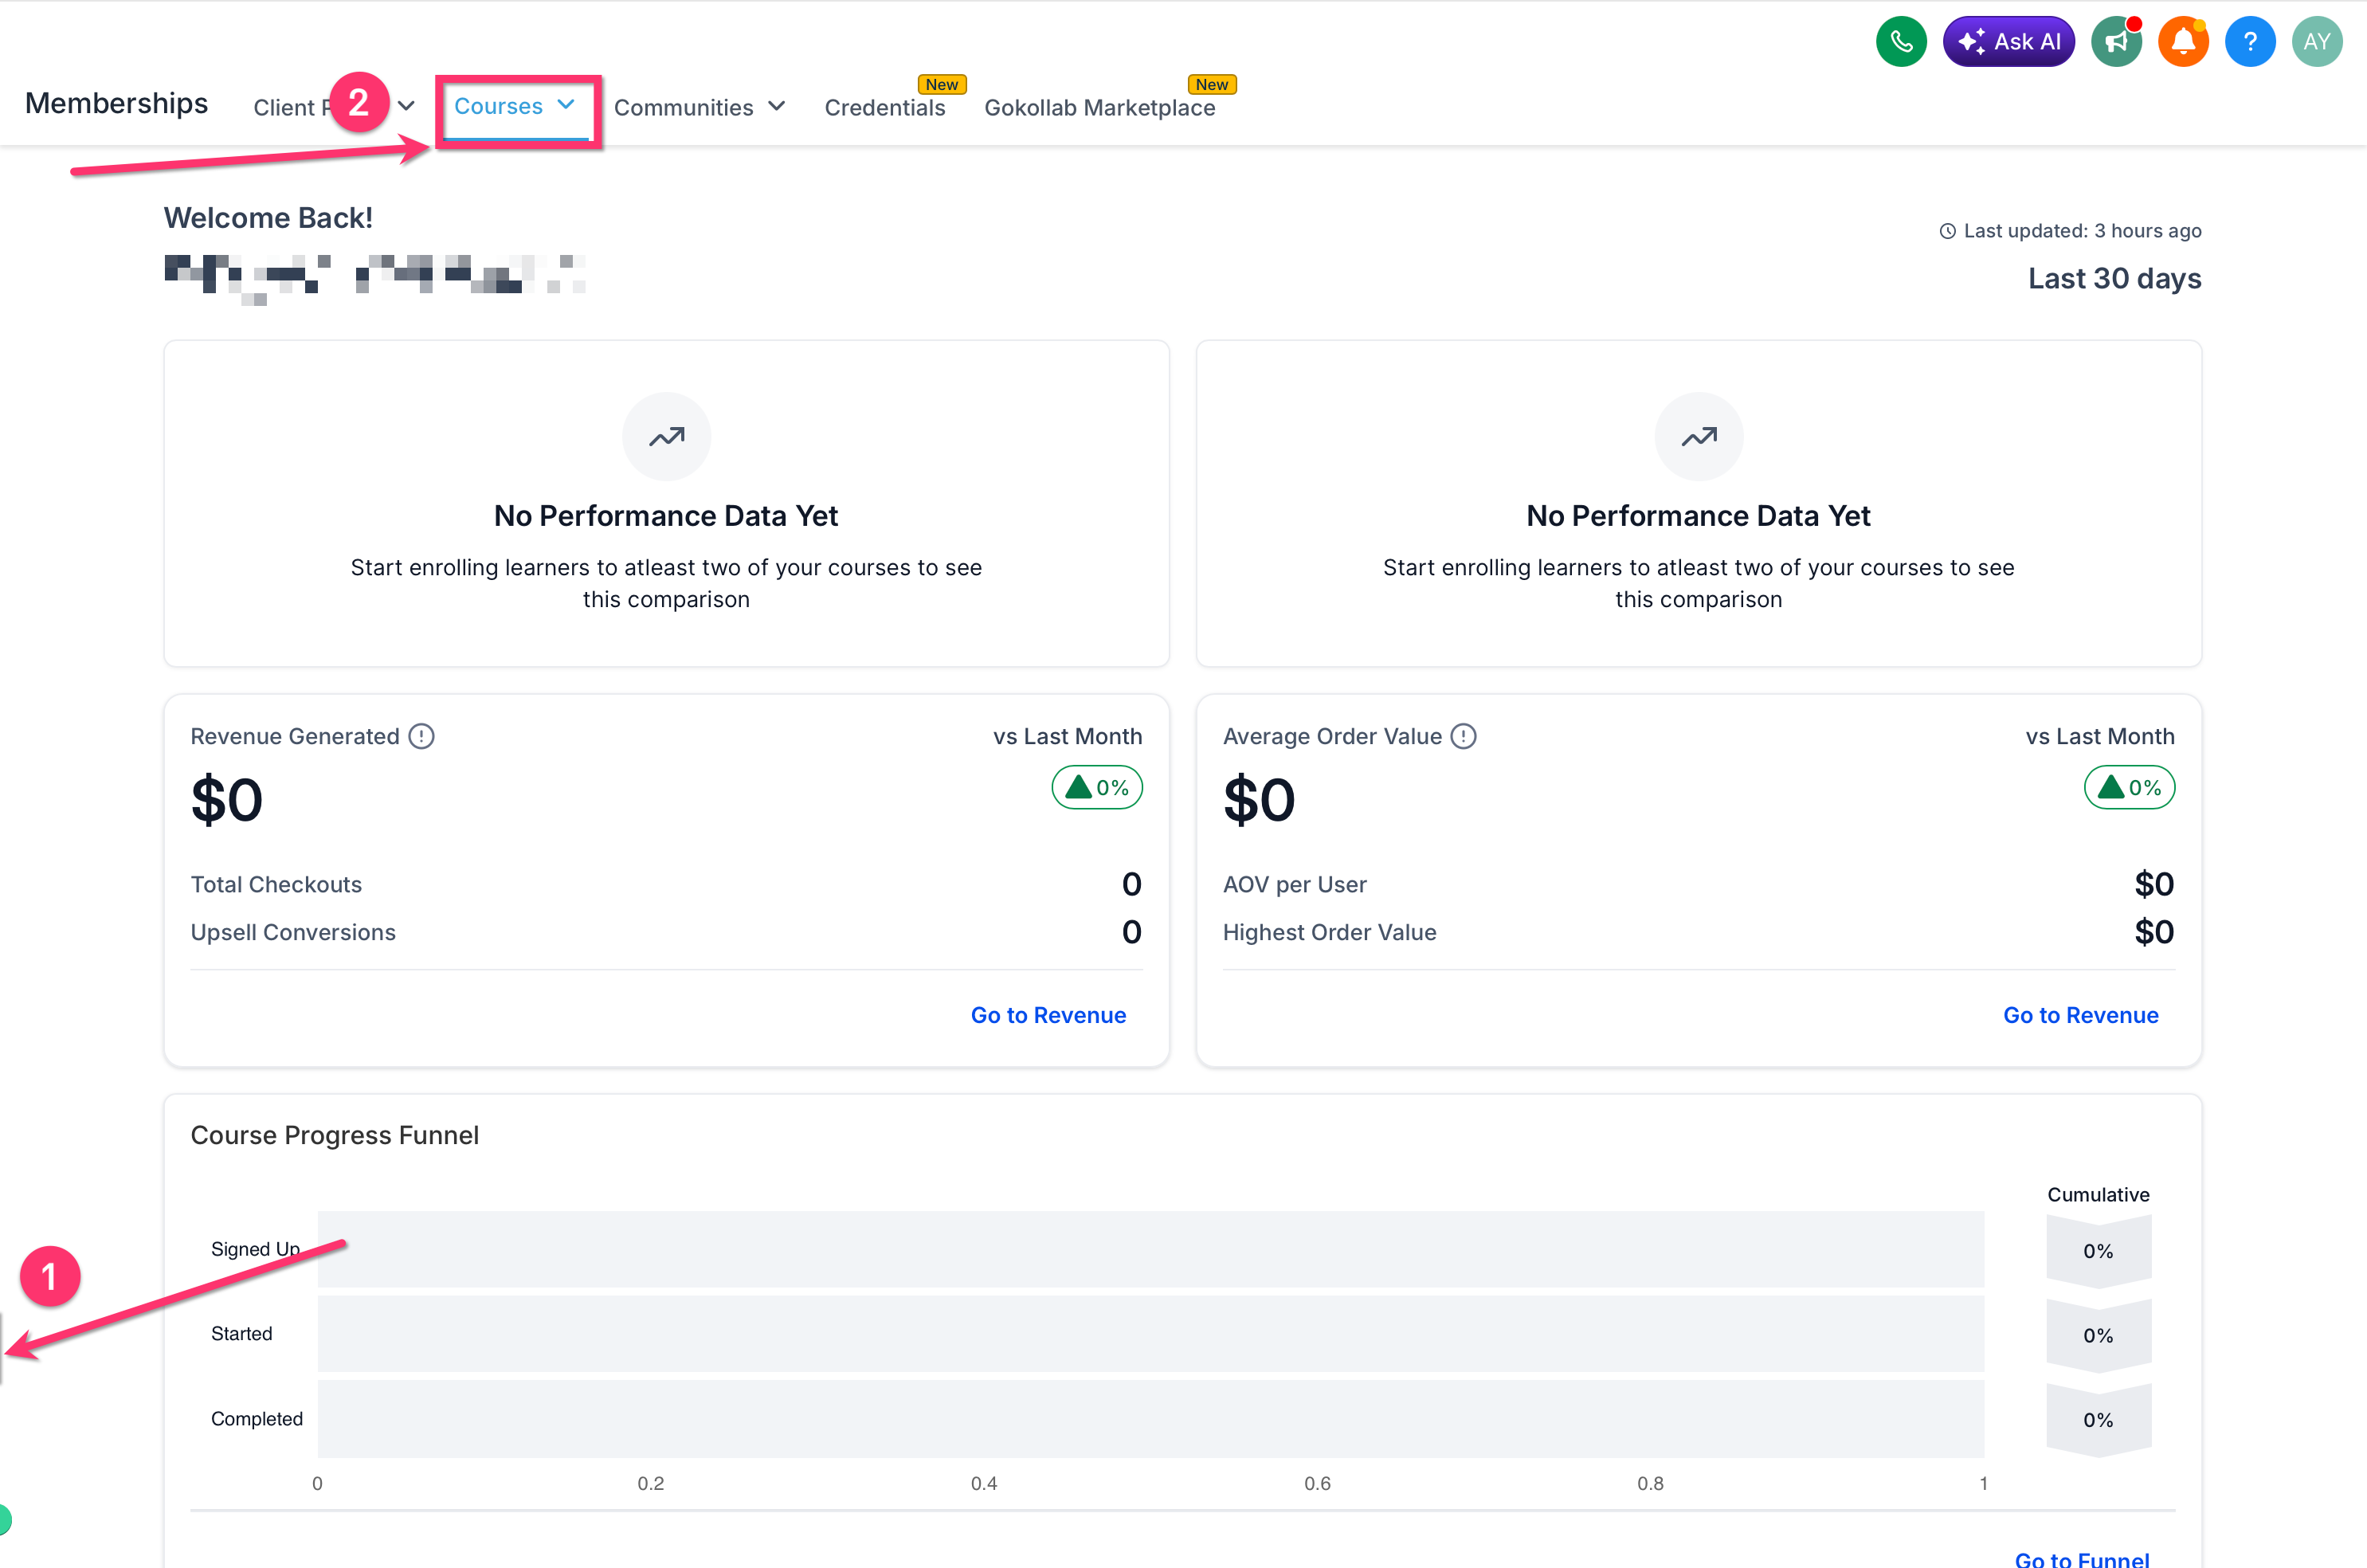
Go to Marketing > Memberships.
Open Courses.
Navigate to the settings area for your site.
Review the migration message shown in the settings interface.
Follow the on-screen steps to move to Client Portal settings.
Note: After migrating, review your branding, domain, email settings, and app settings to confirm everything still matches what you had configured before.
Open the Client Portal dropdown at the top of the Web Tools > Websites page, then select Branding.
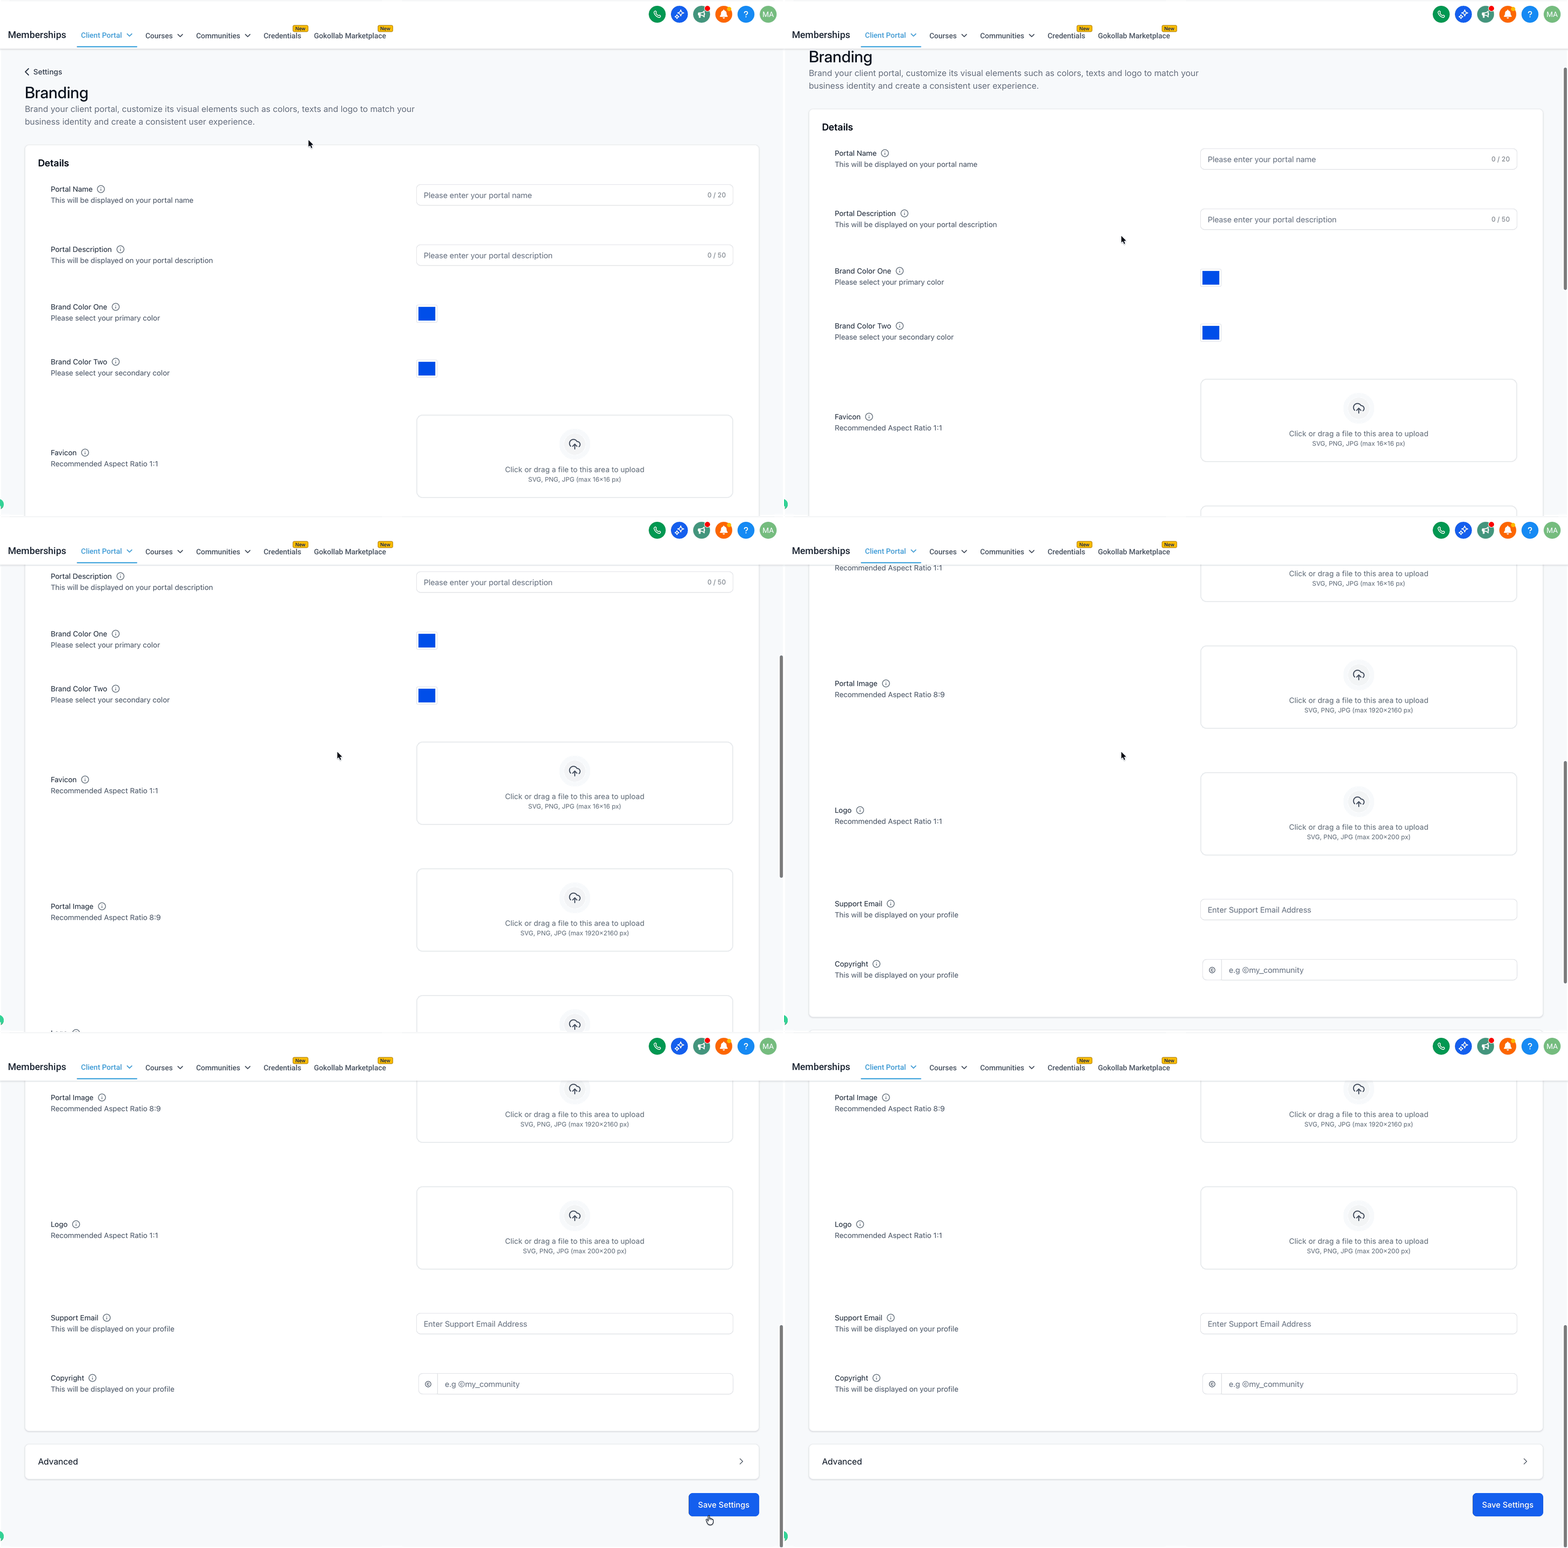
Customize the portal's appearance using the options below.
Setting | Description |
|---|---|
Portal Name | The name displayed prominently on your portal. |
Portal Description | A short description of your portal or the services it covers, visible to patients. |
Brand Color One | Your primary brand color, typically used for buttons, headings, and highlights. |
Brand Color Two | A secondary color that complements your primary color and adds variety to the portal's color scheme. |
Favicon | The small icon shown in the browser tab. Use a 1:1 aspect ratio in SVG, PNG, or JPG format, up to 16x16 pixels. |
Portal Image | A square (1:1) brand image in SVG, PNG, or JPG format, up to 720x720 pixels. This serves as the main branding image inside your portal. |
Logo | Your practice logo, in a 1:1 aspect ratio, SVG, PNG, or JPG format, up to 200x200 pixels. |
Support Email | The email address patients can use to reach you with questions about the portal. |
Copyright | Copyright text shown in the portal, such as "© Your Practice Name." |
Save Settings | Applies your changes. Click Cancel before saving if you want to discard them instead. |
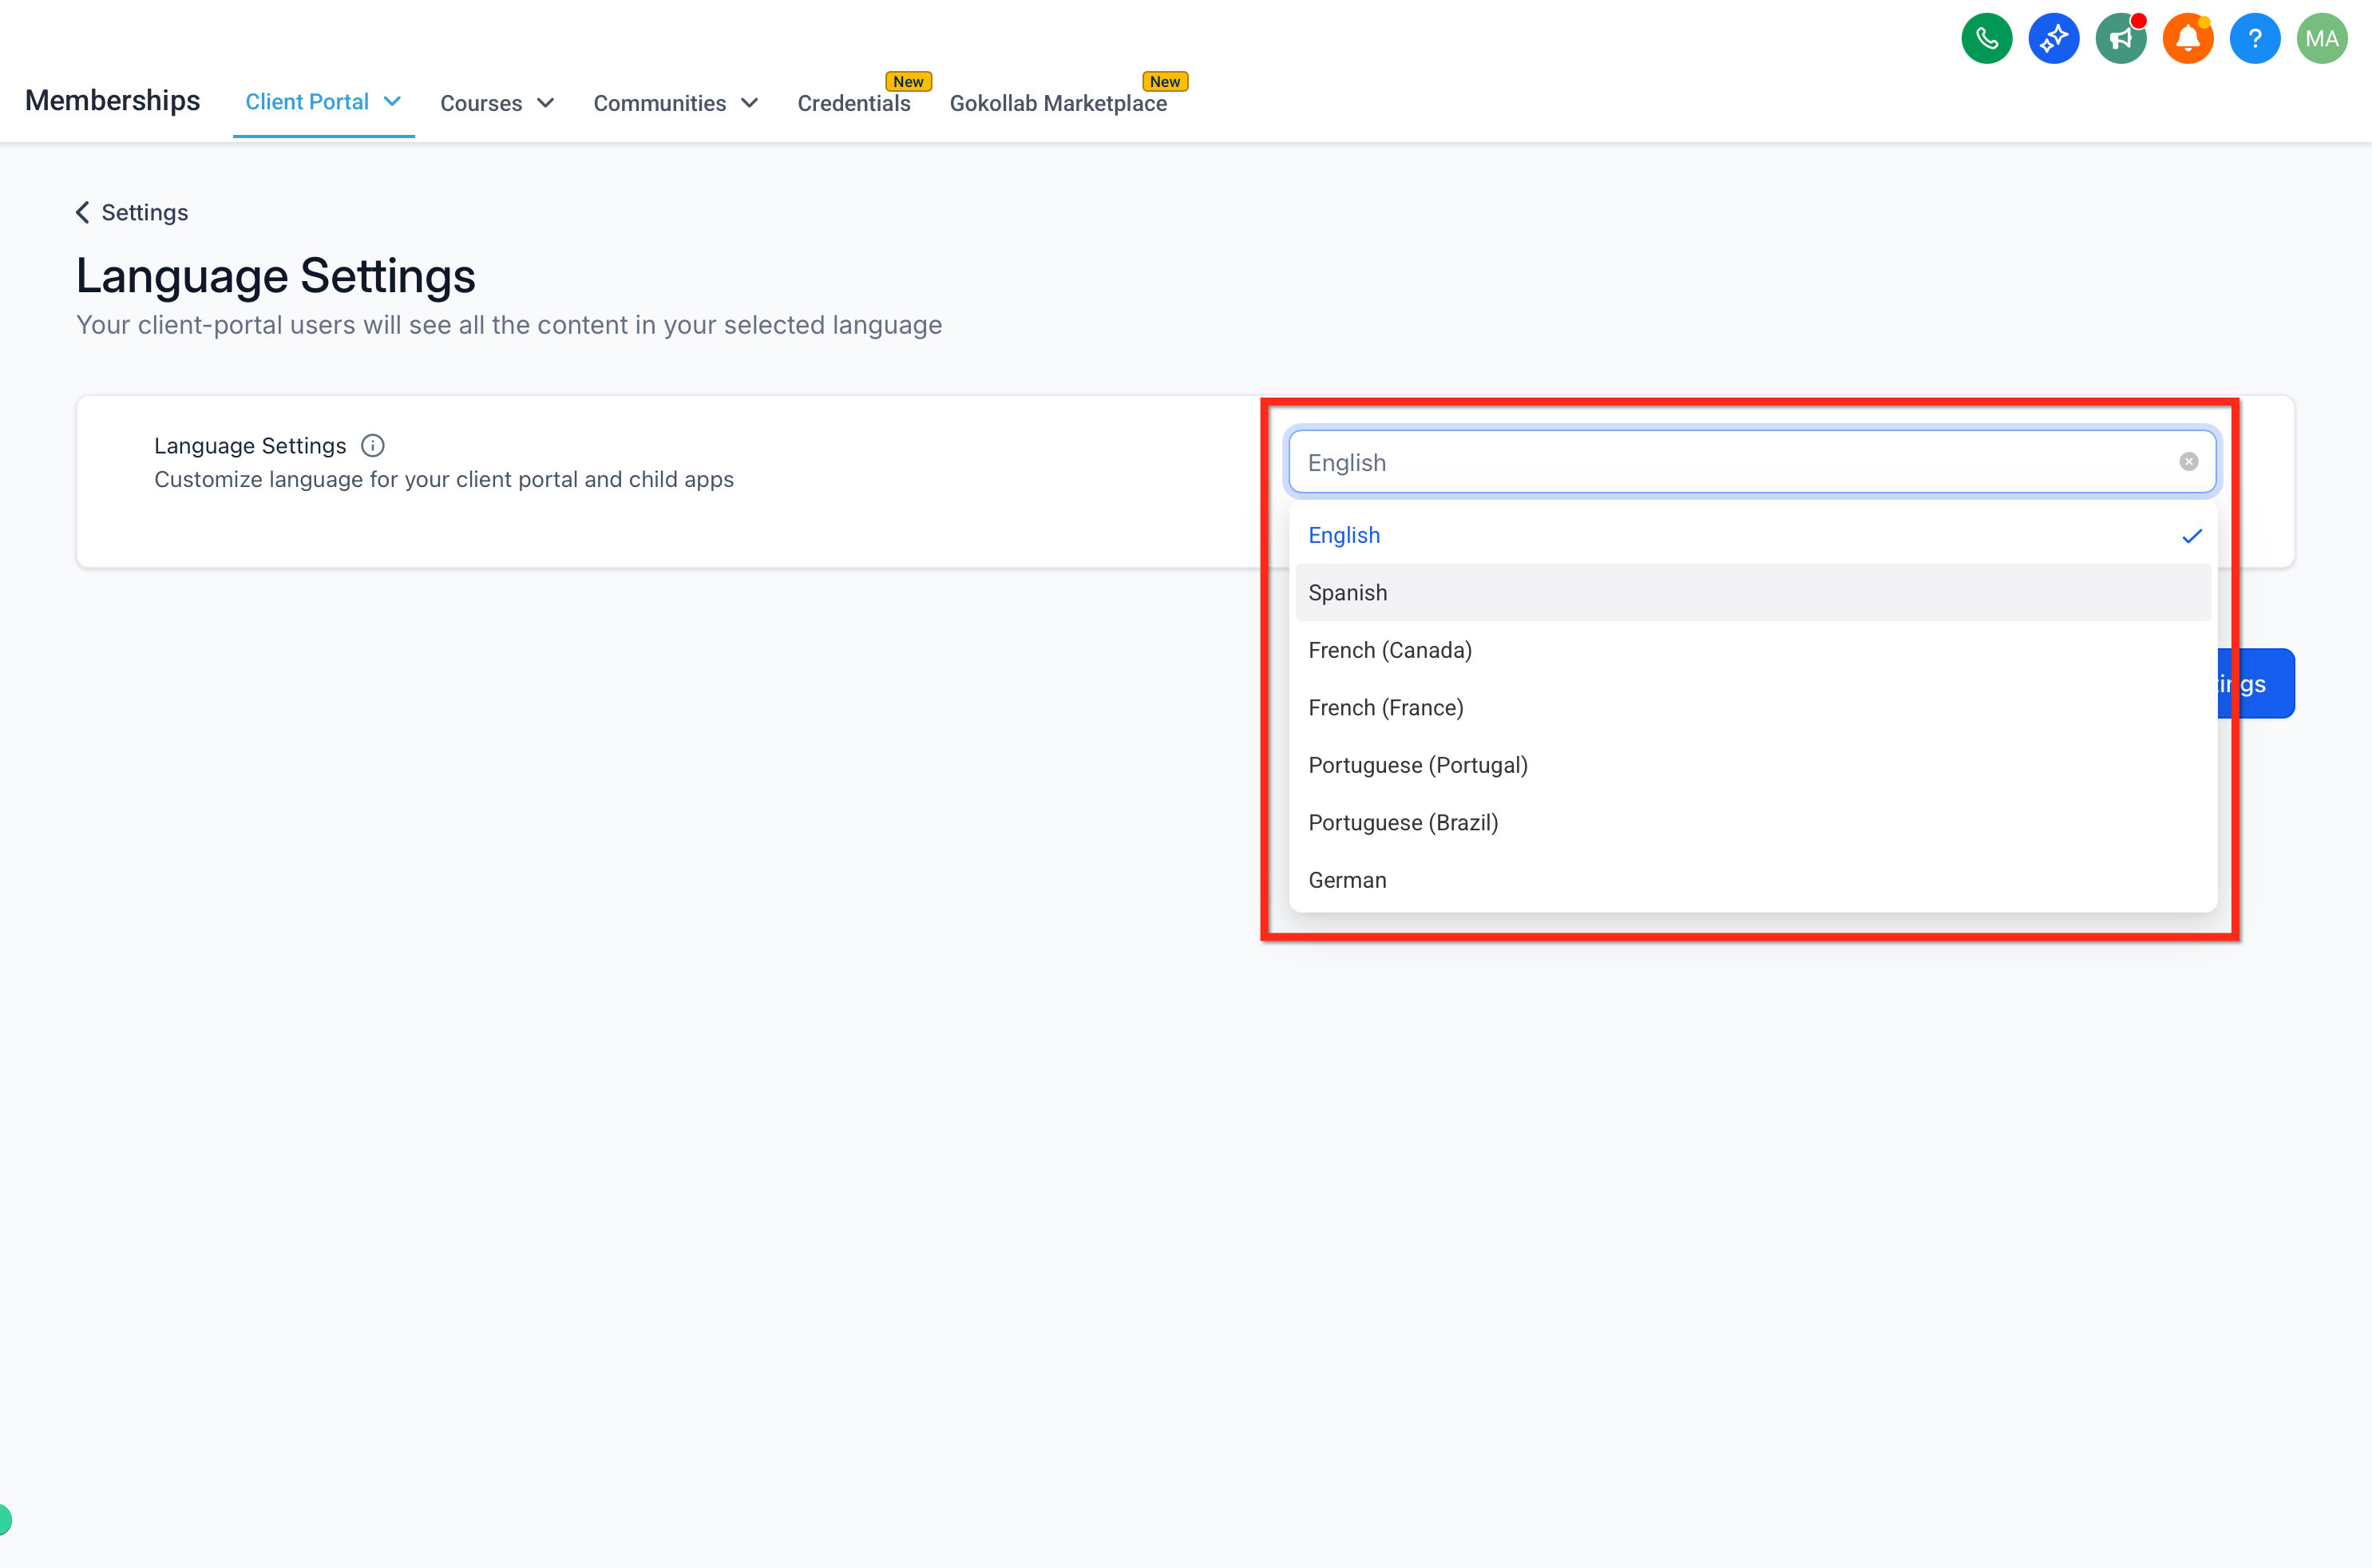
If you treat patients in multiple regions, you can set a default language for your Client Portal.
Go to Web Tools > Websites > Client Portal > Settings > Language Settings.
Select a language and click Save.
Patients can still change their own language from within the portal, under Manage Your Account > Language Settings.
You can let patients sign in to the Client Portal with their existing Google account, so they don't have to create or remember a separate portal password.
Go to Web Tools > Websites > Client Portal > Settings.
Find the Google Sign-In option and turn it on.
Save your changes.
Once enabled, patients see a Sign in with Google button on the portal login screen and can log in with a single click.
There are two main ways to get patients into your Client Portal.
Membership courses: Patients who already have access to a course can log in through the portal using their existing username and password, no separate signup needed. For patients with no existing course access, grant it directly (manually, or automatically with a workflow, see crs-grant-access) and they'll set up their portal account the first time they log in.
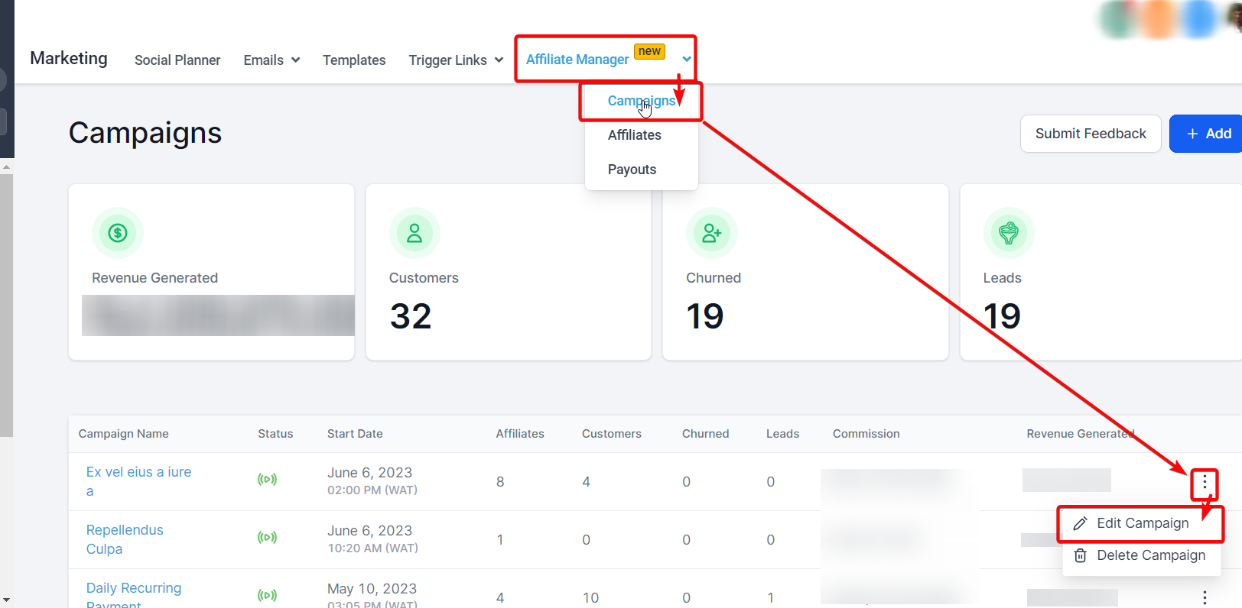
Affiliate program: Invite affiliates from your Affiliate Manager. Go to Marketing > Affiliate Manager > Campaigns > Edit Campaign.
Copy the signup link to share with the people you want to invite:
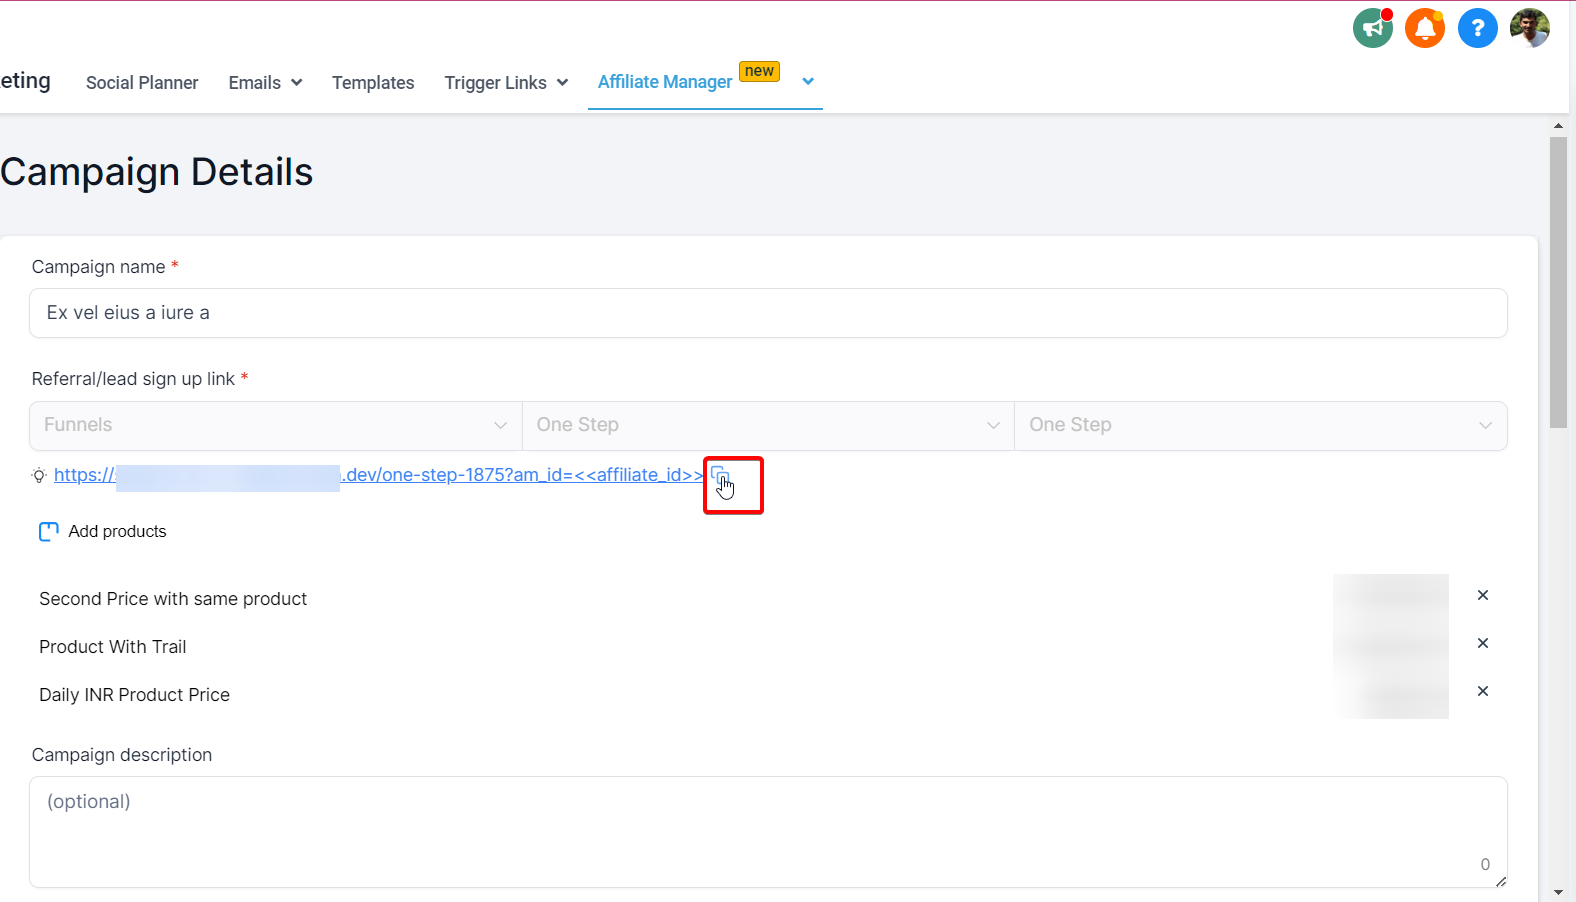
This lets them sign up as an affiliate and manage all their referral activity (links, commission rates, and earnings) through the Client Portal. The day-to-day affiliate portal experience is covered in your Affiliate Manager help articles.
For a more direct approach, or to invite many patients at once, share your portal URL. Copy it from the Domain Setup area of your Client Portal settings.
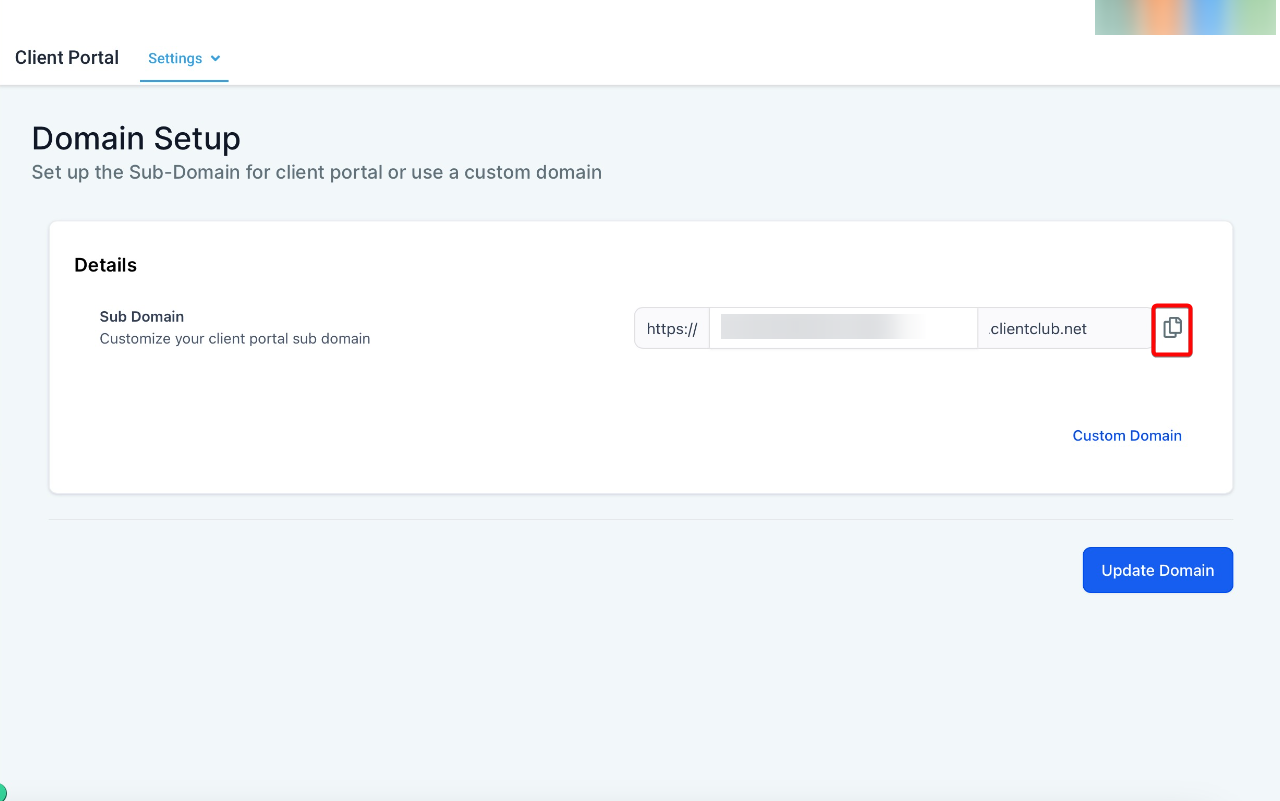
Share this URL by email, text message, or any channel you already use to reach patients. It's a good fit for a welcome email or newsletter to new patients, or a link on your website or social media profiles. When you share it, call out what patients gain by logging in, such as their courses, certificates, community groups, and exclusive content.
The Client Portal dashboard gives you an at-a-glance view of who has been invited and who has joined, plus quick actions for inviting patients and getting them logged in.
Copy your portal URL directly from the dashboard to share with patients. This URL updates automatically based on your custom domain selection.
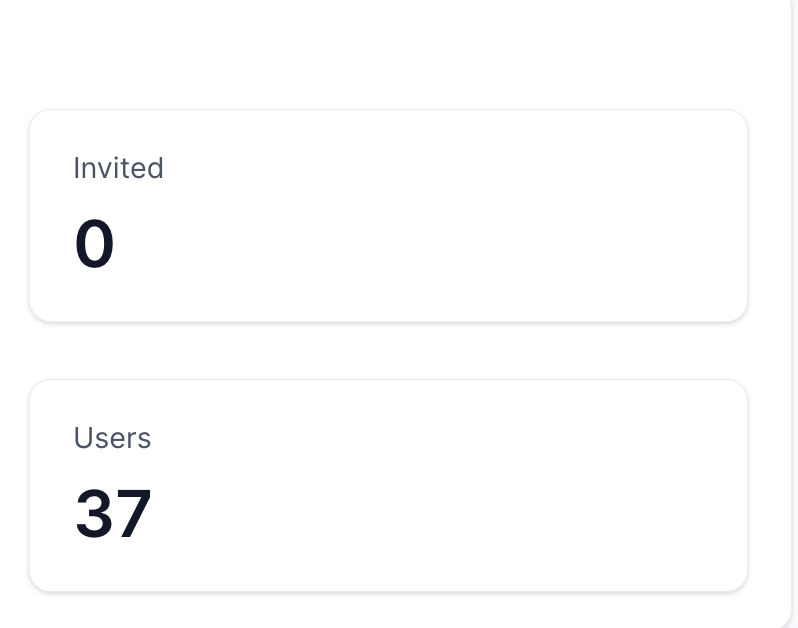
Invited Users is the count of patients you've invited to the portal using the Invite action.
Joined Users is the actual number of patients who have logged in and joined your portal.
A magic link lets a patient log in to the portal directly from a link, without entering a password. It's a quick option for sending over email or text message.
Note: Magic links generated from the dashboard are short-lived and expire automatically. If a patient reports that their link no longer works, generate a fresh one and resend it. For the full picture on magic links, including using them as custom values in workflow emails and embedding them as one-click access to specific portal apps, see the dedicated guide on SSO and magic links for the portal.
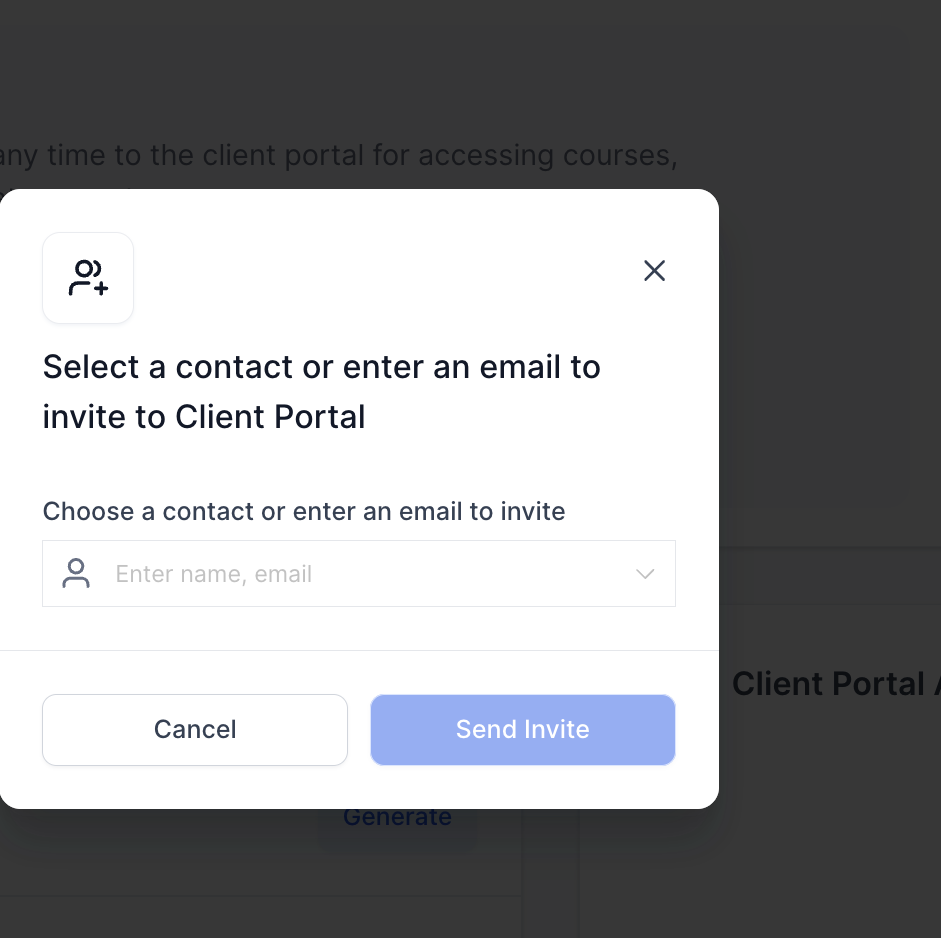
Use the Invite action to add a new patient to the portal. You can invite an existing contact or enter an email address directly. The invitation is sent from your portal's default domain.
The Login Email action sends a patient an automatic email with a one-click login button, so they can get into the portal without typing a password.
Note: You can select multiple contacts at once and send them all a login email together. For custom, branded login emails with your own copy and design, see the guide on sending members their login information.
Do I need to do anything to turn on the Client Portal? No. The Client Portal is available automatically for every account. A custom domain, branding, and invitations are all optional layers you add on top of the default setup.
My branding changes aren't showing up. What could be wrong? This is usually a caching issue. Clear your browser cache or view the portal in an incognito window. If the issue persists, contact support.
I've set up my DNS records correctly, but the portal still isn't accessible. Why? DNS changes can take up to 48 hours to propagate, so a recent change may not show up right away. If it's been longer than that, check with your domain registrar.
What's the ideal format and size for my favicon? Use a 1:1 aspect ratio, in SVG, PNG, or JPG format, no larger than 16x16 pixels. If your file meets those specs and still won't upload, contact support.
Can patients log in with their Google account? Yes. Enable Google Sign-In from Web Tools > Websites > Client Portal > Settings, and patients will see a "Sign in with Google" button on the login screen, so they can log in without a separate portal password.
Can I invite a patient who doesn't already have course access? Yes. Use the Invite action on the dashboard, or grant them access to a course, community group, or the affiliate program directly, and they'll be prompted to finish setting up their portal account.
How is "Invited" different from "Joined" on the dashboard? Invited counts everyone you've sent an invitation to. Joined counts only the patients who actually logged in and completed setup. A gap between the two usually means invitations are sitting unopened, worth a follow-up login email.
Do magic links expire? Yes. Links generated from the Client Portal dashboard are short-lived and expire automatically. Generate a new one any time a patient says theirs stopped working.
Can I send a login email to more than one patient at a time? Yes. Select multiple contacts on the dashboard before choosing the Login Email action, and they'll all receive it together.
Where do patients see their community groups and certificates? Once they log in, patients access their community groups and completion certificates from inside the Client Portal itself. Setting up those features is covered in their own guides in the Courses collection.
Are affiliates having trouble seeing their stats a portal problem? Usually not. First confirm the affiliate has the correct login details and the right permissions to view their stats in your Affiliate Manager. If the problem continues, contact support.
