Course offers in Aesthetix CRM are sold through payment products. You build the product (name, price, taxes, variants) in Payments > Products, then link it to a published offer in Memberships > Offers so that anyone who completes checkout is automatically enrolled in the course, whether that's a patient education series, a staff training module, or a paid membership program.
A course offer bundles one or more courses and sells them at a set price. When someone purchases the payment product tied to that offer, they're automatically granted access to every course included in it. No manual enrollment is needed after purchase.
Creating a paid course offer gives you:
Automatic course access the moment payment clears
One-time or recurring pricing options
Direct connection to your course delivery (patient education, staff training, membership content)
Bundled course sales through a single product
Built-in purchase tracking and reporting
Room for upselling and offer customization
A payment product can only link to an offer that already exists and is published. Draft offers won't appear in the product setup dropdown.
To create a course offer:
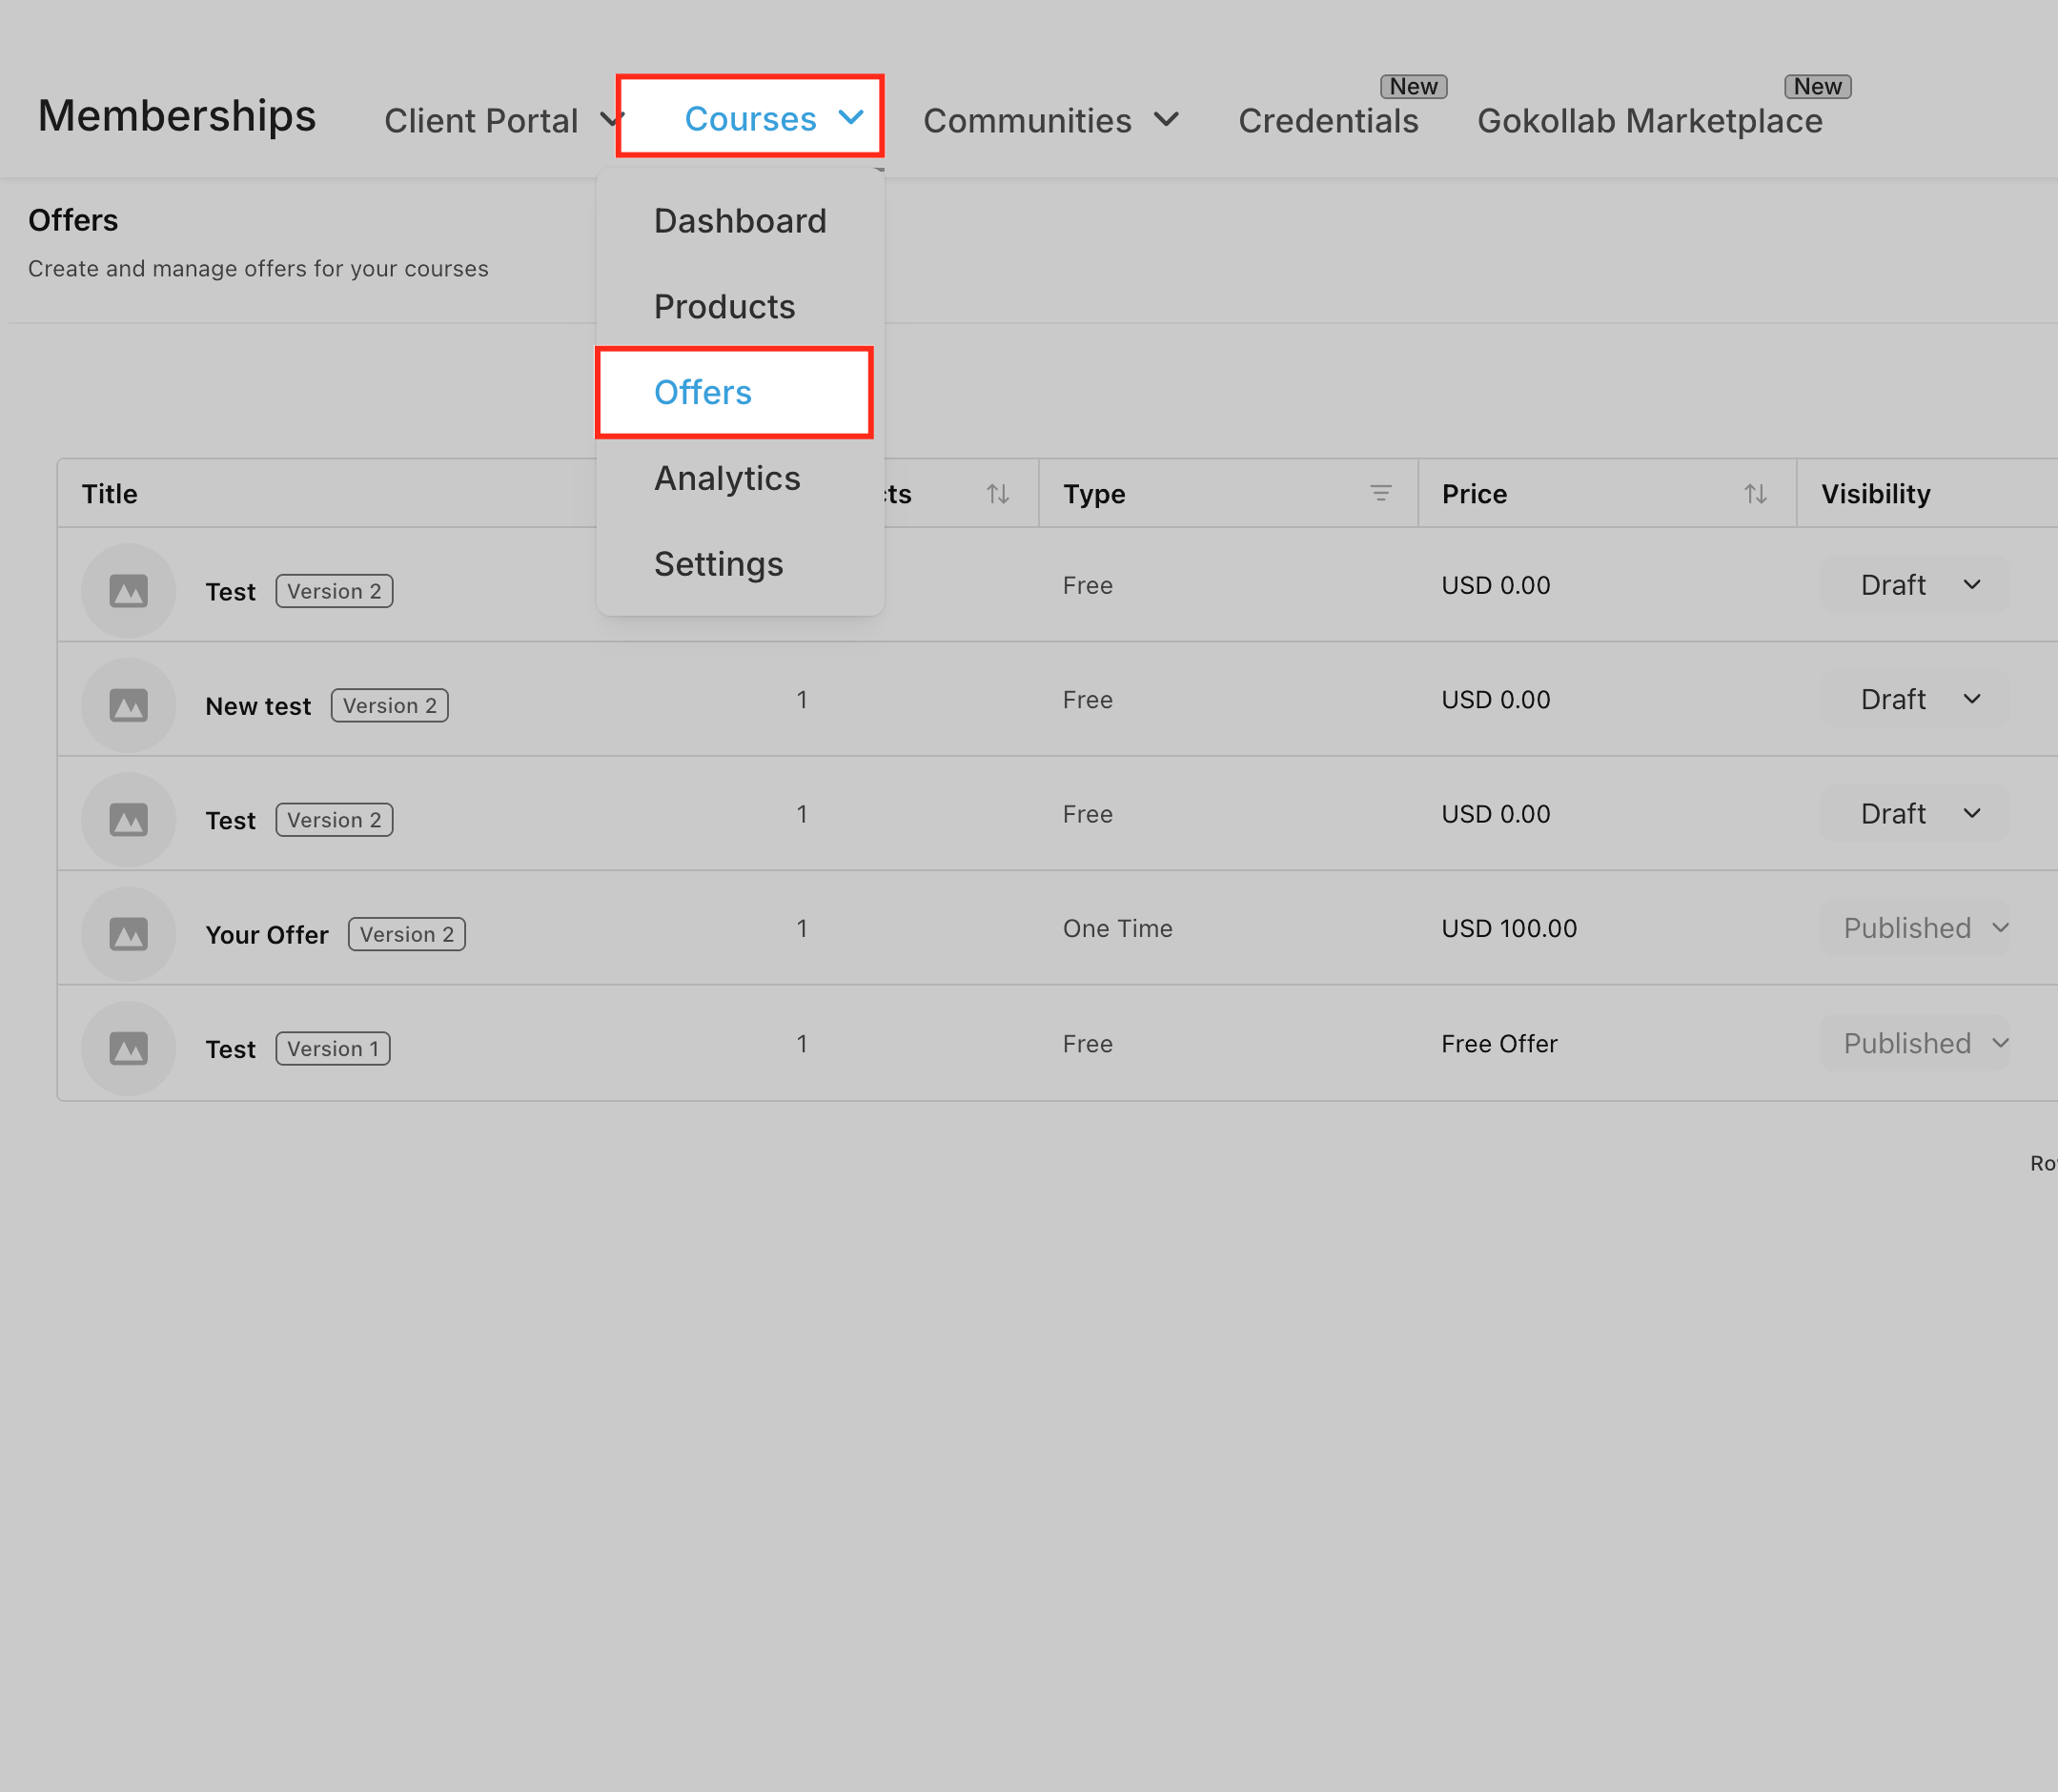
Go to Memberships, click the dropdown, and select Offers.
Click + Create Offer.
Add a title, select the course(s) to include, and set the price.
Click Create, then Publish the offer.
Once the offer is published, you're ready to build the product that sells it.
Navigate to Payments in the left-hand menu, hover over the Products dropdown in the top menu, and click Products. This opens the product management page listing everything you've already created. Click the blue + Create Product button in the top right to open the product creation screen, where you'll enter the product name, pricing, and membership configuration.
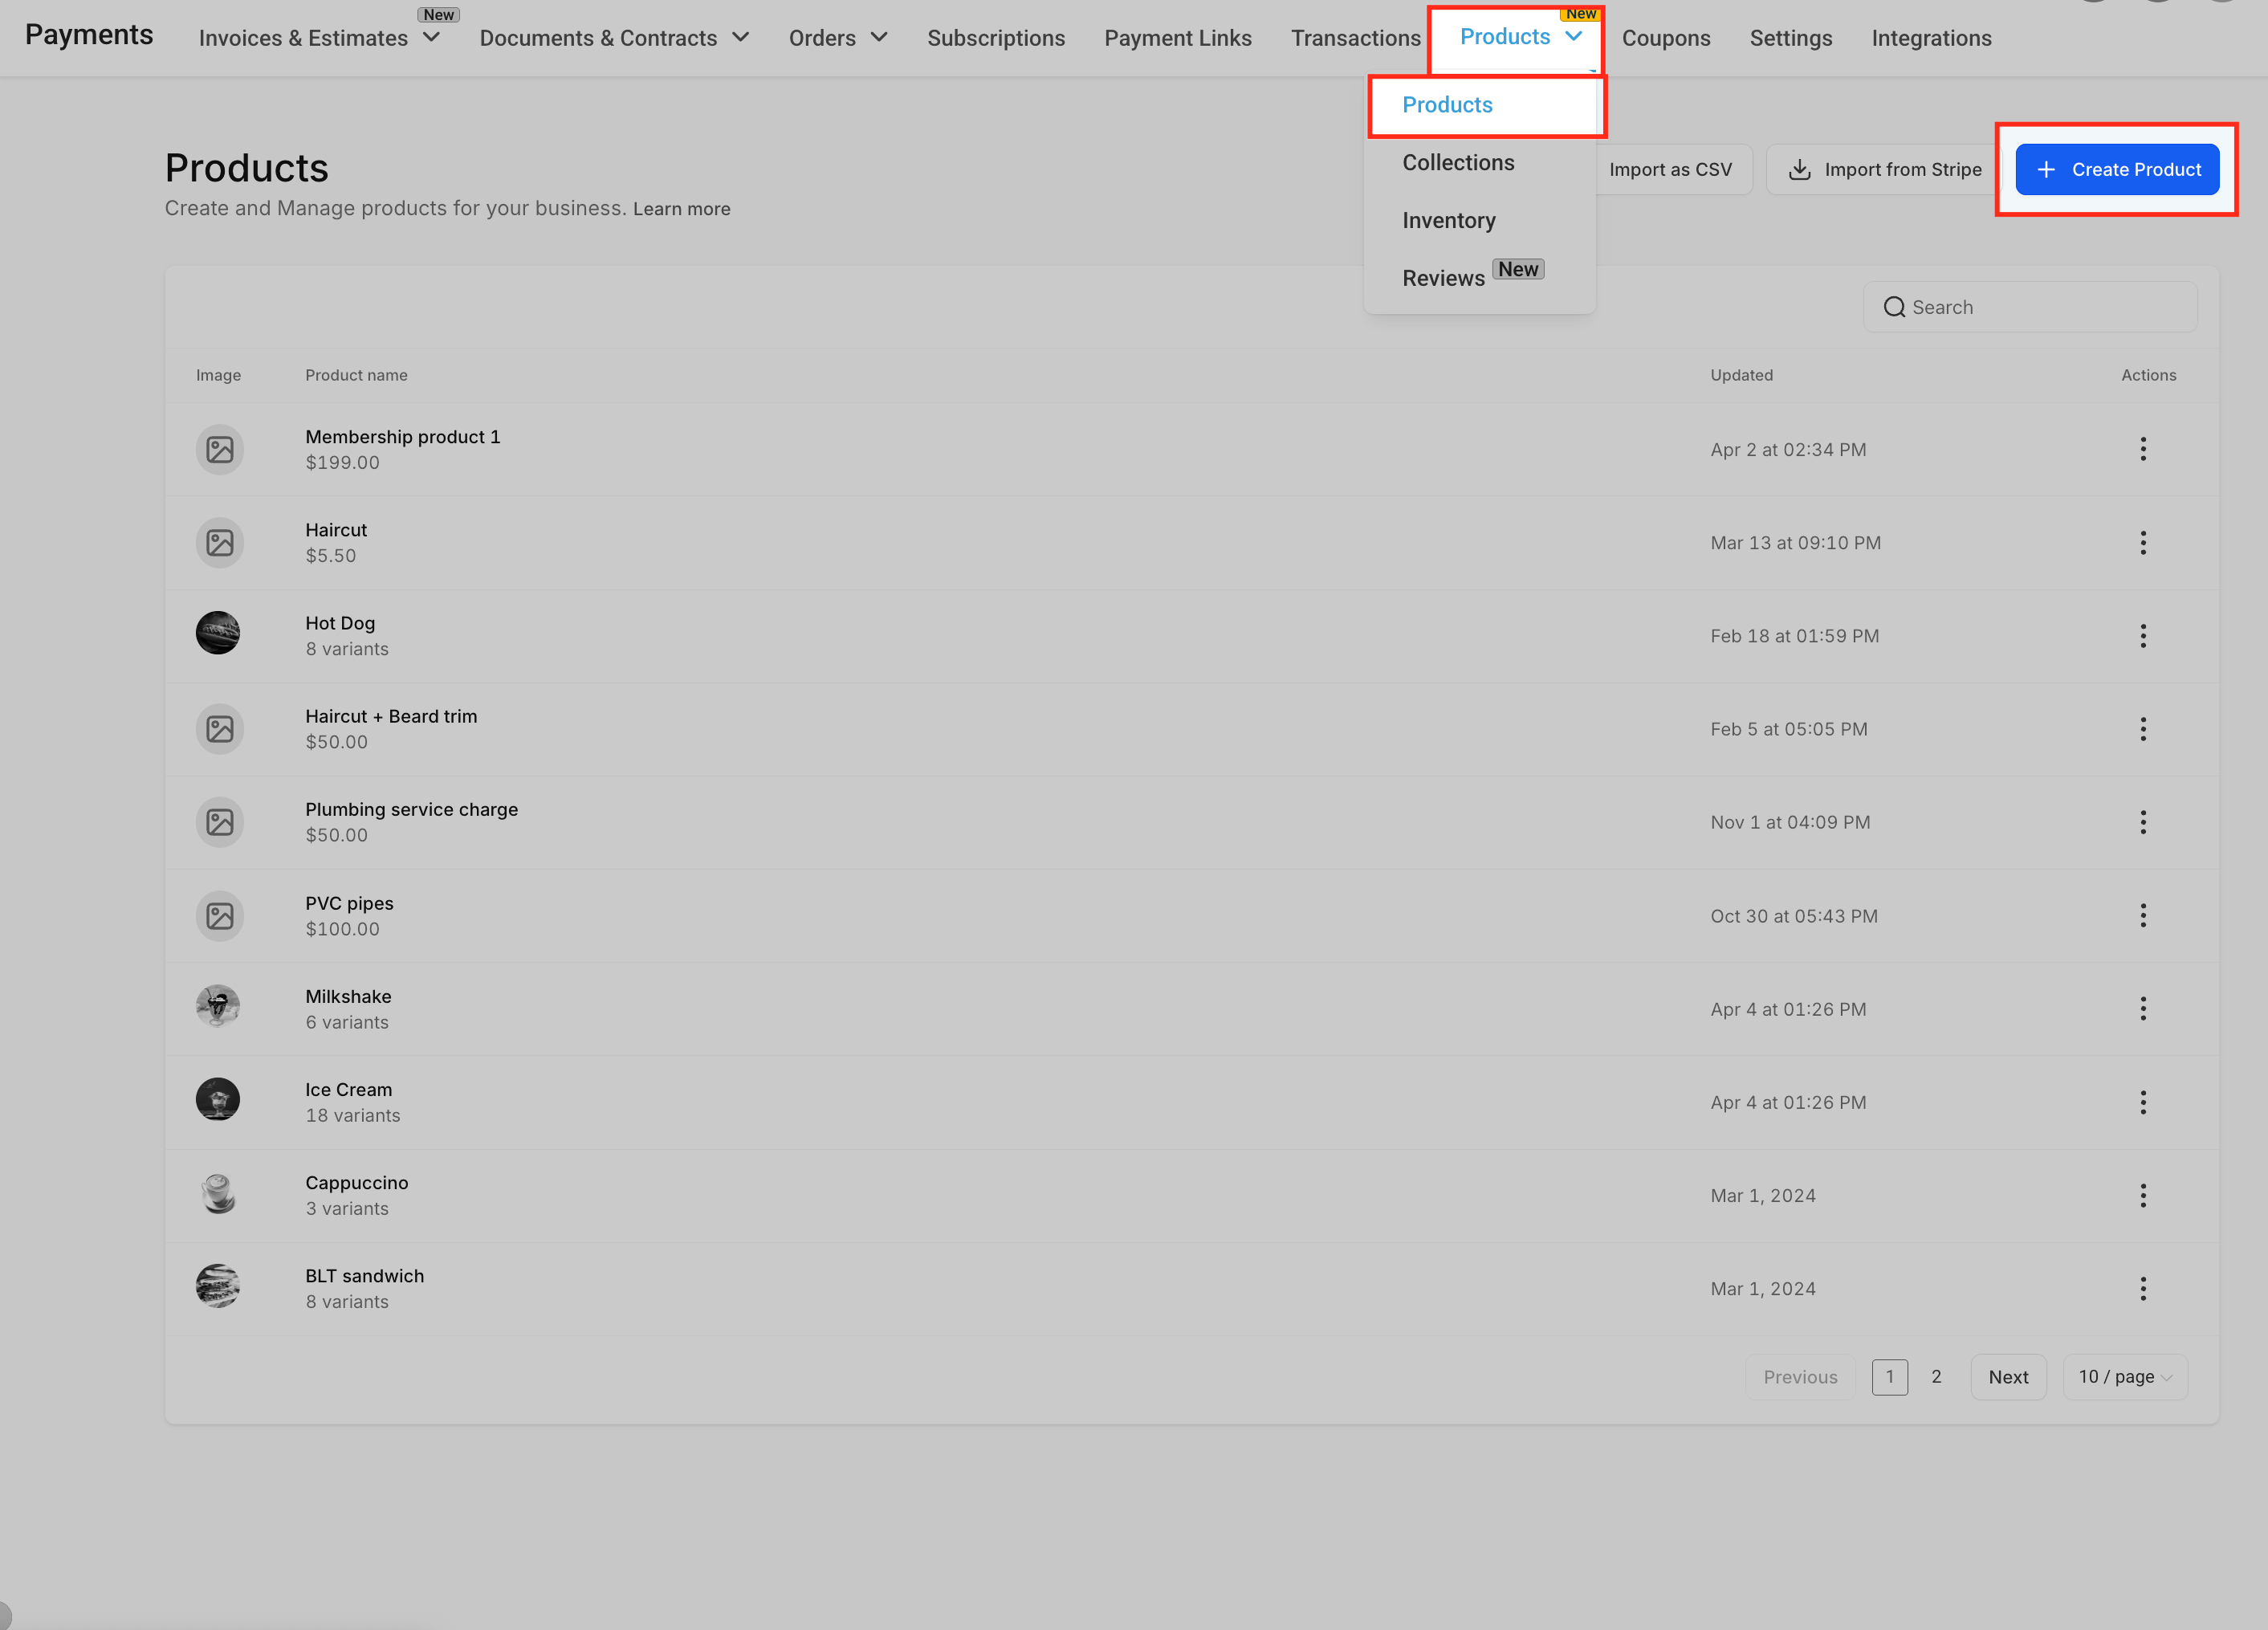
The Product Information section defines the foundational details:
Include in Online Store: toggle this on if you want the product visible and purchasable through your storefront. Leave it off for a product that's only sold through a direct checkout link.
Title: required. This appears at checkout, in internal views, and on public listings.
Description: use rich text (bold, italics, links, bullet points, font styling) to explain what patients or students are buying.
Media: upload an image or video to represent the product. Aim for 1024x1024 resolution and under 10MB for best display.
Enable Product Label: optional checkbox that lets you tag the product with a badge like "New" or "Top Pick" for visual organization.
Product Collection: assign the product to an existing collection to keep a larger catalog organized.
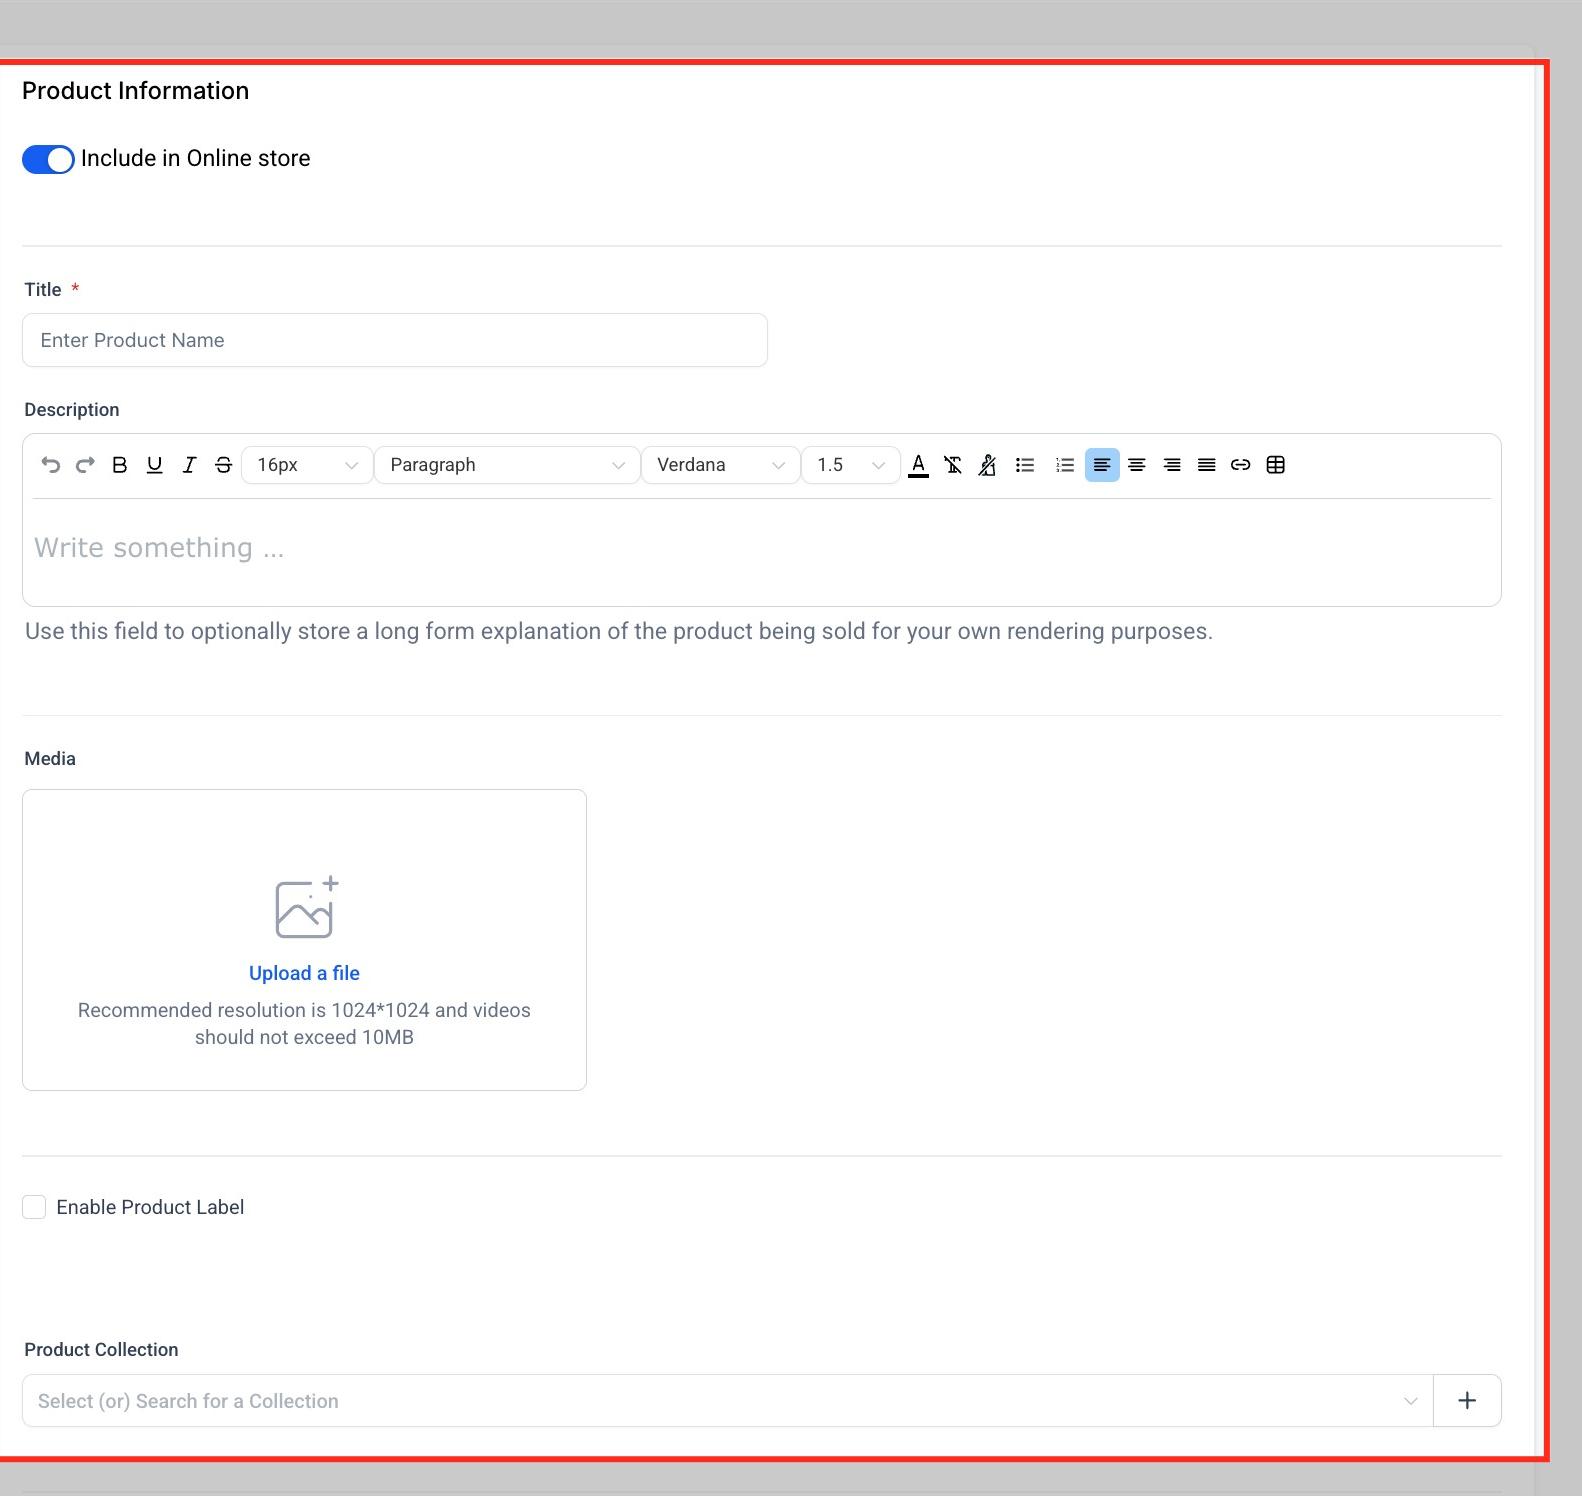
Product Tax Code: select a tax category so checkout can calculate tax automatically. Leave it blank to fall back to your global tax settings.
Include tax in prices: choose whether the displayed price already includes tax ("Yes") or shows tax as a separate line ("No"), or inherit the global setting.
Attach Tax Rates: attach manual tax rates if you handle taxes yourself or sell to buyers outside your primary tax region.
Statement Descriptor: override the default name that appears on the buyer's bank or card statement, which helps reduce confusion or disputes.
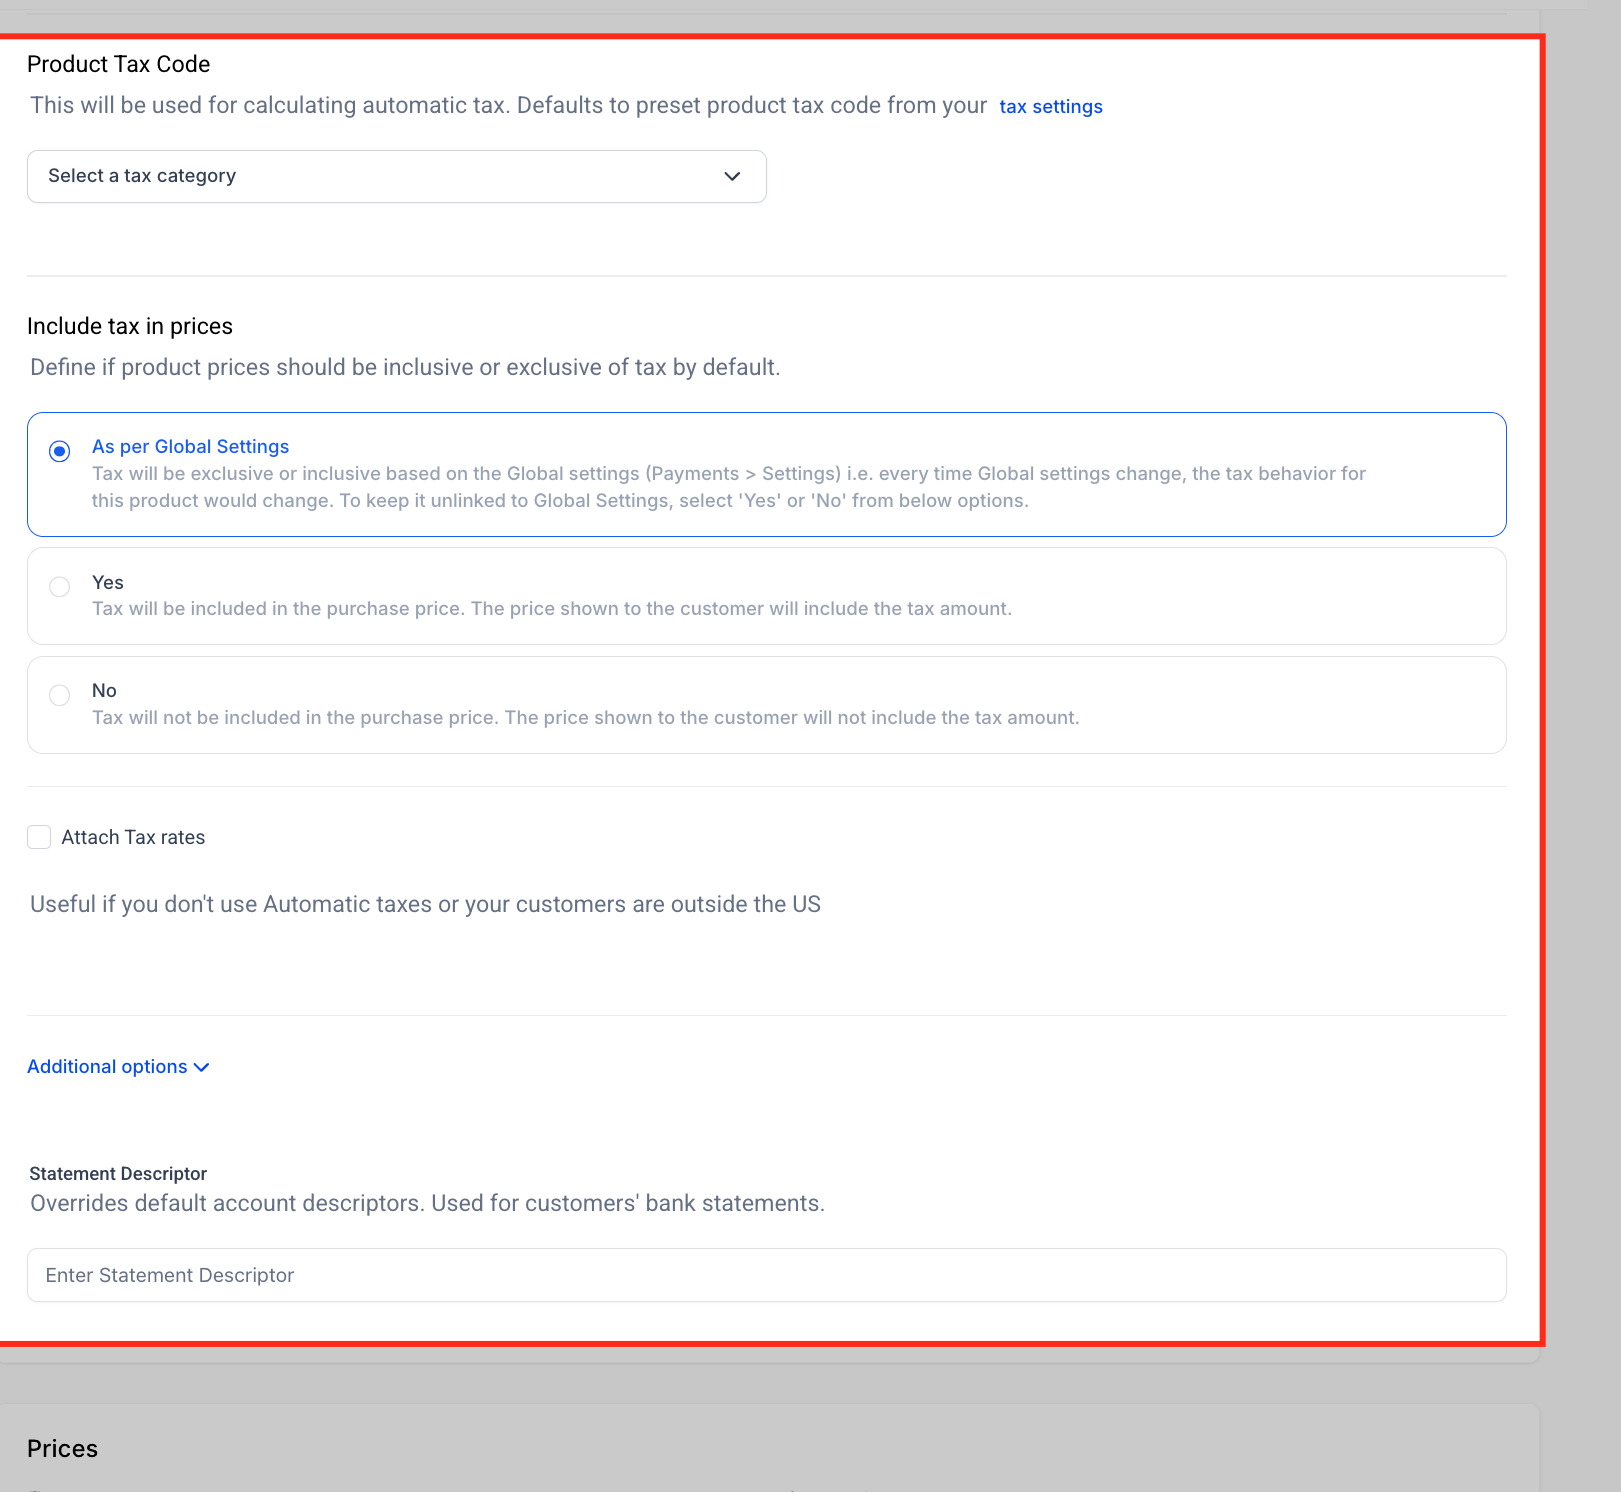
In the Pricing section:
Pricing Name: an internal label to distinguish between pricing tiers if you're offering more than one.
Type: choose Onetime for a single charge, or Recurring for billing cycles, trial periods, and setup fees.
Amount: the price you're charging.
Compare-at Price: optional, shows a crossed-out original price next to a discounted price.
Currency: select the currency for the charge.
Track Inventory: check this if you need to manage available quantity (useful for capped enrollment or limited-seat trainings).
Additional Options: purchase limits and metadata fields.
Price Description: an internal note about this pricing entry.
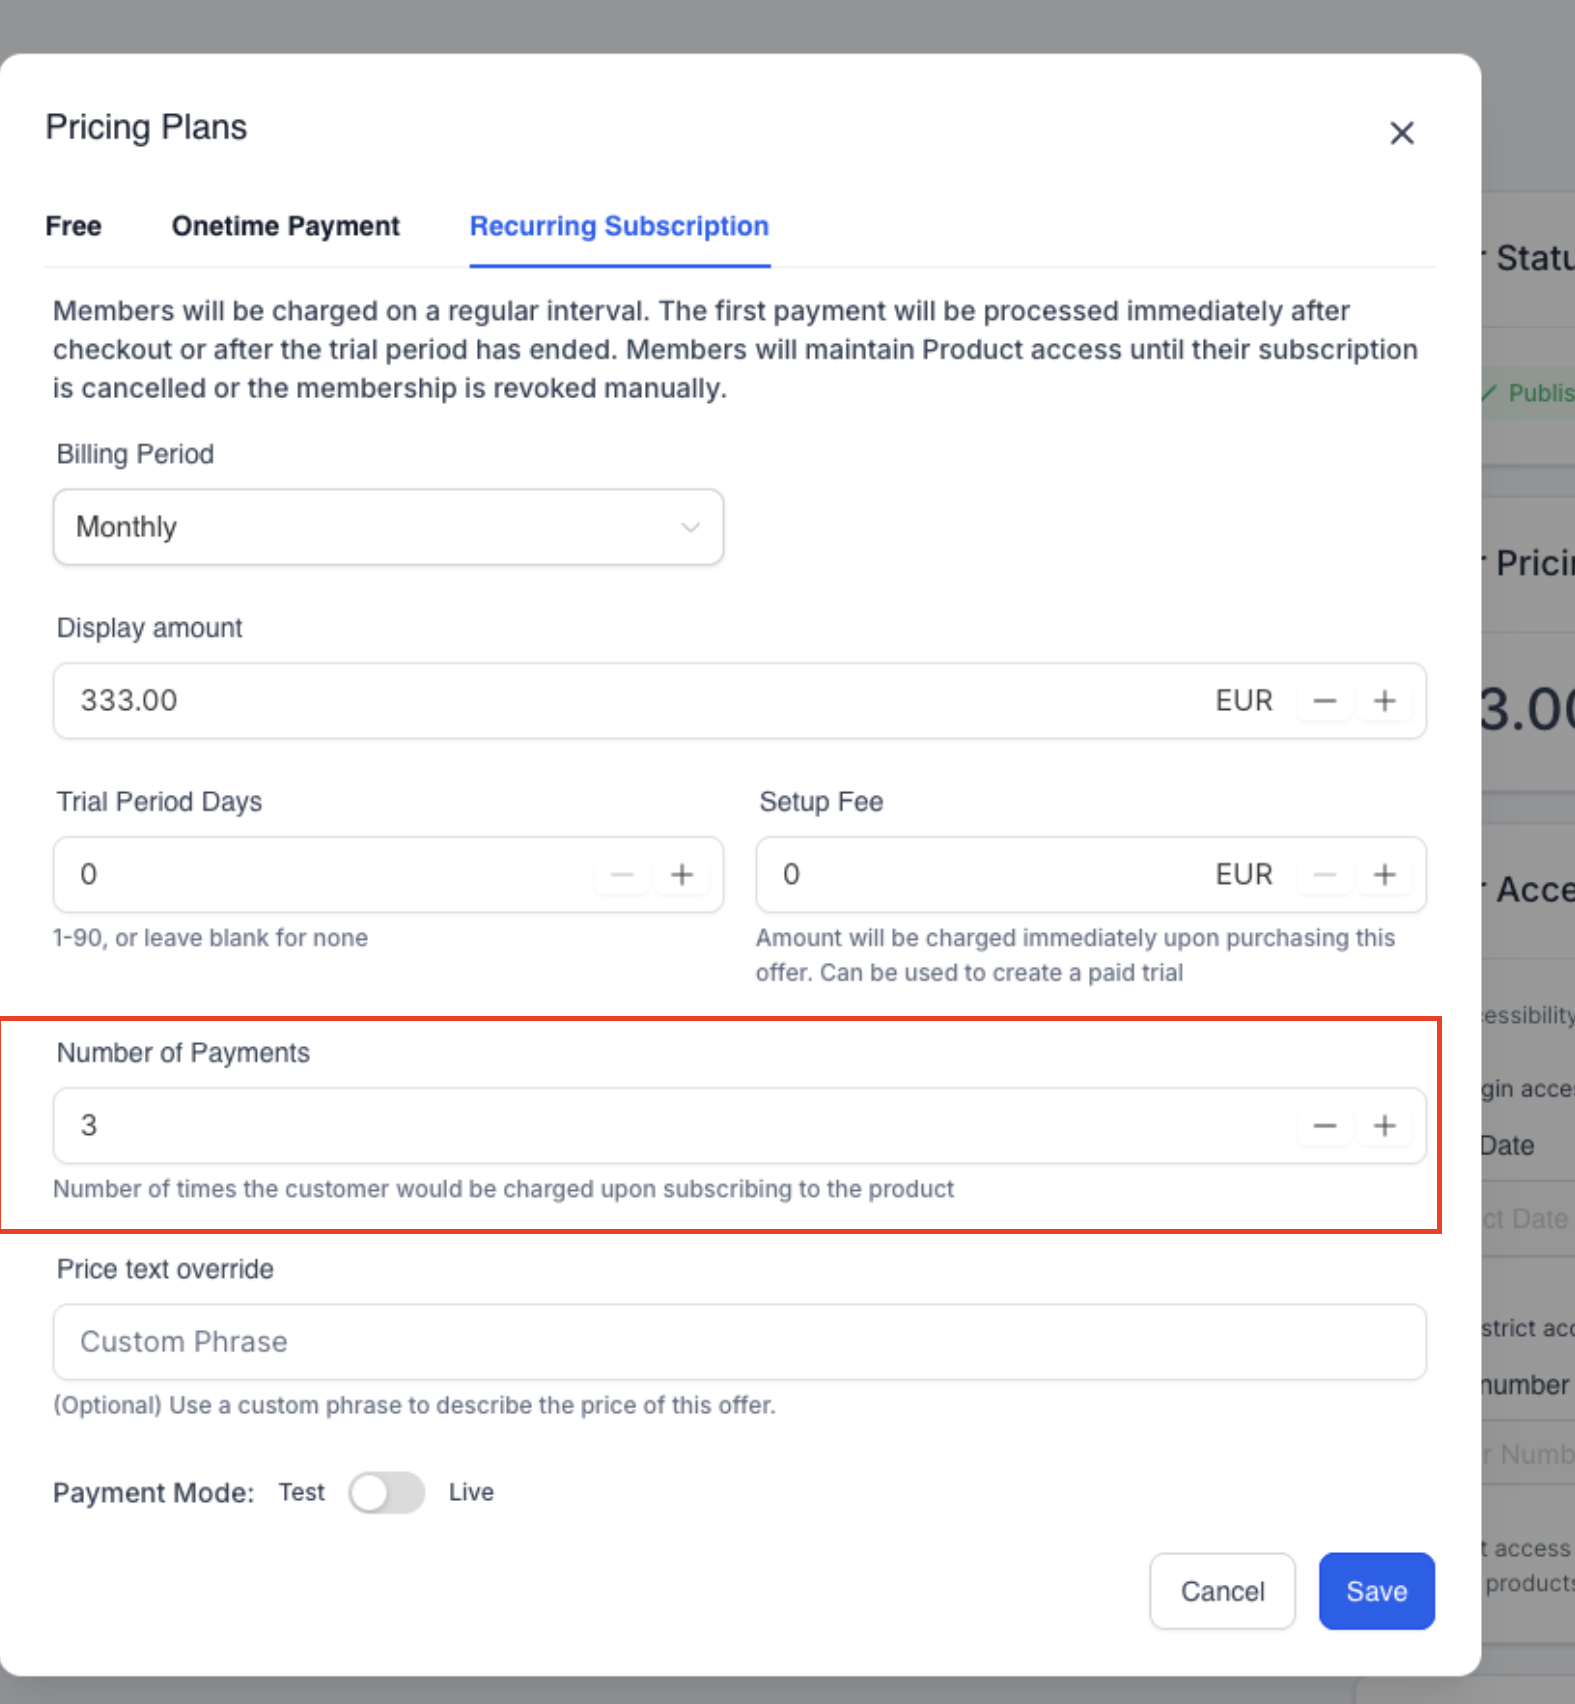
If you set a recurring price with a limited number of payments, the subscription will automatically end and cancel once that number of charges has been collected. Leave the payment count blank if you want the subscription to continue until it's manually cancelled.
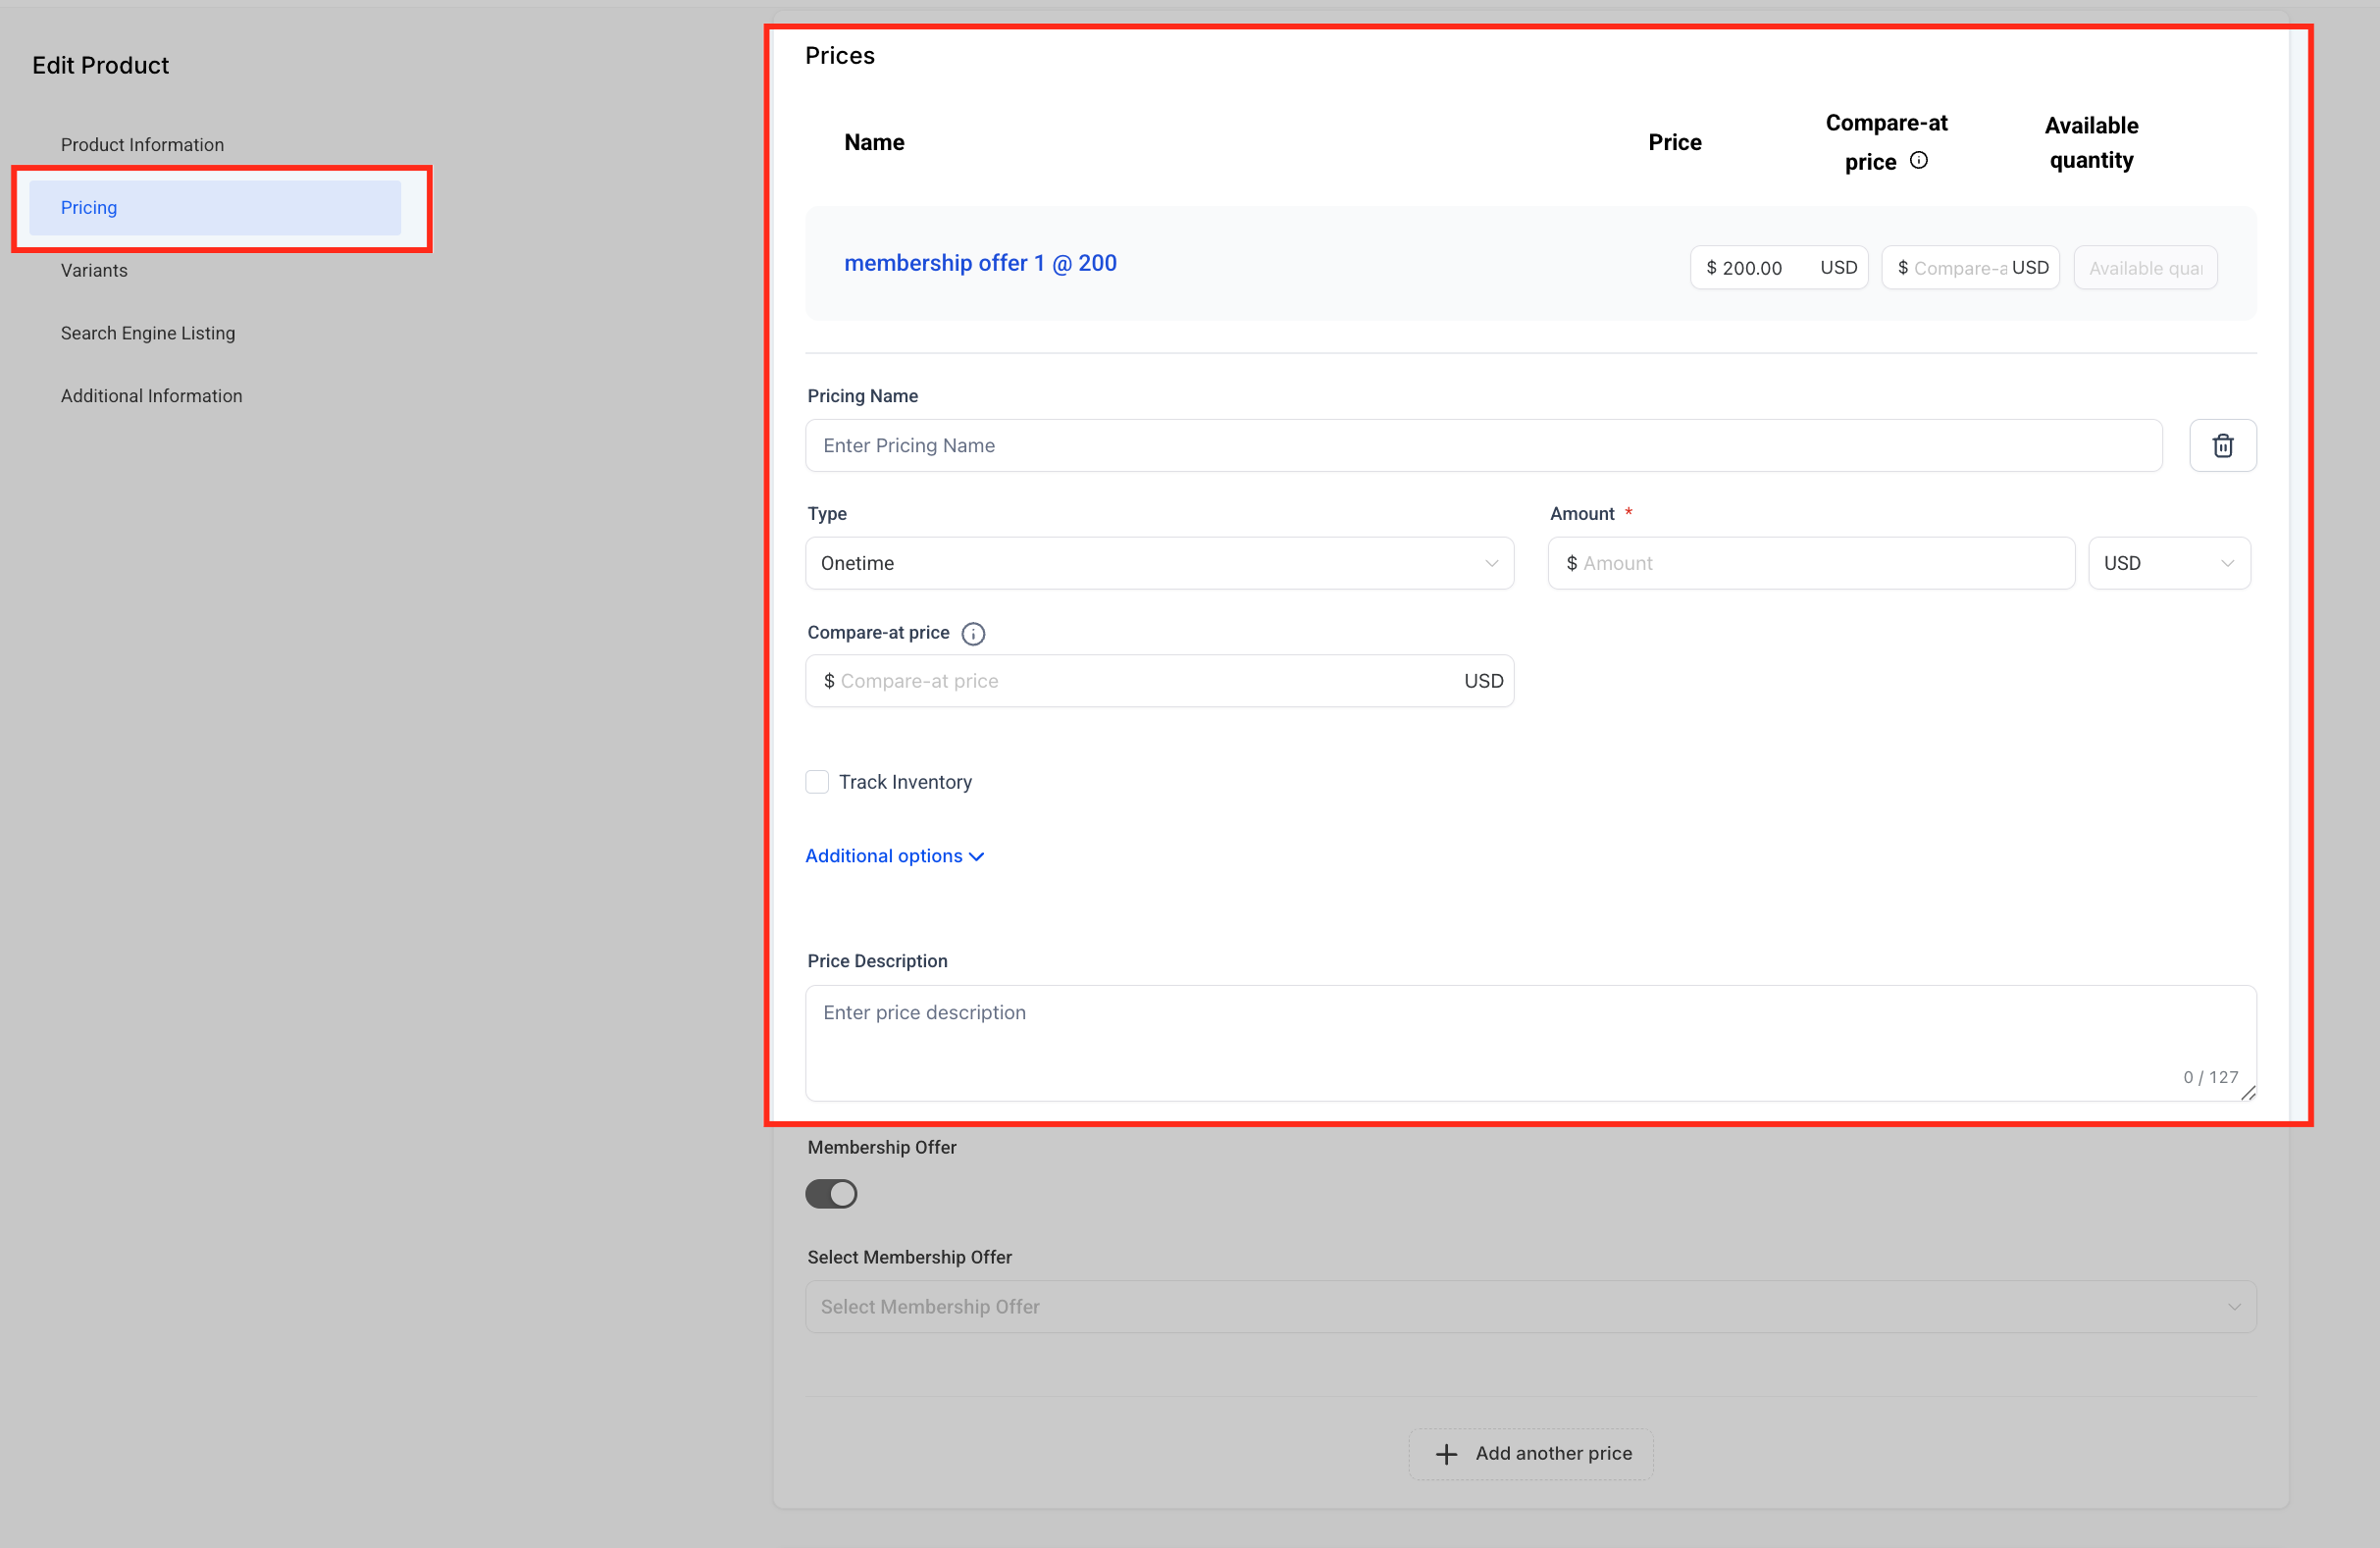
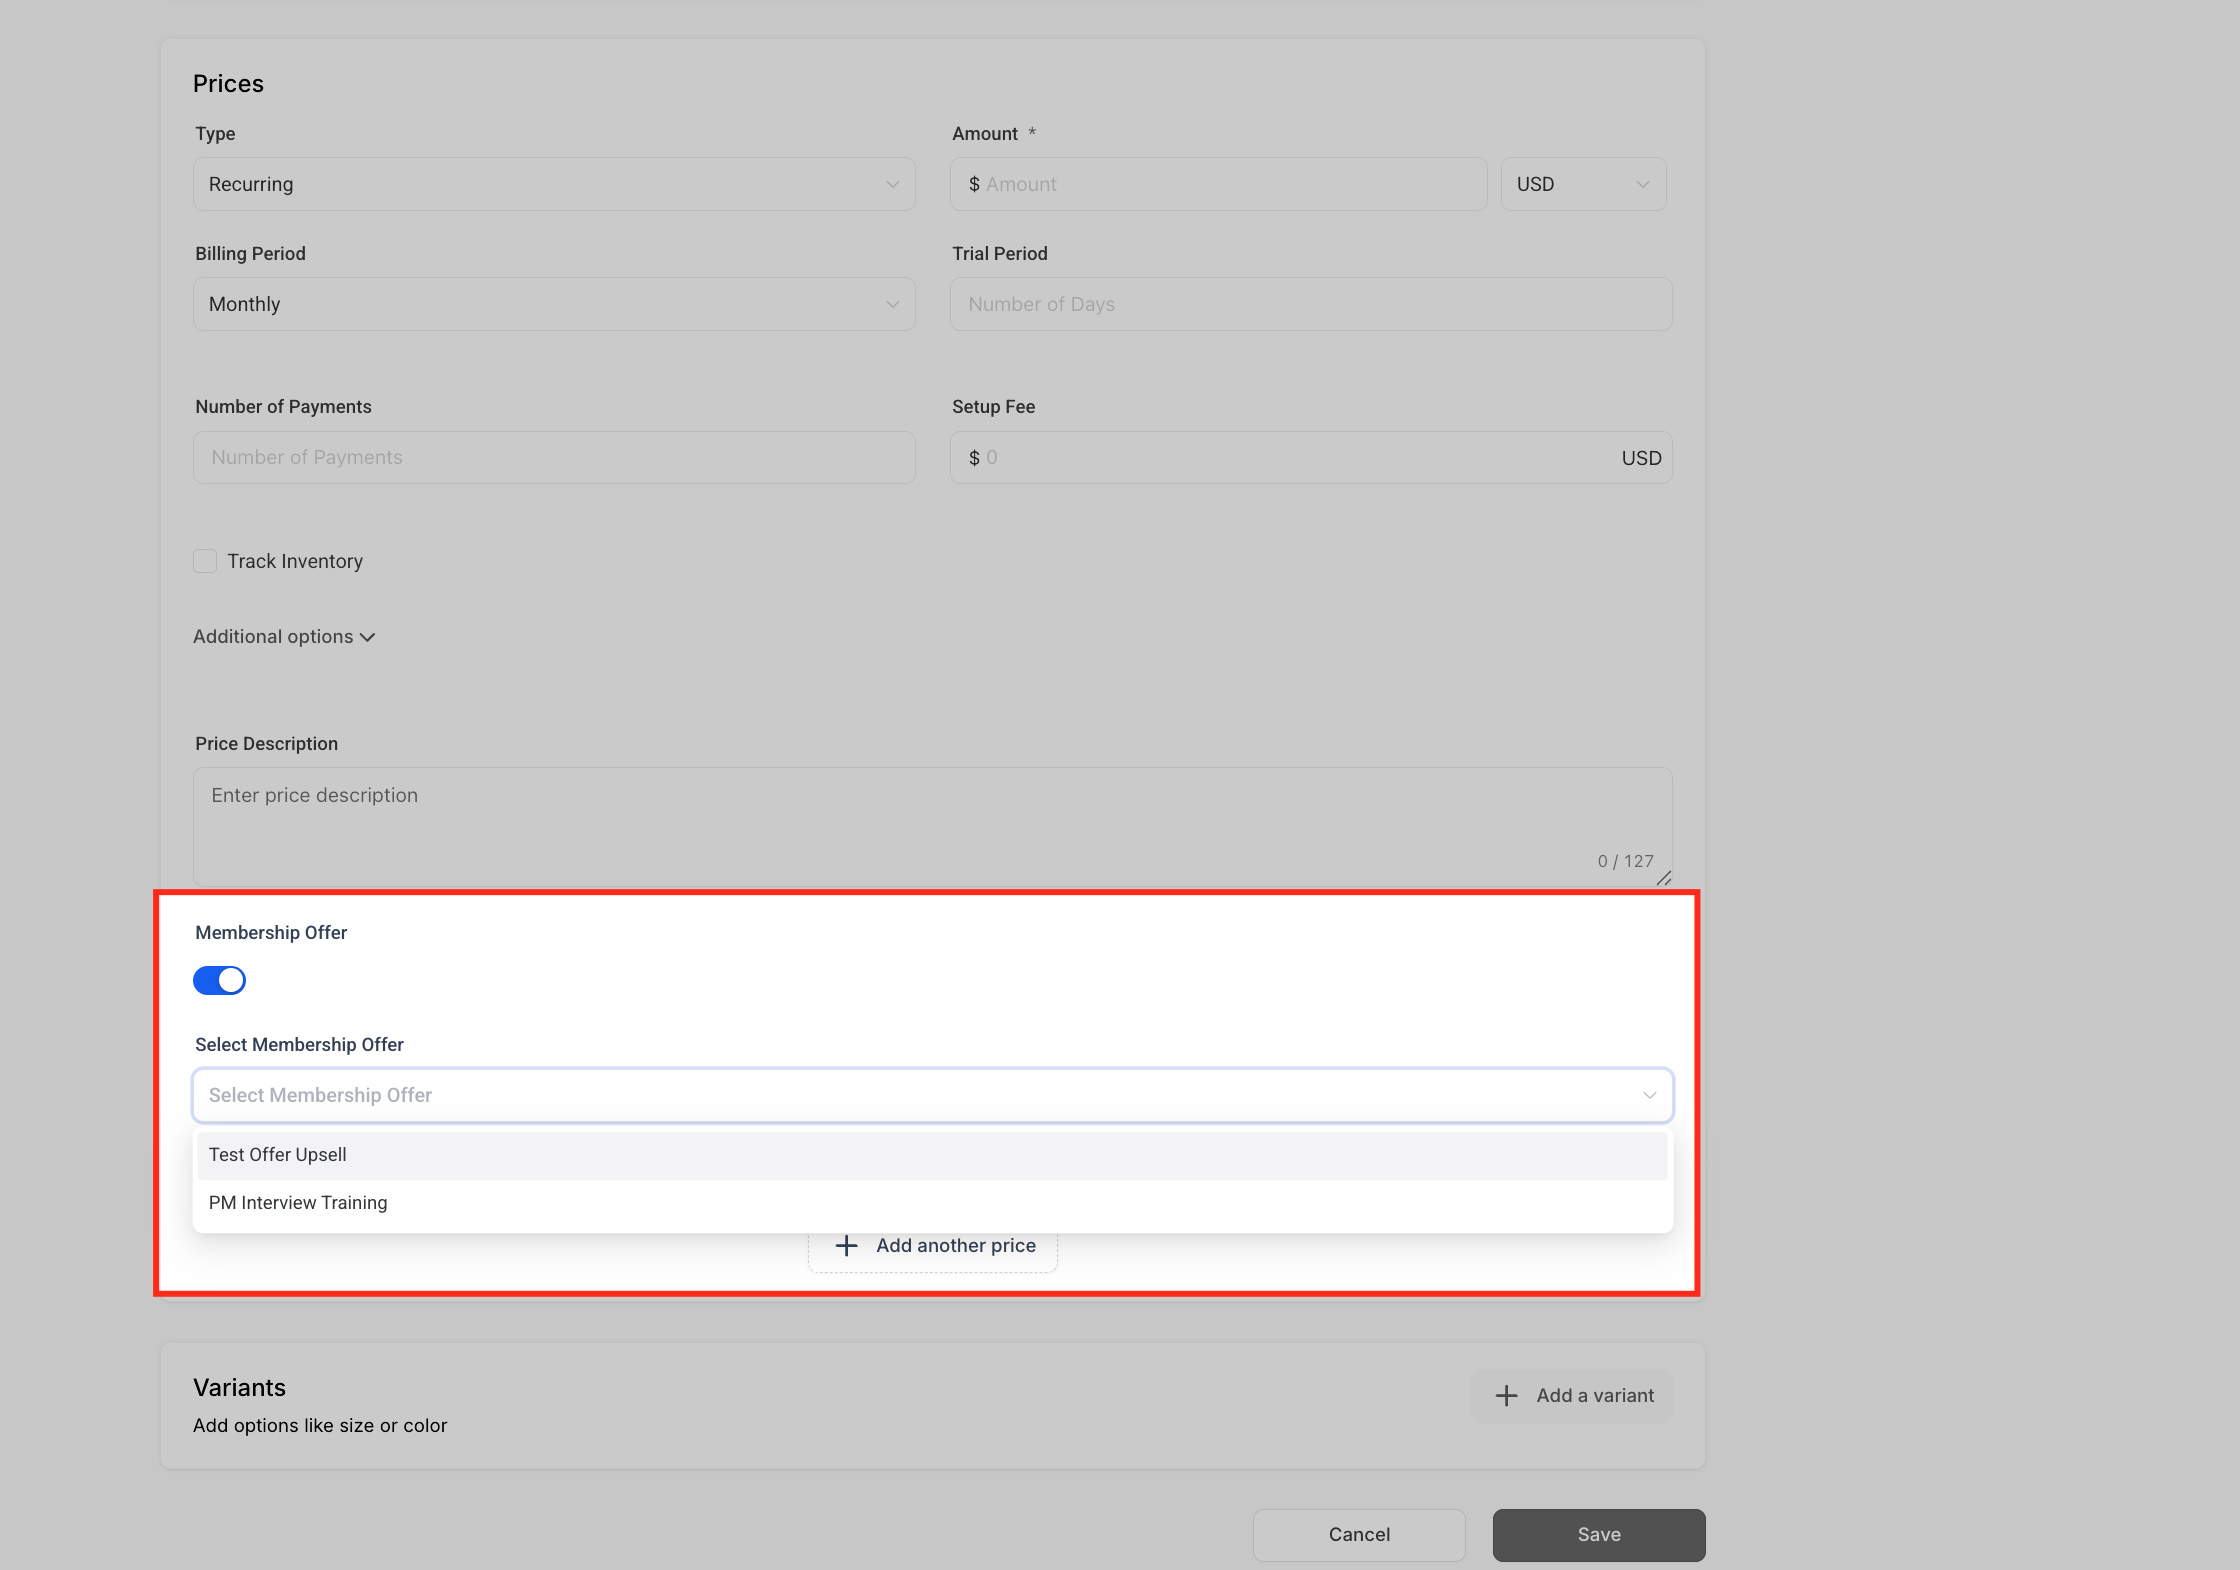
Toggle on Membership Offer to activate access linking. A Select Membership Offer dropdown appears, listing every published offer. Only published offers show up here; if the offer is still in draft, it won't be selectable, which is why publishing it first (see above) is required.
Choose the offer that should be granted when this product is purchased. Without this step, buyers will complete checkout but won't be enrolled in any course.
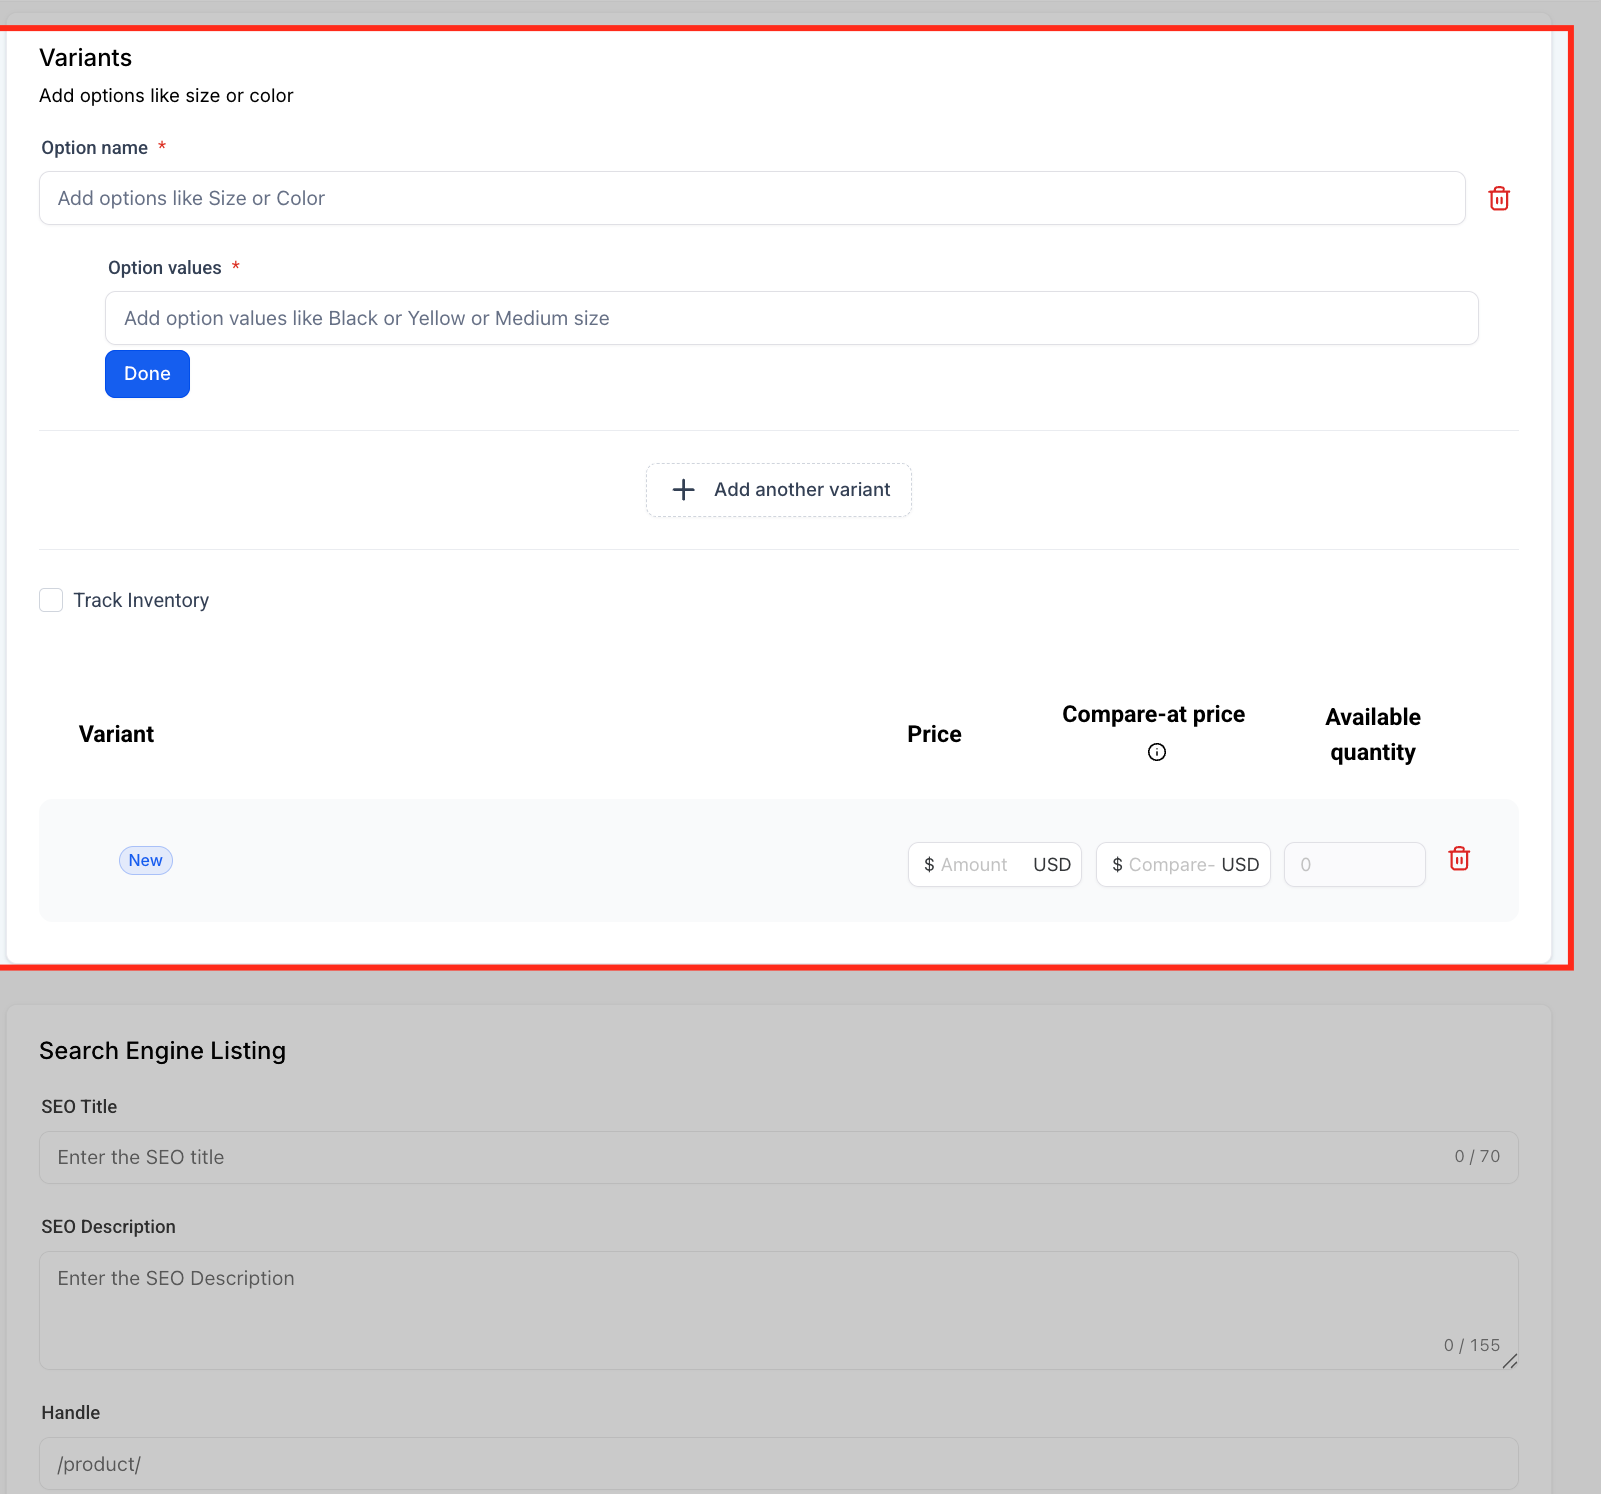
Variants let you offer multiple versions of the same product, such as different pricing tiers, content levels, or access durations. Add an Option name (for example, "Access Plan"), then list the specific Option values (for example, "Basic," "Premium," "Pro") and click Done. Each variant can carry its own price, compare-at price, and available quantity, which is useful for bundles or time-limited enrollment windows. Enable Track Inventory on a variant if you want to cap how many of it can be sold.
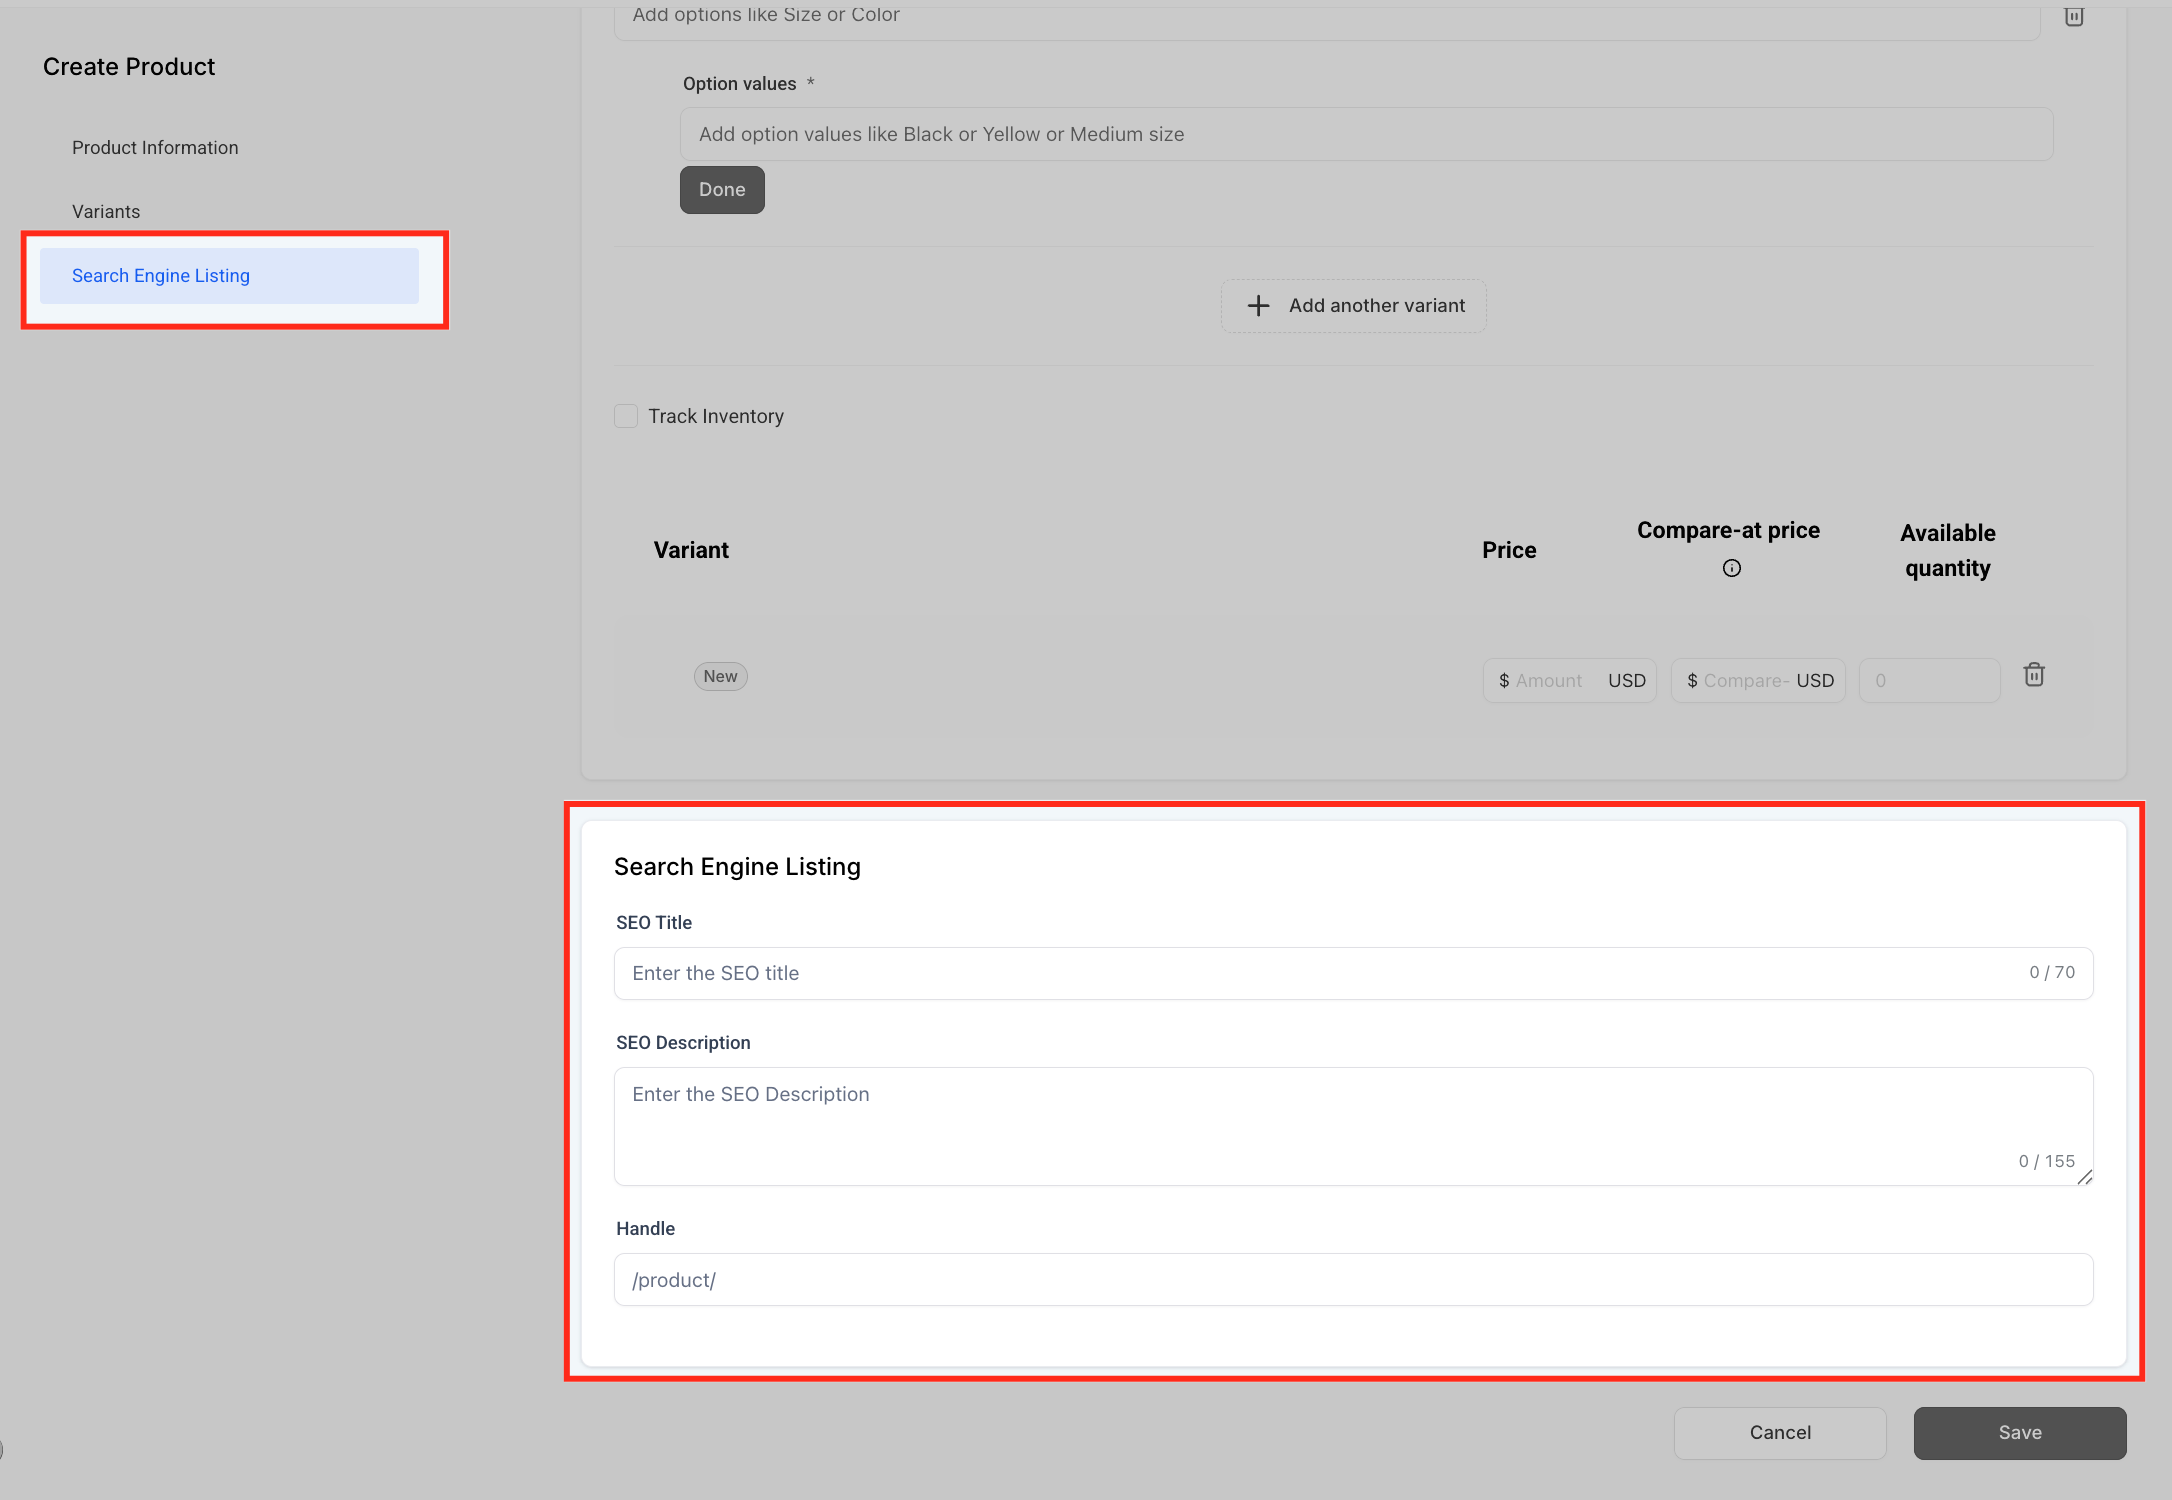
The Search Engine Listing section is optional but recommended if the product is listed publicly:
SEO Title: a concise, keyword-relevant title.
SEO Description: a short summary that helps the product surface in search results.
Handle: the product's URL slug (for example, /product/skin-health-course).
Click Save in the bottom-right corner. From this point on, anyone who purchases the product is automatically granted access to the linked course offer.
To send login credentials automatically after purchase, enable Send Welcome Email in your Membership settings.
If you need to remove a payment product, delete the offer it's attached to; the associated payment product is removed along with it.
Taking payments for course products? AX Pay, Aesthetix CRM's built-in payment provider, offers better processing rates than Stripe and connects directly to the same Payments section used here. See the AX Pay help article for setup details.
Tax support connects your course checkout to the same Payments tax engine used across Aesthetix CRM, so course pricing, discounts, and taxes stay consistent with your other checkouts (funnels, payment links, and store orders).
What it does:
Calculates tax in real time using the buyer's billing address, your nexus locations, and each product's tax category.
Shows a clear tax line item (subtotal, tax, total) before payment is confirmed.
Supports automatic tax calculation, manually attached tax rates, or both, with manual rates acting as a fallback where automatic tax doesn't apply.
Applies only where you have a tax obligation (nexus), based on your configured nexus addresses and product tax codes.
Lets you choose tax-inclusive or tax-exclusive pricing globally or per product.
Works with coupons: discounts reduce the taxable subtotal first, and tax is calculated on the discounted amount.
Applies to both one-time and recurring course products.
Connect and configure Payments. Make sure your payment provider is connected and you can already create products and accept payments for course offers, as described above.
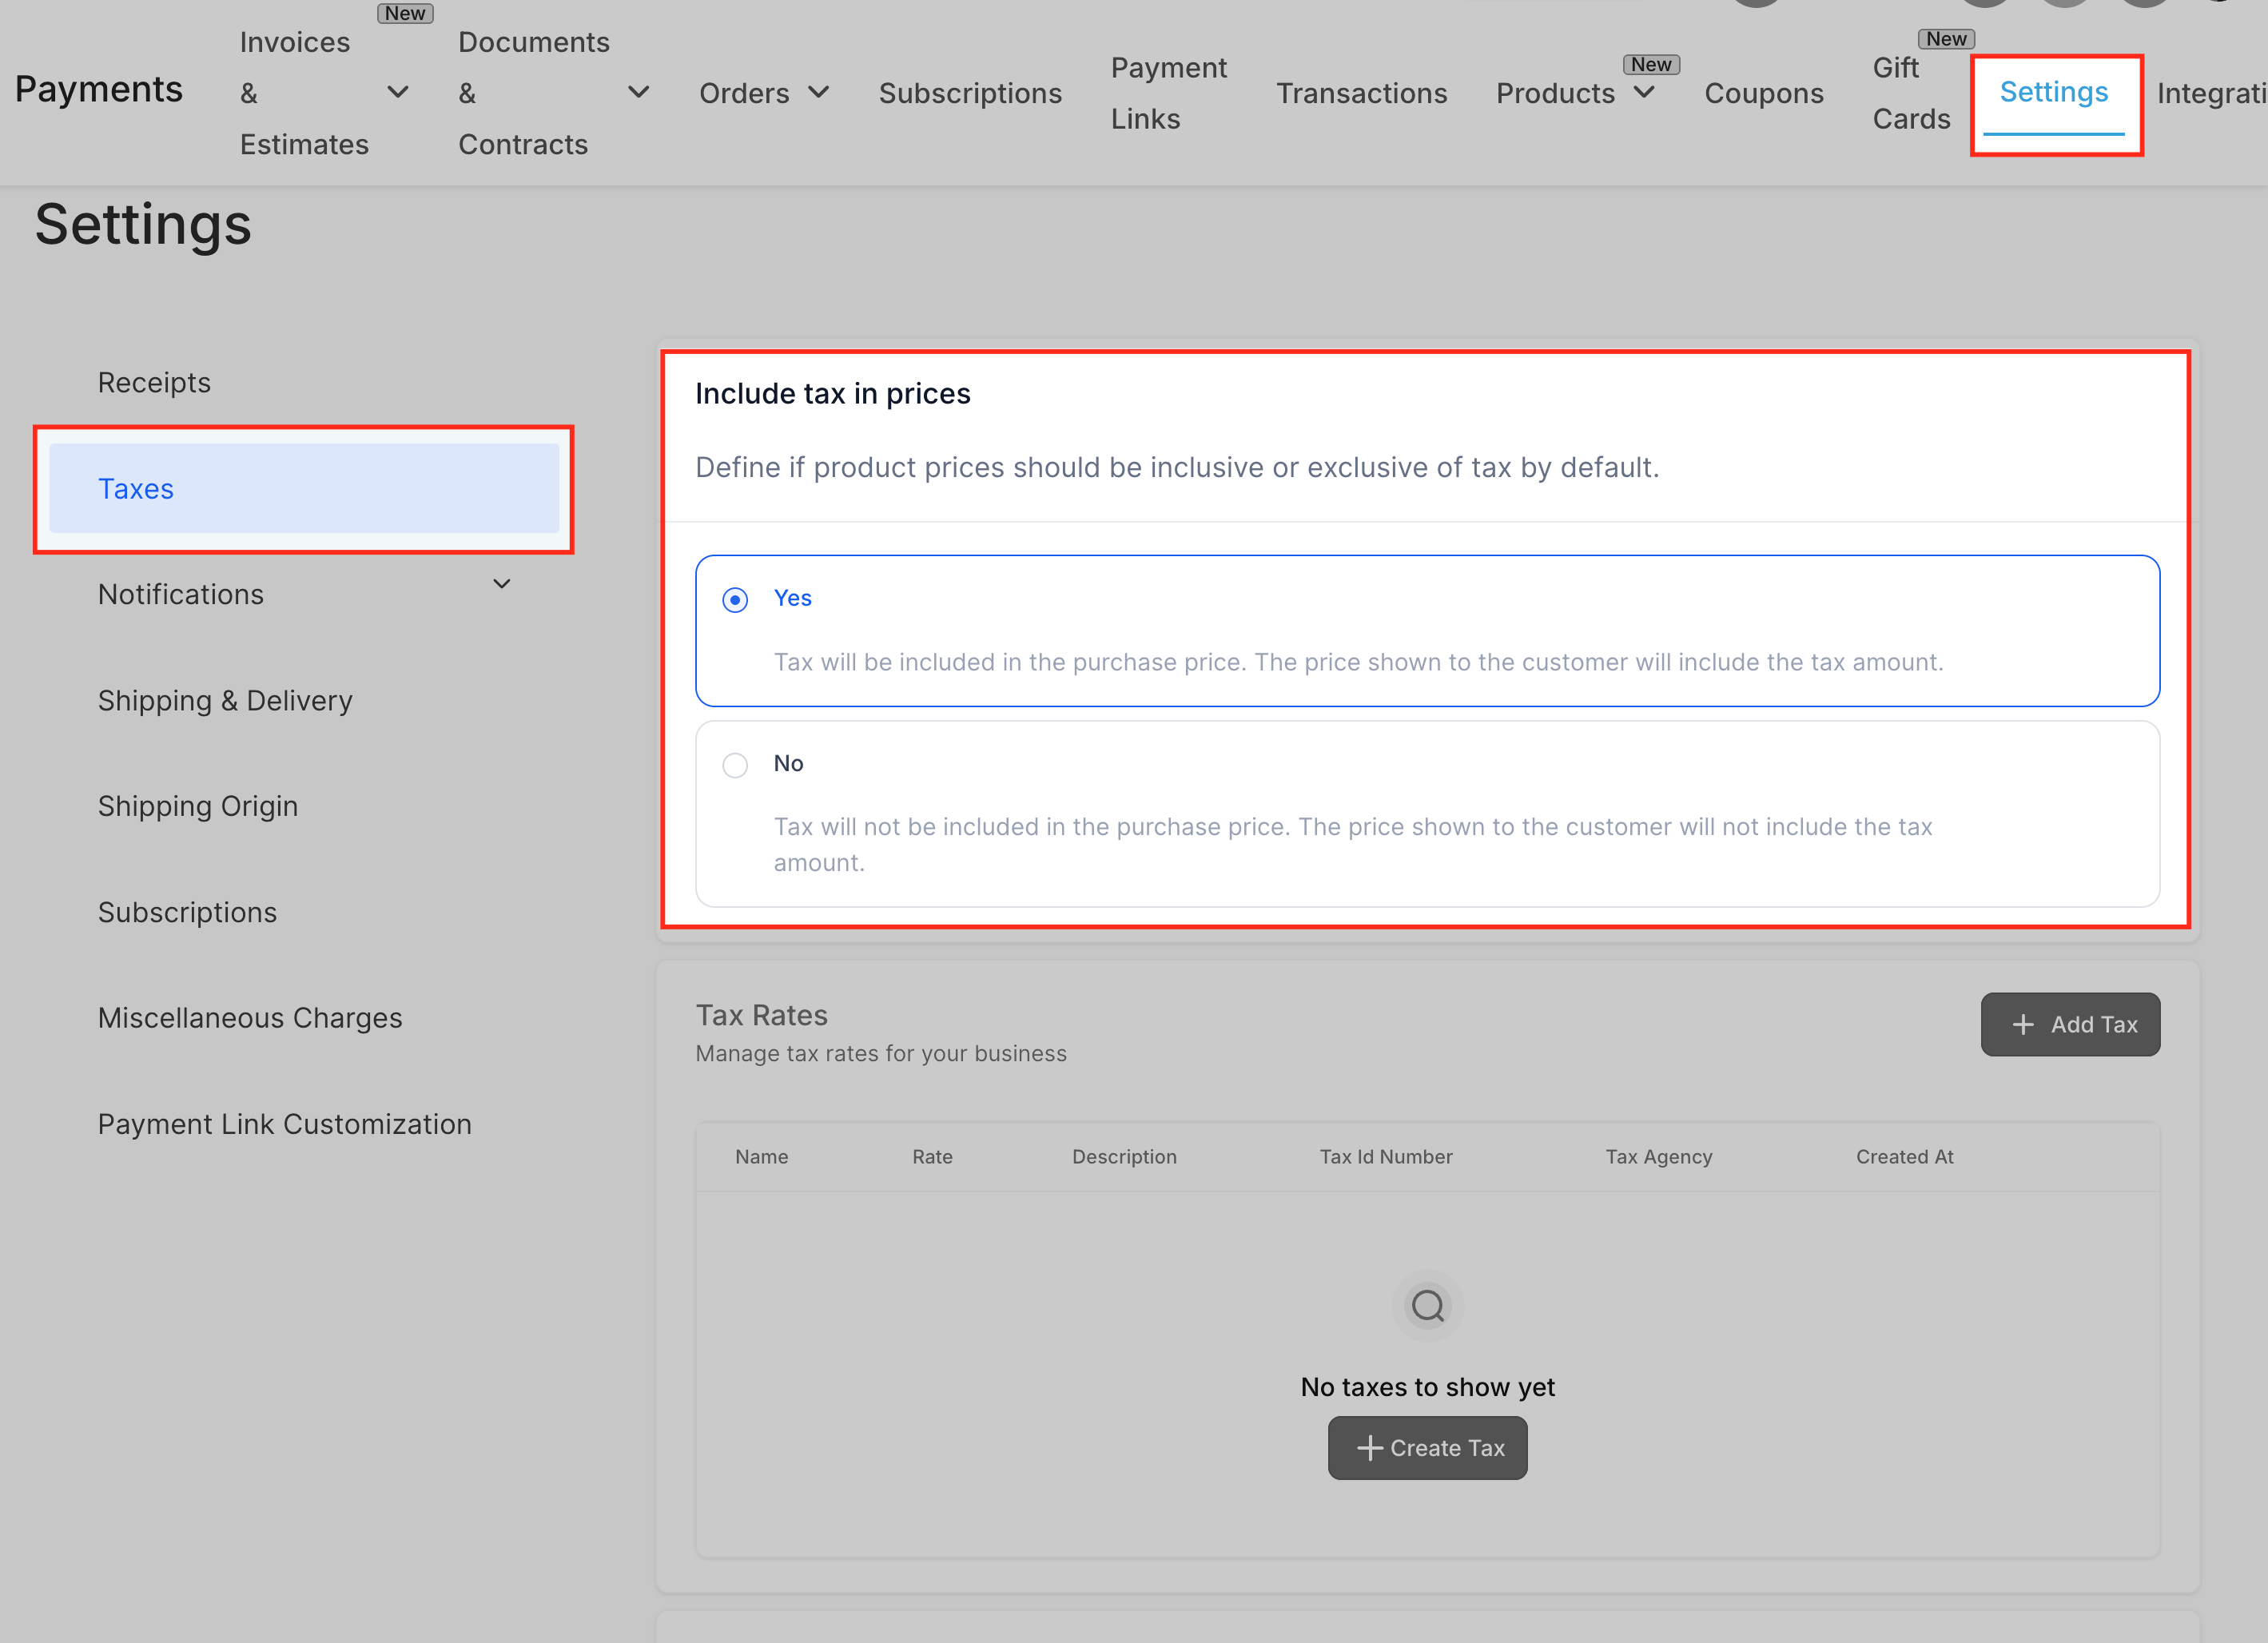
Enable and configure tax settings. Go to Payments > Settings > Taxes and choose whether prices are tax-inclusive or tax-exclusive using Include tax in prices. Optionally create manual tax rates for regions not covered by automatic tax.
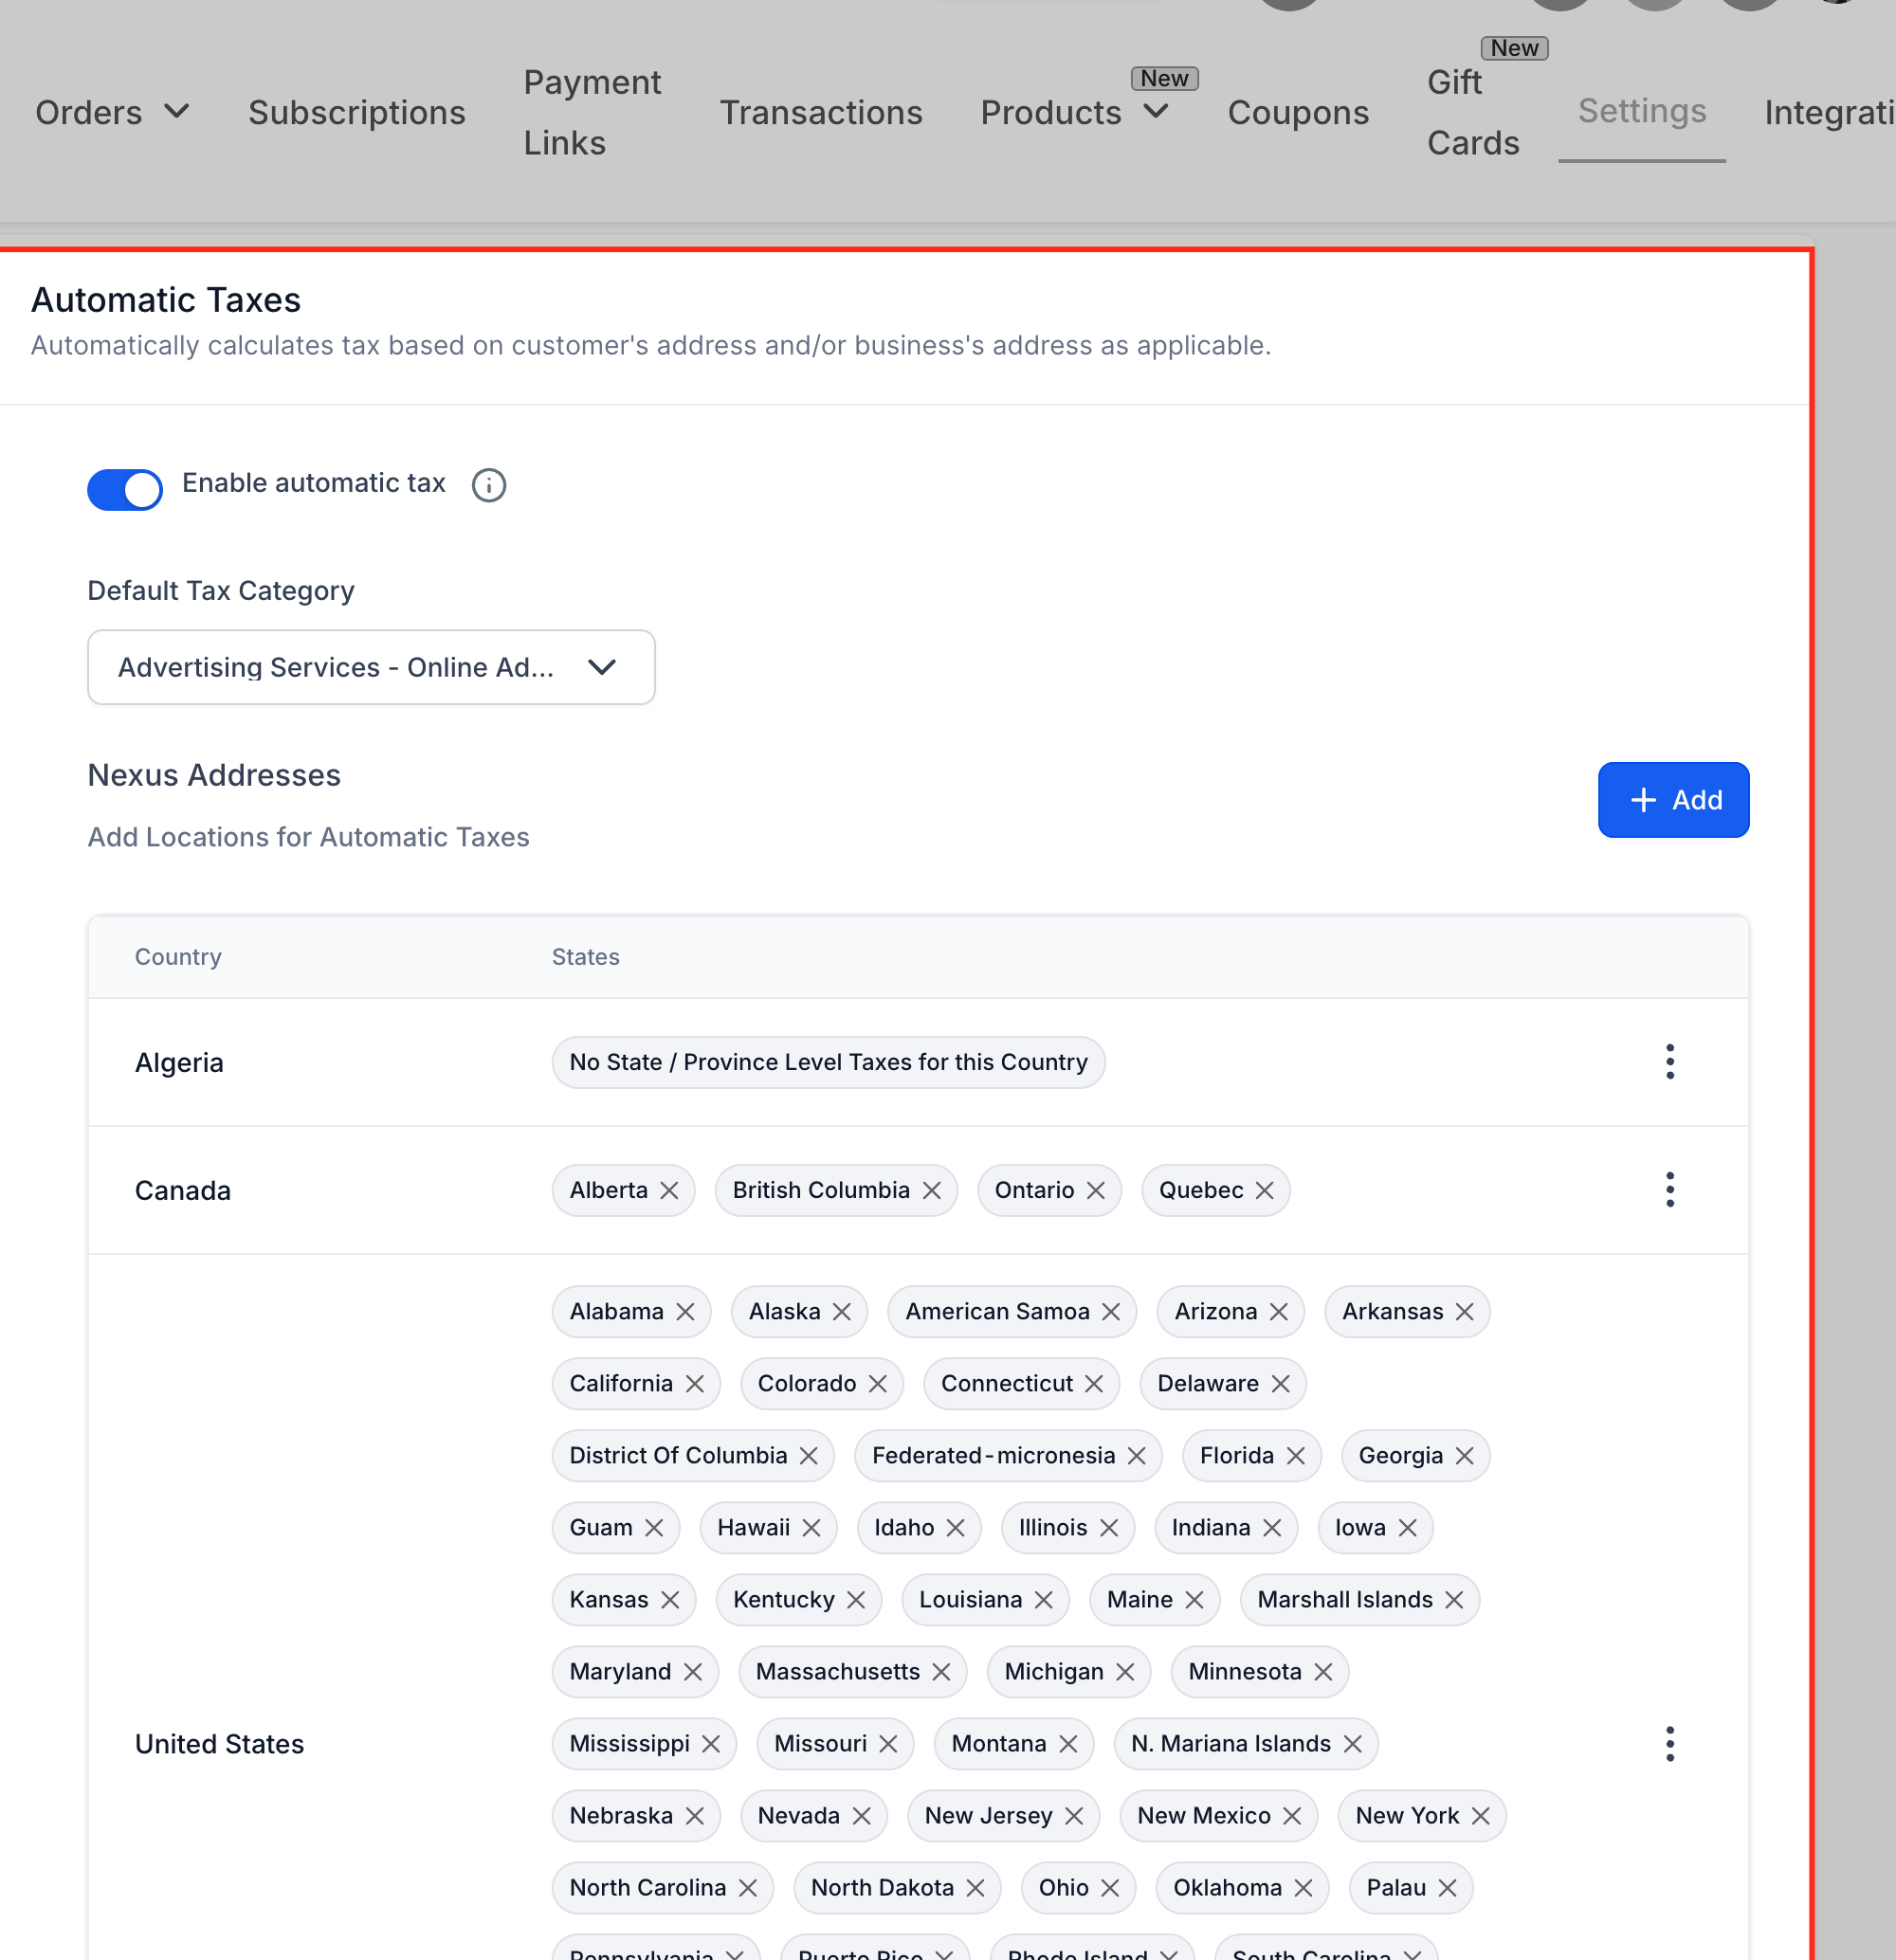
Turn on International Automatic Taxes (if applicable). Still under Payments > Settings > Taxes, scroll to Automatic Taxes, toggle Enable automatic tax on, and select a Default Tax Category that best matches your typical product type (for example, digital services).
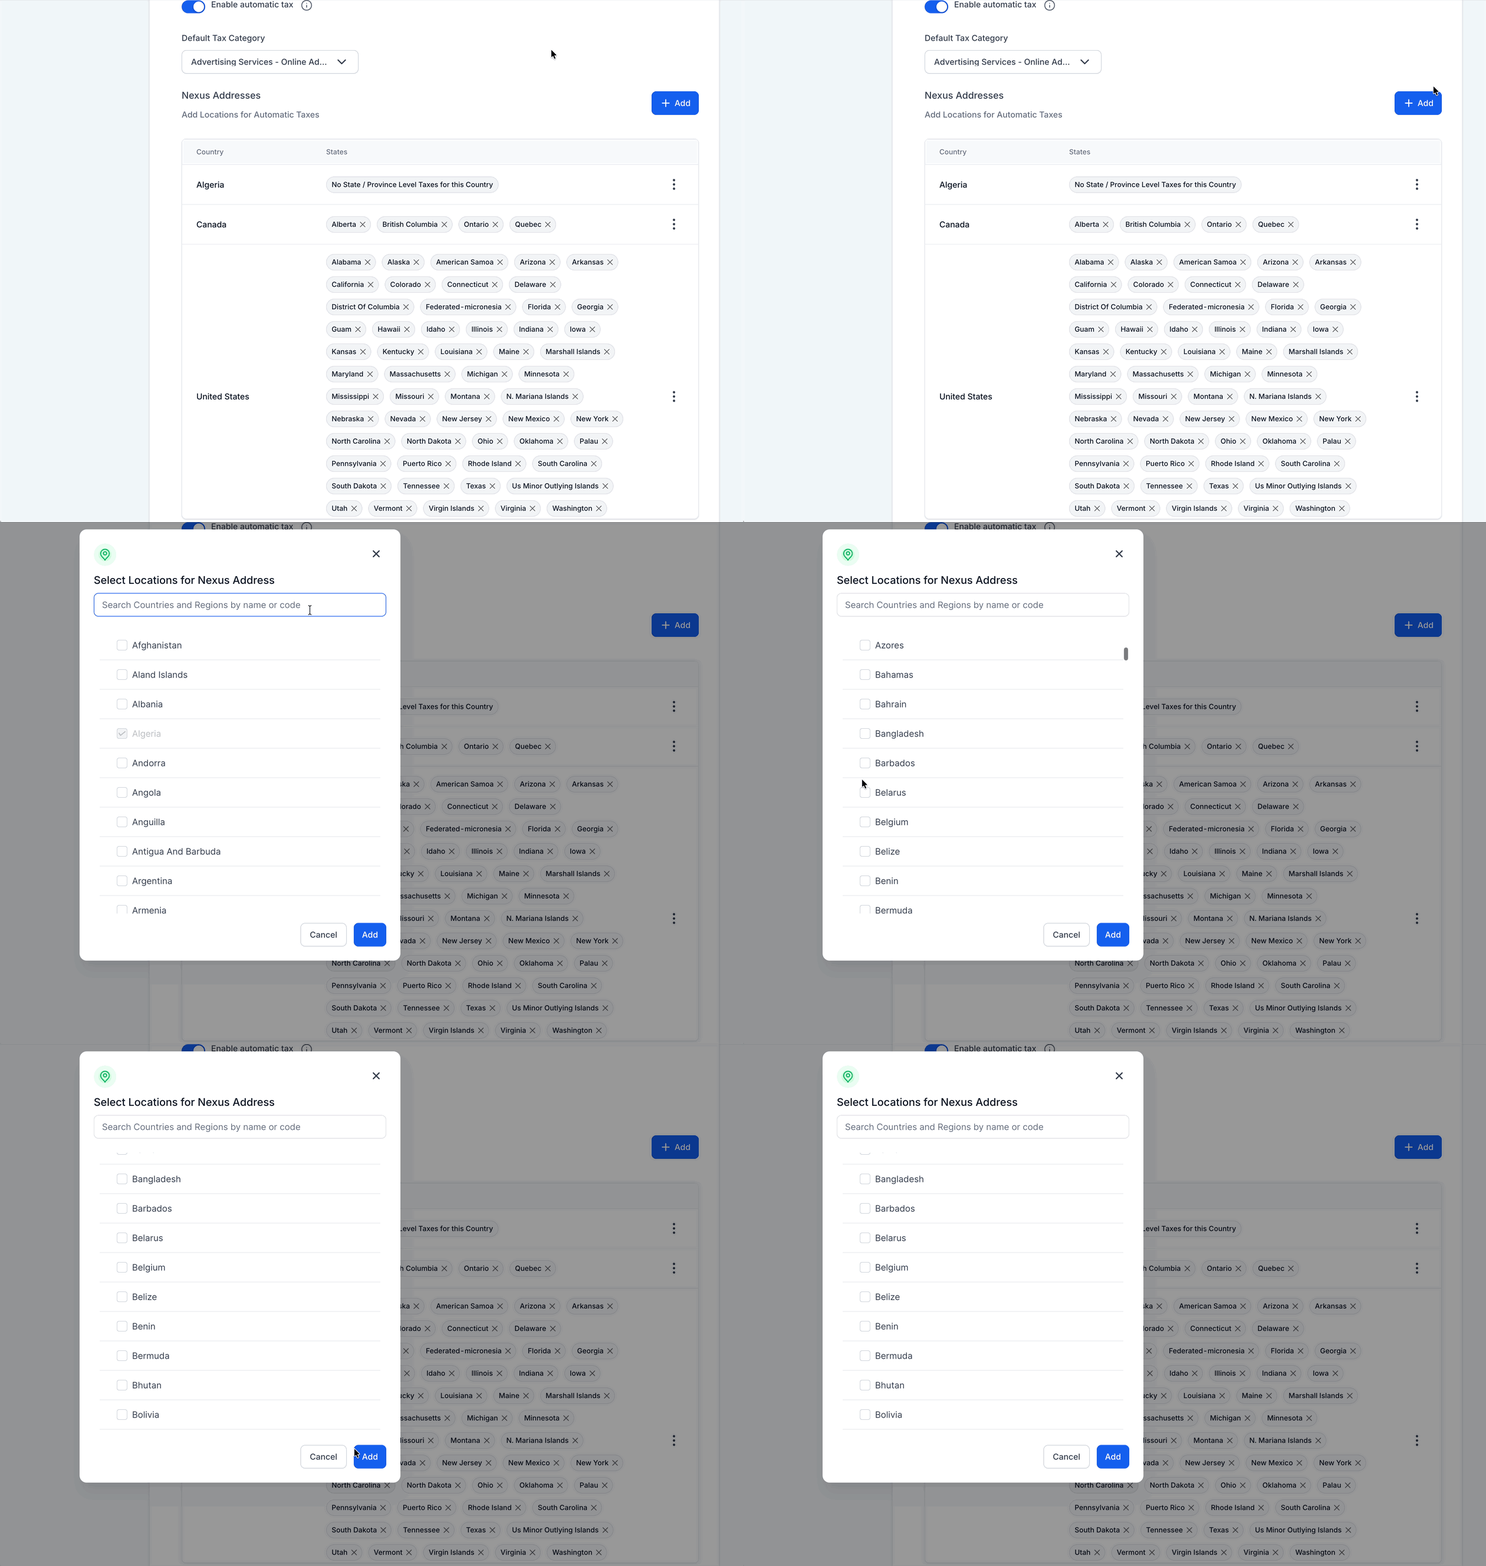
Add and review nexus addresses. Click Add Nexus Address and add each country (and state or province, where applicable) where your practice must collect tax. Optionally enter a Tax ID for each nexus region, then save.
Confirm your business address. Keep your business address accurate in your account or Payments settings, especially for locations where you have tax obligations, since it affects compliance and tax region mapping.
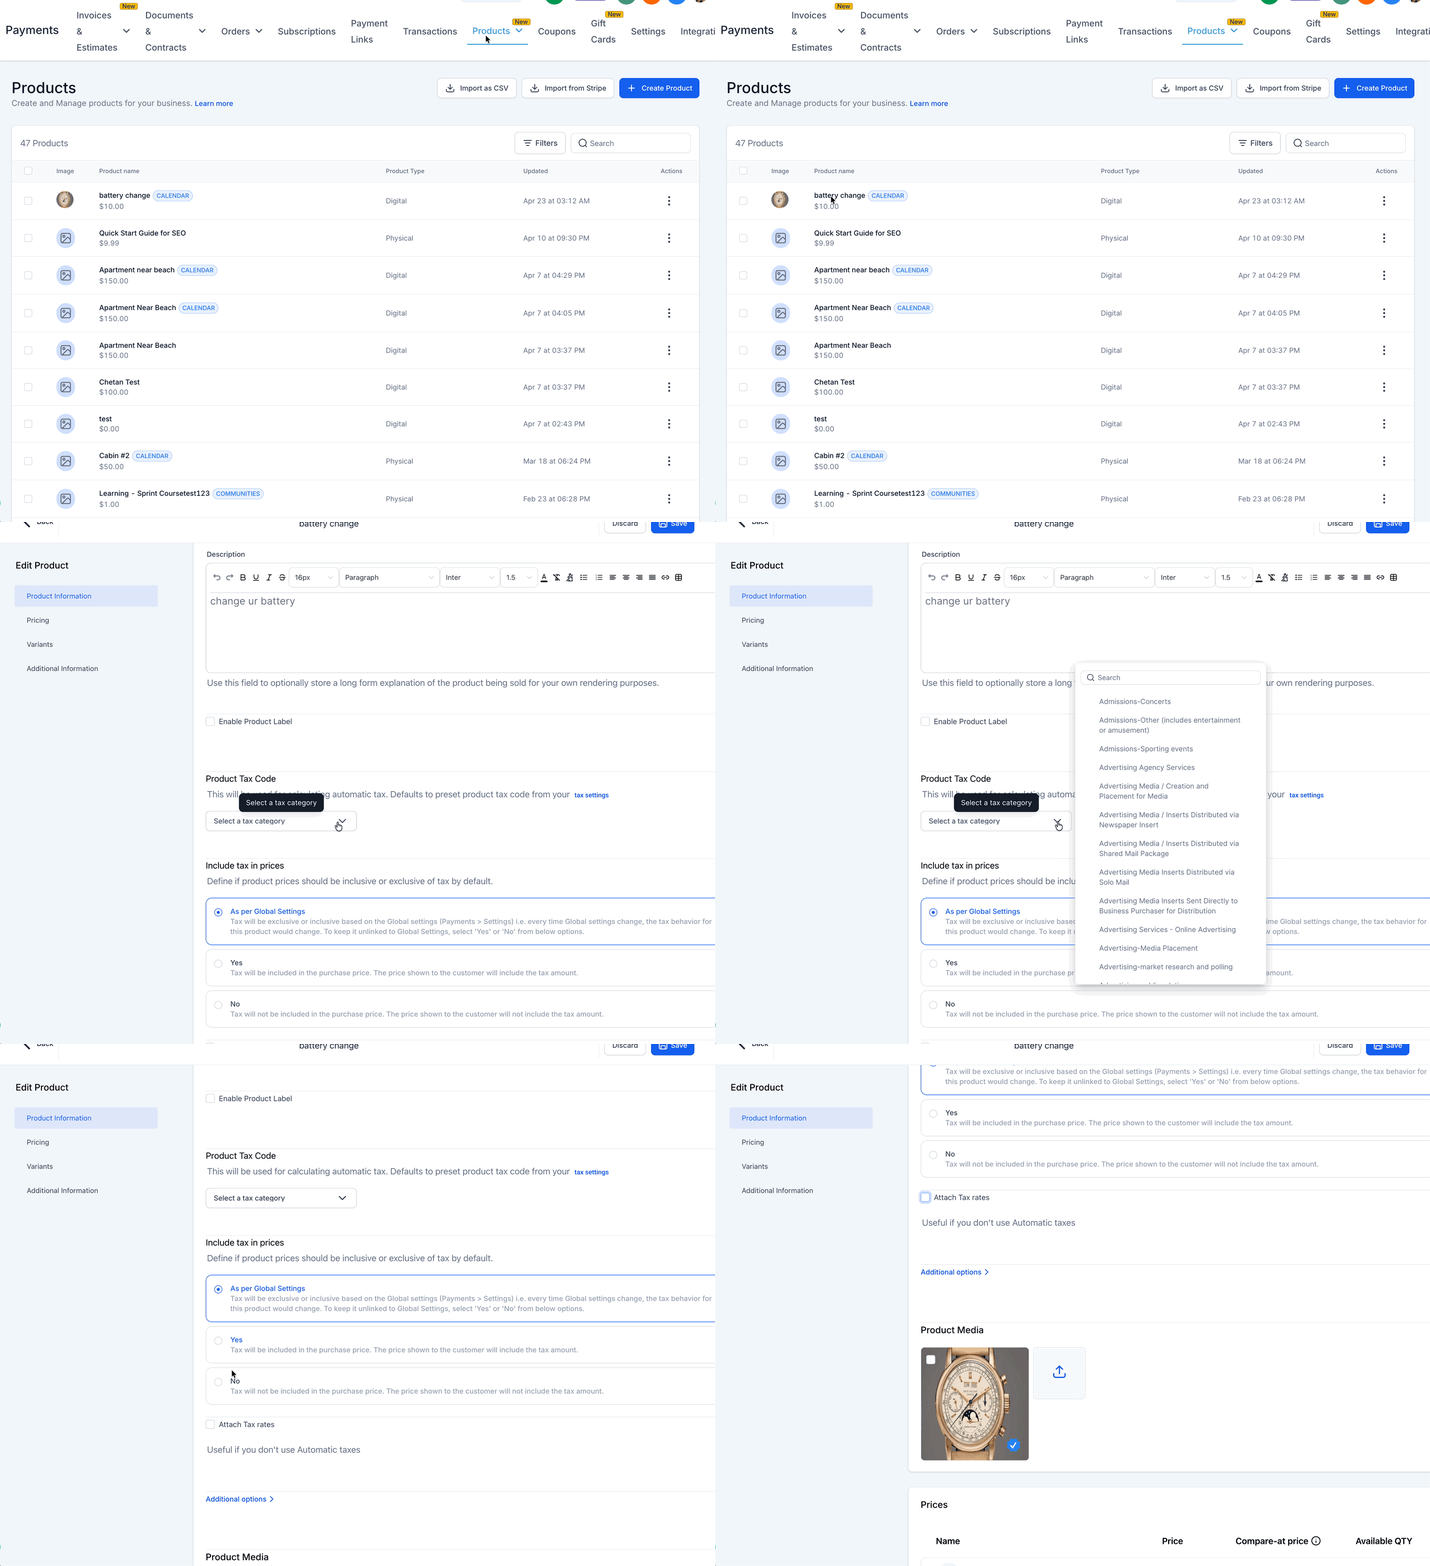
Configure tax options on your course products. In Payments > Products, open each course product and set a Product Tax Code, choose whether it includes or excludes tax in price (or inherits the global setting), and attach manual tax rates if needed.
Link products to course offers, if you haven't already. Confirm your course offer is published in Memberships, then enable Membership Offer on the product and select the correct offer from the dropdown.
Test a checkout. Open the course offer checkout (preview or a test link), enter a billing address in a region where you have nexus, apply a coupon if you use them, and confirm the subtotal, discount, and tax amounts display correctly and the total matches expectations.
Once this is configured, every purchase through your course offers automatically follows the same tax rules as your other Payments-powered checkouts. You don't need to rebuild existing offers; as long as your products and tax settings are correct, they pick up the updated tax behavior automatically.
If your region isn't supported by automatic tax calculation, rely on manual tax rates attached to the product or build tax into your listed price, and confirm the requirements with a tax professional.
Course offer checkouts run on a fast, self-healing checkout pipeline that coordinates payment, access-granting, and notifications in one flow. In practice, this means:
Checkout typically completes in 3-4 seconds.
Duplicate-prevention tokens ensure a patient or student is never charged twice, even if a retry happens.
Failed steps automatically retry up to five times before resuming exactly where they left off.
Every step is logged in Memberships > Checkouts > Activity Log, so you can see exactly where a failed purchase broke down.
No configuration changes are needed. Existing offers, funnels, forms, and one-click upsells continue to work as before.
To confirm everything is running smoothly on a new offer, open Memberships > Offers, select the offer, click Checkout > Preview Checkout, and place a $0 test order. Then check the Activity Log to confirm each step shows "Success."
Automations tied to a purchase, such as tagging a contact, sending follow-up messages, or notifying staff, are built in Workflows rather than in the product or offer itself. Set those up separately once your product and offer are live.
Why doesn't my membership offer show up in the product dropdown? The offer must be published first. Draft offers never appear in the Membership Offer dropdown when you're setting up a product.
Can I create both one-time and recurring prices for the same product? Yes. Add another price entry and configure both pricing types on the same product.
What happens after someone purchases the product? They're automatically granted access to the course(s) defined in the linked offer. No manual enrollment step is required.
How do I send login credentials to buyers automatically? Enable Send Welcome Email in your Membership settings to send credentials right after purchase.
How do I delete a payment product? Delete the offer it's attached to. The associated payment product is removed automatically.
Do I need to change existing course offers to start using tax support? No. As long as your products and Payments tax settings are configured correctly, existing offers pick up the current tax behavior automatically on their next checkout.
What happens if a buyer doesn't provide a full billing address? Automatic tax calculation depends on a valid address. If the checkout doesn't capture enough location detail, taxes may not apply, or they may fall back to any manual tax rate set on the product.
Can different courses use different tax behavior (one inclusive, one exclusive)? Yes. Use the Include taxes in prices setting at the individual product level to override your global setting for a specific course.
Will a patient or student ever be charged twice if a checkout retries? No. Duplicate-prevention tokens ensure a contact is only ever charged once per order, even through an automatic retry.
Where can I see tax amounts after a purchase is complete? Tax amounts appear in the order details, transaction details, and related reports and exports in Payments, so you have full visibility for reconciliation.
