Course lessons in Aesthetix CRM aren't limited to plain video. From Memberships > Courses, you can build lessons around uploaded video, uploaded audio, closed captions for accessibility, embedded funnels, and embedded third-party media like YouTube or Spotify. This guide walks through each lesson type and the settings that go with it.
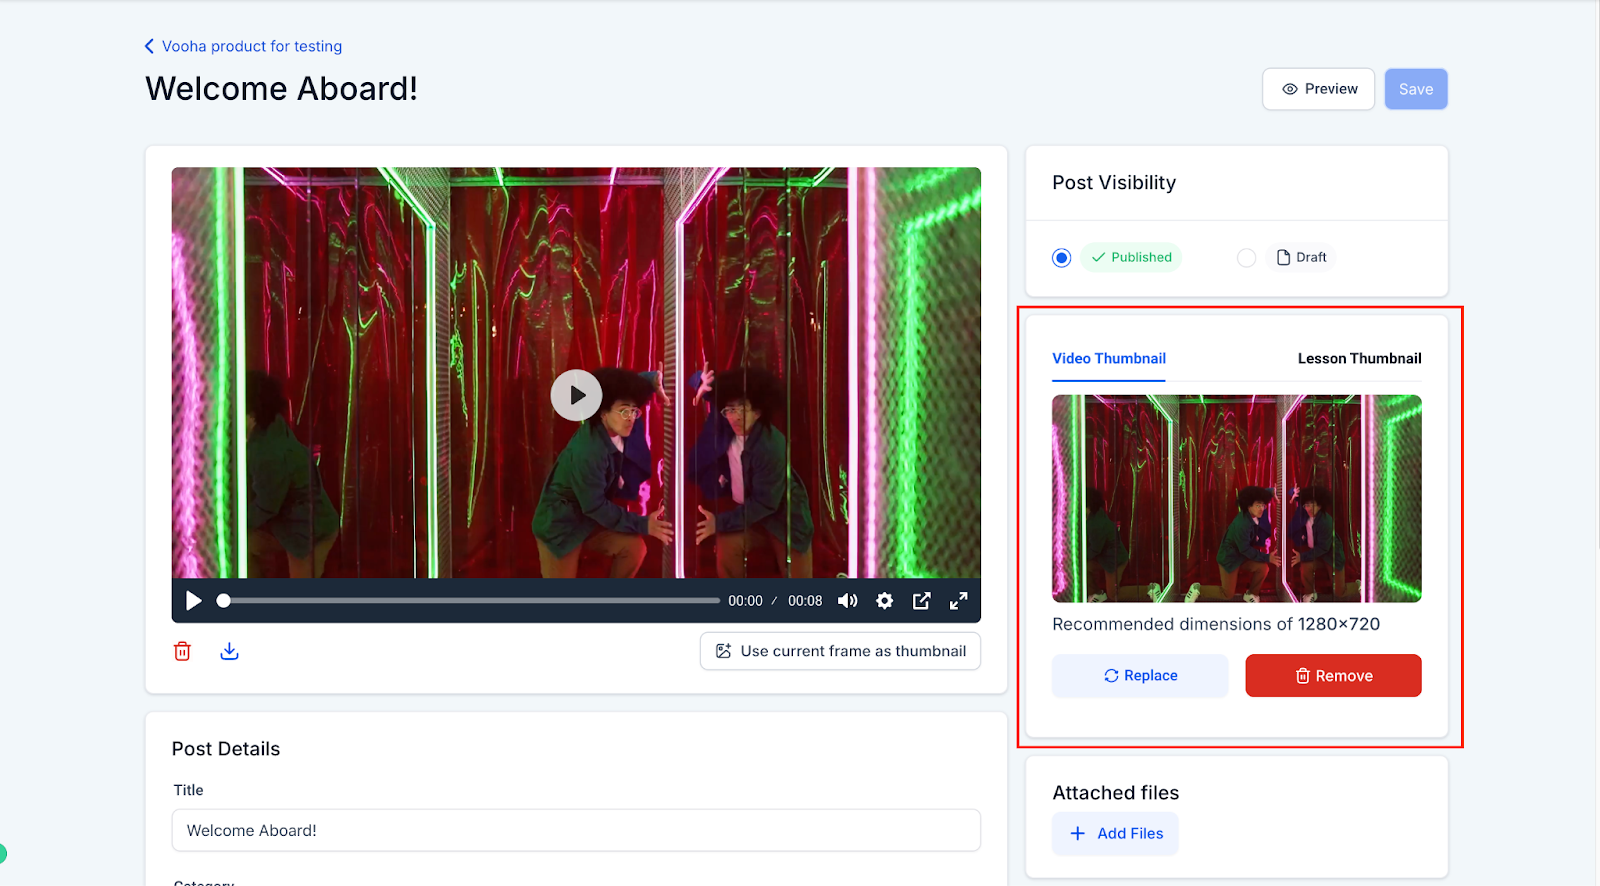
Every video lesson needs a thumbnail: the image learners see on the course tile before they press play. You can either capture an exact frame from your uploaded video or upload a custom image.
Why the thumbnail matters:
Brand consistency: keeps lesson visuals aligned with your practice's branding and course theme.
Higher engagement: a clear, relevant frame attracts more plays and reduces drop-off.
Faster workflow: set a thumbnail in one click without leaving Aesthetix CRM or using an external editor.
Improved navigation: distinct thumbnails help patients and students find the right lesson quickly.
Where the thumbnail shows up: once you save your selection, the image appears as both the Lesson thumbnail (the tile in the course outline) and the Video thumbnail (the image shown before playback starts inside that lesson). If you want a different image for the tile than for the video player, upload a separate lesson thumbnail to override it.
Requirements and limitations:
Frame-capture only works with videos uploaded directly to the lesson.
For lessons using an embedded third-party player, use Upload custom thumbnail instead. This is the same option used for lessons built around embedded funnels or third-party media, covered later in this guide.
Always click Save to confirm your thumbnail selection.
Best practices: center clear subject matter (a face, key graphic, or product) in the frame, add minimal readable text if needed (3 to 5 words), keep contrast and sharpness high, and keep the visual style consistent across lessons.
To set a lesson thumbnail:
Go to Memberships > Courses > Products and open the course you want to edit.
Select the lesson you want to edit and upload the video.
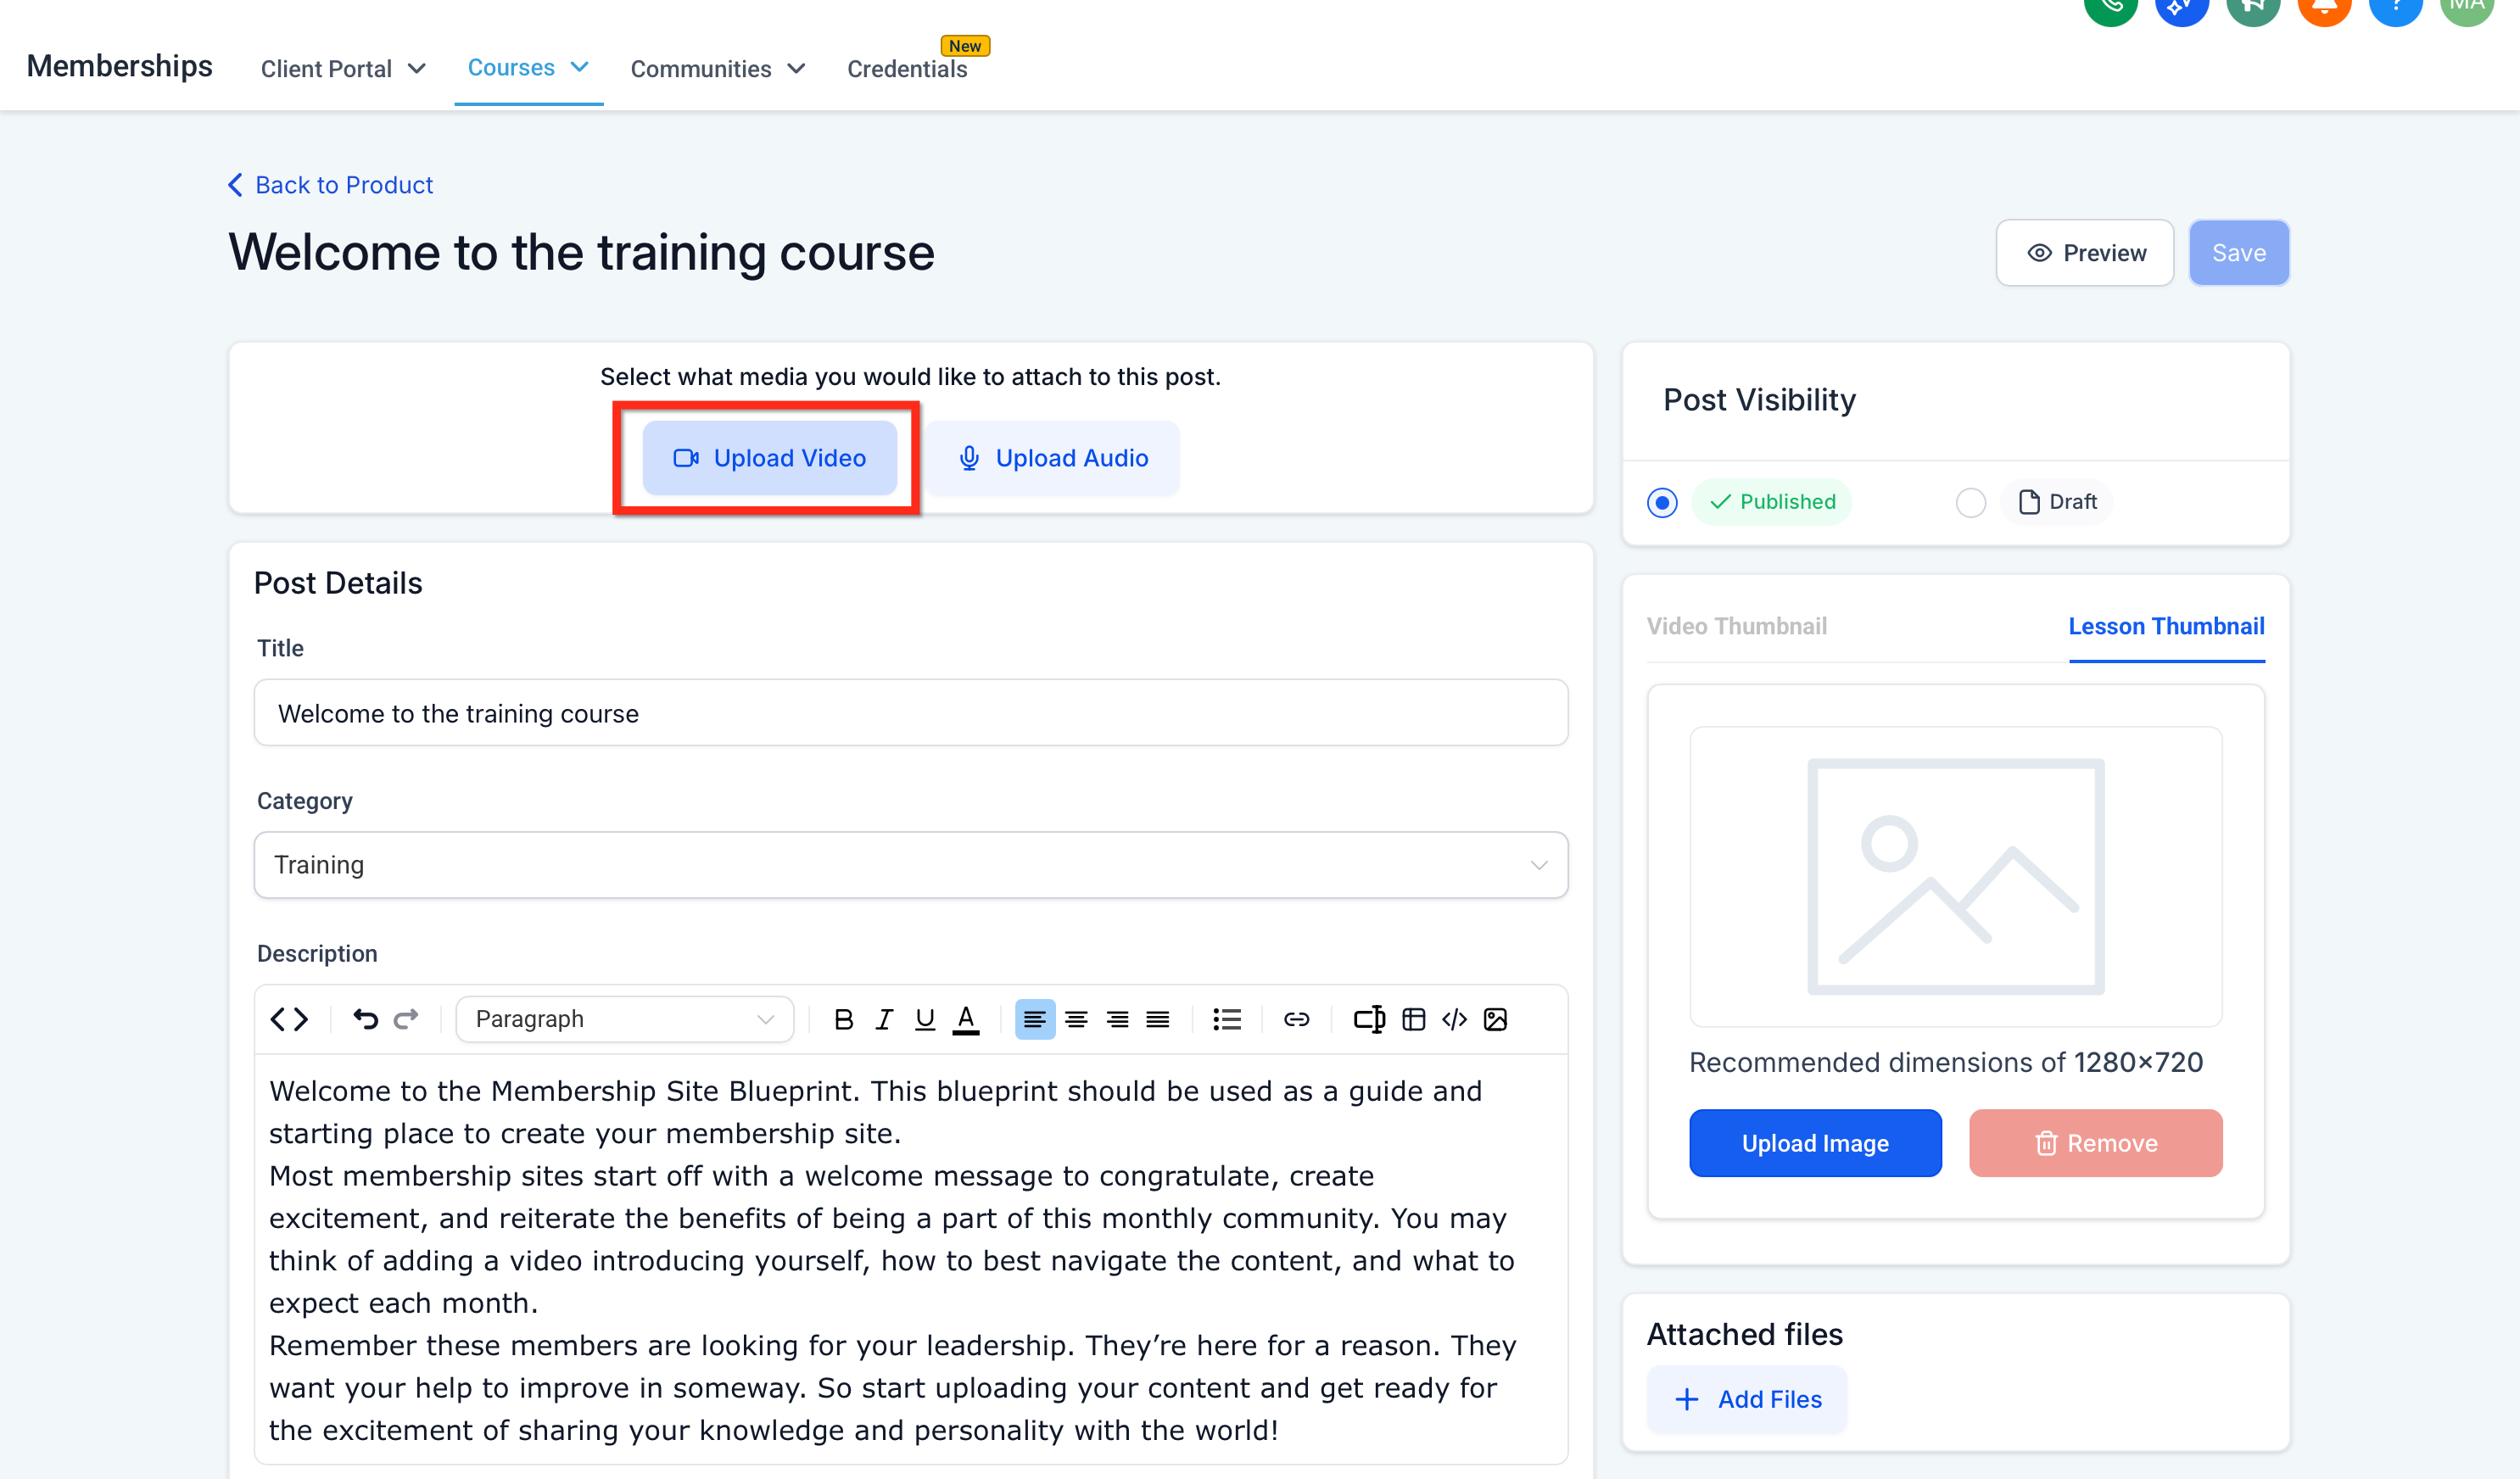
Play the video to the moment you want, pause, then click Use current frame as thumbnail. Confirm the preview updates, then click Save in the lesson editor.
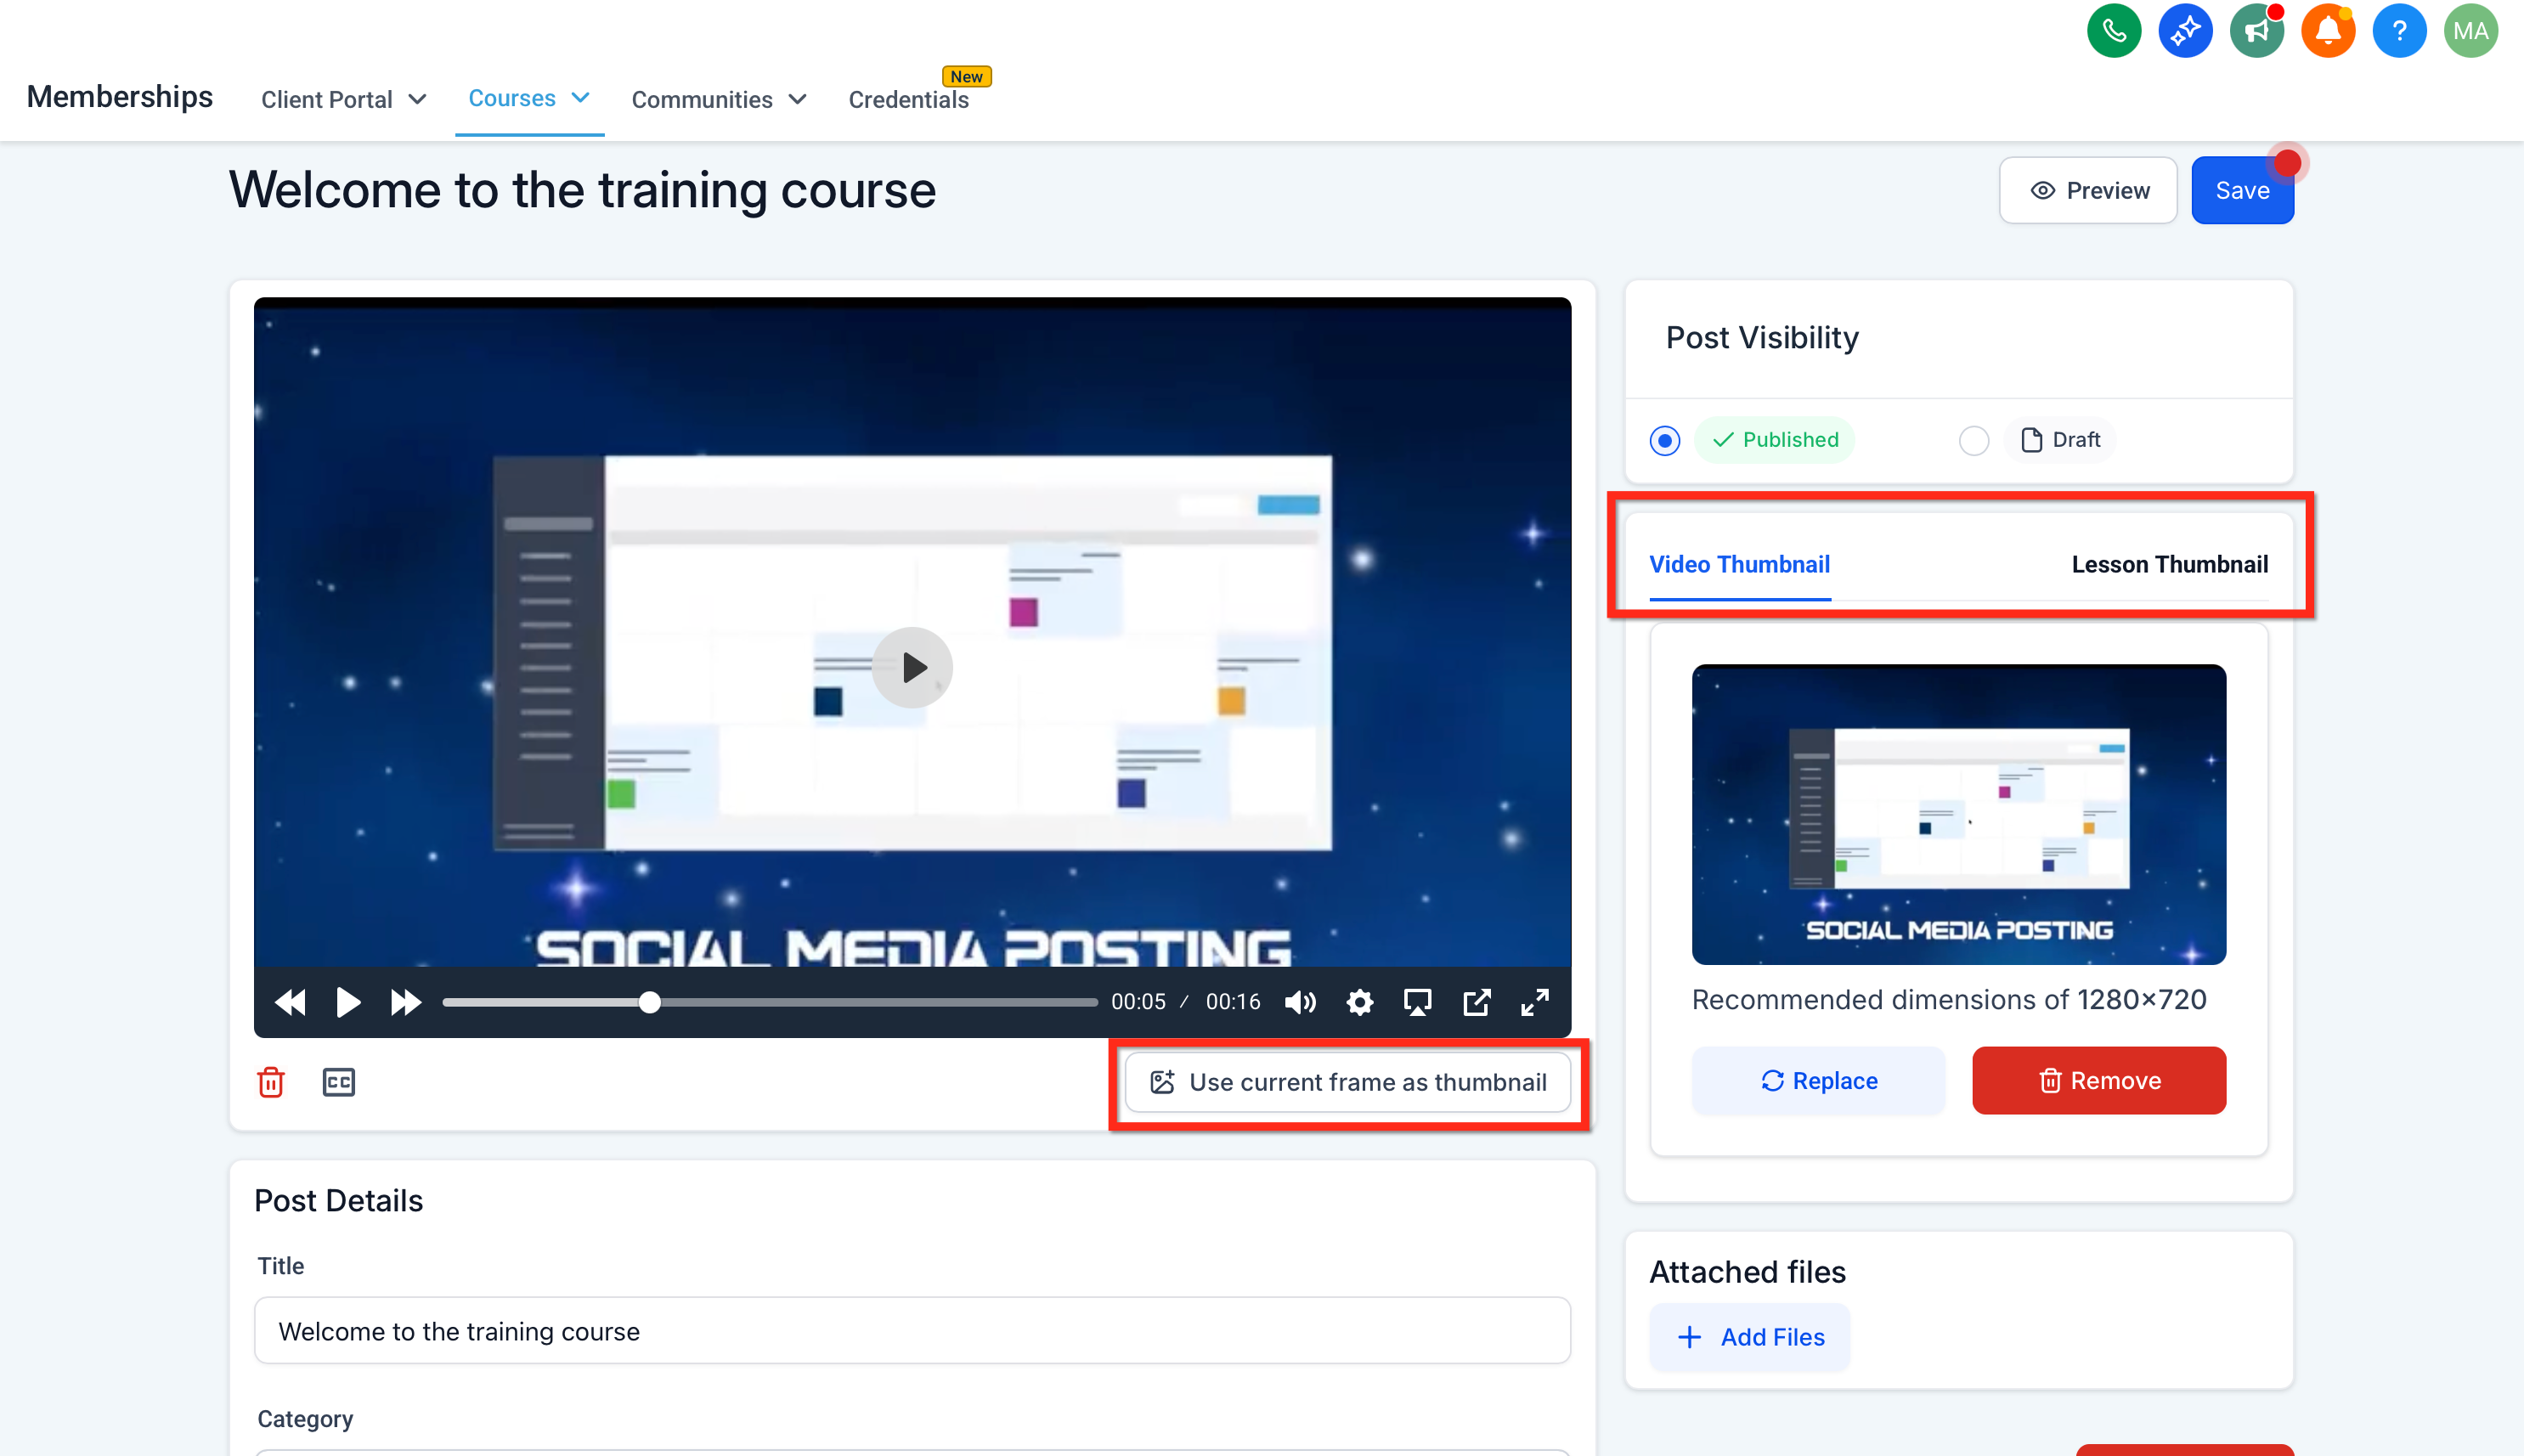
Selecting Use current frame as thumbnail sets both the Video thumbnail (shown before playback) and the Lesson thumbnail (shown on the course tile) at once.
To use different images for each: keep your chosen frame for the video thumbnail inside the lesson, then either switch to the lesson thumbnail field and choose a different frame, or upload a separate image in the lesson details.
Return to your course list to confirm the lesson and video thumbnails match your selection. Once saved, both new and returning students see the updated thumbnail everywhere it appears.
You can add audio lessons directly into your courses instead of, or alongside, video. This gives you flexibility for content like guided routines, aftercare instructions, or podcast-style education that patients can listen to without needing to watch a screen.
To add an audio lesson:
Go to Memberships > Courses > Lessons and choose Audio as the lesson type.
Choose audio alone as the lesson, or combine it with text content.
Upload your audio file.
Publish the lesson to make it available to students.
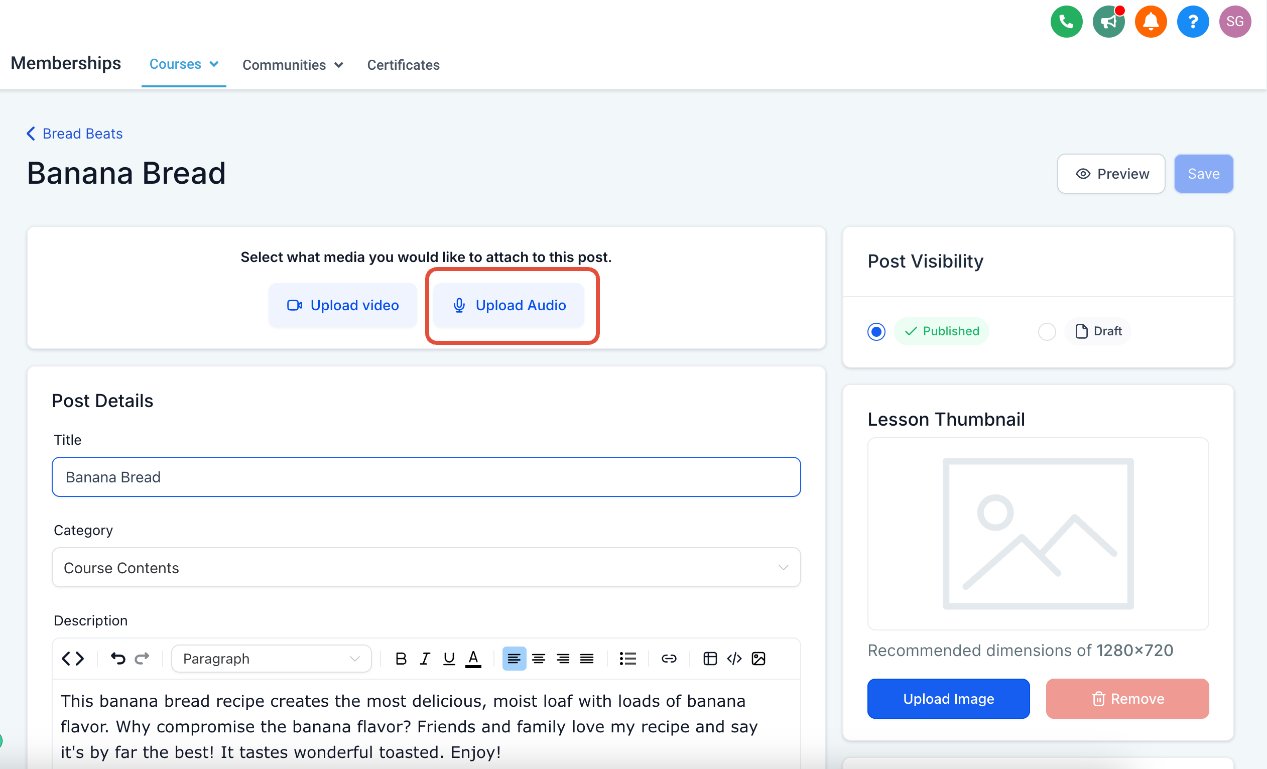
Supported formats: the system accepts a range of audio file types for compatibility across devices, including MP3, AAC, and WAV.
Audio content is optimized for playback on desktops, tablets, and mobile phones, so learners can access lessons from whatever device they're using.
Thumbnails for audio lessons are pulled automatically from the lesson thumbnail you've set, keeping branding consistent across your audio and video content.
Playback controls: learners can adjust and configure playback speed to move through content faster or slower.
Note: duplicating an audio lesson into another course isn't supported yet.
Closed captions and subtitles let you upload subtitle files to your video lessons, in multiple languages, and edit them directly inside Aesthetix CRM. This improves accessibility for patients and students with hearing impairments, helps with comprehension and retention through visual reinforcement, and makes your courses usable by a wider audience.
To upload subtitles to a video lesson:
Go to Memberships > Courses and open the course you want to edit.
Click on a lesson that contains a video.
Locate the Upload Subtitles option next to the video player.
Click Upload Subtitle and choose a .srt file from your device.
Select the appropriate language from the dropdown list.
Click Save to attach the subtitle file to the video.
You can upload multiple .srt files, each assigned to a different language, so viewers can choose their preferred subtitle language from the player controls while watching.
Using the advanced subtitle editor: after uploading a subtitle file, use the built-in editor to refine it.
Click the Edit Subtitles button next to the uploaded file.
View subtitles in a structured list with timestamps and text.
Click a timestamp to jump to that moment in the video.
Warning icons flag issues such as overlapping lines or gaps; hover over an icon to see the issue description.
Click directly into the text to make corrections, then select Save Changes.
Raw Mode editing: for direct access to the subtitle file's structure, click Switch to Raw Mode inside the Subtitle Editor. Edit the file using standard .srt formatting (timestamps followed by subtitle text), review the syntax carefully to avoid formatting errors, then click Save to update the video.
Currently, only .srt files are supported for subtitles.
Funnel lessons let you drop a full funnel page, built in the Funnels and Websites collection, directly into your course outline as its own lesson. Instead of linking out to a funnel and pulling learners away from the course, the funnel page renders right inside the course player, so learners can read content, submit a form, or take action without leaving the course.
This is useful for turning a lesson into a live experience: present an intake form, a booking step, or an offer right after a lesson teaches the concept behind it, so students can act immediately instead of hunting for a separate link.
Where you'll work:
Course structure lives under Memberships > Courses > Products.
Funnels live under the Funnels and Websites collection.
To add a funnel lesson to a module:
Go to Memberships > Courses > Products and open the course you want to edit. Open the Outline or Syllabus view.
Expand the module (and sub-module, if used) where you want the funnel lesson to appear.
Click Add Content and choose the Funnel lesson type.
Give the lesson a clear title (for example, "Book Your Consult" or "Intake Form"), then choose the funnel and the specific funnel page you want to embed.
Click Add or Save to attach the funnel page as a new lesson, and confirm it appears in the module's lesson list in the right position.
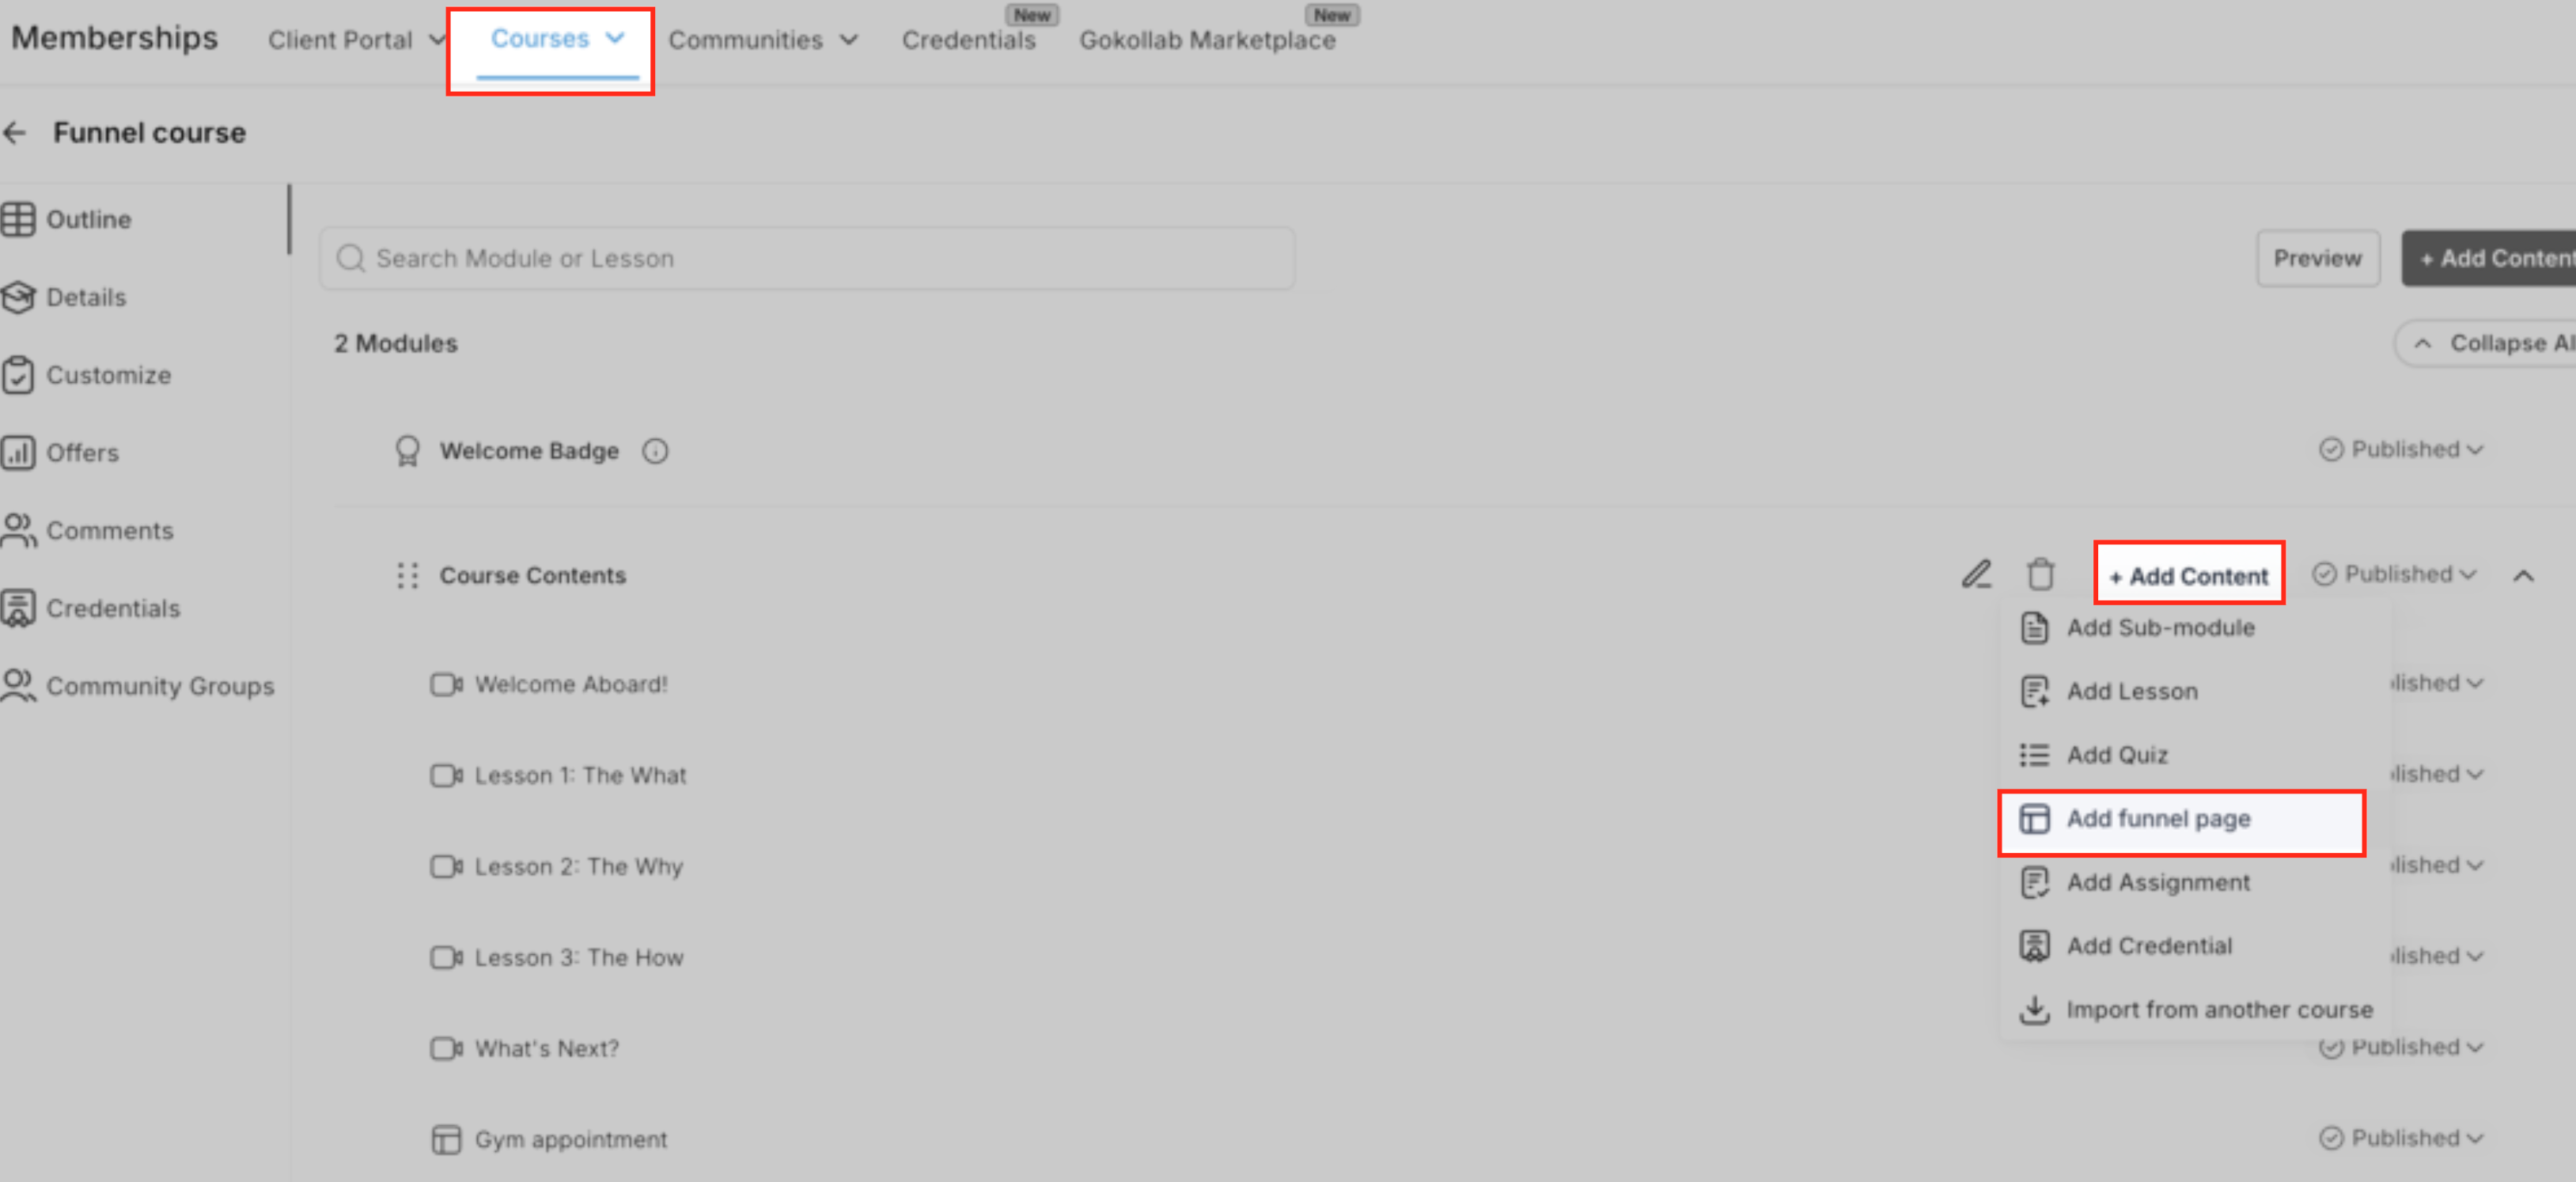
Editing and managing a funnel lesson: hover over the funnel lesson in your course outline and click the edit icon to open the funnel edit modal. From there you can preview how the funnel will look inside the course player, use Open in Builder to jump into the funnel editor and adjust copy, design, forms, and calls to action, set a thumbnail for the lesson, save the lesson as a draft while you work, and click Save & Publish when it's ready. You can also drag the lesson to reposition or move it between modules.
What learners see: the funnel page appears embedded inside the course player, framed by your course layout, with navigation and progress still accessible. Learners can also click Full Screen to view the funnel as a full-page experience, which works well for longer forms or multi-step flows. Forms and buttons behave exactly as they would on a standalone funnel page, and the lesson still follows whatever access rules and drip schedule you've set for the course.
This feature may still be rolling out under Labs. If you don't see the Funnel lesson option in your course outline, check Settings > Labs and enable it for your account, or reach out to Aesthetix CRM support.
If a funnel lesson collects patient information (an intake form, a consult request, symptoms, or medical history), treat that data with the same care as any other PHI collected through Forms: only route it to staff who need it, and avoid using it in unsecured automations or email.
If a funnel lesson includes an order form, deposit, or paid consult, make sure the funnel's checkout is connected to a payment provider before you publish the lesson.
Before you publish a funnel lesson that takes payment, connect it to AX Pay, Aesthetix CRM's own payment provider, which offers better processing rates than Stripe. See the AX Pay help article for setup steps.
Analytics for a funnel lesson still live in the Funnels and Websites collection, not inside Courses. Editing the funnel page updates the lesson automatically since the lesson simply references that page, so if you unpublish or delete the underlying funnel page, remap the lesson to a new one to avoid a broken lesson. For workflow automation tied to course or funnel activity (enrollment, lesson completion, form submission), build the trigger and action in the Workflows collection rather than inside Courses.
Beyond uploaded video and audio, you can embed media directly from popular third-party platforms using a media link or an embed code, with no upload required. This is useful for pulling in an existing YouTube tutorial, a podcast episode, or a demo video without re-uploading it as a lesson file.
Supported platforms:
Video: YouTube, Vimeo, Loom
Audio: SoundCloud, Wistia, Spotify, Mixcloud
To embed media:
Go to Memberships > Courses > Products and open the course you want to edit.
Open the lesson or module where you want to add the media.
In Lesson Media or the lesson's description area, select Embed Media.
Paste the iframe embed code from a supported platform, then click Embed.
Confirm the media appears correctly in the lesson preview.
Click Save, then publish the lesson to make it available to students.
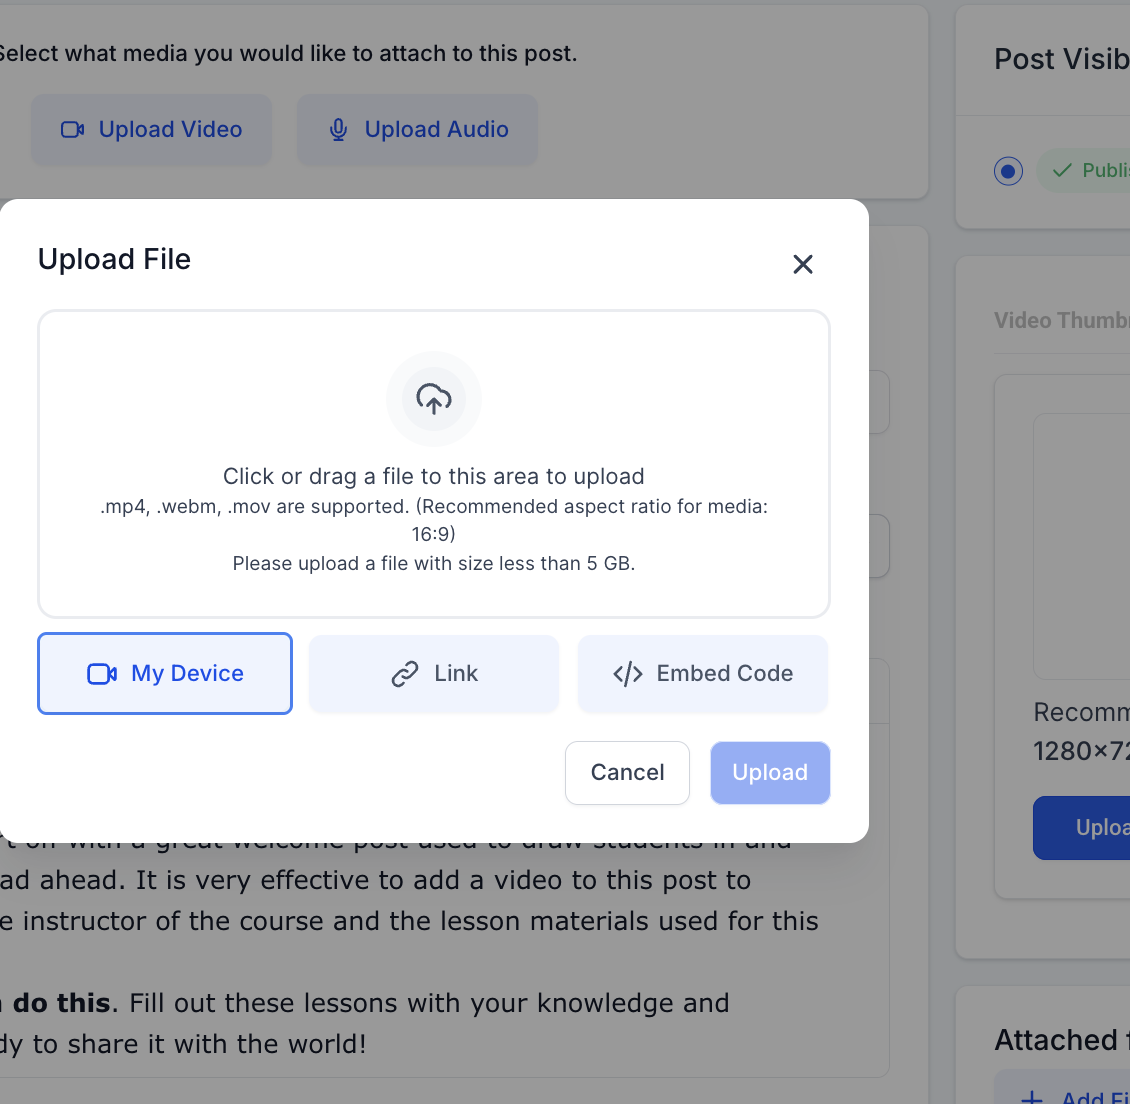
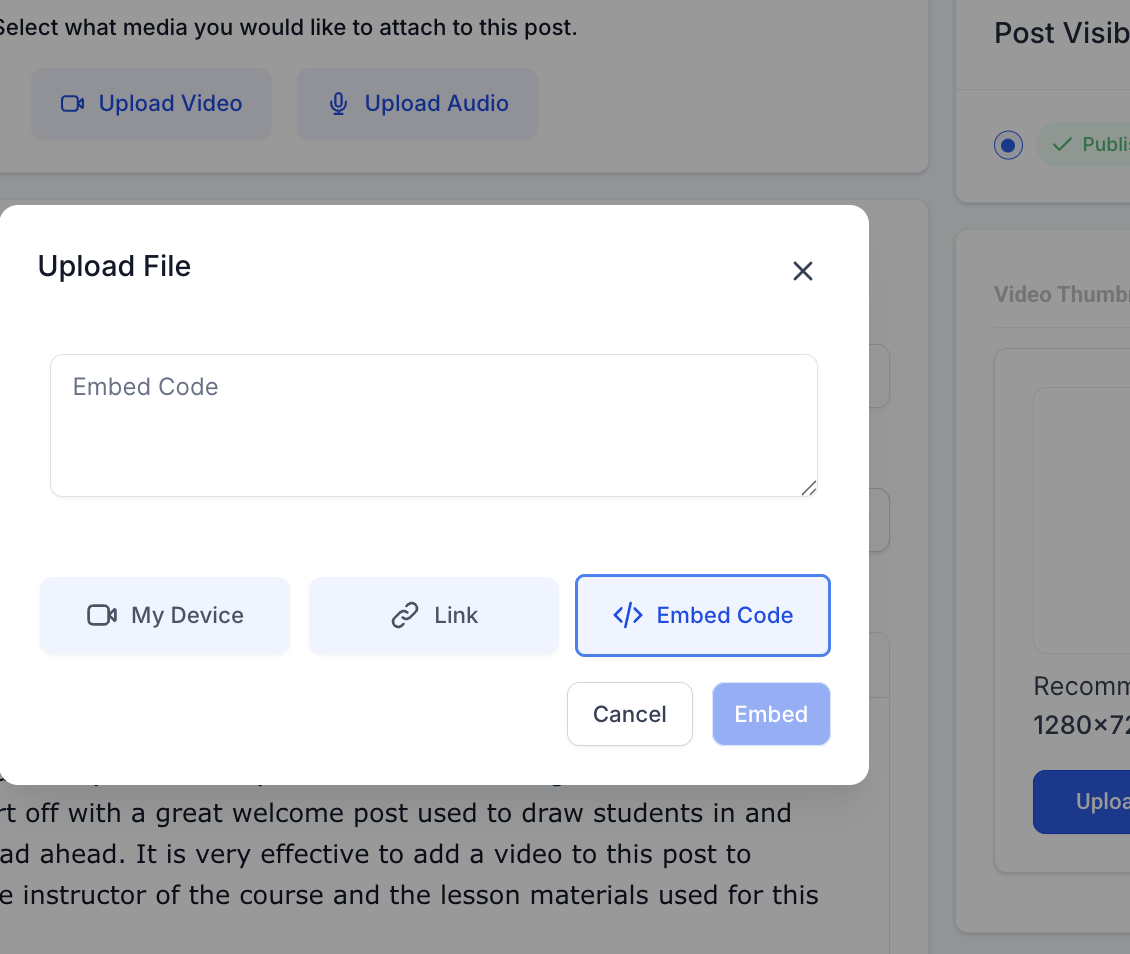
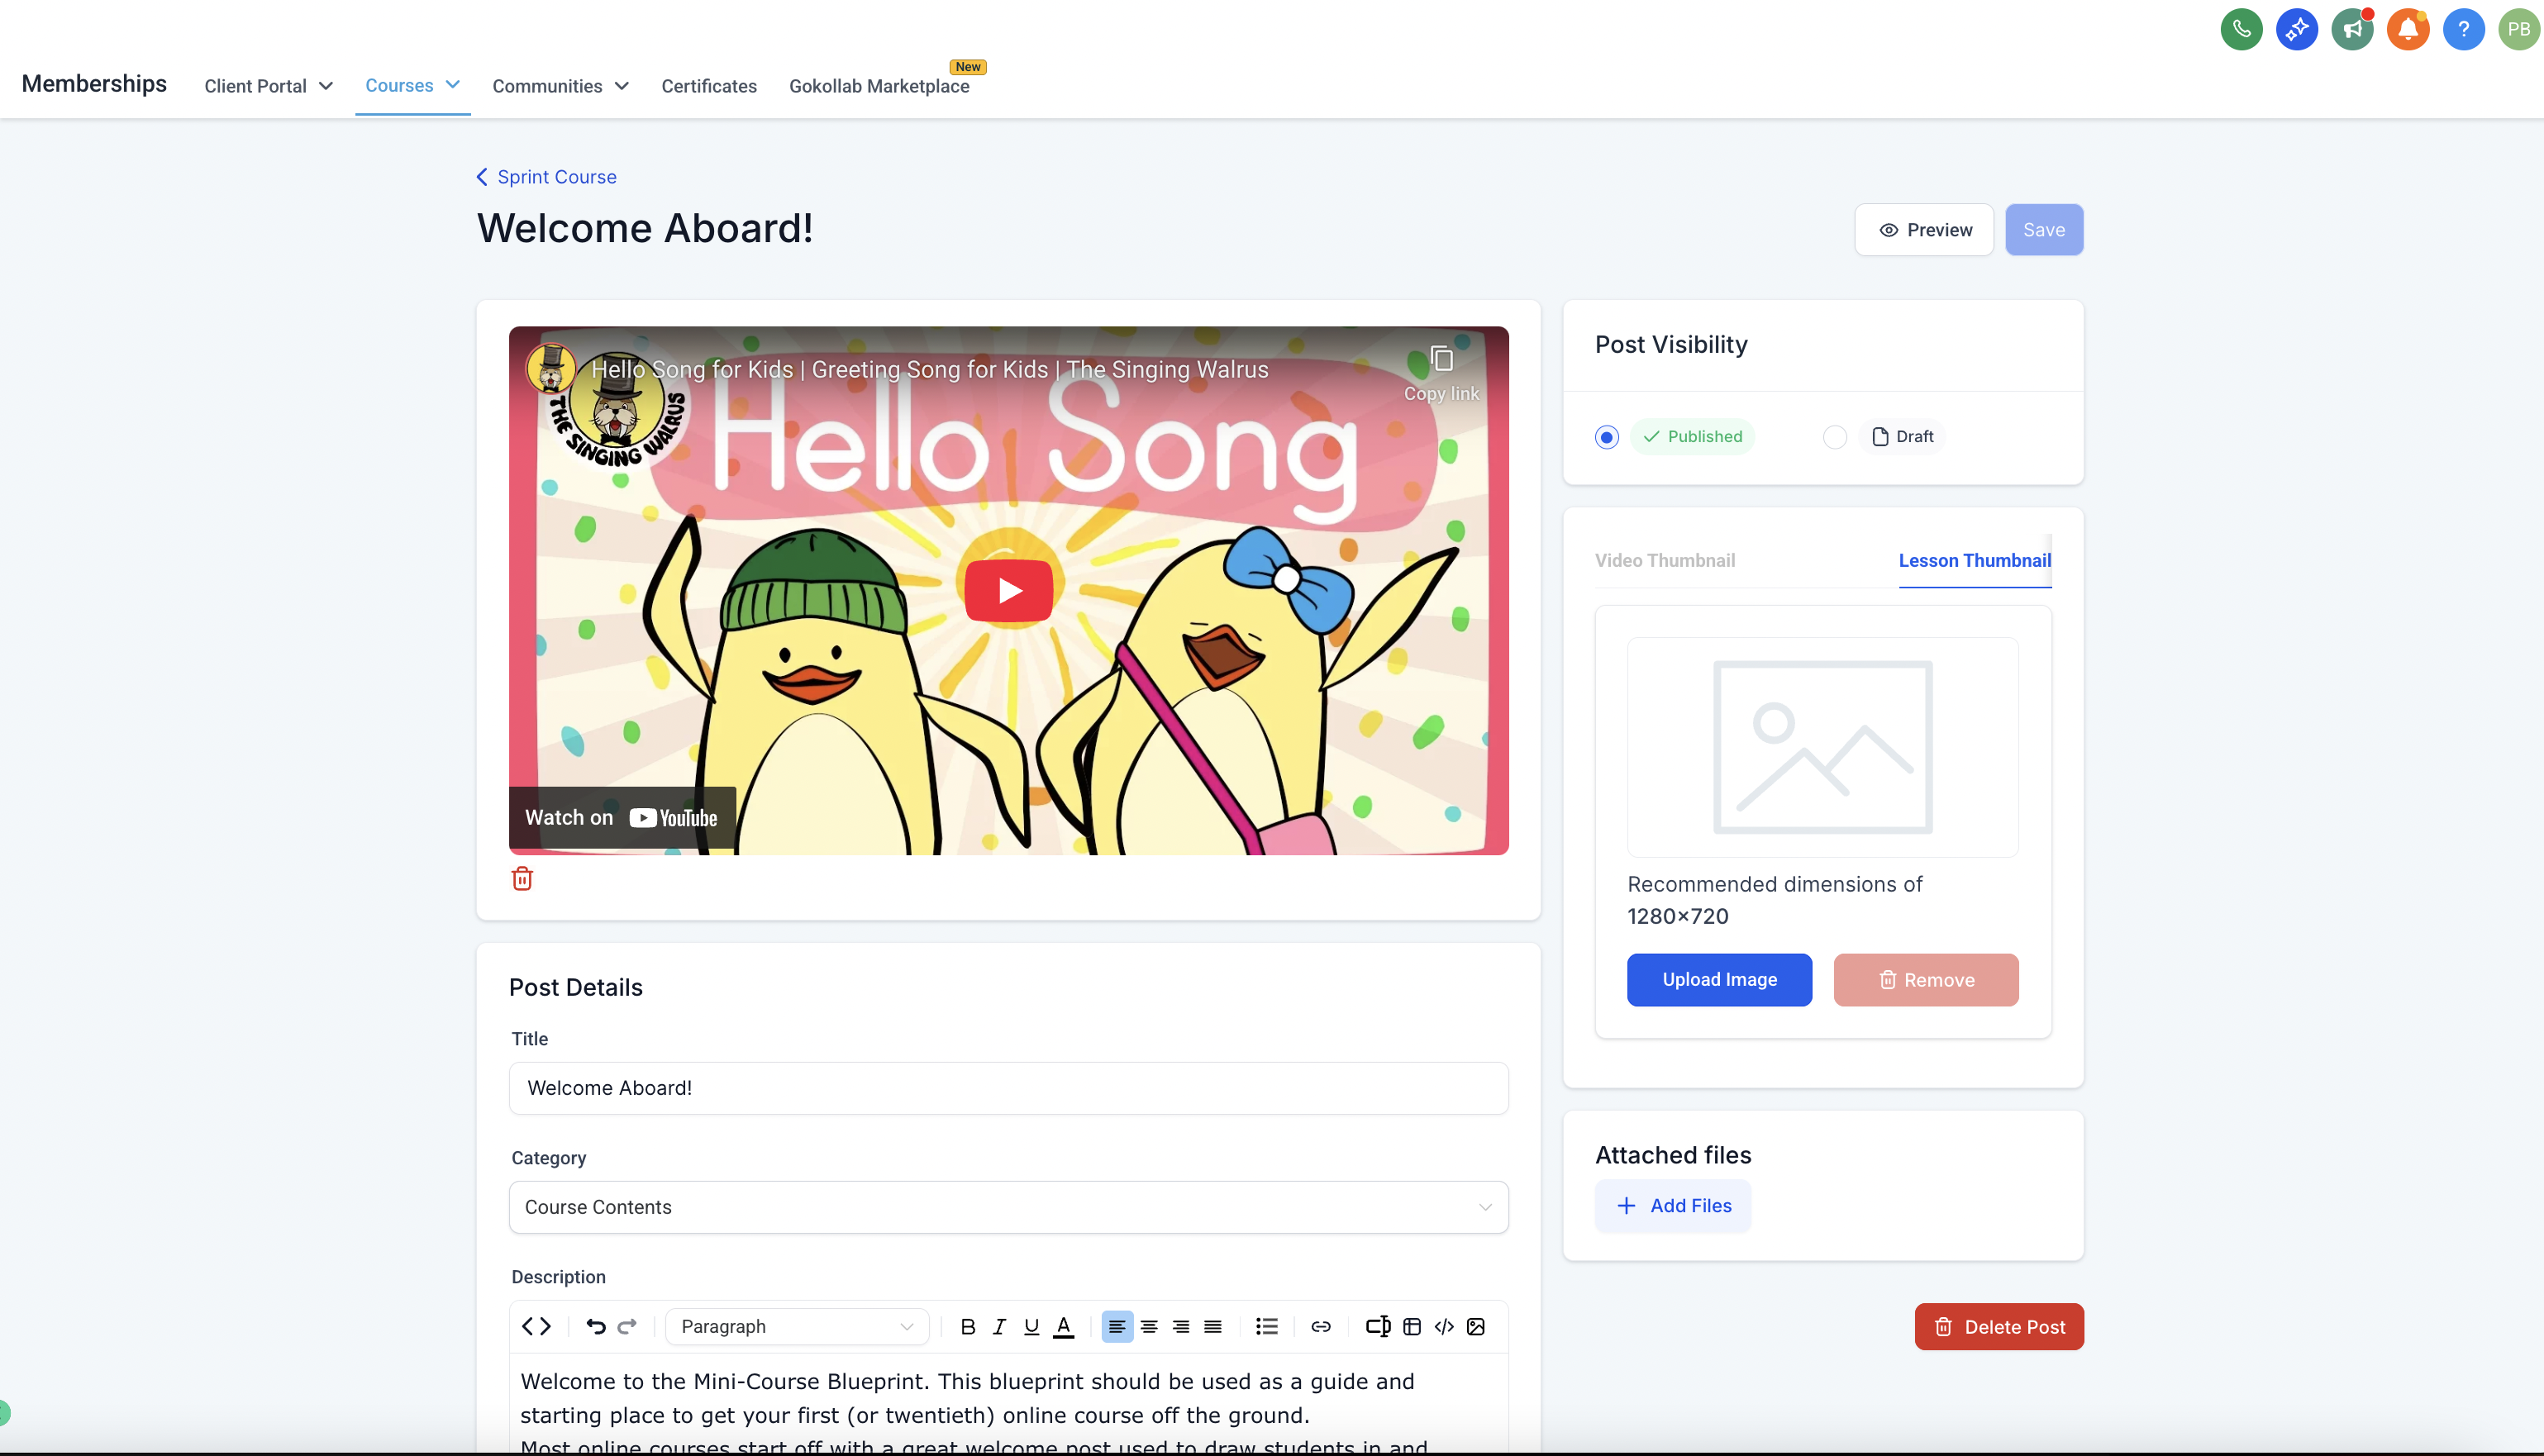
To get an embed code: go to the media on the third-party platform, look for the Share or Embed option, and copy the iframe embed code (it starts with <iframe...>). Paste that code into the Embed Media modal. Width and height adjust automatically to fit your layout, so you don't need to modify the code.
Copyright and usage: you're responsible for making sure you have the right to embed third-party content. Before embedding, confirm the content is public or permissioned for sharing, that you have the legal right to display it, and that you're complying with the source platform's terms of service. Don't embed content that's private, licensed without permission, or marked as non-shareable.
Best practices: always preview your post to confirm the embed loads correctly, use official embed codes rather than shortened or redirected links, and make sure your team understands content licensing before embedding third-party material.
You control whether emails go out for different course events, so students only hear from you about what's relevant.
Emails covered:
Course sign-up emails
Offer access emails
Drip emails
Course comment emails
New course materials unlocked emails
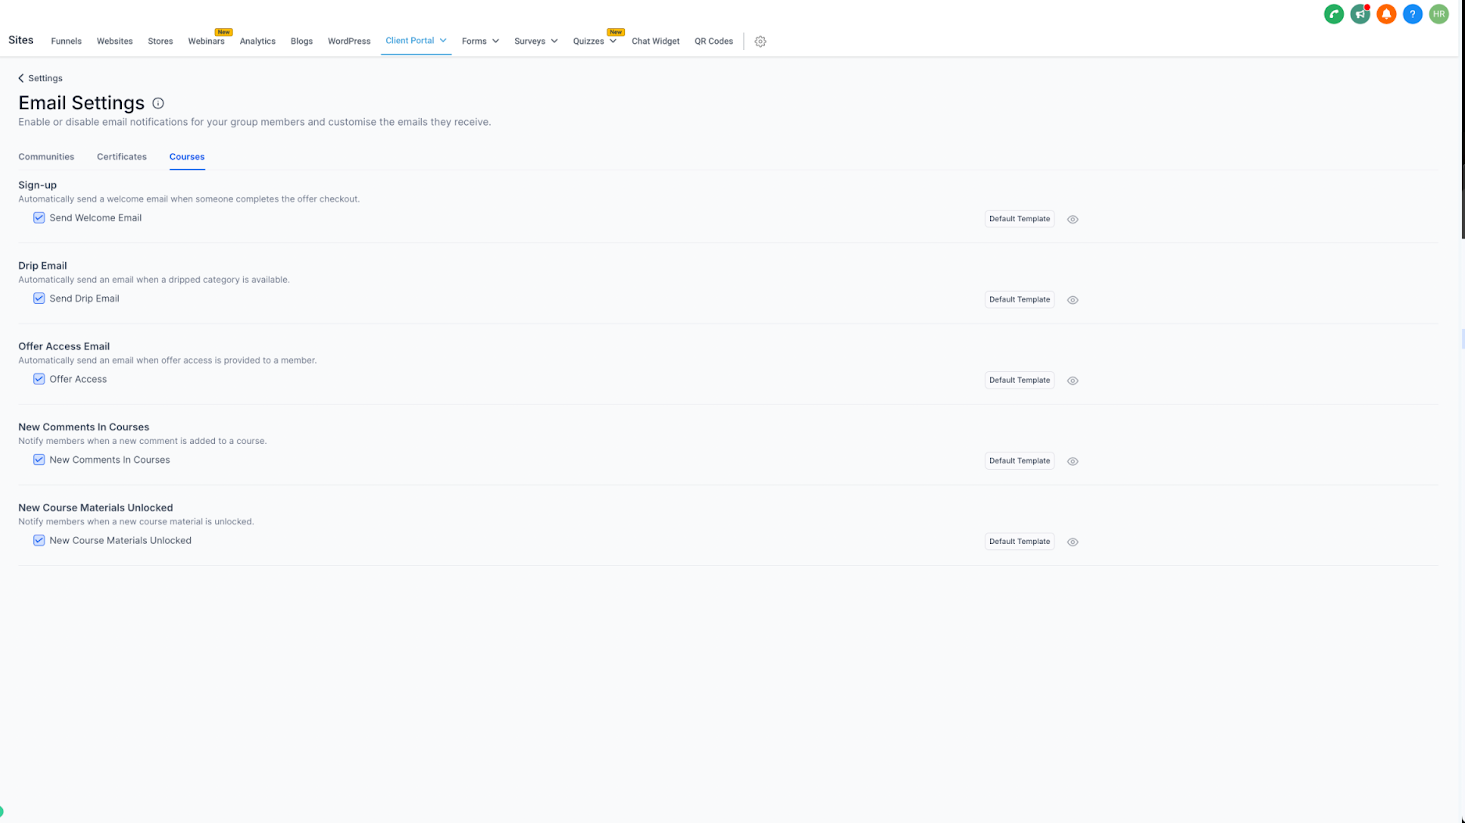
Turning off a notification type stops that email for all students on the course; it isn't a per-student setting.
Do I need to create a separate funnel just for a course lesson? No. You can reuse any existing funnel page as a lesson. It's often best to clone and lightly customize a high-converting funnel so the messaging fits the course context without affecting the original funnel elsewhere.
Where do I see analytics for a funnel lesson? Embedding a funnel inside a course doesn't move its analytics. Views, submissions, and conversions for that page still appear under the Funnels and Websites collection, the same as a standalone funnel.
What subtitle file formats are supported?
Only .srt files are supported for closed captions and subtitles.
Can students choose which subtitle language to watch with? Yes. If you've uploaded subtitles in more than one language, viewers can switch between them using the video player controls.
Does the video-frame thumbnail option work with embedded videos like YouTube? No. Frame capture only works for video uploaded directly to the lesson. For embedded players or third-party media, upload a custom thumbnail image instead.
What image size should I use for a custom thumbnail? Use a 16:9 image, 1280x720 or larger, with good contrast and sharpness.
Which audio file formats can I upload for an audio lesson? MP3, AAC, and WAV are all supported.
Can I restrict who sees a funnel lesson? Yes. Funnel lessons follow the same access rules and drip schedule as the rest of the module and course.
Is there an extra cost to add funnel lessons to a course? No, as long as your account includes both Courses and Funnels and Websites and the feature has rolled out to your account under Labs.
What happens if I delete or unpublish a funnel page that's used as a lesson? The lesson may stop rendering correctly. Keep the underlying funnel page active, or edit the lesson to point at a new page.
What should I do if an embedded video or audio doesn't display correctly? Confirm you copied the official iframe embed code from the supported platform (not a shortened or redirected link) and that the source media is set to public or otherwise permissioned for sharing. If the source platform isn't one of the supported video or audio platforms listed above, embedding isn't supported.
