Course products let you package training content, patient education material, or paid programs into a structured membership experience for your practice. You build them from the Courses section of Aesthetix CRM, using categories, lessons, and assessments to organize your content, then publish the product so members can access it.
Aesthetix CRM also includes a walkthrough video library if you'd rather watch a guided tutorial before building your first course product.
The tutorial covers naming your product, building out categories and lessons, and setting up quizzes or assignments from start to finish.
Go to the Courses section and open Products.
Click Create Product, then Start Building.
Enter a name for the course, then click Create Product to save it.
Your new product appears in your product list, where you can edit, preview, customize, or clone it, and assign a price to it.
Course content is organized into categories, which can hold lessons, subcategories, and assessments.
Click the + icon next to Product Structure to create a category, give it a title, and save it.
Click Add Lesson inside a category to create a lesson, and give each lesson a title.
Click Add Subcategory if you want a nested grouping. For each subcategory, add a title, a short description, and select the parent category it belongs to.
Inside a subcategory, click Content to choose whether it holds a lesson or an assessment.
Each lesson has a few pieces to fill in:
Video: Click Select Video to upload a file. Supported formats are .mp4, .webm, and .mov.
Post details: Set the lesson title, its category, and the lesson body text.
Thumbnail: Click Select Image to upload a lesson thumbnail. Recommended dimensions are 1280x720. Click Remove next to the button to replace or delete an uploaded image.
Files: Use Add Files to attach any supporting documents or downloads for the lesson.
Visibility: Switch the lesson from Draft to Publish mode when it's ready to go live.
Click Preview at any point to see how the lesson will look to members, and click Save to store your changes.
Inside a category or subcategory, click Add Assessment and choose either a Quiz or an Assignment. Give the assessment a title either way.
Enter a quiz title.
Set a passing grade if you want members to need a minimum score.
Write a pass confirmation message and a "try again" fail message.
Build your questions. Each question can be single-choice or multiple-choice, with the correct answer(s) marked.
Save the quiz as a Draft while you're working on it, use Preview to review it, and Save to store your progress.
Delete removes the entire quiz. You'll be prompted to confirm before it's permanently removed.
Enter an assignment title and write instructions for what members need to submit.
Upload a template file if members need one to complete the assignment. Accepted formats are .jpg, .jpeg, .pdf, and .xls.
Write a confirmation message members see after submitting.
Save as Draft or switch to Publish when ready, use Preview to check it, and Save to store changes.
Delete removes the entire assignment after a confirmation prompt.
From the product structure, you can edit or preview any lesson, subcategory, or assessment, and switch each one between visibility modes:
Published: Live and visible to members.
Draft: Editable without going live, so you can keep refining it before release.
Locked: Available only after the member completes a specific post in a preceding category. Click the lock icon and choose the post that must be marked complete first.
Drip: Content unlocks a set number of days after the member gets access. Choose how many days apply to each category.
Use the 3-dot menu next to the preview button to Clone or Delete a product. Cloning lets you copy the course within your current Aesthetix CRM account, or to another location if your account manages more than one.
You can control how members move through a course, from a fully guided flow to self-paced browsing. These settings live at the course level and shape the video and lesson-completion experience.
Autoplay: Video lessons can start playing automatically when a member opens them.
Up Next card: When a video finishes, an Up Next card previews the following lesson so members can continue automatically or click Play Now to start it right away.
Smart video completion: A video lesson can be marked complete automatically once the member finishes watching it.
Automatic text completion: Text lessons can be marked complete as the member moves forward, without an extra click.
Configure these from the course settings and choose the mix that fits your course: a guided path where lessons advance on their own, or a self-paced layout where members control each step.
Title: Edit the course name at any time from the title box.
Description: Add a short one-liner describing the product. It appears on the product welcome page and in previews.
Thumbnail: Upload the image members see in their library. Recommended size is 1280x720.
Course tags help members find the right course faster and set expectations before they open it. You set tags from Course Settings, and members can filter by them in the All Courses and My Courses views of their library.
Three tag types are available:
Language: The language the course is taught in.
Difficulty: The intended skill or experience level, so members know what to expect.
Topic: The primary subject the course covers.
Open Course Settings for the product, select a value for each tag type, then save. The tags appear on the course card in the member library, and members can use the matching filters to narrow the courses shown in All Courses and My Courses. Tags are for organization and discovery only. Pricing, access, and content are still managed from the course builder and its offer.
Heading: Add header text, for example "Instructor."
Instructor photo: Upload a headshot at 300x300.
Instructor name and title: Enter the name and job title members will see, for example "Coach."
Bio: Write up to 1,000 words introducing the instructor.
Logo: Upload a logo (recommended 640x640) to appear in the top left corner of the course page.
Favicon: Upload a small icon (32x32) that shows on the browser tab alongside the course title.
Advanced: You can also add your own custom JS, CSS, and tracking code to the product page if you need deeper customization.
Click Customize on your product, then select Theme to adjust the layout of your course page.
To sell the course, attach a Membership Offer to the product from the Offer section. From there you can:
Preview, edit, or view the checkout page.
Edit offer details, including the banner, video, poster image, logo, and checkout copy.
Turn on Extra Contact Info to collect additional details like address and phone number at checkout.
Make the Service Agreement mandatory or optional, and customize its text.
If you're charging for this course product, connect its checkout to AX Pay, Aesthetix CRM's built-in payment processor, which offers better rates than Stripe. See the AX Pay guide for setup steps.
Click Preview in the upper right corner of the outline page to review the finished product, then switch it to Publish mode to make it live. You can leave it in Draft mode as long as you need while you keep editing.
Members can comment on lessons and assessments. Click Comments, then View All to see every comment left on the product, including comments that have since been deleted.
When patients or team members access a published course, they get a clean, mobile-friendly learning experience:
Seamless navigation between categories and lessons on the same screen, with the option to expand for depth or collapse for a quick glance.
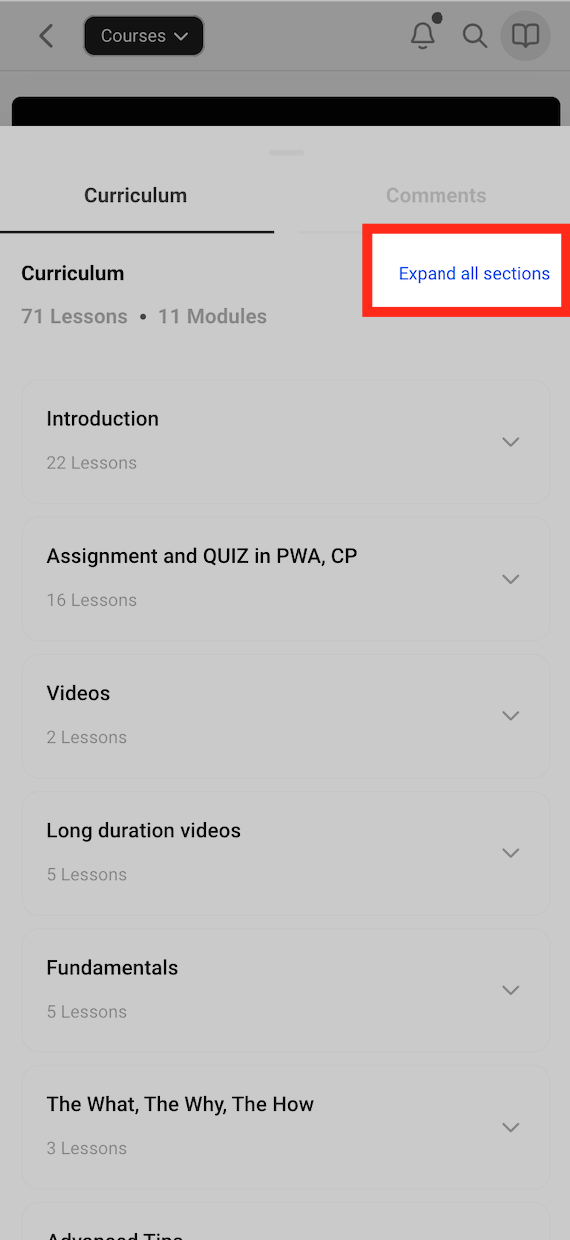
Consistent support for every lesson type (text, audio, or video).
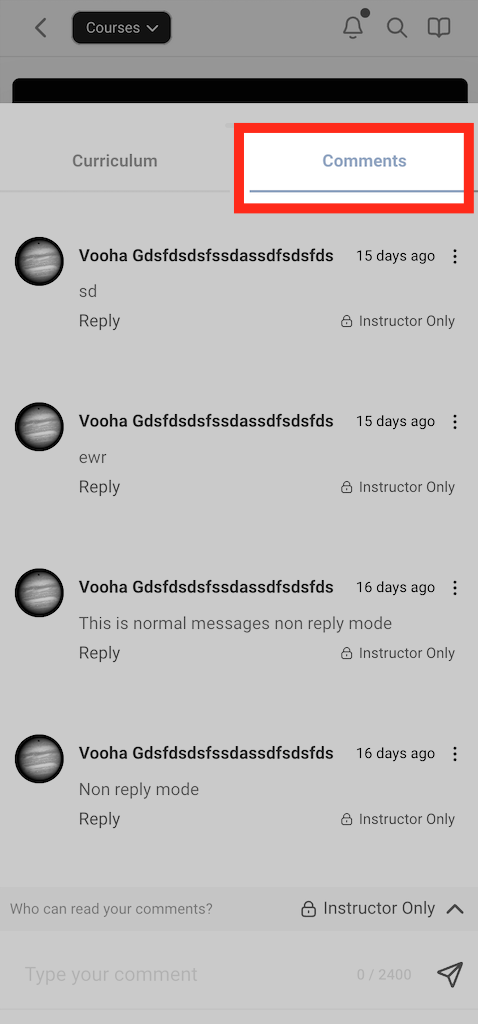
A comments section where members can reply to each other and keep a conversation going on any lesson.
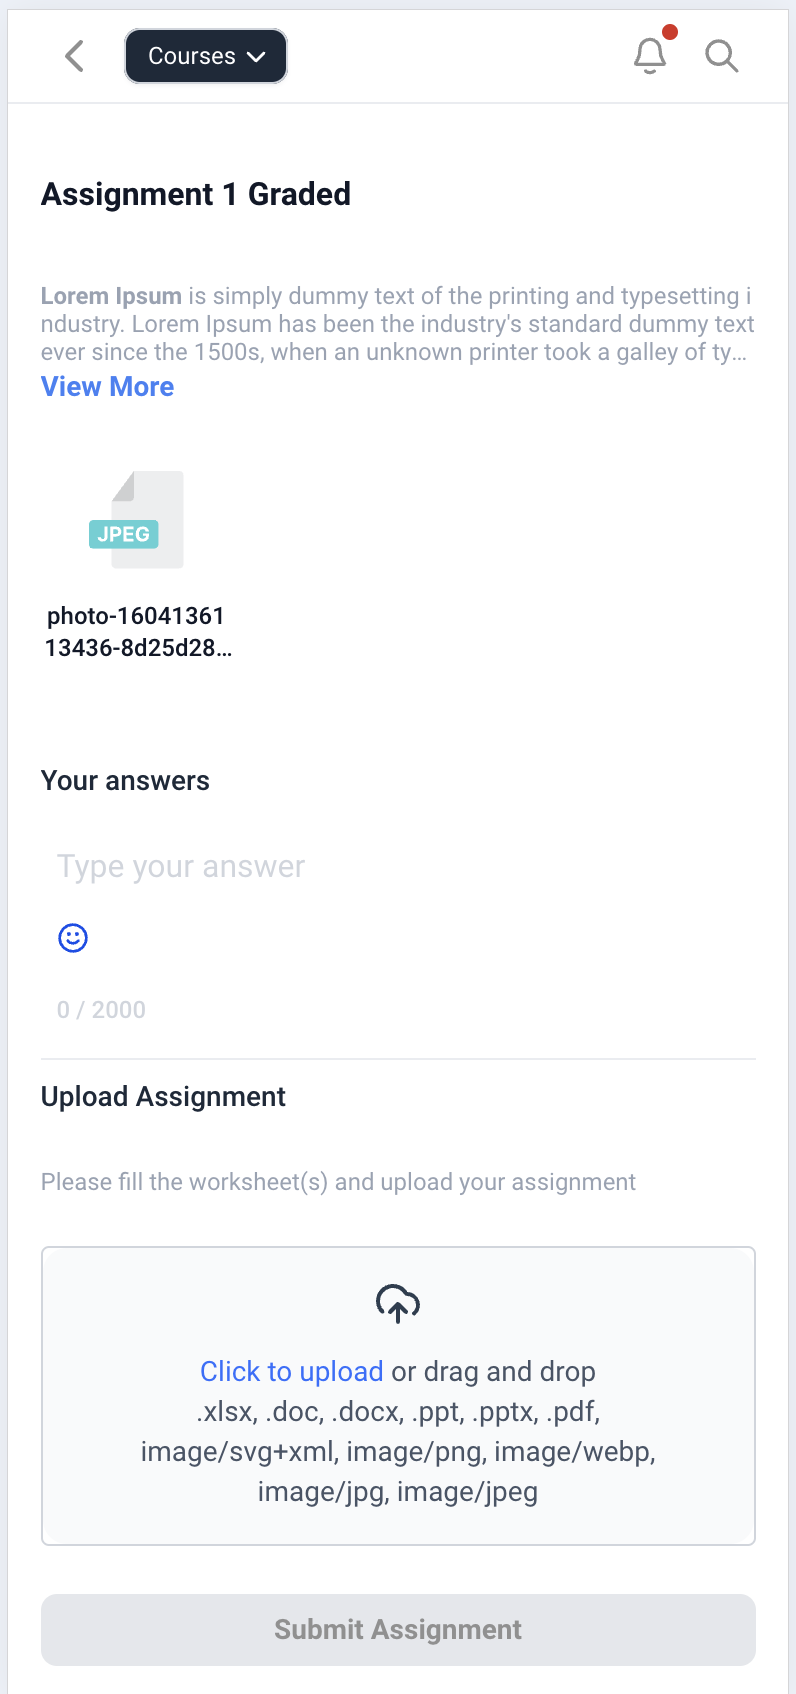
A clean quiz and assignment interface with no cropped content or confusing transitions between questions.
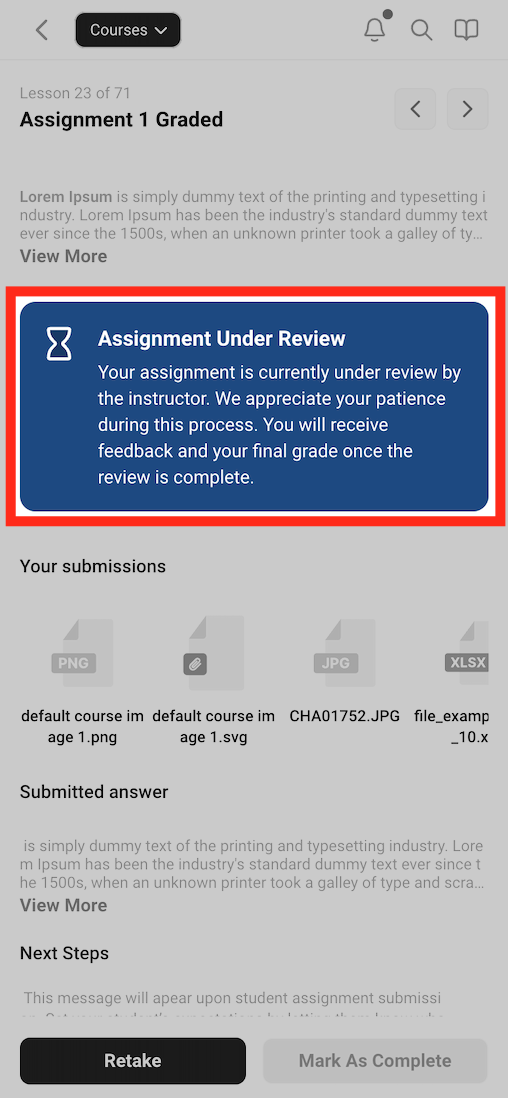
A quick status overview so members can see at a glance whether their quizzes and assignments are in review, passed, or need another attempt.
Triggers and actions tied to course enrollment, completion, or offer purchases (like sending a certificate or enrolling a member automatically) live in Workflows, not in the course builder itself. If you want a dedicated quiz outside of a course product, see the Quiz Builder guides. For member-to-member or member-to-practice chat inside a course, see the Chat Widget guides.
What's the difference between a category and a subcategory? Categories are the top-level building blocks of your product structure. Subcategories nest inside a category and let you group related lessons or assessments more tightly, each with its own title, description, and parent category.
What video formats can I upload for a lesson? Lesson videos support .mp4, .webm, and .mov files.
What image sizes should I use for thumbnails, headshots, logos, and favicons? Product and lesson thumbnails should be 1280x720. Instructor headshots should be 300x300. Logos should be 640x640. Favicons should be 32x32.
What's the difference between Locked and Drip visibility? Locked content requires members to complete a specific post in a preceding category before they can access it. Drip content unlocks automatically after a set number of days, regardless of what else the member has completed.
Can I require members to pass a quiz before moving on? Yes. Set a passing grade on the quiz, and pair it with Locked visibility on the next category so members must hit that grade before continuing.
Can I clone a course product? Yes. Use the 3-dot menu next to the preview button to clone the product within your current account, or to another location if your Aesthetix CRM account manages more than one.
What file types can members submit for an assignment? Assignment submissions accept .jpg, .jpeg, .pdf, and .xls files, matching whatever template format you upload for the assignment.
Do I need to set up an offer to publish a course? An offer connects a checkout page and pricing to your course, but you can publish a course product without one if you're distributing it for free or granting access another way.
Can I delete a quiz or assignment once it's built? Yes. Click Delete on the quiz or assignment. You'll be asked to confirm before it's permanently removed.
Can members filter courses in their library? Yes. Assign Language, Difficulty, and Topic tags from Course Settings, and members can filter by those values in the All Courses and My Courses views to find the right course faster.
Can video lessons play and advance automatically? Yes. Turn on autoplay and the Up Next card in the course settings so videos start on their own and members can continue to the next lesson, and enable smart or automatic completion so lessons are marked done as members finish them.
Will my edits go live immediately? Only if the lesson, subcategory, or product is already in Publish mode. Keep it in Draft while you're still working, and switch to Publish when it's ready for members to see.
