Your Dashboard gives your practice a real-time view of leads, booked consults, revenue, and pipeline activity. Widgets are the individual charts, numbers, and tables you place on a dashboard to track the metrics that matter most to your front desk and providers. You'll find Dashboard in the main left-hand menu of Aesthetix CRM.
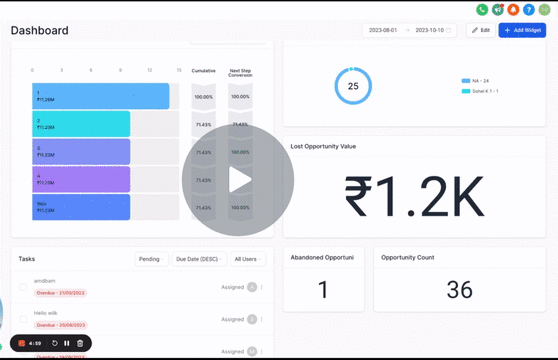
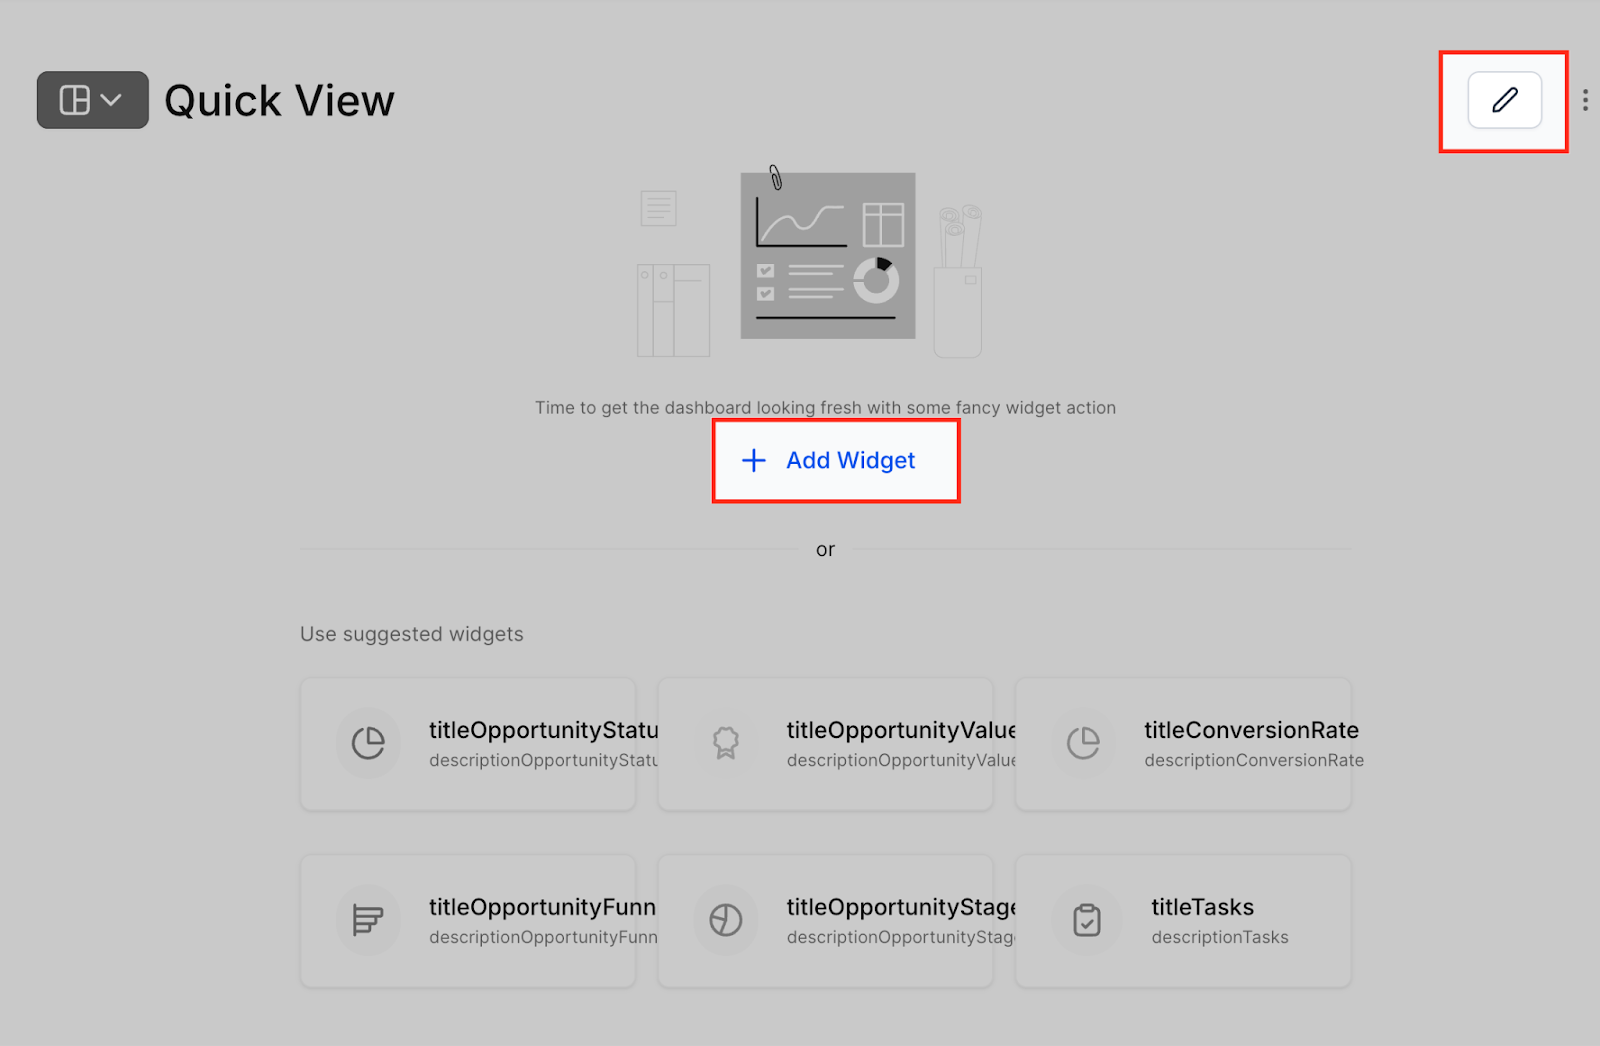
From the main menu, select Dashboard.
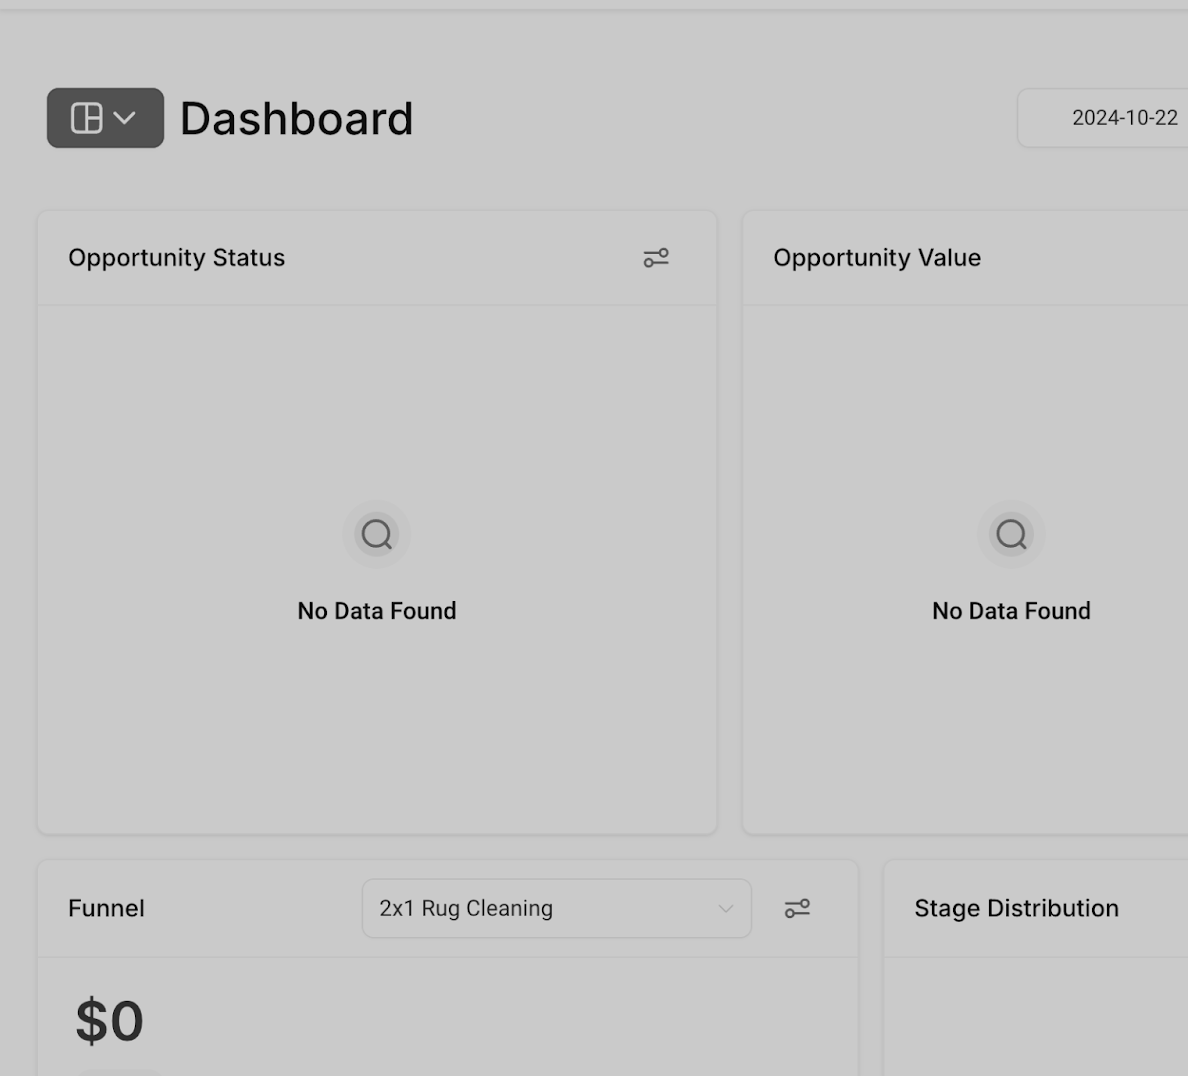
Click Edit Dashboard.
Click the Add Widget button.
Go to the Widgets section to browse available widget types.
Step into the Objects section if you want a widget built around a specific object, such as Contacts or Opportunities.
Deselect any objects or fields you don't need by clicking the X next to them.
When you're happy with your selections, click Save Changes.
If you'd rather build a fresh dashboard instead of editing your default one:
Click the blue Add Dashboard button.
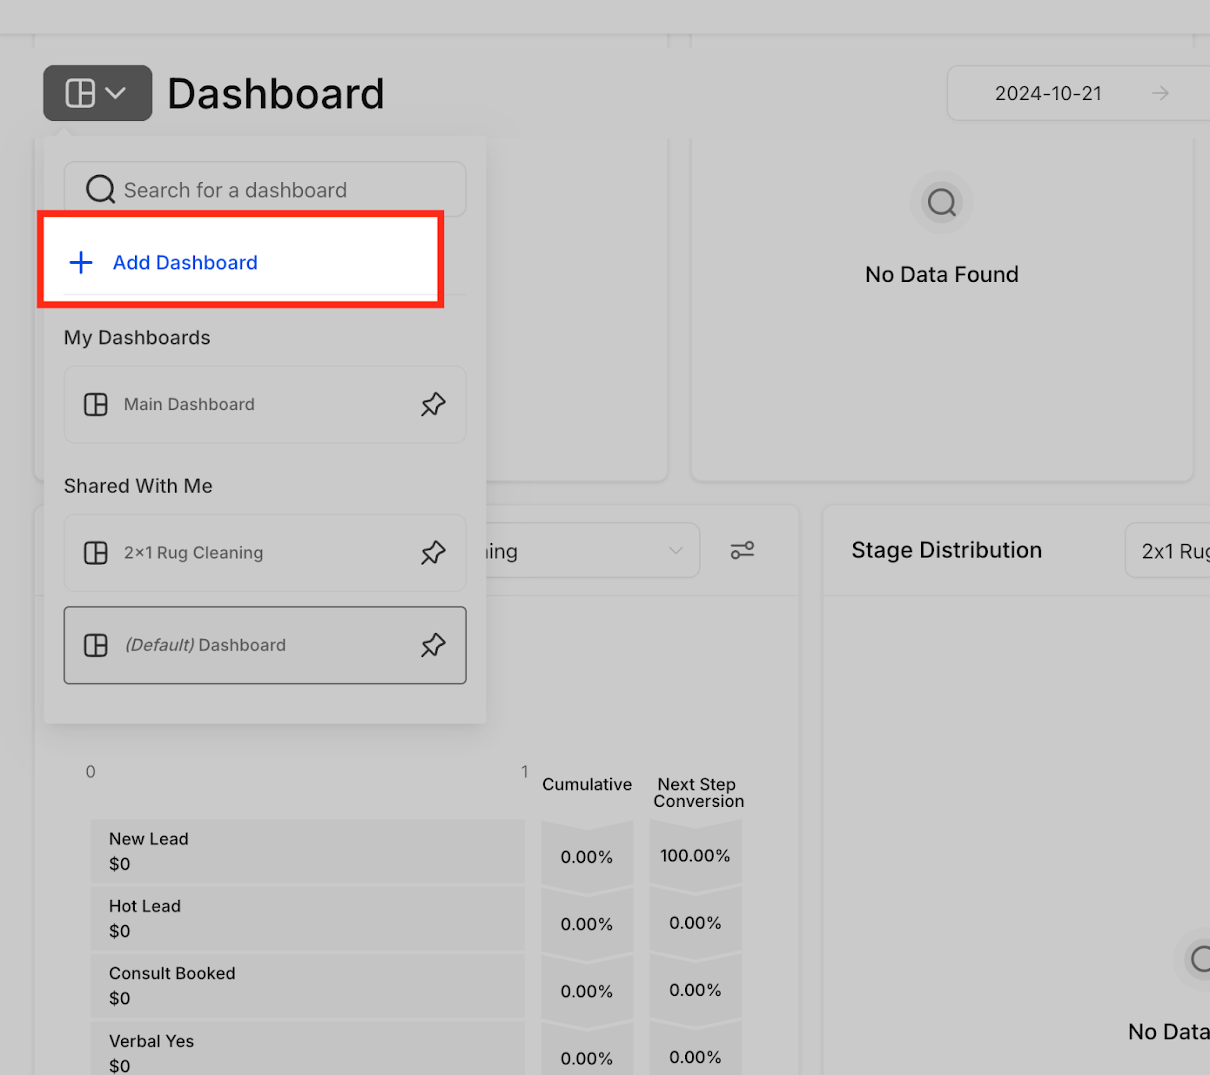
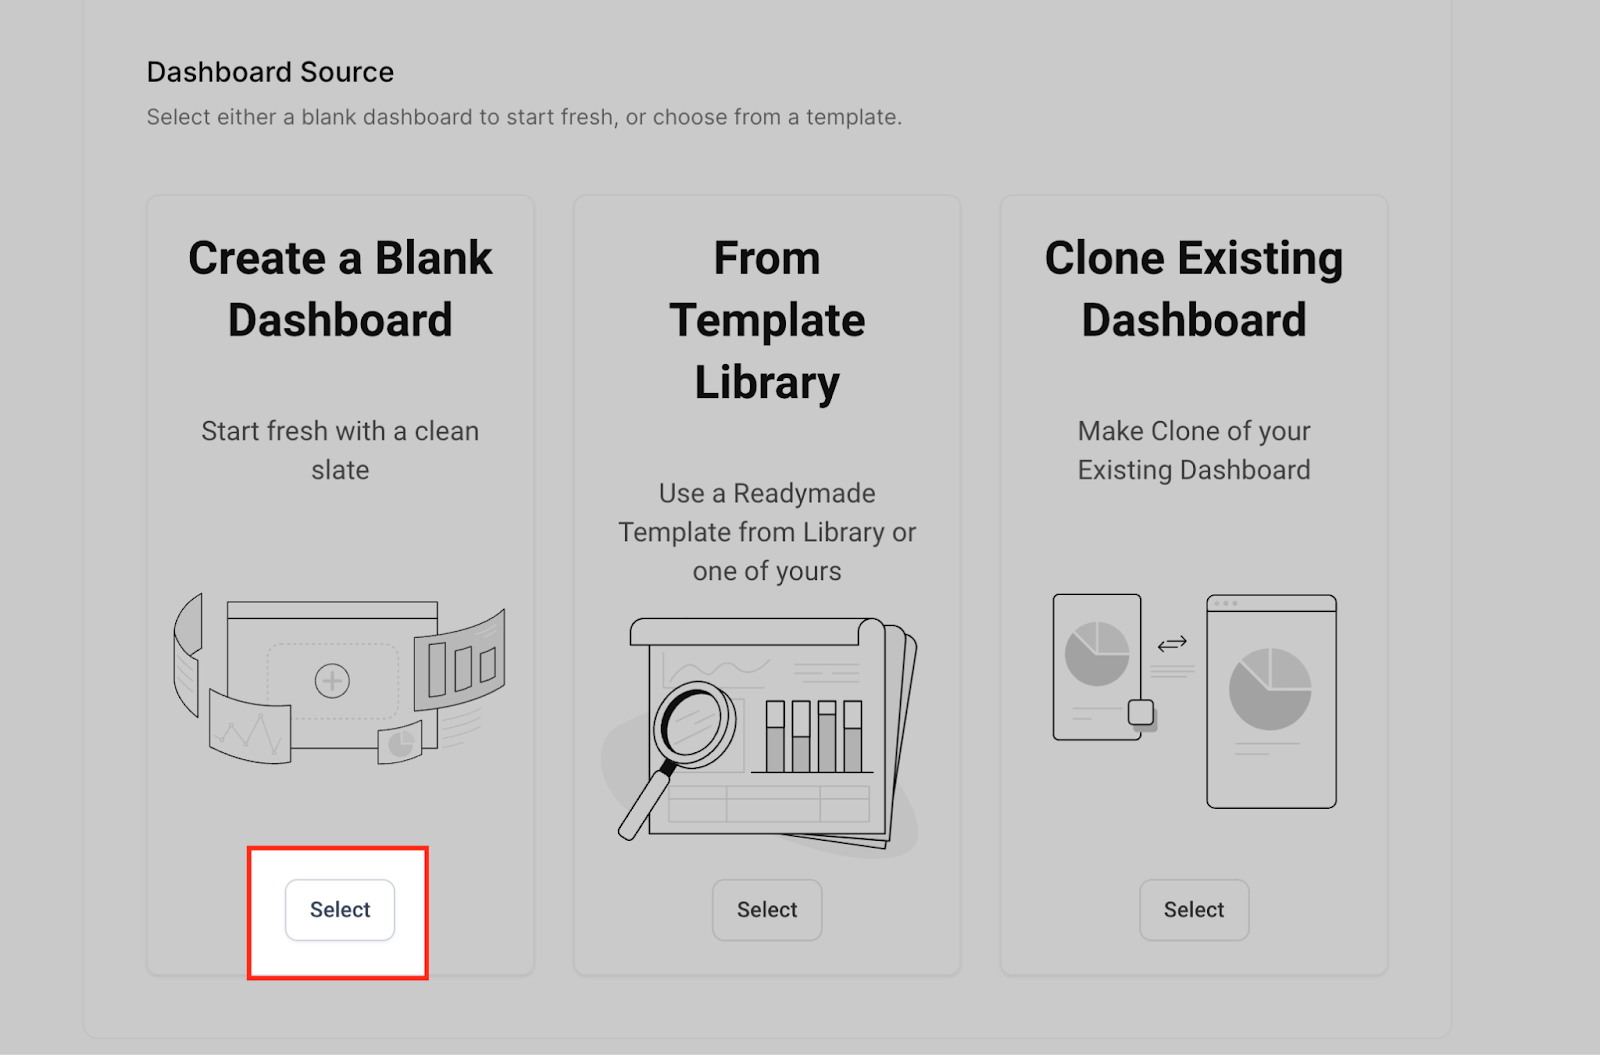
Select Select a Blank Dashboard.
Give your dashboard a name, such as "Front Desk Overview" or "Provider Revenue."
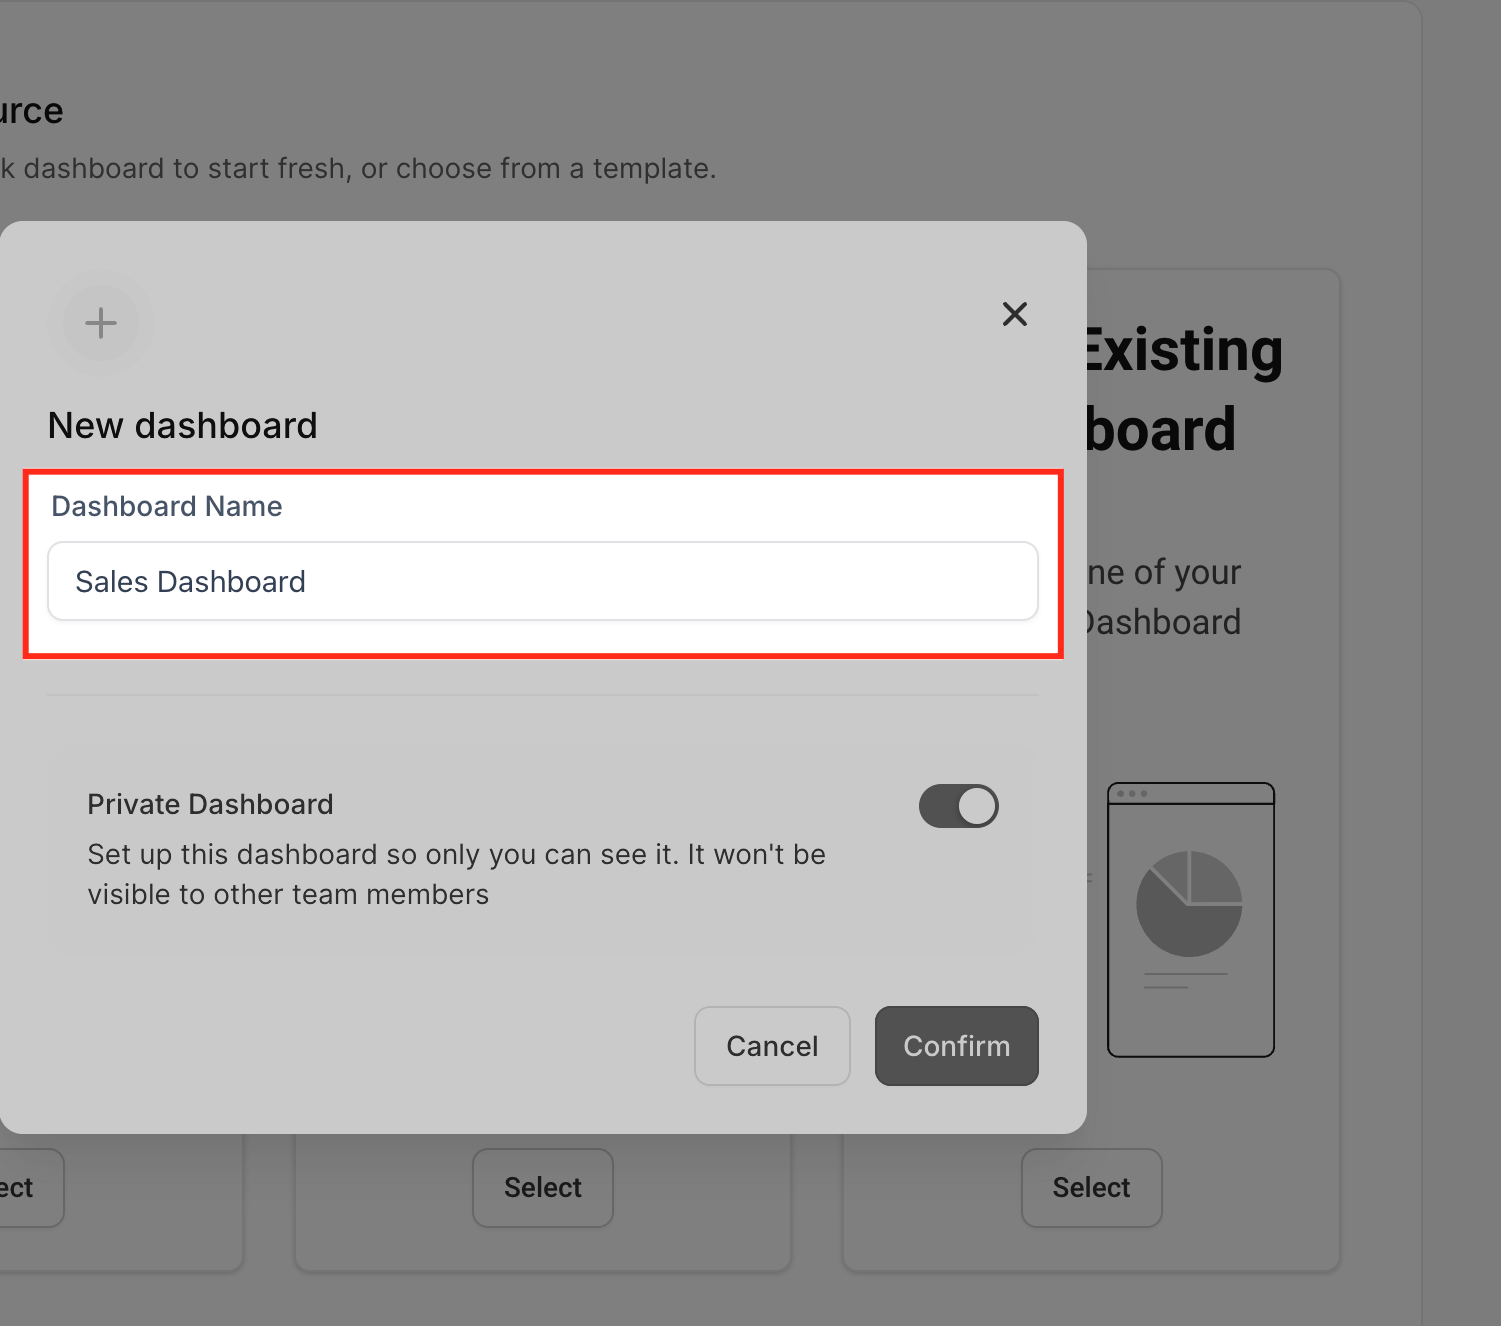
Choose whether the dashboard is Private (visible only to you) or For Everyone (visible to all users on your account).
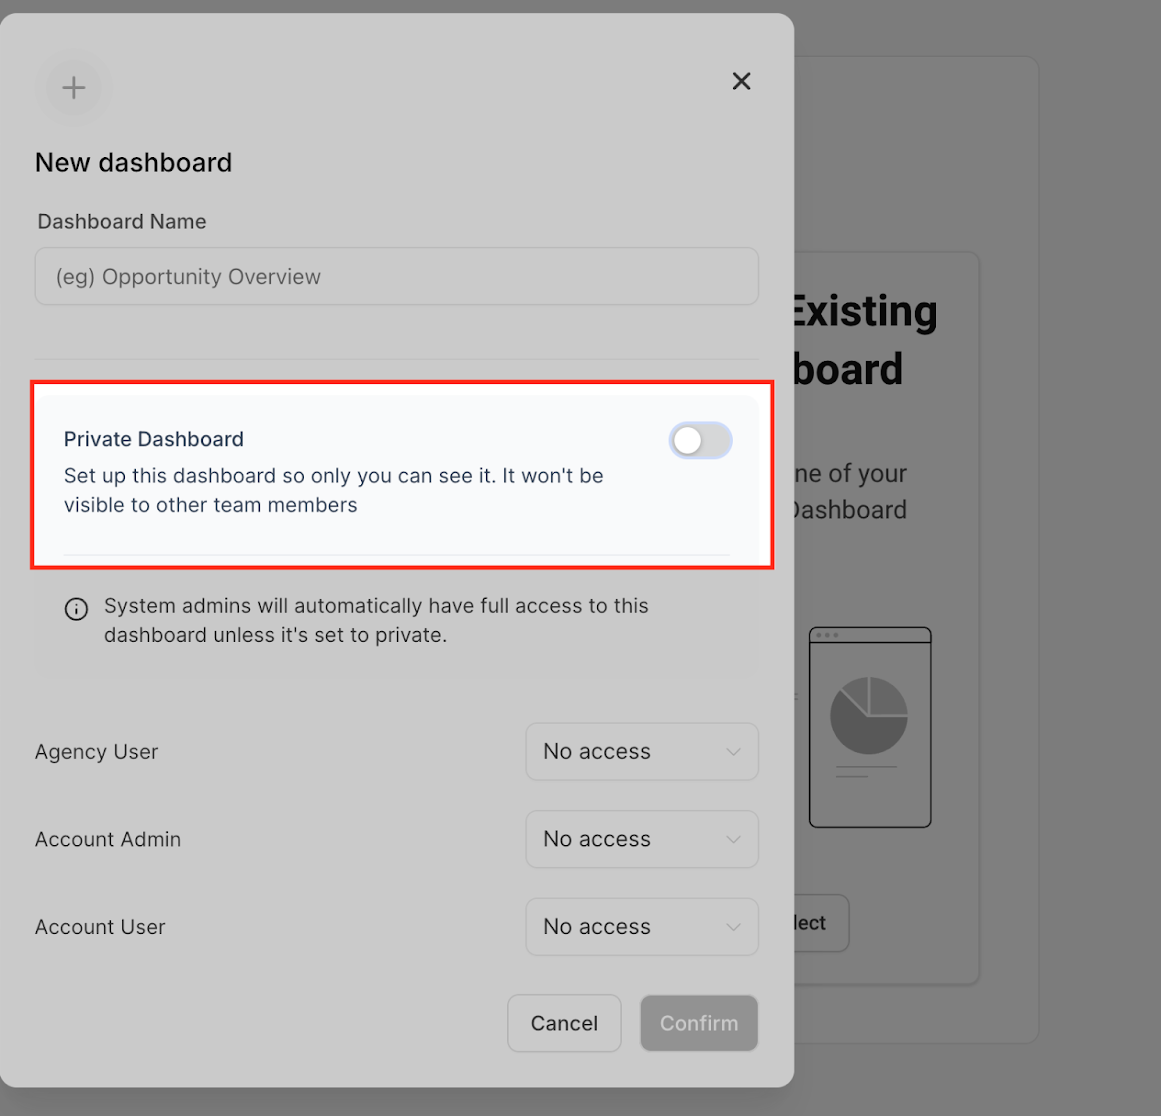
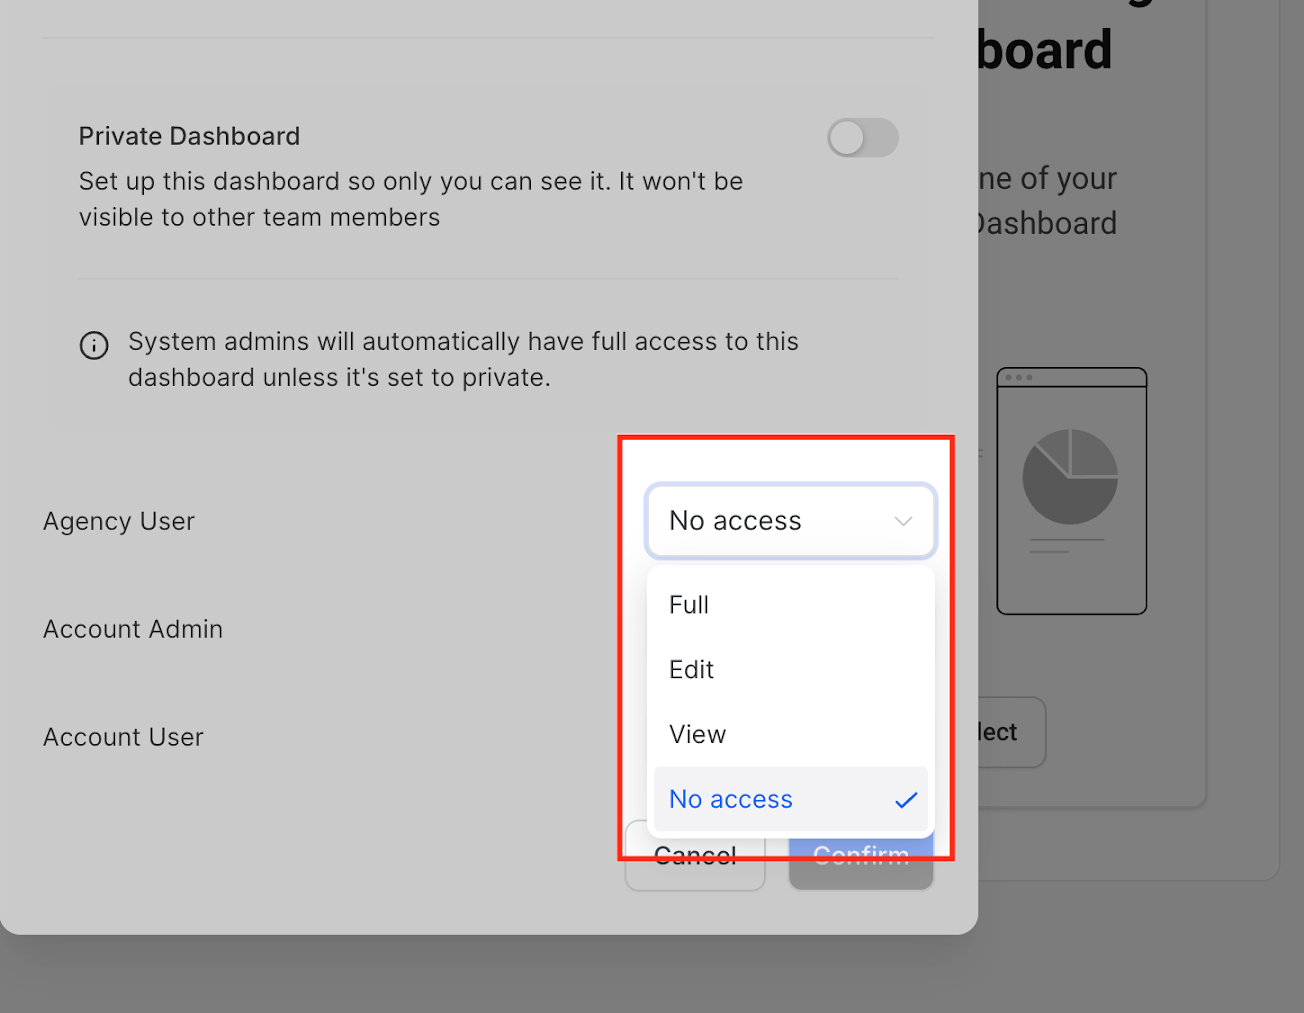
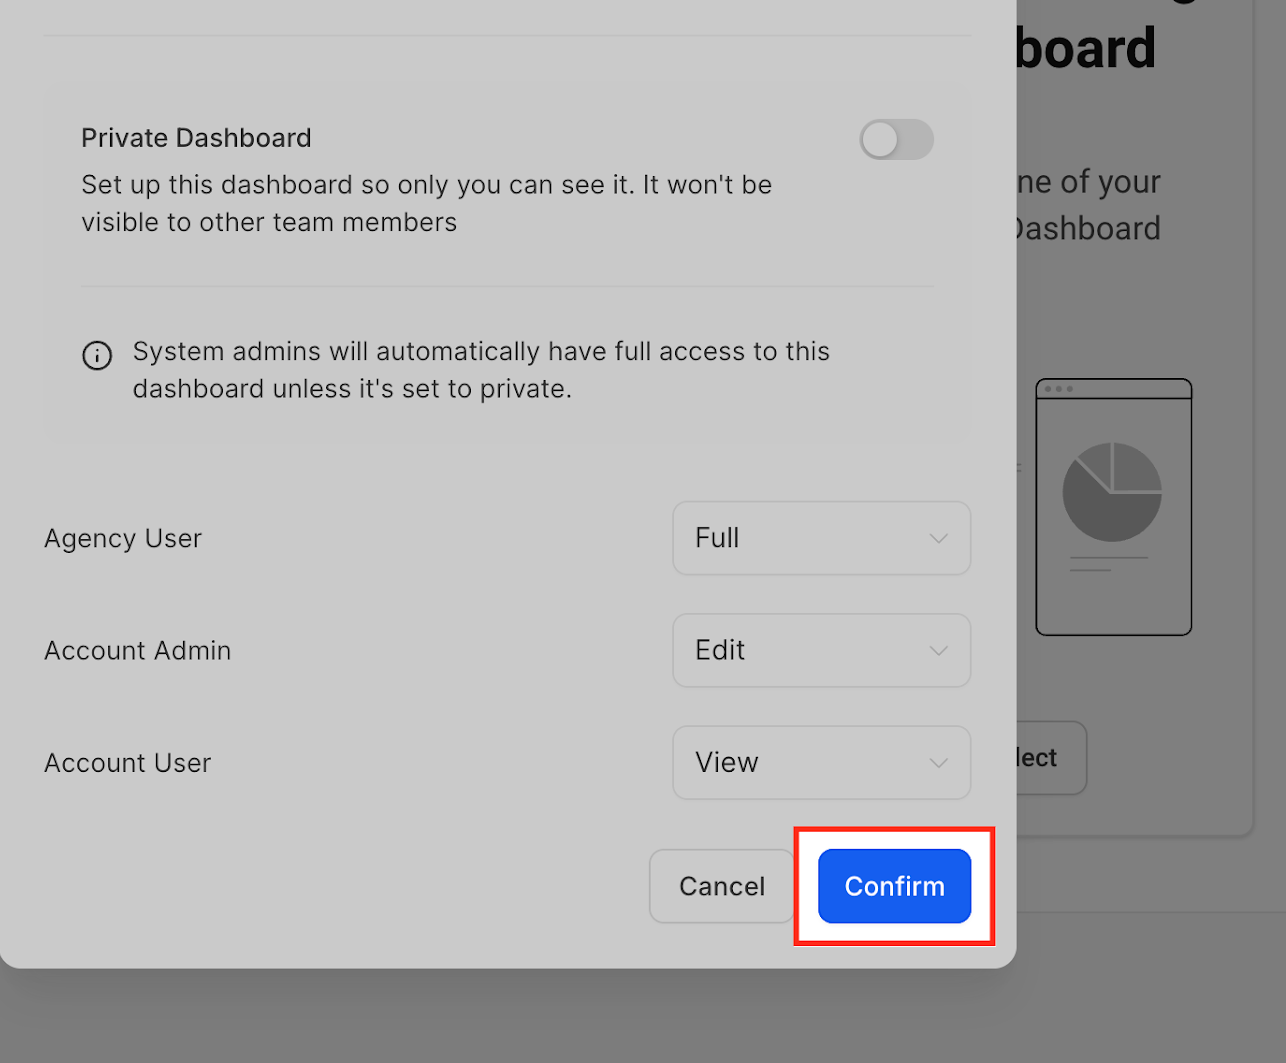
If it's a shared dashboard, set how your team can access it. You can grant Full access, Edit access, View-only access, or No access to specific admins and users on your account.
Click Confirm. You now have a blank canvas ready for widgets.
Once you click Add Widget (or the pencil icon at the top right of an existing dashboard to open the edit view), the widget menu opens on the right side of the screen.
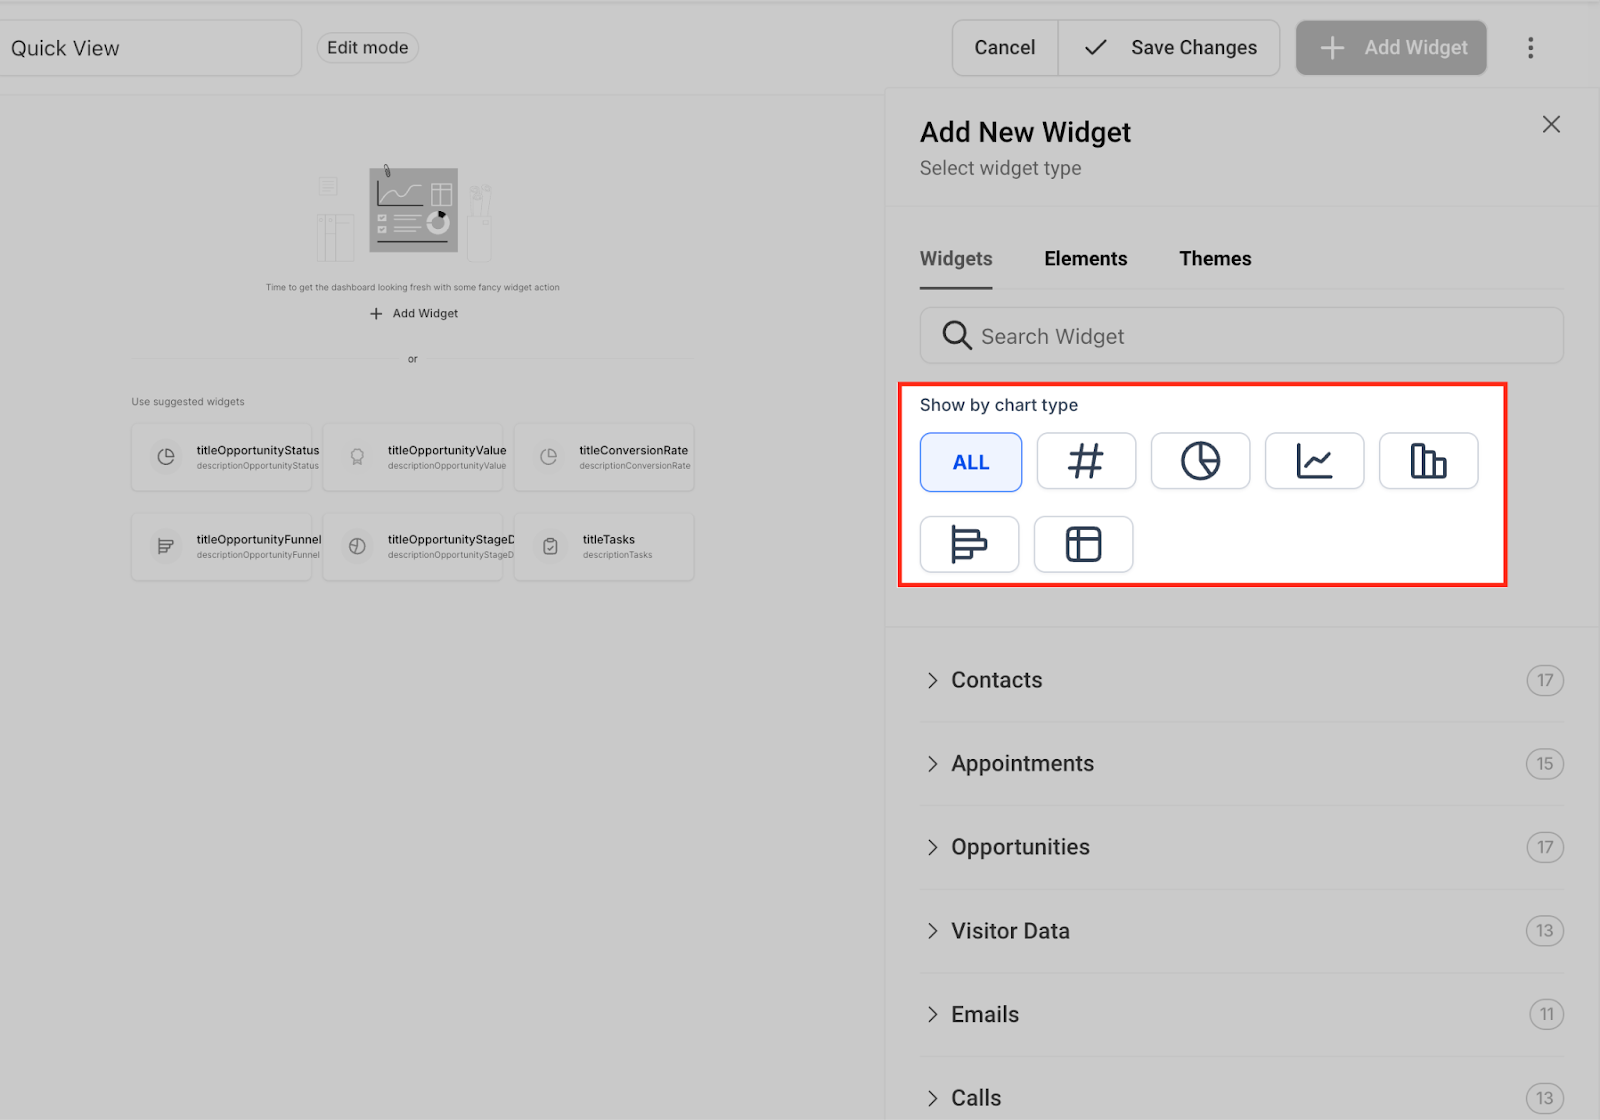
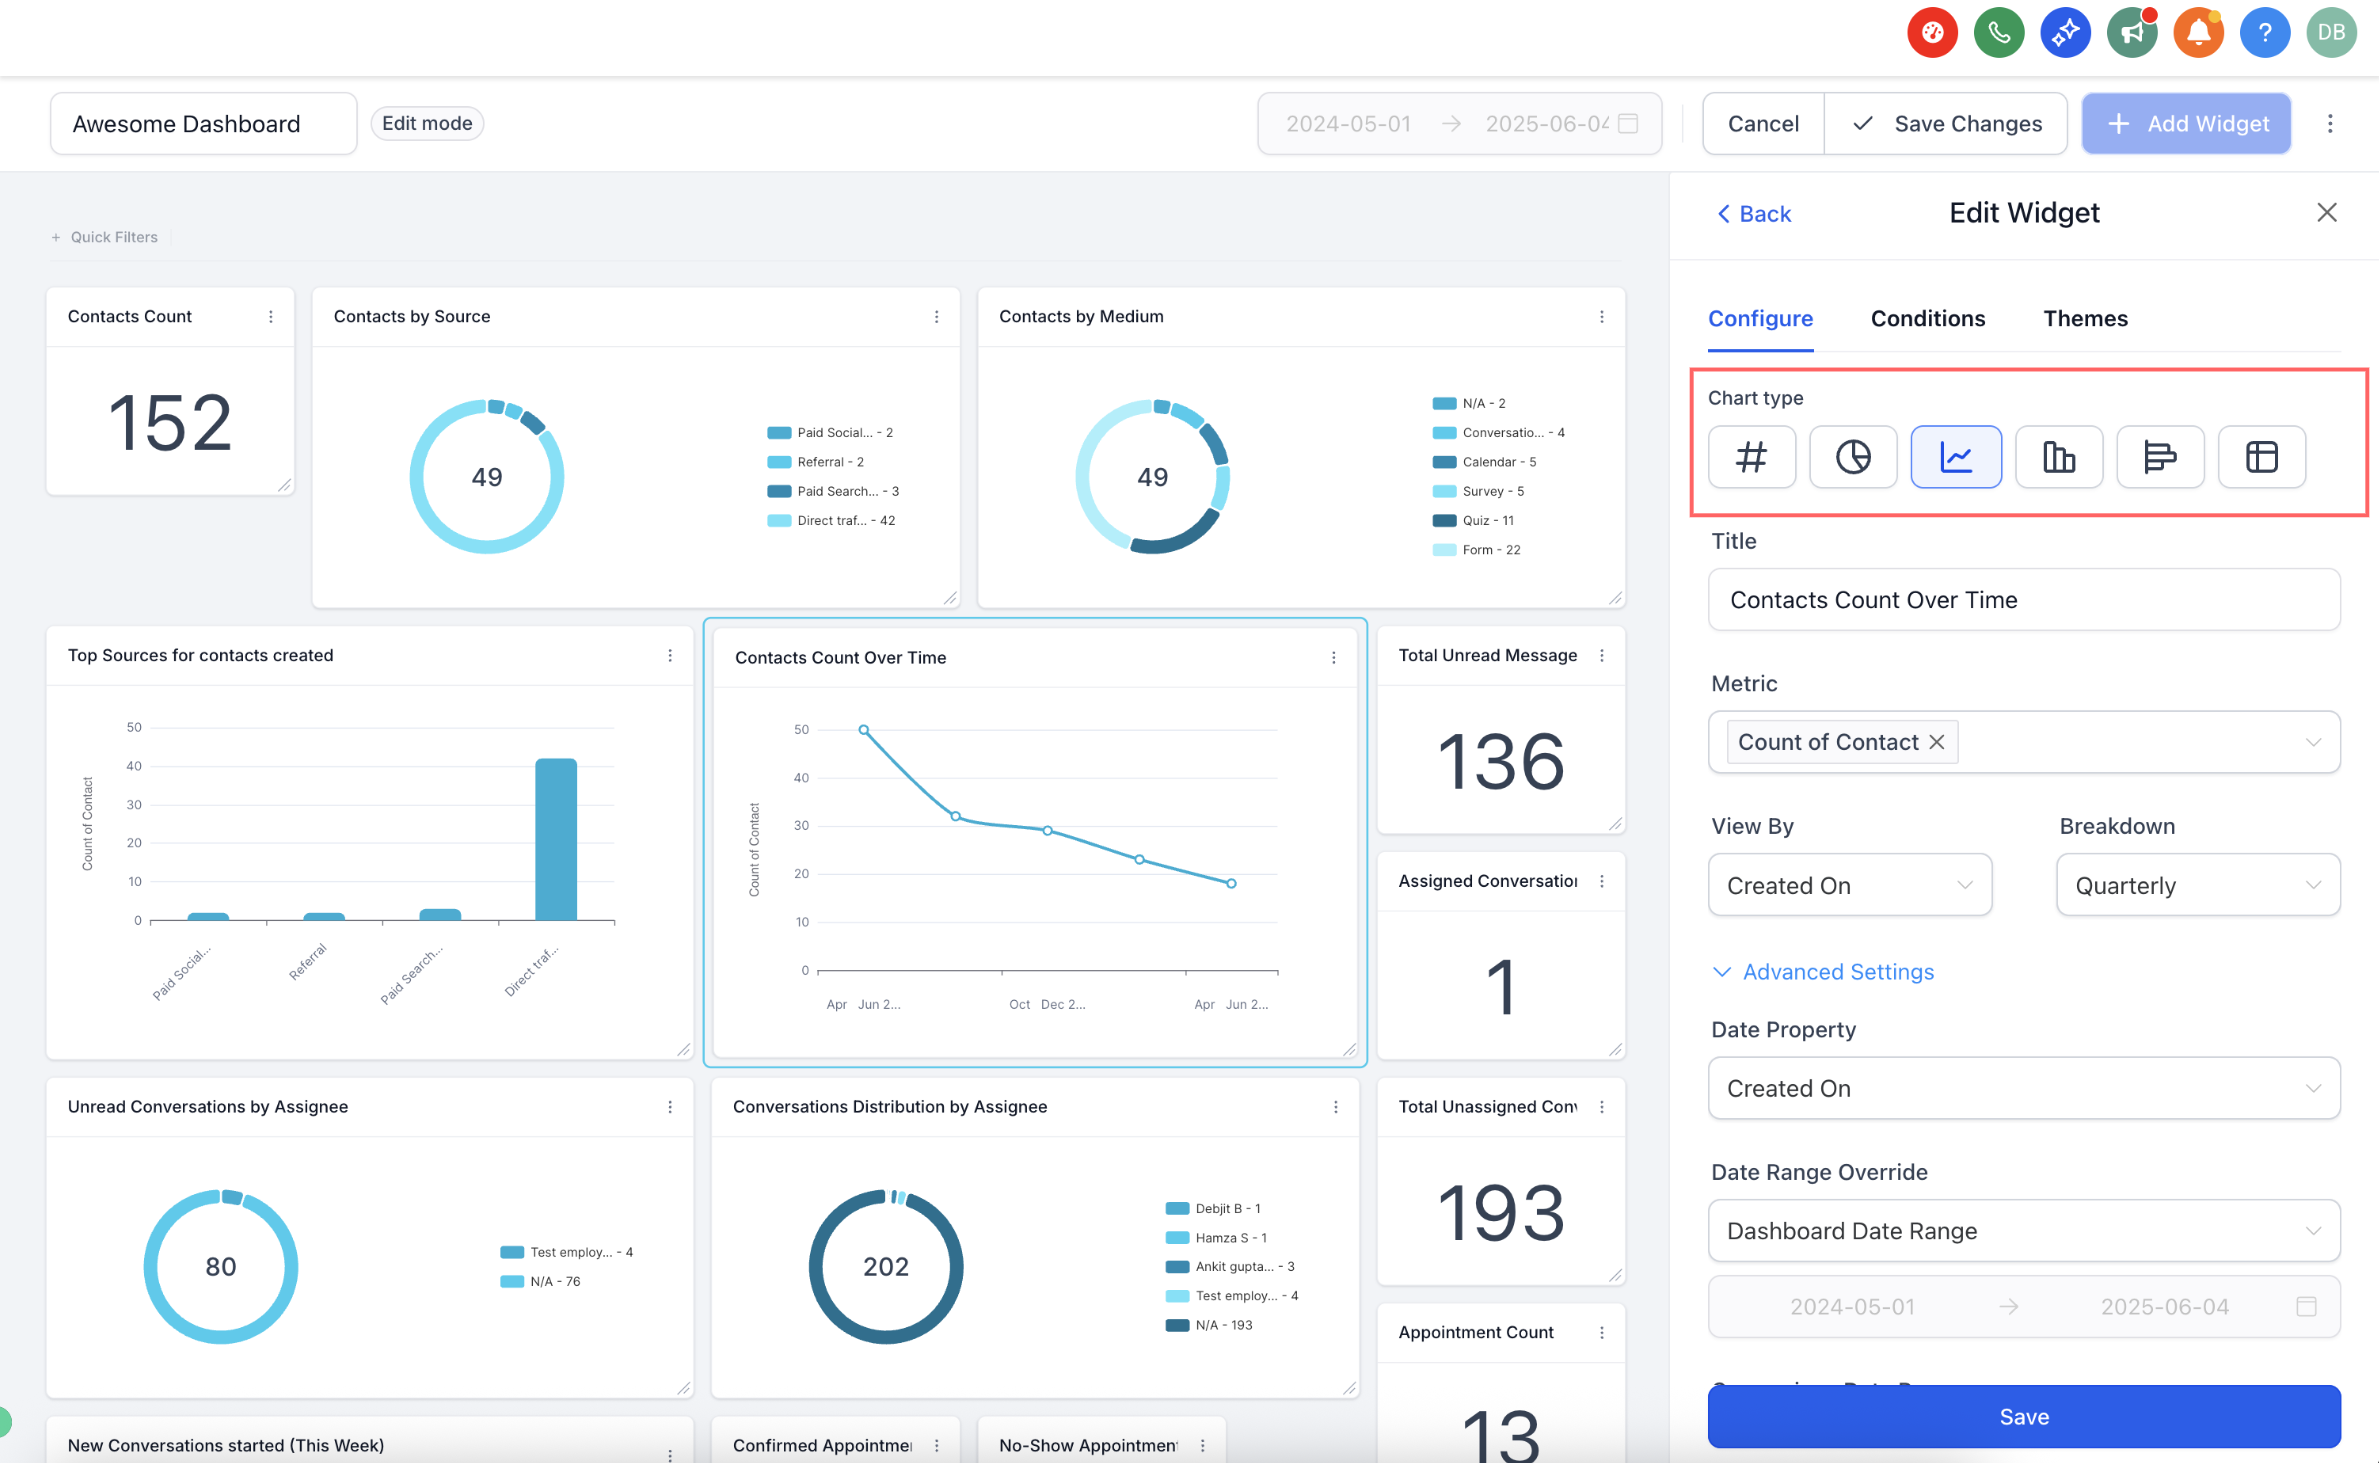
Select the chart type for how you want the data displayed: Numeric, Donut Chart, Line Chart, Bar Chart, Horizontal Bar Chart, or Table.
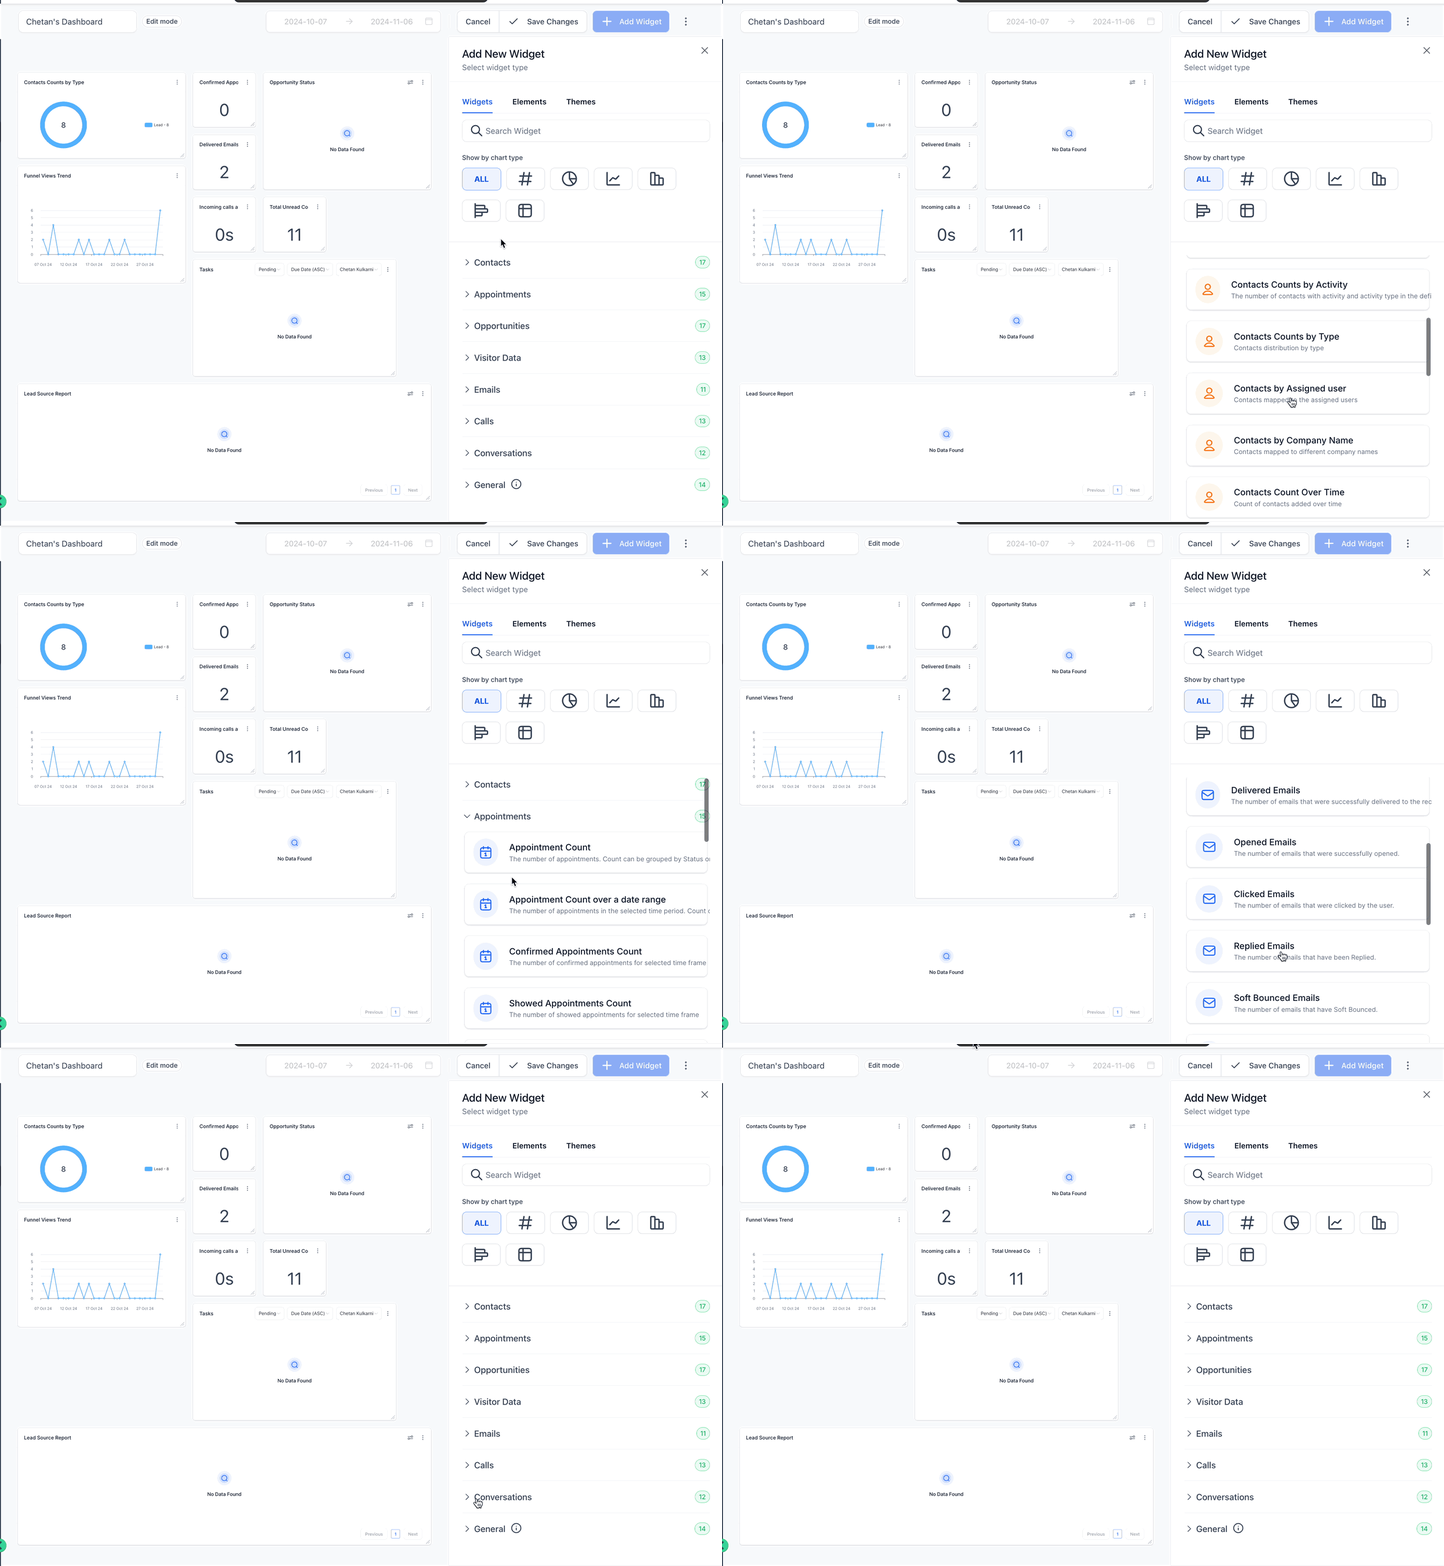
Select the widget category based on the data you want to see, such as leads, appointments, revenue, or a specific object type.
You can also pick your chart type directly from the Configure tab without leaving the edit flow. Open the widget editor, go to Configure, and use the Chart Type selector to choose a visualization. Review the live preview as you go, then continue to Conditions or save.
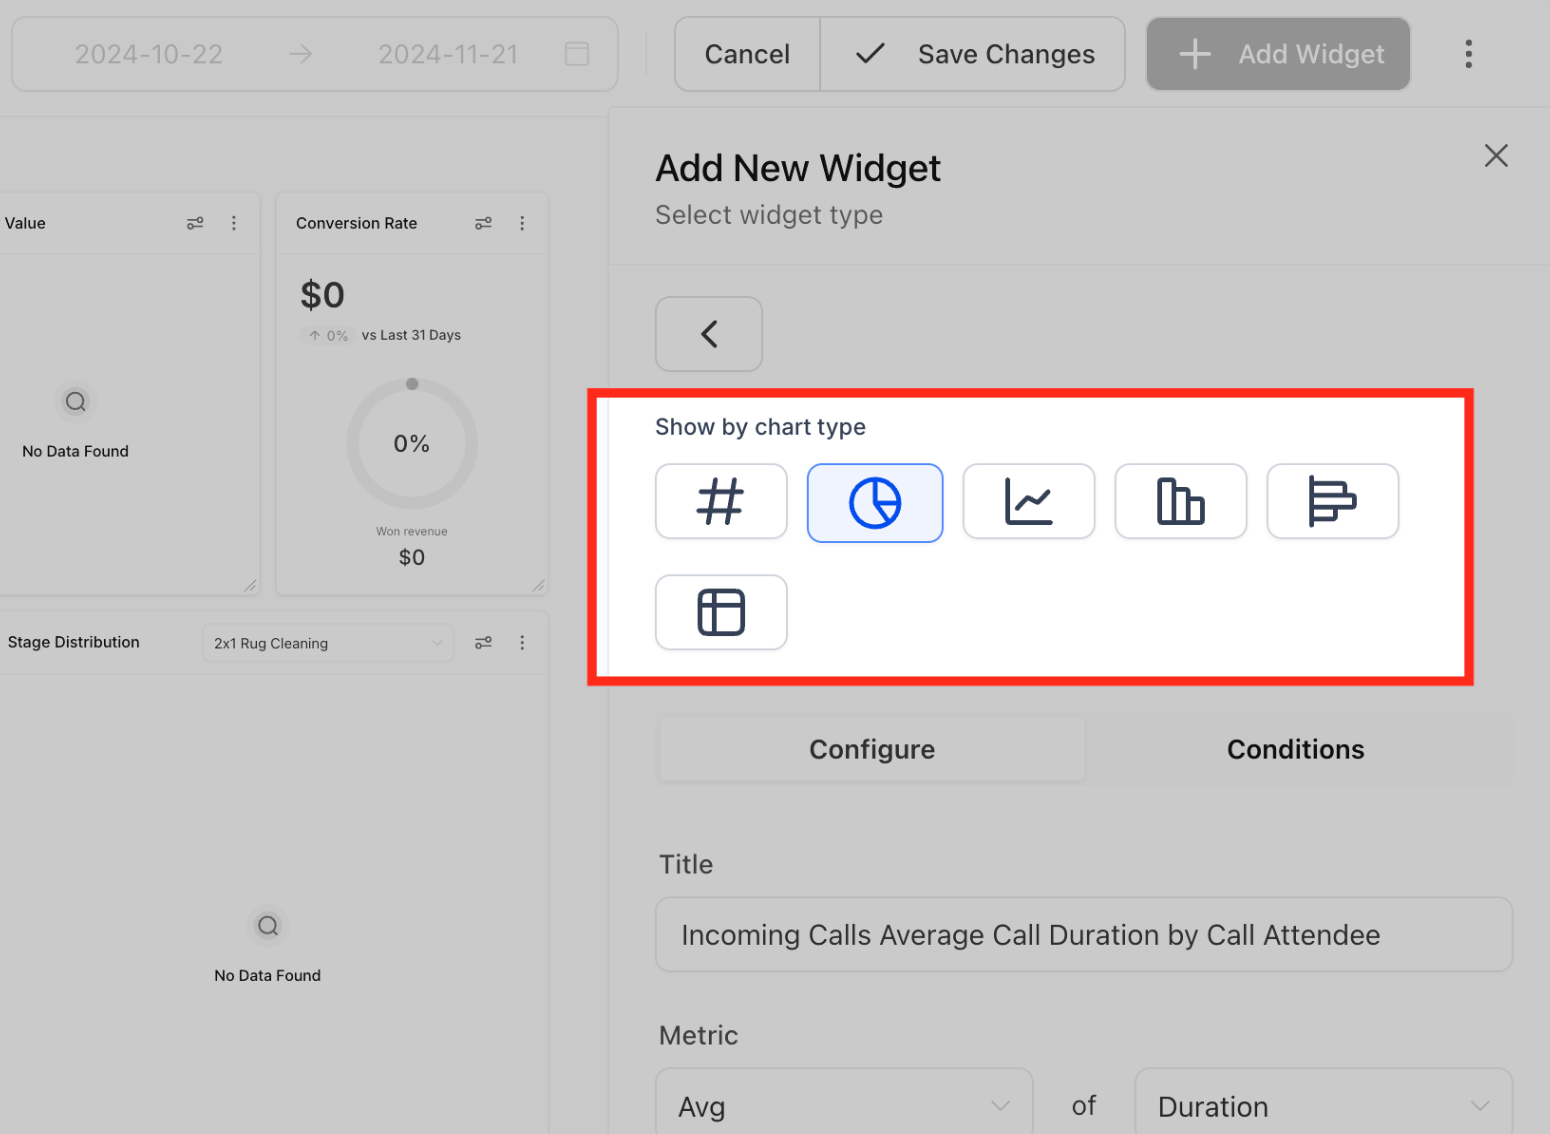
In the Widget Settings panel:
Confirm or adjust the chart type. The selector is built directly into the widget settings for quicker access.
Add an optional title and short description so your team knows what the widget is tracking at a glance.
Switch to the Conditions tab to filter what data a widget shows:
Click Add Filter to create your first group of filters.
Use +AND to add more filters within the same group.
Click +Add Filter again to start a new group. This creates an OR condition between groups.
You can reuse the same filter (for example, "Session Source") across different groups.
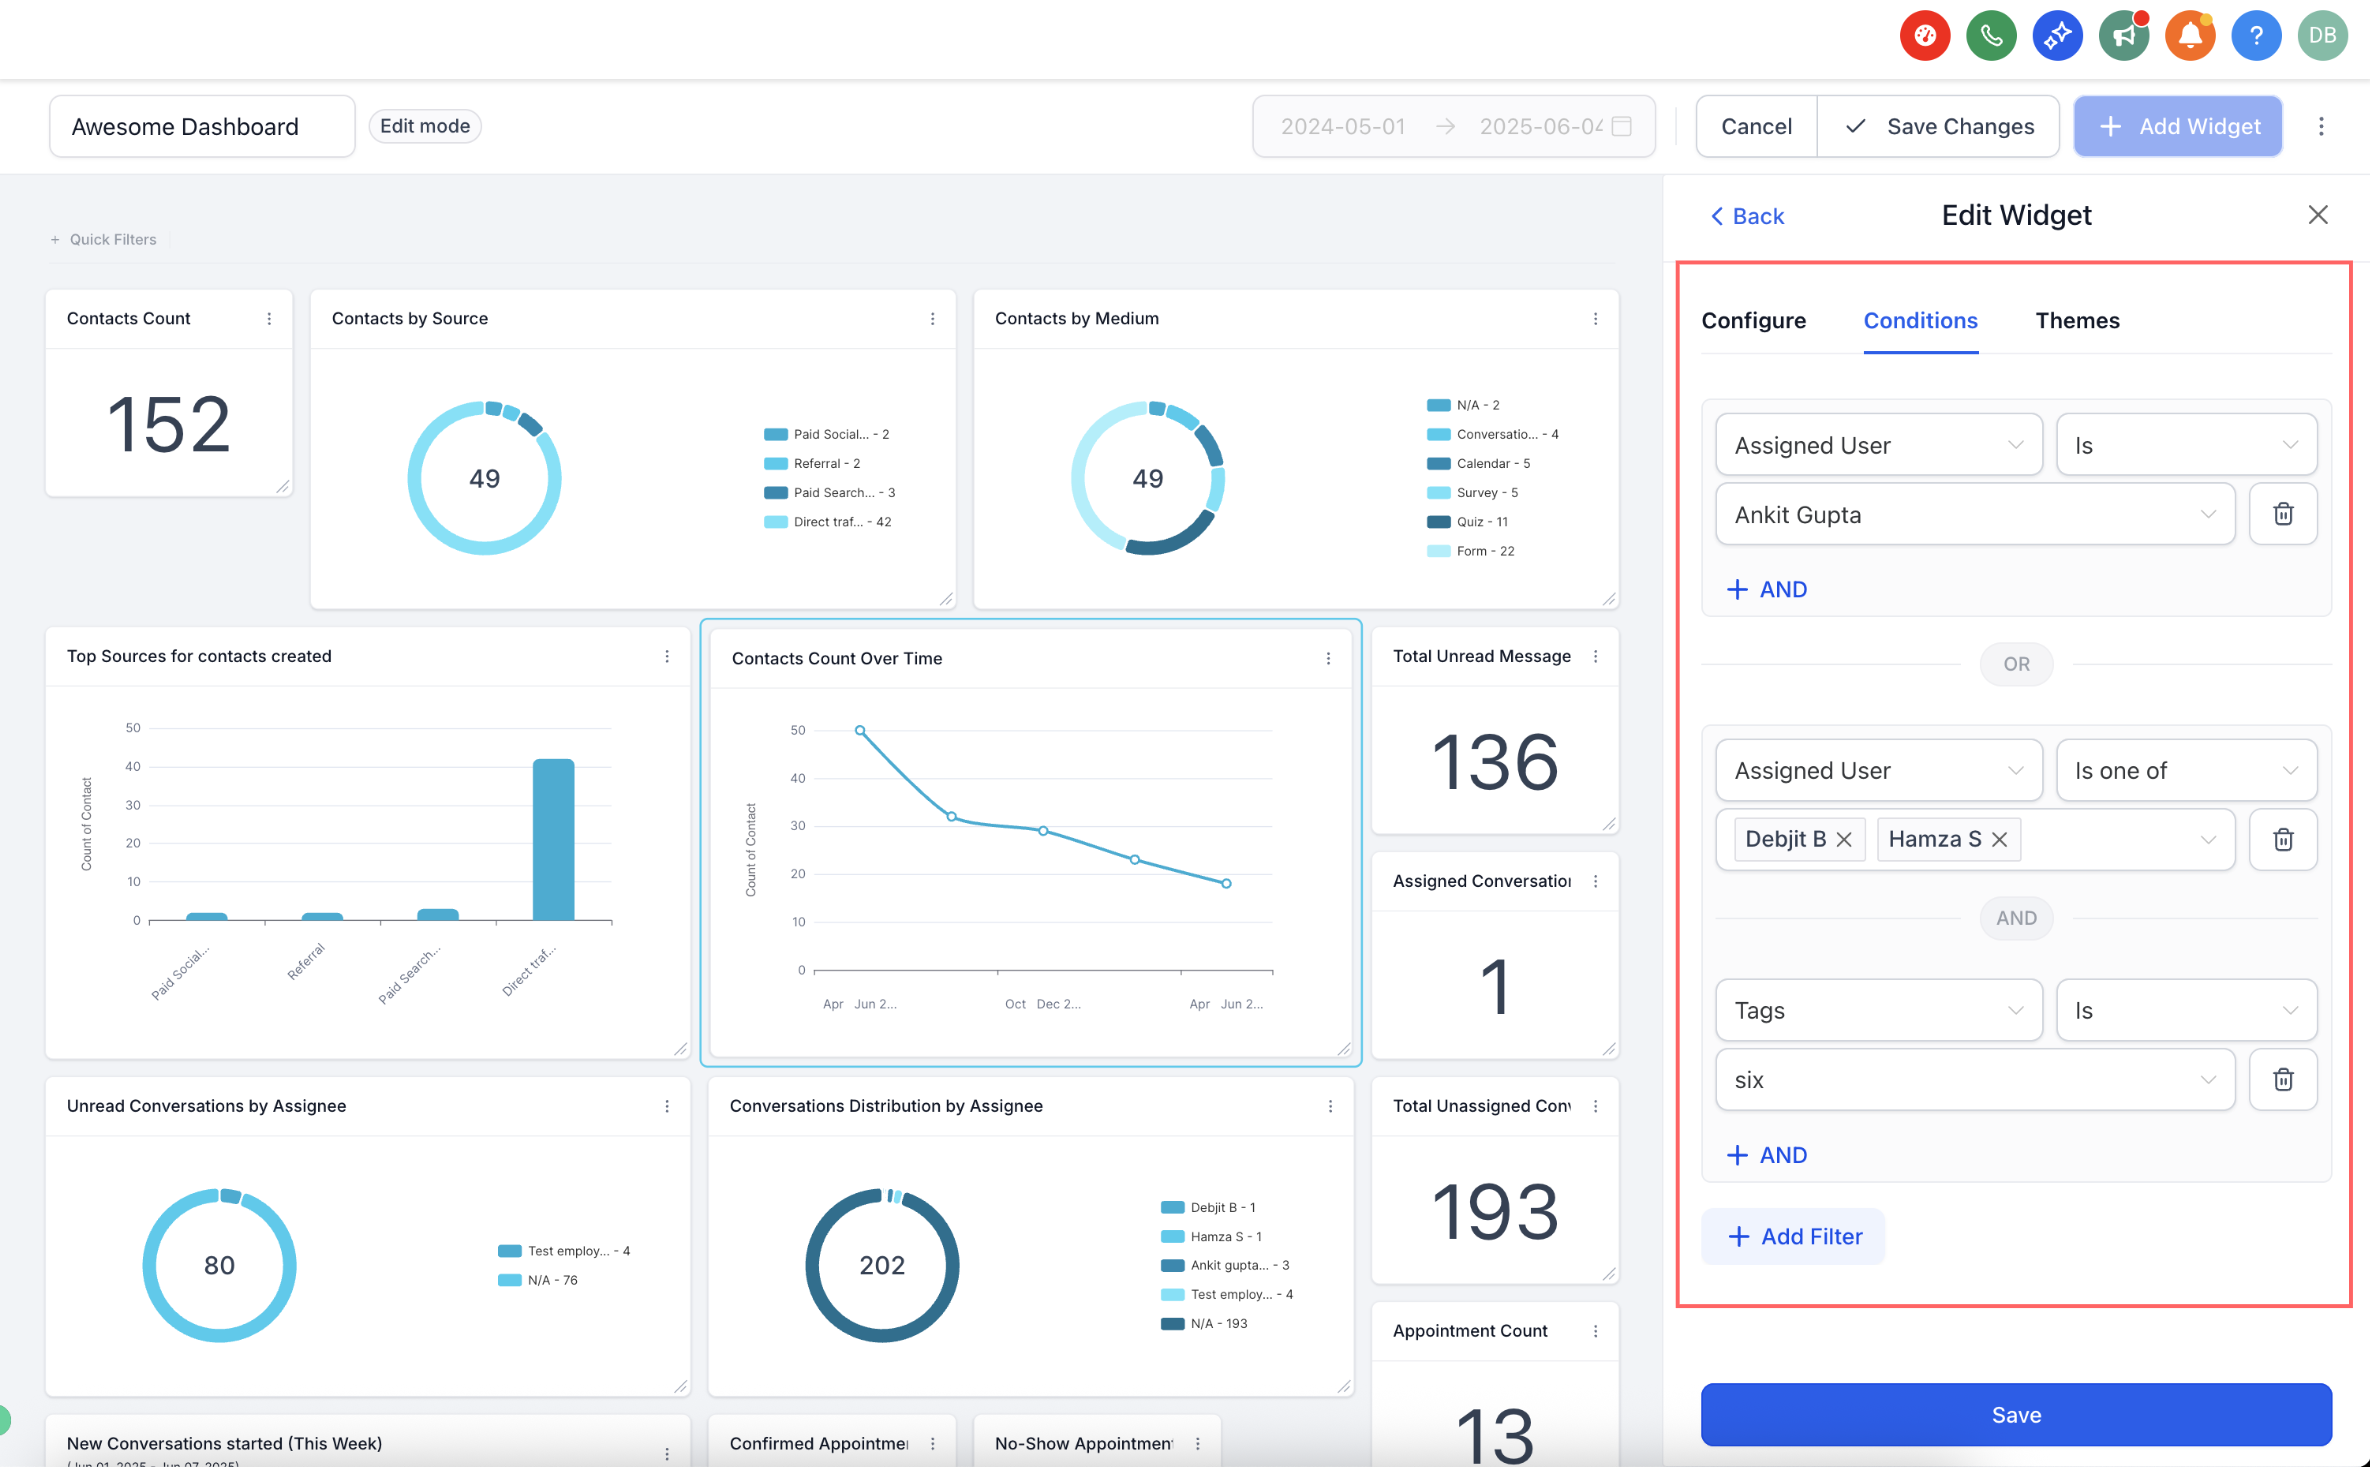
A note on attribution fields: if you're using attribution fields like Session Source or Session Medium in the Group By or View By dropdown (for example, on a donut or line chart), only one compound filter group is allowed, and that group must include the Attribution Type (First Touch or Last Touch) as a filter. If you add multiple filter groups, attribution-based fields are disabled in the dropdown. This keeps your attribution data consistent.
Once a widget is set up, click Save to add it to your dashboard.
Repeat the process to add more widgets and build a complete picture of your practice's performance.
Drag and drop widgets to resize and reposition them for better visibility.
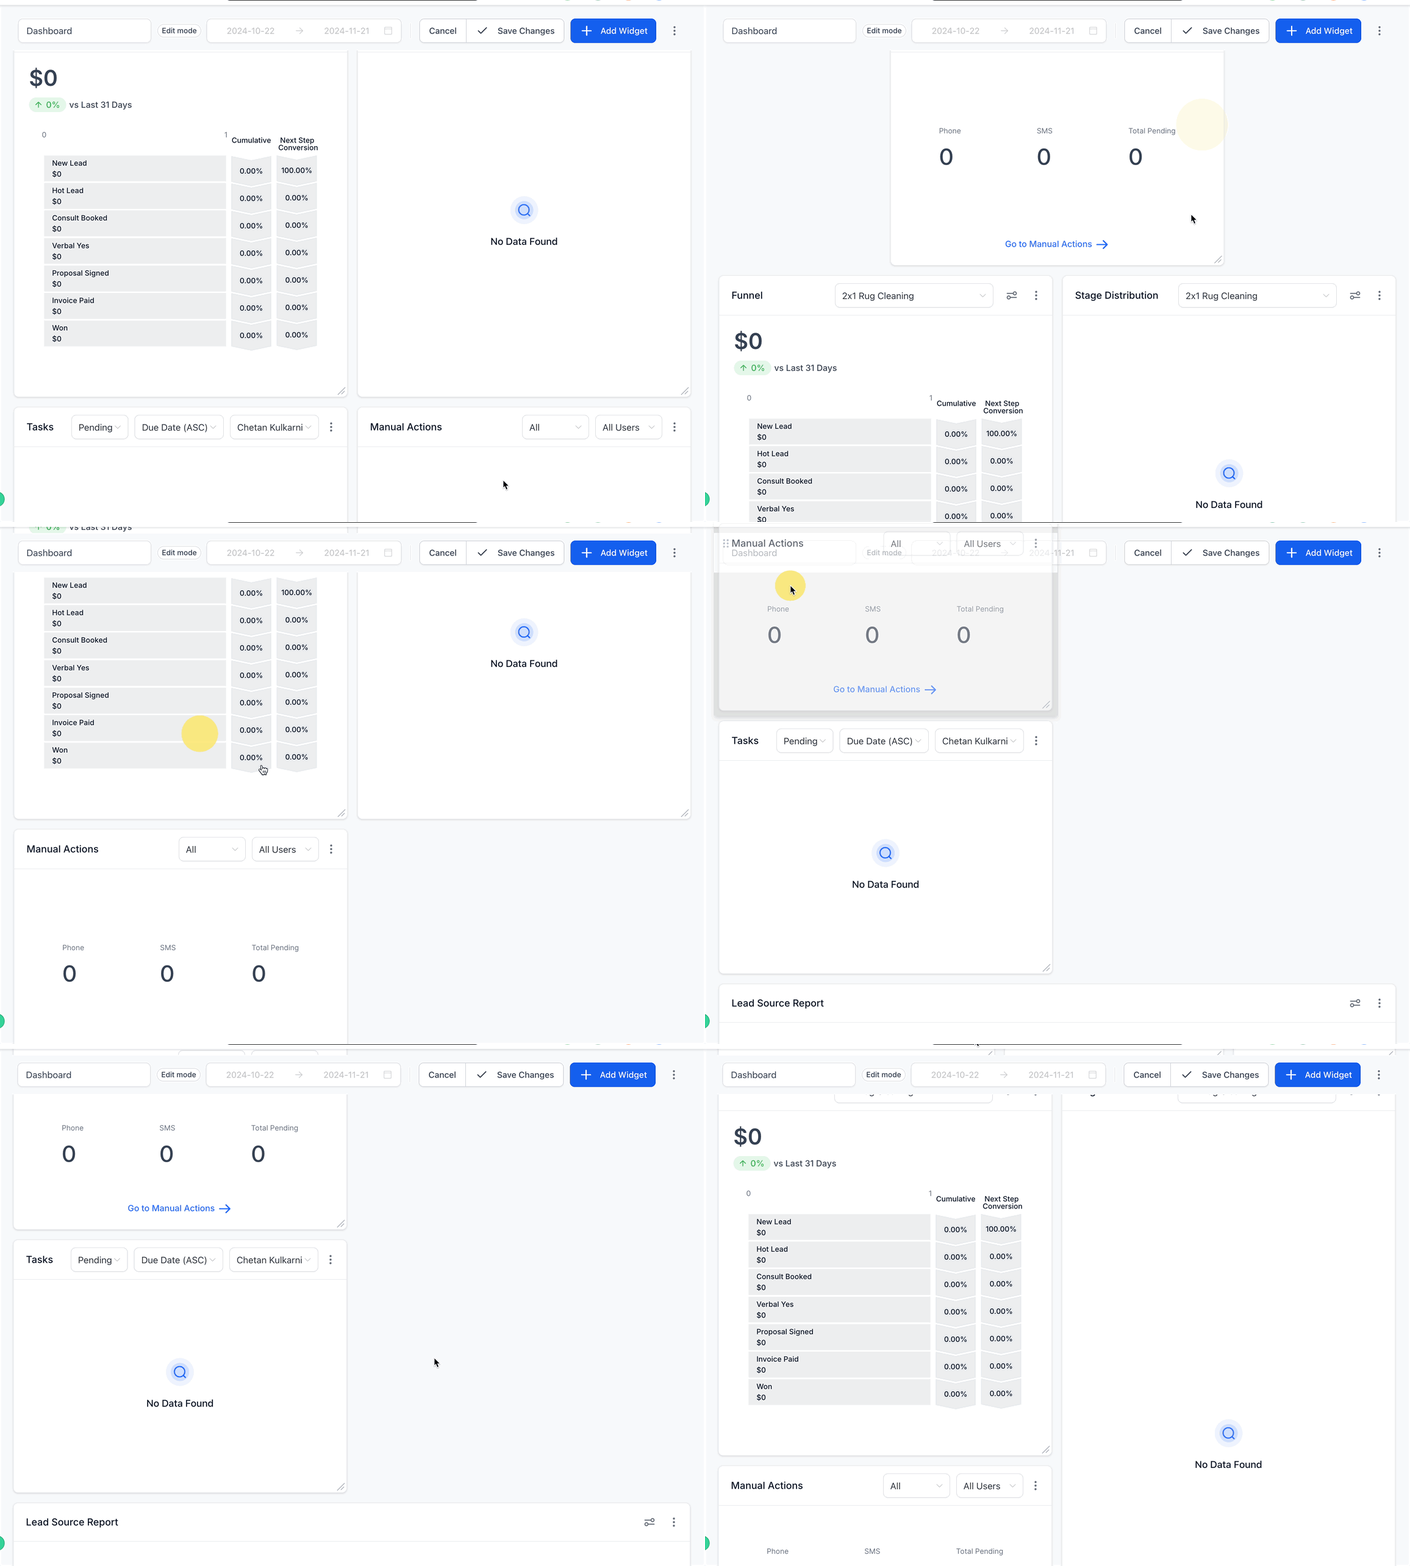
When you're finished arranging widgets, click Save Changes at the top of the dashboard to lock in your layout.
The Contact widget puts a patient's key details front and center without forcing you to open their full profile or switch tabs. It's especially useful at the front desk, where speed matters.
With the Contact widget, your team can:
Instantly view tags, lead source, last activity, and more
Call, text, or email a patient right from the widget
Add notes or create tasks on the fly
Jump into the full contact record only when they need more detail
Add the Contact widget the same way you add any other widget: open Add Widget, browse to the Contact category, select it, and save. Because the Contact widget can surface patient details like contact history and notes, treat any device where it's visible the same way you'd treat any screen showing patient information: lock your workstation when you step away and limit shared-computer access to staff who need it.
If you don't see the Contact widget:
Problem | Fix |
|---|---|
Widget not showing | Refresh the page |
Blank or stuck widget | Clear your browser cache |
No access to contacts | Ask your account admin to check your permissions |
If you already have a widget configured the way you like it, duplicating it is faster than building a similar one from scratch.
Navigate to the dashboard where you want to duplicate a widget.
Click Edit to enter edit mode.
Locate the widget you want to duplicate.
Click the three-dot menu in the top-right corner of the widget card.
Select Duplicate from the dropdown menu. A copy of the widget appears on your dashboard.
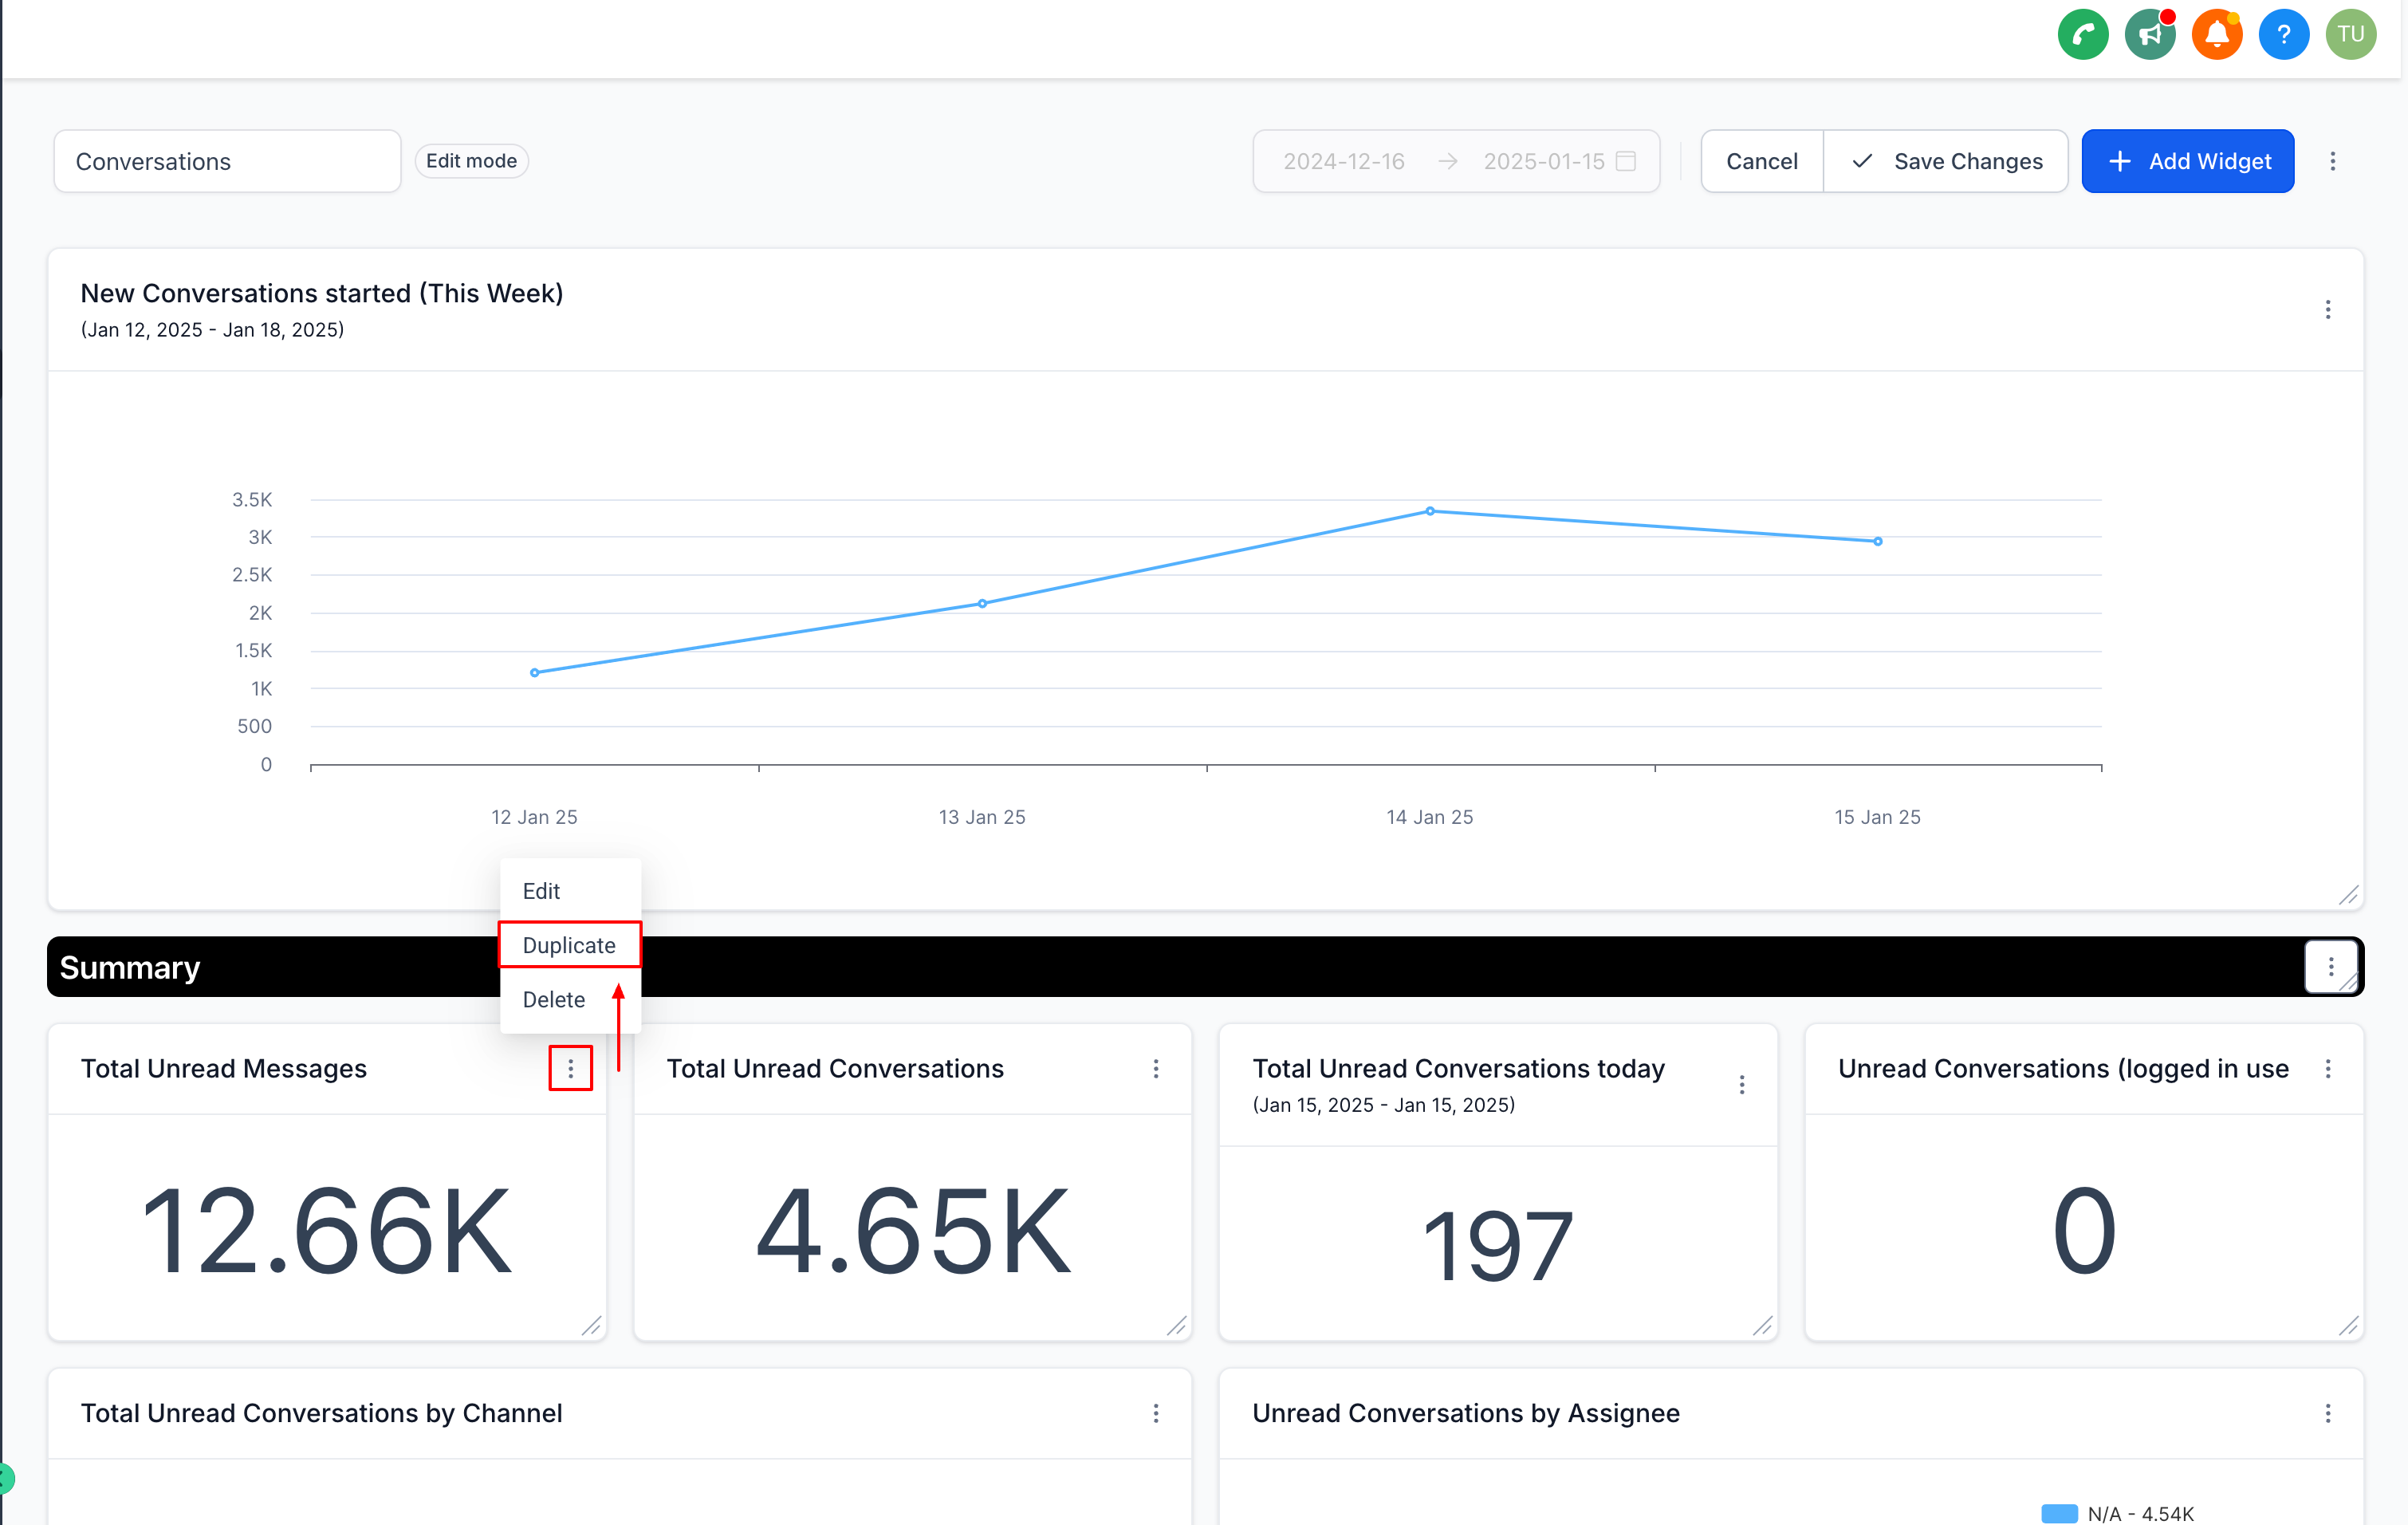
Make any edits you need to the duplicate, then click Save to finalize it.
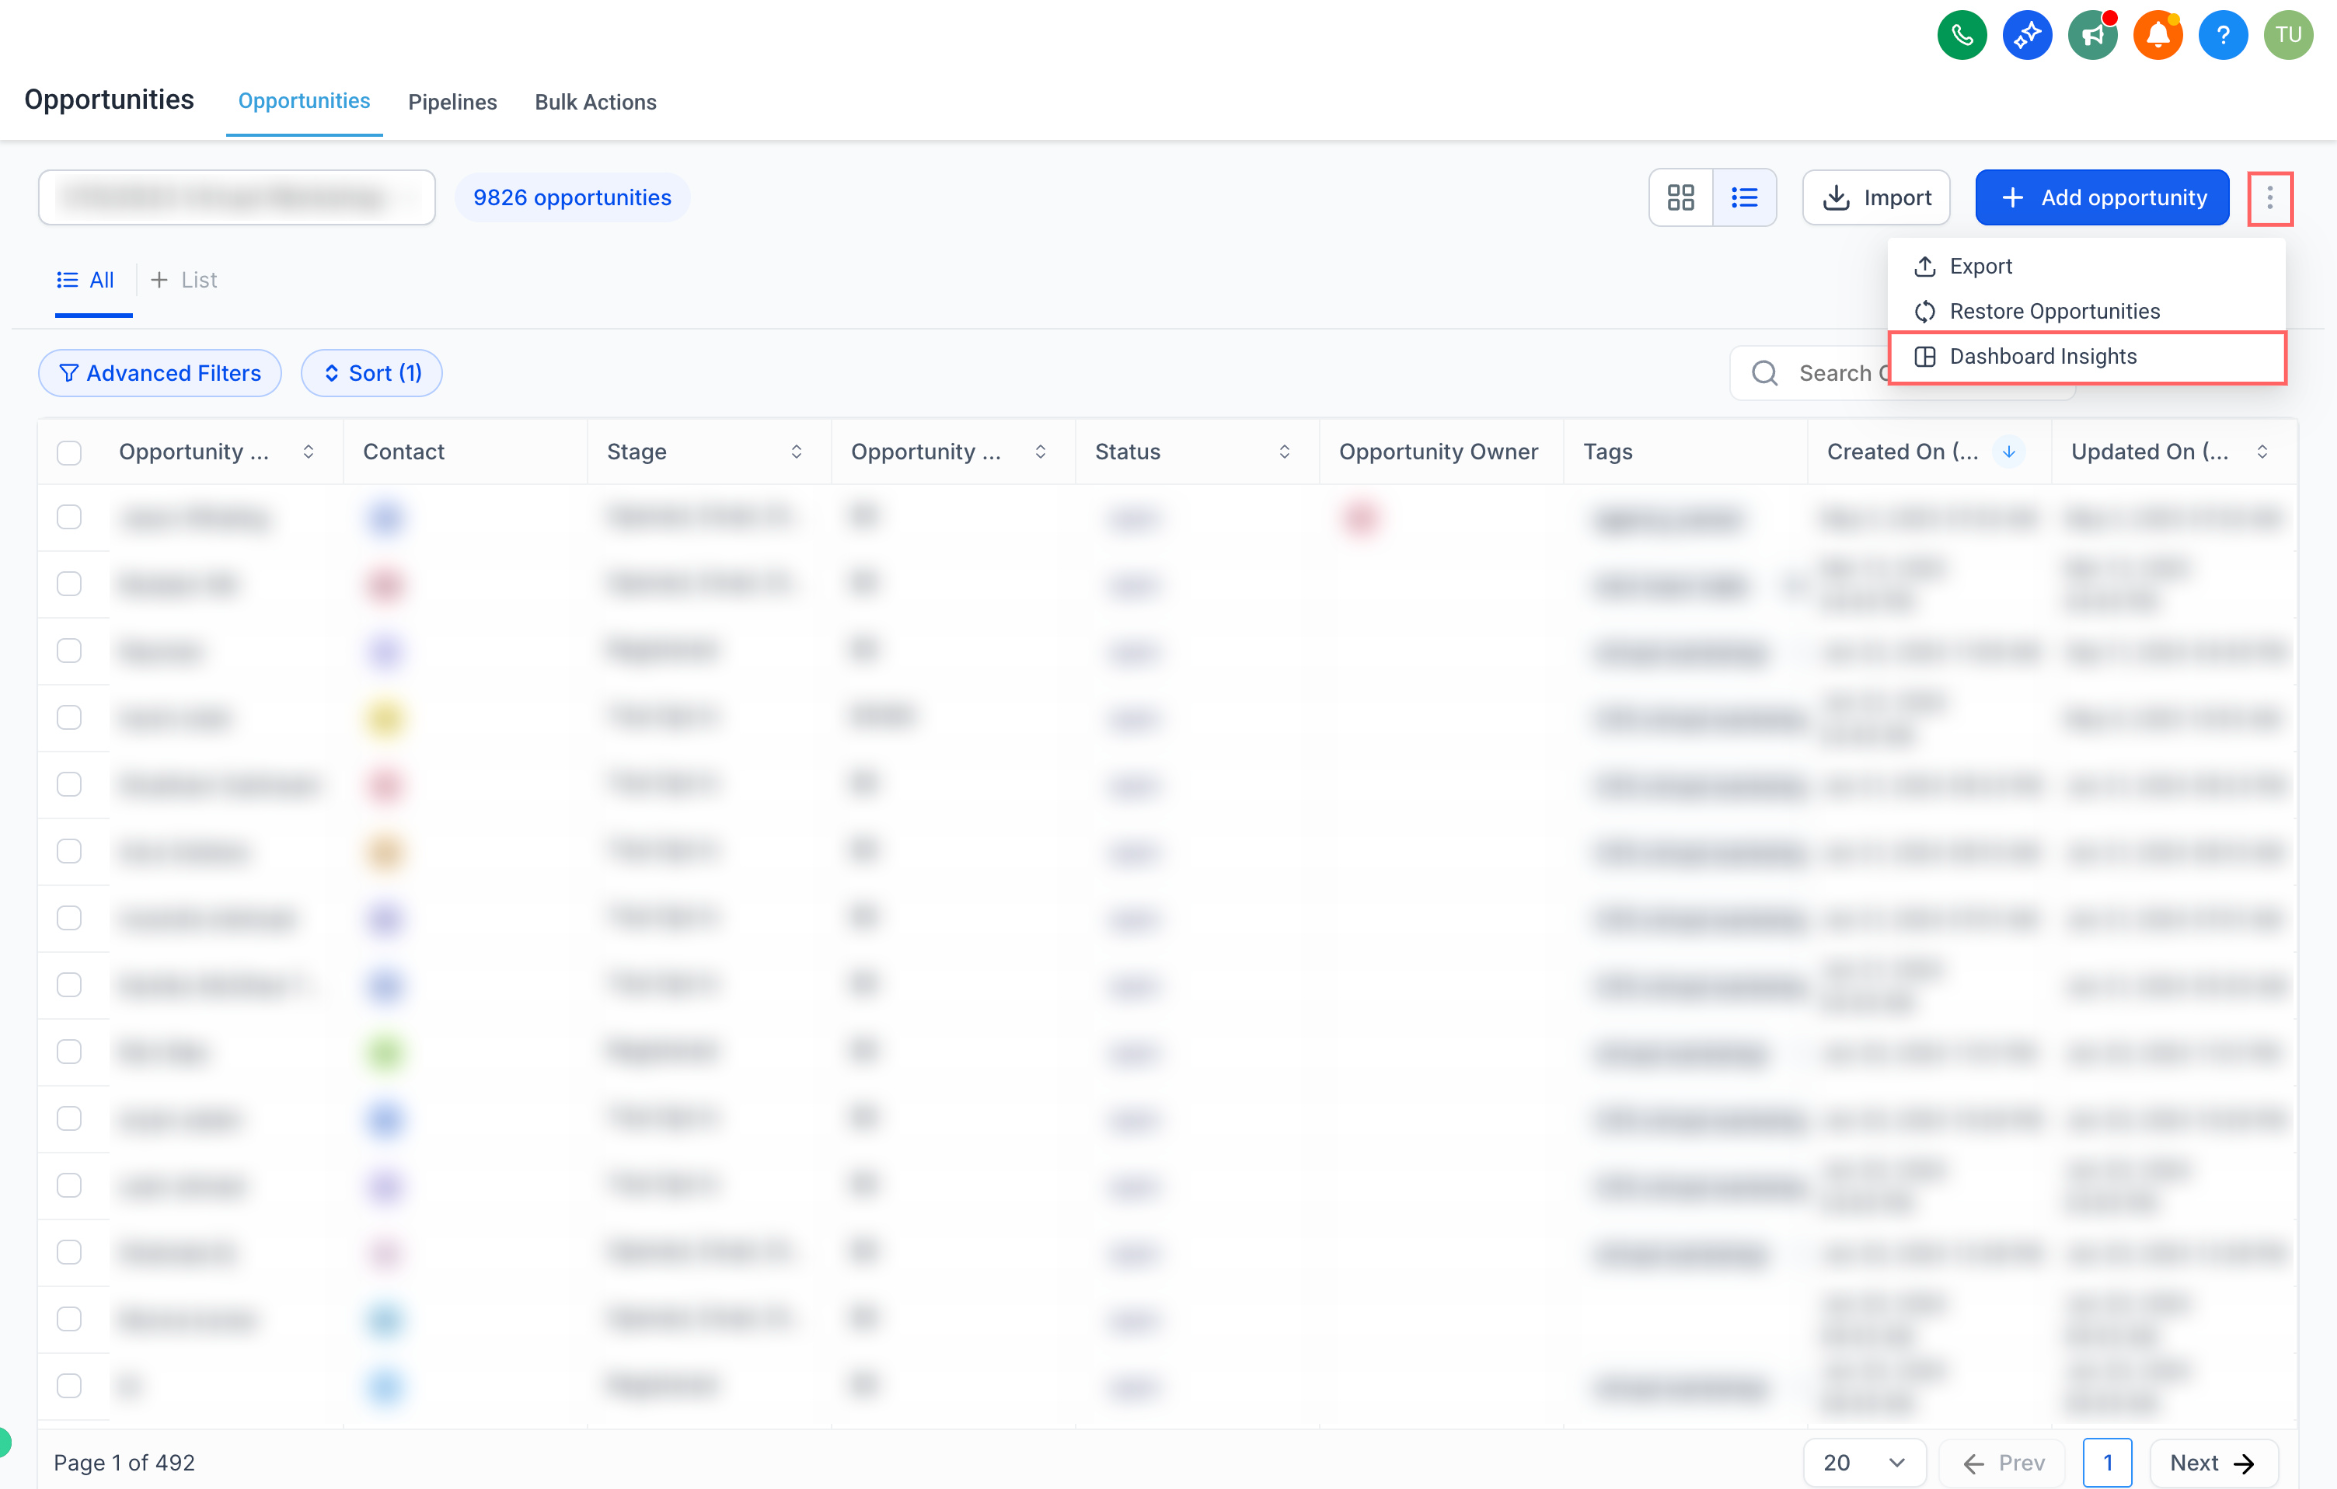
Certain high-traffic pages let you add relevant insight widgets straight to a dashboard without leaving the page, so you can bring analytics into your day-to-day workflow.
Supported pages currently include:
Opportunities
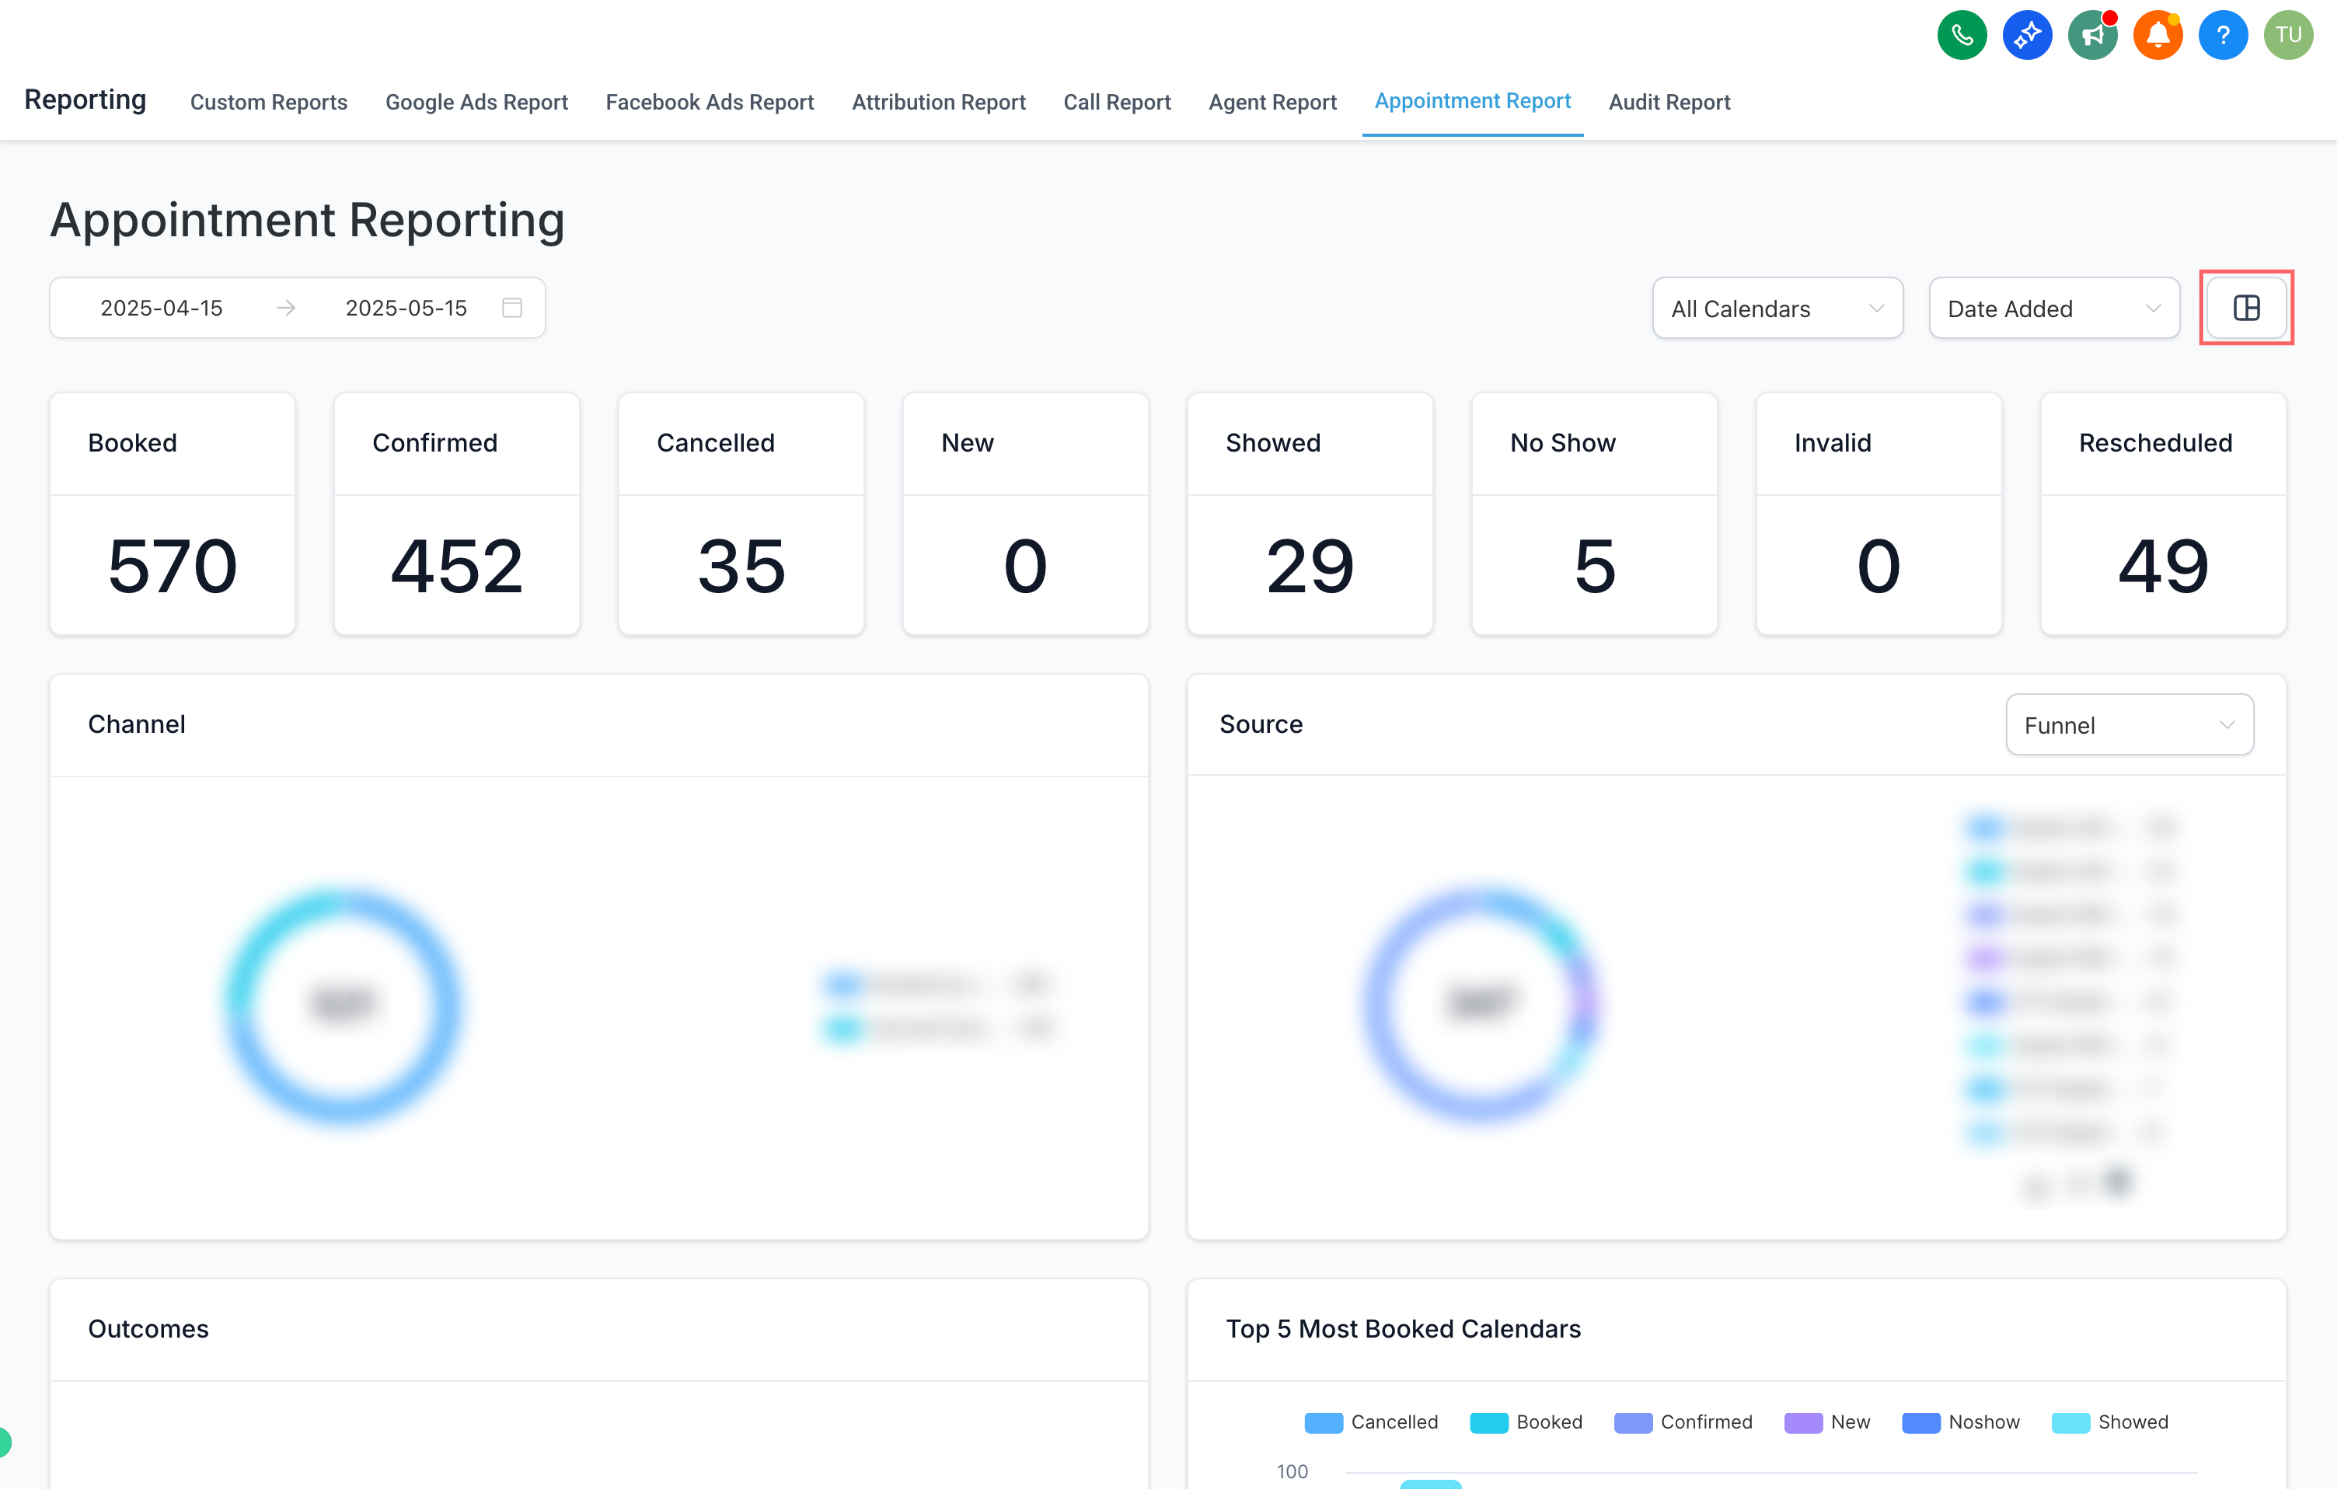
Appointment Report
Call Report
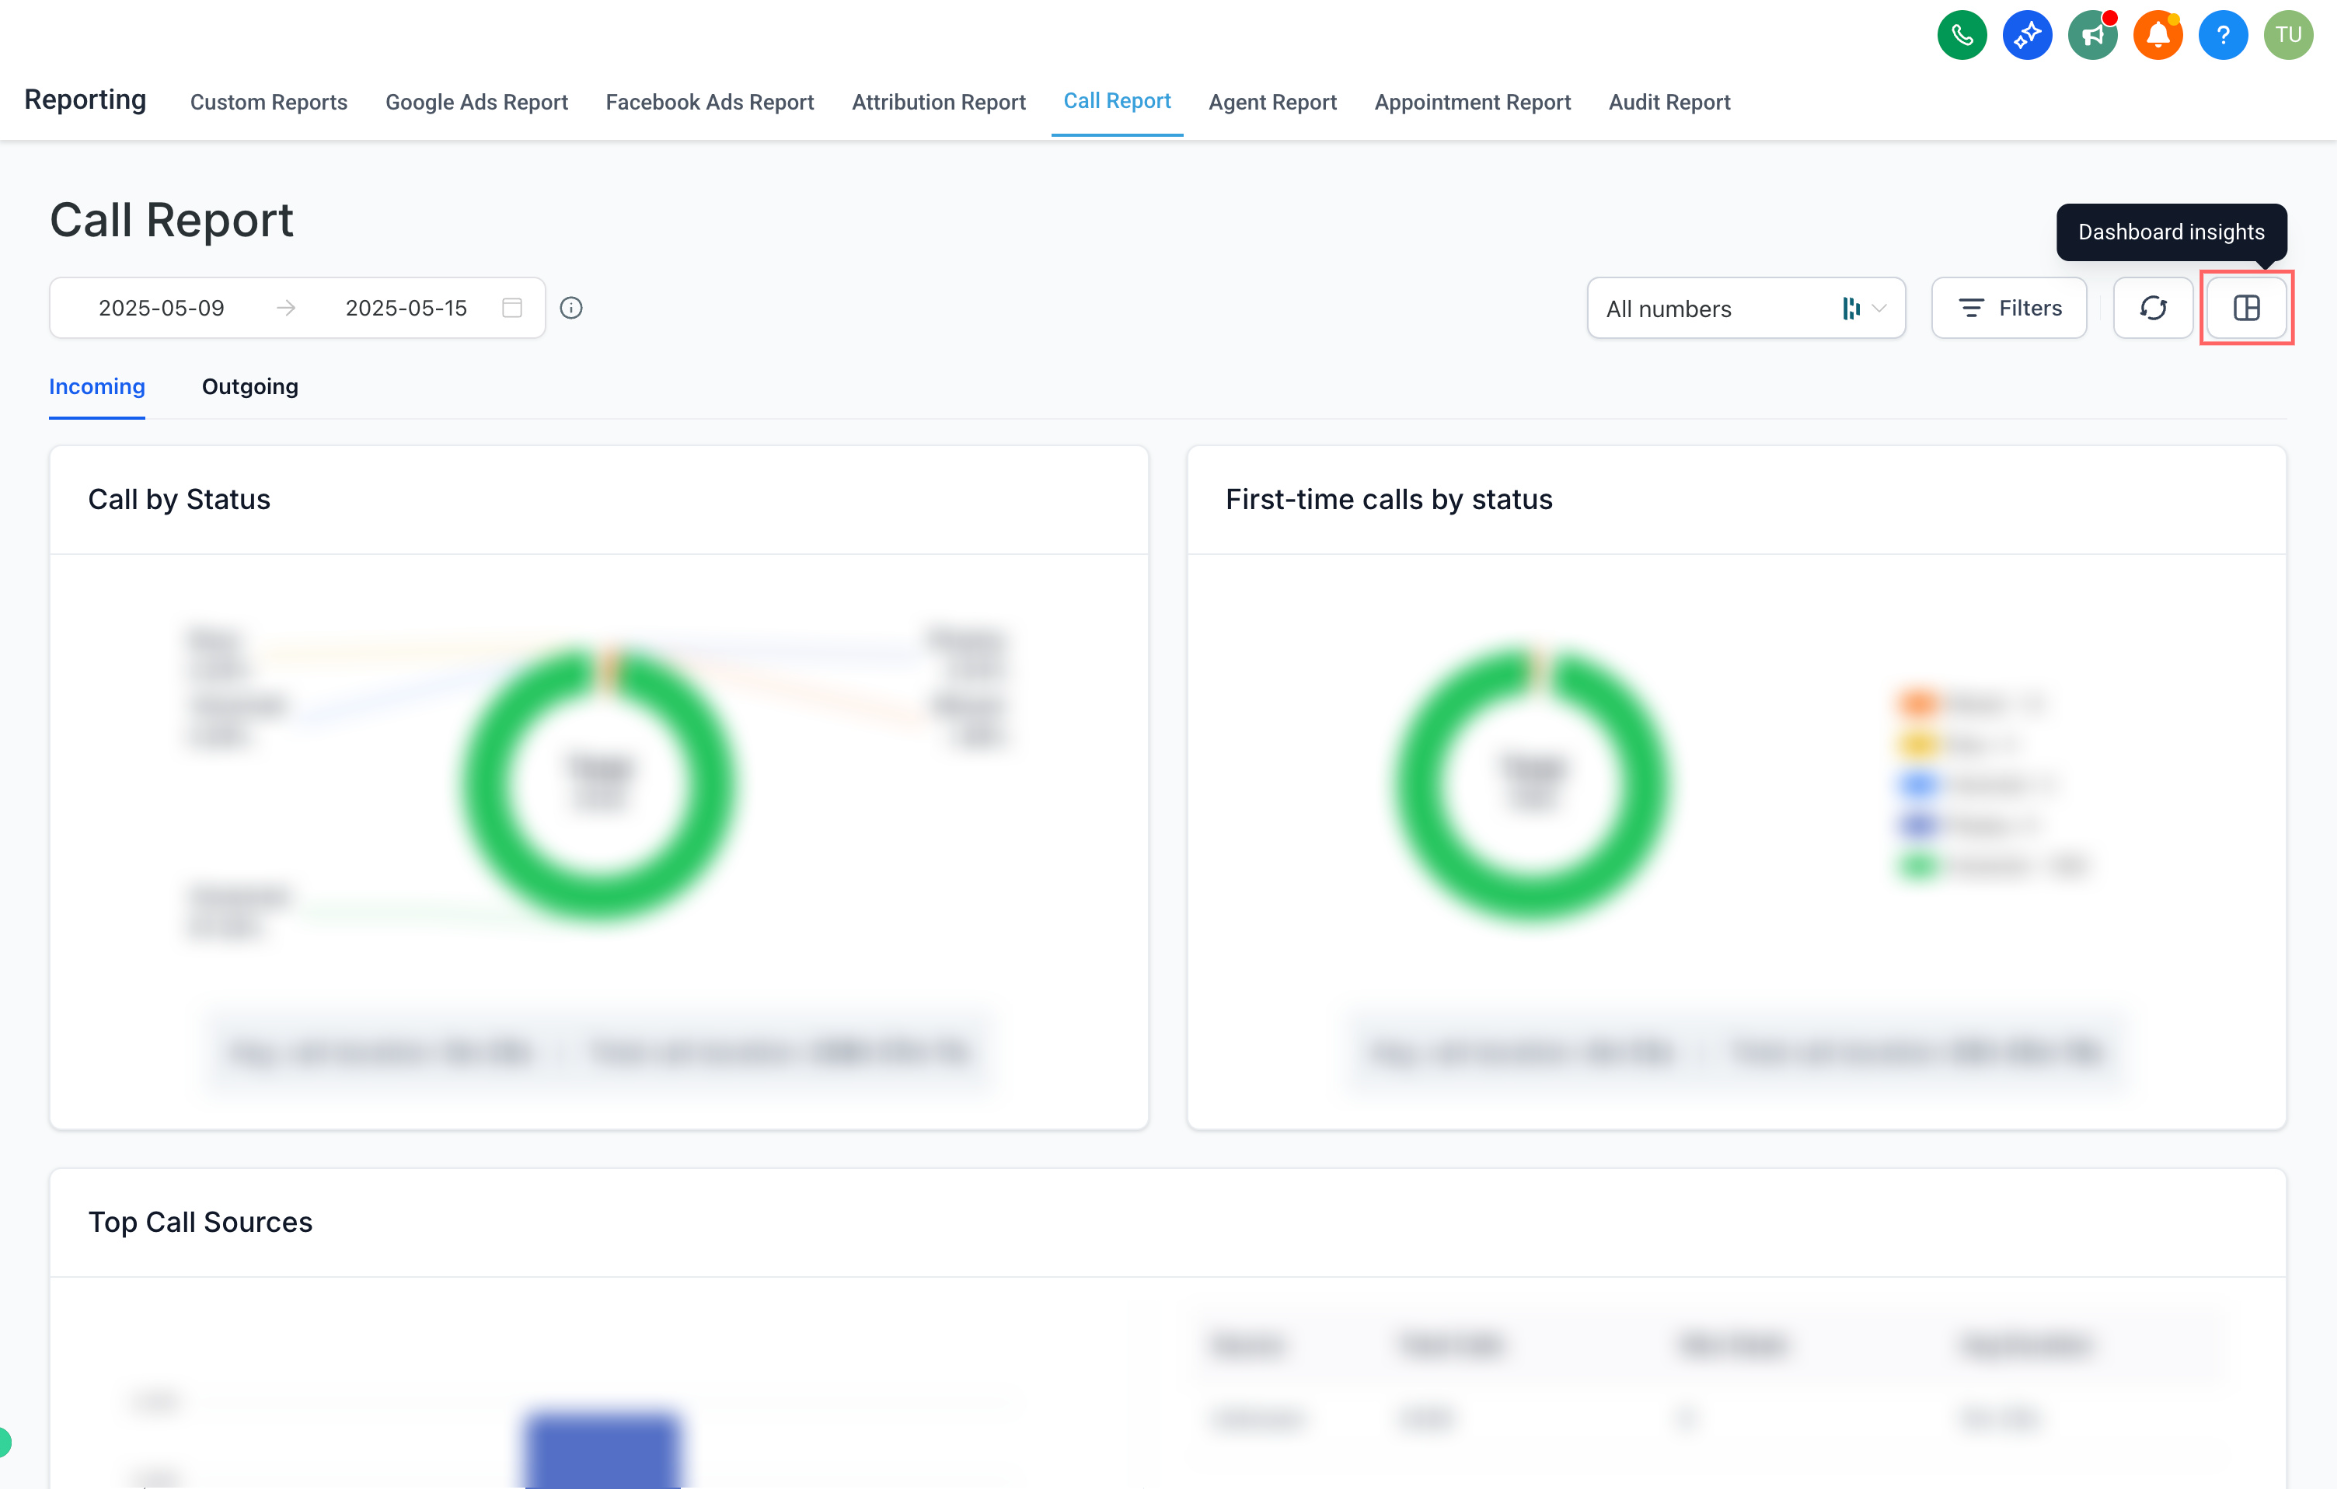
To add insight widgets from one of these pages:
Navigate to a supported page.
Click the Dashboard Insights icon.
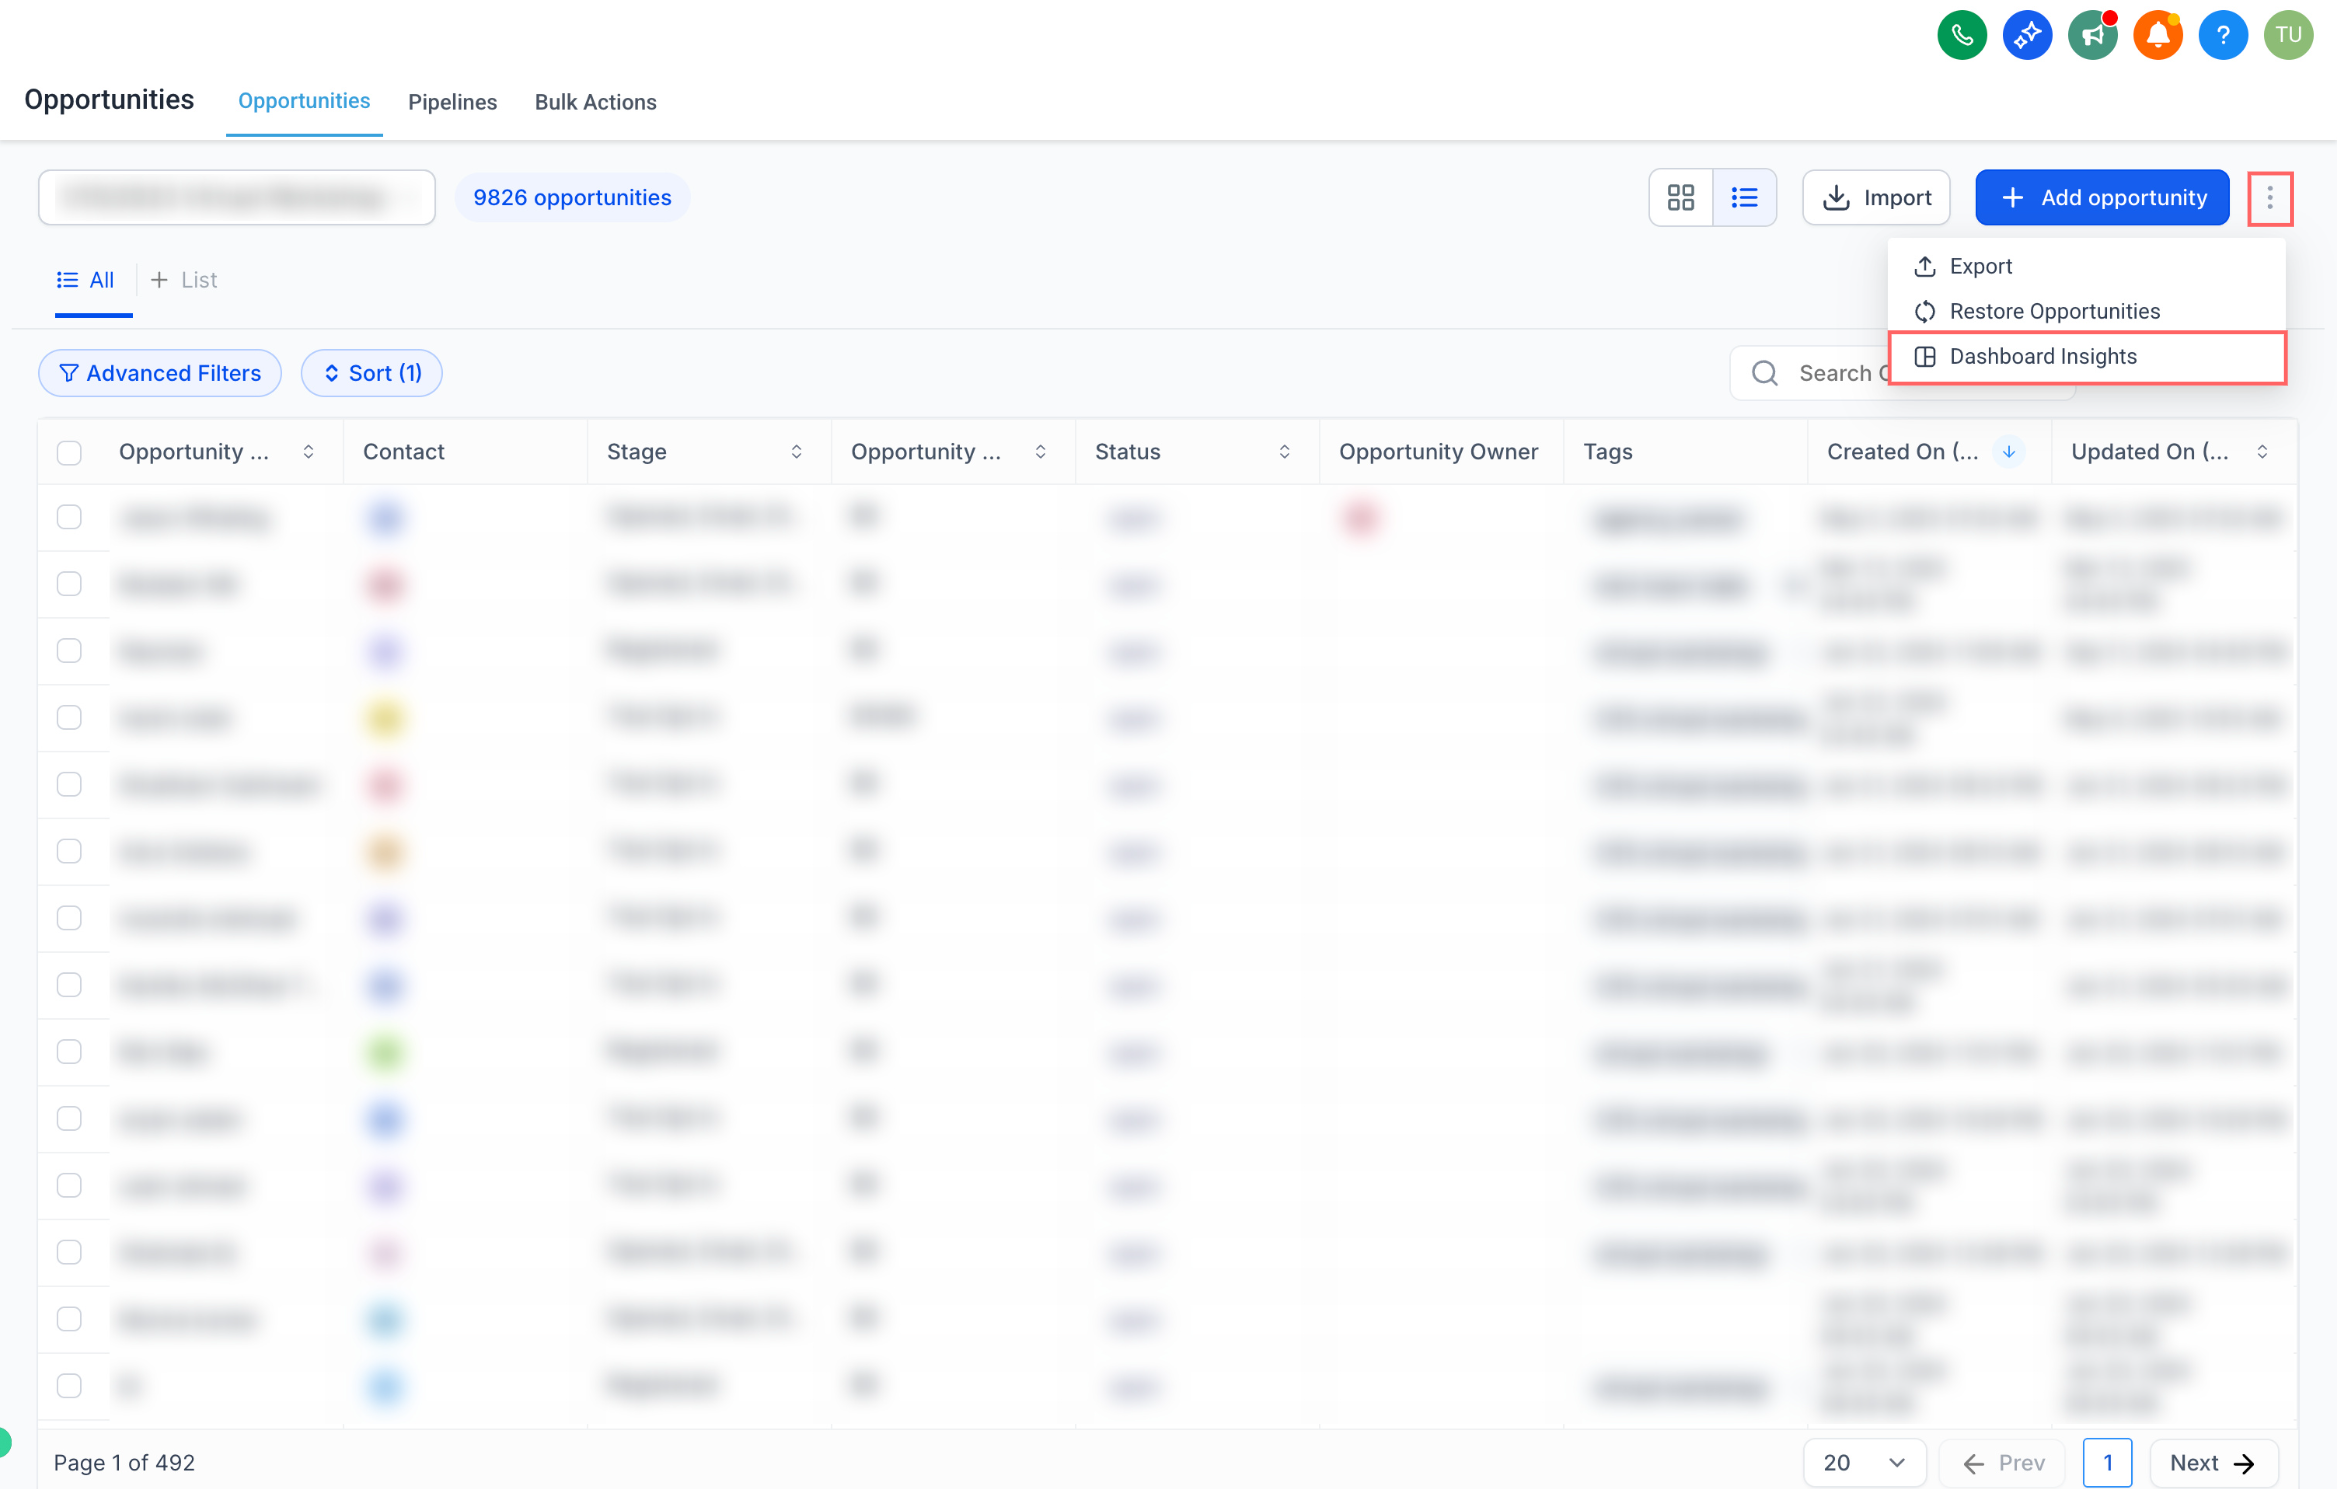
Select the dashboard where you want to add the widgets.
Review the suggested widgets and confirm your selection.
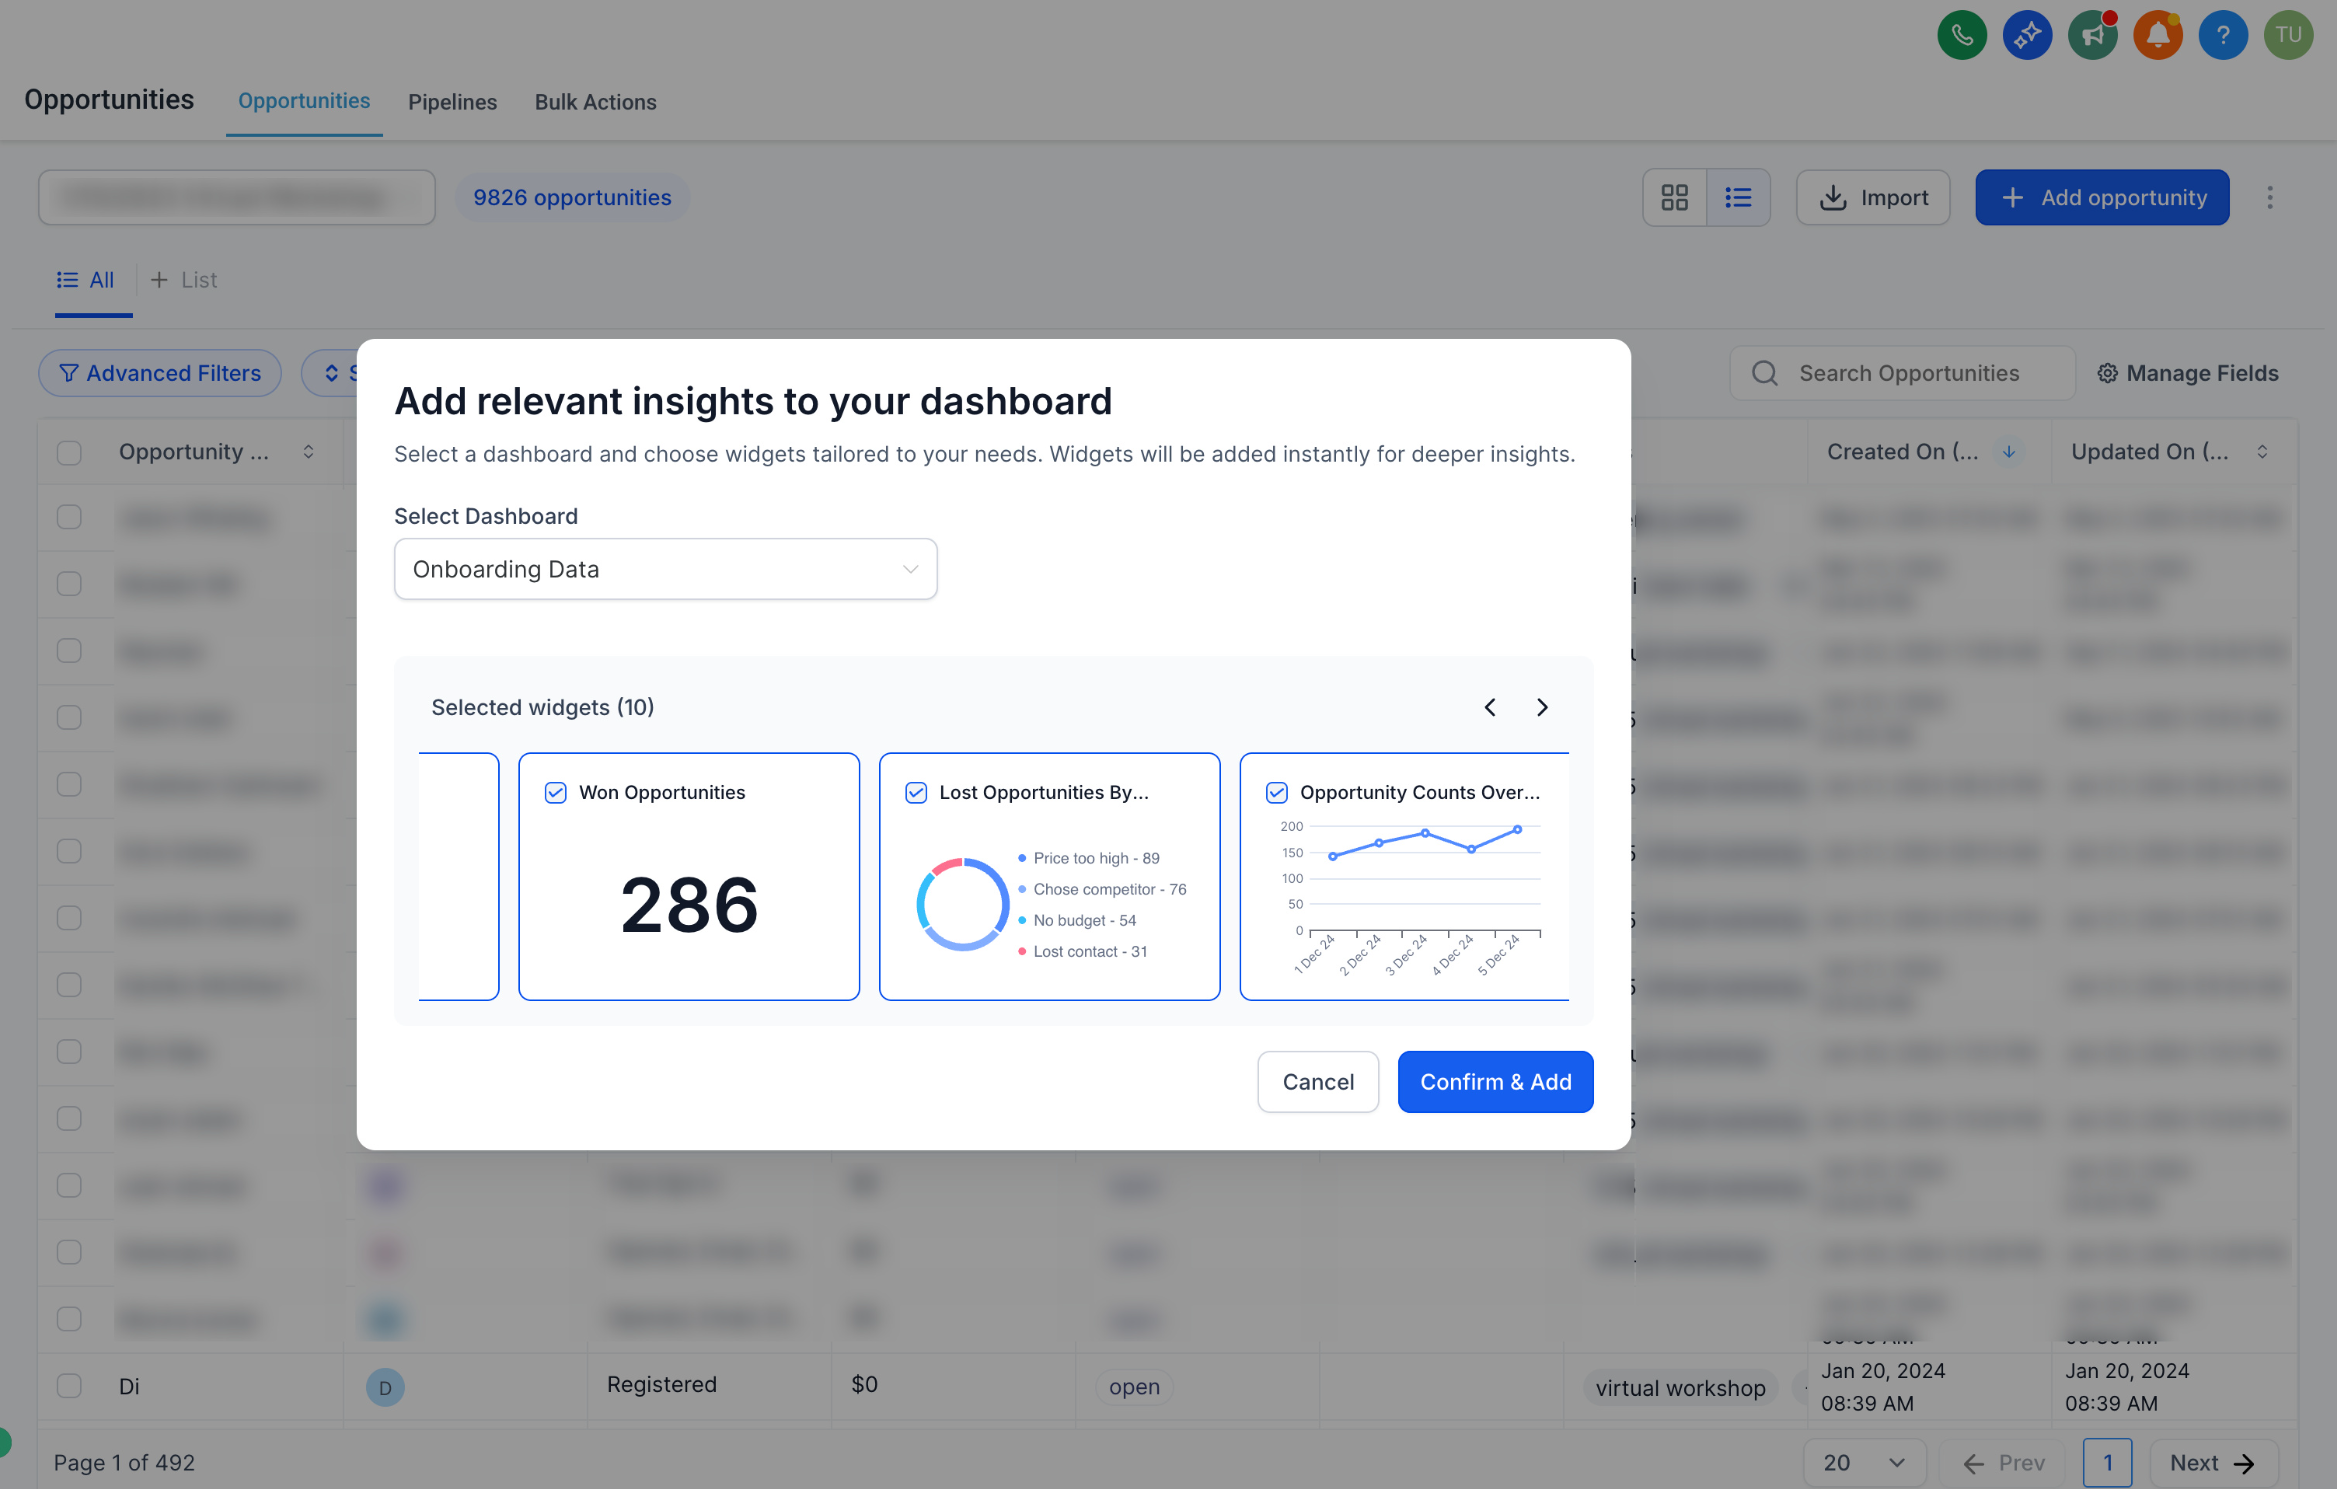
Click Add. The widgets are added to the dashboard you chose.
Stay on the current page or head to the dashboard to view your new insights right away.
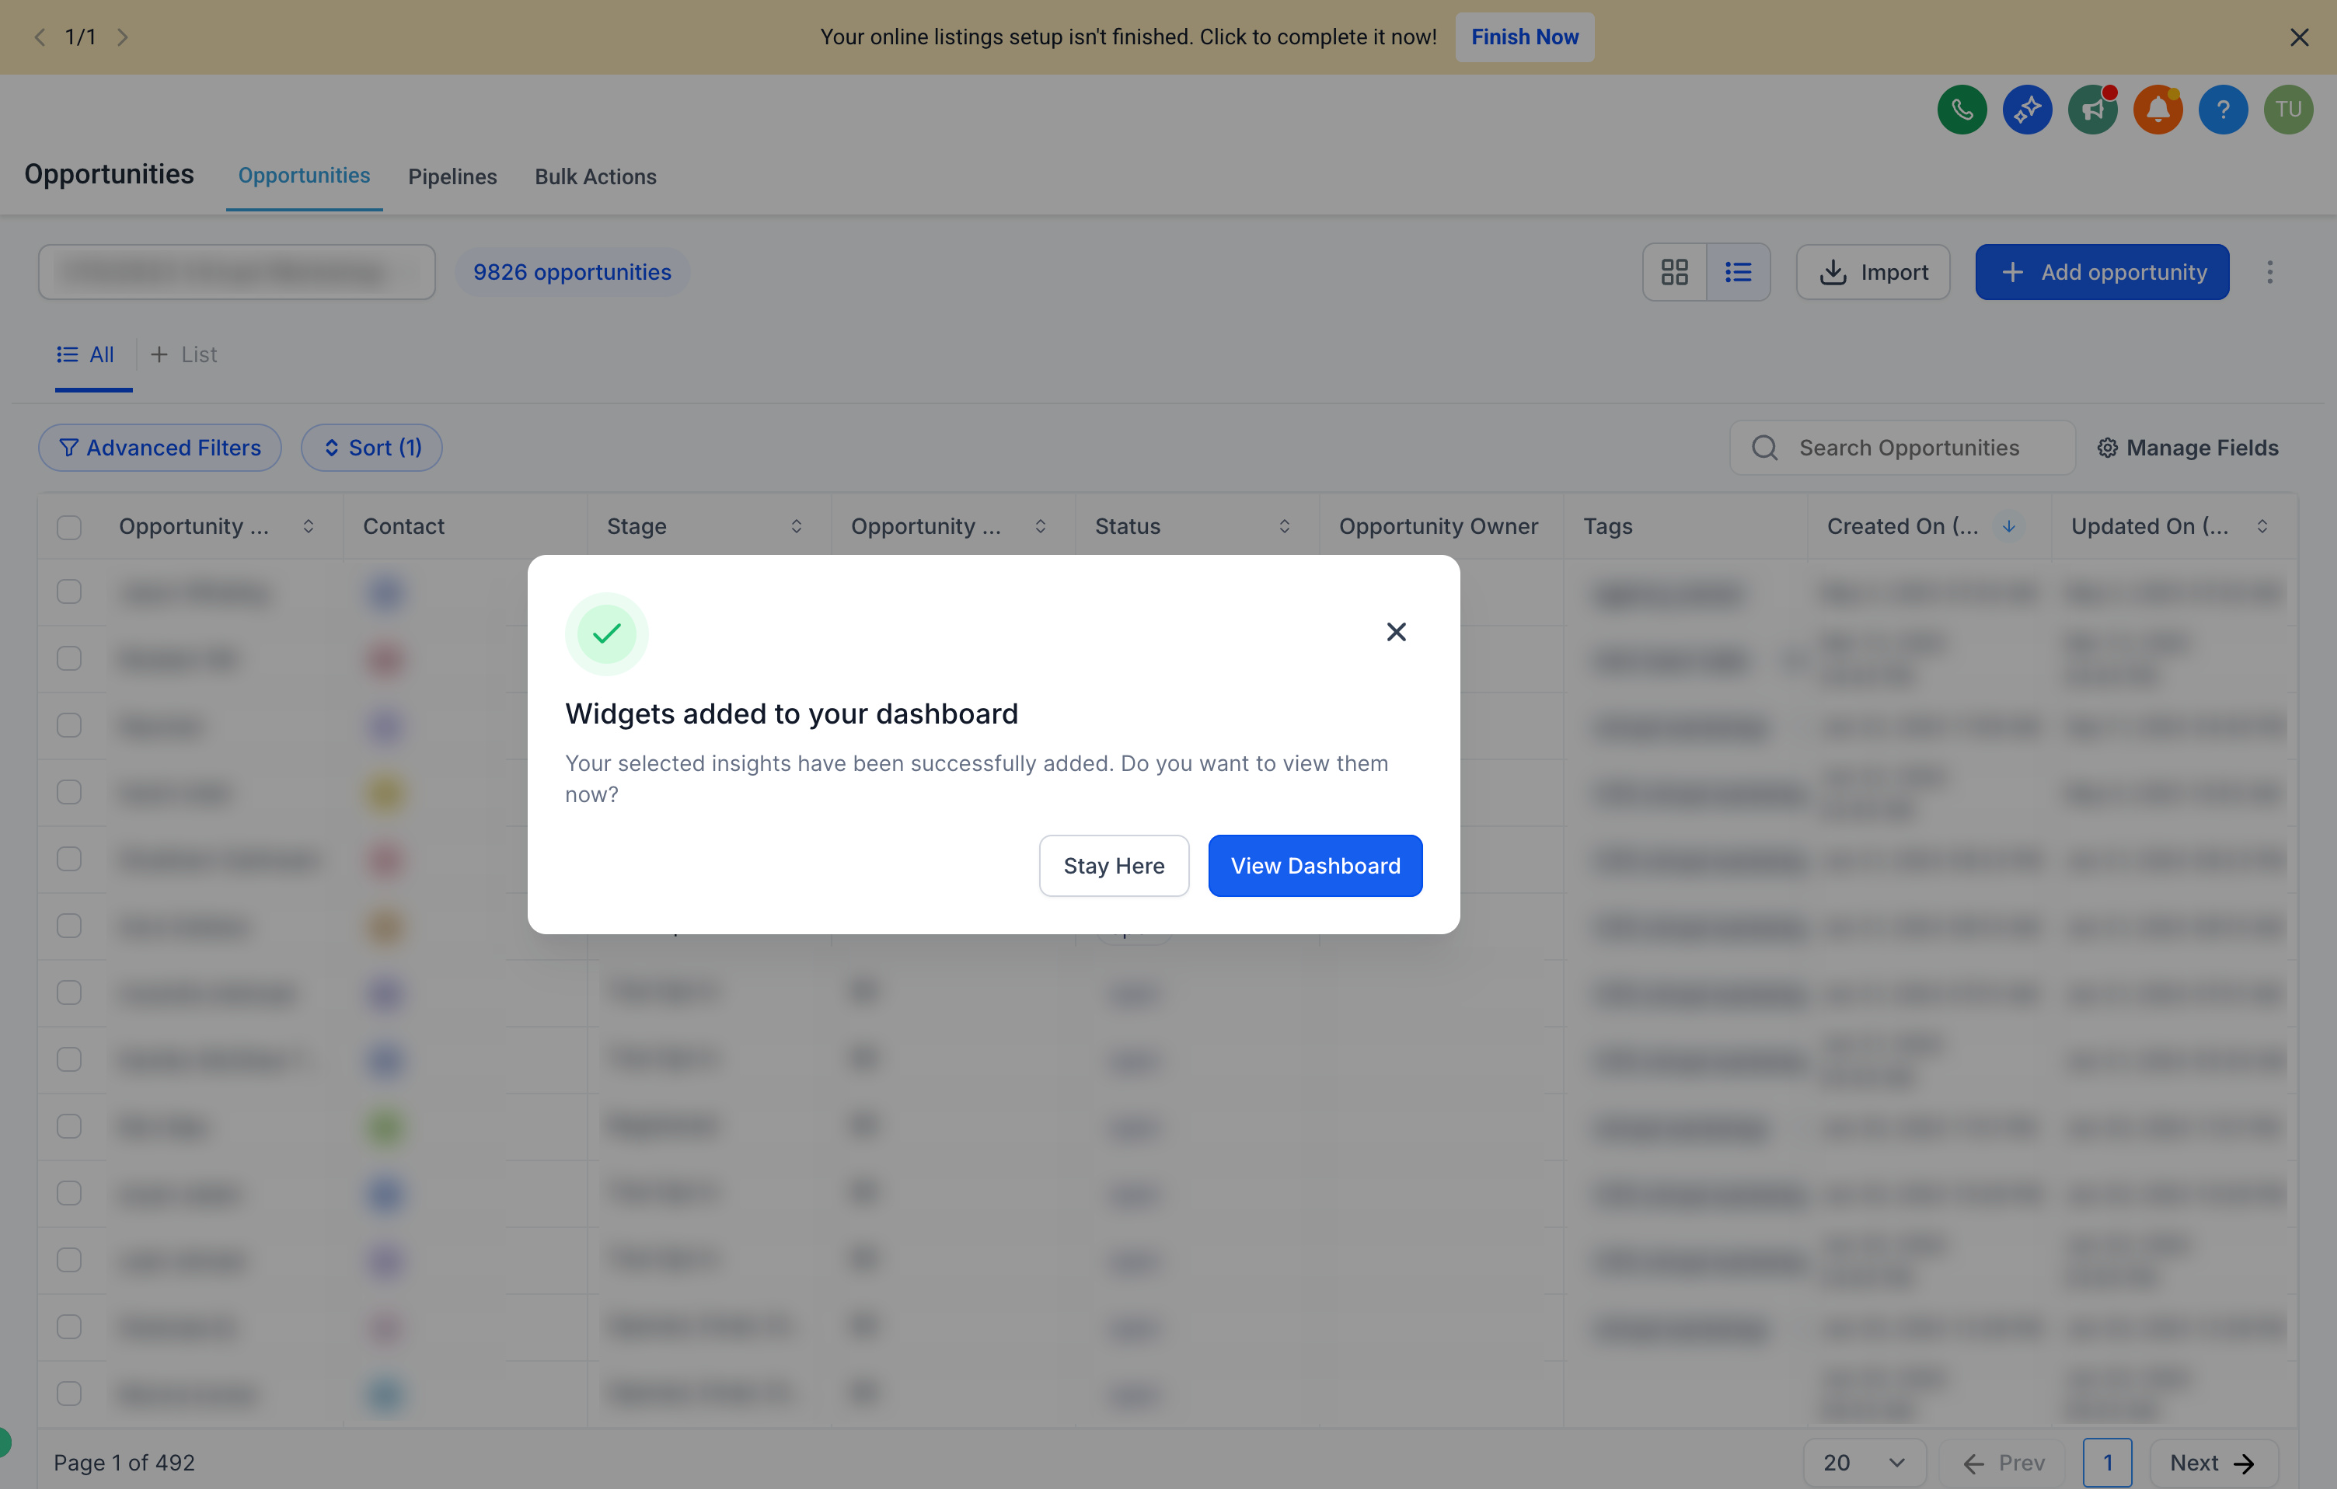
Aesthetix CRM continues to expand which pages support this shortcut, so check back periodically for more supported pages.
What's the difference between adding a widget from the Dashboard and adding one from a page like Opportunities? Both add a widget to a dashboard. Adding from the Dashboard gives you full access to every widget category and chart type. Adding from a supported page (like Opportunities or Appointment Report) is a shortcut that suggests widgets relevant to that page so you don't have to leave what you're doing.
Can I have more than one dashboard? Yes. Click Add Dashboard to create additional dashboards, such as a front desk overview and a separate one for provider revenue, and set each as Private or For Everyone.
Who can see a shared dashboard? Anyone you grant access to. When you create a shared dashboard, you choose Full, Edit, View-only, or No access for specific admins and users on your account.
Can I filter a widget to show only certain data? Yes. Use the Conditions tab to add filter groups. Filters within a group are combined with AND, and separate groups are combined with OR.
Why is a filter grayed out when I try to use Session Source or Session Medium? Those are attribution fields, and they only work correctly with a single compound filter group that includes the Attribution Type (First Touch or Last Touch). Adding more than one filter group disables attribution fields.
How do I quickly build a widget similar to one I already have? Use the Duplicate option on the existing widget's three-dot menu instead of building a new one from scratch, then adjust the settings on the copy.
Why isn't the Contact widget showing up? Try refreshing the page first. If it's still blank or stuck, clear your browser cache. If you still don't see it, ask your account admin to check that you have the correct contact permissions.
Can I resize or move widgets after adding them? Yes. In edit mode, drag and drop widgets to reposition them and resize them for better visibility, then click Save Changes.
Do I need to add a title to every widget? No, titles and descriptions are optional, but adding a short one helps your team understand what each widget is tracking at a glance.
Will more pages support the insight widget shortcut in the future? Aesthetix CRM continues to add support for more pages beyond Opportunities, Appointment Report, and Call Report, so check back for updates.
