Gift Cards let you sell a prepaid balance that patients can buy for themselves or send to someone else. You can sell a gift card through its own dedicated checkout, or by adding it to a checkout you already use, such as a Form, Funnel, Store, Payment Link, Invoice, or Calendar. This guide walks through every selling method, what the patient experiences at checkout, and best practices for smooth delivery and redemption.
Selling a gift card is the process of offering a prepaid balance as a product in your Aesthetix CRM. You can sell it through its own checkout link or by adding it to any of your existing selling workflows, so you can sell gift cards wherever patients already buy from your practice.
When someone completes a purchase, Aesthetix CRM creates a Gift Card Order and delivers the gift card based on the delivery option chosen at checkout (immediate or scheduled). Every Gift Card includes:
A dedicated checkout link
An embed code
A QR code
The ability to be added to any checkout that supports product selection
Multiple sales channels: Sell via a dedicated link, embed, QR code, or your existing checkouts for maximum reach.
Gifting built in: "Myself or Someone Else" flows make it simple for patients to buy a gift card for someone else, with scheduled delivery.
Safe testing and rollout: Separate Test and Live links let you validate pricing, denominations, and the purchase flow without touching real balances.
Immediate cash flow: You collect revenue at the time of sale, before the card is ever redeemed.
Brand-aligned design: Upload custom artwork and choose gradients so the gift card matches your practice's branding.
Before you can sell gift cards, confirm you have:
At least one Gift Card product created and active. Create and activate a gift card under Payments > Gift Cards > Create Gift Card before you try to sell it anywhere.
A connected payment method. You need a payment method set up in your account in order to collect payment when a patient buys a gift card.
AX Pay tip: If you have not set up a payment processor yet, use AX Pay, Aesthetix CRM's own built-in payment provider. AX Pay offers better rates than Stripe and keeps your gift card revenue, deposits, and reporting inside one system. See the AX Pay help article for setup steps.
Test Mode is a safe sandbox with its own checkout links and payment keys. Use it to simulate purchases, validate pricing, check inventory behavior, preview delivery messages, and test redemption before you go live. Live Mode is for real transactions with real patients.
Gift cards purchased in Test Mode are redeemable only in test mode checkouts.
Gift cards purchased in Live Mode are redeemable only in live mode checkouts.
Sending a gift card without payment (issuing it as a comp or promotion) is only available in Live Mode.
Choose one channel or combine several to match your practice's strategy:
Dedicated Checkout Link: a standalone purchase page for each Gift Card product.
Embed Code: places the checkout directly on a website page.
QR Code: ideal for in-person or print use; scanning it opens the dedicated checkout link.
Existing Checkouts: add the Gift Card as a product to a Form, Funnel, Store, Payment Link, Invoice, or Calendar.
The dedicated checkout link is a standalone purchase page that comes with every Gift Card product. It is the fastest way to start selling, perfect for sharing in emails, texts, social posts, or as a button on your website, with no funnel or form to build. Each Gift Card product has its own unique checkout link in both Test and Live mode.
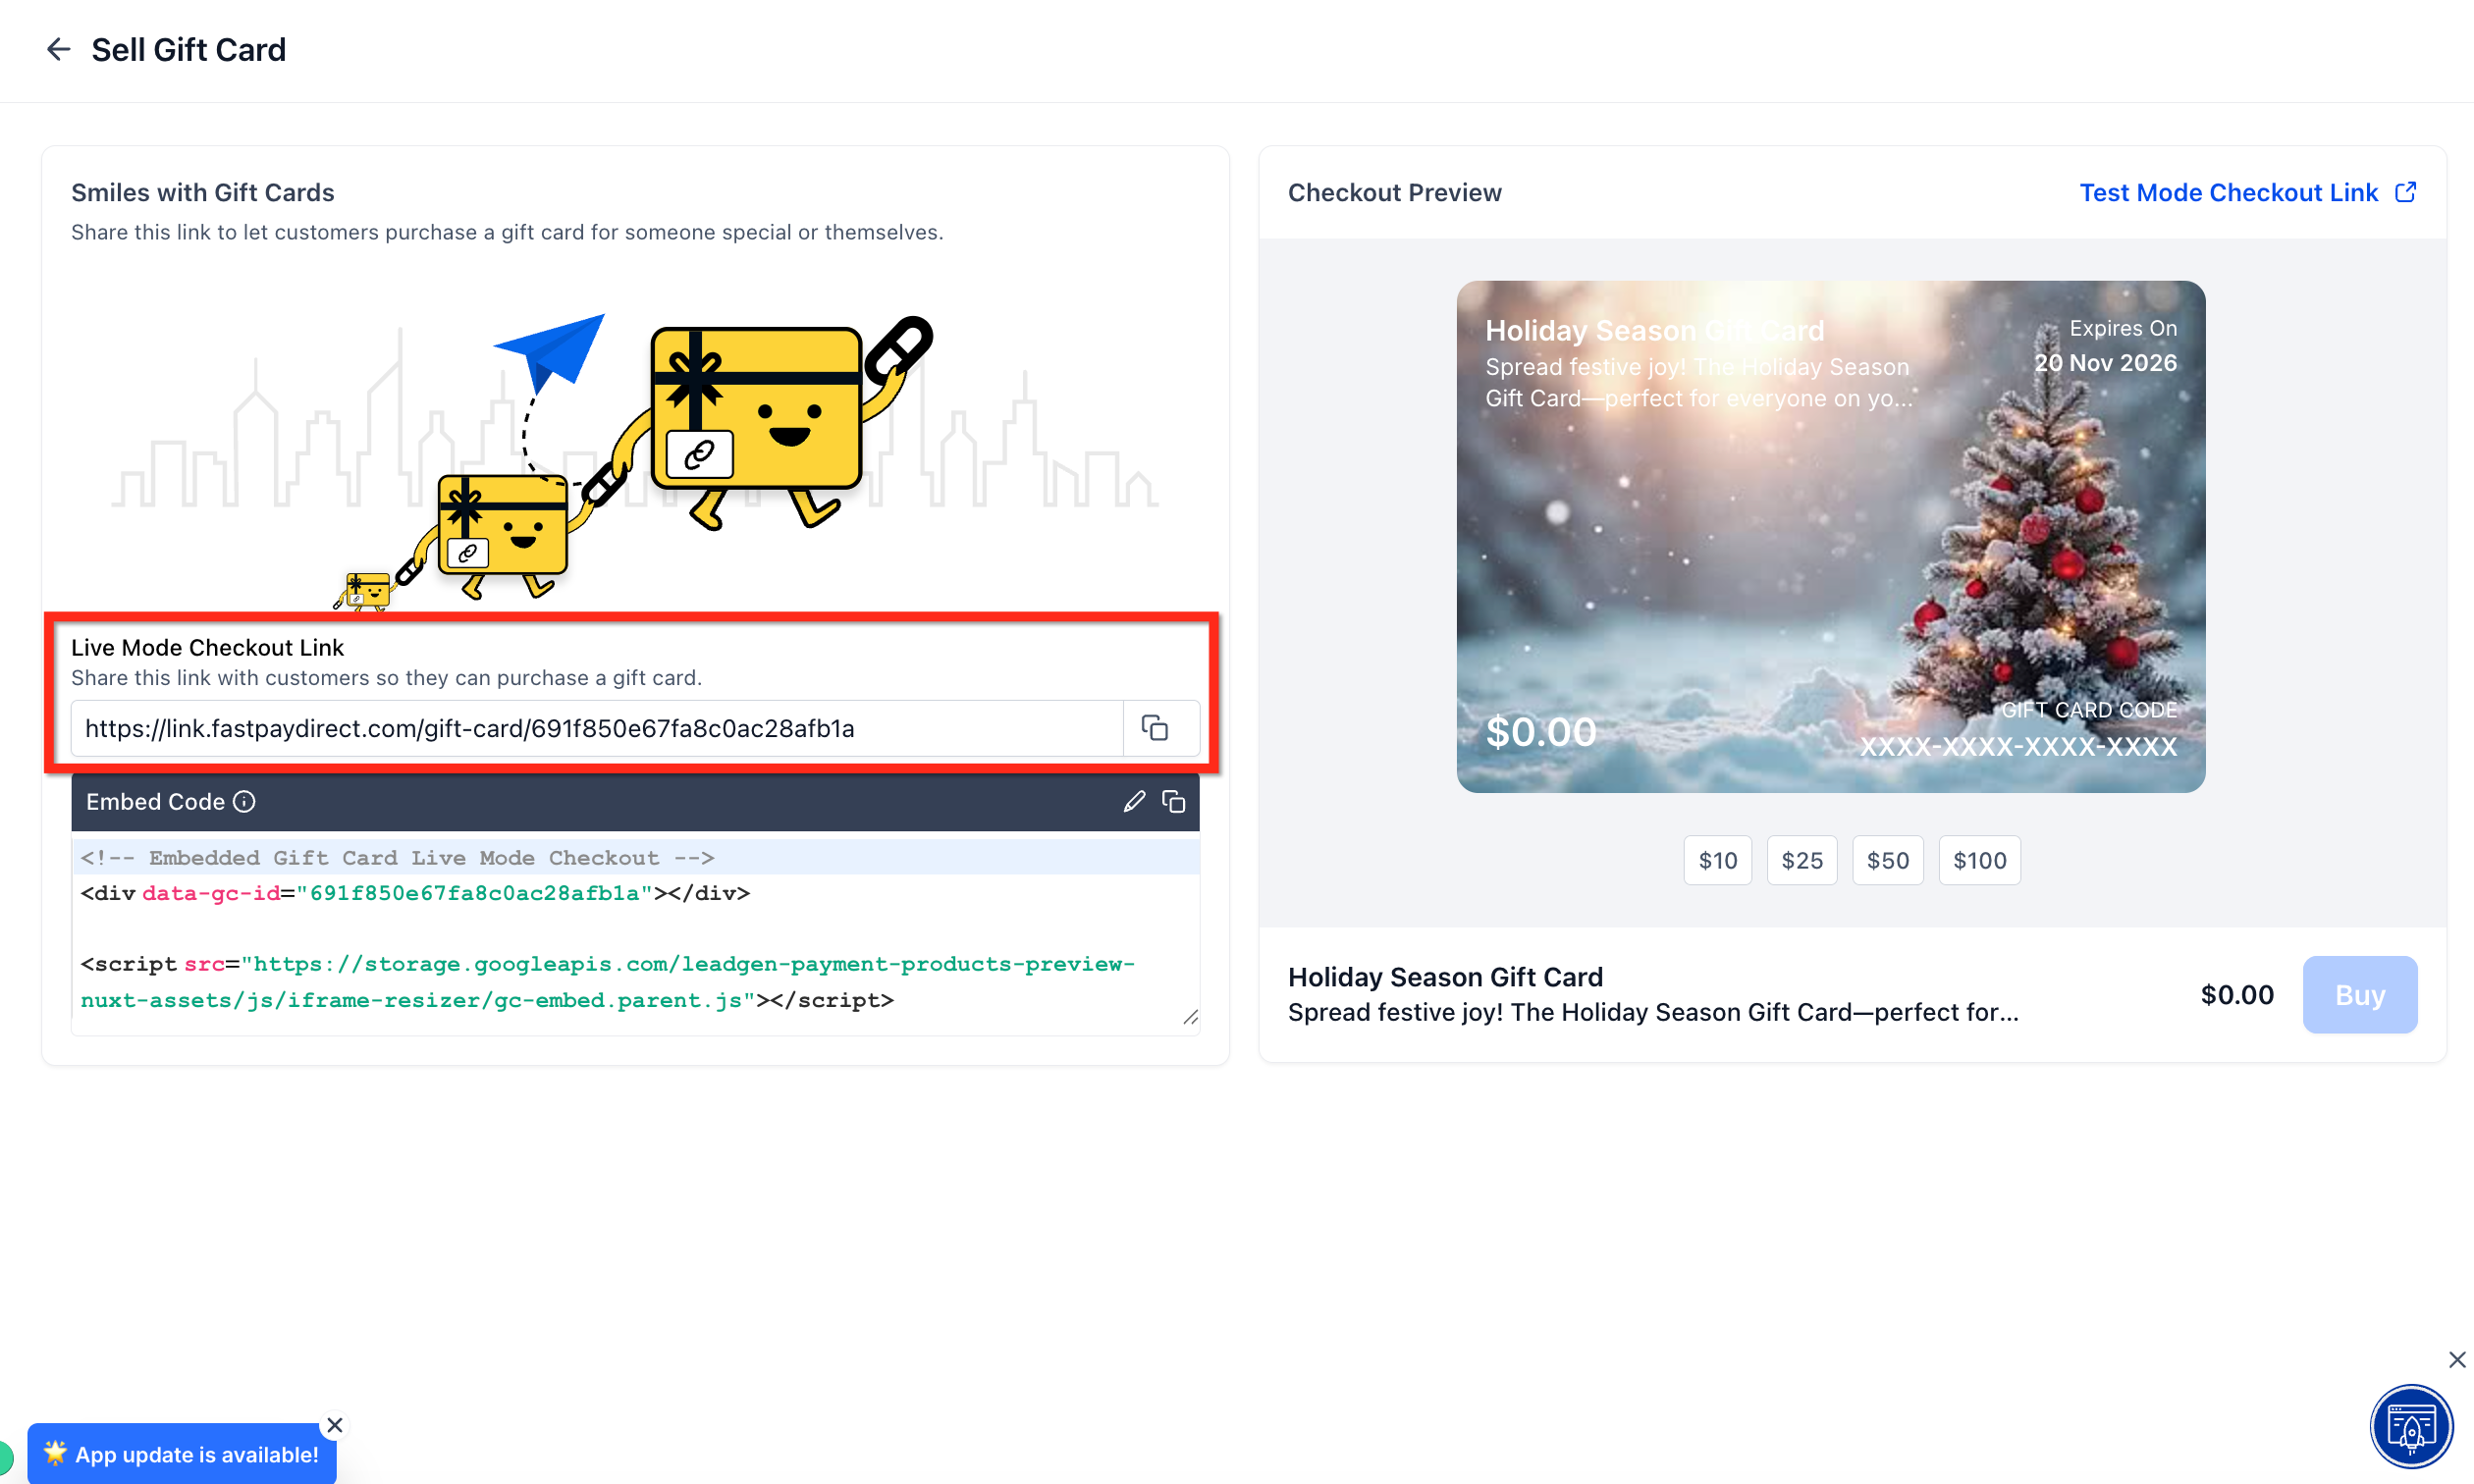
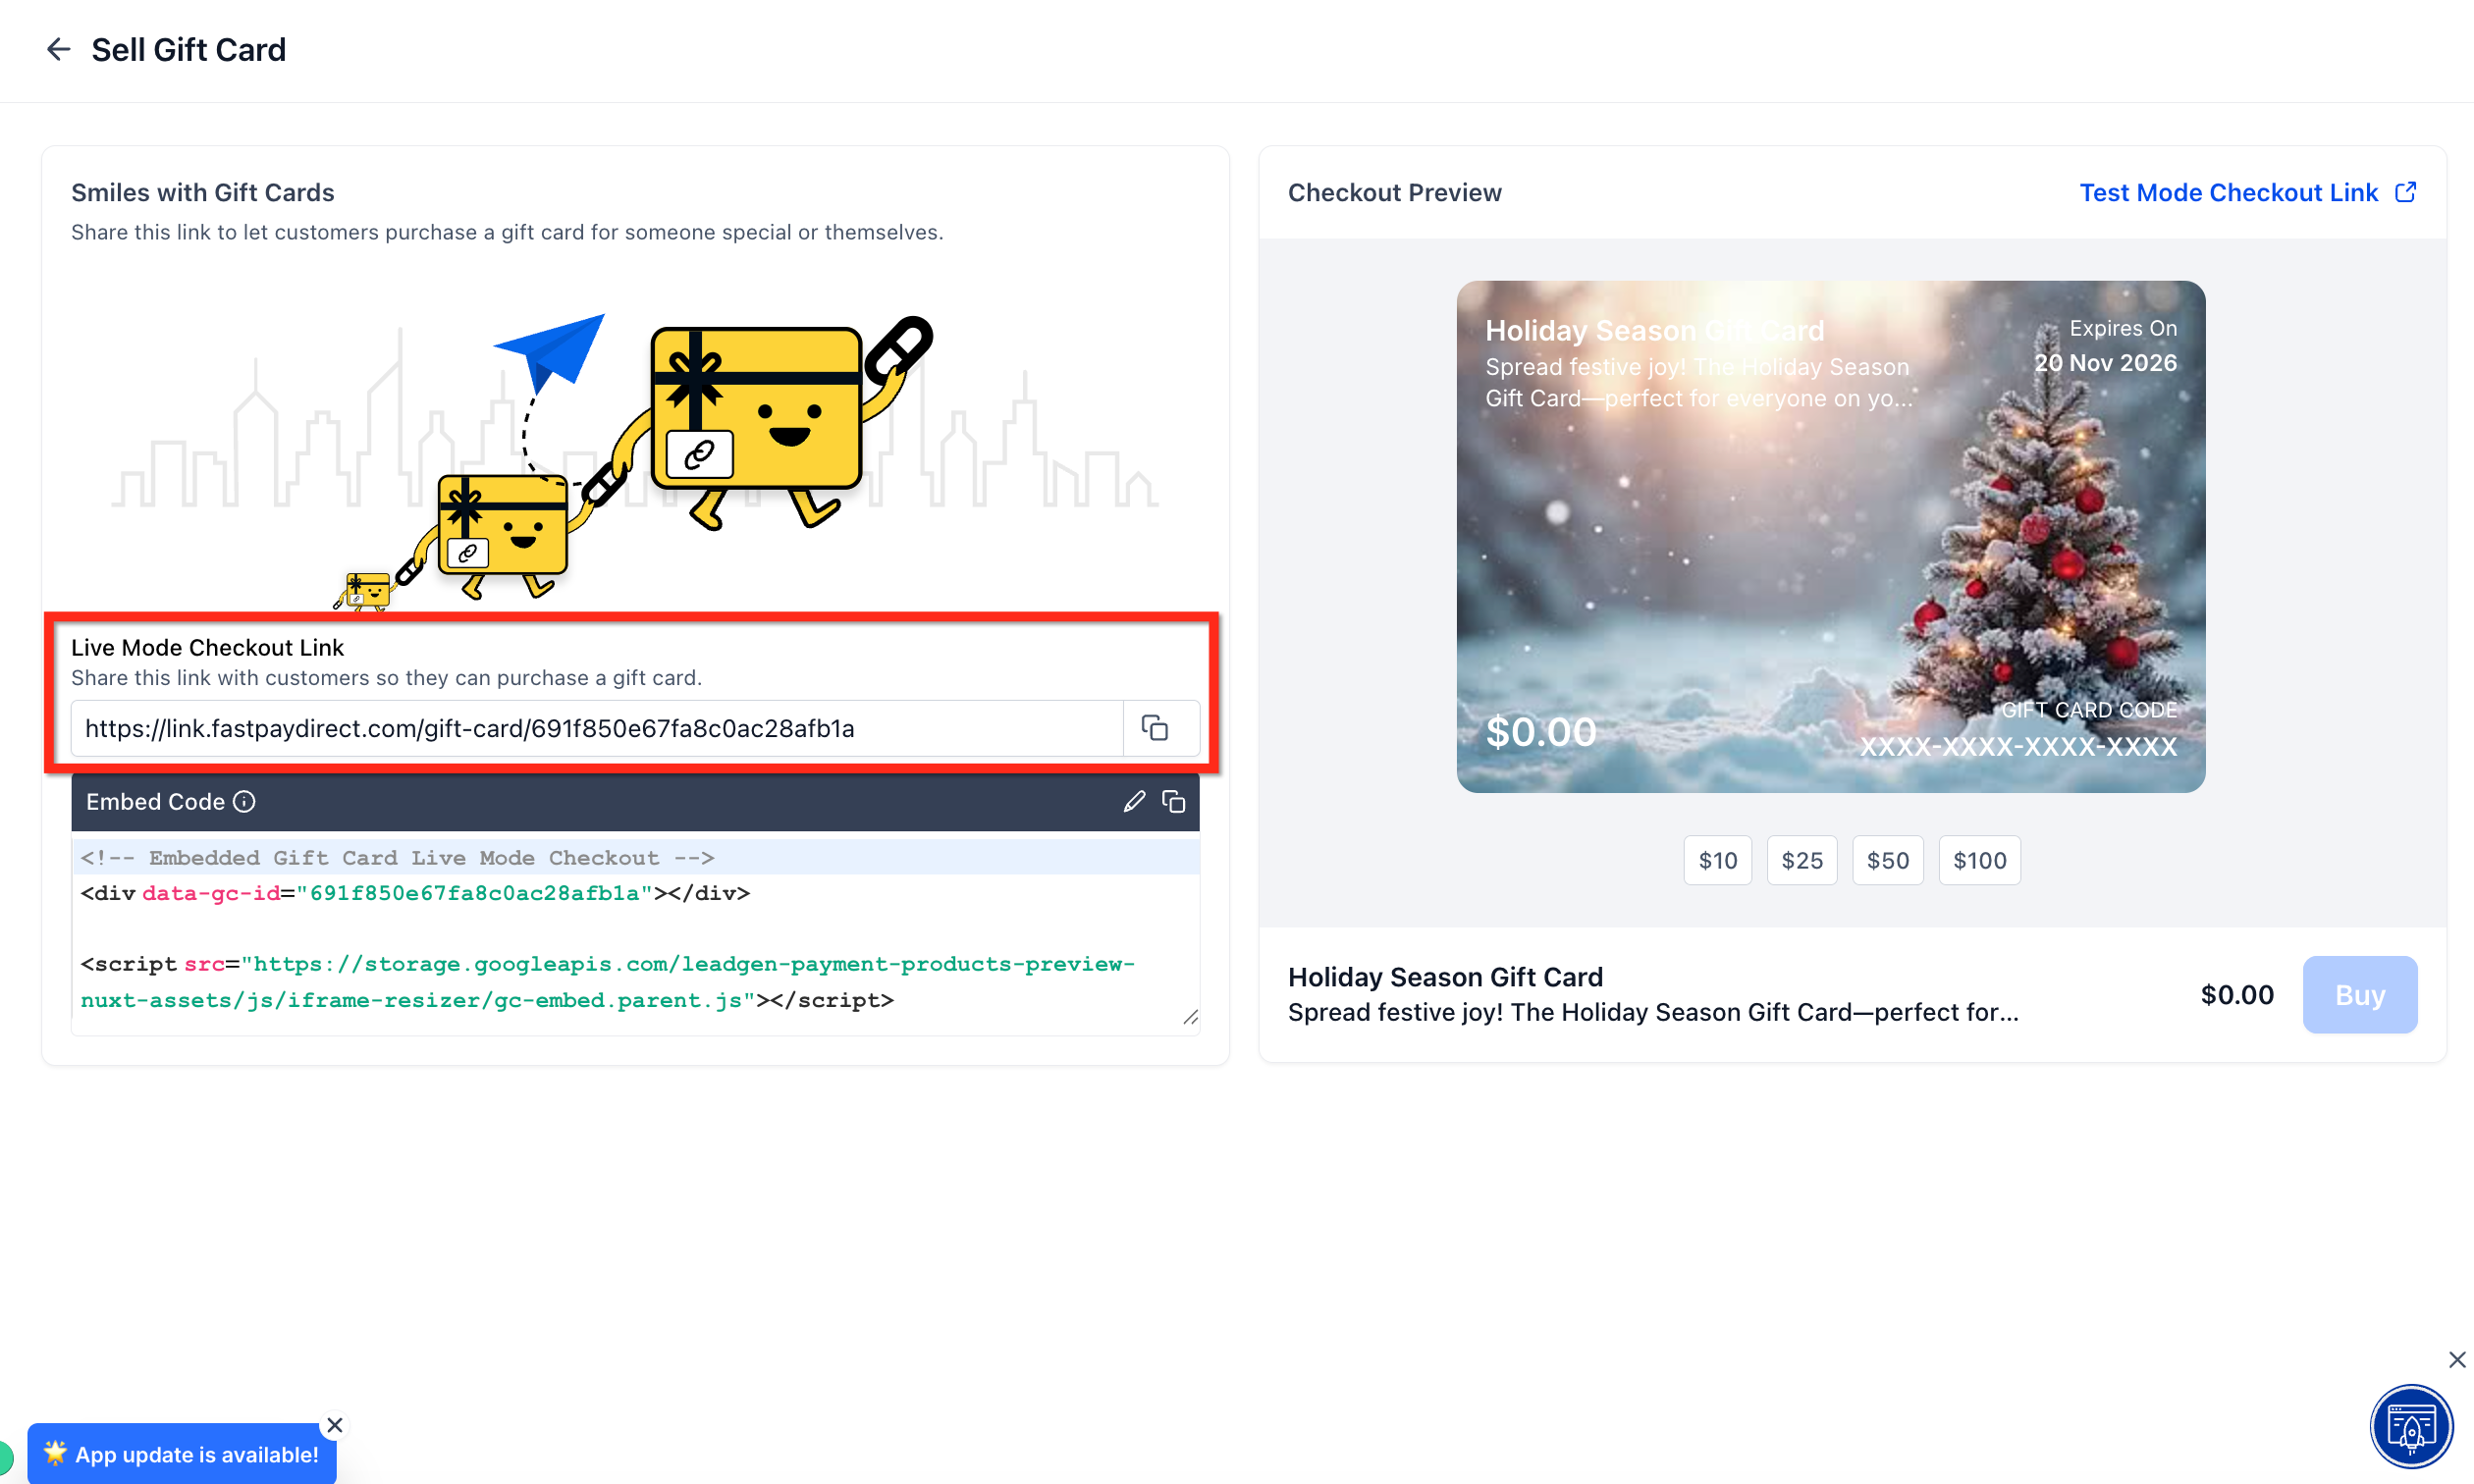
Use these steps to grab the Live checkout link you can share with patients right away.
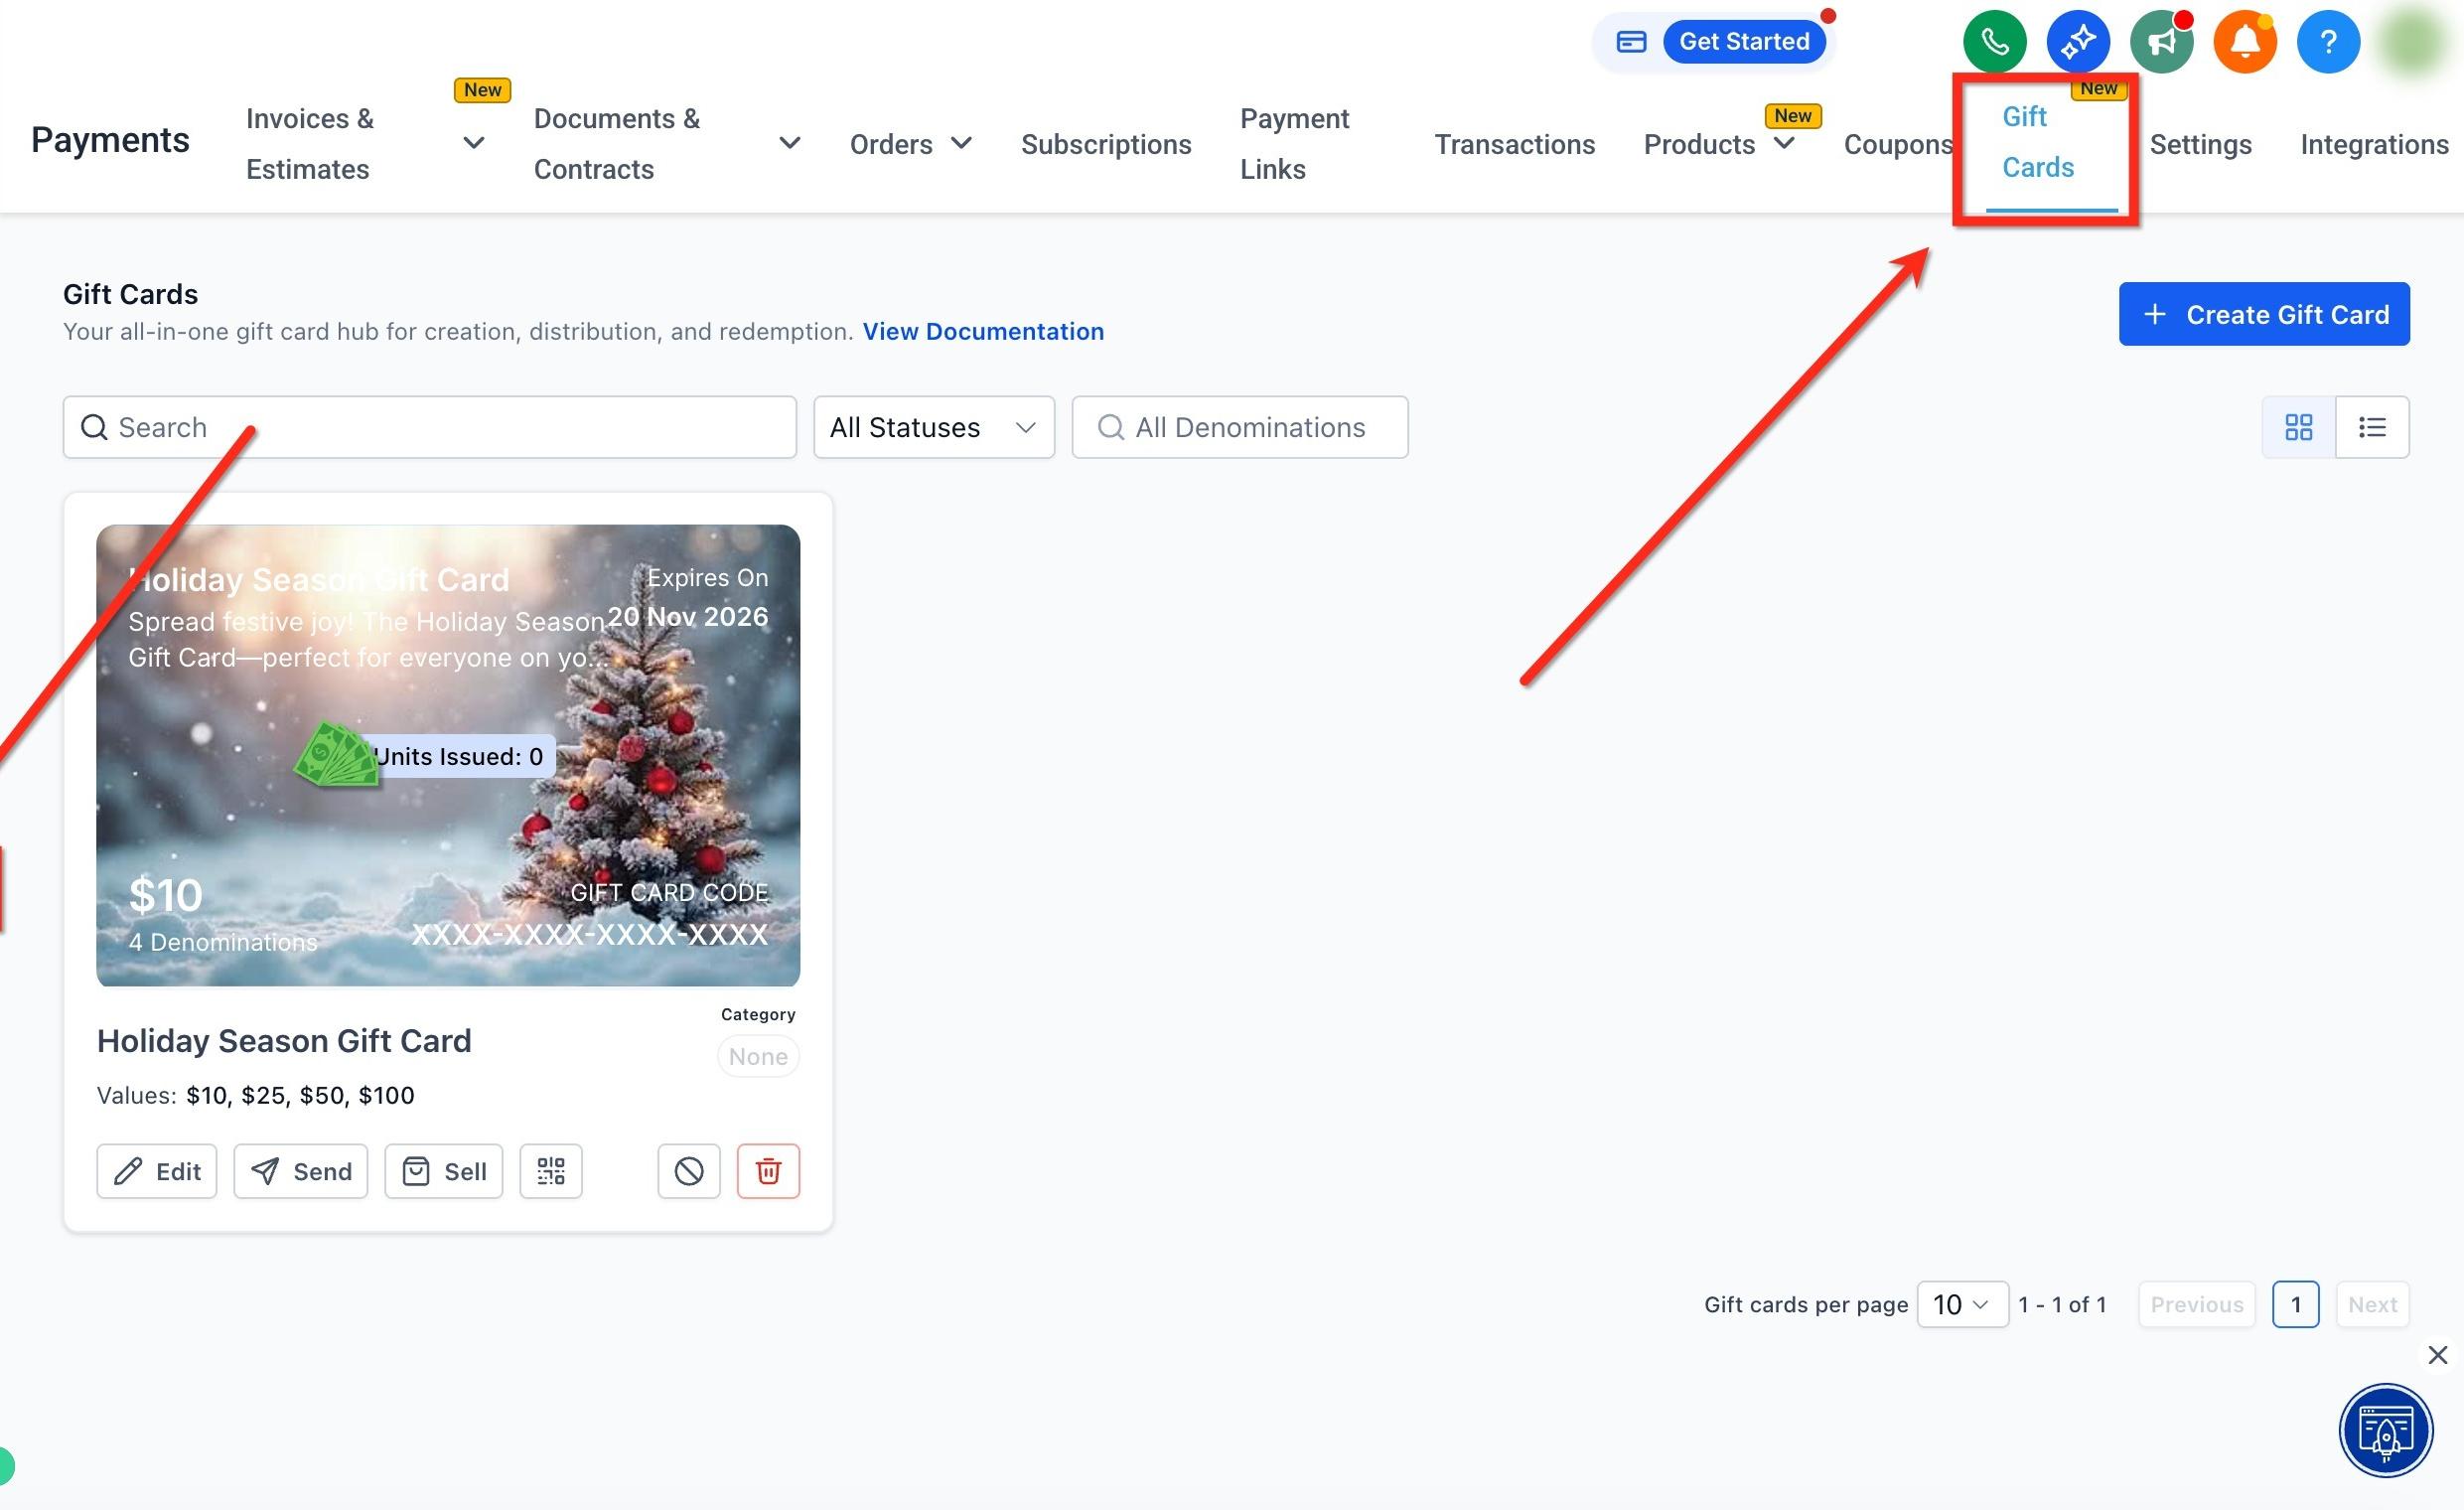
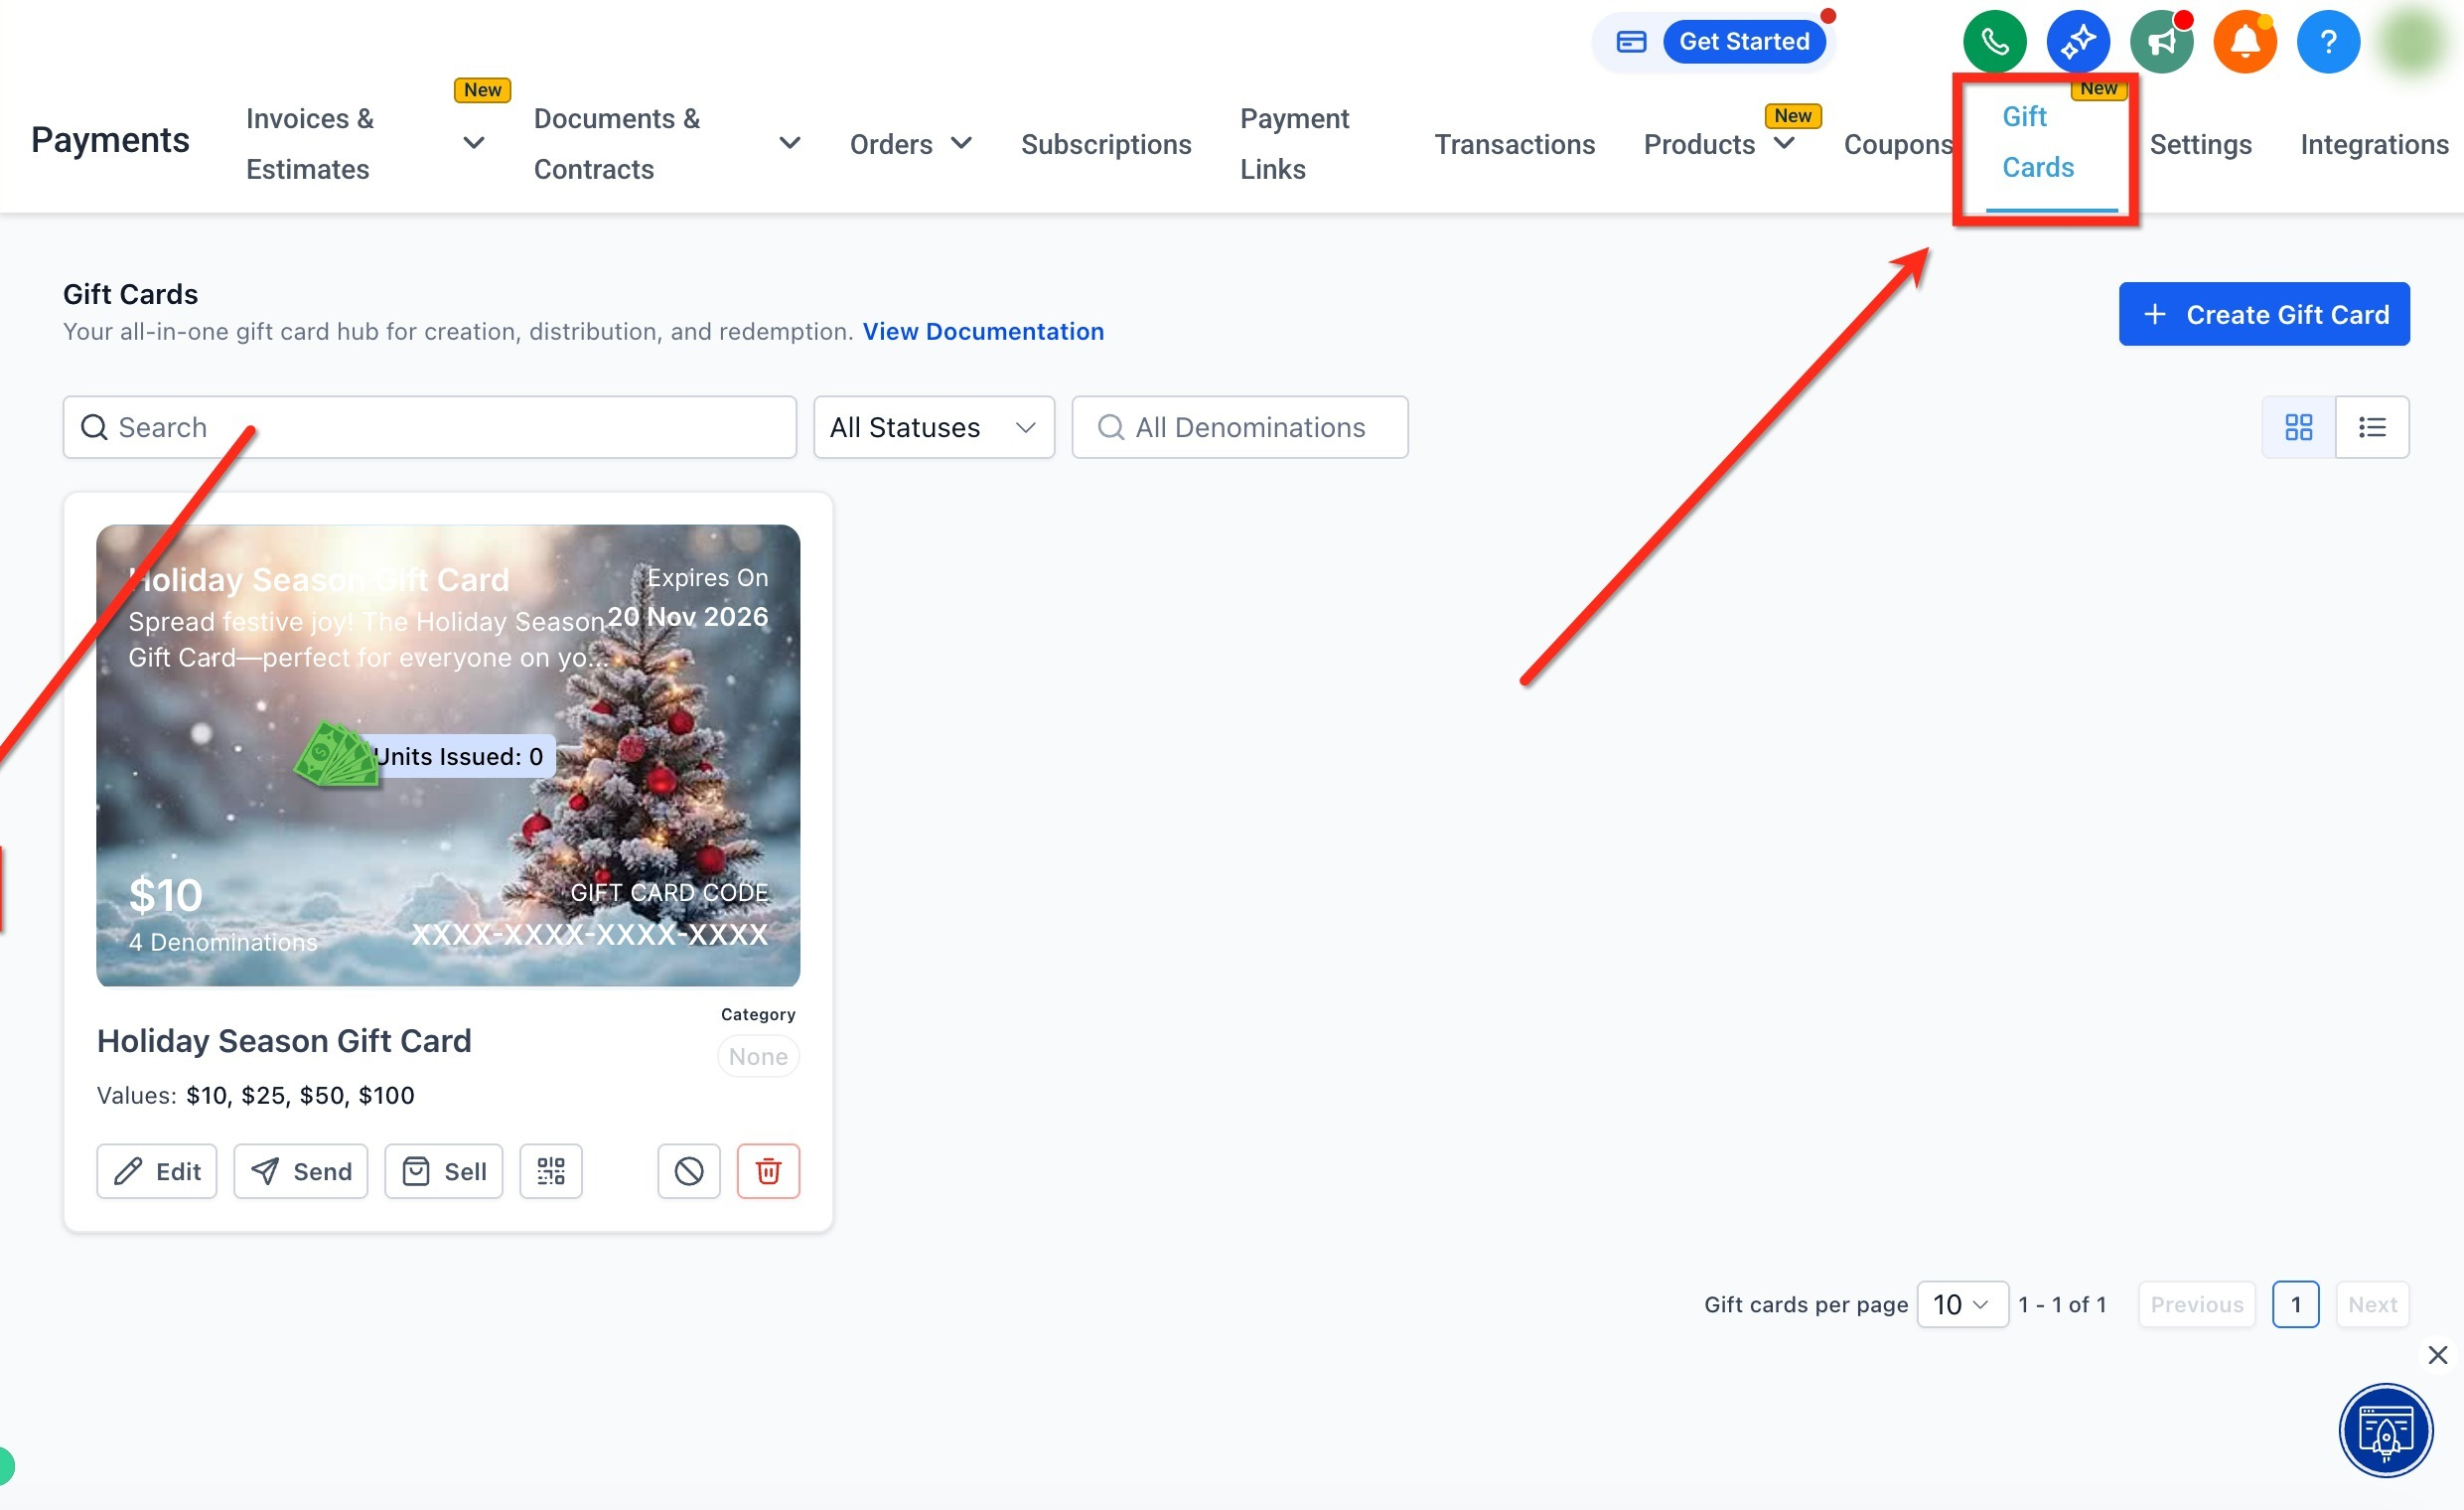
Step 1: In the left menu, click the Payments tab. Then in the top ribbon, click Gift Cards to open the Gift Cards dashboard.
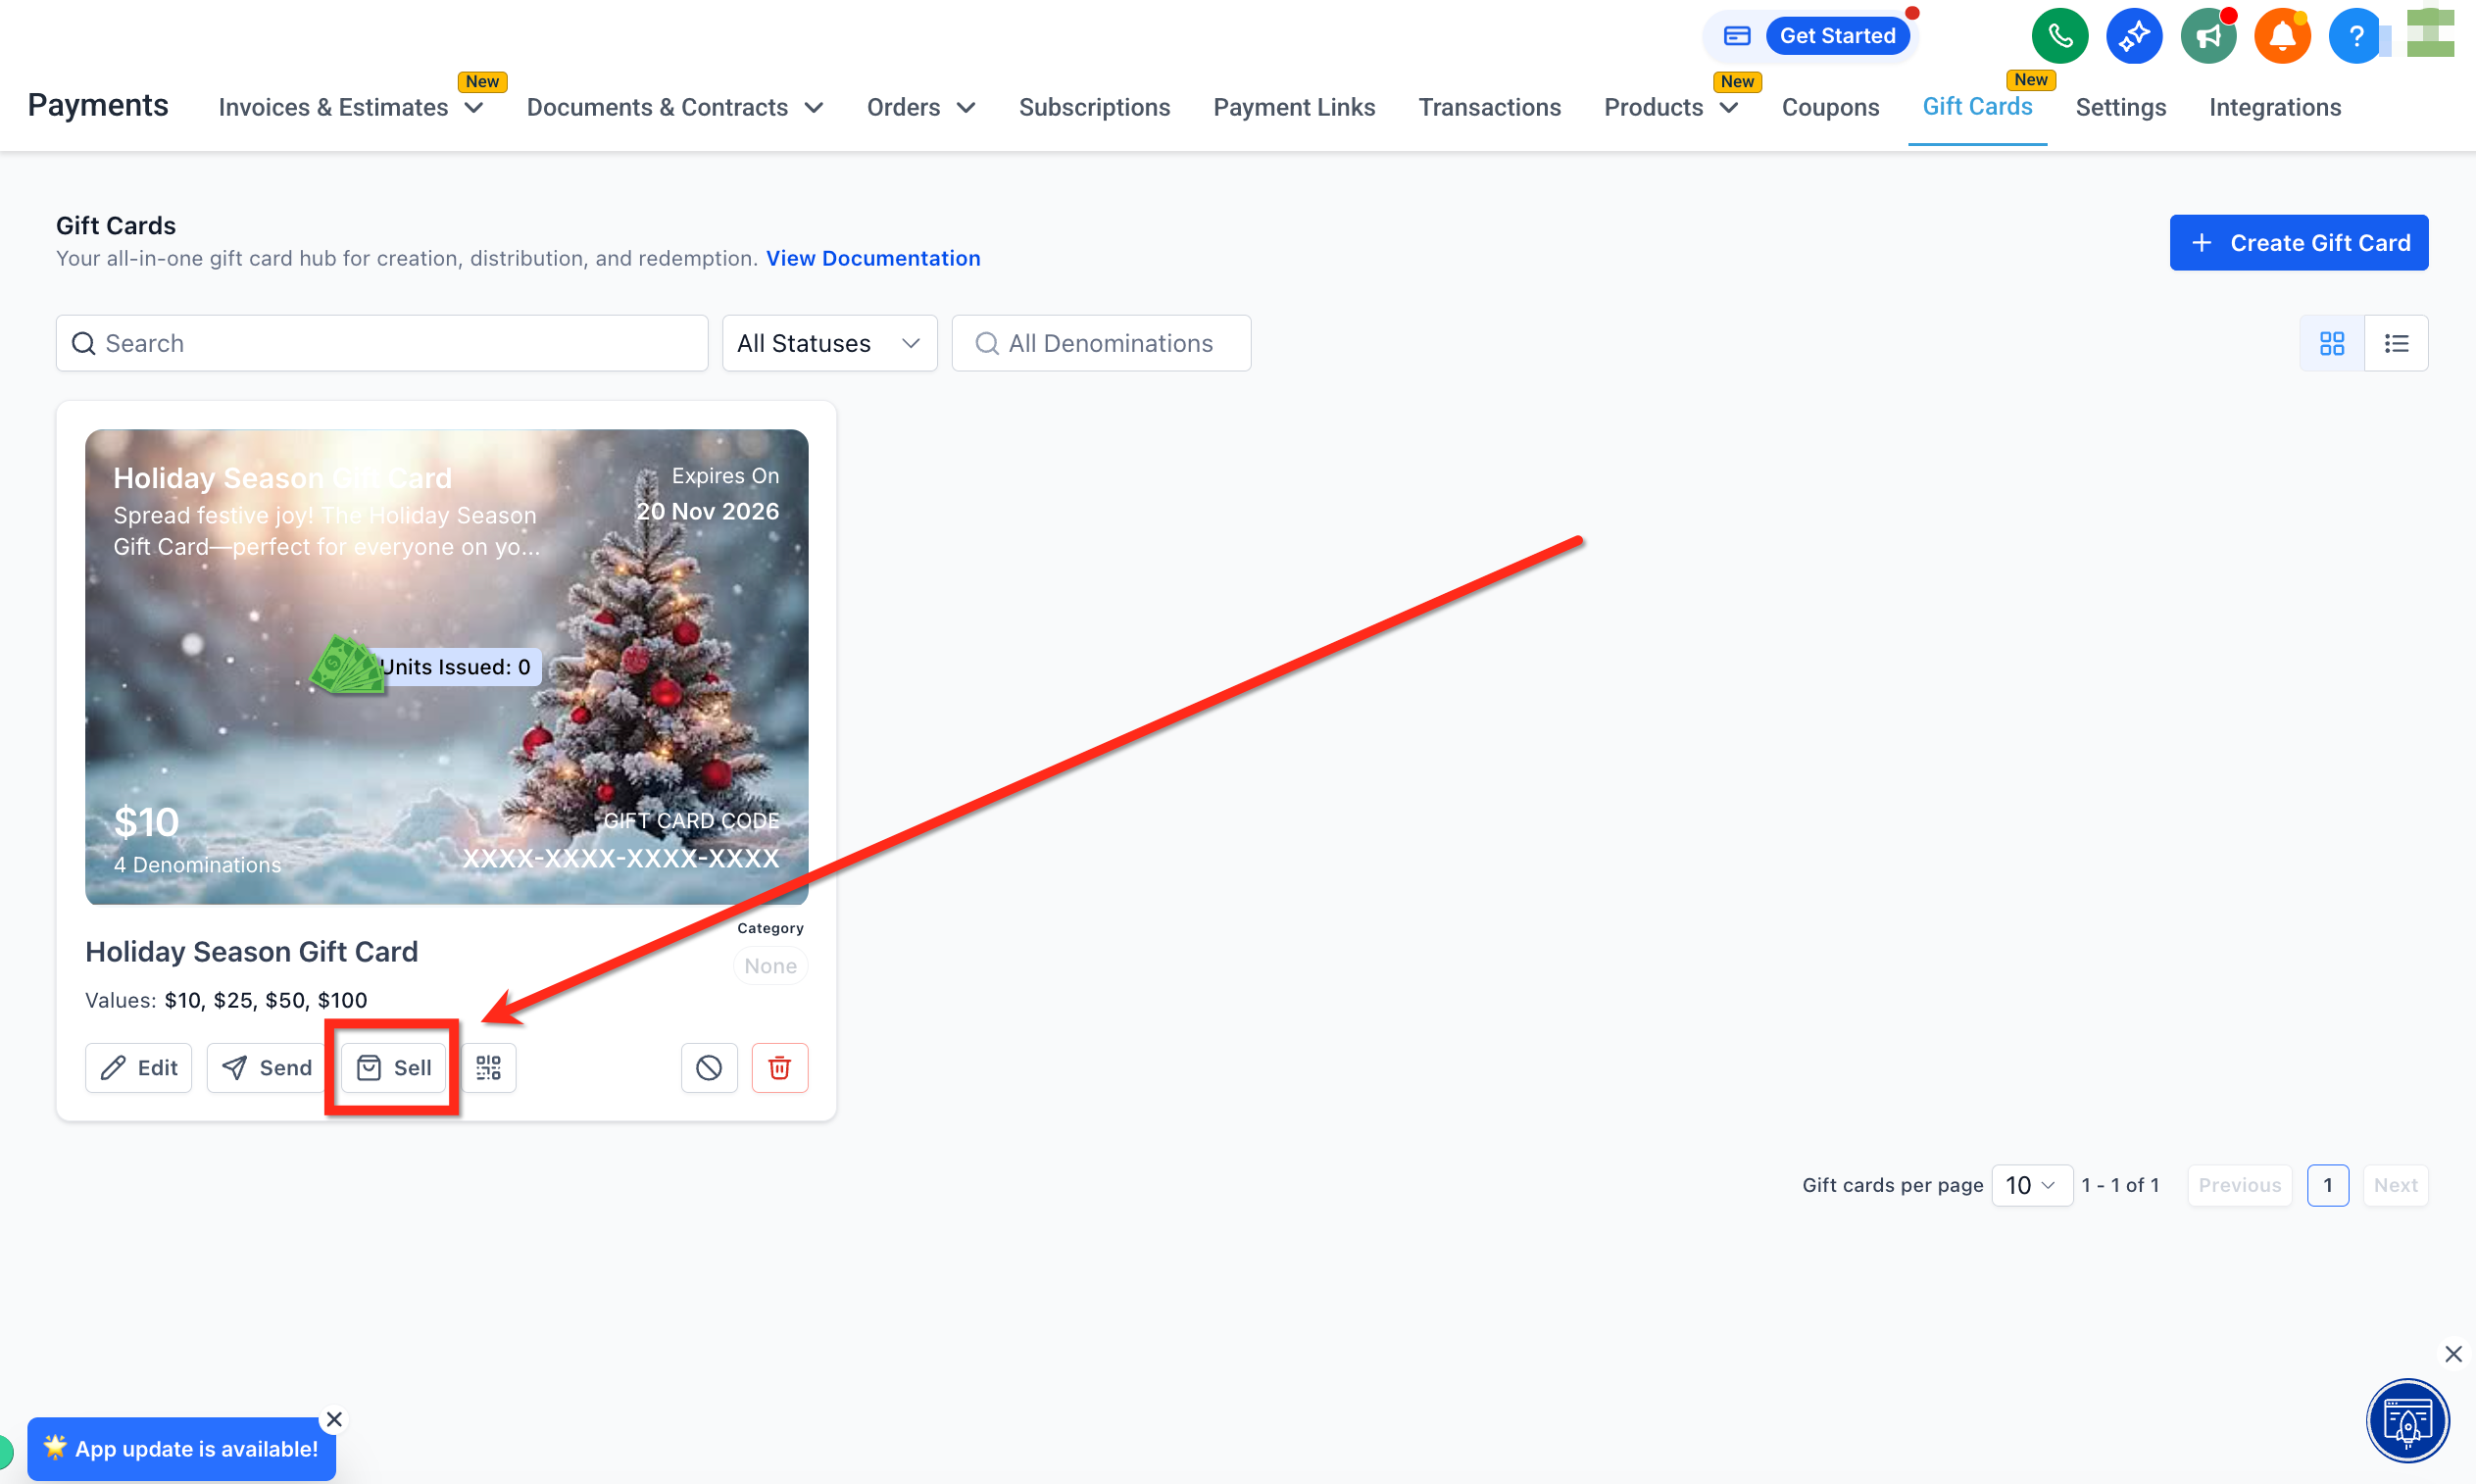
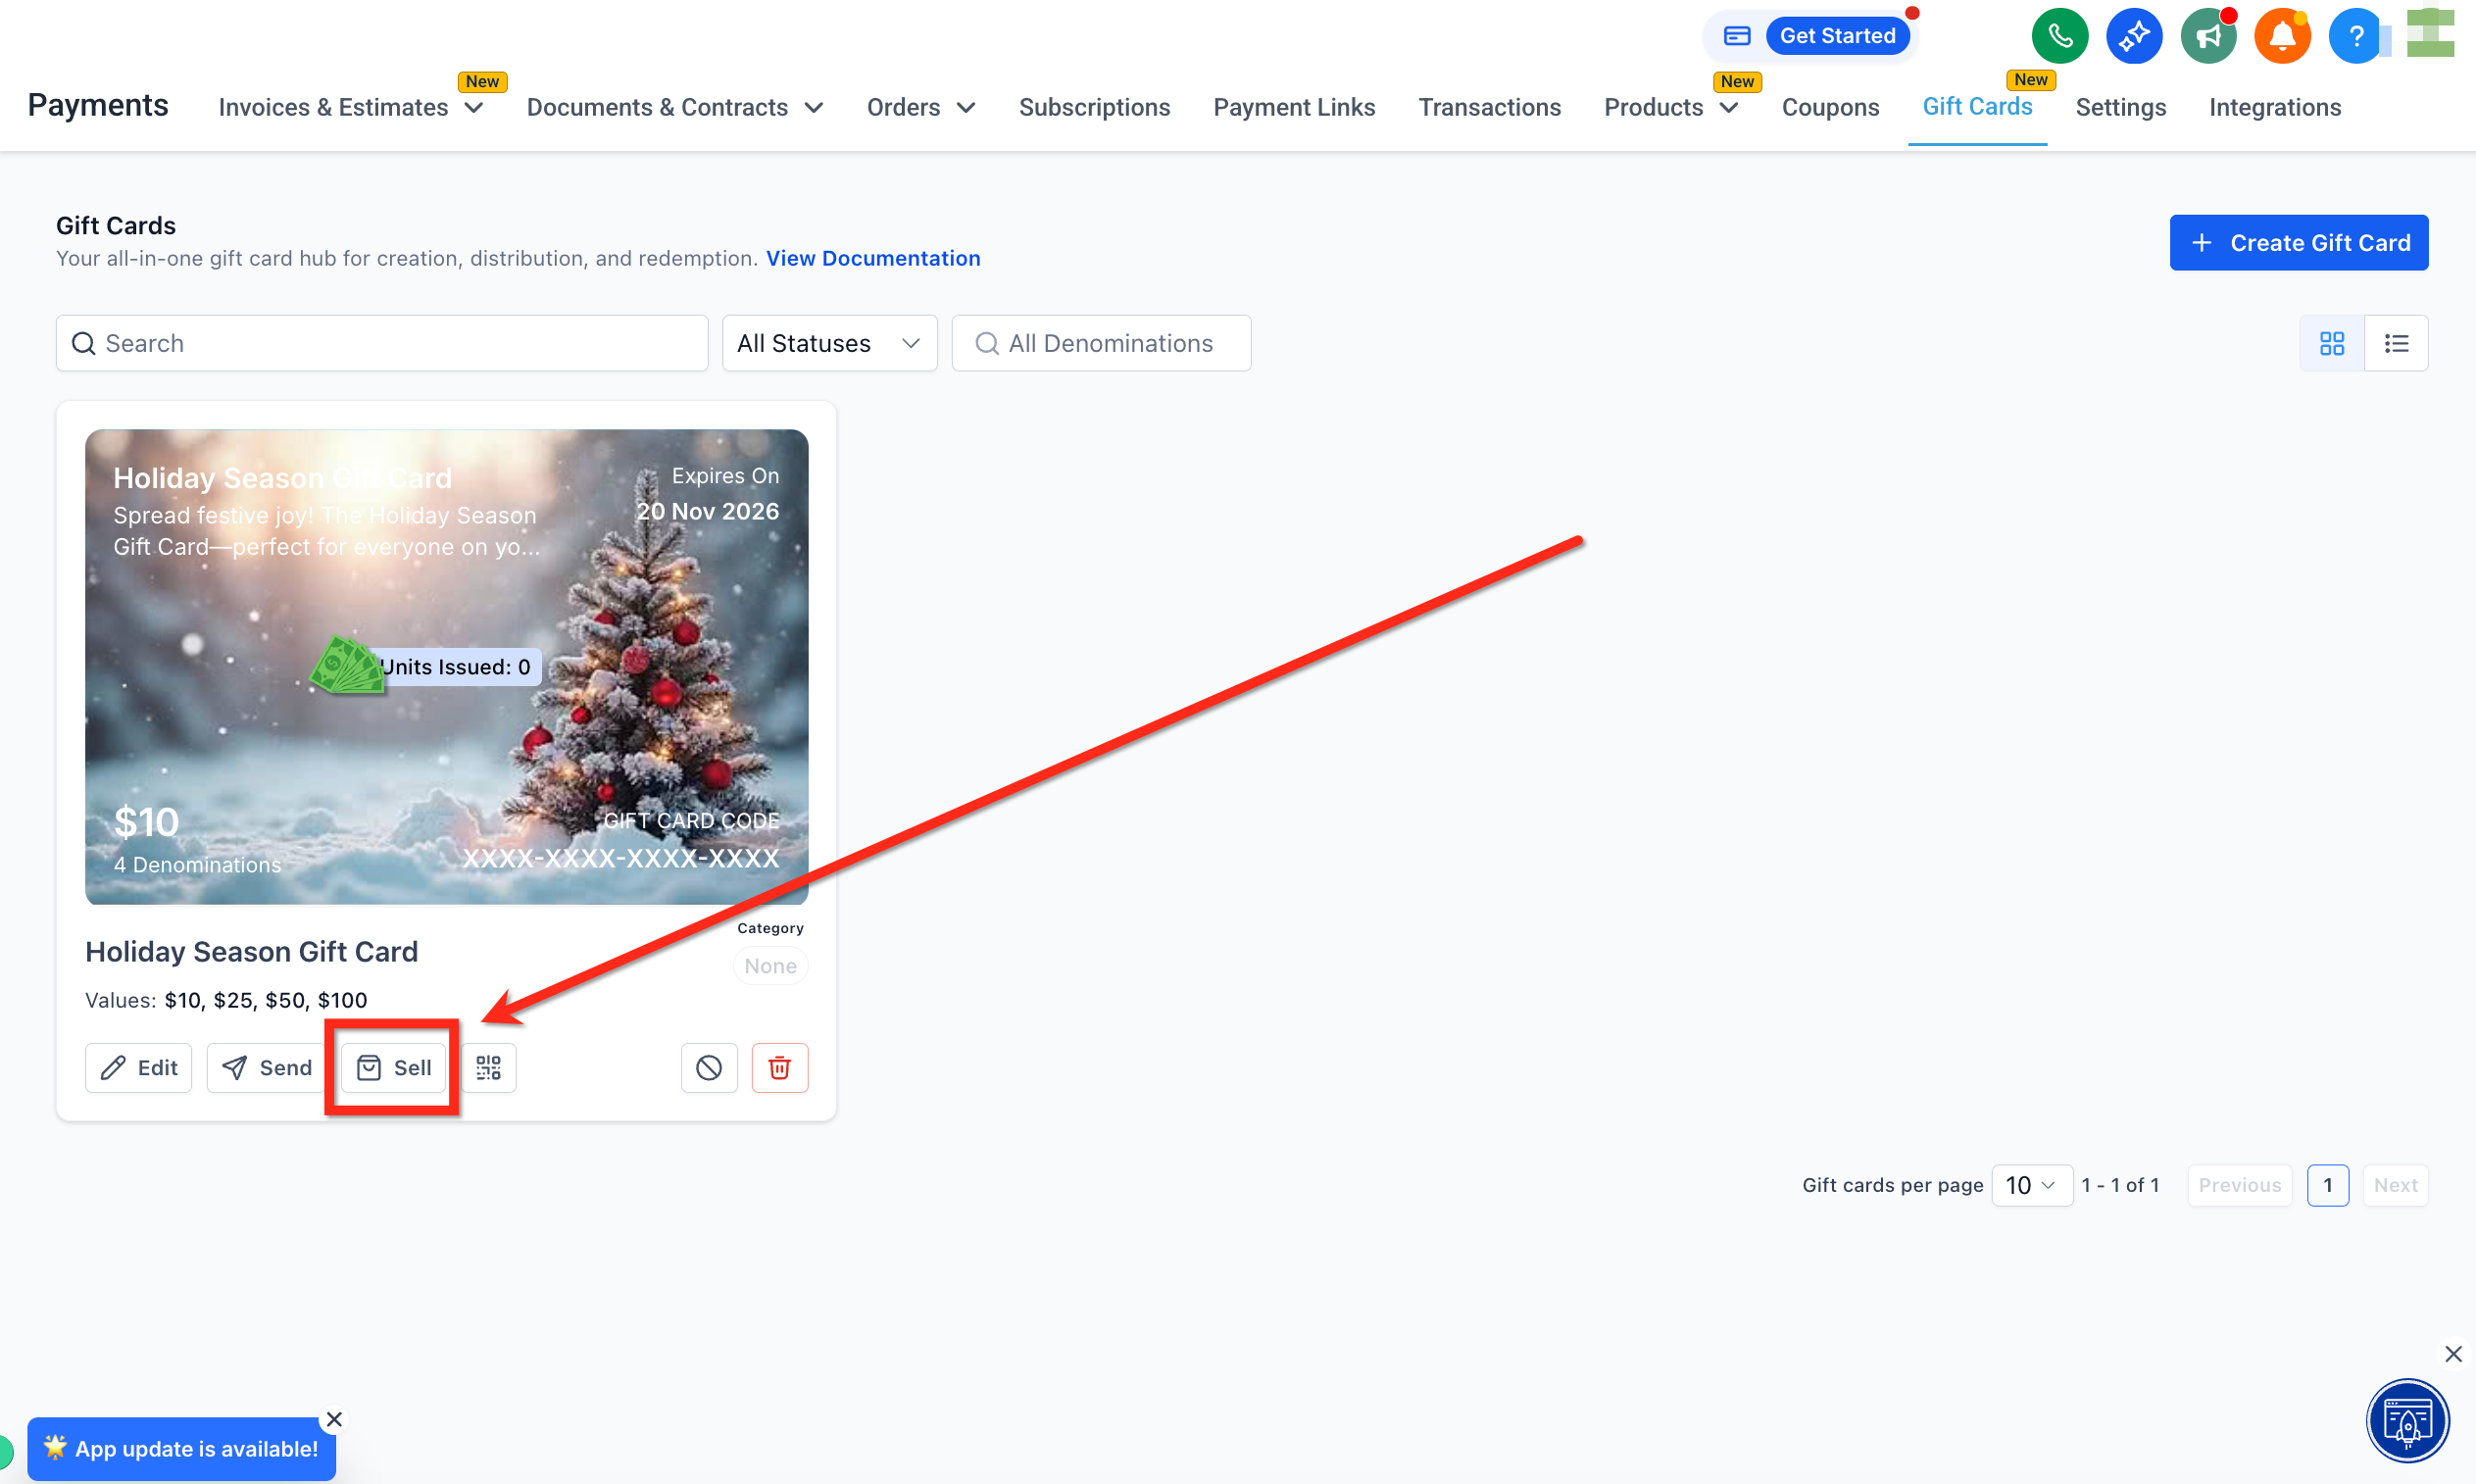
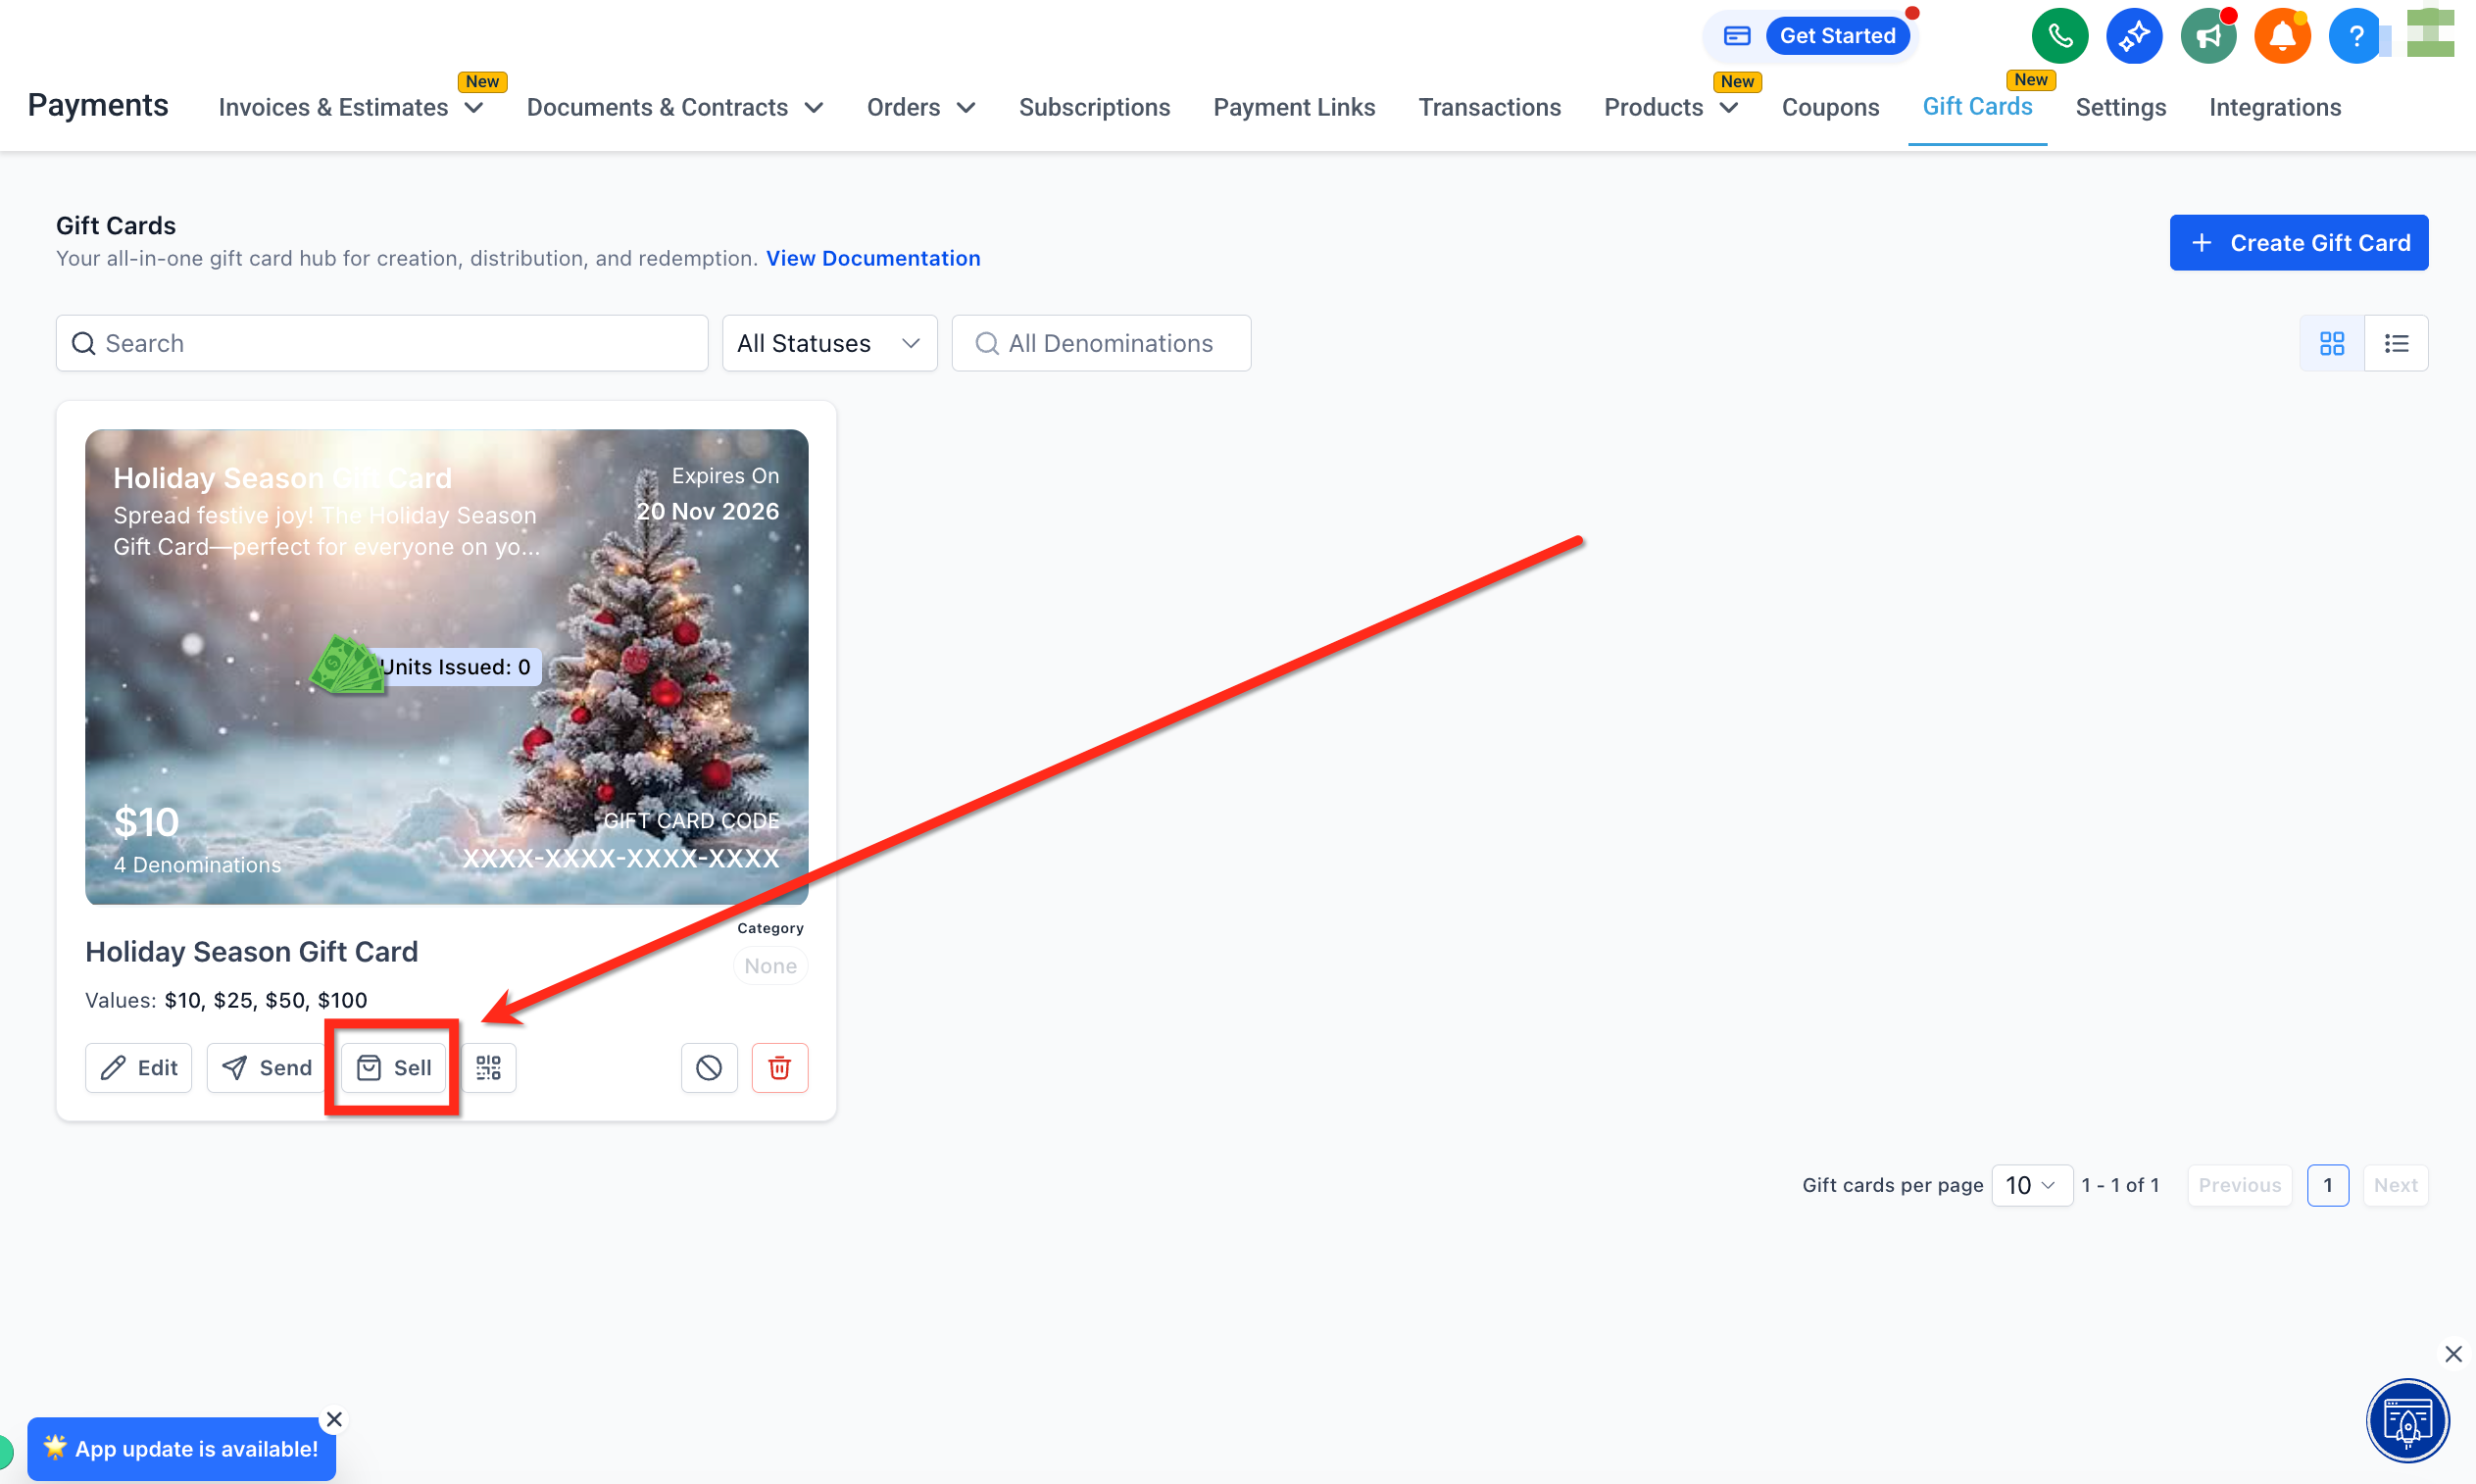
Step 2: Locate the card you want the link for and click Sell on its tile.
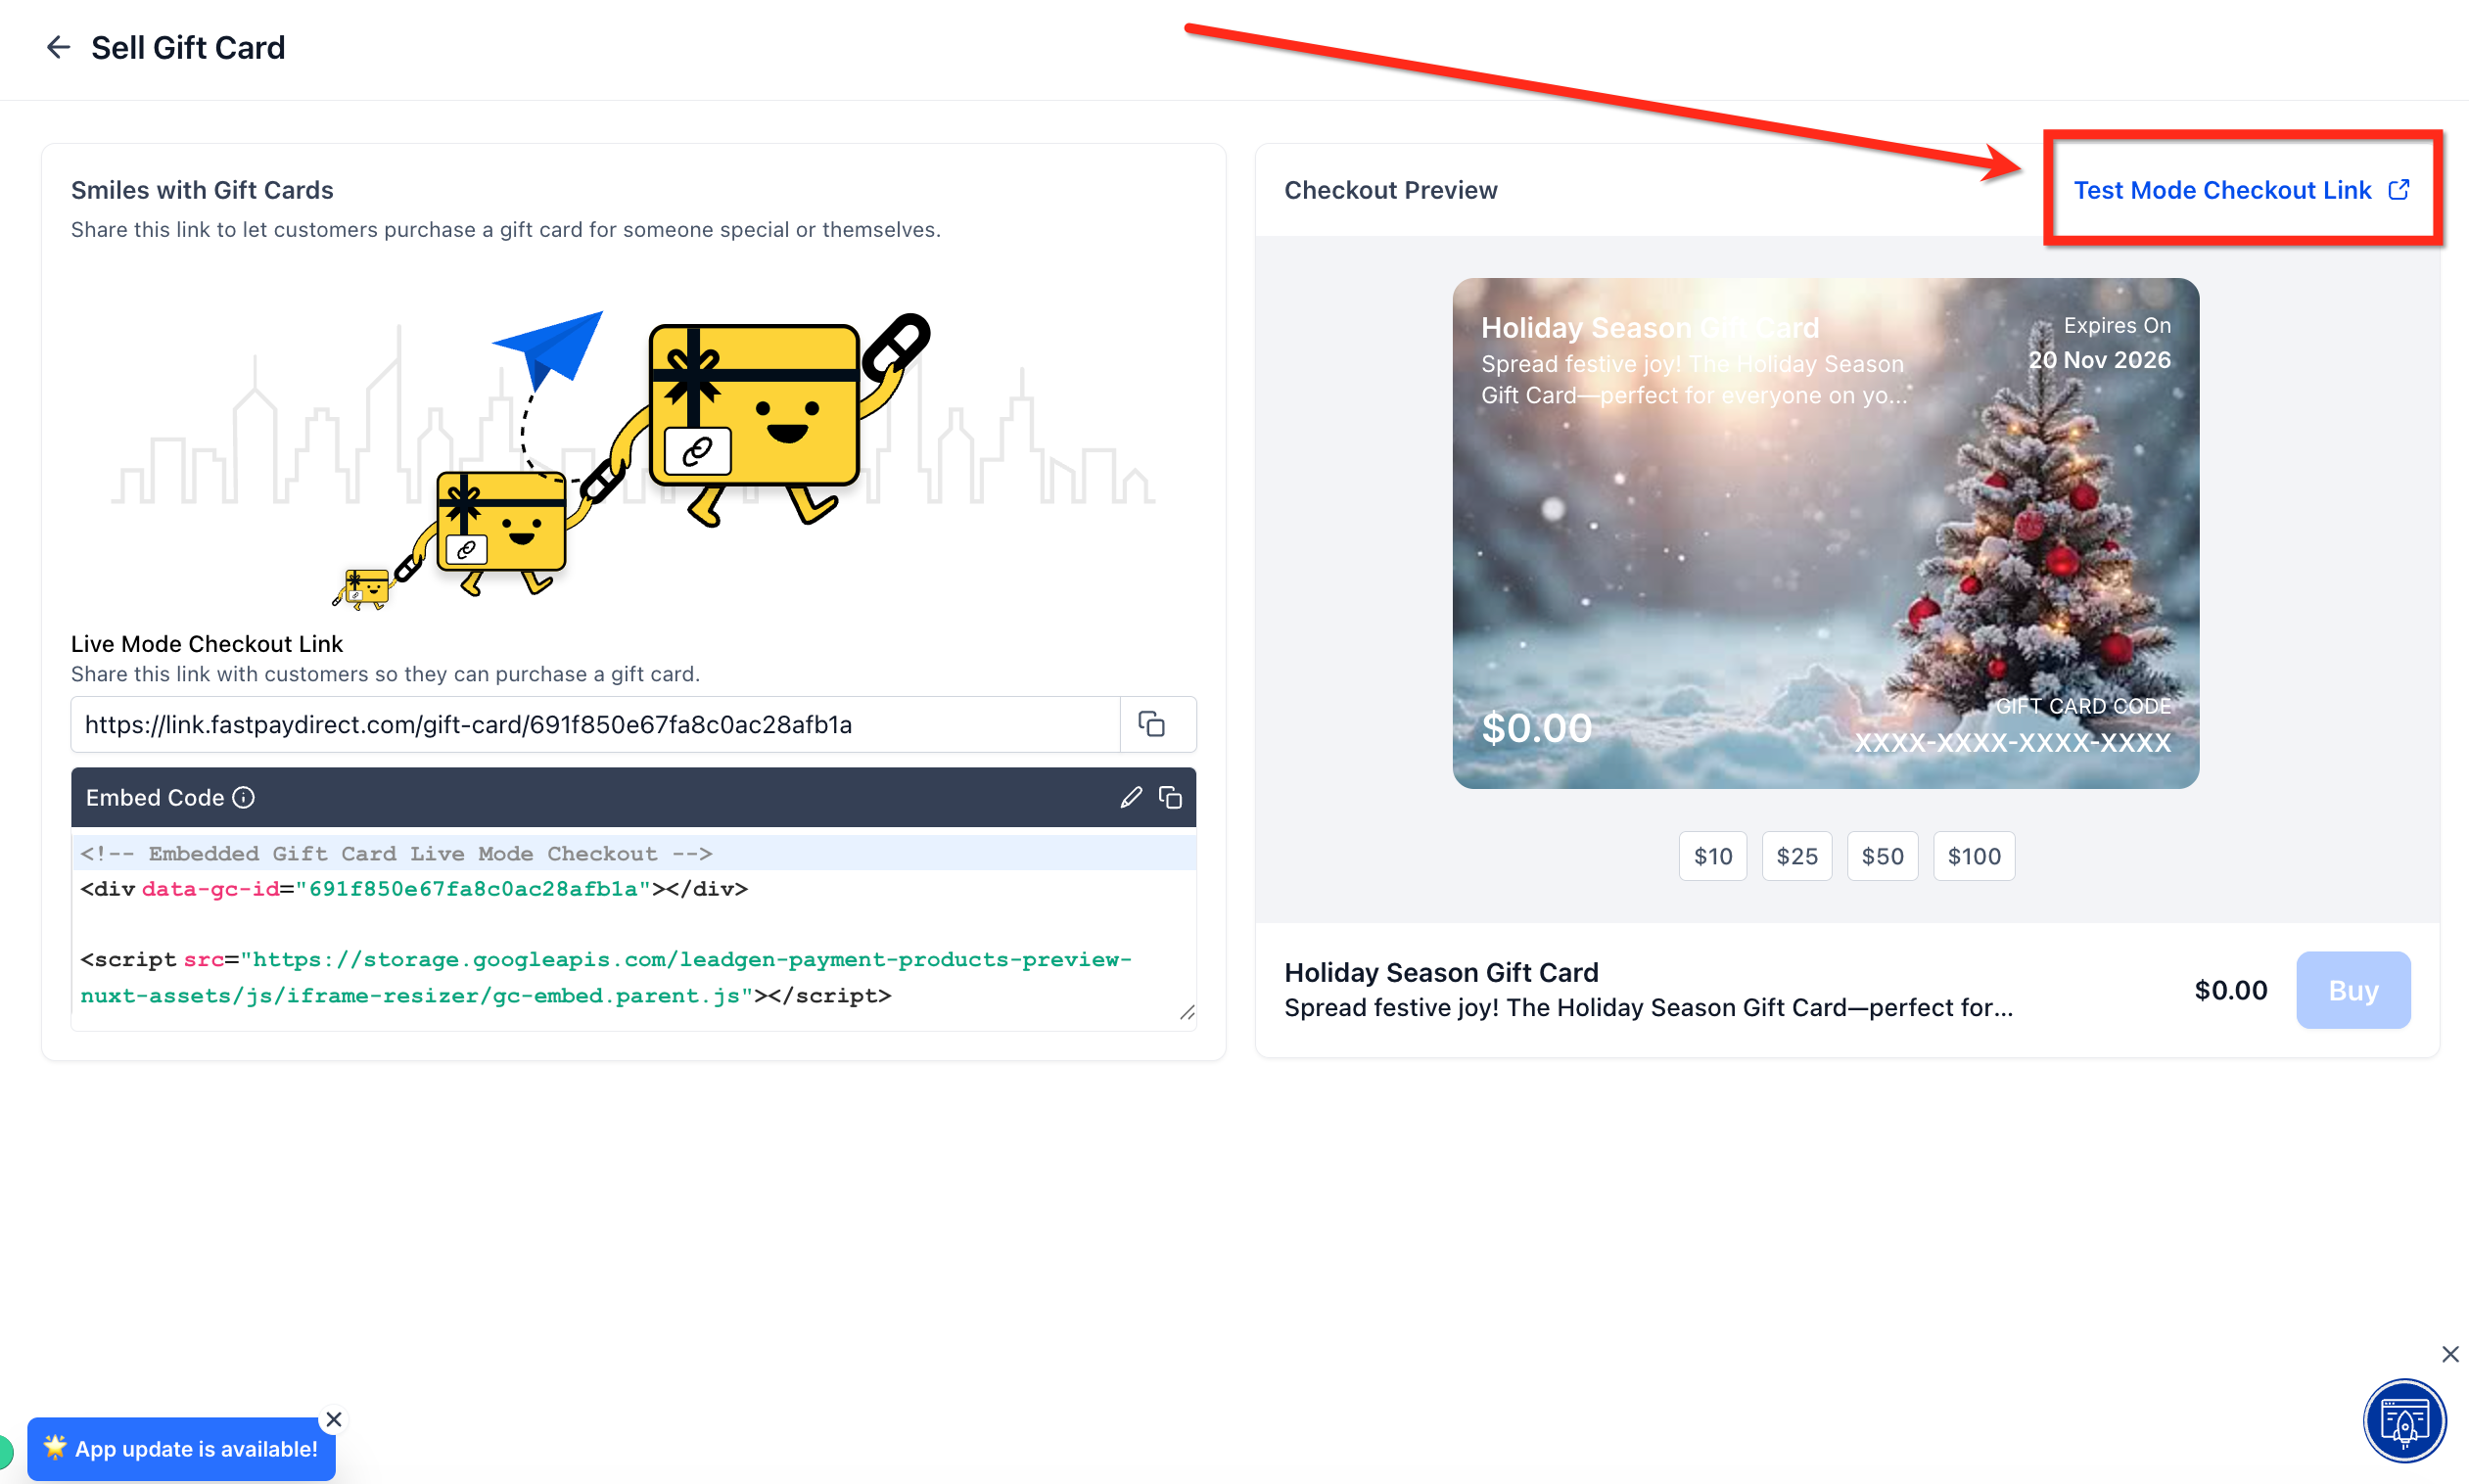
Step 3: Click the Copy icon to copy the Live Mode Checkout Link to your clipboard, then share it with your patients so they can purchase the gift card.
Use these steps to copy a Test link for internal QA without affecting real balances.
Step 1: In the left menu, click the Payments tab. Then in the top ribbon, click Gift Cards to open the Gift Cards dashboard.
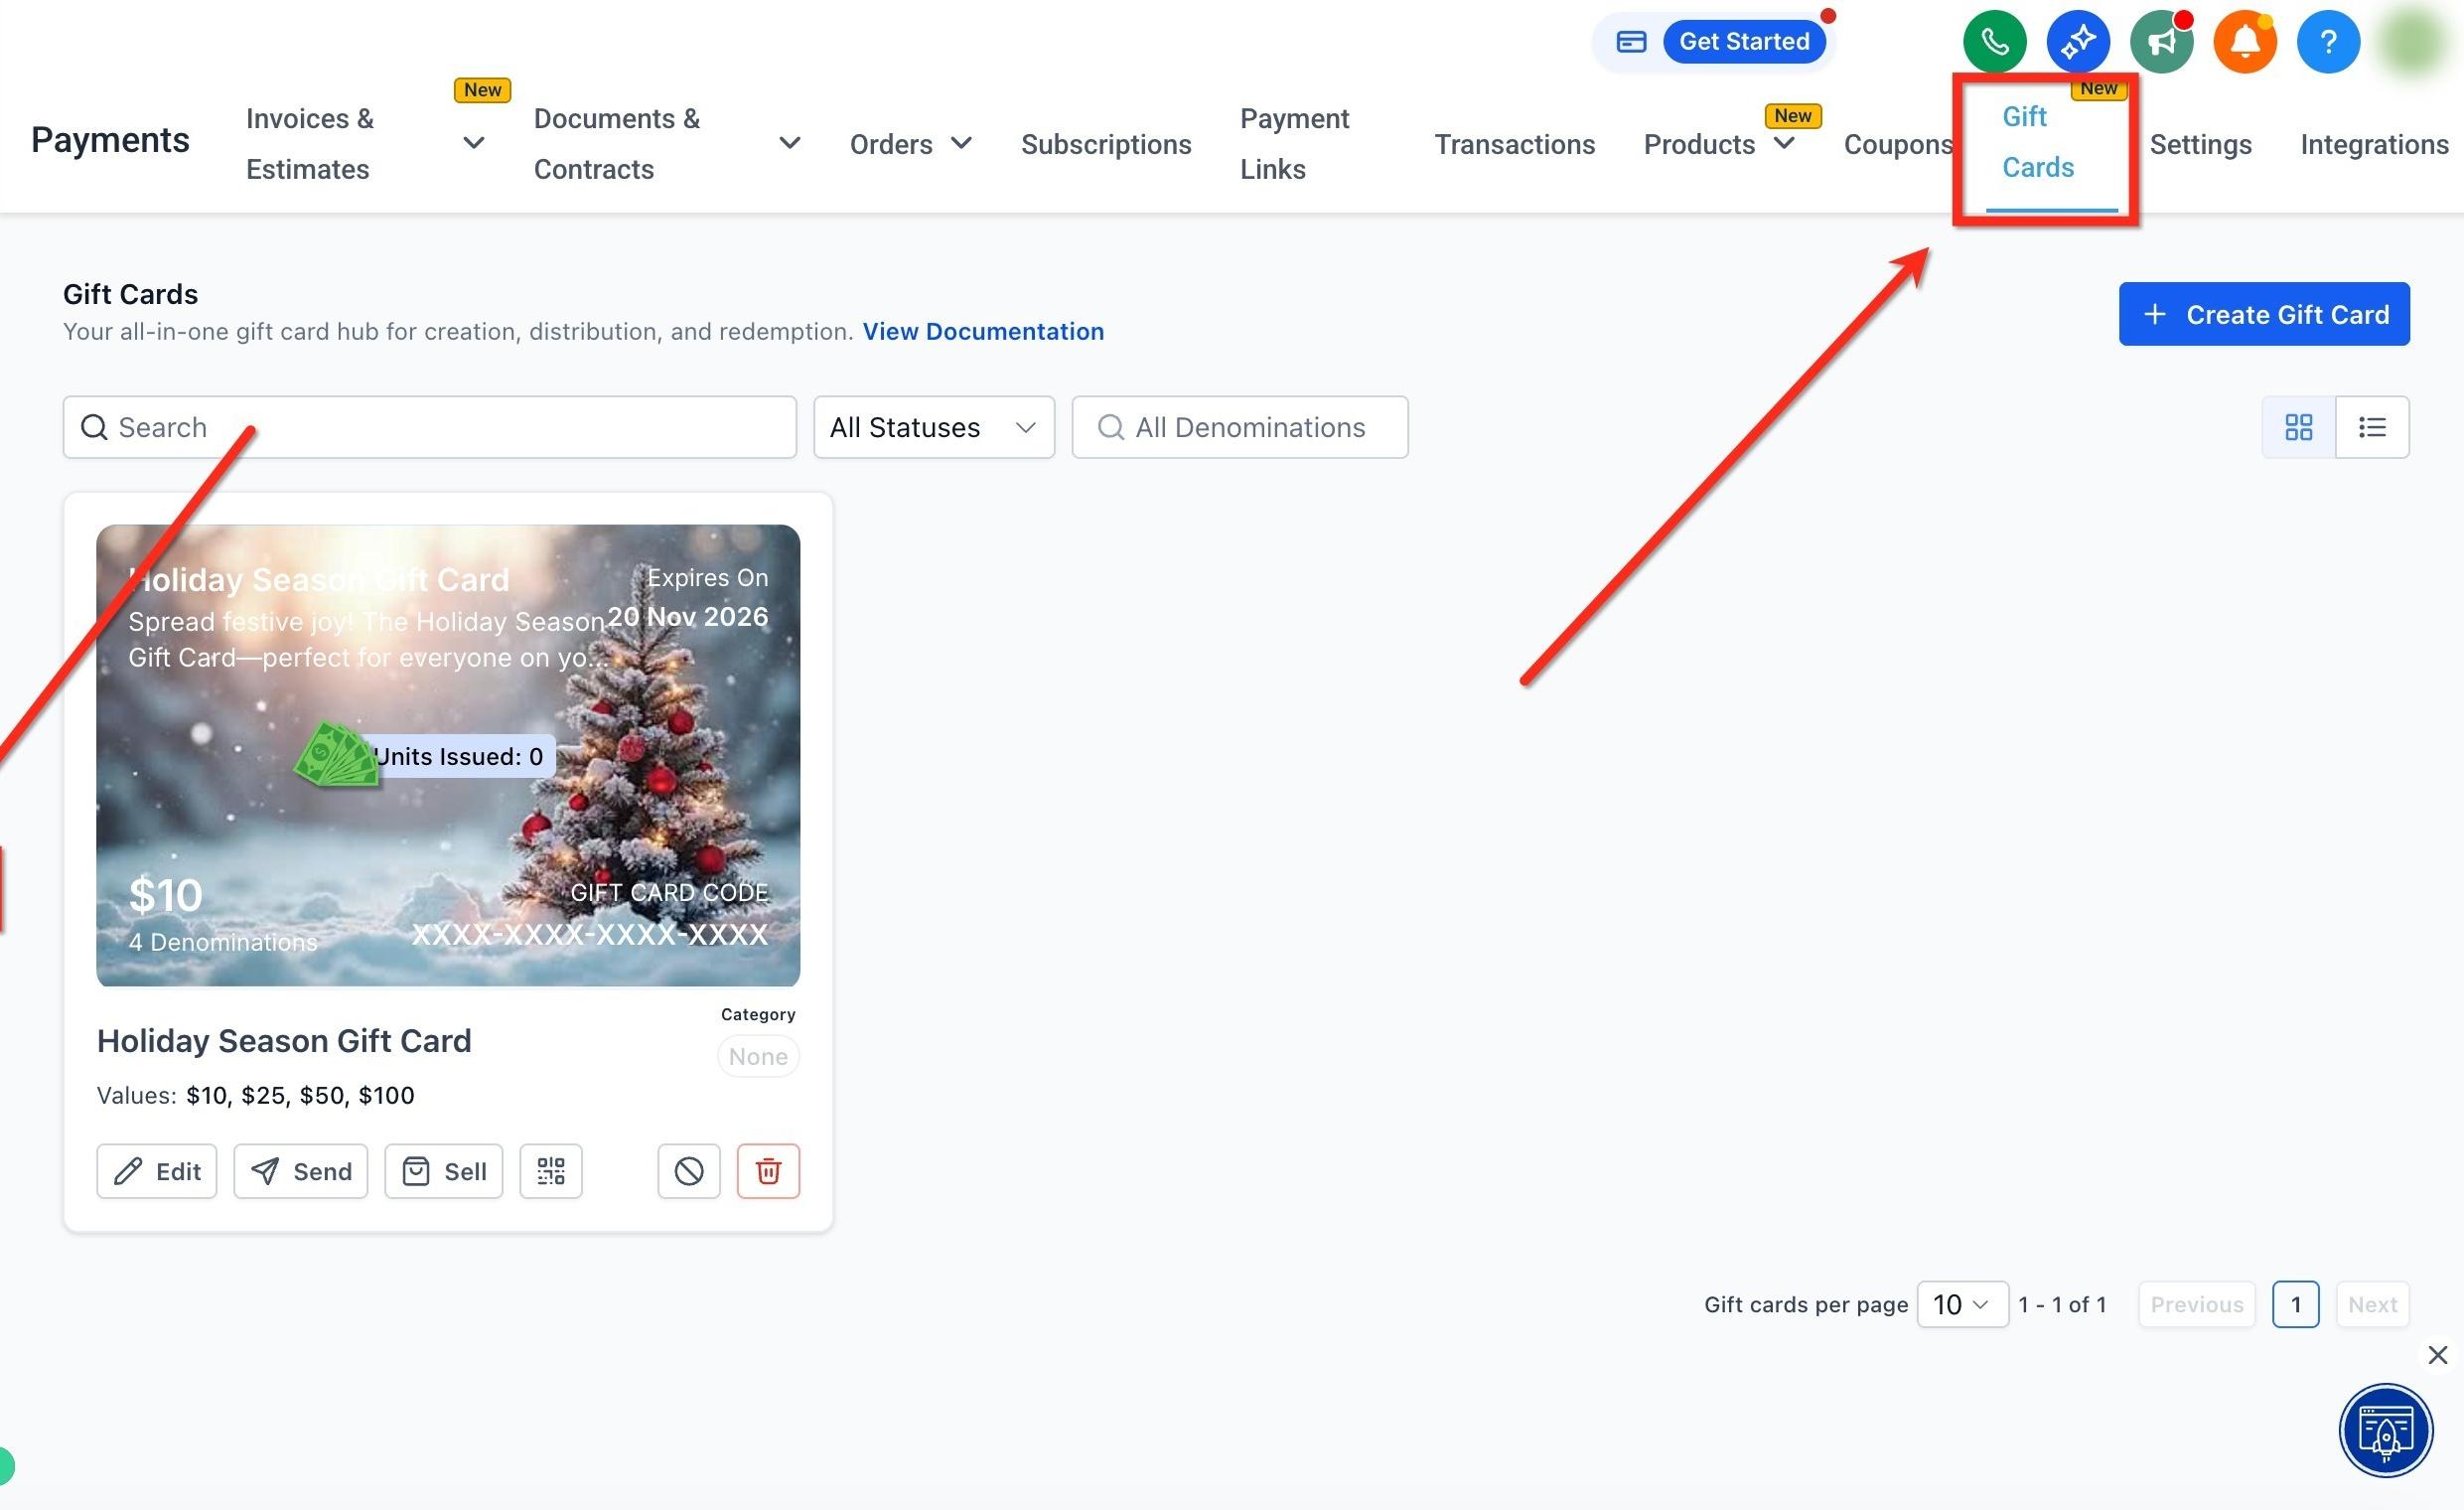
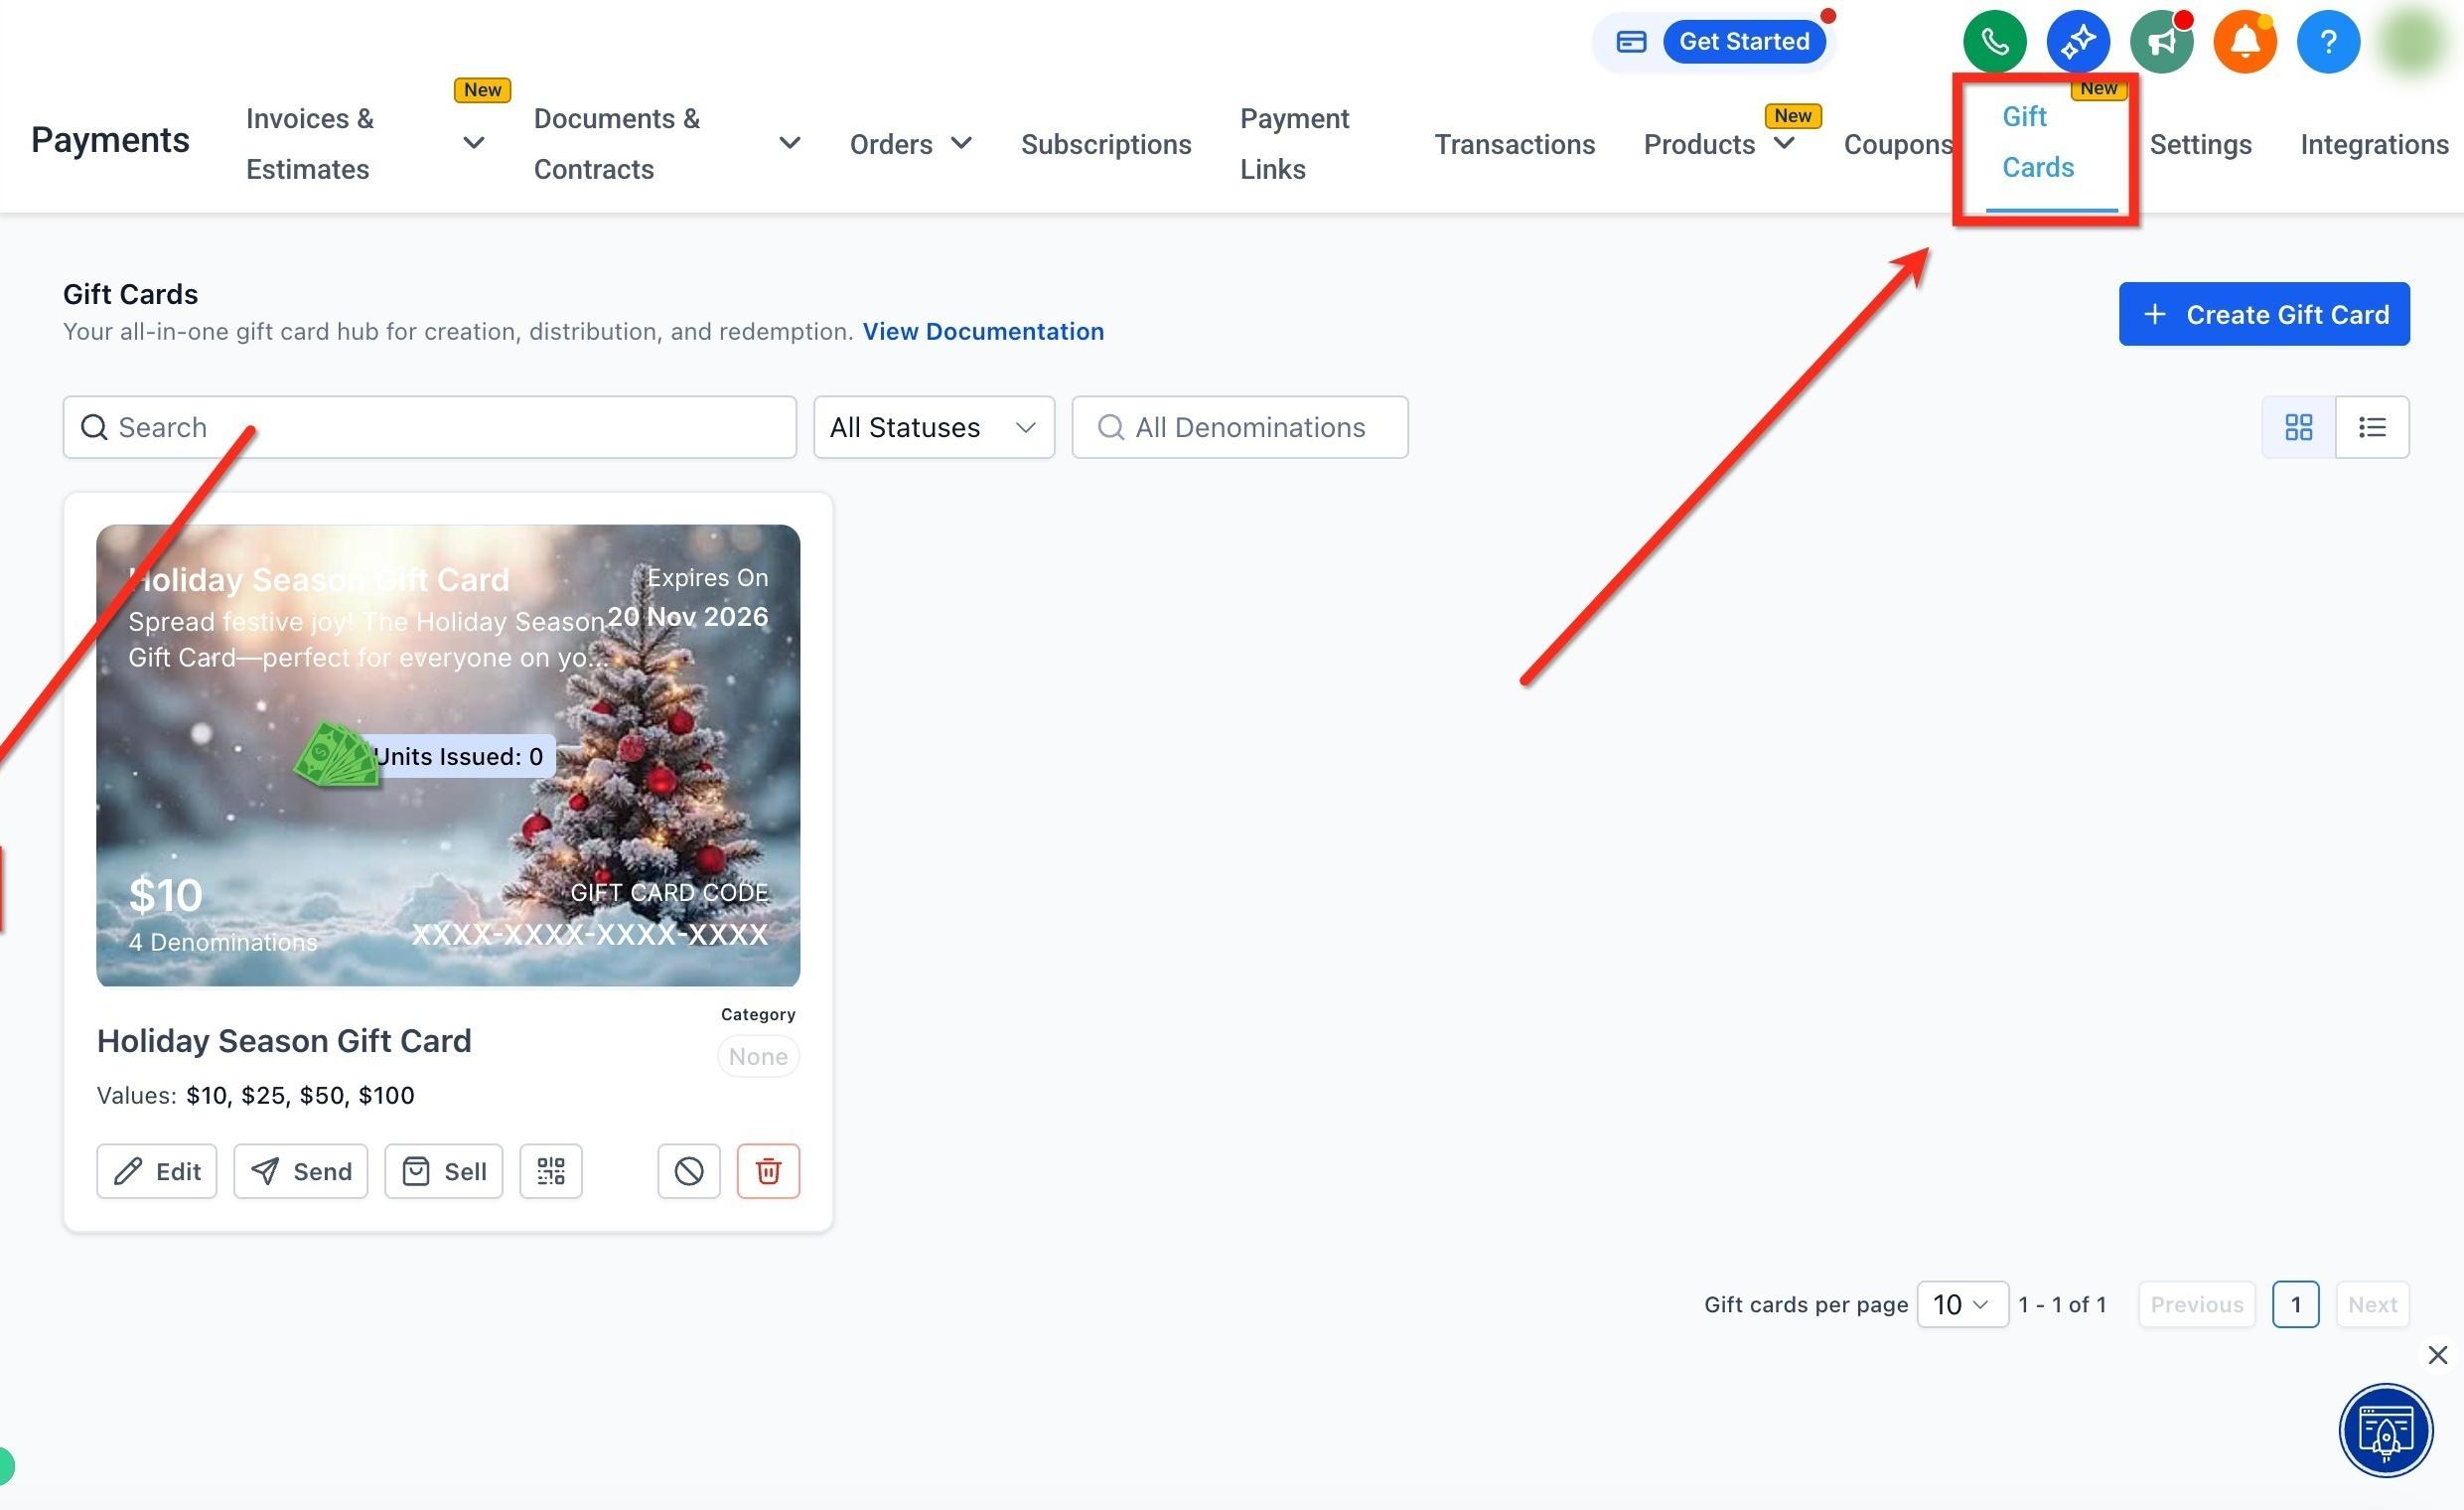
Step 2: Locate the card you want the link for and click Sell on its tile.
Step 3: Click Test Mode Checkout Link in the upper right corner to open it. Use this link for internal testing only.
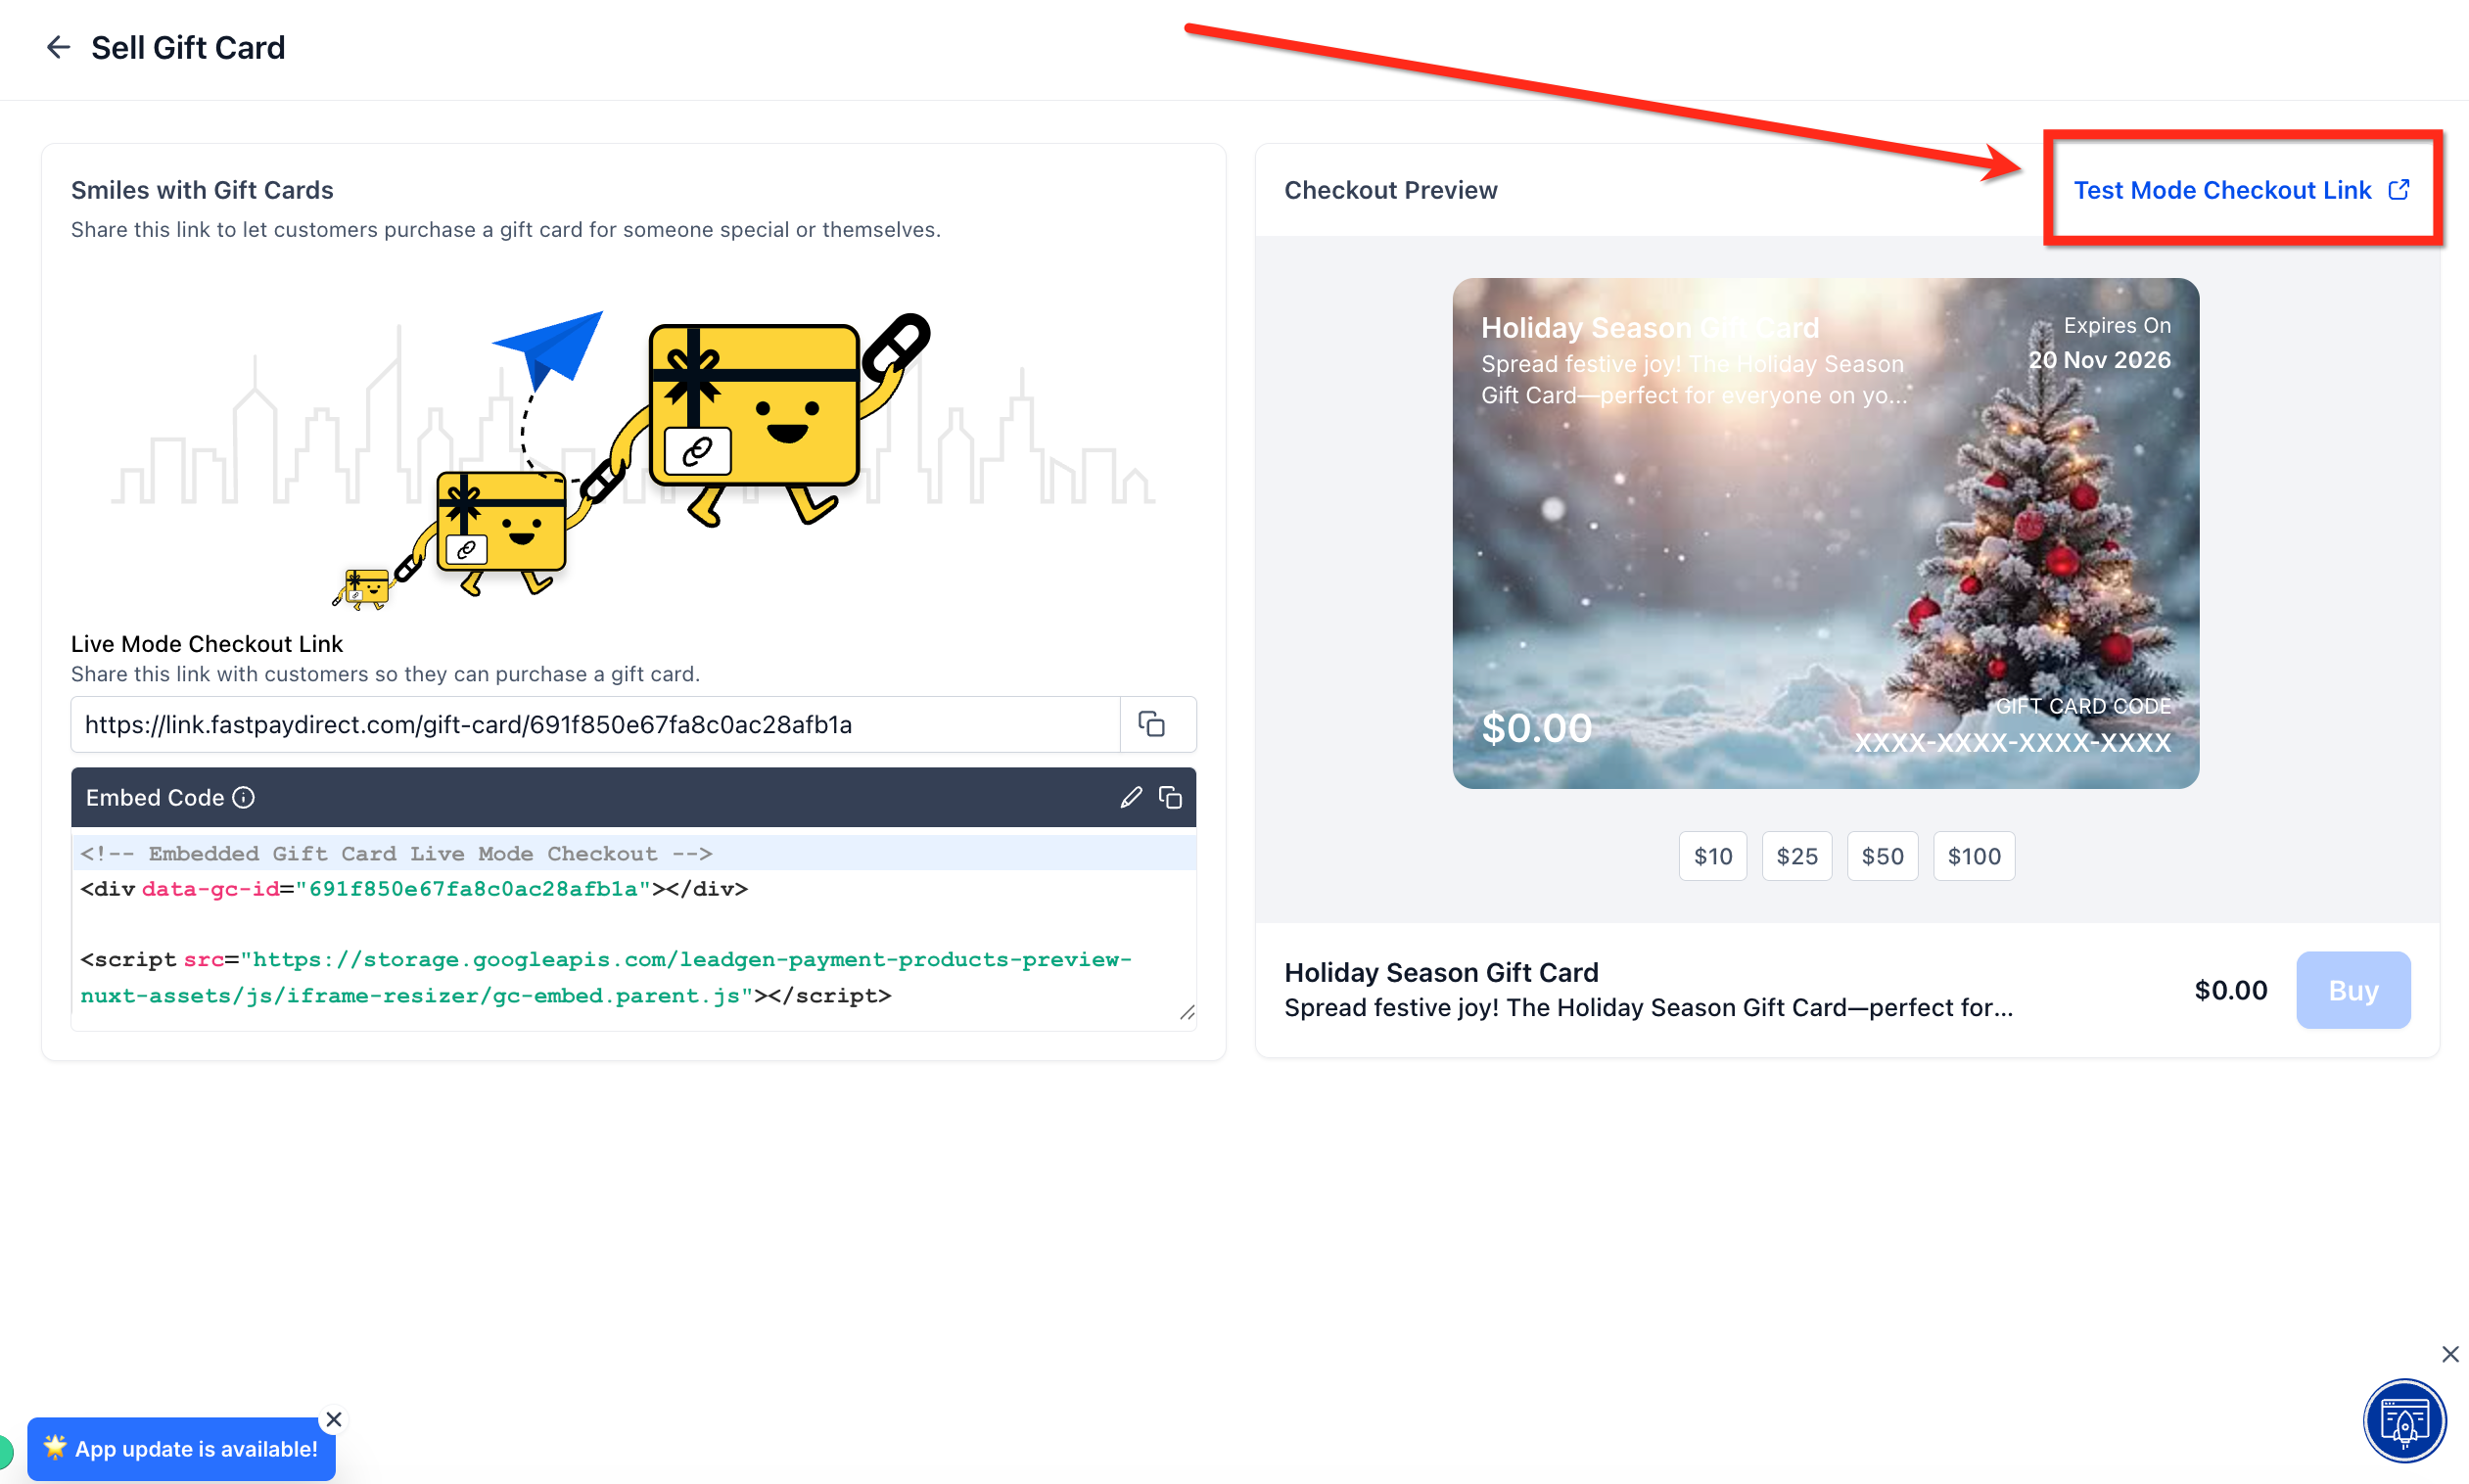
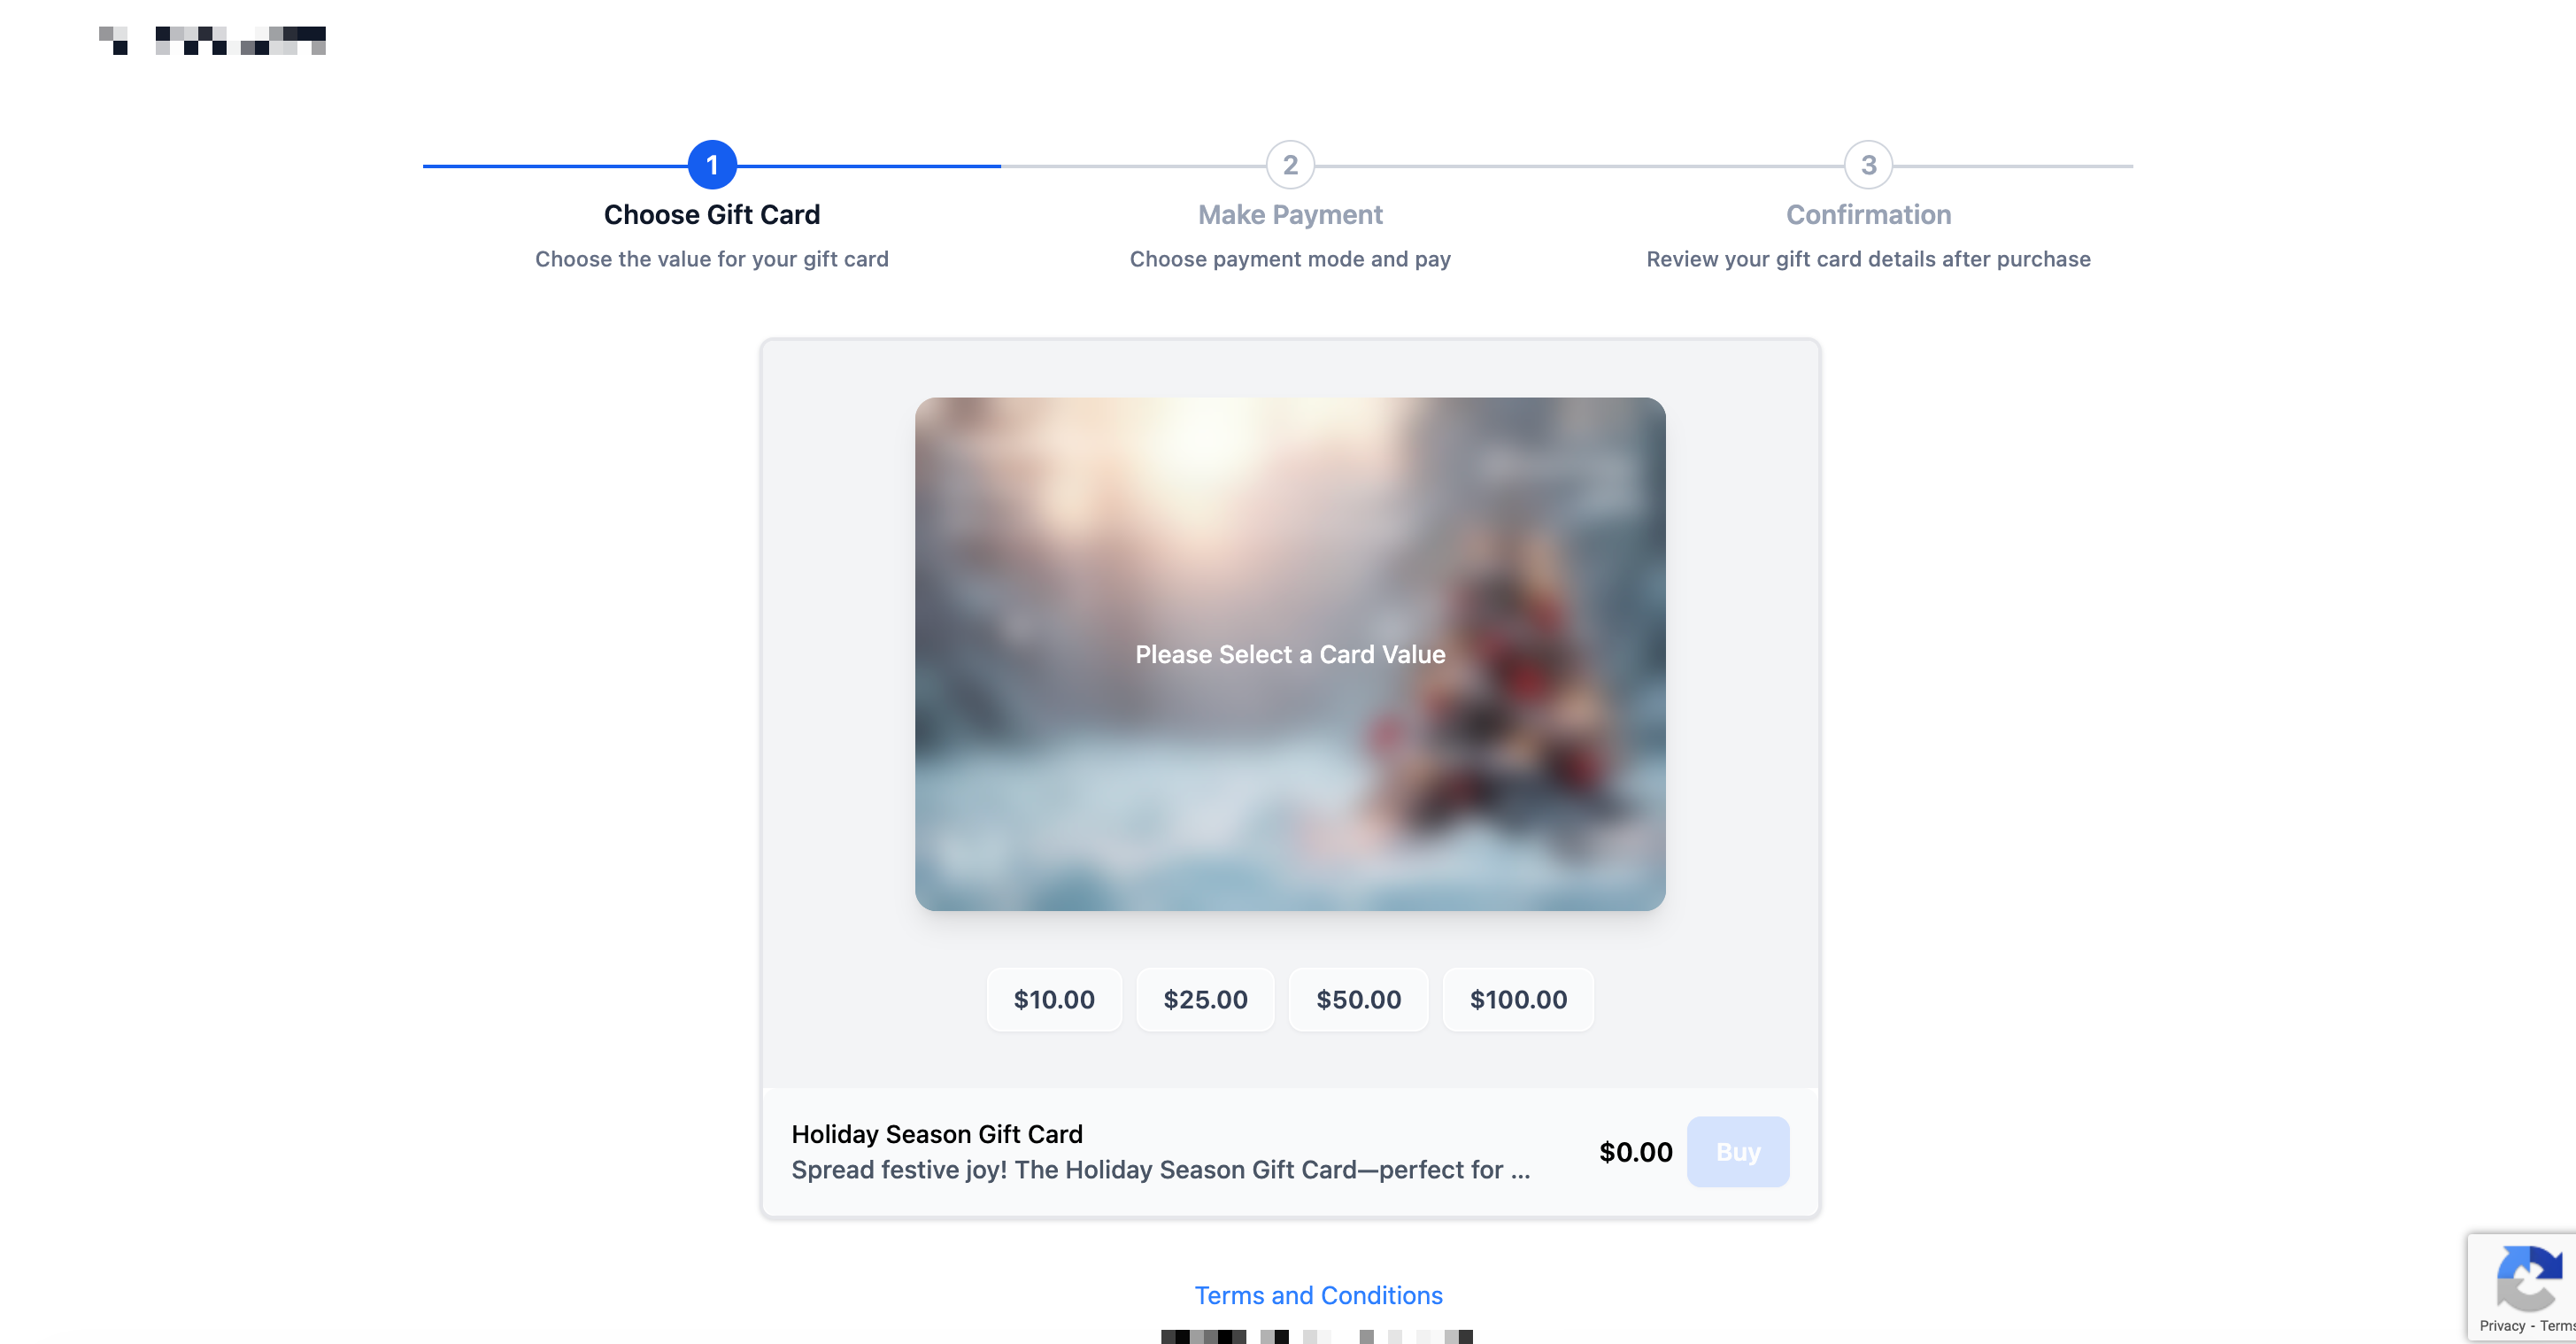
This is the flow a patient goes through when purchasing a gift card through the dedicated checkout link.
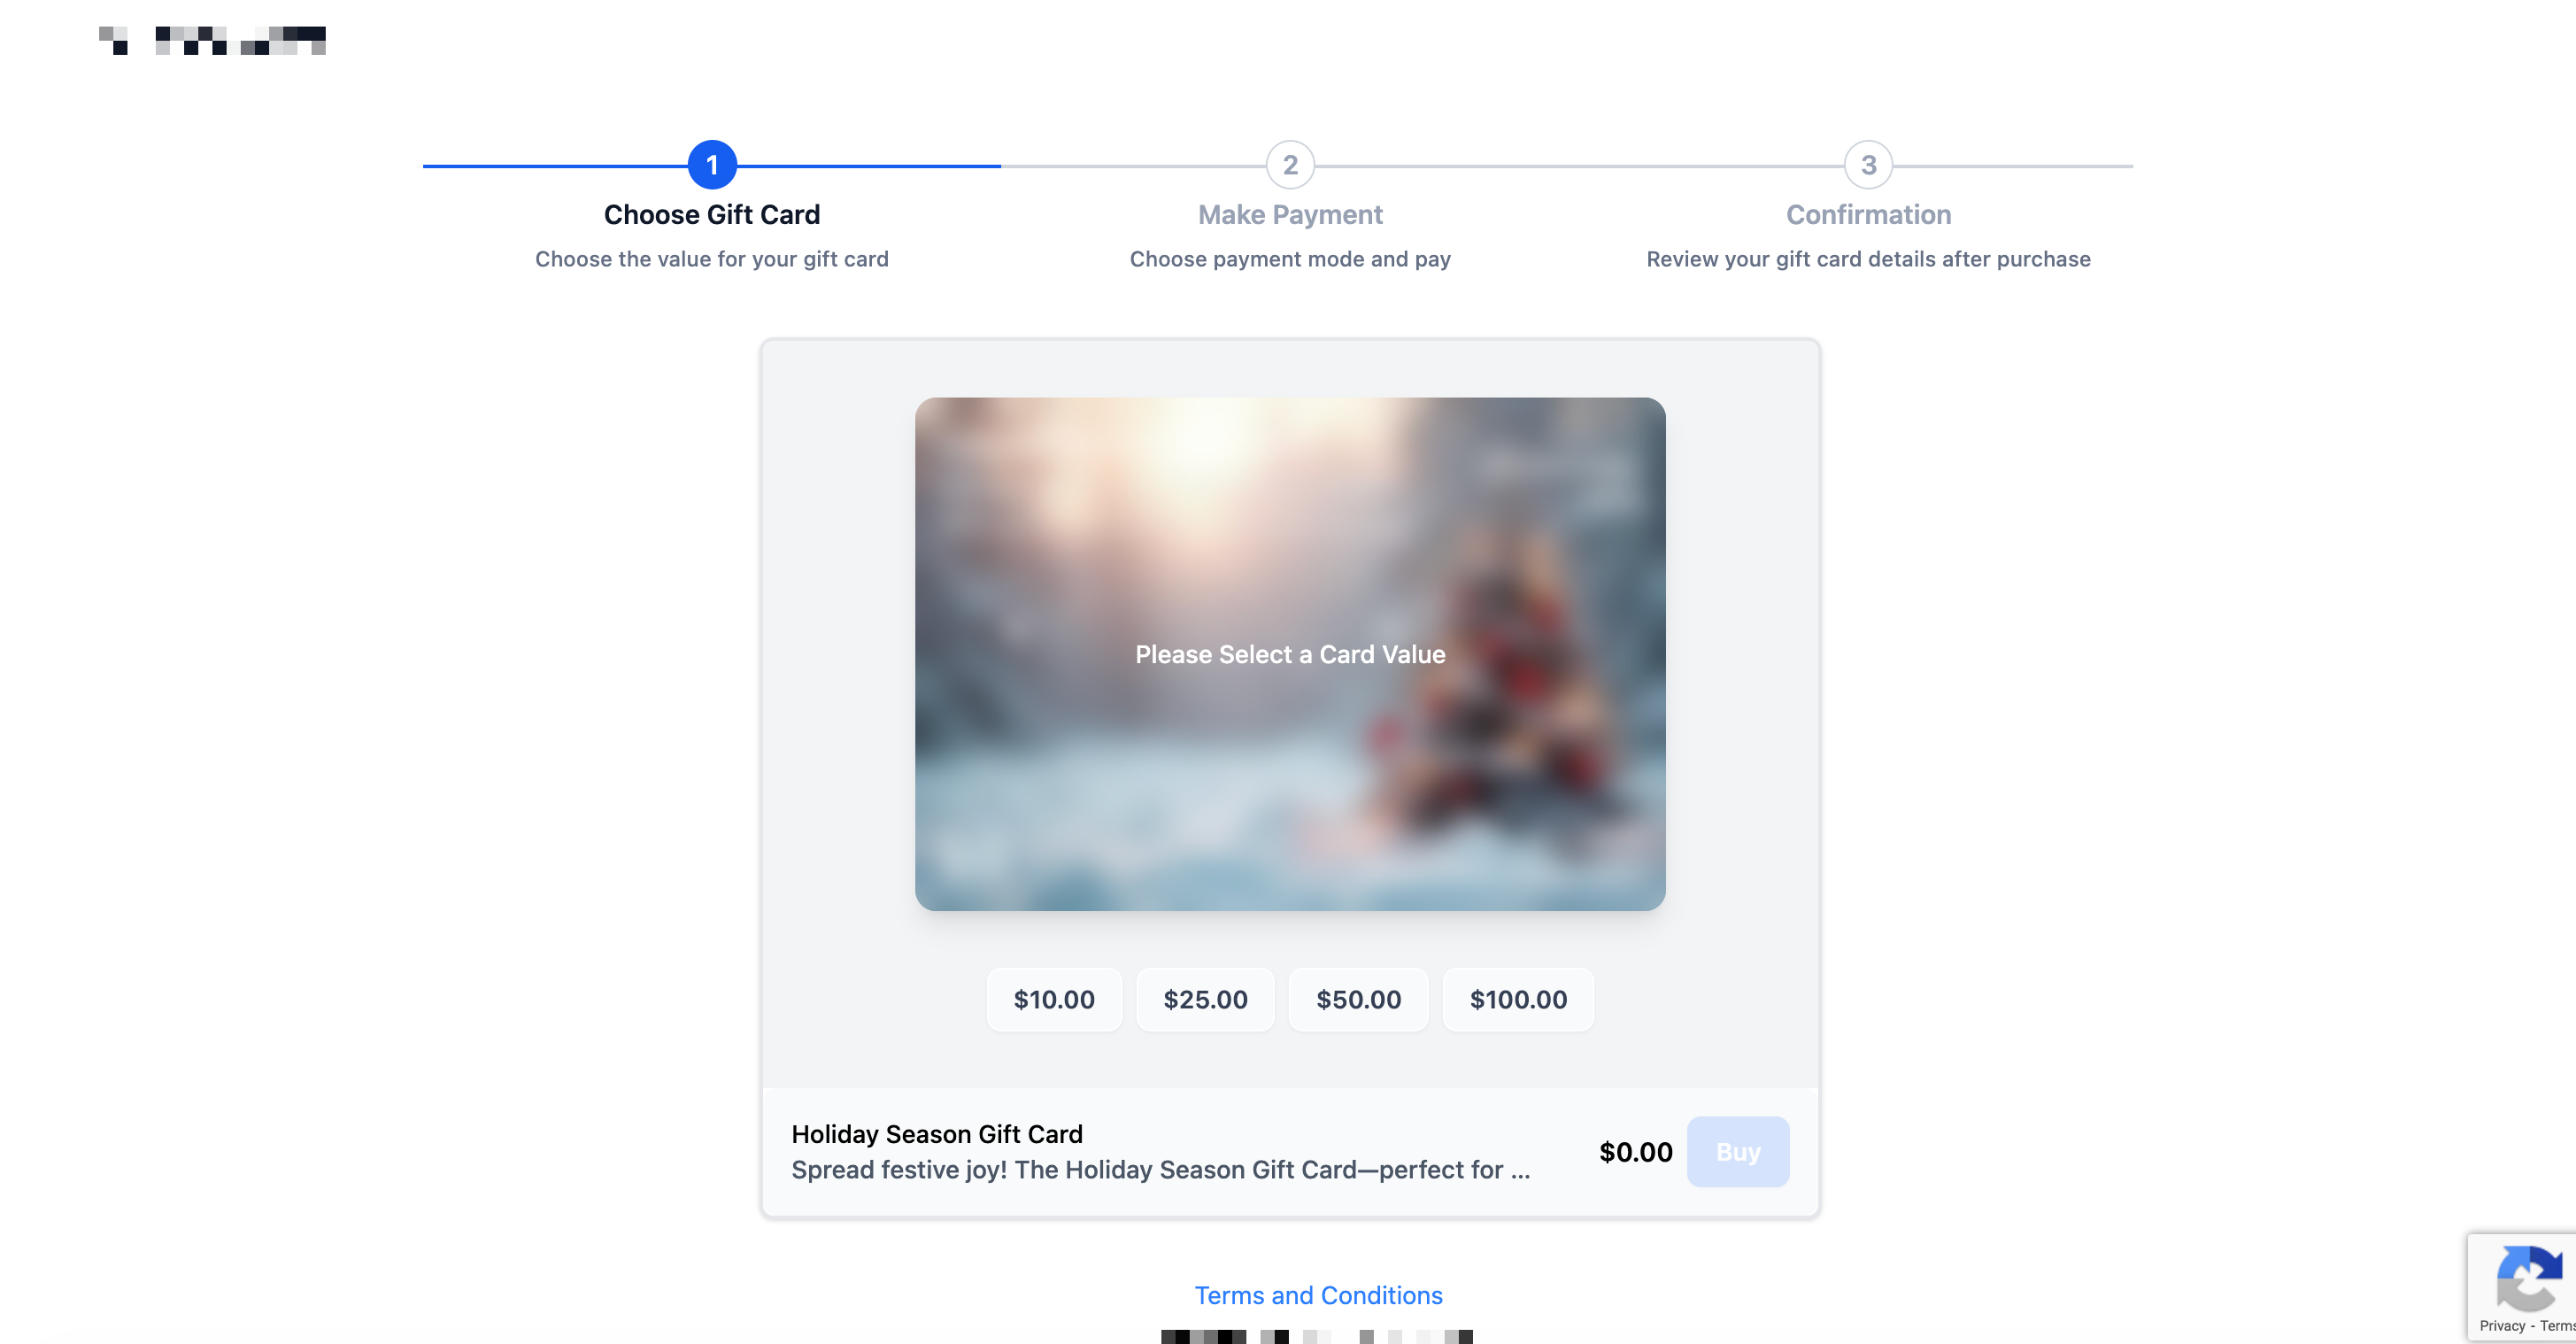
Step 1: Select a denomination. The patient picks one of the available values (for example $10, $25, $50, $100).
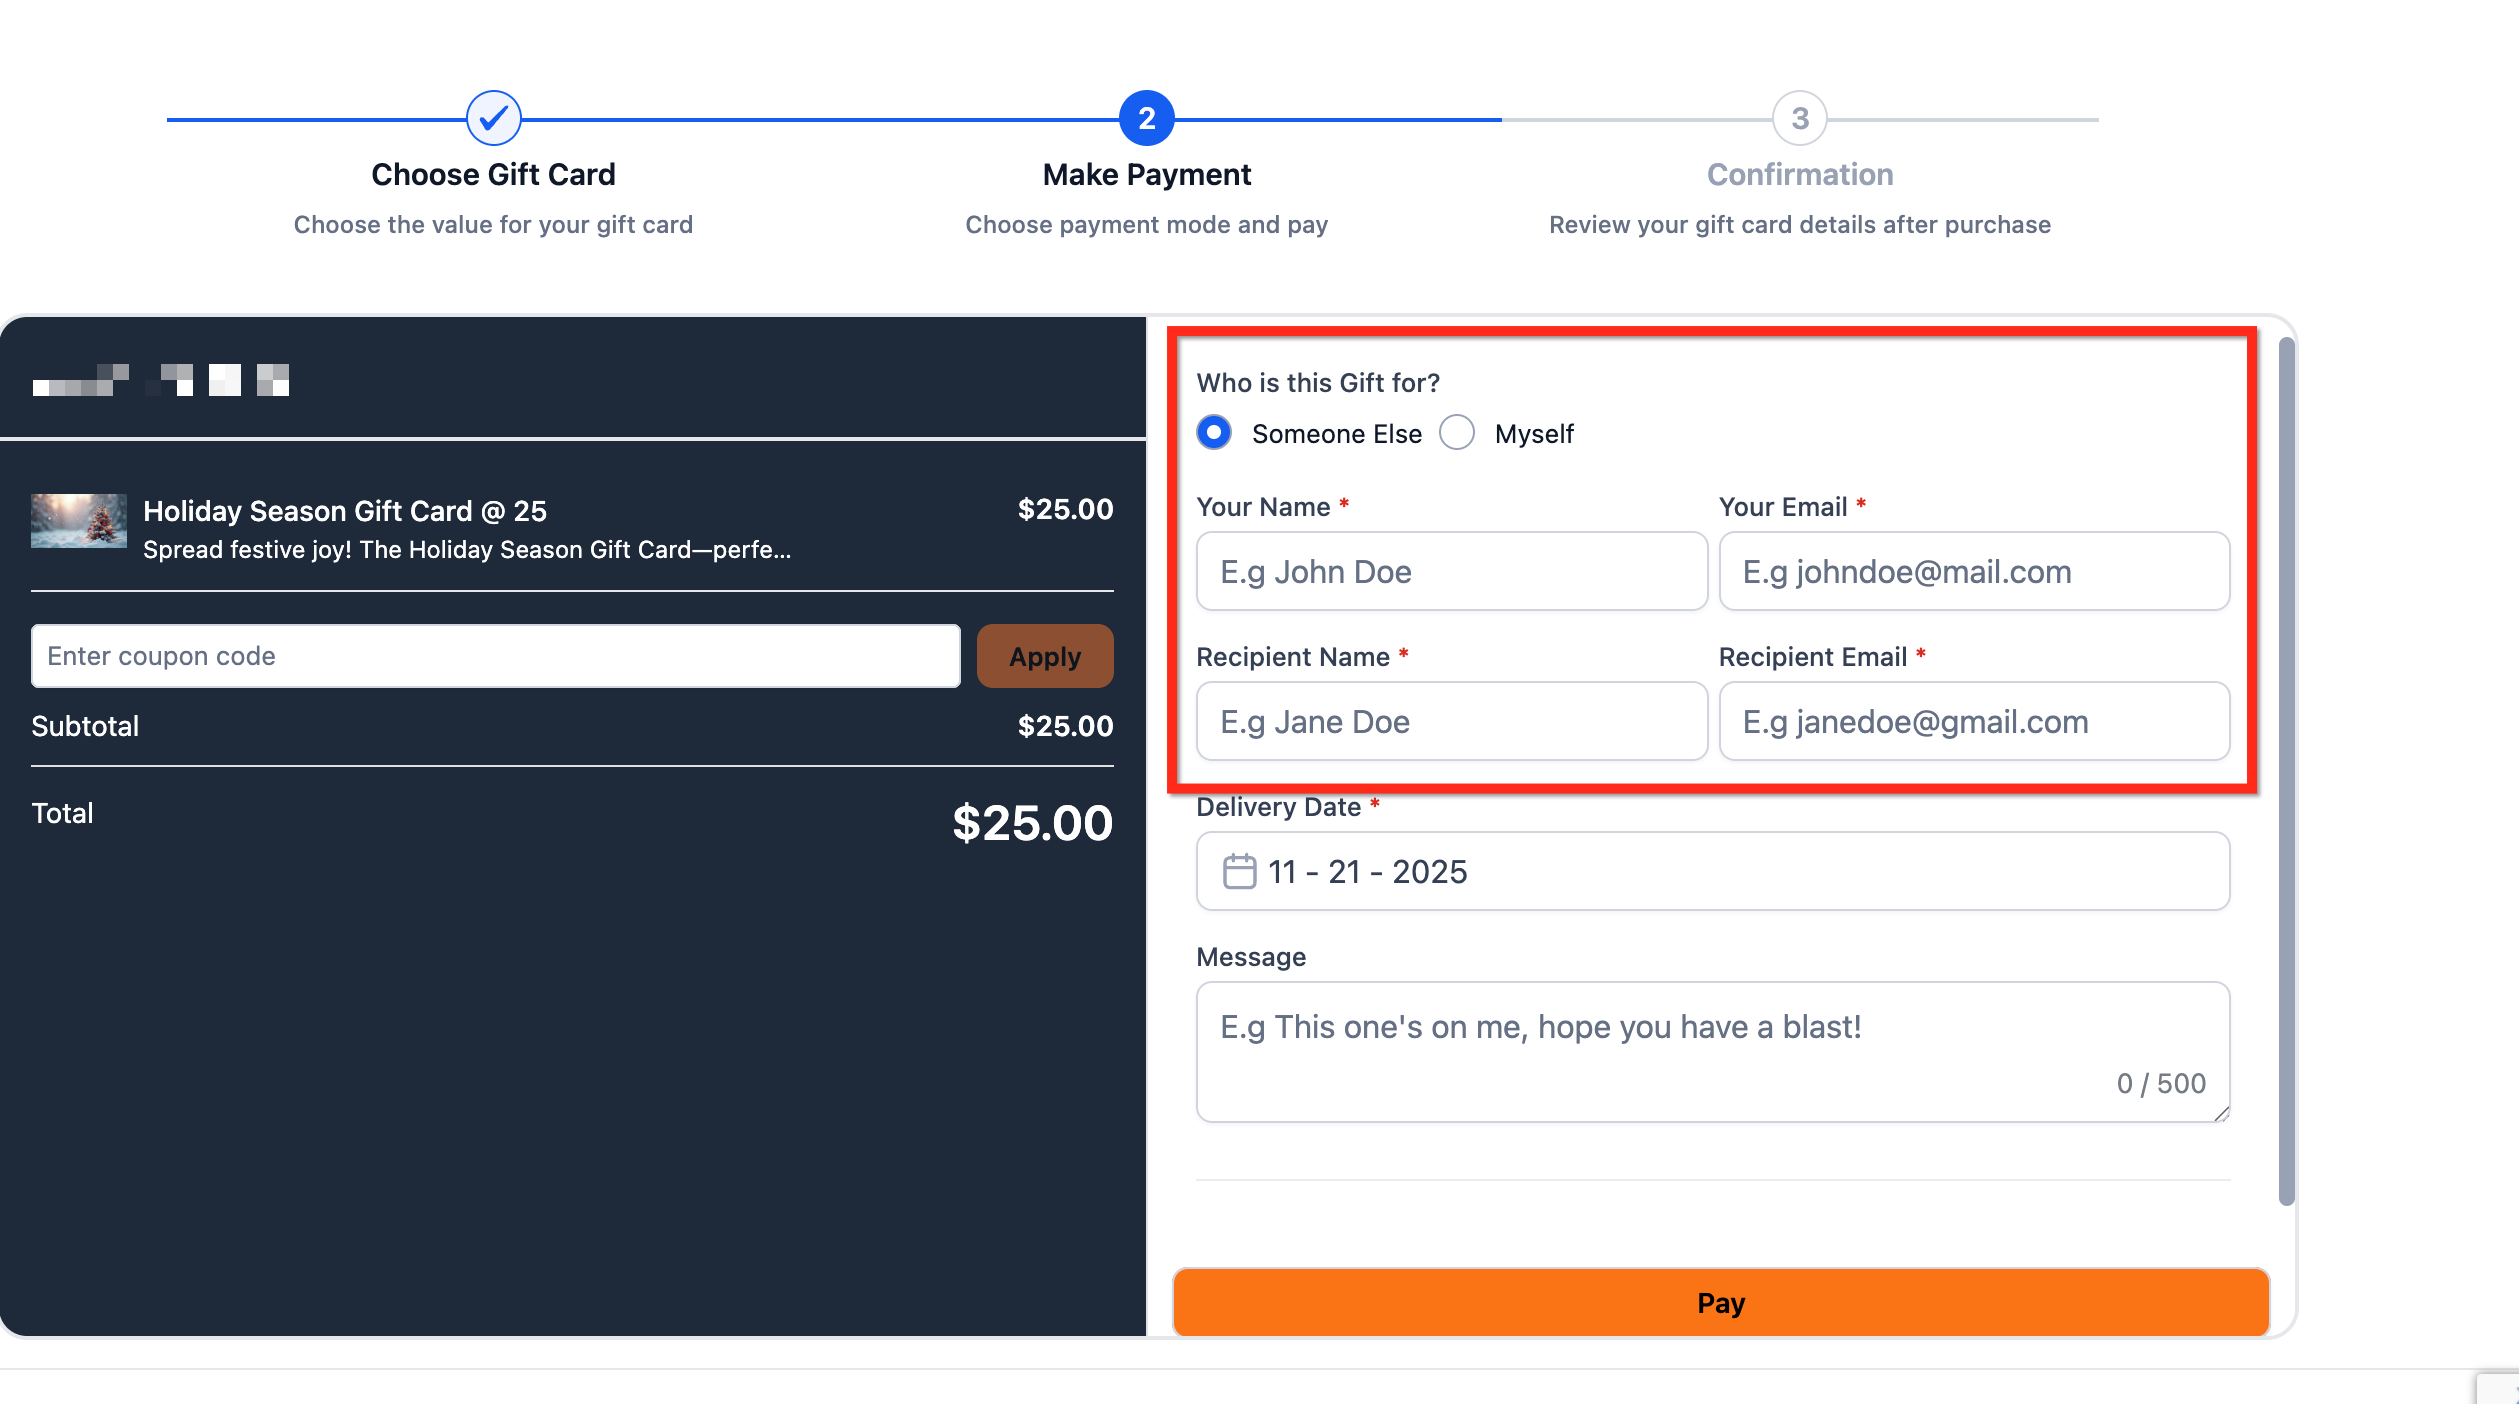
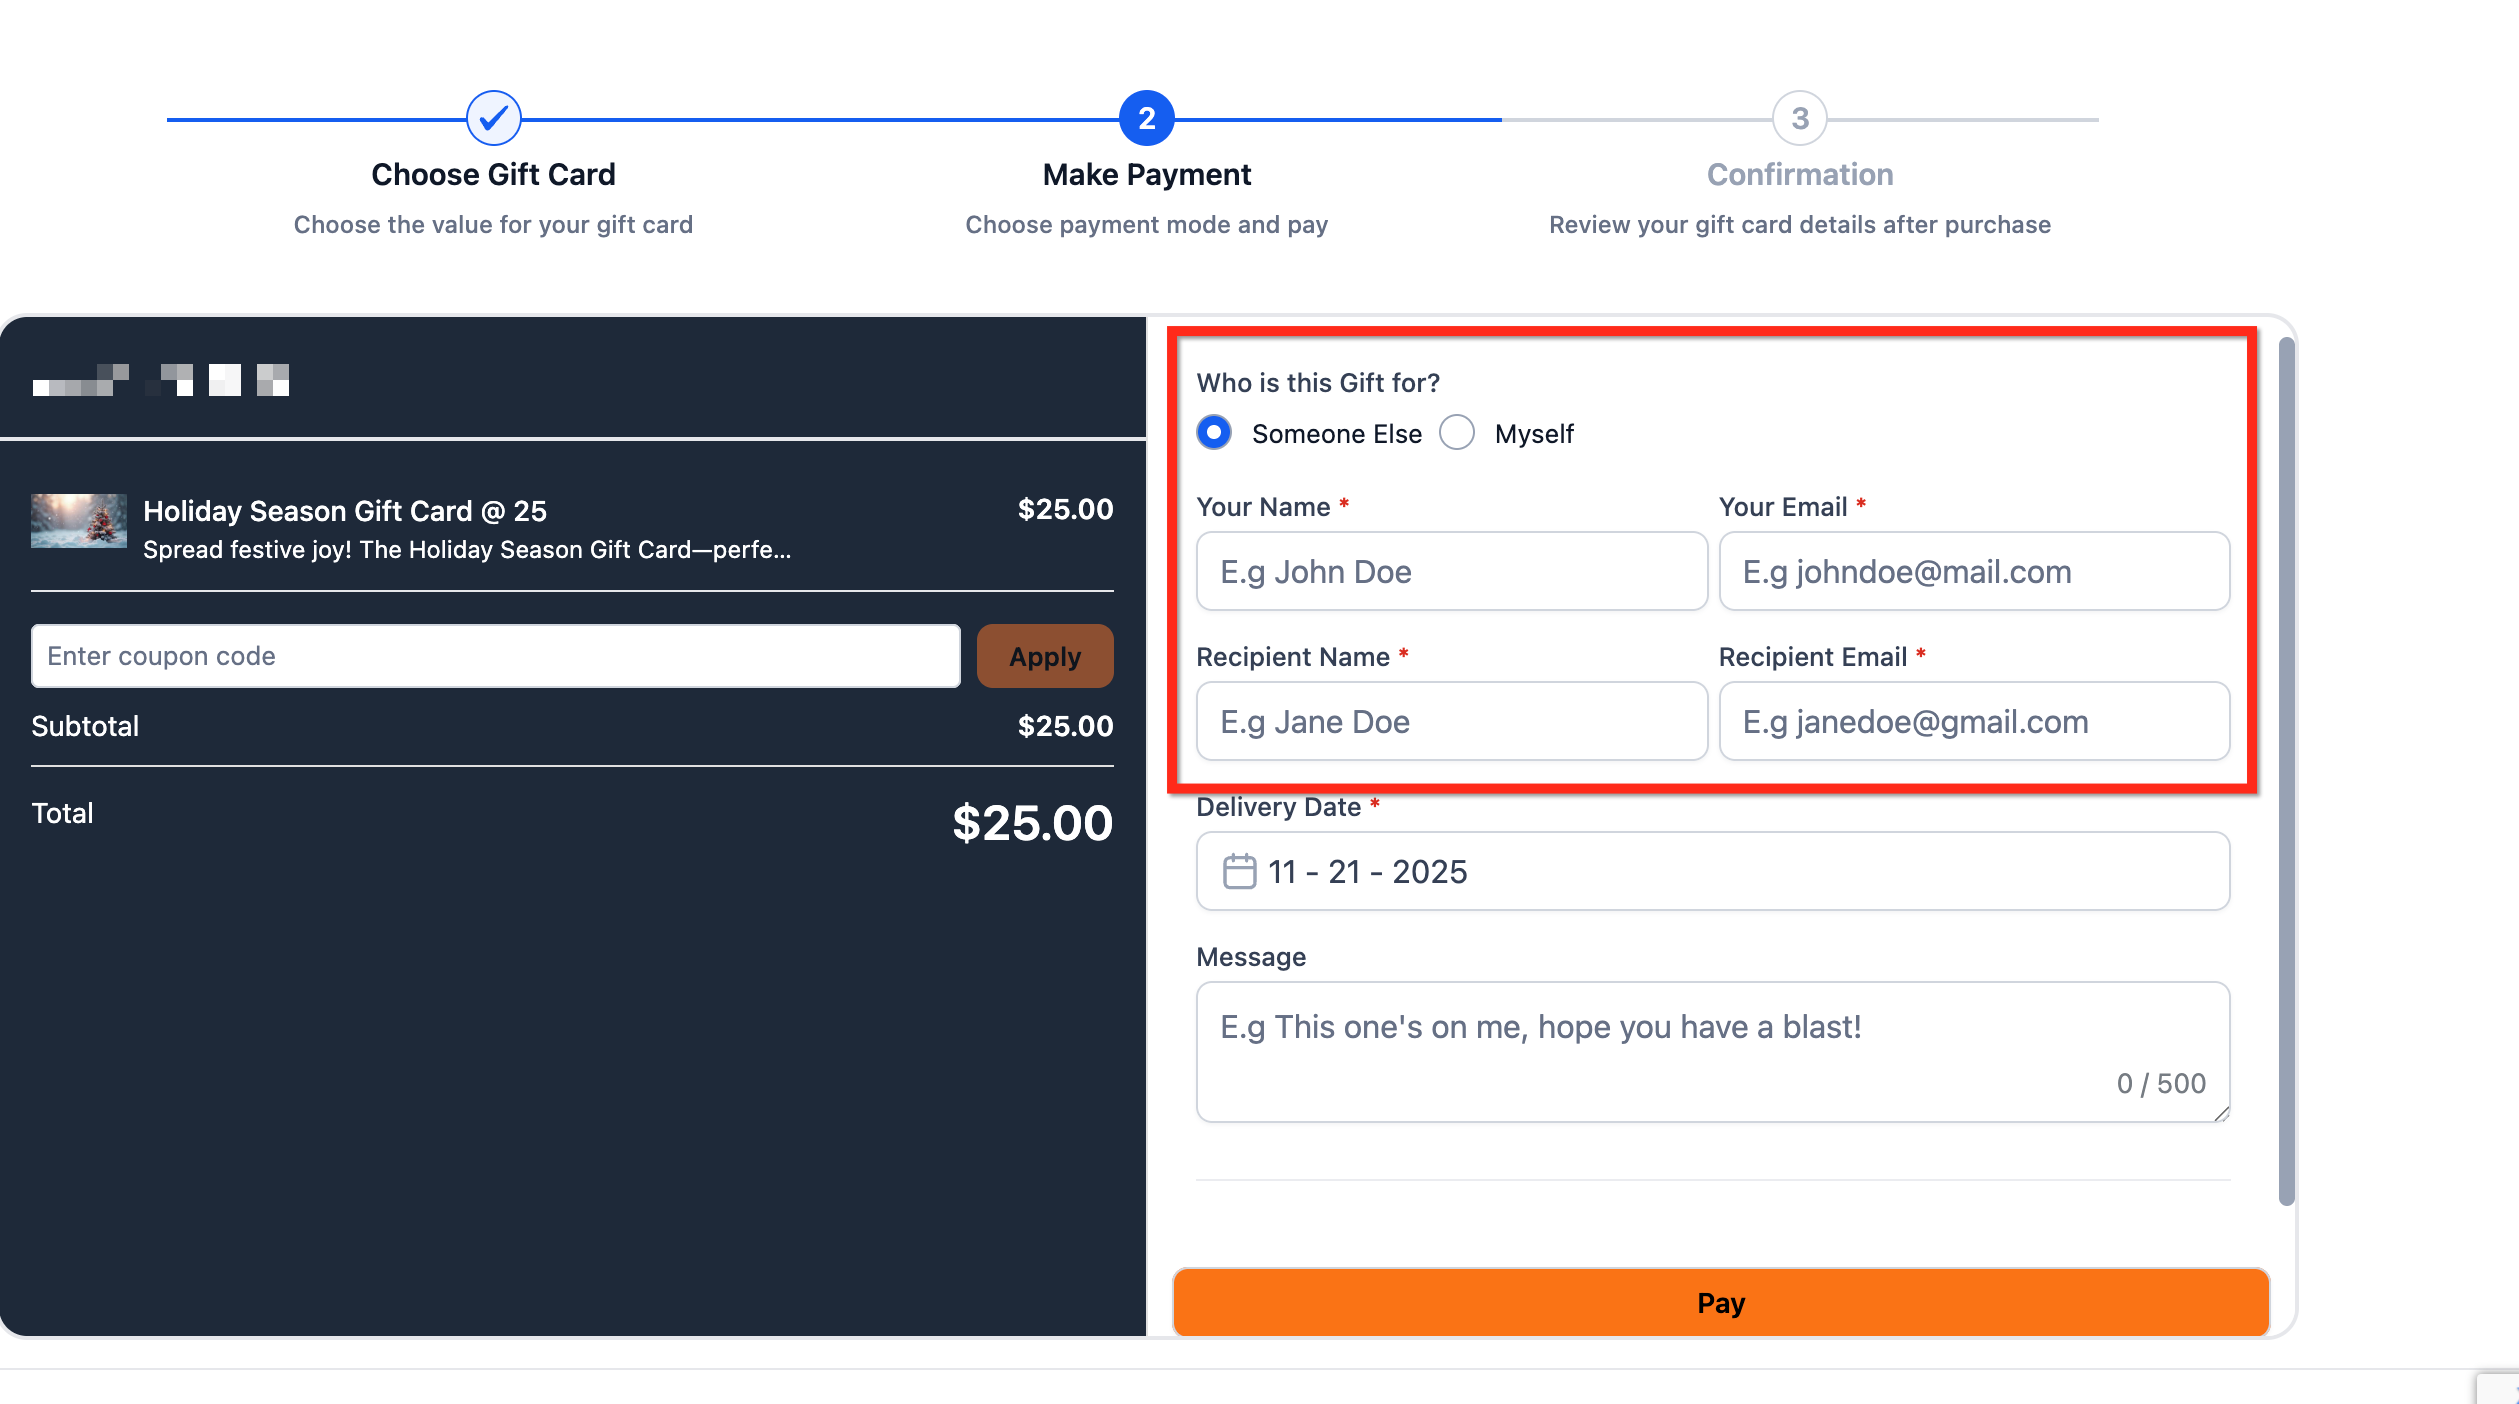
Step 2: Choose who the gift card is for. The patient selects Myself or Someone Else.
If it is for someone else, checkout collects the recipient's name and email, plus the sender's name and email.
If it is for themselves, checkout collects the buyer's name and email.
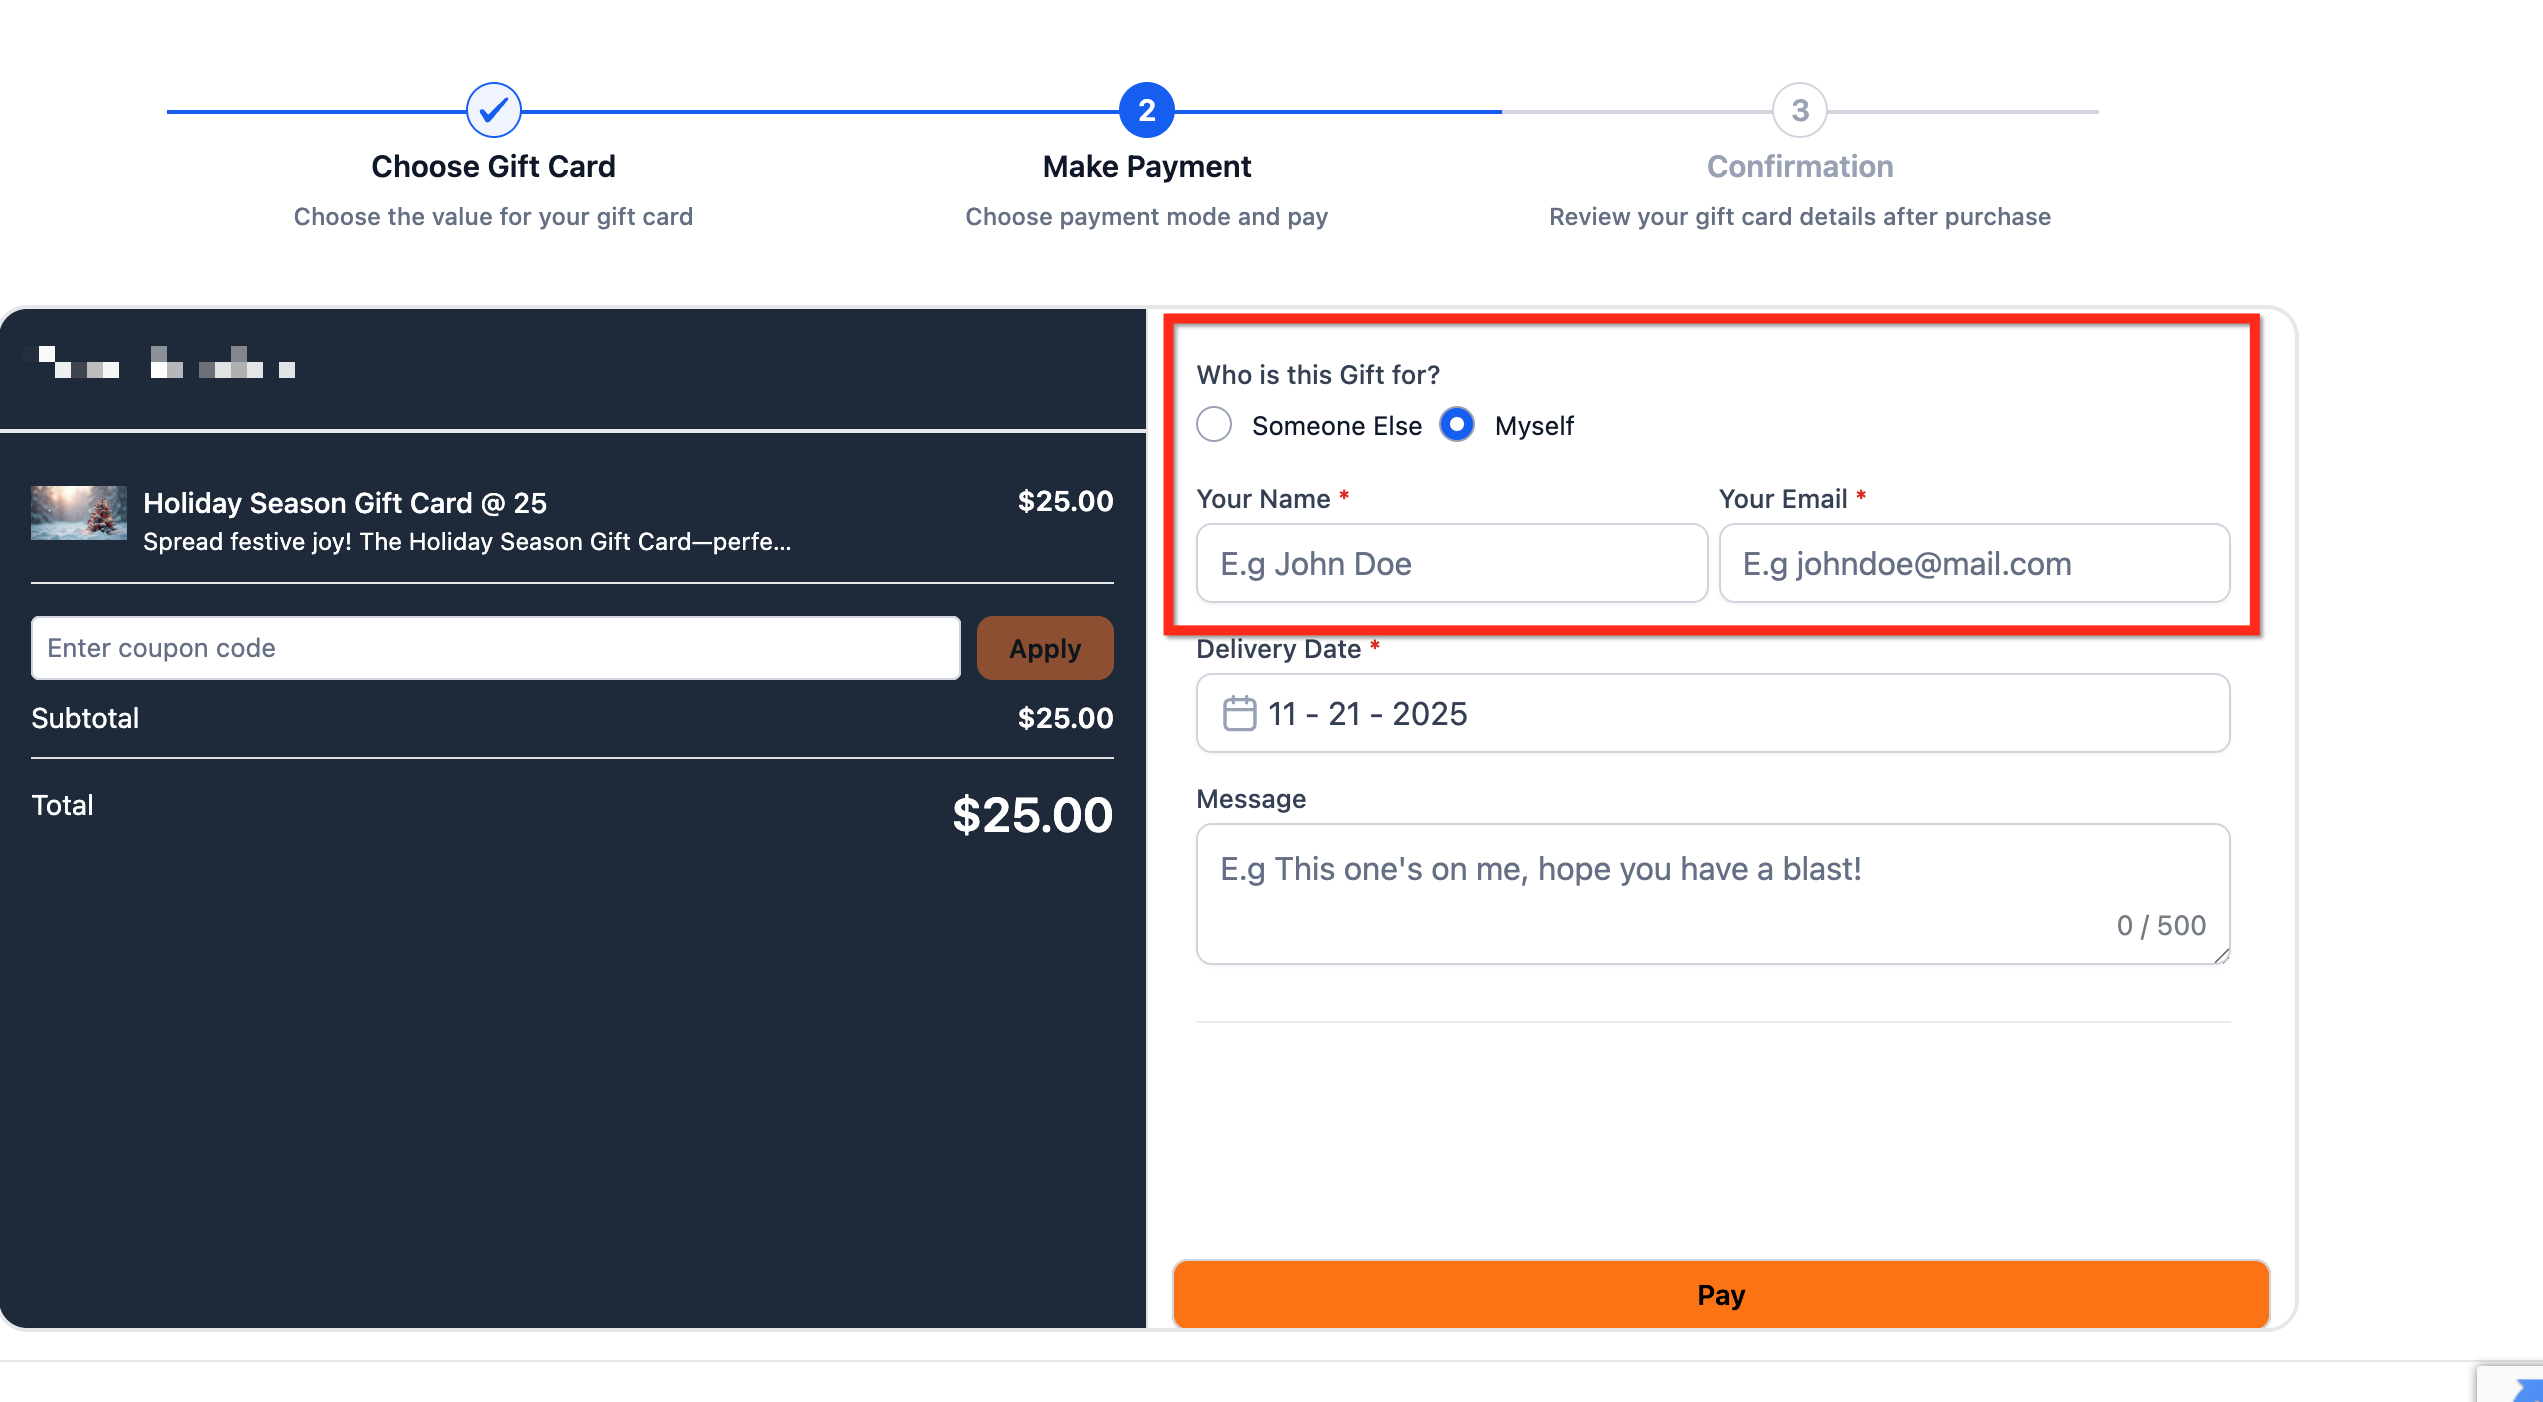
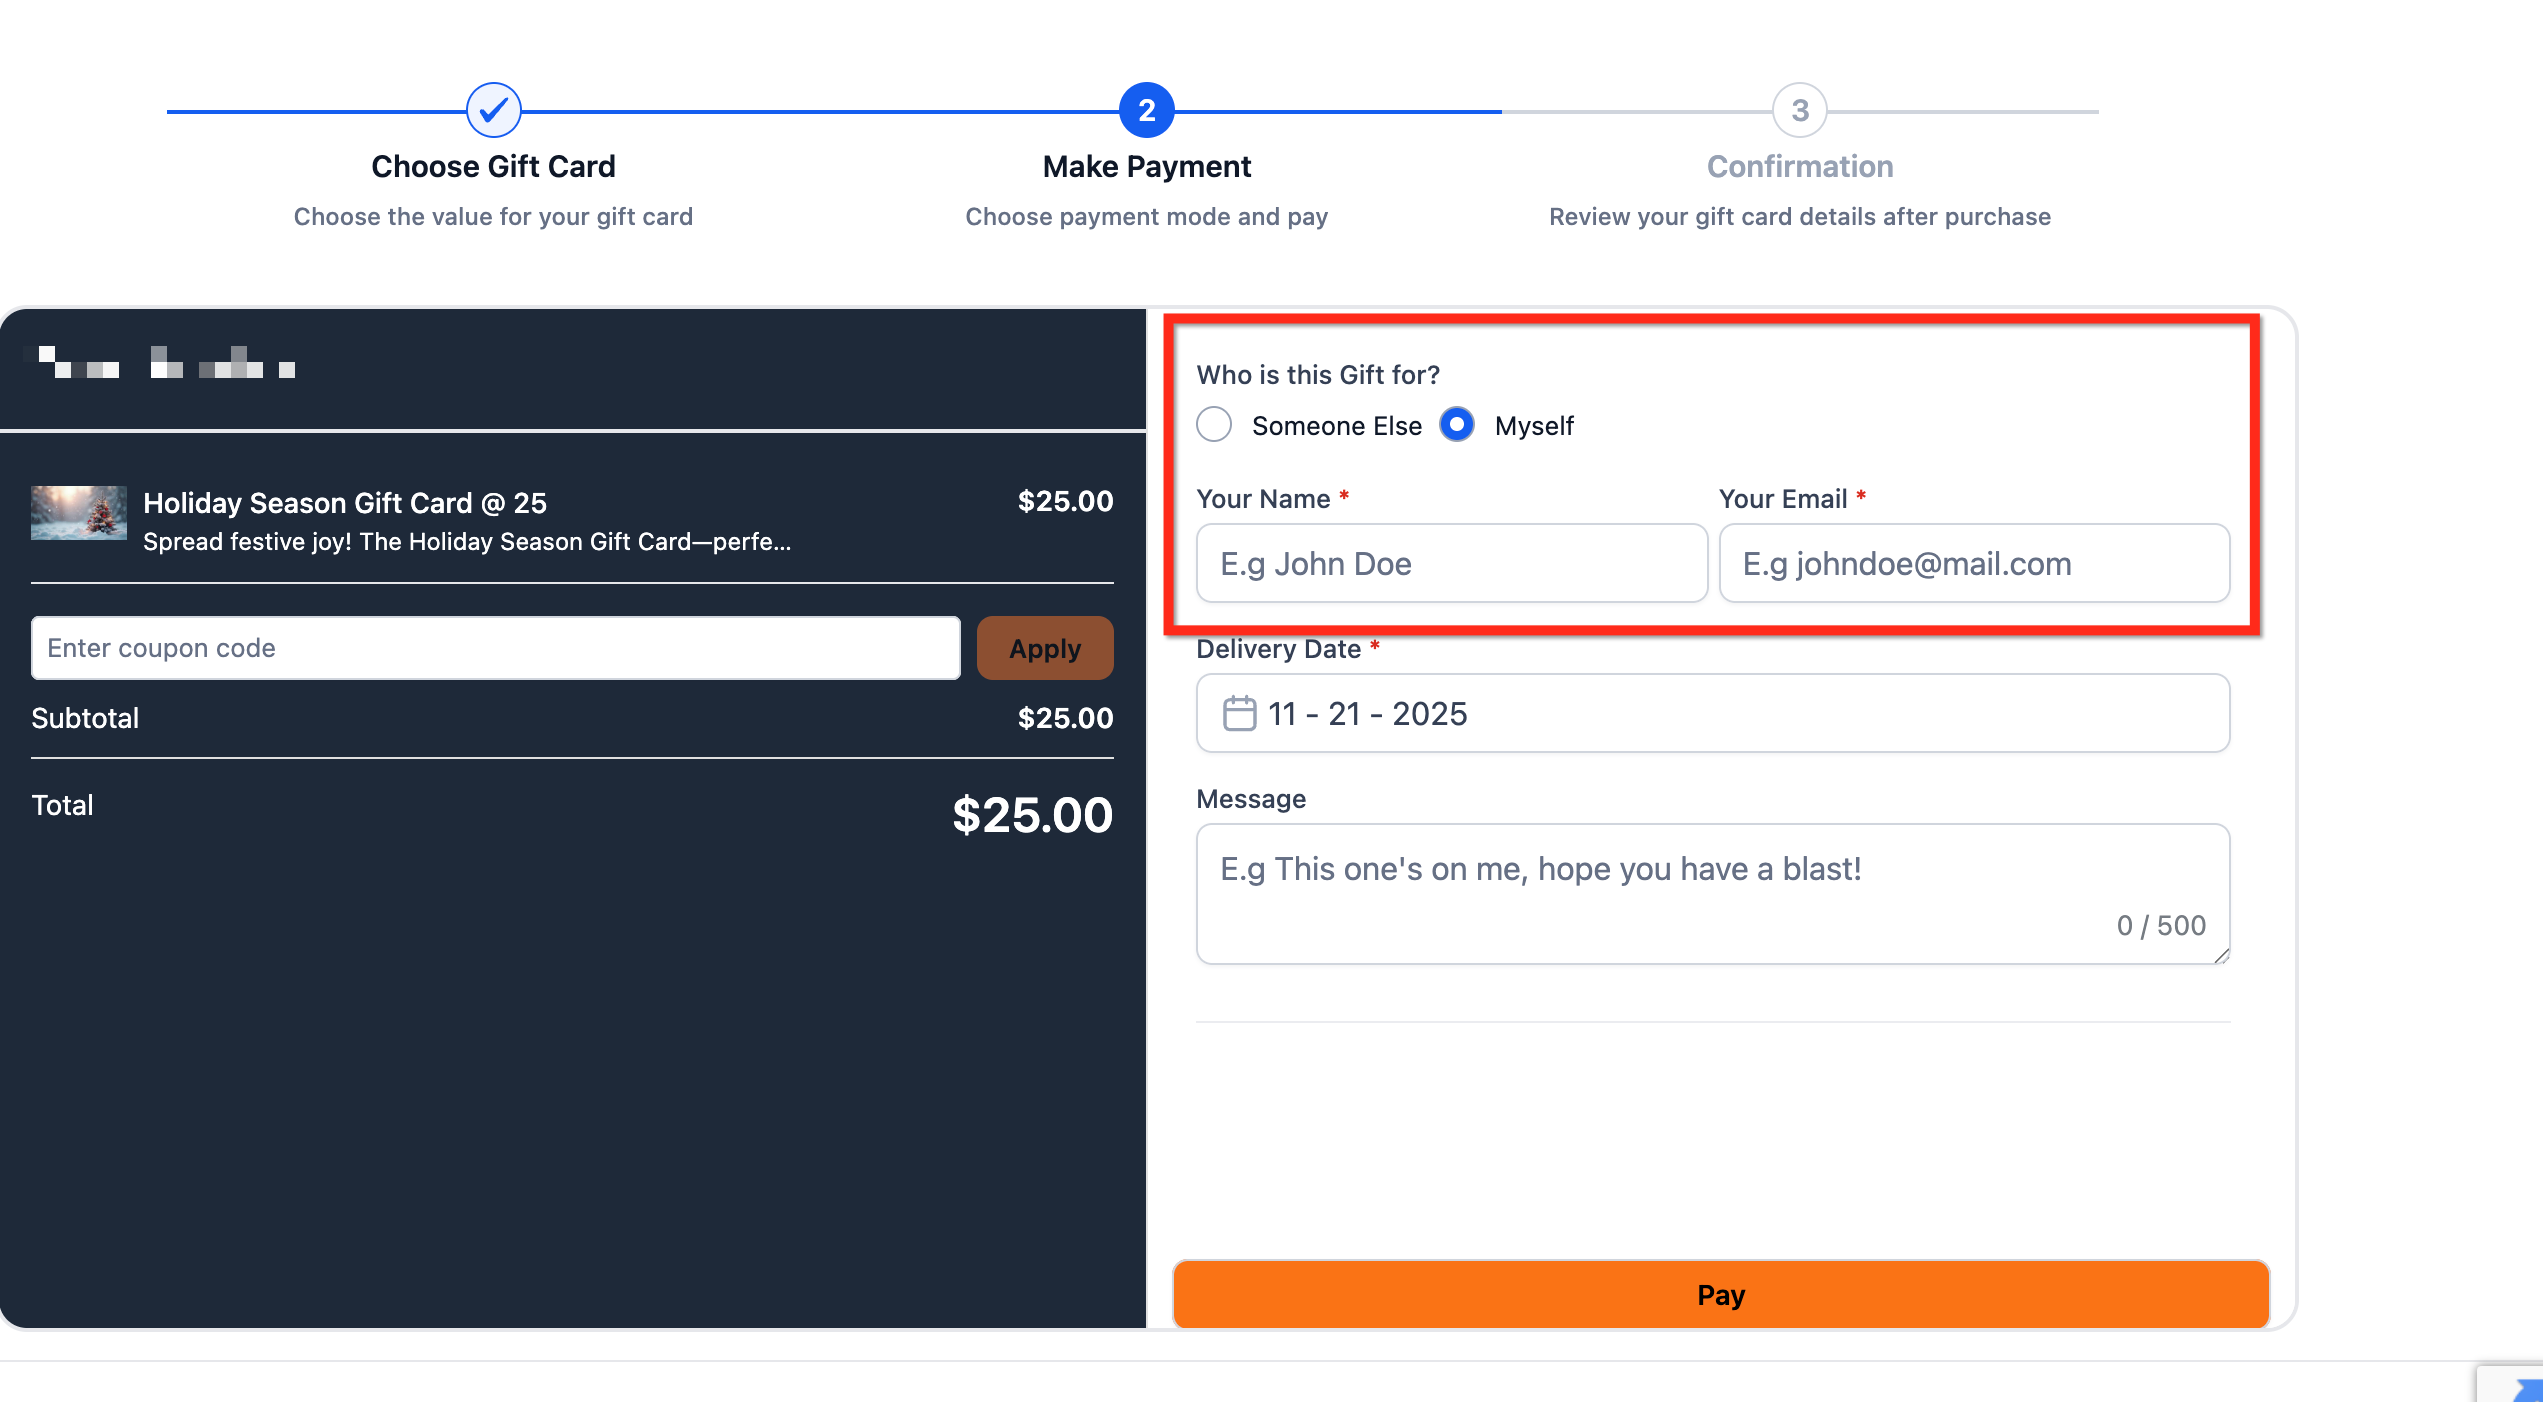
Step 3: Add a delivery date. The patient chooses Deliver Now (immediate) or Schedule for later and picks a date (and time, if shown). They can also add an optional message for the recipient.
Scheduled gift cards are not sent until the chosen date, but if the code is accessed and used at any checkout before then, it can still be redeemed early.
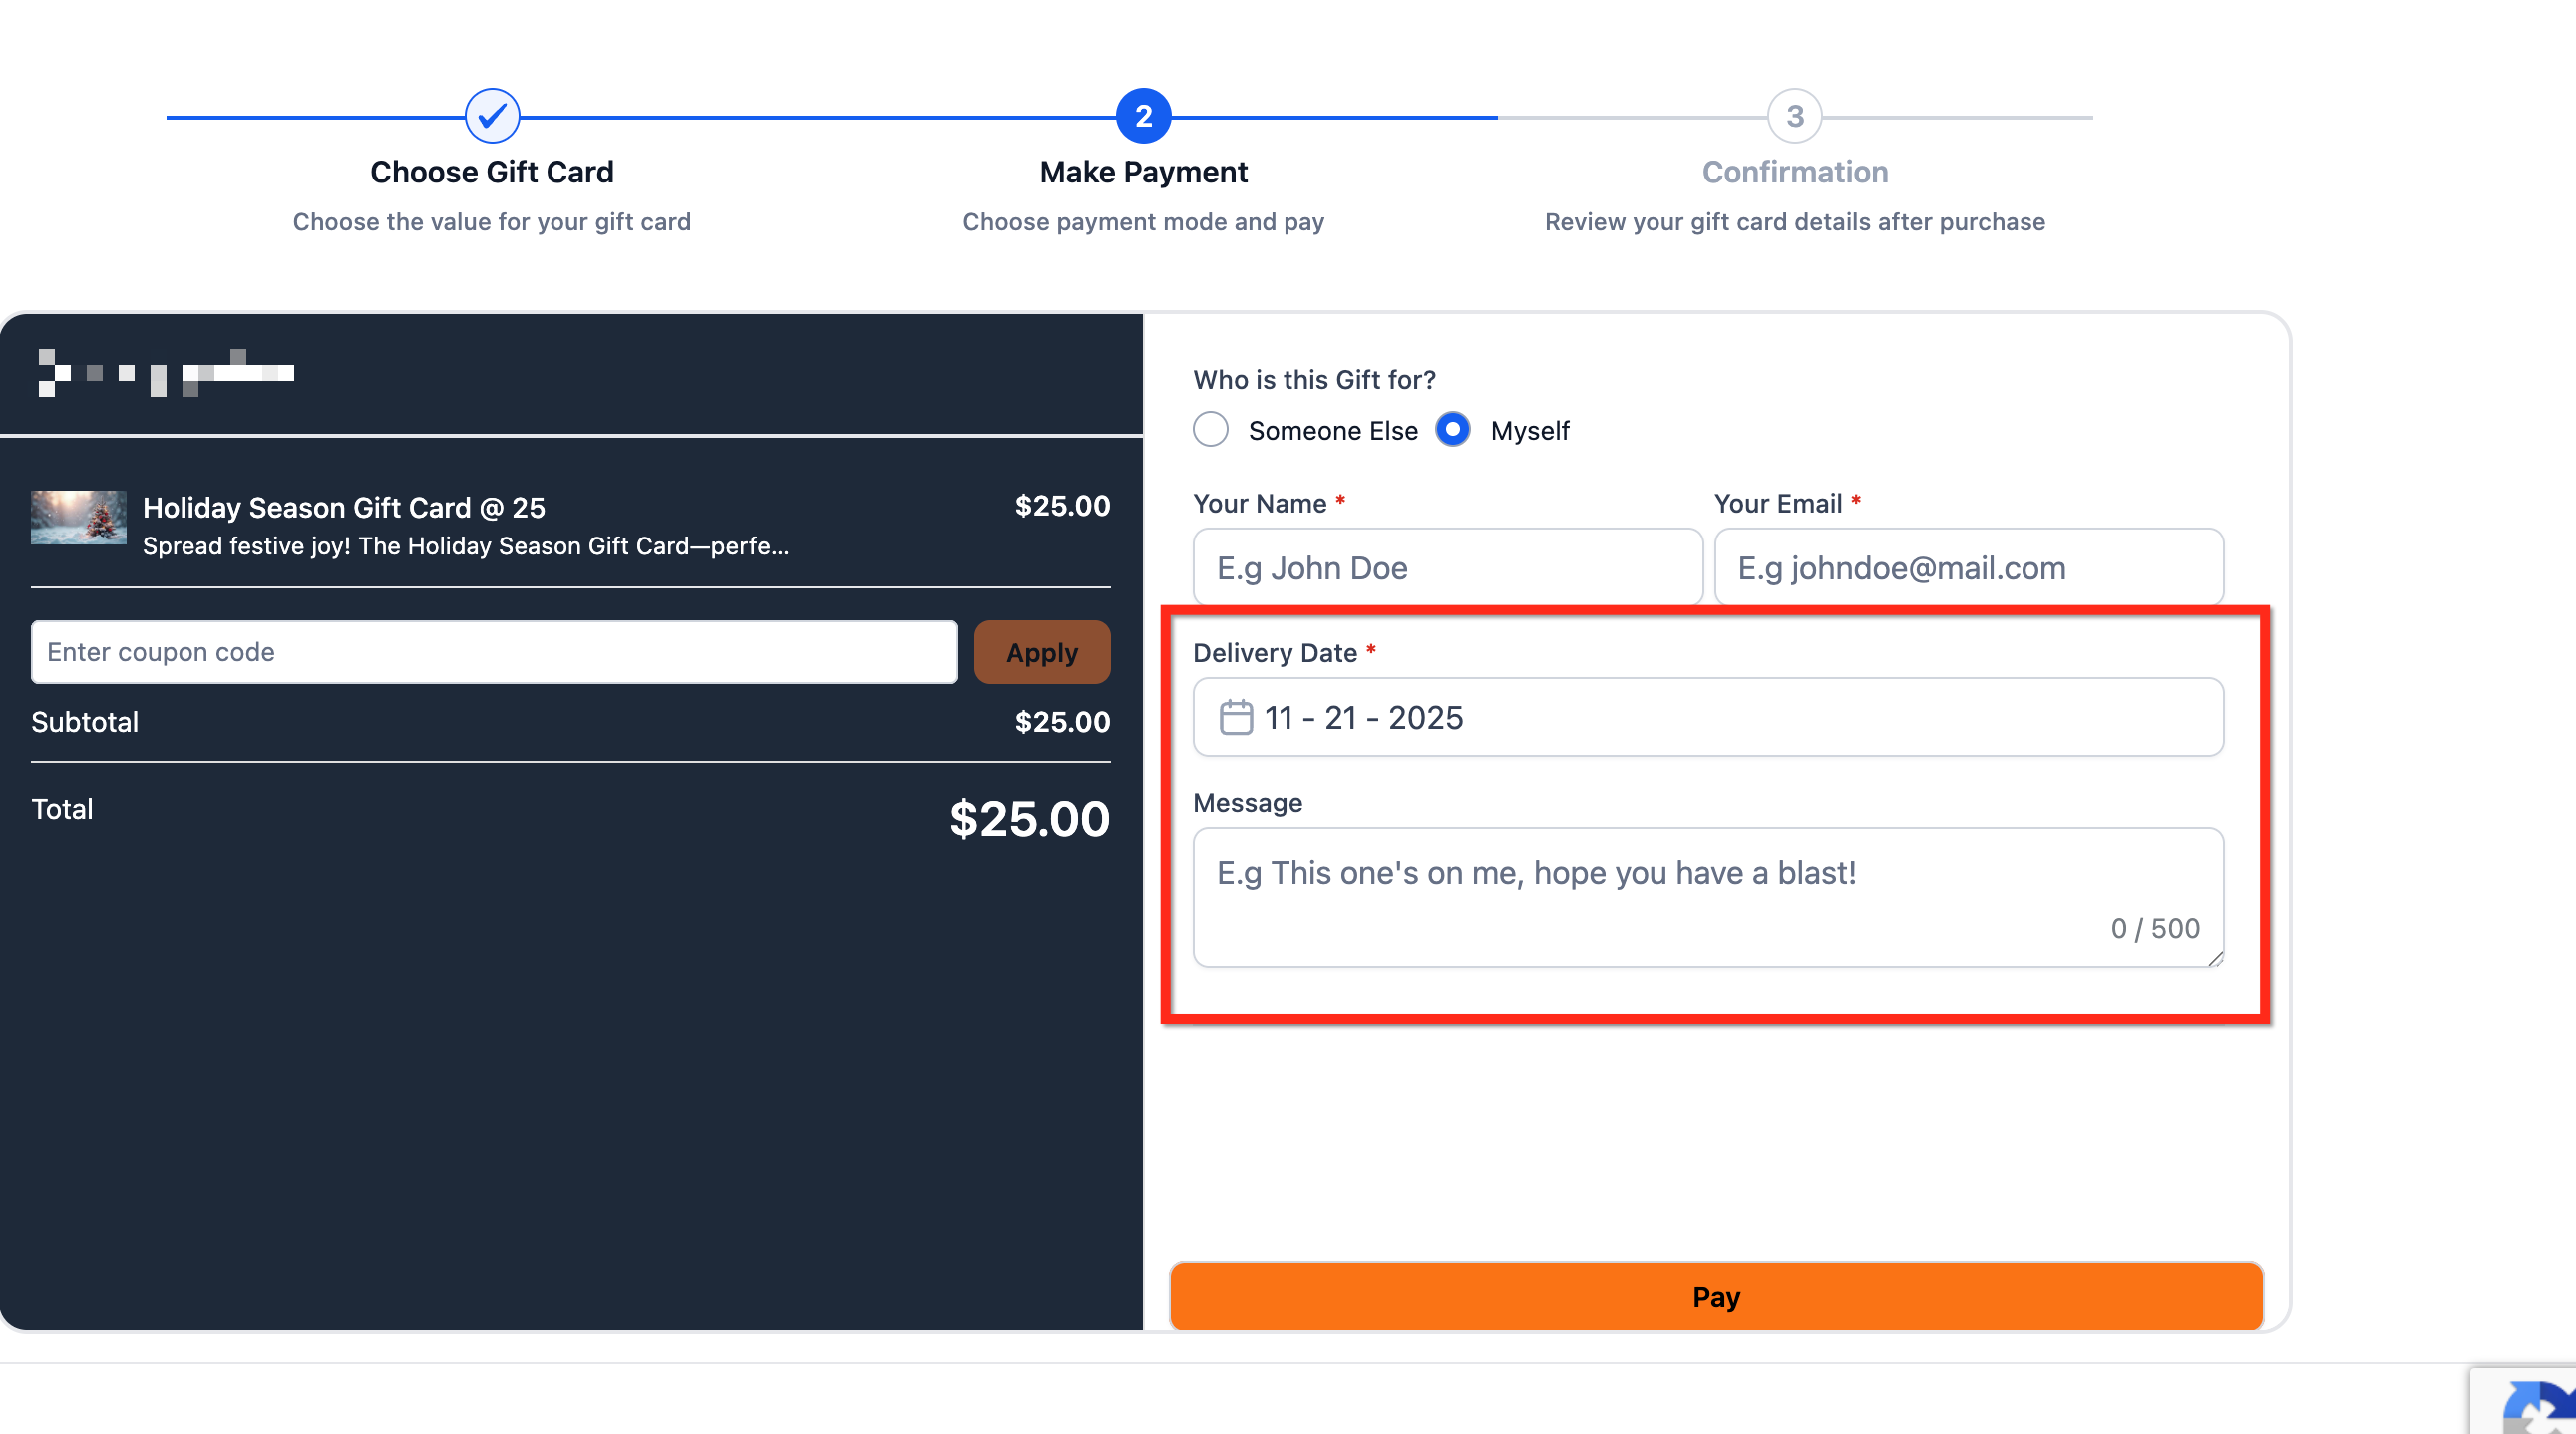
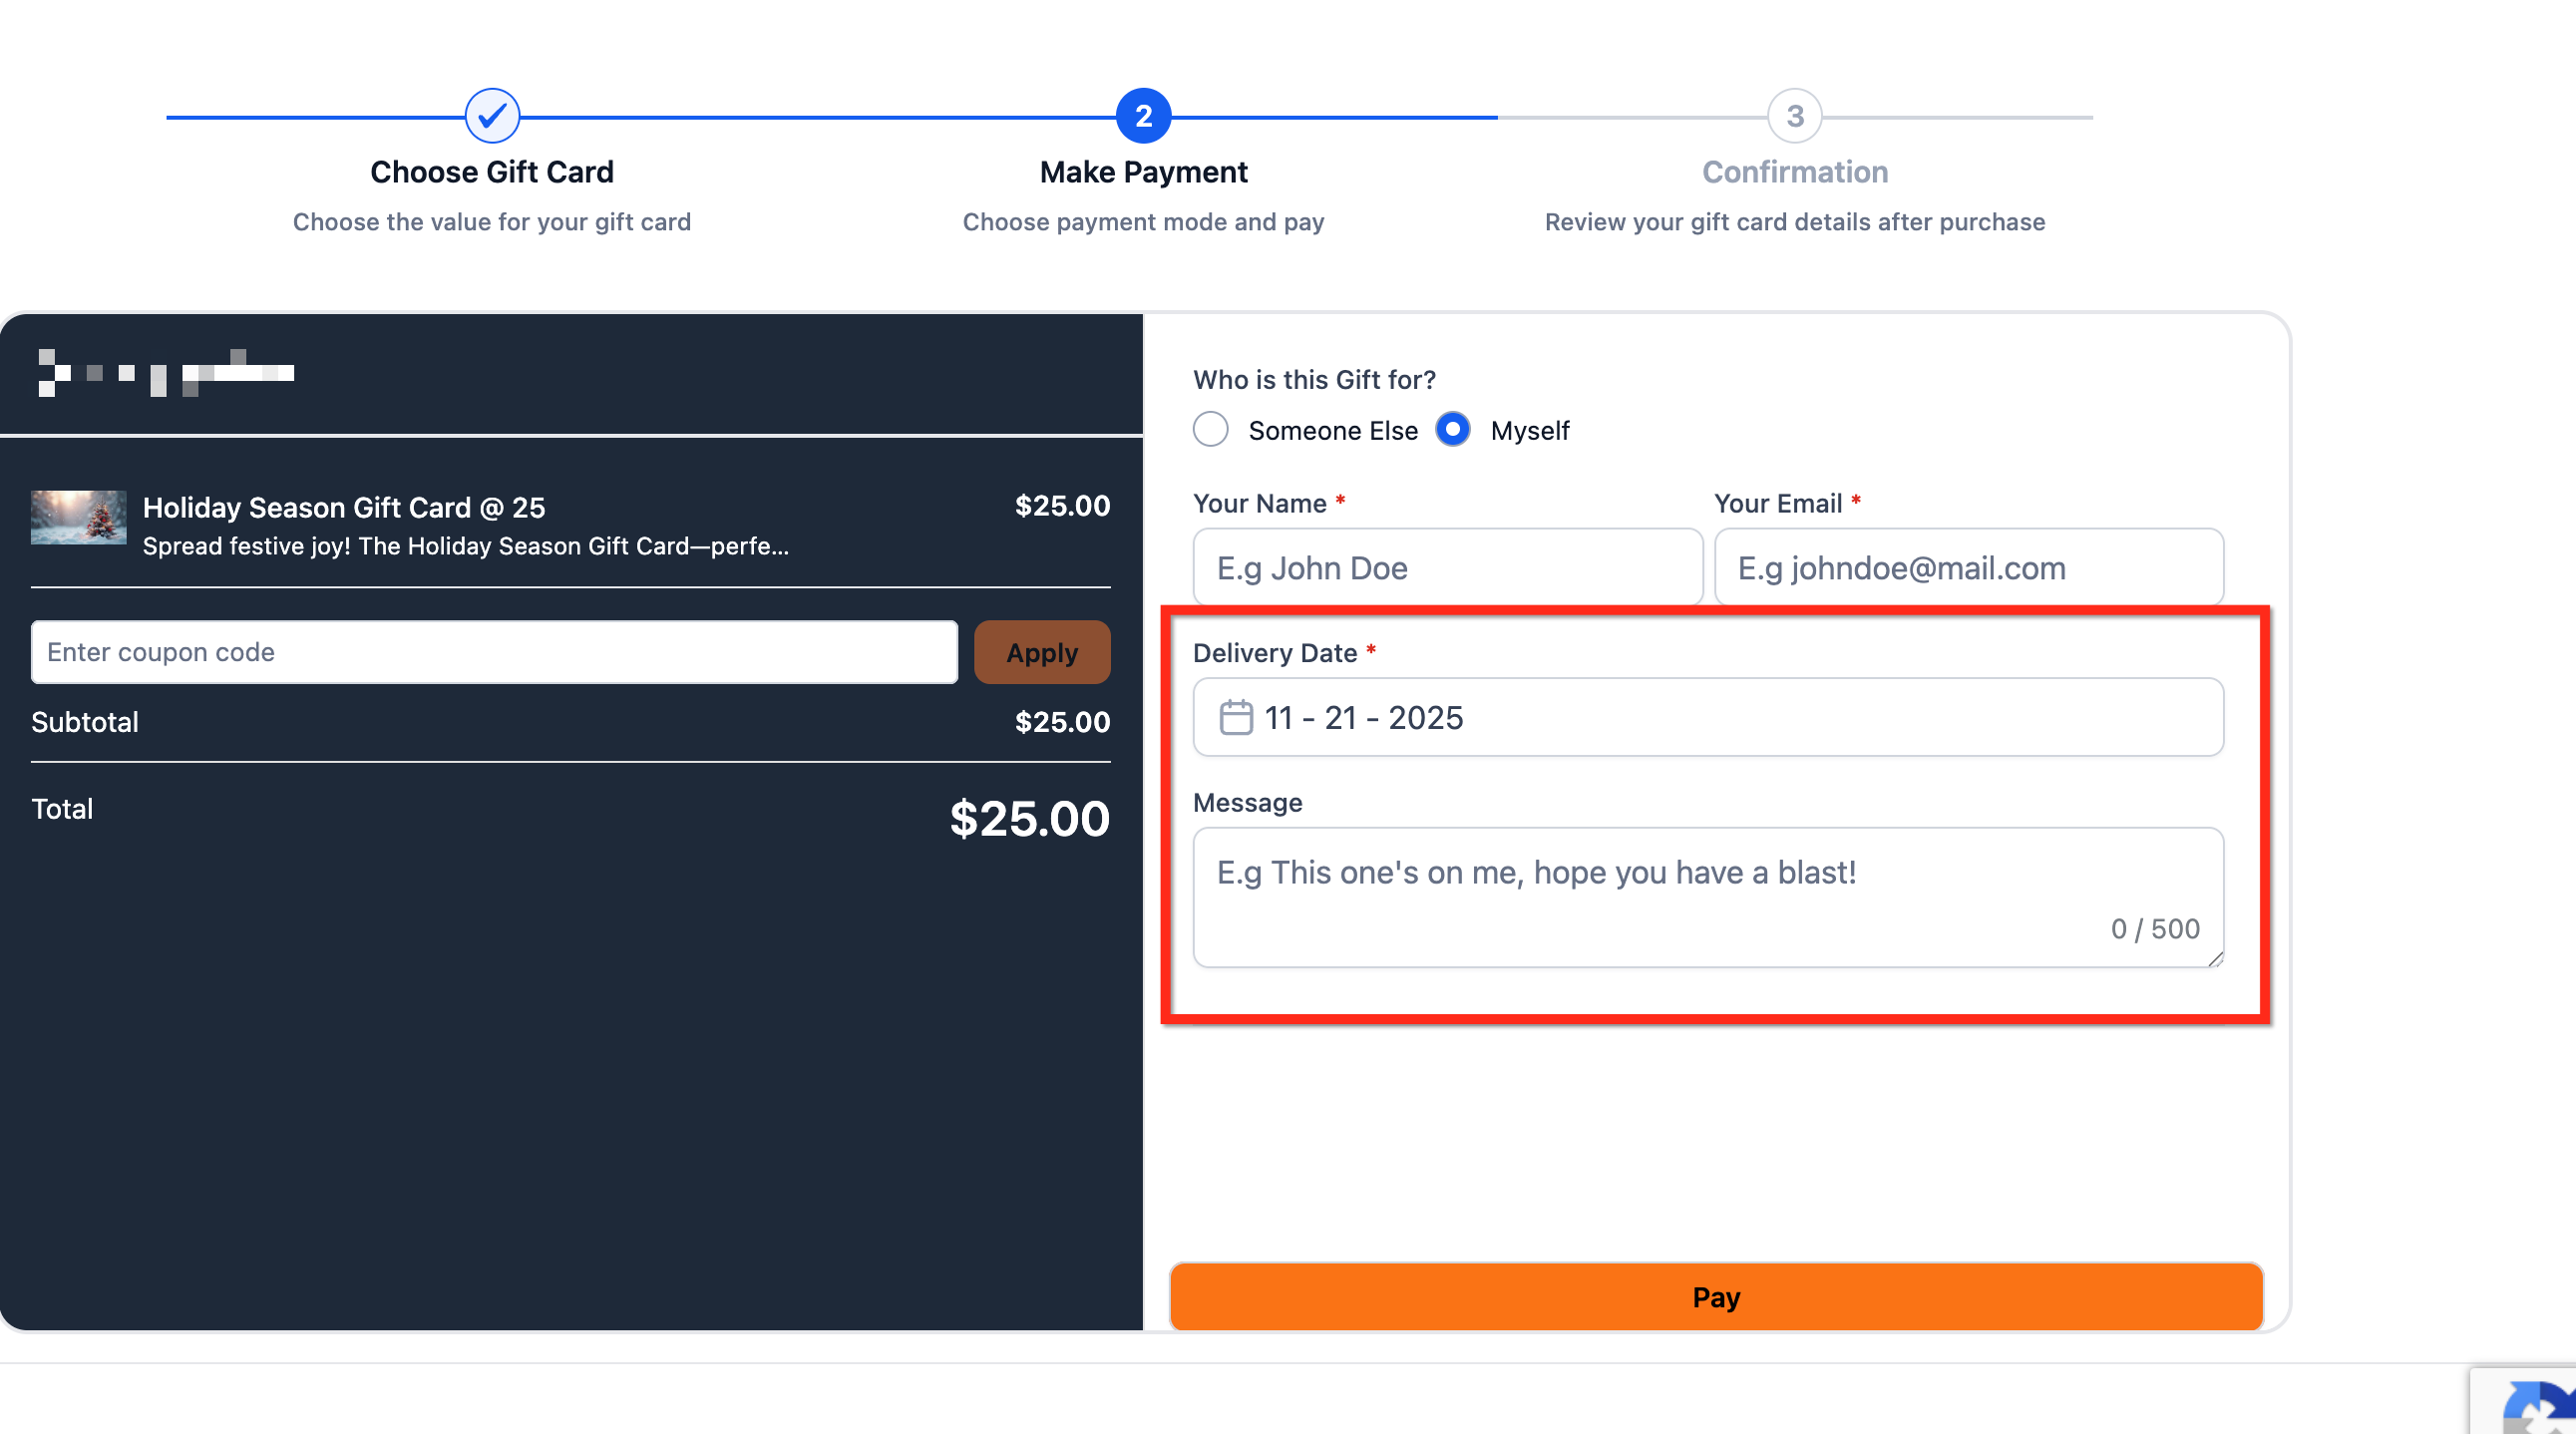
Step 4: Complete payment. The patient selects an available payment method and clicks Pay. Once payment is confirmed, they can download the gift card directly from that screen.
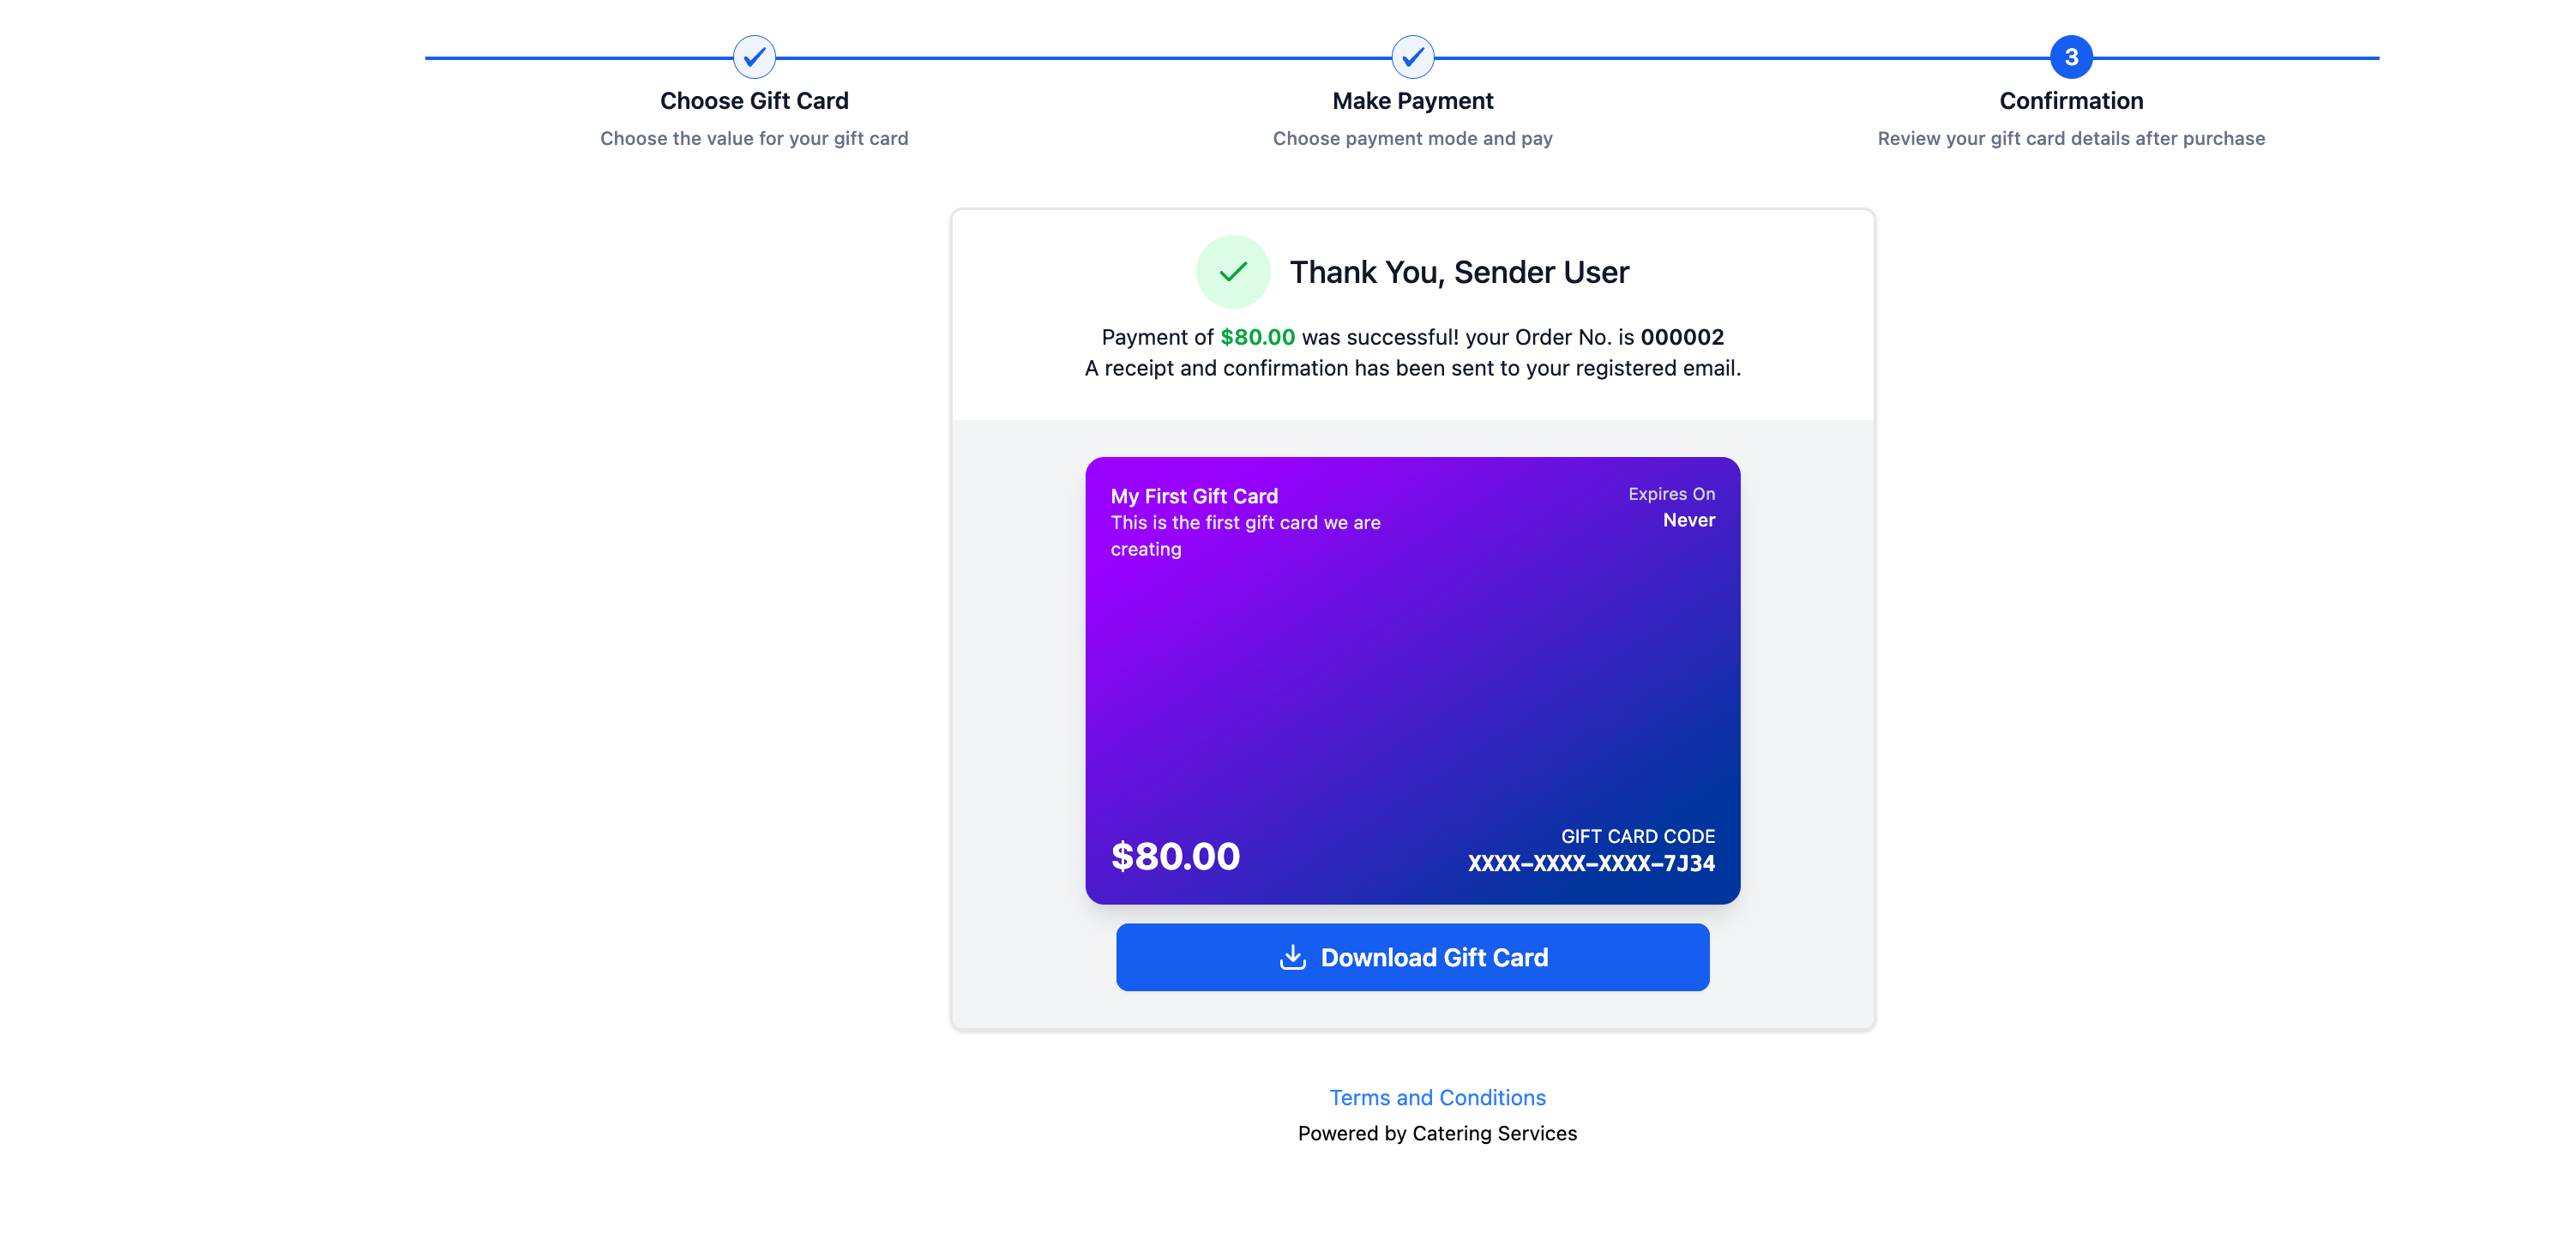
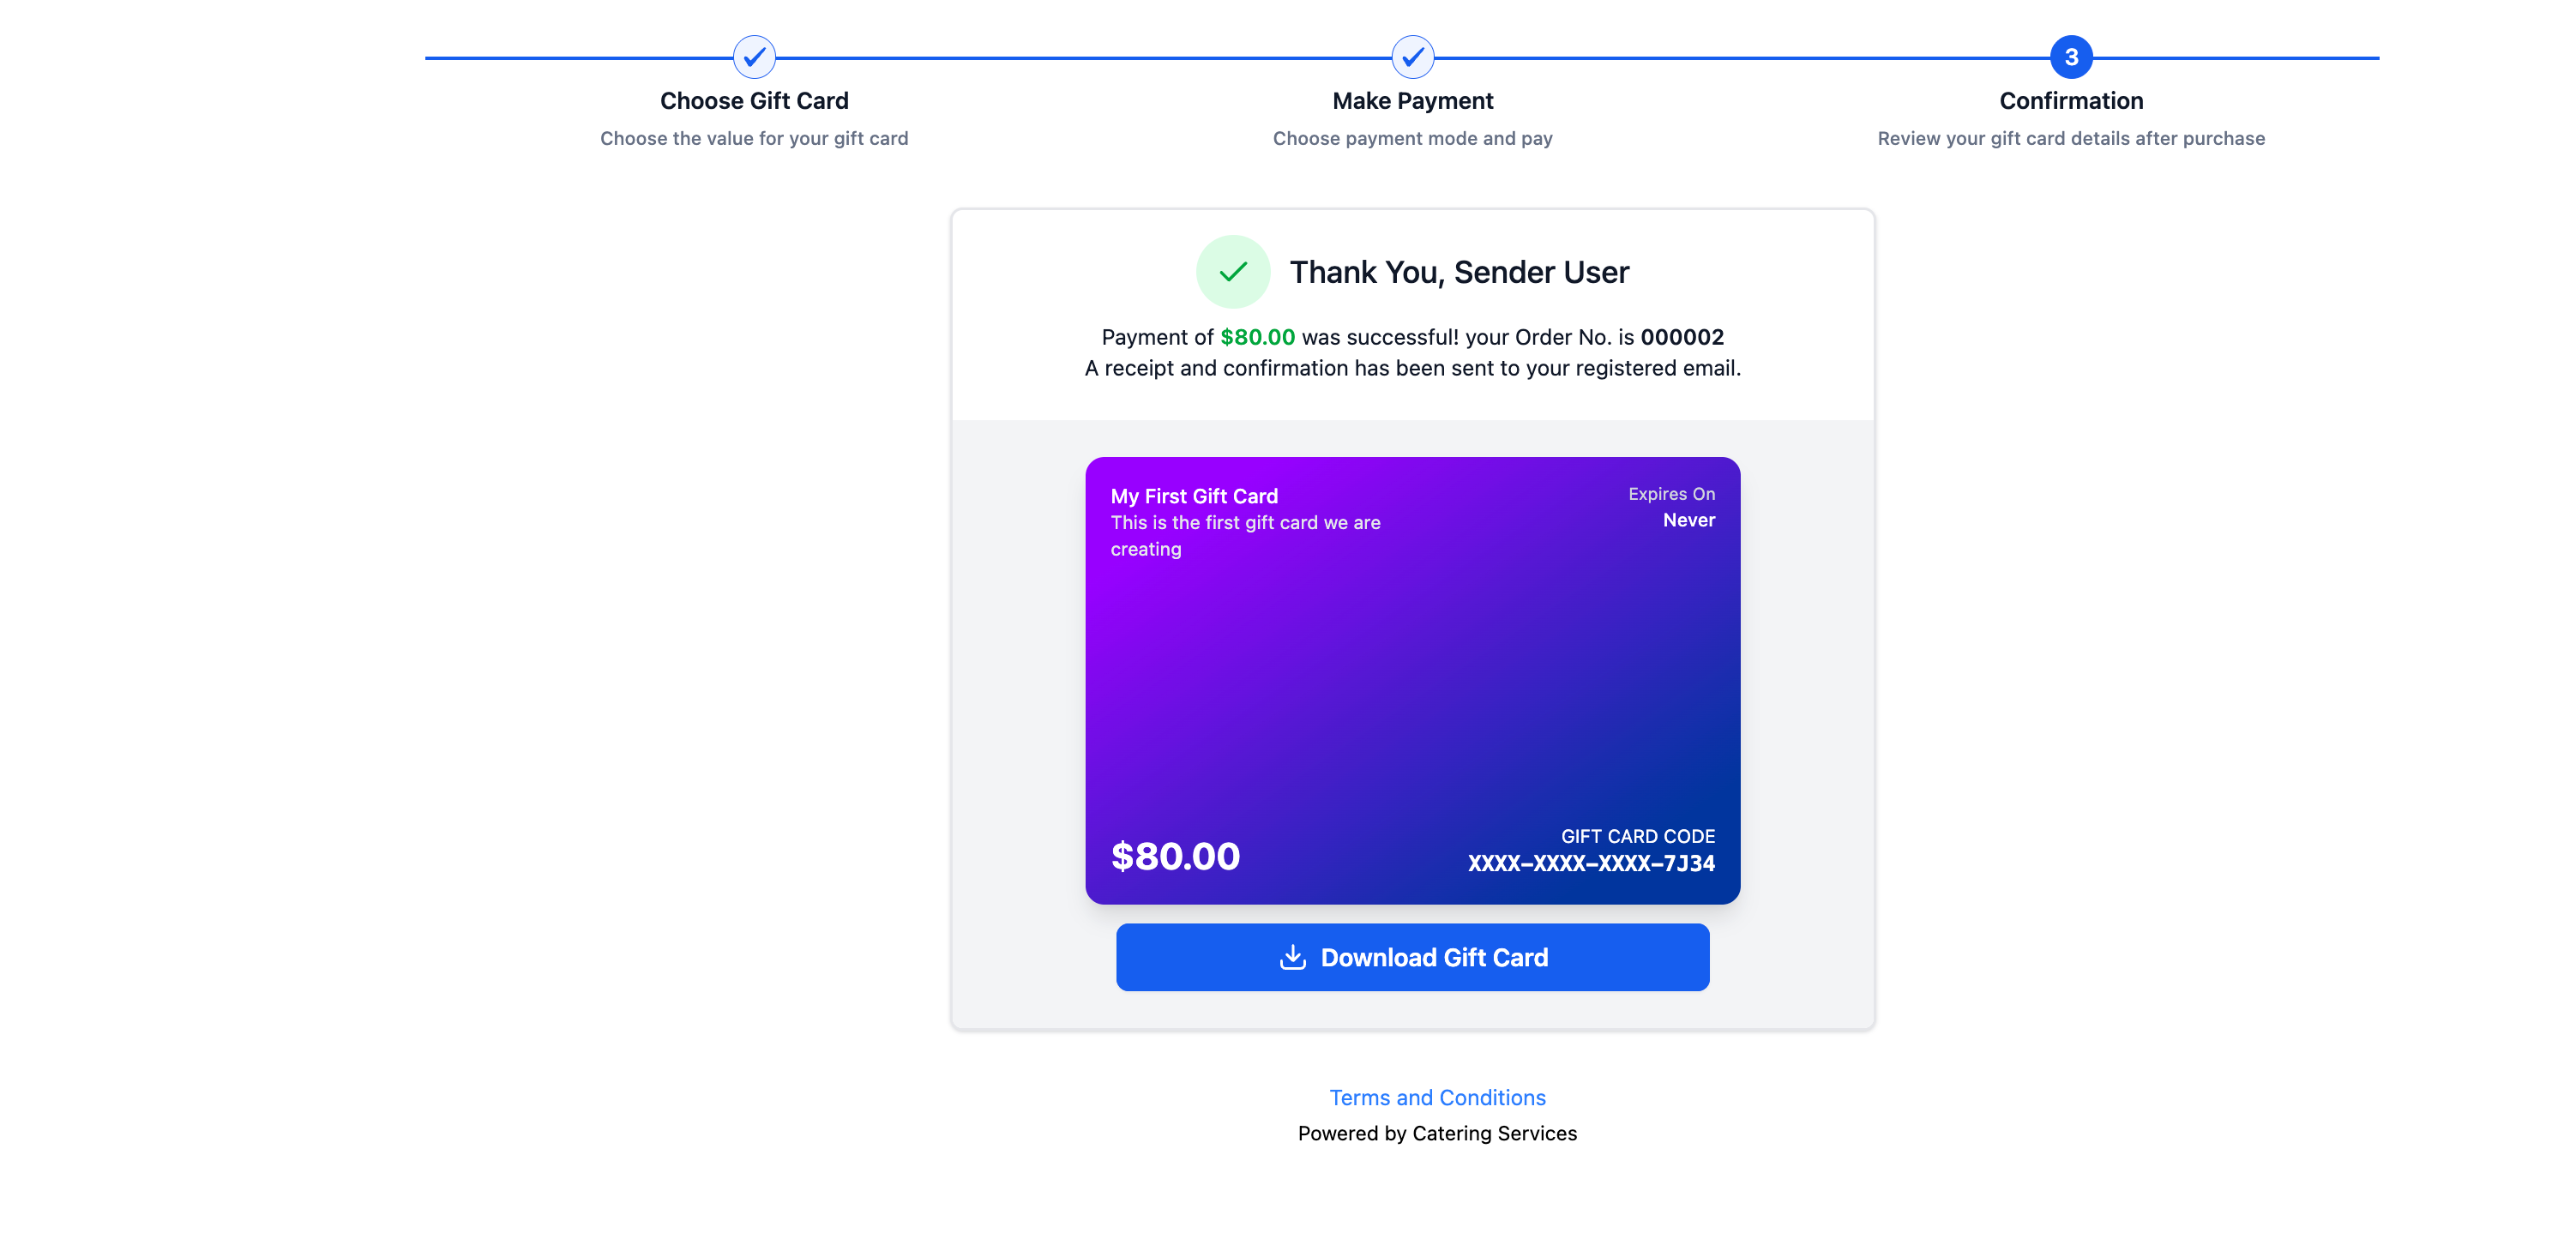
Step 5: Delivery. If the gift card was bought for someone else, the recipient receives it by email at the chosen time (immediately or on the scheduled date).
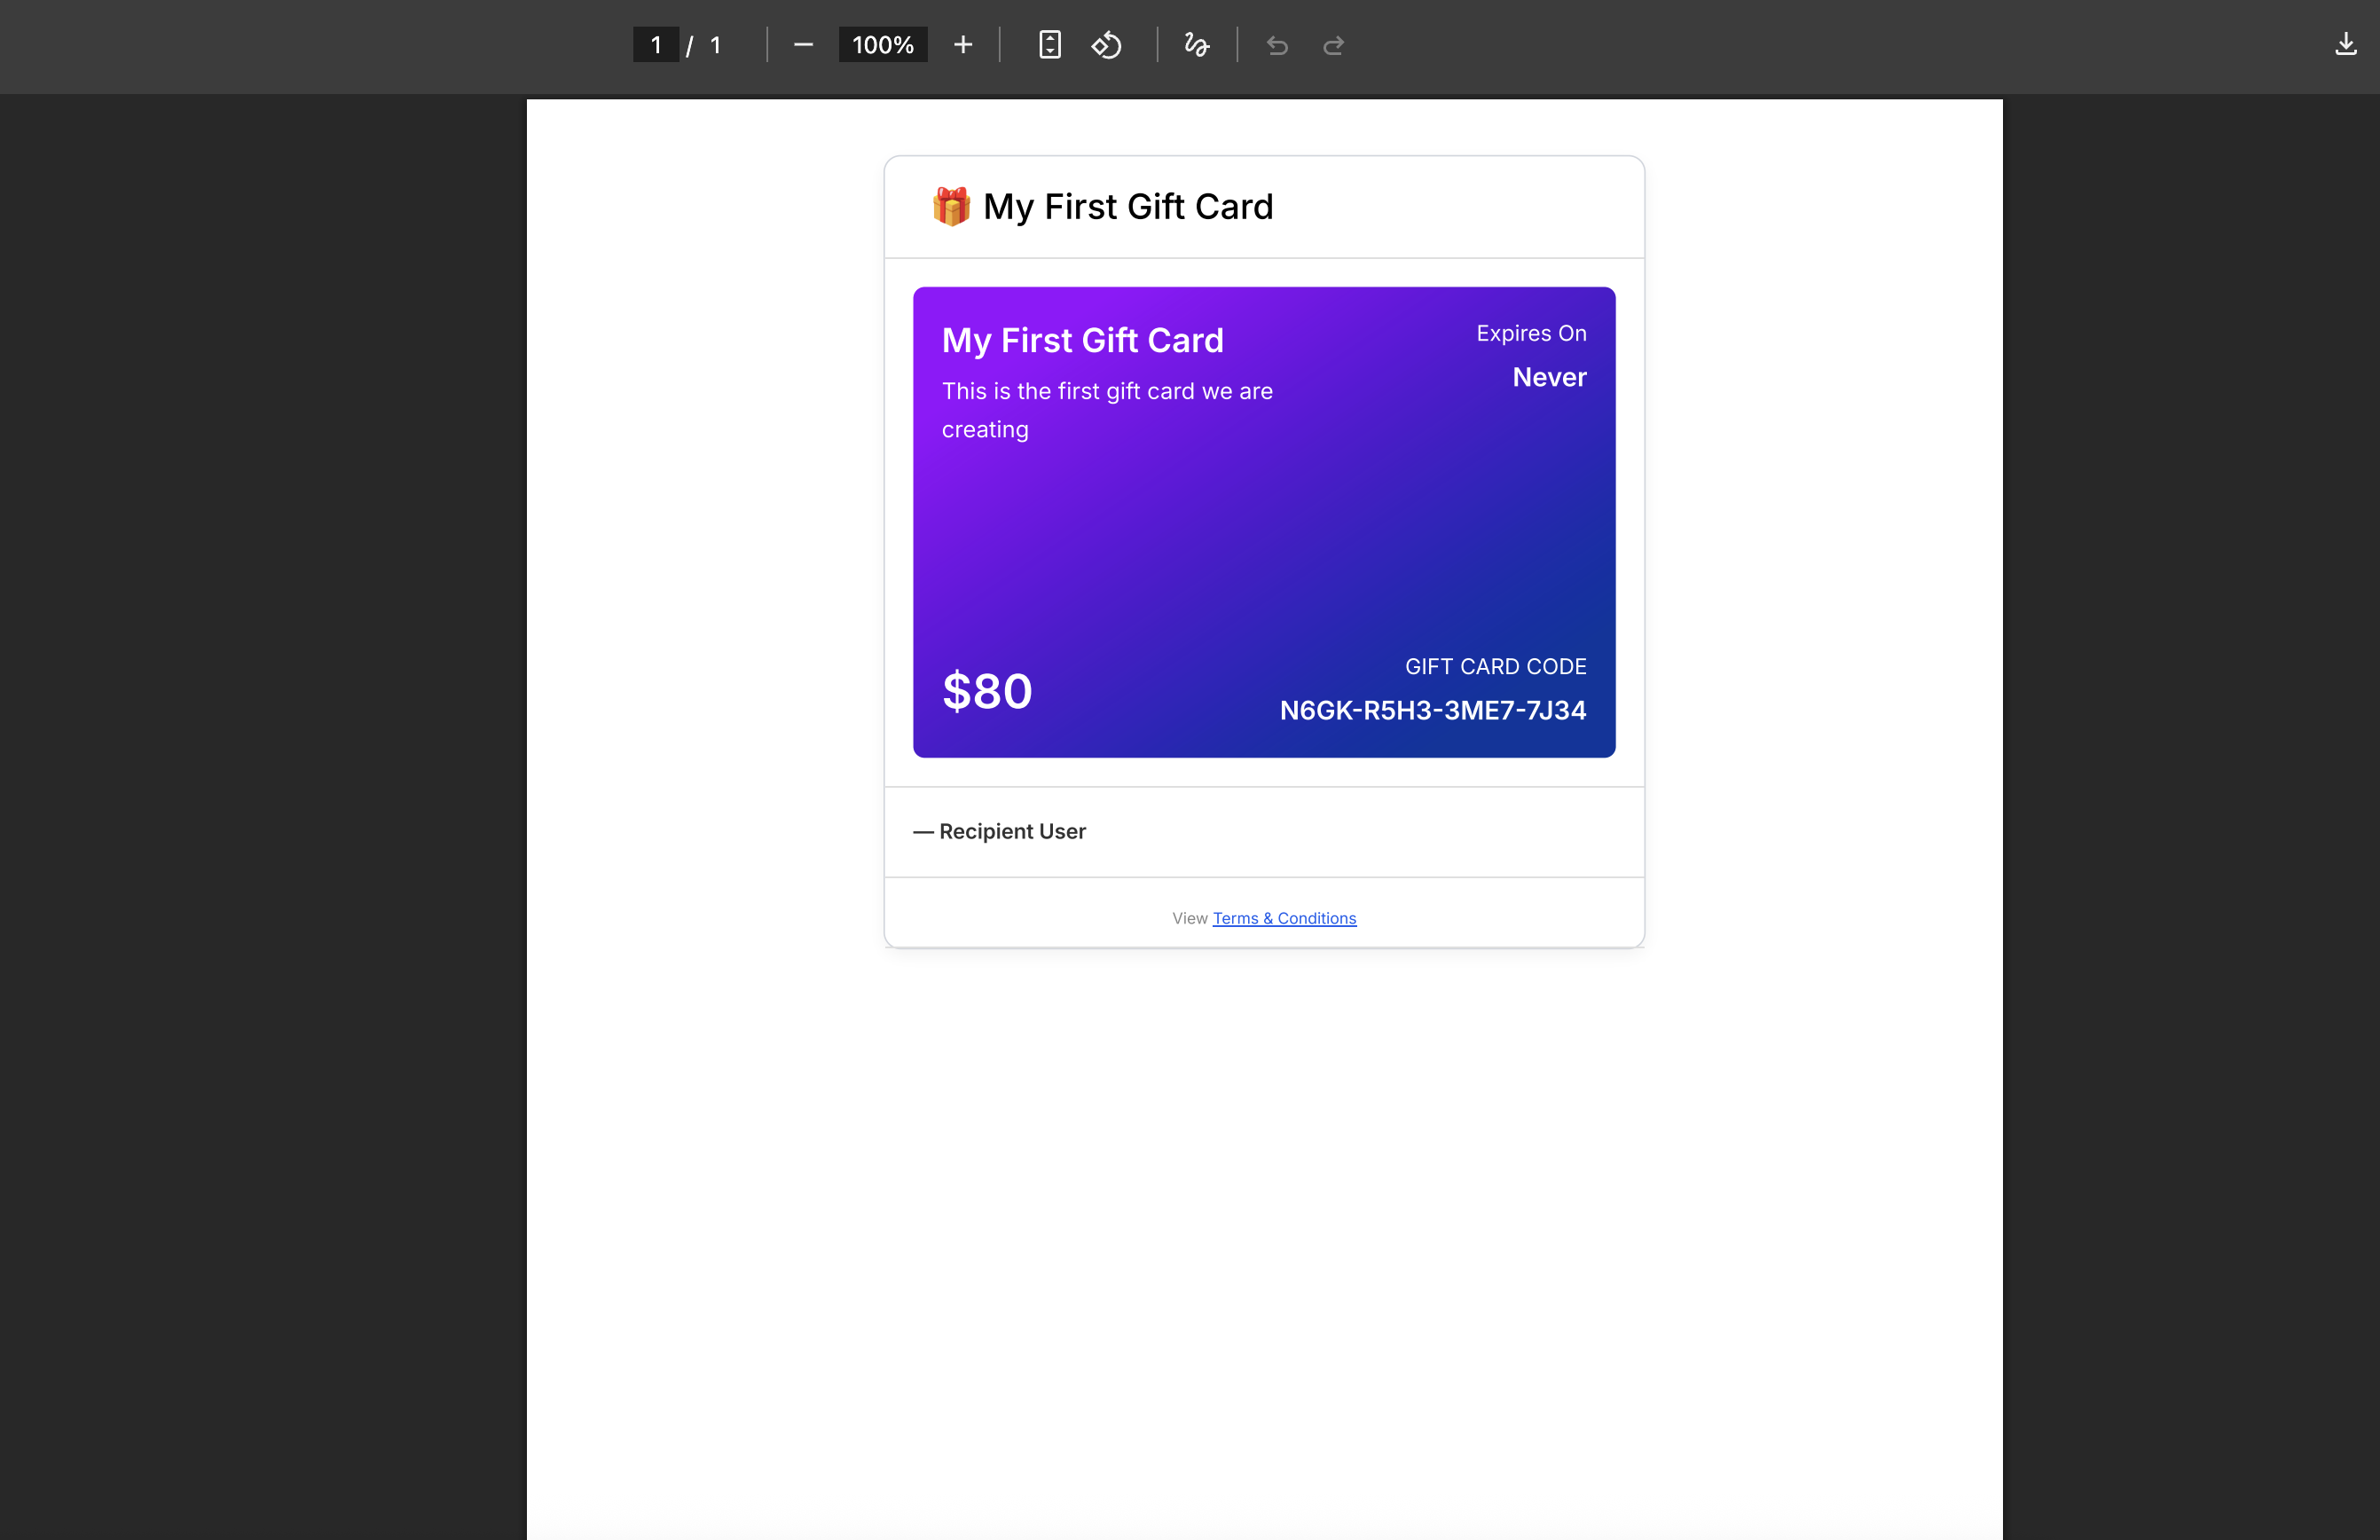
Add the dedicated checkout to any external webpage with no custom development required. Once embedded, patients can browse gift cards and complete a purchase without leaving your website. This code can be embedded into:
WordPress websites
HTML landing pages
Blog pages
Custom portals
Link-in-bio pages
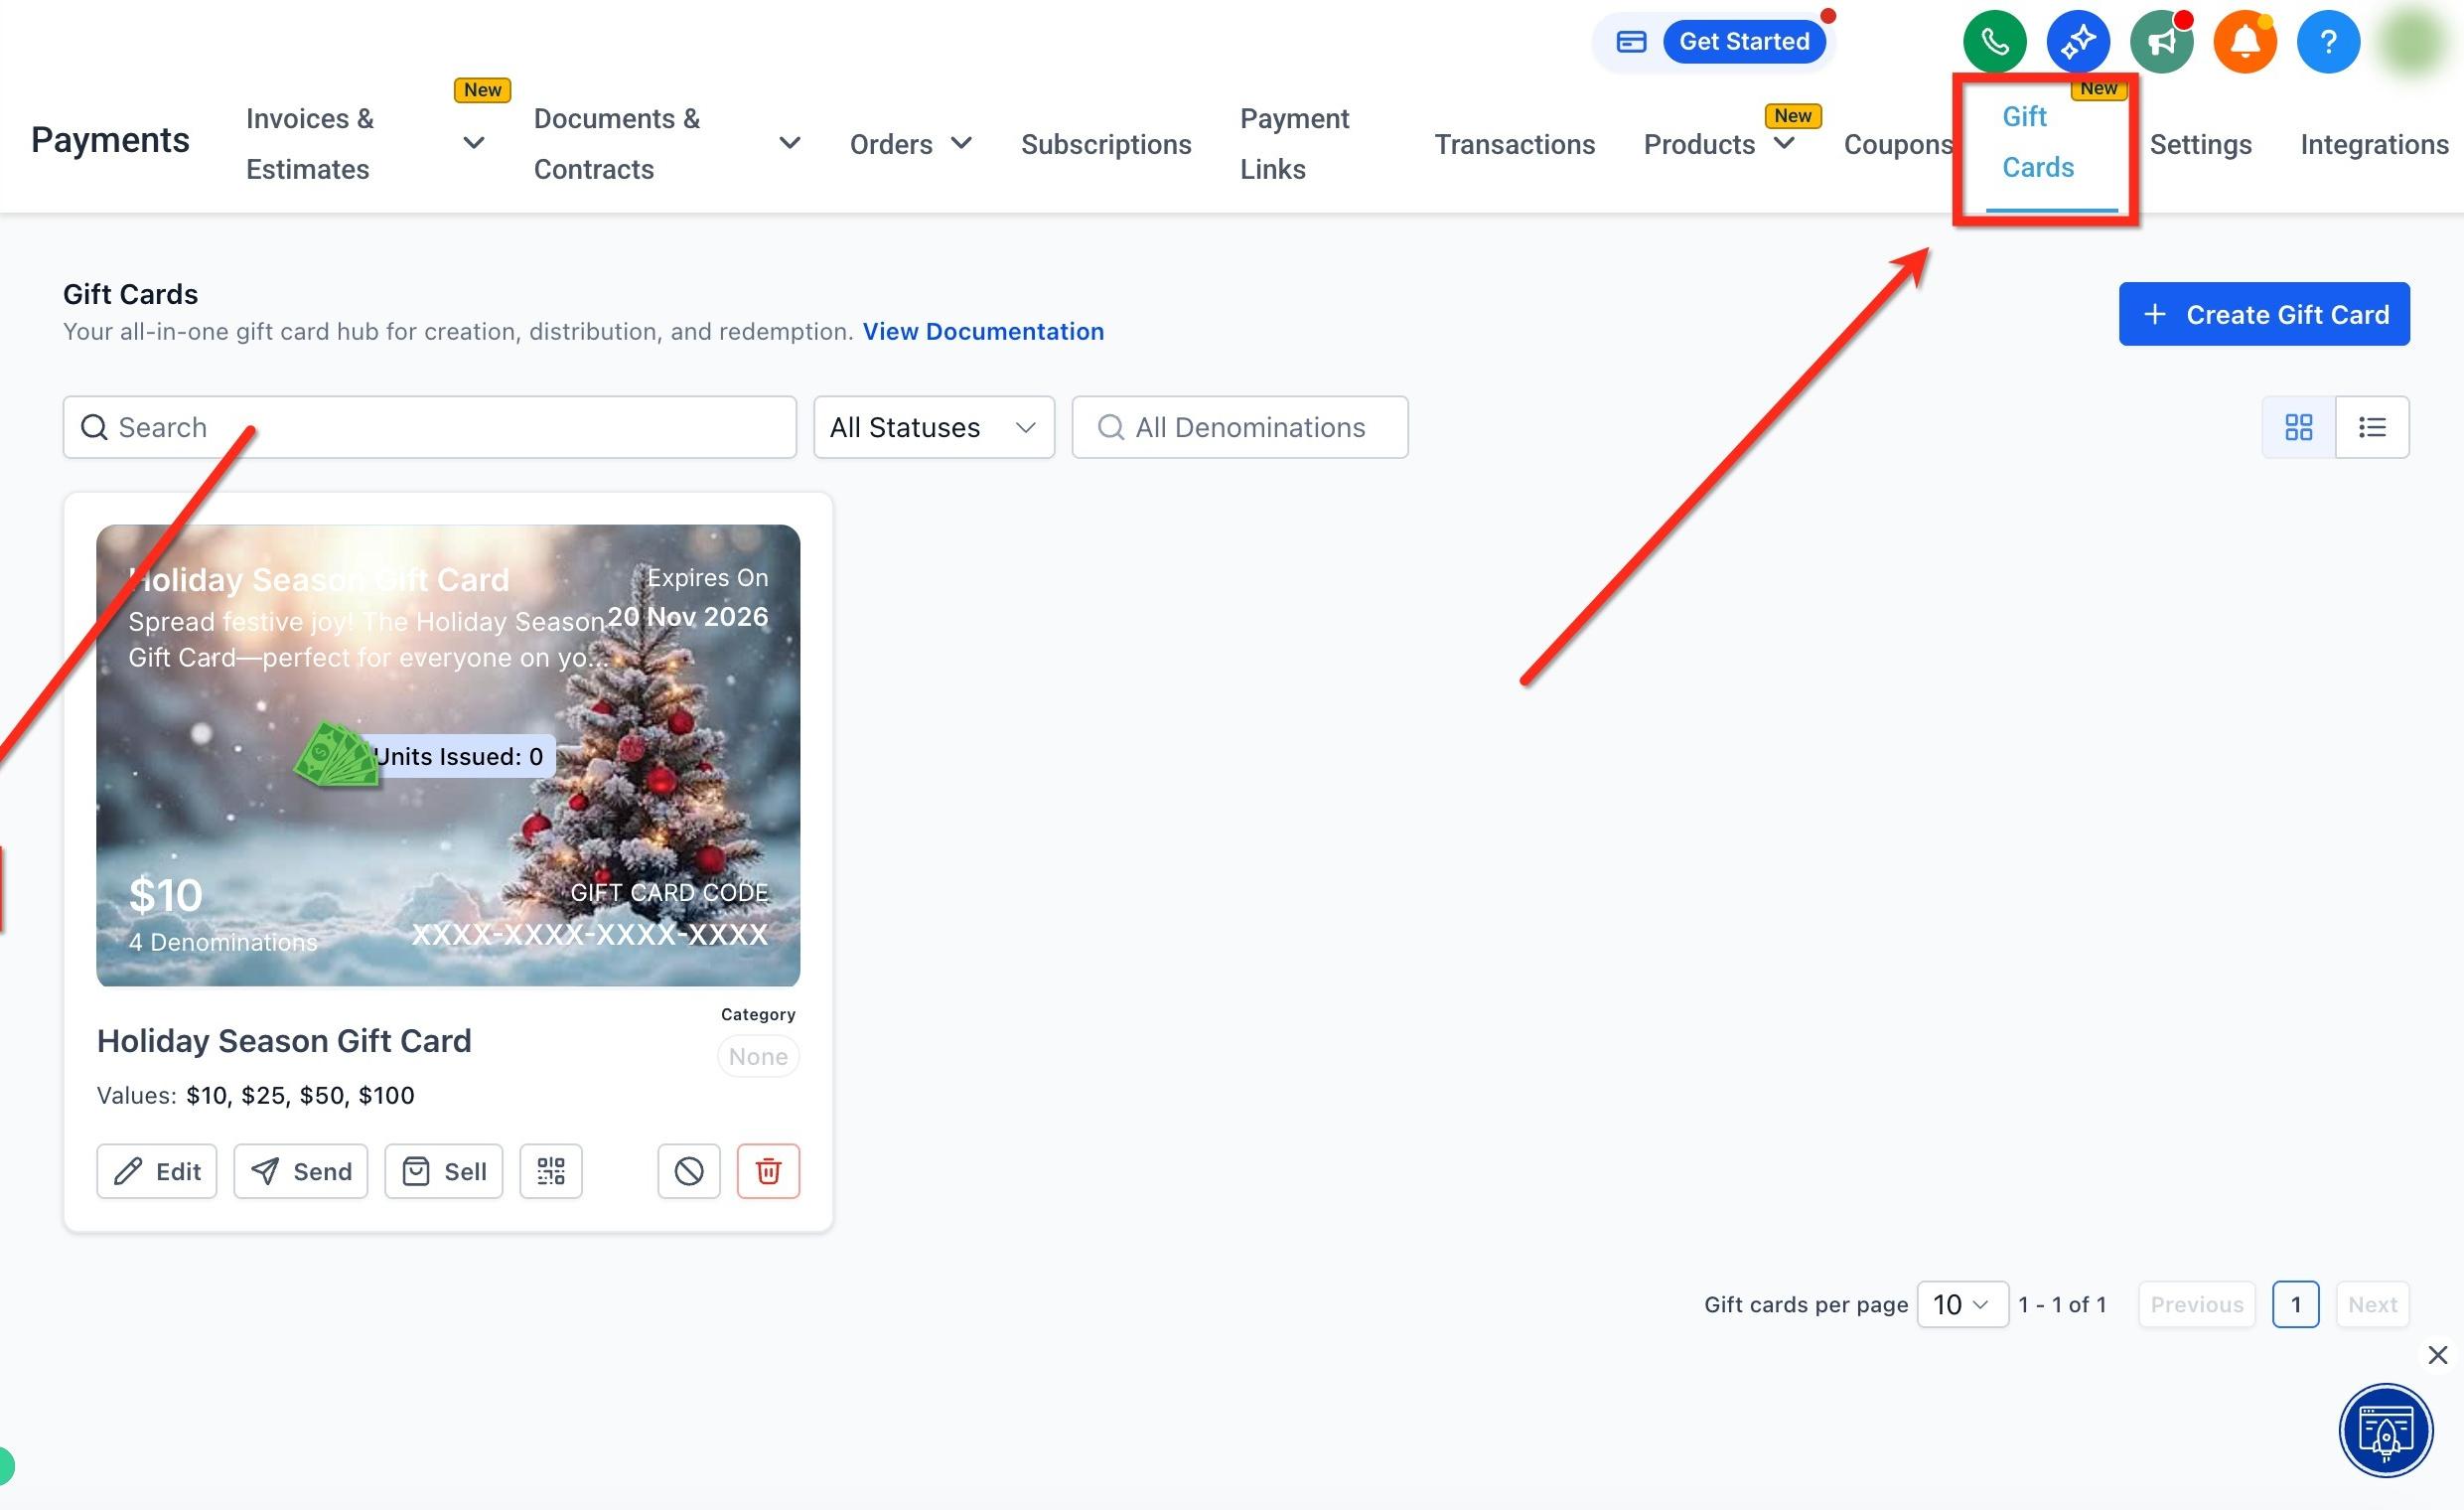
Step 1: In the left menu, click the Payments tab. Then in the top ribbon, click Gift Cards to open the Gift Cards dashboard.
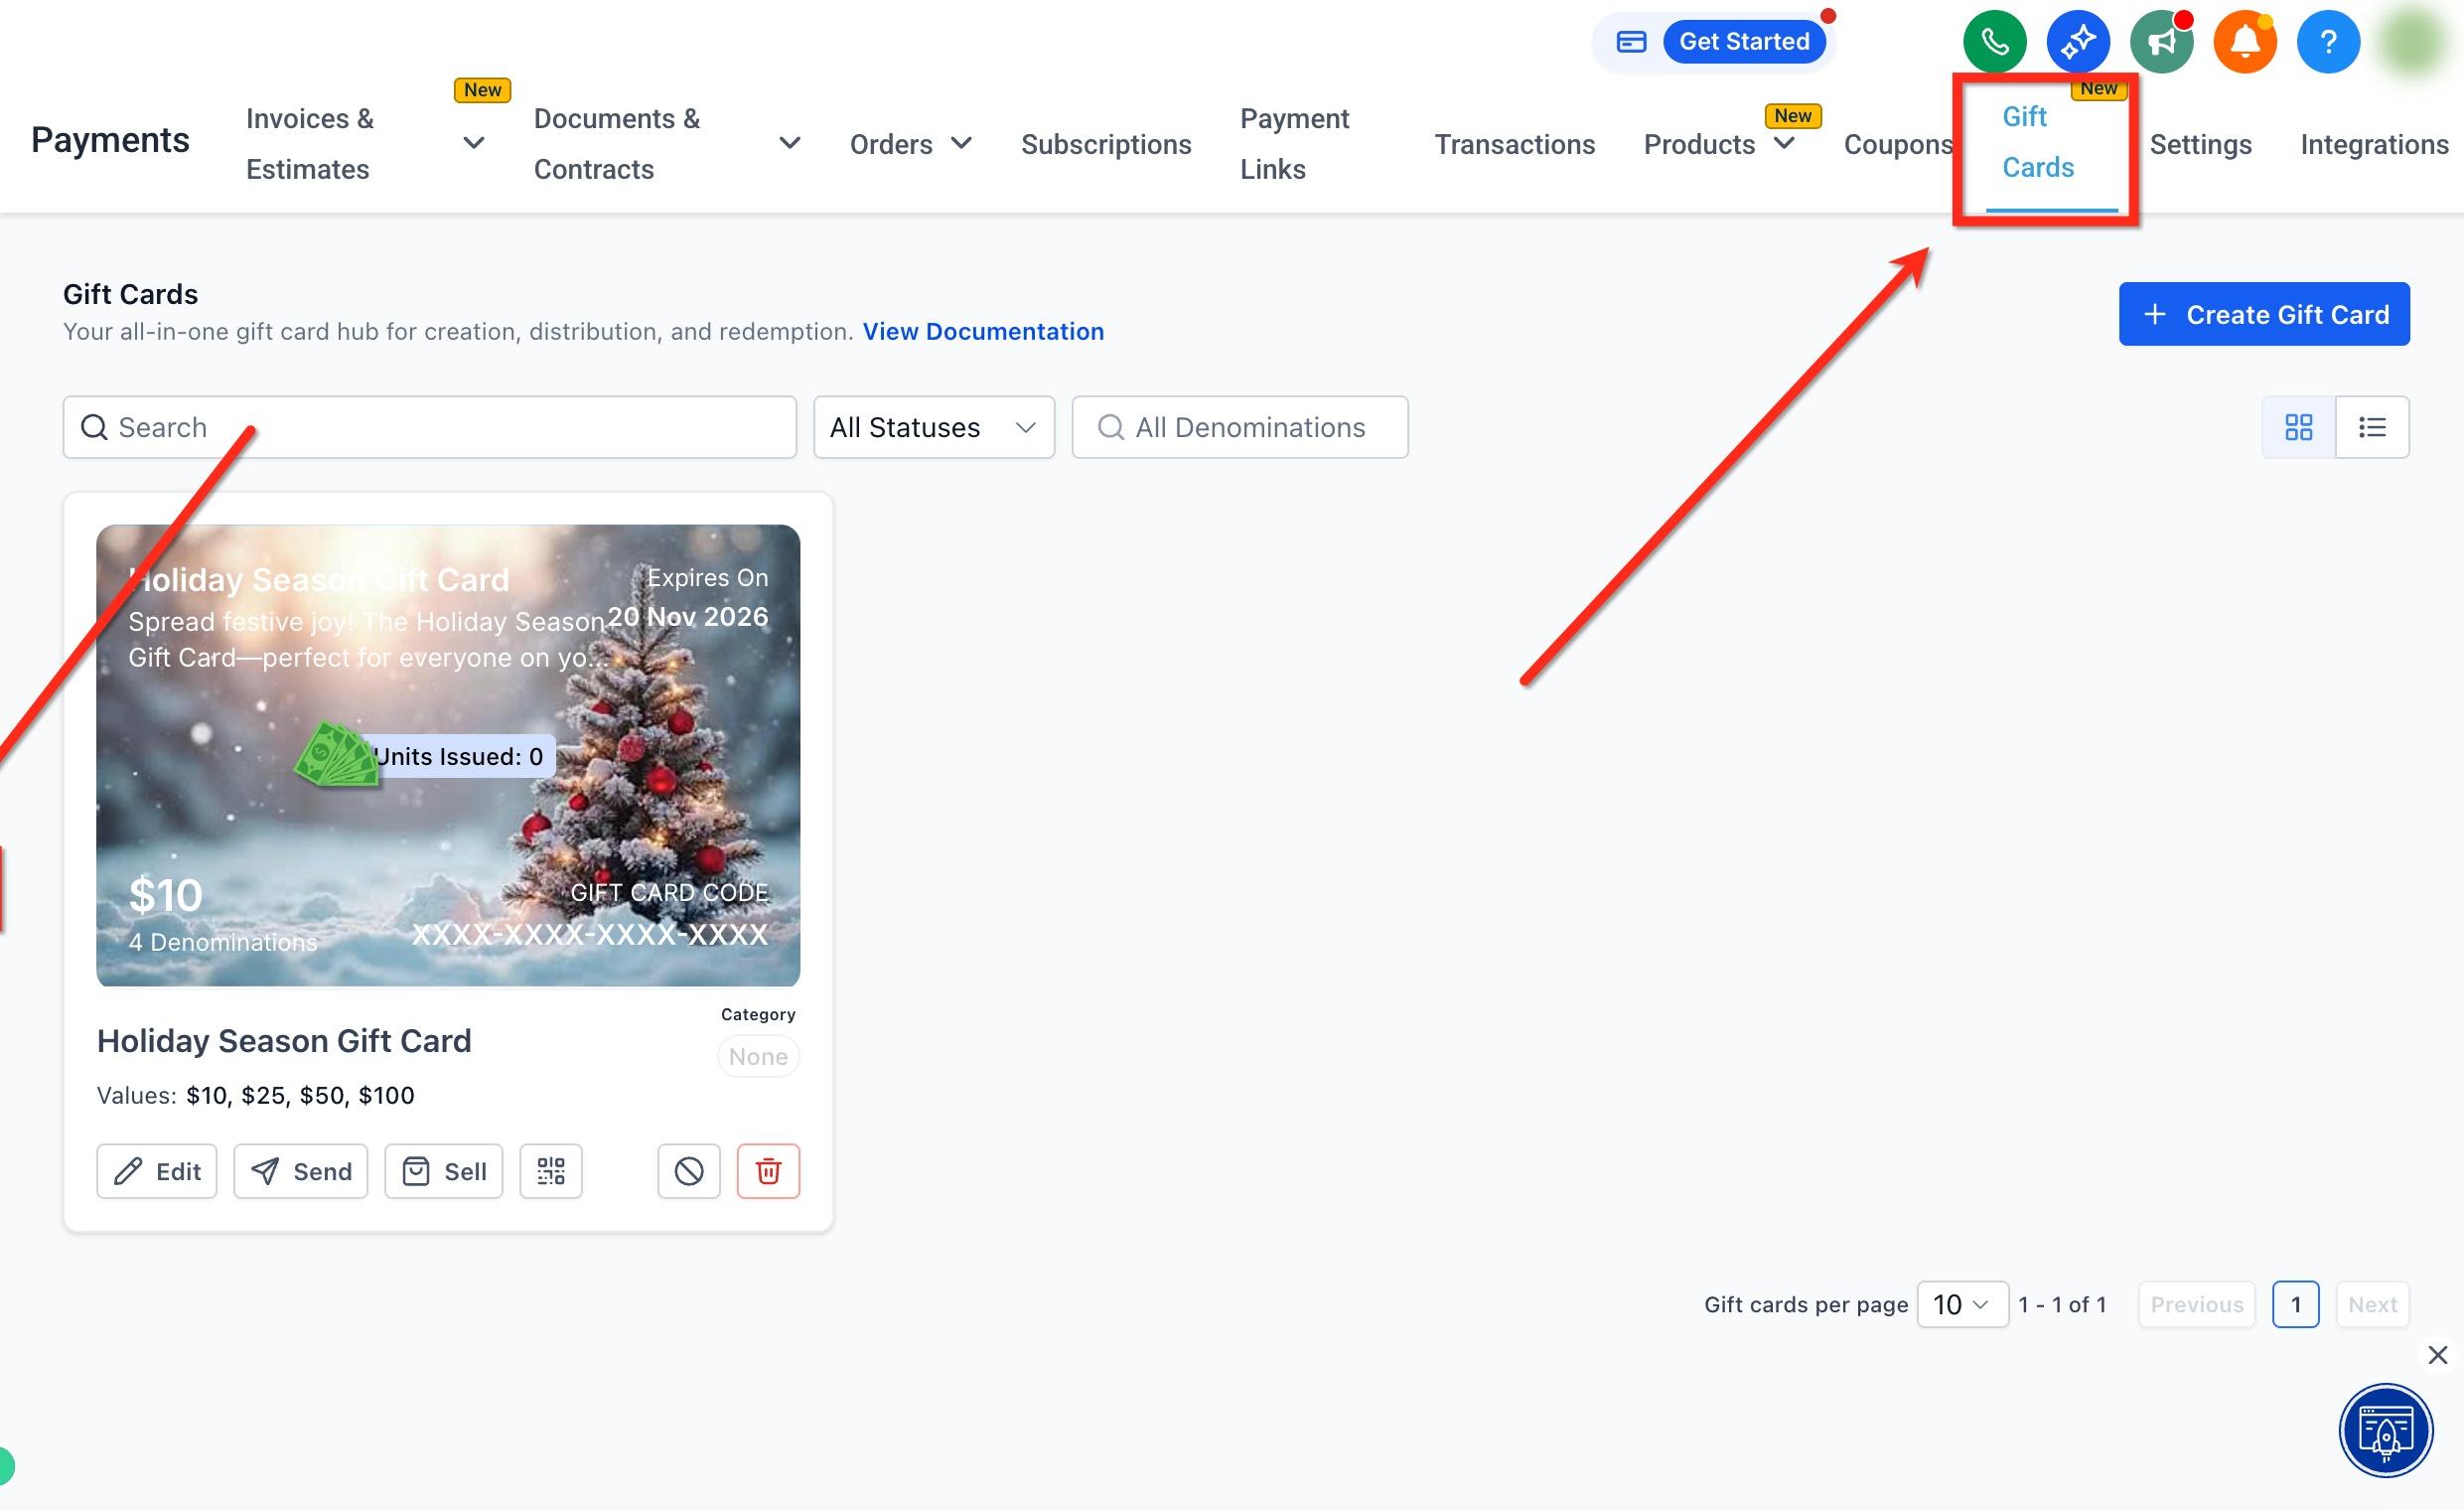
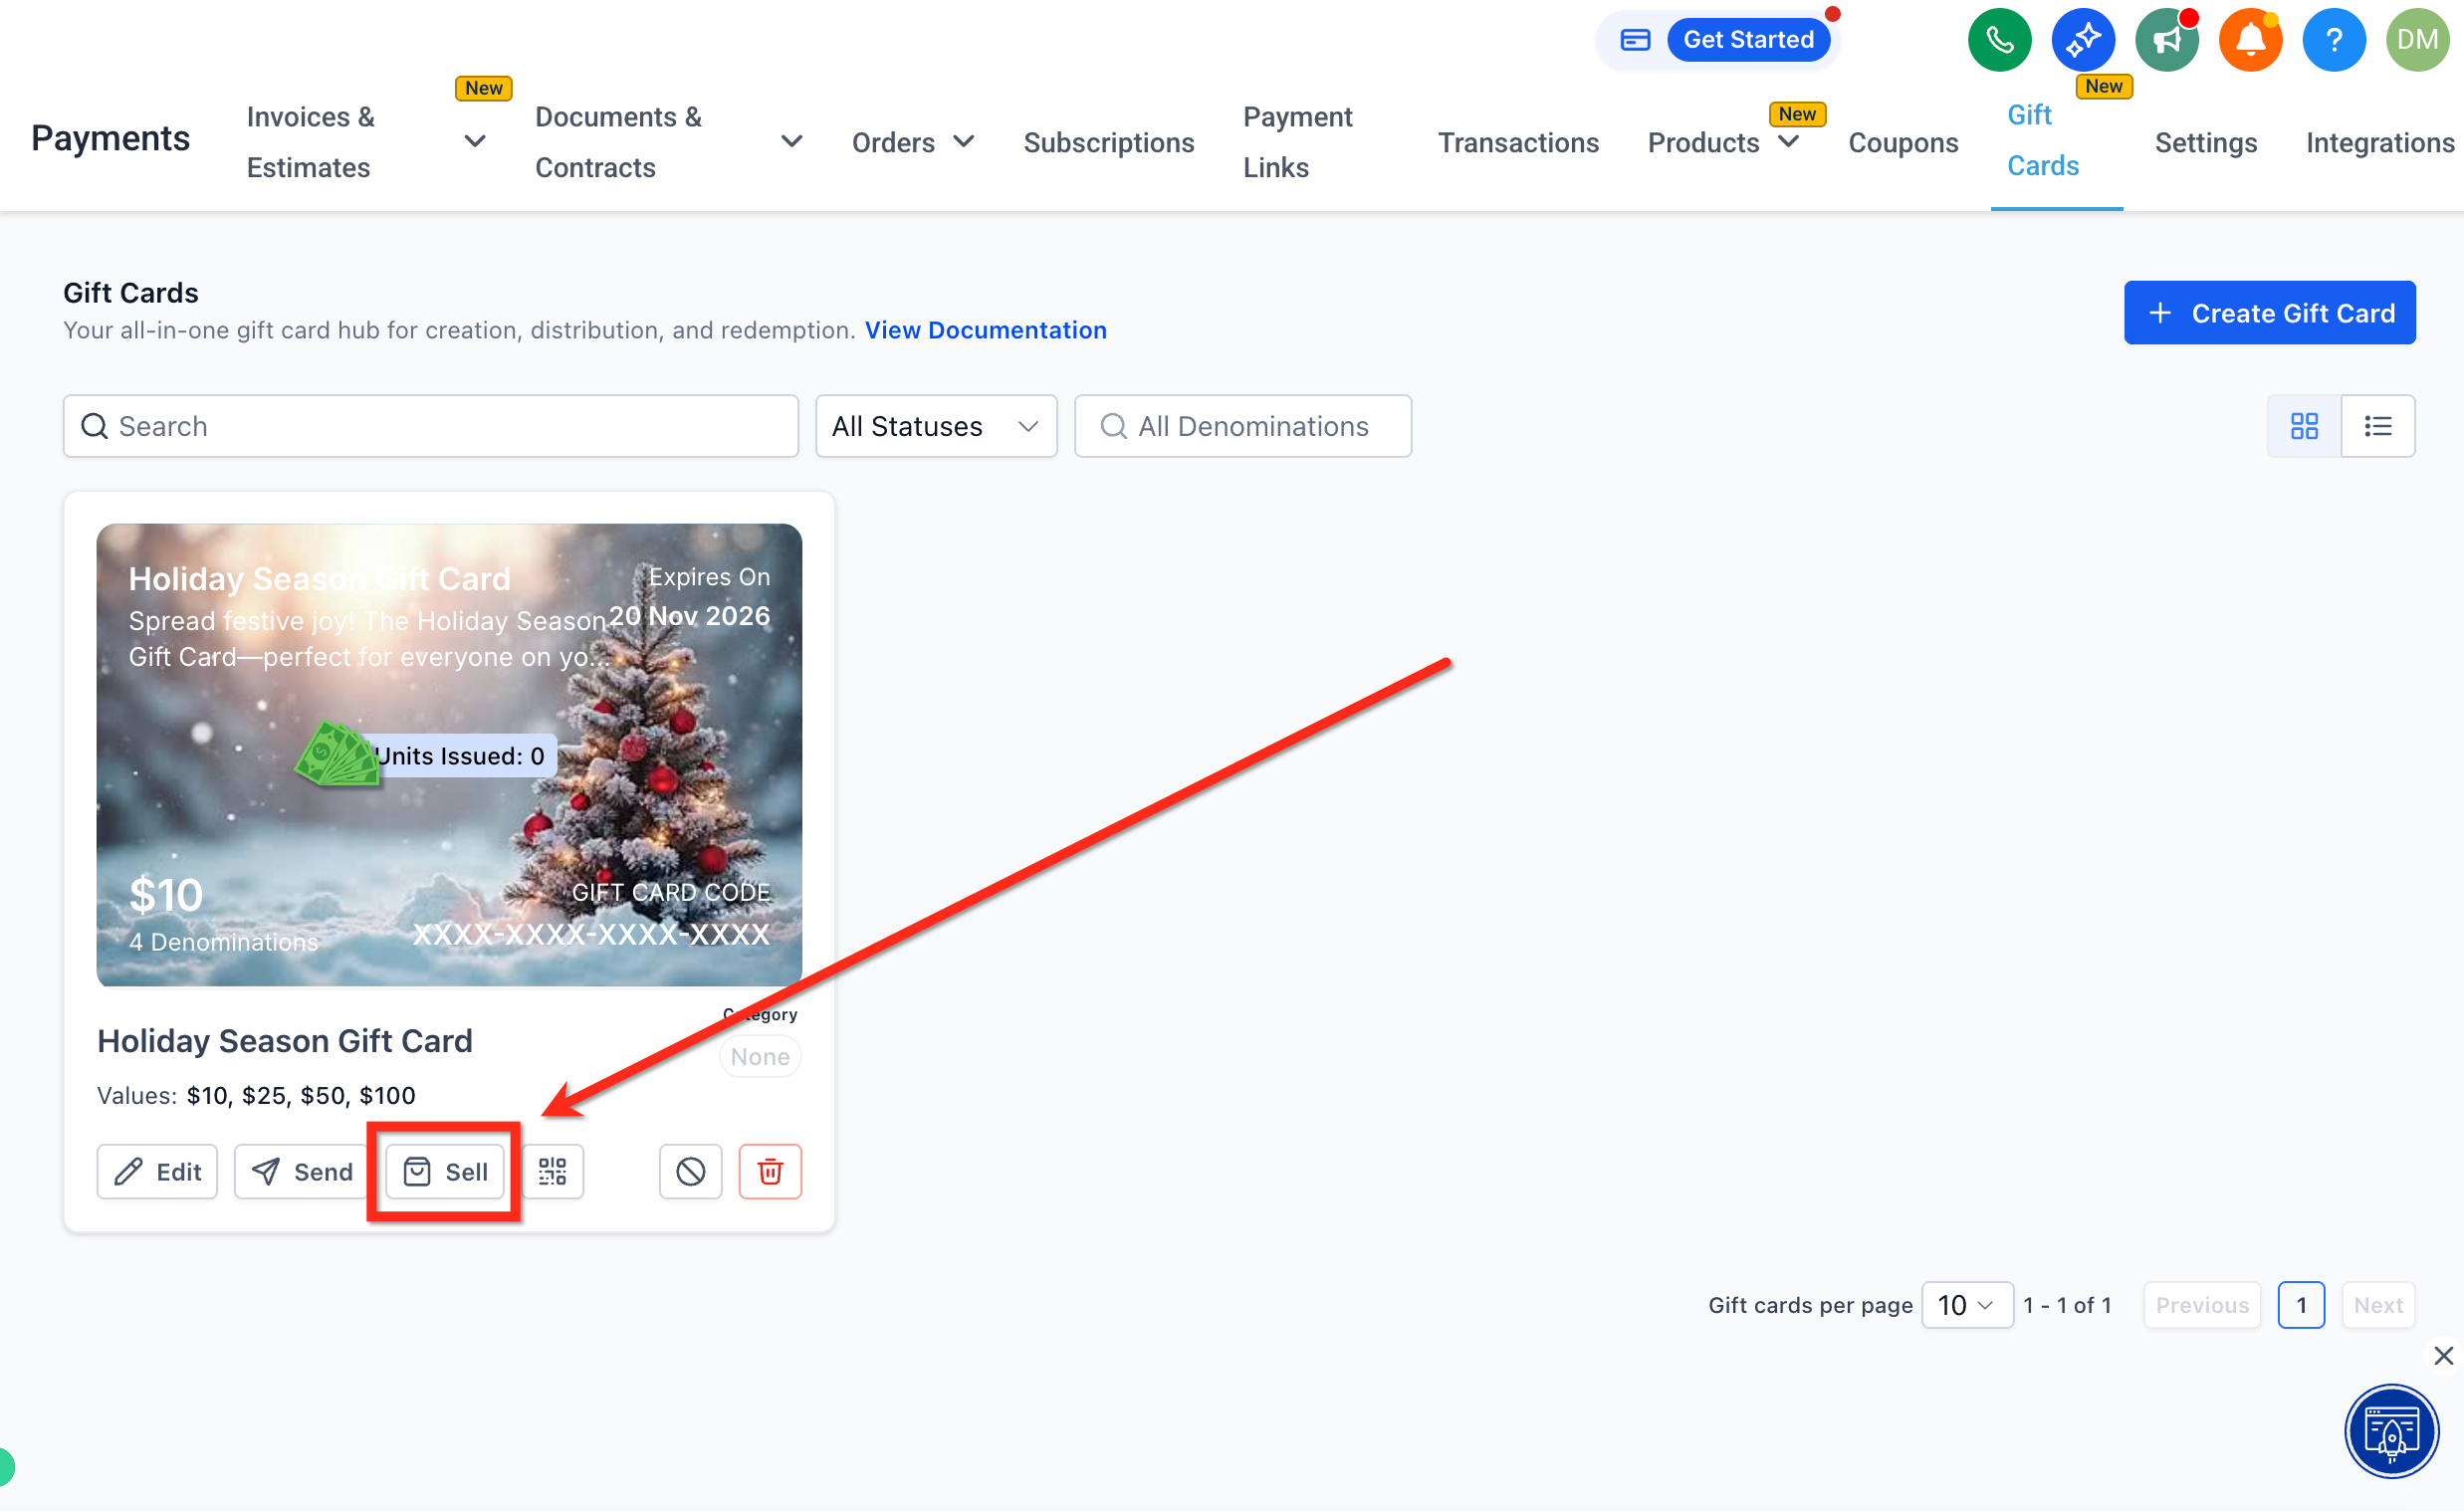
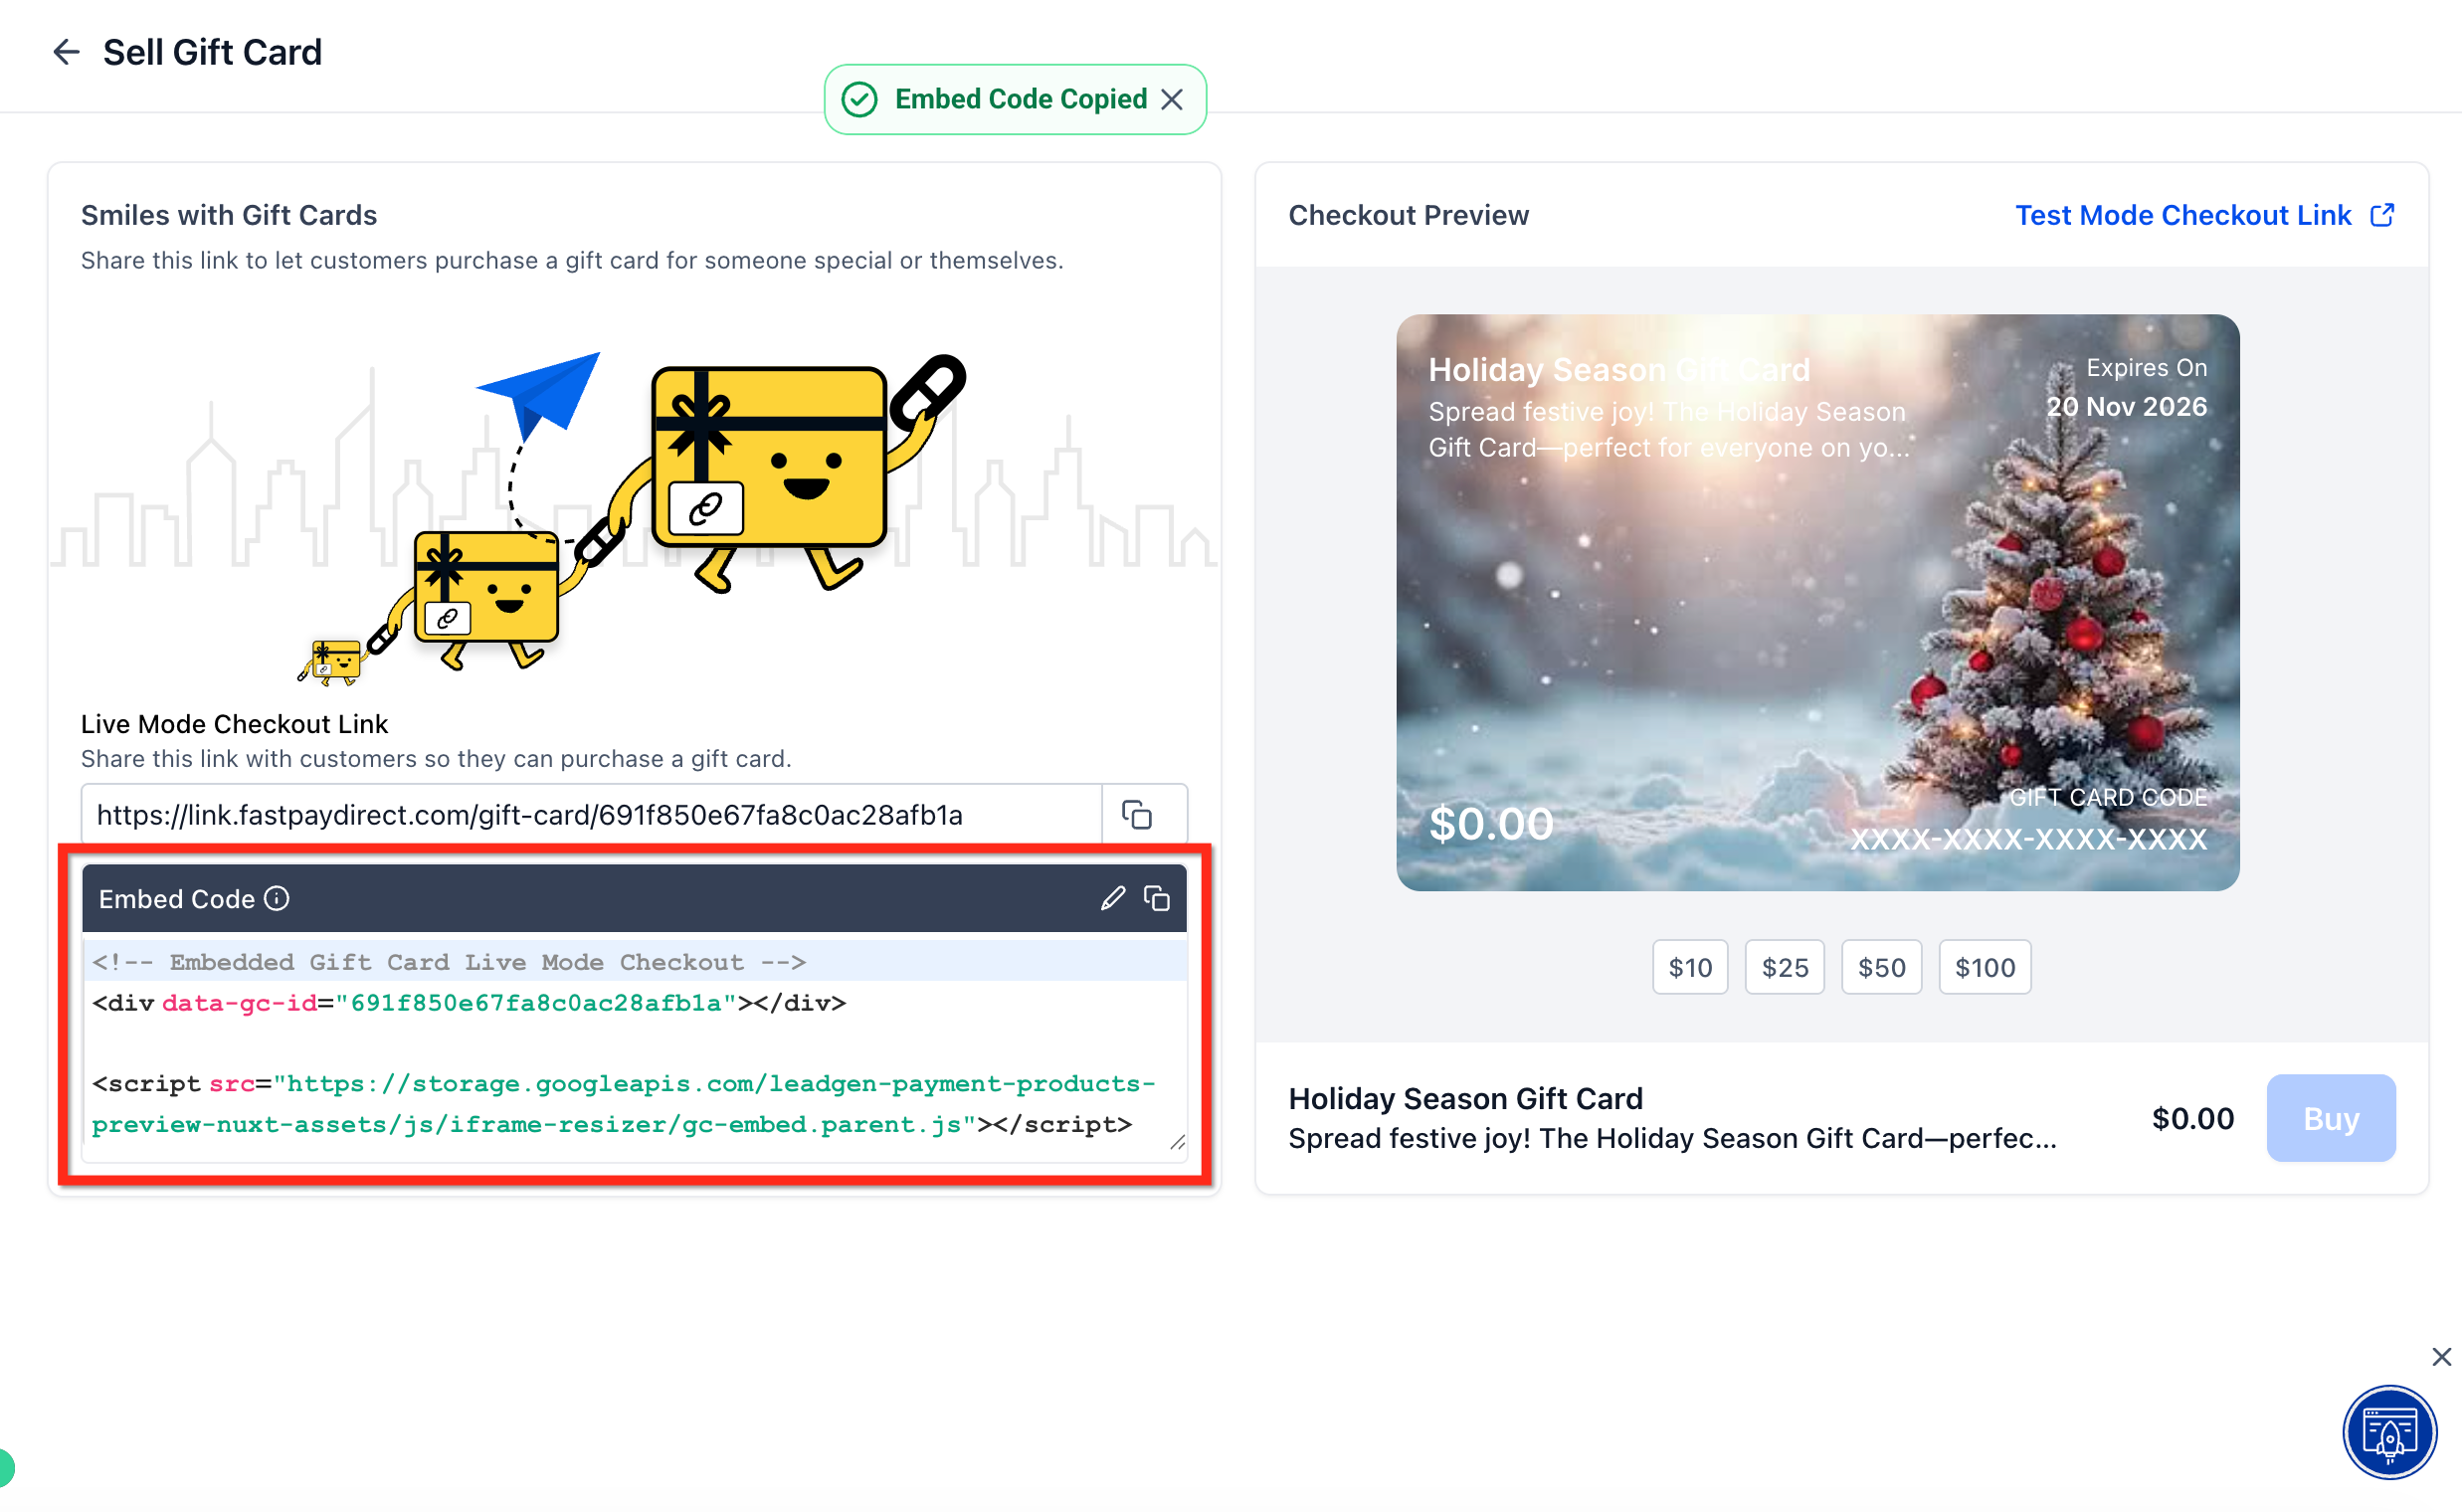
Step 2: Locate the card you want the embed code for and click Sell on its tile.
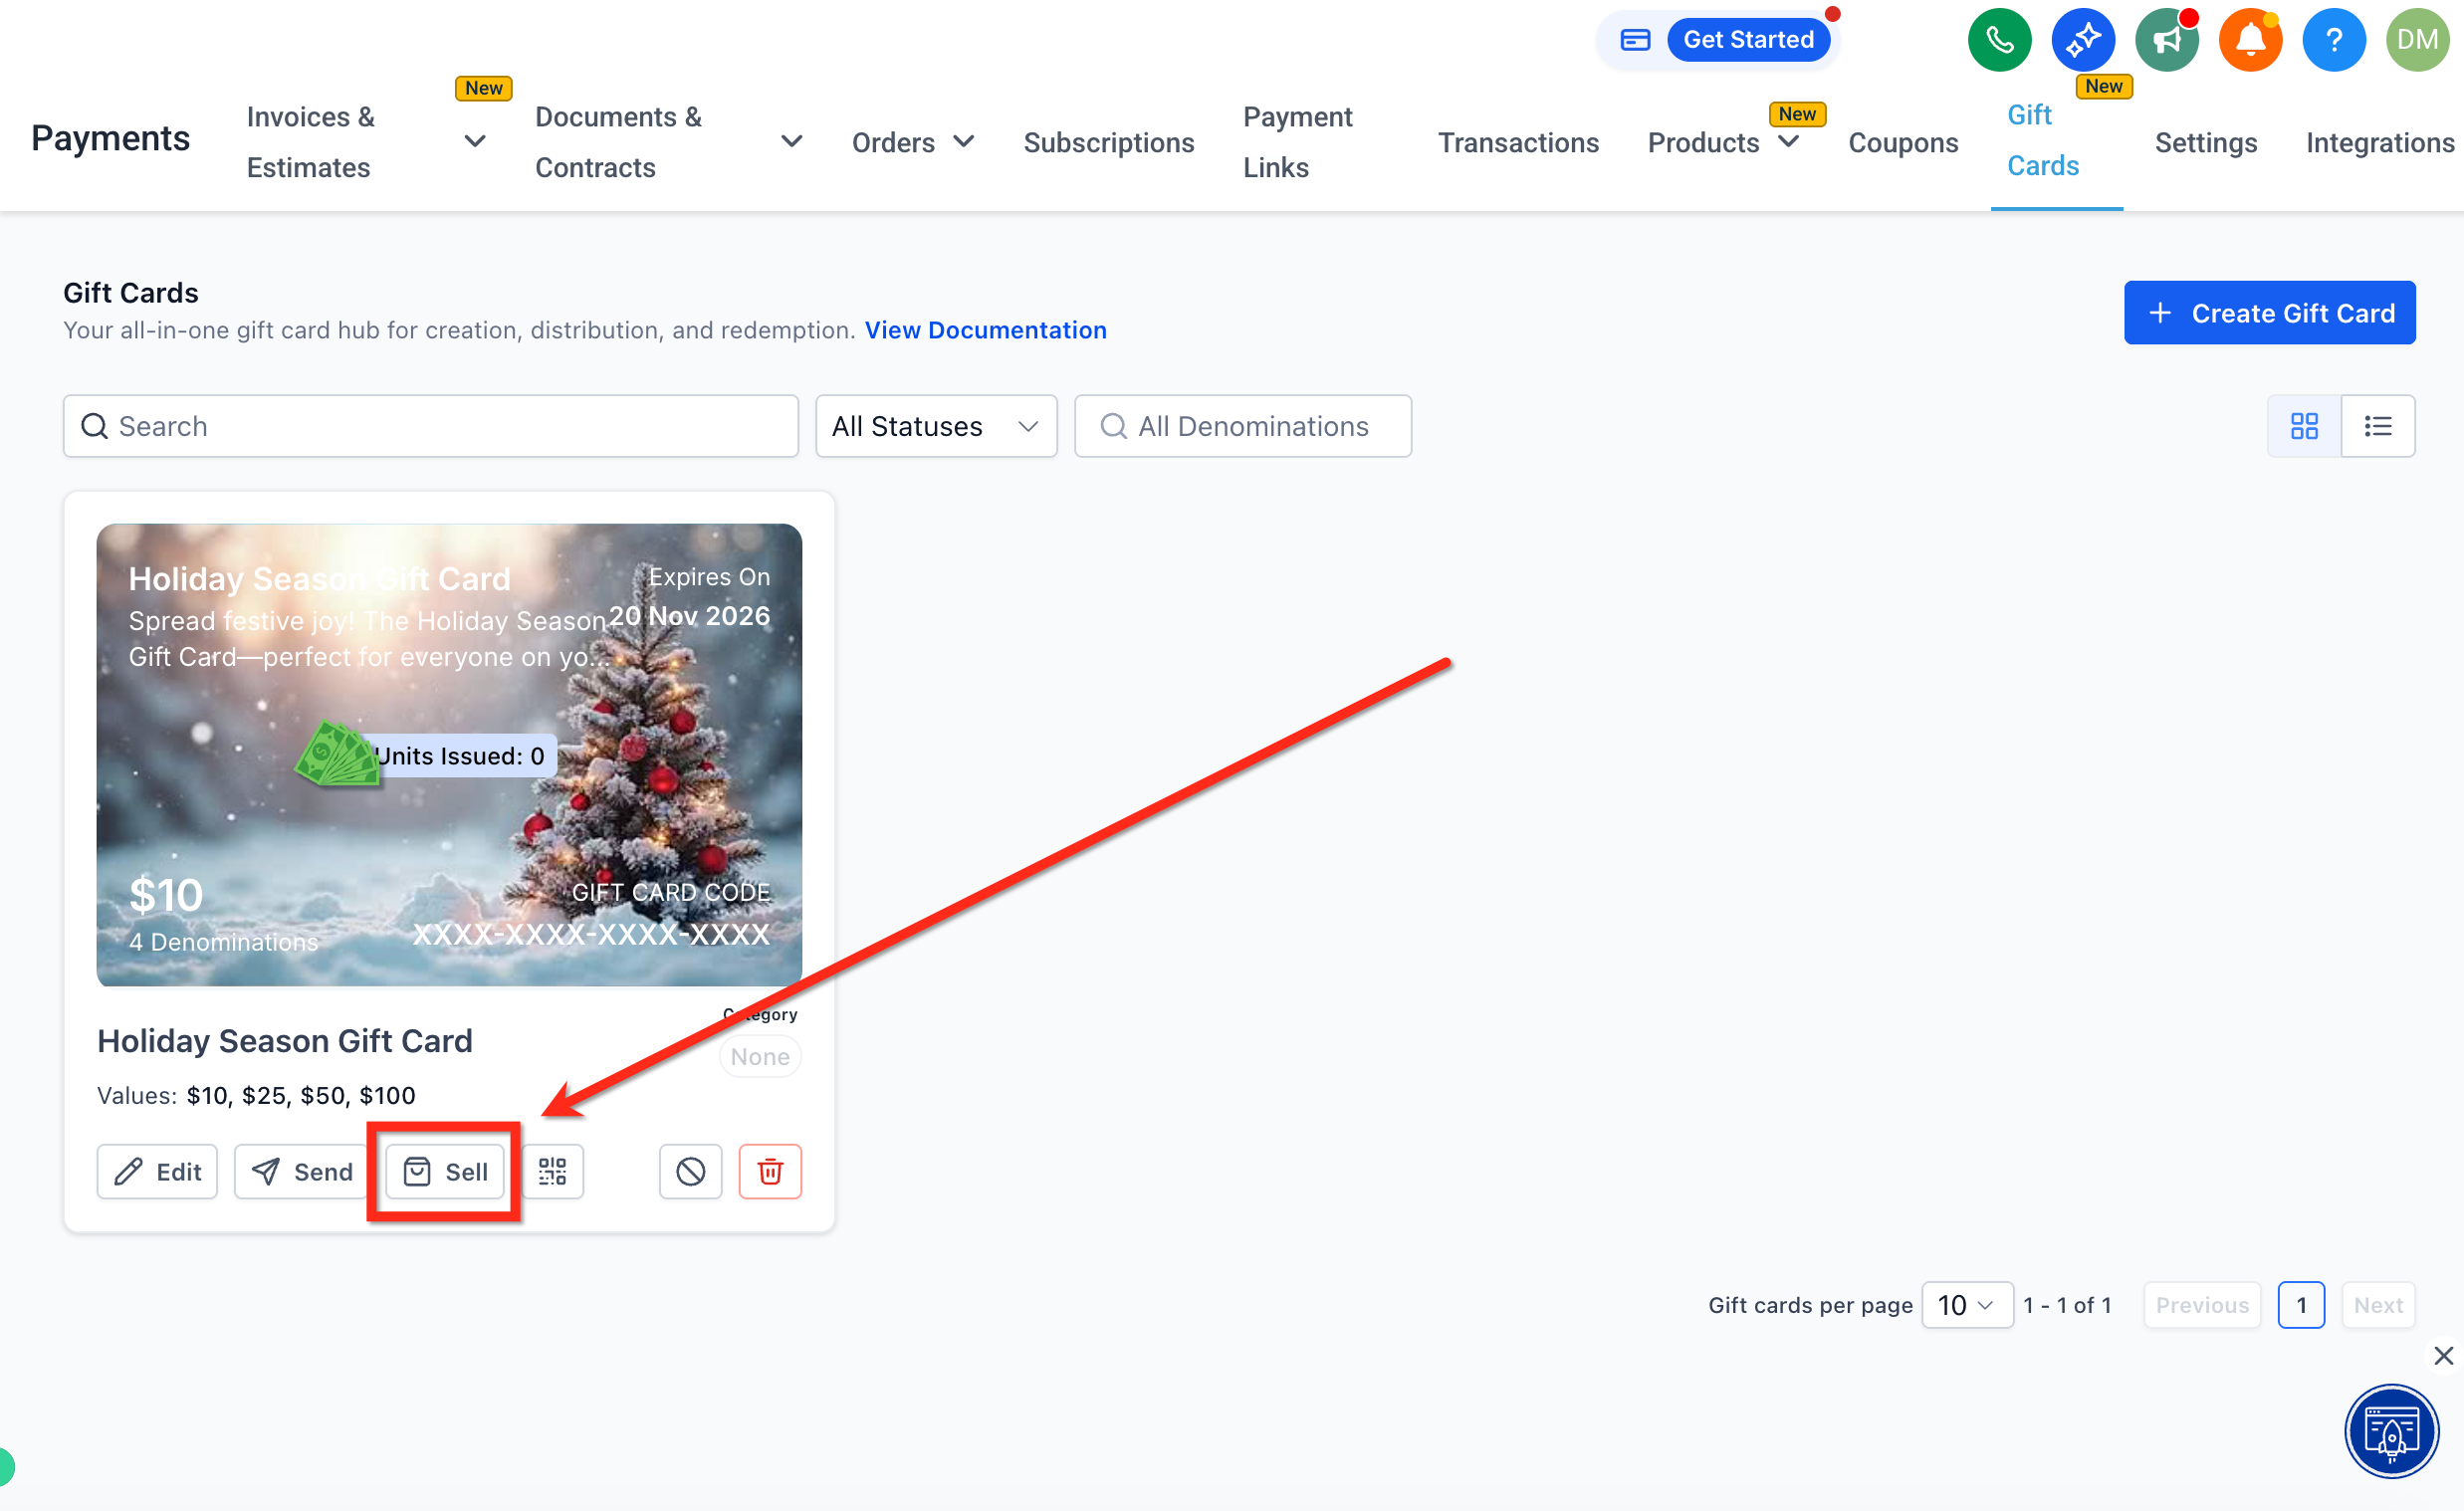
Step 3: Click Copy to copy the embed code. Use this code to embed the dedicated gift card checkout directly onto any external webpage.
QR codes make in-person and offline selling easy. Scanning the code opens the same dedicated checkout link, which makes it ideal for in-office displays, print campaigns, or any medium that is not clickable.
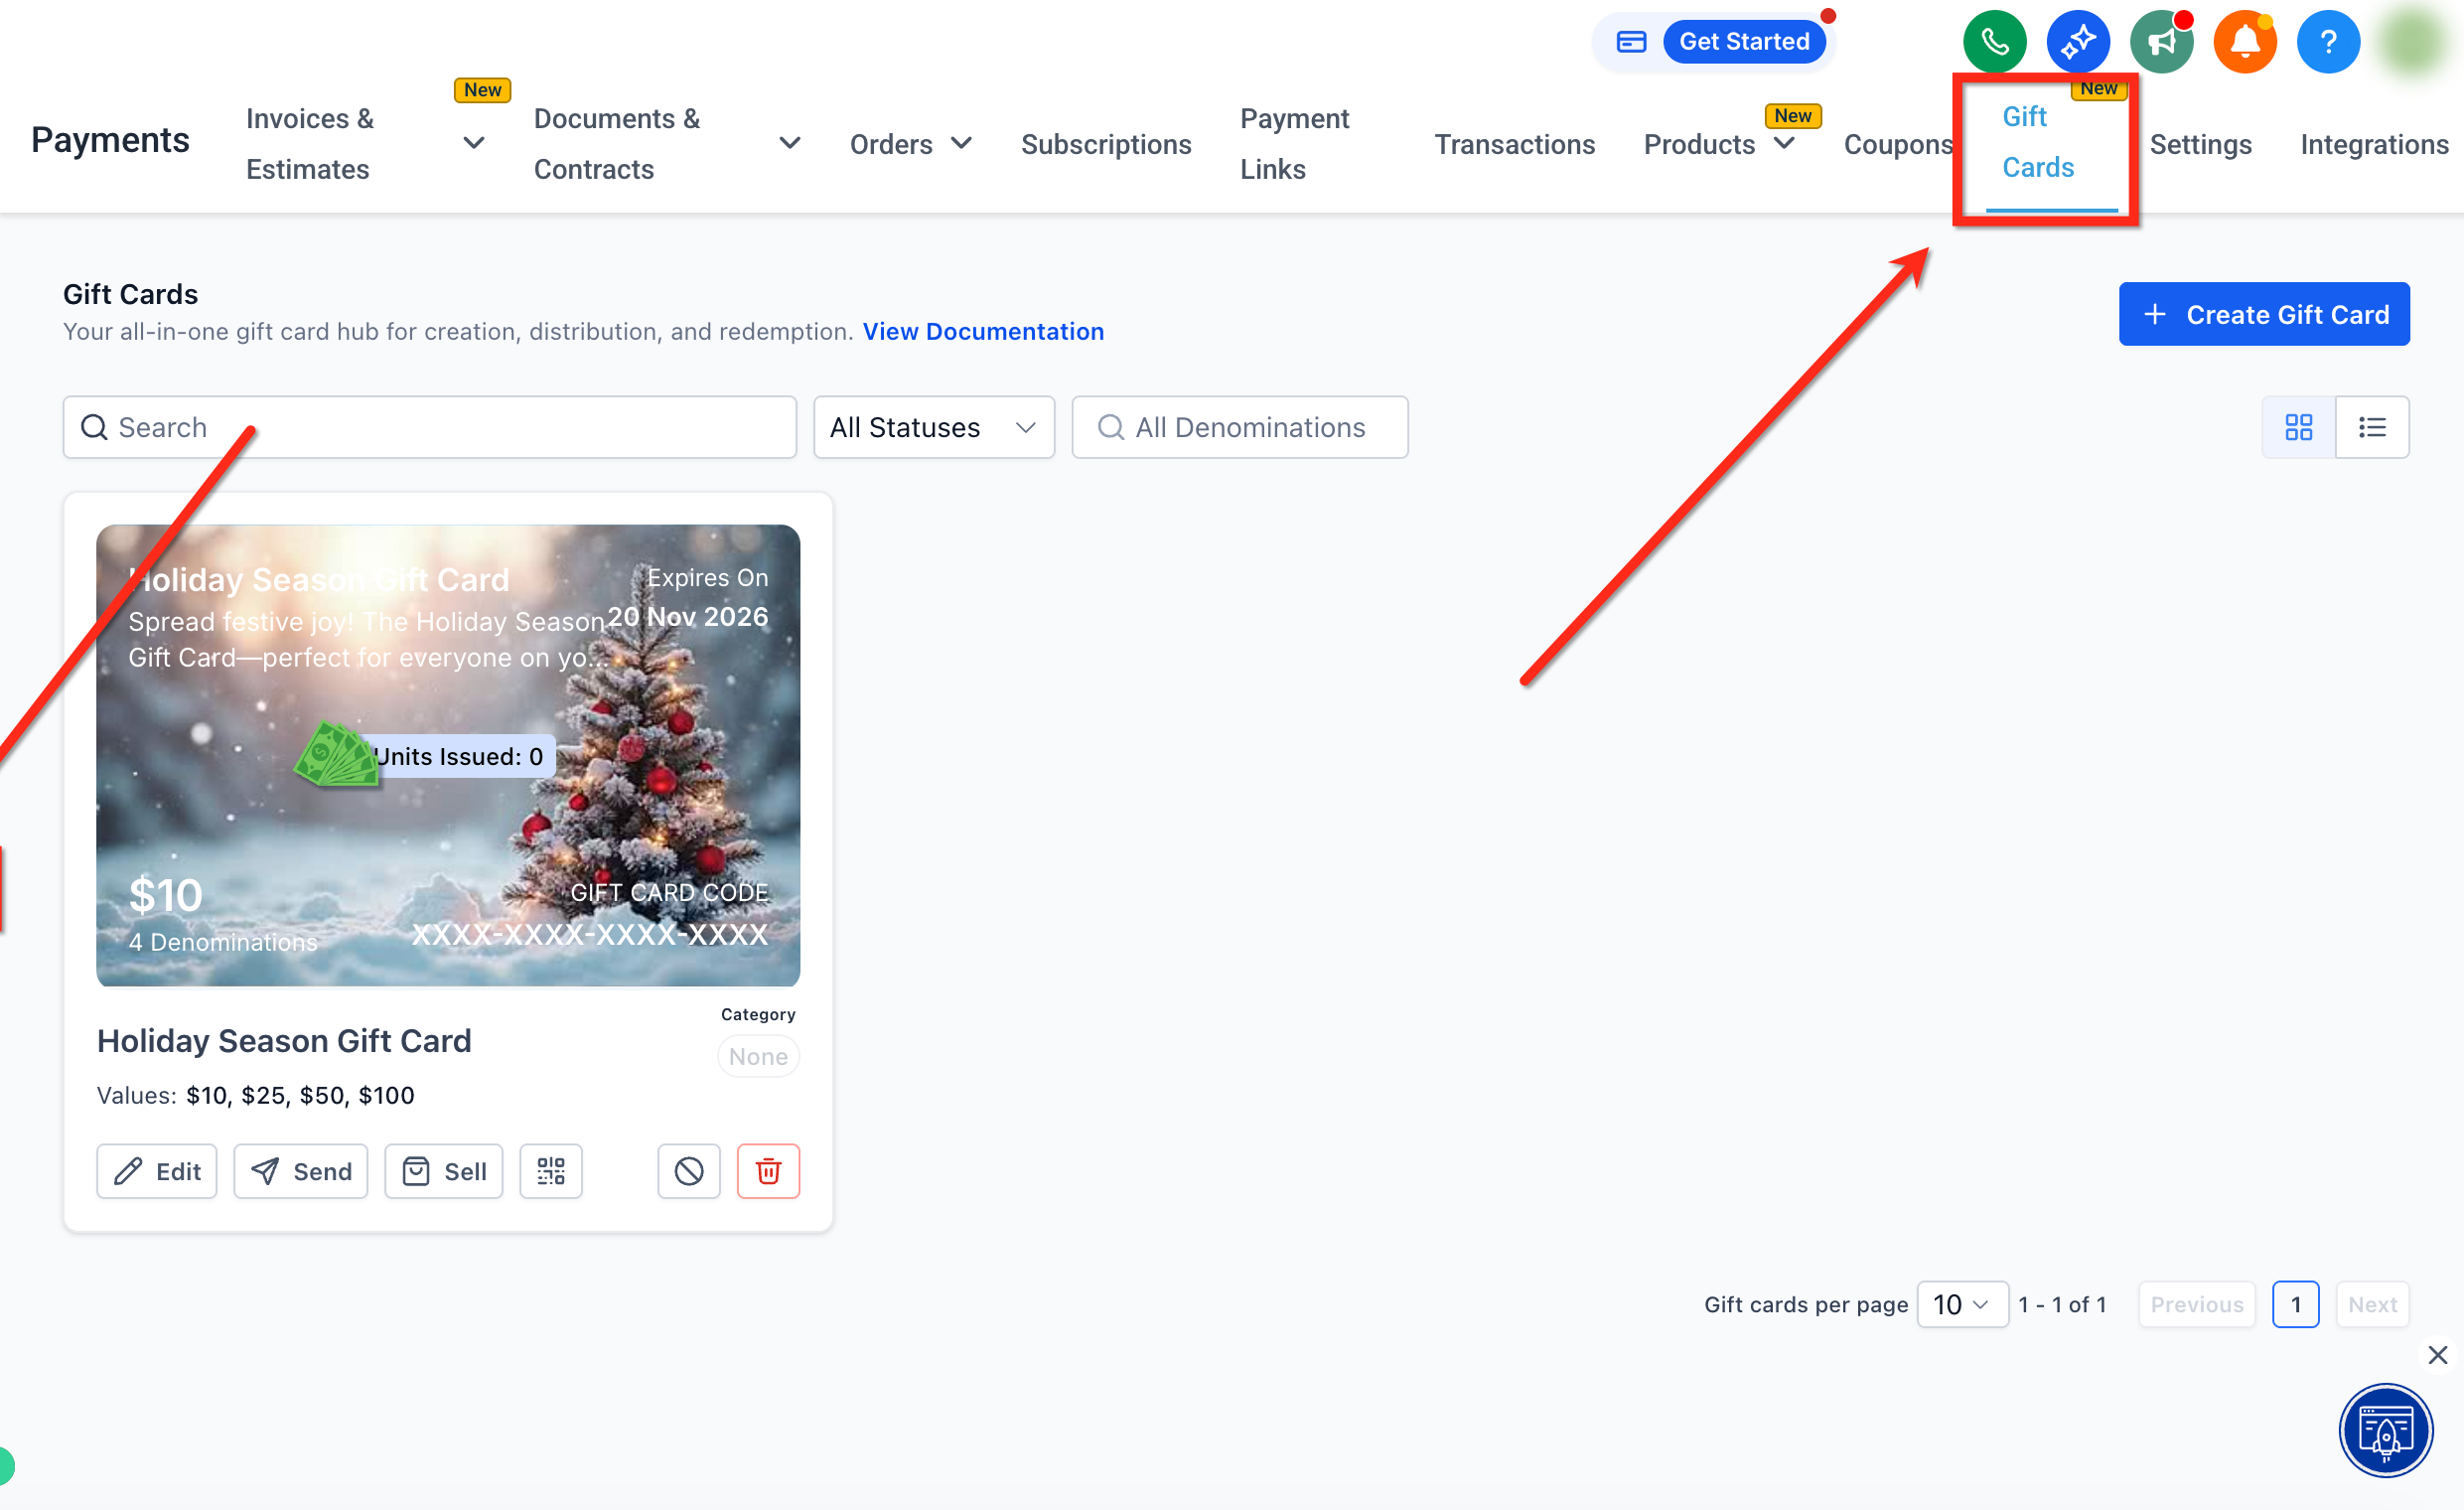
Step 1: In the left menu, click the Payments tab. Then in the top ribbon, click Gift Cards to open the Gift Cards dashboard.
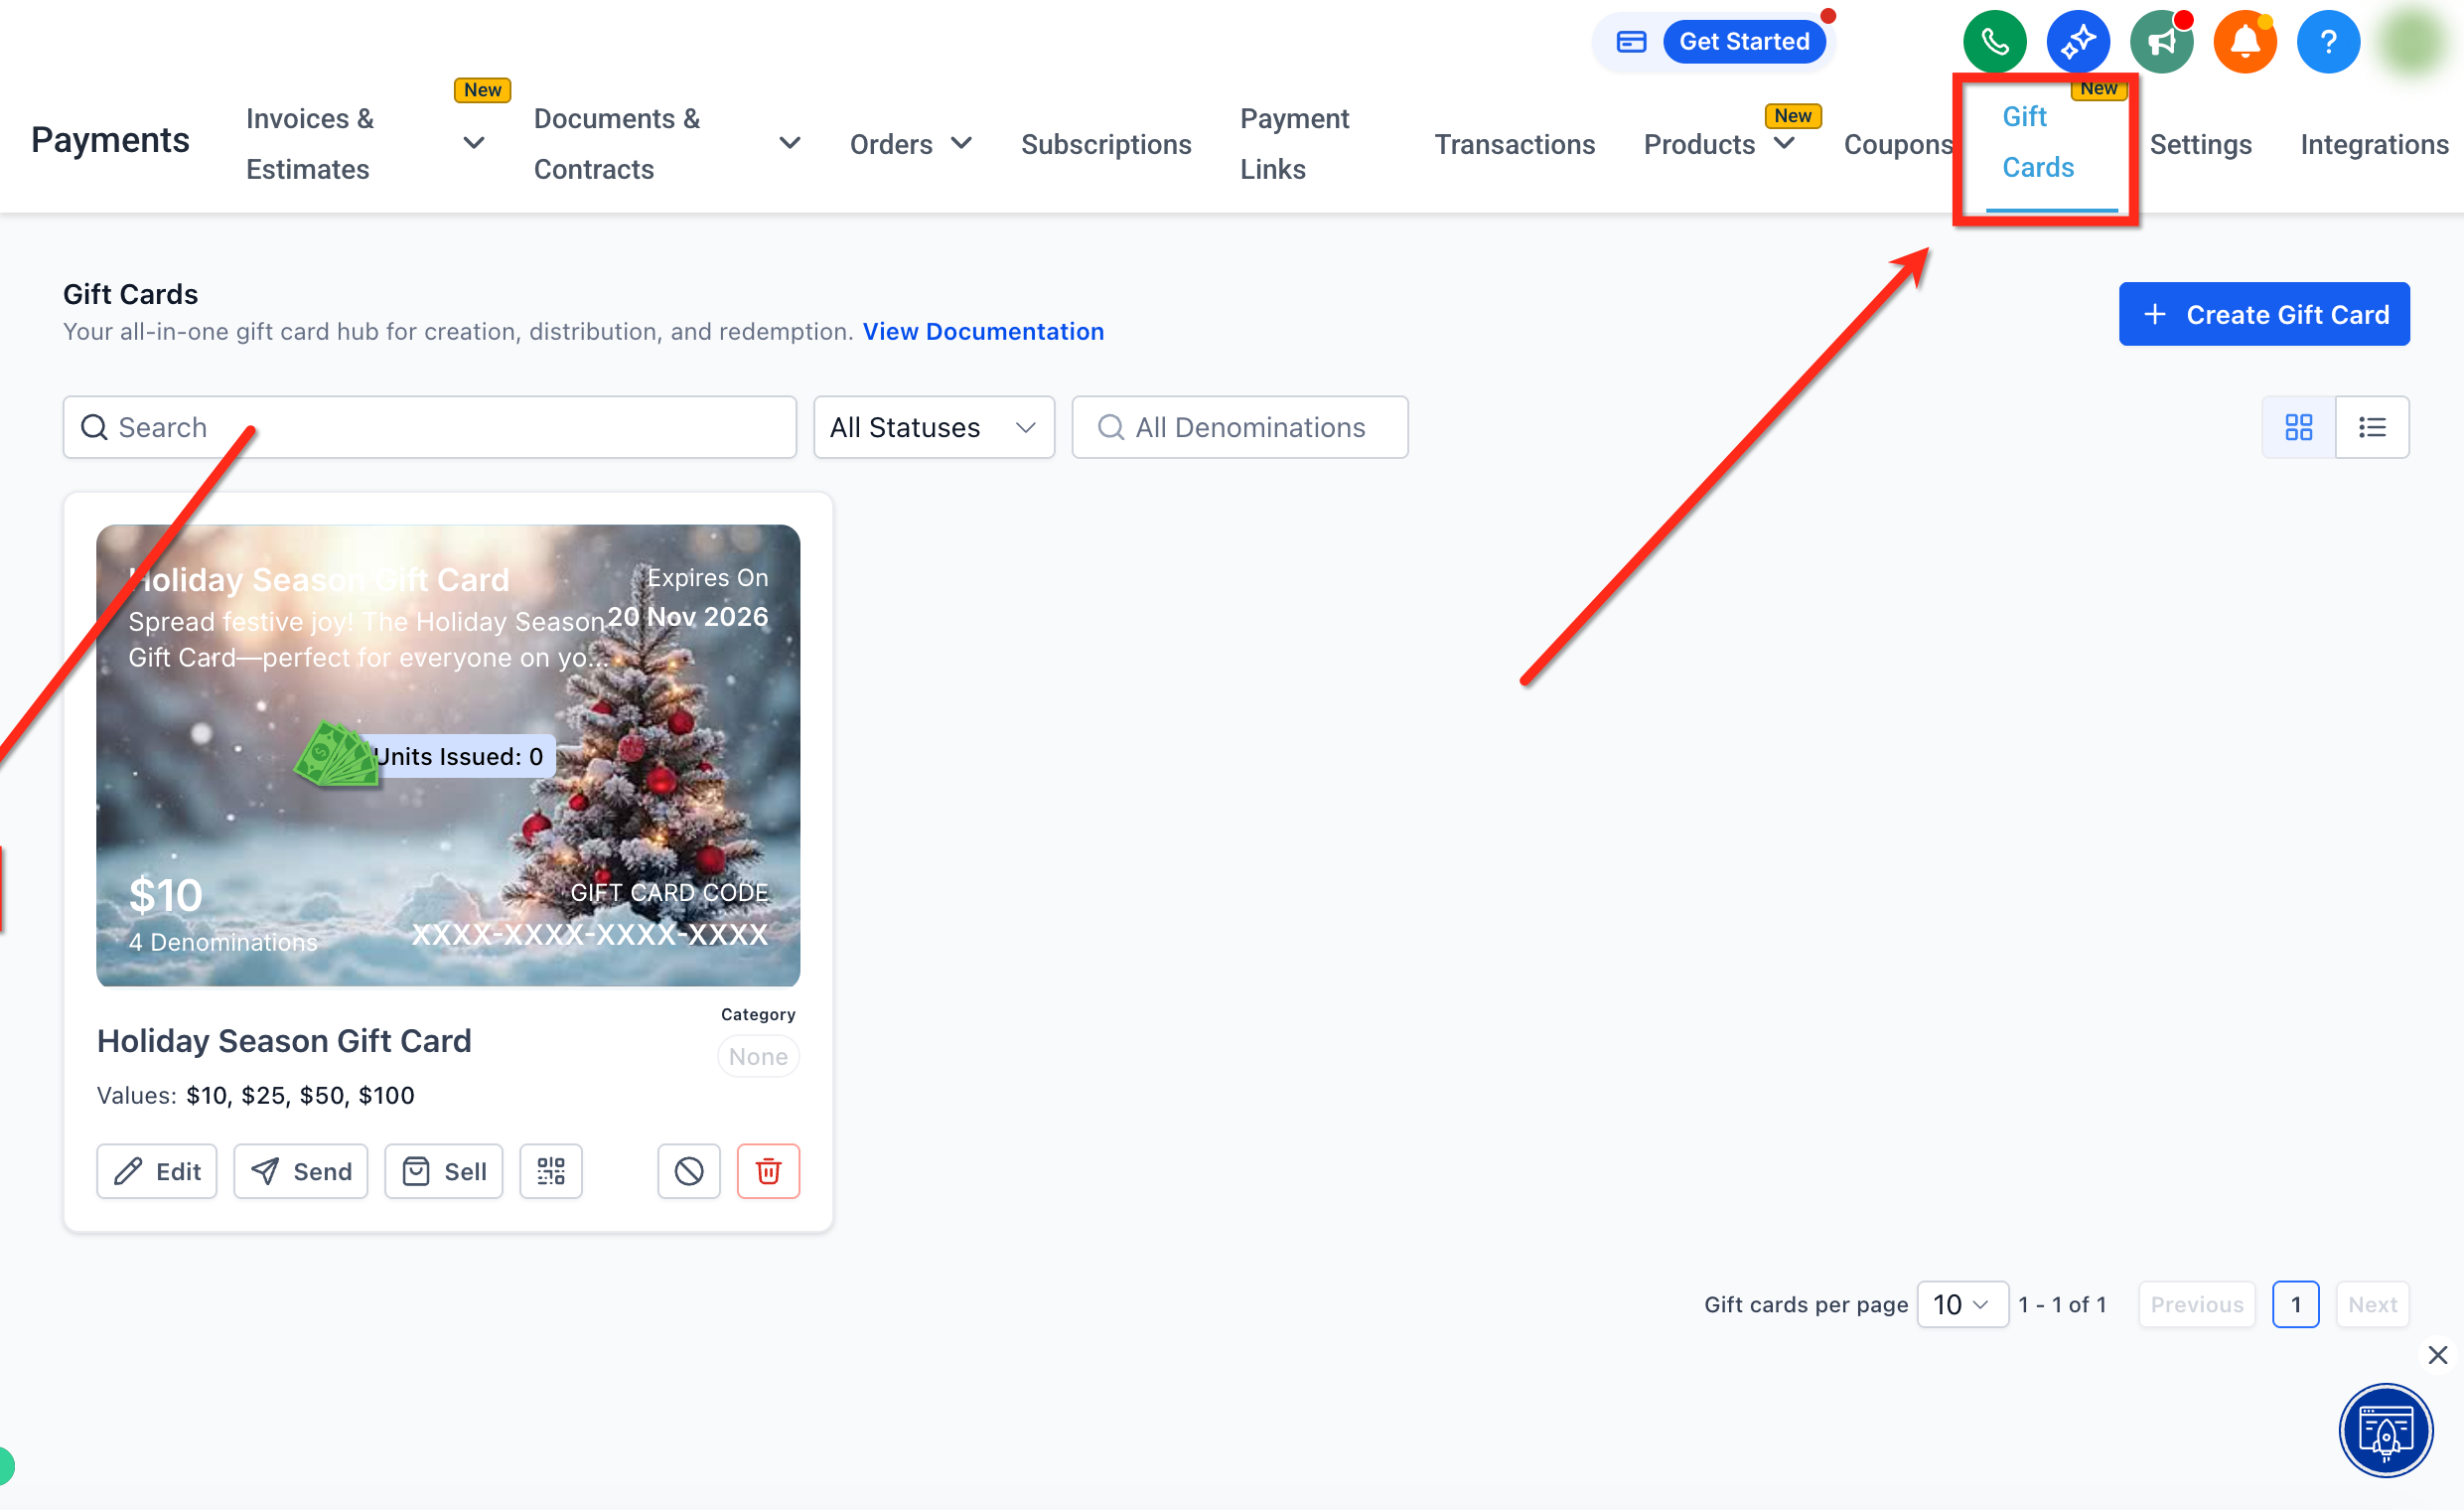
Step 2: Locate the card you want the QR code for and click QR Code on its tile.
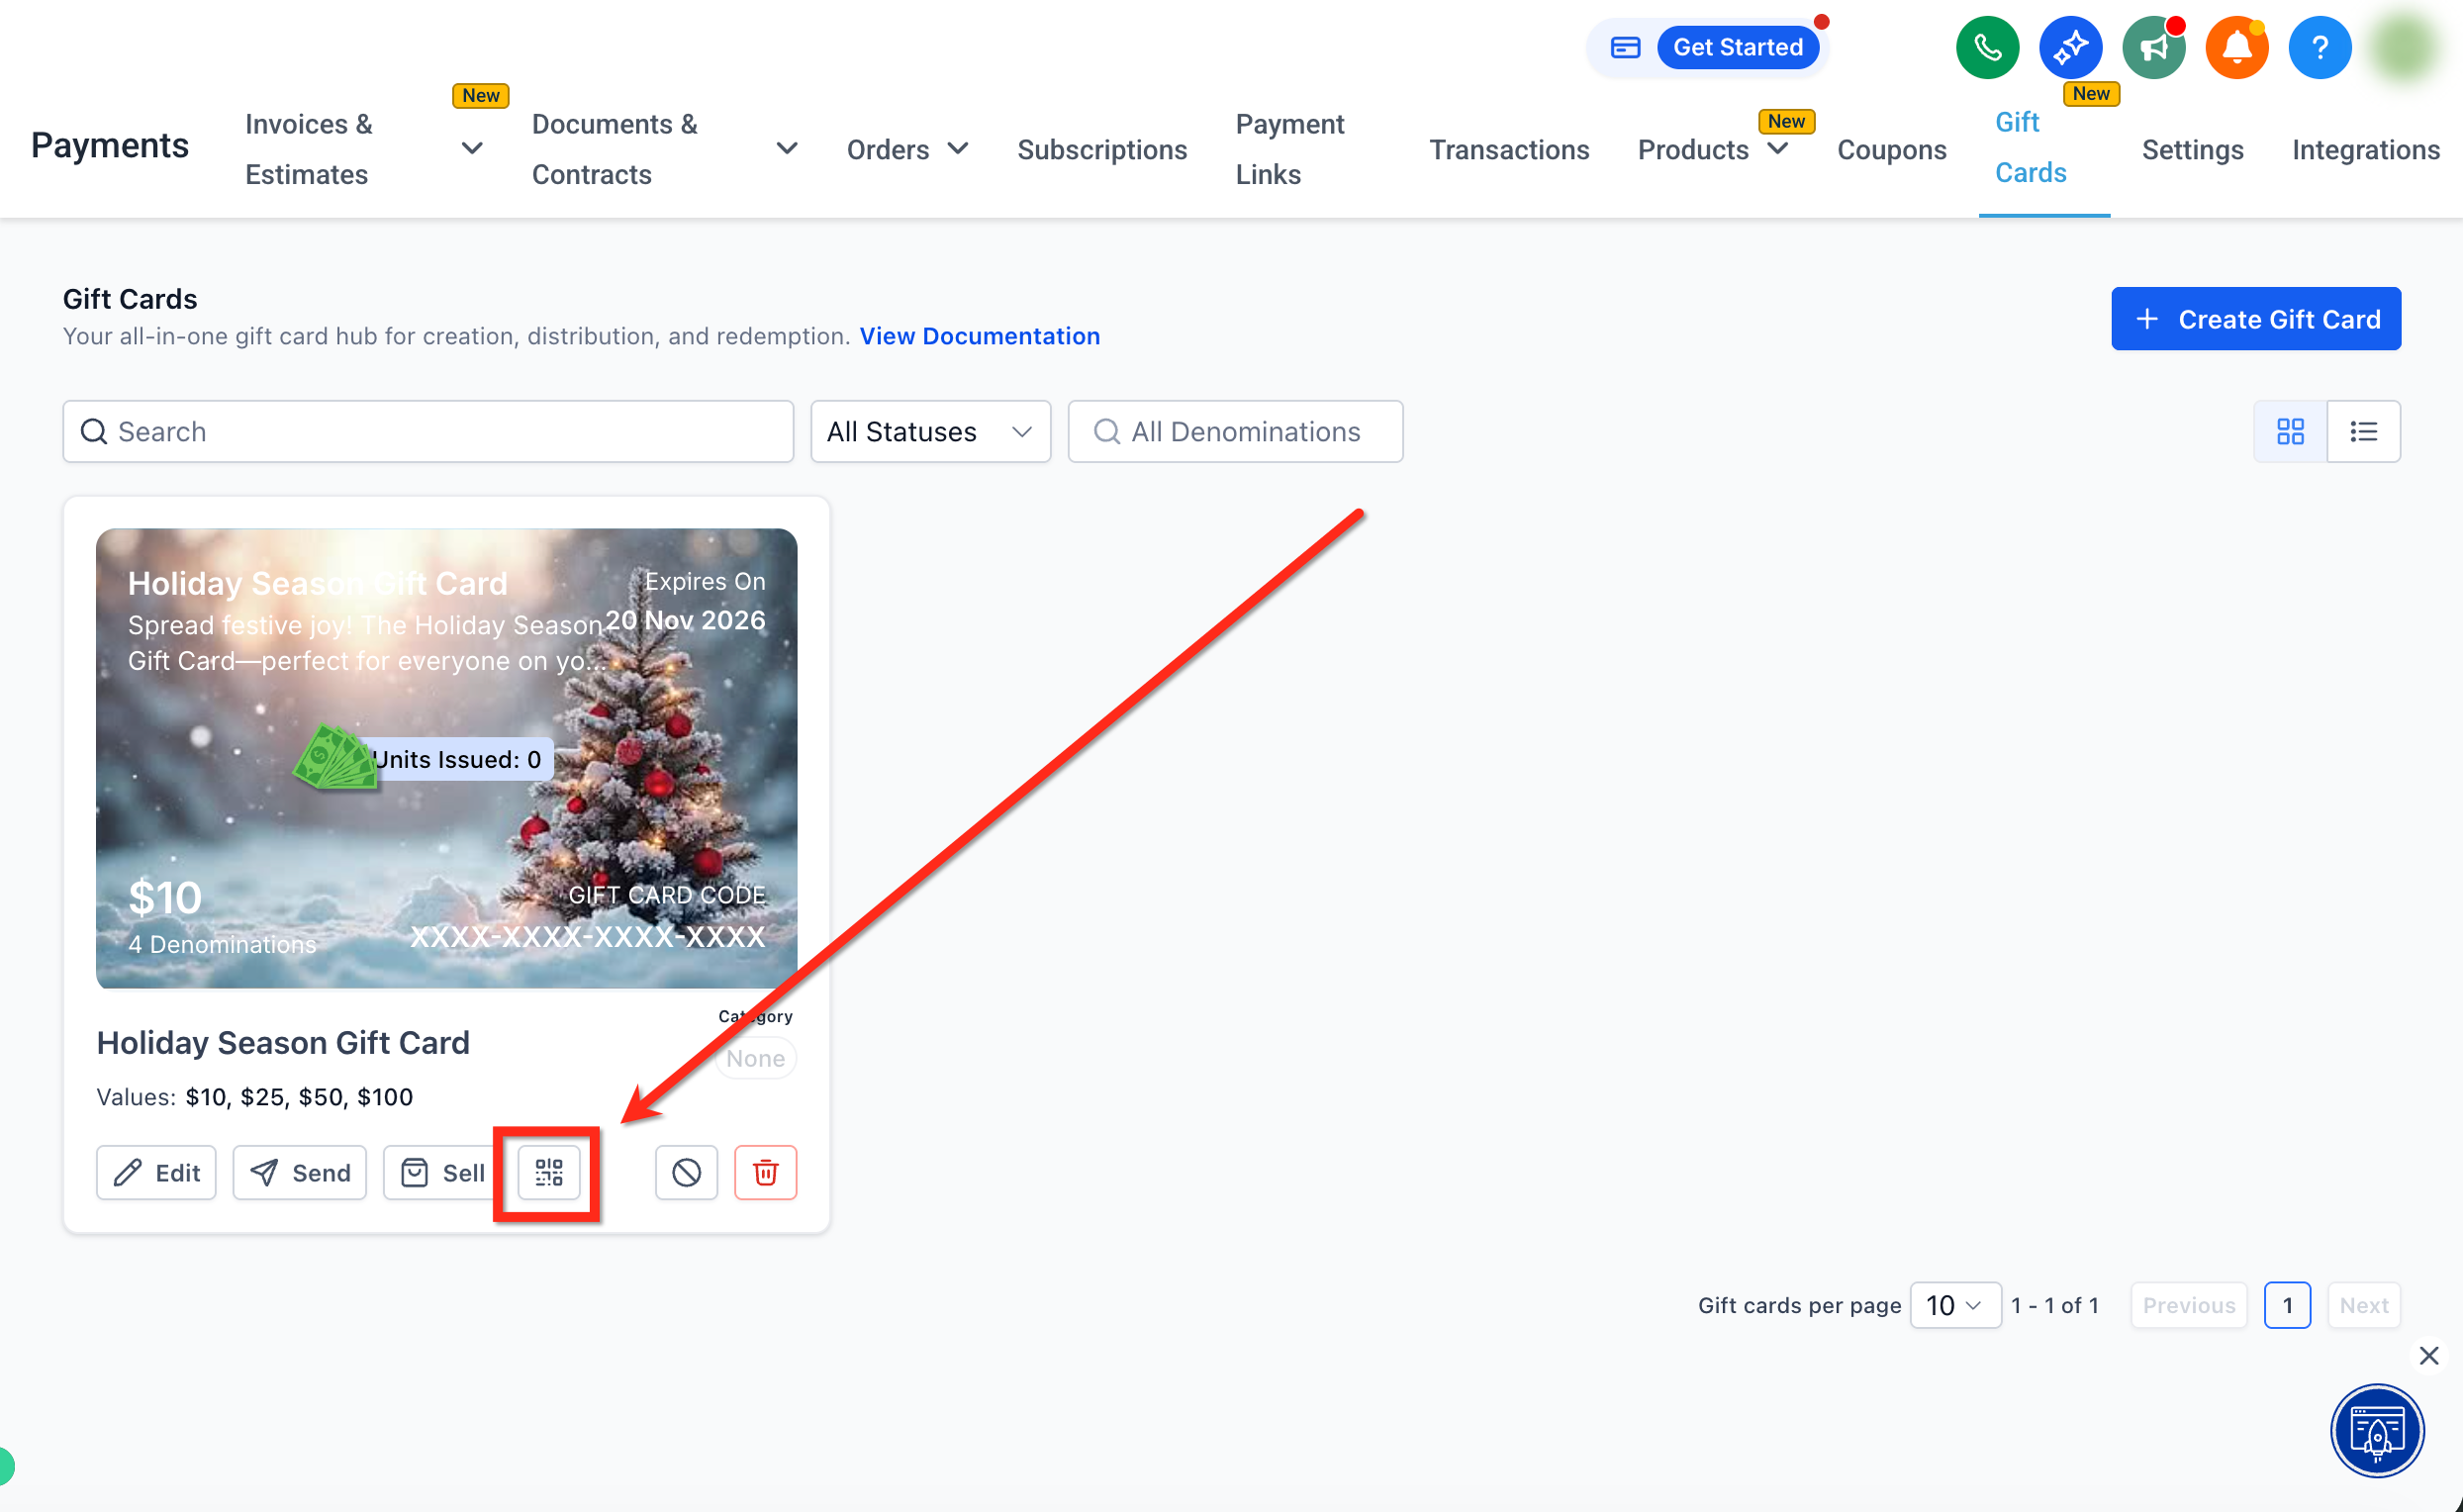
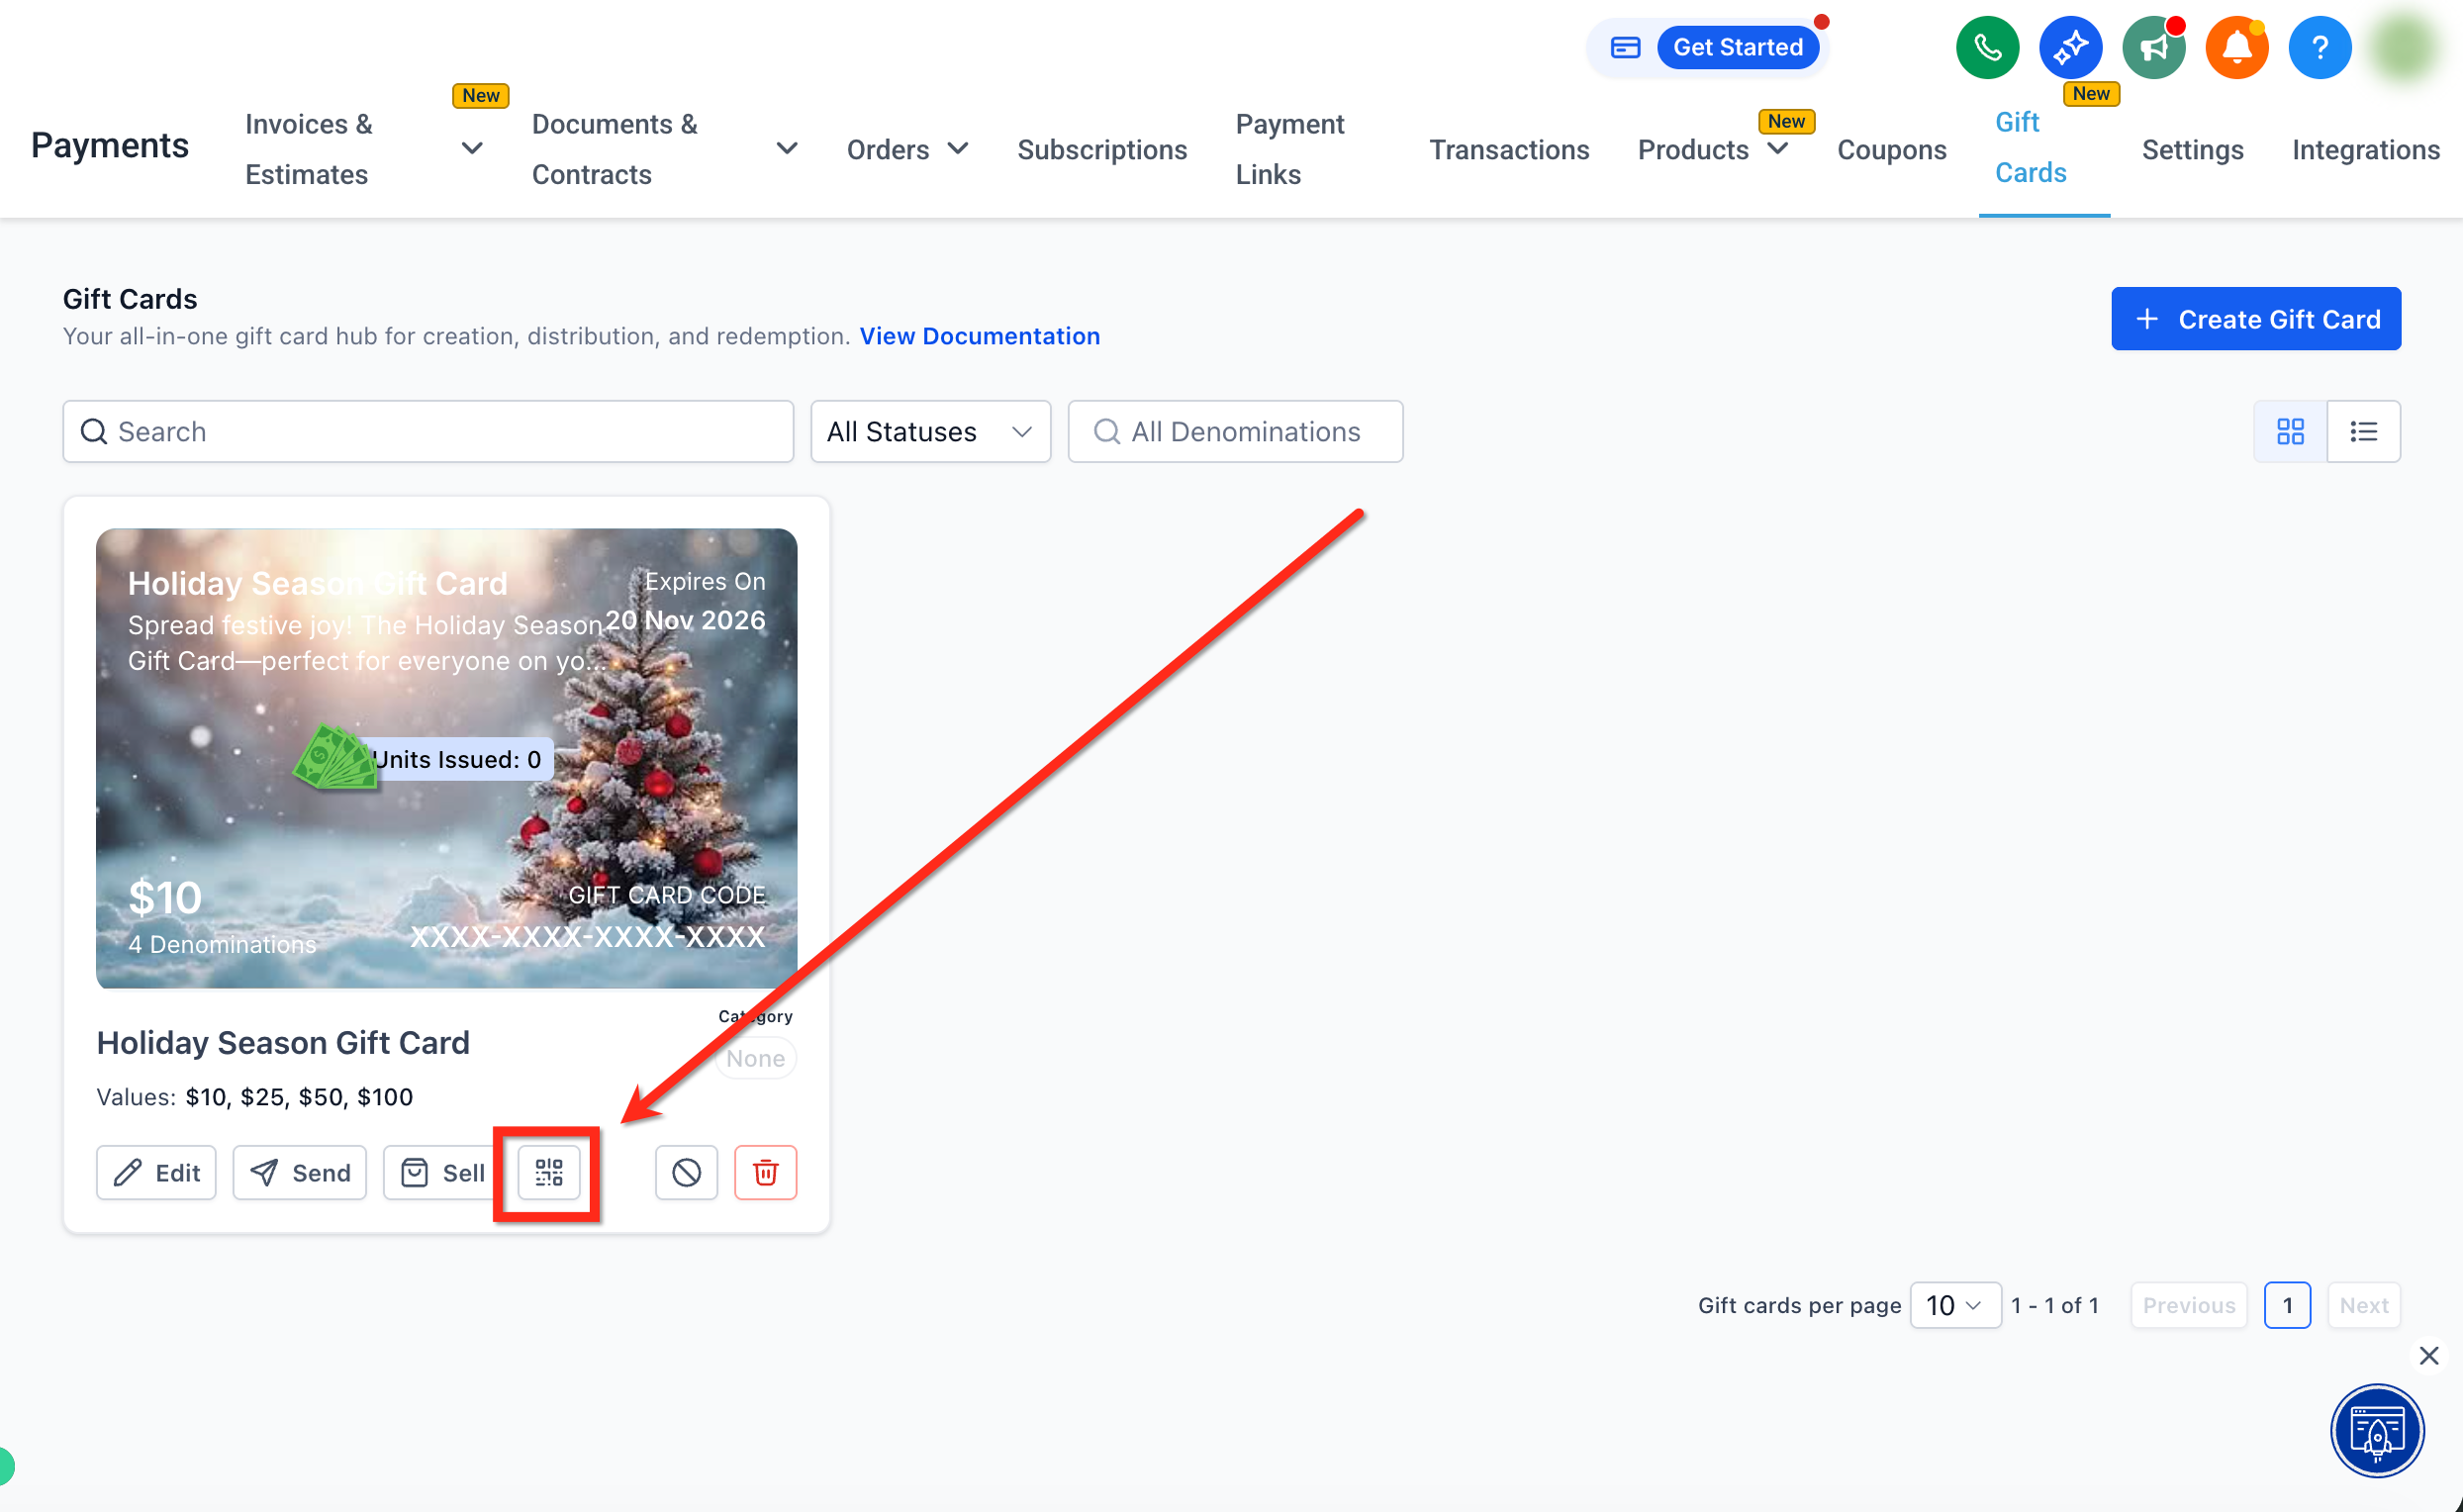
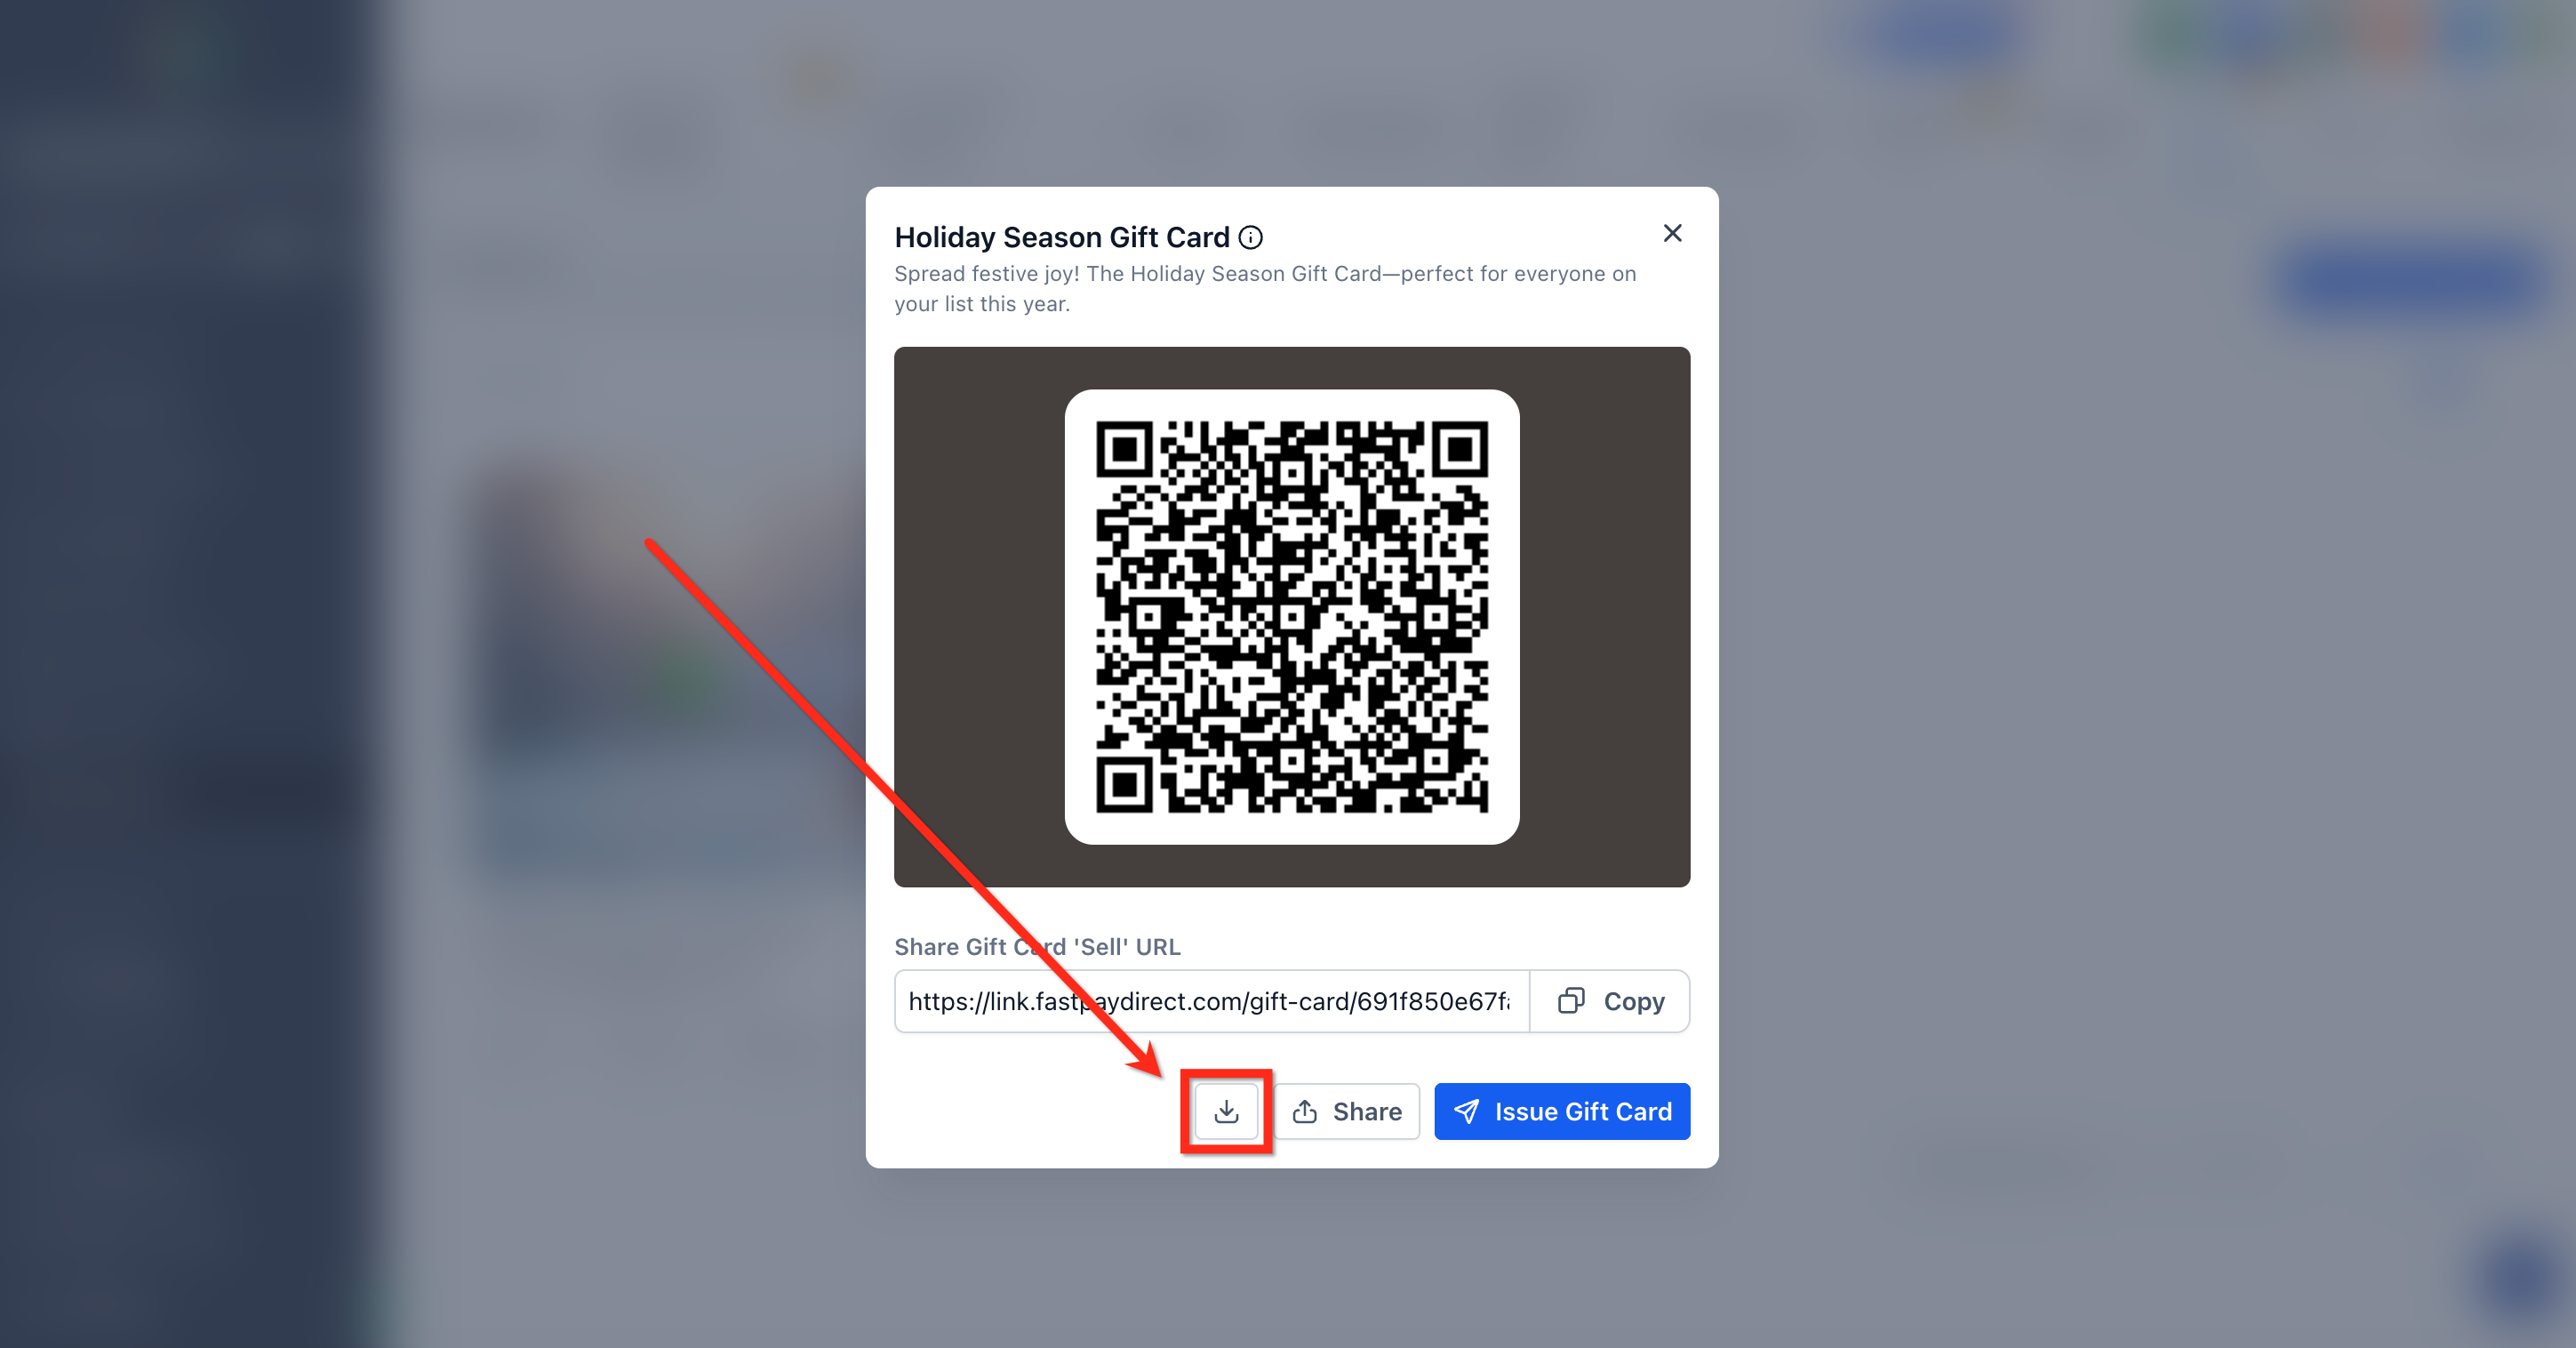
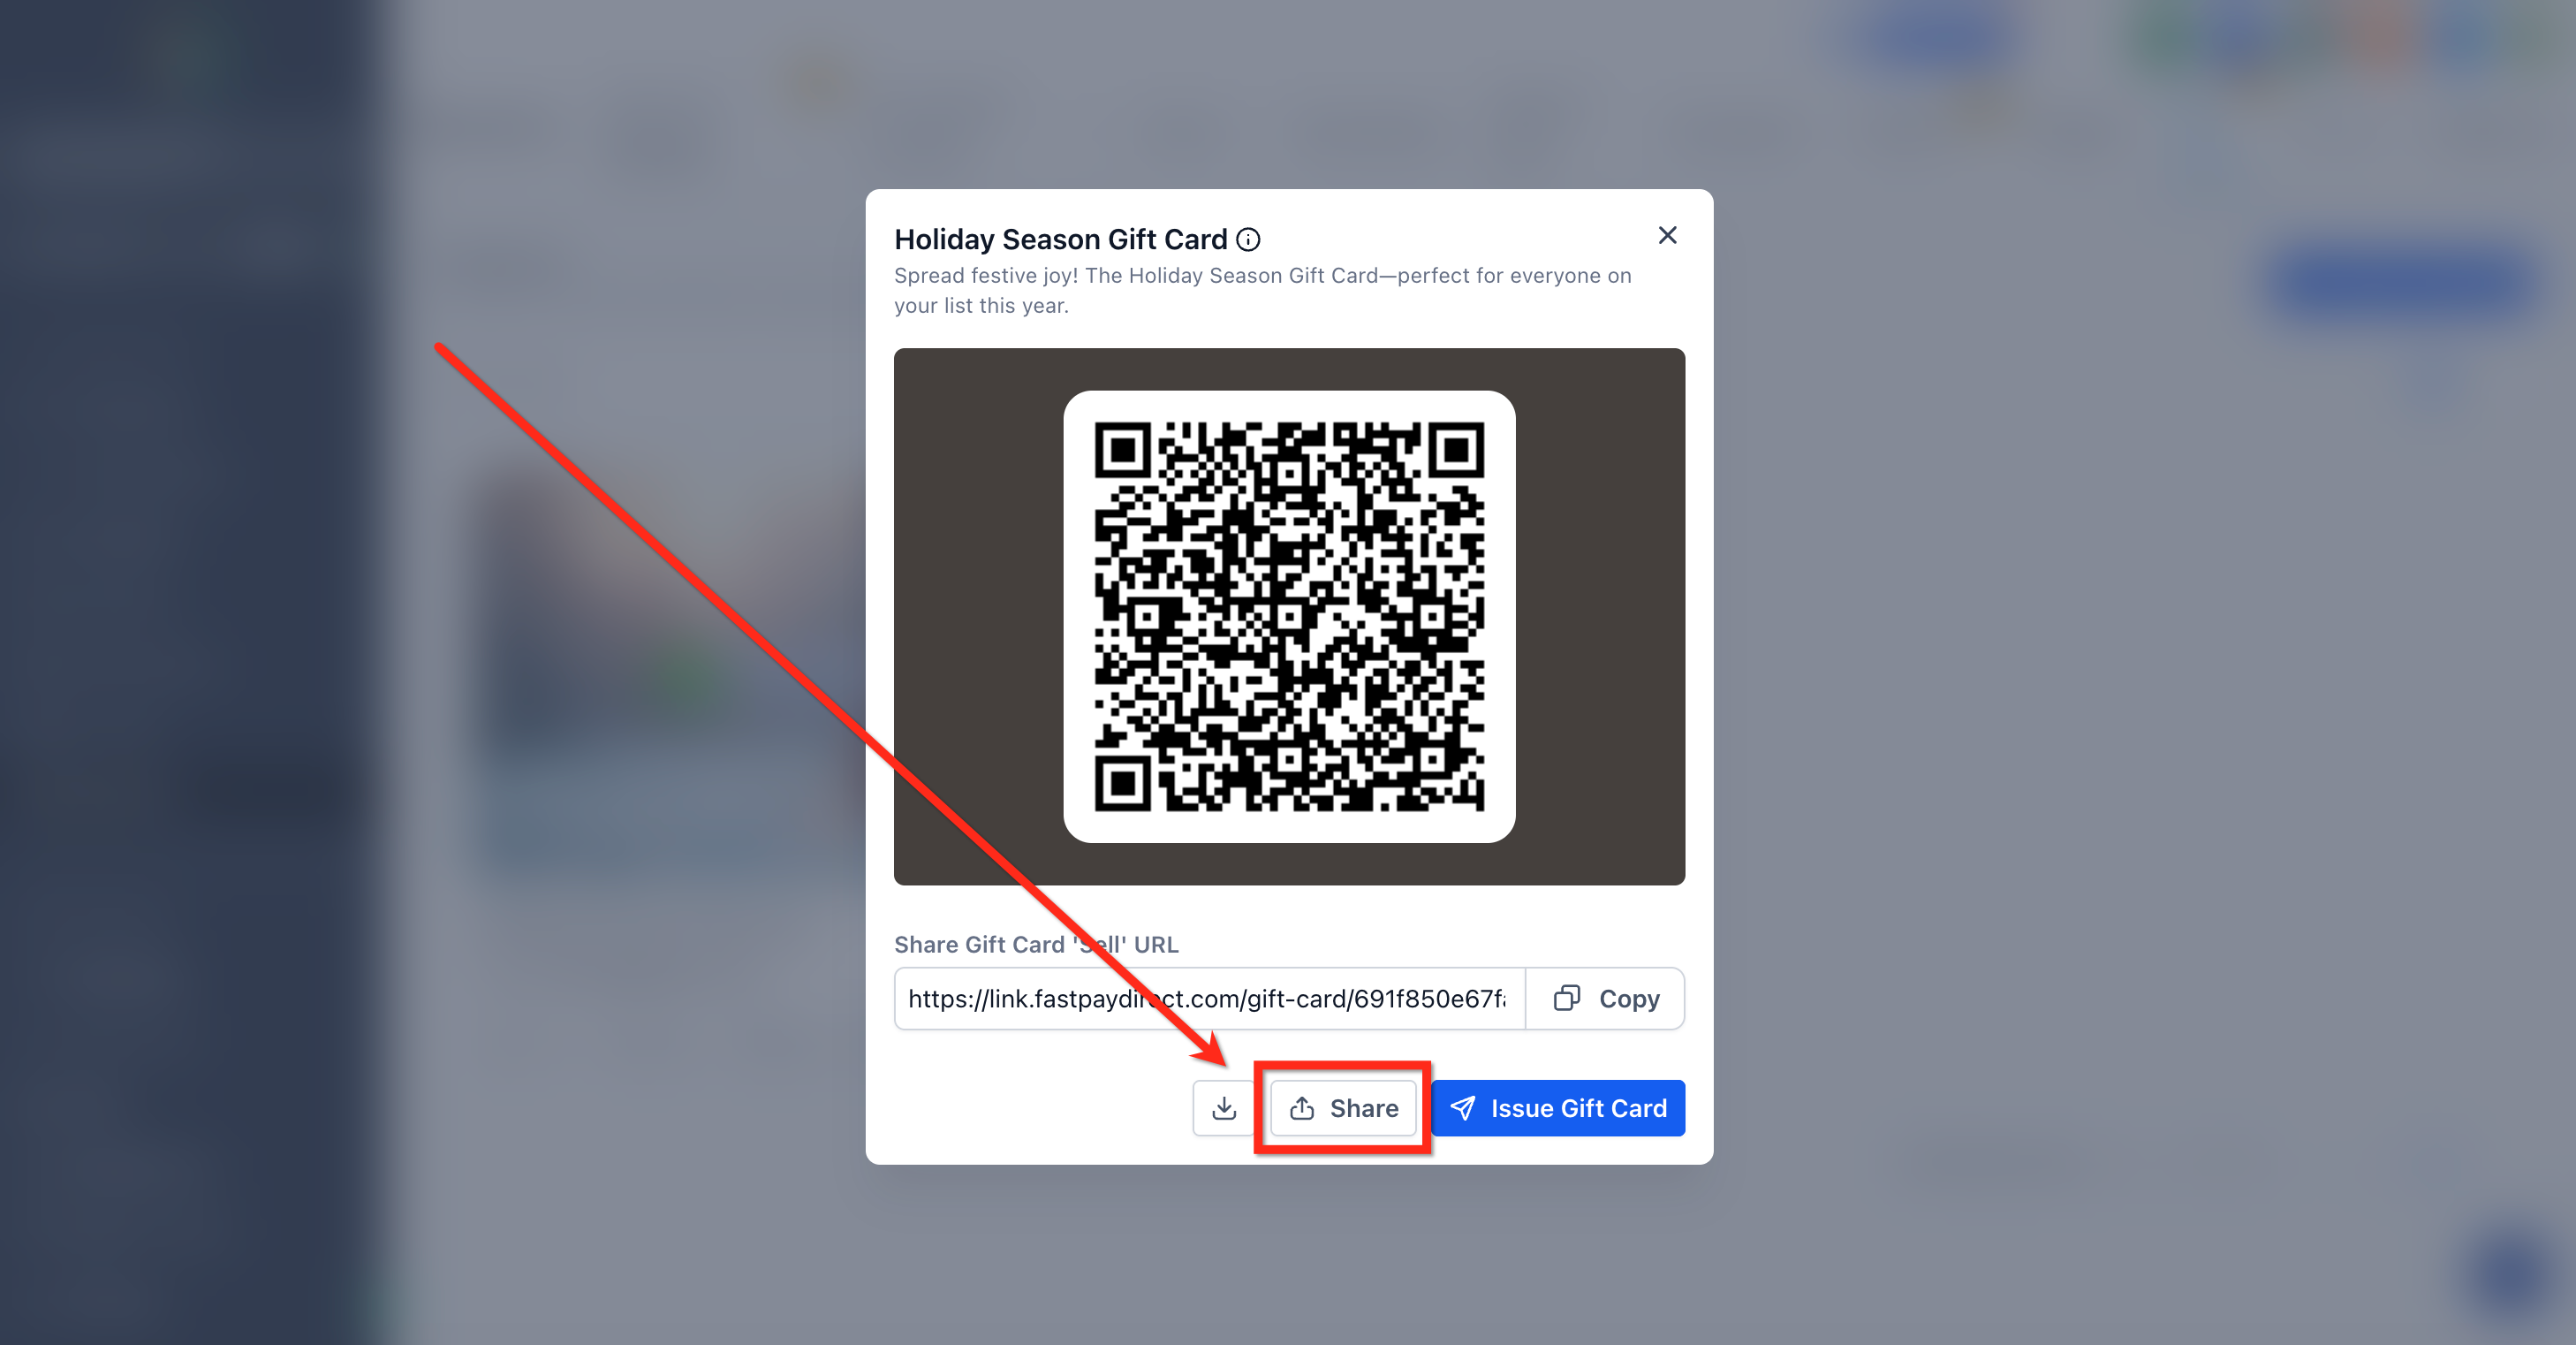
Step 3: From here you can download and share the QR code.
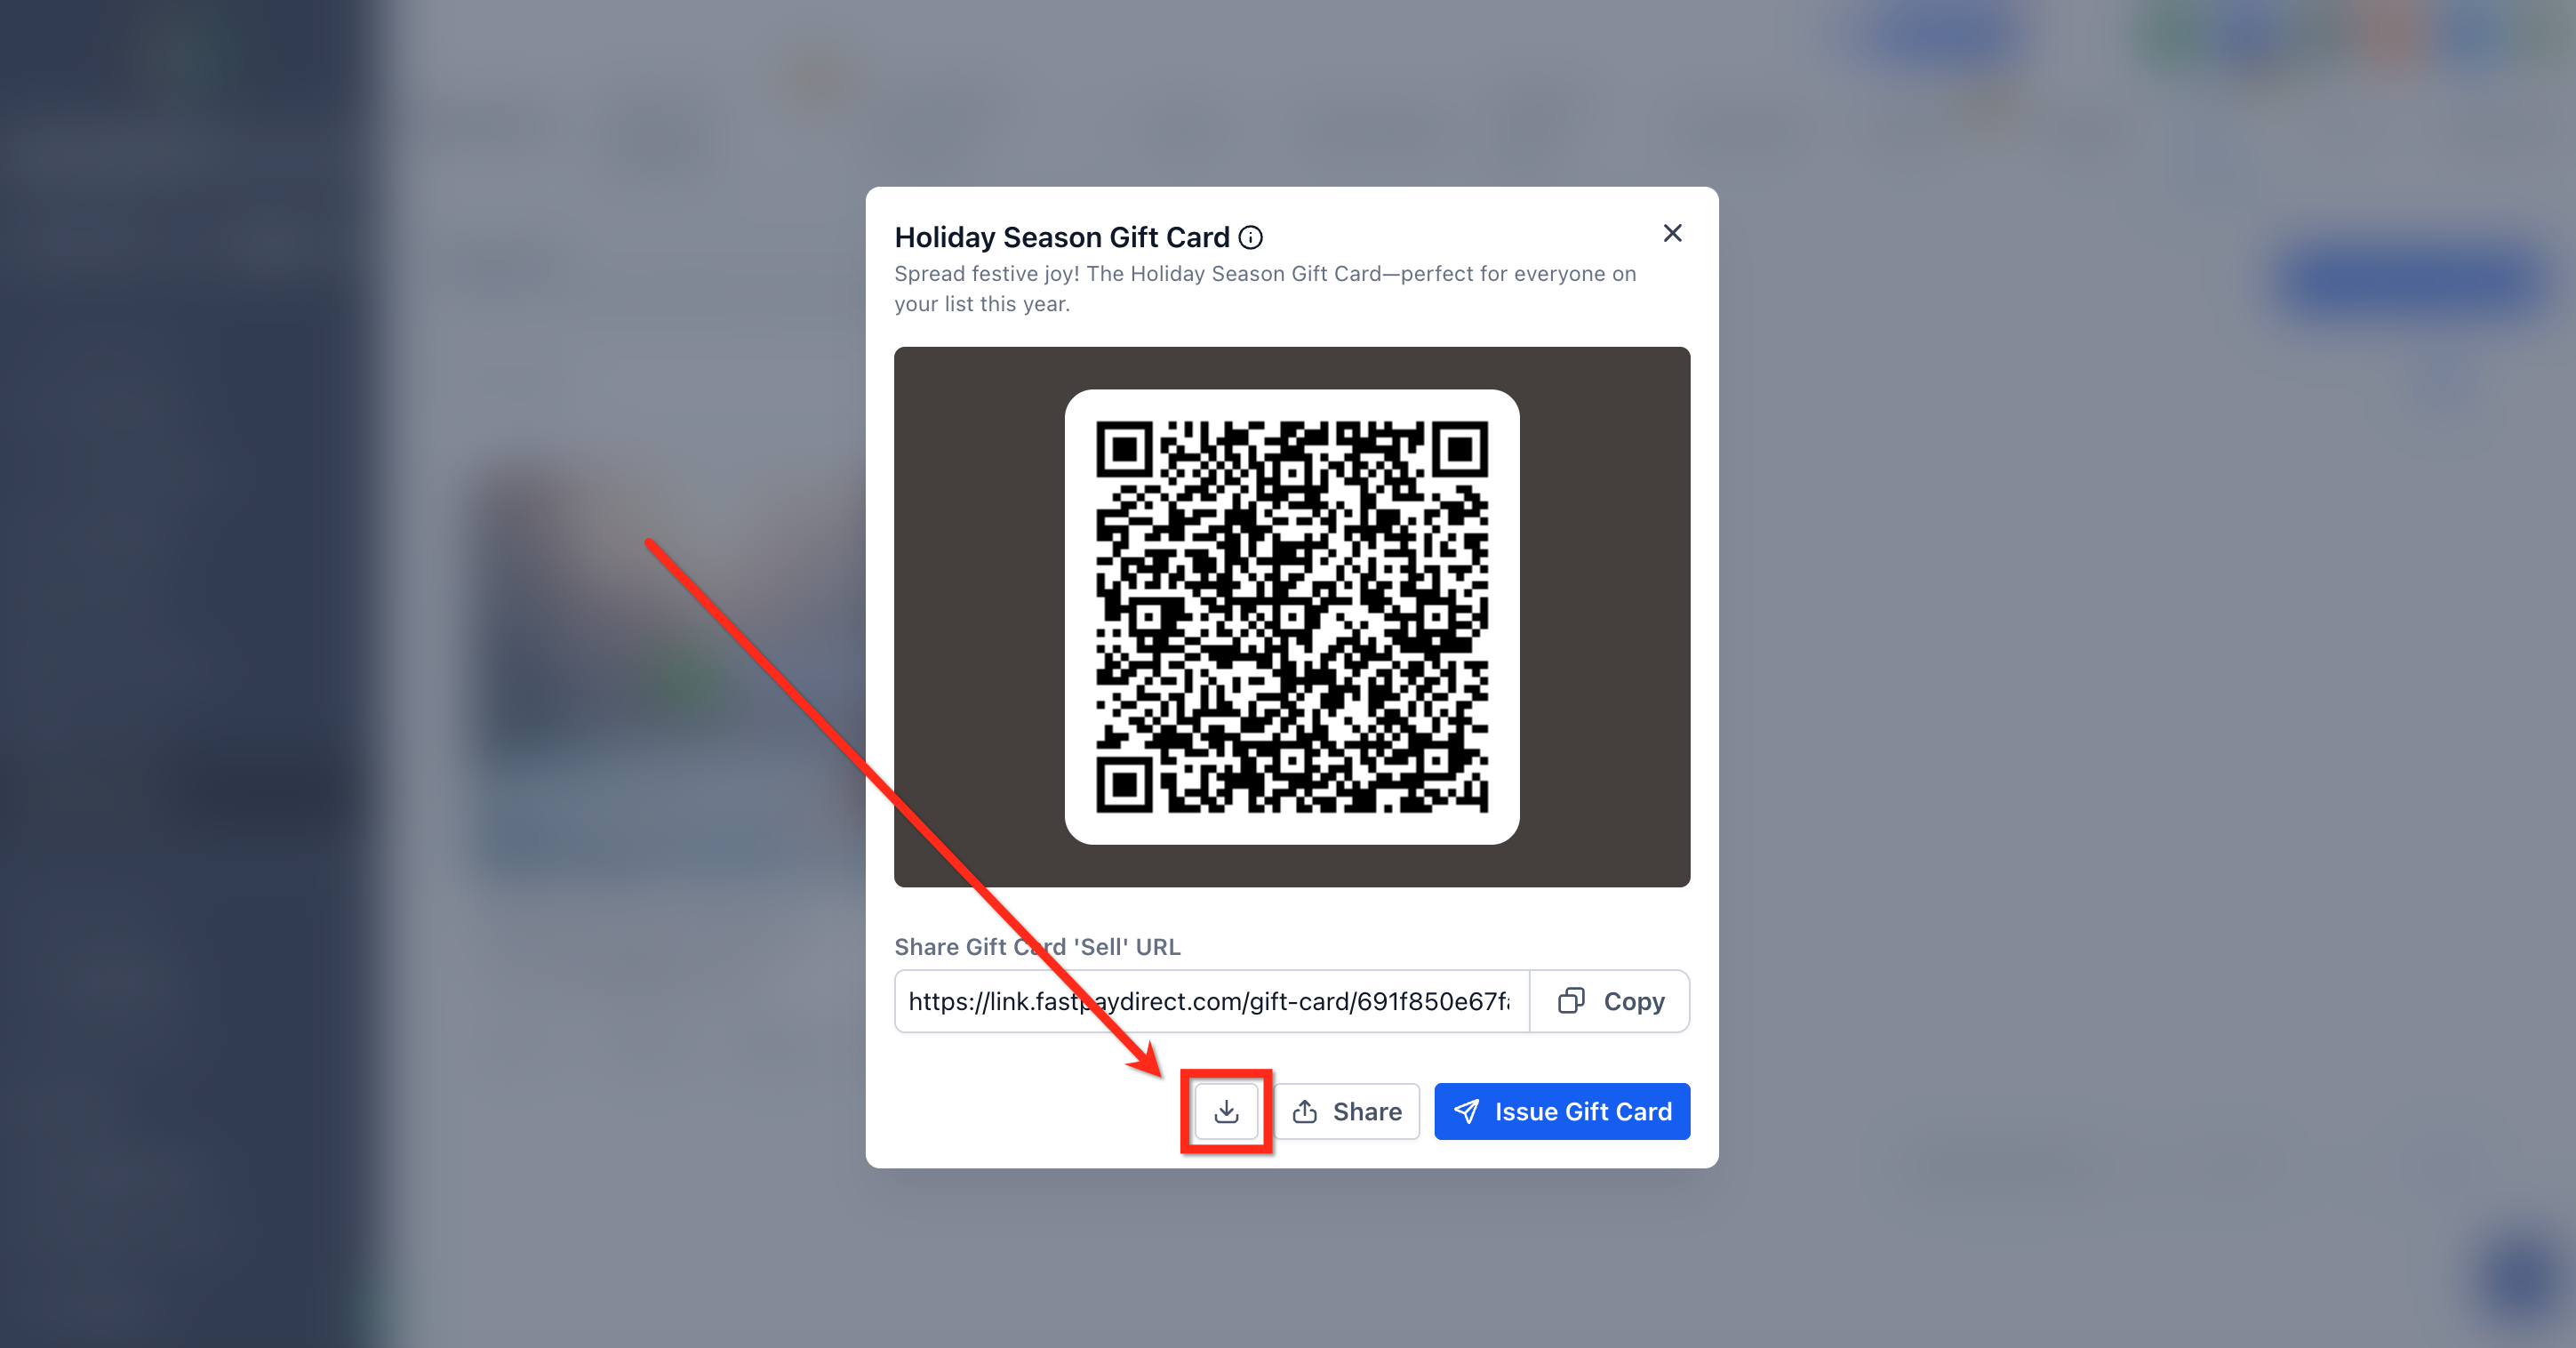
Click Download to save the QR image. Use this file in print materials and in-office campaigns.
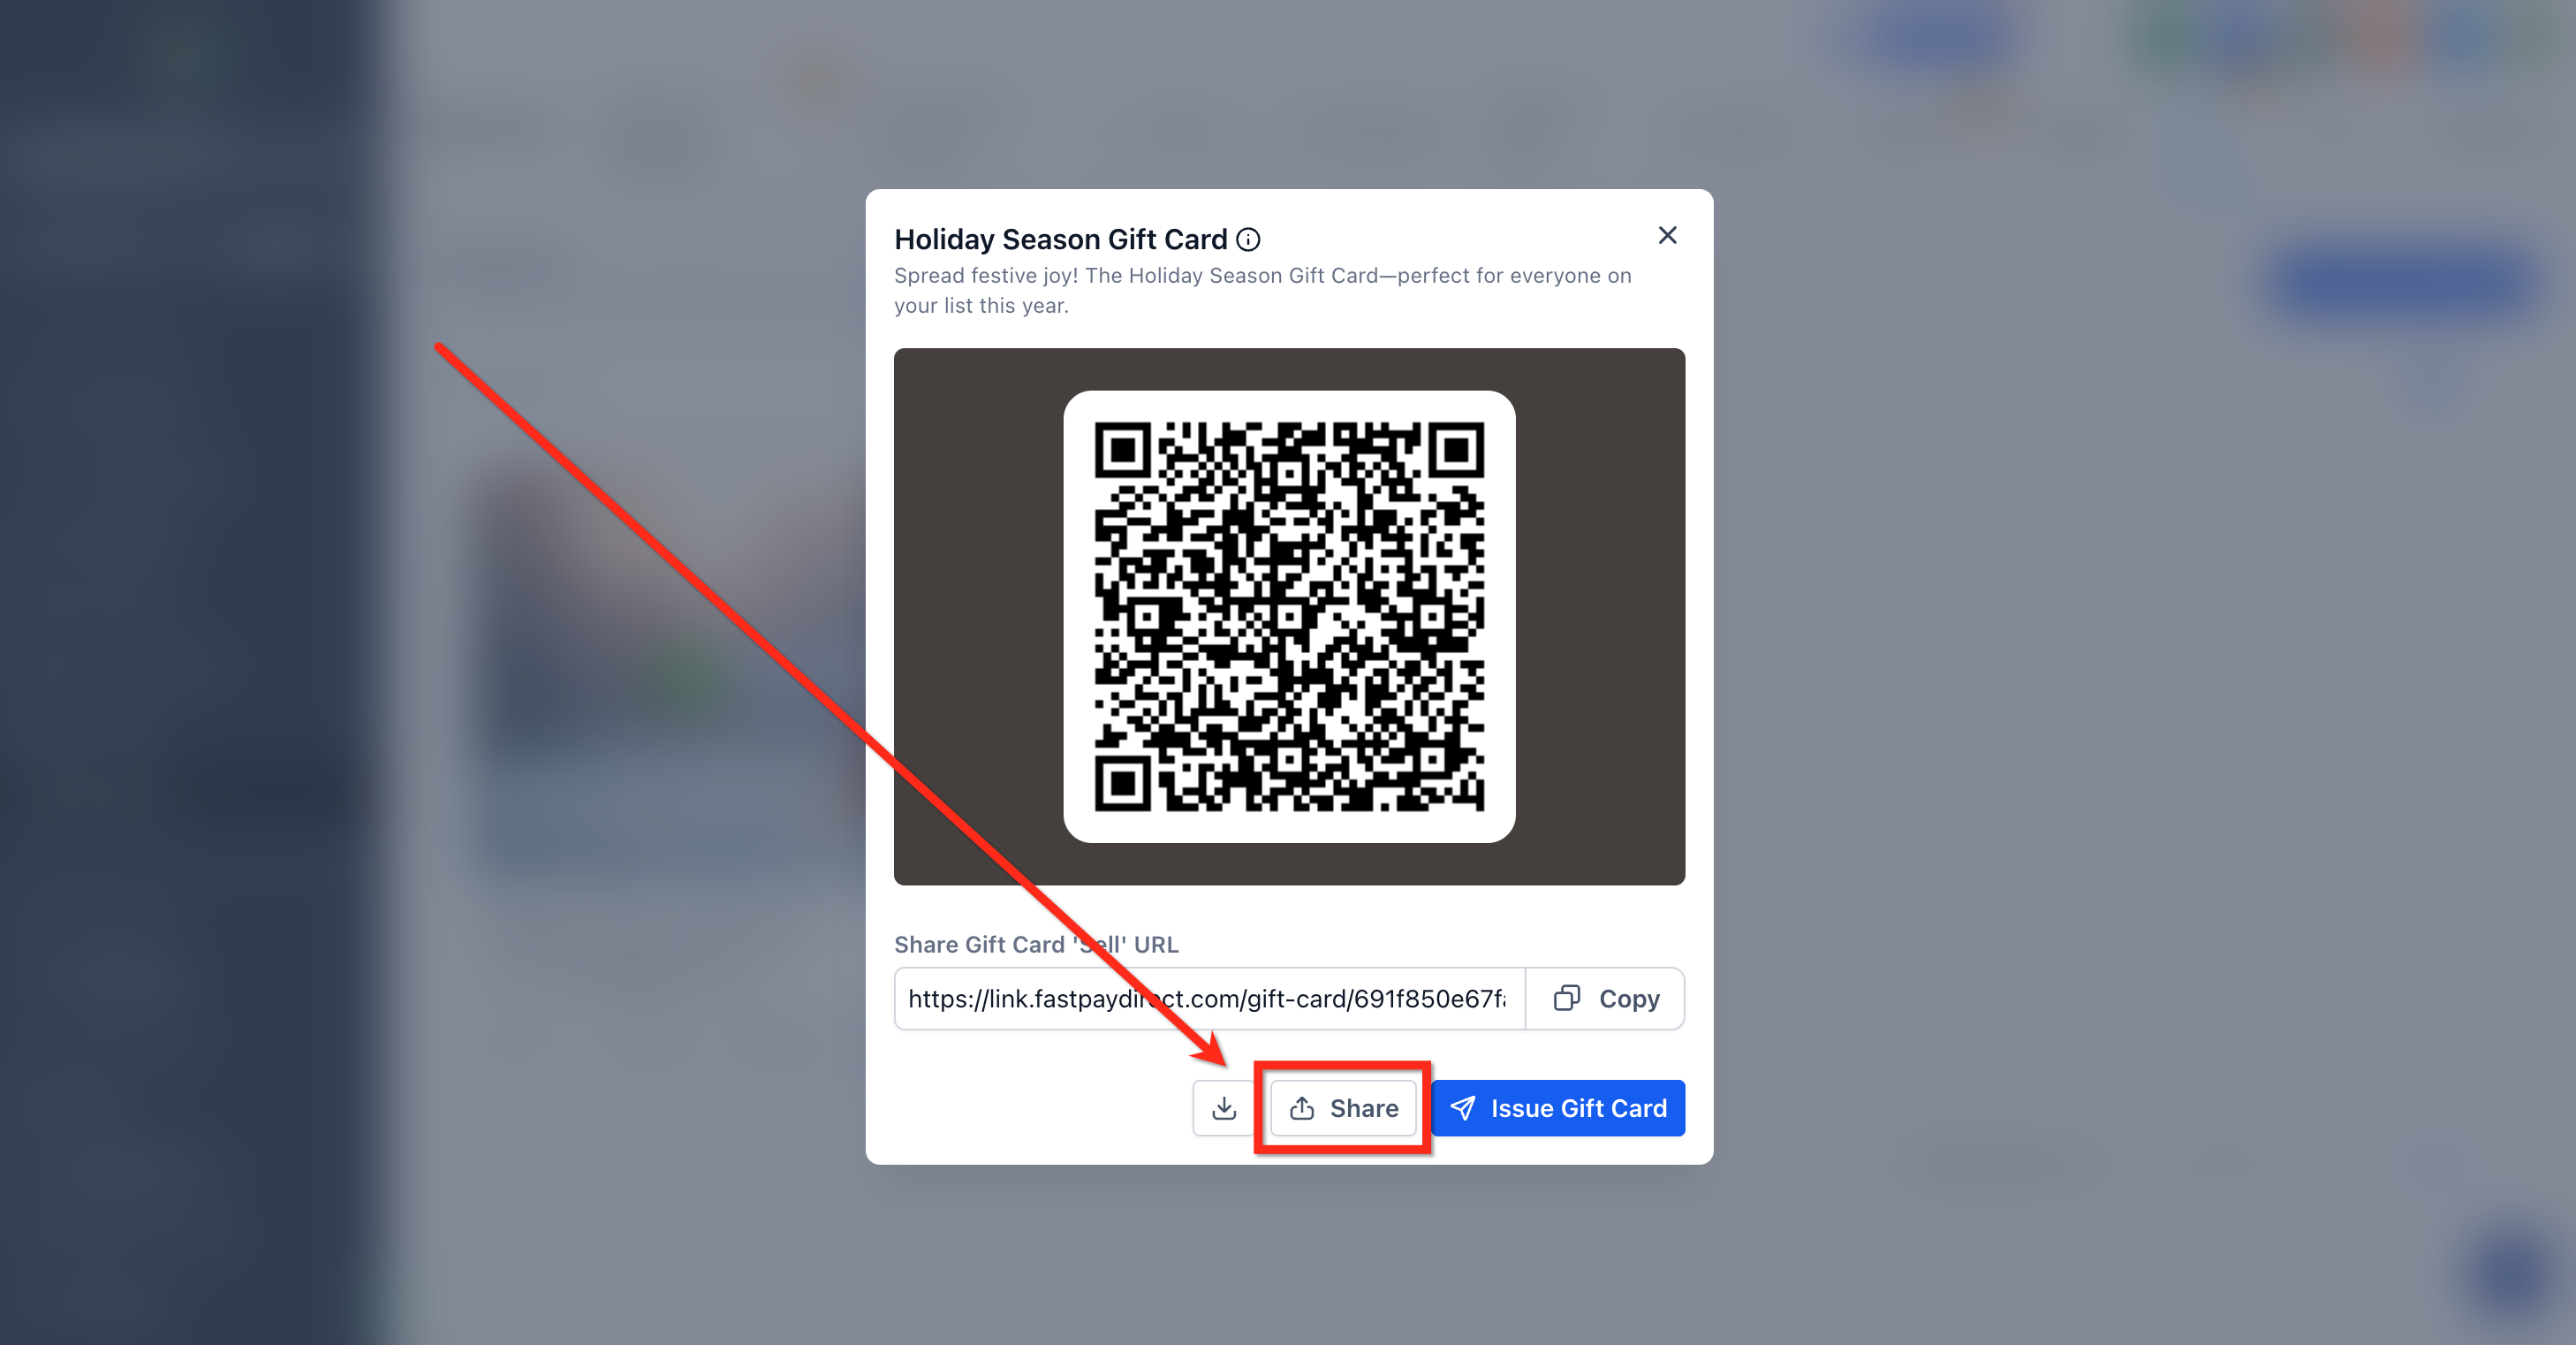
Click Share, then choose Copy from the dropdown to copy the QR code link so you can share it directly.
Gift Cards can be sold as a product on any checkout that supports product selection, which gives you full flexibility to bundle a gift card alongside your other services. Adding a Gift Card product is supported in Forms, Funnels, your Store, Payment Links, Invoices, and Calendars (if the calendar supports products).
Use the Payment Element in Forms to sell gift cards in lead capture and lightweight checkout scenarios, collecting payment and selling a gift card in a single form submission.
Step 1: Navigate to Sites > Forms and open an existing form or create a new one.
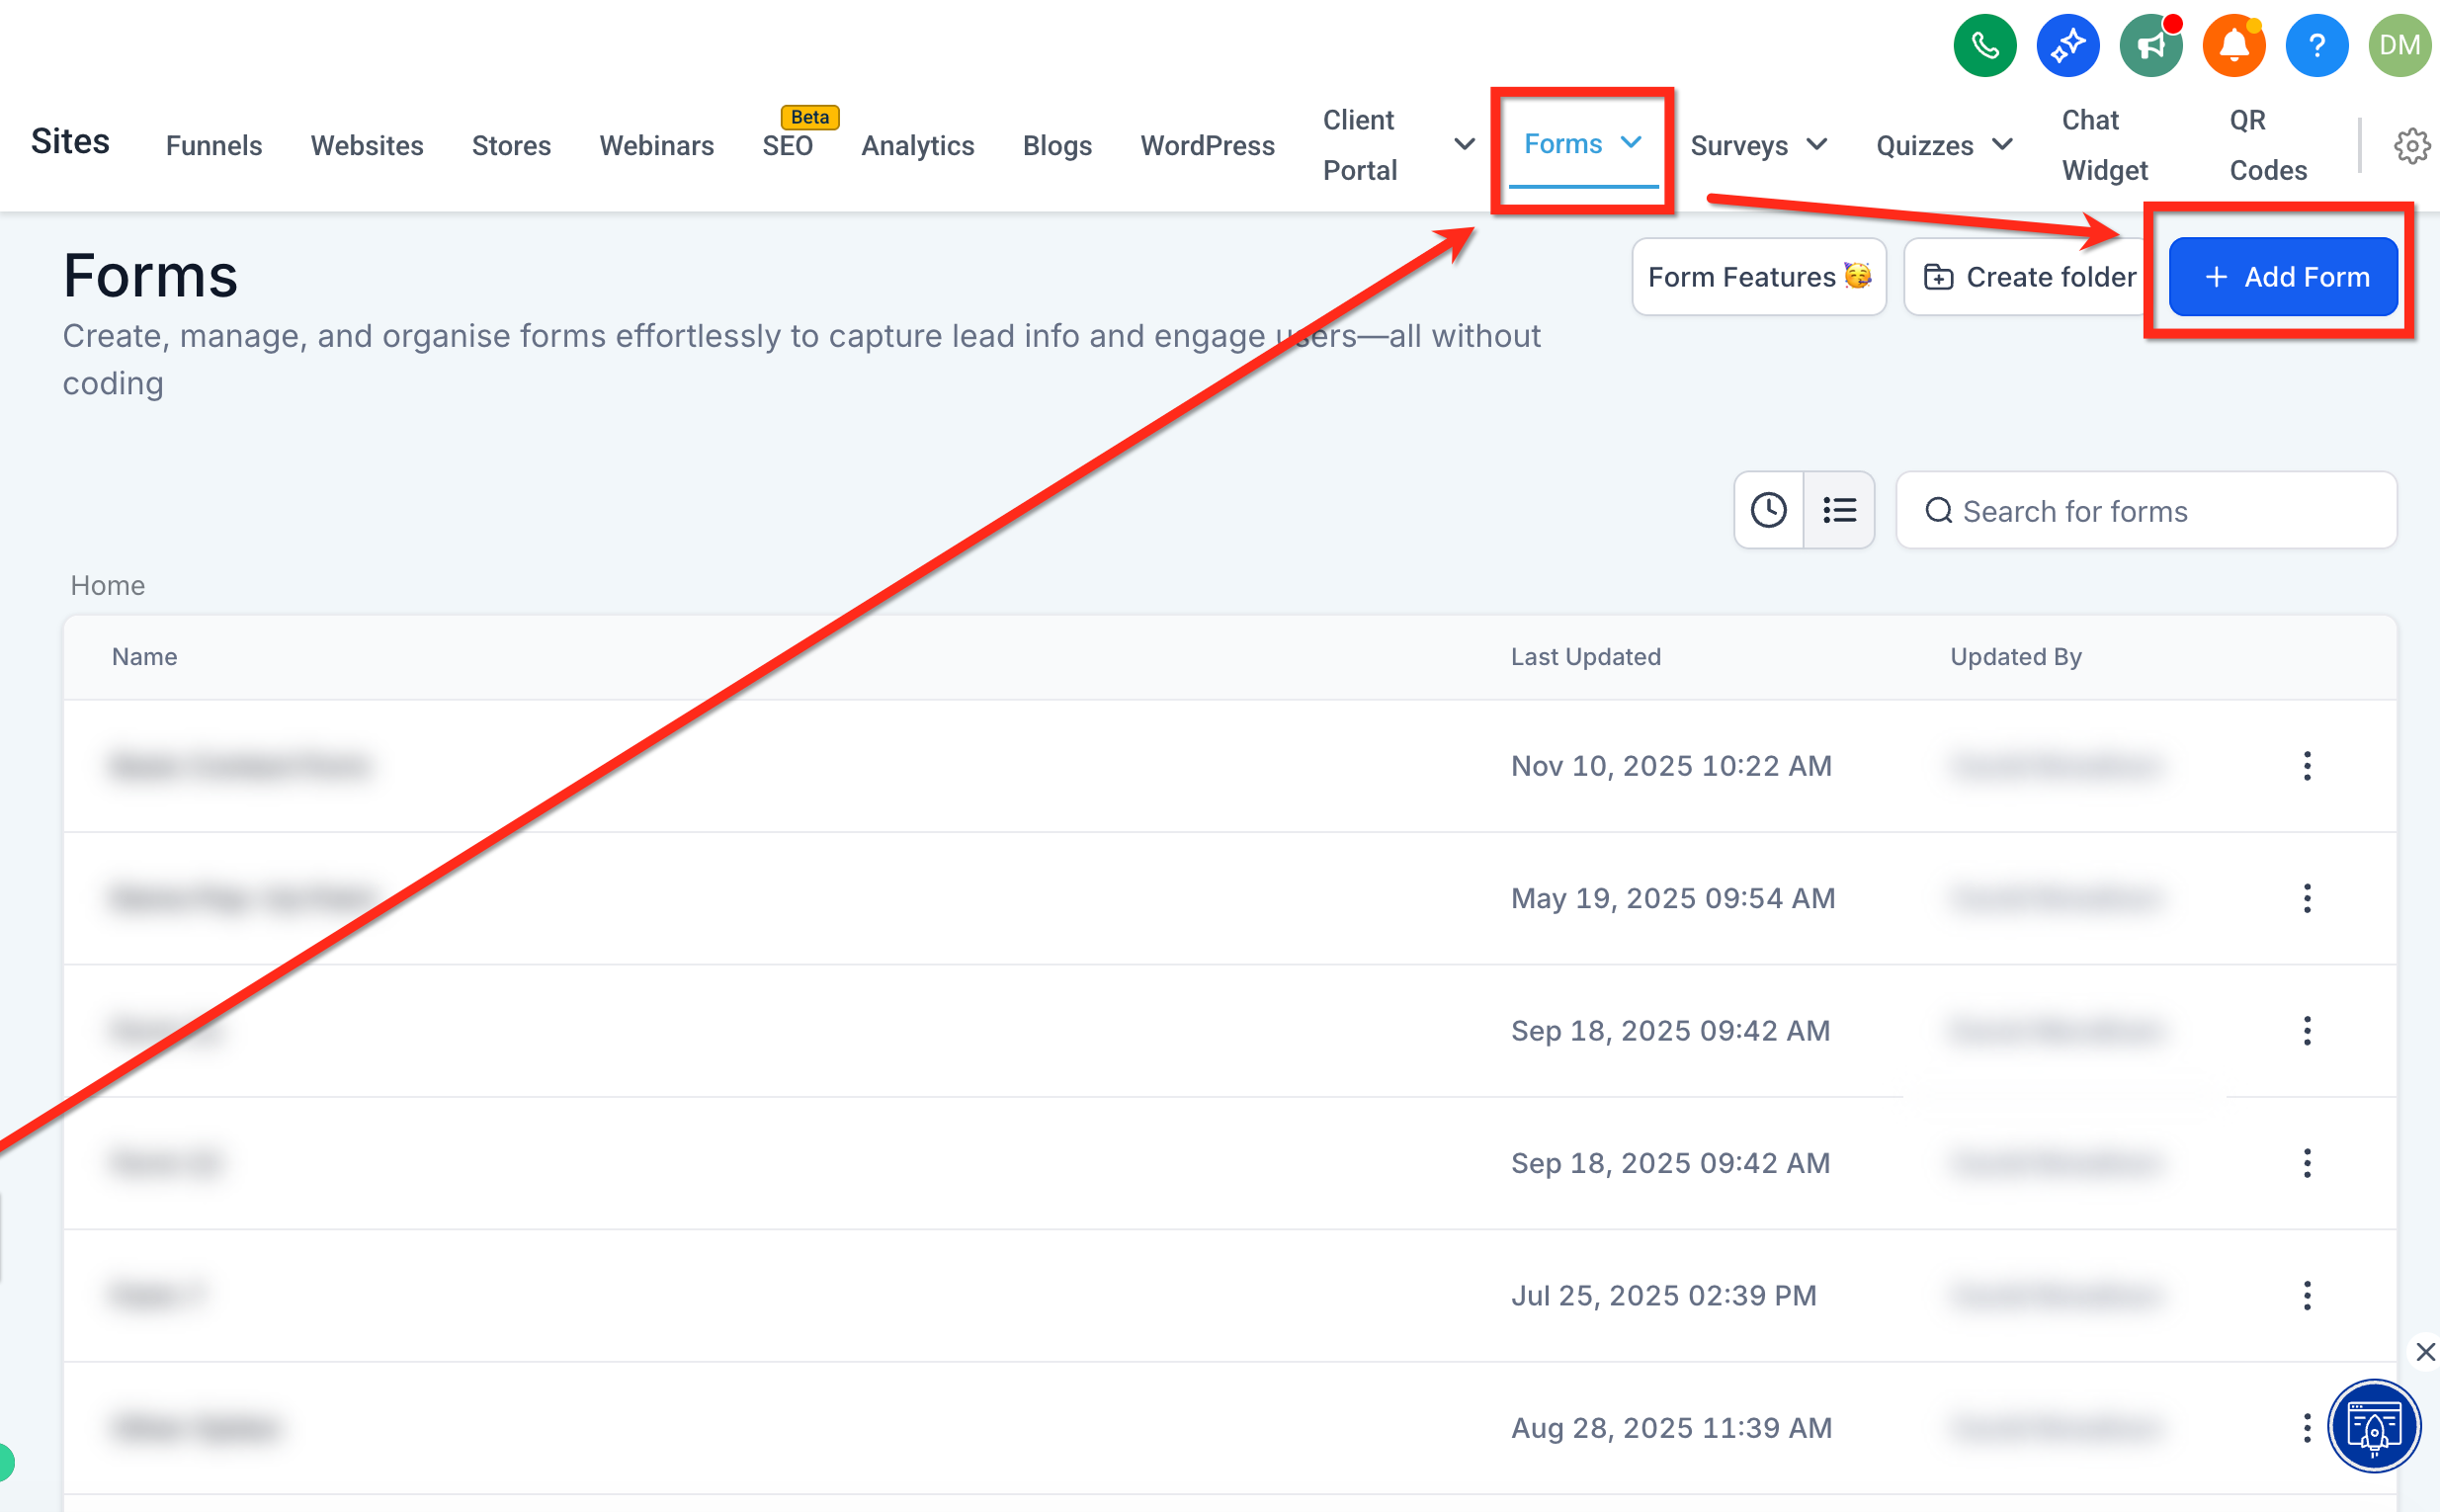
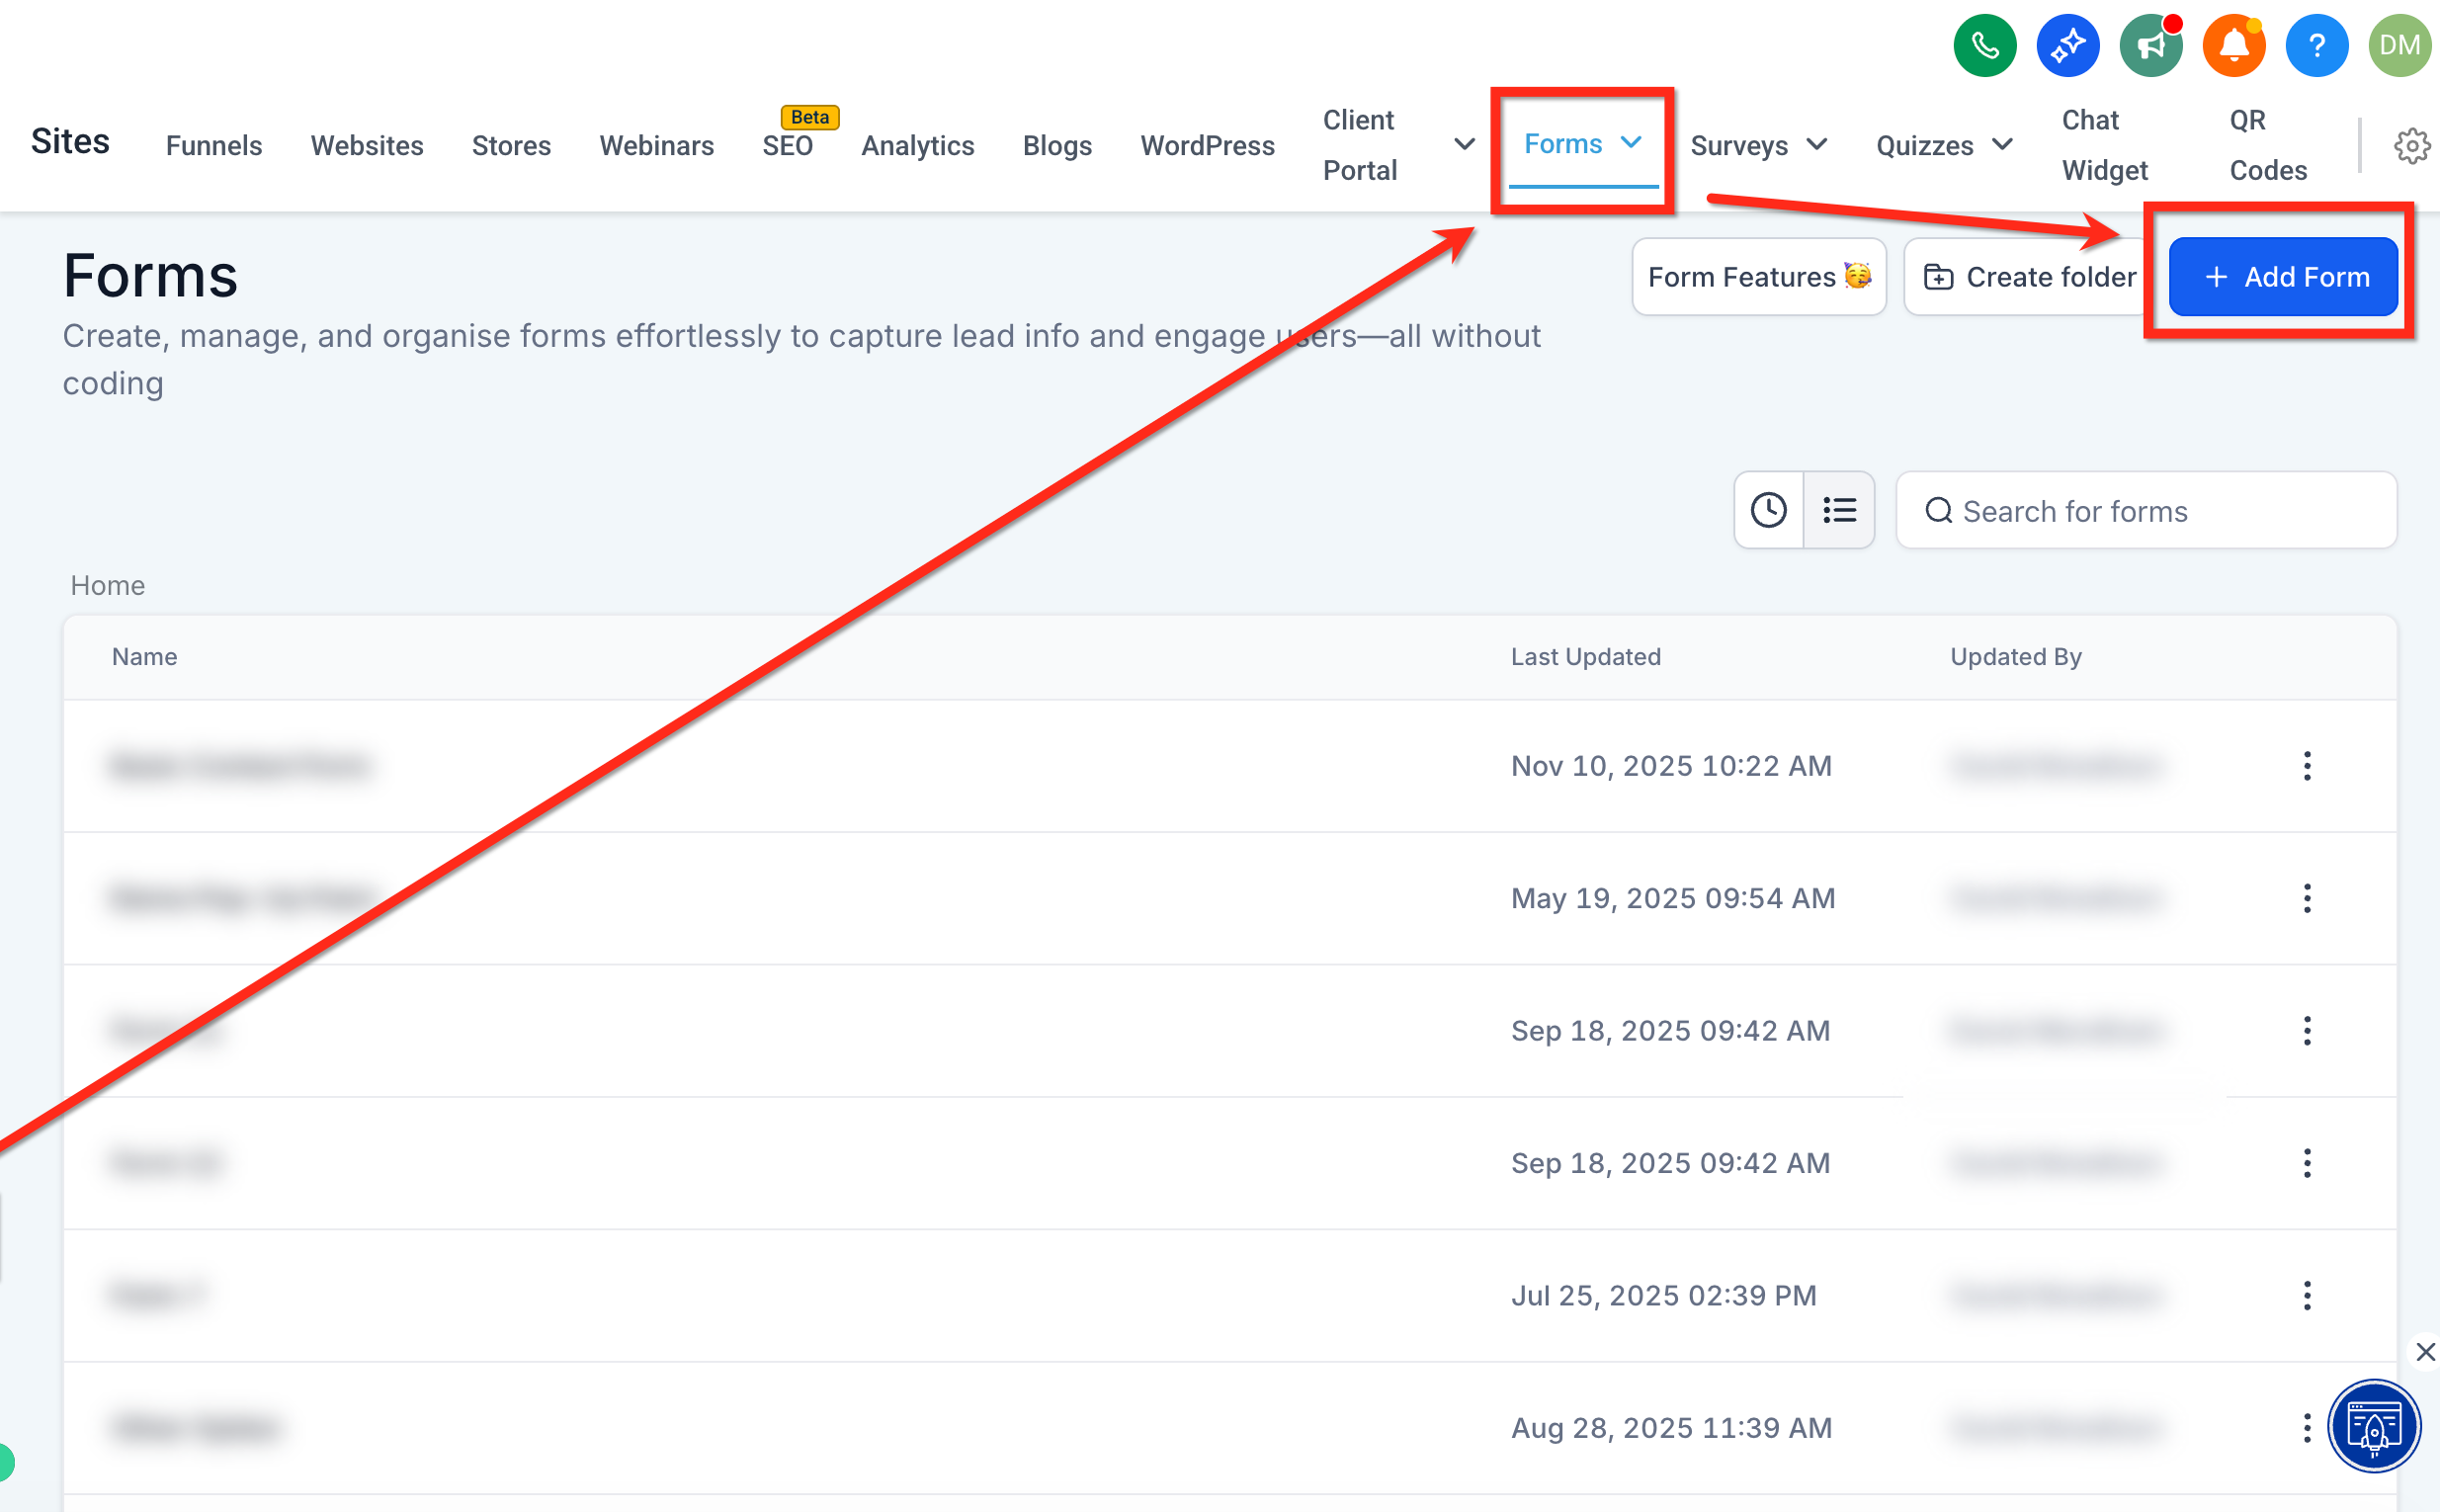
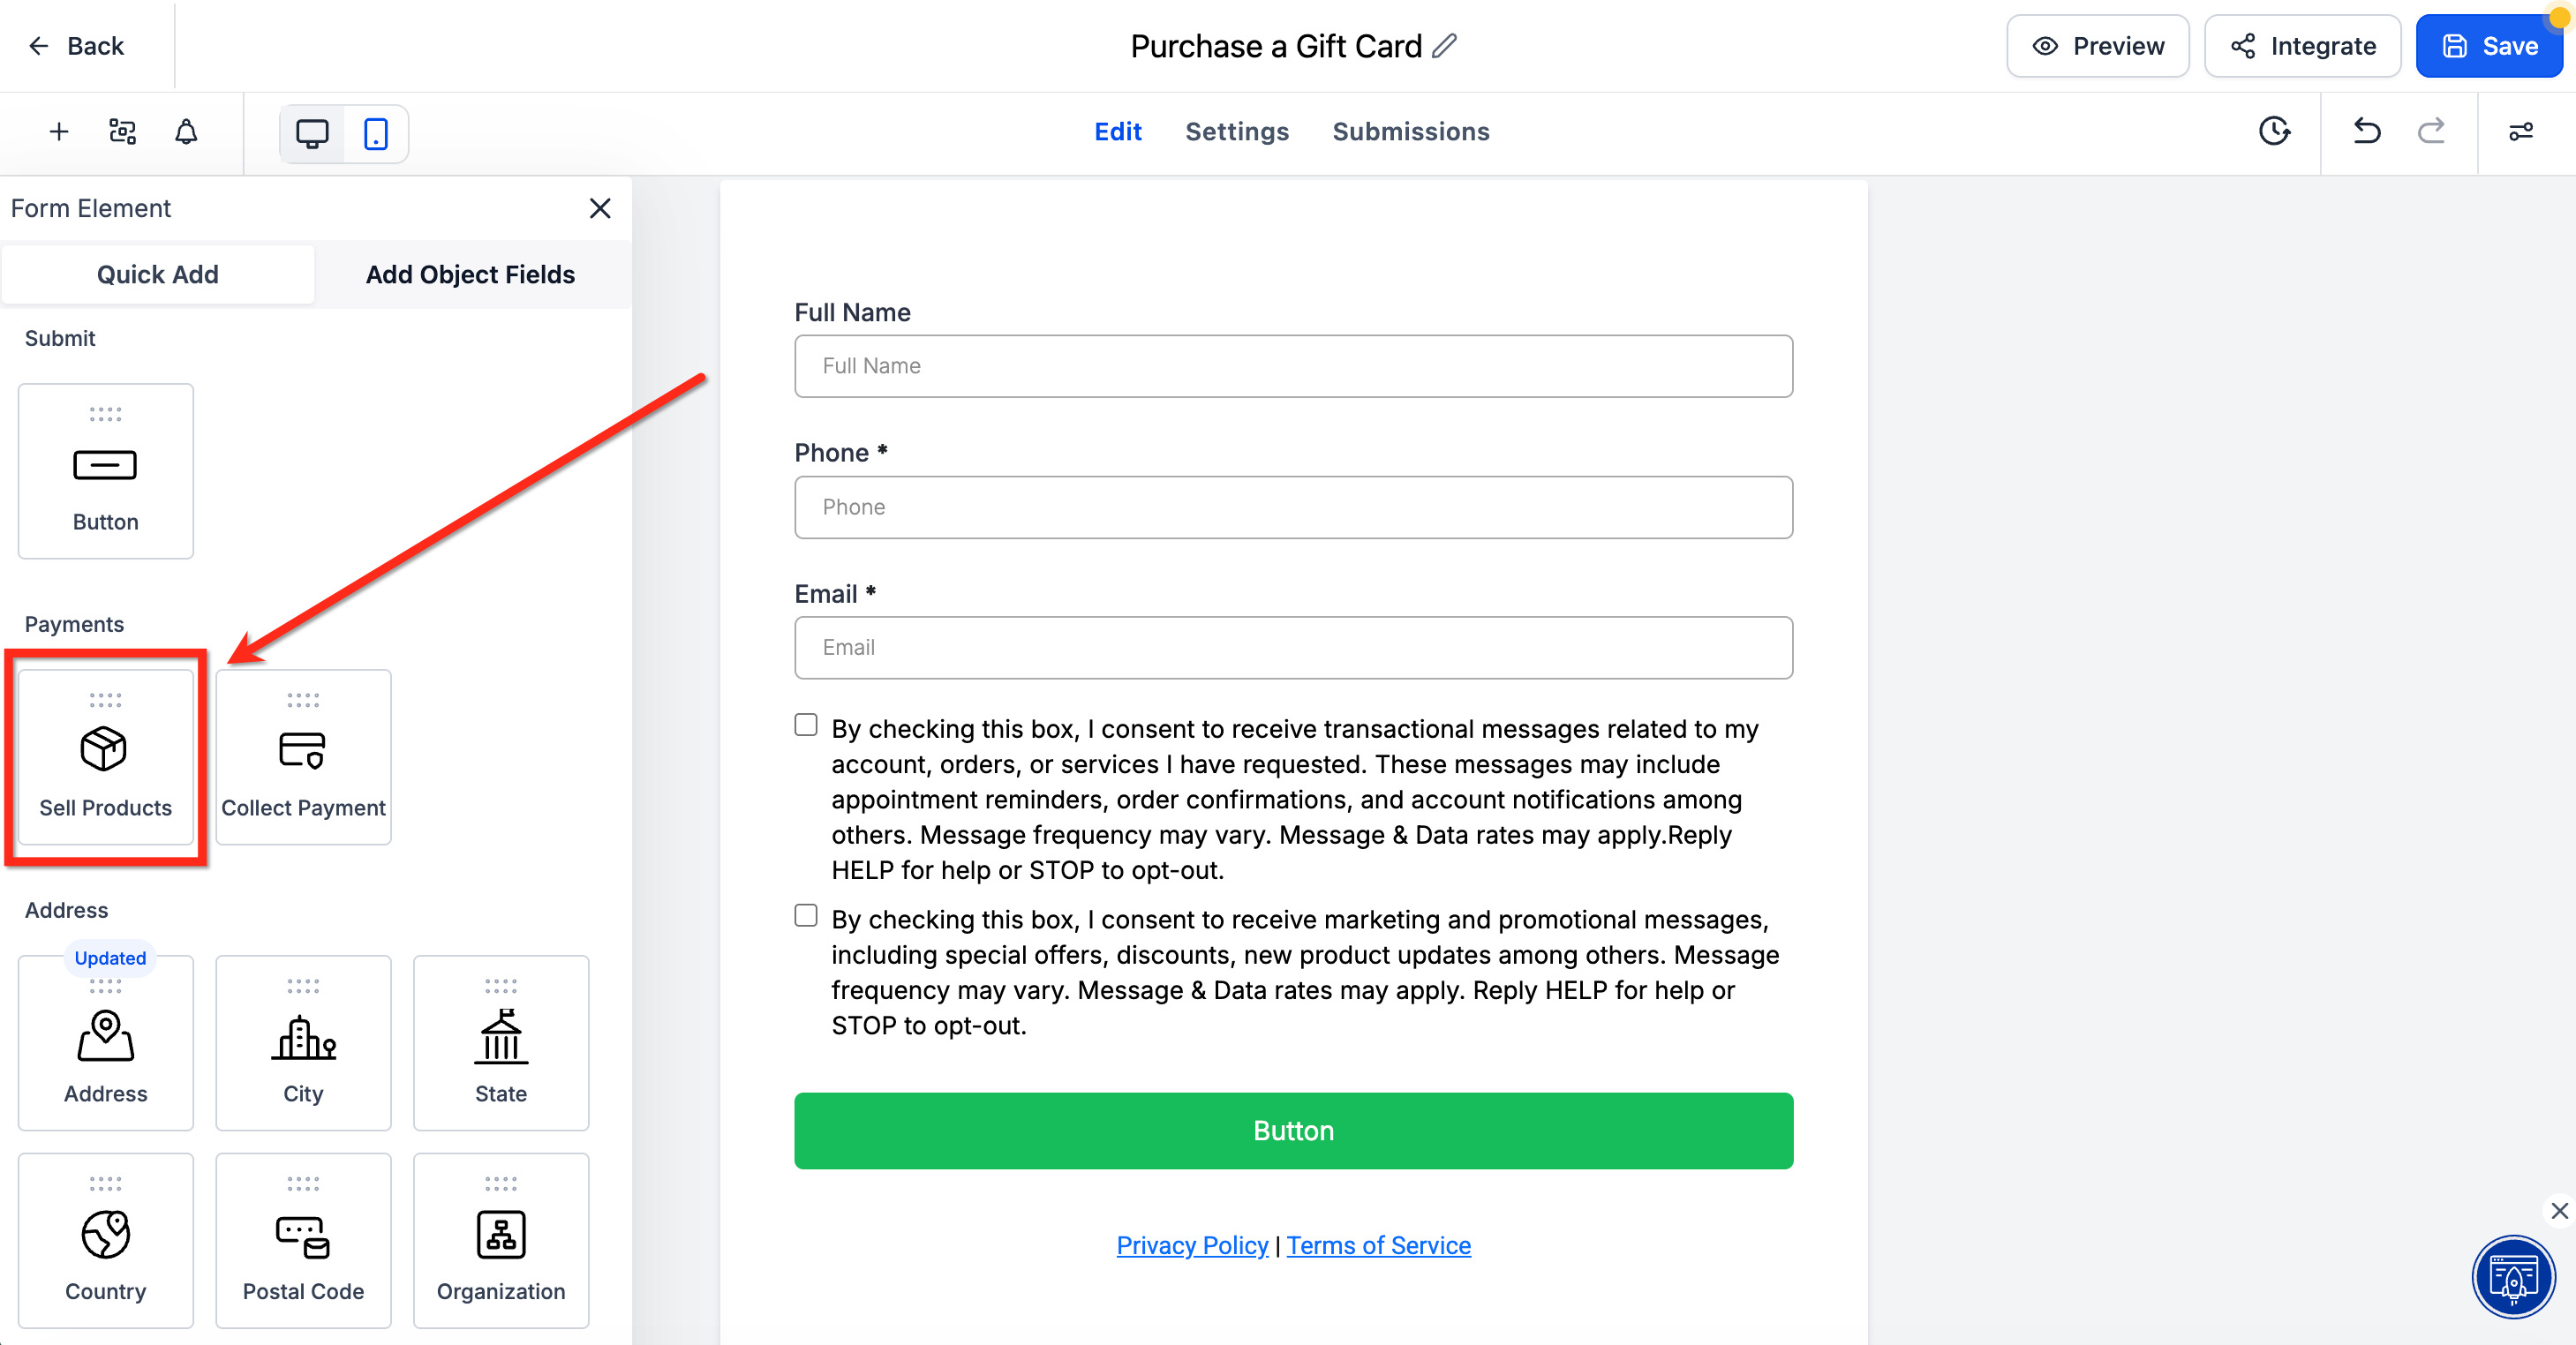
Step 2: Under Payments, locate the Sell Products element and drag it onto your form.
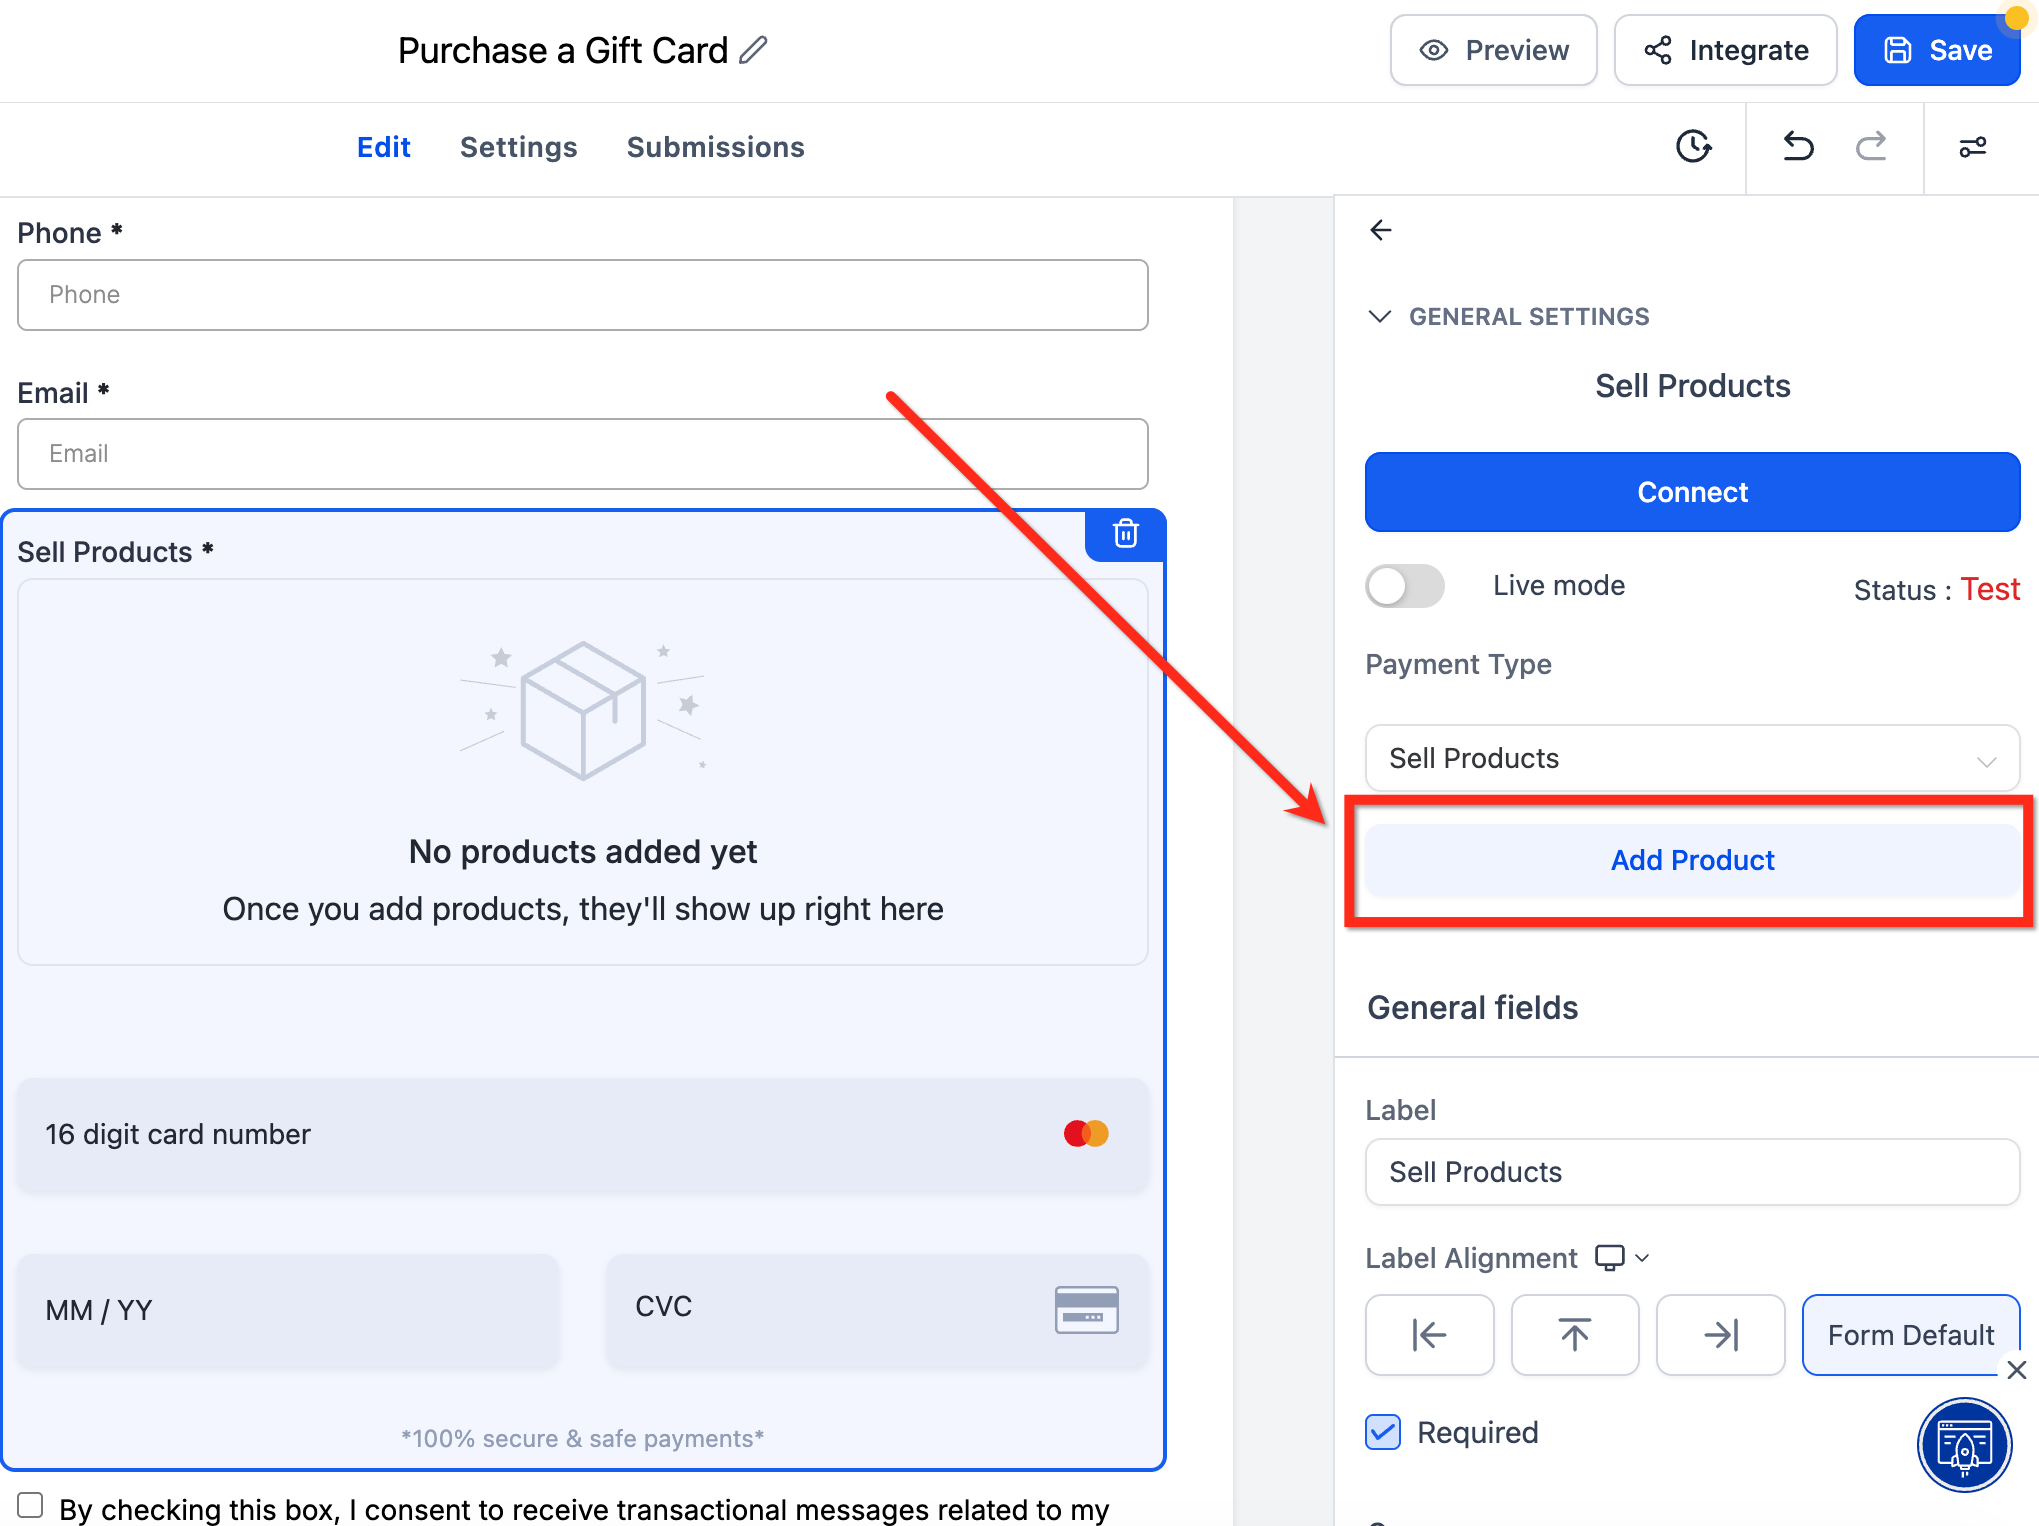
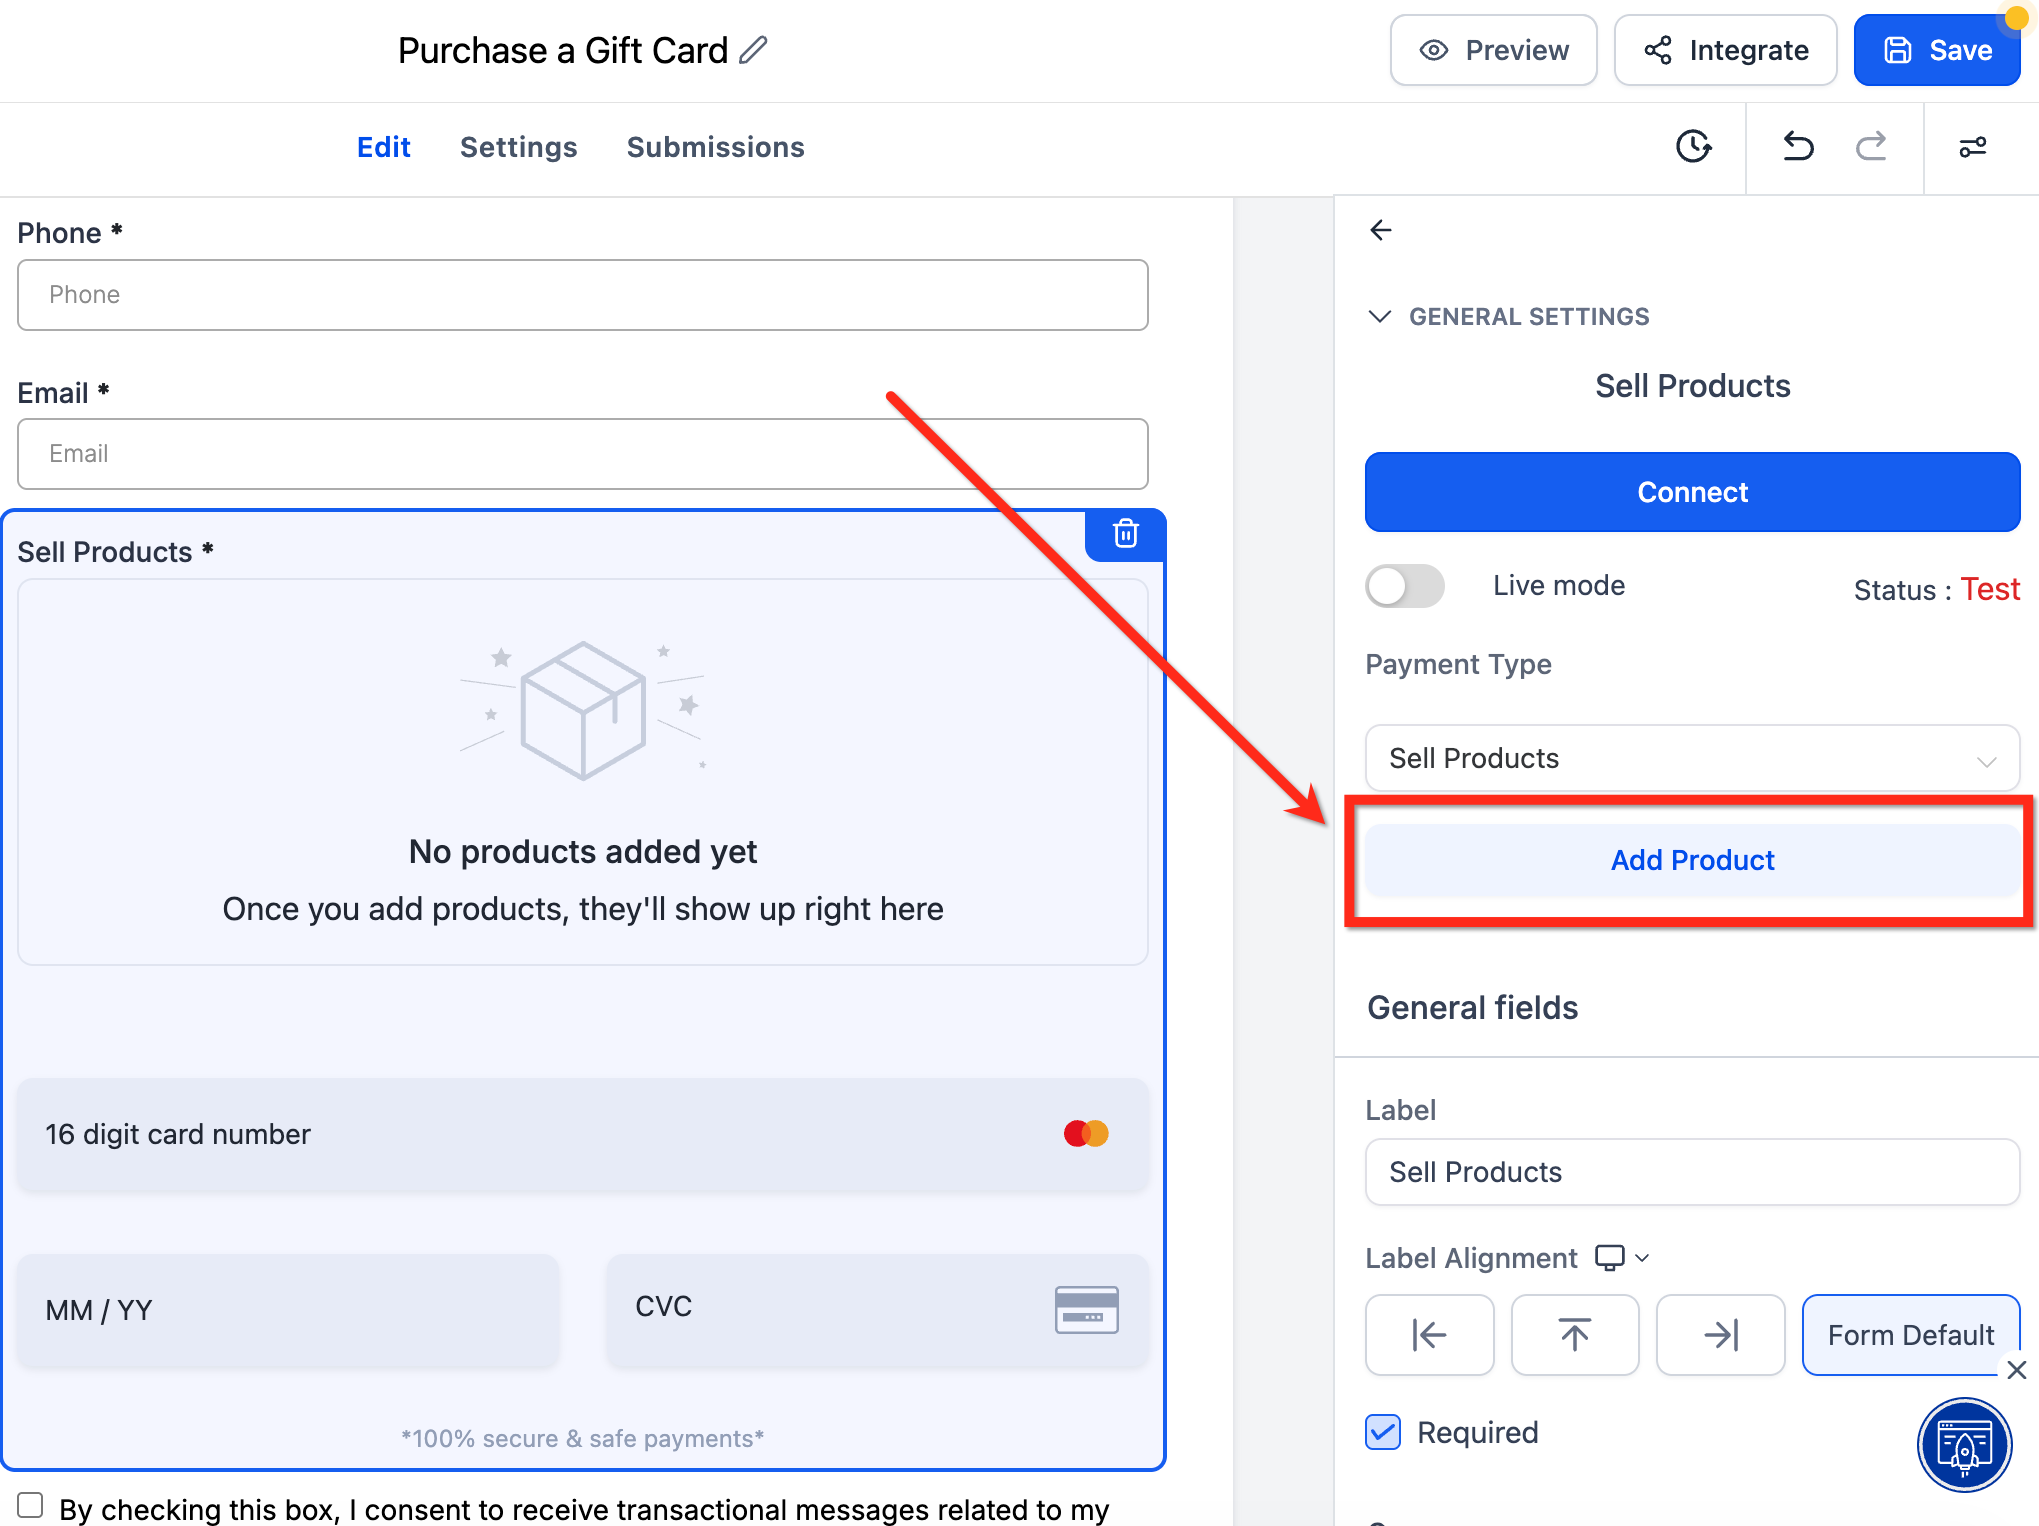
Step 3: Click on the Sell Products element to open its settings, click Add Product, and select your gift card from the list. Click Save once it has been added.
Offer gift cards on a one-step or two-step order form inside a funnel. Patients who buy through a funnel receive the gift card automatically after successful payment. If you add a gift card to a test-mode funnel, buyers will only receive test gift cards.
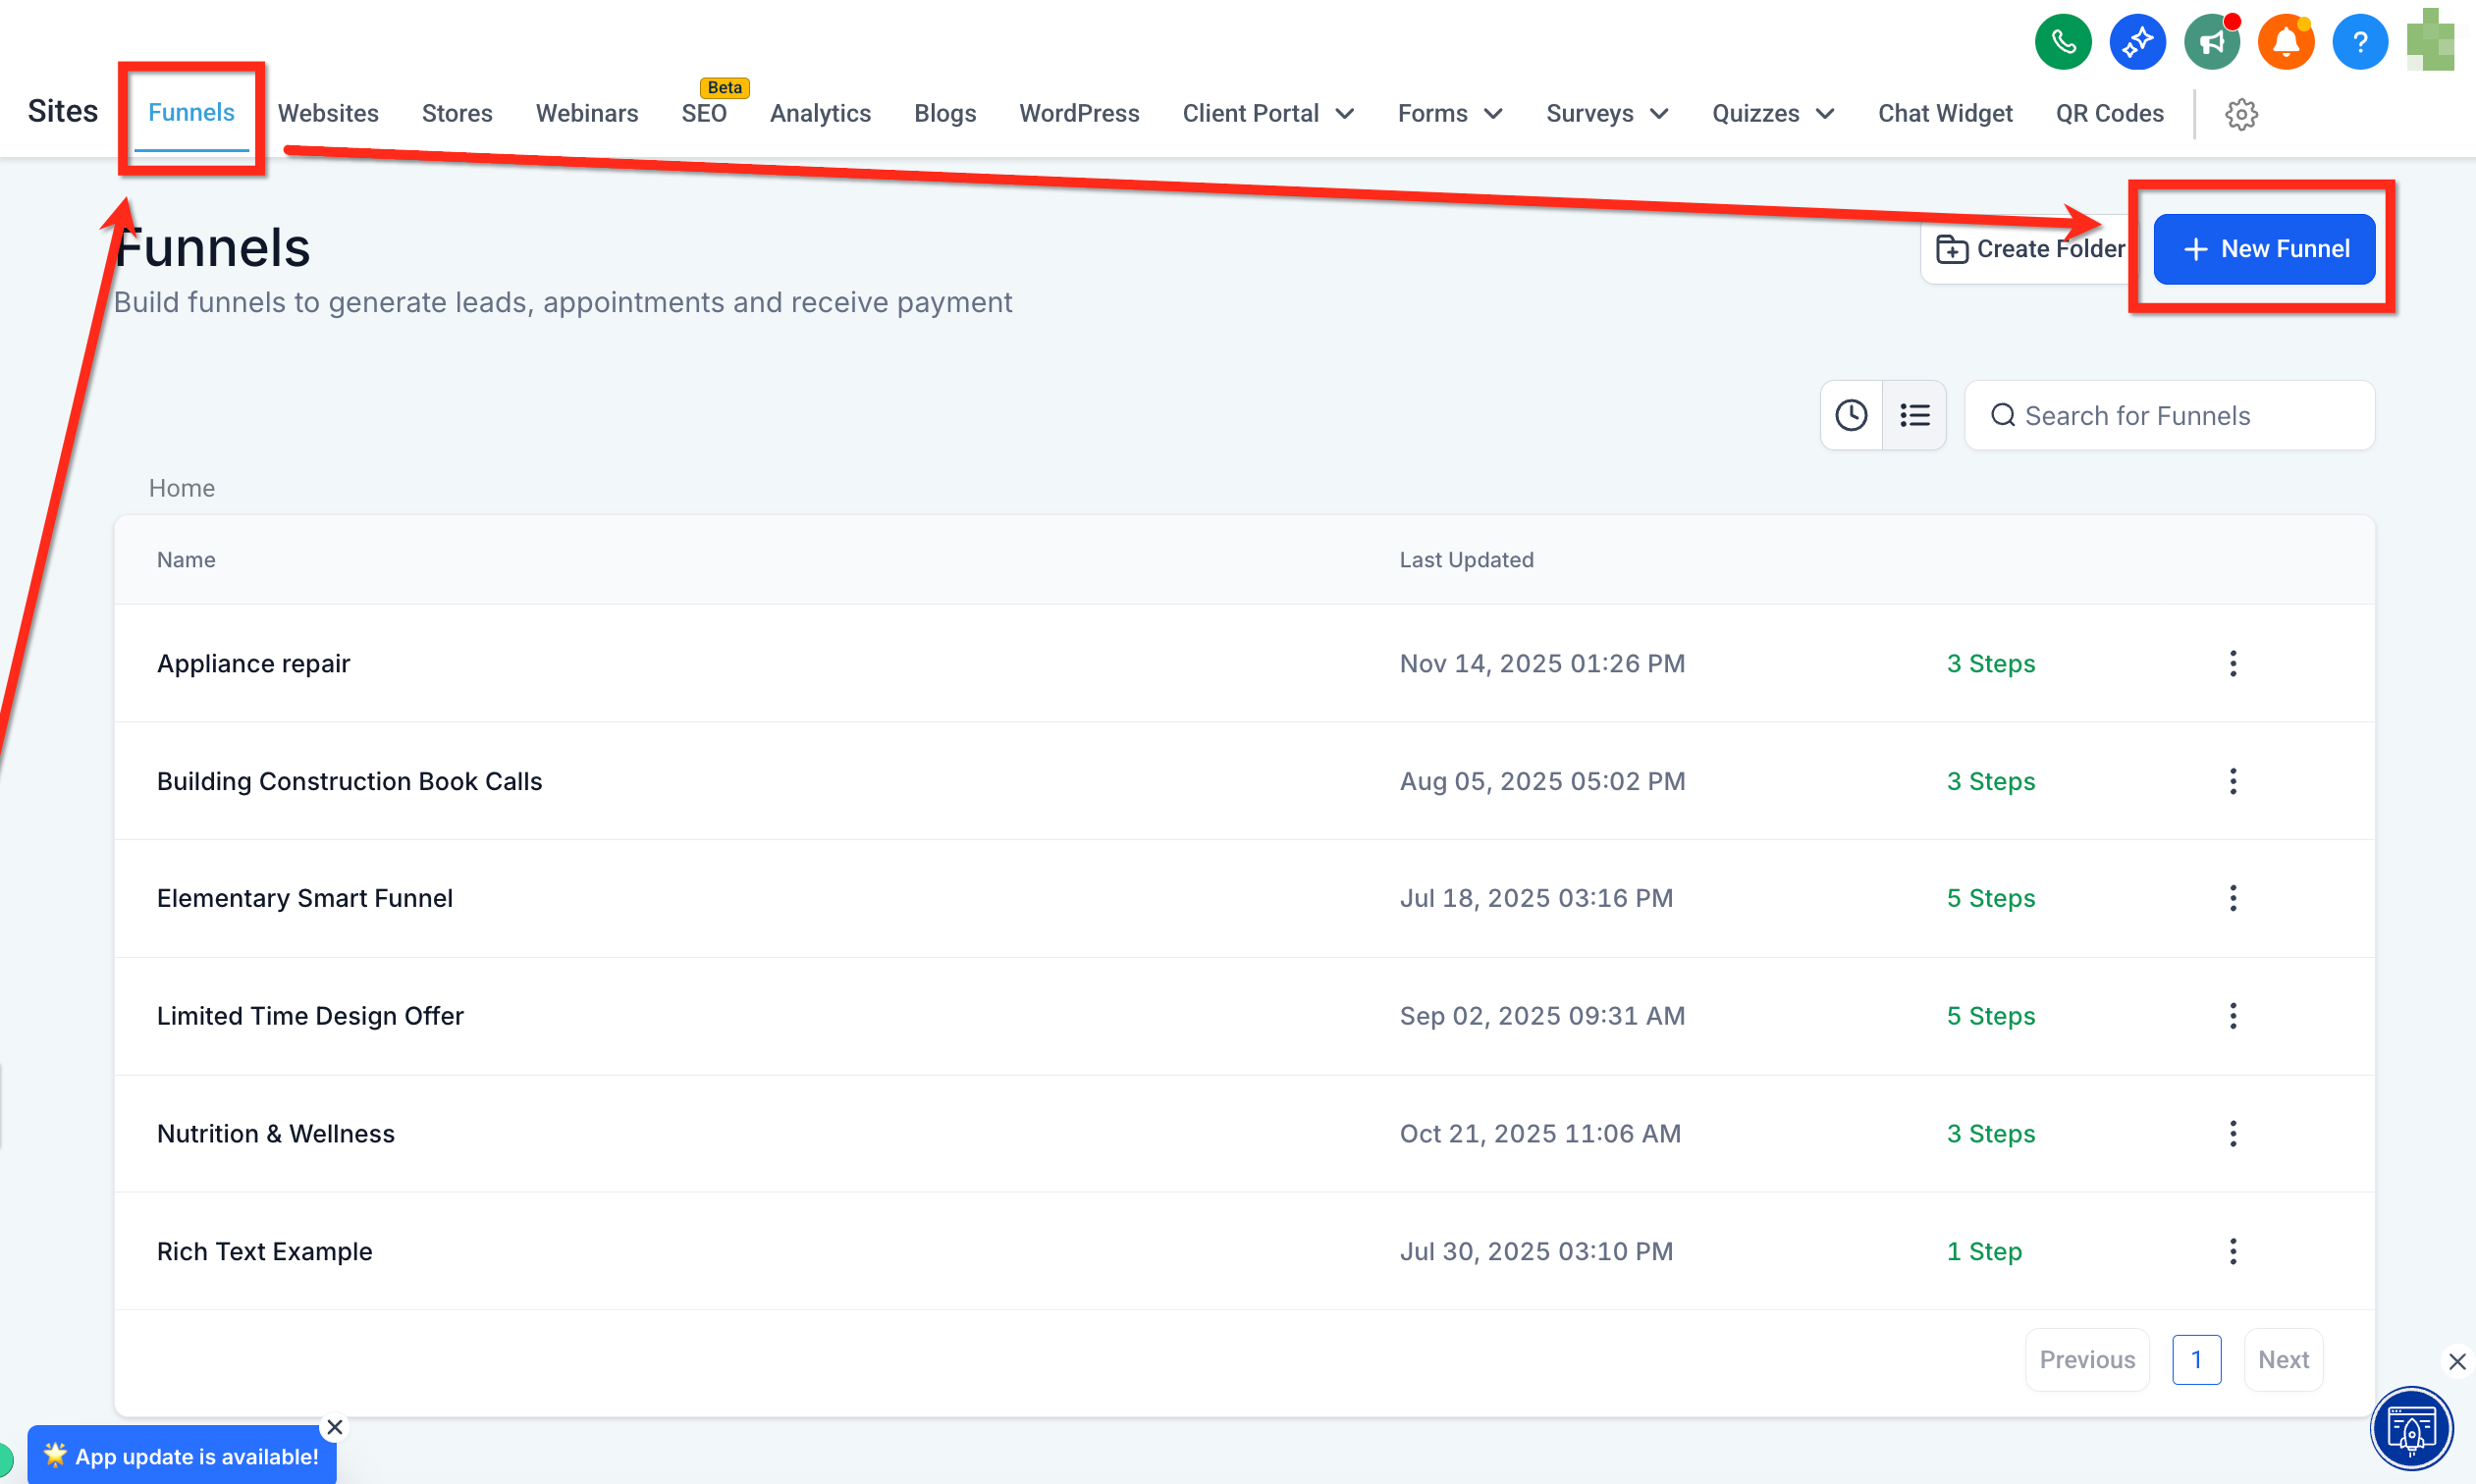
Step 1: Navigate to Sites > Funnels and open an existing funnel or create a new one.
Step 2: Locate the Form element and drag it into your page.
Step 3: Click the Form element and use the dropdown to select the form you set up for purchasing gift cards (see Selling Through Forms above). If you have not created one yet, use the link in the element to create a new form. Once the form is added and your edits are complete, publish your funnel.
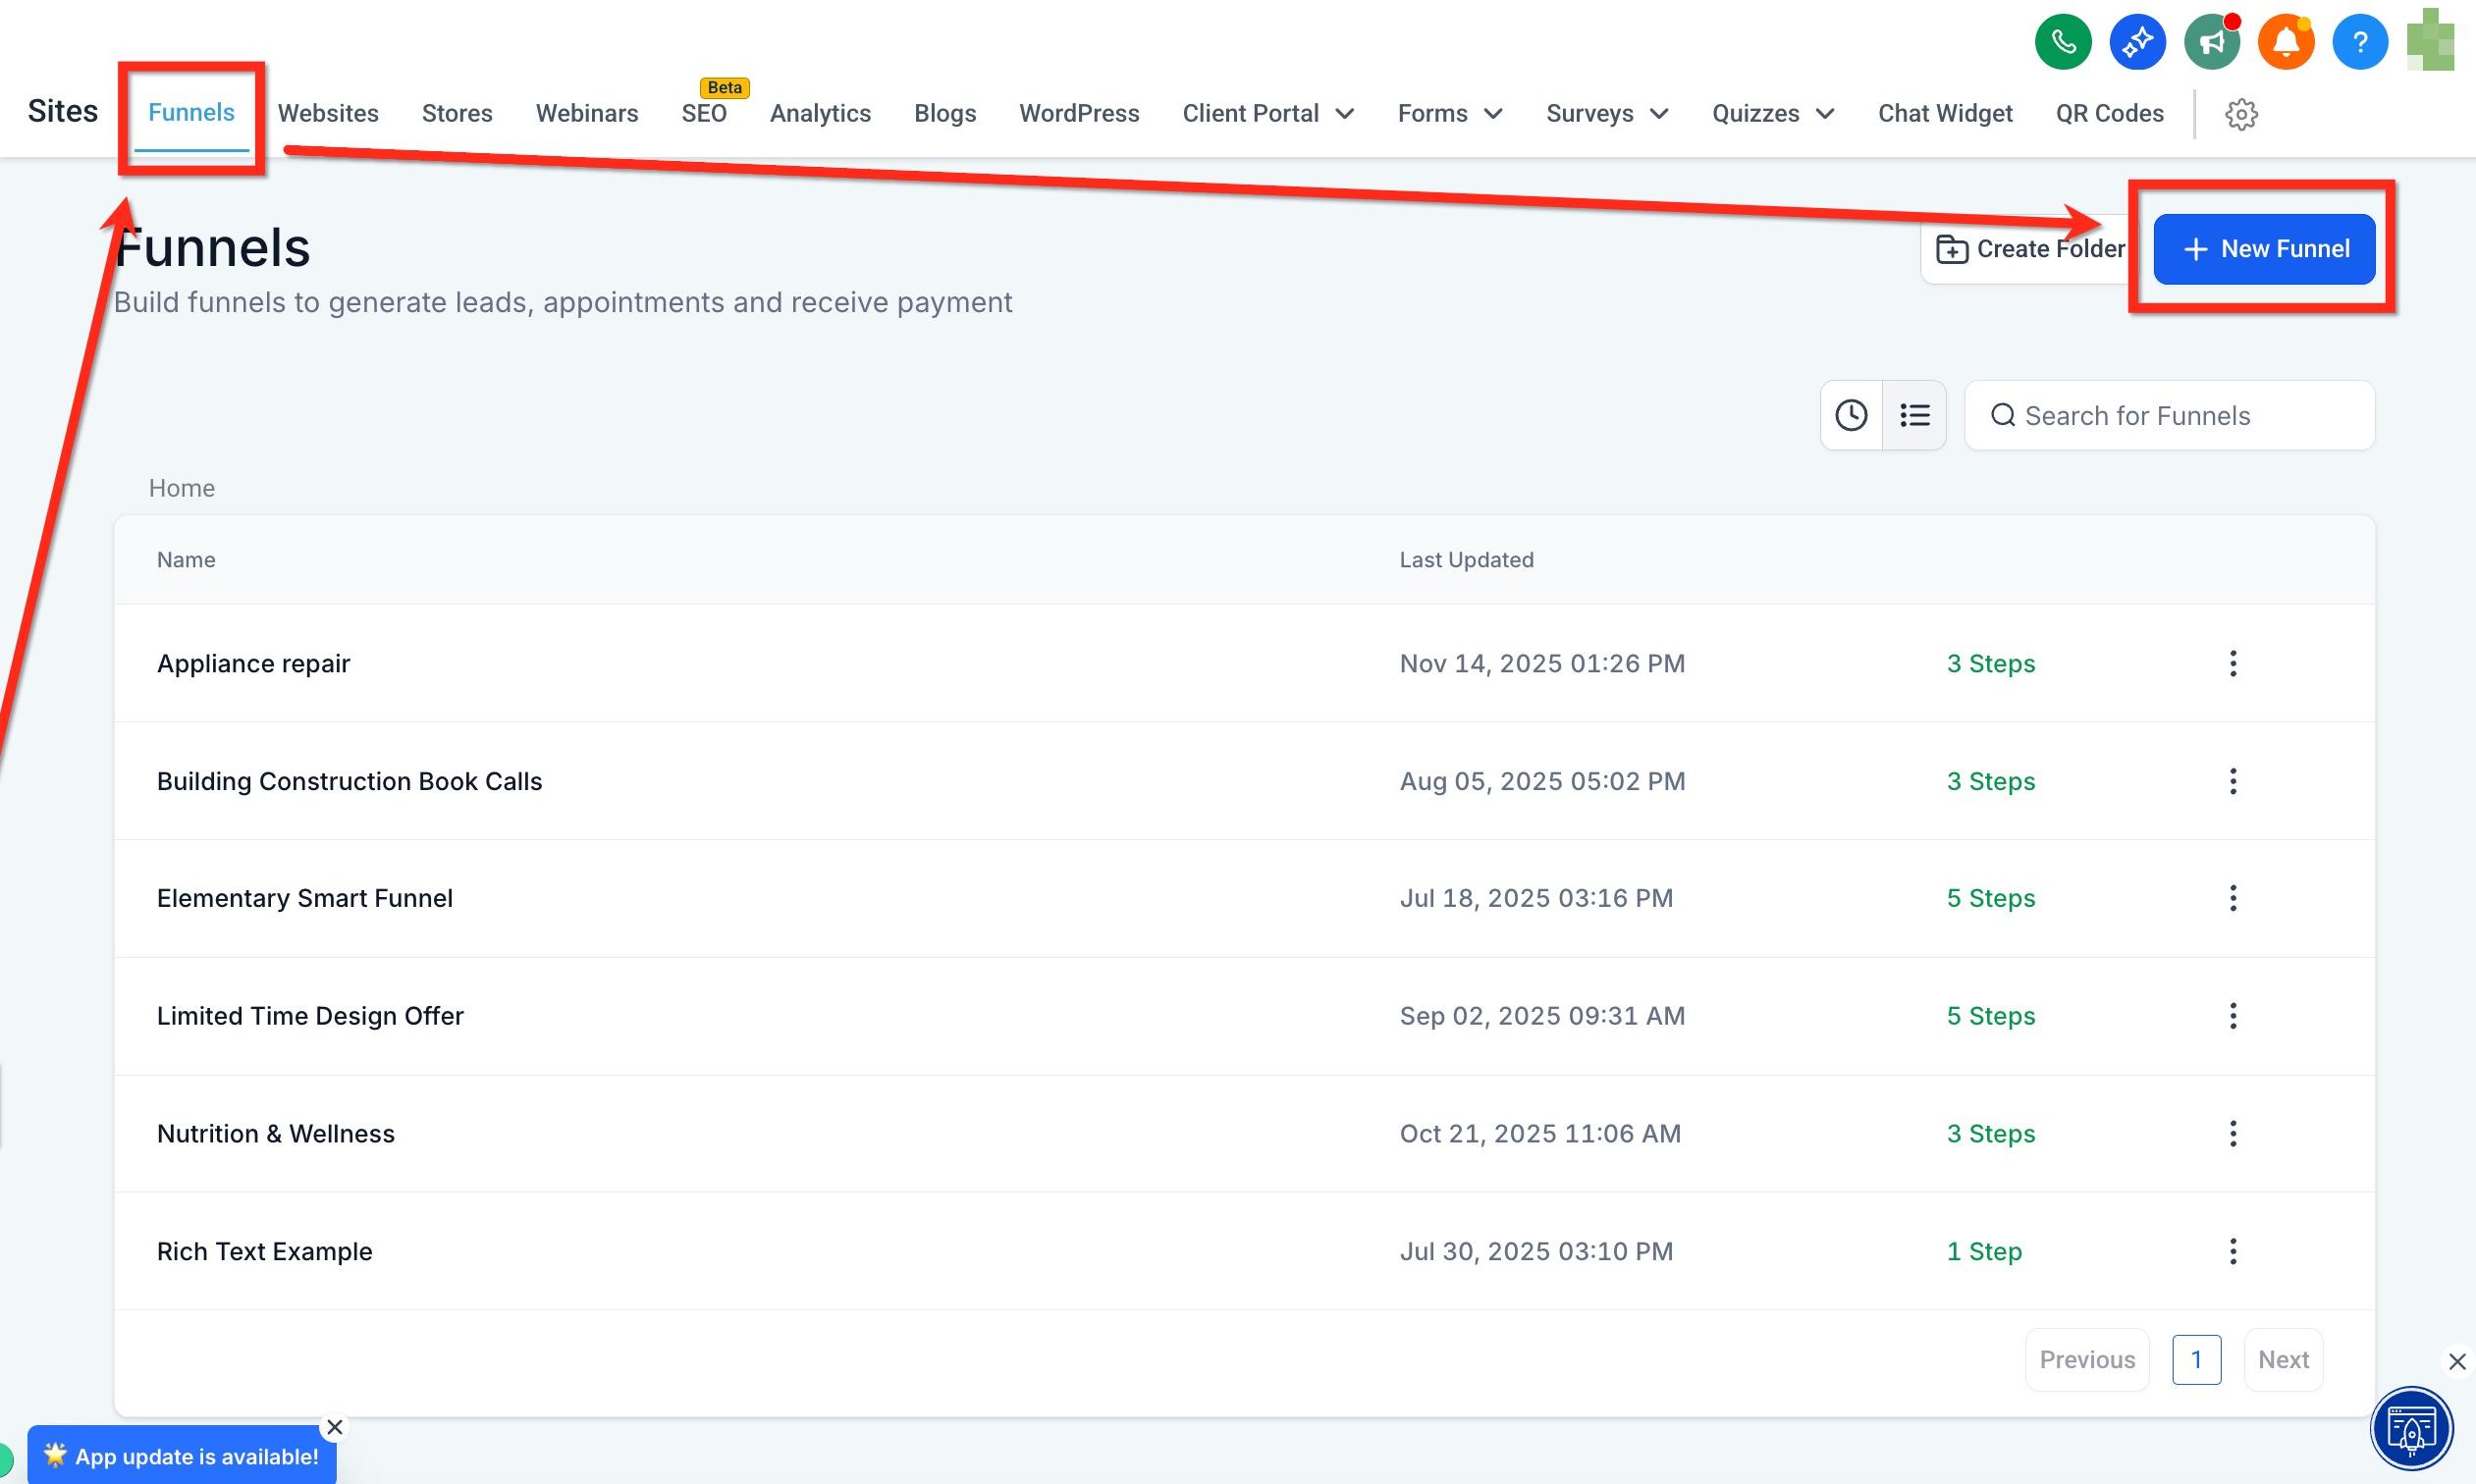
Display gift cards in your online storefront so patients can browse and buy them like any other product.
Step 1: Navigate to Sites > Stores and open an existing store or create a new one.
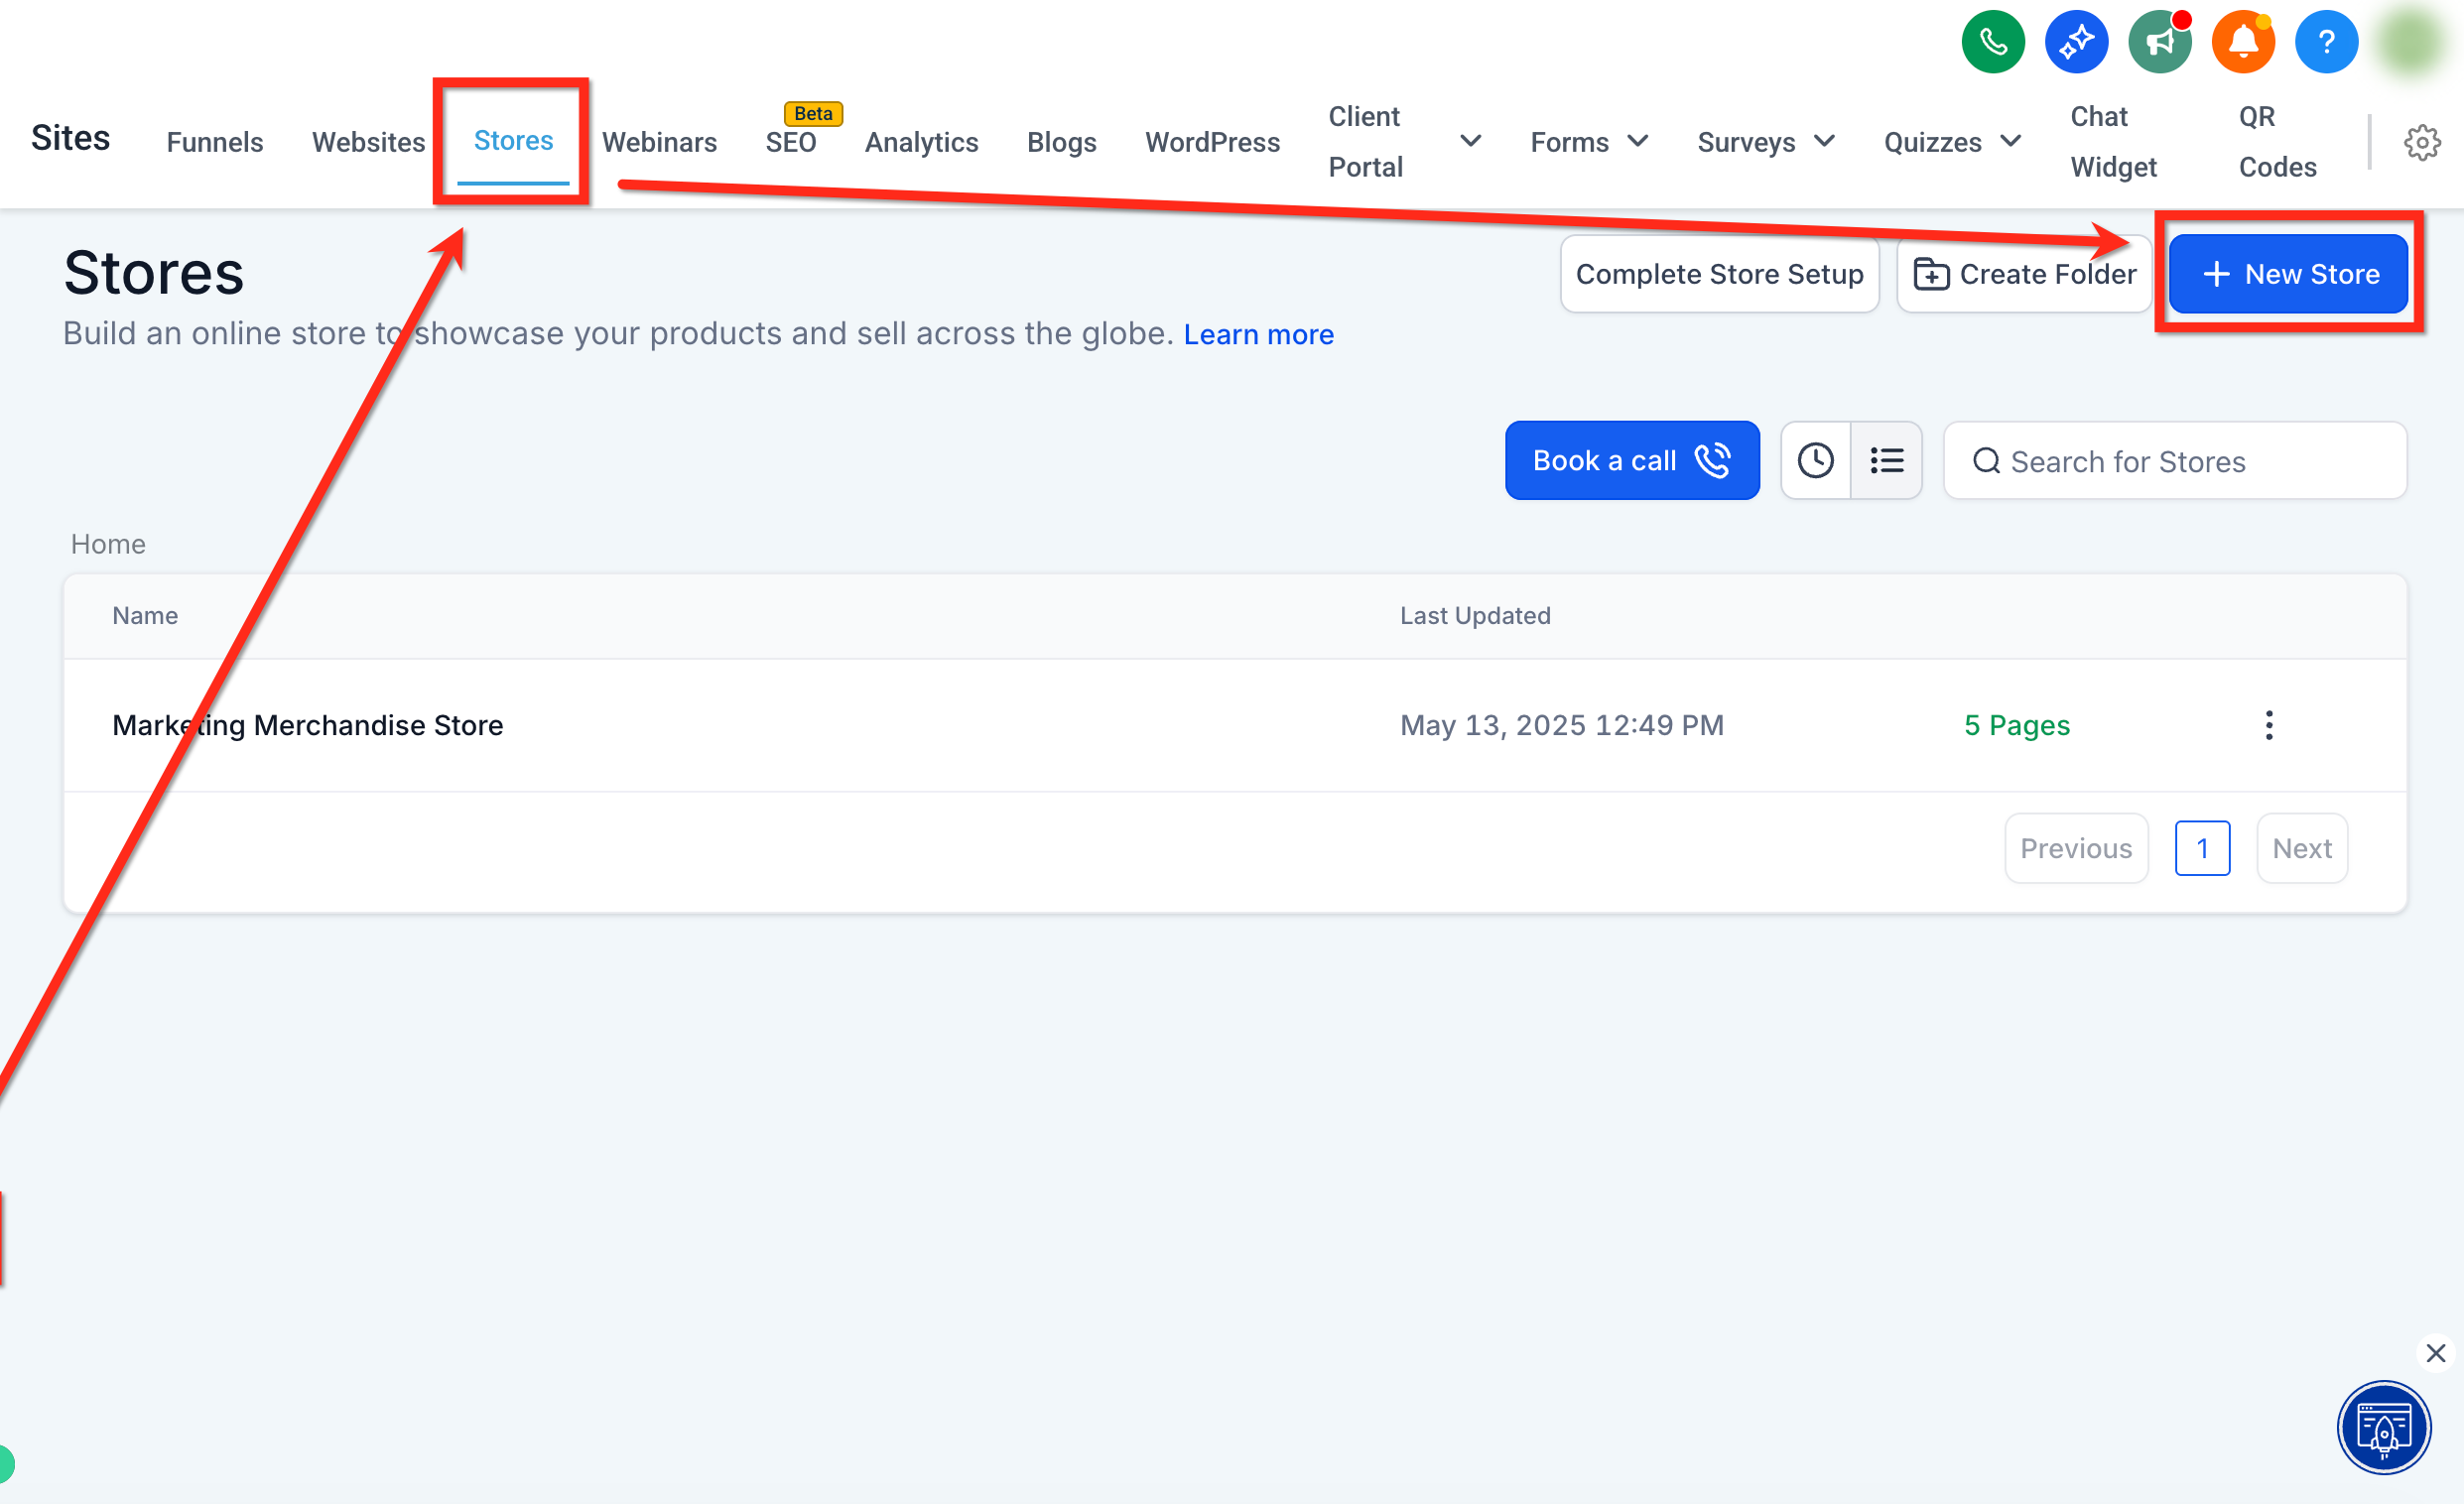
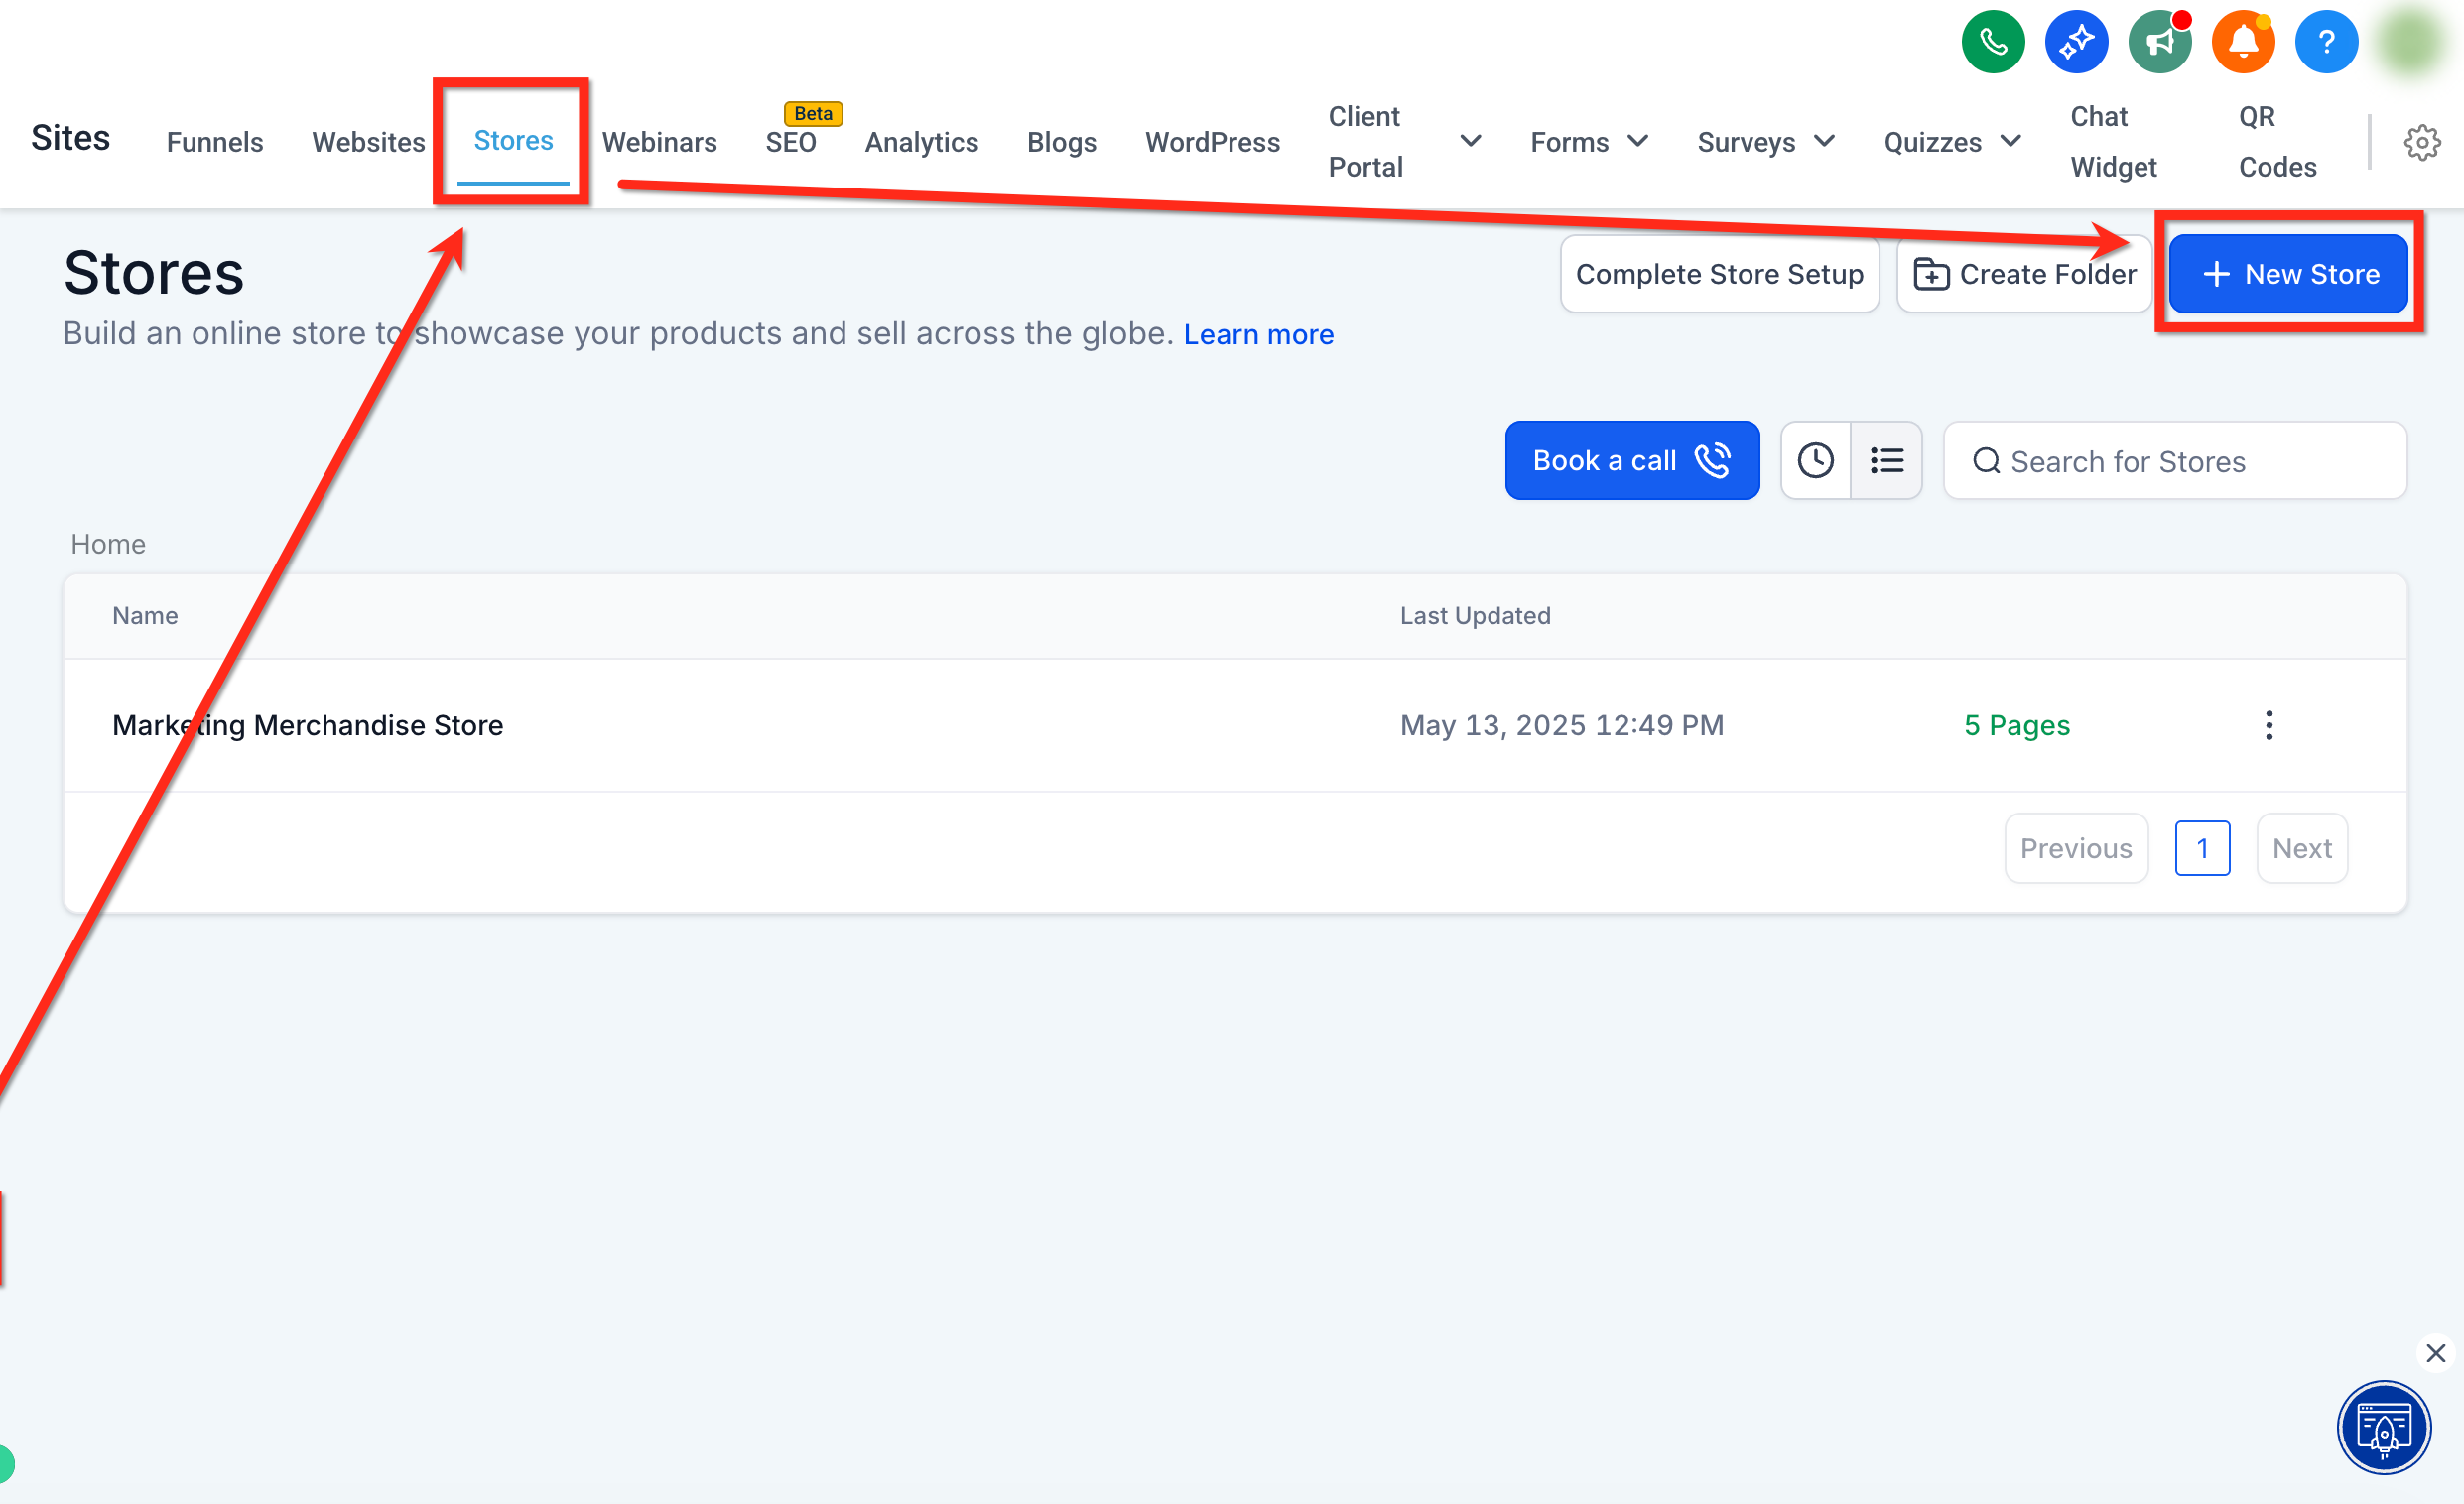
Step 2: From the store page, go to the Products tab.
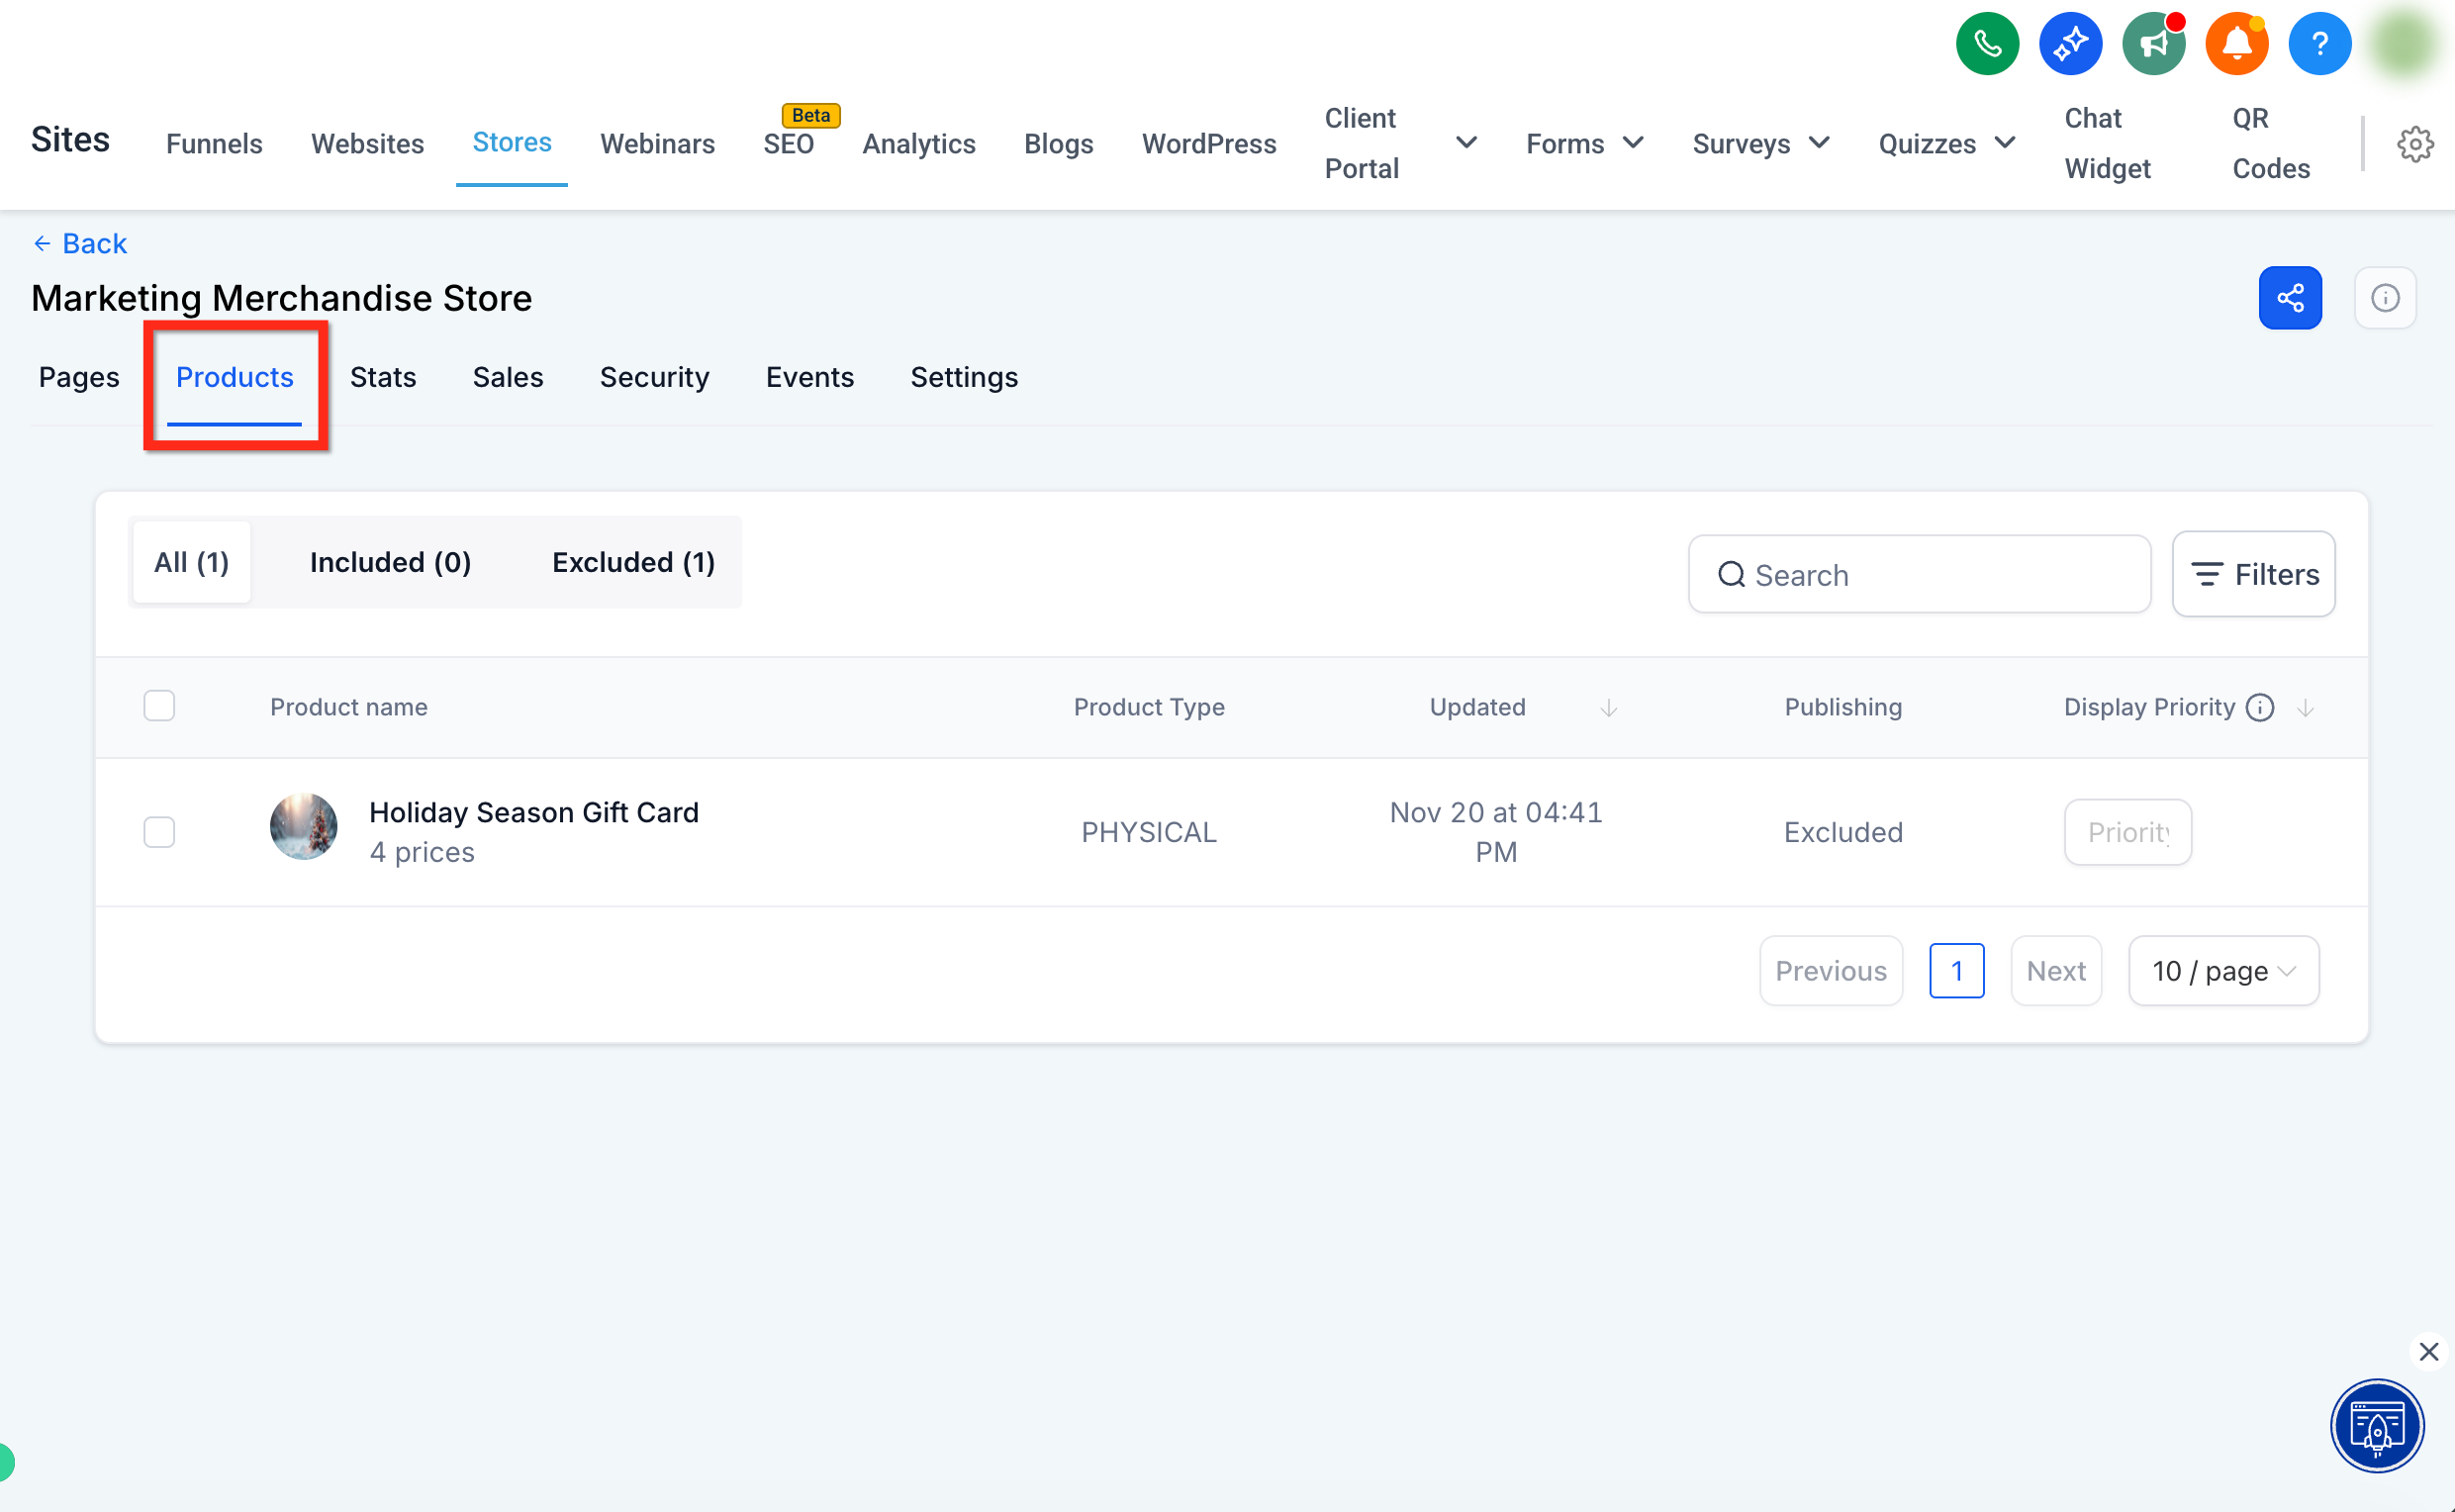
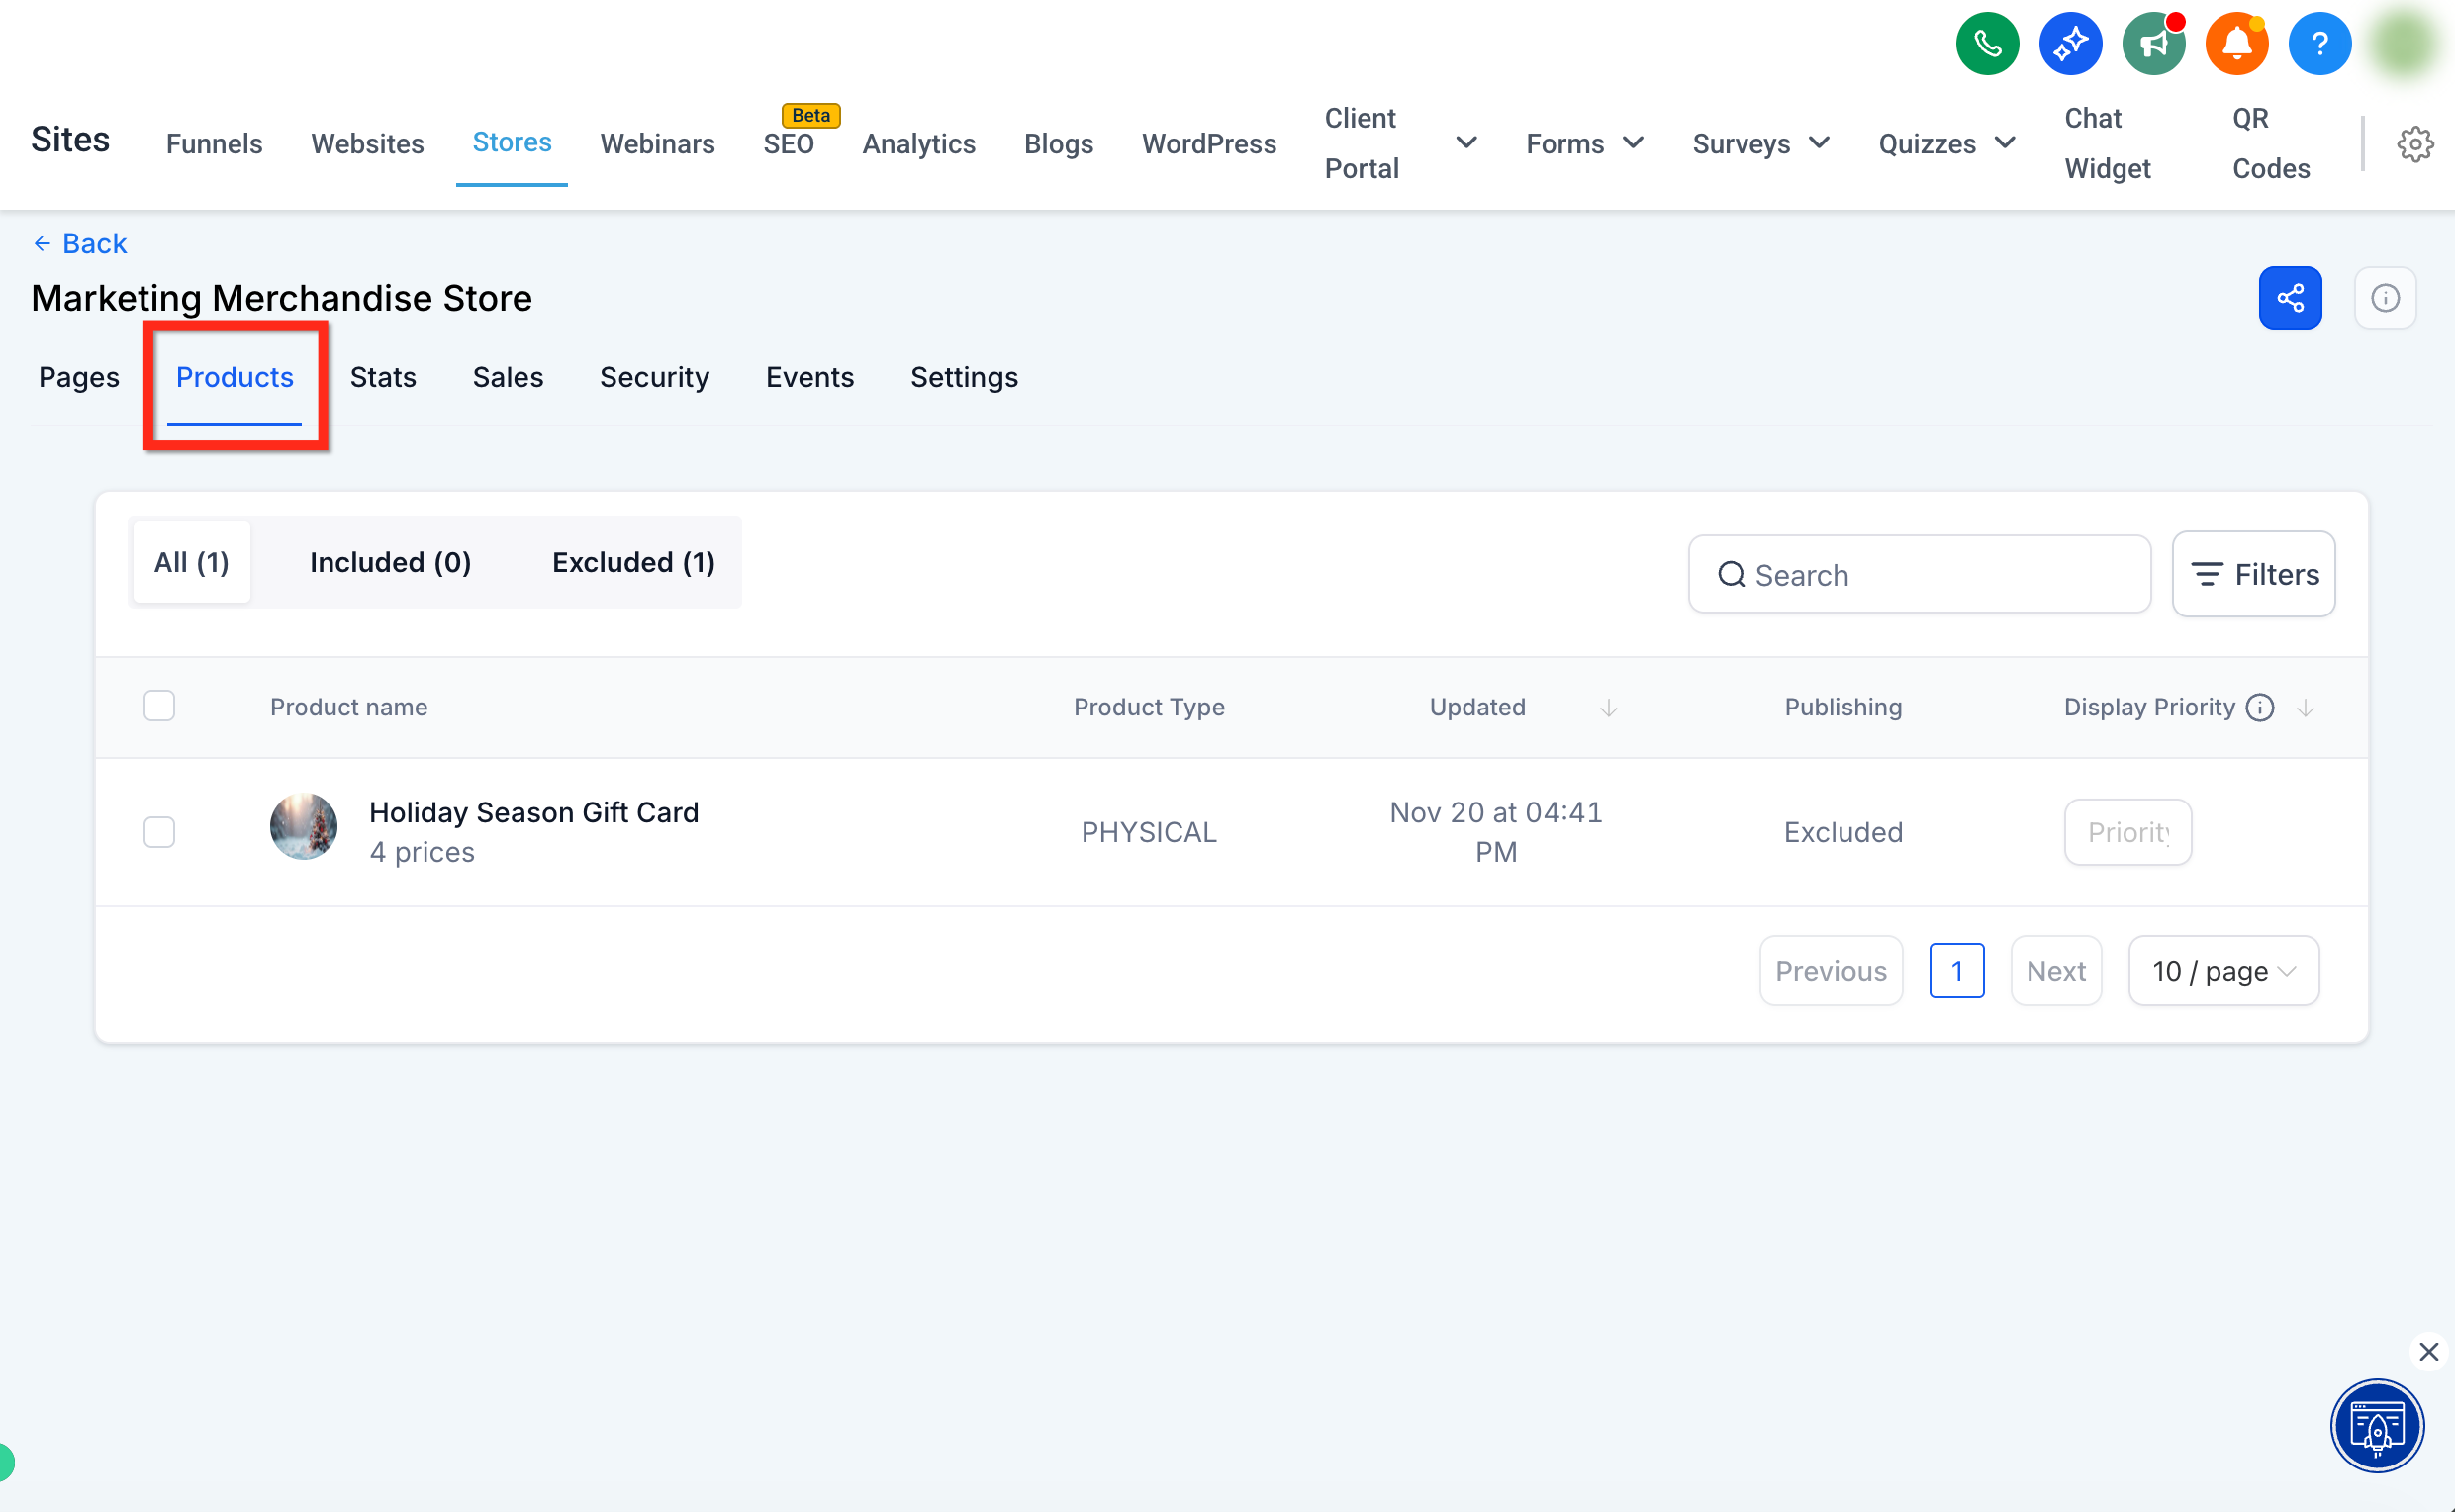
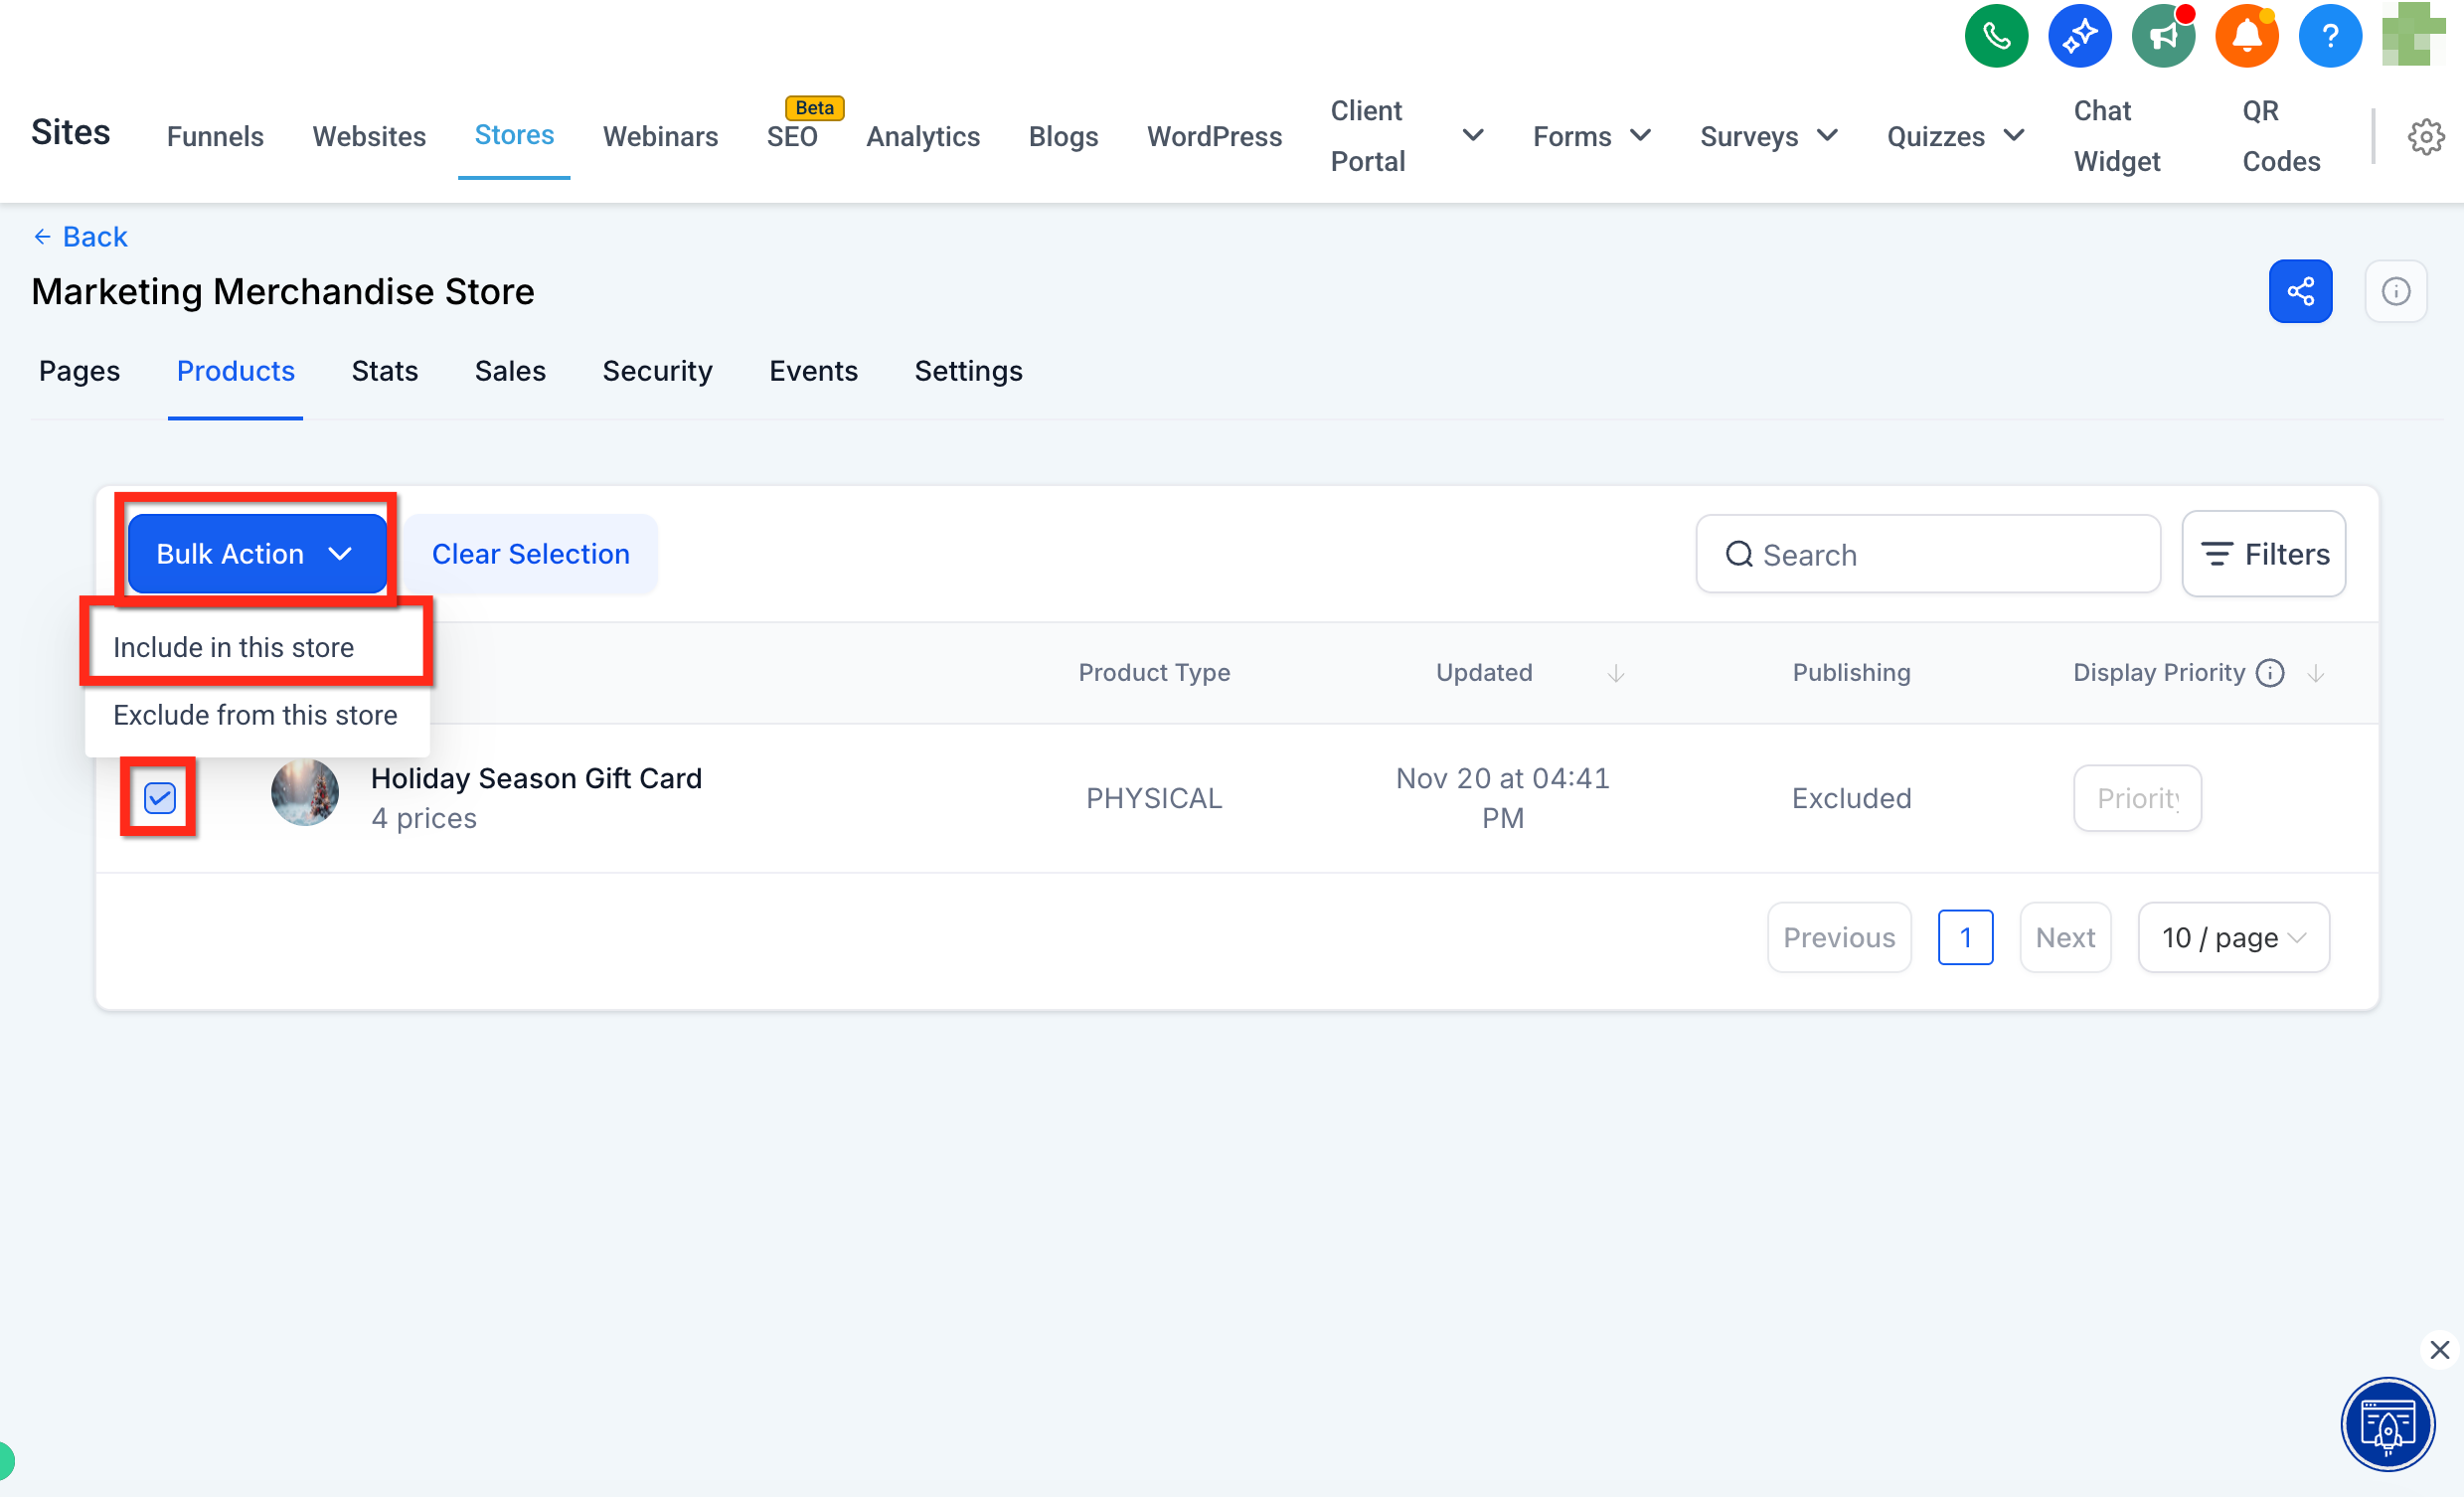
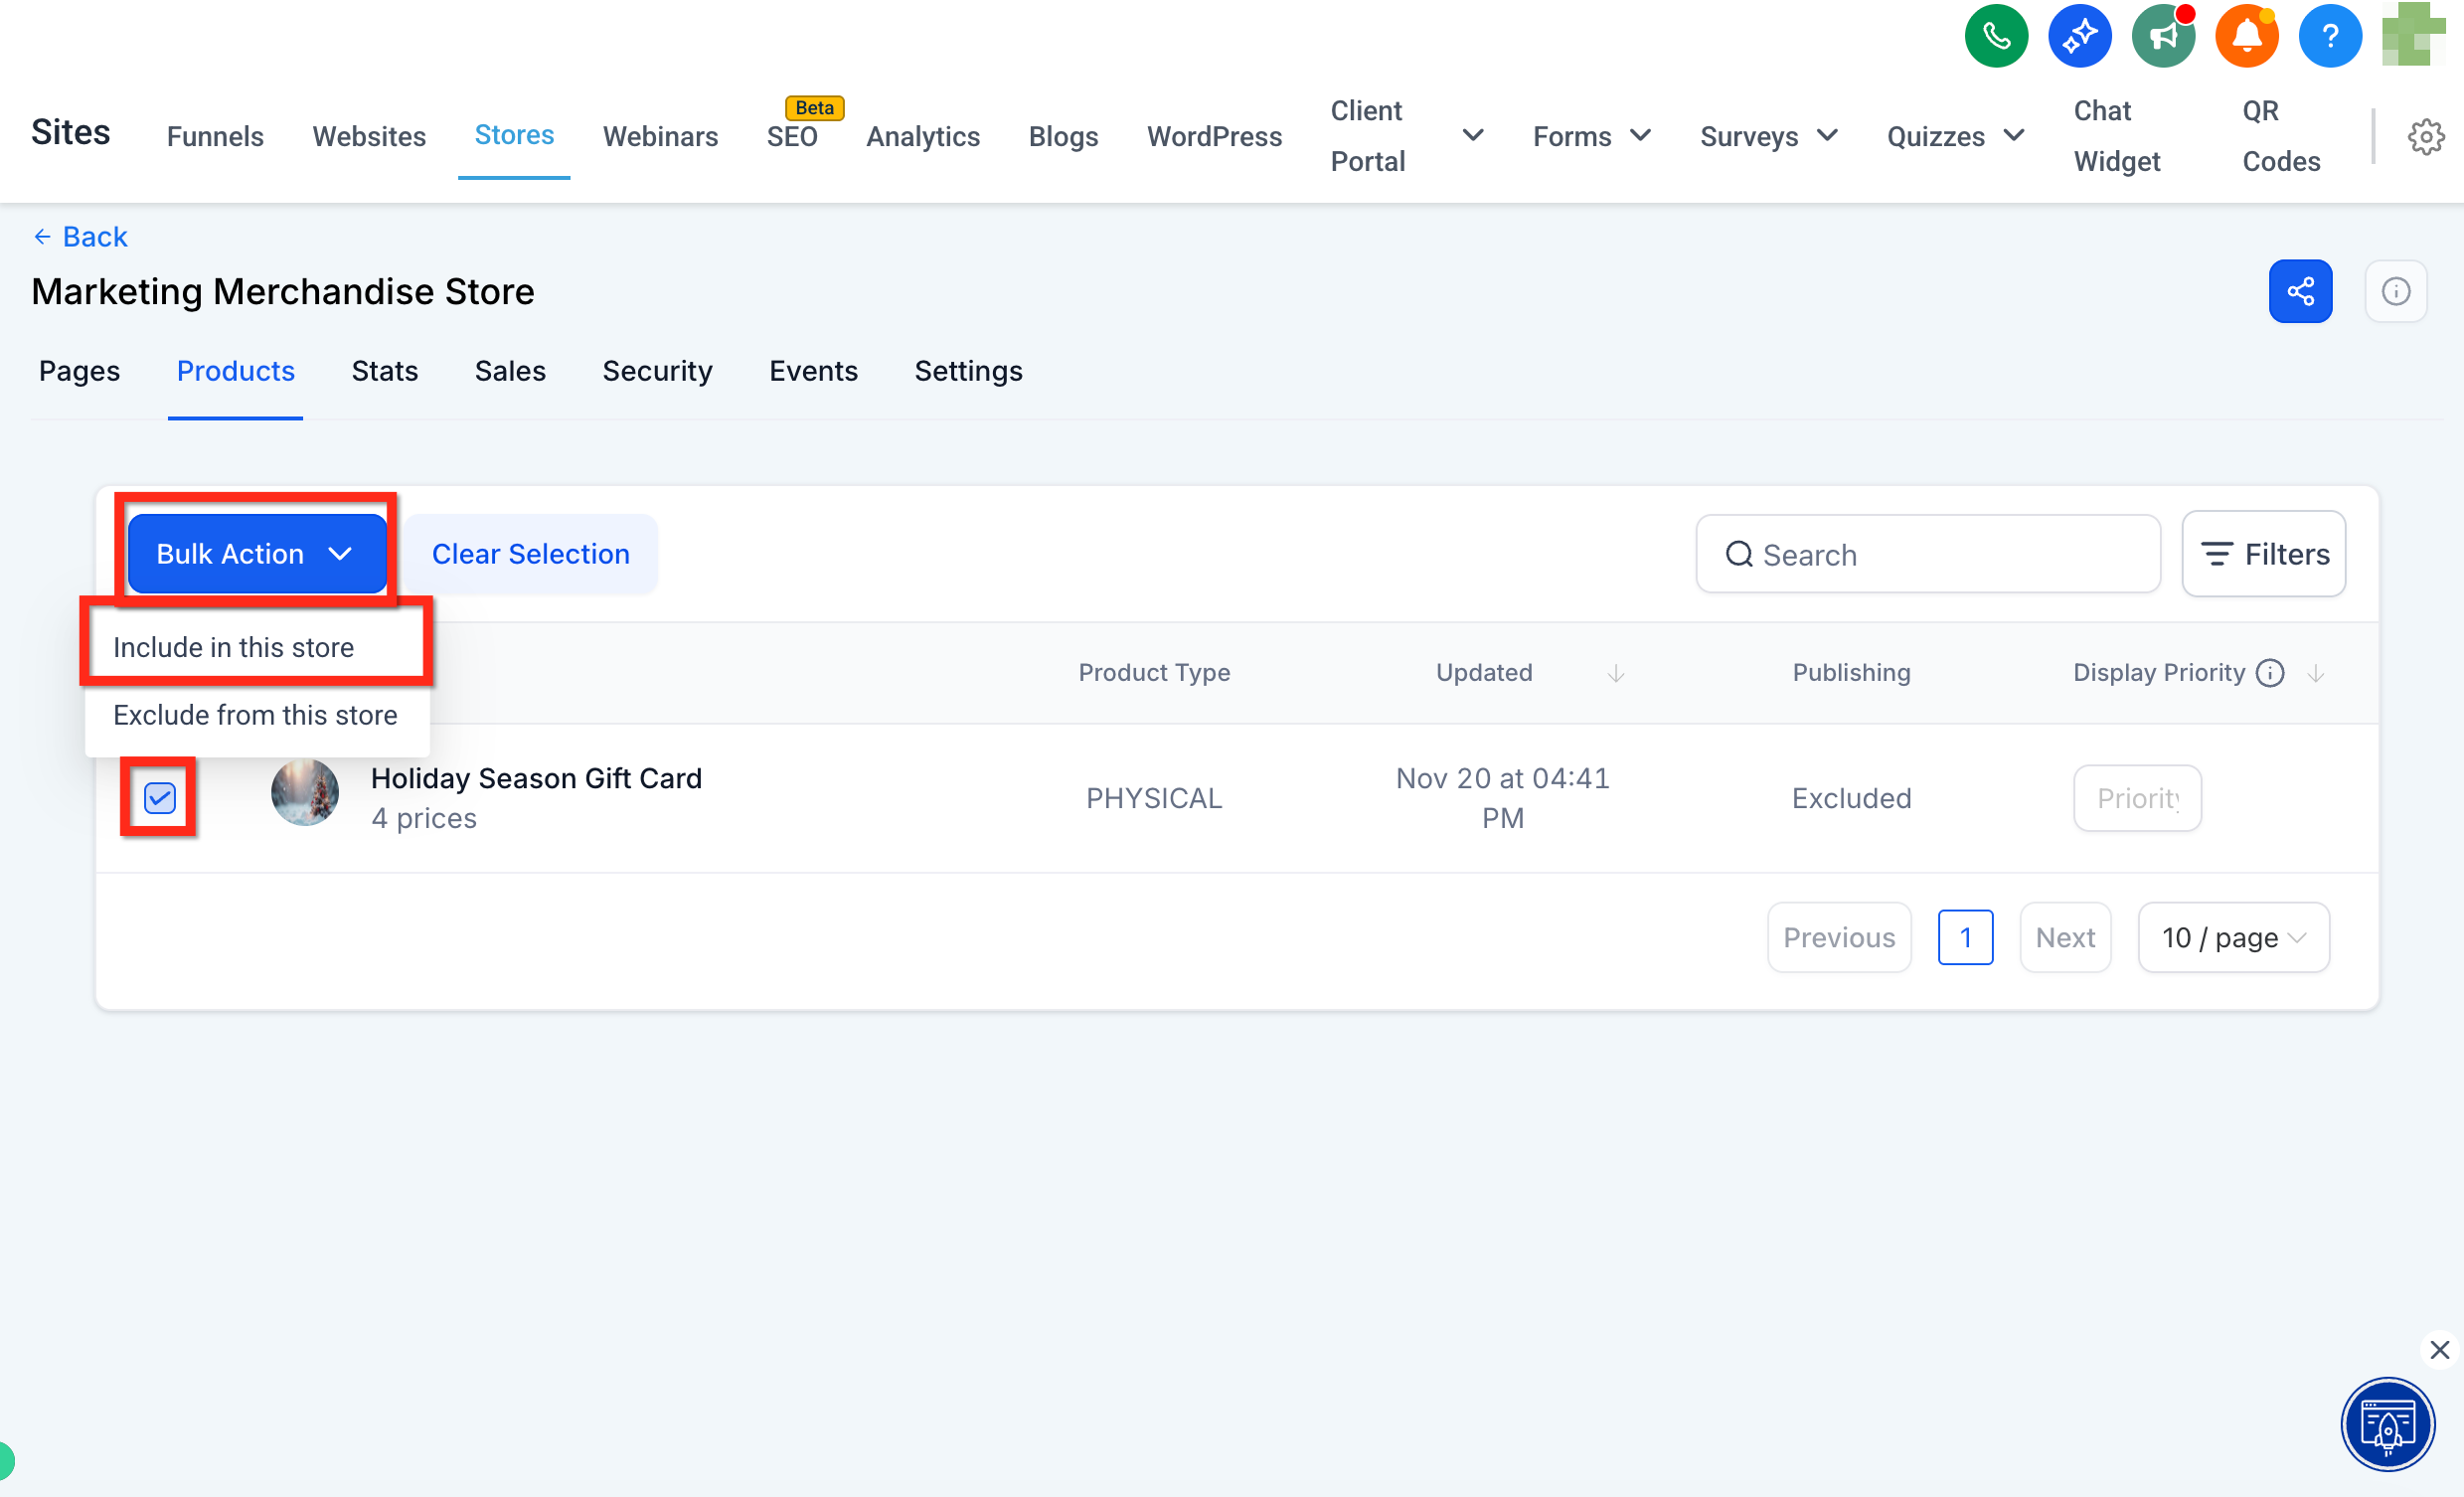
Step 3: Check the box next to the gift card you want to add, click Bulk Actions, and select Include in this store from the dropdown.
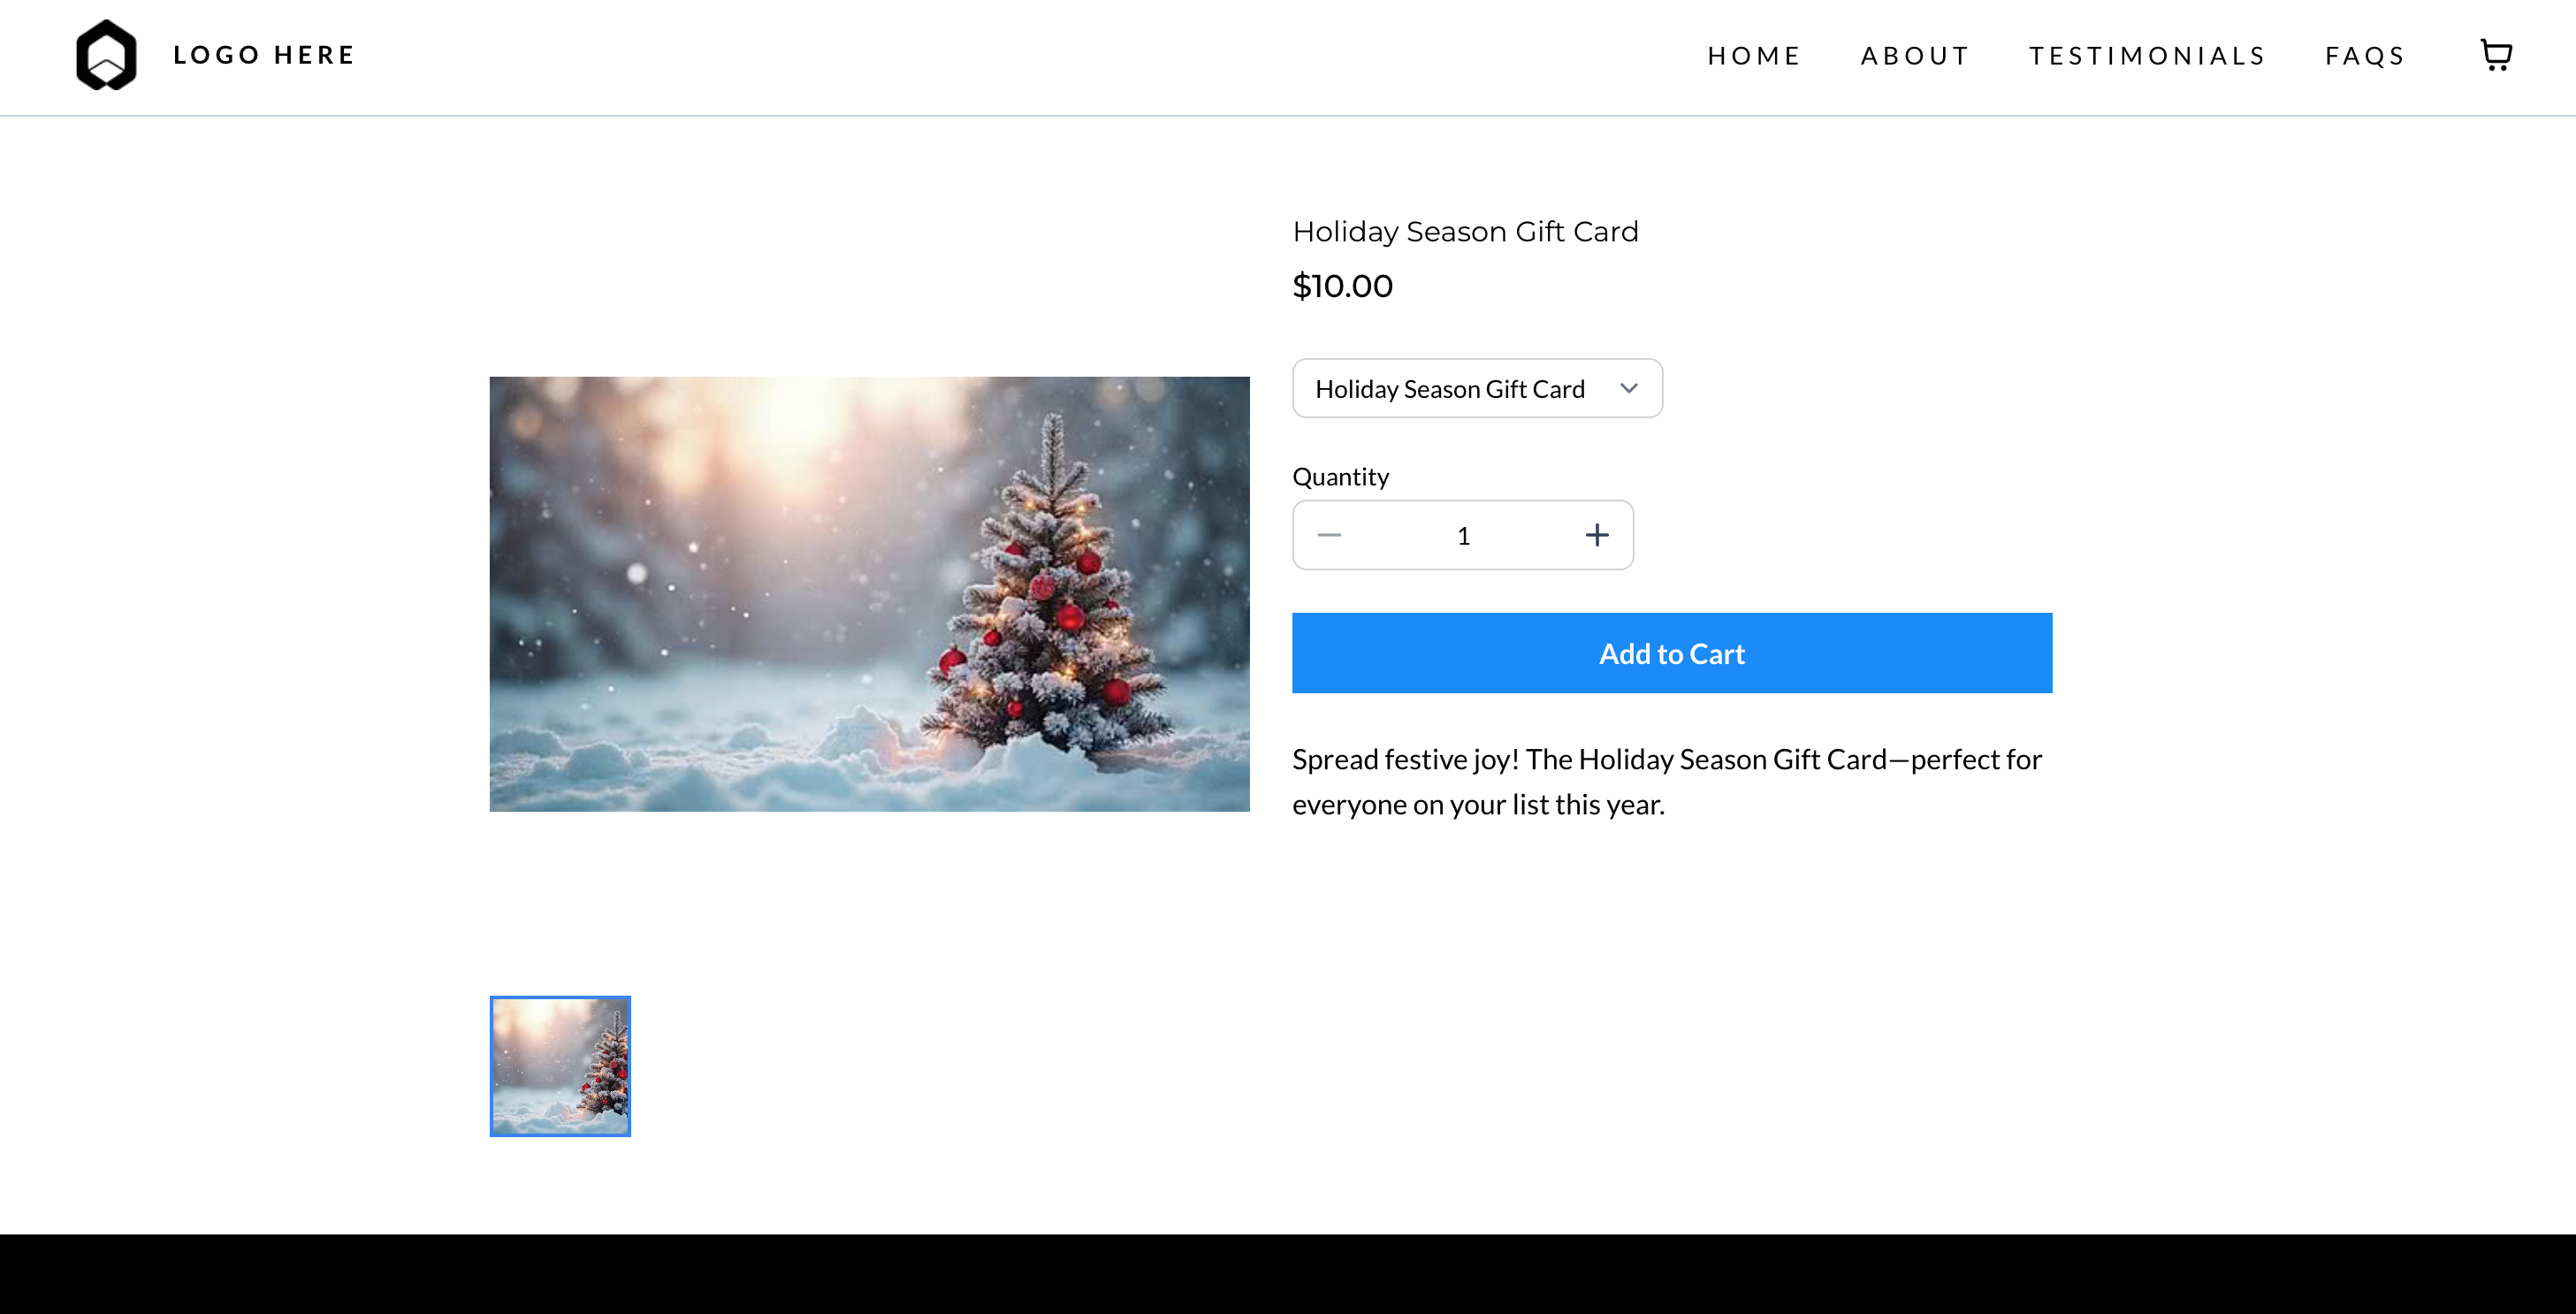
Step 4: Preview your store. Patients can now browse and purchase gift cards like any other item.
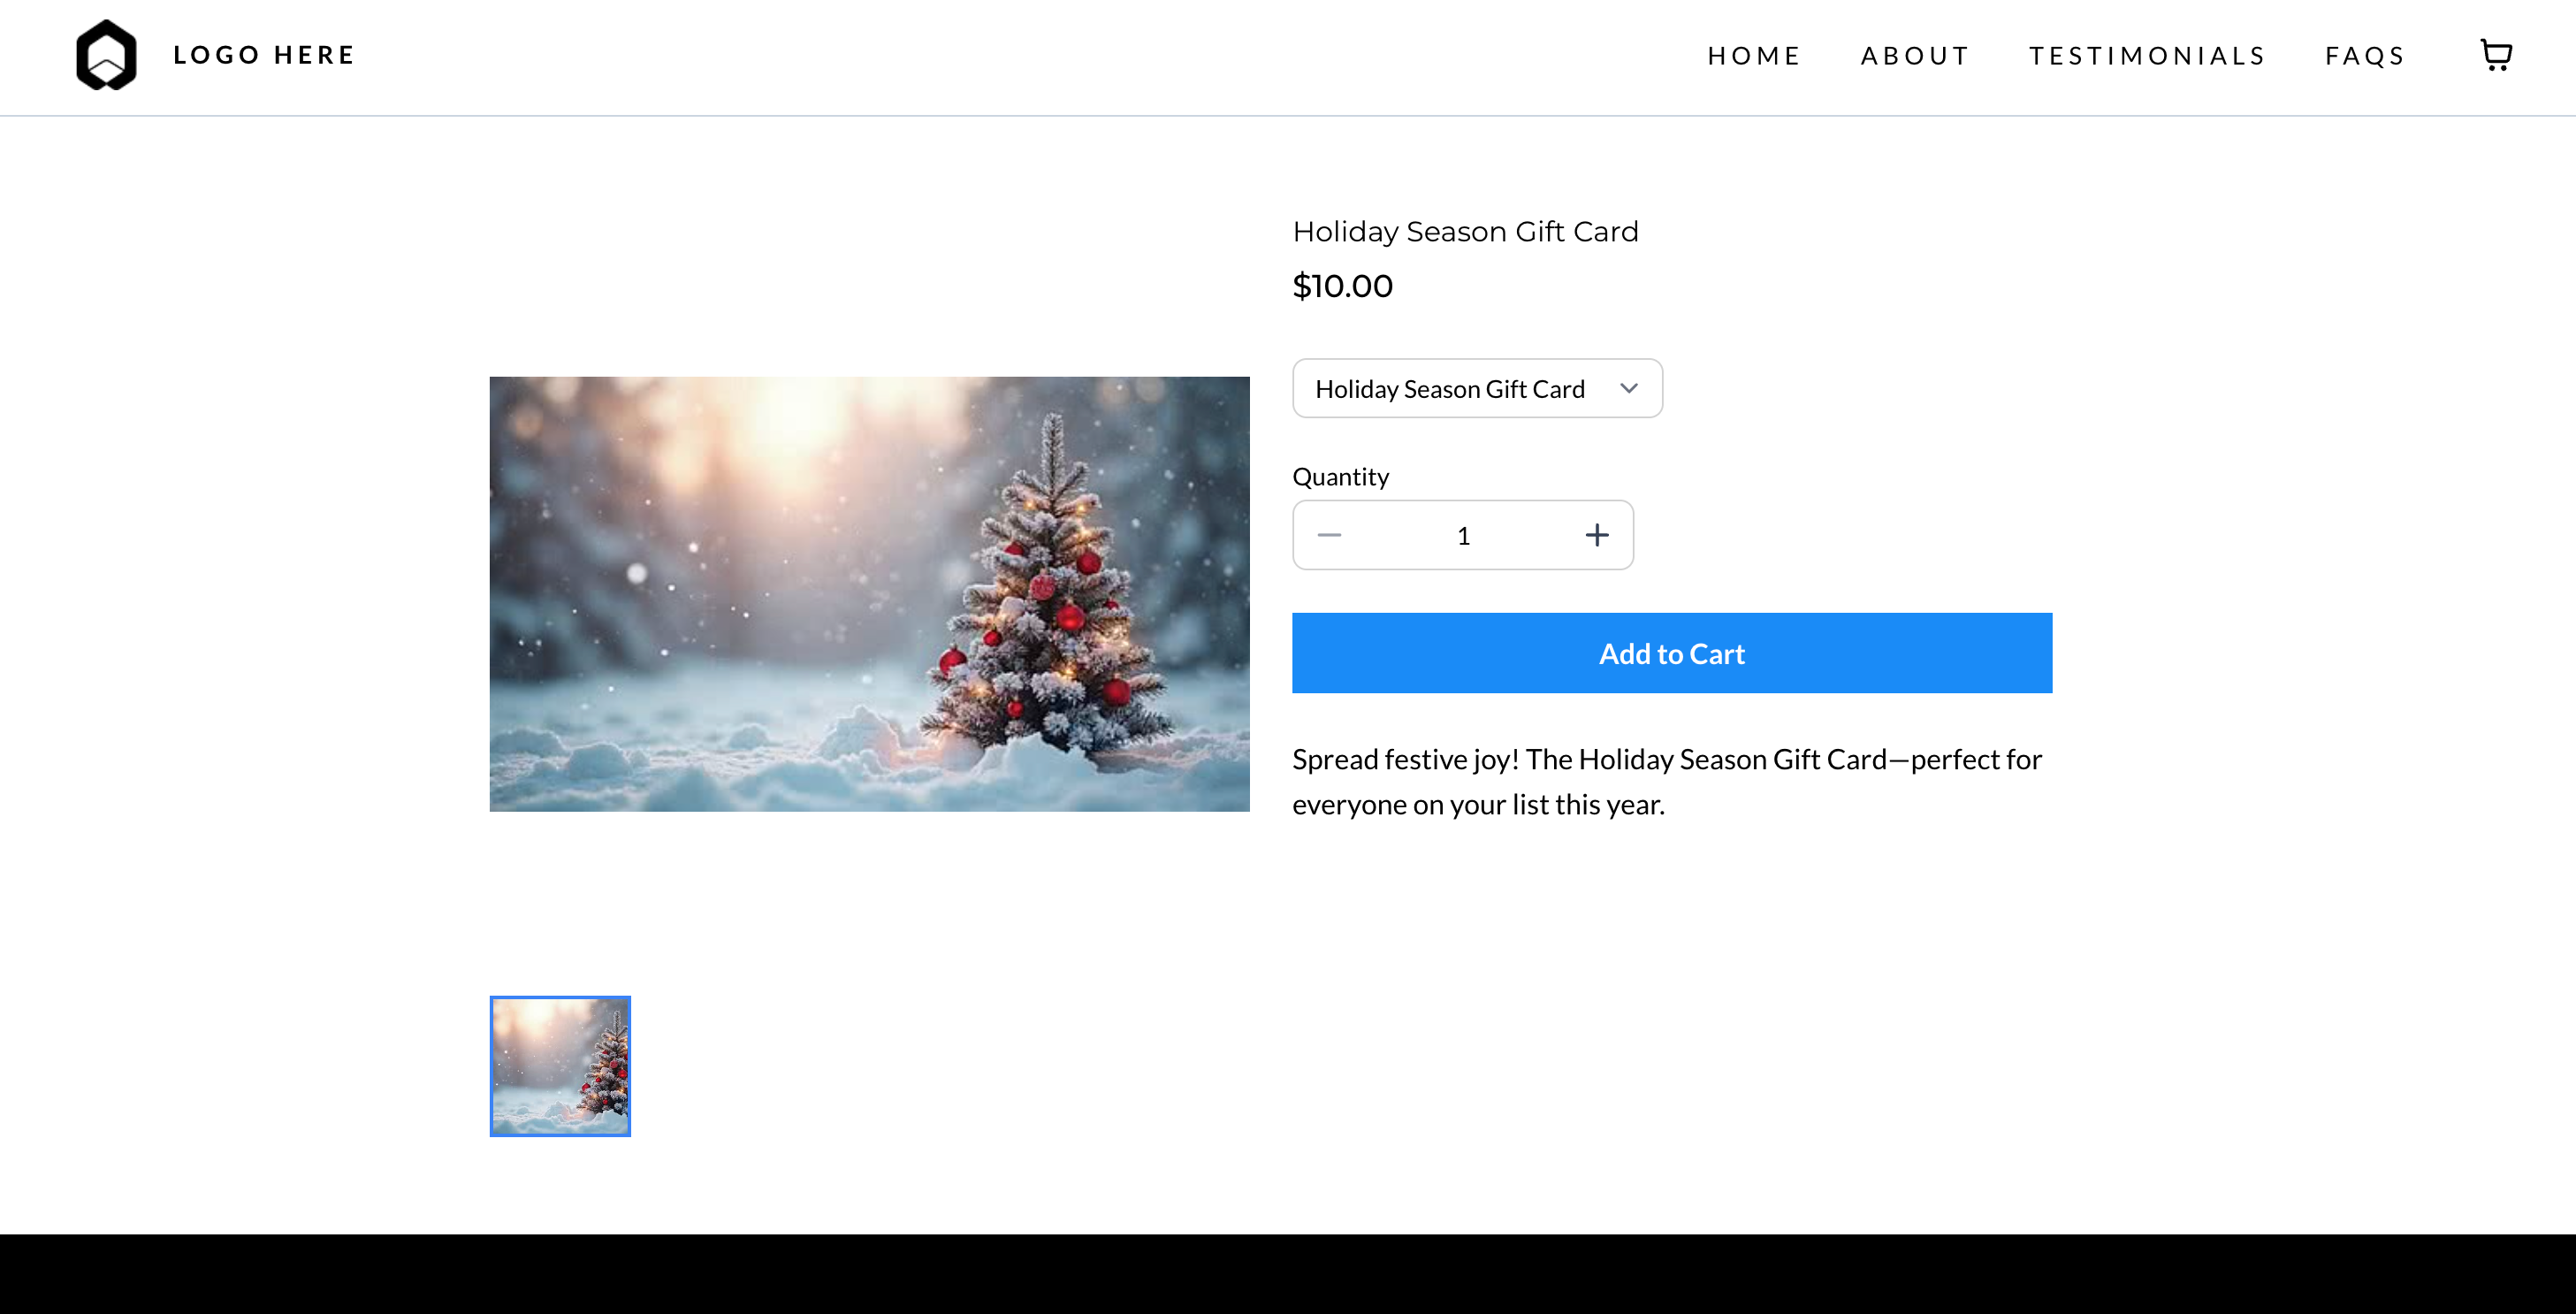
Payment Links are fast to create and easy to share, which makes them a great fit for email or text.
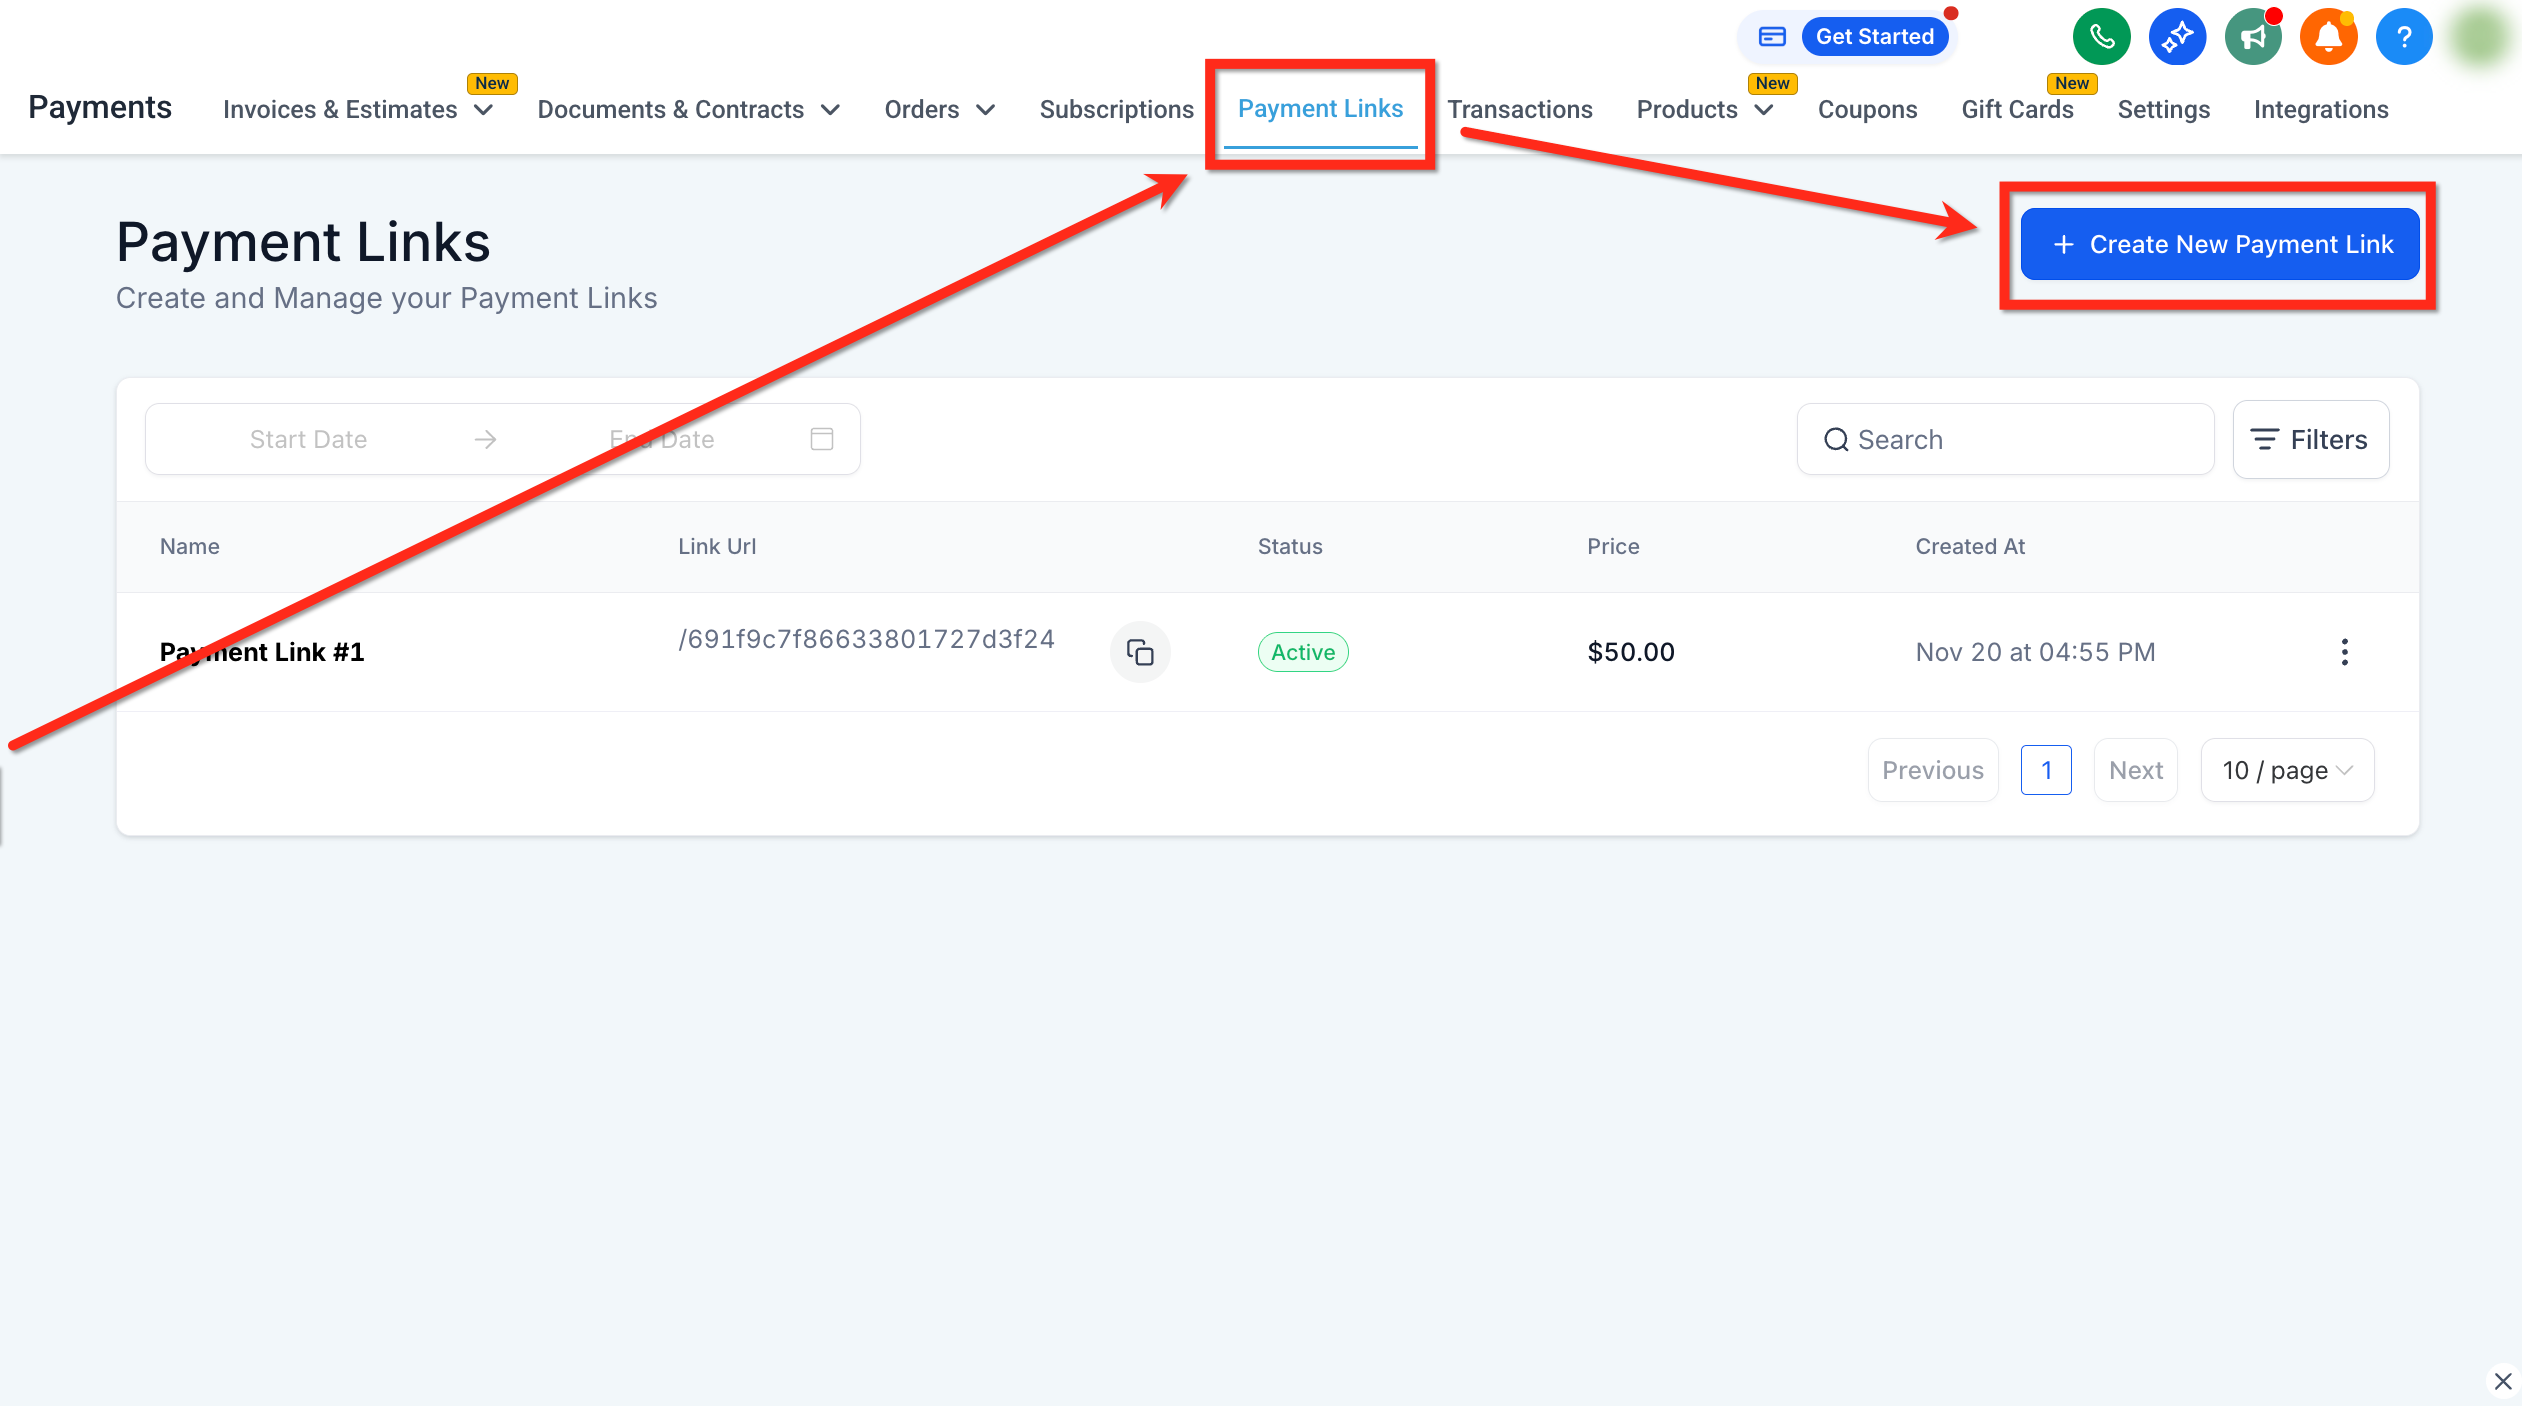
Step 1: Navigate to Payments > Payment Links and create a new Payment Link.
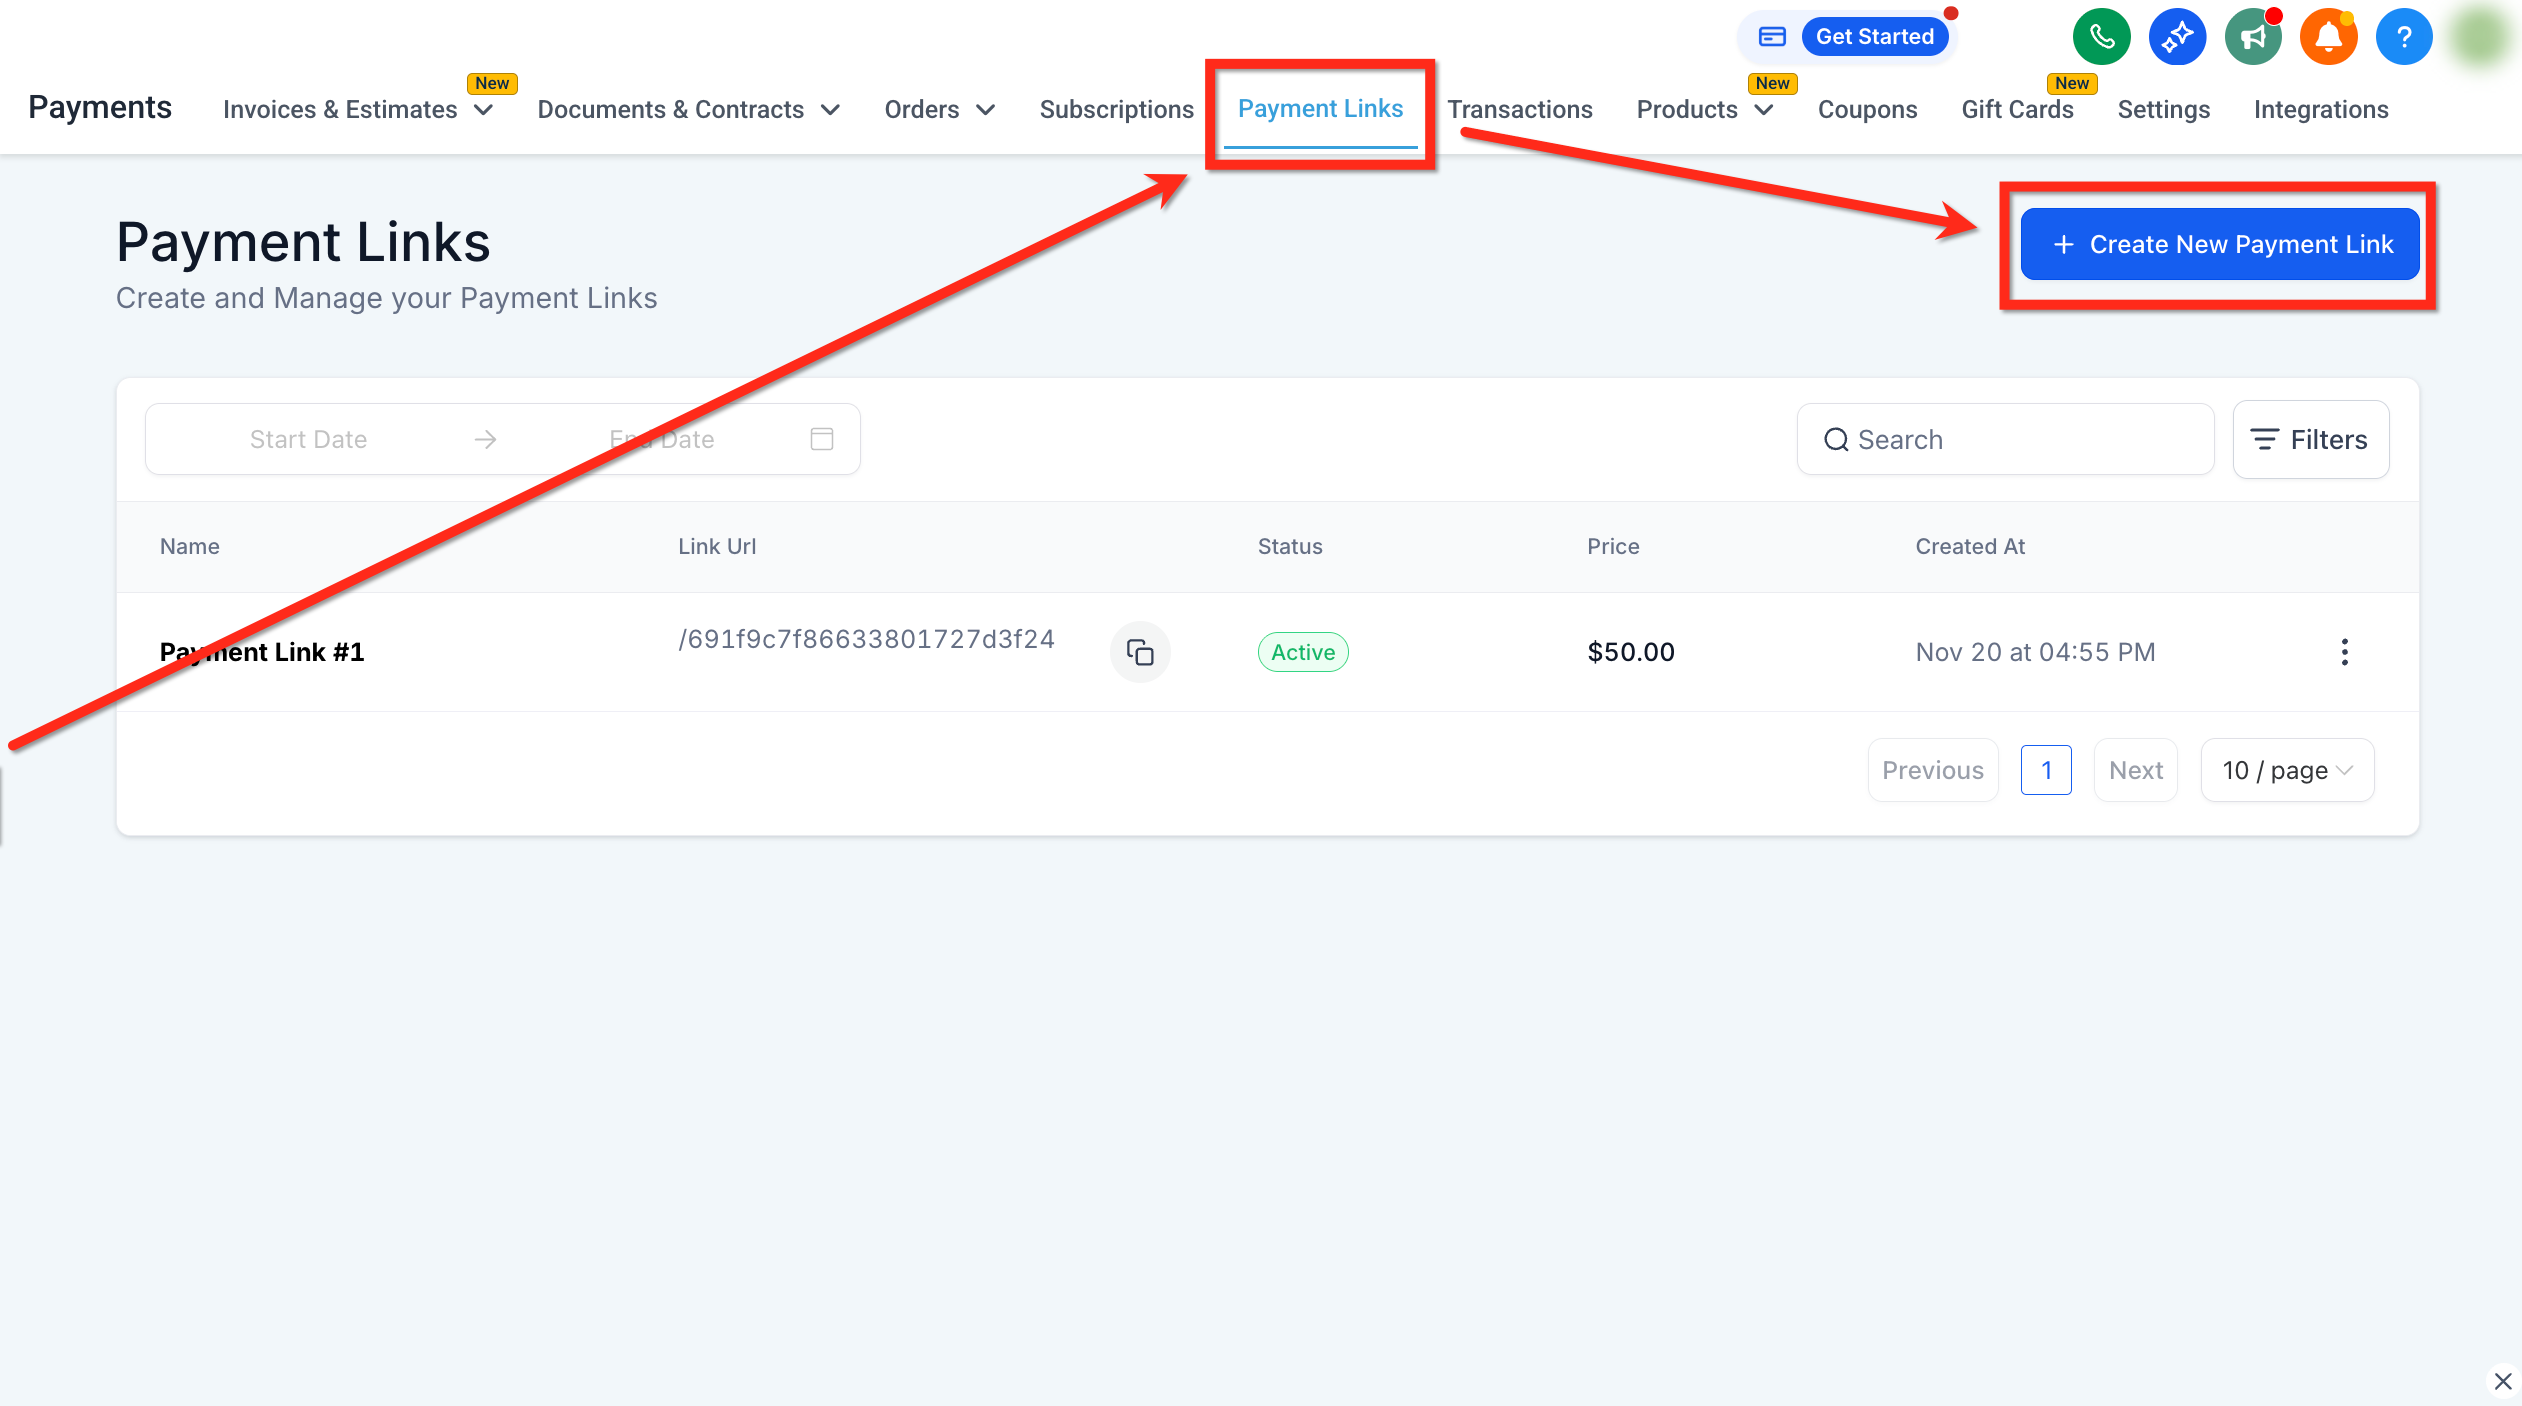
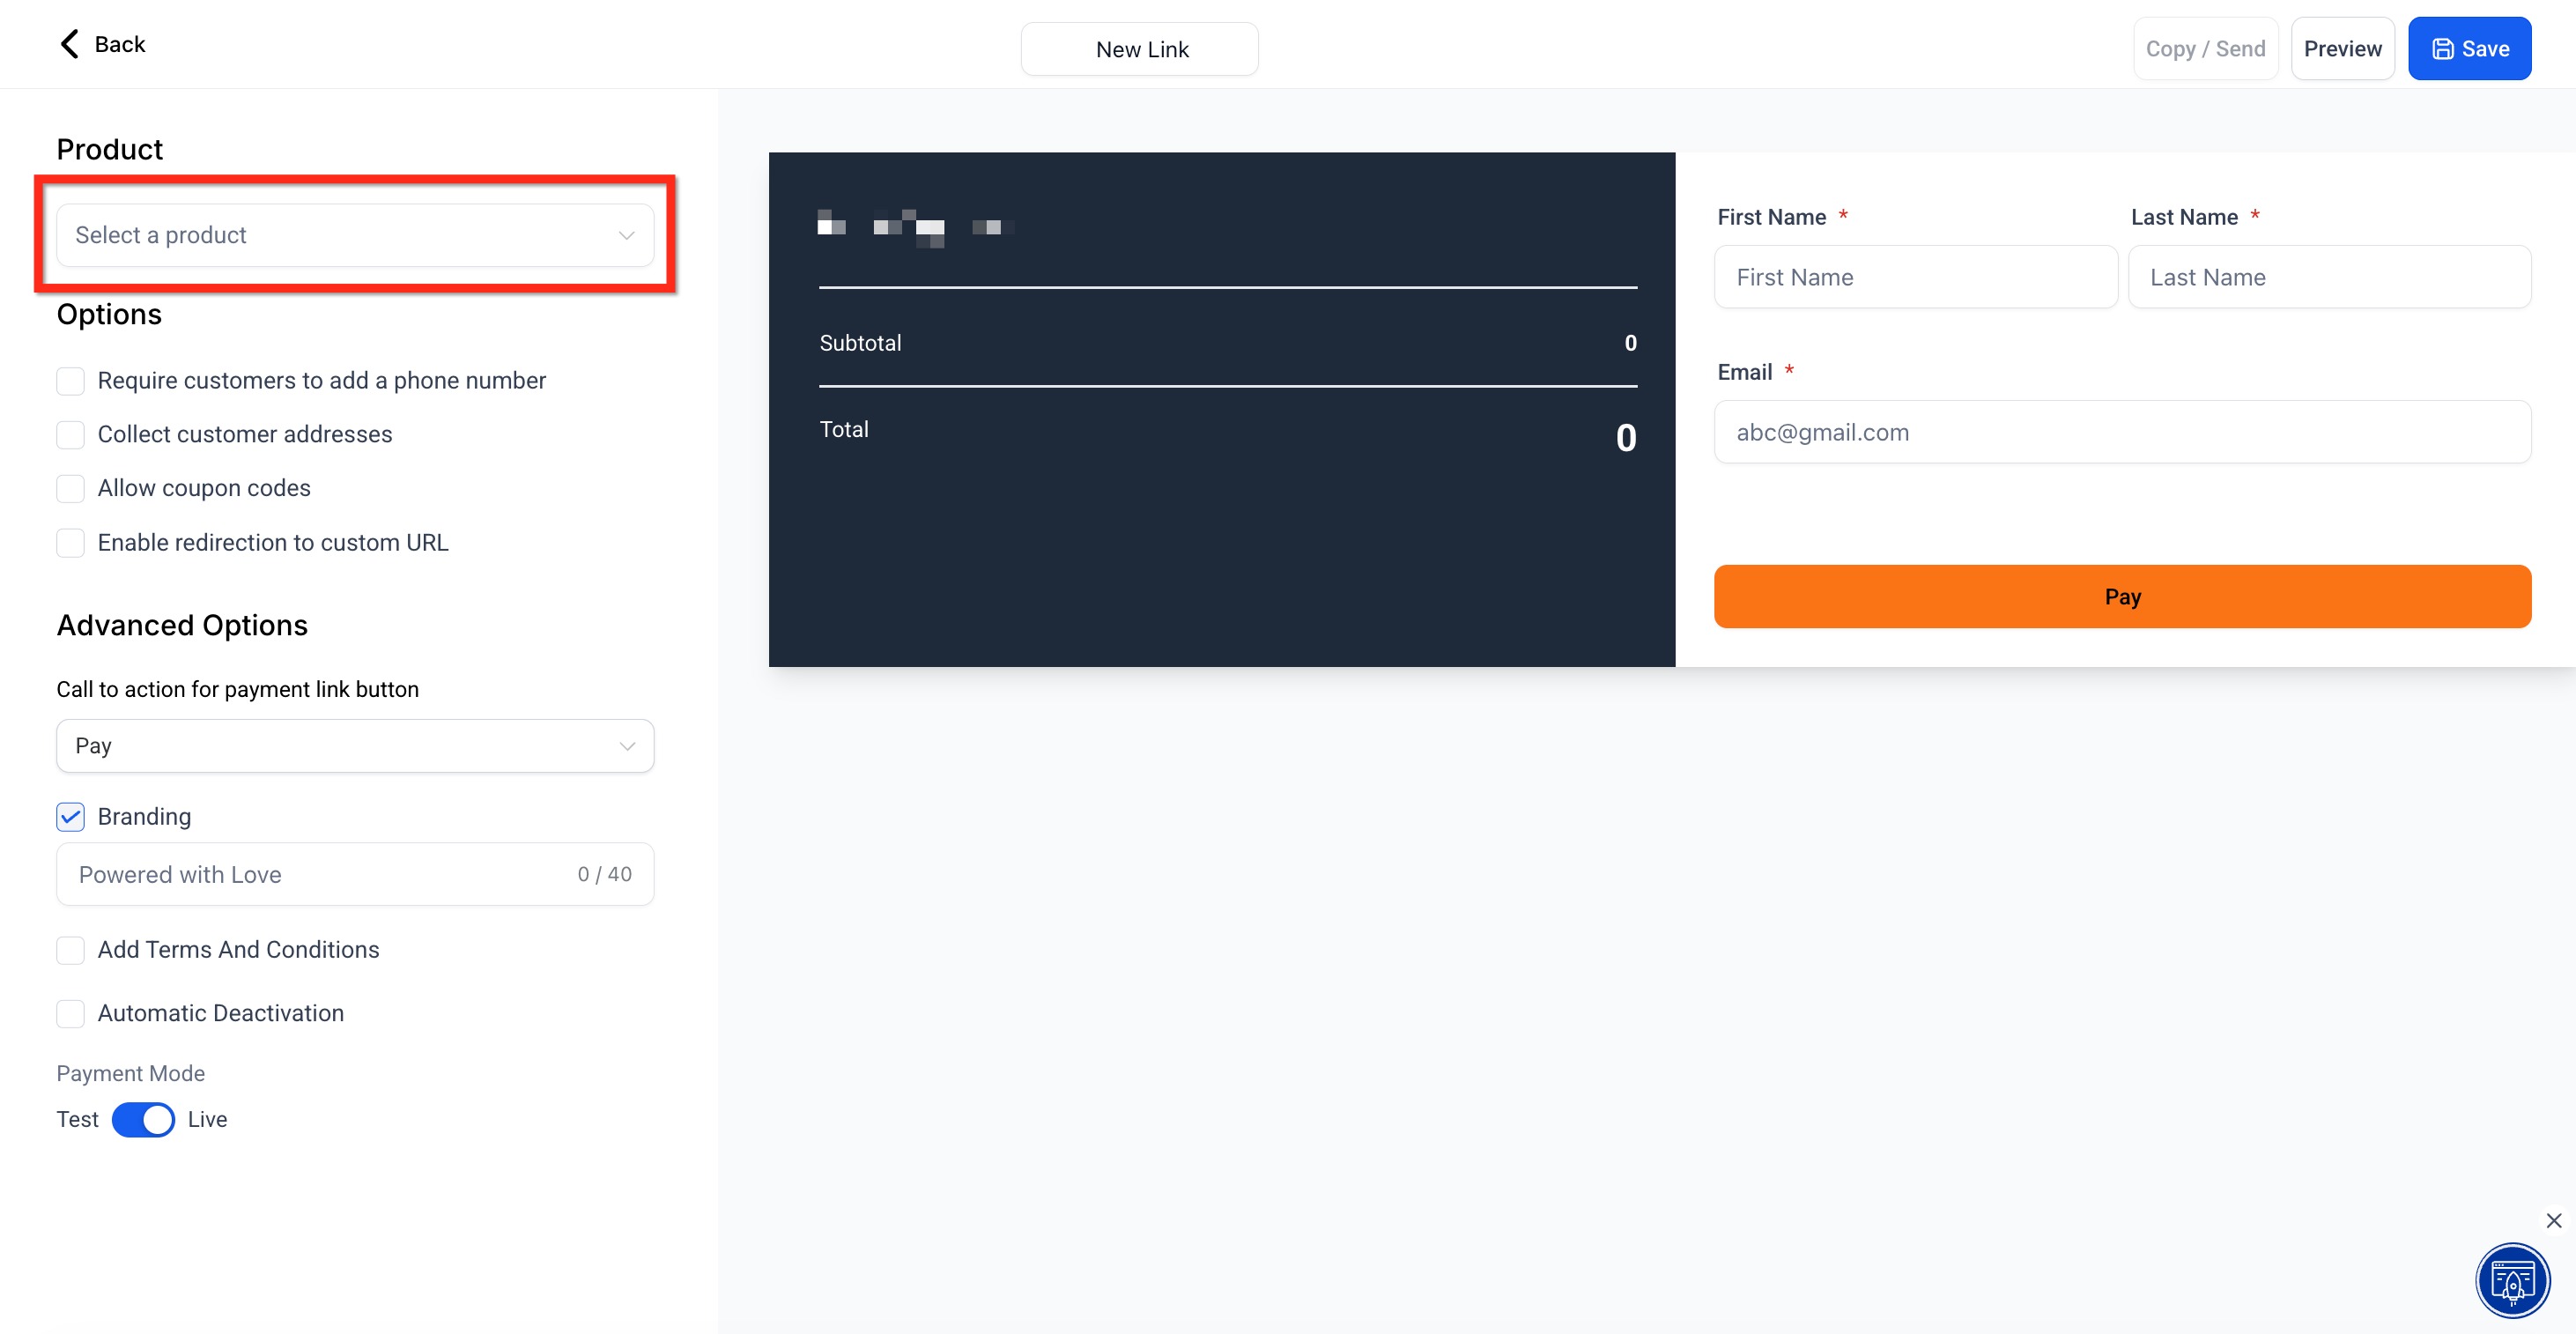
Step 2: Click Select a Product and choose the gift card you want to add from the dropdown. Click Save once it has been added.
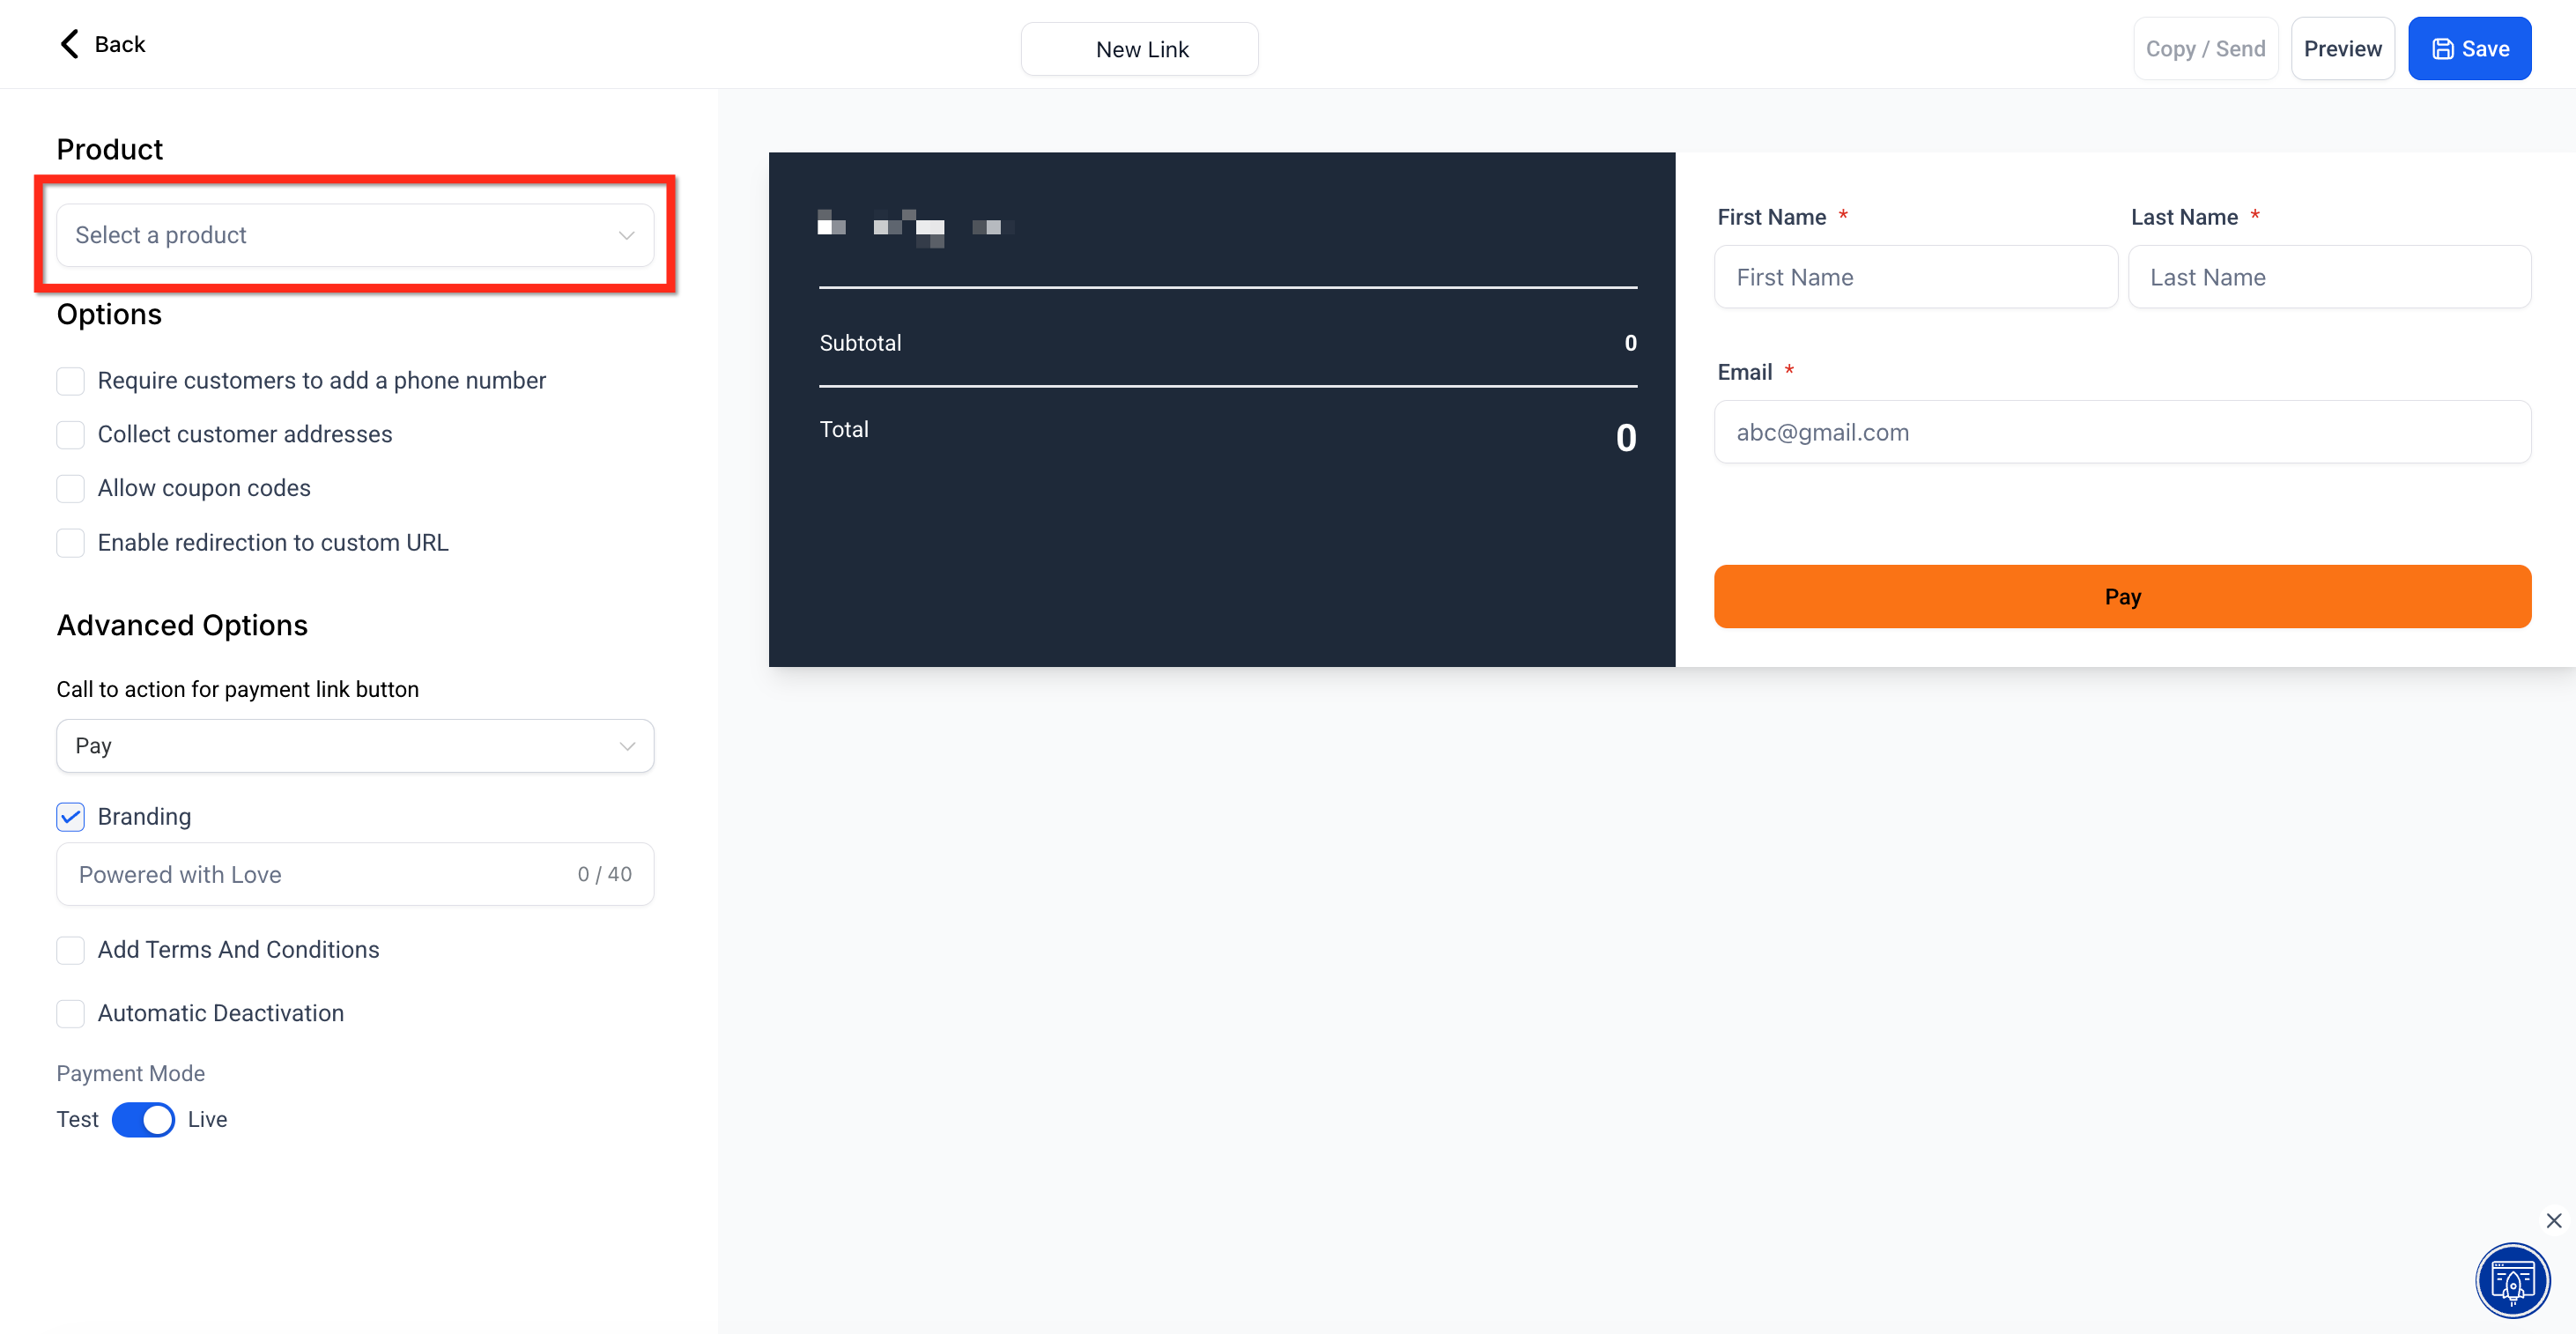
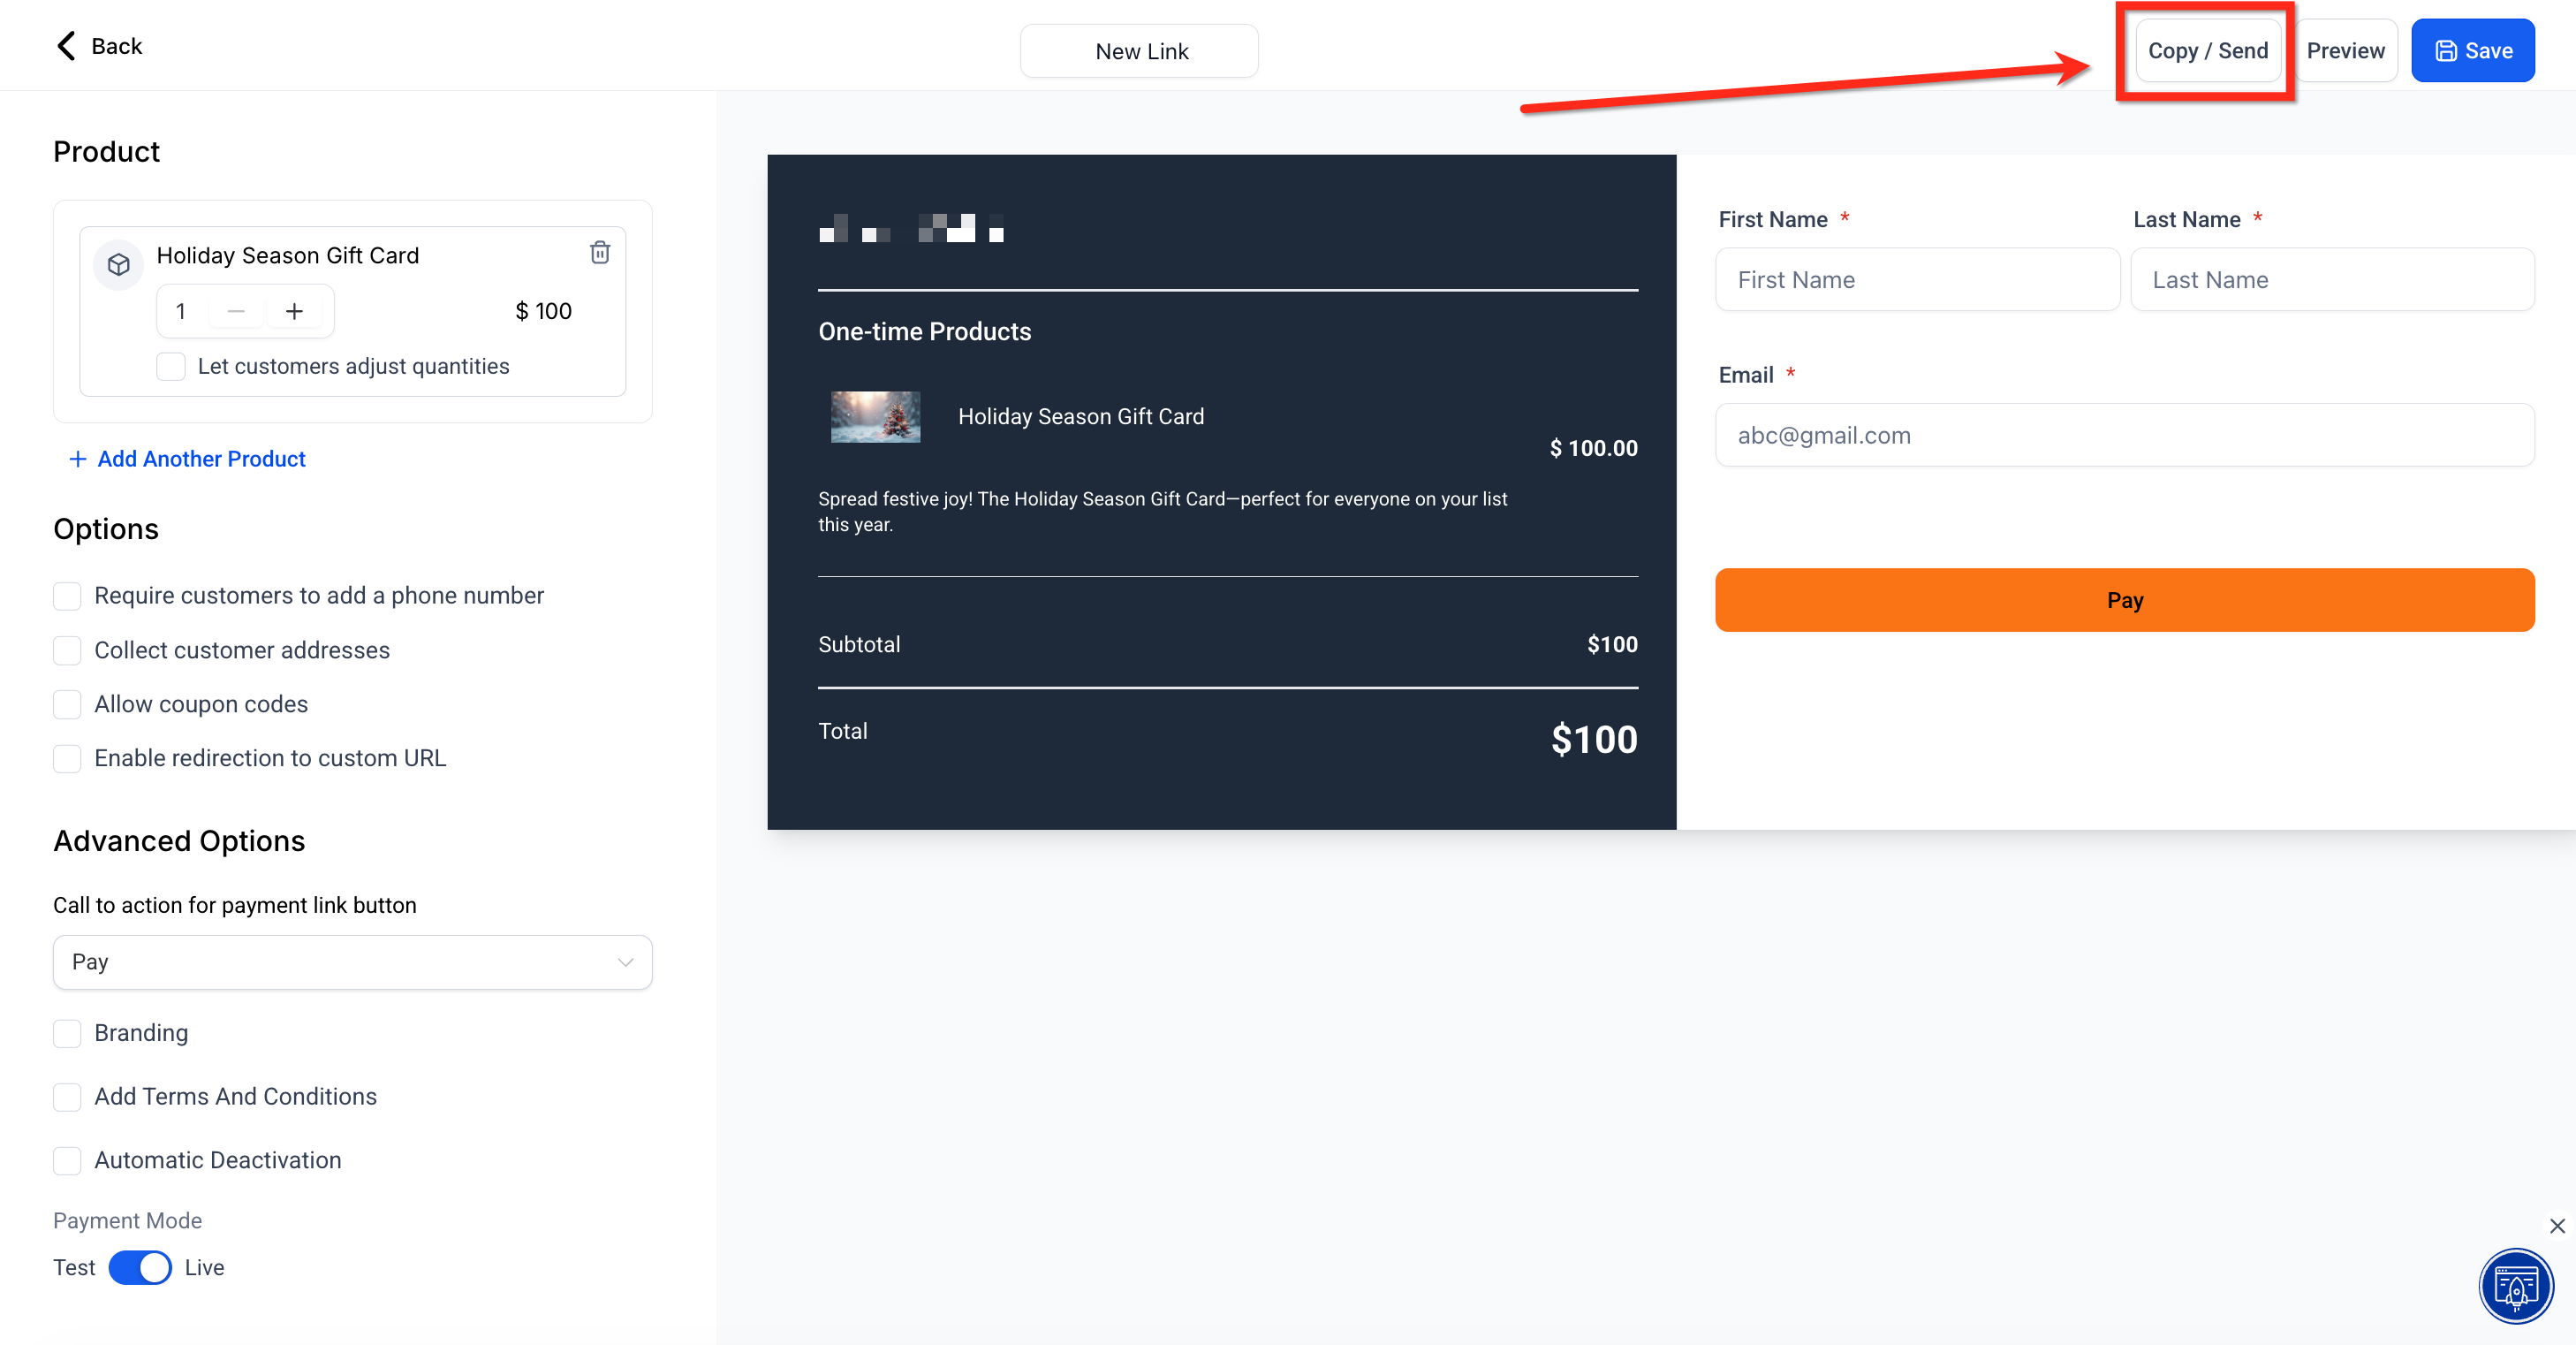
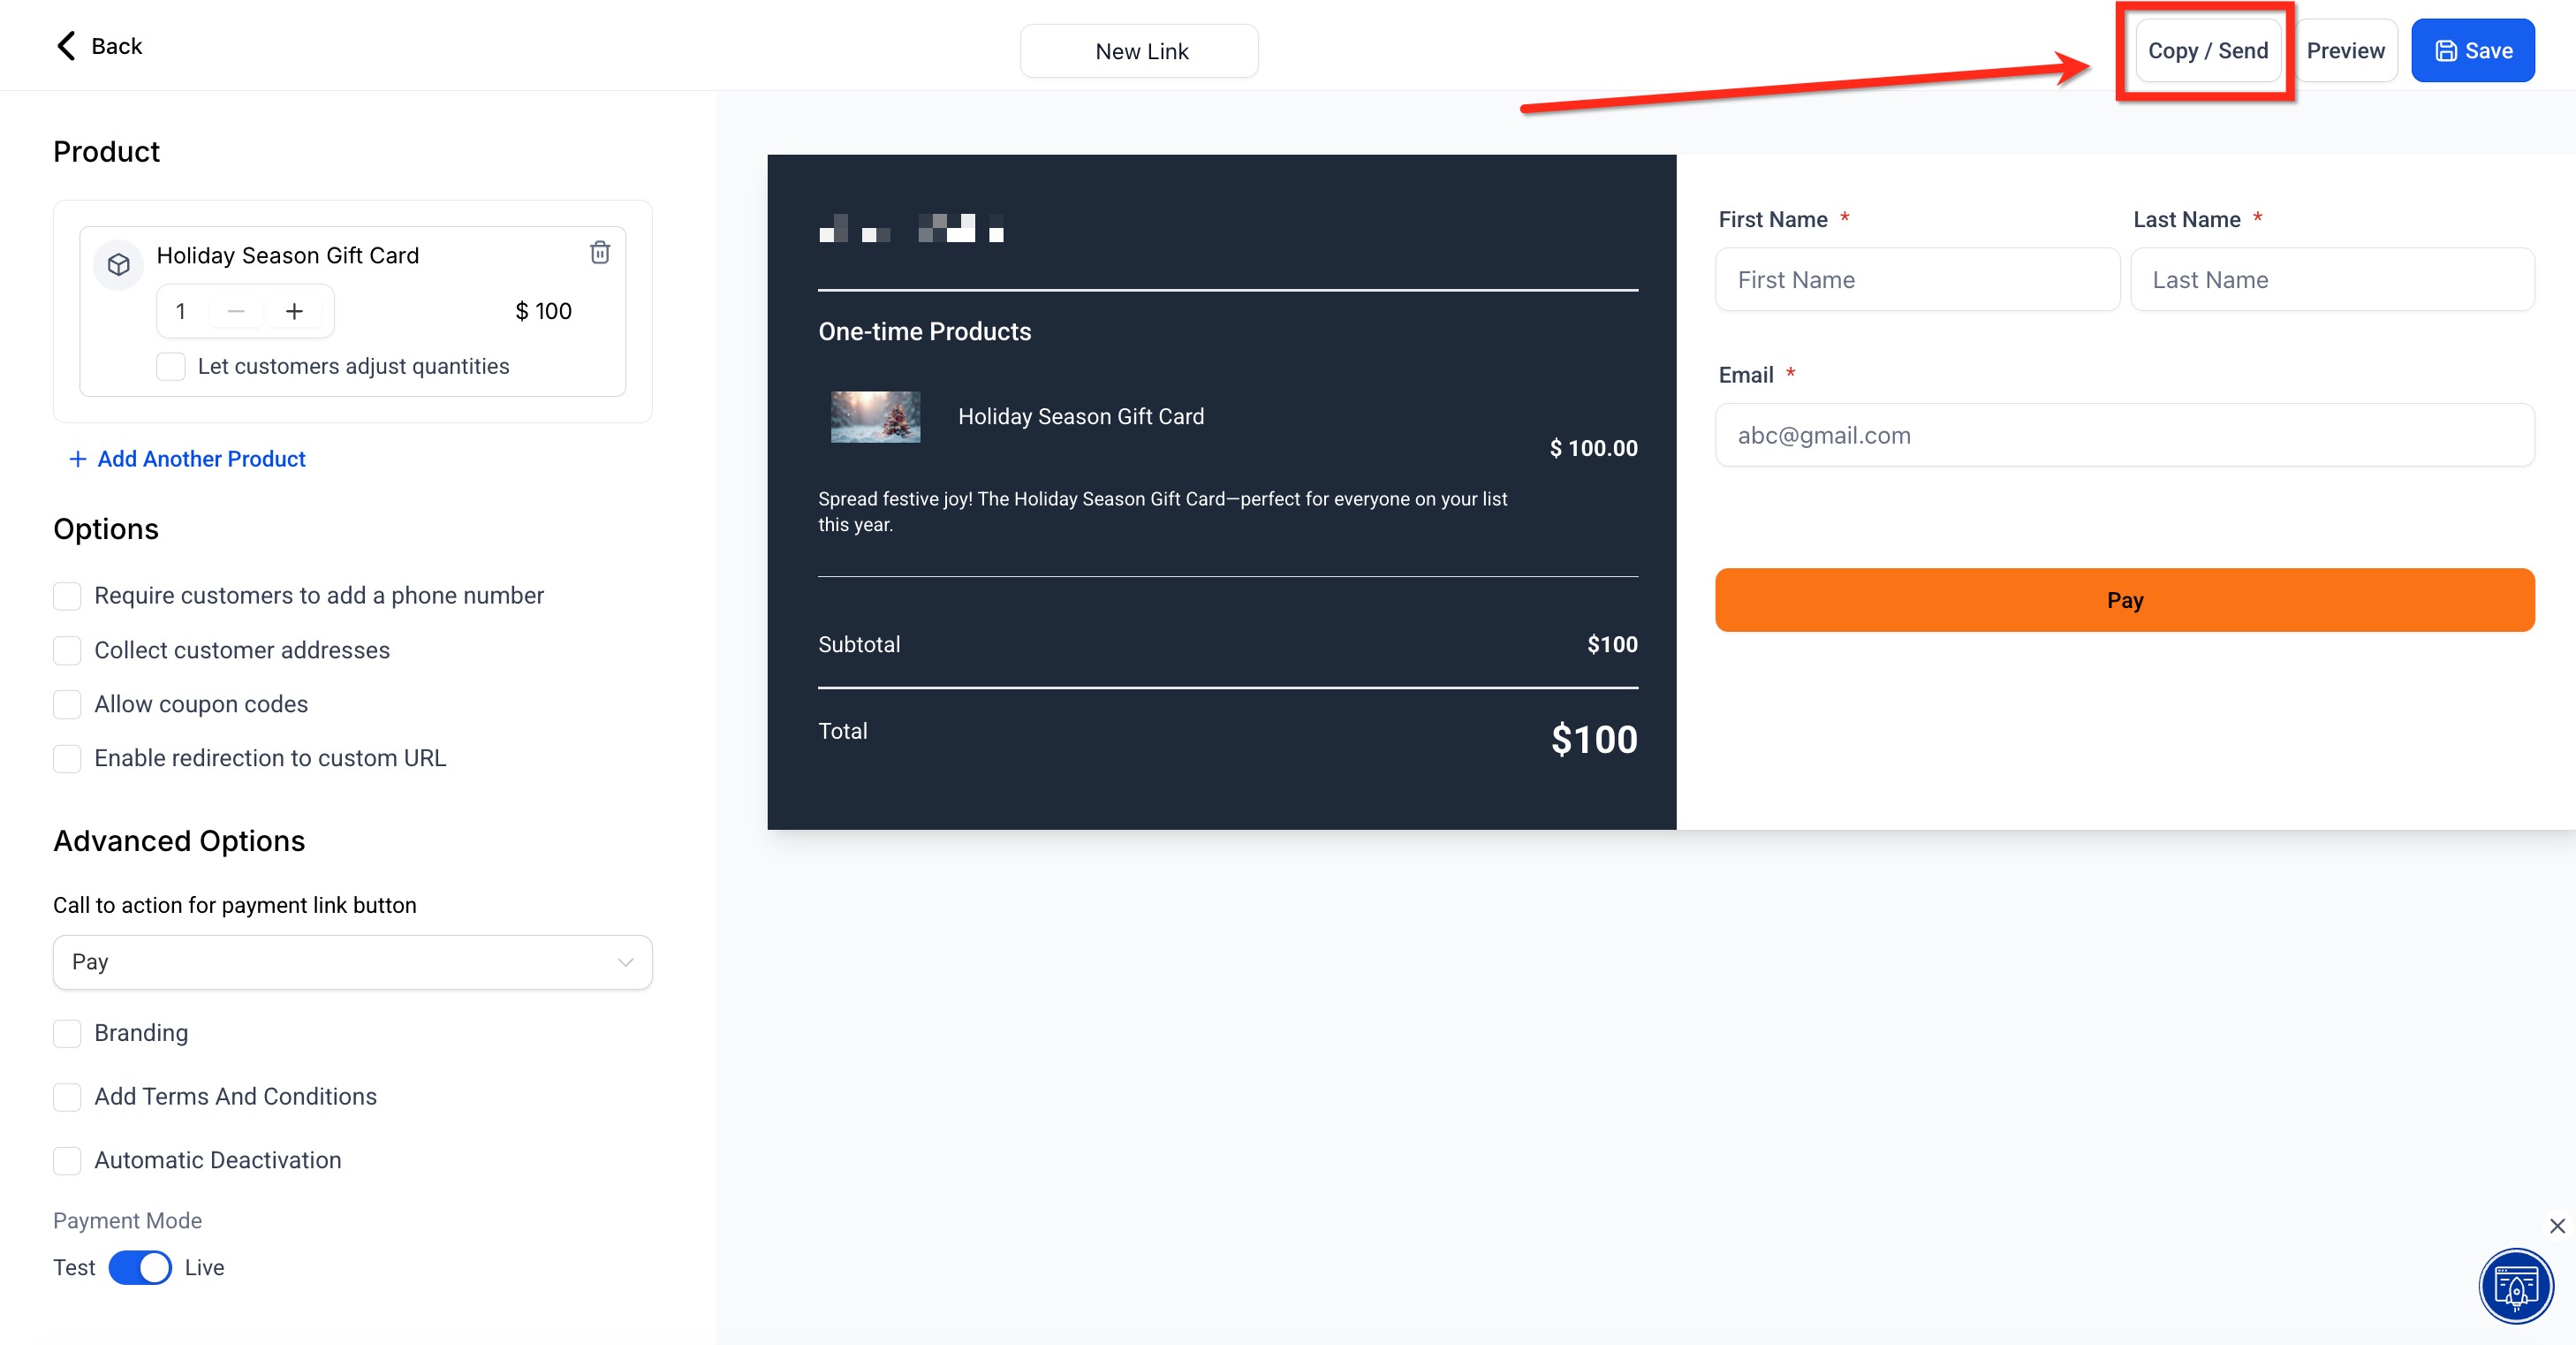
Step 3: Click Copy/Send to get the shareable payment link. You can now send this link directly to patients.
Add gift cards to invoices for patients who prefer an invoice and pay-on-receipt workflow. When the invoice is paid, a Gift Card Order is created automatically.
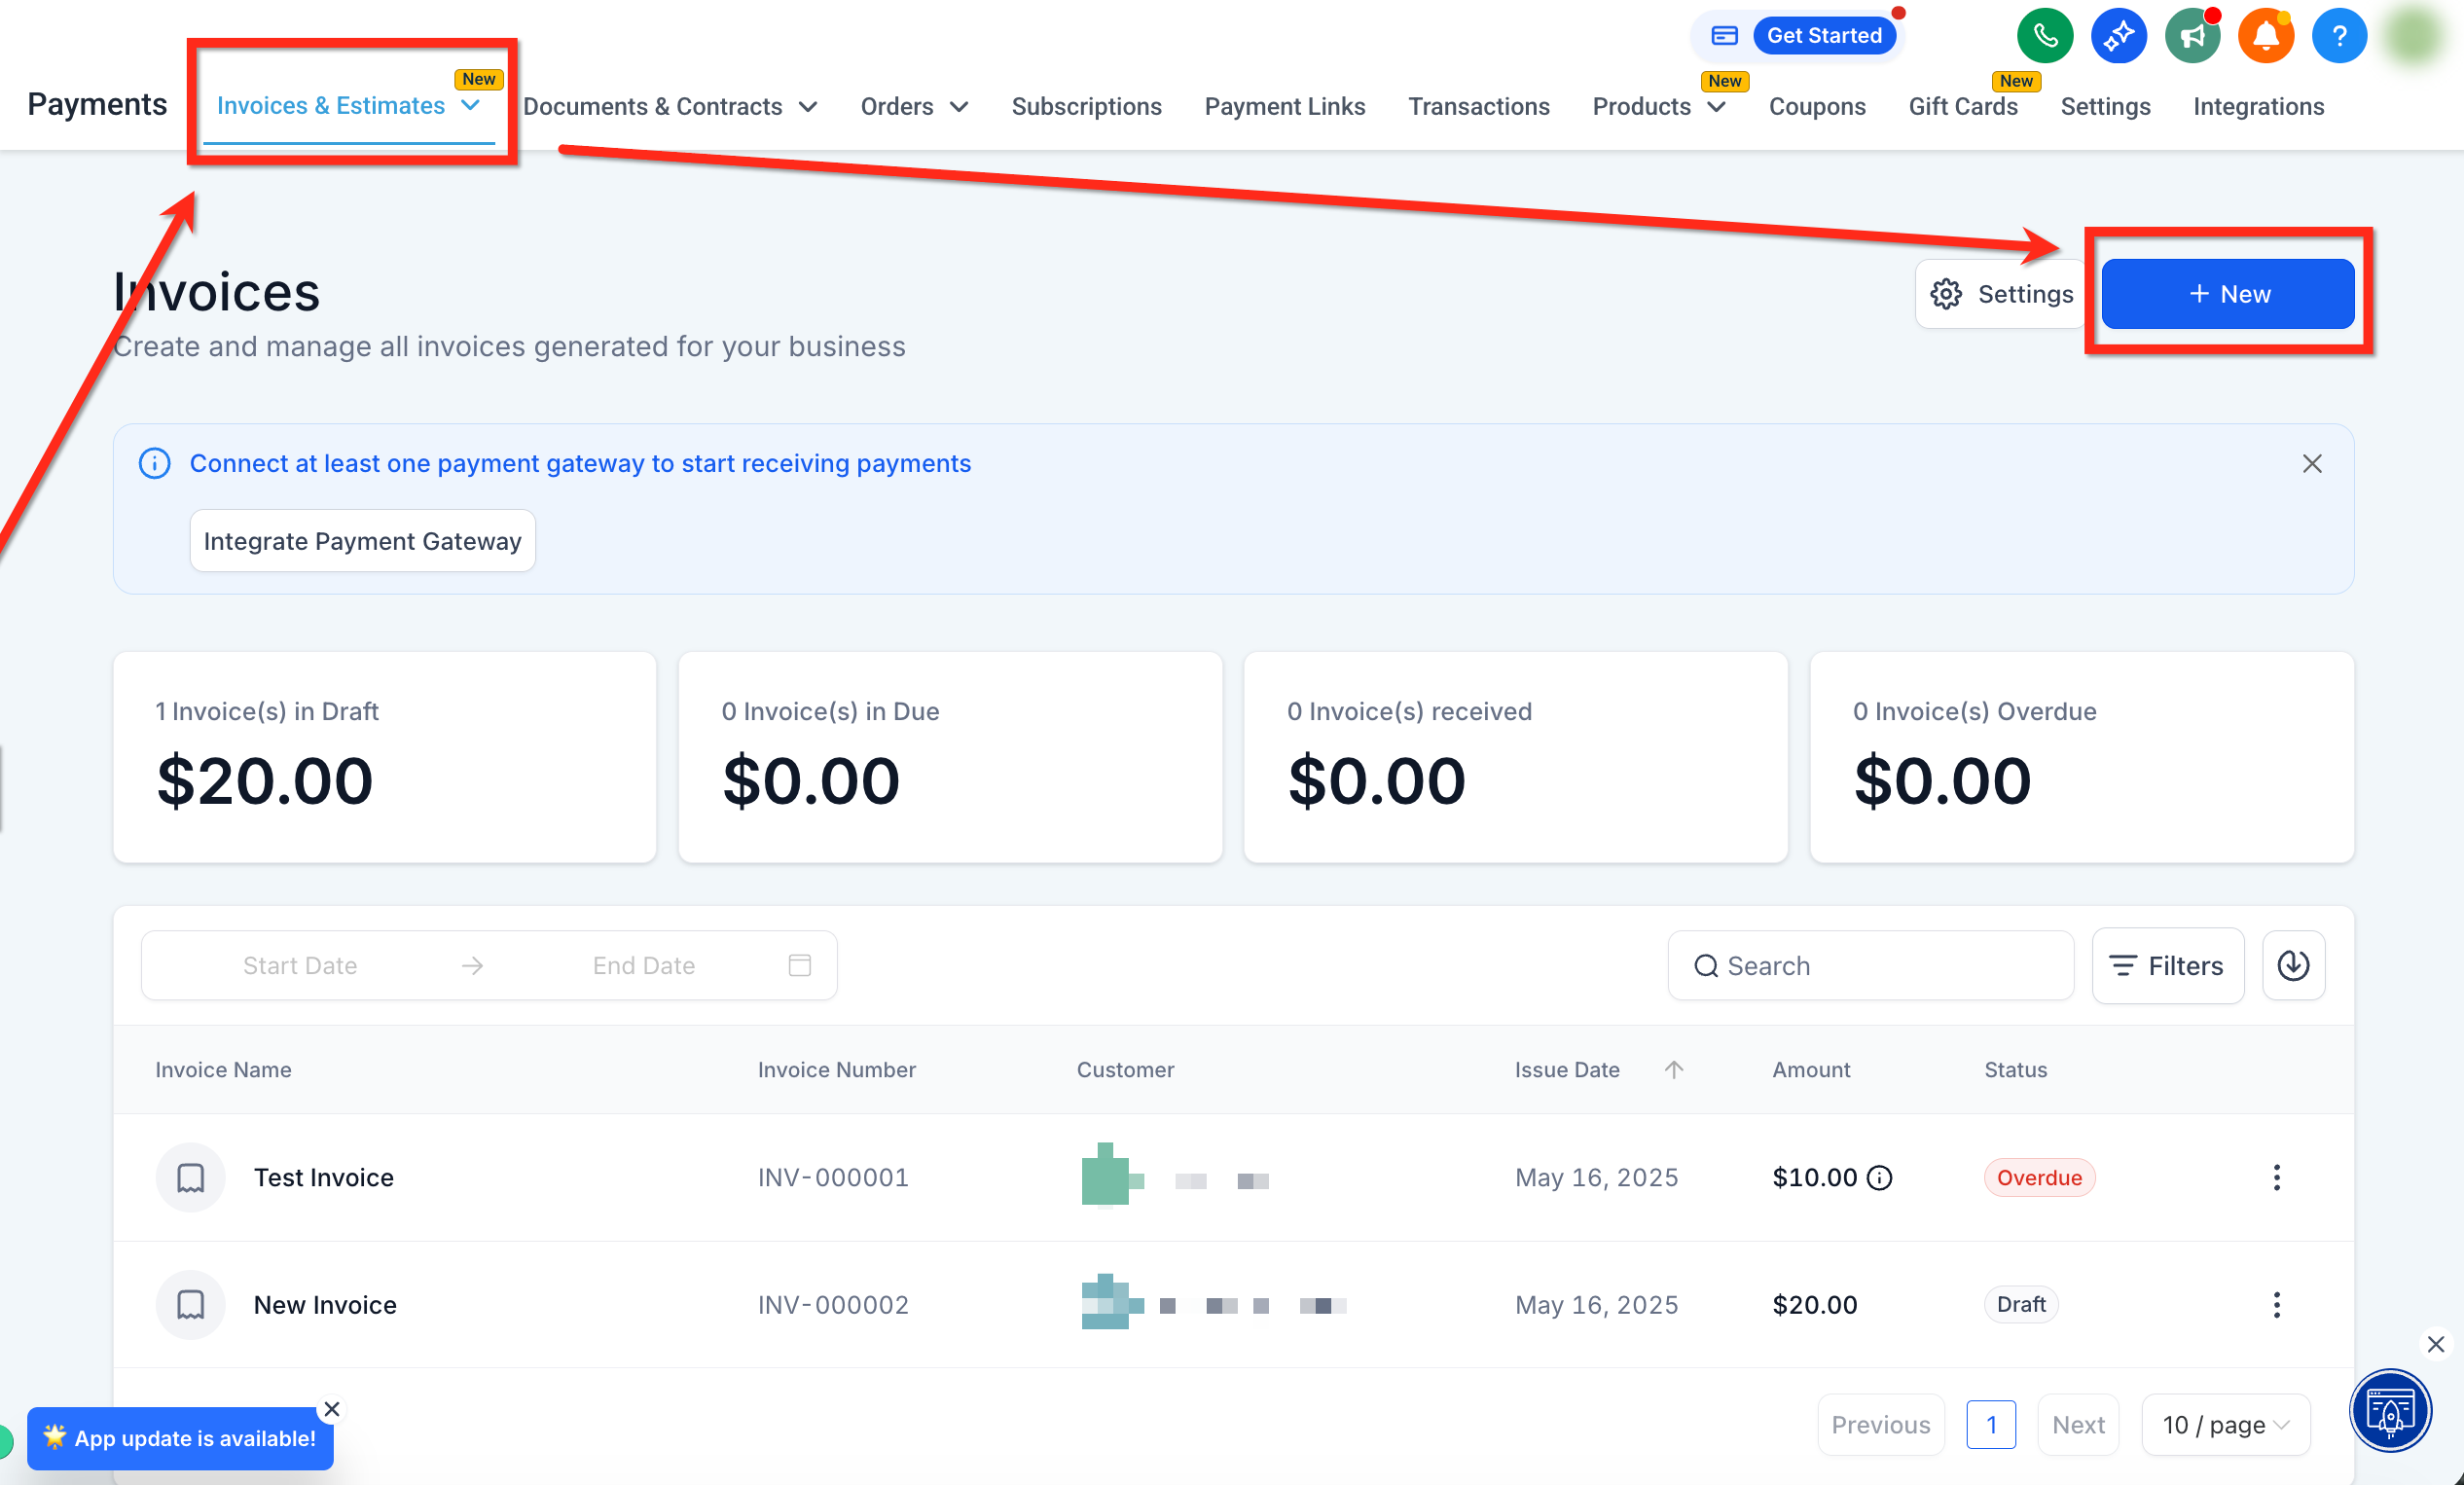
Step 1: Navigate to Payments > Invoices & Estimates and open an existing invoice or create a new one.
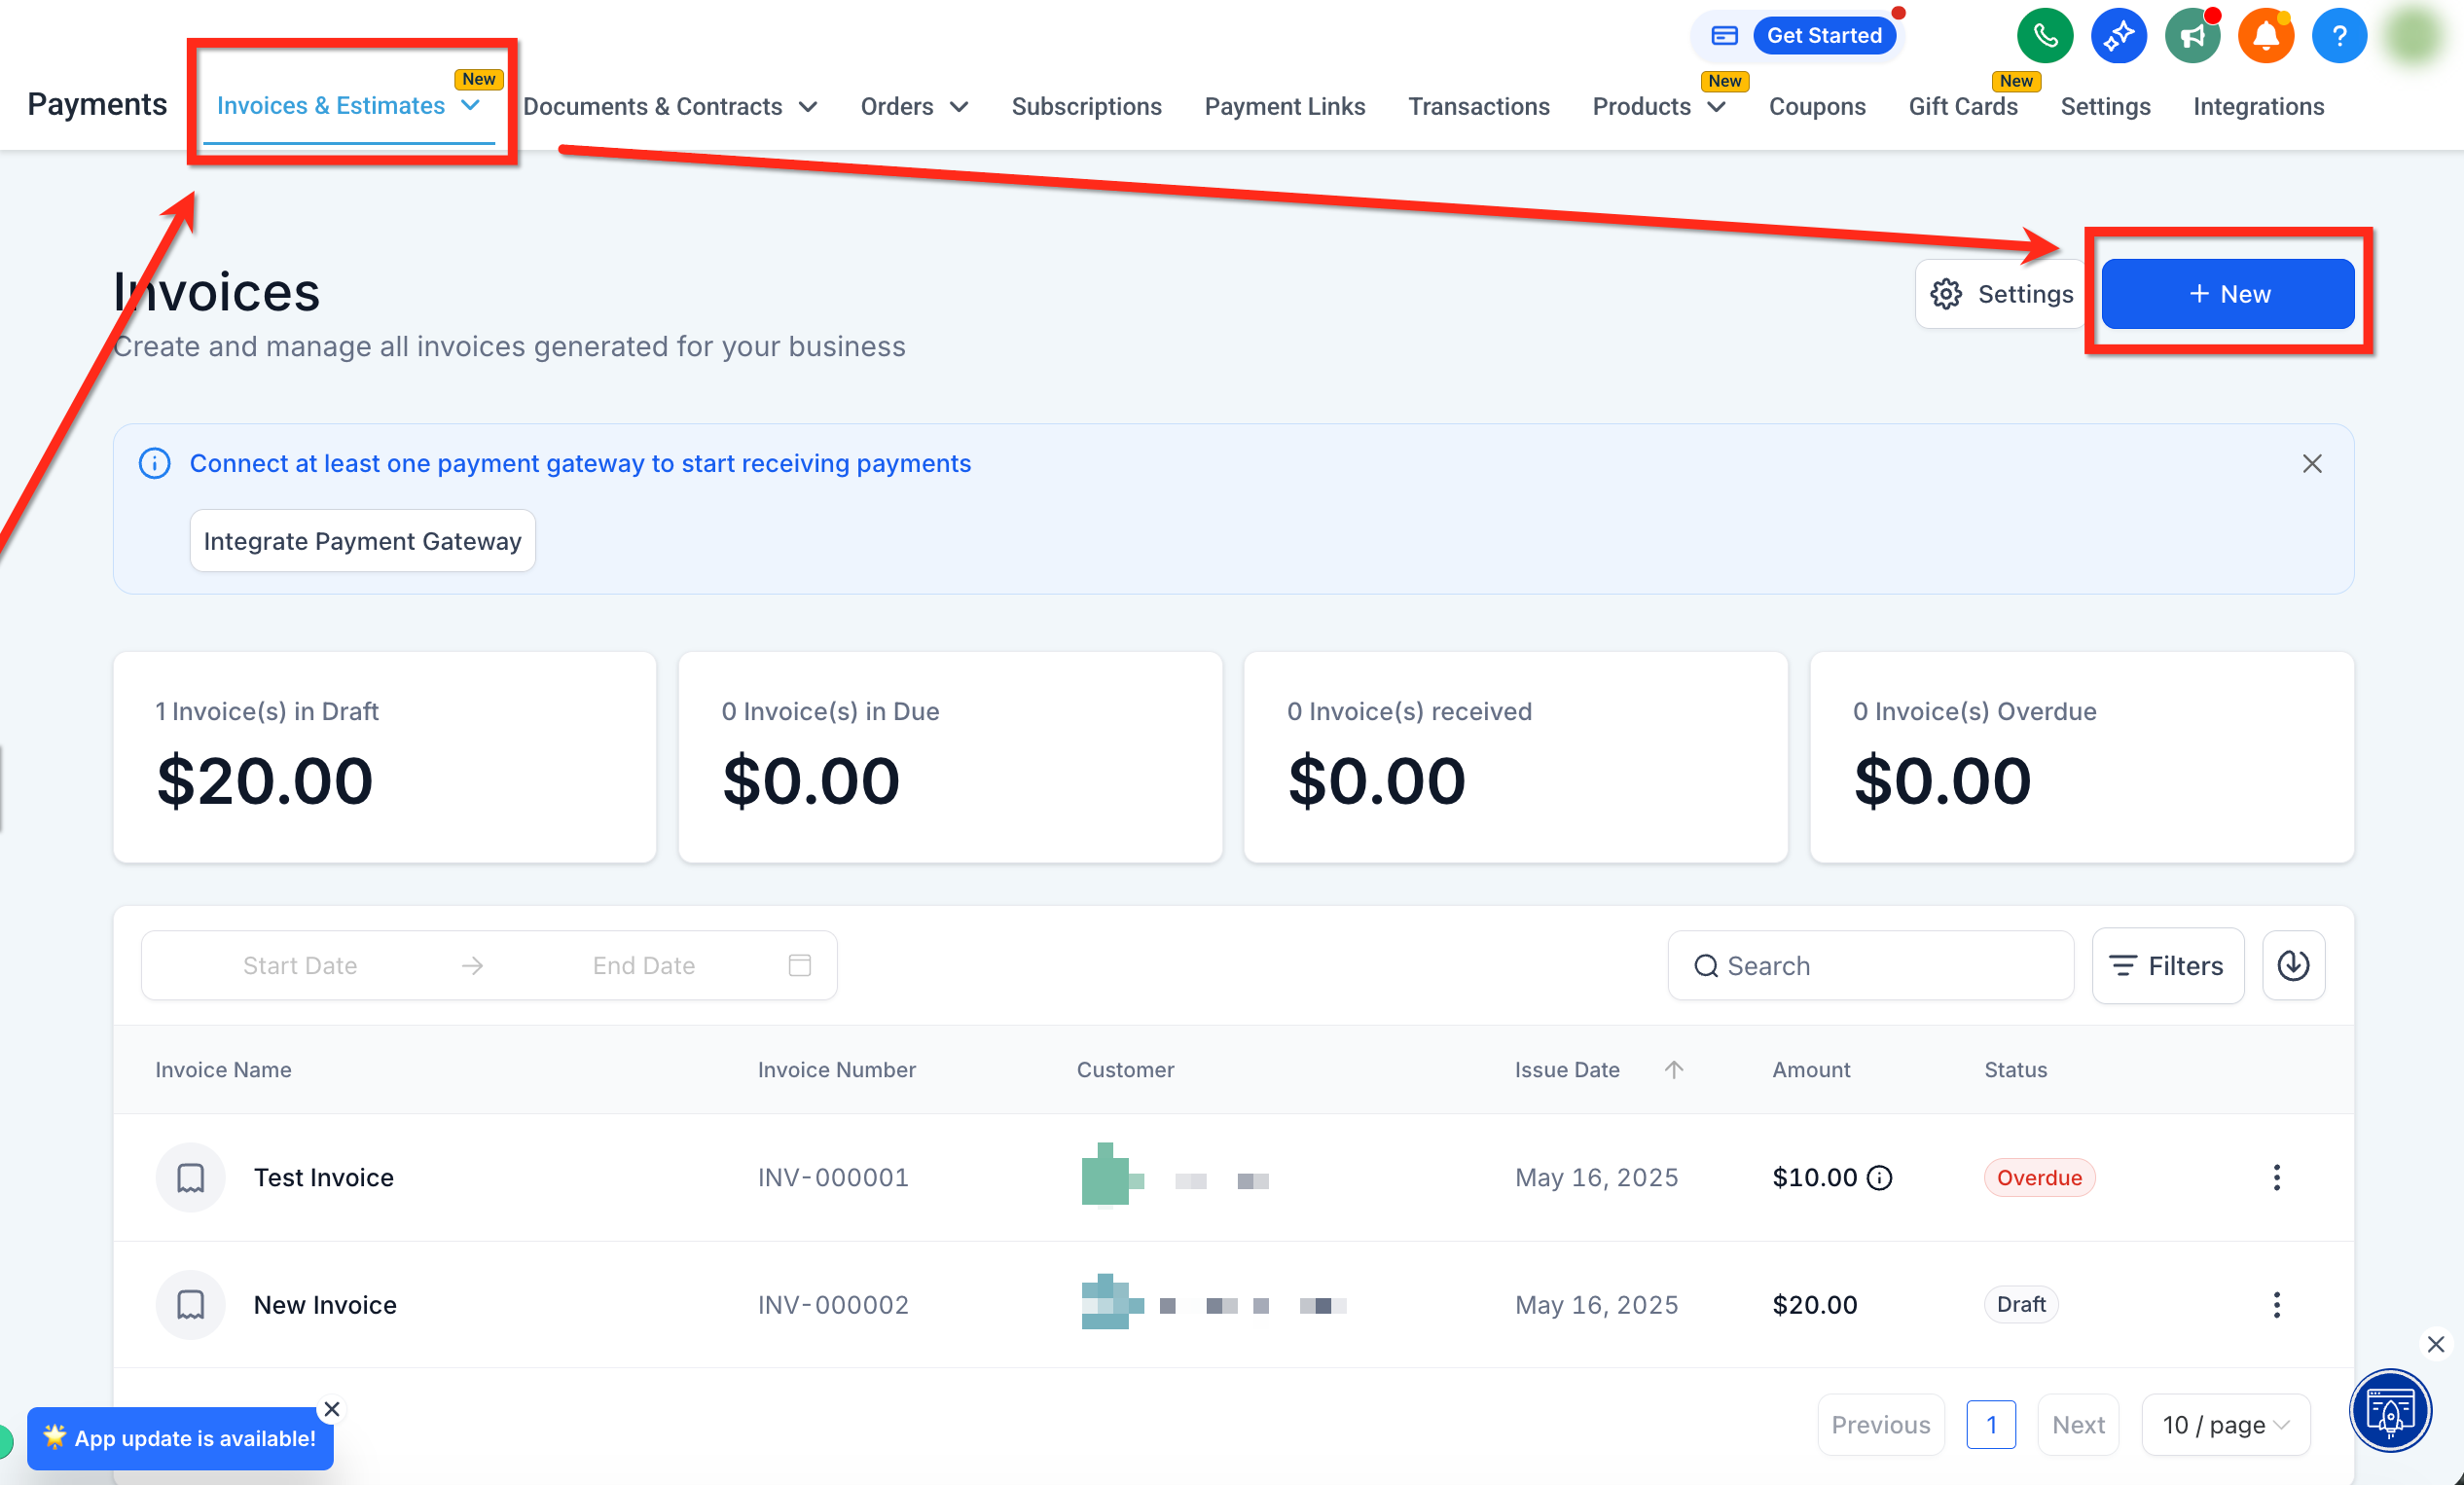
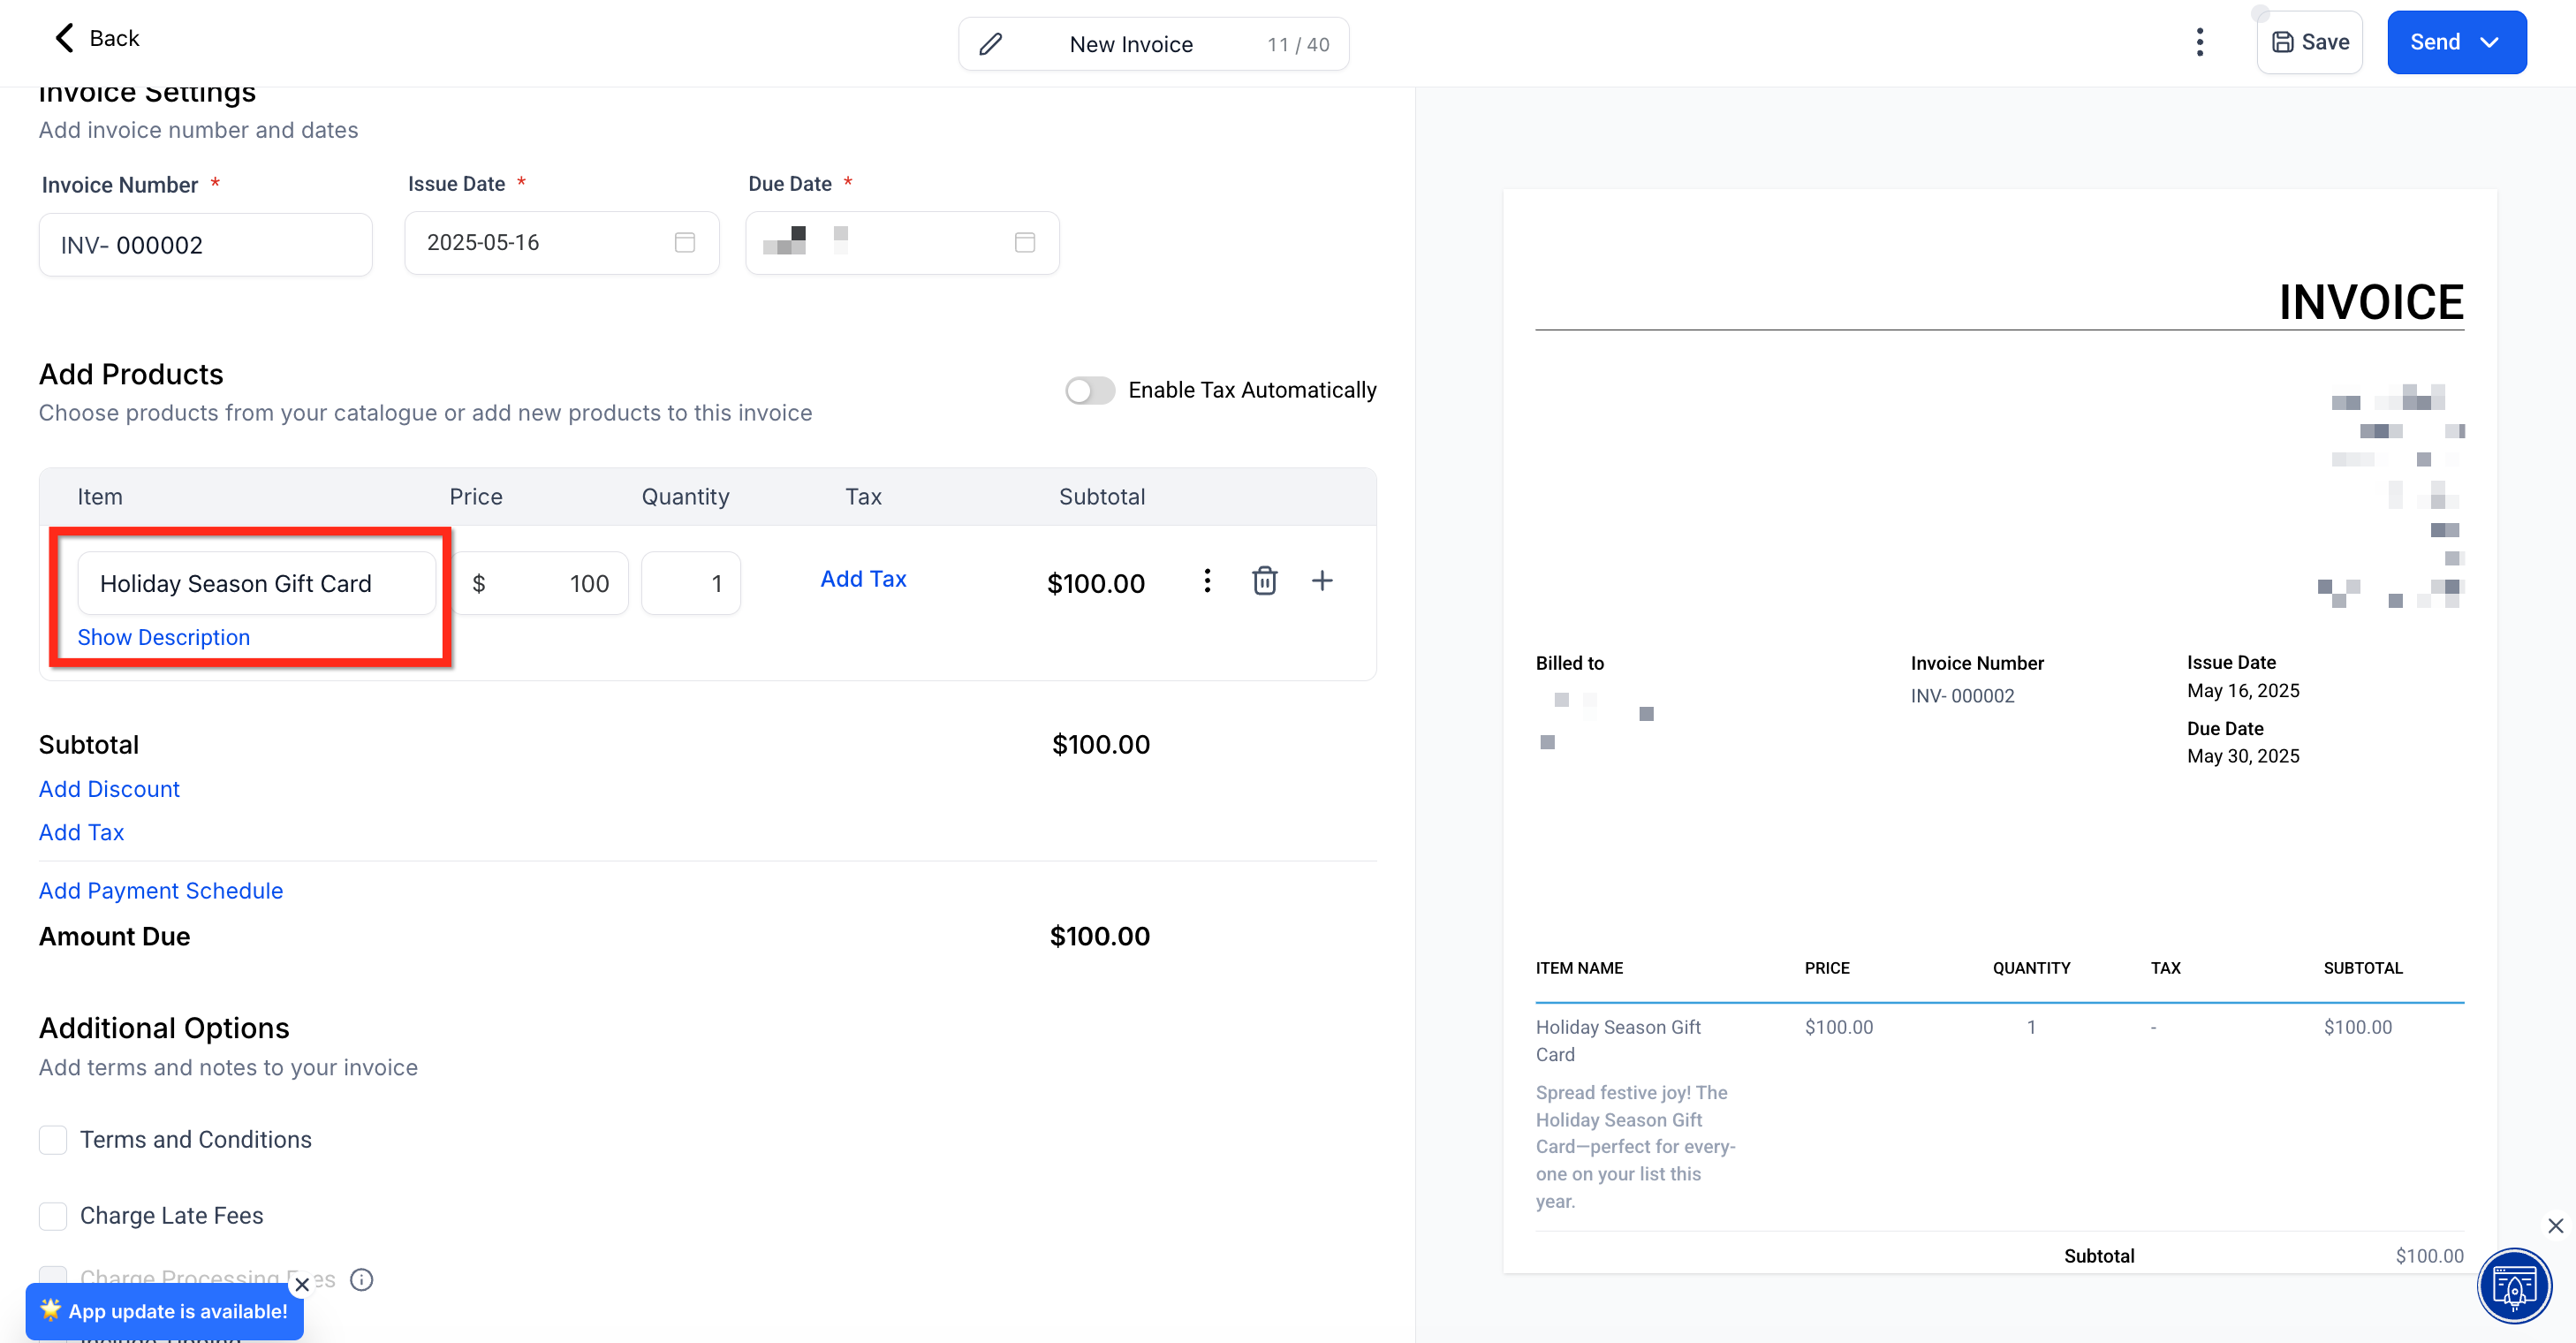
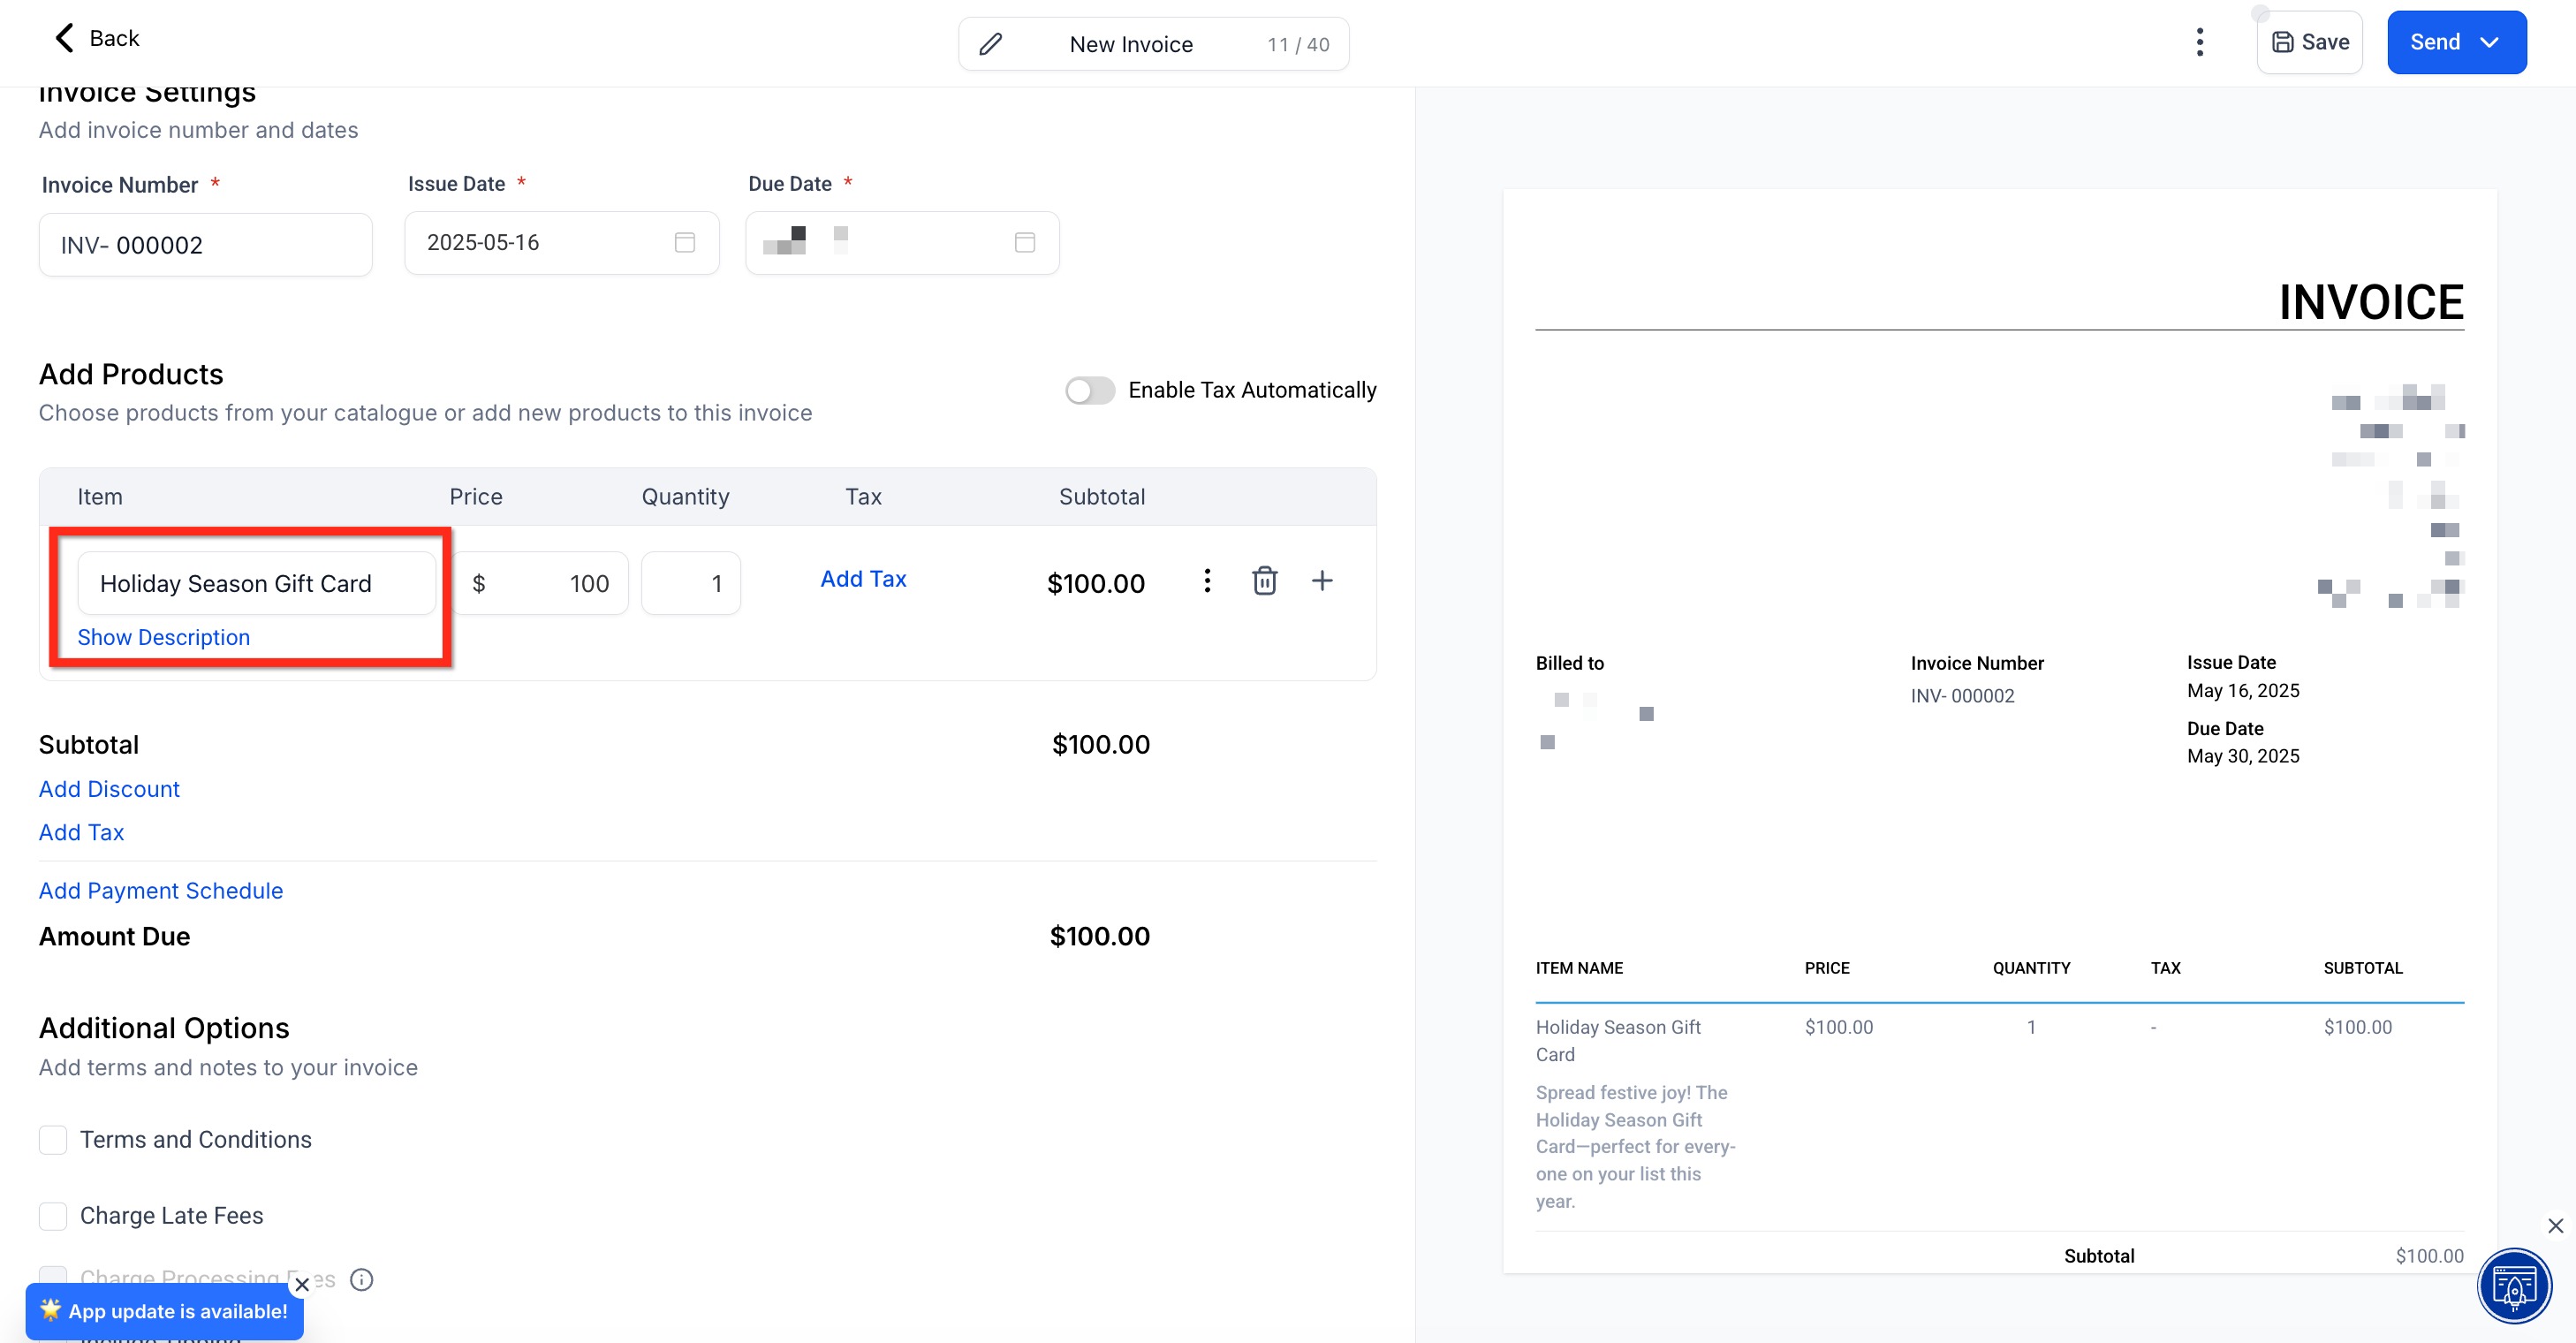
Step 2: Under Add Products, select the gift card(s) you want included on the invoice. Once all details and products have been added, click Send to send the invoice to the patient.
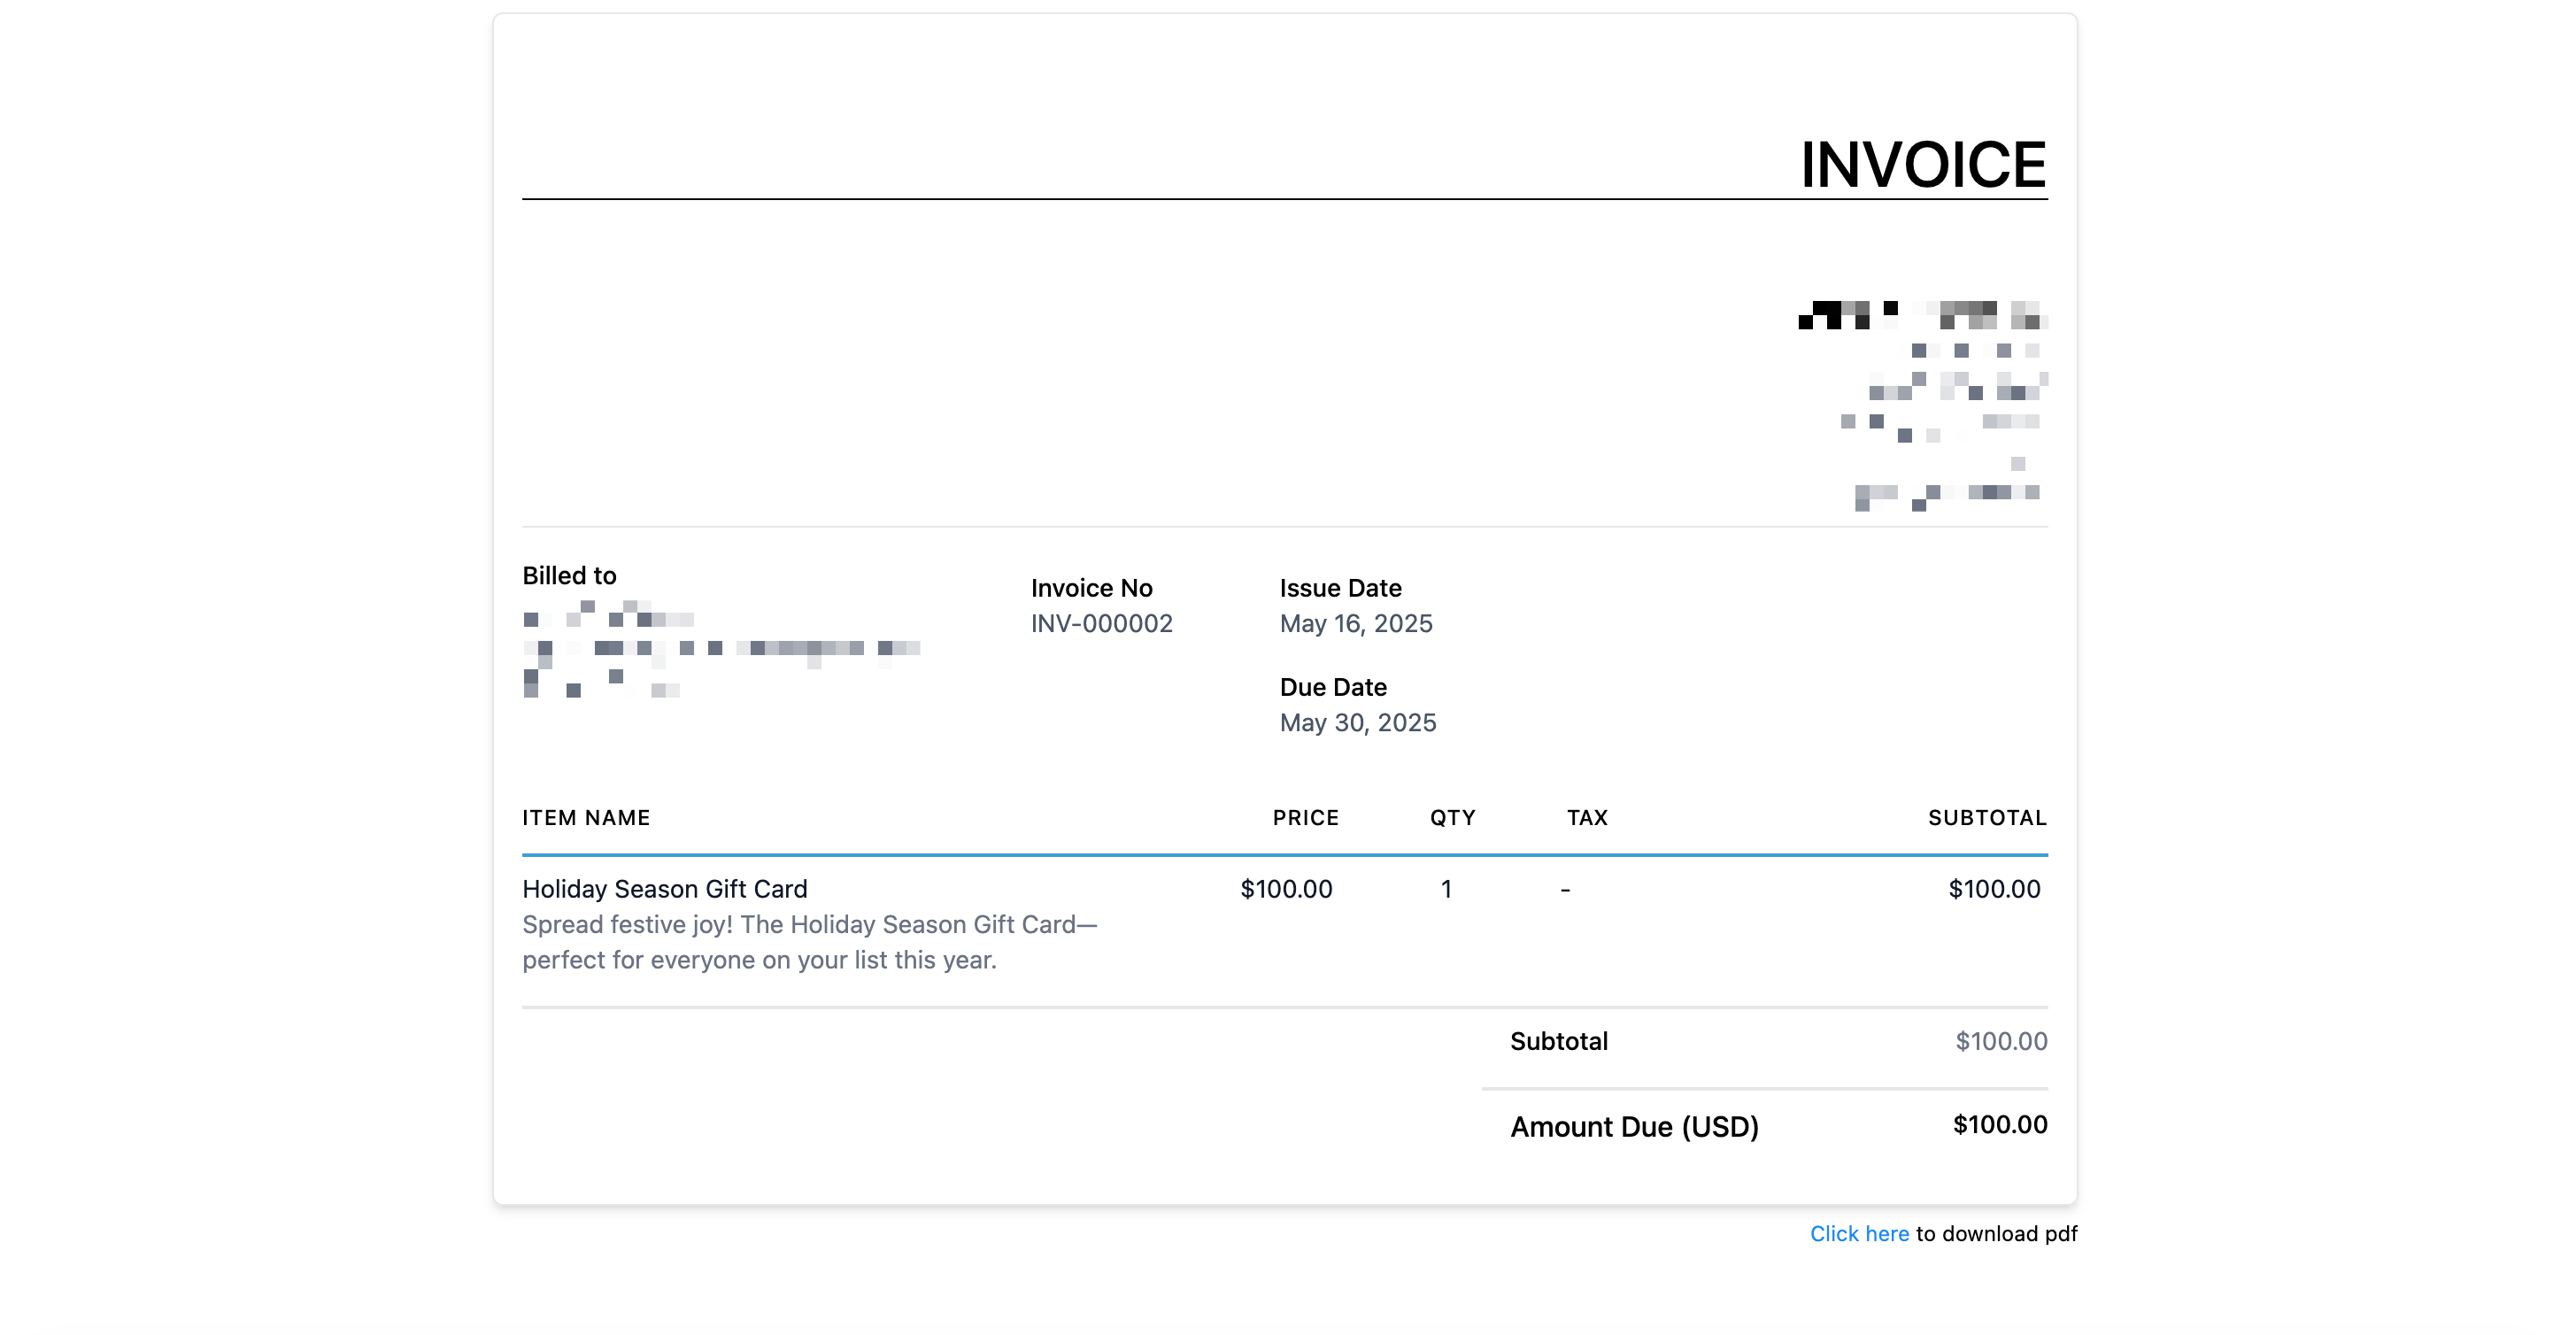
Step 3: Once the invoice is paid, the gift card is delivered to the buyer automatically.
If your calendar supports product-based payments, you can add a Gift Card product to the appointment booking flow. Selling through the calendar flow requires a form set up for gift cards first, so complete the steps under Selling Through Forms above before you start here.
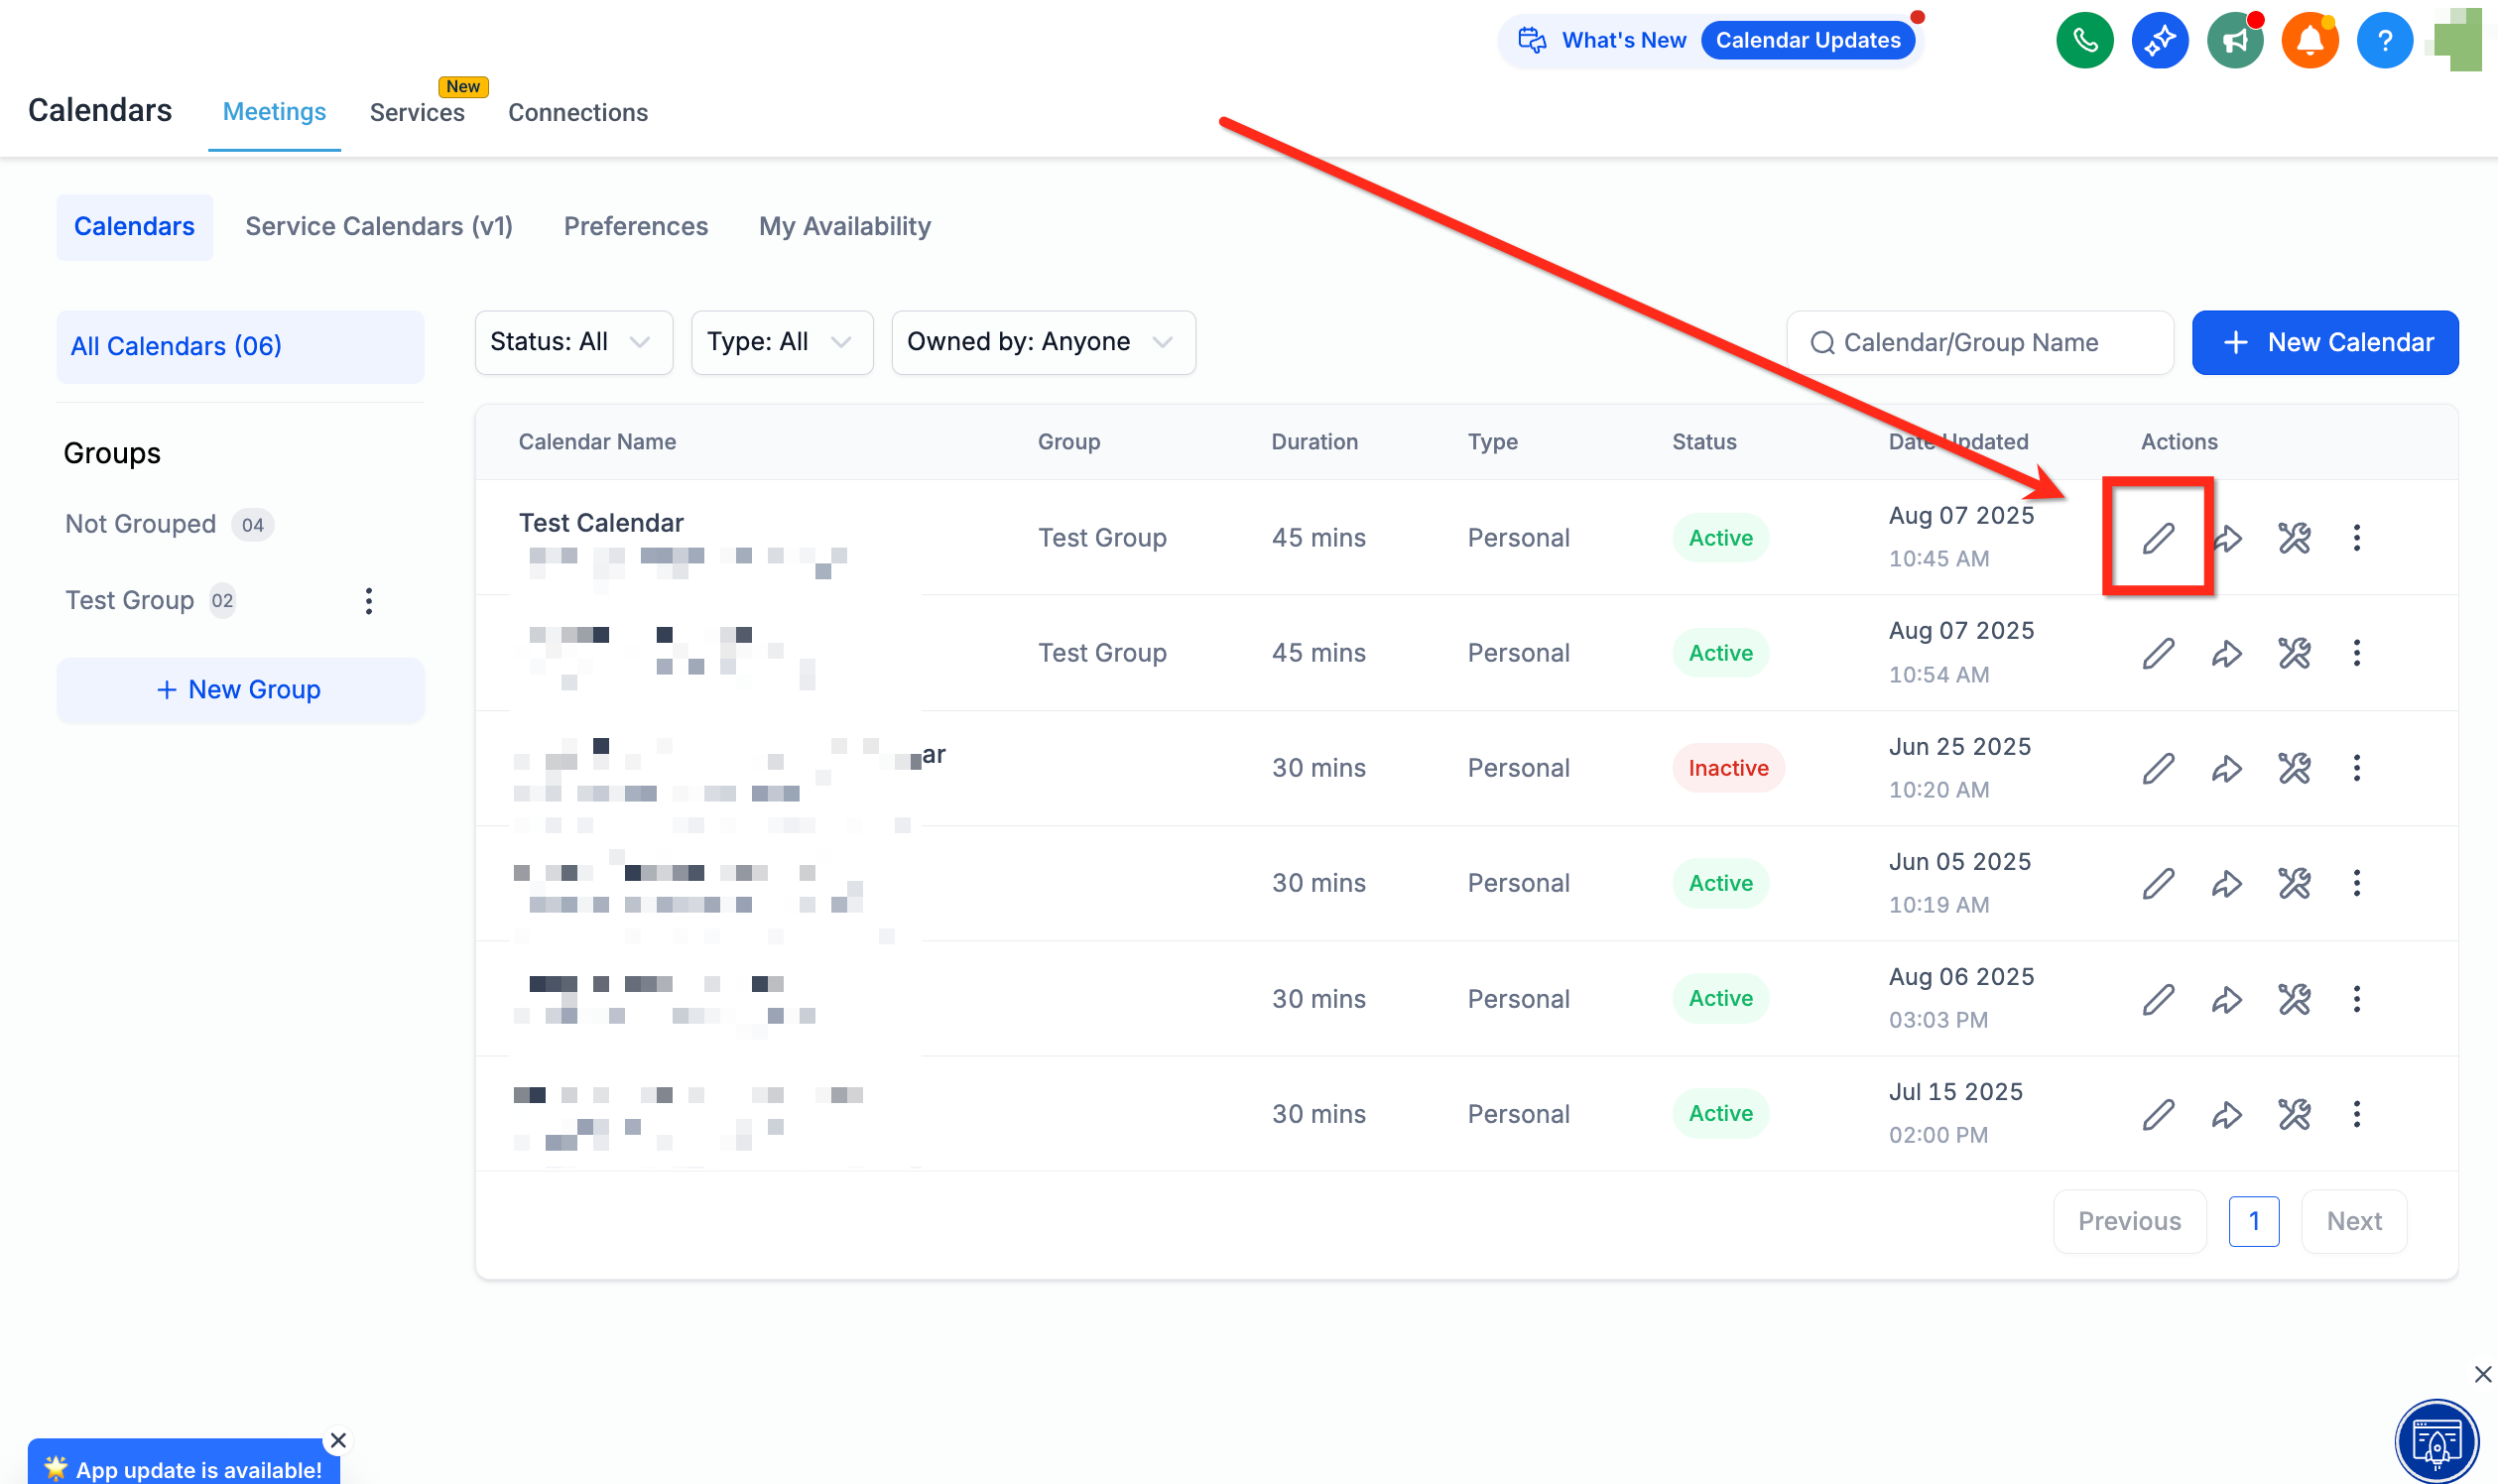
Step 1: Navigate to Calendar Settings and click Edit on the calendar you want to add gift cards to.
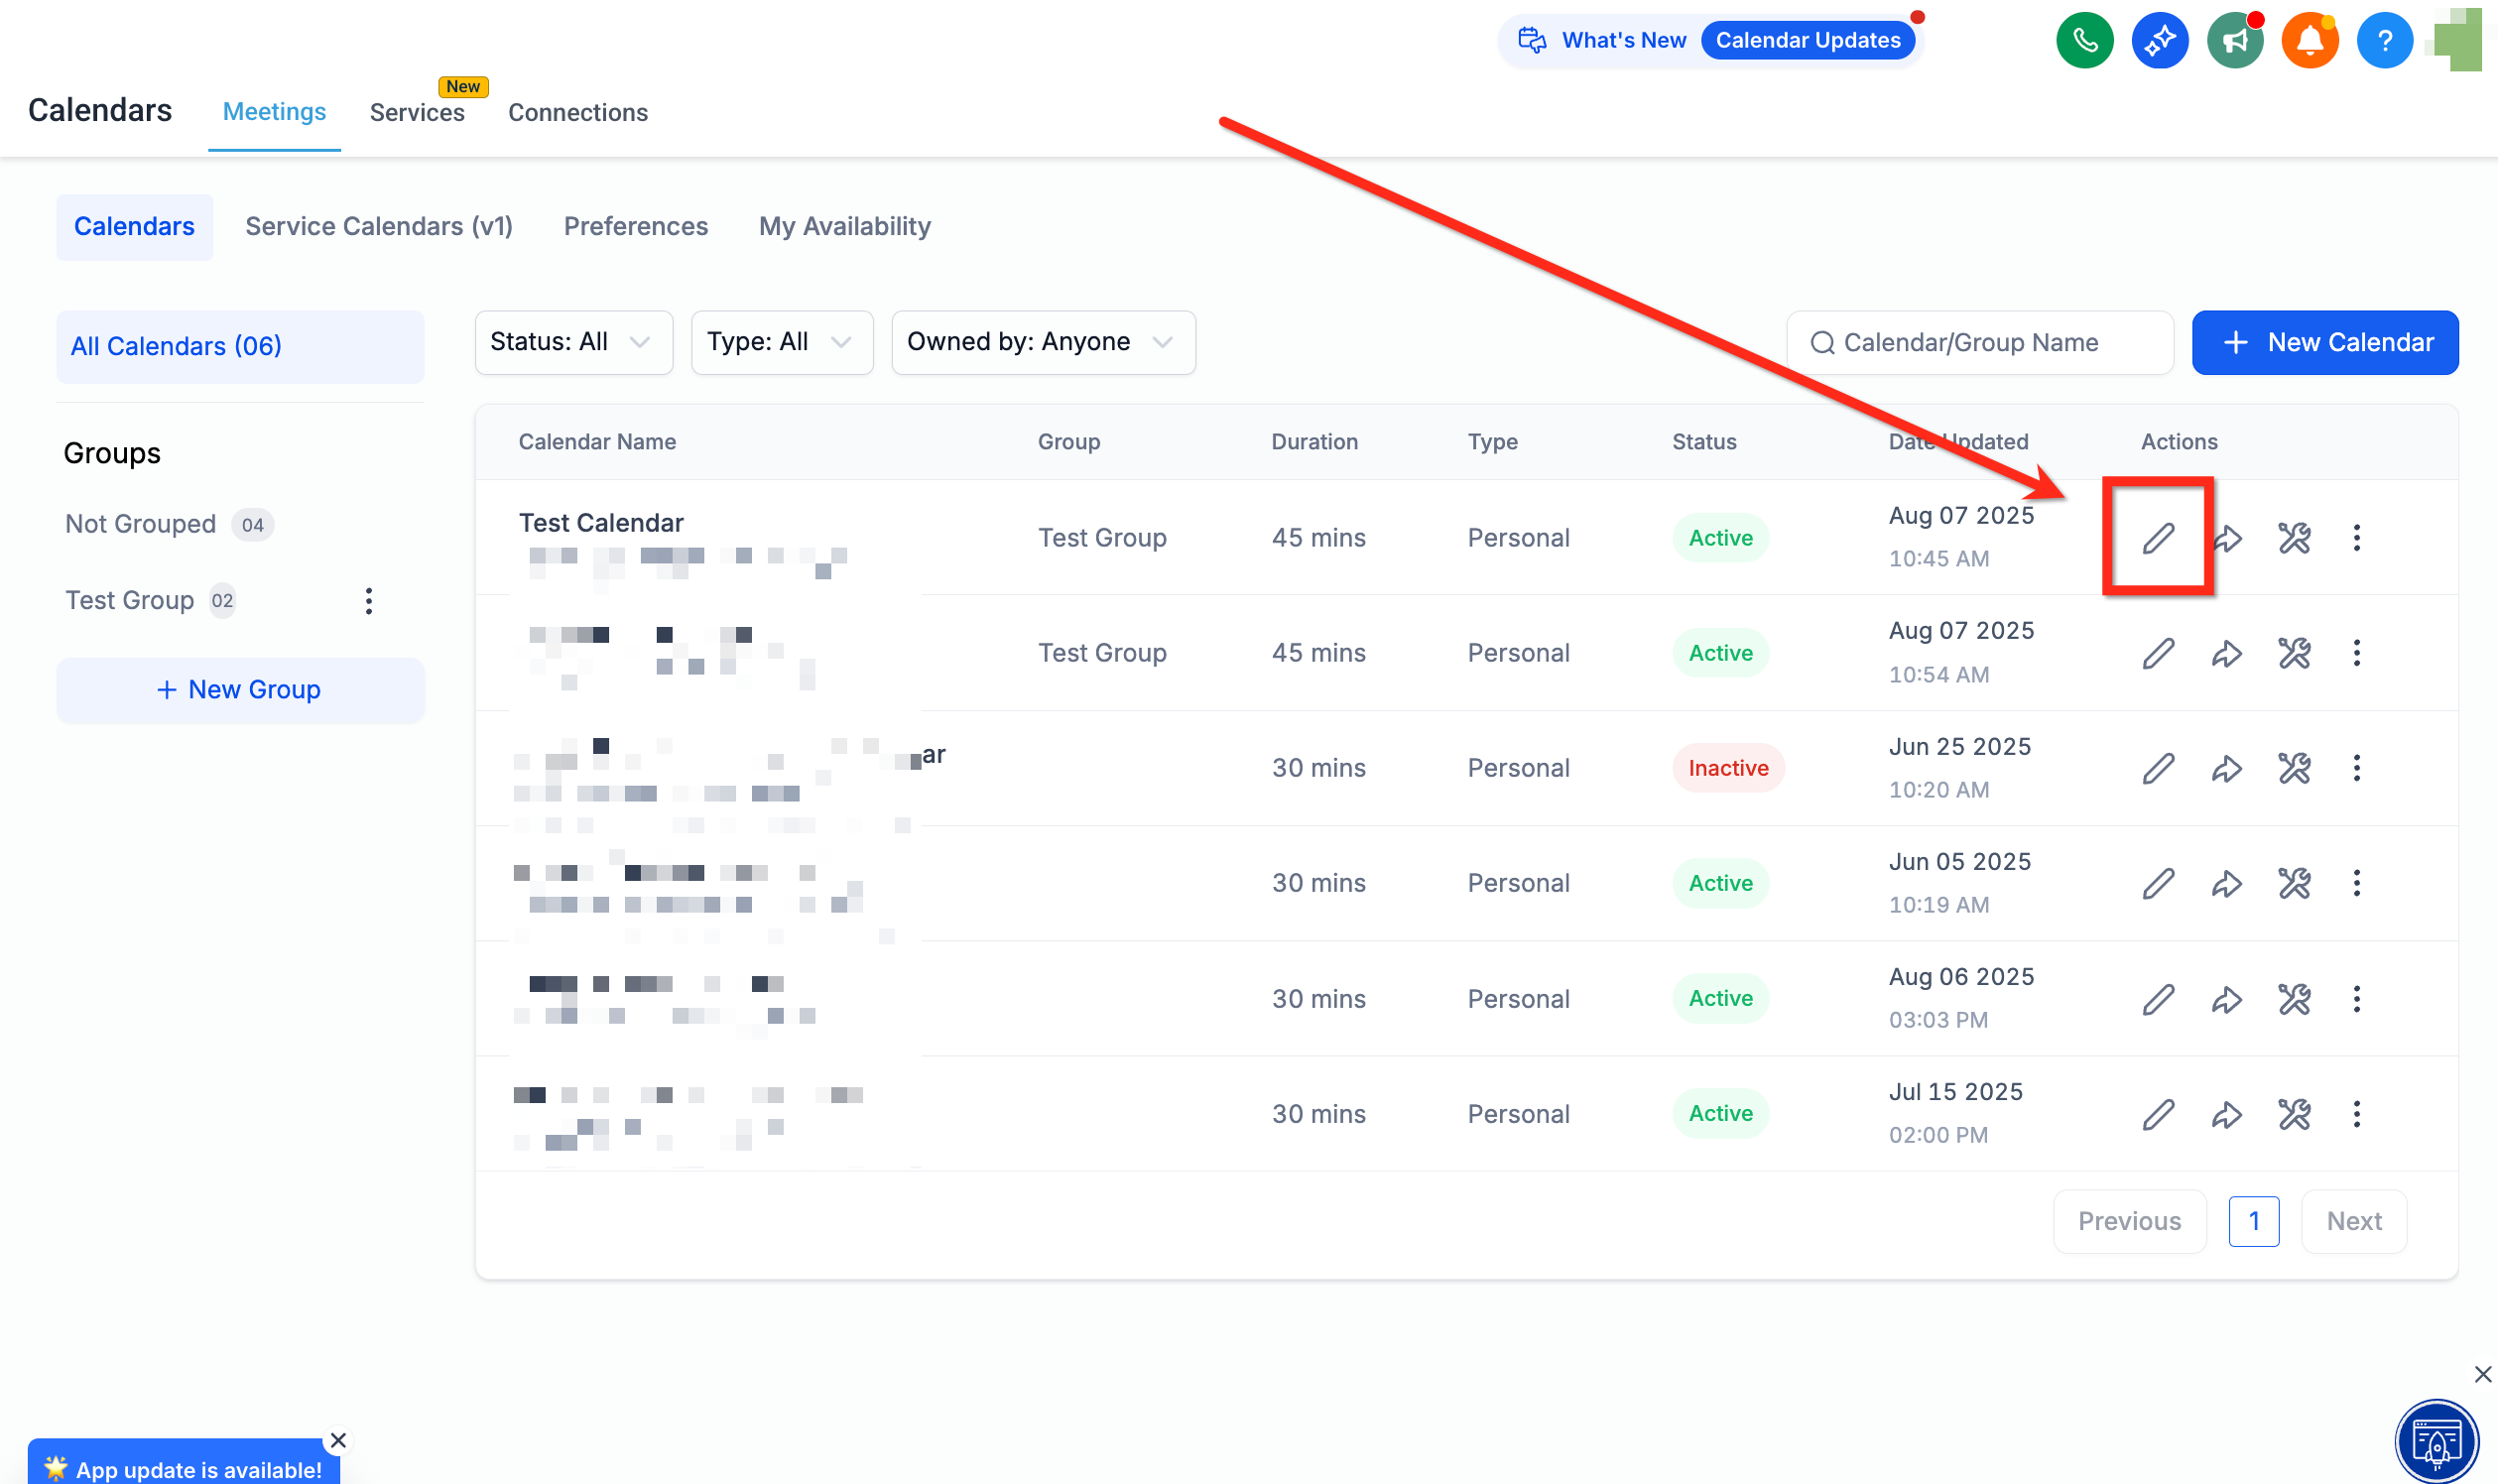
Step 2: Under the Forms & Payments tab, use the Select Form dropdown to choose the form you set up for purchasing gift cards.
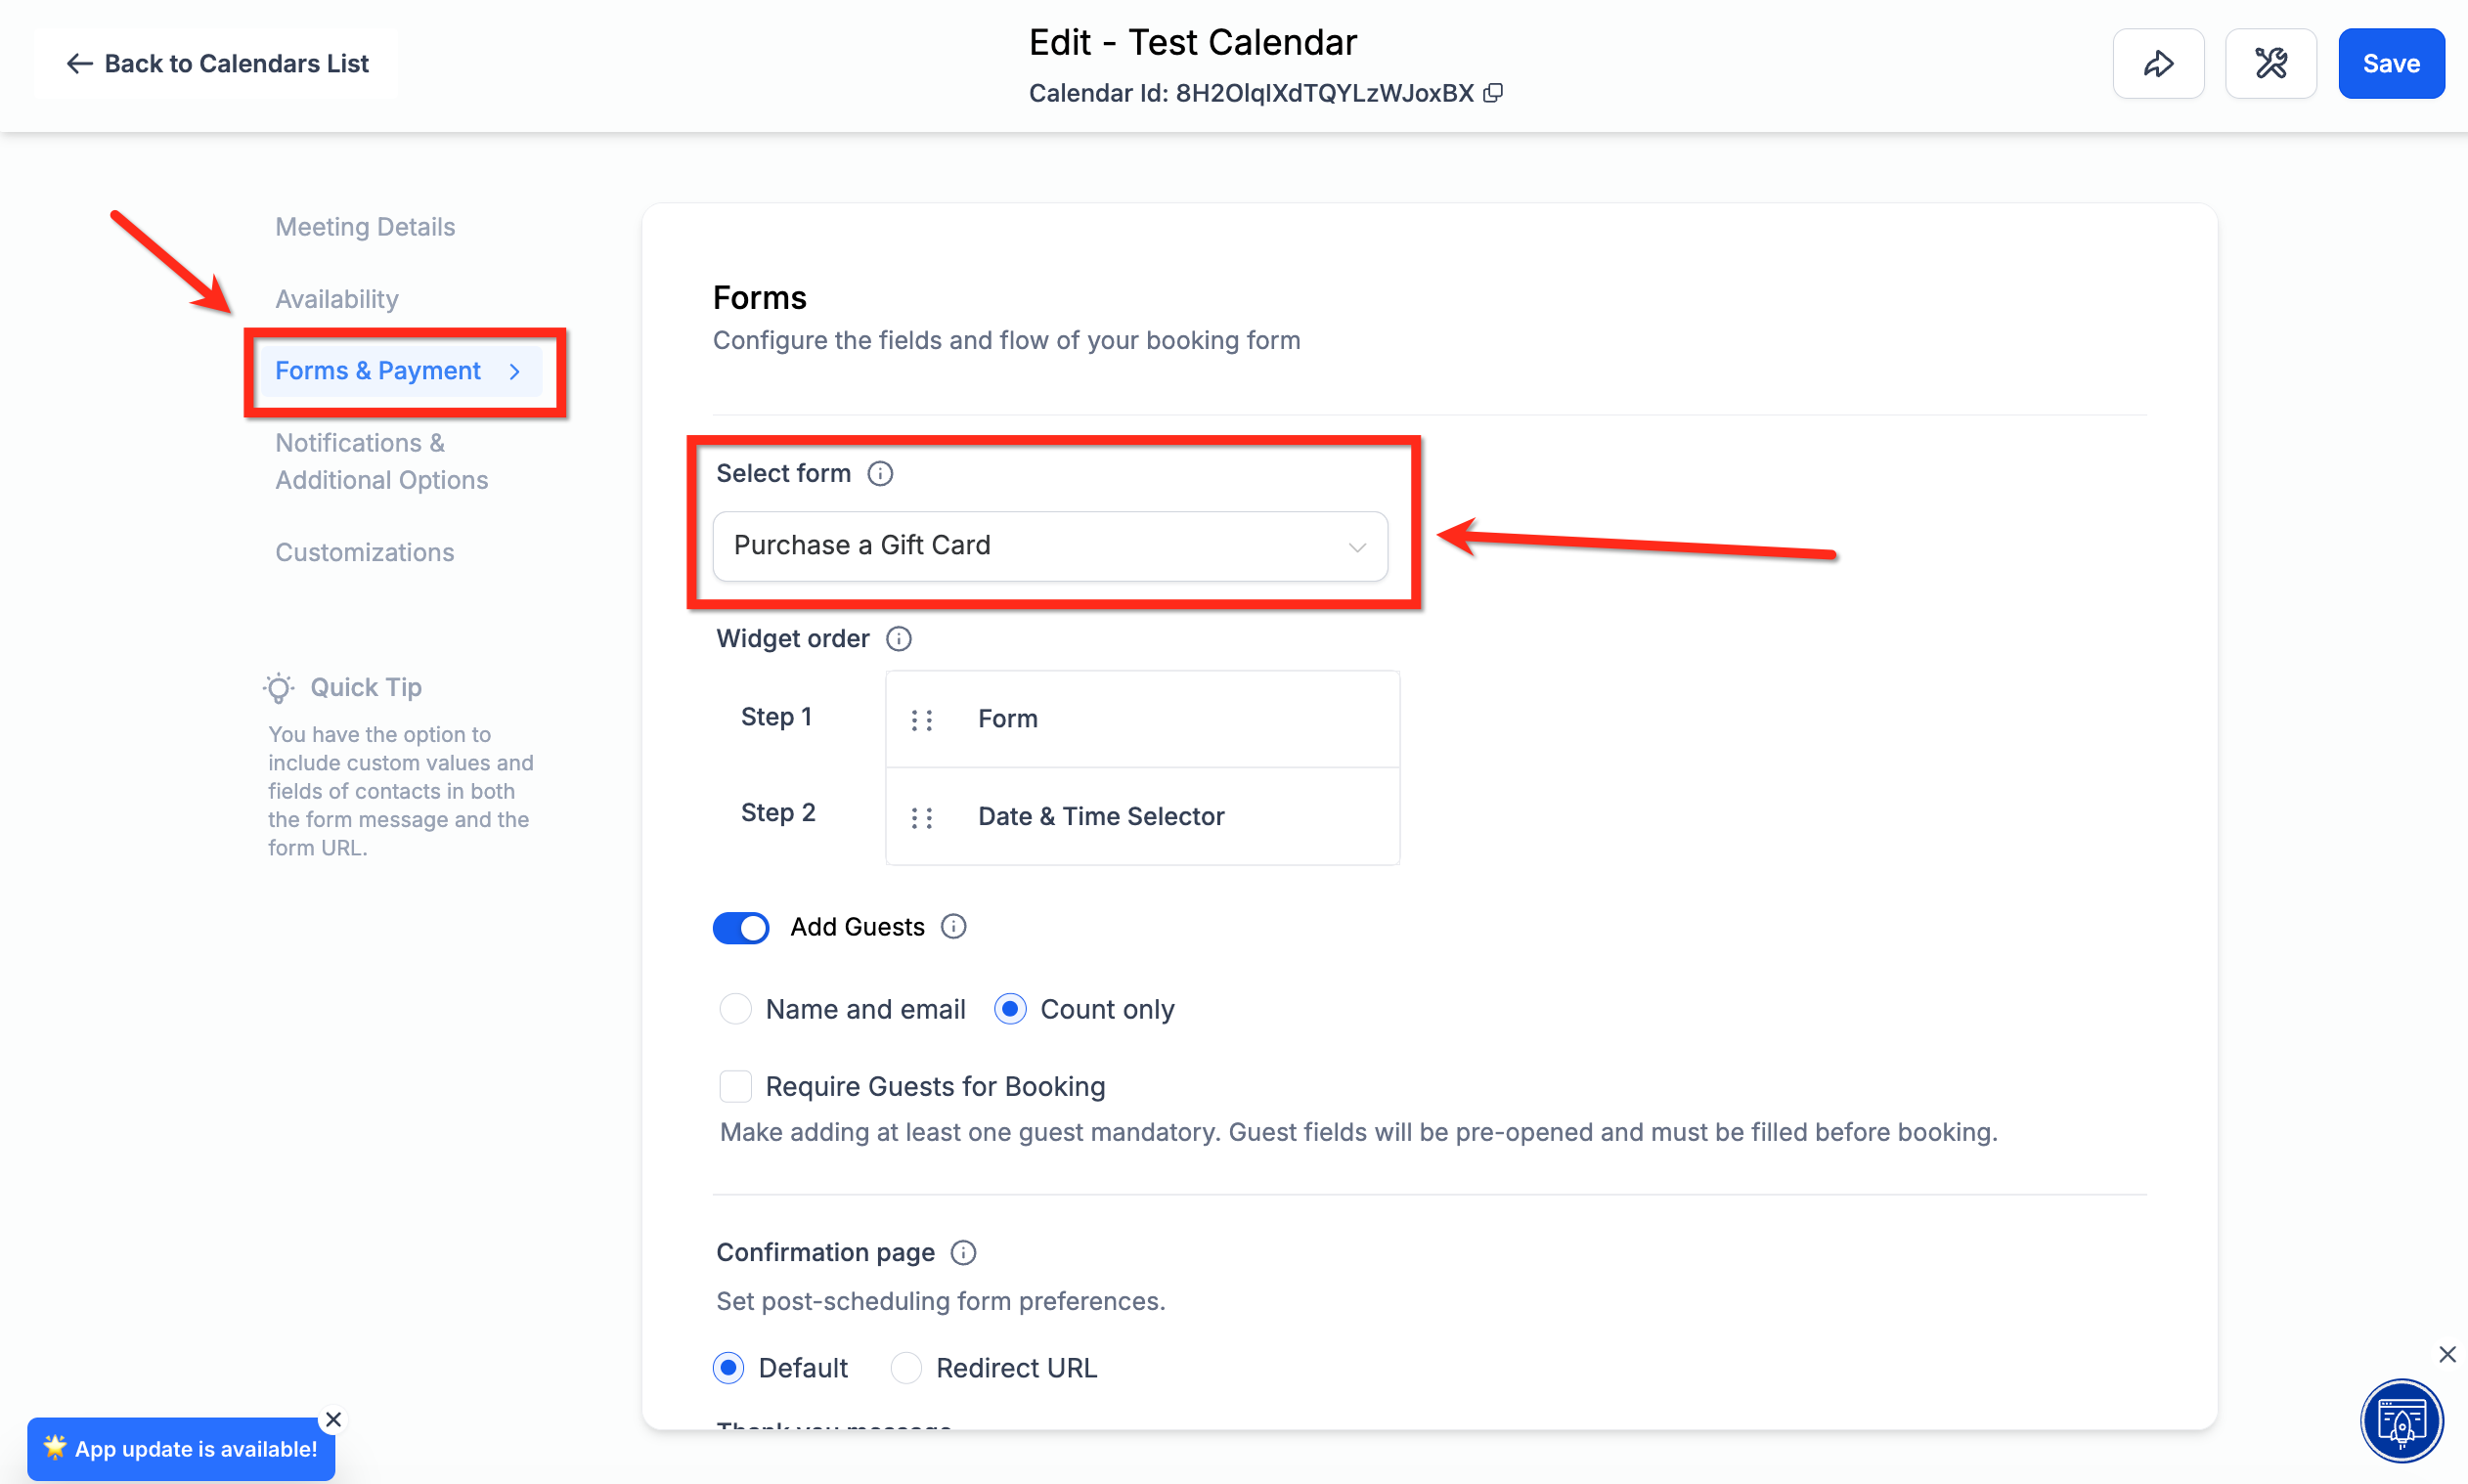
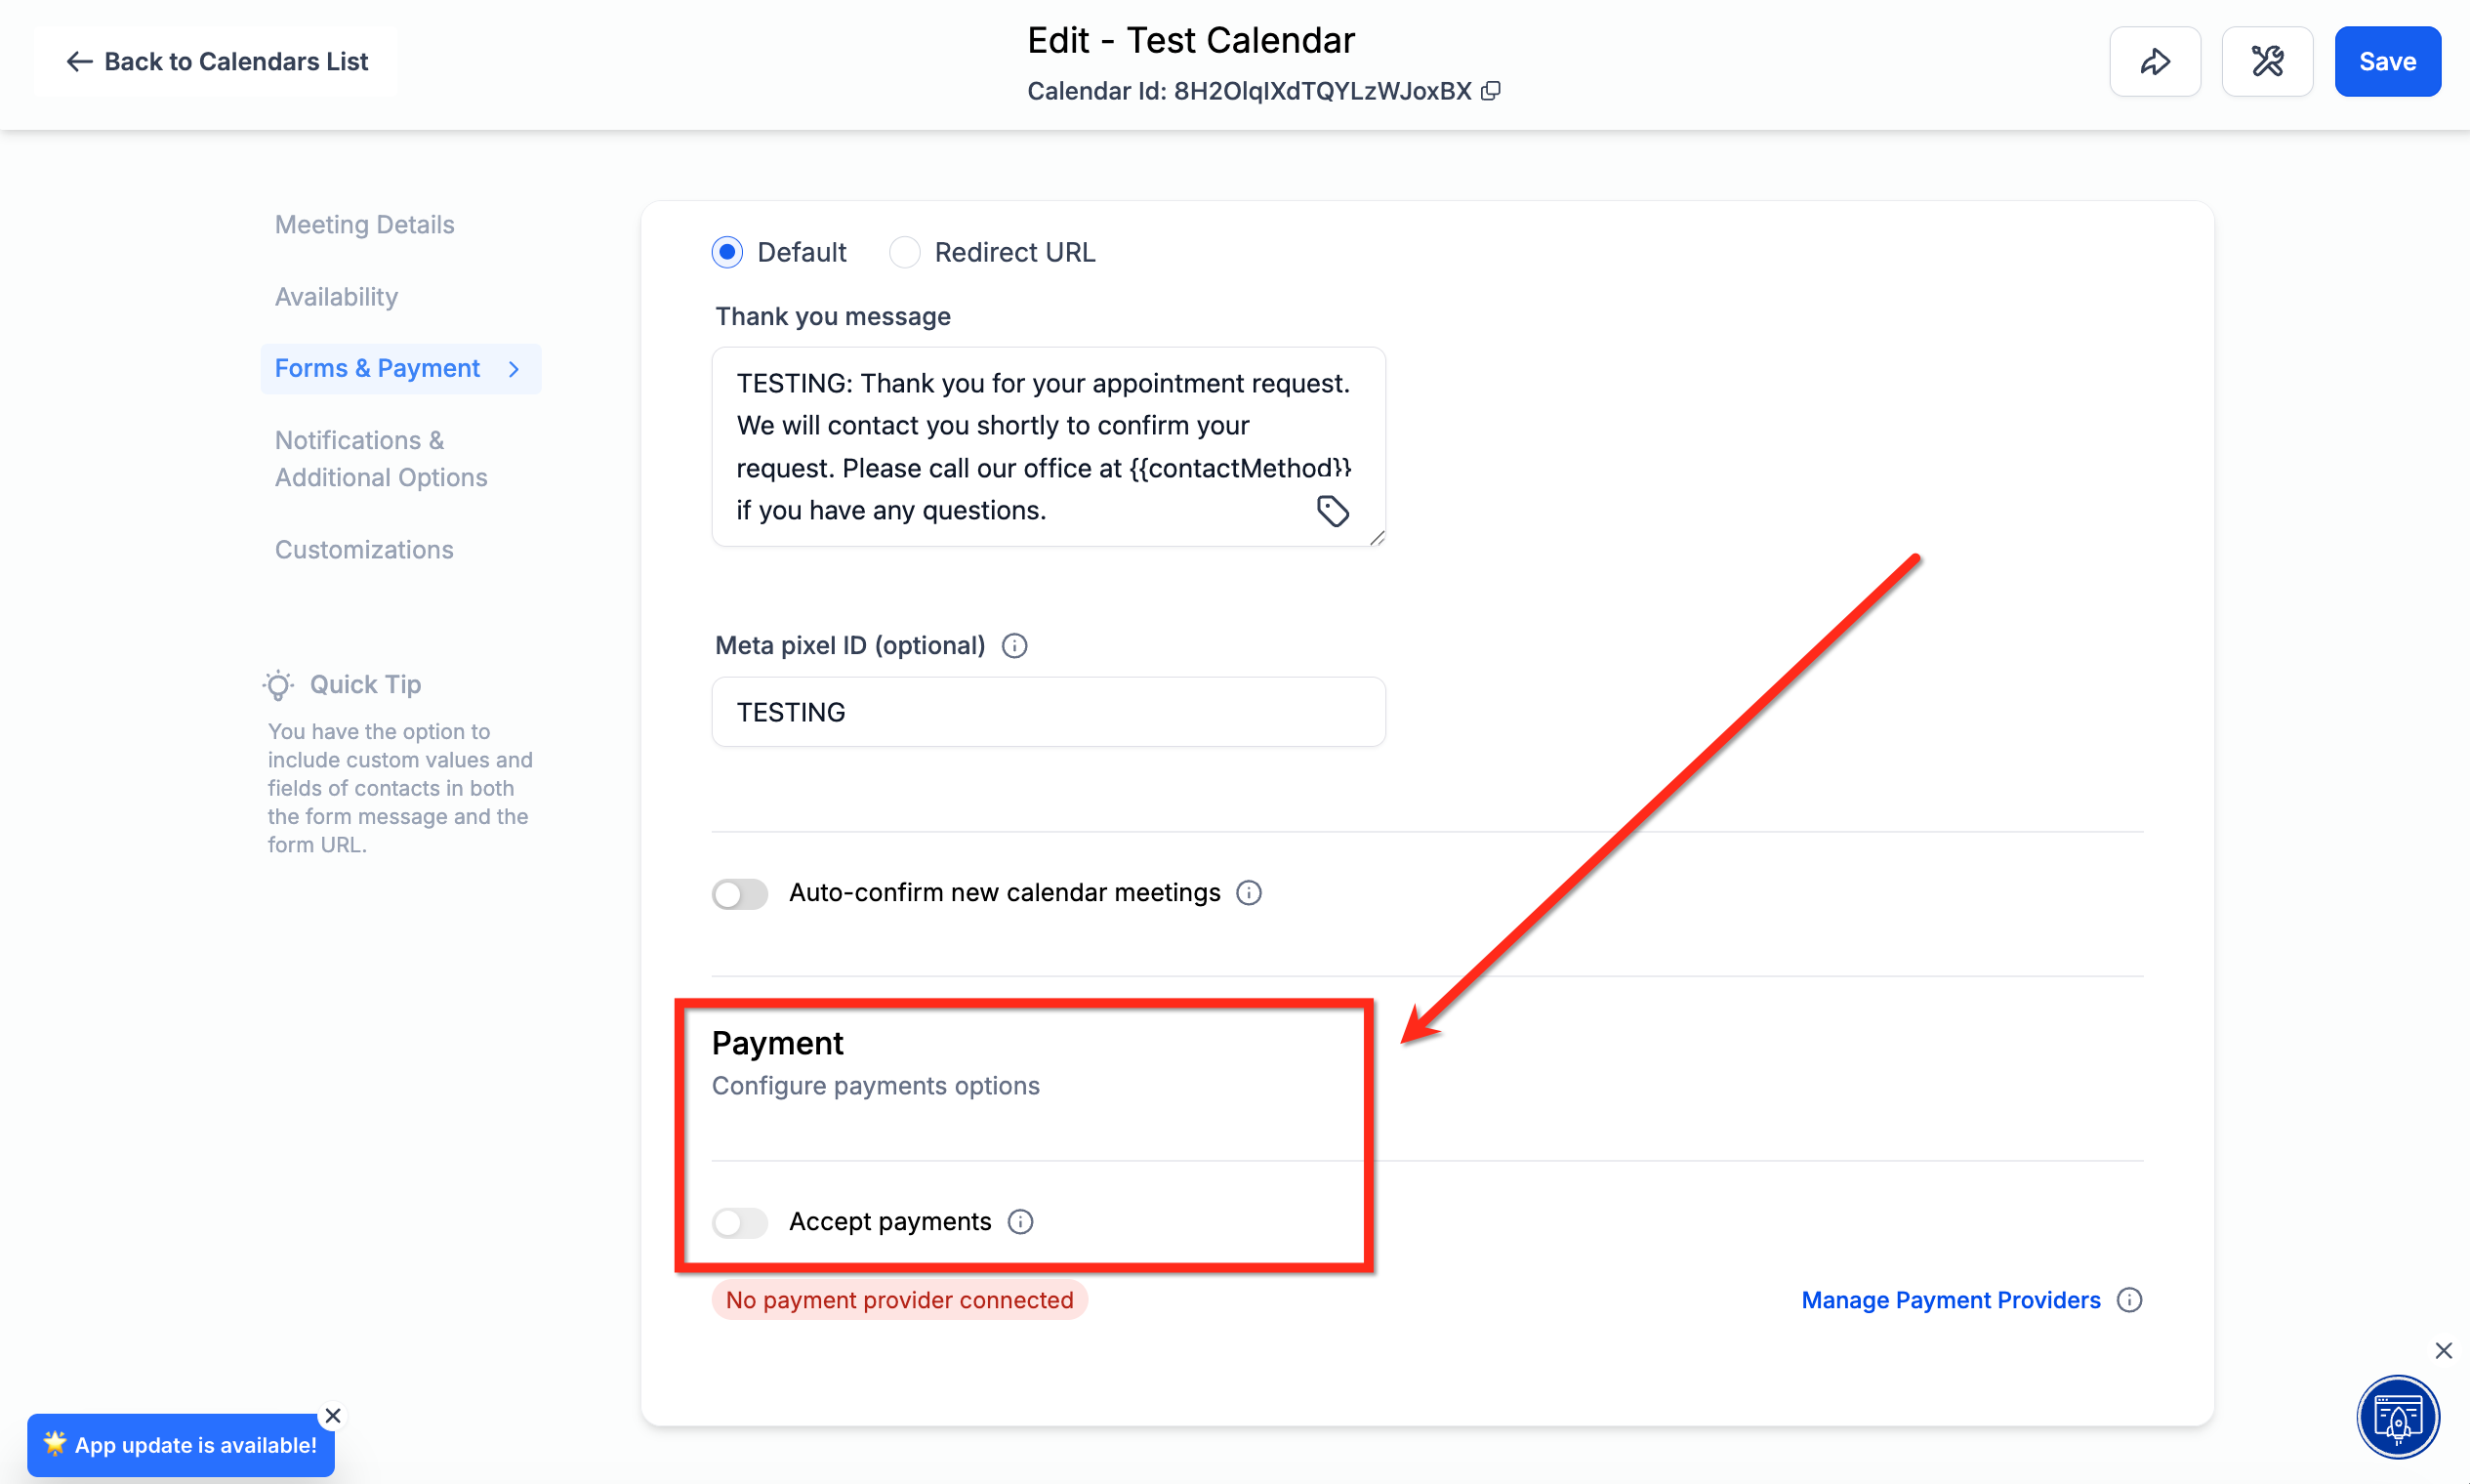
Step 3: Under Payments, toggle on Accept Payments. Click Save once your edits are complete.
AX Pay tip: Any checkout that collects payment for a gift card (Form, Funnel, Store, Payment Link, Invoice, or Calendar) uses the payment processor connected to your account. If you have not already switched, connect AX Pay under your Payments settings for better rates than Stripe on every gift card sale.
Can I sell the same gift card through multiple channels at the same time? Yes. A gift card can be sold through its dedicated link, QR code, embed, and any existing checkout at once. Inventory (if you set a limit) depletes as sales happen across all channels.
What happens if I deactivate a Gift Card product? Its dedicated Sell flow stops working, the checkout link becomes invalid, and it can no longer be purchased from your Store. Checkouts where it was already added (Forms, Funnels, Payment Links, Invoices, Calendars) will keep selling it until you manually remove it, so deactivate a card and then check any place you added it as a product.
Can I sell gift cards through any payment provider? Yes, a gift card can be sold through whichever payment processor is connected to your checkout. Redemption of gift card balances toward other products is currently only supported with Stripe, NMI, Authorize.net, and Square as the connected processor. Check with support for current AX Pay redemption support if you plan to use gift card balances toward other purchases.
Can a patient use a gift card to buy another gift card? No. A gift card balance cannot be used to purchase another gift card.
Do I need a Form to sell gift cards through a Funnel or Calendar? Yes. Both the Funnel and Calendar selling methods rely on a Form with the Sell Products element already set up for your gift card, so build that form first.
What is the difference between a scheduled gift card and Deliver Now? Deliver Now sends the gift card to the recipient immediately after payment. A scheduled gift card is emailed on the date the buyer chooses, but the code itself is valid as soon as it is issued, so it can technically be redeemed early if someone gets hold of it before the scheduled delivery date.
Do I need to build separate checkouts for Test Mode and Live Mode? No. Every Gift Card product automatically gets both a Test Mode and a Live Mode checkout link. Use the Test link internally to validate pricing and the purchase flow, then share the Live link with real patients.
Can I customize how the gift card looks? Yes. When you create the Gift Card product, you can upload custom artwork and choose a gradient so the card matches your practice's branding.
