If your practice sells retail products, skincare lines, or aftercare kits through your Aesthetix CRM Store, you can charge accurate, region-specific delivery costs instead of one flat shipping fee for every order. Shipping zones and rates are configured under Payments > Settings > Shipping & Delivery. Full checkout, tax, and coupon setup for your Store lives in the Payments collection, and connecting Shopify or WooCommerce is covered in Integrations; this guide focuses on the native shipping configuration for your Store.
Shipping is only half of getting paid for a retail order. If you have not set up a payment processor yet, we recommend AX Pay, Aesthetix CRM's own built in payment provider, which offers better processing rates than Stripe. See the AX Pay help article for setup steps.
A shipping zone is a region, made up of one or more countries, states, or provinces, that shares the same delivery rules. Once a zone exists, you assign it one or more rates so customers see accurate shipping costs at checkout based on their delivery address.
You can create as many zones as you need. For example, a practice that ships retail orders nationwide might set up separate zones for "In-State," "Continental US," and "International," each with its own rate.
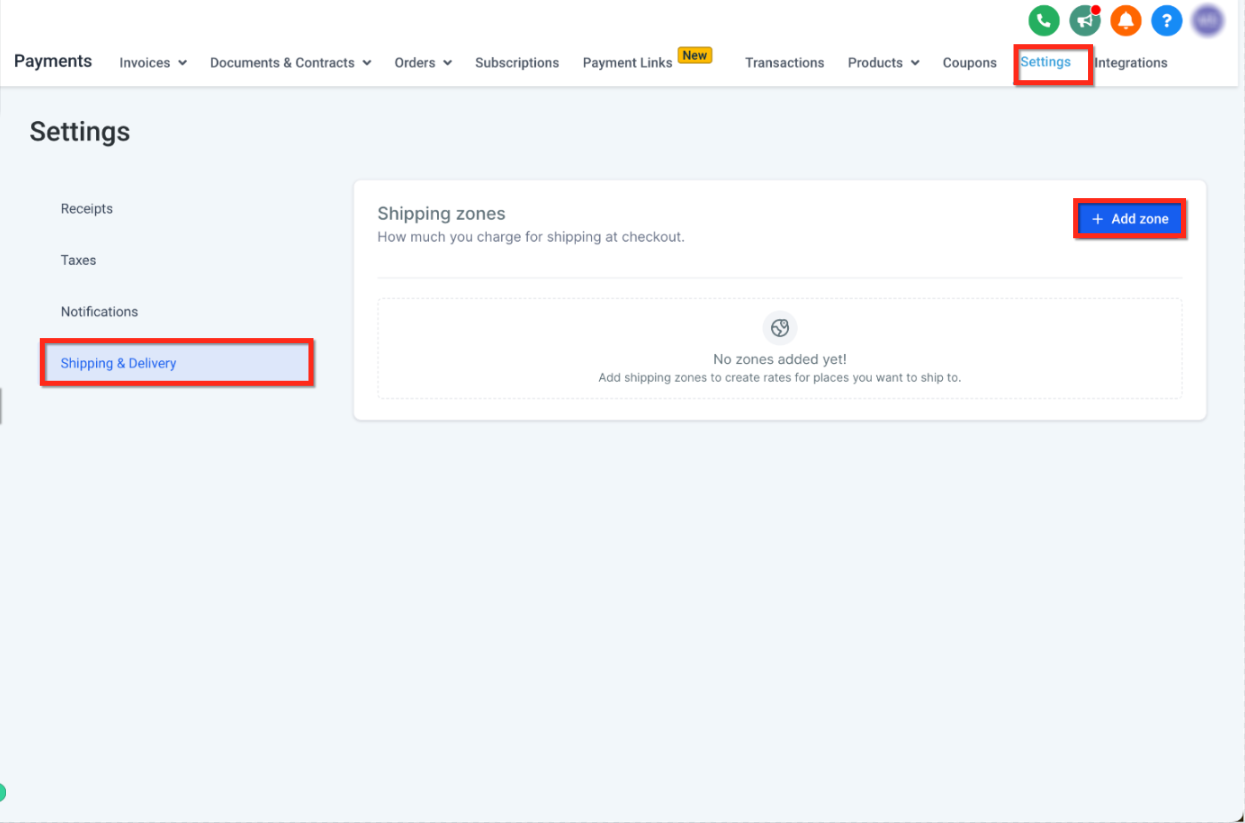
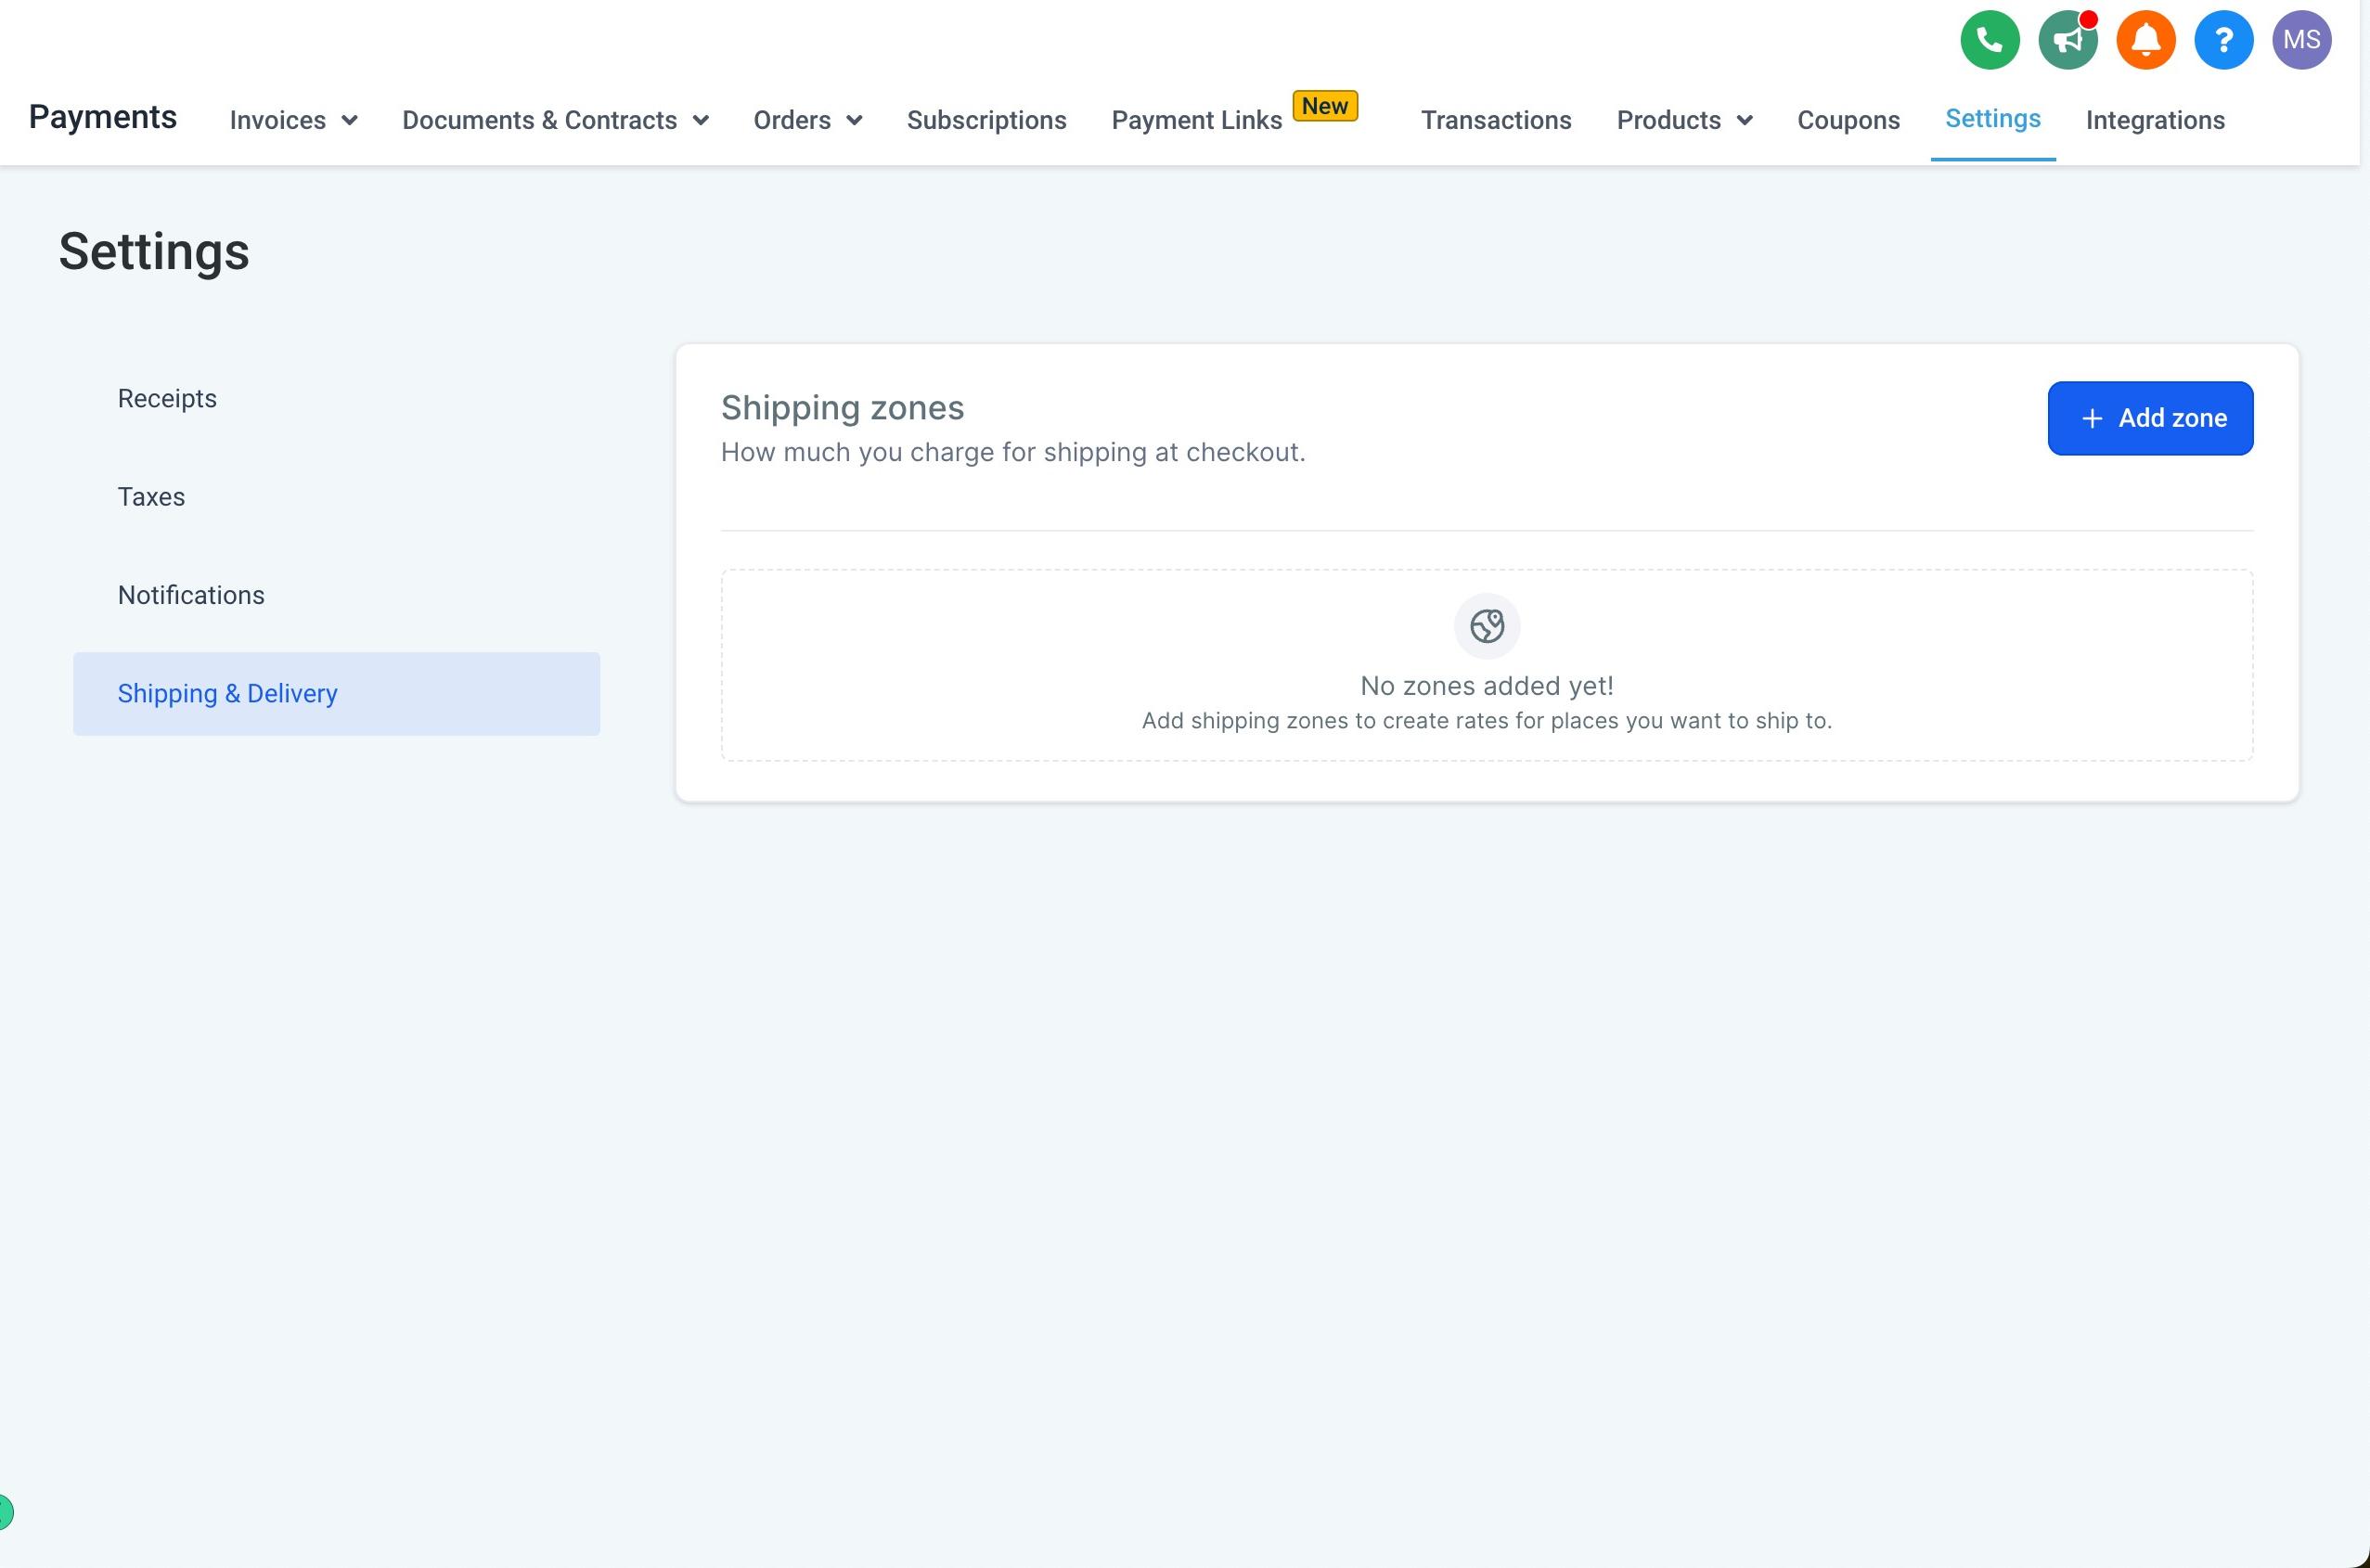
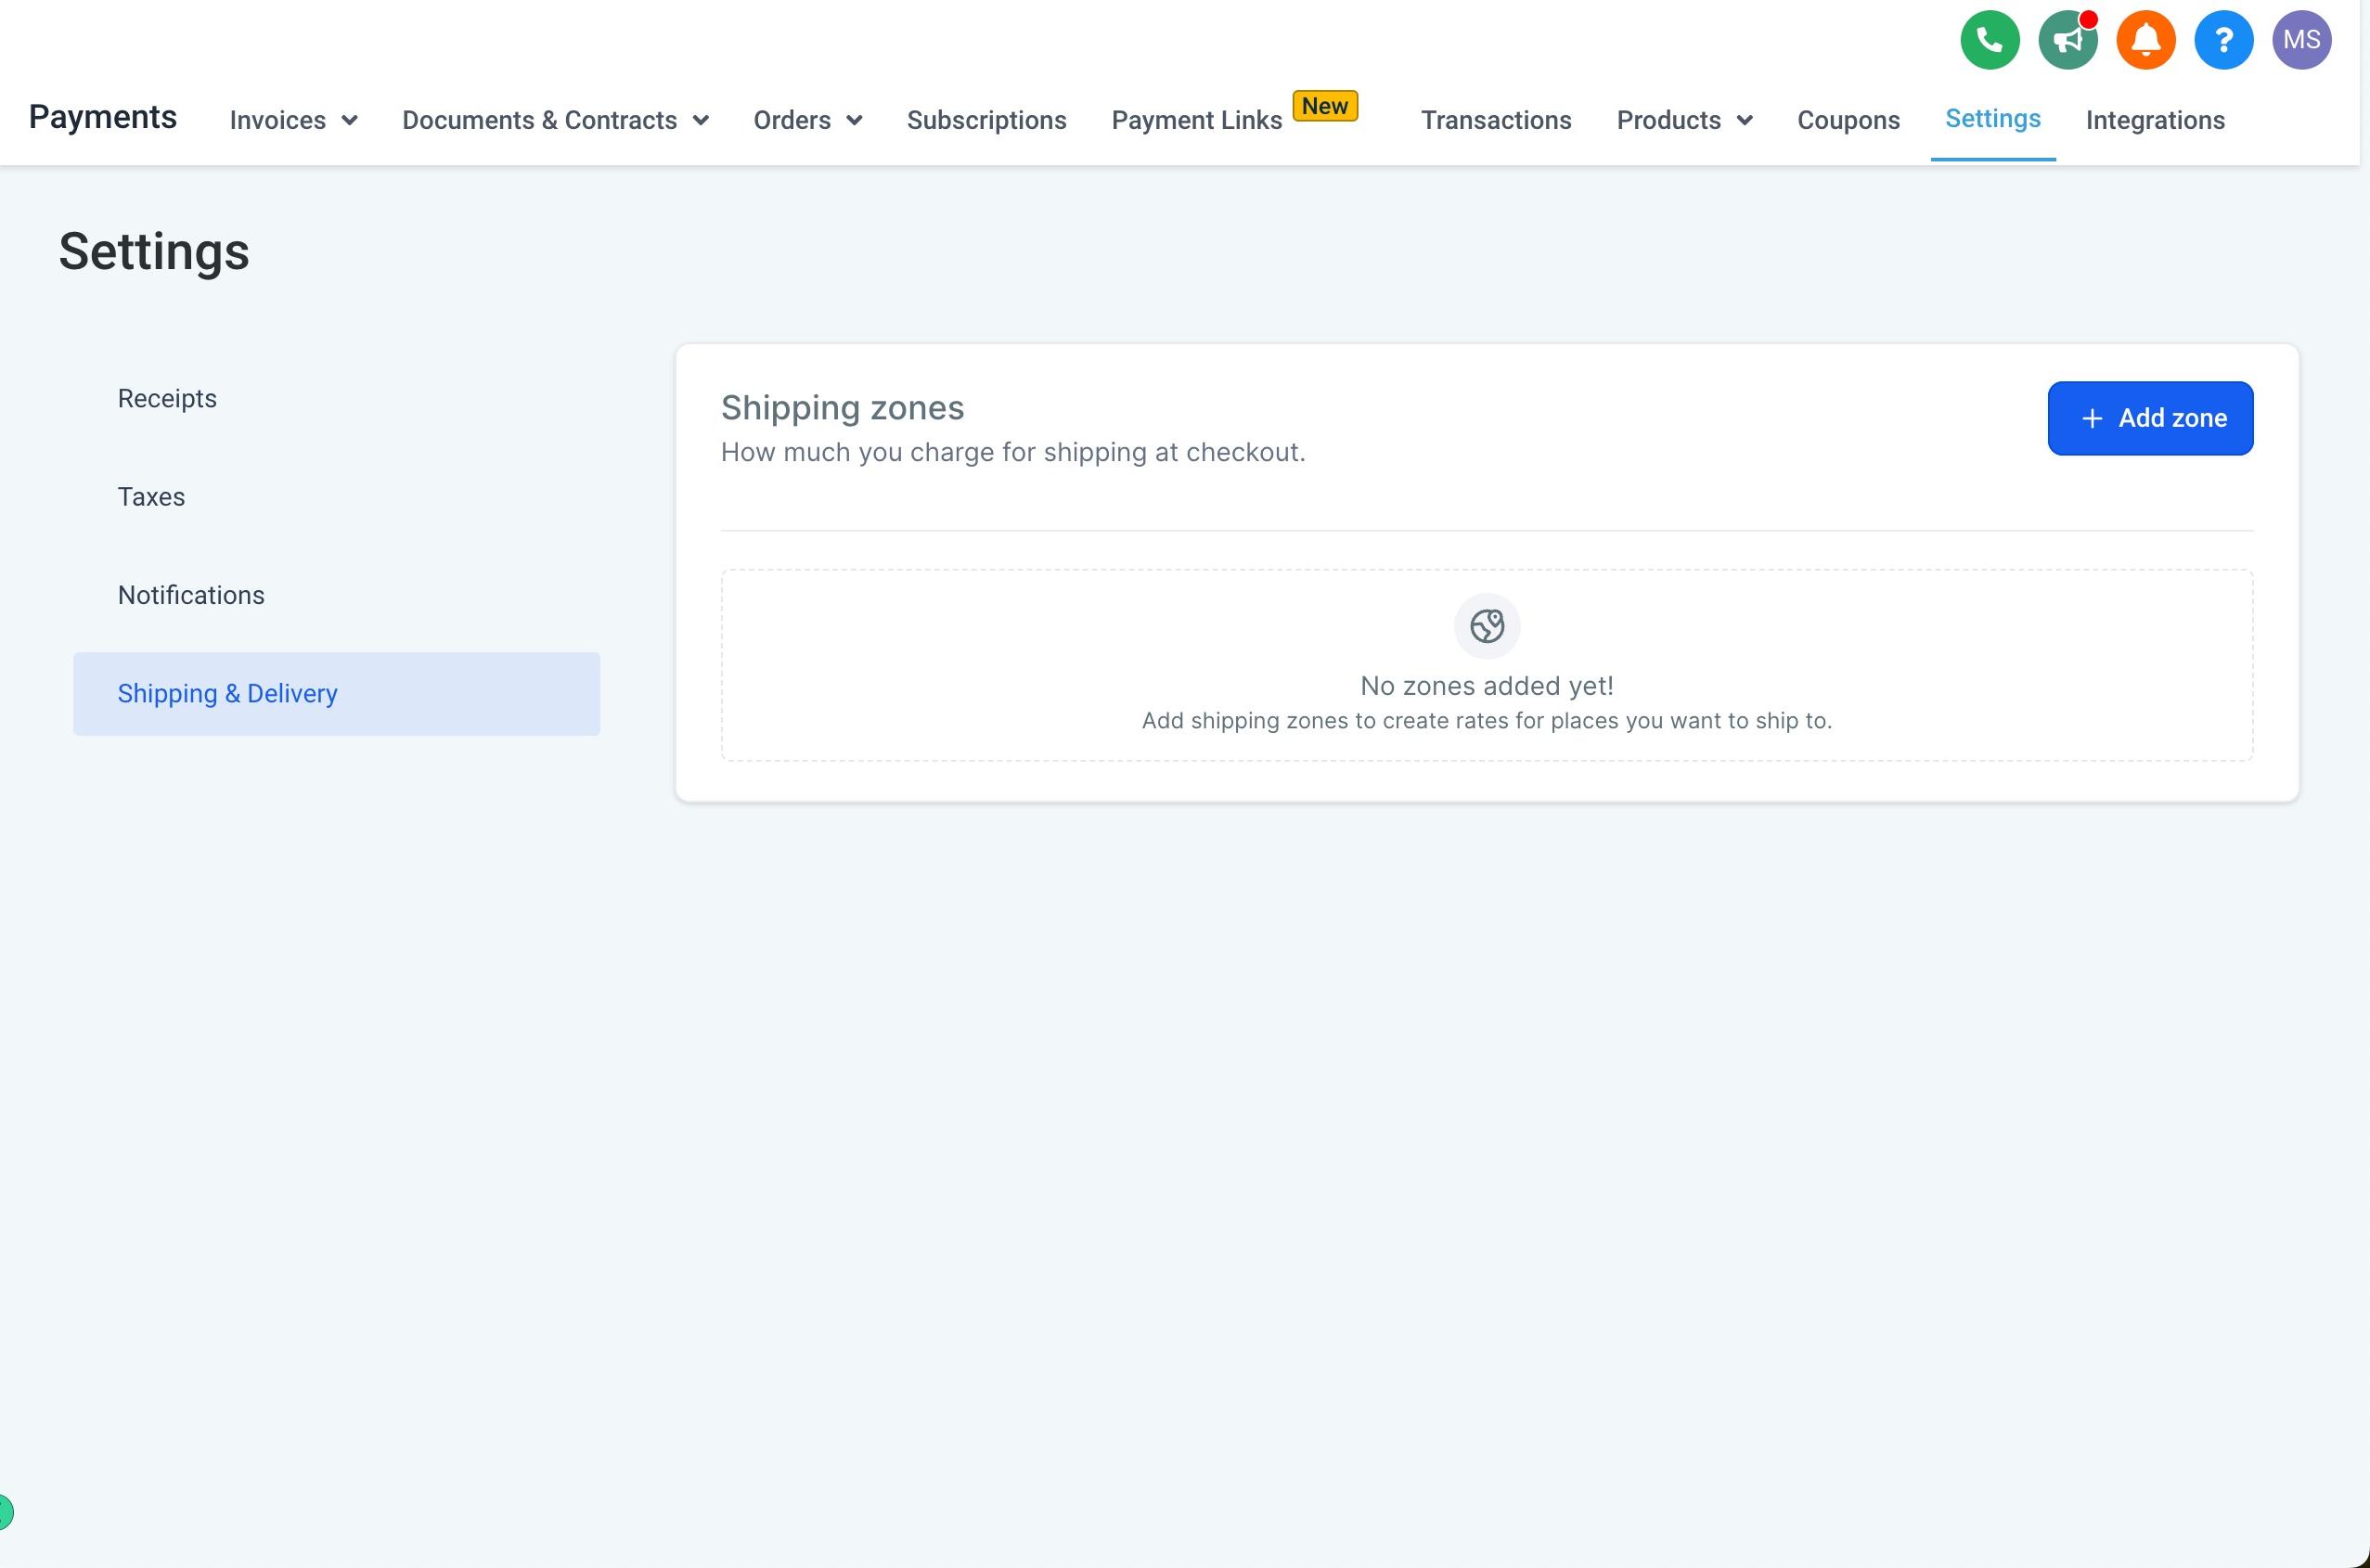
From your Aesthetix CRM account, click Payments.
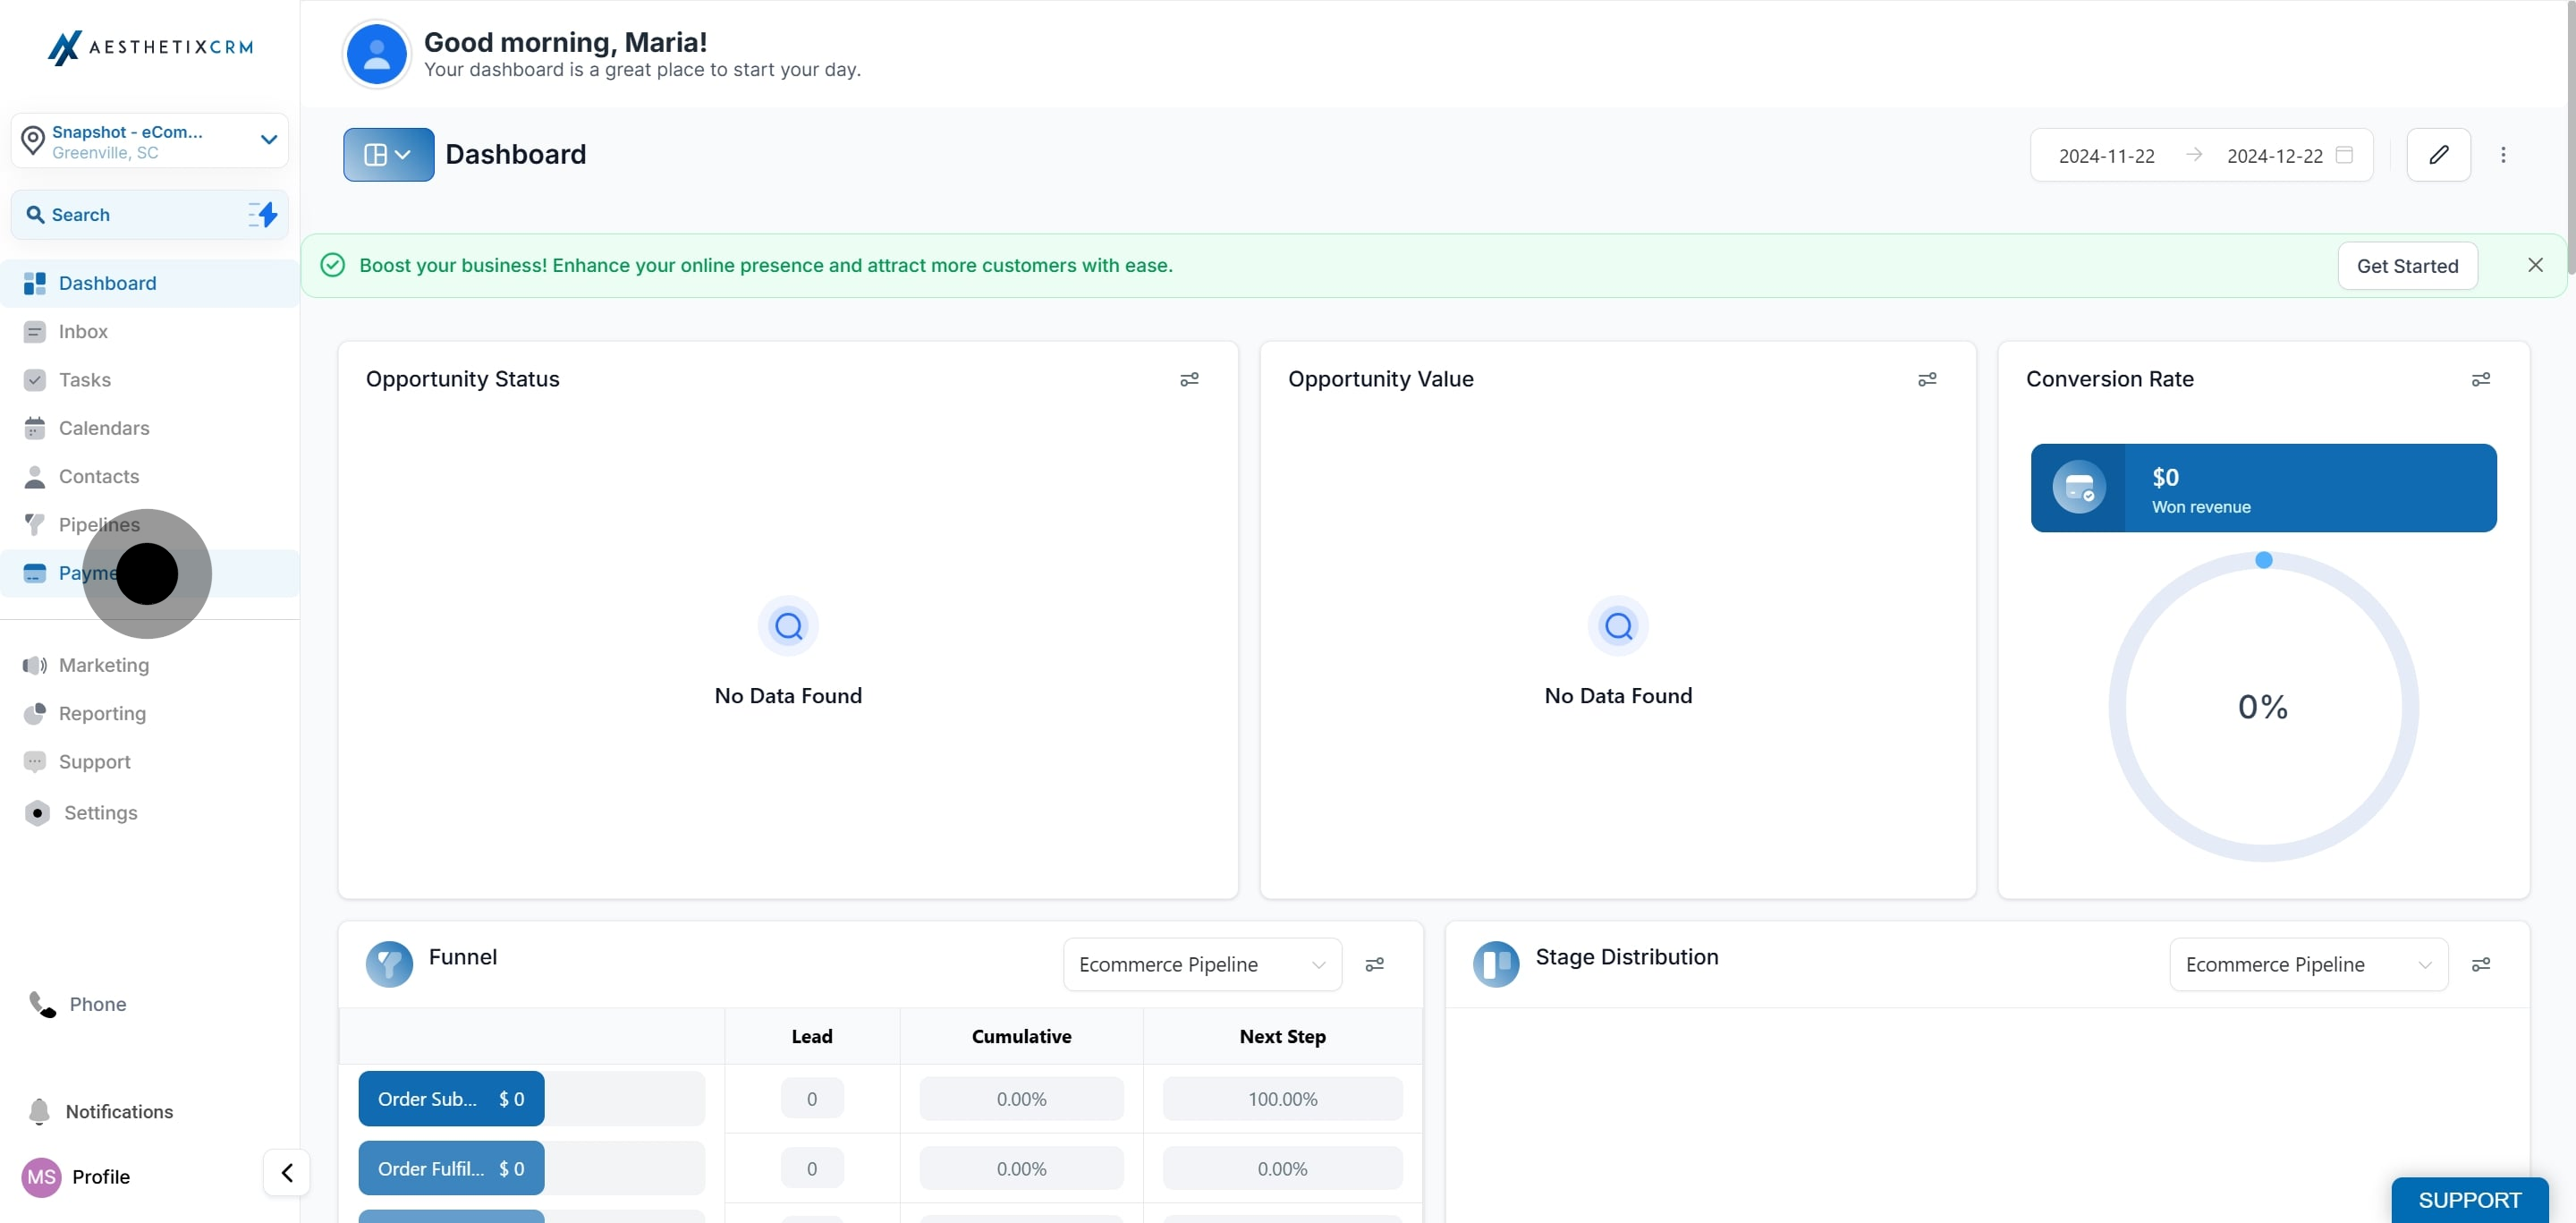
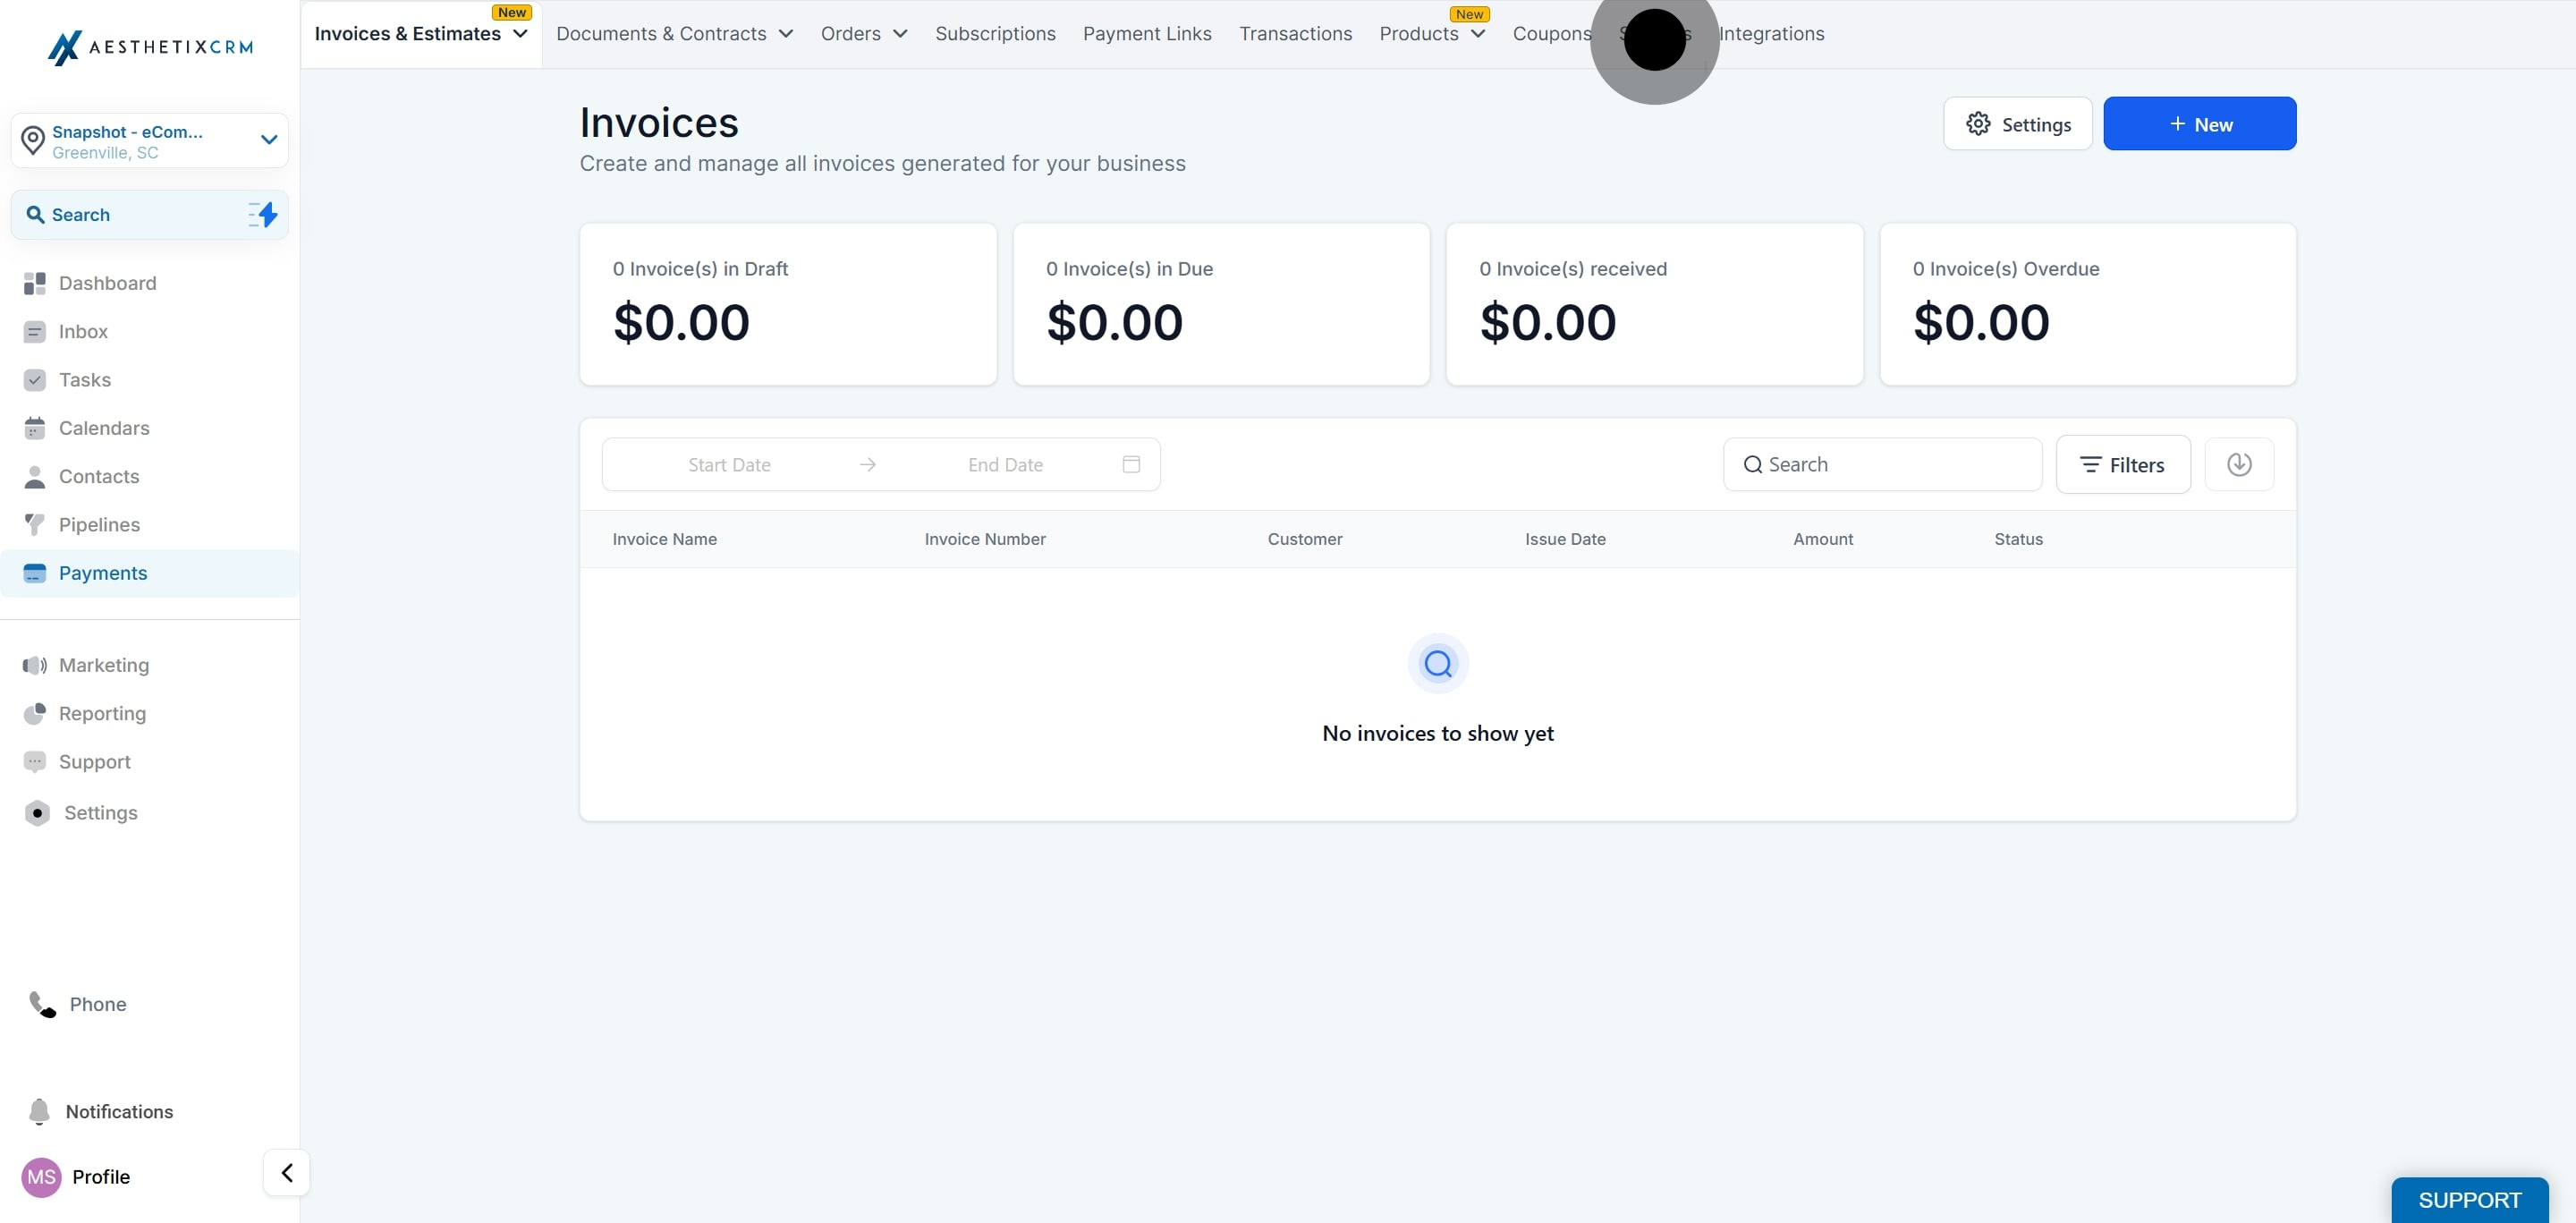
Click Settings.
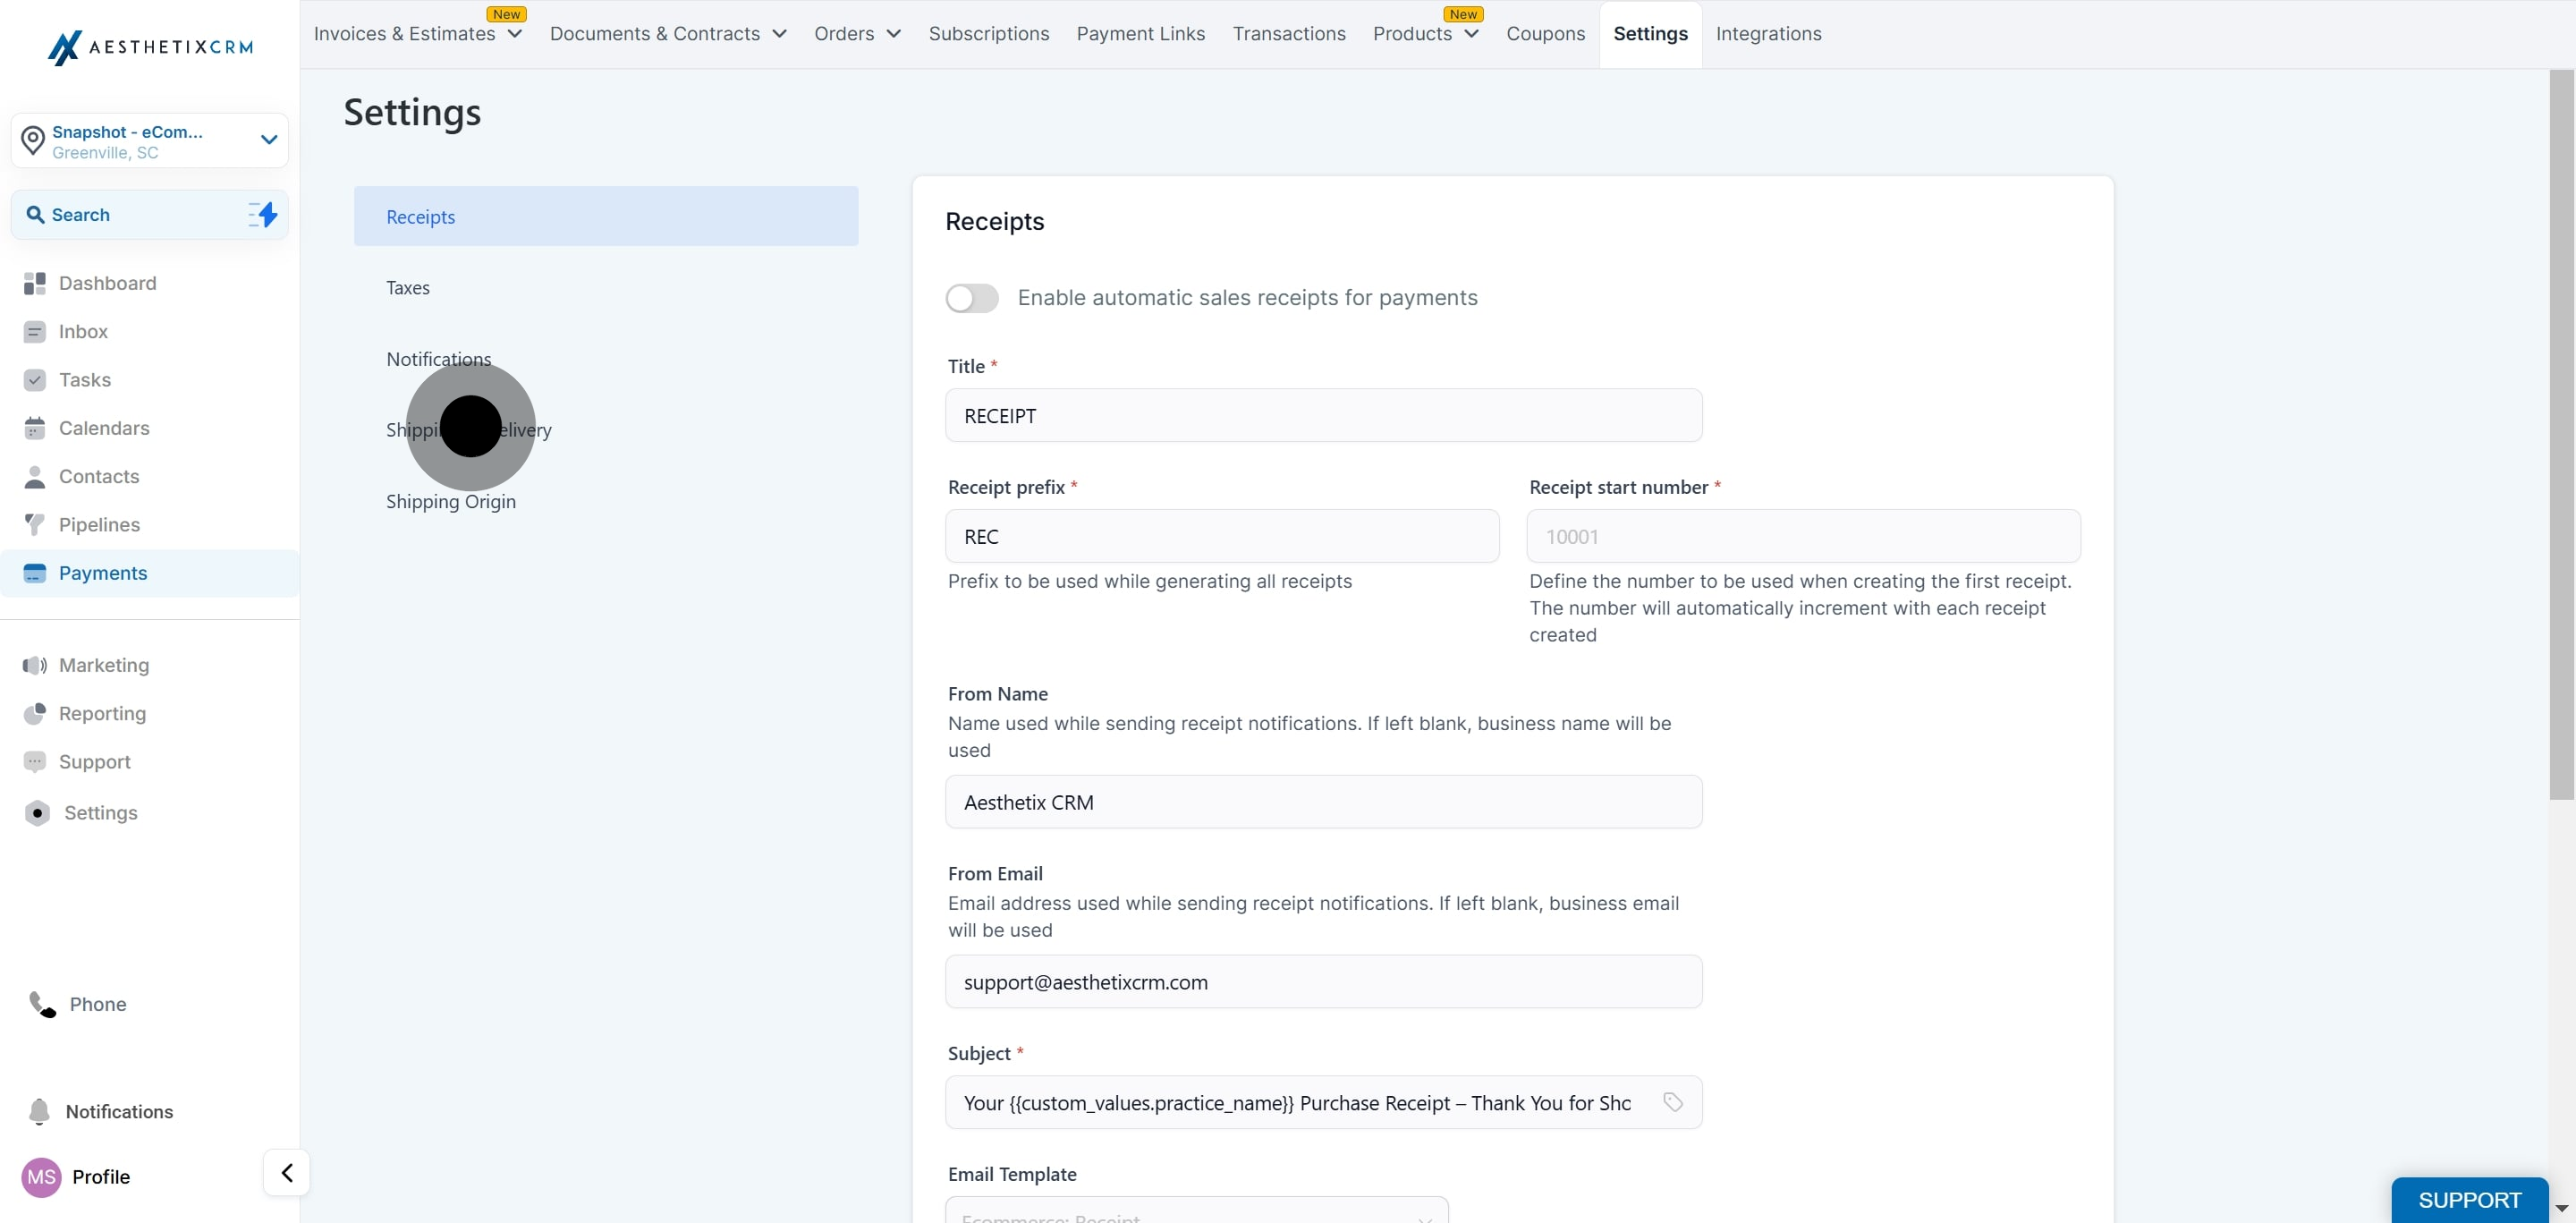
Click Shipping & Delivery.
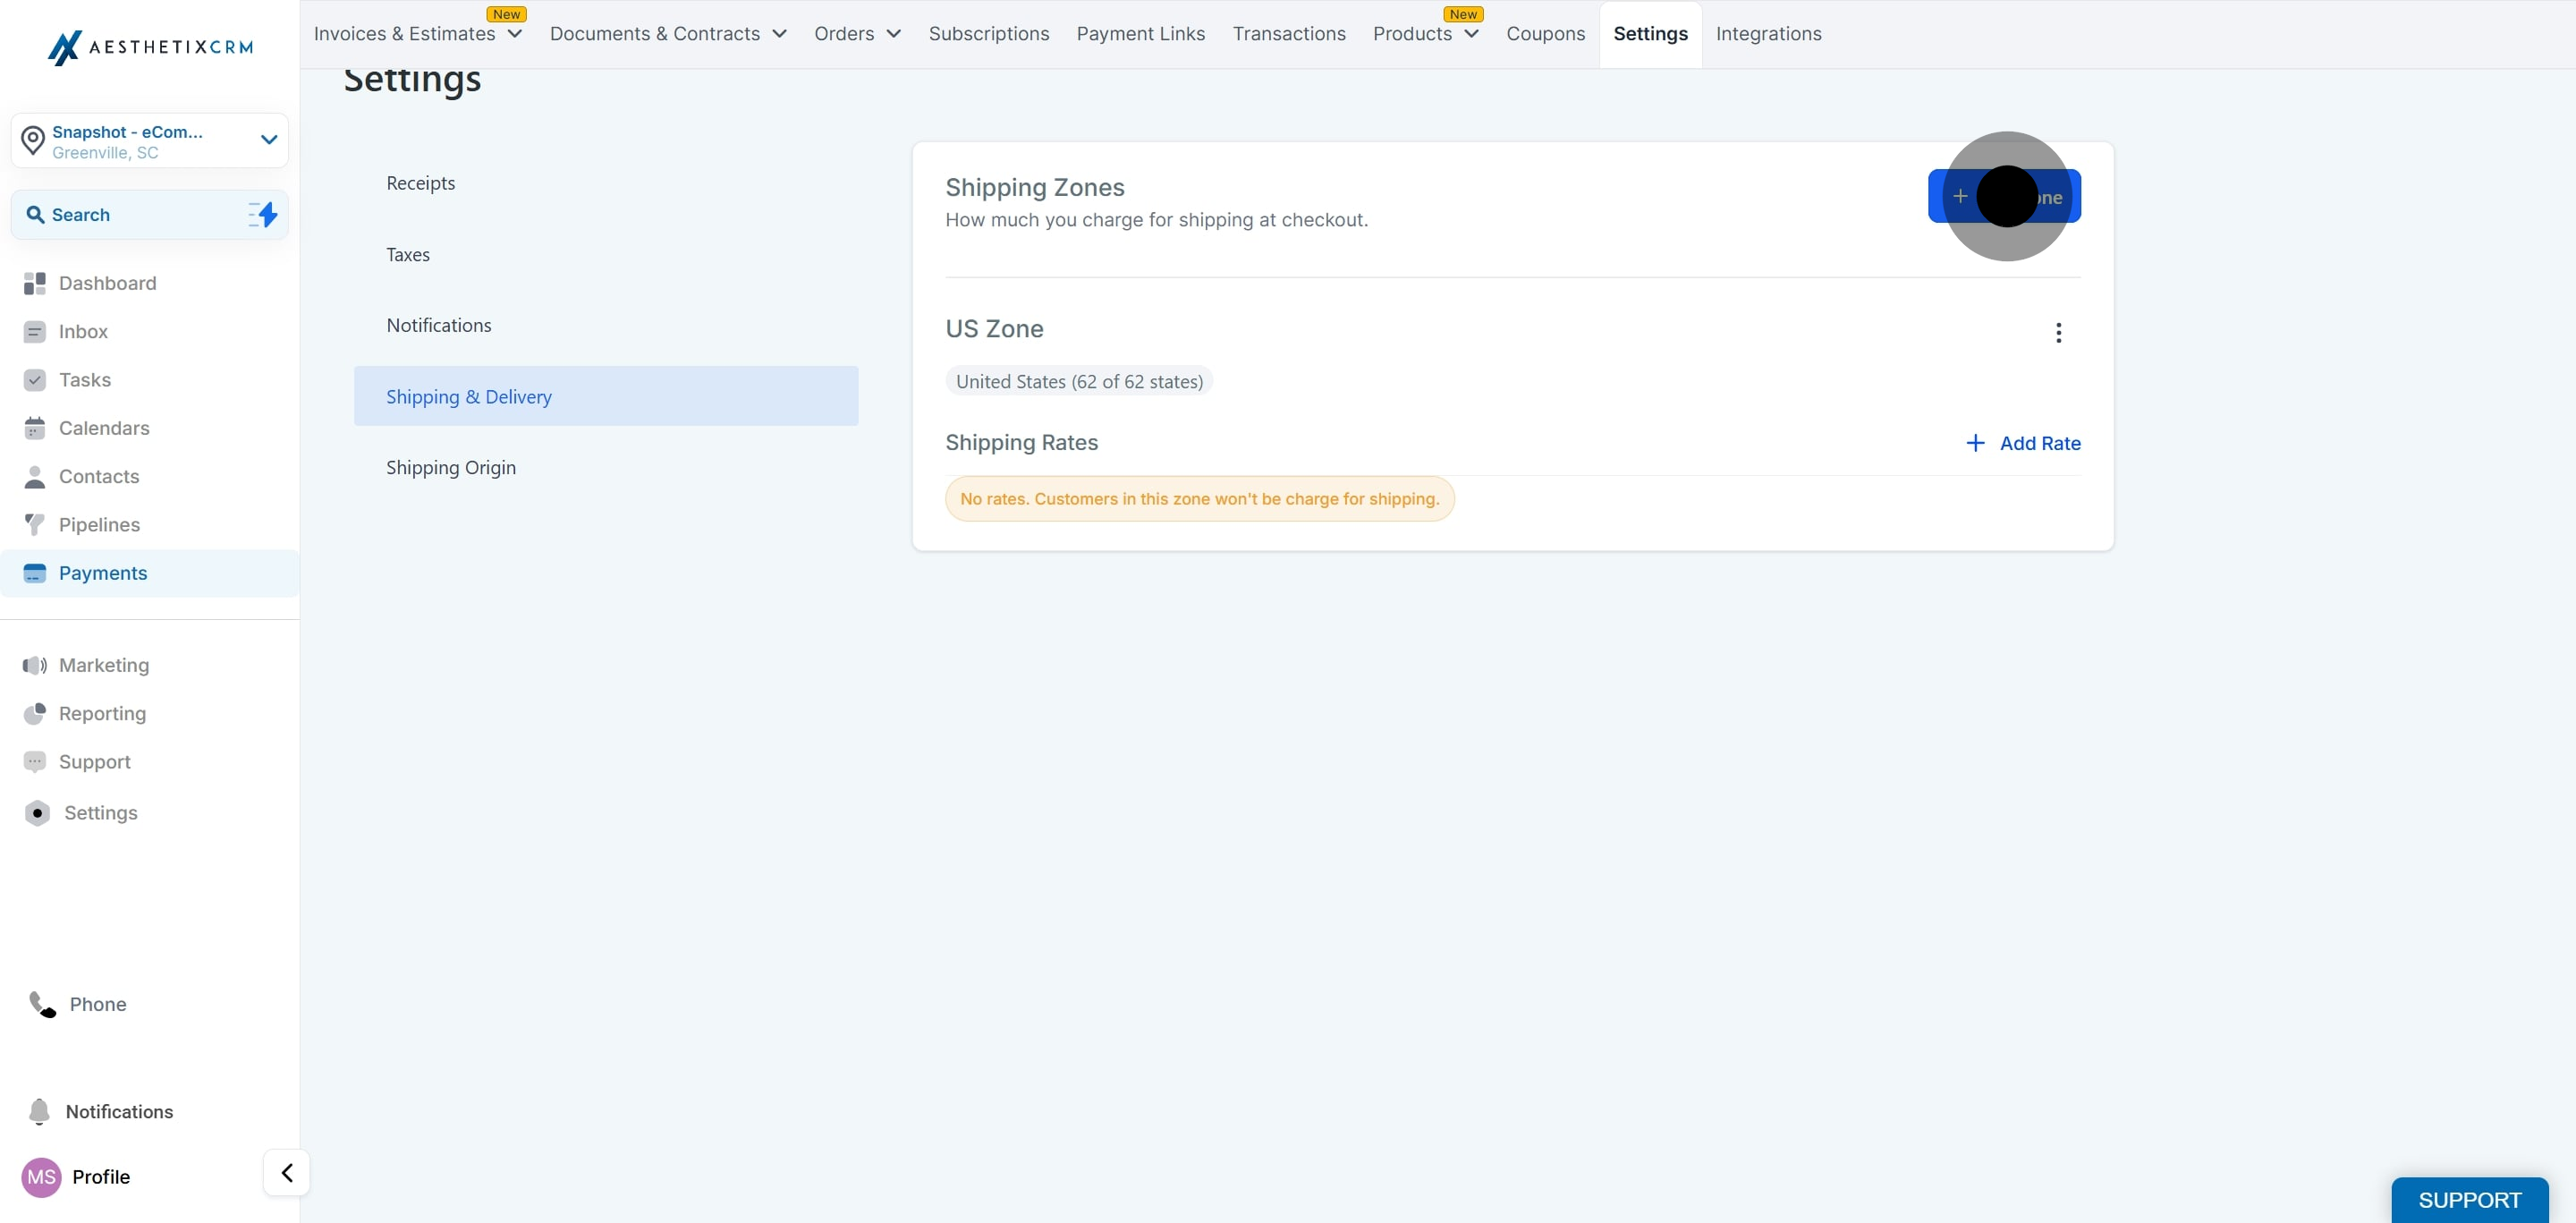
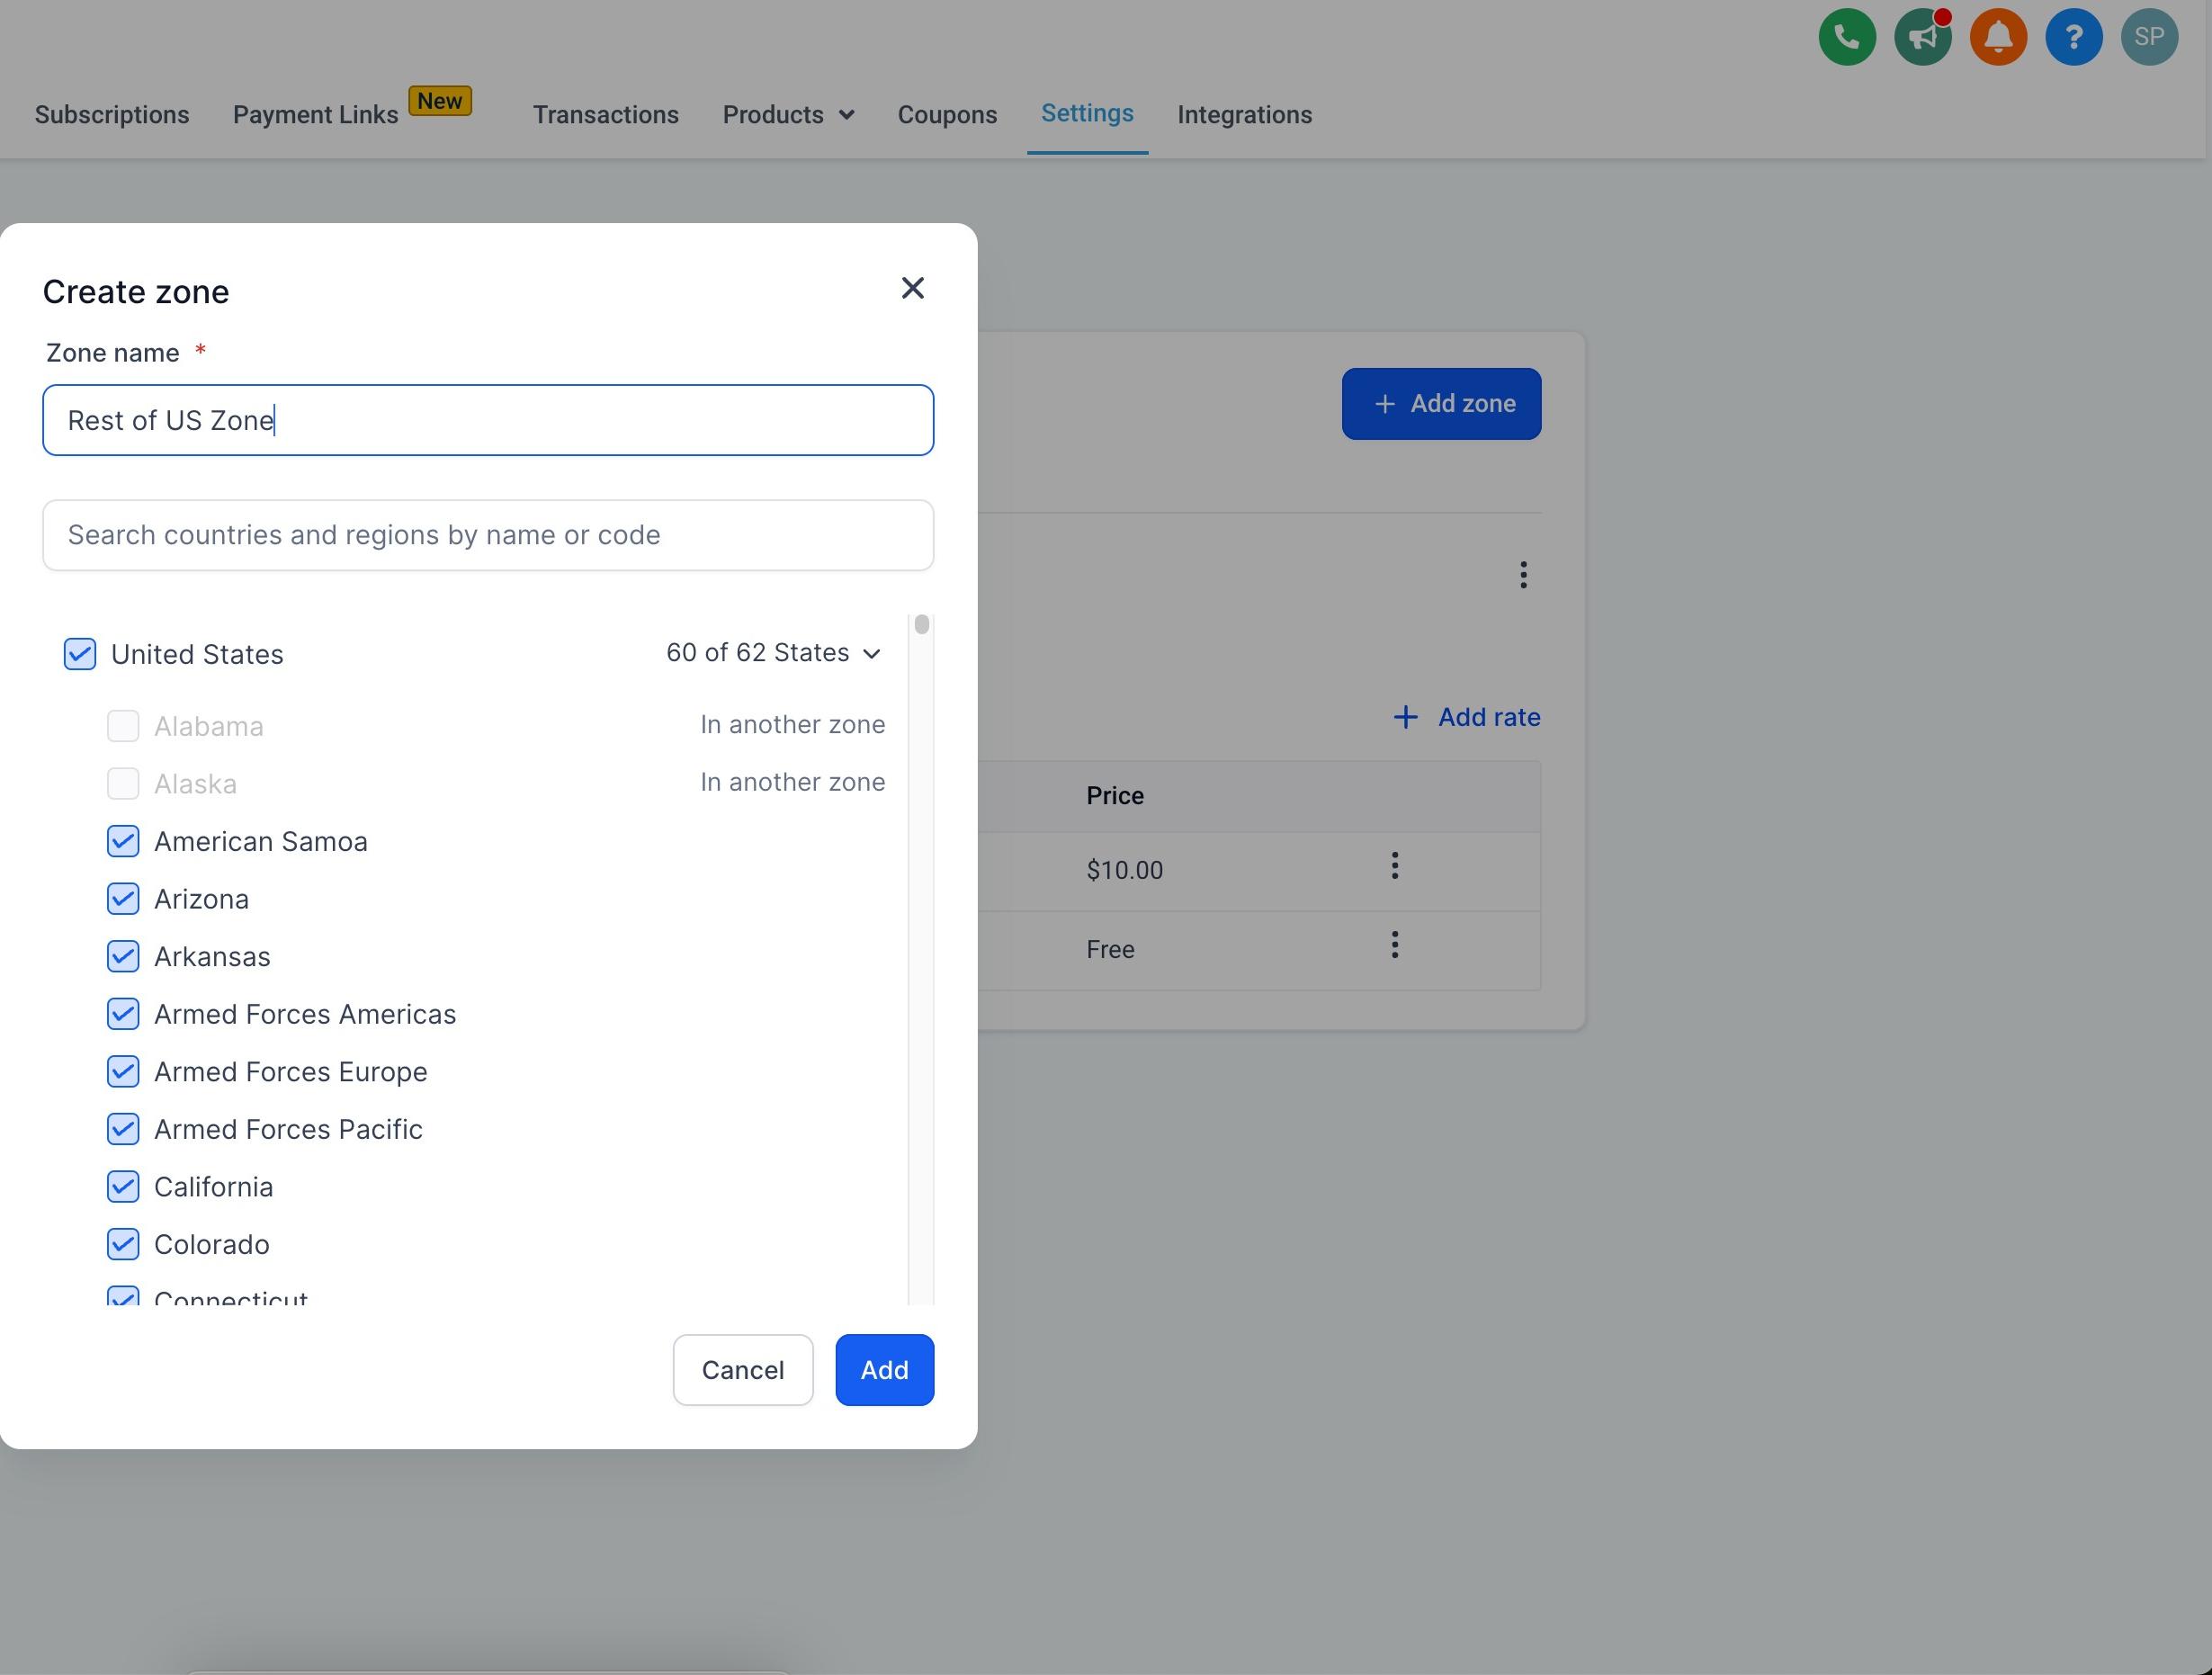
Click Add Zone.
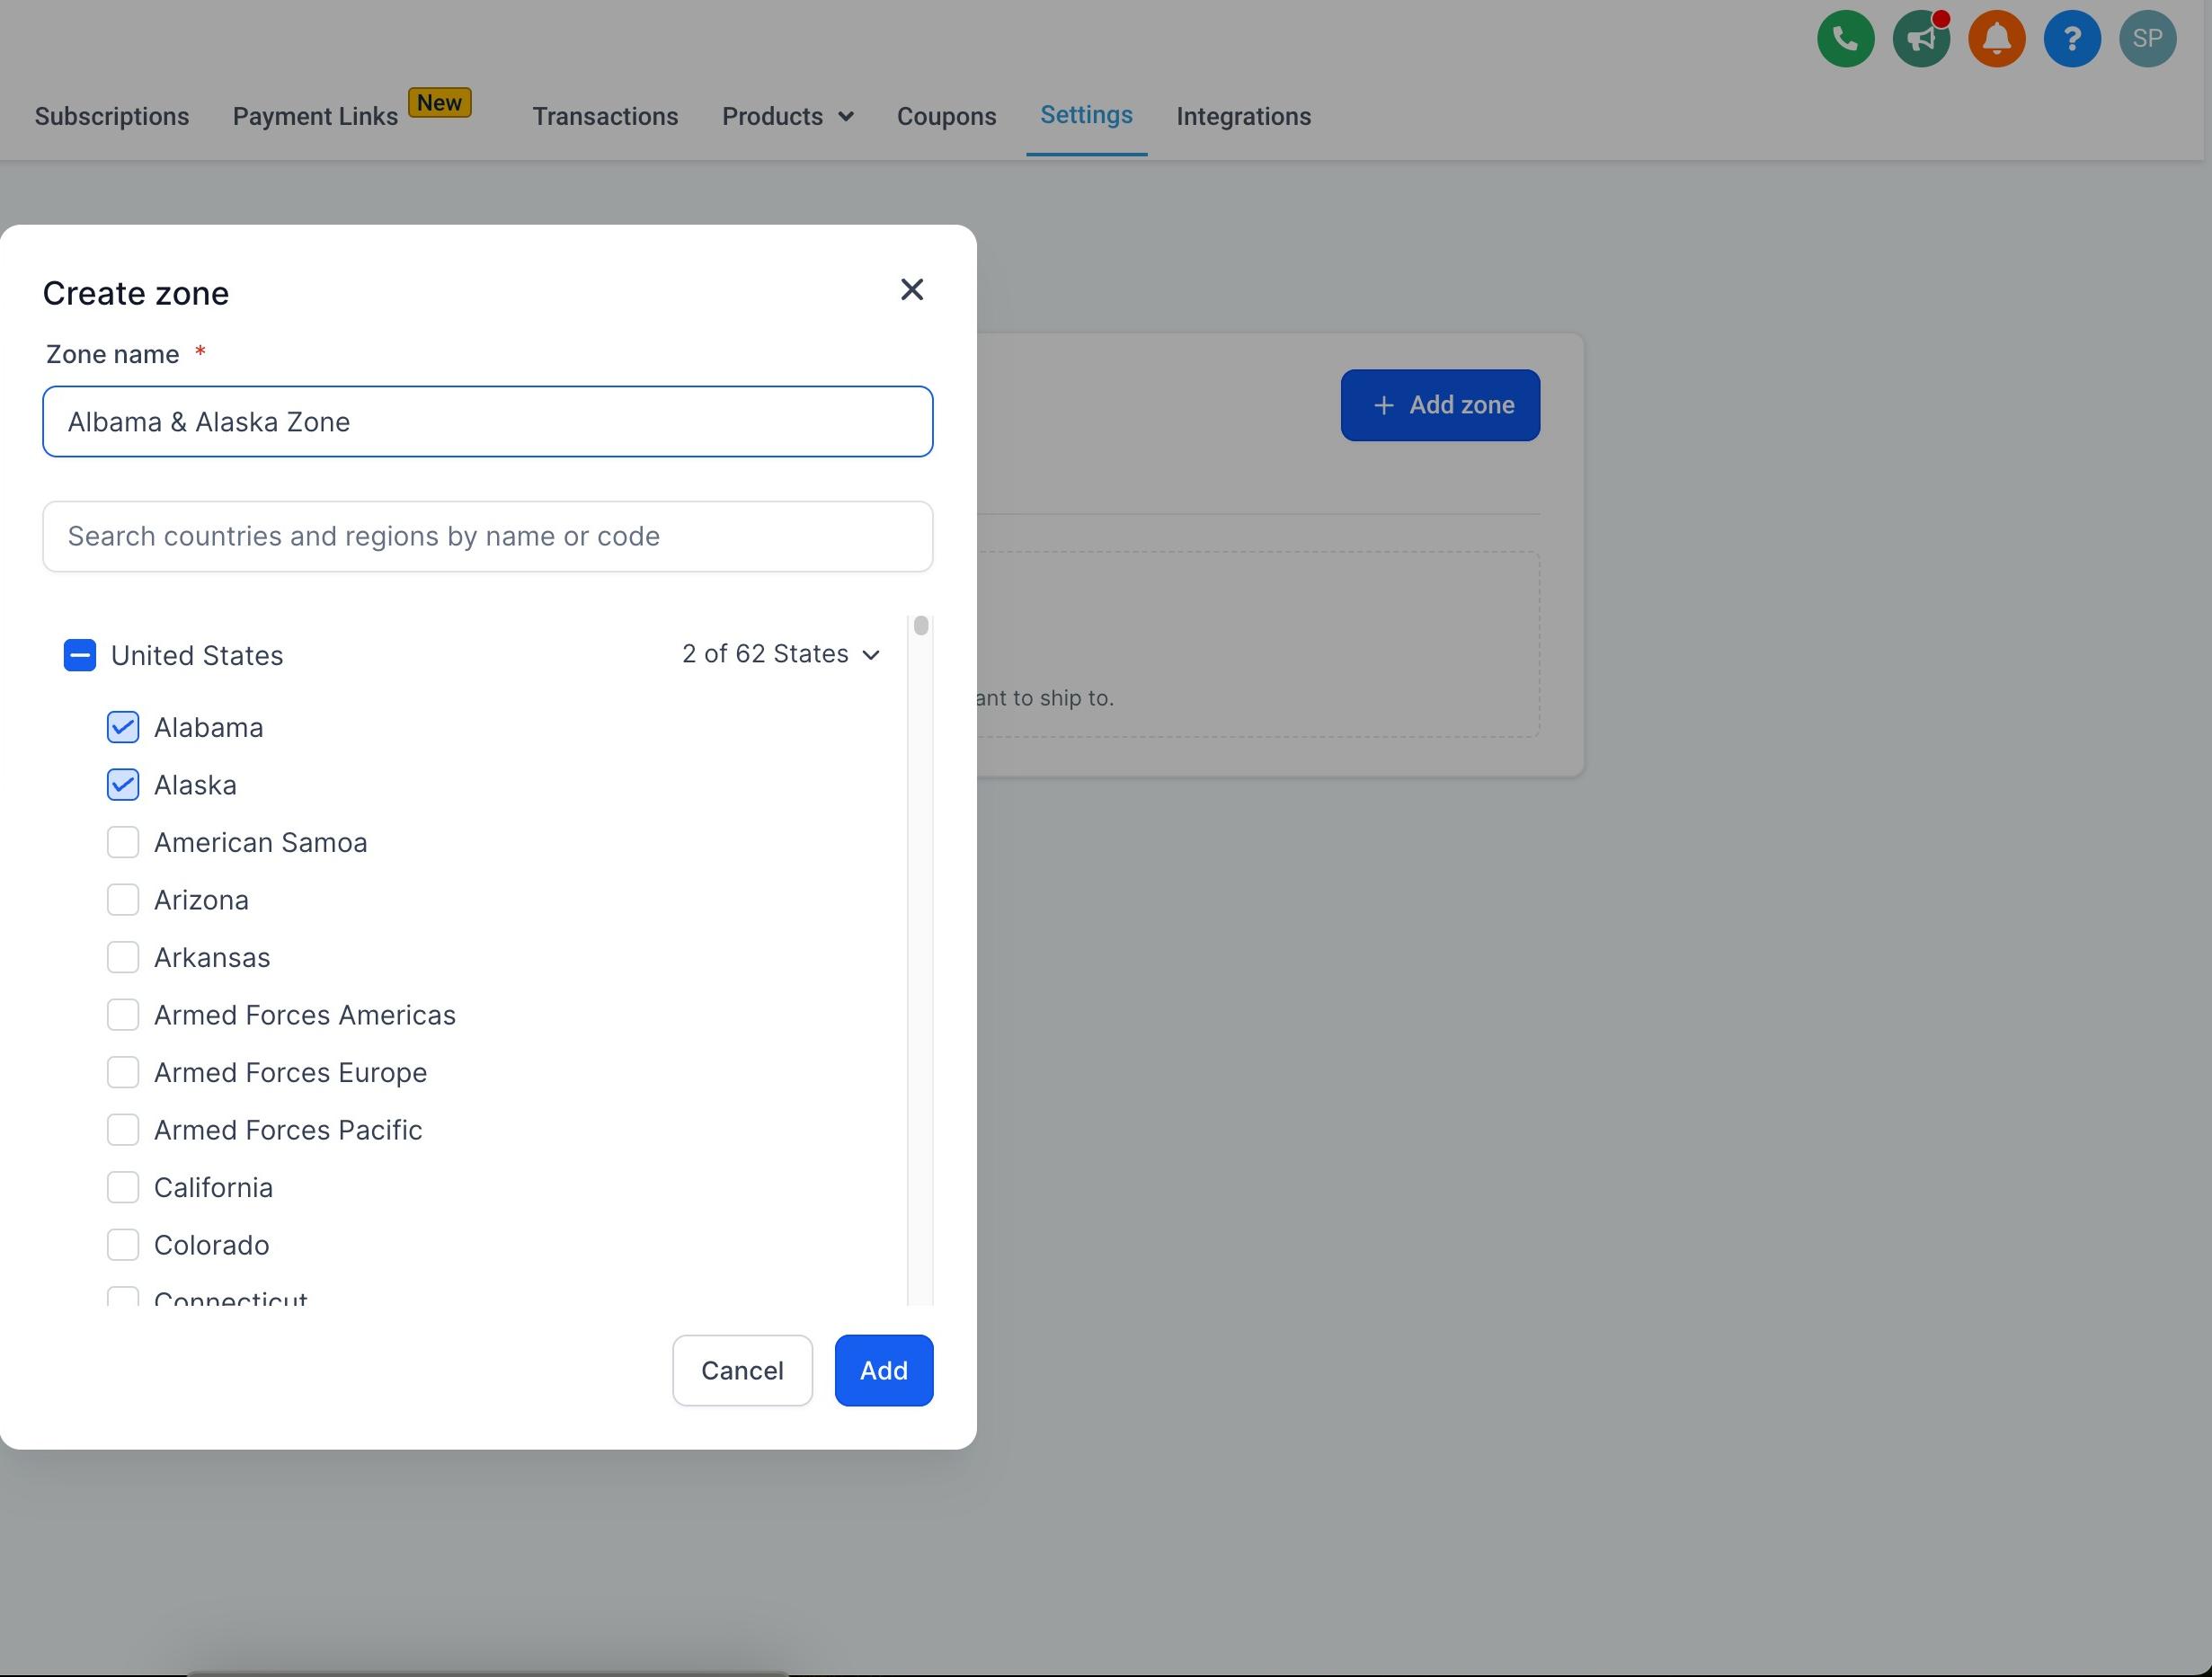
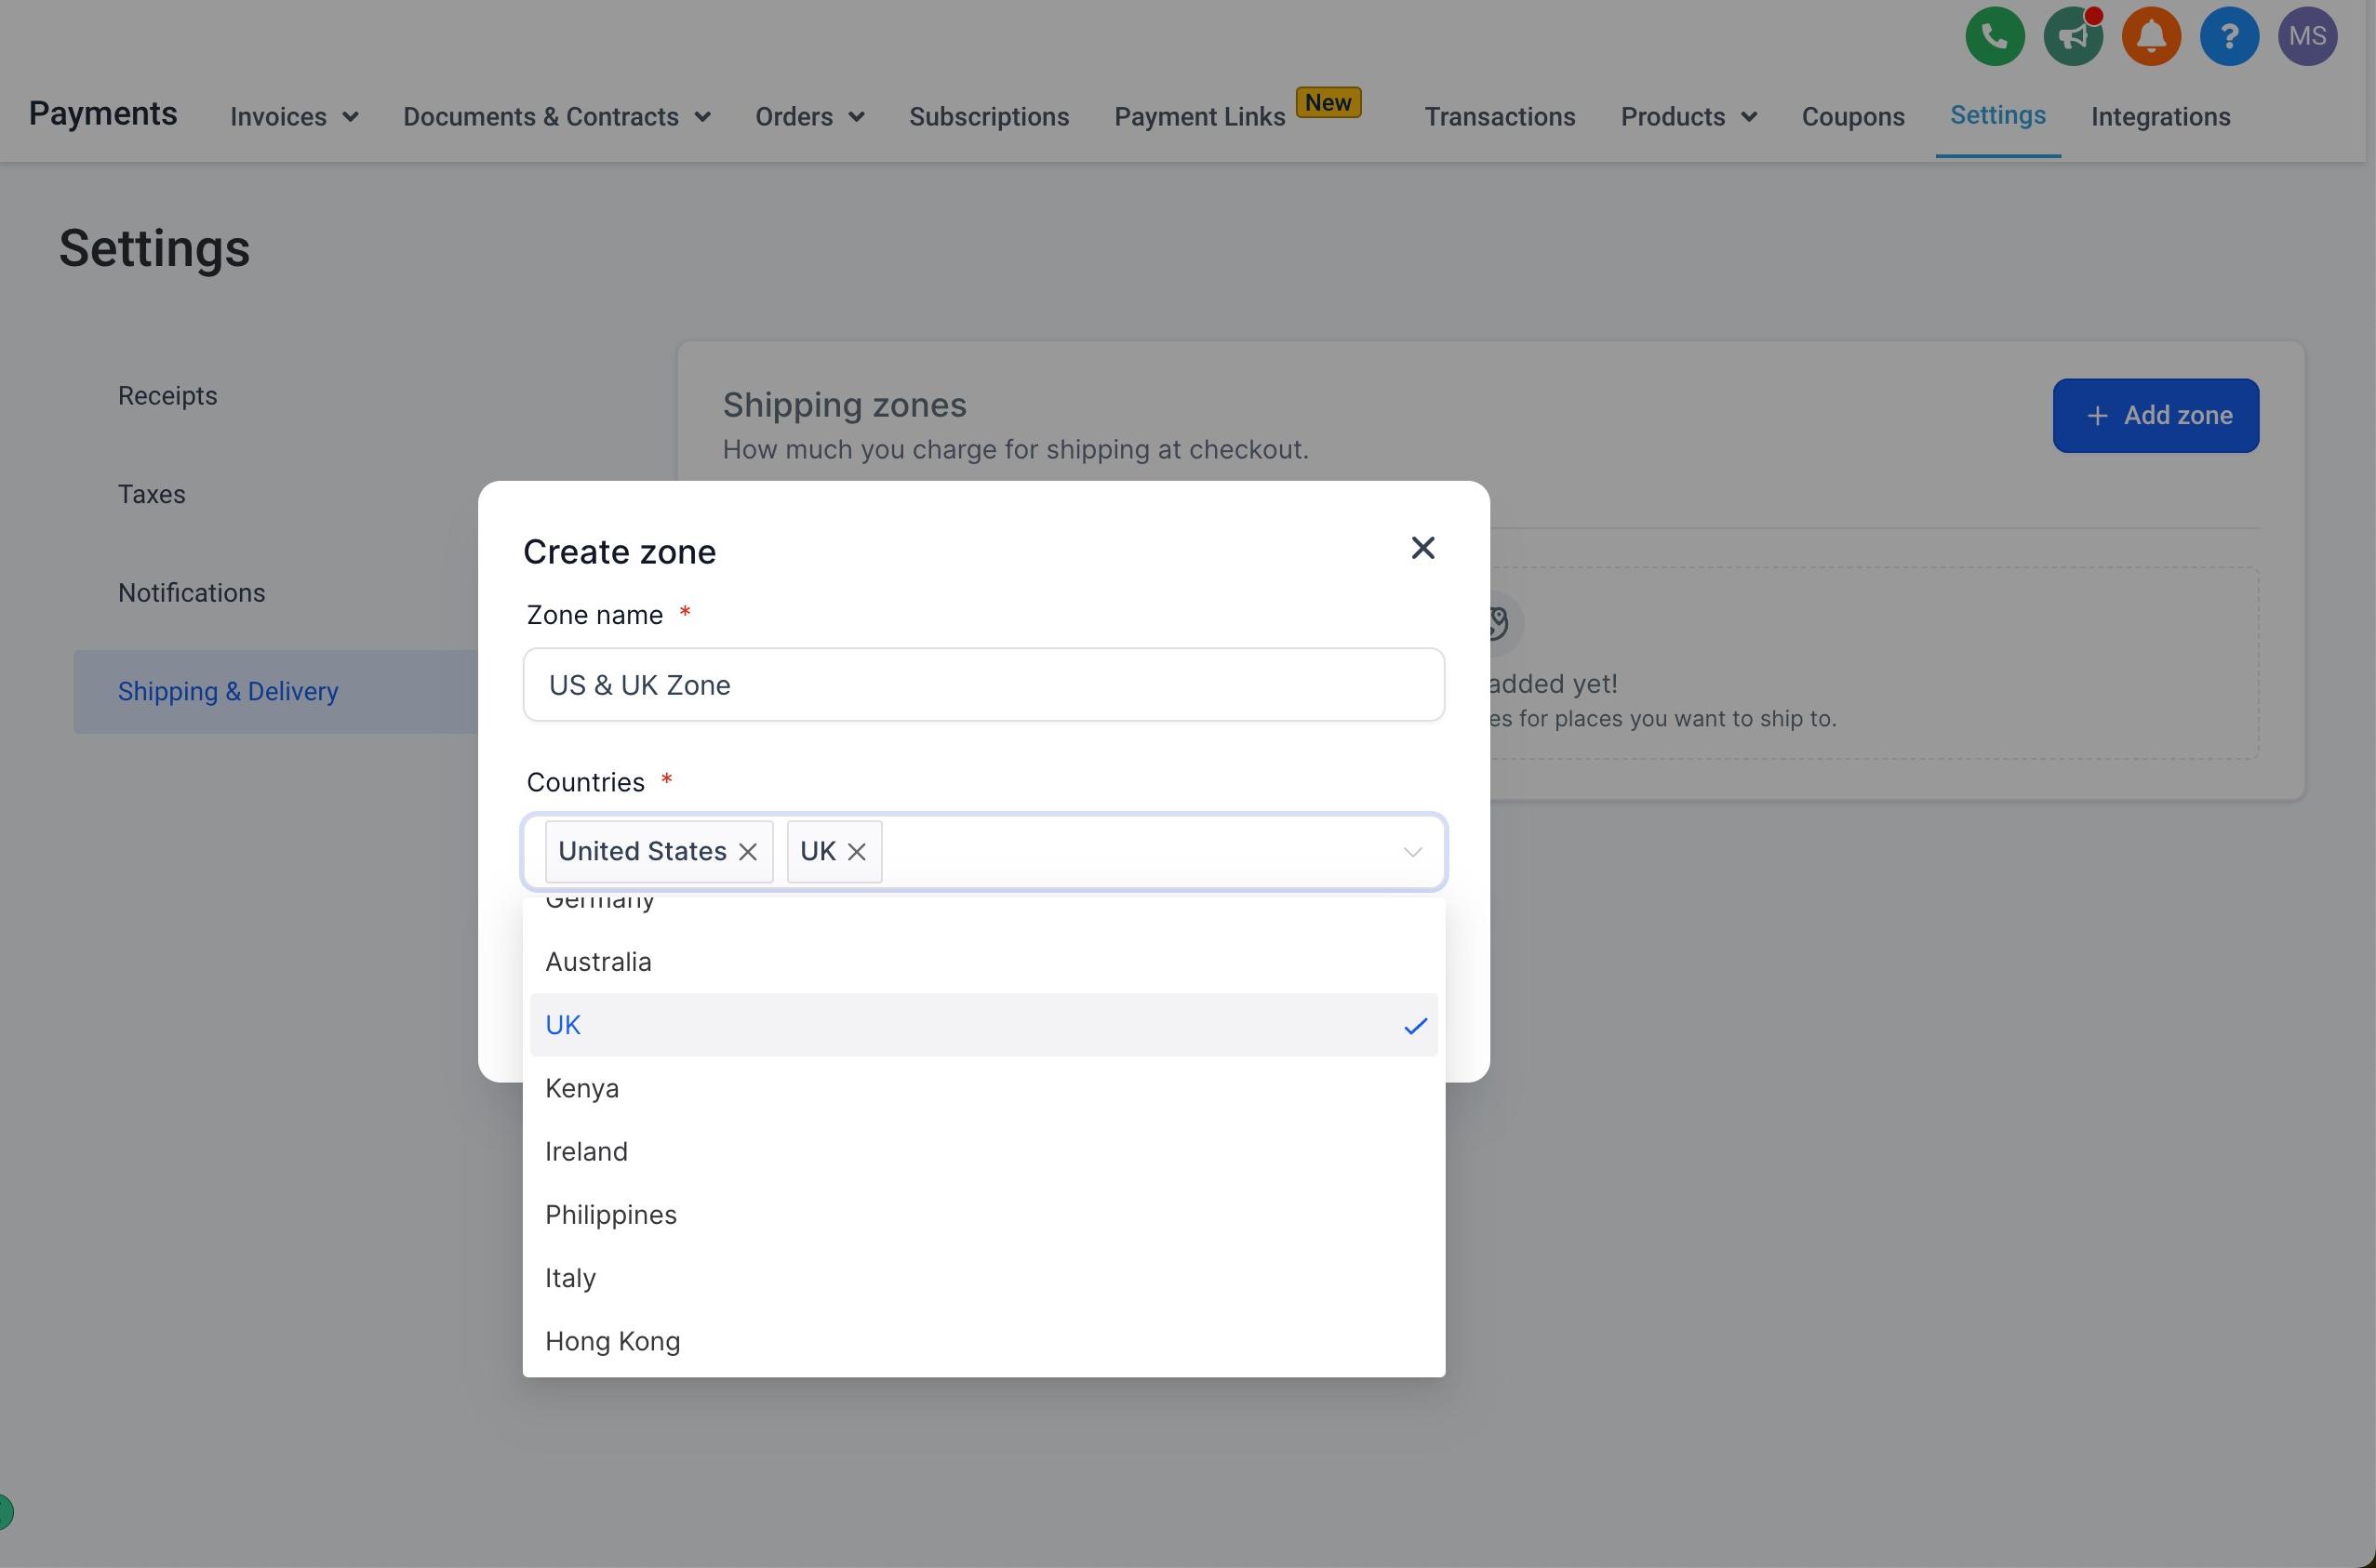
Enter a zone name (for example, "In-State" or "Continental US"). This name is for your internal reference only; customers do not see it at checkout.
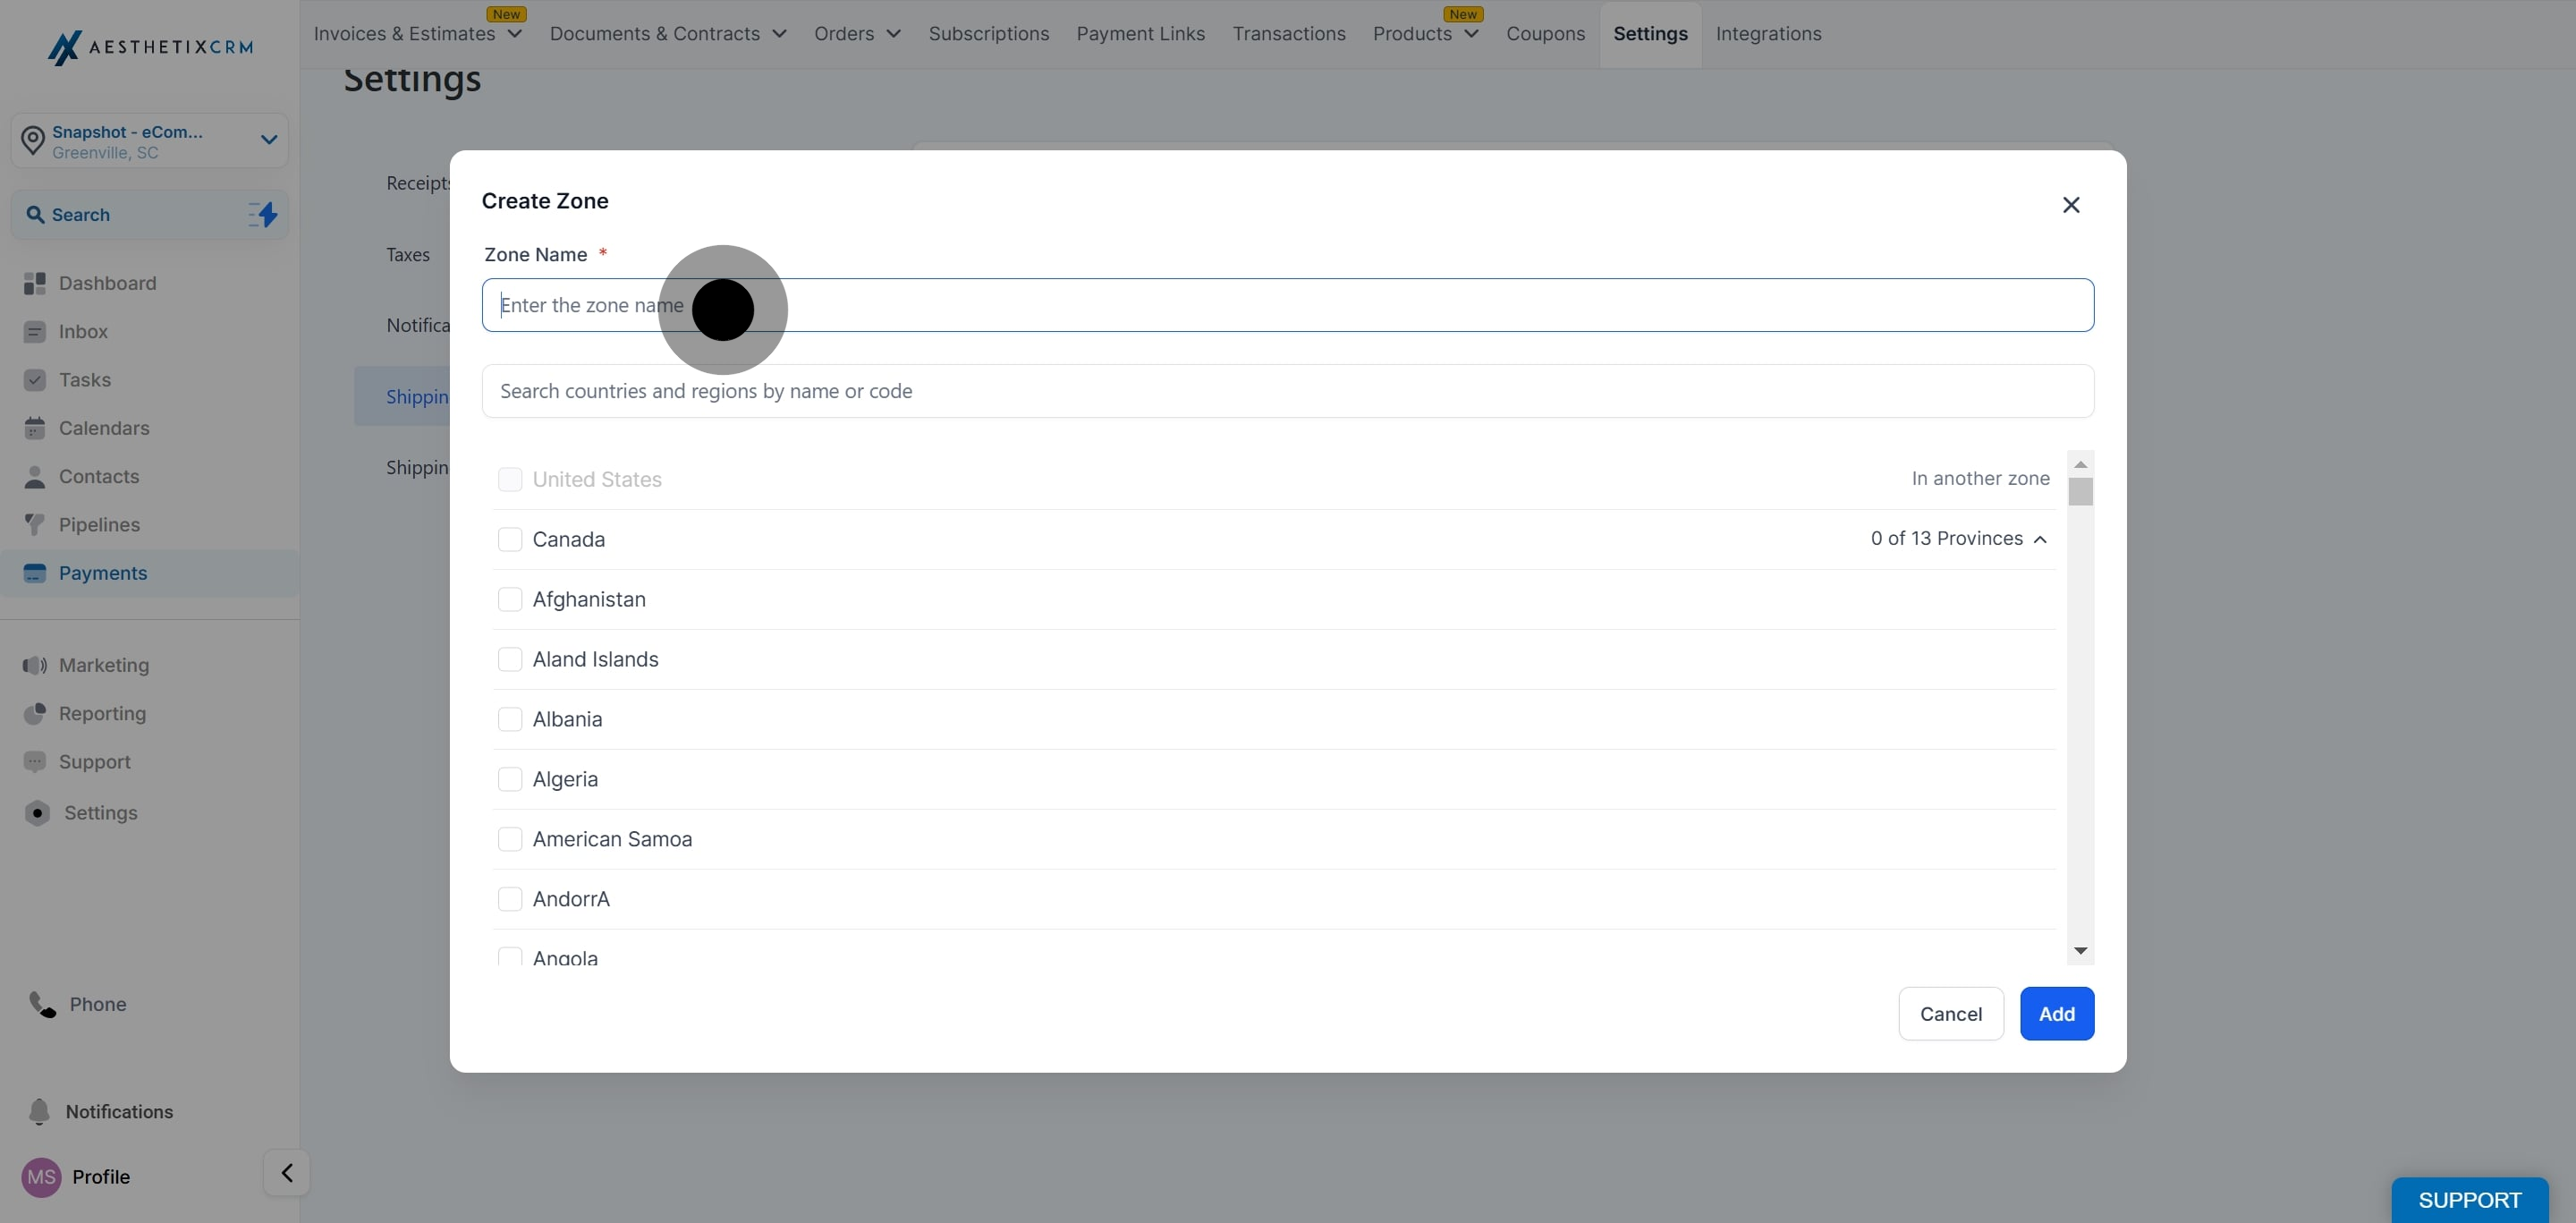
Select the countries, and the specific states or provinces within each country, that belong to this zone. Once a state or province is assigned to a zone, it cannot be reused in another zone, so plan your regions before you start.
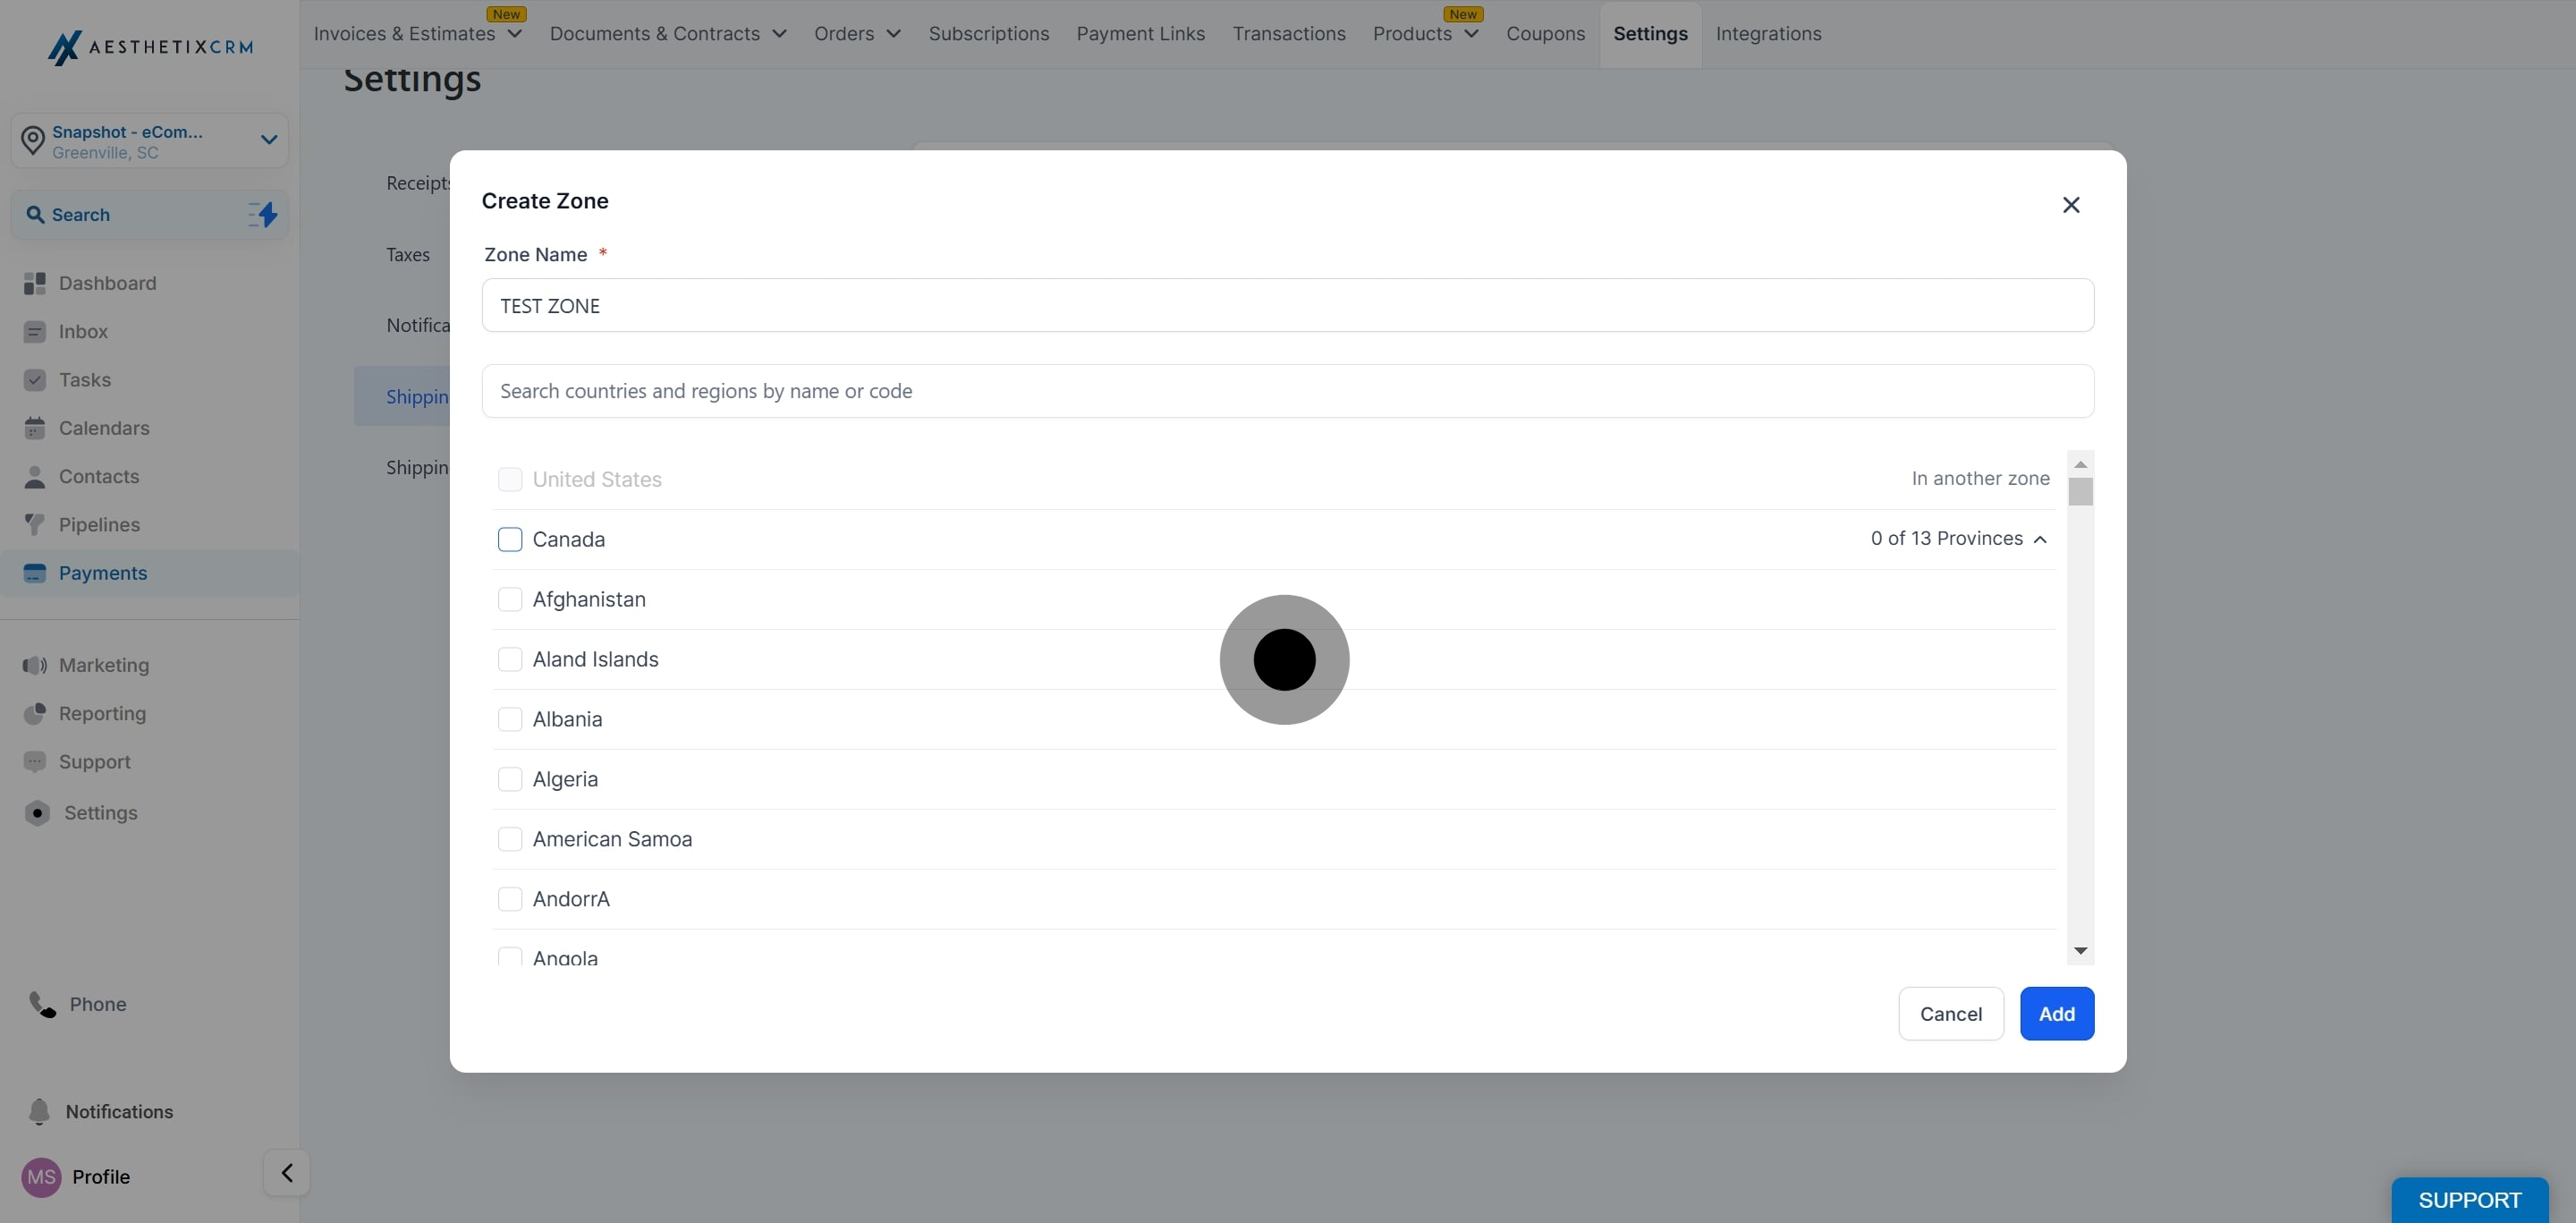
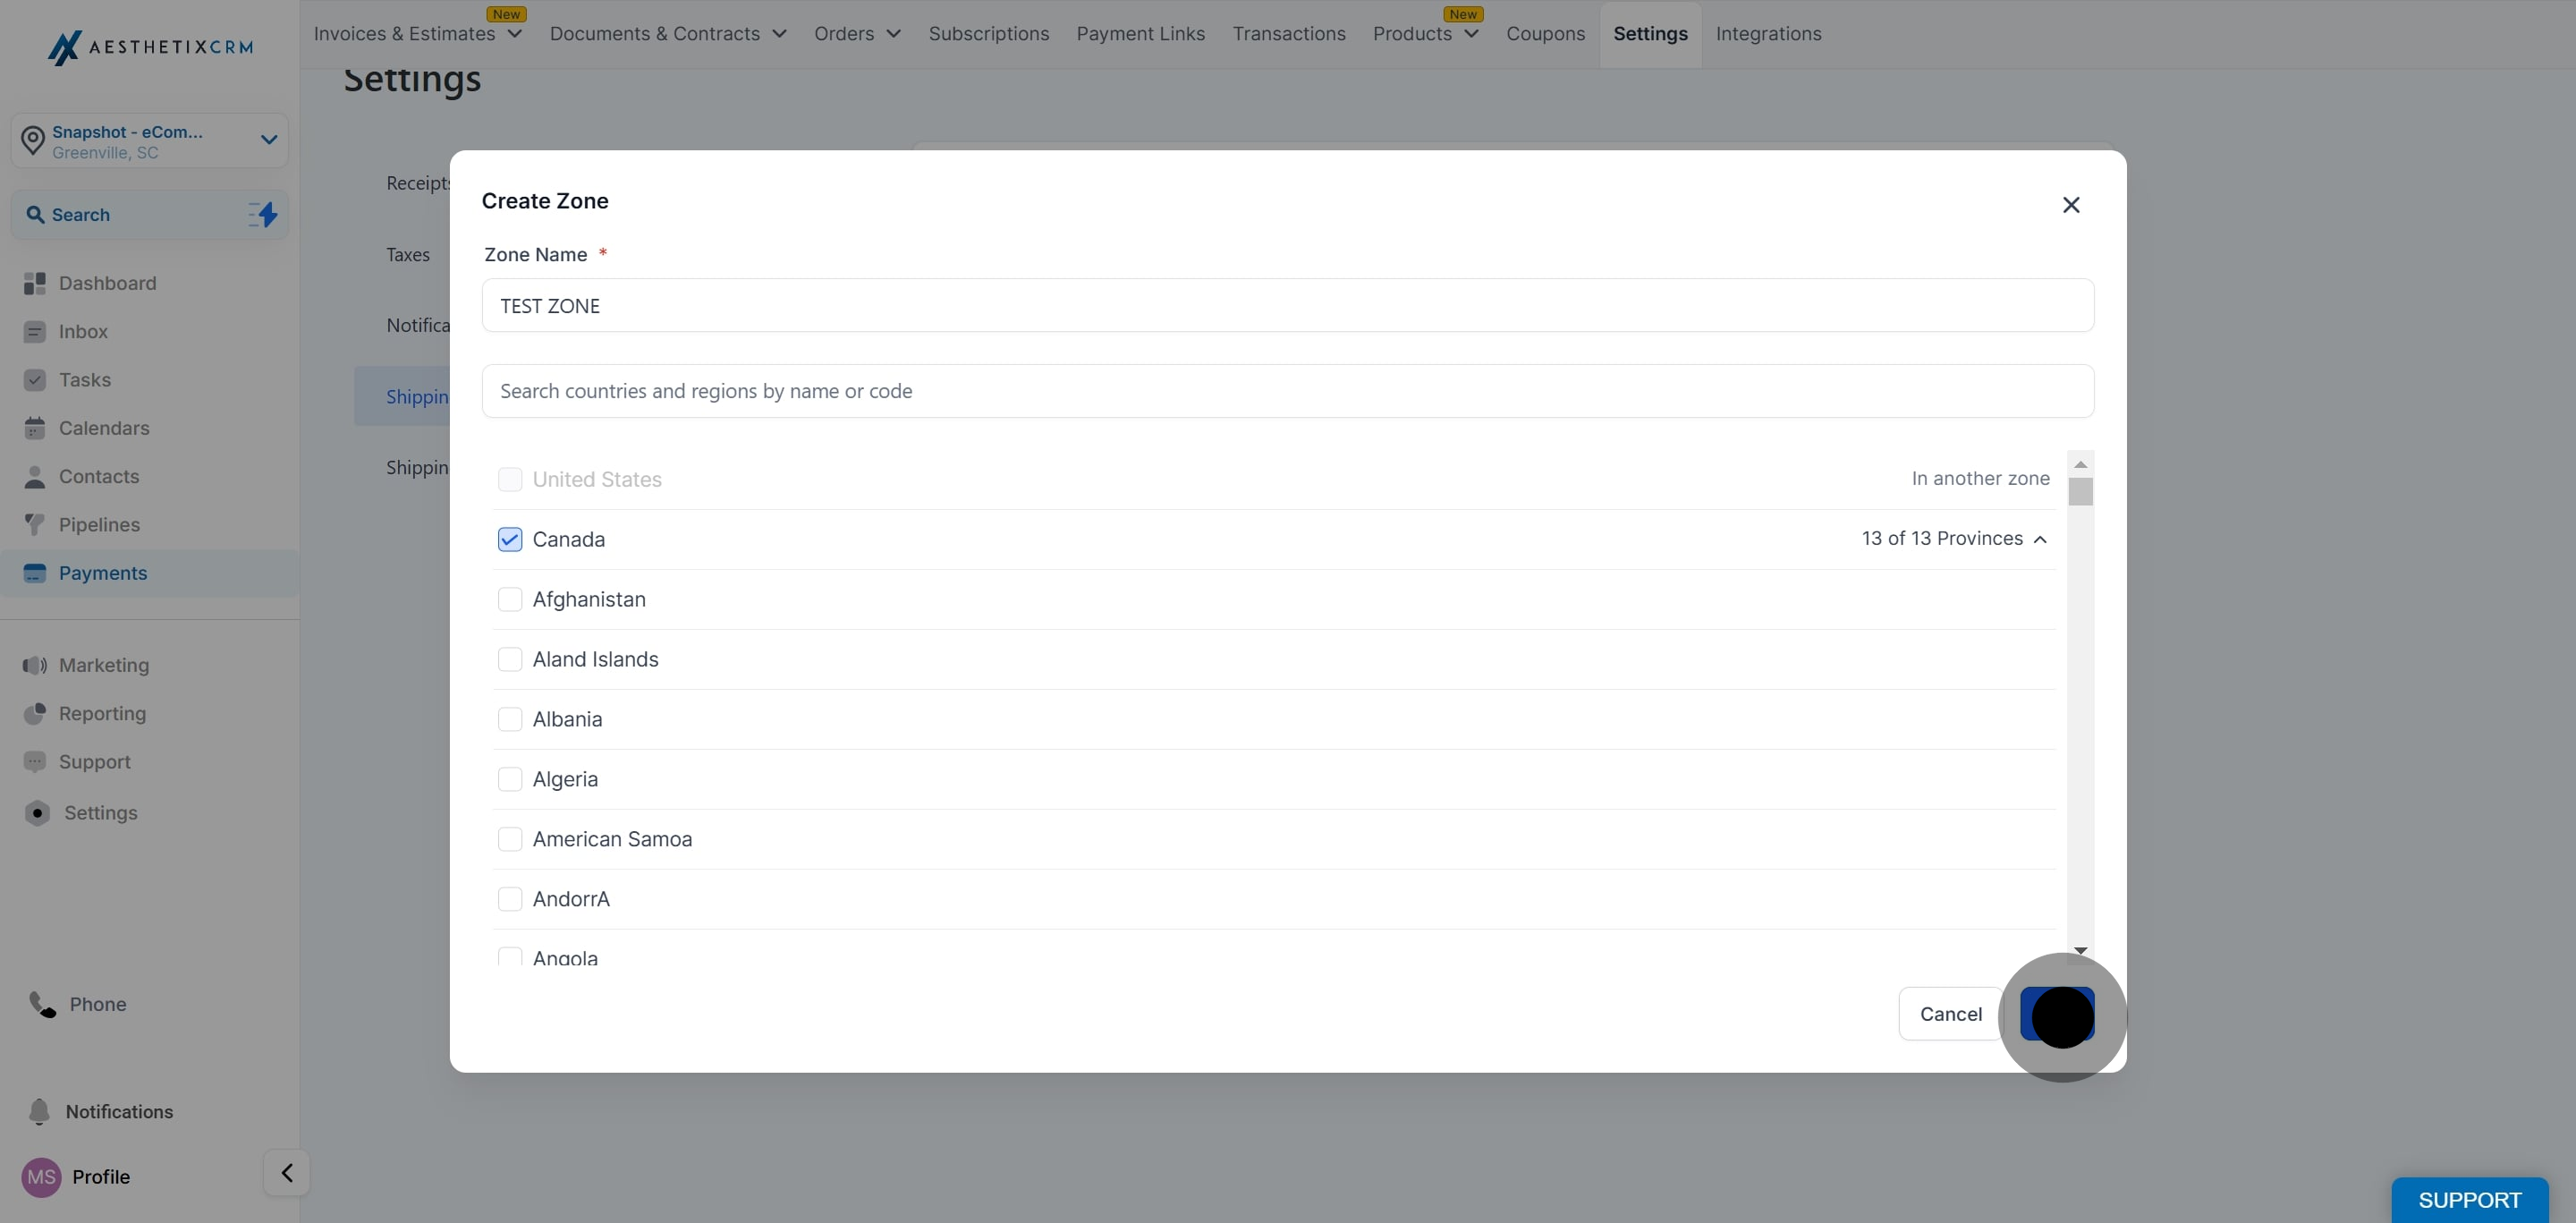
Click Add to save the zone. Once the zone exists, click Add Rate on that zone to define what it costs to ship there (flat rate or conditional pricing, covered below).
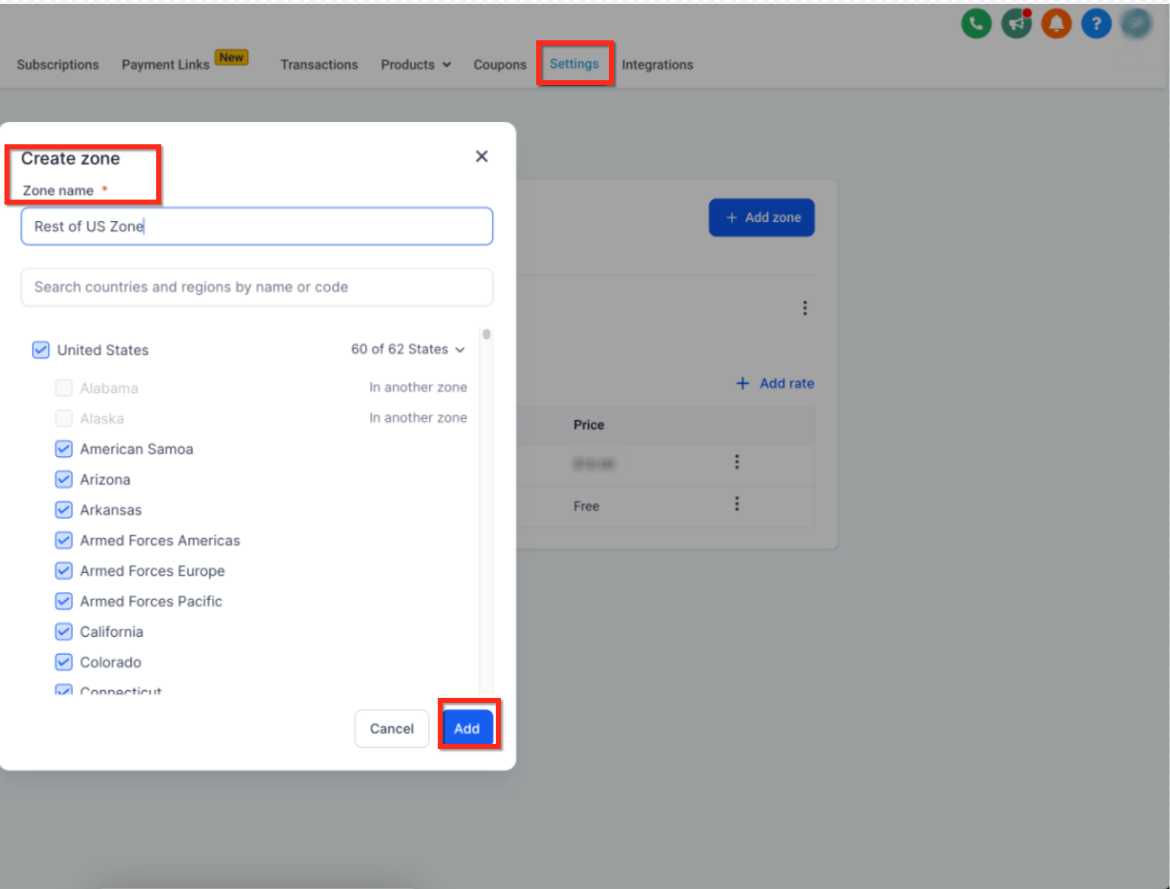
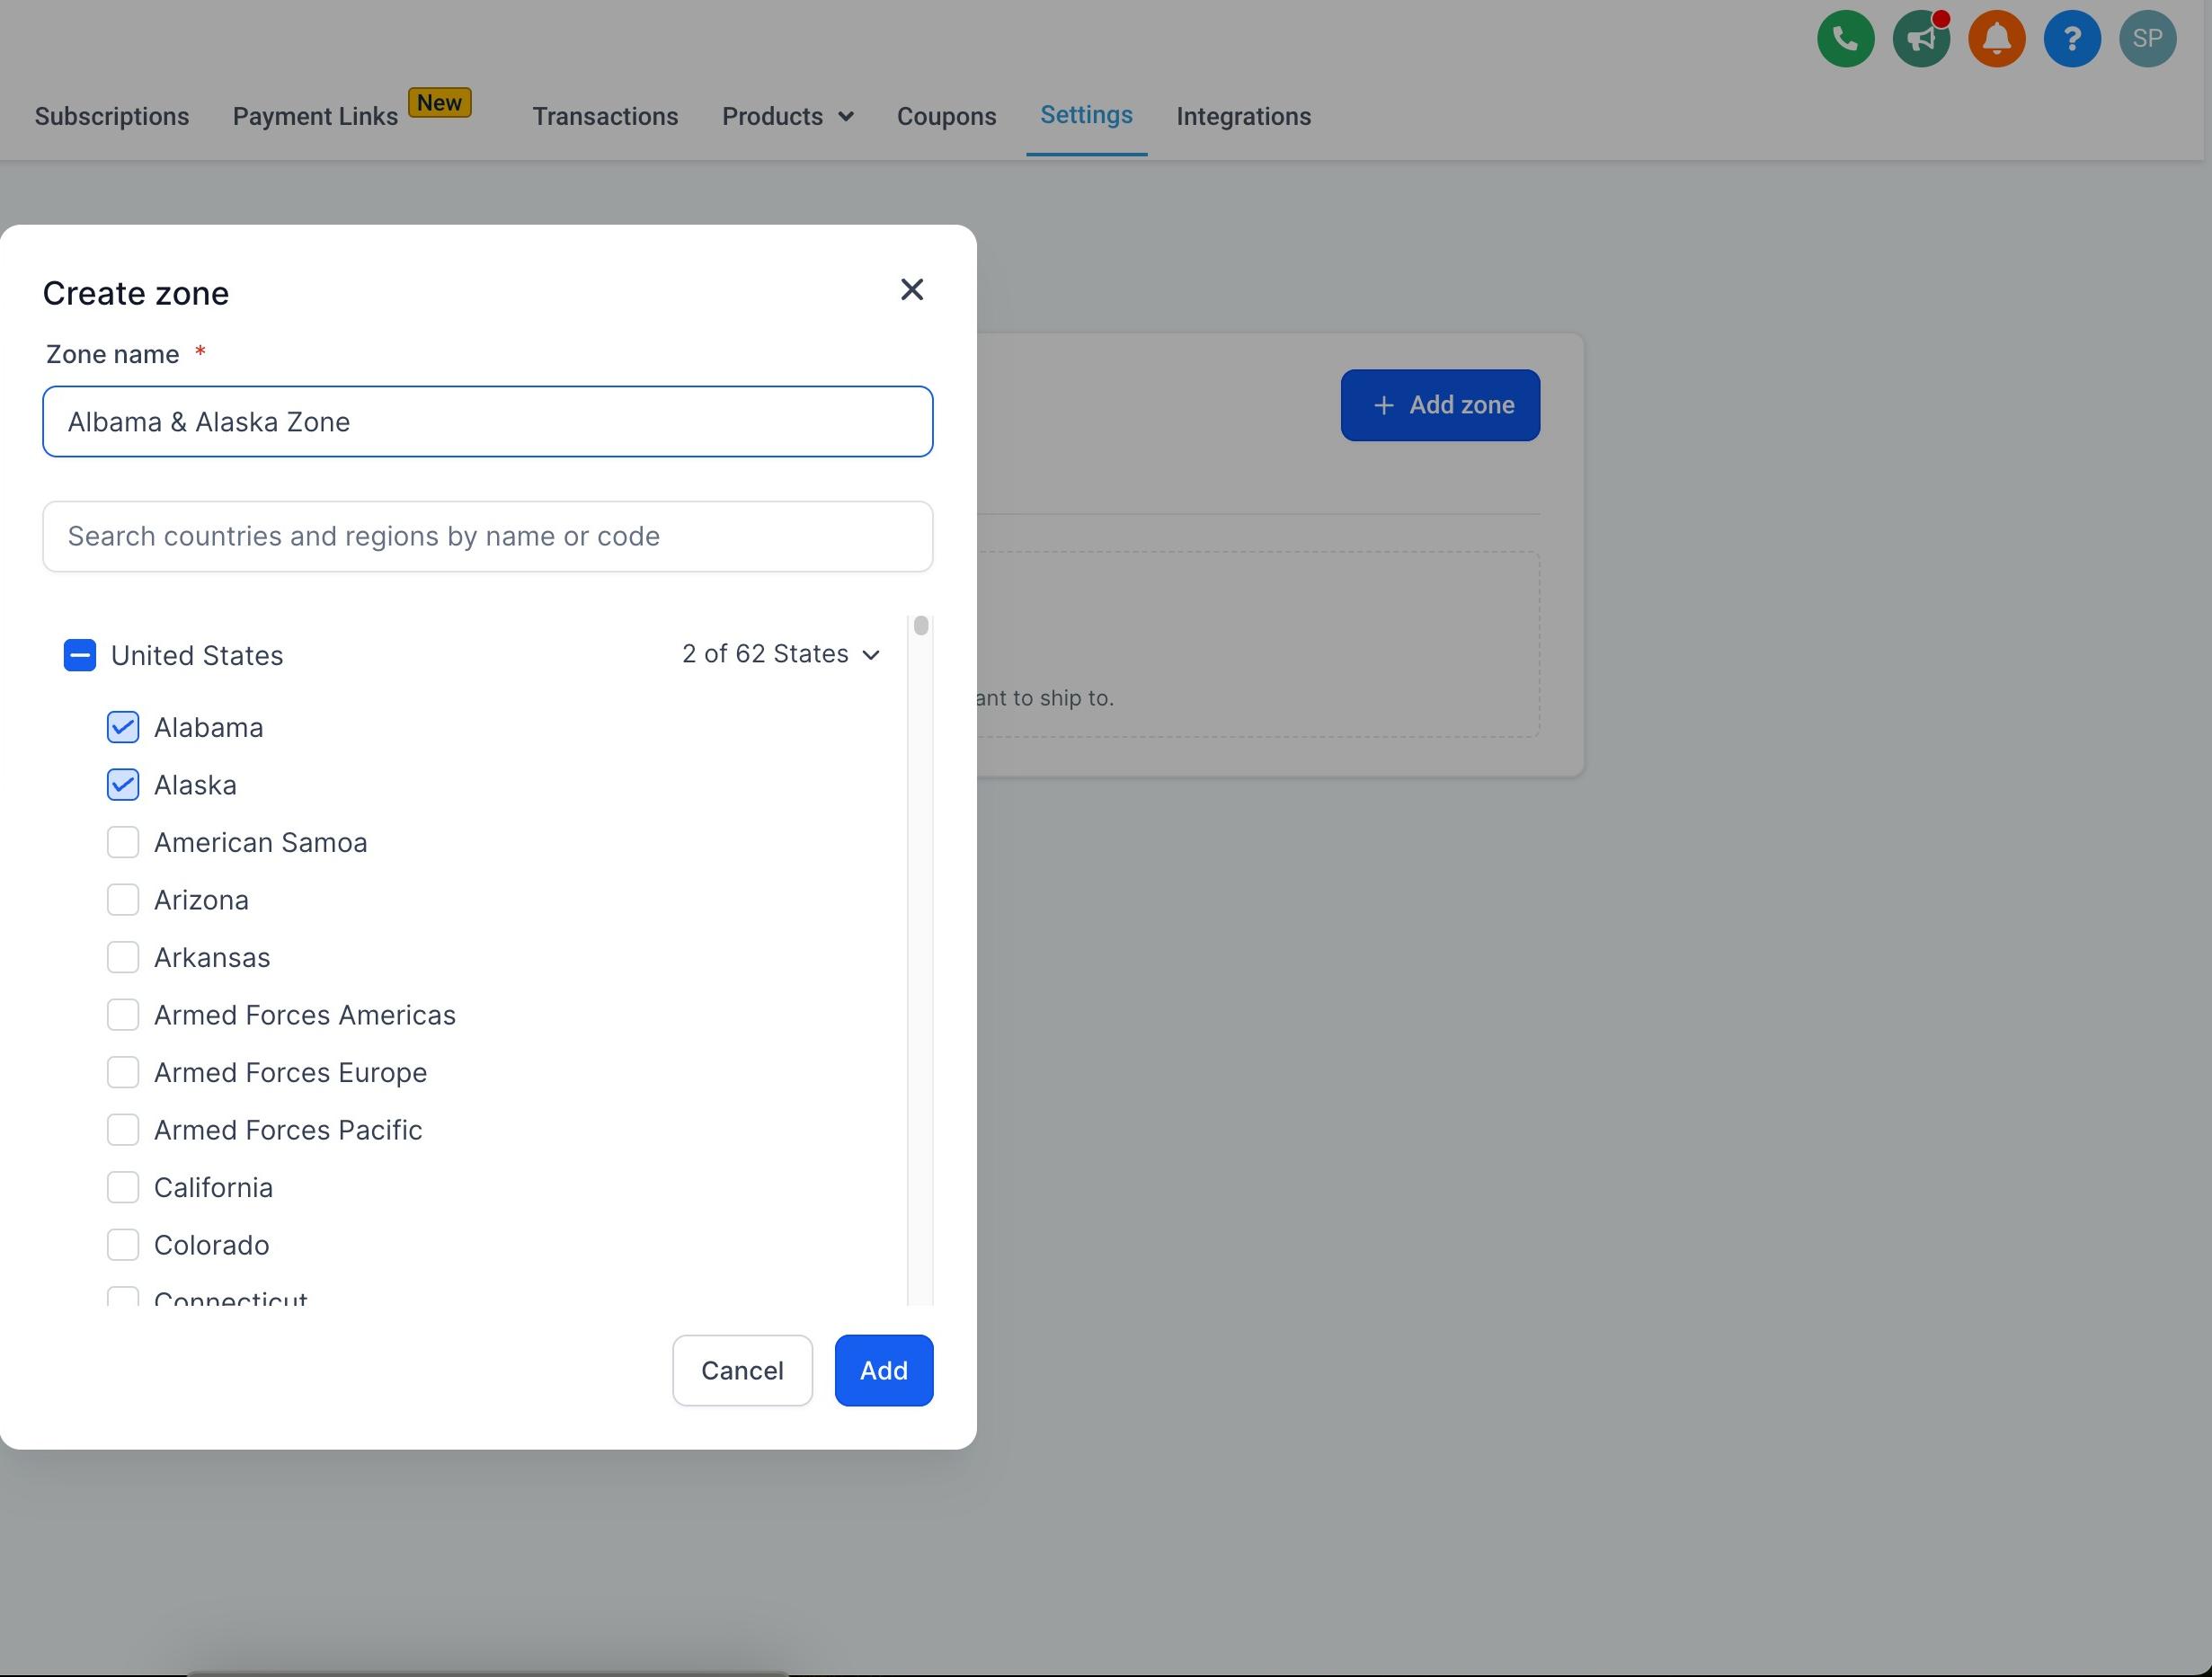
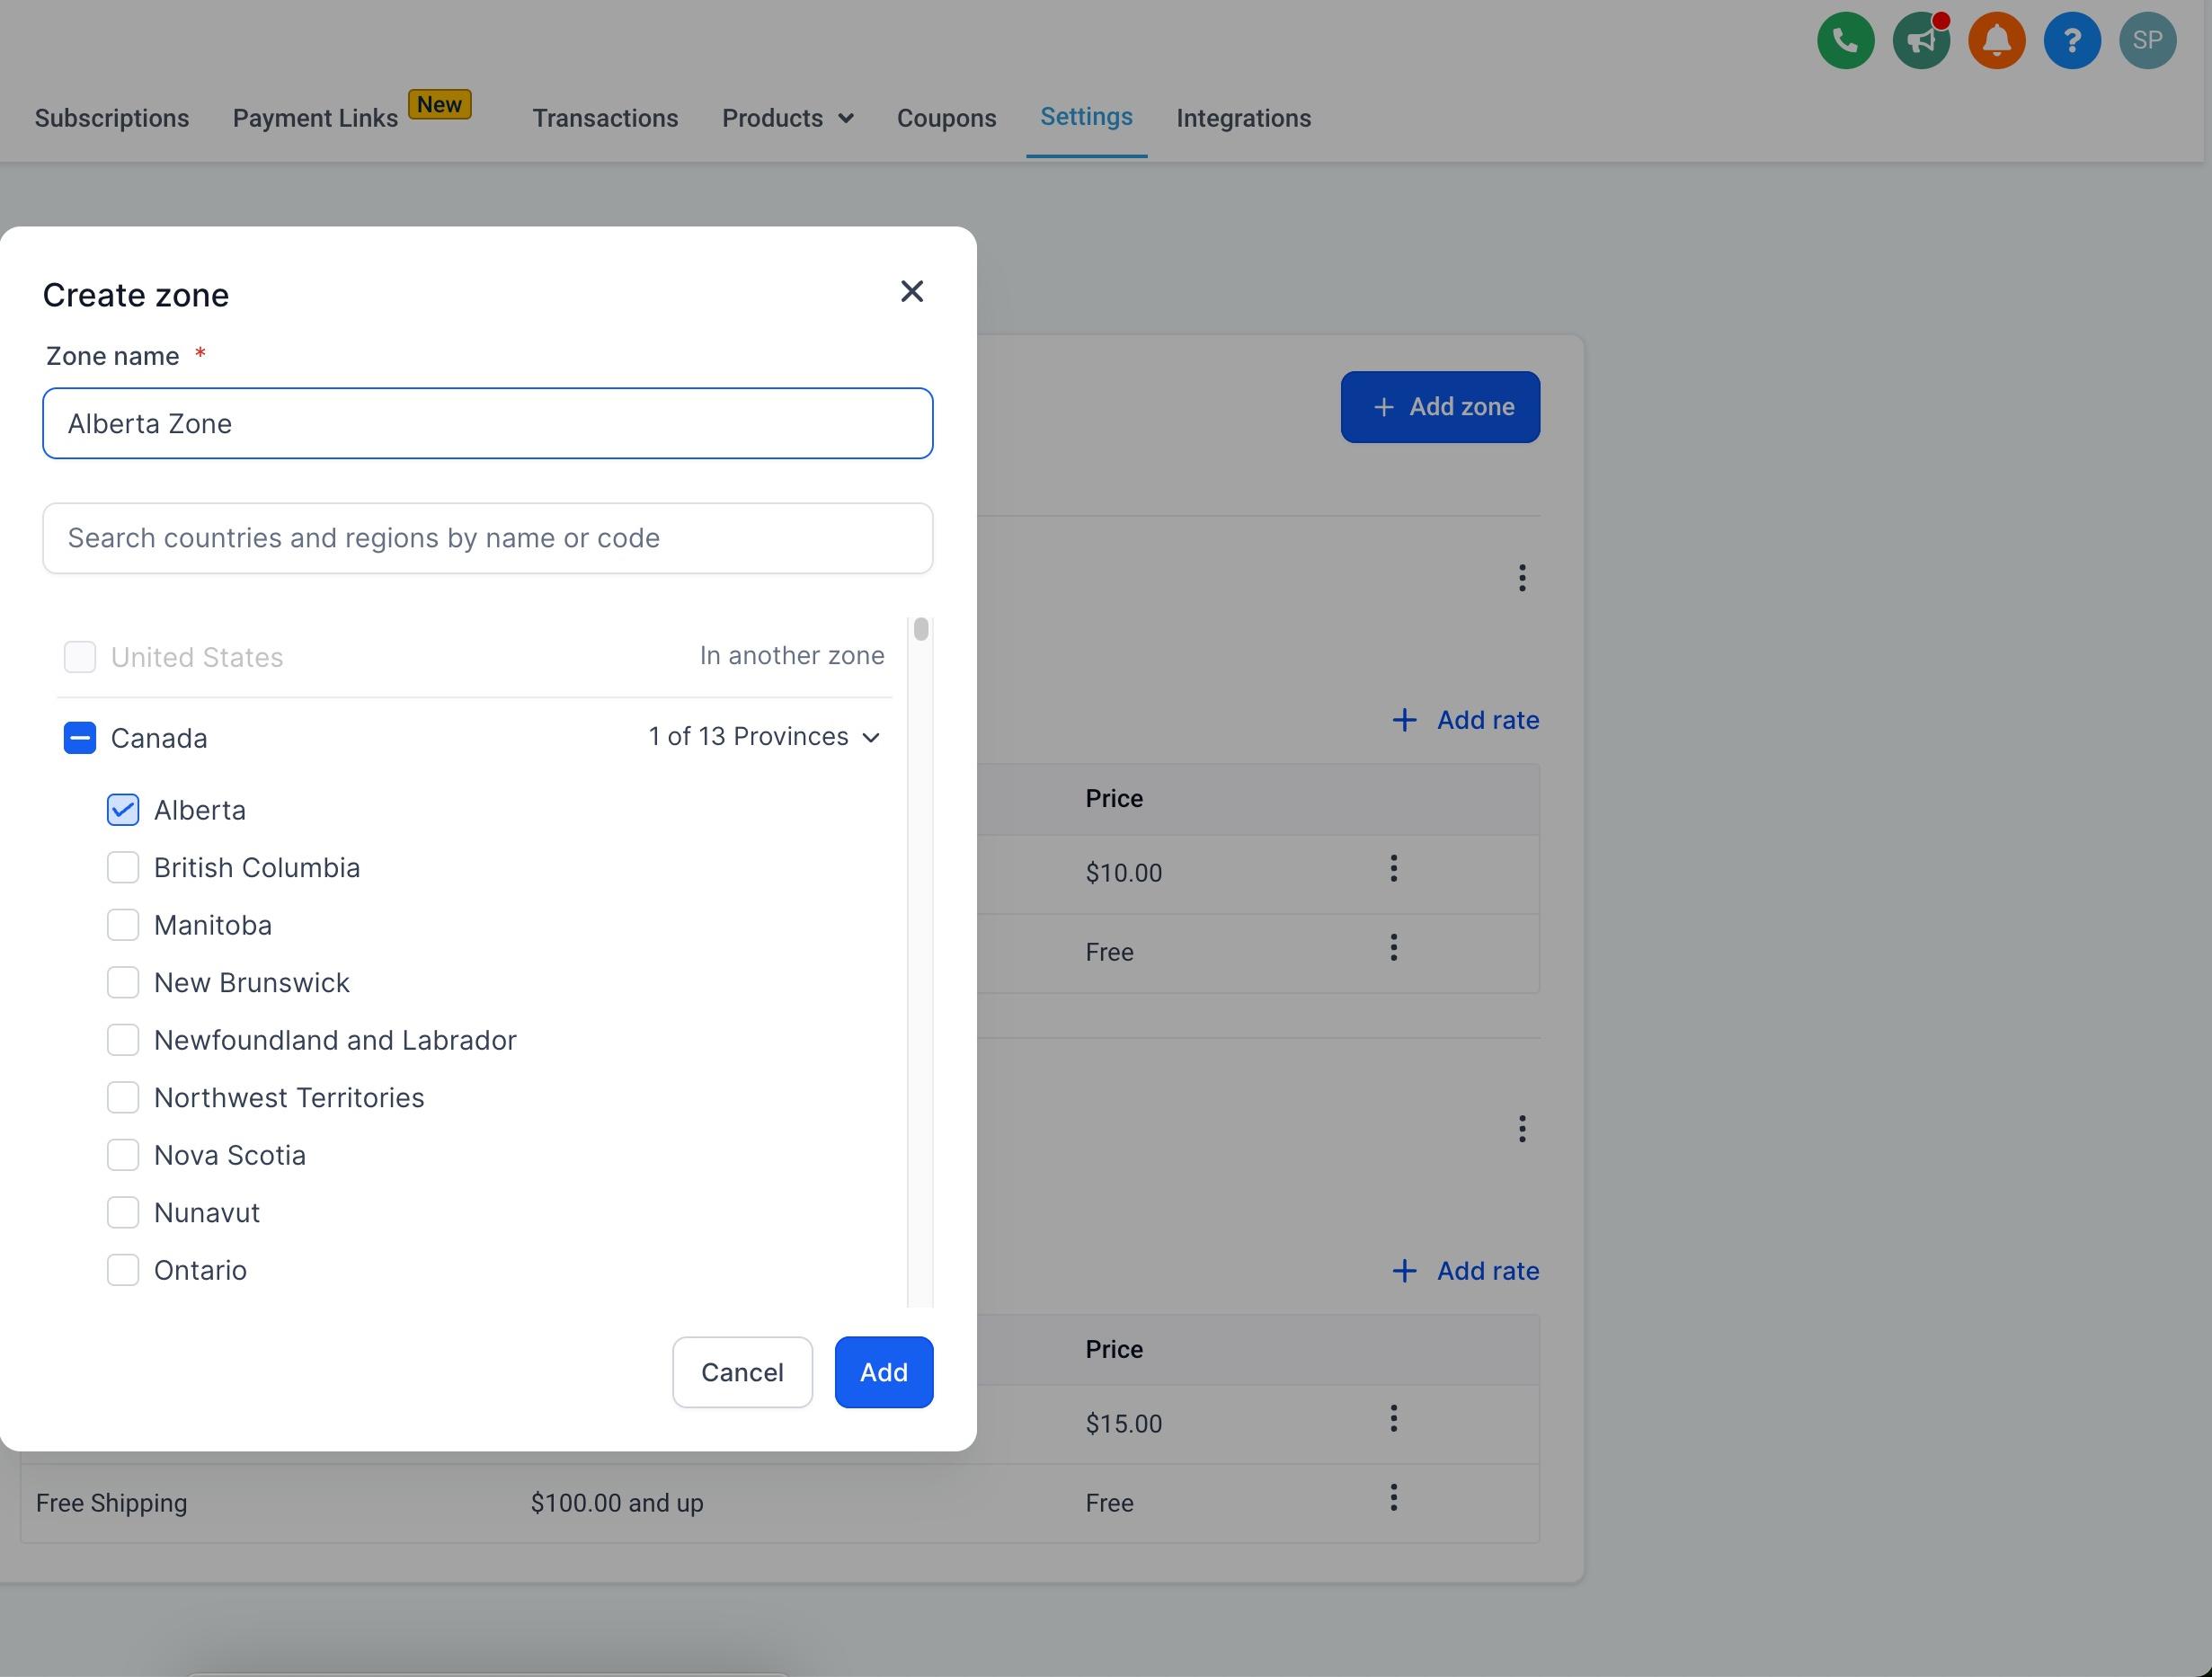
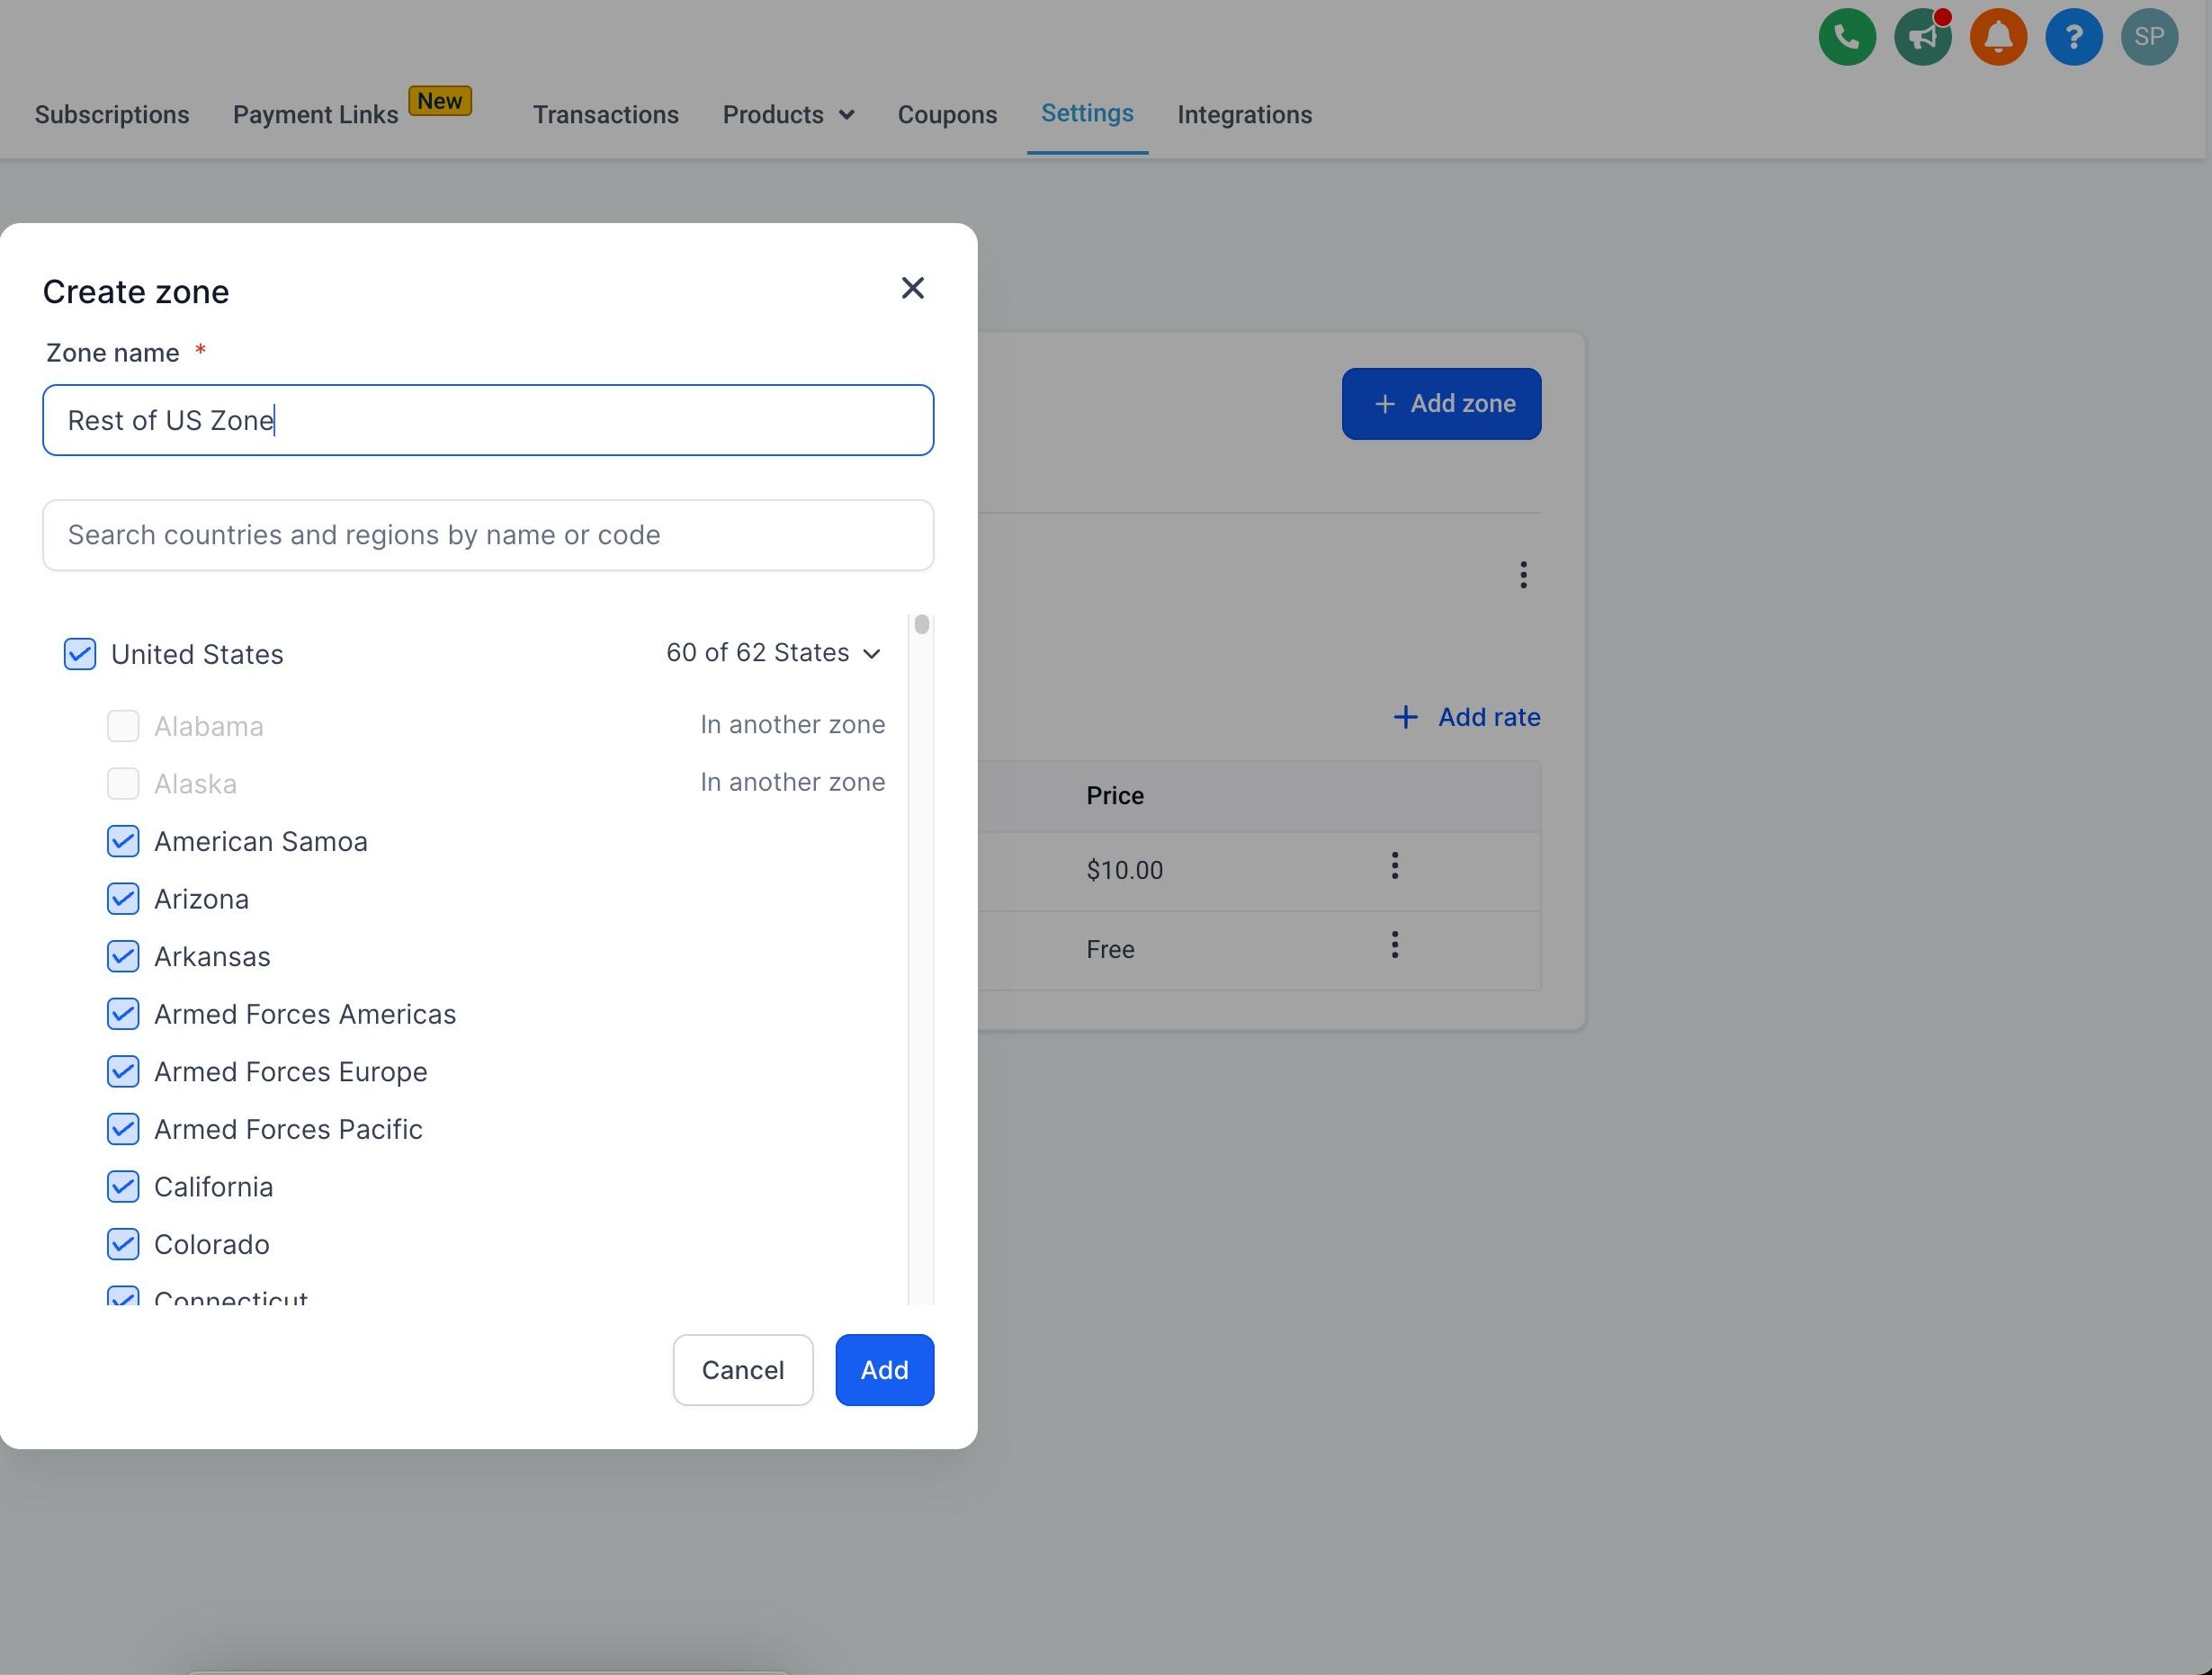
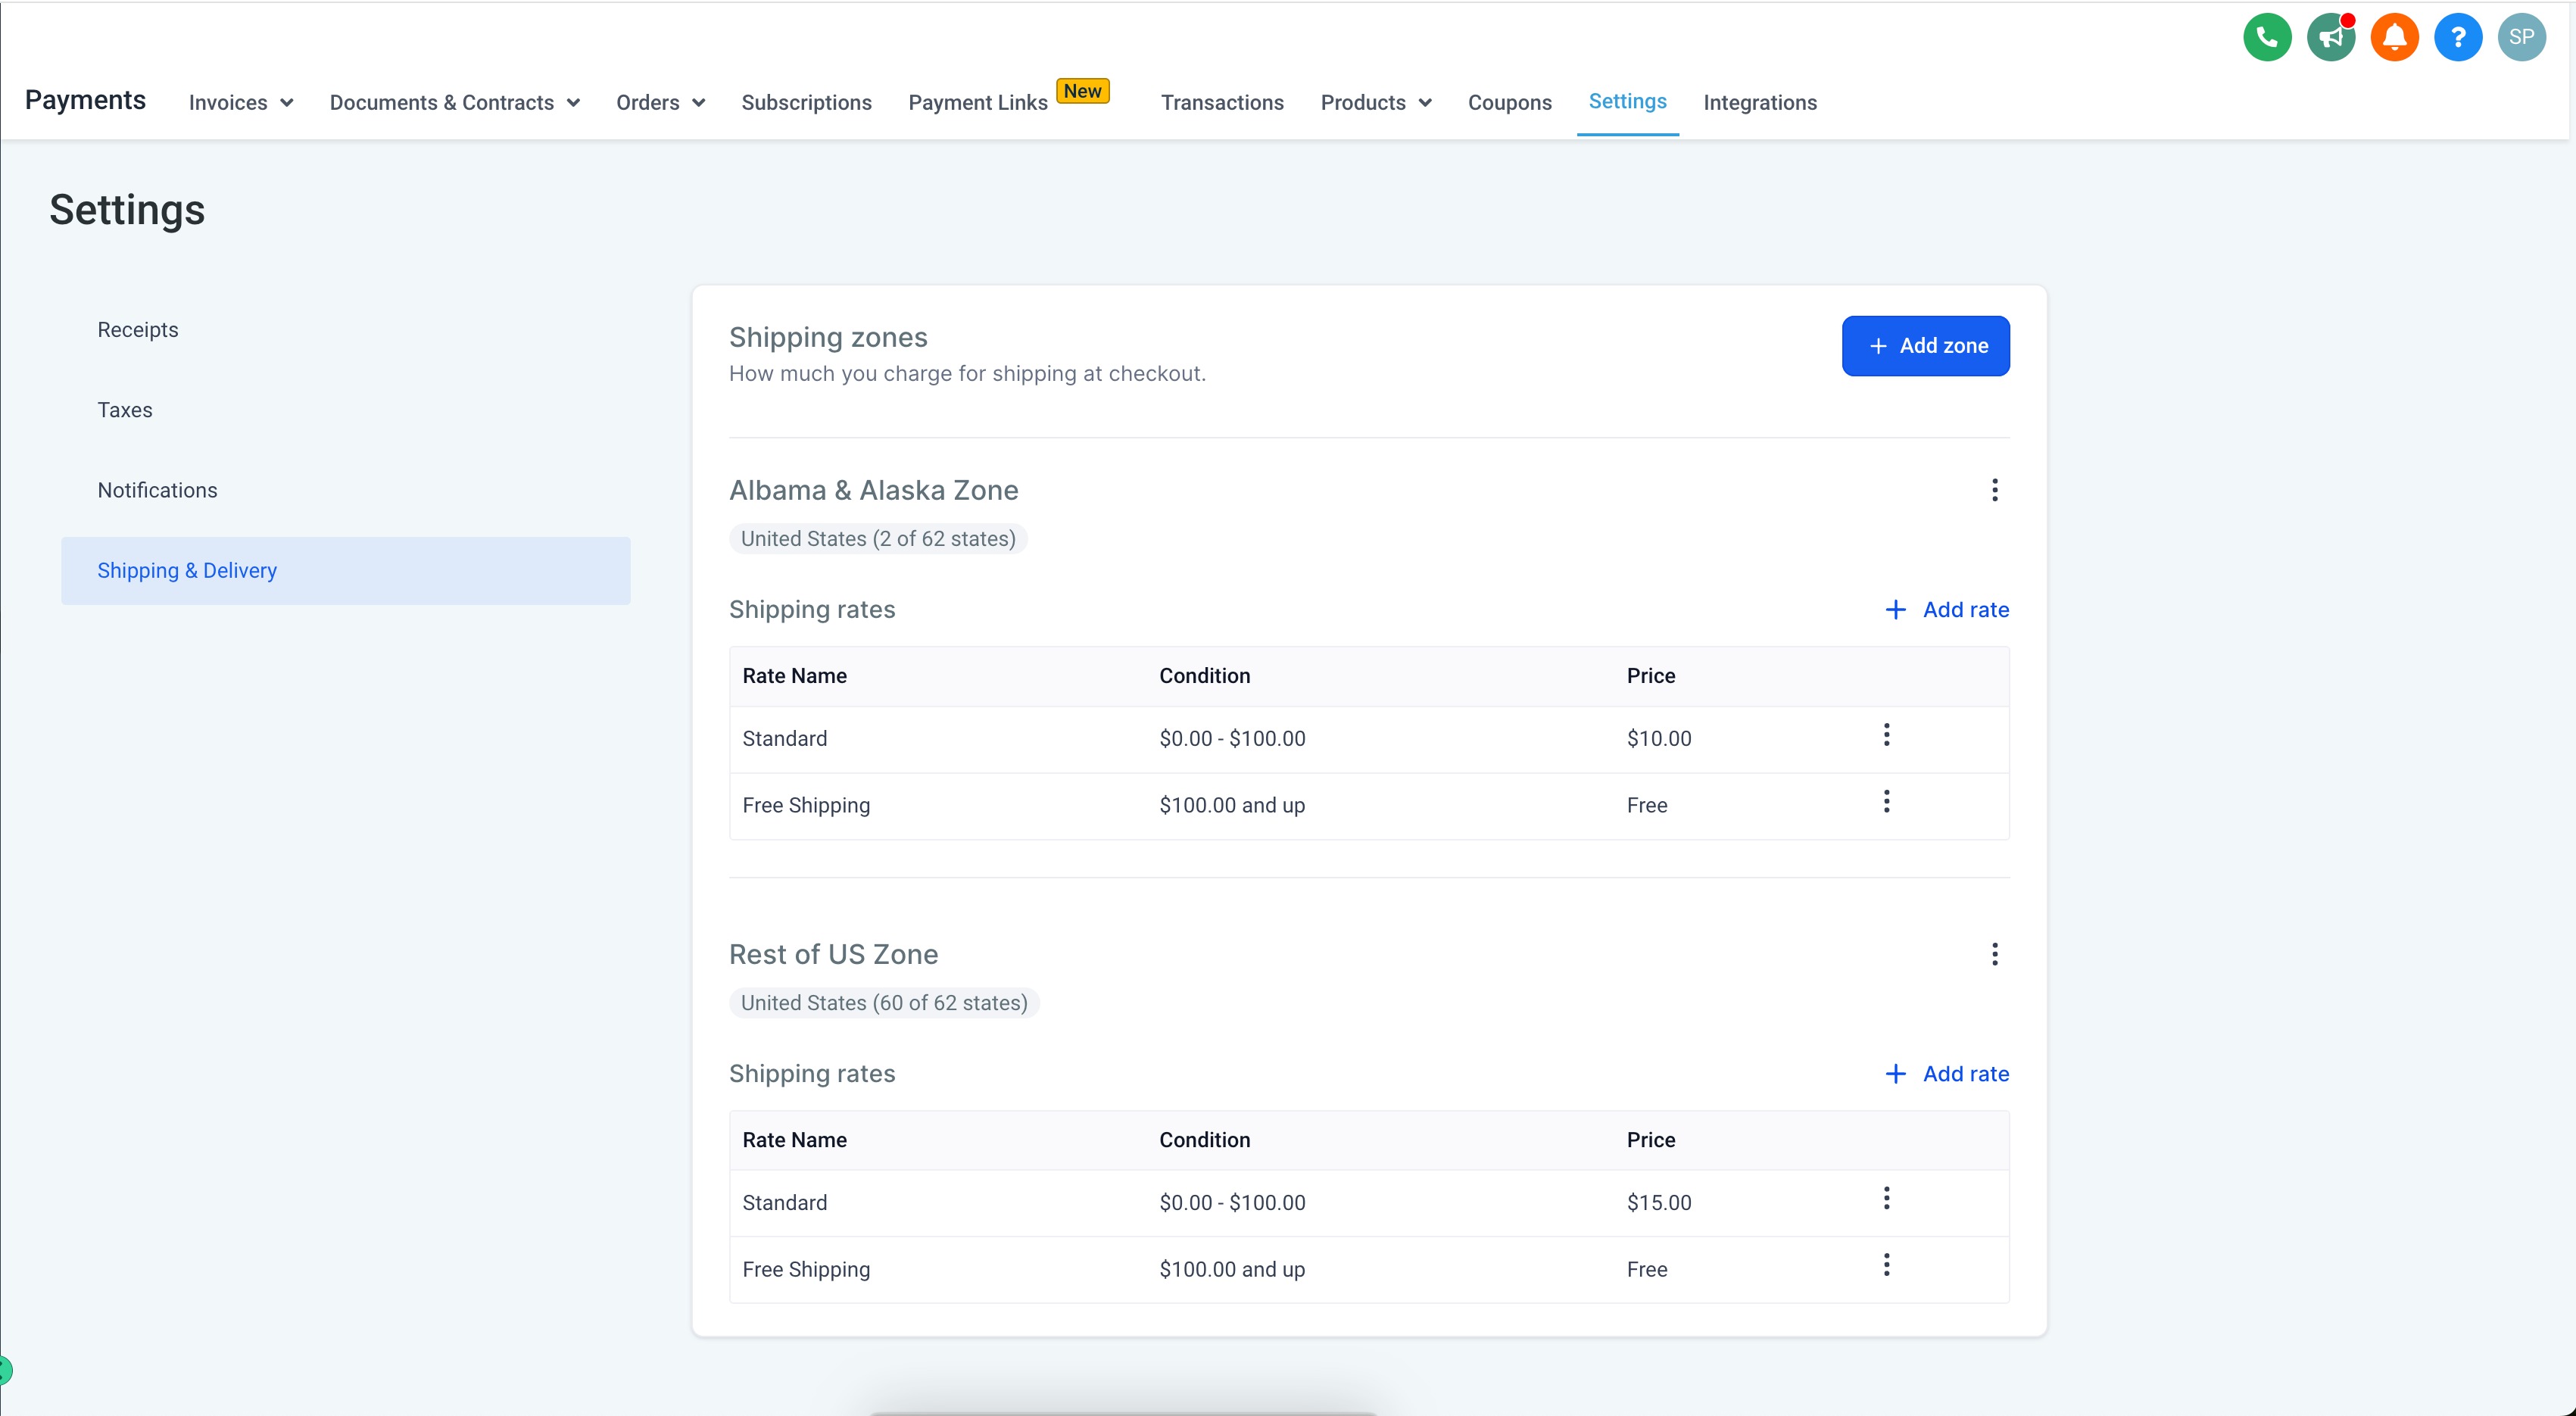
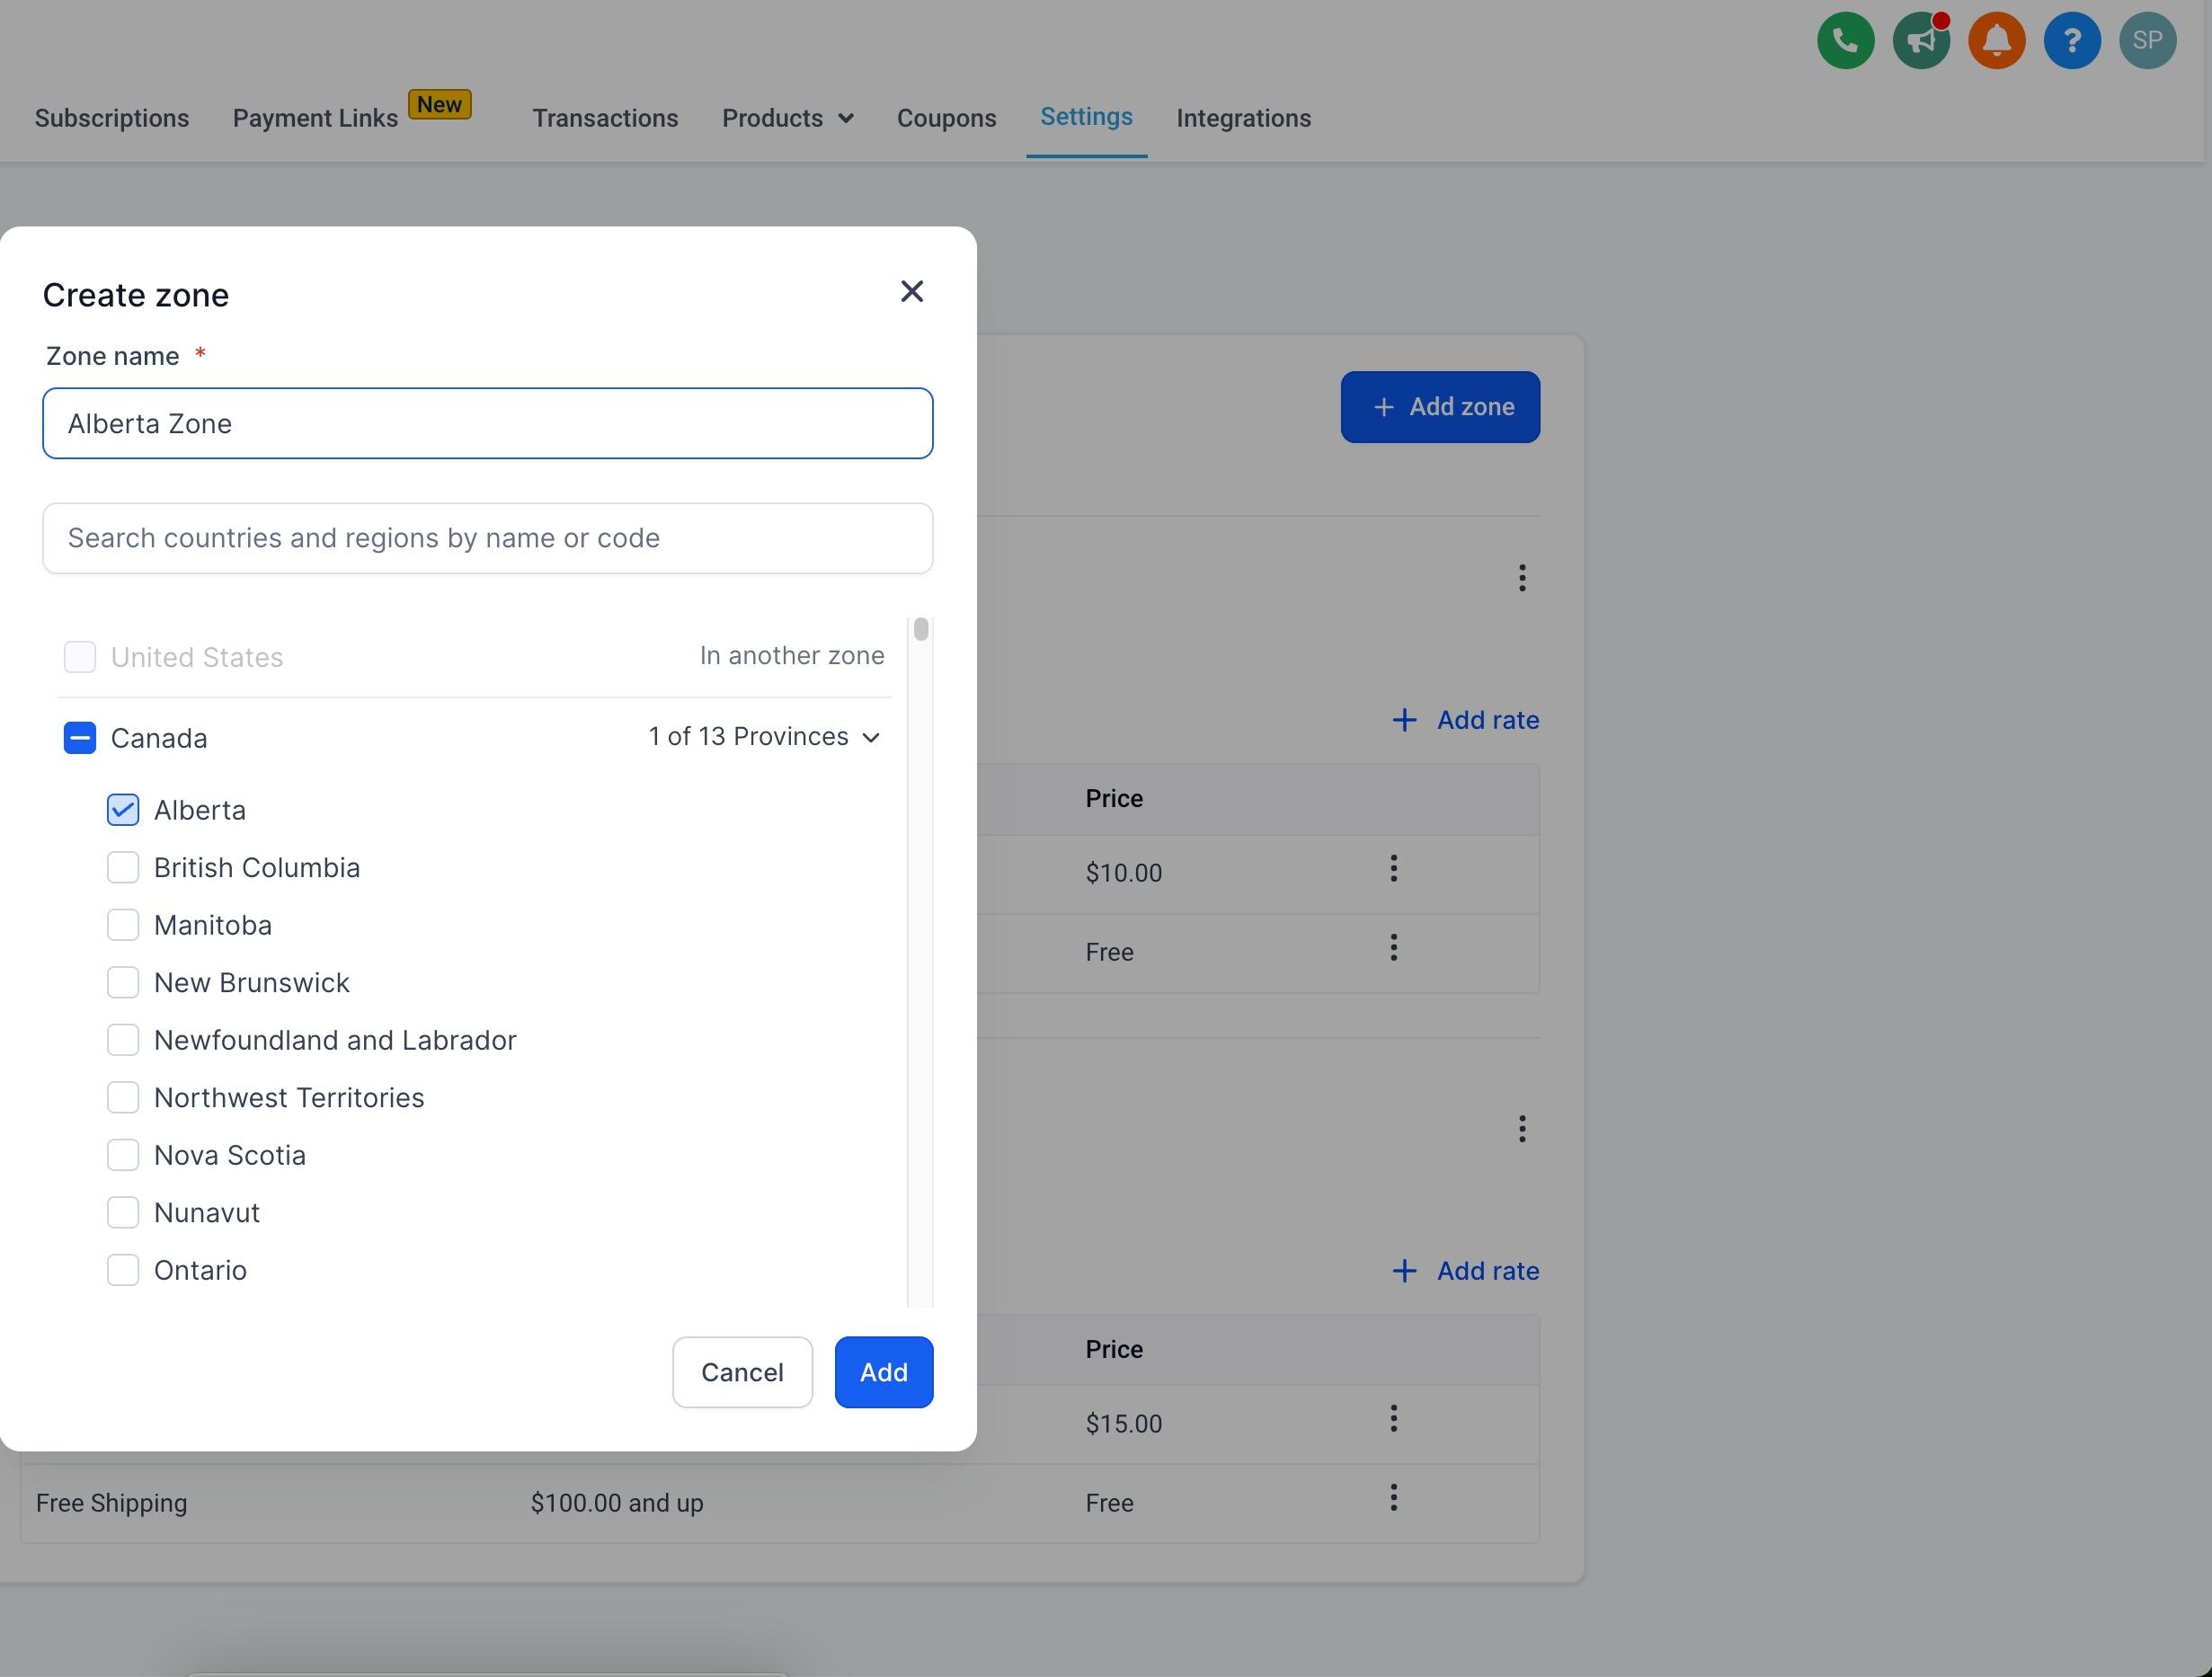
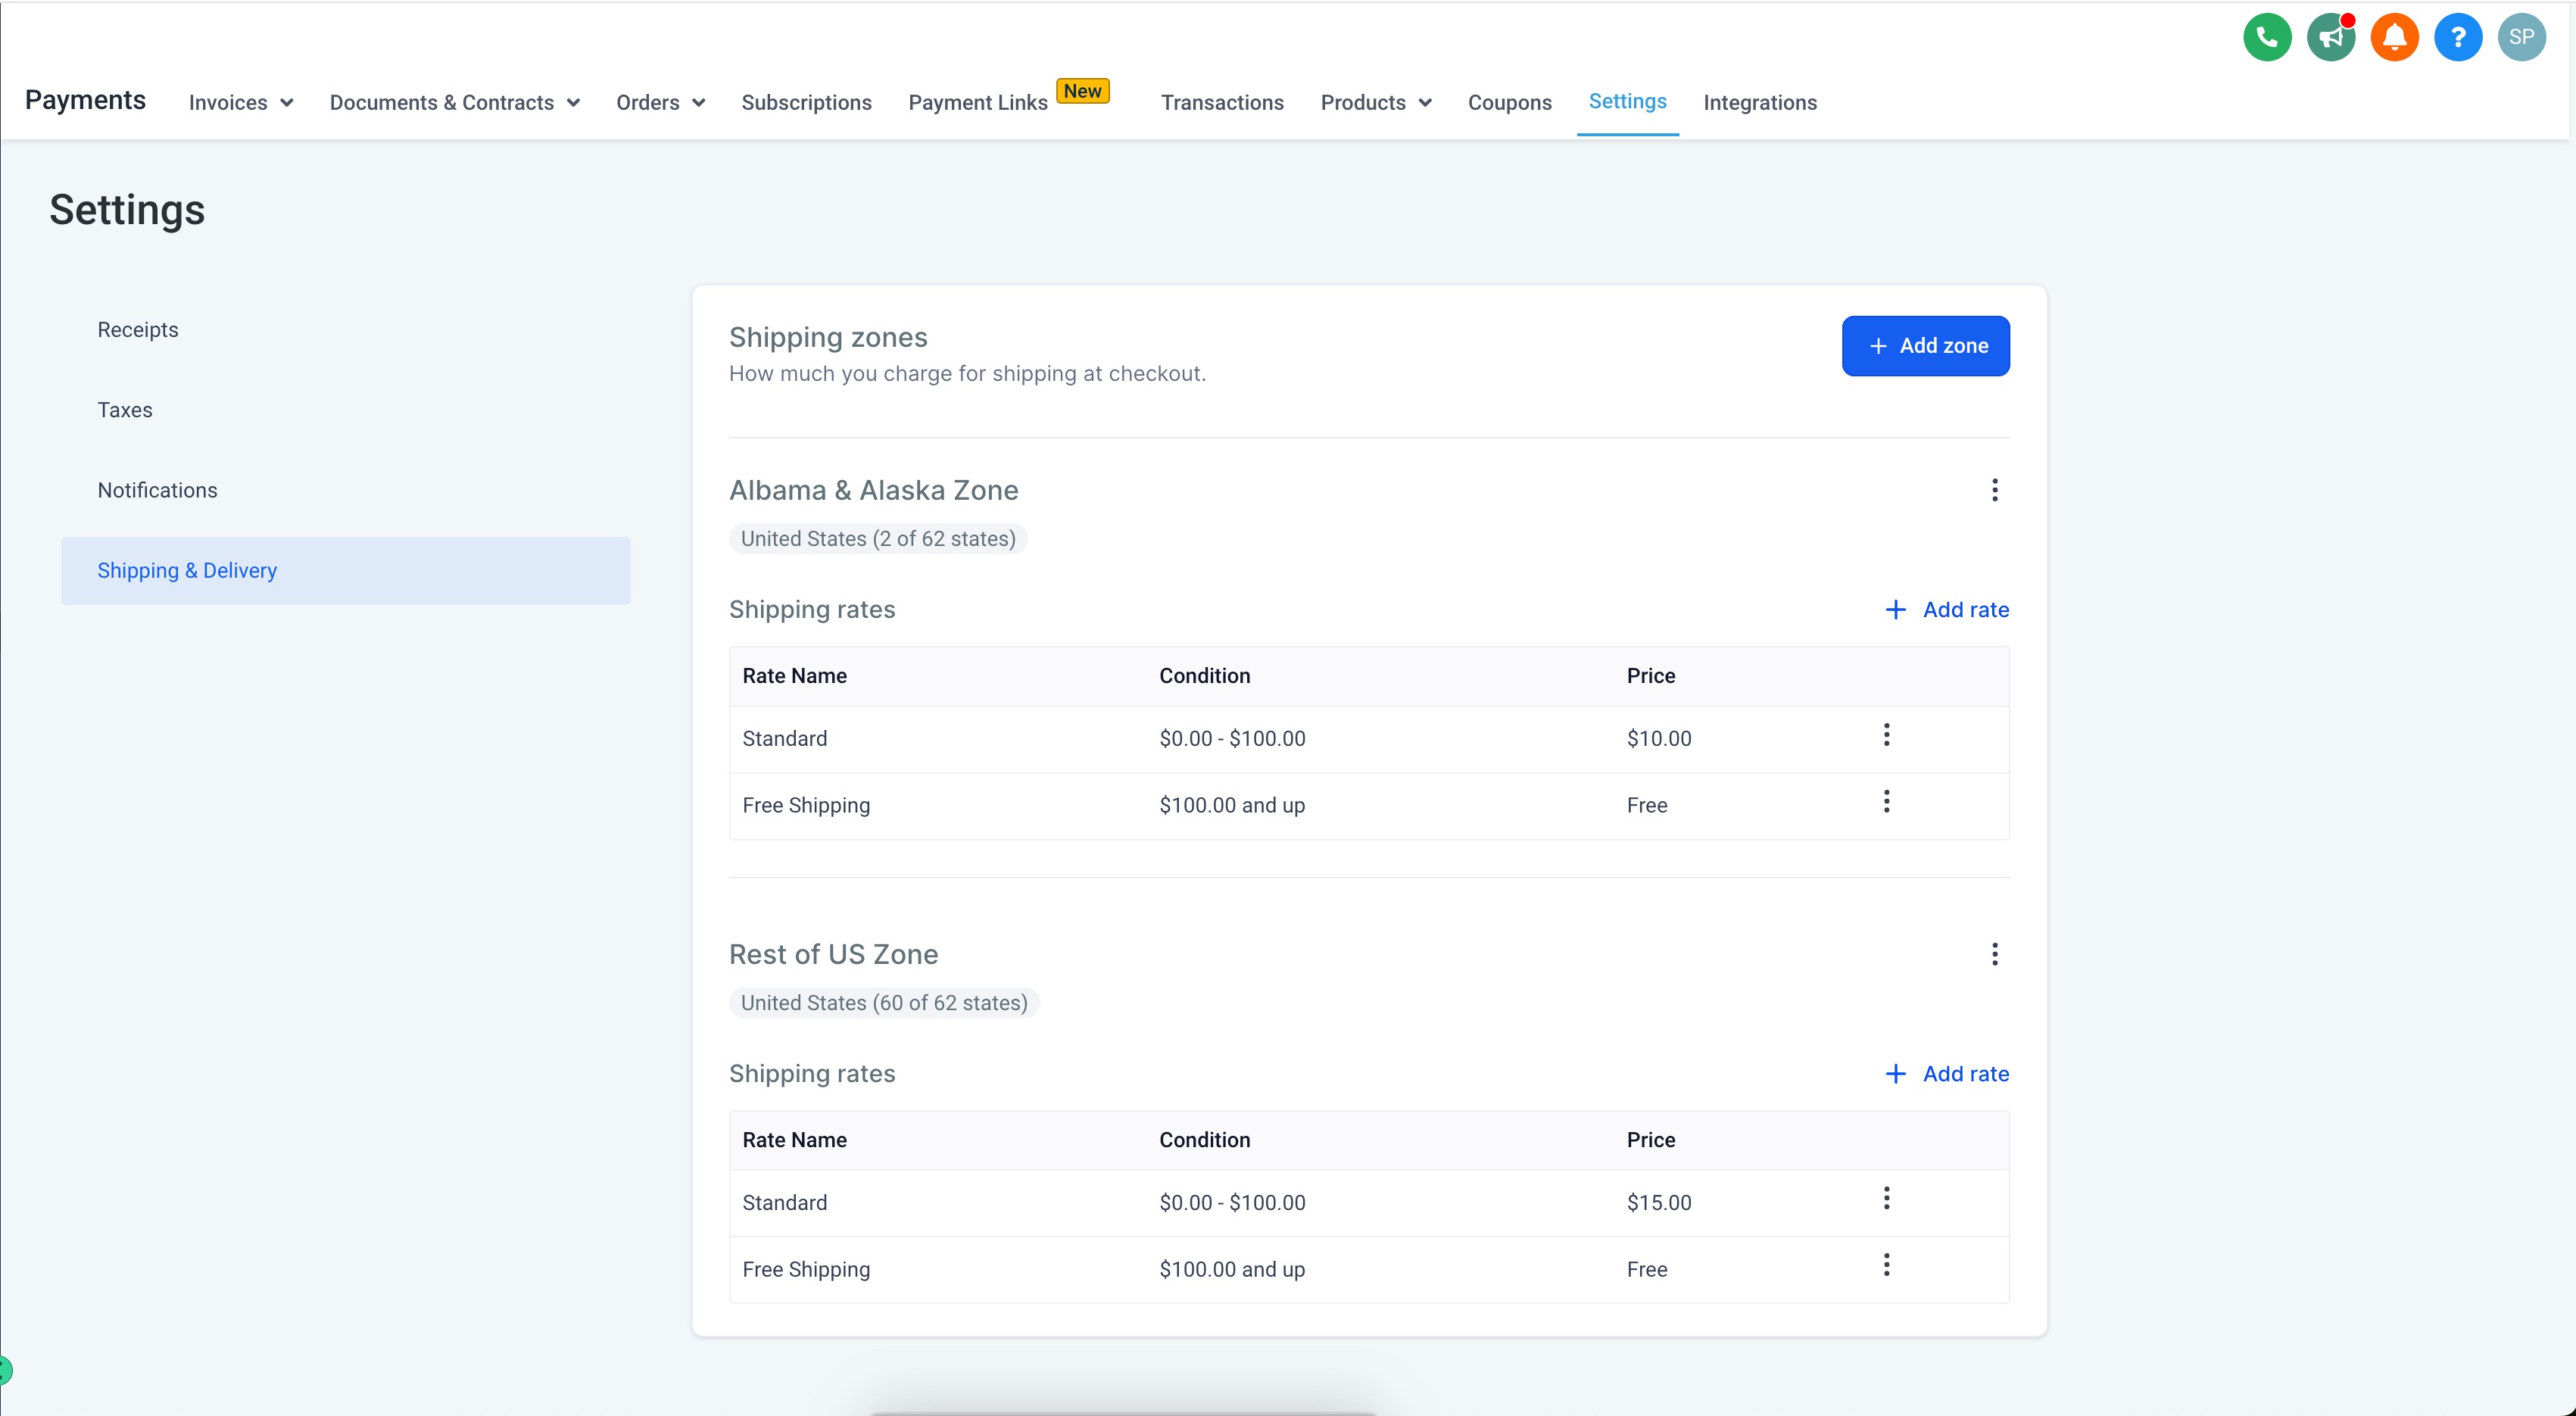
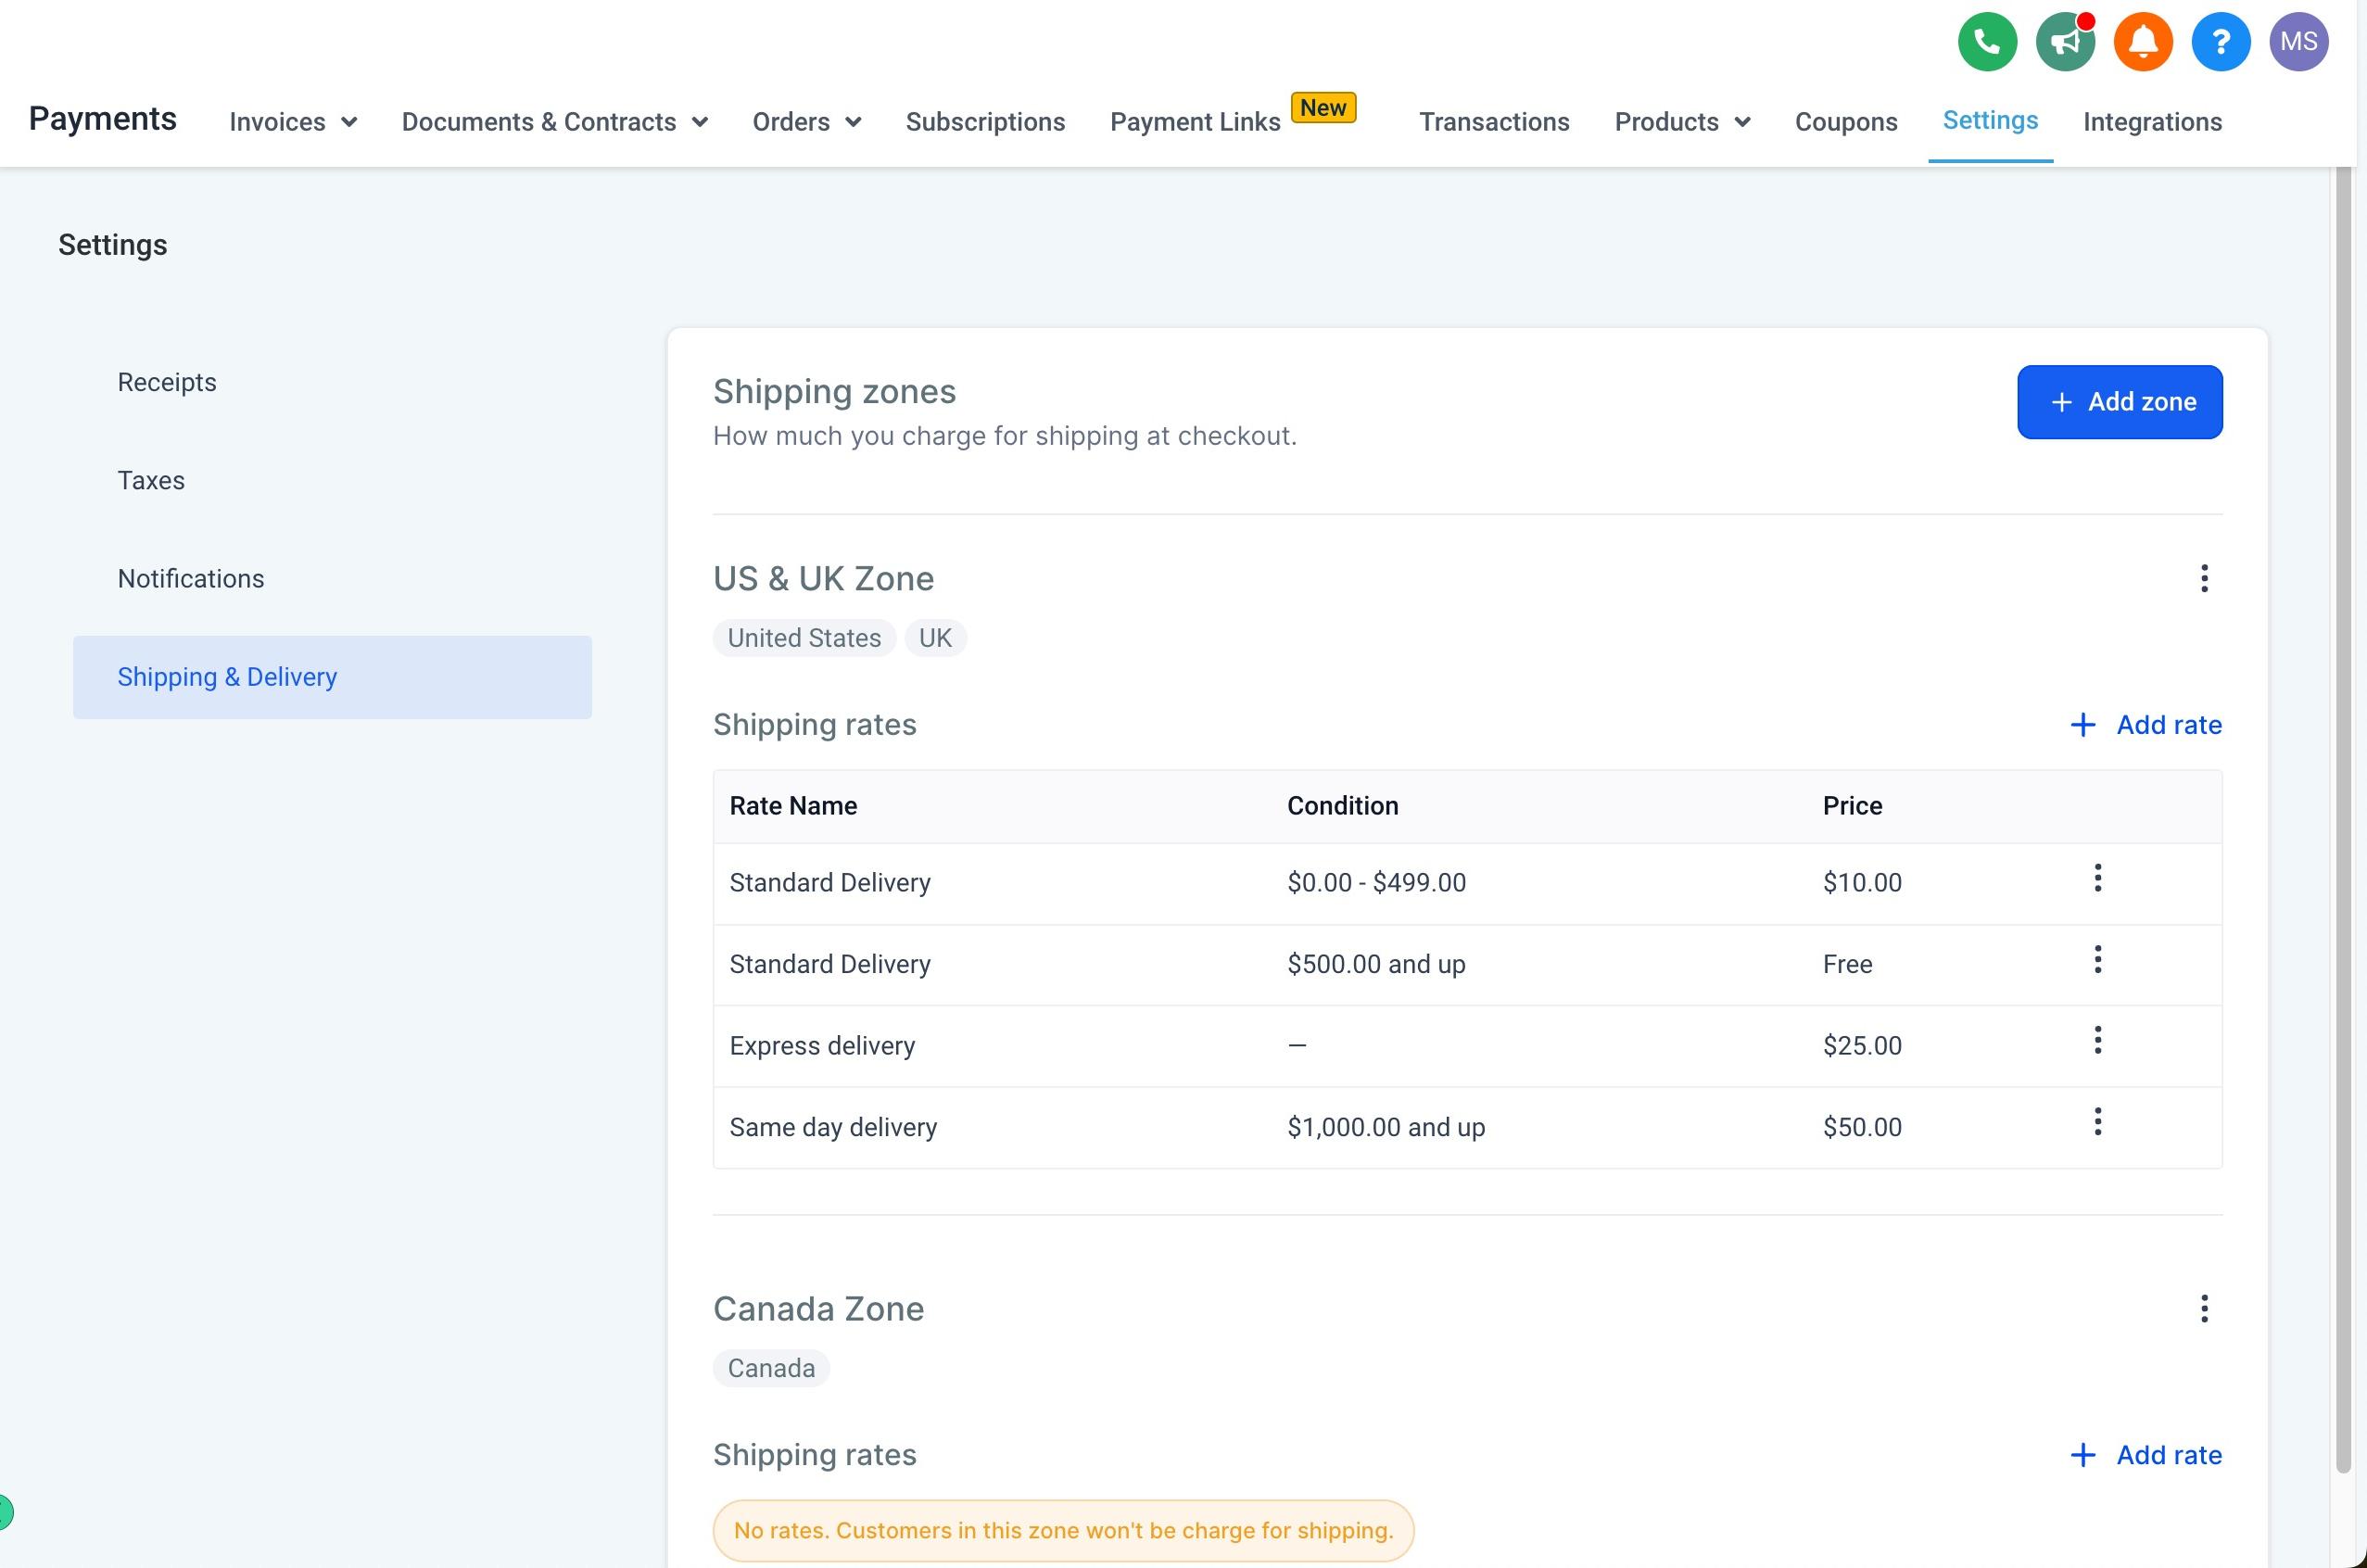
You can create multiple zones with different delivery charges, and each zone can carry multiple rates. A product isn't tied to a single zone; every zone you build is evaluated against the customer's shipping address at checkout.
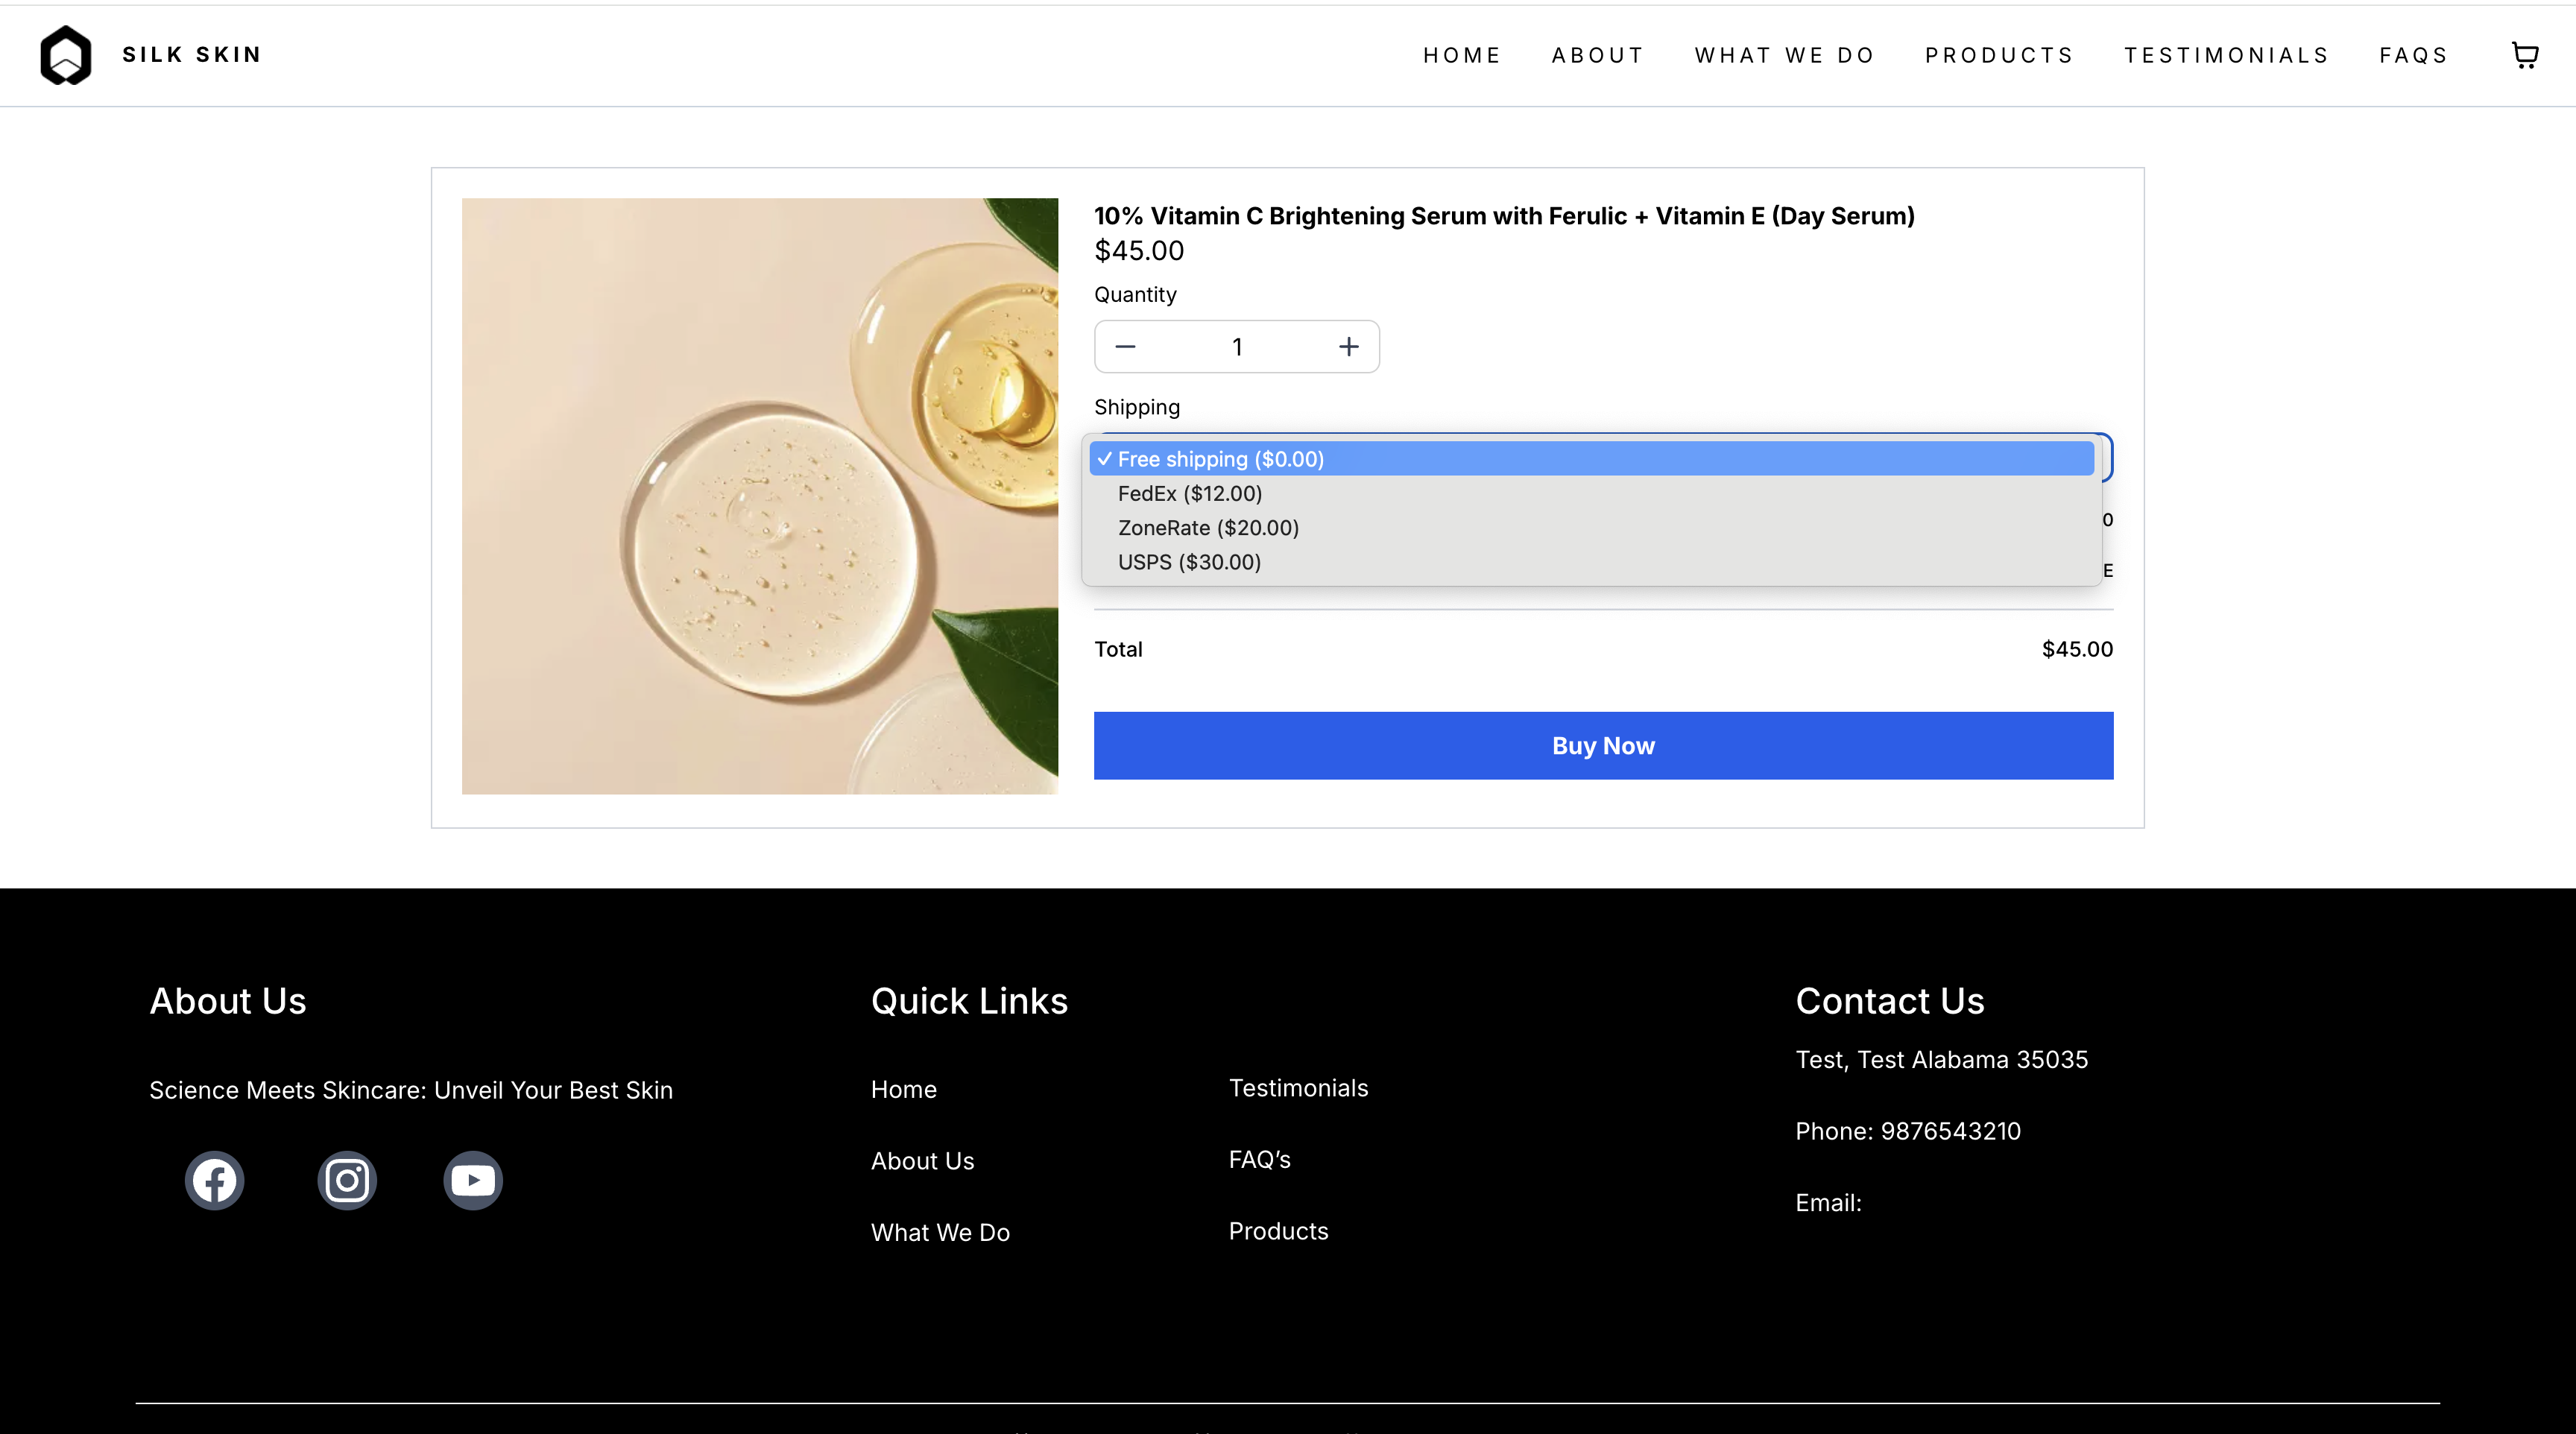
Once your zones and rates are configured, patients and retail customers automatically see the available shipping options at checkout, and the correct rate is applied based on their address and cart contents.
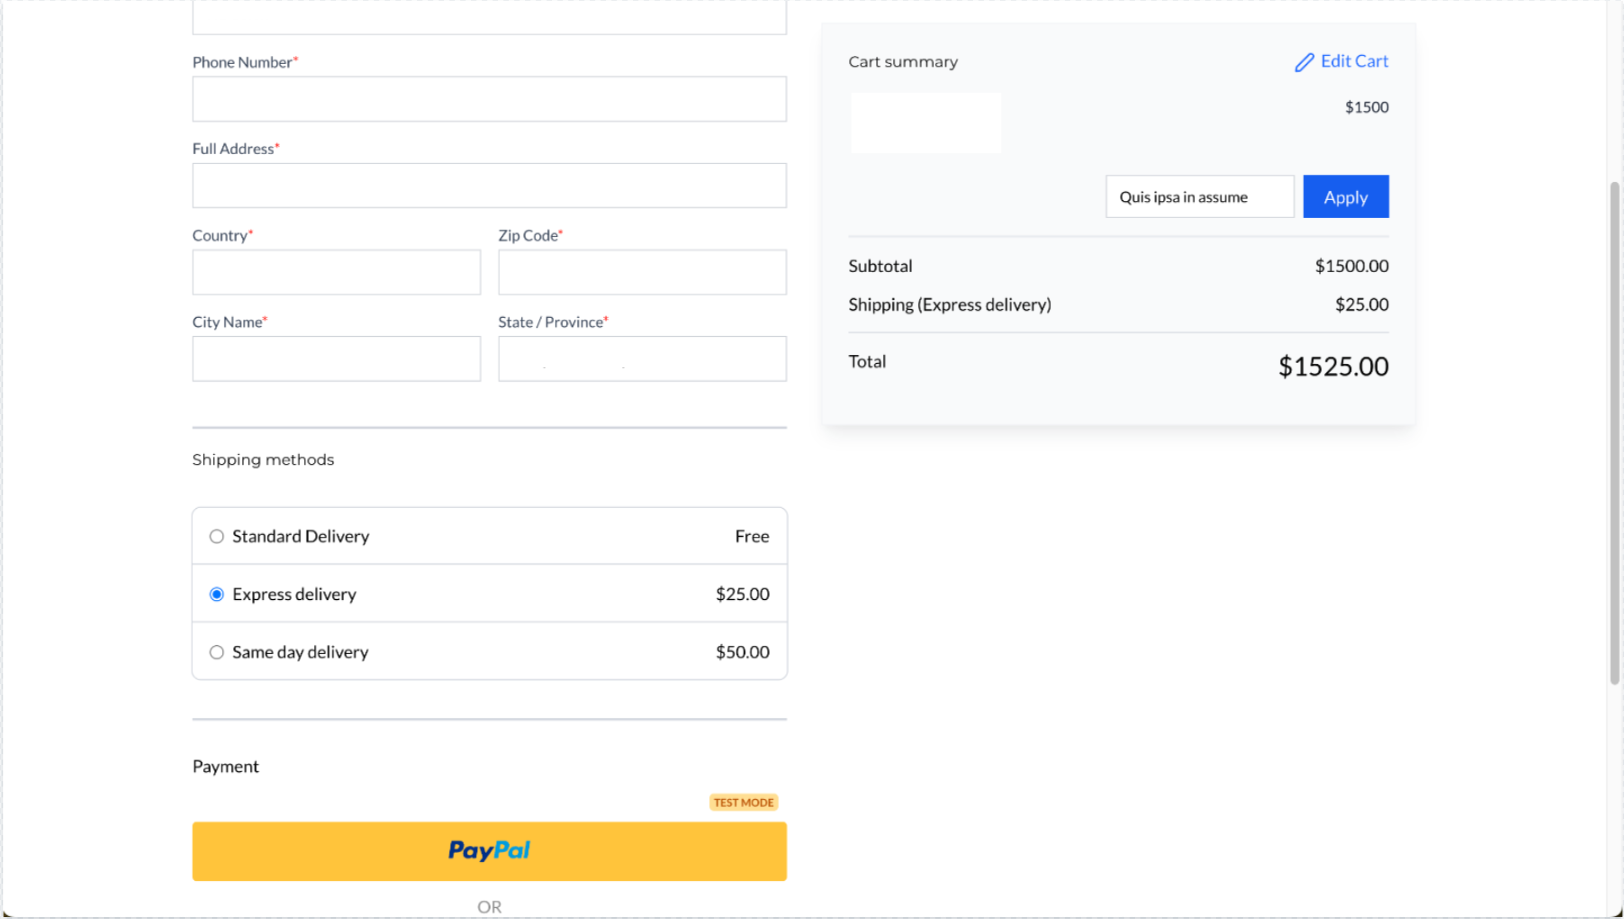
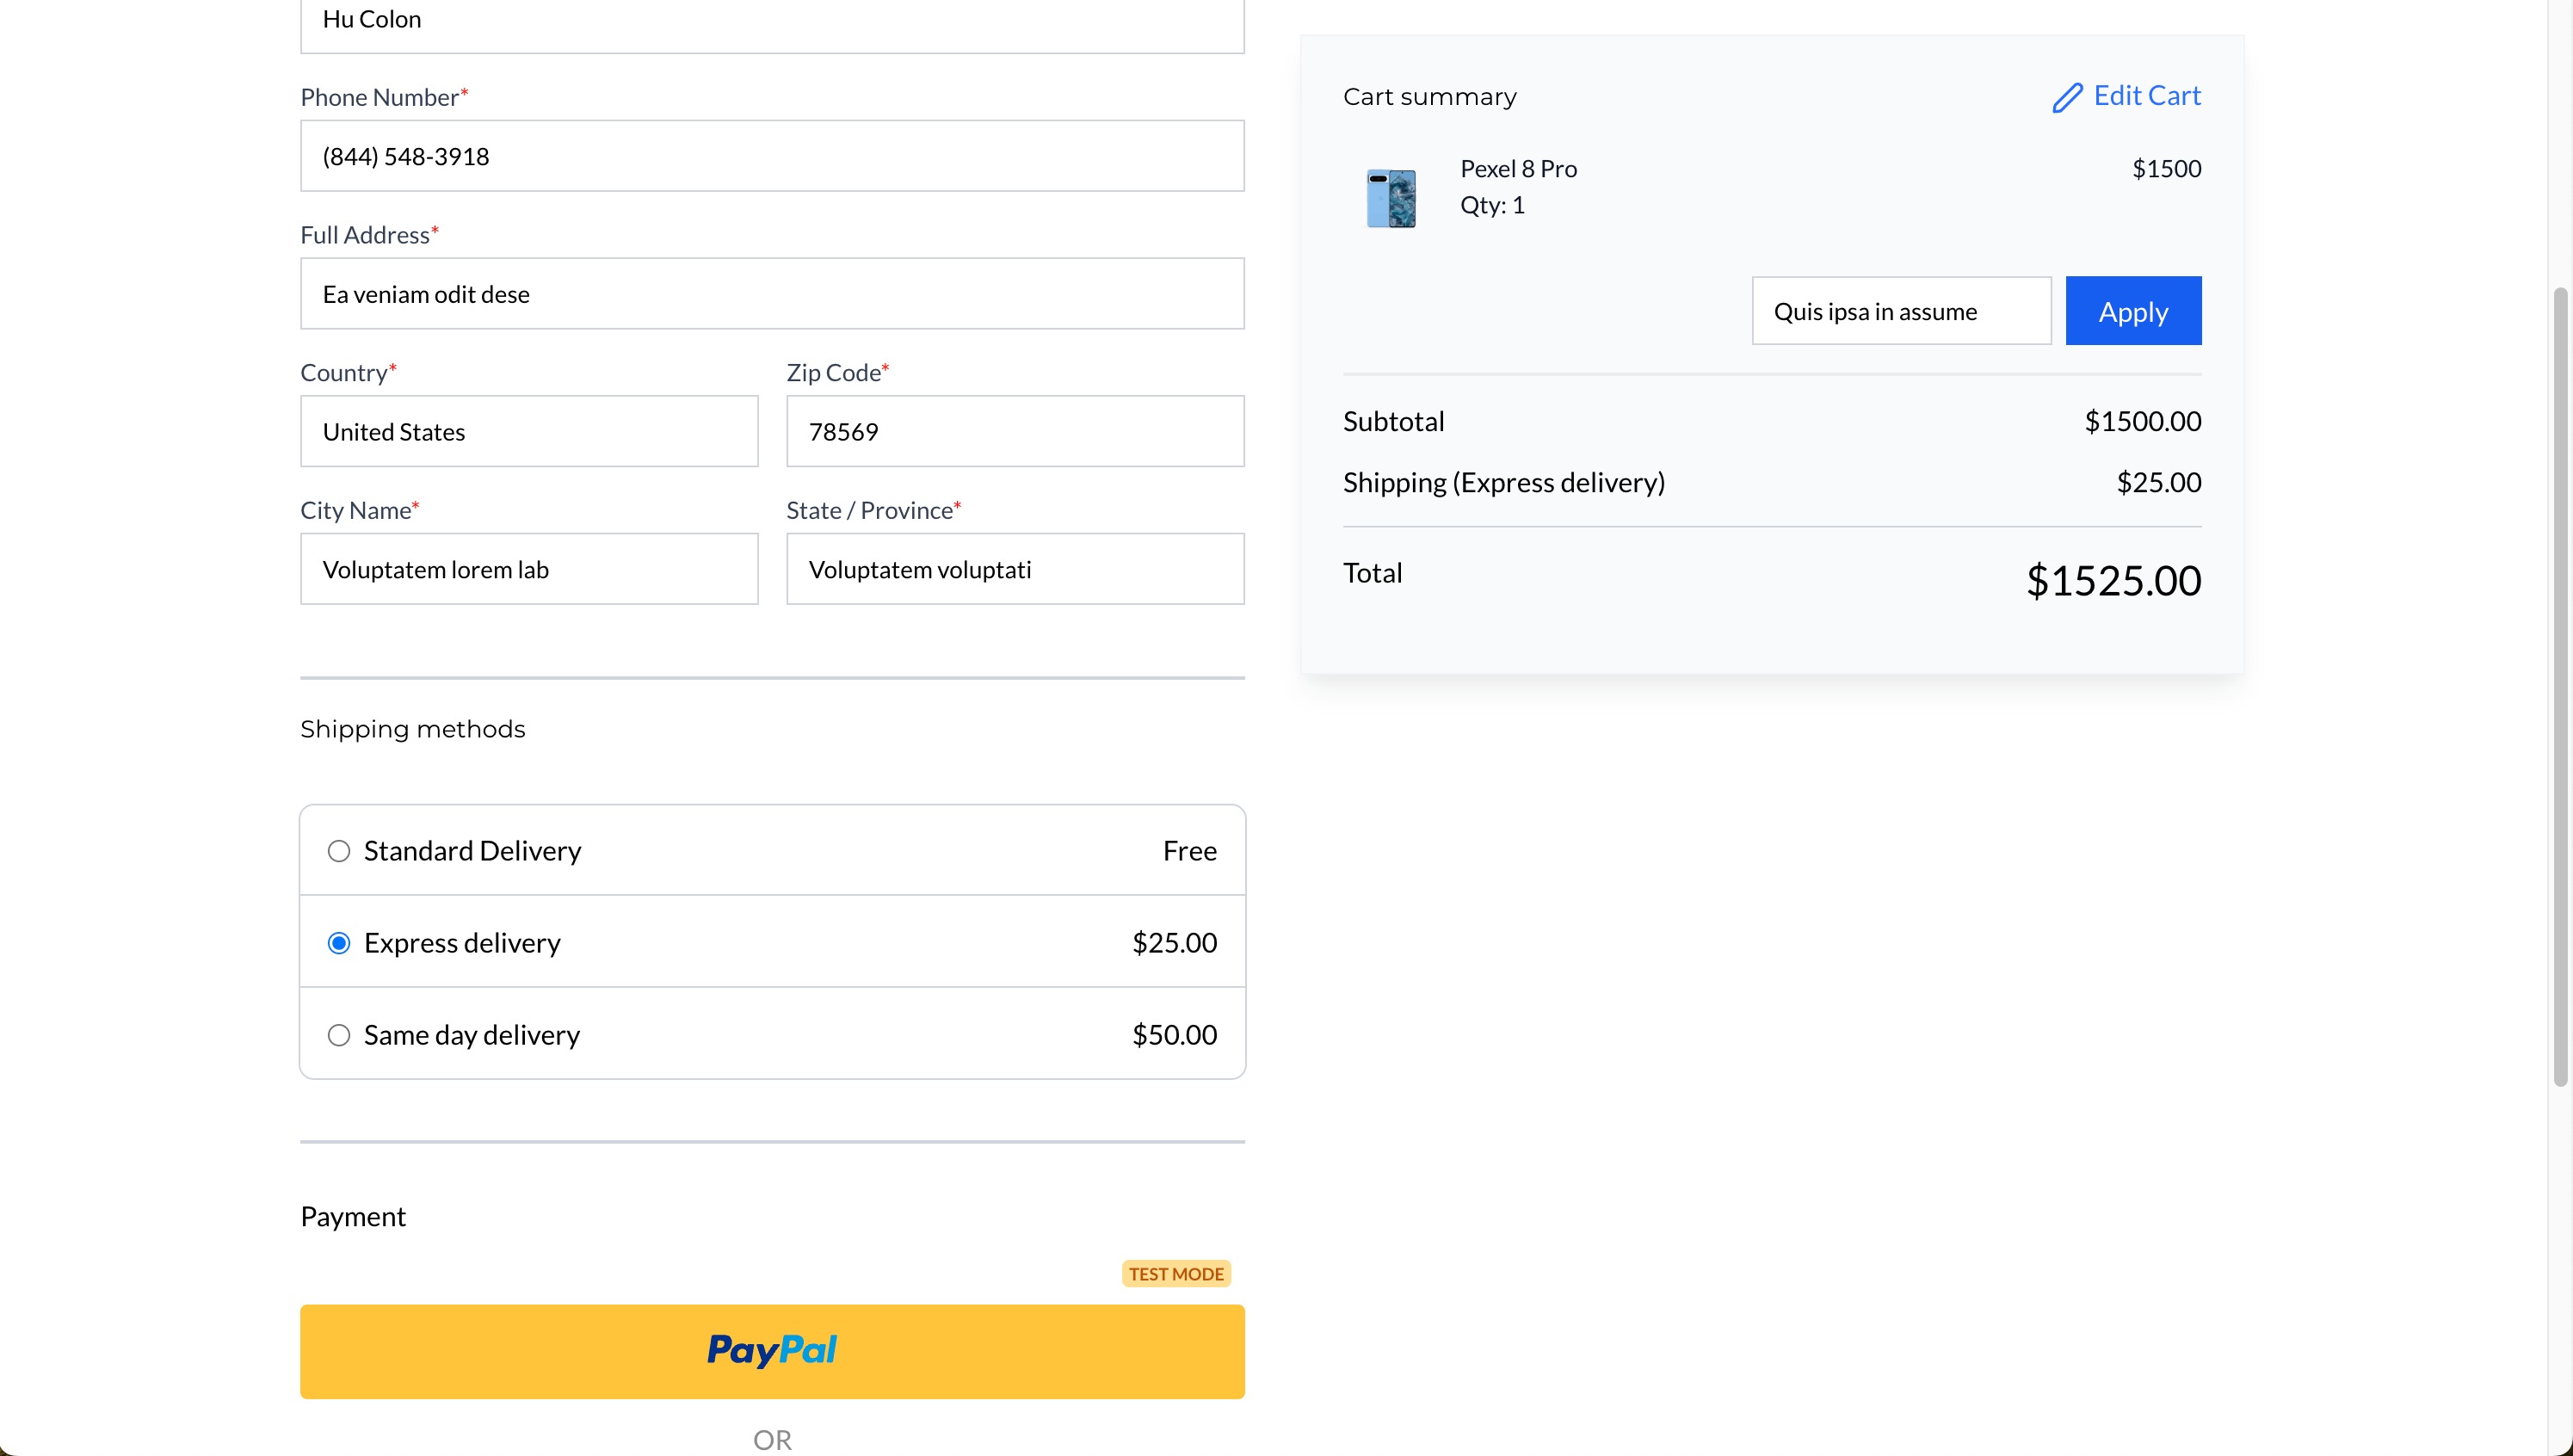
Checkout automatically sorts shipping options by price, lowest first, and preselects the lowest cost option:
If Free Shipping is available, it appears first and is selected by default.
If rates change after an address or cart update, checkout re-sorts and reapplies the default selection.
If only one option is available, it is selected automatically.
If multiple options share the same price, checkout keeps them in the order you created them and selects the first one in that price group.
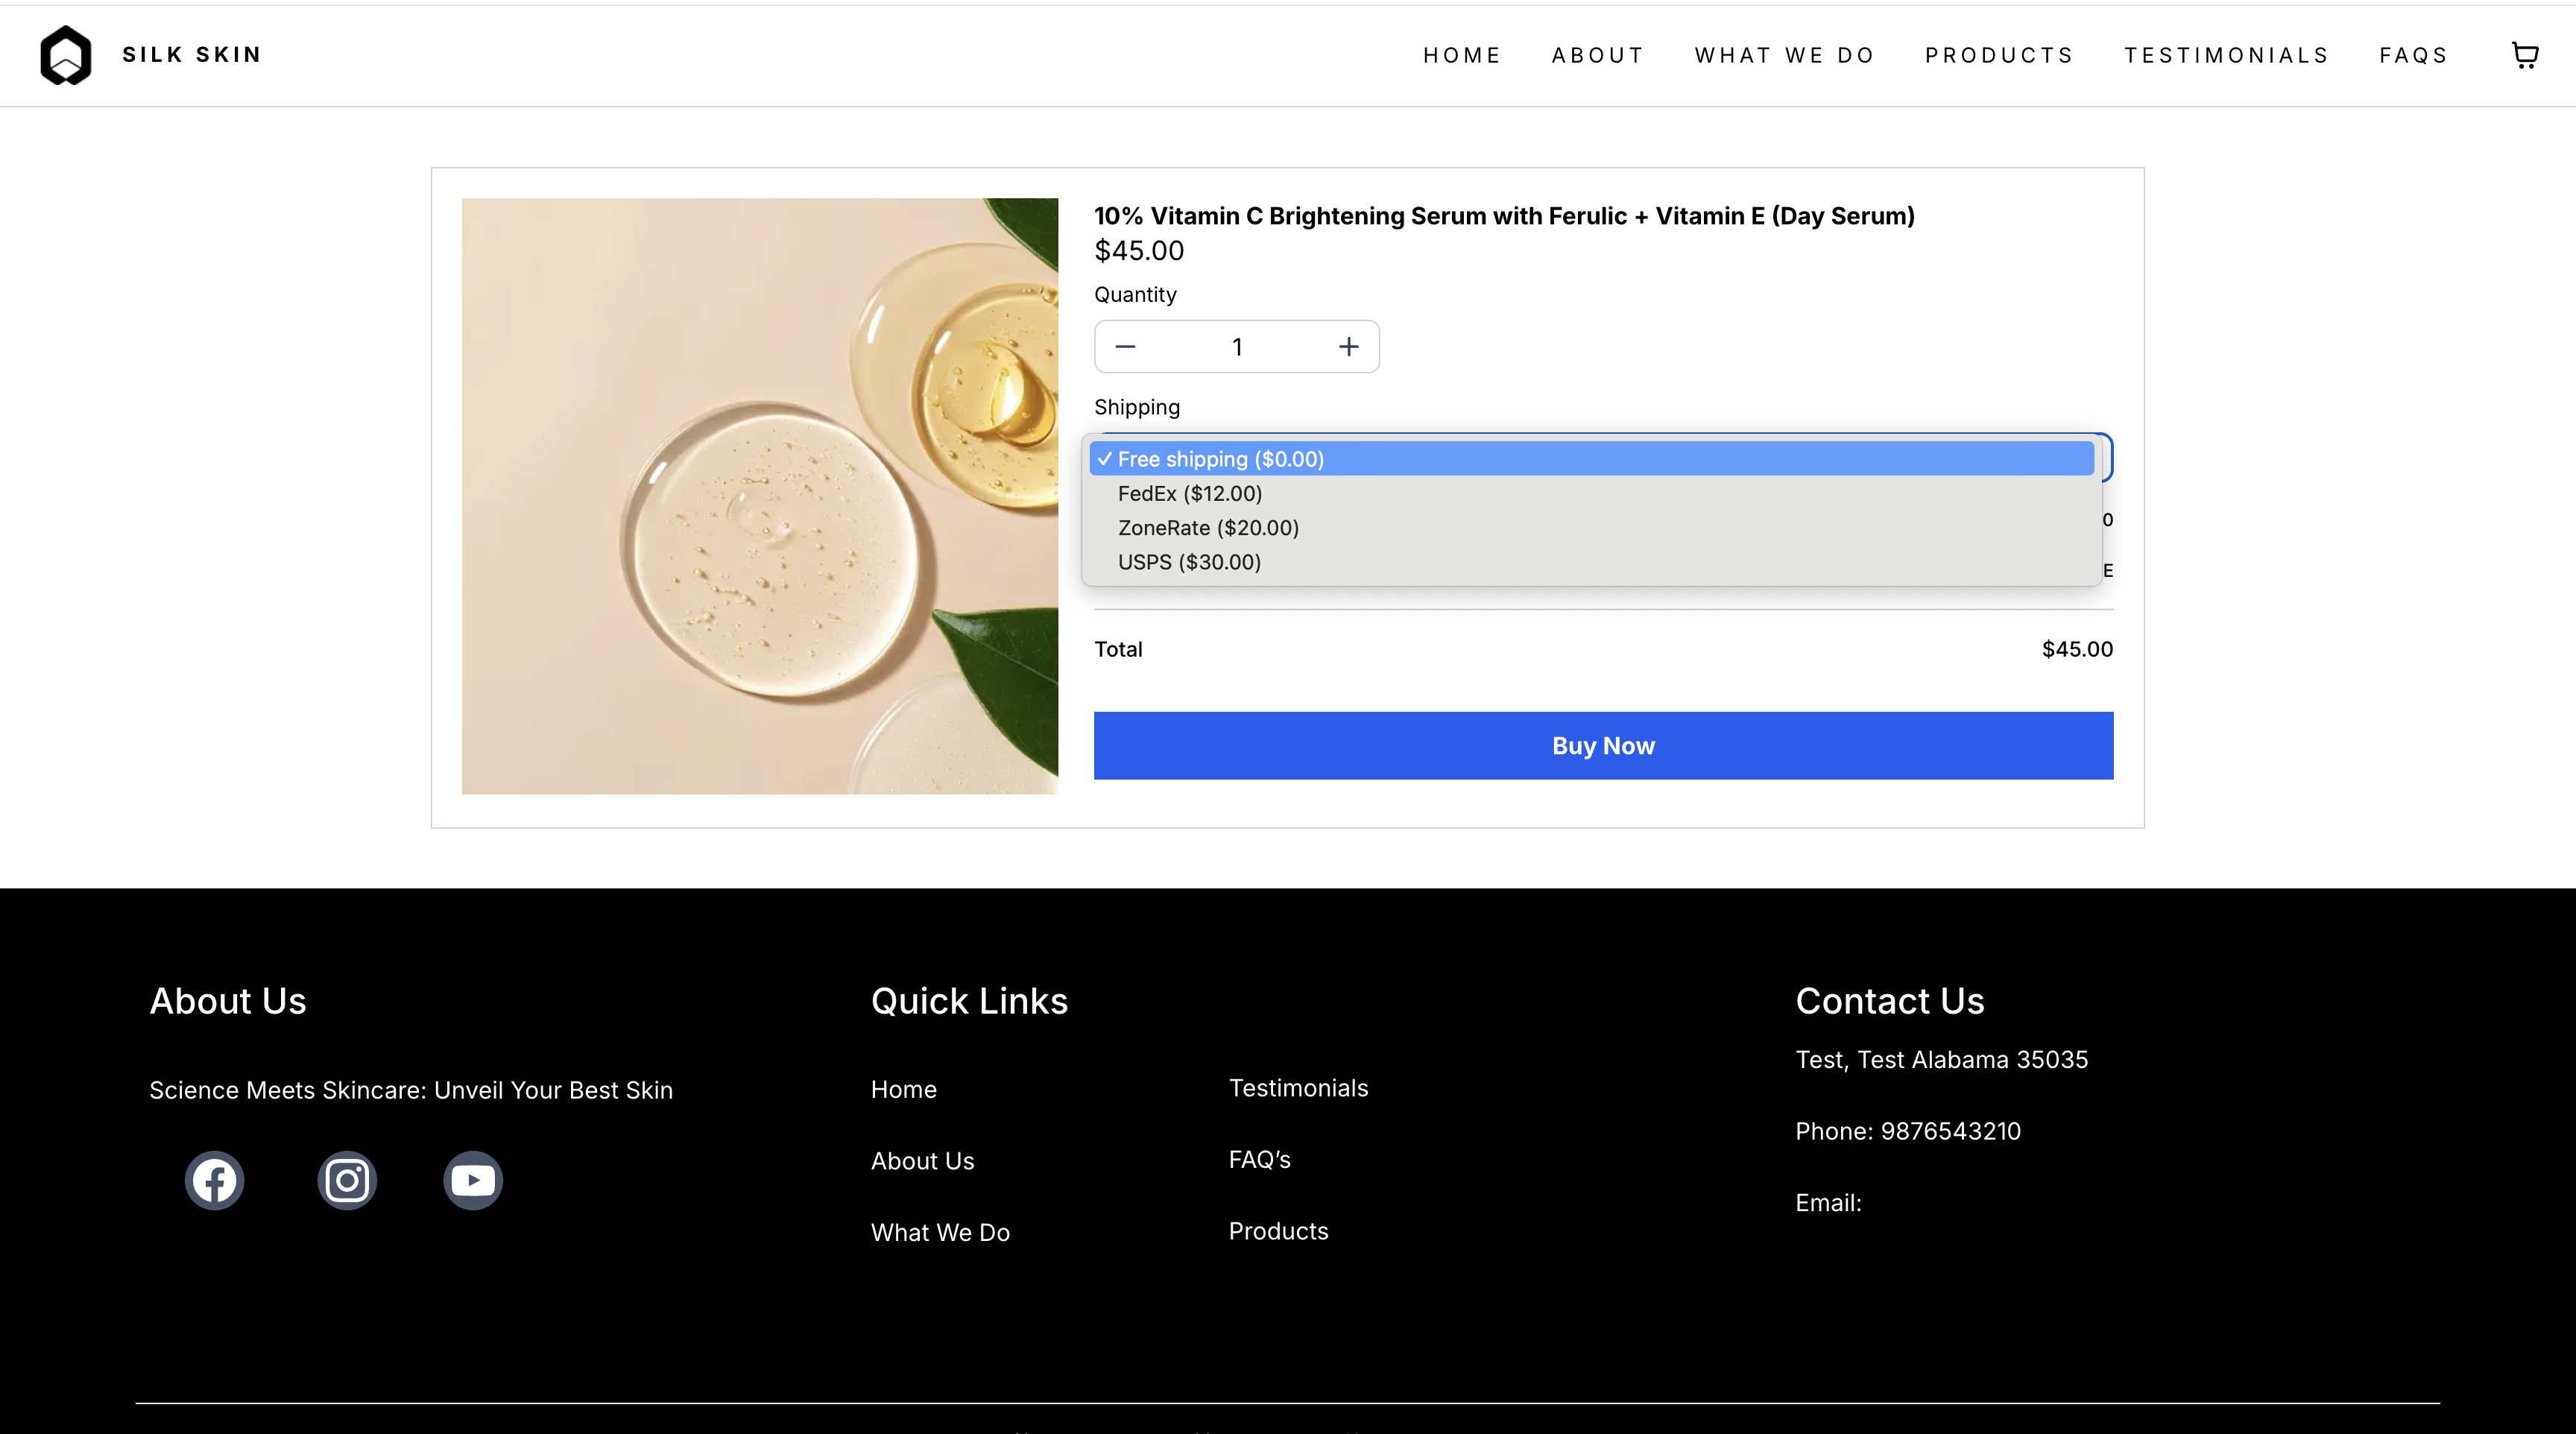
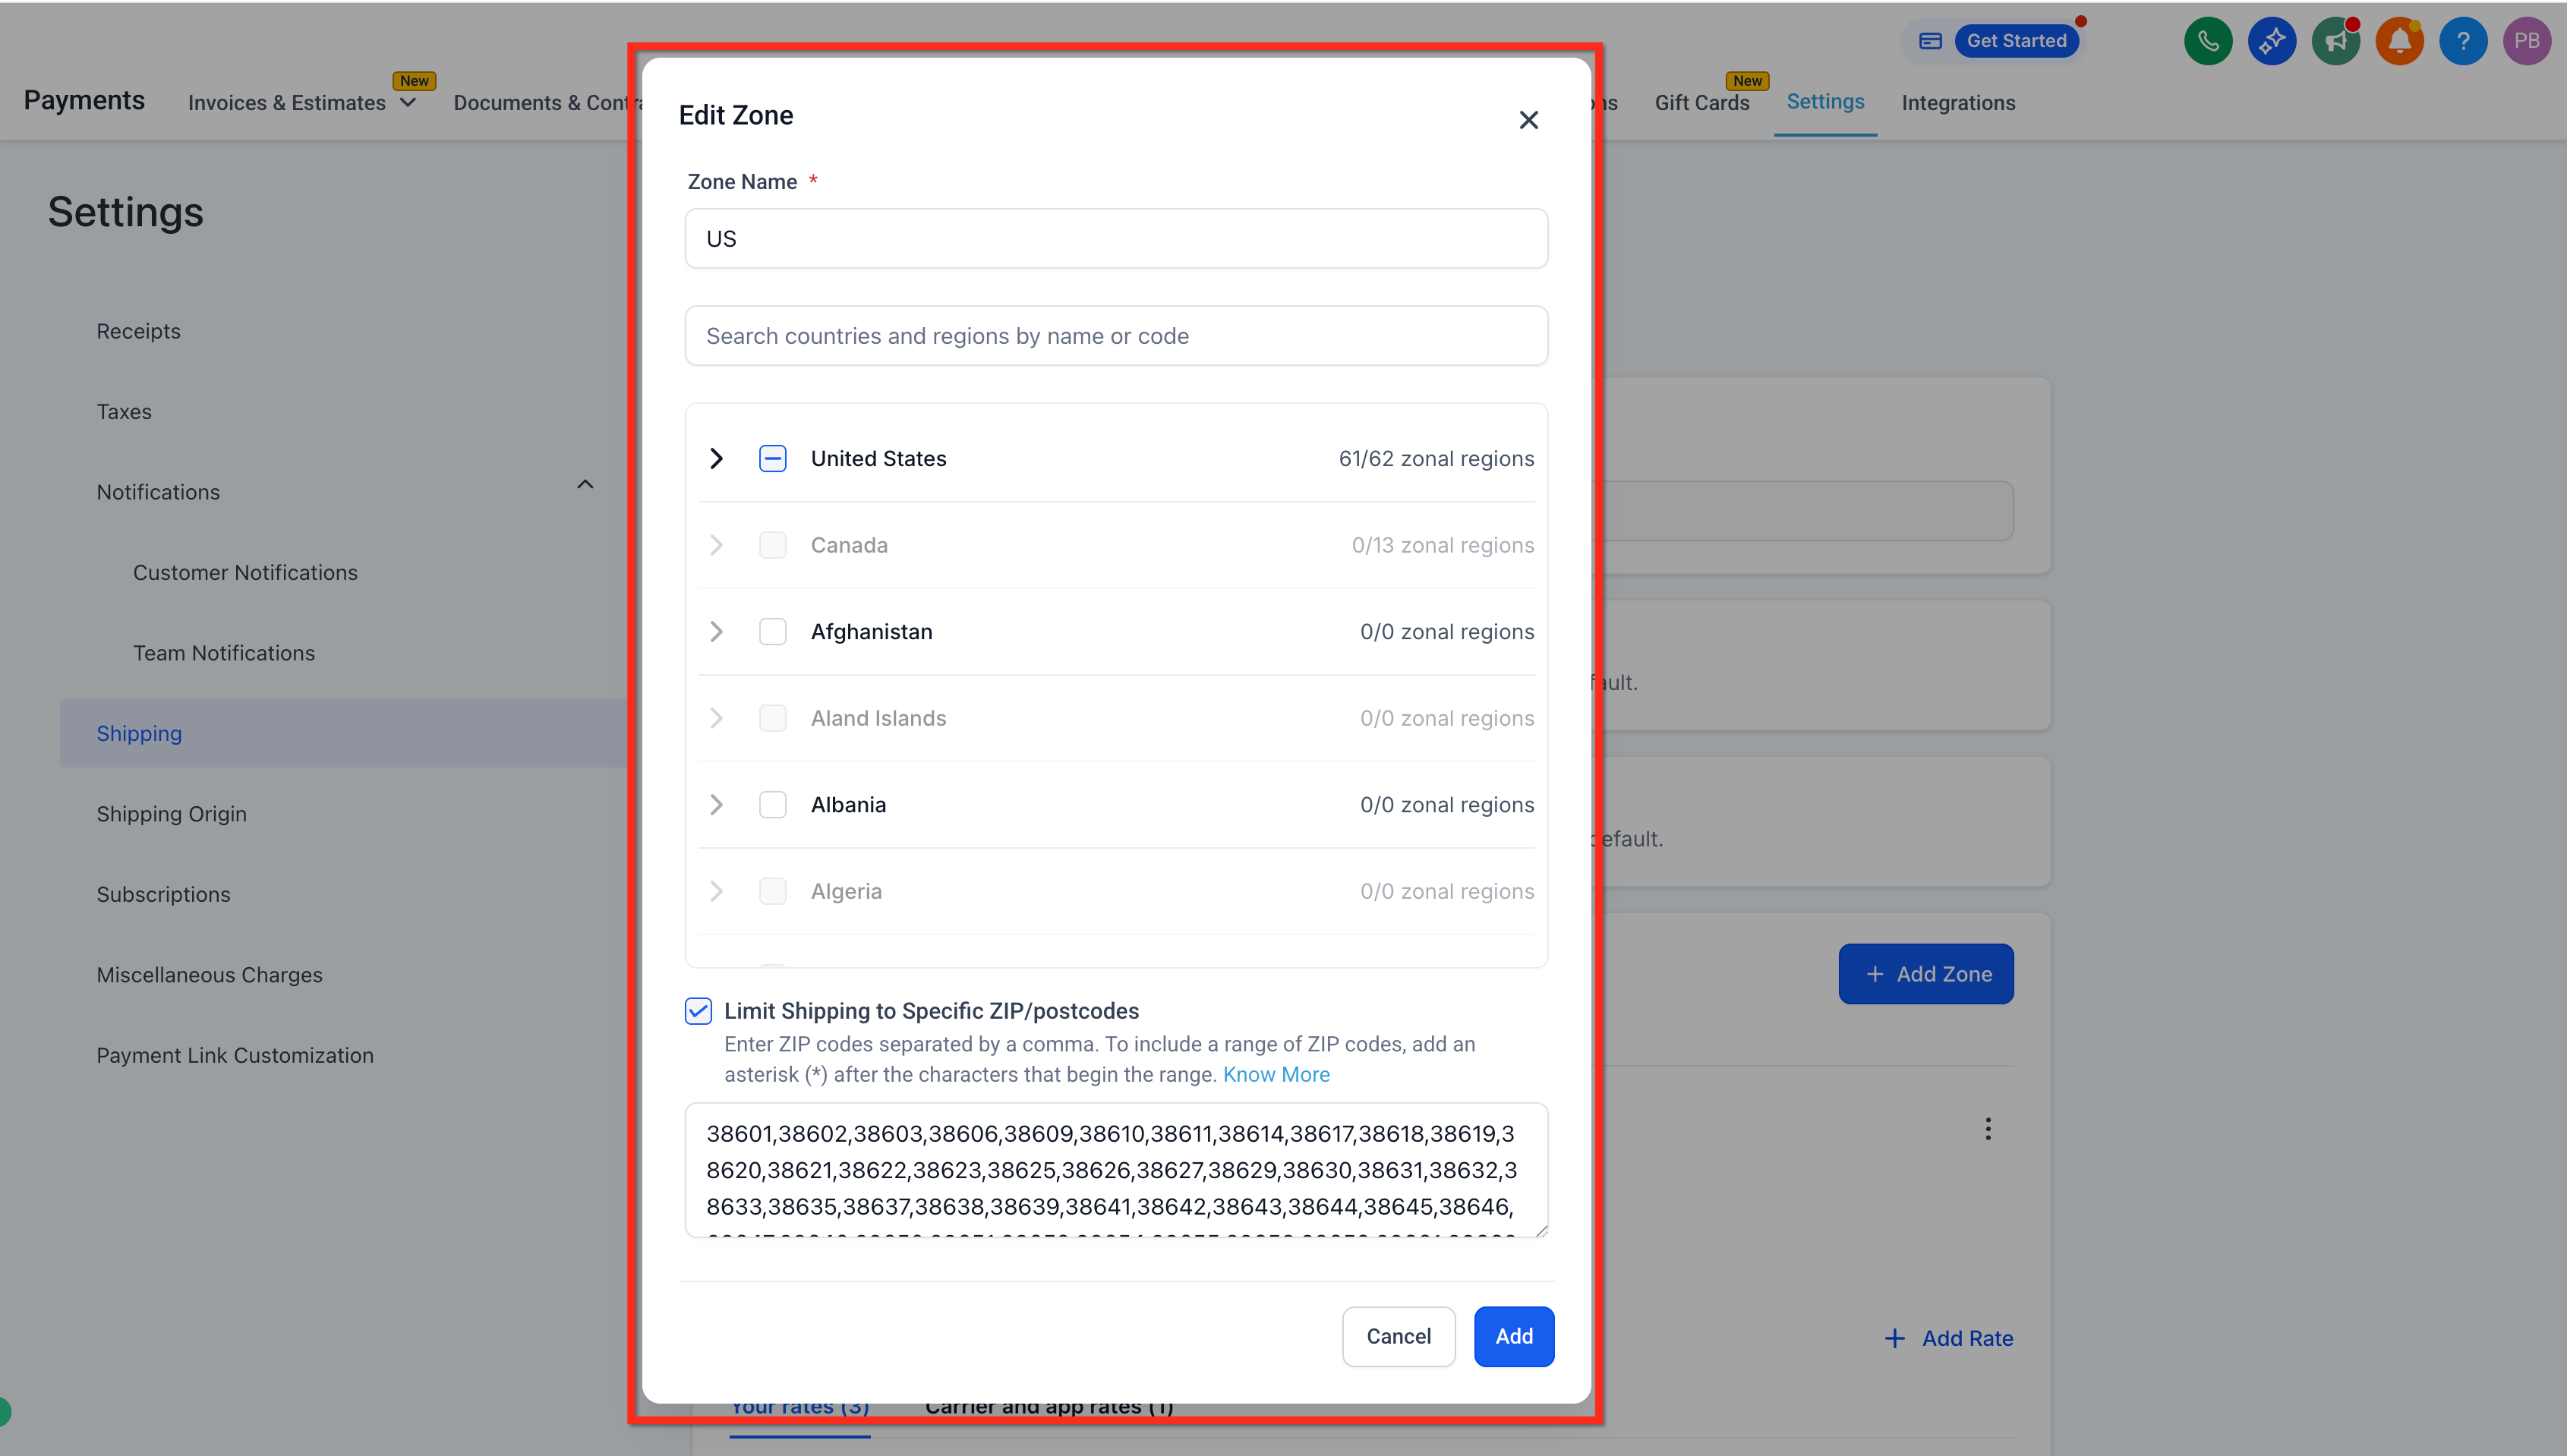
For hyper-local delivery, or to keep a zone from applying to areas you don't want to serve, you can restrict a shipping zone to specific ZIP or postal codes.
Go to Payments > Settings > Shipping & Delivery.
Open the shipping zone (General or a Custom Profile's zone) you want to restrict, or click Add Zone to create a new one.
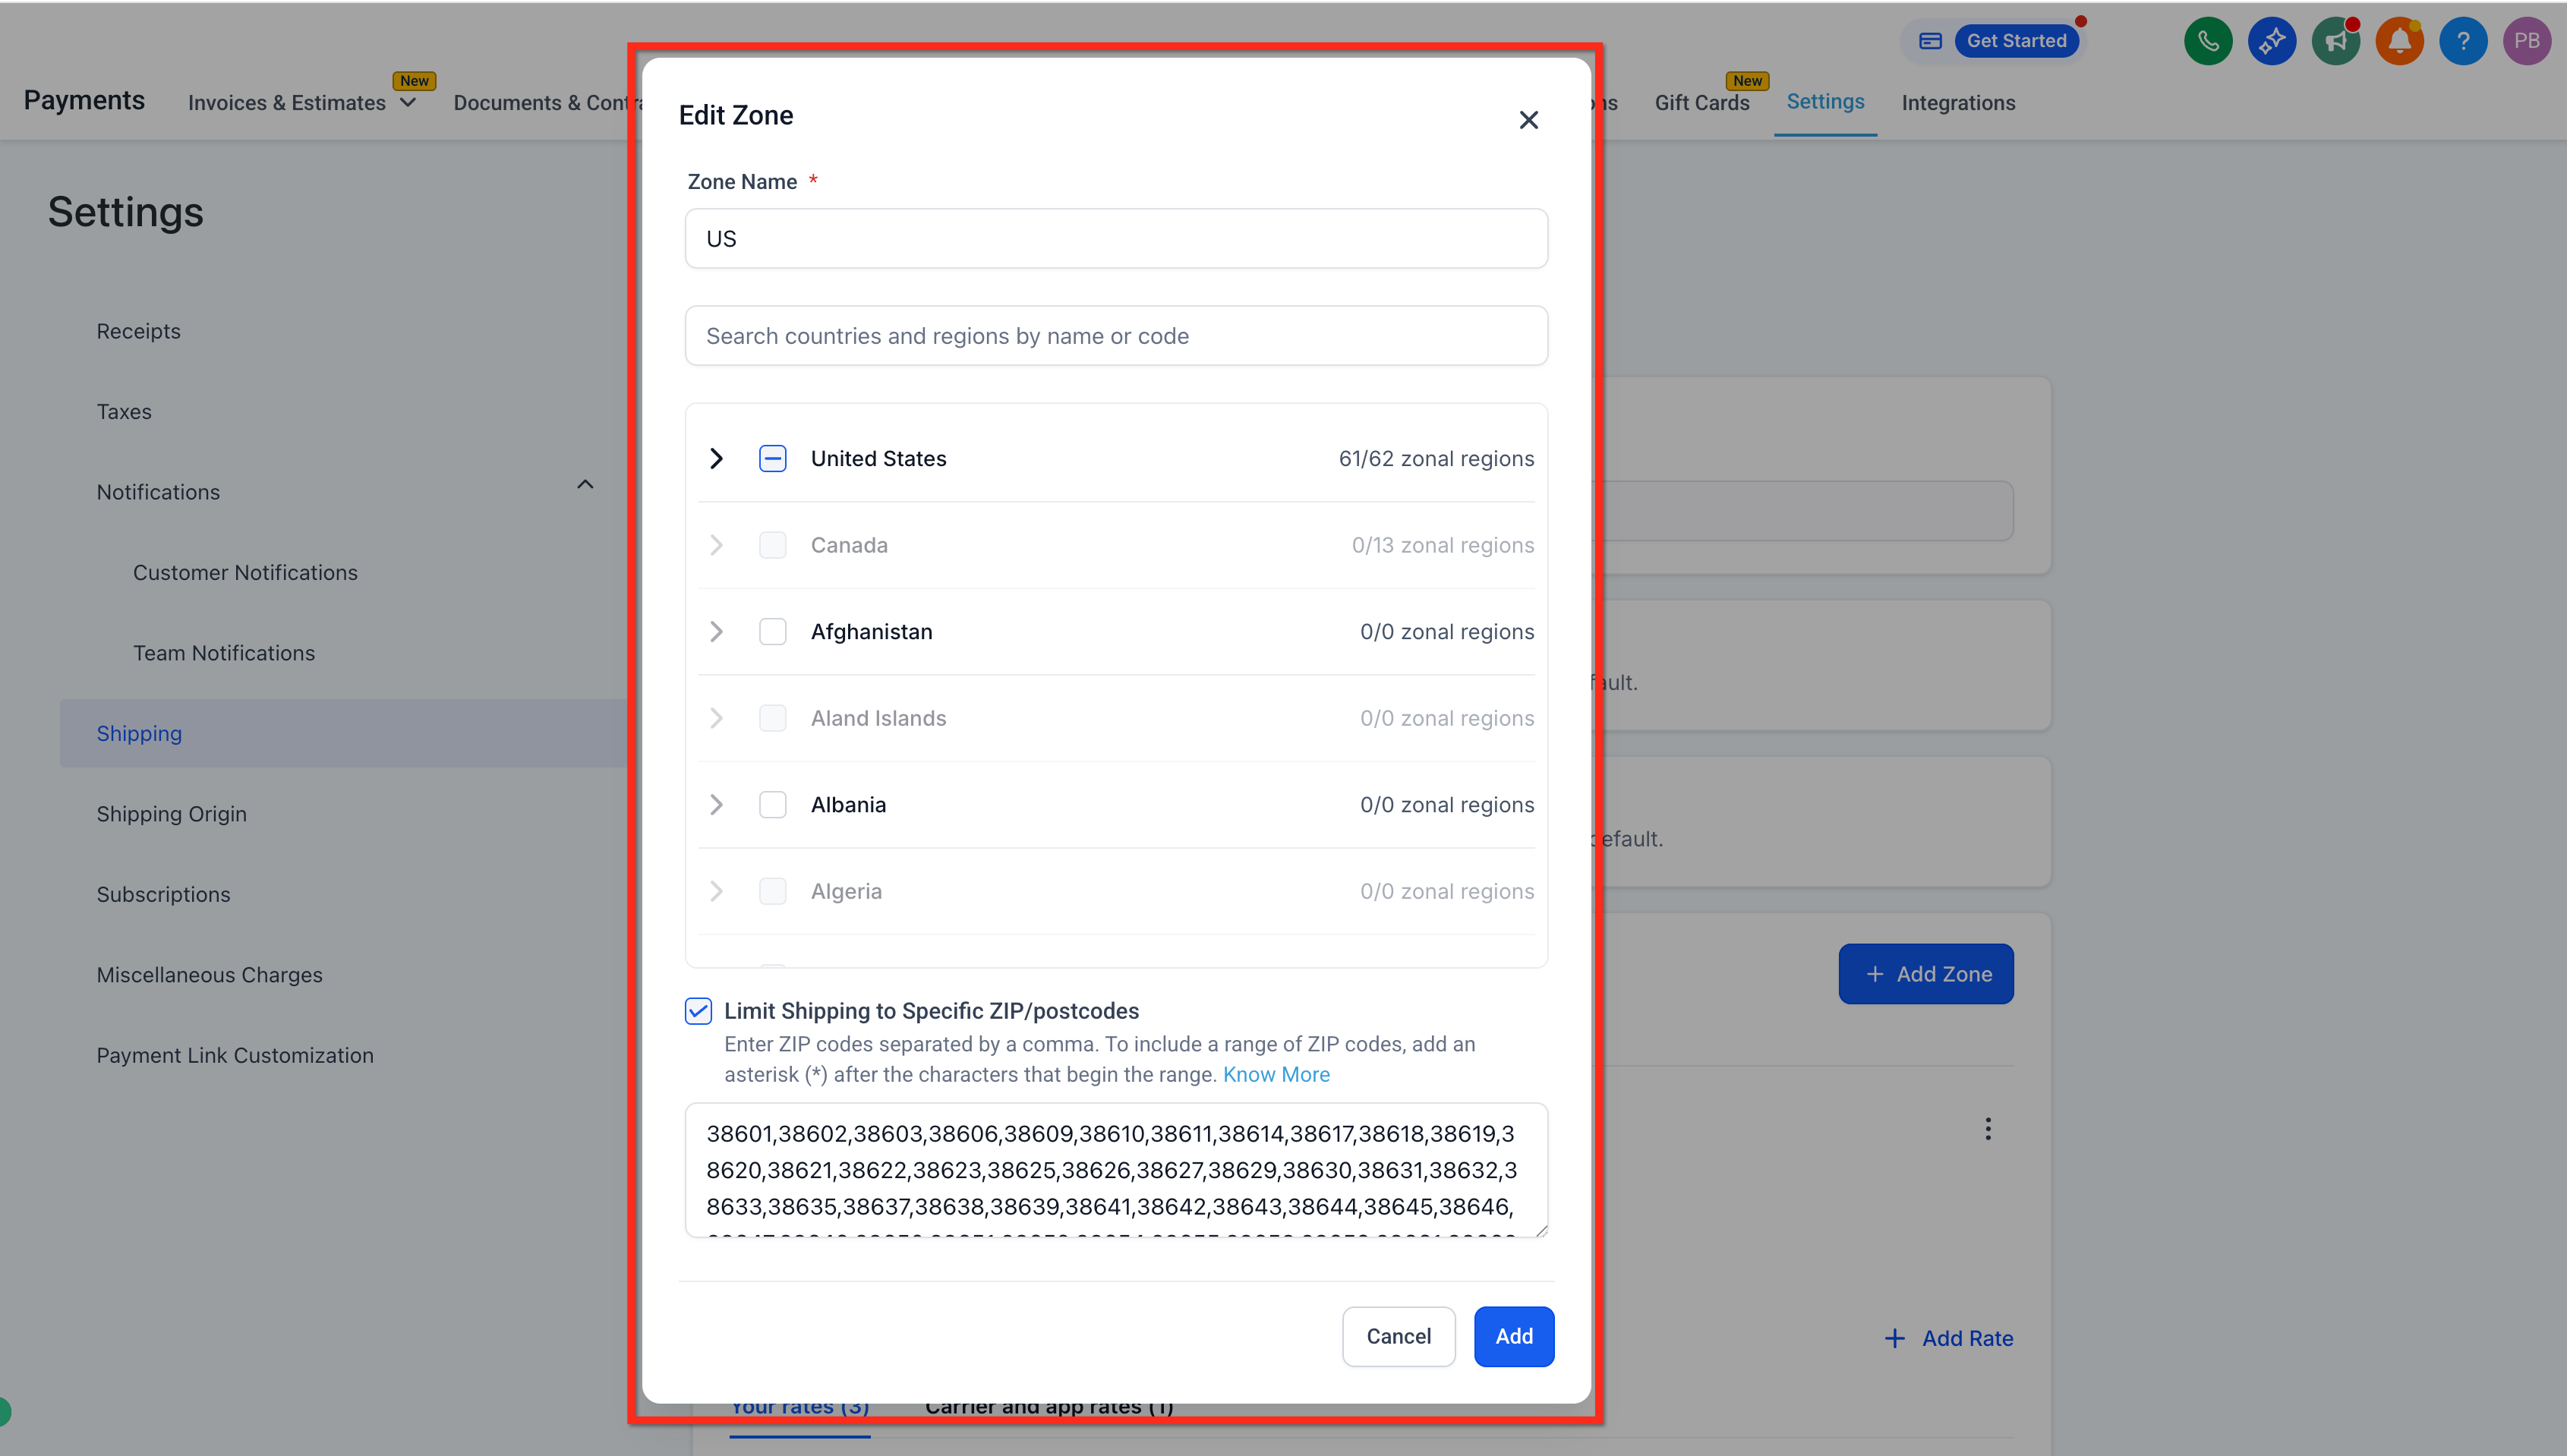
Enable Limit Shipping to Specific ZIP/Postcodes.
Enter the codes, separating multiple entries with commas. Accepted formats:
A single code, for example 100210
Comma-separated codes, for example 100210,122021
A wildcard prefix, for example 46*, which matches every ZIP or postal code starting with "46"
Validation rules:
The wildcard asterisk is only allowed at the end of an entry (56* is valid; *56 is not).
Codes are matched only within the countries and regions you selected for that zone.
The wildcard matches left to right only. 56* matches 560001 and 561122, but it will not match a code that has "56" in the middle or at the end.
Duplicate or invalid entries (spaces, special characters, empty entries between commas) are blocked when you try to save.
If ZIP/postcode restriction is turned on, the zone cannot be saved until at least one valid code is entered.
If a customer's address doesn't match any code or wildcard pattern you configured, that zone simply does not apply, and shipping will not show for that address unless another zone covers it.
Once saved, you'll see a summary of the country, regions, and a truncated list of the deliverable codes on the zone. You can come back and edit the list at any time.
Instead of one flat rate per zone, you can charge different amounts based on the total dollar value of the cart or the total weight of the items in it. This lets you, for example, offer free shipping on larger retail orders while charging a standard rate on smaller ones.
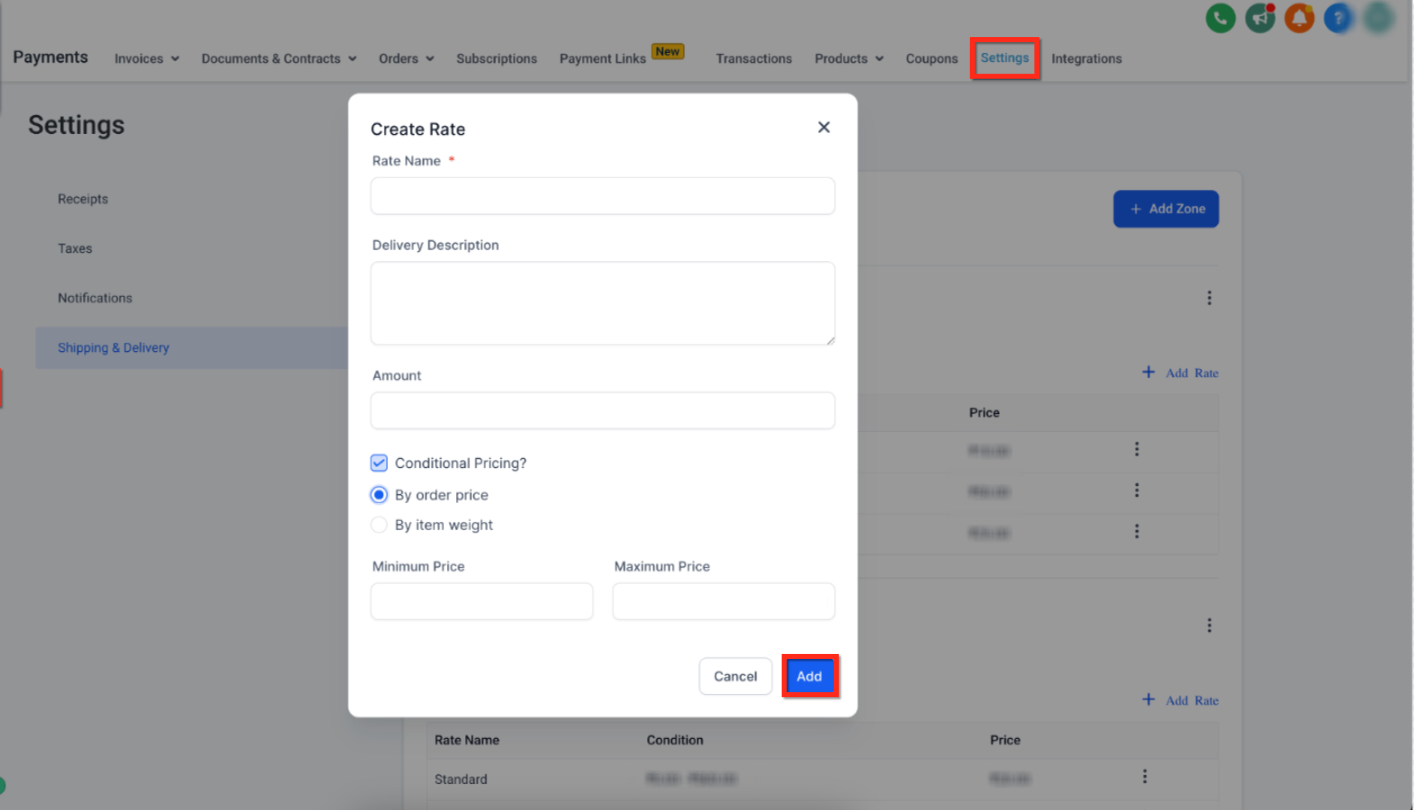
Go to Payments > Settings > Shipping & Delivery.
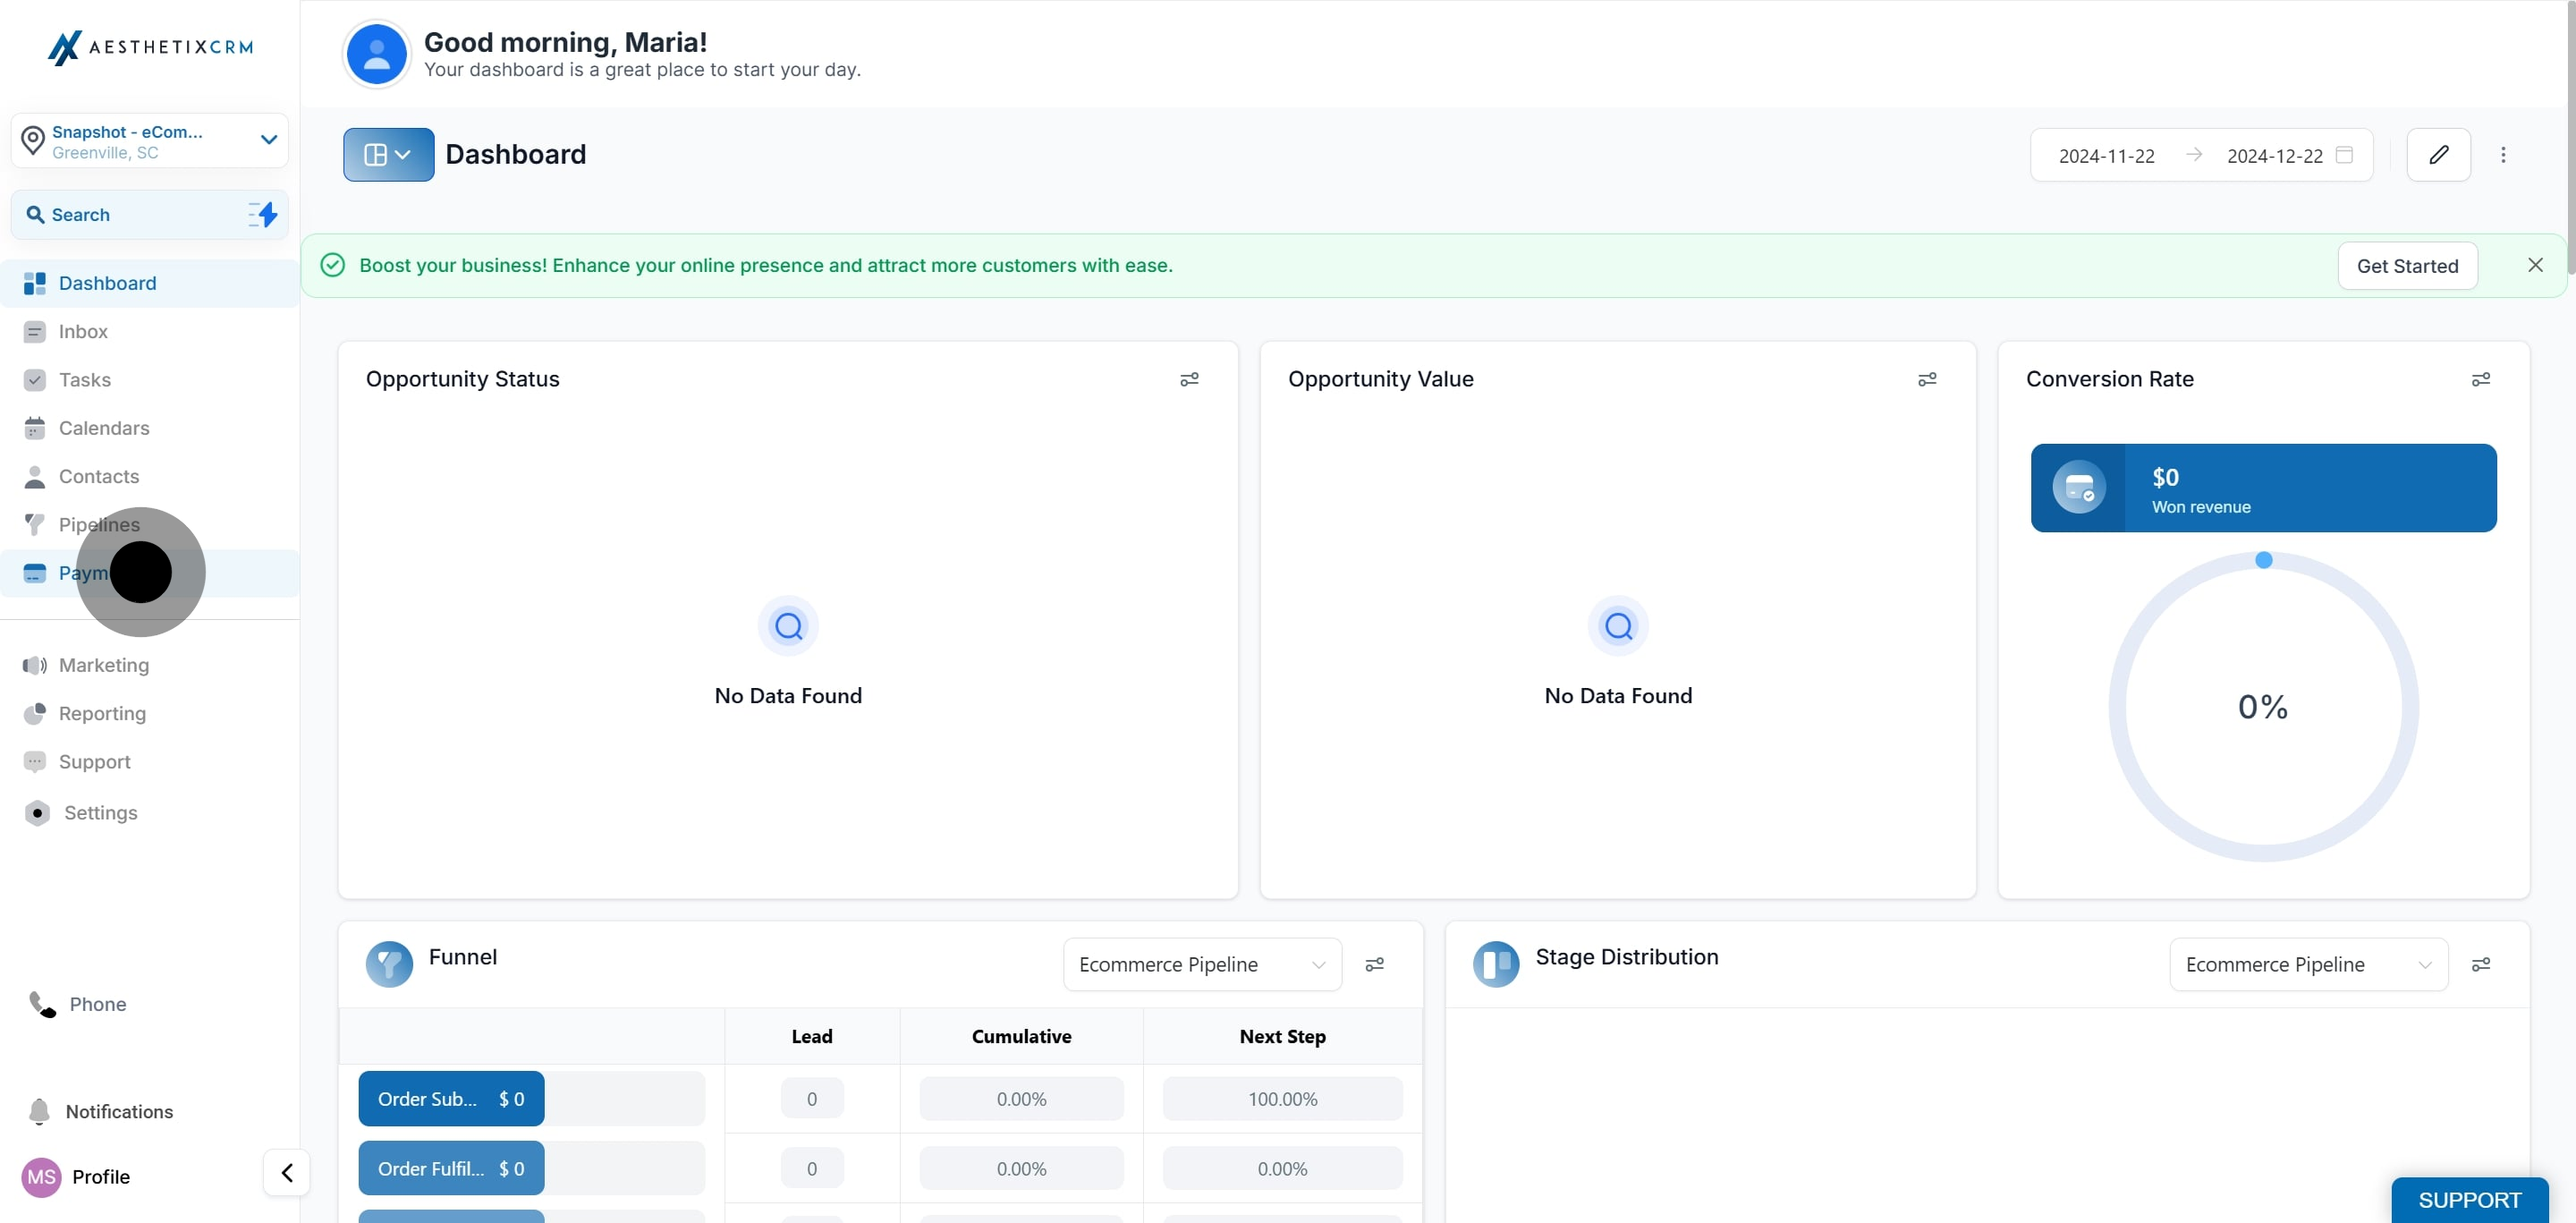
Click Settings.
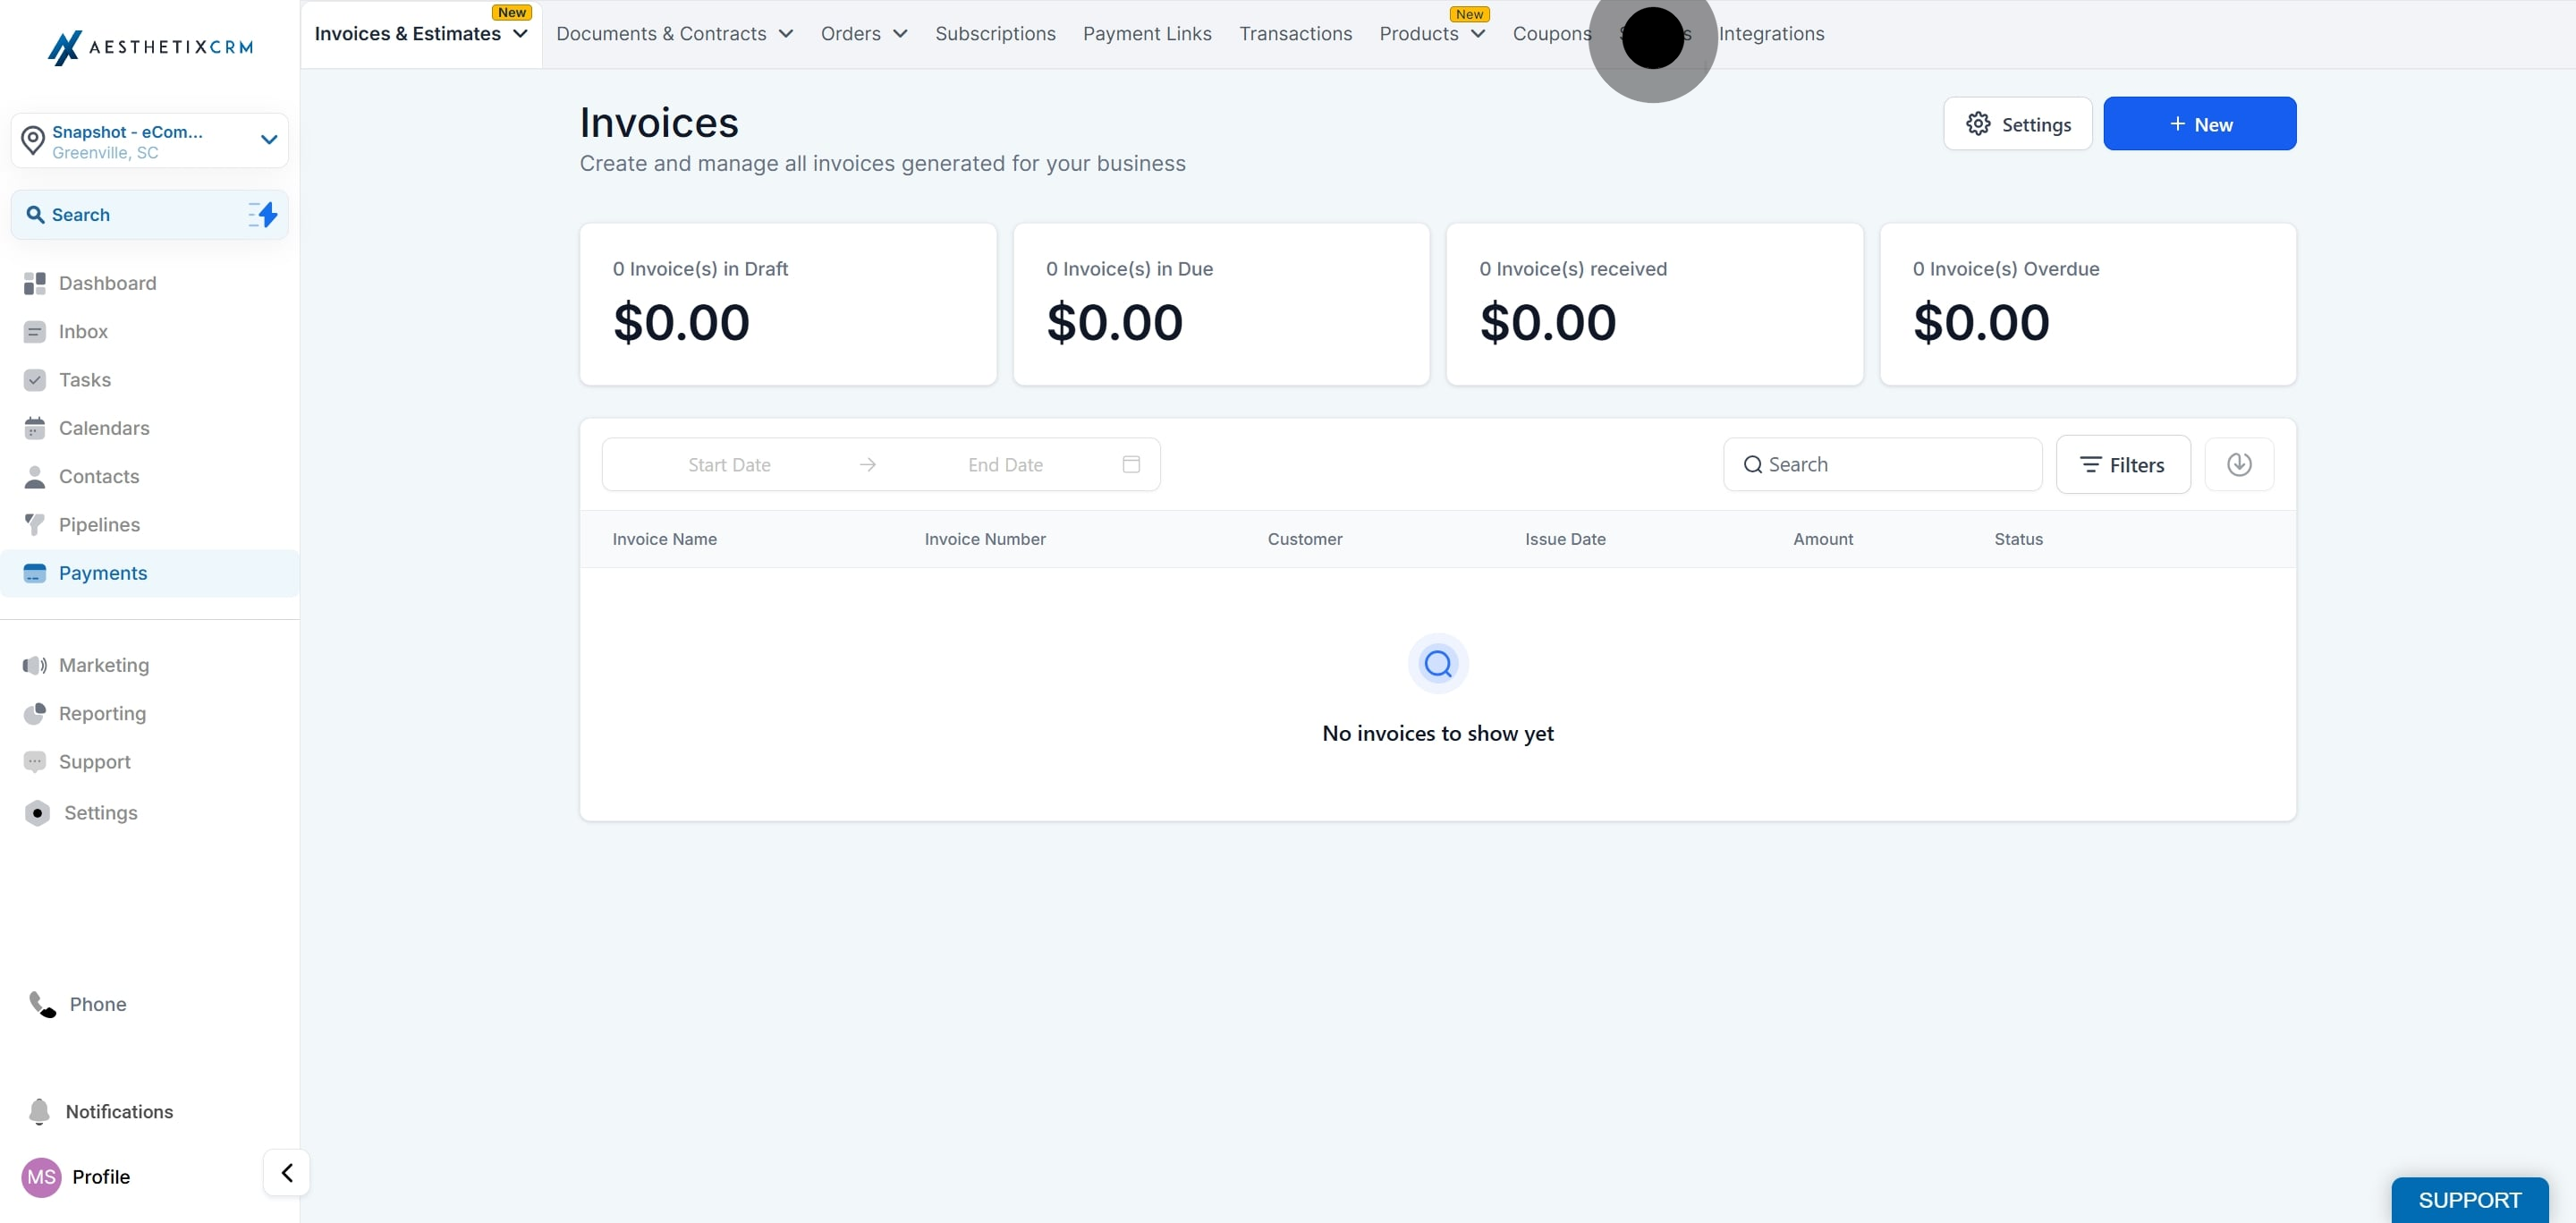
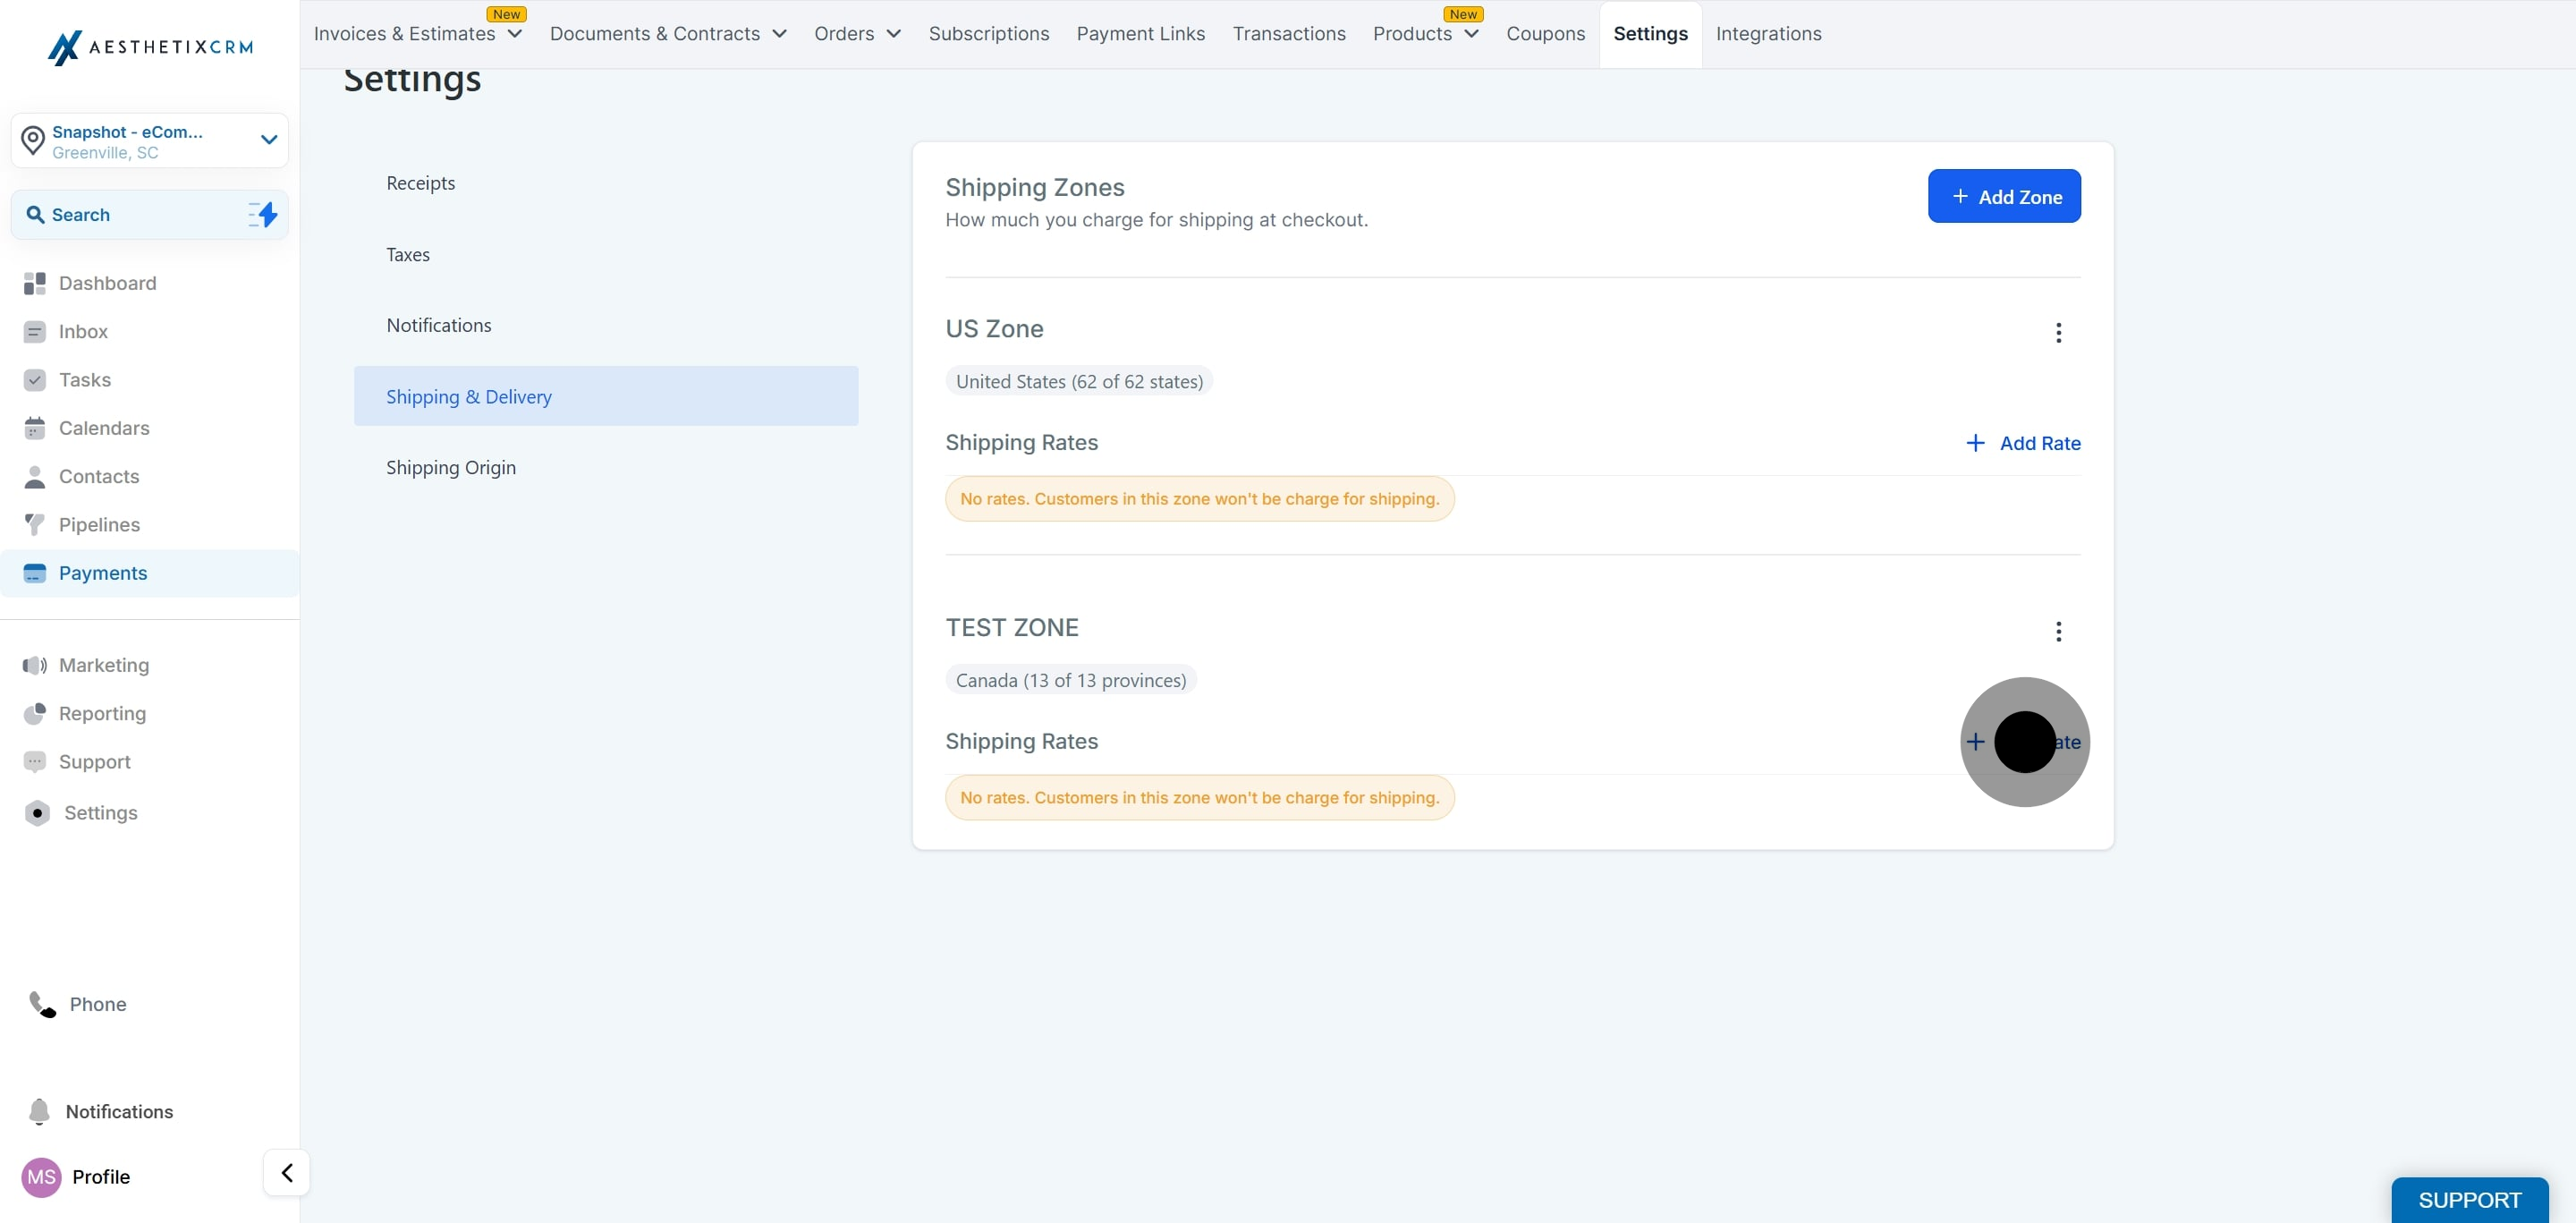
Select the shipping zone and click Add Rate.
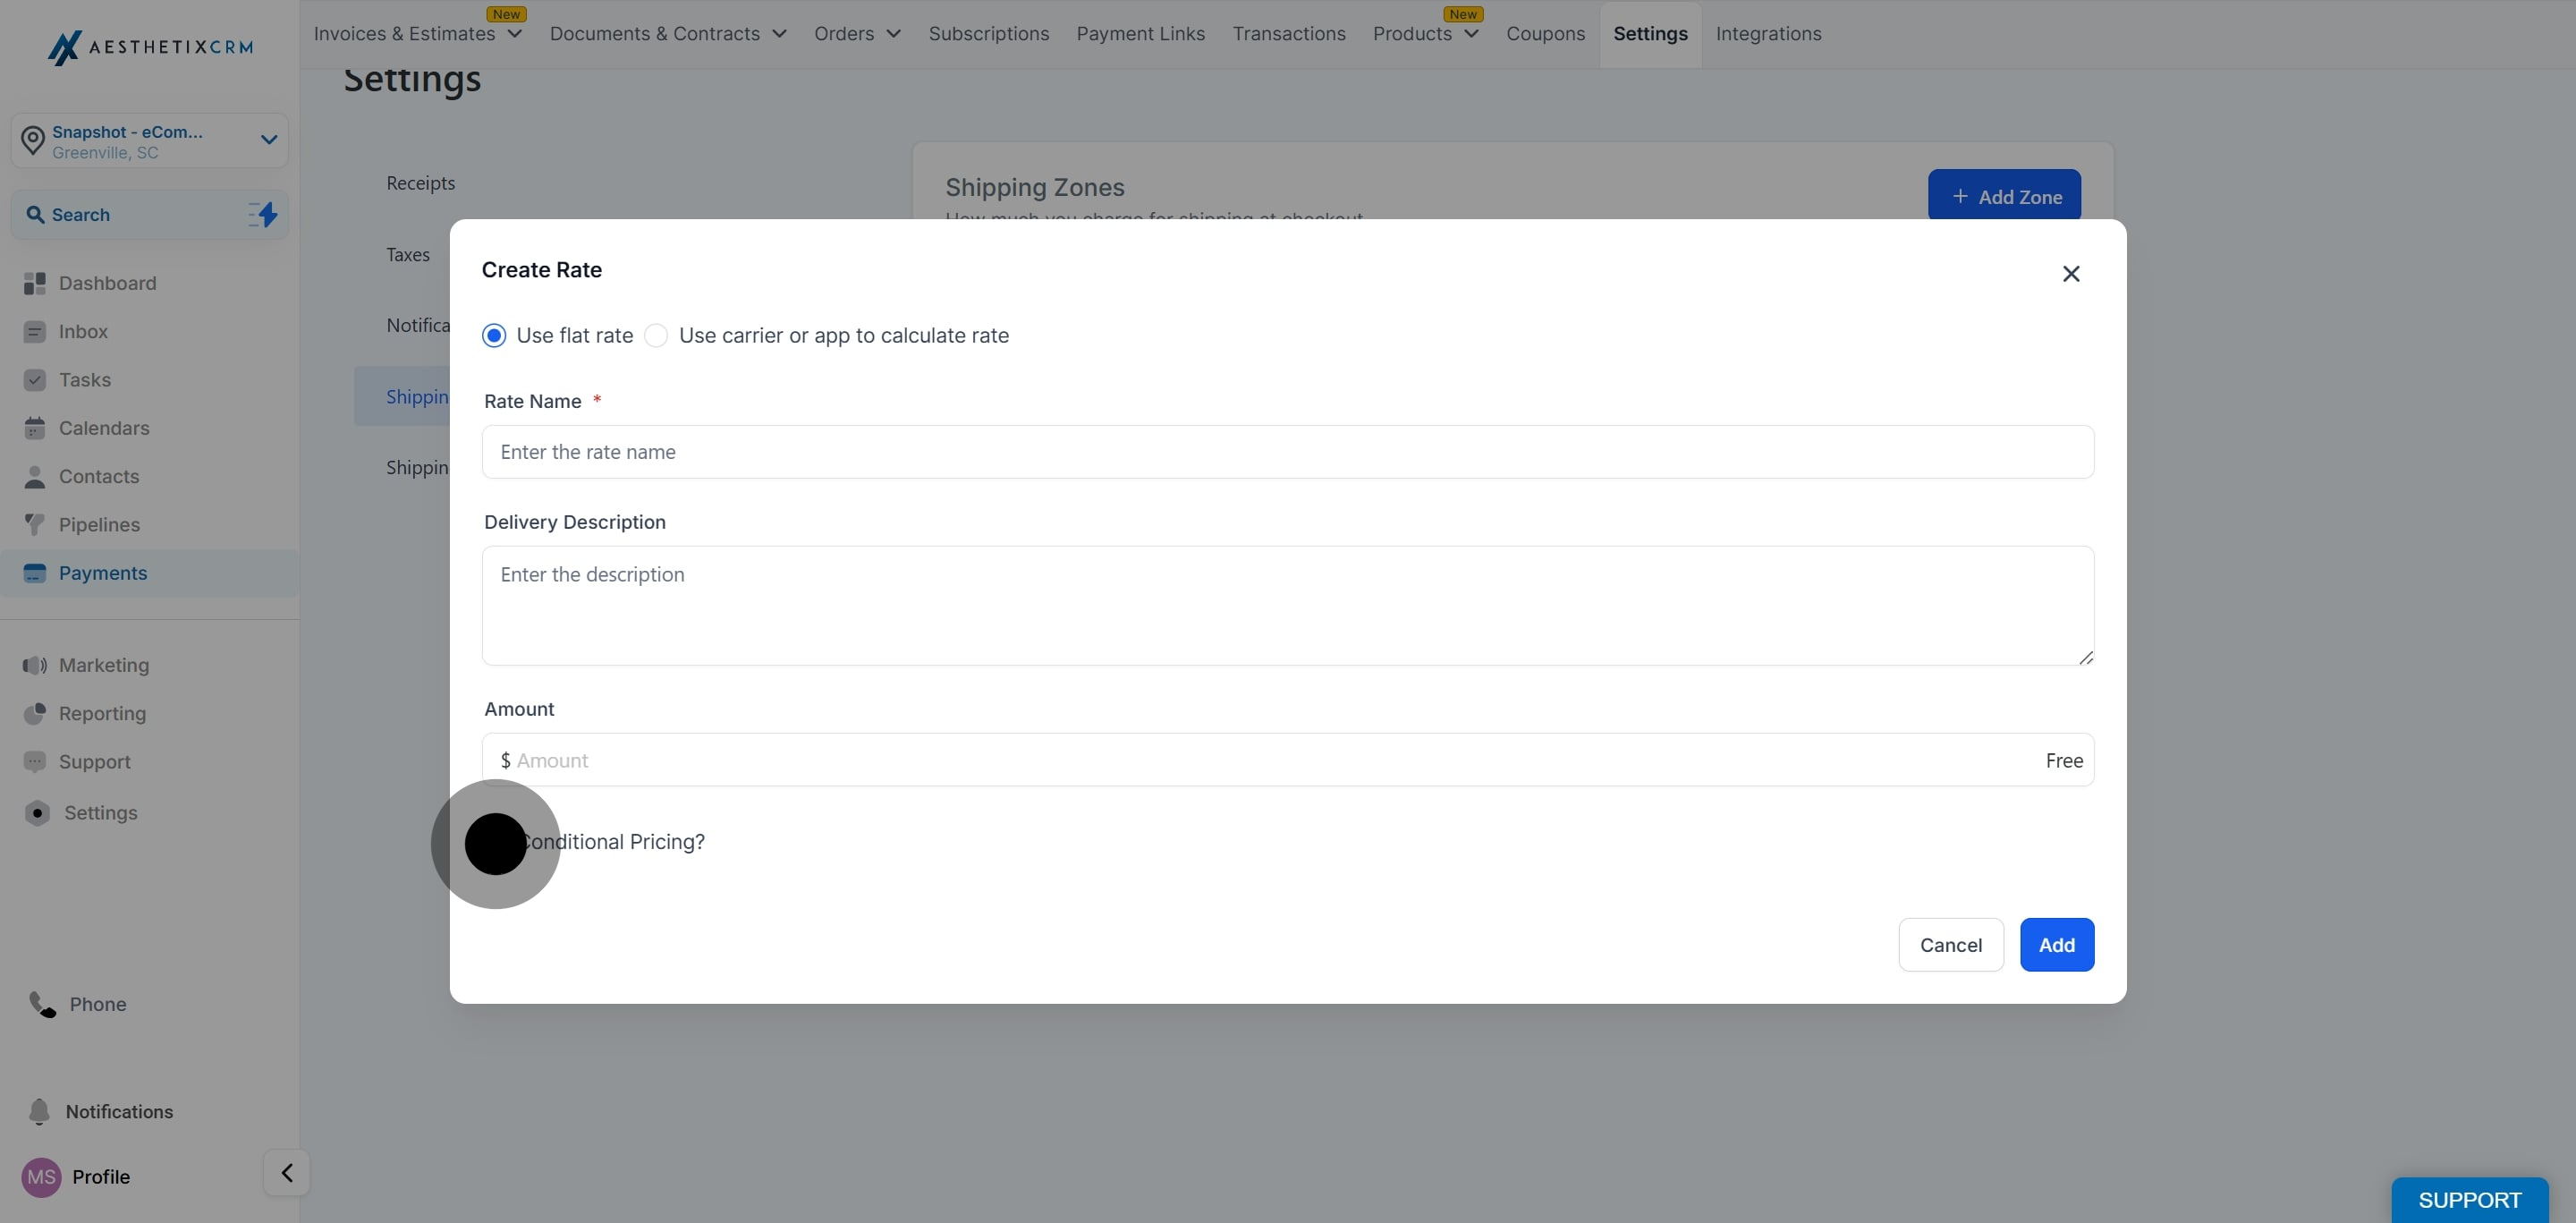
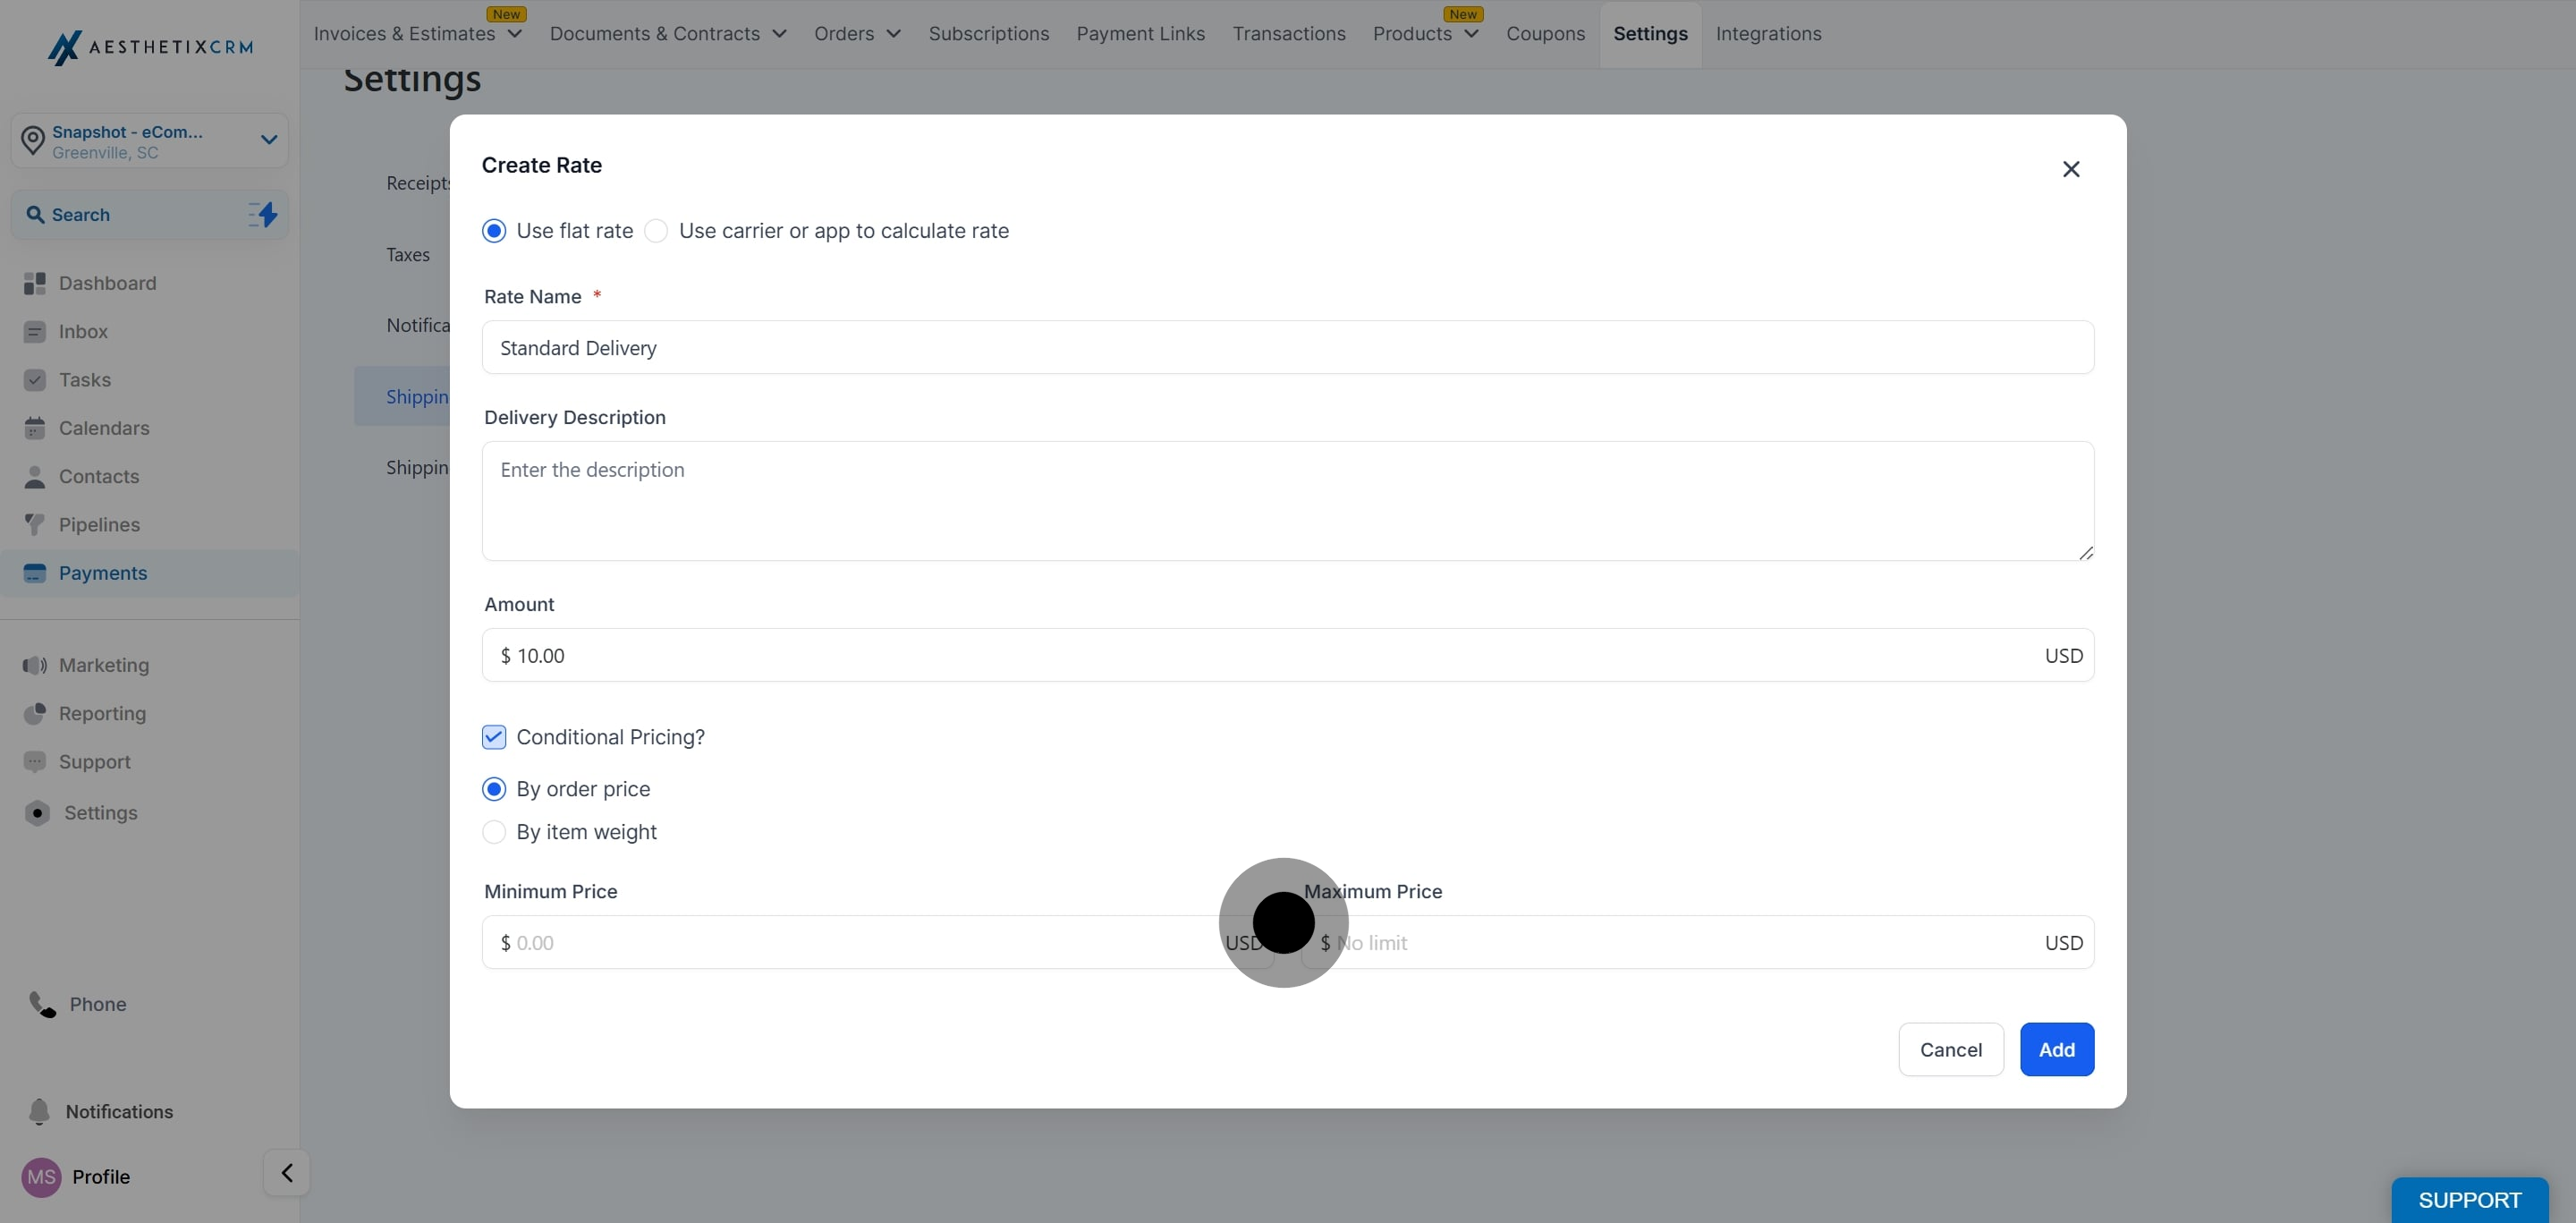
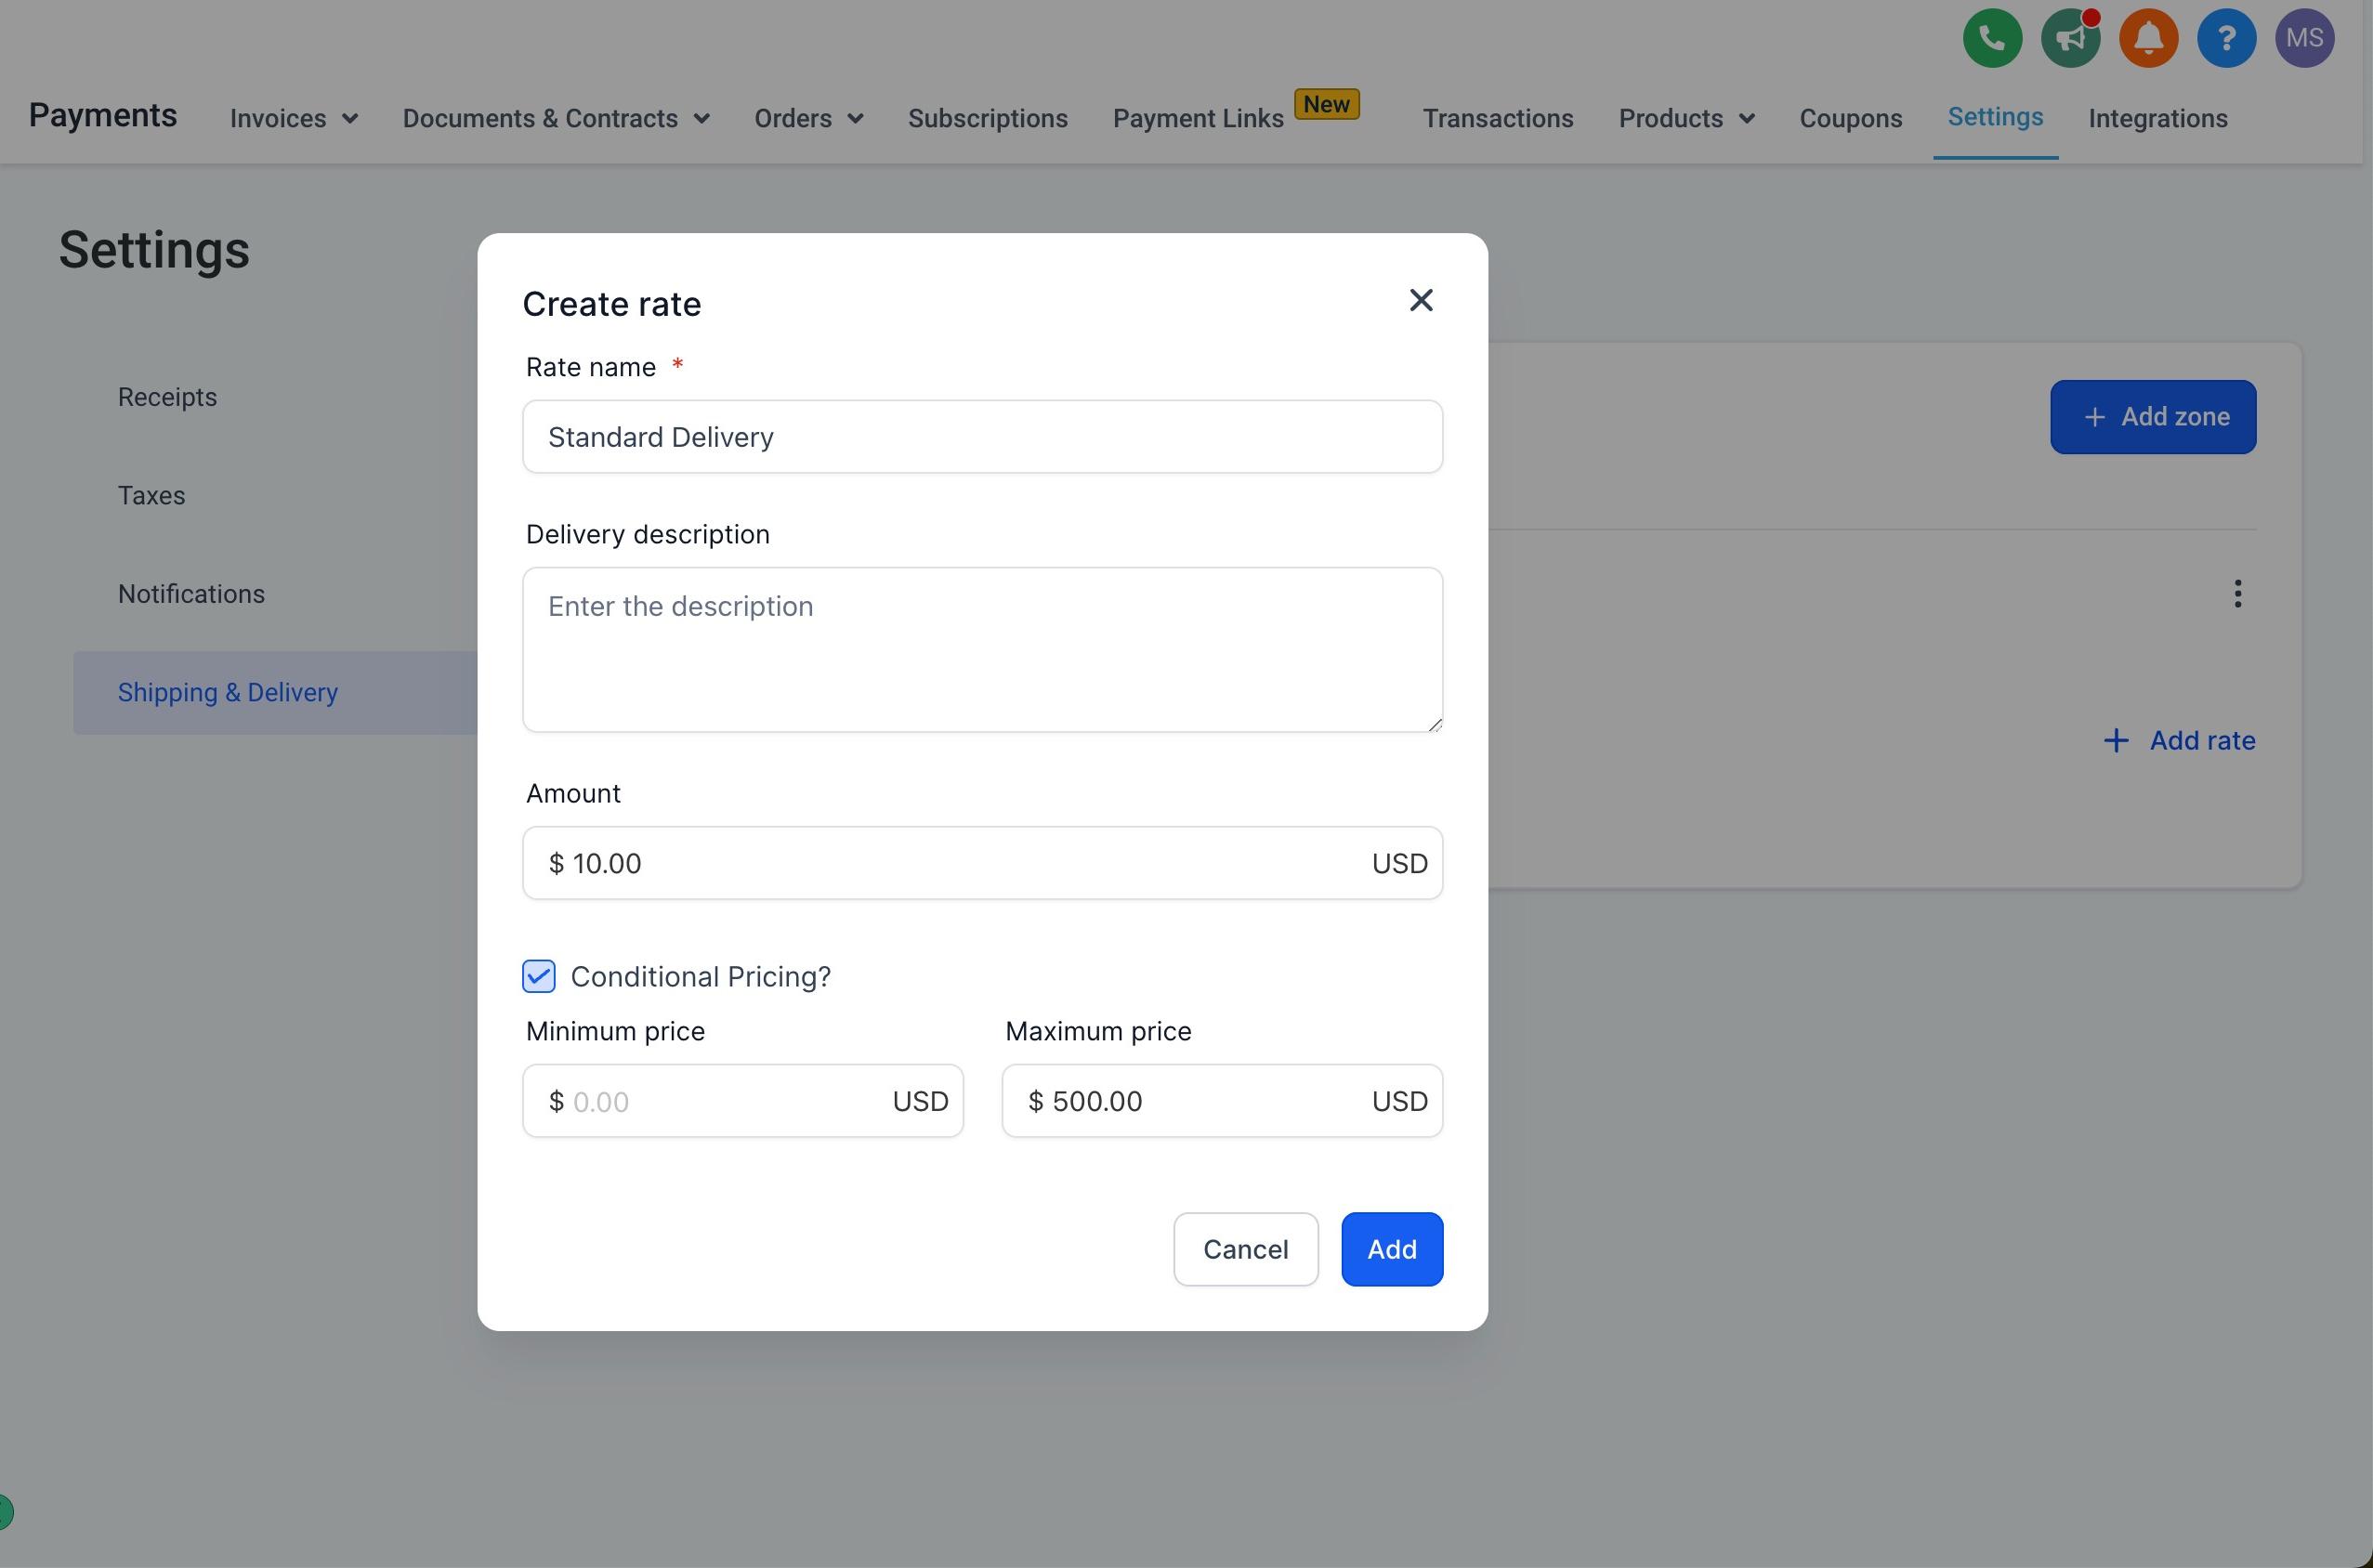
Click Conditional Pricing.
Choose which condition to price against: By Order Price or By Item Weight.
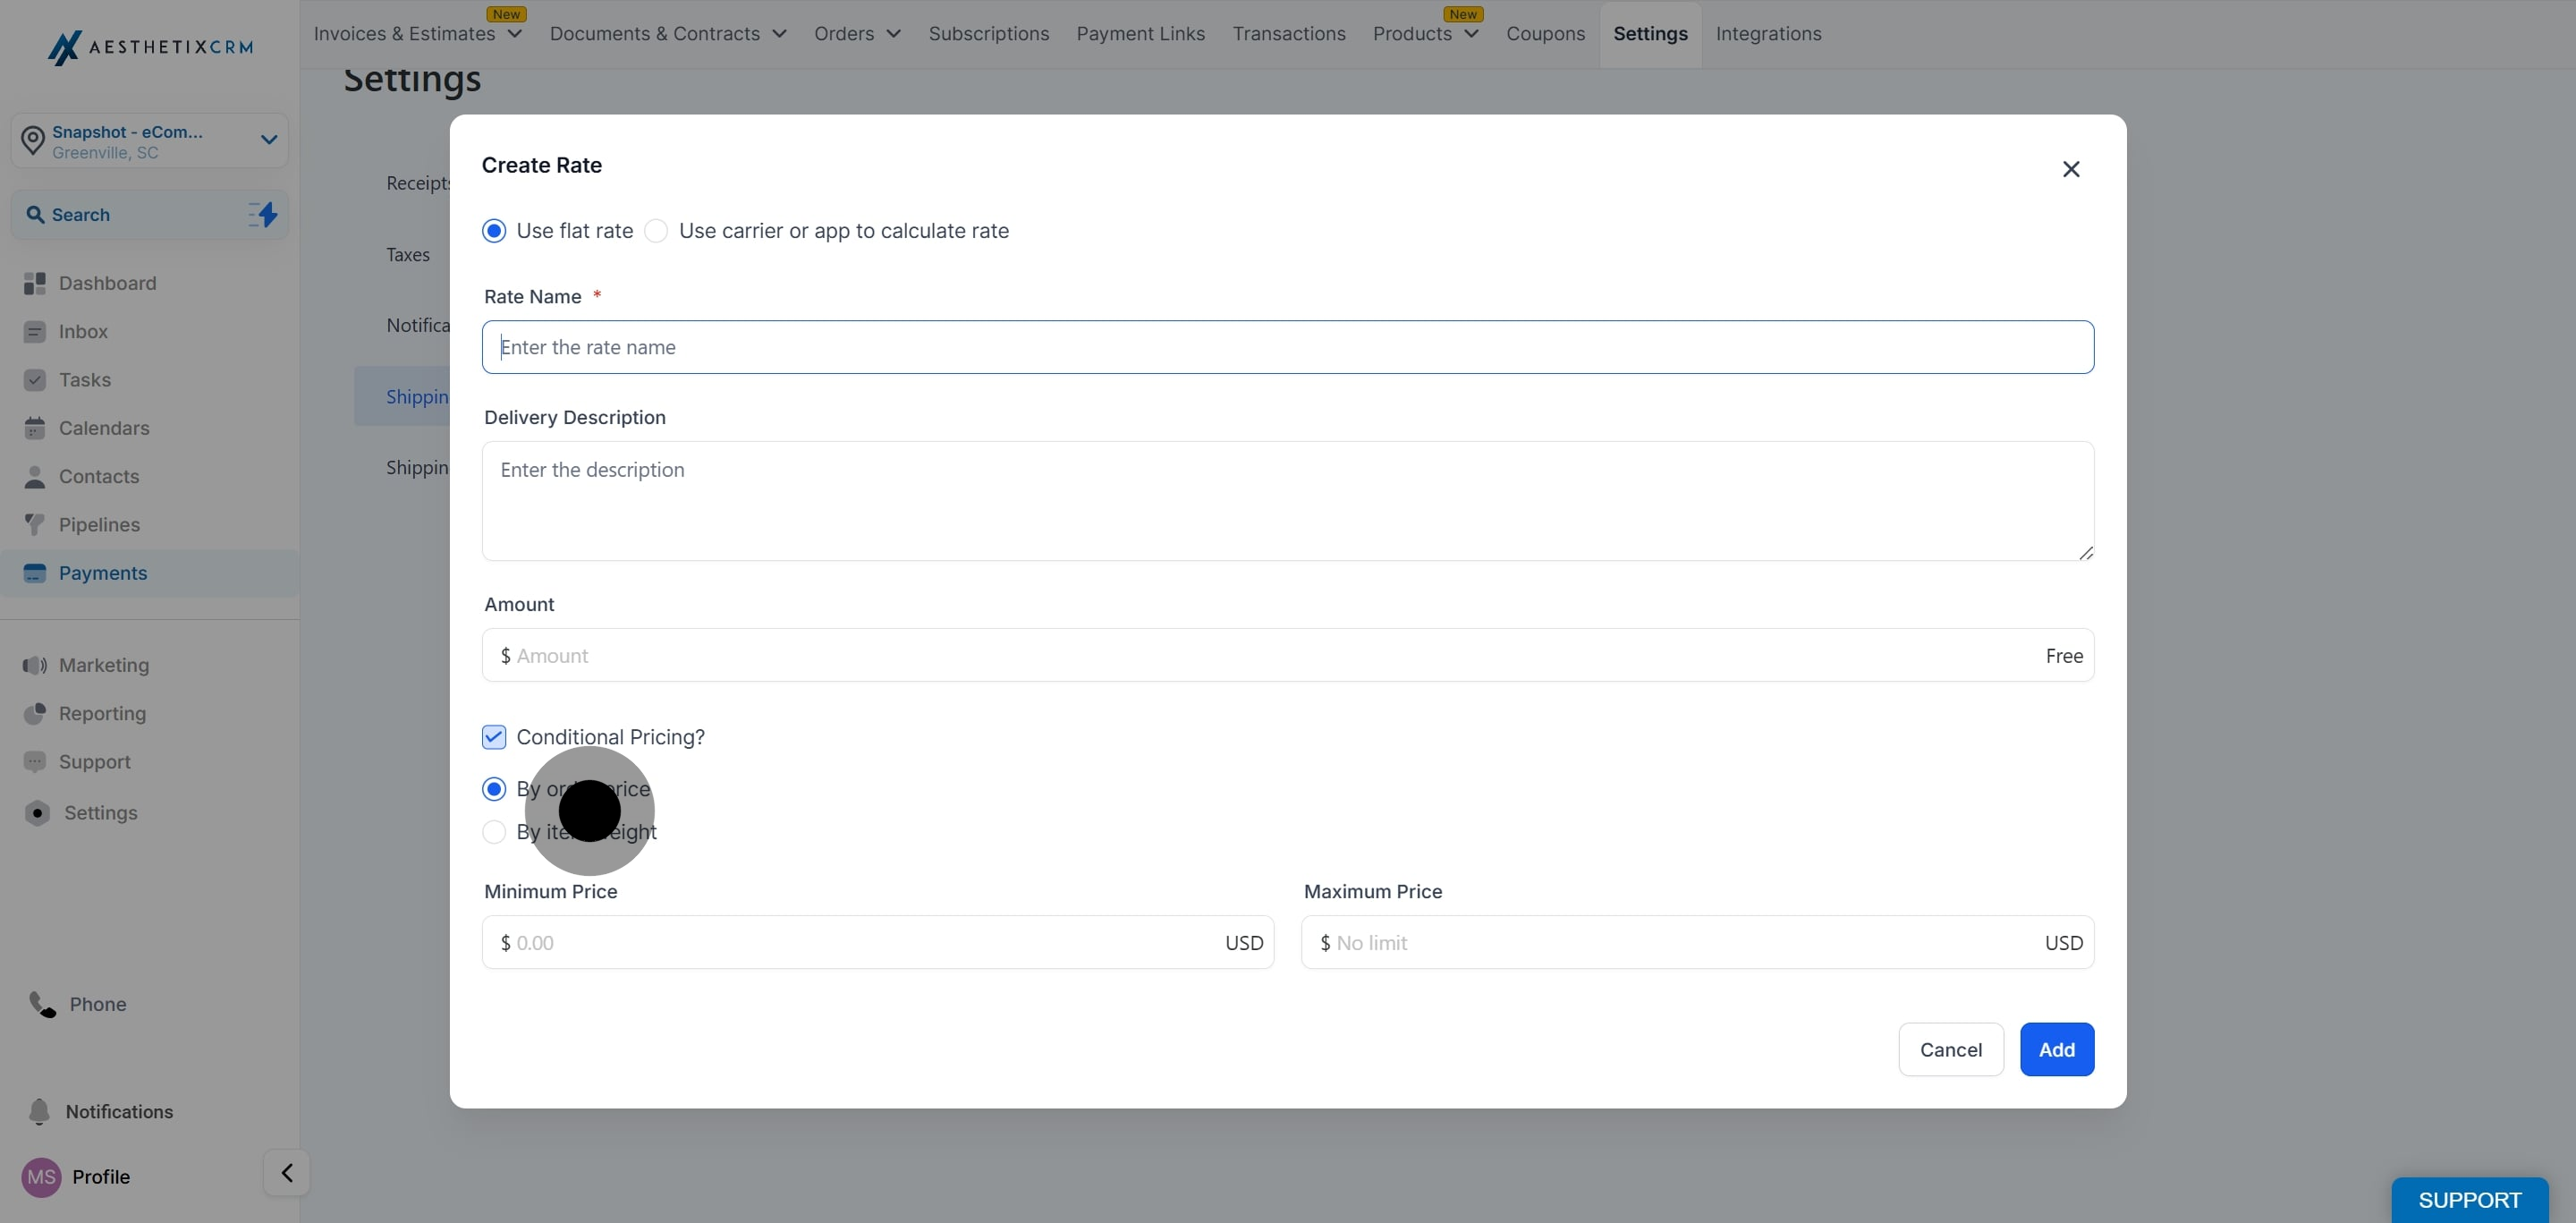
Define the Minimum and Maximum (Maximum is optional) for the price or weight range, then enter the rate amount that applies within that range.
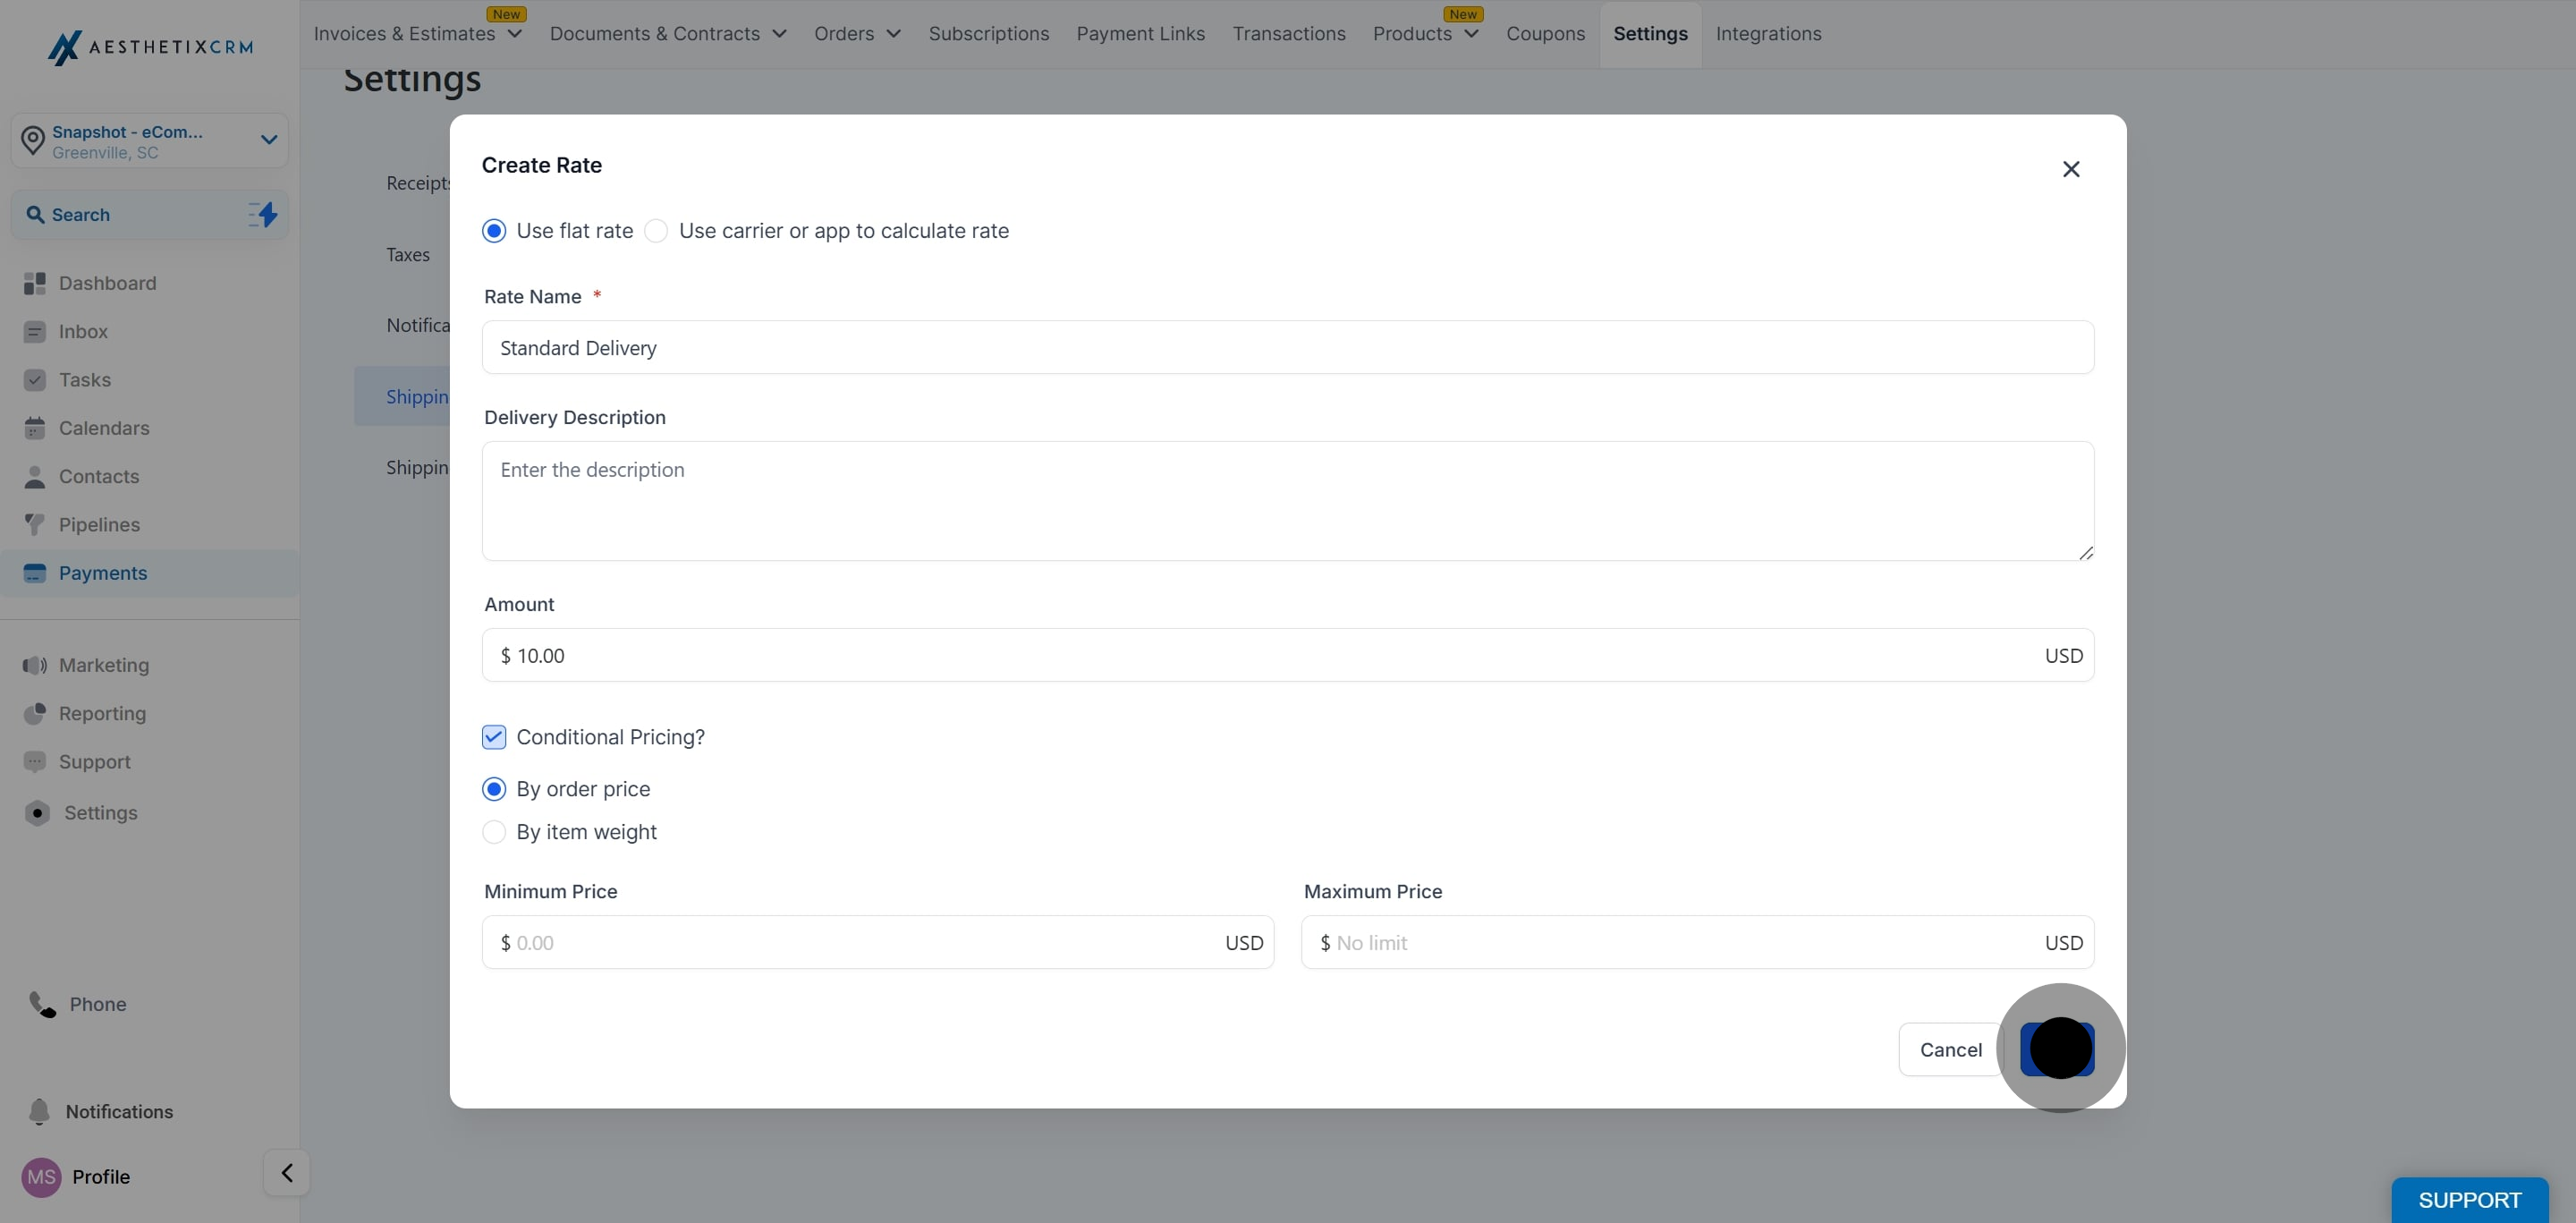
Click Add to save the rate.
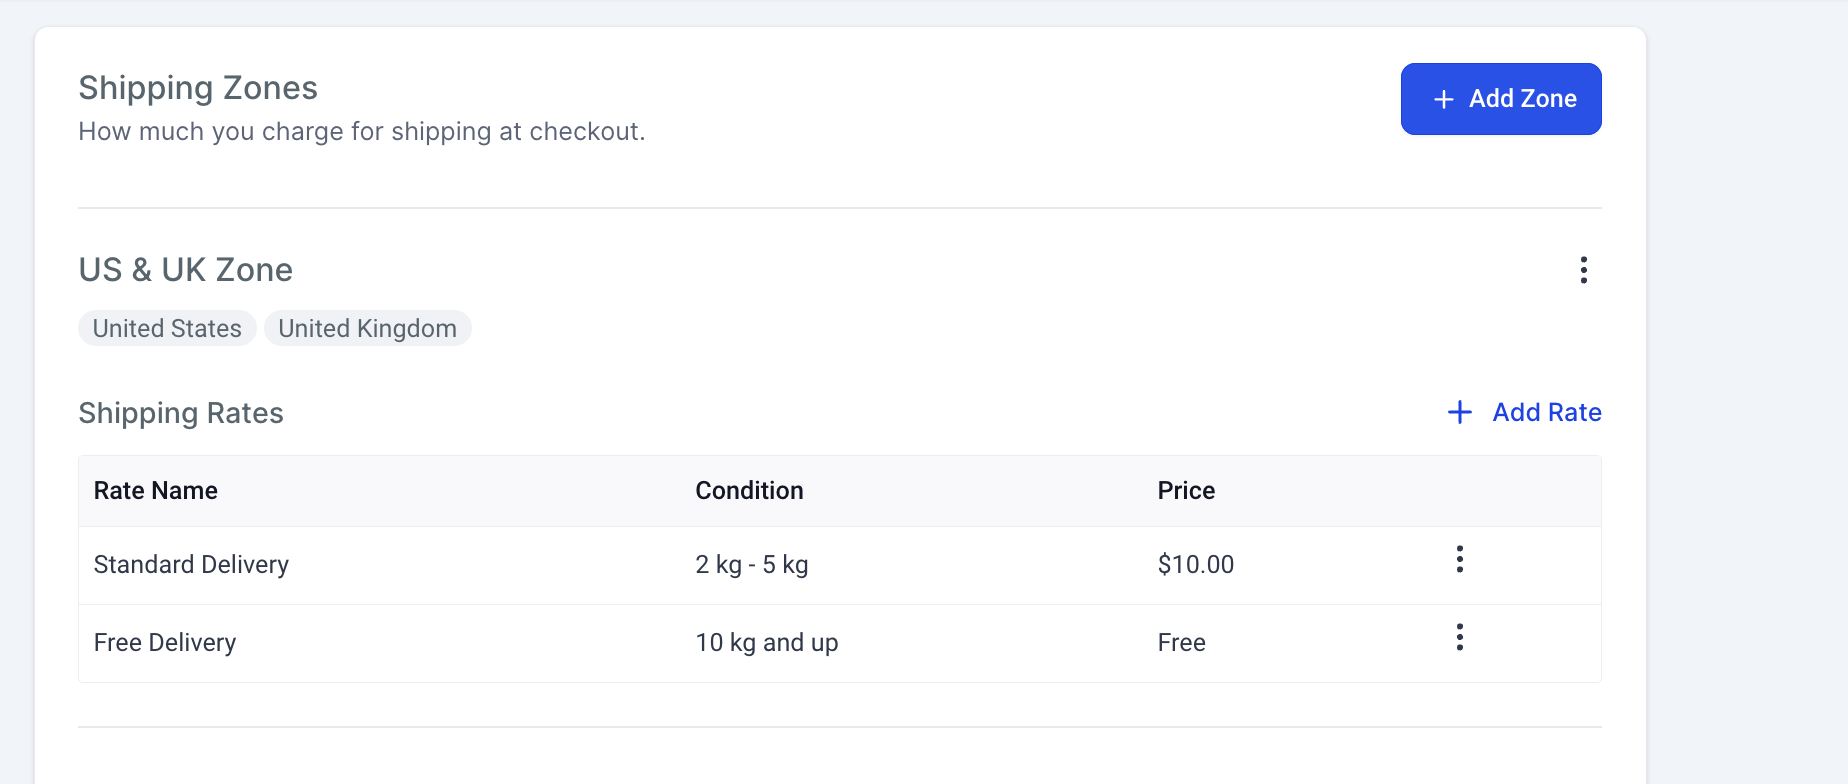
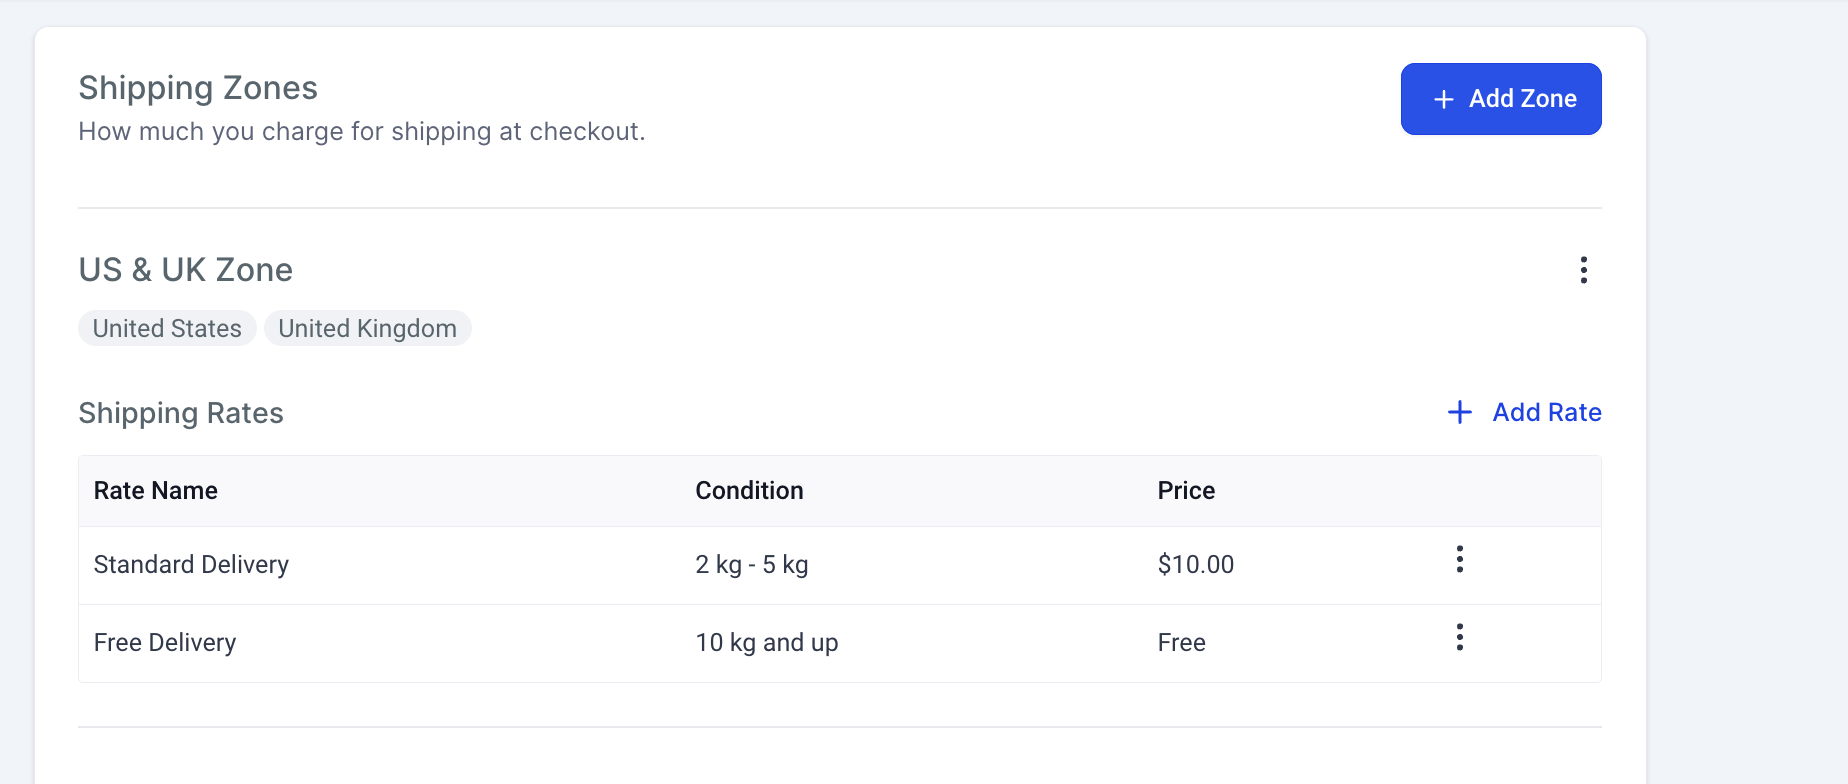
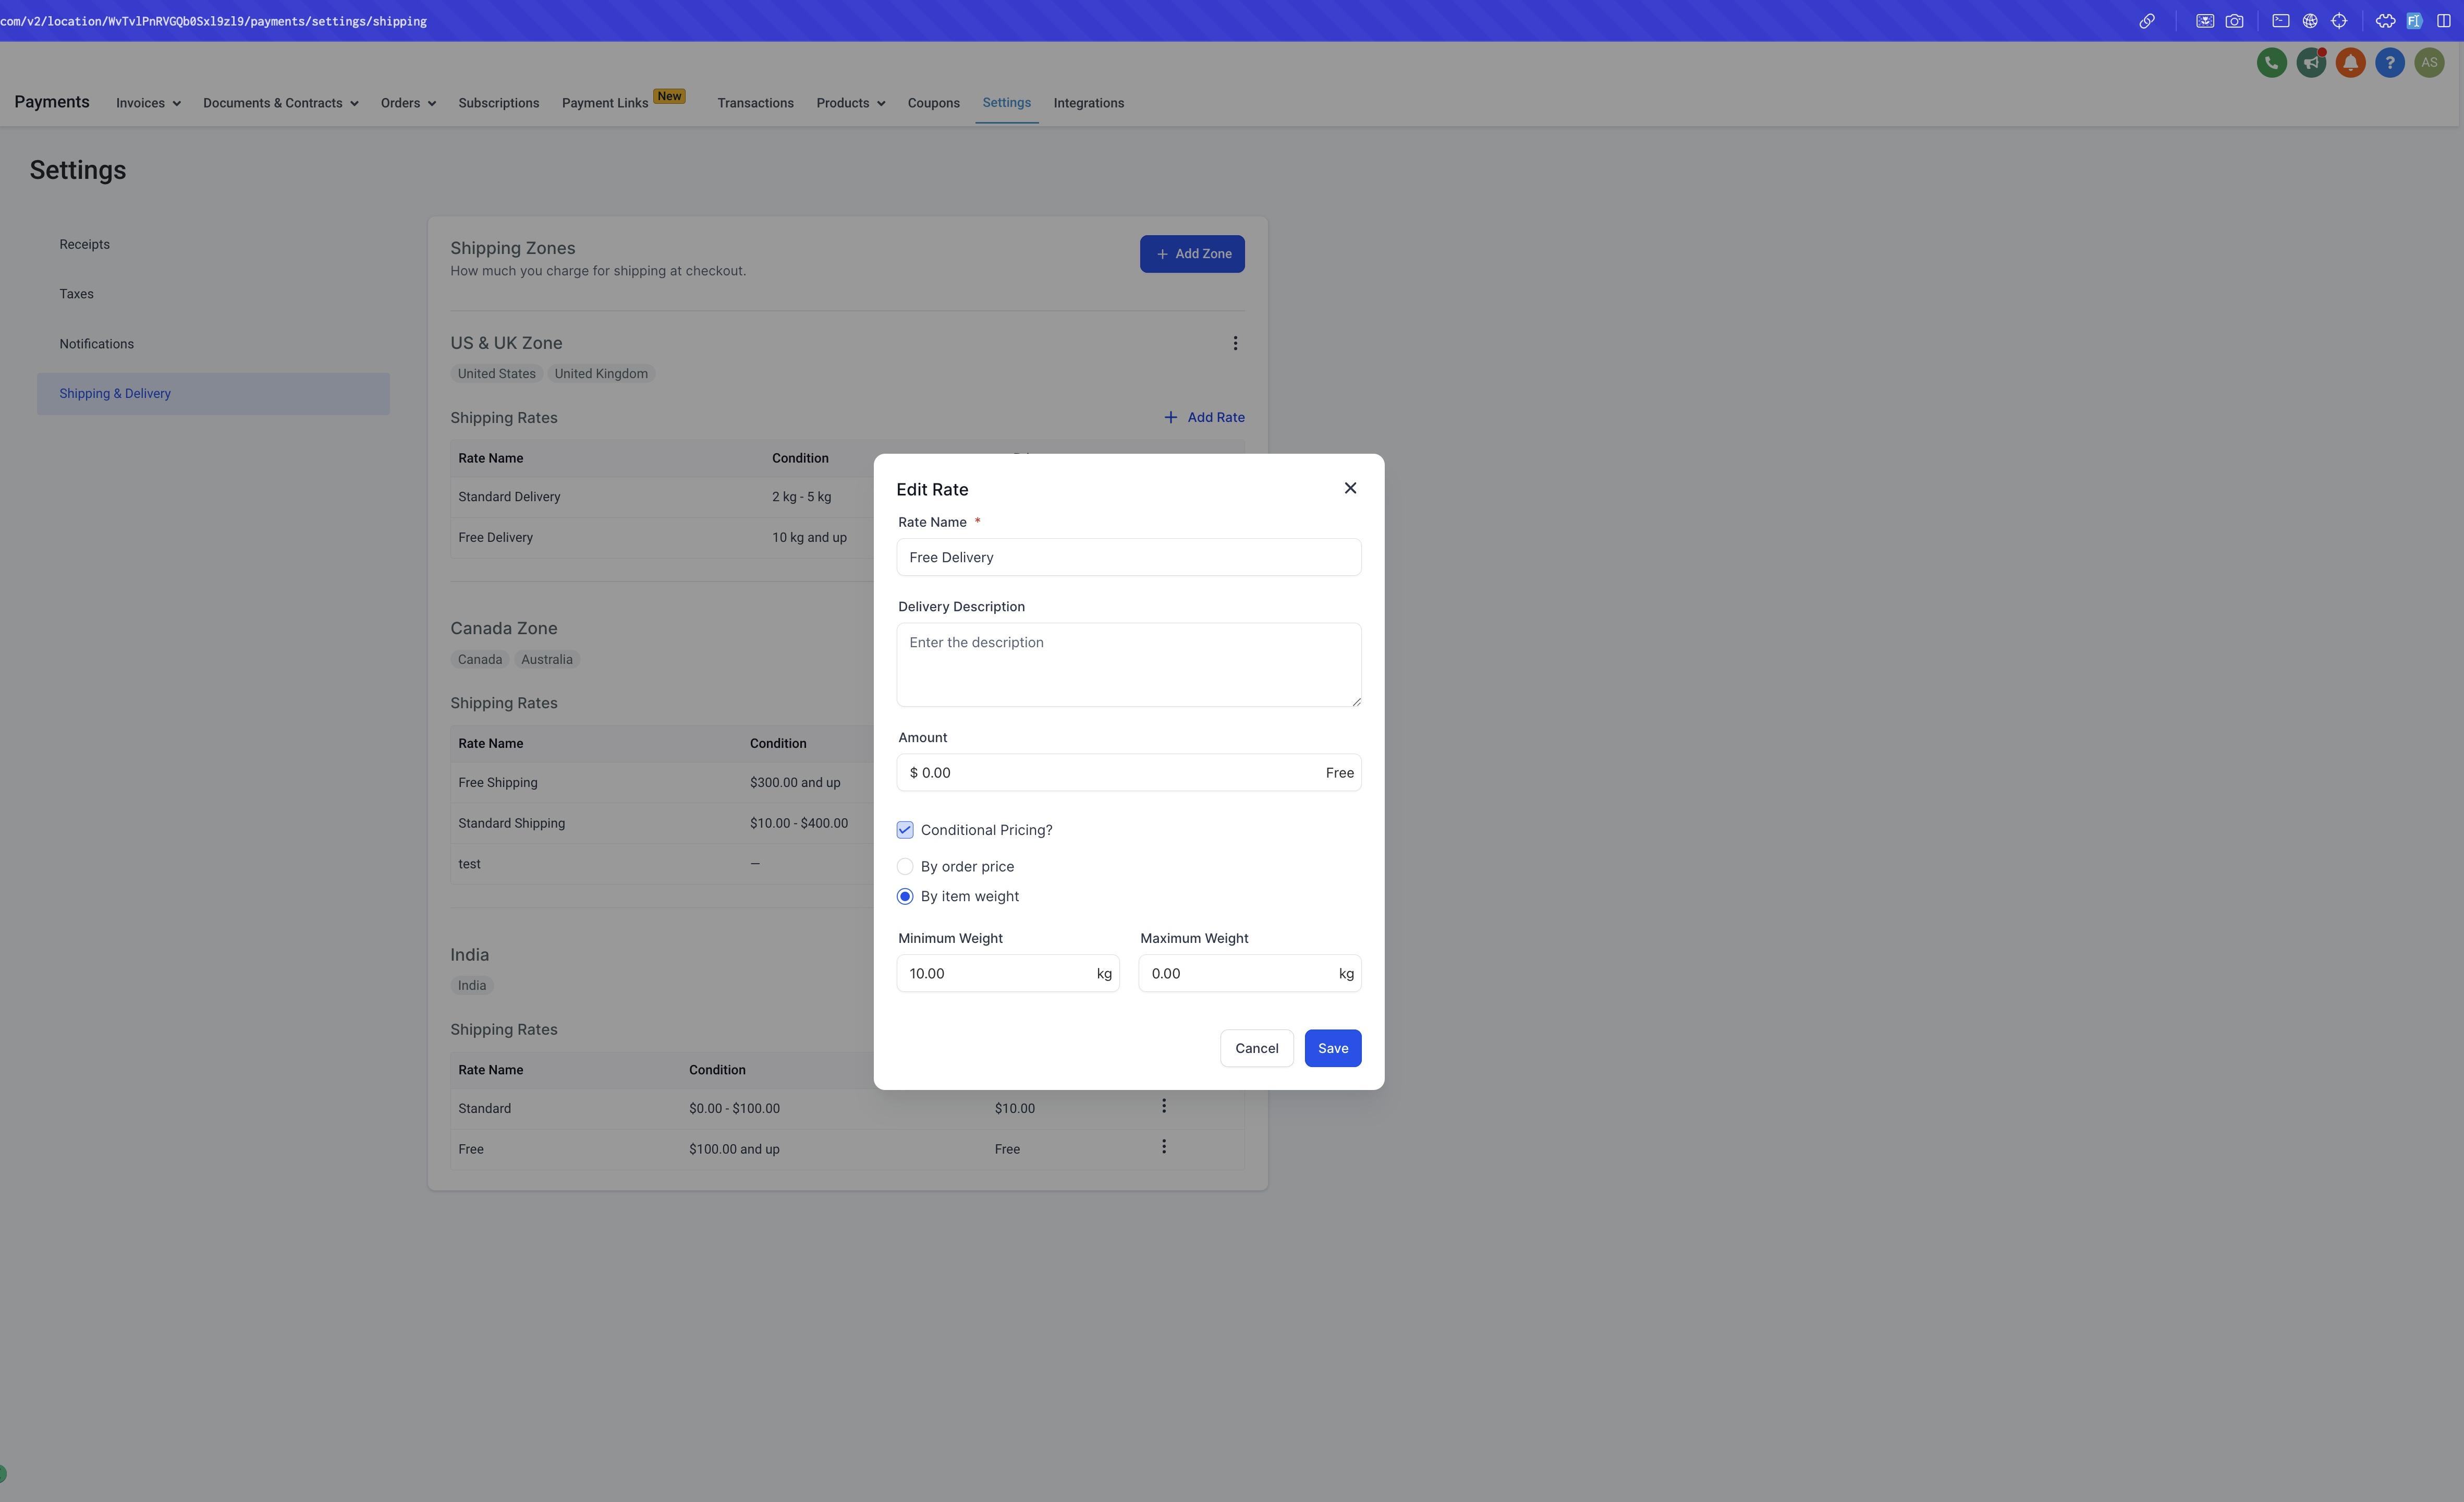
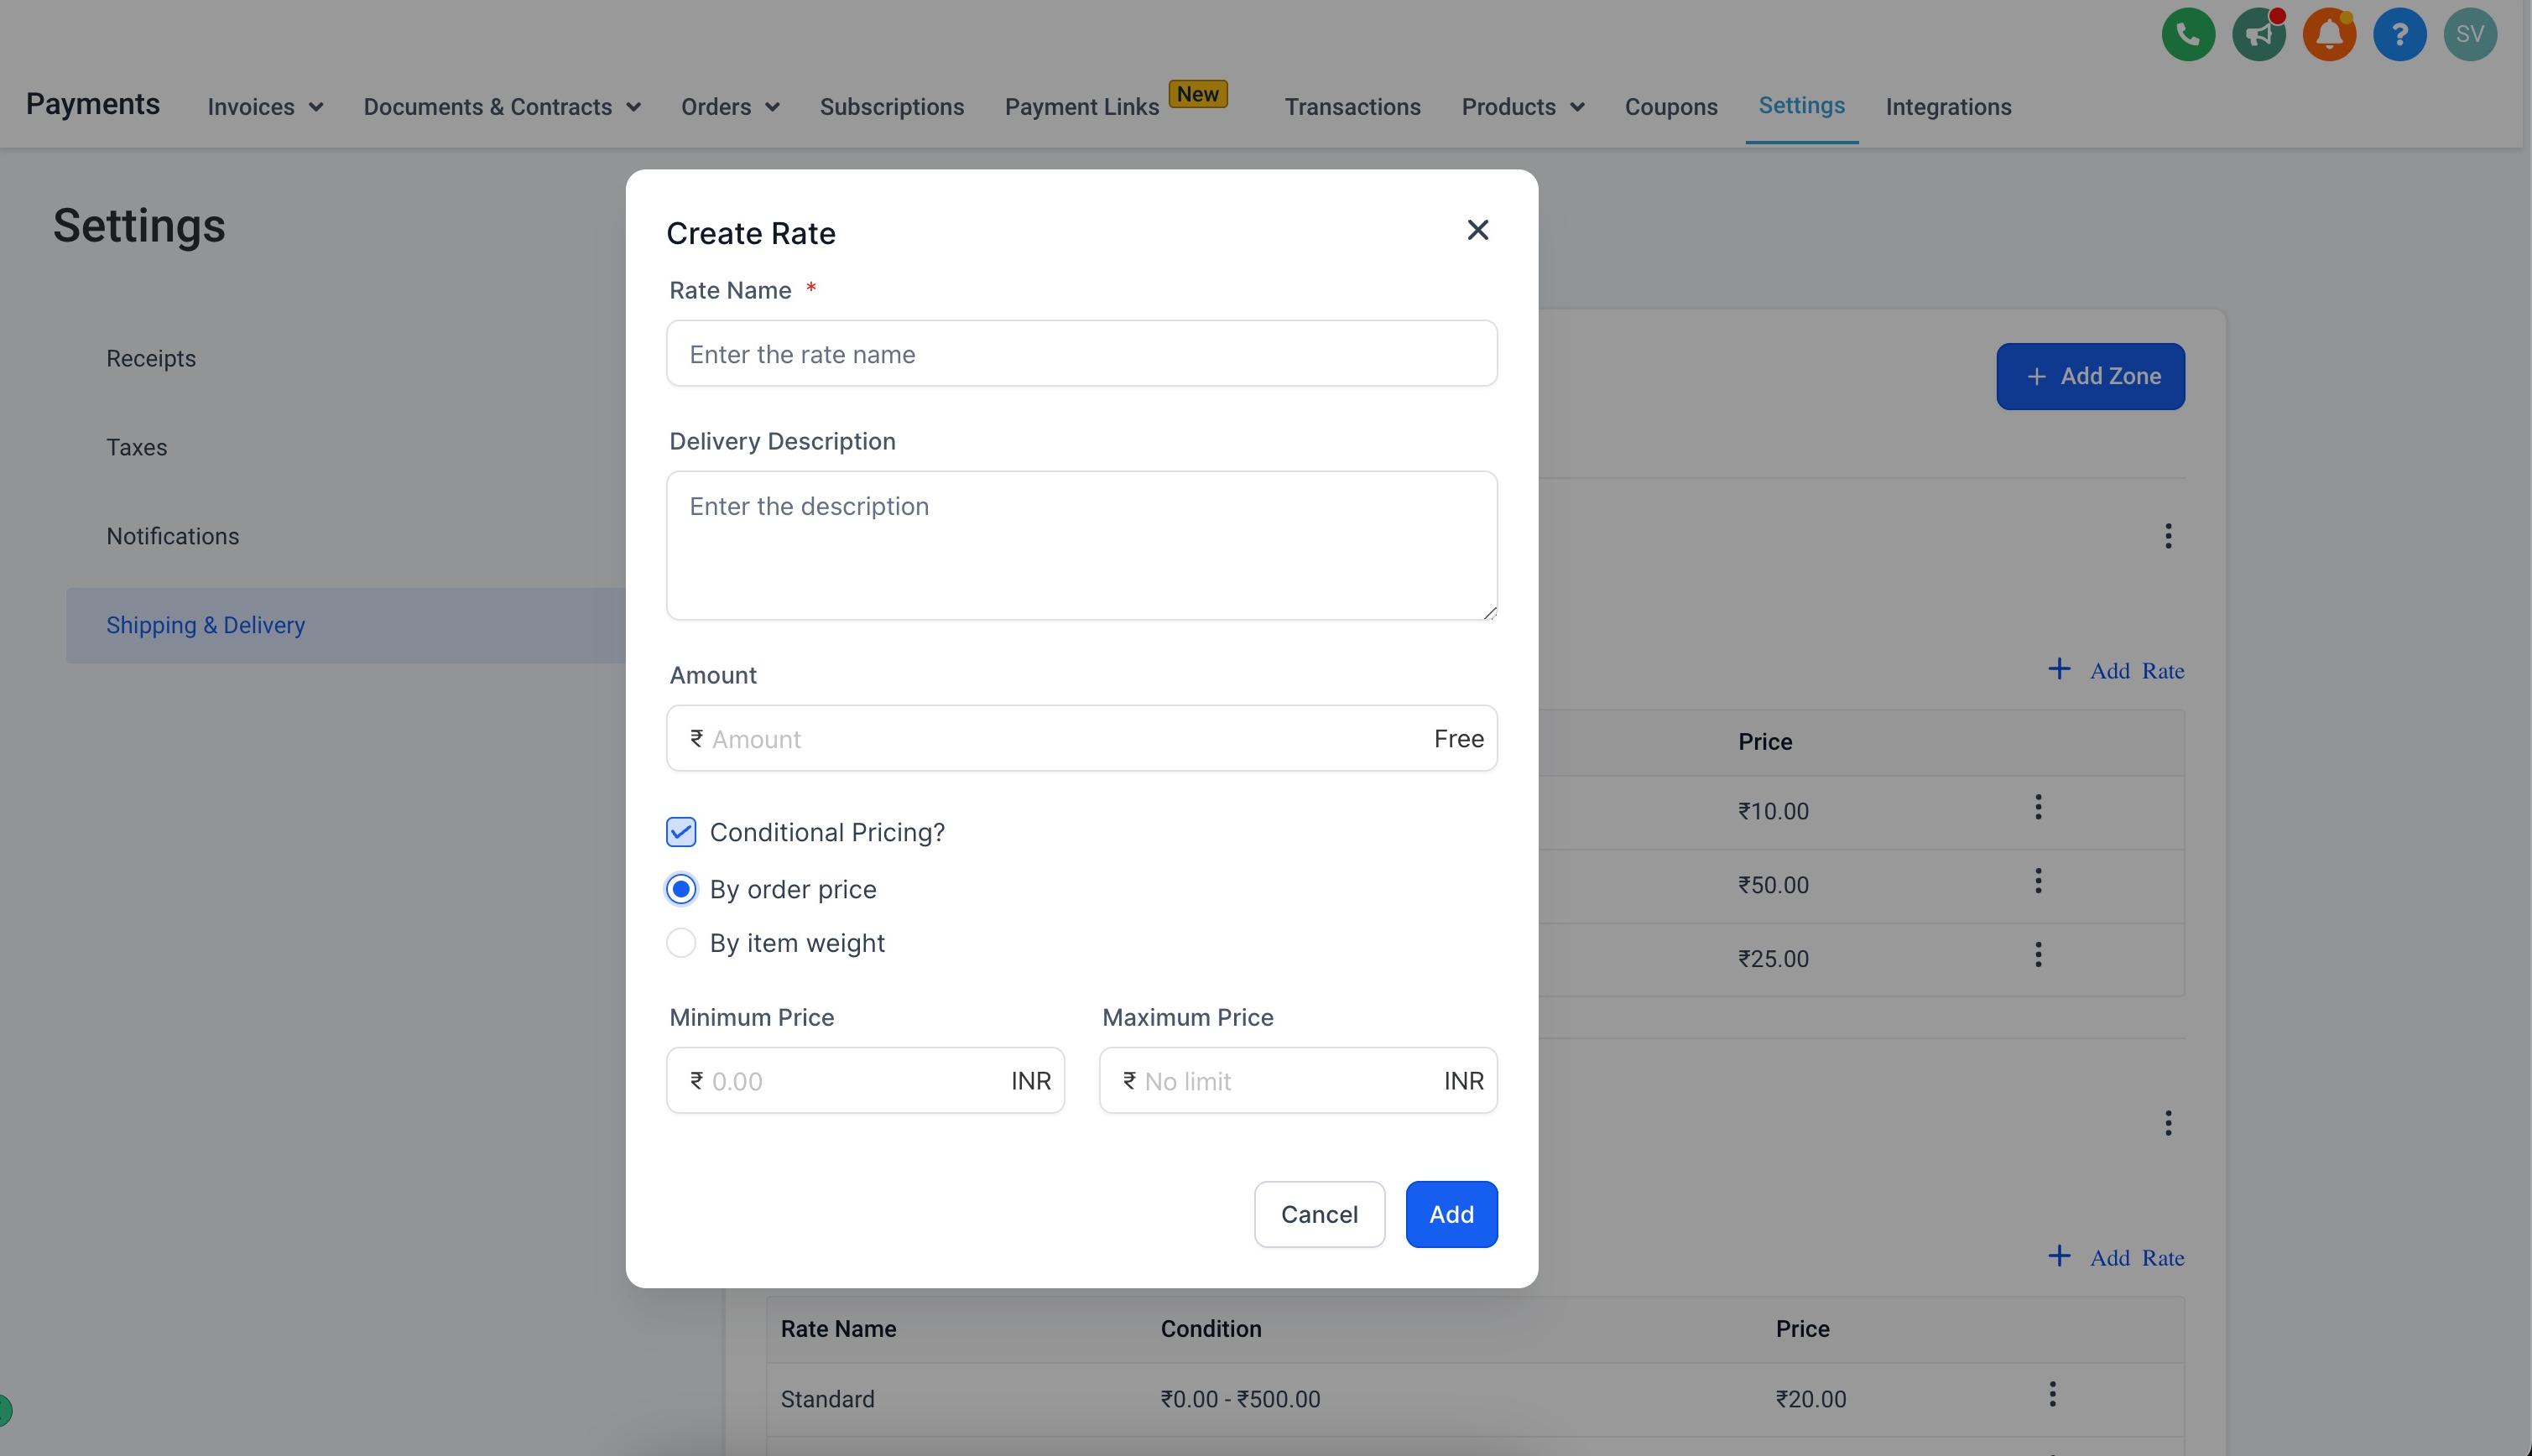
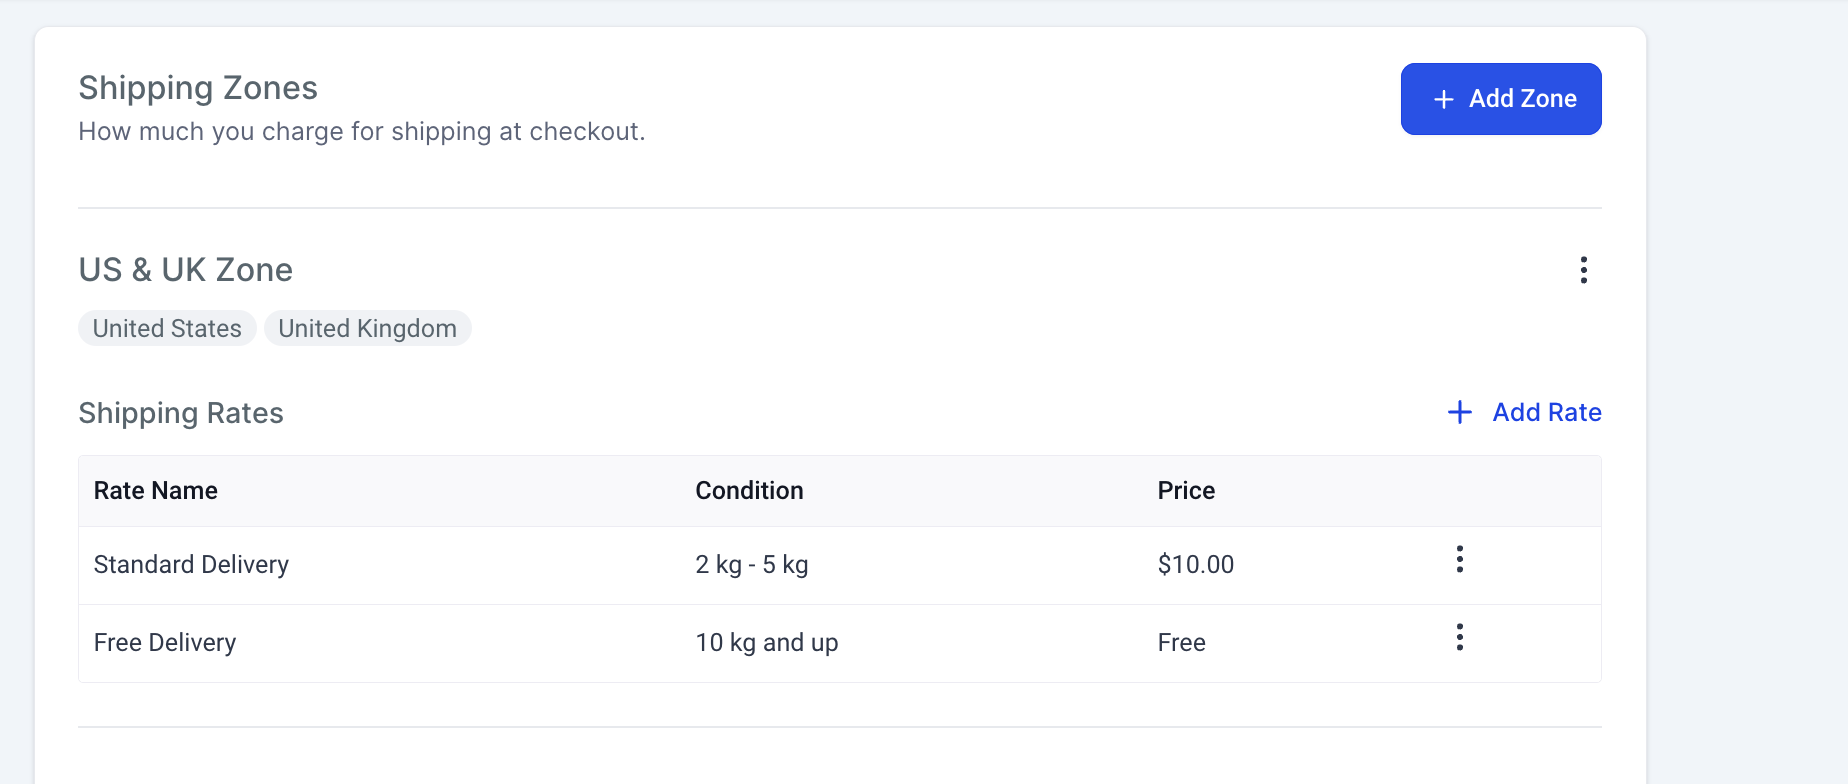
Example setups:
By order price: Free shipping on orders over $500; charge $10 on orders below $500.
By item weight: Free shipping on orders weighing 10 kg (about 22 lb) or more; charge $10 on orders under 10 kg.
You can build multiple price or weight ranges within a single zone, and you can mix a price-based rate with a weight-based rate in the same zone if that fits your product mix. Once saved, these rates apply automatically at checkout based on the customer's cart and delivery address.
Shipping Profiles let you apply different shipping rules to specific products instead of one rule for your whole Store. This is useful if you sell a mix of lightweight retail items (serums, supplements) alongside bulkier products (device accessories, gift sets) that genuinely cost more to ship.
General Shipping Profile: Every store automatically has a General Shipping Profile. Any product that isn't assigned to a custom profile uses it, so checkout always has a valid shipping rate even if you haven't built out custom profiles yet.
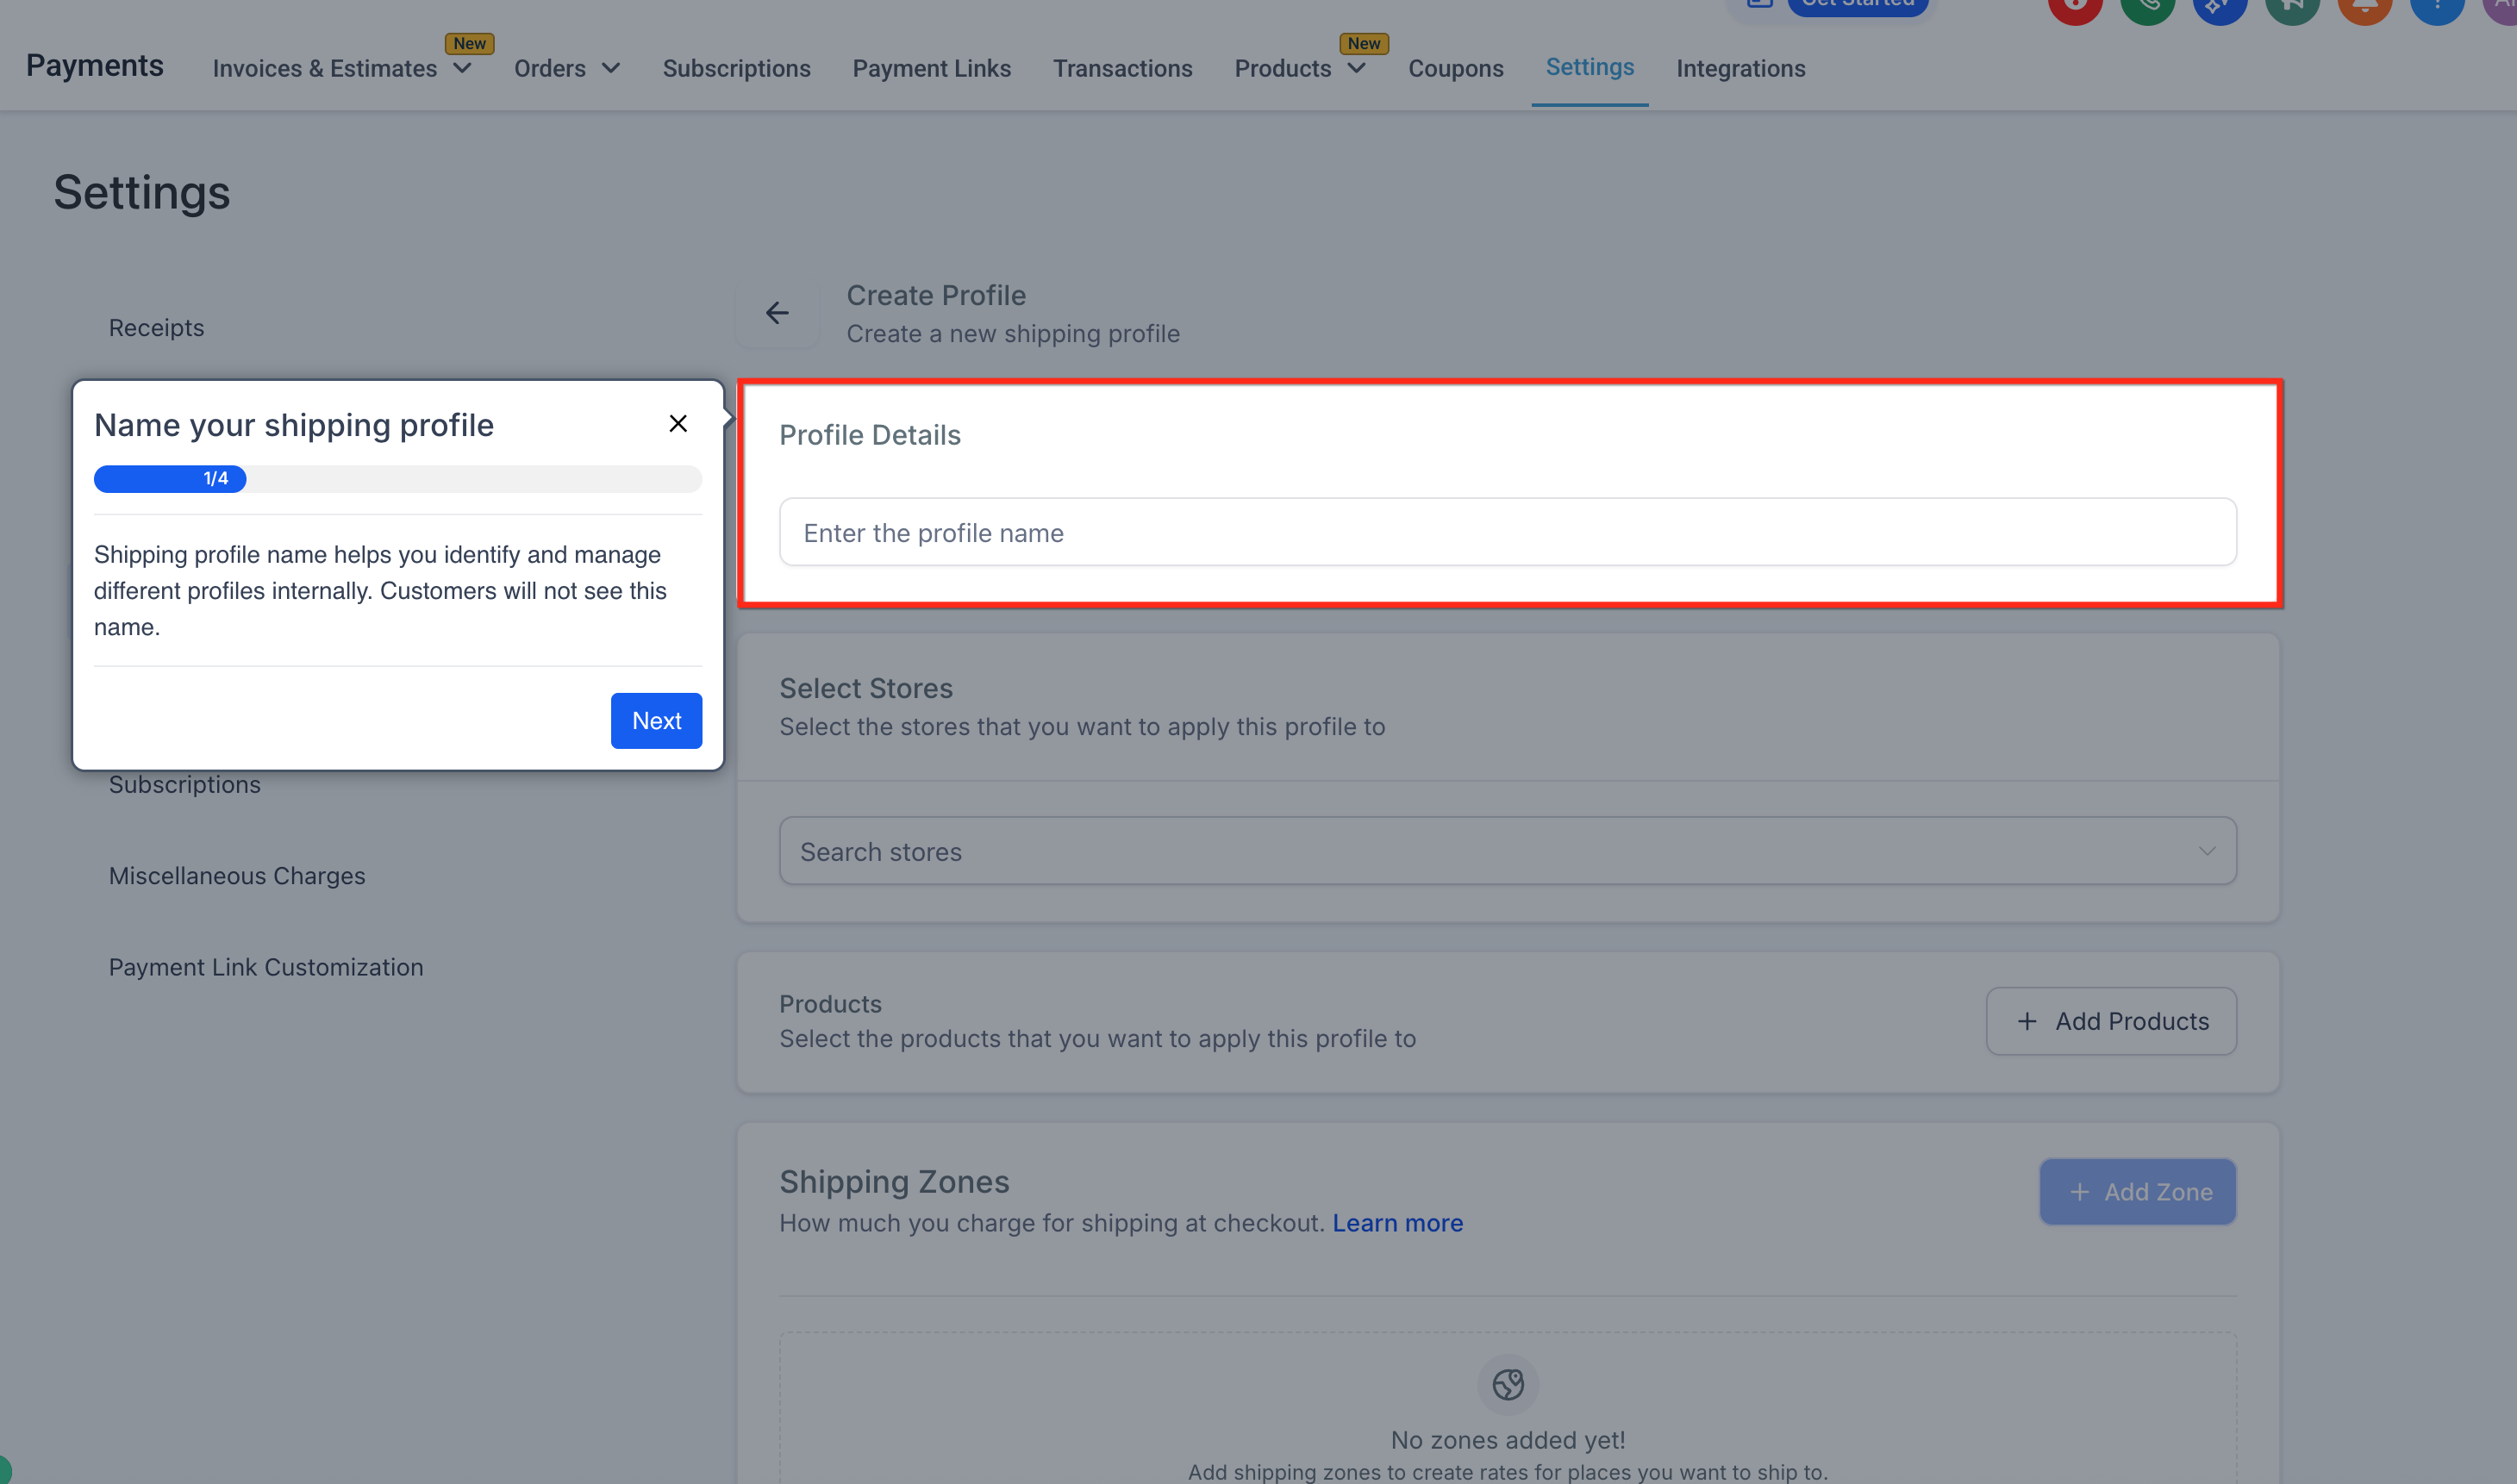
Custom Shipping Profiles: A custom profile lets you charge specific rates for a defined group of products. Each custom profile can:
Apply to one or more of your stores.
Include a selected set of products.
Define its own zones by country, region, or province.
Use any combination of rate types: flat, price-based, weight-based, or free.
A product can only belong to one custom profile at a time; assigning it to a new profile overrides the old assignment.
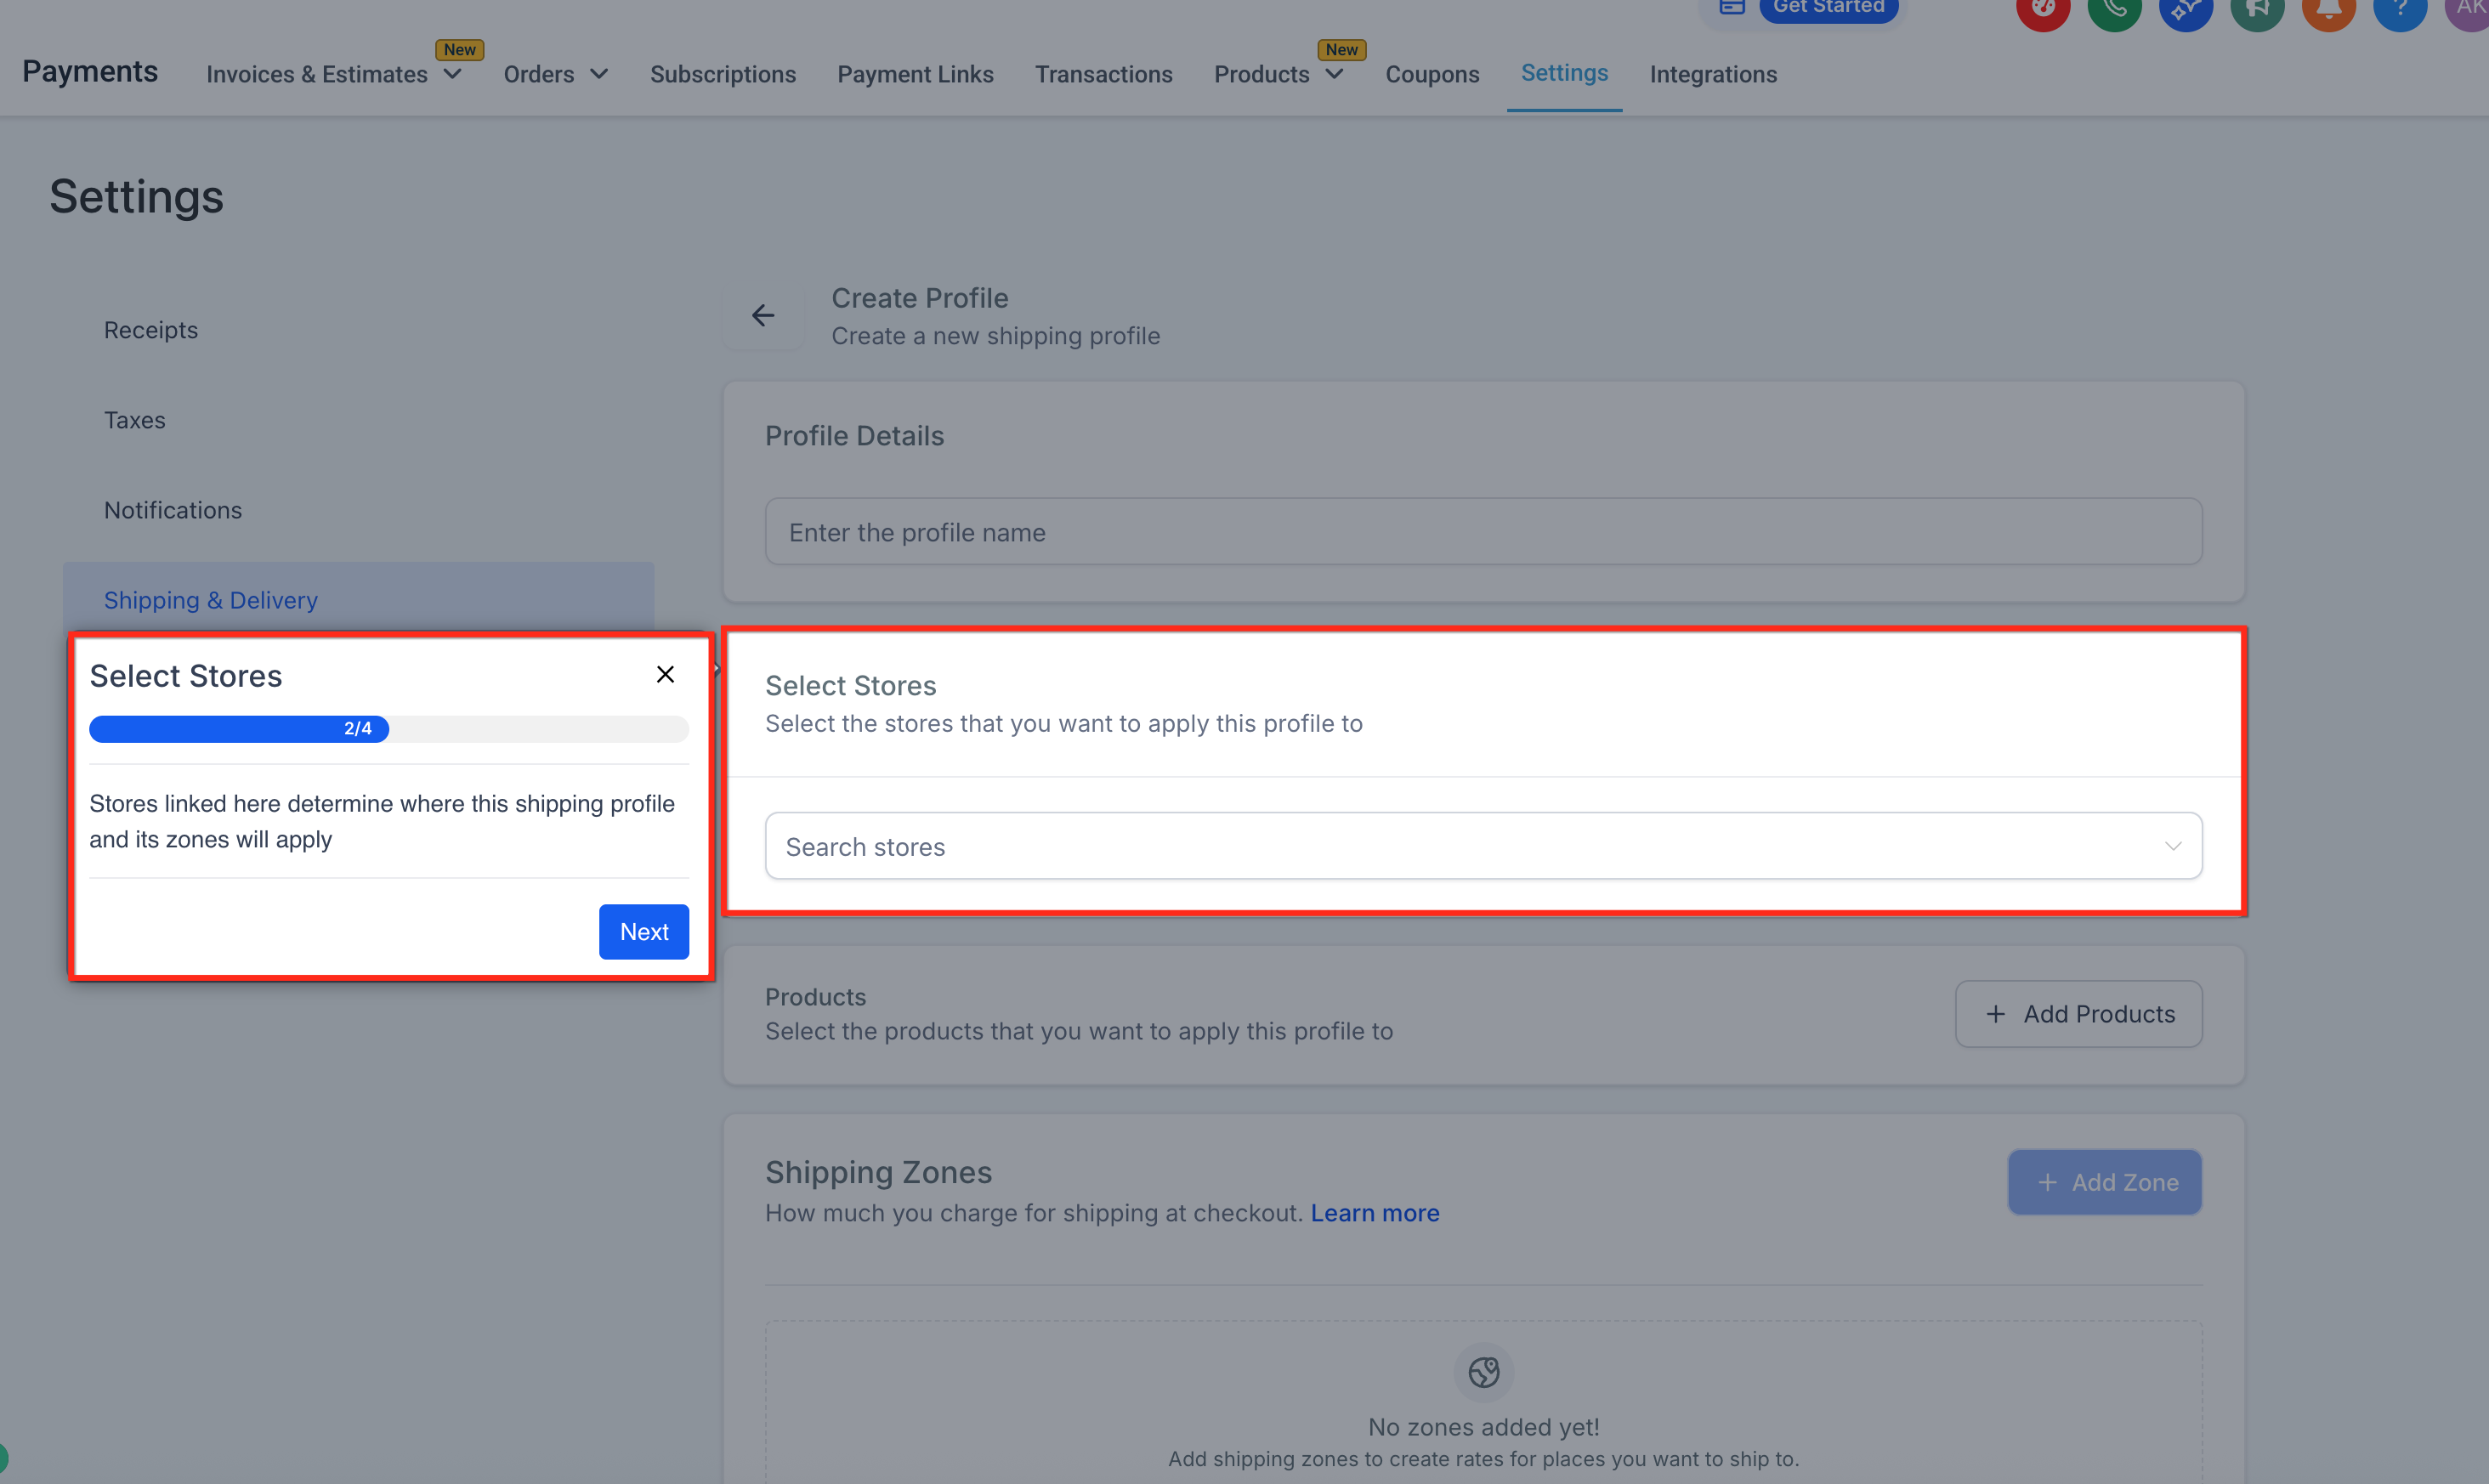
Setting up a custom profile:
Go to Payments > Settings > Shipping & Delivery > Custom Profiles.
Click Add Custom.
Enter a unique profile name (internal use only, not shown to customers).
Select the store(s) this profile applies to.
Choose the products or product groups to include.
Click Add Zone and select the countries or regions this profile covers.
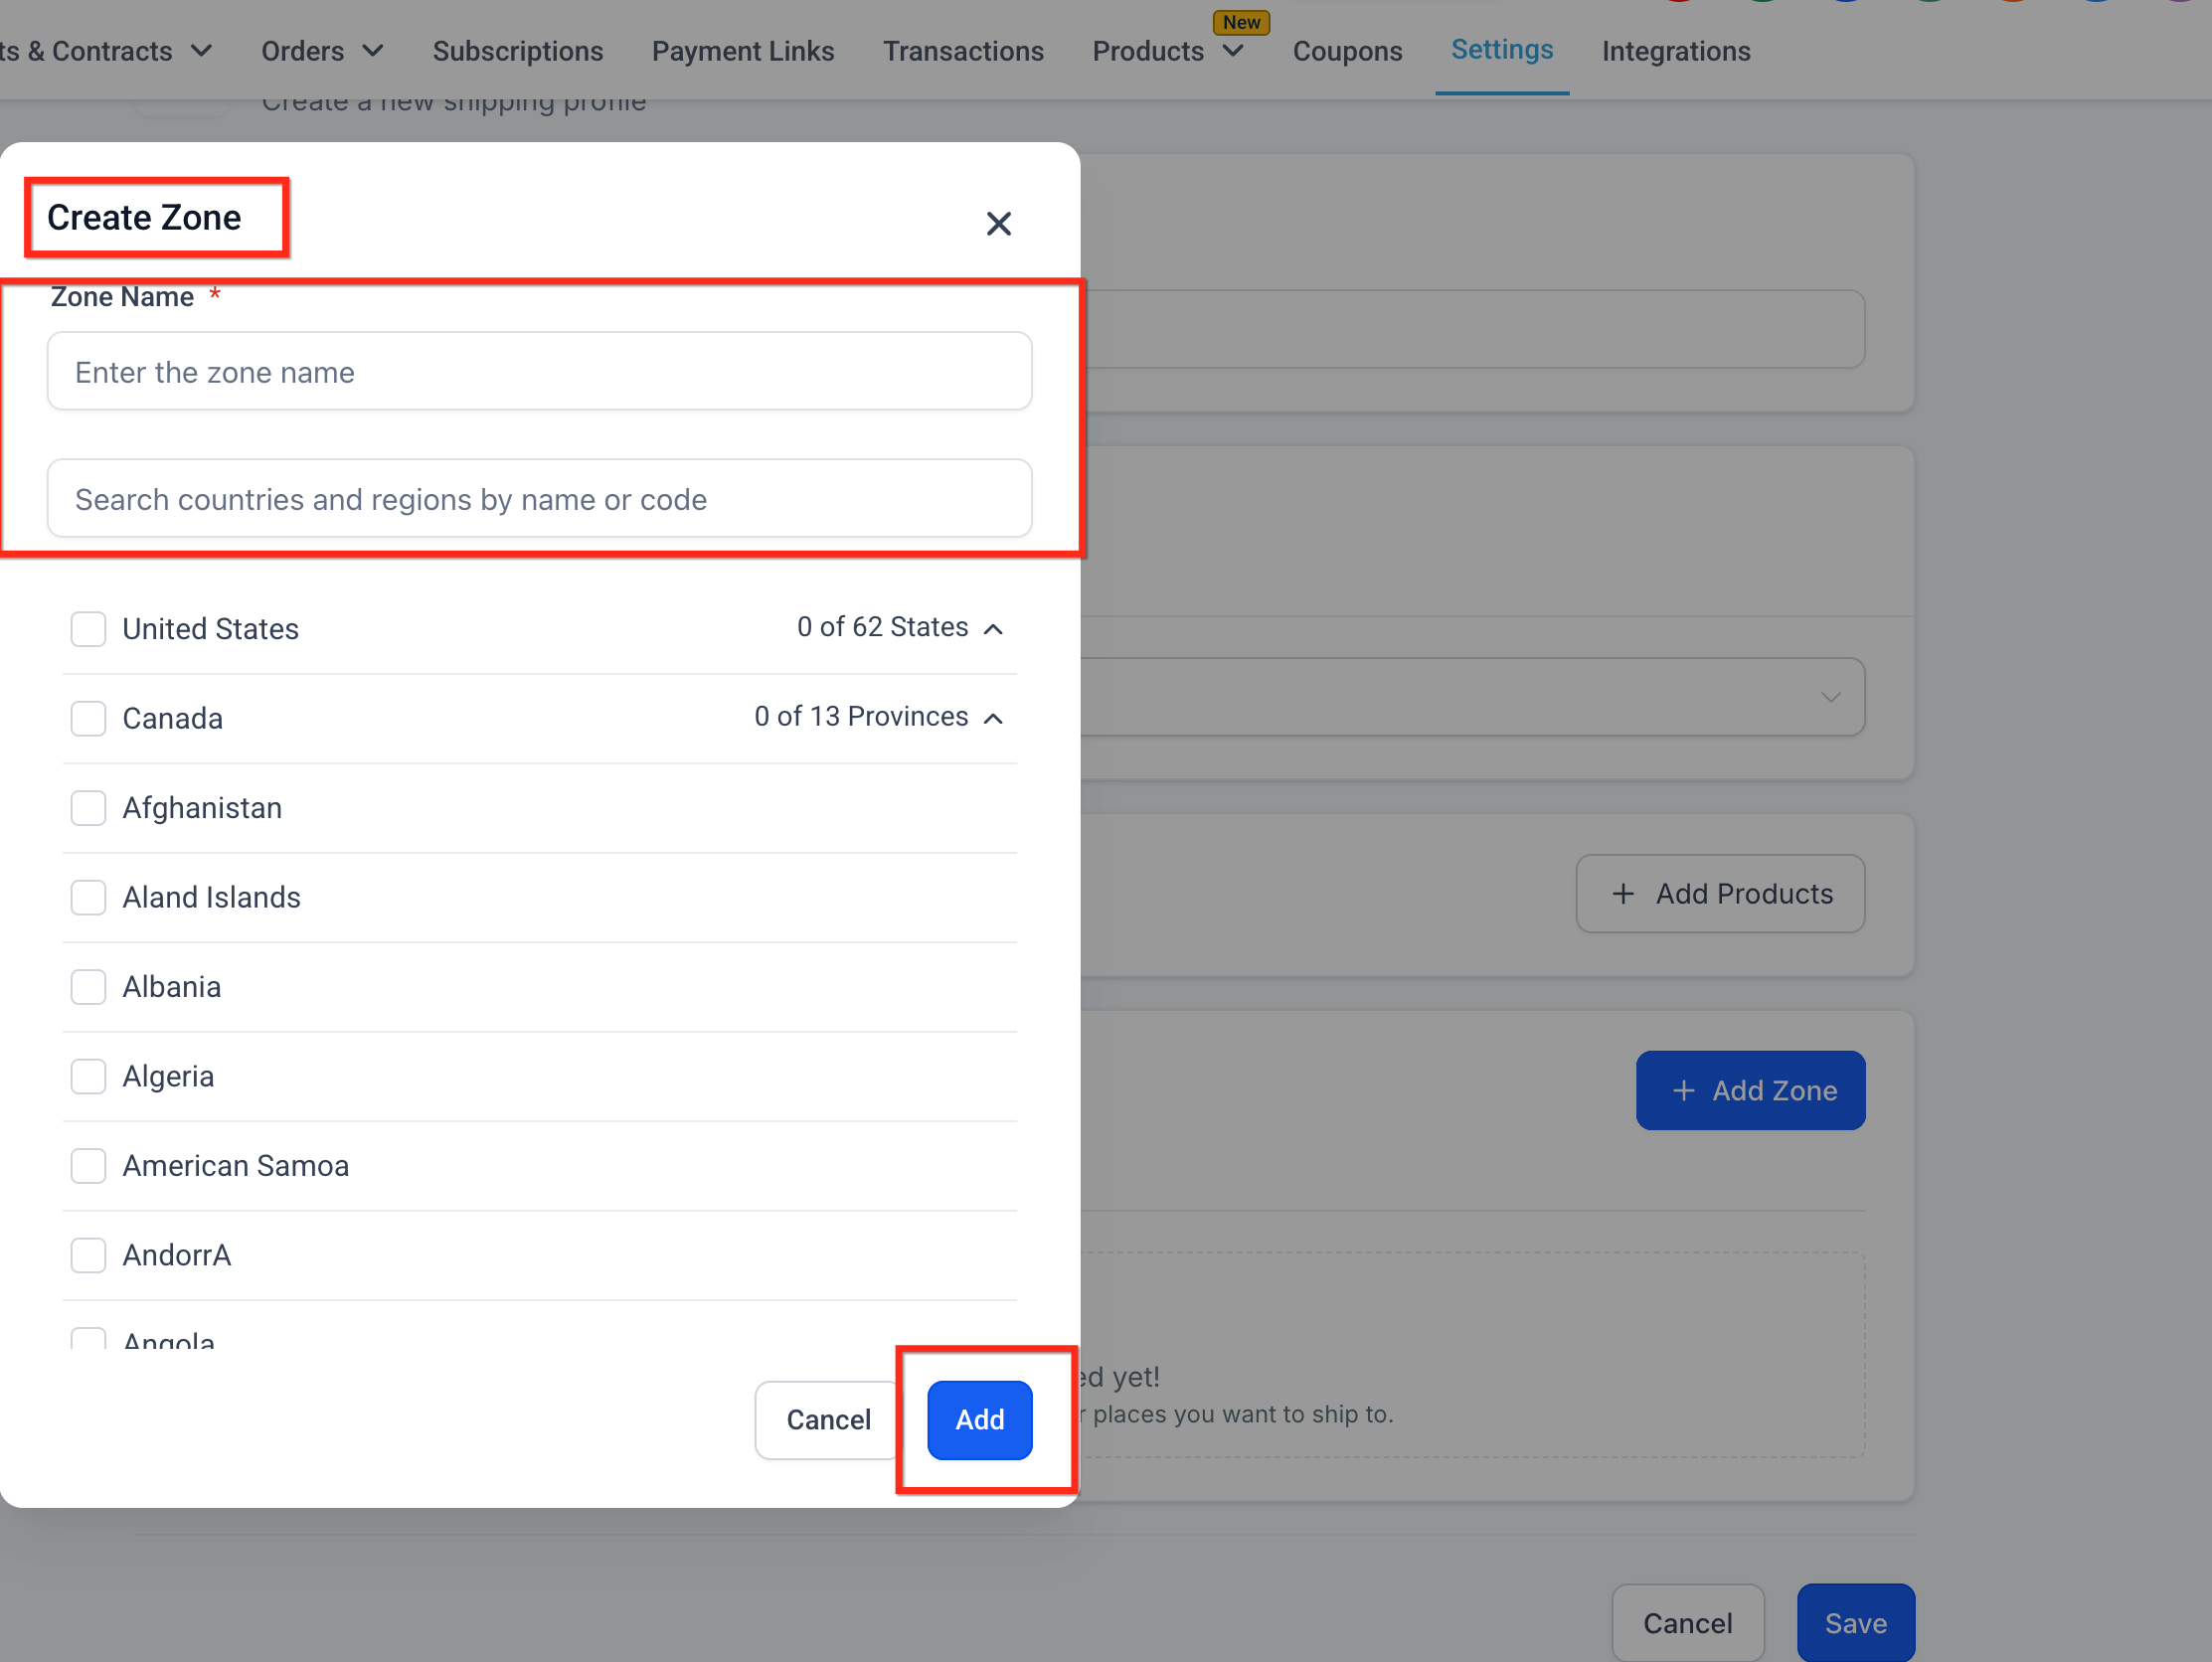
For each zone, add one or more rate types: flat rate (for example $5), price-based (for example free over $50), weight-based (for example $10 for 0 to 10 lb), or free shipping.
Click Save.
Place a test order to confirm the correct rate displays at checkout.
Start with your General Profile configured first, then layer in Custom Profiles only for the products or regions that genuinely need different rates.
Checkout logic for mixed carts: If a customer orders items from more than one shipping profile, Aesthetix CRM combines them automatically. If the profile names differ, checkout shows a single combined line called "Shipping." If the profile names match, the rates combine under that shared name.
By default, if a customer's delivery address doesn't match any shipping zone you've configured, checkout simply shows no shipping option for that address and the order may proceed without a shipping charge. The Block Shipping at Checkout setting changes that: when it's turned on, checkout is blocked and a "Shipping not available" message displays whenever the system successfully calculates shipping but finds no rate that applies to the customer's cart and delivery address. This setting is OFF by default, so your current checkout behavior stays the same until you turn it on.
Turning it on helps you:
Prevent orders you can't fulfill, by blocking checkout when no configured rate matches the delivery address.
Avoid accidentally shipping for free when your rate conditions don't cover a customer's location.
Give customers a clear "Shipping not available" reason when checkout can't proceed.
Match your store's branding by customizing the error message color.
How validation works: Shipping is checked at two points in checkout. First, when the customer enters their delivery address, the system calculates available shipping methods; if none apply, checkout is blocked immediately. Second, if the customer accepts an upsell offer, shipping is re-checked for the updated cart; if the added item can't ship to that address, checkout is blocked the same way. Block Shipping only stops checkout when the calculation runs successfully and simply returns no matching rate, not when a system error prevents the calculation from completing, and it never affects a cart made up entirely of digital products, since those don't require shipping.
What the customer can do: When checkout is blocked, customers can remove the undeliverable item if the rest of the cart can still ship, clear the cart and start over, or update their delivery address. Changing the address automatically re-checks shipping, and if the new address matches a configured rate, the block is lifted and checkout can continue.
Customizing the error message: You can change the color of the "Shipping not available" message from your store's theme settings so it matches your branding. It applies consistently on both the Checkout page and the Upsell element; only the color is customizable, the message text itself is fixed.
Go to Payments > Settings > Shipping & Delivery.
Turn on the Block Shipping toggle.
Confirm your shipping zones, profiles, and rates cover every region you intend to serve. Block Shipping enforces exactly what you've already configured, so any gaps in your zones become blocked checkouts instead of unrated orders.
Save your changes and publish your store so the setting applies to your live checkout. If it doesn't seem to take effect right away, republish the page or site to clear the cache.
Place a few test orders with different delivery addresses before relying on this in production, to confirm checkout blocks and allows orders the way you expect.
Create a separate zone for each region that needs its own pricing, and assign unique rates per zone.
Once a state or province is assigned to one zone, it cannot be reused in another zone.
You can define multiple weight or price ranges within a single zone.
Set up a catch-all zone that covers any remaining countries or states so customers outside your named zones still see a shipping rate at checkout, rather than none at all.
Free shipping applies at the zone or condition level, not per individual product. To offer free shipping on specific products only, group those products into their own zone or custom profile and set that rate to Free.
Always place a test order after adding or editing zones, rates, or profiles to confirm the correct charge appears at checkout.
Can I set both weight-based and price-based conditions in the same zone? Yes. You can add multiple rates within one zone, each using a different condition, so you can mix and match based on what fits your products.
What happens if a customer's address doesn't fall into any shipping zone I've created? No shipping rate will display for that address. To avoid this, set up a default fallback zone that covers all remaining countries or states you ship to.
Can I offer free shipping on select products only? Free shipping is applied at the zone or condition level, not per product. Group the products you want to ship free into their own zone or custom profile and set that rate to Free.
What's the best way to handle several countries that share the same shipping cost? Group them into one zone, for example "US & Canada," and assign a shared rate. This keeps your setup simpler and avoids duplicate configurations.
How do I test that my shipping setup works correctly? Add products to a test order and run through checkout using different delivery addresses to confirm the right zone, rate, and ZIP restrictions apply as expected.
What happens if I delete a custom shipping profile? Any products assigned to that profile automatically fall back to the General Shipping Profile.
Can I override a rate for products synced from an app integration? Yes. Create a custom profile covering the same products, and its rates will take priority over the app-defined rates.
What happens if a customer's ZIP or postal code doesn't match my restricted zone? That zone simply won't apply at checkout. If no other zone covers the customer's address, no shipping option will display for them.
Can two custom shipping profiles share the same name? No. Each profile needs a unique name so checkout doesn't combine or confuse rates that were meant to stay separate.
What does turning on Block Shipping at Checkout actually change? Instead of letting an order proceed with no shipping charge when no rate matches, checkout is blocked and customers see a "Shipping not available" message until they remove the undeliverable item, clear their cart, or enter an address that matches a configured rate.
Does Block Shipping at Checkout apply to digital-only orders? No. Carts made up entirely of digital products aren't affected, since digital items don't require shipping.
Does Block Shipping re-check shipping if a customer accepts an upsell offer? Yes. Accepting an upsell re-triggers shipping validation for the updated cart, and checkout is blocked if the new cart can no longer ship to the customer's address.
Can I customize the wording of the "Shipping not available" message? Only its color, to match your store's branding. The message text itself is fixed.
Where do I set up my actual payment processor for these orders? Payment provider setup, checkout configuration, taxes, and coupons are covered in the Payments collection. We recommend AX Pay for better processing rates than Stripe; see the AX Pay help article for setup details.
