Recovering Abandoned Carts
When a prospective patient adds a product to their cart, starts checkout, enters an email address, and leaves without paying, that is an abandoned checkout. Aesthetix CRM can automatically follow up with those shoppers by email, and you can layer a Workflow on top for more advanced, multi-step recovery. Everything below applies to the native Store built into your account (Payments in the left-hand menu). If you sell through Shopify or WooCommerce instead, connect it under Integrations first.
Product catalog setup, taxes, coupons, and choosing a payment provider live in the Payments overview article, not here. This guide covers what happens after a cart is abandoned and how to bring the shopper back.
Taking payments through your Store? AX Pay is Aesthetix CRM's own payment processor and typically runs lower rates than Stripe. See the AX Pay article for setup details before you connect a processor to your Store.
Once a shopper reaches your checkout page and provides an email address but does not complete payment, the system marks the checkout as abandoned. Turning on abandoned cart emails lets Aesthetix CRM automatically send a follow-up email inviting that shopper to finish their purchase, no manual outreach required. You can also customize the design, the timing, and the message to match your practice's voice.
Benefits of turning it on:
Sales recovery. Re-engage shoppers who dropped off before paying, whether they were buying a product, a gift card, or a treatment package.
Runs on its own. Once configured, the system tracks abandoned checkouts and sends the reminder without any manual work.
Personalized messaging. Tailor subject lines and copy to match your brand voice.
Dynamic product display. The email can show the exact items the shopper left behind, using live product images, names, and prices.
The link in the abandoned cart email behaves in a few specific ways worth knowing before you turn it on:
Works across devices. A shopper can open the link on a different phone, browser, or session than the one they abandoned checkout on.
One link per abandoned cart. Each link represents a single abandoned session; only the items from that session appear.
View only. Shoppers cannot add new items from the recovery link, they can only complete the checkout as it was left.
Updates live. Product names and prices reflect whatever is current at the moment the shopper opens the link, not the price at the time of abandonment.
Inventory aware. If an item has gone out of stock since the cart was abandoned, a Remove Item option appears instead.
Works for guest checkout. Shoppers who checked out as guests get a temporary session so they can still complete the purchase from the link.
Handles deleted products. If every item in the abandoned cart has since been deleted or made unavailable, the page shows a Continue Shopping button instead of an empty checkout.
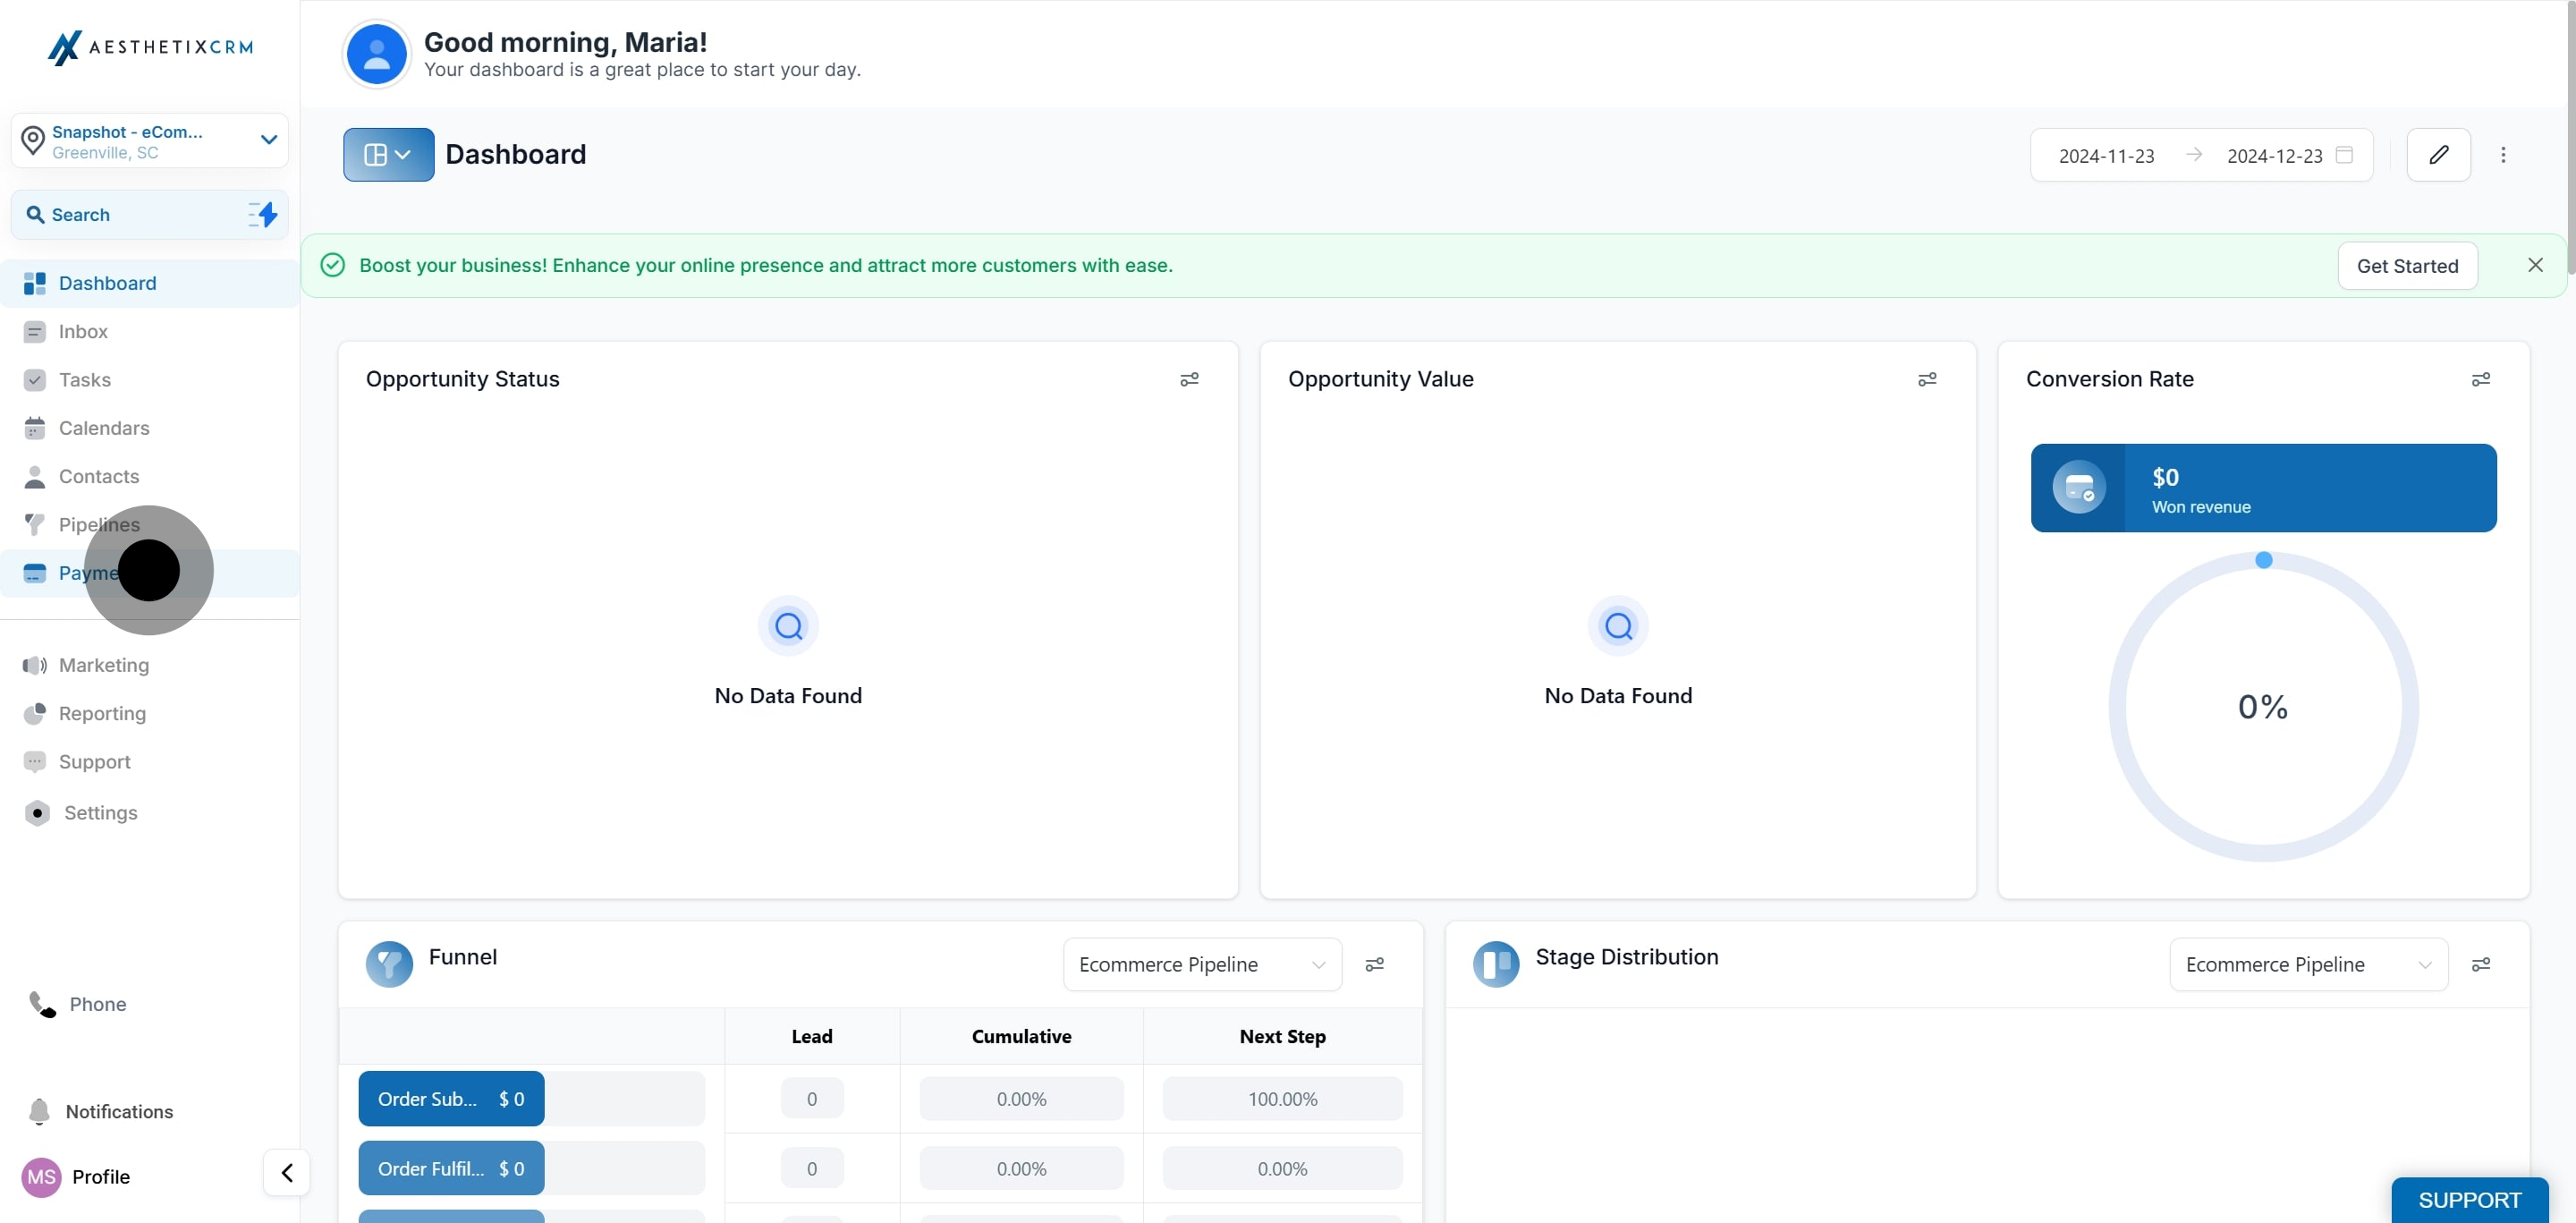
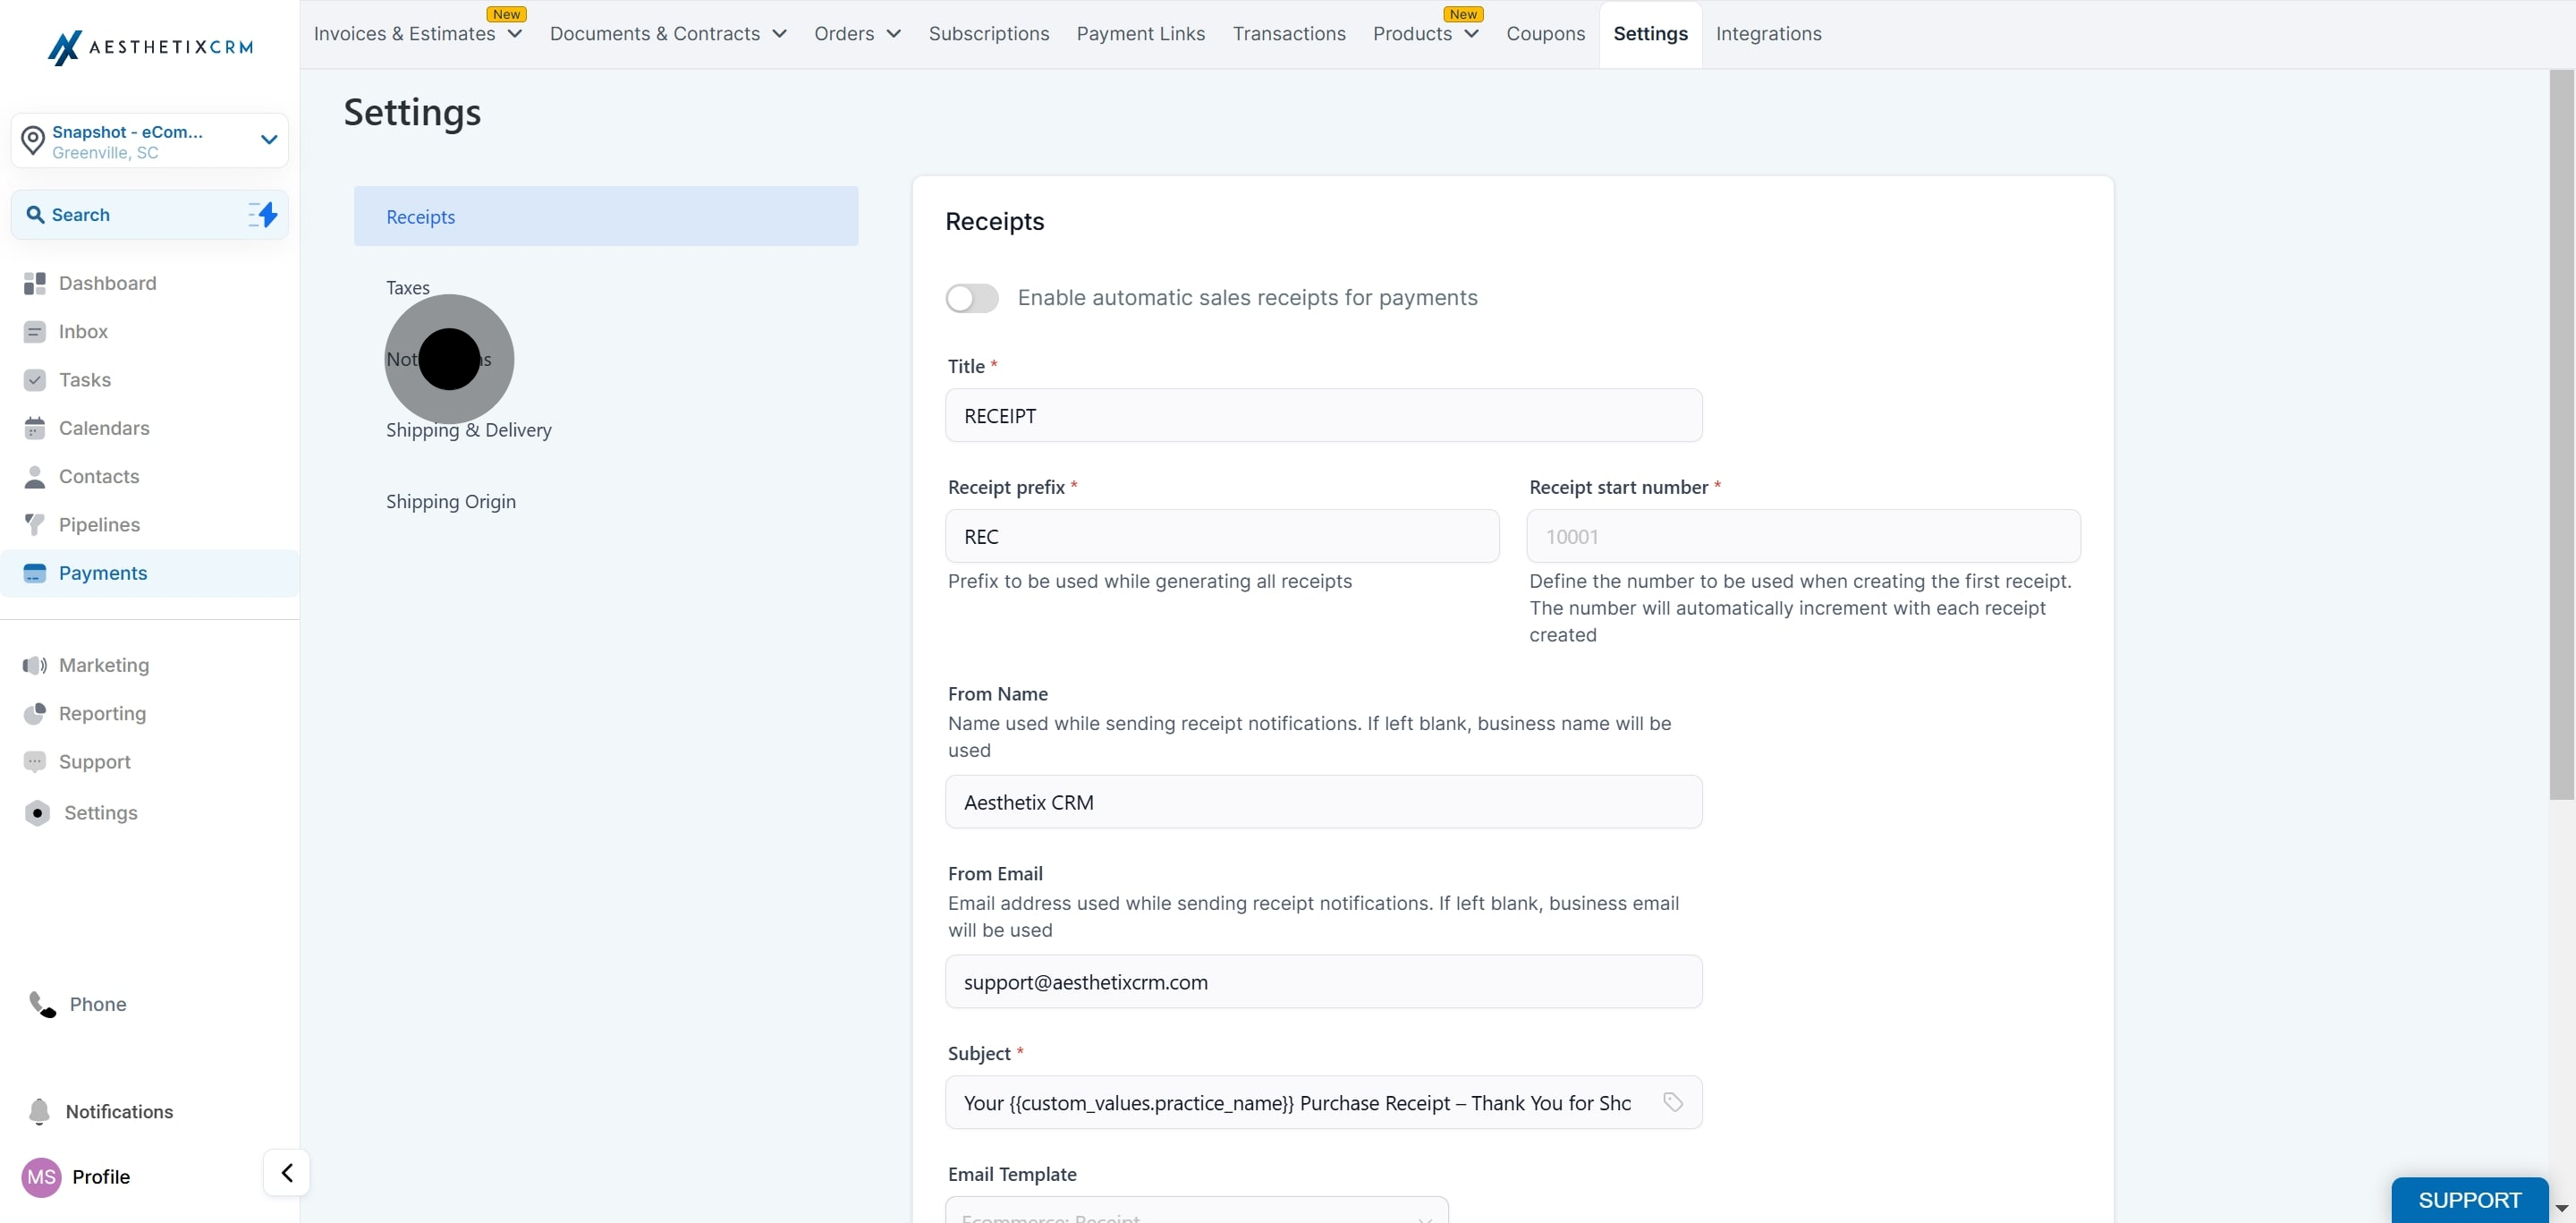
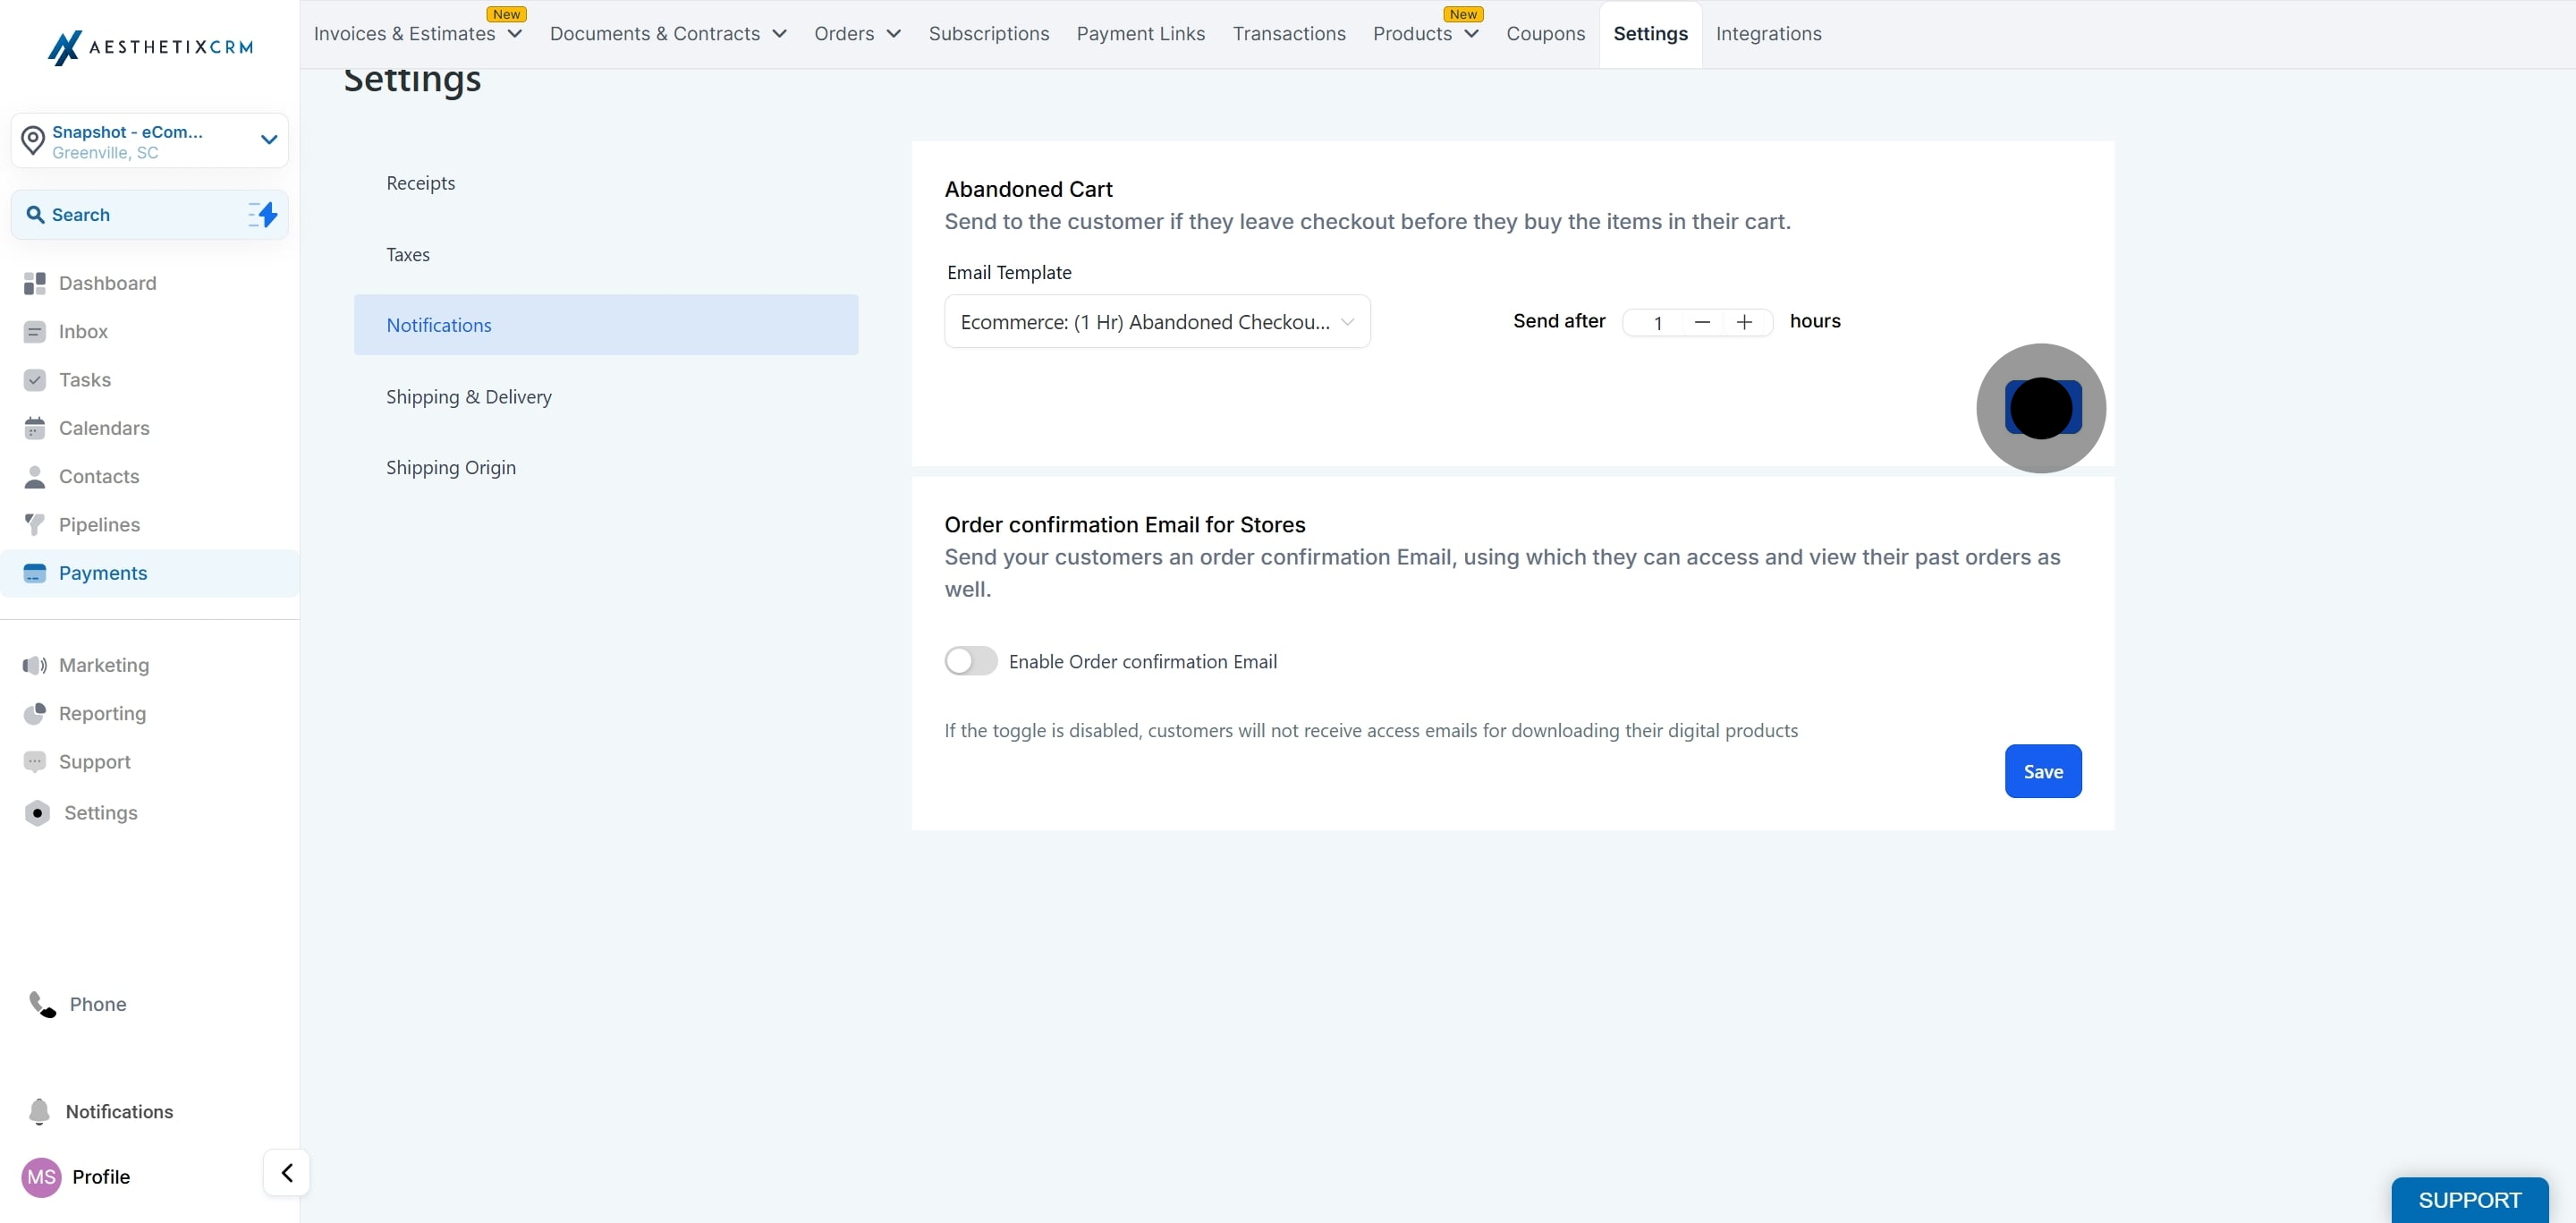
Navigate to the Payments section in the left-hand menu.
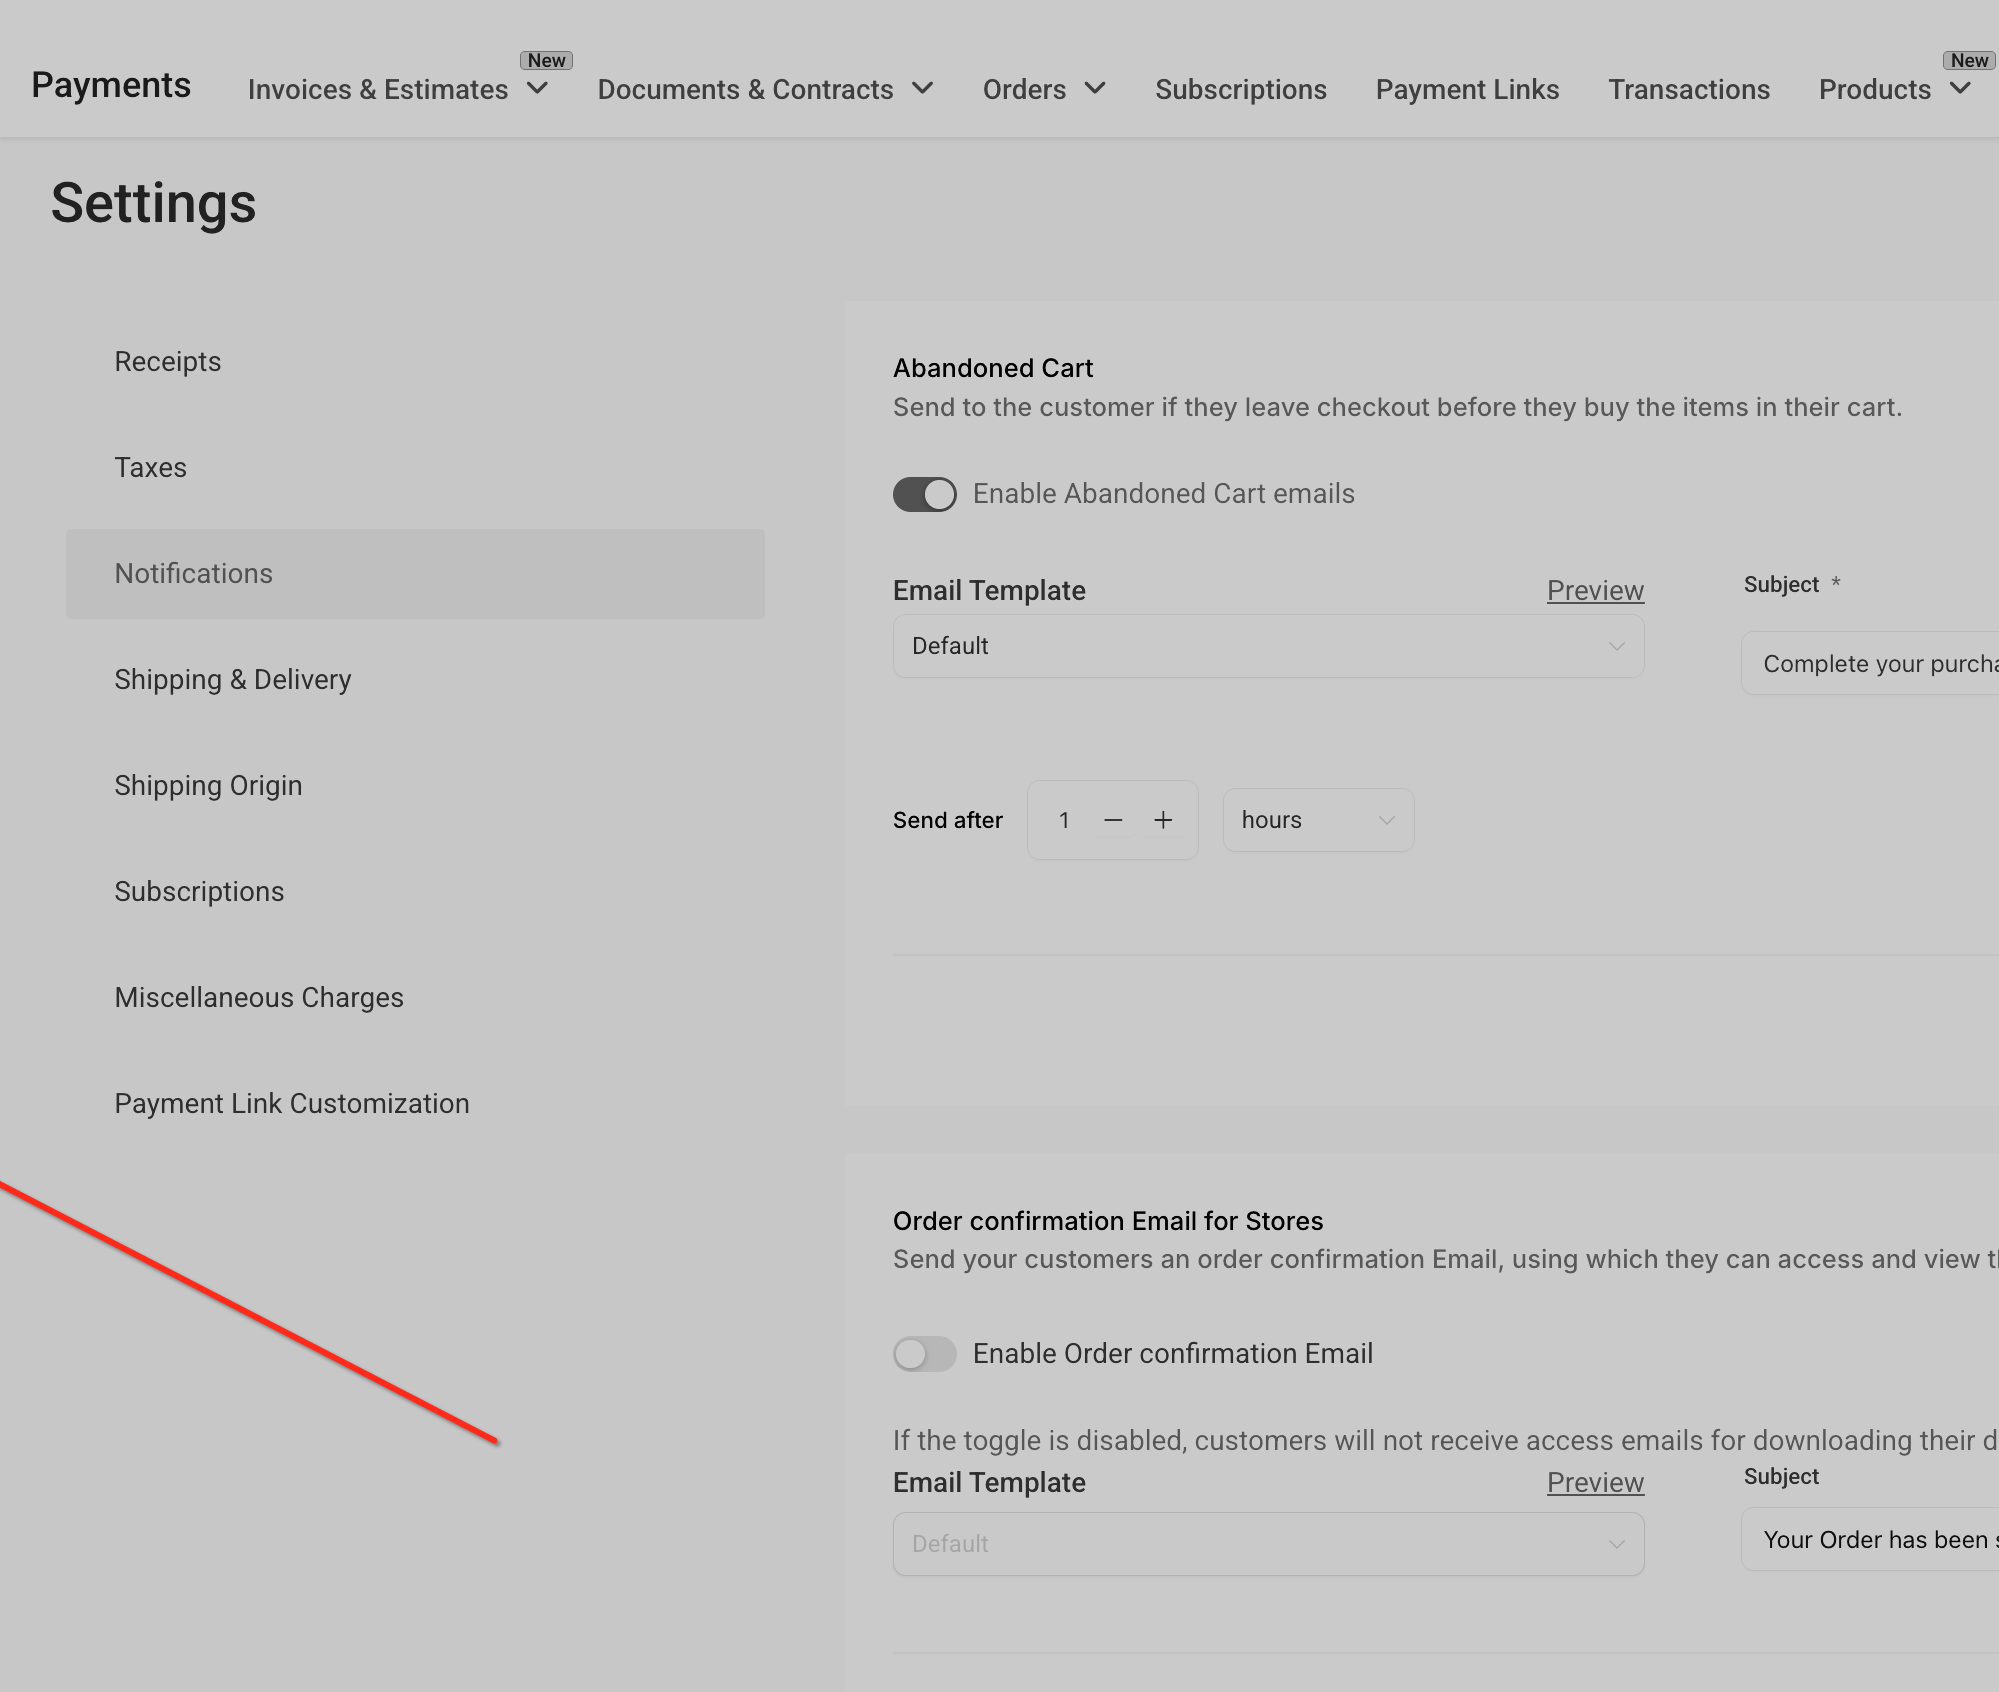
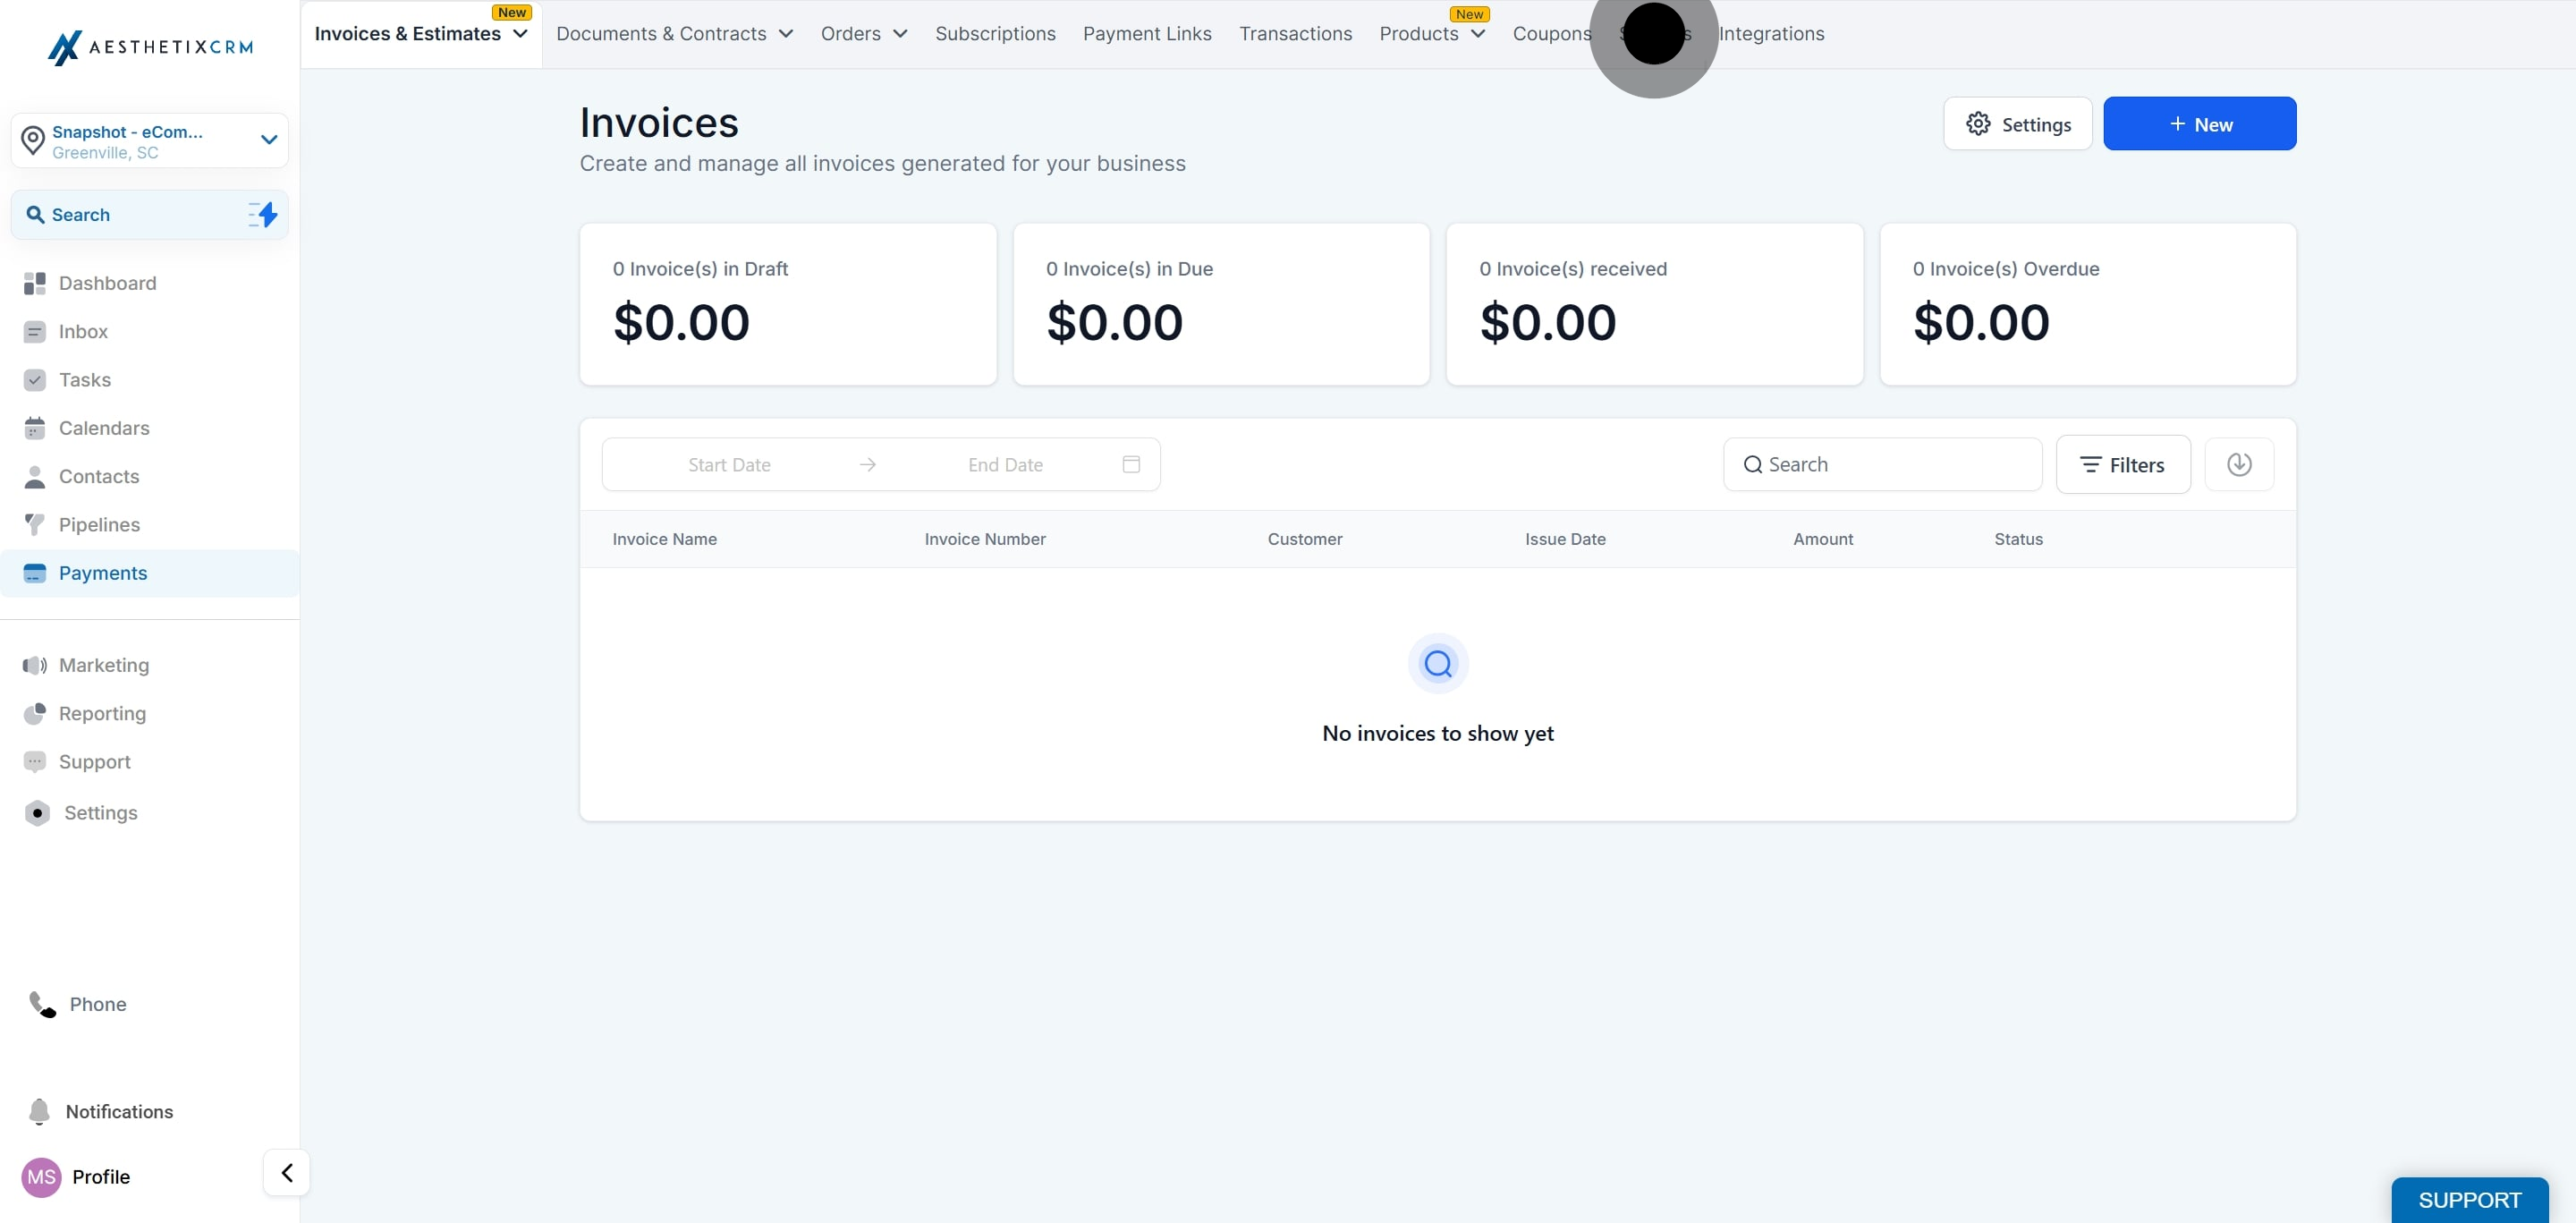
Click Settings.
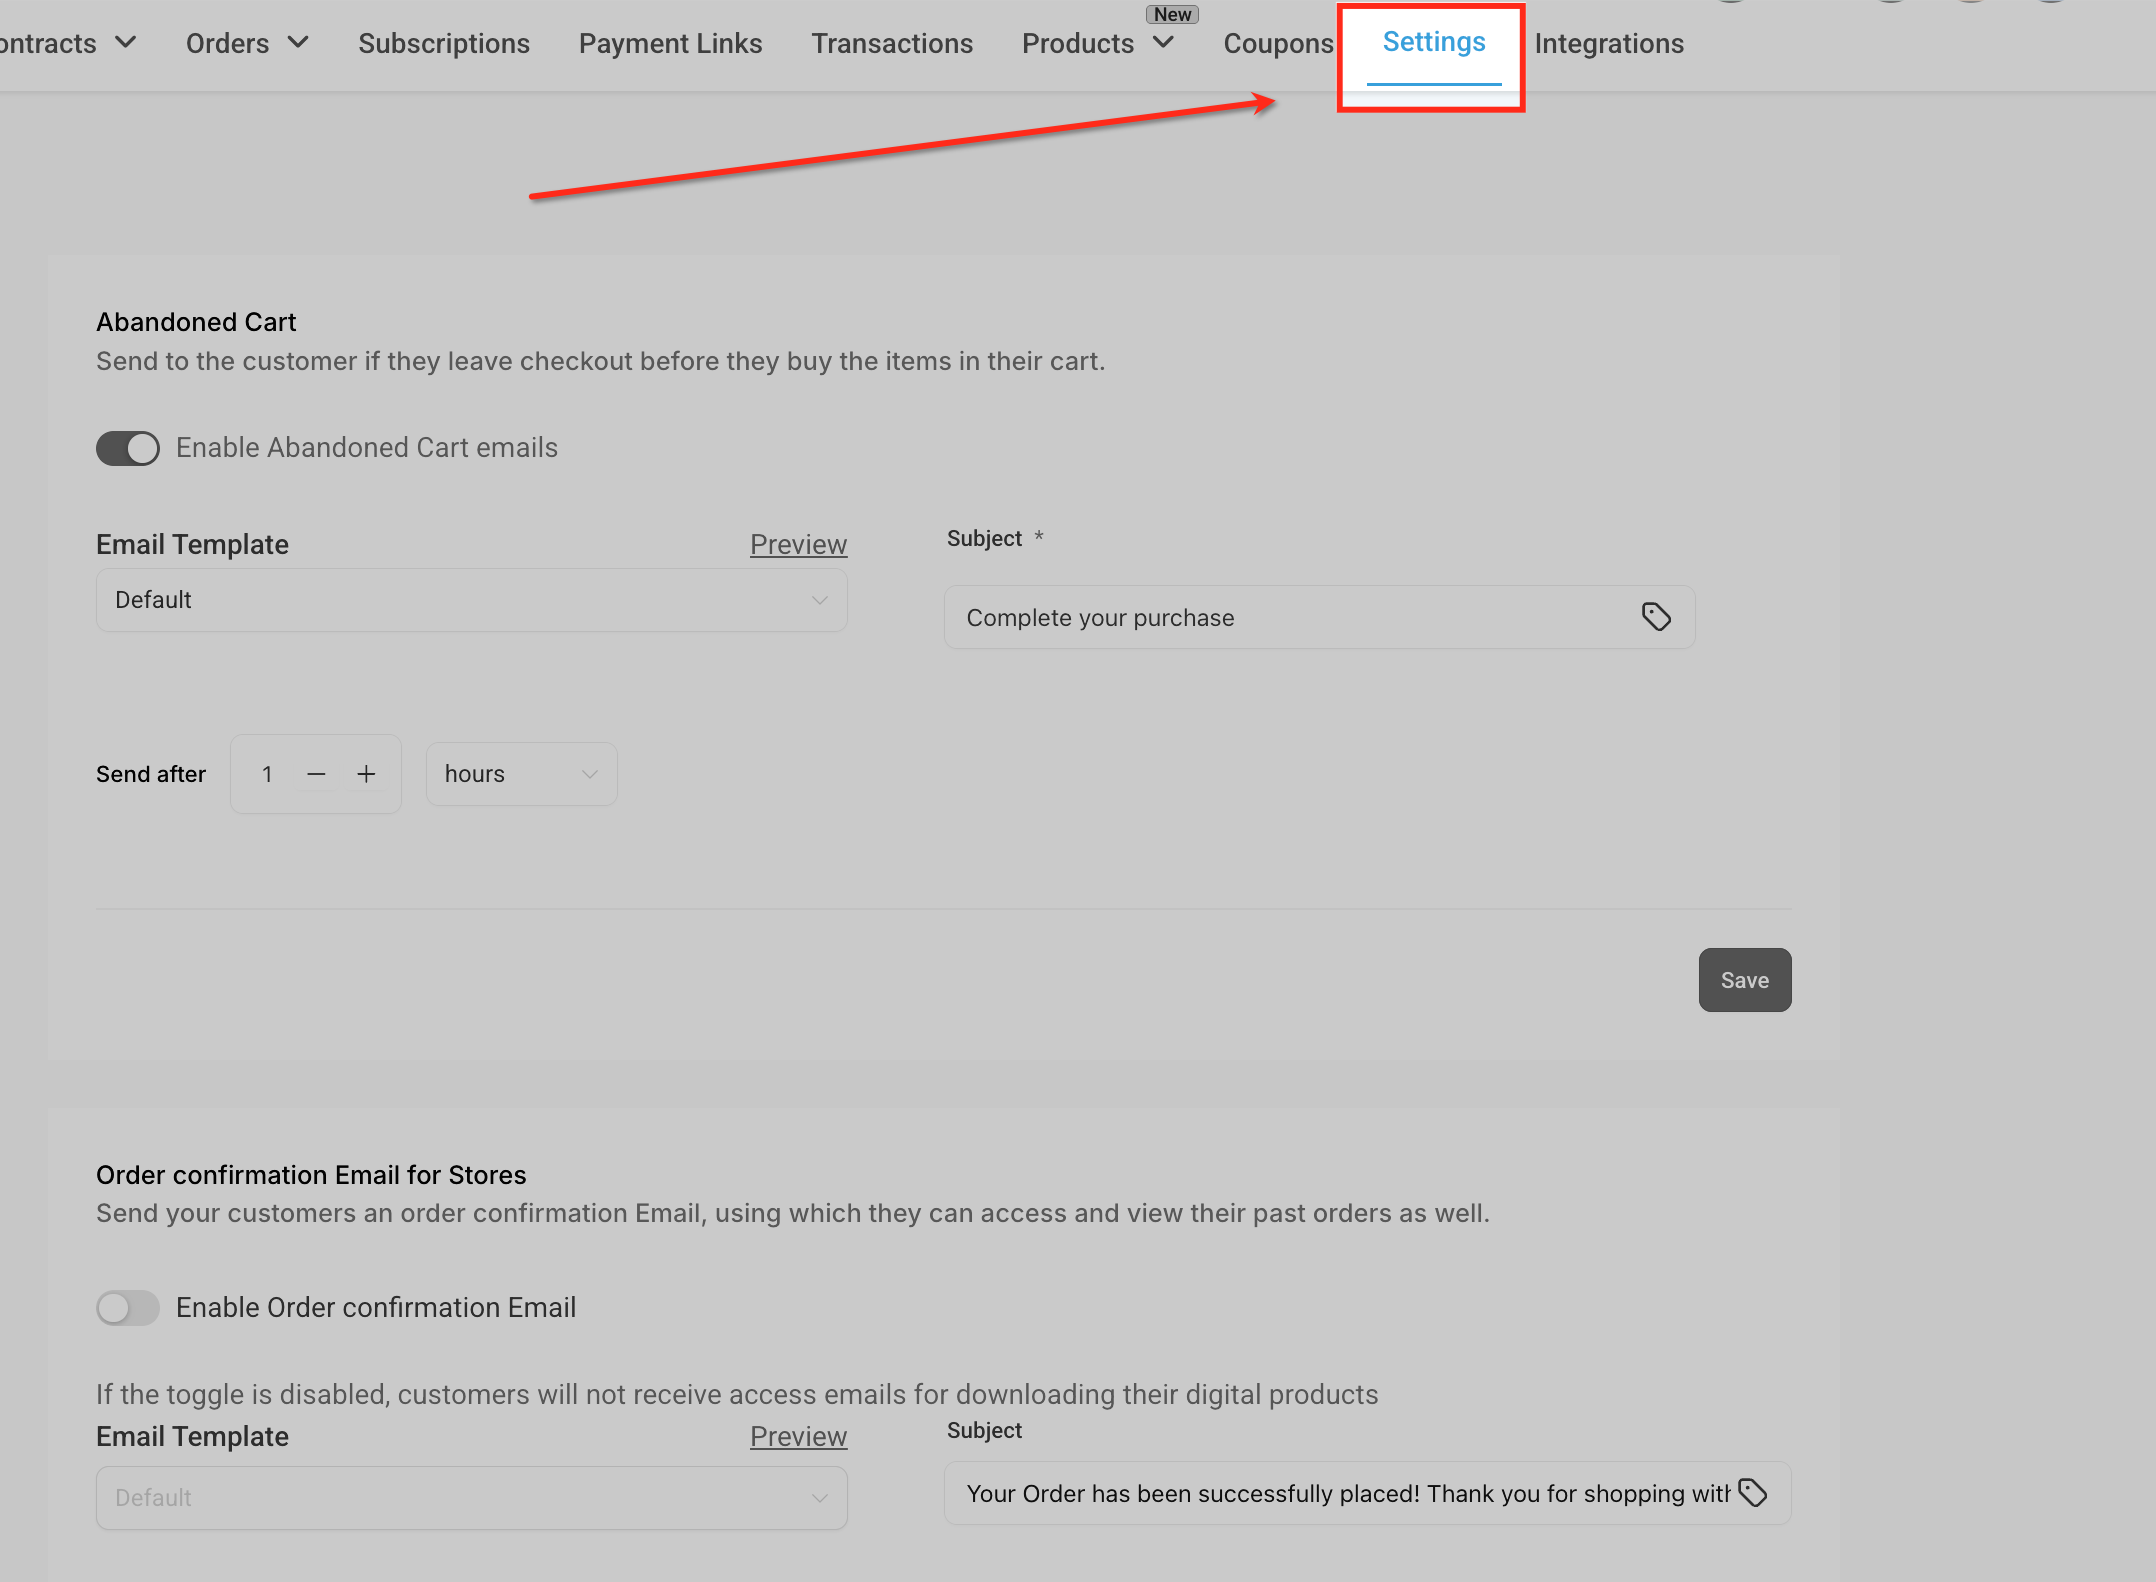
Click Notifications.
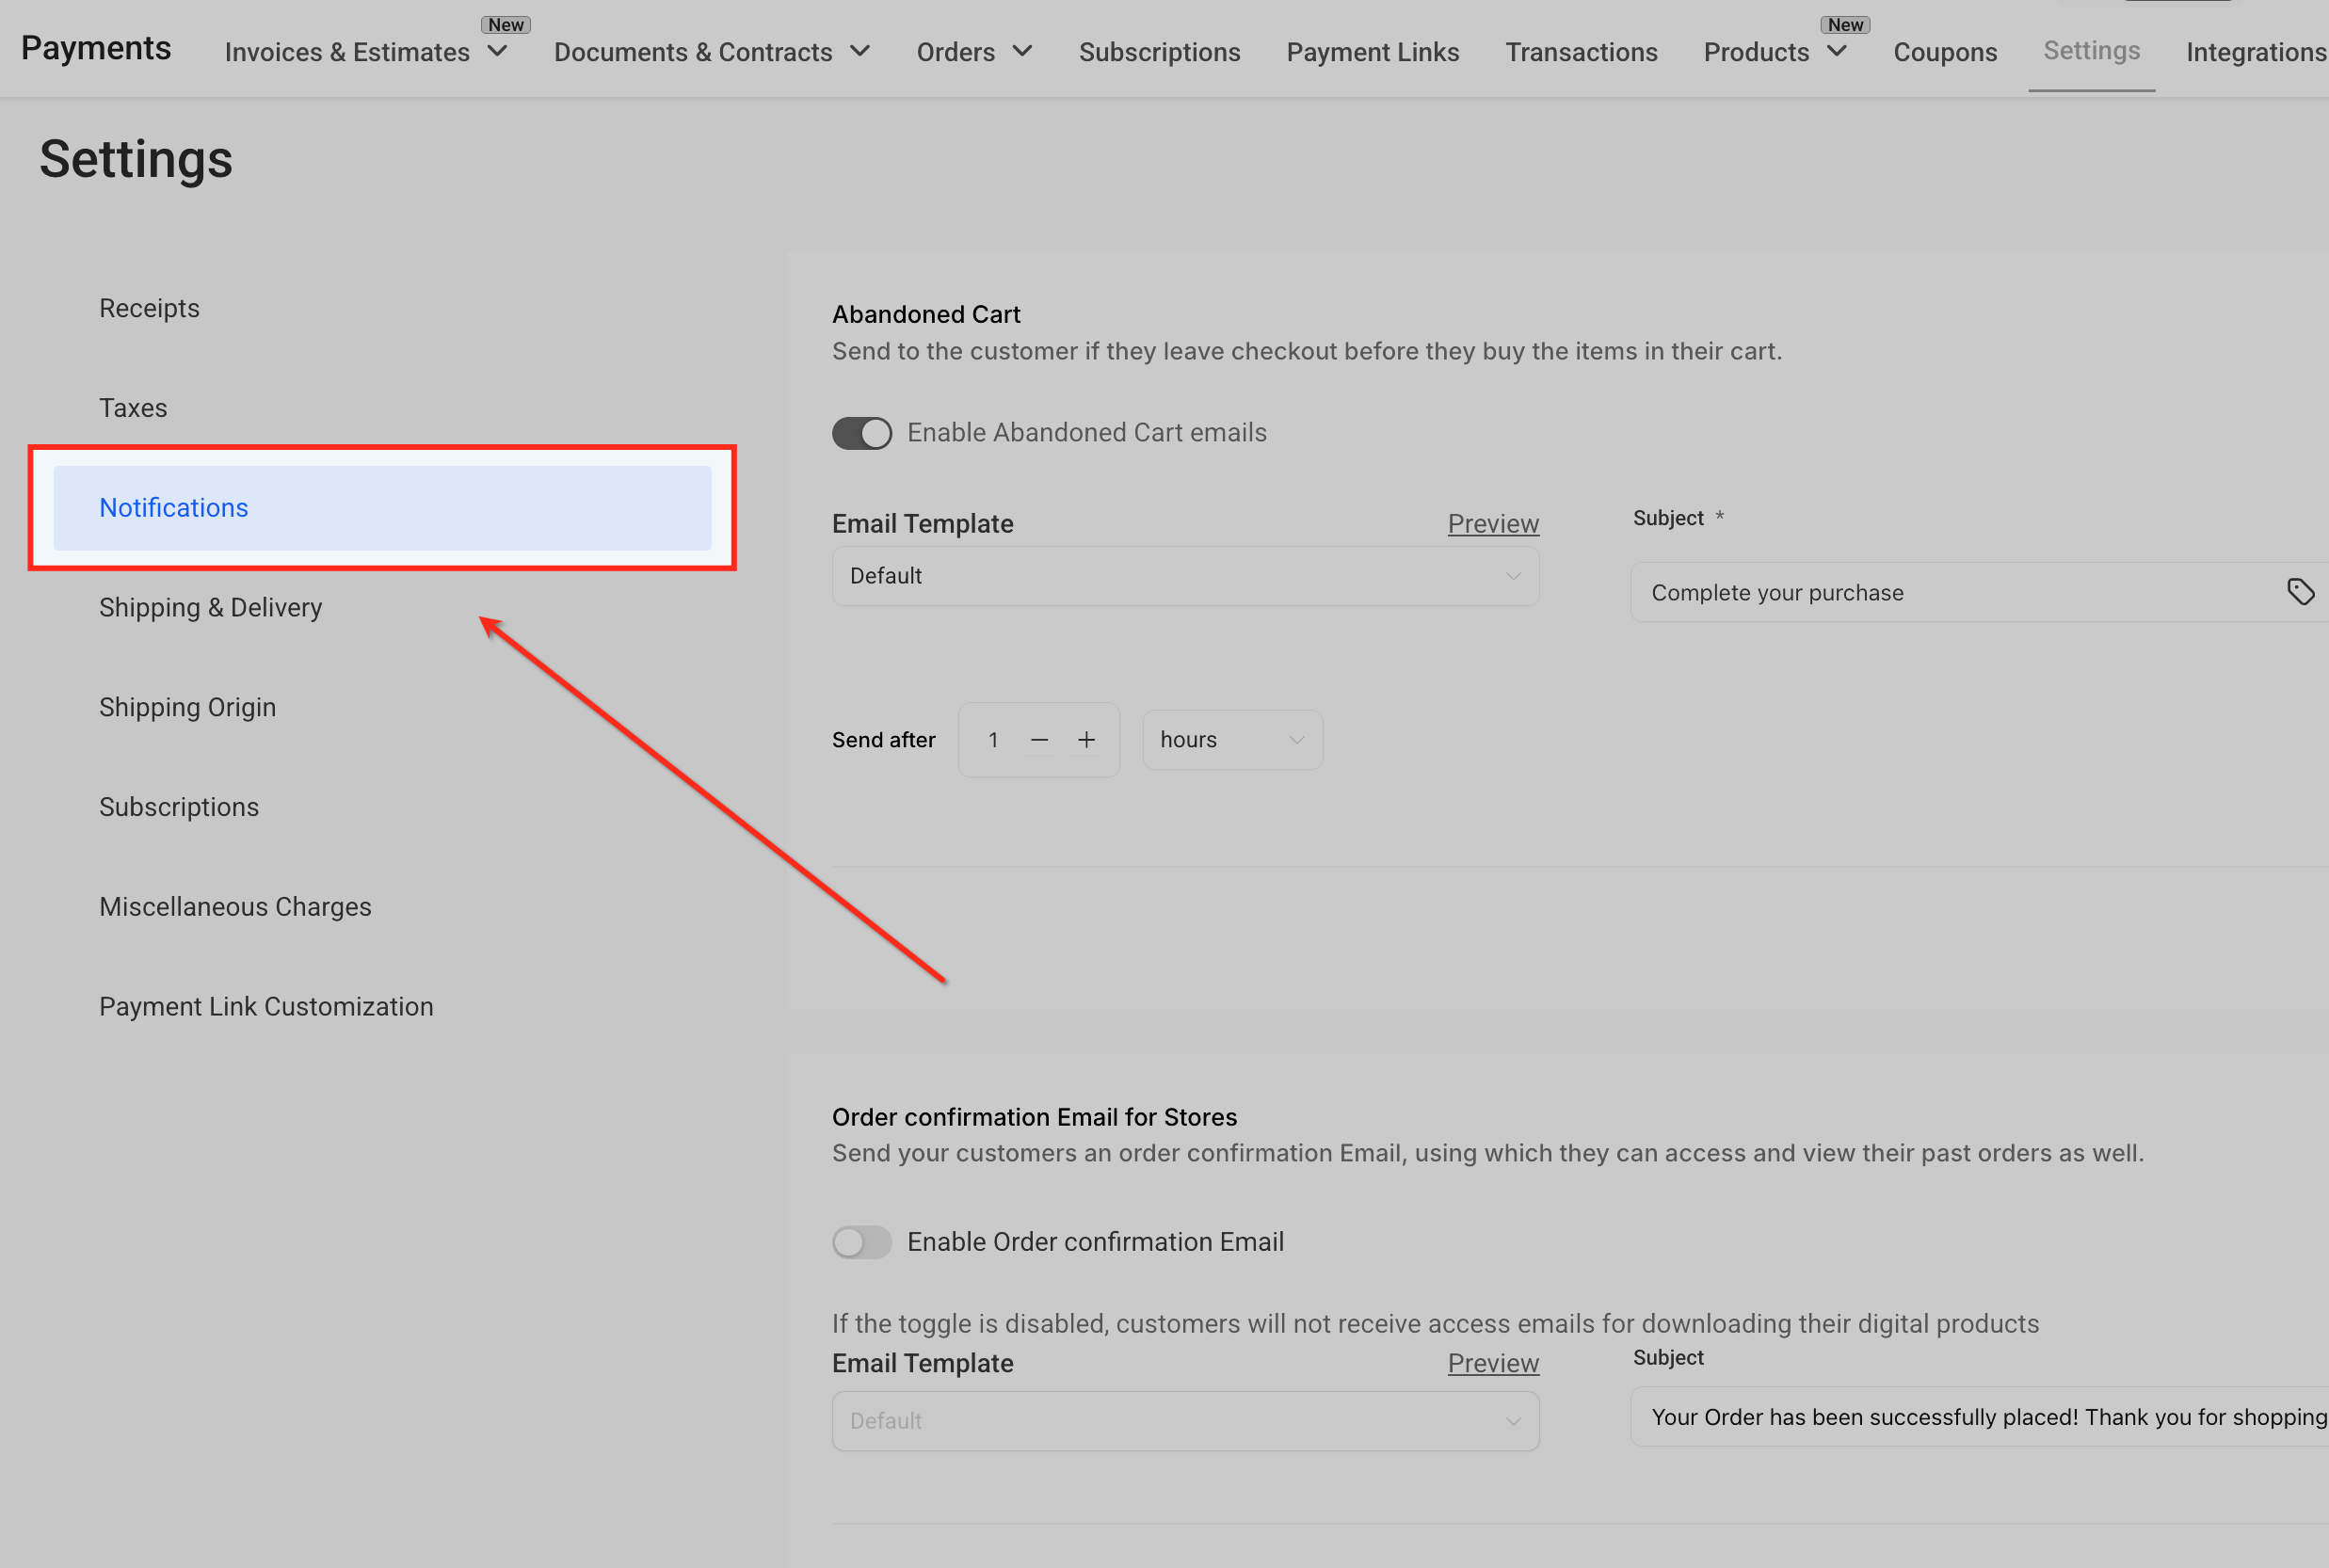
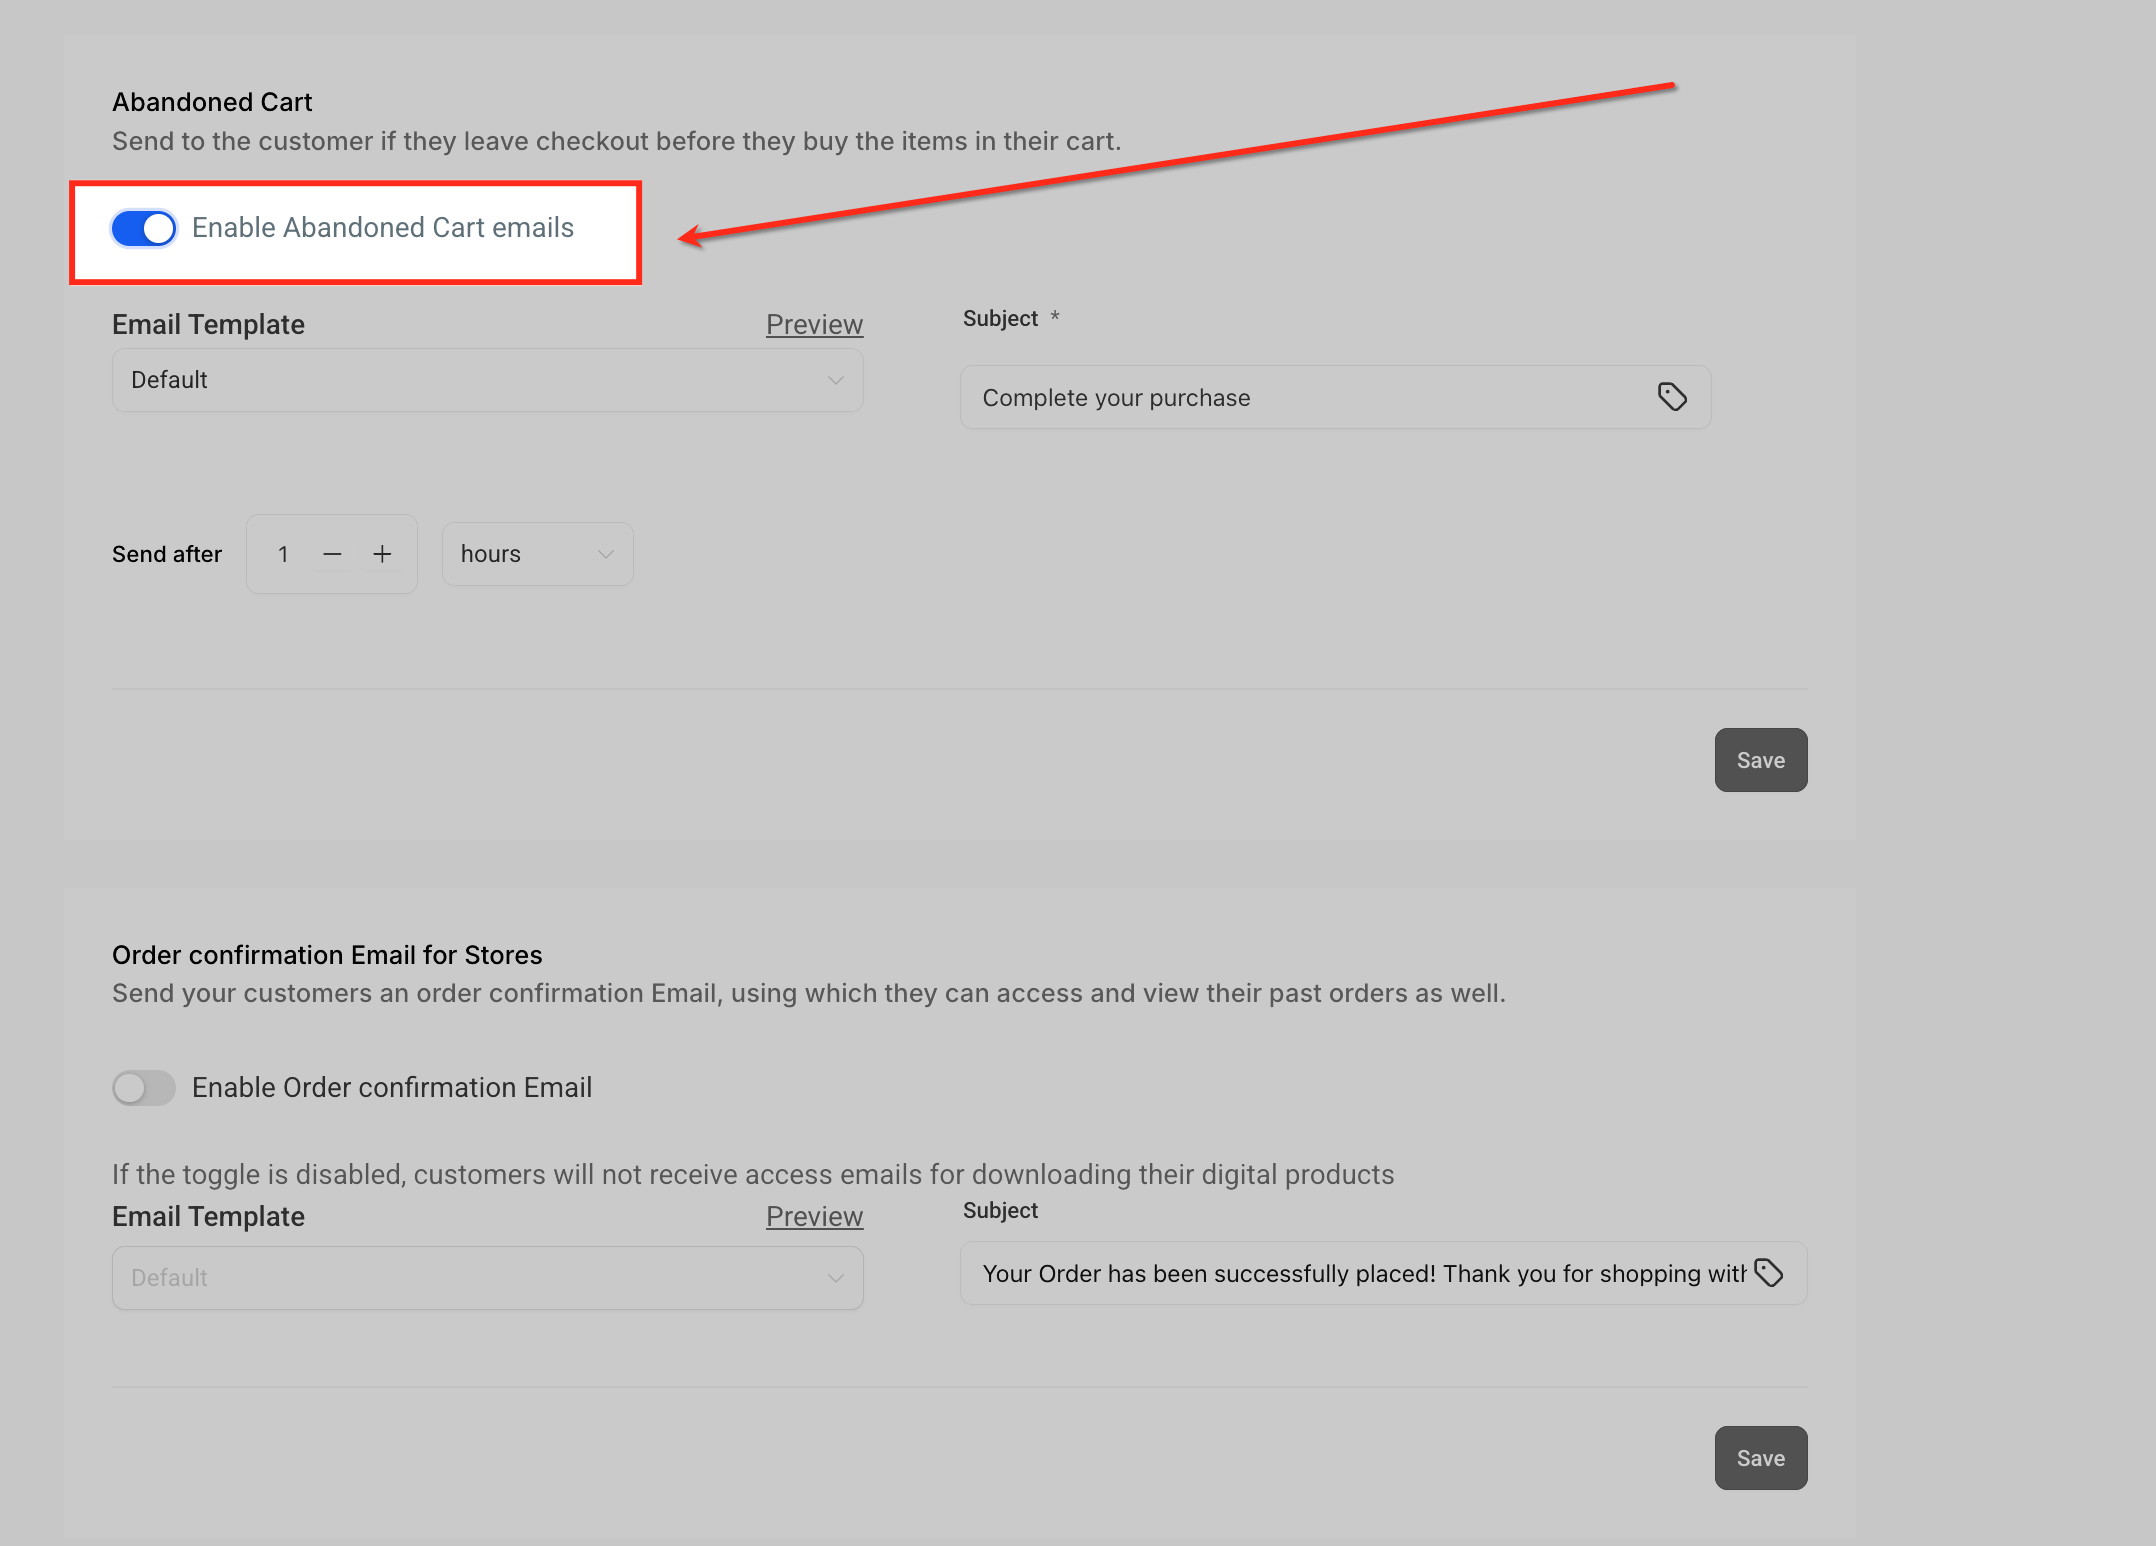
Toggle on Enable Abandoned Cart emails. This is what actually activates the automated reminders, nothing sends until this is switched on.
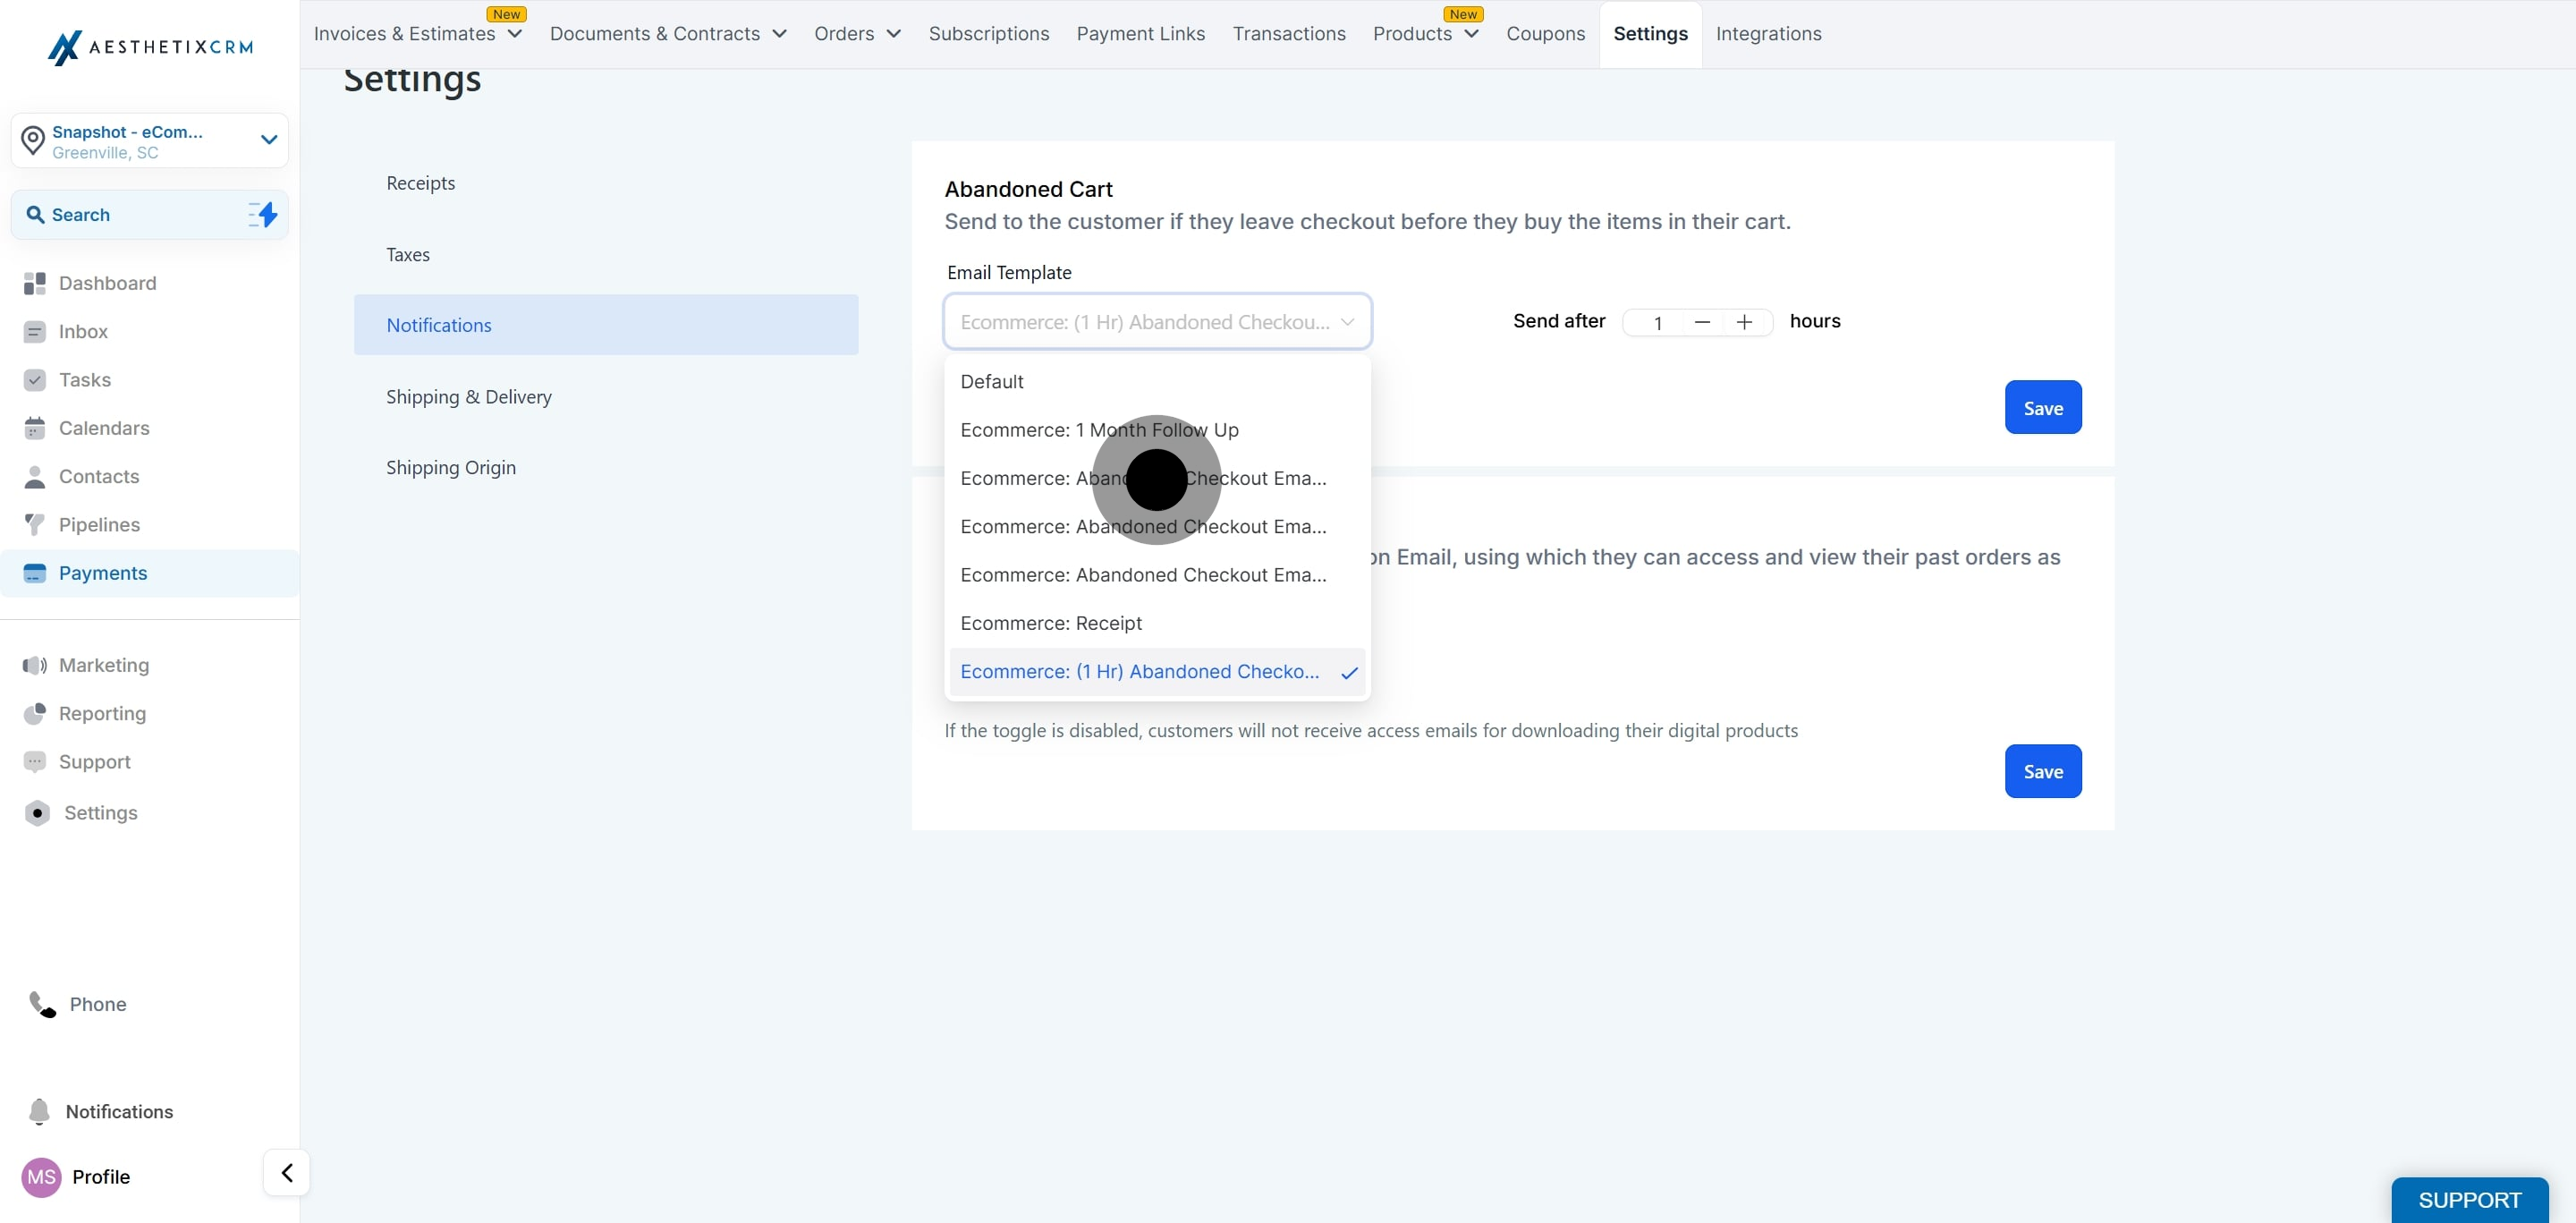
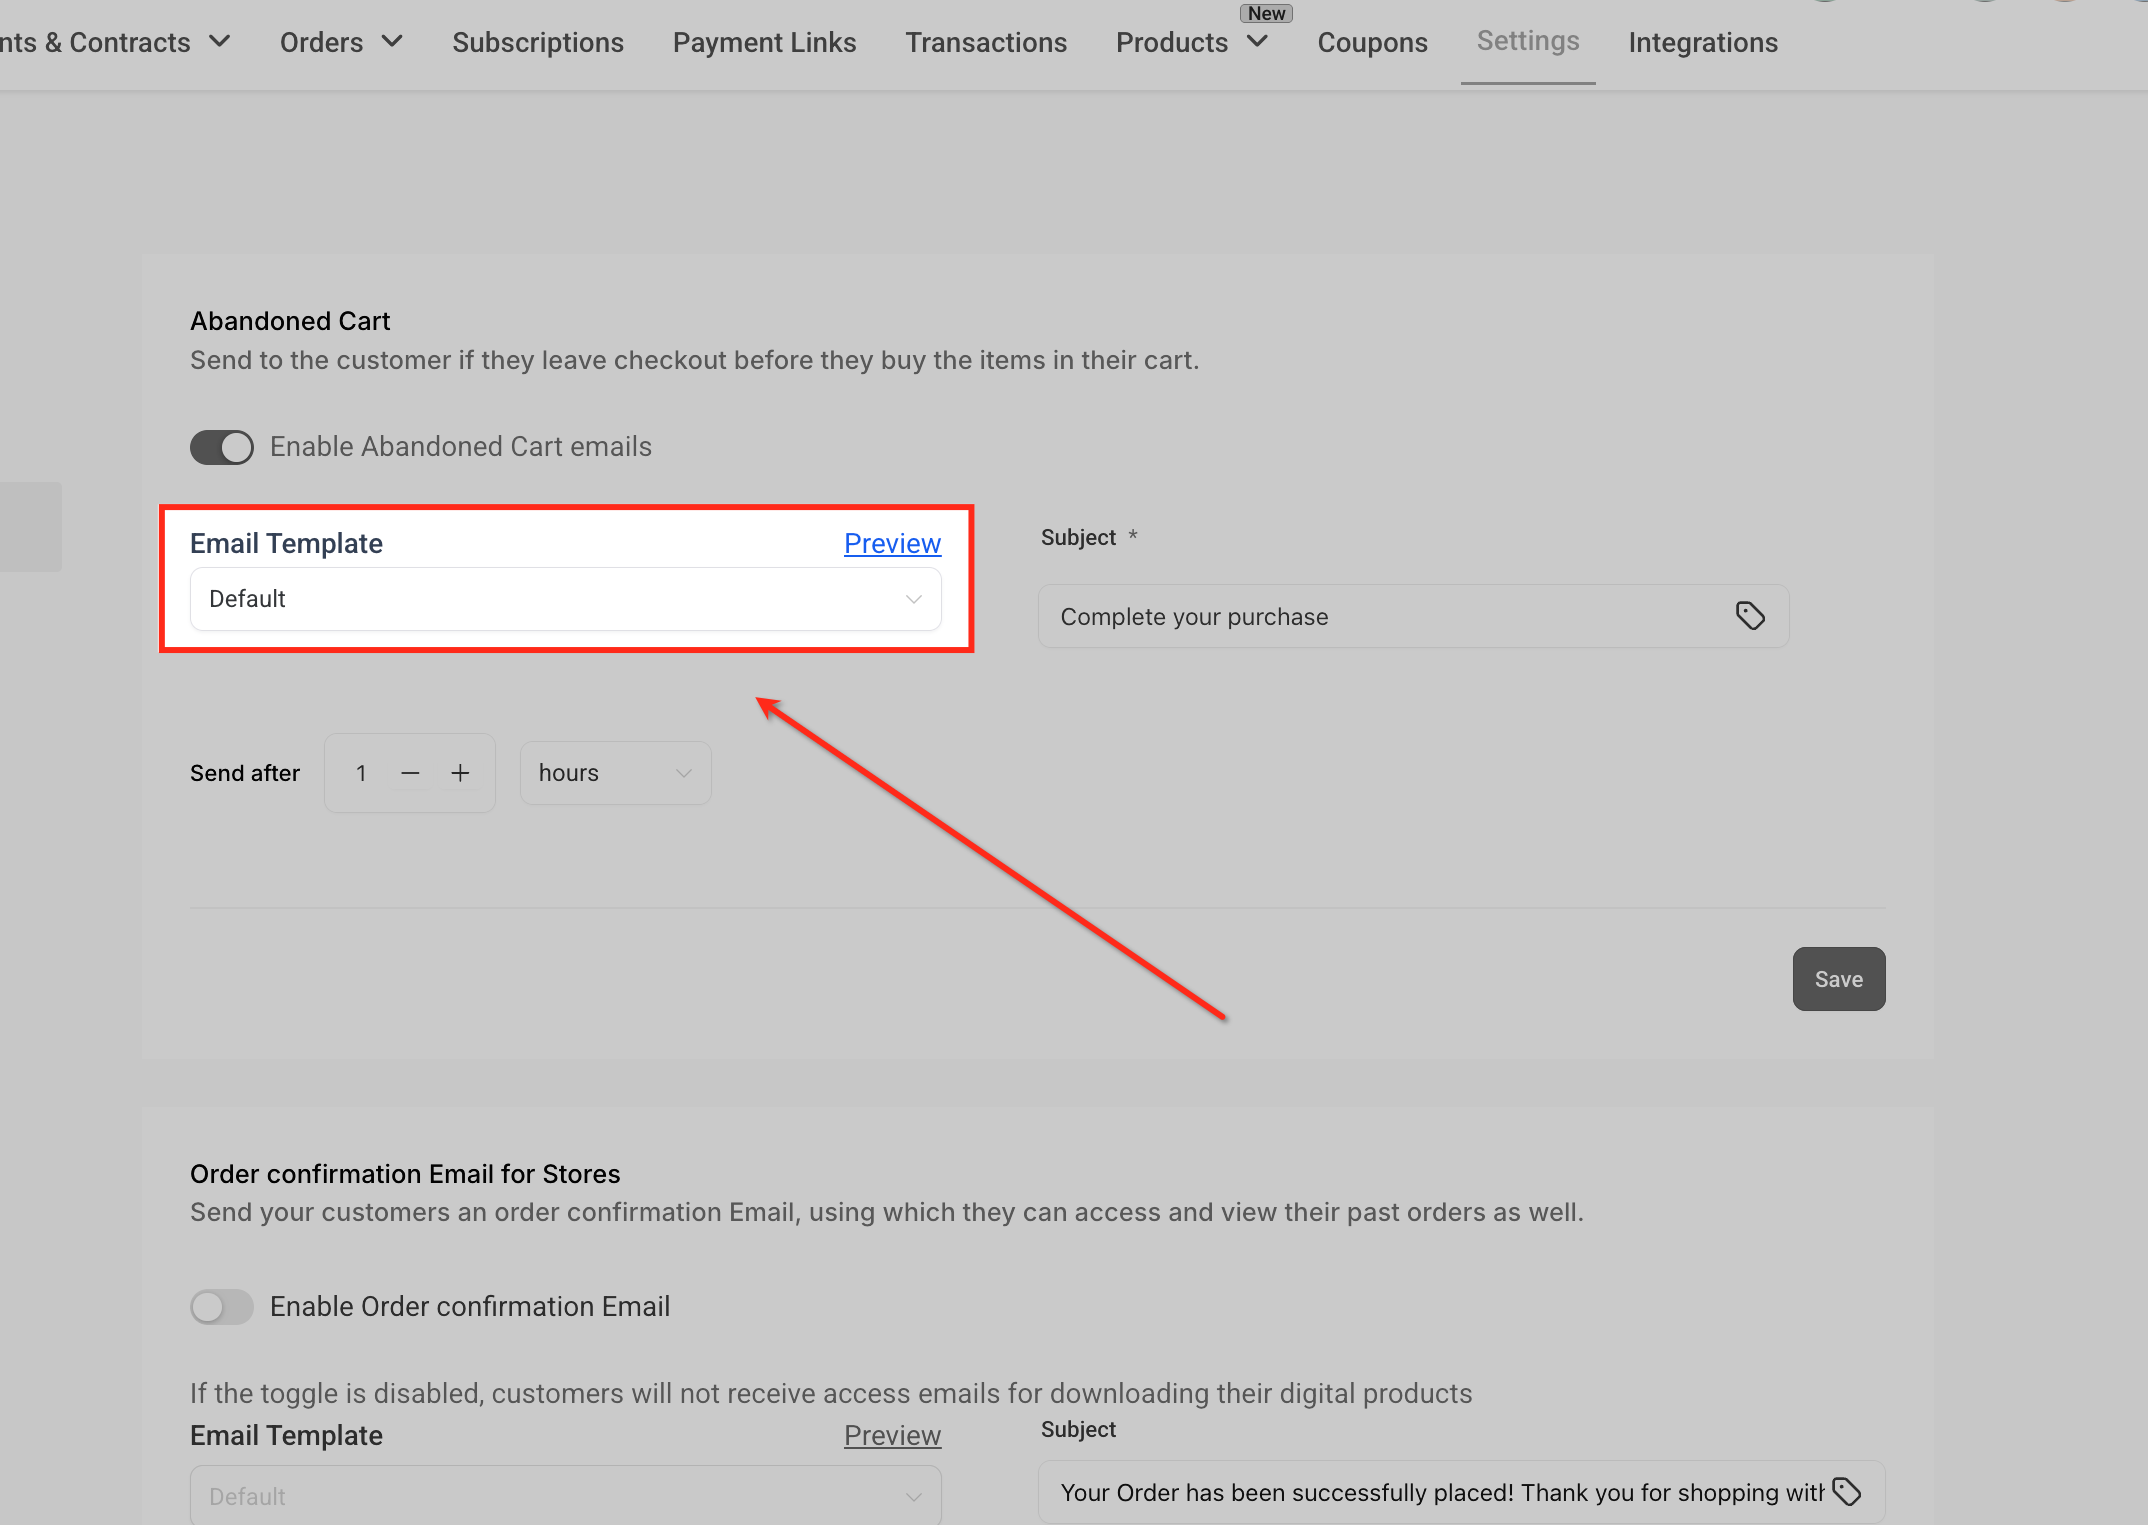
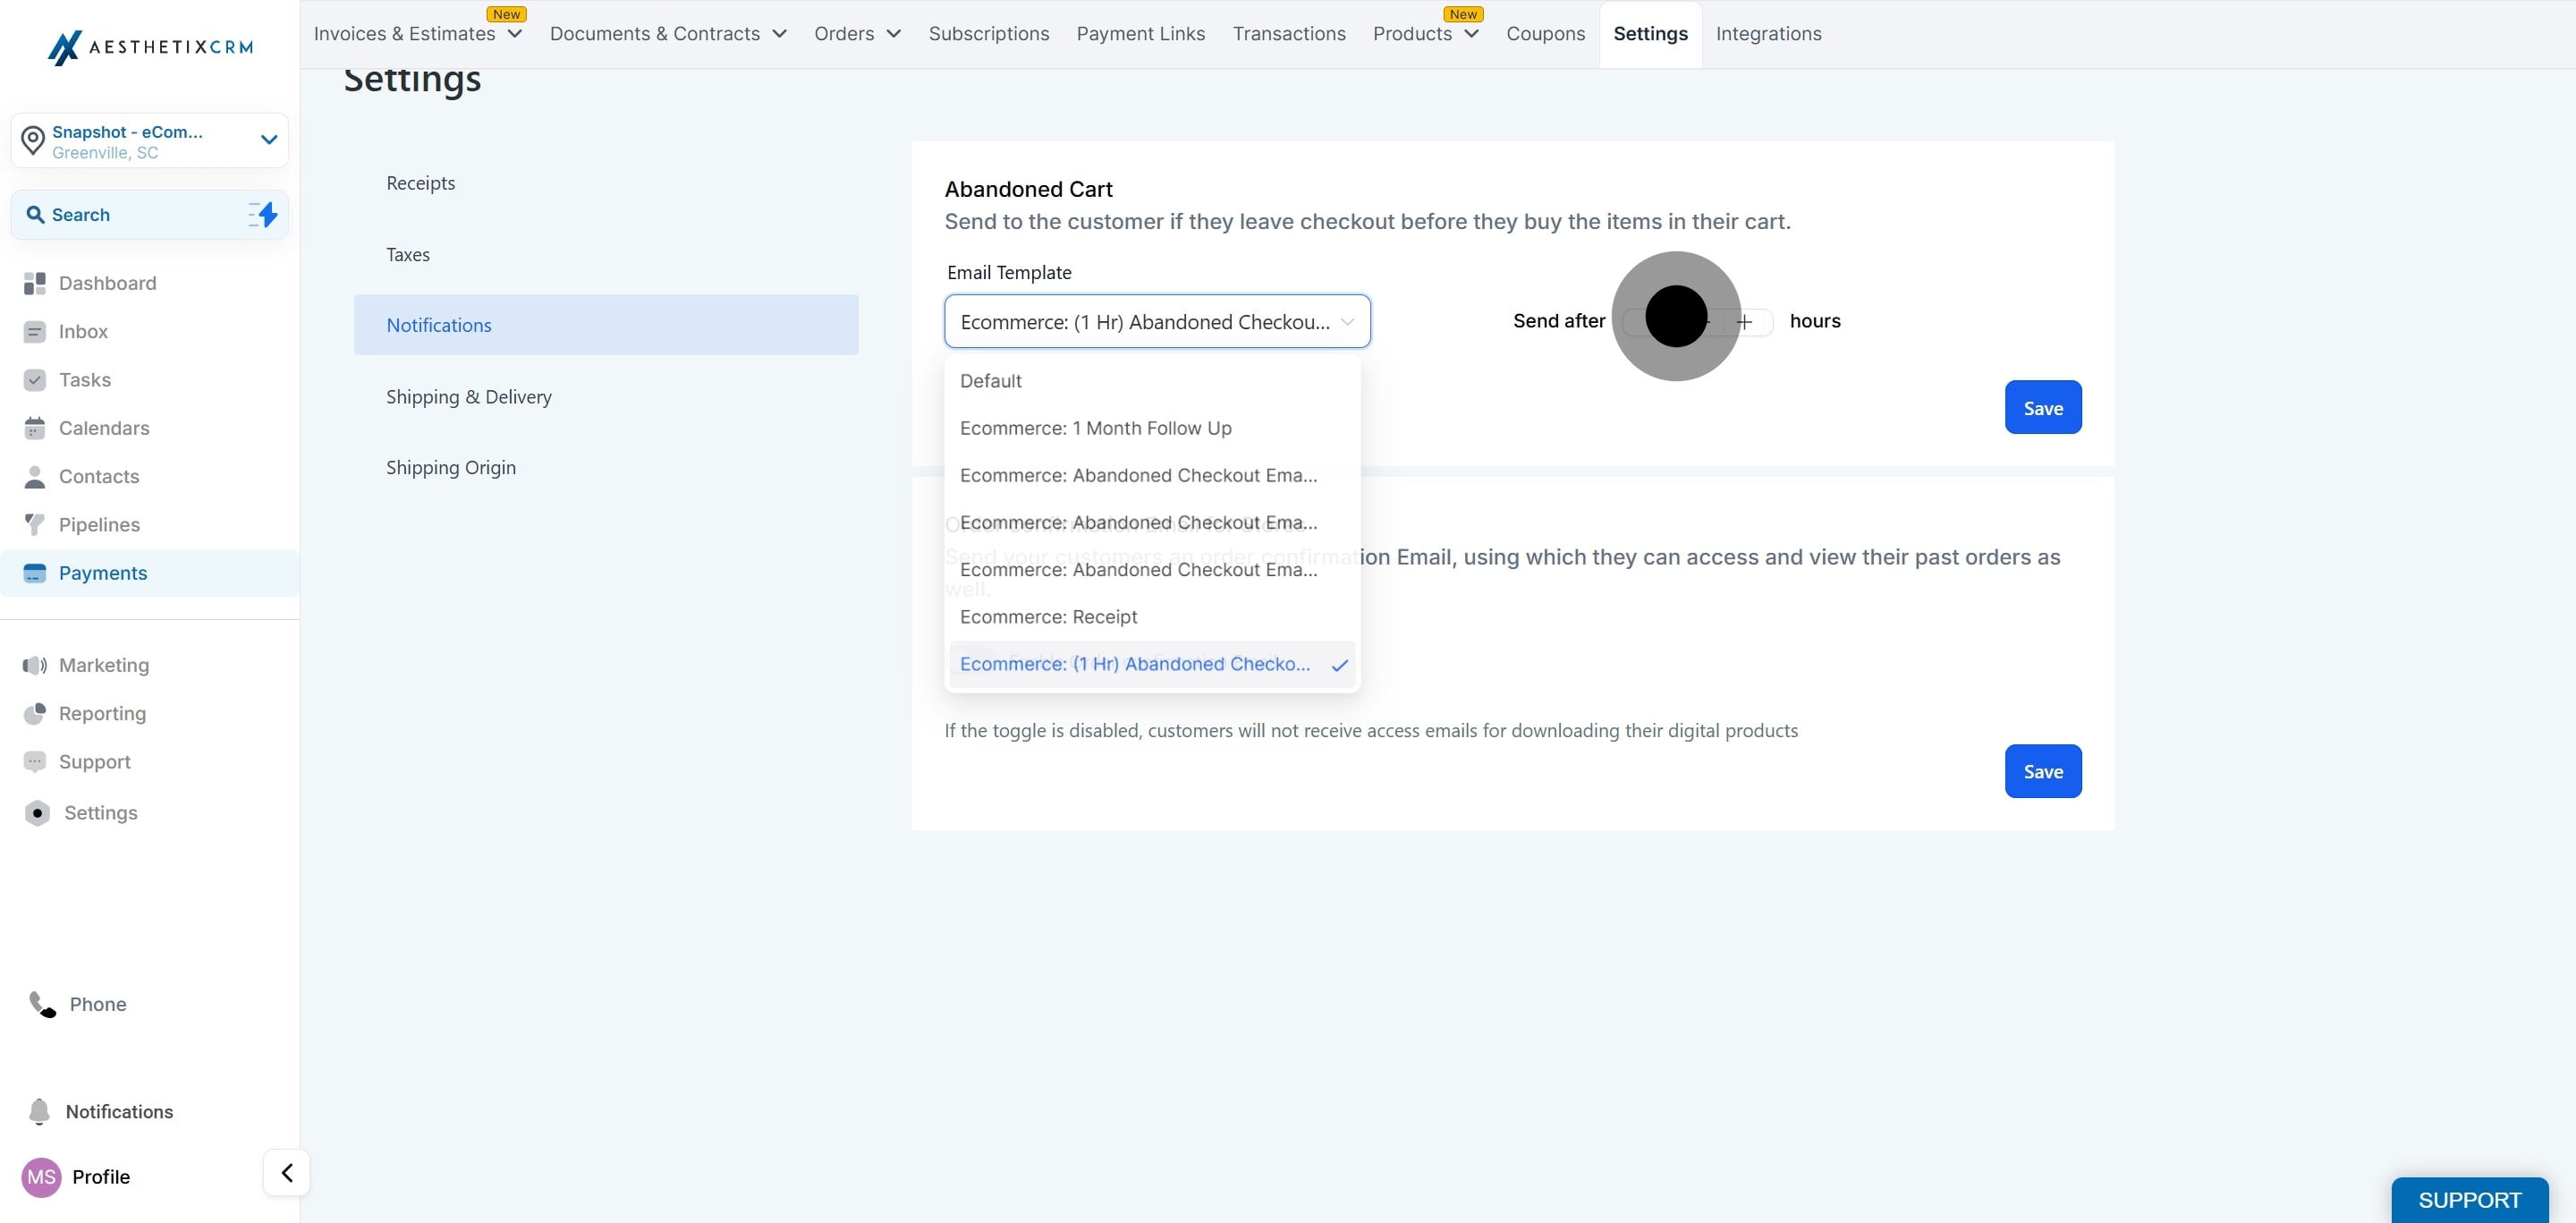
Choose the email template you want to send from the dropdown. You can use the default template or link one you build yourself (see the next section).
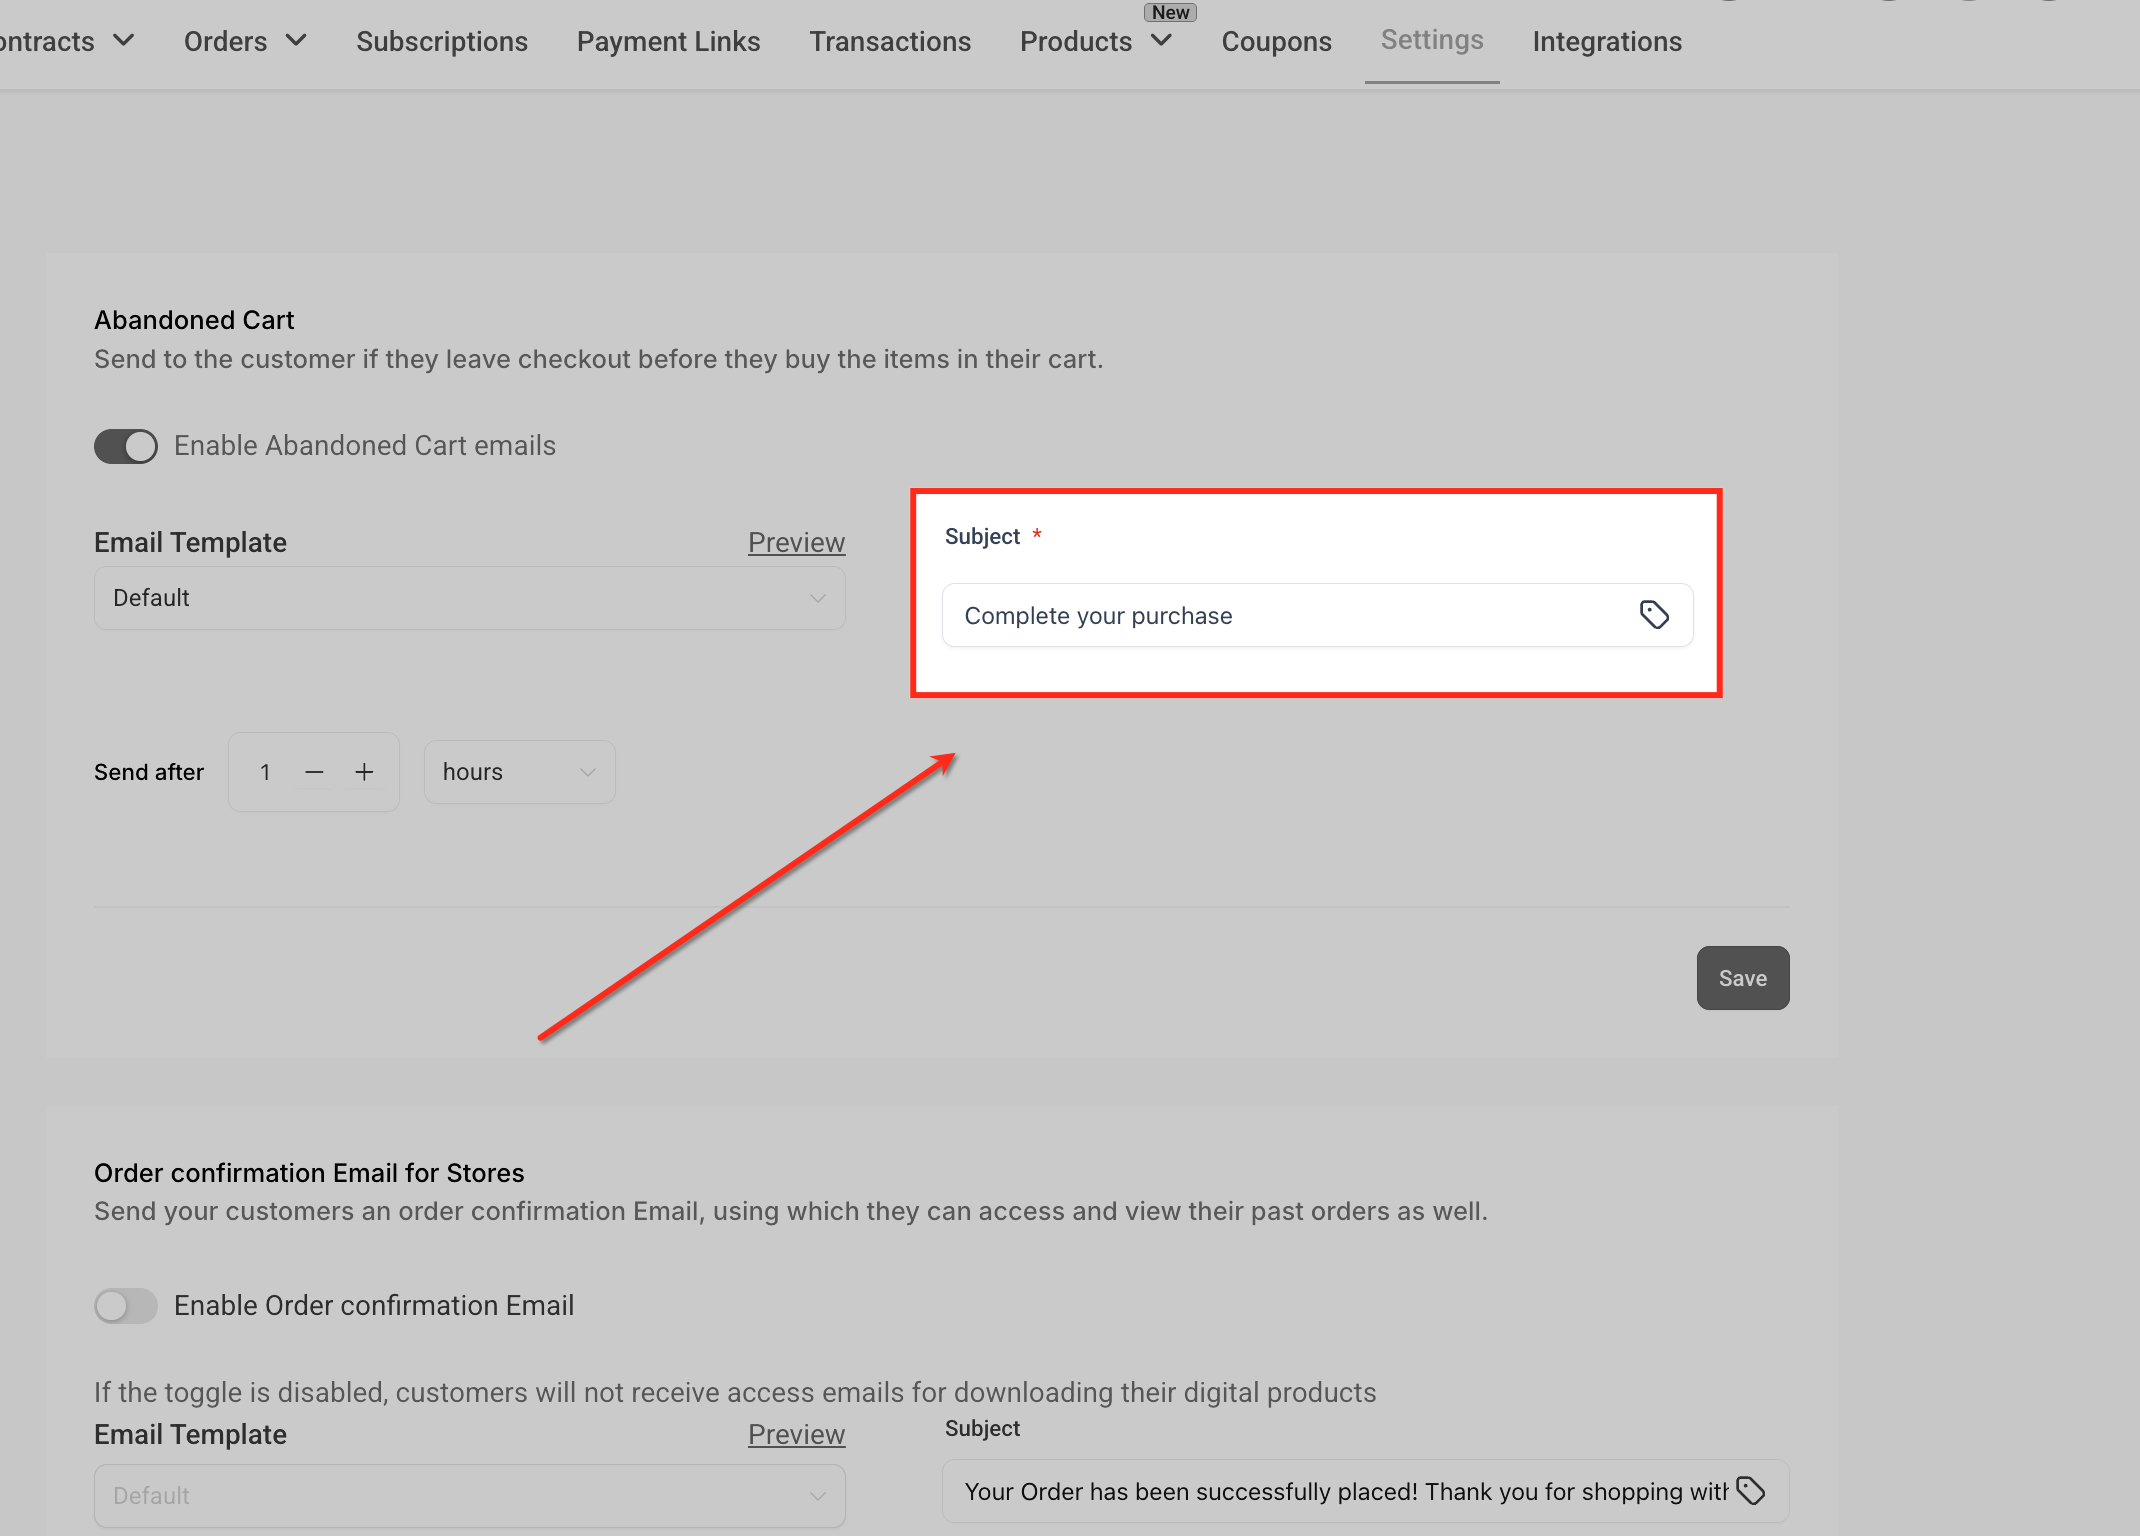
Enter the subject line shoppers will see in their inbox. Use a friendly, action-driven line that nudges them to come back and finish checking out.
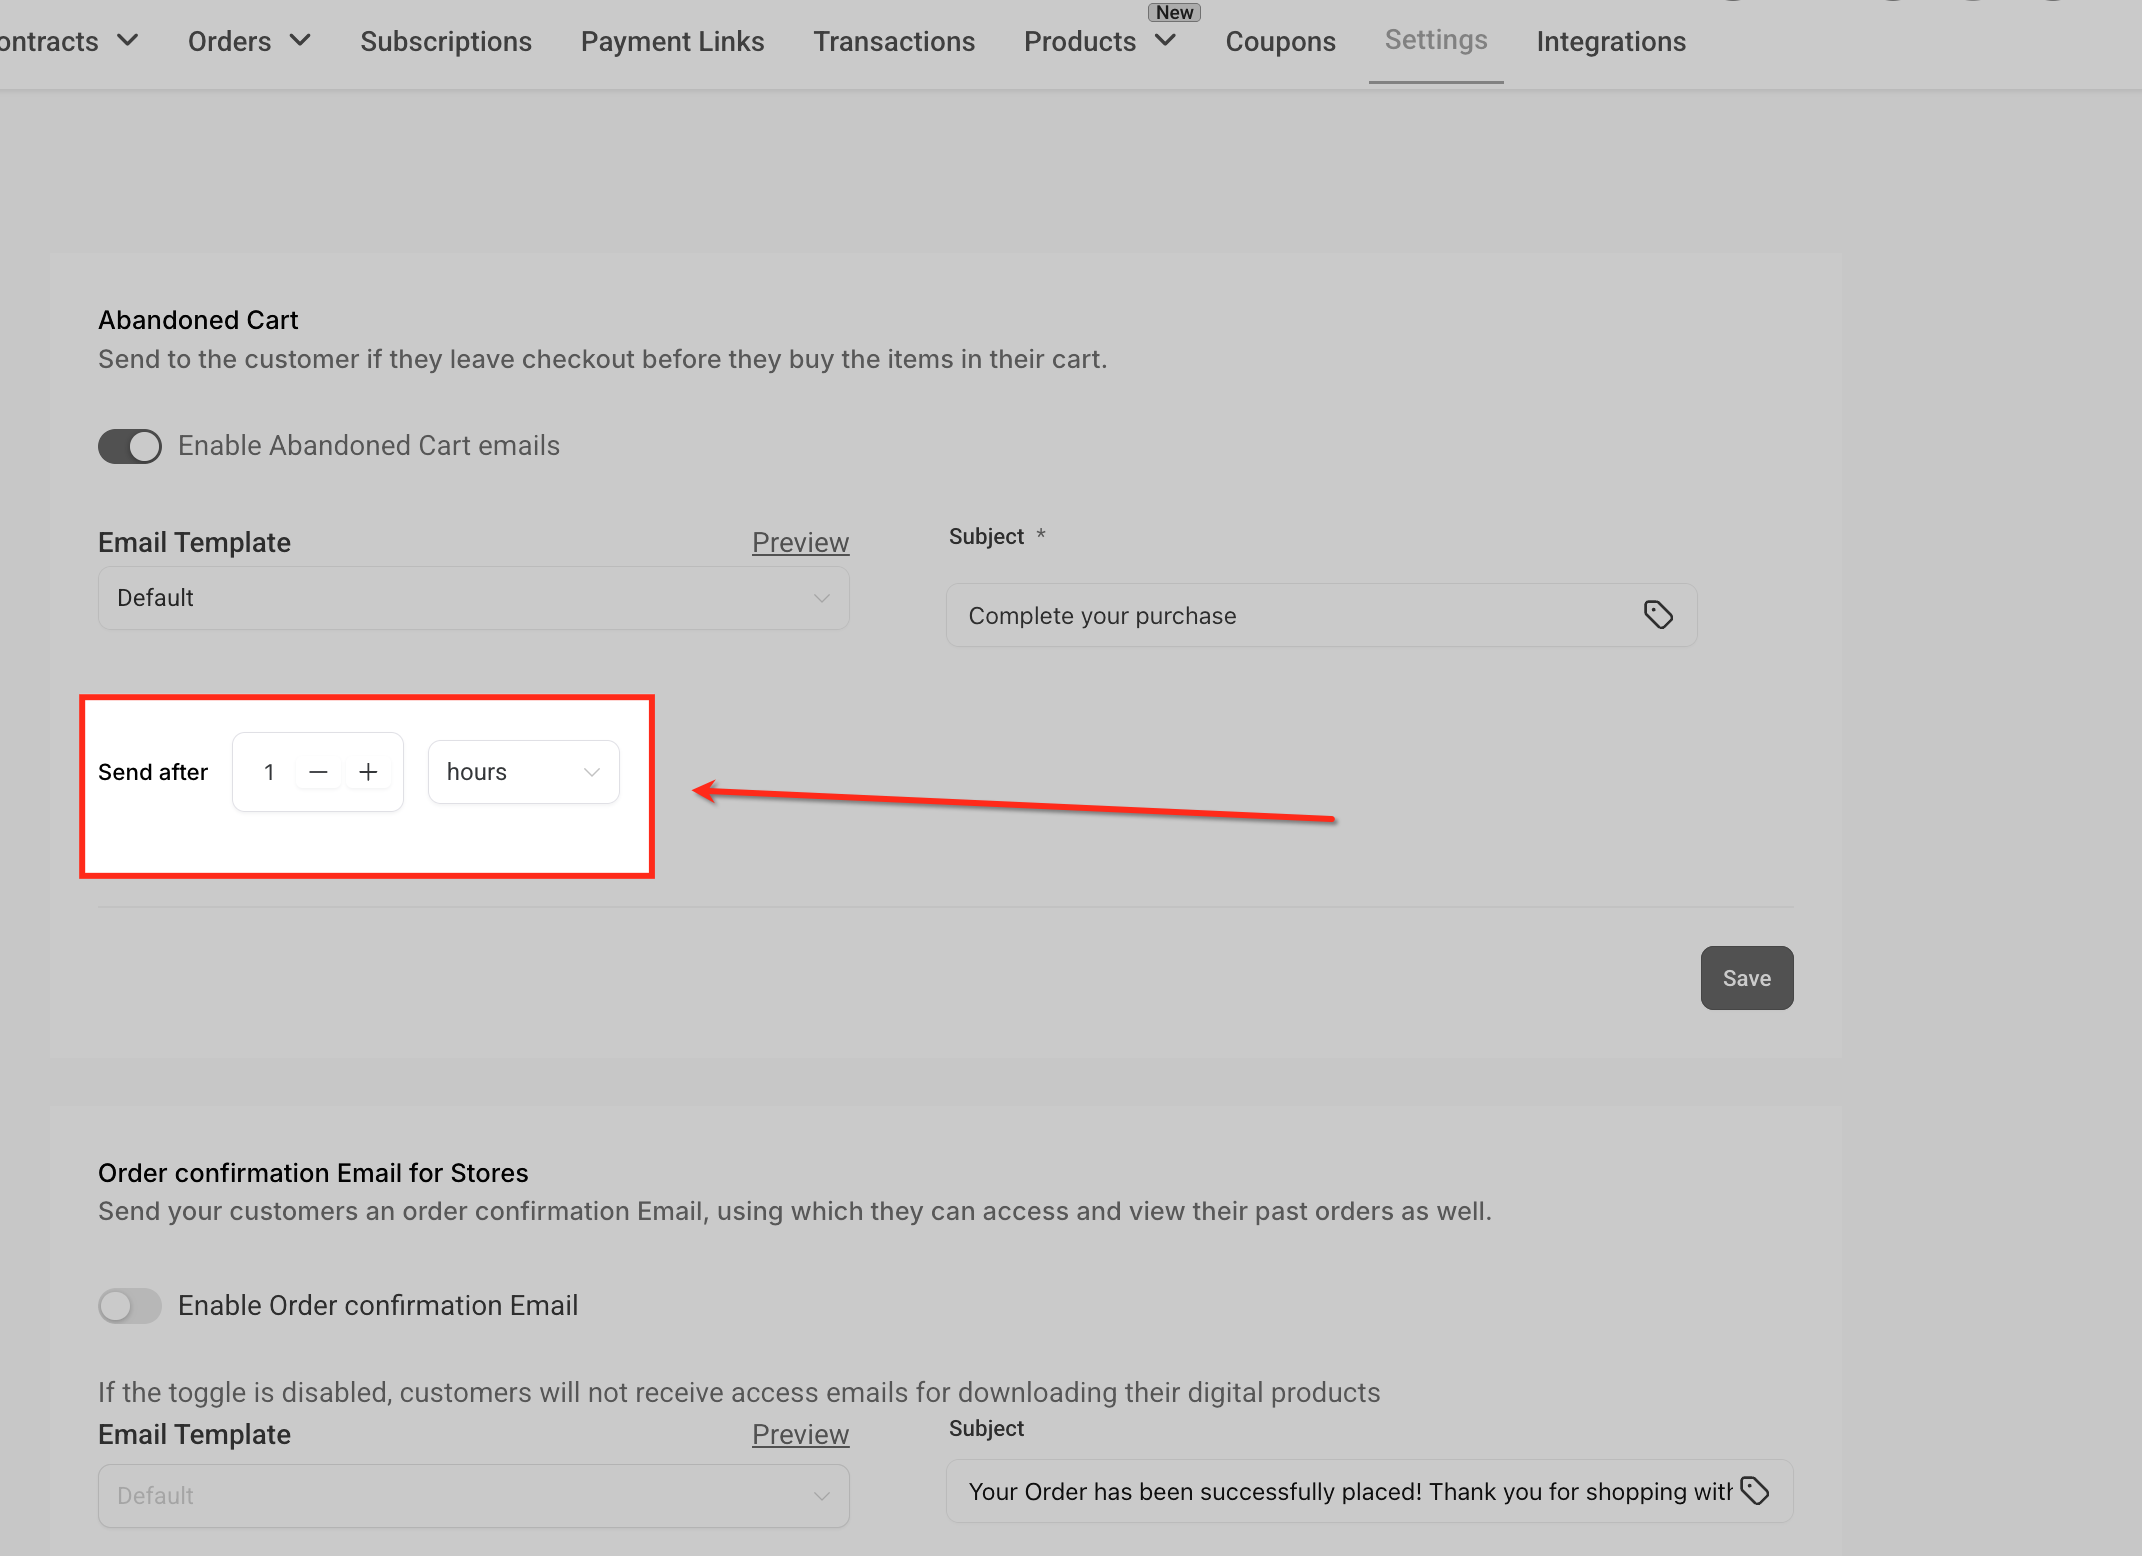
Set Send after to control how long the system waits before sending the reminder. The default is 10 hours; adjust it in hours or minutes to match your follow-up strategy.
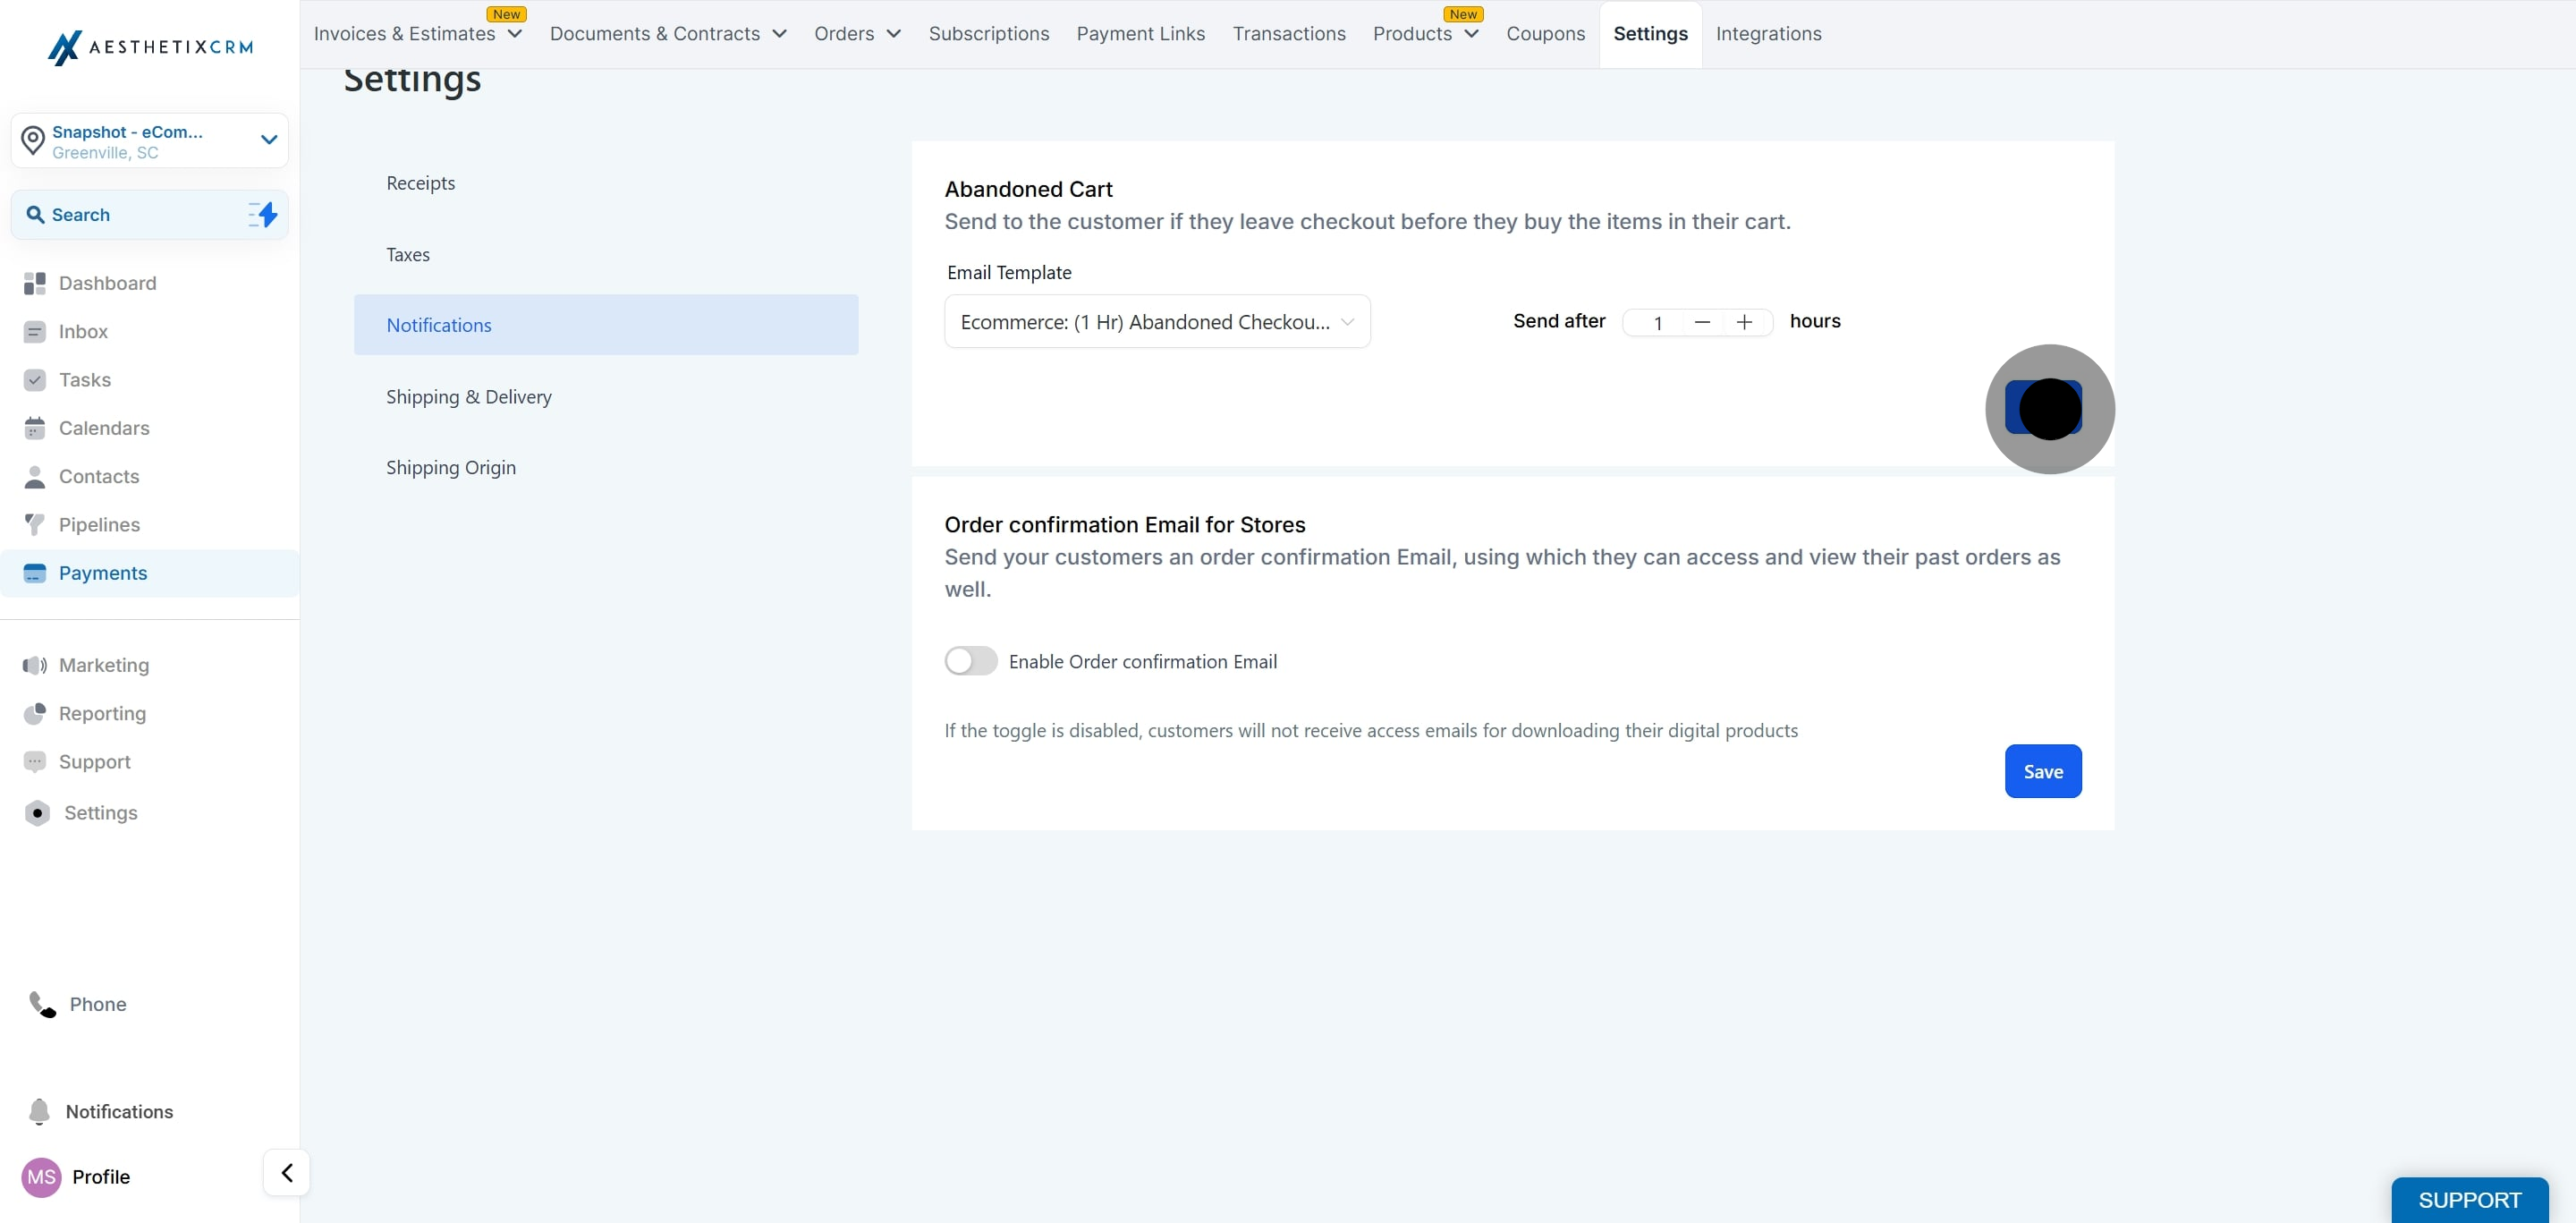
Click Save to finish.
If you skip the template step entirely, Aesthetix CRM still sends its built-in default template with products displayed dynamically, so recovery emails go out even before you've designed a custom one.
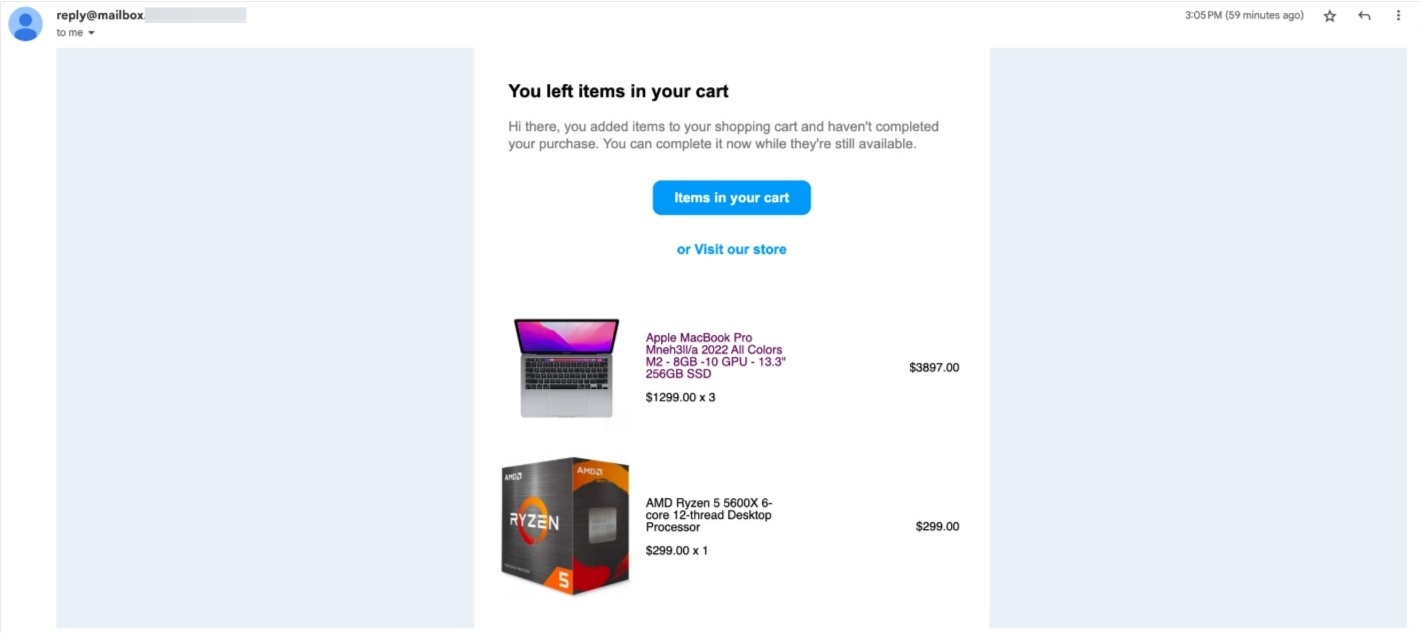
The default template works out of the box, but most practices get better results with a template that matches their brand and speaks directly to the products left behind.
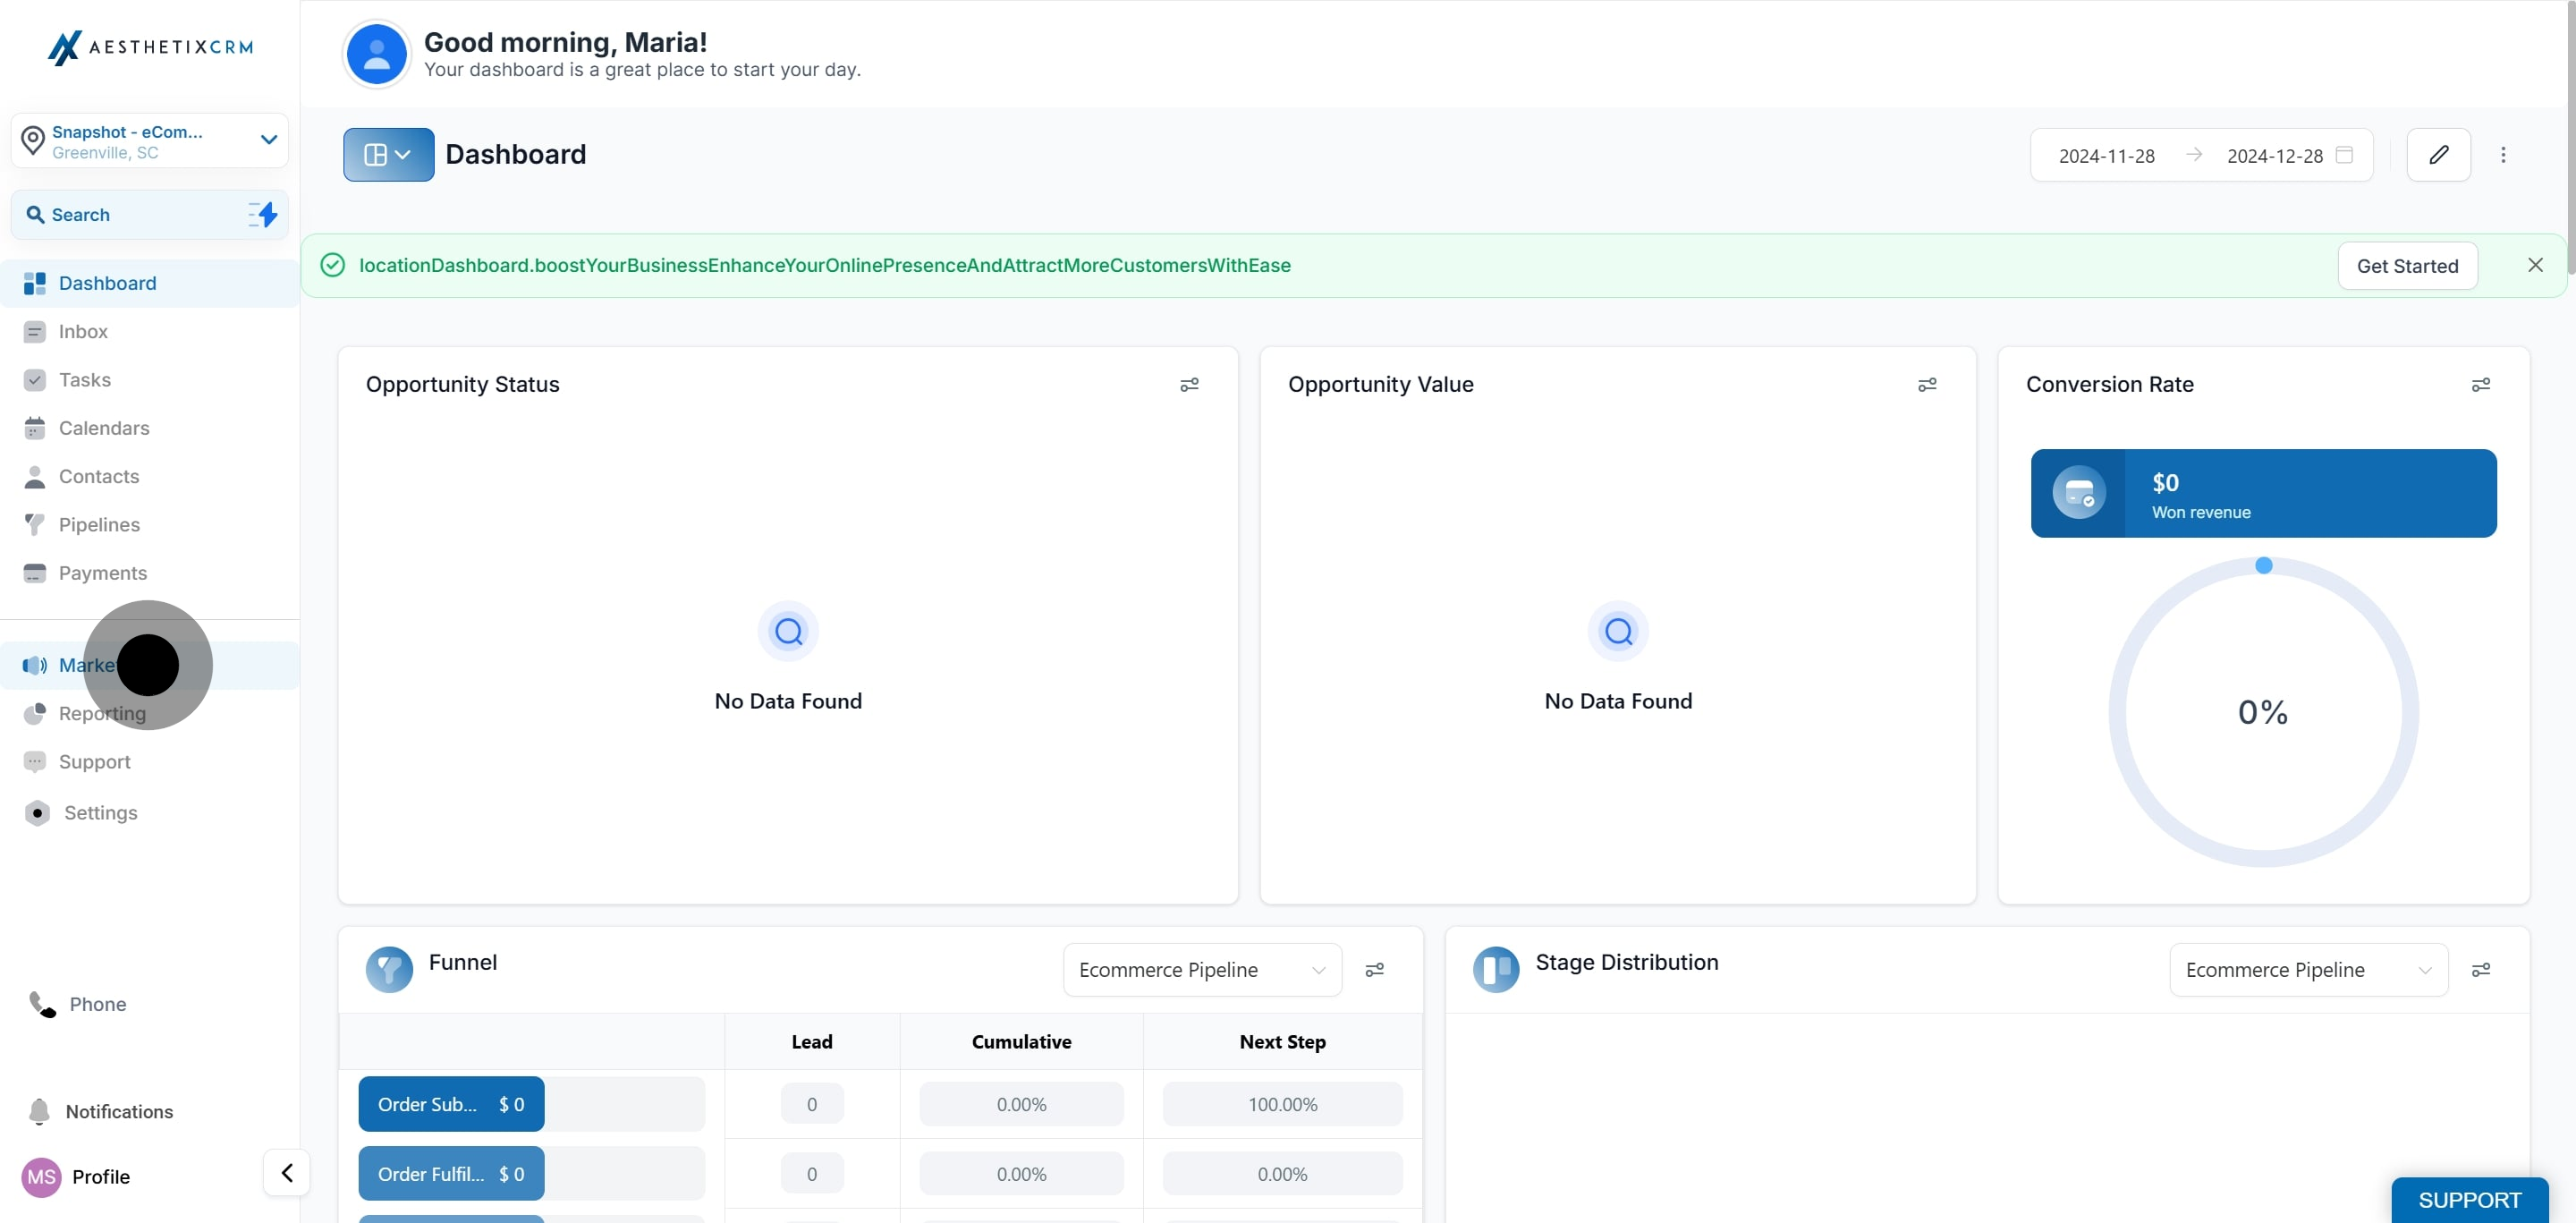
Navigate to the Marketing section in the left-hand menu.
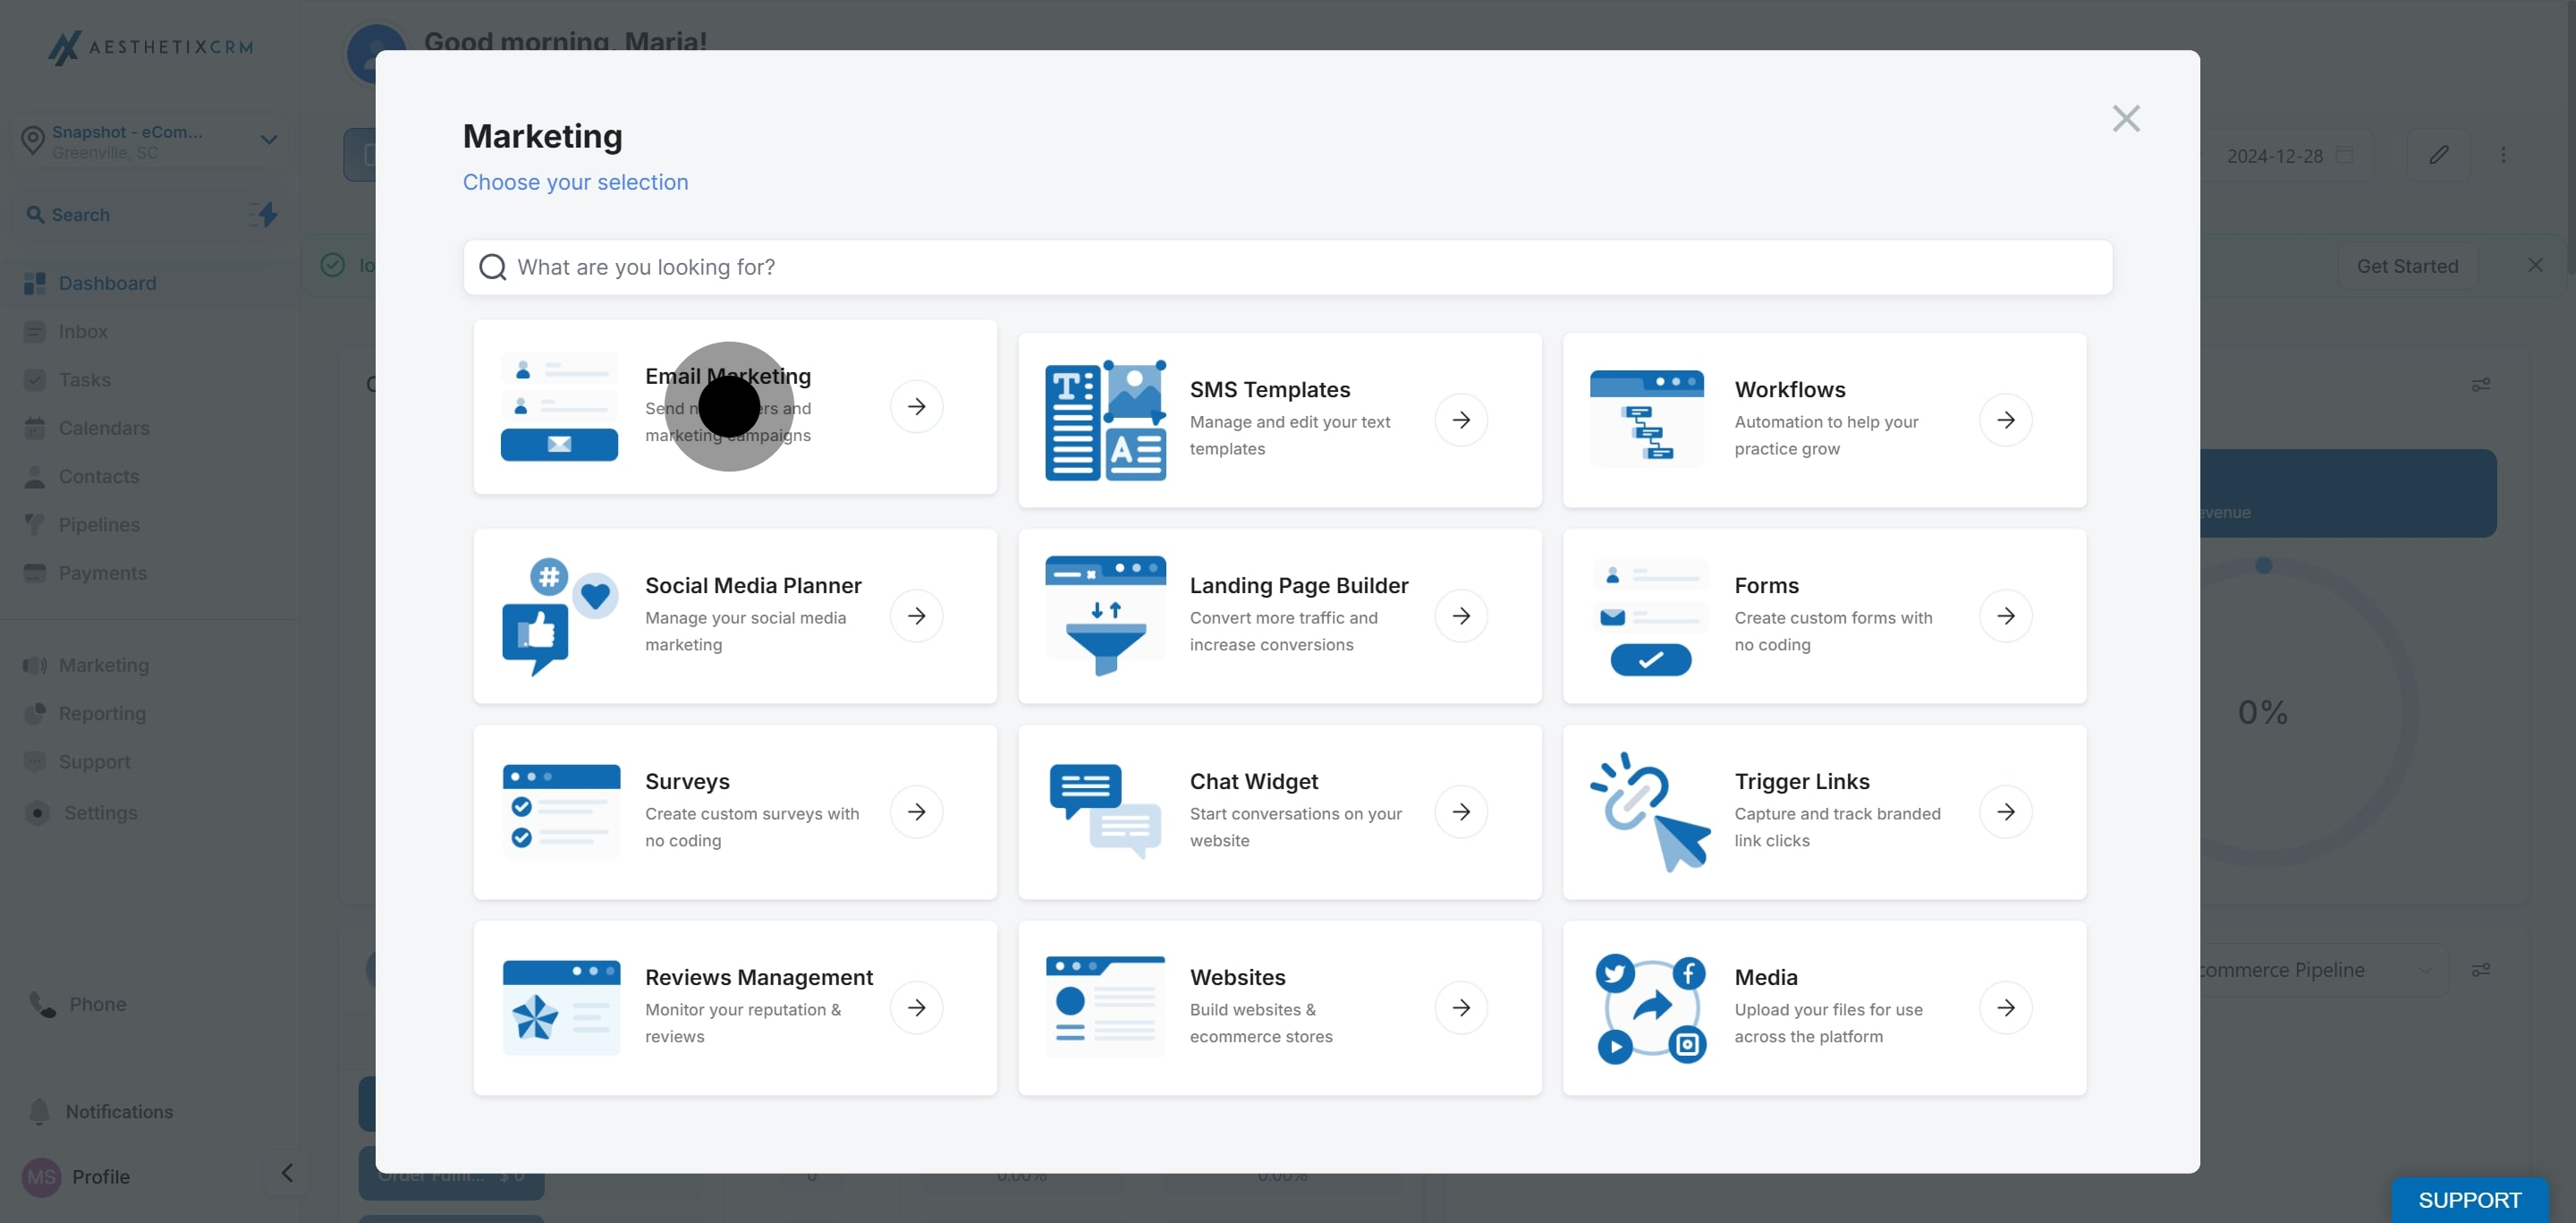
Select Email Marketing from the menu.
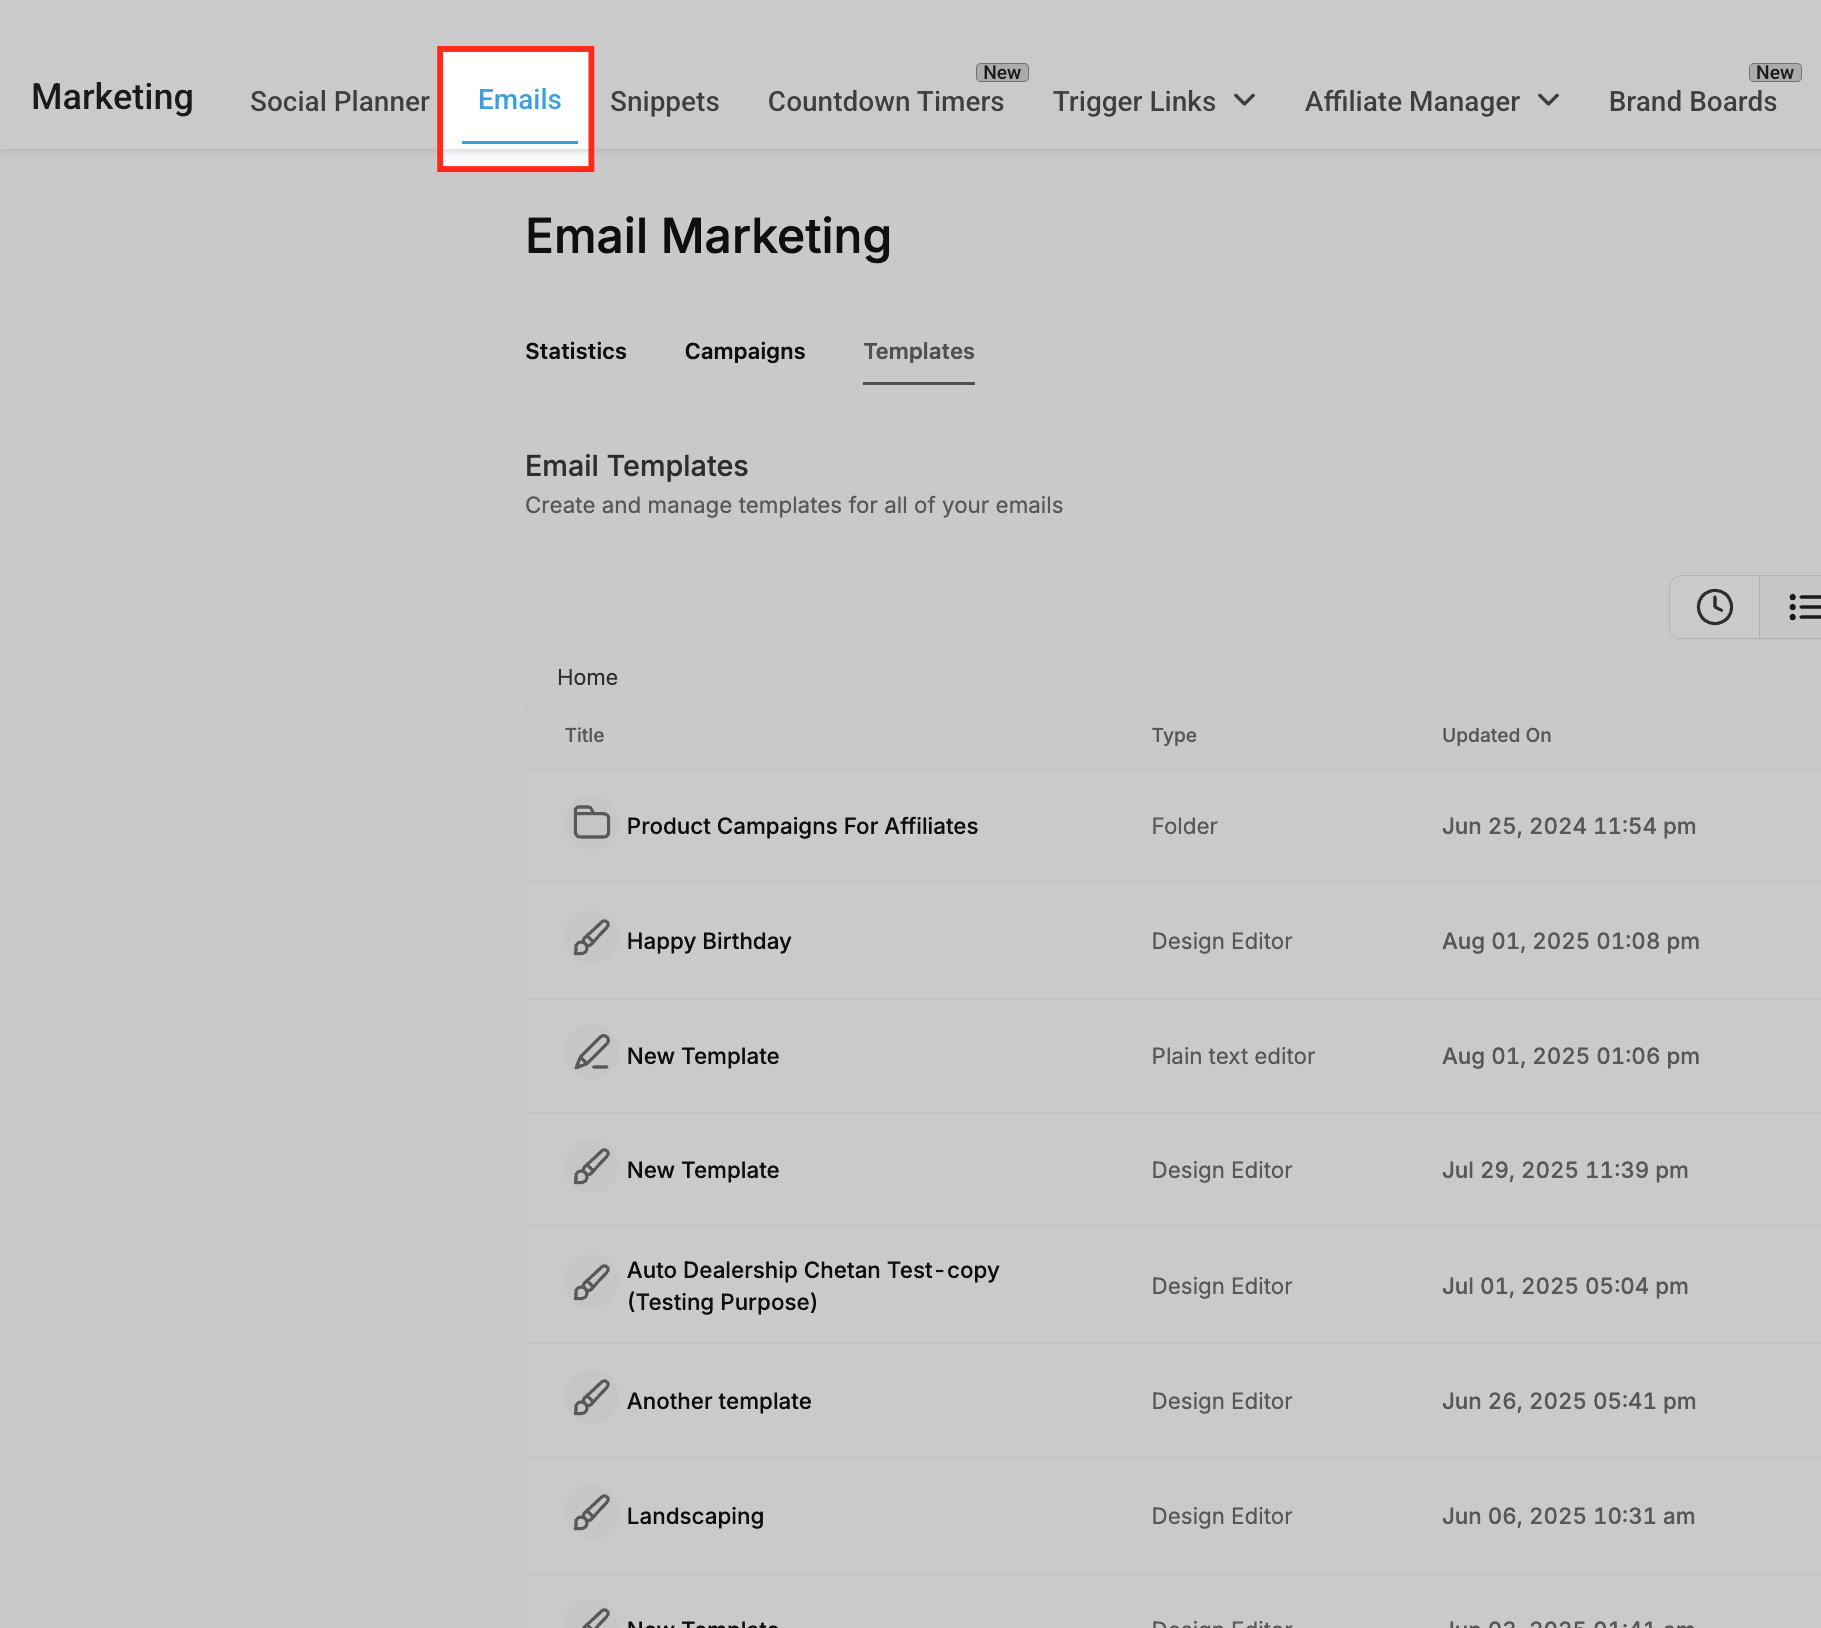
Click the Templates tab.
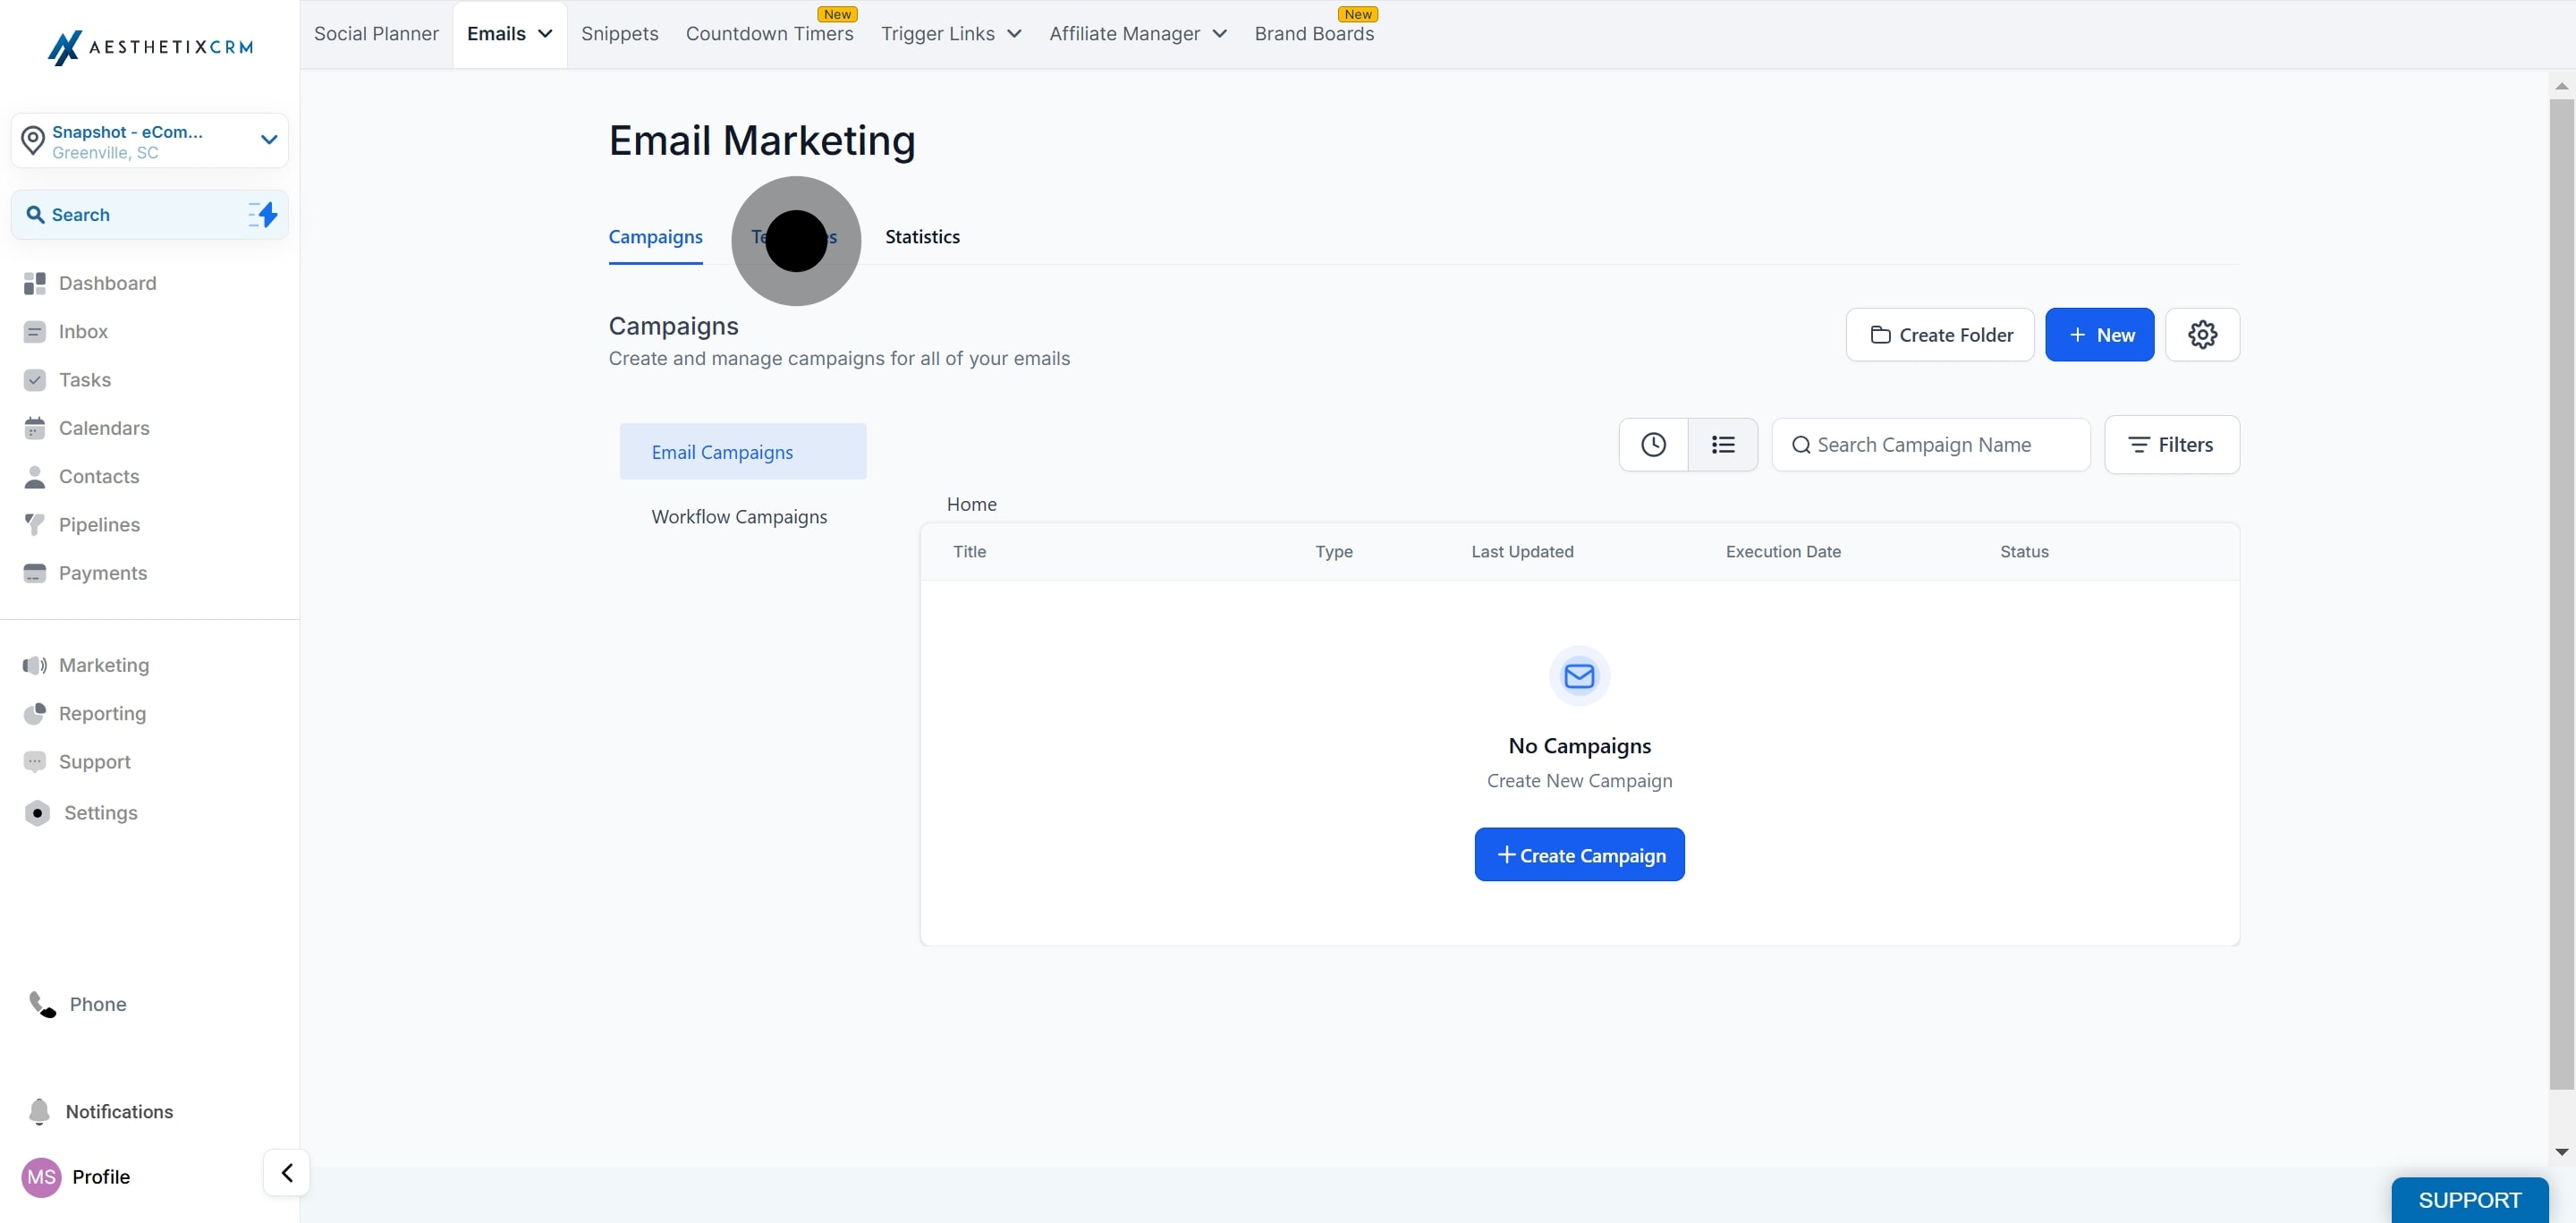
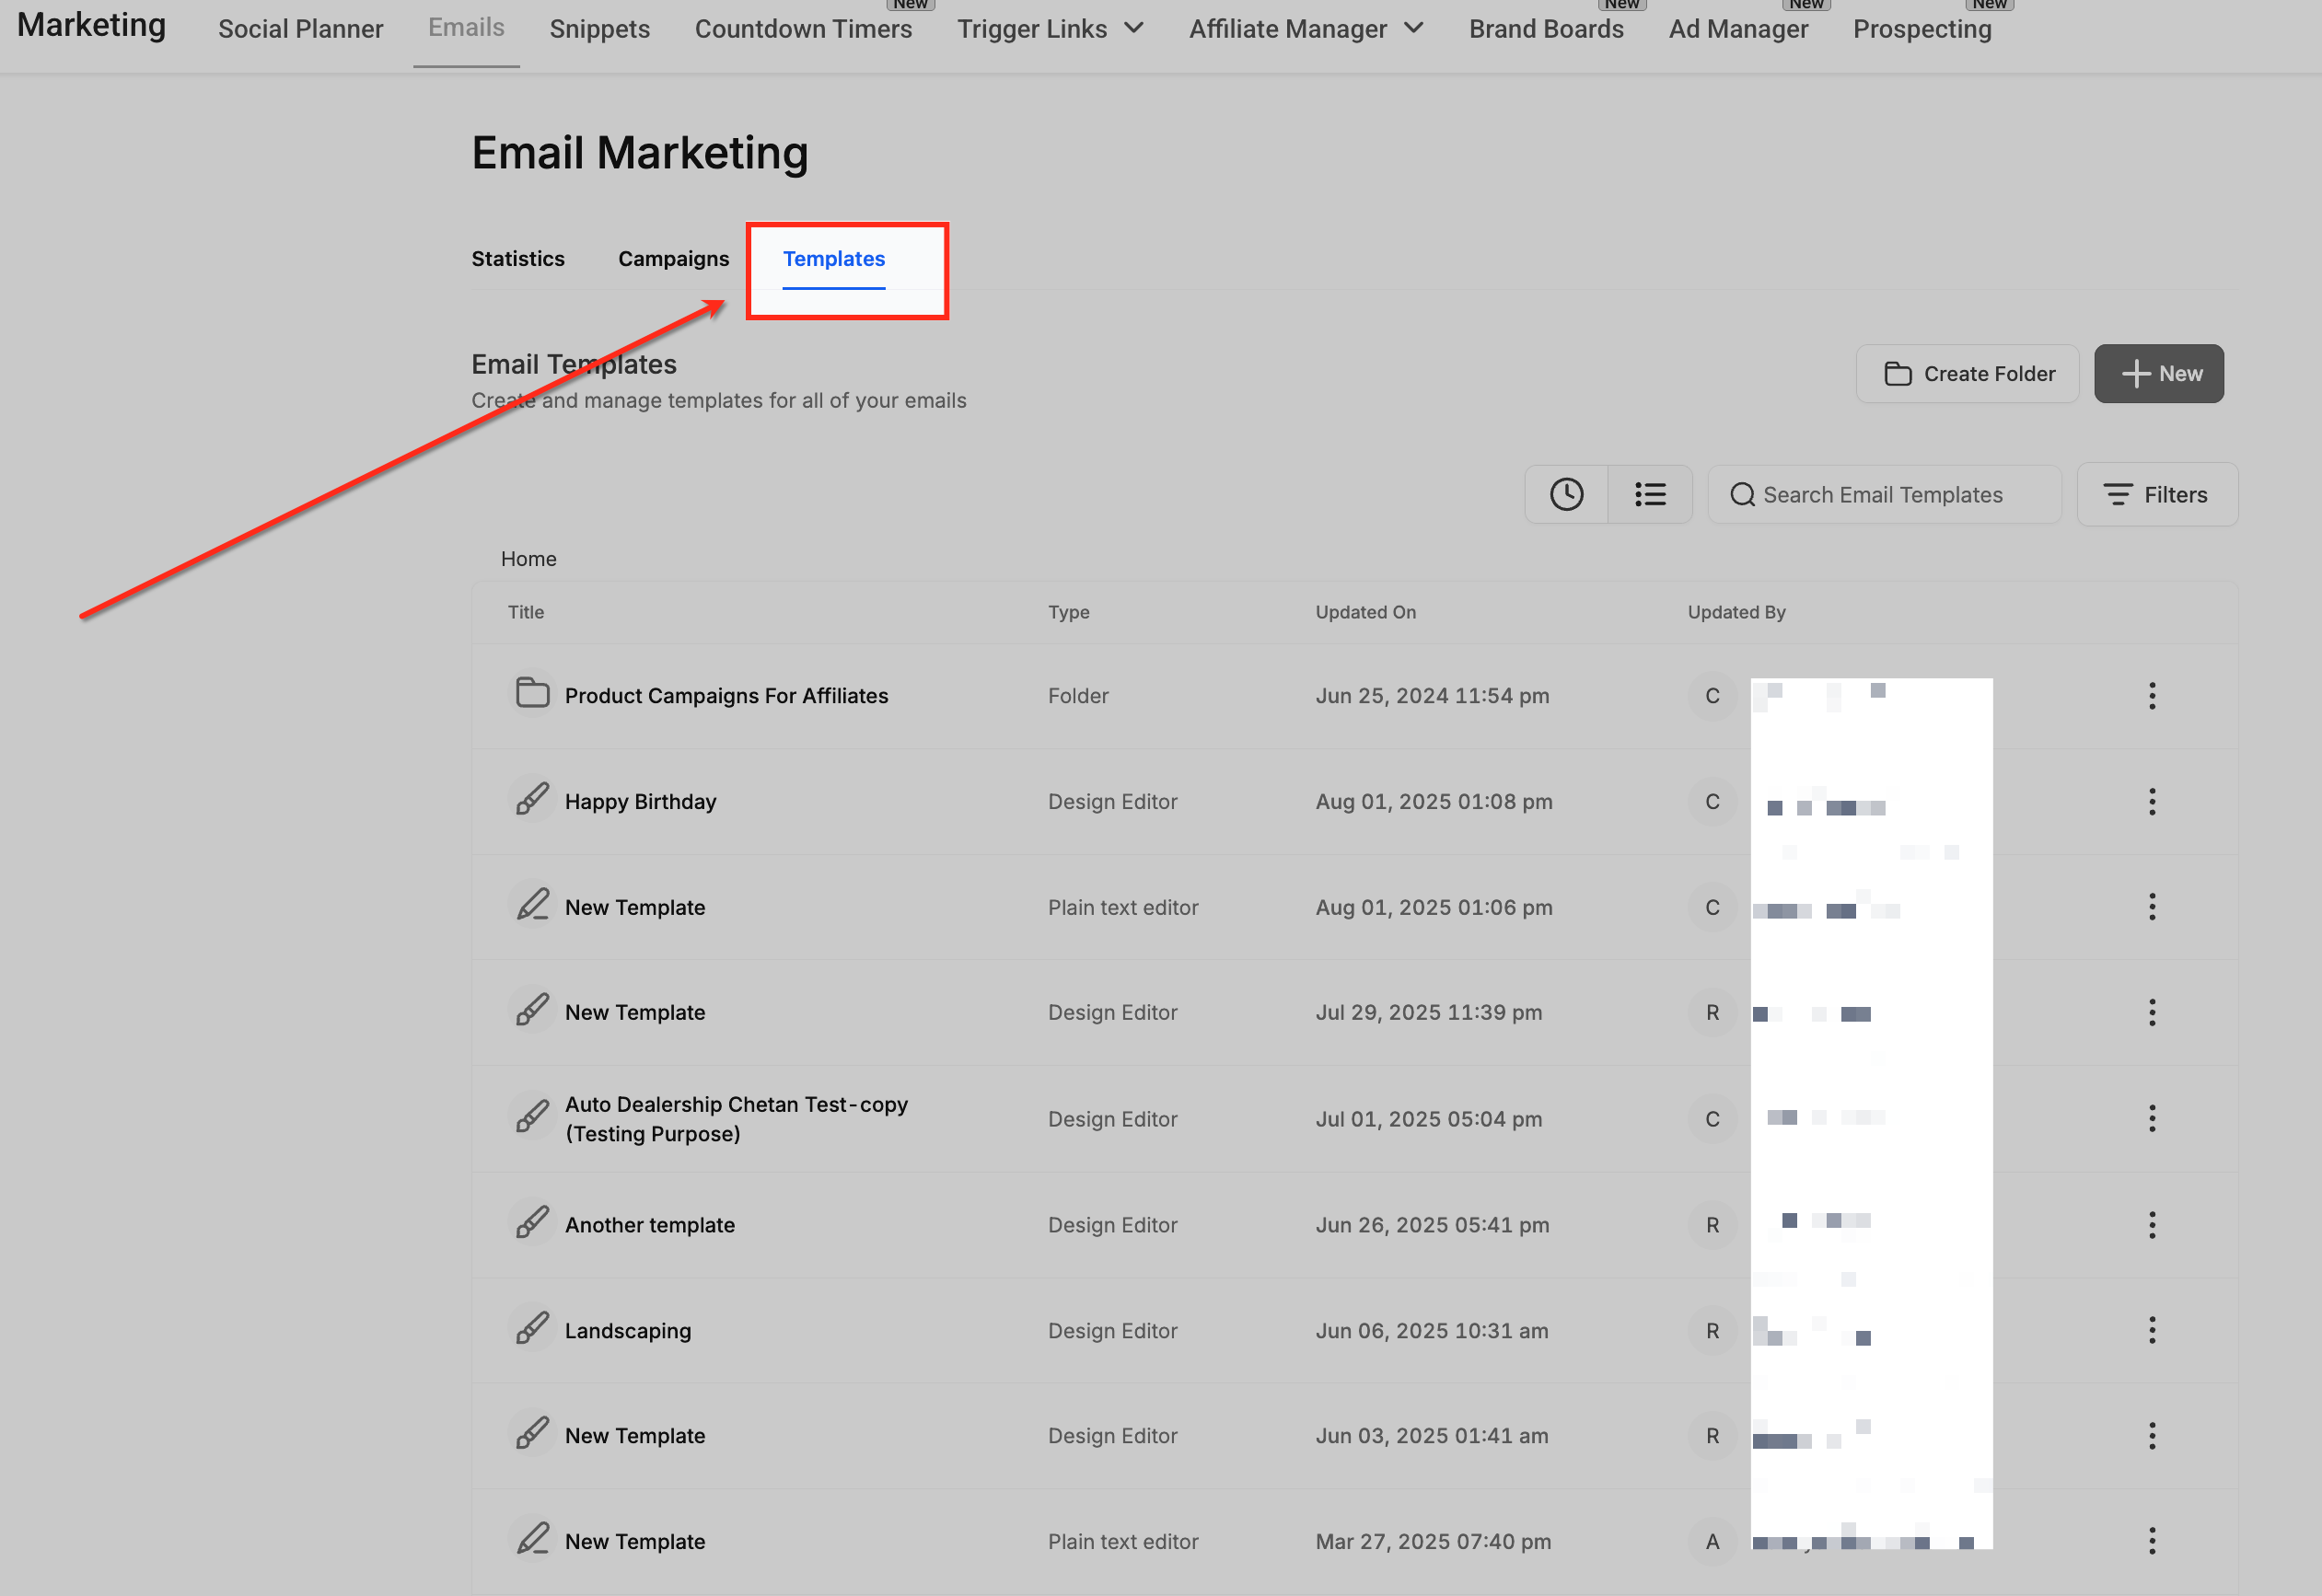
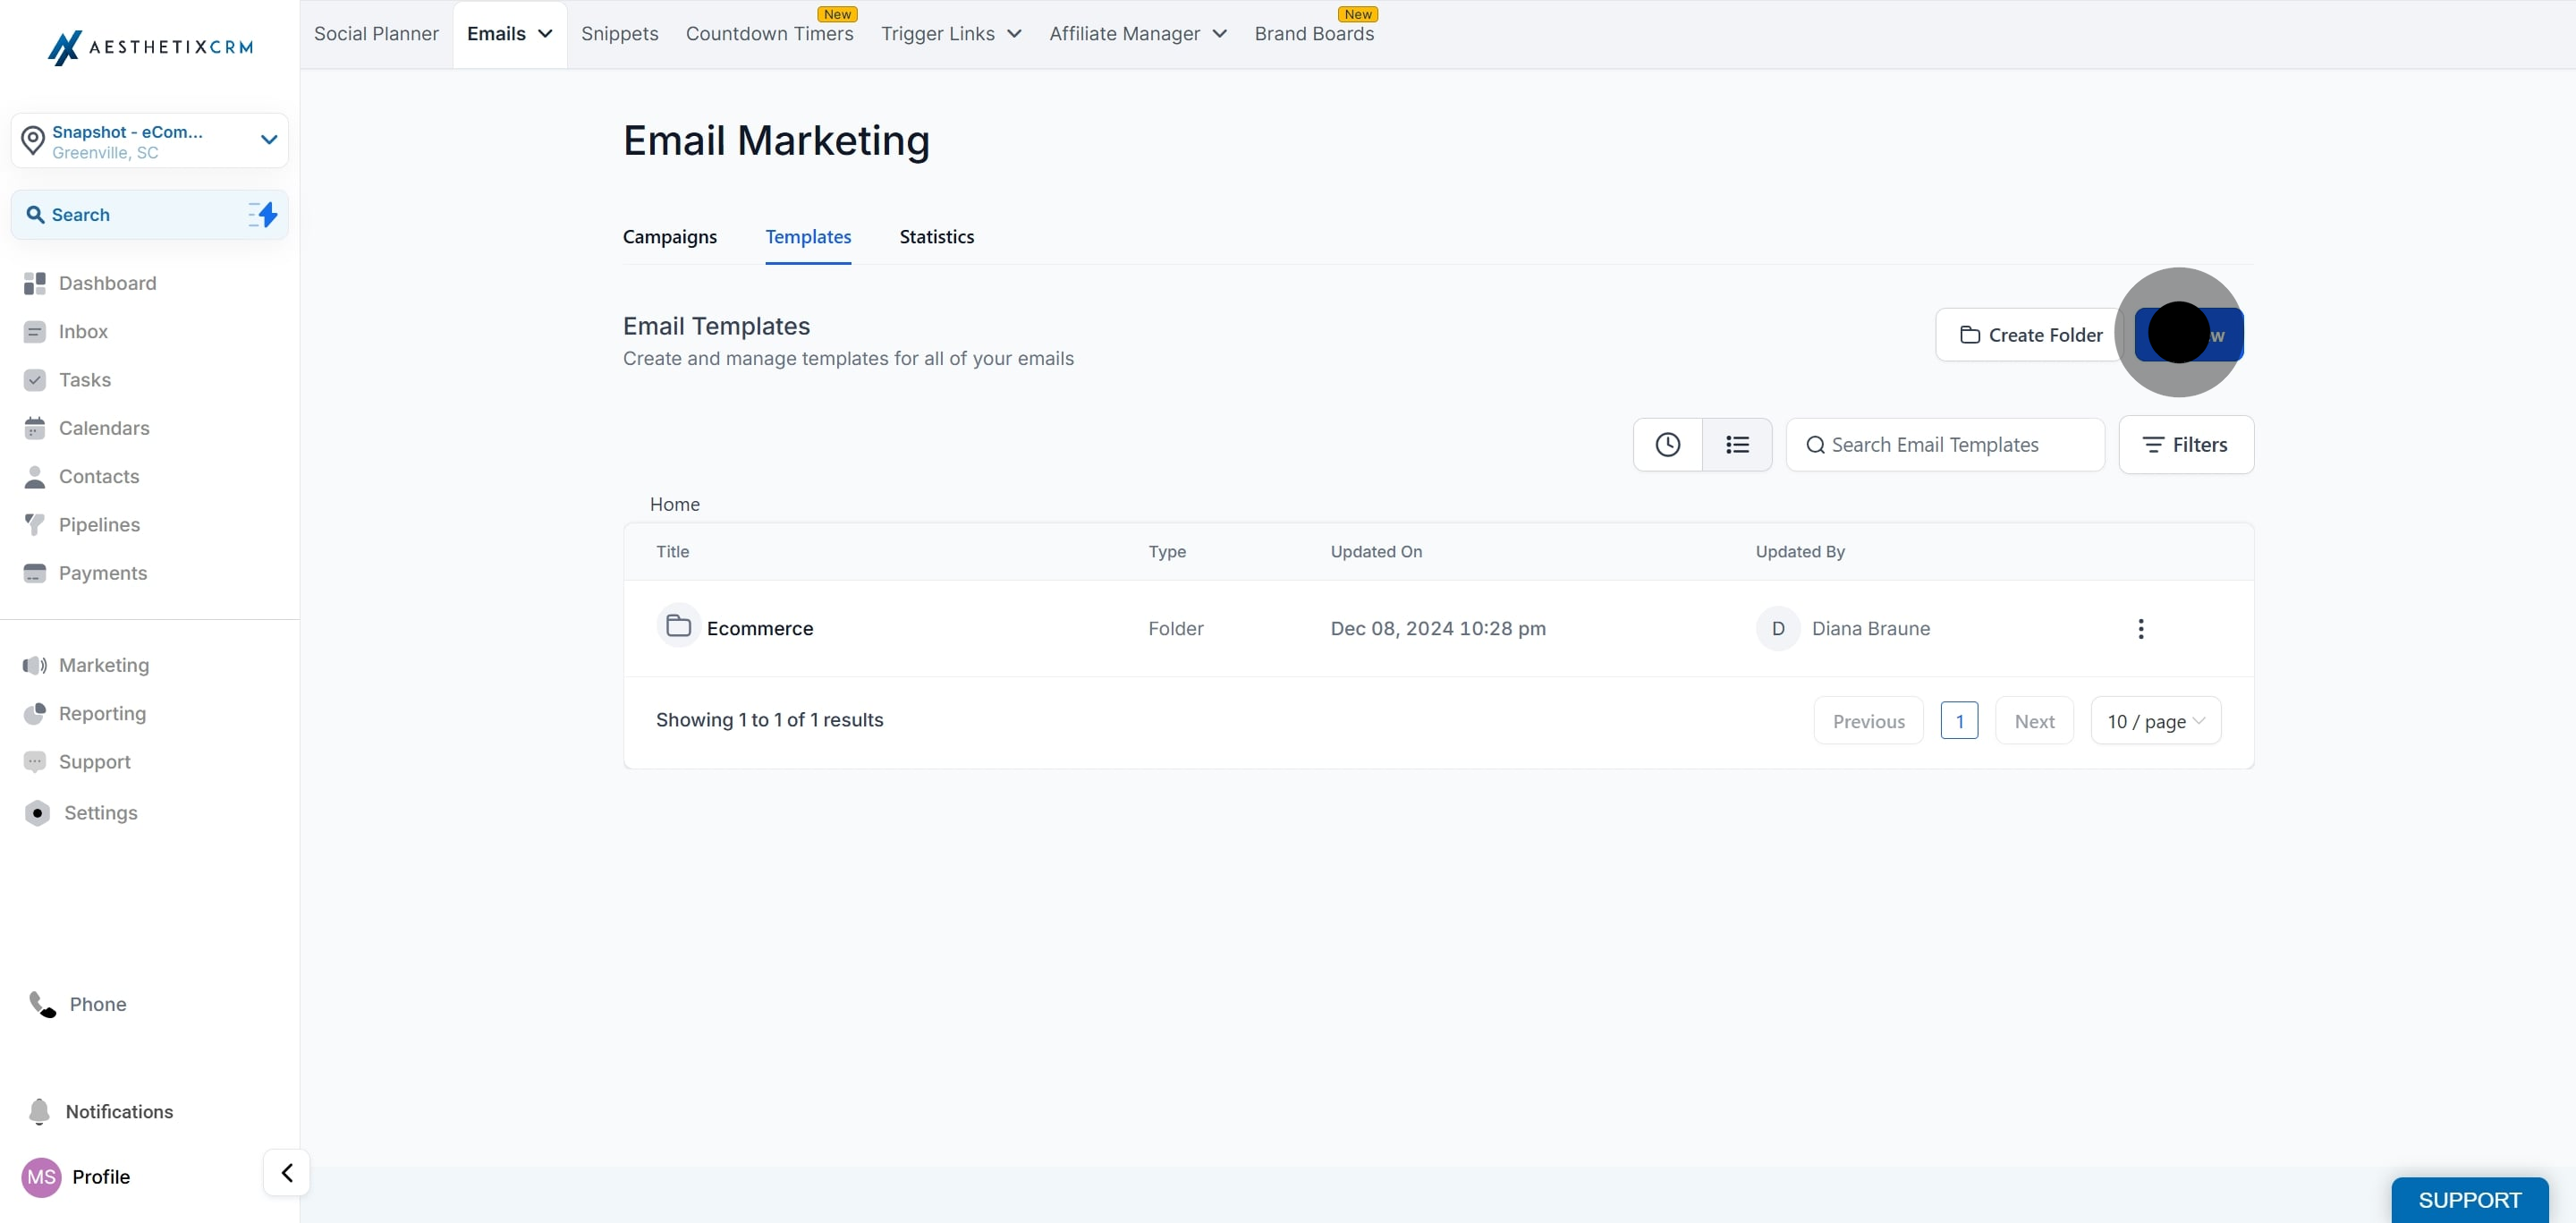
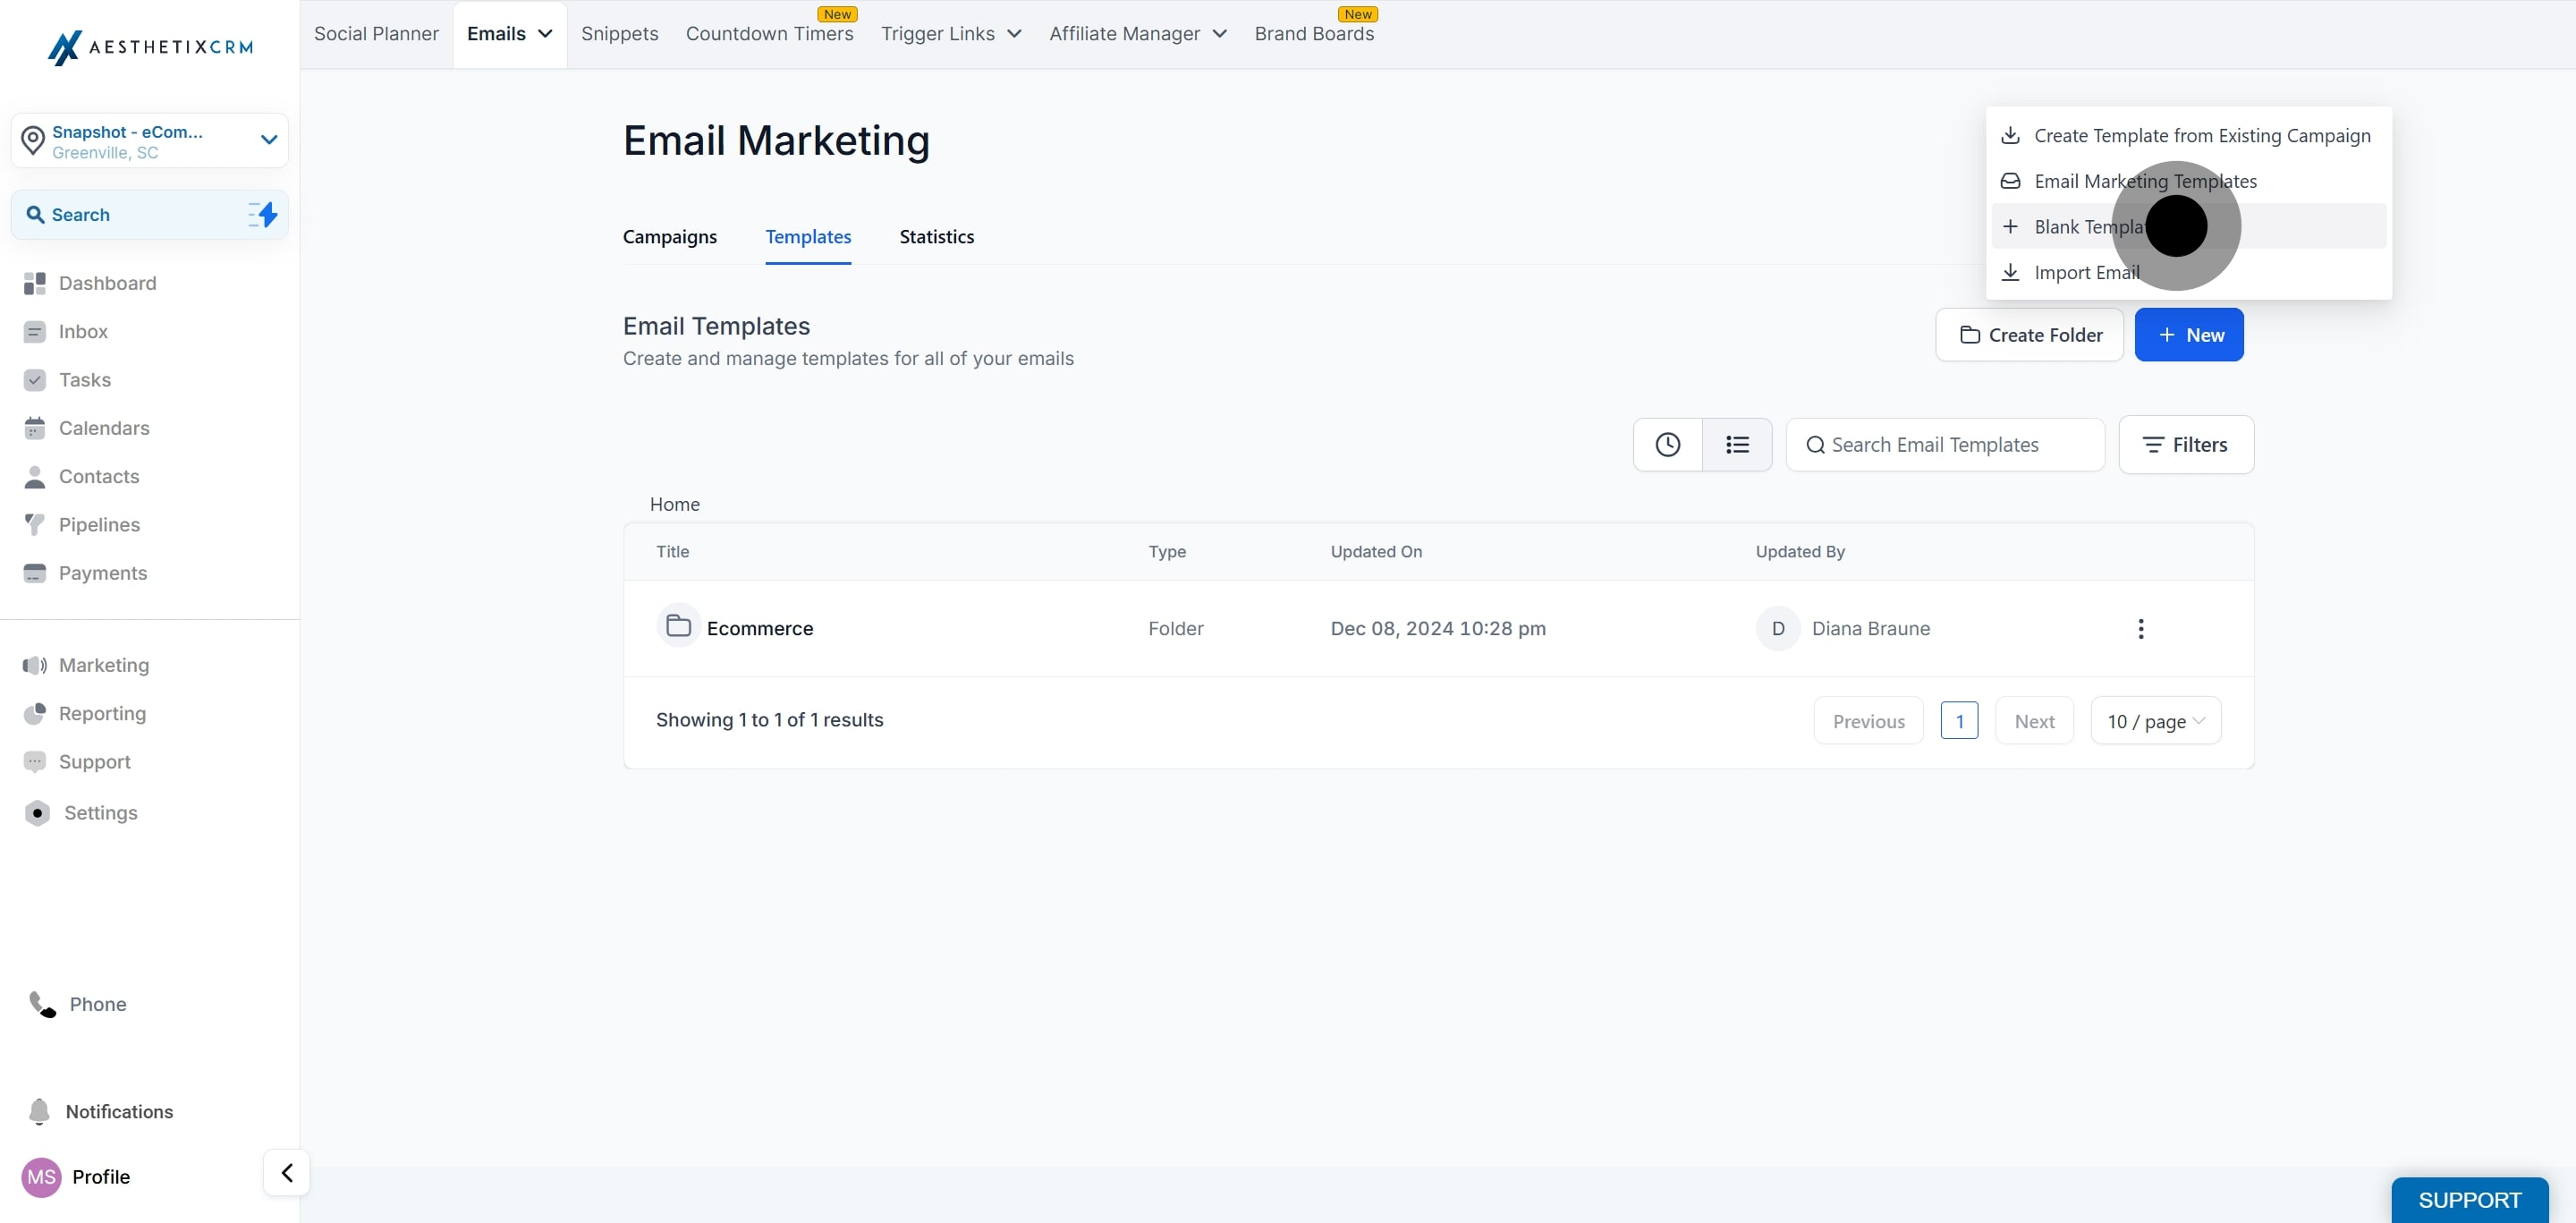
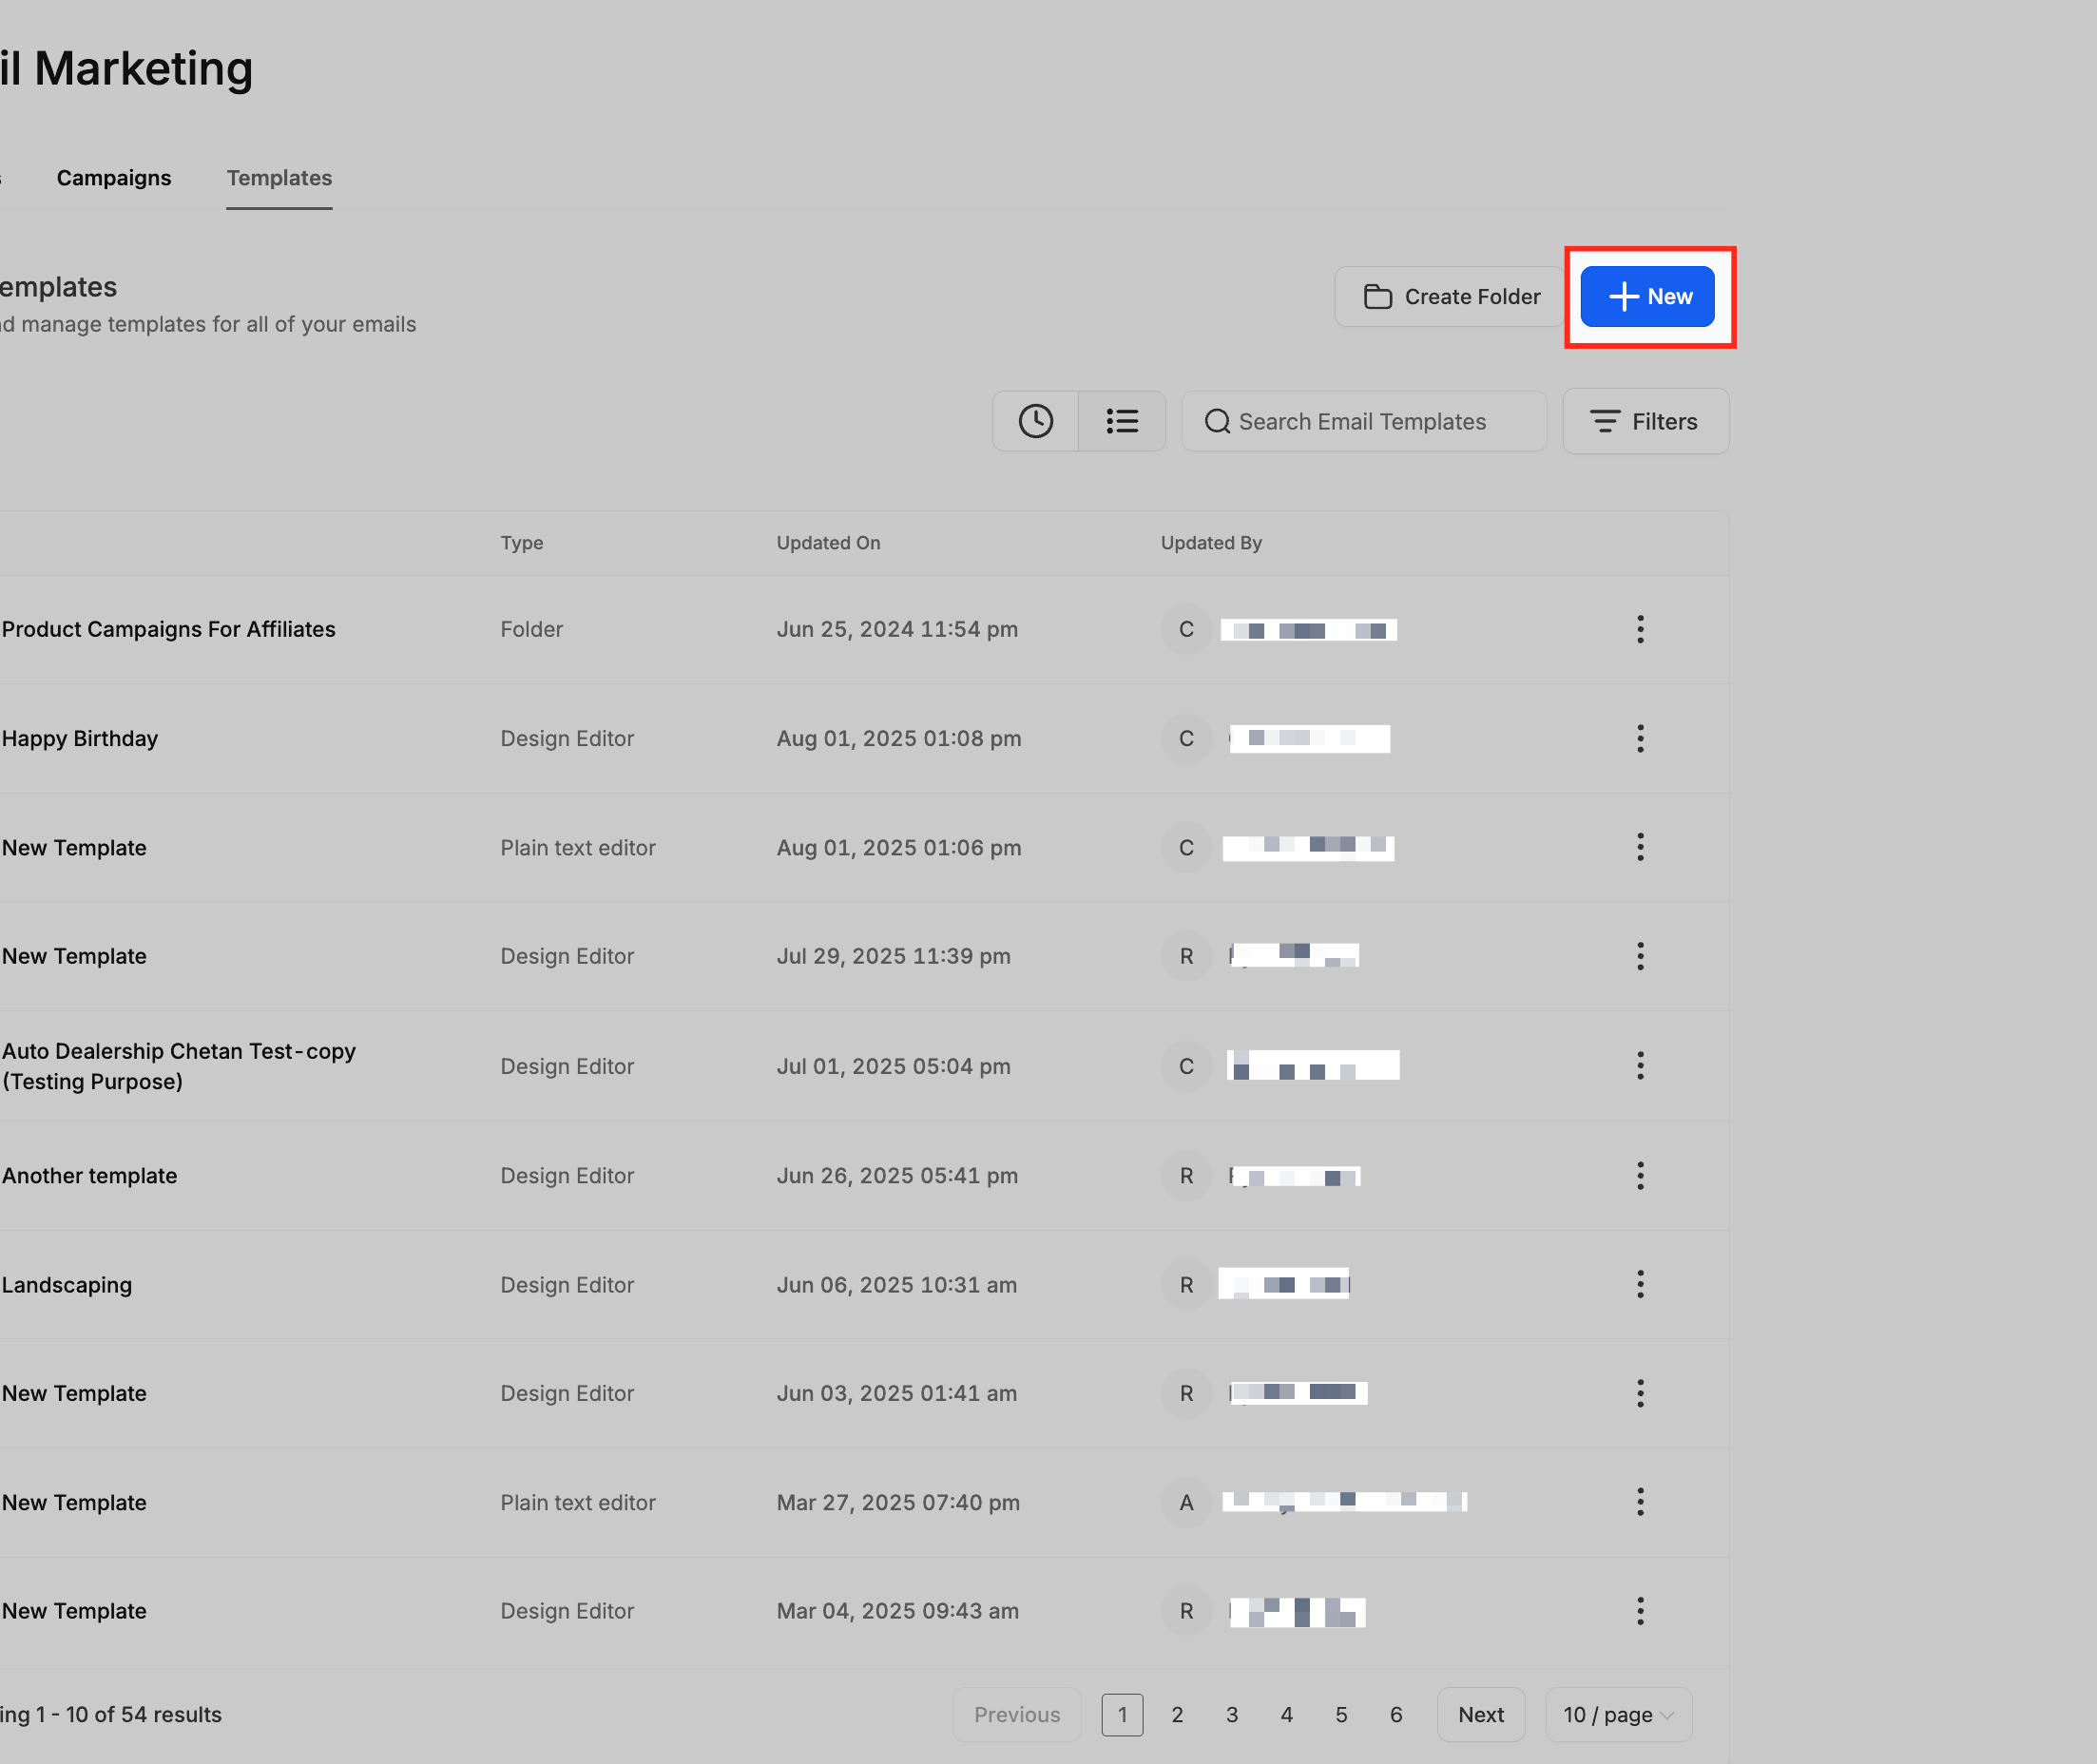
Click New to build a fresh template, then choose Blank Template to start from scratch, or select an existing saved template from the list.
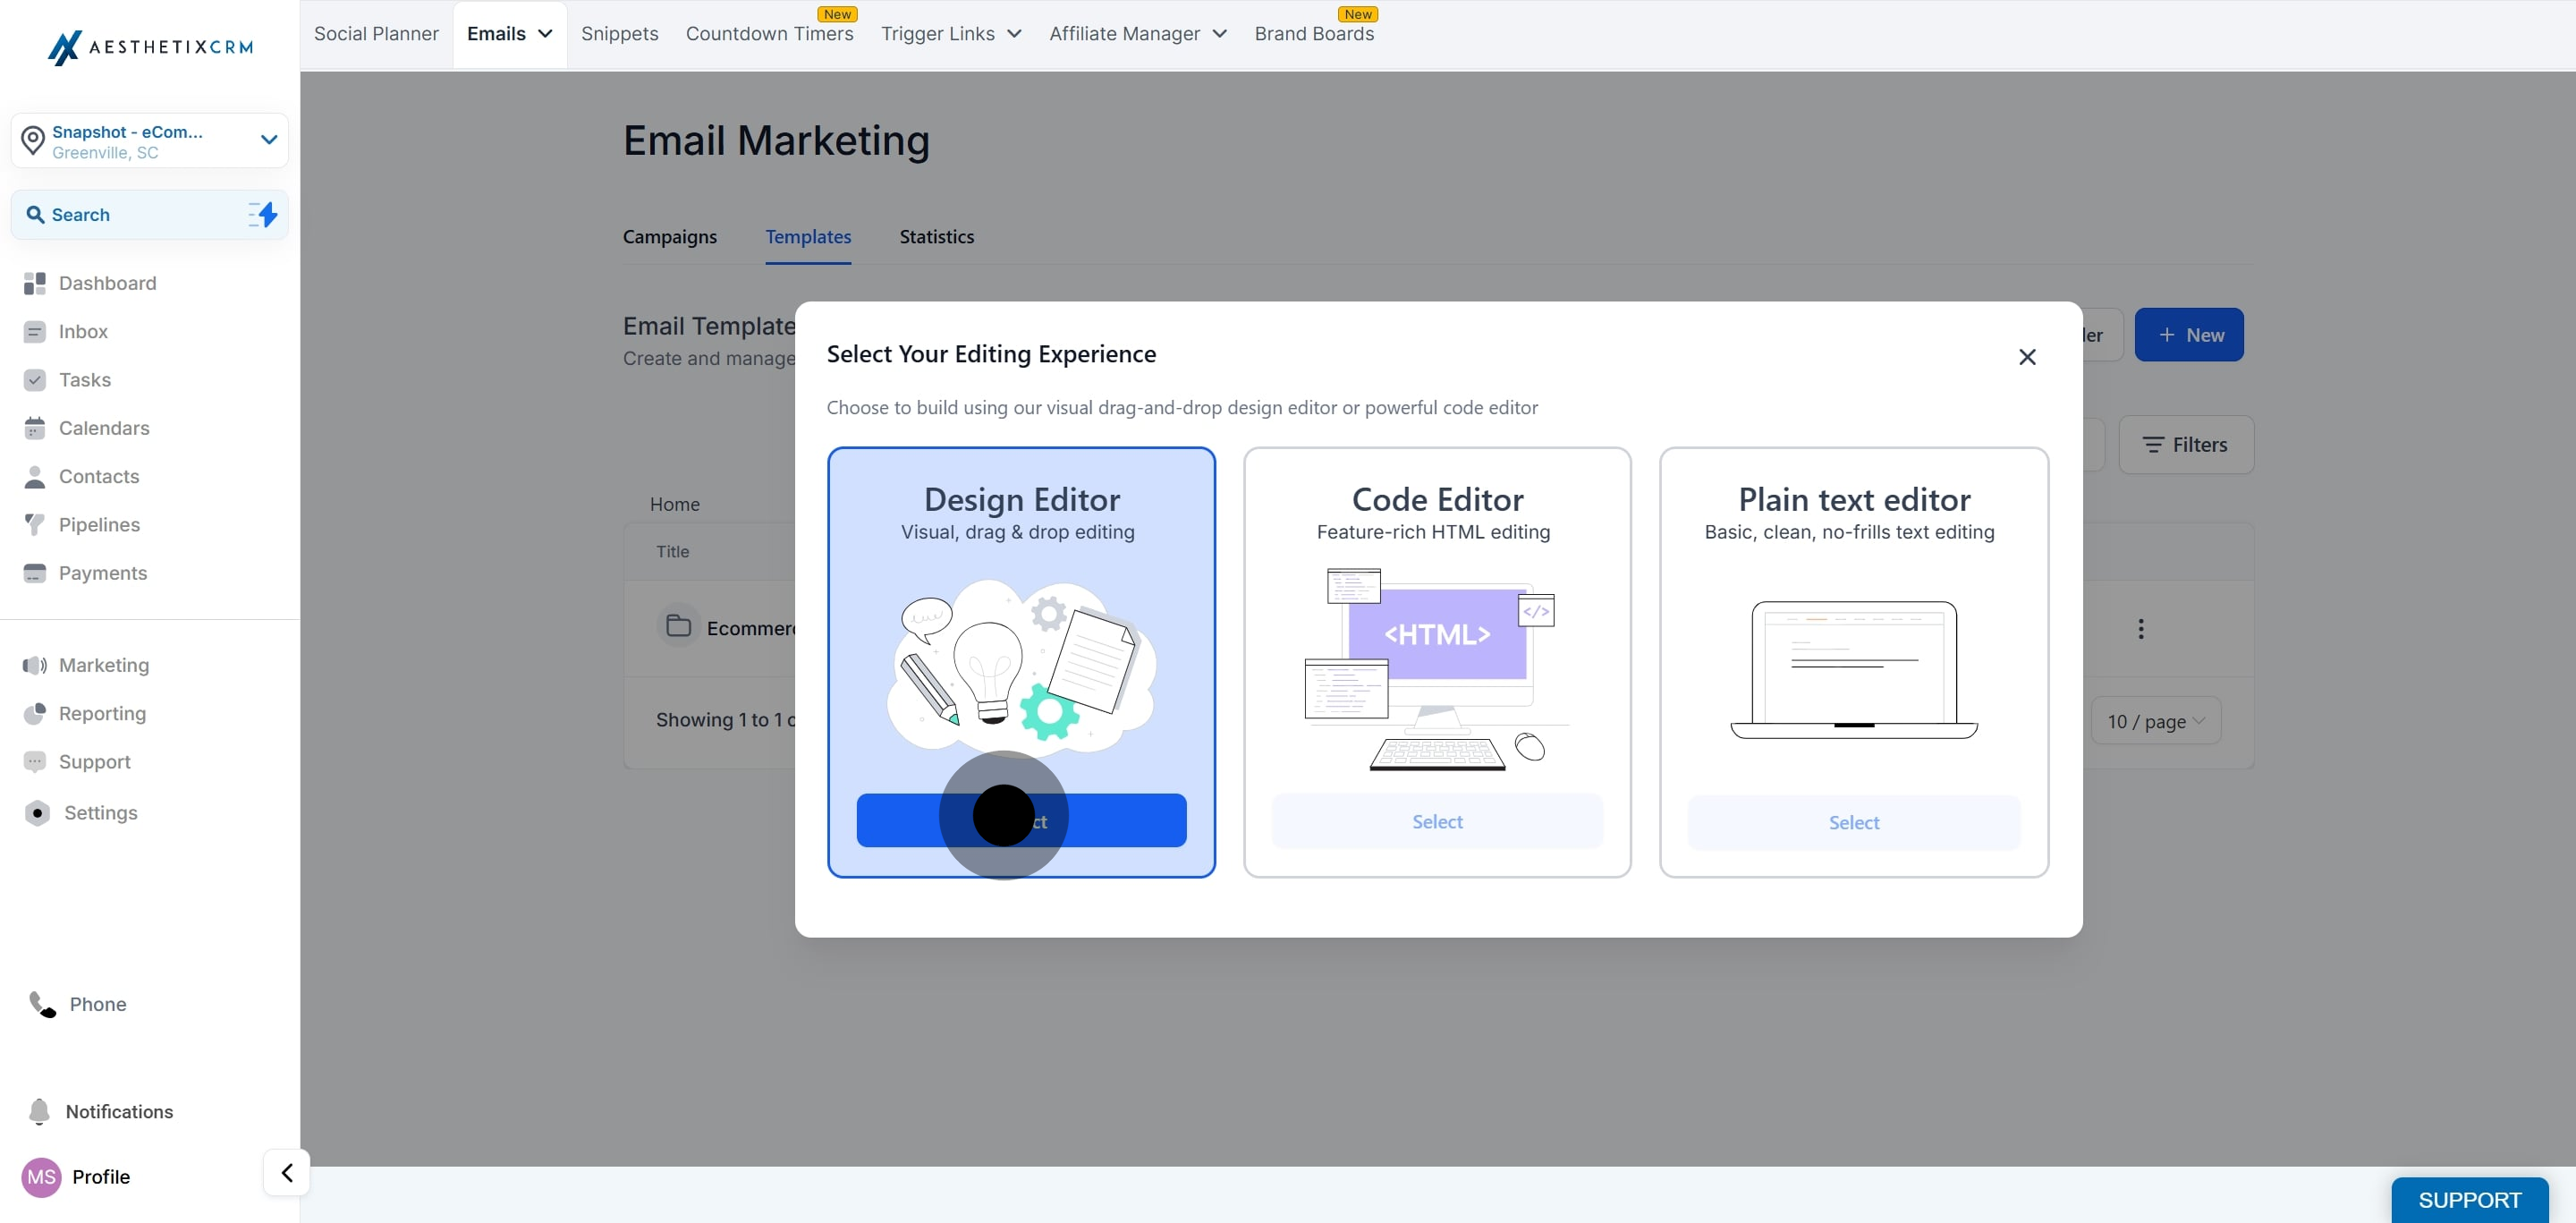
Select your preferred editing experience to begin customizing.
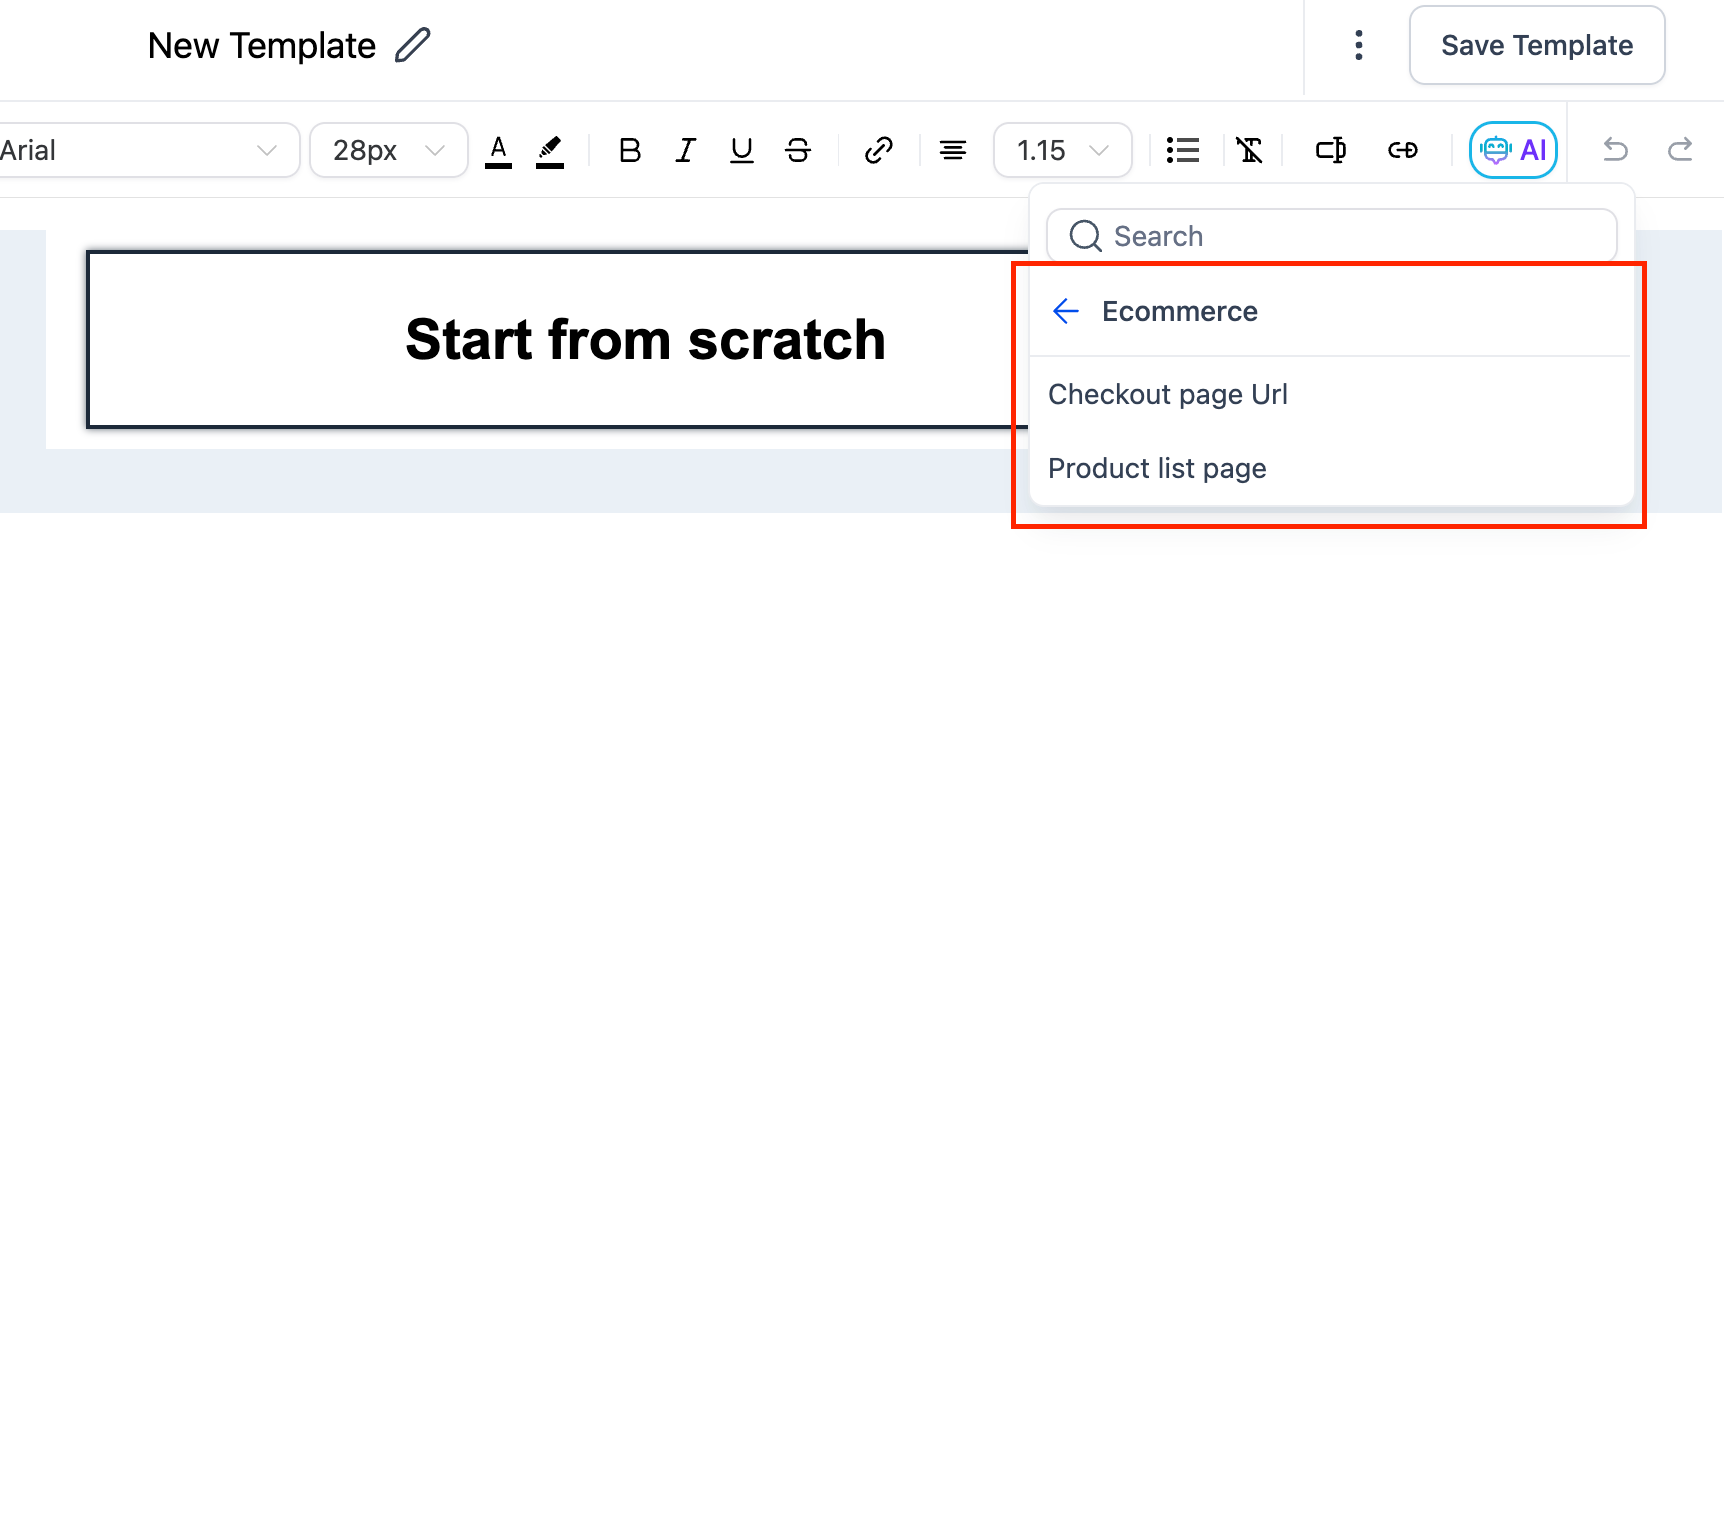
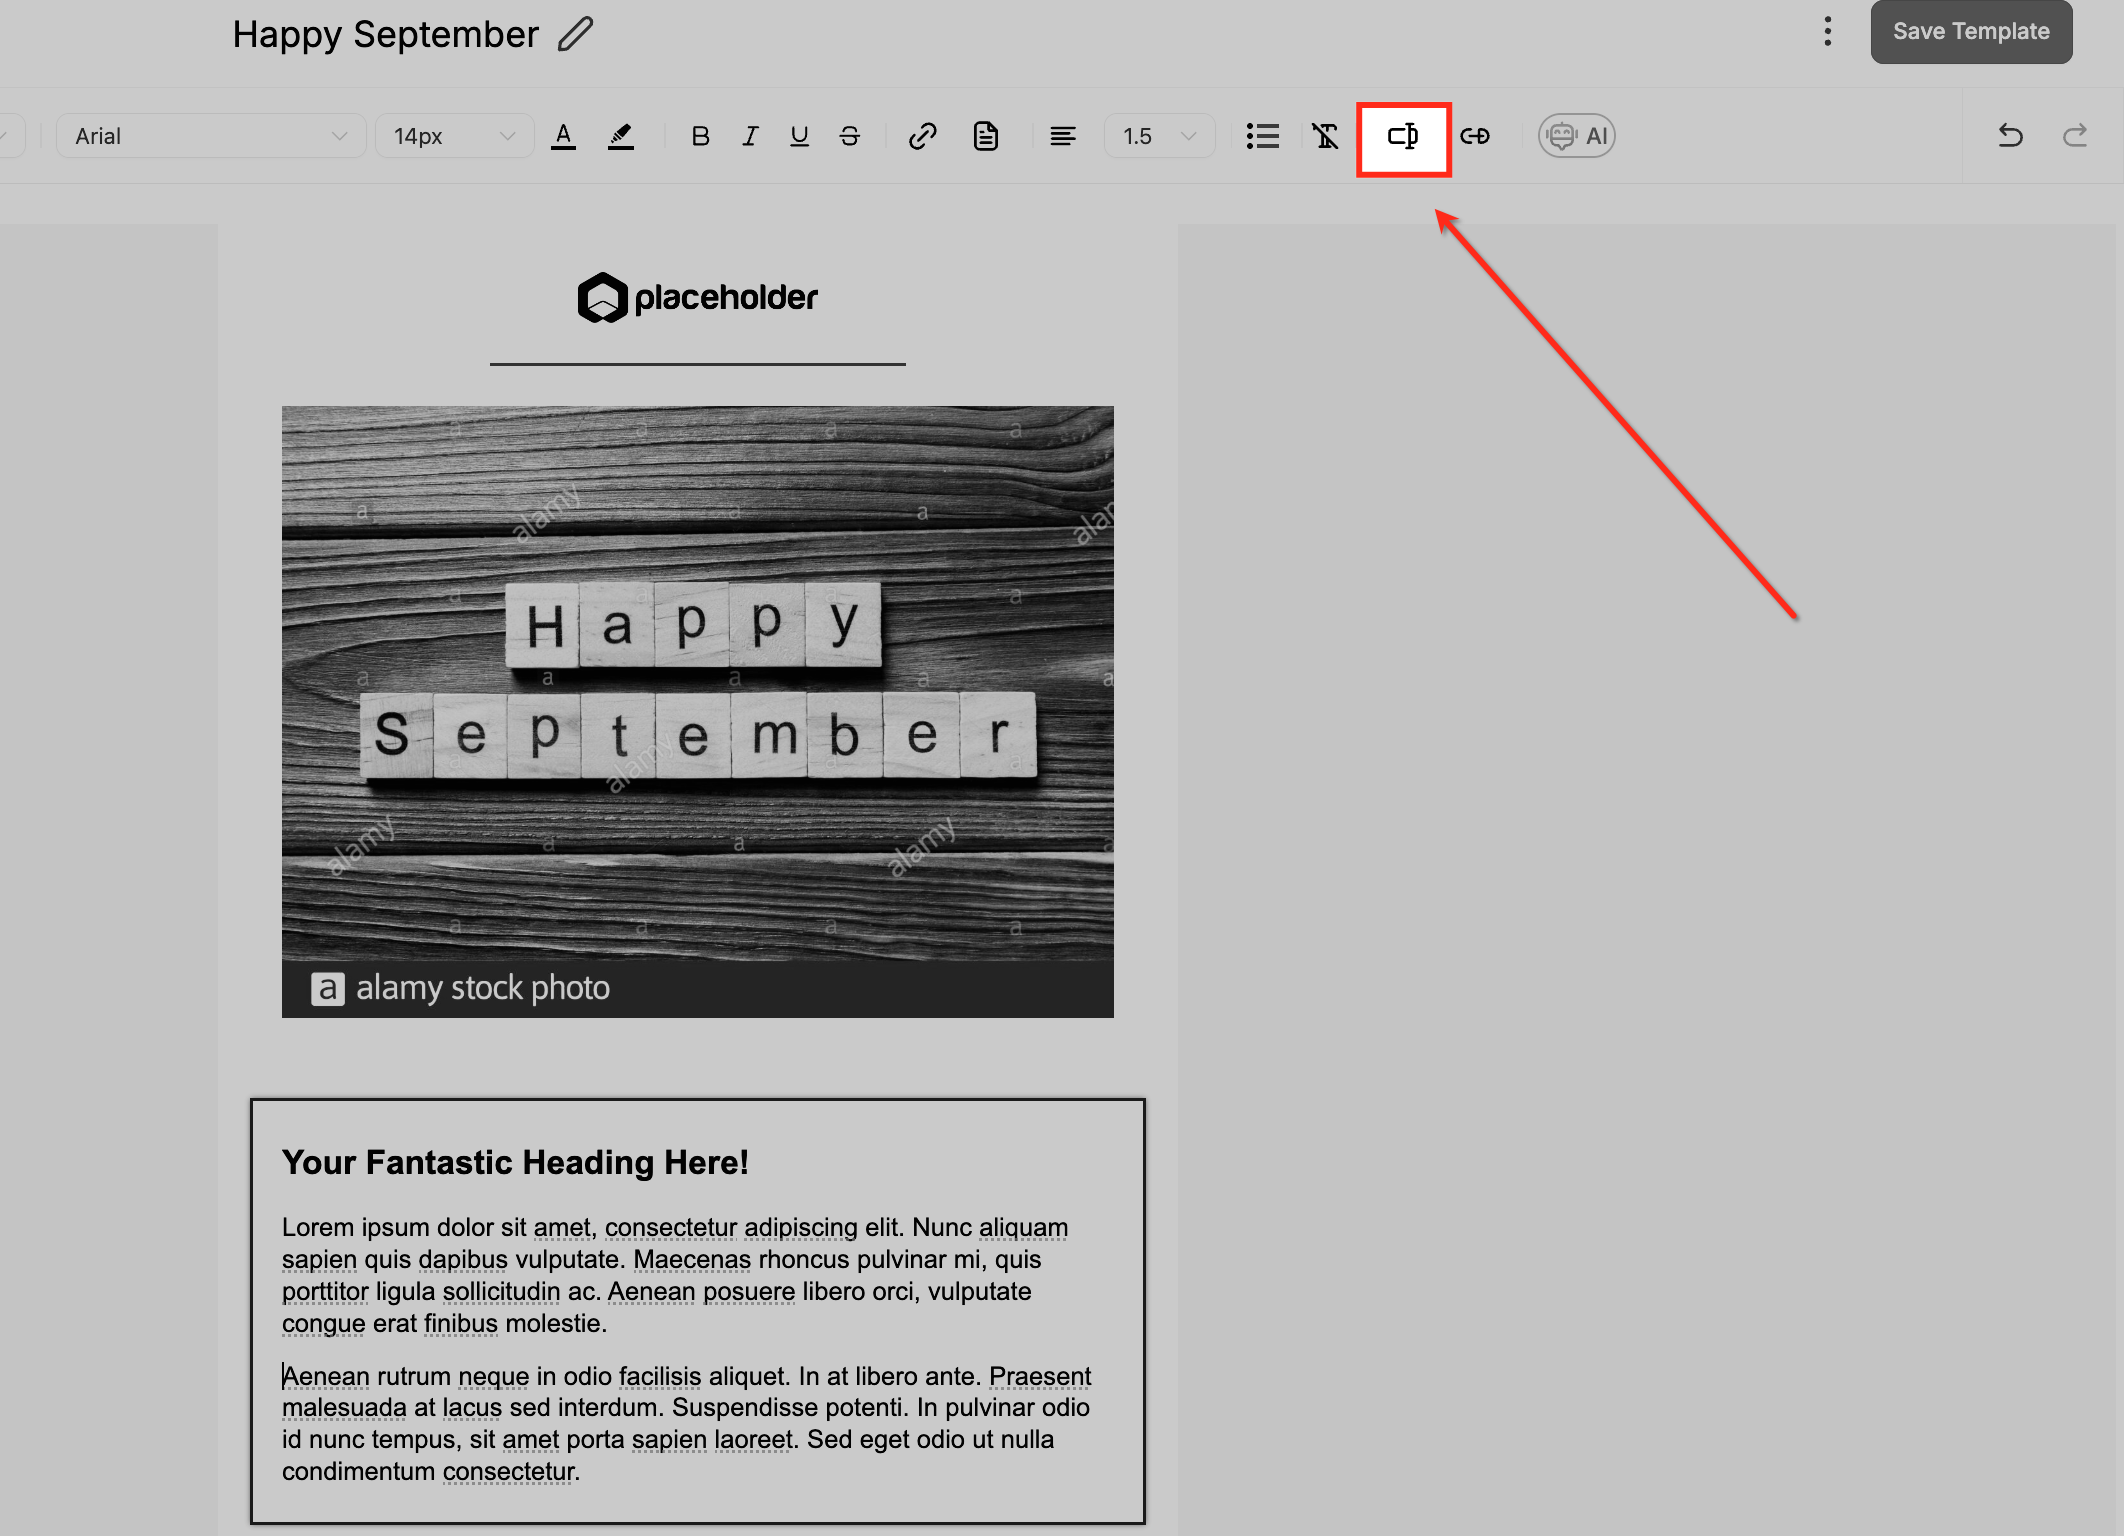
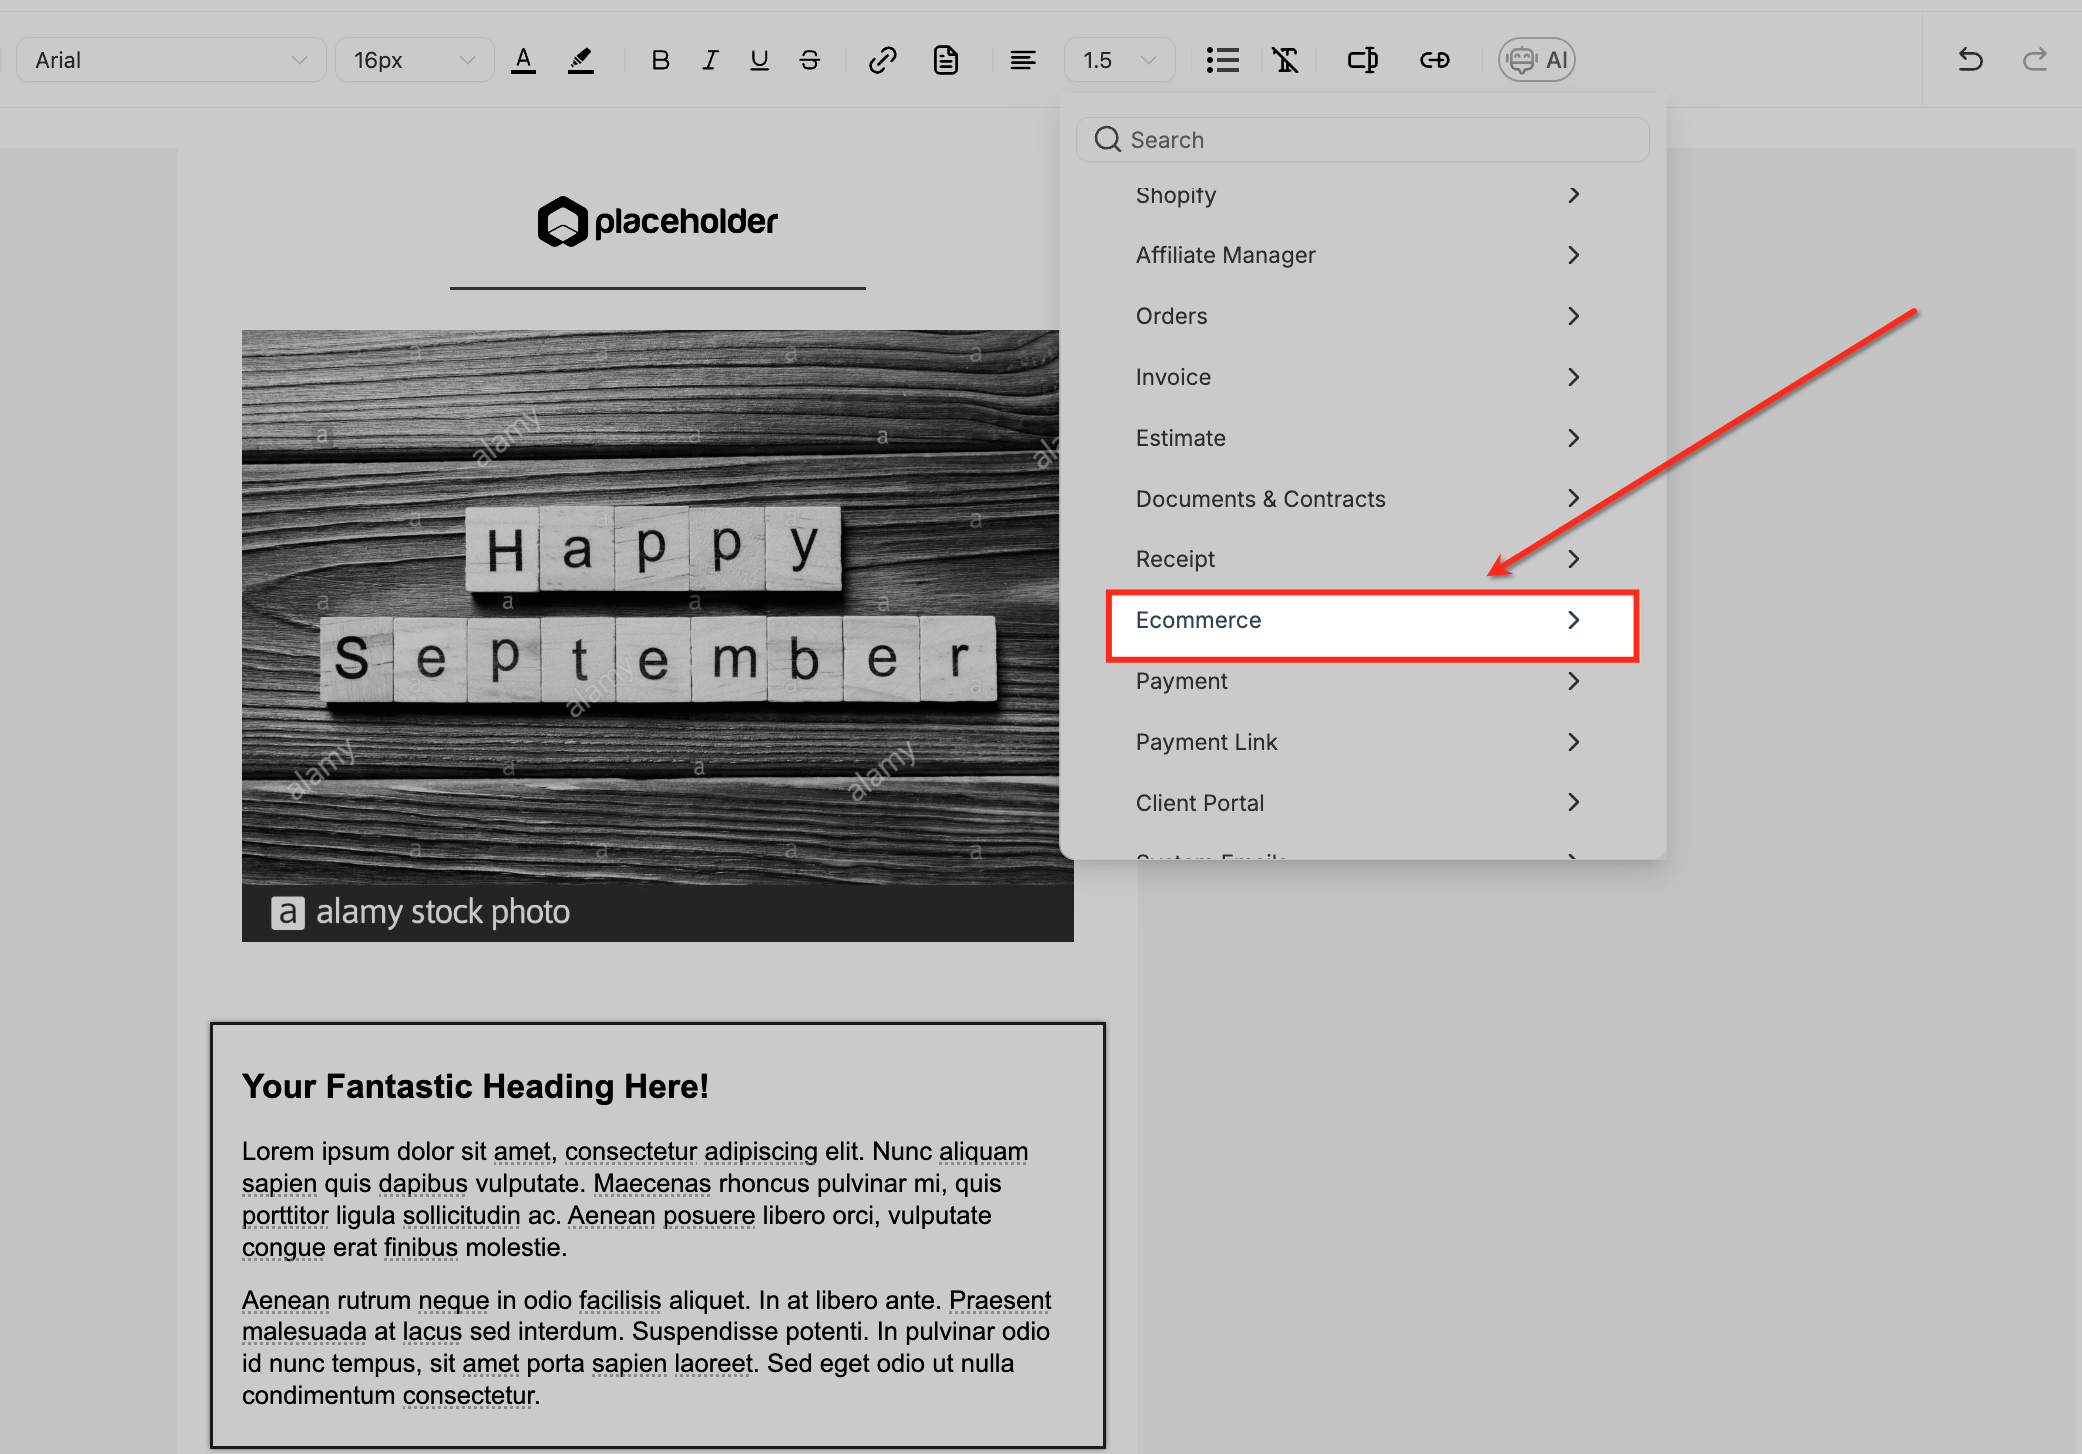
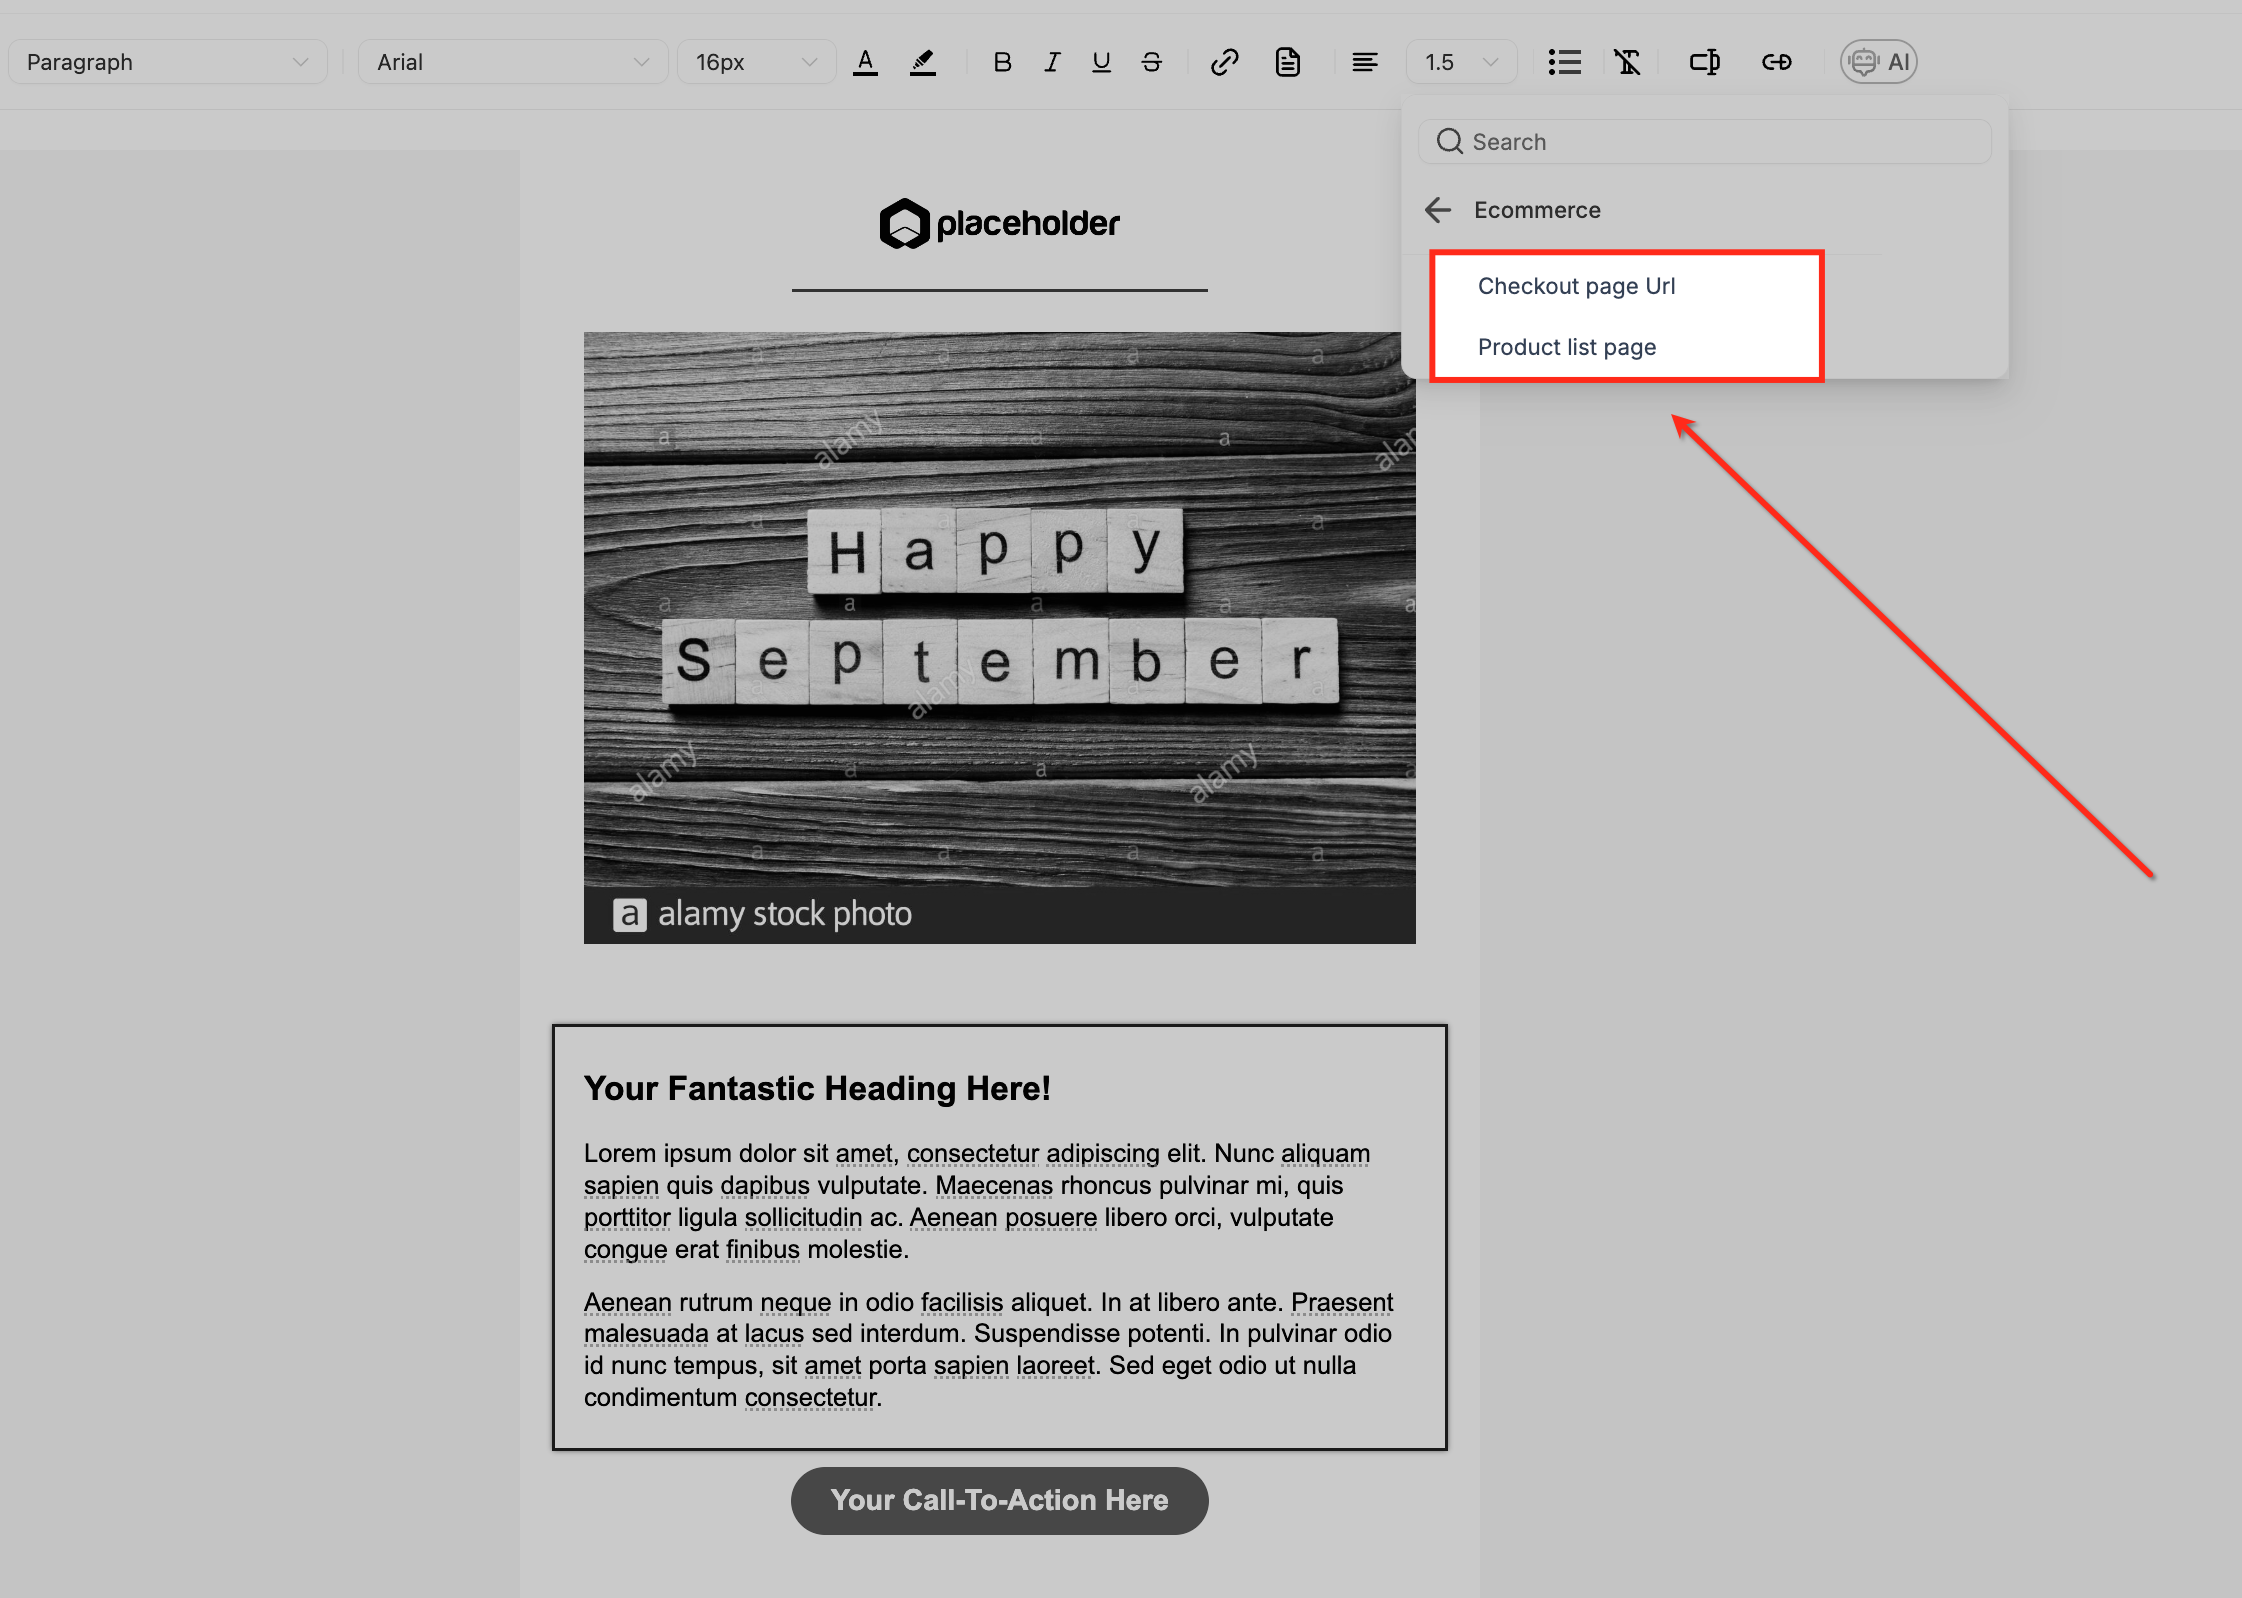
Click the custom value icon in the editor toolbar to insert dynamic e-commerce fields, then select Ecommerce from the menu. Use the Checkout page URL field to send shoppers straight back to their abandoned cart with items still in it, or the Products list page URL field to send them to your full product catalog instead.
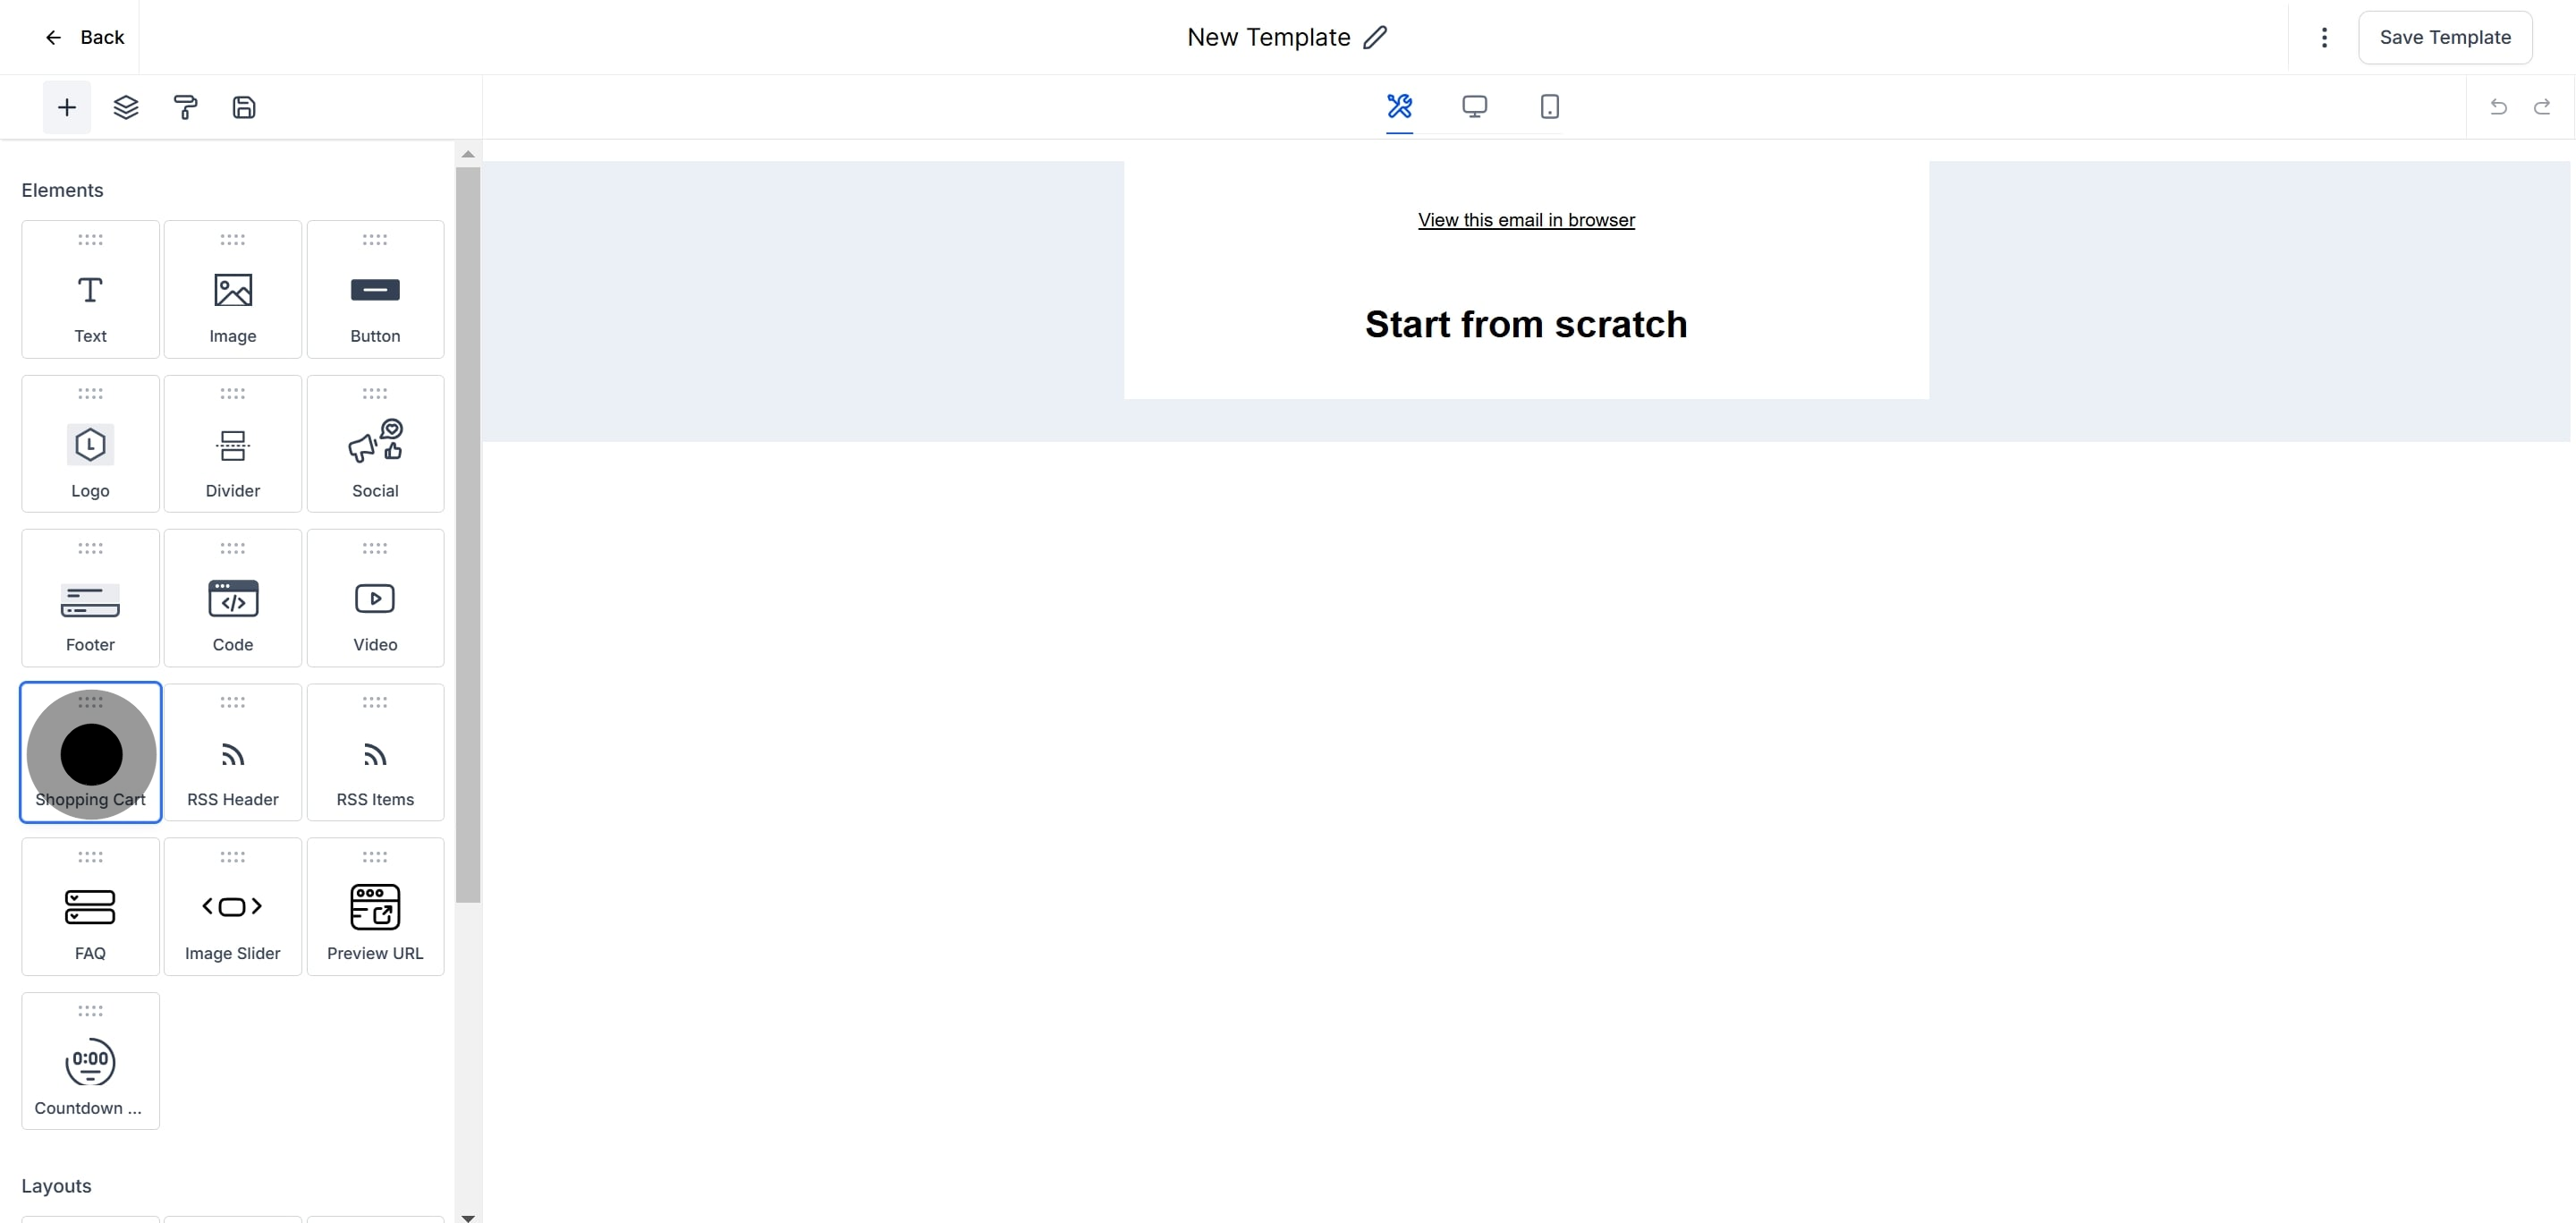
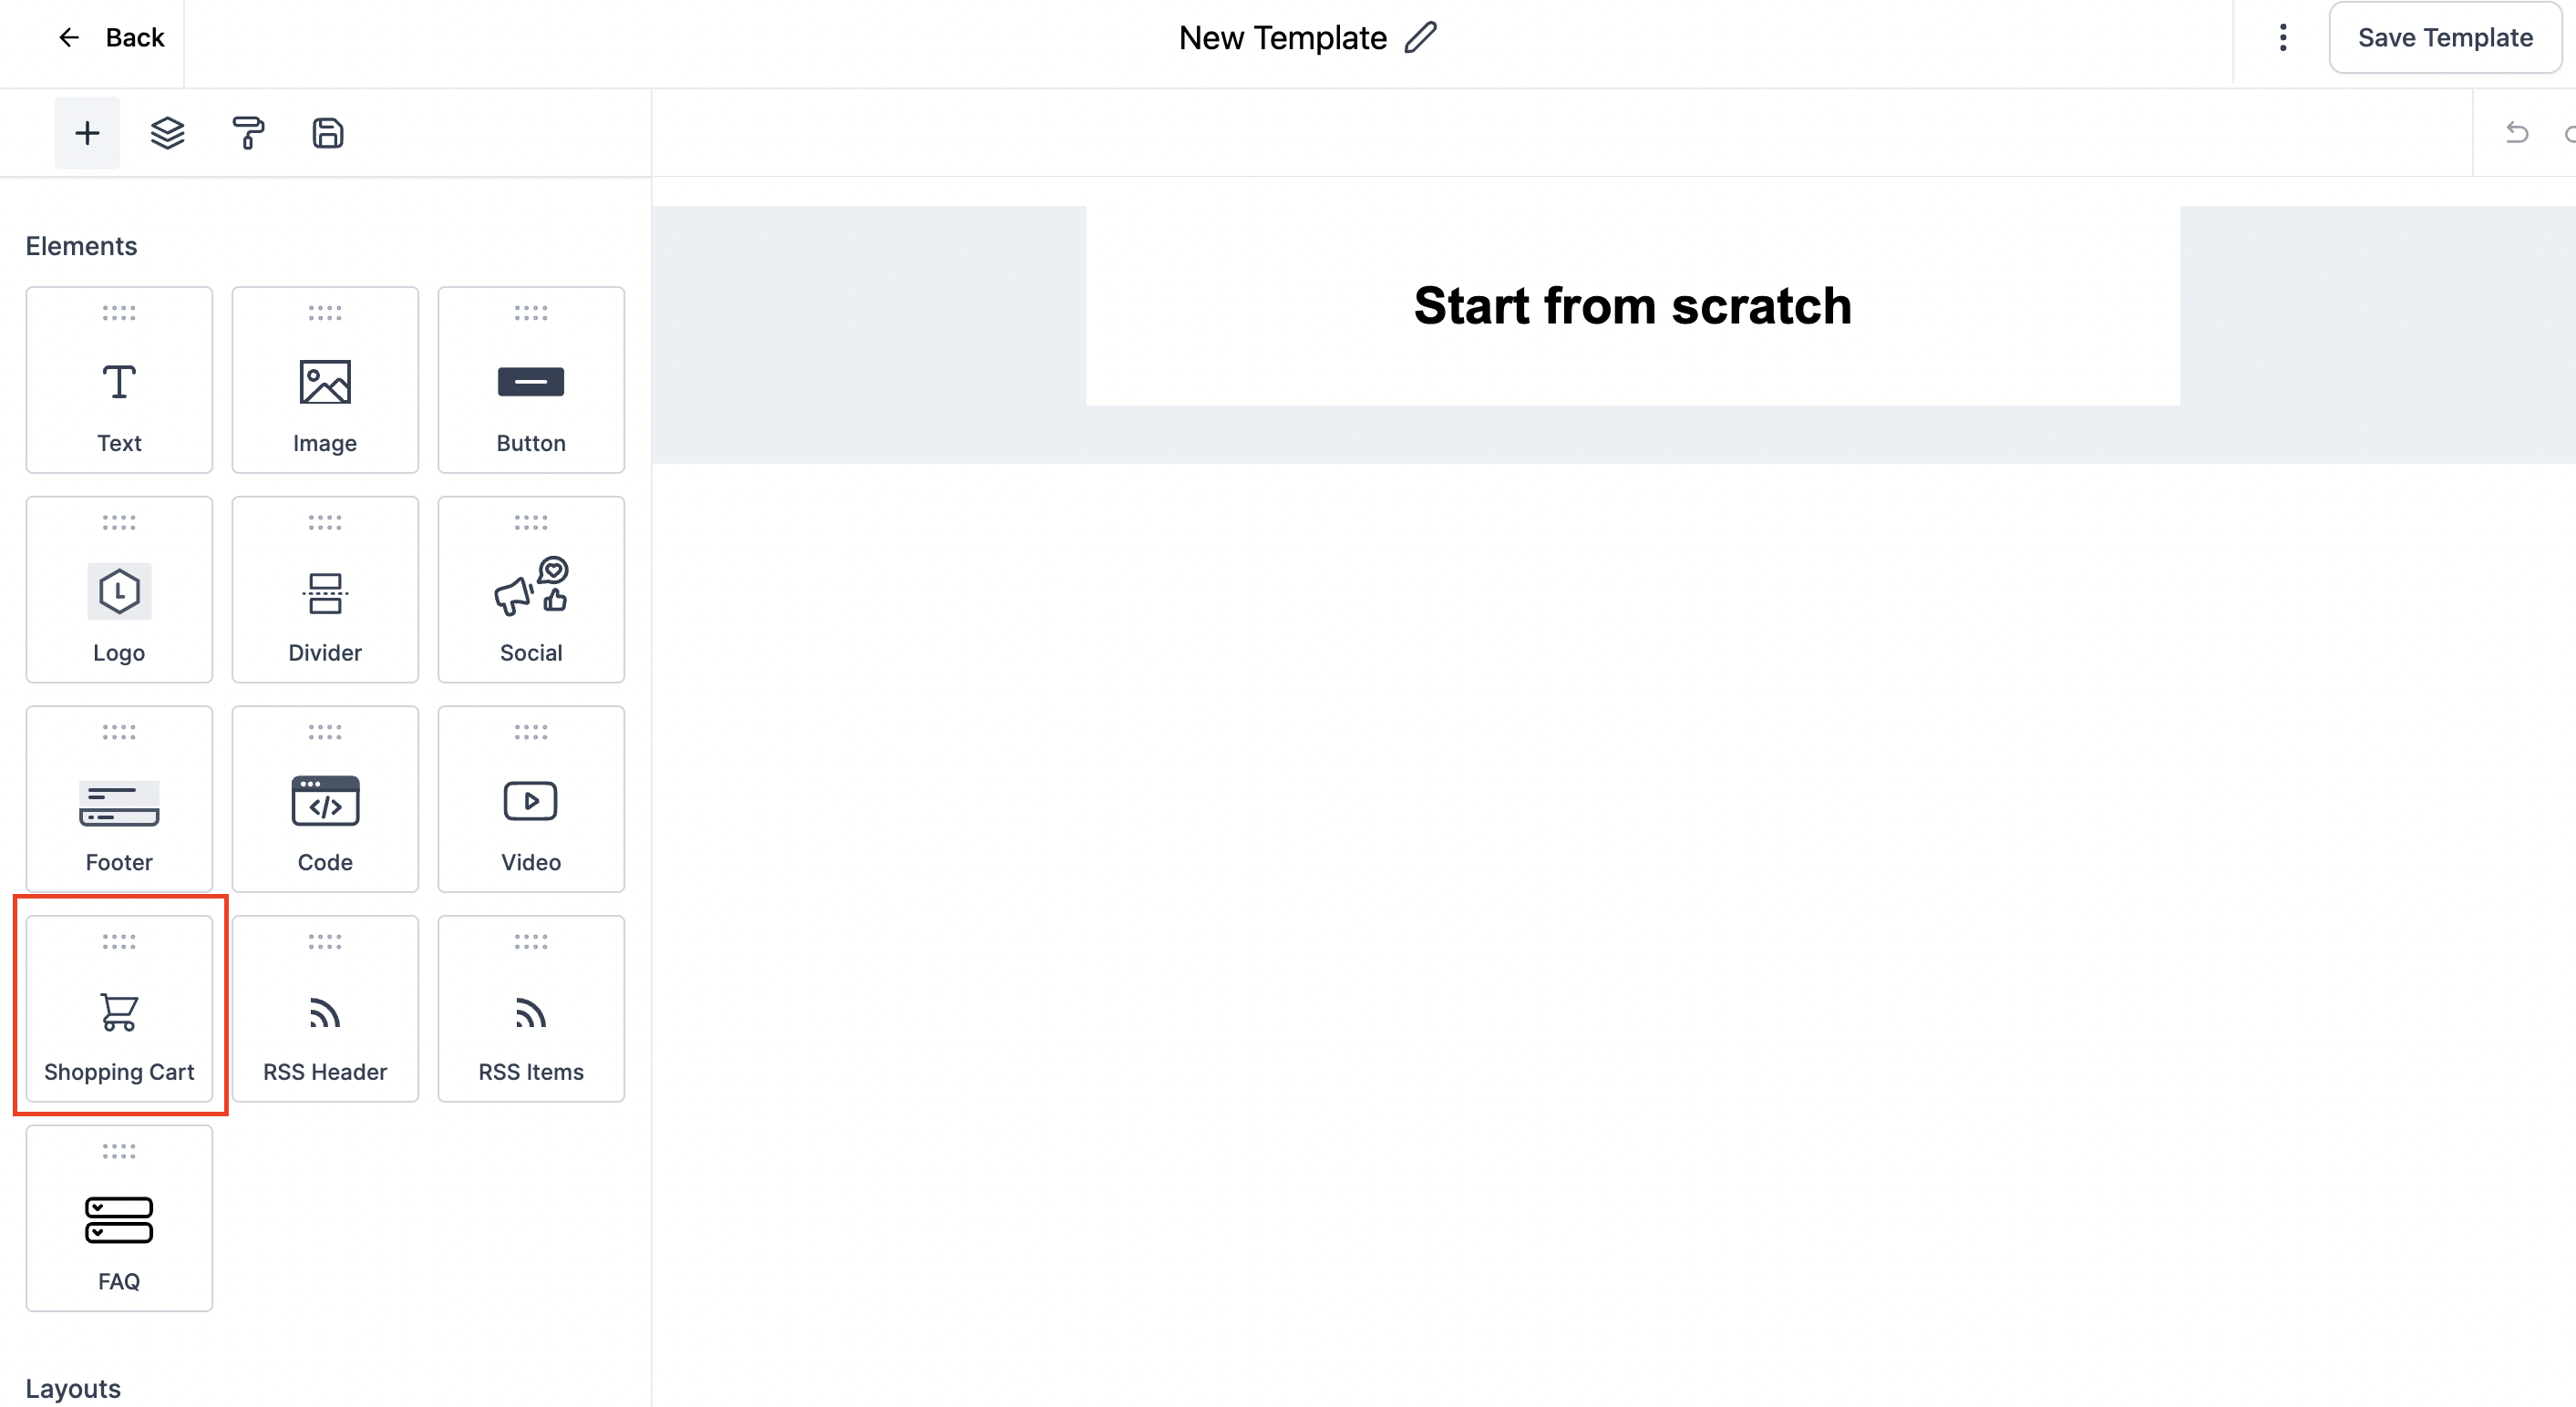
Drag the Shopping Cart element into your layout. It automatically pulls in the exact products, images, prices, and quantities the shopper left behind, as long as they reached the checkout page and provided an email address.
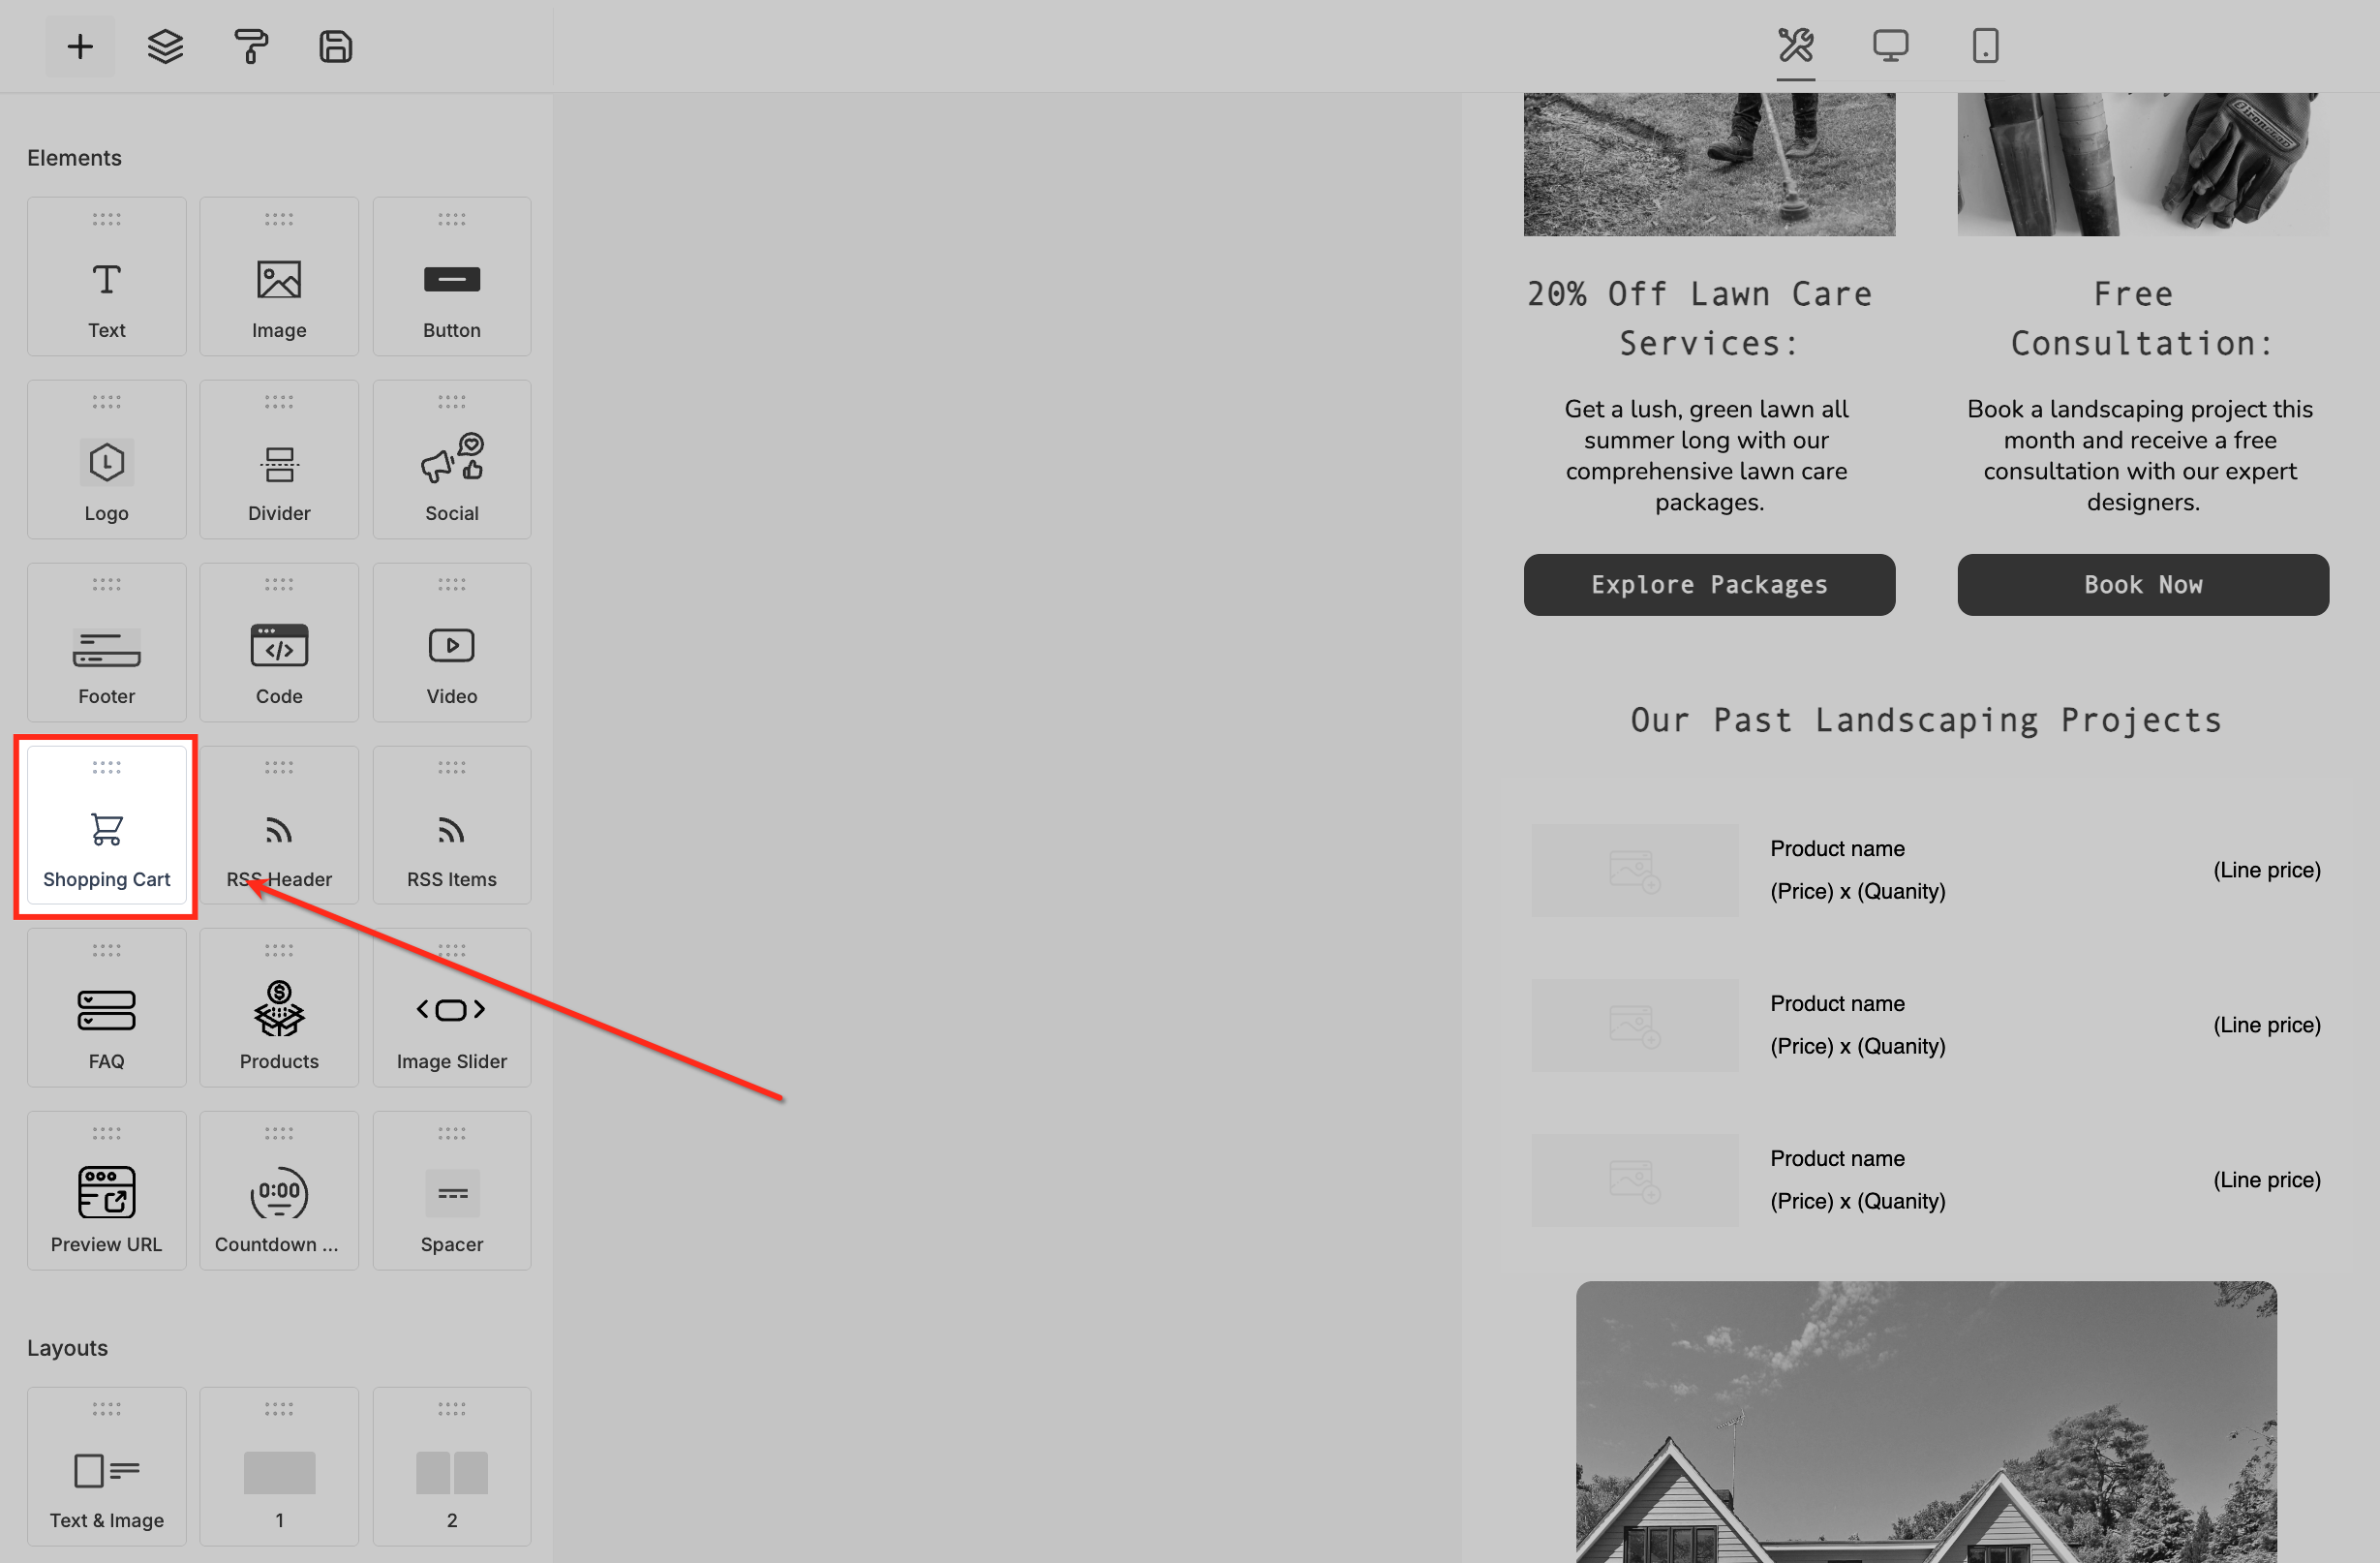
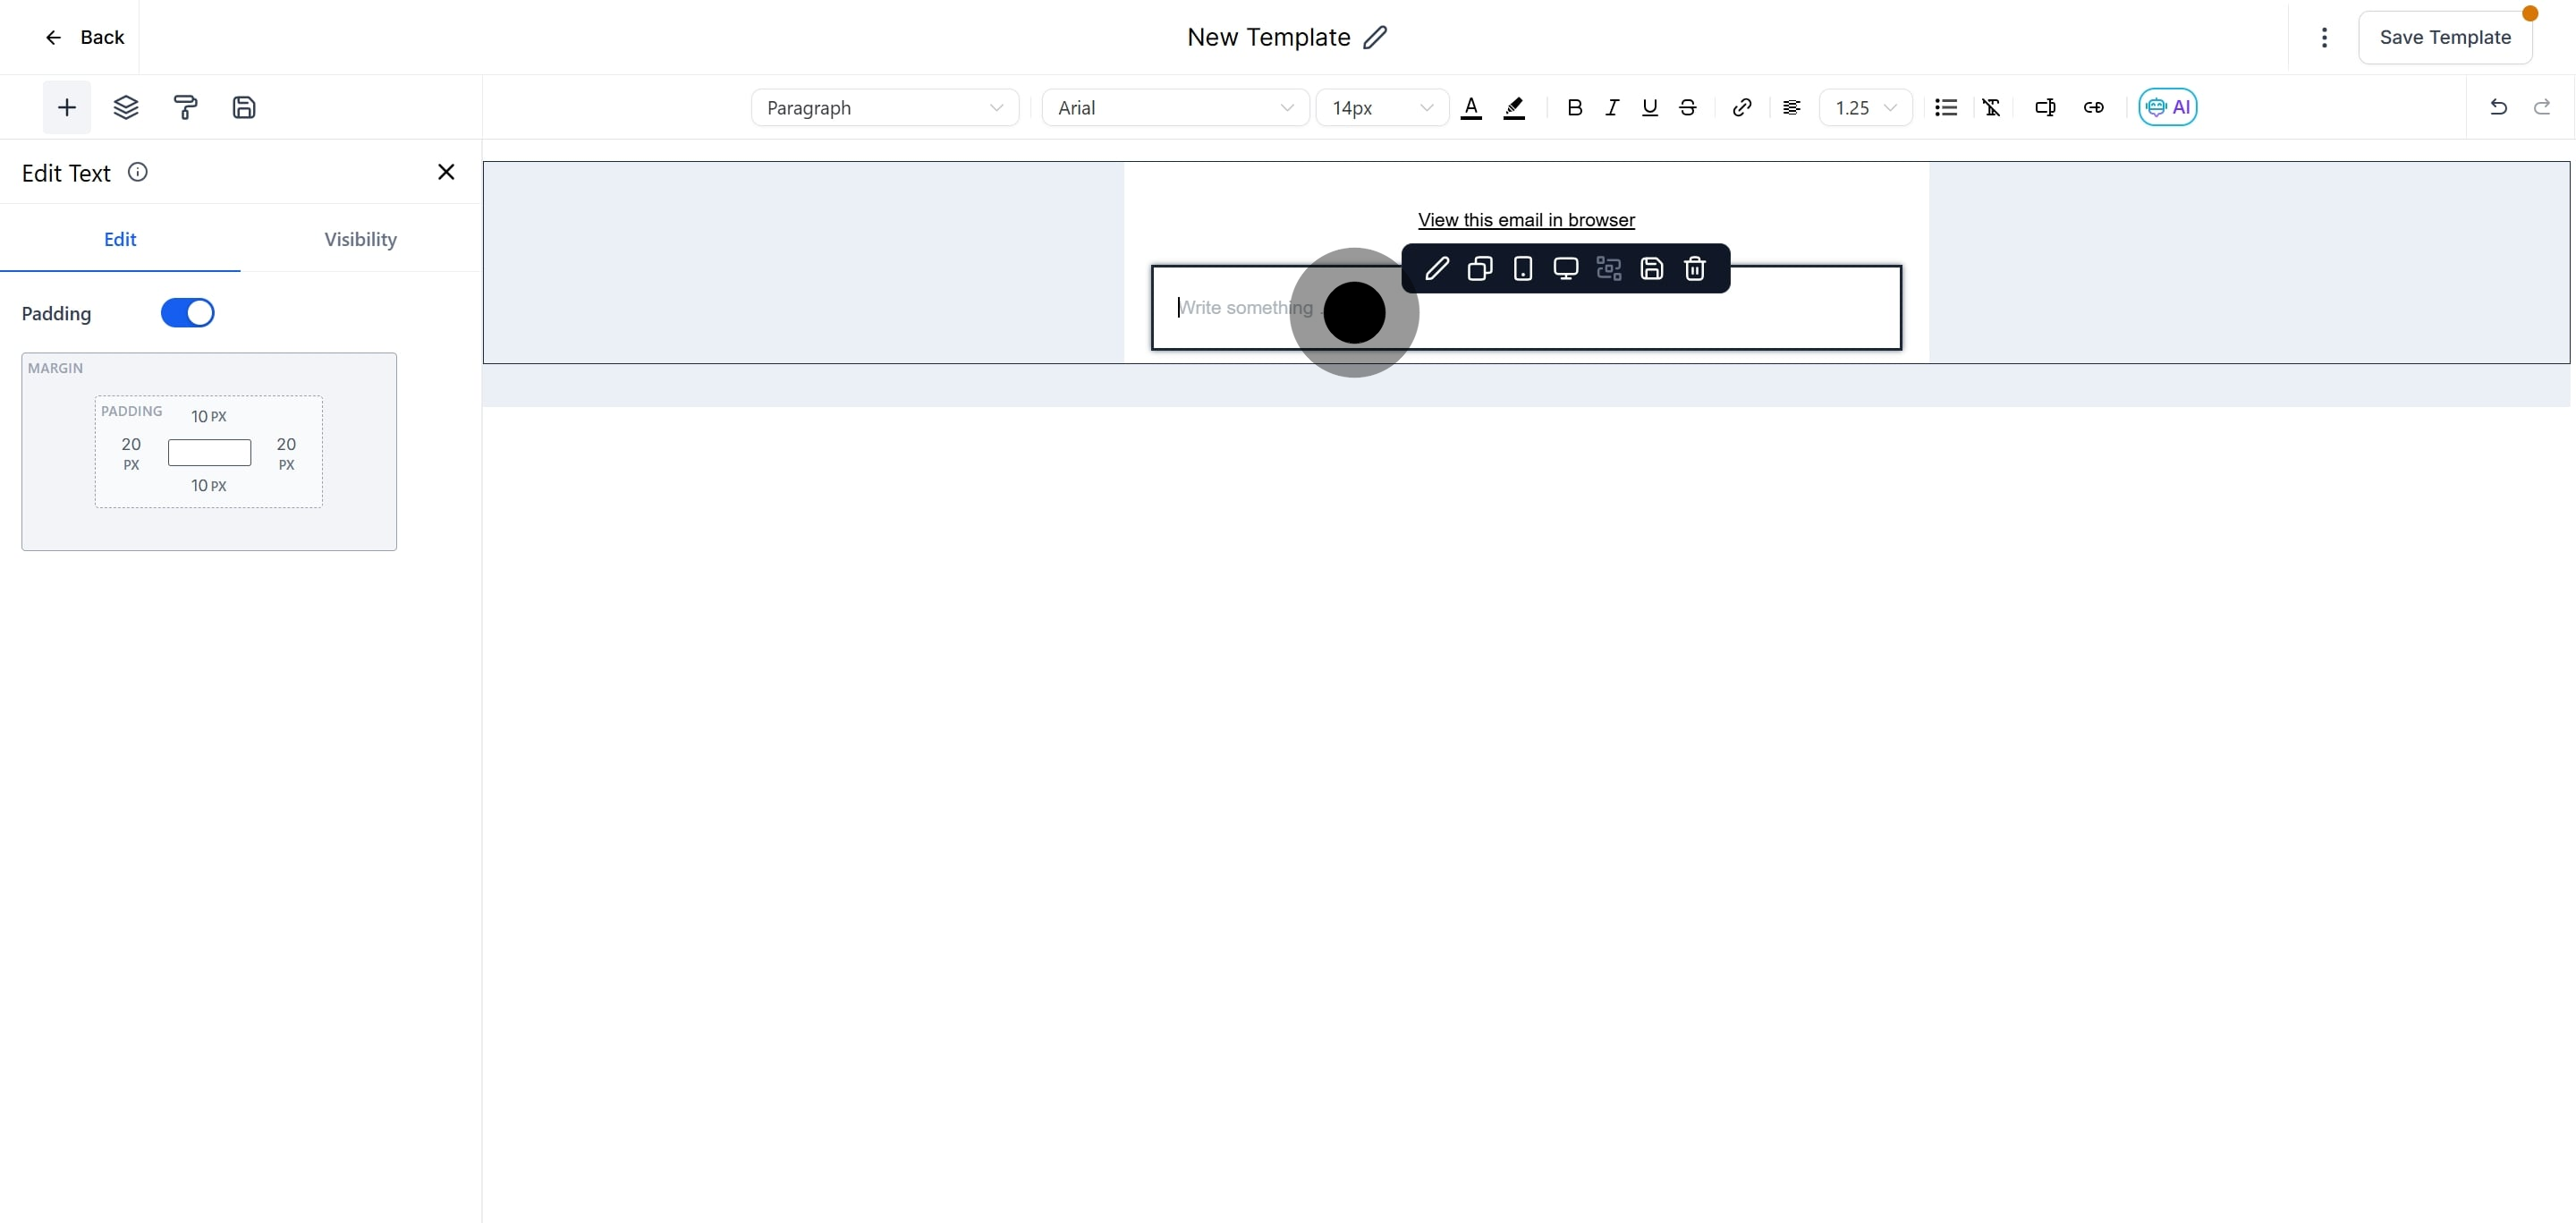
Add personalized copy that speaks to what's in the cart, then click Save Template.
Back in Payments > Settings > Notifications, select the saved template you want to use and set the time interval before it sends.
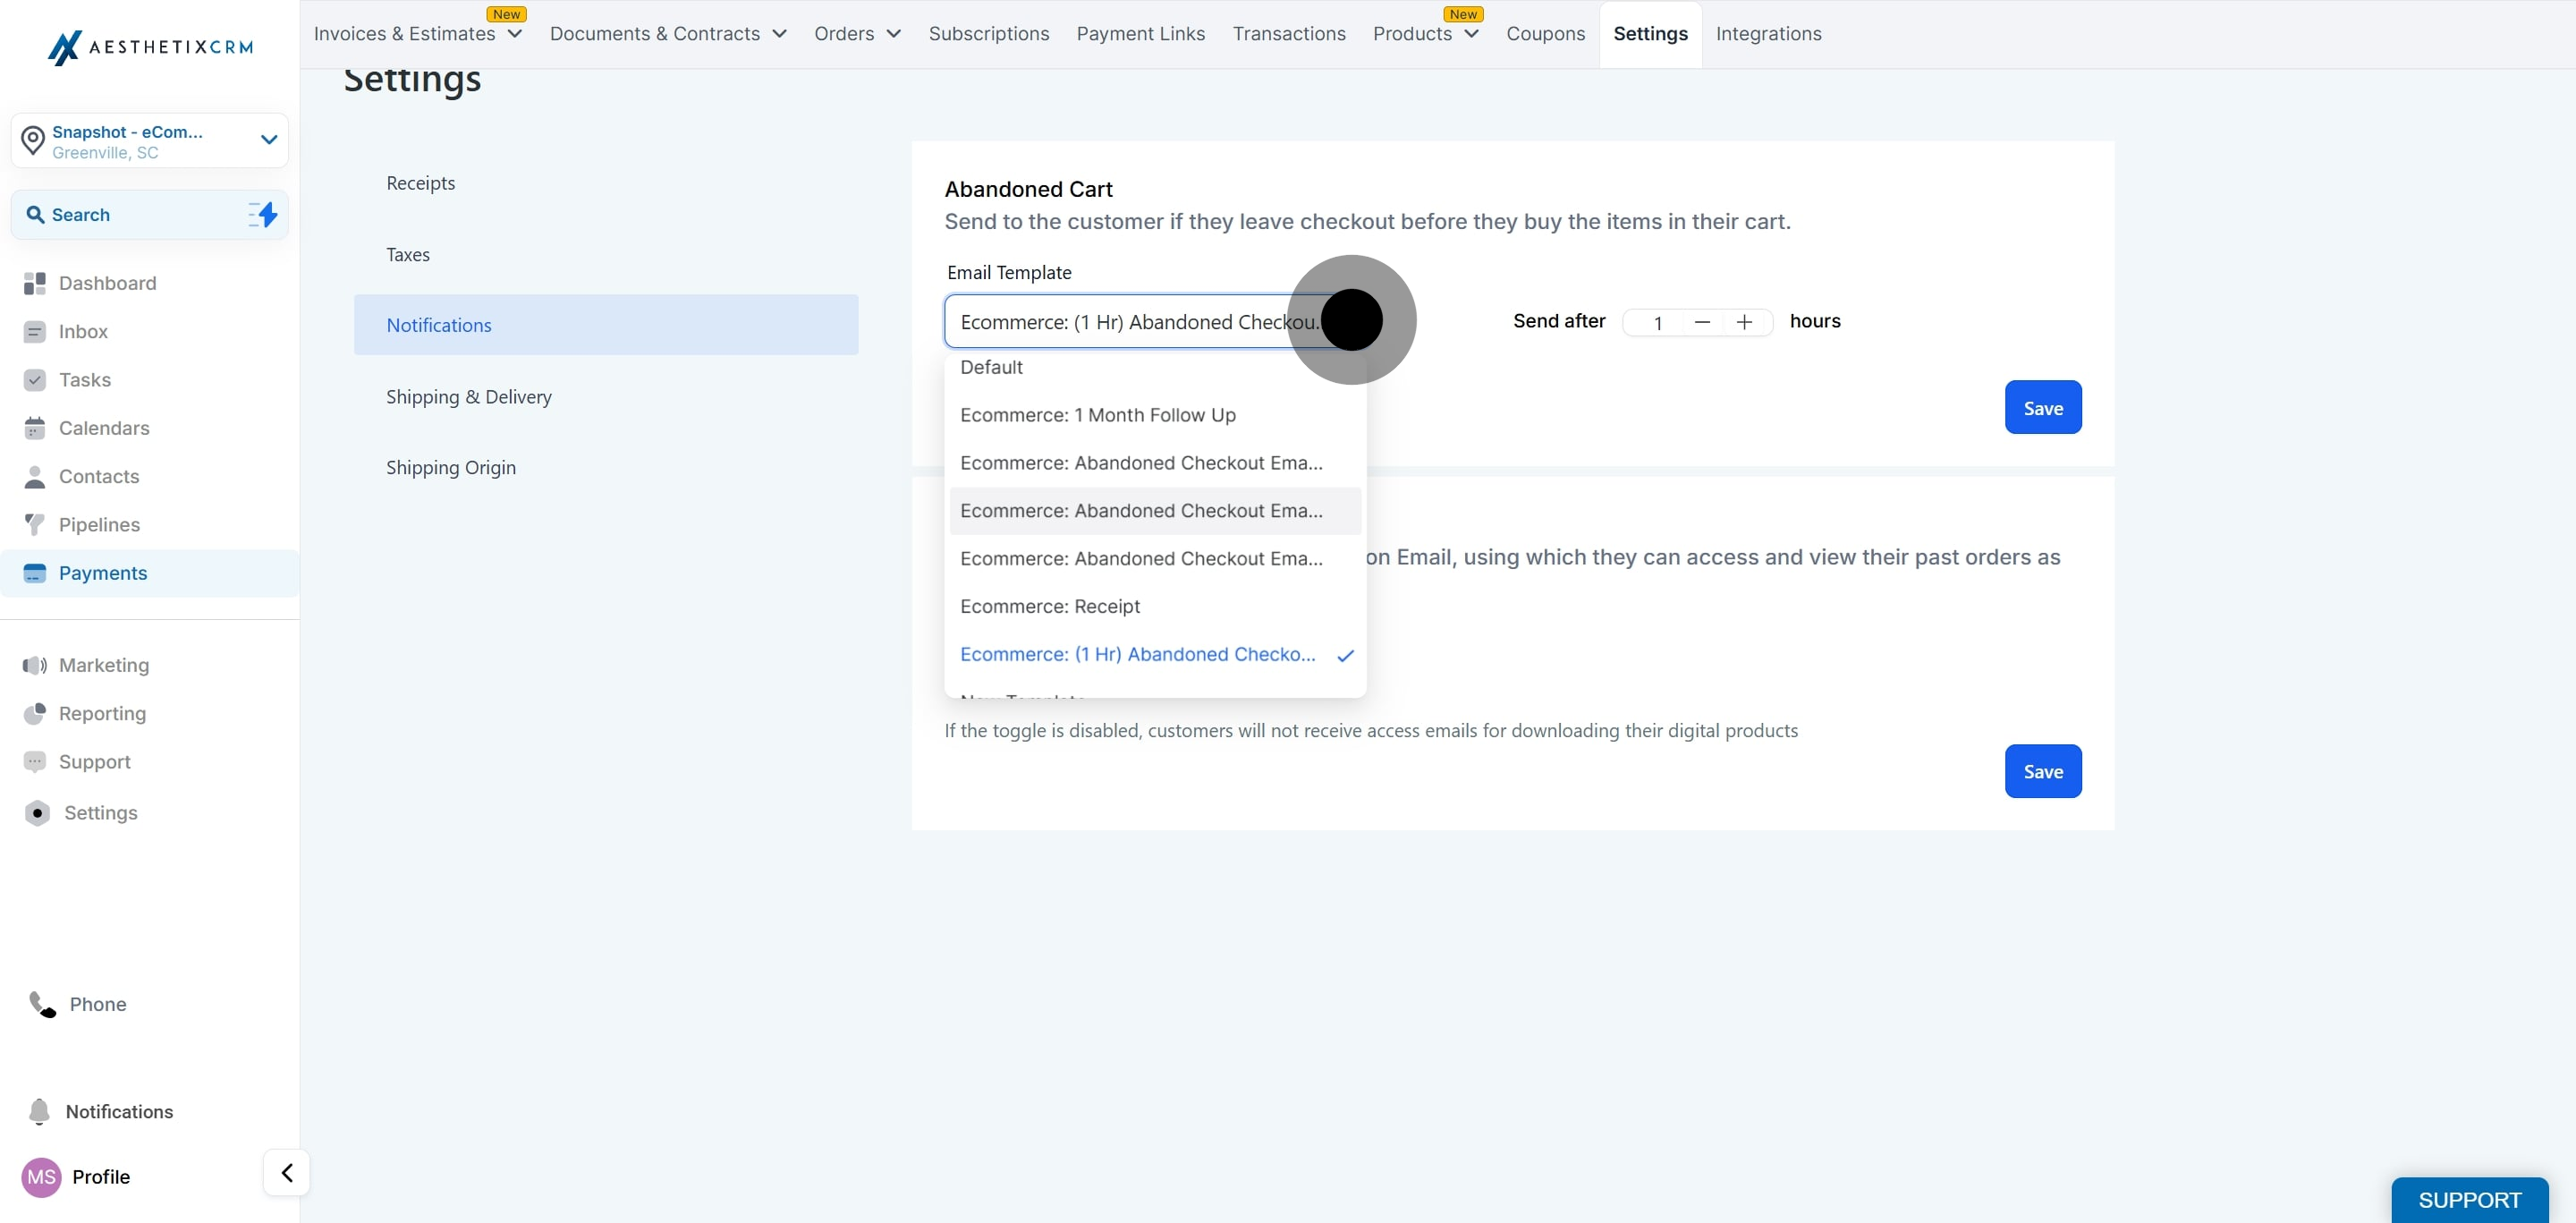
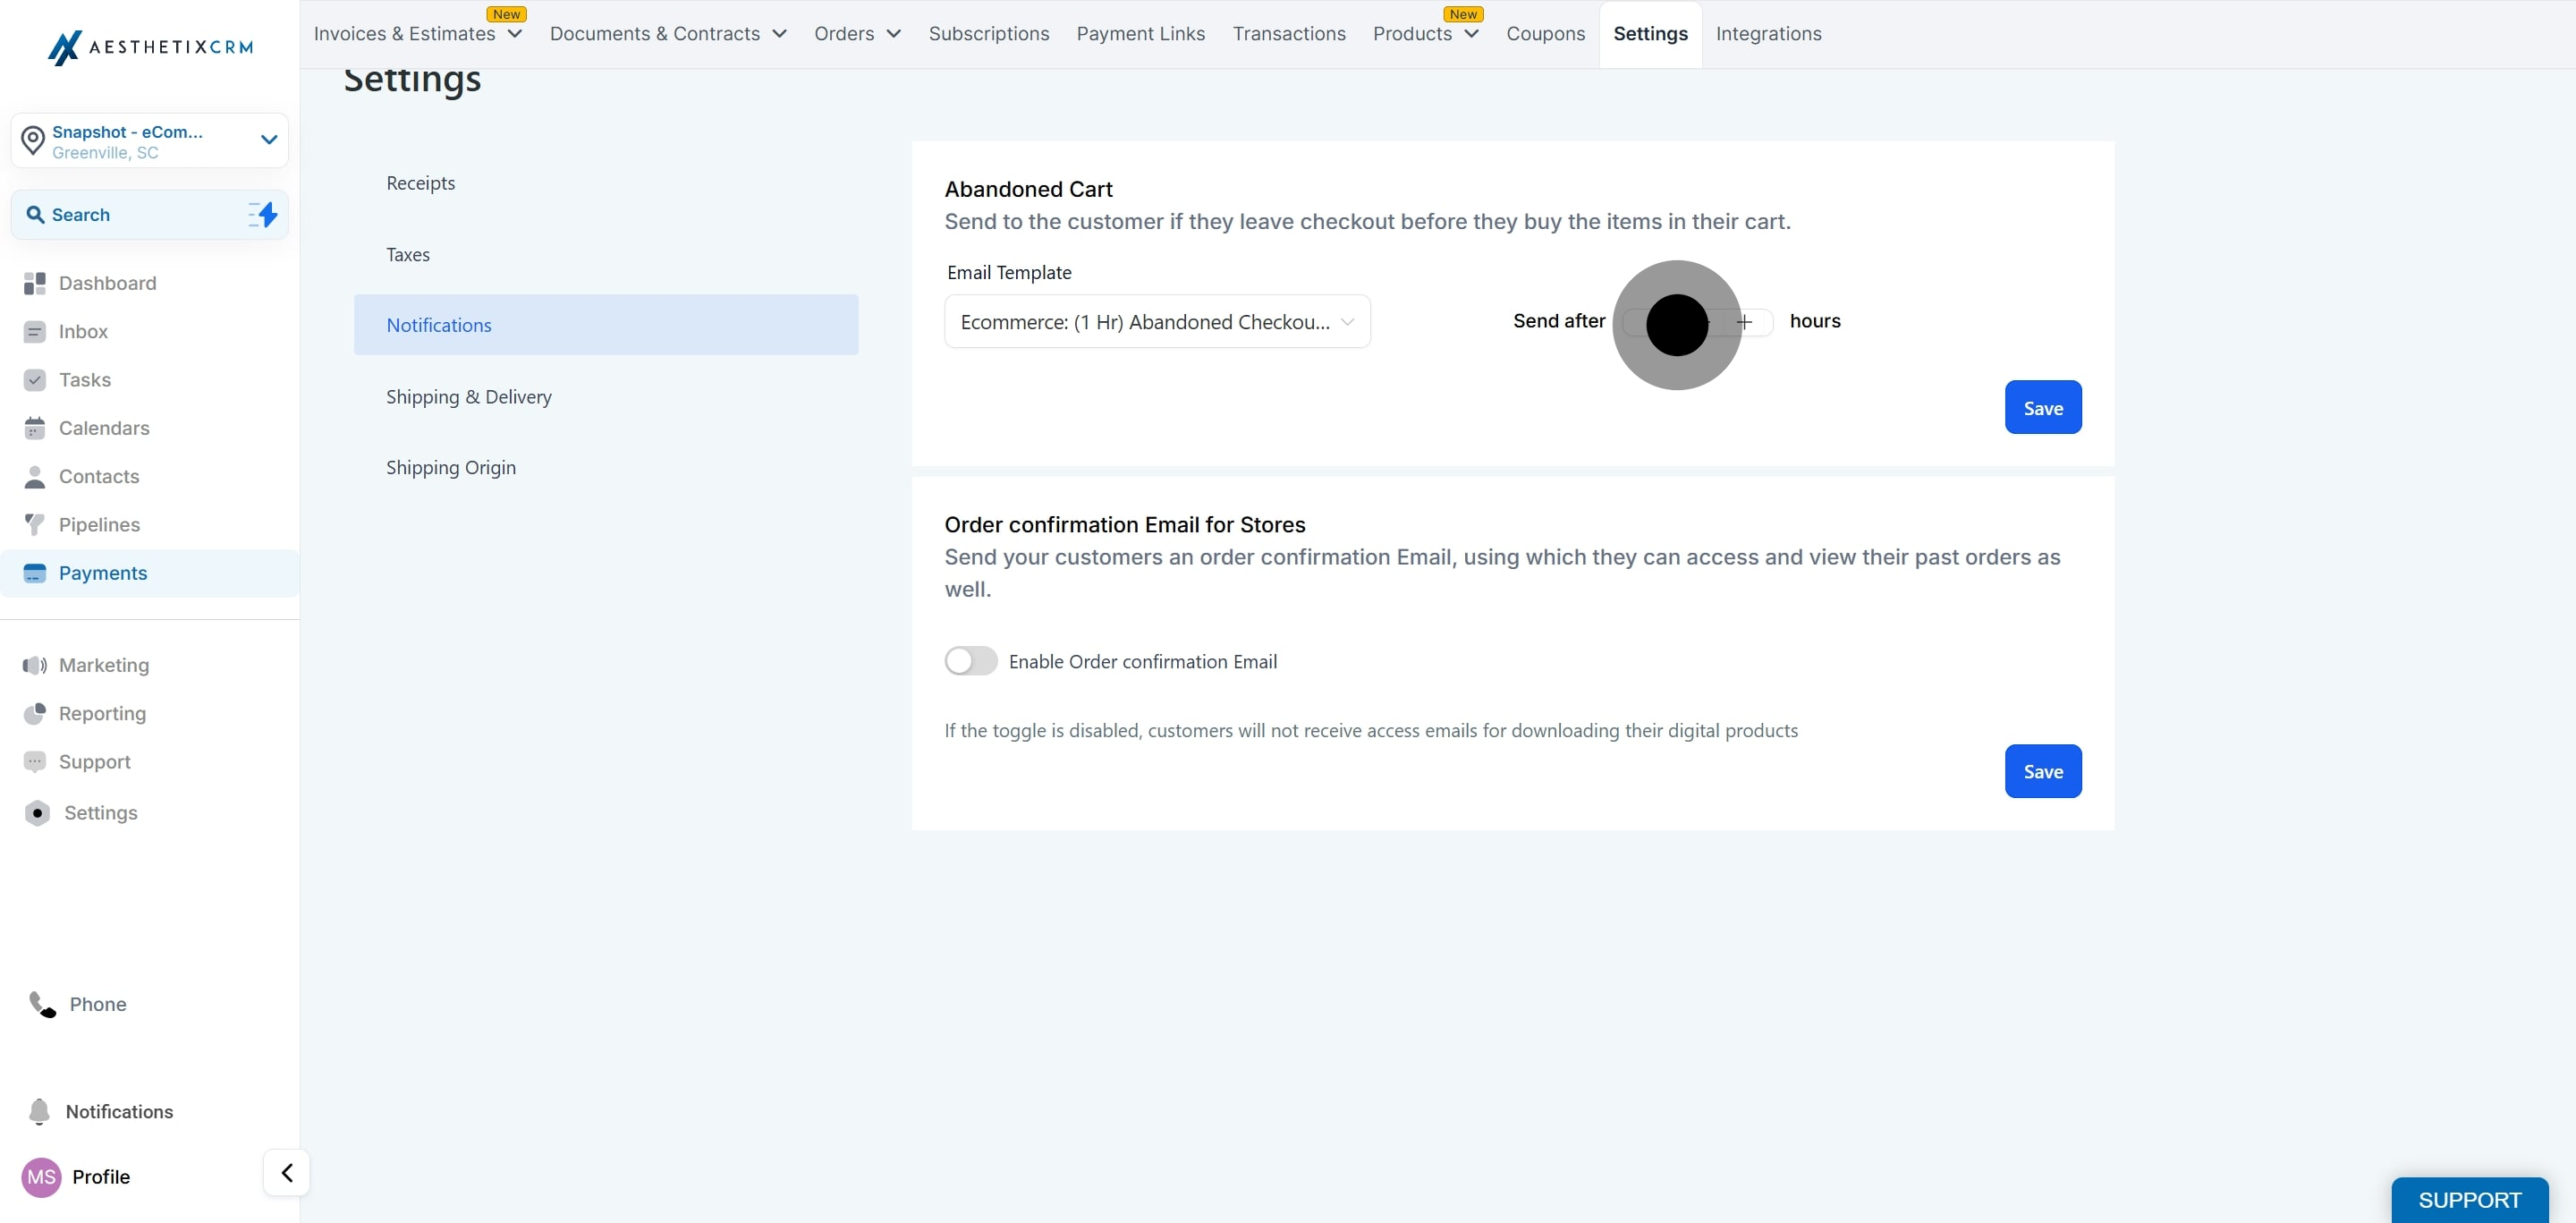
Click Save.
The Notifications settings above cover a single automatic email. For a multi-step recovery sequence (an email, then an SMS a day later, then a task for your team to call a high-value cart), use the Abandoned Checkout trigger in Workflows instead. This one trigger fires for both your native Store and any connected external store, so you don't need separate automations for each.
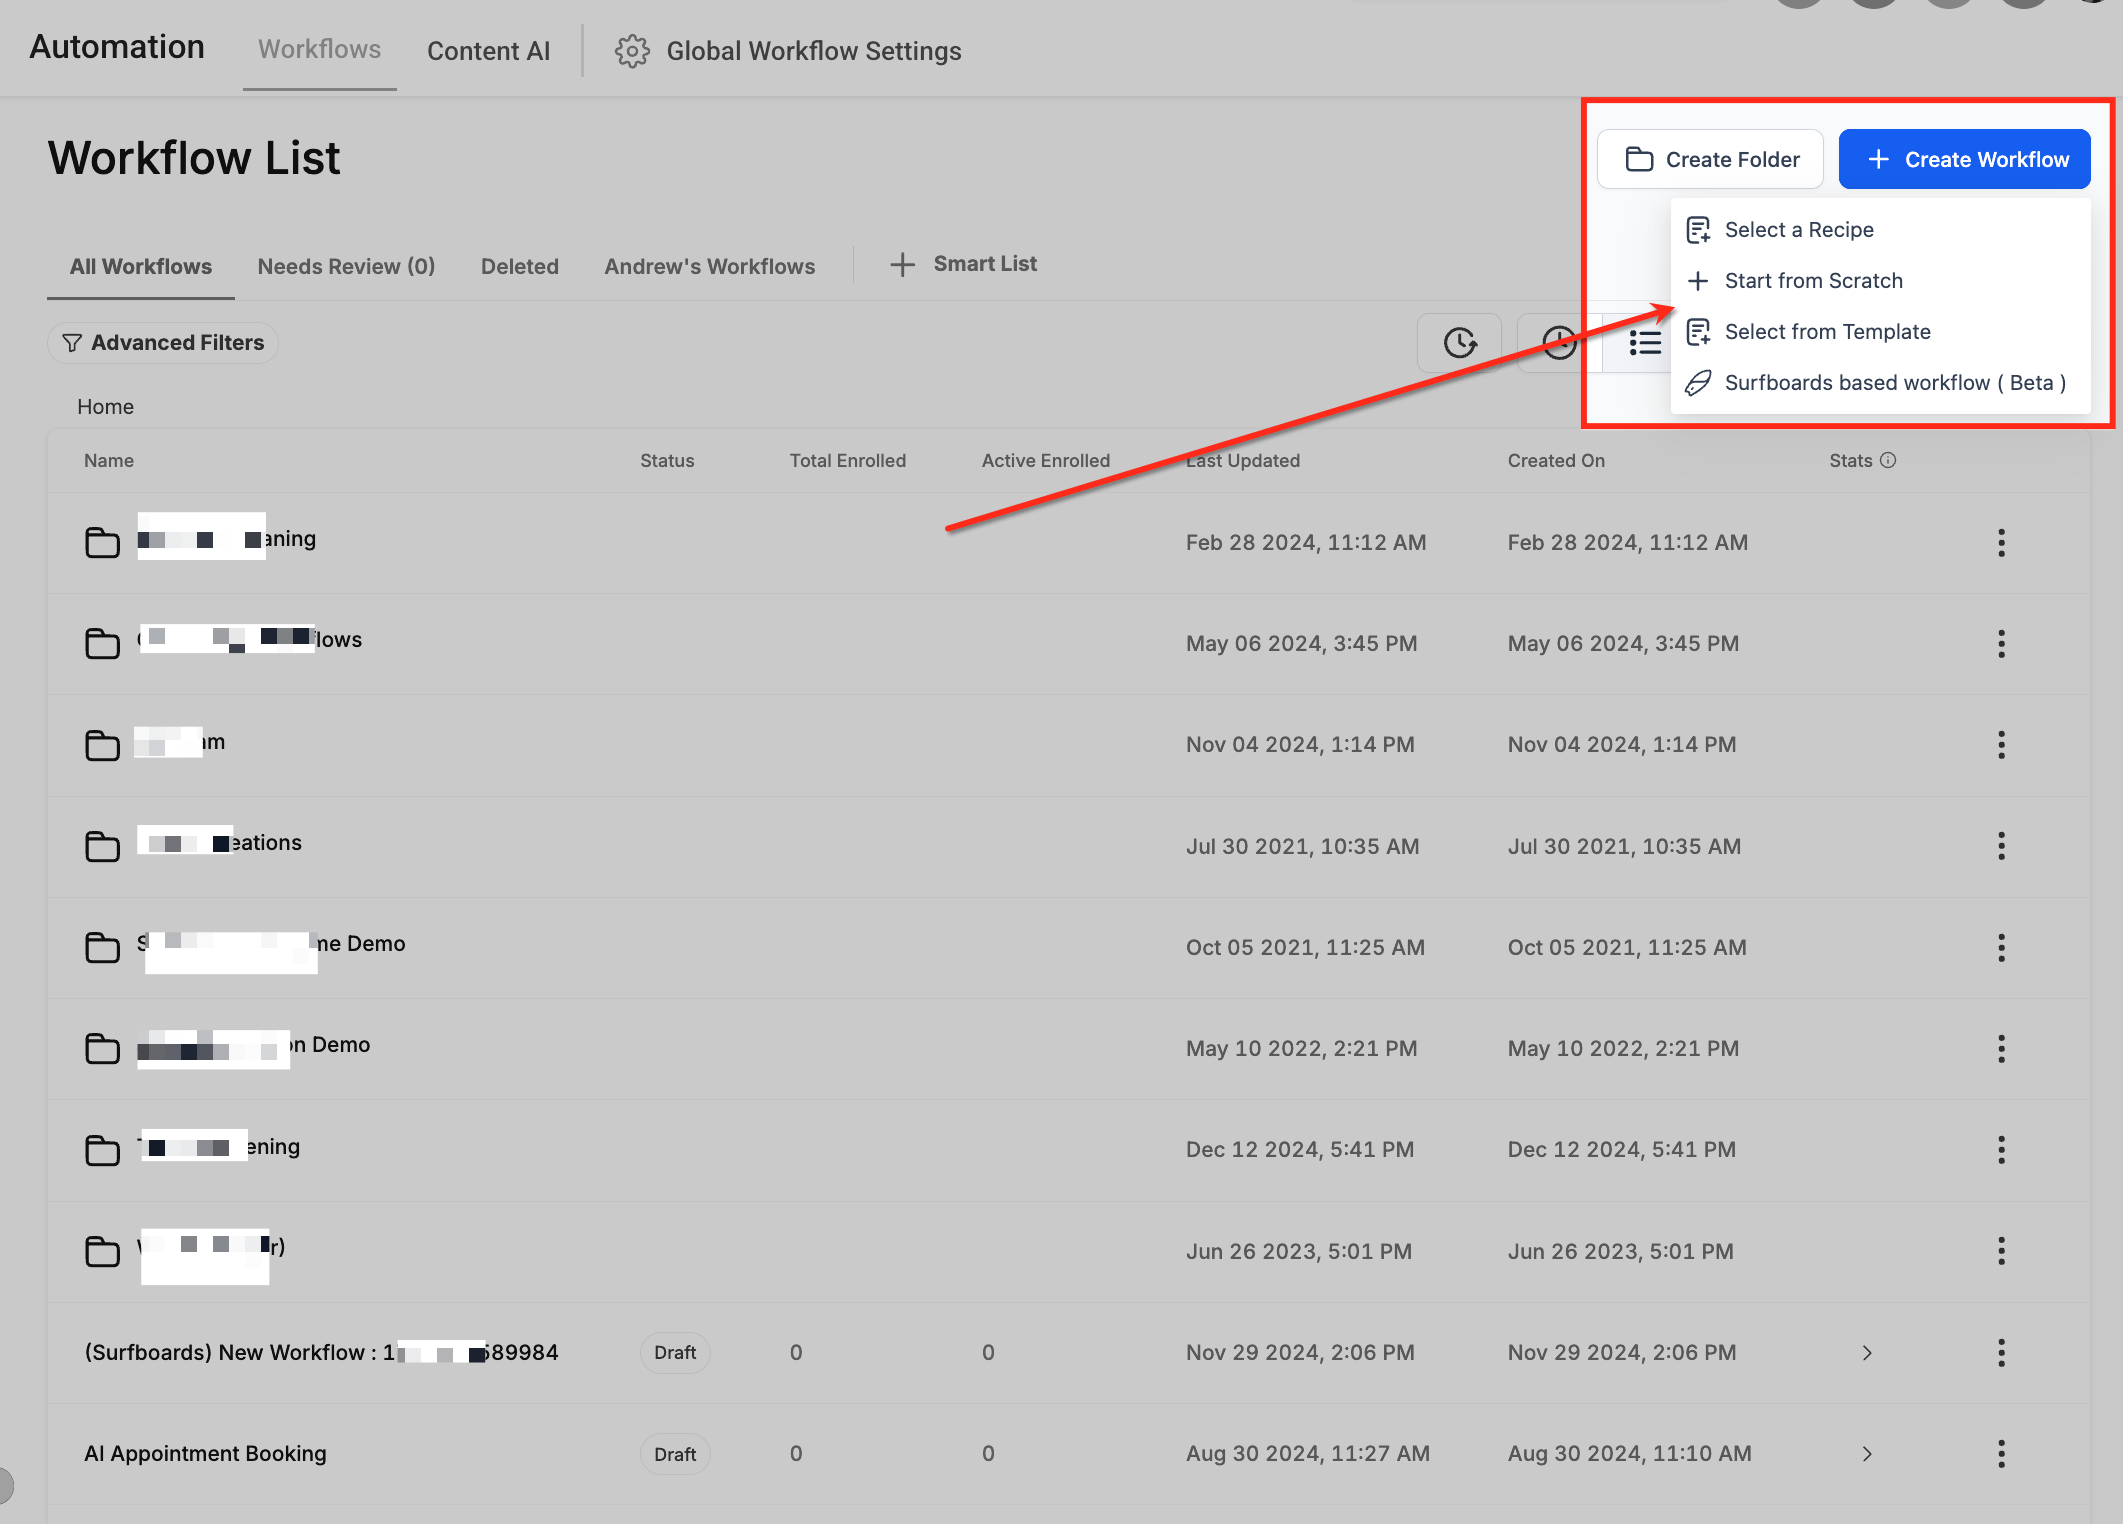
Go to Automation > Workflows and click + Create Workflow, then Start from Scratch.
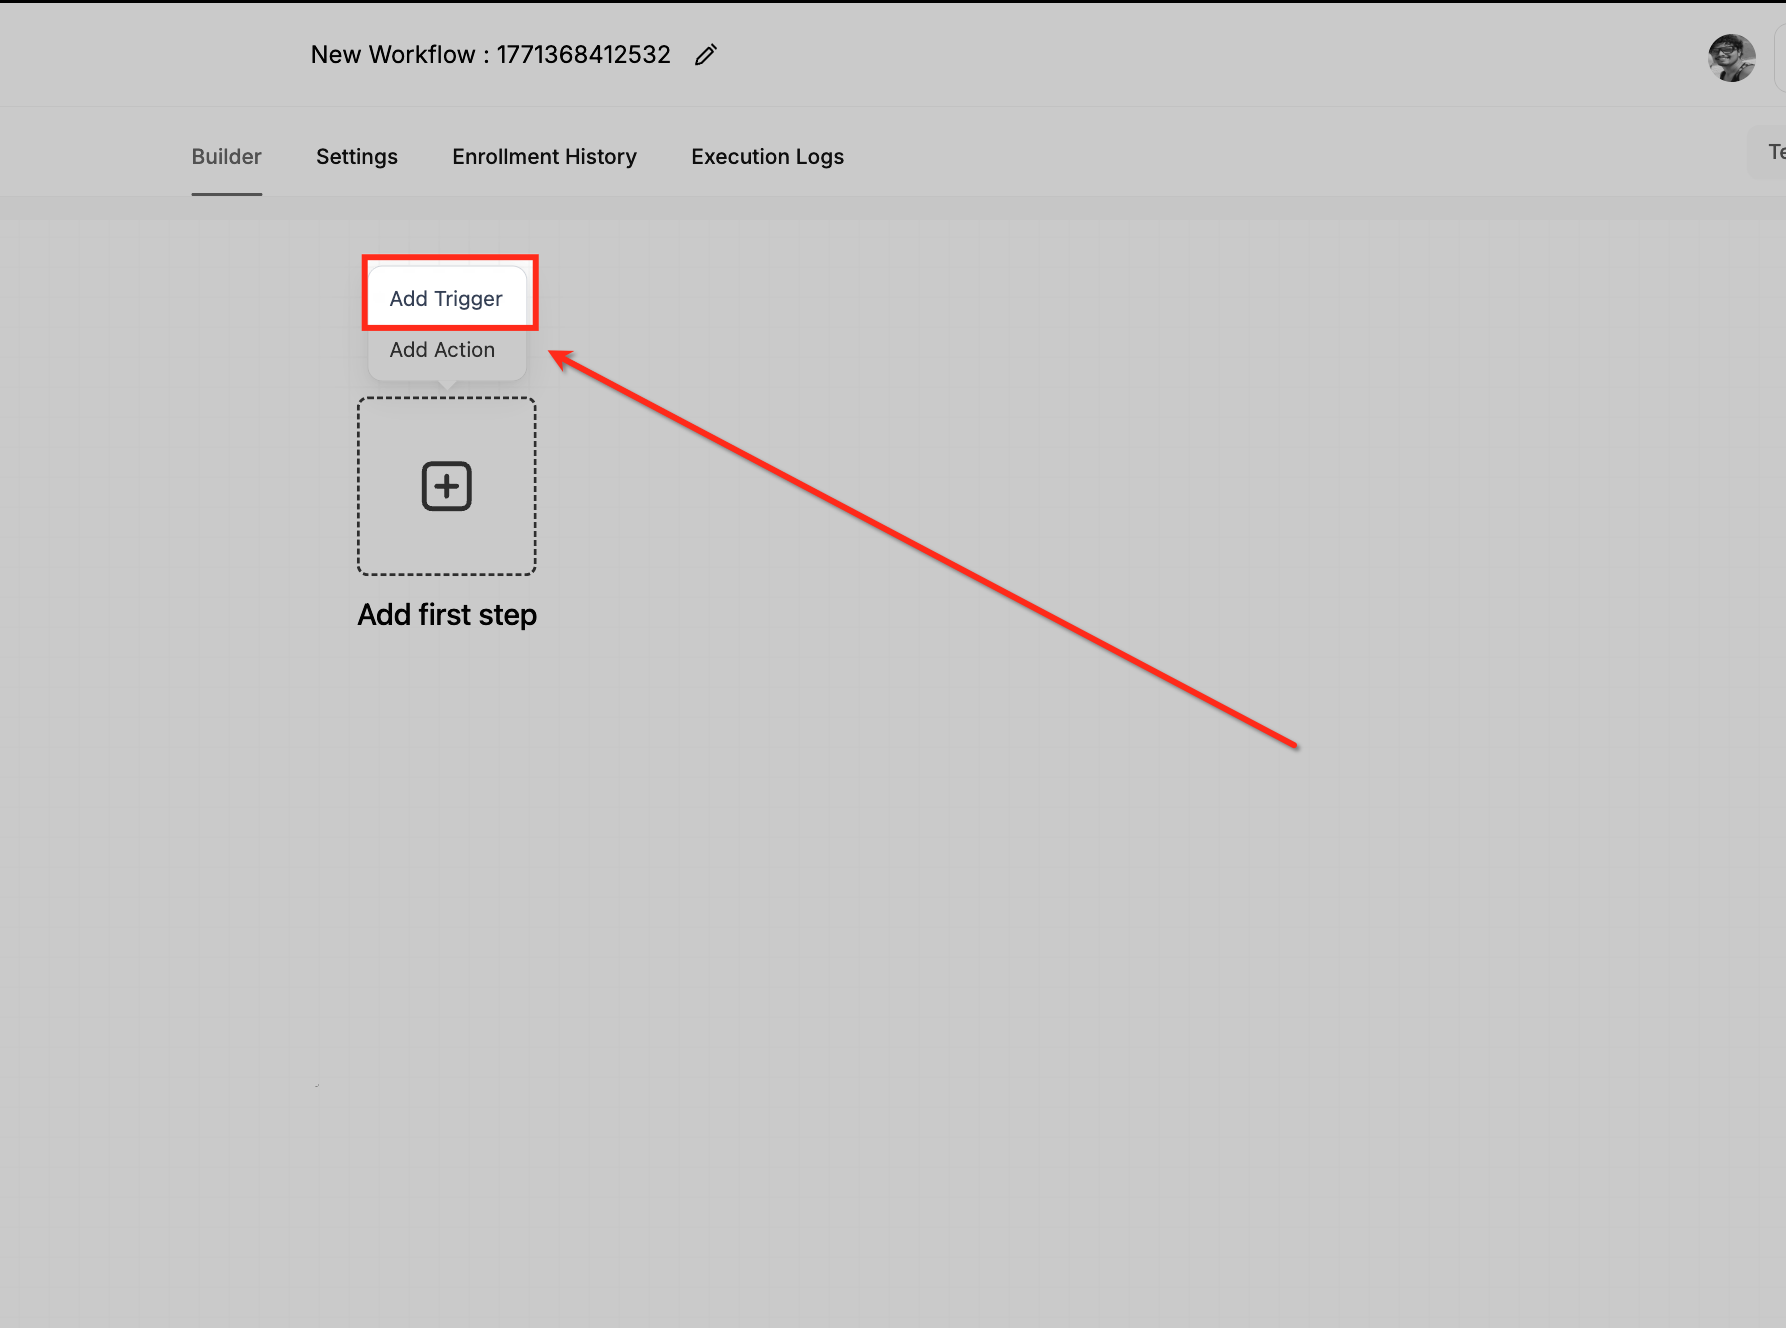
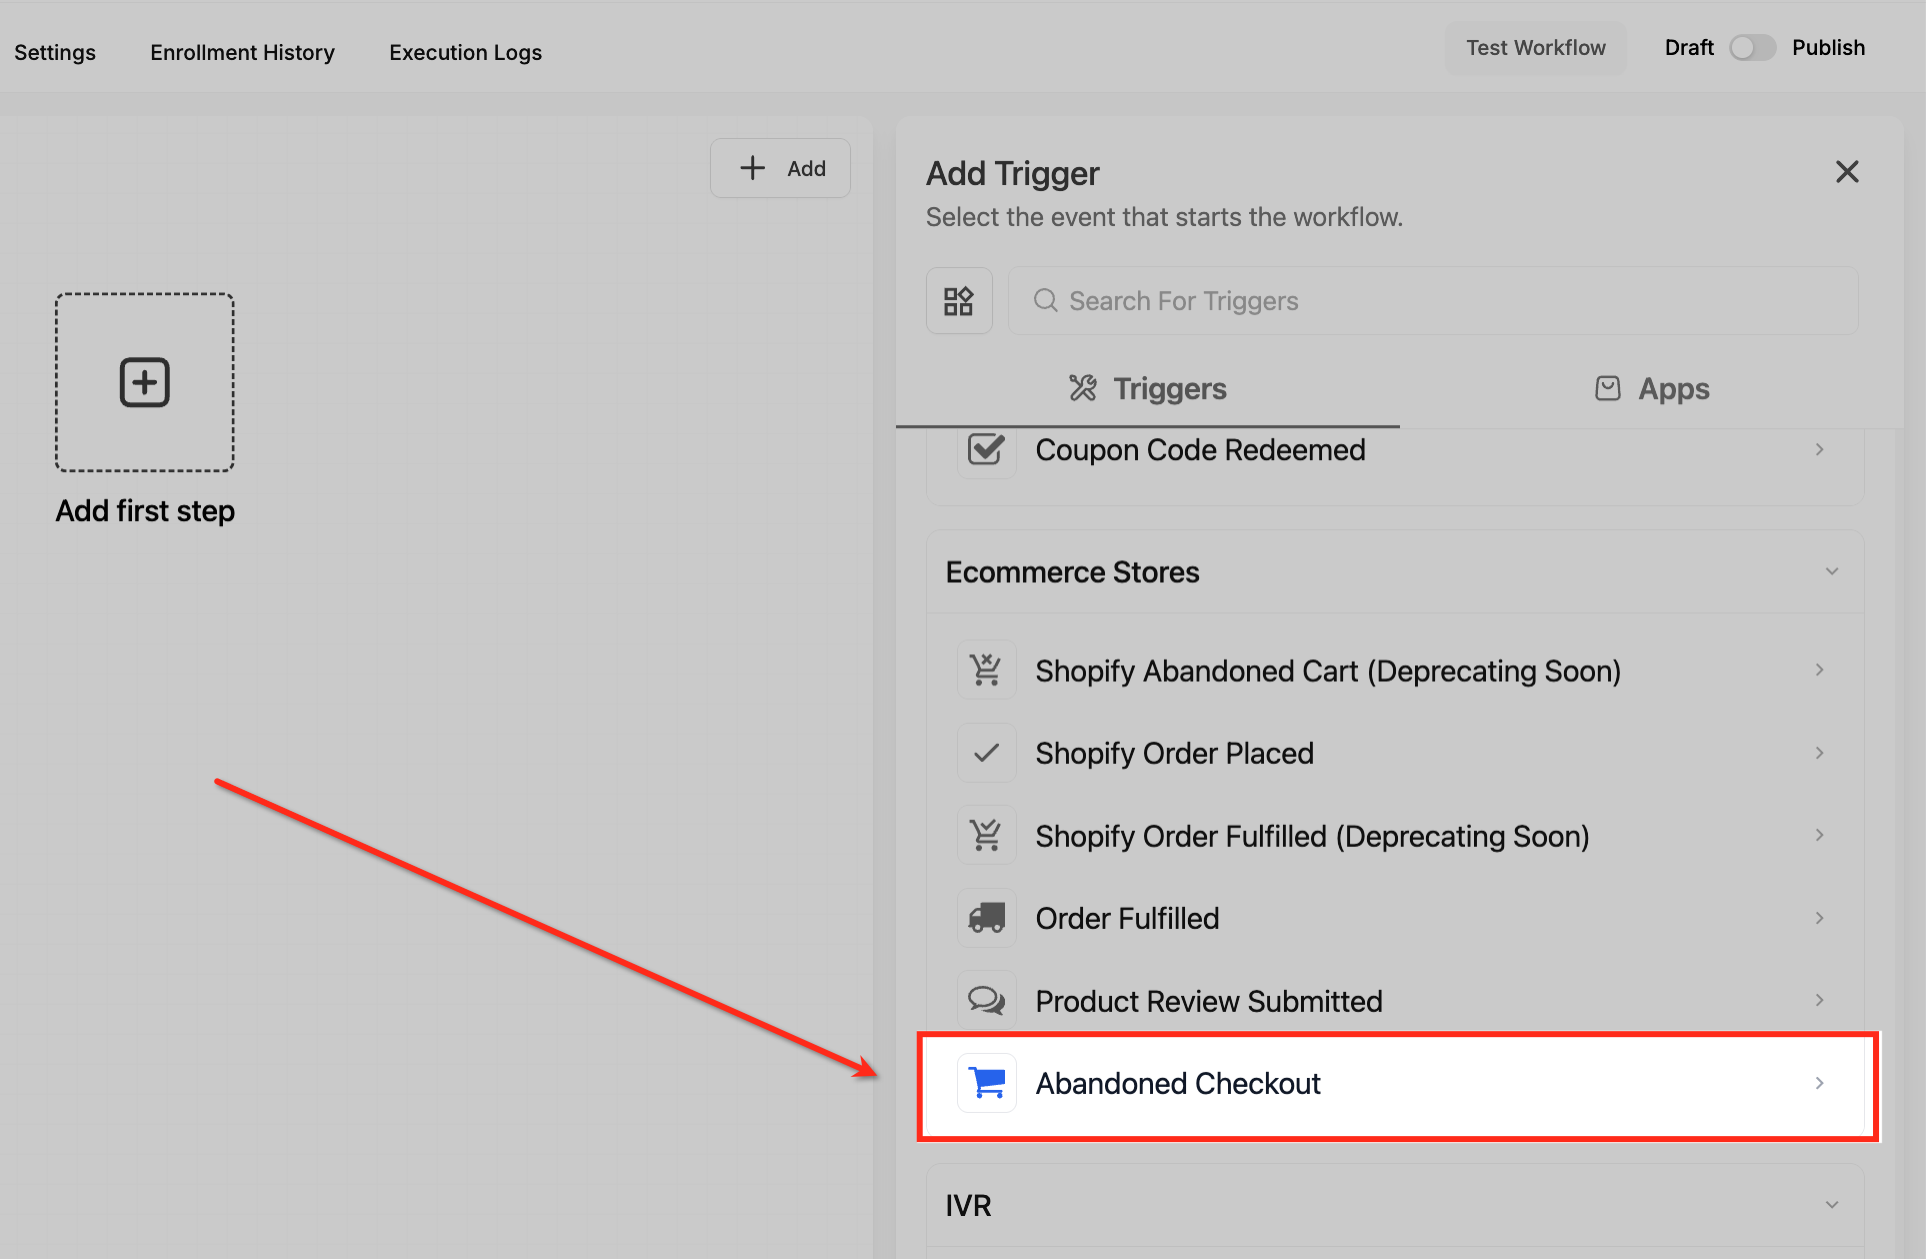
Click Add Trigger to open the trigger selection panel.
Scroll to the Ecommerce Stores section and select Abandoned Checkout.
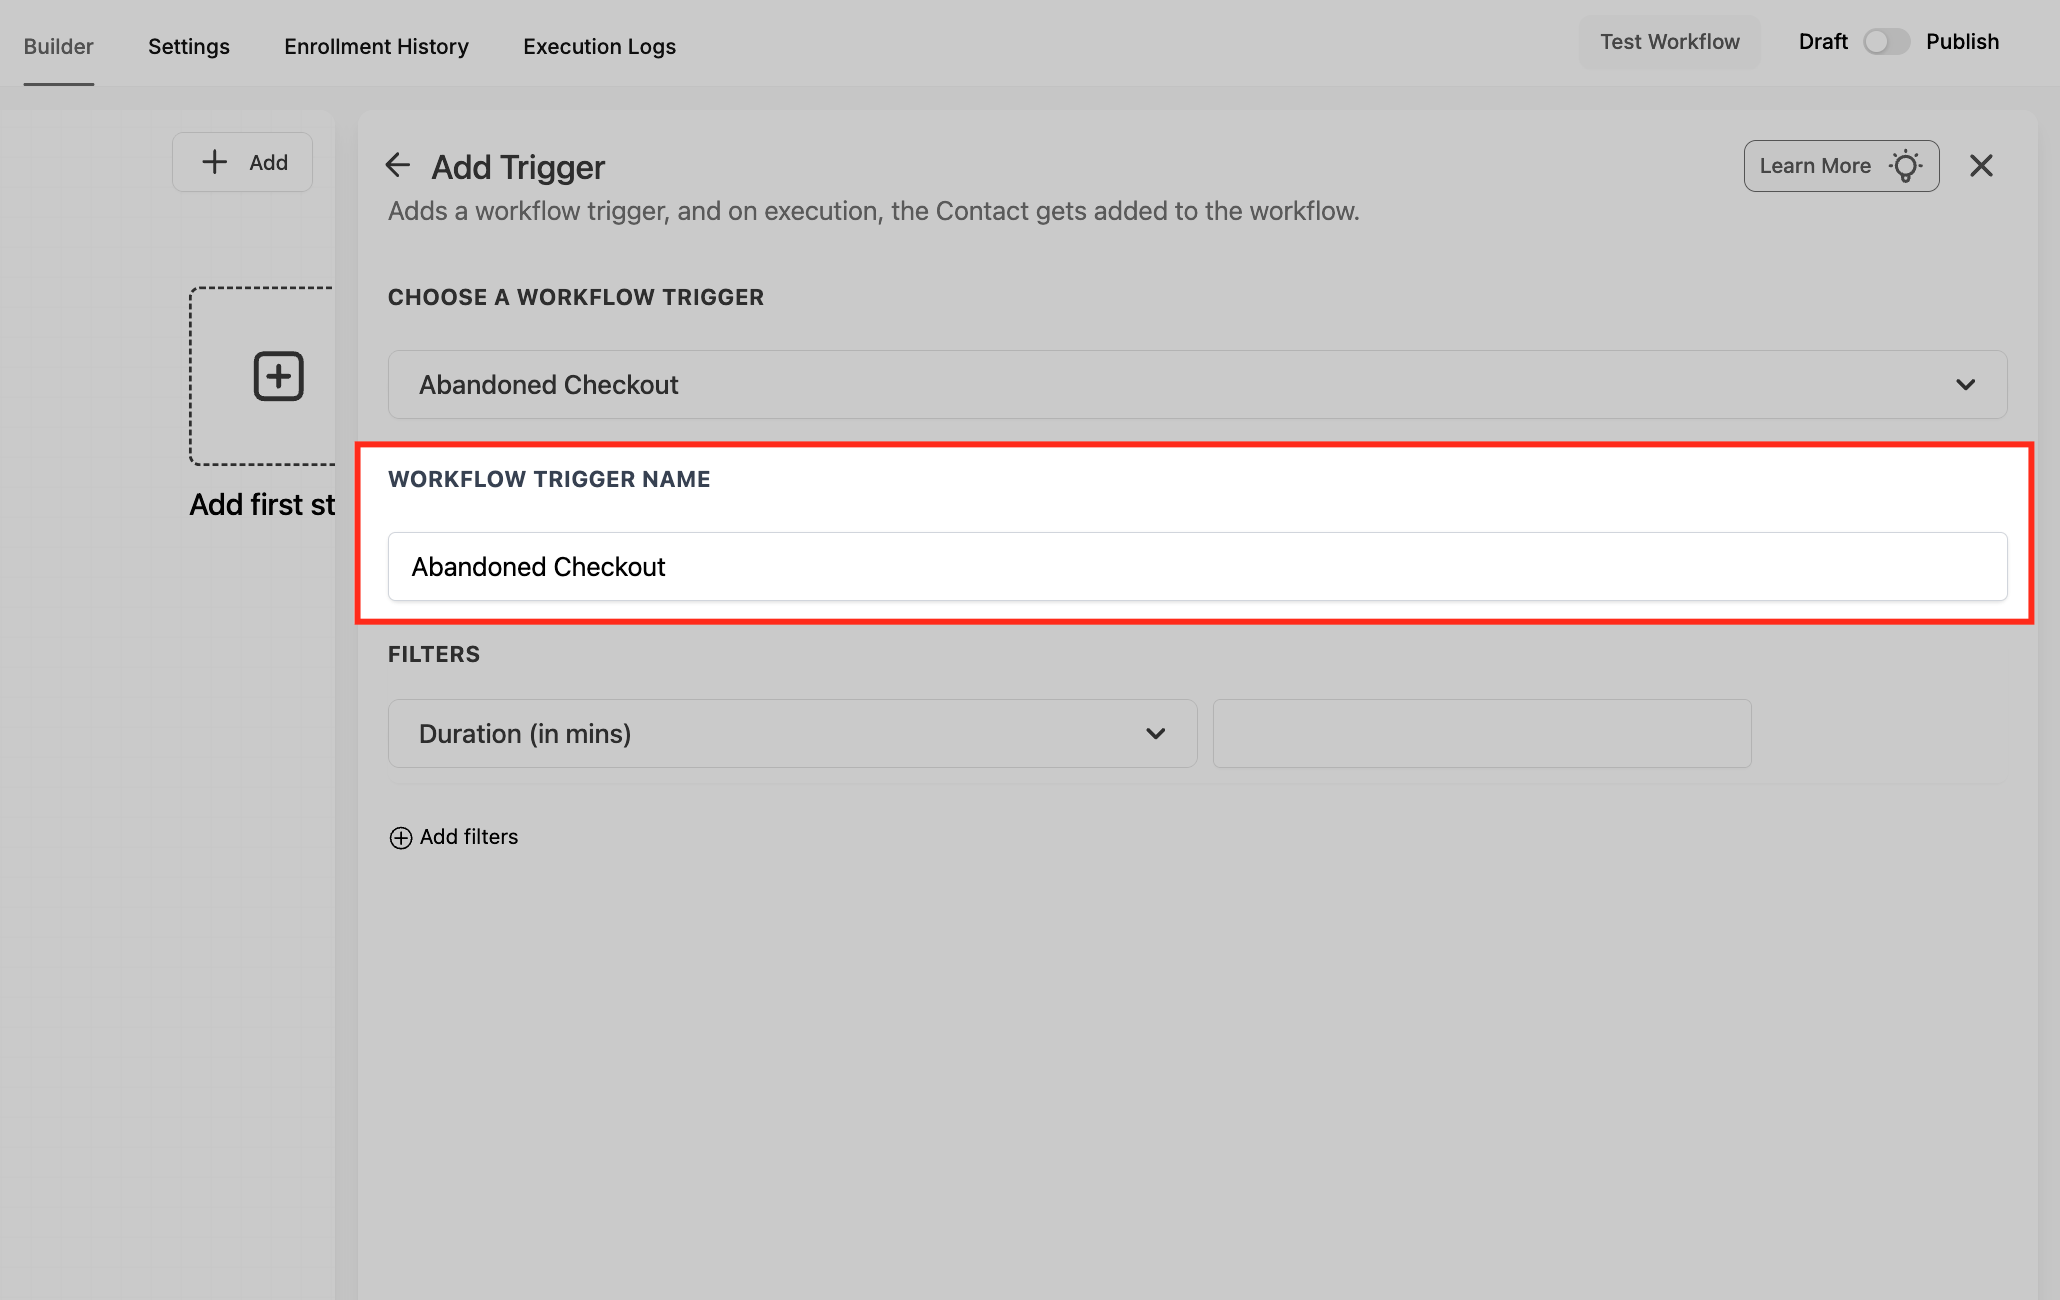
Confirm Abandoned Checkout is selected and keep the default trigger name or rename it if you're running more than one abandonment automation.
Configure the filters:
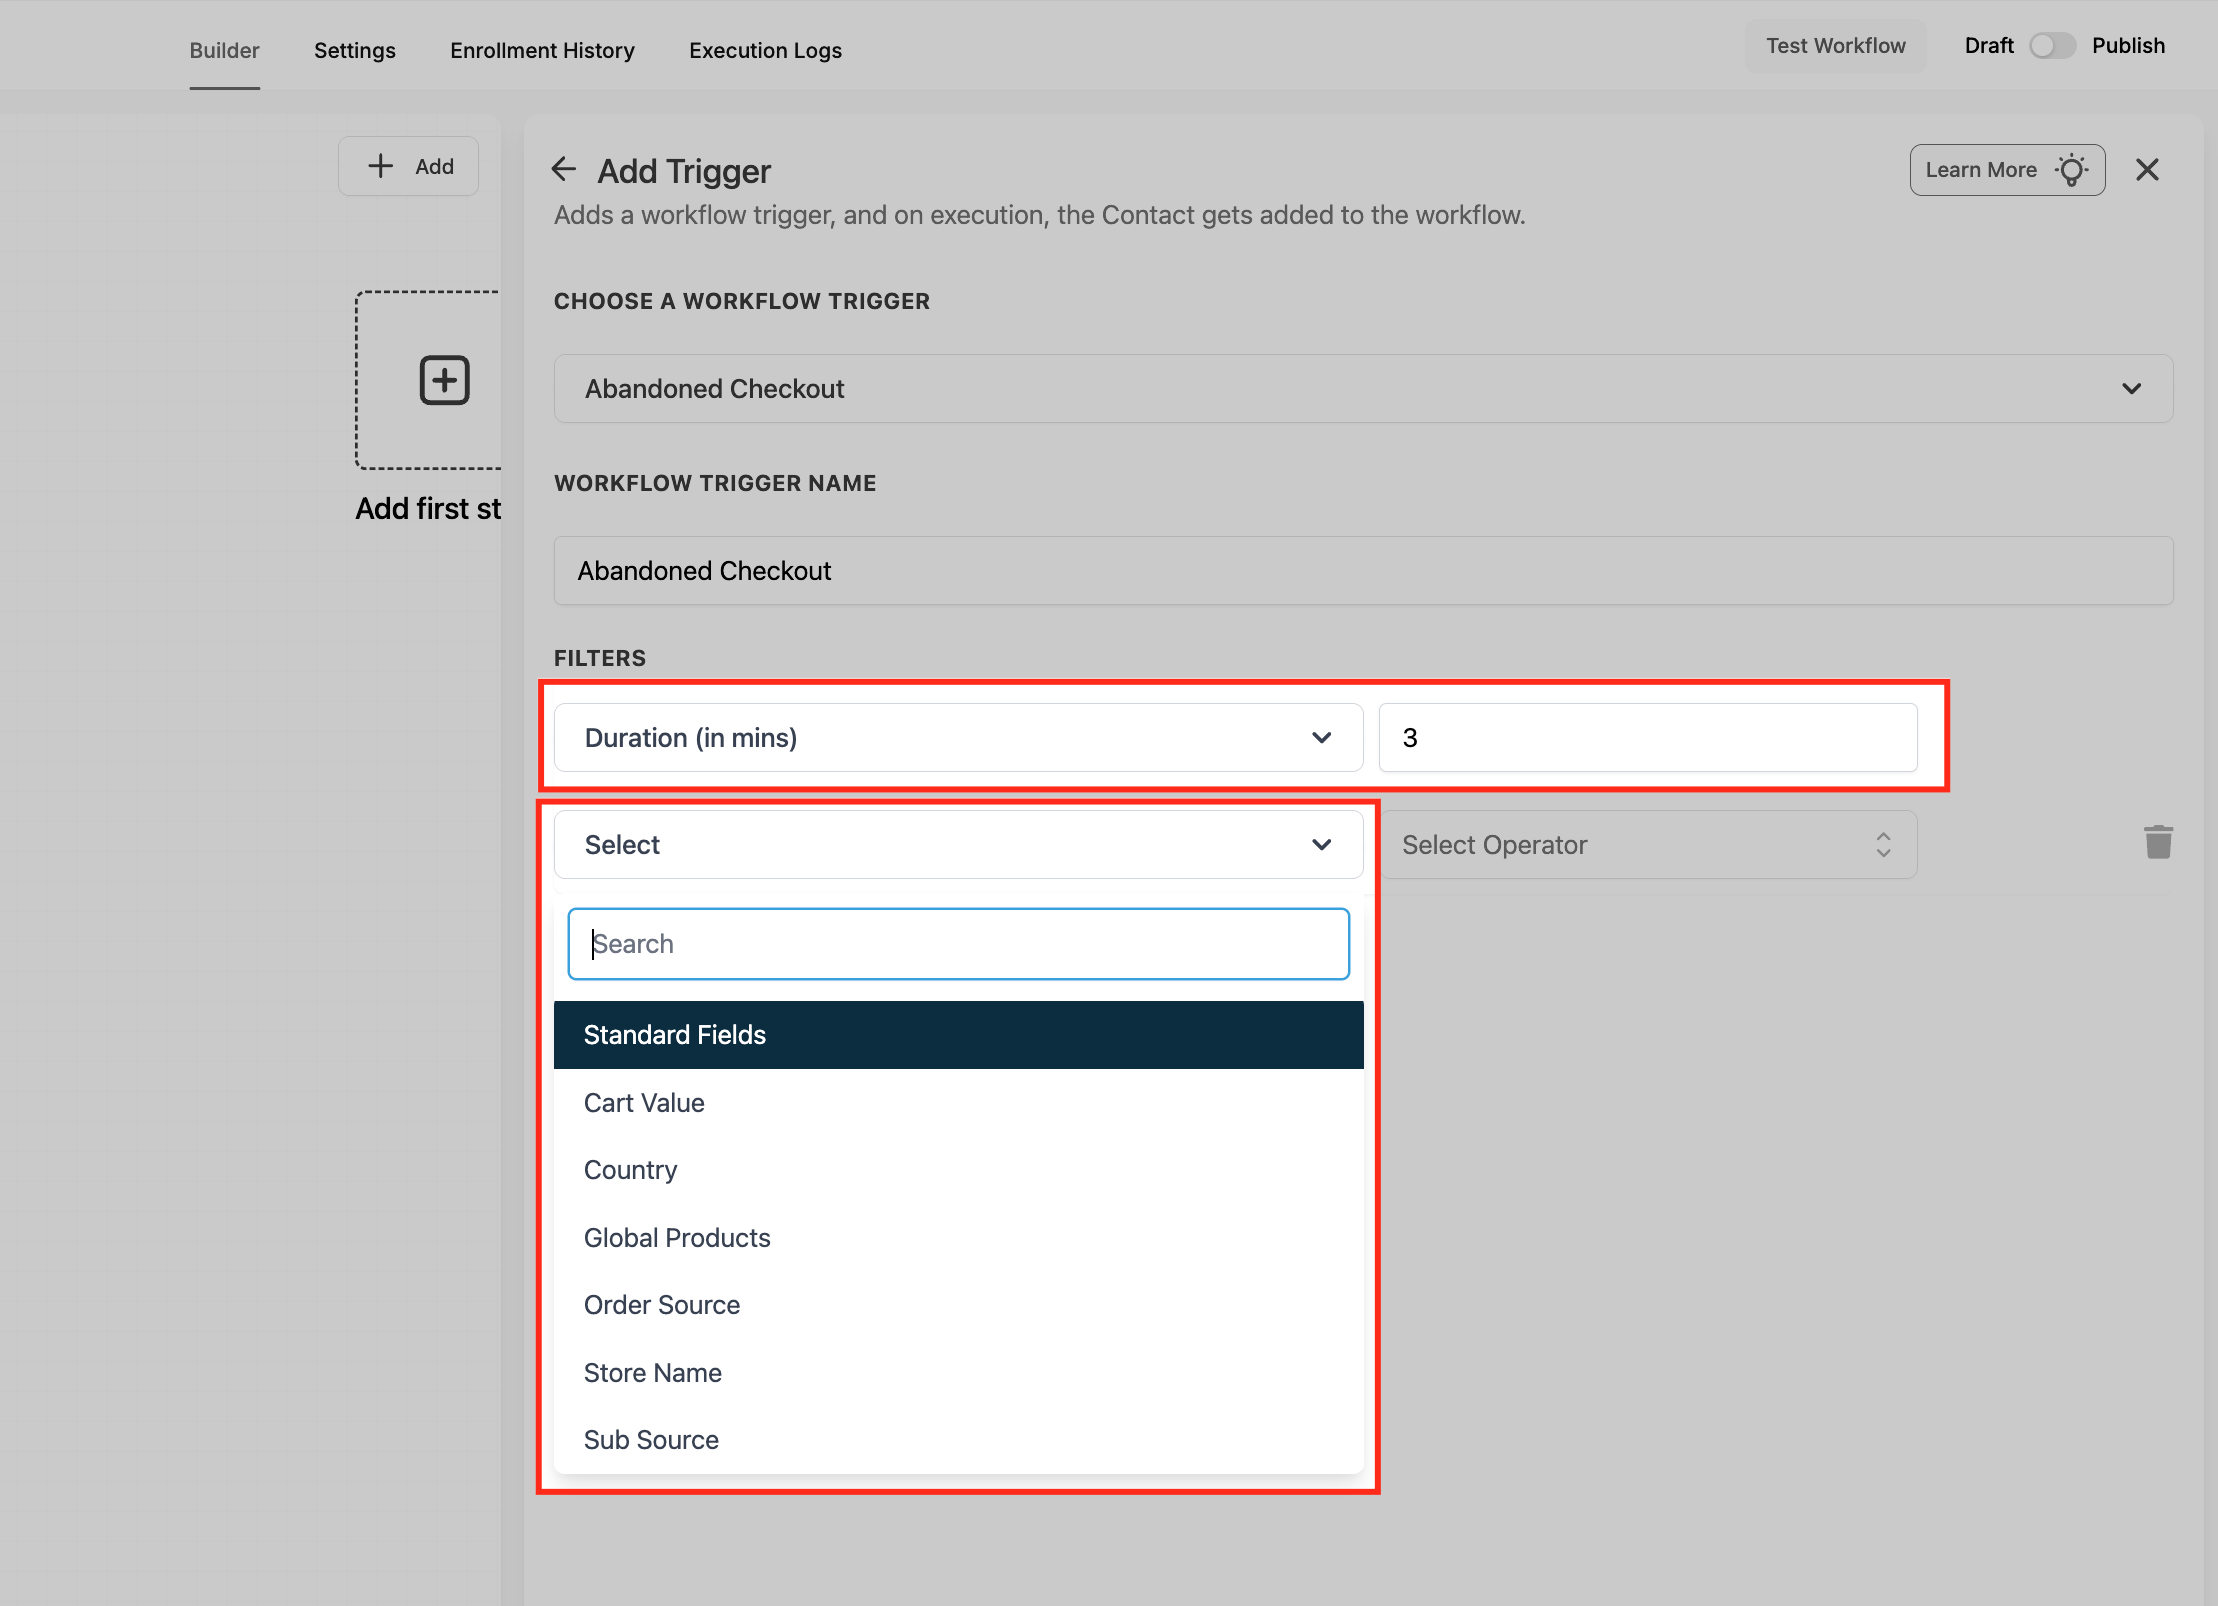
Filter | What it does |
|---|---|
Duration (minutes) | How long to wait before a cart counts as abandoned. |
Cart Value | Trigger only above, below, or within a specific cart value range. High-value carts might deserve a phone call instead of just an email. |
Country | Limit the automation to shoppers in specific locations. |
Global Products | Trigger only when specific product(s) are in the cart, useful for promoting a flagship item or package. |
Order Source | Choose Store (your native Store) or External. |
Sub Source | Appears when Order Source is External; choose the connected platform (currently Shopify). |
You can add a Condition step after the trigger to branch contacts by Cart Value, Order Source, or Sub Source so different carts get different follow-up messaging instead of one generic email for everyone.
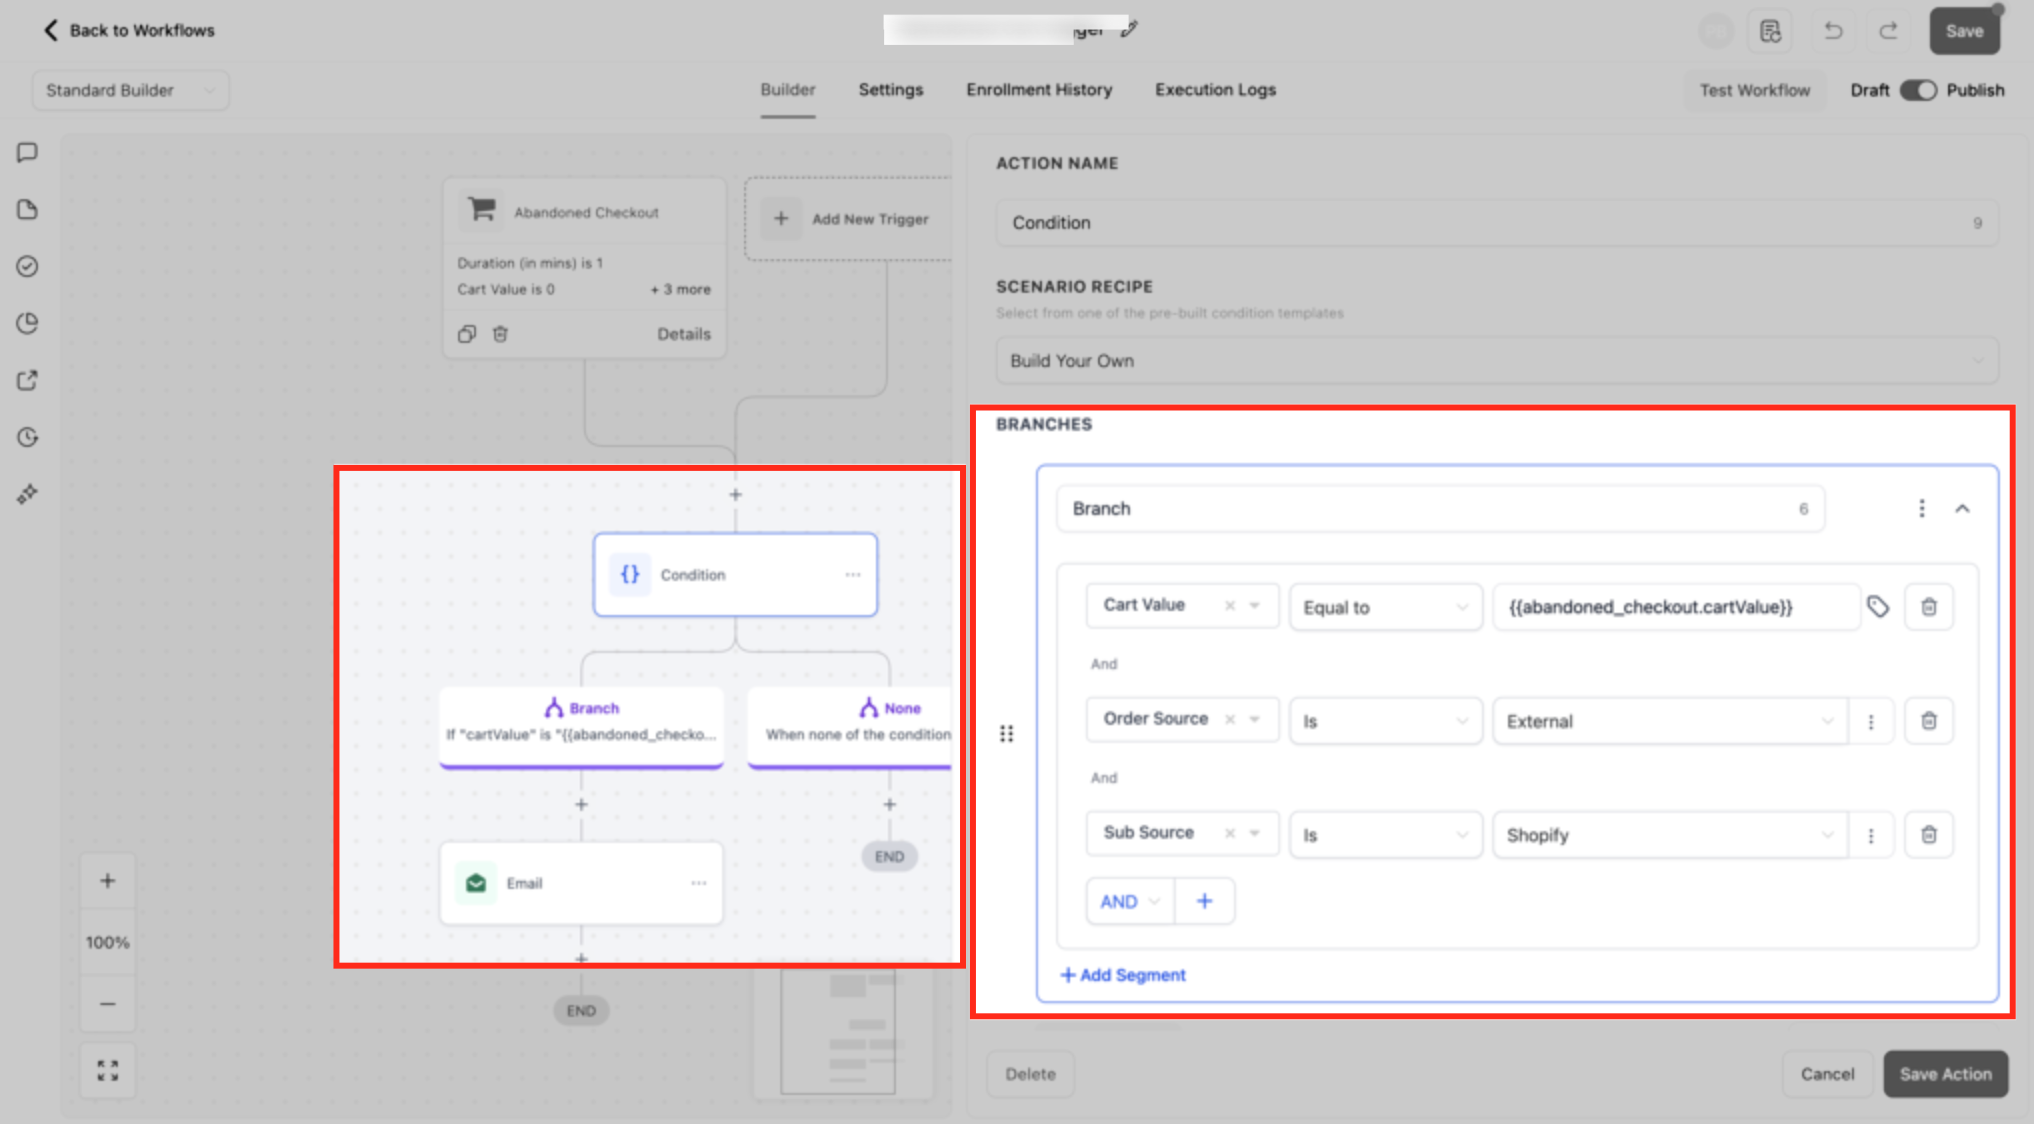
Once the trigger fires, add whatever workflow actions you want: email, SMS, a task for your front desk to call a high-value abandoned cart, or a wait step before a second reminder.
A related legacy trigger called "Shopify Abandoned Cart" still works for existing workflows built on it, but it's being phased out. Use the Abandoned Checkout trigger under Ecommerce Stores for any new automation going forward.
To check performance, open the workflow's Analytics tab for sent, open, and click stats, and check Payments > Orders to see which abandoned carts converted into recovered orders.
A note on Funnels and Website order forms: abandoned cart emails and the Abandoned Checkout trigger only apply to checkouts inside your native Store under Payments. They do not fire for order forms built in Funnels or Websites. To recover those, build a Workflow that watches for order form page visits and sends a follow-up if no payment posts within a set window.
Beyond the automated email and Workflow follow-ups, Aesthetix CRM keeps a running list of every abandoned checkout so you can review, filter, export, and manually recover them from one place. Open the Abandoned Checkouts page under Payments to see each incomplete checkout along with the customer, the cart contents, and the recovery status. It is the same view whether the checkout started in your native Store or a connected external store.
From this page you can:
Search and filter. Search by customer name or email, and filter the list by Email Status, Recovery Status, or a Date Range to focus on the carts that matter most.
Export to CSV. Select an individual record, several at once, or every record on the current page, then export a CSV that includes customer information, cart contents, product details, activity logs, and recovery status. This is handy for reporting or for handing a list to a team member doing personal outreach.
Copy a recovery link to share manually. Copy the checkout URL for any abandoned cart and send it to the shopper yourself, by text, DM, or a personal email, so they can pick up exactly where they left off. This is the same view-only recovery link the automated email uses (see What the Recovery Link Does above), so all the same behavior applies.
Jump to notification settings. Open the Abandoned Cart notification settings directly from the page to adjust the automated recovery email without hunting through menus.
Reviewing this list regularly is a quick way to spot high-value carts worth a personal phone call and to confirm your automated recovery is actually converting.
Is abandoned cart recovery only available on Store checkouts? Yes. It covers checkouts inside your native Store under Payments. Order forms built in Funnels or Websites need a separate Workflow-based follow-up, since they don't run through the same checkout flow.
Can I turn off abandoned cart emails? Yes. Go to Payments > Settings > Notifications and toggle the Enable Abandoned Cart emails switch off.
What happens if a shopper never enters an email address? No reminder is sent. The system needs an email address to identify and follow up with an abandoned checkout.
Can I change how long the system waits before sending the reminder? Yes. The default is 10 hours, but you can adjust it in the same Notifications settings panel, or set a custom Duration on the Abandoned Checkout workflow trigger if you're building a Workflow instead.
Can I send more than one reminder? The built-in Notifications setting sends a single automated email per abandoned cart. If you want a multi-touch sequence (email, then SMS, then a follow-up email), build it as a Workflow using the Abandoned Checkout trigger.
Can I send an SMS instead of, or in addition to, the email? Not through the Notifications toggle, that's email only. Build a Workflow off the Abandoned Checkout trigger and add an SMS action for text-based follow-up.
Can I target only high-value carts differently? Yes. Use the Cart Value filter on the Abandoned Checkout trigger, or add a Condition step after the trigger, to route high-value abandoned carts to a different message (or a phone call task for your front desk) than smaller ones.
Does this work for products connected through Shopify? Yes. The Abandoned Checkout trigger fires for both your native Store and connected external stores like Shopify, selectable through the Order Source and Sub Source filters. Connect Shopify or WooCommerce under Integrations first.
Where can I see a list of all my abandoned checkouts? Open the Abandoned Checkouts page under Payments. It shows every incomplete checkout with the customer, cart contents, and recovery status, and lets you search, filter, and export the records.
Can I export abandoned checkout data? Yes. From the Abandoned Checkouts page, select individual, multiple, or all records on the current page and export a CSV that includes customer information, cart contents, product details, activity logs, and recovery status.
Can I send a recovery link manually instead of waiting for the automated email? Yes. On the Abandoned Checkouts page you can copy the checkout URL for any cart and share it directly with the shopper by text, DM, or your own email, so they can finish the purchase right away.
Can shoppers add more items from the recovery link? No. The link reopens their checkout exactly as they left it; it's view-only for adding new products.
What if every item in the abandoned cart has since sold out or been removed? The recovery page shows a Continue Shopping button in place of the checkout so the shopper can browse your current catalog instead of hitting a dead end.
