Collections let you group the retail products, skincare lines, and gift cards you sell in your Aesthetix CRM store into organized sets, such as "Post-Treatment Skincare" or "Under $50," and then display those groupings on your storefront. Collections are managed under Payments > Products > Collections, and shown on your site with the Collection List element in the Page Builder.
There are two ways to build a collection:
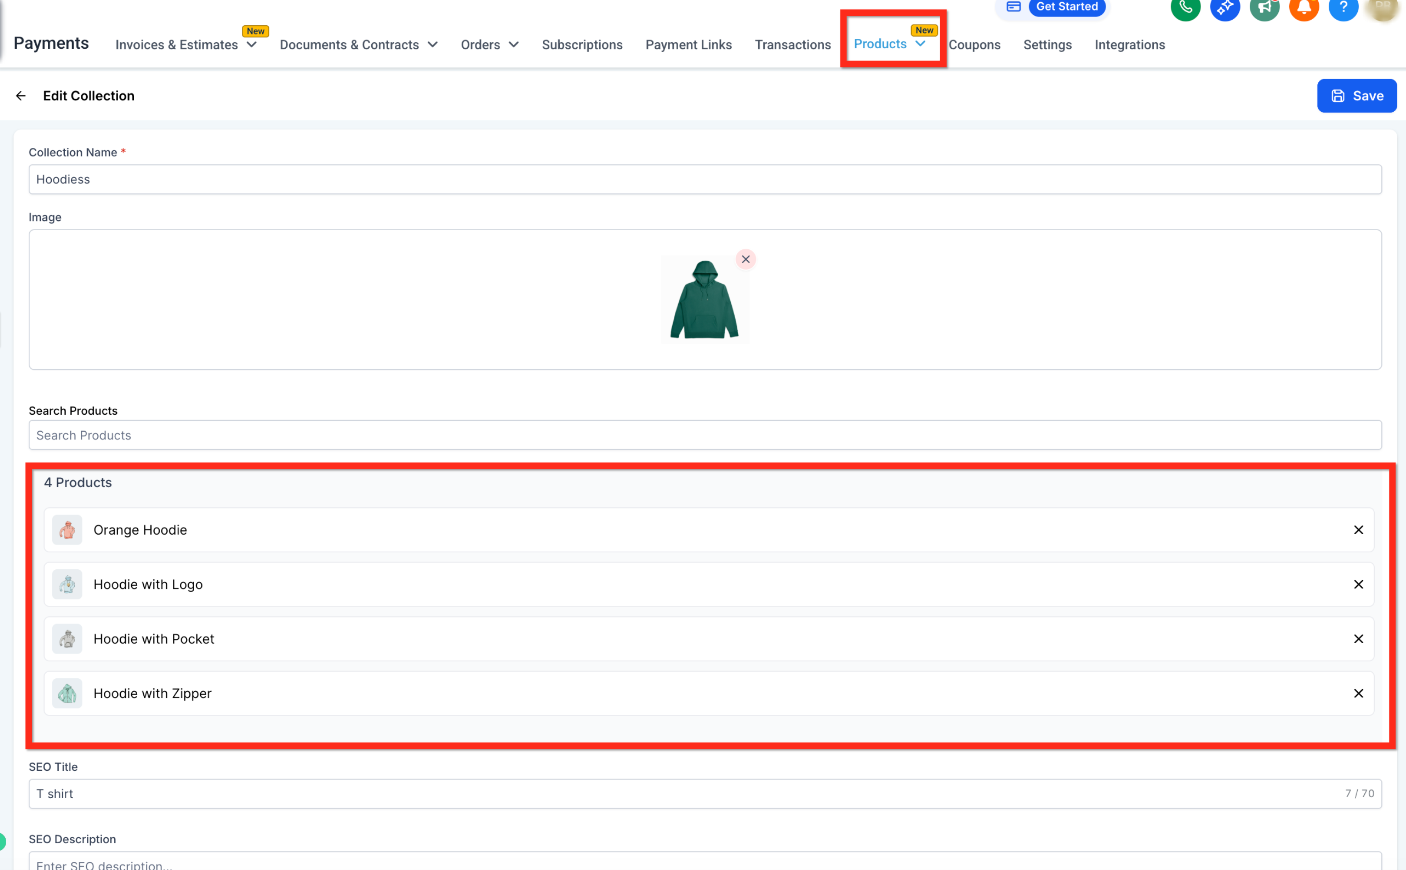
Manual Collection: You hand-pick which products belong in the collection. Best for seasonal promotions, limited-time bundles, or a curated assortment where you want full control over exactly what's included.
Smart Collection: You define rules (based on product title, variant title, price, or inventory), and Aesthetix CRM automatically adds any product that matches. Best for dynamic groupings like "products under $50" or "in-stock retail items" that should stay current without manual upkeep.
Products can be added or removed at any time.
Items can be manually reordered with drag-and-drop.
Ideal for a fixed set of products tied to a specific campaign or promotion.
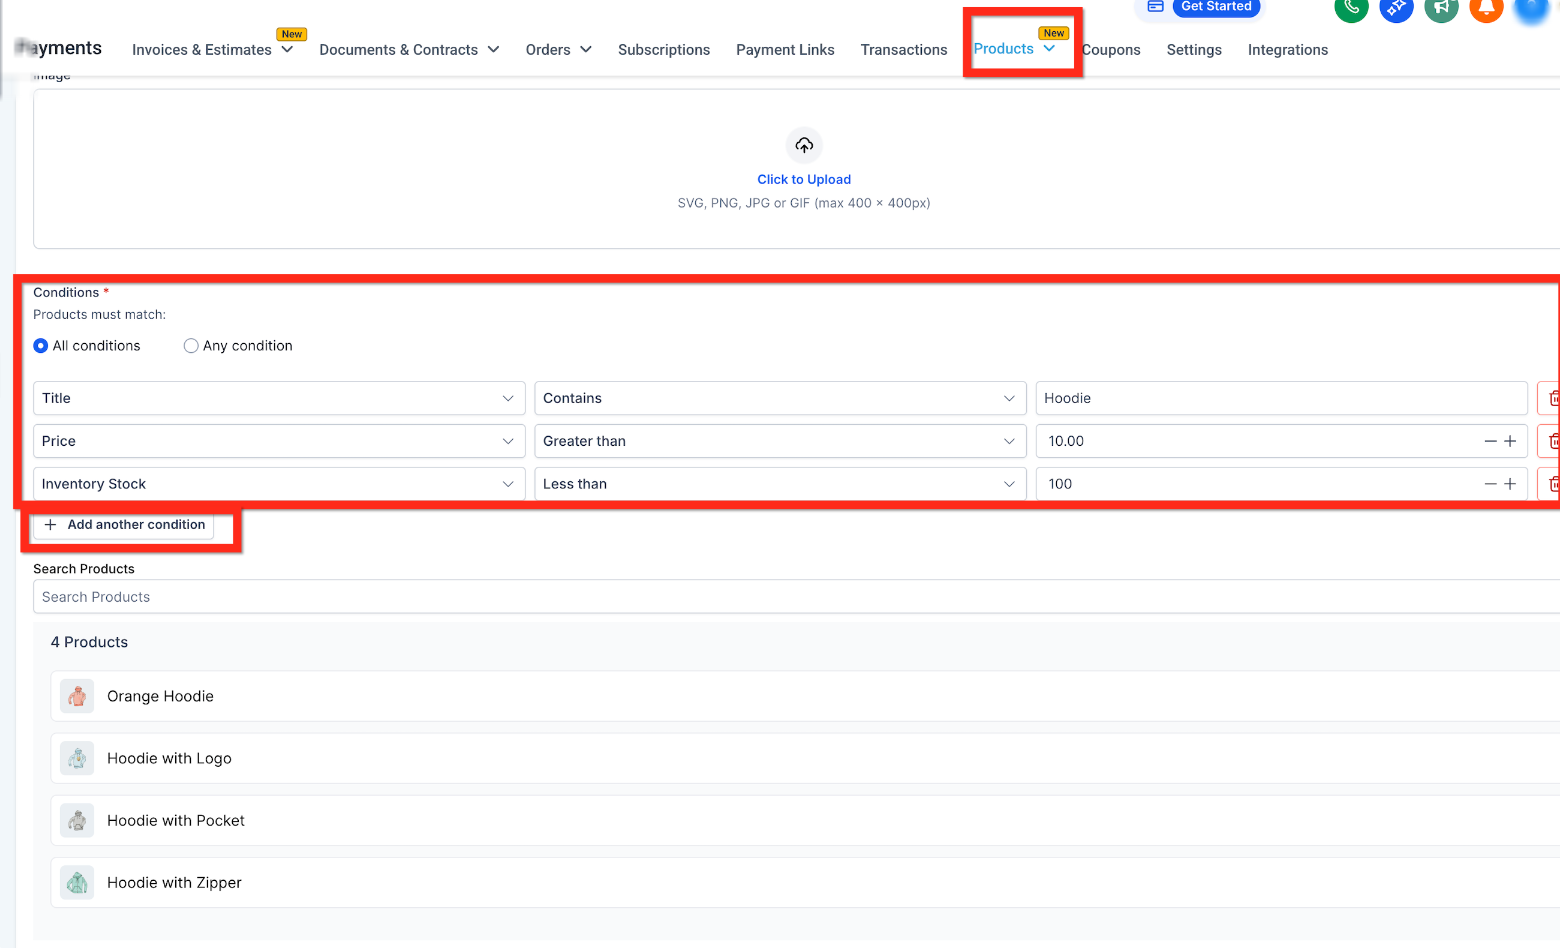
Conditions can be based on Title, Variant Title, Price, or Inventory.
A product qualifies if any of its variants or price rows matches the saved rule.
Invalid or conflicting conditions (for example, "Price greater than $100 AND Price less than $50") are blocked when you try to save.
Smart Collections refresh automatically in the background, usually within a few minutes.
Manual additions or removals are disabled for Smart Collections since inclusion is rule-based.
A collection's type is permanent. Once you create a collection as Manual or Smart, you cannot switch it to the other type later. If you need the opposite type, create a new collection and swap it into your pages or workflows in place of the old one.
When building a Smart Collection, you'll choose from these operators to define what qualifies a product:
Equals
Not Equals
Greater Than / Less Than
Contains / Does Not Contain
You can combine multiple conditions using AND (a product must match all conditions) or OR (a product must match any one condition) logic for more precise targeting.
Go to the Payments section.
Select Products, then navigate to the Collections tab.
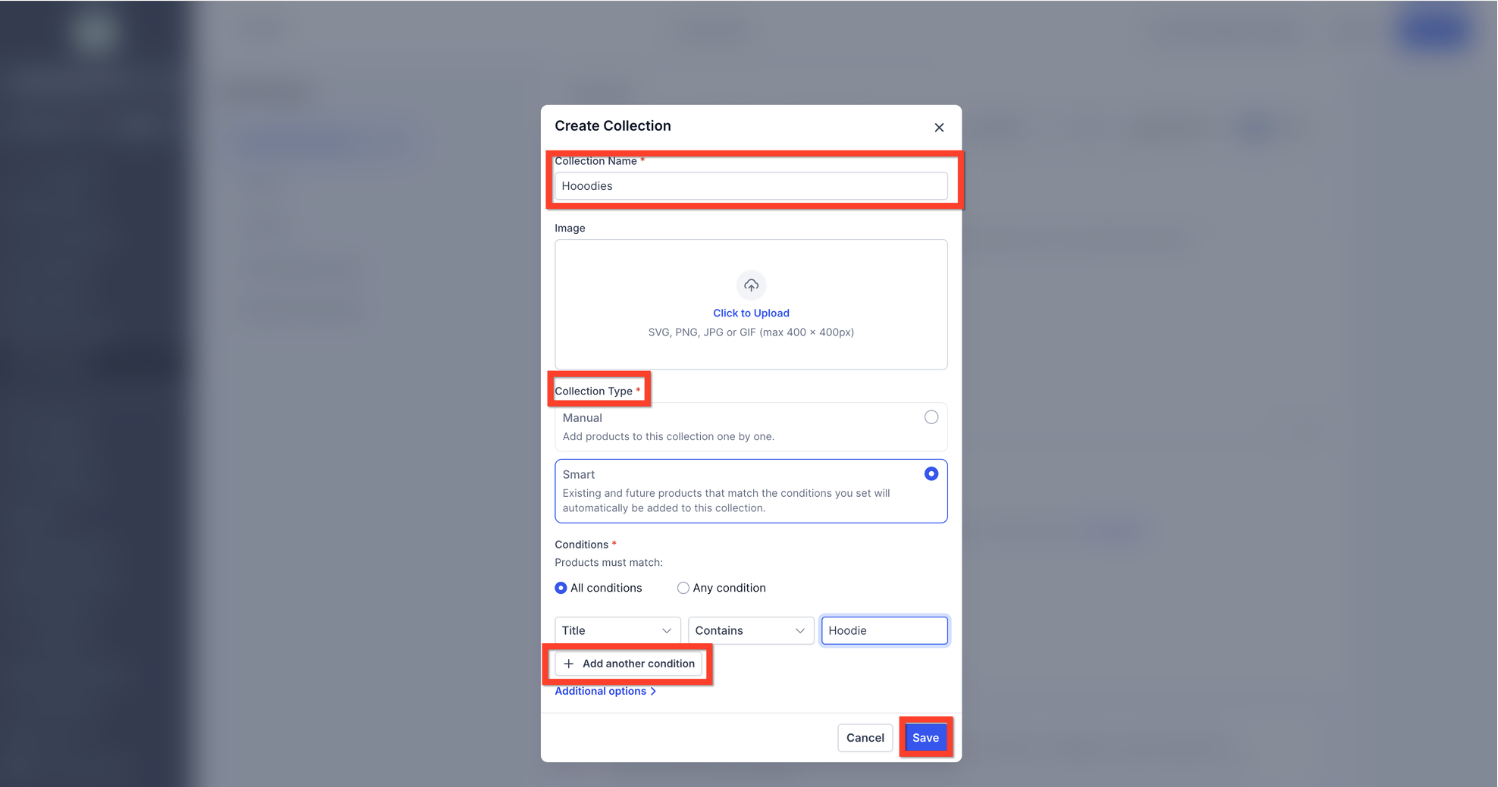
Click Create Collection to start a new collection.
Enter a unique collection name.
Upload or select an image for the collection. If you skip the image, the collection's name will be shown centered over a background instead.
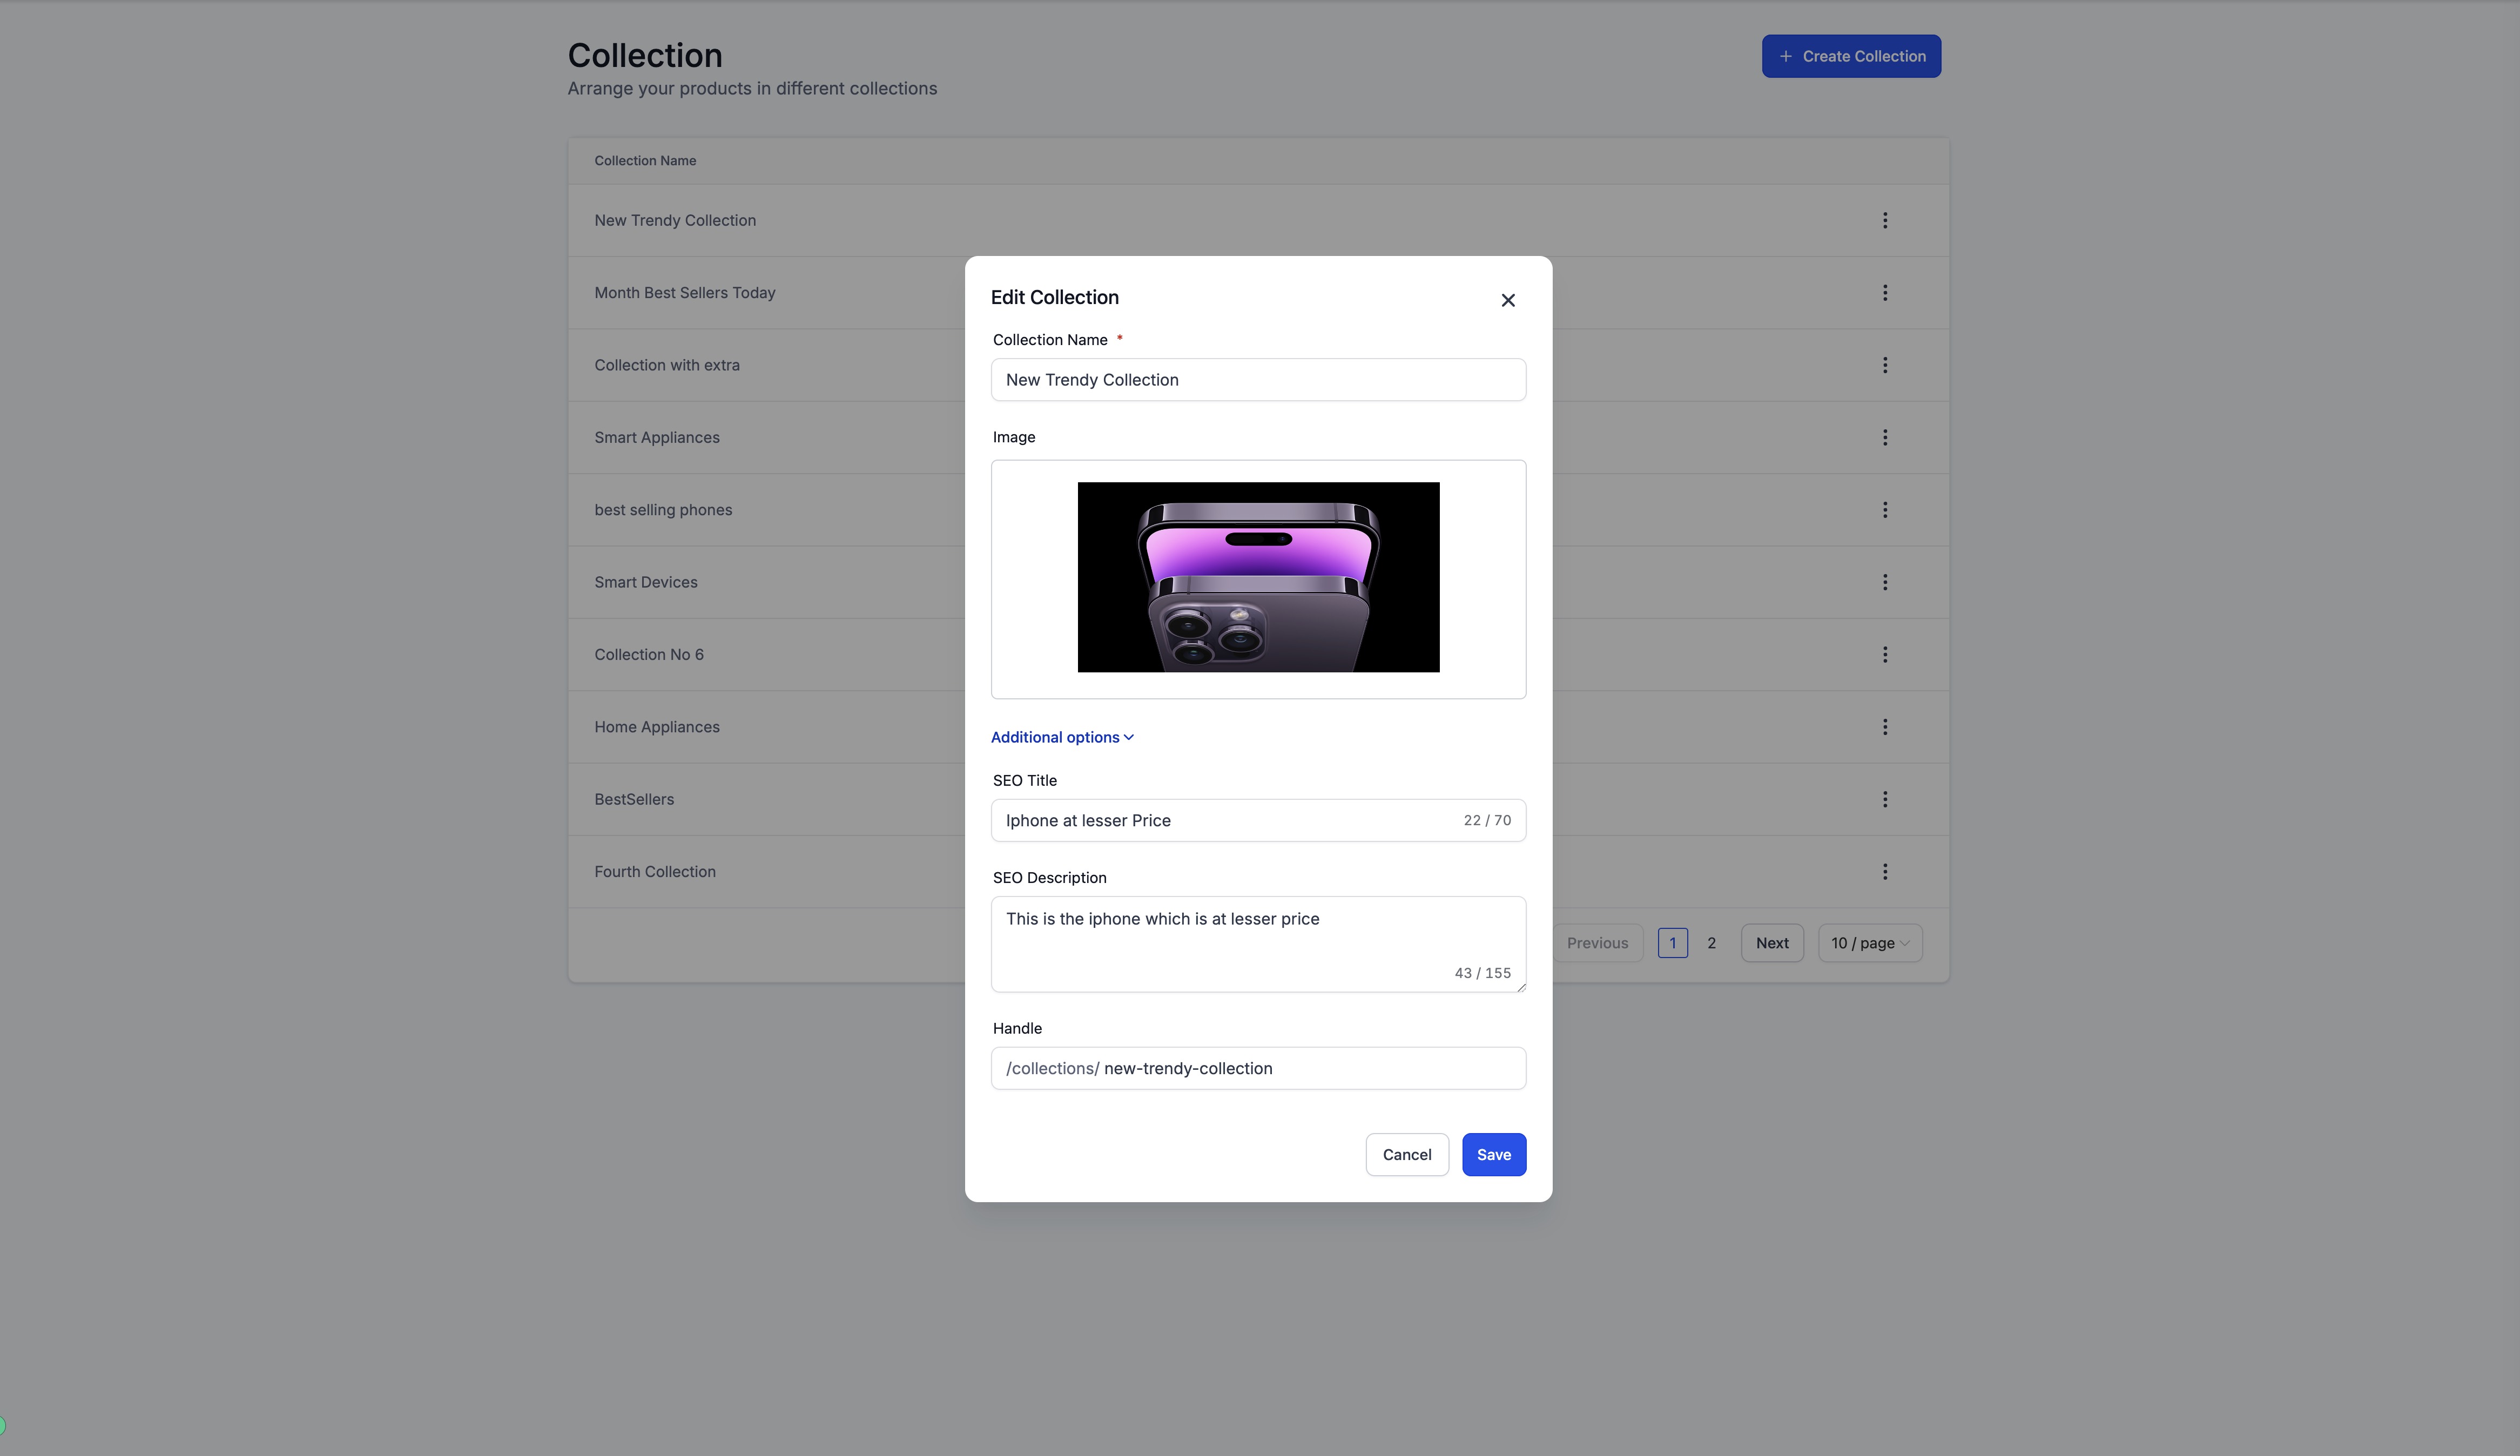
Click Additional options to reveal SEO and URL fields.
Input an SEO title to improve how the collection appears in search results.
Add an SEO description for the collection.
Specify a custom handle for the collection's URL.
Choose the collection type:
Manual: search for and select products individually.
Smart: define one or more rules, such as "Price less than $50," and choose whether All or Any of the conditions must be met.
Click Save. Manual Collections are ready immediately; Smart Collections will process in the background and populate automatically.
Products can belong to more than one collection at a time, whether they were added manually or matched by rules, so the same product can appear in several groupings across your store.
Once a collection exists, you add it to a page using the Collection List element.
Open the Page Builder for your store.
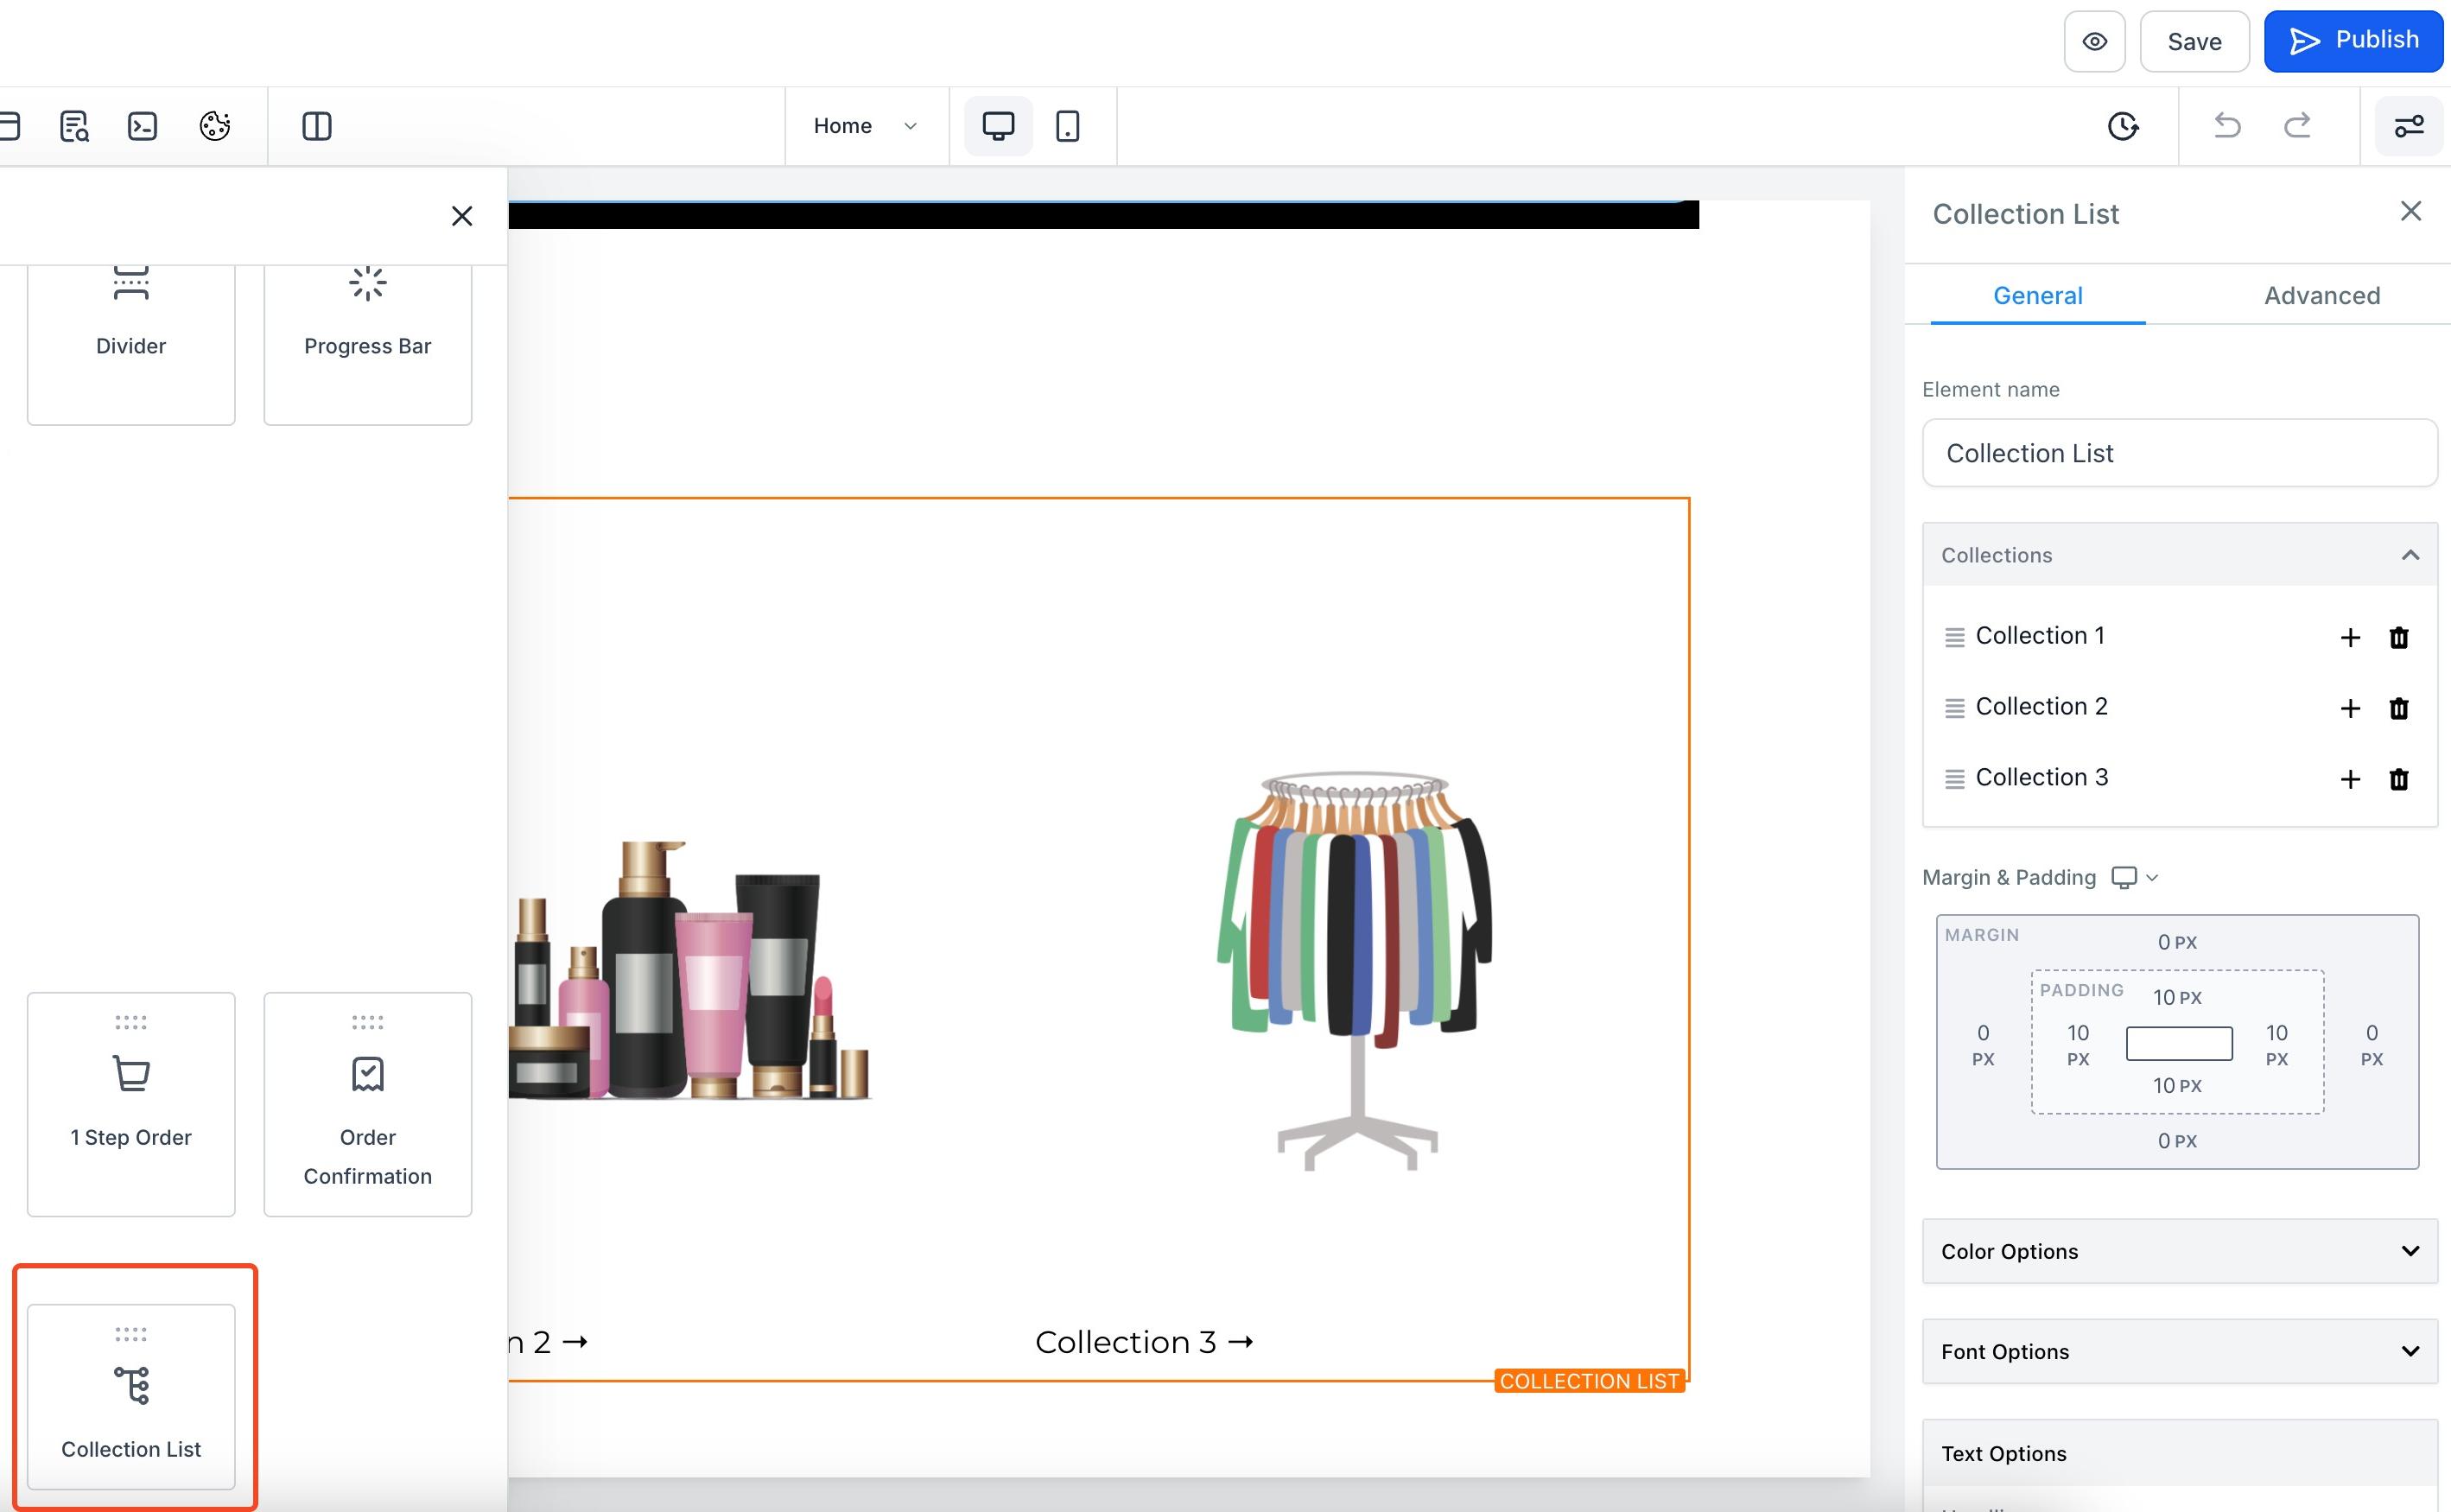
Add the Collection List element to the page. You'll find it under the Store section of the elements panel.
When first added, the element shows three placeholder collections with placeholder names and images. Click the element to open its settings on the right and configure layout, heading, margin, padding, colors, borders, and fonts, the same way you would with any other element.
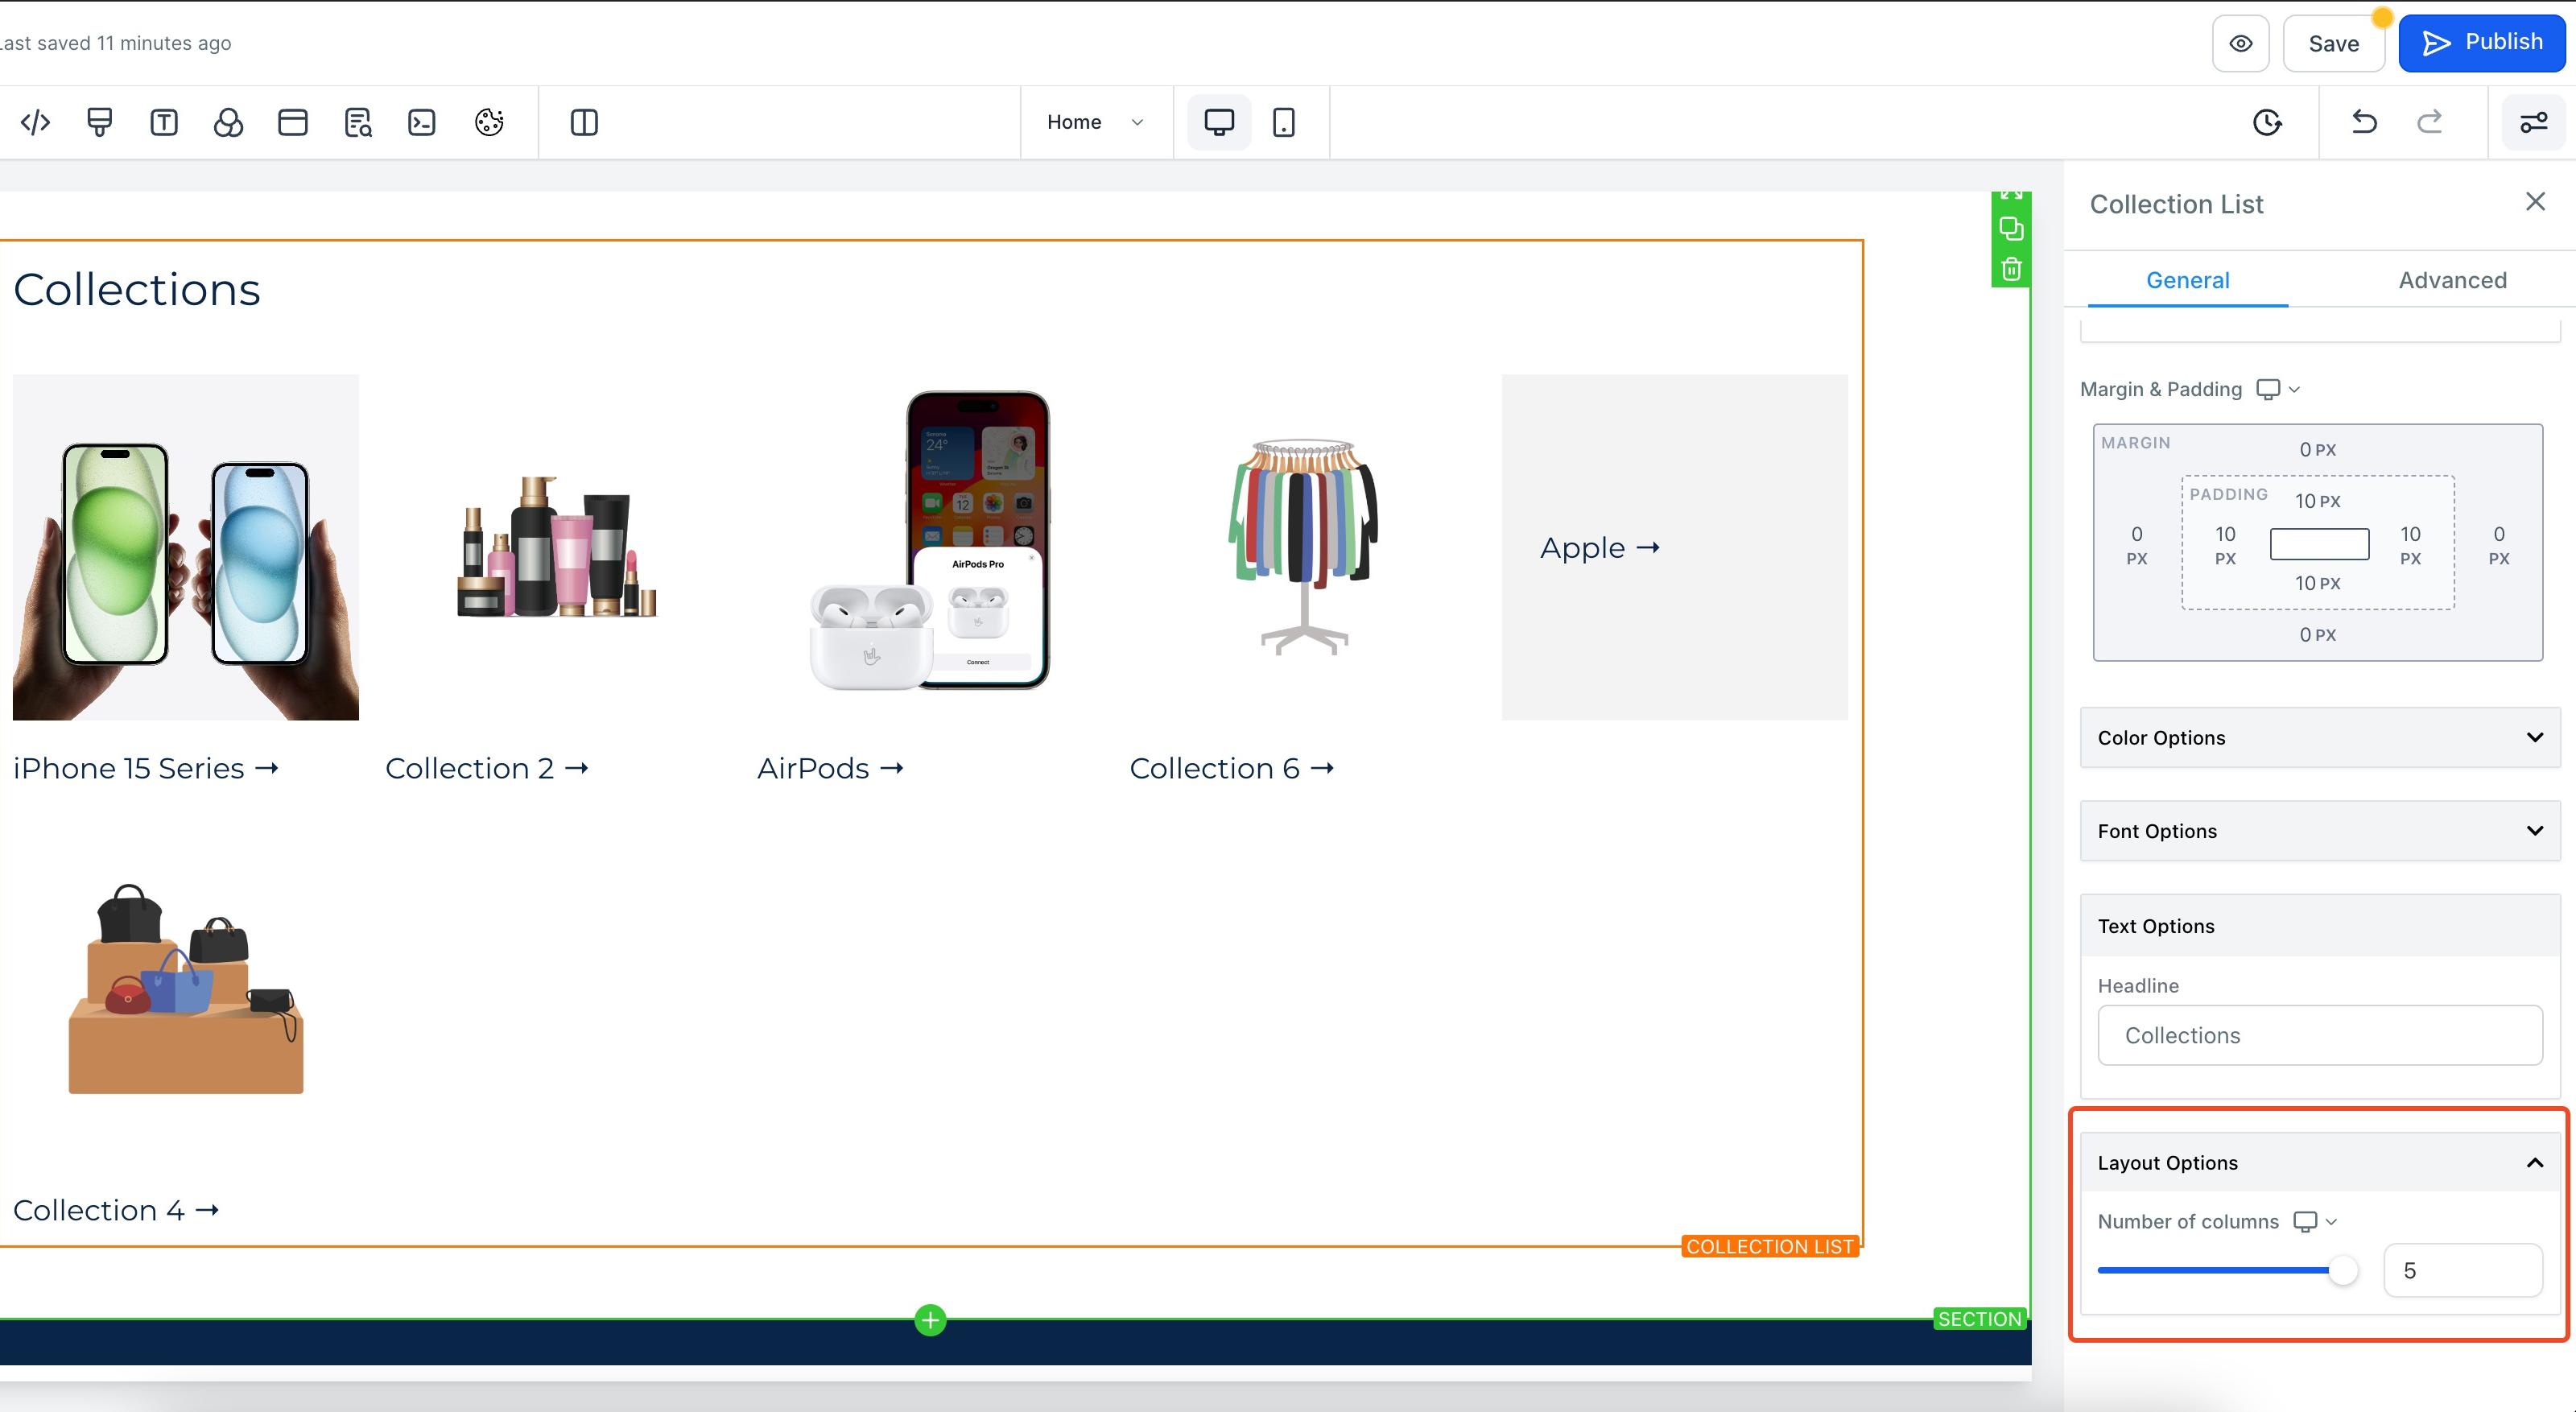
By default, three collections are shown per row. Use the Number of columns field under the Layout tab to change this, up to a maximum of 5 columns on desktop and 2 on mobile.
To remove the heading entirely, leave the Headline field empty under Text options.
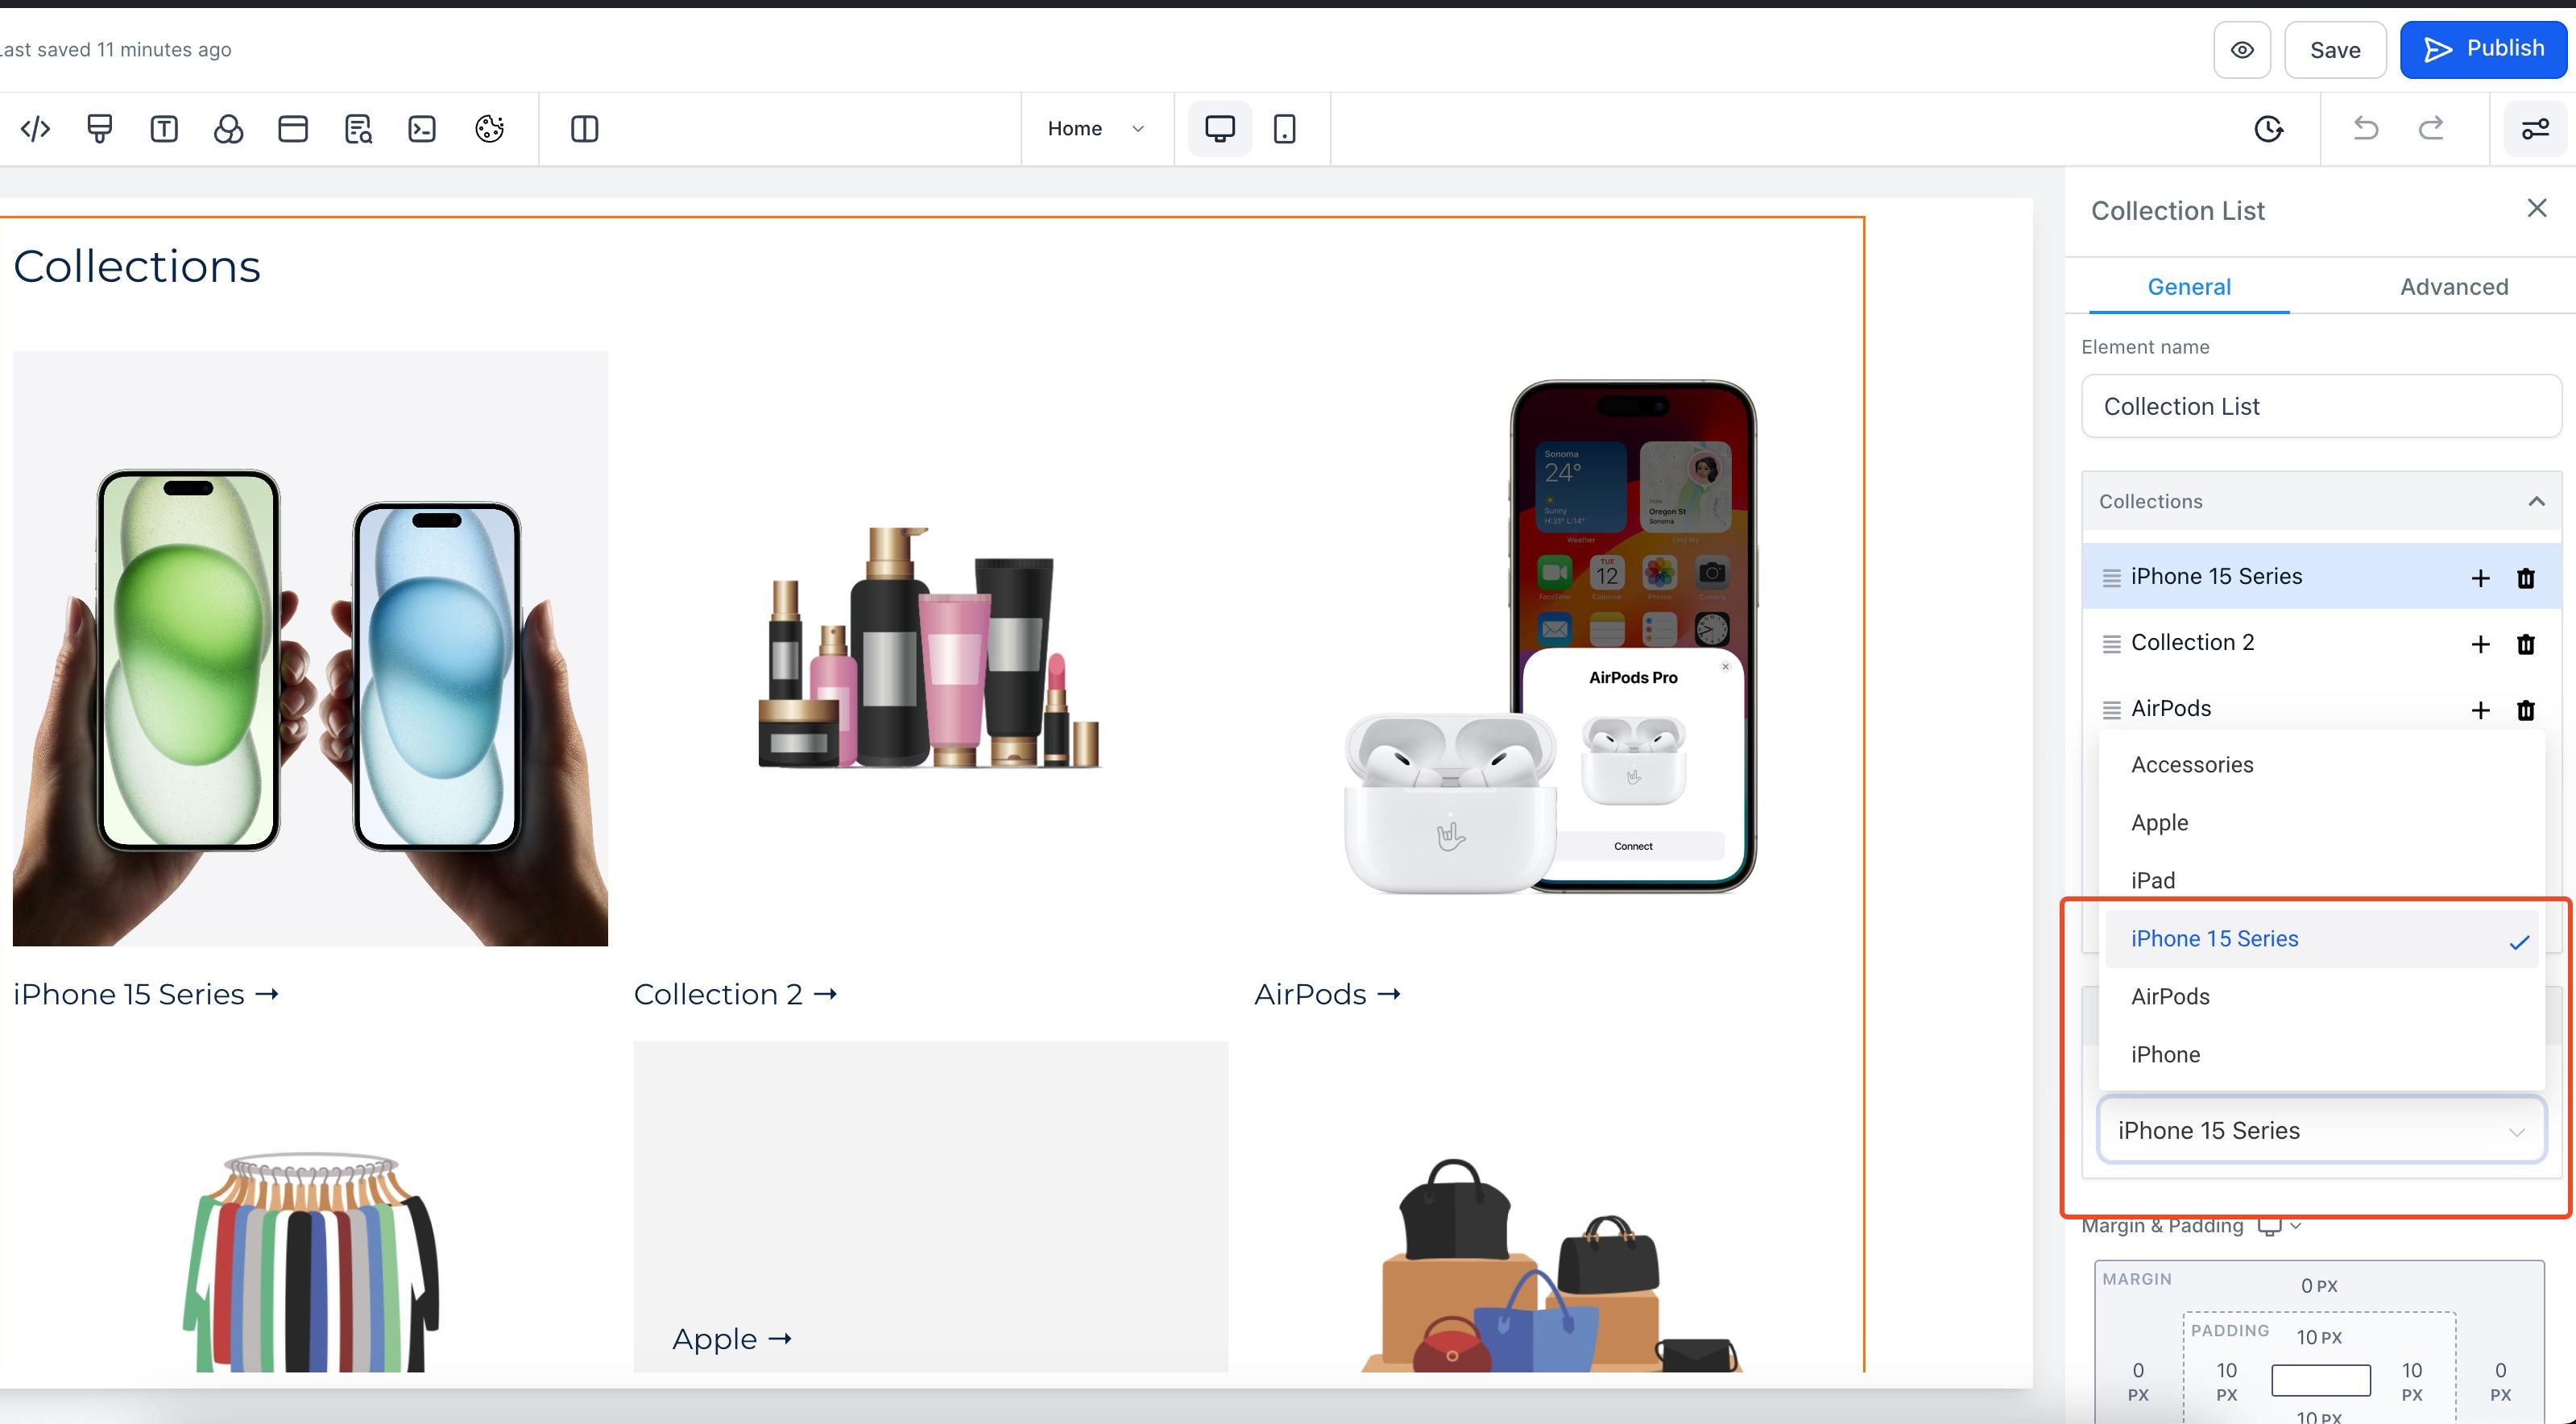
Click on any placeholder item under the Collections group to open a selection panel and assign it a real collection. The item will then update to show that collection's name and image. Placeholder collections do nothing on a live site until they're mapped to real collections this way.
You can also double-click an item directly on the canvas: if it isn't mapped yet, the selection panel opens automatically; if it's already mapped, the assigned collection is highlighted for clarity. Changes made in the selection panel and on the canvas stay in sync with each other, and the display order of items stays stable as you add or remove them from the element.
If a collection has an image, that image displays for the item. If it doesn't, the collection's name is centered over a background instead. Any SEO title and description you set on the collection are used to generate SEO tags on the resulting collection product-list page.
Click Save/Publish to apply your changes and view them live on your site.
Collections built here can also be reused elsewhere, such as filtering in email templates or referencing in workflows, so you don't have to recreate the same grouping logic in multiple places.
Creating the underlying products, setting their prices, taxes, and coupons, and choosing your payment processor are handled separately in Payments. This guide covers only how products are grouped and displayed once they already exist in your catalog.
What's the difference between a Manual and a Smart Collection? A Manual Collection is a hand-picked list of products you choose yourself. A Smart Collection automatically includes any product that matches rules you define, such as price or inventory, and updates itself as your catalog changes.
Can I convert a Manual Collection into a Smart Collection, or the reverse? No. The collection type is set permanently when you create it. If you need the other type, create a new collection and use it in place of the old one.
What happens if no products match my Smart Collection's rules? The collection stays empty until a product in your catalog satisfies the conditions you've set.
Can I manually add or remove a product from a Smart Collection? No. Smart Collections manage their own product list based on the saved rule logic. To control membership directly, use a Manual Collection instead.
Can the same product appear in more than one collection? Yes. A product can be included in multiple collections at once, whether through manual selection or by matching more than one Smart Collection's rules.
How long does it take for a Smart Collection to update? Updates process in the background and typically complete within a few minutes of the underlying product data changing.
Why aren't the collections I see in the Page Builder showing on my live site? New Collection List elements start with placeholder collections that don't pull real data. You need to click each placeholder (or double-click it on the canvas) and assign it an actual collection before publishing.
Where else can collections be used besides my storefront pages? Collections can also be referenced in email templates and workflows for filtering and automation, in addition to being displayed on store pages.
Do I need an image for every collection? No. If you don't upload an image, the collection's name is centered over a background wherever it's displayed instead of a photo.
Where do I set up the actual products and their prices? Product creation, pricing, taxes, and coupons are managed in the Payments area of Aesthetix CRM, separate from how collections group and display those products on your storefront.
