Getting Started with Your Online Store
Aesthetix CRM includes a native Online Store you can add to any website you build in Sites. It lets your practice sell retail skincare, take-home kits, gift cards, and other products directly to patients, with orders, payments, and fulfillment tracked right alongside the rest of your account. Products live under Payments > Products, and the storefront itself lives under Sites.
An online store is a virtual storefront that lets patients browse, select, and purchase products from your practice without calling the front desk or waiting for an in-office visit. For a med spa, that typically means retail skincare lines, post-treatment care kits, gift cards, and other take-home products.
A few reasons practices add one:
Reach beyond office hours: Patients can shop any time, from any device, without needing to be in the building.
Convenience: Existing patients can reorder their favorite serums or cleansers in a few clicks.
Lower overhead: No need for a separate retail checkout system or point-of-sale hardware.
Automated transactions: Payment processing, receipts, and order records happen automatically once a purchase is made.
The Store is included with your Aesthetix CRM account. There is no separate purchase required to turn it on.
Think of the Store in three layers:
Products (Payments > Products): the catalog of items you sell, their pricing, descriptions, images, and variants.
Storefront (Sites): the actual store pages that display those products on your website, cart, checkout, and thank-you experience.
Orders & fulfillment (Payments > Orders / Transactions): where you track what patients bought, process payments and refunds, and mark items shipped.
You build the catalog first, then add the Store to a website, then manage what comes in through Orders and Transactions. The rest of this guide walks through each layer.
For the full walkthrough of creating product records (pricing types, tax settings, coupons, and checkout configuration), see the product guides in the Payments collection. This article focuses on the Store display itself: adding it to your site, launching it, and fulfilling what patients buy.
If you're launching your first store, the Store Setup Wizard walks you through the key steps to get up and running, so you don't have to piece the setup together on your own.
To start the wizard:
Go to Sites > Stores.
If the welcome modal appears, click Start Onboarding.
Complete each setup step in the wizard. Every step includes a call-to-action button and a linked help doc so you can finish the task without leaving the flow.
Once all steps are done, use the Setup Completed action to finish the flow.
The steps below cover the same setup in more detail, so you can use the wizard as a fast track or follow along manually.
Products are created and configured under Payments > Products. From here you set the product name and description, attach images and video, define pricing, and configure variants if the product needs them (for example, a serum offered in two sizes).
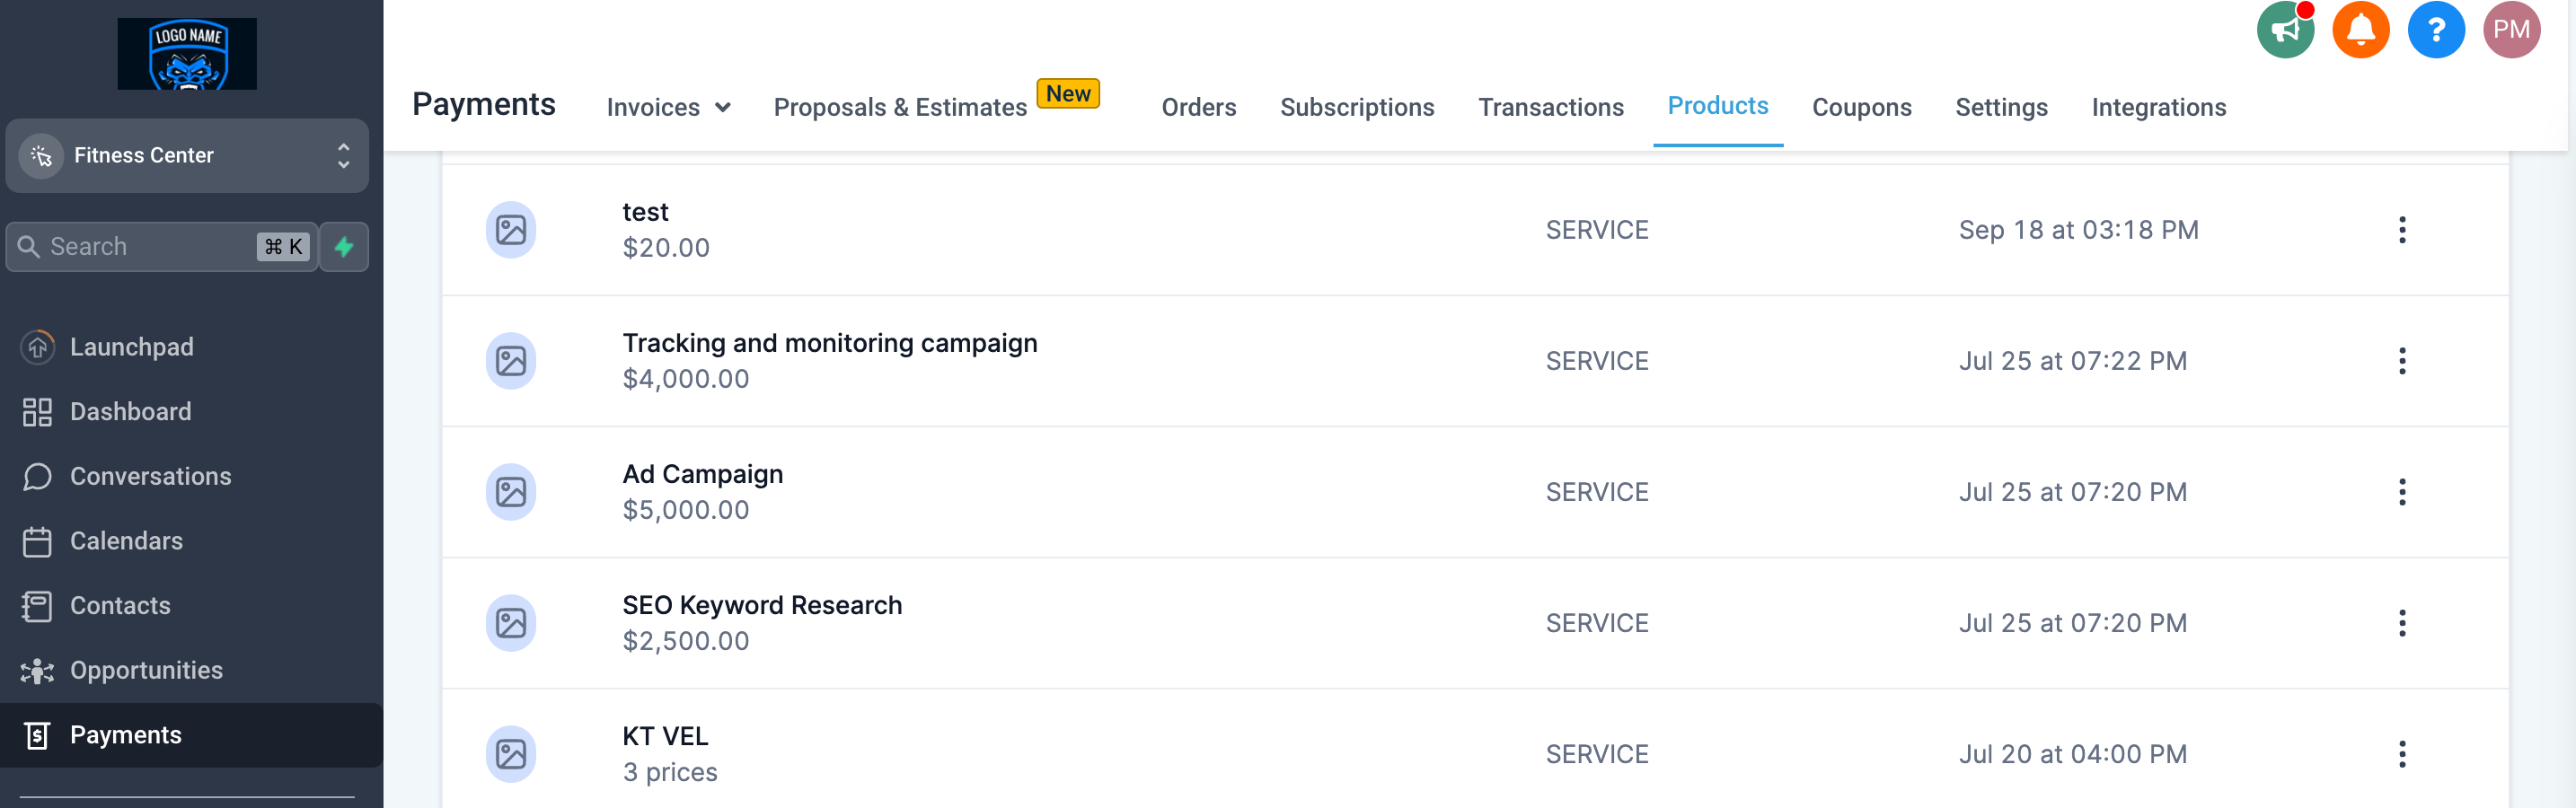
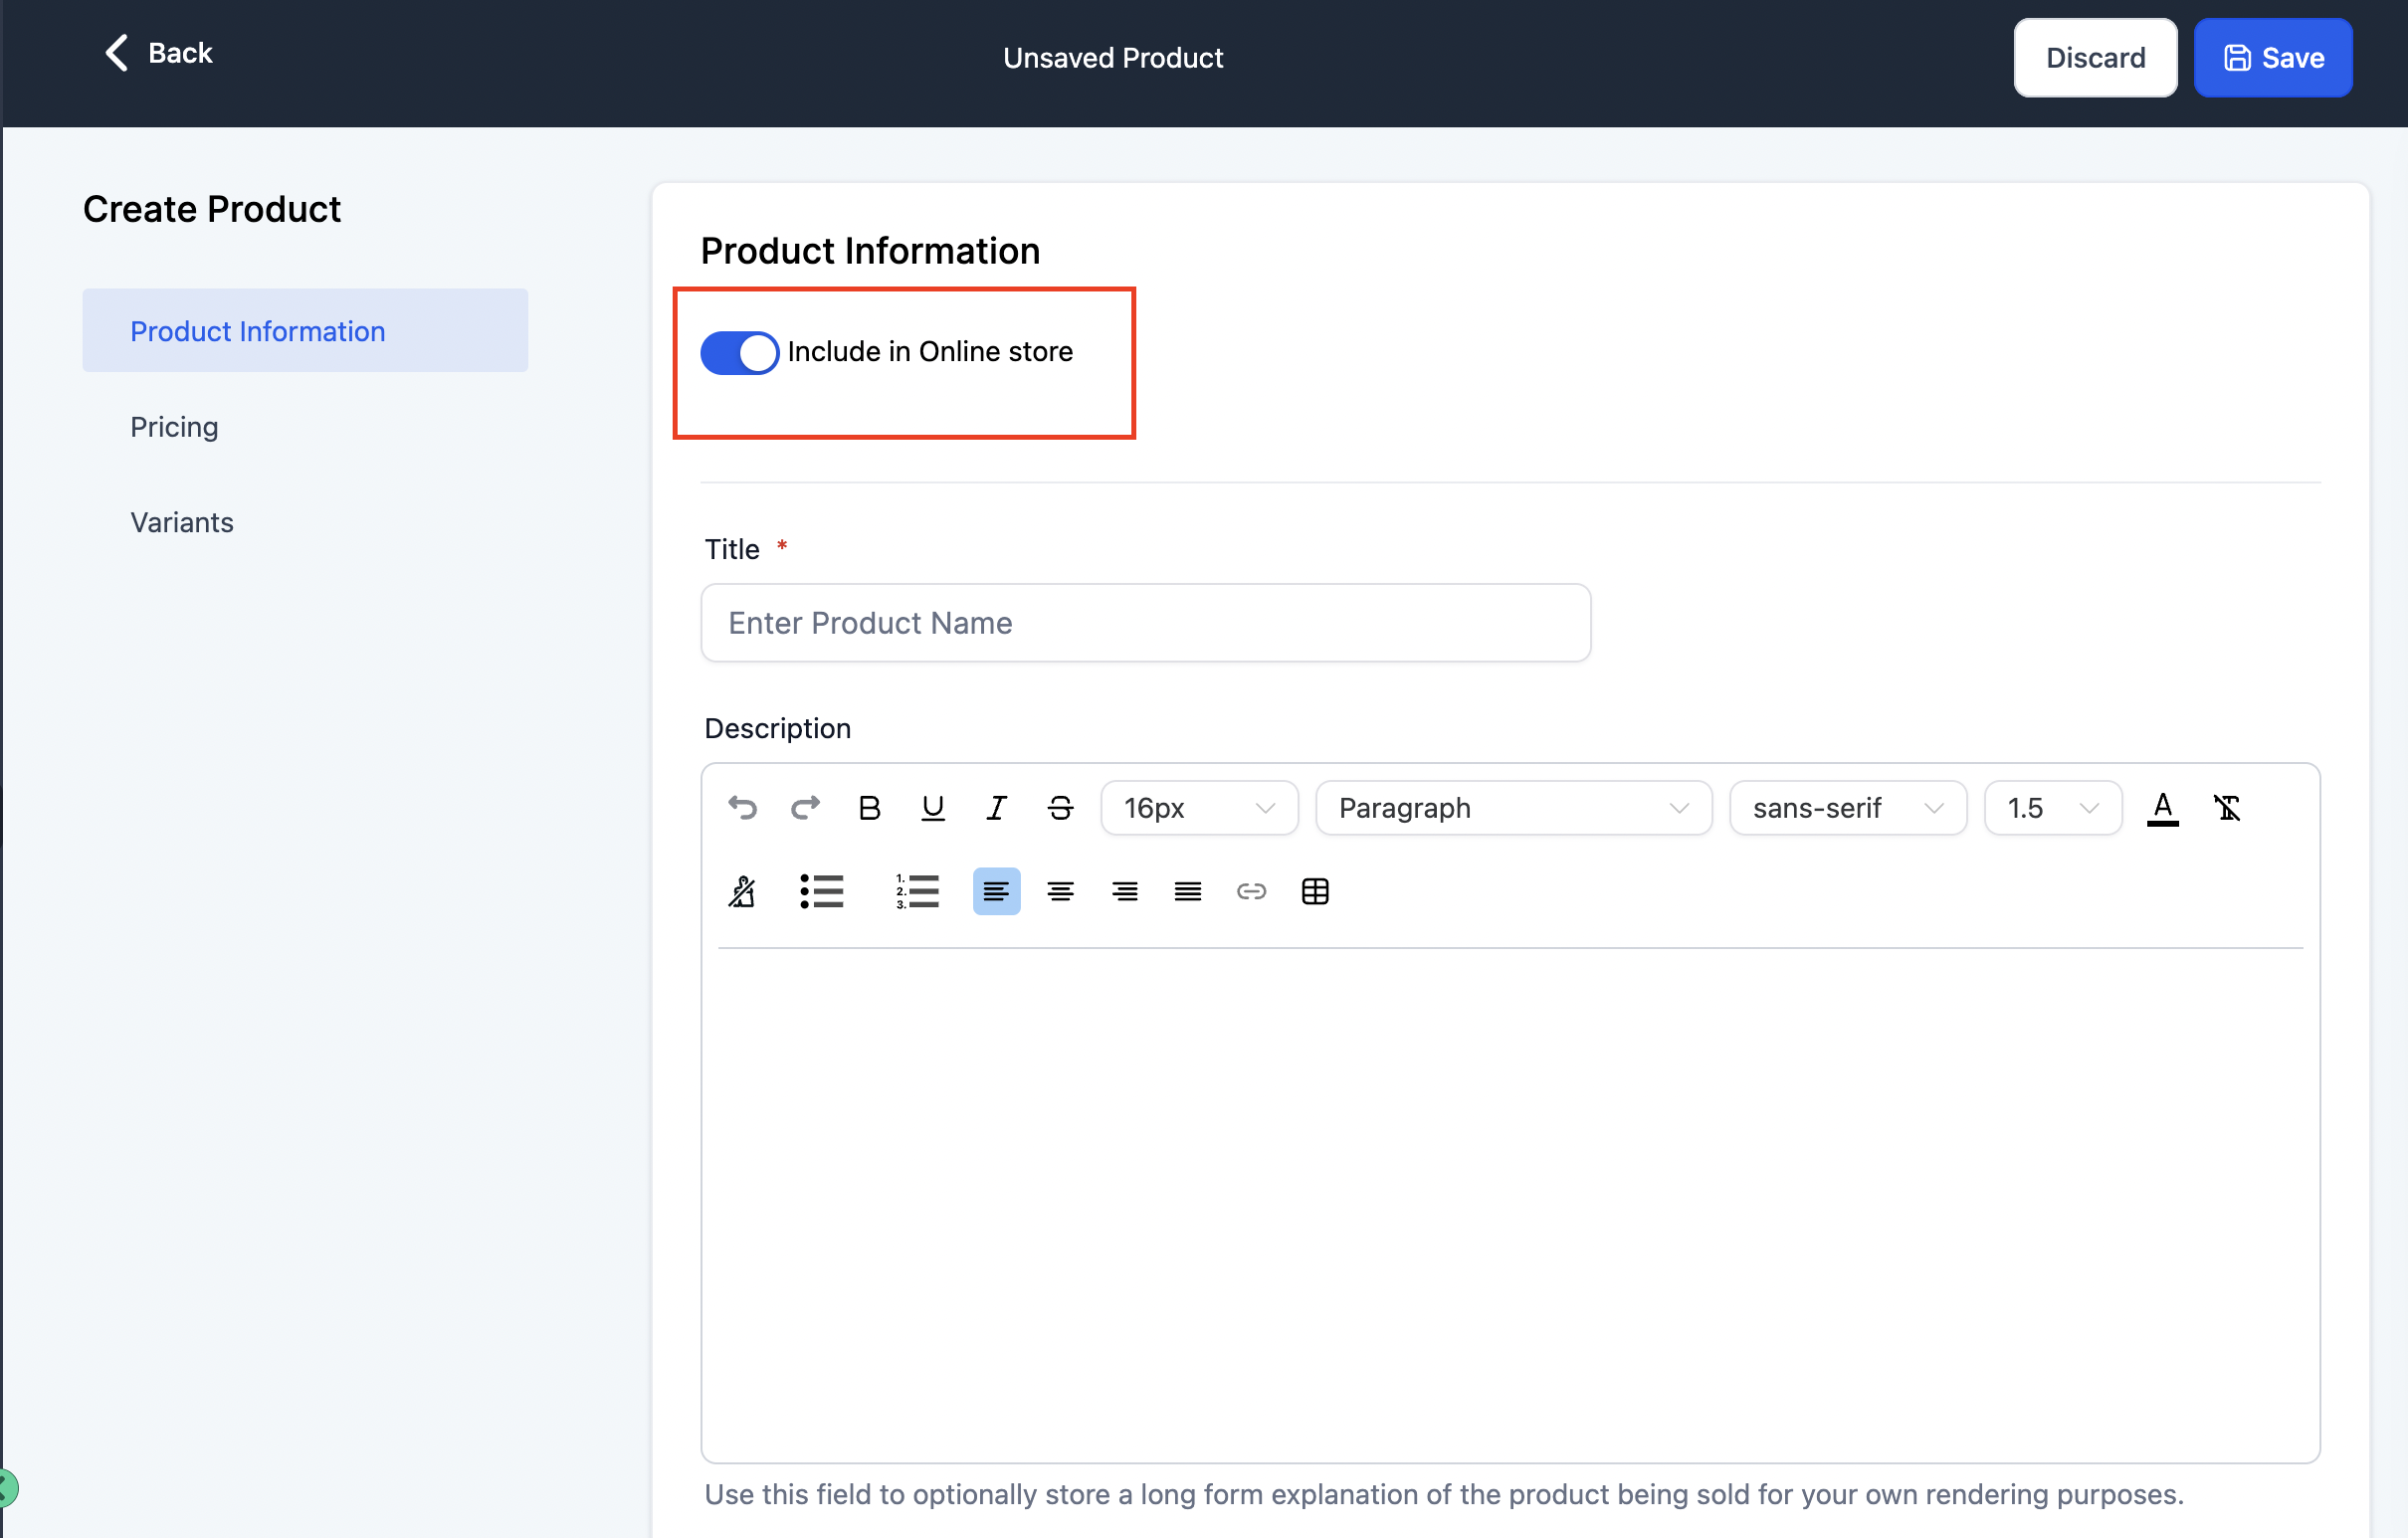
While creating or editing a product, use the toggle at the top to decide whether that product should appear in the online store. Products are not shown in the store by default, so you'll need to turn this on for anything you want patients to be able to buy online.
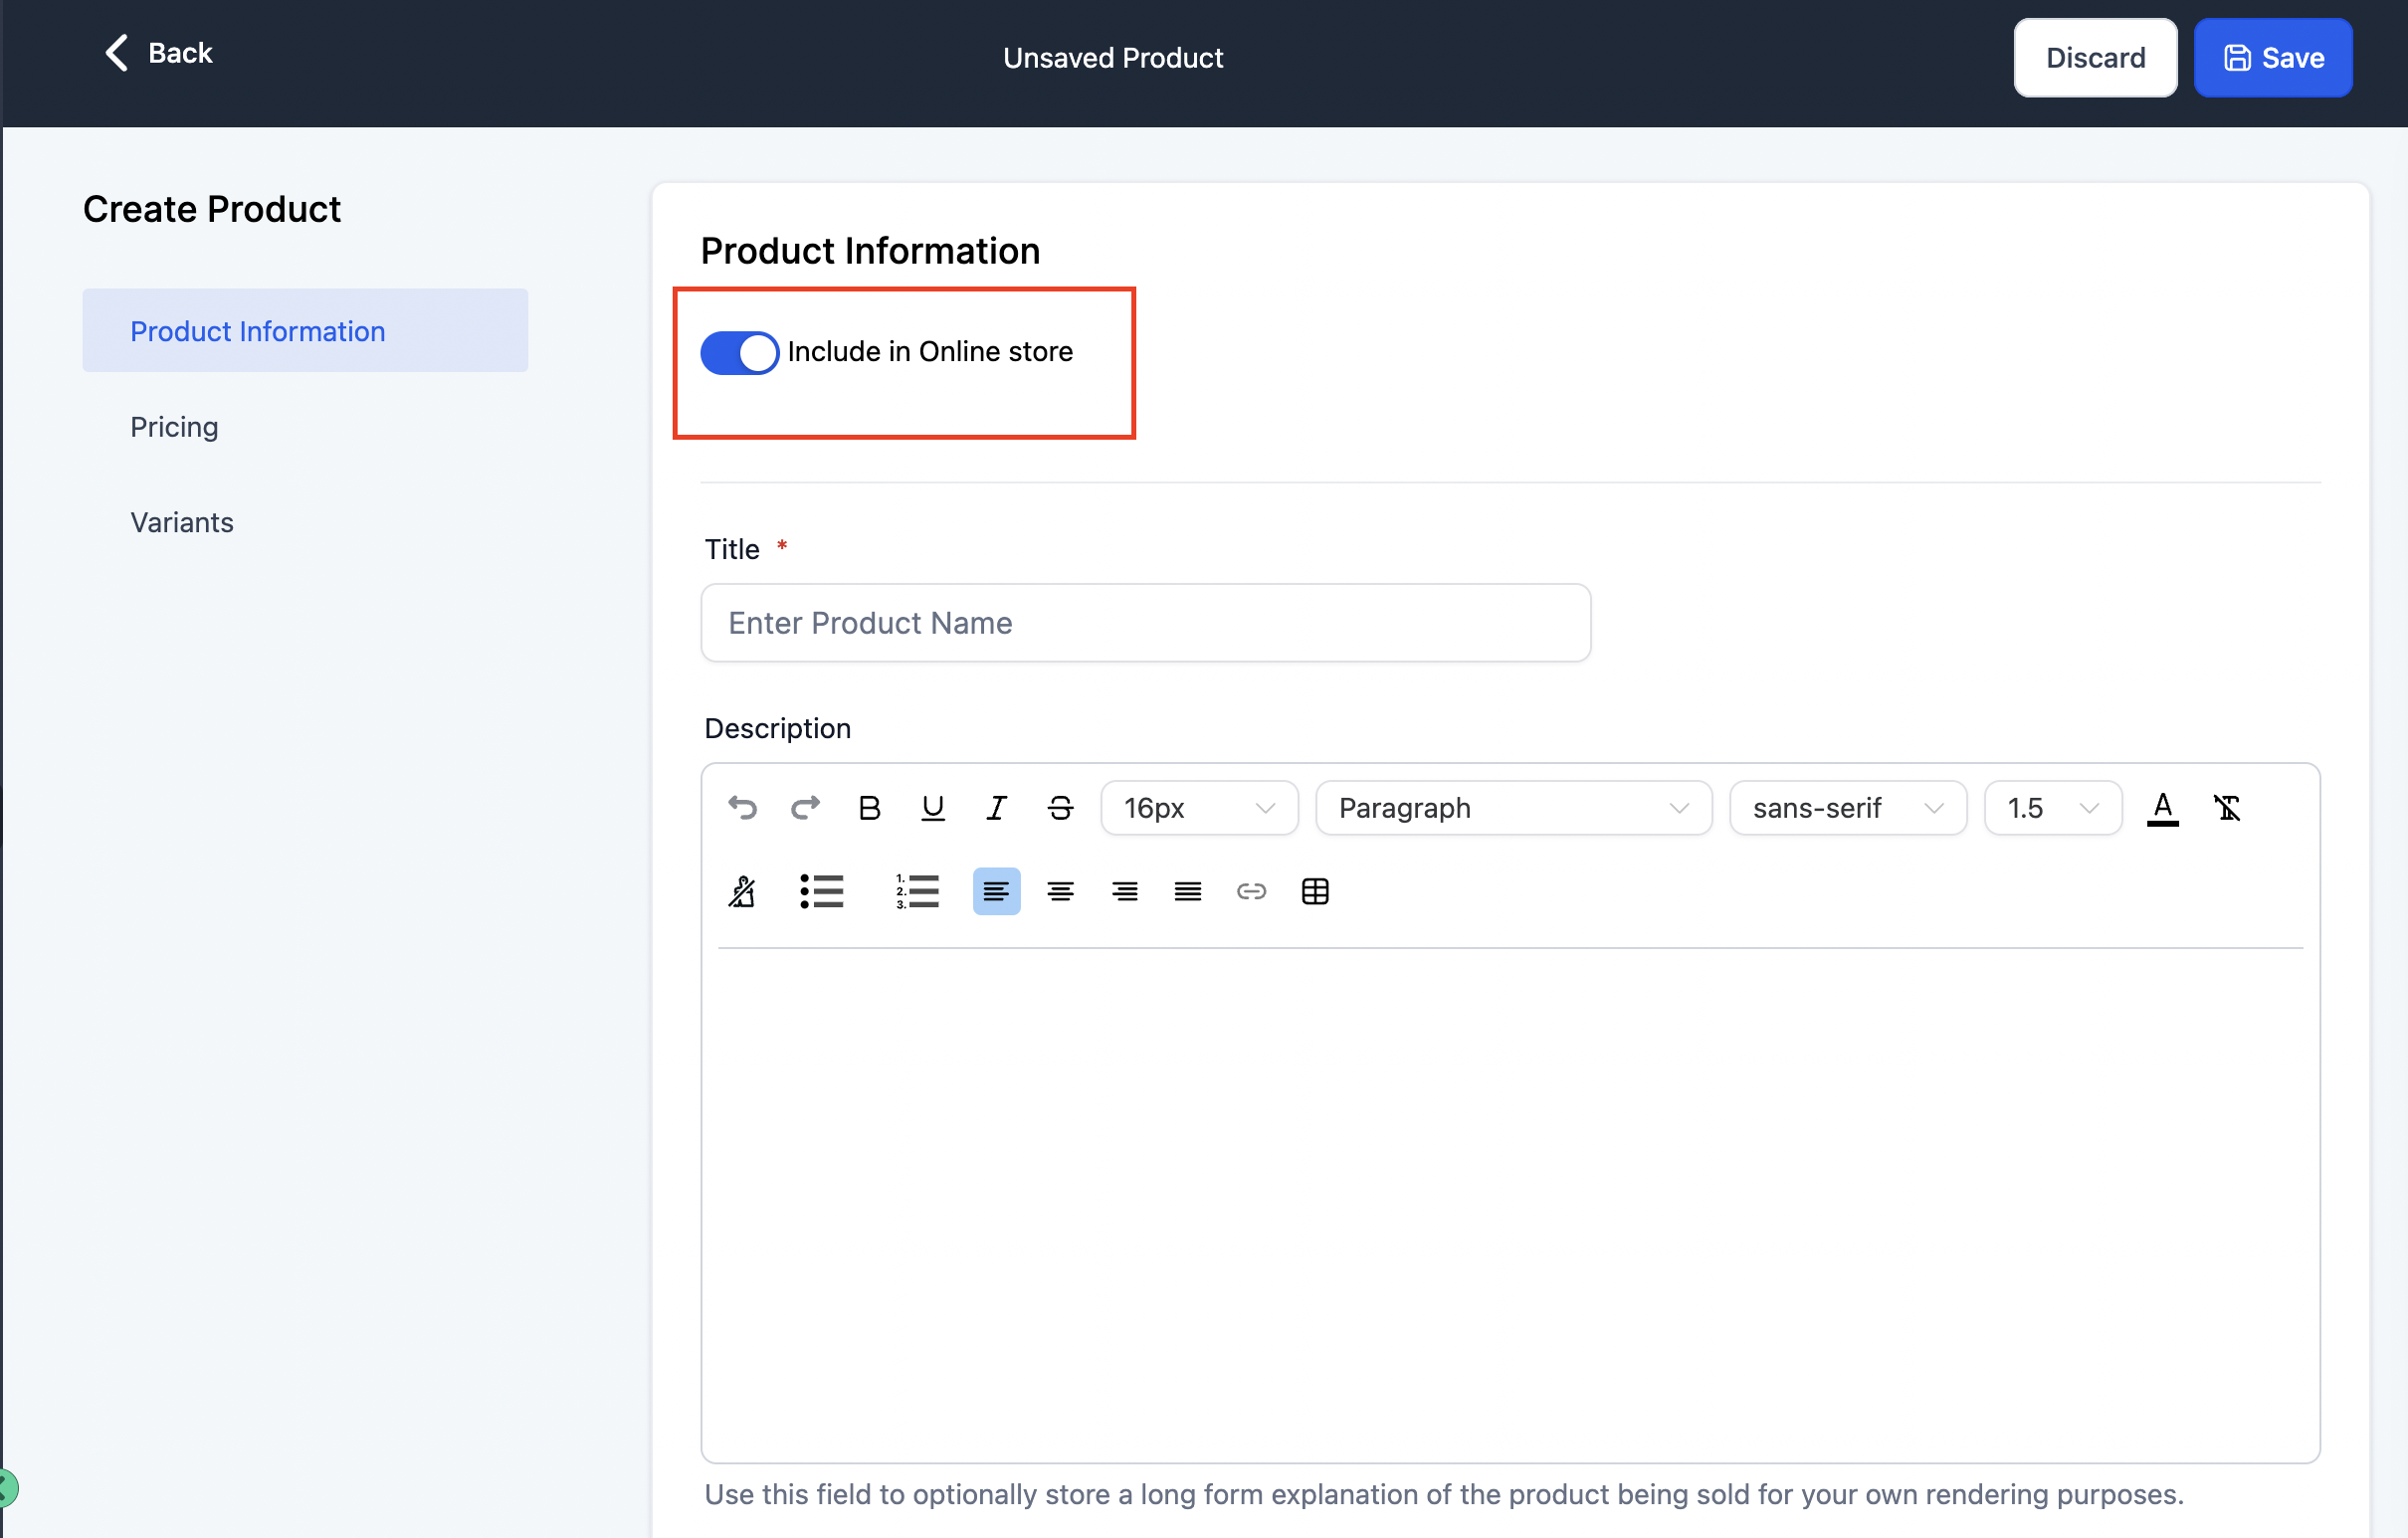
Three capabilities are worth knowing about as you build out your catalog:
Rich text descriptions. Format product descriptions with bold, italics, bulleted lists, and tables. This description auto-populates on the product's detail page.
Multiple images and video. Attach several images or short videos per product so patients can see exactly what they're buying, front, back, and in use.
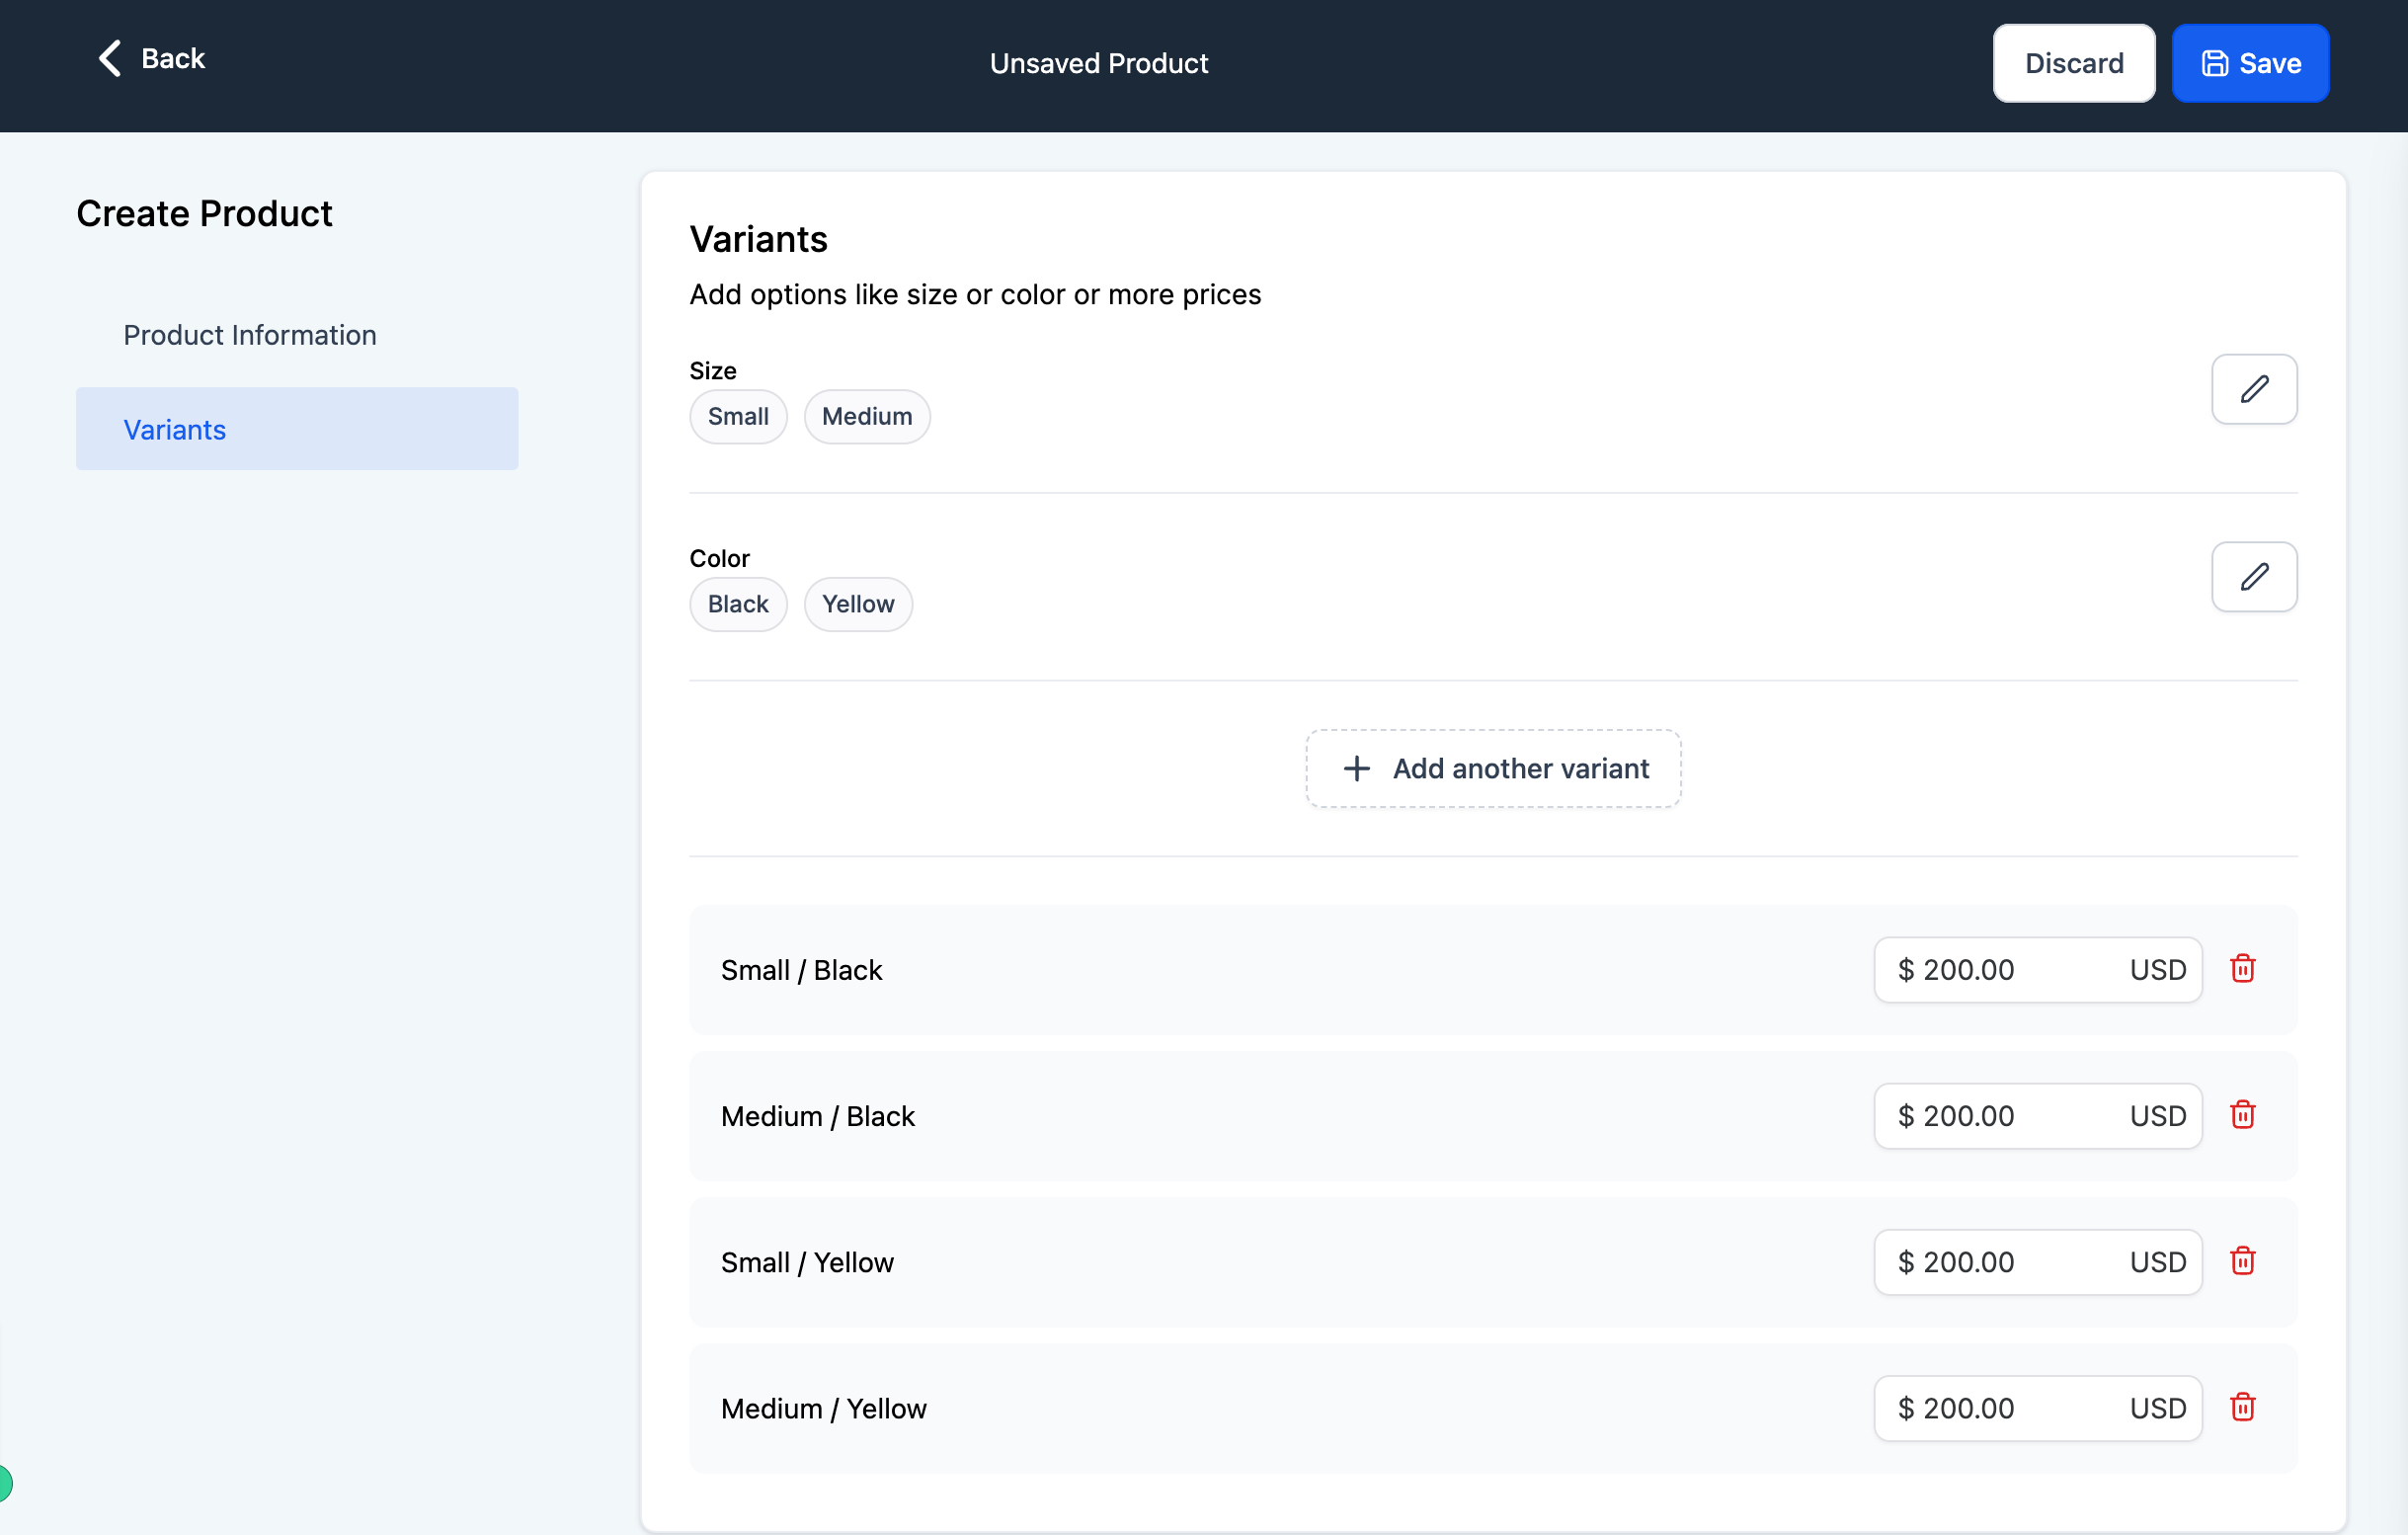
Variants. Add variants like size or scent for a product, each with its own price, so you can sell different versions of the same item without creating separate product records.

When you set a product's pricing, choose the type based on how you want patients to be charged:
One-Time | Recurring | |
|---|---|---|
How the patient is charged | Charged once | Charged repeatedly on the billing period you set |
Best for | Retail items, kits, single services, consultations | Skincare memberships, subscription boxes, ongoing plans |
Billing period required | No | Yes |
Trial period available | No | Yes |
Example | $45 cleanser | $59/month skincare subscription |
By default, only one-time products display in the standard store listing. Recurring (subscription) products can be created too, but they're best sold through an order form or checkout page rather than the general store listing (see Step 5). For the full product setup, including tax codes, statement descriptors, SEO settings, and physical vs. digital handling, see the Payments collection.
An online store can be added to an existing website or to a brand-new one. To activate it, open the website in the Site Editor and click the + icon to add elements, then choose the Store element.
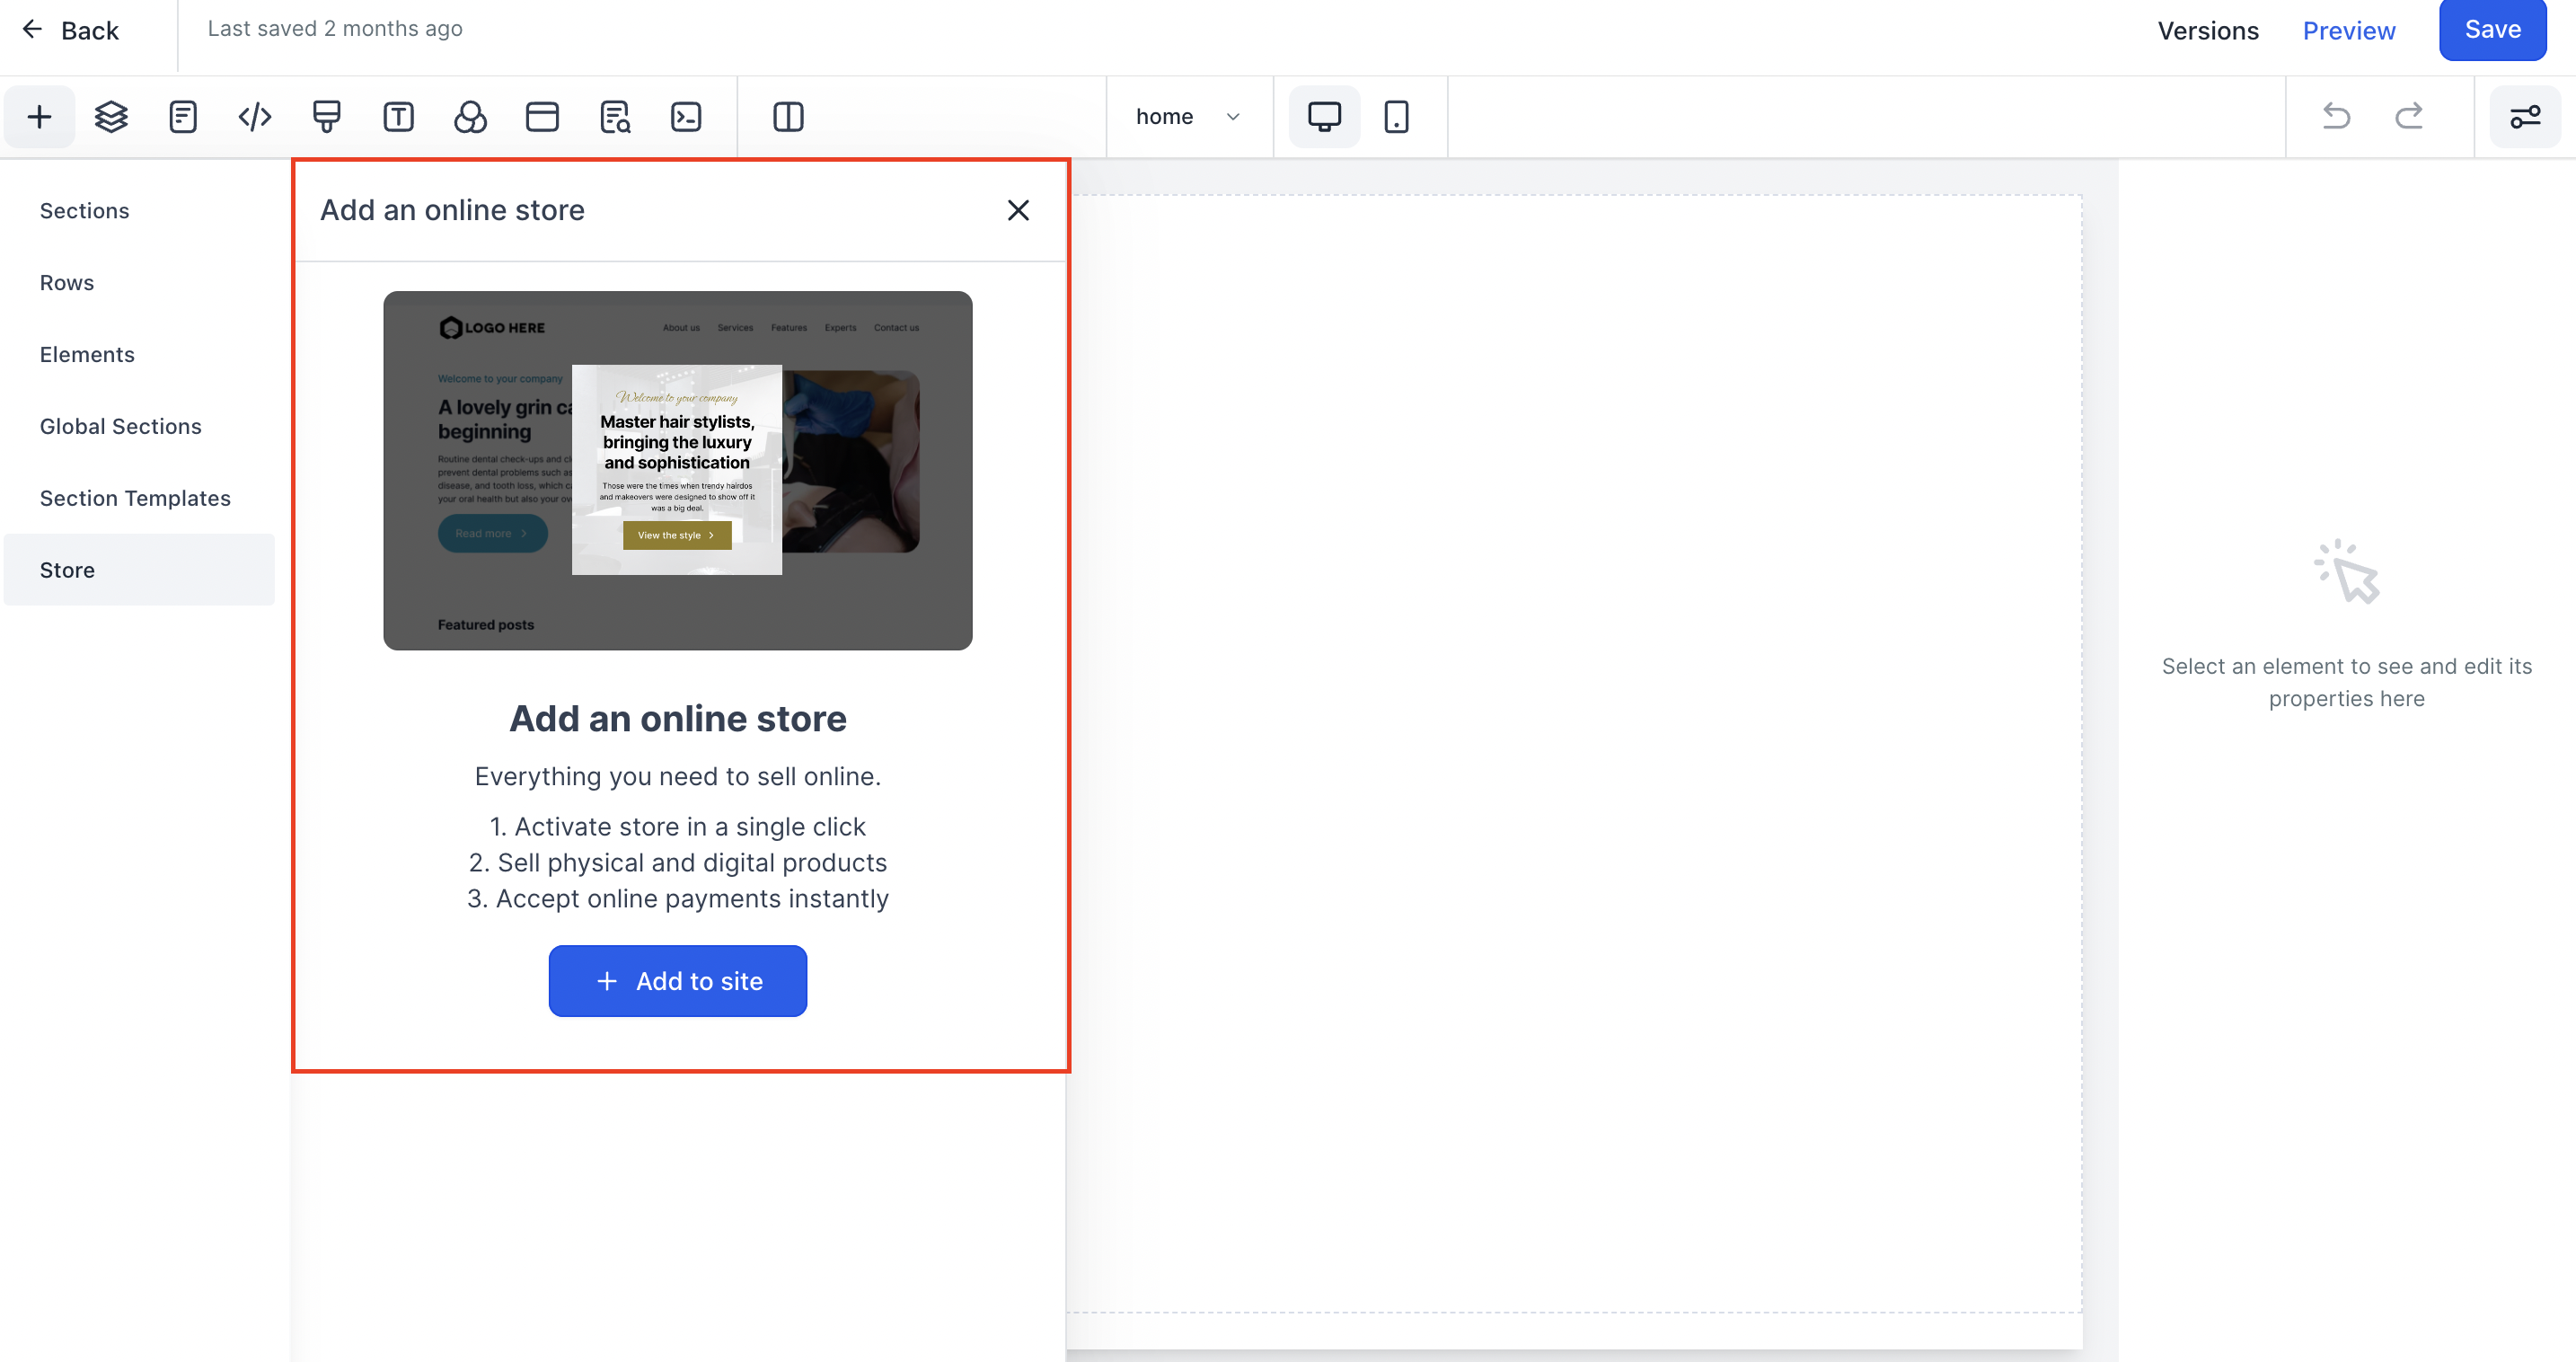
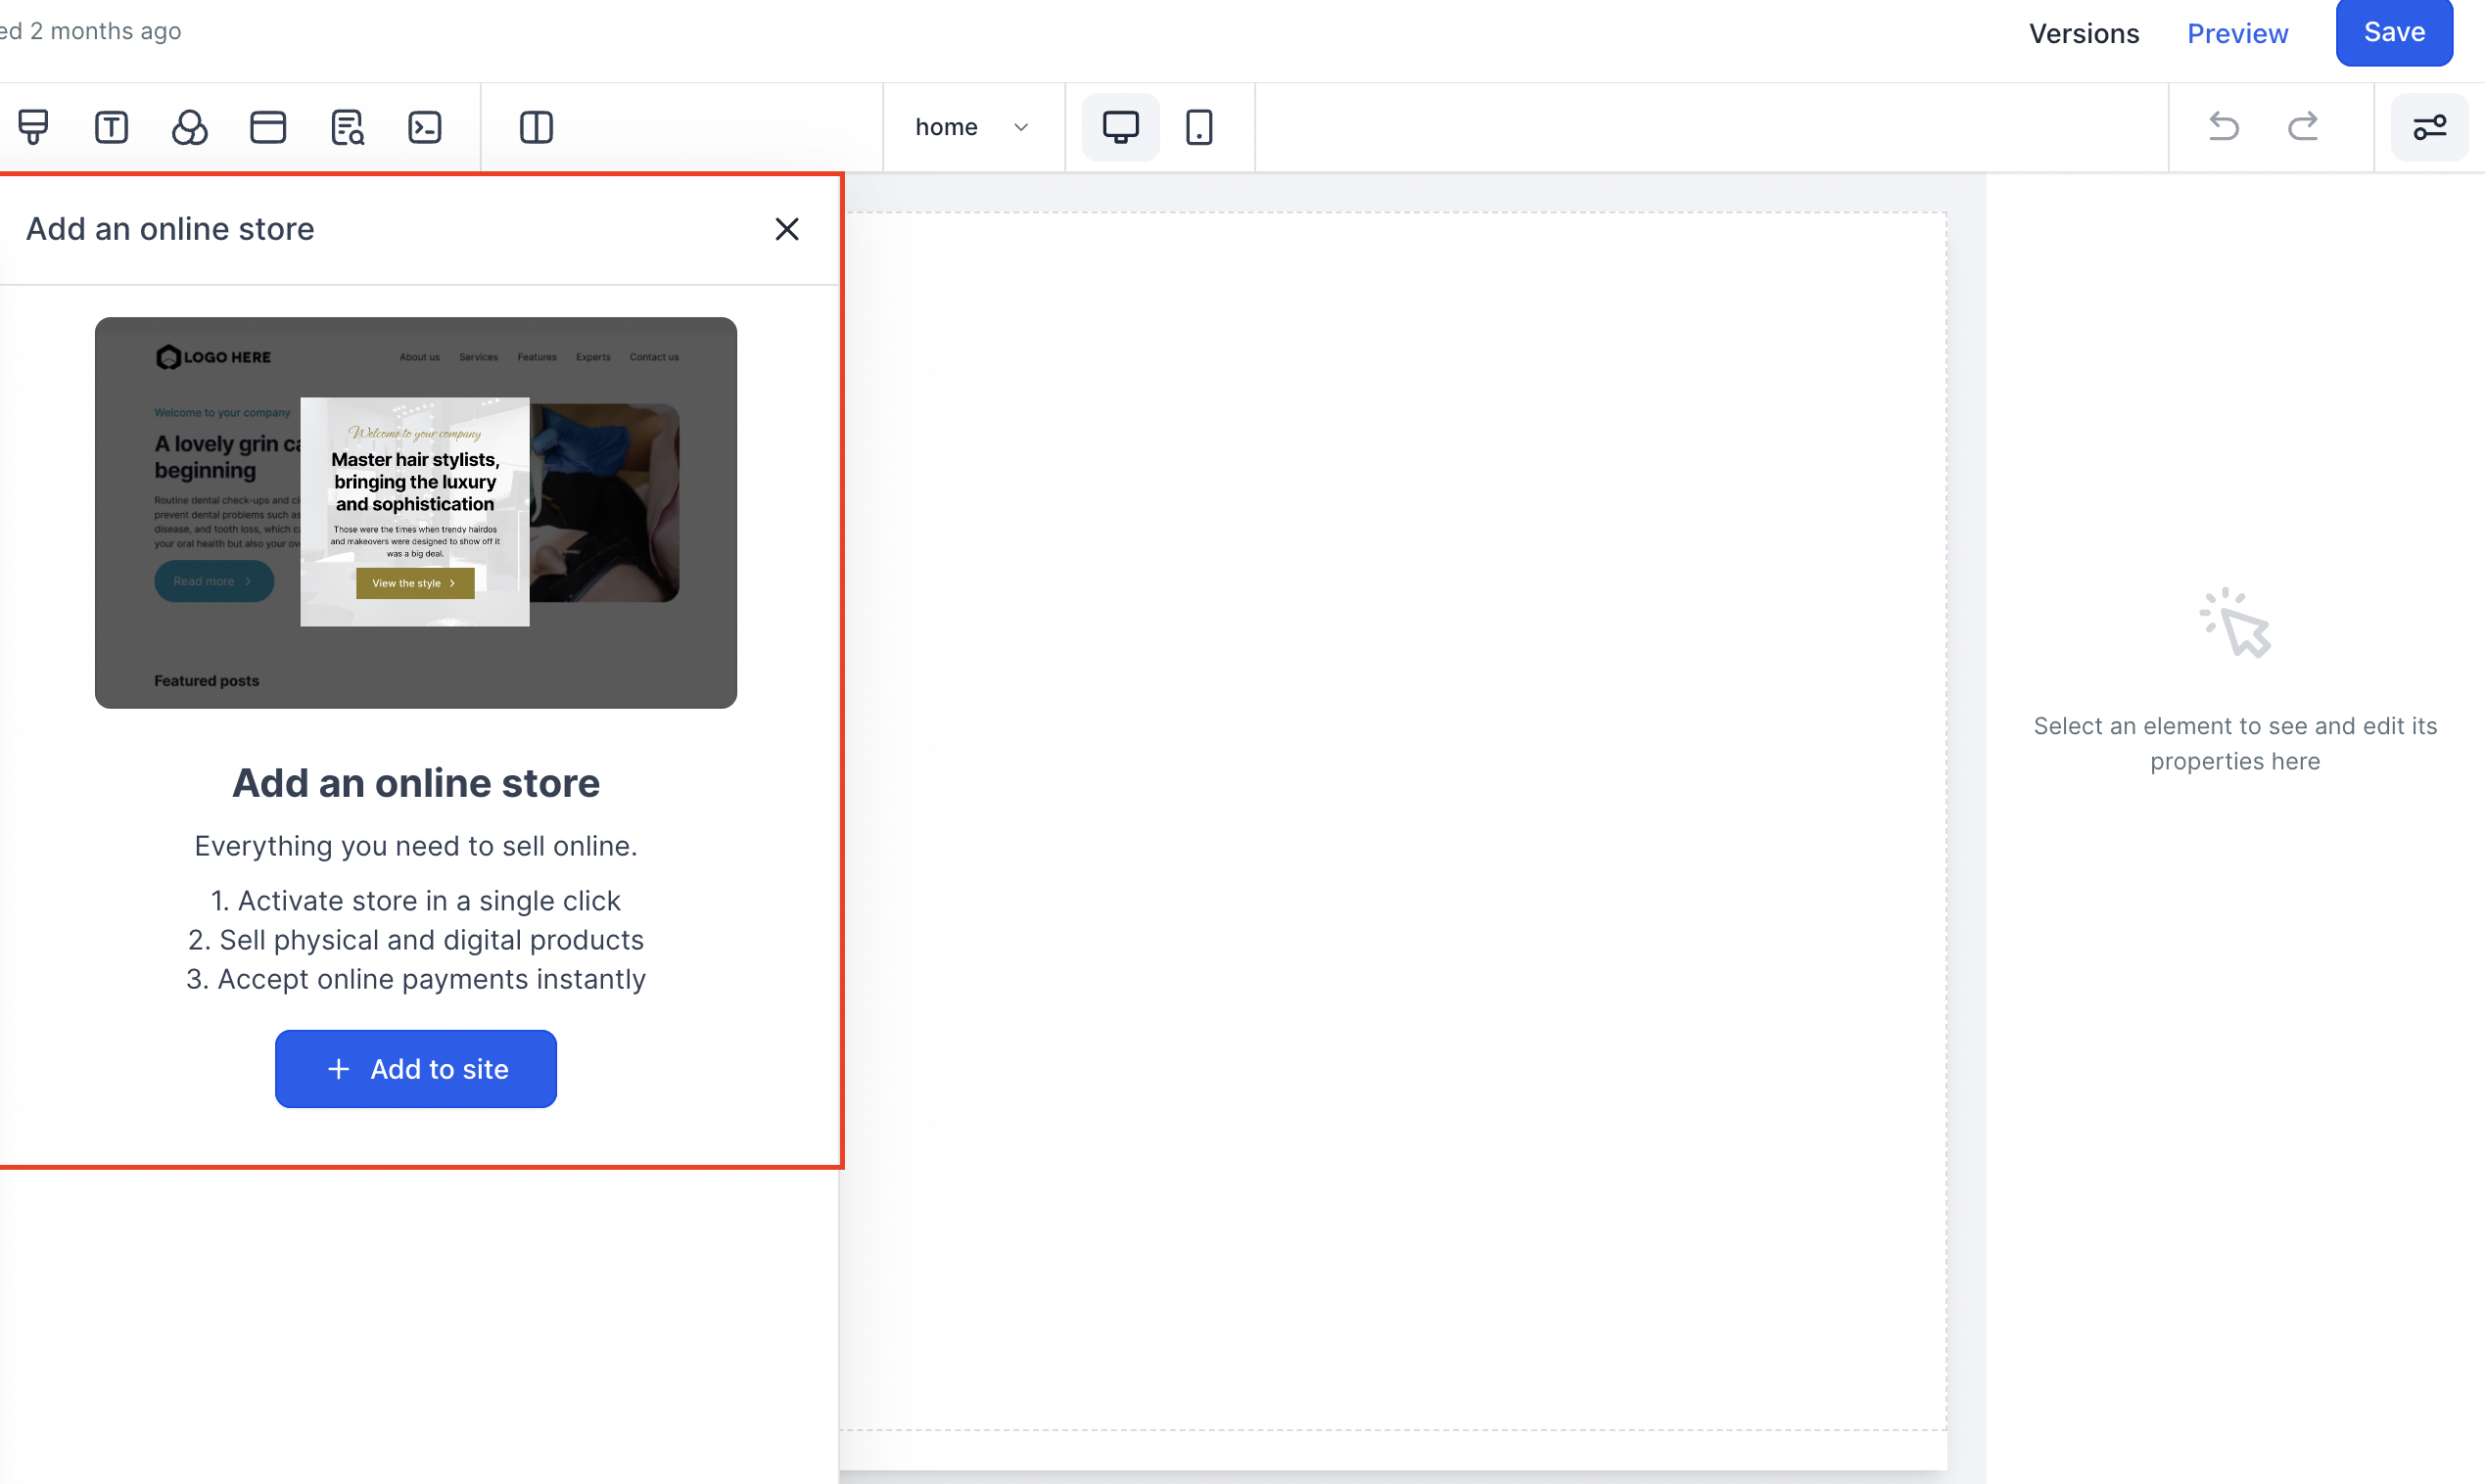
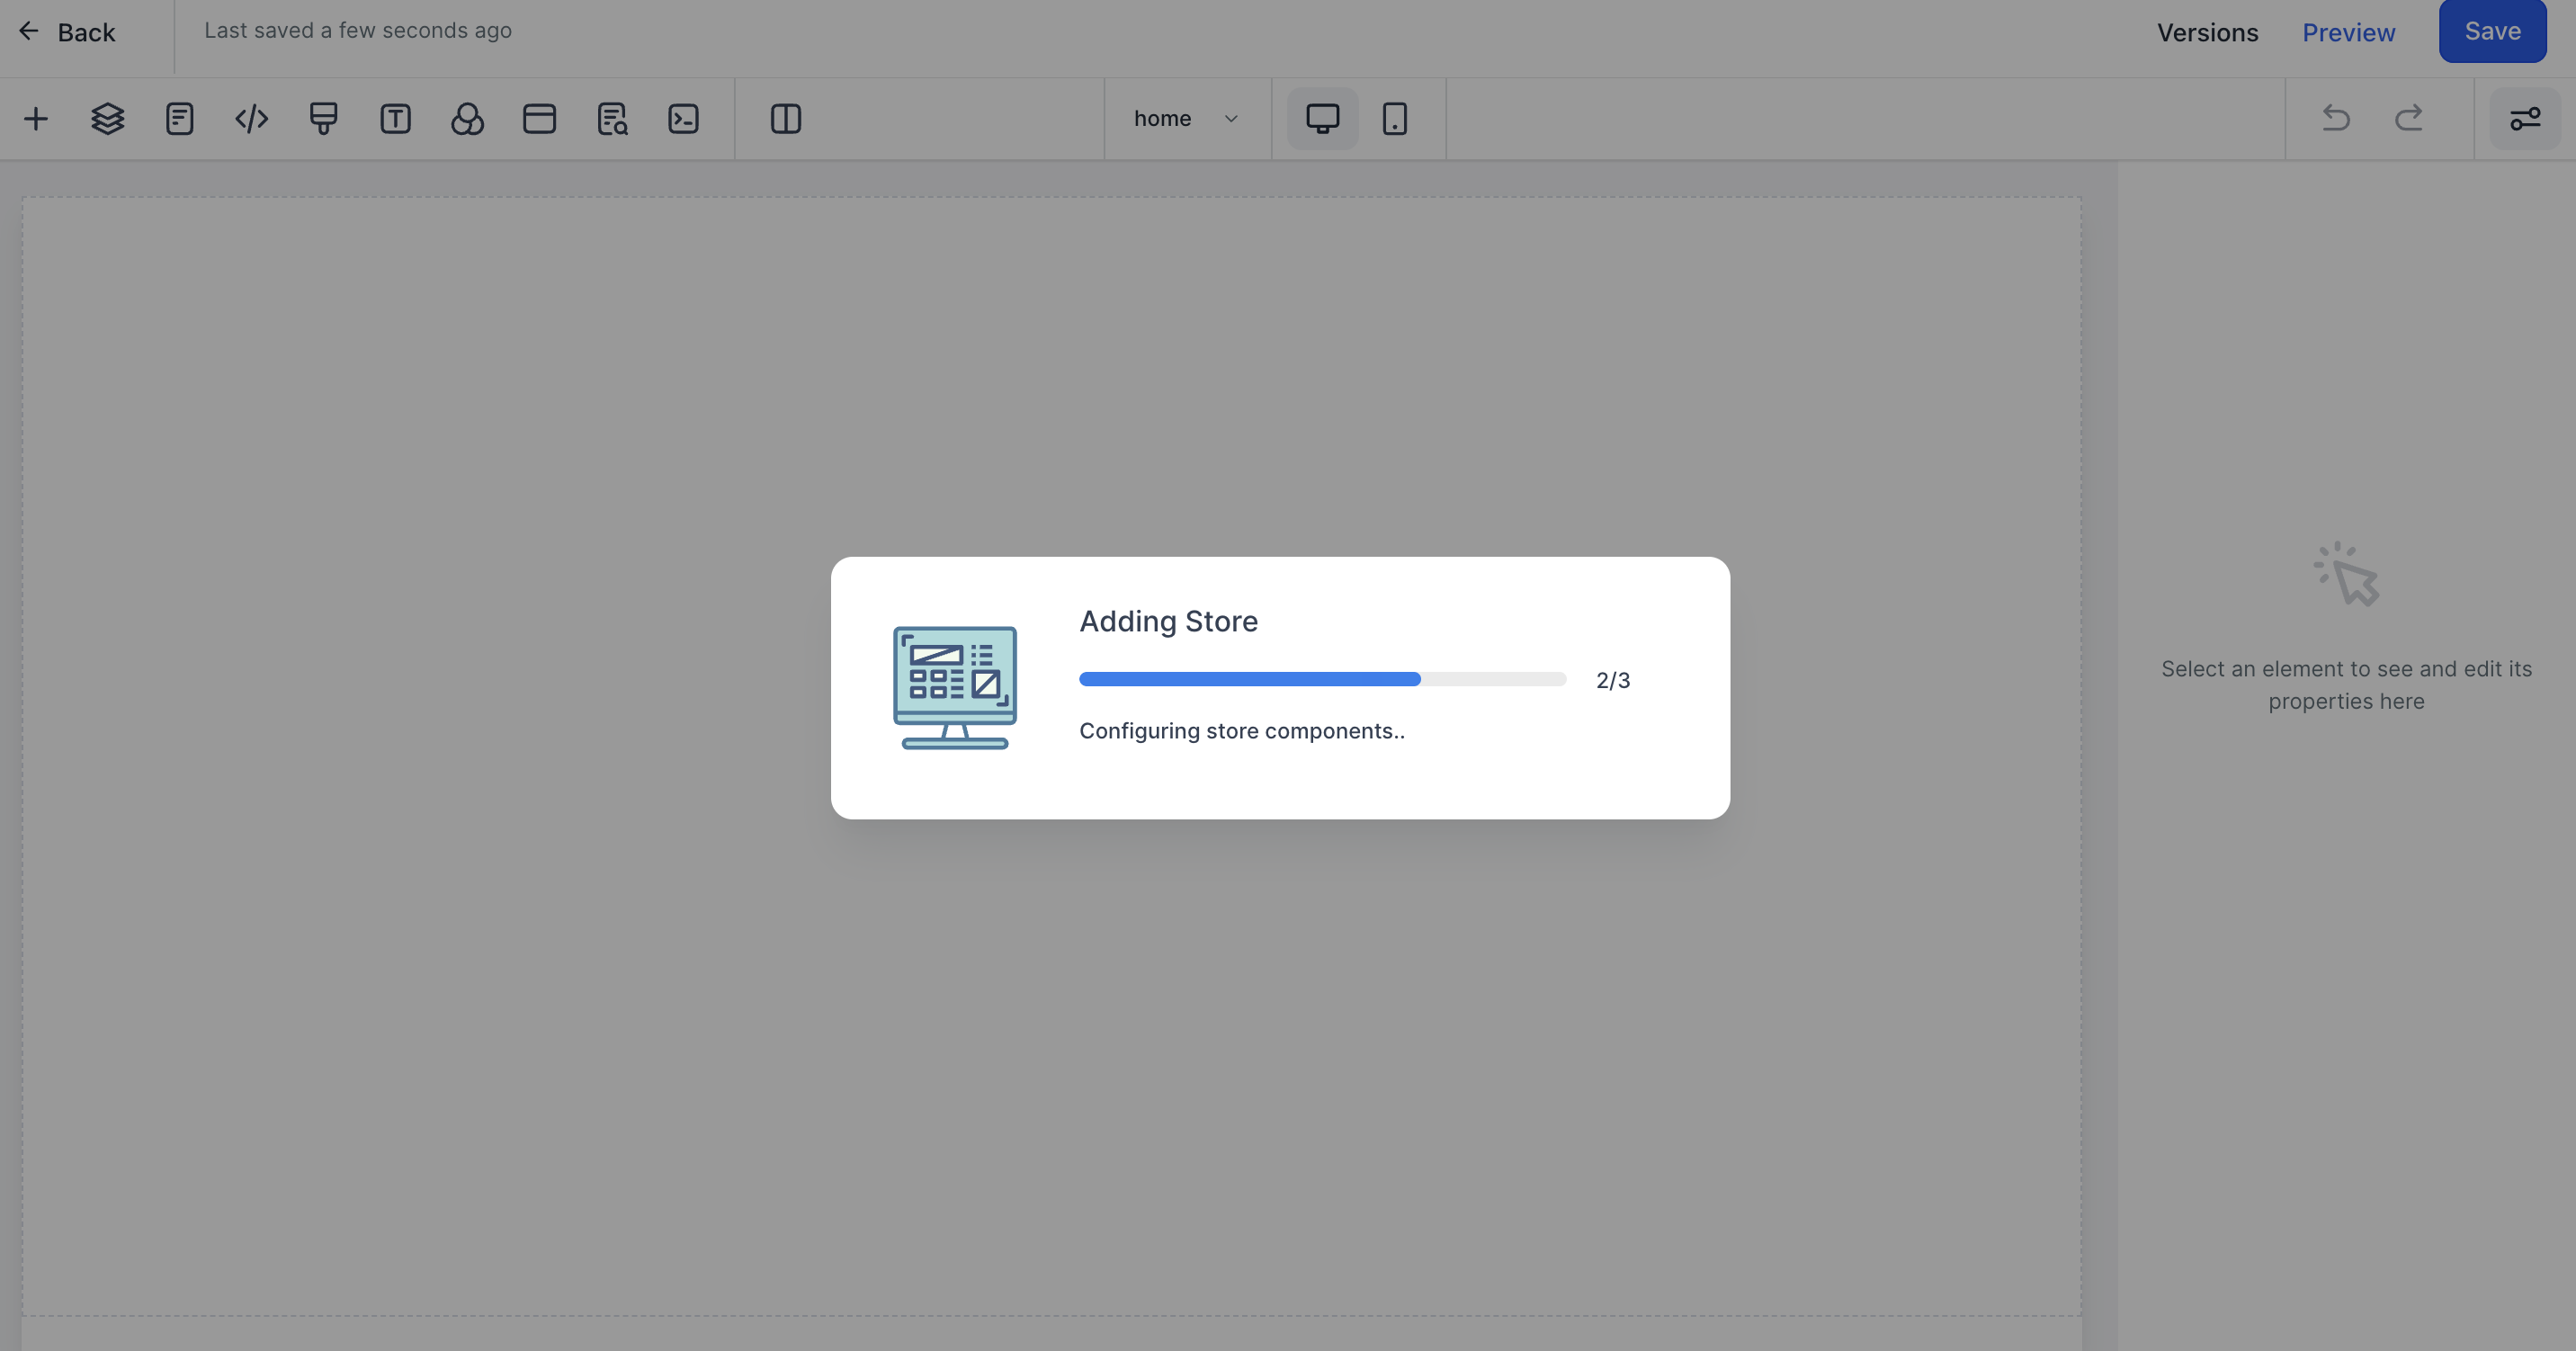
Adding a store automatically creates five pages that form the building blocks of your storefront. You can add other elements around these to match your website's brand and layout:
Page | What it does |
|---|---|
Products list page | Shows all products or services available to patients |
Product details page | Displays the rich text description, images, and pricing for one product |
Cart page | Summarizes items a patient intends to buy, with the option to add or remove items |
Checkout page | Collects shipping information, email, and coupon codes, and takes payment by card, Apple Pay, or Google Pay |
Thank you page | Confirms the order automatically once payment succeeds |

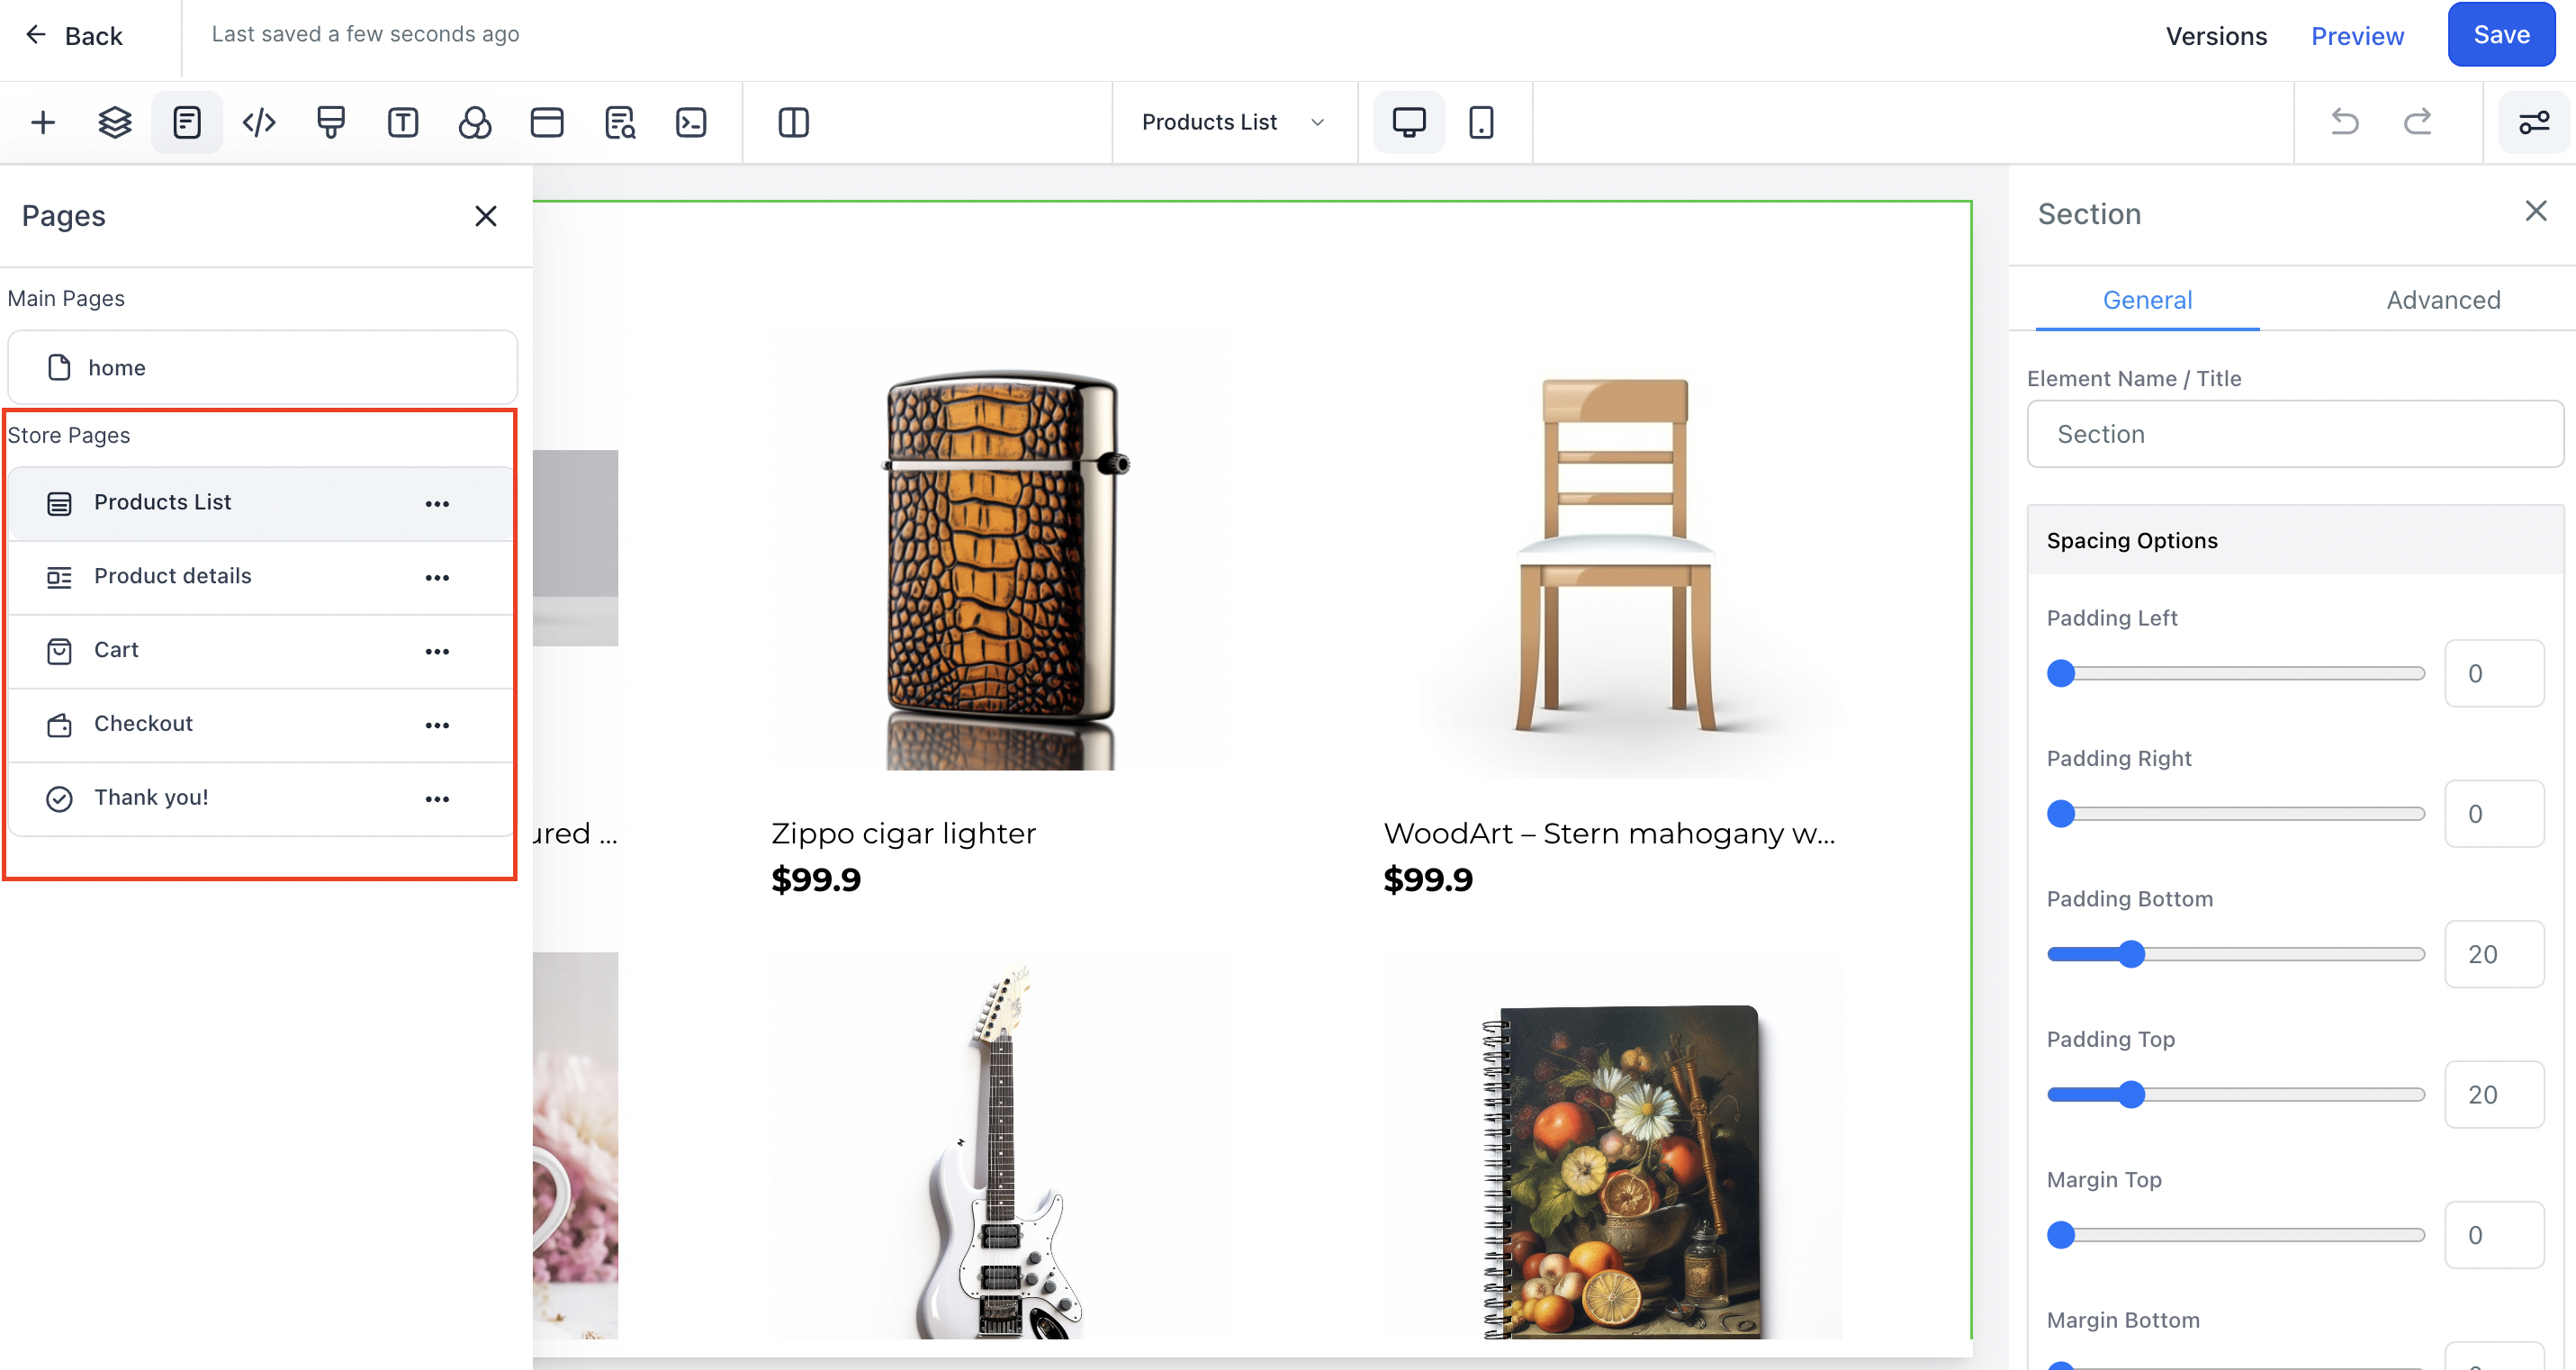
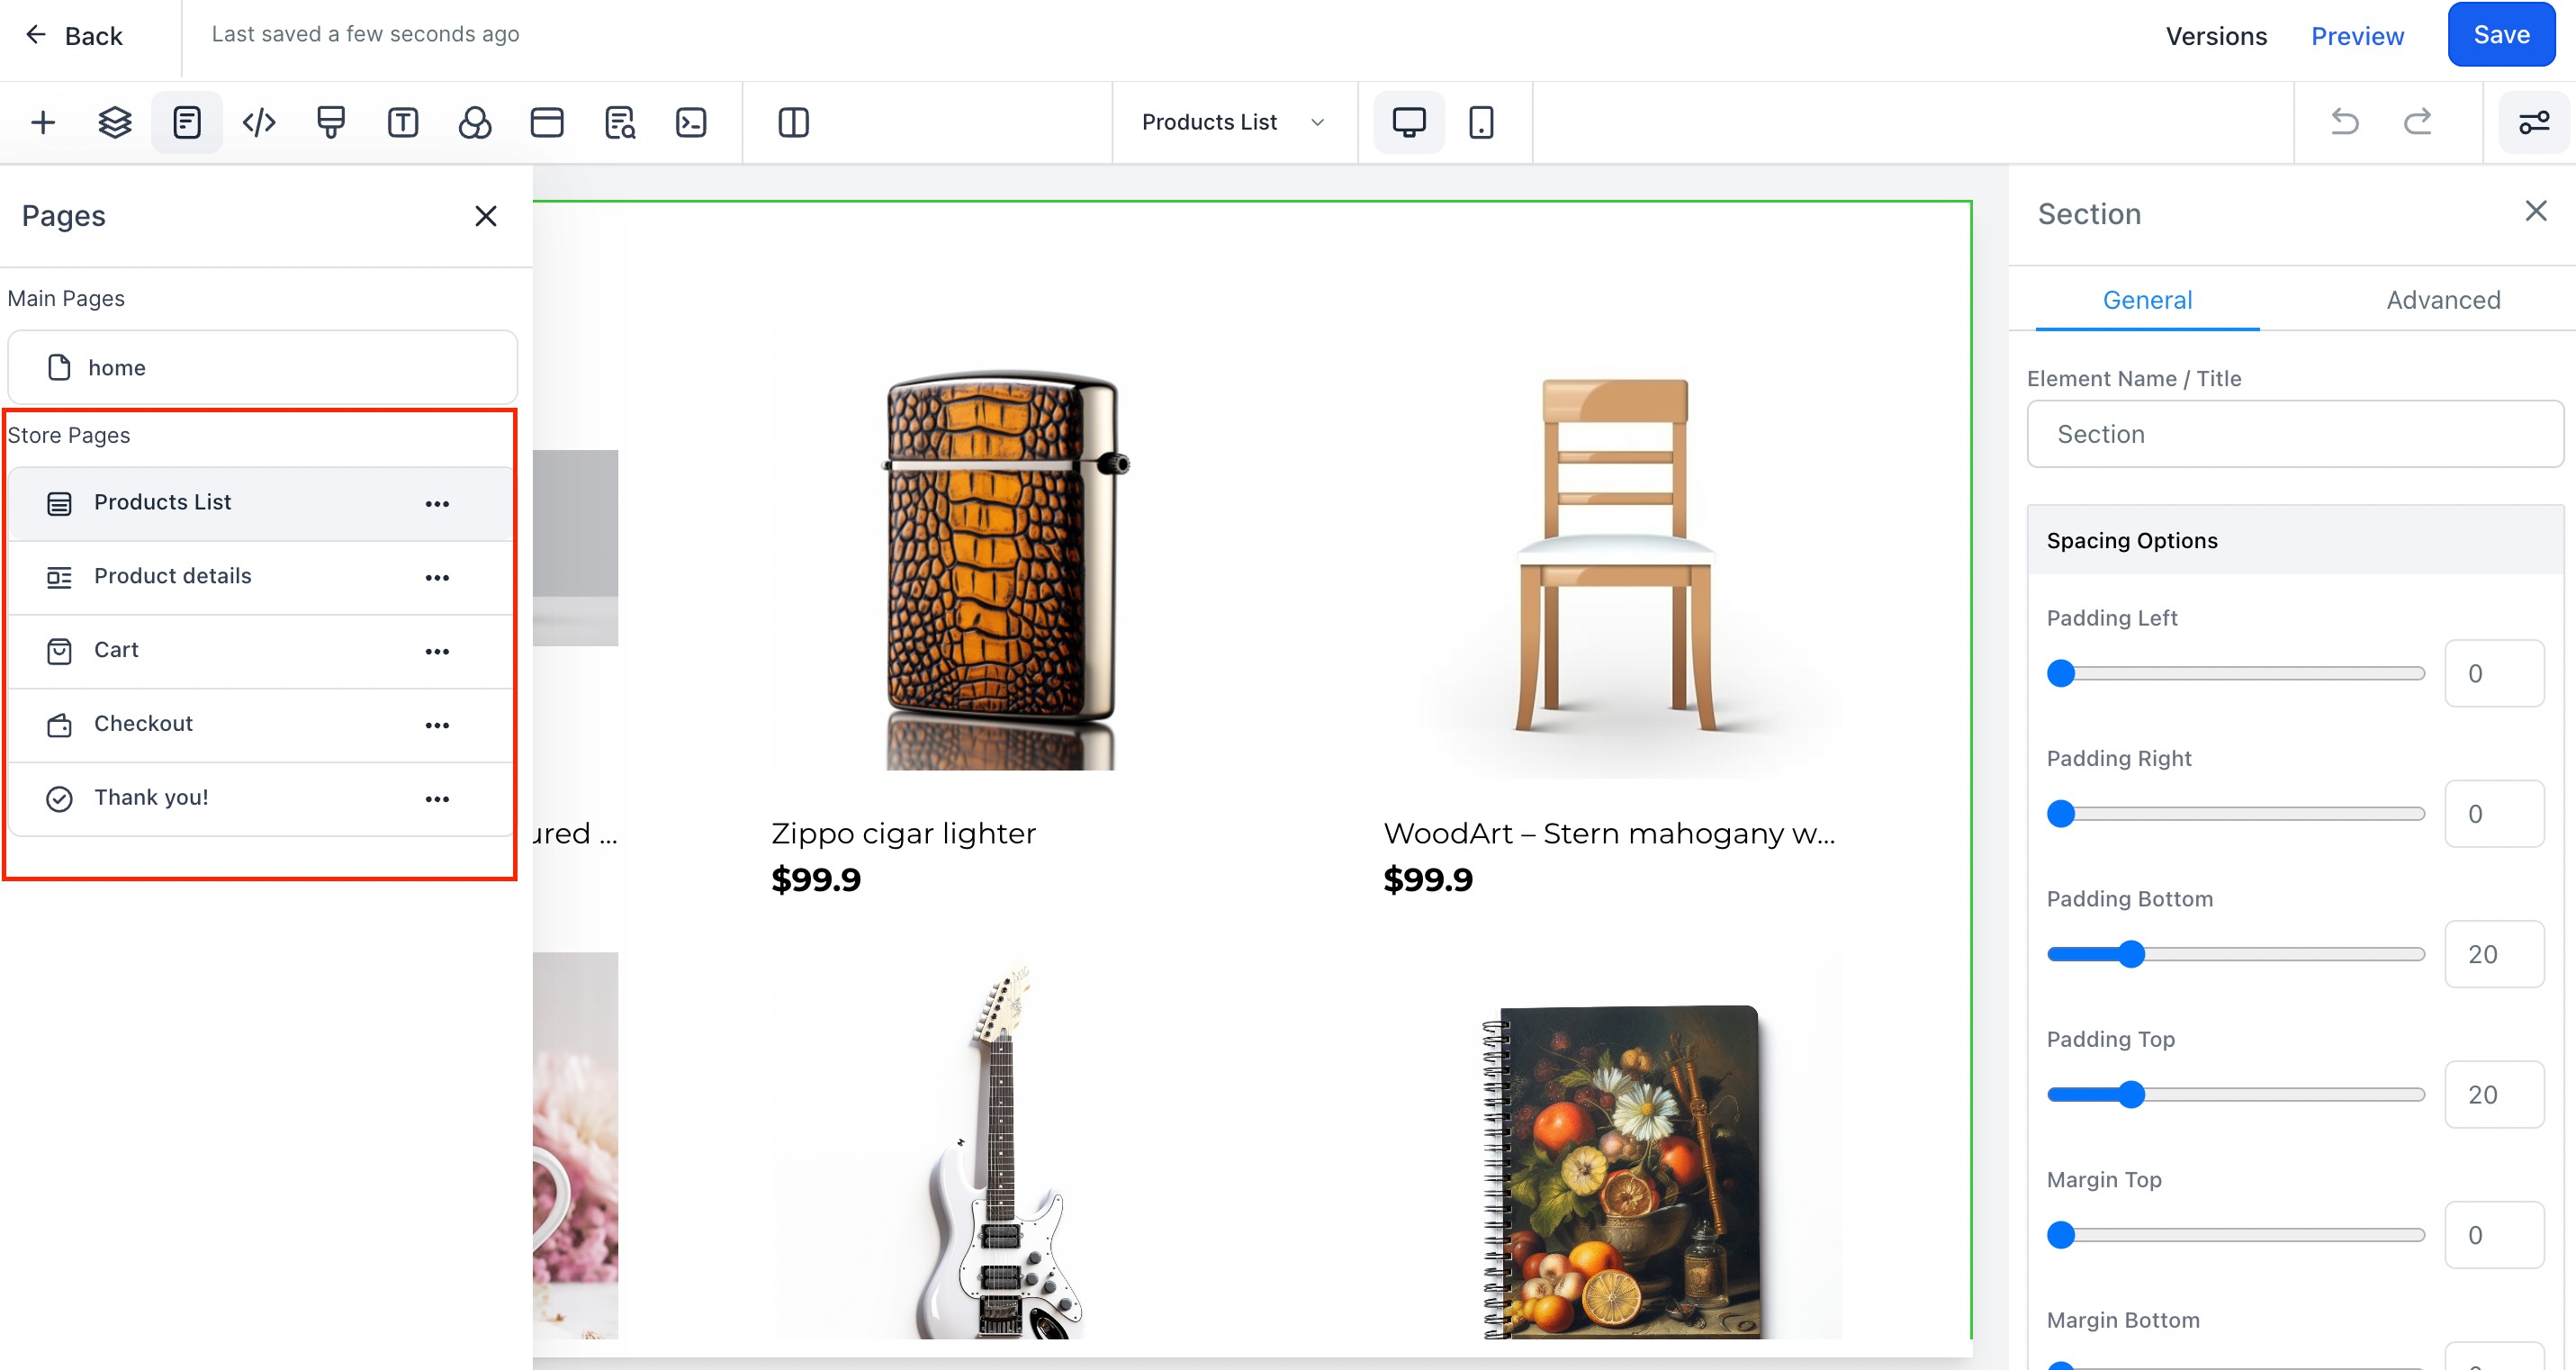
Each of these elements has General and Advanced formatting settings so you can match the rest of your site's look and feel.
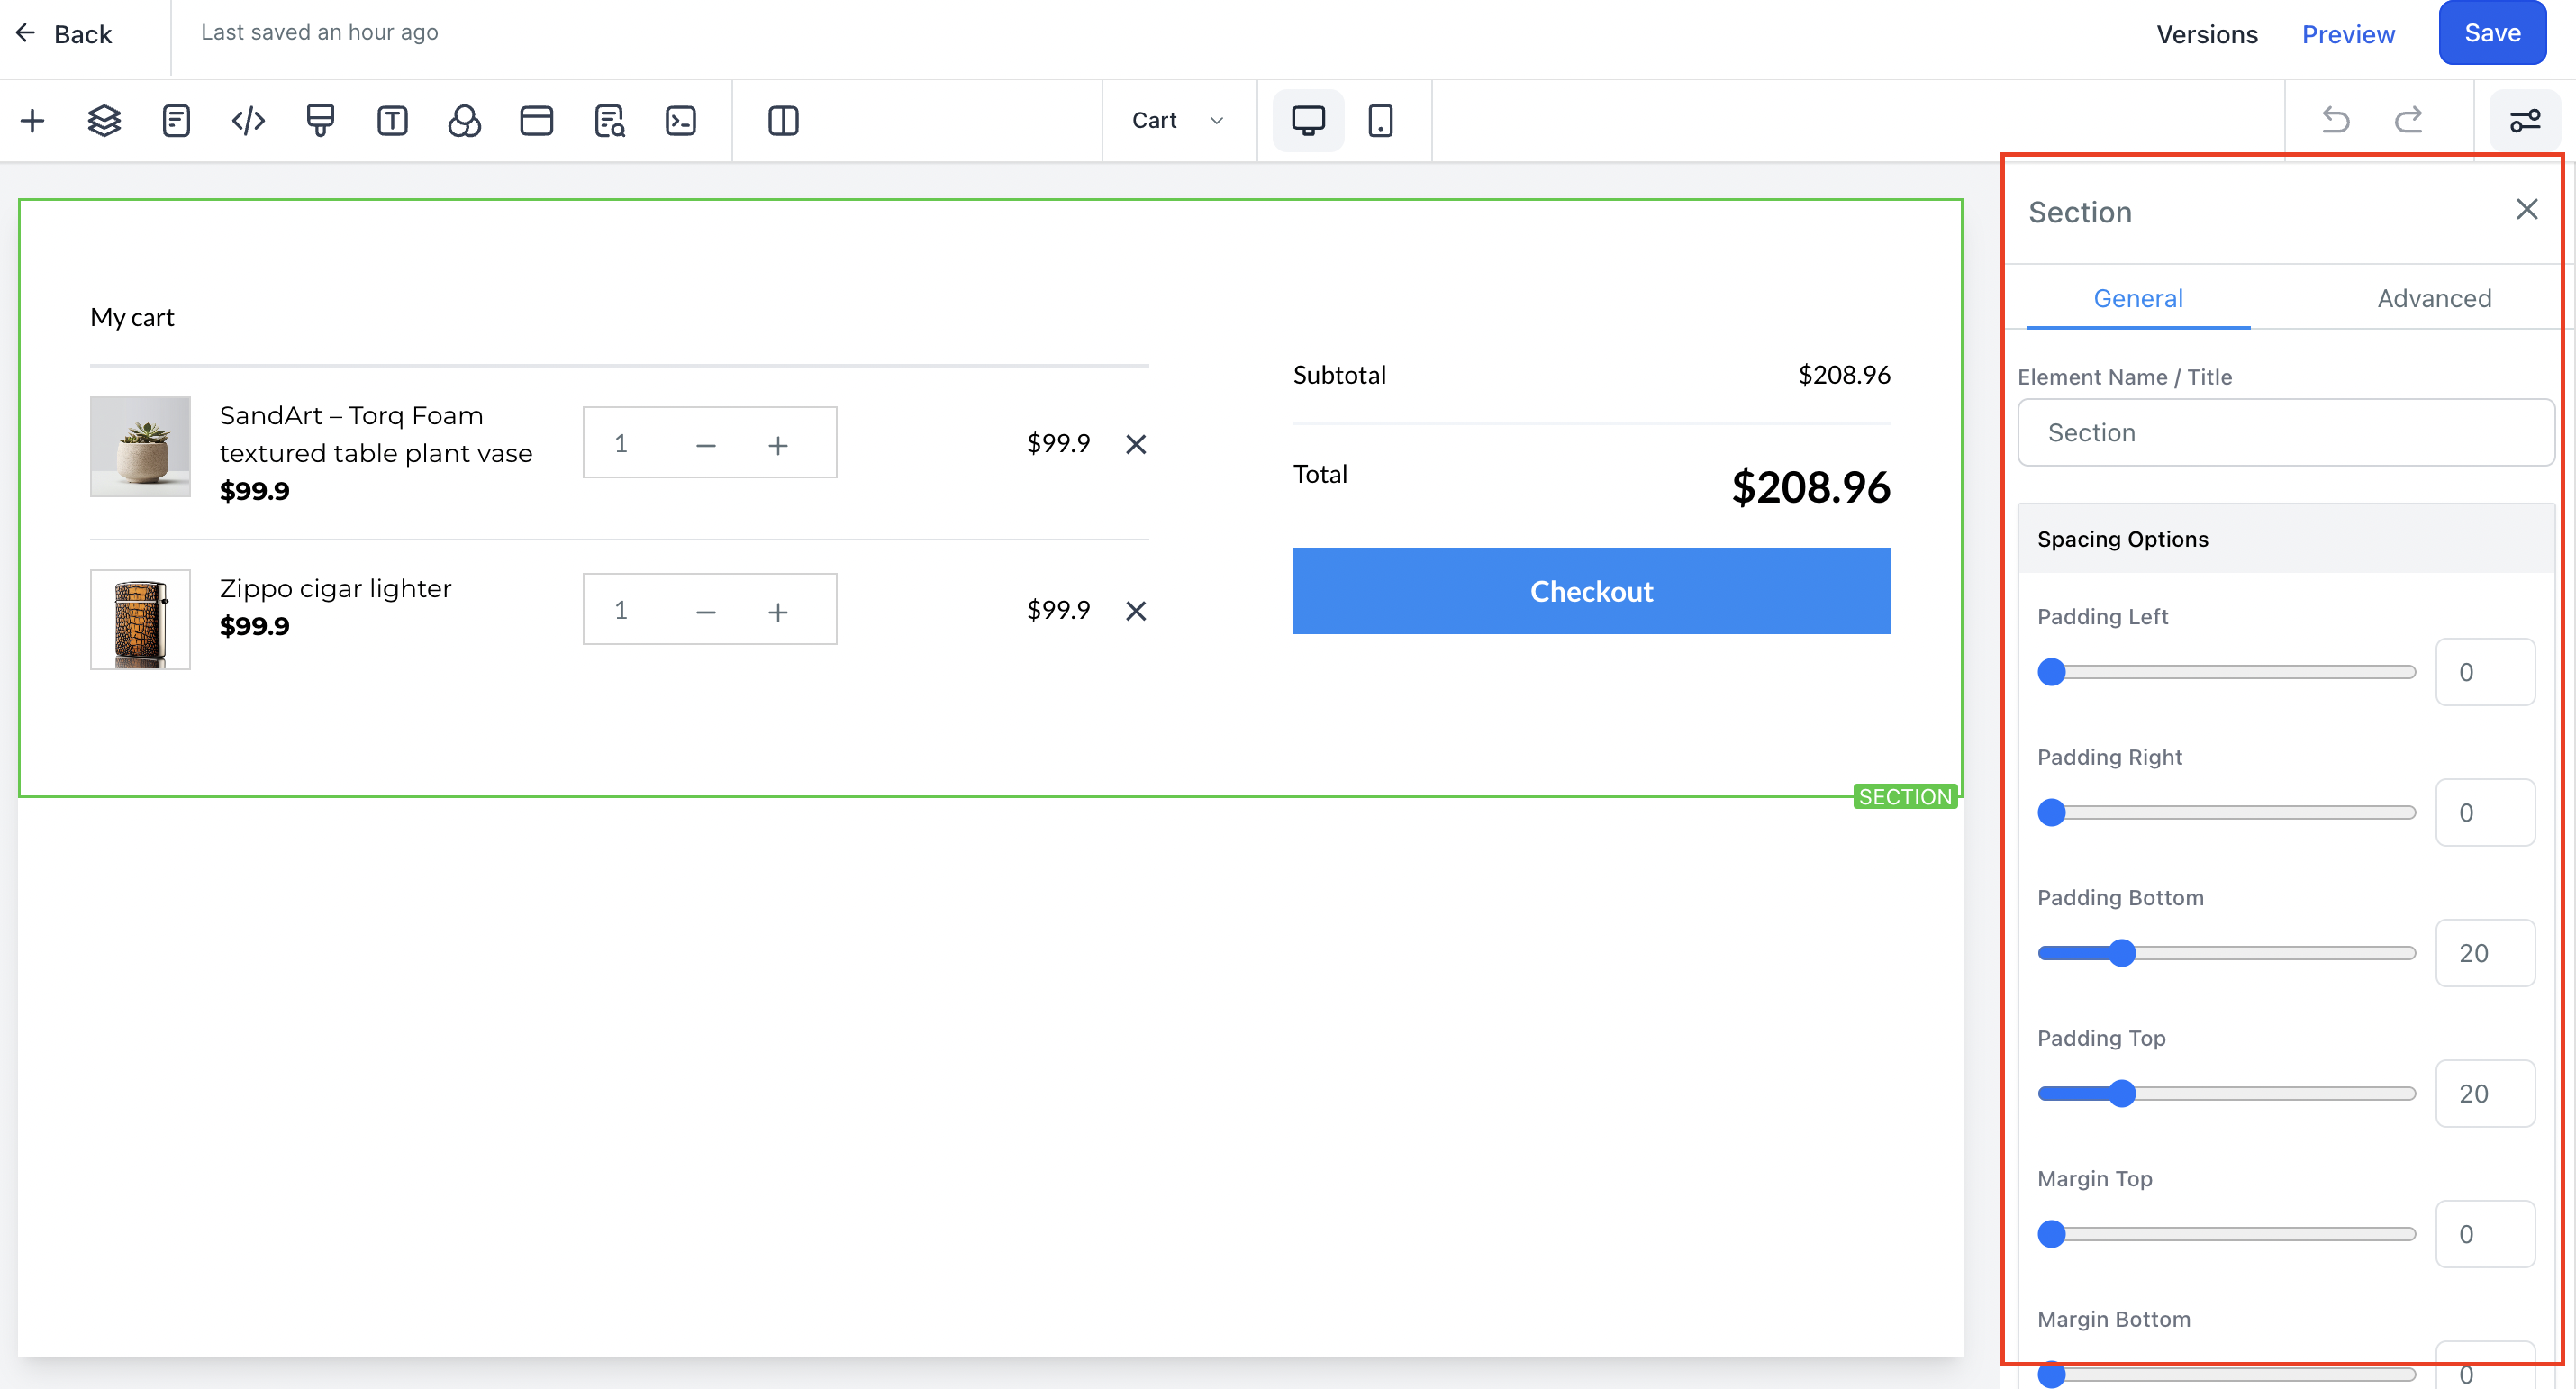
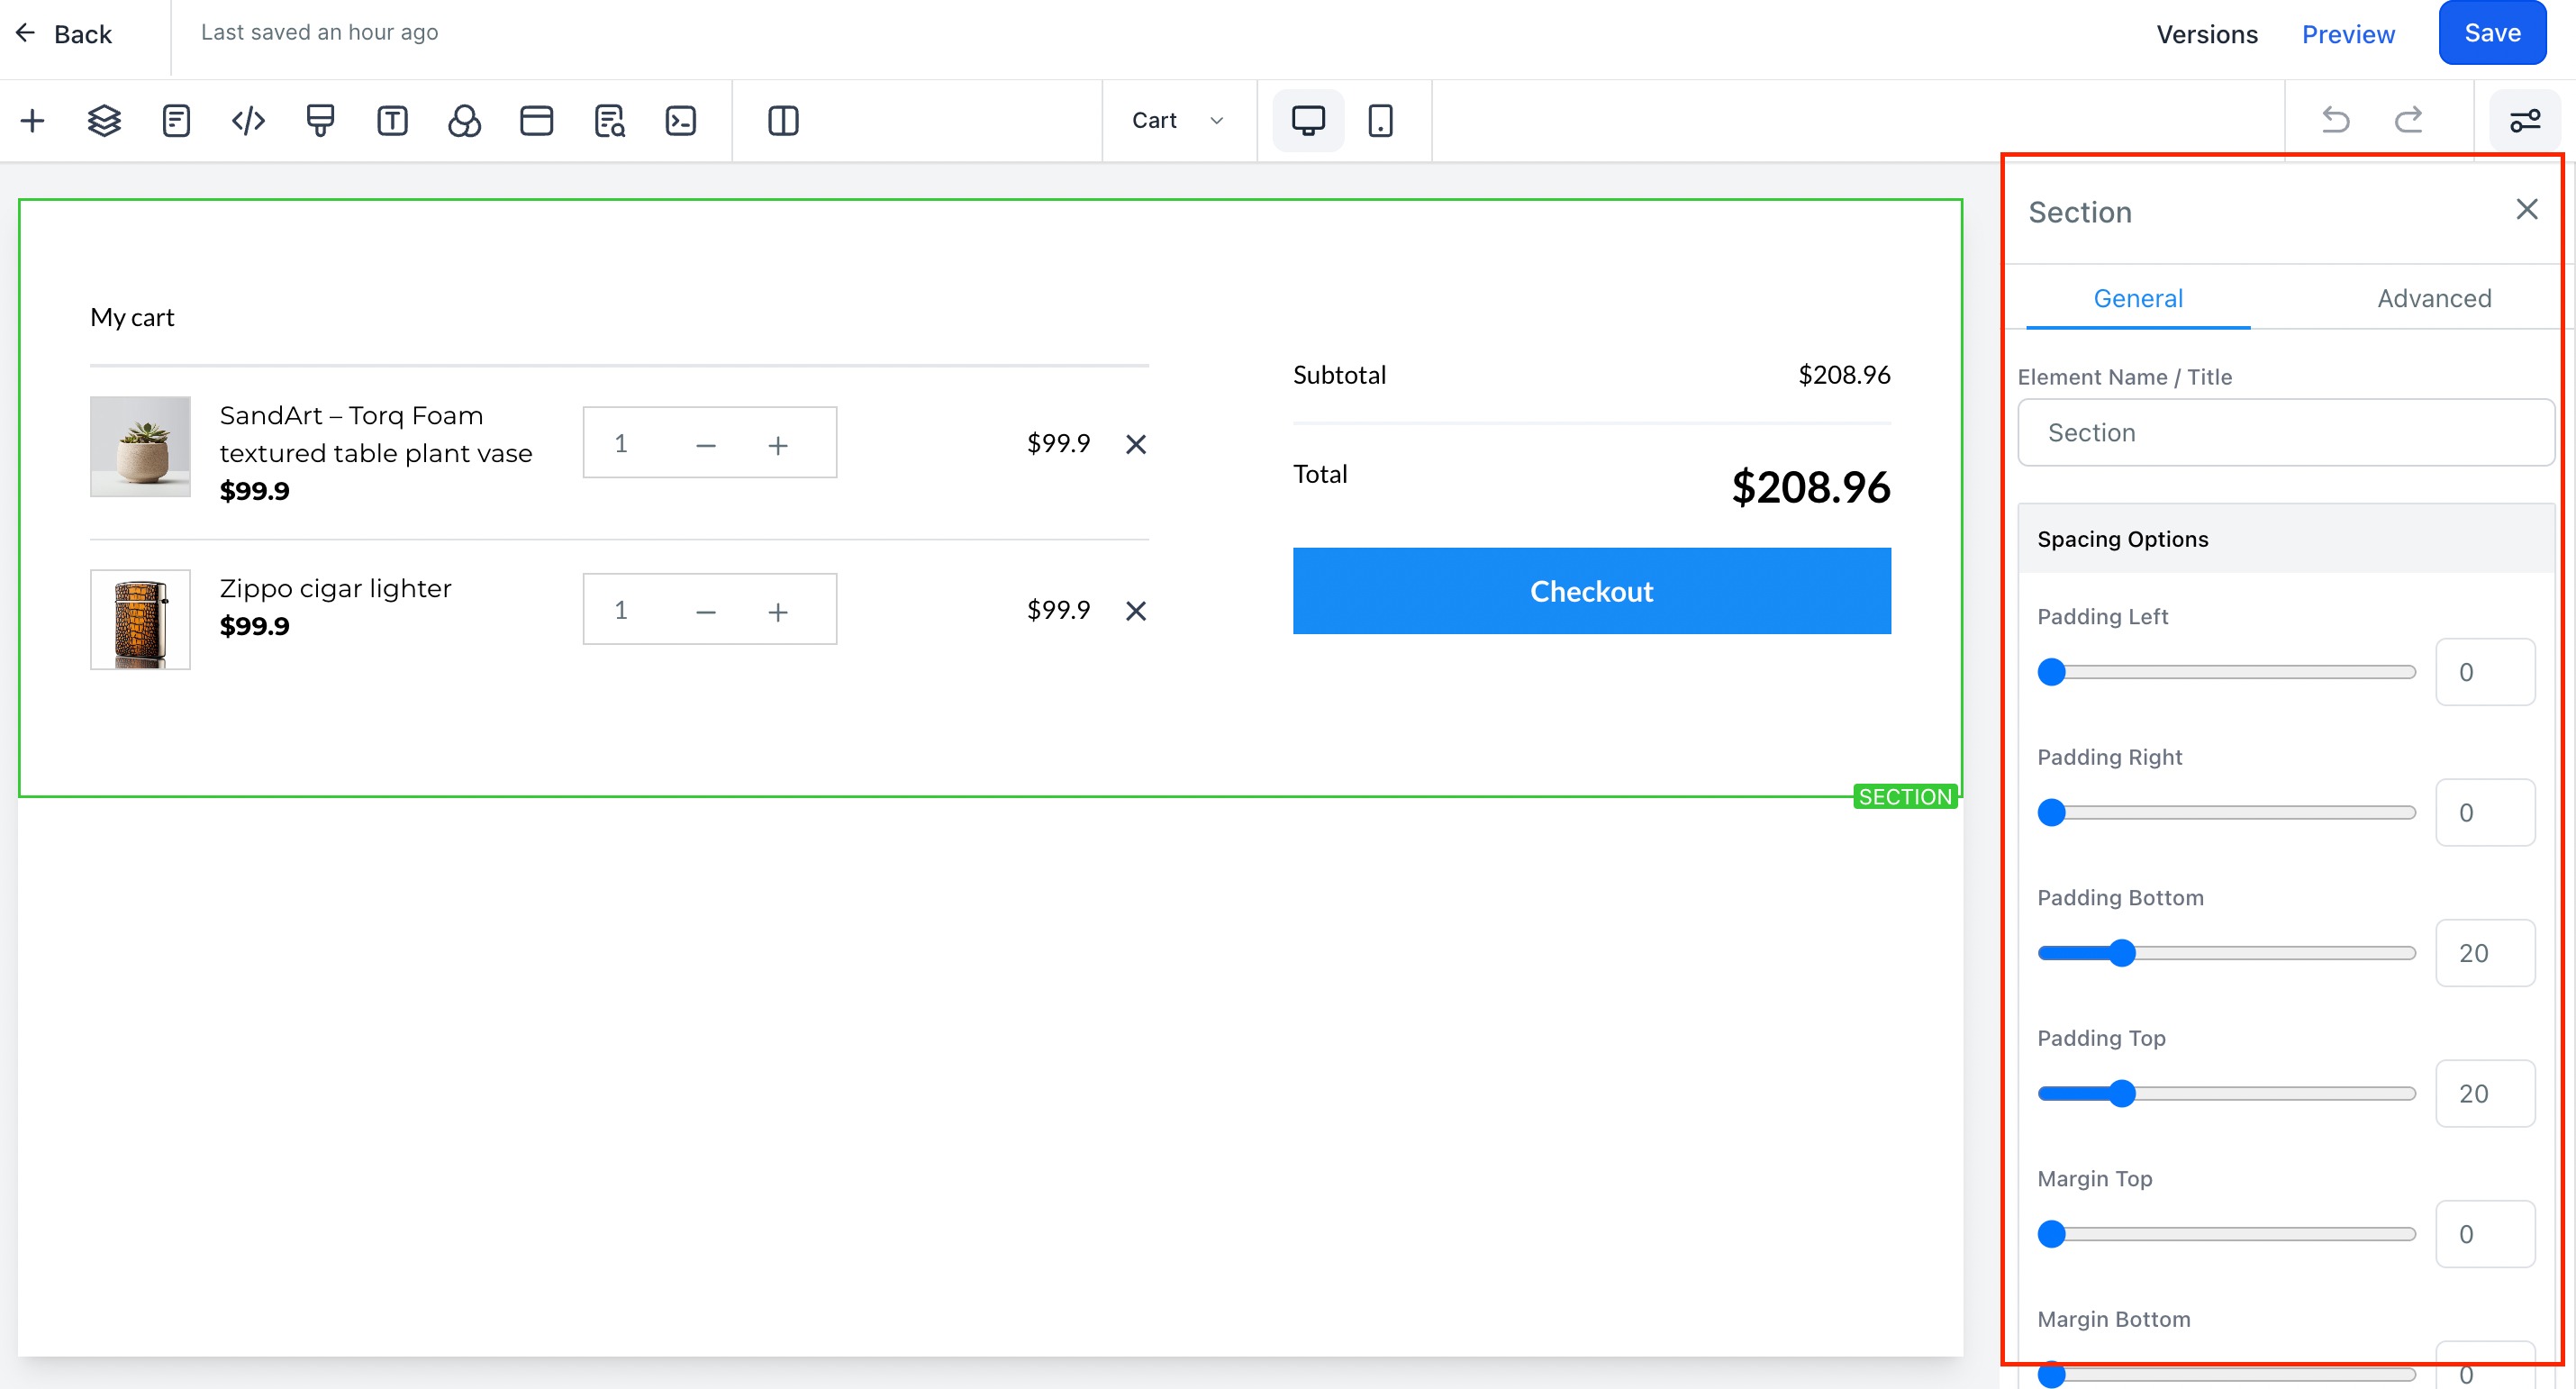
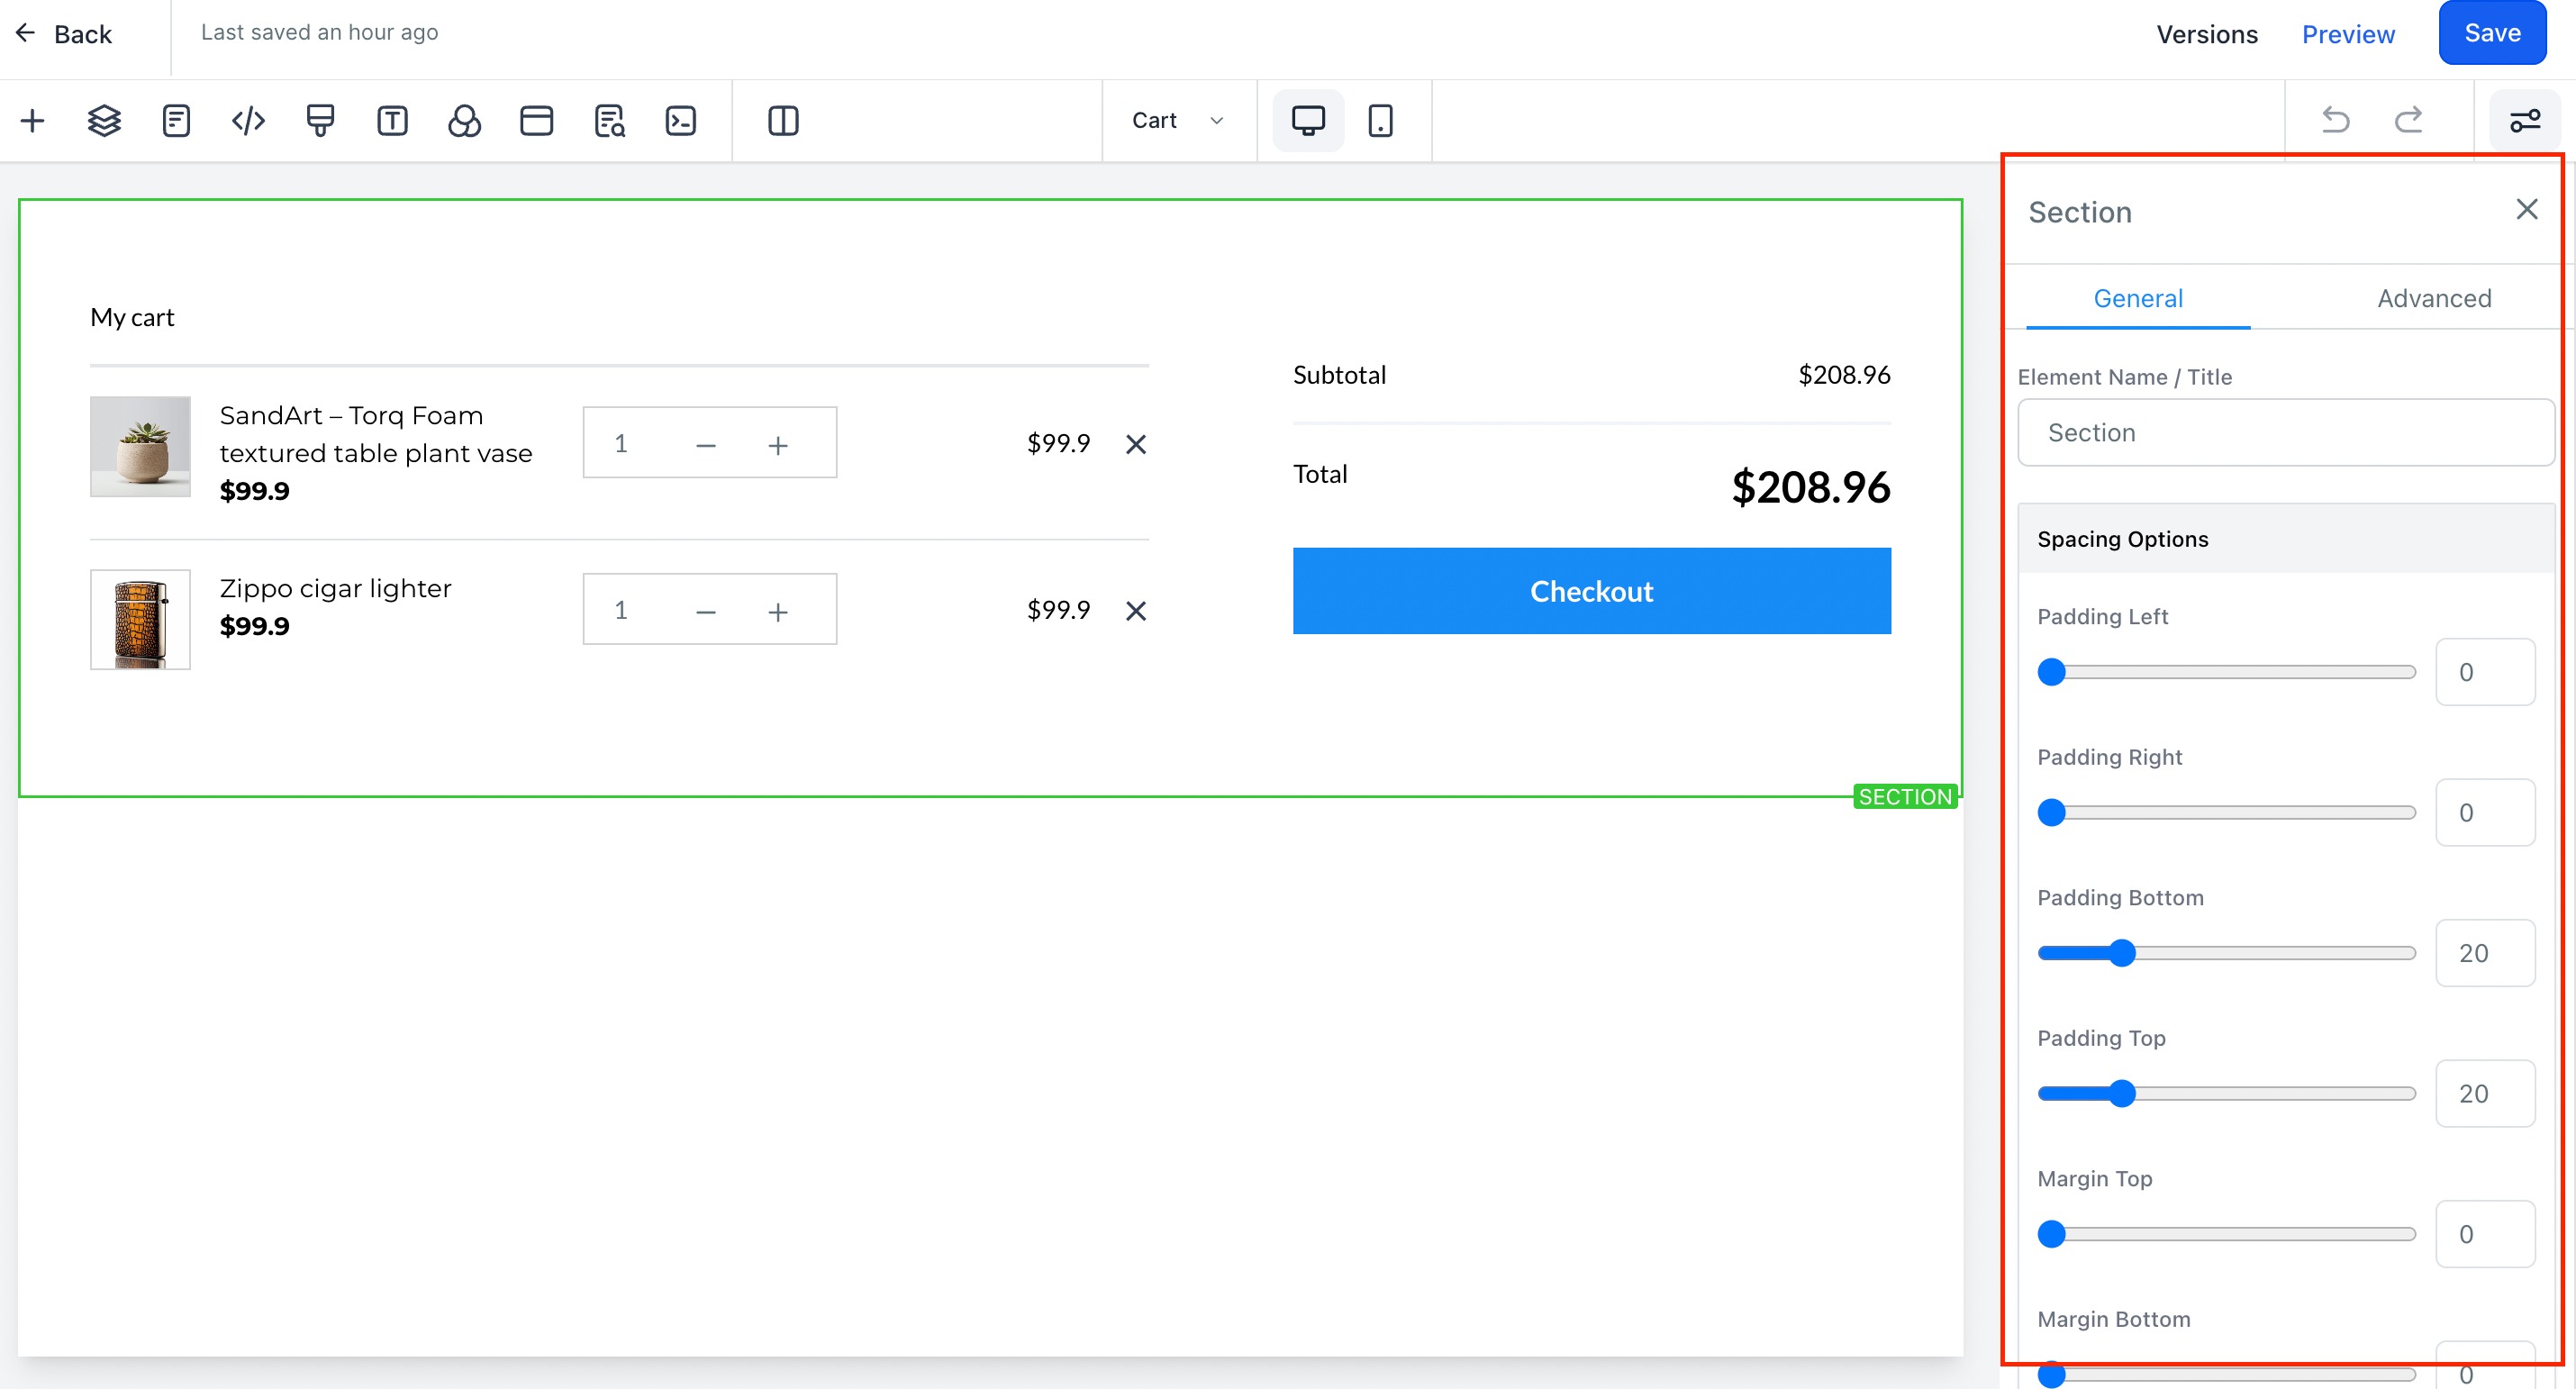
In the Store Builder, certain elements support direct item selection right on the canvas. For the Featured Product and Collections List elements, double-click an item to map or review it: an unmapped item opens the selection drawer automatically, and a mapped item highlights for quick confirmation.
Product titles display in full, without truncation, across the pages patients use to complete a purchase: the Product Detail page, Cart, Side Cart, Checkout, Thank You page, and the Upsell Product, Collection List, and Featured Product elements. Titles wrap across multiple lines as needed, and layout stays aligned for pricing and buttons on both desktop and mobile. The Product List page and Featured Products element still use standard title truncation.
If you're offering a recurring product, such as a monthly skincare subscription, you can attach a free trial period:
Go to Payments > Products.
Create a new product or edit an existing one.
Under Pricing, set the product's Type to Recurring.
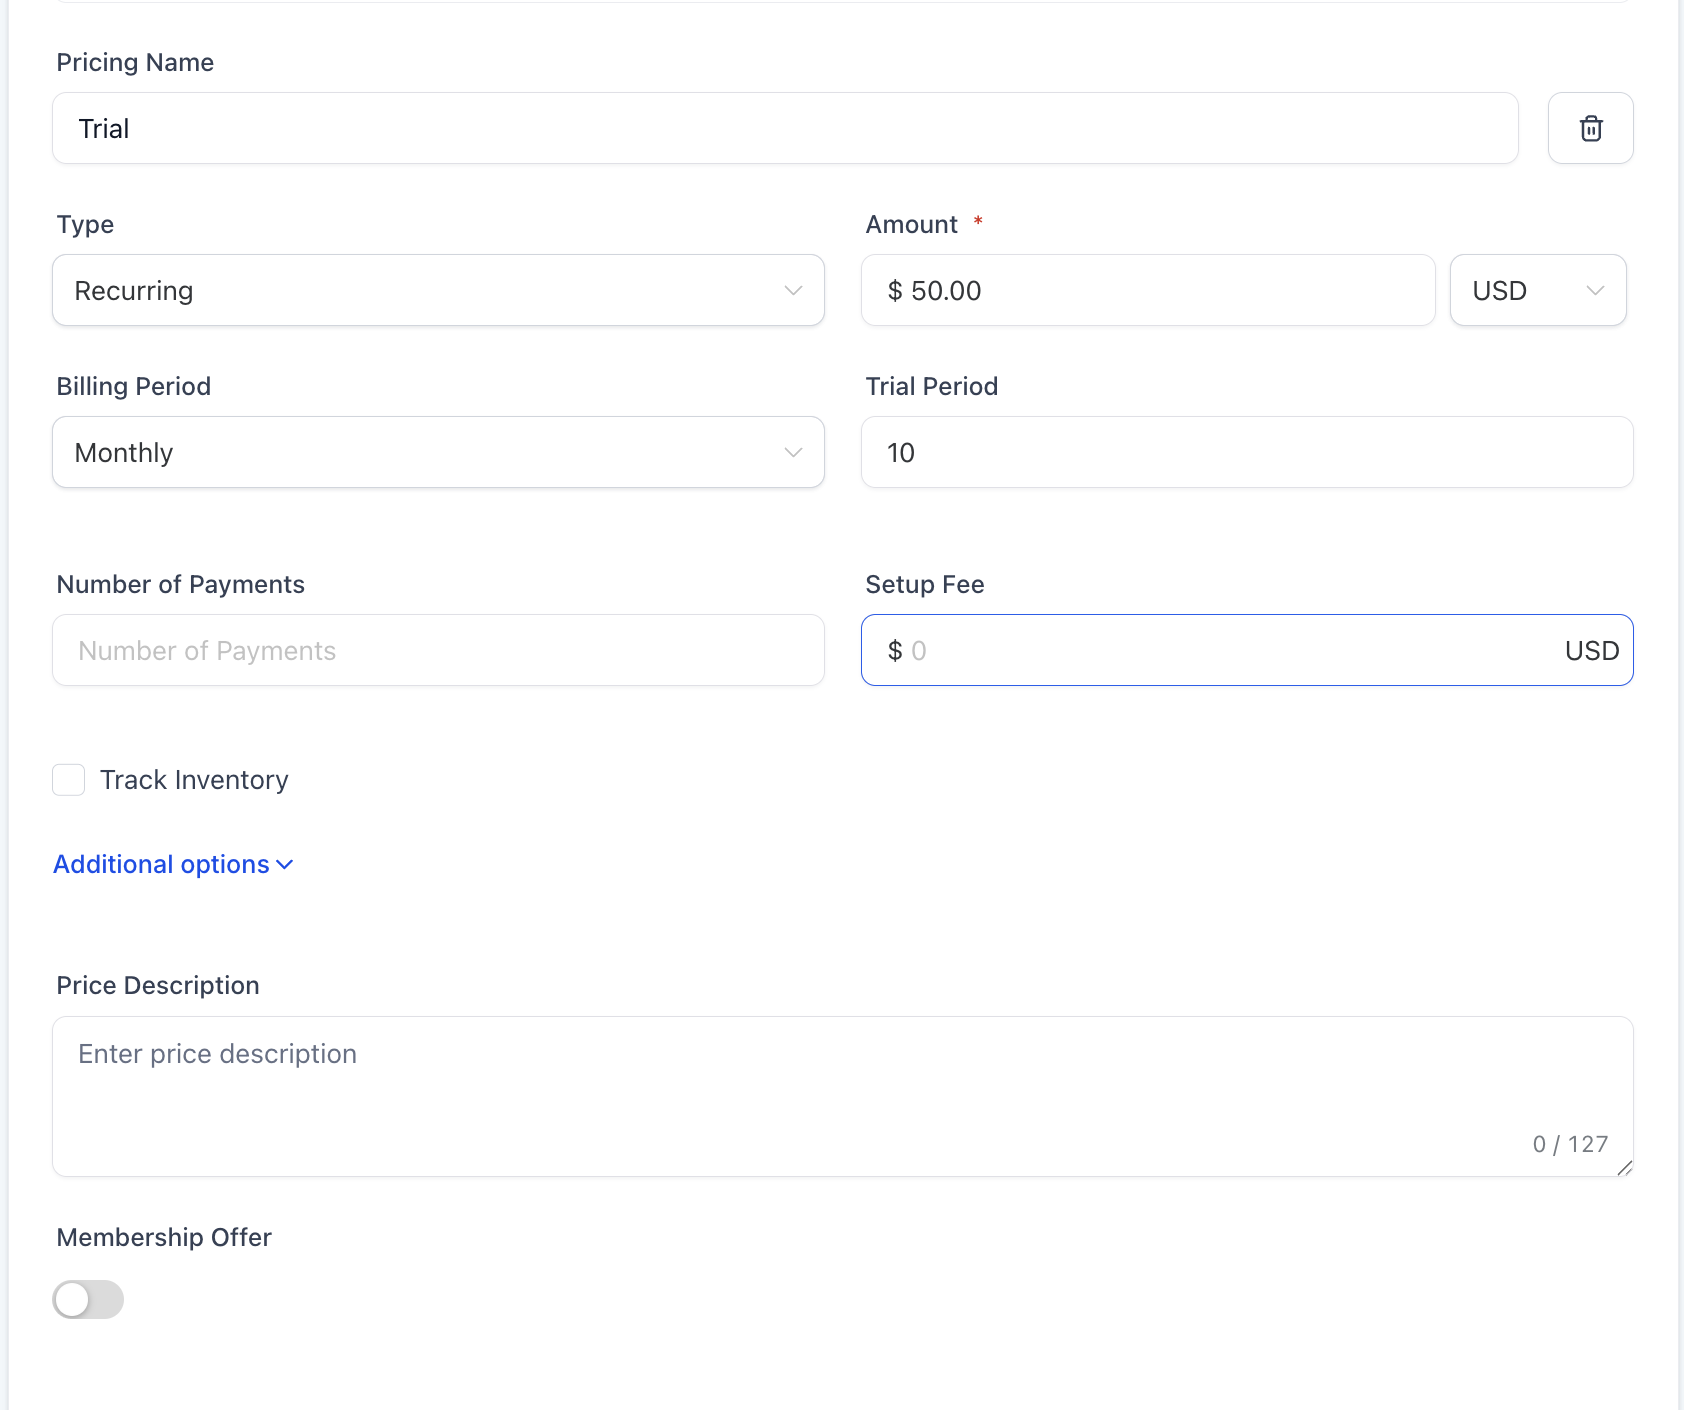
Enter the amount.
Add a compare-at price if you want to show a discount (optional).
Select the billing period.
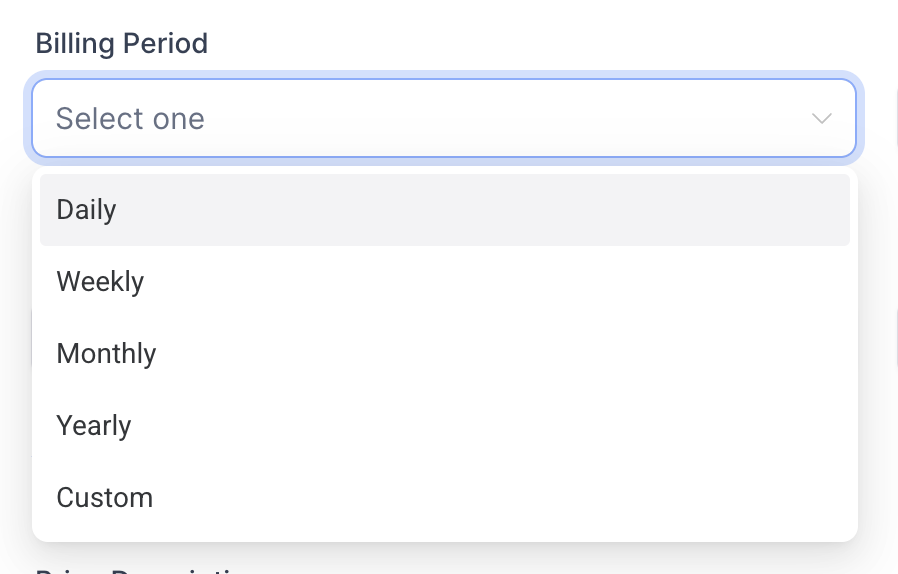
Enter the trial period, for example "5 days."
Set the number of payments and any setup fee (optional).
Save the product.
Add the product to an order form, invoice, or checkout page.
The trial period is always measured in days, even if the product bills monthly or annually. Entering 30 means a 30-day trial before the first charge.
Once a product exists, decide where patients can actually find and buy it. If you're selling a digital product (a downloadable guide or program, for example), make sure the digital files are uploaded to each product variant. Without an uploaded file, patients won't see a download option after checkout.
A product isn't limited to the online store. You can sell the same product through several different checkout experiences, depending on the situation:
Selling Method | When to Use It | What to Do |
|---|---|---|
Online Store | Let patients browse products and complete purchases through your storefront | Turn on Include in Online Store for the product, then add or map it in your store |
Funnel | Sell a product through a dedicated sales or checkout funnel | Add the product to the funnel and place an order form on the checkout page (see Step 5) |
Payment Link | Share a direct checkout link by email, SMS, QR code, or another channel | Create a Payment Link and select the product and price you want to sell |
Invoice | Bill a specific patient directly for a product or service | Create an invoice and add the product; make sure the invoice type matches the product's one-time or recurring pricing |
Form | Collect patient information and payment on the same form | Add the Payment element to the form and select the product you want to offer |
Go to Sites and choose where the product should appear: Website, Funnel, or Store.
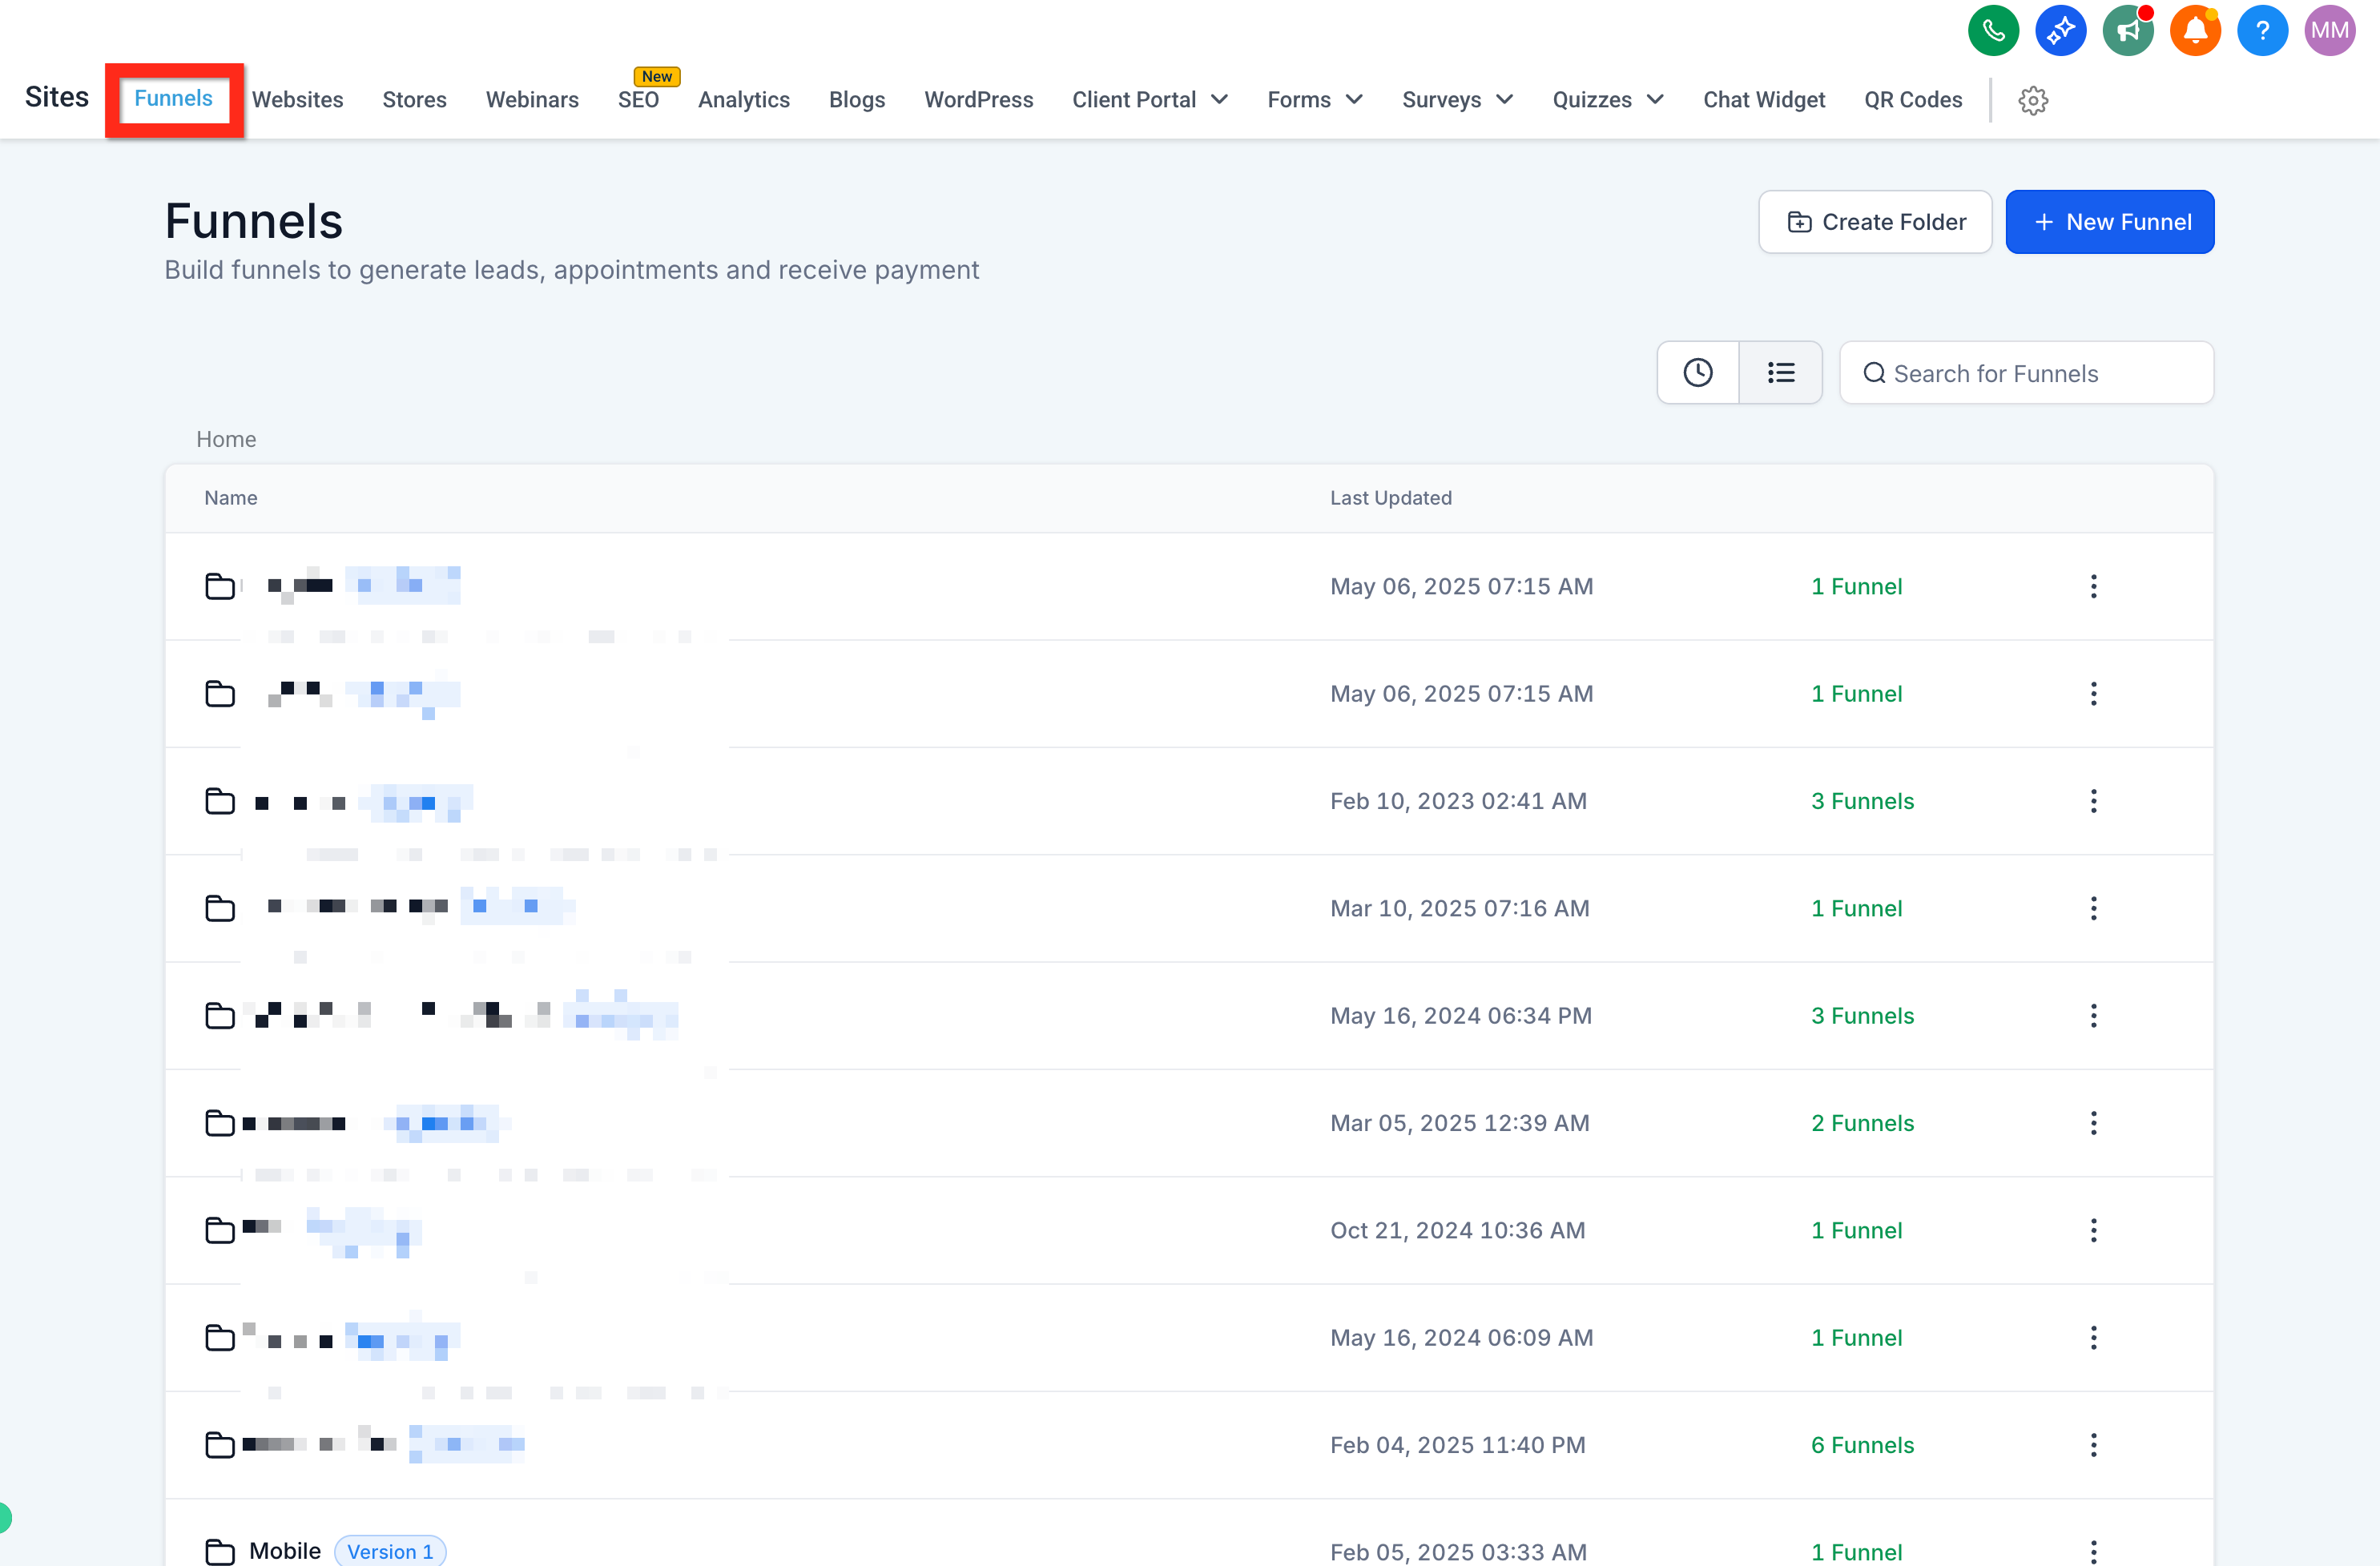
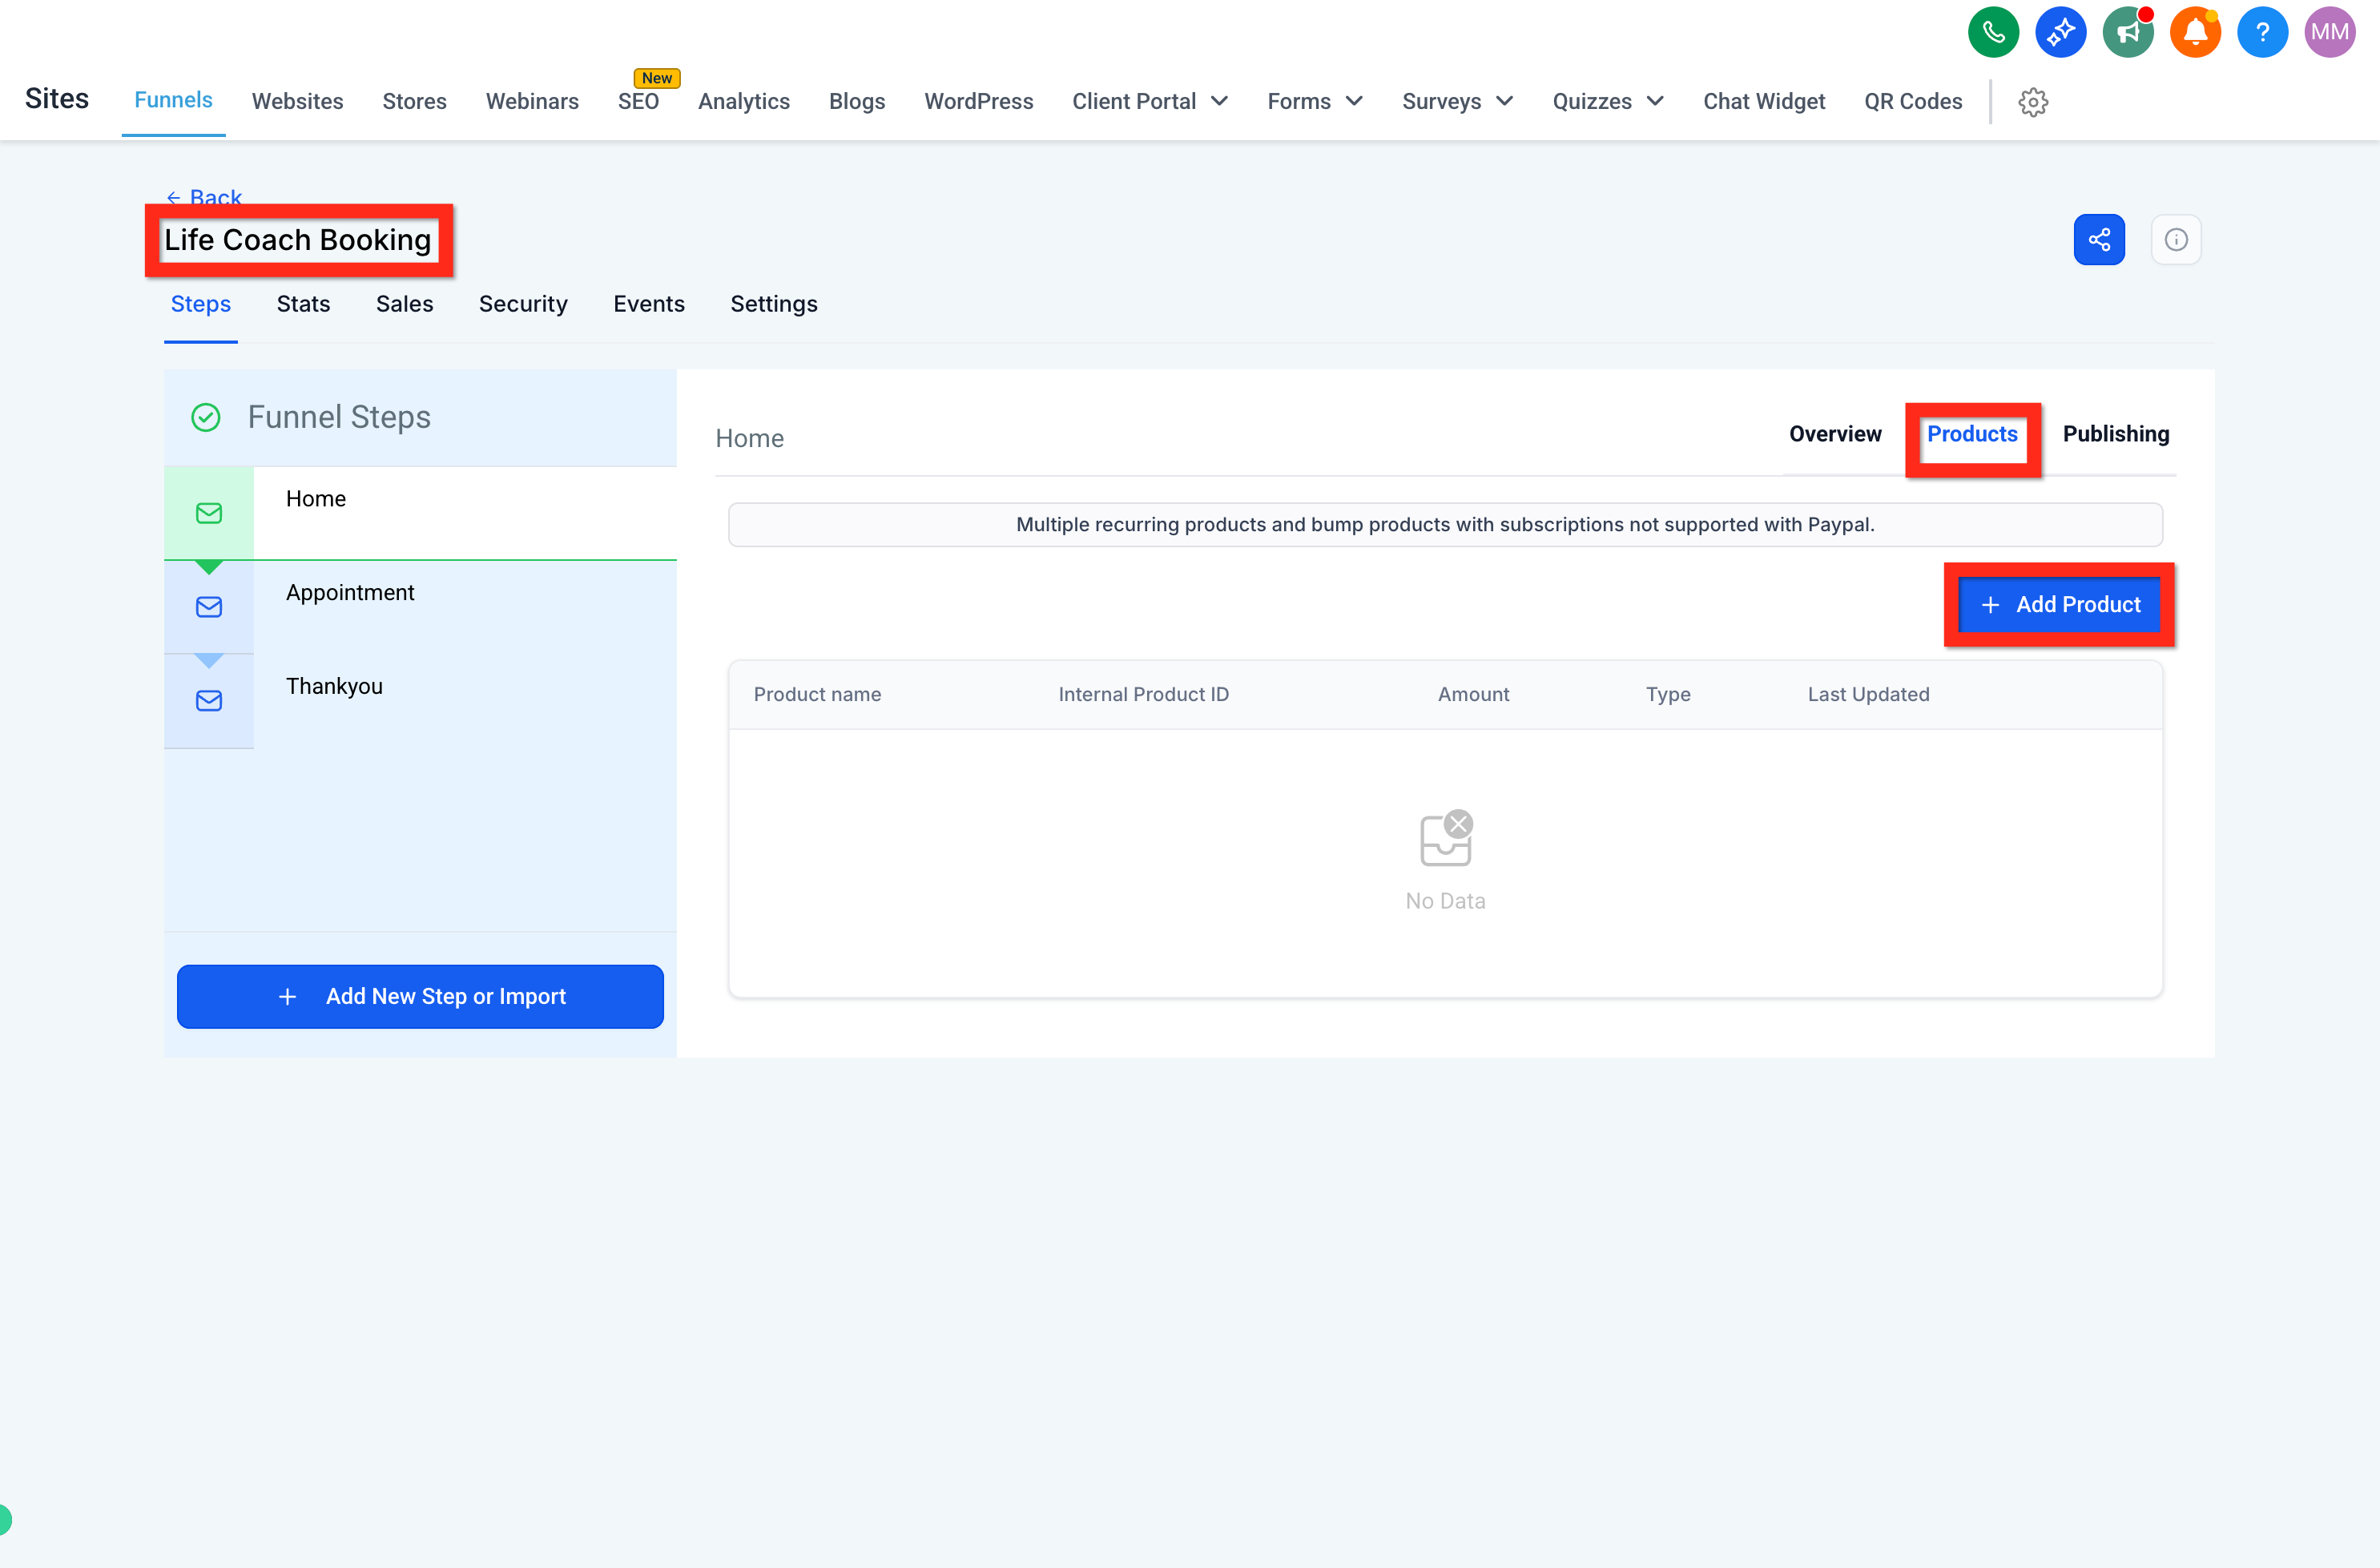
To add a product to a funnel specifically:
Click Funnels and select the funnel you want to use.
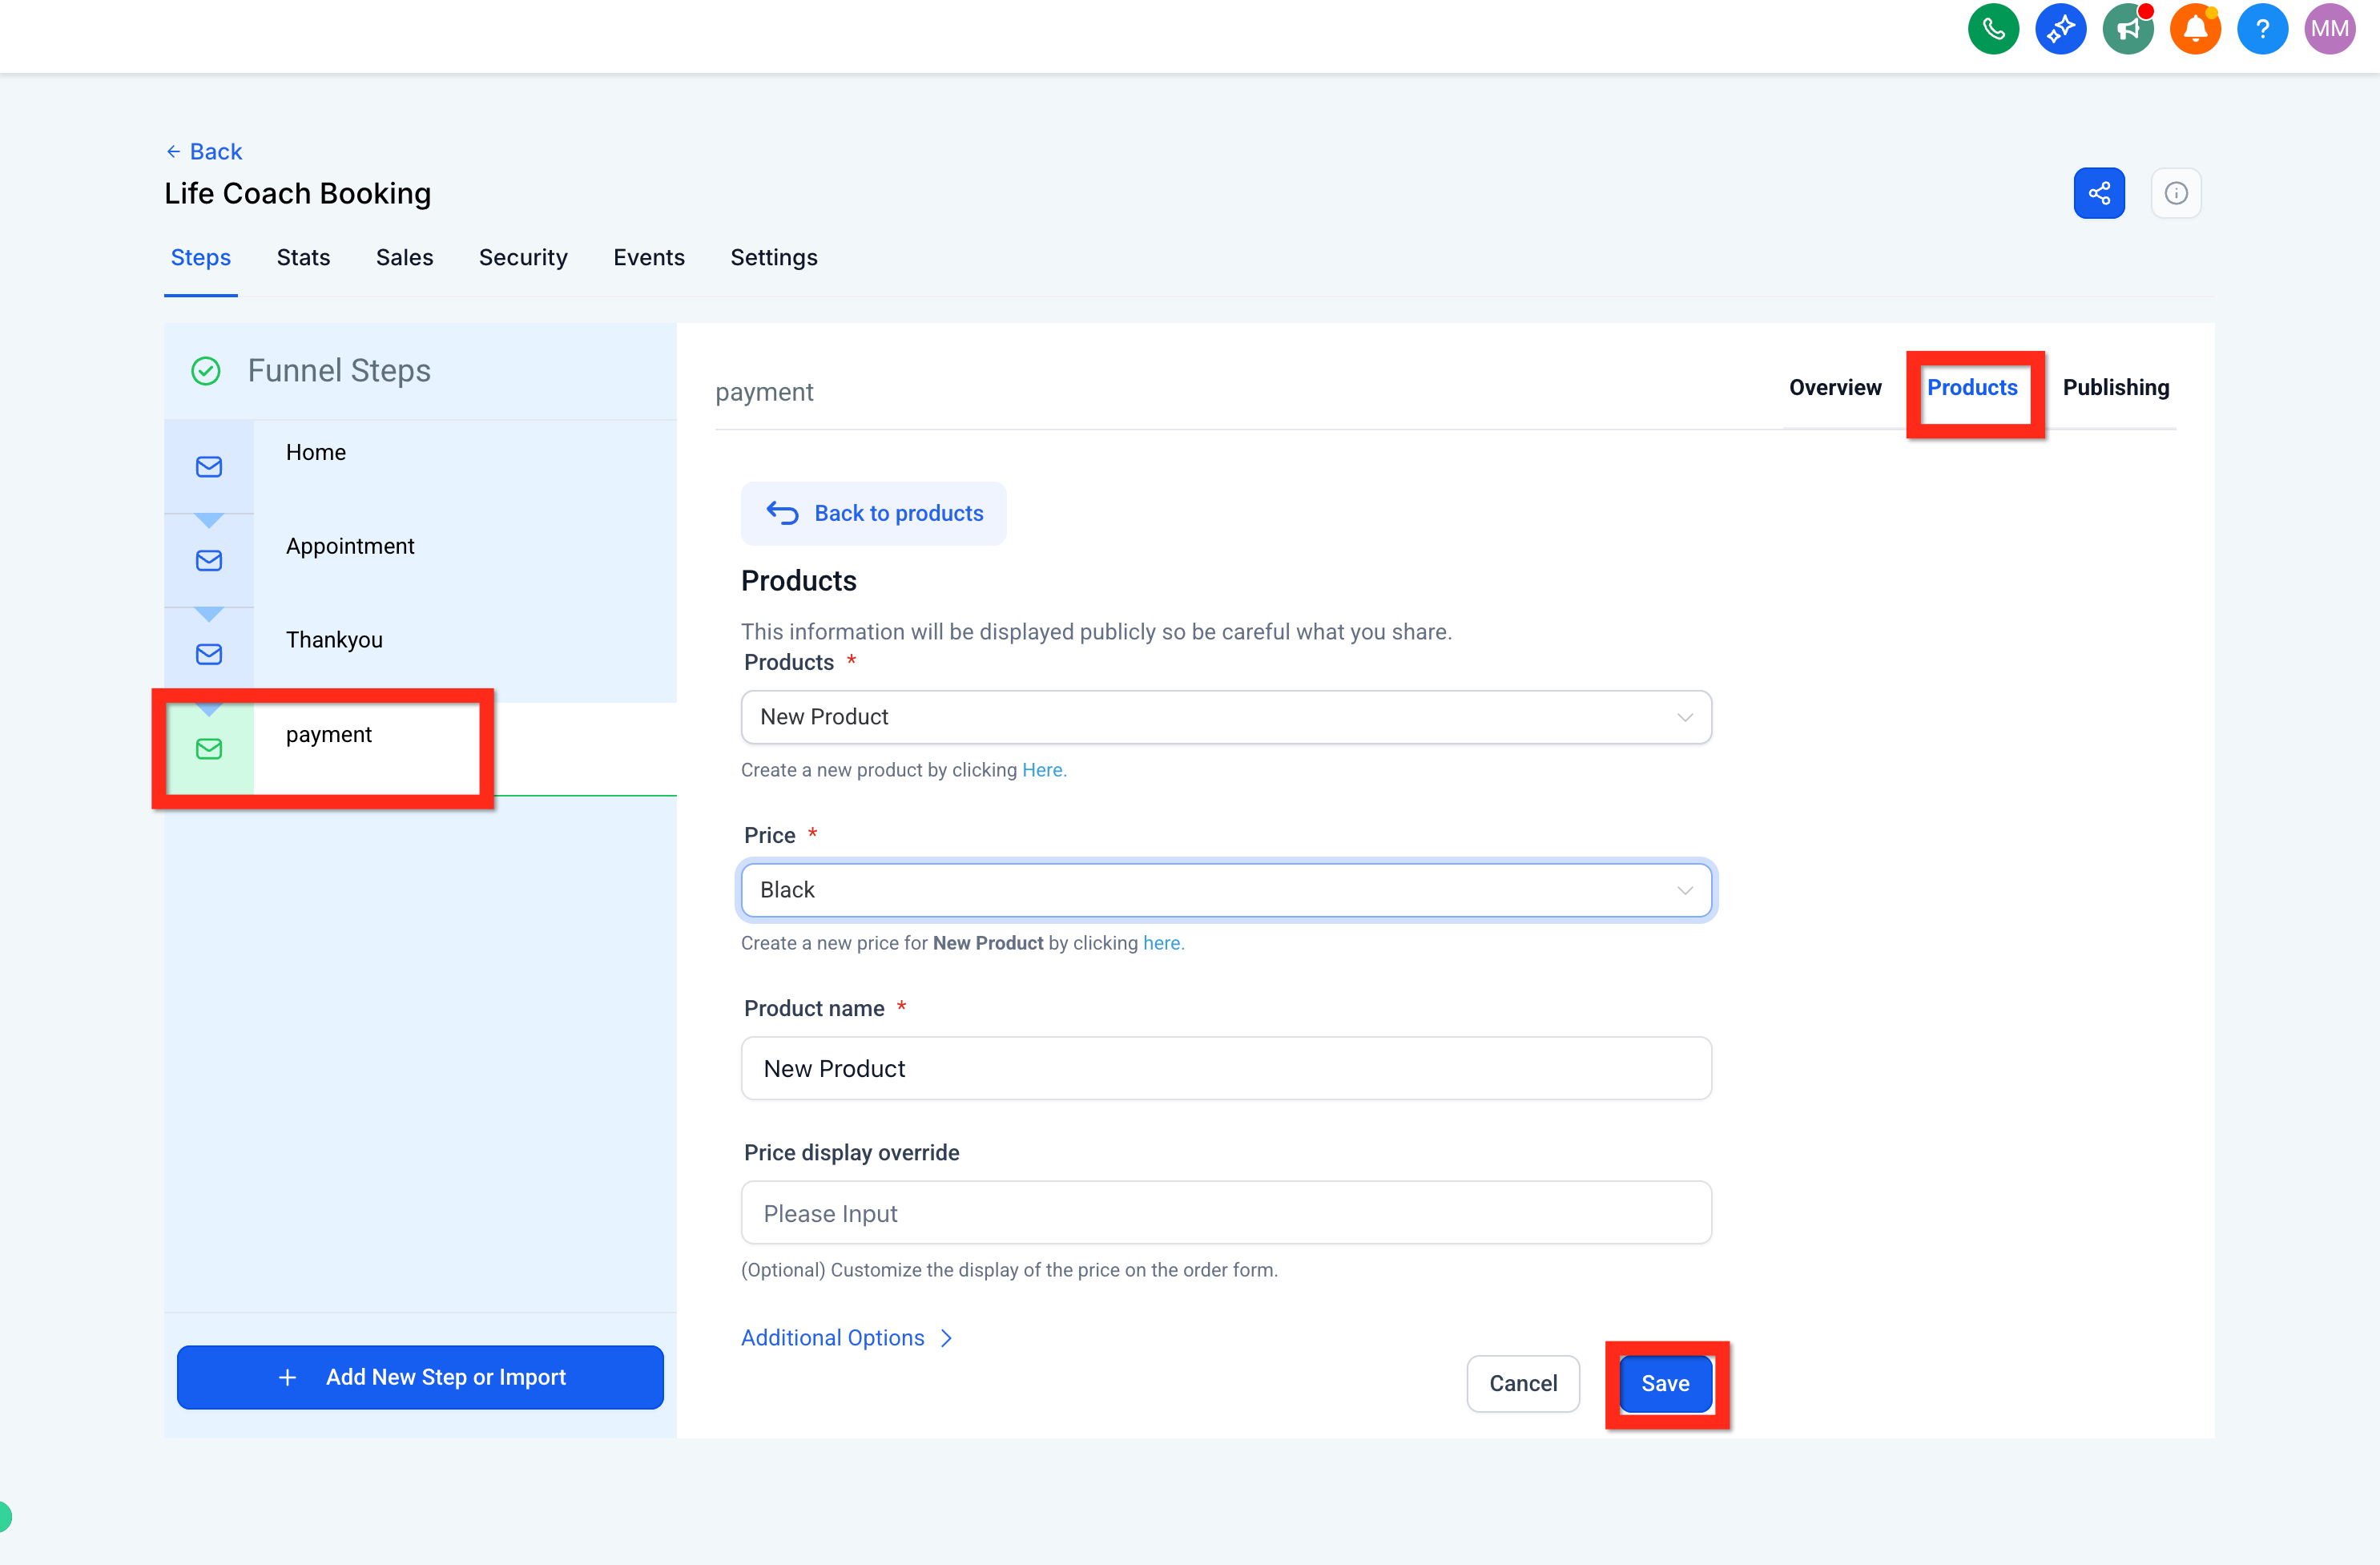
Go to the Products tab.
Click Add Product.
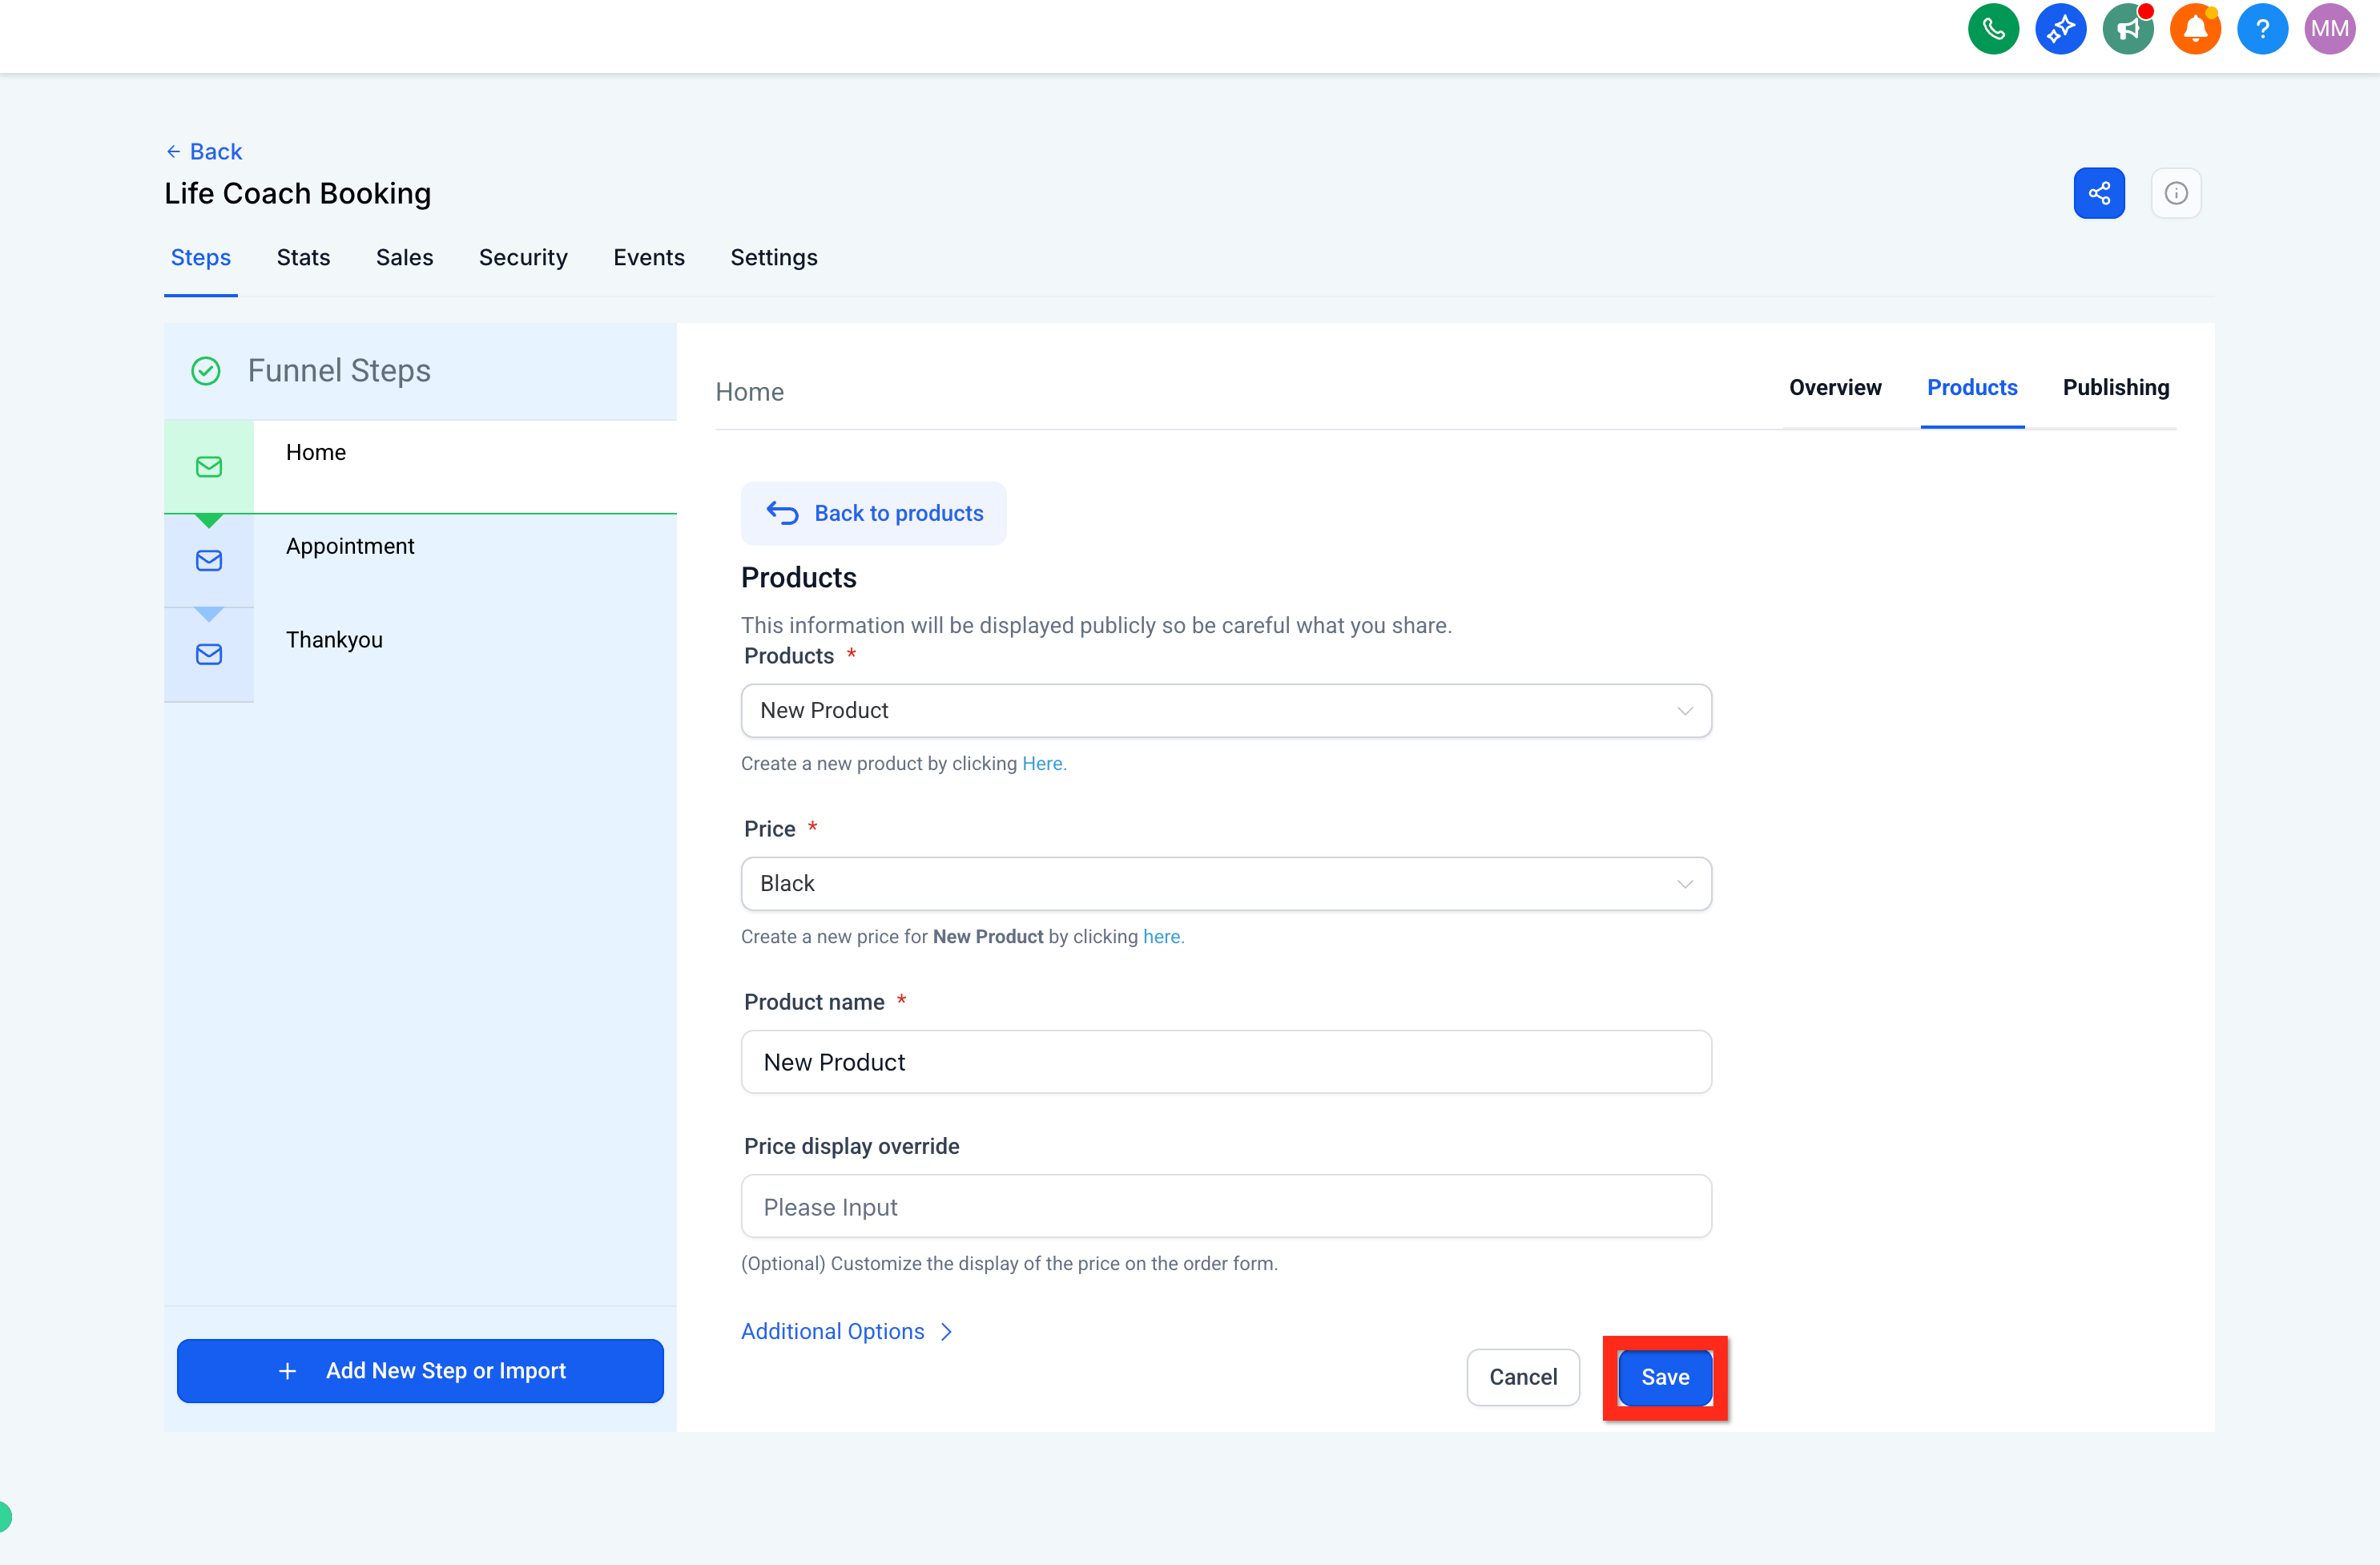
Configure the product details.
Click Save.
If you're selling through a funnel rather than the storefront, you'll need to add an order form so patients can check out.
Open the Site Editor.
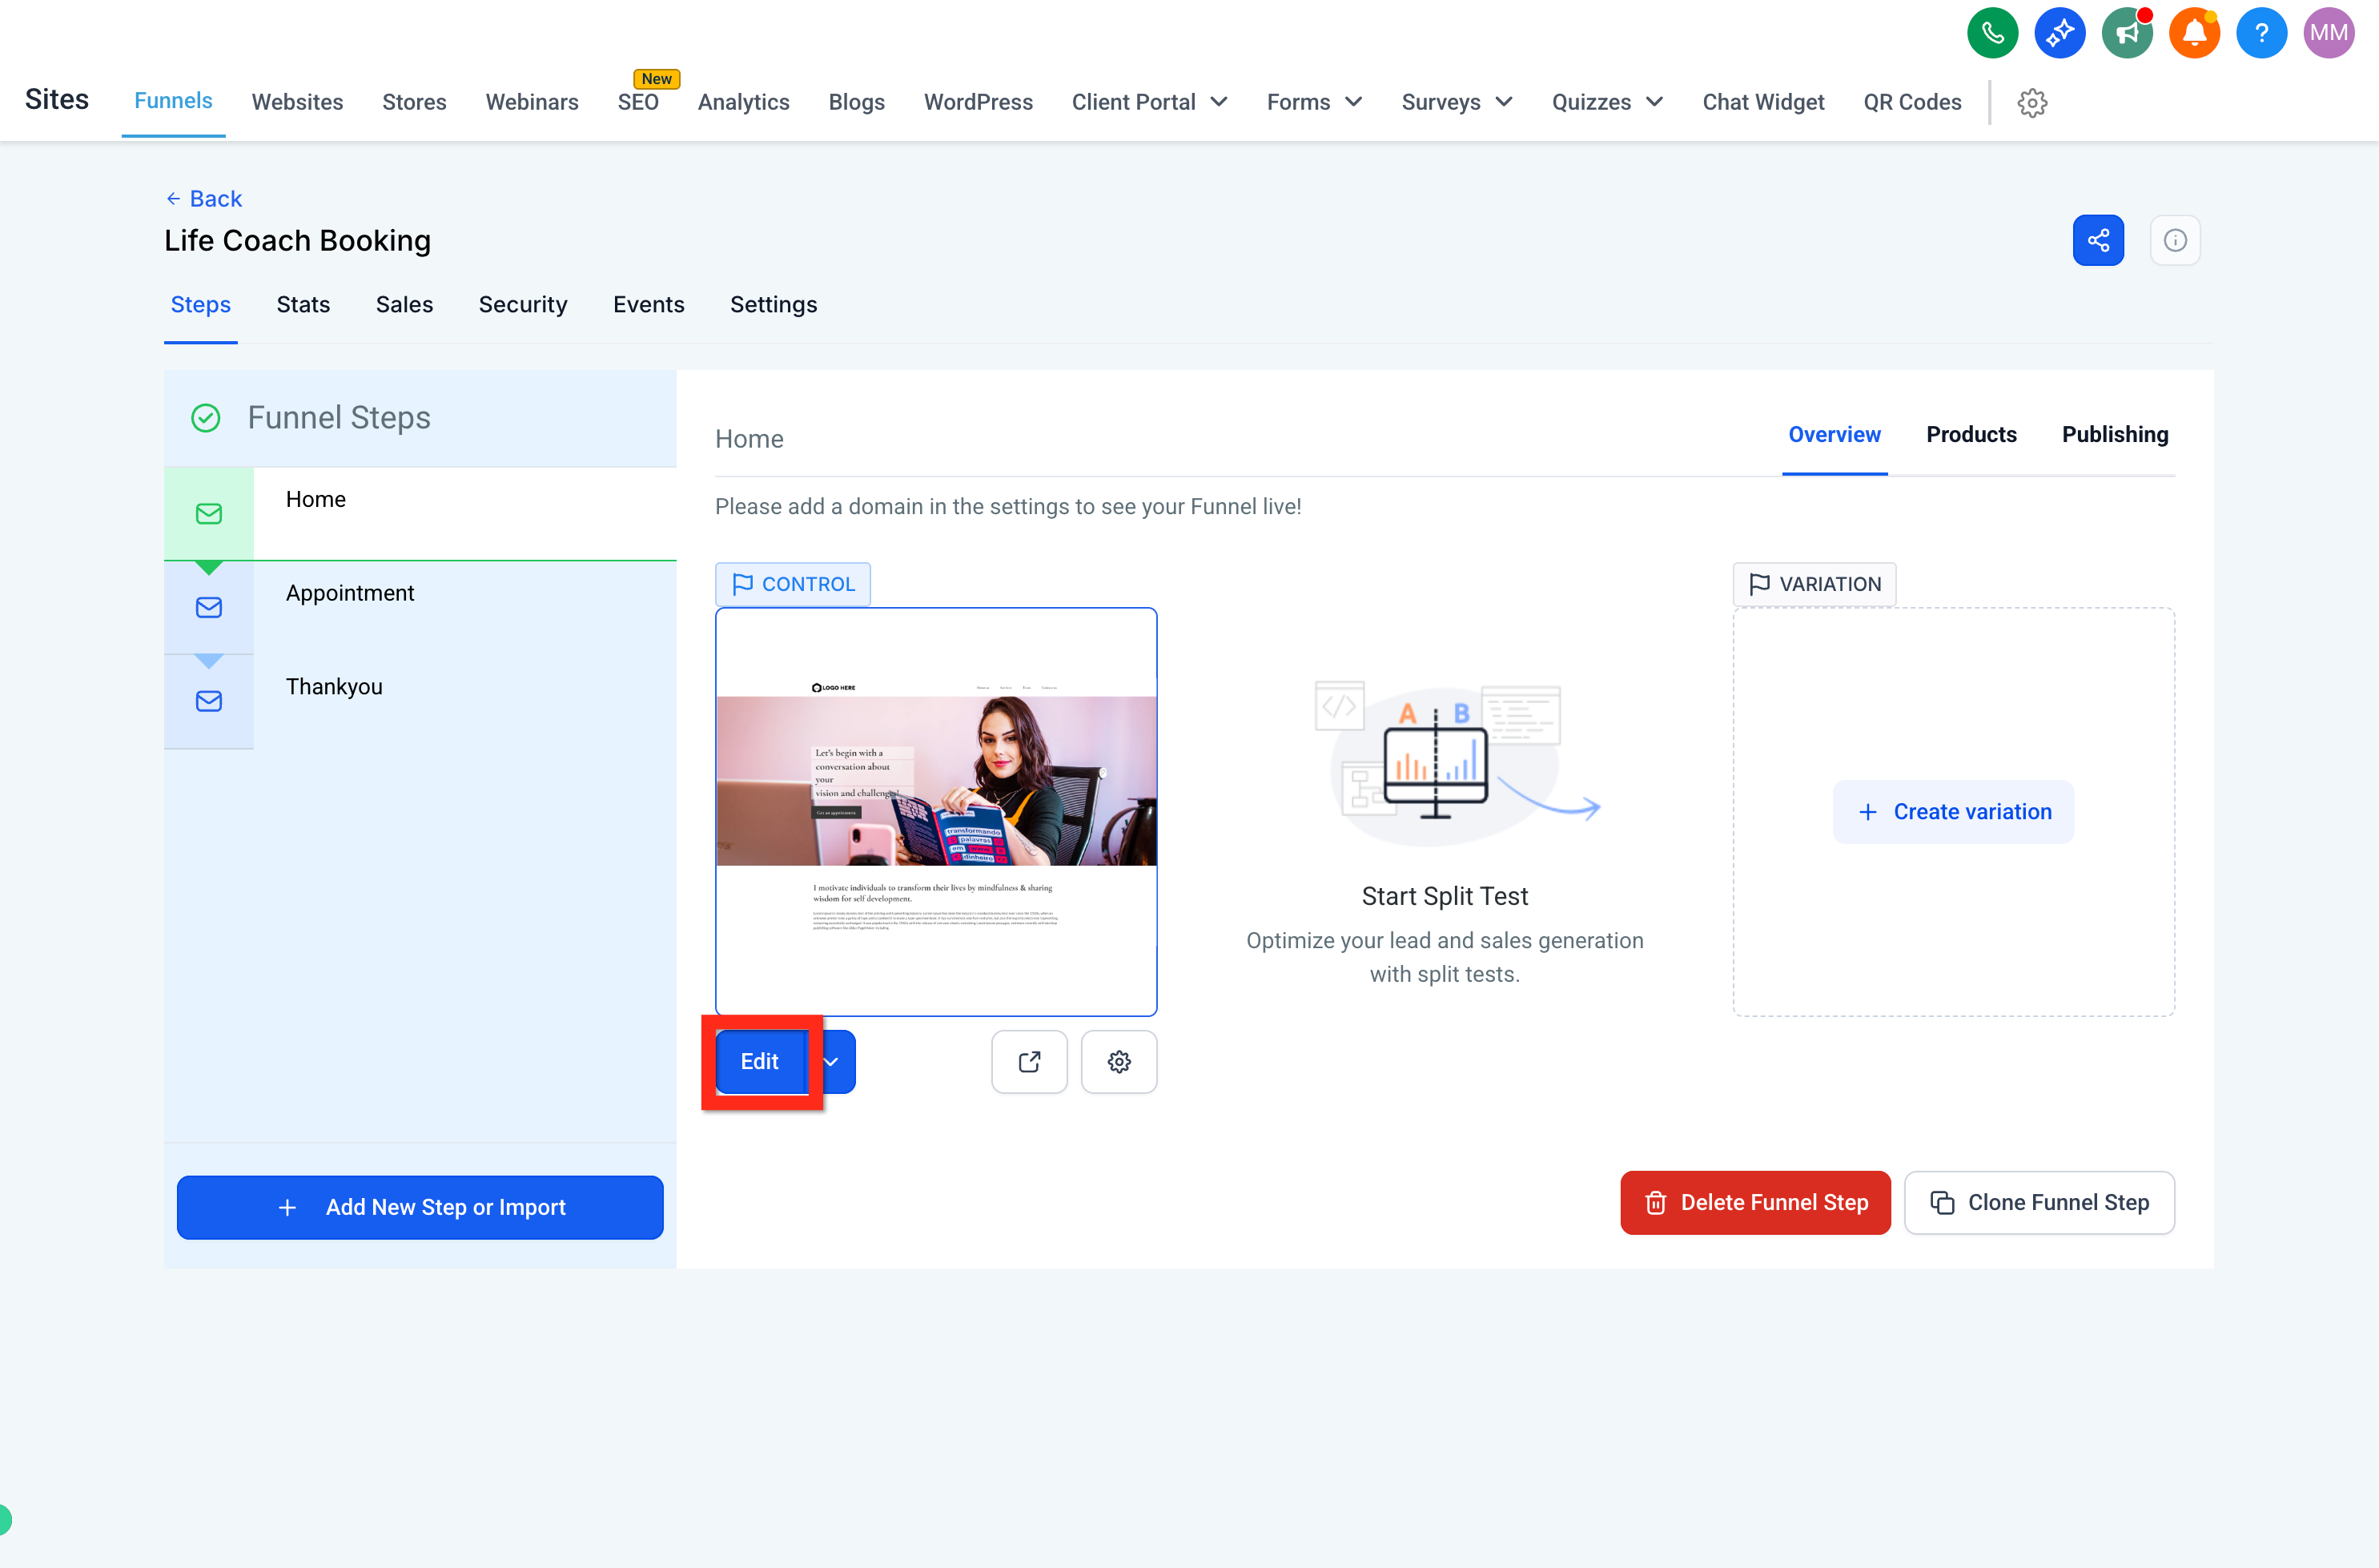
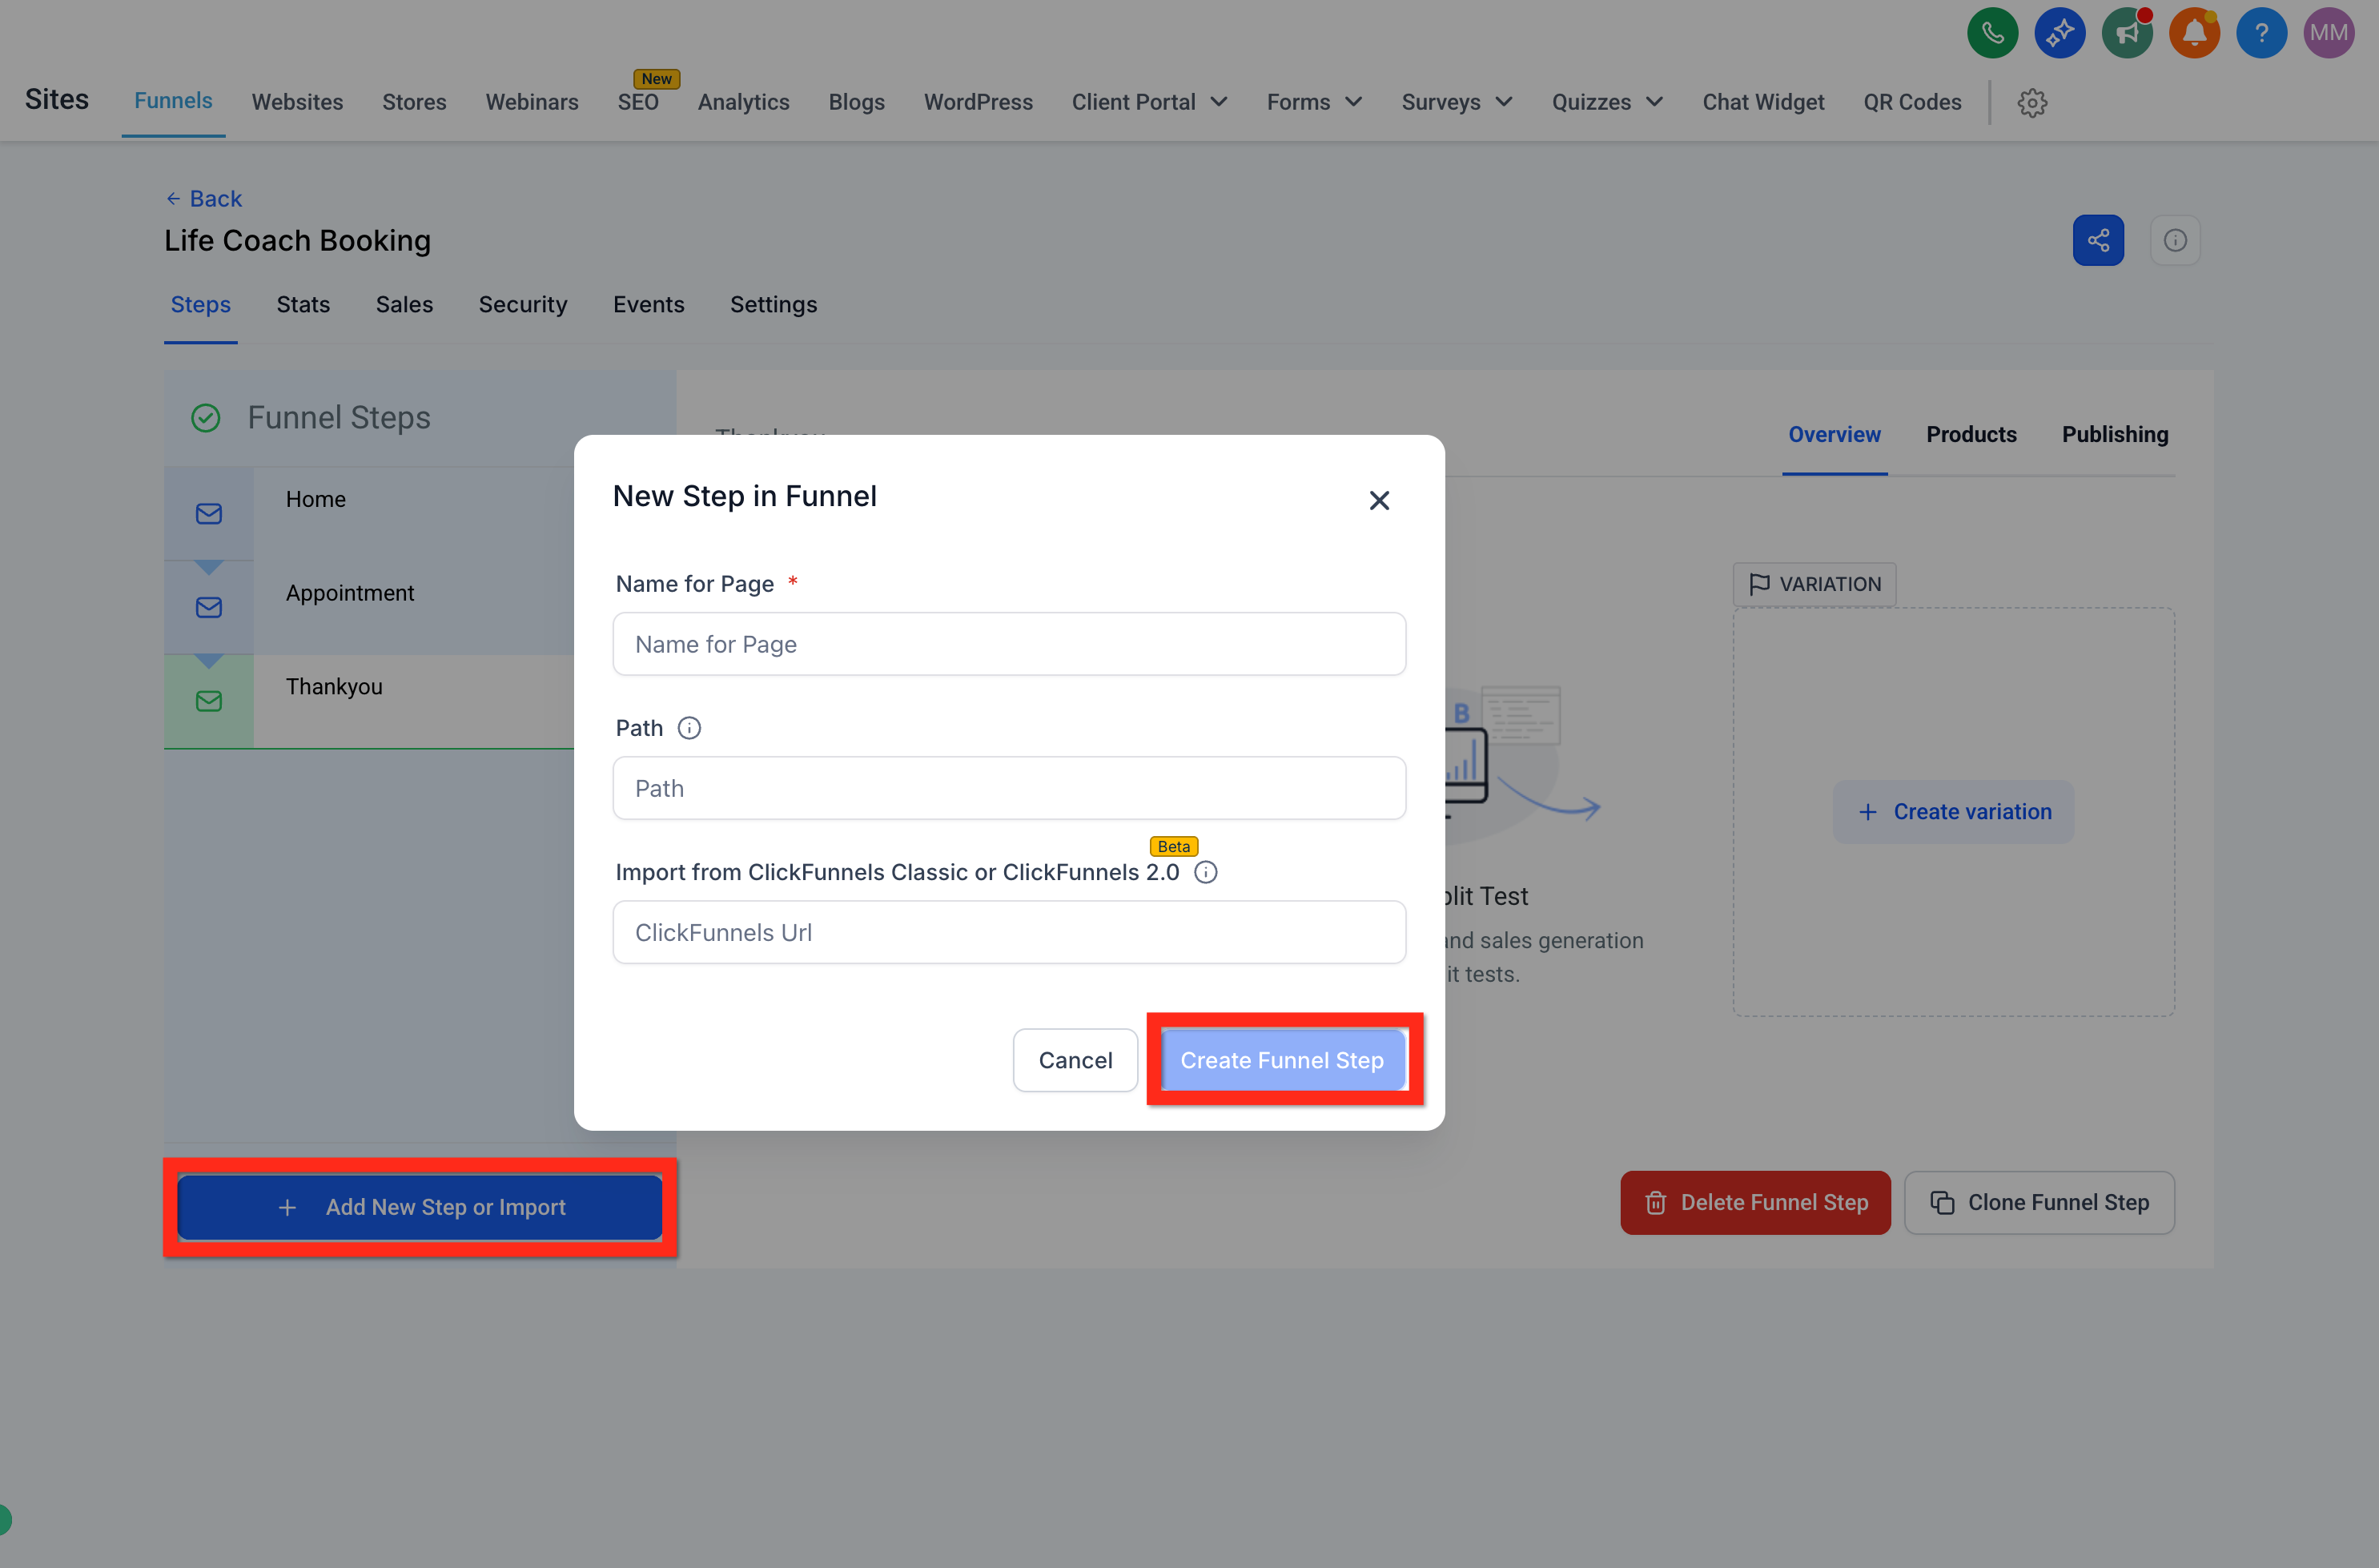
Select the funnel page that should hold the checkout form. If it doesn't exist yet, click Add New Step, fill out the details, and click Create Funnel Step.
Add a full-width section to the page.
Inside the section, add a one-column row.
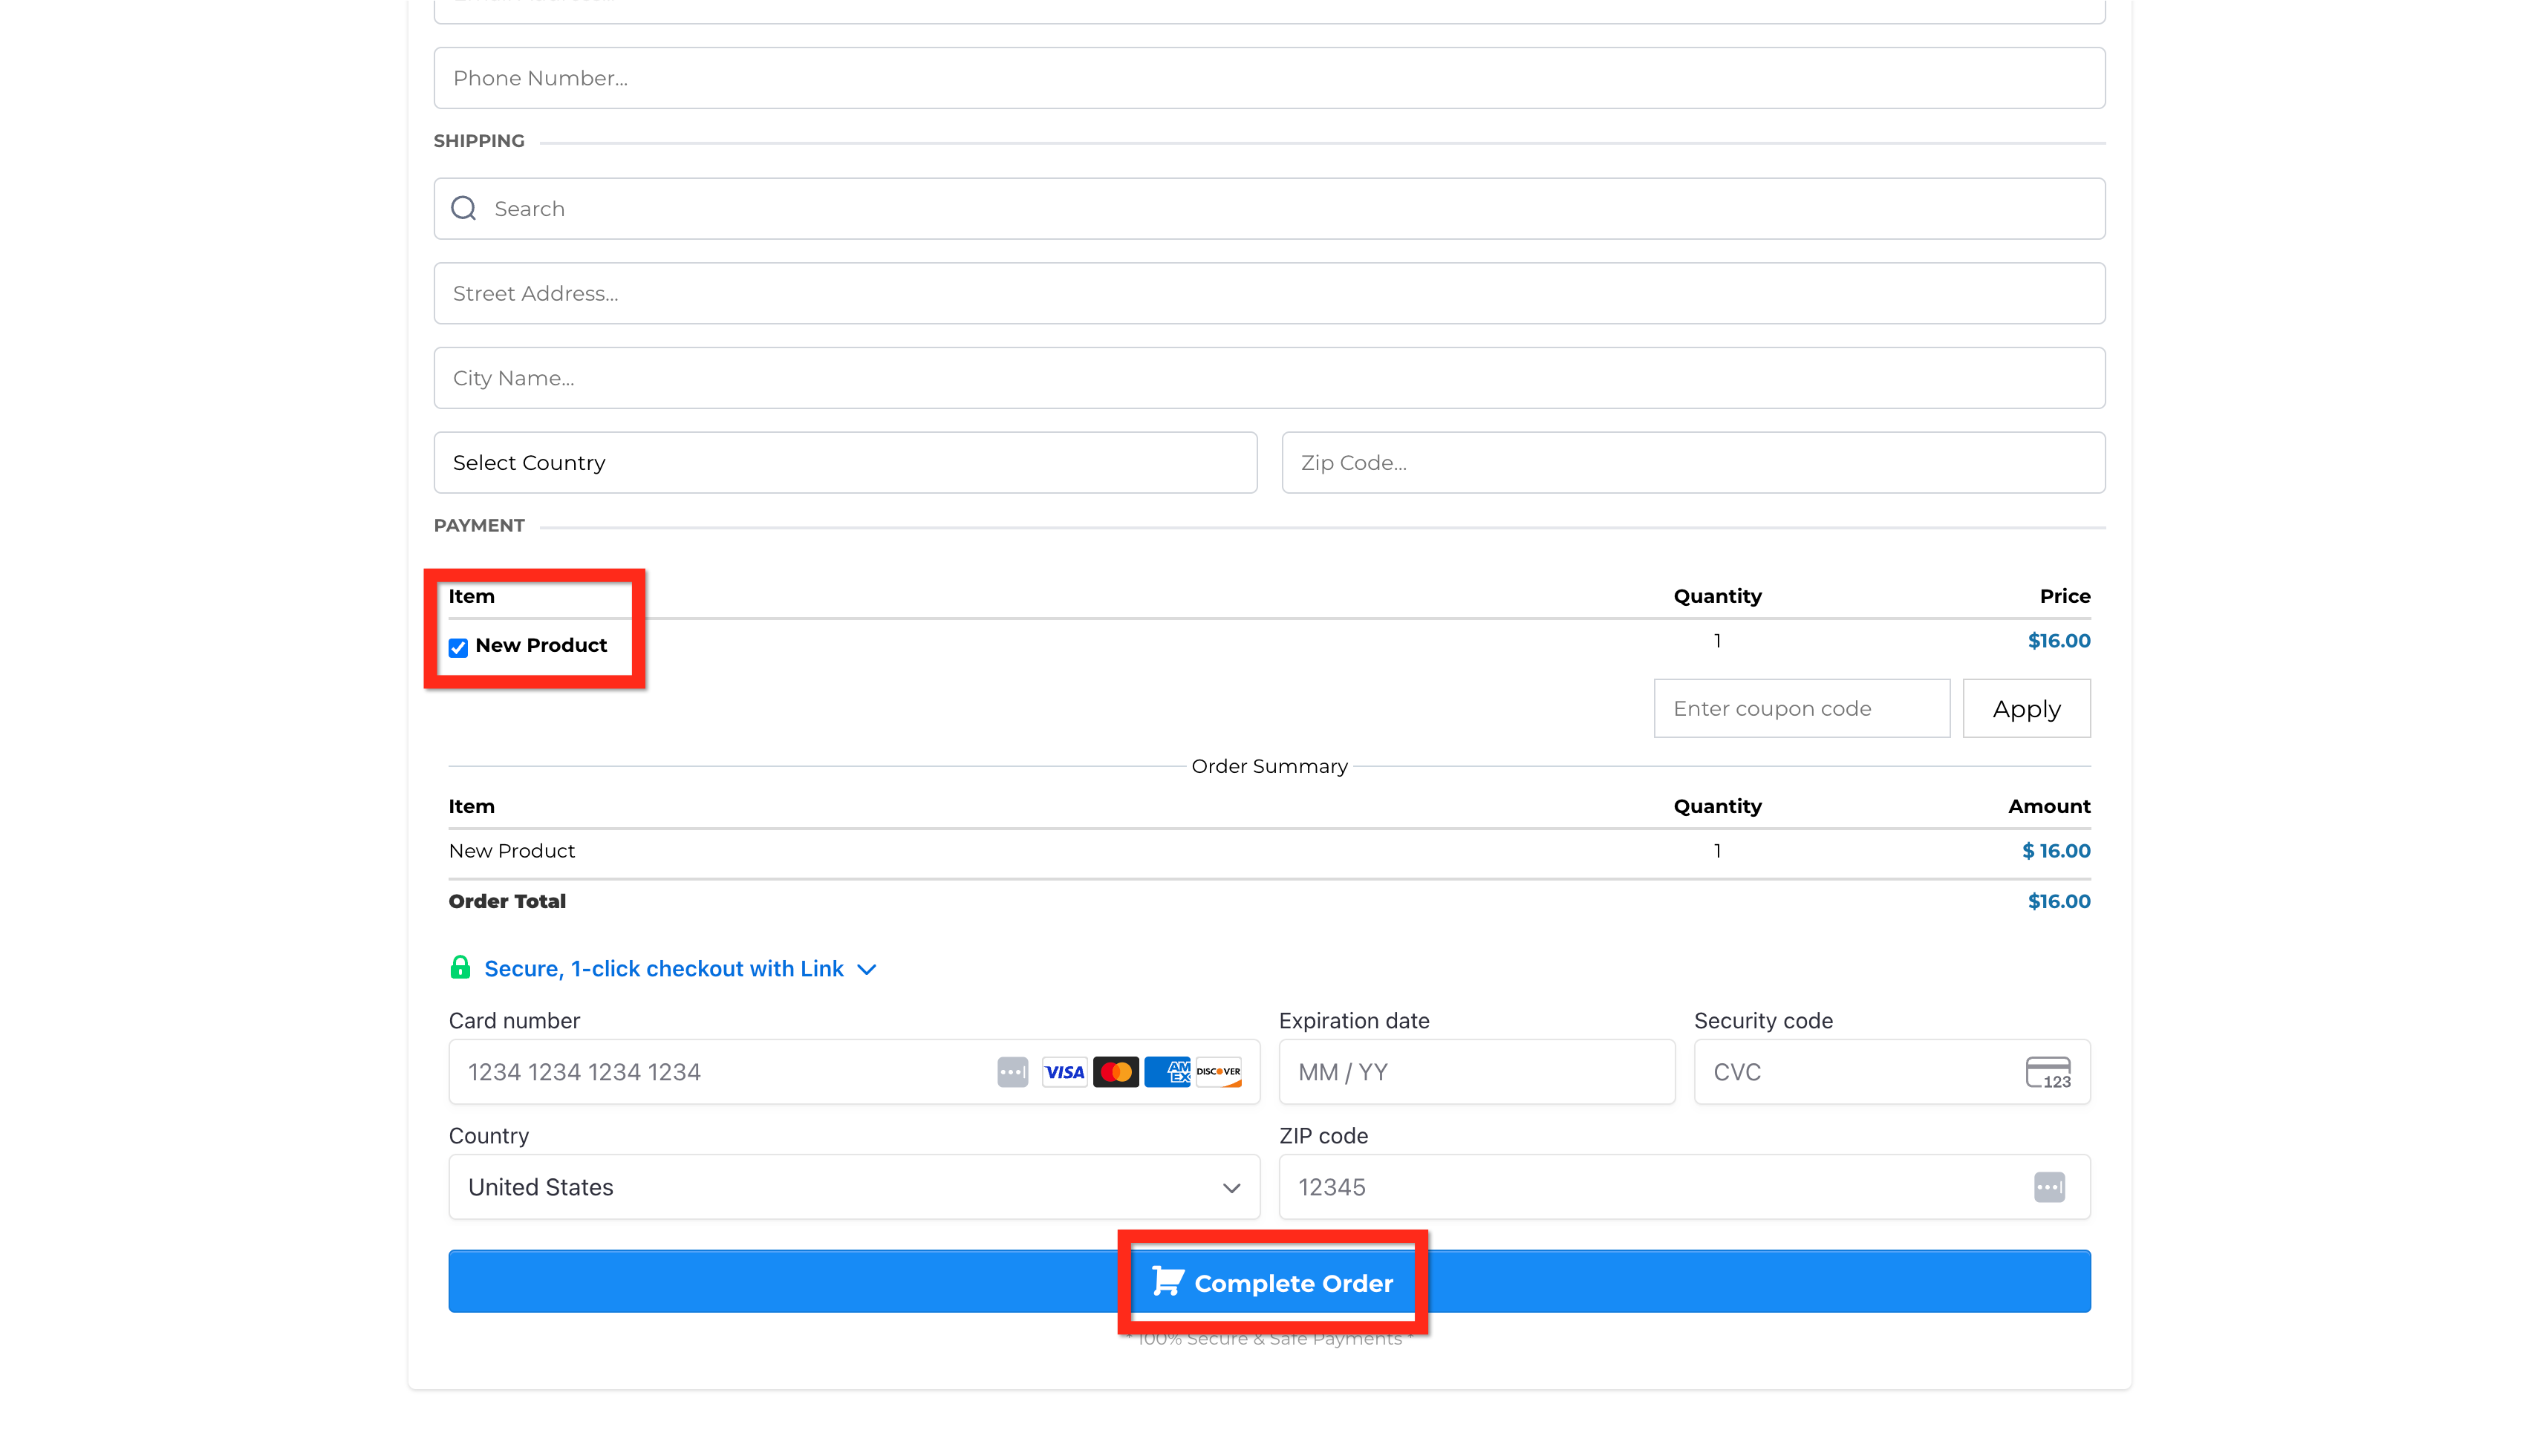
Inside the row, add a one-step or two-step order form.
Customize the order form, then click Save and Publish.
Make sure the product itself is also added to the same page as the order form.
Test the checkout flow yourself to confirm the correct product, price, and payment options appear before you share the funnel with patients.
A finished funnel order form looks something like this:
Faster, cheaper payouts: Whichever checkout you use, consider routing payments through AX Pay, Aesthetix CRM's own payment processor. It offers better rates than Stripe and connects to the same Payments tools you're already using for products, orders, and refunds. See the AX Pay help article for setup details.
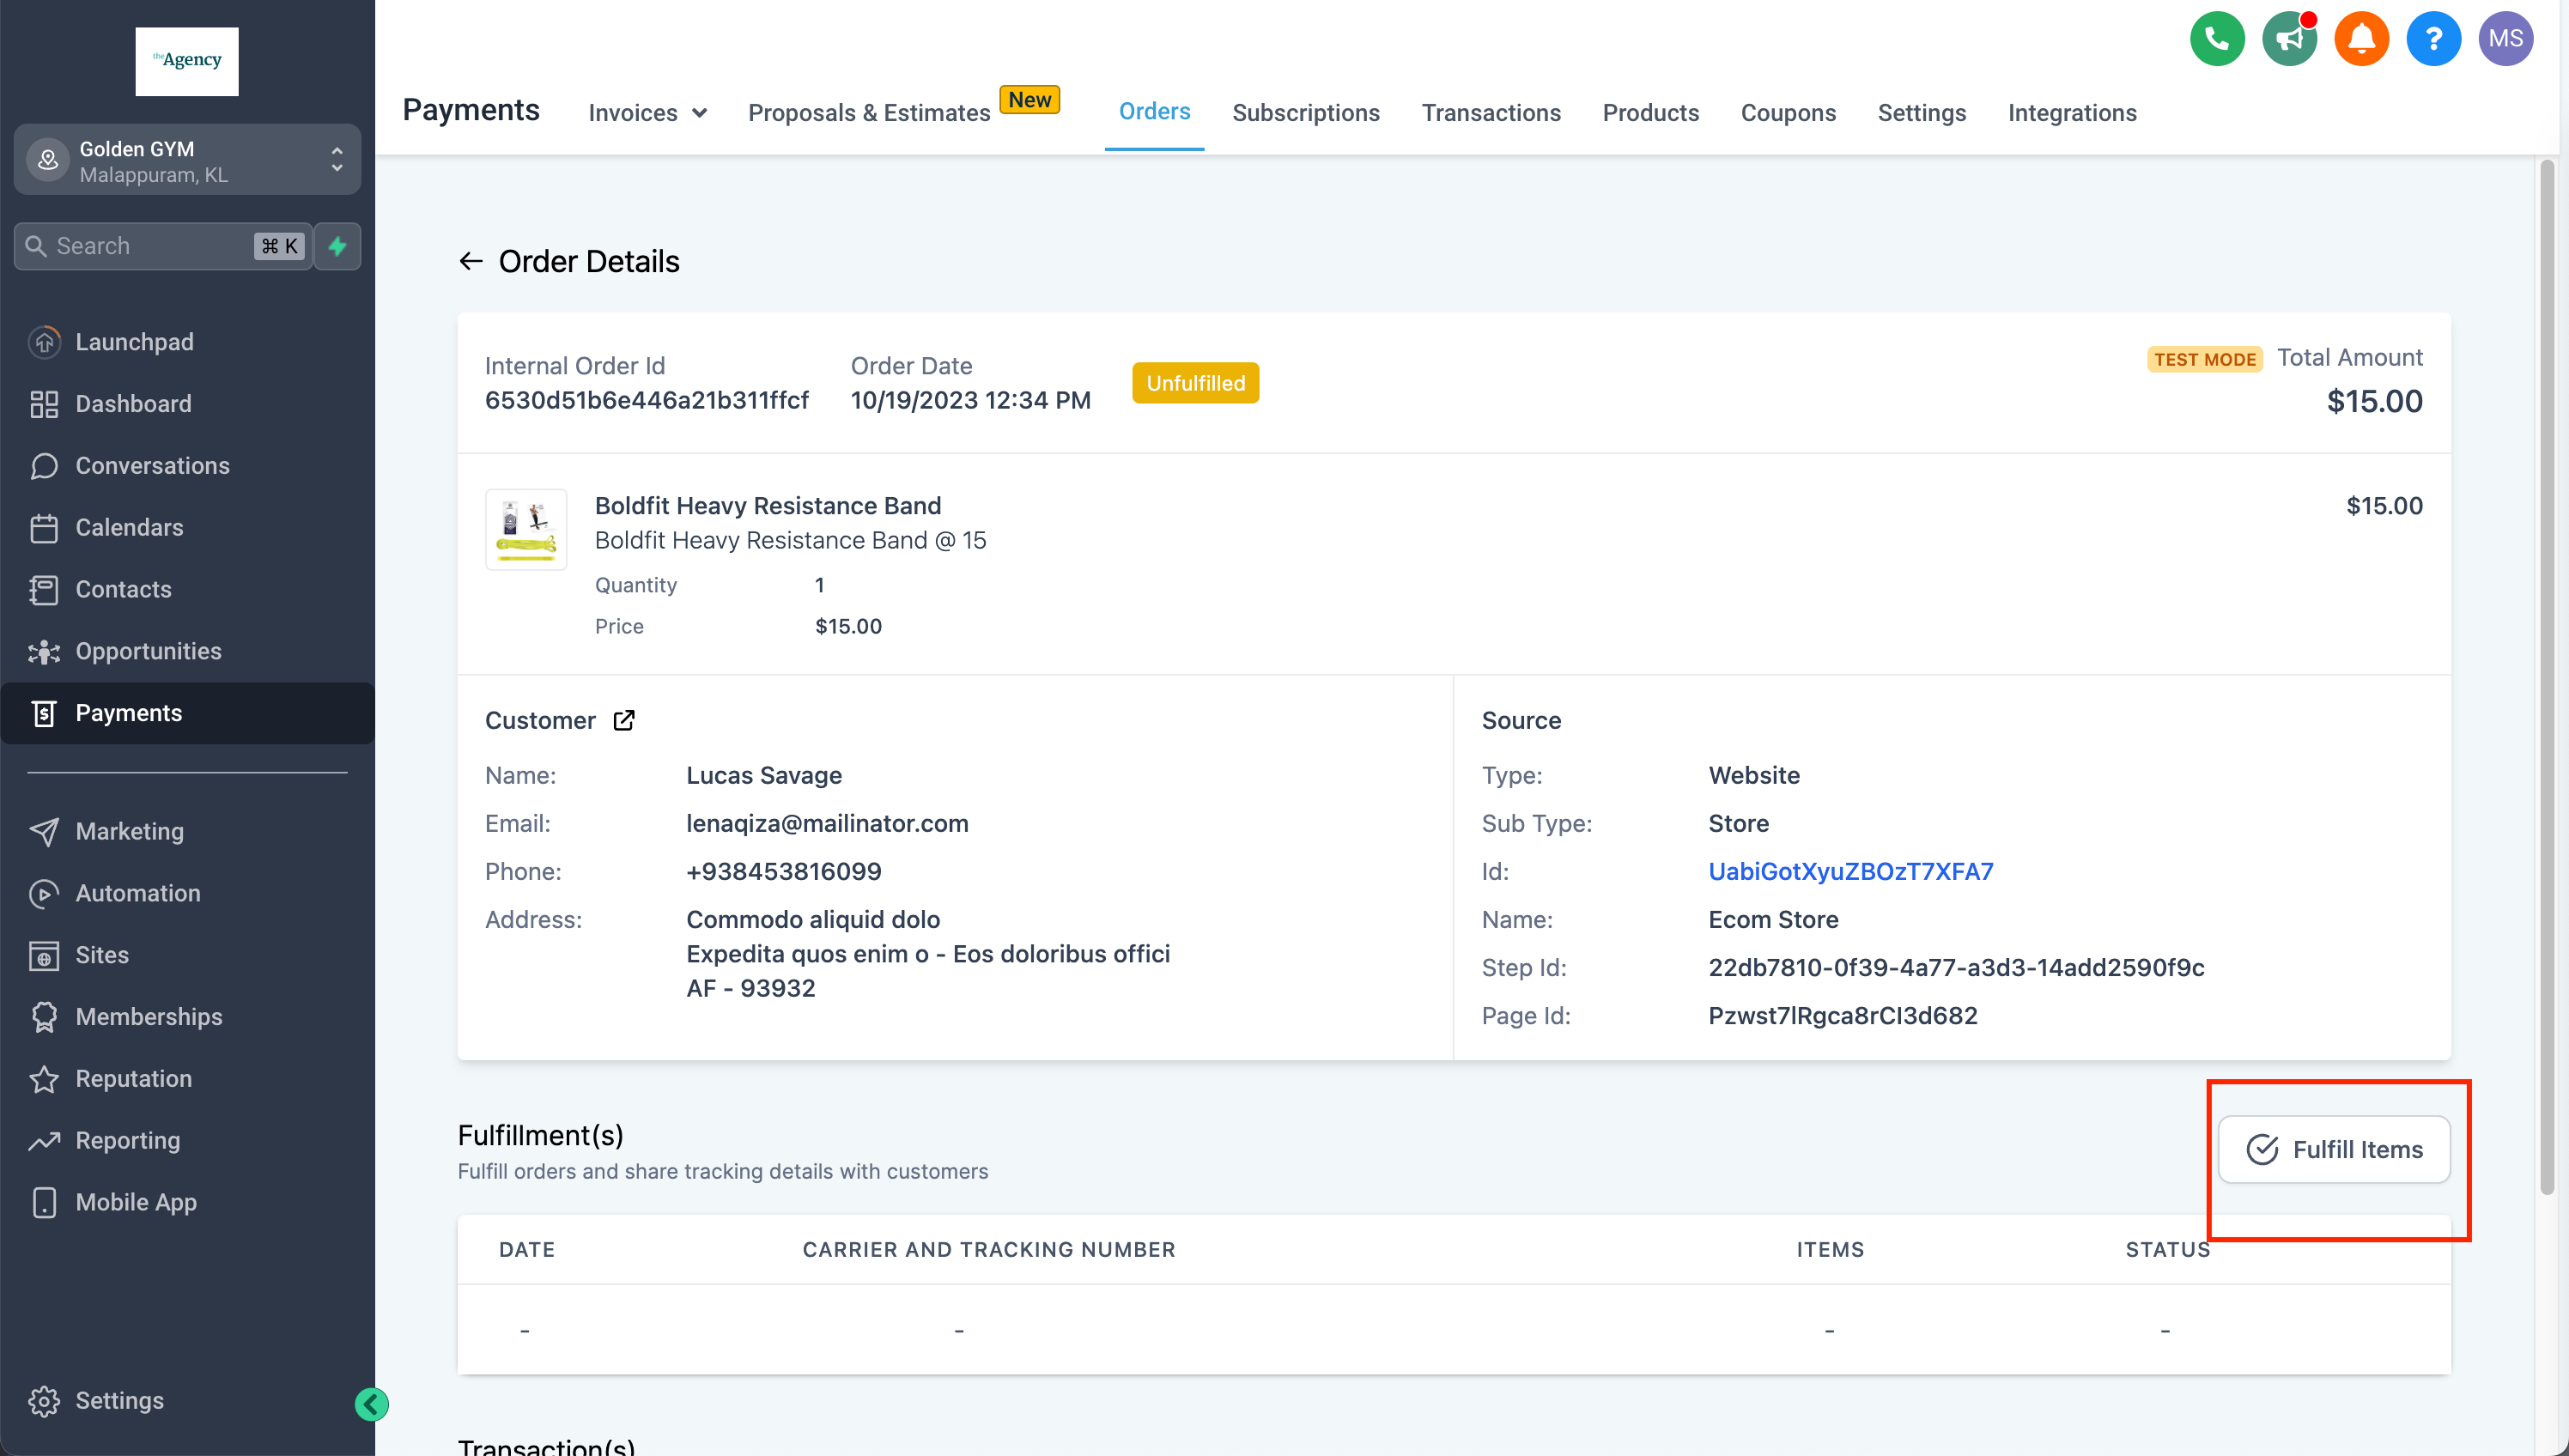
Every order placed through the Store, whether from the main storefront or a funnel checkout, along with its payment, is tracked under Payments > Orders and Payments > Transactions. You can also process refunds from either screen.
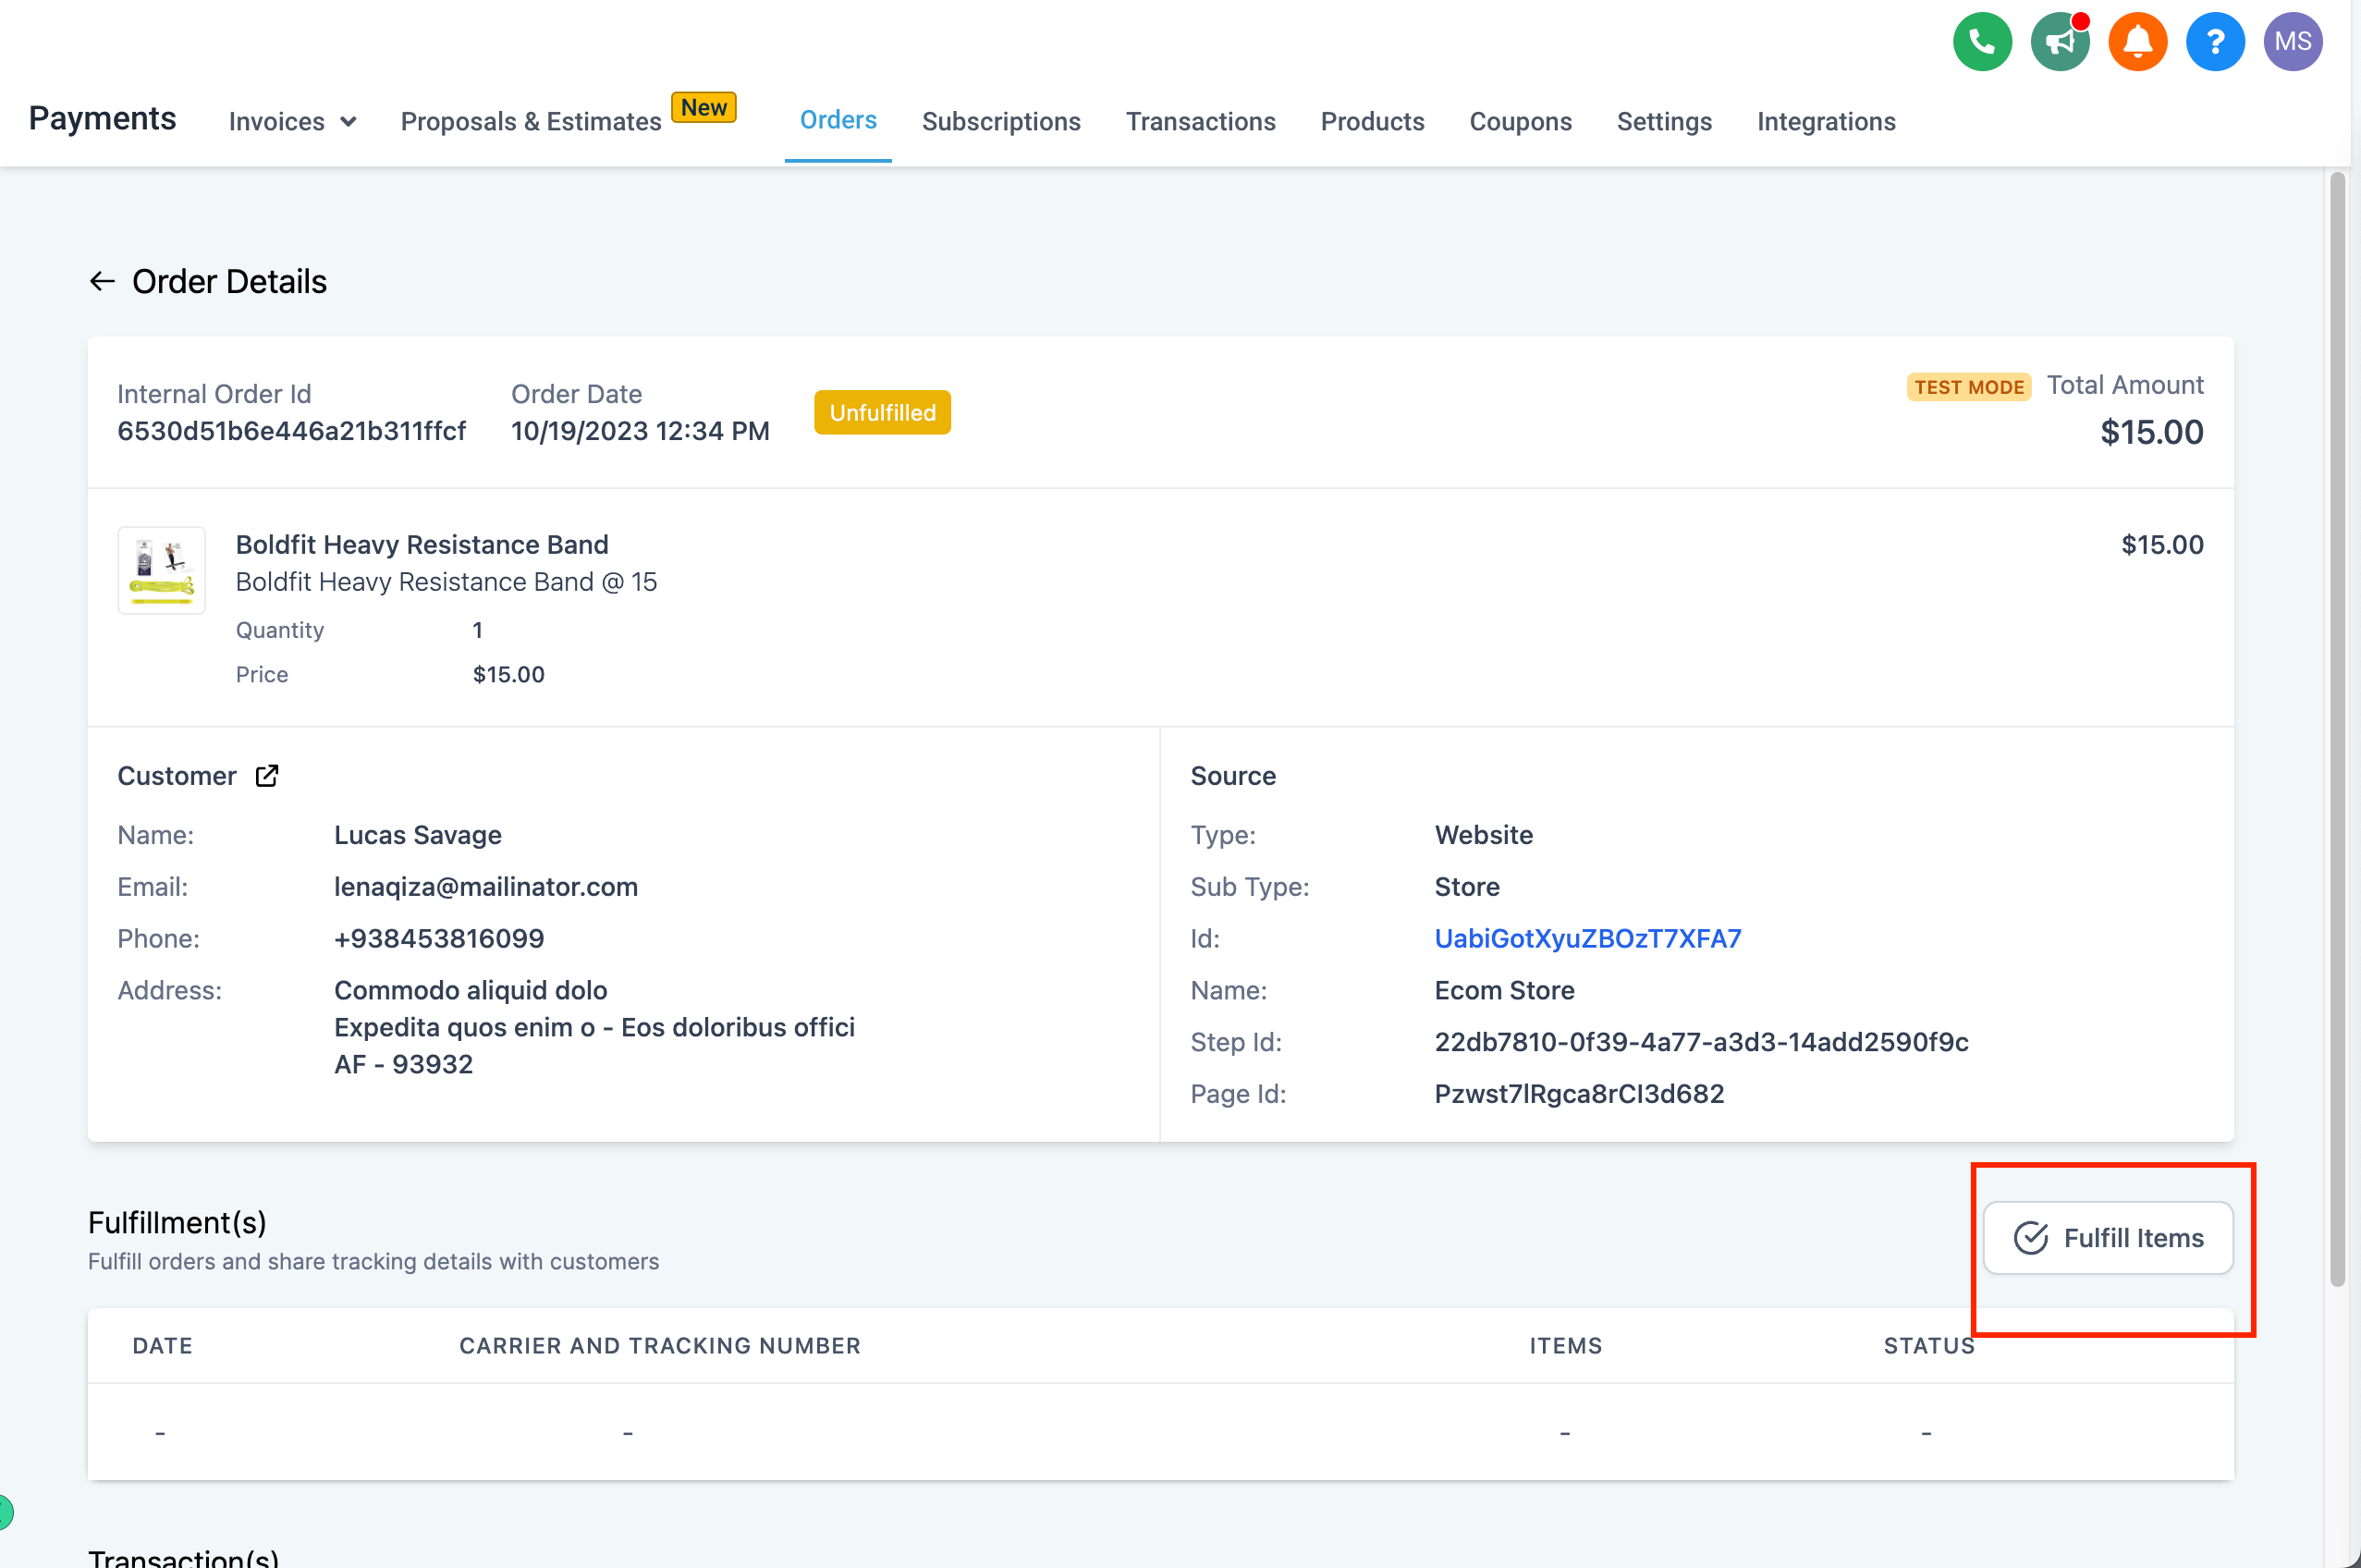
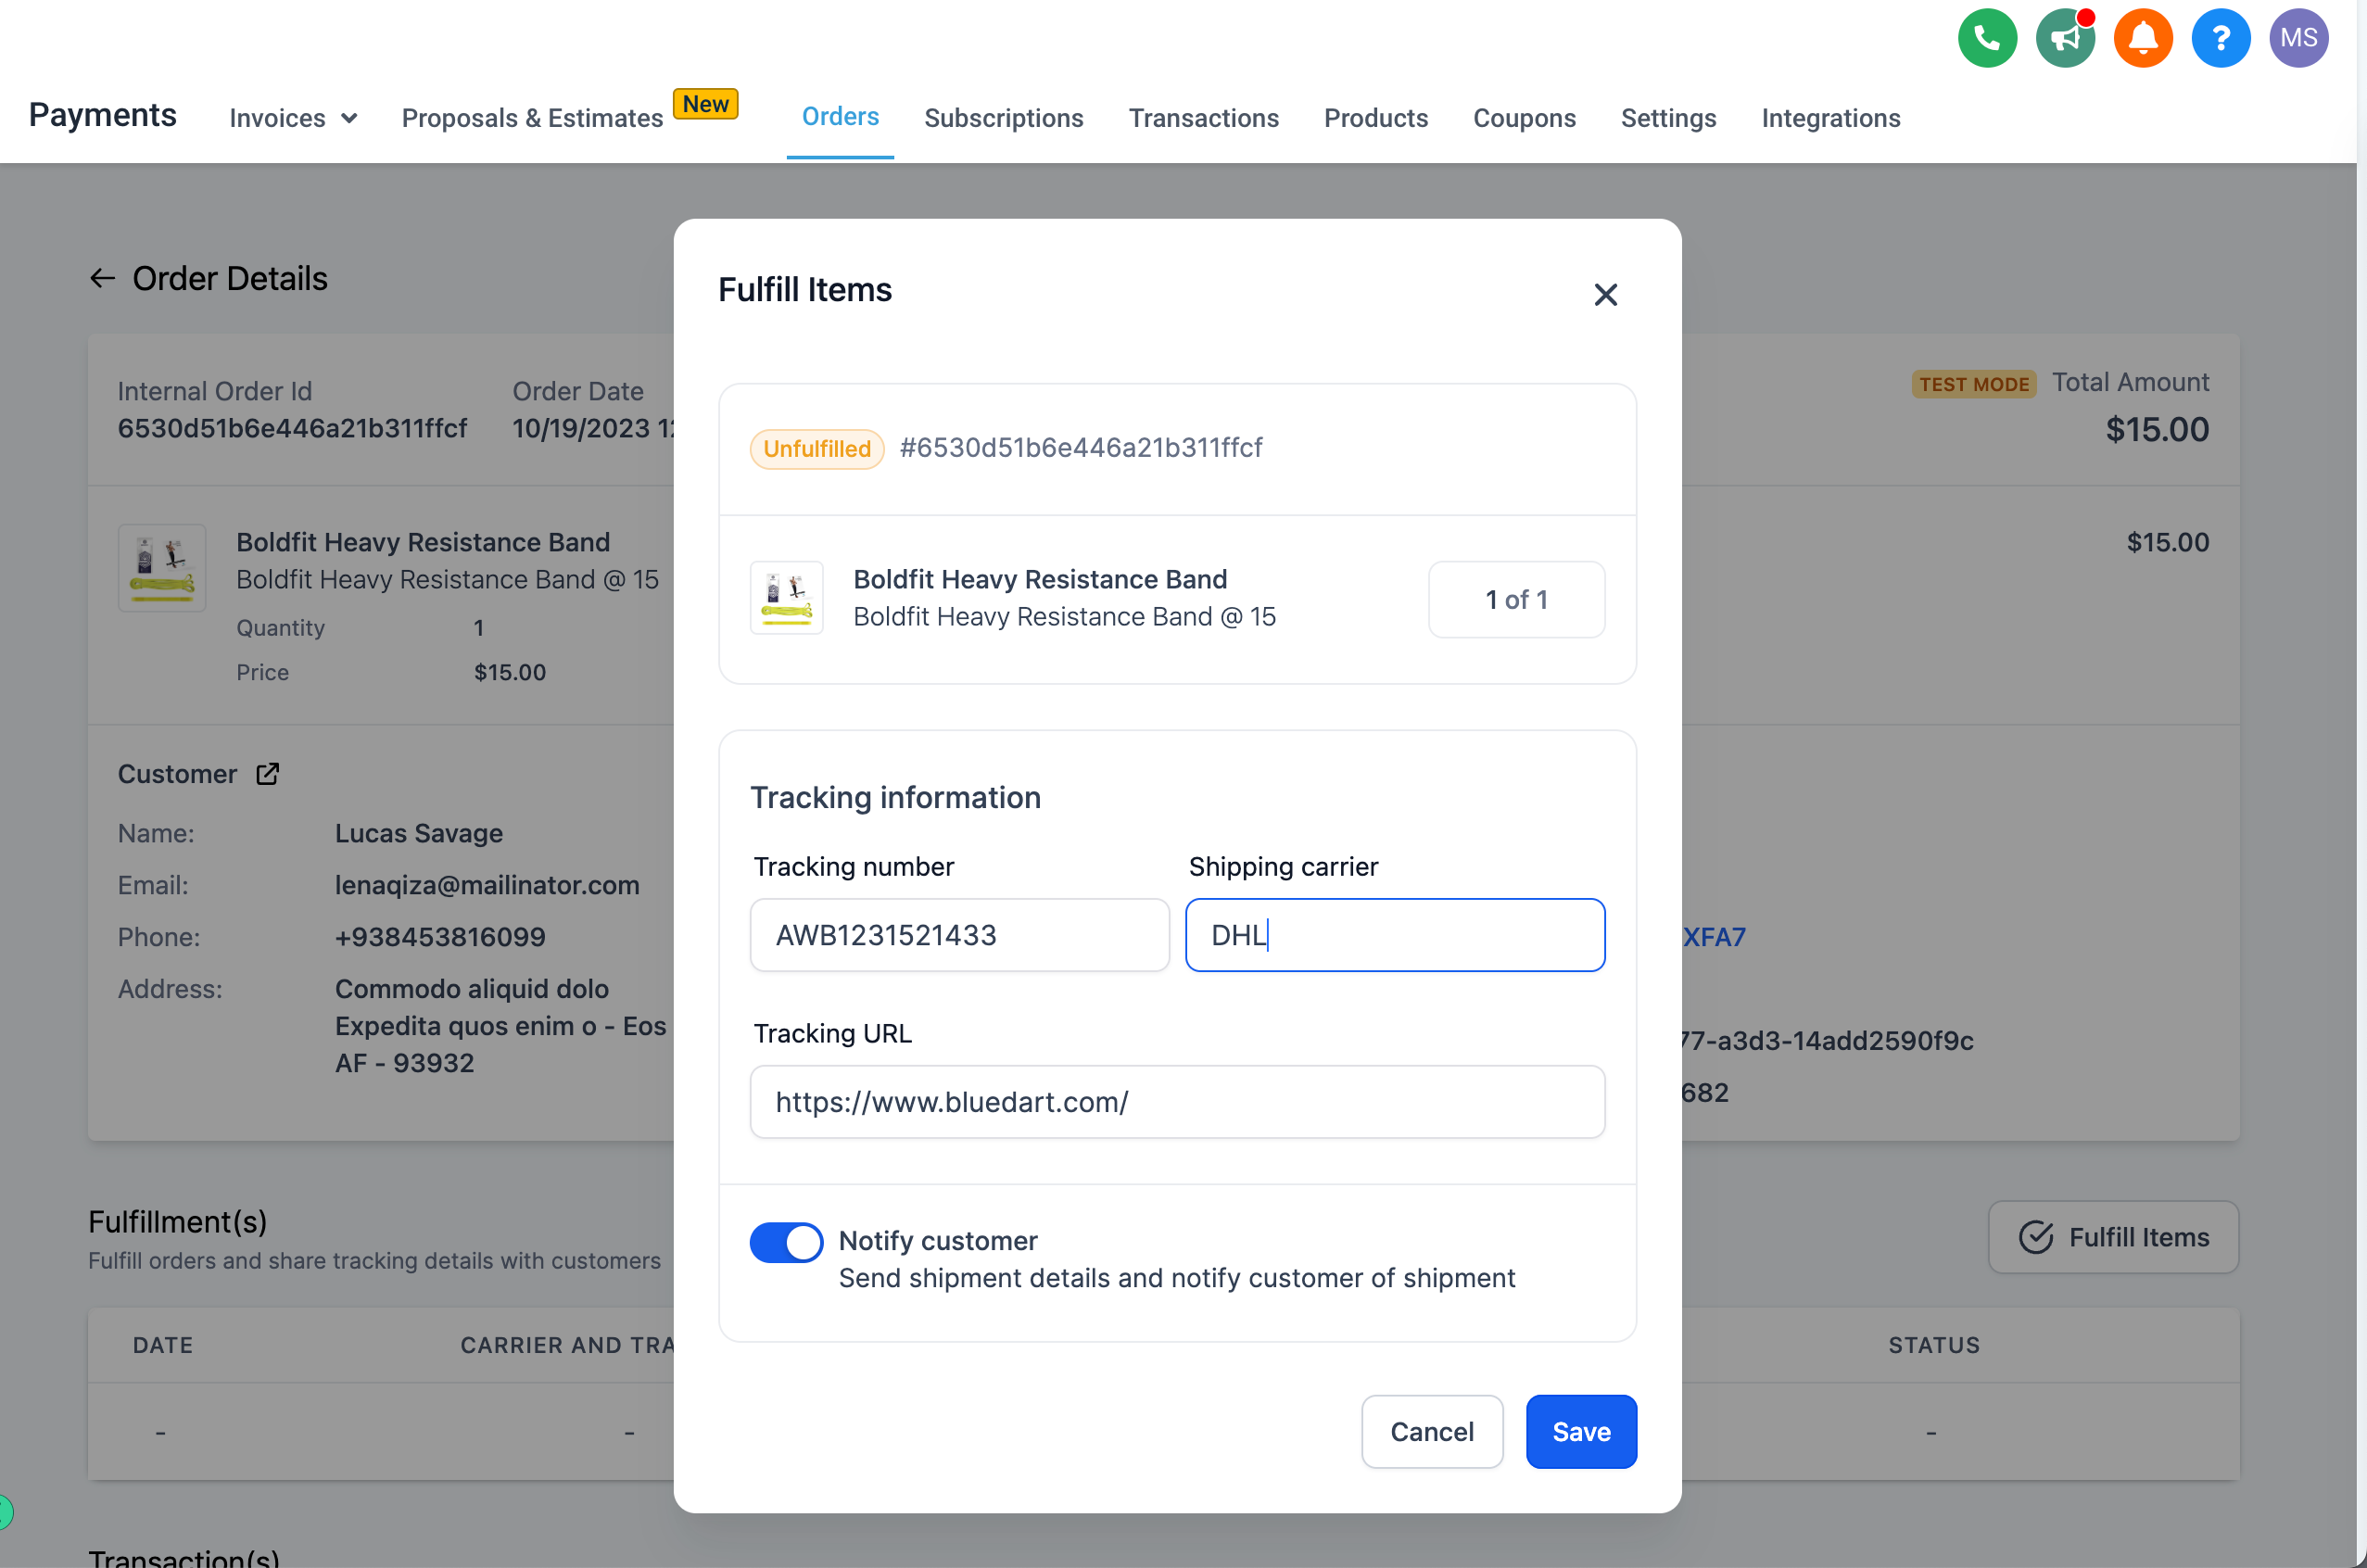
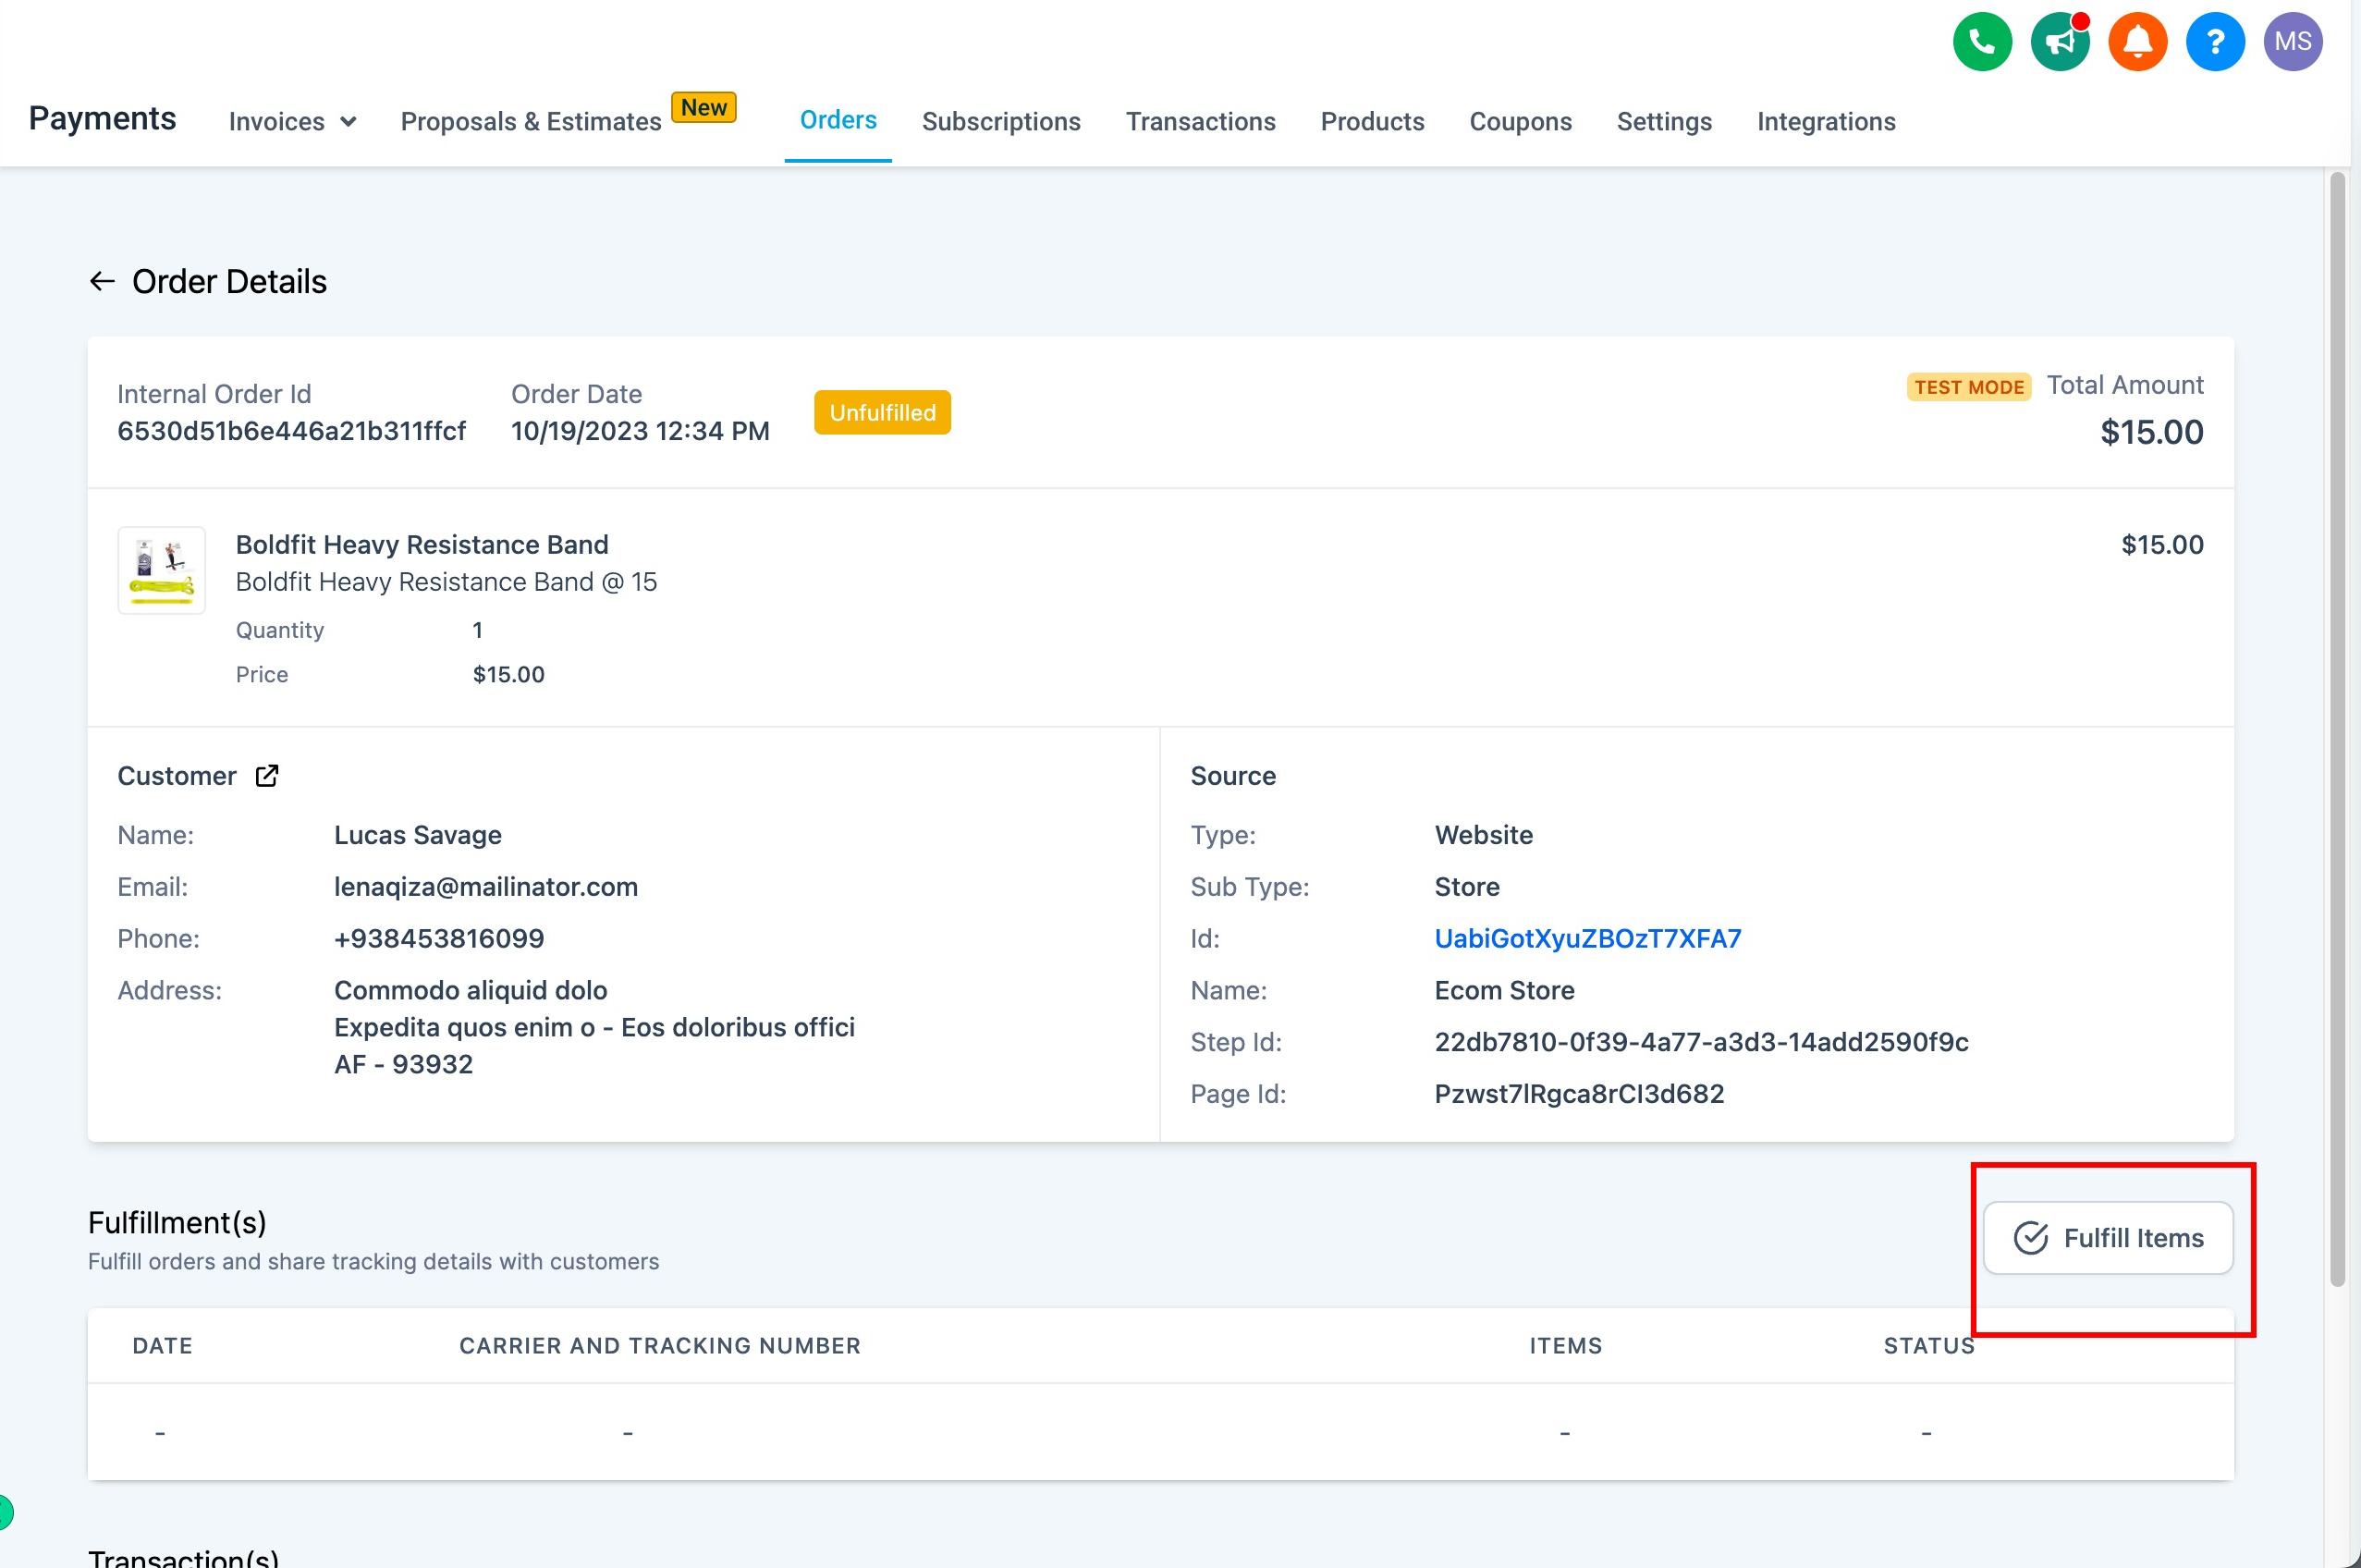
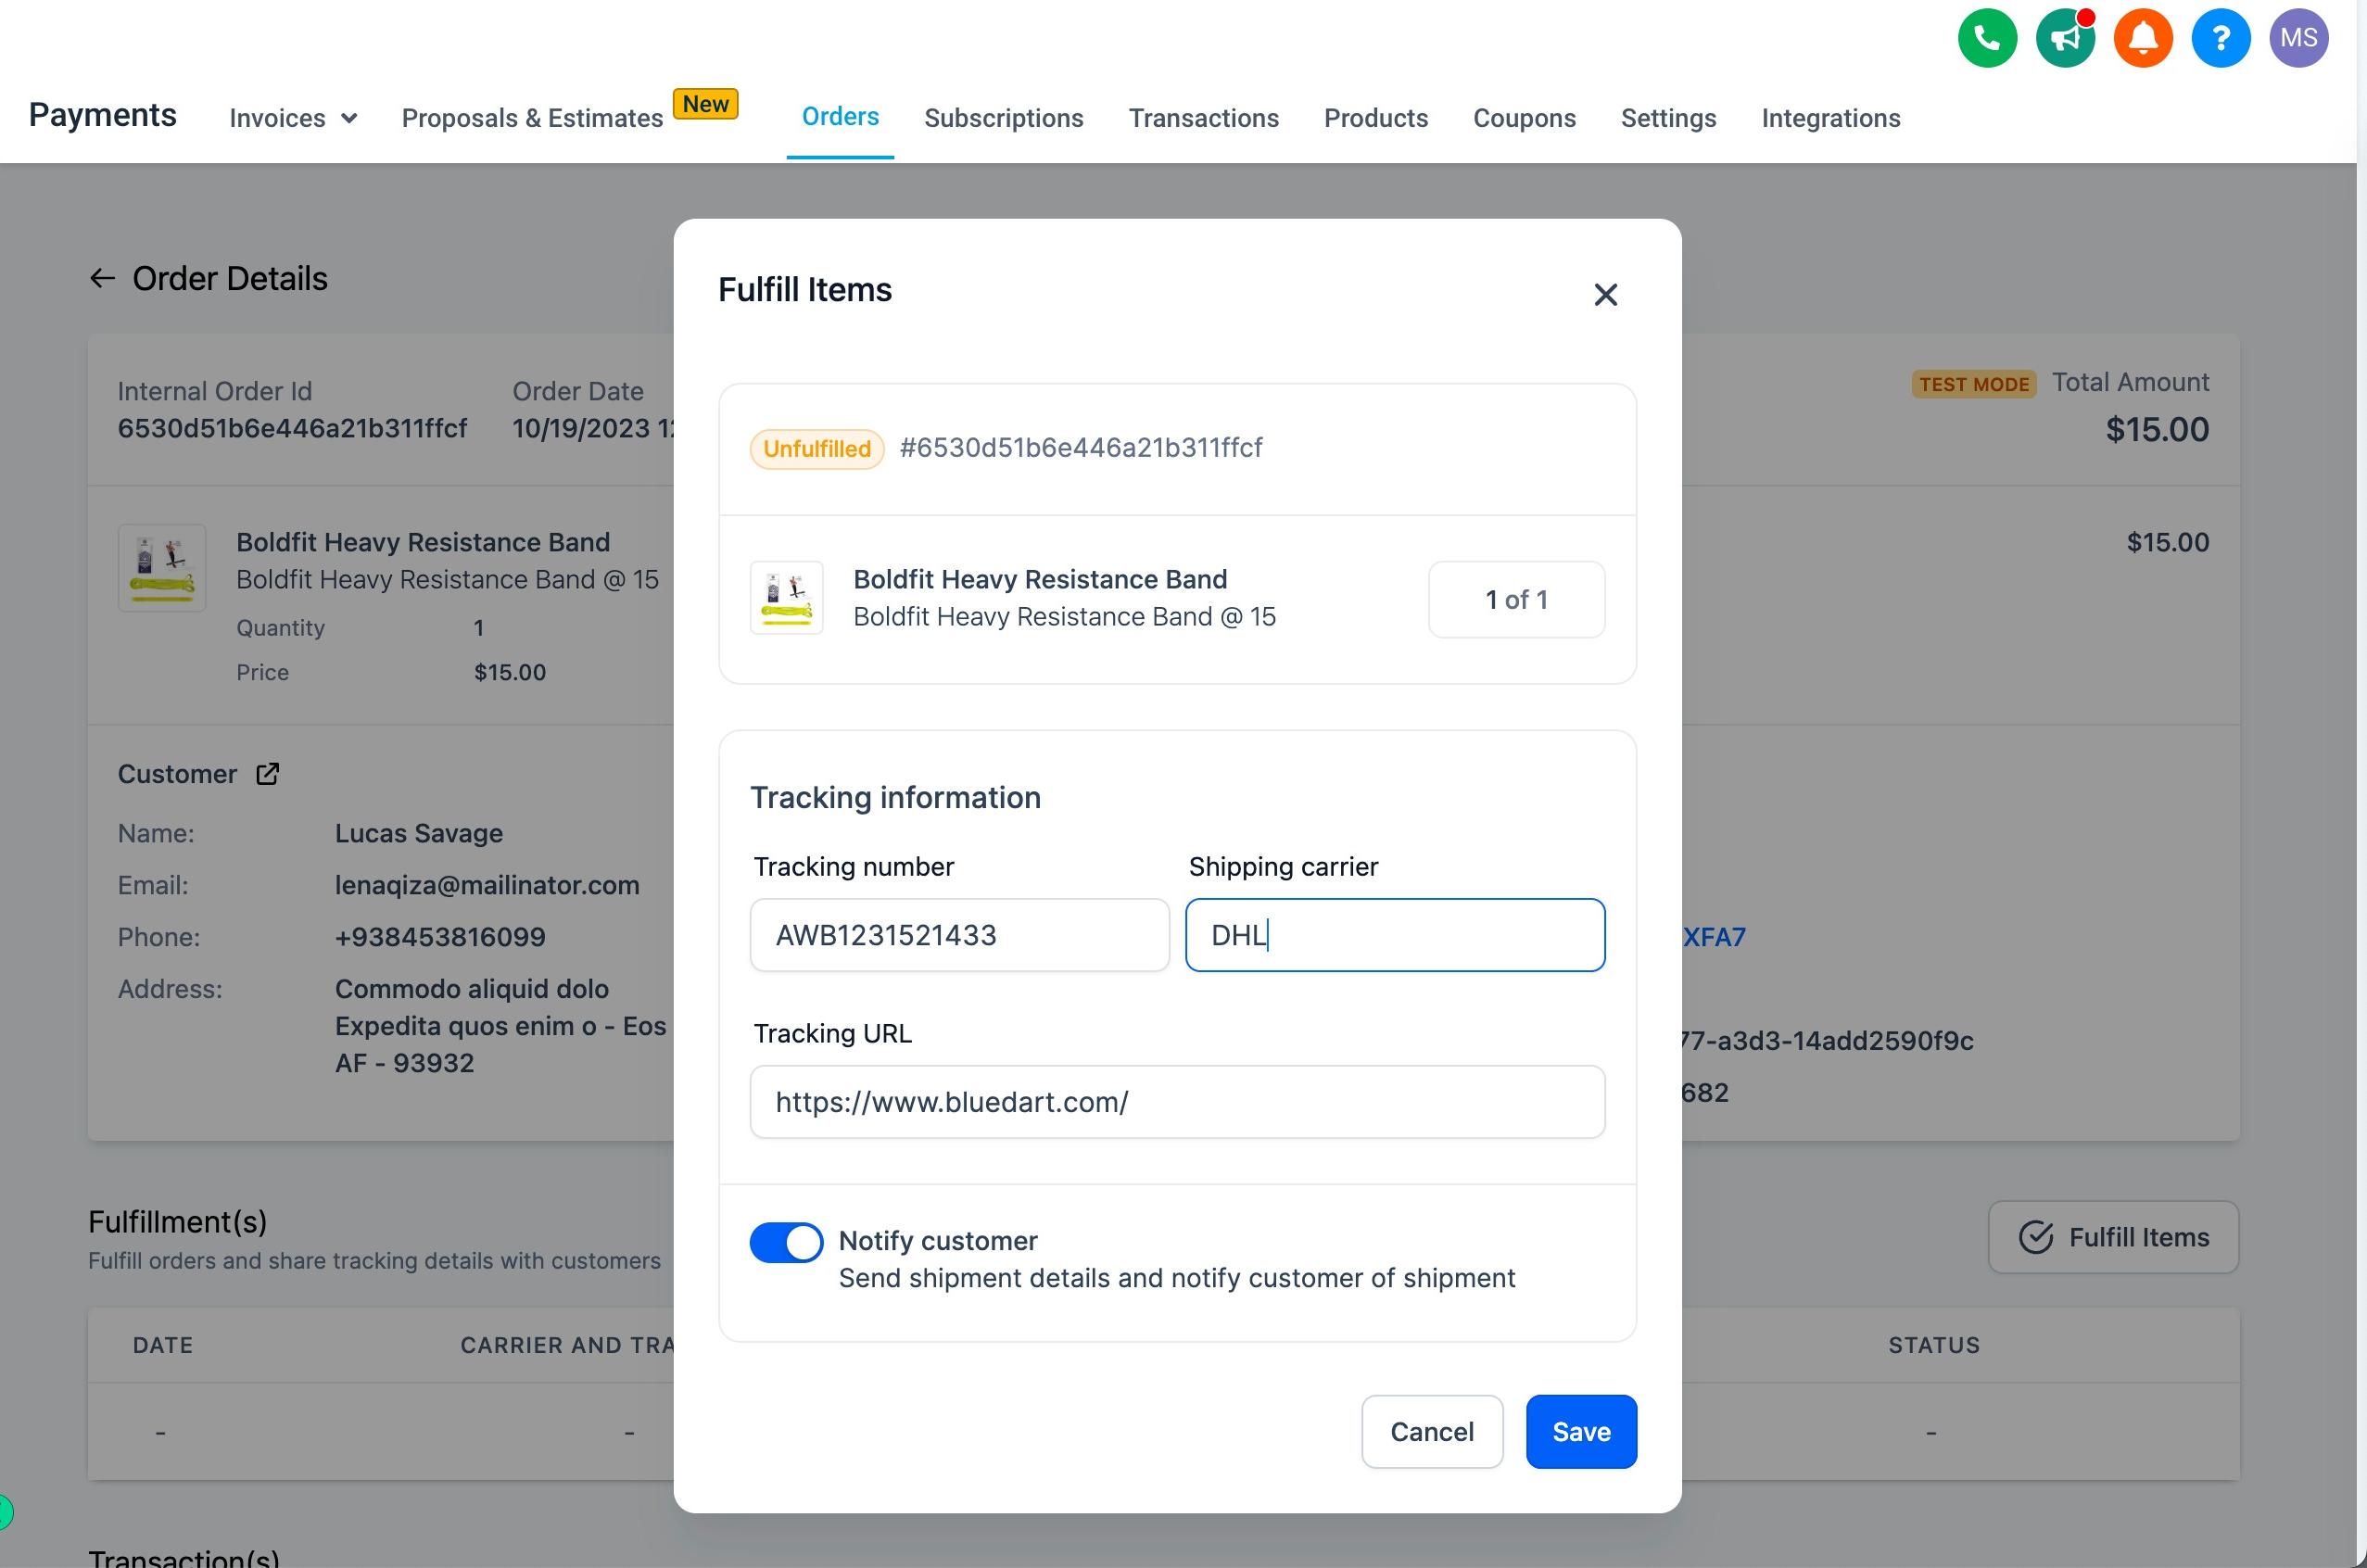
By default, a new order sits in an unfulfilled state. To mark it fulfilled, attach a tracking number, carrier, and tracking URL. Once fulfilled, the order details show the fulfillment date, tracking information, and the number of items shipped, so patients can follow their order without contacting the front desk.
Since orders can include a patient's name, shipping address, and purchase history, treat order data with the same care you apply to other patient records. Avoid putting clinical or diagnosis-related detail into product names or order notes that a patient might see on a receipt or packing slip.
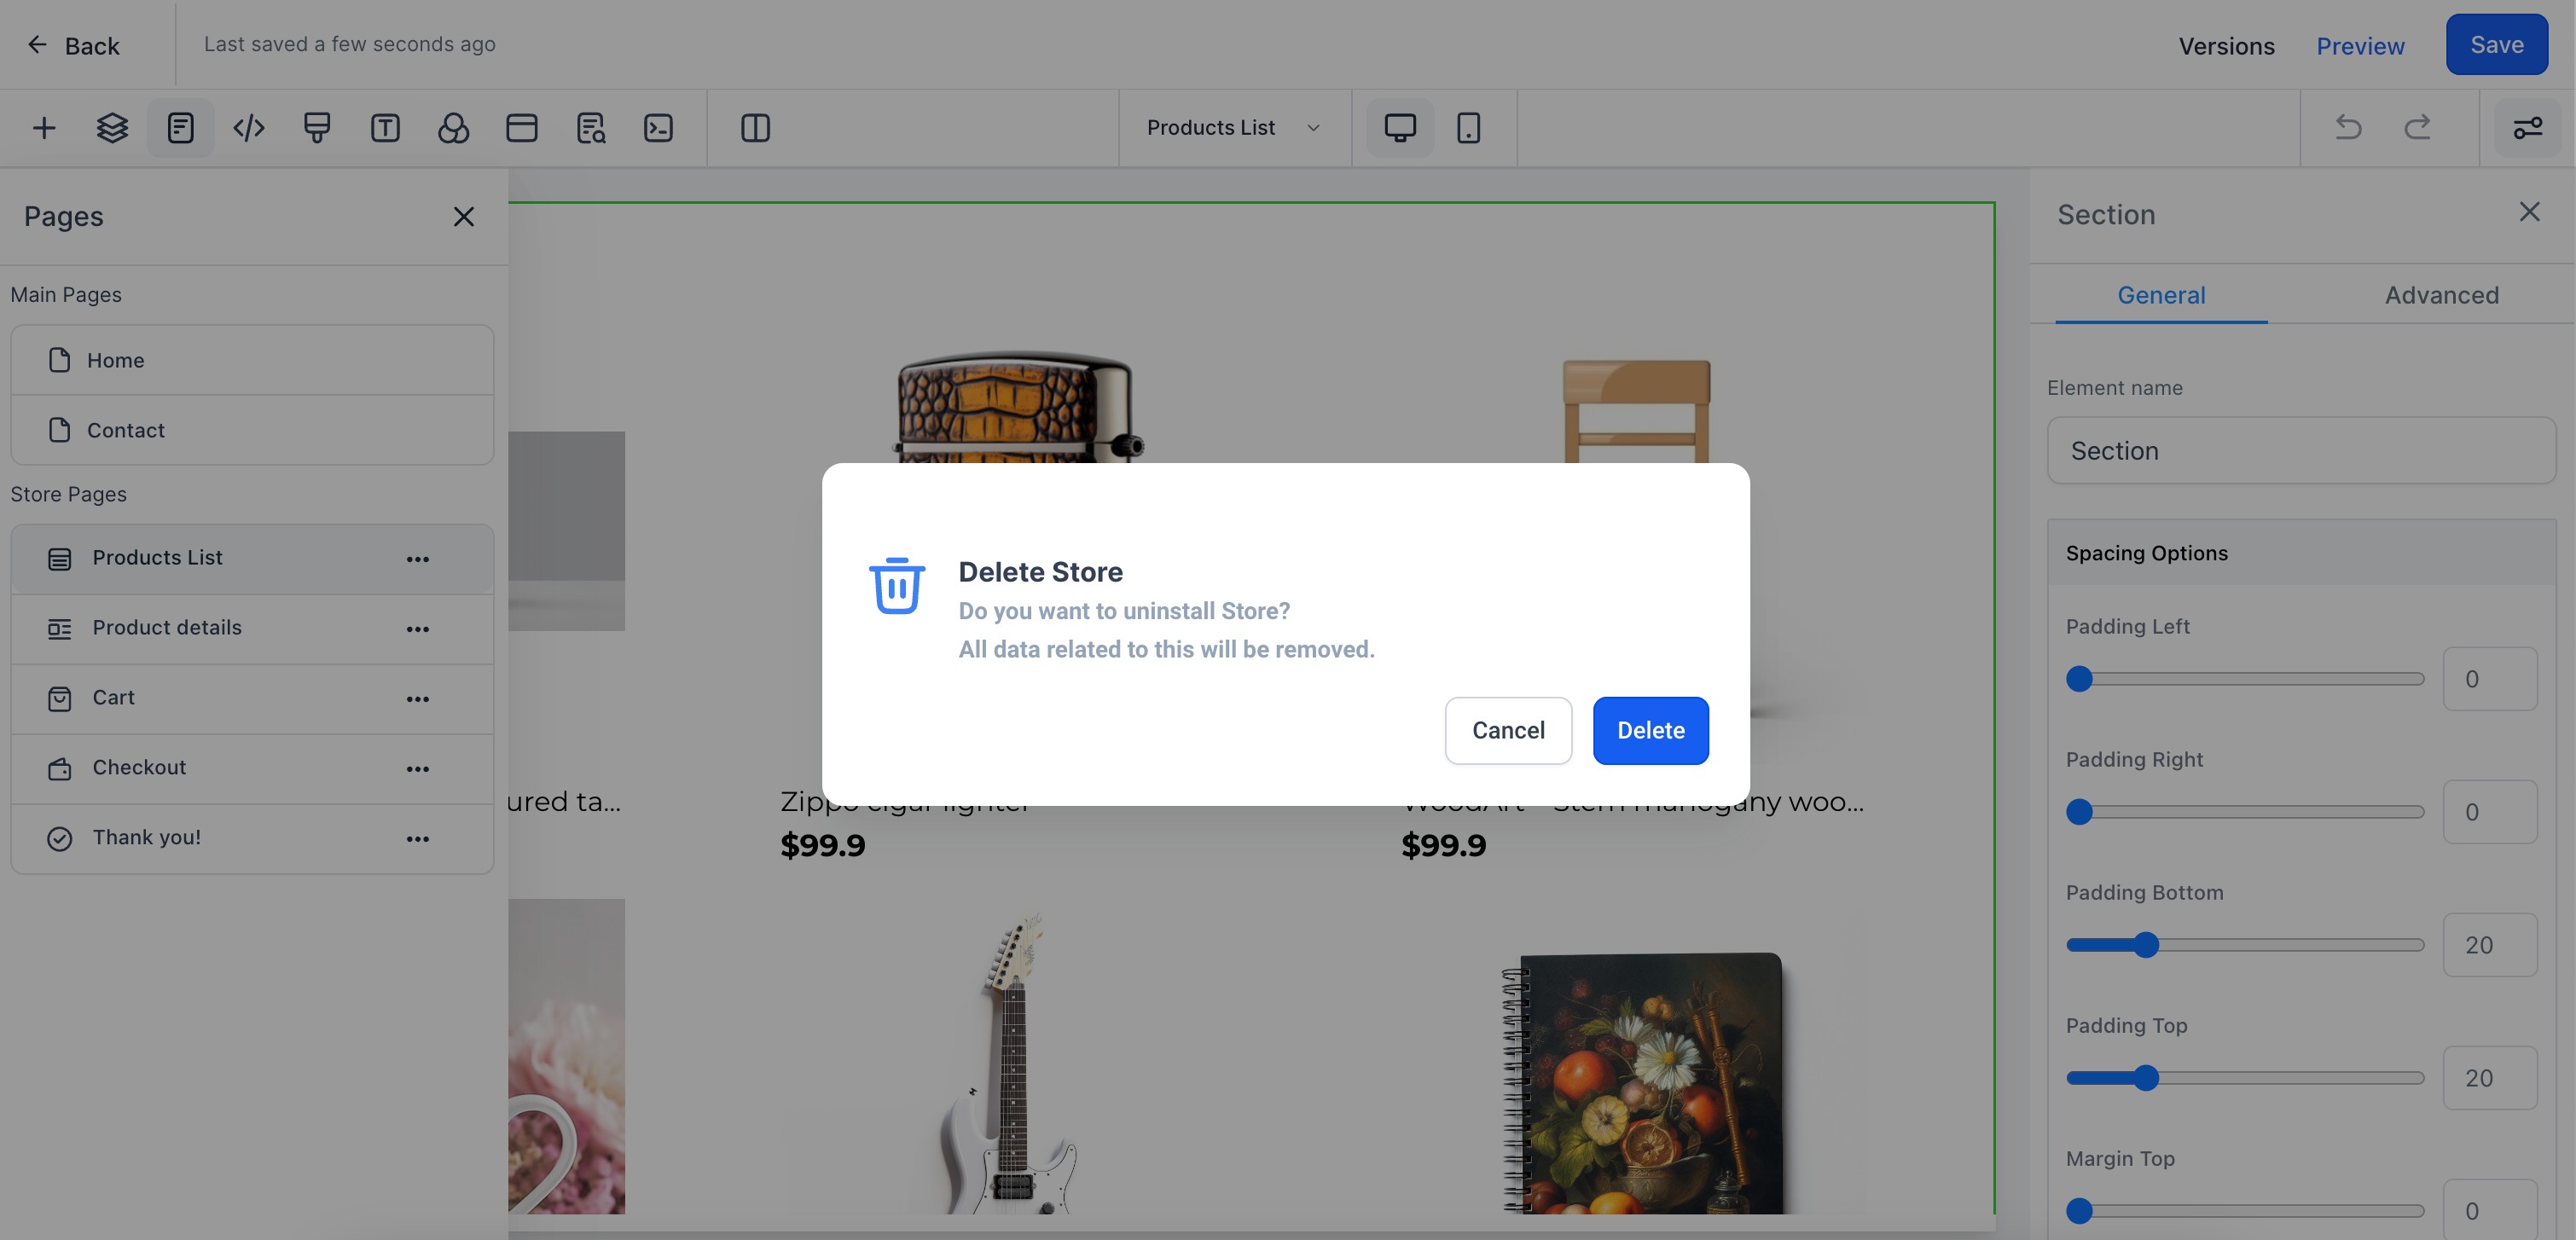
Deleting a store only removes the pages that belong to that store (Products List, Product Details, Cart, Checkout, and Thank You). Your other website pages, like Home or About, are left untouched.
You can delete a store from either the Stores list or from Store Settings; both work the same way.
To delete a store:
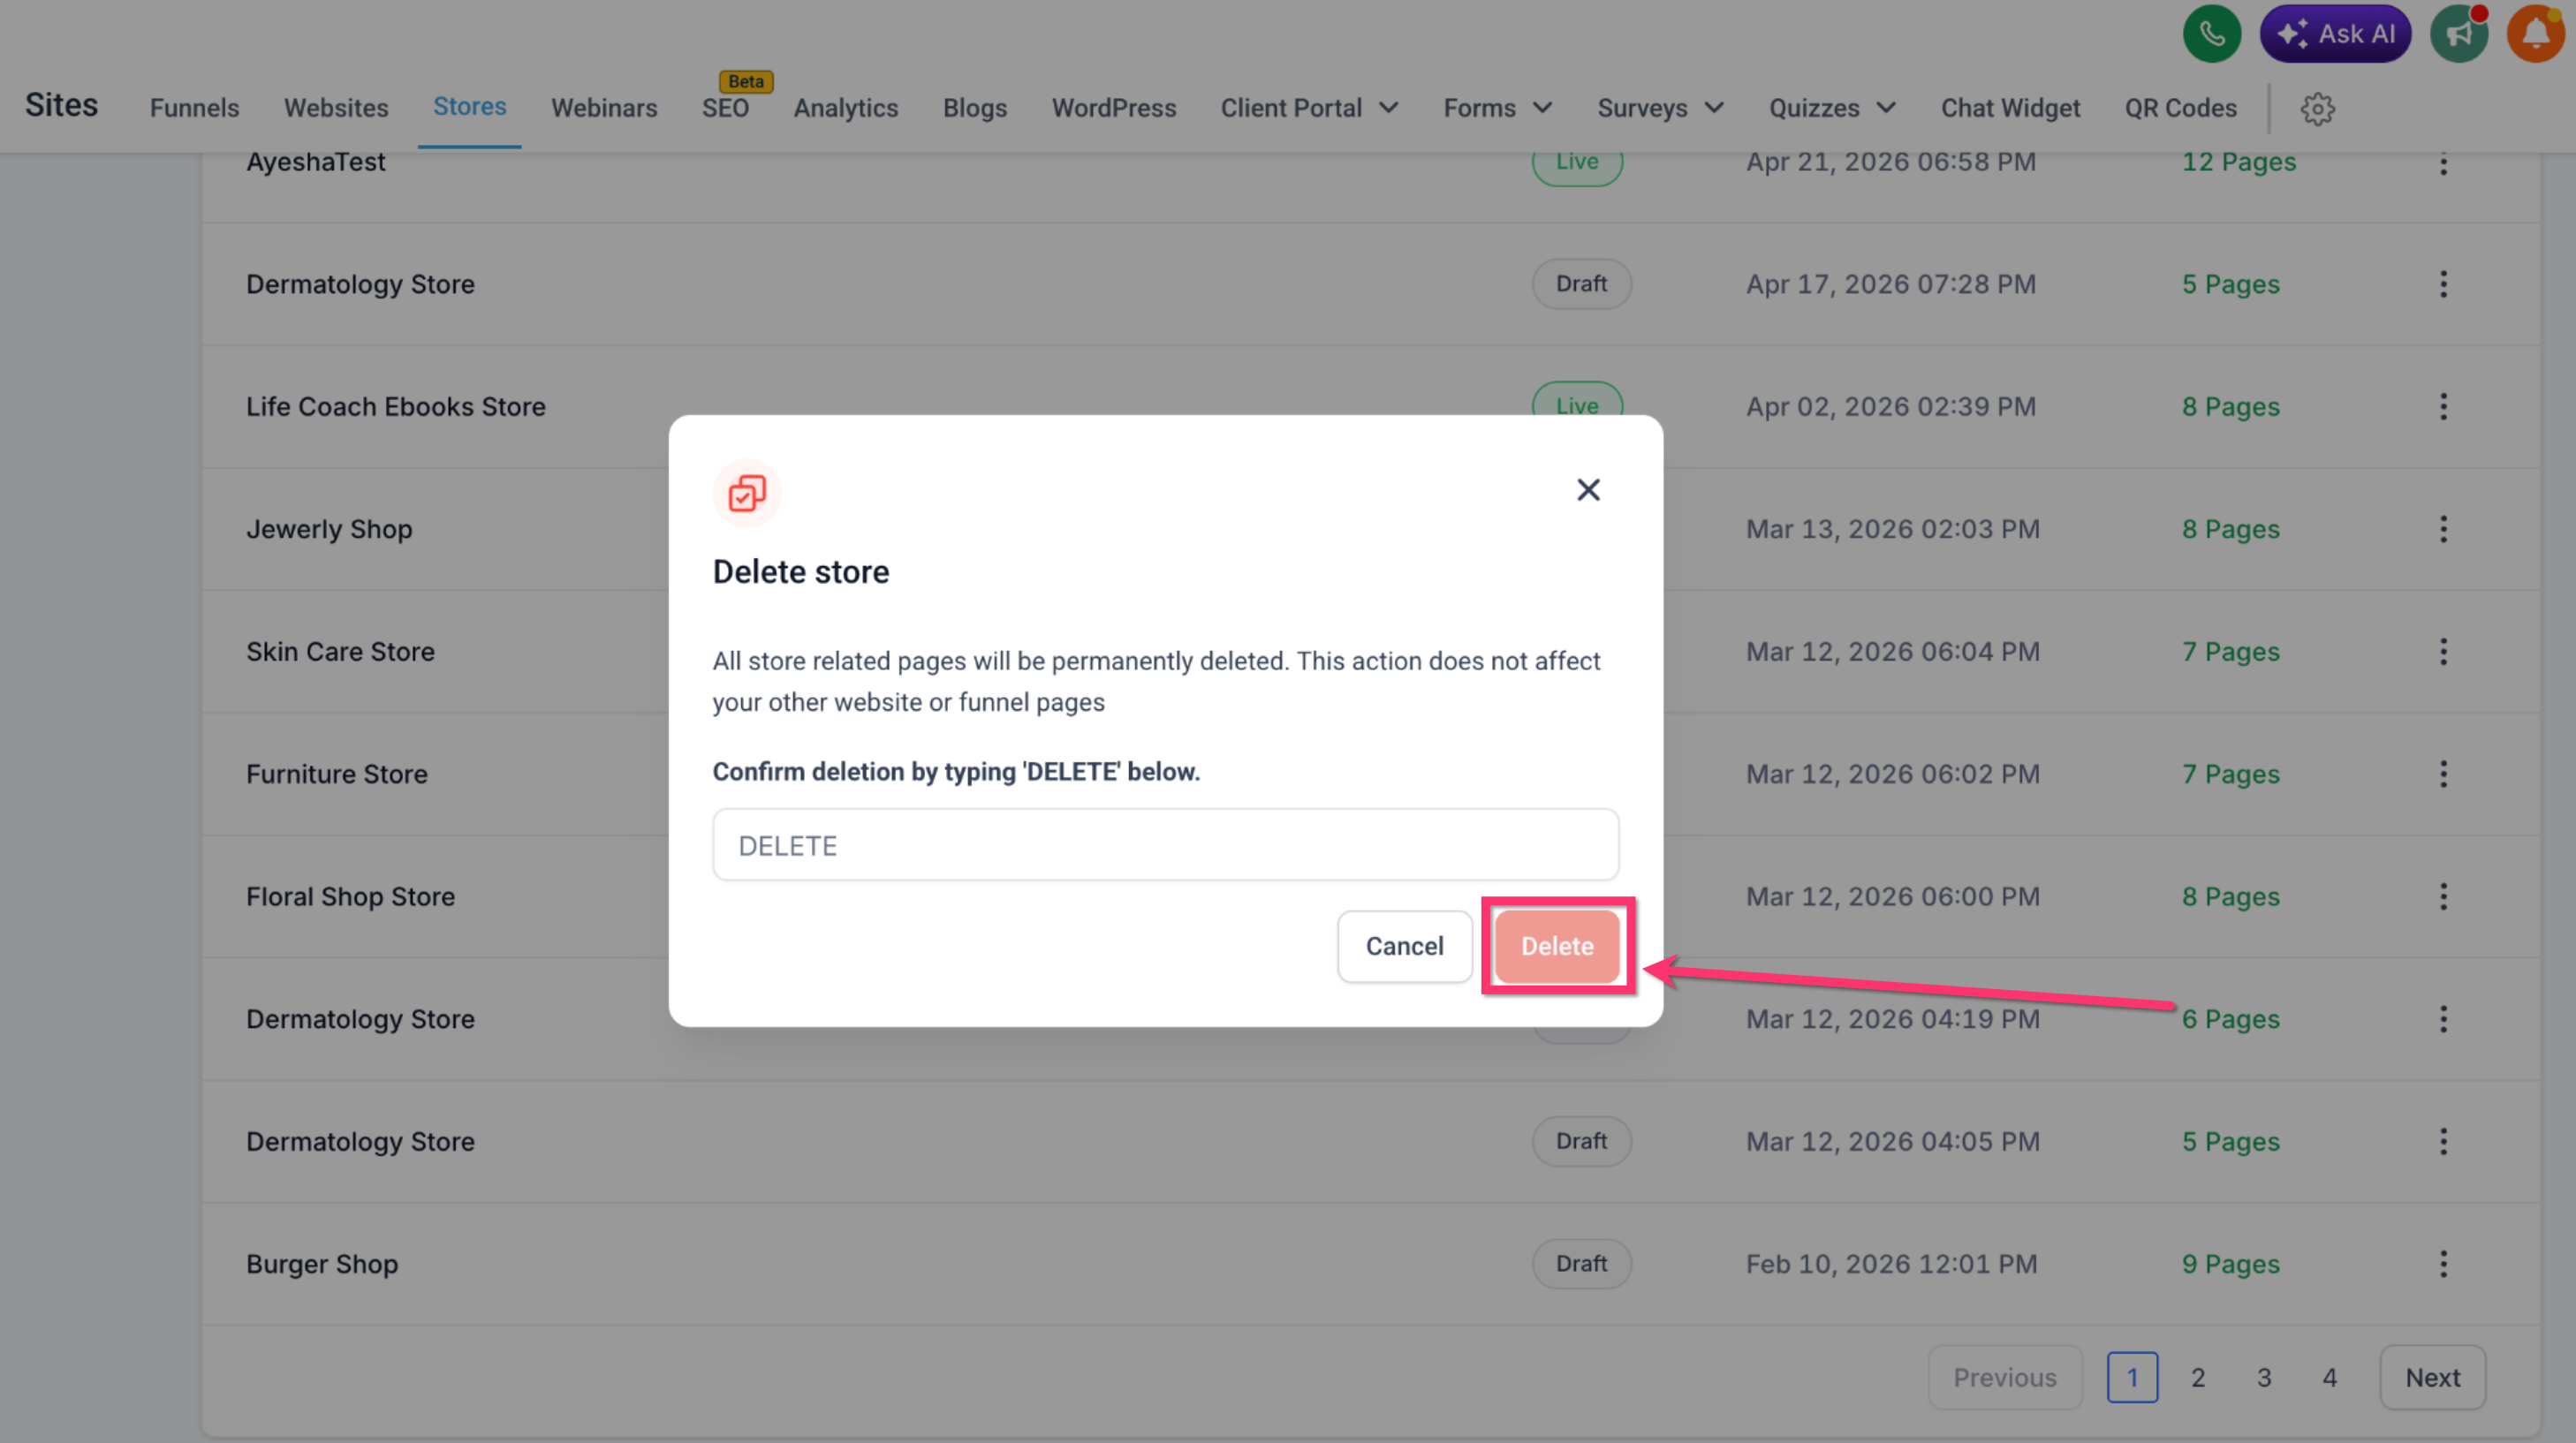
Go to Sites > Stores.
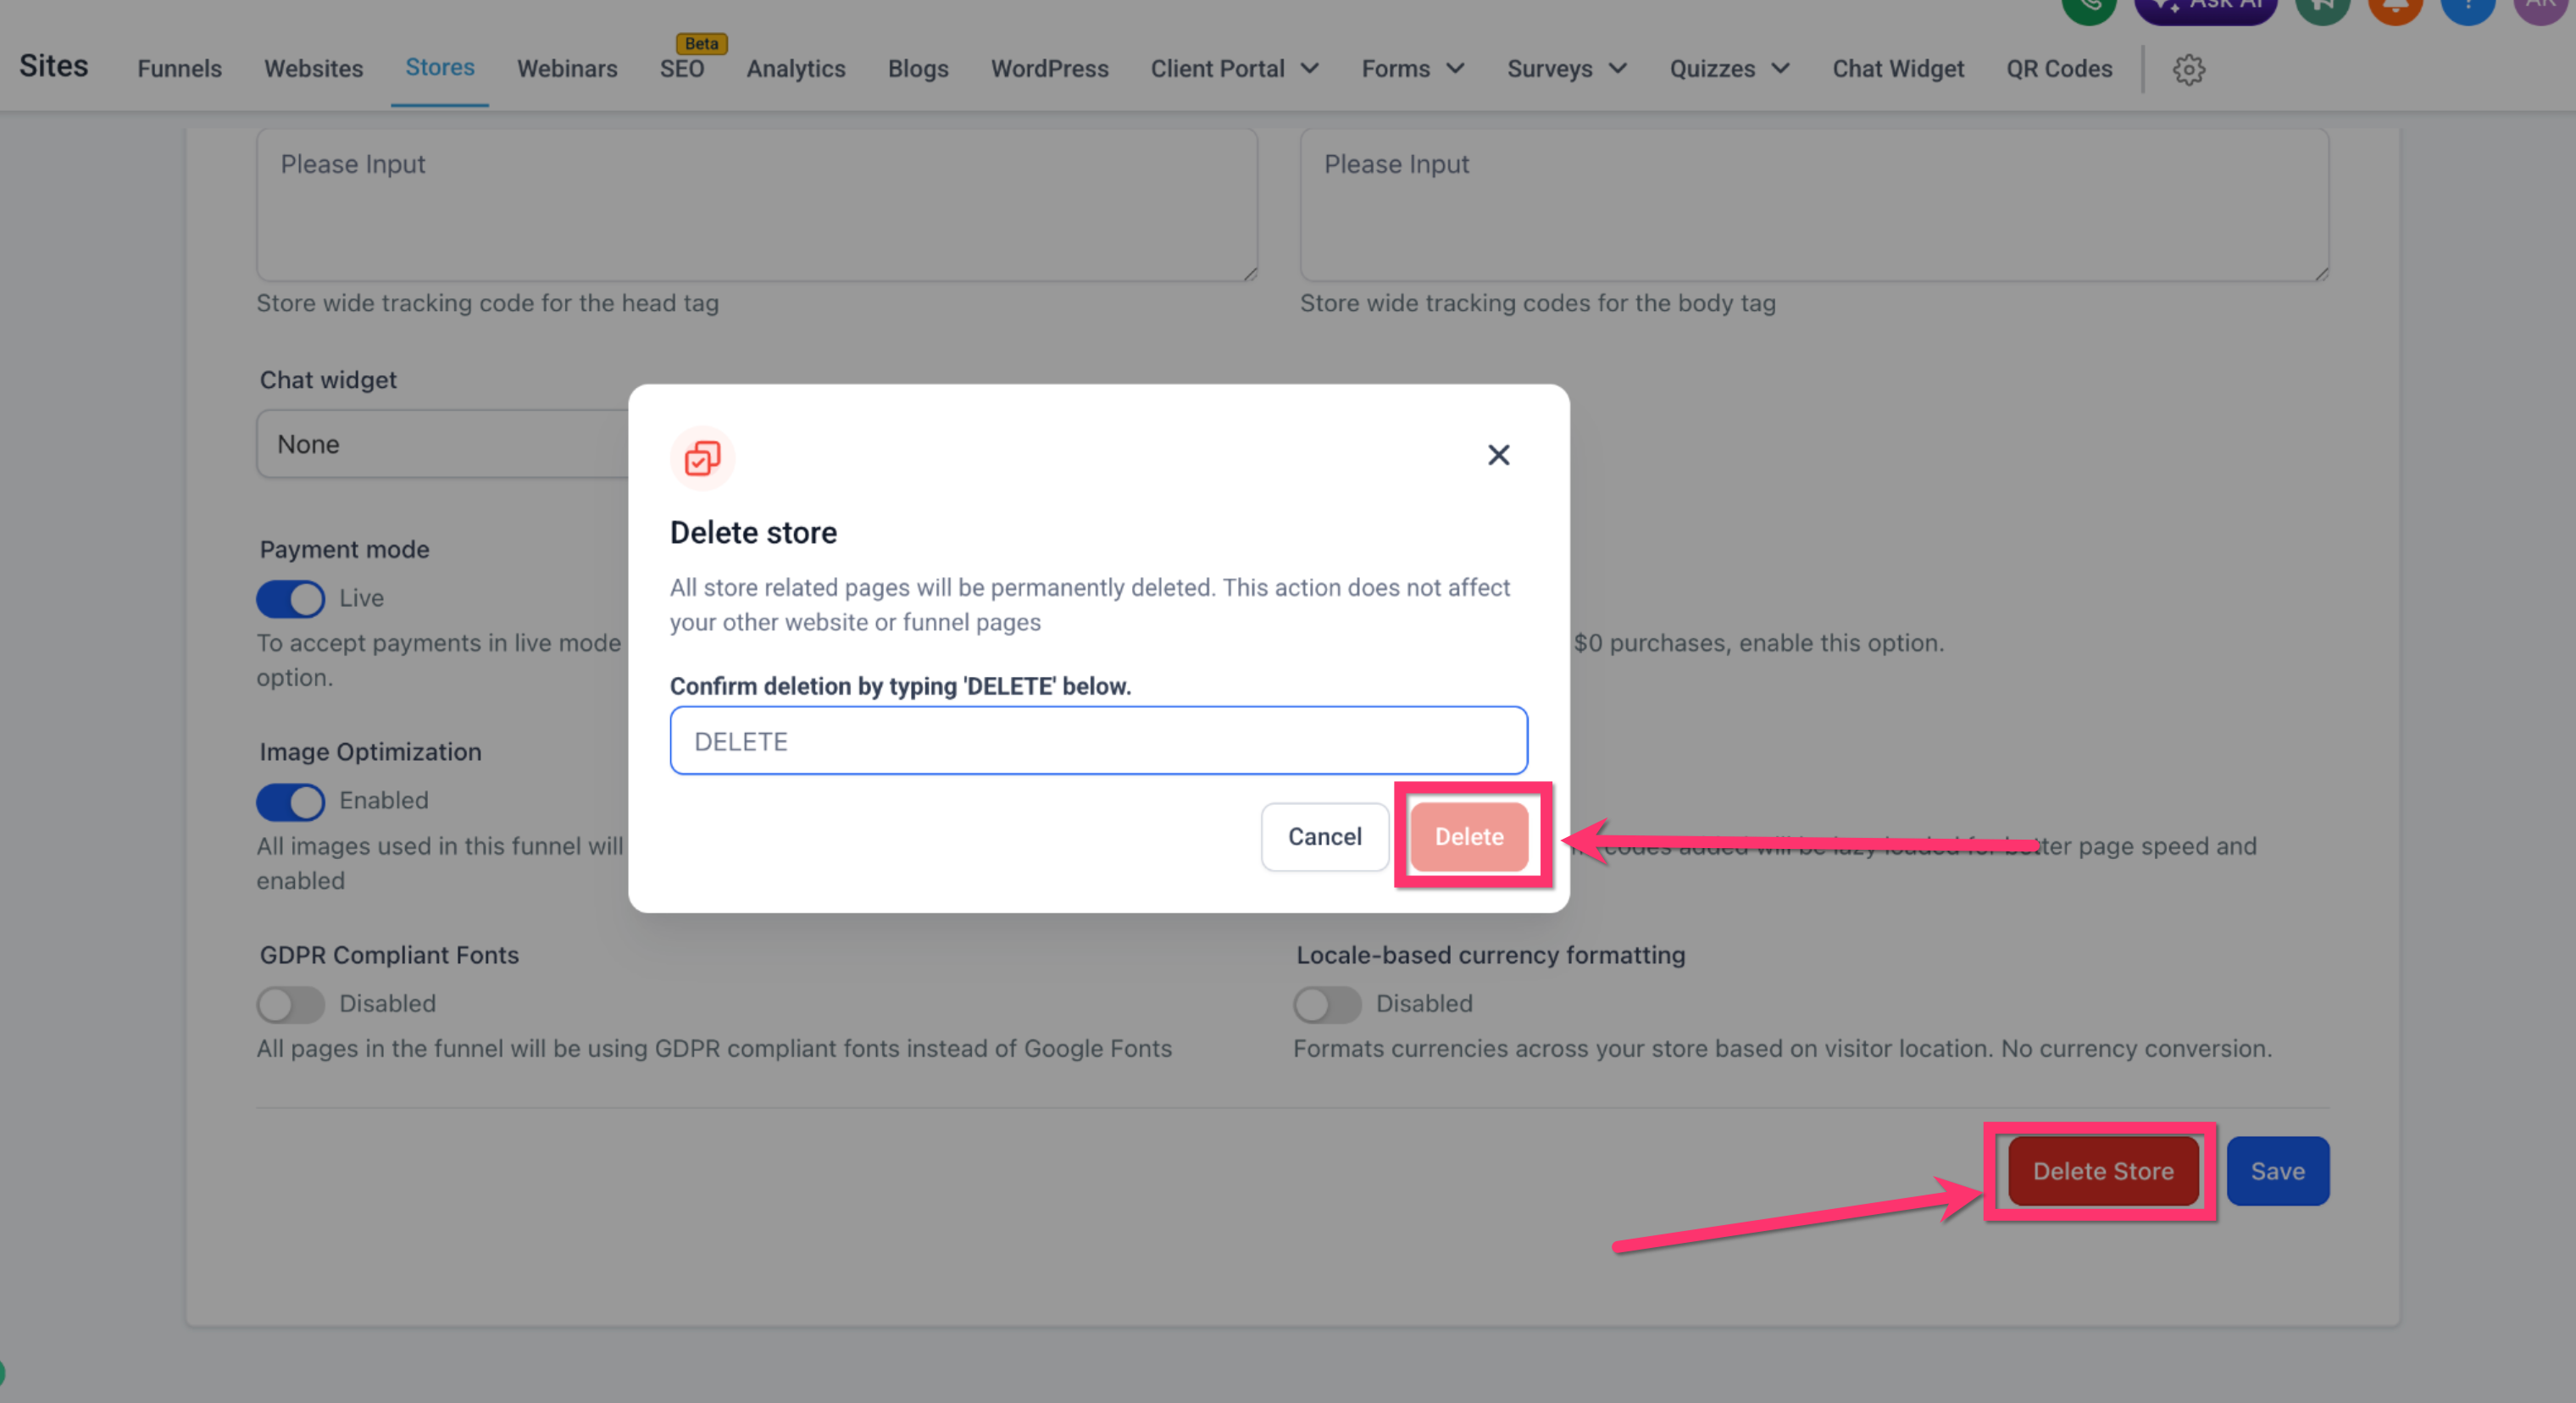
Open the three-dot menu for the store, or open Store Settings.
Select Delete Store.
Type DELETE in the confirmation modal.
Click Delete.
Only the store-related pages are removed; the rest of your website stays exactly as it was. If you want to remove an entire website, use the Delete Website option in the website's settings instead.
One-time vs. recurring: The main store listing is built around one-time products. Recurring or subscription products can still be sold, but through an order form or checkout page rather than the general storefront (see Steps 3 to 5).
New products are hidden by default. Any product you create has to be explicitly turned on for the online store; existing products won't suddenly appear in your storefront.
Multiple stores are allowed. You can create more than one store within the same account if you want separate storefronts for different websites.
Stores only live on websites, not funnels. You can't configure a full store inside a funnel, but you can still sell individual products on a funnel using an order form (Step 5).
Coupons and automation work automatically. Coupon codes, sales receipts, the Order Submitted and Payment Received triggers, and the shopping cart element in the email builder all work out of the box with any store you create, no extra setup required.
Editing store FAQs: To edit the FAQ content on a store page, click the FAQ element in the Page Builder to activate it, then select the question you want to change in the FAQ List panel on the right. Both the question and its answer open for editing.
Can I sell recurring products in my online store? The main store listing shows one-time products. Recurring or subscription products can still be sold, but they work best through a checkout page or order form (see Step 5) rather than the default store listing.
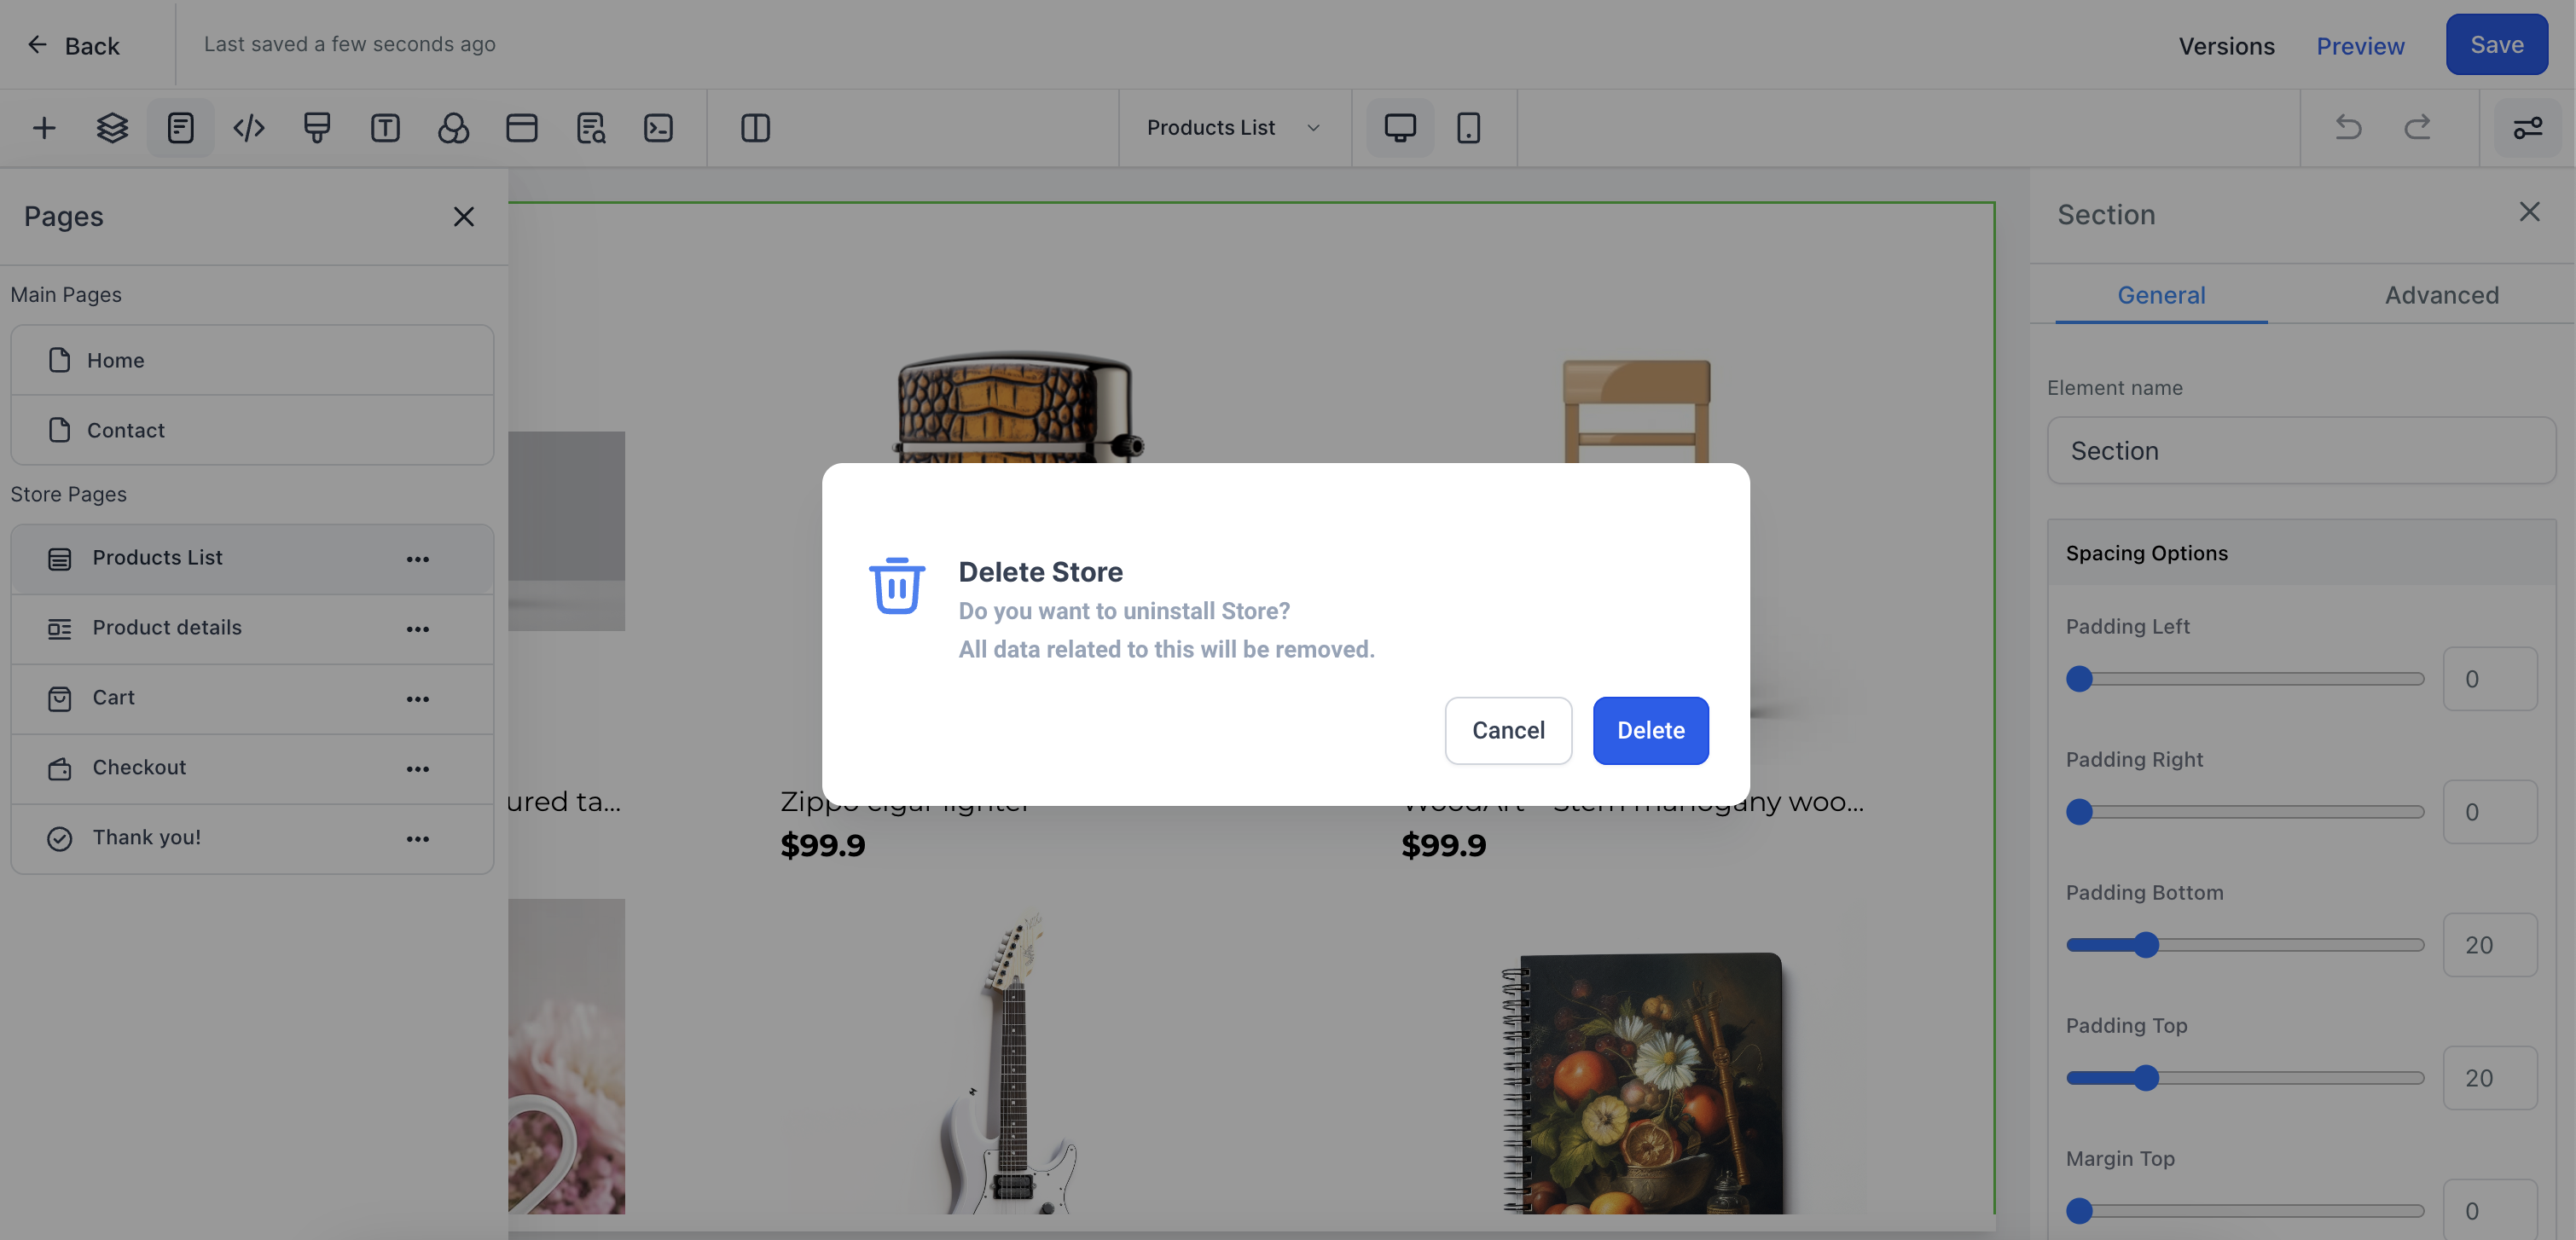
I created a store just to test it out. How do I delete it? Delete any of the automatically added store pages (Products List, Product Details, Cart, Checkout, or Thank You), or use Delete Store from the Stores list or Store Settings. Confirming the deletion removes all data tied to that store.
Can different variants of a product have different prices? Yes. You can customize the price of each variant you configure. By default, a new variant inherits the product's base price until you change it.
How do I mark an order fulfilled and share shipping details with a patient? Open the order in Payments > Orders, mark it fulfilled, and attach a tracking number and URL. This automatically makes the shipping details available to your patient.
Can I create more than one store in the same account? Yes, you can set up multiple stores within the same Aesthetix CRM account, for example if you run separate websites for different service lines.
Can I put a store inside a funnel instead of a website? No, a full online store can only be configured inside a website. You can still sell individual products on a funnel page using an order form.
What's the difference between a physical and a digital product? Physical products show shipping fields at checkout. Digital products skip shipping for a faster checkout. For digital products, the download option only appears after purchase if at least one file has been uploaded to the product or its variant. If files are added later, download access appears automatically; if they're removed, access disappears immediately.
Why is a product showing as unavailable when I preview my store? This usually happens when inventory tracking is turned on and stock has hit zero. Open the product under Payments > Products, then increase the stock or turn off inventory tracking.
What time unit does the trial period use? Always days. Even if a product bills monthly or annually, entering 30 means a 30-day trial before the first charge.
Can I change a product's currency after it's created? No. Once a product is created, its currency is locked. To sell in a different currency, create a new product or add a new pricing entry with the currency you need.
Is there a faster way to set up my first store? Yes. Go to Sites > Stores and, if the welcome modal appears, click Start Onboarding to launch the Store Setup Wizard. It walks you through the key launch steps, with a call-to-action and a linked help doc for each one, and finishes with a Setup Completed action.
What ways can I sell a product besides the online store? Beyond the storefront, you can sell the same product through a funnel checkout, a Payment Link, an invoice, or a form with a Payment element added to it. Which one to use depends on whether you're sending a patient a direct link, billing them individually, or collecting information and payment together.
Where do I edit a product's details after it's created? Go to Payments > Products and select the product. From there you can update its name, description, media, product type (physical or digital), tax settings, SEO settings, and statement descriptor.
How do I change a product from physical to digital? Go to Payments > Products, open the product, select the pricing option you want to edit, scroll to Shipping and Delivery, and change it to Digital. Save your changes.
Why can't I find my product when I'm creating an invoice? Invoices filter products by pricing type. A one-time invoice only shows one-time products, and a recurring invoice only shows recurring products, so make sure the product's pricing type matches the invoice you're creating.
Why are duplicate-looking products grayed out when I try to add them to an invoice? Open the product and confirm it's published, has active pricing, and that the pricing's billing type and currency match what the invoice needs. A draft product, inactive pricing, or a currency mismatch will keep it from being selectable.
