Google Ads conversion tracking lets you see what actually happens after someone clicks your ad: did they fill out a consult form, book an appointment, call your practice, or reply in chat. A conversion action is the rule you create in Google Ads to record one of those outcomes, and Aesthetix CRM can send that event back to Google automatically once the action exists.
This article covers both halves of the setup: creating the conversion action inside your Google Ads account, and connecting it to Aesthetix CRM so real patient actions (form fills, booked appointments, chat replies) get reported as conversions. Once conversions are flowing, campaign performance shows up in Ads Manager > Ad Reporting.
Setting up a conversion action correctly improves the quality of the data Google uses to optimize your campaigns, and it gives you cleaner reporting on what's actually driving new patients.
Accurate optimization: Google's Smart Bidding needs clean conversion signals to spend your budget well.
Clear reporting: separating a real qualified lead from a secondary event (like a page view) keeps your numbers meaningful.
Control over counting: you decide whether to count every occurrence of an action or just one per person.
Offline compatibility: because appointments, calls, and consult bookings often happen after the click, Google Ads can match these "offline" events back to the ad and keyword using identifiers like GCLID, GBRAID, or WBRAID.
You need admin or standard access to the Google Ads account for your practice.
Decide on your goal taxonomy ahead of time (for example, "Booked Consult" vs. "Form Submitted" vs. "Qualified Lead") so your naming stays consistent.
Decide whether this action should be marked Primary, meaning Google Ads uses it for bidding optimization.
Aesthetix CRM only sends offline conversions. Website conversion pixels, app events, and other conversion sources are not supported through this connection, only conversions triggered from your workflows.
This part happens entirely inside your Google Ads account. Google updates this screen periodically, so the exact wording you see may vary slightly from account to account, but the steps below cover the current flow.
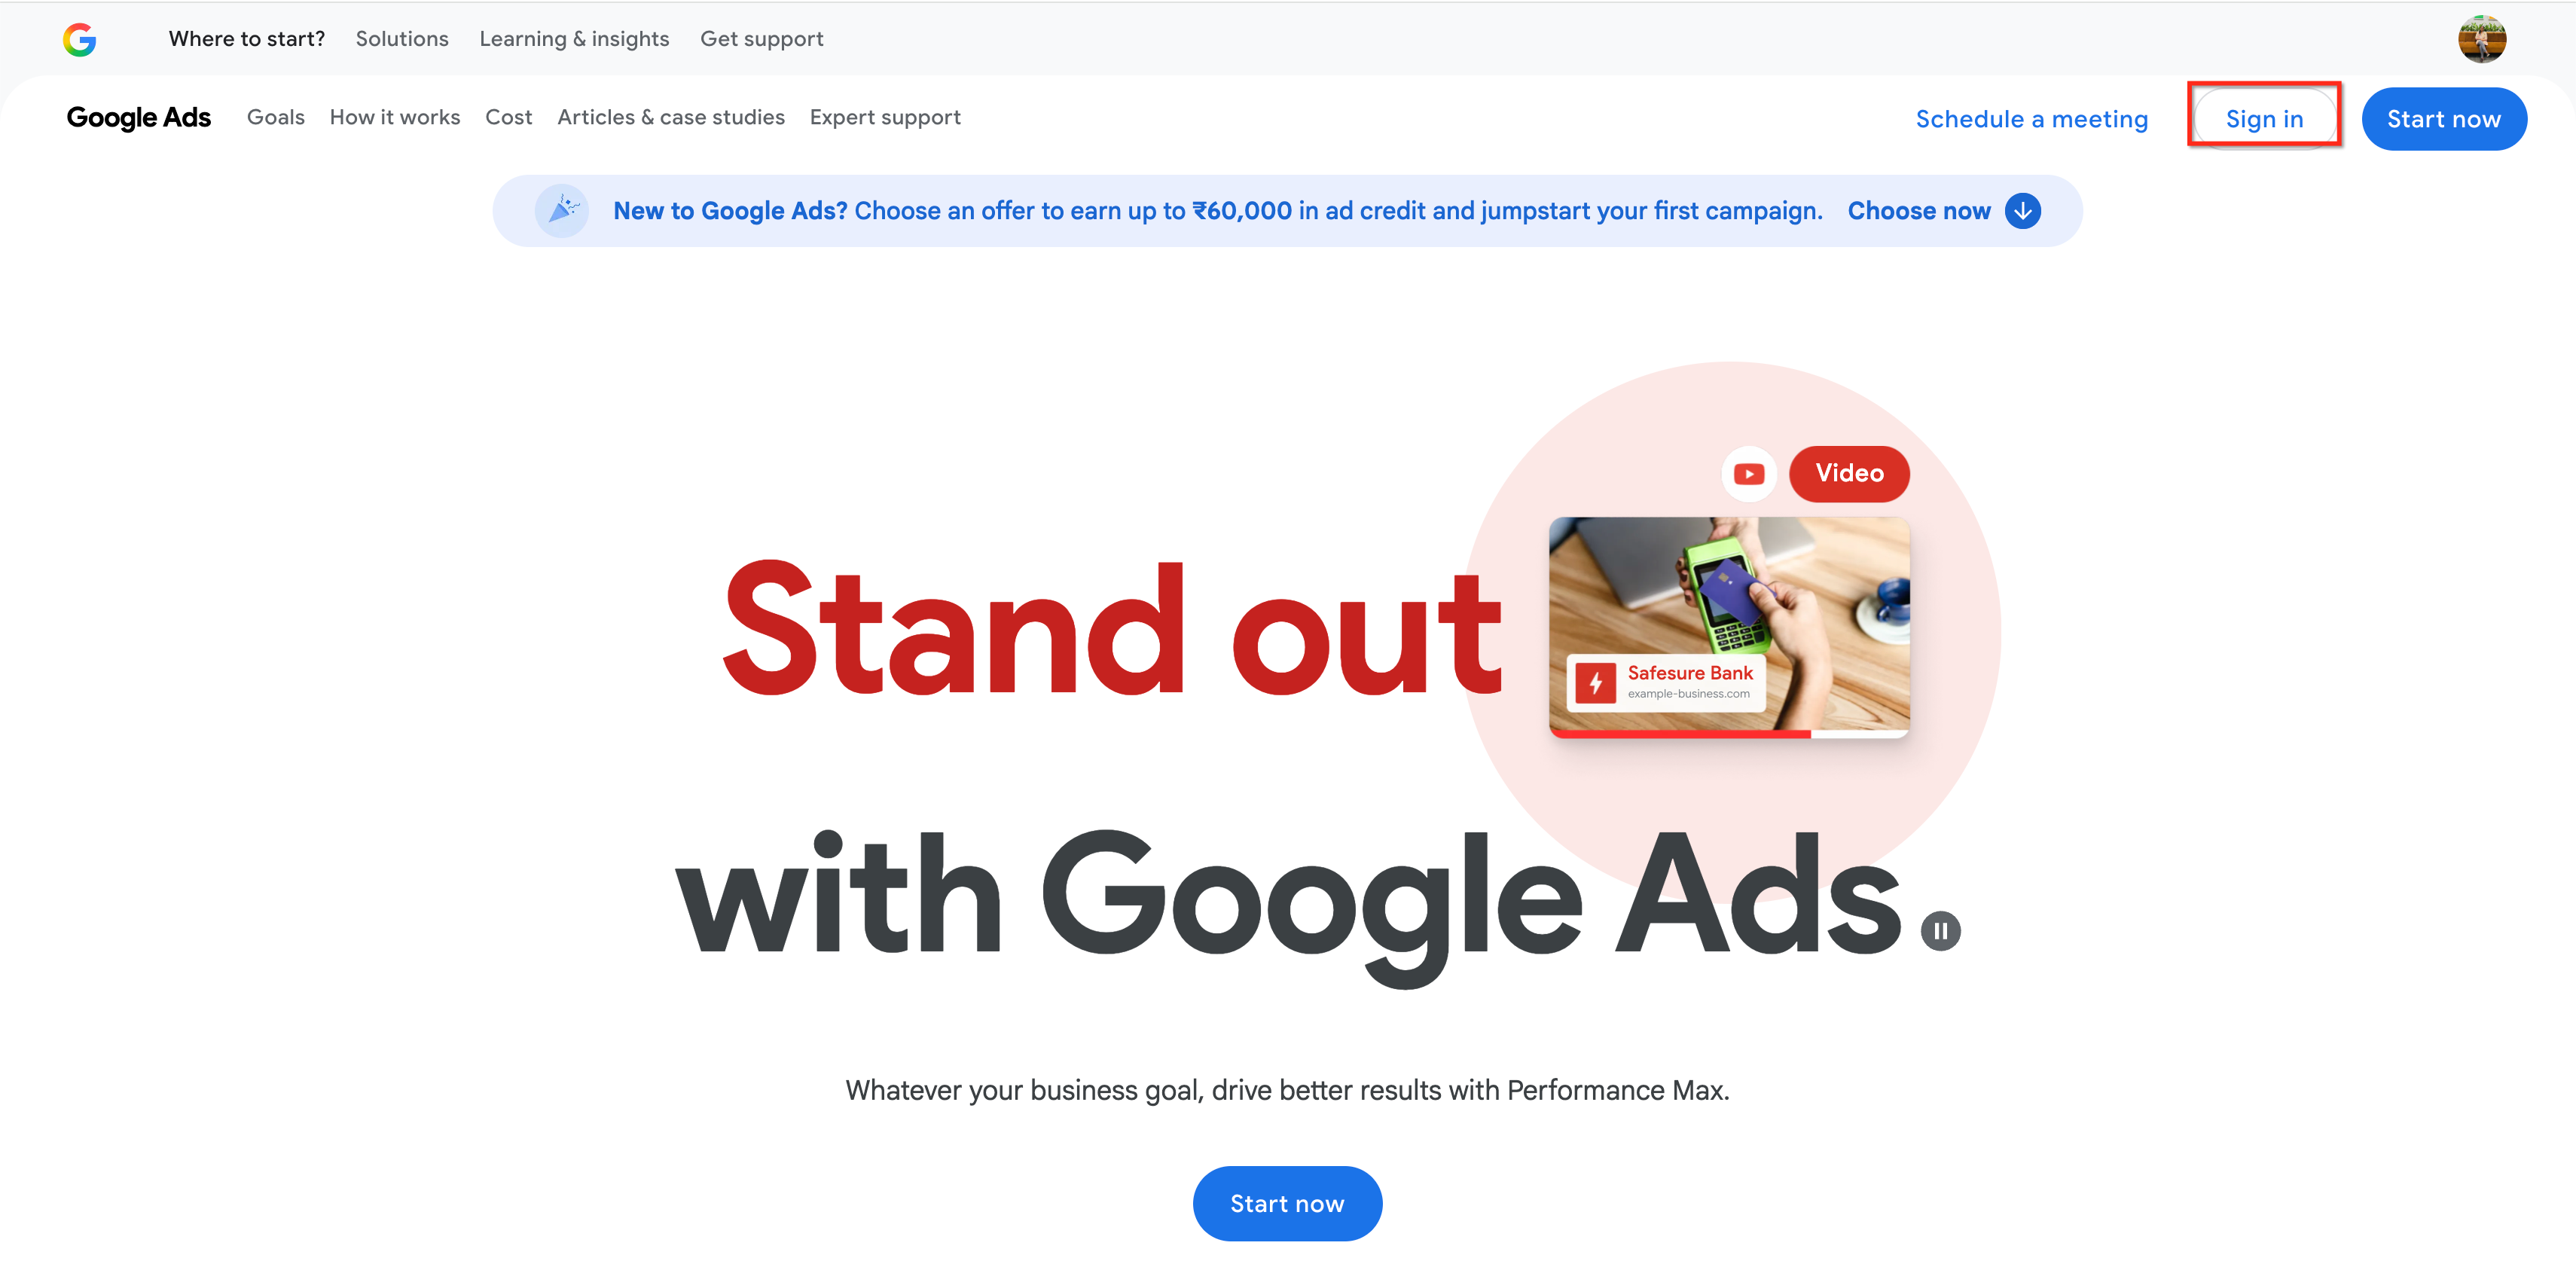
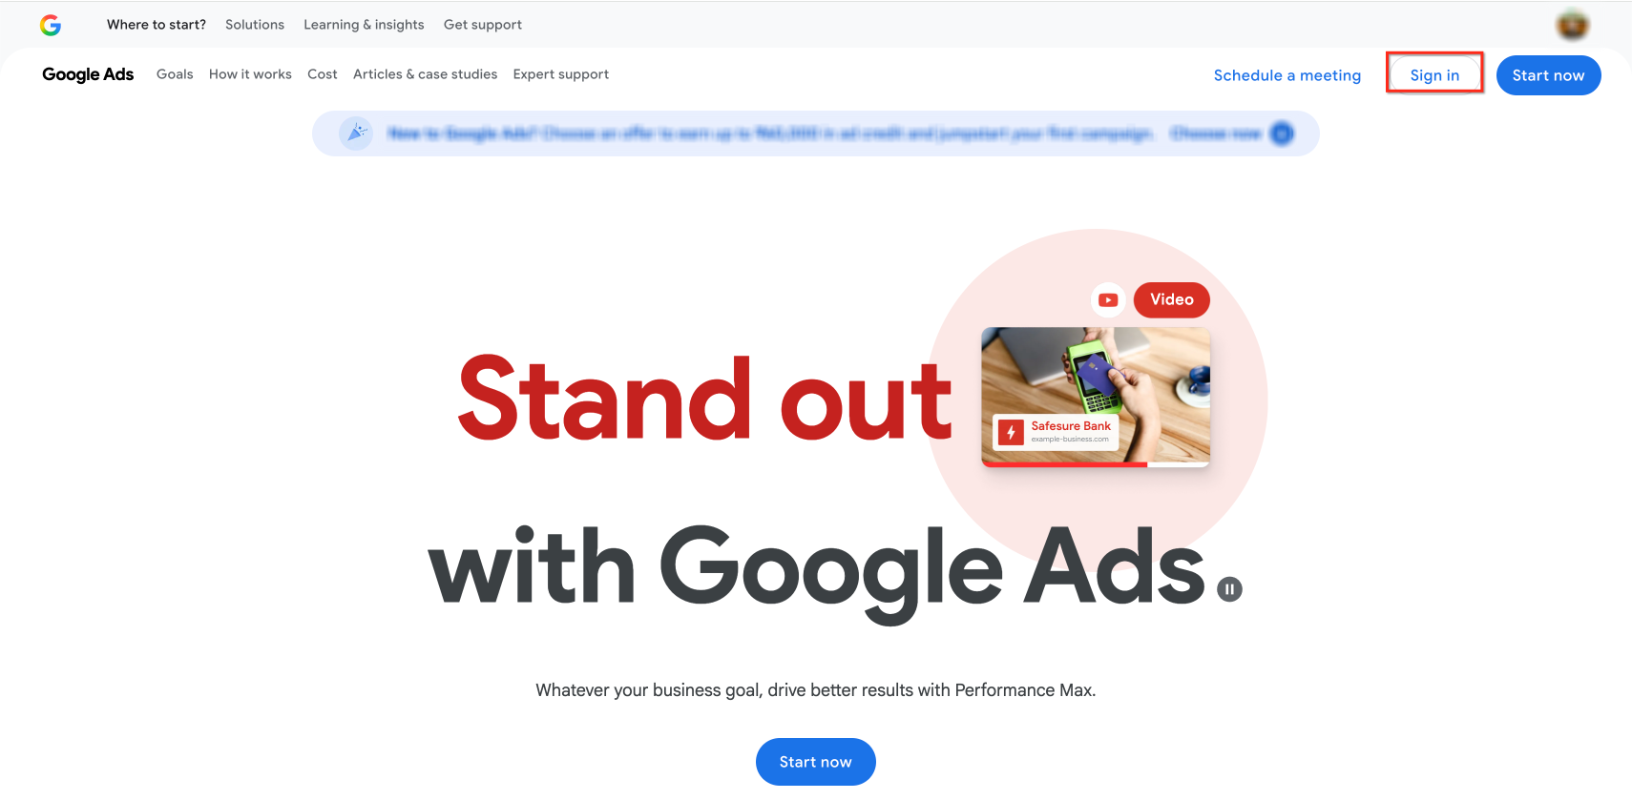
Head into your Google Ads account at ads.google.com and sign in (or create an account if you don't have one yet).
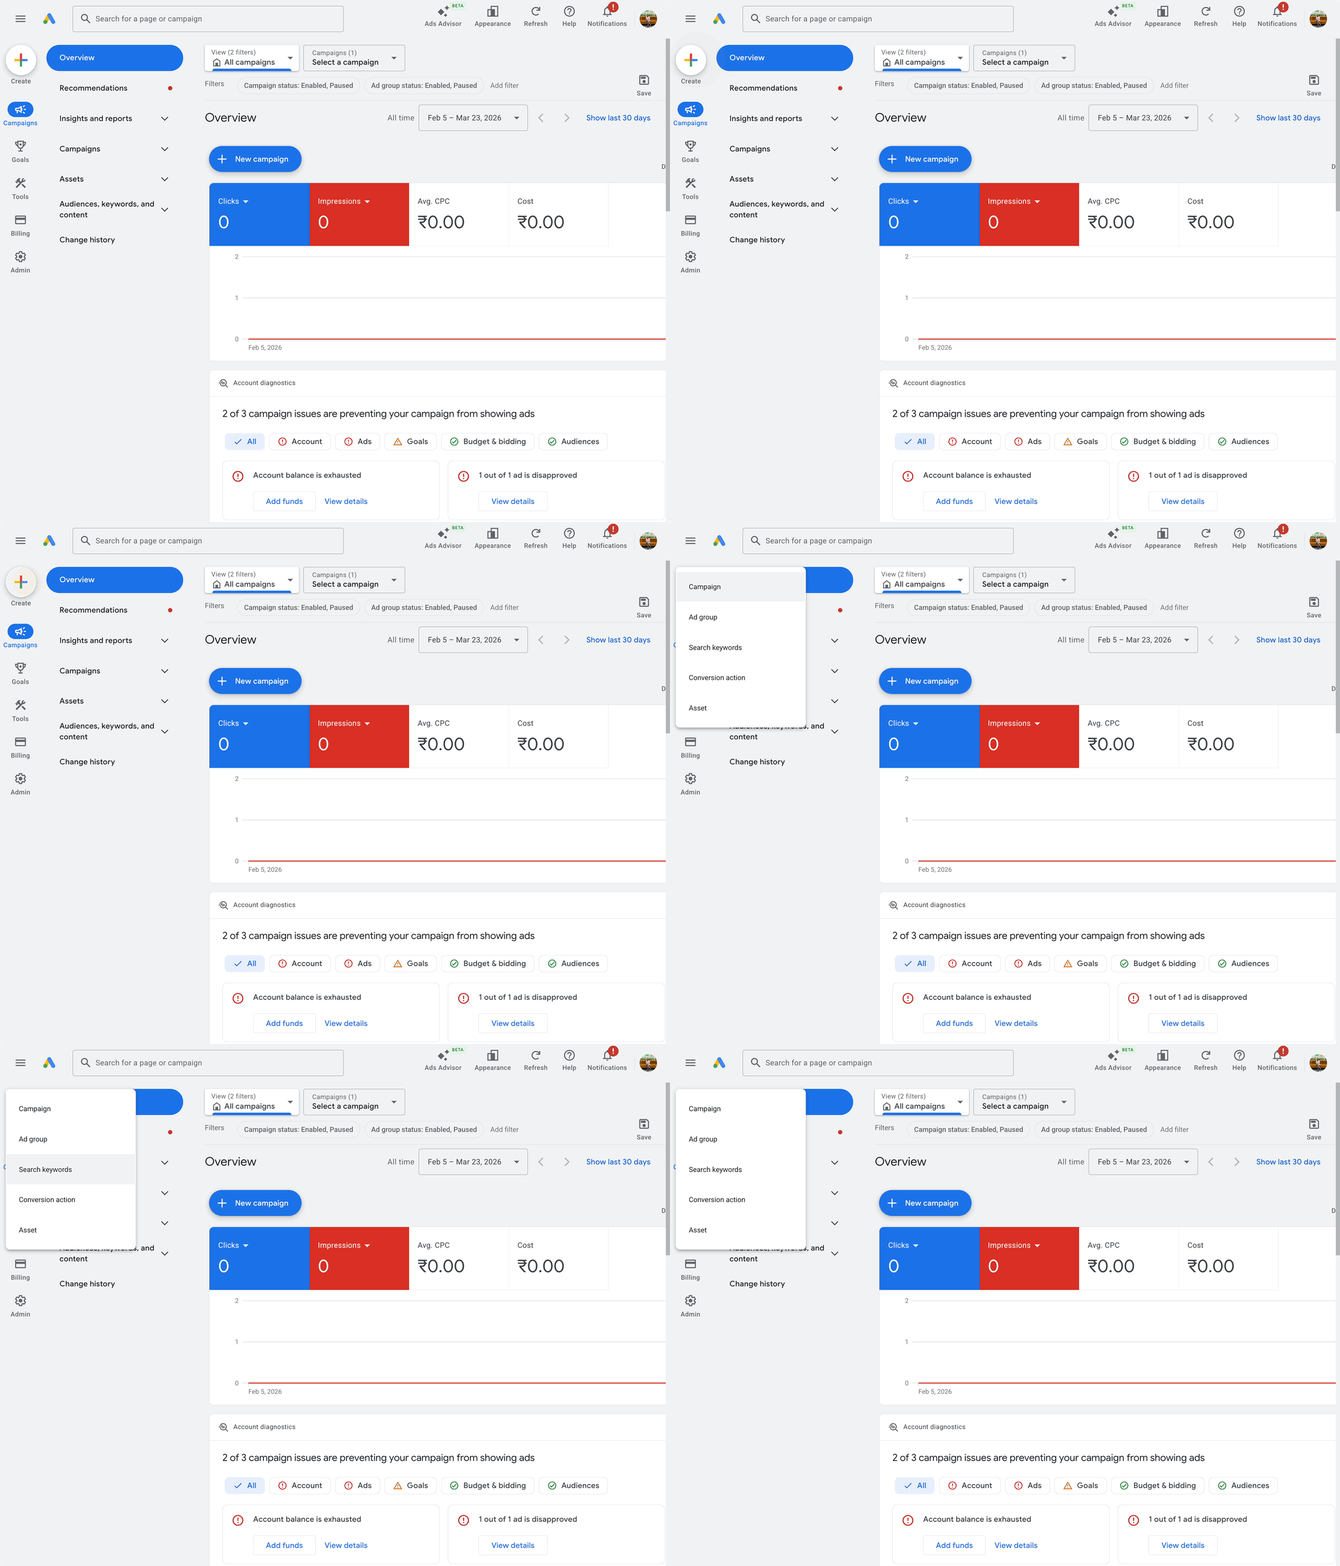
Click the + icon and navigate to Conversion Action from the dropdown.
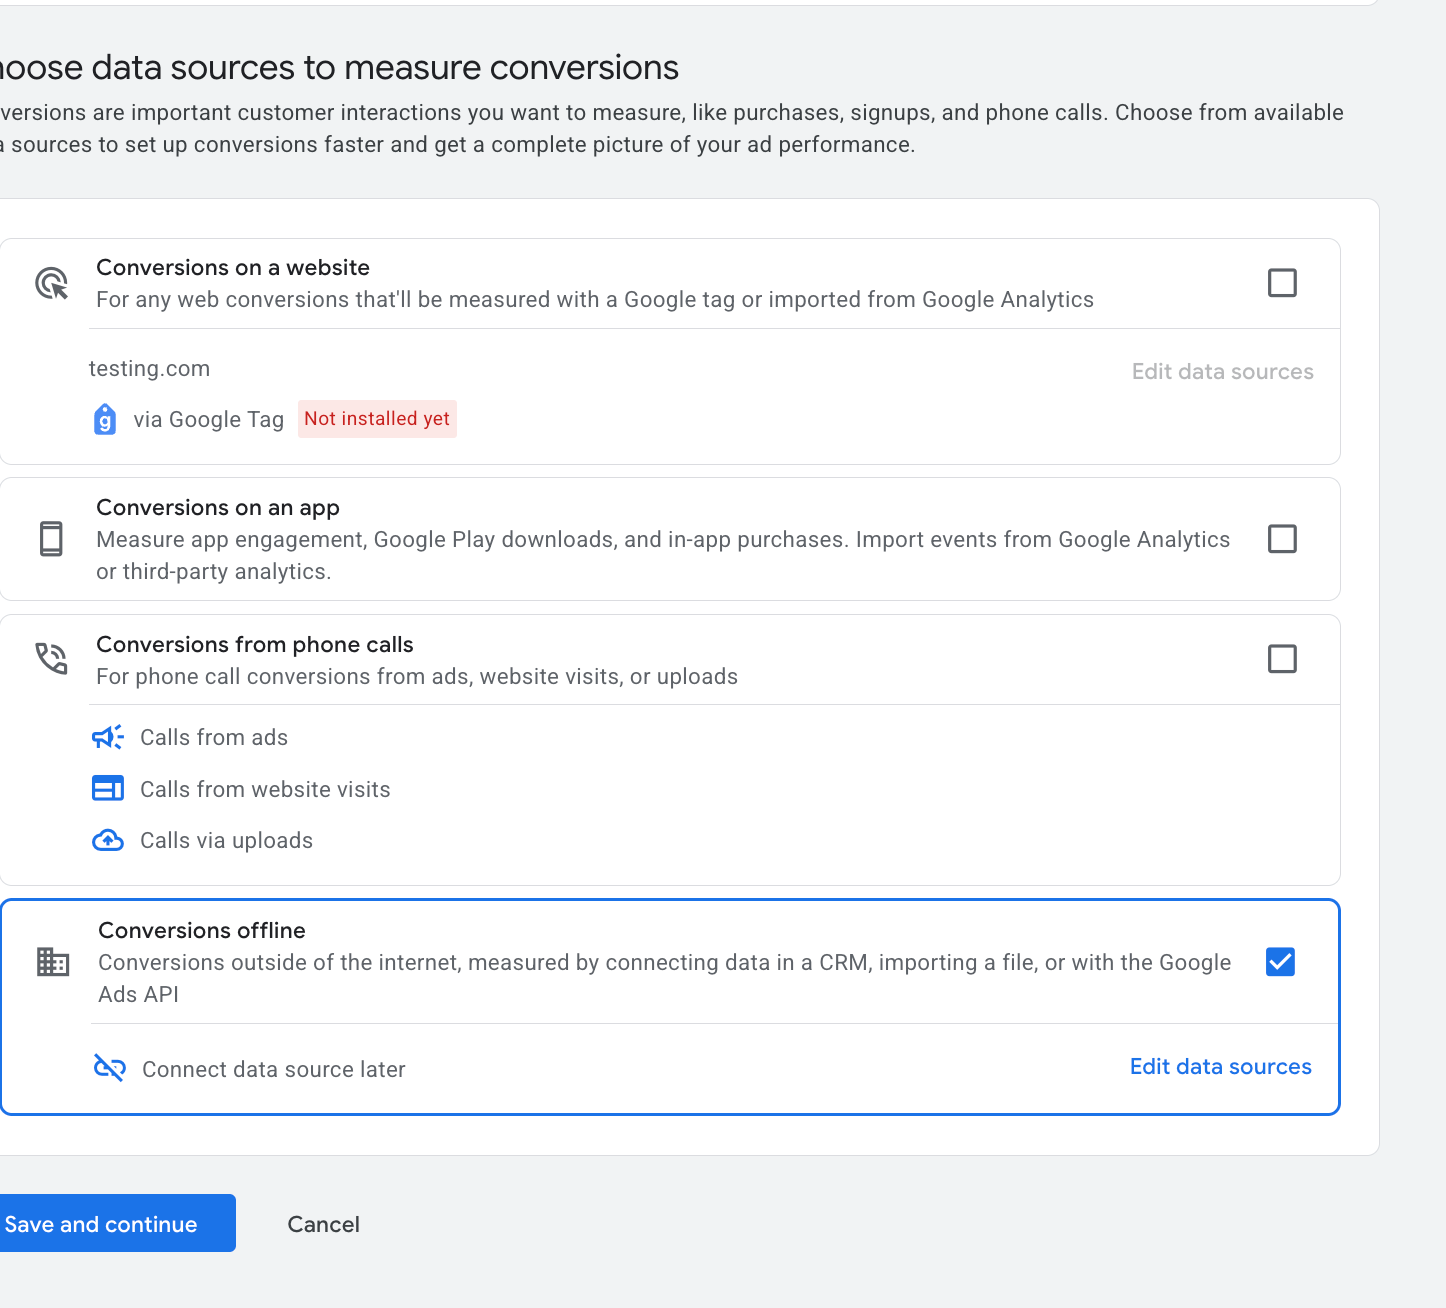
Choose how you want to measure conversions. Depending on the version of your Google Ads account, you'll be asked to pick a data source, then select Conversions offline.
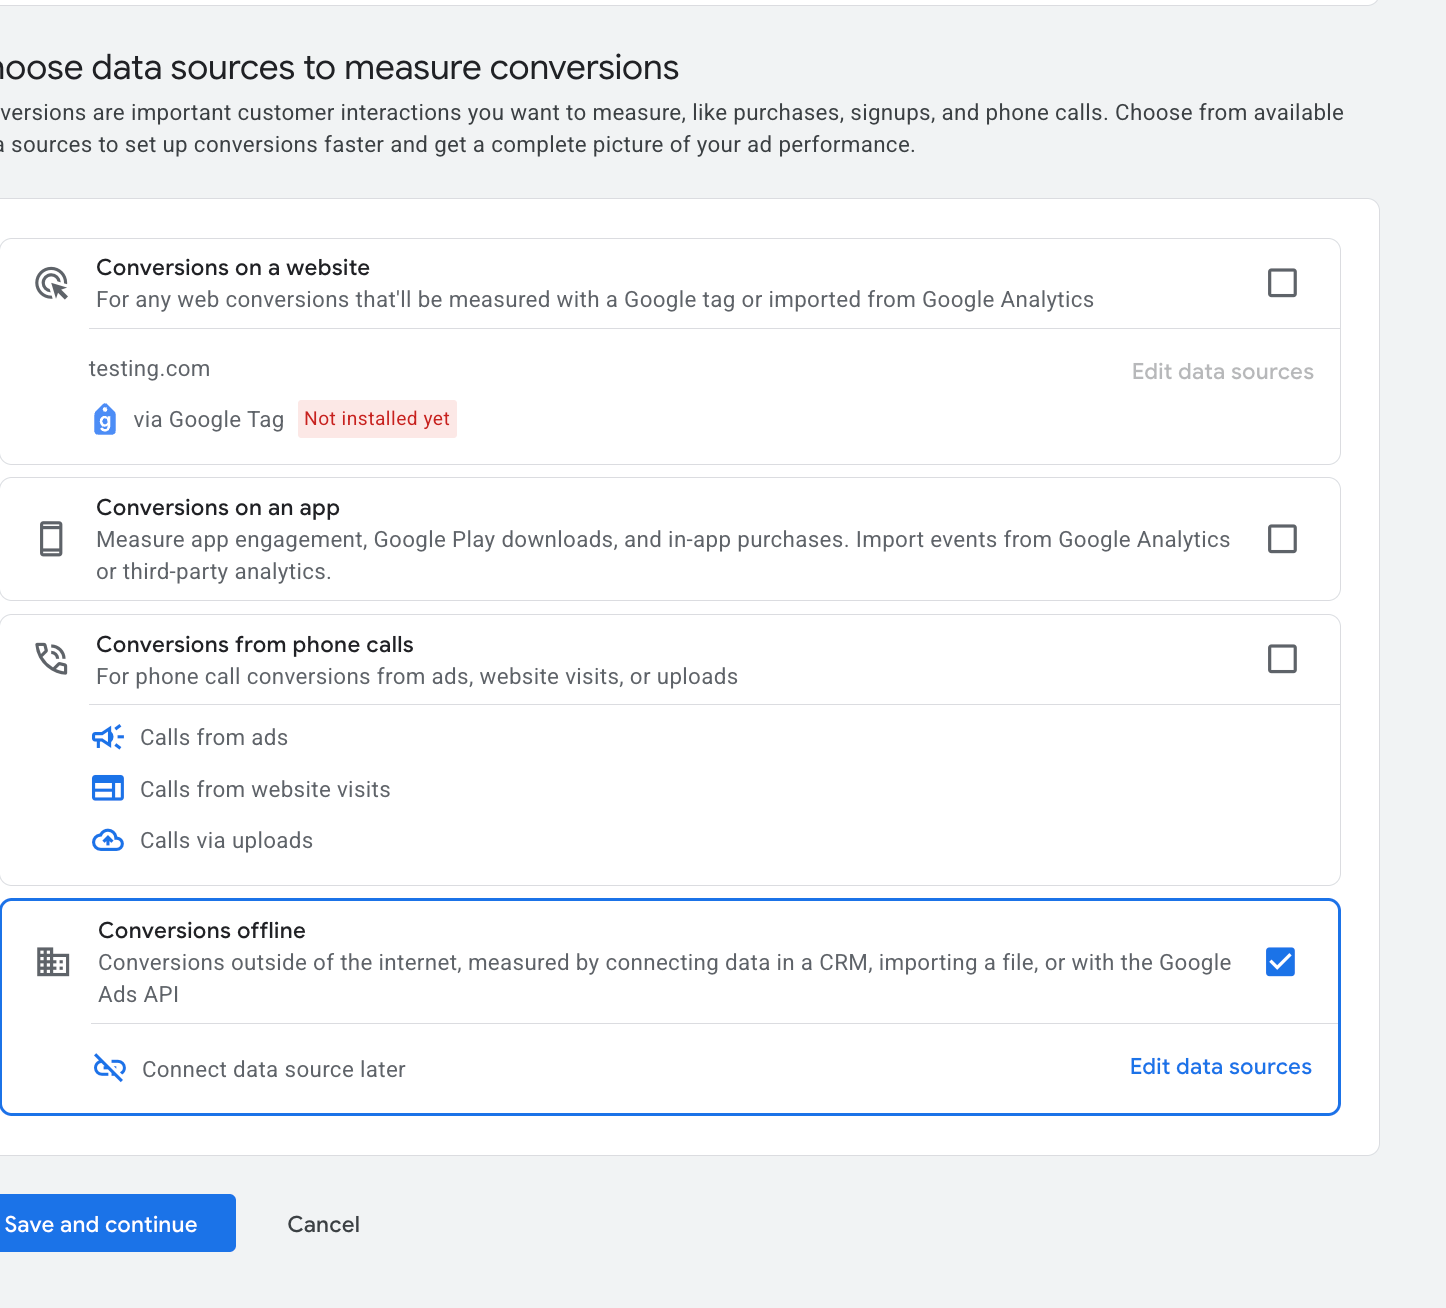
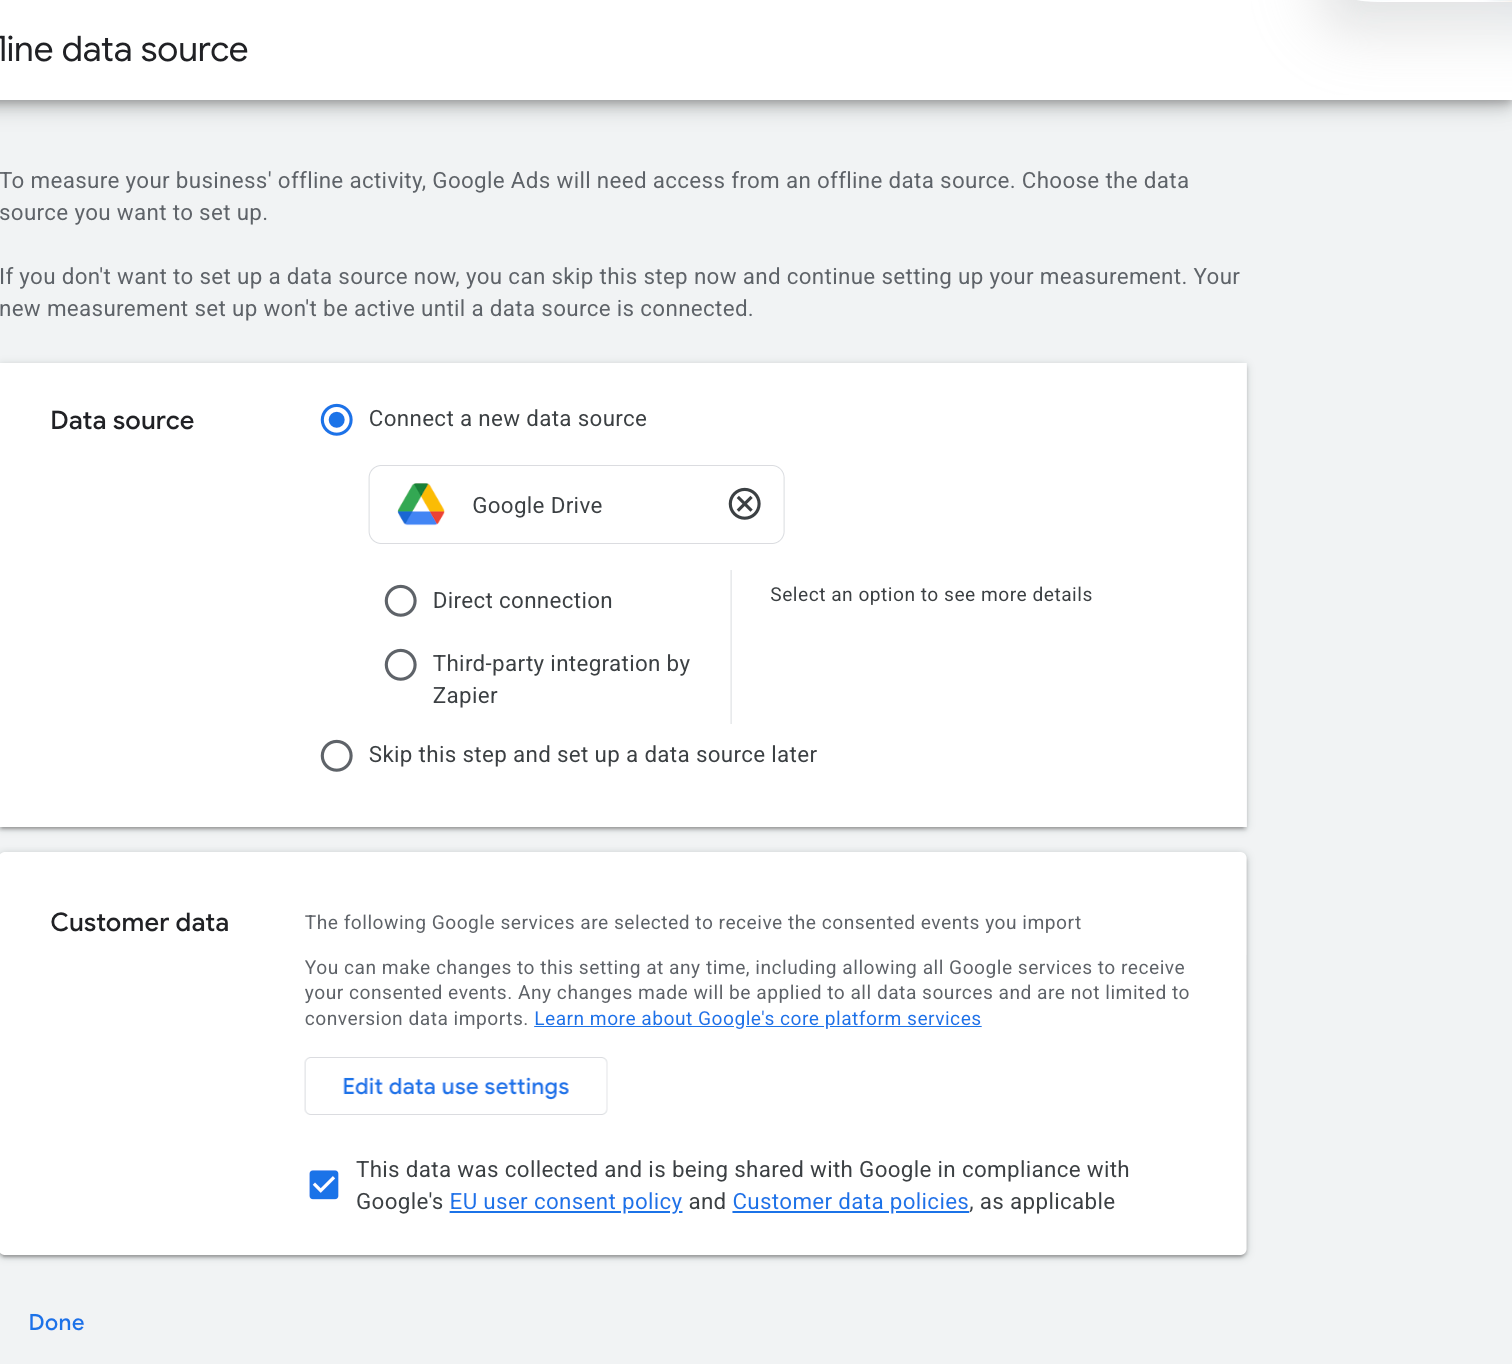
Click Edit Data Sources to add an offline data source, then choose "Skip this step and set up a data source later." You don't need to connect a live data source to create the action itself.
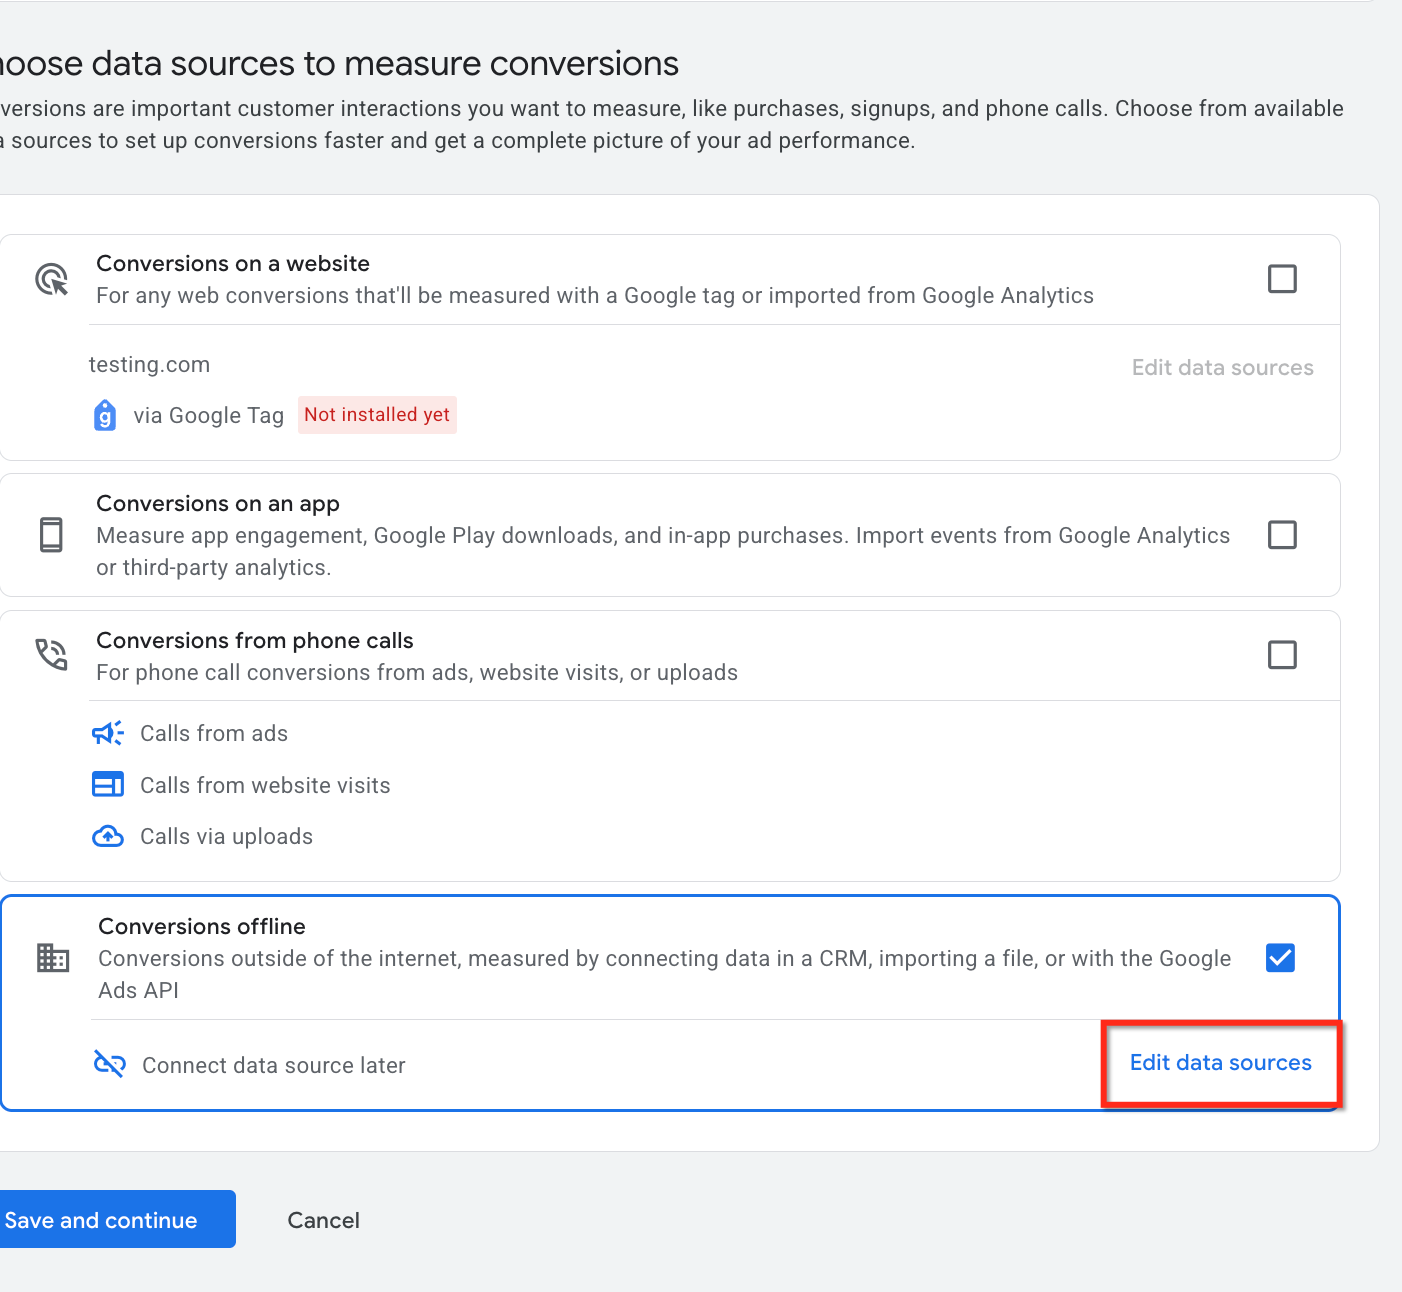
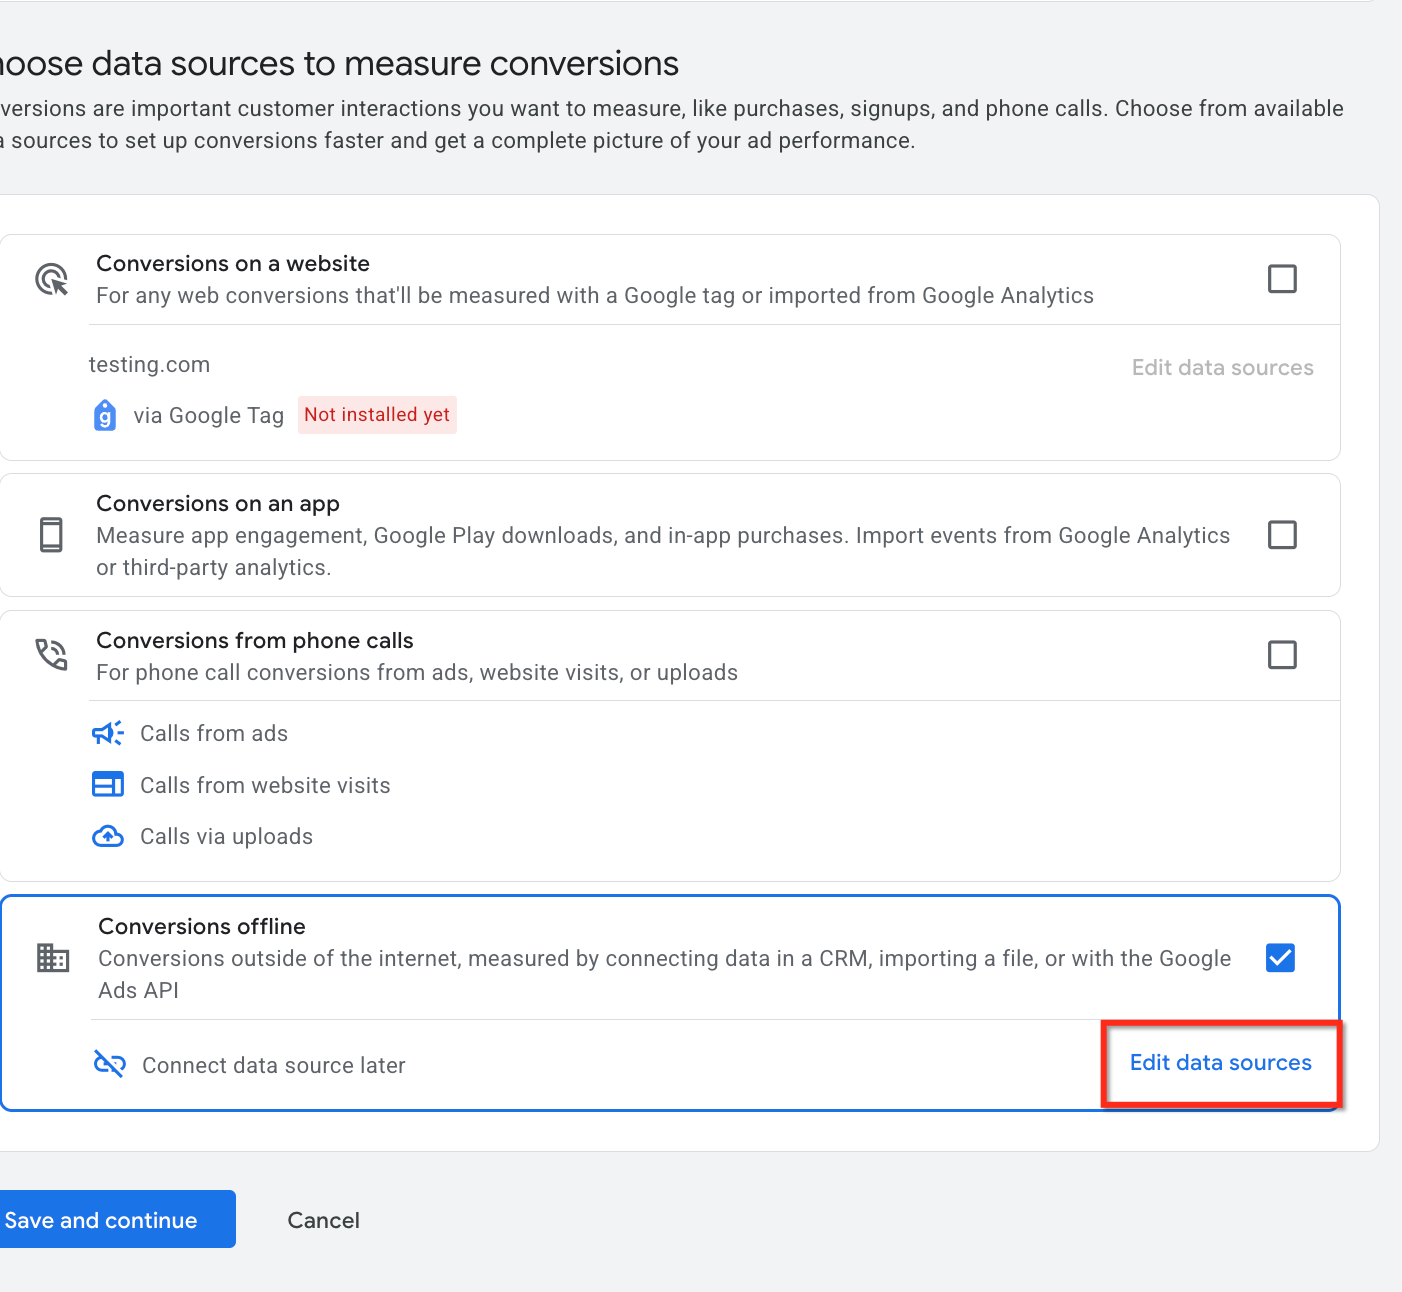
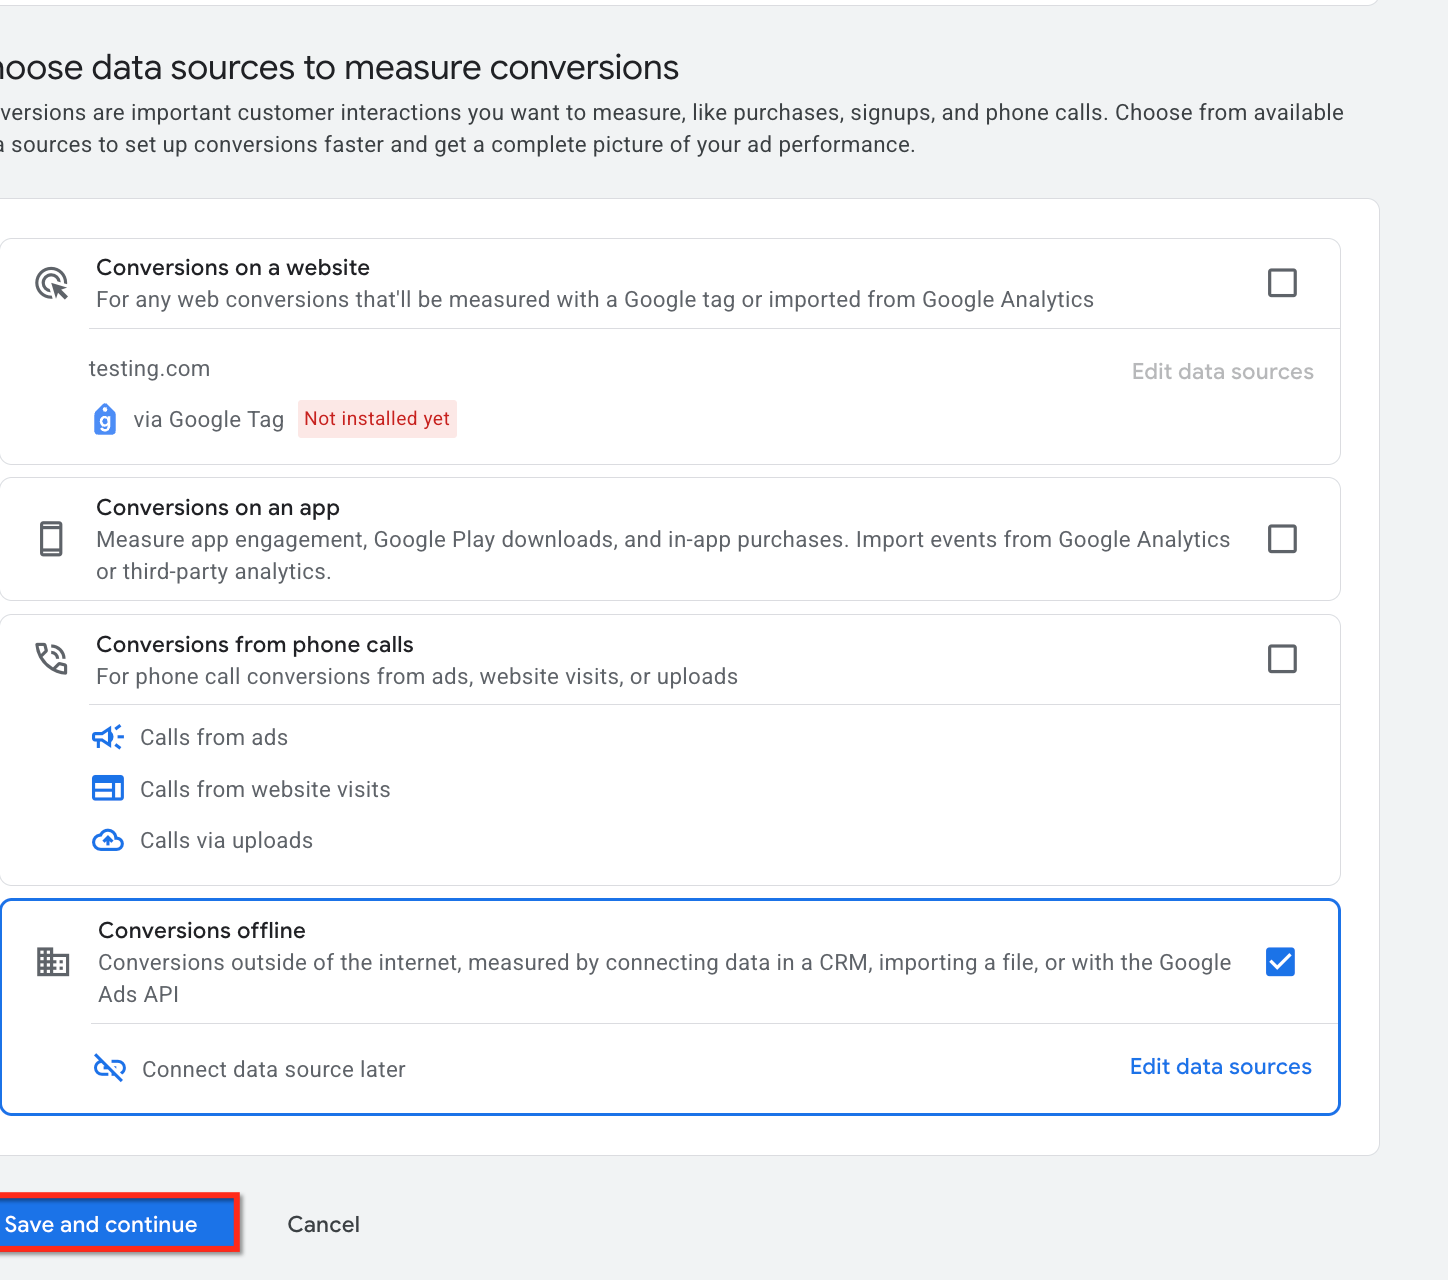
Click Save and Continue. Next, select the Conversion Category that best describes what you're measuring (this answers "what do you want to measure?"). Click See all to browse the full list of categories.
Add your chosen category as the data source, then click Edit settings to define the details.
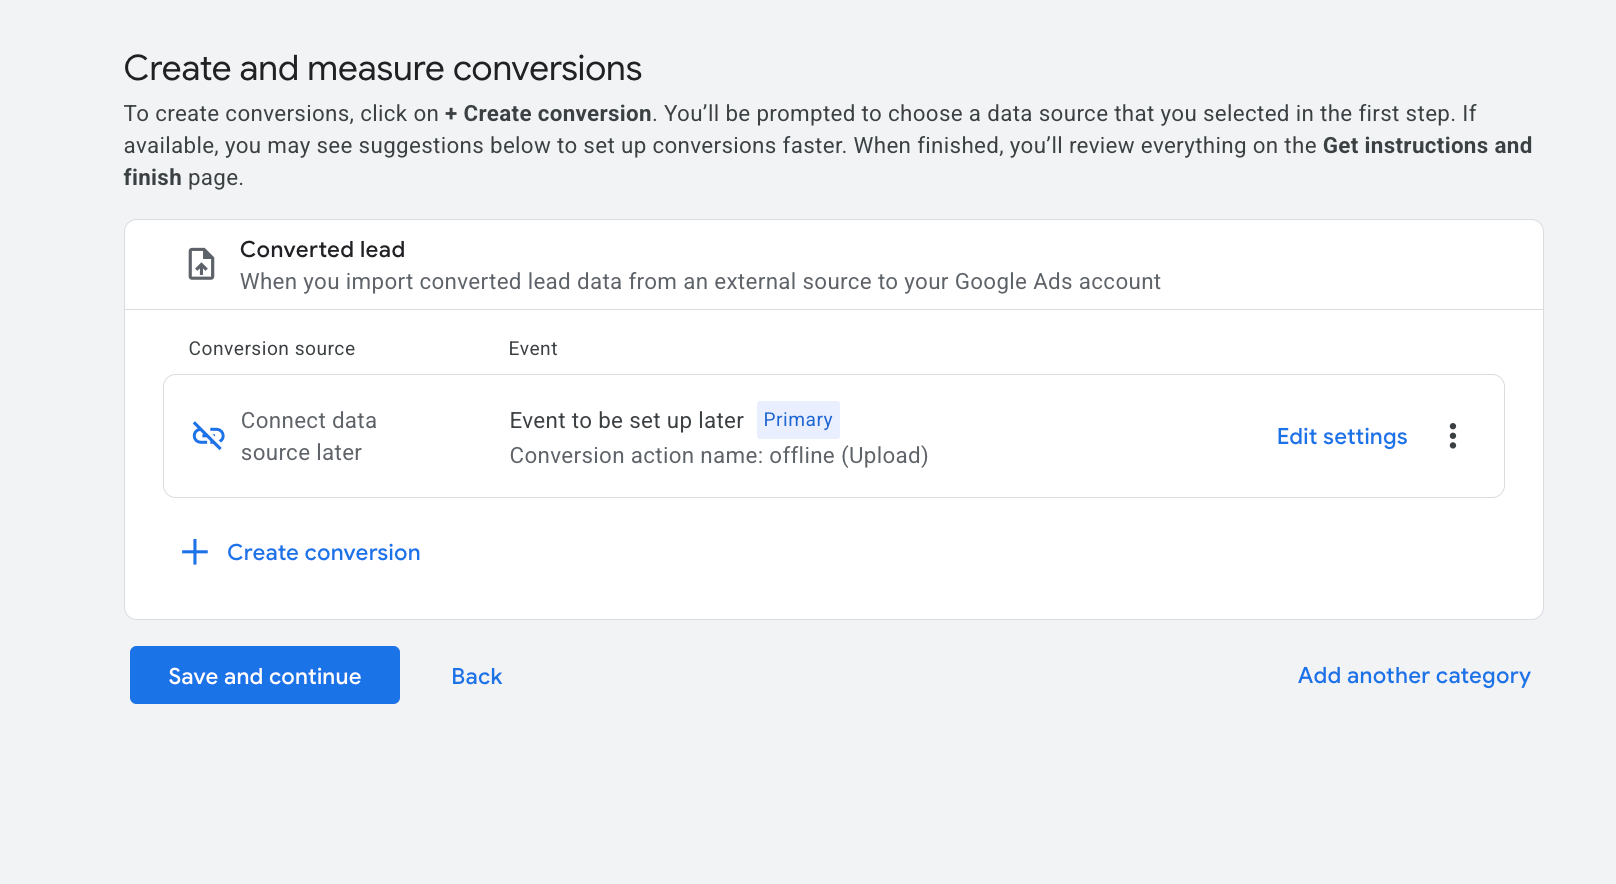
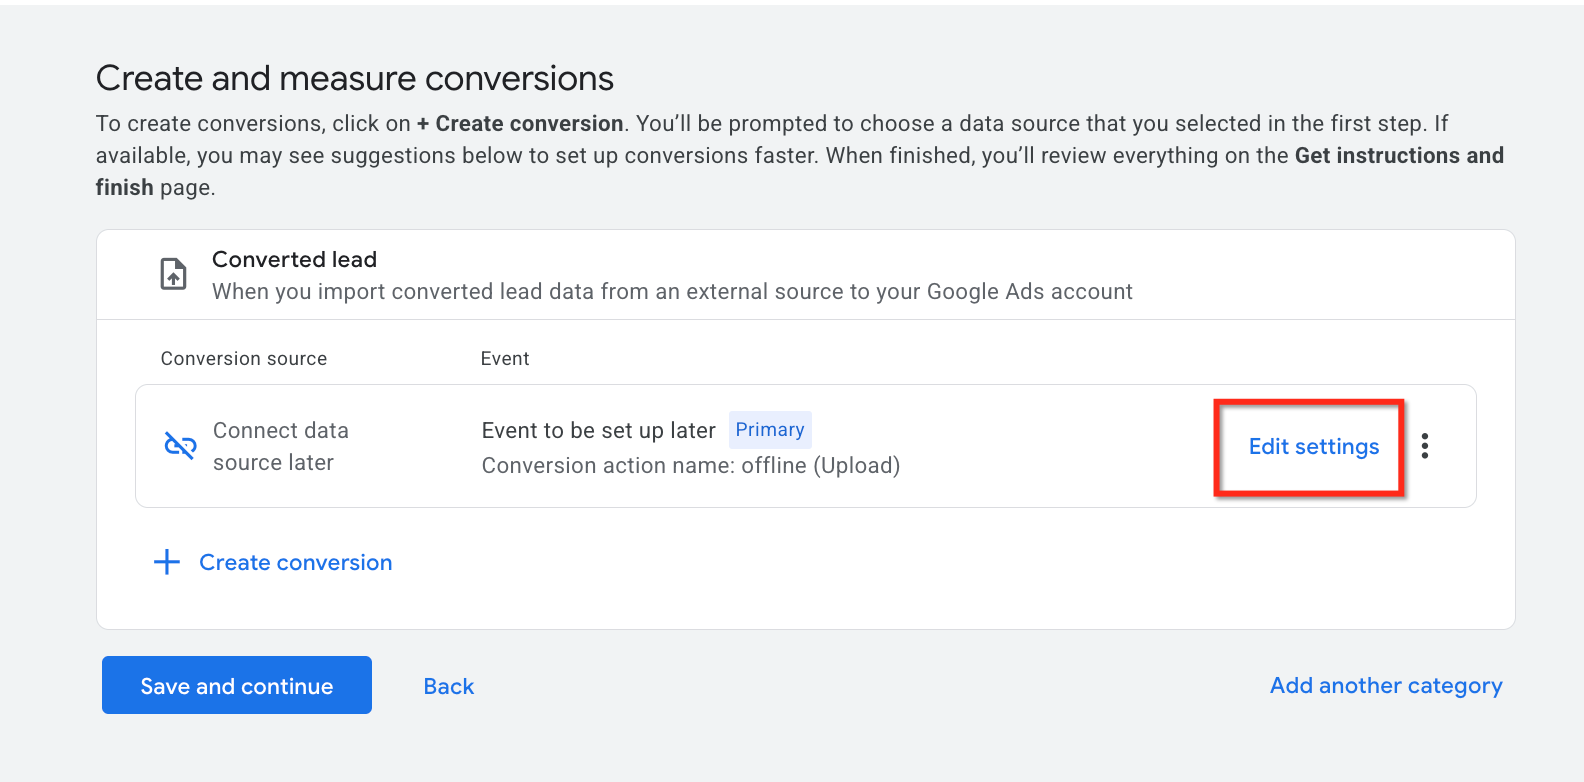
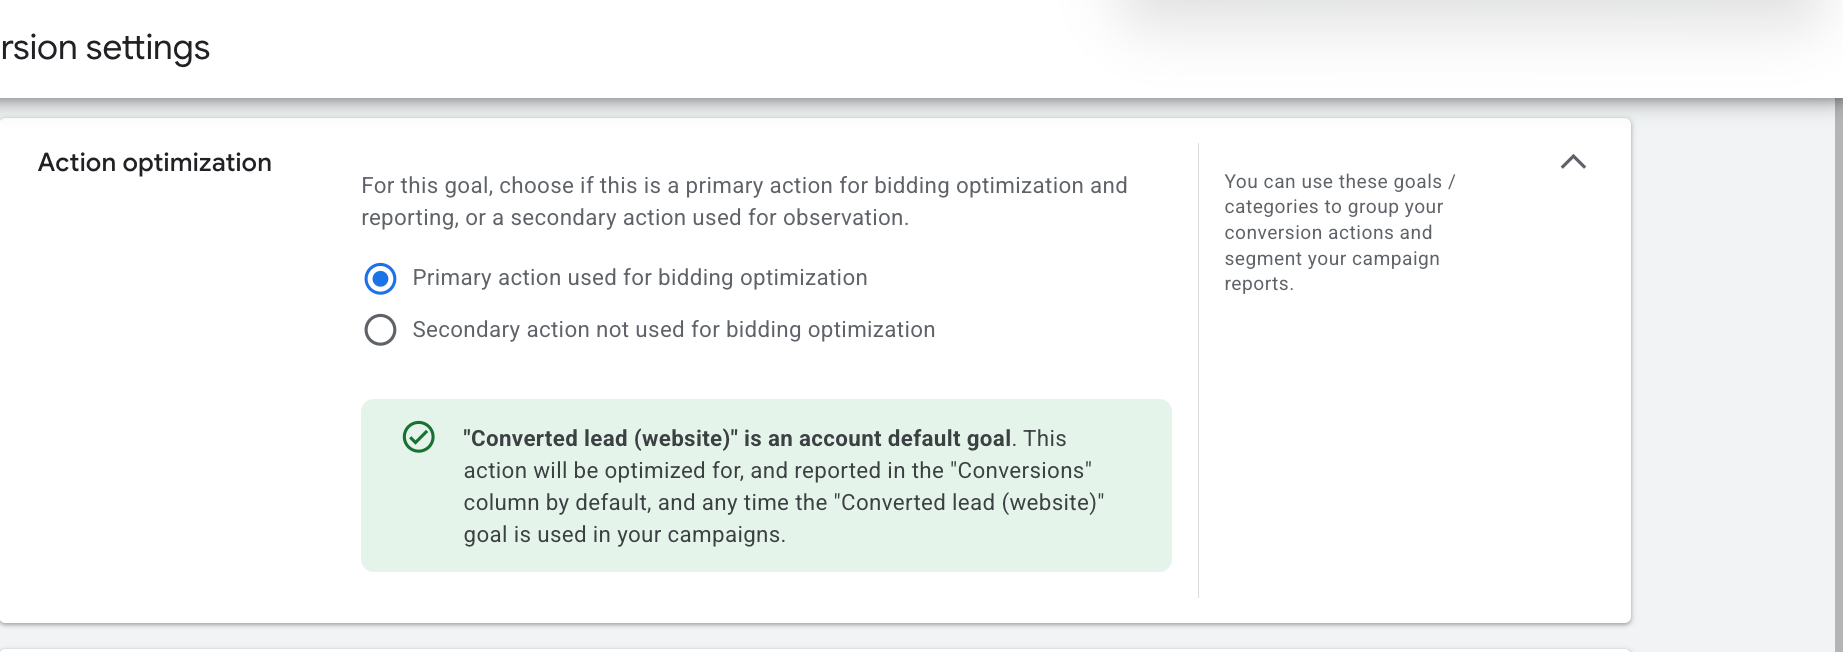
In the action optimization section, leave the radio button set to "Primary action used for bidding optimisation" if you want this conversion to influence bidding.
Name the conversion action. Use something specific and consistent, such as "Booked Consult" or "New Patient Lead," and copy the name somewhere safe. You'll need to paste it into your Aesthetix CRM workflow exactly as spelled, including capitalization.

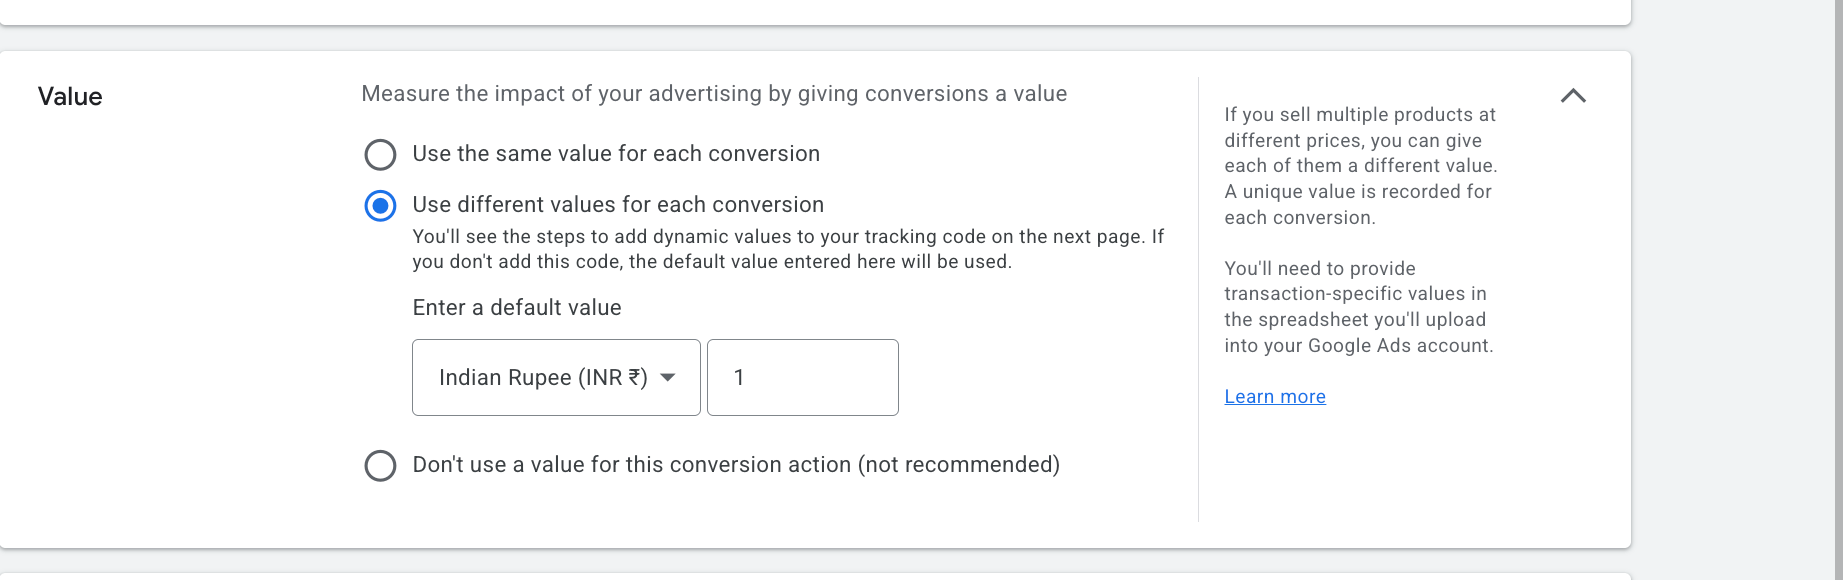
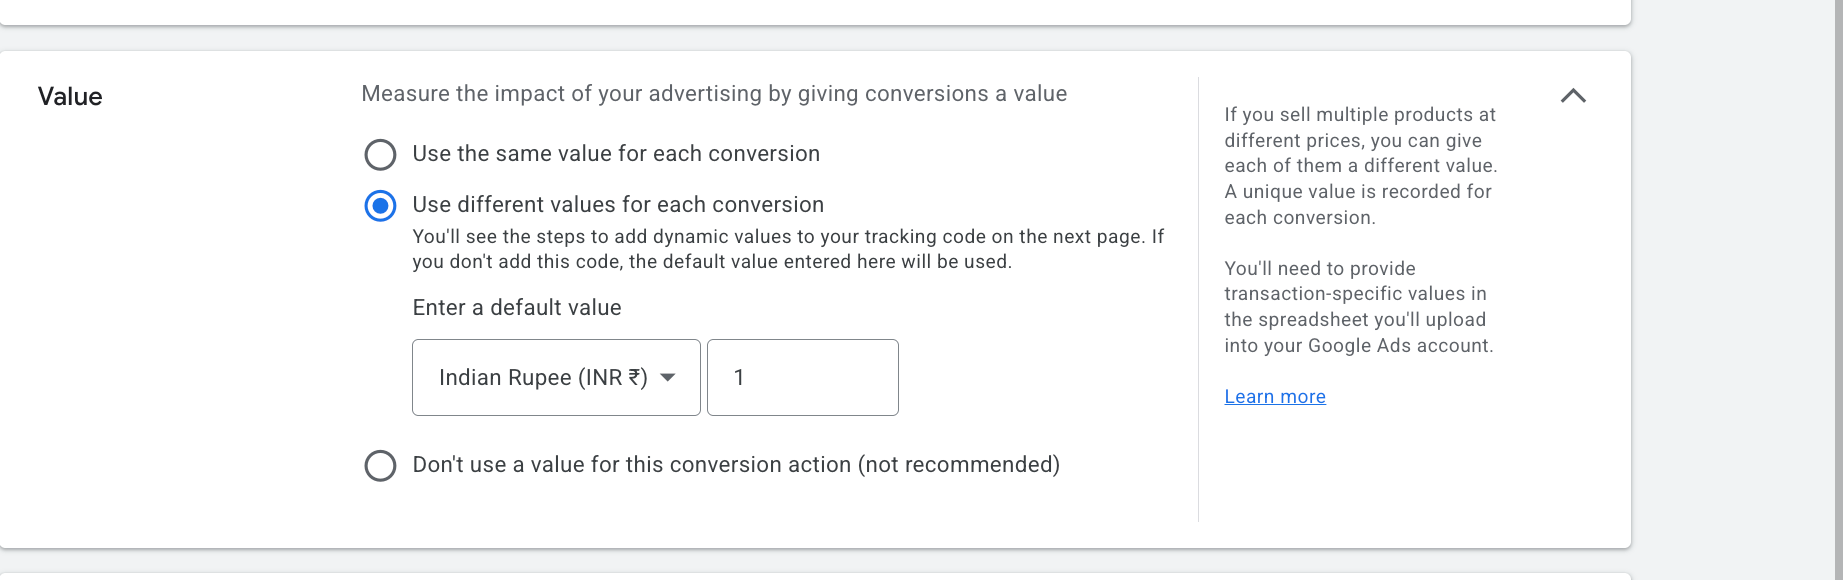
Select the value for the conversion: same value every time, a different value per conversion, or no value at all. More info
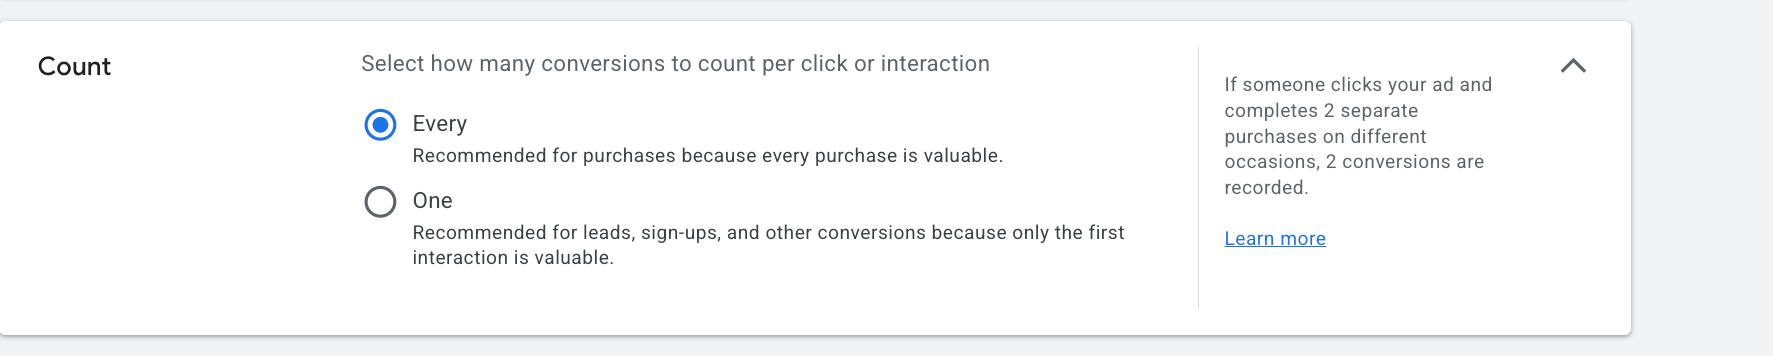
Choose how conversions are counted. Select "Every" if you want every qualifying event counted (useful for revenue events like purchases), or "One" if you only want to count a single conversion per person (recommended for lead generation, so a contact who submits twice doesn't inflate your numbers).
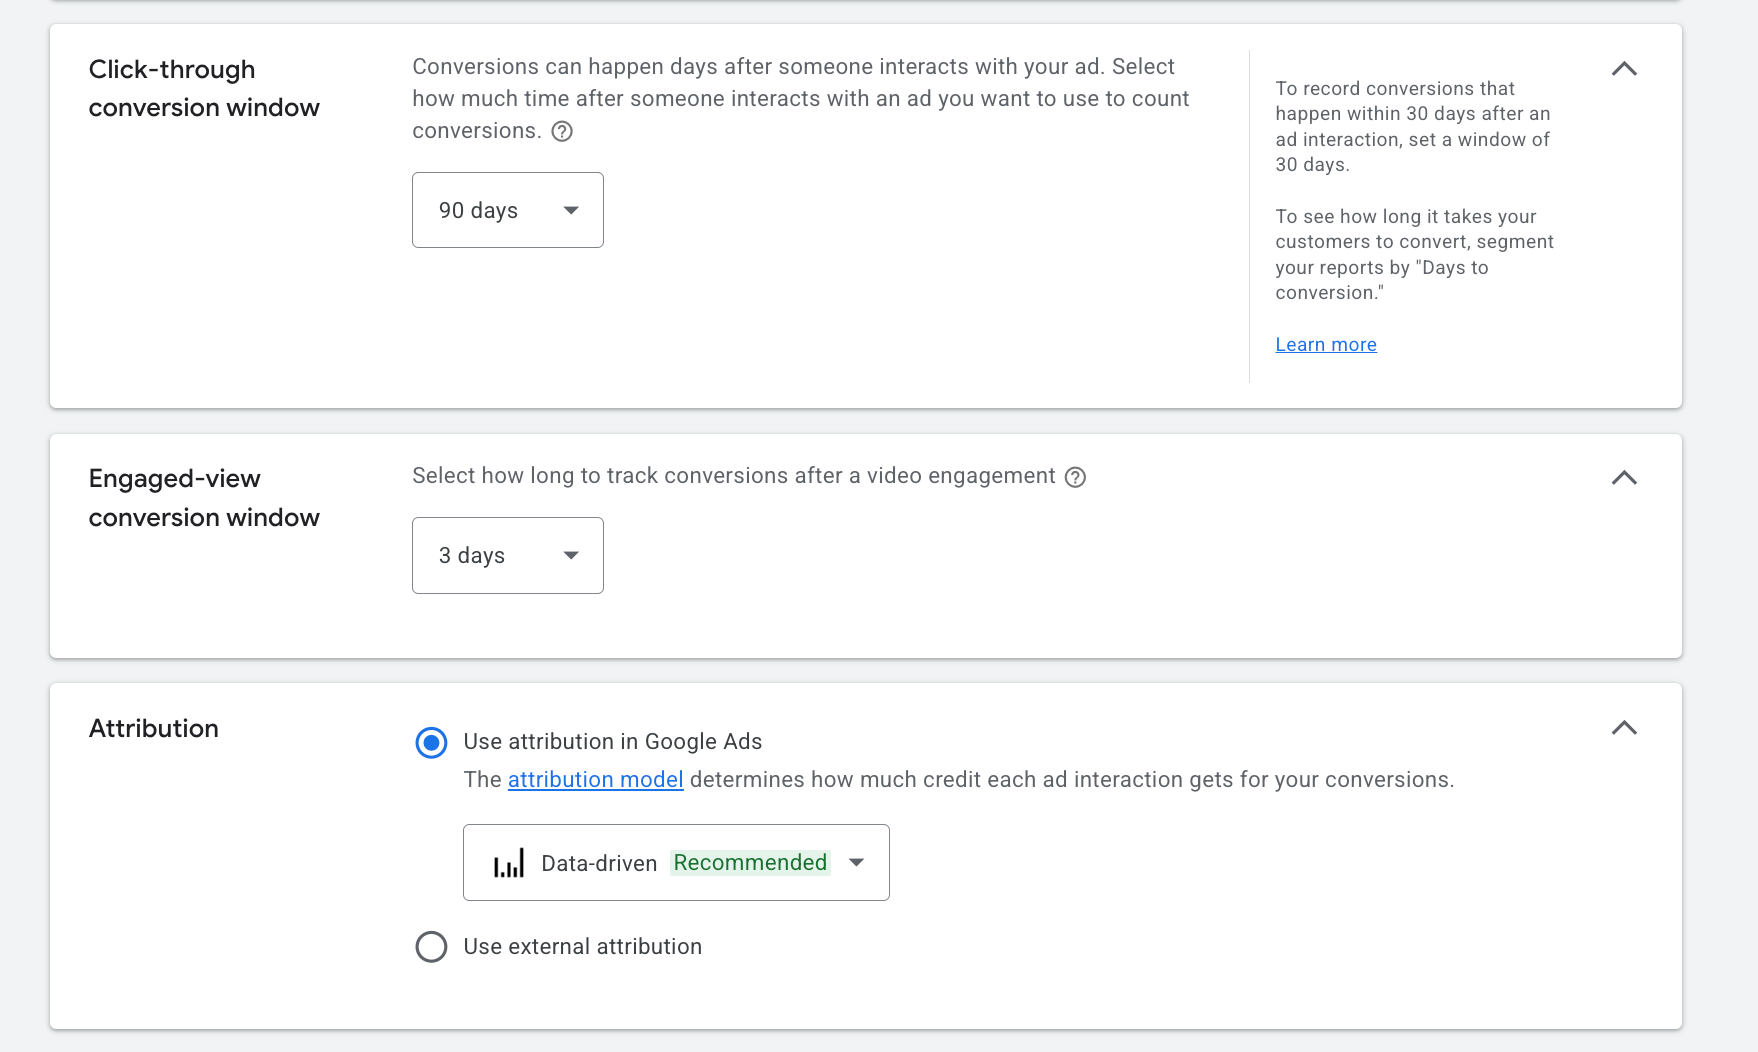
Set the conversion window and attribution model:
Set the click-through conversion window to 90 days.
Set the engaged-view conversion window from the dropdown.
Set the attribution model to "Last Click" or "Data-Driven" (recommended). More info
Click Done to save the conversion settings.

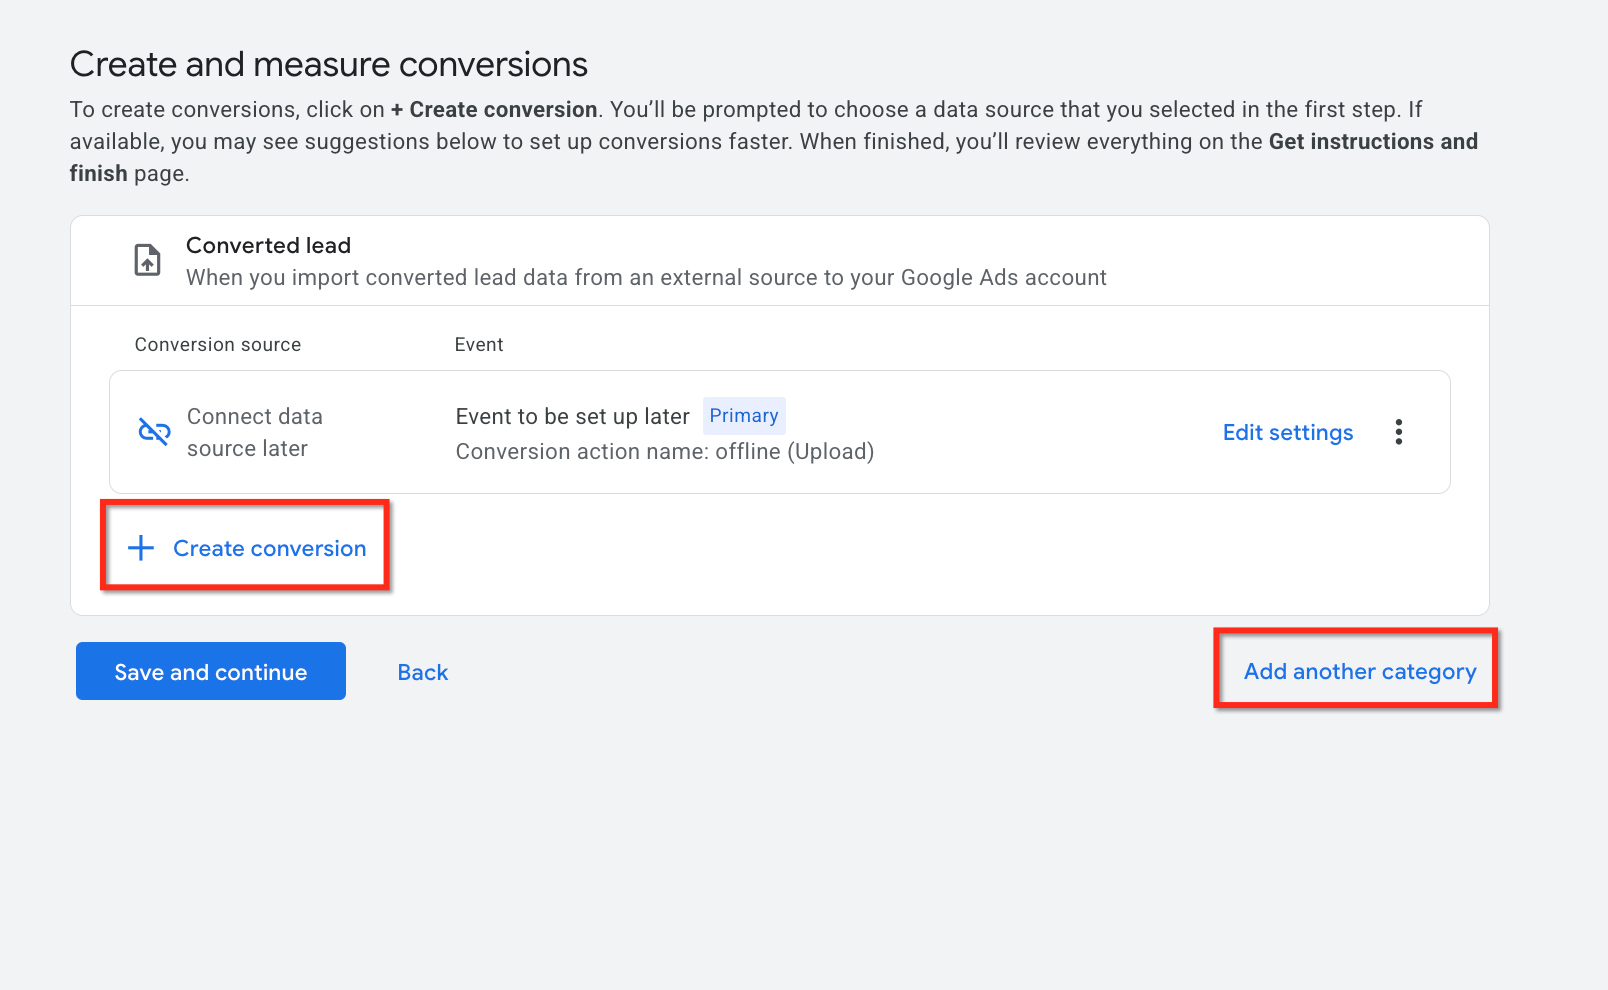
Click Save and Continue, then Create Conversion to finish creating this conversion action. Use Add Another Category if you want to set up more than one conversion at the same time.
Click Finish to complete the process.
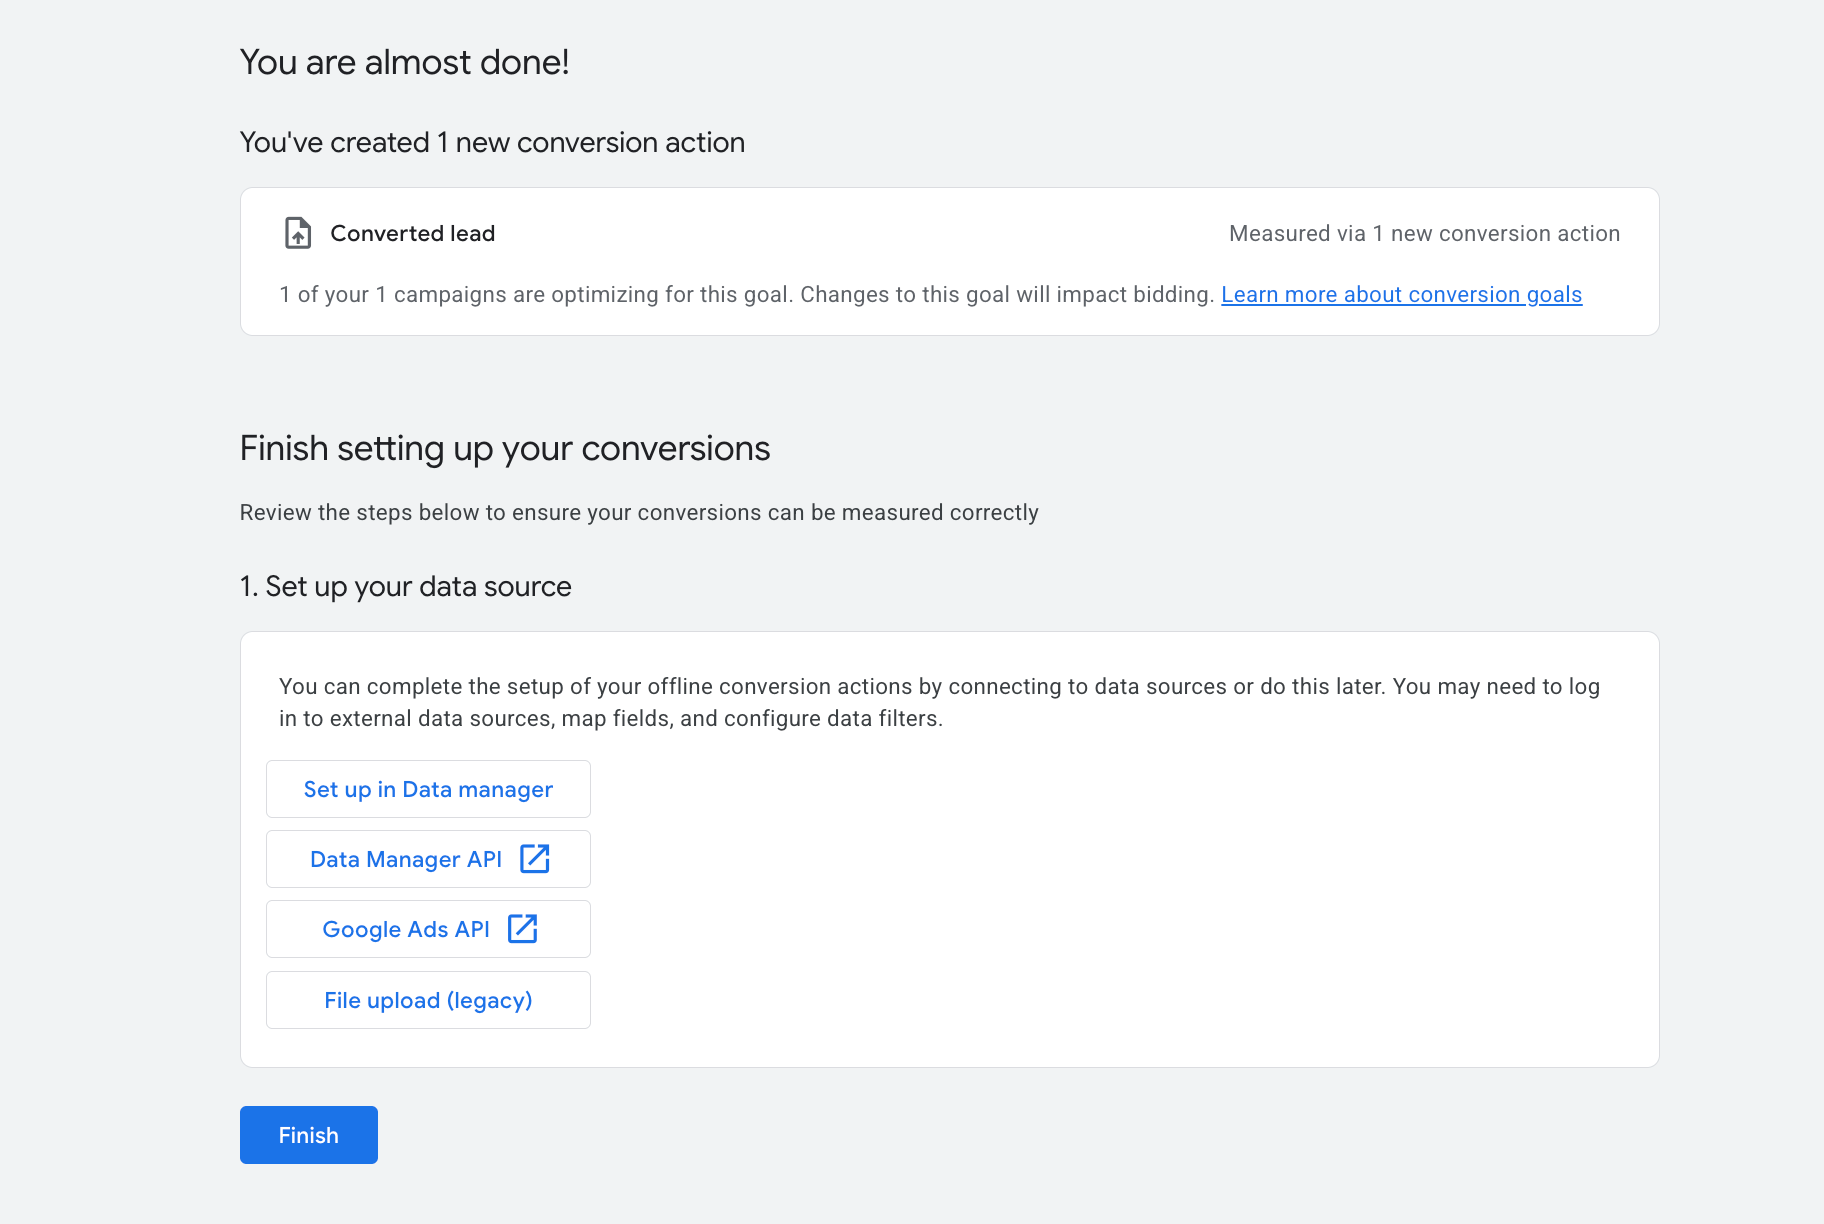
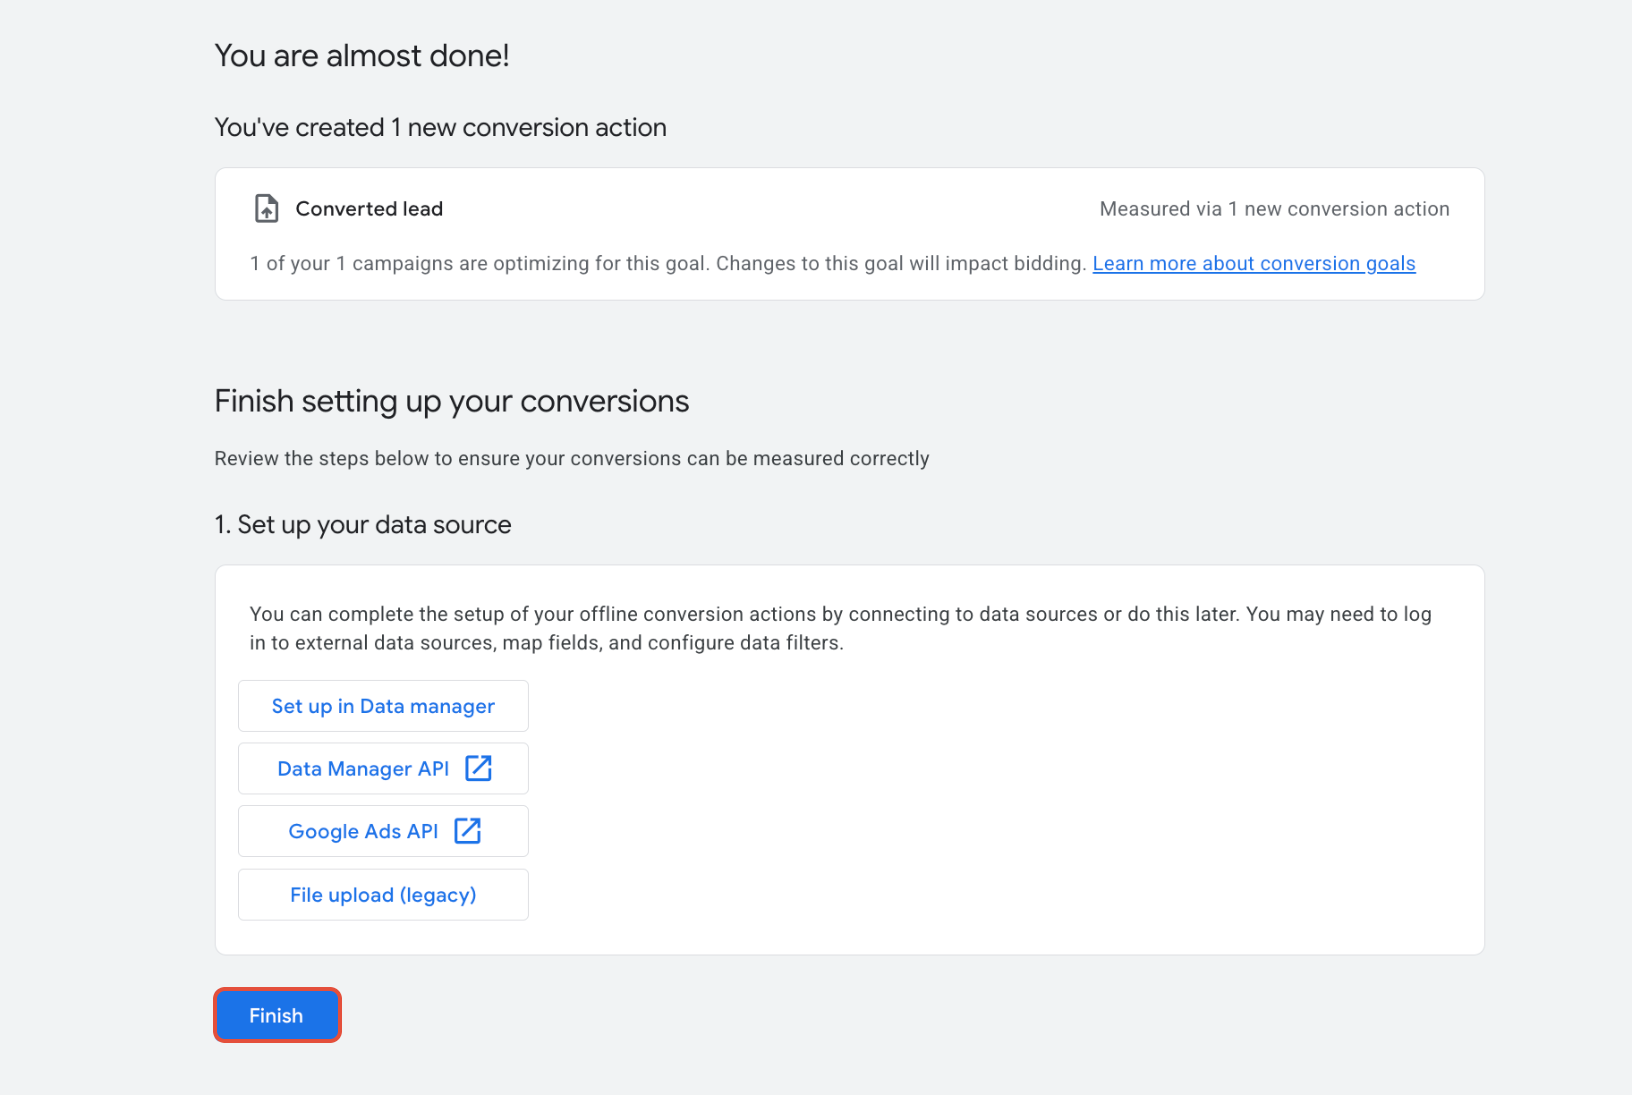
Your conversion action now exists in Google Ads. The next step is telling Aesthetix CRM when to fire it.
Some accounts still show an earlier version of this flow that starts from an "import" option rather than the Conversion Action dropdown above. If your account looks like this instead, the underlying steps are the same, you're just choosing your data source and goal from a slightly different menu.
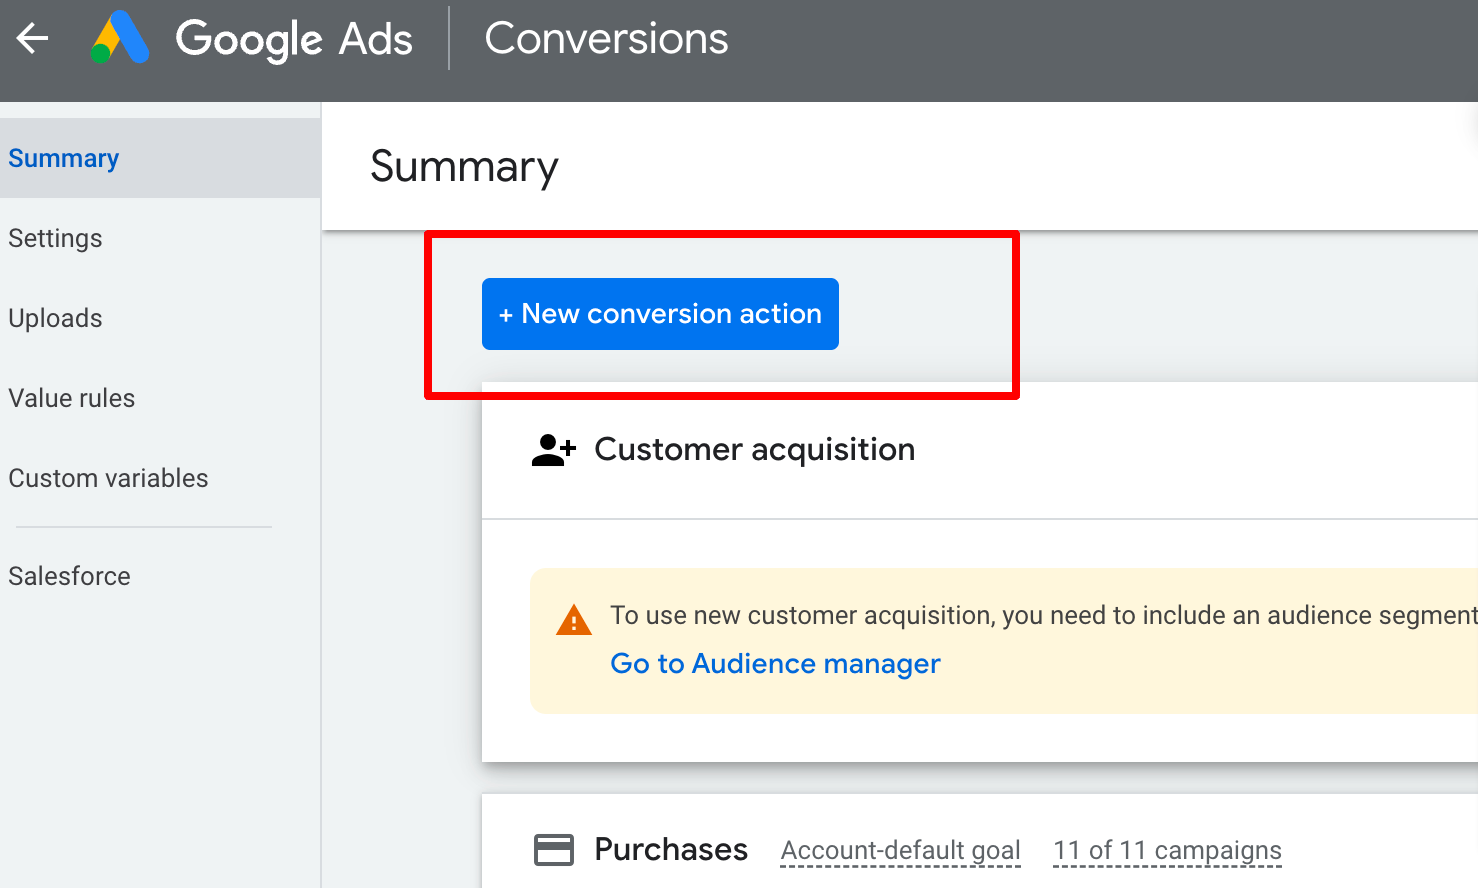
Click Tools and Settings, then Conversions, then + NEW CONVERSION ACTION to begin.
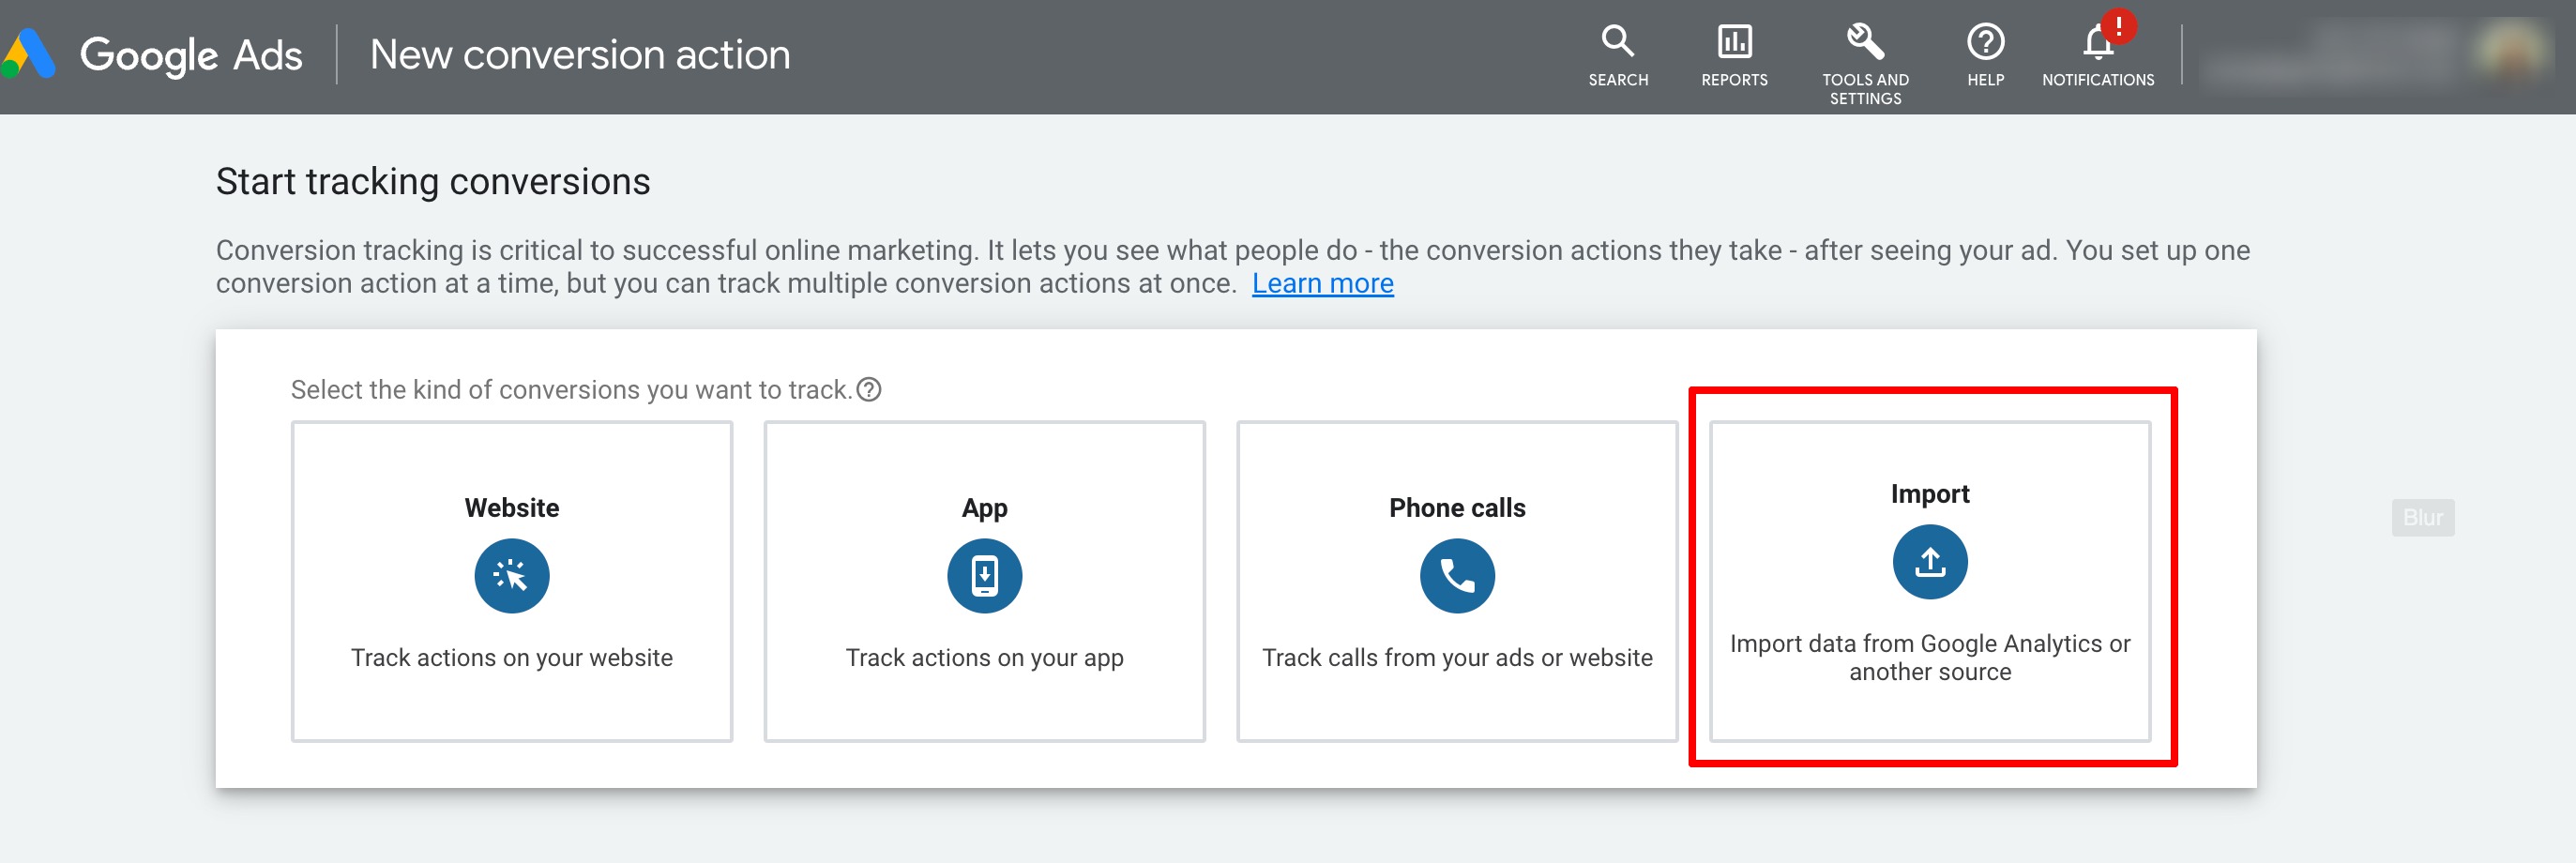
Choose the Import option to start tracking conversions.
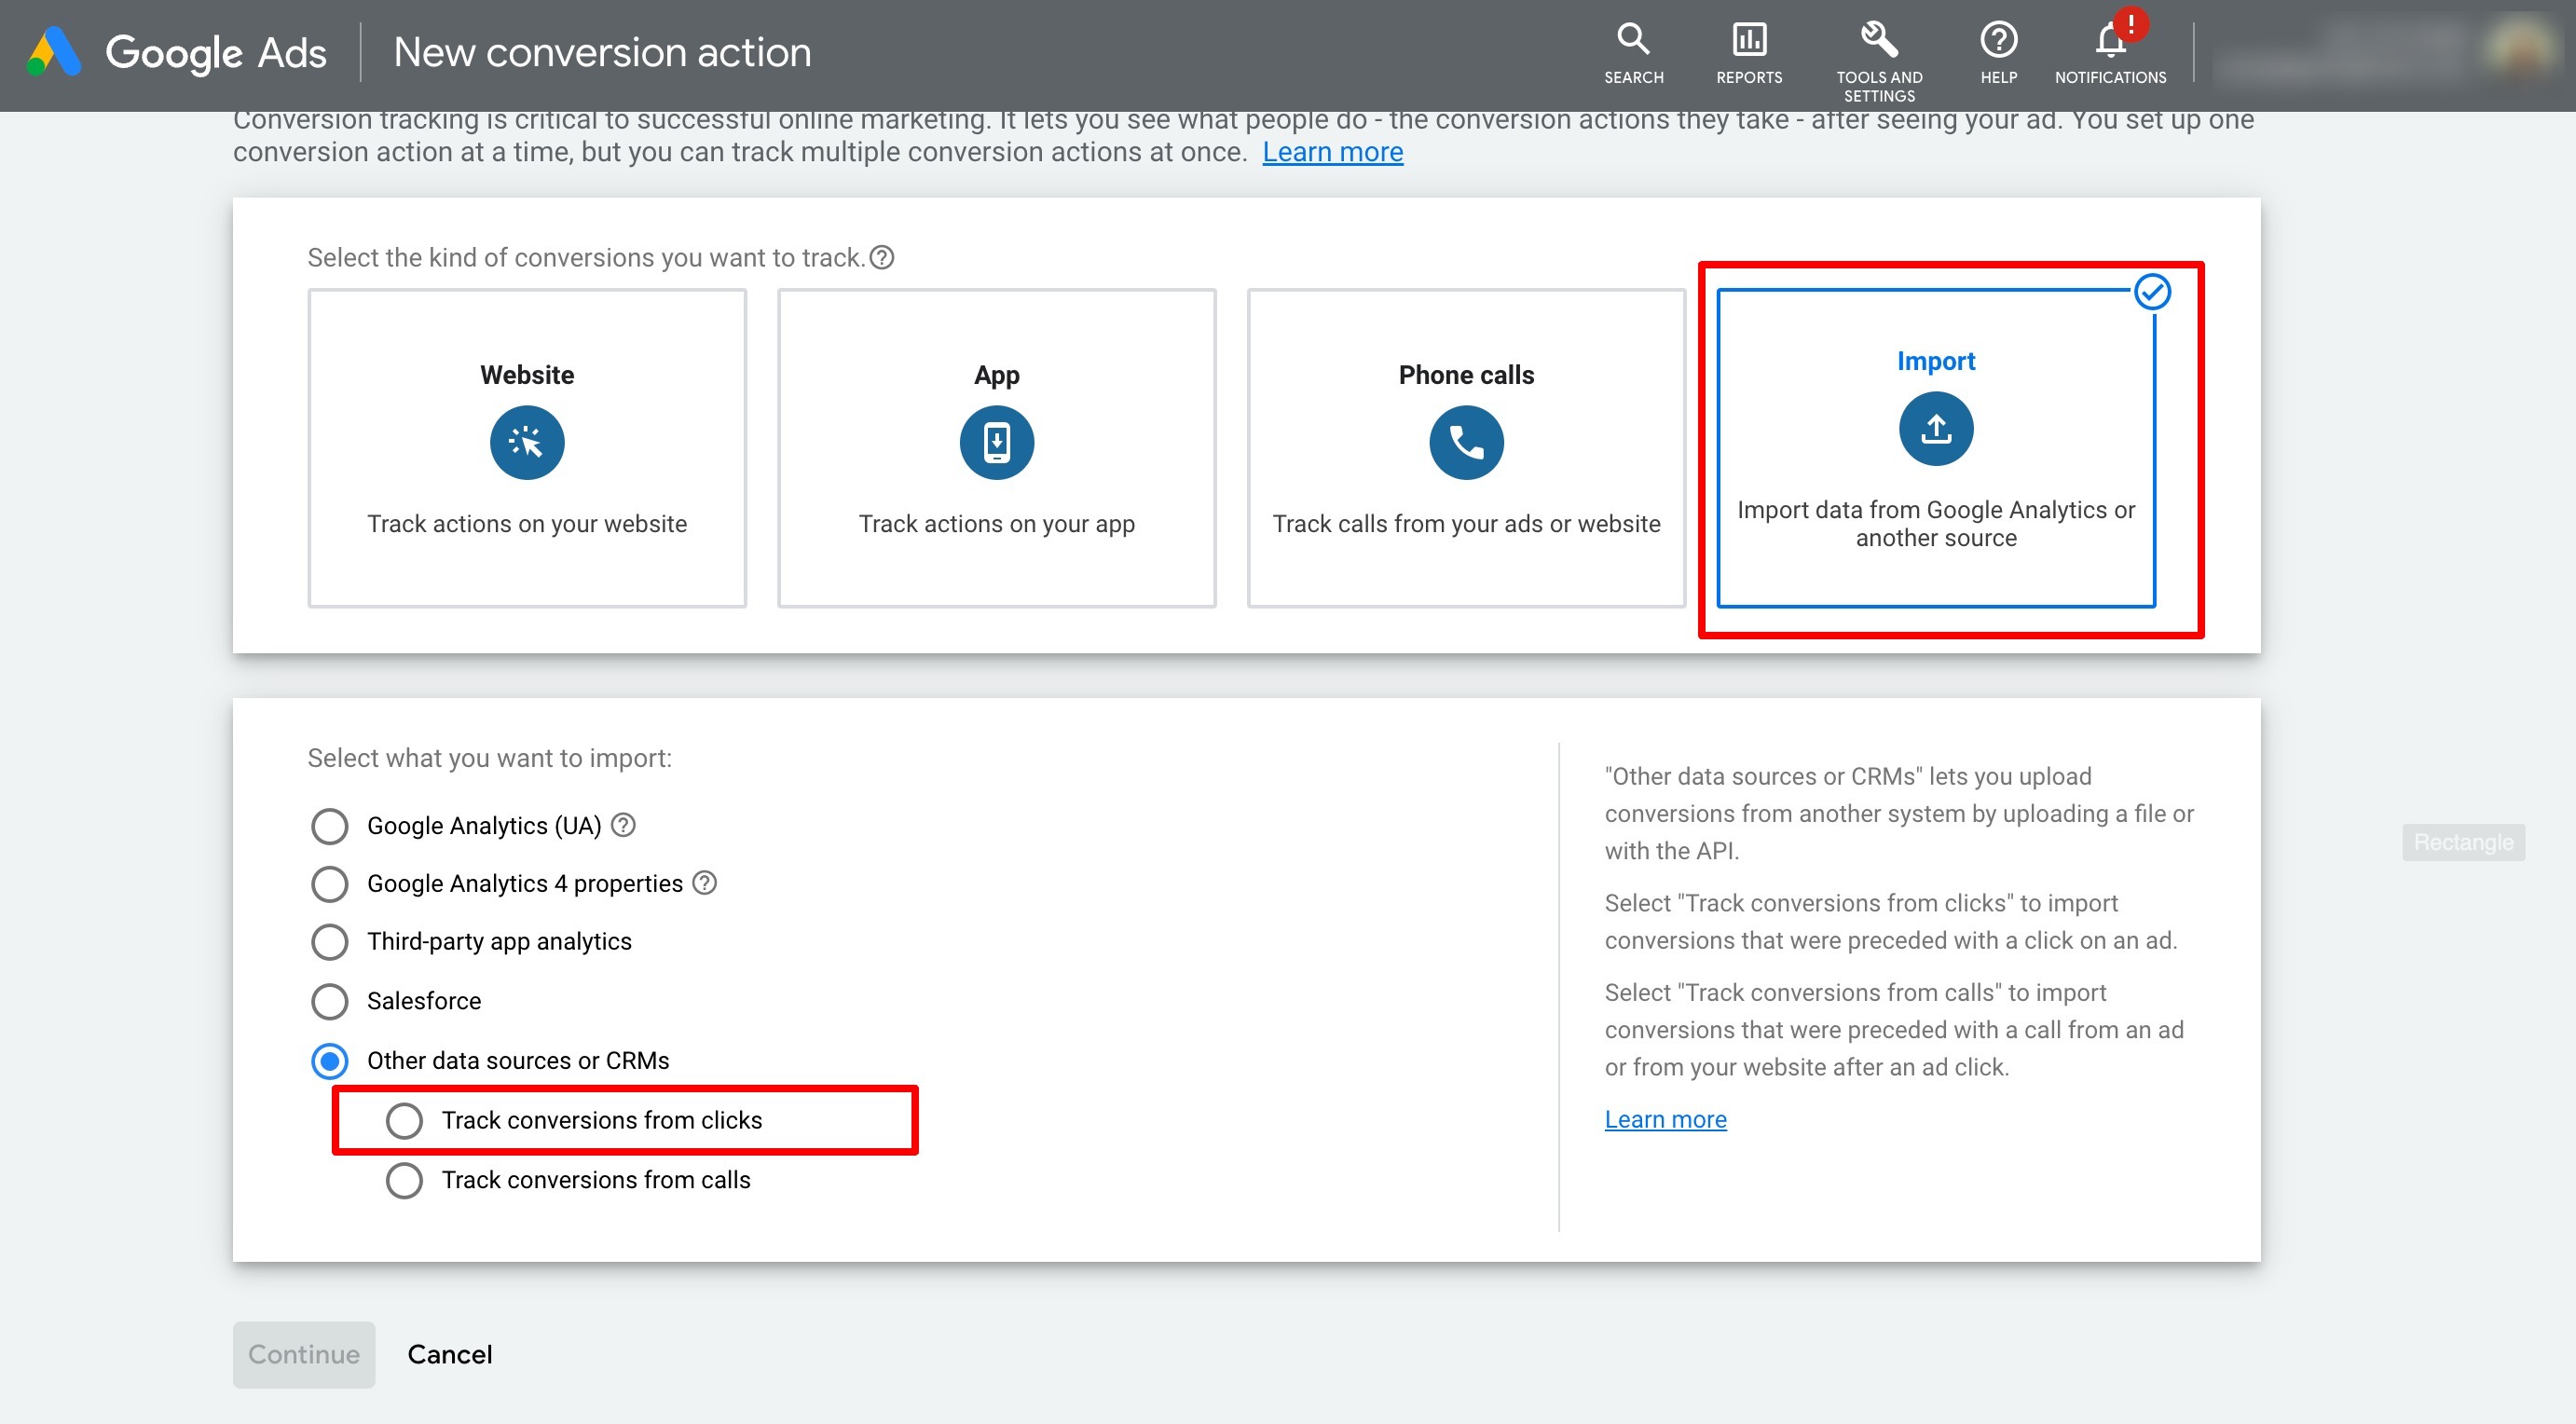
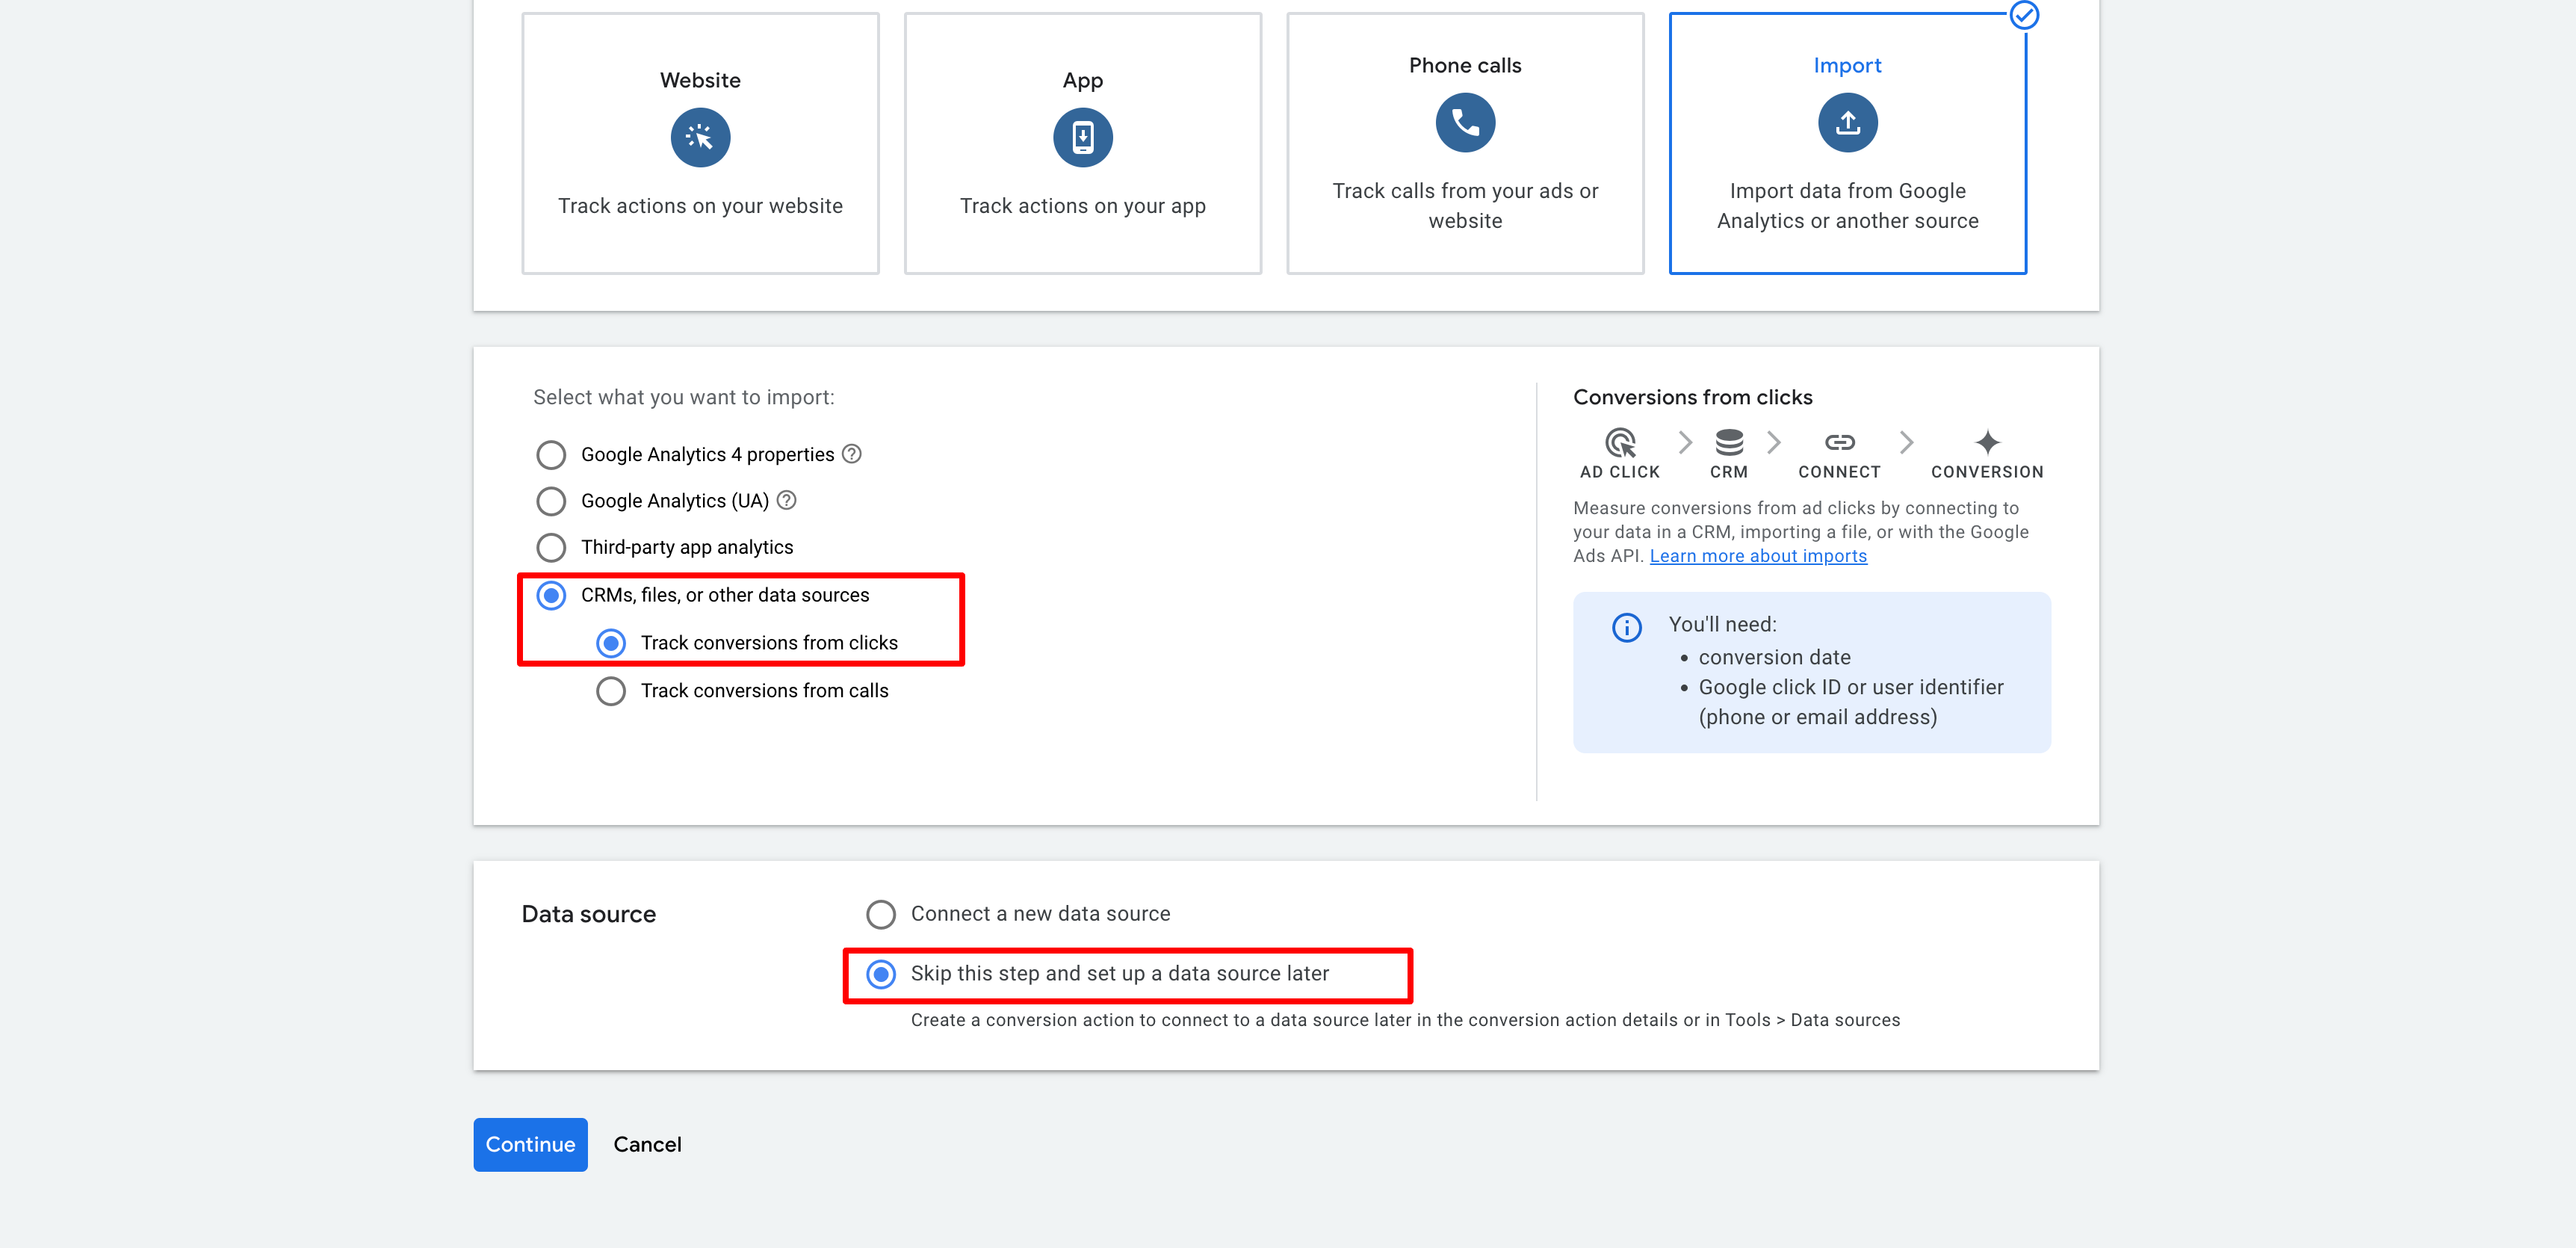
Depending on your account's version, you'll see one of these three data source screens. Select "Other data sources or CRMs" and then "Track conversions from clicks."
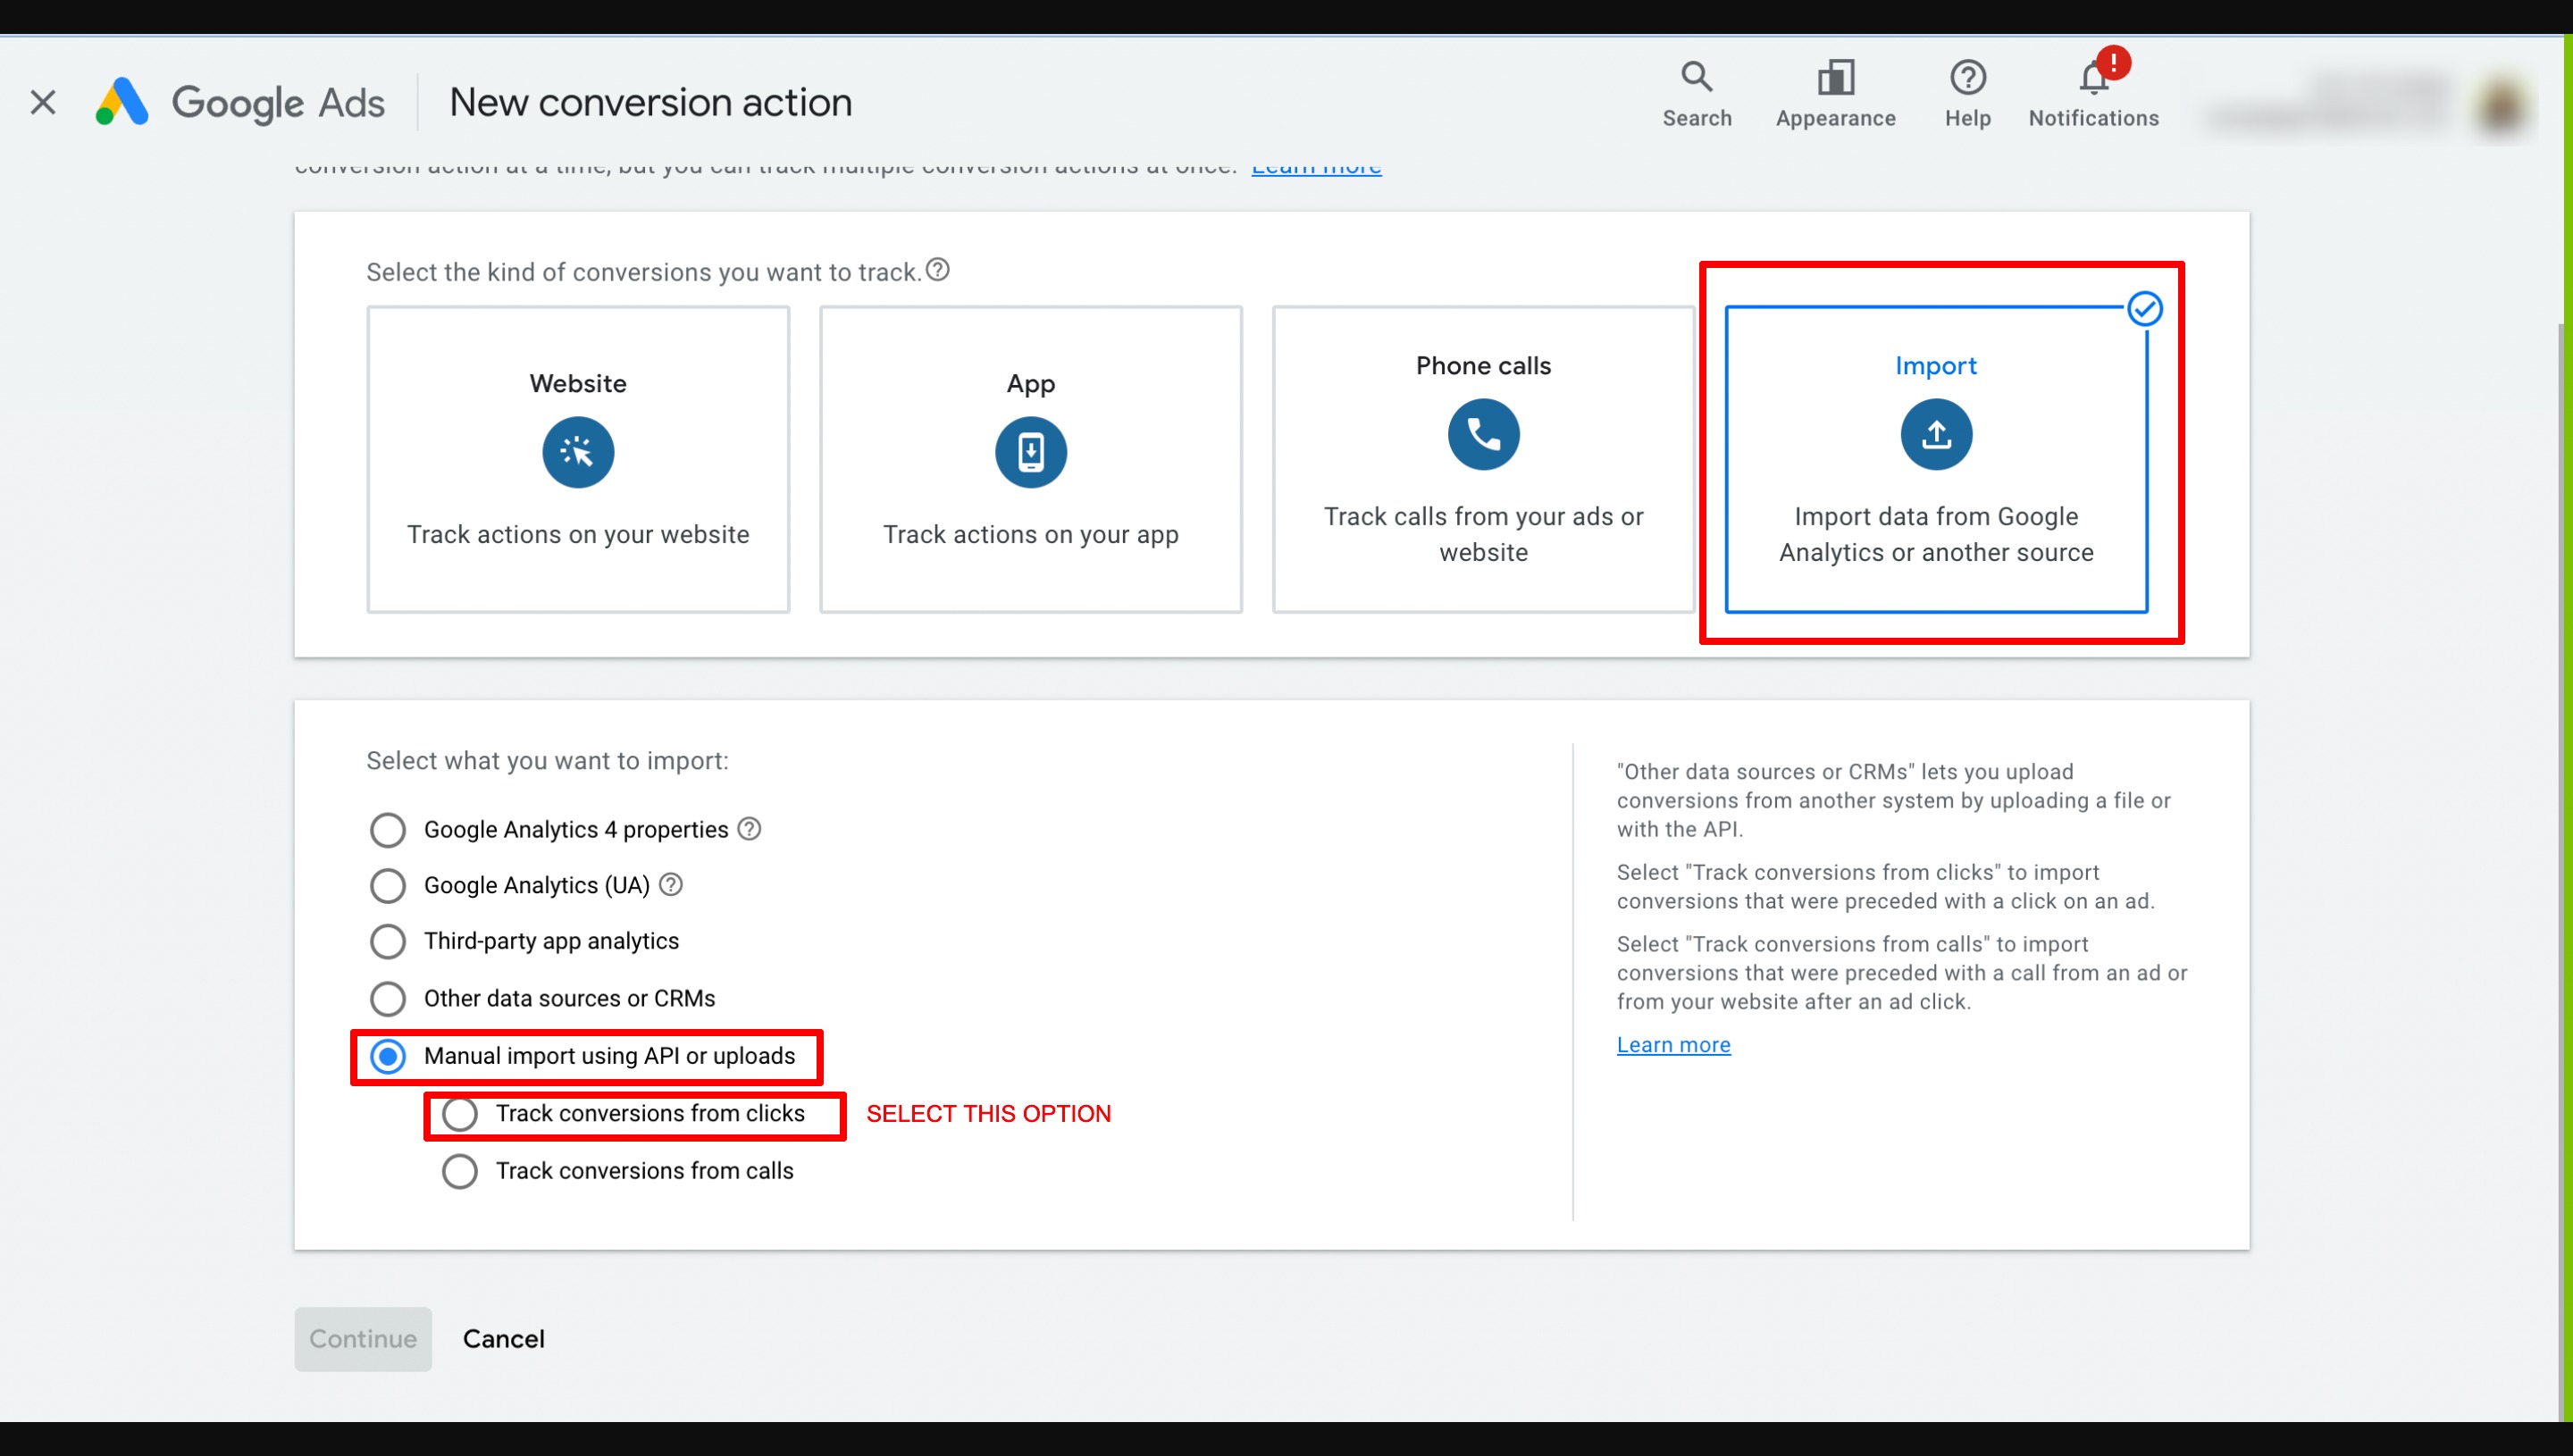
Or select "Manual import using API or uploads" and then "Track conversions from clicks."
Or, on the more recent version of this screen, select "CRMs, files, or other data sources," then "Track conversions from clicks," and under Data Source choose "Skip this step and set up a data source later."
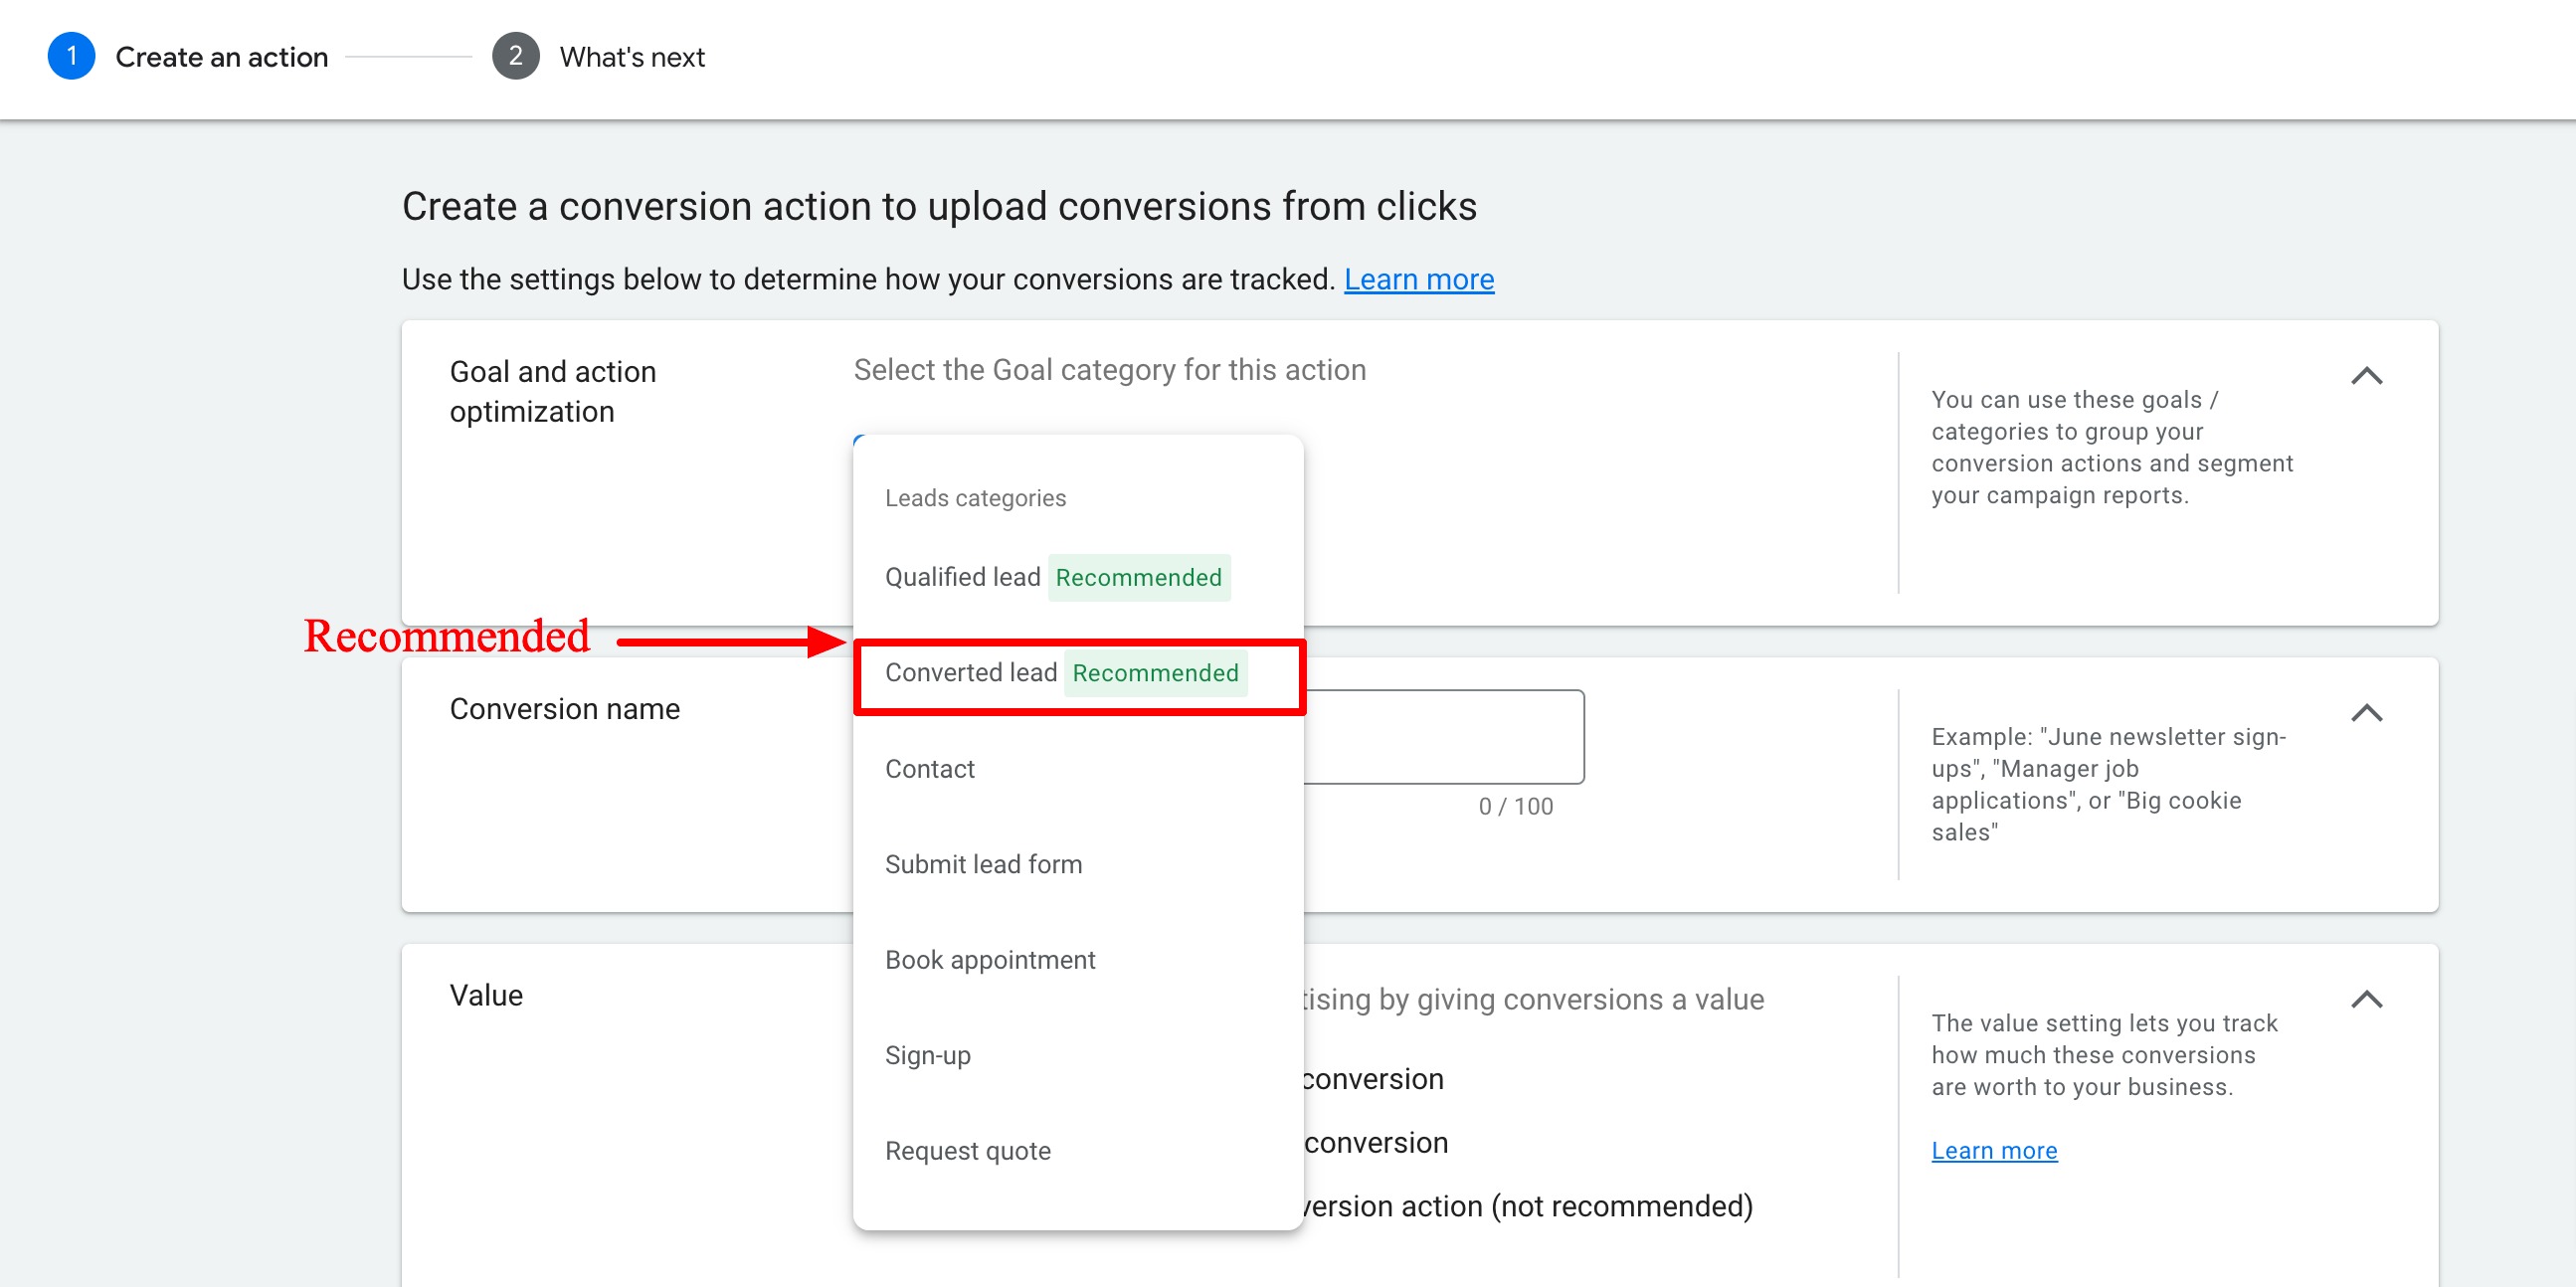
For Goal and action optimization, select "Converted Lead" as the primary option.
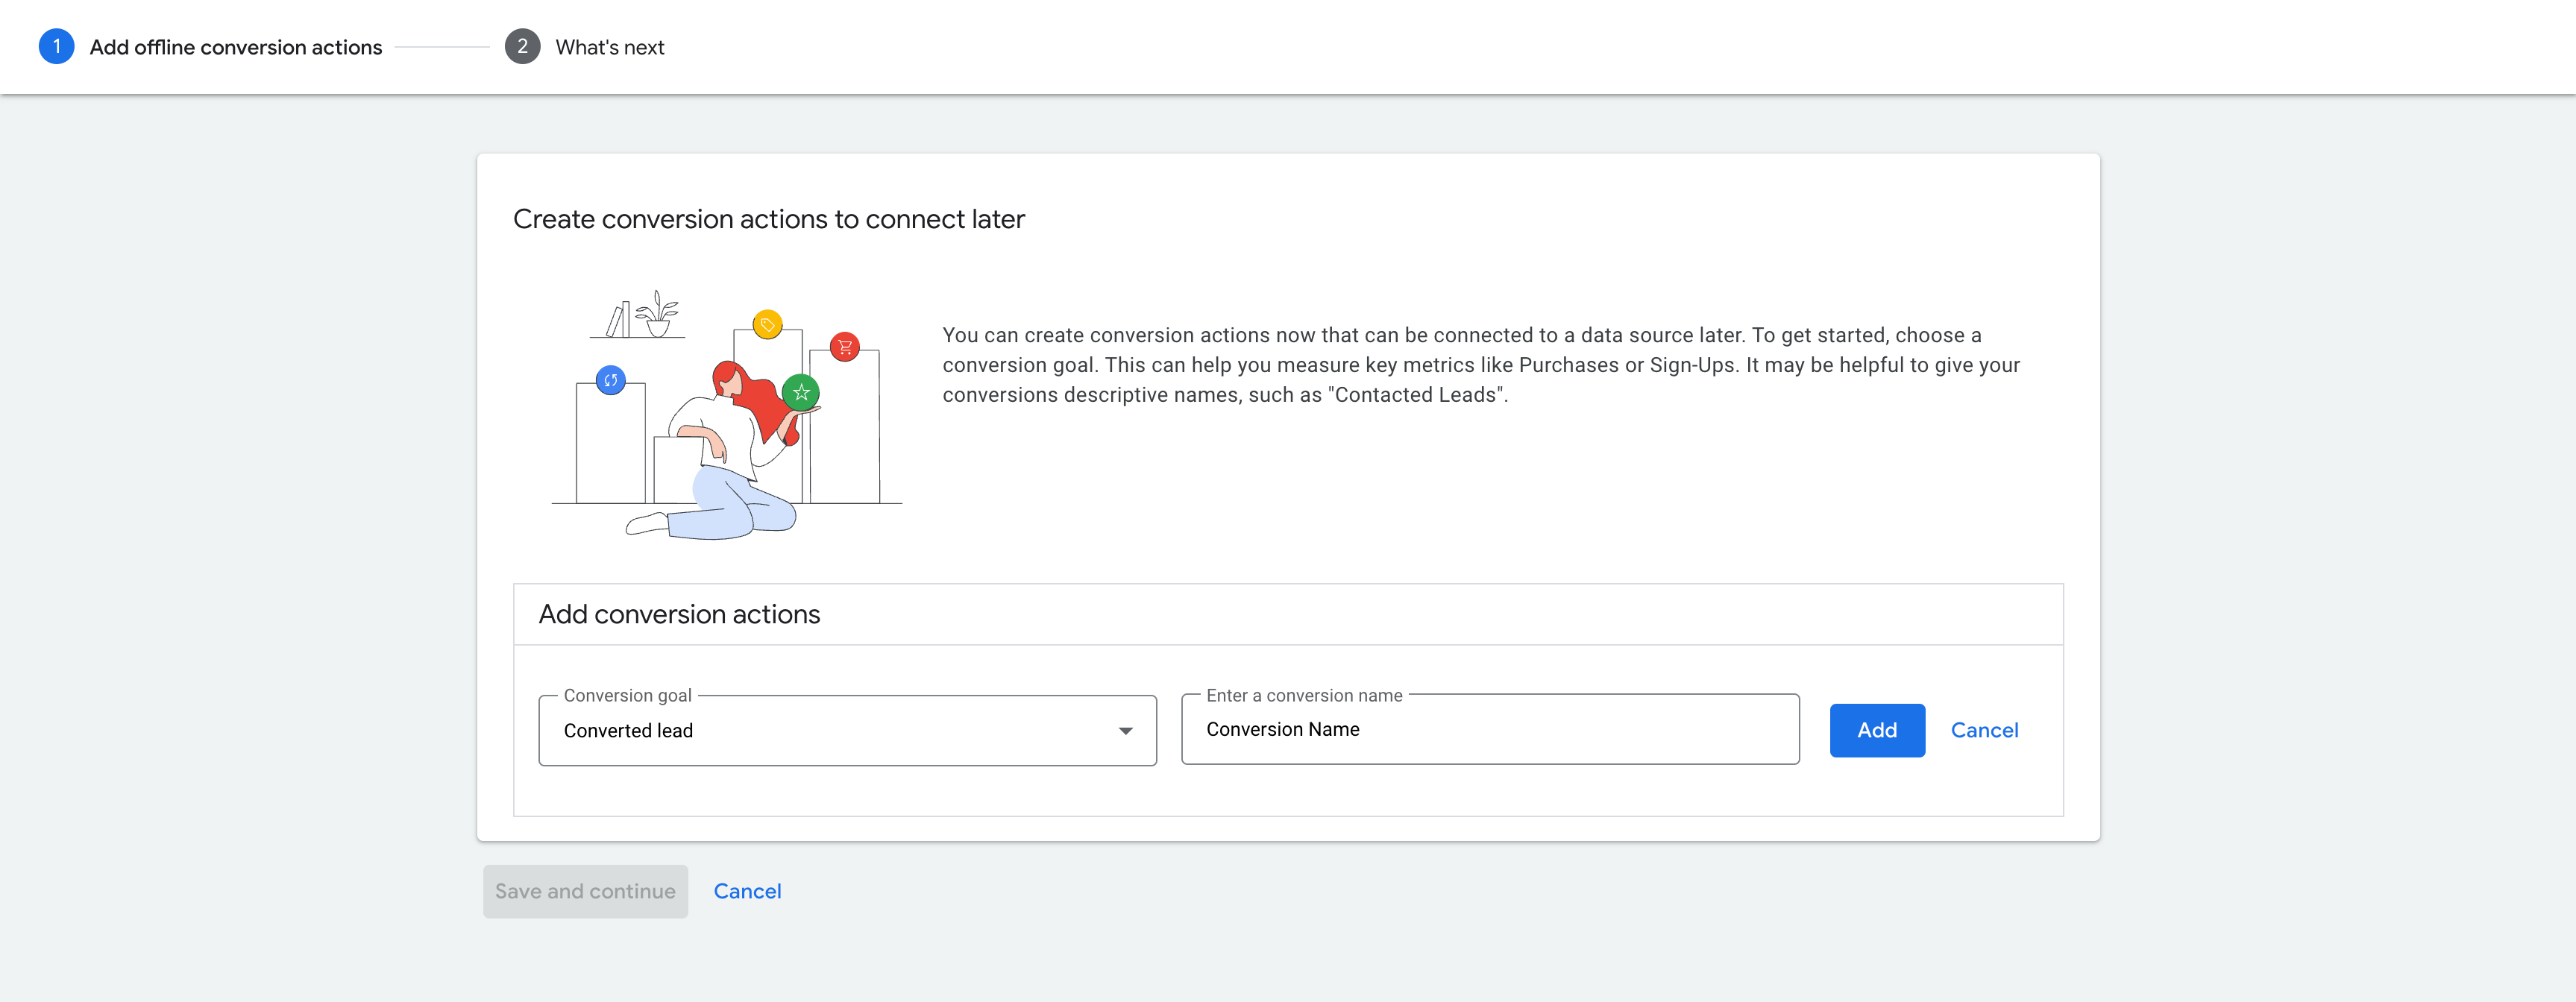
On the newer UI, you'll choose the conversion goal directly as "Converted Lead."
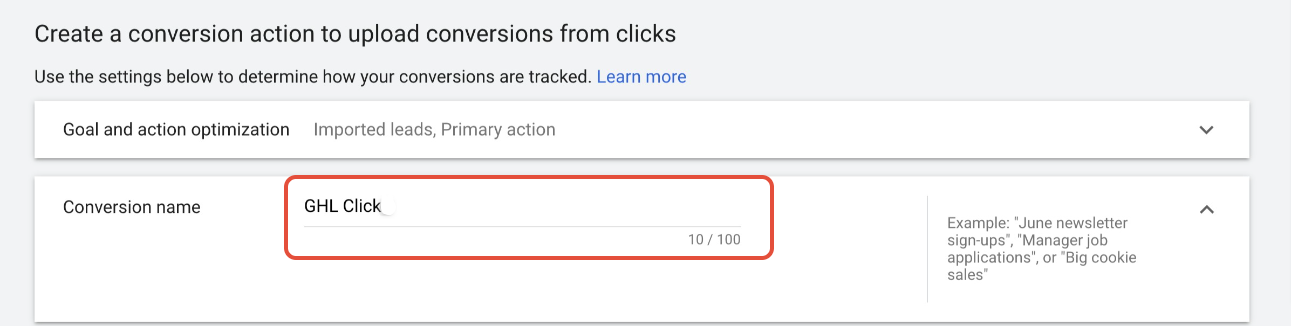
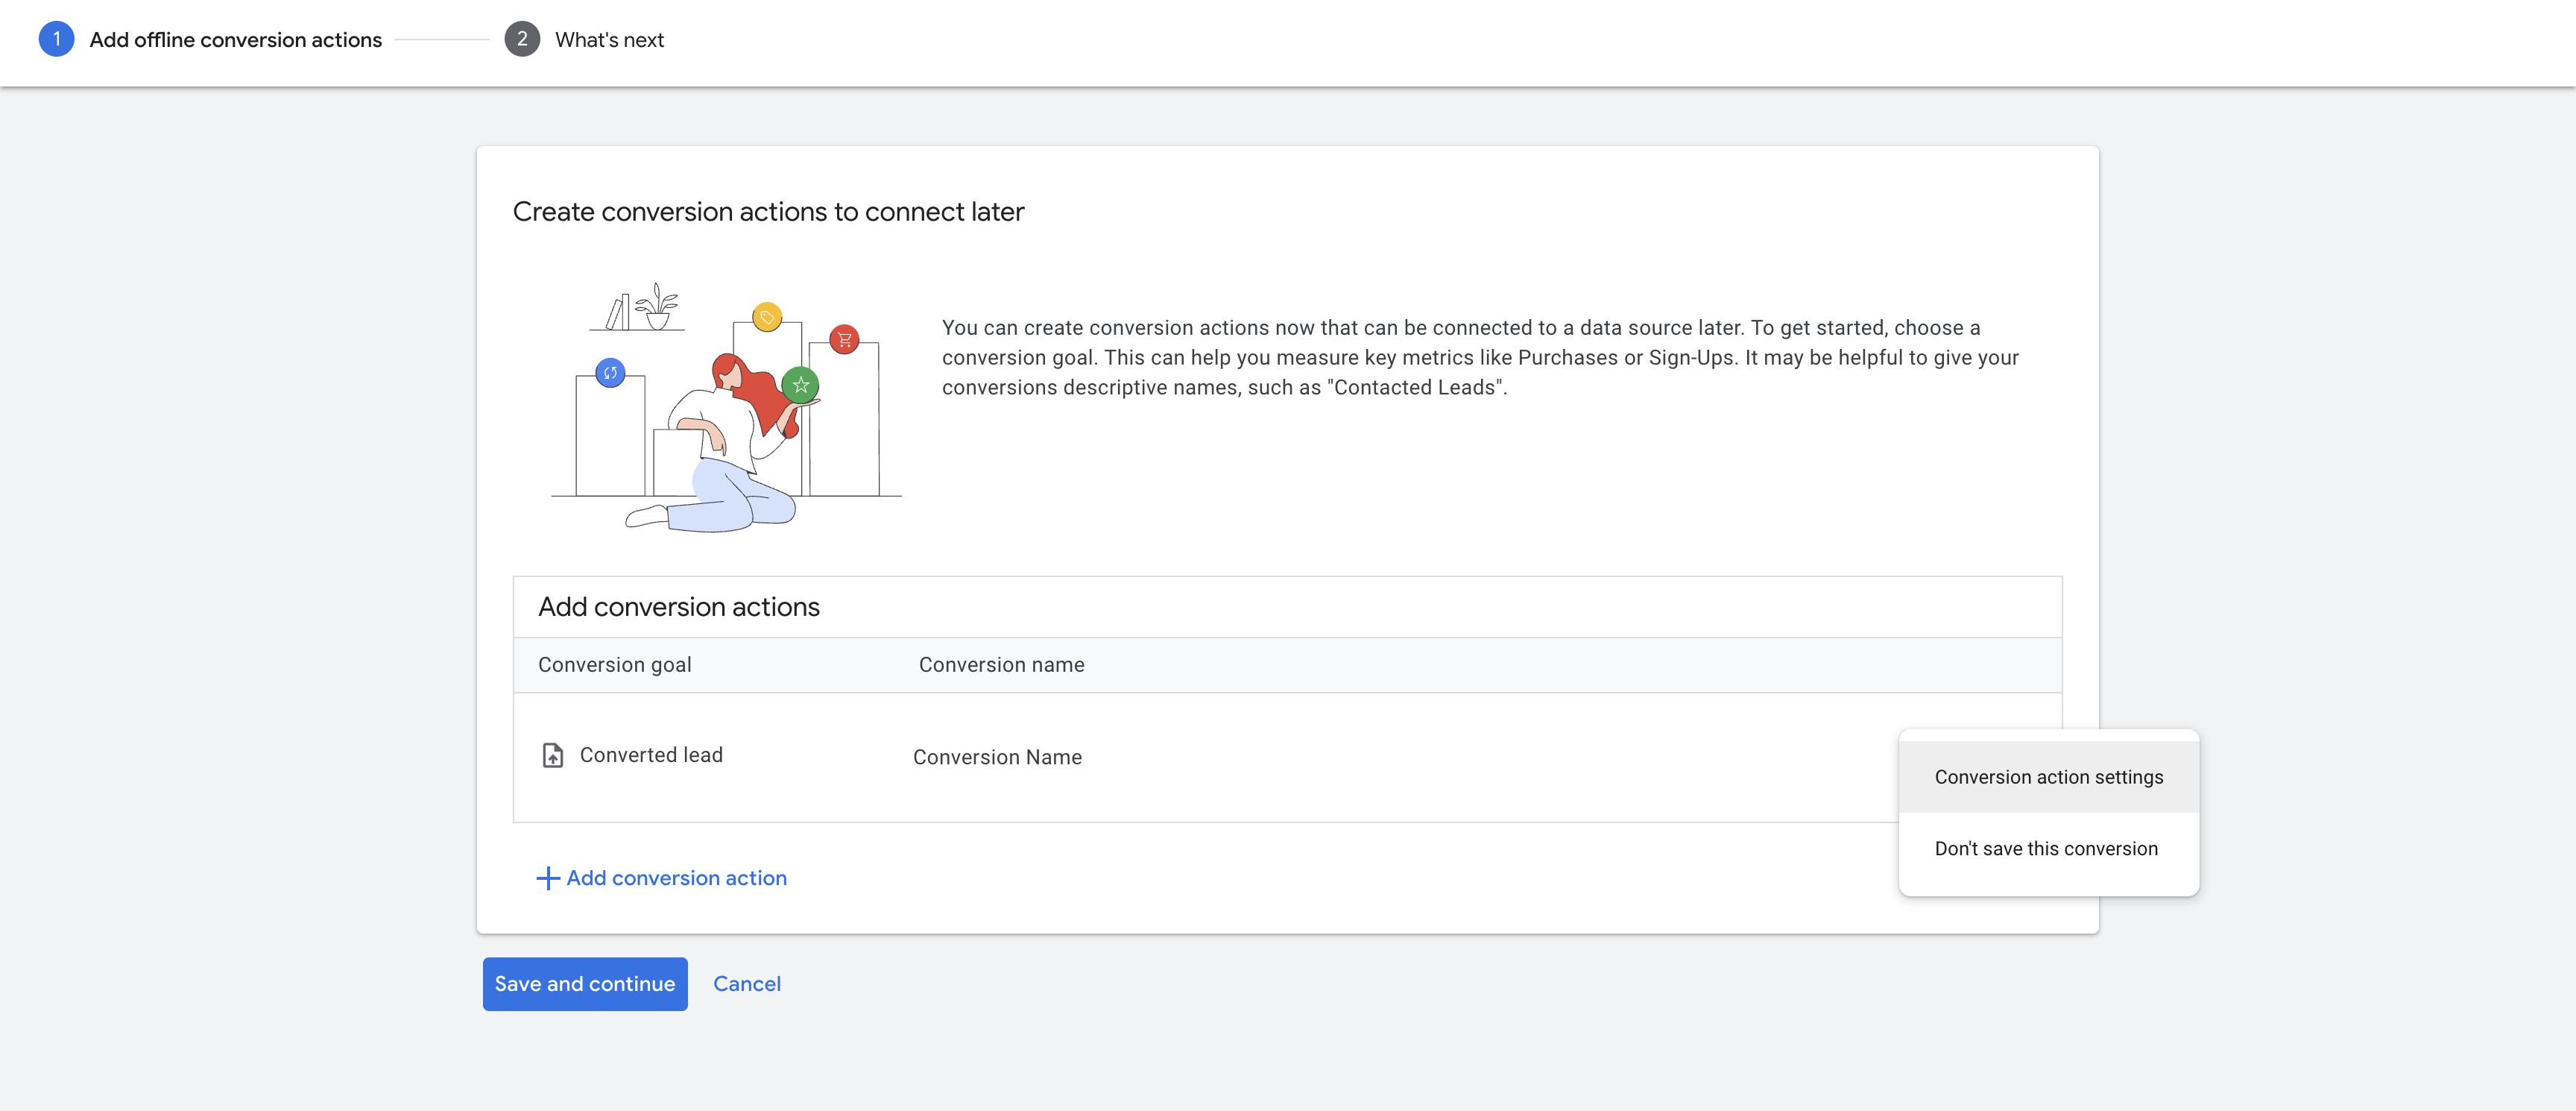
Type in a name for your conversion. In this example we're calling it "New Patient Lead."
On the newer UI, add the conversion name and click Add.

If you already created the conversion and need to revisit its settings, click Settings next to it and choose Conversion action settings.
Select the value for your conversion: same, different, or don't use a value. More info

For count, we recommend choosing "One."

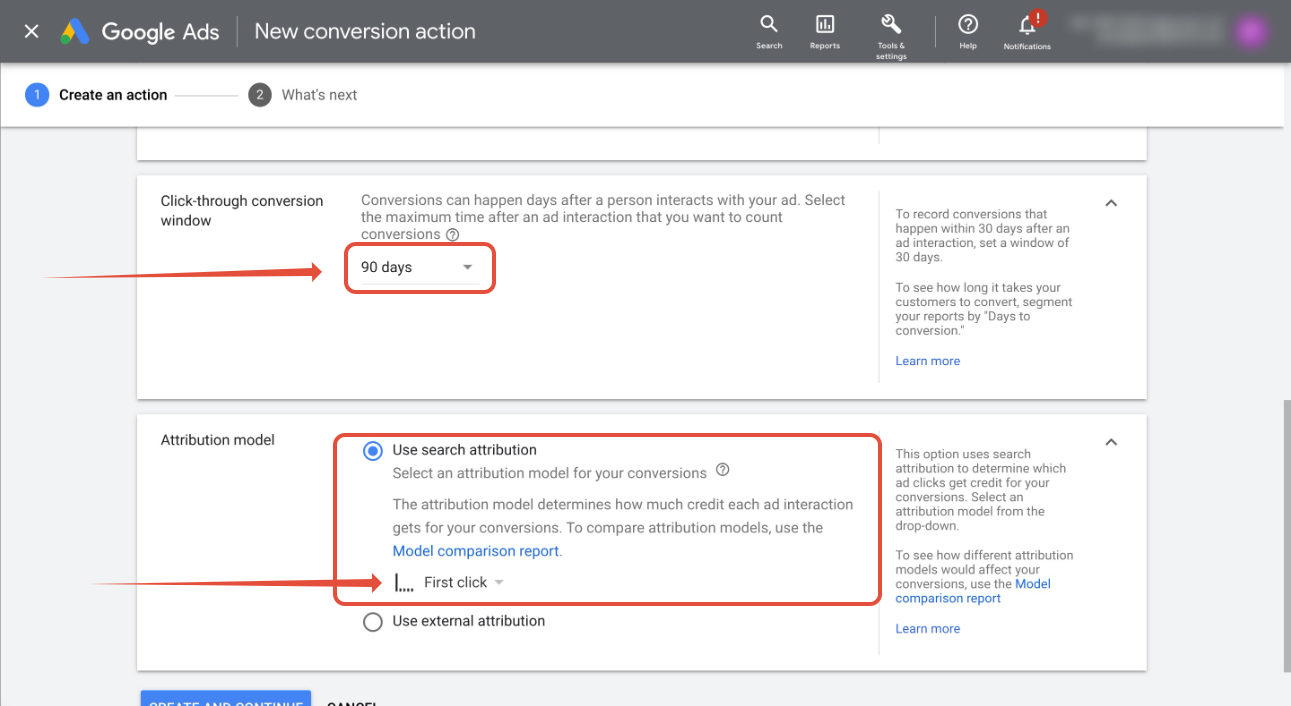
Set the click-through conversion window to 90 days, and set the attribution model to "First click" or "Latest click" (recommended). More info
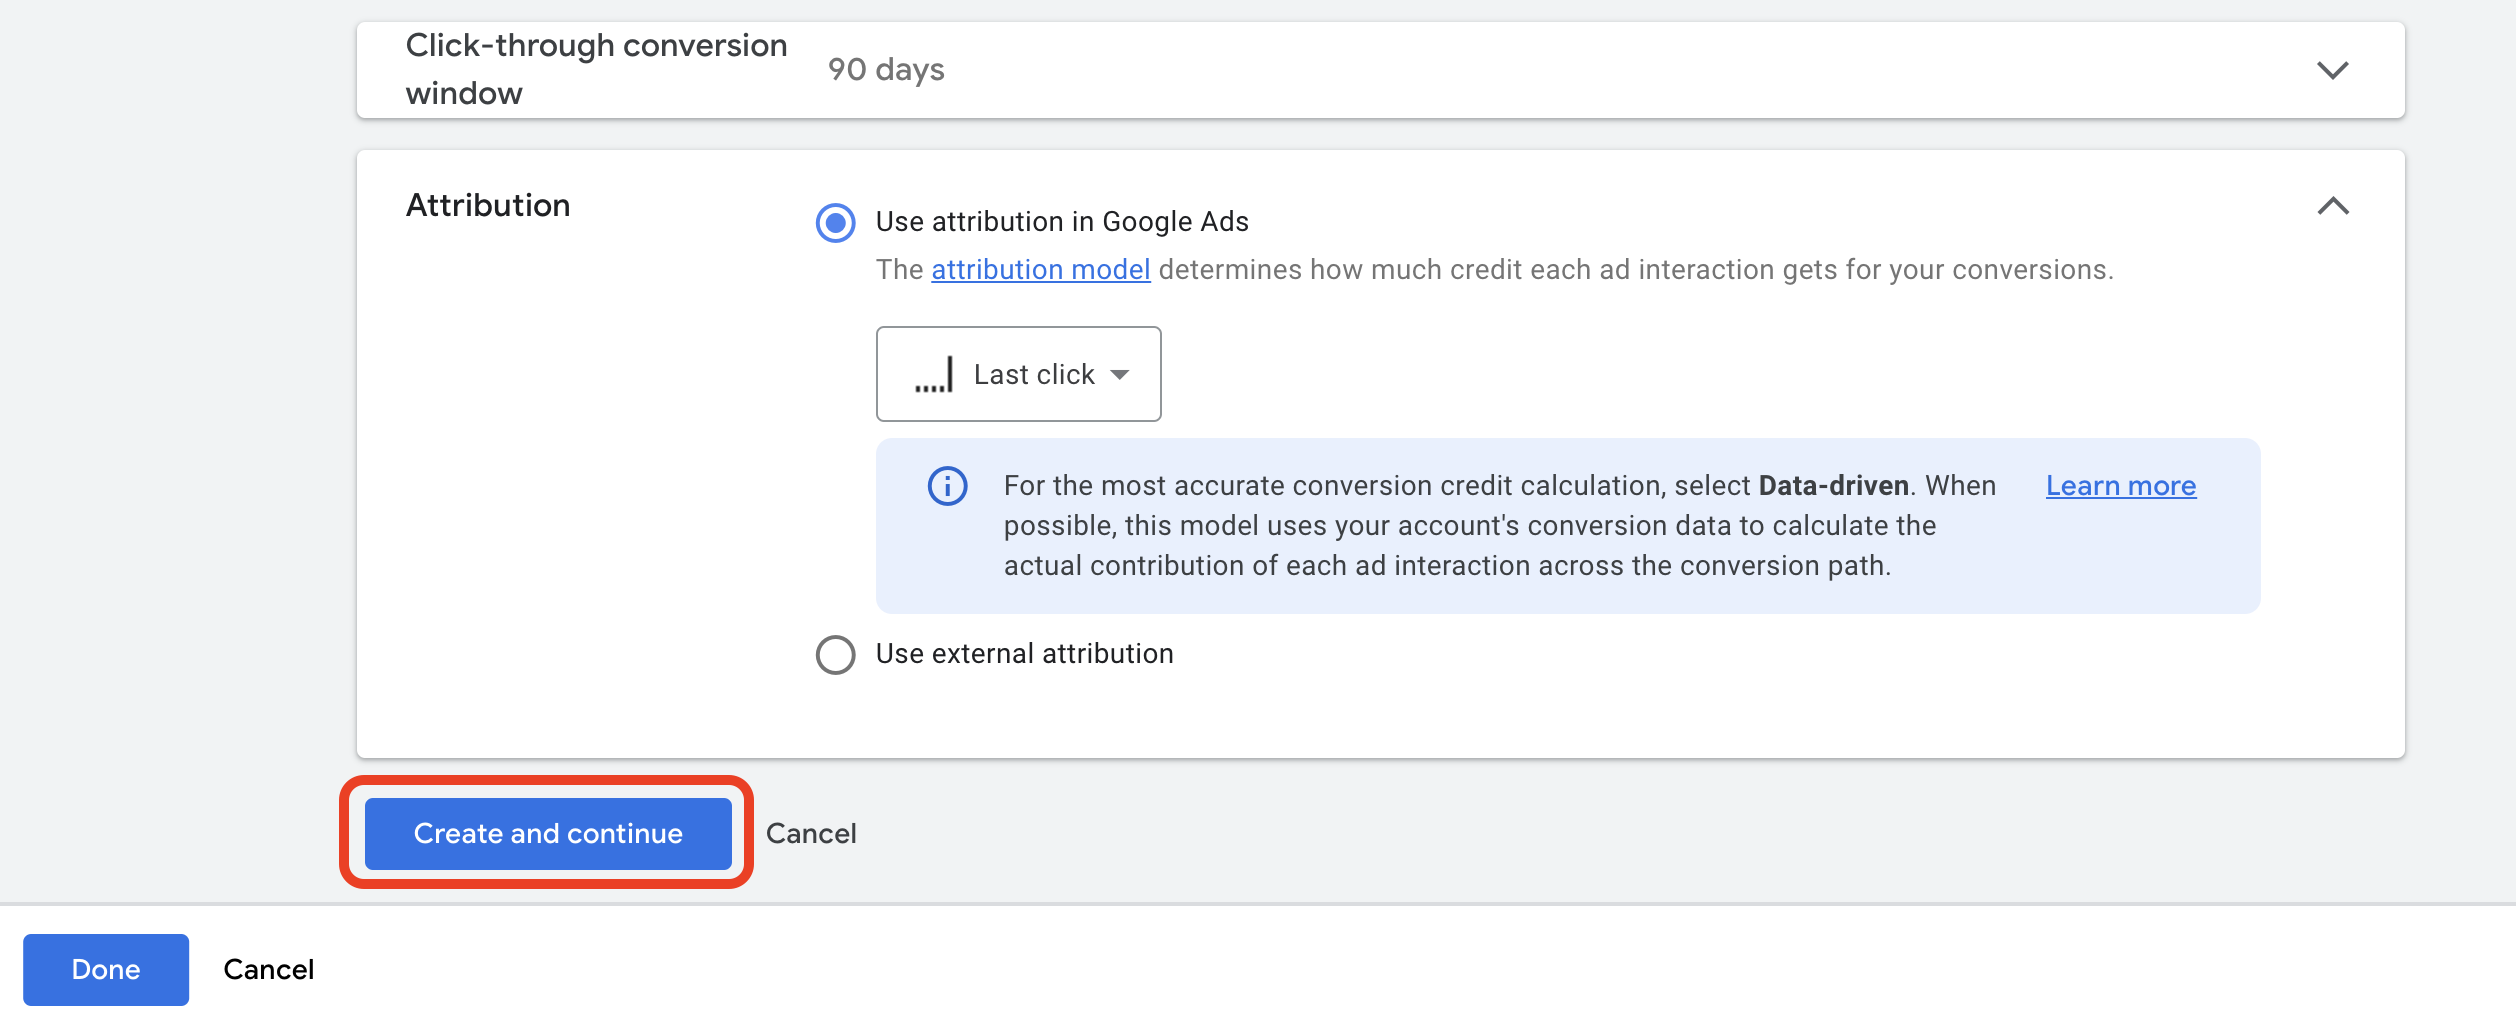
Click "Create and Continue." Newer accounts will see a slightly different confirmation screen.
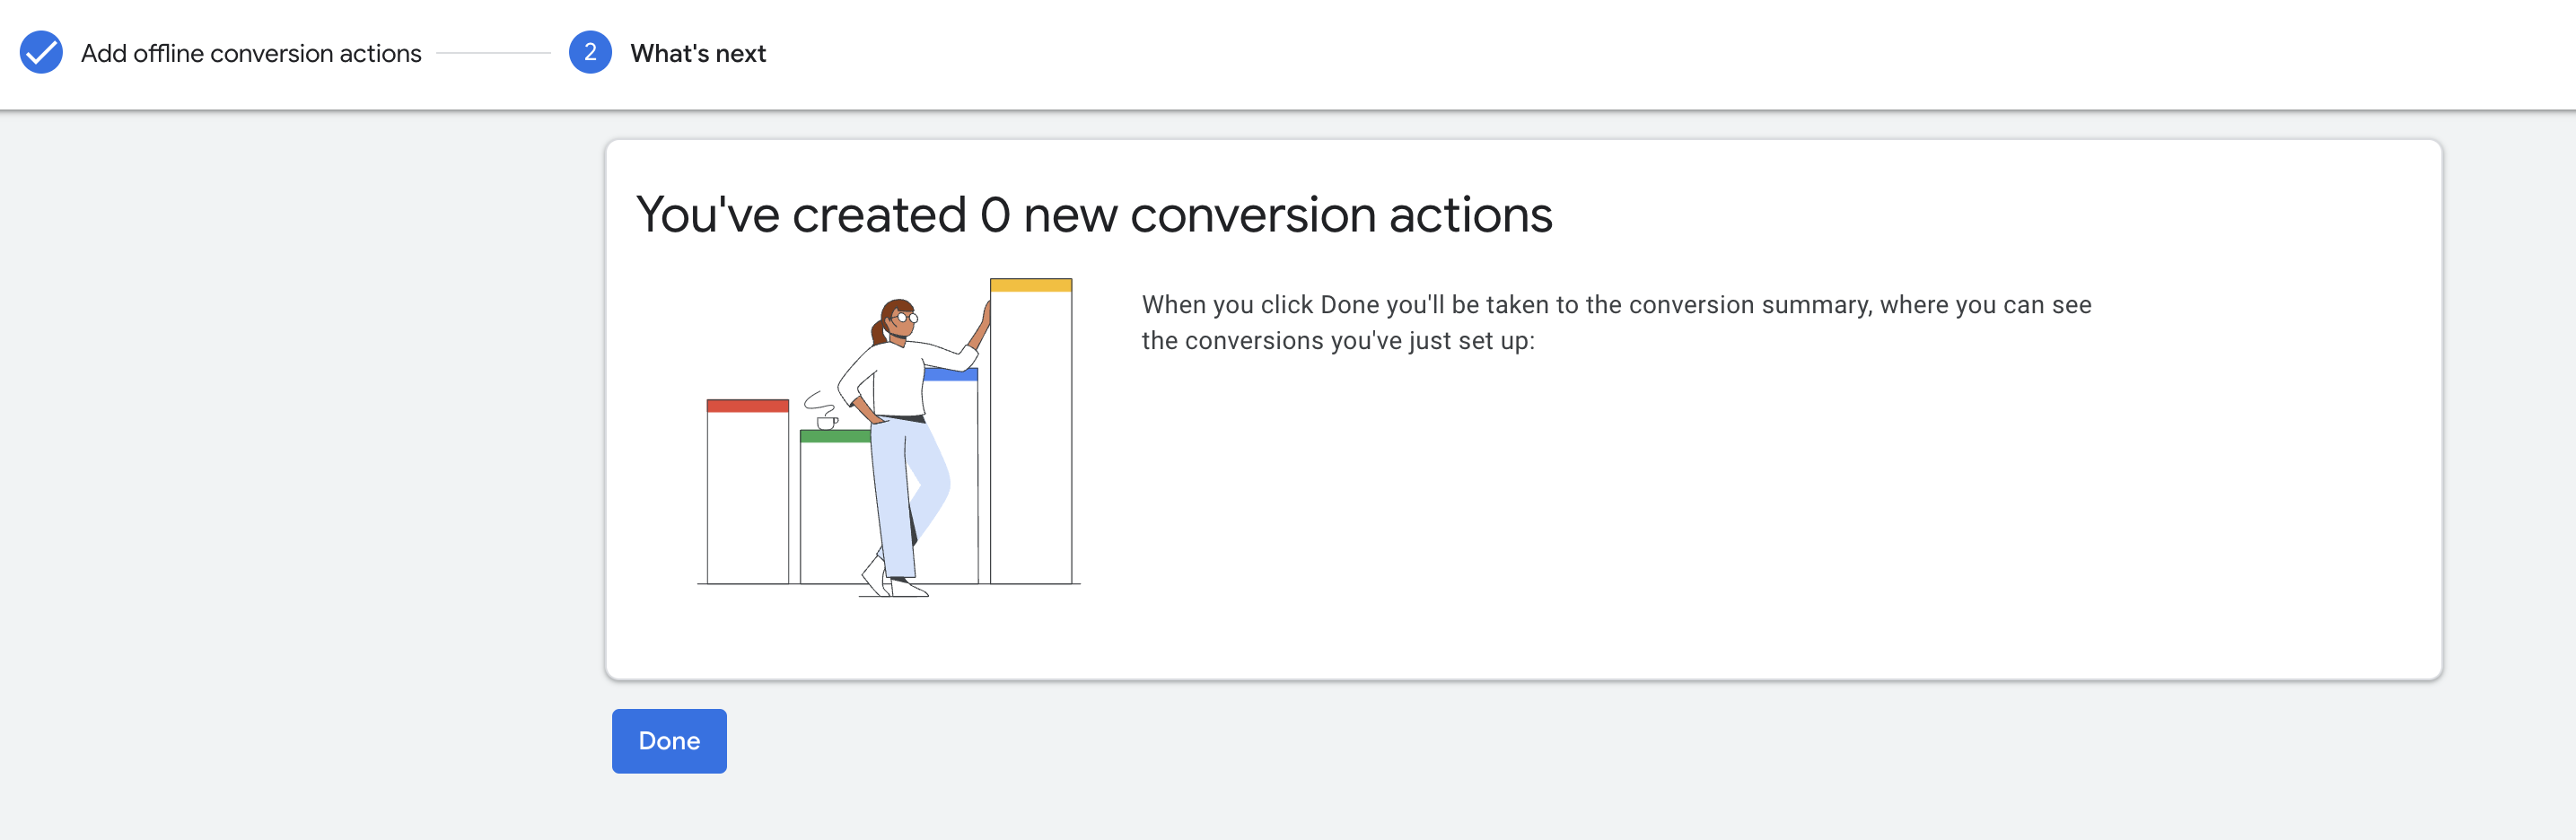
Click Done.
Once your conversion action exists in Google Ads, build a workflow in Aesthetix CRM to fire it whenever the matching patient action happens. This connection only works with these triggers: Form Submission, Order Form Submission, Survey Submission, Number Pool Calling, and Chat Widget replies. No other trigger type will send a Google Ads conversion.
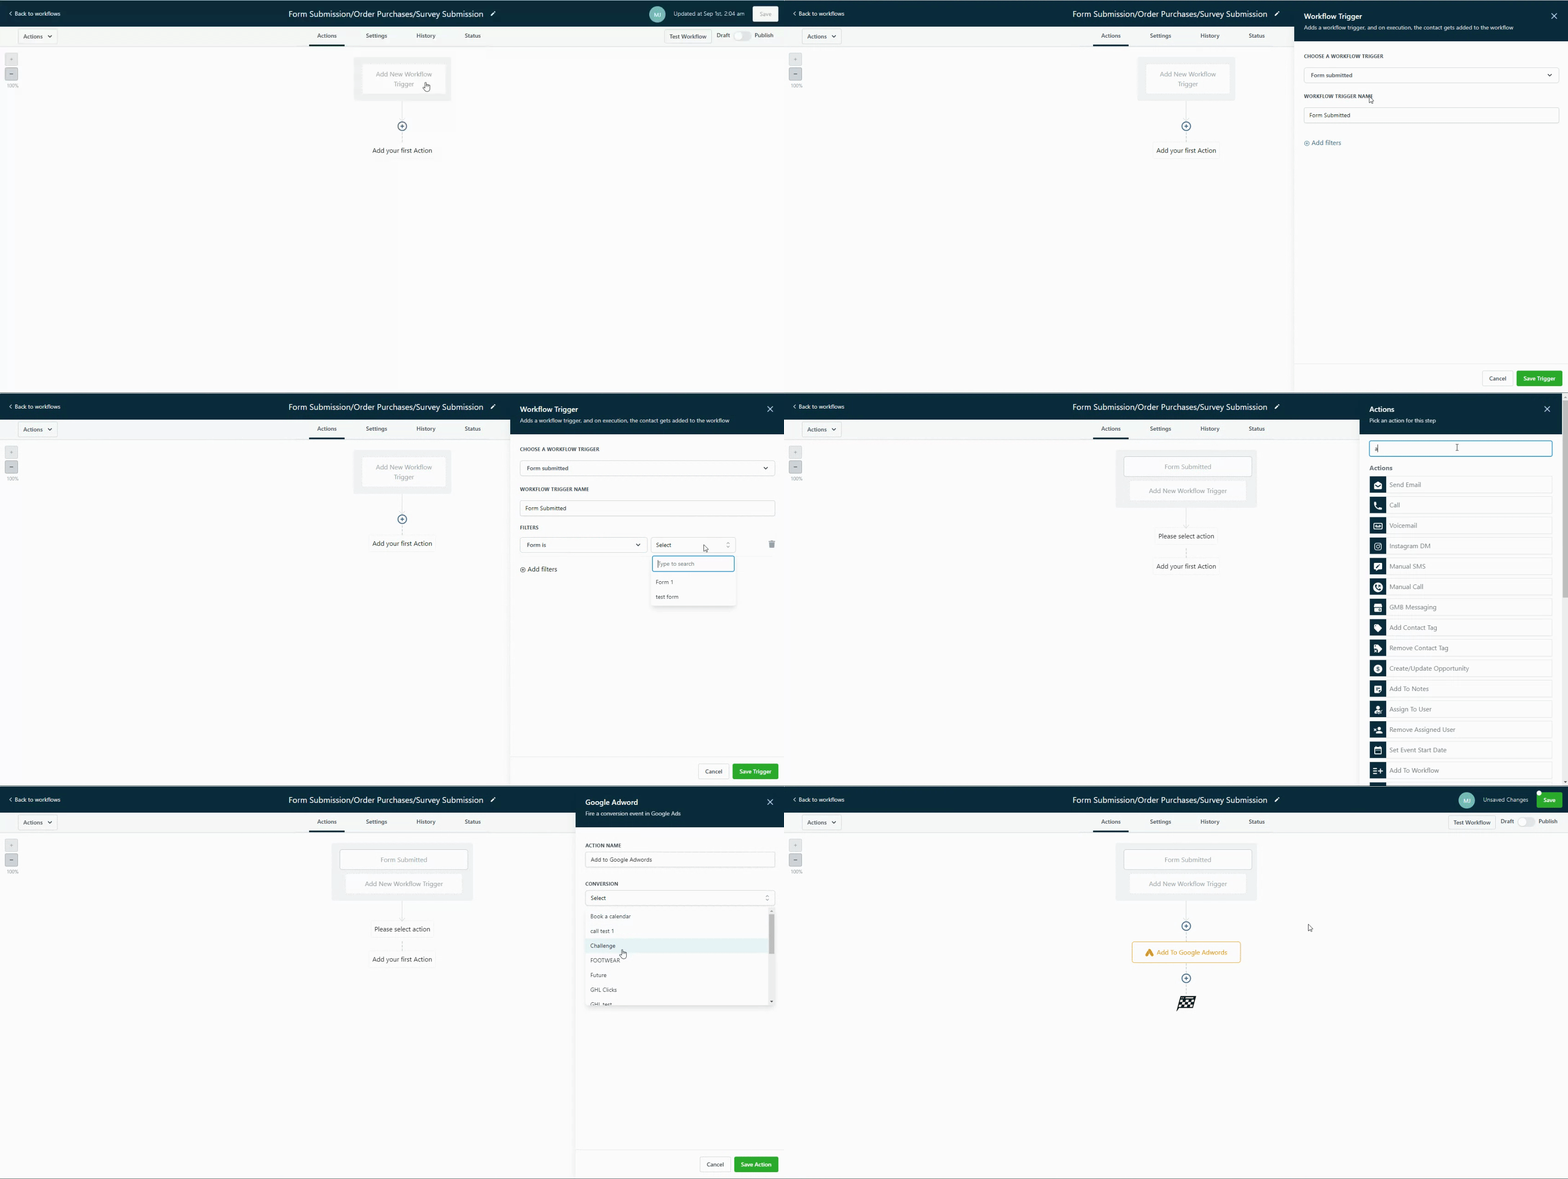
Create a new workflow.
Select the trigger: Form Submission, Order Form Submission, or Survey Submission.
Add filters for the specific form, order form, or survey you want to track, then save the trigger.
Click the + icon to add an action, choose "Add to Google Ads," and select "Other." Paste the conversion name you created in Google Ads exactly as it's spelled, including capitalization.
Click Save, then Publish the workflow.
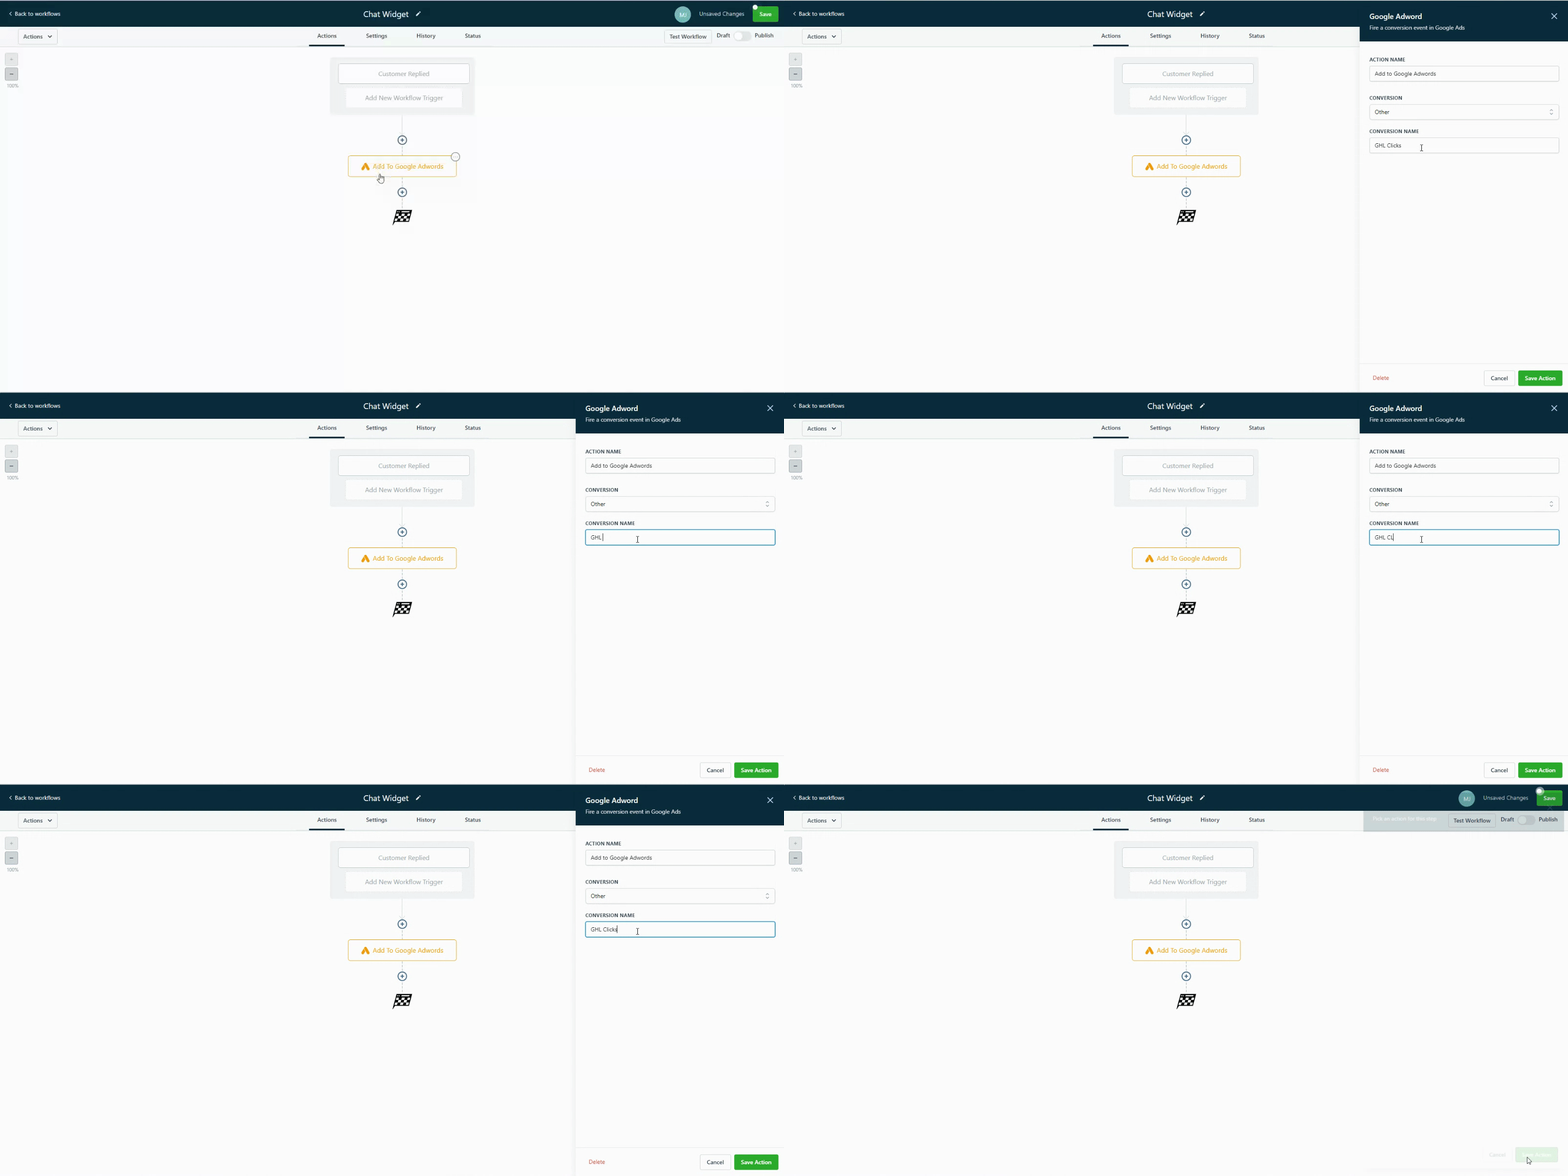
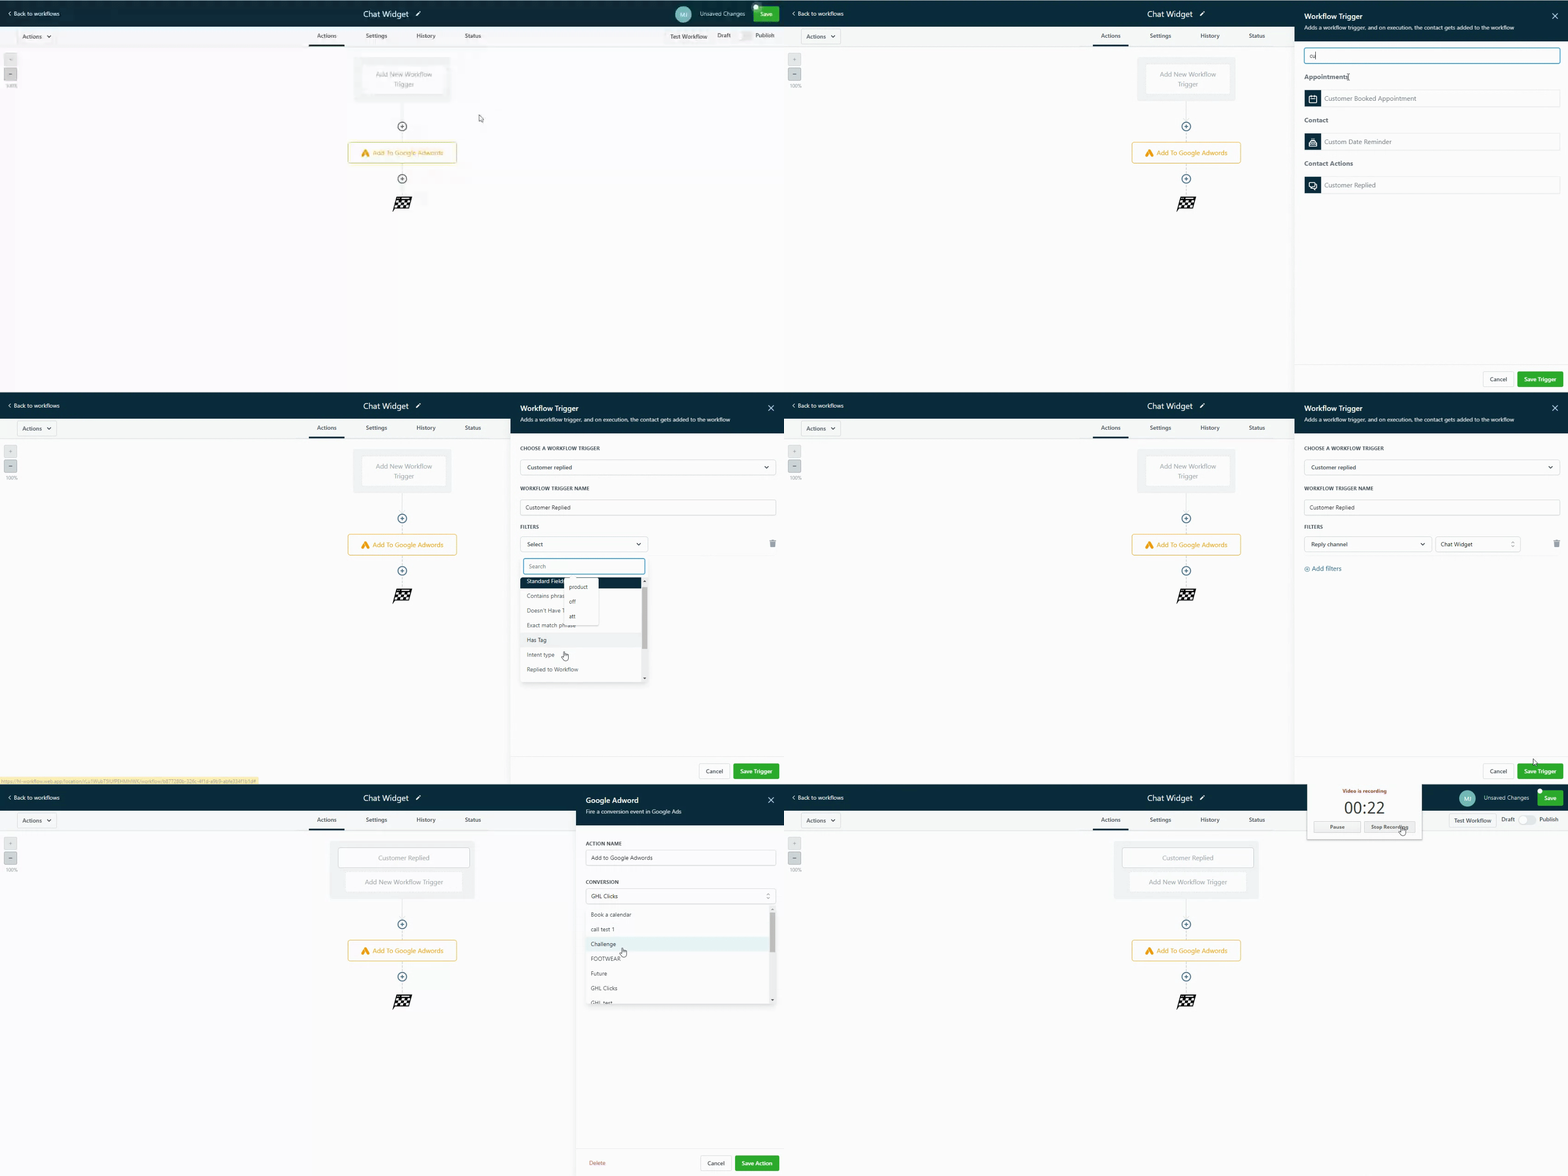
Create a new workflow.
Select the trigger: Customer Replied.
Click the + icon to add an action, choose "Add to Google Ads," and select "Other." Paste the conversion name you created in Google Ads exactly as it's spelled.
Click Save, then Publish the workflow.
Once this is live, keep an eye on results in Ads Manager > Ad Reporting, where your Google Ads campaign performance appears alongside the rest of your ad data.
What's the difference between "One" and "Every" for counting conversions? "One" counts a single conversion per person no matter how many times they trigger the event, which is what you want for lead generation so repeat form fills don't inflate your numbers. "Every" counts each occurrence separately, which fits revenue events like purchases.
How long does it take for a conversion to show up in Google Ads? Processing typically takes anywhere from a few hours up to 24-48 hours depending on volume. In the meantime, you can confirm the event fired by checking the workflow's history tab in Aesthetix CRM.
Do I need a GCLID, GBRAID, or WBRAID to send offline conversions? Yes, at least one of these click identifiers is needed for Google to match the offline event back to the ad and keyword that generated it. Capture whichever is available on first touch so it's present when the conversion is sent.
Where can I check that my conversions are actually working? There's currently no built-in test button for this action. Check the History tab on your workflow to confirm the "Add to Google Ads" action executed, and check Tools & Settings > Conversions in your Google Ads account to see the recorded totals.
Does this work with every workflow trigger? No. Only Form Submission, Order Purchase, Number Pool Calling, Survey Submission, and Chat Widget triggers can send a Google Ads conversion. Any other trigger type won't fire the action.
Can I edit a conversion's settings after I've created it? Yes. Most settings, including value, count, conversion window, and attribution model, can be updated later from Tools & Settings > Conversions in Google Ads. Reopen the conversion action and click into its settings to make changes.
Why aren't my conversions matching or showing up at all? The most common causes are a misspelled or mismatched conversion name between Google Ads and the workflow action, a missing click identifier, or simply normal reporting delay. Double-check that the conversion name in your workflow matches the Google Ads conversion exactly, including spacing and capitalization.
Should this action be marked as Primary in Google Ads? Mark it Primary if you want Google's Smart Bidding to optimize toward it directly, which makes sense for a core outcome like a booked consult. Secondary actions are still tracked and reported but don't influence bidding, which can be useful for lower-funnel events you want visibility into without shifting your ad spend.
