The booking widget is the calendar patients see when they schedule an appointment online, whether it is embedded on your website, shared as a link, or dropped into a funnel page. Aesthetix CRM lets you control its look, its fields, and the order patients move through it so the booking experience matches your practice's branding.
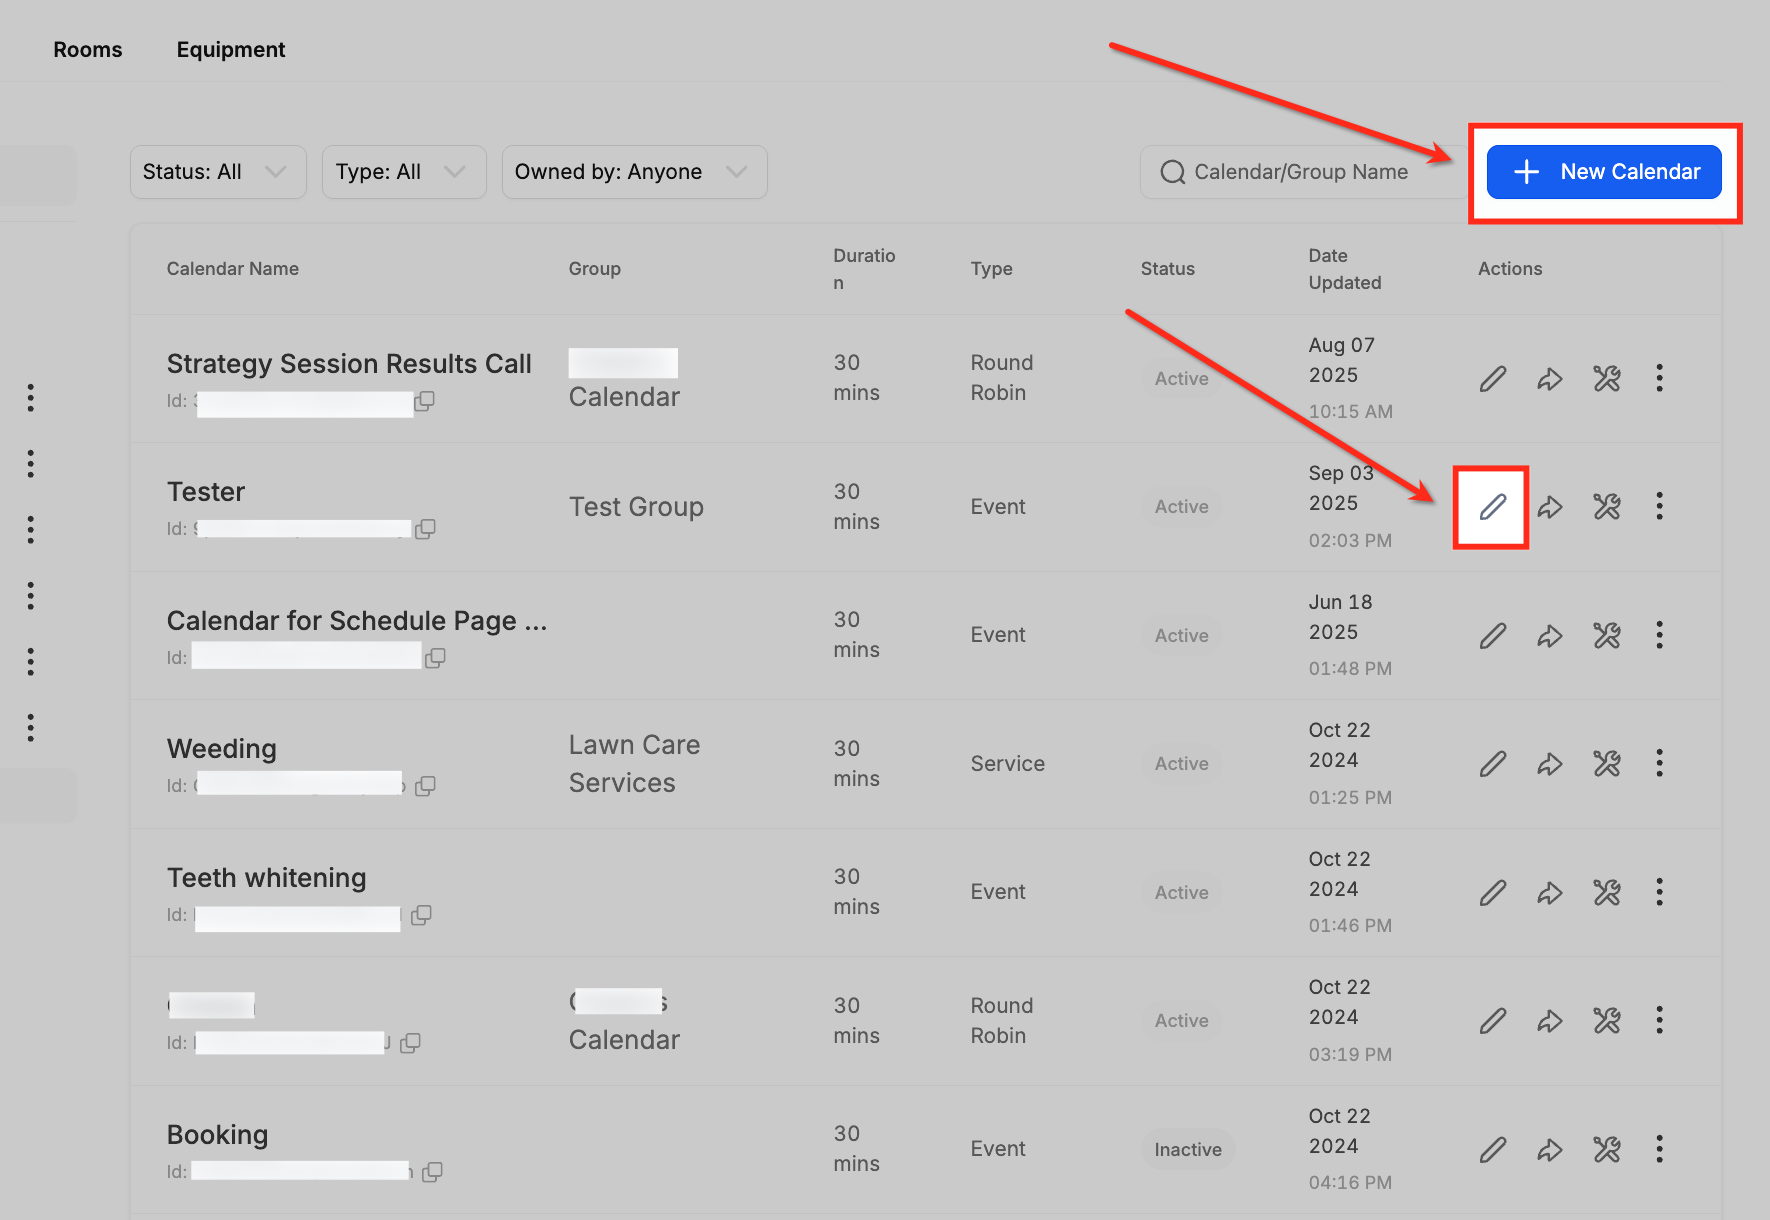
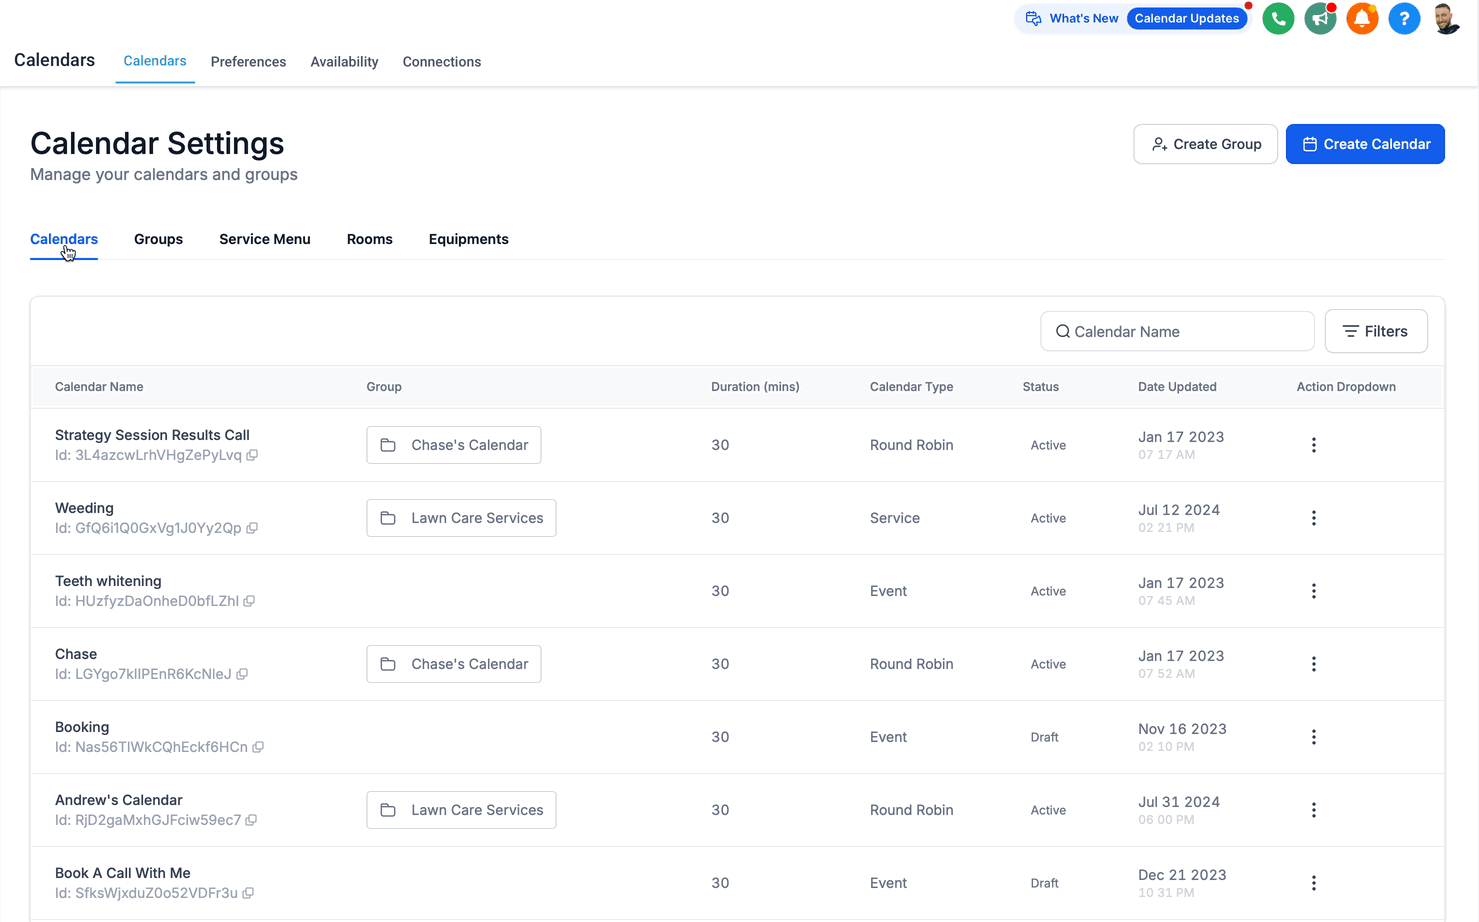
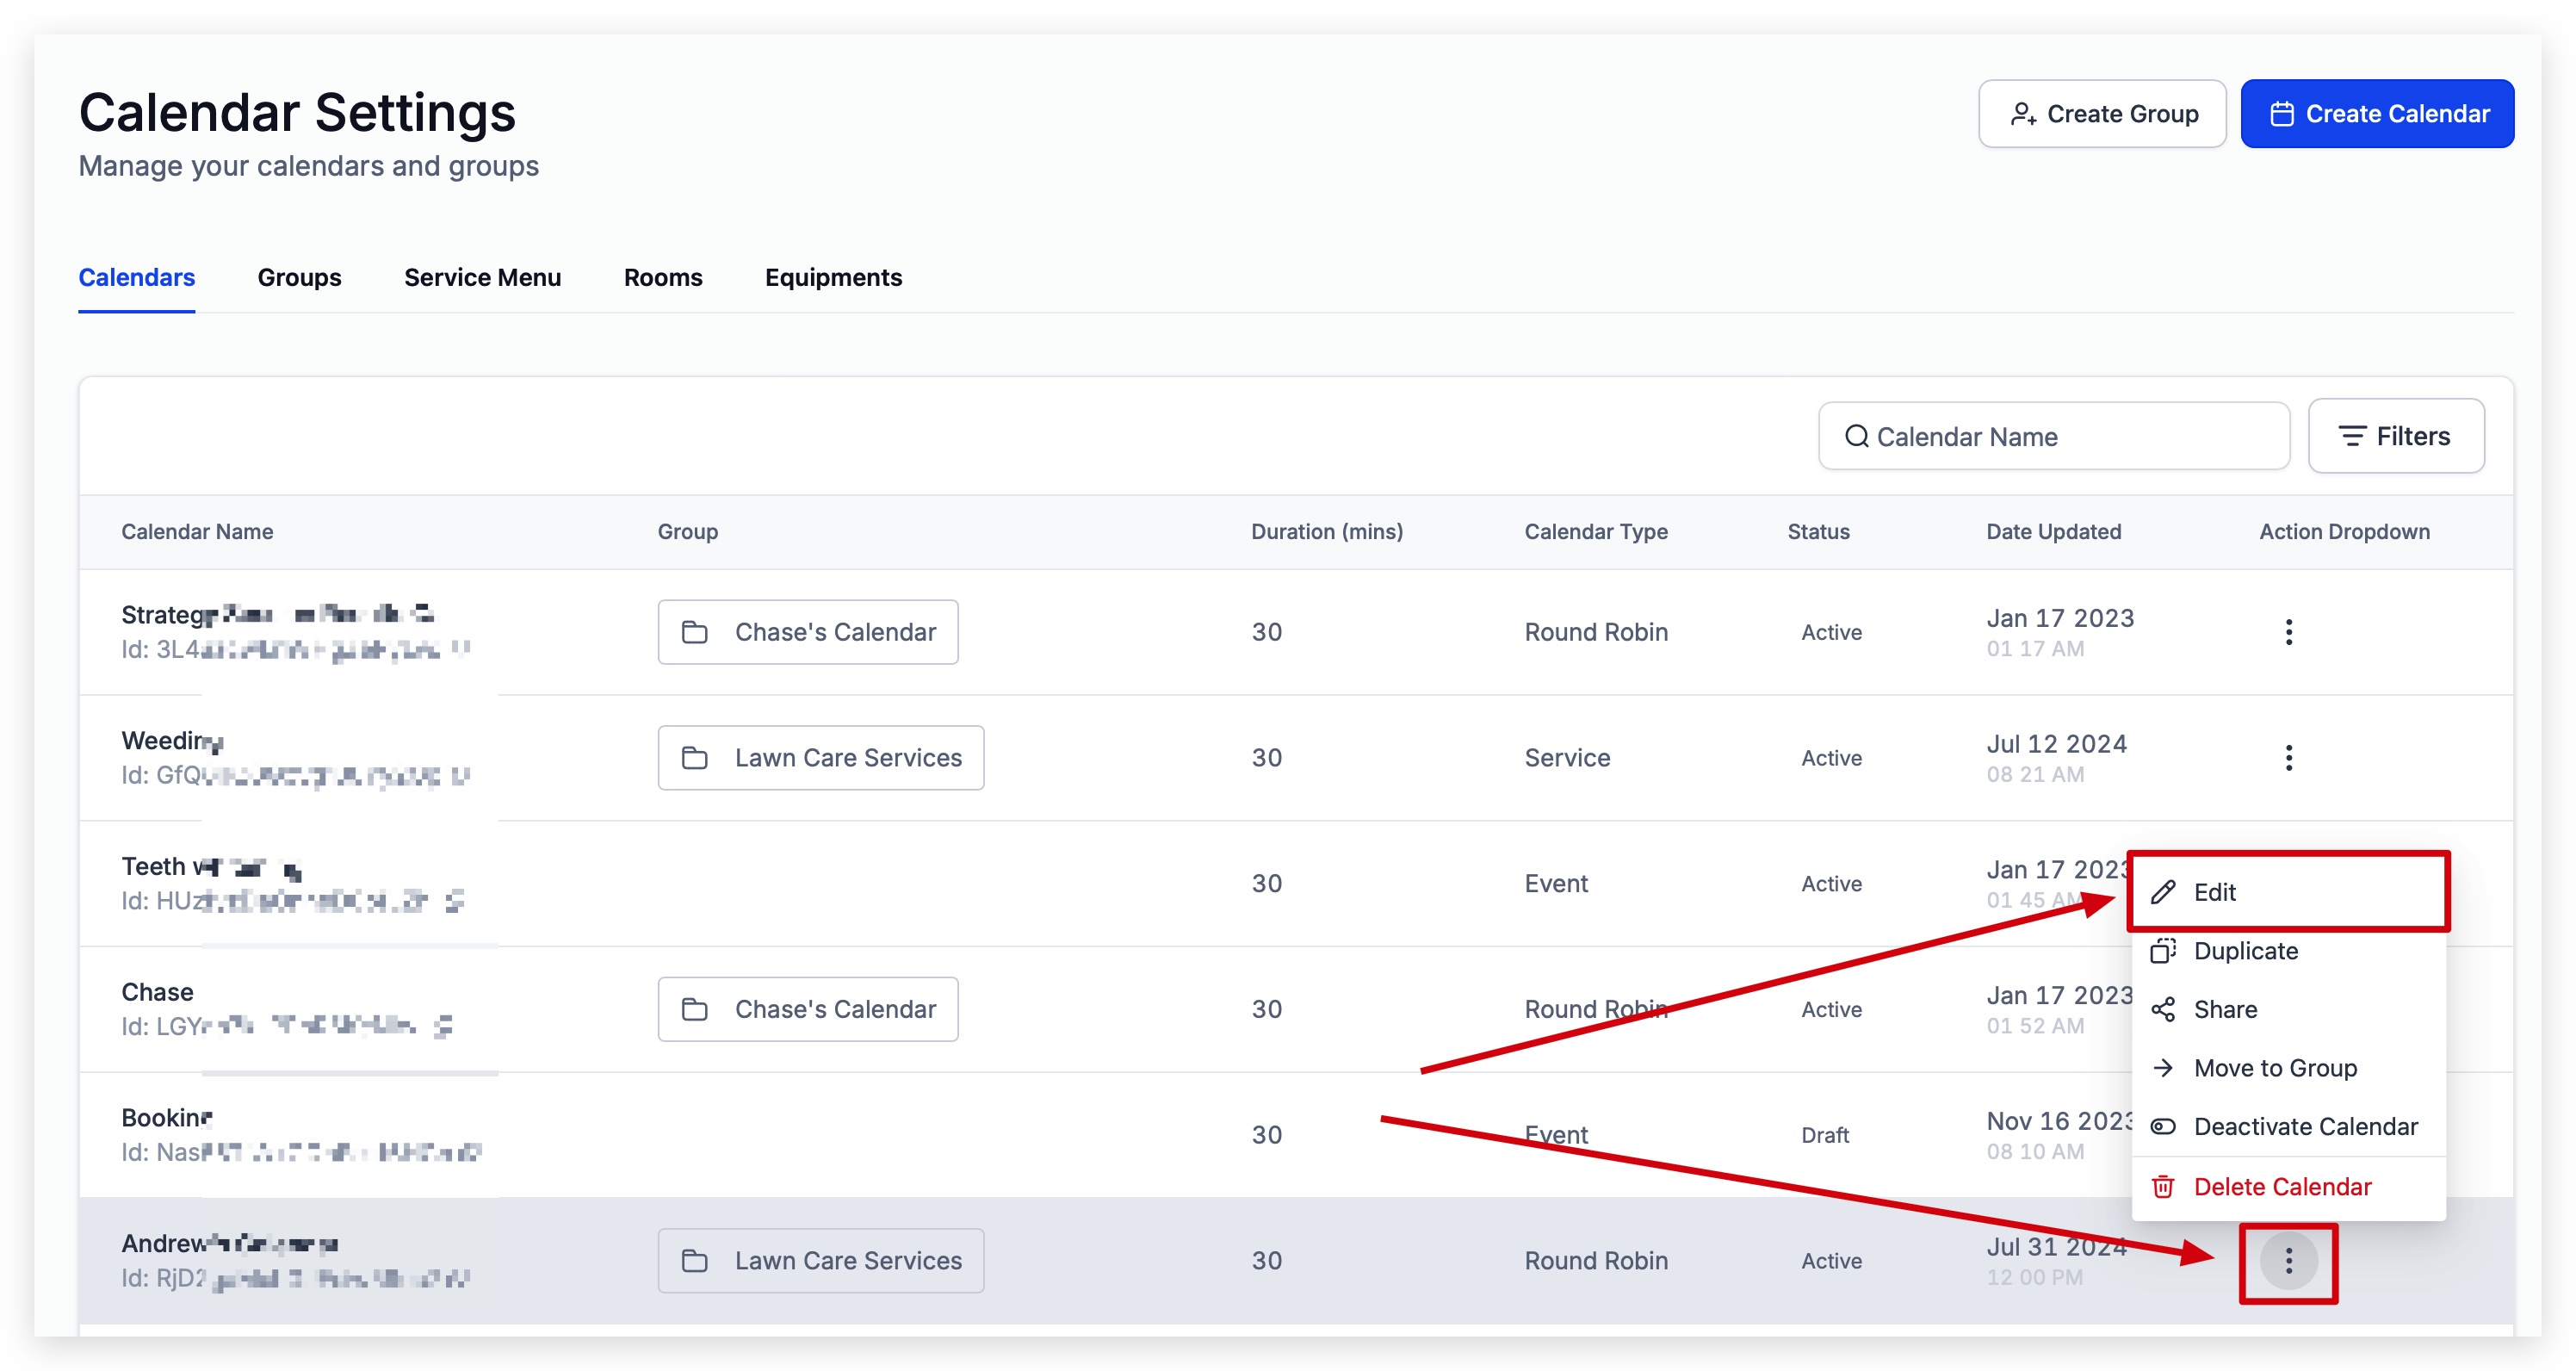
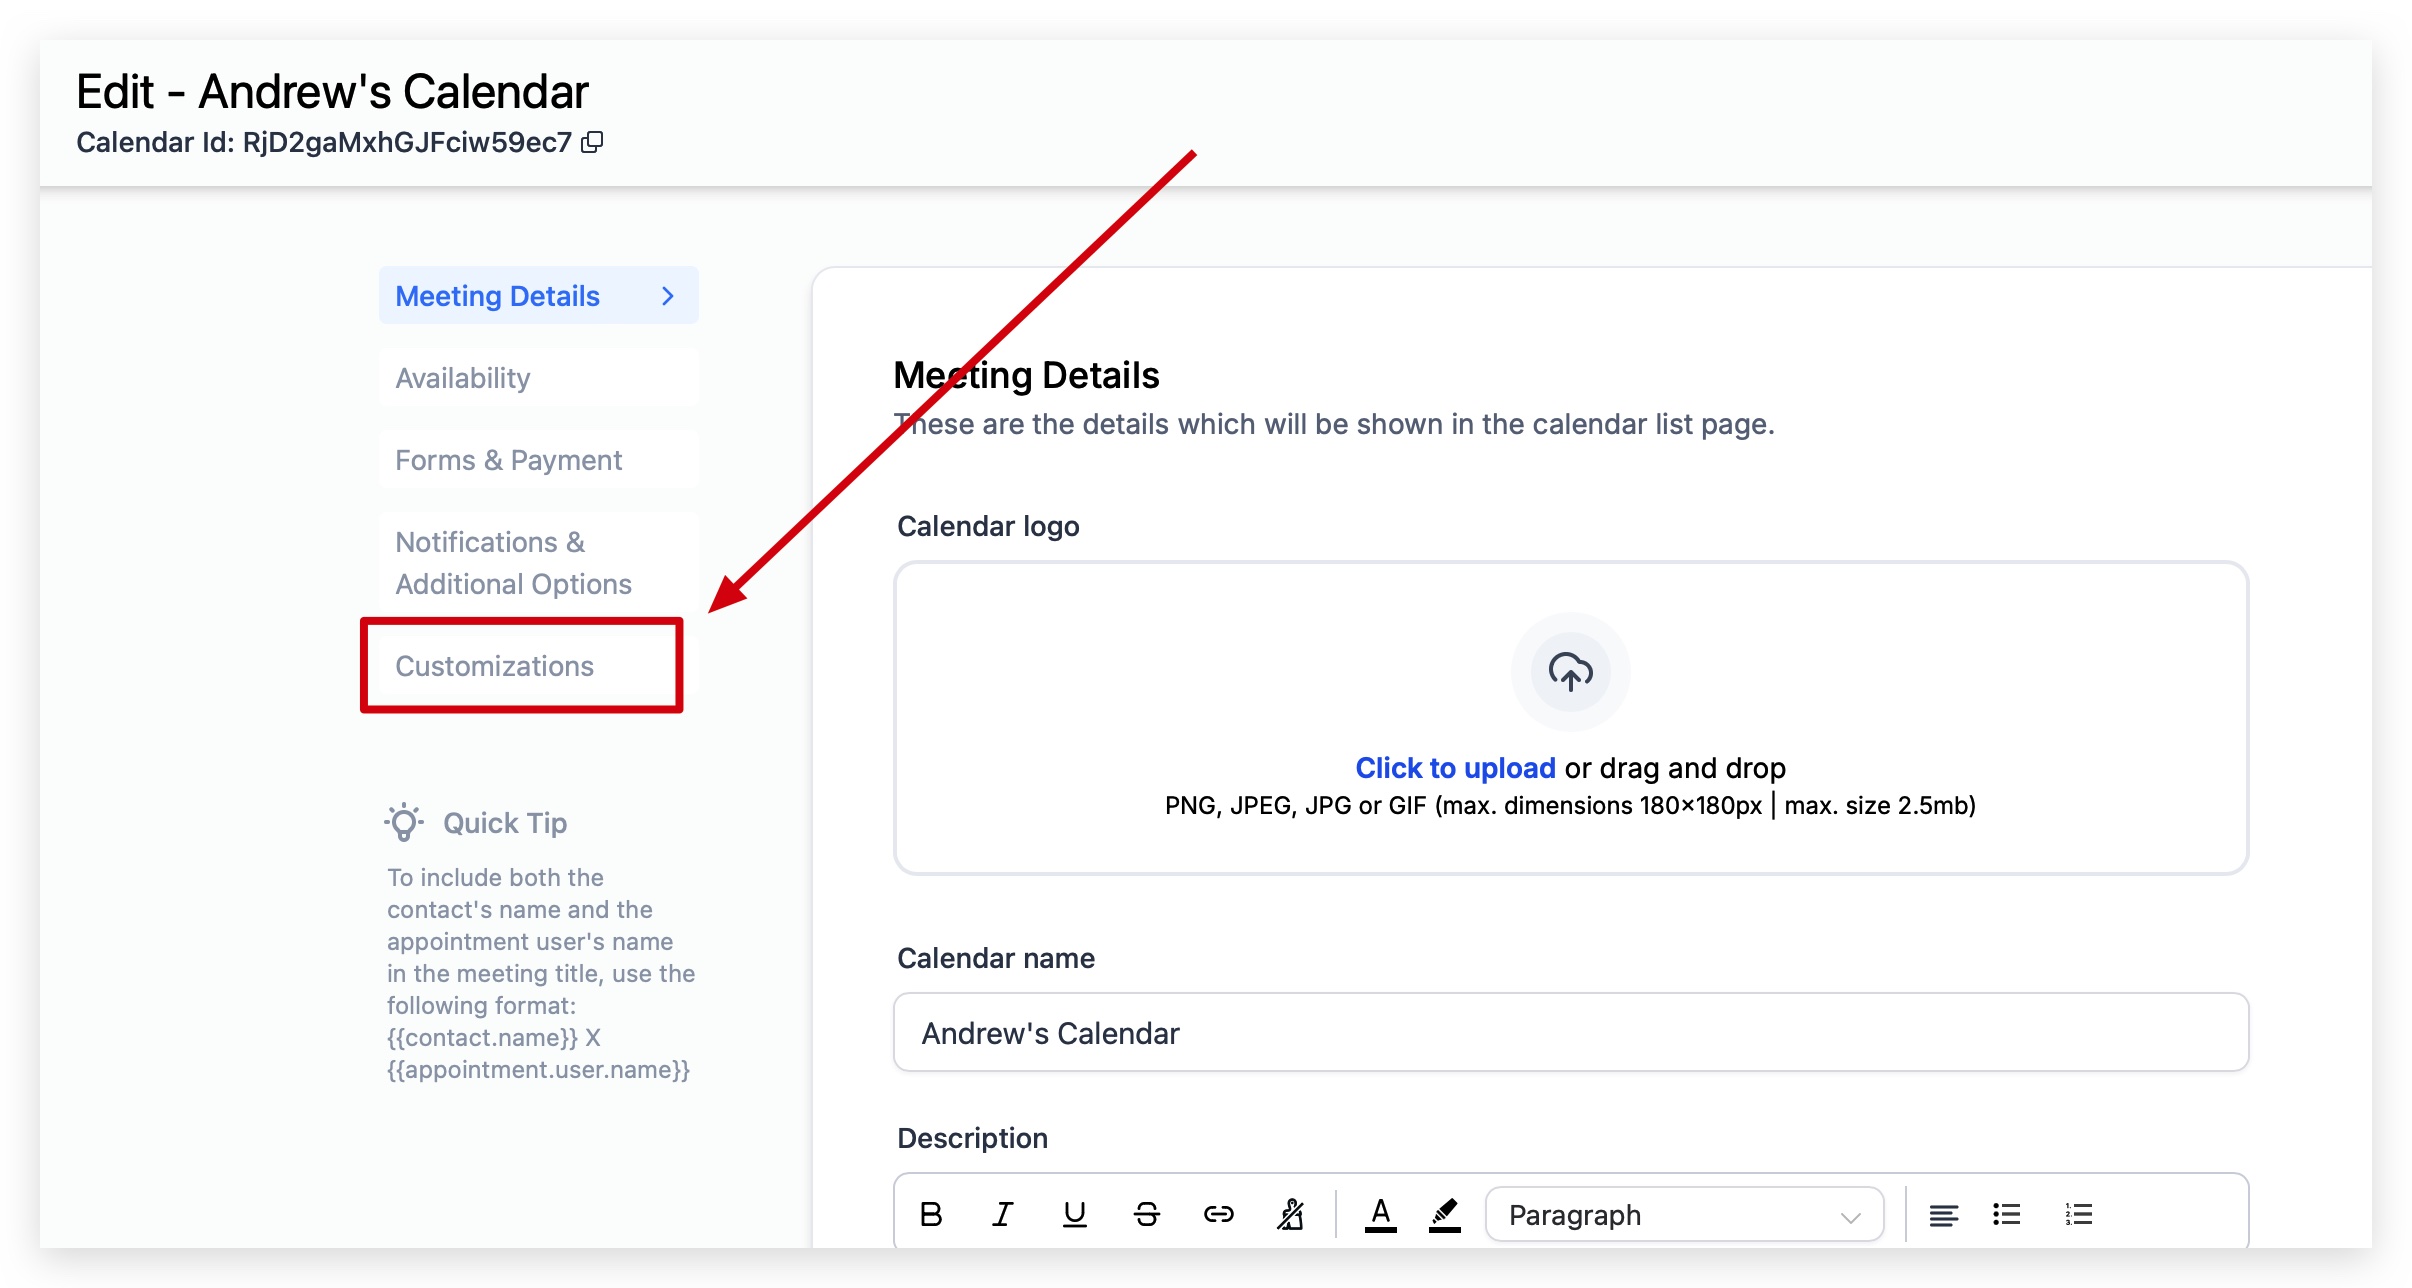
To get started, go to Calendars → Calendar Settings, then click the edit icon (or the three-dot menu) next to the calendar you want to update. Inside the calendar editor, open the Customizations tab to access most of the options below.
Aesthetix CRM offers two widget styles, and which one your calendar uses determines what you can customize.
Classic | Neo | |
|---|---|---|
Layout | Simple, standard layout | Modern, flexible layout |
Setup | Fastest to set up | Slightly more setup, more control |
Color customization | Not available | Available |
Button text customization | Not available | Available |
Step reordering (Form / Date & Time) | Not available | Available |
Staff selection (Round Robin calendars) | Not available | Available |
Seat display (Class Booking calendars) | Not available | Available |
Payment collection | Supported | Supported |
Default for | Single/unassigned calendars | Group calendars |
Almost everything in this article, colors, button text, hiding the left panel, and step reordering, only works on the Neo widget. If your calendar is still set to Classic and you don't see a customization option described below, that's why.
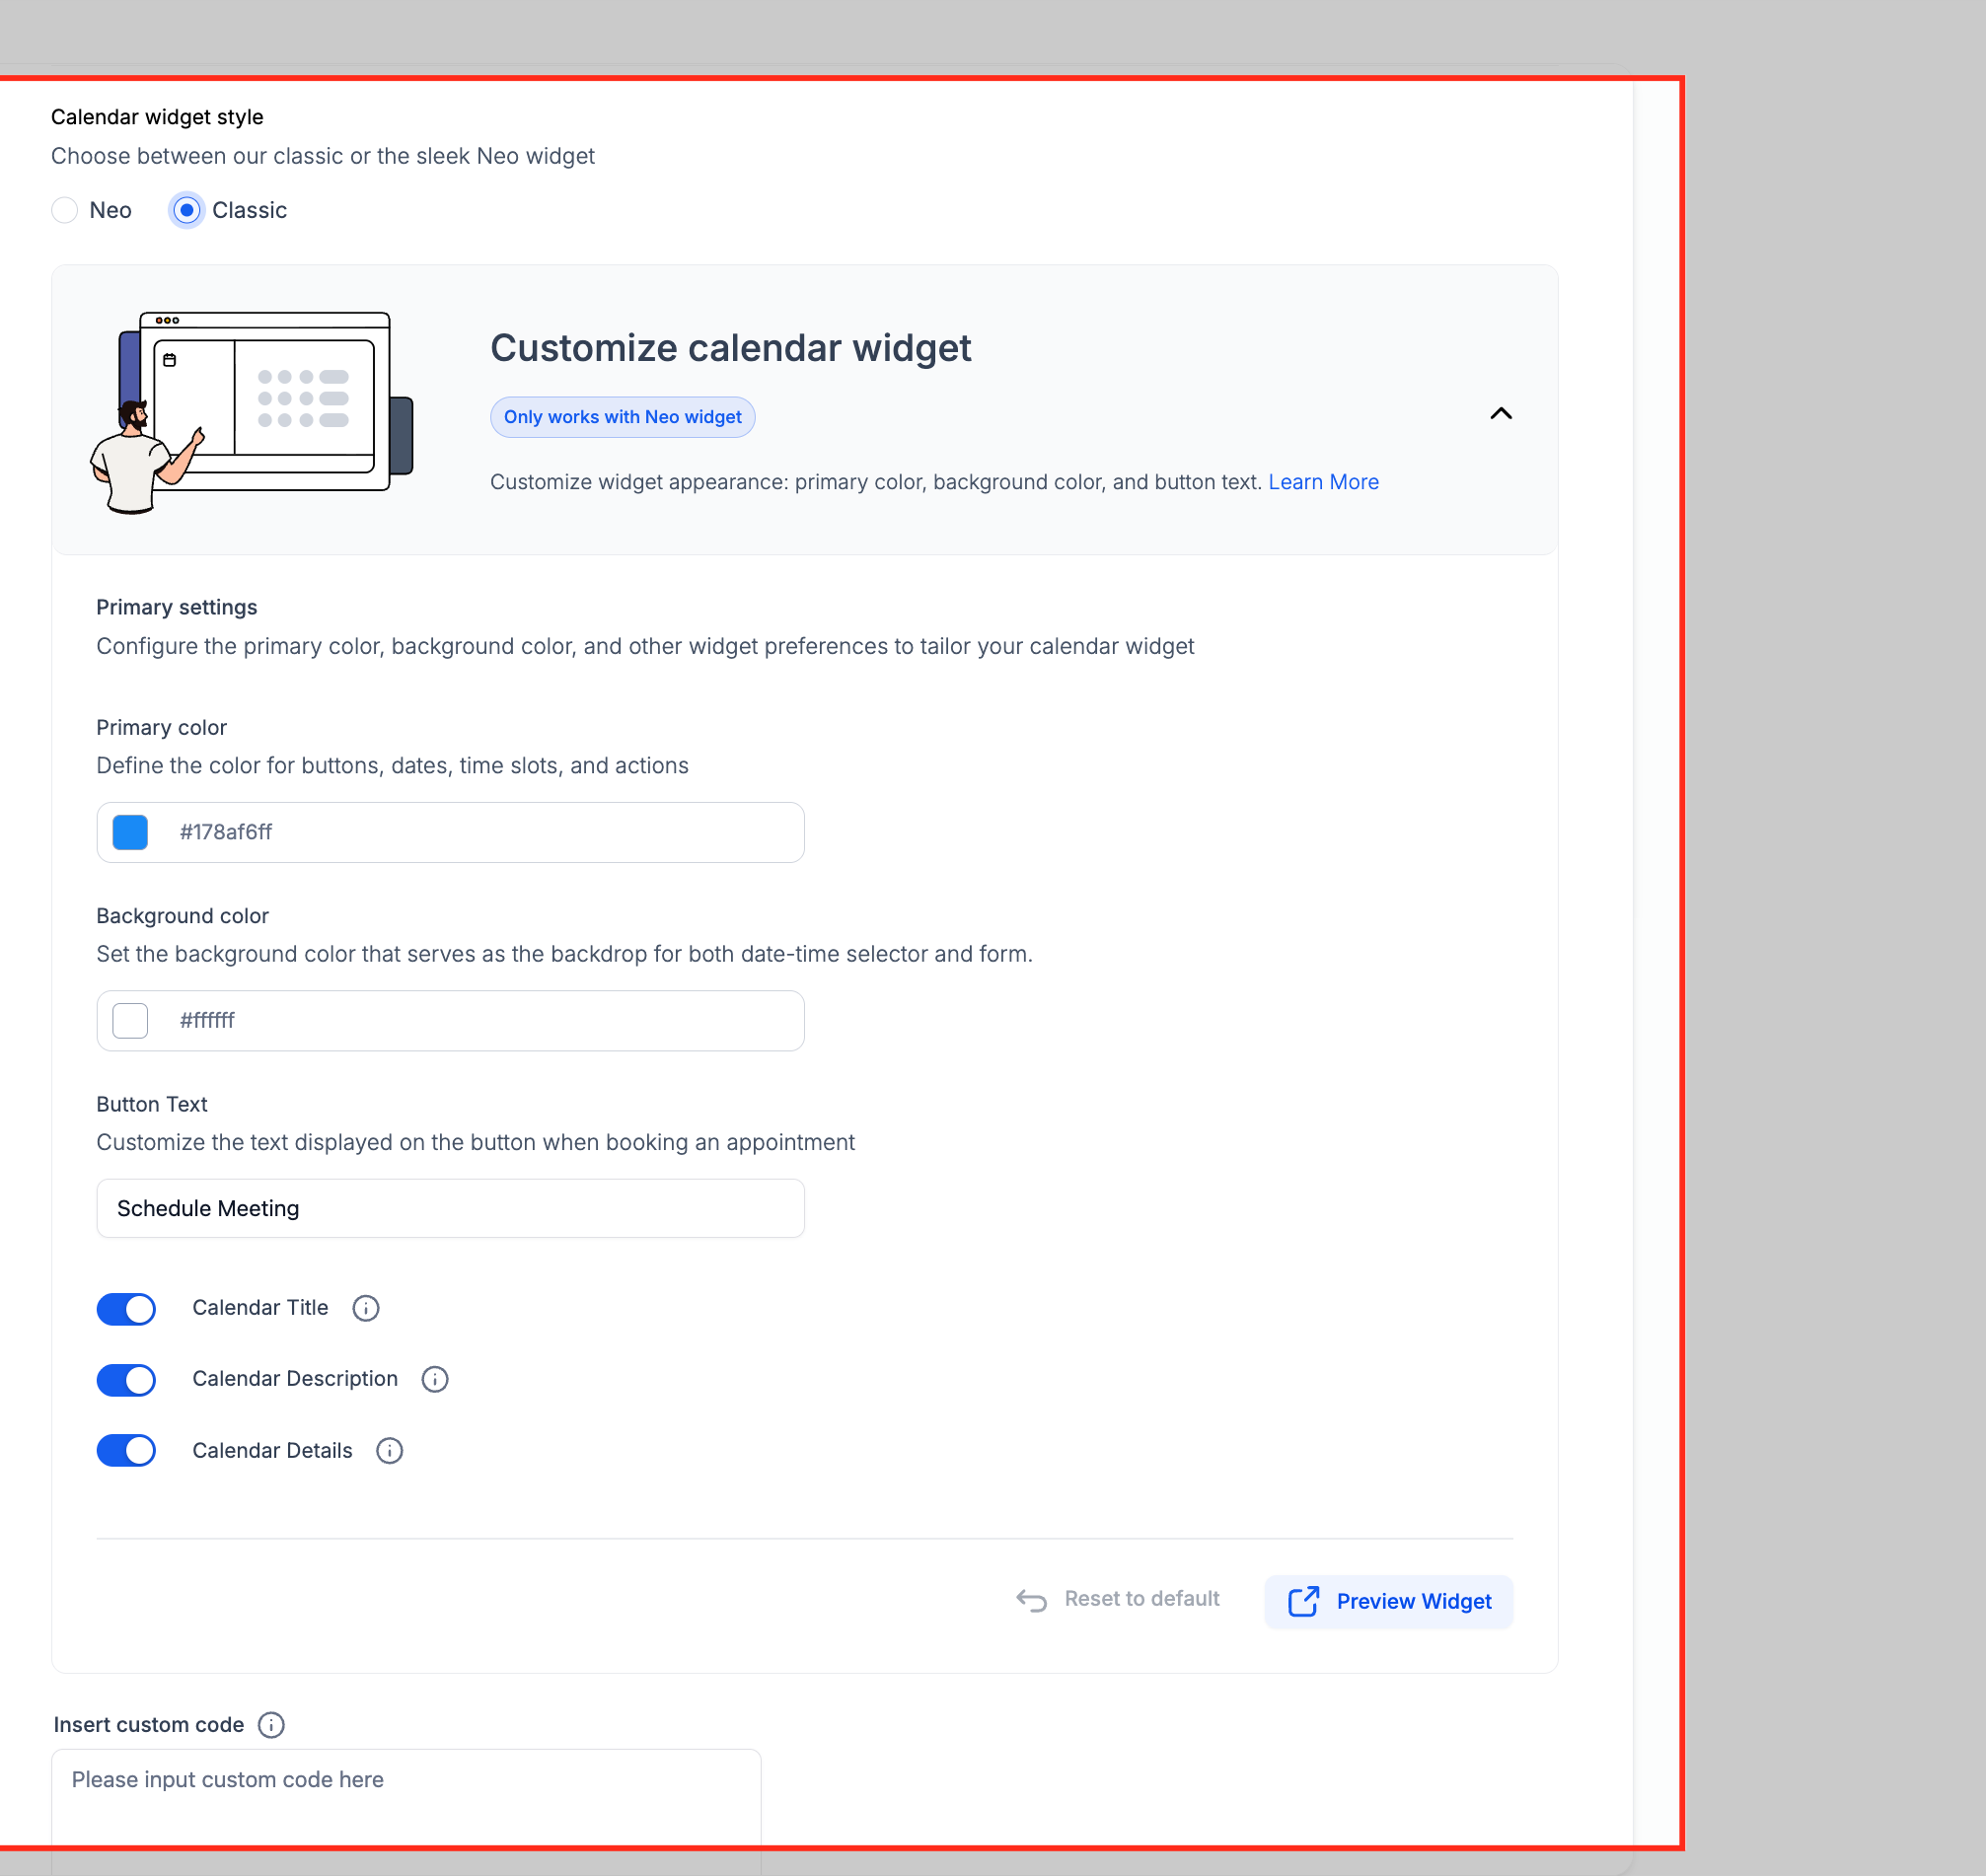
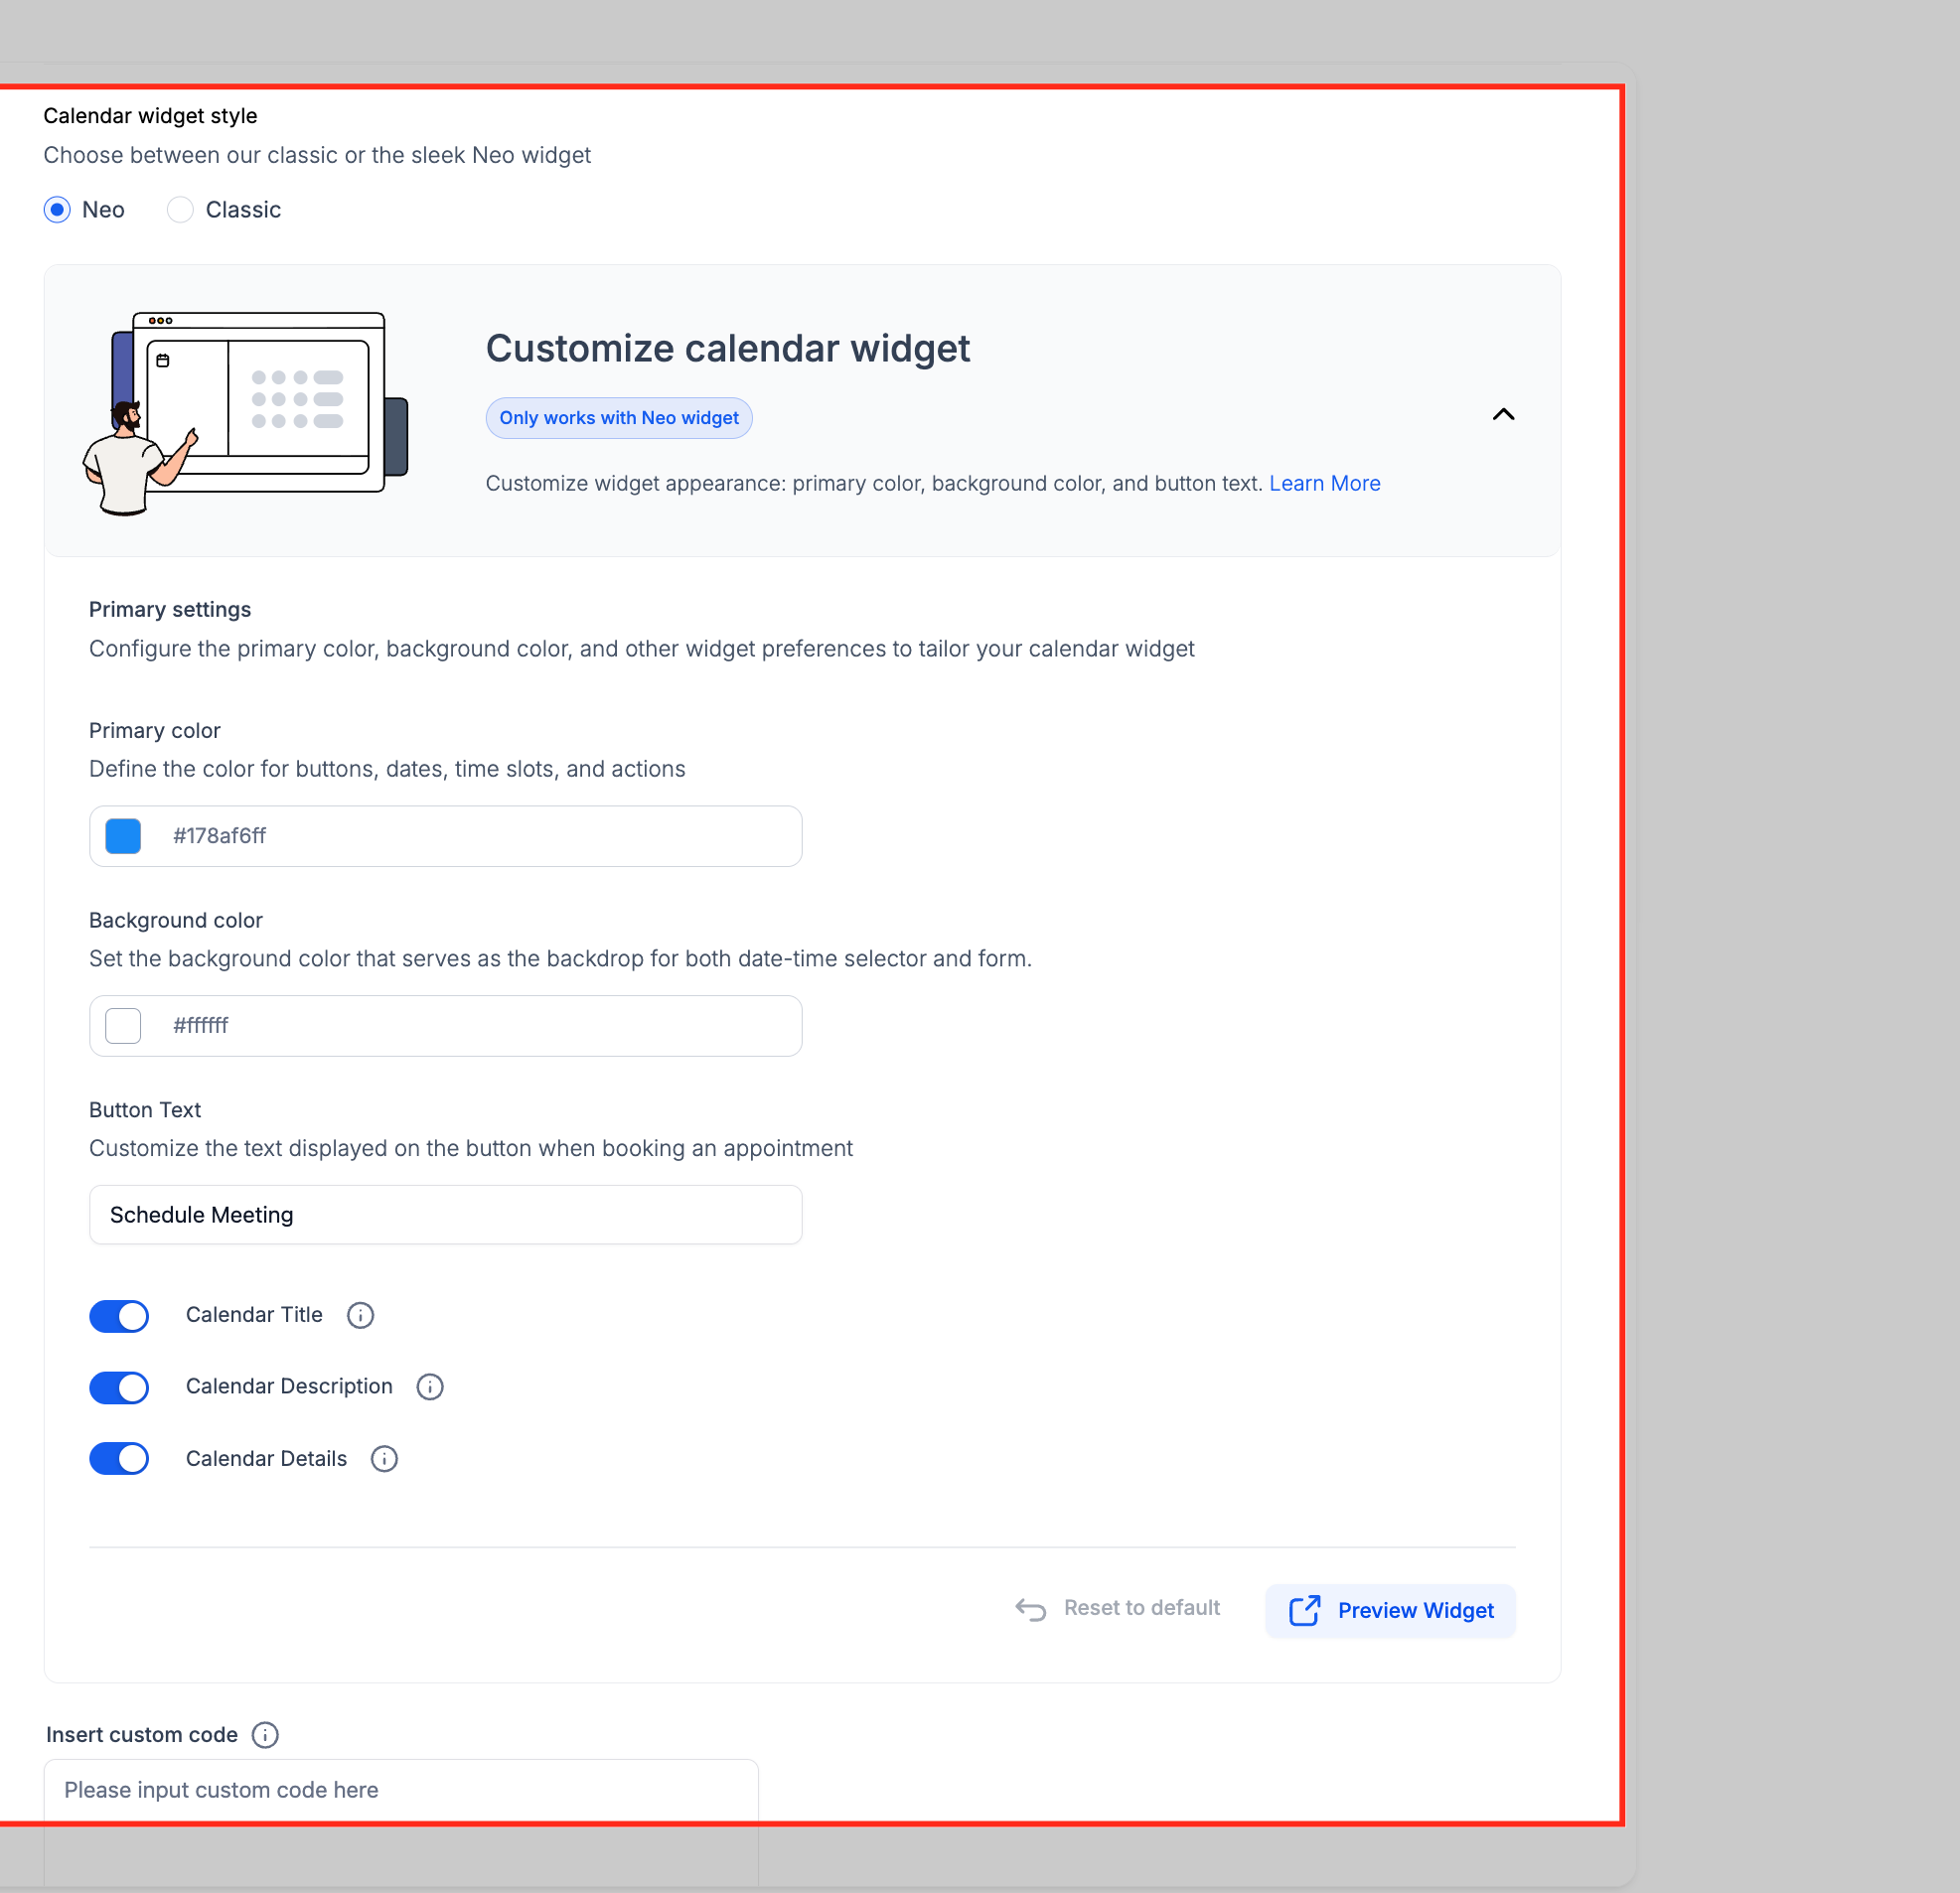
You can switch a calendar between Classic and Neo at any time without affecting existing appointments already on the books.
To change a calendar's widget style:
Go to Settings in the left sidebar.
Click Calendars under the Business Services section.
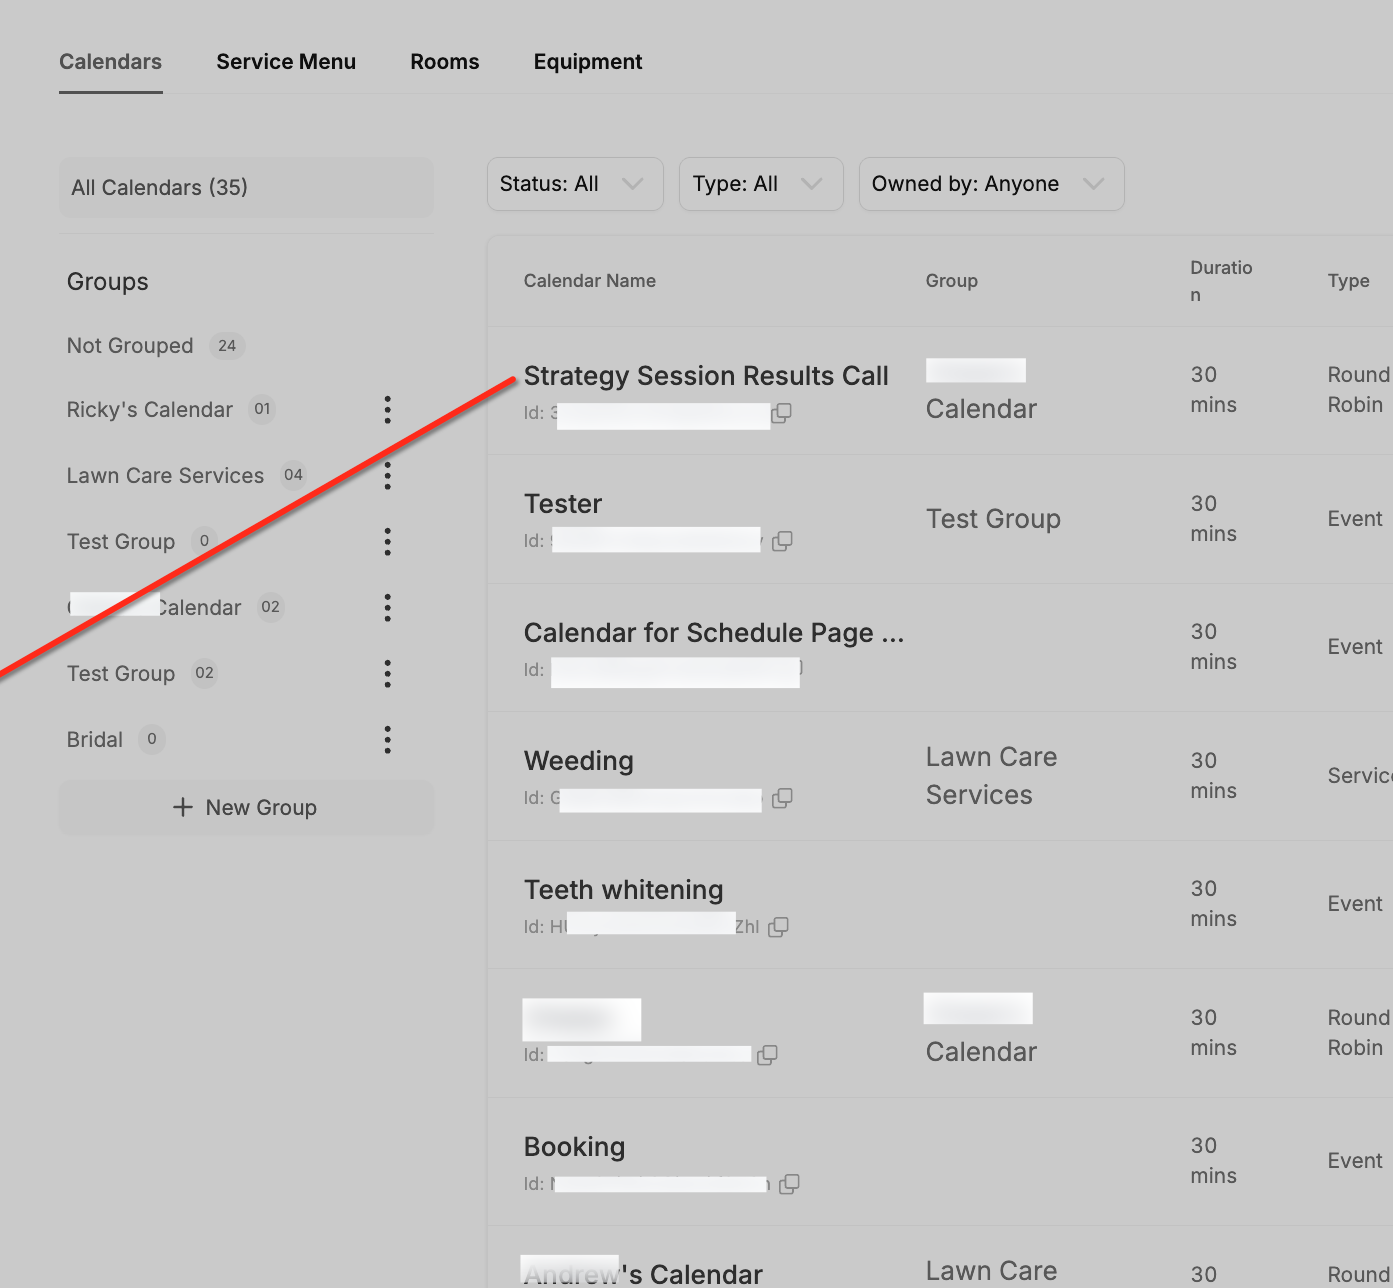
Click New Calendar to create one, or use the edit icon next to an existing calendar.
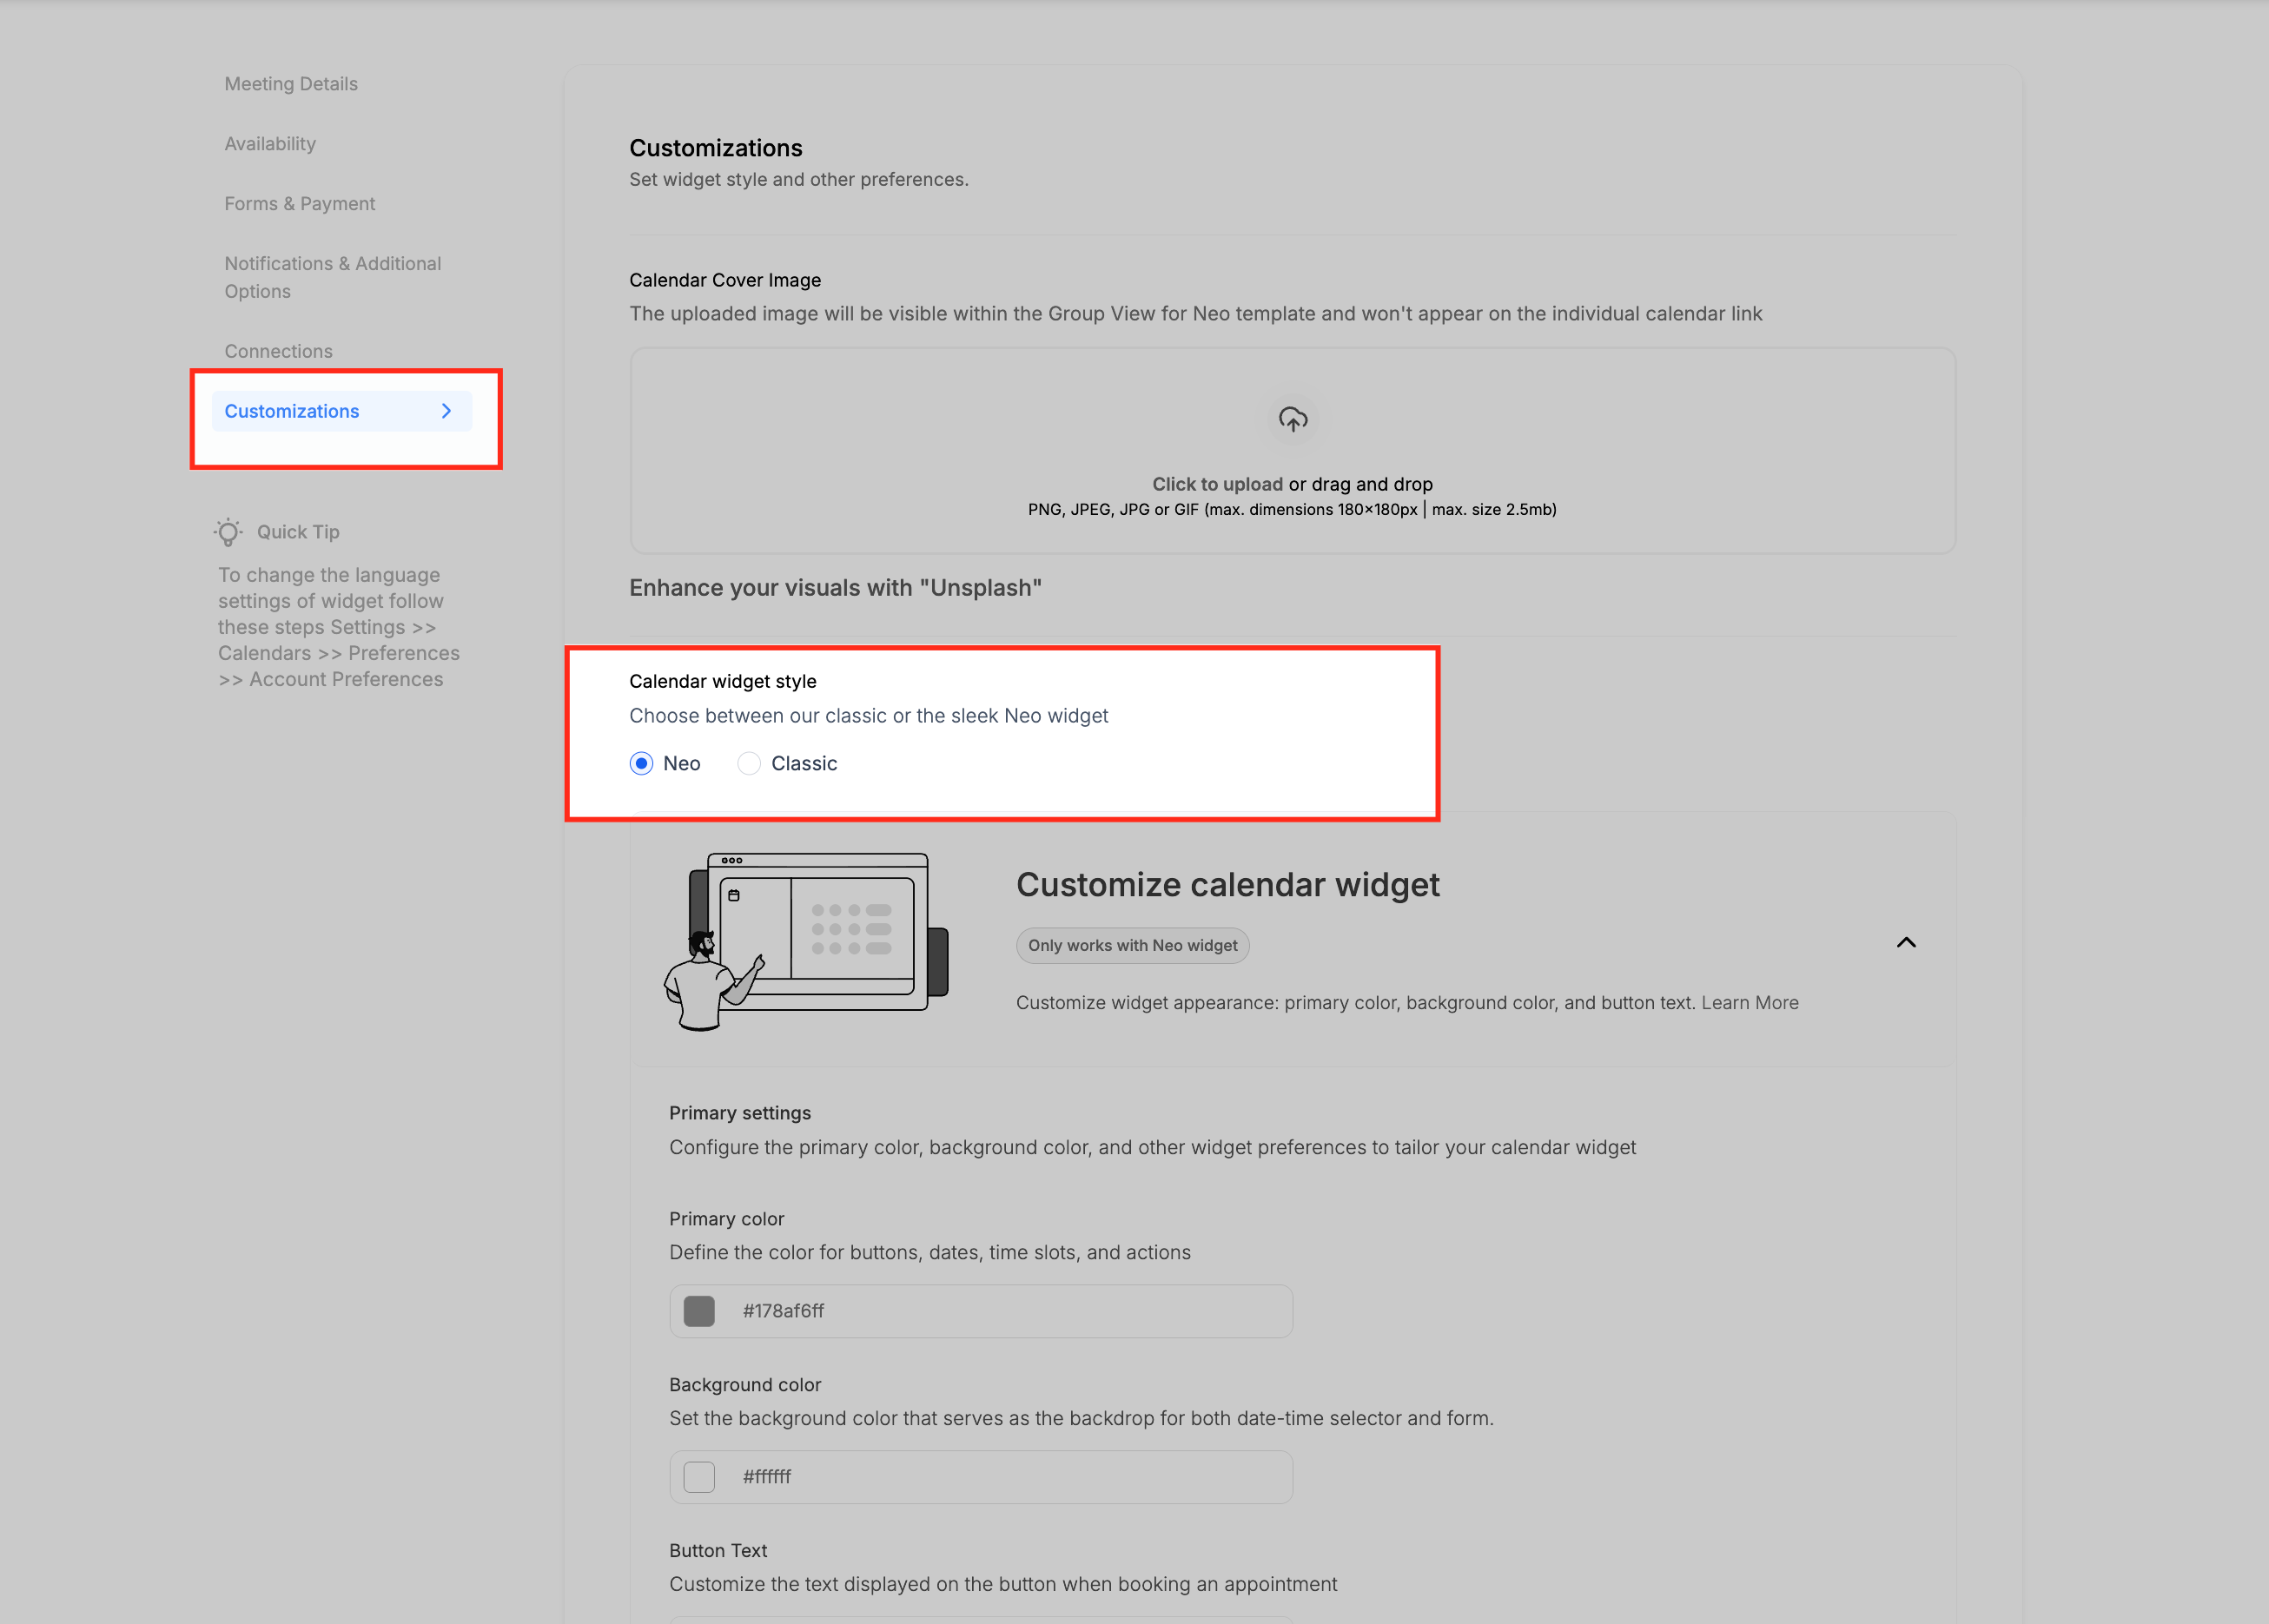
Open the Customizations tab and choose Classic or Neo under Calendar Widget Style.
Matching your booking widget to your practice's brand colors (rather than the default blue and white) makes the booking experience feel like a natural extension of your website instead of a generic scheduling tool. If your logo is one color and your widget defaults to another, patients notice the mismatch, even if only subconsciously.
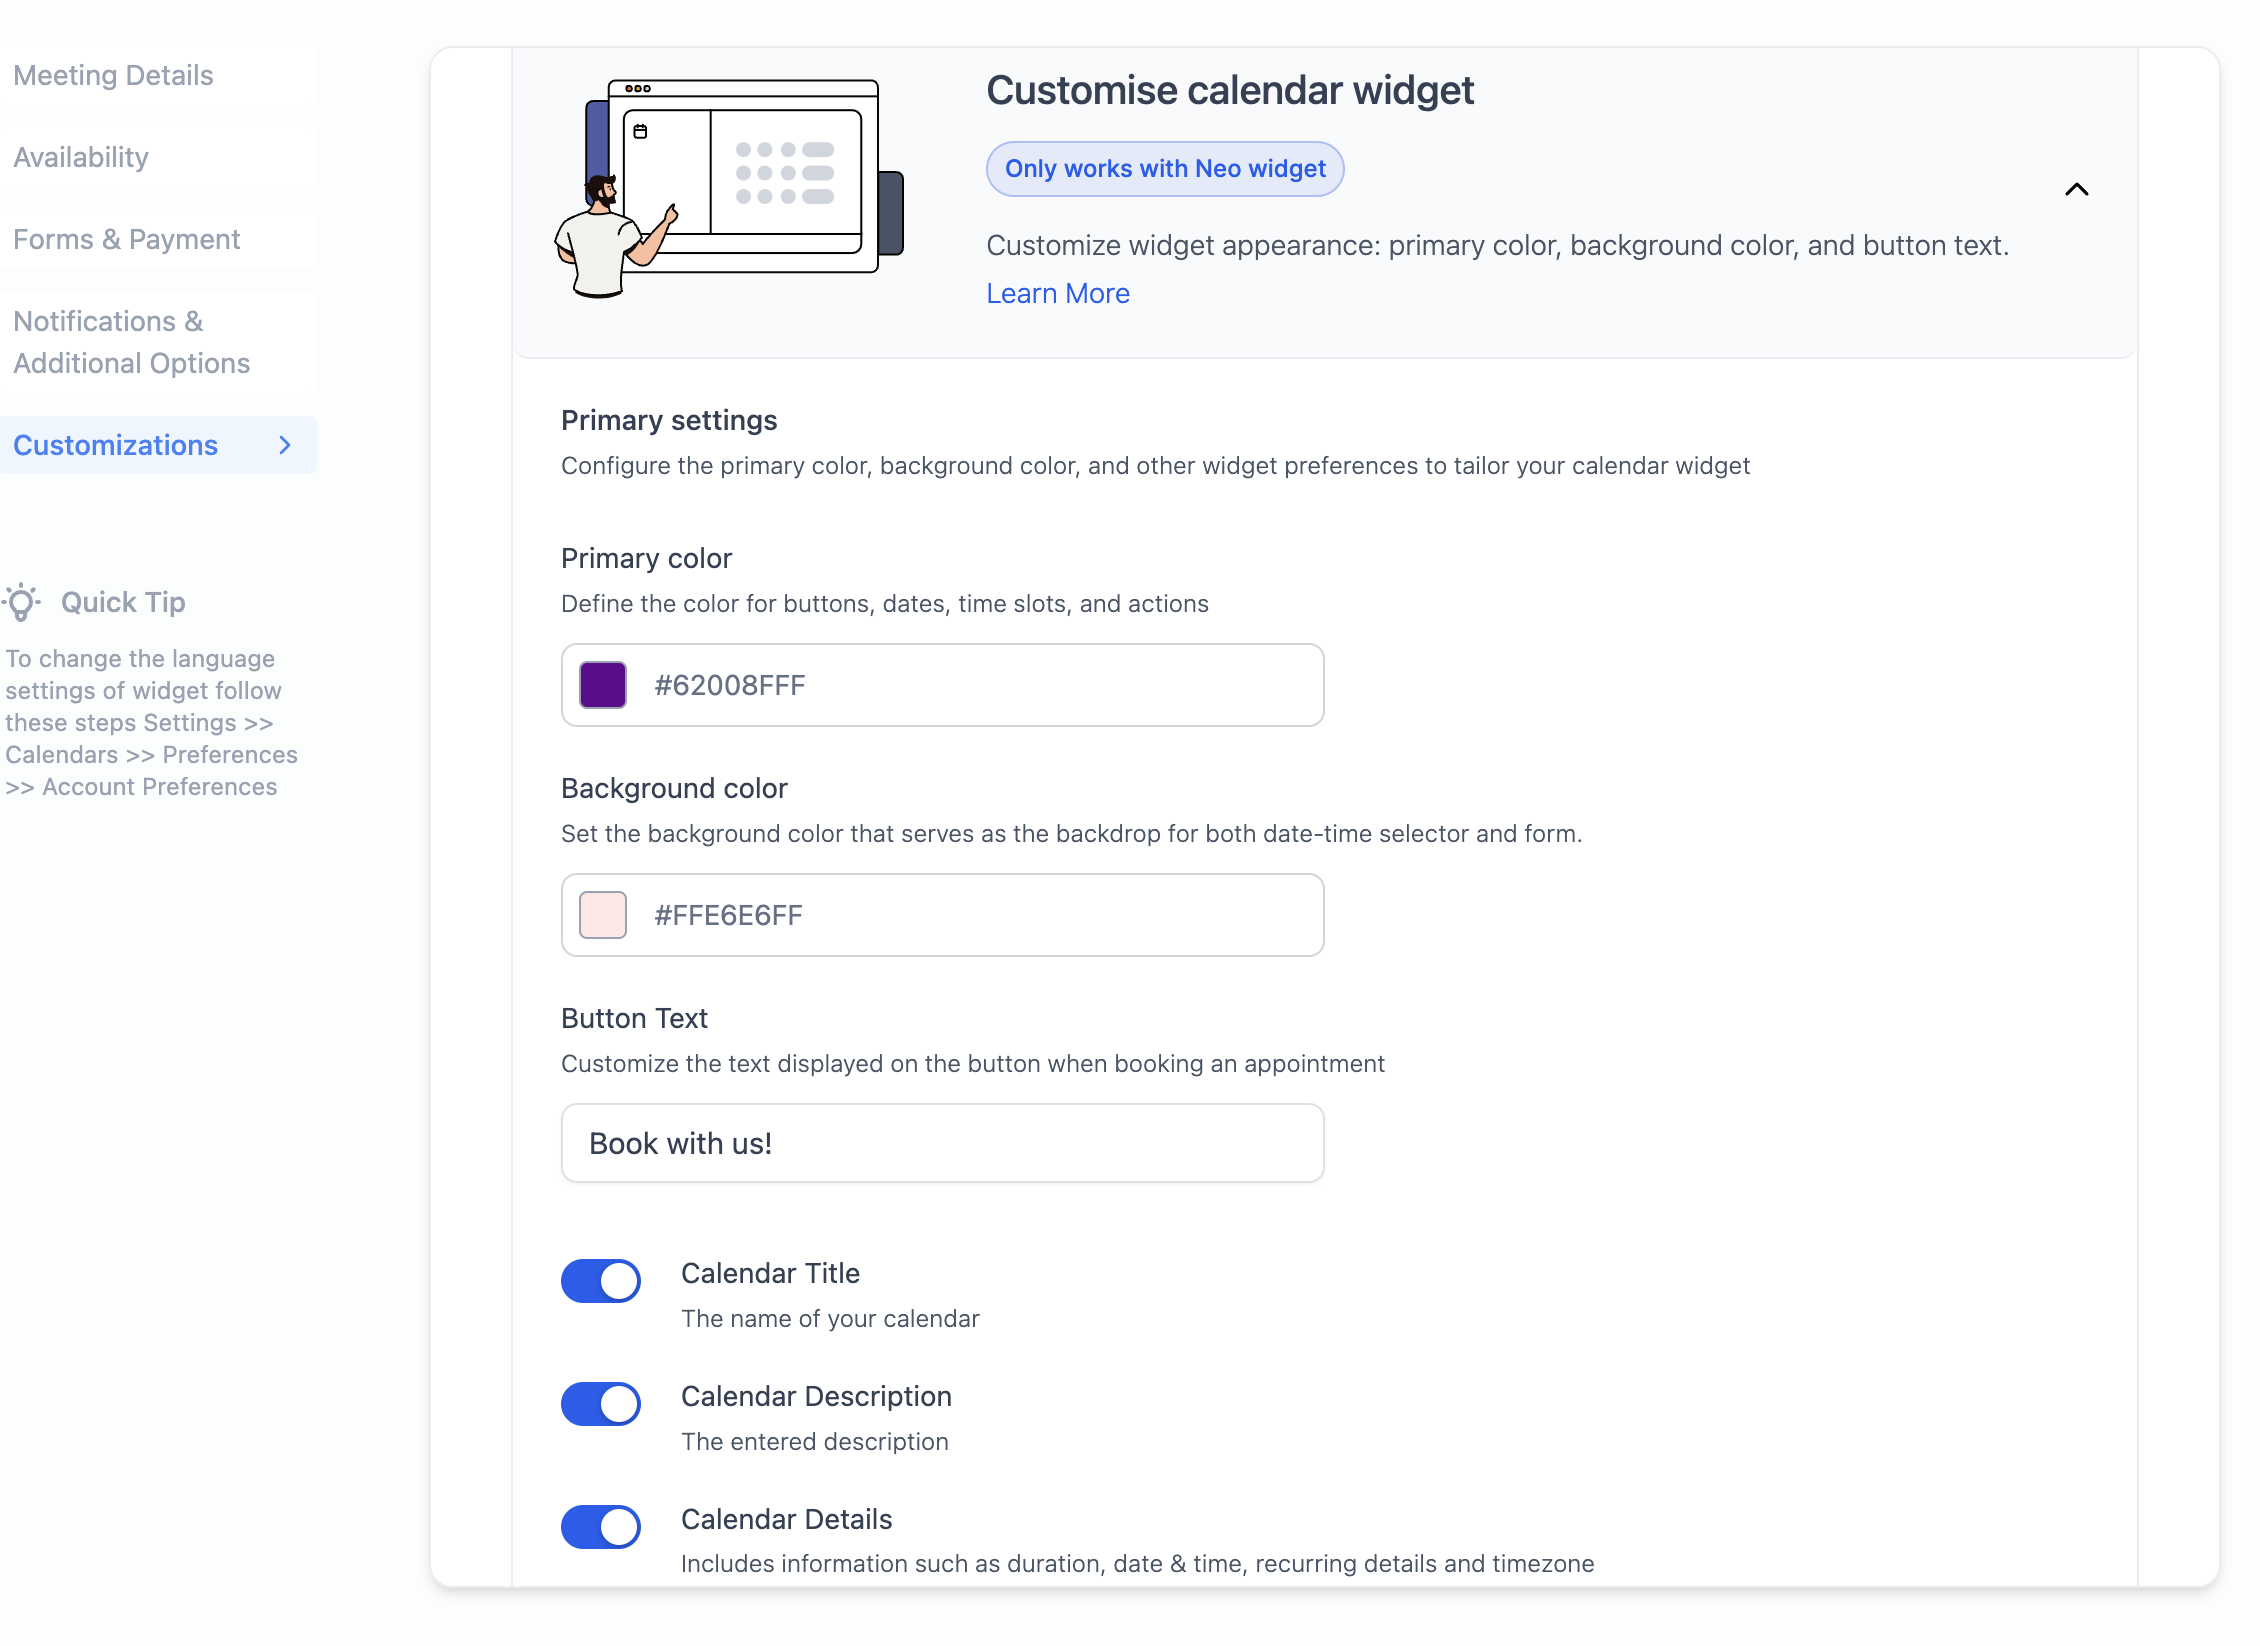
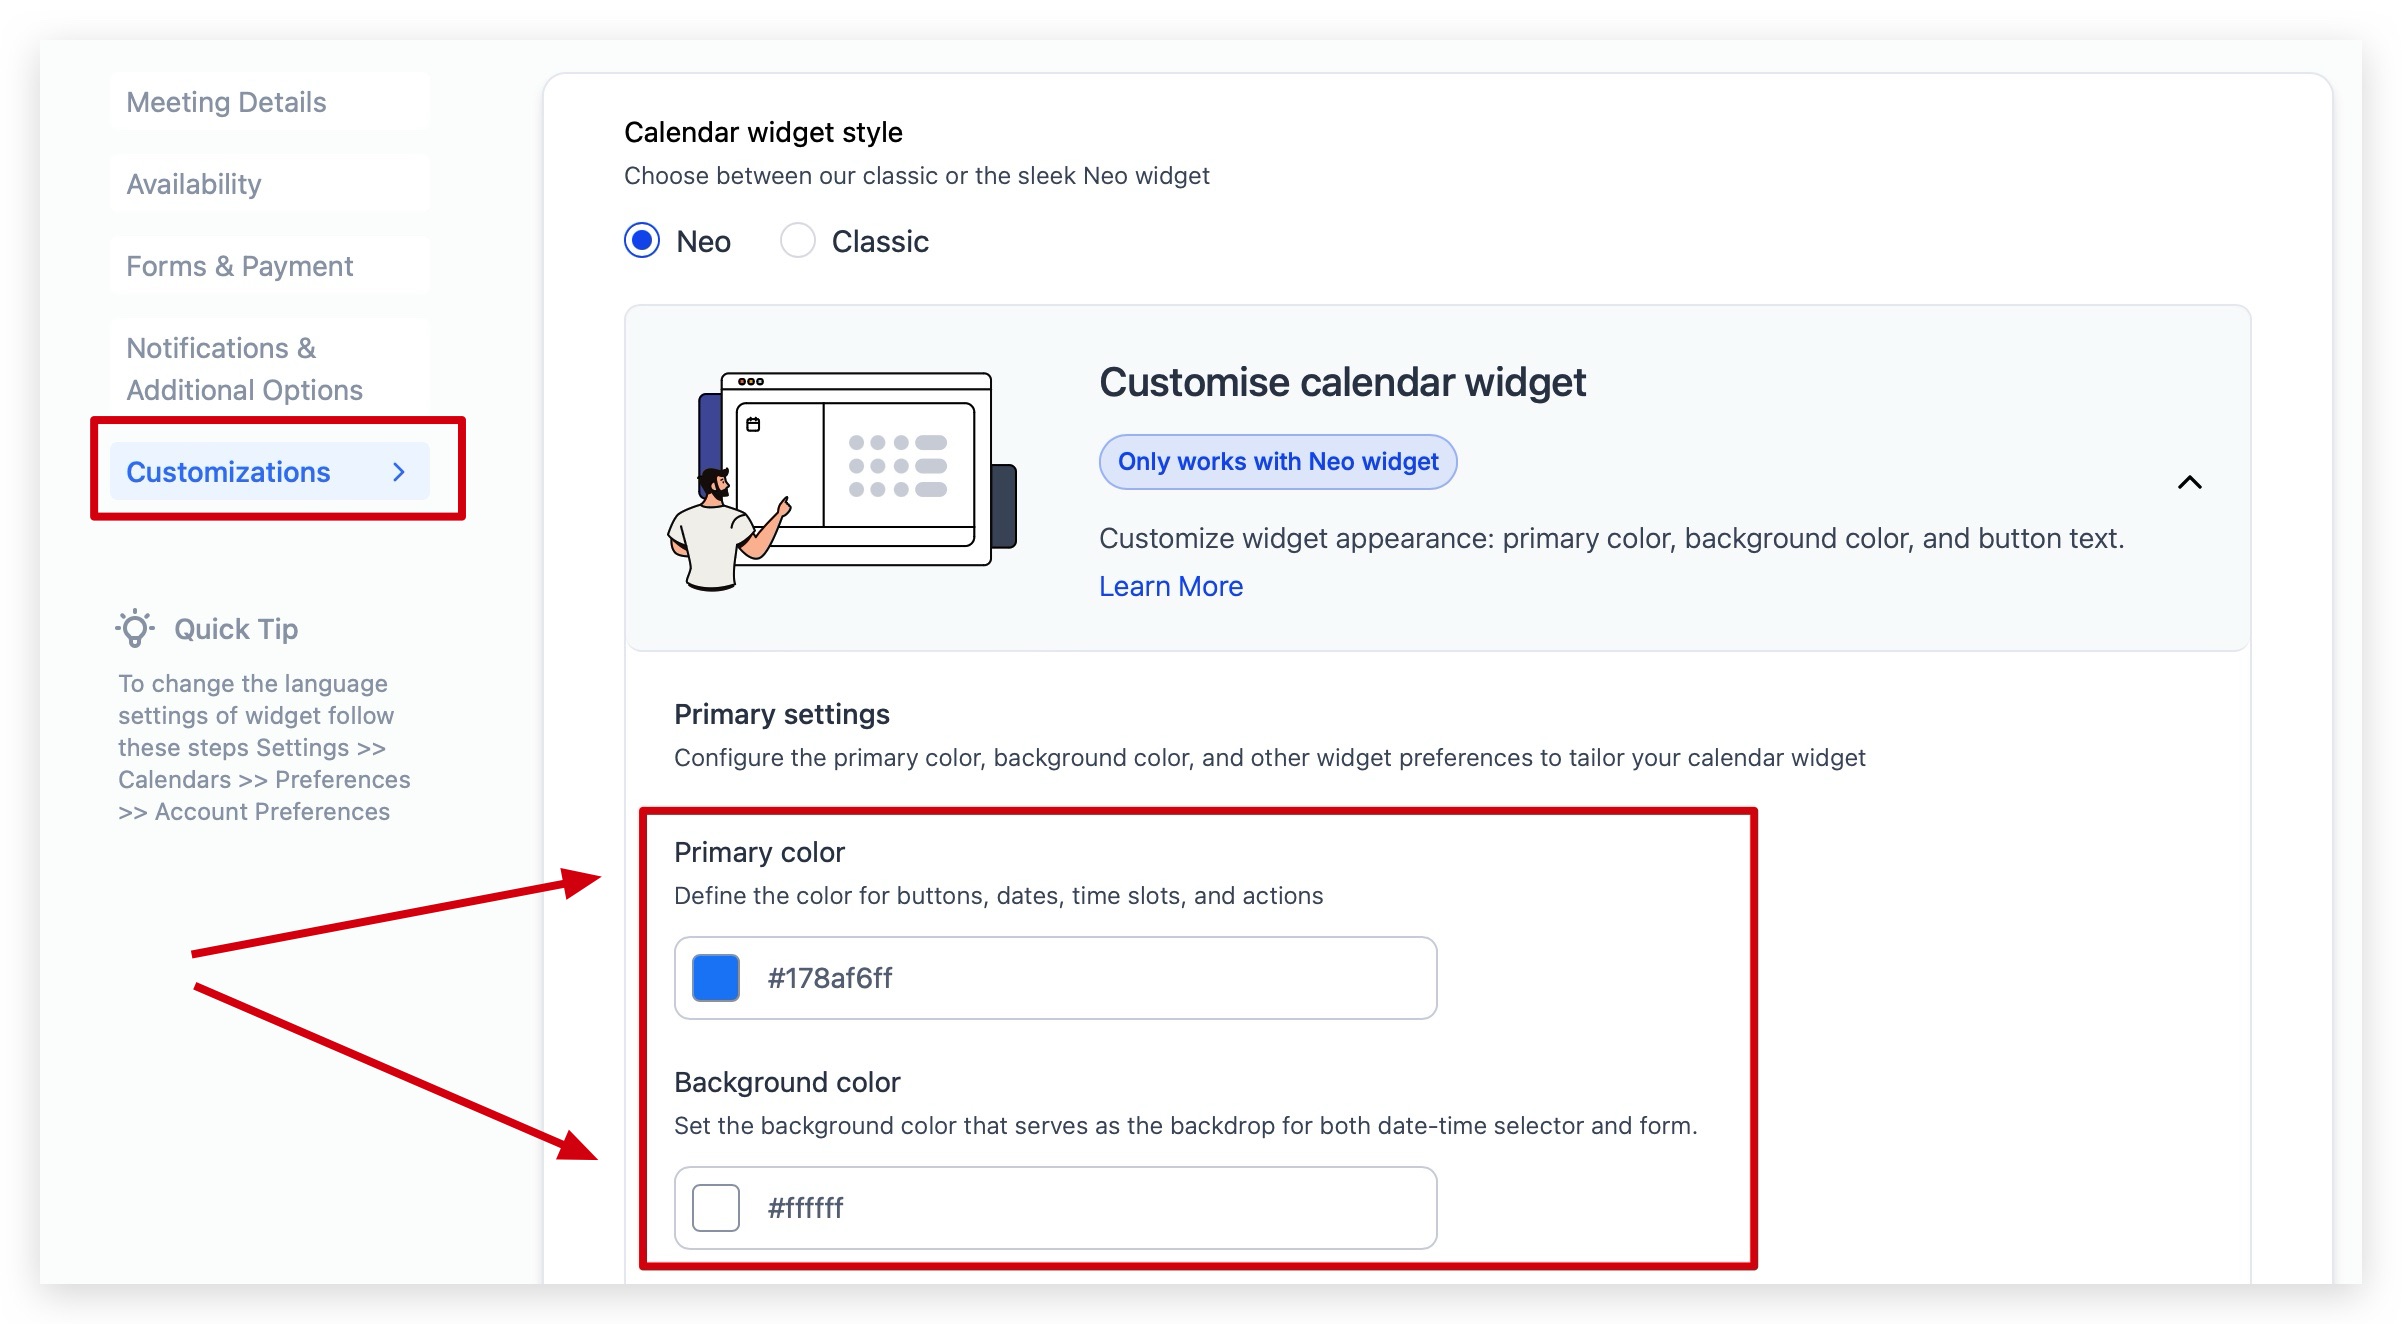
Inside the Customizations tab, scroll to the color pickers. There are two settings:
Primary Color: affects buttons, dates, time slots, and interactive elements such as staff selection and guest fields.
Background Color: sets the background behind the date/time selector and the form. If you're using a custom intake form on the widget, its background follows this setting too, though the form's actual fields still come from your form configuration.
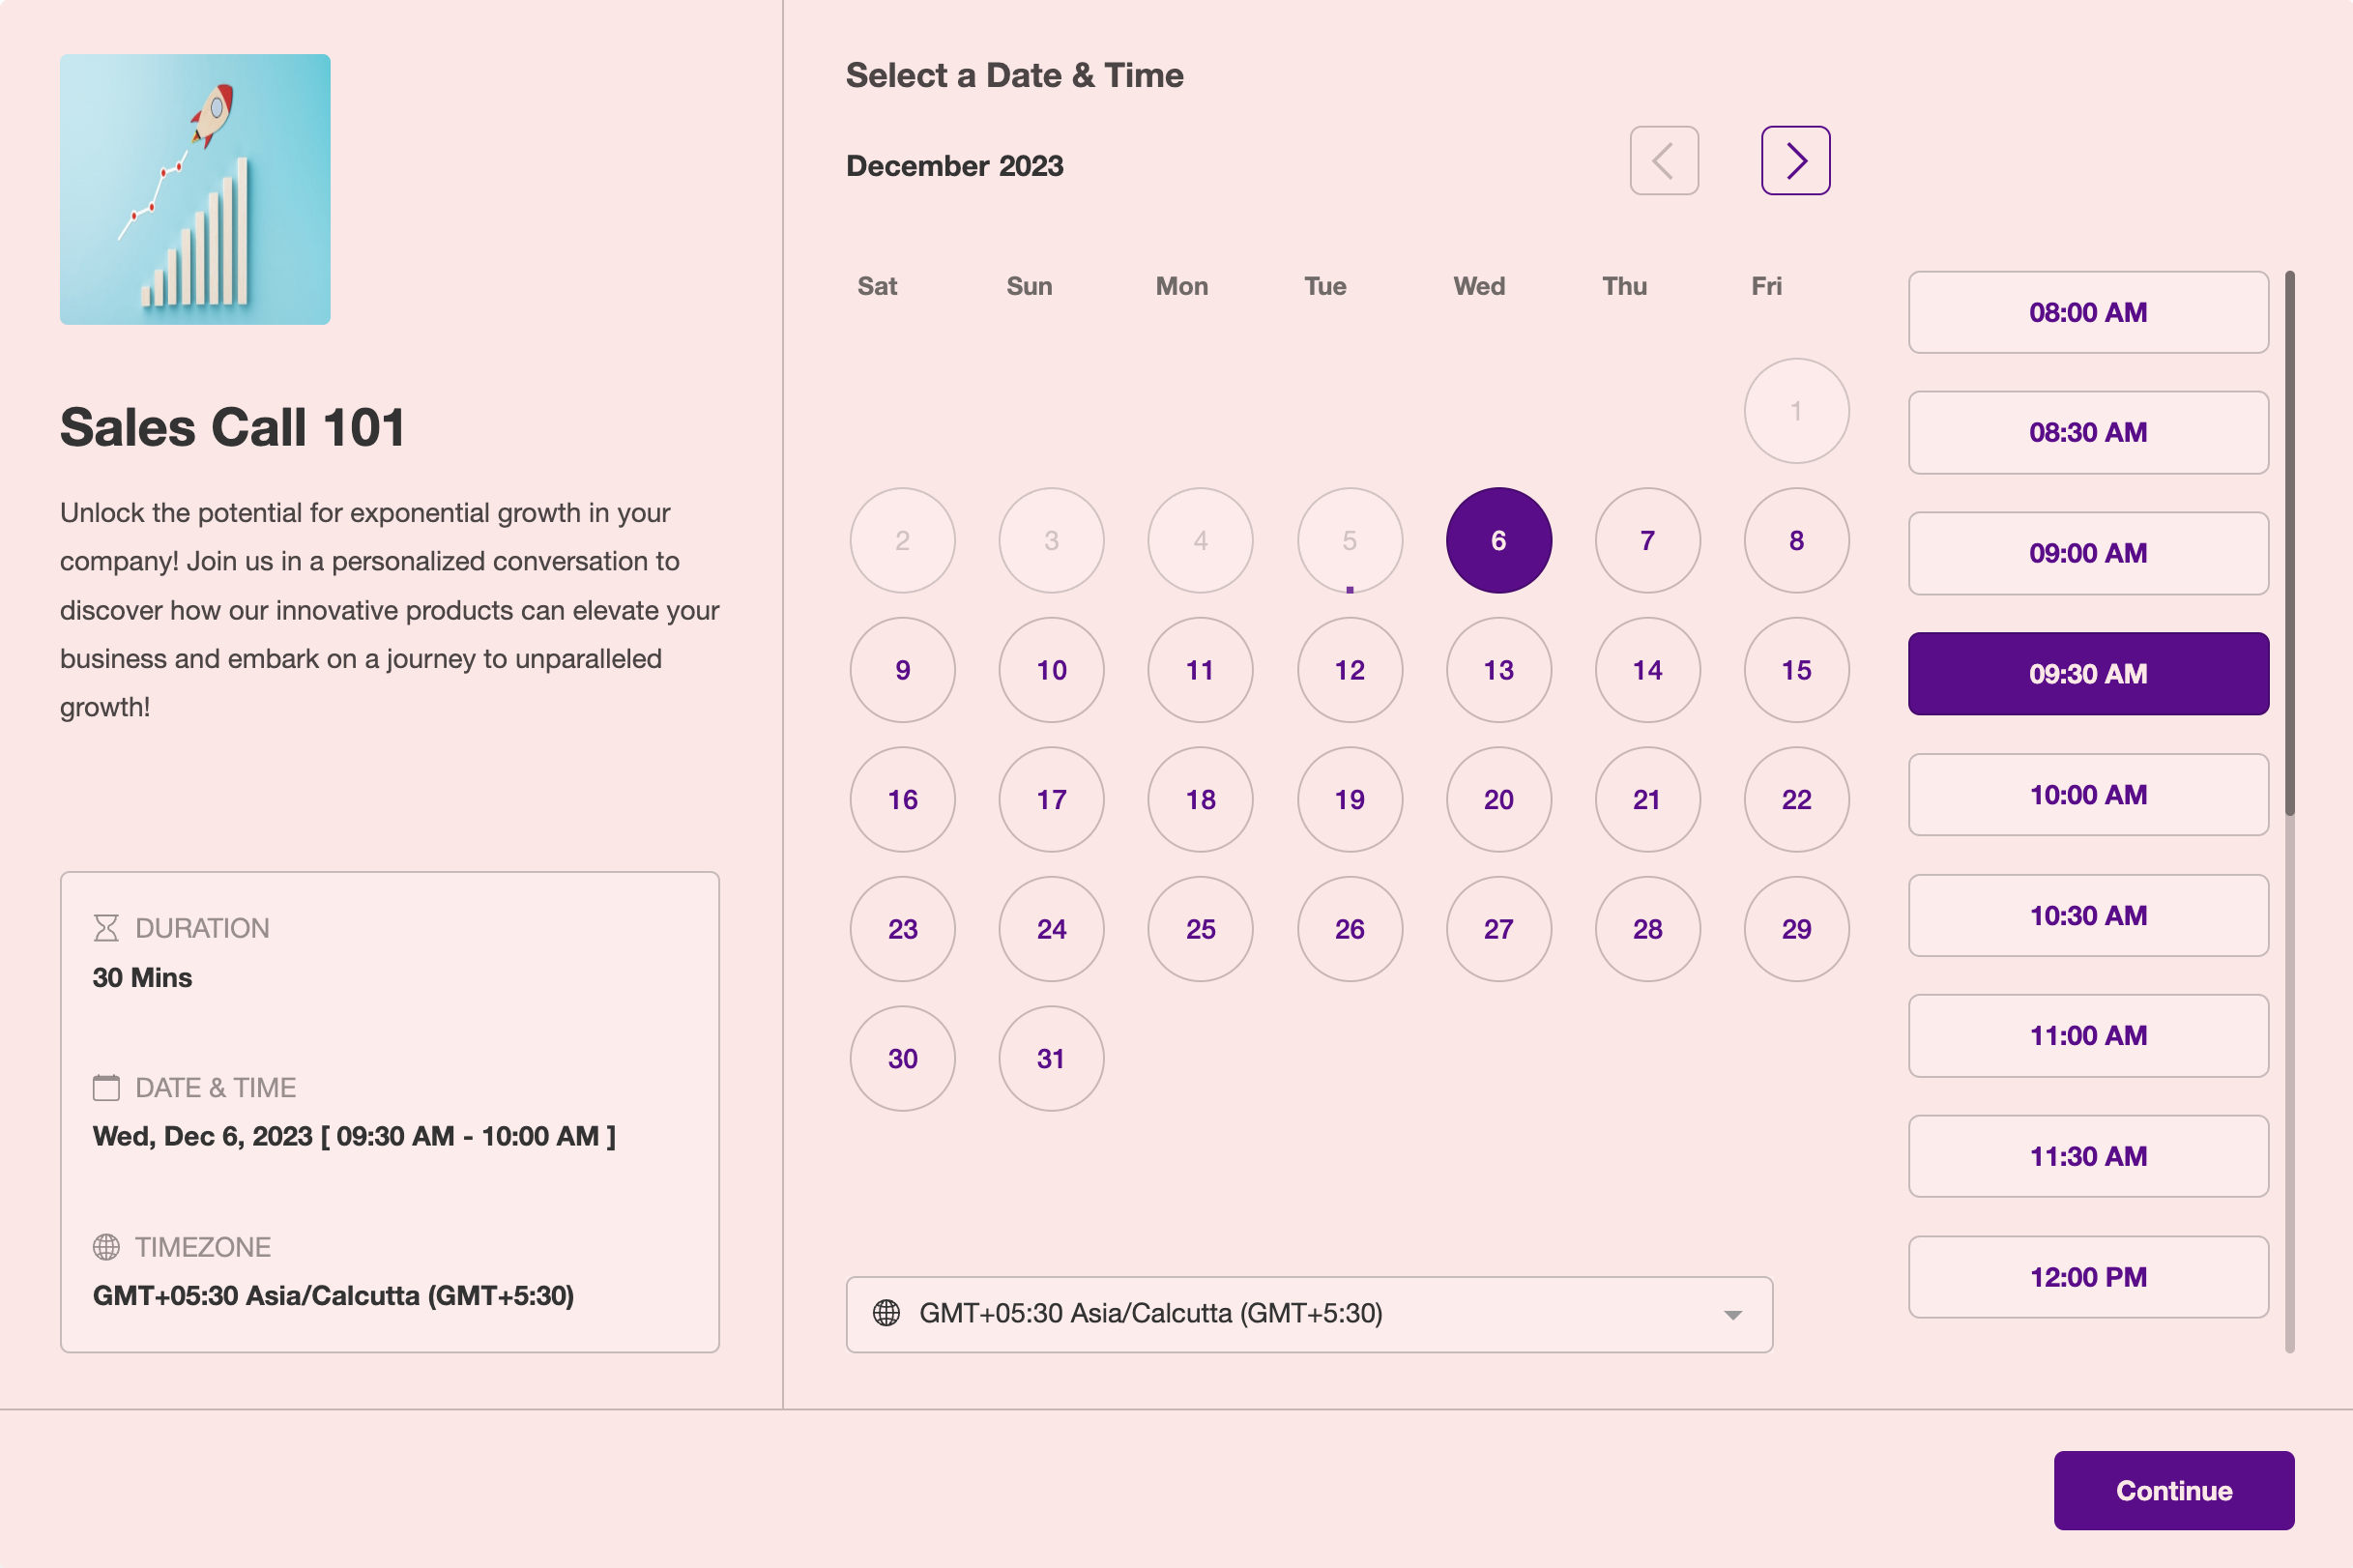
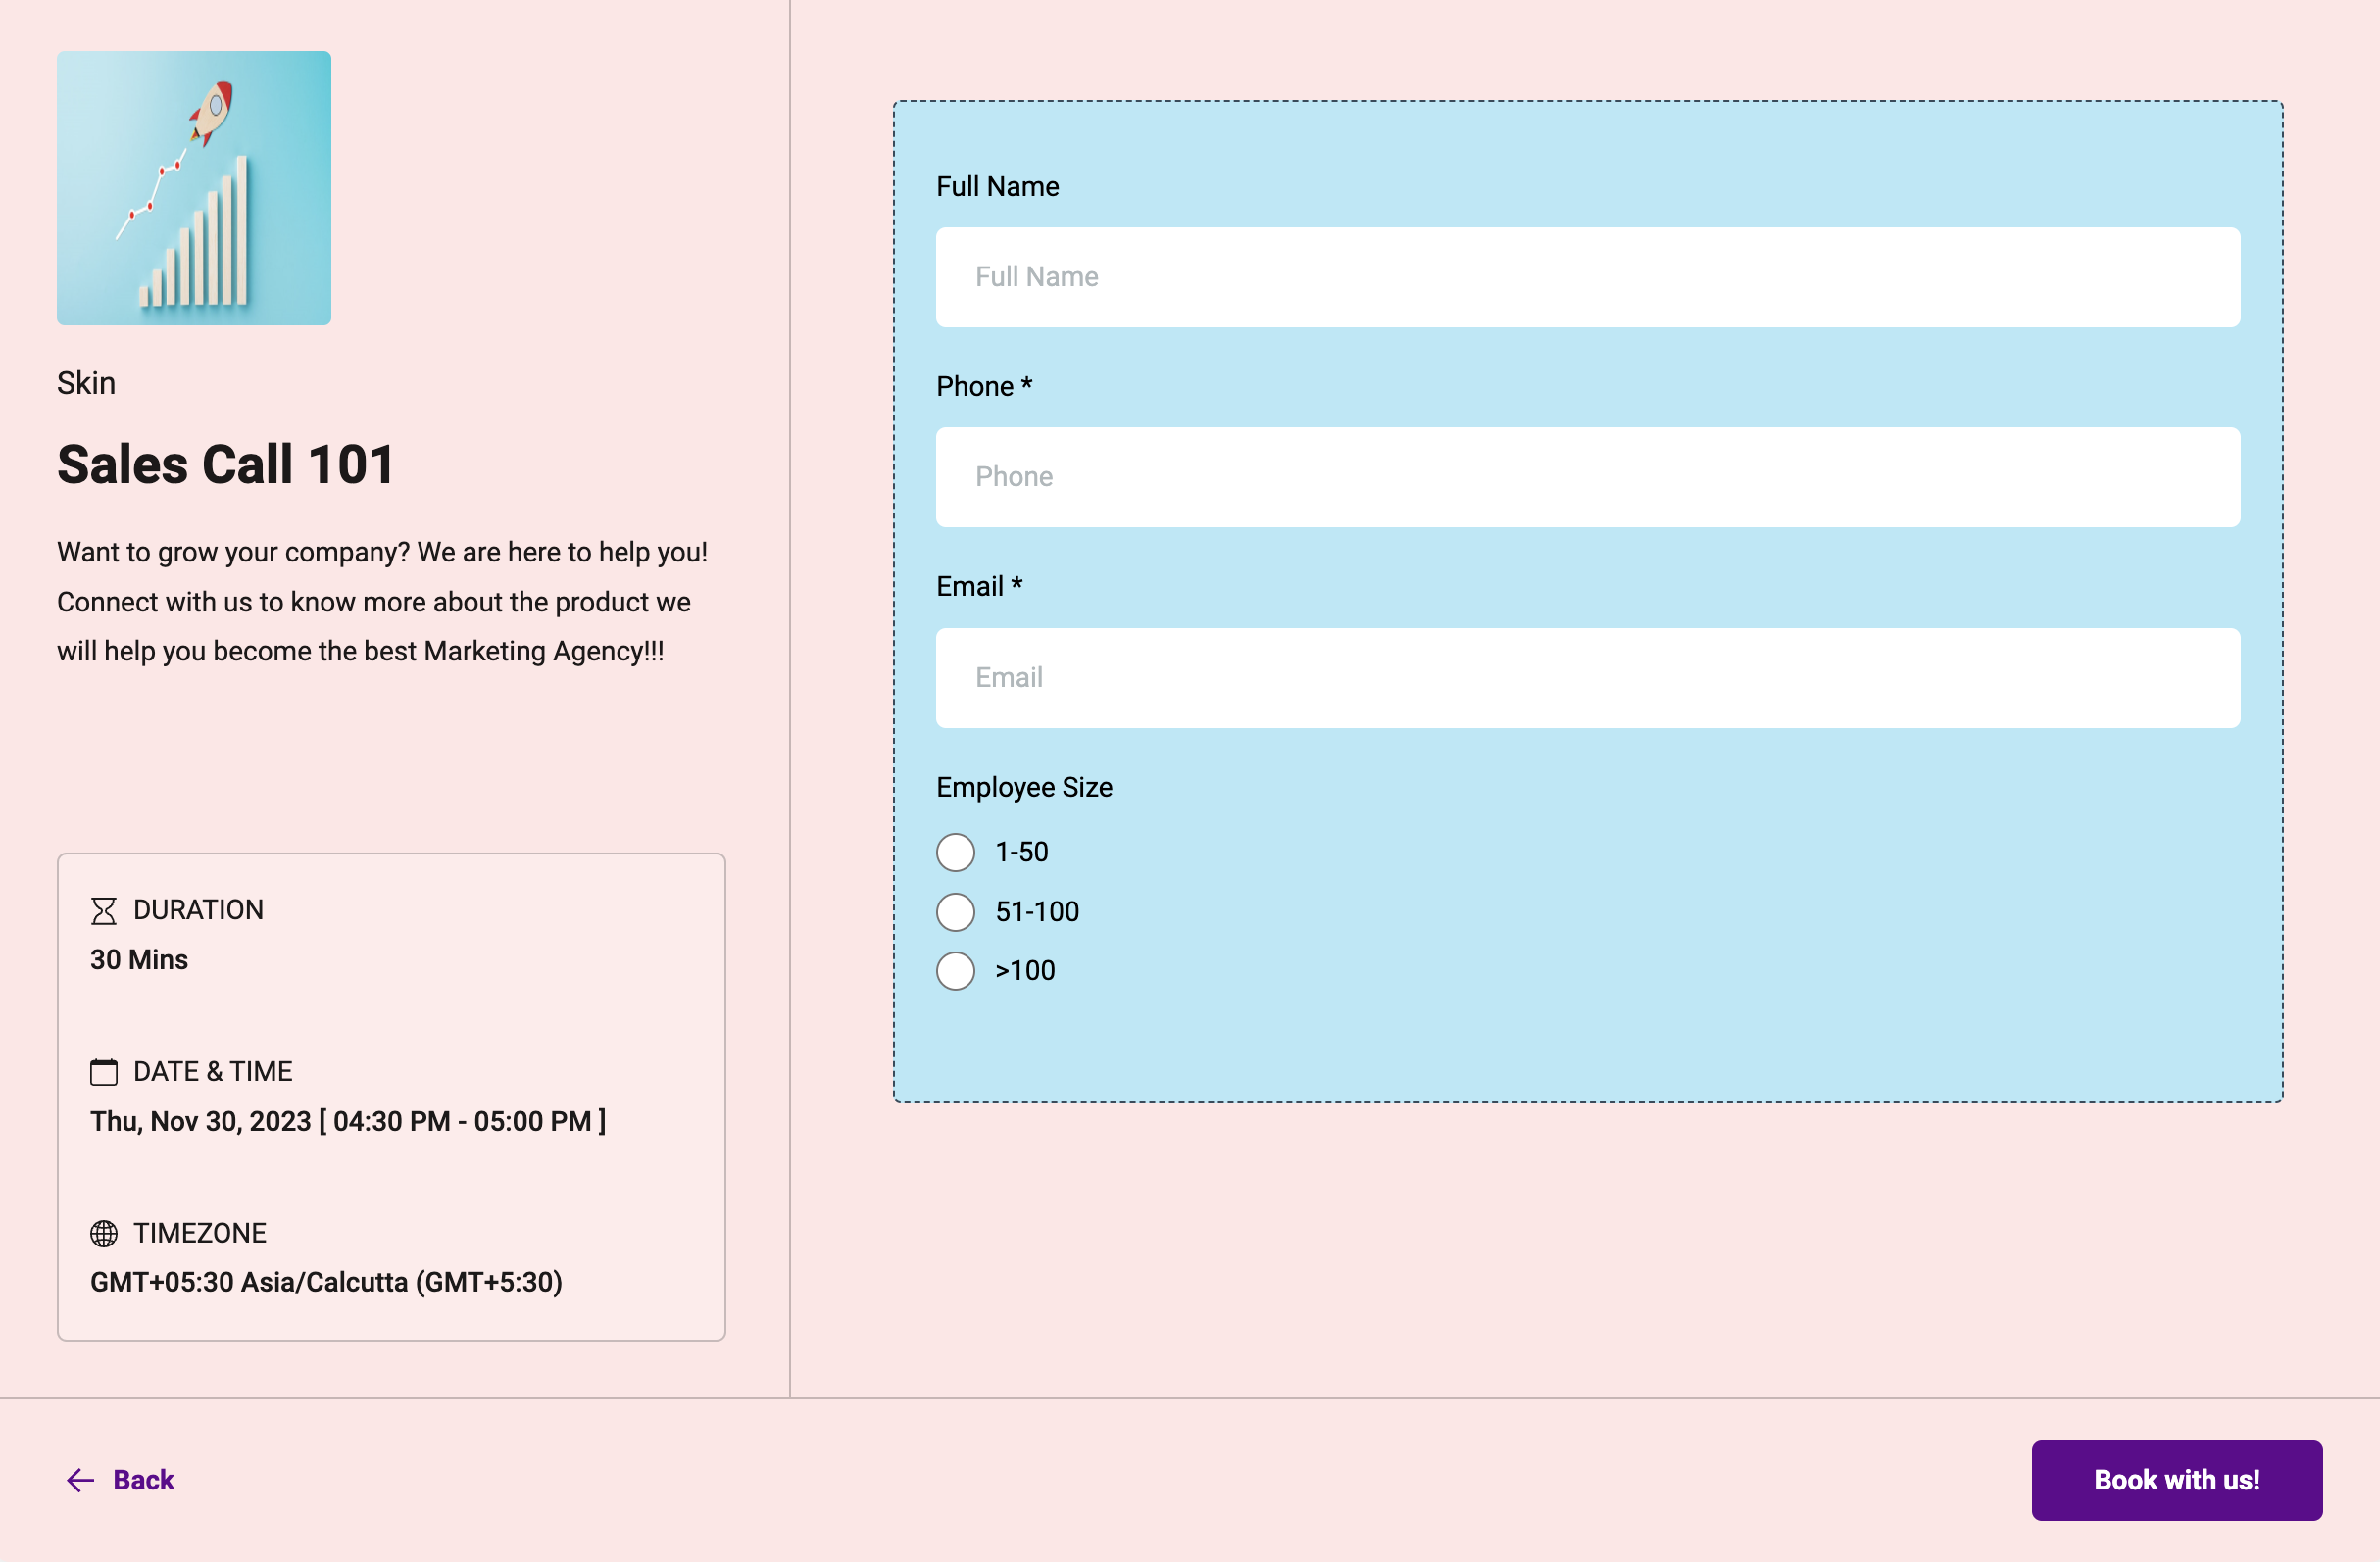
If you're pairing the widget with a custom form, keep the form's own theme in sync with your widget colors so the transition from date/time selection to intake form feels seamless rather than jarring.
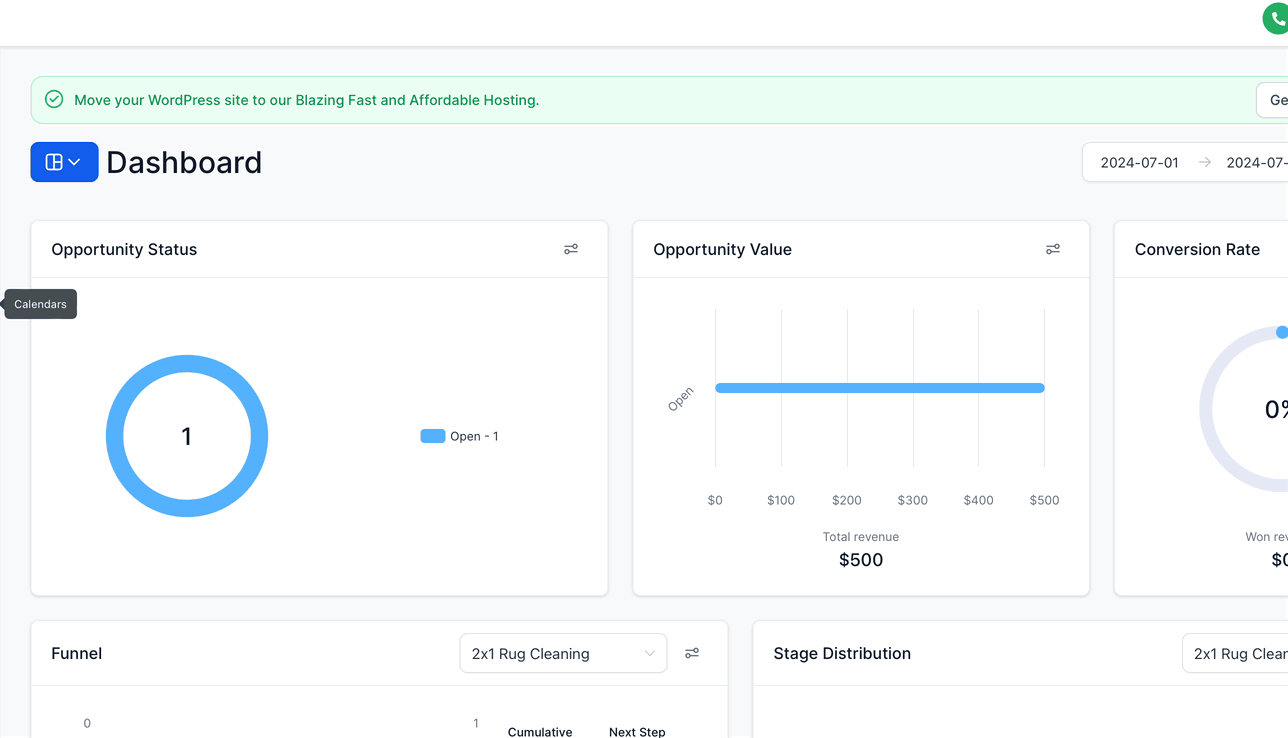
To set your colors:
Go to Calendars → Calendar Settings.
Click the three-dot menu next to the calendar and choose Edit.
Open the Customizations tab.
Under the color pickers, set your Primary Color and Background Color either by typing a hex code (codes starting with #, useful when you need an exact brand match) or by dragging the slider to pick a shade visually.
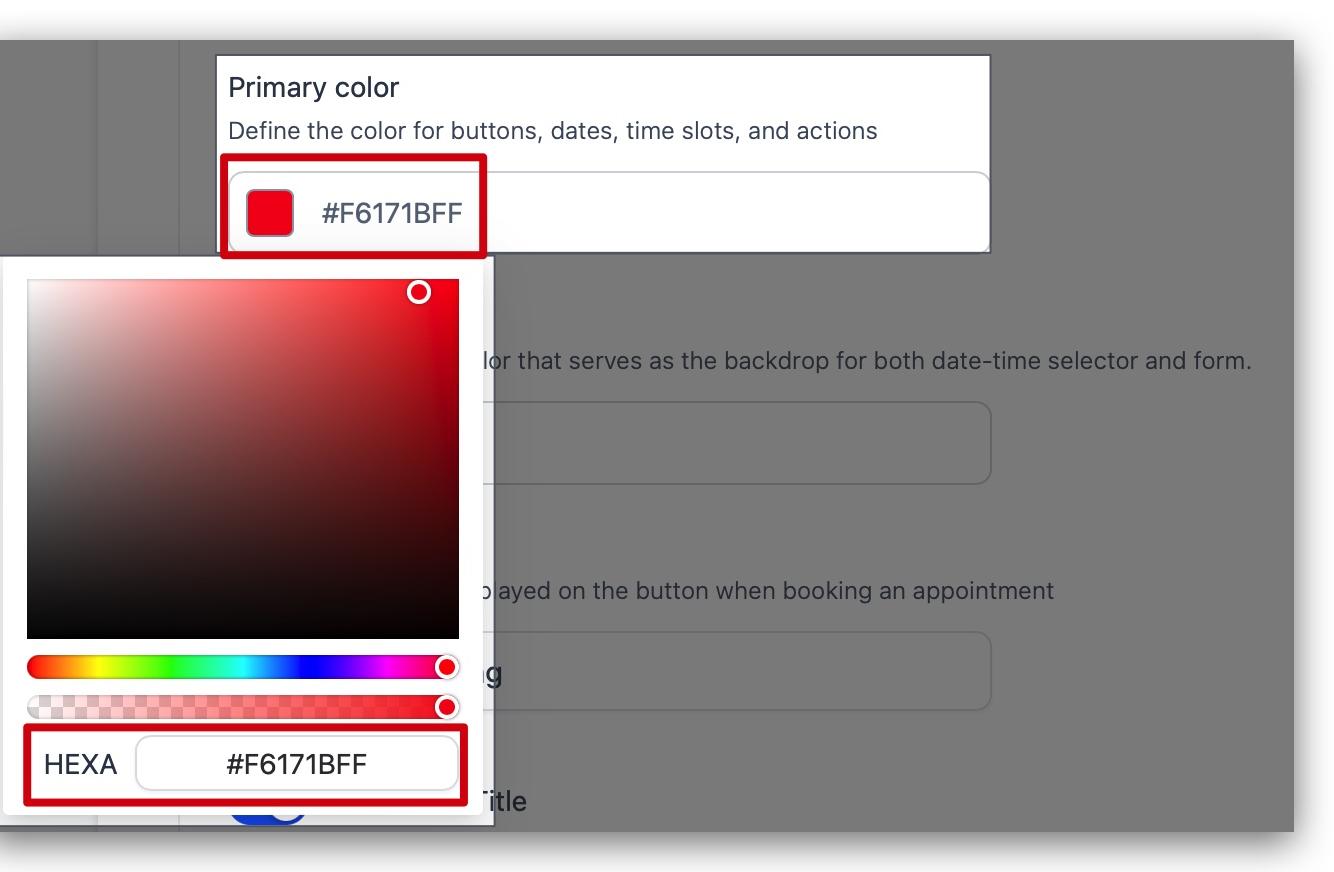
Once saved, every button, date, and time slot on the widget reflects your brand rather than the default theme.
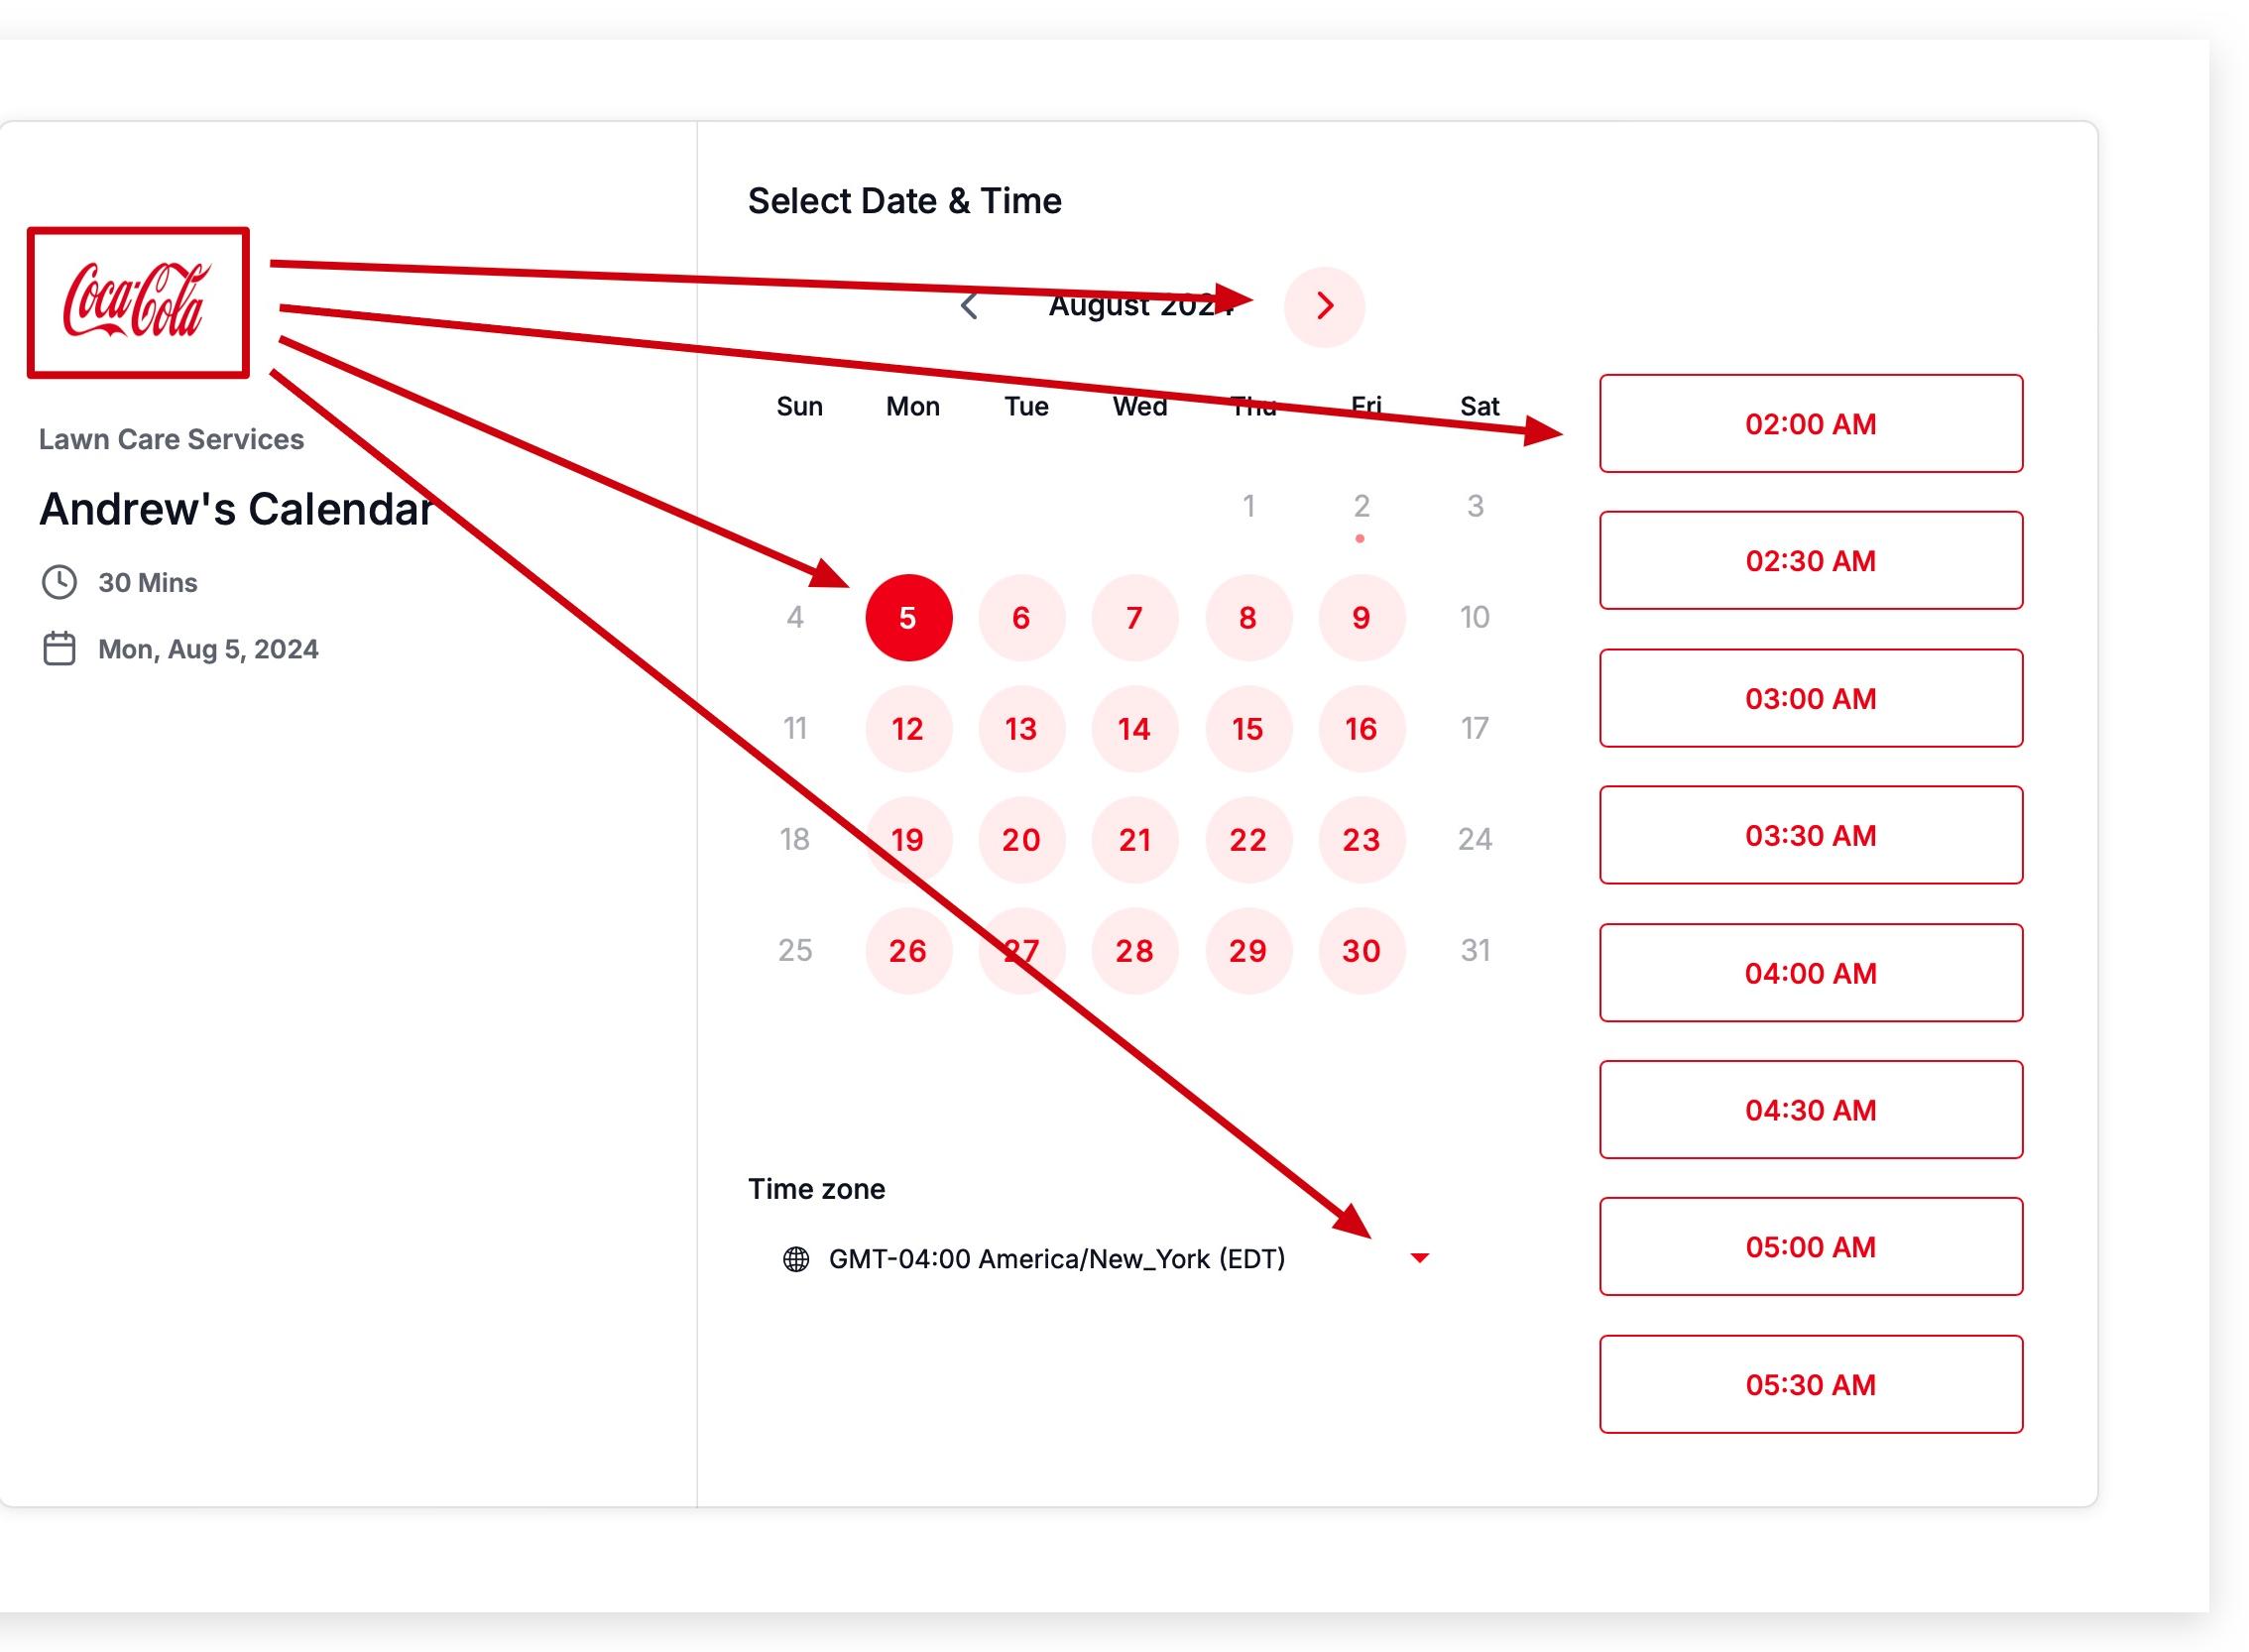
For the cleanest result, choose a primary color and background color that contrast well with each other. A light background with a bold primary color (or vice versa) tends to read more clearly than two similar tones.
What the Primary Color affects:
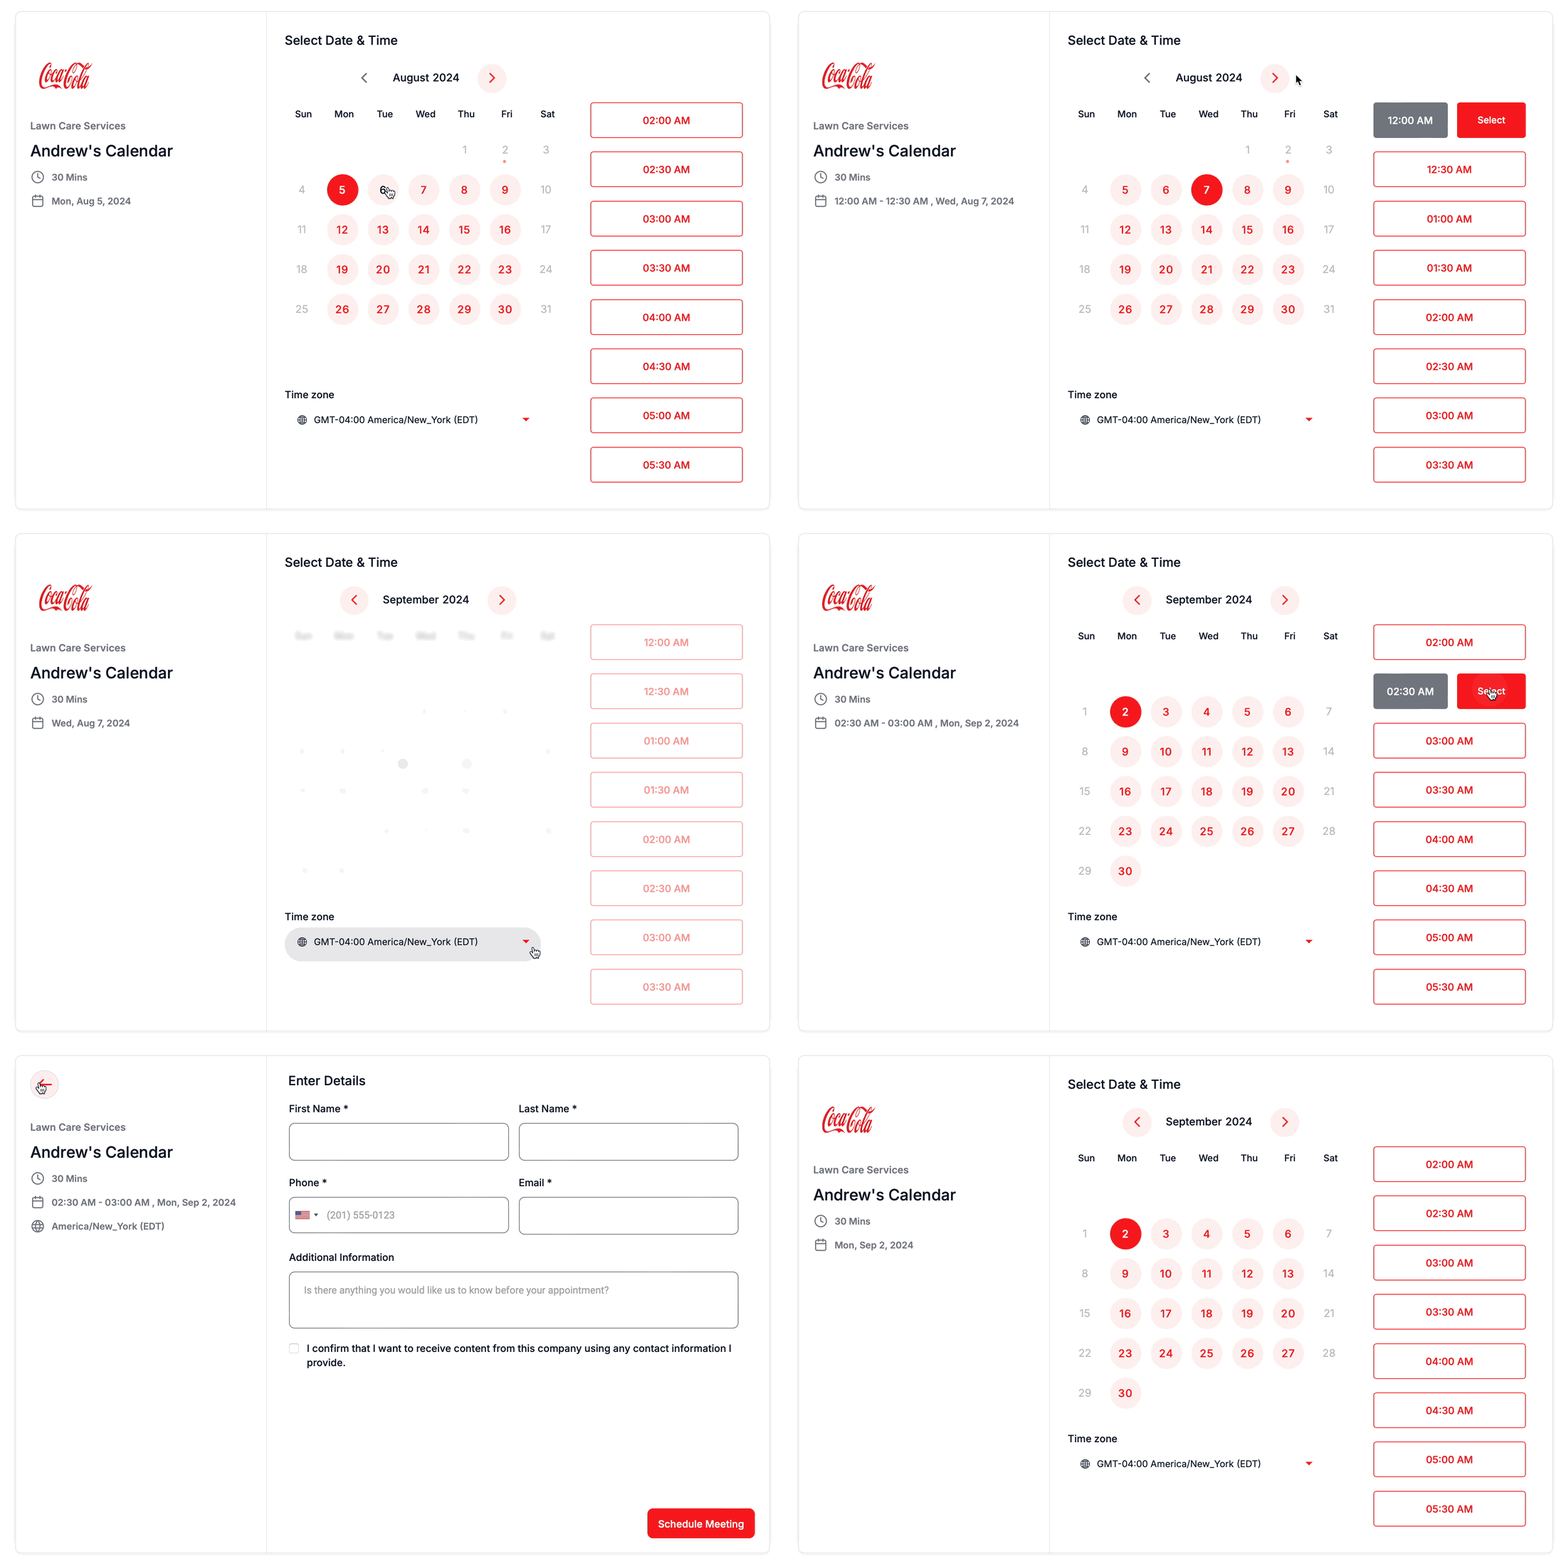
What the Background Color affects:
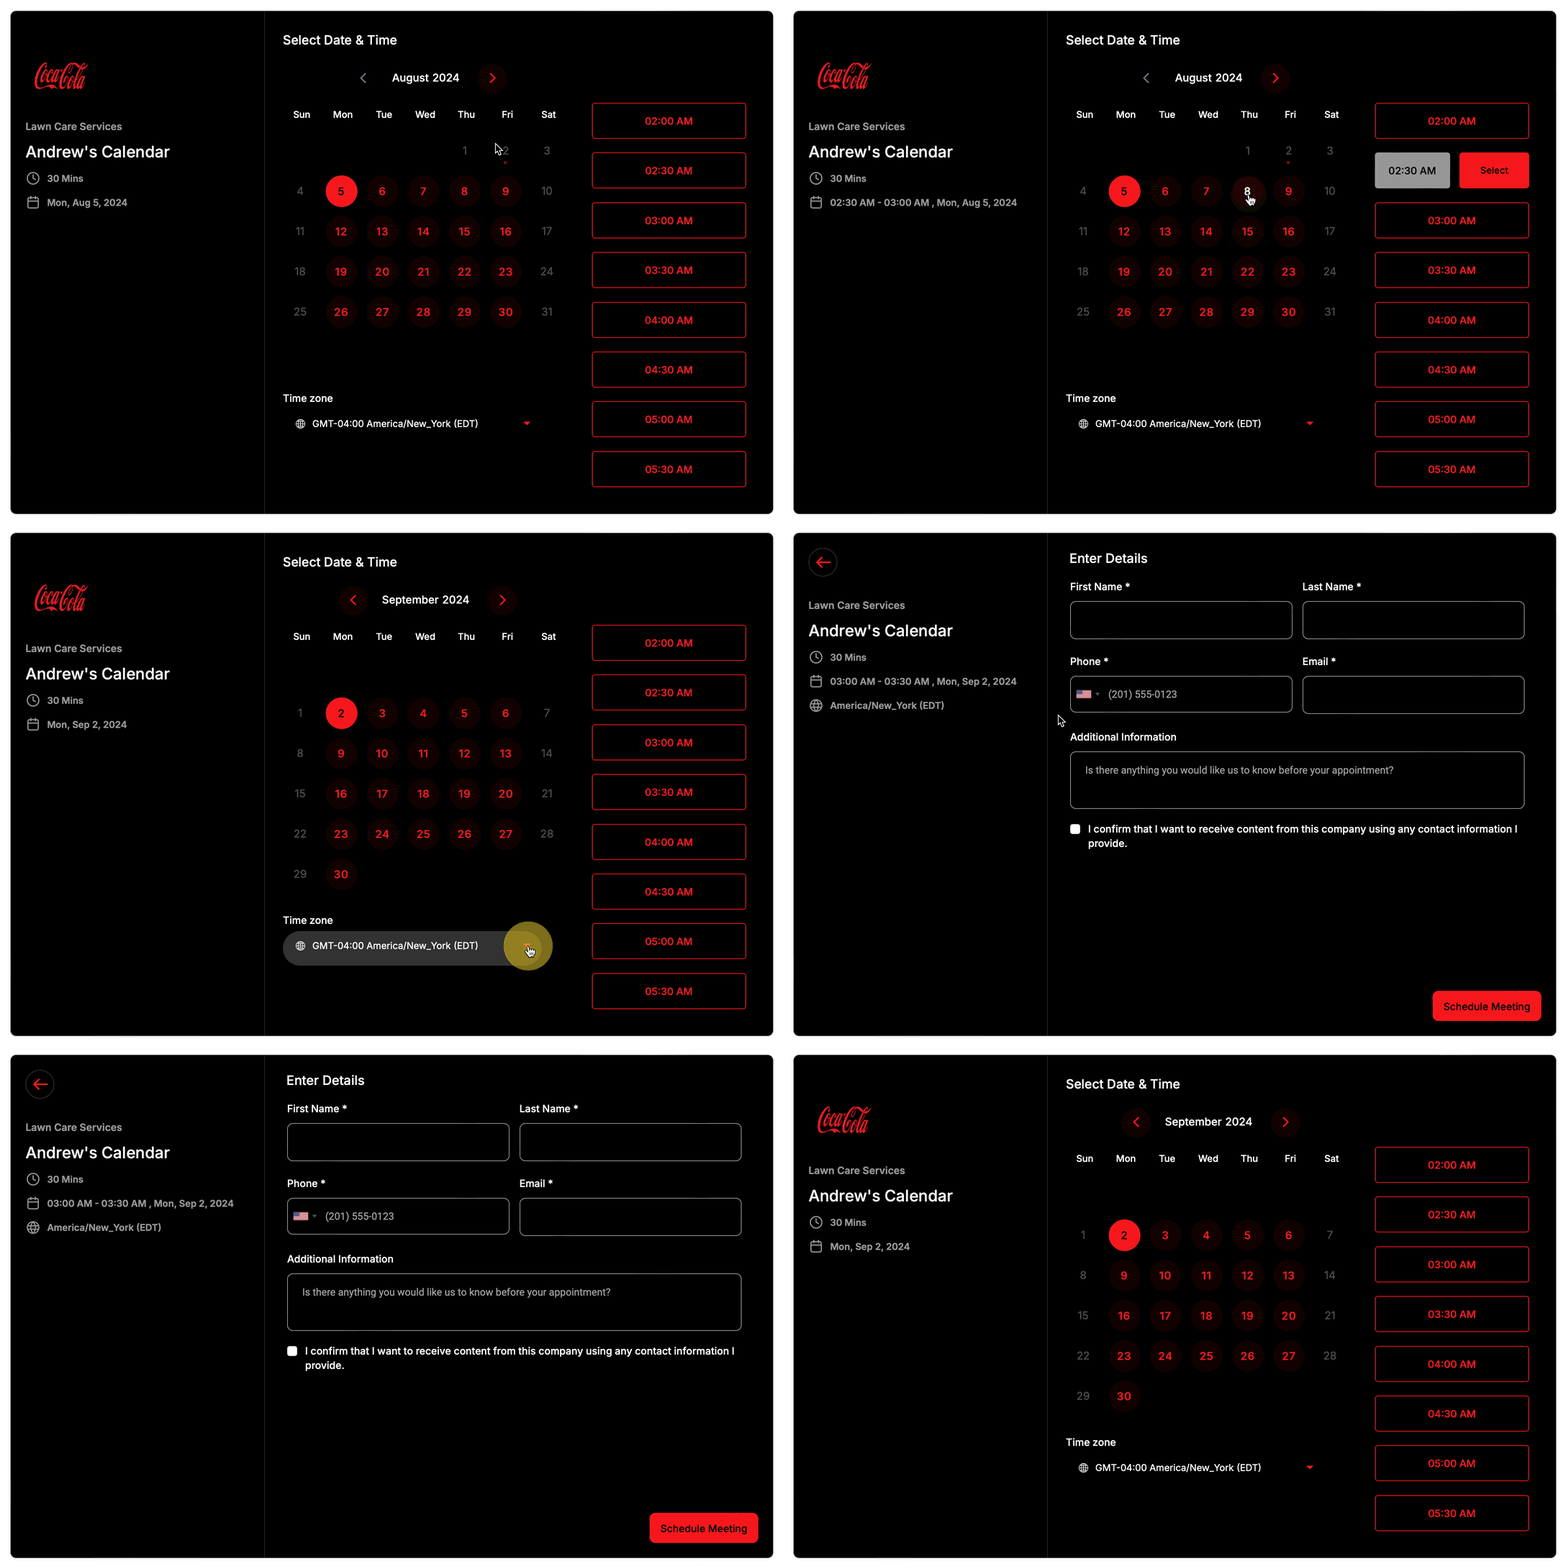
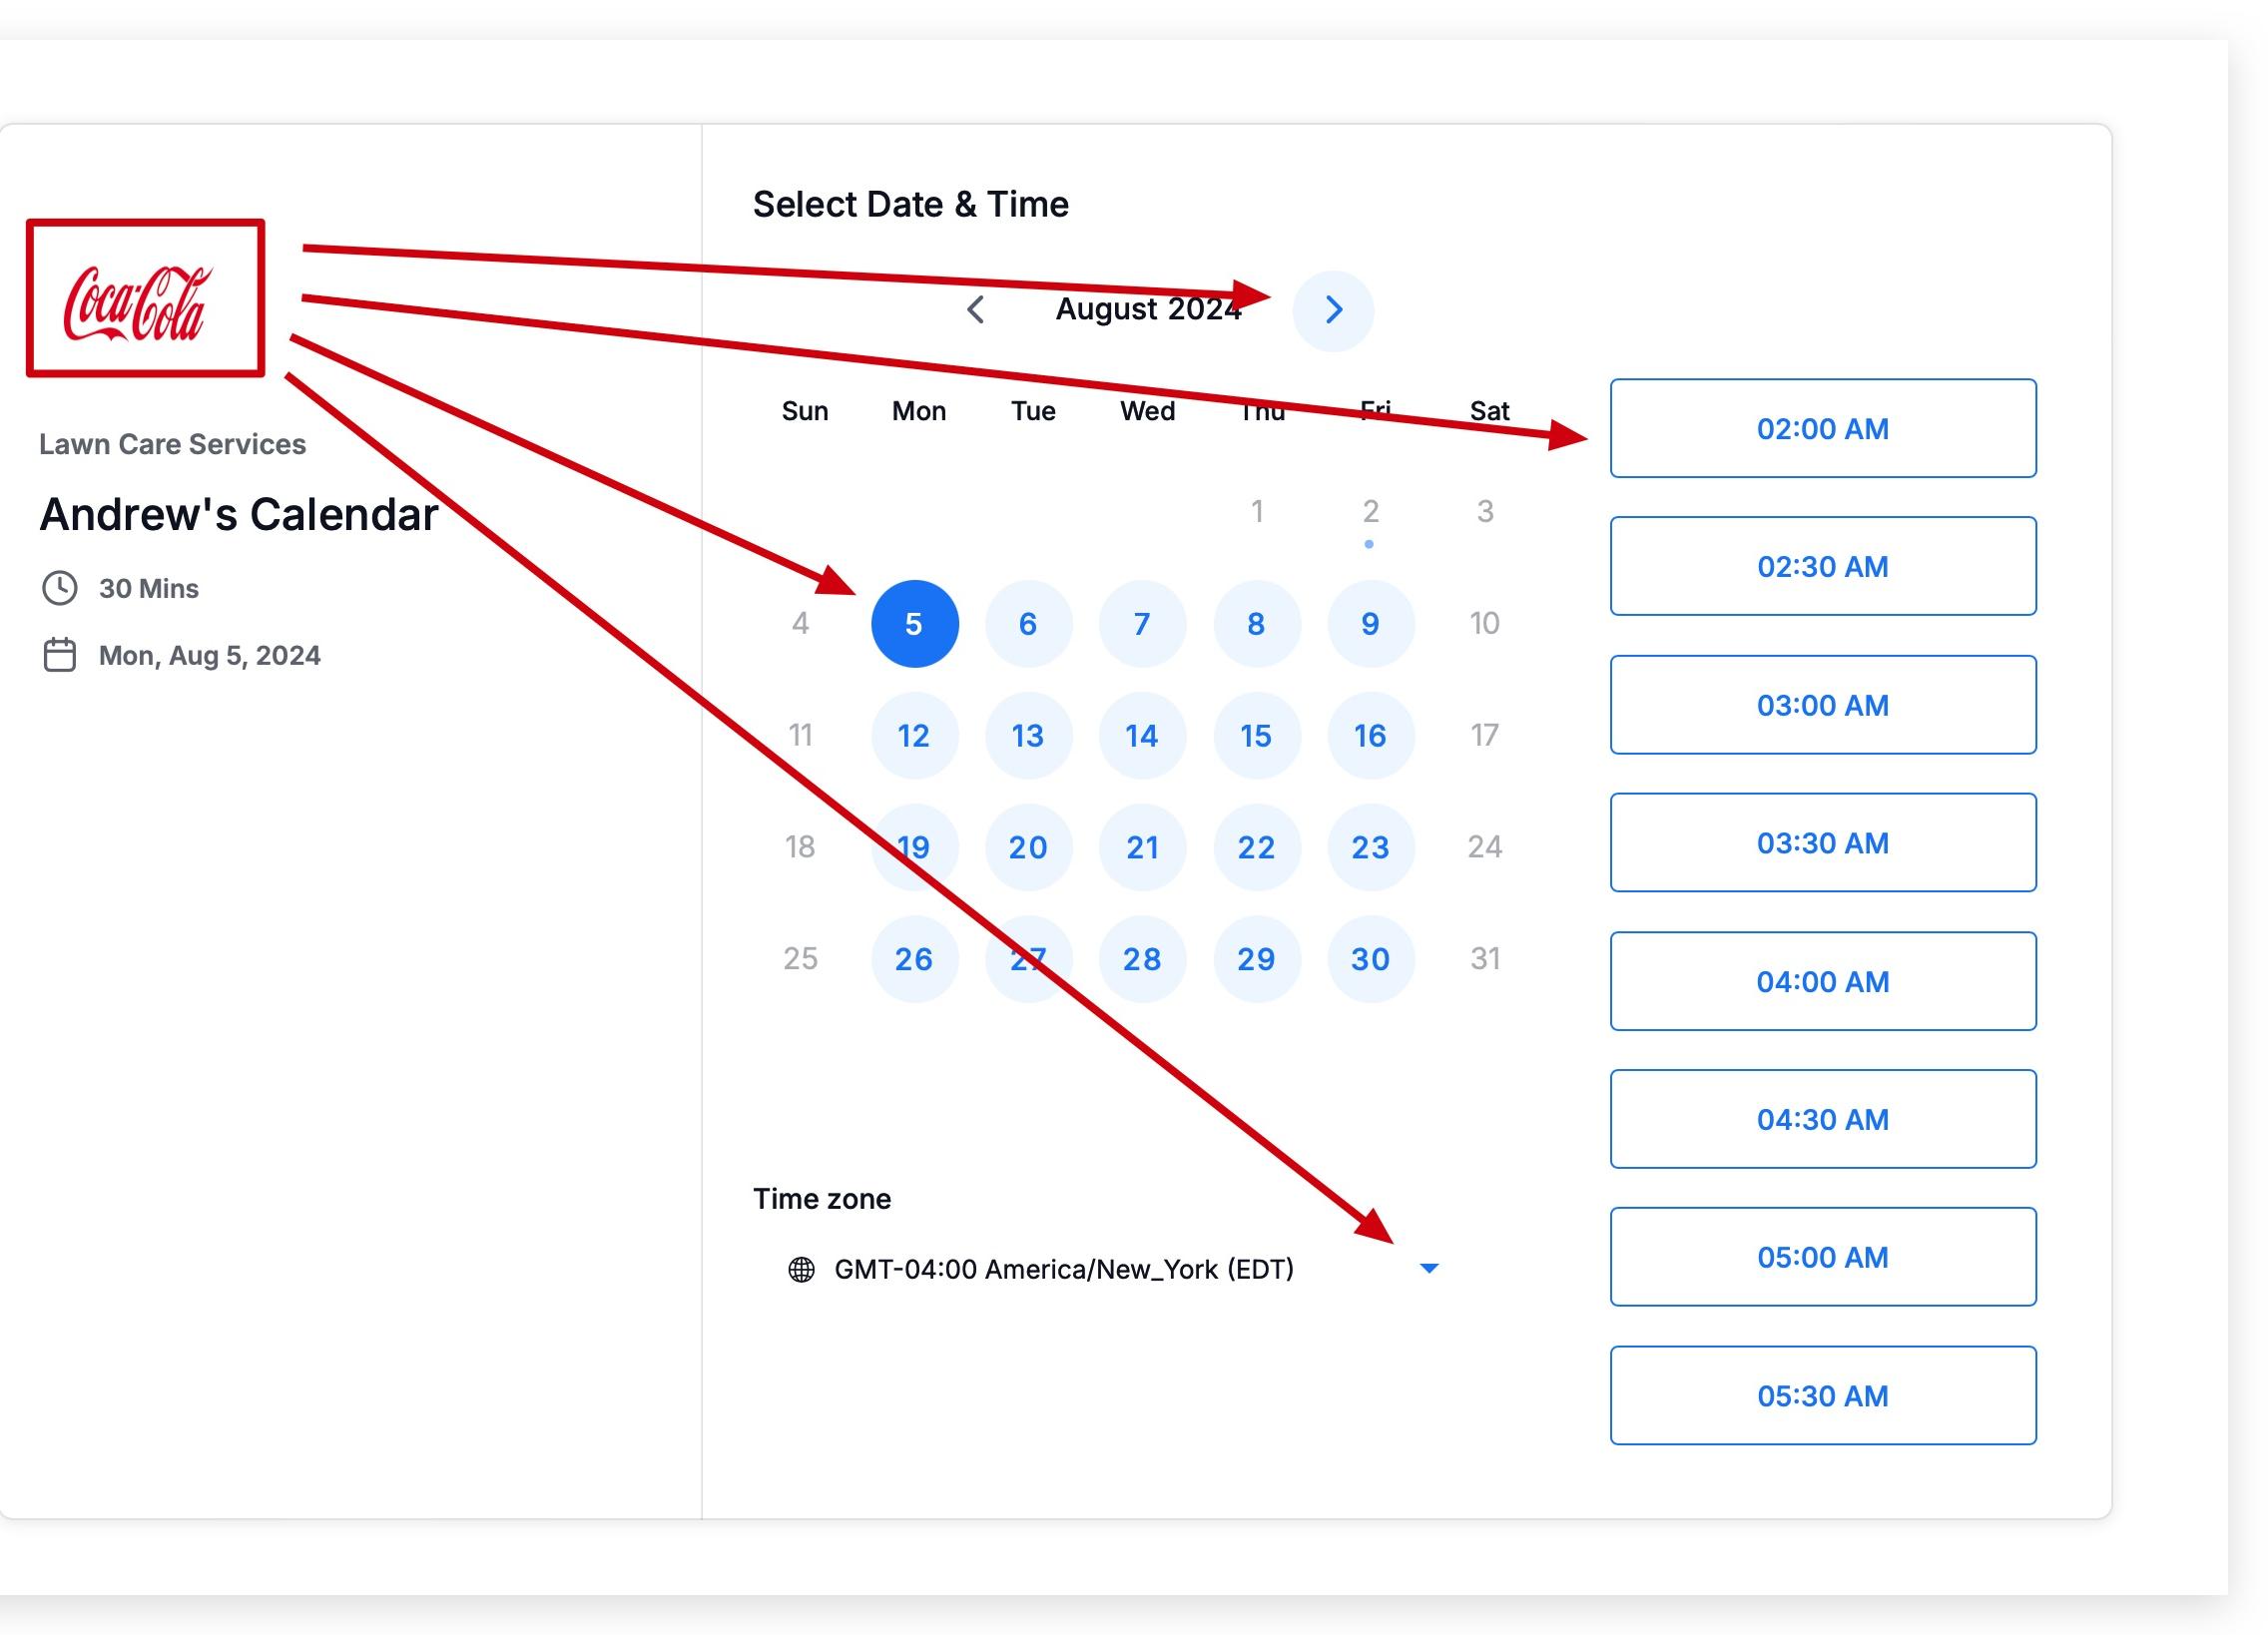
You can add a logo to the booking widget so it carries your practice's branding, not just its colors.
Open the calendar editor and go to the Team and Event Setup tab.
Scroll down to the logo upload option.
Upload an image. Logos must be 180x180px or smaller, no larger than 2.5MB, and saved as JPEG, GIF, or PNG.
Choose the logo shape: Square or Circle.
Choose which widget style the logo applies to: Classic or Neo.
Once uploaded, you can swap the logo out or remove it at any time from the same screen. If you'd rather not show a logo at all, remove it from the meeting details settings.
The text on the final booking button (the one a patient clicks to confirm their appointment) is customizable. Use language that matches how your front desk actually talks to patients, such as "Book My Consult," "Schedule Appointment," or "Reserve My Spot," instead of a generic "Submit."
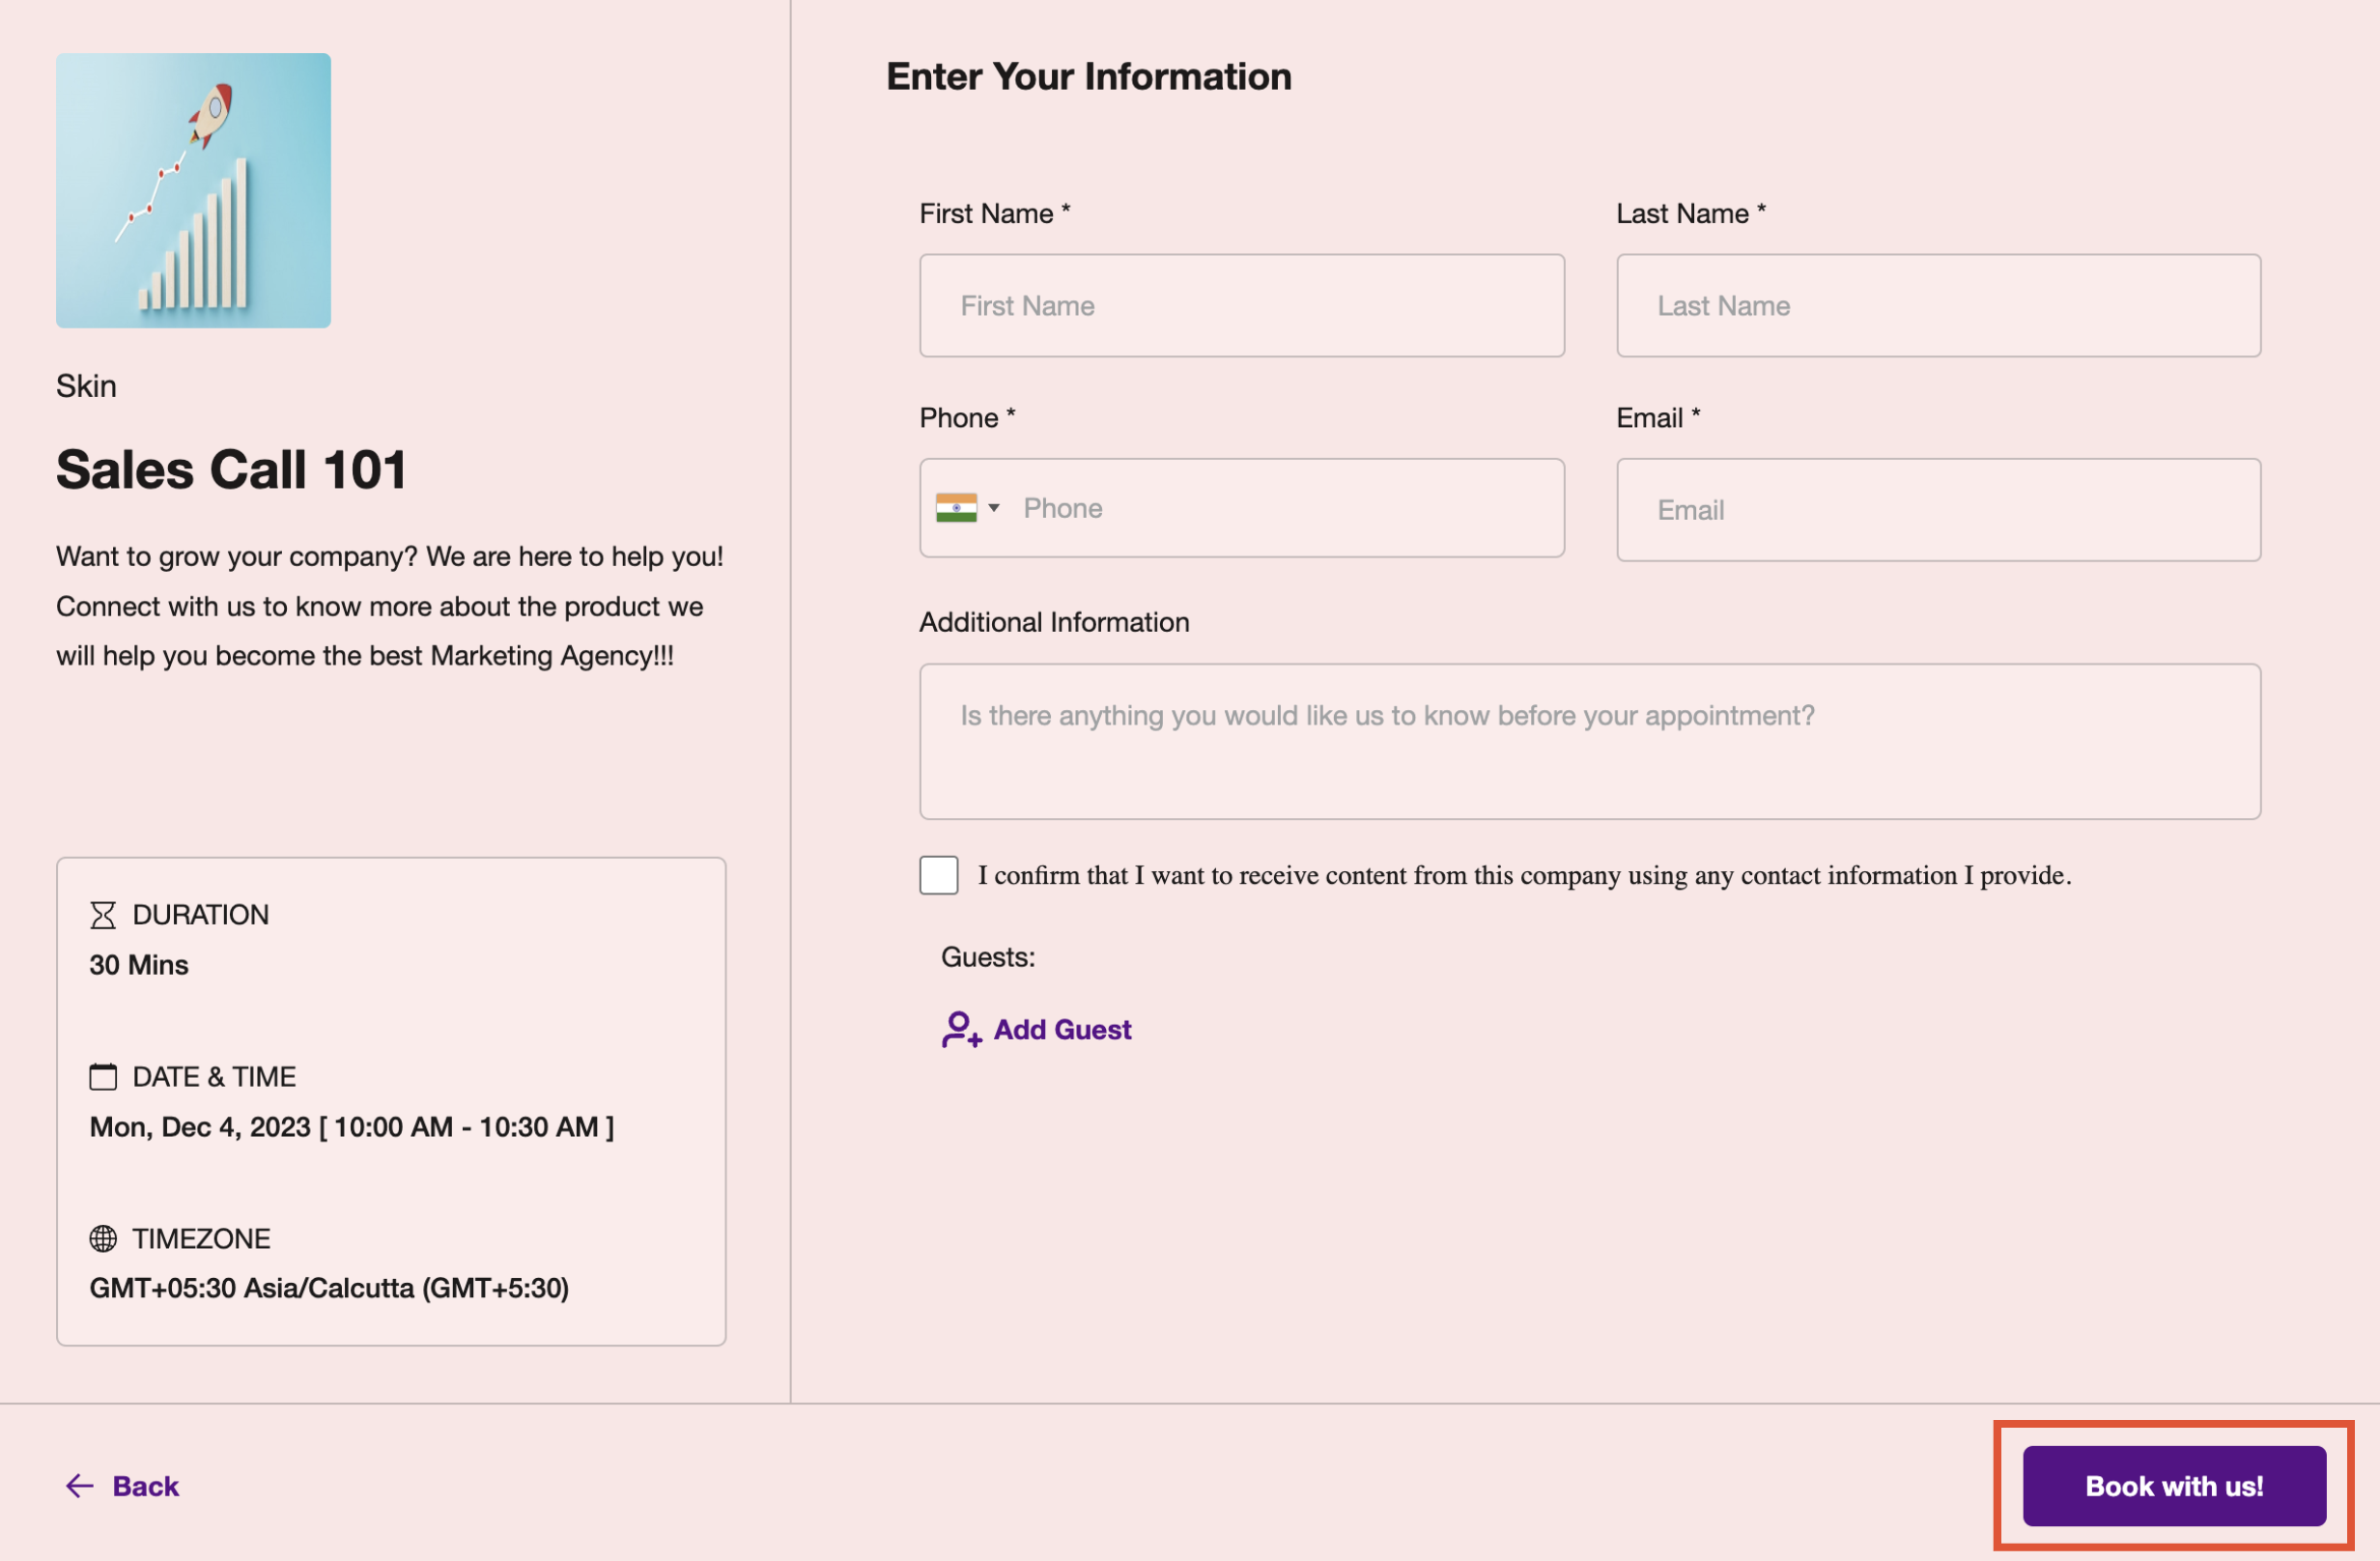
You can hide the calendar name, description, duration, date/time, recurring details, and timezone that normally show in the widget's left panel, useful if you want a cleaner, more minimal booking screen.
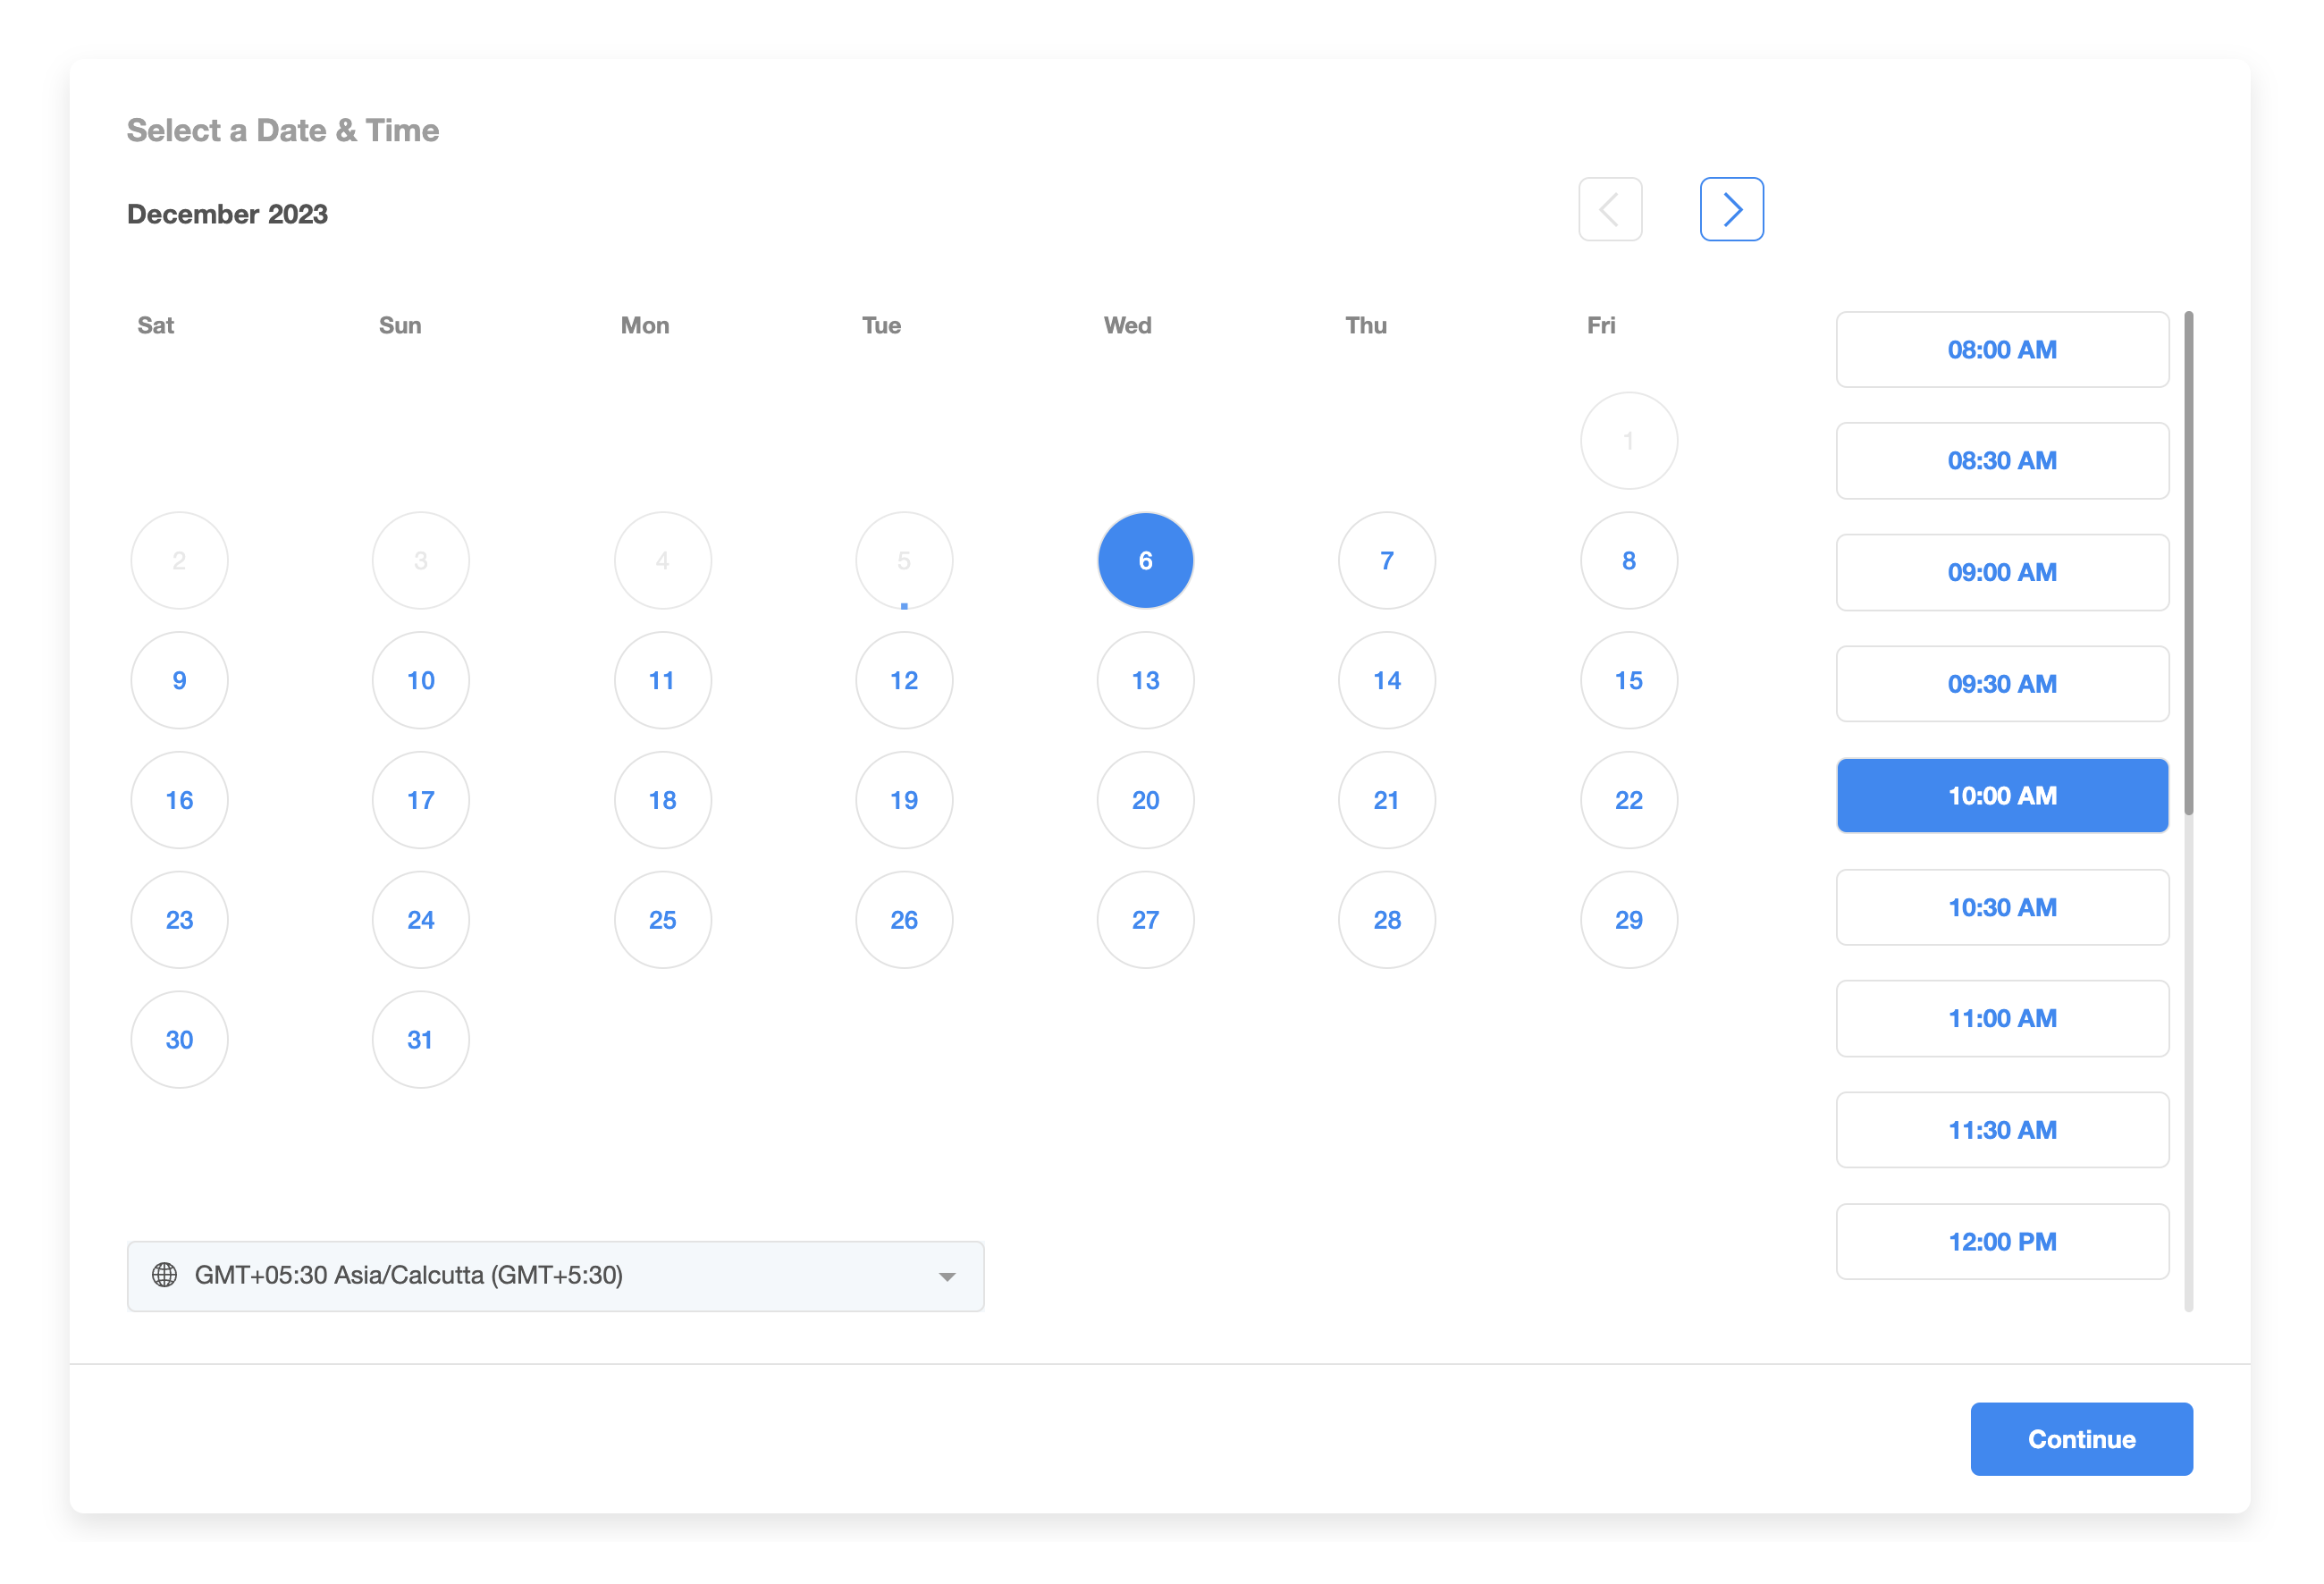
If you want the entire left panel gone and it's still showing after you toggle these settings, double-check all of the following:
Calendar Details settings: Calendar Name, Calendar Description, and Calendar Details are all disabled.
Logo: any logo attached to the calendar is removed.
Customizations tab: the "Allow Select Staff" option is turned off.
All three areas need to be off together; leaving any one of them on will keep part of the left panel visible.
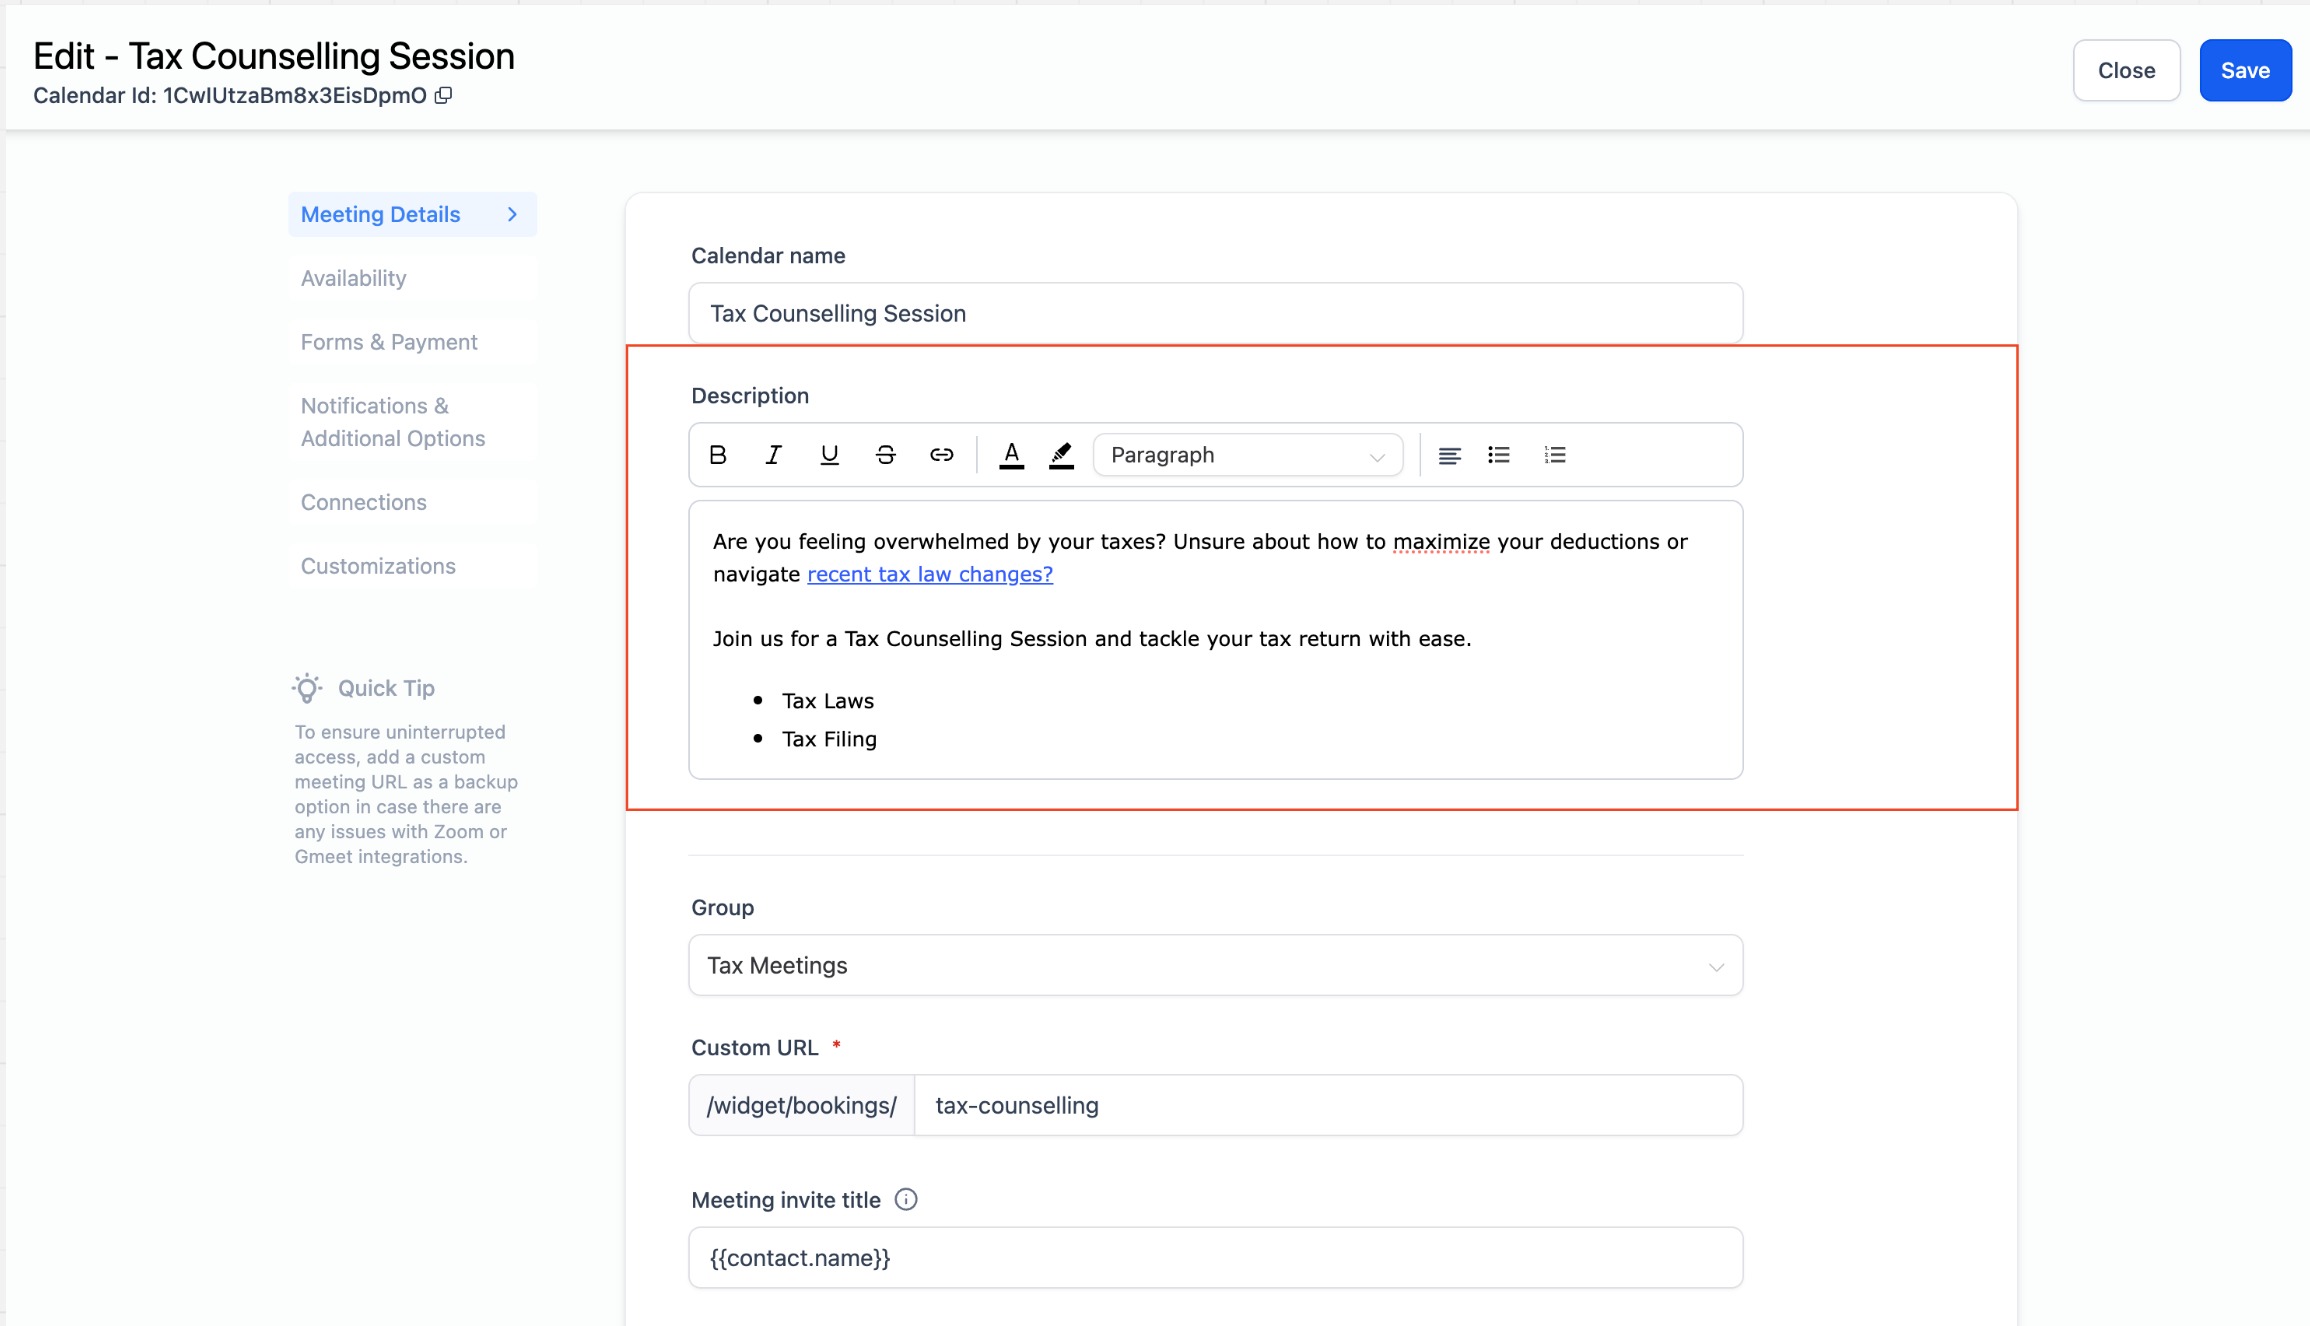
Calendar descriptions support a rich text editor, so you're not limited to plain text in the meeting details a patient sees before booking. You can use:
Bold, italics, underline, and strikethrough
Bulleted and numbered lists
Hyperlinks (useful for linking to a pre-visit instructions page or intake form)
Text and background color
Headings and paragraph formatting
Left, center, or right text alignment
This is a good place to lay out what to expect at the appointment, prep instructions, or a link to your intake paperwork, formatted so it's actually easy to read instead of a wall of plain text.
To format a calendar description:
Go to calendar settings and select the calendar you want to edit.
Open the Meeting Details section.
Use the rich text toolbar above the description field to format your text.
Click Save.
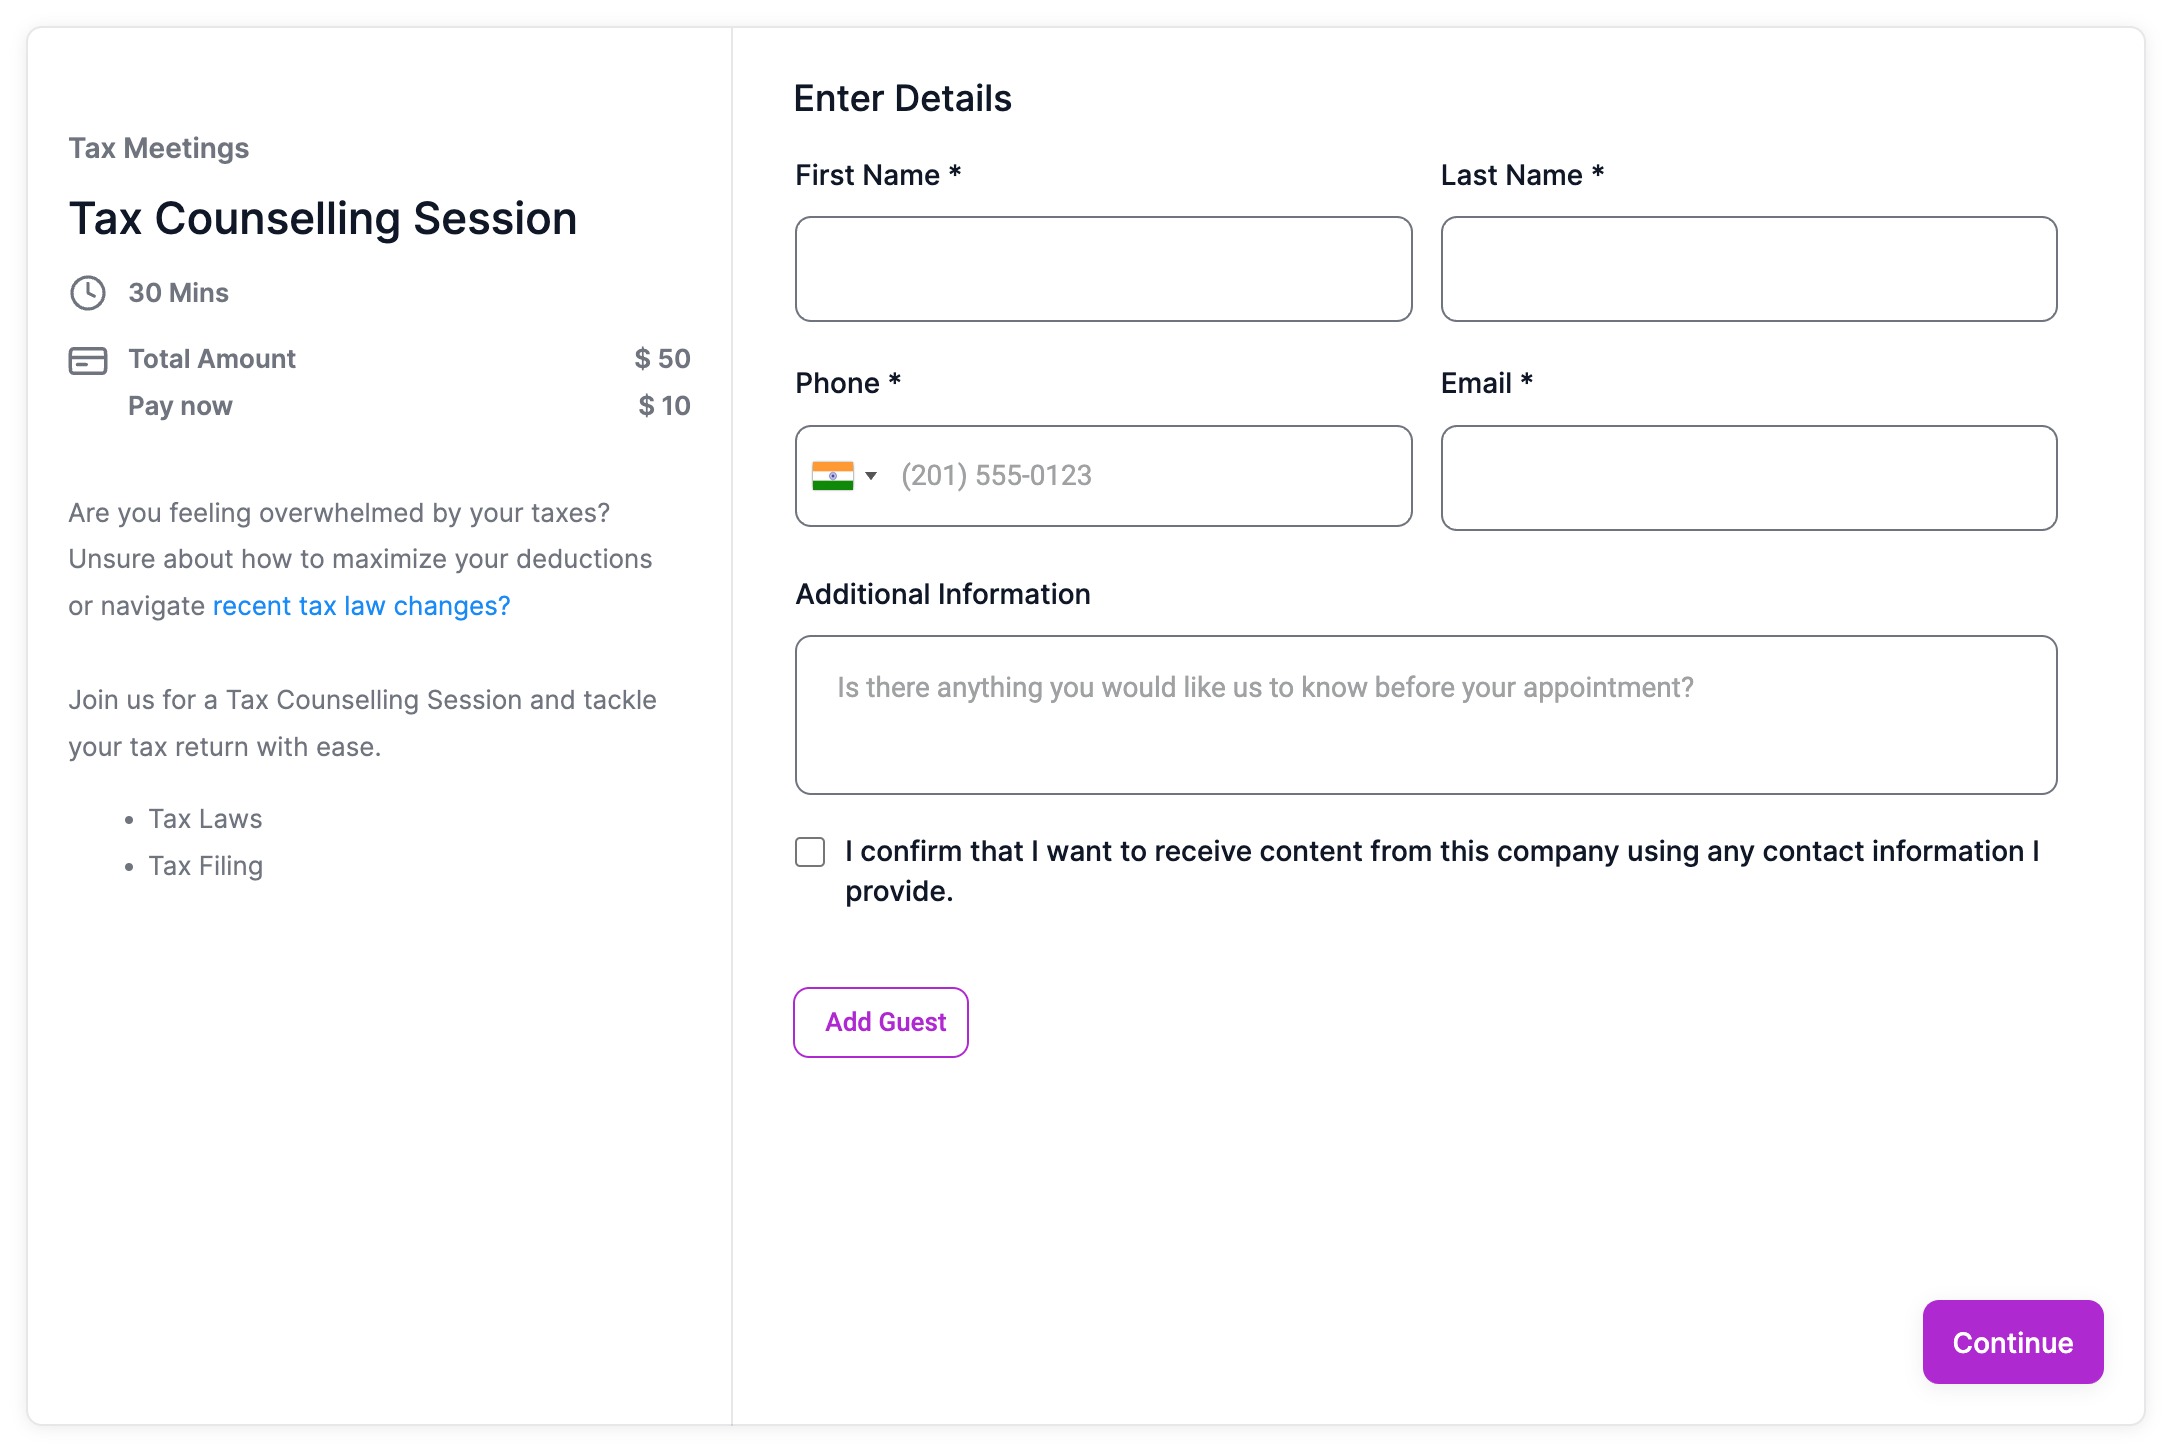
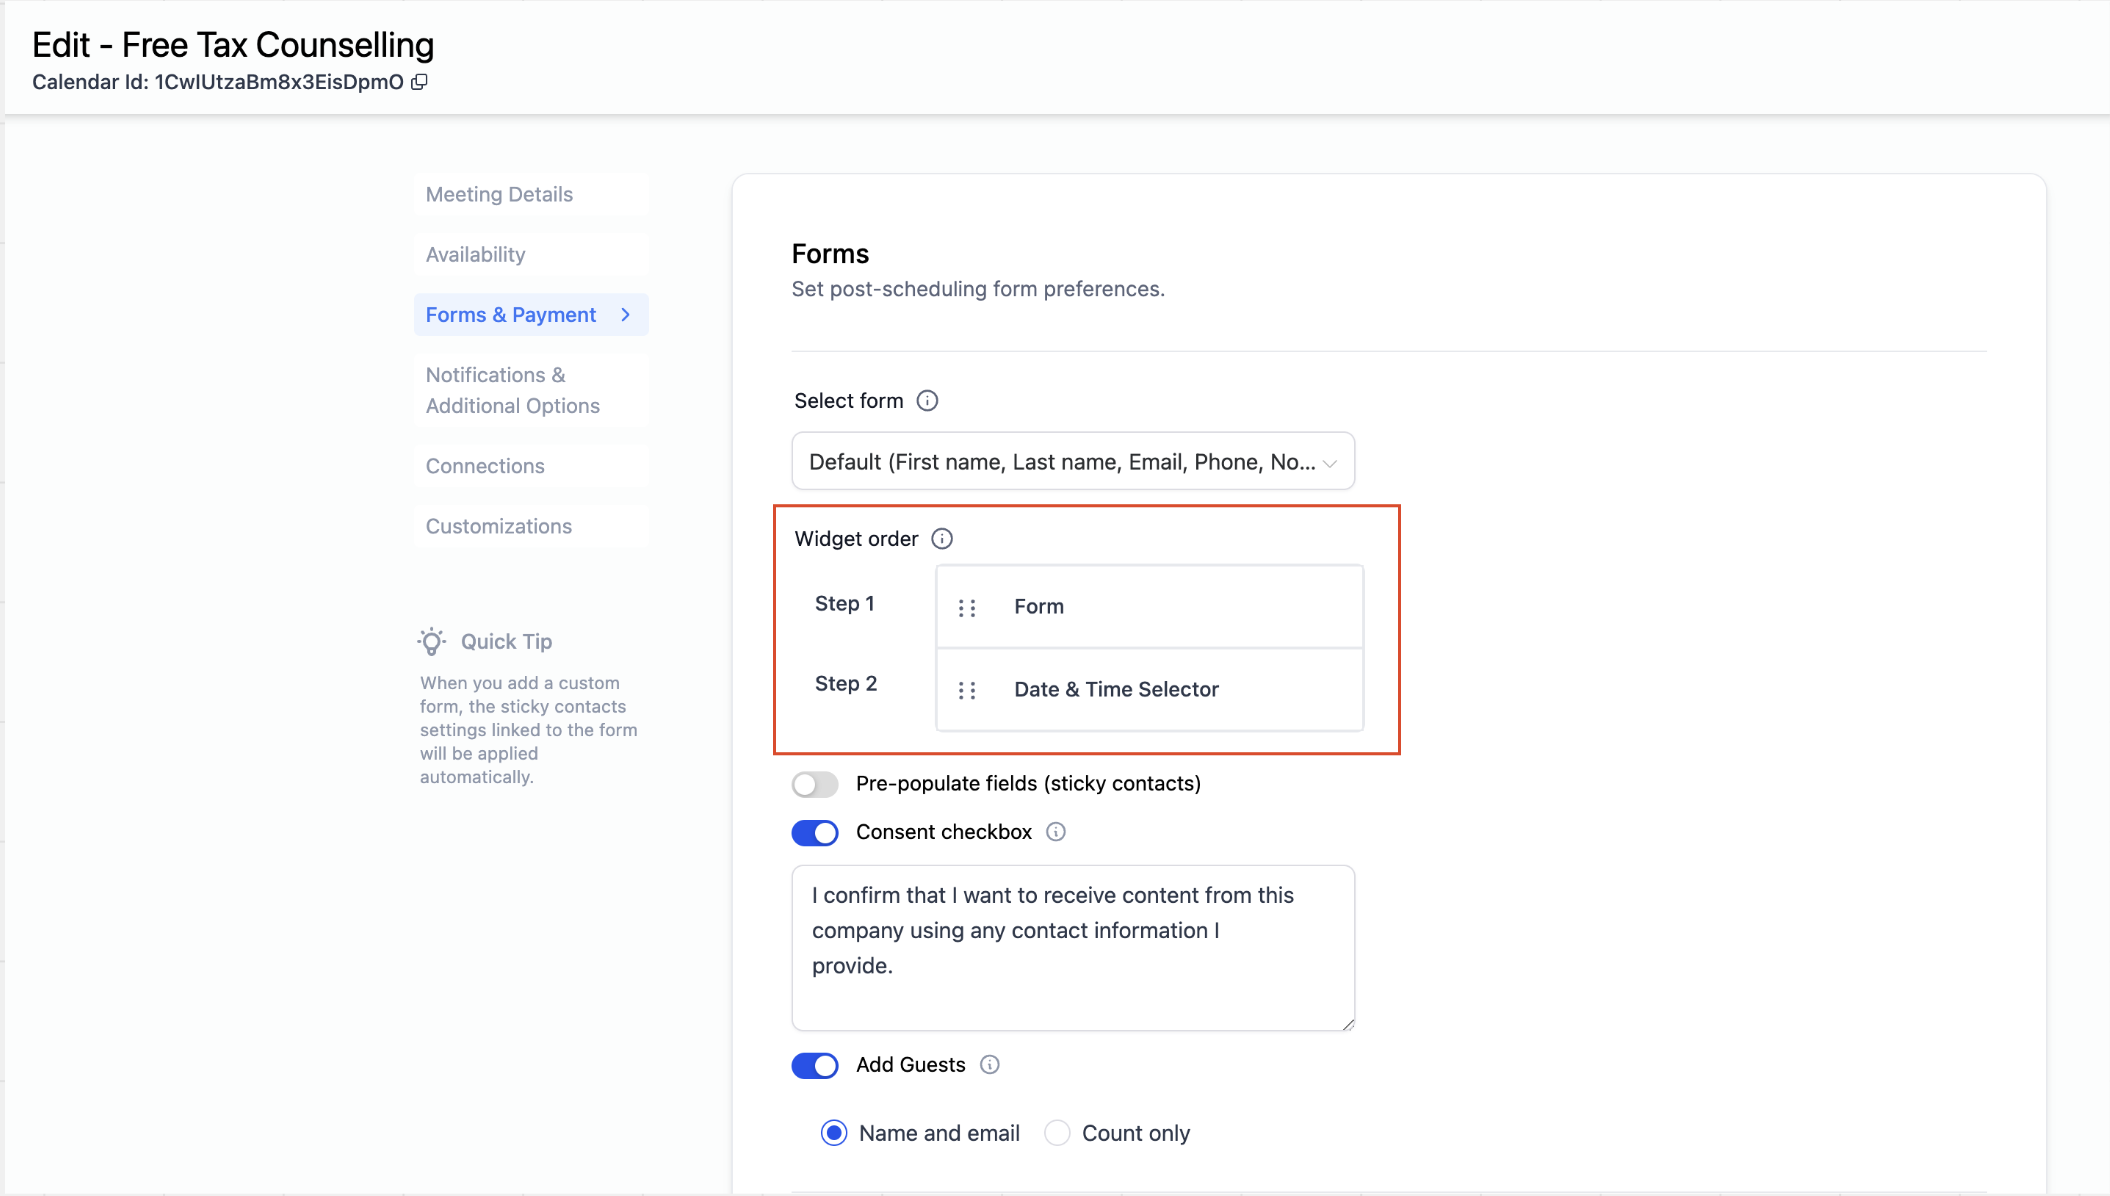
On the Neo widget, you can control whether patients fill out the Form or pick a Date & Time first, and where the Payment step (if you collect a deposit or payment at booking) falls in that sequence.
This matters for practices that want to capture lead information even from patients who start booking but don't finish, since putting the form first captures a contact right away, before the appointment itself is confirmed.
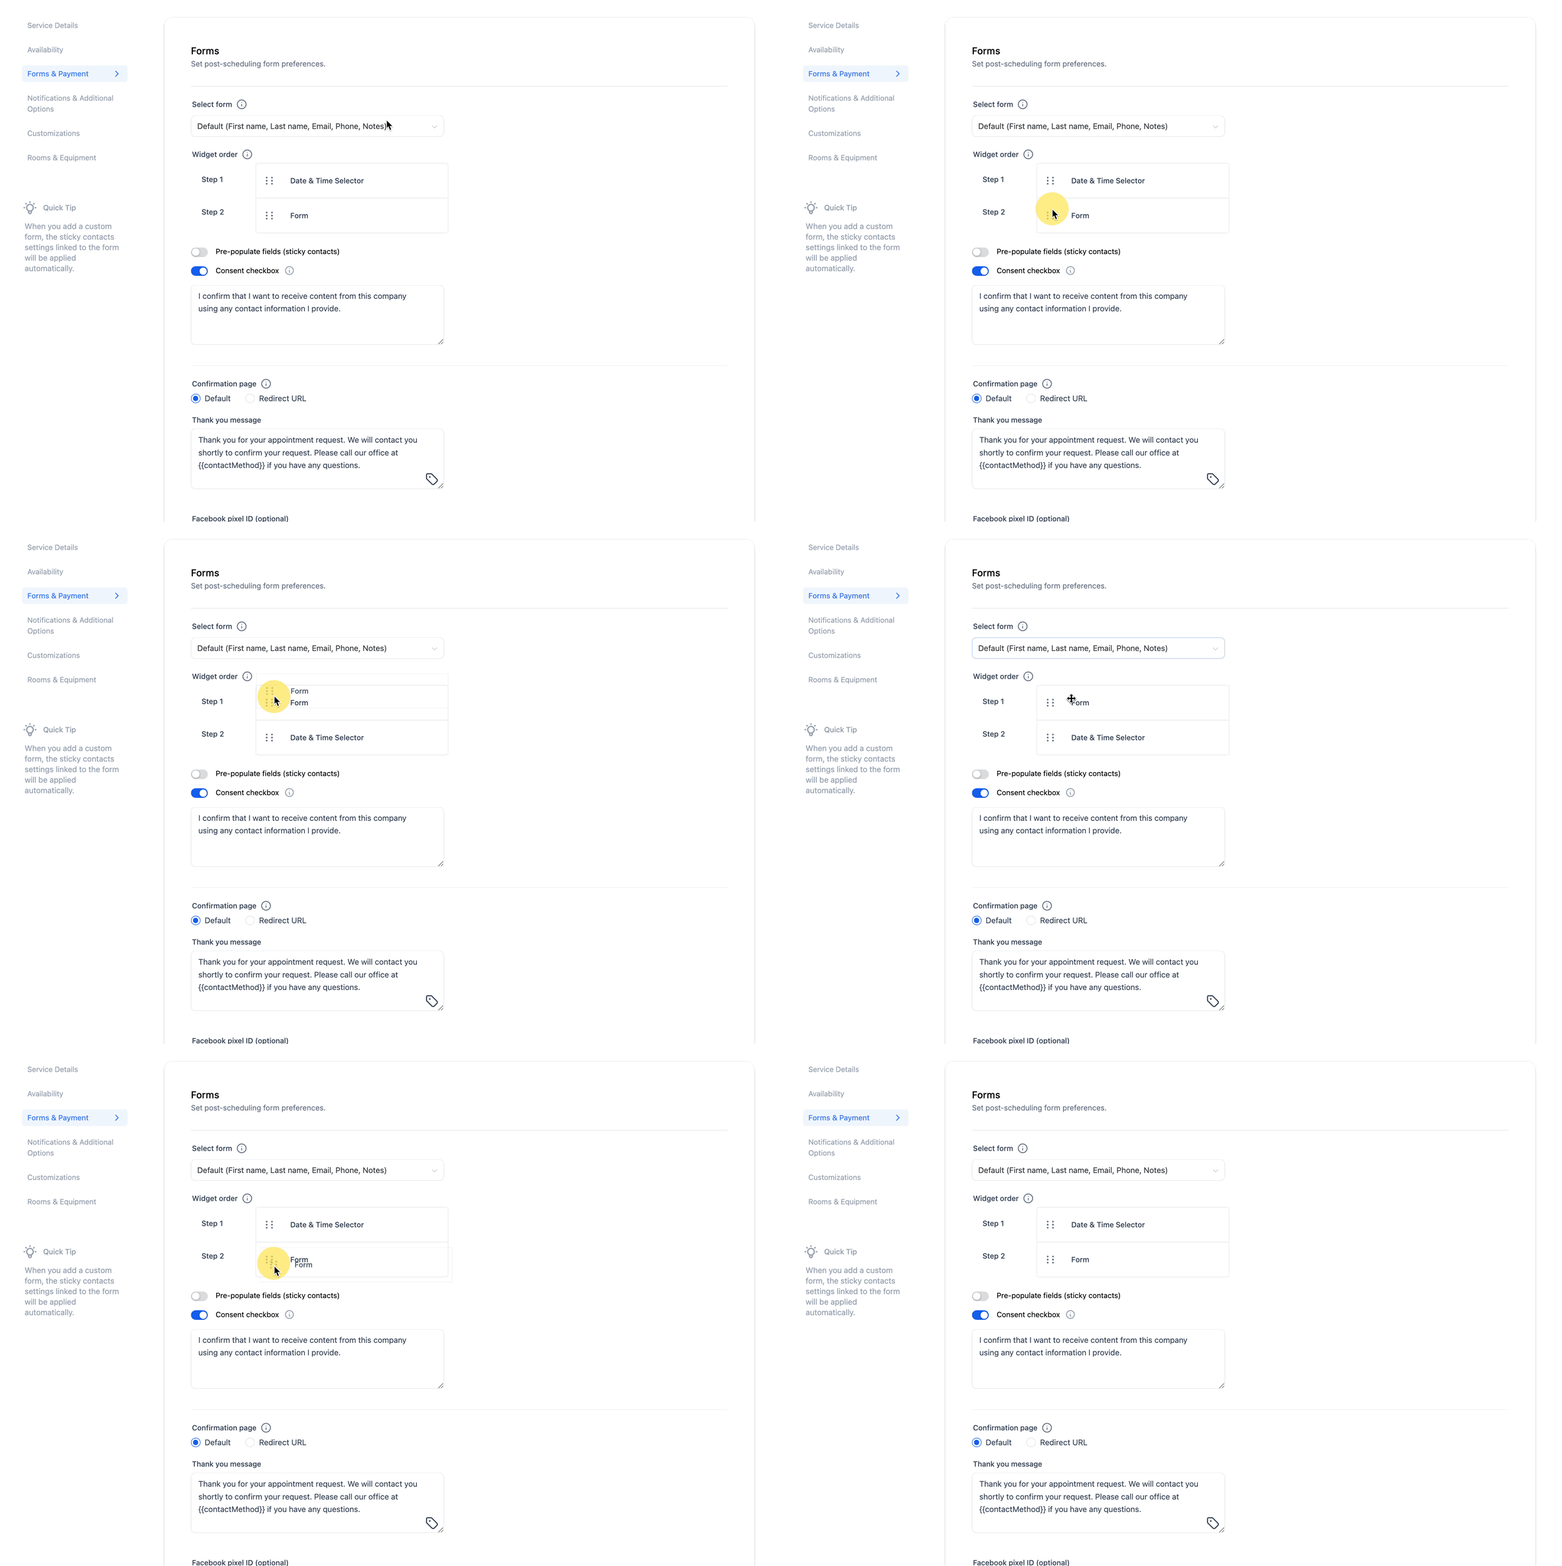
To reorder the steps:
Go to Calendar Settings and select your calendar.
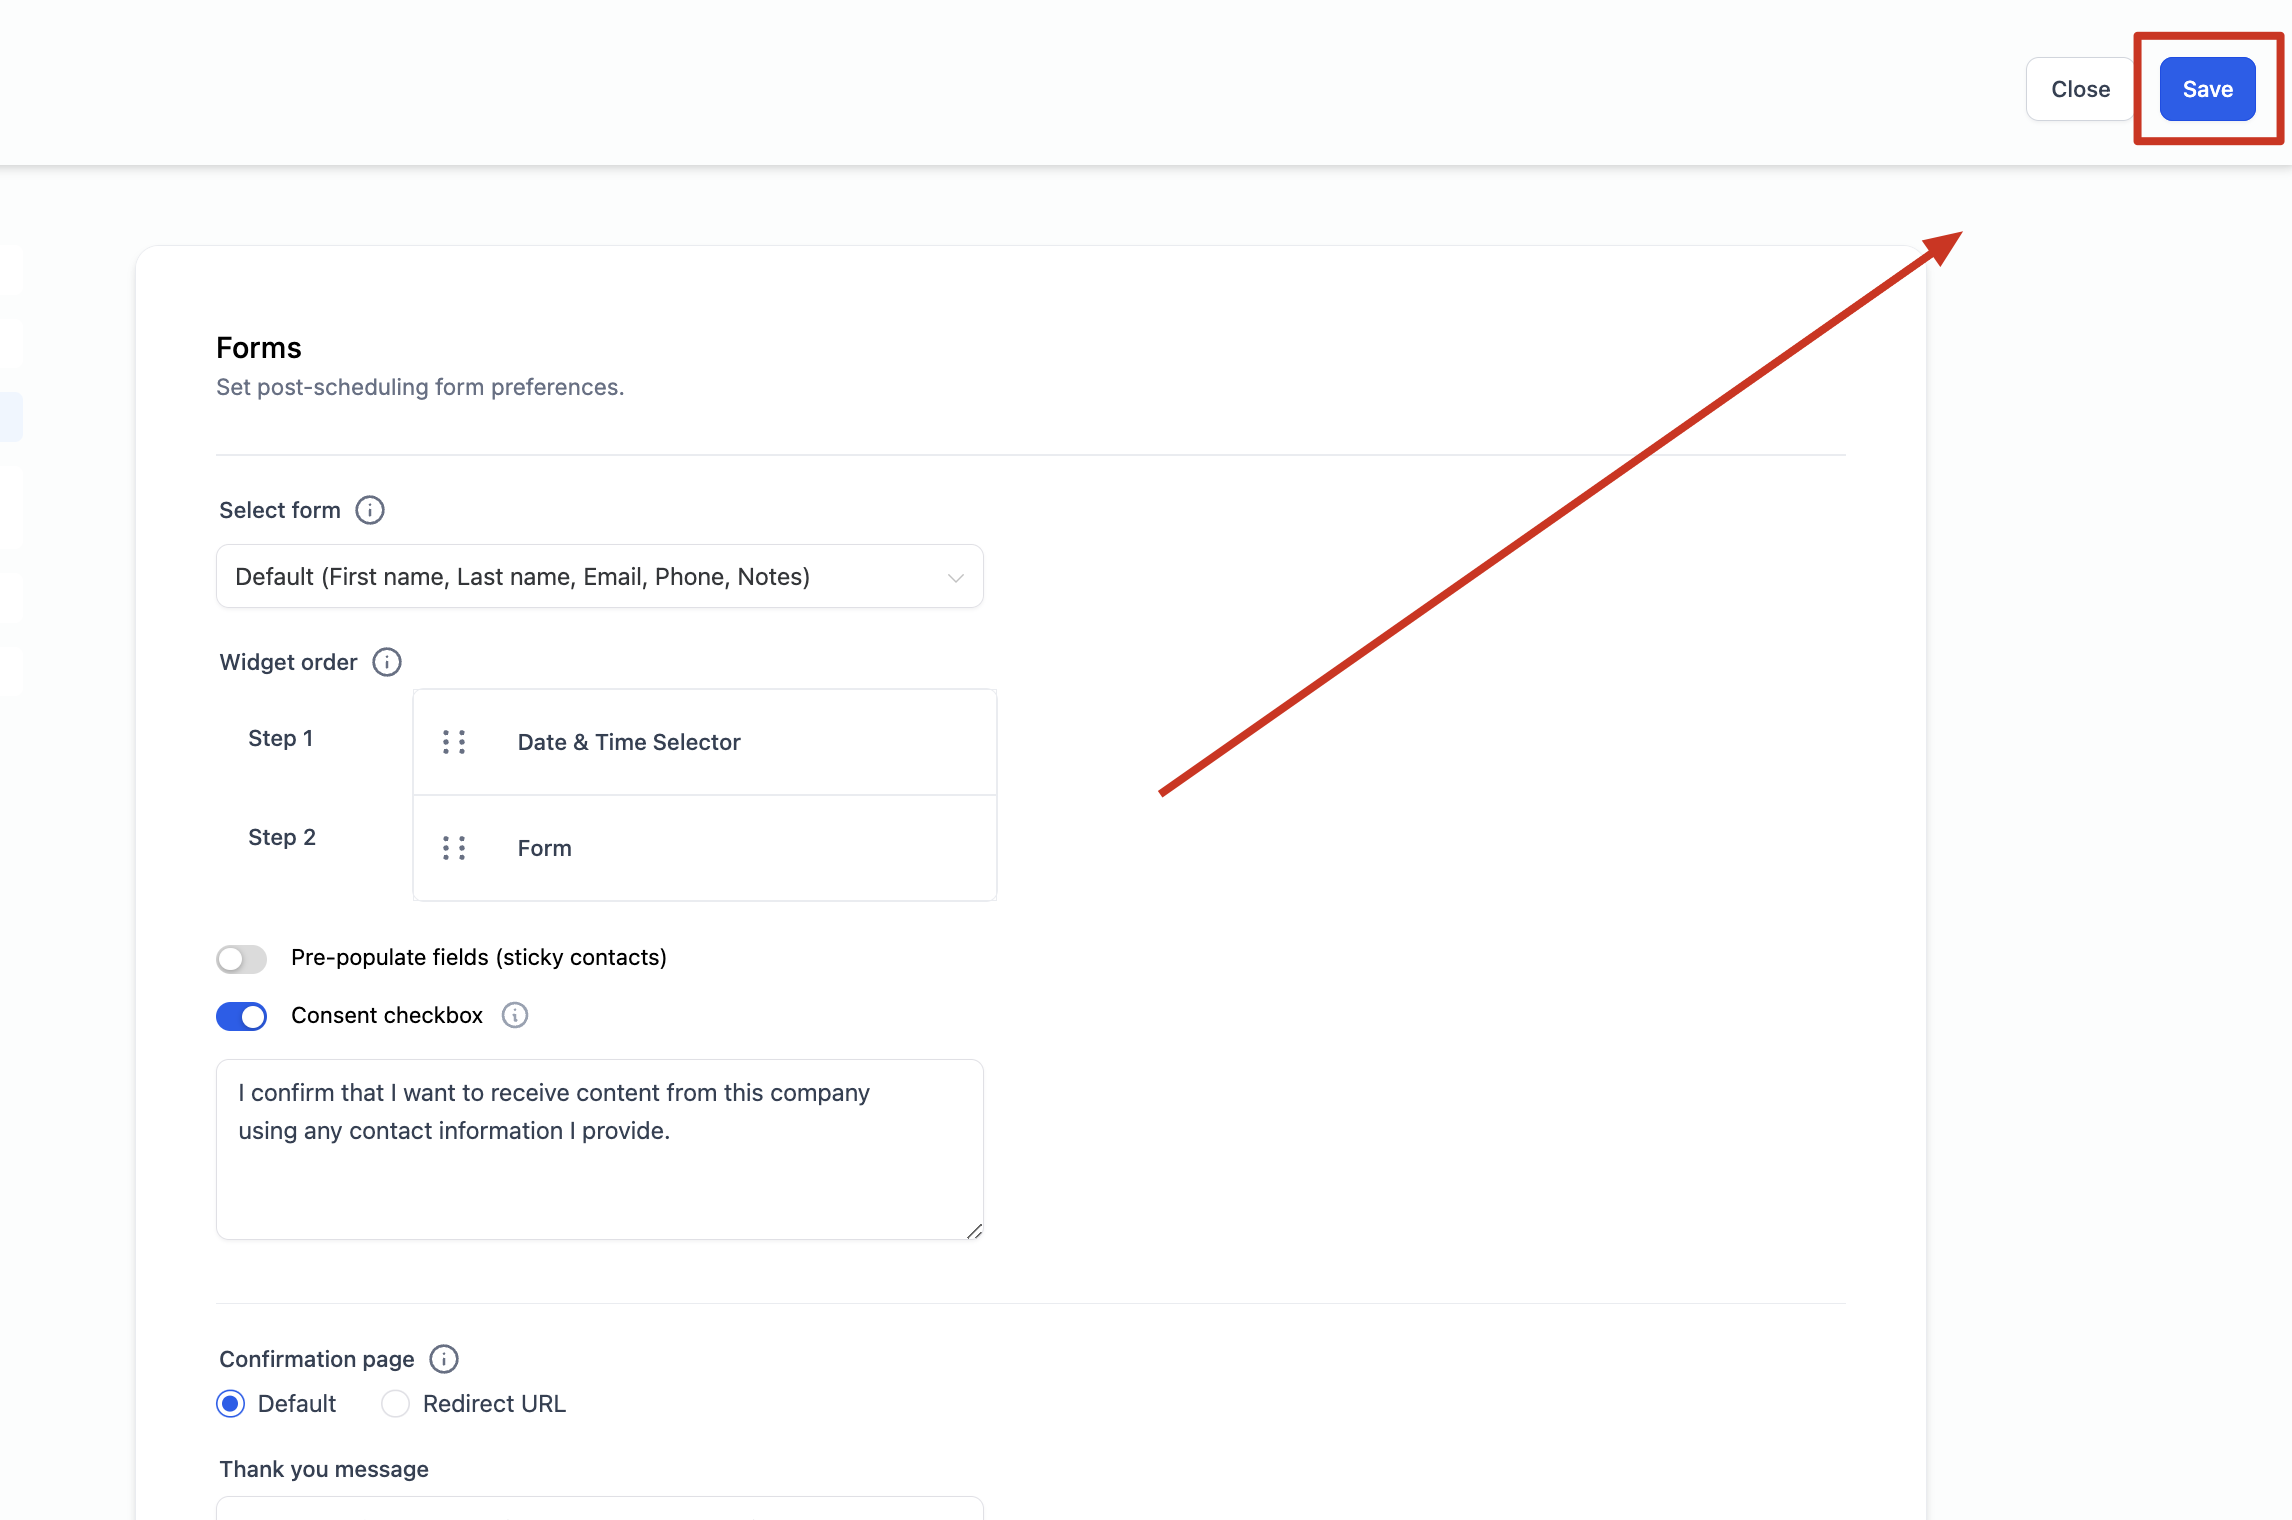
Open Forms & Payments.
Drag the Date & Time Selector and Form into your preferred order.
Click Save.
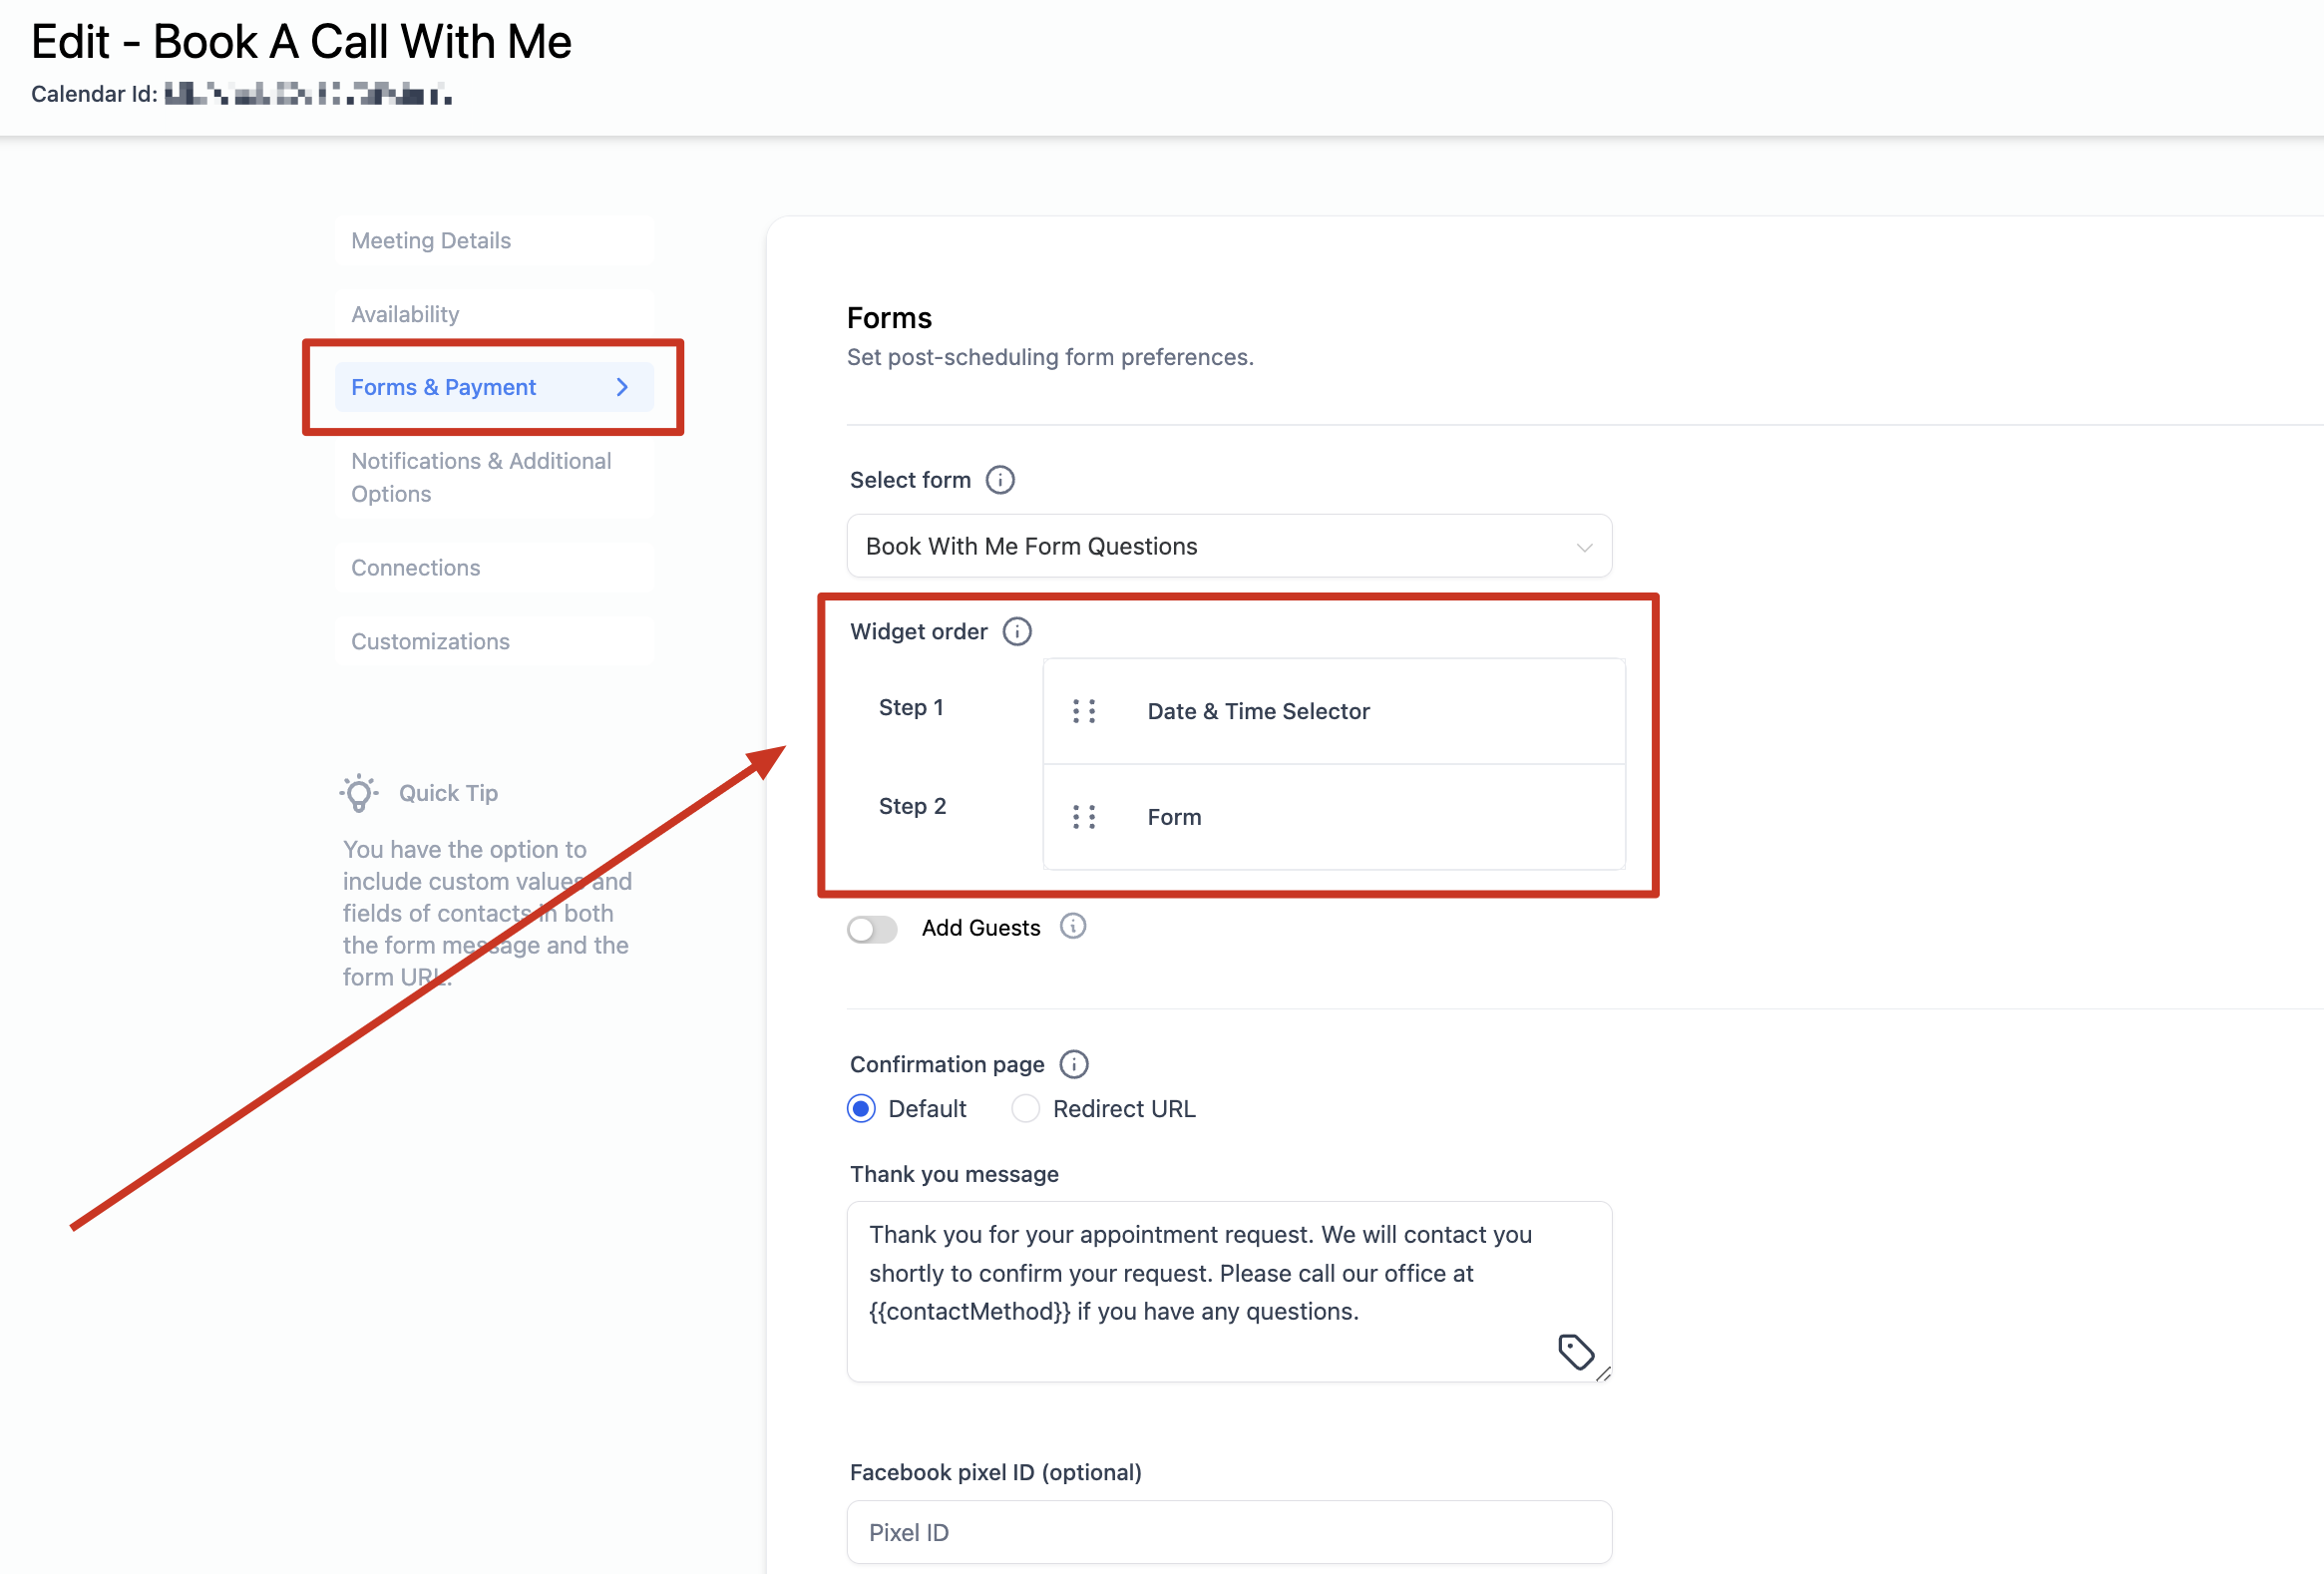
How it behaves depends on the order you choose:
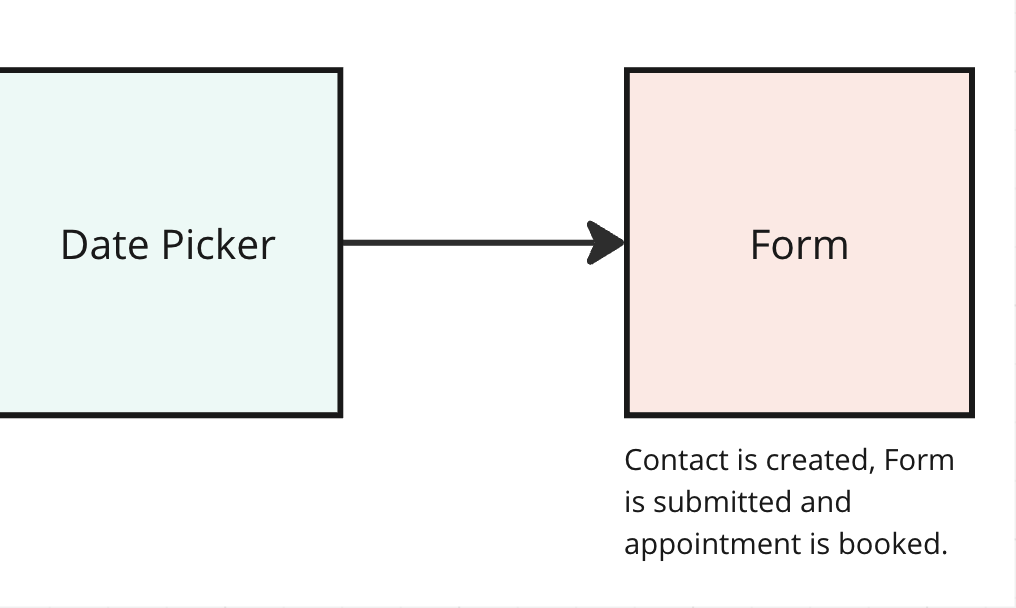
Date & Time first, then Form: the patient picks a slot, fills out the form, and the appointment is booked. A contact is created and the form submission is logged at the same time the appointment is created.
Form first, then Date & Time: the patient fills out the form first. A contact is created immediately, even if they never complete booking a time. If they go on to pick a slot successfully, the appointment is then created and linked to that contact.
Because intake forms in the widget can capture a patient's name, contact information, and reason for visit, treat that data the same way you would any other patient record: limit access to staff who need it and avoid pasting form responses into places outside Aesthetix CRM.
When a calendar collects payment as part of booking, the appointment itself isn't confirmed until payment clears:
The patient has 10 minutes to complete payment once they reach the payment step.
If payment succeeds within that window, the appointment is booked and the time slot is locked in.
If payment isn't completed in time, the appointment is not created, and the slot reopens for anyone else to book. This is also why a slot can briefly appear unavailable on the widget even though nothing is actually on your calendar yet: someone else may be mid-checkout.
Tip: If you're weighing payment providers for paid bookings, deposits, or pre-paid consults, take a look at AX Pay, Aesthetix CRM's built-in payment processor. It offers better rates than Stripe and keeps payment collection native to your booking flow. See the AX Pay help article for setup details.
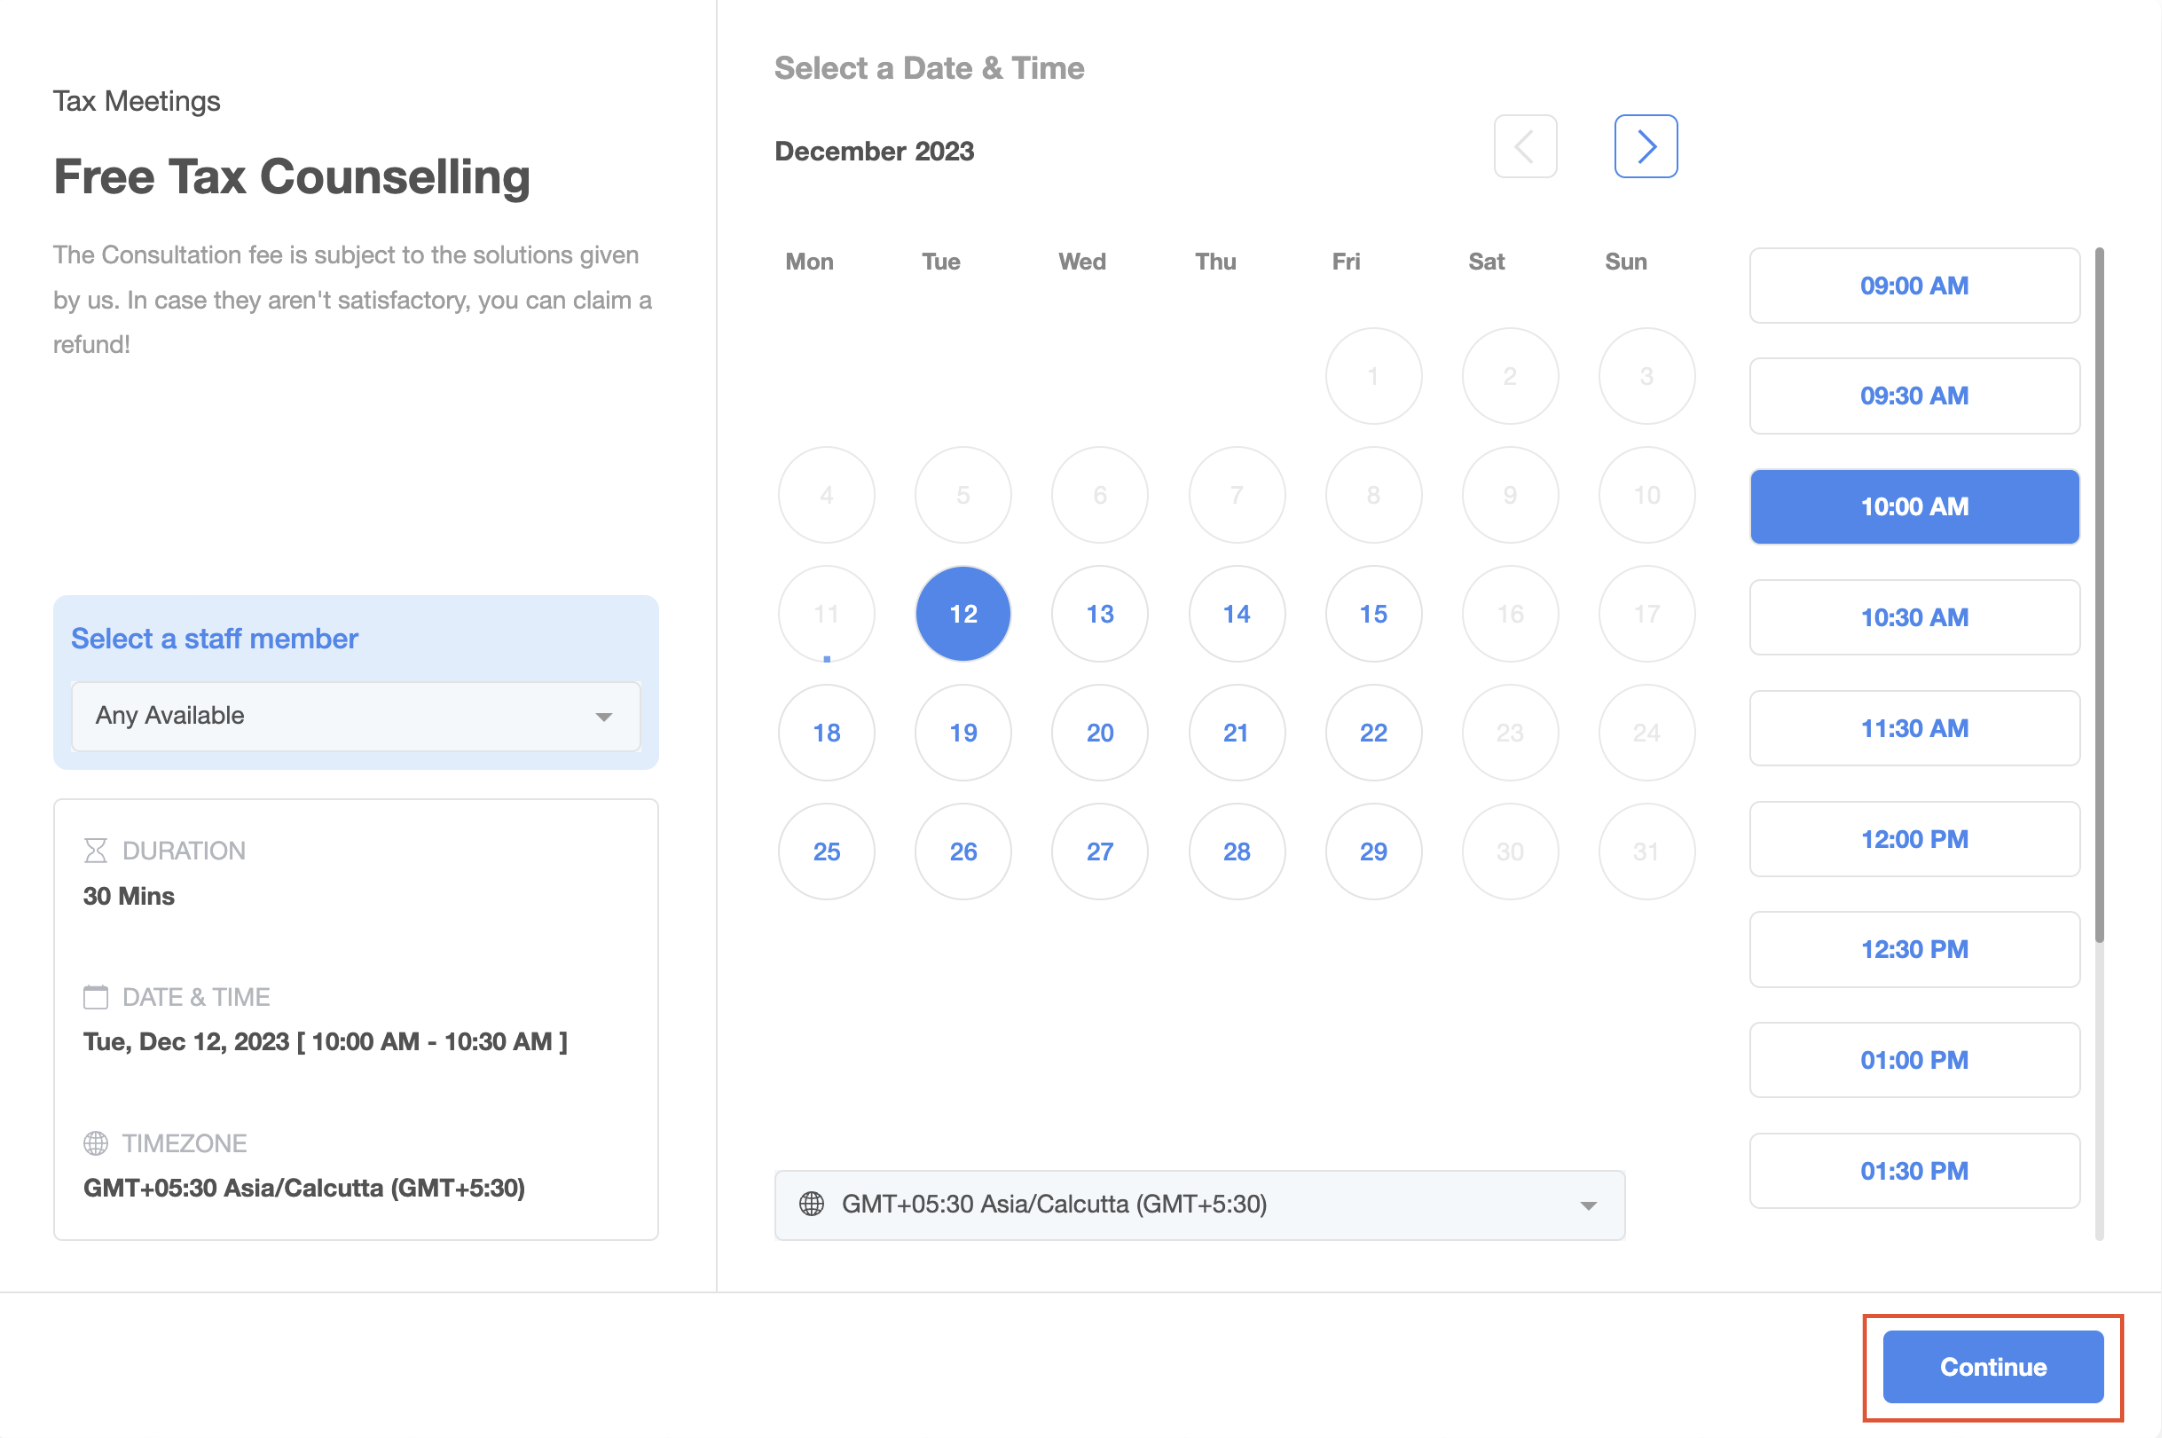
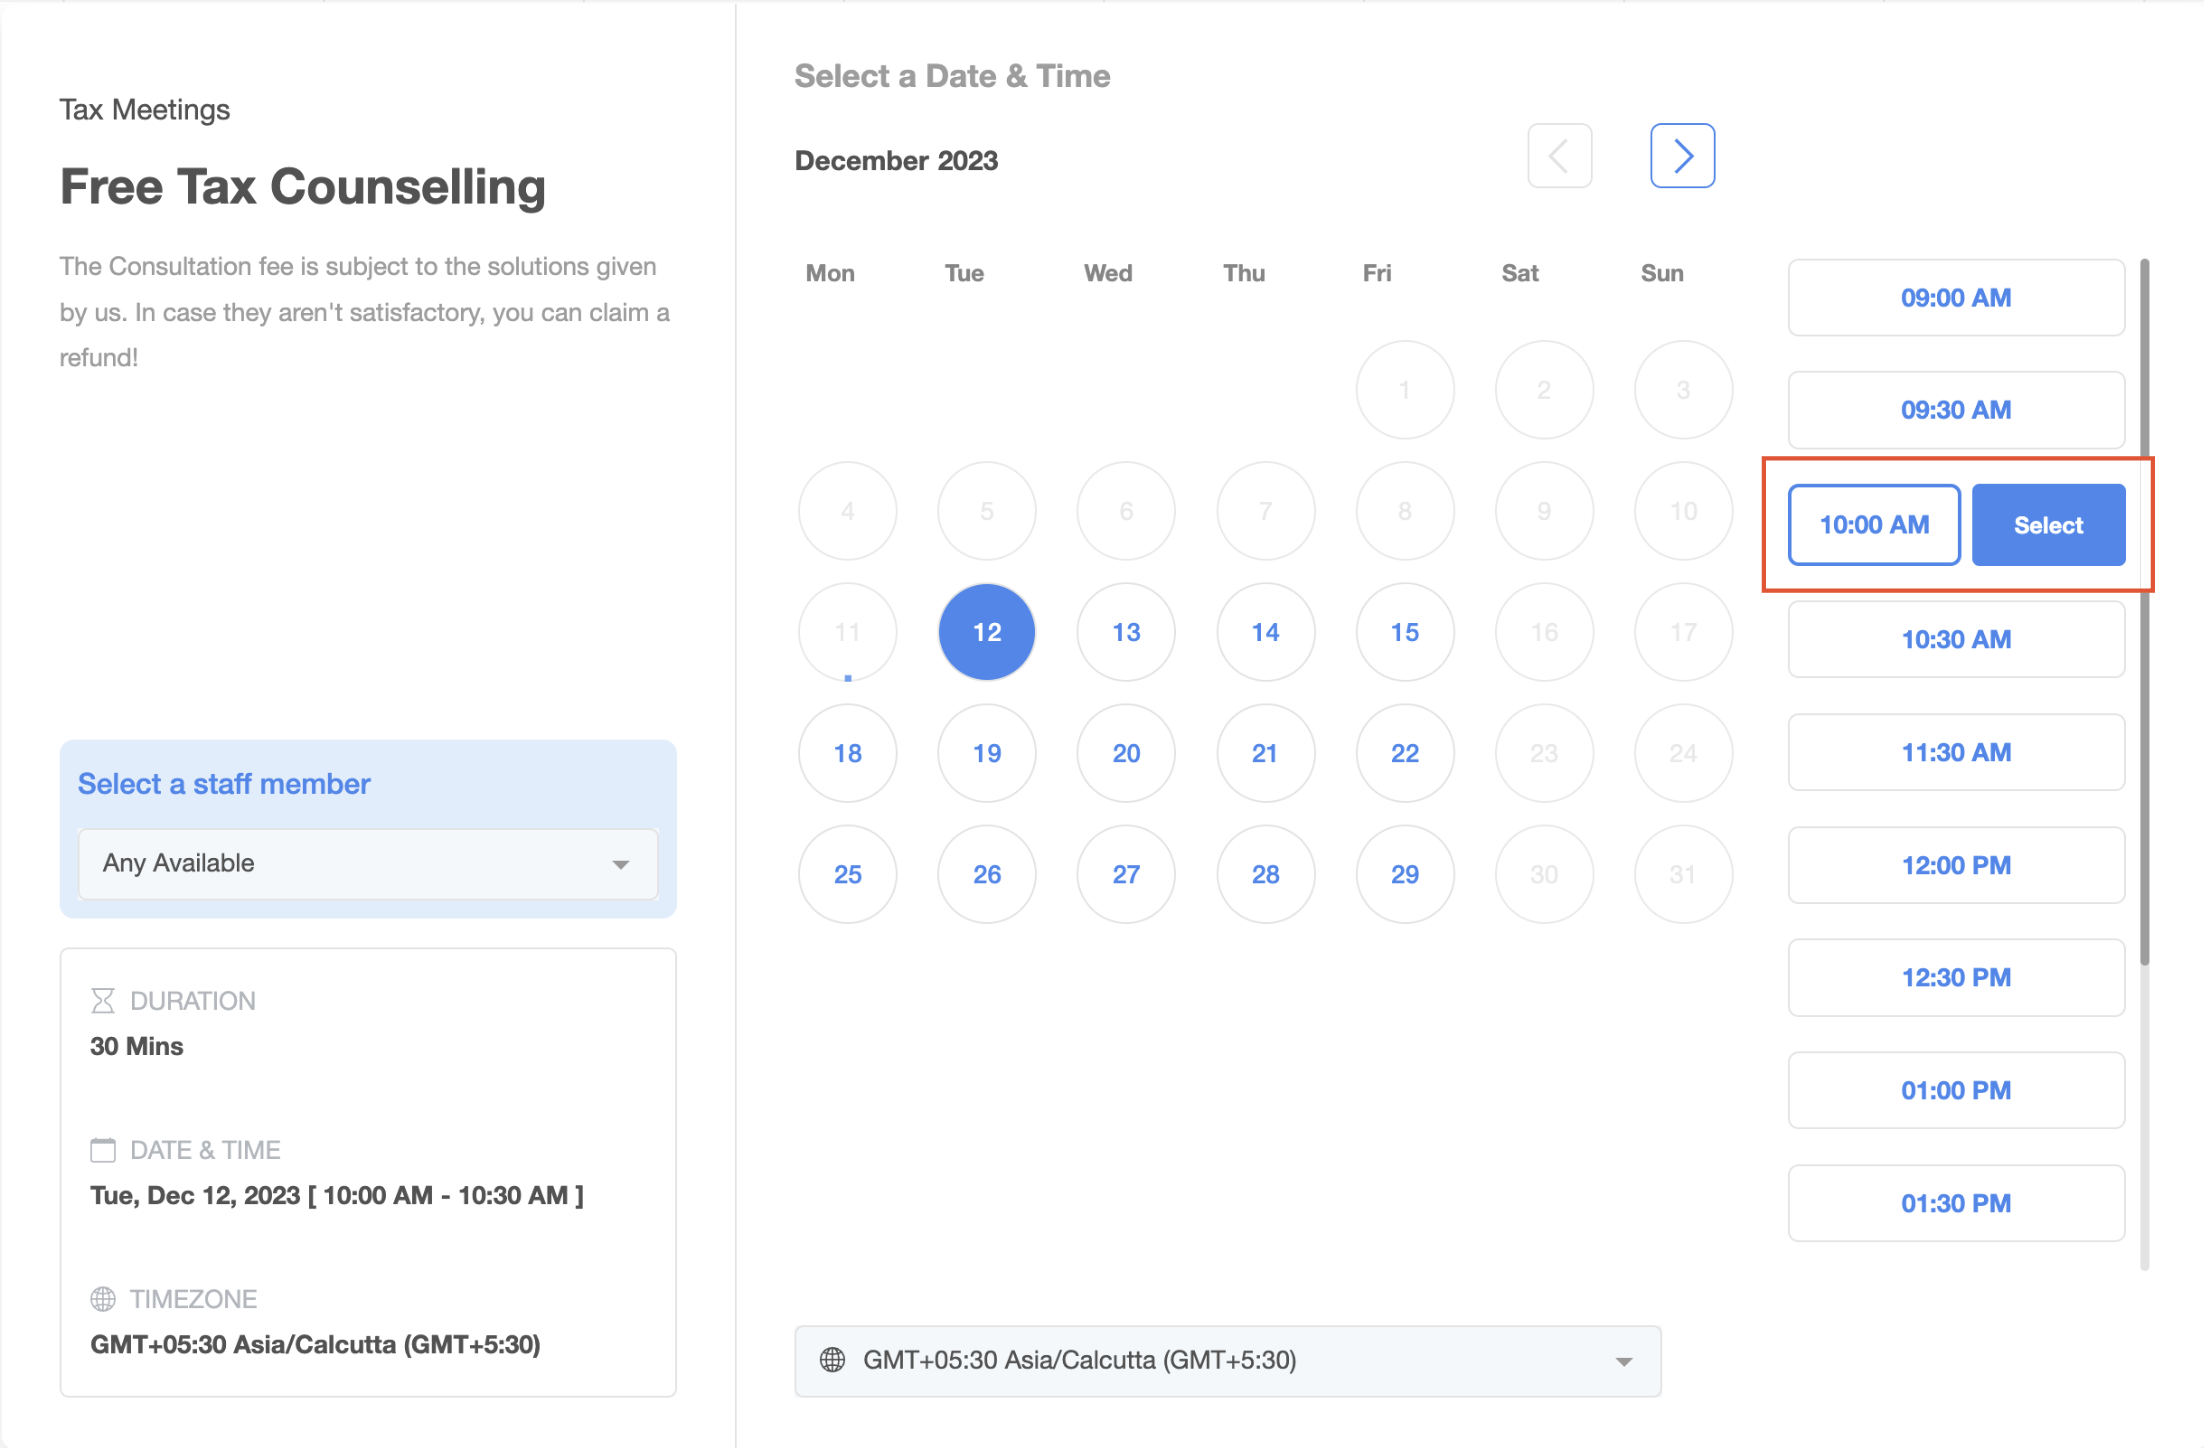
The four possible step configurations look like this:
Date & Time first, payment disabled:
Date & Time first, payment enabled:
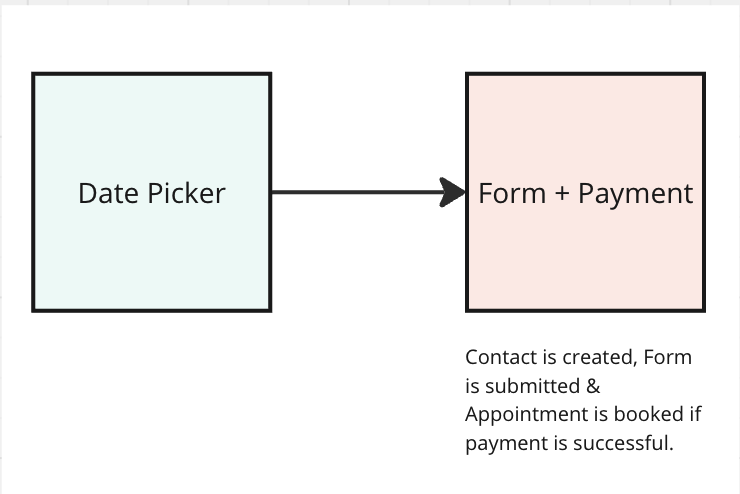
Form first, payment disabled:
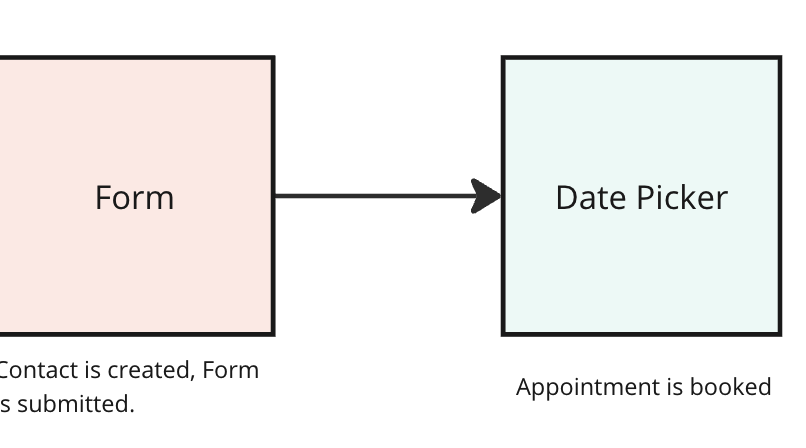
Form first, payment enabled:
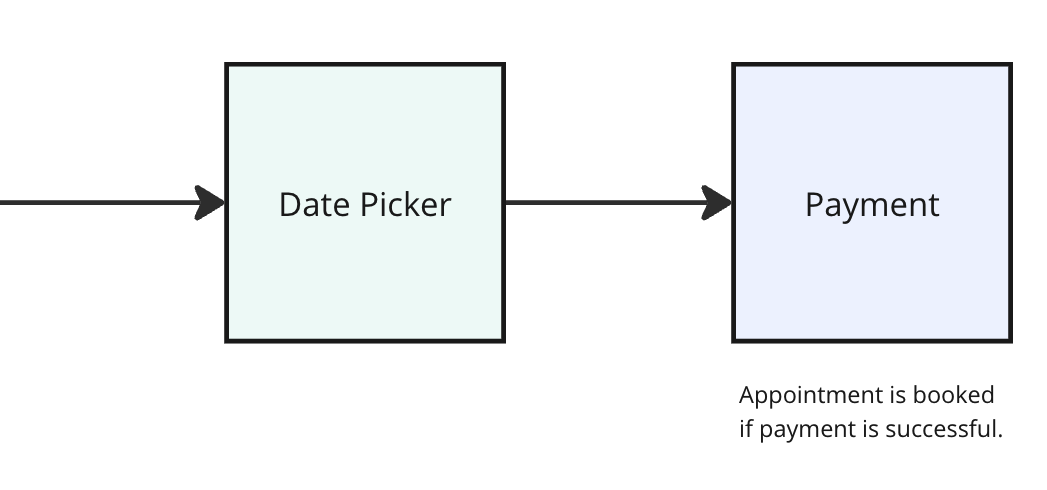
Workflow triggers tied to the form submission or the appointment itself fire at different points depending on this setup: form-submission workflows fire as soon as the form is submitted (immediately if the form is first, or only after a successful booking if the form is second), and appointment workflows fire once the appointment is booked, or only after payment clears if payment is enabled. For a full breakdown of trigger and action options, see the Workflows collection.
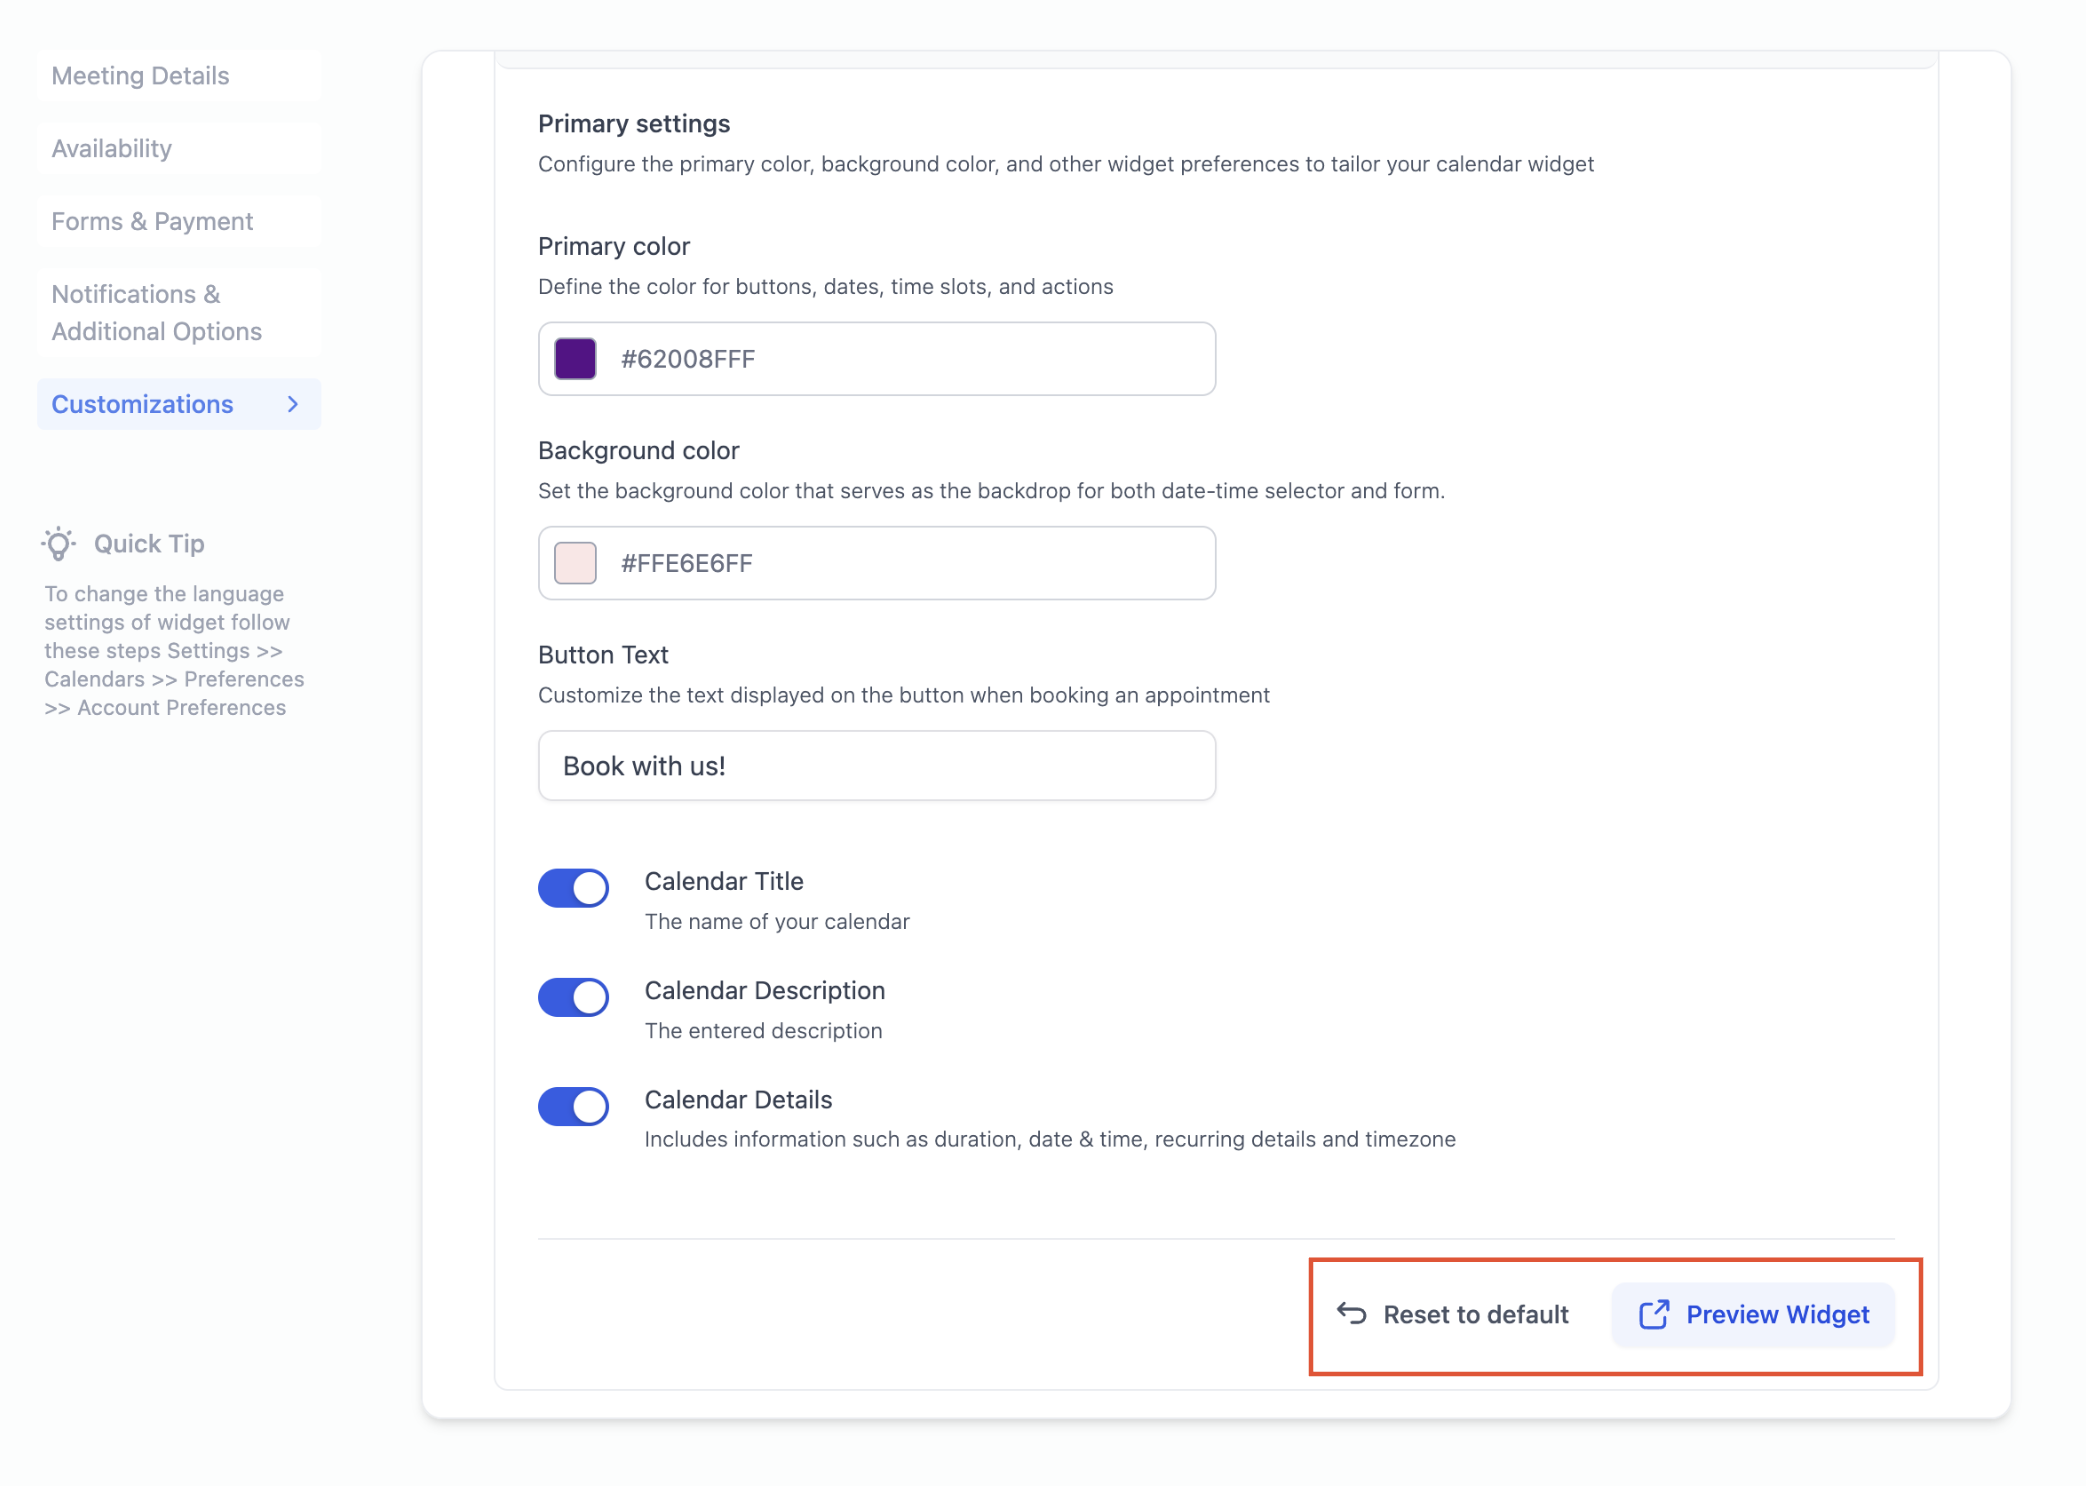
Before you publish your changes, use Preview Widget to see exactly how the booking flow will look to a patient. You'll need to click Preview Widget again each time you make a new change, since it doesn't refresh automatically.
If you want to start over, Reset to Default reverts all customizations back to the standard blue and white widget.
If you've applied custom CSS to your booking widget on top of these settings, keep in mind that your CSS rules take precedence over the Customizations tab settings, so your custom styling will still show through. Aesthetix CRM has occasionally shifted the placement of on-widget elements (such as the booking Continue button) as the widget has evolved, so if your CSS ever looks misaligned, check where that element currently sits before assuming your styling broke.
Which calendars support widget customization? Color, button text, and panel visibility options are available on Event, Round Robin, Class Booking, Collective, and Service Calendars, as long as the calendar is set to the Neo widget style. These customizations do not apply to the Service Menu.
What's the actual difference between Classic and Neo? Classic is a simpler, faster-to-set-up layout with no styling options beyond payment collection. Neo adds color customization, custom button text, step reordering, staff selection for Round Robin calendars, and seat display for Class Booking calendars. Neo is also the default (and required) style for Group Calendars.
Can I customize colors on a Classic widget? No. Color, background, and button text customization are exclusive to the Neo widget. Switch the calendar to Neo first if you want access to these options.
Can I add a custom form to my booking widget? Yes. Just make sure your custom form's own theme matches your widget's color customizations so the booking flow doesn't feel disjointed between the date/time step and the form step.
I applied custom CSS to my widget. Will my Customizations tab settings still work? Your CSS will take priority over anything set in the Customizations tab, so your custom styling shows through as intended. If you update your CSS later, double-check the layout since element positions can shift over time.
I turned off the left panel details but they're still showing. What am I missing? Make sure Calendar Name, Calendar Description, and Calendar Details are all disabled, any logo is removed, and "Allow Select Staff" is turned off in the Customizations tab. All three need to be off together.
Does switching between Classic and Neo affect appointments patients have already booked? No. Changing the widget style only changes how the booking page looks and behaves going forward. It has no effect on appointments already on the calendar.
What happens if a patient starts paying for a booking but doesn't finish? They have 10 minutes to complete payment. If they don't, the appointment isn't created and the time slot reopens for other patients to book. This is also why a slot can look briefly unavailable even if nothing shows on your calendar yet.
If a patient goes back and resubmits the intake form, does that create duplicate contacts? No. If the form is resubmitted in the same booking session, you may see multiple form submissions logged, but the contact record is updated with the details from the most recent submission rather than creating a duplicate.
How do I get my widget back to the default look if I don't like my changes? Open the calendar's Customizations tab and click Reset to Default. This reverts colors, button text, and other styling back to the standard blue and white widget.
