The Appointment modal is where your front desk and providers review and act on a single Service booking. From this one side panel you can edit appointment details, reschedule, duplicate a booking, block off unavailable time, and see which resource is attached to a visit, all without leaving your calendar.
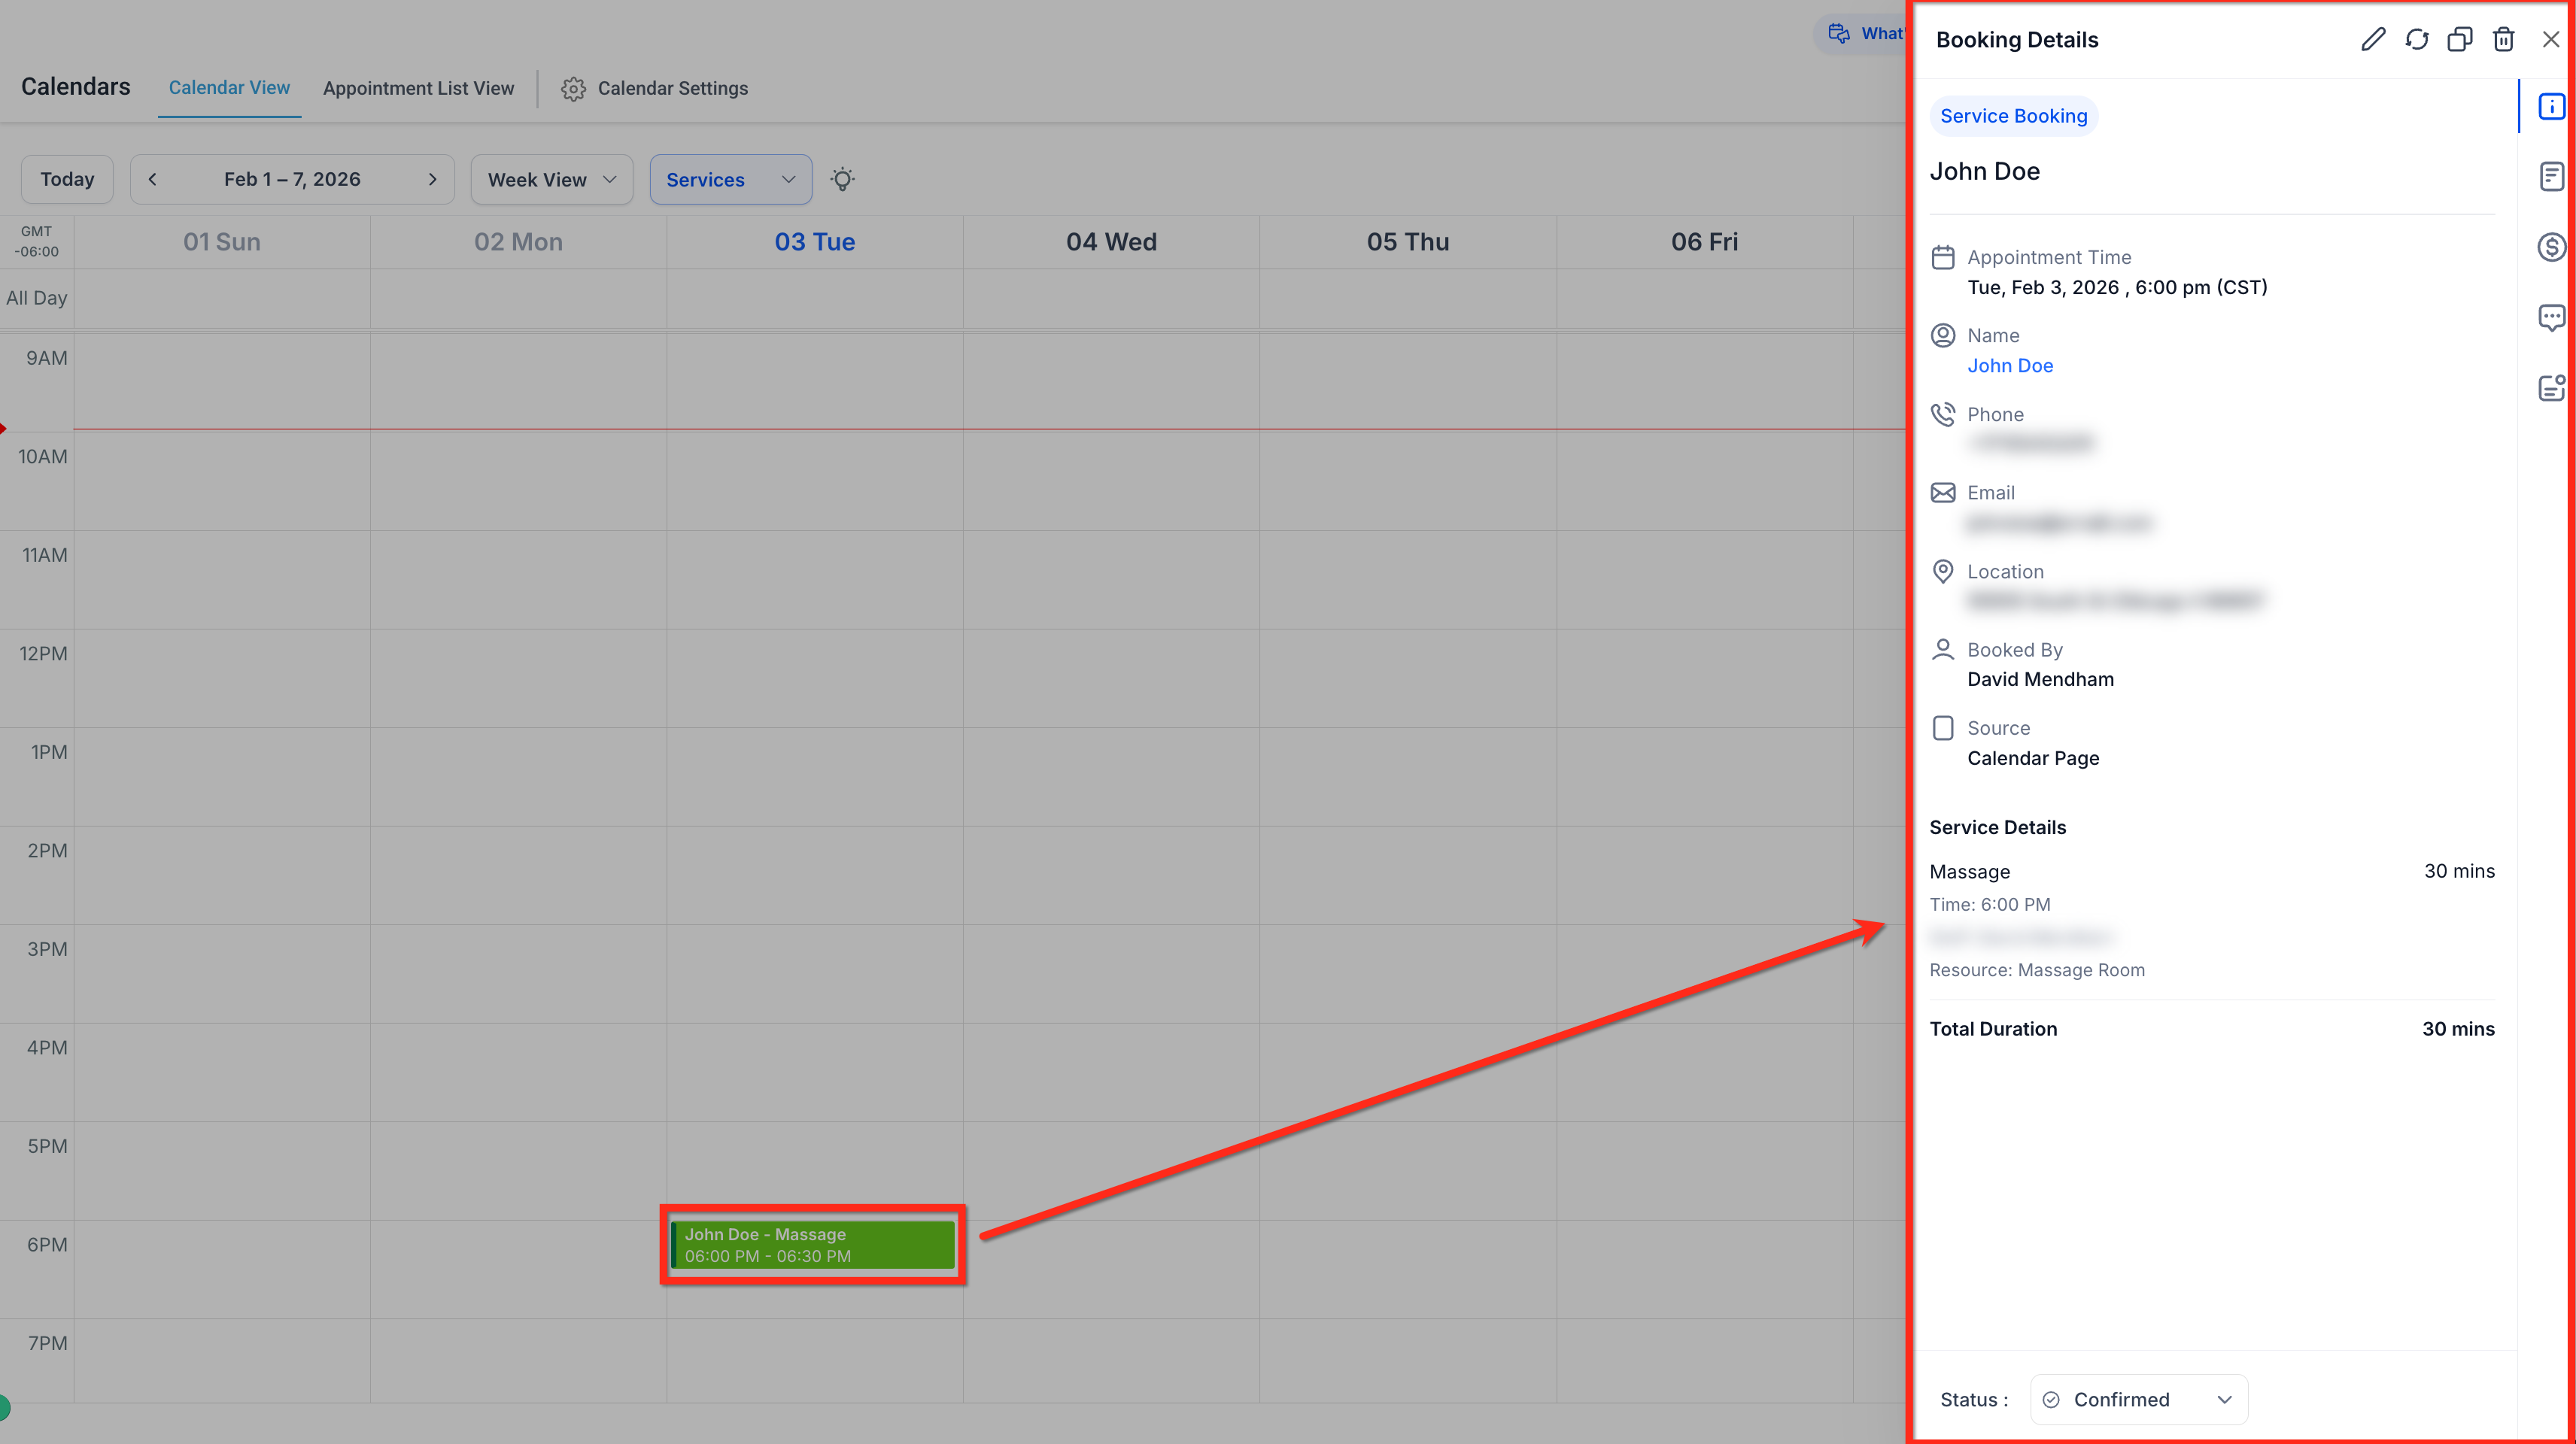
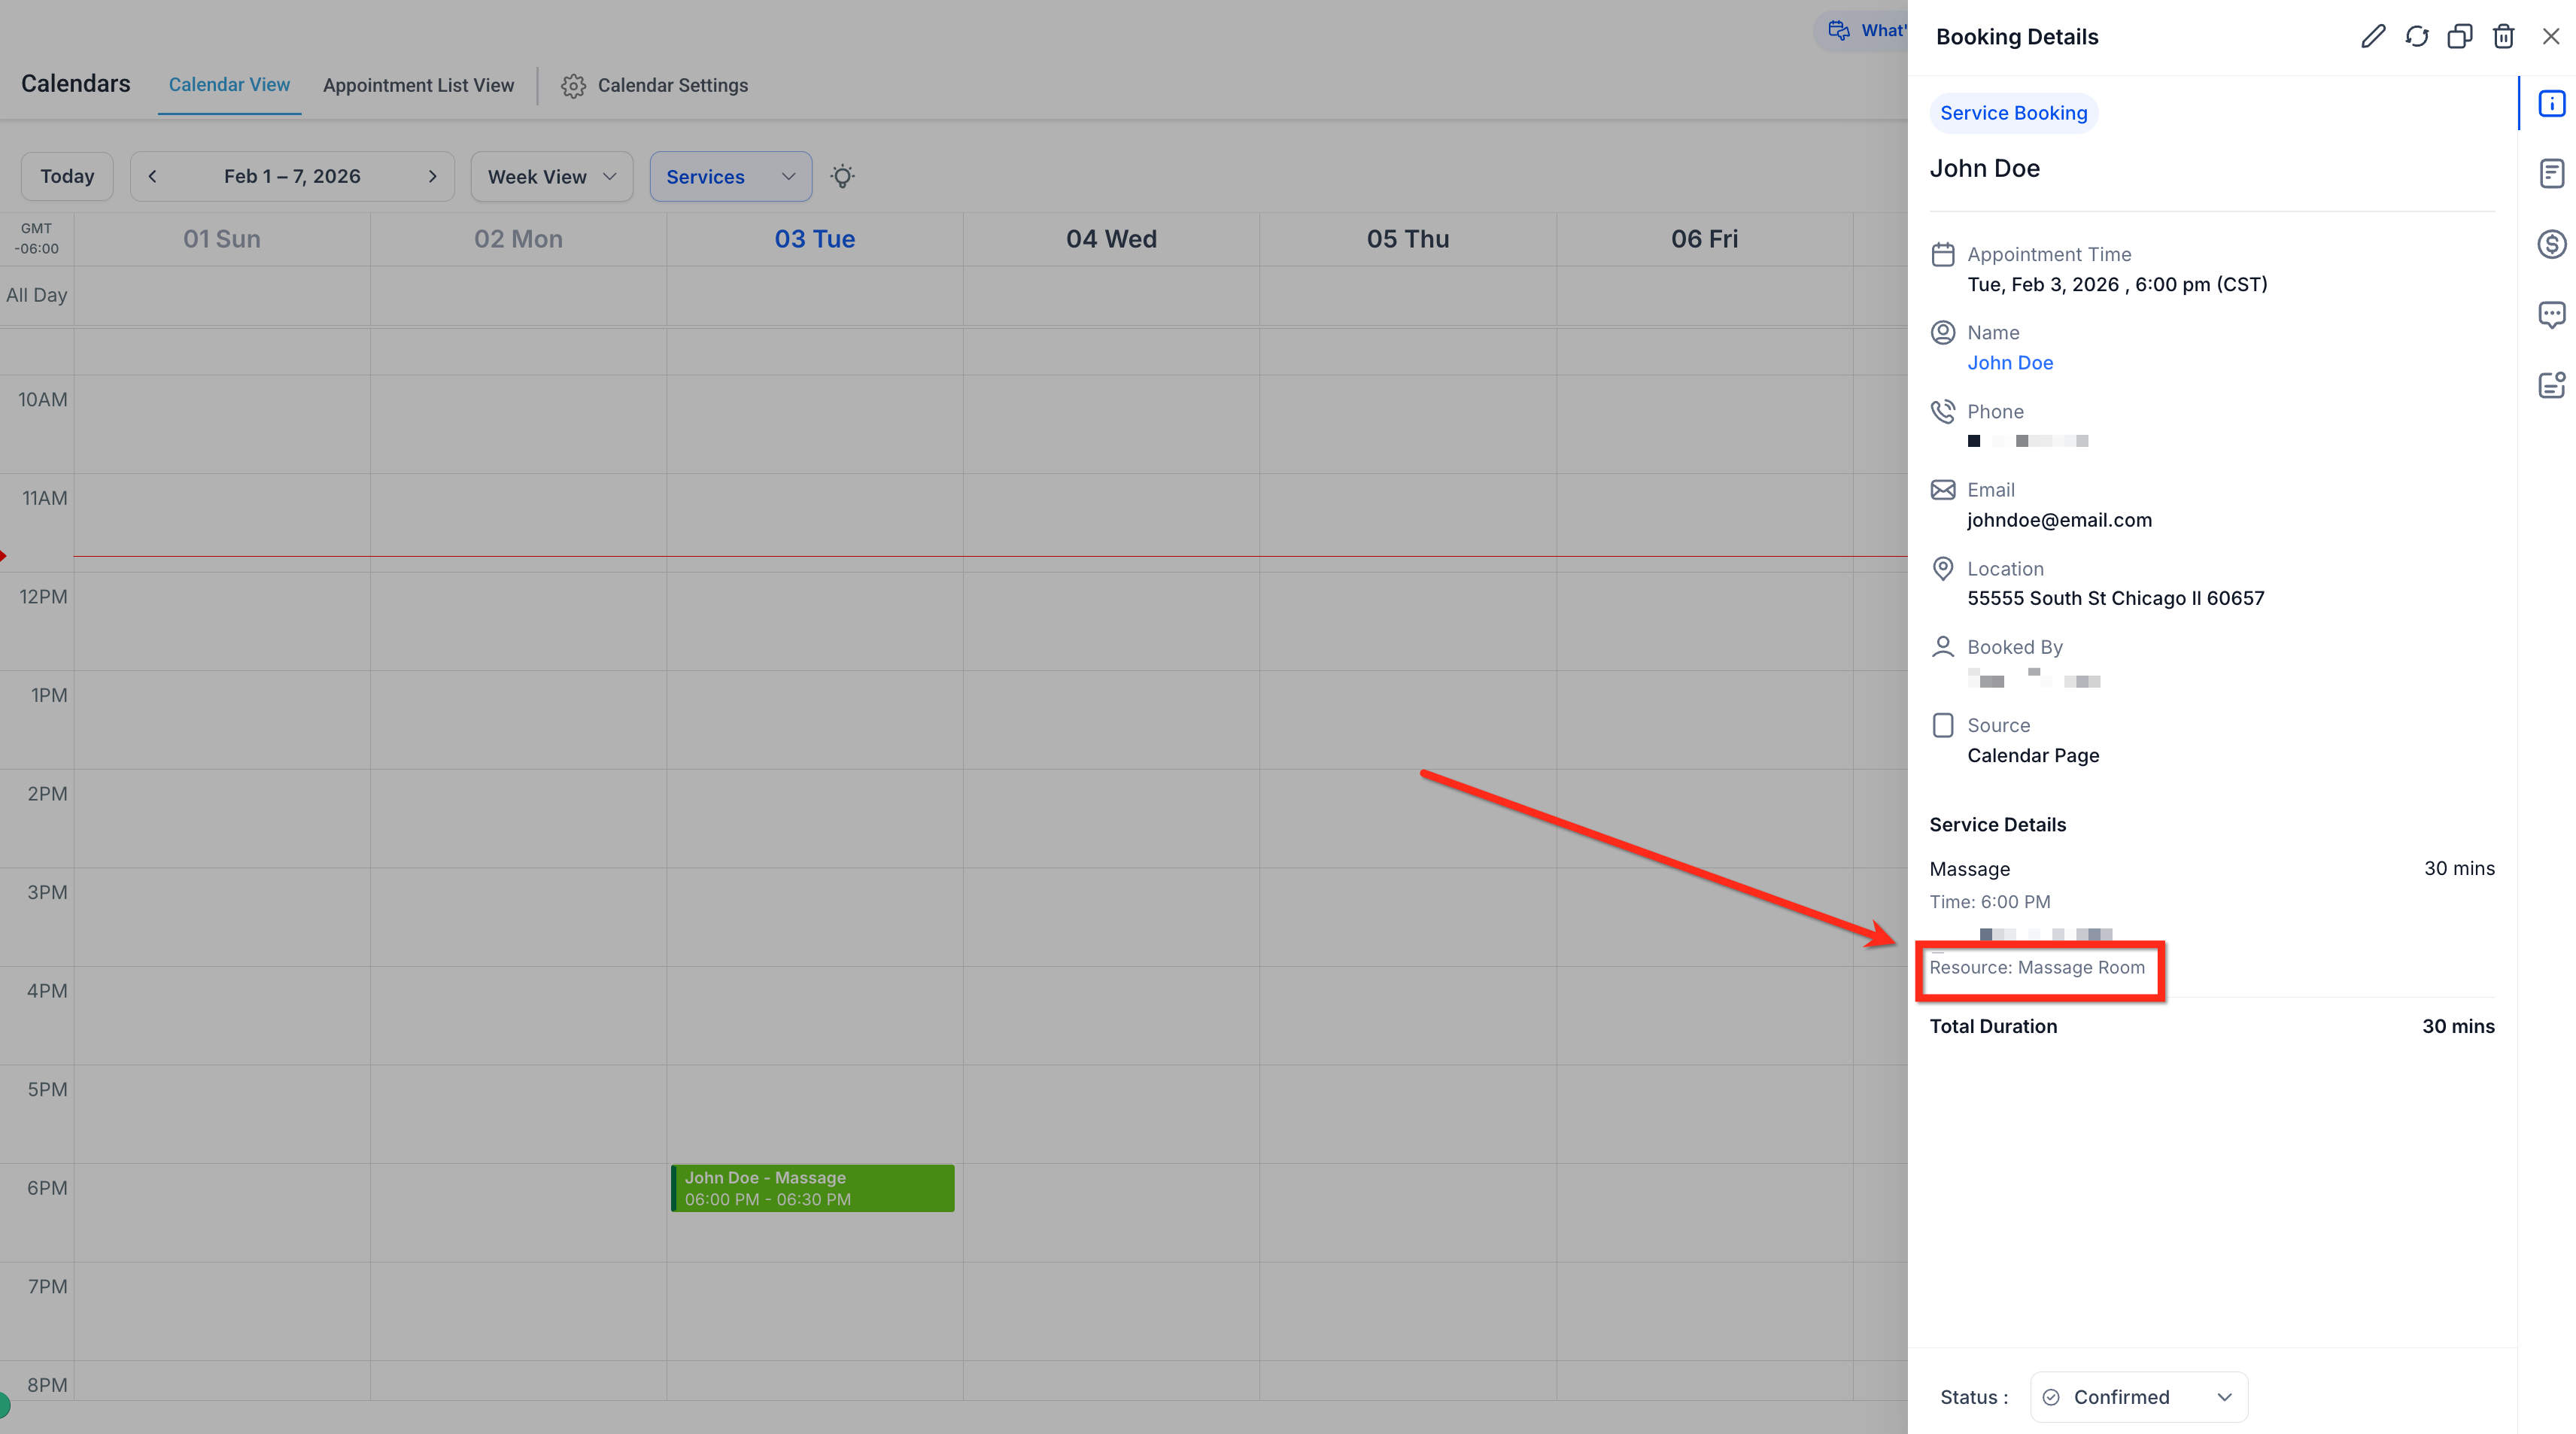
Opening any appointment on a Service Calendar brings up the Booking Details side panel. It centralizes the tasks your team does most often on a booking:
Speed: edit or reschedule a service without leaving the calendar page.
Control: block time from the same modal to keep the calendar accurate.
Scalability: duplicate bookings for repeat patients or similar appointments instead of re-entering everything.
Go to Calendars → Calendar View (or Appointment List View) and select the Services tab.
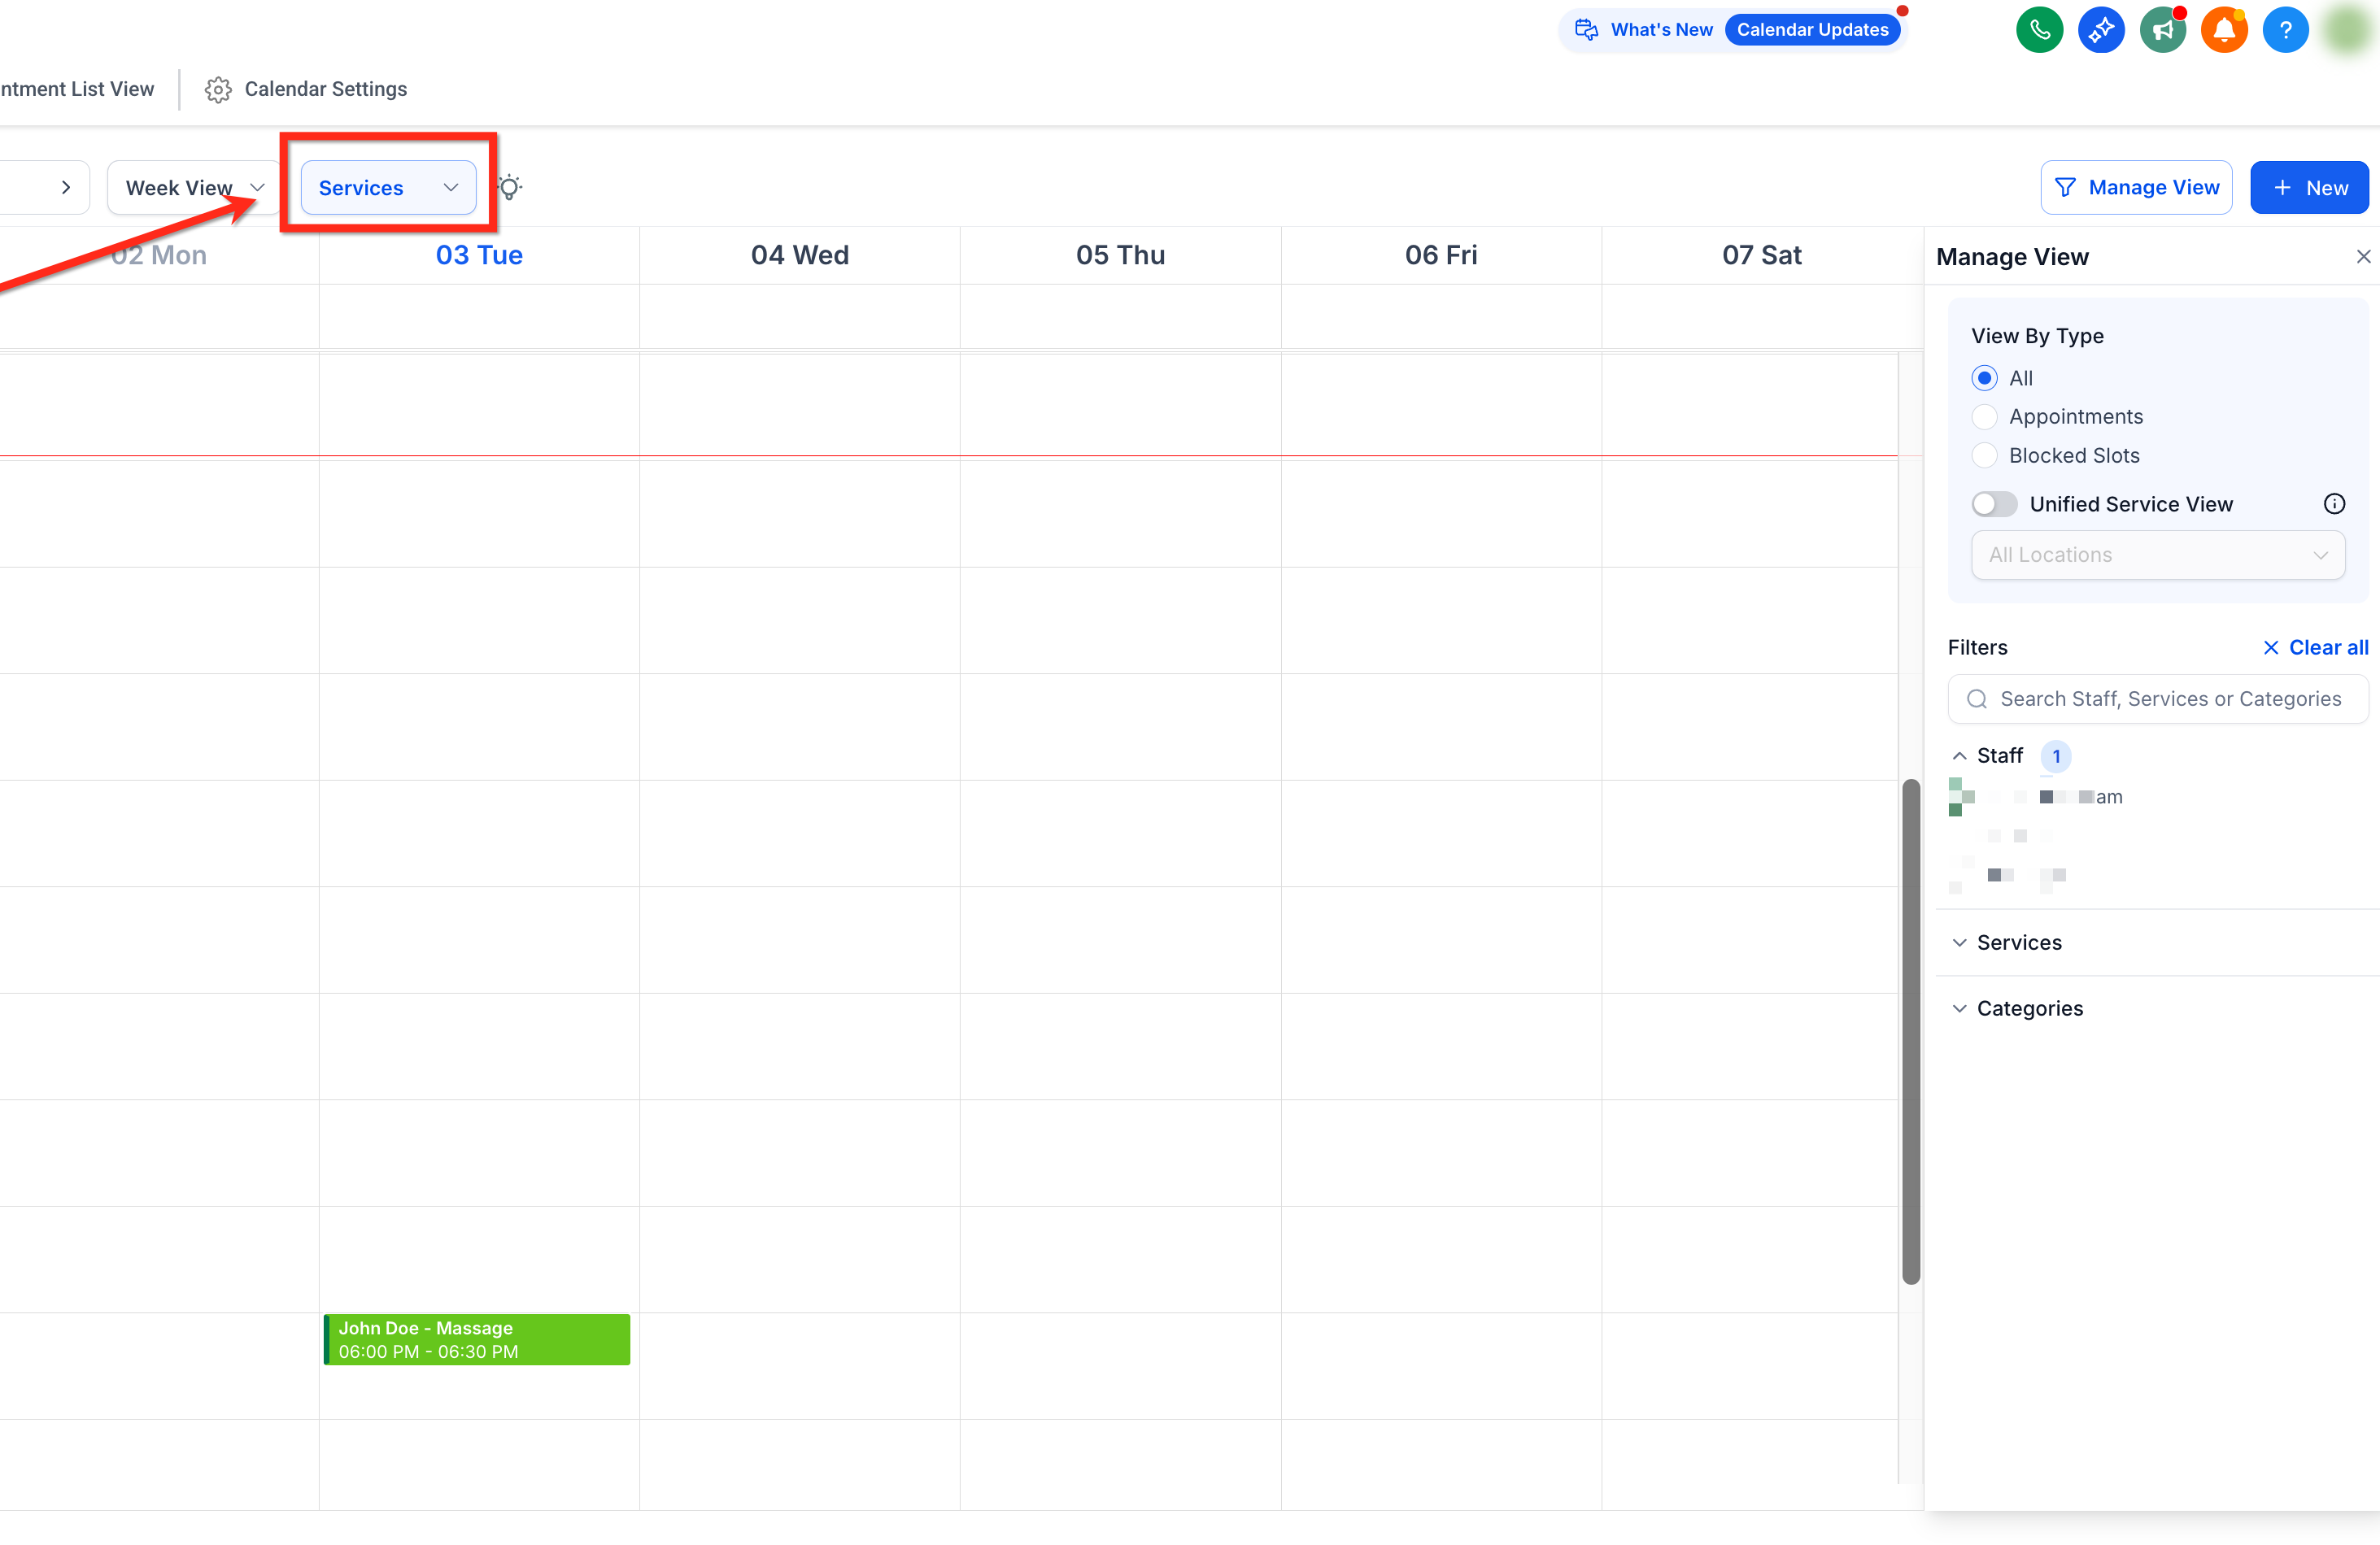
Click any appointment to open Booking Details in the side panel.
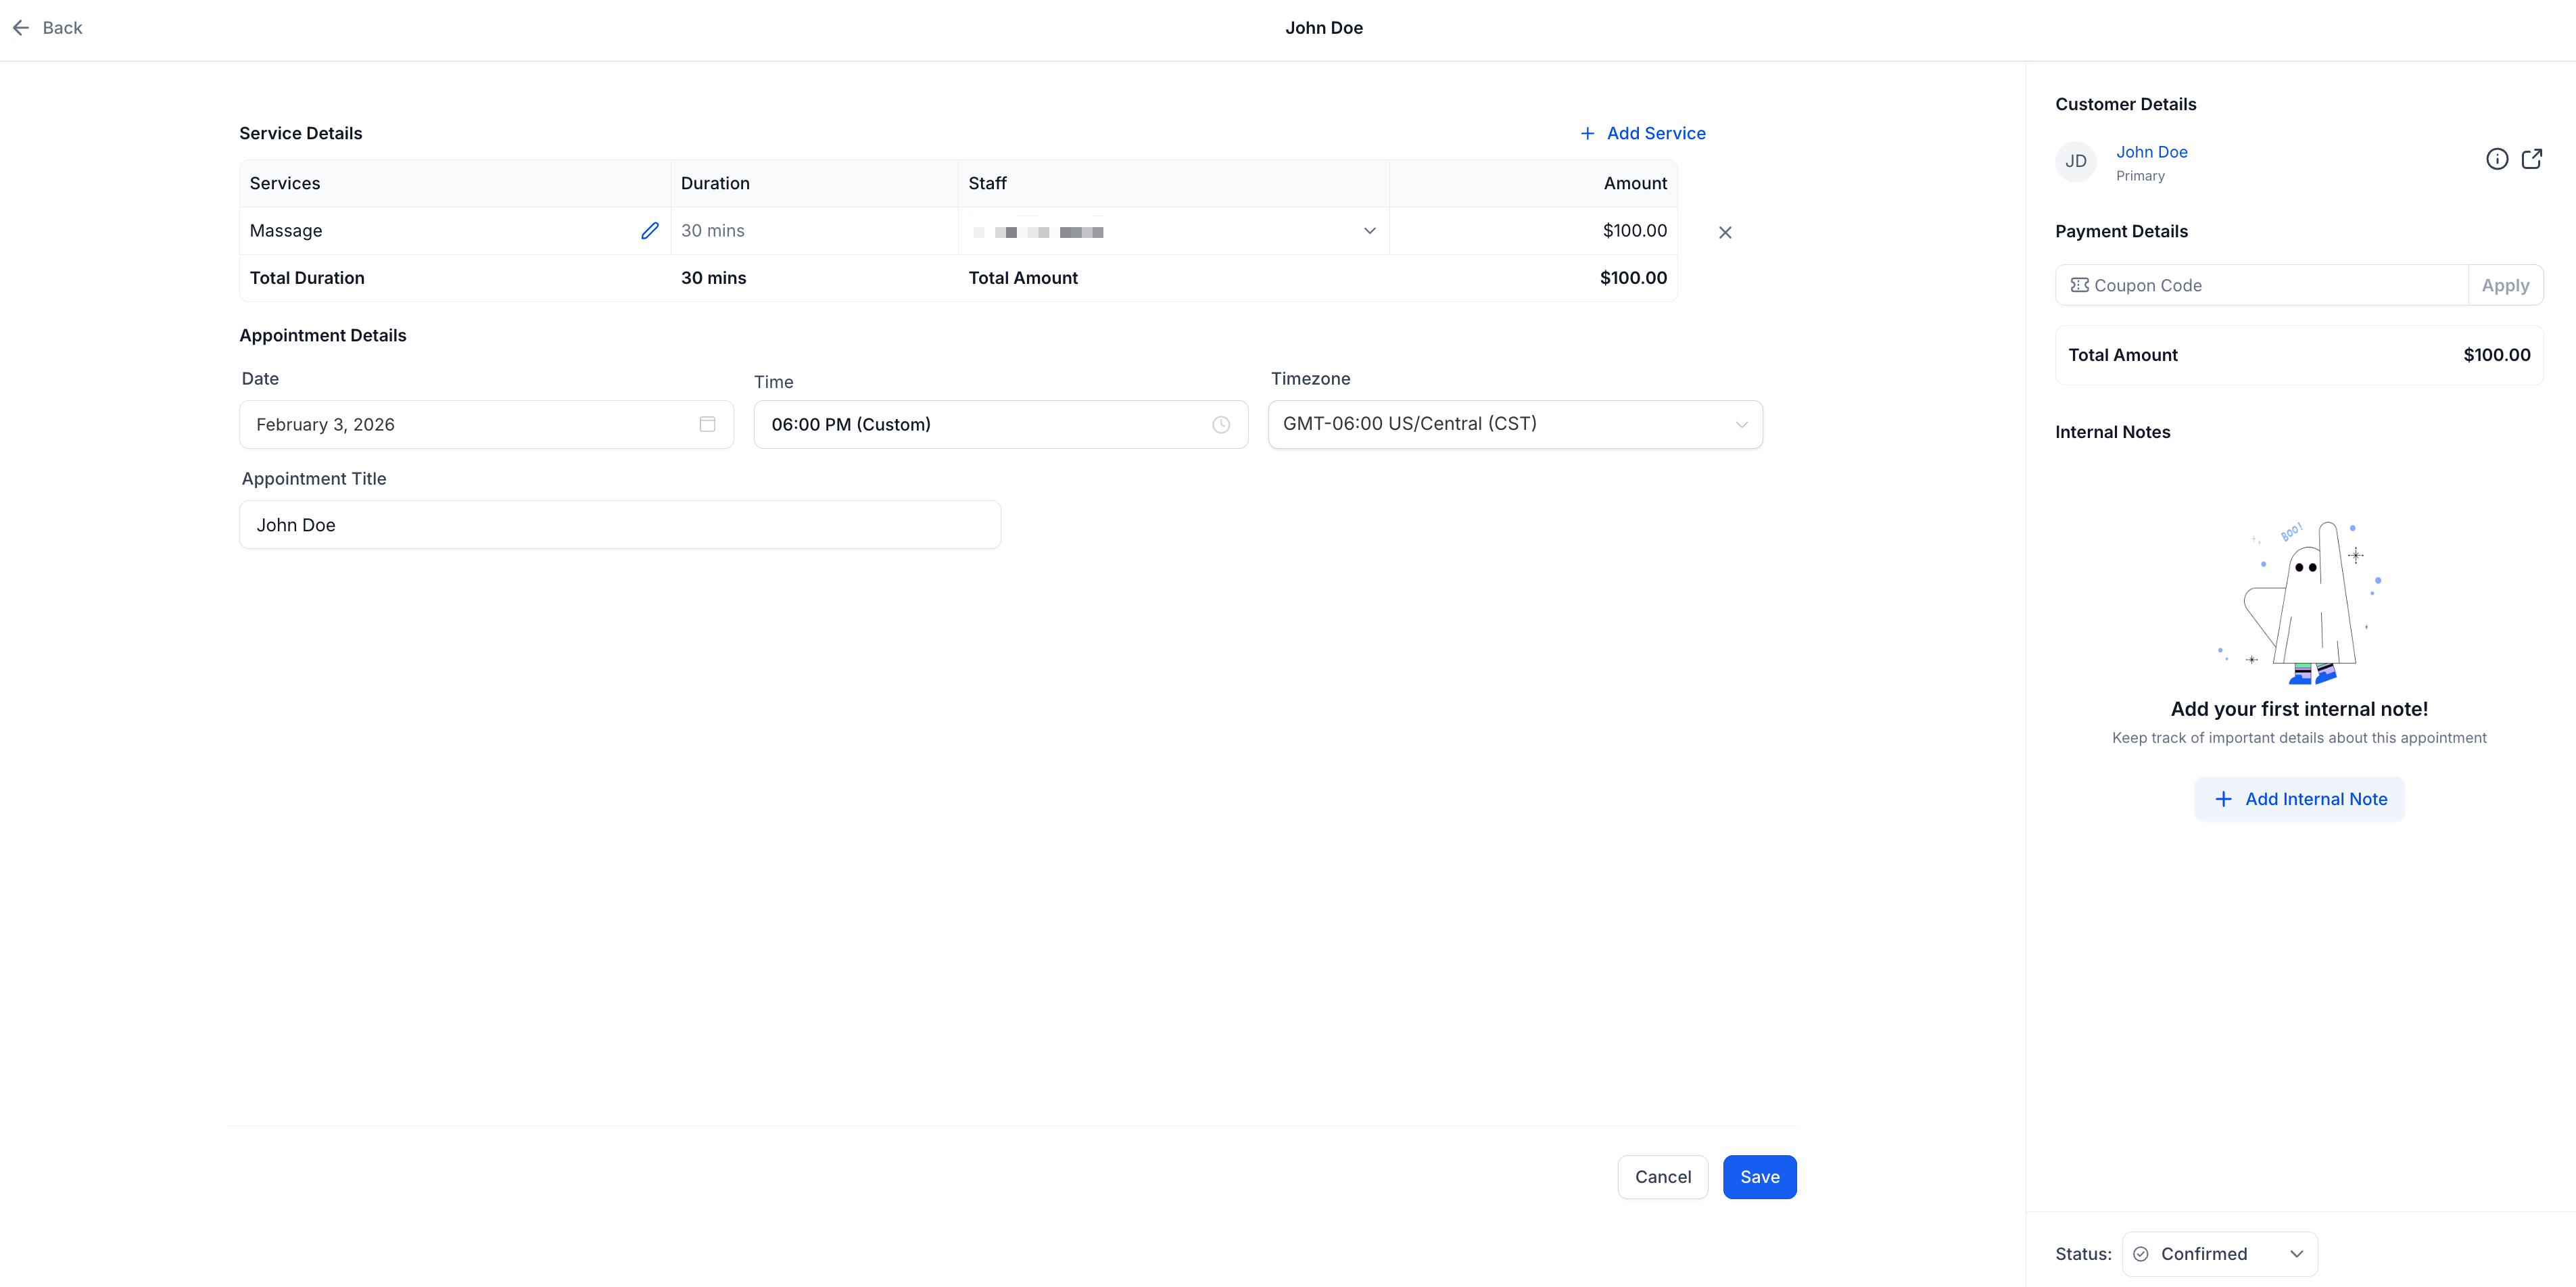
Unpaid Service Appointments can be fully modified directly from the edit screen, so your staff doesn't need to cancel and rebook to fix a mistake or accommodate a last-minute change. From the editor your team can update nearly every detail on the appointment, including:
Add or remove Services
Add or remove Add-Ons
Change the assigned Staff member or Service Variant
Change the Location, appointment title, appointment date/time, timezone, or coupon code
To edit an unpaid service appointment:
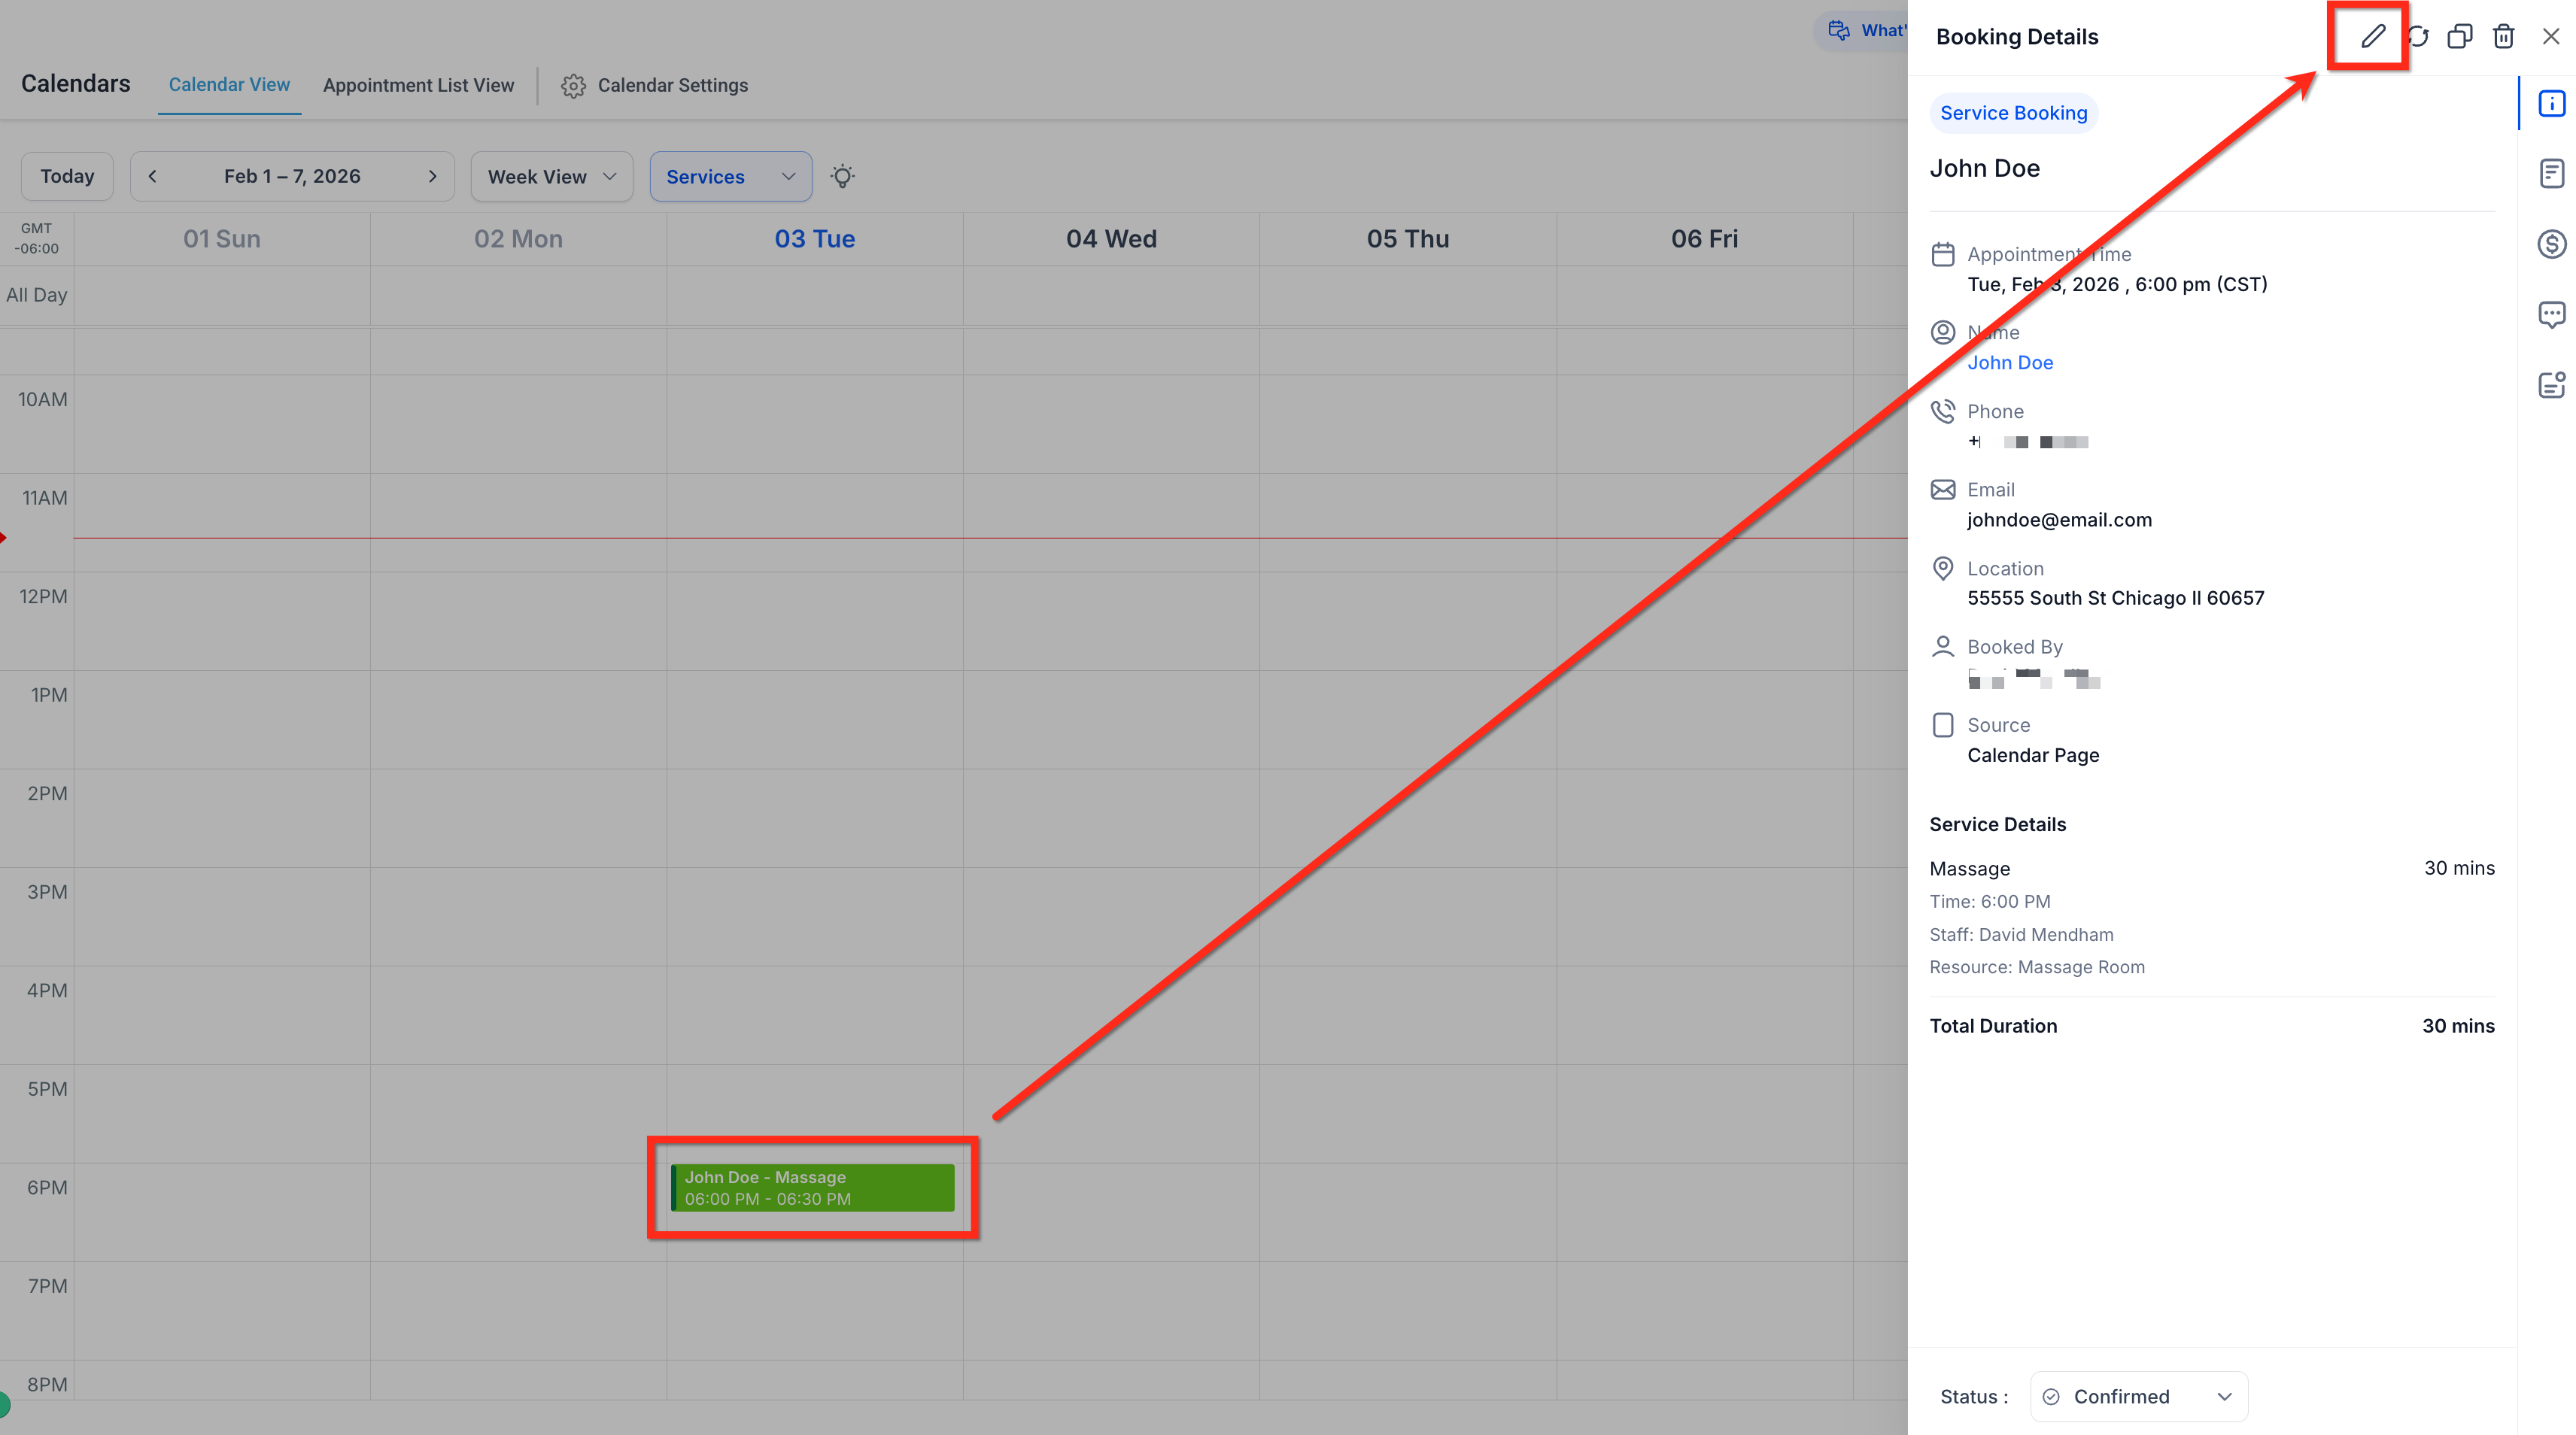
Select the appointment, then click the pencil icon to open the editor.
Adjust services, add-ons, staff/variant, location, title, date/time, timezone, or coupon, then click Save.
Once a payment has been collected, structural changes (service, add-ons, staff, or variant) are locked to protect the record tied to that payment. Your team can still duplicate the appointment to quickly clone it, make the needed edits on the copy, and rebook the patient without starting from scratch. The edit screen shows a clear message explaining exactly what's editable and what's not on a paid booking, so there's no guesswork at the front desk.
The Duplicate Appointment button lives in the appointment modal. With one click it creates a new booking that carries over the same details, which is a fast way to set up a repeat visit or a similar appointment for another patient without retyping everything.
To duplicate an appointment, open the appointment you want to copy and select the Duplicate icon.
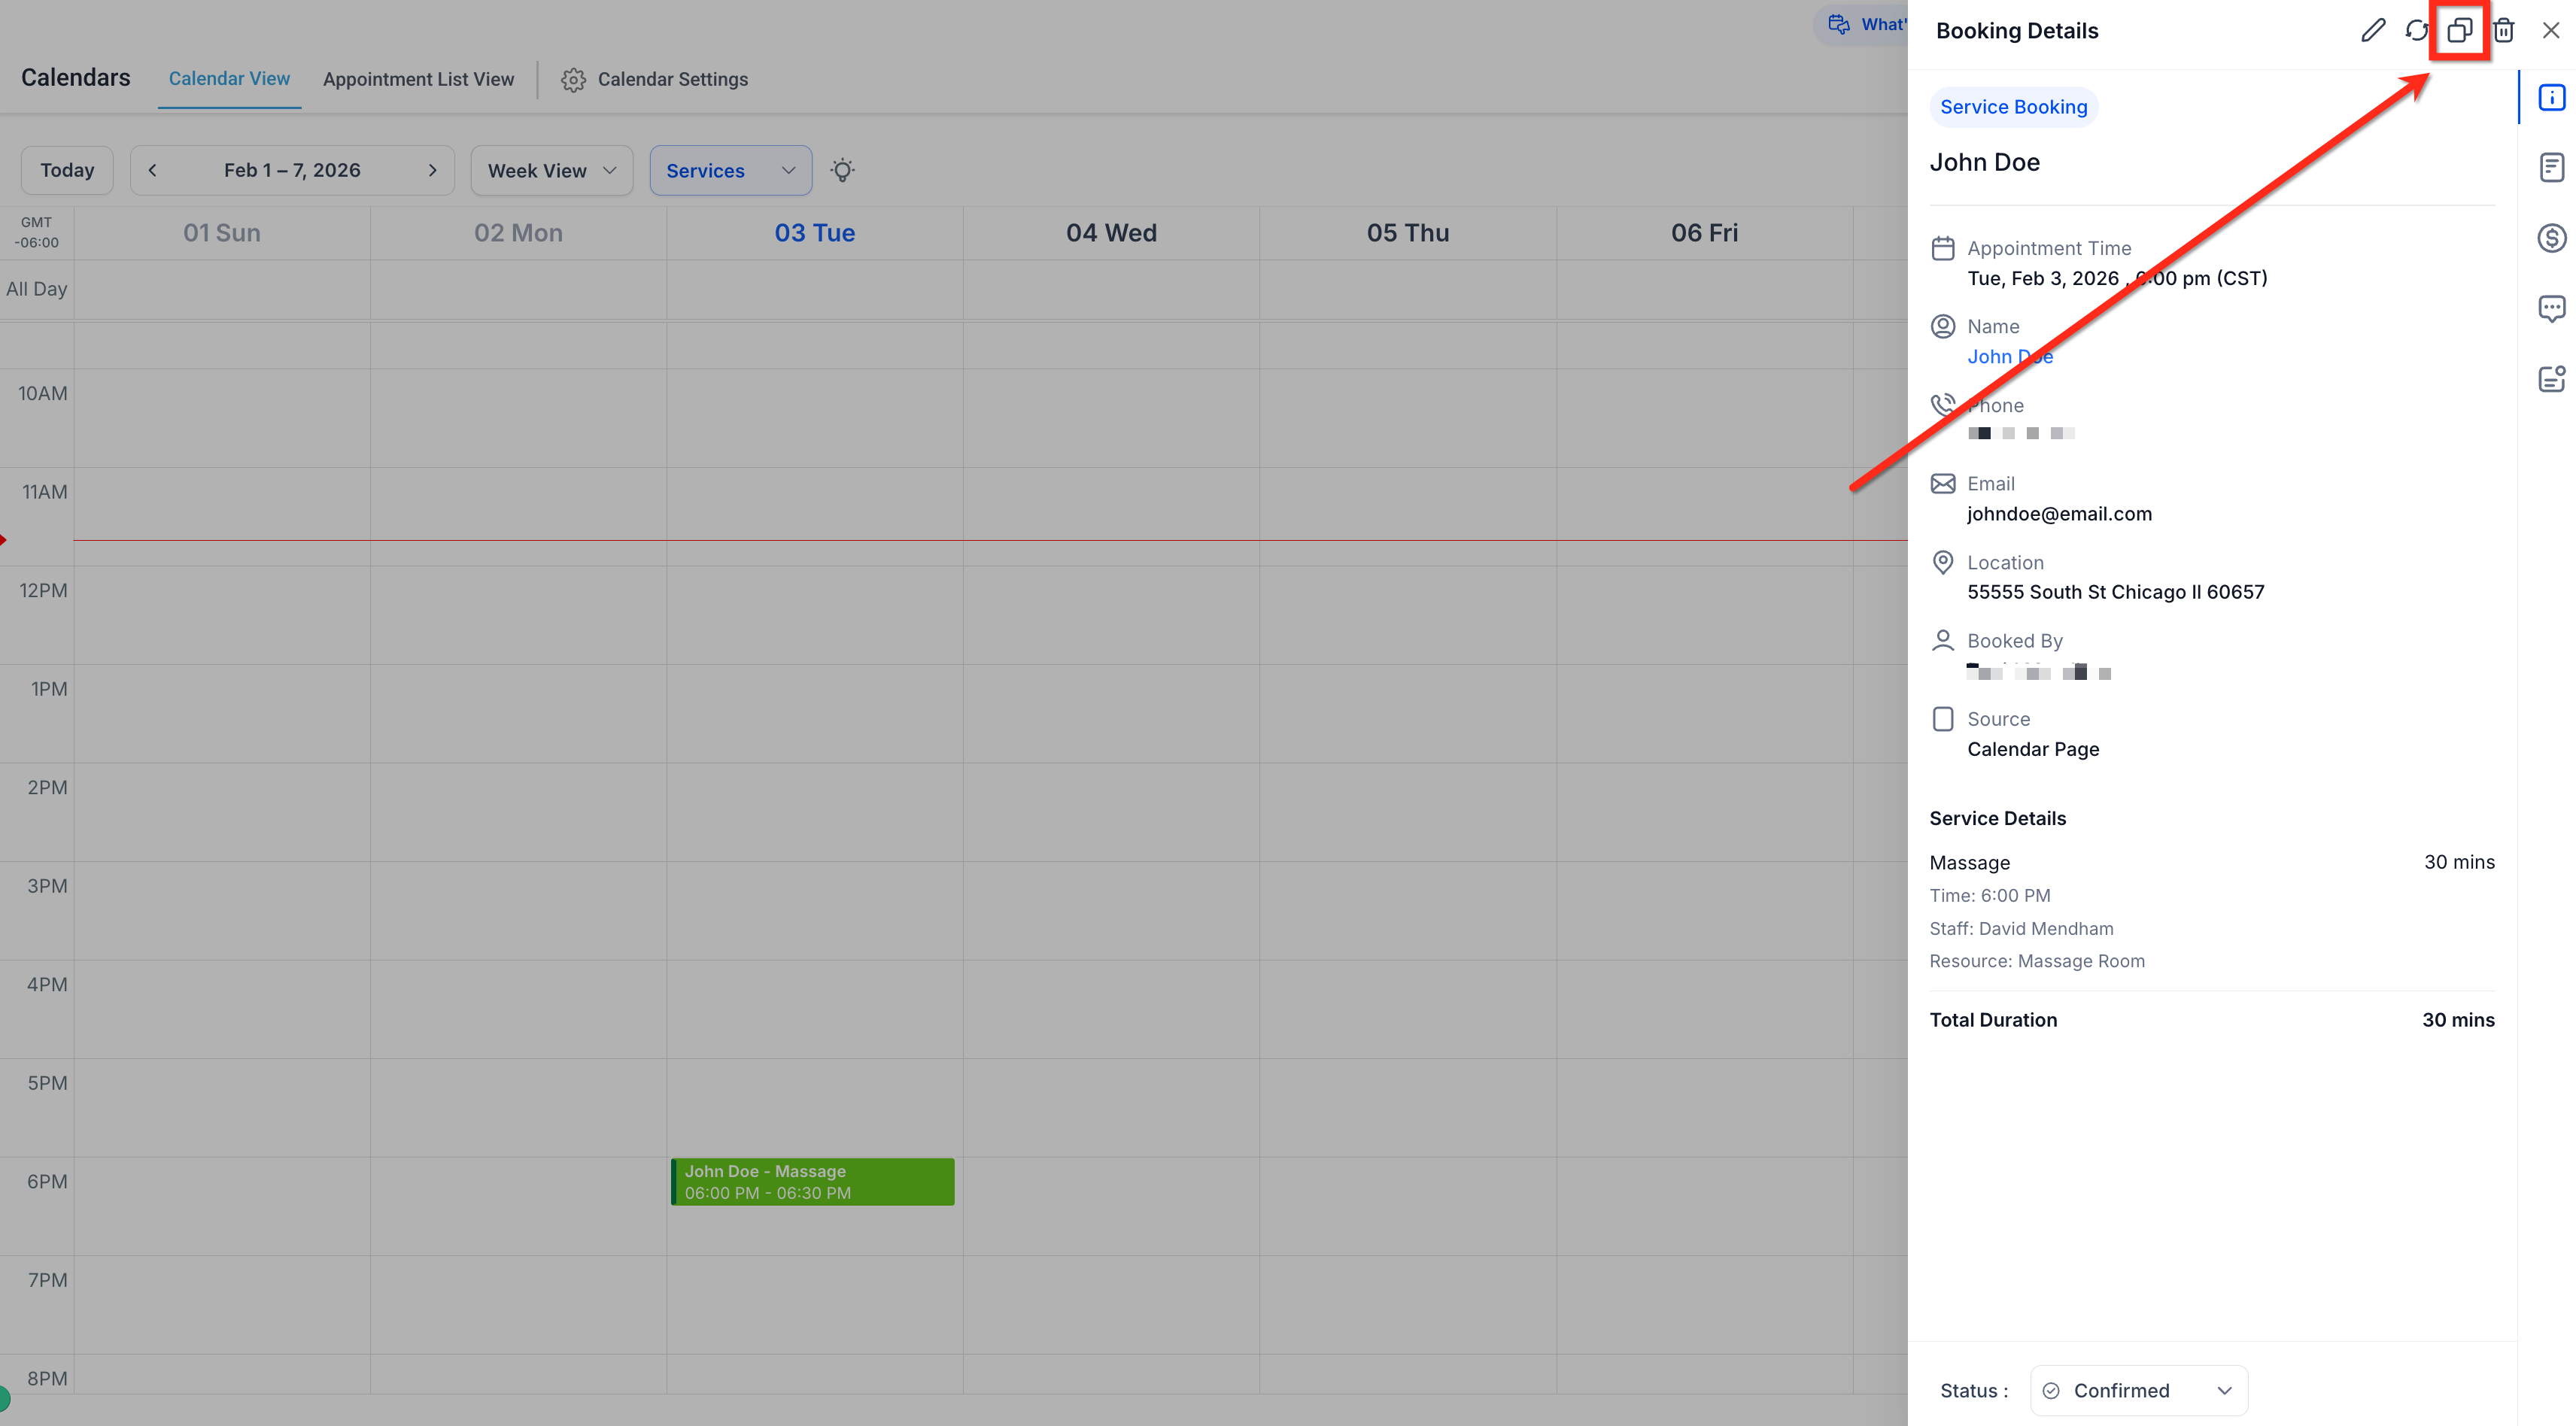
Contact, services, add-ons, staff/resource, meeting location, and notes typically carry over to the duplicate. Review and adjust anything that needs to change before confirming the new booking.
Blocked slots let you mark time as unavailable directly in the booking flow, keeping your calendar accurate and preventing an accidental double-booking during a procedure, staff meeting, or maintenance window.
To create a blocked slot:
Click New Booking on your calendar.
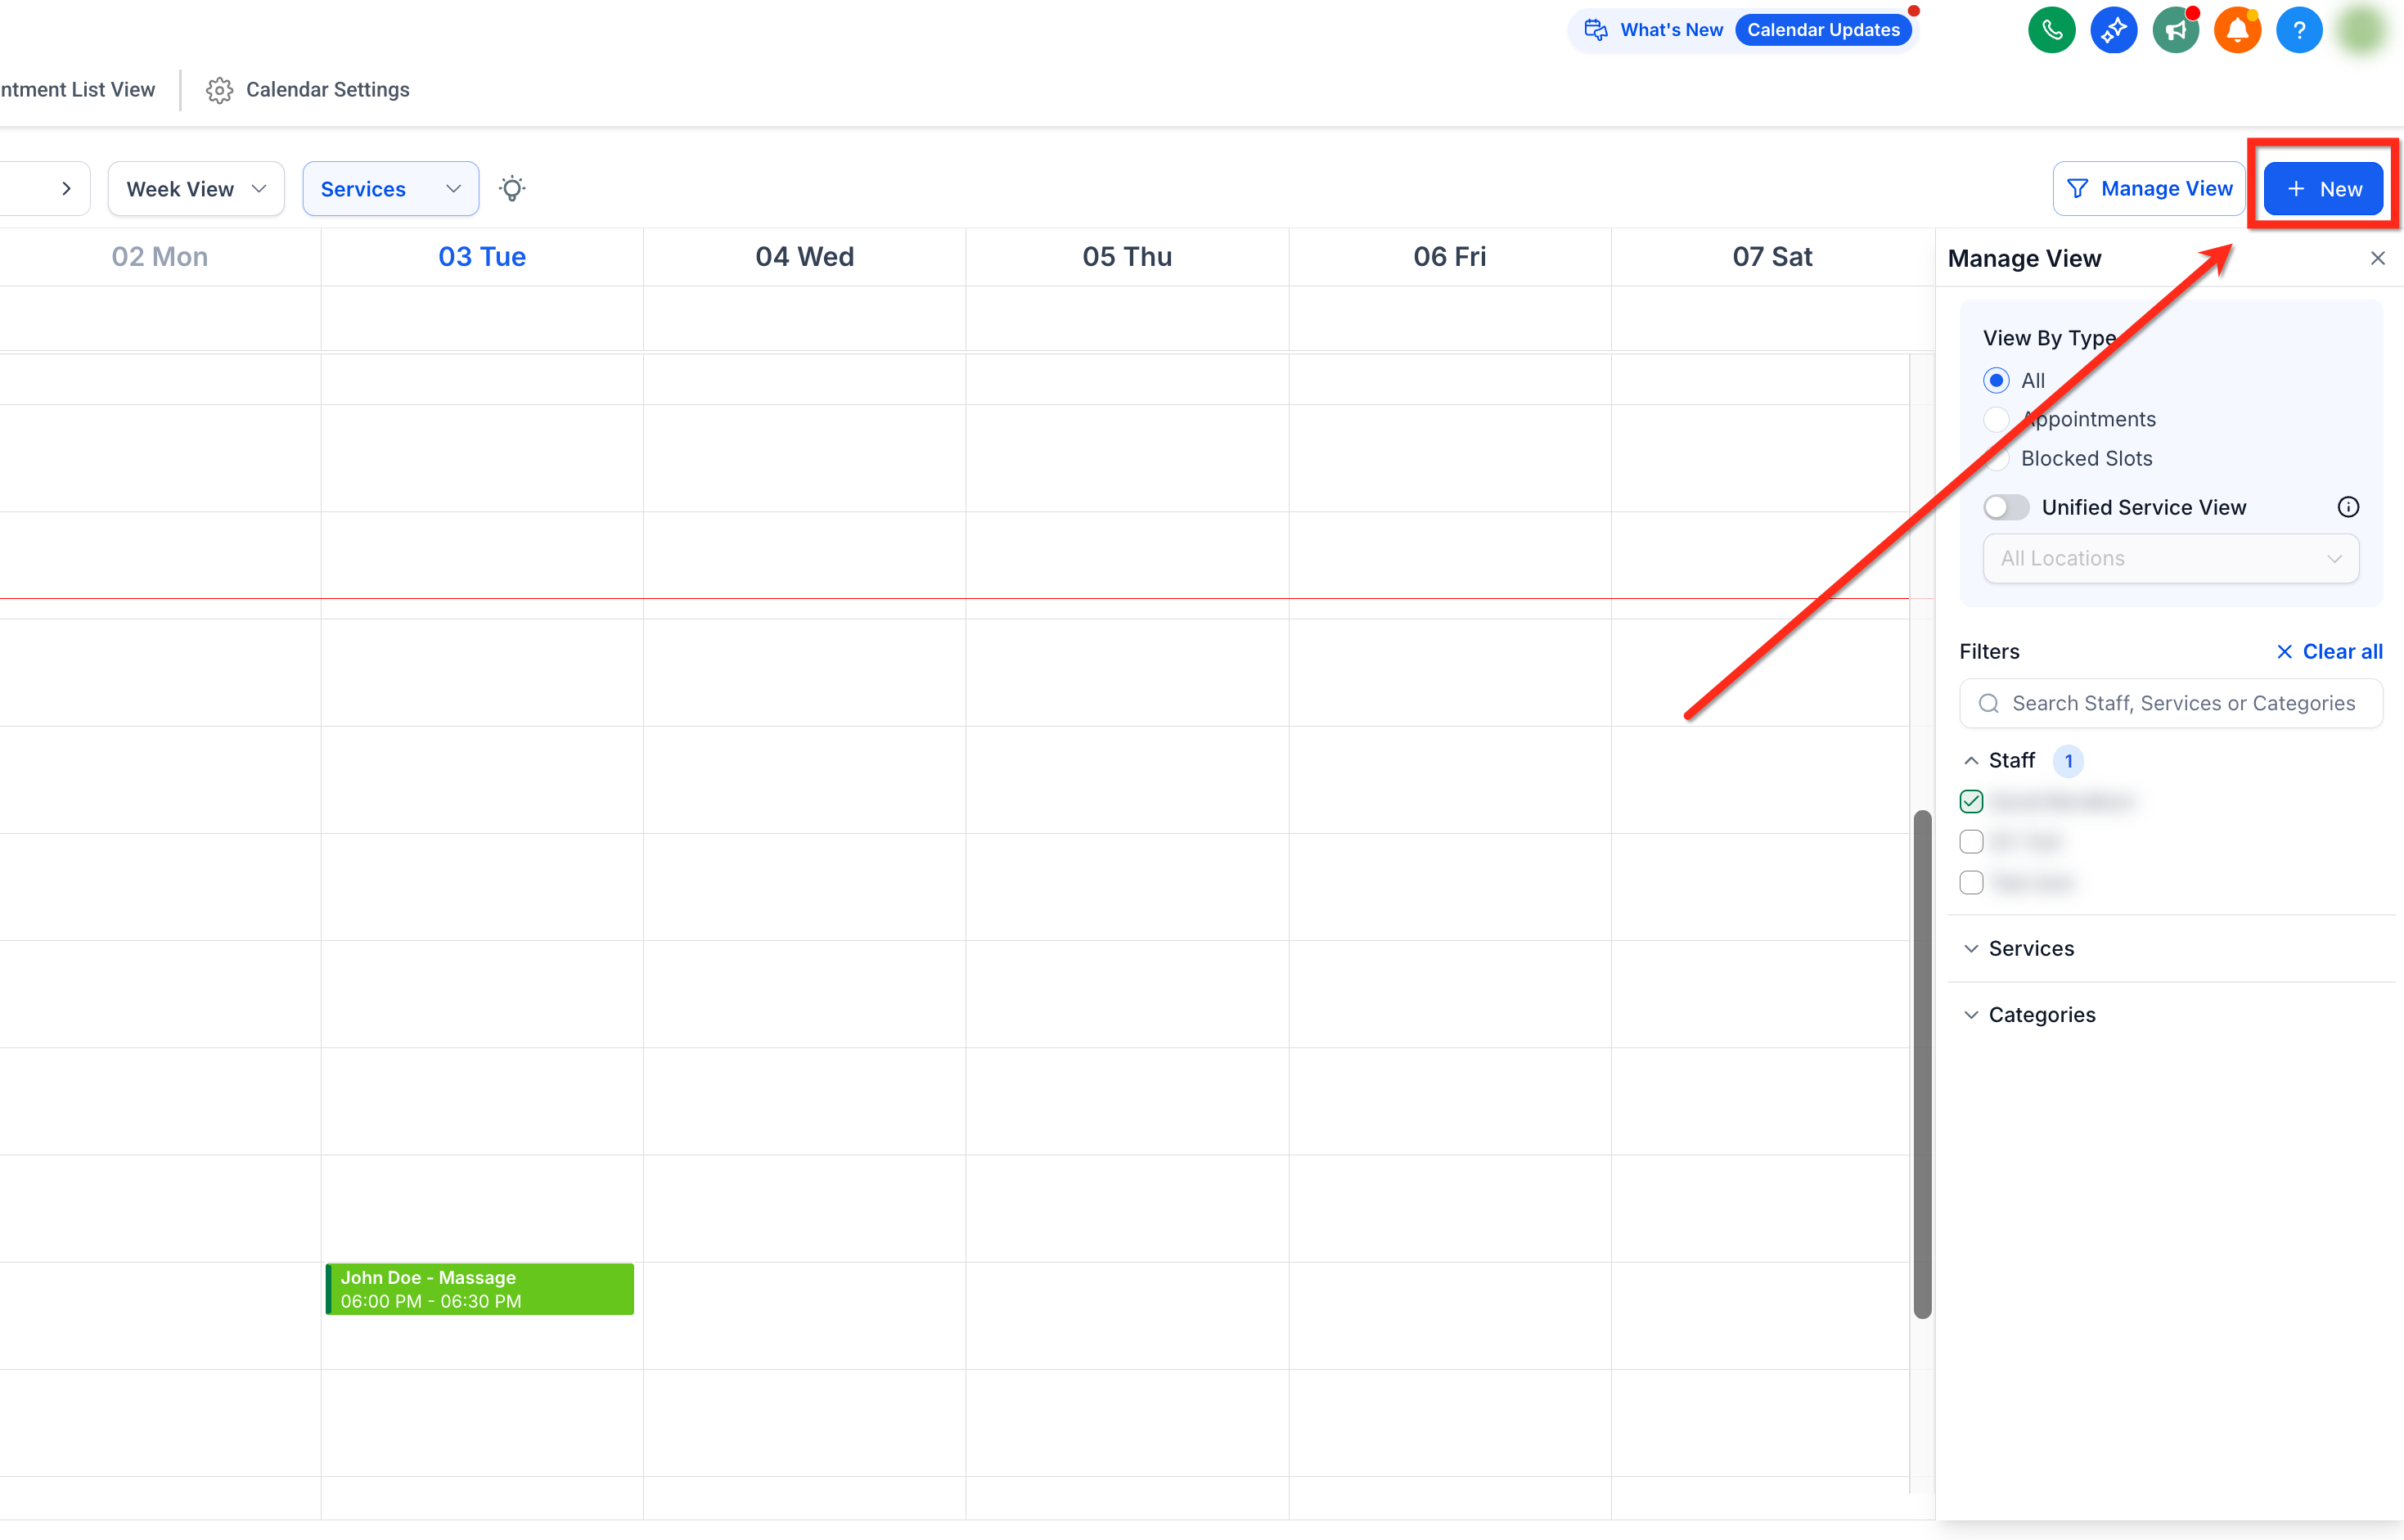
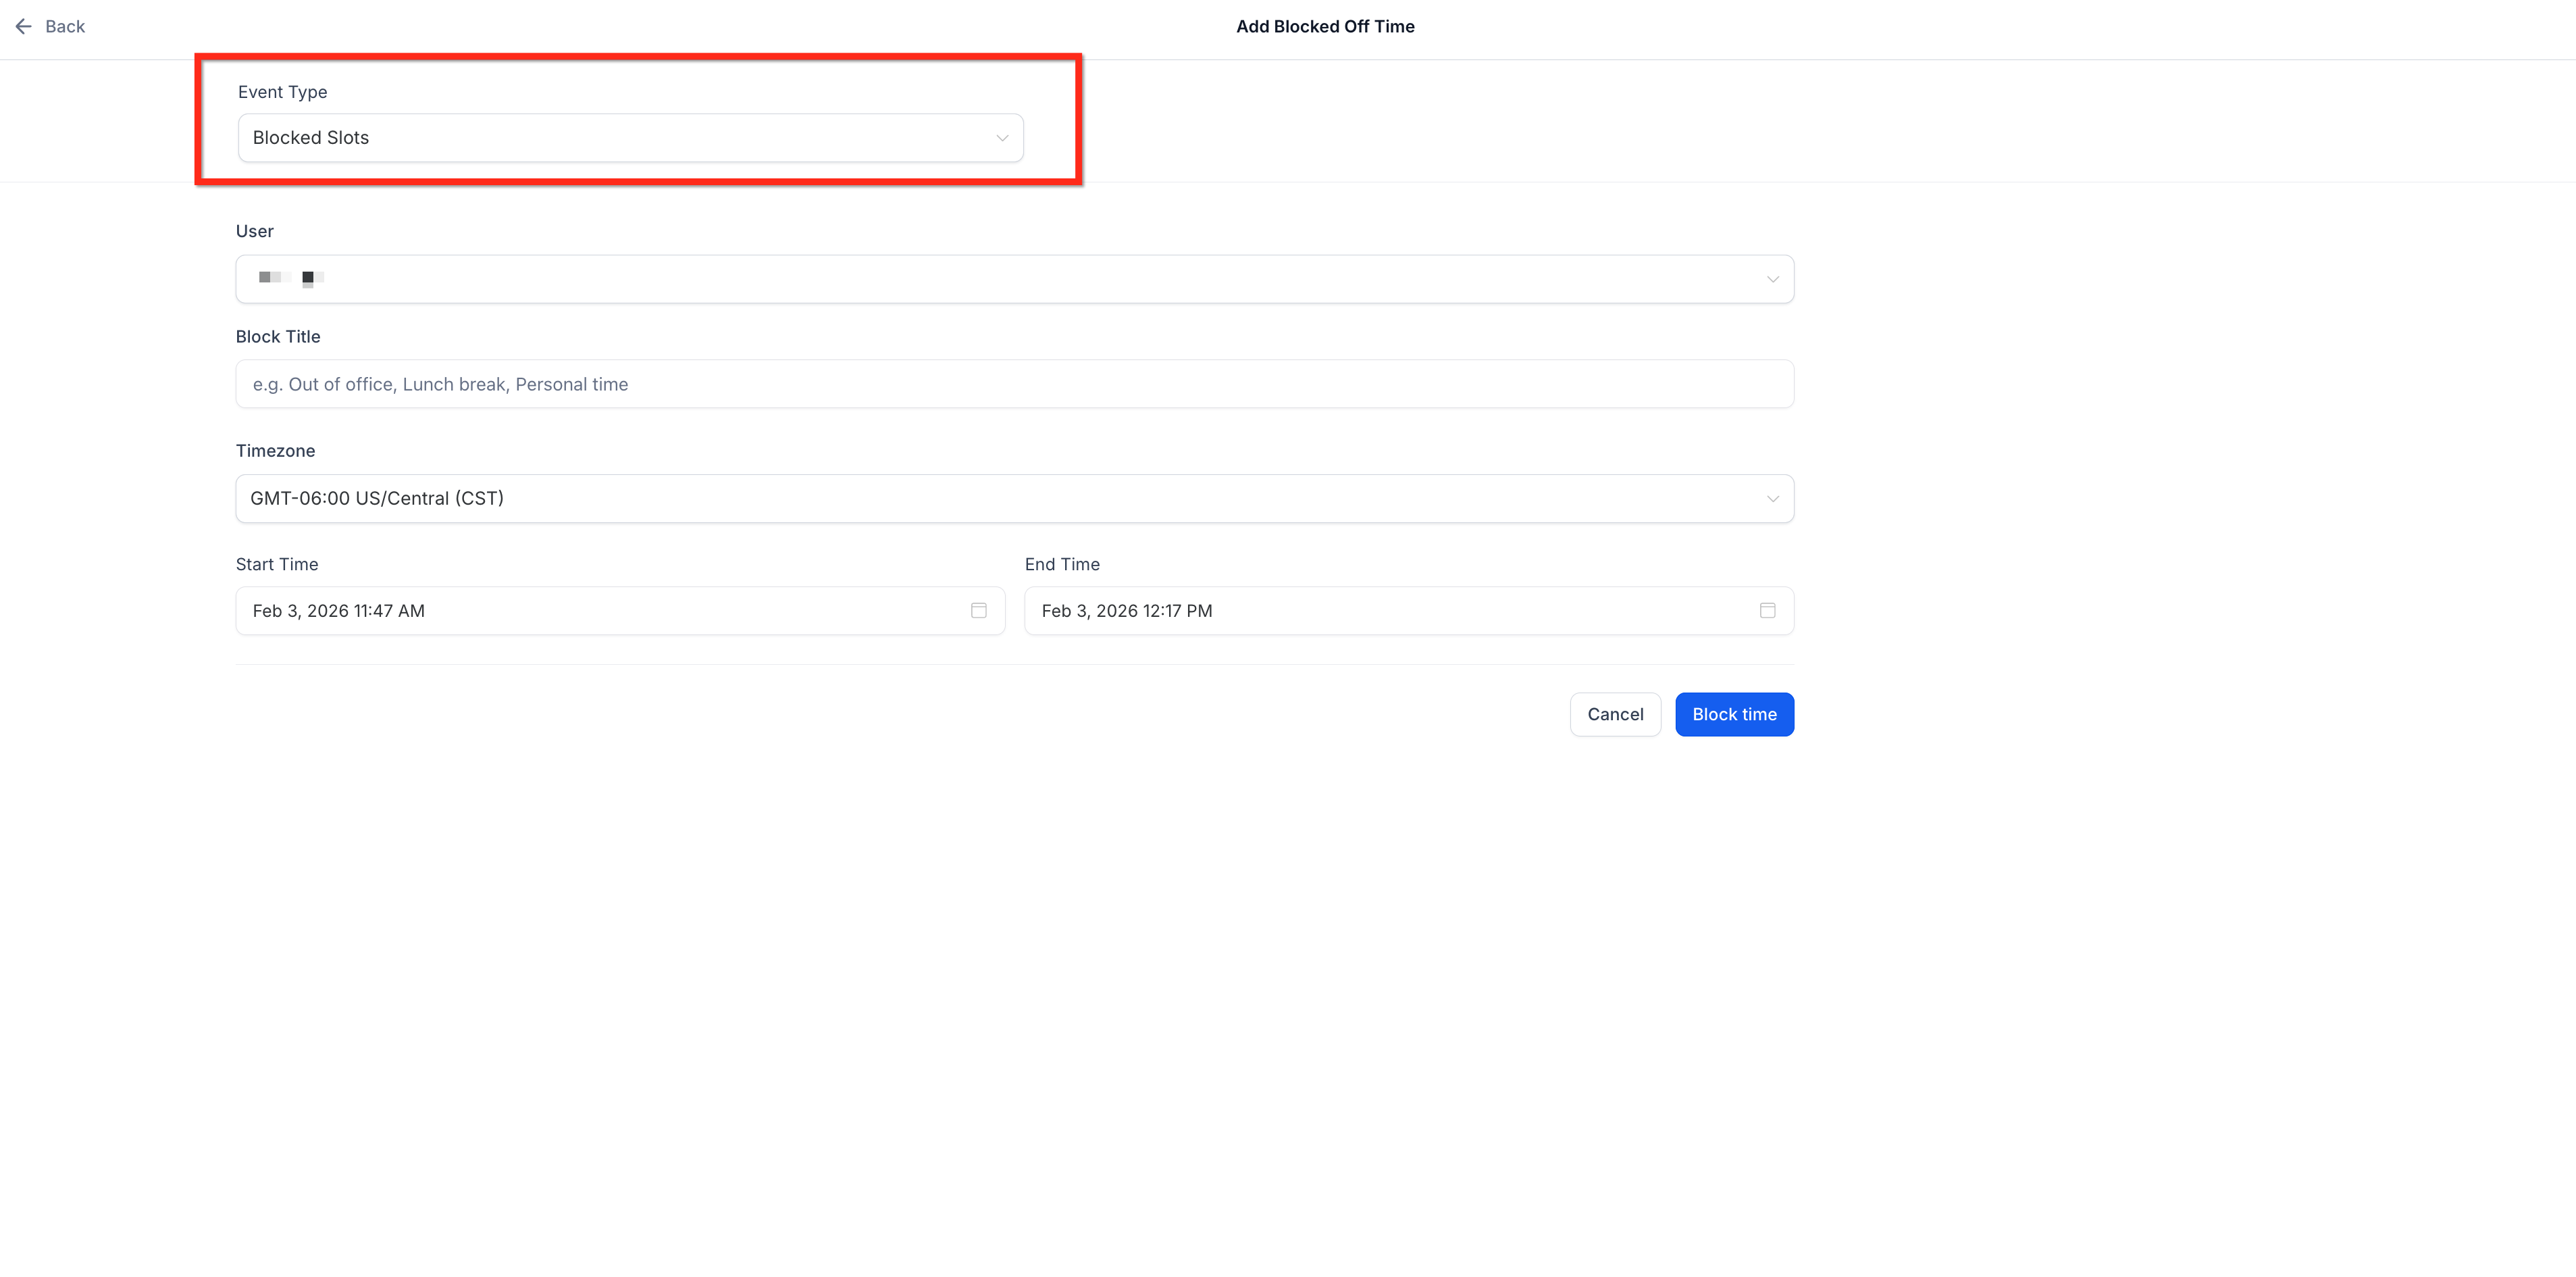
Switch the Event Type to Blocked Slot.
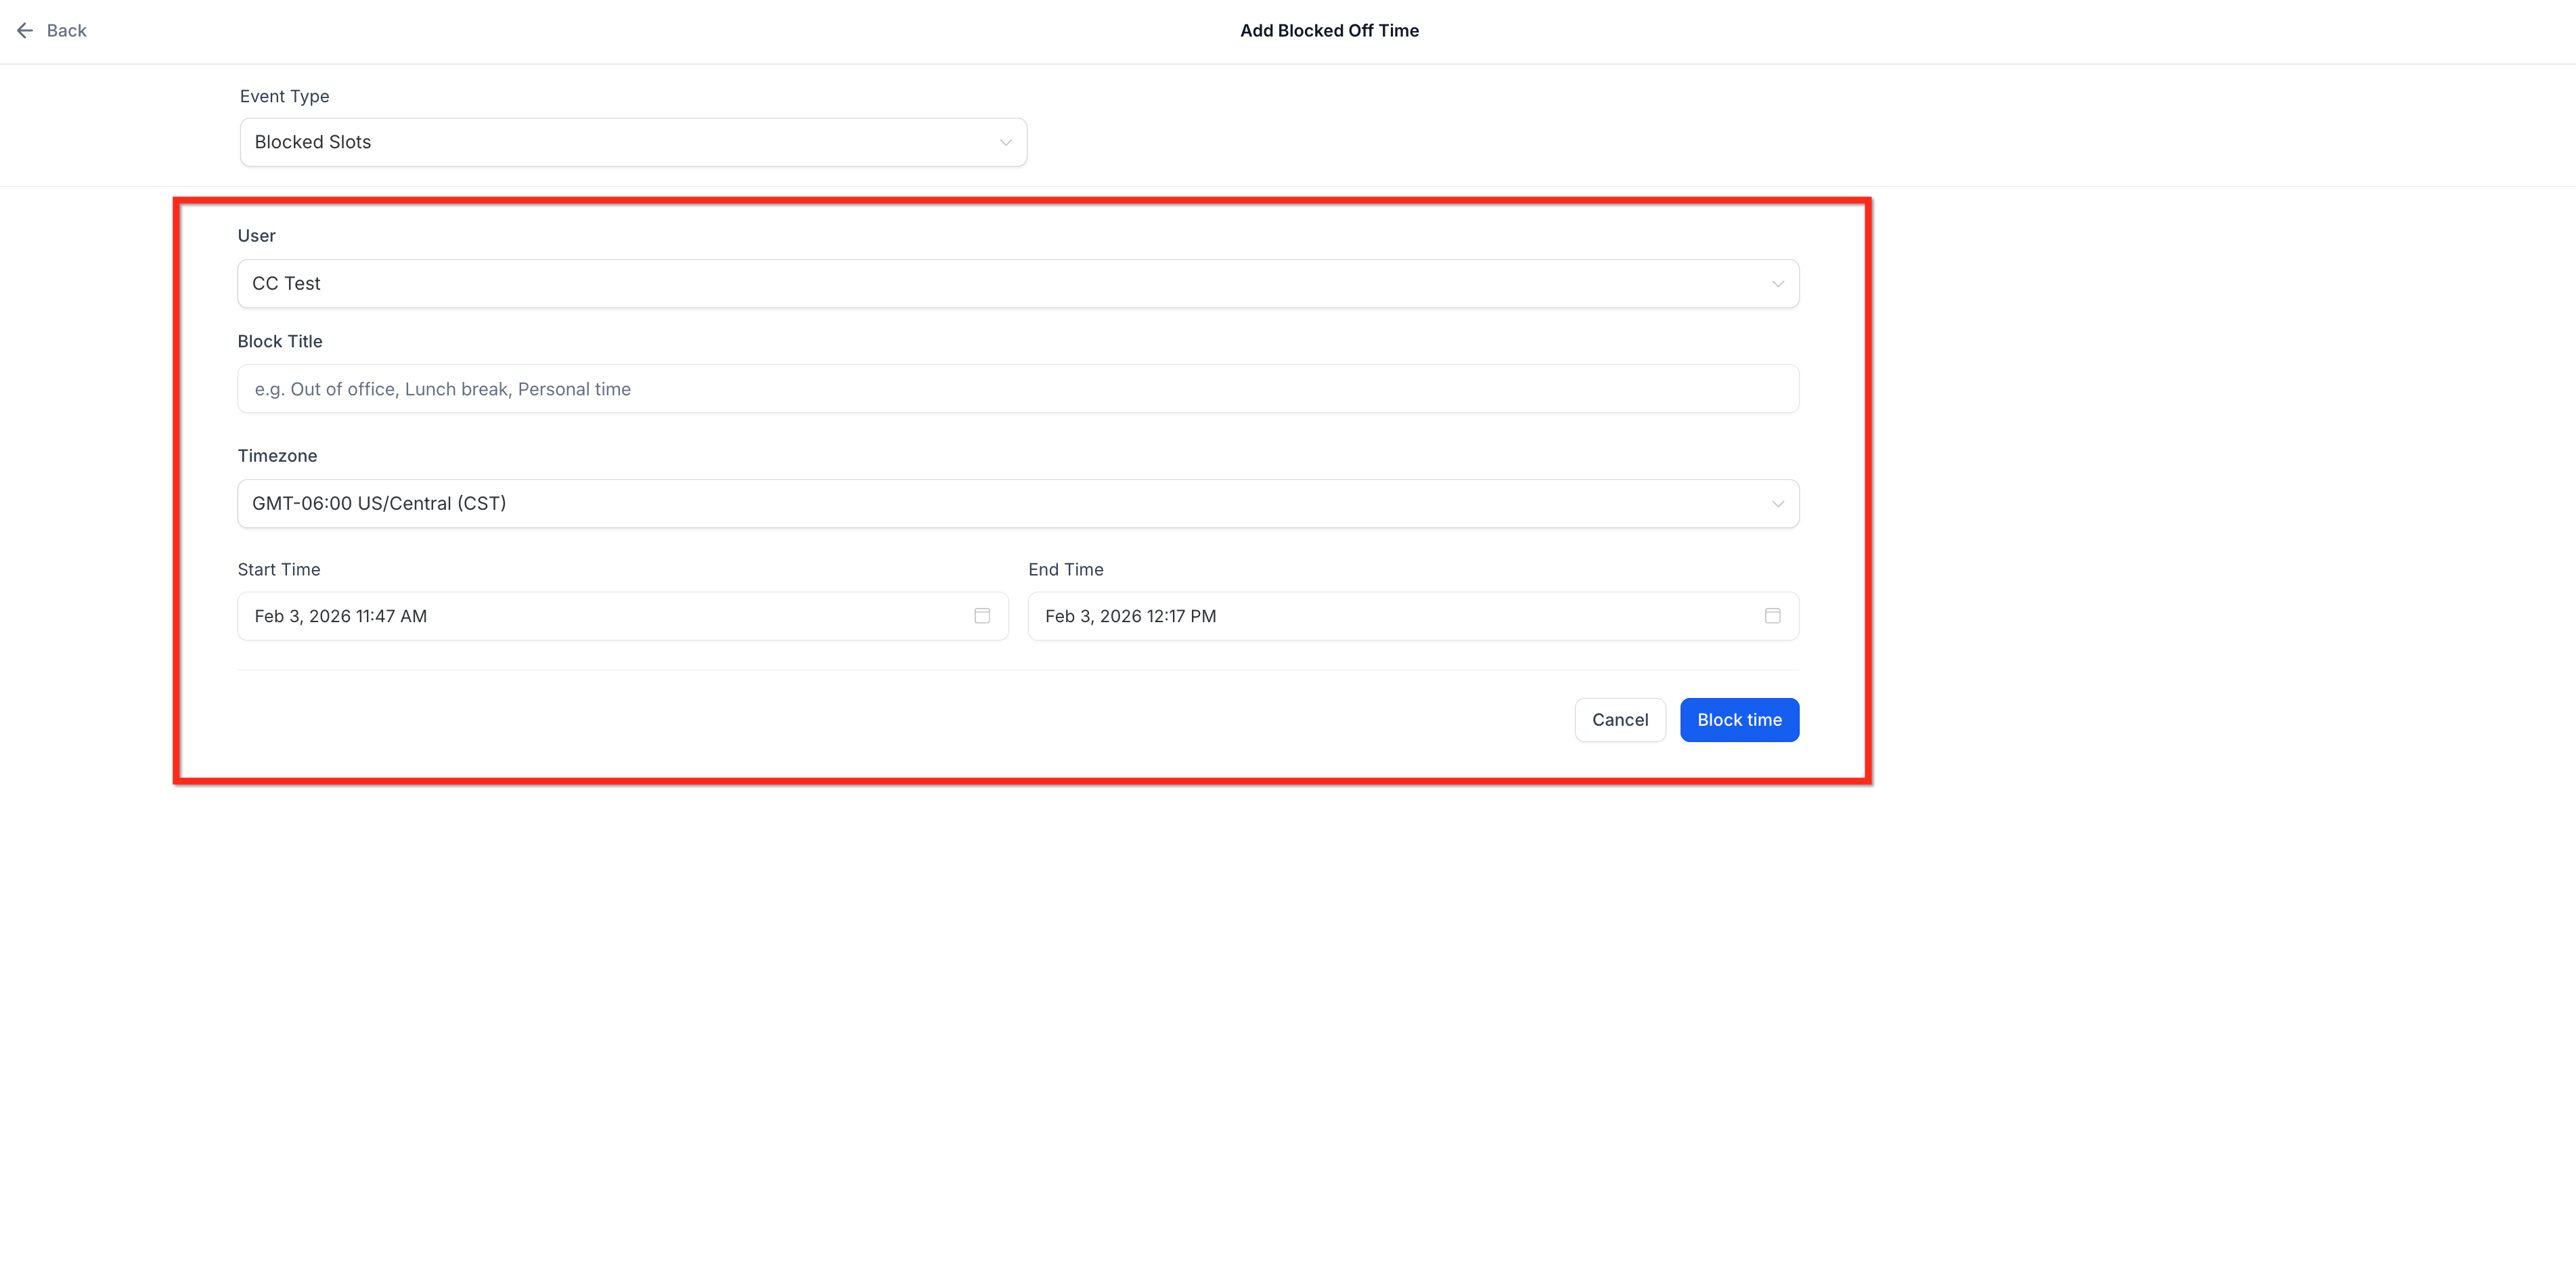
Select the date/time, add a title, choose the staff member, then click Block Time.
The appointment modal displays the resource (such as a treatment room or piece of equipment) that was reserved for that visit. This makes it easy to confirm what's booked at a glance and helps avoid double-booking a room or device that's already in use.
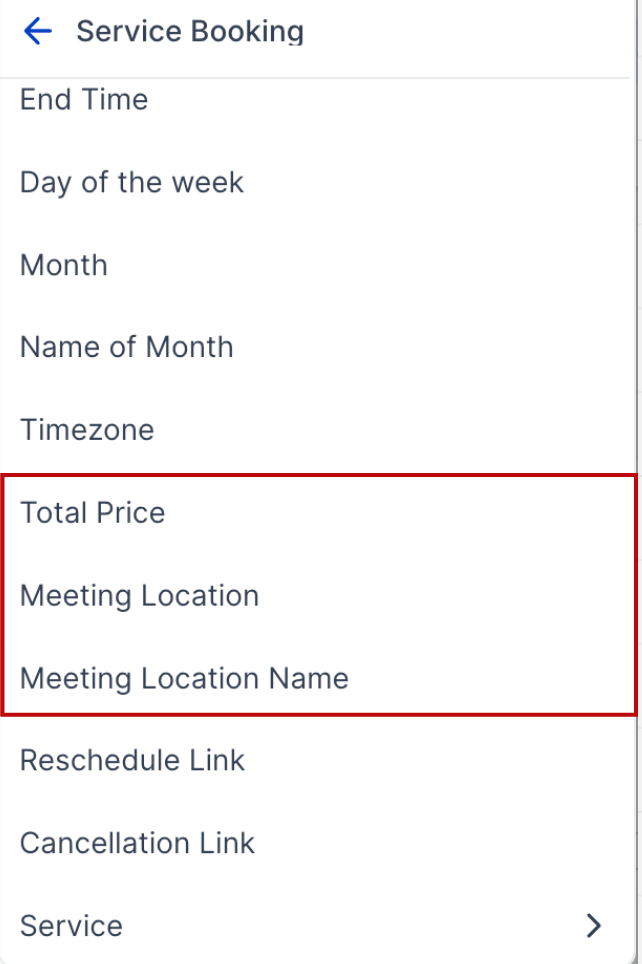
Two custom values are available specifically for calendar notifications:
Service Booking Price
Meeting Location Name (a short label instead of the full address)
Use these to personalize confirmation emails, reminders, and other patient touch points with dynamic booking details.
Go to Calendars → Calendar Settings → Notifications.
Open the template you want to edit (confirmation, reminder, etc.).
Insert Service Booking Price or Meeting Location Name from the merge field picker.
Save and send a test notification to confirm it looks right.
Some services aren't one-on-one. Group consultations, classes, and treatments booked for more than one person need a way to capture everyone attending and, in many cases, bill for the whole group. The Add Guests settings handle both.
Collect accurate payment based on the total number of attendees.
Ensure required guest details are captured at the time of booking.
Show a complete guest list on the appointment record.
Optionally collect guest email addresses for confirmations and reminders.
Choose whether to collect a guest's email, phone number, or both, depending on how the calendar is configured.
Collect only the guest count when you don't need an individual contact record for every attendee.
Track attendance and group size more effectively.
Reduce payment confusion and the support questions that come with it.
Go to Settings → Calendars in your Aesthetix CRM account.
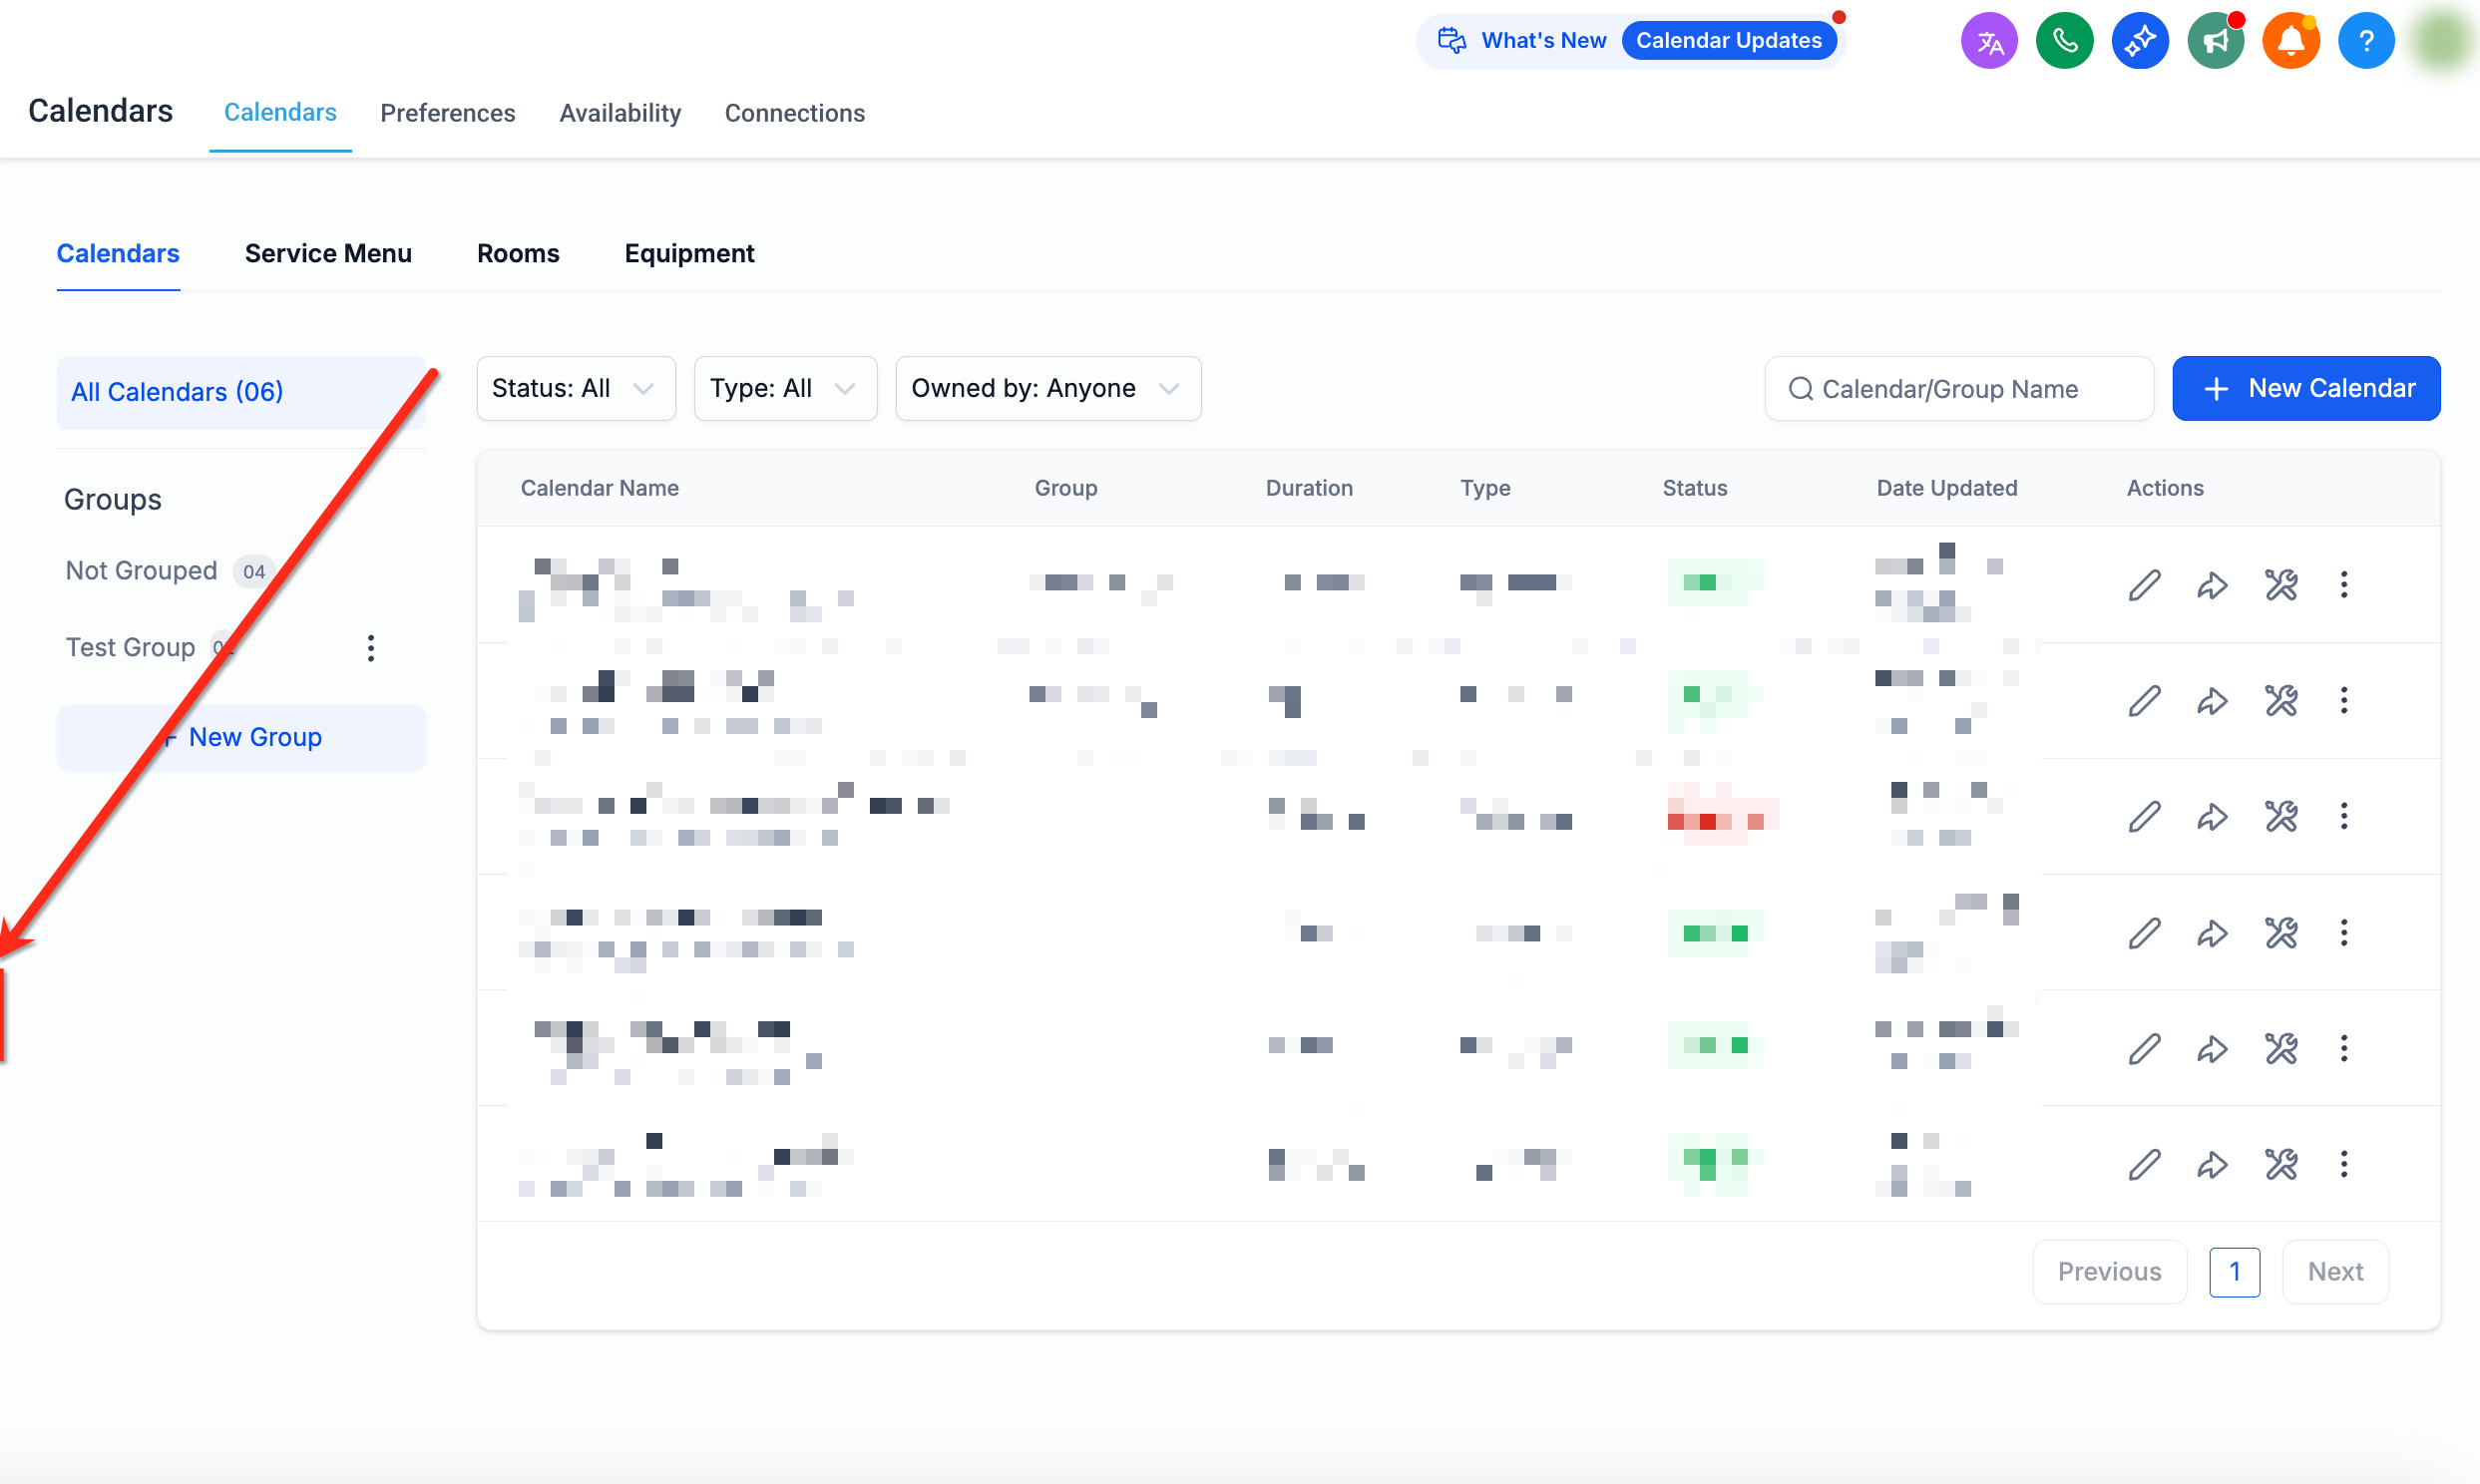
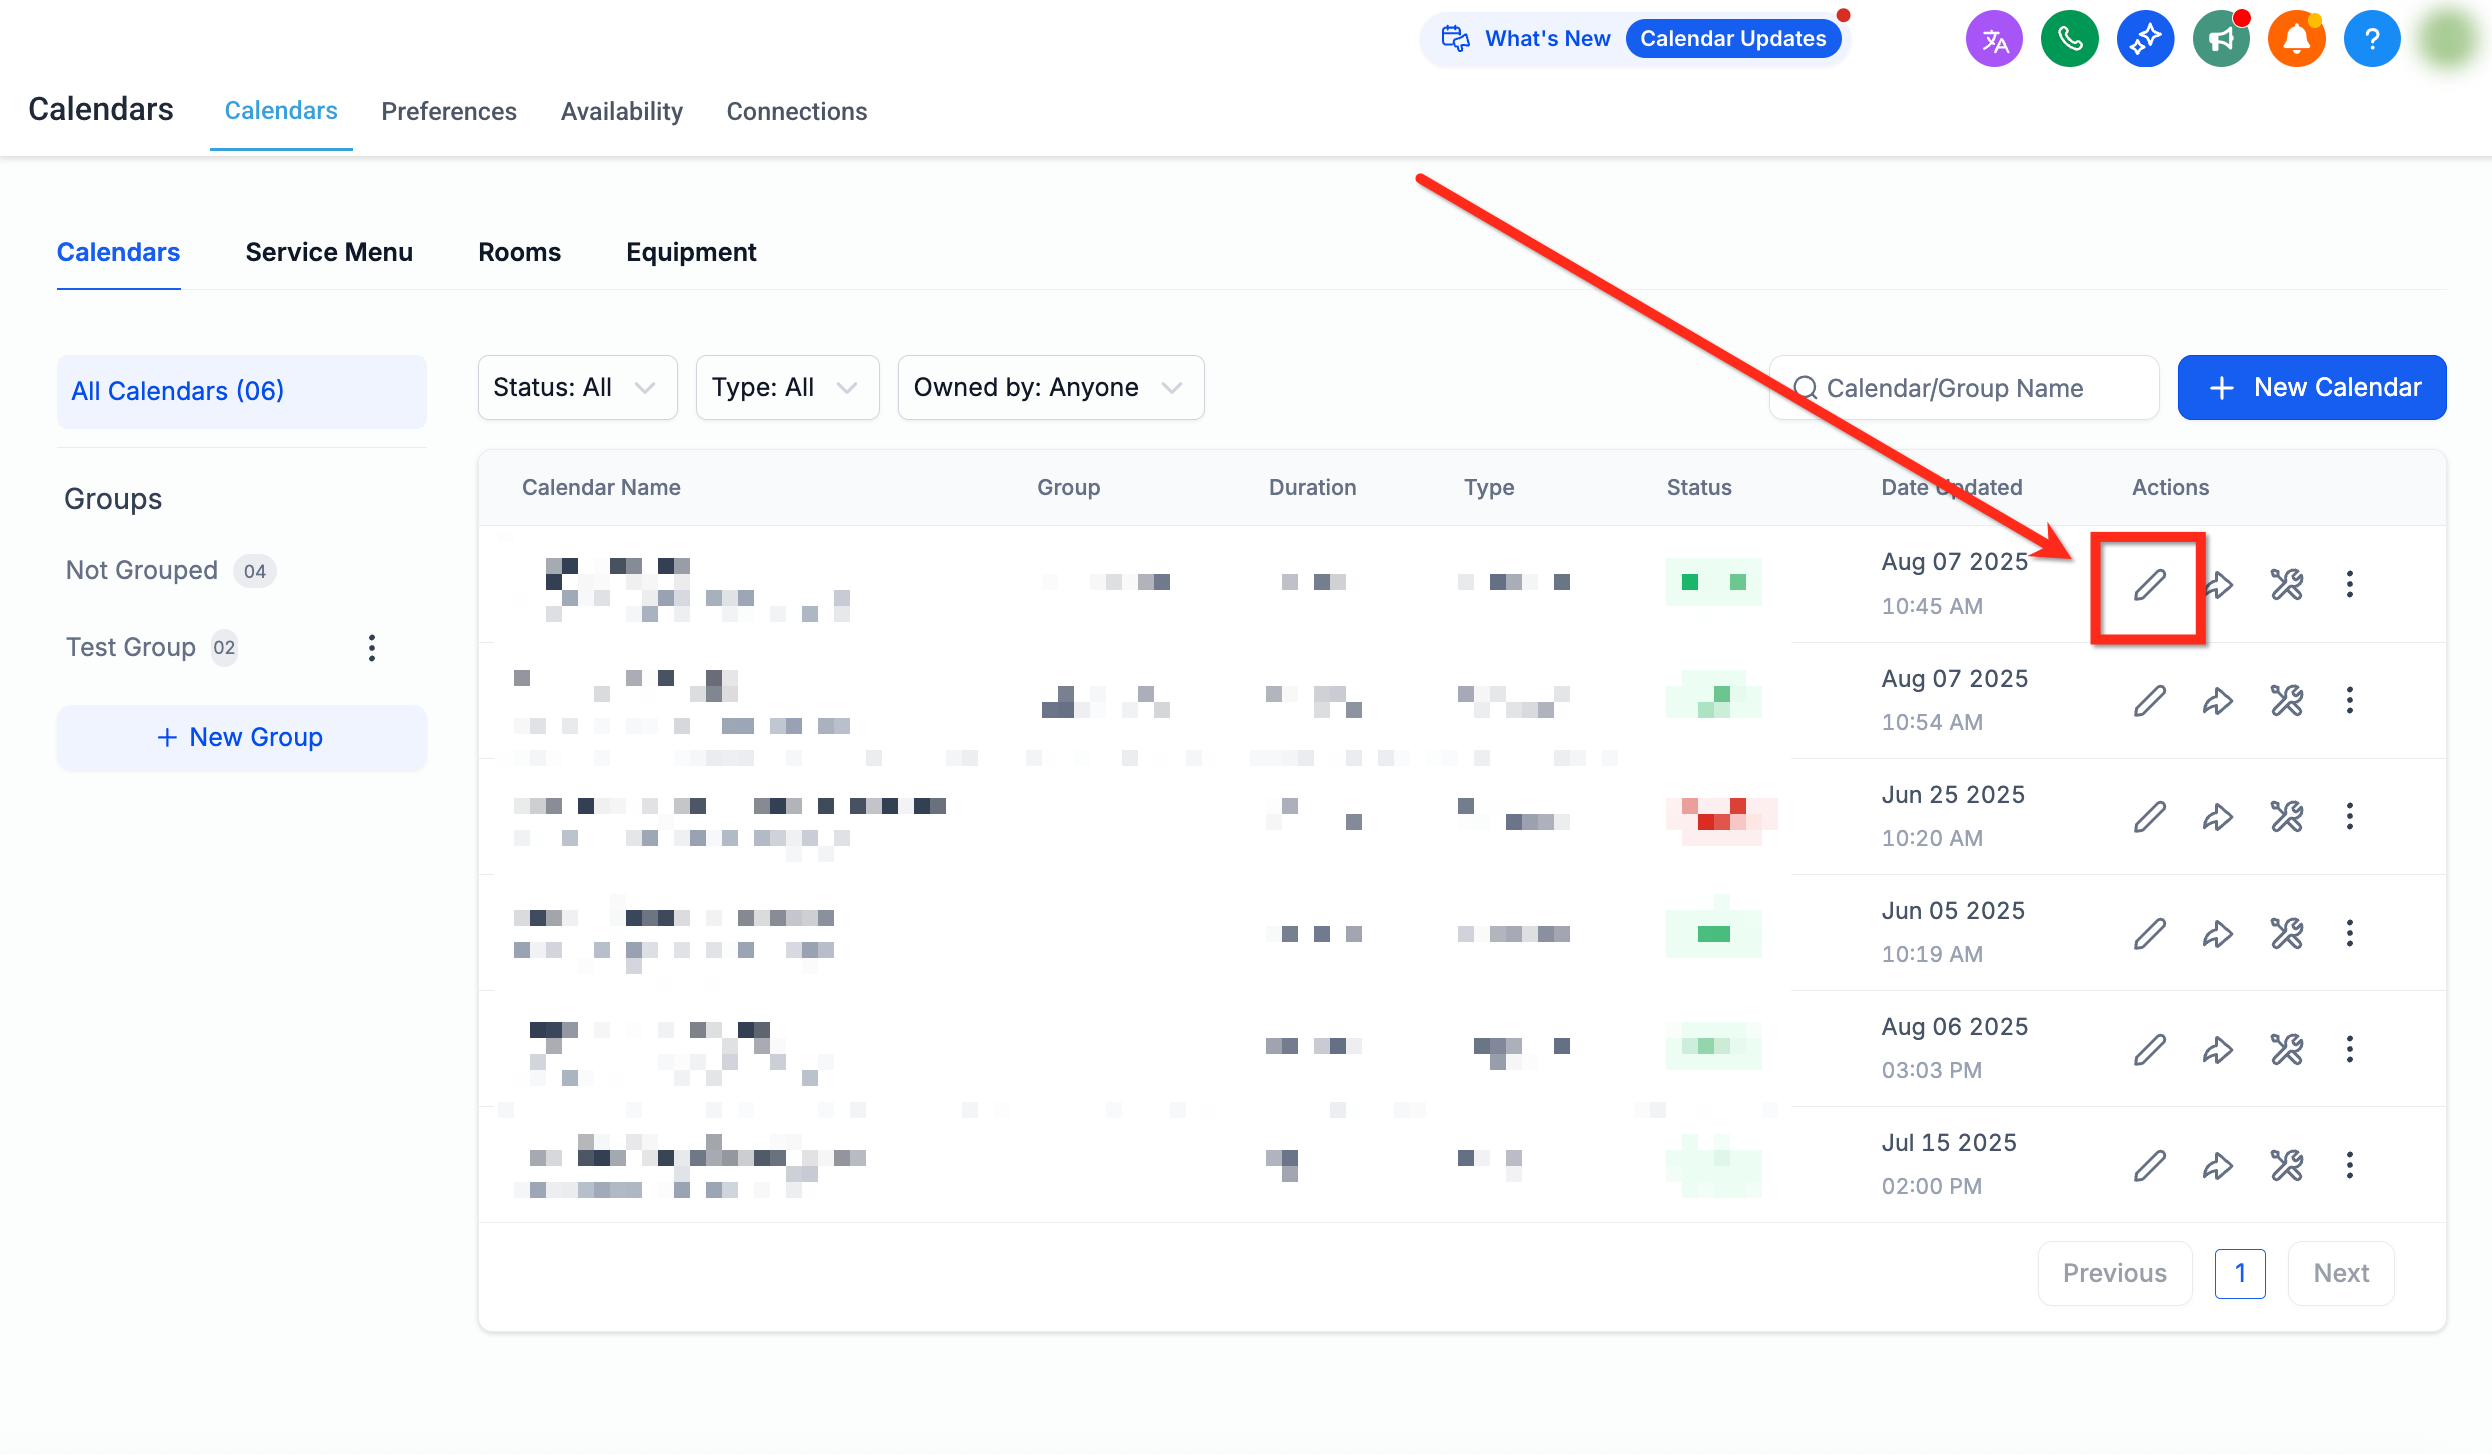
Click Edit next to the calendar you want to modify.
Open the Forms & Payment tab.
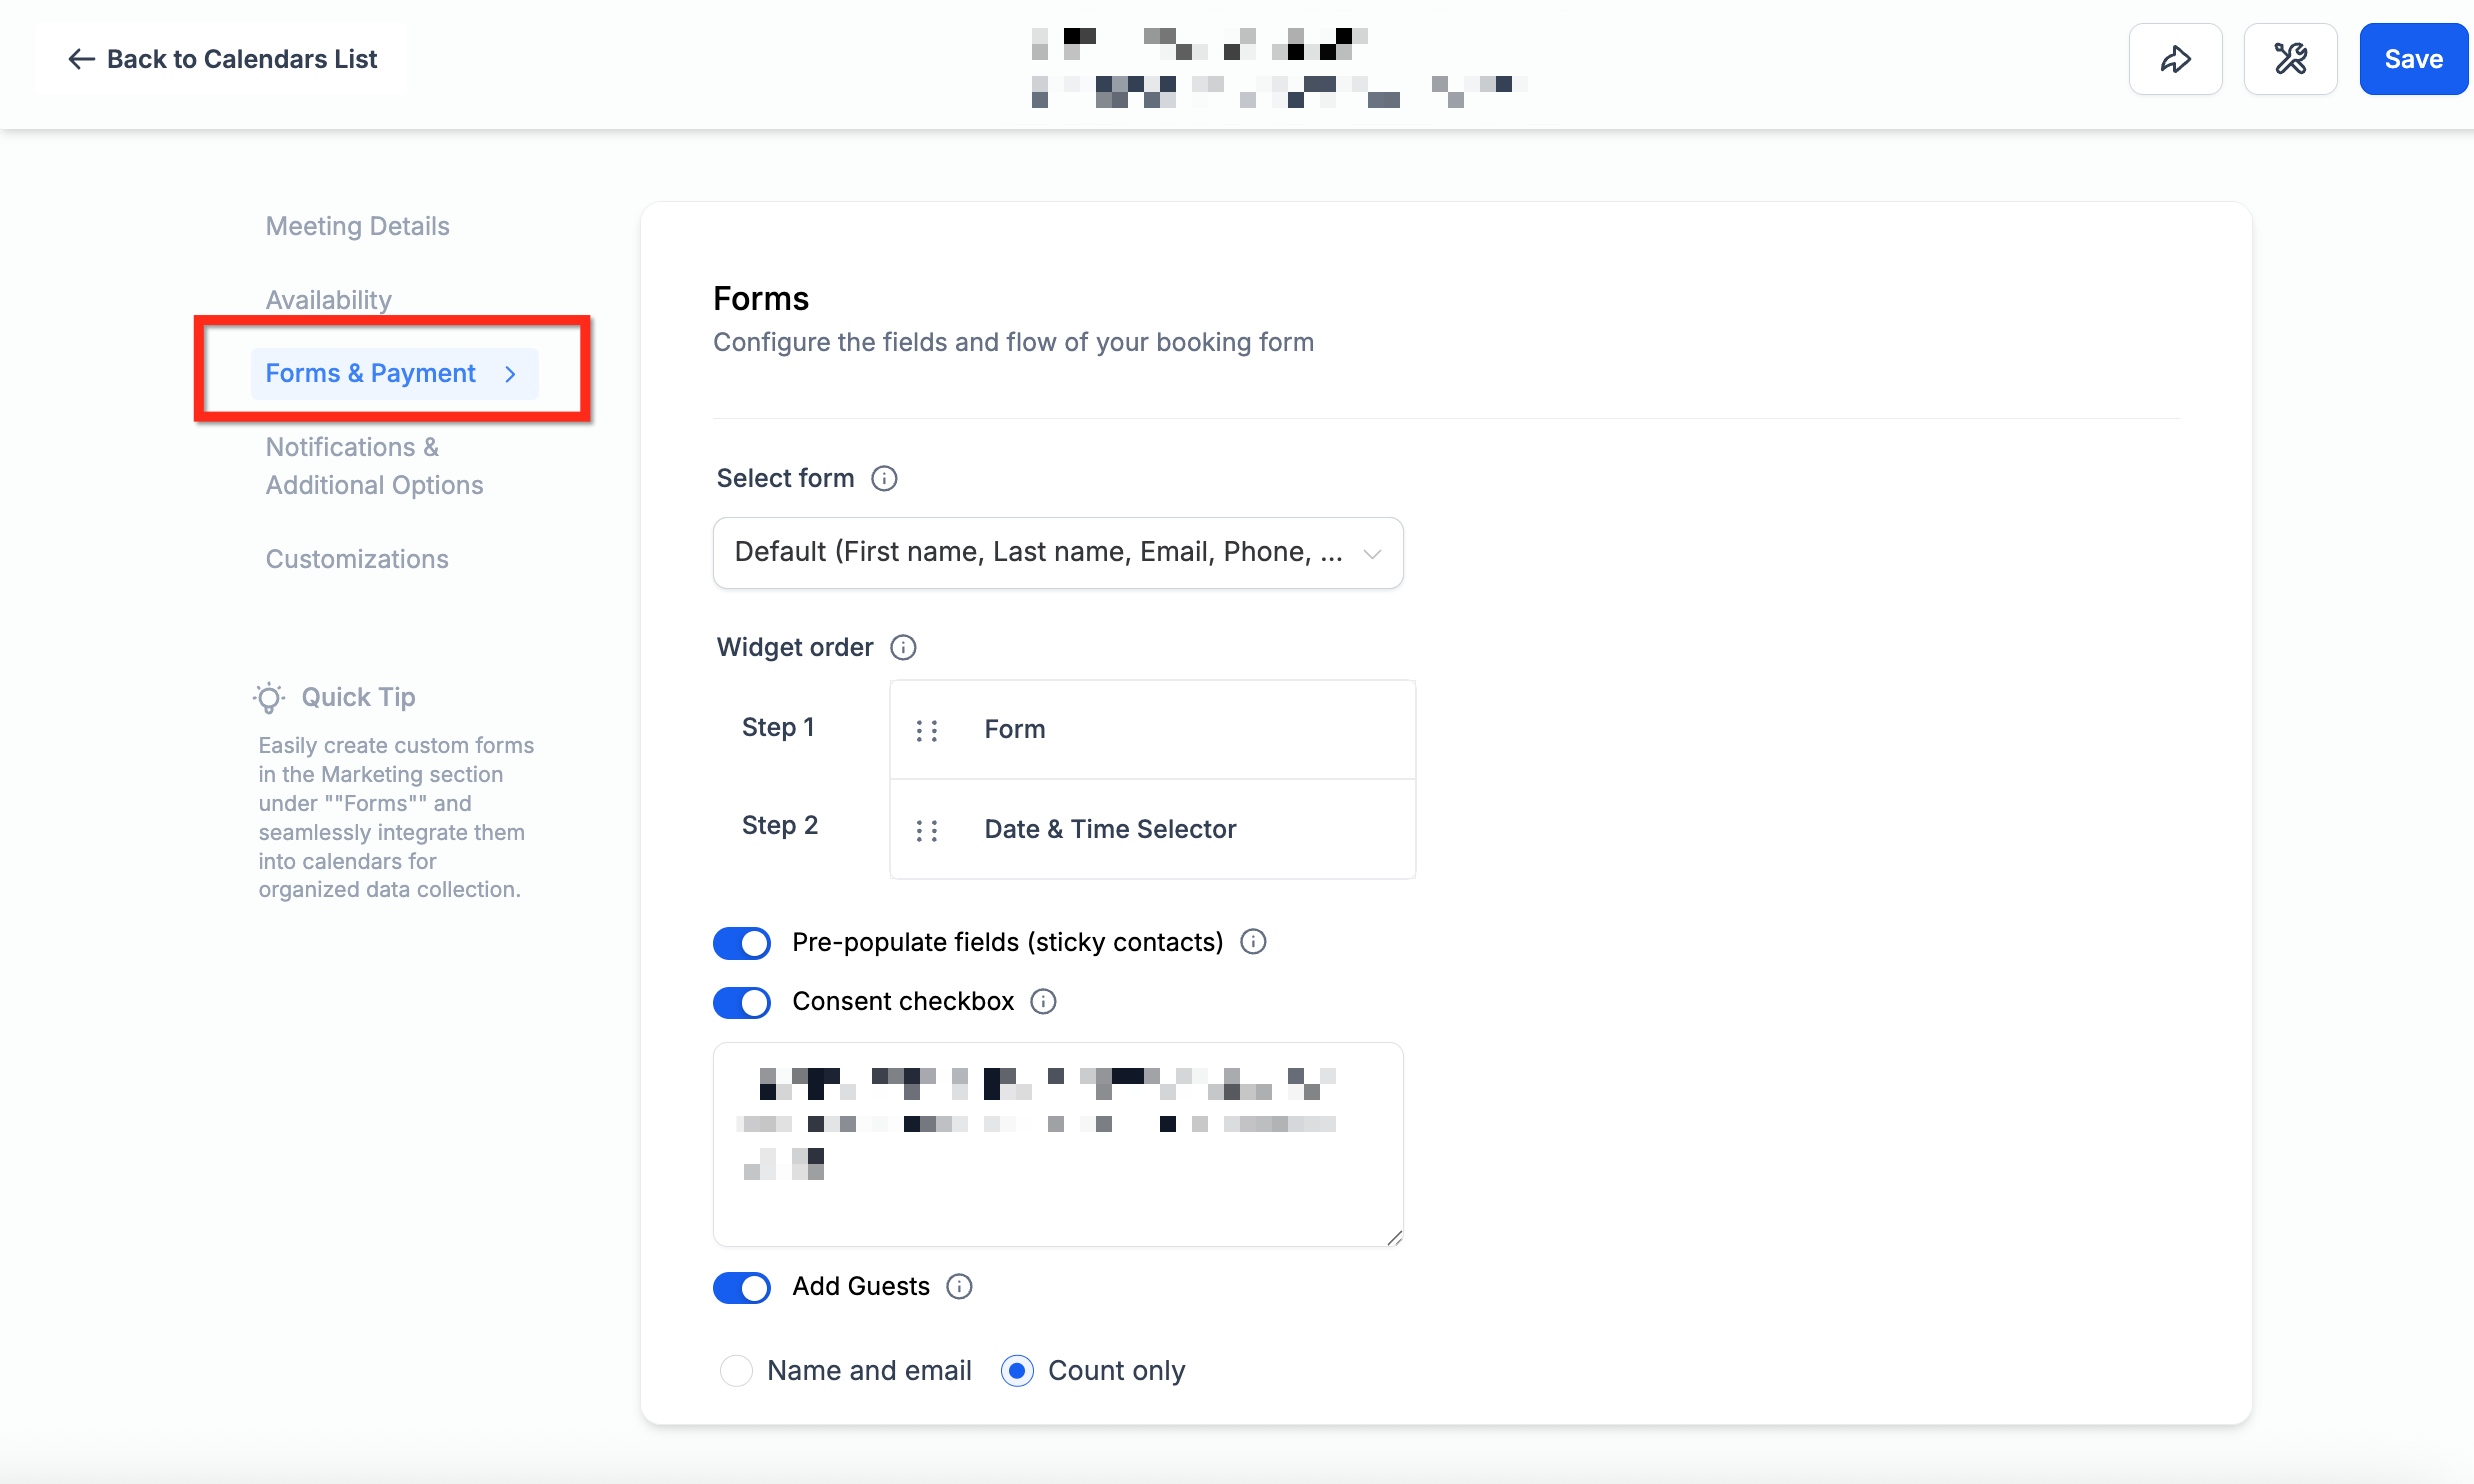
Scroll to the Add Guests section and toggle on Require Guests for Booking if guest information should be mandatory before a booking can be submitted.
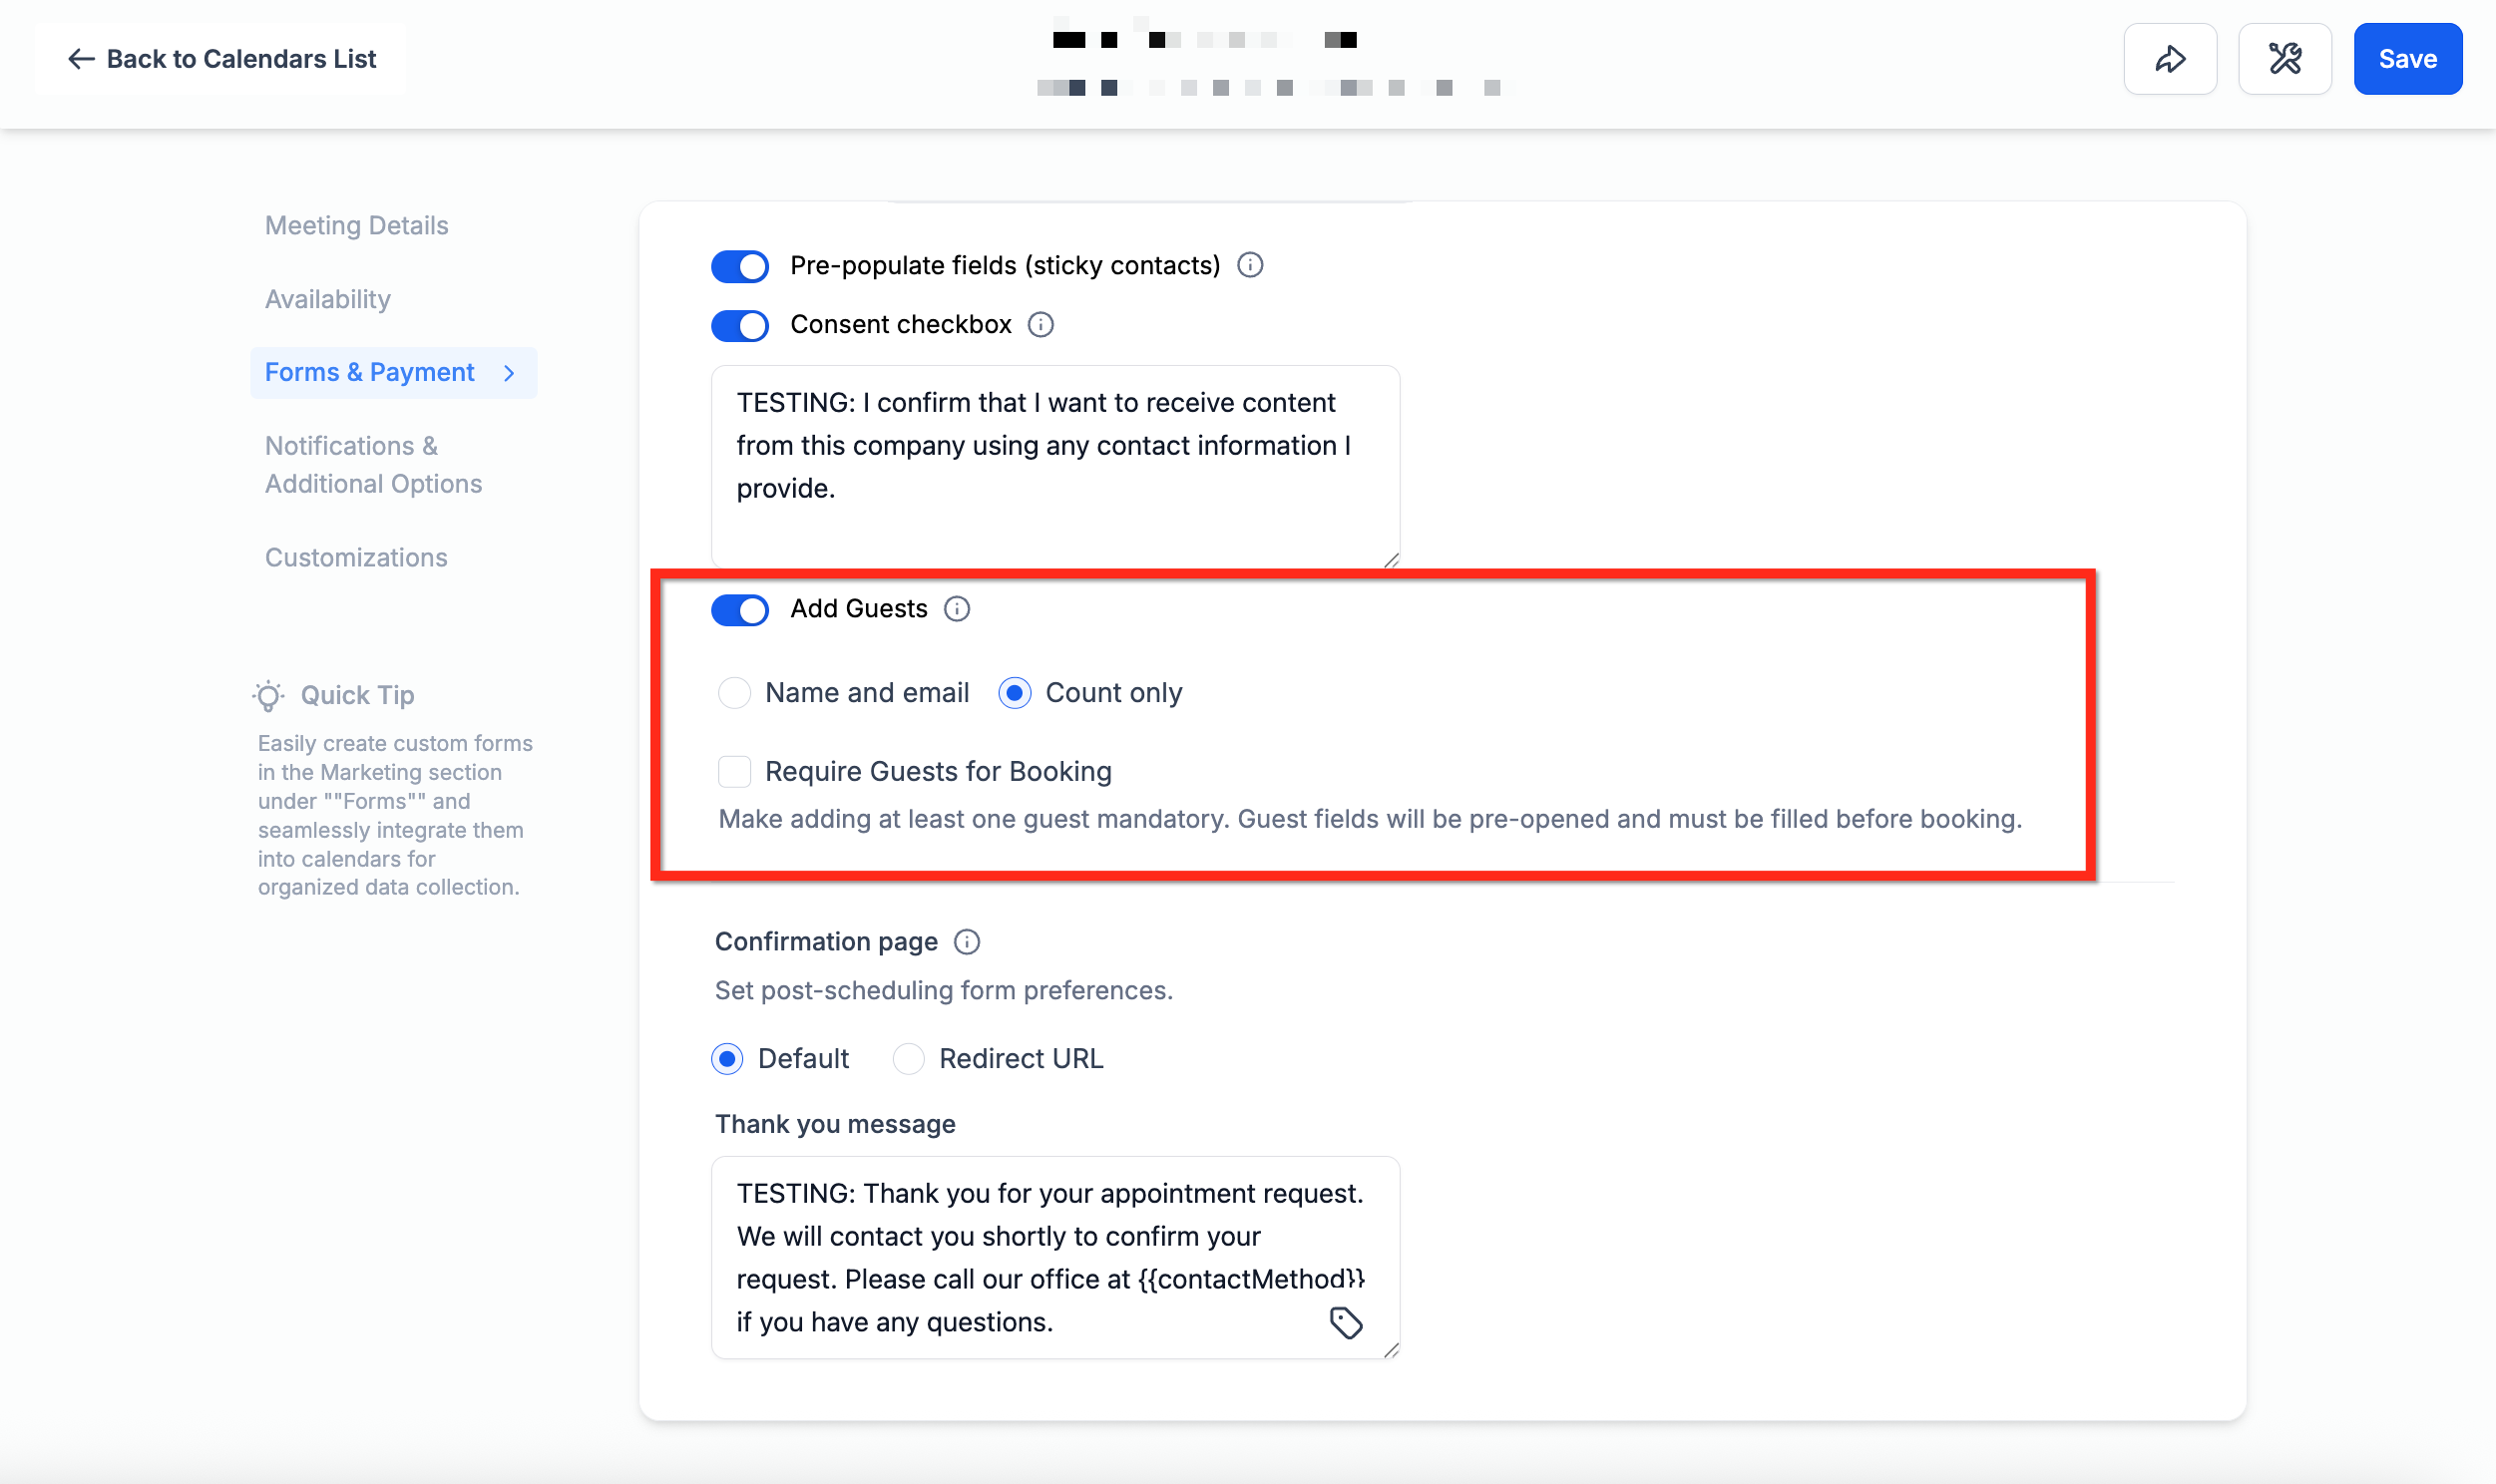
Then choose which information to collect for each guest:
Name & Email: collects the guest's name and email address.
Name & Phone: collects the guest's name and phone number.
Name, Email & Phone: collects all three guest details.
Guest Count Only: collects just the number of guests, without creating an individual contact record for each one.
Calendars that were already collecting guest details keep using Name & Email until you change it. New calendars default to Name, Email & Phone.
Scroll to the Payments section and enable Accept Payments for all attendees if you want the total charged to be based on the number of participants.
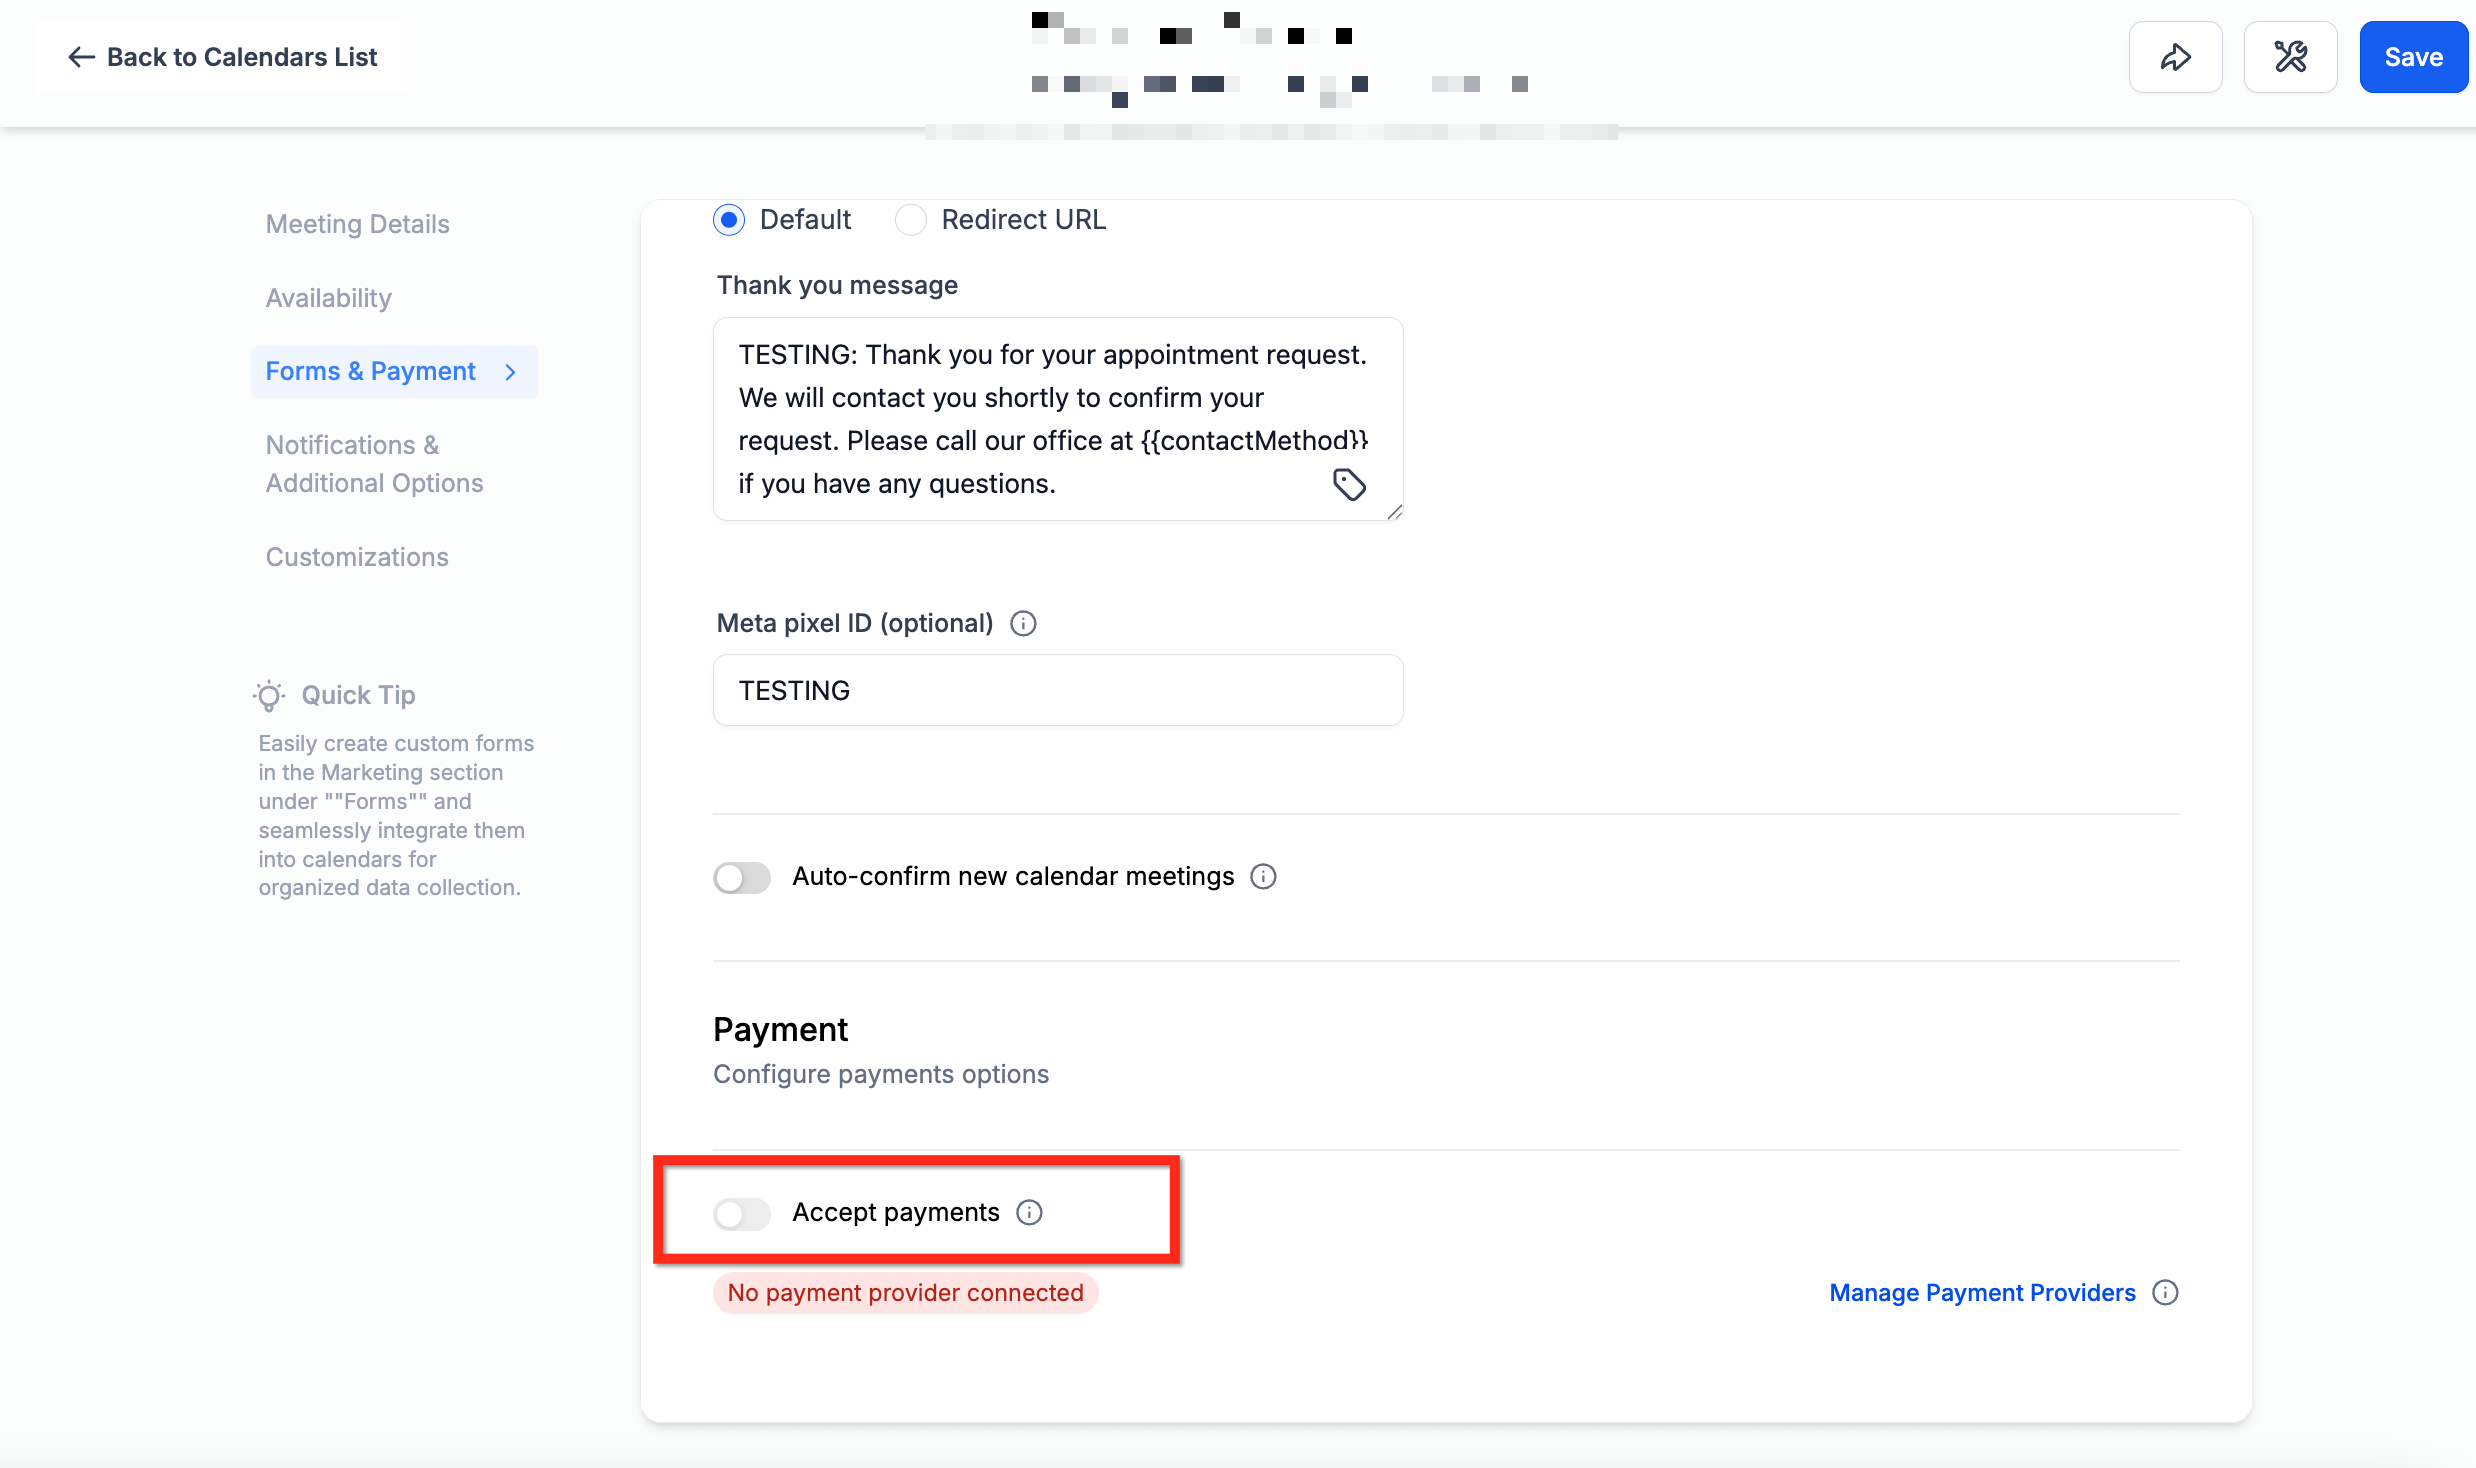
You can enable either setting on its own. Requiring guest information does not require you to also turn on per-attendee payment, and vice versa.
When a calendar collects individual guest details (any option other than Guest Count Only), Aesthetix CRM automatically creates a new contact for each guest, or matches them to an existing one, using the email address and/or phone number provided at booking. If the calendar is set to Guest Count Only, the system records the number of guests but does not create an individual contact record for each one.
When a new guest contact is created during a booking, it inherits the primary booker's timezone. If the guest already exists as a contact in your CRM, their existing timezone is left unchanged.
When this is enabled, the patient cannot complete the booking without adding at least one guest. Guest details, typically name and optionally email, must be provided before the appointment can be submitted. This is useful for group consultations, classes, or any session where your practice needs a complete attendee list going in.
With this enabled, the amount charged at booking is calculated automatically based on the total number of attendees, including the primary booker and any guests they've added. Instead of a flat fee per booking, the system multiplies the per-person service price by the number of attendees:
Total price = Service Price × (1 booker + number of guests)
The booker is charged the full total at the time of booking through your connected payment processor. This works well for:
Group consultations or treatments
Workshops or educational sessions
Any service priced on a per-person basis
Guests will only receive their own confirmation emails if their email addresses were collected and guest-specific notifications are set up through a workflow.
If a guest cancels but the booker still attends, refunds or price adjustments need to be handled manually since the original charge was calculated from the guest count at the time of submission.
Tip: For per-attendee and other calendar payments, connect AX Pay, Aesthetix CRM's own payment provider, which offers better processing rates than Stripe. See the AX Pay help article for setup steps.
Can I change the staff or service after payment has been collected? No. Structural edits (services, add-ons, staff/variant, coupon, title, location) are locked on paid bookings. You can reschedule the date/time, or use Duplicate Appointment to rebook with the changes you need.
What carries over when I duplicate an appointment? Contact, services, add-ons, staff/resource, meeting location, and notes typically carry over to the copy. Adjust anything necessary before confirming the new booking.
Does rescheduling a paid appointment affect the existing payment? No. The payment stays associated with the original booking; moving the date/time doesn't change it.
Do I have to enable both Require Guests and per-attendee payment together? No. Each setting works independently. You can require guest information without charging per attendee, or the reverse.
What guest information can I collect at booking? It depends on how the calendar is configured: Name & Email, Name & Phone, Name, Email & Phone, or Guest Count Only, which skips individual contact details entirely. Existing calendars keep using Name & Email until you change the setting; new calendars default to Name, Email & Phone.
Does adding a guest create a new contact in my CRM? Yes, as long as the calendar collects individual guest details. Aesthetix CRM creates a new contact or matches an existing one using the guest's email and/or phone number. If the calendar is set to Guest Count Only, no individual guest contacts are created, only the total count is recorded.
Can guests provide their own email address? Yes. If your form is configured to collect it, each guest can provide a name and email address for confirmations and reminders.
What happens if a guest cancels but the primary booker still comes in? That has to be handled manually. The original charge was based on the attendee count entered at booking, so refunding or adjusting for a canceled guest isn't automatic.
Where do I set up who gets notified and what a notification says? Notification templates live under Calendars → Calendar Settings → Notifications, where you can also insert the Service Booking Price and Meeting Location Name custom values.
Can AI book service appointments with guests automatically? AI-driven appointment booking only works with native Aesthetix CRM calendars, not the EMR calendar. If you're using an AI Employee to handle bookings, confirm your Service Calendar is the one connected to it.
Is there a limit to how many guests a booker can add? The booking form supports multiple guest entries, and the number allowed can be configured based on the service or appointment type.
Where do I manage the payment processor used for these charges? Payment providers and checkout setup live in the Payments section of your account, where you can also connect AX Pay.
