Aesthetix CRM lets you decide exactly which staff members can see and manage your calendars, and it lets you customize the emails, SMS, WhatsApp messages, and in-app alerts that go out when an appointment is booked, confirmed, rescheduled, canceled, or approaching. Permissions are set per staff member under Settings > My Staff, and notifications are configured per calendar under Calendars > Calendar Settings > [your calendar] > Notifications.
Calendar permissions are granular, so you can give each staff member access only to the parts of the scheduling system that match their role. A front desk coordinator, an injector, and a practice manager rarely need the same level of access, and you can set that up precisely.
There are two categories of permission:
View permissions let a user see specific elements of the Calendar module (calendars, appointments, or groups) without being able to change anything.
Manage permissions let a user create, edit, and delete those same elements.
You grant these separately, so a staff member can, for example, see every calendar on the schedule but only manage the appointments on their own calendar.
In addition to View and Manage permissions, each user has an Assigned Data toggle:
When Assigned Data is enabled, the user can see appointments and calendars they're assigned to, plus appointments for any contacts they follow (as long as they have the required View permissions).
When Assigned Data is disabled, the user's access follows their granted permissions only, regardless of what they're personally assigned to.
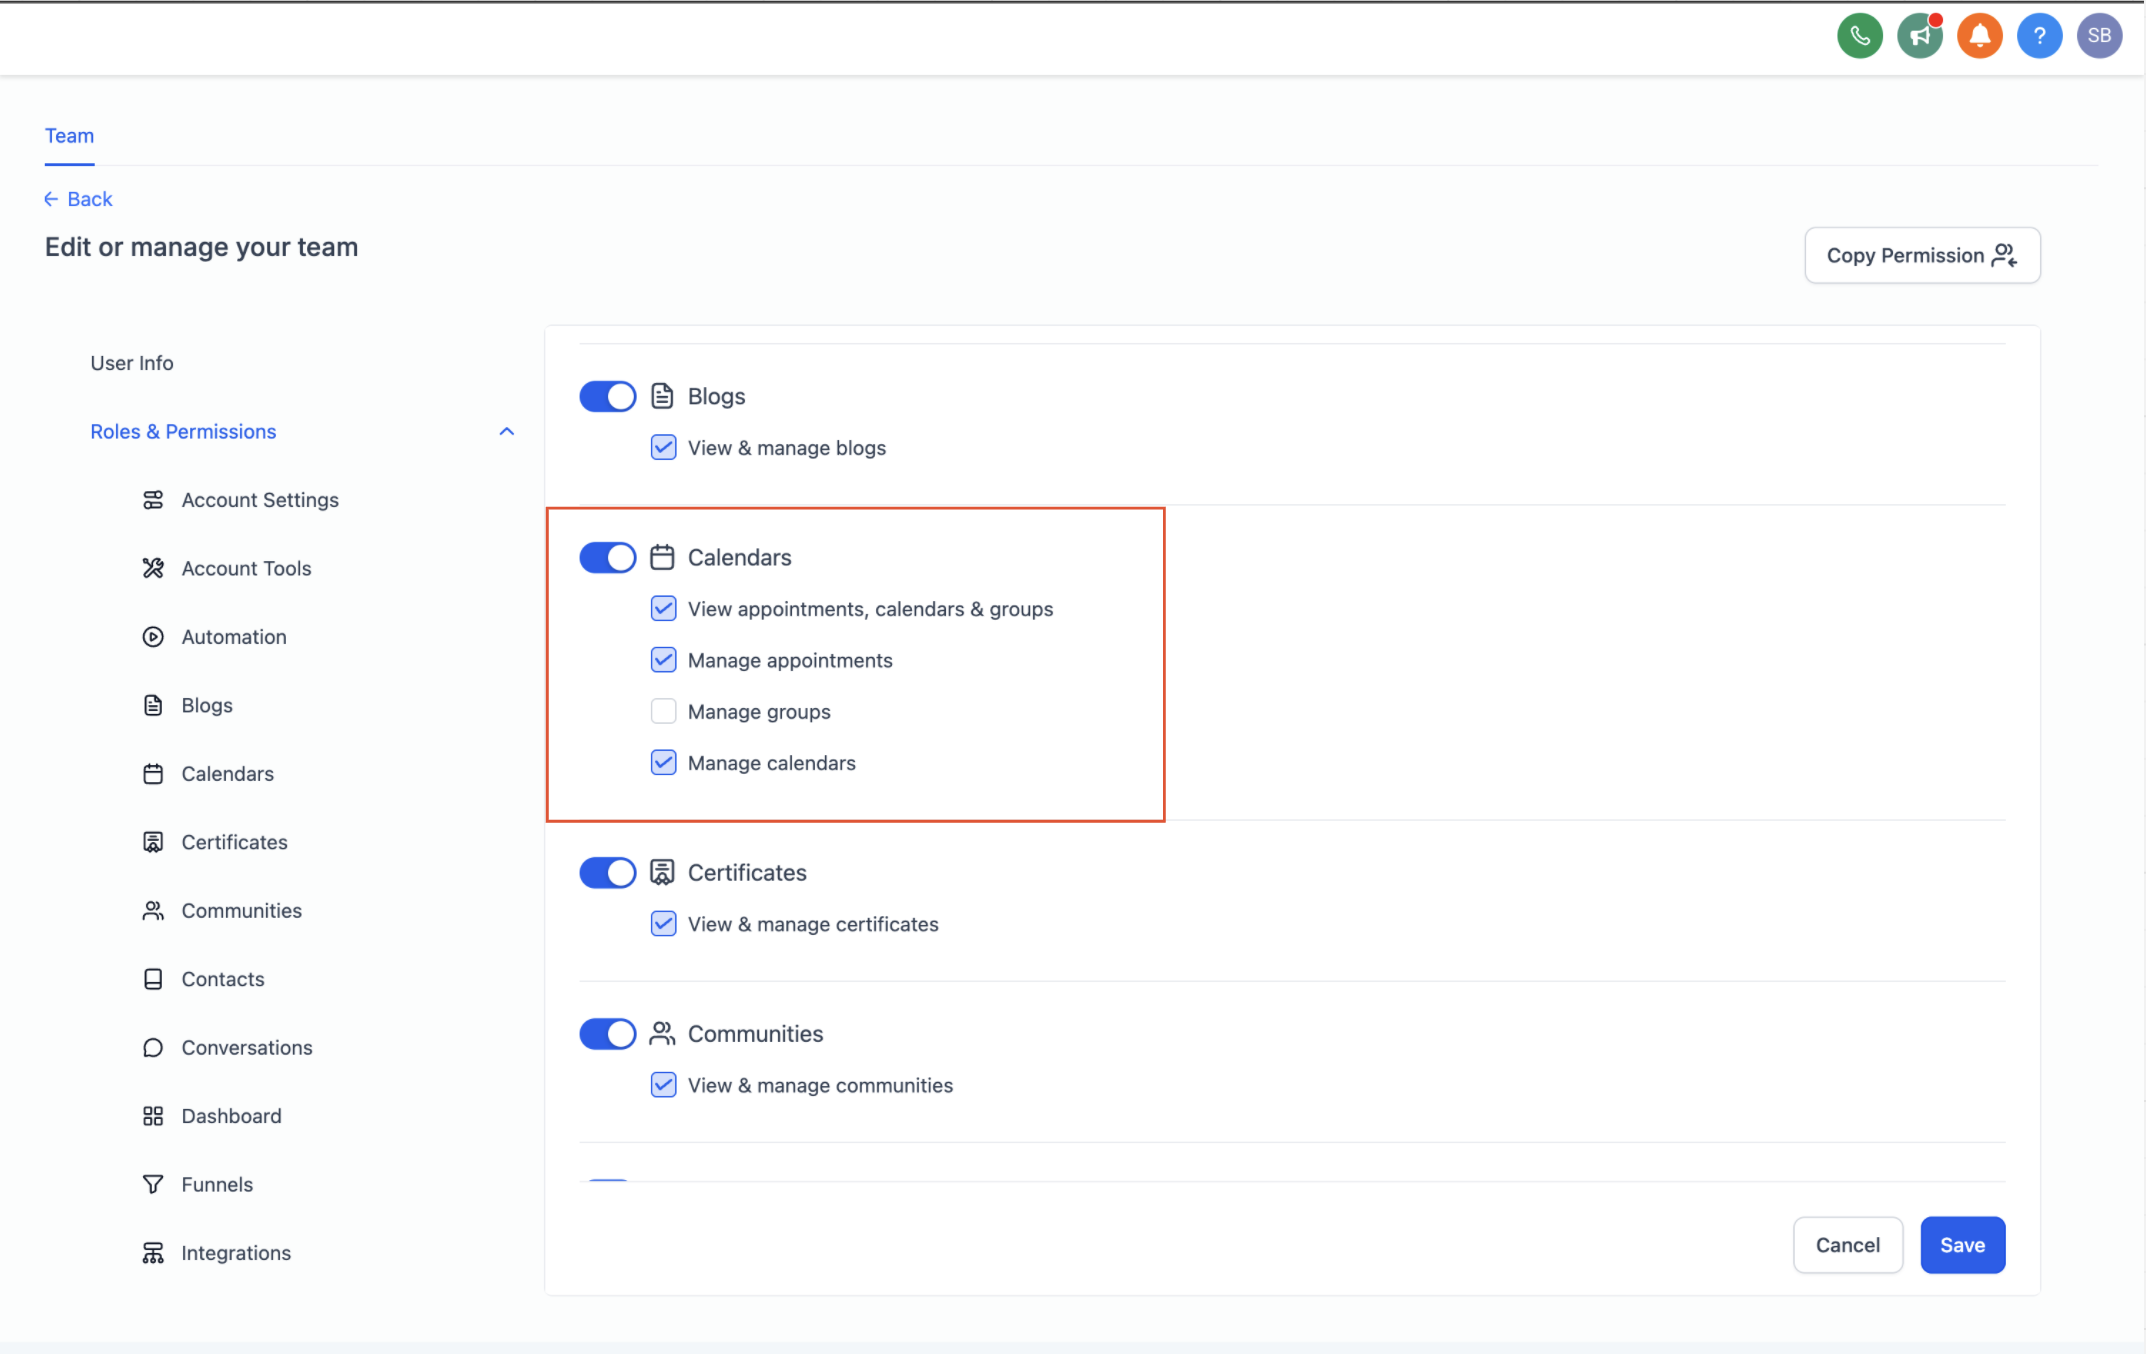
You can set View and Manage permissions independently at three levels:
Level | What it controls |
|---|---|
Calendars | Whether the user can see or edit calendar configuration (hours, staff assignments, booking rules) |
Appointments | Whether the user can see or edit individual appointments on the calendar |
Groups | Whether the user can see or edit calendar groups |
Enabling any View permission is what grants a user access to the Calendar module in the first place. From there, Manage permissions determine what they're allowed to change.
User setup | Result |
|---|---|
View access for Calendars, no Manage permissions | Can see all calendars but cannot create, edit, or delete them |
Manage permissions for Appointments only | Can create, edit, and delete appointments but cannot touch calendars or groups |
Assigned Data enabled, View for Appointments | Only sees appointments they're personally assigned to |
Assigned Data enabled, following a contact, View for Appointments/Calendars/Groups | Sees appointments for followed contacts in addition to their own assigned appointments |
Same as above, but with Manage Appointments enabled | Can also edit or delete those appointments based on their calendar access |
Same as above, without Manage Appointments | Can view but cannot edit or delete those appointments |
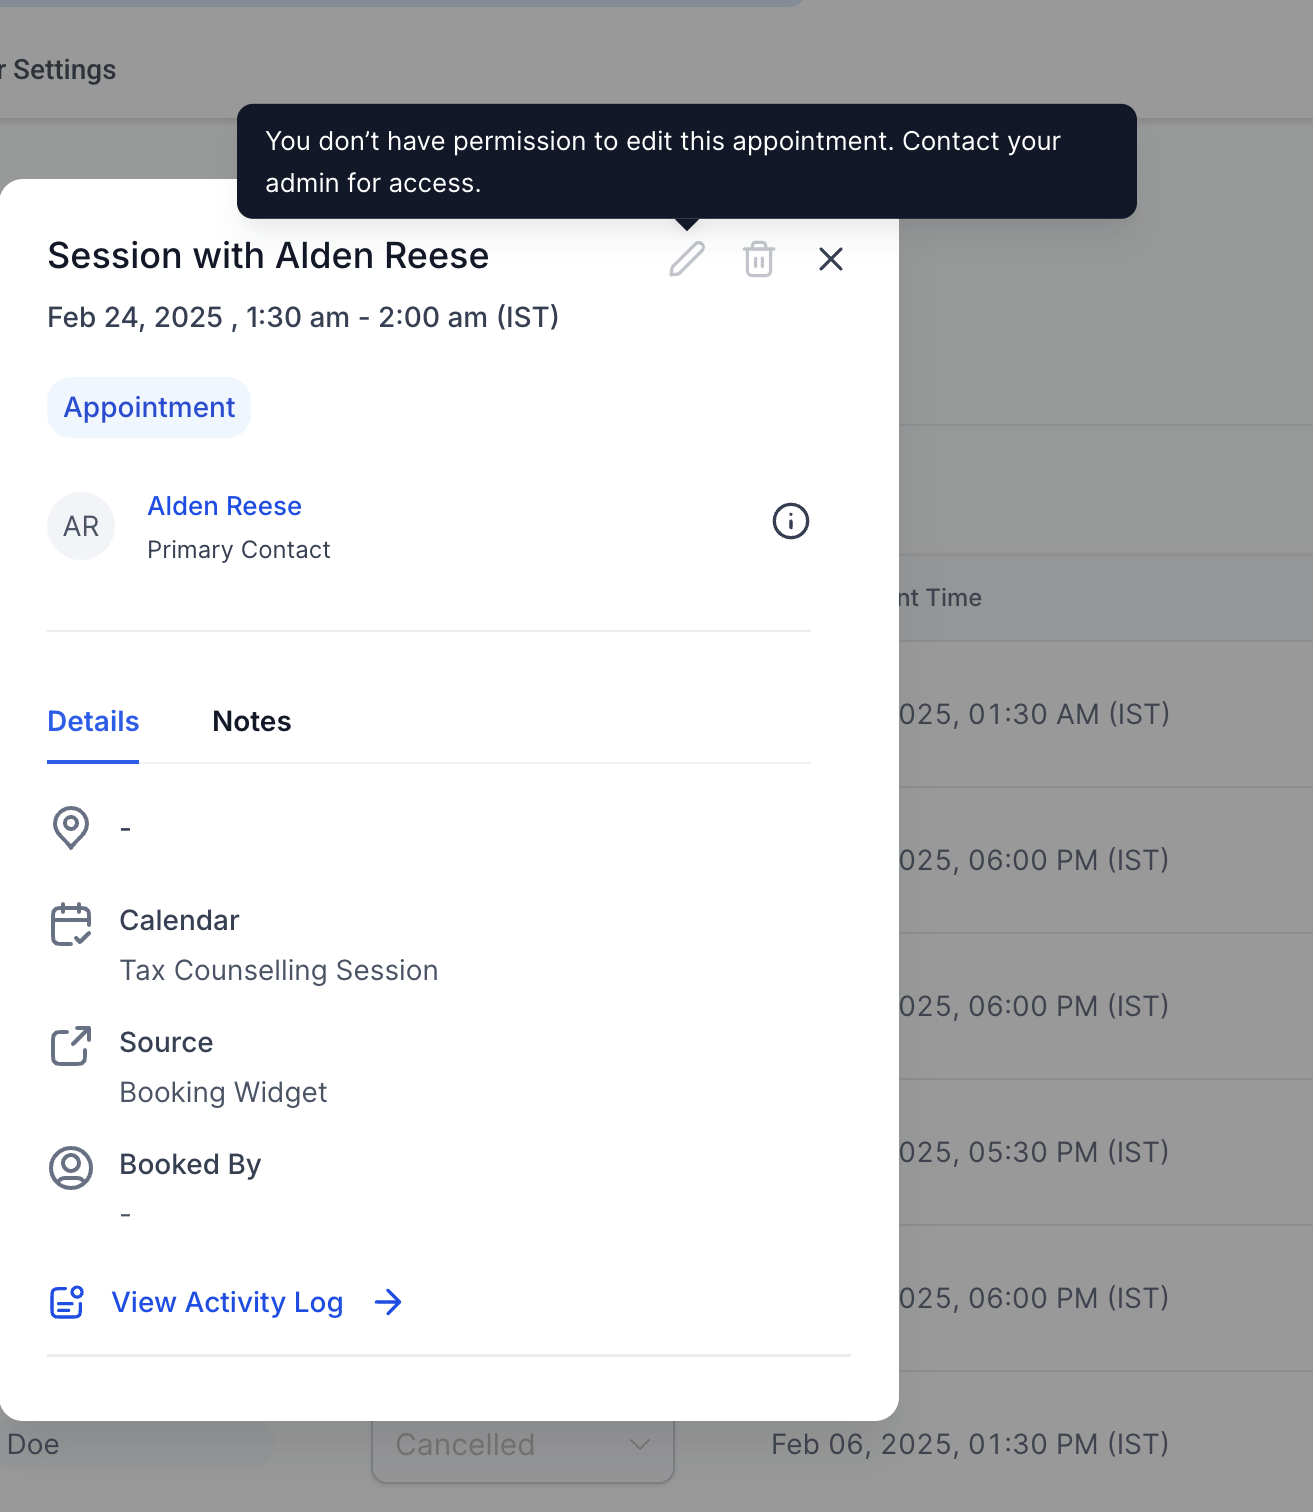
Setting these permissions properly keeps your schedule organized and helps protect patient appointment data: staff only see the calendars and appointments relevant to their job.
Notifications keep patients, guests, and staff informed at every stage of an appointment, and keep your front desk from missing a meeting that was booked without a link or location. You can send notifications by email, in-app alert, SMS, and WhatsApp, and each channel is configured independently.
Each calendar supports six notification triggers. Every trigger can be turned on or off separately for each channel:
Appointment Booked (Unconfirmed Status): sent immediately when an appointment is booked with an unconfirmed status.
Appointment Booked (Confirmed Status): sent immediately when an appointment is booked as confirmed, or when its status changes to confirmed.
Cancellation: sent when an appointment is canceled, marked as a no-show, or marked invalid.
Reschedule: sent when the appointment date or time changes.
Reminder: sent before the appointment, on a timing you configure.
Follow-Up: sent after the appointment, on a timing you configure.
To avoid missed meetings, staff can also enable an internal alert for appointments booked without a meeting link or location. Configure it under Settings > My Staff > [staff member] > Notification Settings > Calendar Notifications > Notify when meeting link/location is missing.
Notifications are managed at the individual calendar level.
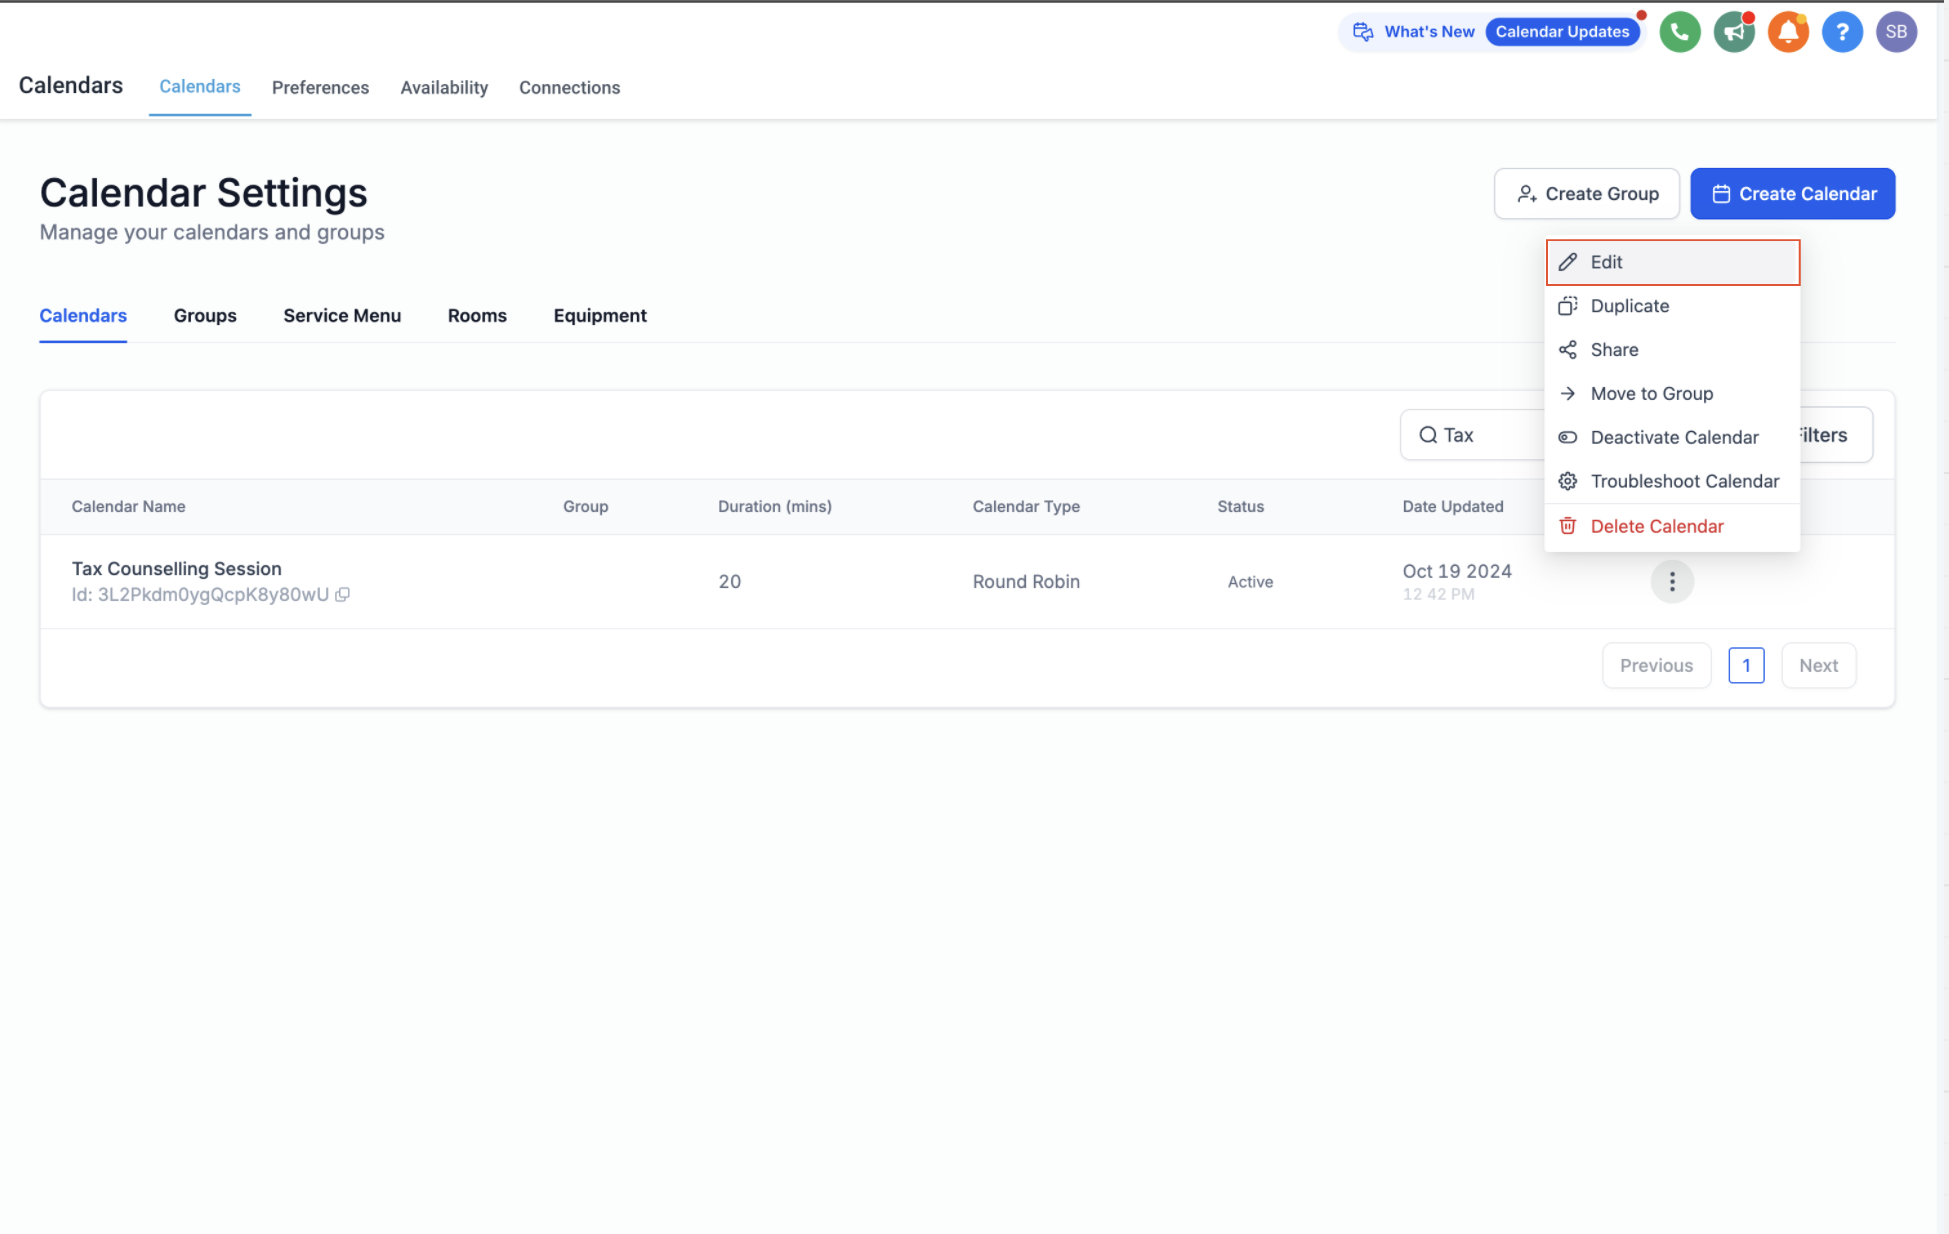
Step 1: Open the Notifications tab
Go to Calendars > Calendar Settings.
Select the calendar you want to configure.
Click the Notifications tab.
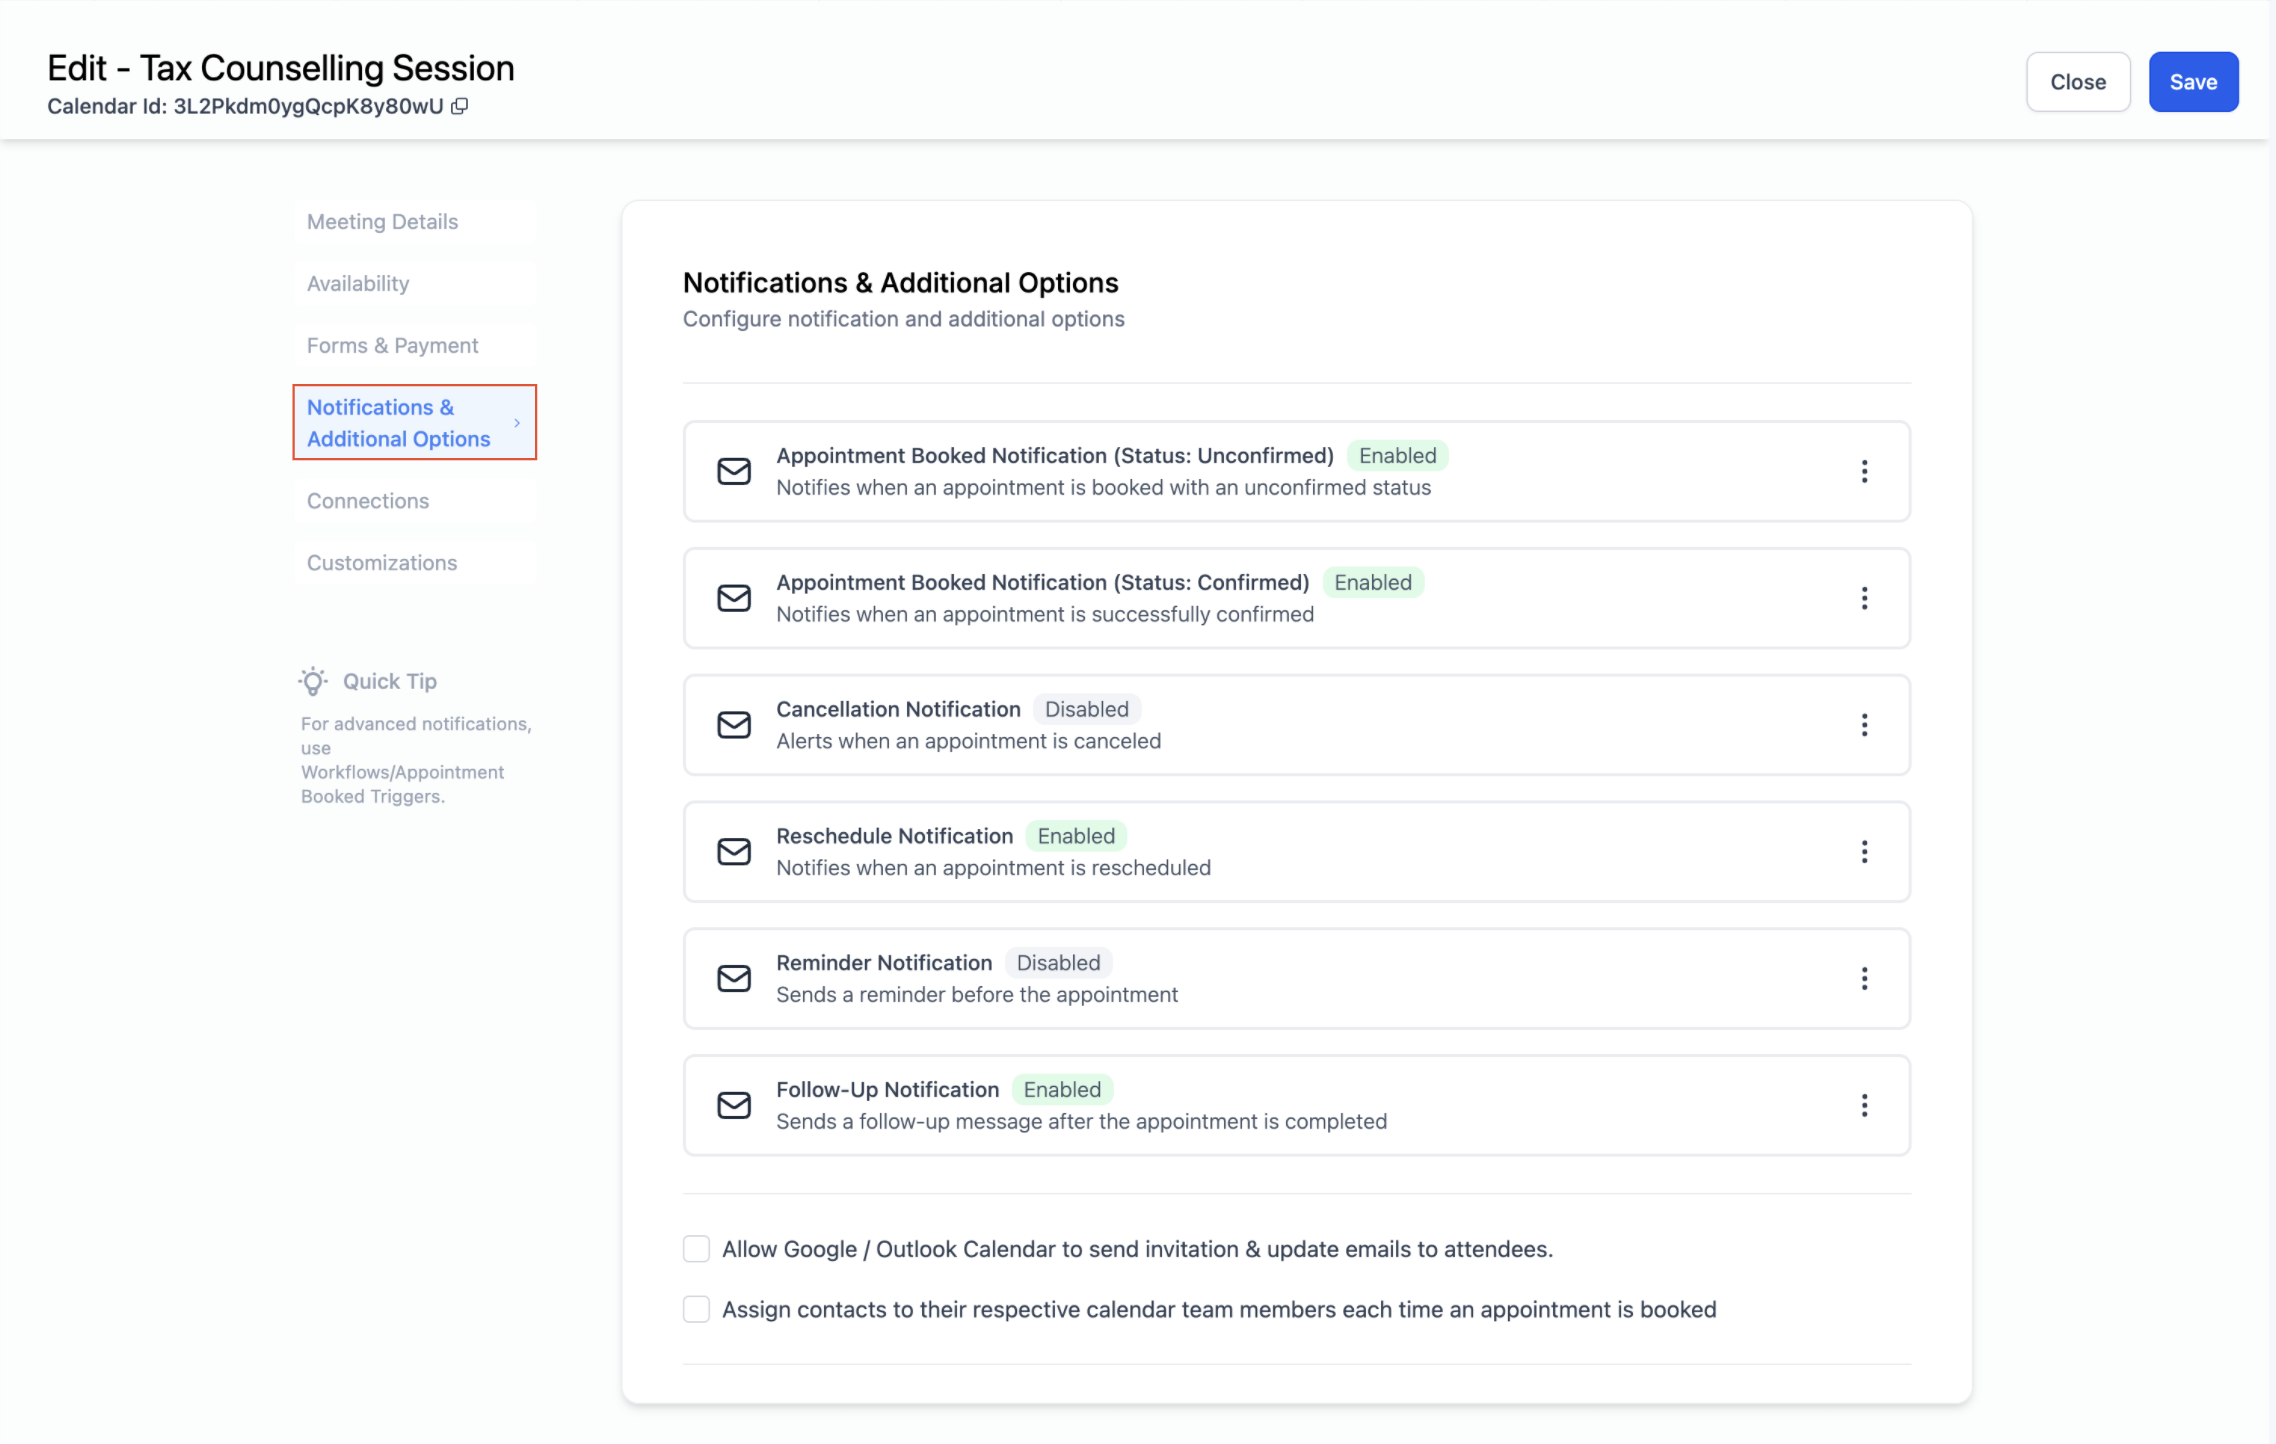
Step 2: Customize each notification
For each of the six notification types, you can:
Customize the content sent to each recipient type: Contact, Guest, User, or any additional email addresses/phone numbers you add.
Disable the notification entirely for any recipient type that doesn't need it.
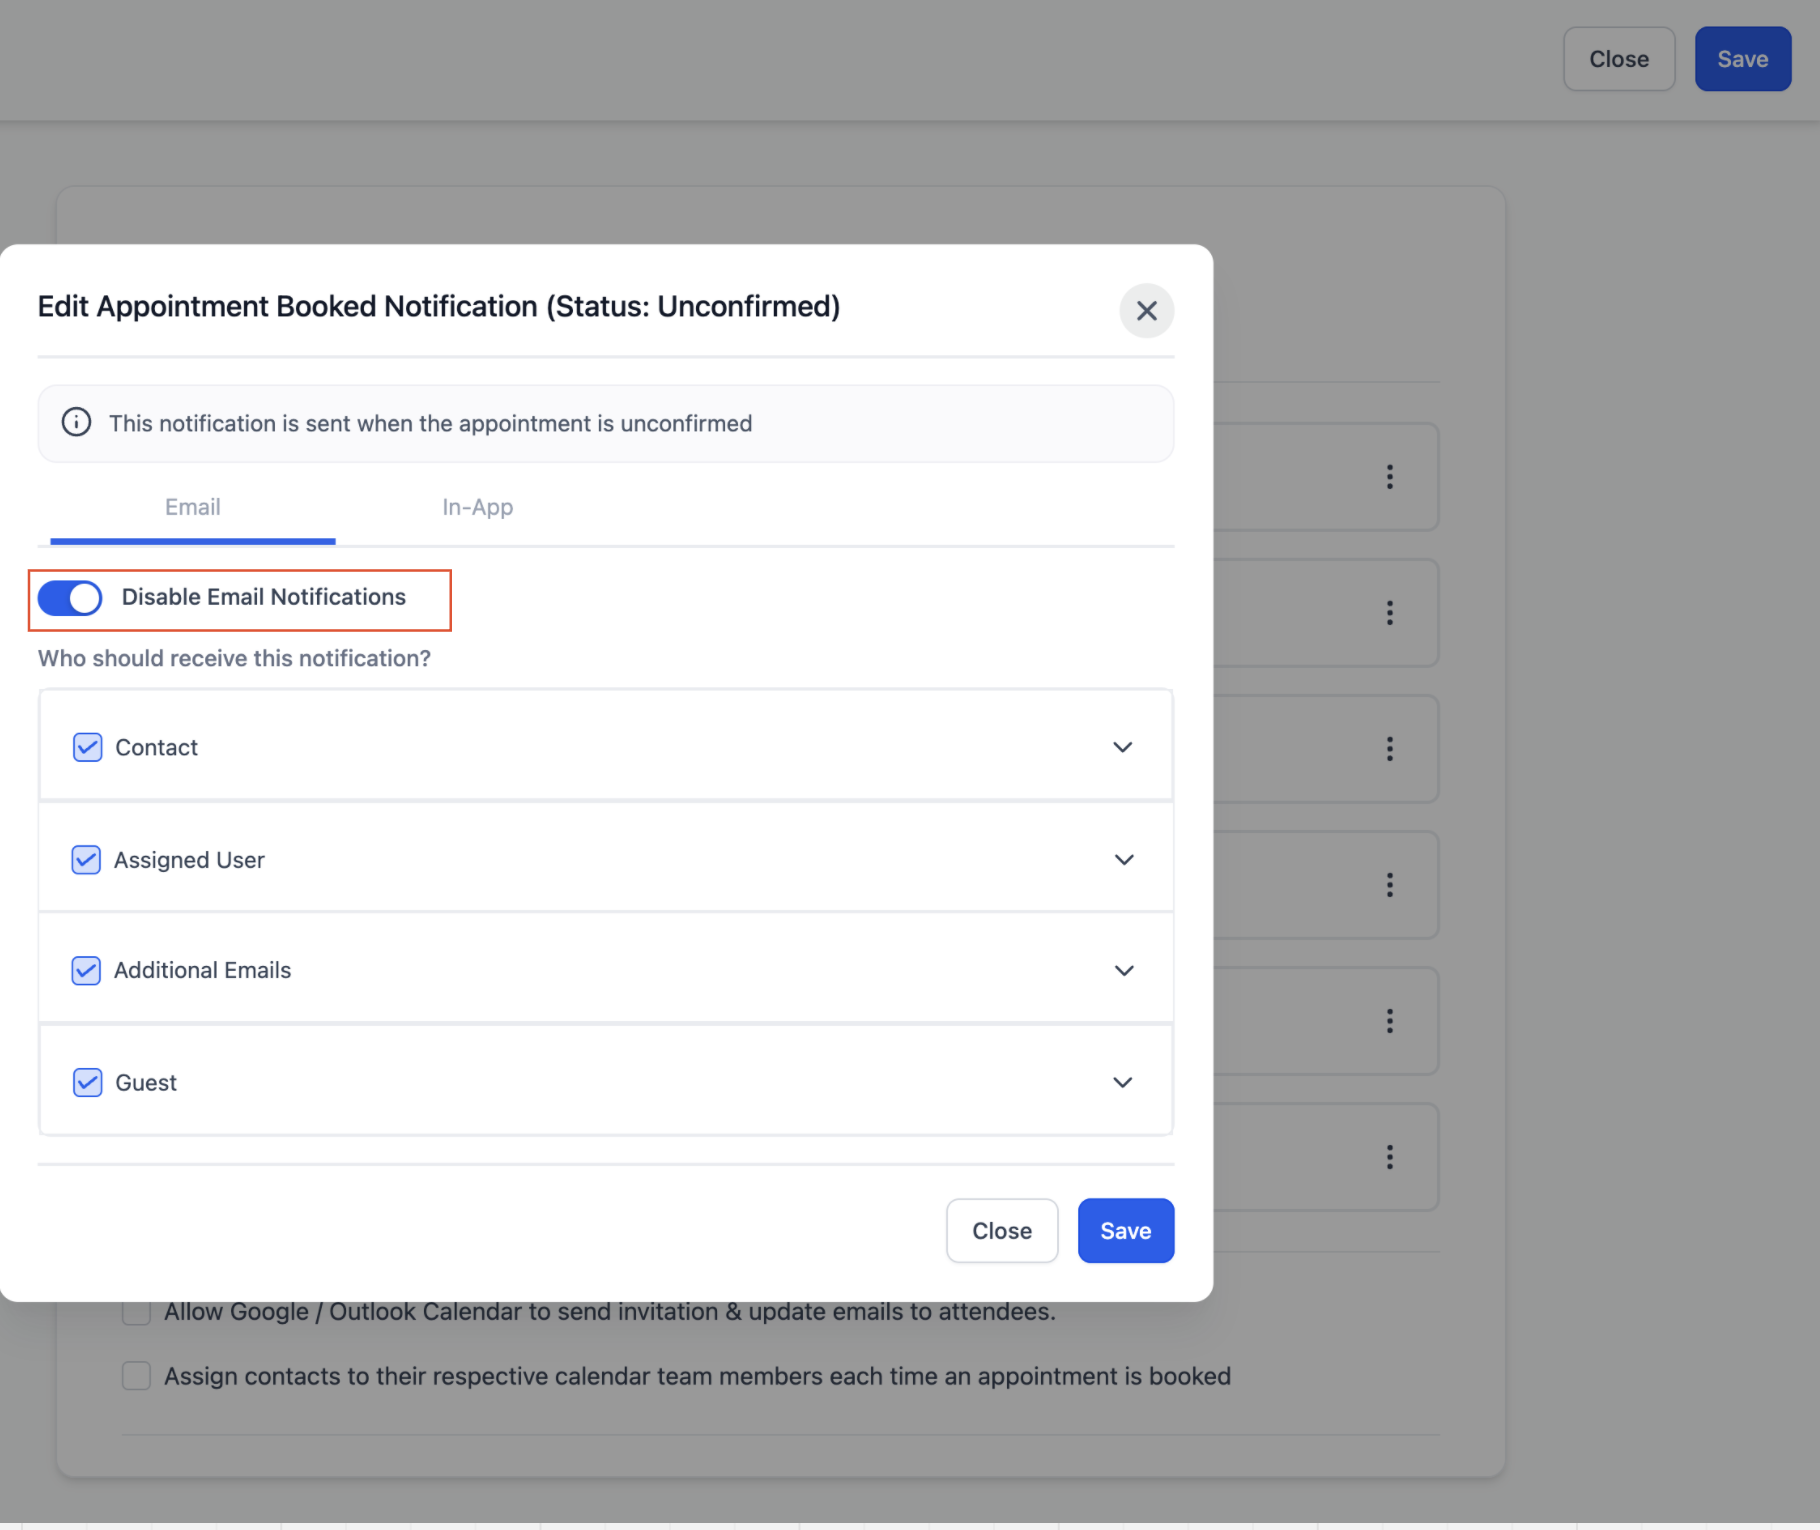
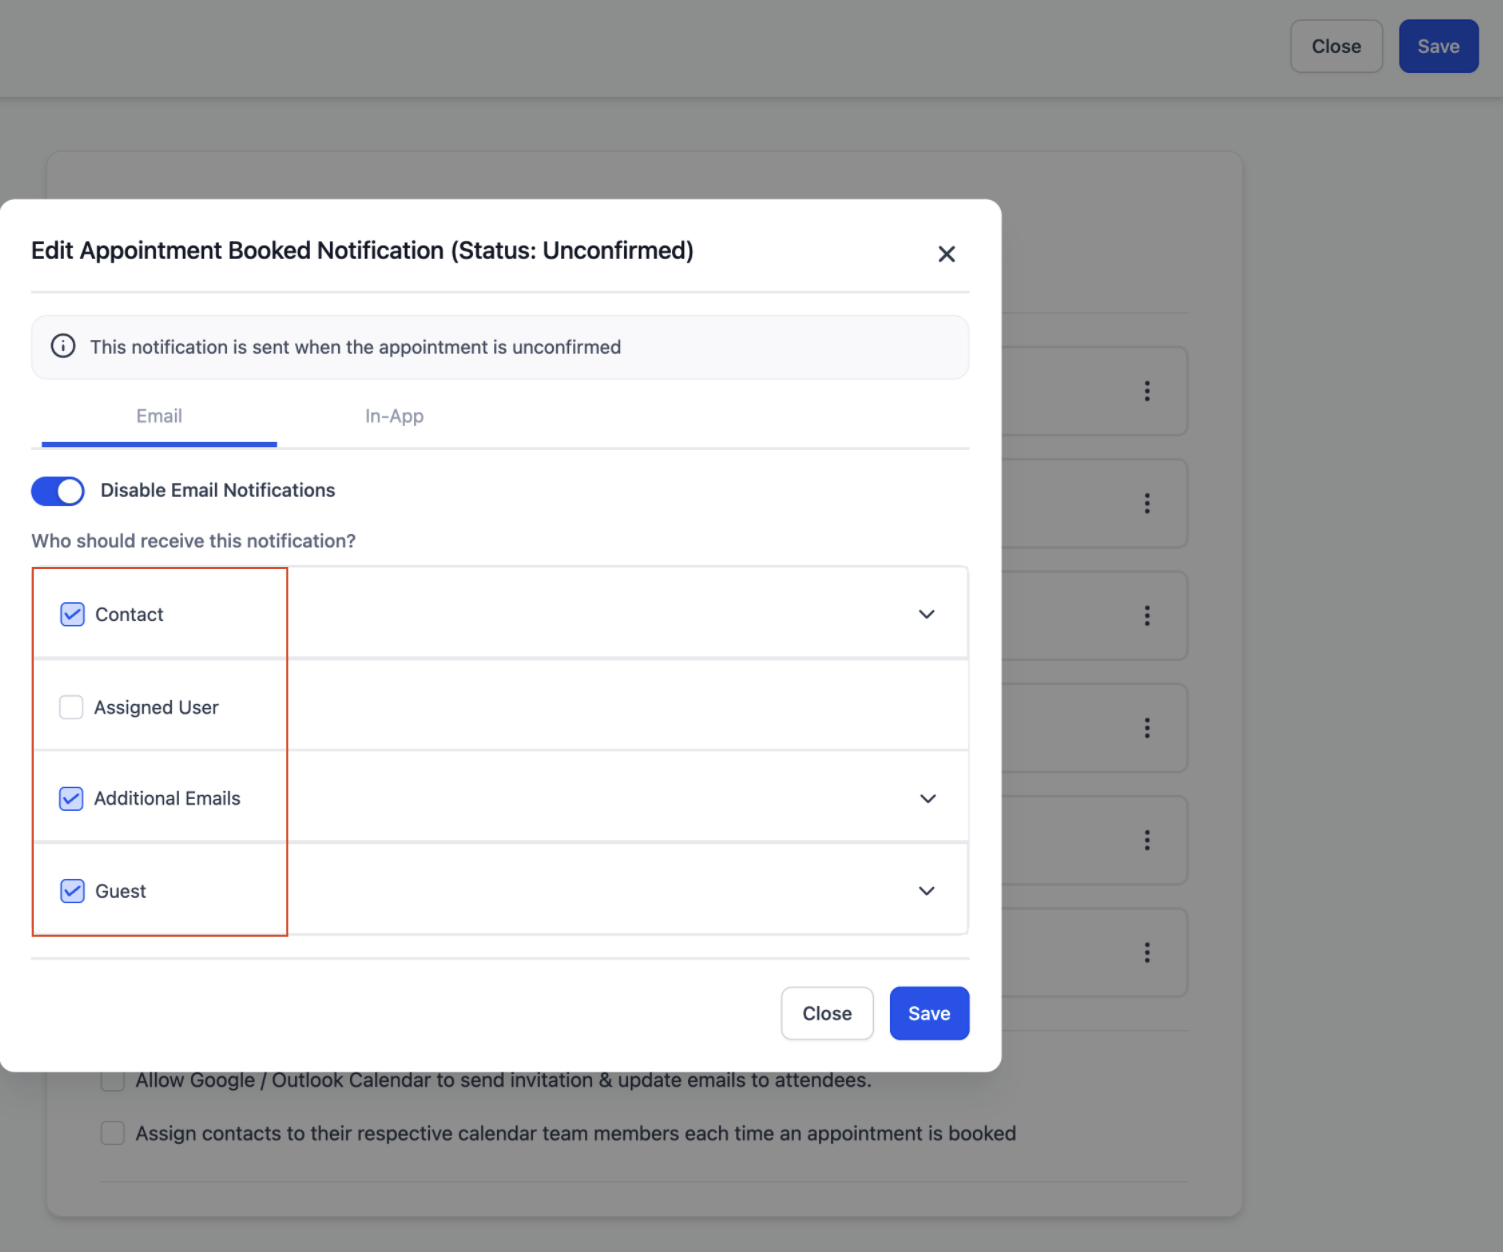
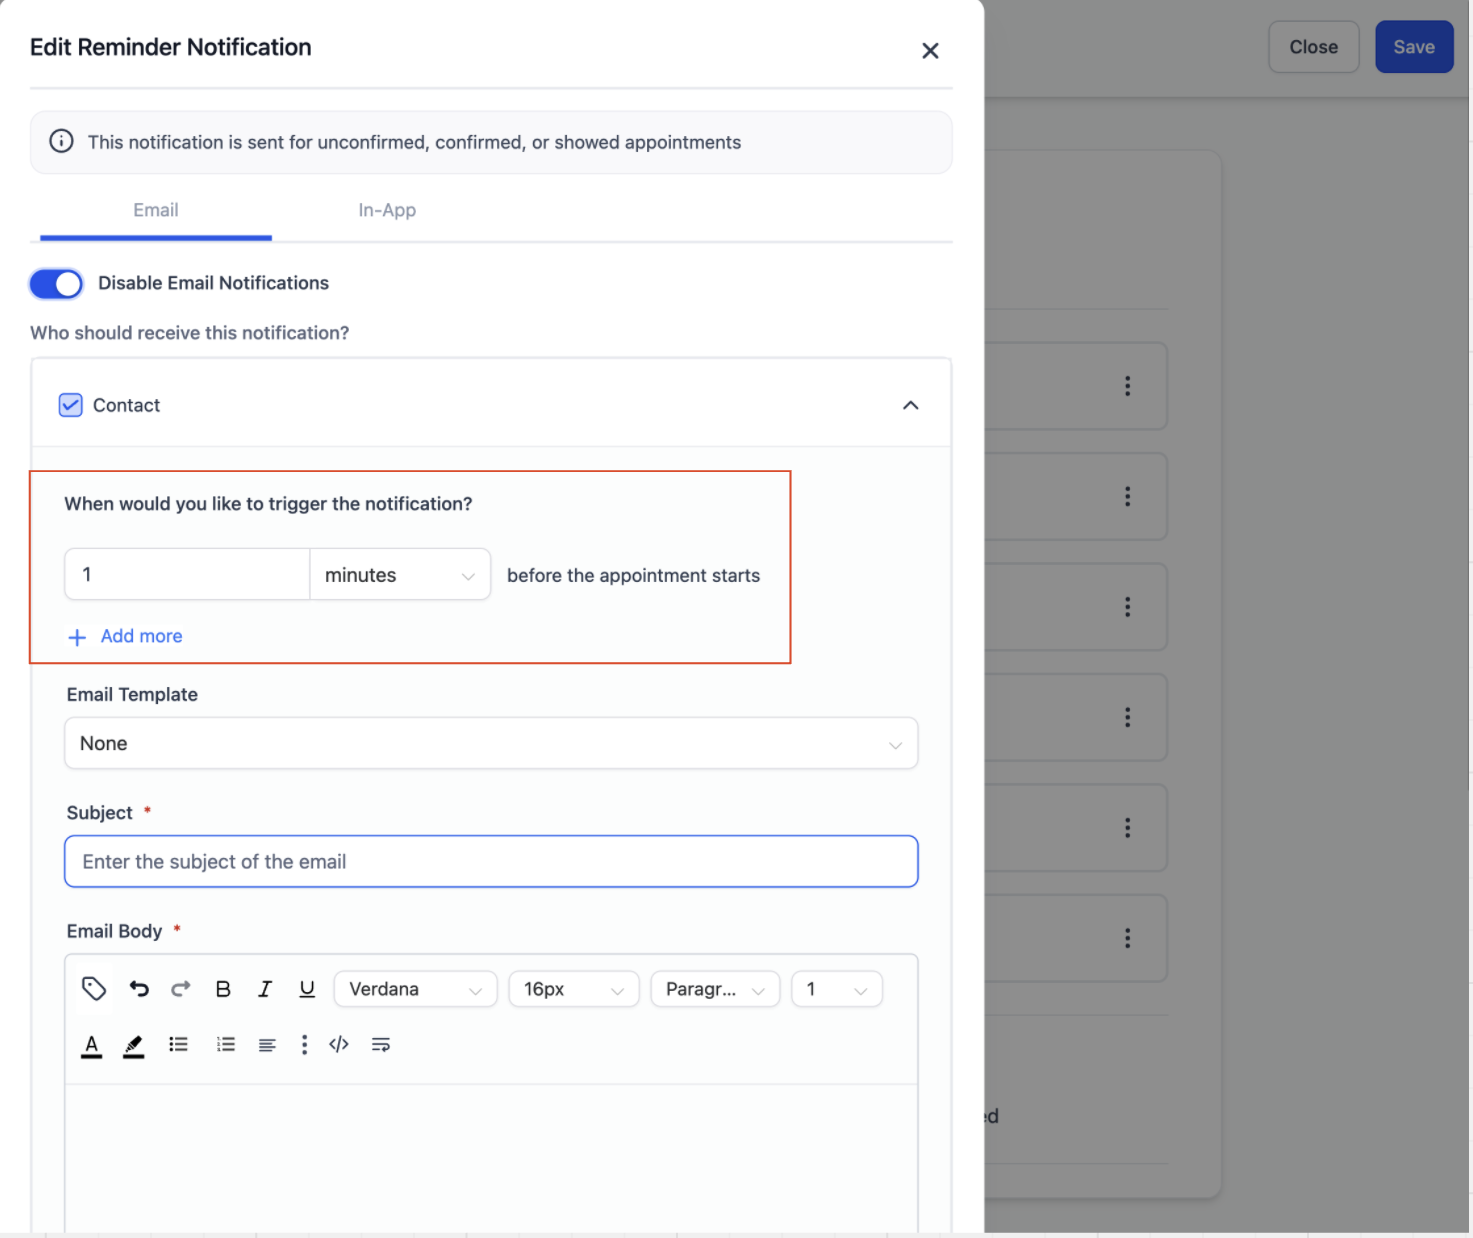
From the notification list, click the type you want to configure, then open the Email tab and make sure the toggle is turned on.
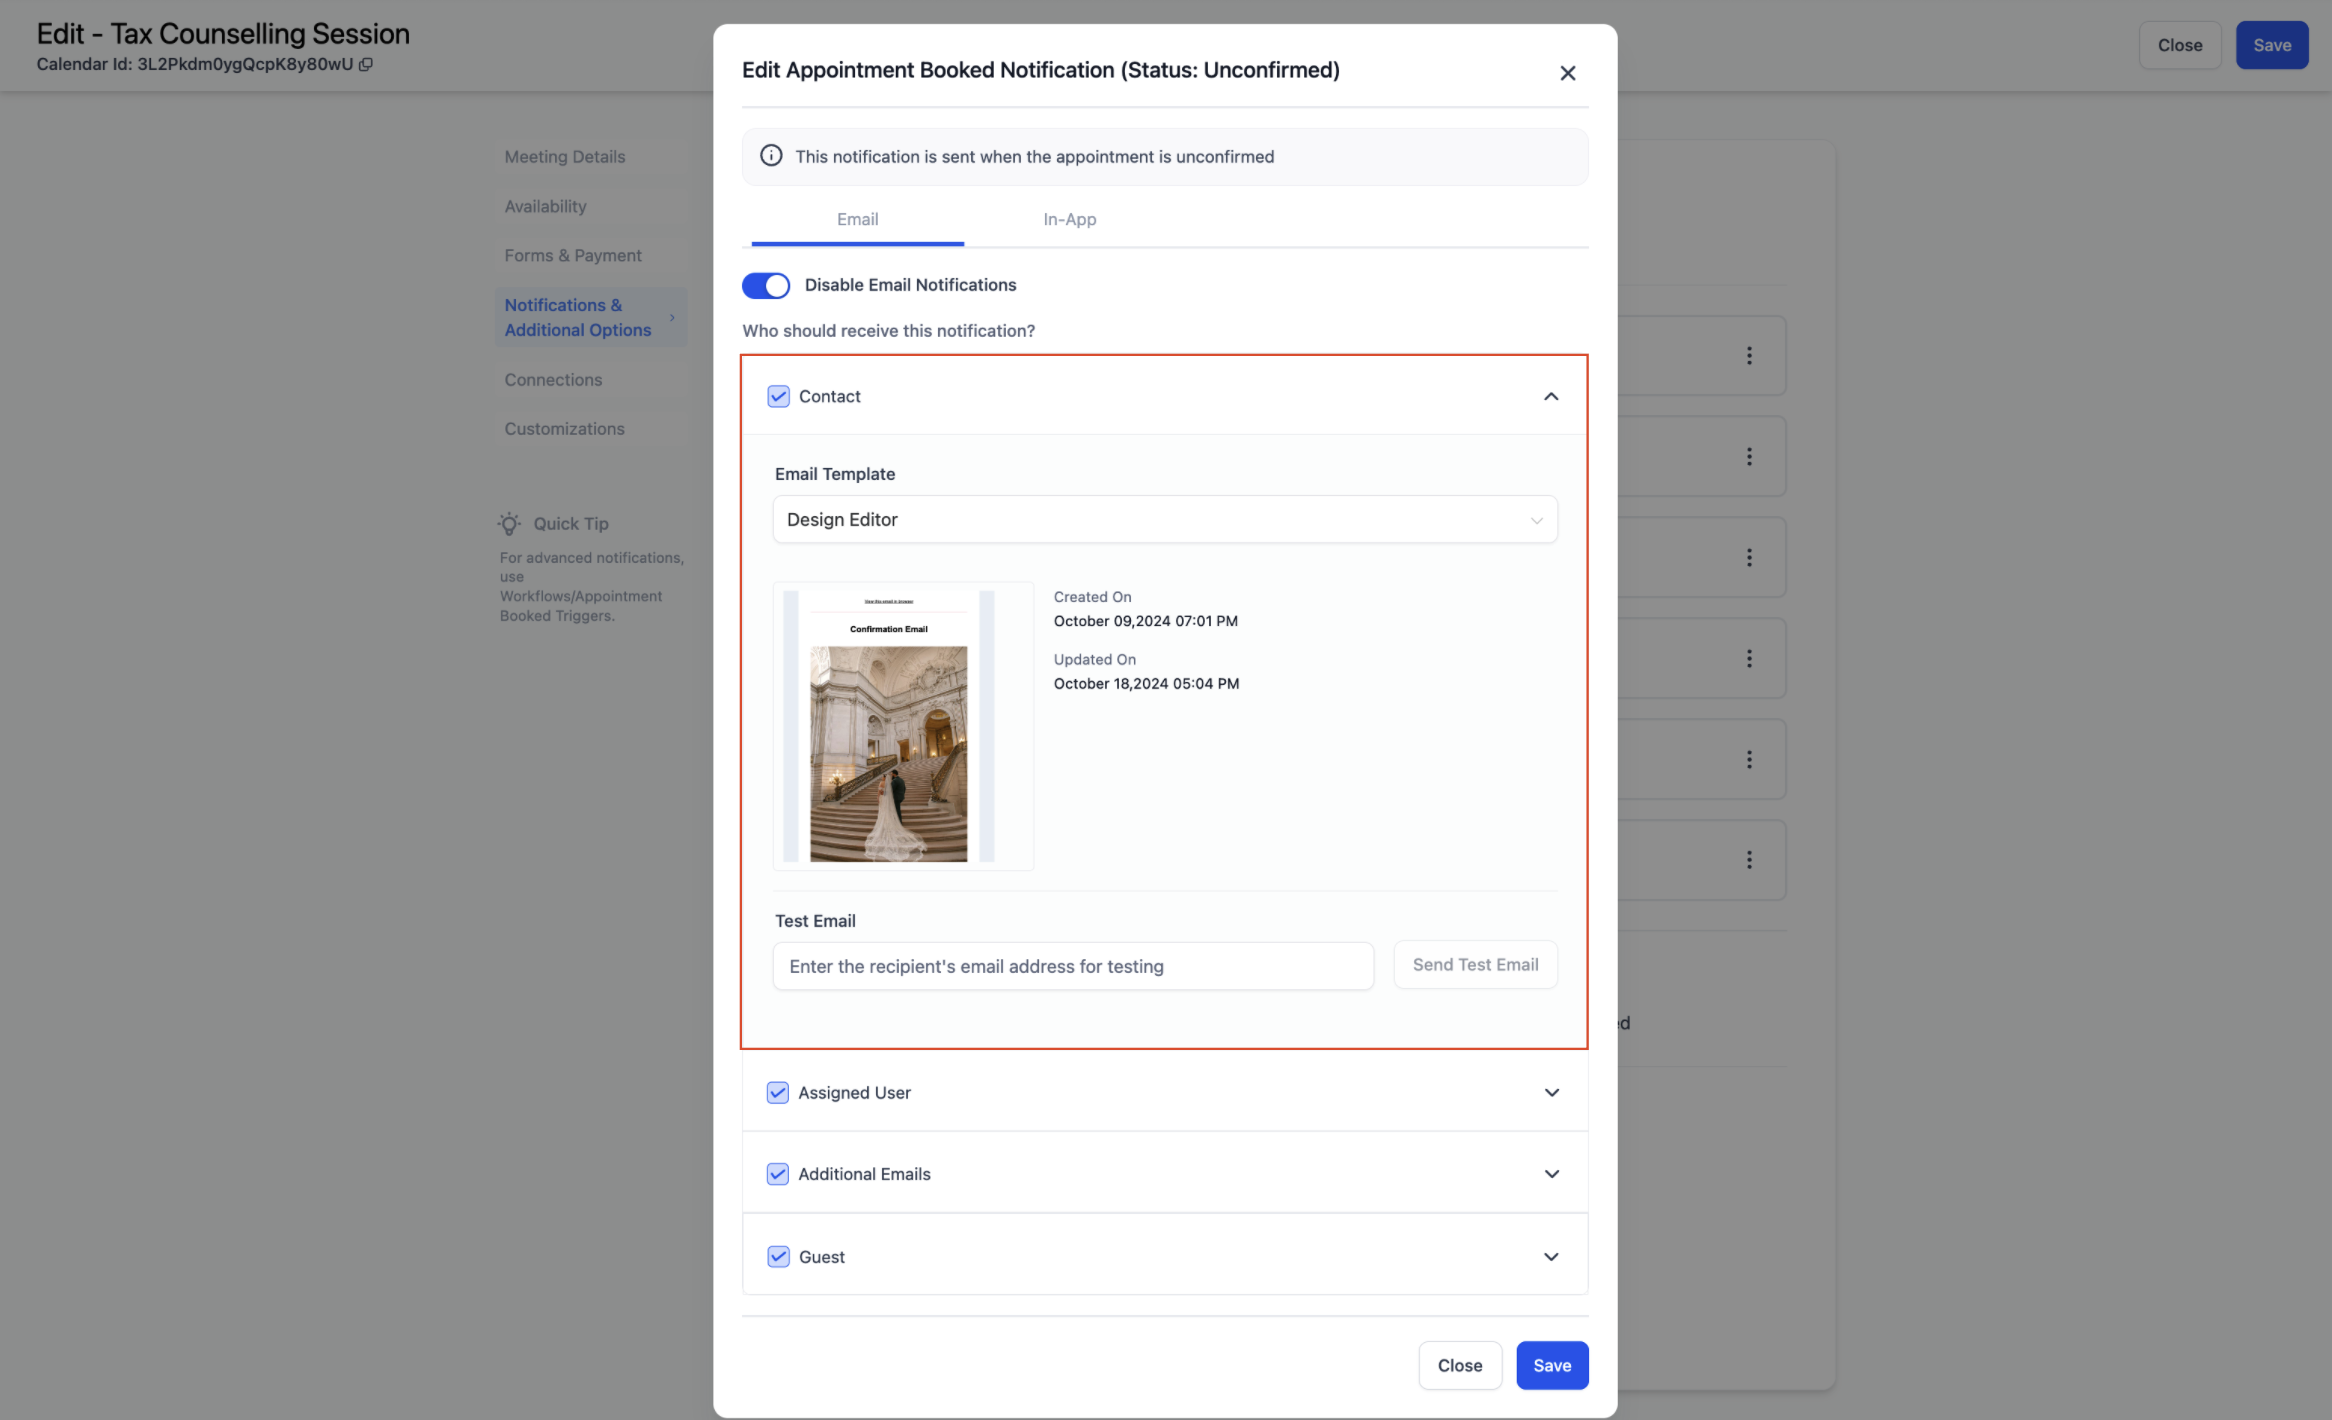
Choose an existing email template, or customize the subject line and body directly. Selecting None at the top of the template dropdown removes the current template.
Send a test email to preview how it will look before it goes live.
For Reminders and Follow-Up emails, set the timing: how far in advance a reminder goes out, or how long after the appointment a follow-up sends. You can add multiple timings for either one.
Click Save once each recipient type is configured the way you want.
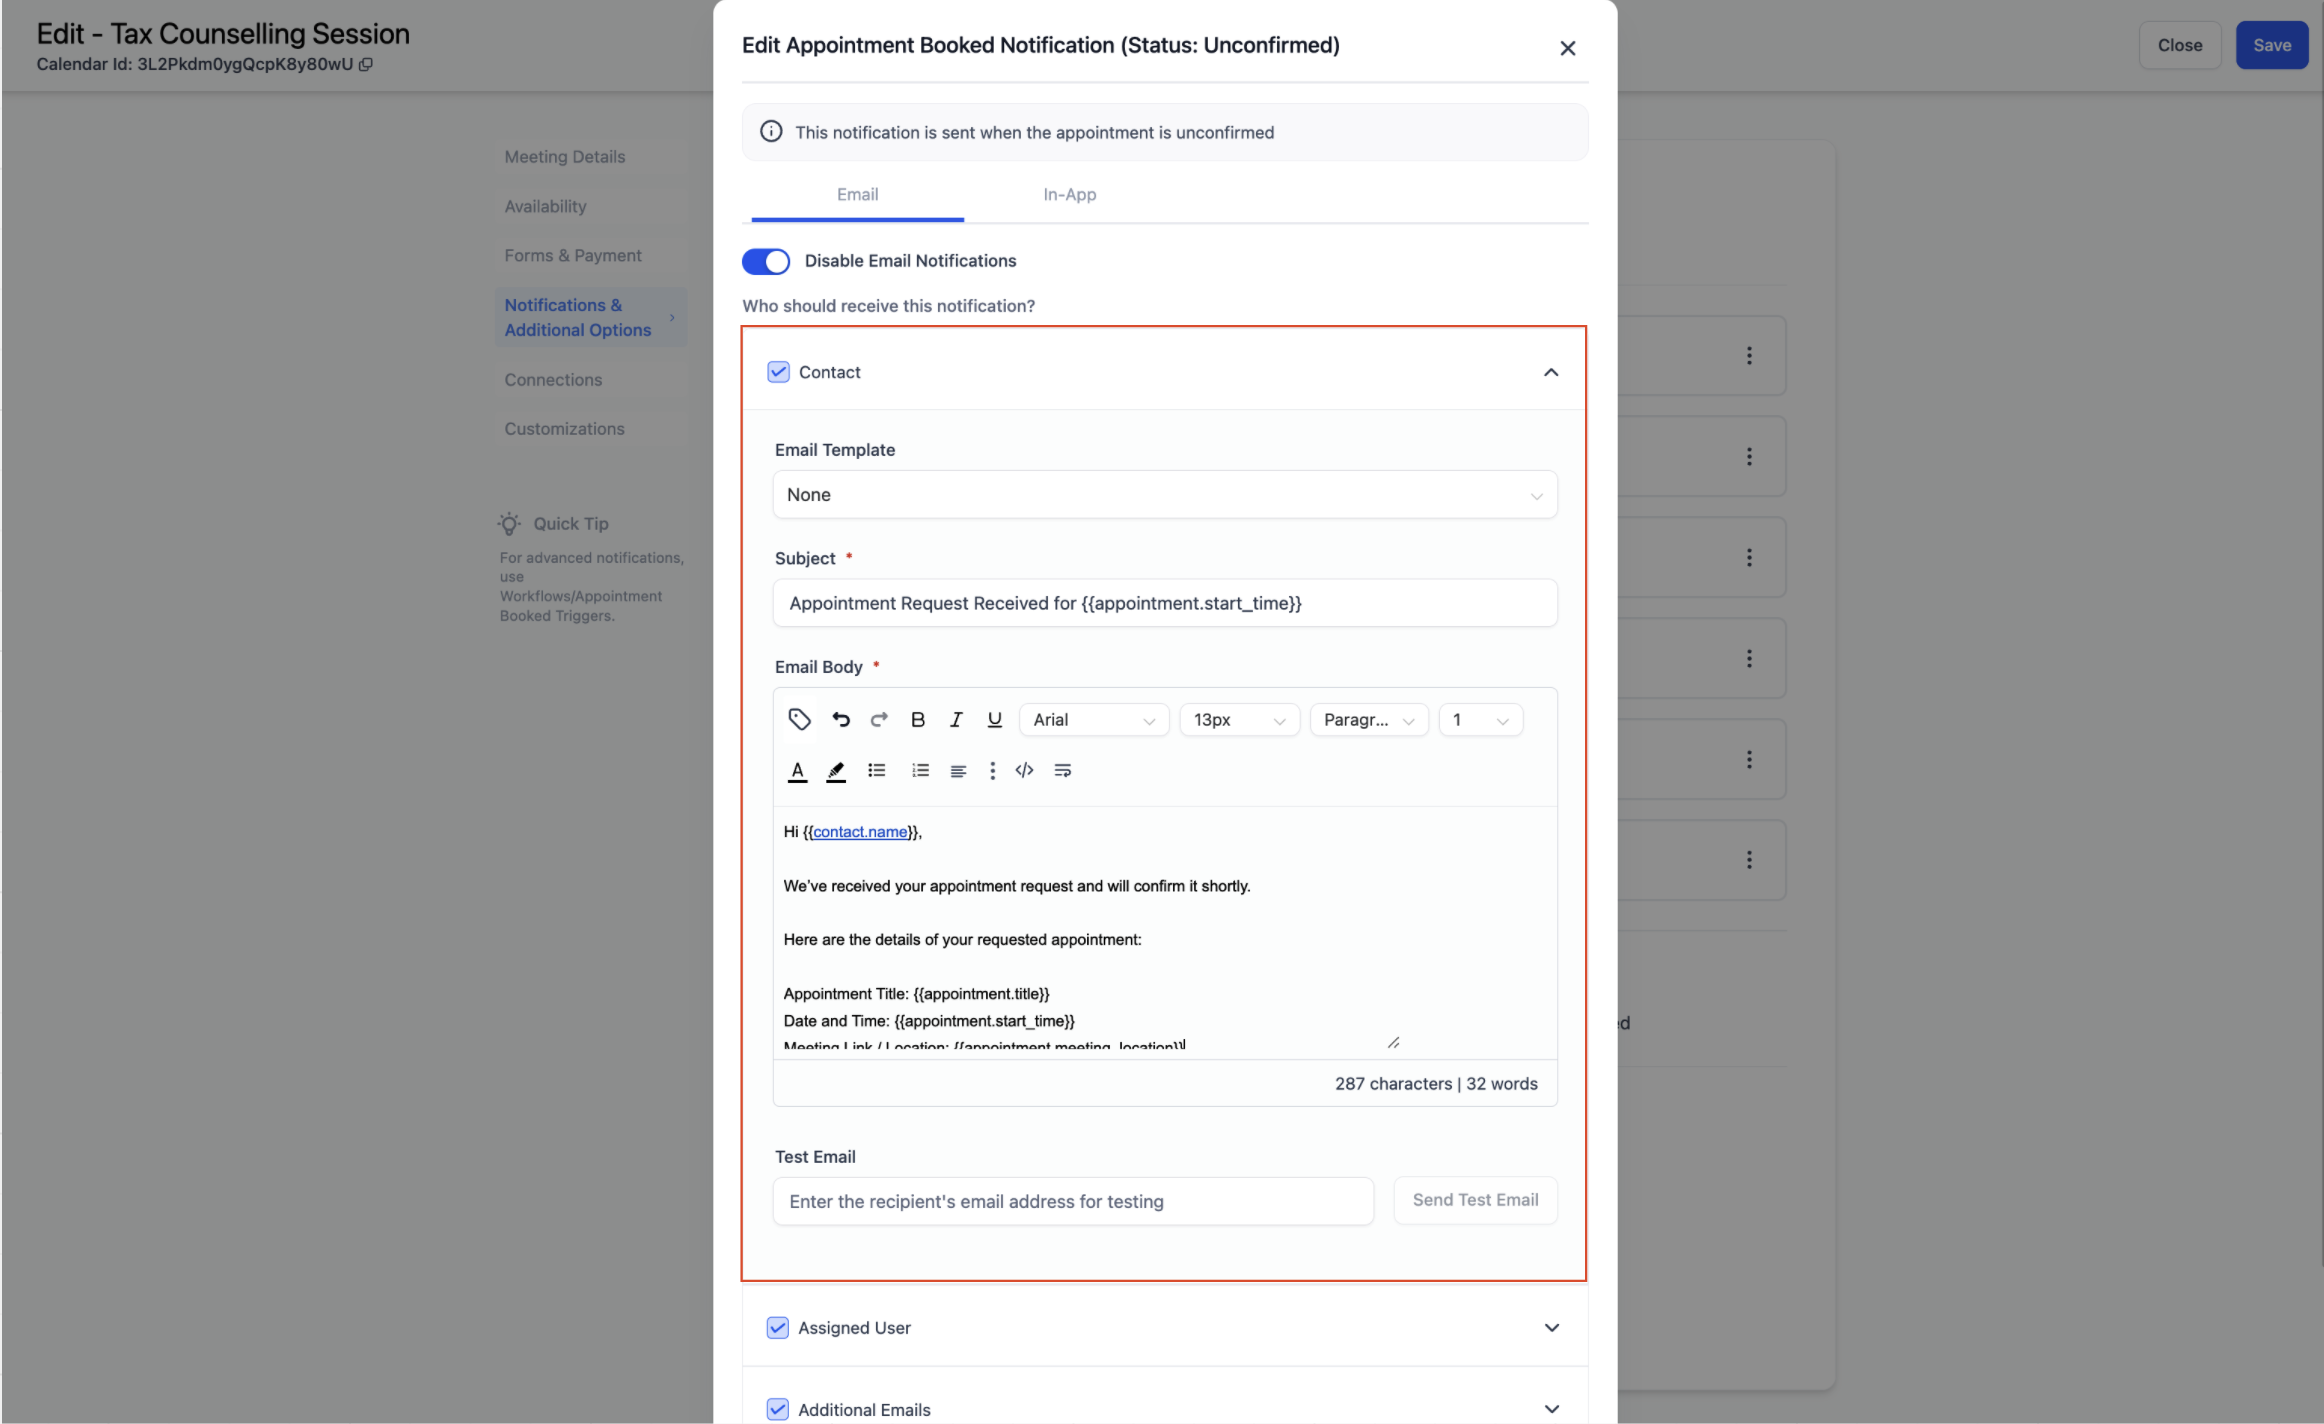
You can personalize email, SMS, and WhatsApp notifications with merge fields and Custom Values. While editing a message, click the { } icon and choose from the Custom Values section of the dropdown to insert patient names, appointment details, custom links, or internal notes without typing them manually each time.
From the notification list, open the In-App tab.
Turn on the toggle, then choose which users should receive the alert.
For Reminder and Follow-Up notifications, set the timing: how far in advance a reminder fires, or how long after the appointment a follow-up fires.
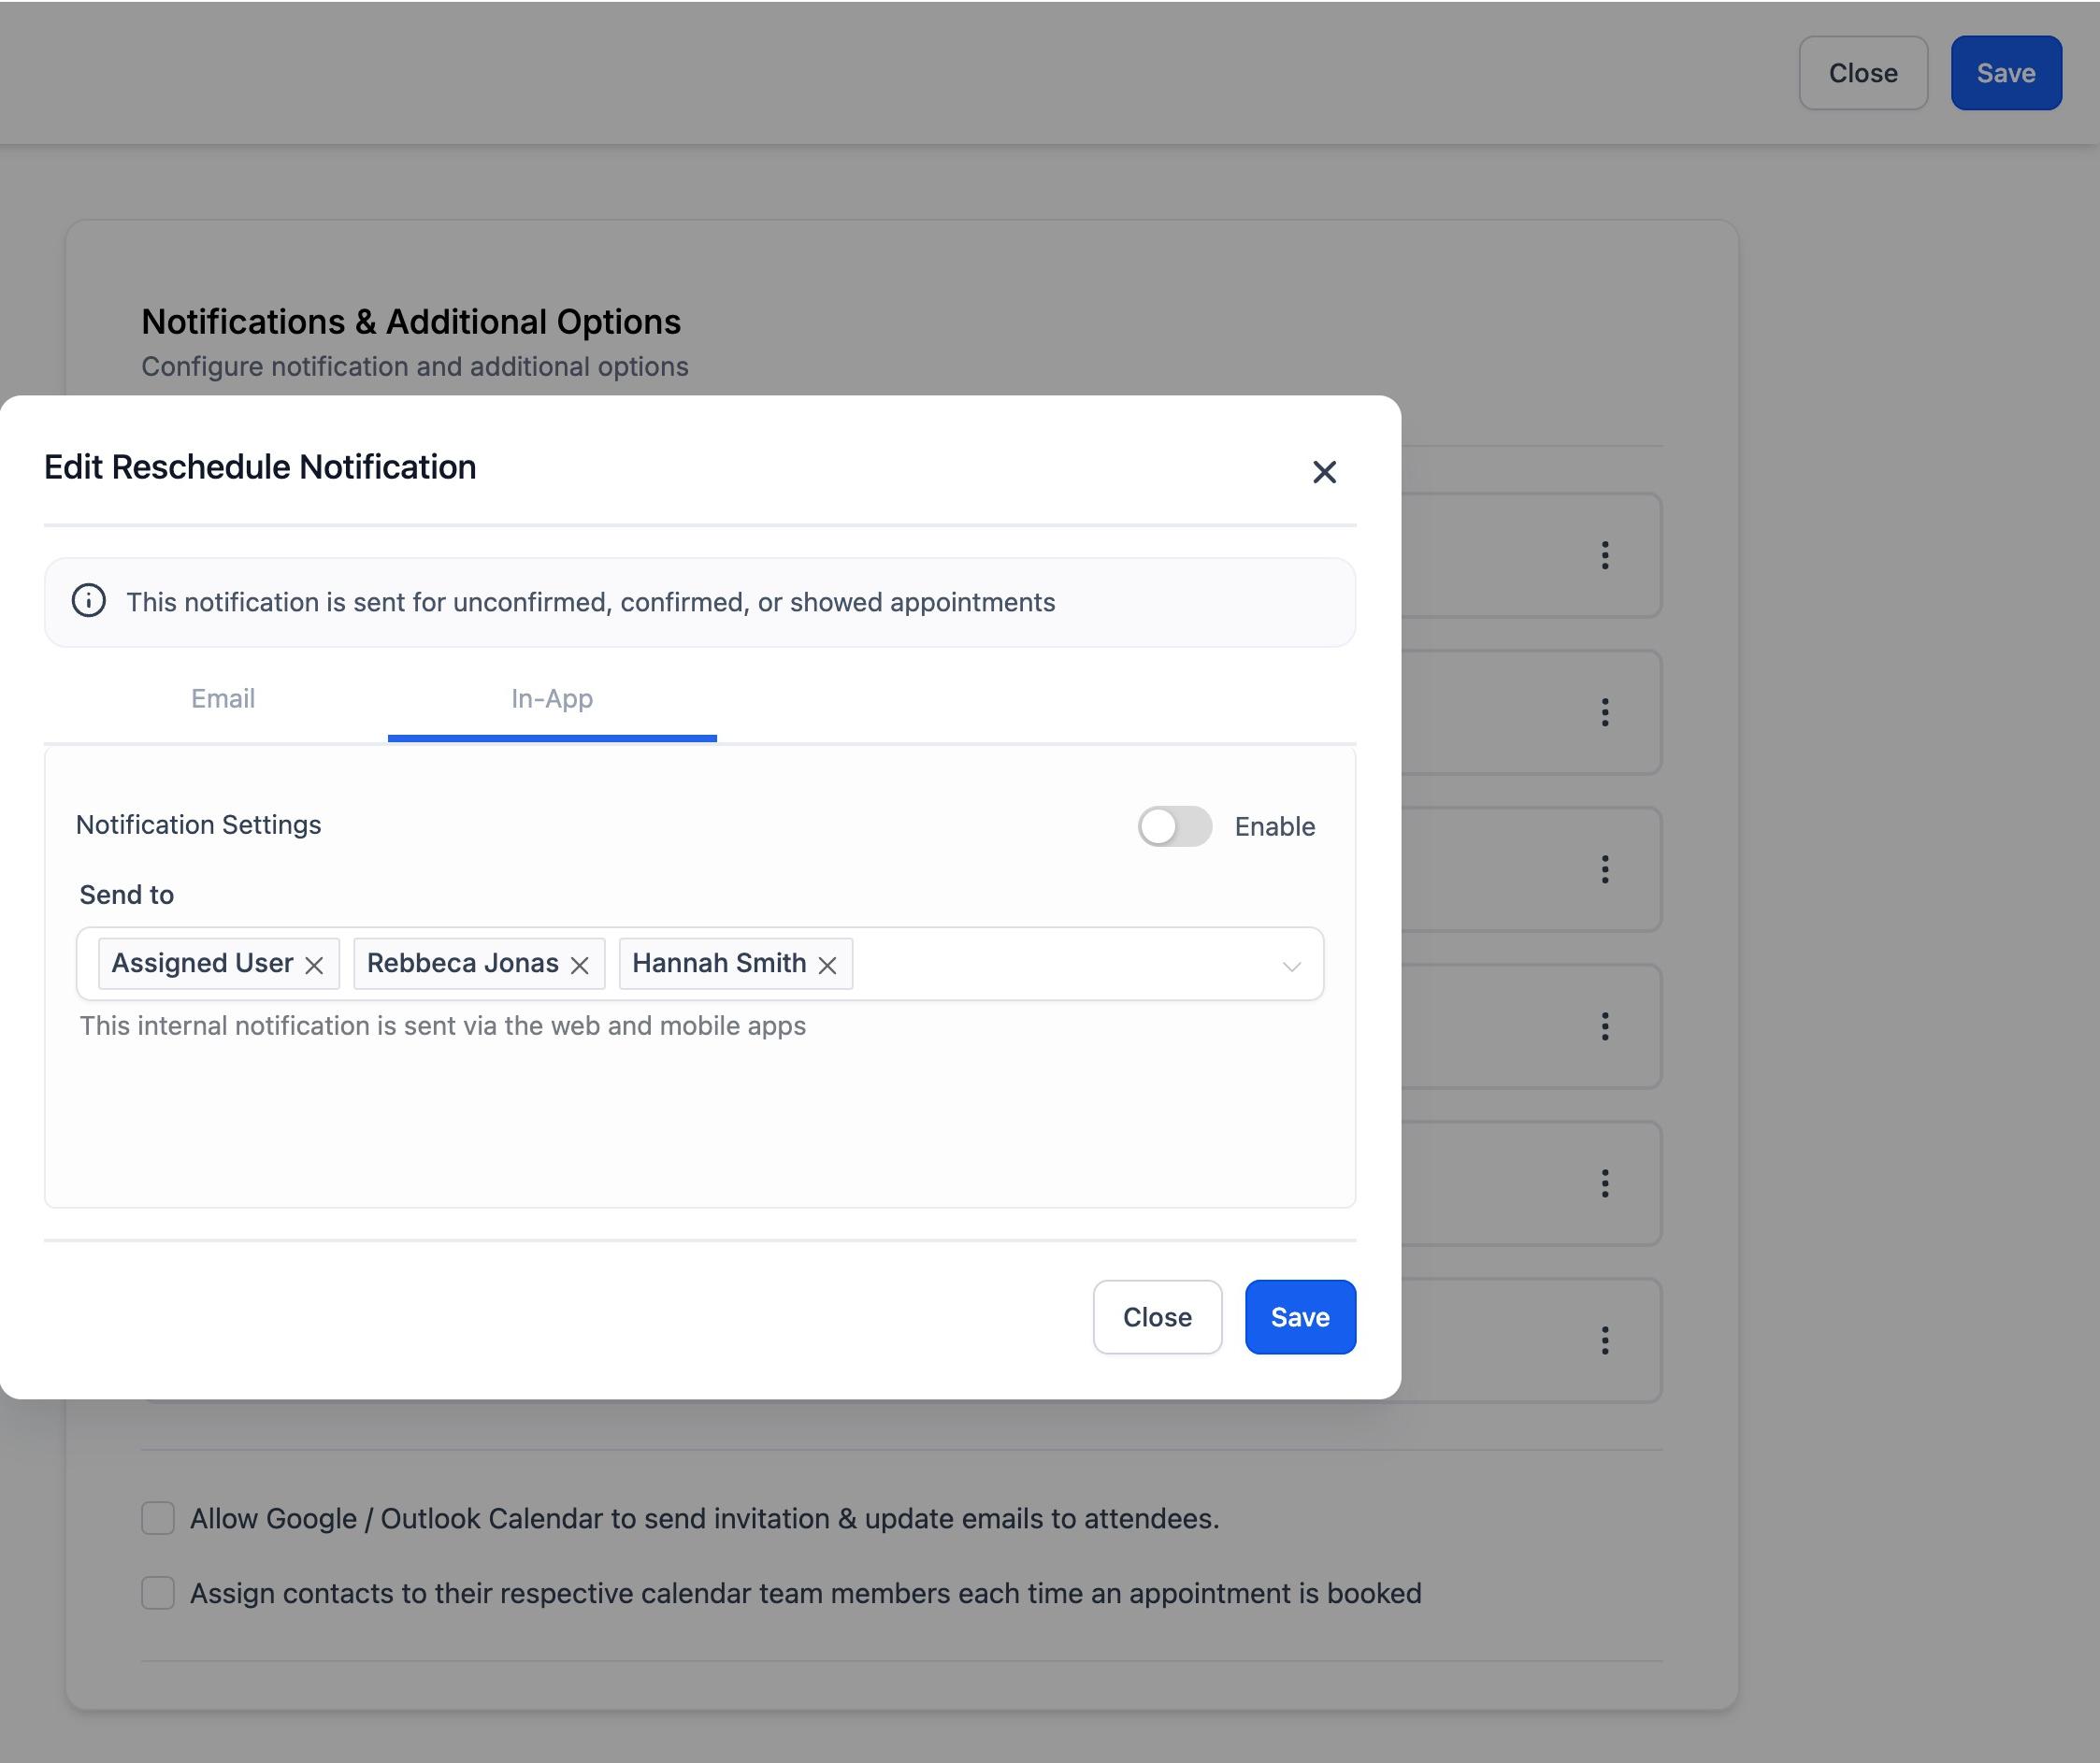
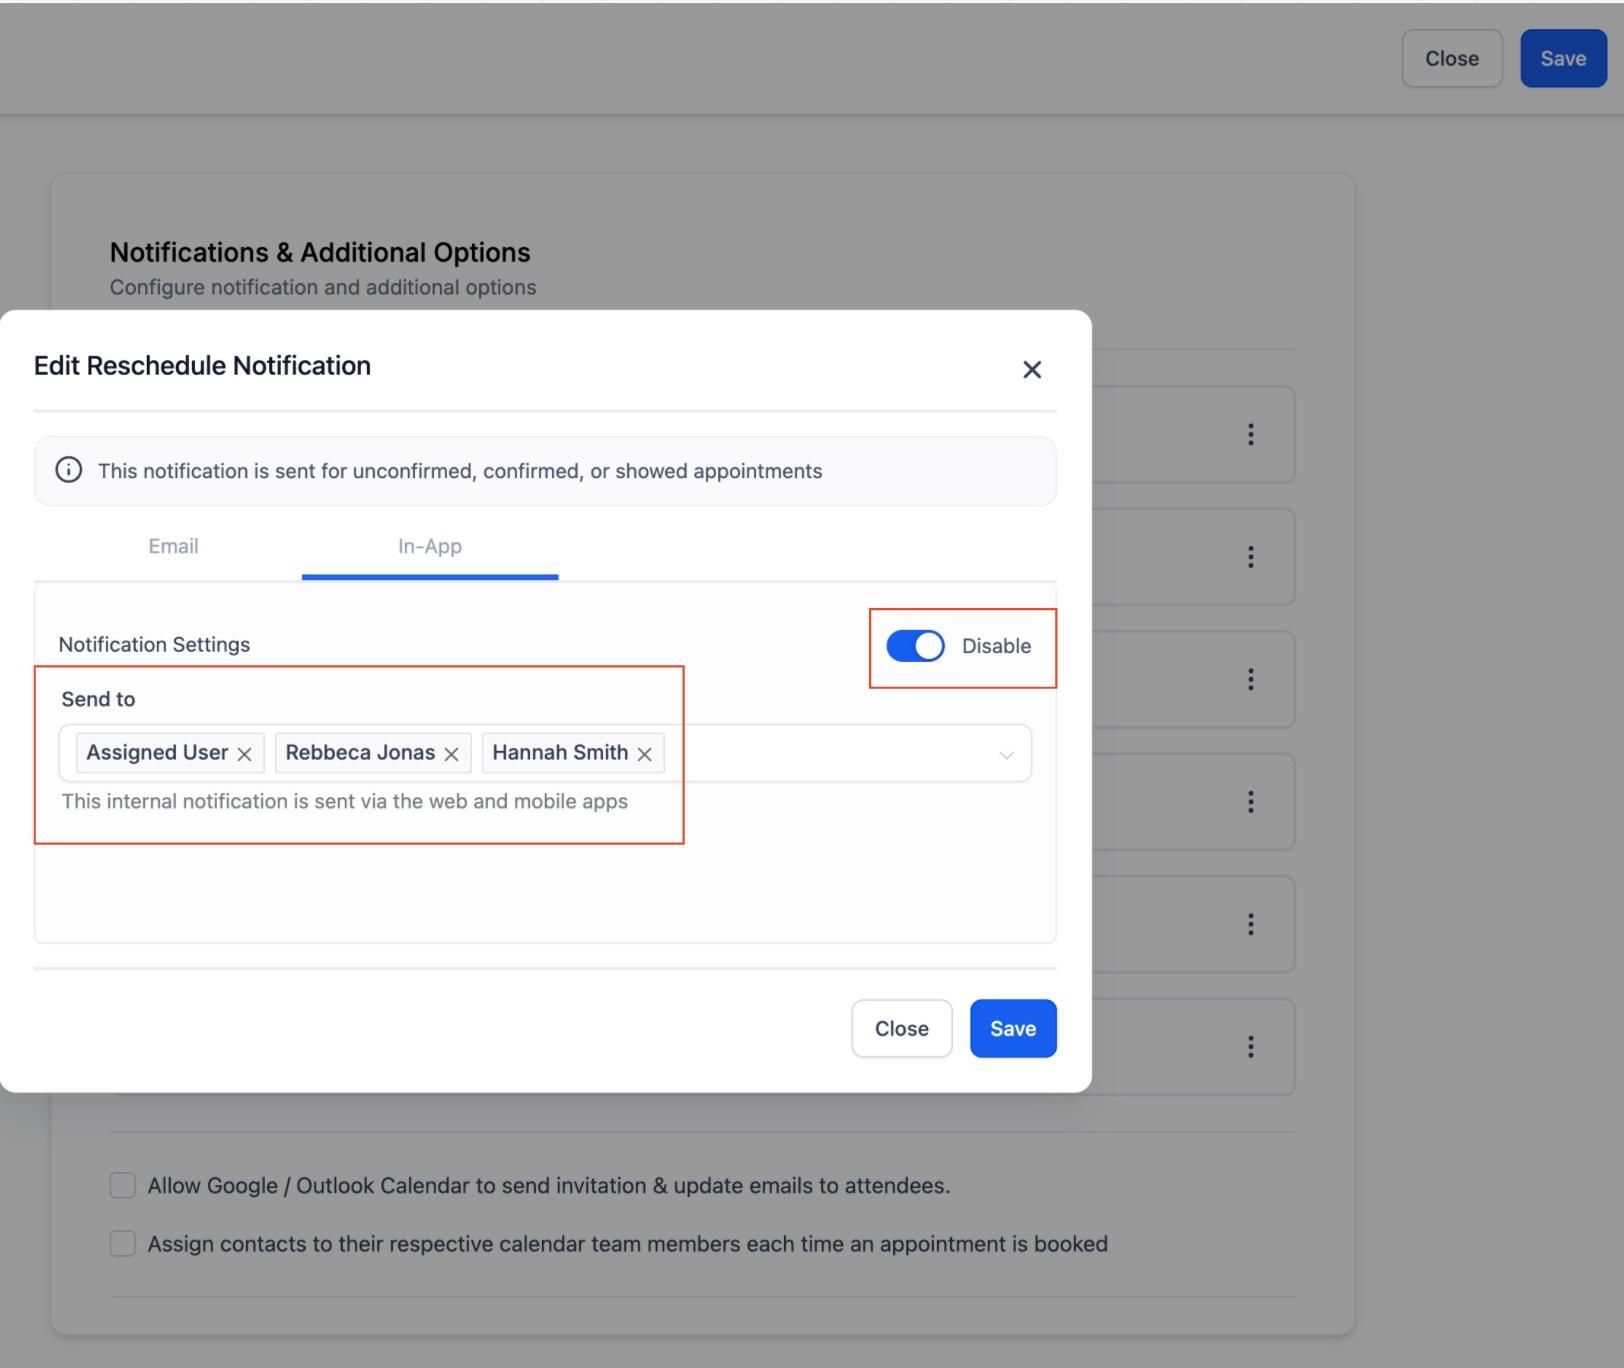
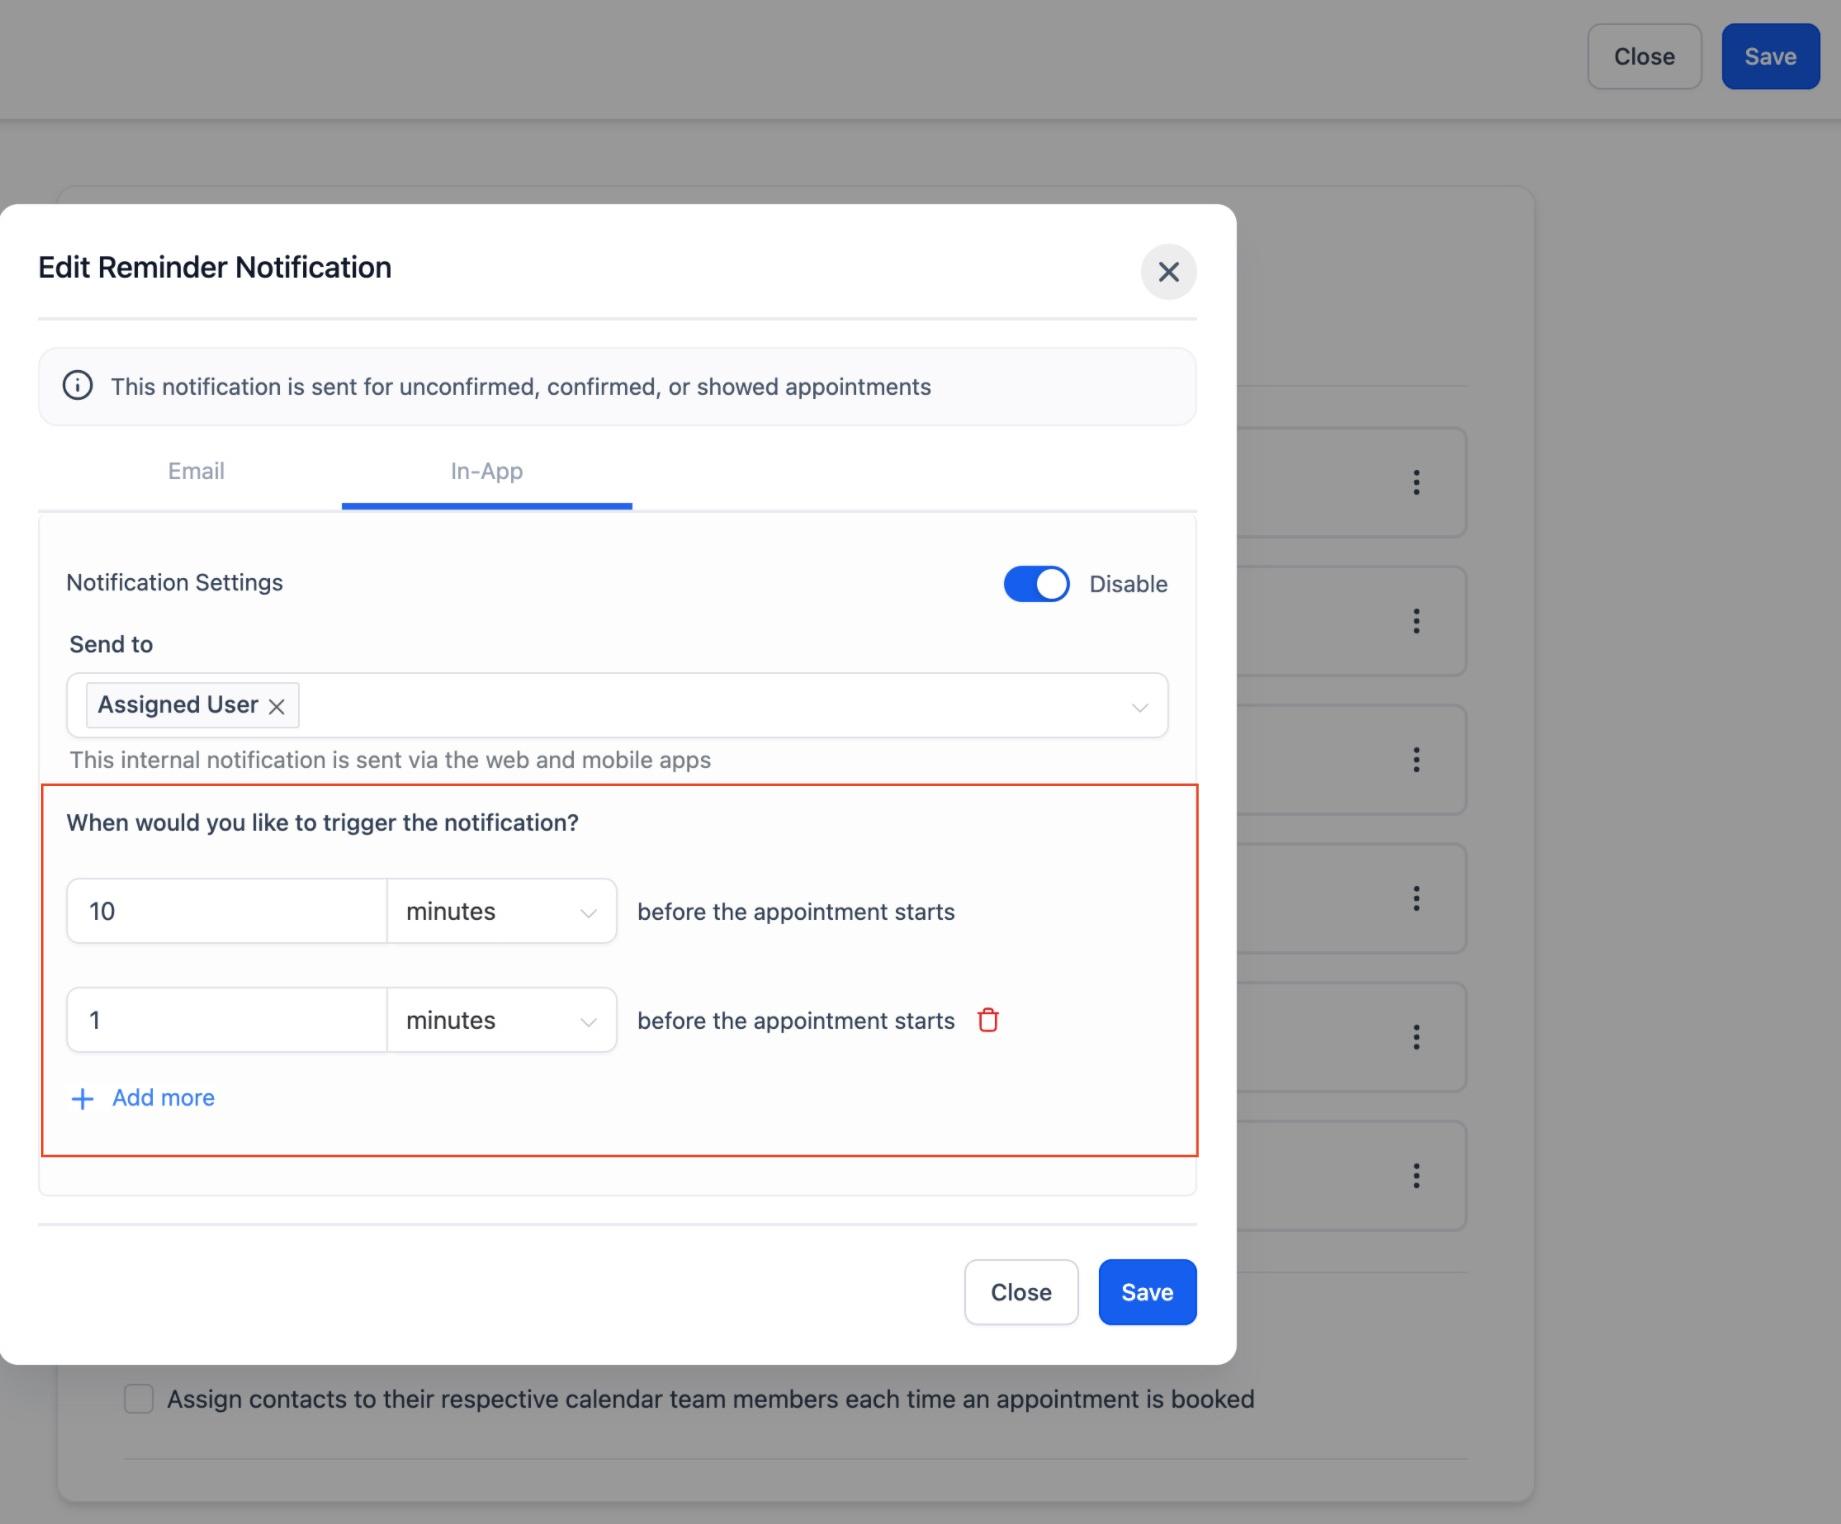
The in-app configuration is fully customizable. For example, you can leave the confirmation alert on while keeping every other type off. For Event Calendars, account admins receive in-app notifications by default. For every other calendar type, the assigned user receives them by default.
From the notification list, open the SMS tab.
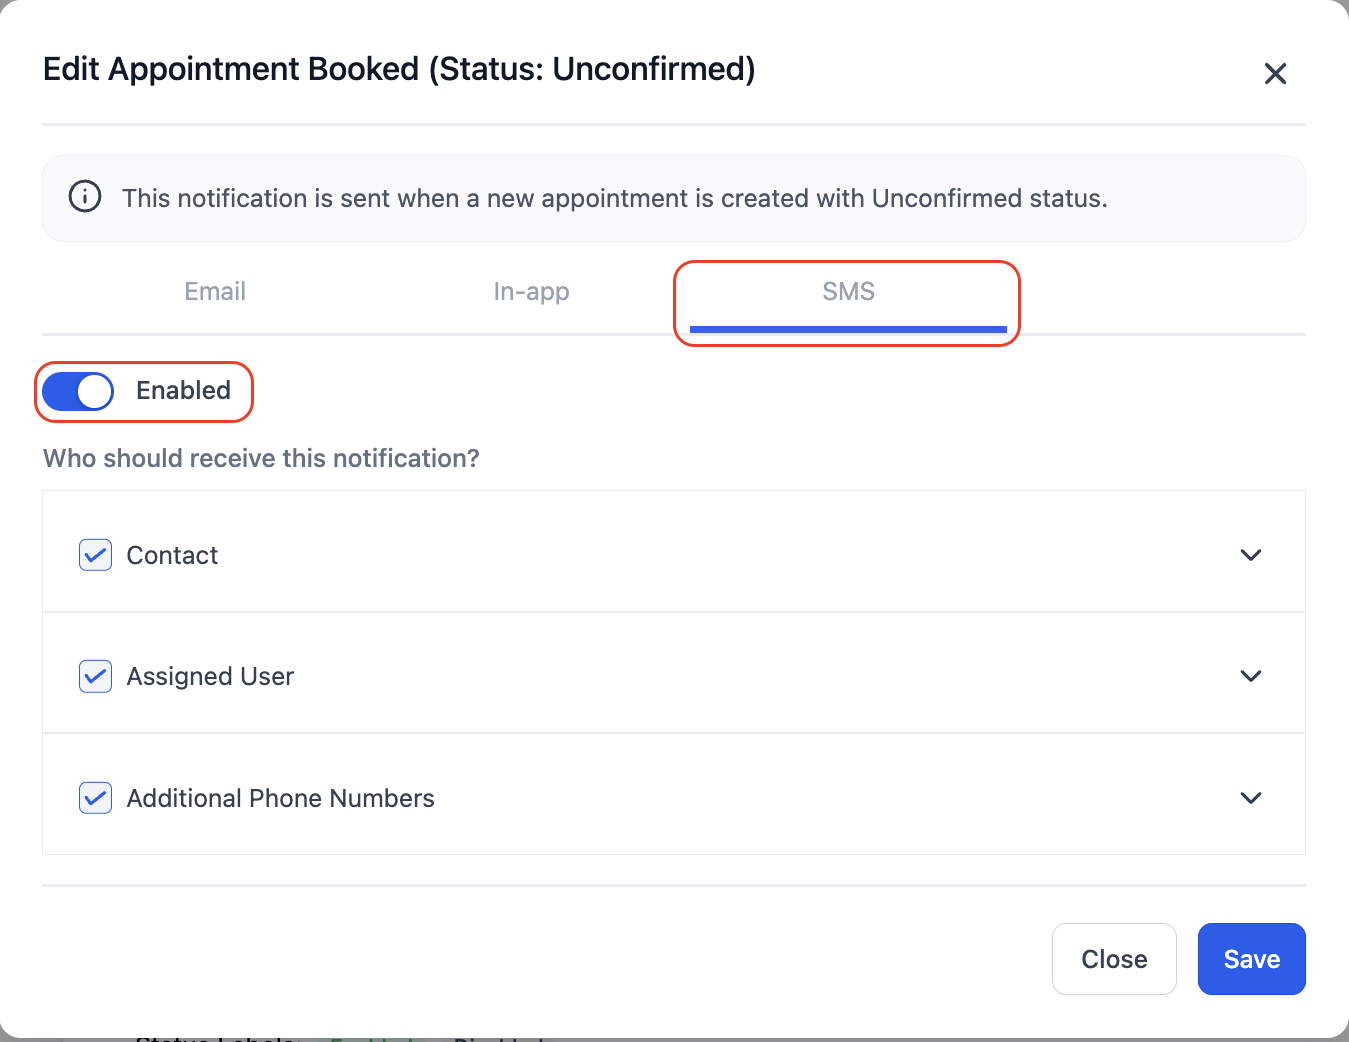
Choose recipients: Contact, Assigned User, or Additional Phone Numbers.
Choose an existing SMS template, edit it, or create a new one.
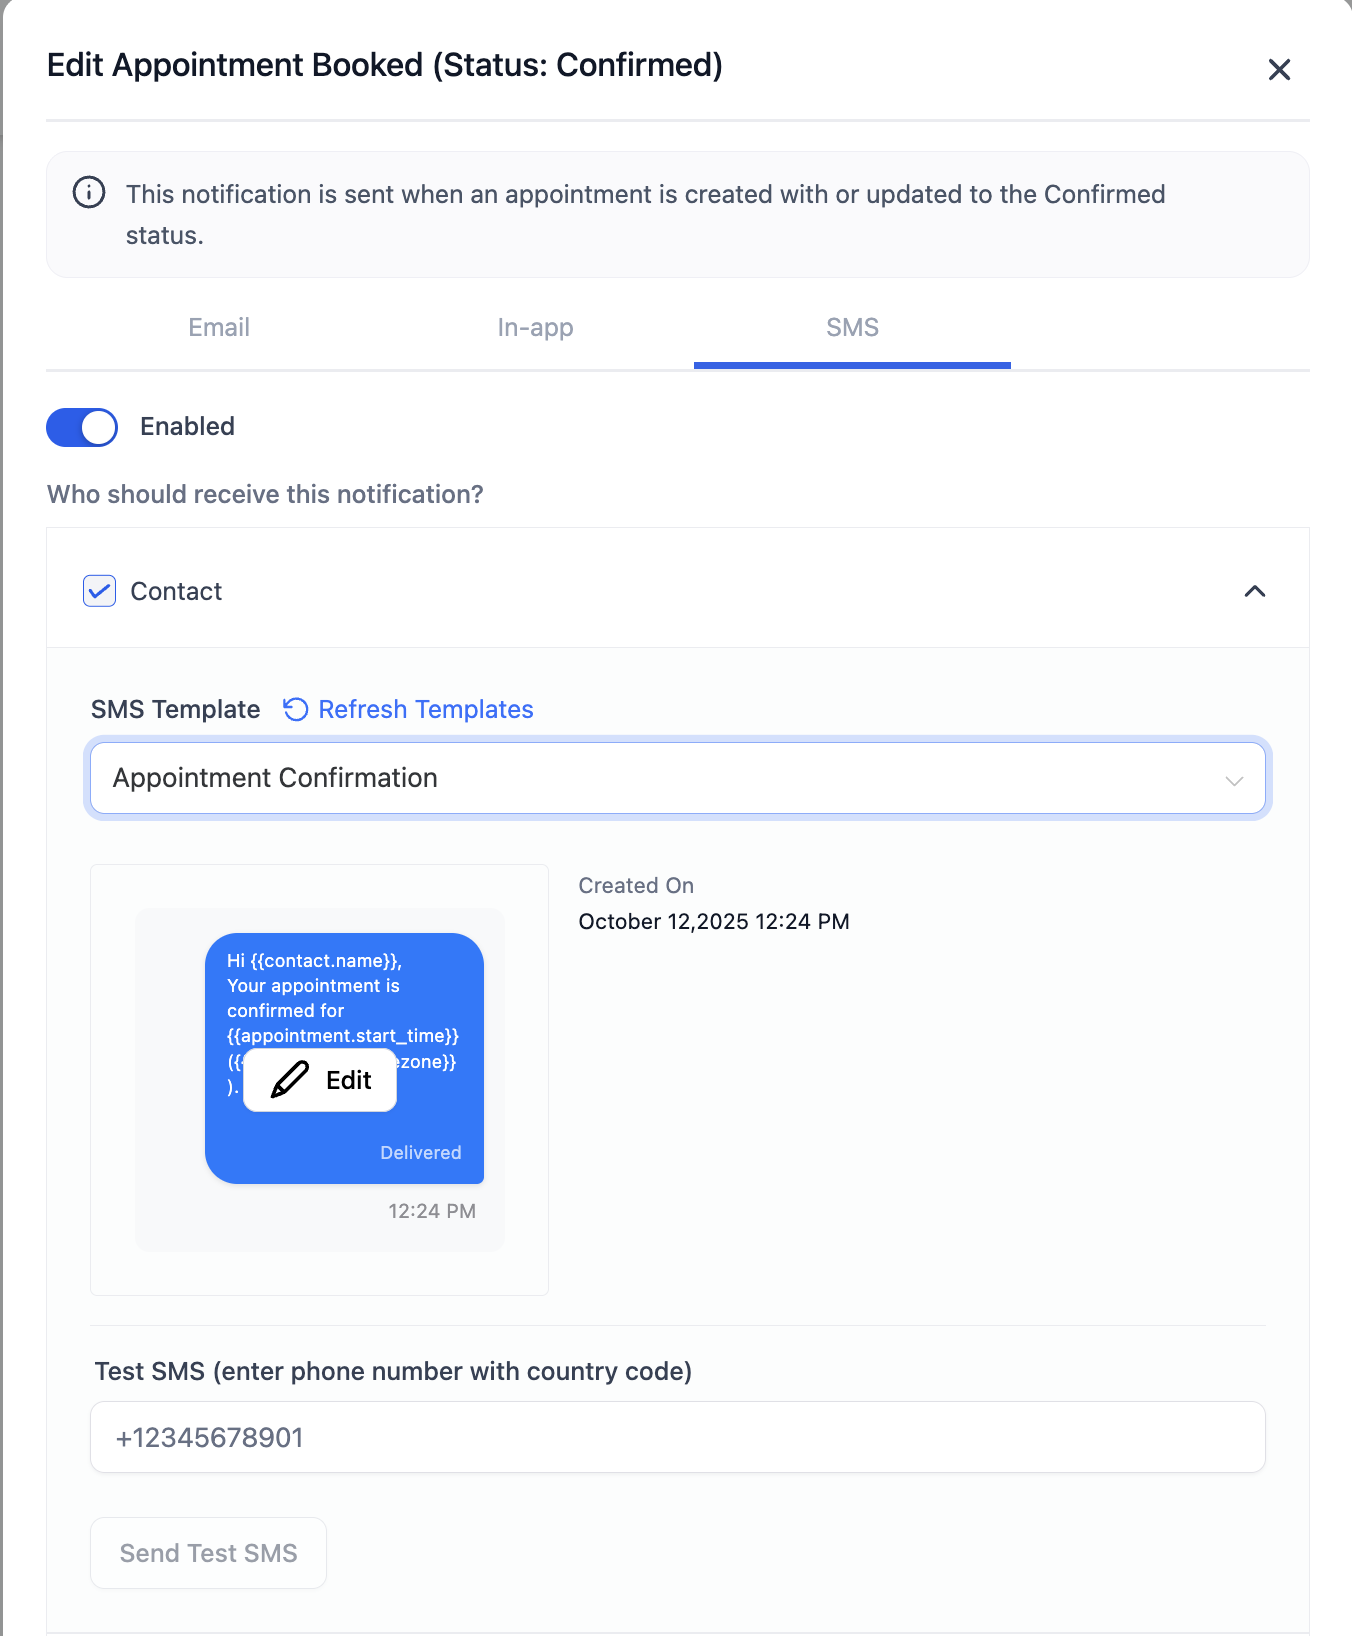
Send a test SMS to preview the message.
For Reminders and Follow-Ups, set the timing the same way you would for email. Multiple timings are supported.
Click Save once every recipient type is configured.
Additional phone numbers must include country codes for the message to deliver successfully. SMS is billed per message segment, so keep reminder and follow-up text concise to manage cost.
Select a notification type, open the WhatsApp tab, and turn the toggle on.
Choose recipients: Contact, Assigned User, or Additional Numbers.
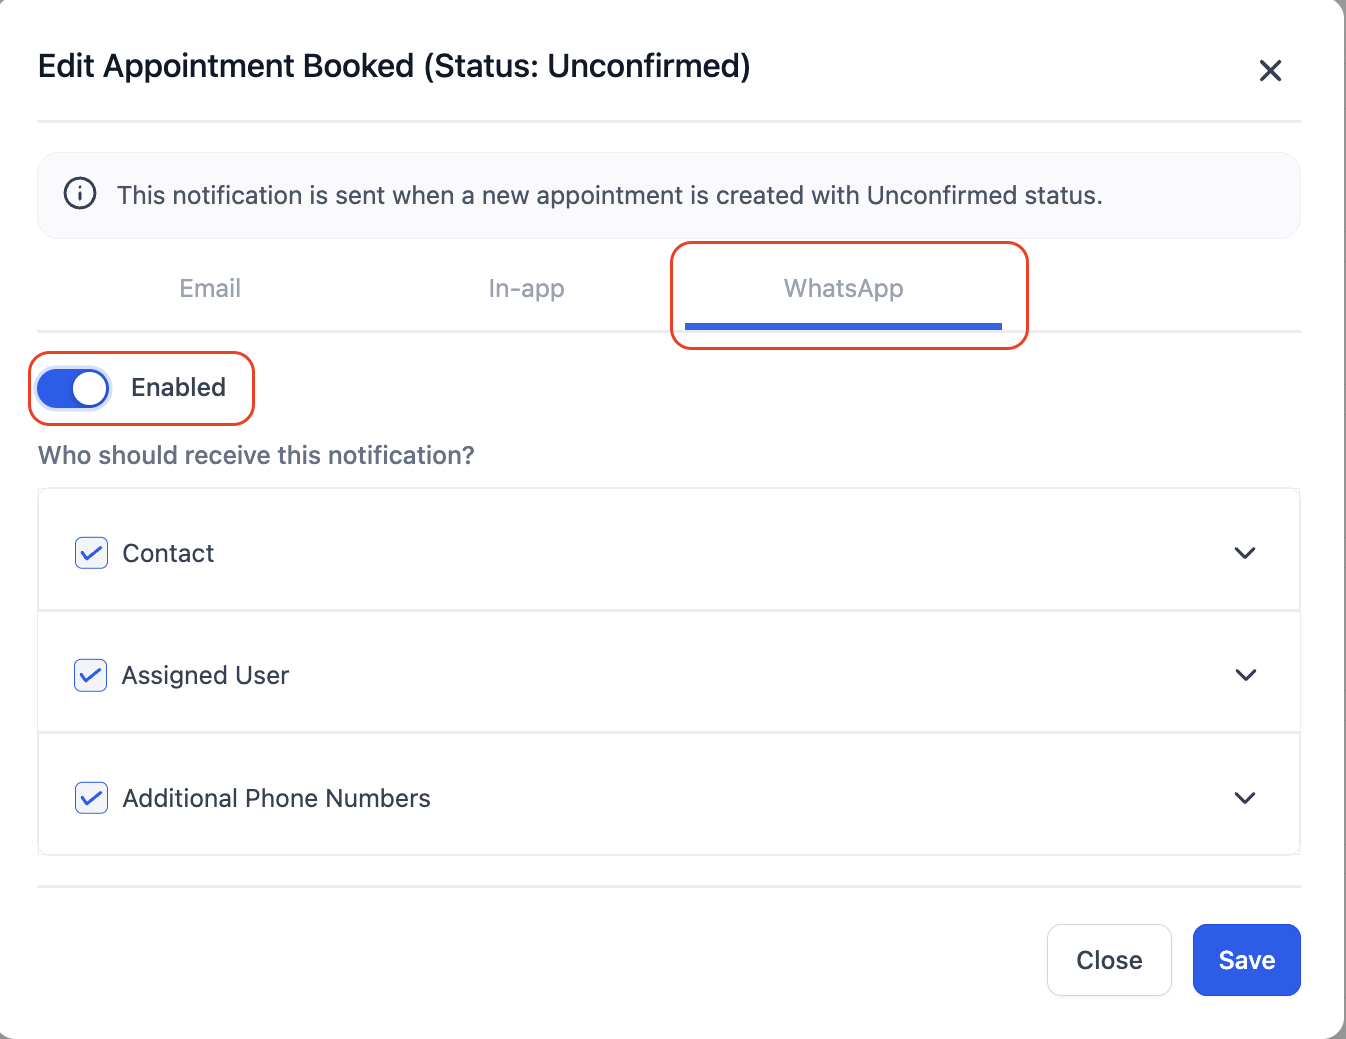
Choose or create an approved WhatsApp template for that notification type.
Use Send Test WhatsApp Notification to preview the message.
Click Save to activate it.
WhatsApp notifications require a connected and verified WhatsApp Business Account, and only approved templates can be used. Use Fetch New Templates to refresh your available template list, and always test a template's formatting before turning it on for patients.
Additional Emails are any extra recipients (front desk inbox, provider, practice manager) you want copied on a notification. Add their address and they'll receive it along with everyone else.
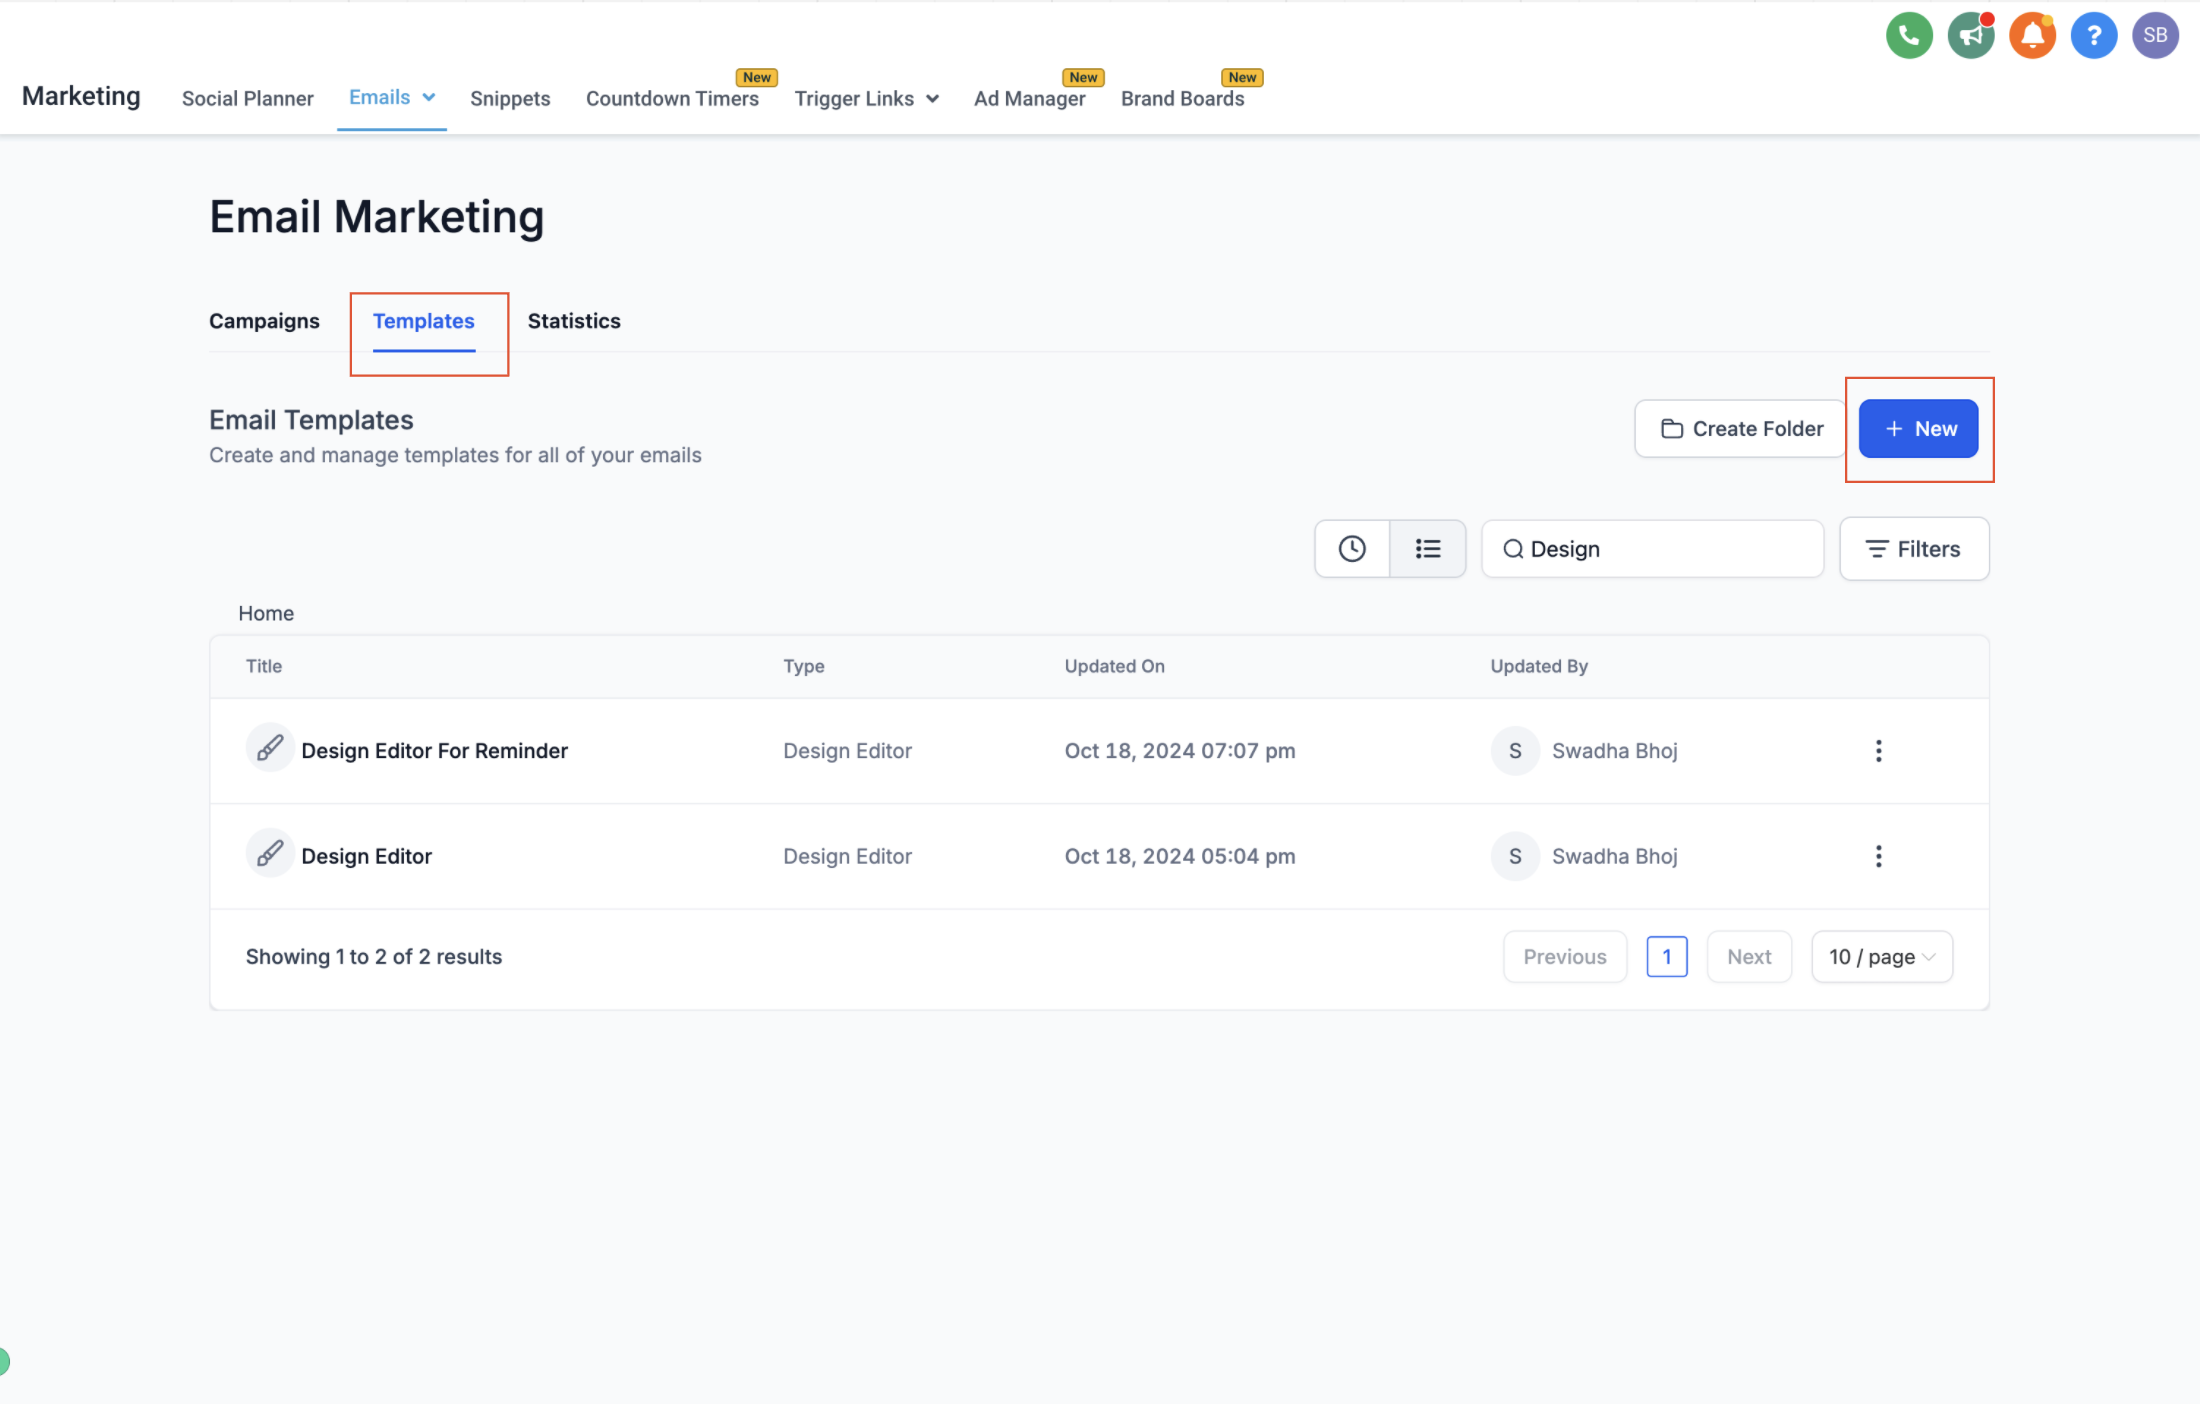
Build your own notification templates in Marketing > Emails > Templates.
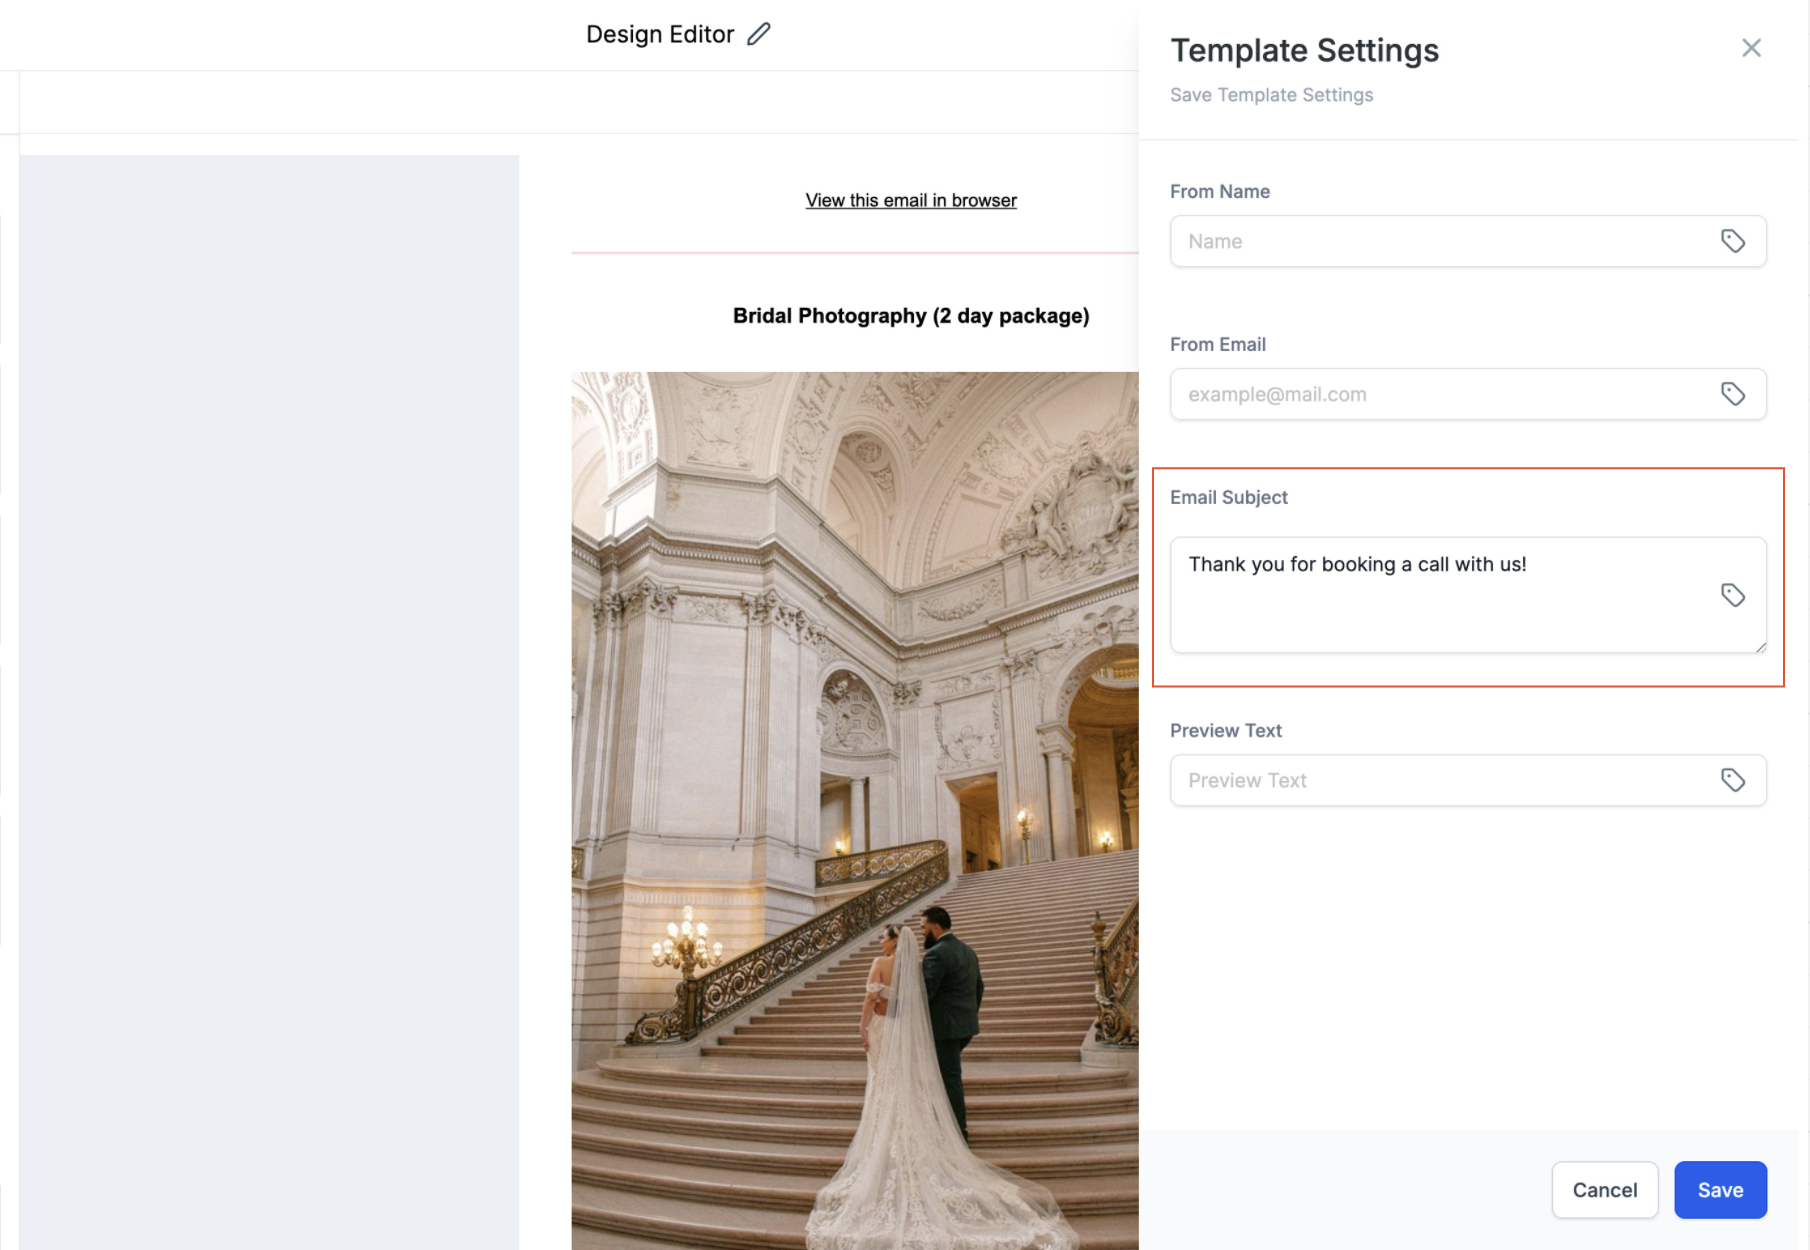
Every email template needs a subject line, or delivery may fail.
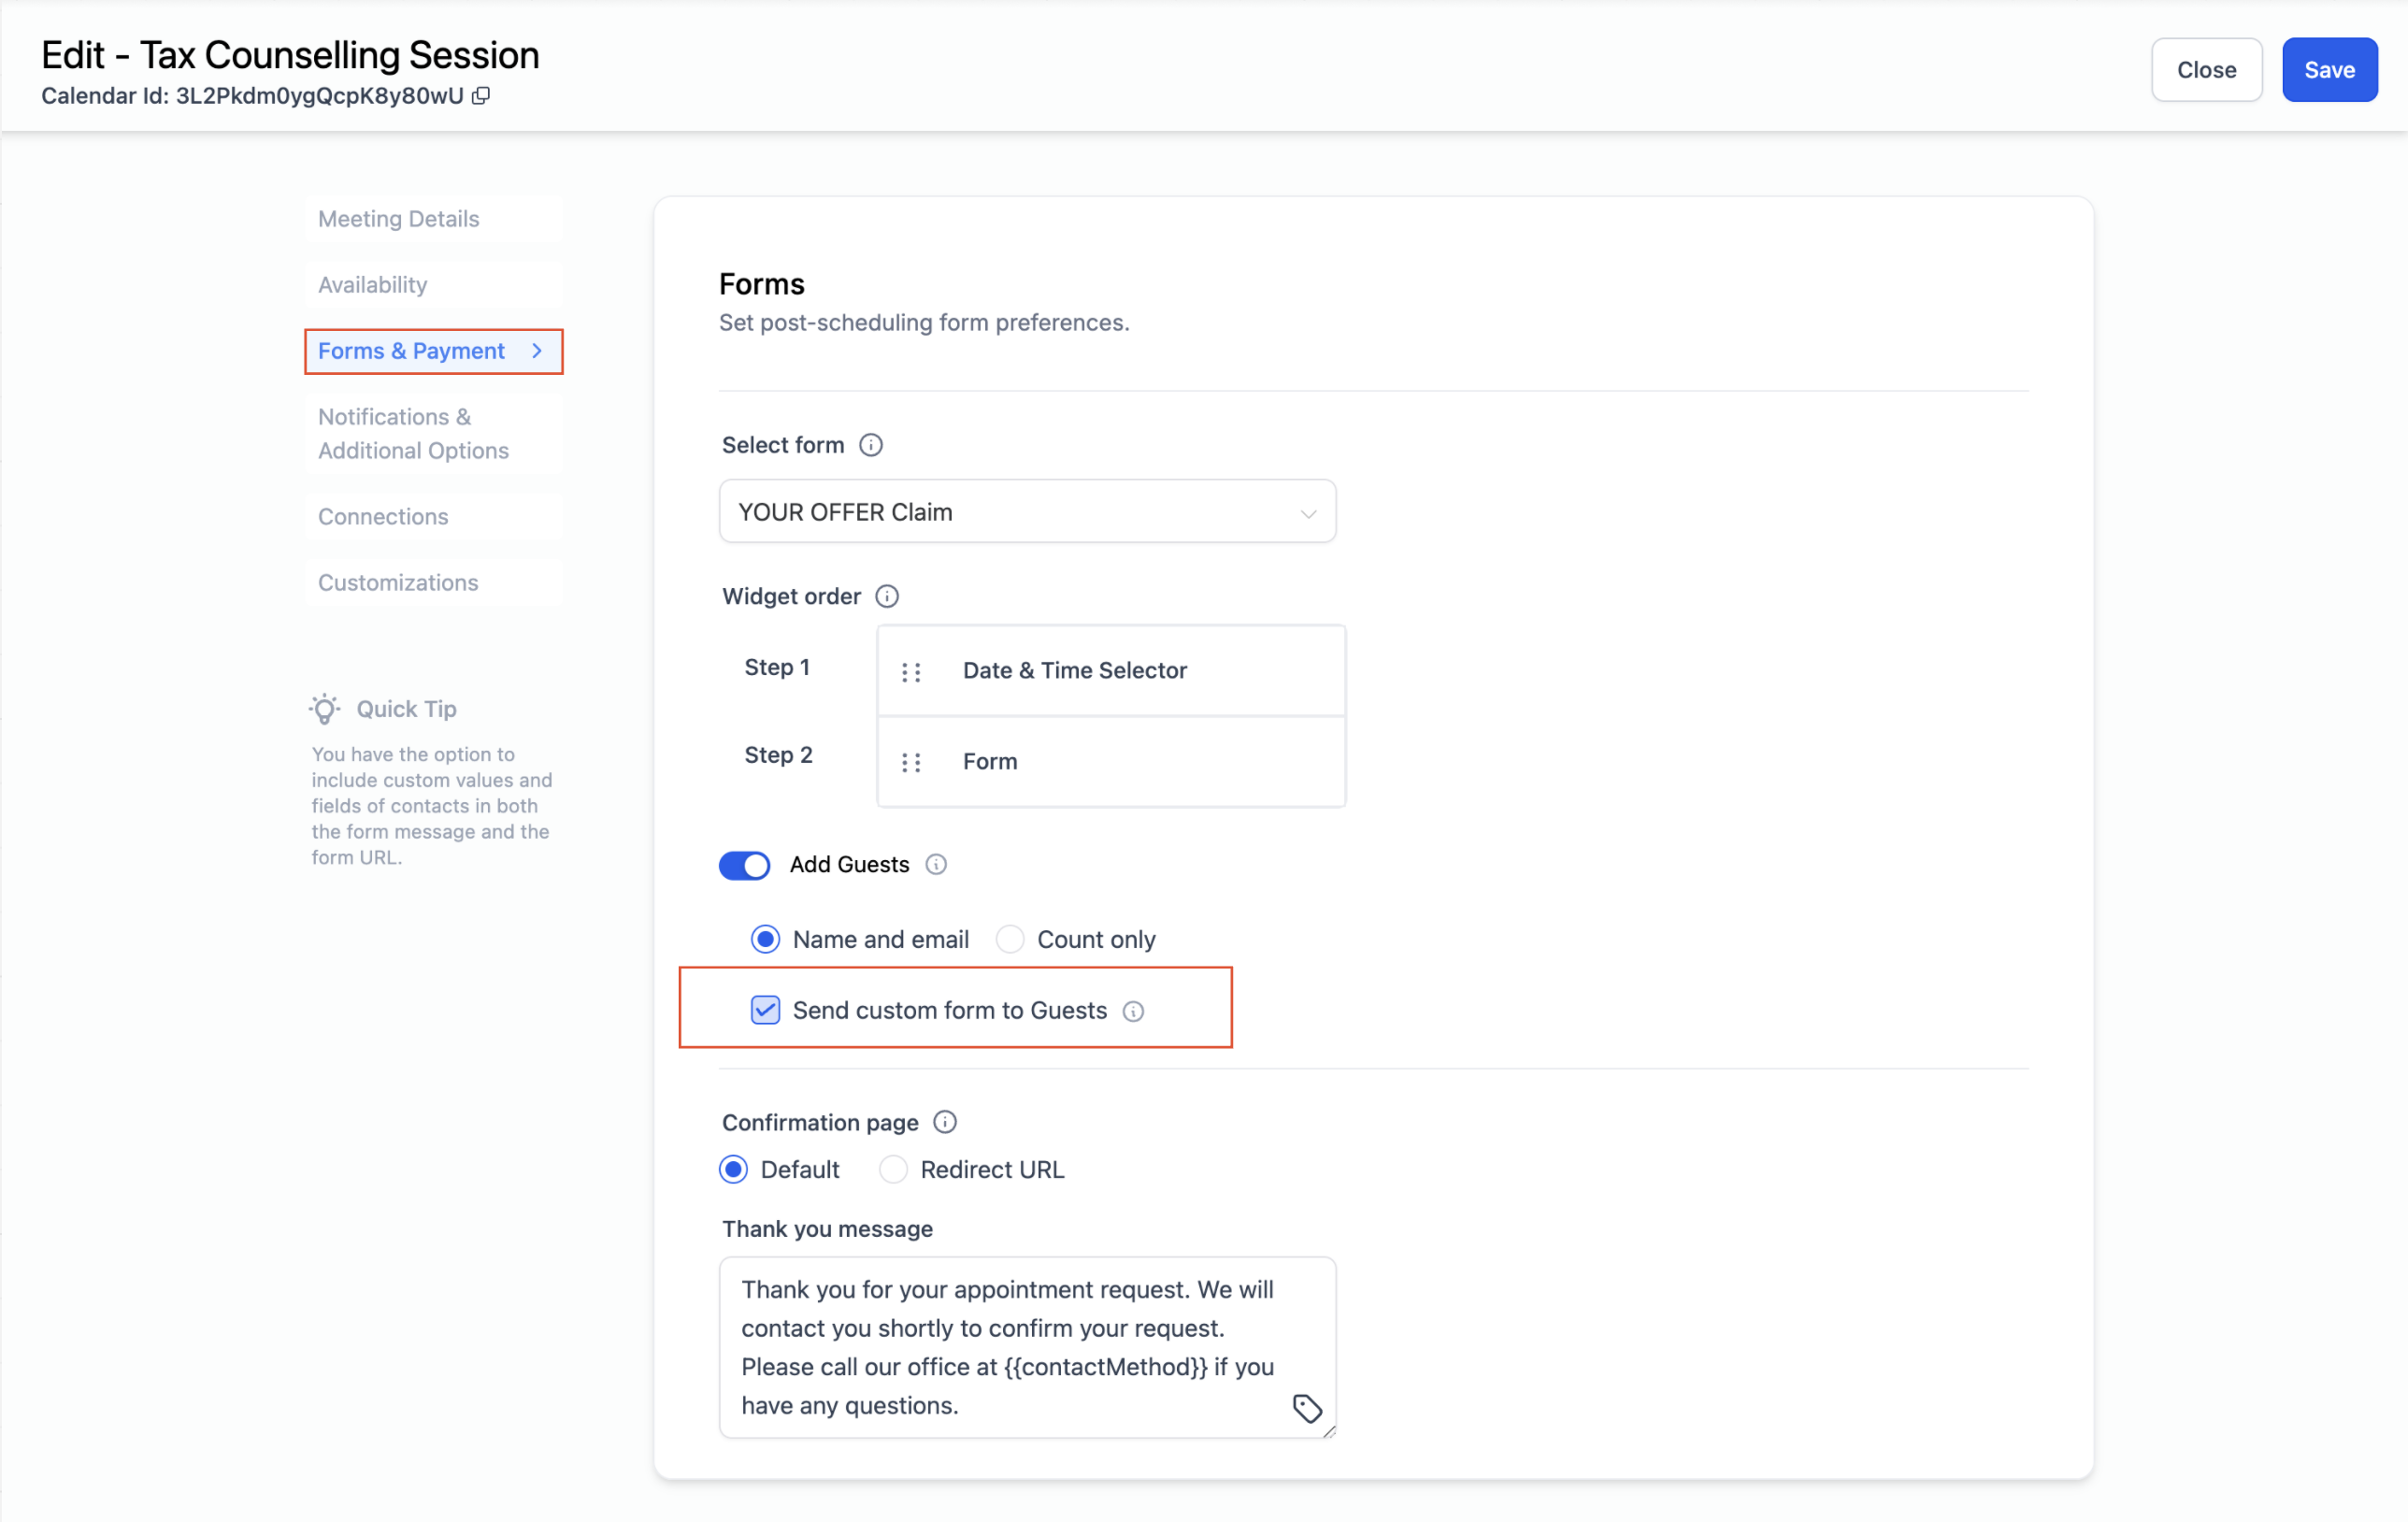
If you've enabled Add Guest with a custom intake form attached, enabling this option sends guests a system-generated email containing a link to that form once their appointment is confirmed. Check the Confirmation Notification setting first so guests don't receive two separate confirmation emails.
Because appointment notifications can include a patient's name, appointment time, and provider, treat them as PHI. Keep subject lines and message bodies limited to scheduling details, avoid including treatment or diagnosis information in SMS or WhatsApp text, and confirm your WhatsApp Business Account and email sending domain are properly secured before sending patient communications.
What's the difference between View and Manage permissions? View lets a user see calendars, appointments, or groups without changing them. Manage lets that same user create, edit, and delete them. You can grant one without the other.
What does Assigned Data actually change? It narrows a user's visibility to appointments and calendars they're personally assigned to (plus contacts they follow, if permitted), instead of everything their general permissions would otherwise allow.
Can I give a front desk coordinator access to only their own appointments? Yes. Enable Assigned Data for that user and grant View permissions for Appointments. They'll only see appointments assigned to them or to contacts they follow.
Who gets in-app notifications by default? For Event Calendars, account admins receive them by default. For every other calendar type (including Service Calendars), the assigned user receives them by default. You can customize either.
Can I turn on one notification type and leave the rest off? Yes. Each of the six notification types (Unconfirmed, Confirmed, Cancellation, Reschedule, Reminder, Follow-Up) can be enabled or disabled independently, per channel, per recipient type.
How do I personalize a reminder with the patient's name or appointment time? Click the { } merge field icon while editing any email, SMS, or WhatsApp message and select the field or Custom Value you need.
Do additional phone numbers need anything special to receive SMS notifications? Yes, they need to include the country code, or the message won't deliver.
What do I need before I can send WhatsApp appointment notifications? A connected, verified WhatsApp Business Account and at least one approved WhatsApp template. Use Fetch New Templates if you don't see a template you expect.
Can a guest automatically receive an intake form after booking? Yes, if Add Guest is enabled with a custom form attached. A system email with the form link goes out once the appointment is confirmed. Check your Confirmation Notification setting first to avoid sending guests two confirmation emails.
How do I test a notification before it goes out to patients? Every channel has a test option: Send Test Email, Send Test SMS, or Send Test WhatsApp Notification. Send it to your own number or address first to confirm formatting and content look right.
