Every appointment booked through Aesthetix CRM, whether a patient self-books online or your front desk books it manually, lands in Calendars. From there you can view appointments on a traditional calendar grid or work through them in a filterable list, update statuses, add internal notes, and book new appointments on behalf of a lead or patient.
Aesthetix CRM gives you two complementary views for the same appointment data:
Calendar View shows appointments on a date-based grid and is best for day-to-day scheduling and checking availability.
Appointment List View shows appointments as a structured, filterable list and is best for managing appointments at scale, such as working a queue of unconfirmed bookings or reviewing everything scheduled for a specific team member this week.
Both views pull from the same underlying data, so a status change or note added in one is reflected in the other.
Before appointments will appear on your Calendar View, make sure your calendar is toggled on. On the right-hand side of the Calendars area, click Calendars and toggle on the specific calendar you use (for example, a Consult Call or Service calendar). If multiple team members handle the same type of appointment, each person typically has their own calendar and should toggle on the one assigned to them.
To open the list view, go to Calendars in the left-hand navigation menu, then select the Appointment List View tab at the top.
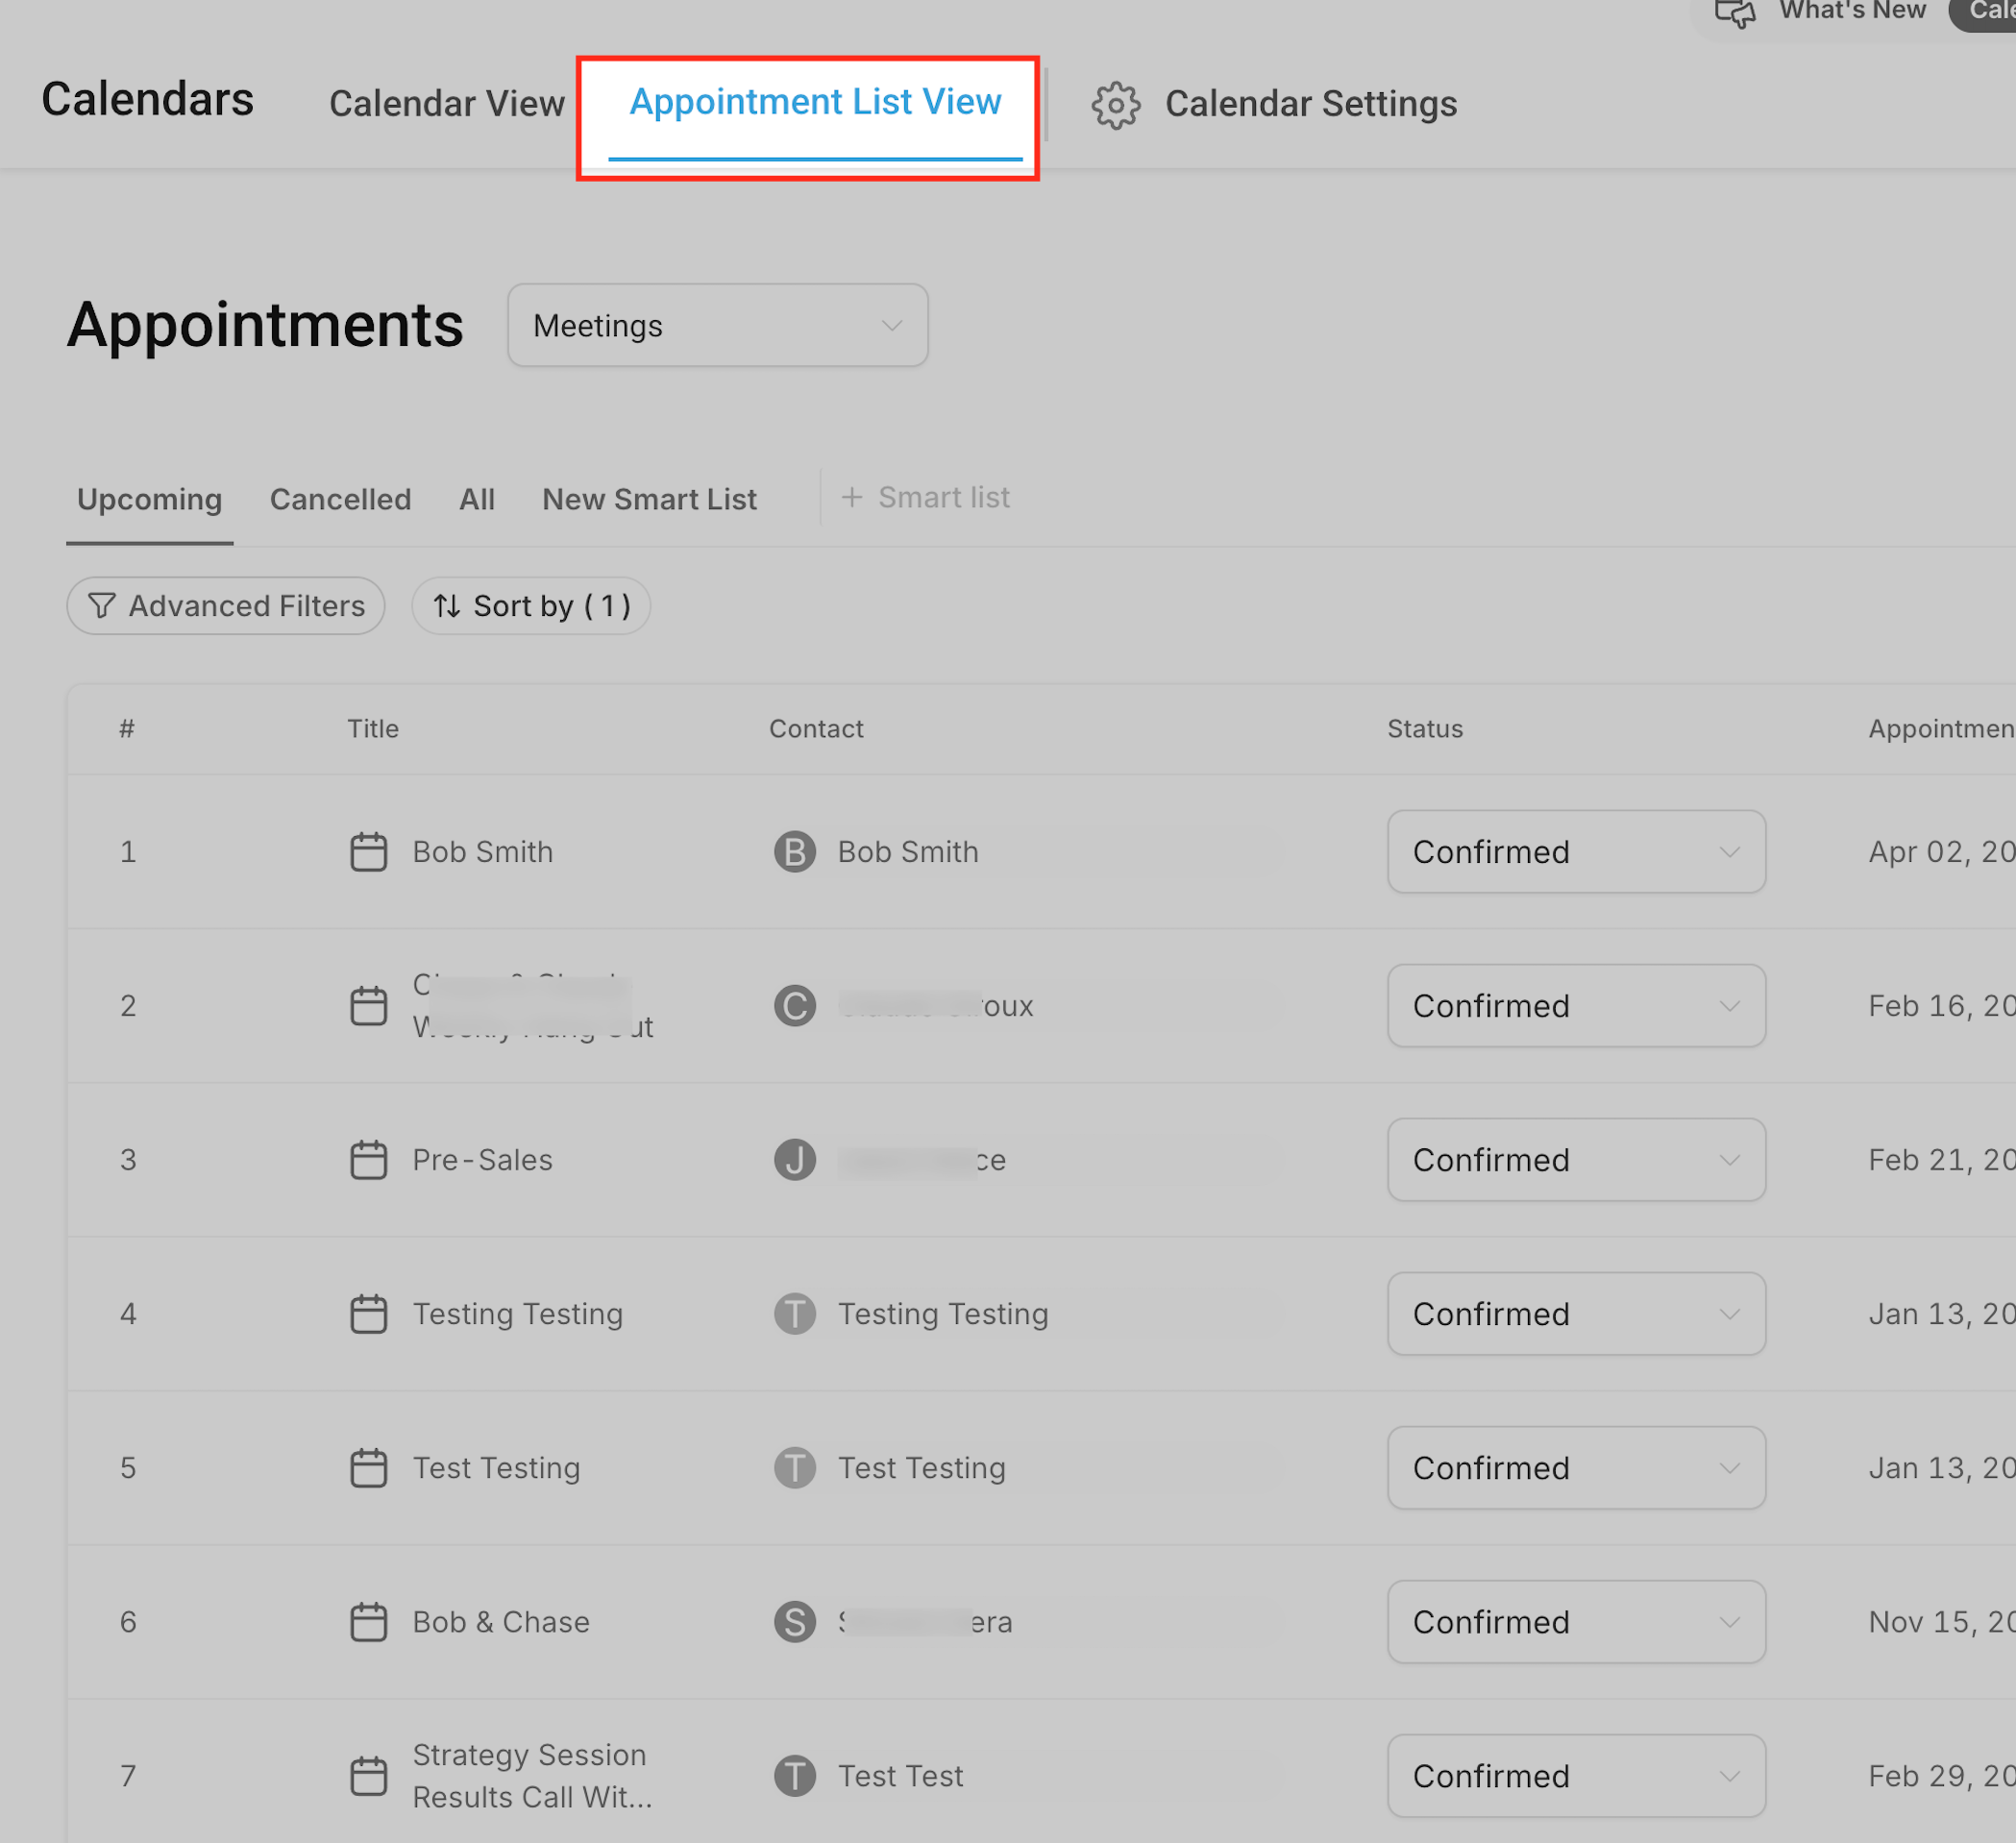
When you open Appointment List View, each row represents one appointment with the following columns:
Column | What it shows |
|---|---|
Name | The patient or lead who scheduled the appointment with you or your team. |
Status | The current appointment status, and where you update it. |
Title | The appointment title. |
Requested time | The date and time the appointment was booked for. |
Date Added | When the appointment was created on your calendar. |
Calendar | Which calendar was used to book the appointment. |
Appointments move through a set of statuses as they progress, and each status can be changed manually from the appointment record or directly from the list:
Confirmed
Unconfirmed
Showed
No Show
Cancelled
Invalid
Reschedule (updates the appointment to a new date/time)
Delete (permanently removes the appointment)
Keeping statuses current matters beyond bookkeeping: many practices trigger follow-up automations (reminders, no-show outreach, review requests) off appointment status changes in Workflows, so an accurate status keeps those messages relevant.
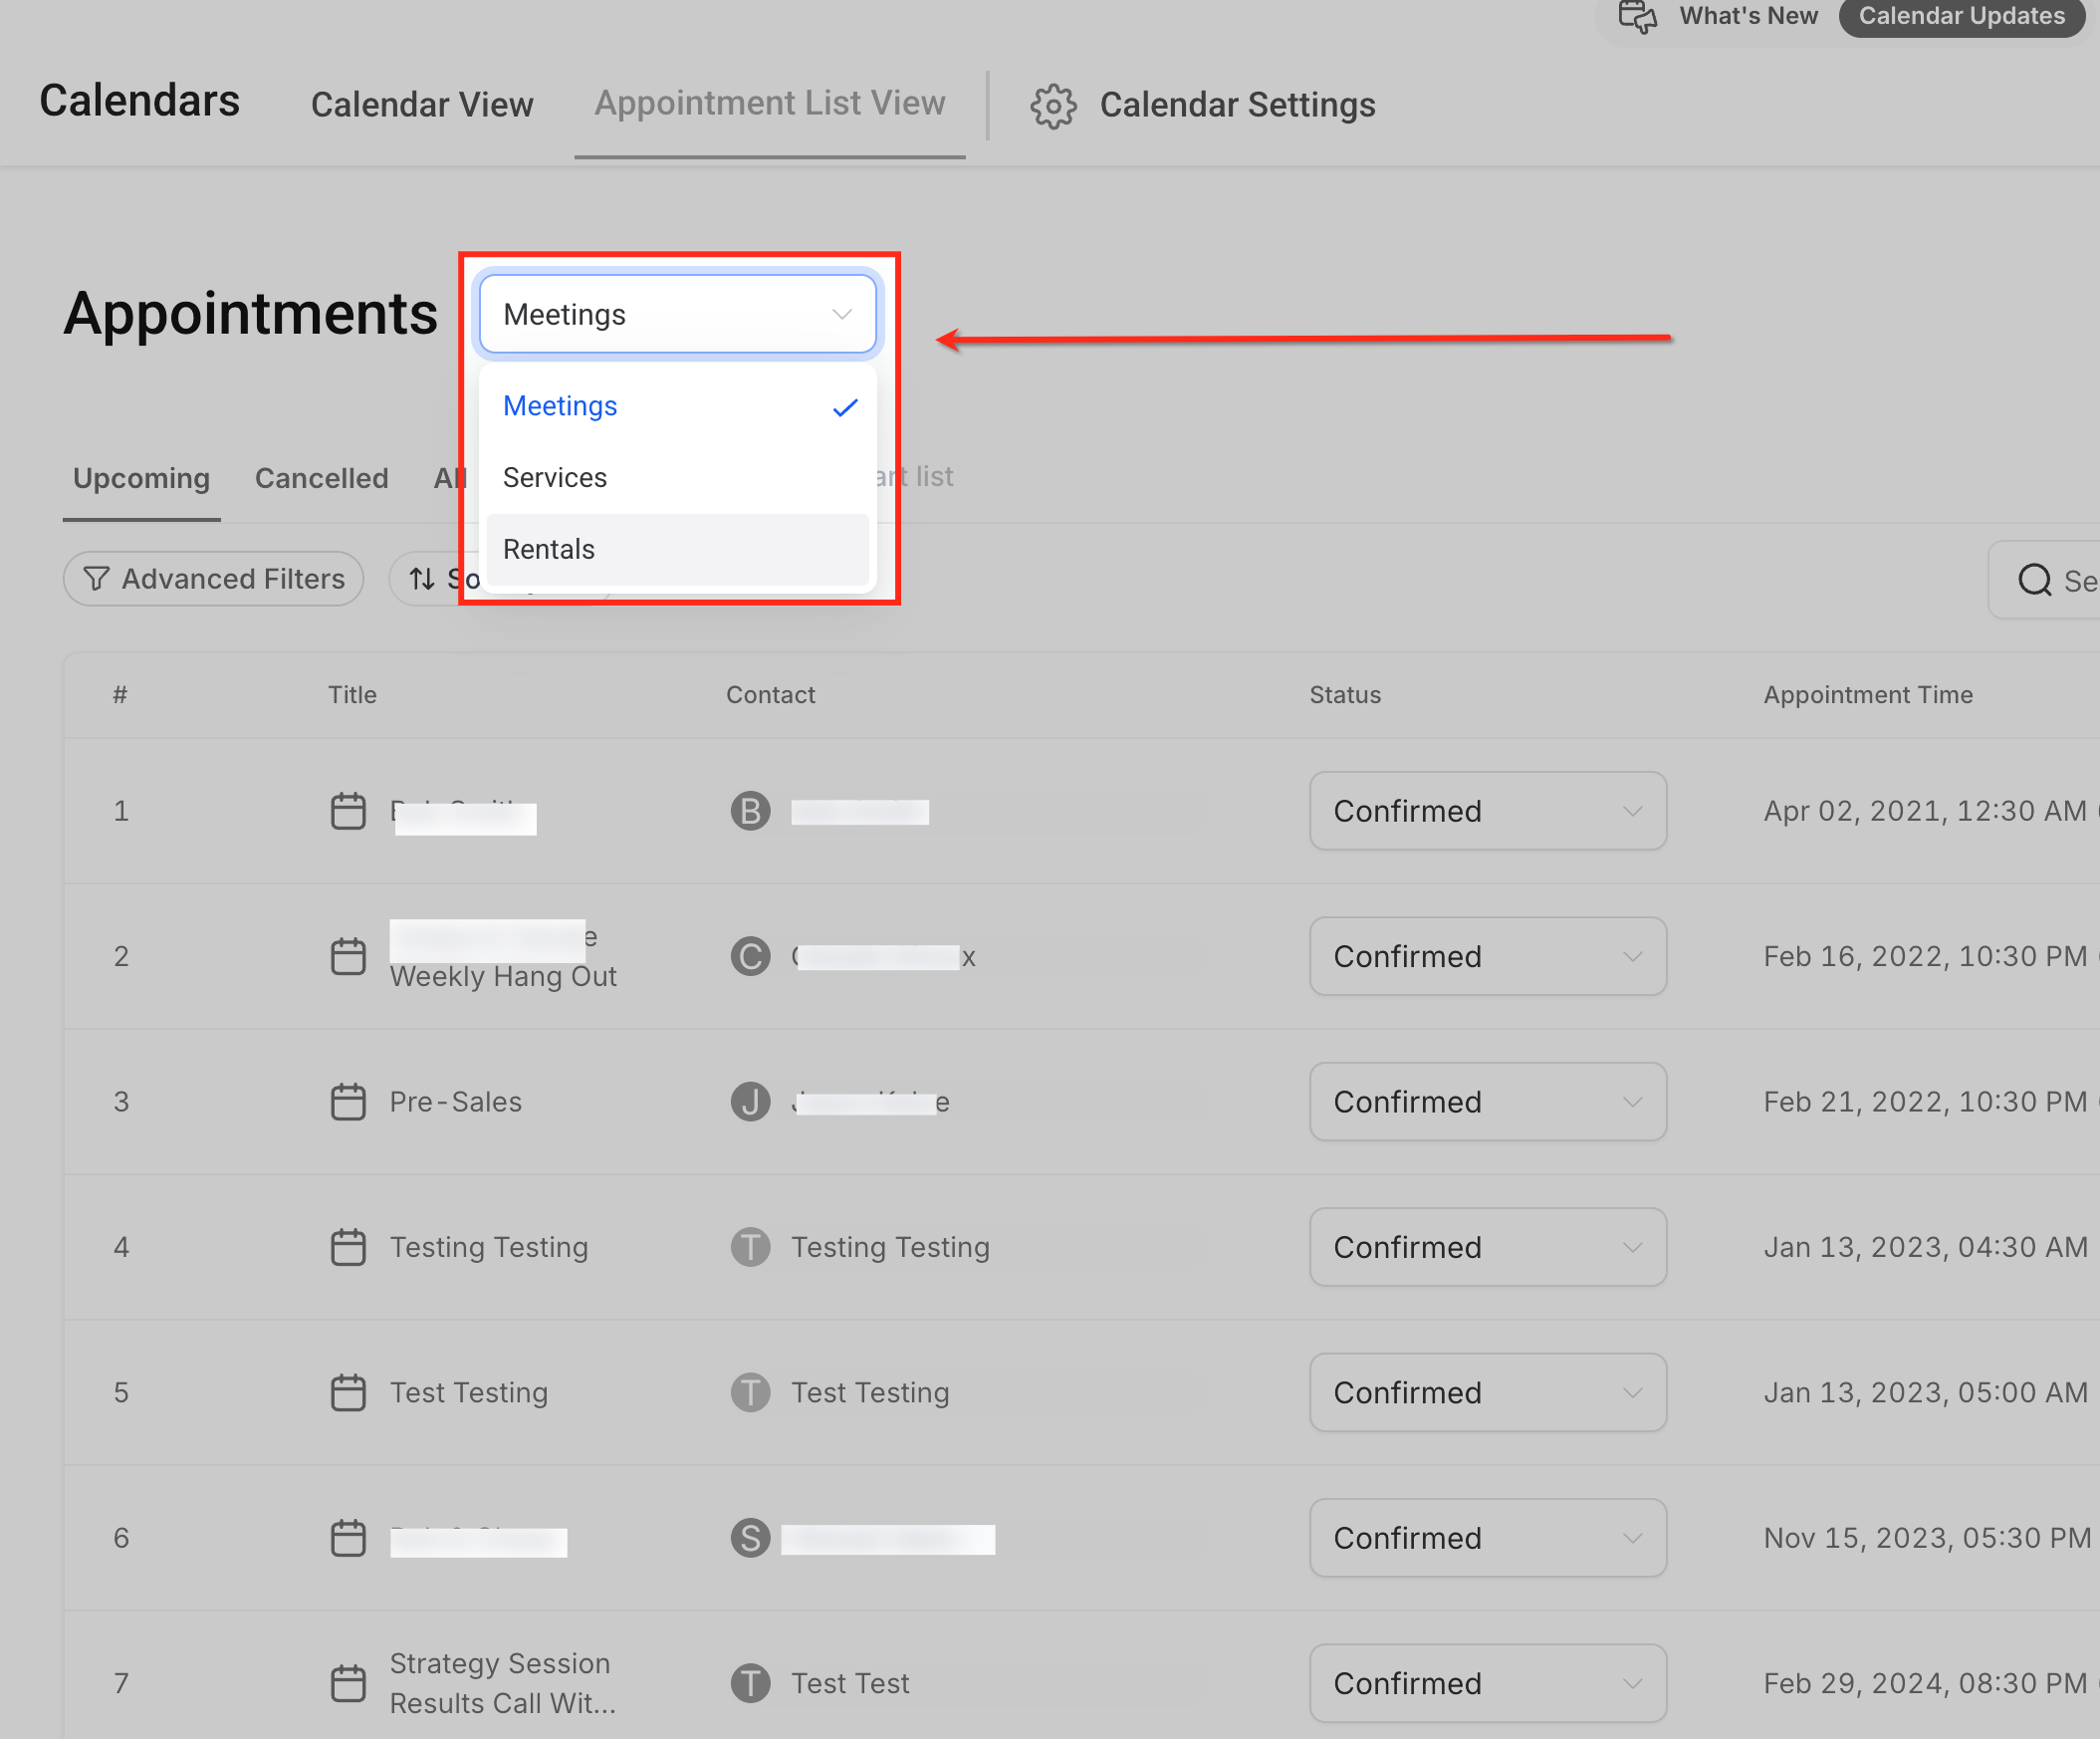
Appointment type is determined automatically by the calendar used to book it. Each calendar is configured as a Meeting, Service, or Rental type, and every appointment booked through it inherits that type. Appointment List View filters by the selected type, so if you don't see an appointment you expect, check that you're viewing the correct appointment type.
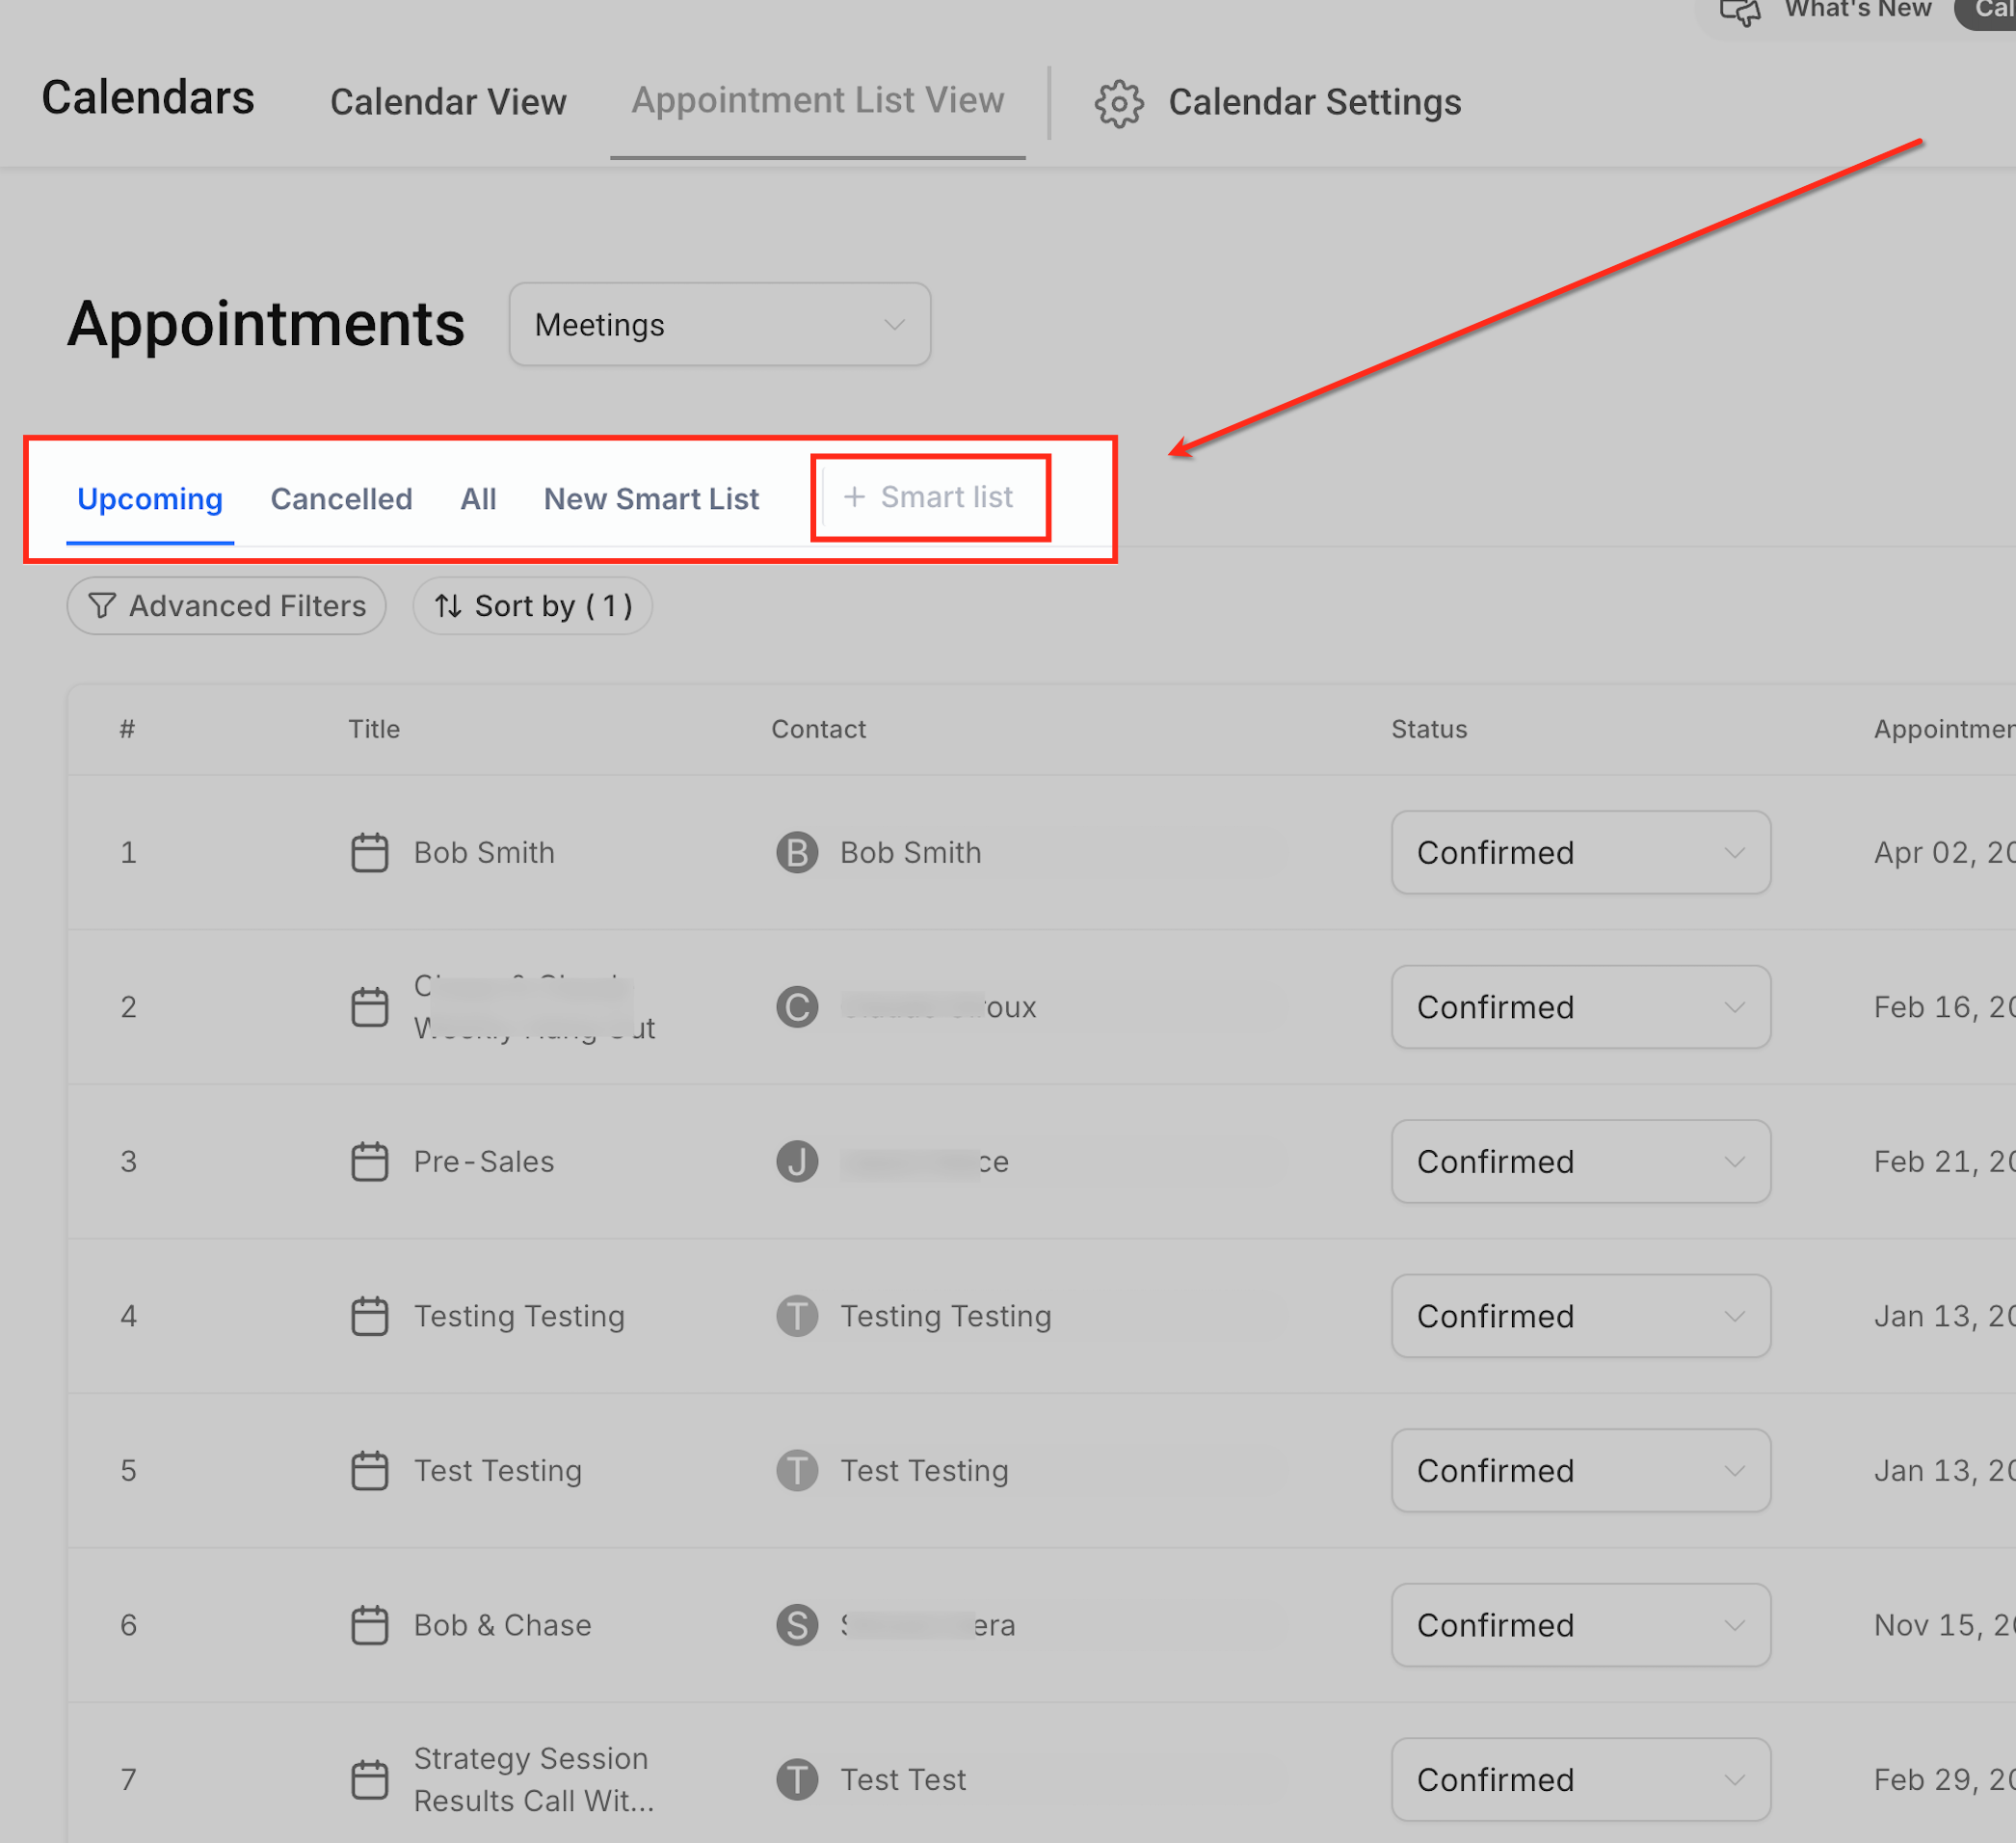
Appointment List View includes three default lists, Upcoming, Cancelled, and All, for quick access to the appointments you check most often. When you need something more specific, click + Smart List to save your own combination of filters, sorting, and visible columns as a reusable view.
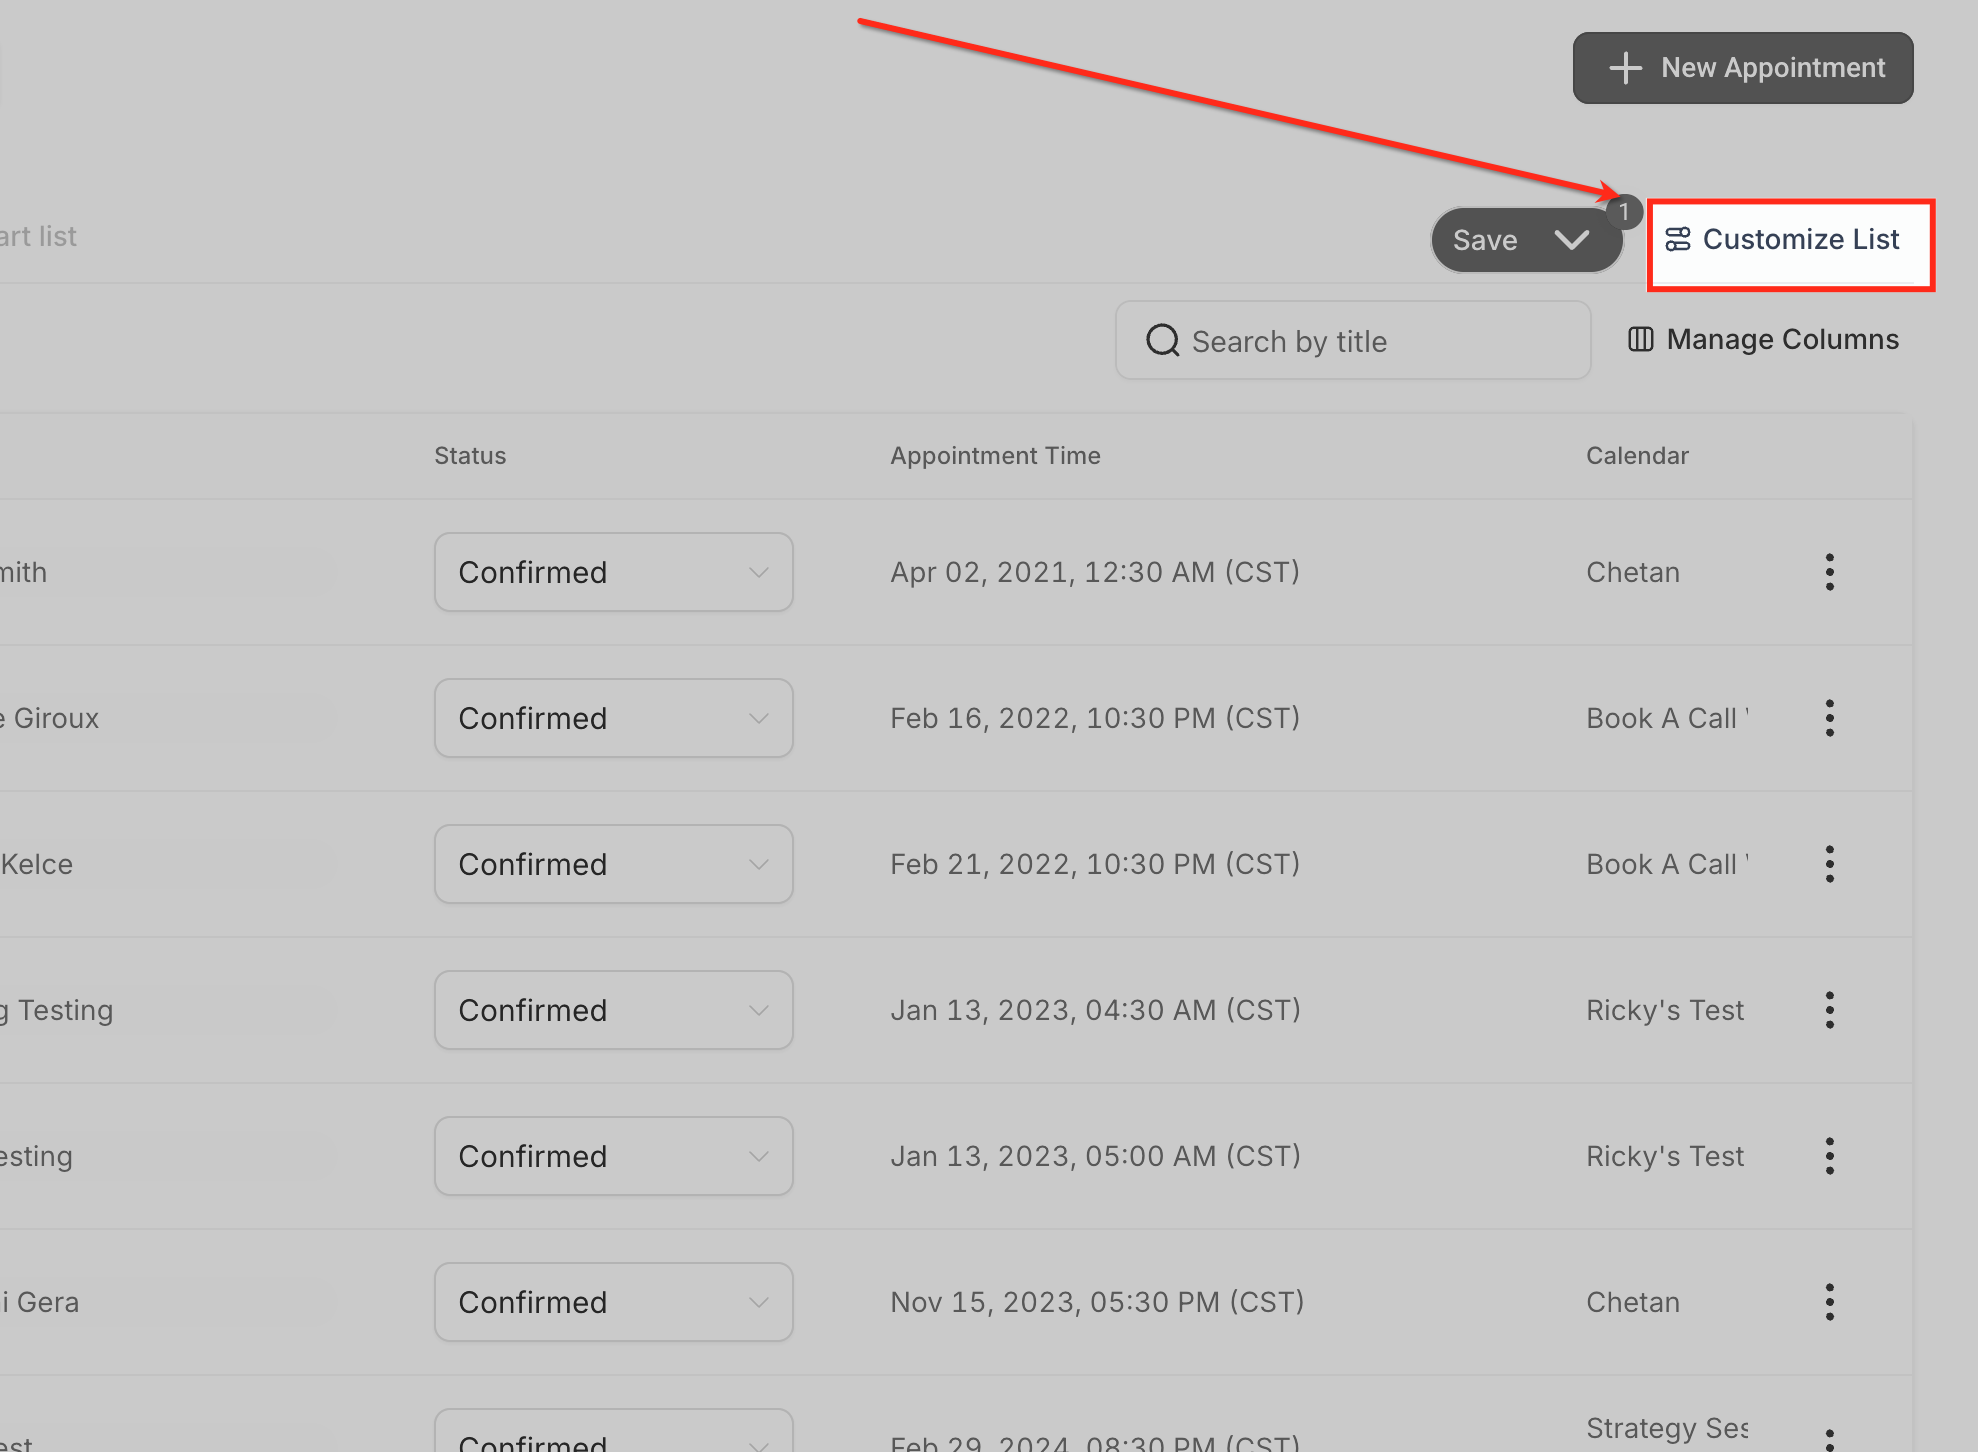
Click Customize List to open the configuration panel, which is where you rename the current list, apply filters, choose sorting, and manage columns. Any changes here can be saved back to the Smart List so the same setup is ready the next time you return to Appointment List View.
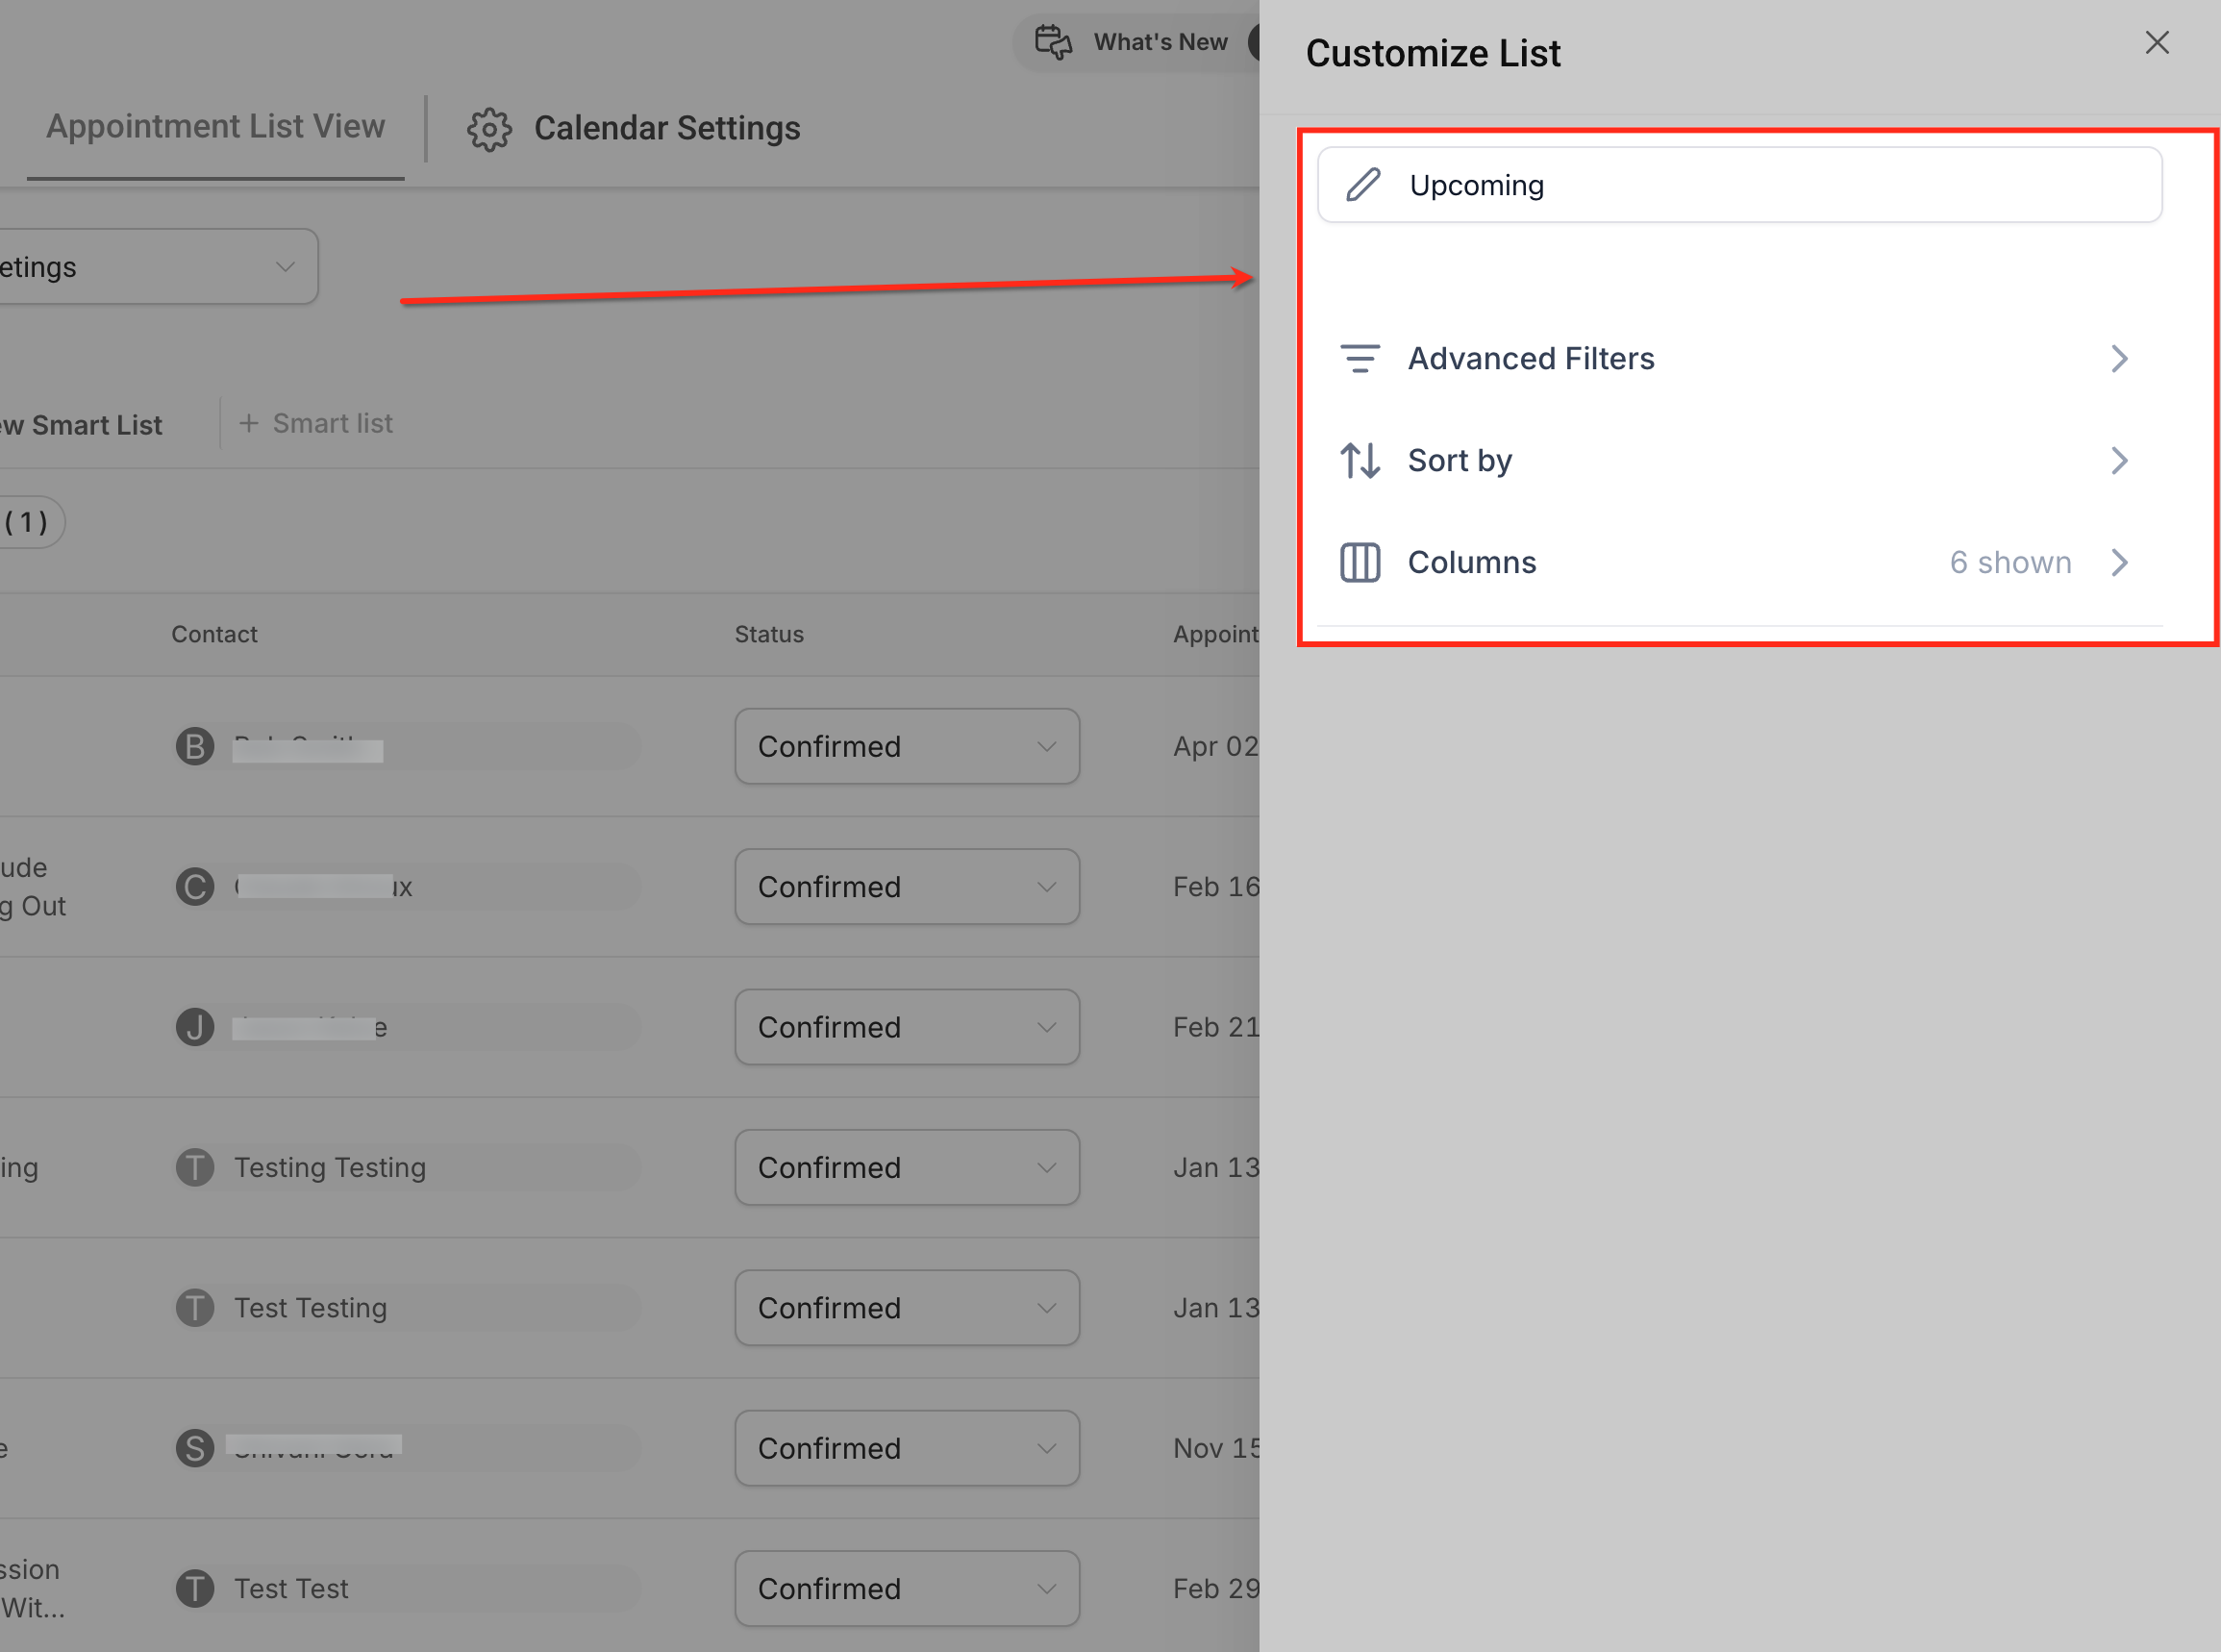
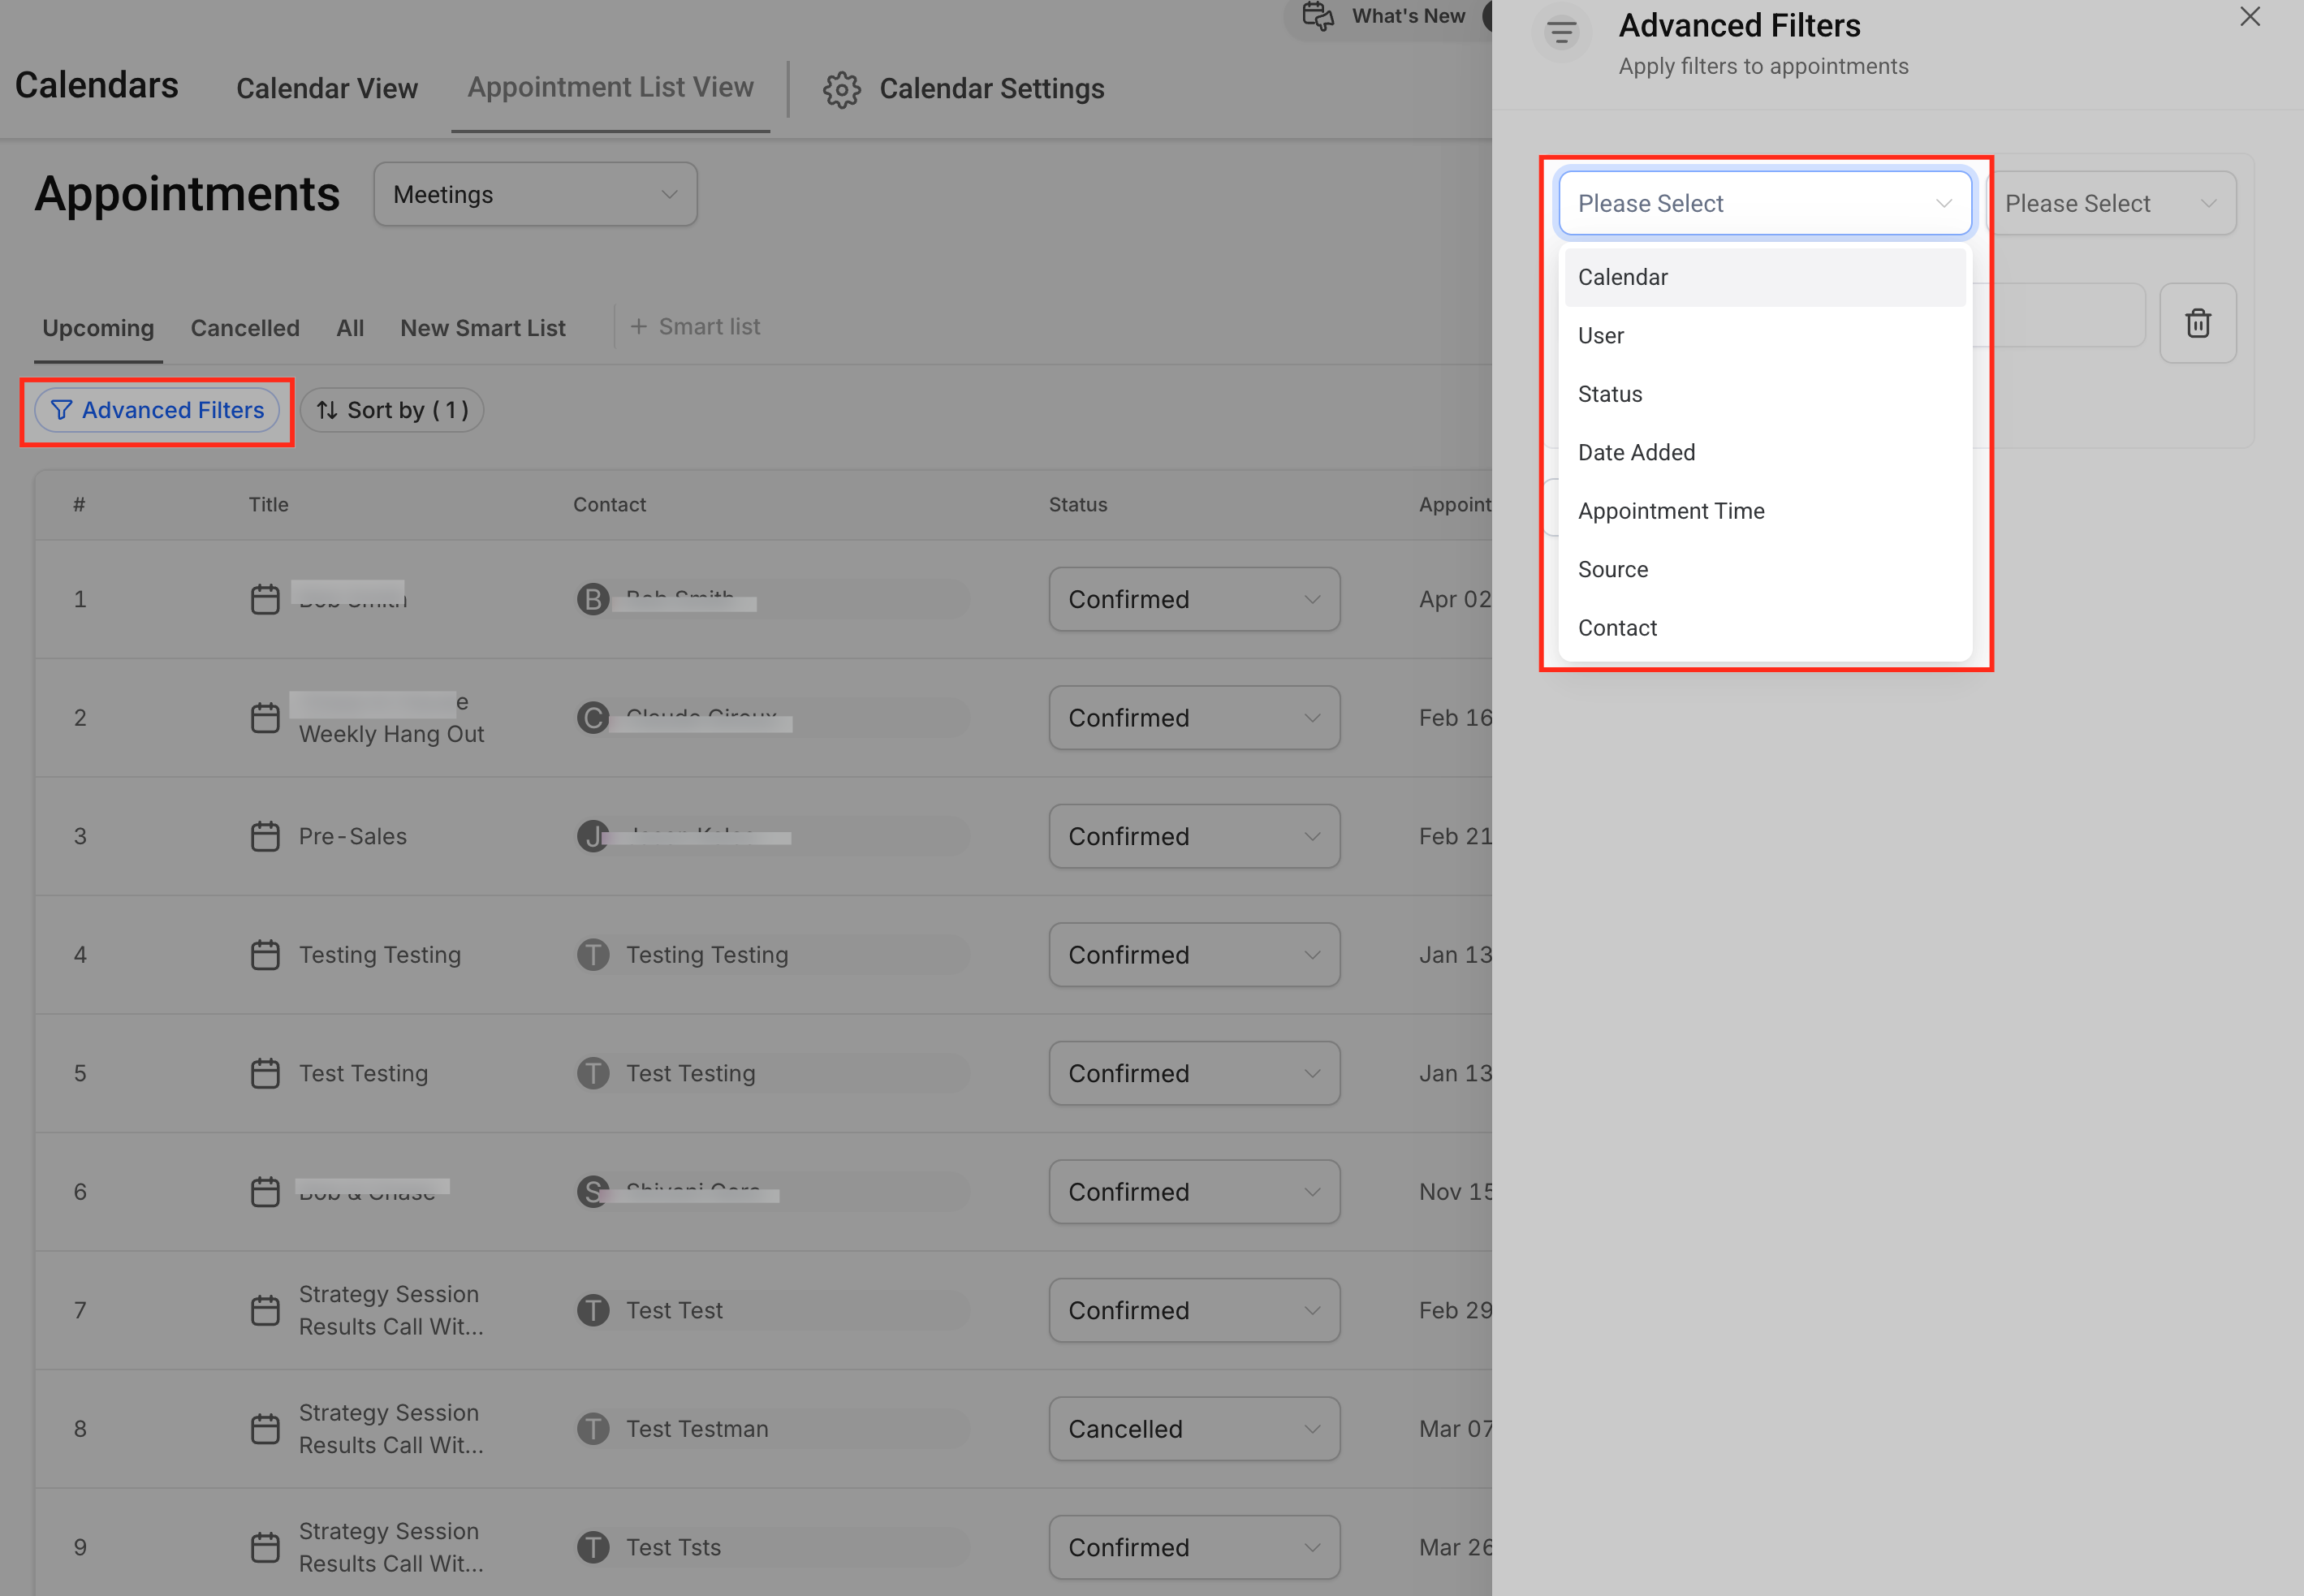
Advanced Filters narrow the list to only the appointments that matter for your workflow. Common filters include:
Appointment status (Confirmed, Cancelled, No Show, and so on)
Assigned user, to see appointments for a specific team member
Calendar, to limit results to one or more calendars
Appointment date or time, to focus on a specific range
Contact details, to filter by the associated patient or lead
Filters combine using AND logic, meaning an appointment must meet every selected condition to appear. This makes it easy to build precise views, such as "upcoming appointments for a specific provider this week," and save them as a Smart List for ongoing use.
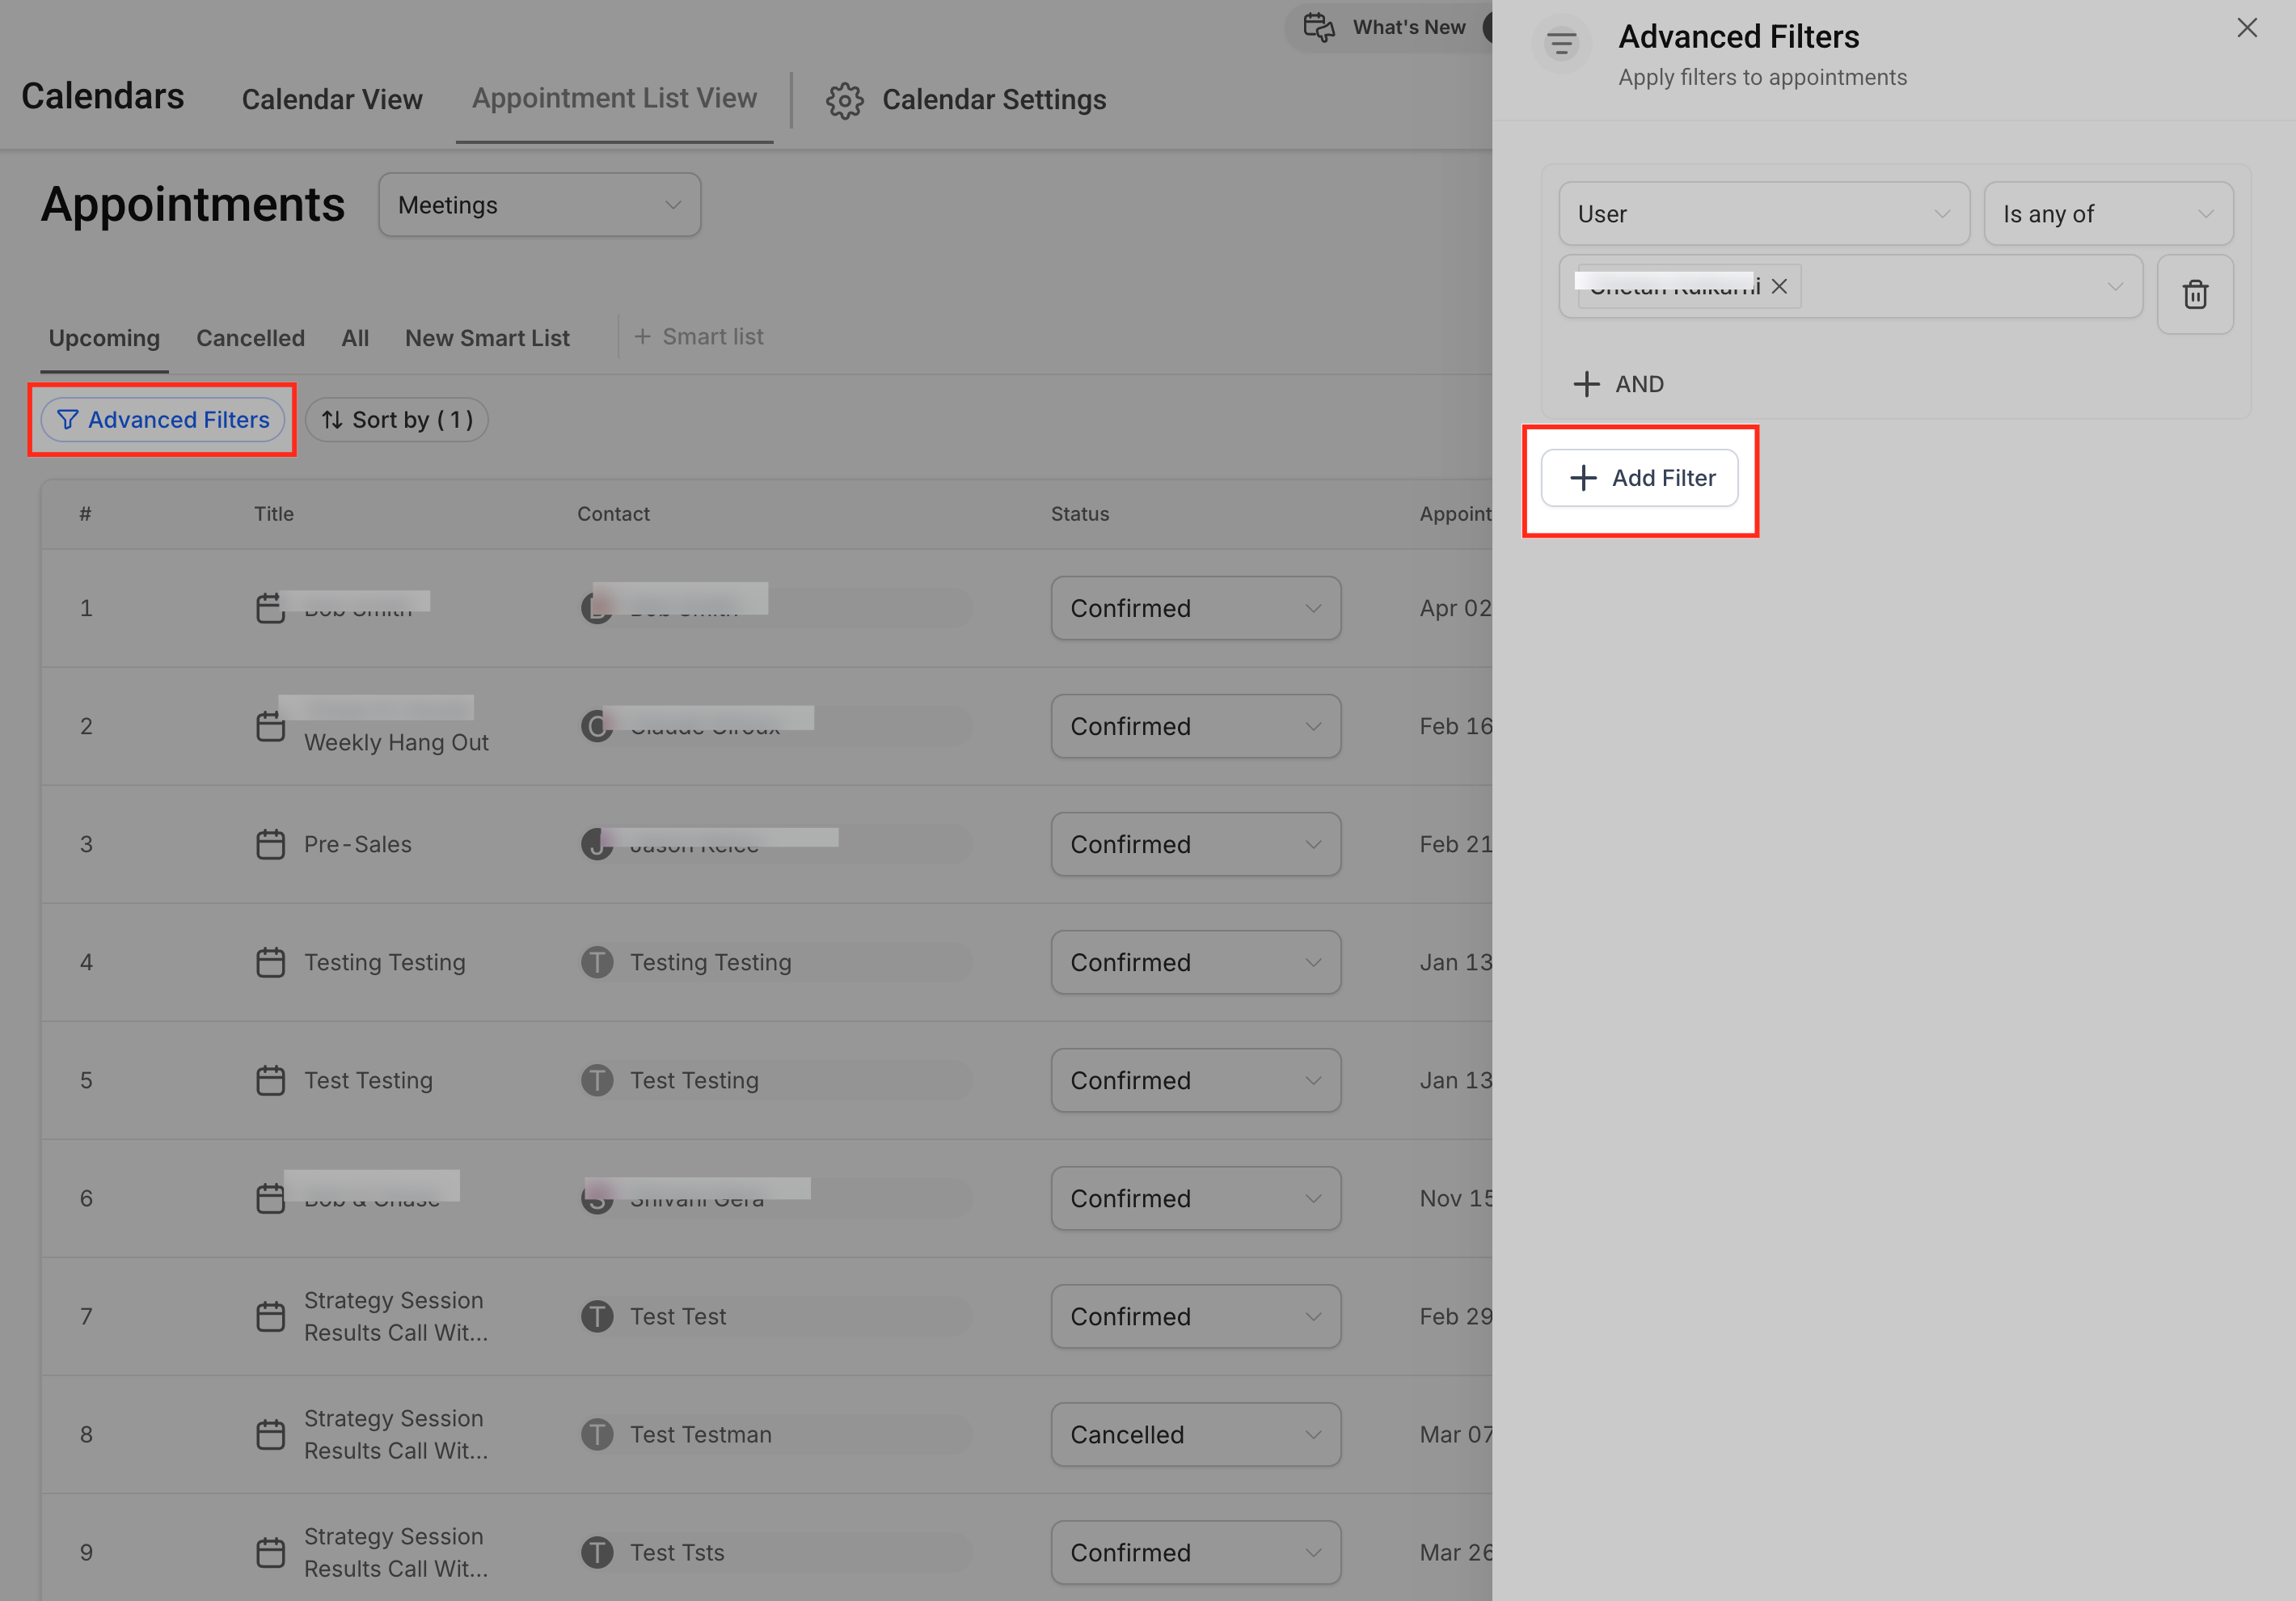
Use Add Filter to layer on additional conditions and narrow the list further.
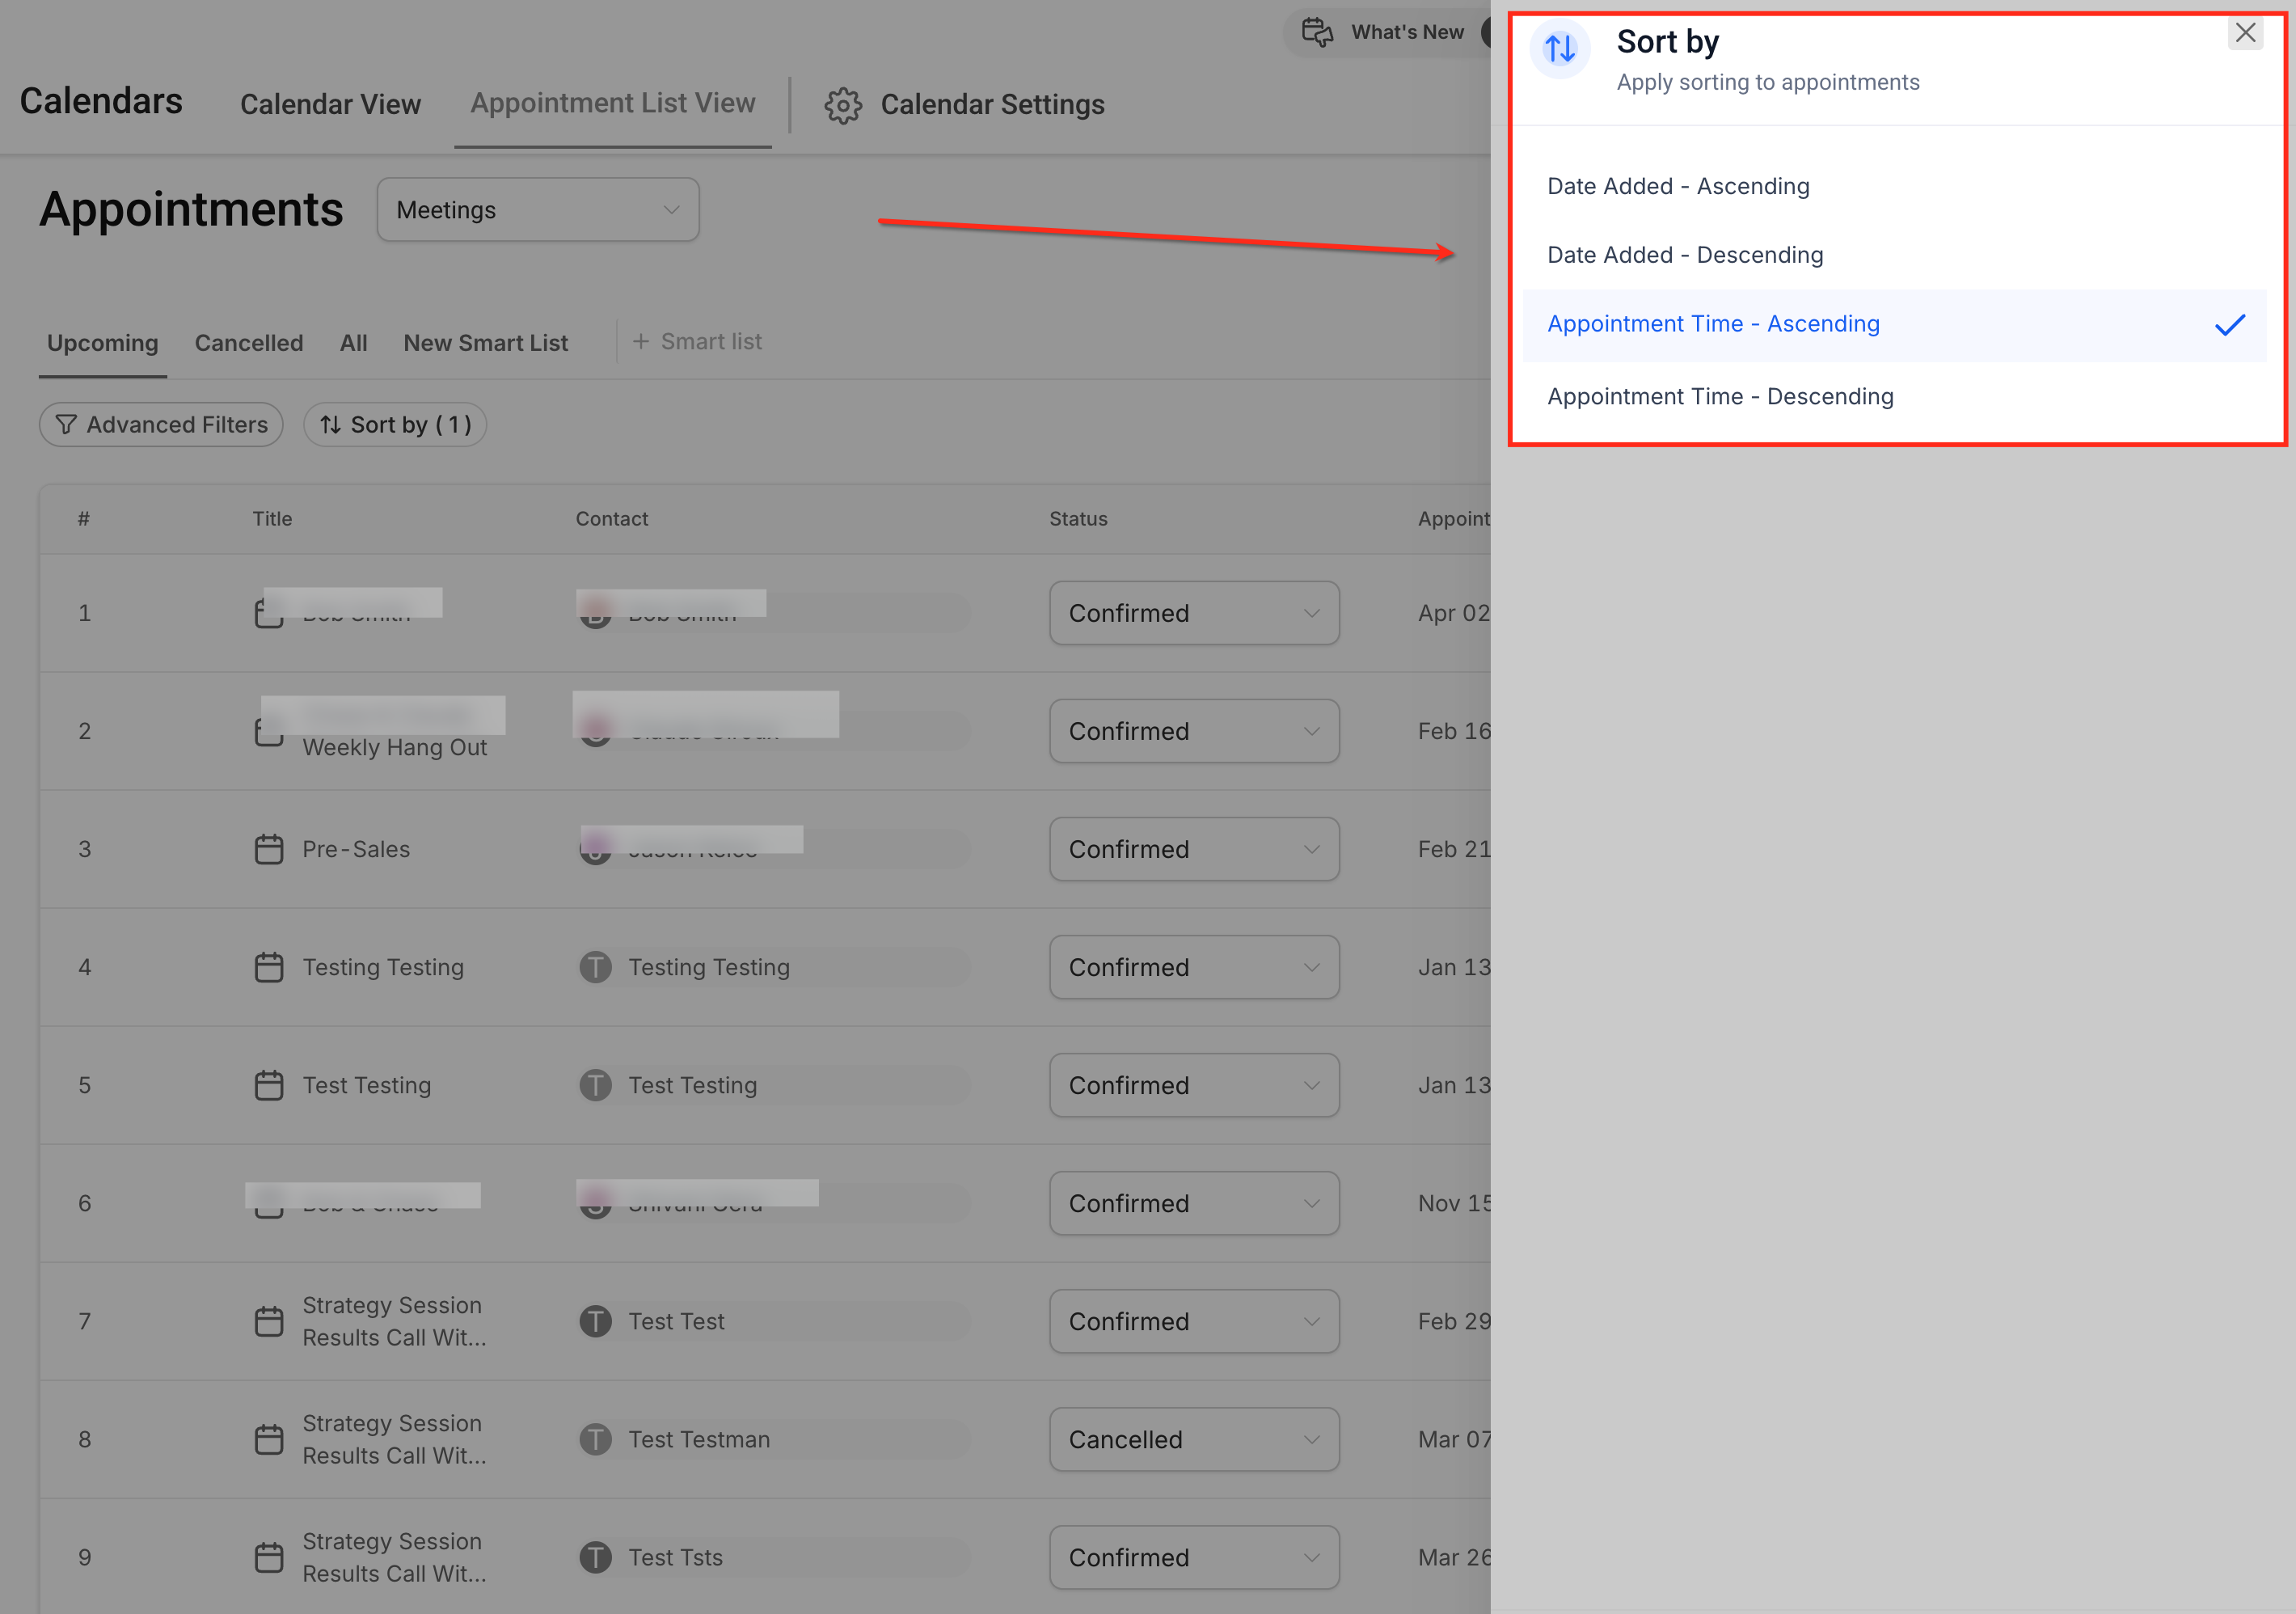
Sort the list by Appointment Time or Date Added, ascending or descending, to prioritize by urgency or by when the appointment was created.
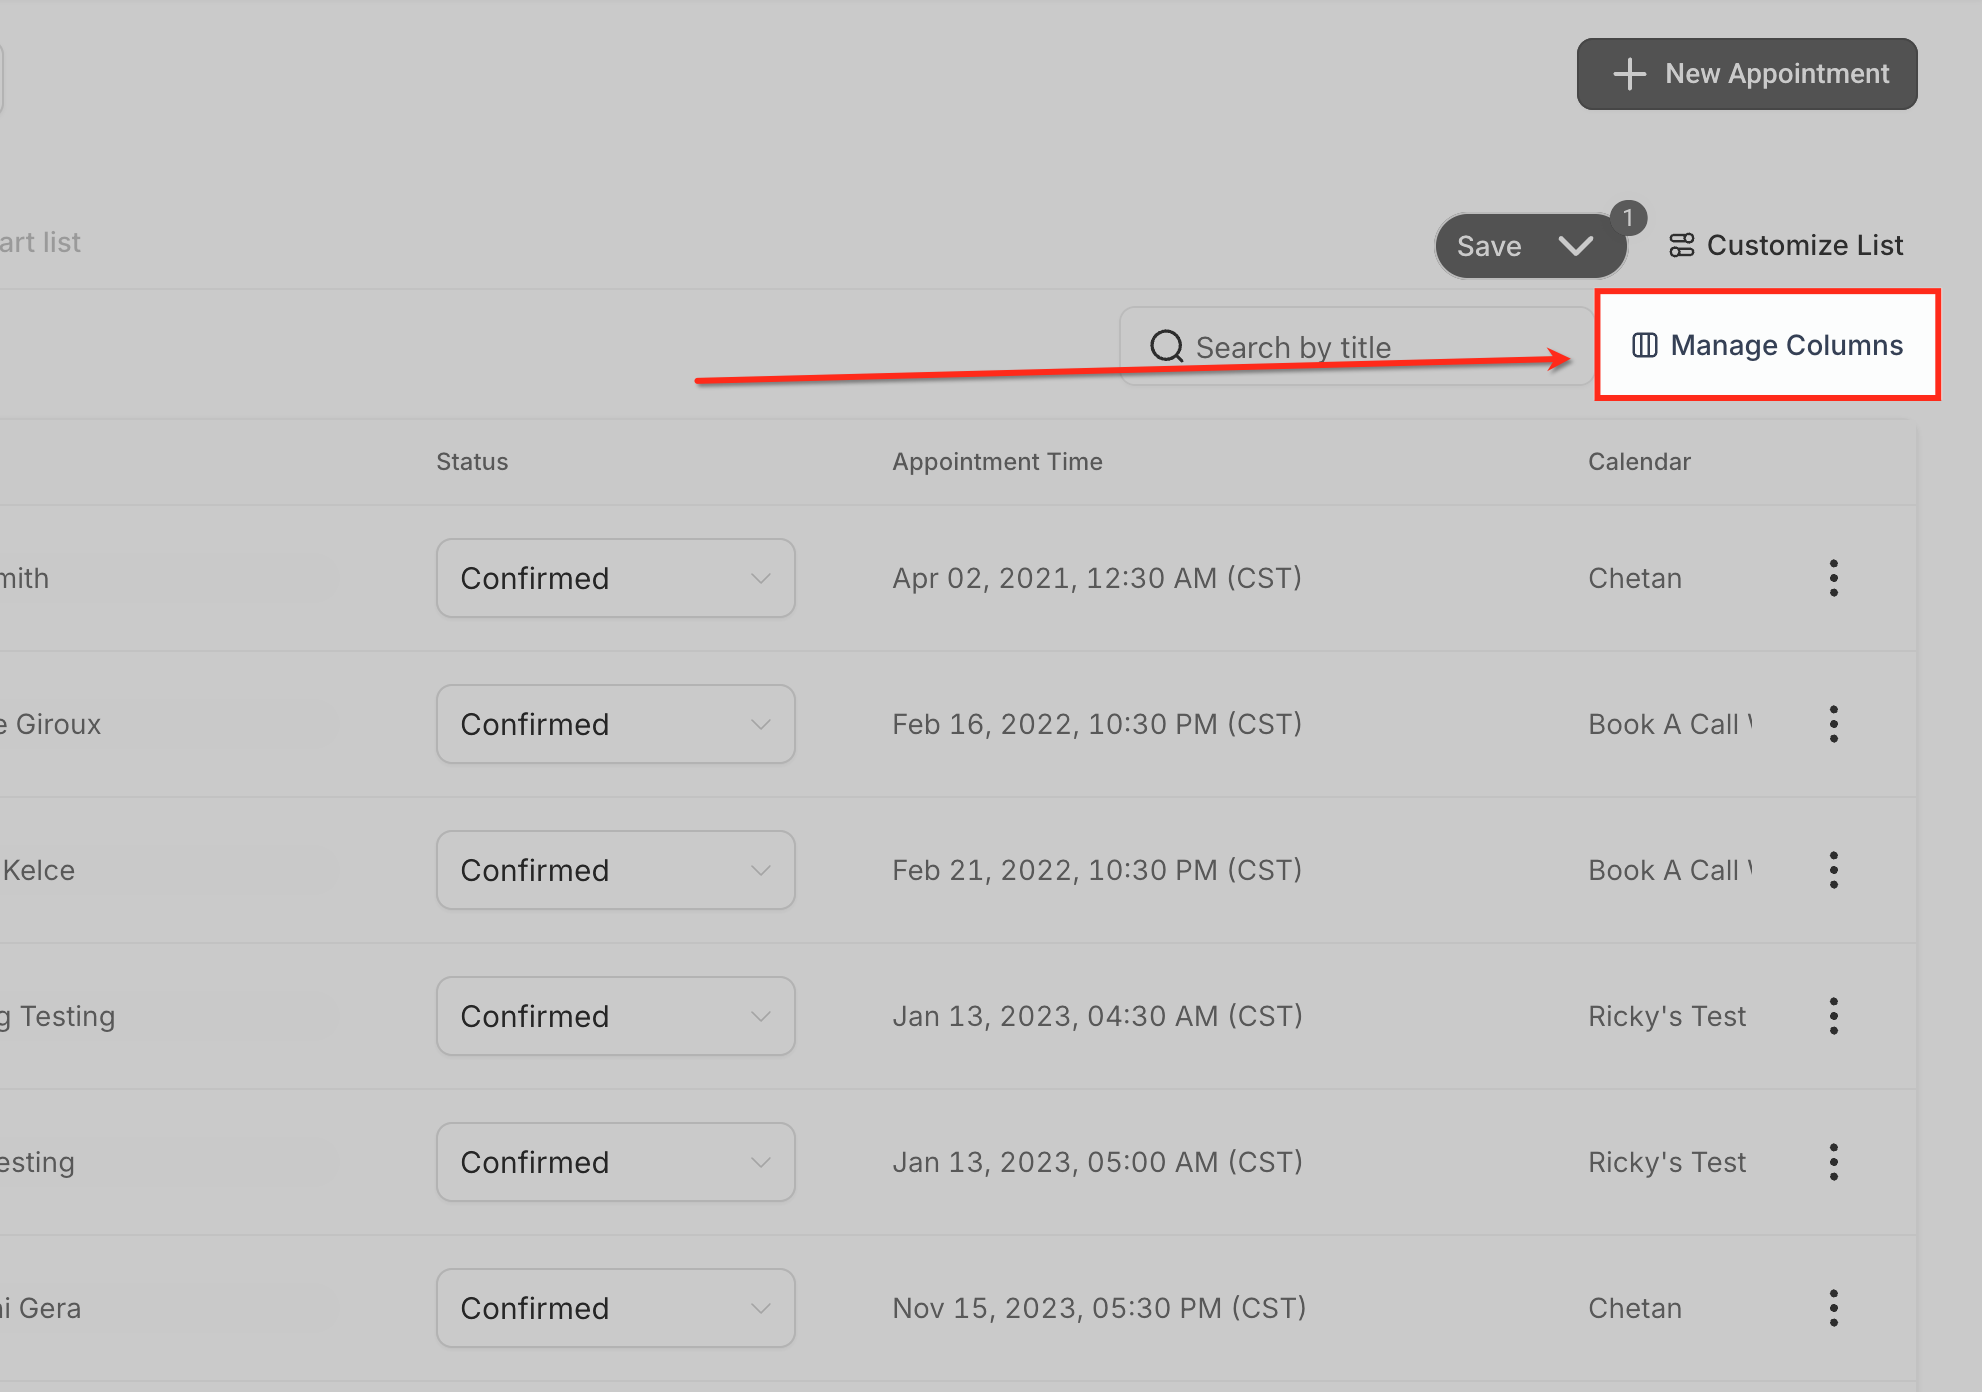
Manage which columns display by showing or hiding them and reordering with drag-and-drop. Some system columns are locked and can't be removed. Column choices, like filters and sorting, are saved as part of the Smart List.
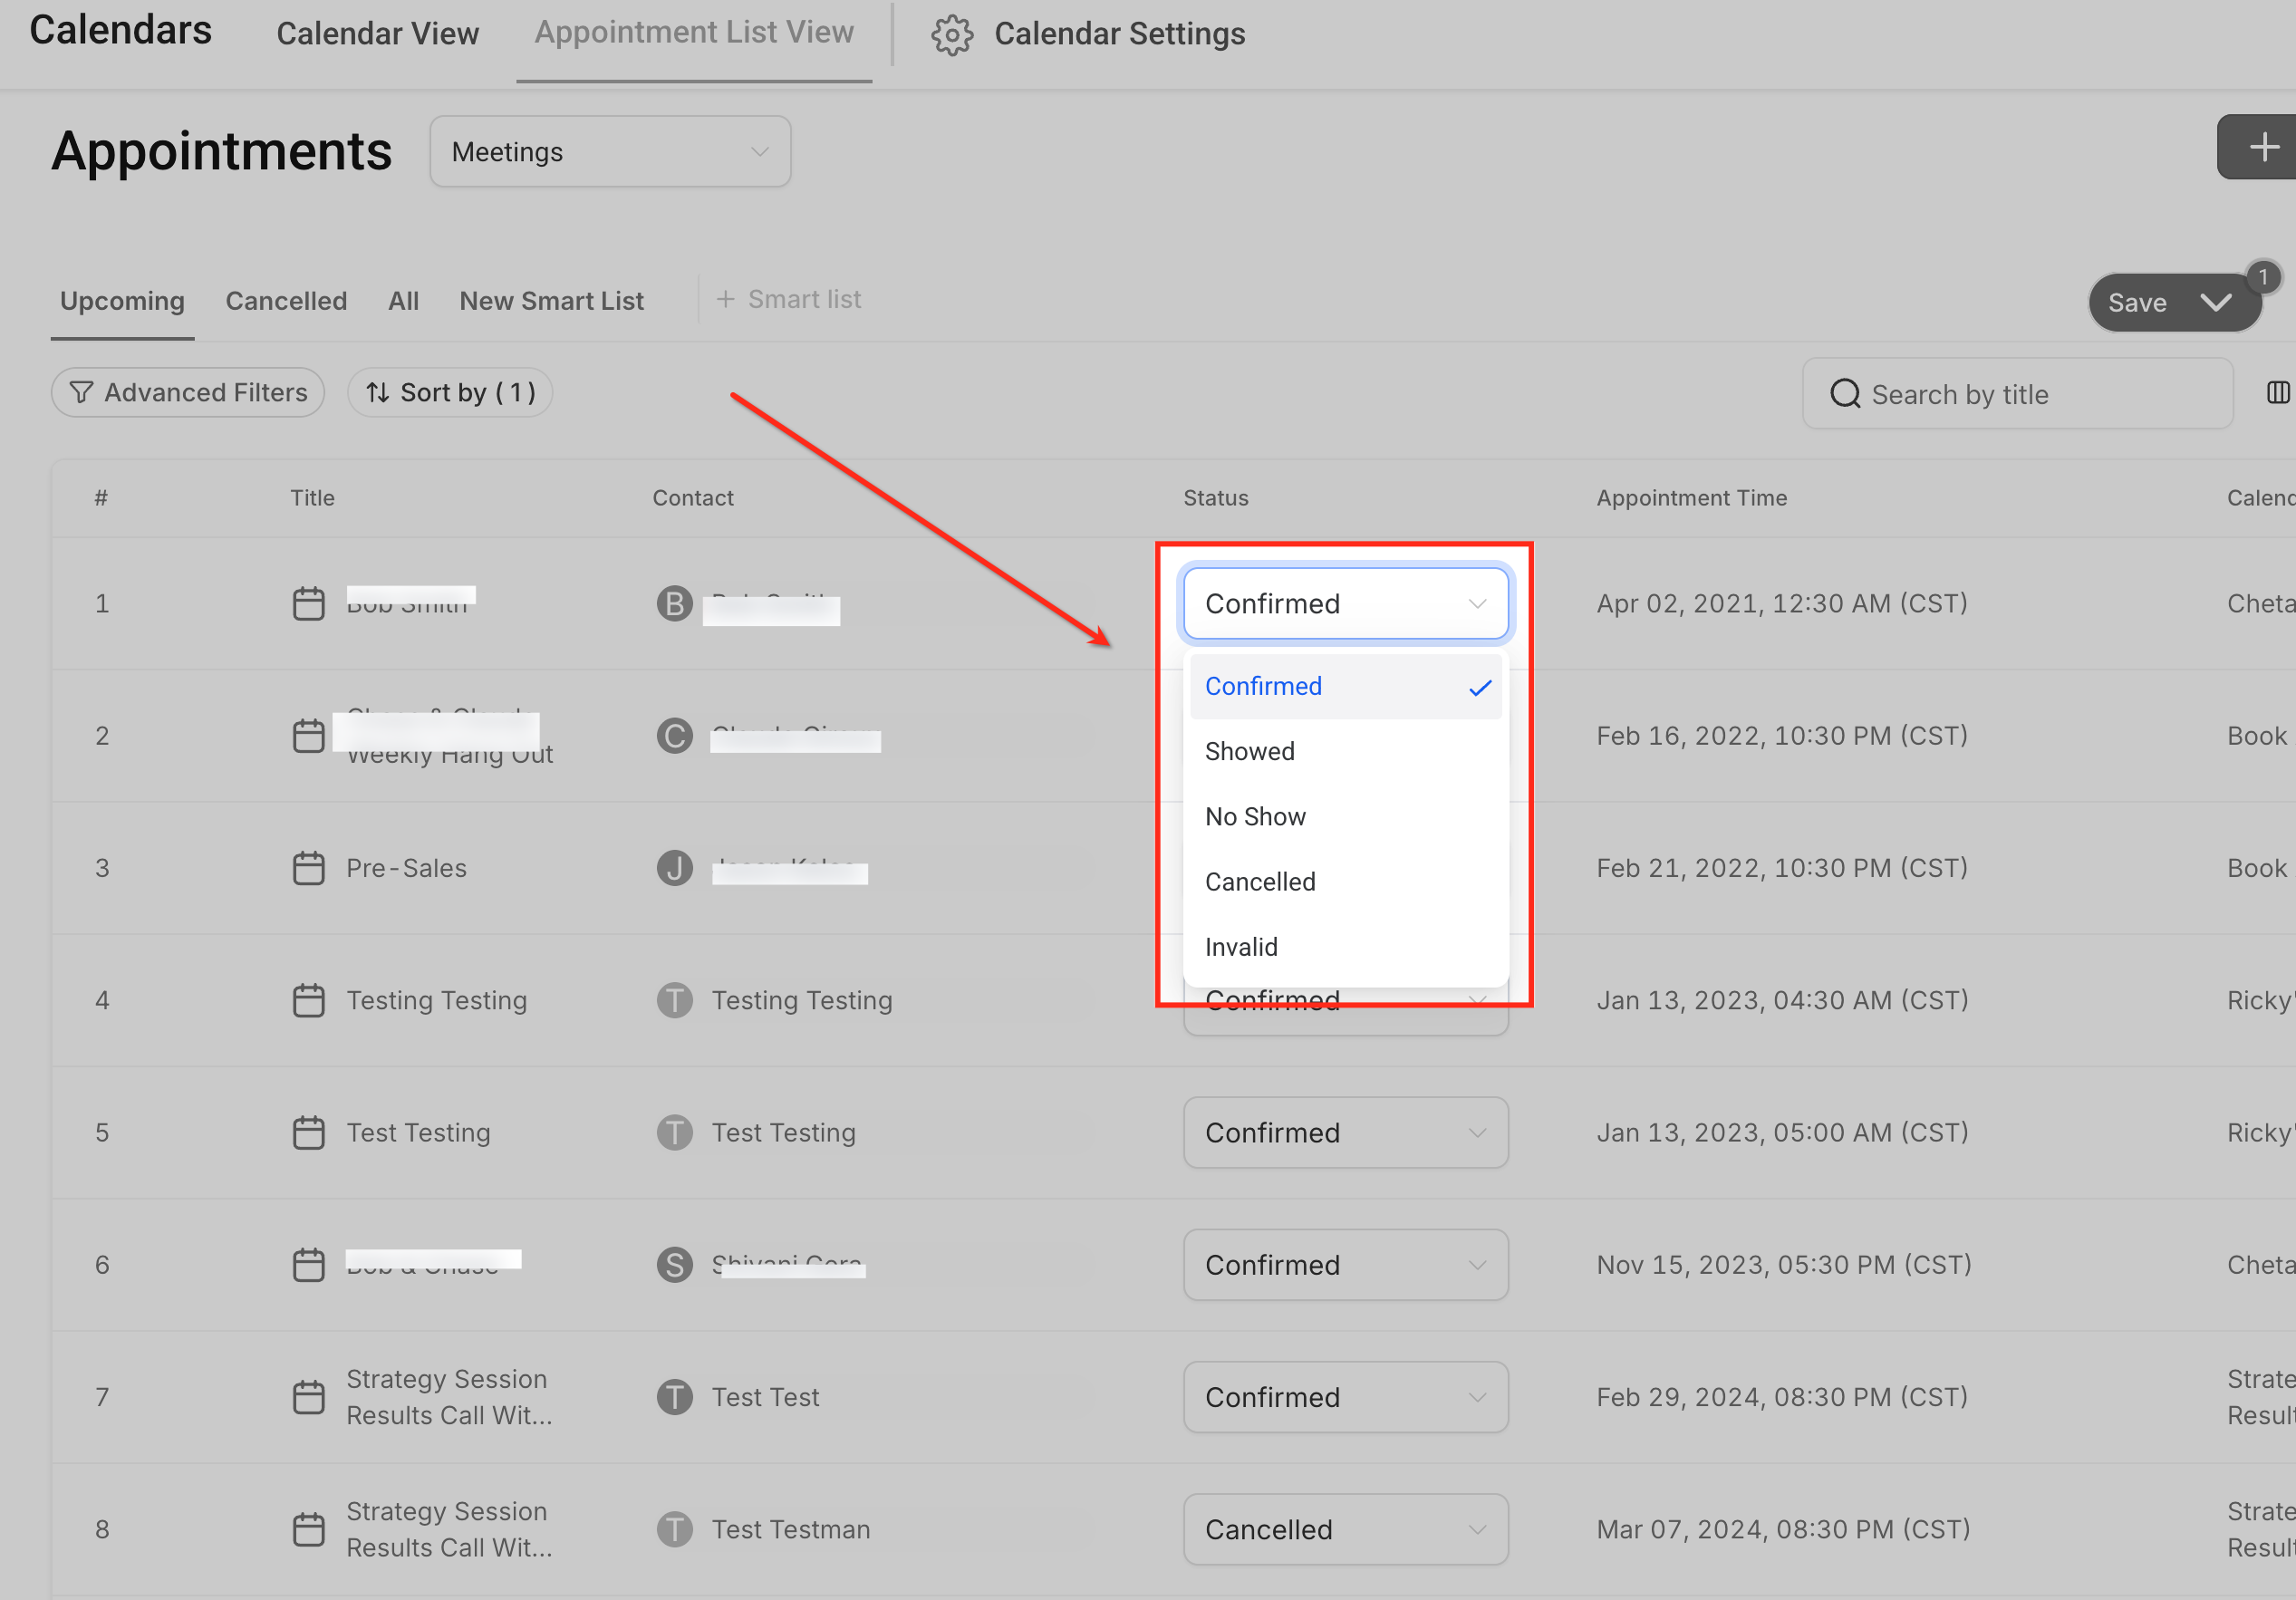
You can change an appointment's status directly from Appointment List View without opening the full record. Click the Status dropdown in the appointment's row and select Confirmed, Showed, No Show, Cancelled, or Invalid. The change saves immediately and is reflected everywhere the appointment appears.
Note: updating an appointment to Showed or No Show updates the status inside Aesthetix CRM, but it does not push an event update to any connected third-party calendar (Google, Outlook, and so on).
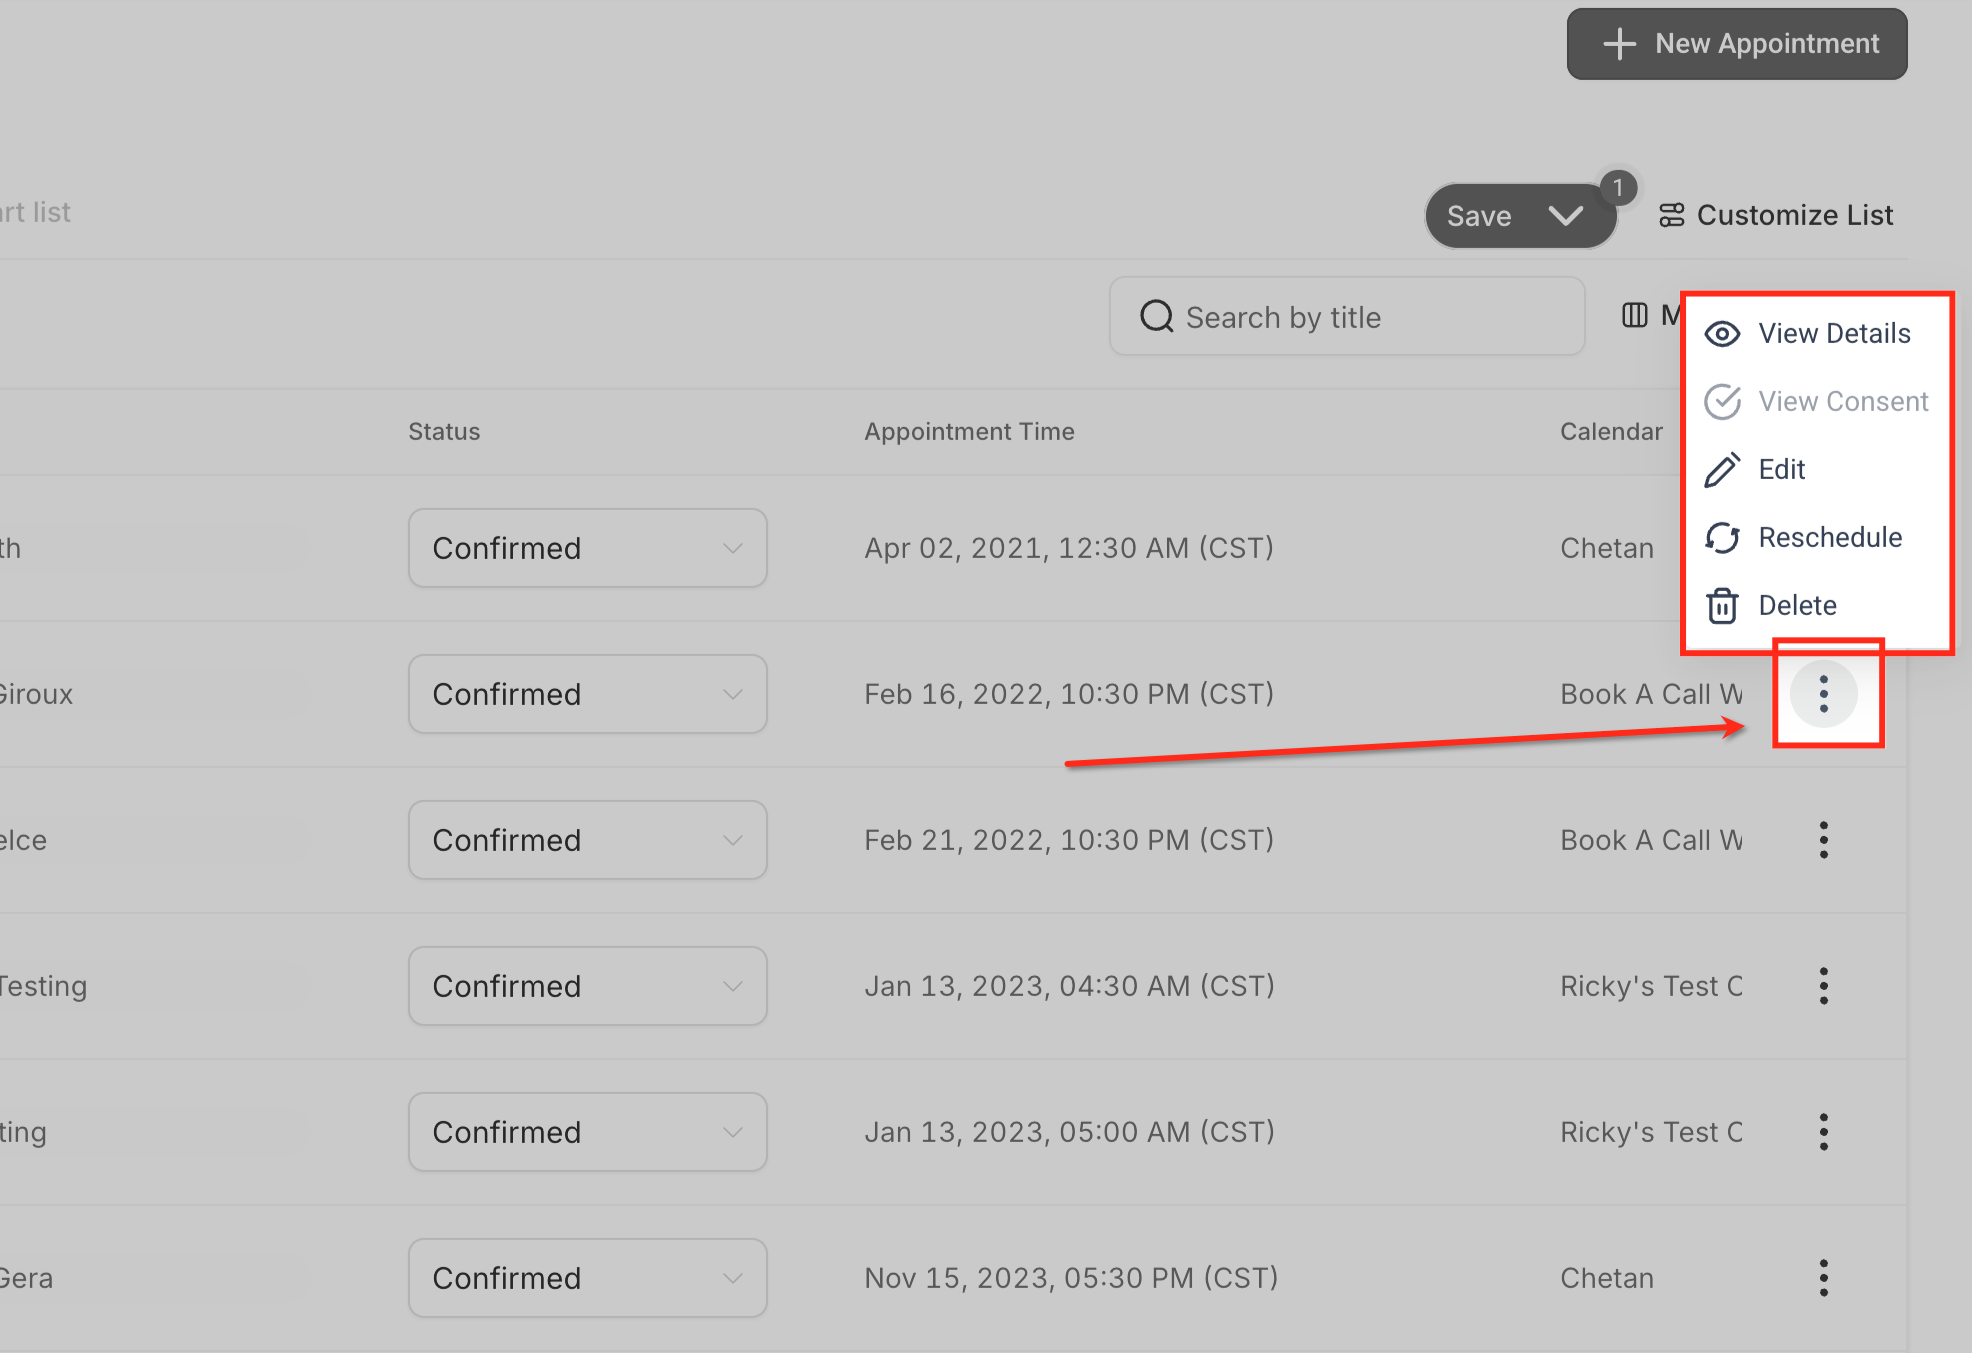
Each appointment row includes a three-dot (⋮) menu with additional actions:
View Details: opens the full appointment record to review all information and activity.
View Consent: shows consent details tied to the appointment, if consent tracking is enabled.
Edit: update the contact, notes, or assigned calendar.
Reschedule: change the date and time while keeping the same appointment record.
Delete: permanently remove the appointment.
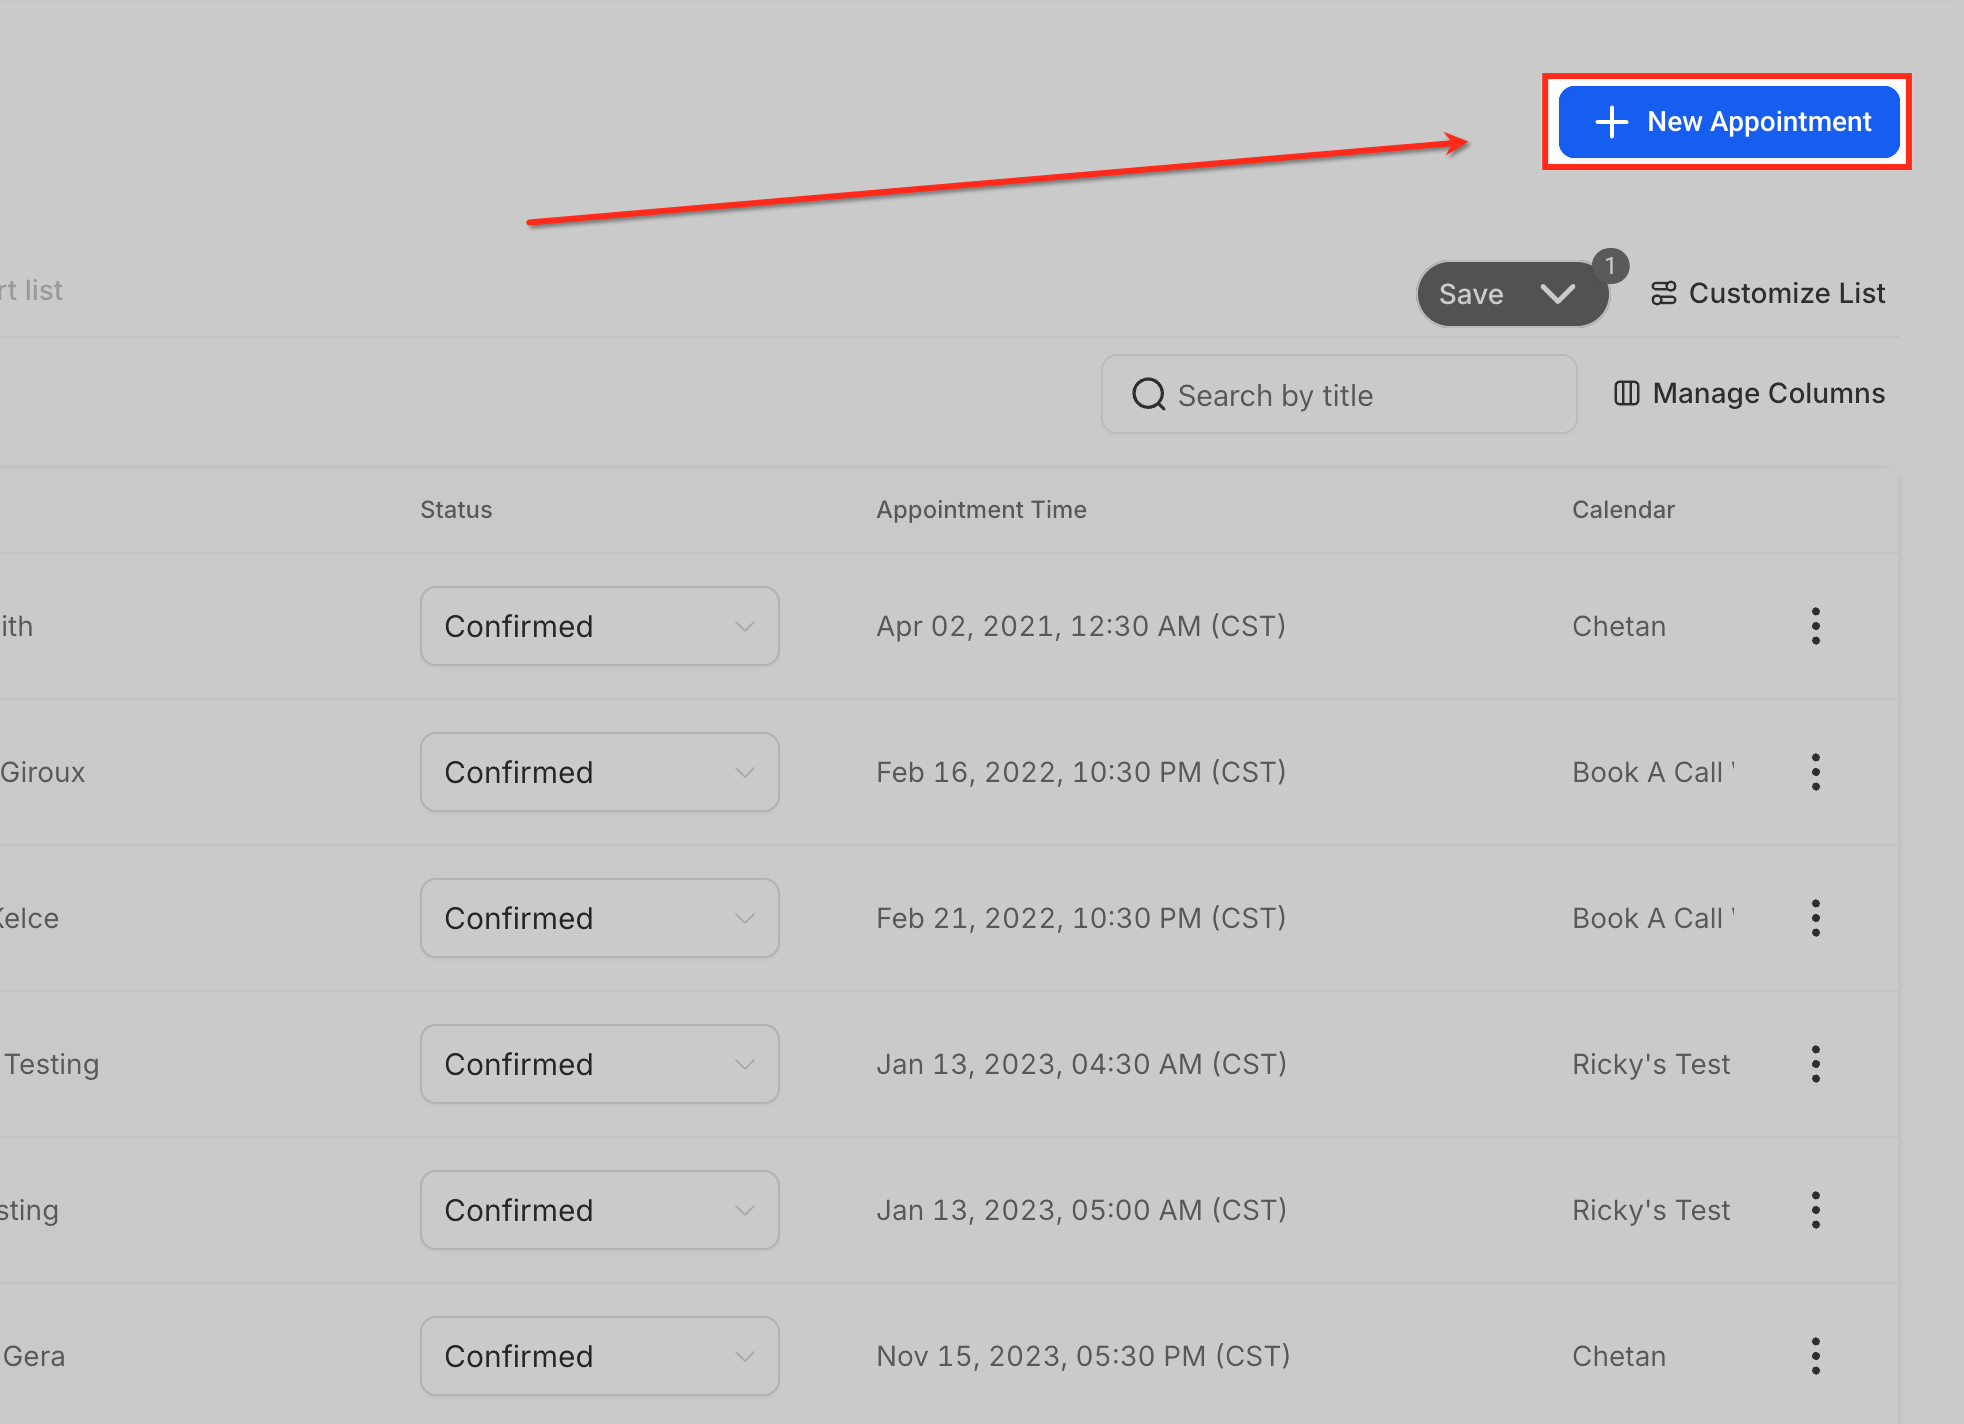
Click New Appointment in Appointment List View to manually book an appointment without leaving the list. This opens the same booking flow described below, and the new appointment is added to the list based on its type and your current Smart List criteria.
Not every appointment gets booked by the patient themselves. Manual booking lets you schedule on behalf of a lead or patient directly from Aesthetix CRM, which is useful when:
A patient can't or doesn't want to self-book online.
You're on the phone with a lead and want to lock in a time before you hang up.
You're confirming a time from an SMS or email reply.
You're scheduling an internal meeting with a team member.
You want to create a test appointment to check a reminder workflow.
You need to account for time zones or precise scheduling.
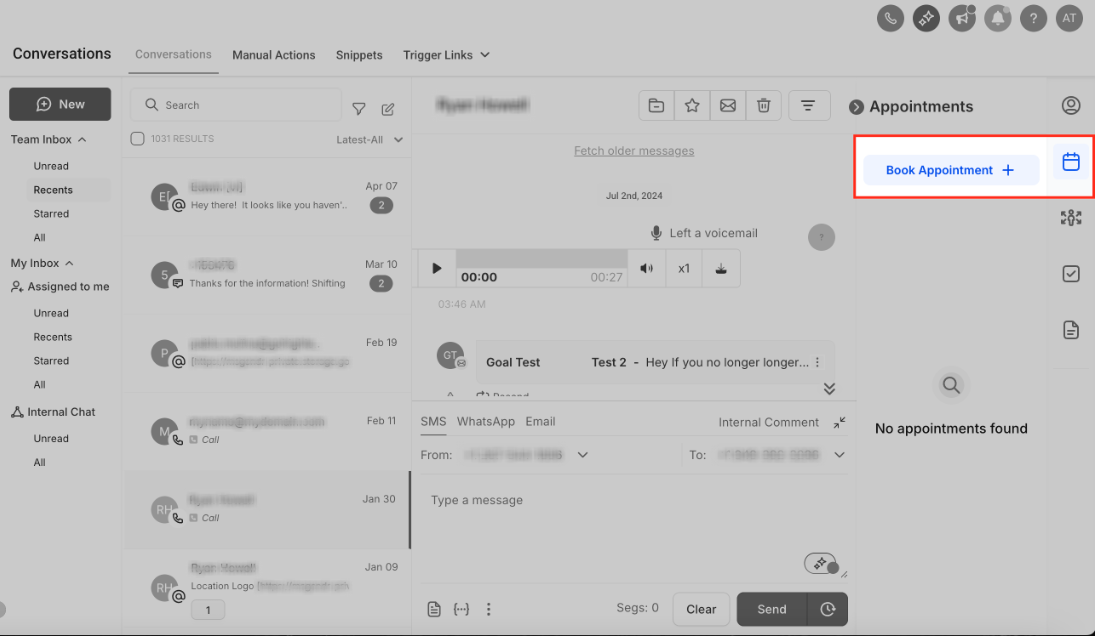
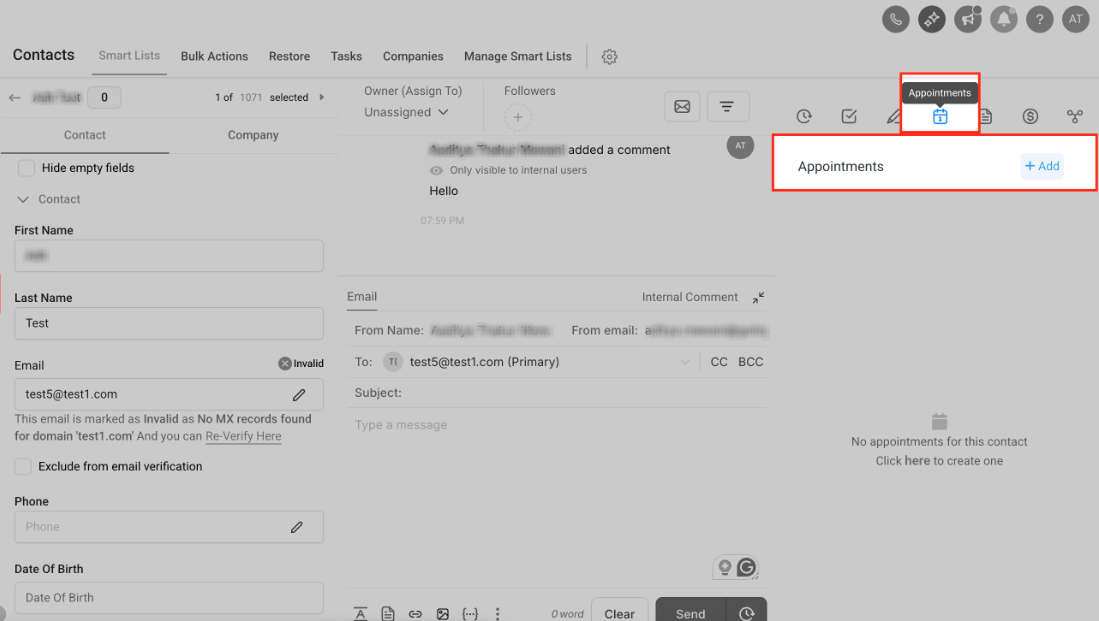
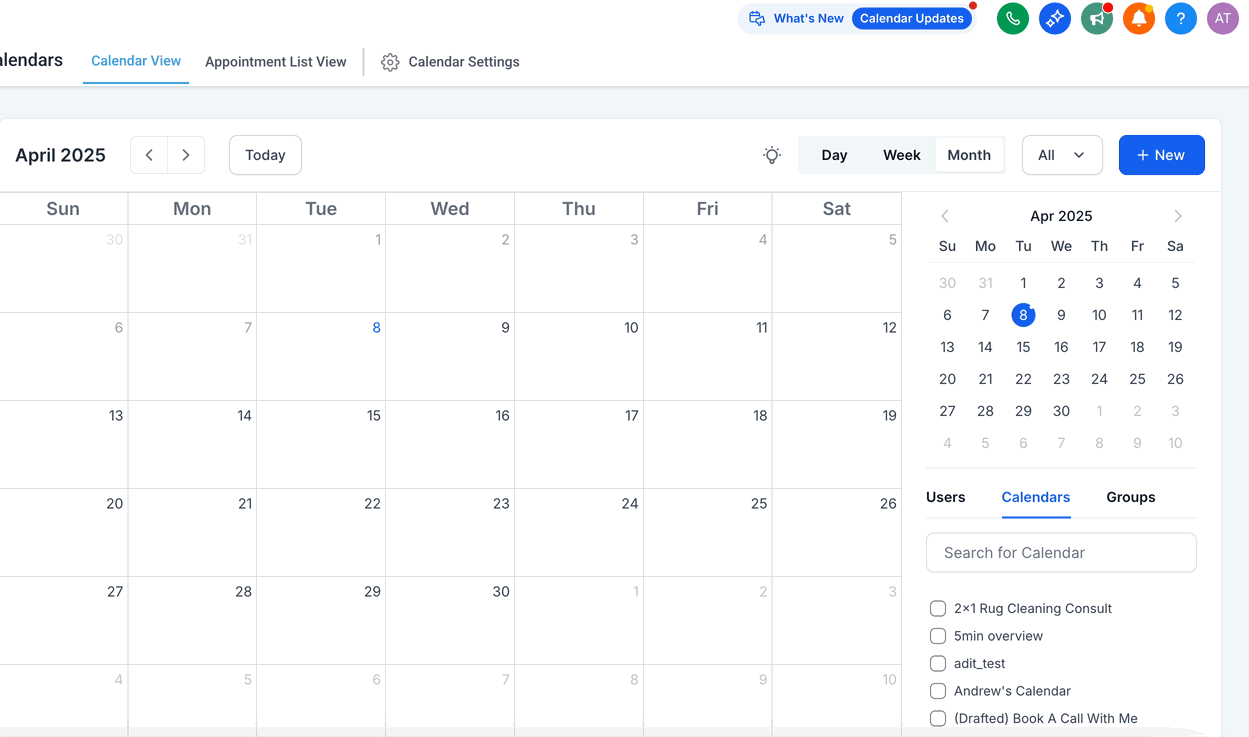
You can start a manual booking from four places, depending on where you're already working:
1. From Conversations. Open the conversation with the contact, click the calendar icon in the sidebar, then click Book Appointment.
2. From Contacts. Open the contact's profile, click the Appointments tab in the right-hand section, then click + Add.
3. From Calendars. In Calendar View, click New or click directly on a specific time slot to start a booking at that time. This is also how you book an appointment on behalf of a lead who calls in and asks your team to grab the slot for them: click the slot, select their contact record, and confirm.
4. From Opportunities. Open the opportunity, then open the Book/Update Appointment section. Click + New Appointment, choose the appointment type (Meeting, Service, or Rental), and complete the details in the modal.
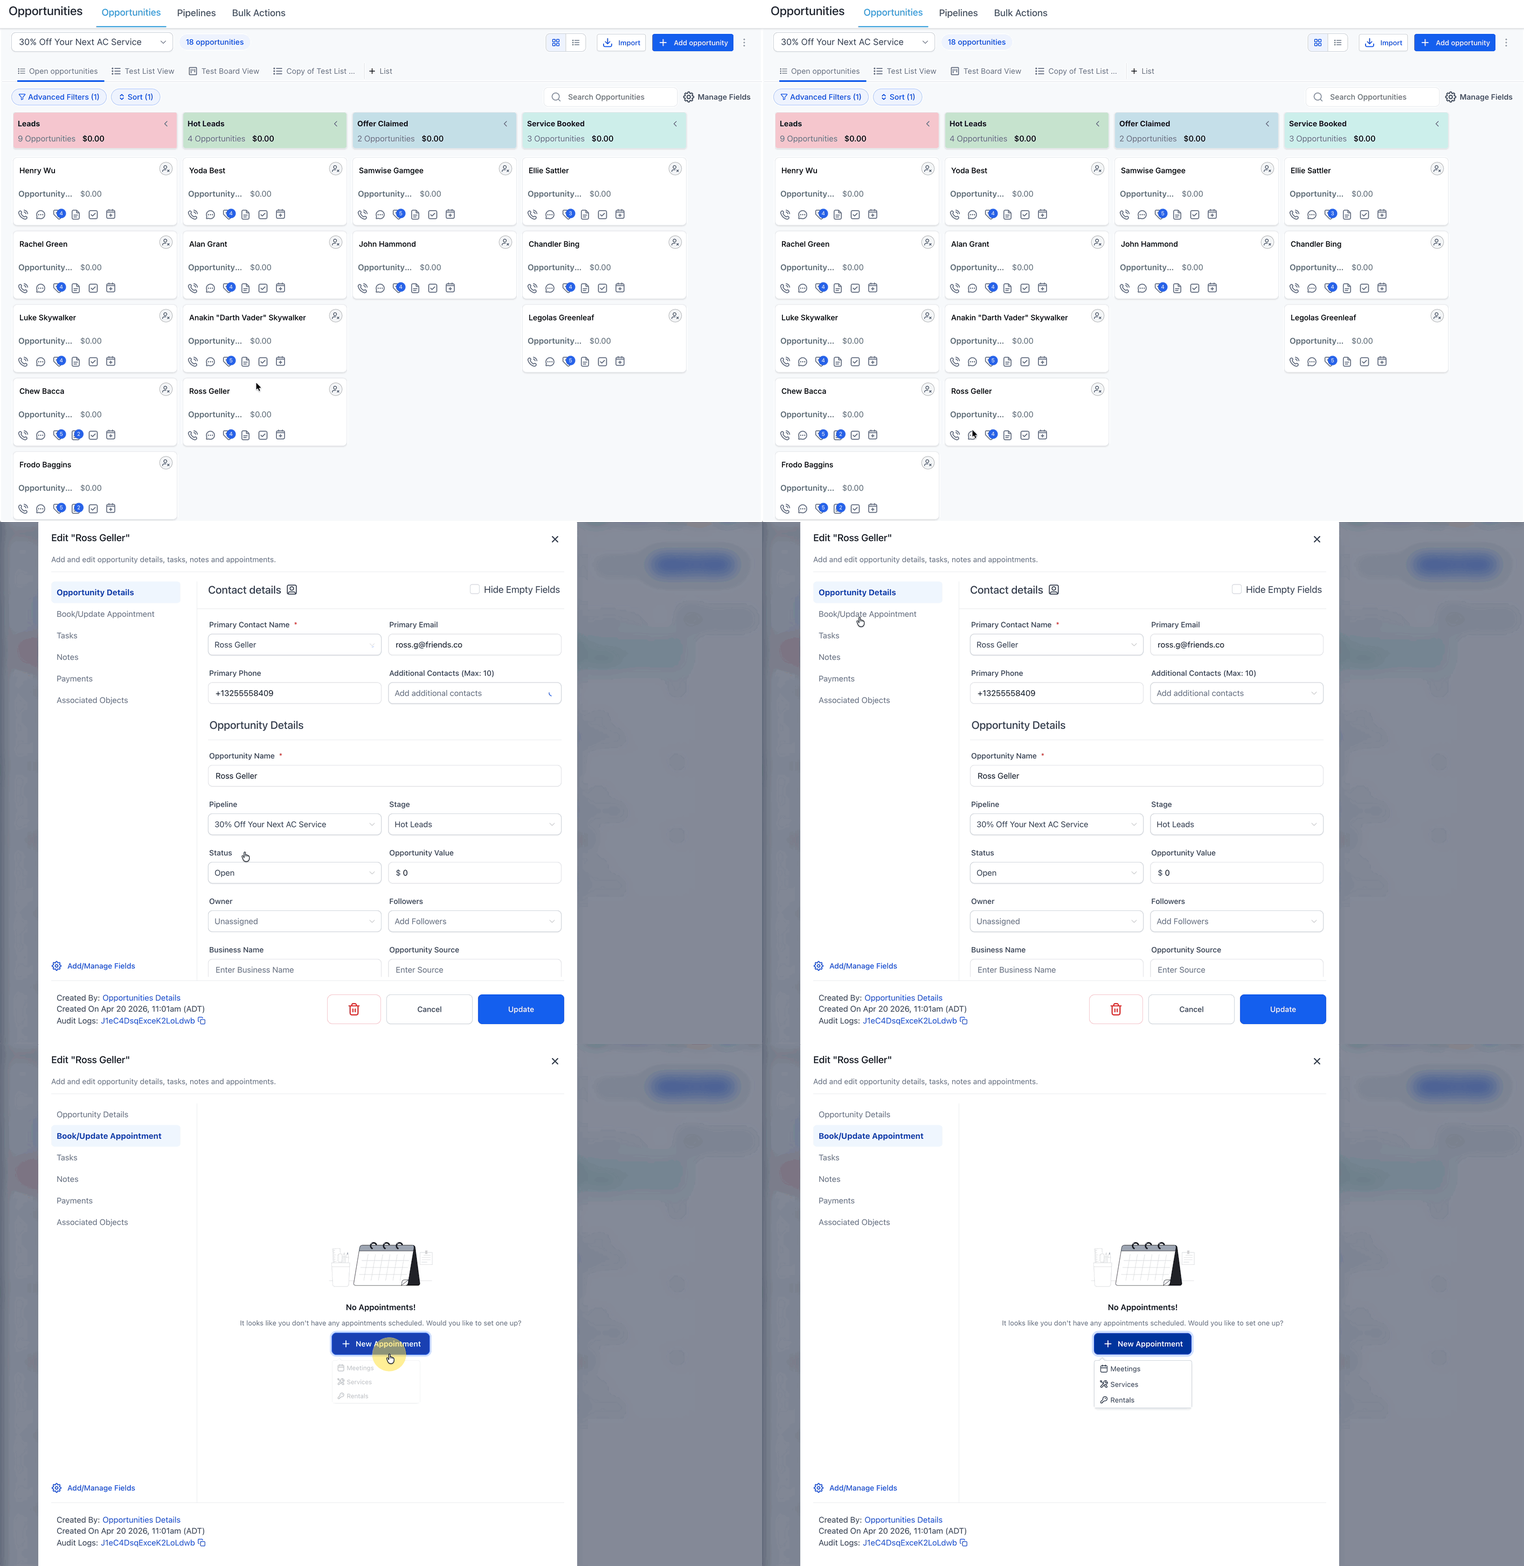
These entry points all lead to the same booking flow, though the surrounding screen looks slightly different depending on where you start.
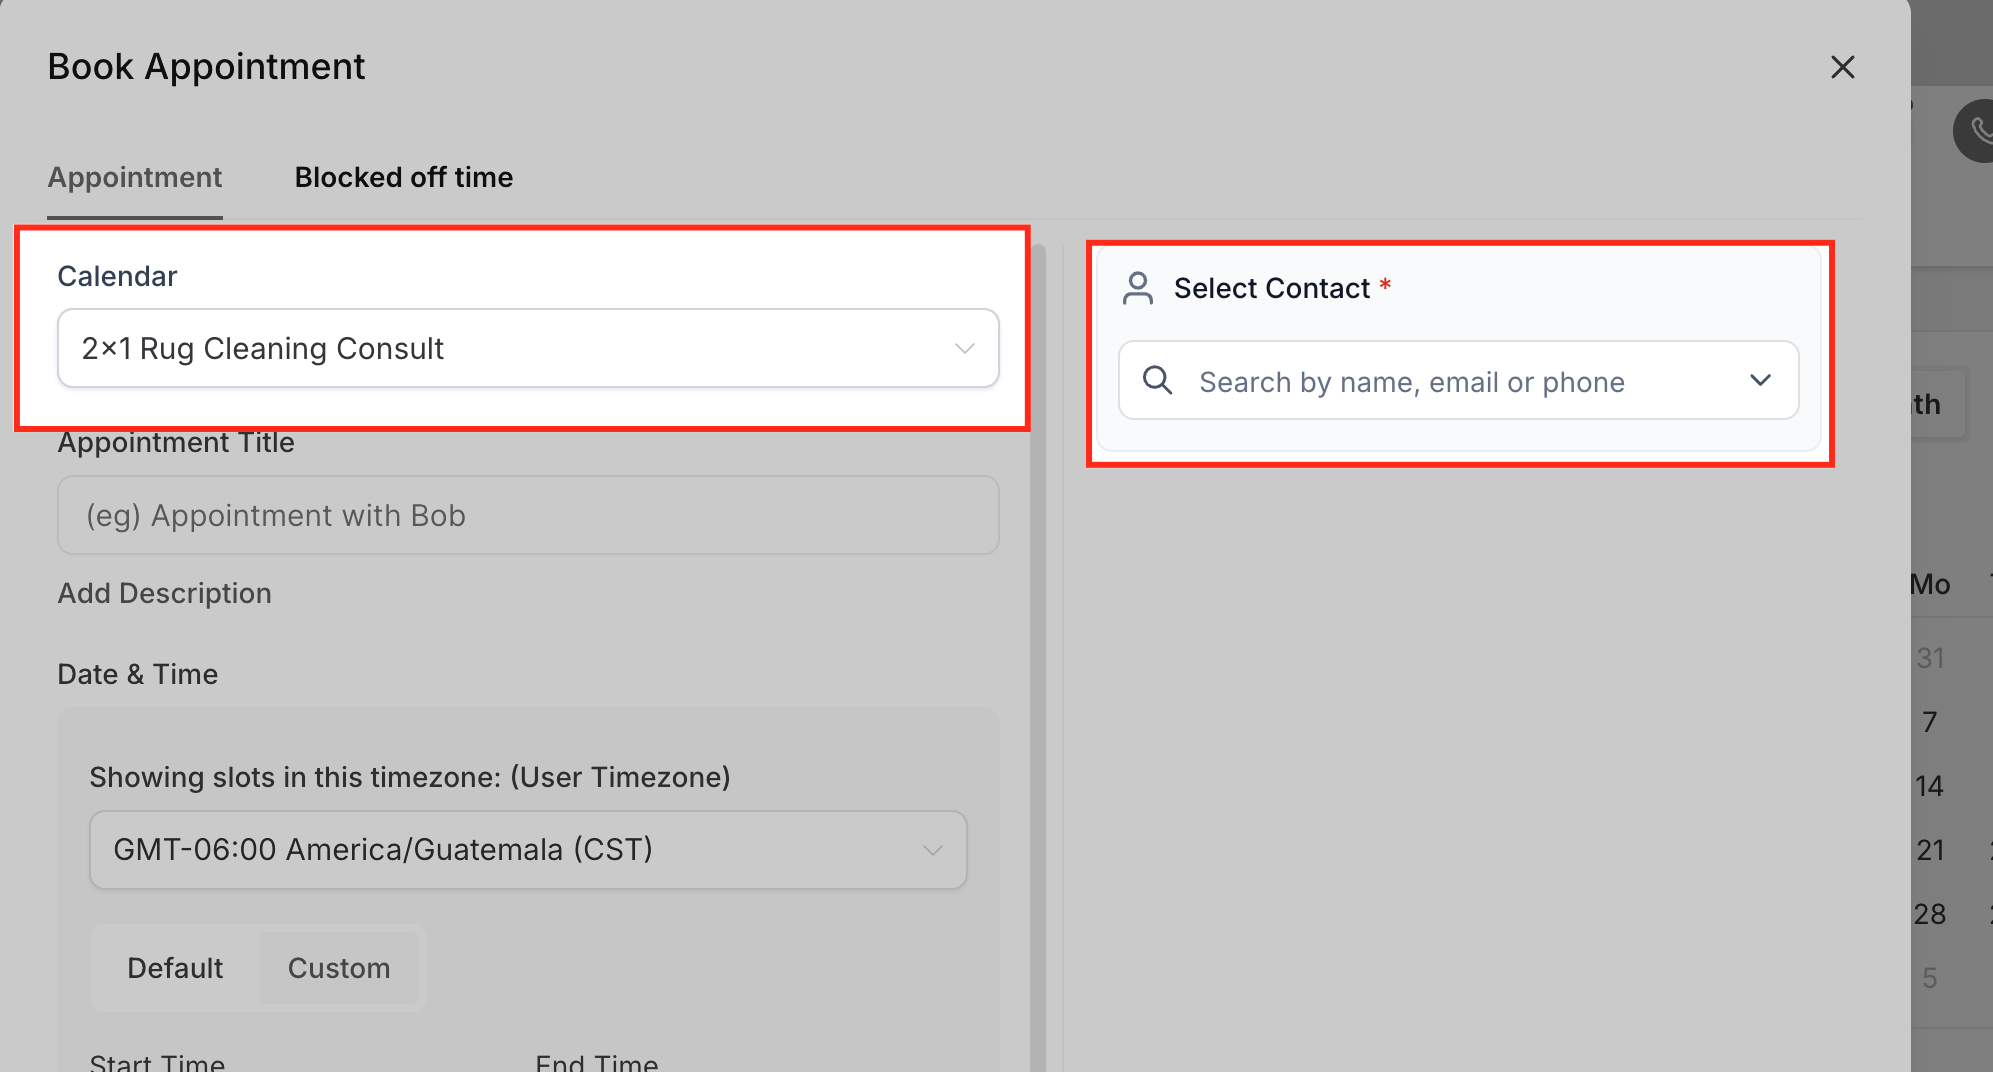
Step 1: Select the calendar and contact. Choose which calendar the appointment belongs to and the contact it should be assigned to.
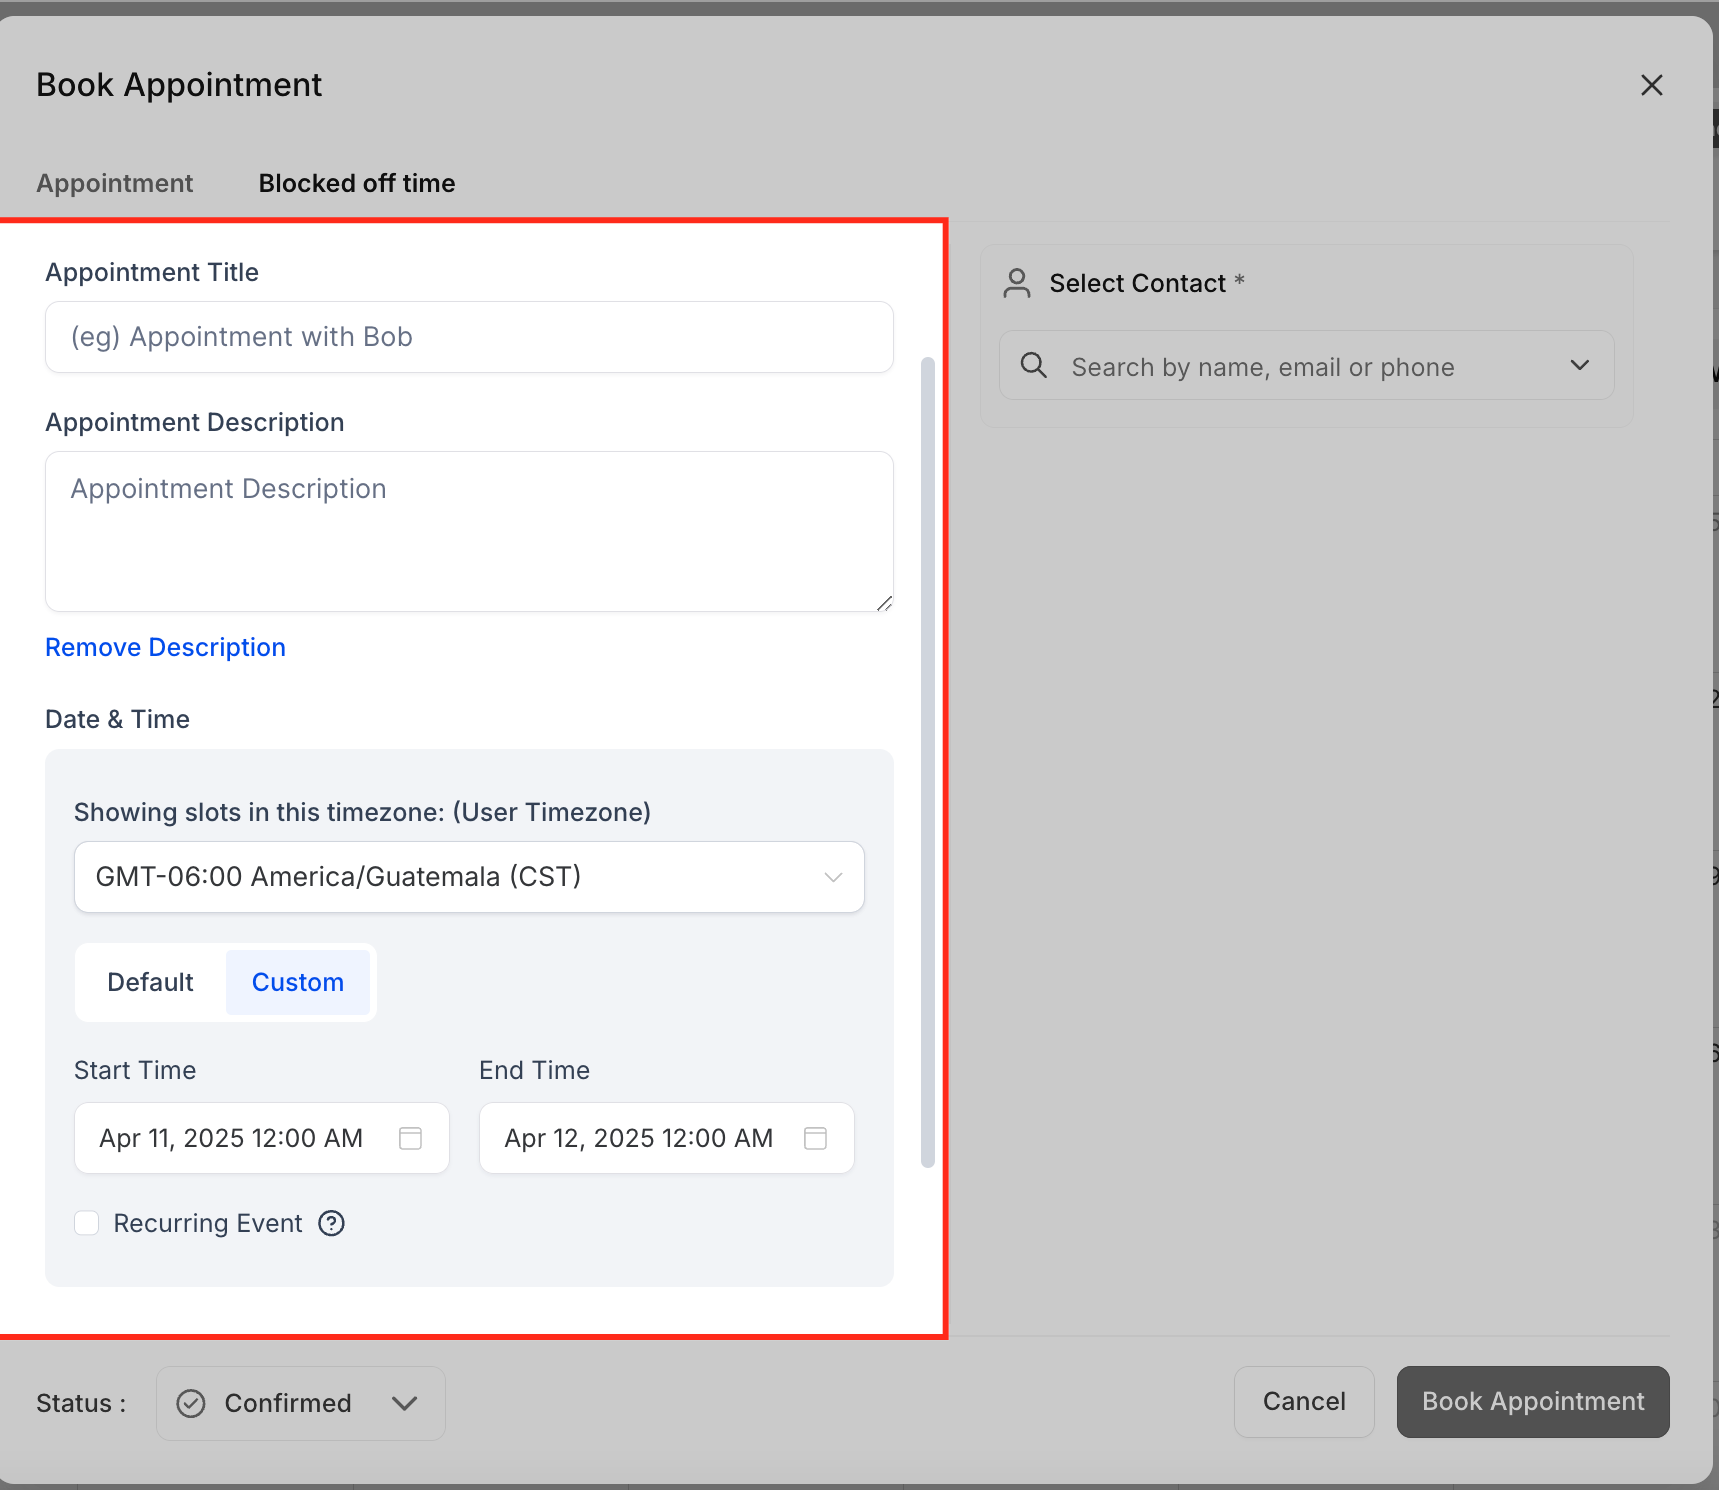
Step 2: Add appointment details. Enter the title (for example, "Consultation with Sarah"), and optionally a description. Choose a start and end time; Aesthetix CRM detects the contact's time zone automatically but you can toggle to a custom date and time if needed. Choose a meeting location, either your default location, a custom location or link (Zoom, Microsoft Teams, or a physical address), or an integrated video option. You can also mark the appointment as recurring and set your preferred cadence.
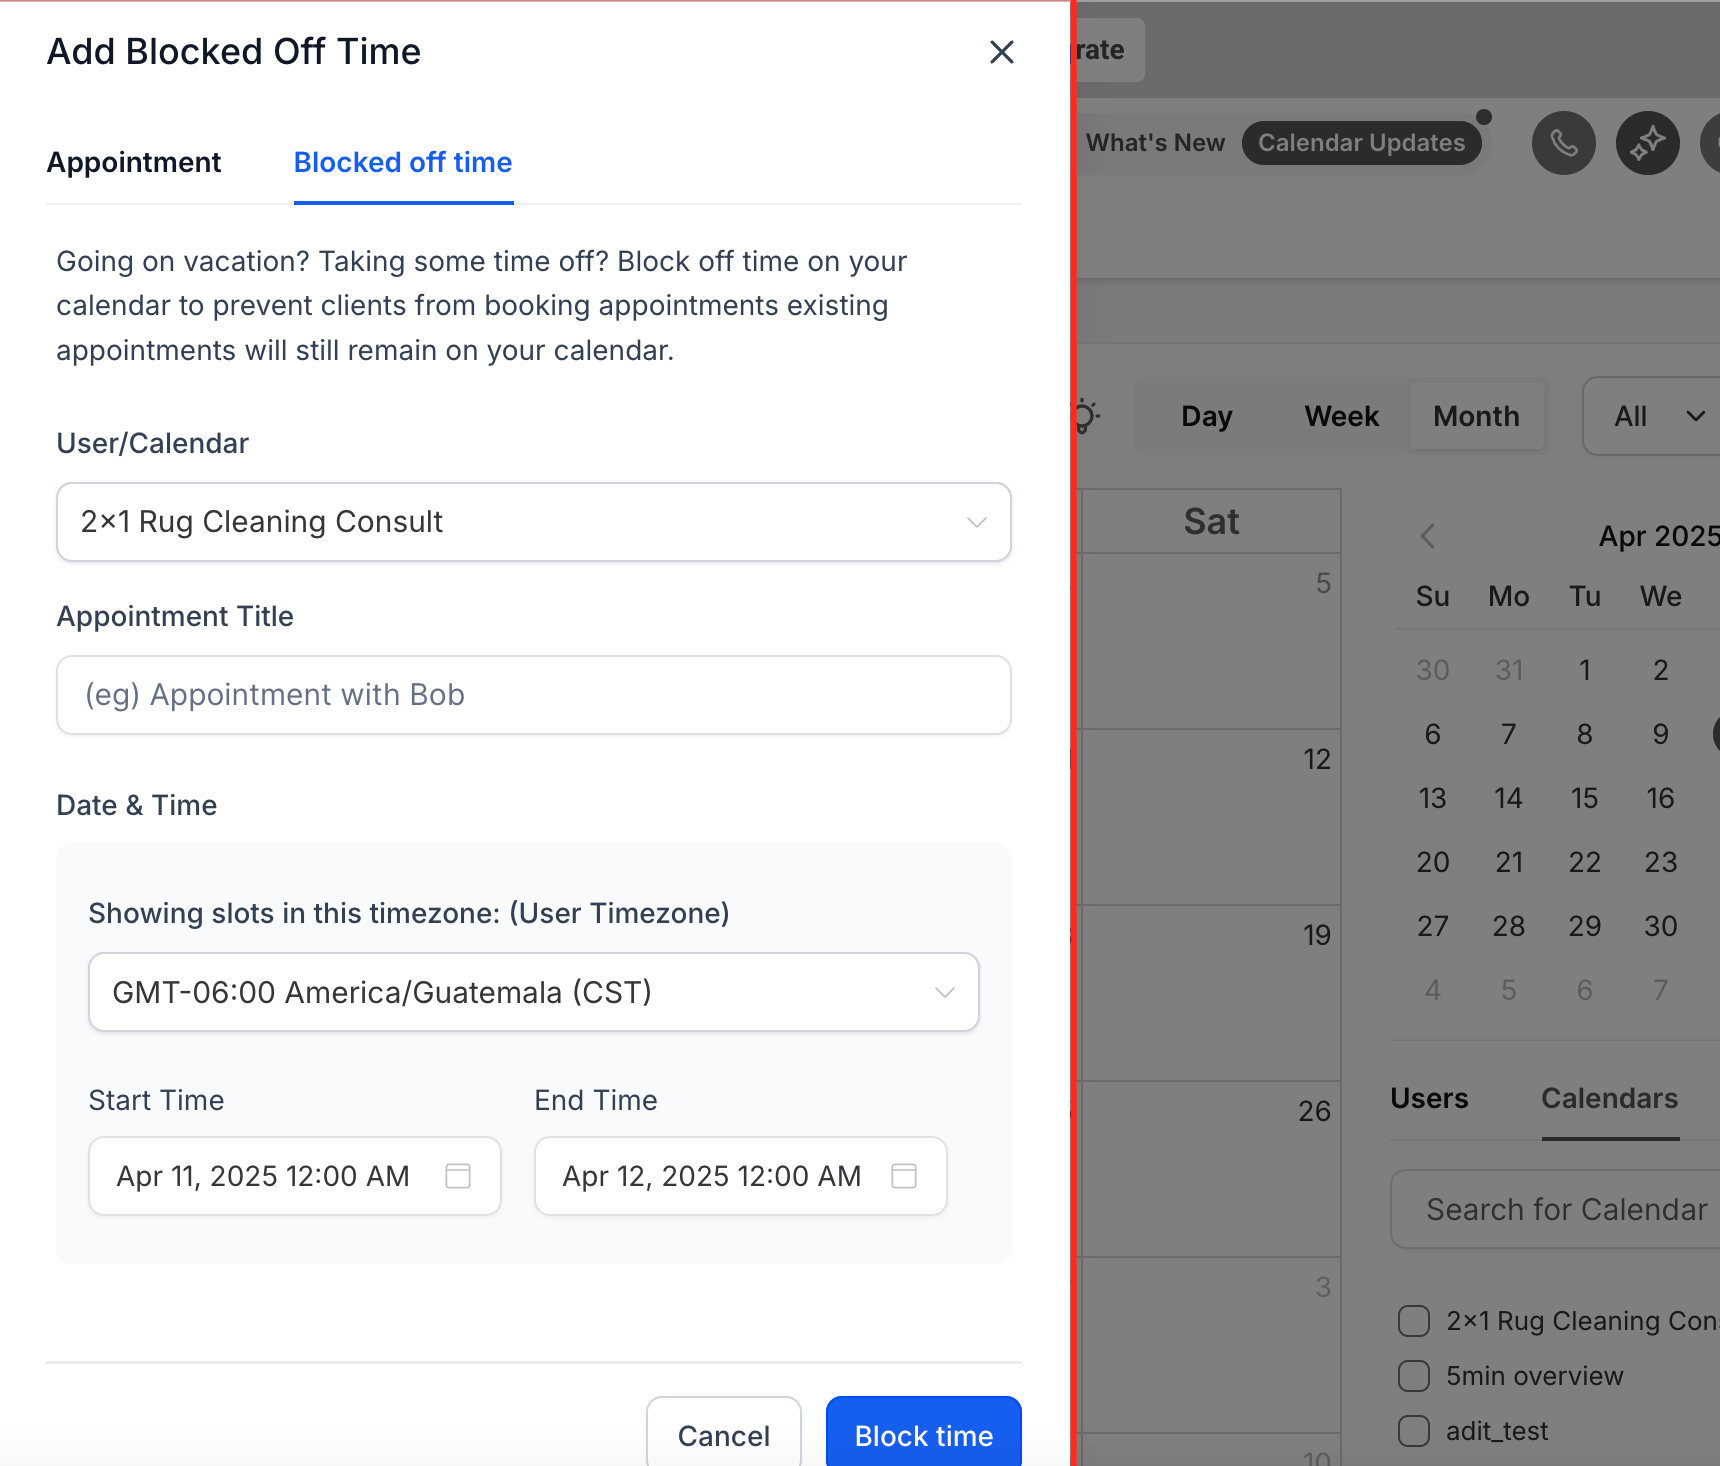
Step 3 (optional): Block off time. Use the Blocked Off Time tab to prevent new bookings during breaks, personal time, team training, or vacation days. Choose whether to block time for a specific user or an entire calendar, and set a start and end time. Blocked time does not delete or affect existing appointments, it only removes availability for new bookings, and it will not appear on your public scheduling link.
Pro tips:
You can book on behalf of any team member as long as their calendar is available to you.
Time zone handling is automatic and shown in the booking modal.
Use recurring appointments for ongoing check-ins or series of visits.
Use Blocked Off Time regularly to keep your team's availability accurate, this is also how you'd block a Friday off for PTO or an internal meeting.
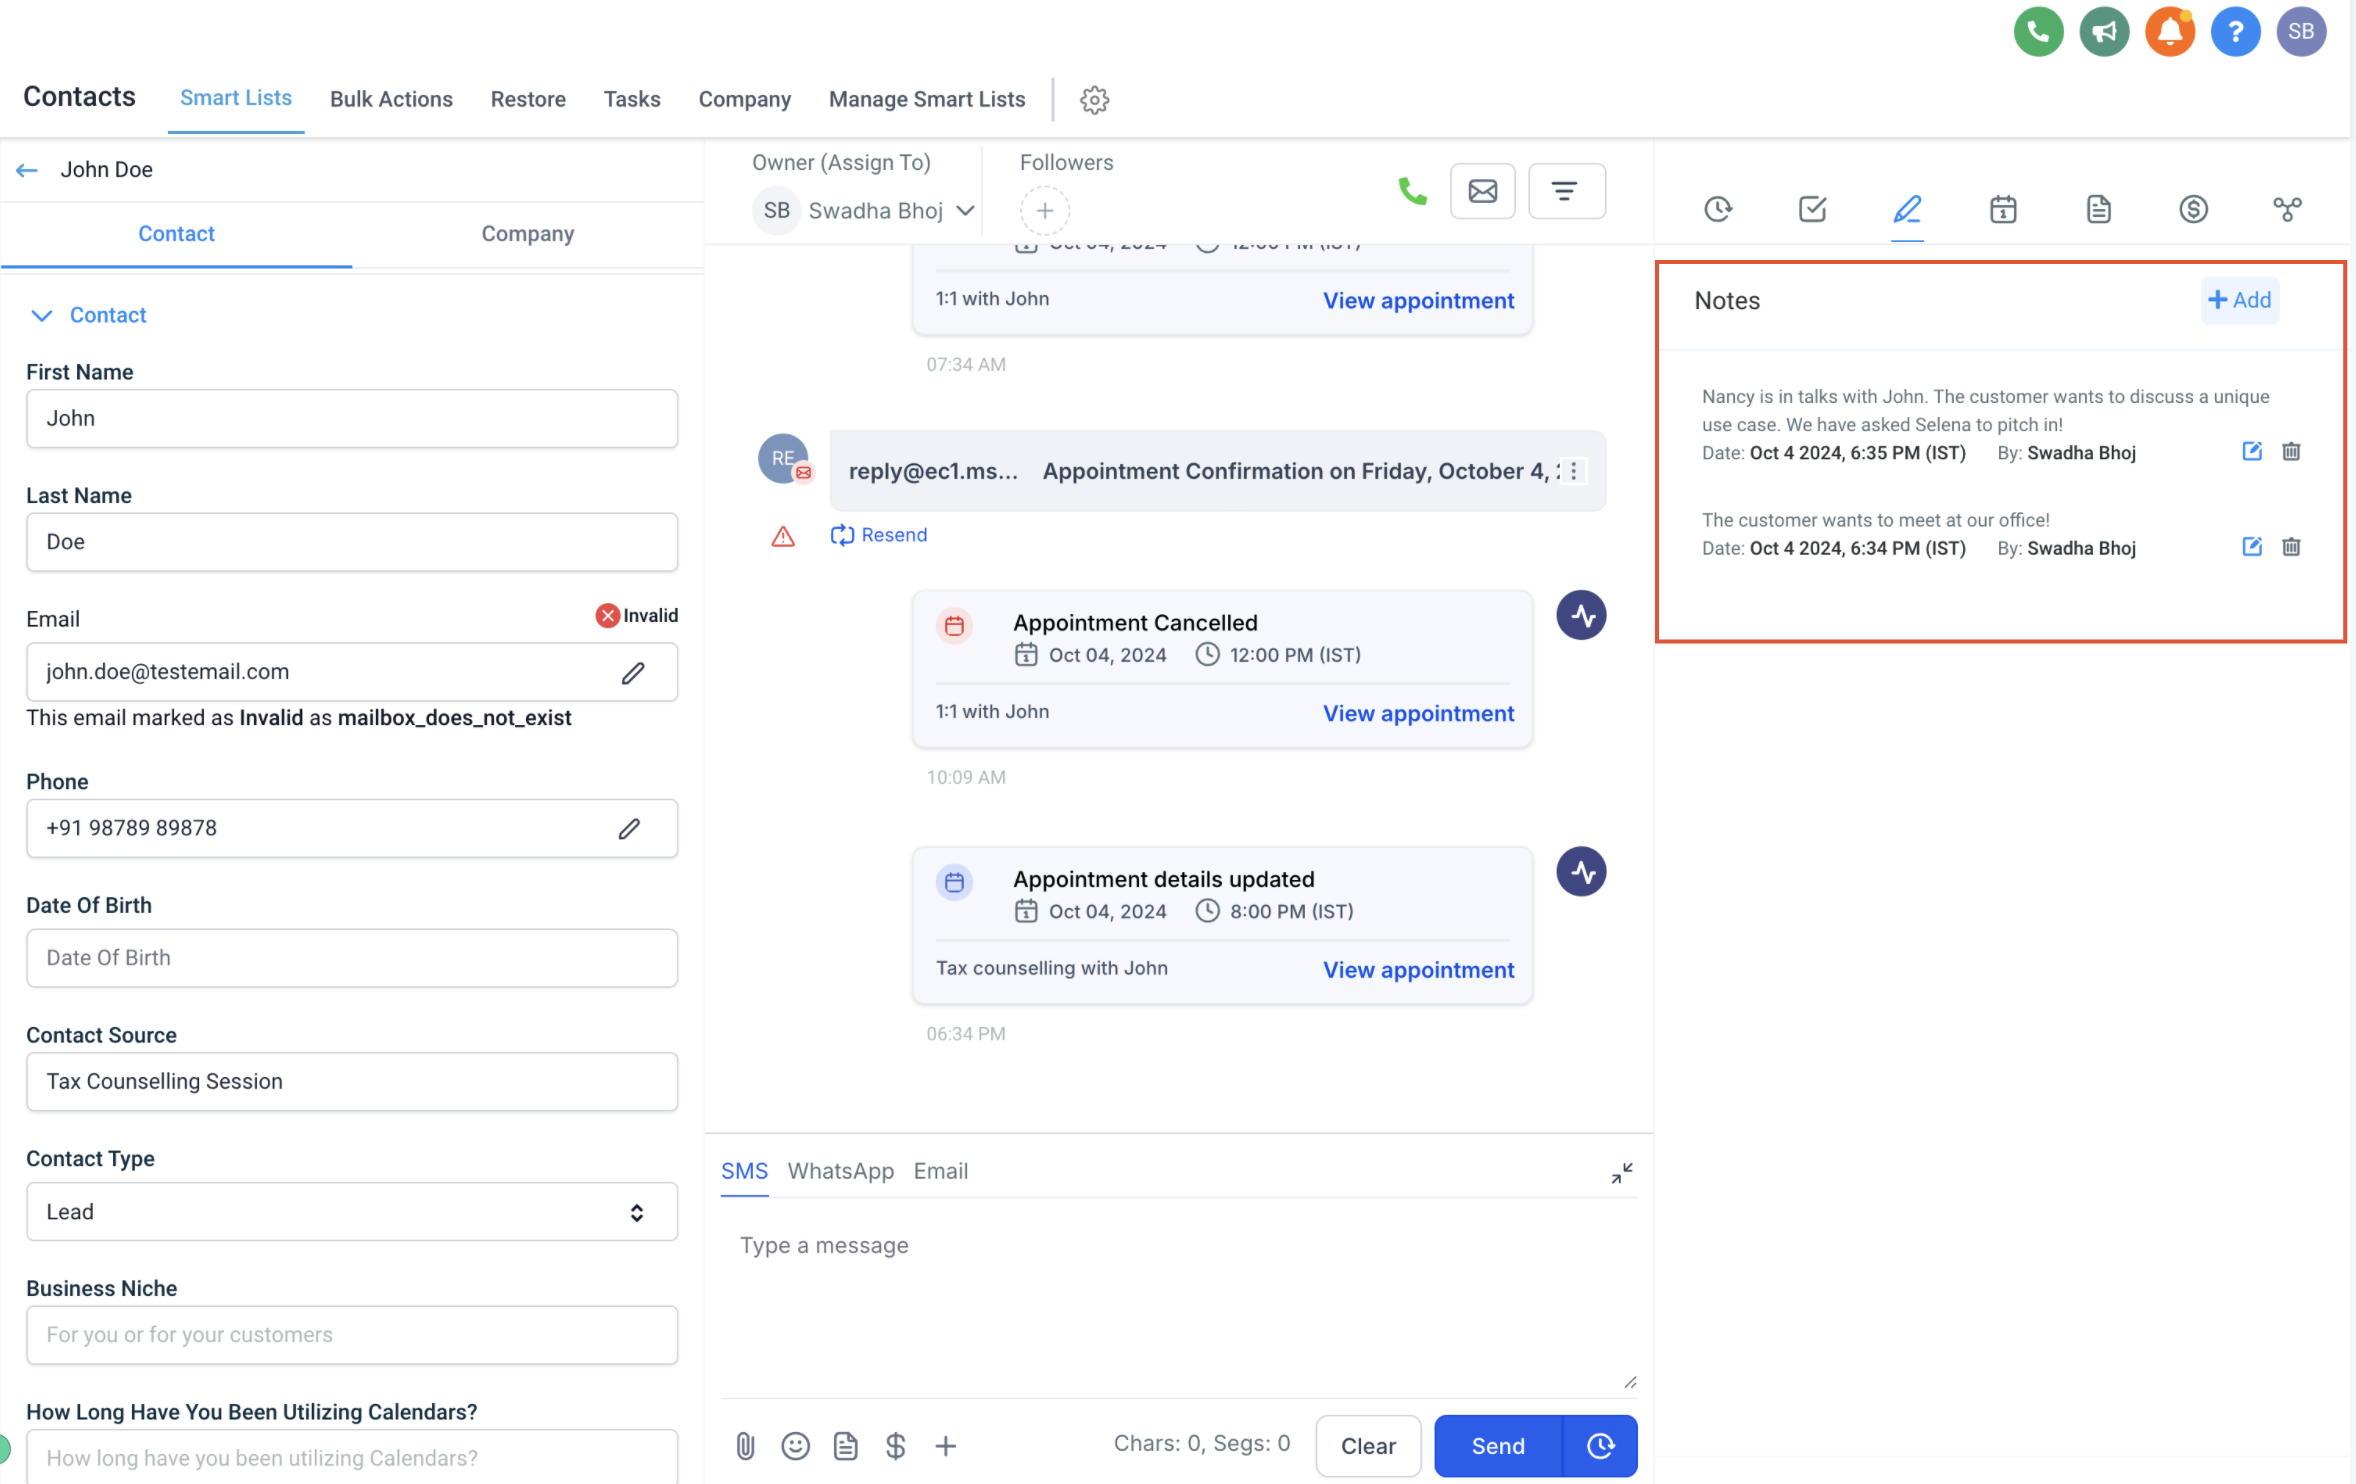
Appointment notes capture context tied to a specific booking, and that context follows the appointment everywhere it's referenced. When you add an internal note to an appointment, it automatically becomes visible on the related Contact, Opportunity, and Conversation records too, so your whole team sees the same information without retyping it. Edits or deletions made from any one of those places update the note everywhere it appears, and each note records who added it and when.
There are three kinds of content you'll see in an appointment's Notes area:
User-added internal notes: created by a team member (or a workflow, or the API), and these propagate out to the Contact, Opportunity, and Conversation records.
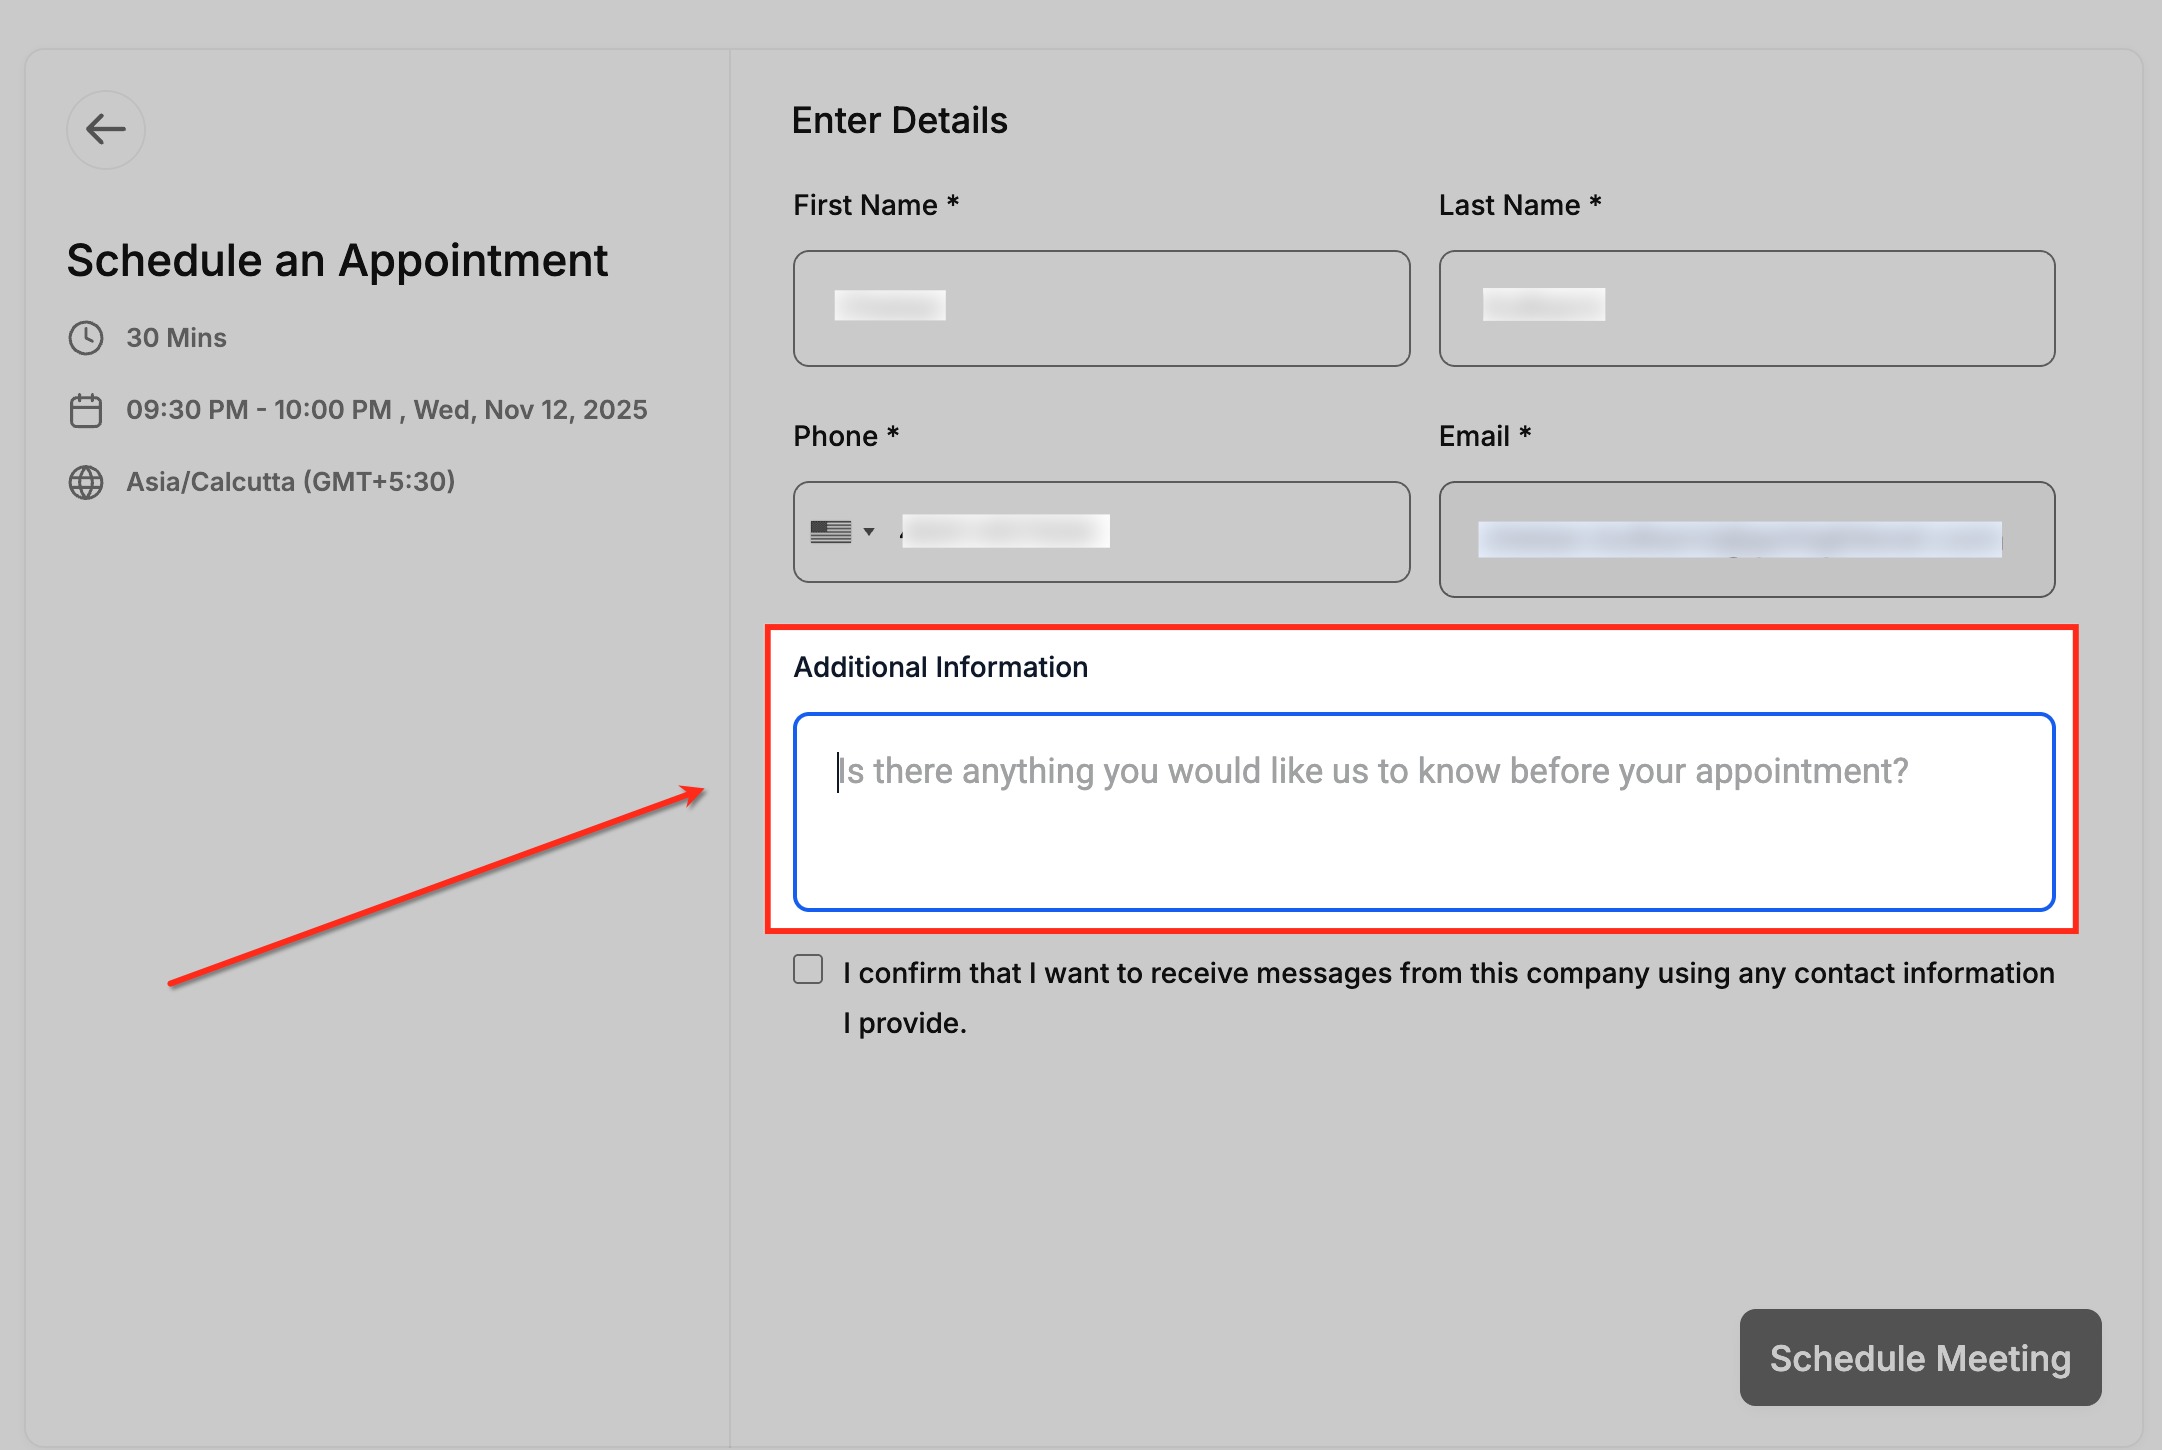
Booker's Additional Information: whatever the patient or lead typed into the "Additional Information" field when they booked. This stays on the Appointment Modal only and does not appear on the Contact or Conversation.
Google/Outlook event descriptions: if you've enabled two-way calendar sync, descriptions from the connected external event appear here for reference. These also stay on the Appointment Modal only.
Internal notes never sync out to your connected Google or Outlook calendar. If two-way sync is enabled, external descriptions can sync in, but that's a one-way flow into the appointment, not the other way around.
Input type | Appointment Modal | Contact | Opportunity | Conversation |
|---|---|---|---|---|
Internal appointment note (user, workflow, or API) | Yes | Yes | Yes | Yes |
Contact note (added directly on the Contact) | No | Yes | No | No |
Booker's Additional Information | Yes | No | No | No |
Google/Outlook event description | Yes | No | No | No |
You can add a note from wherever you're already looking at the appointment:
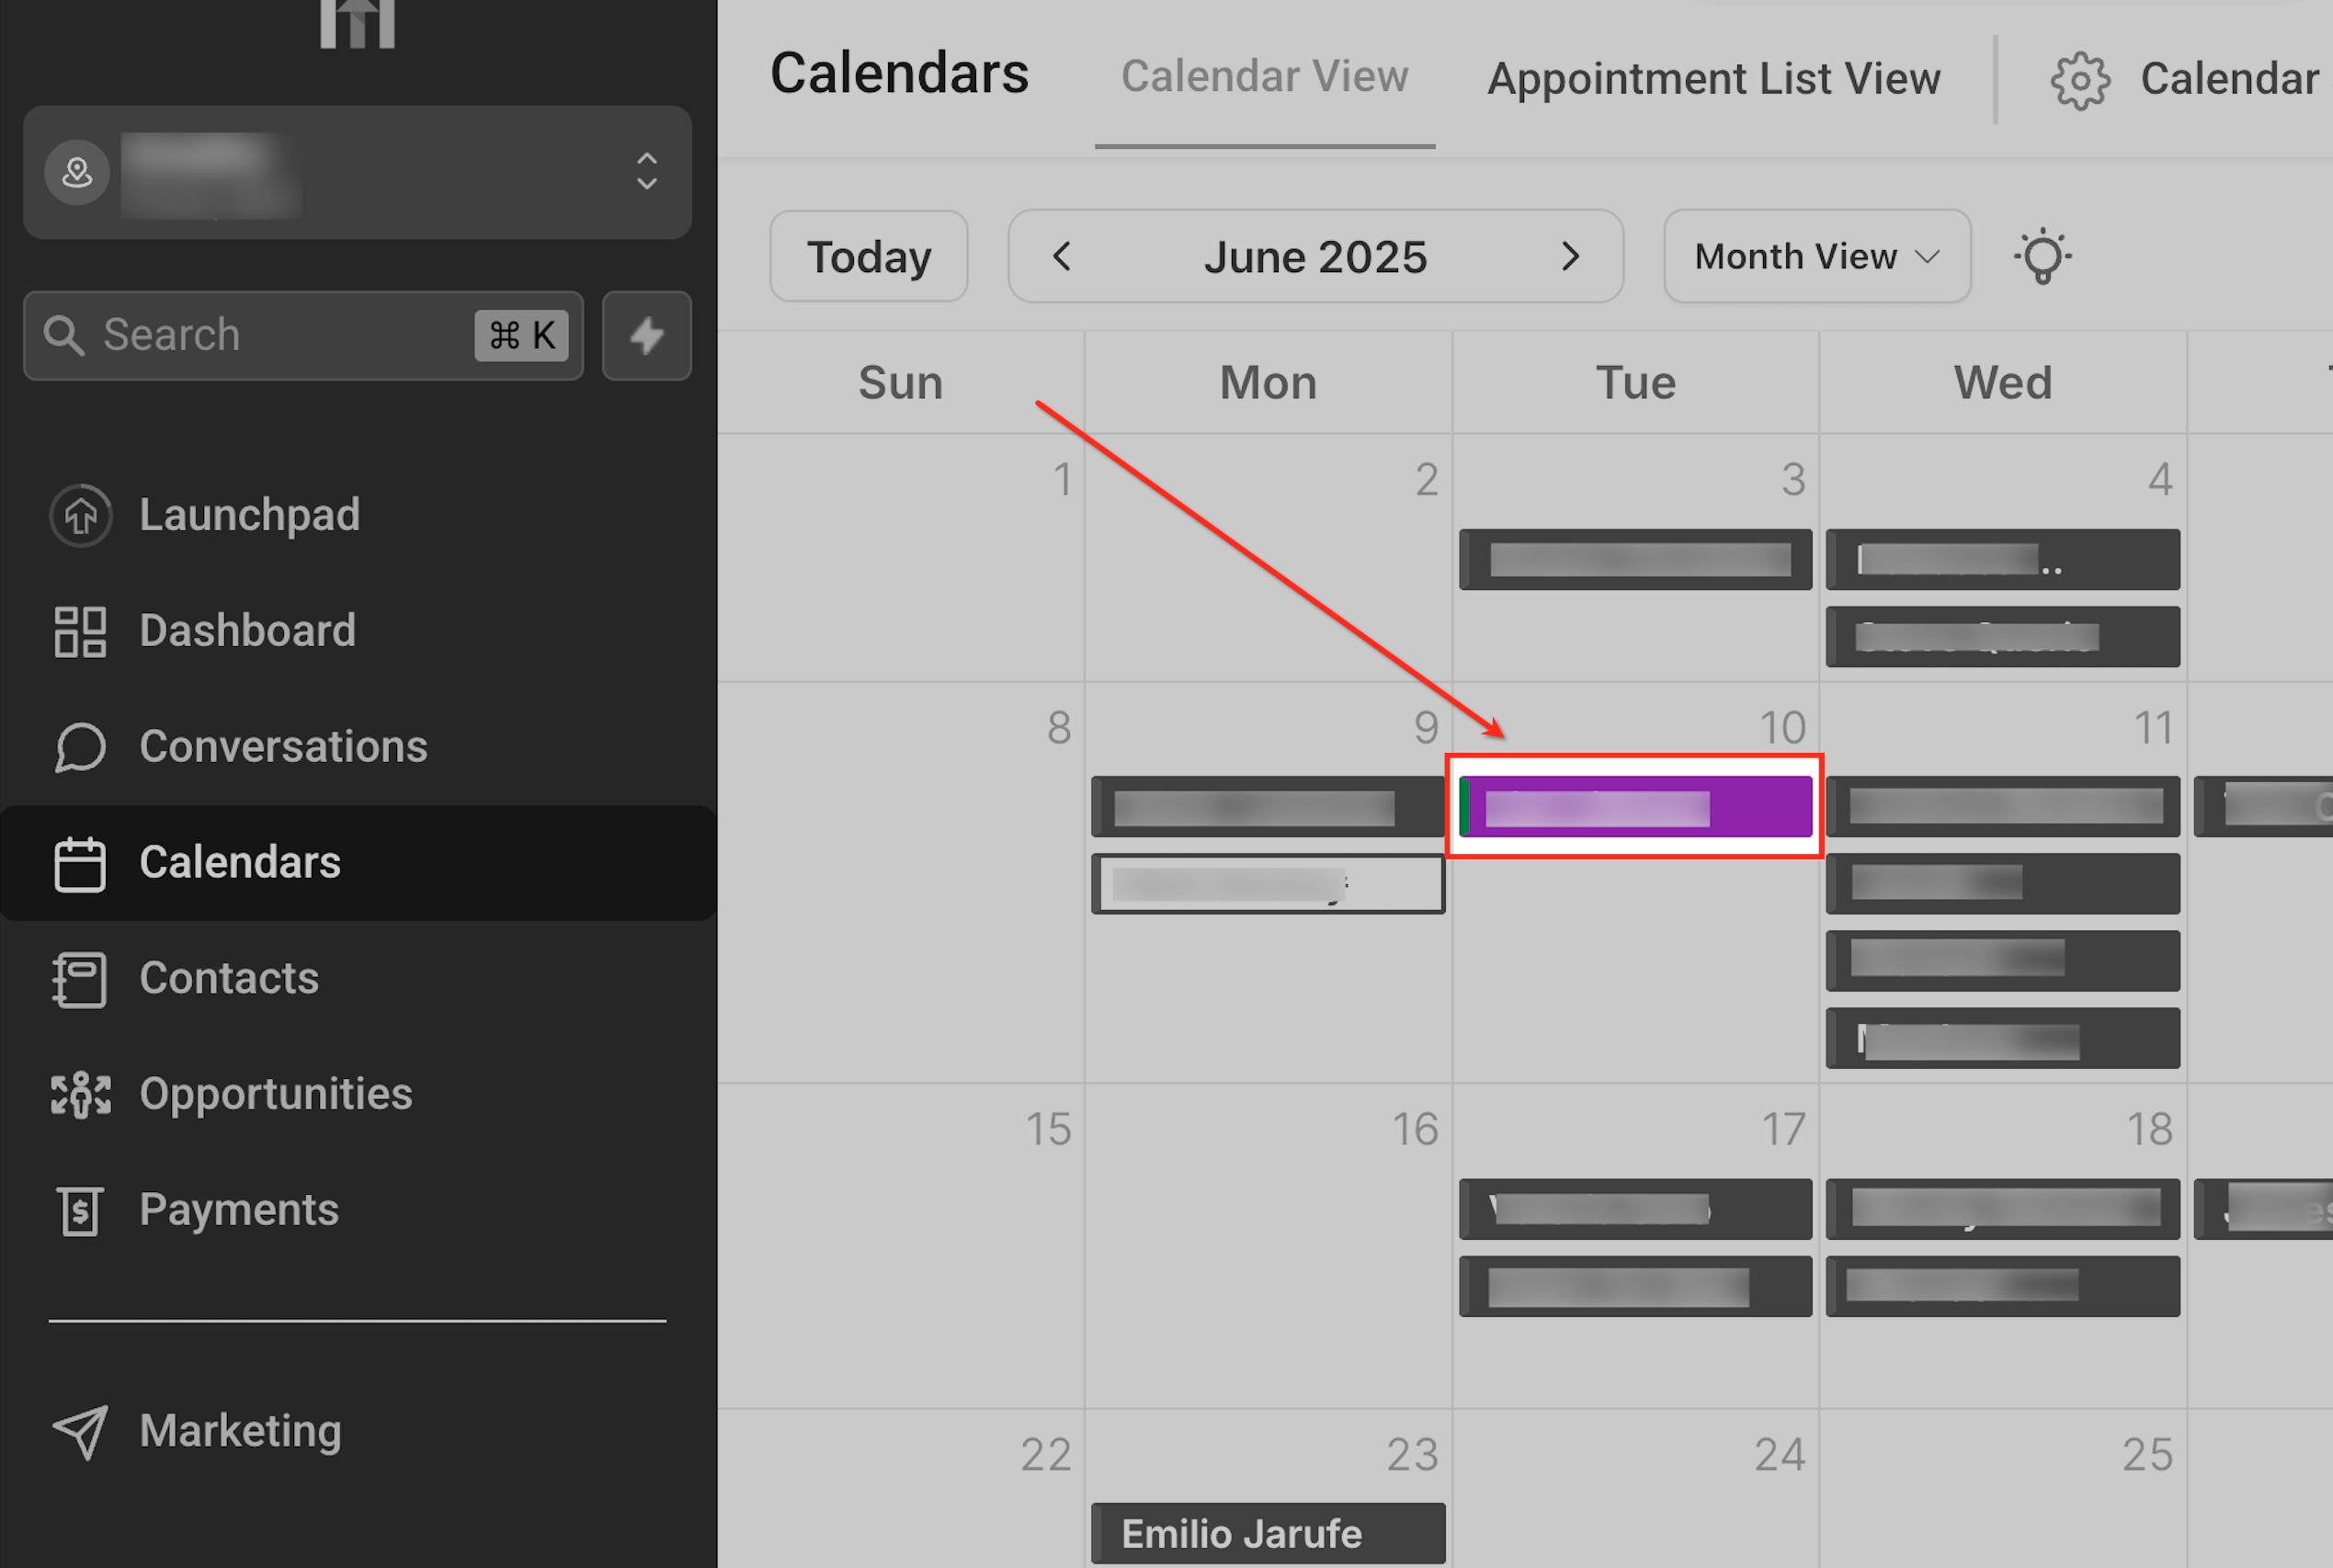
From Calendar View. Go to Calendars → Calendar View.
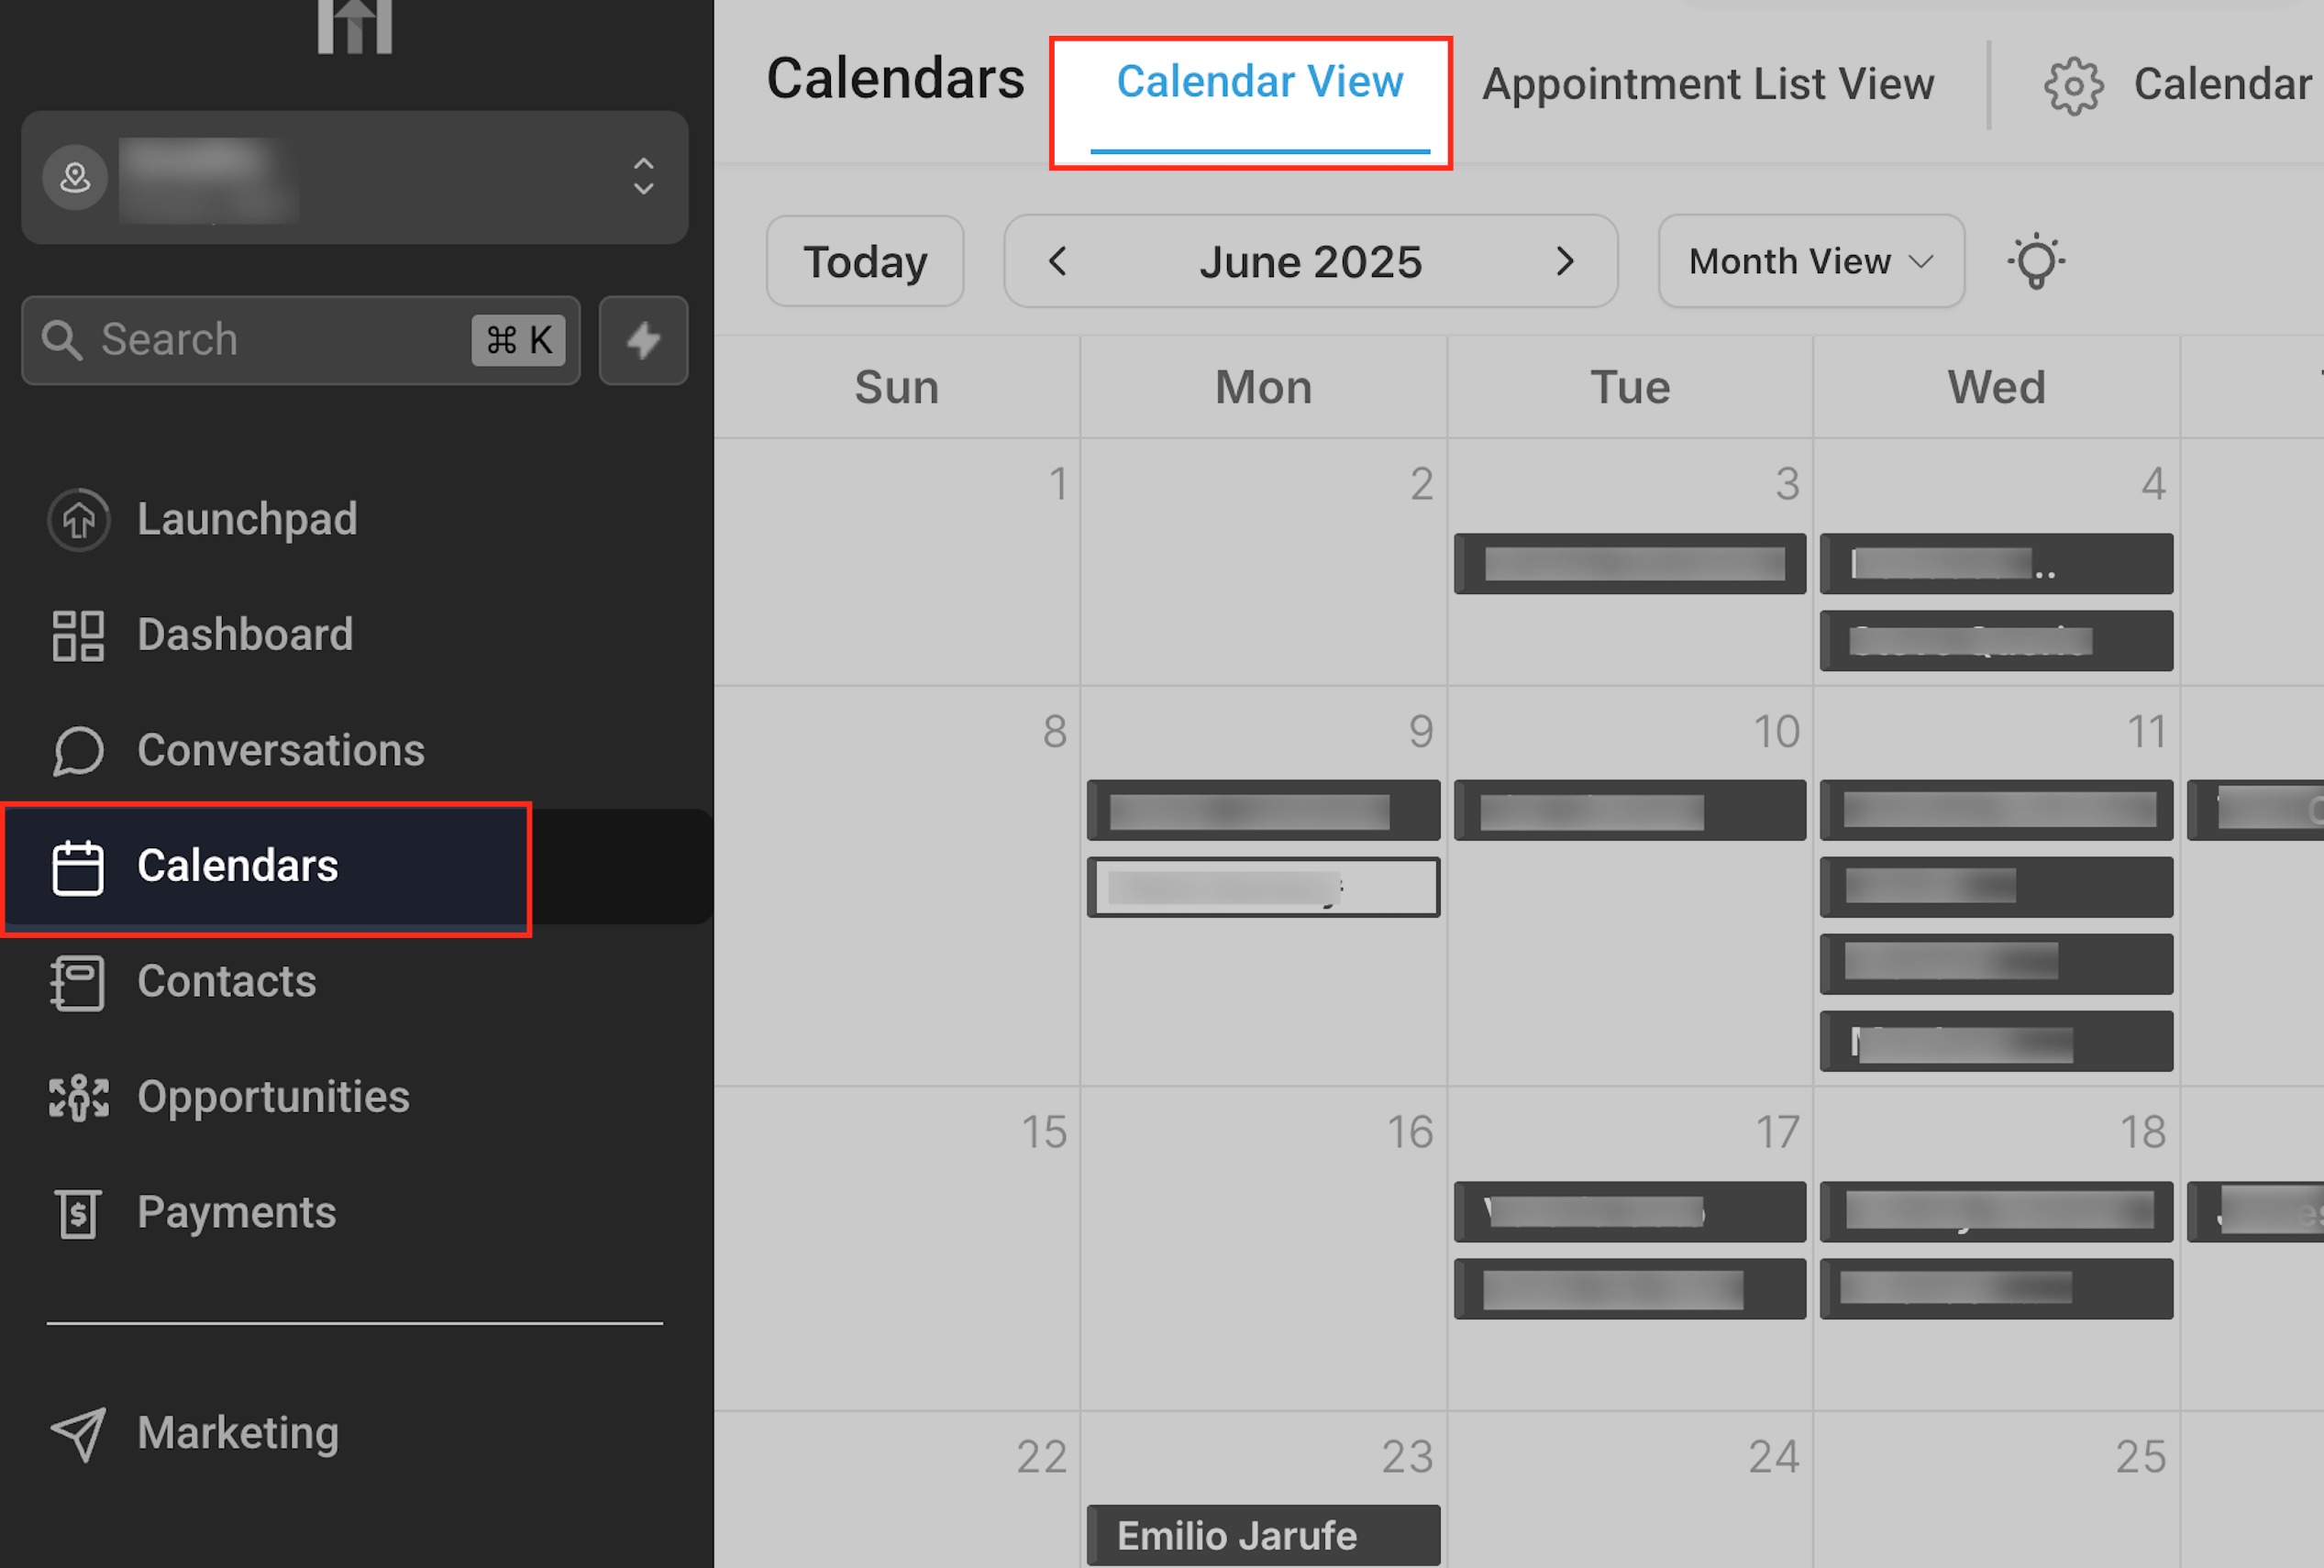
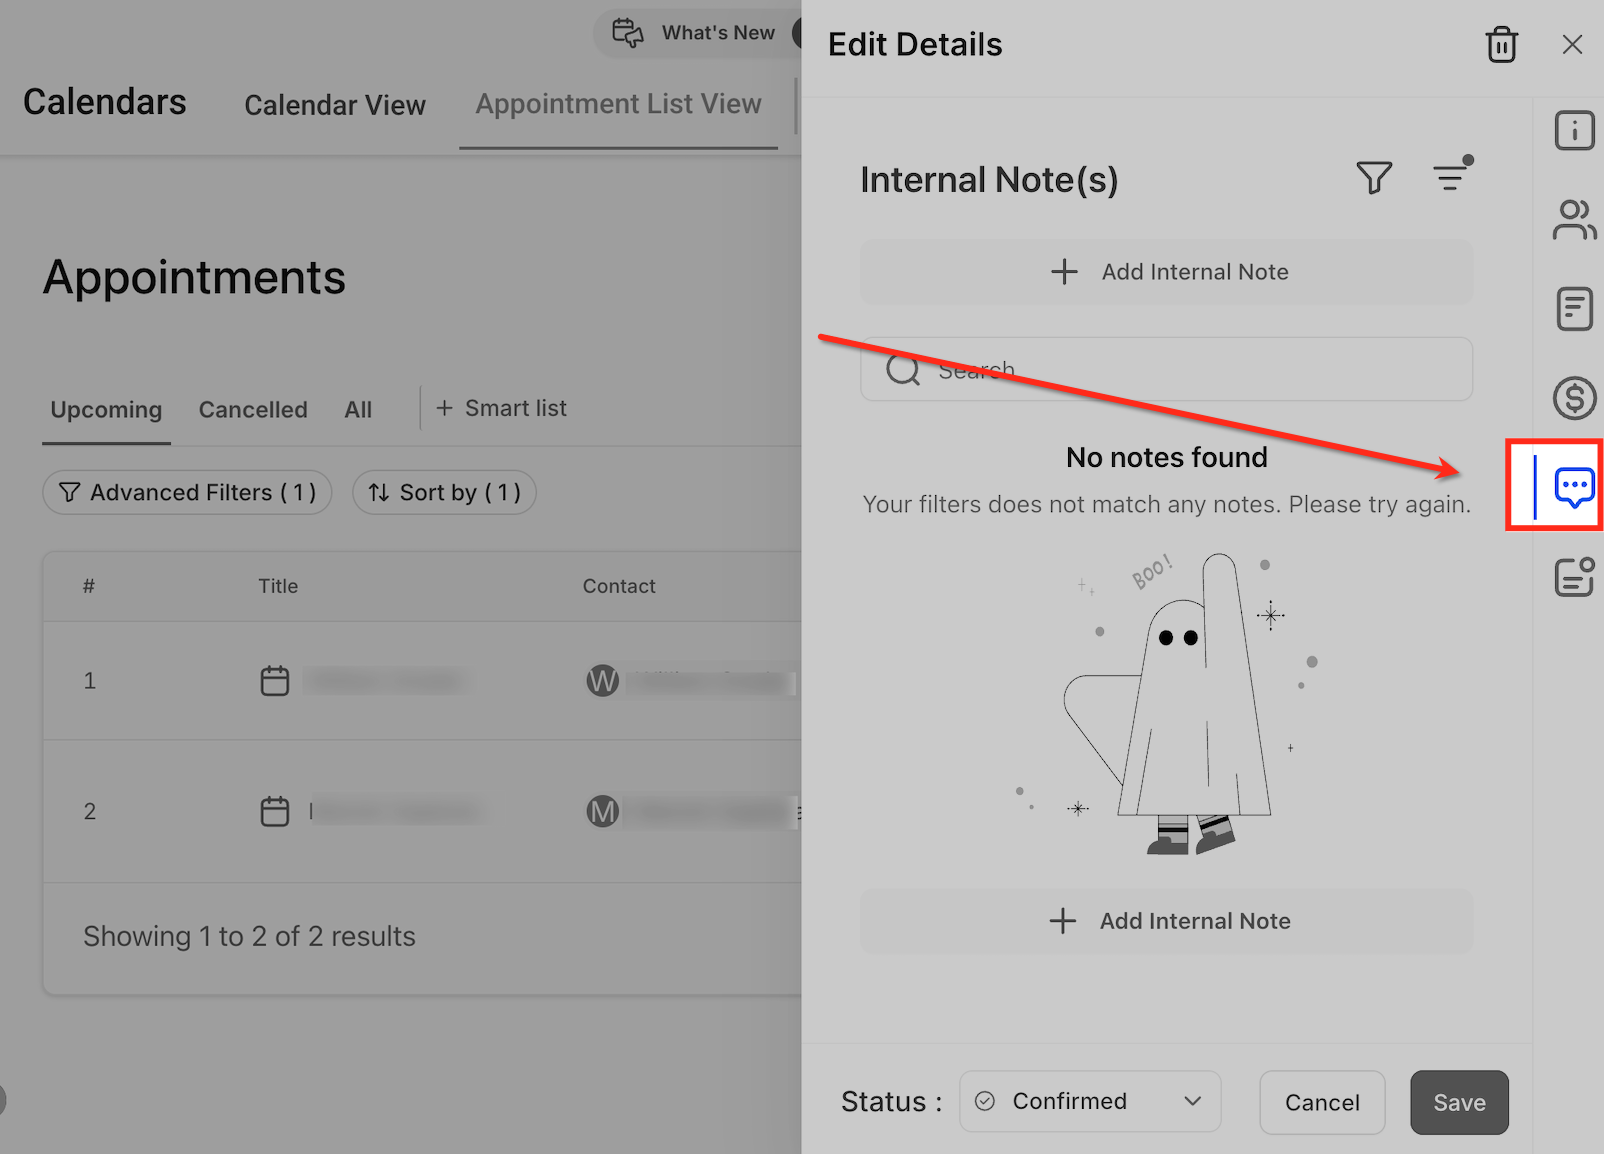
Click the appointment to open it, choose the Notes tab, click Add Internal Note, type your note, and click Save.
From Appointment List View. Go to Calendars → Appointment List View.
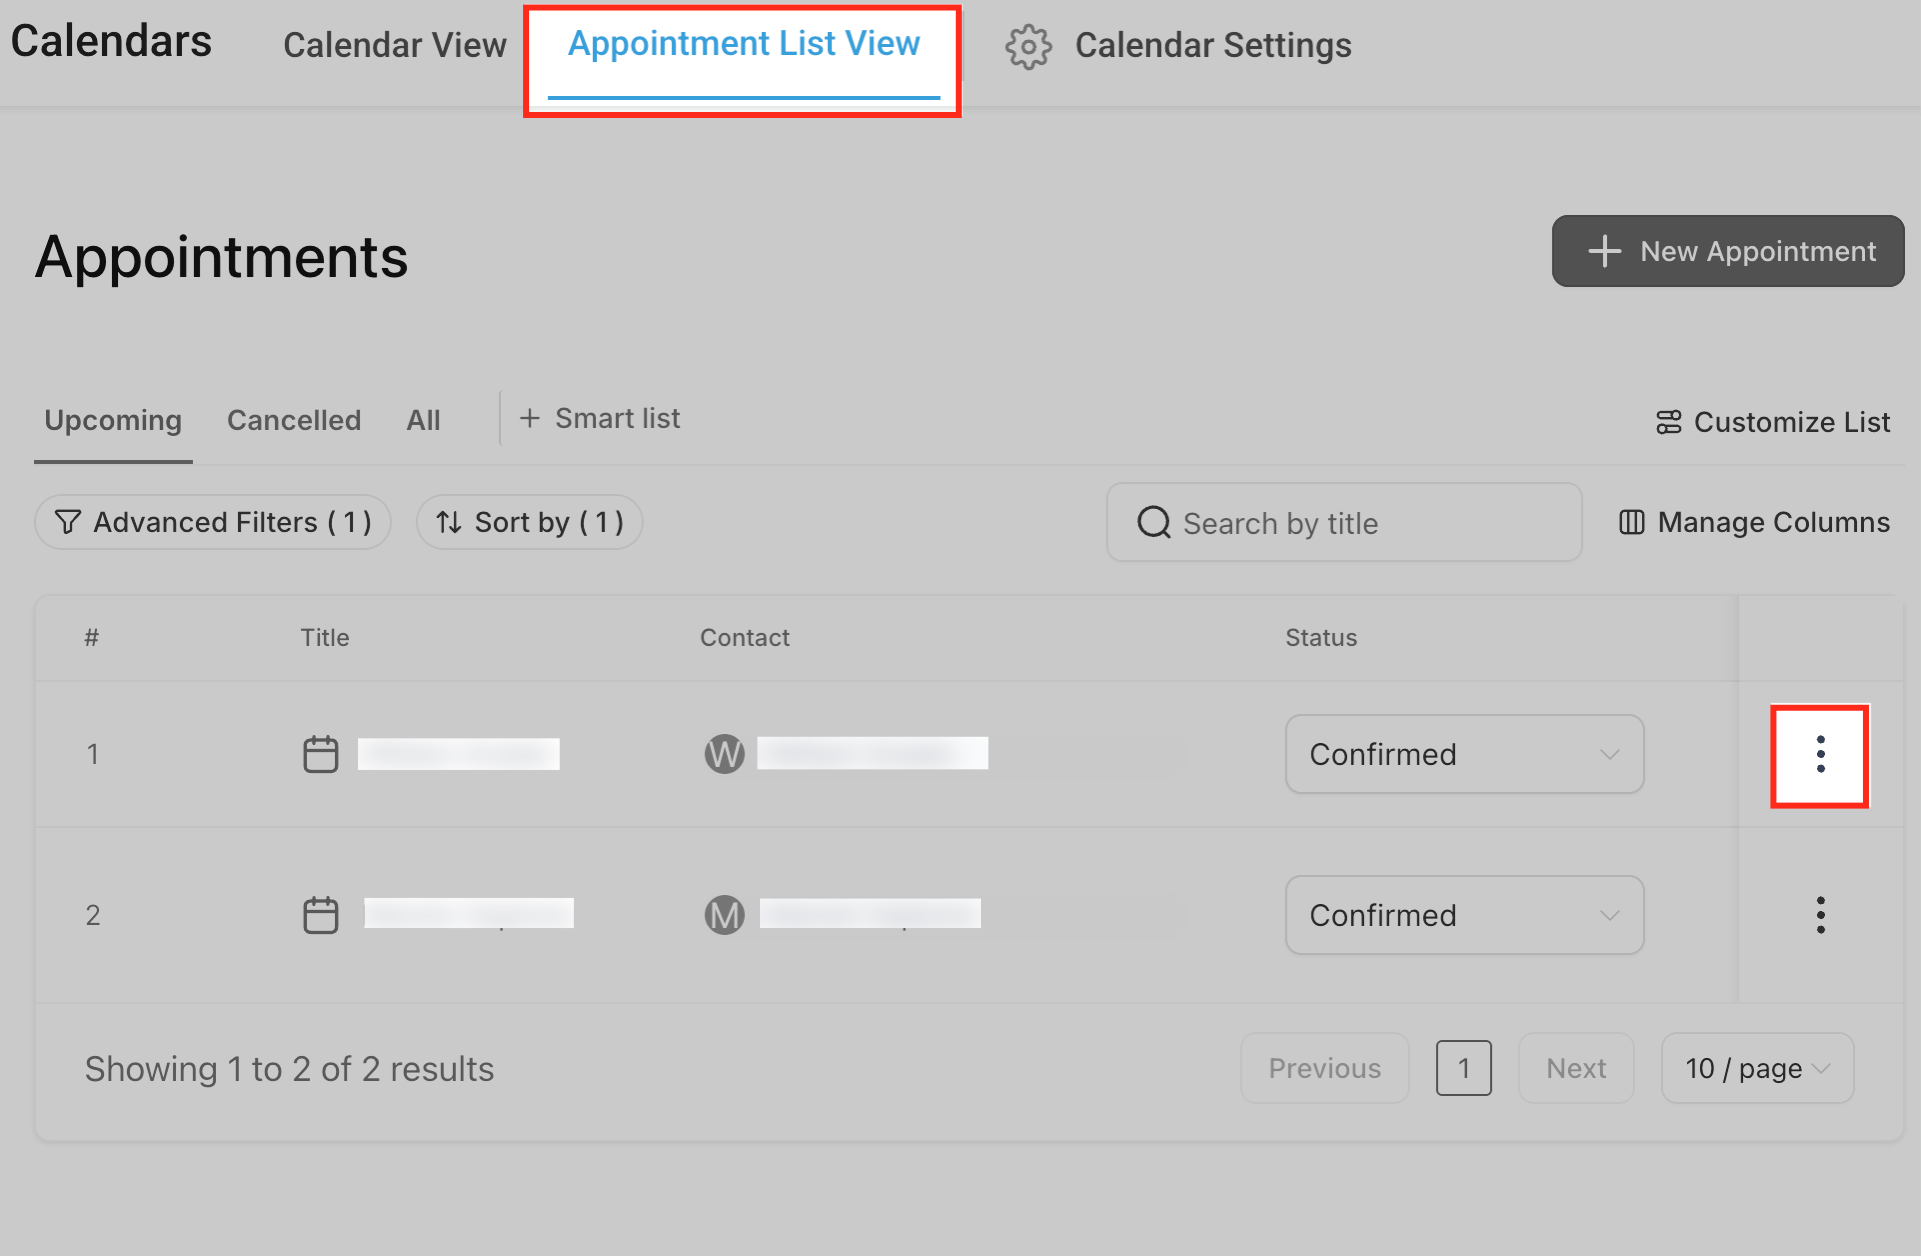
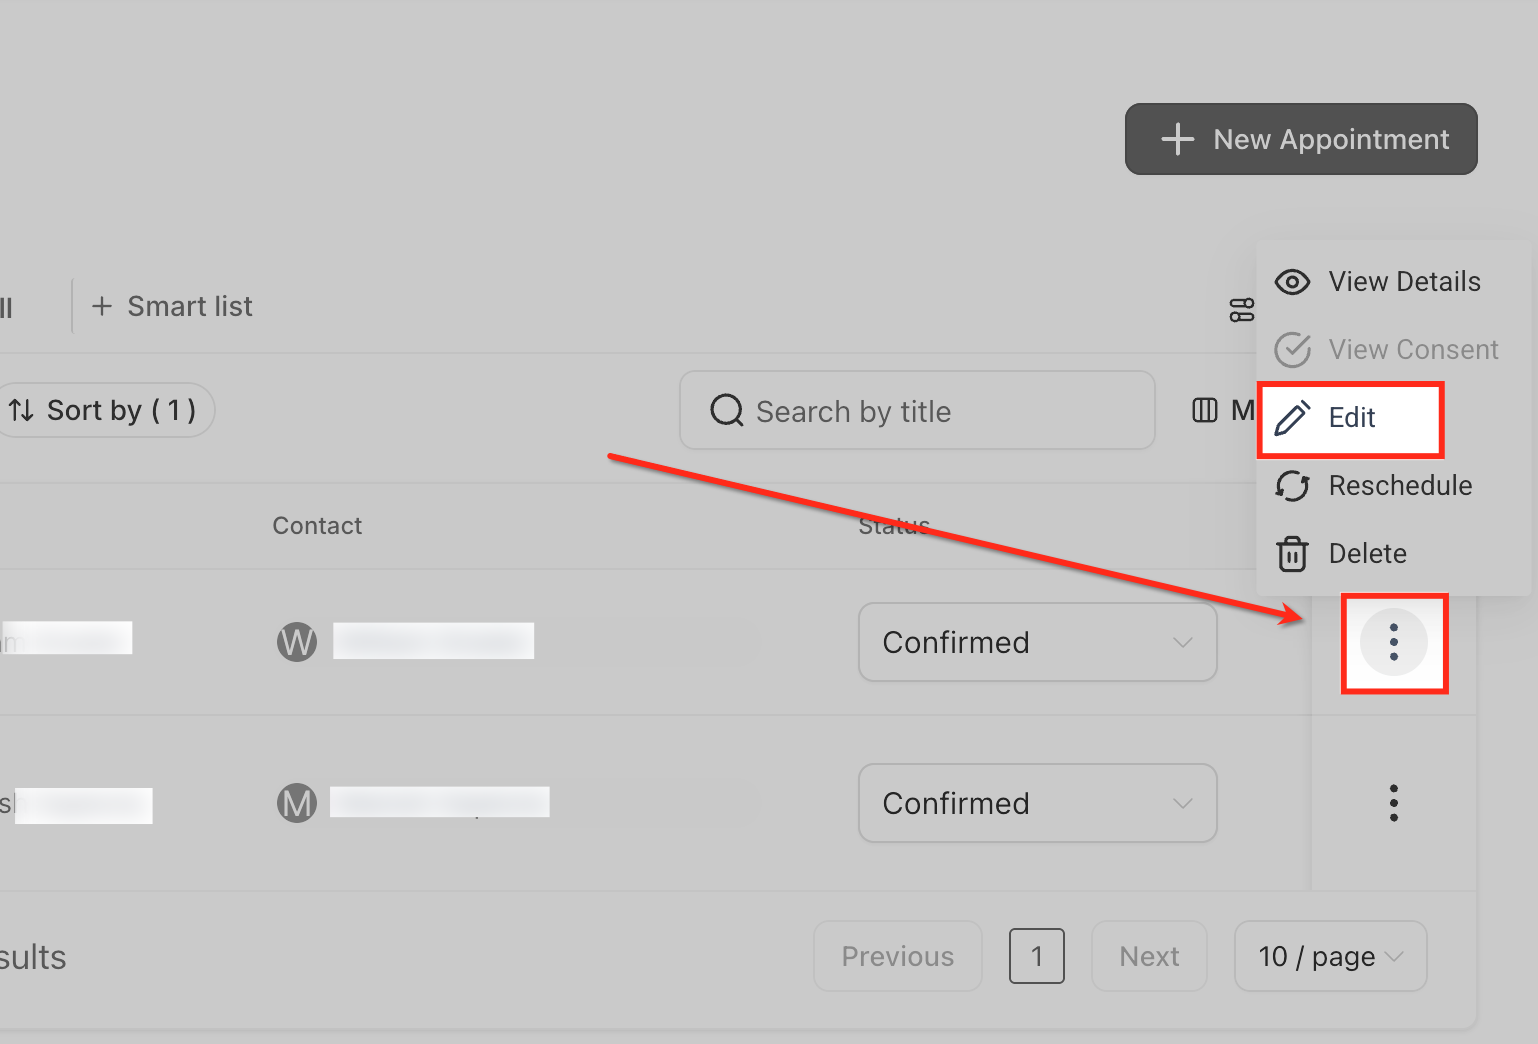
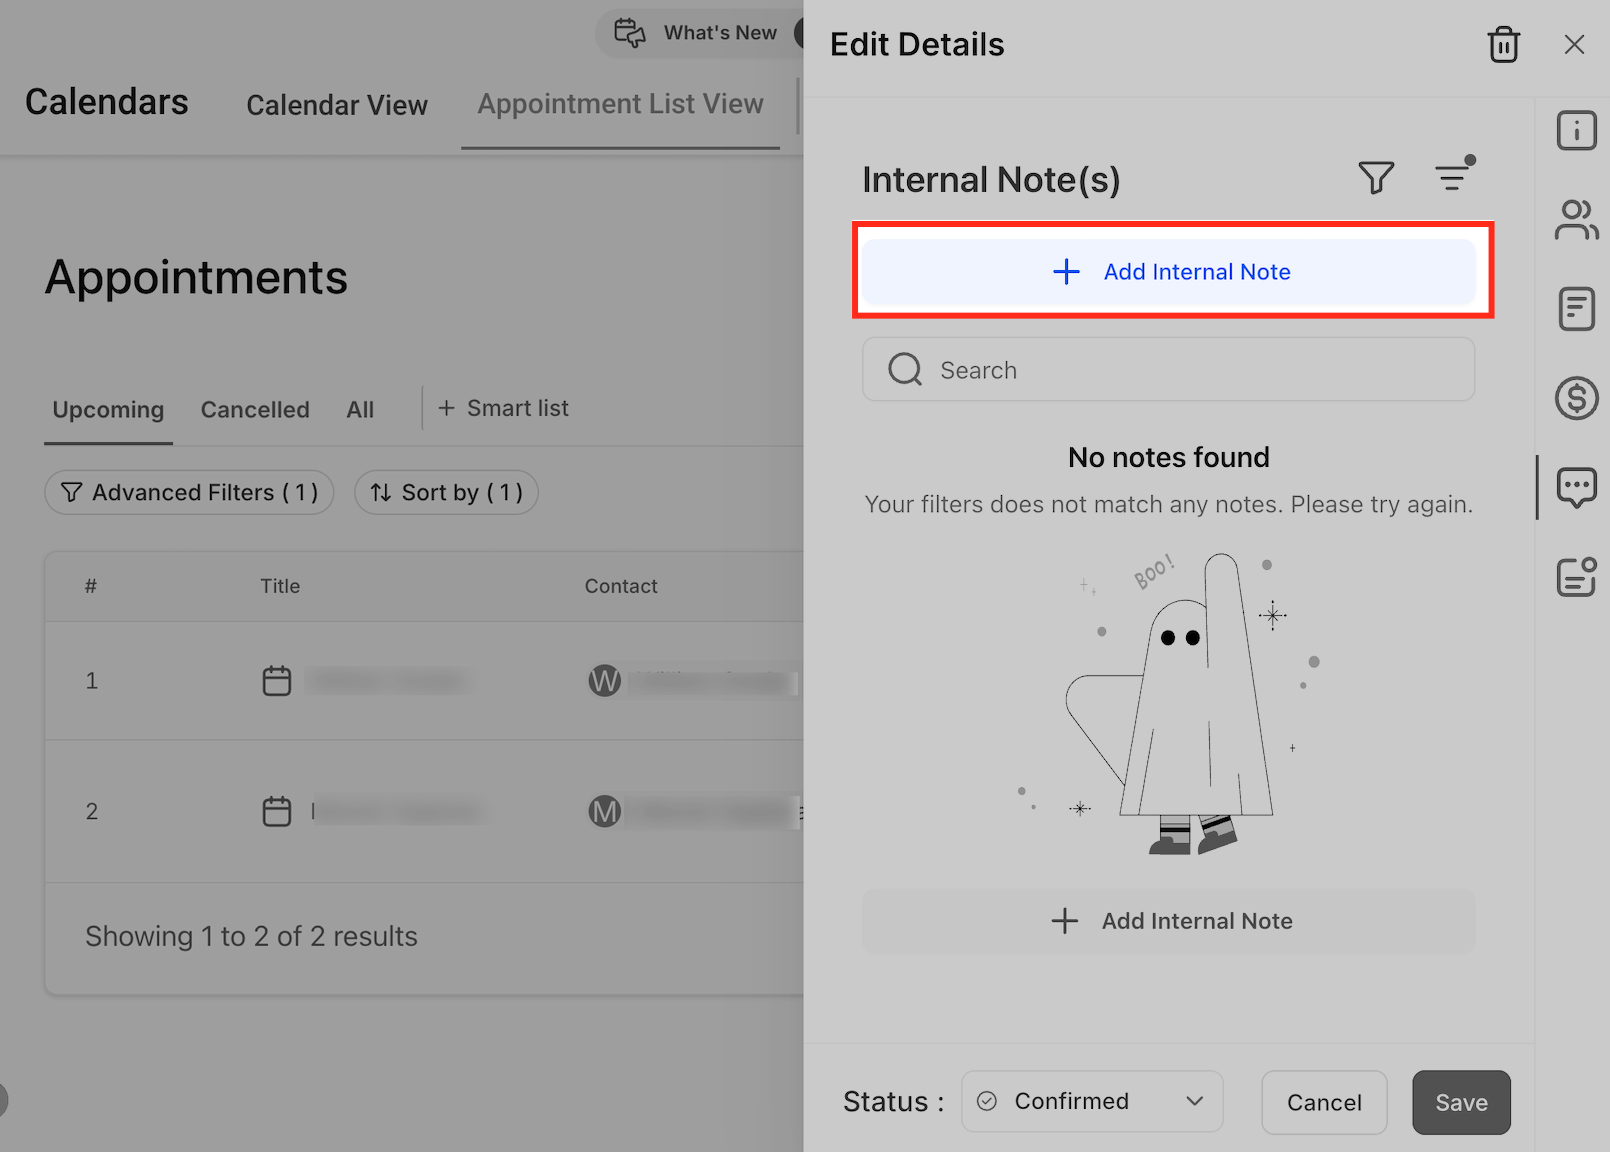
Find the appointment, click the ⋮ menu, select Edit, then in Edit Details → Internal Note(s), click Add Internal Note, type your note, and save.
From the booking form itself. If your calendar's booking form includes an Additional Information field, whatever the patient types there shows up automatically as booking context, no extra step needed on your end.
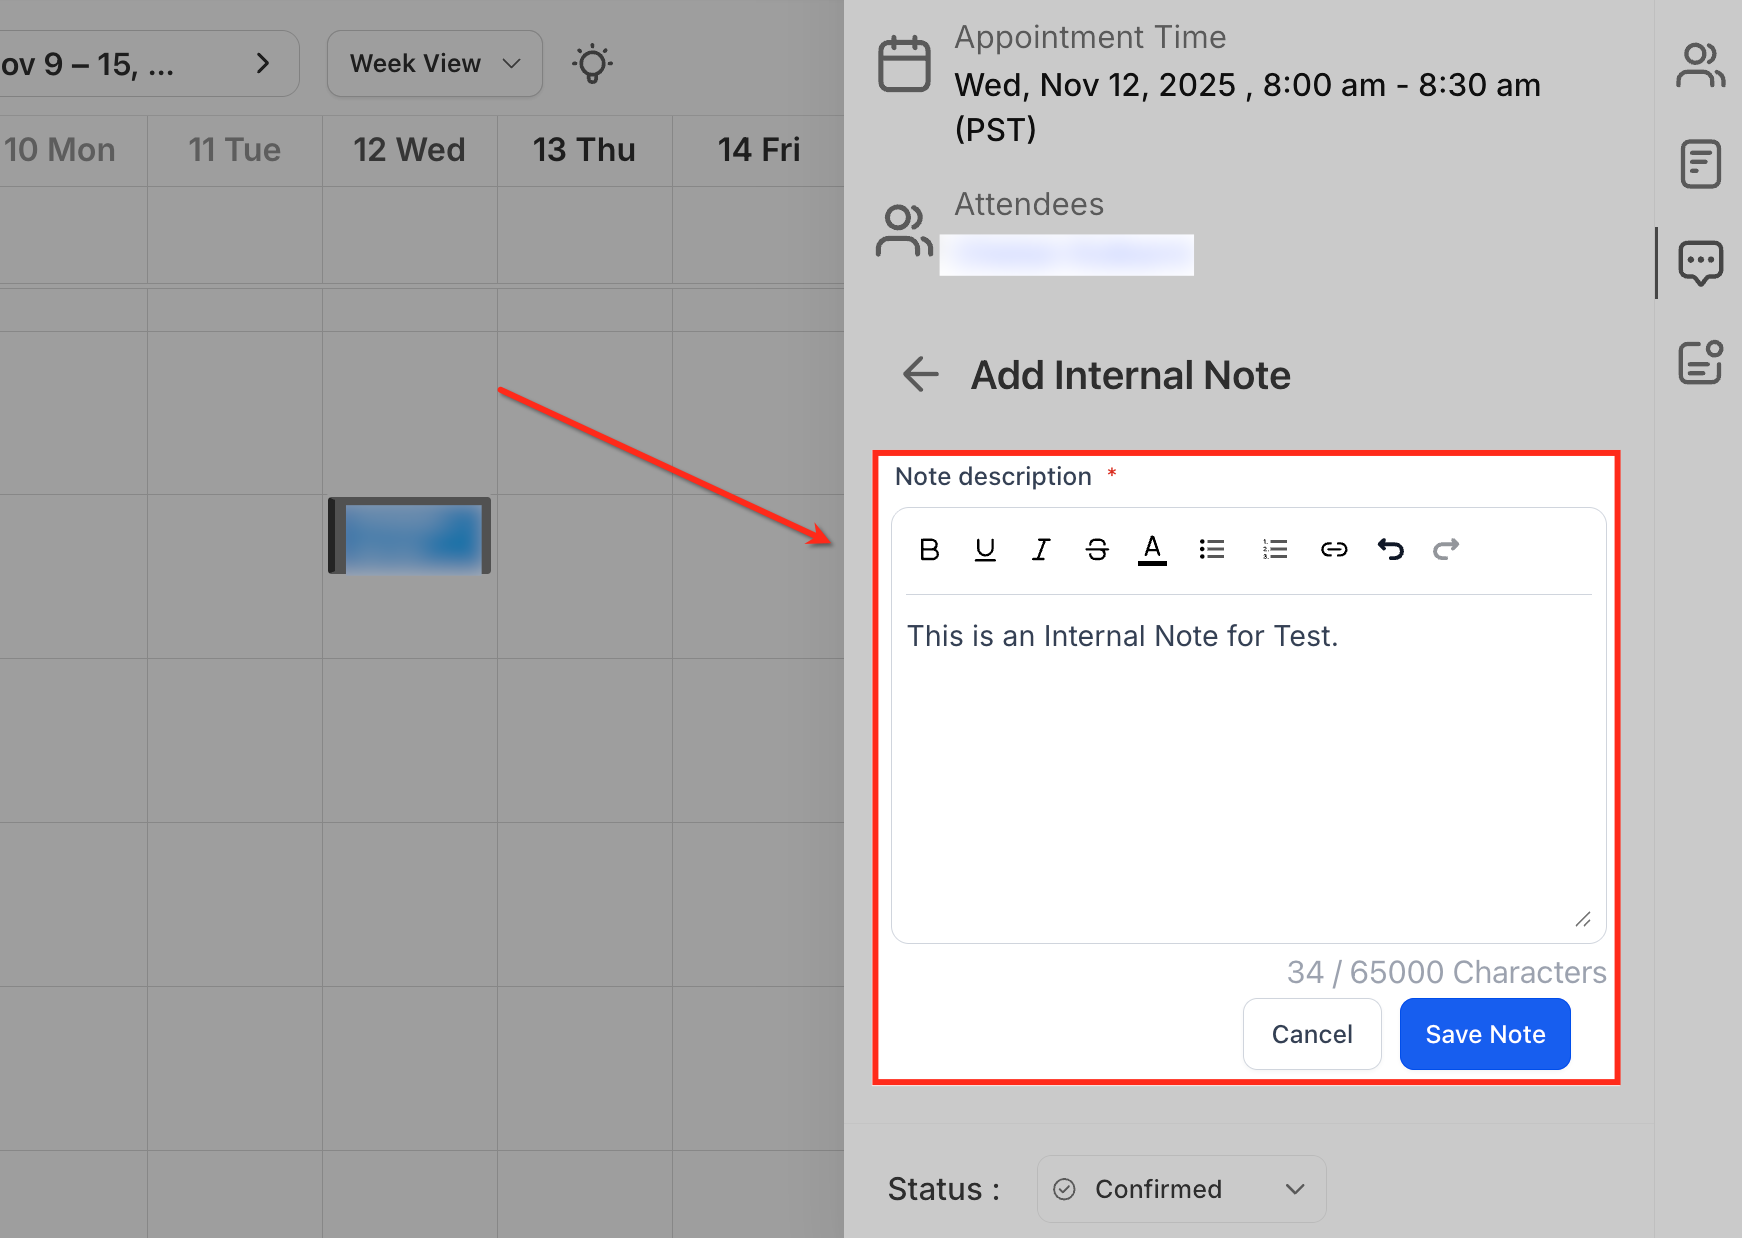
You can also open an appointment from either view and click Add Internal Note directly. The note editor supports basic formatting (bold, italics, underline, lists, links) and up to 65,000 characters, so it's fine to use for detailed pre-visit context or consult recaps.
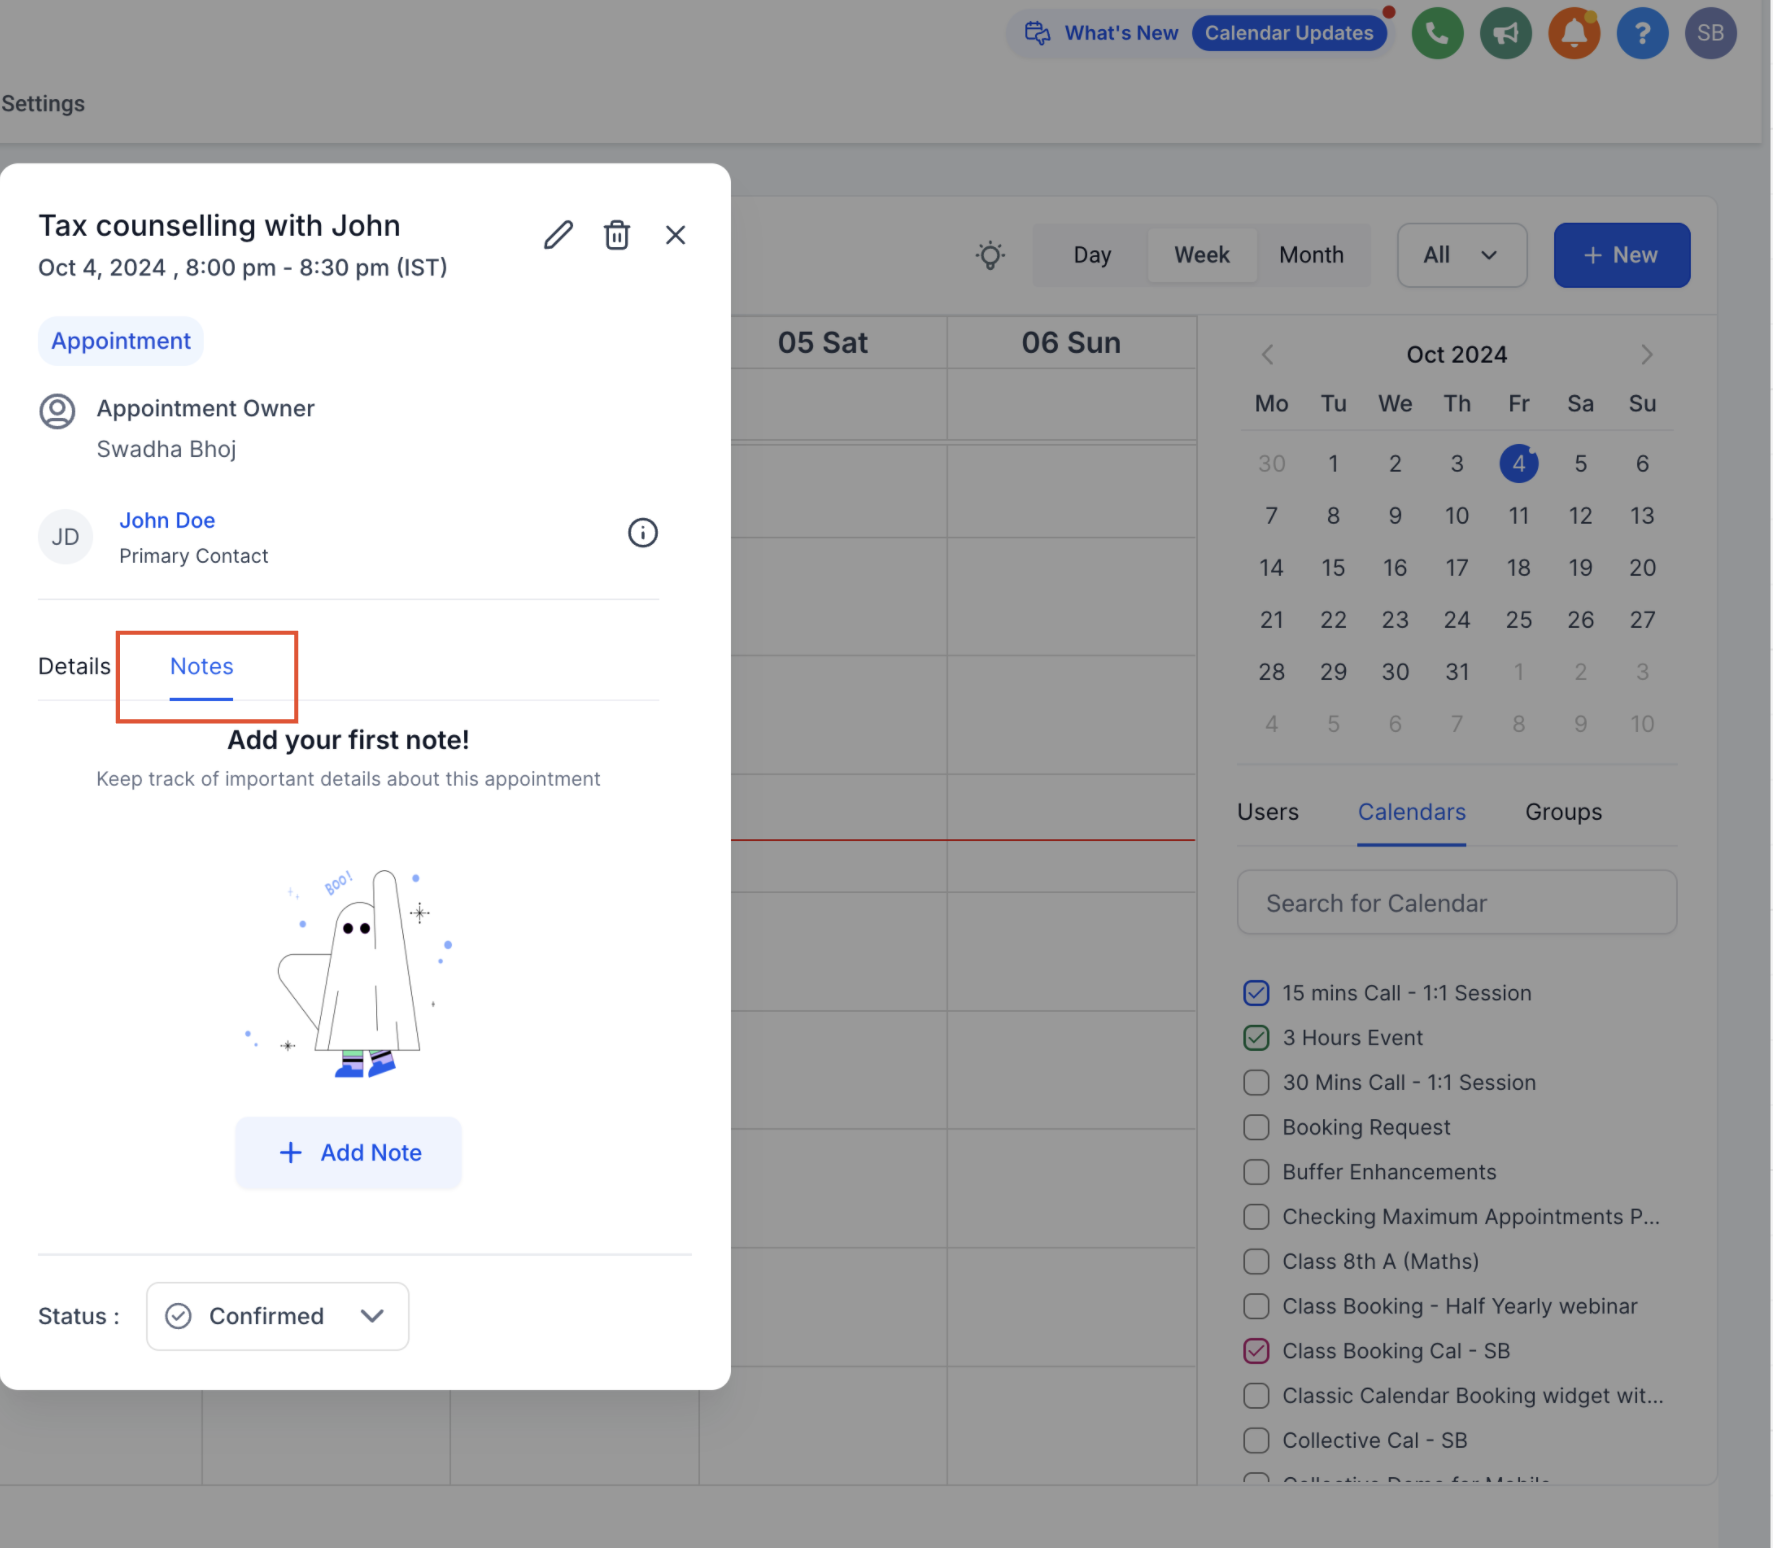
If you're working from the classic Appointment Modal, the flow is the same: open the appointment, go to the Notes tab, click Add Note, type your note, and click Save.
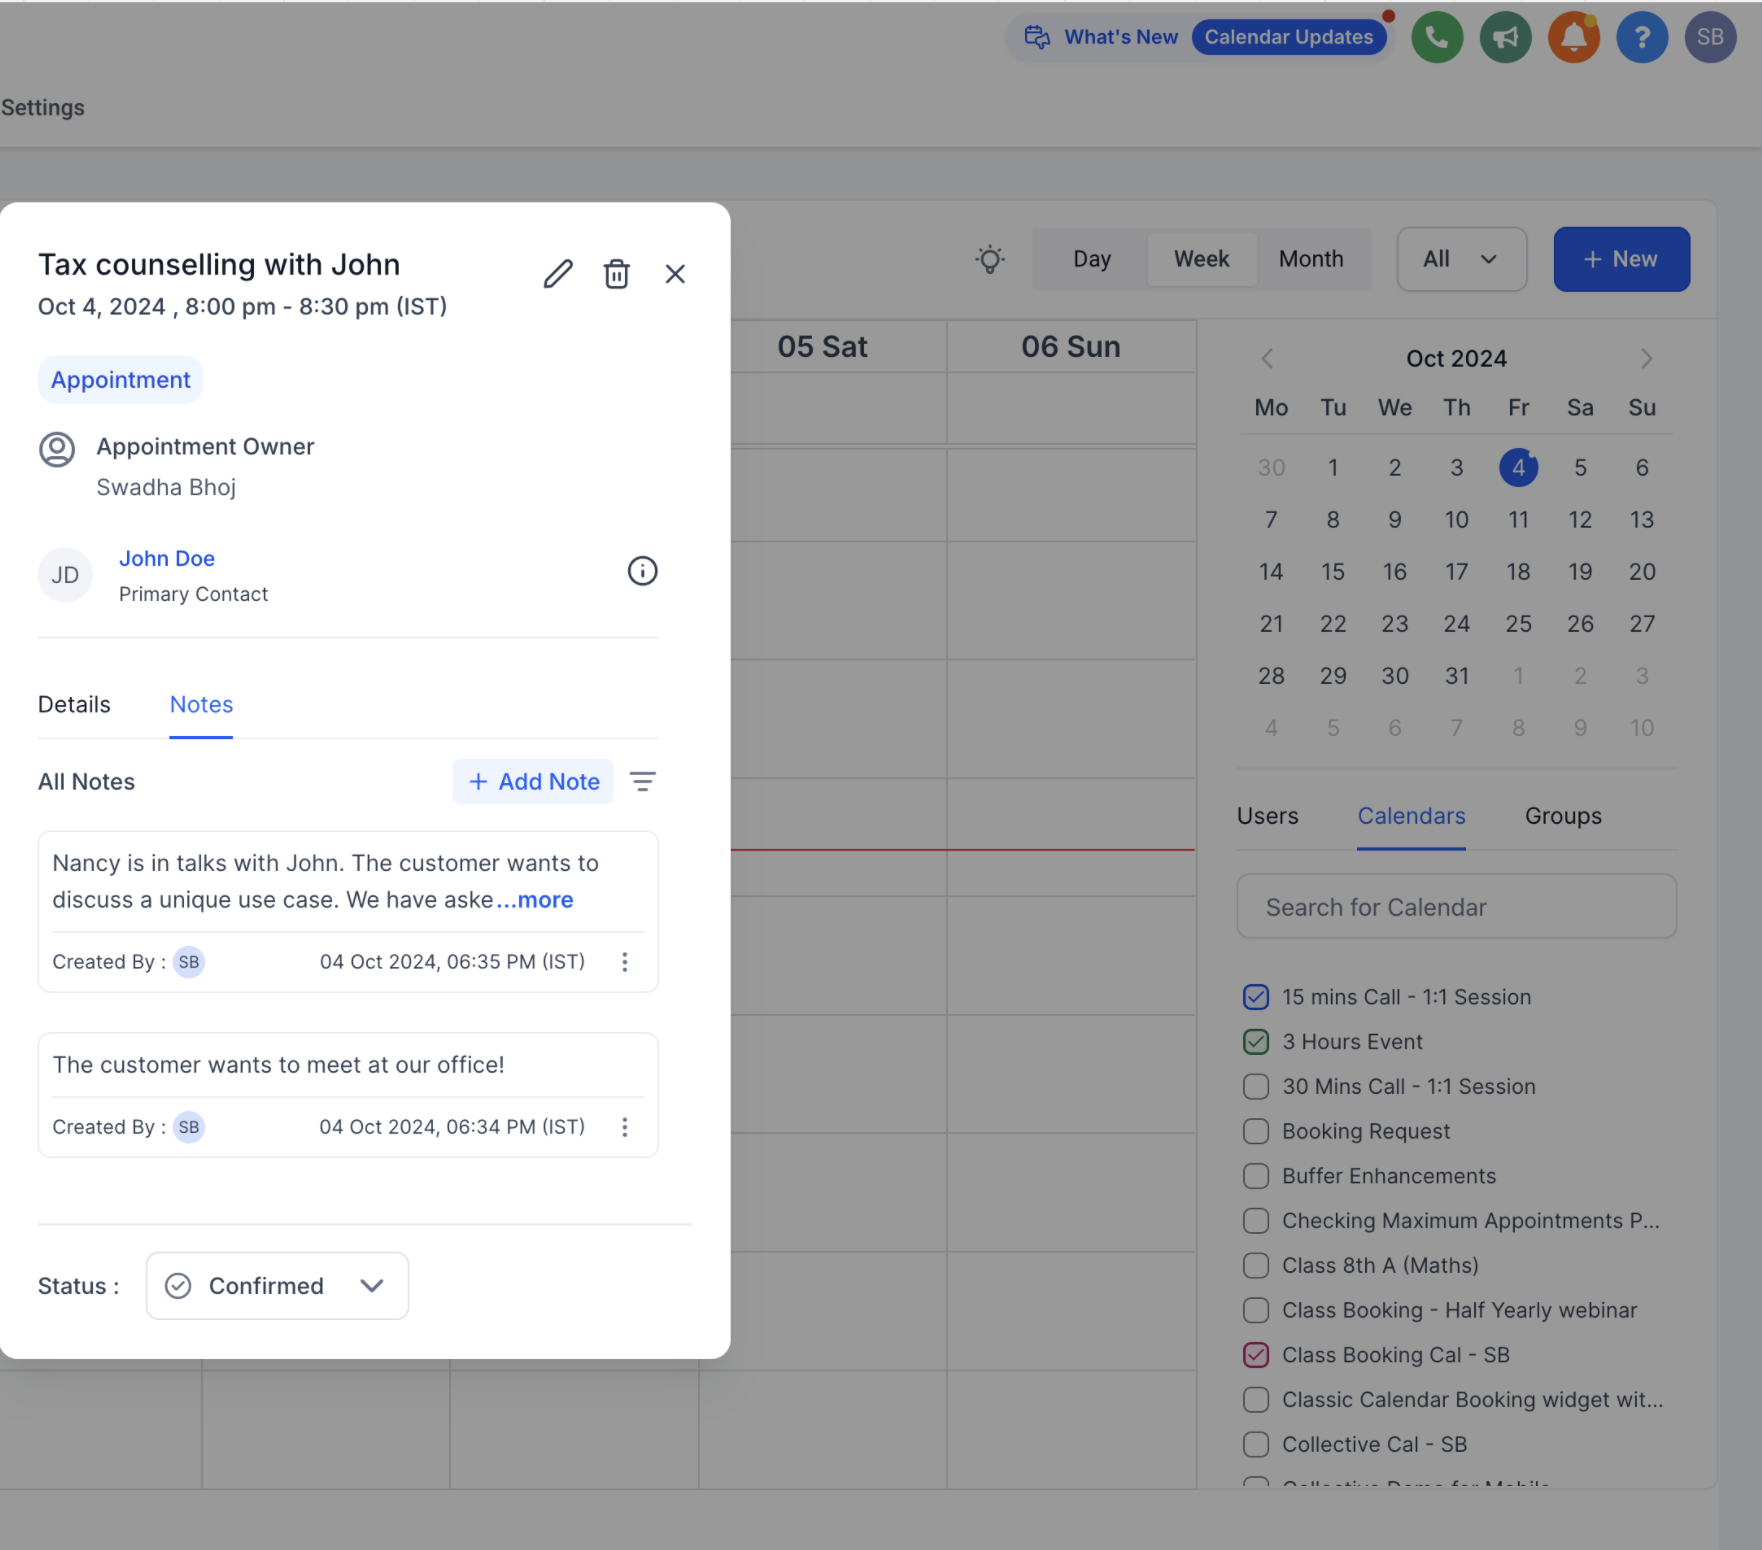
Each note is saved with the name of the person who added it and a timestamp, giving you a clear log of who did what for a given appointment.
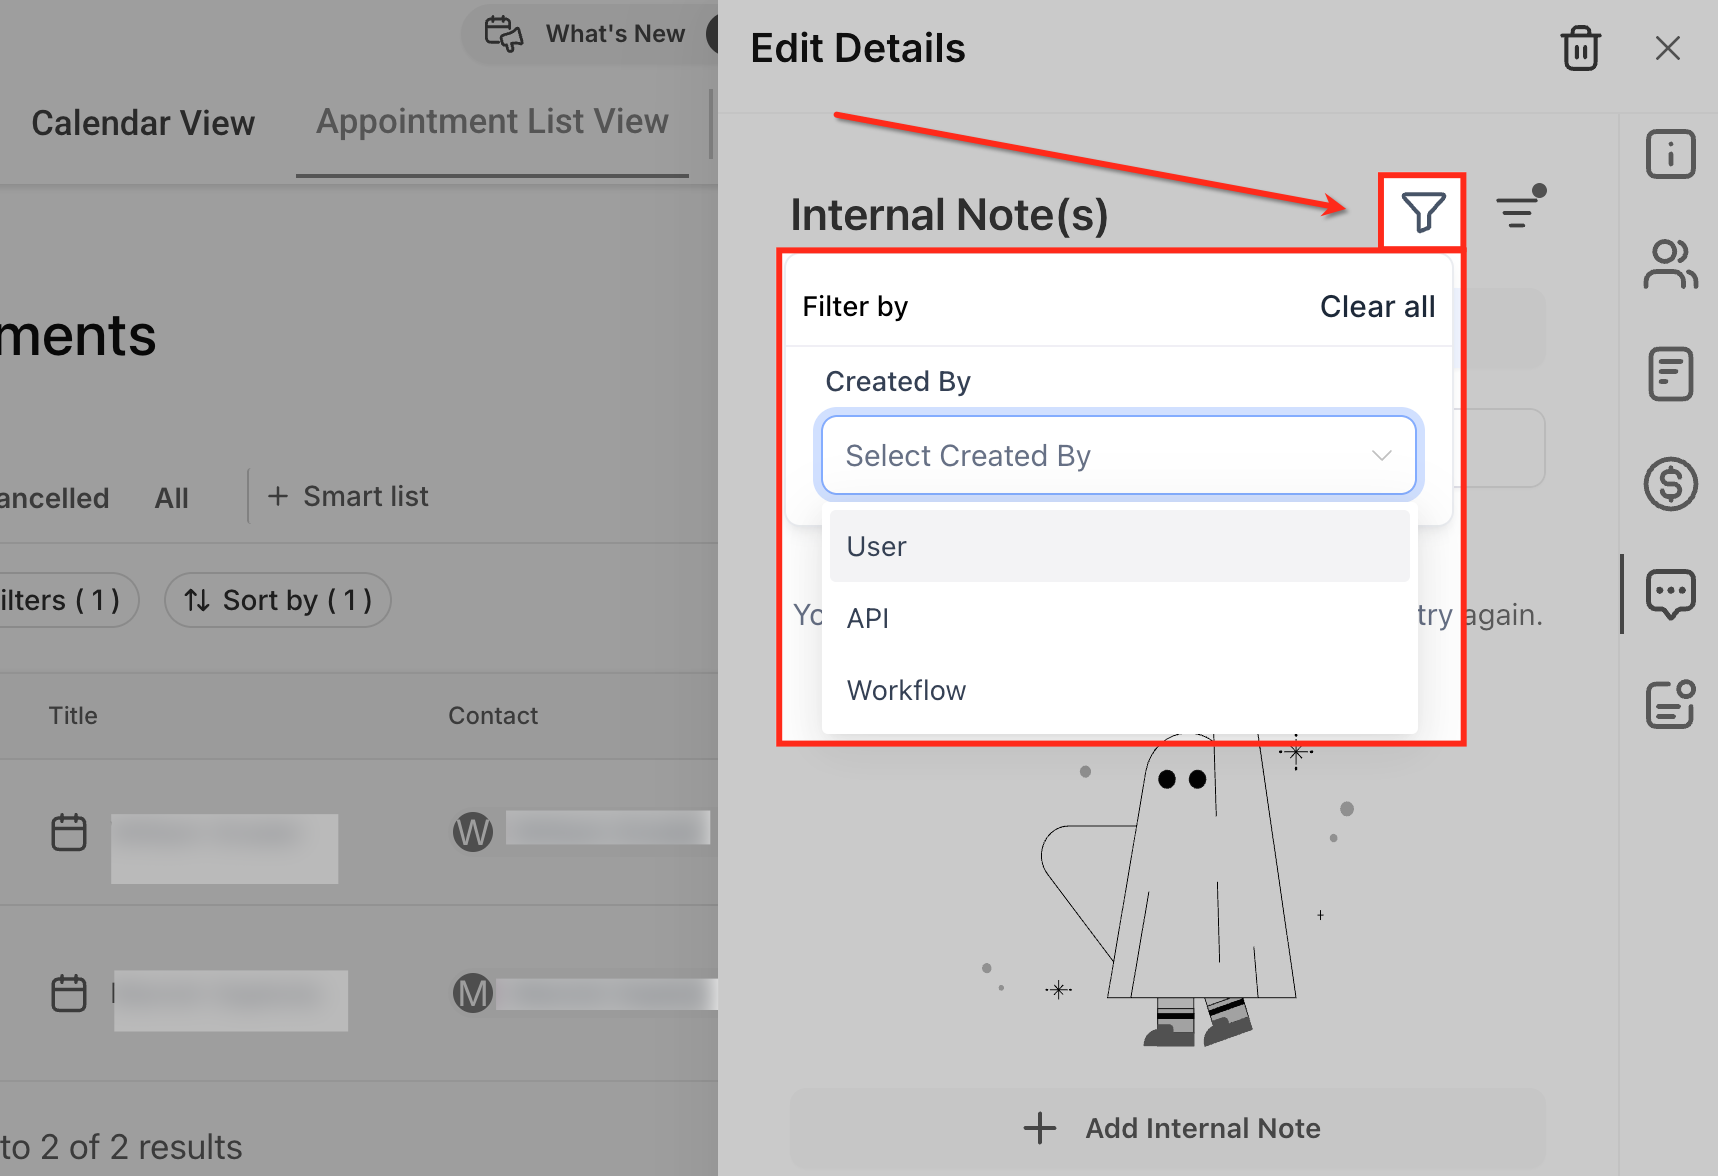
Filter by source: click the filter icon in Internal Note(s) and choose User, API, and/or Workflow, you can select more than one.
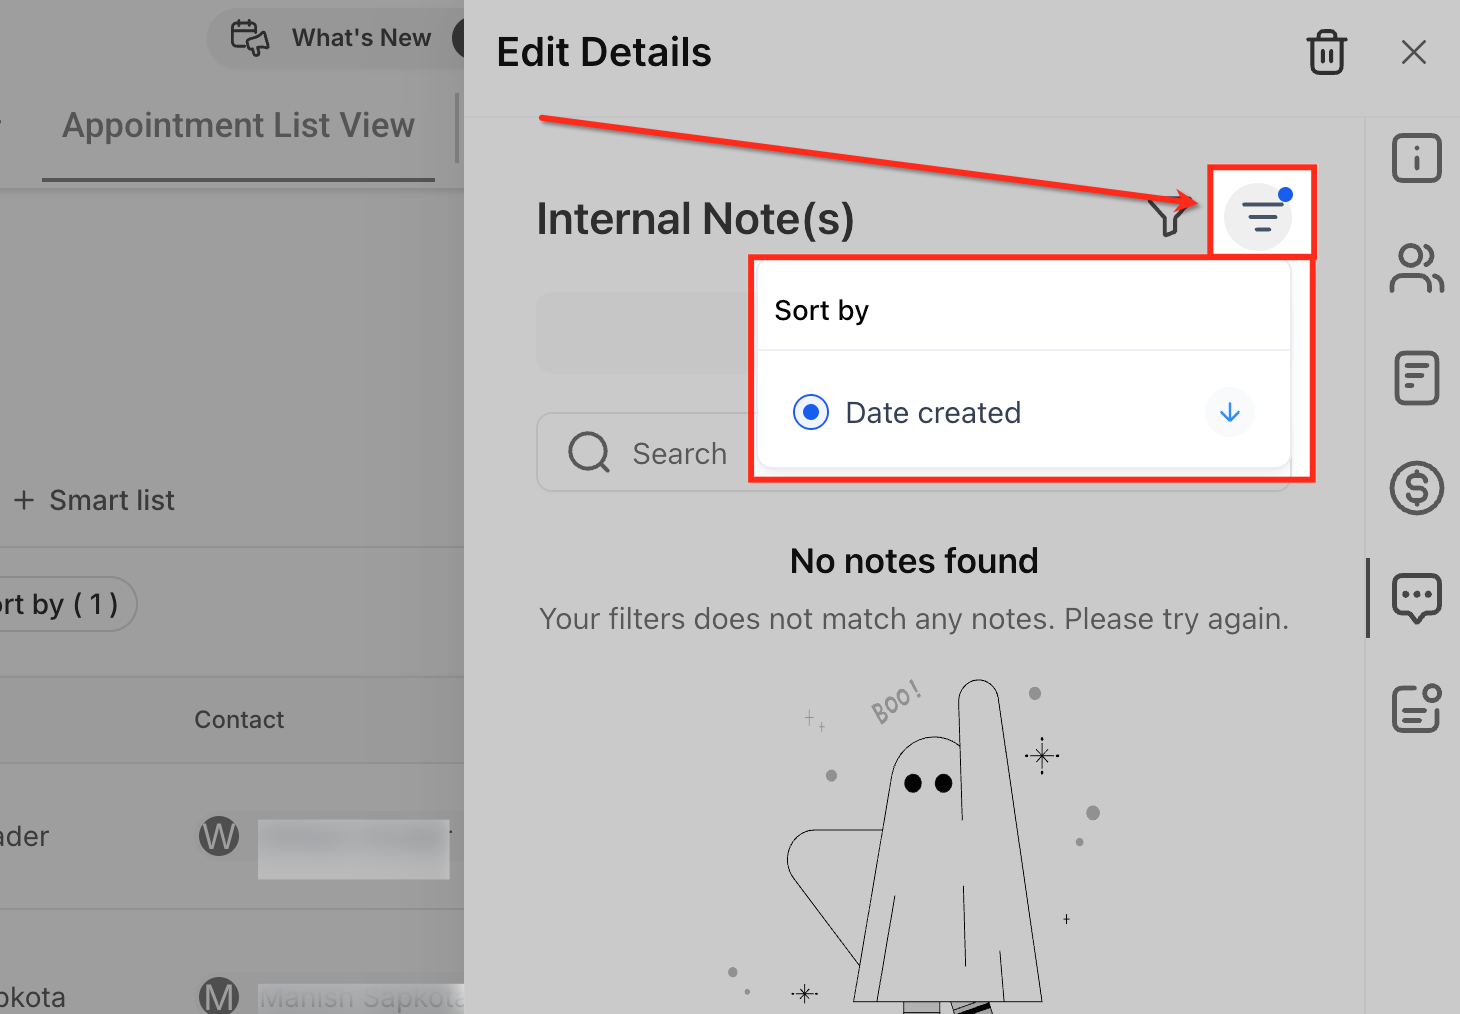
Sort: click the sort icon to order notes by date created, ascending or descending.
Search: use the Search field in Internal Note(s) to find keywords across an appointment's notes.
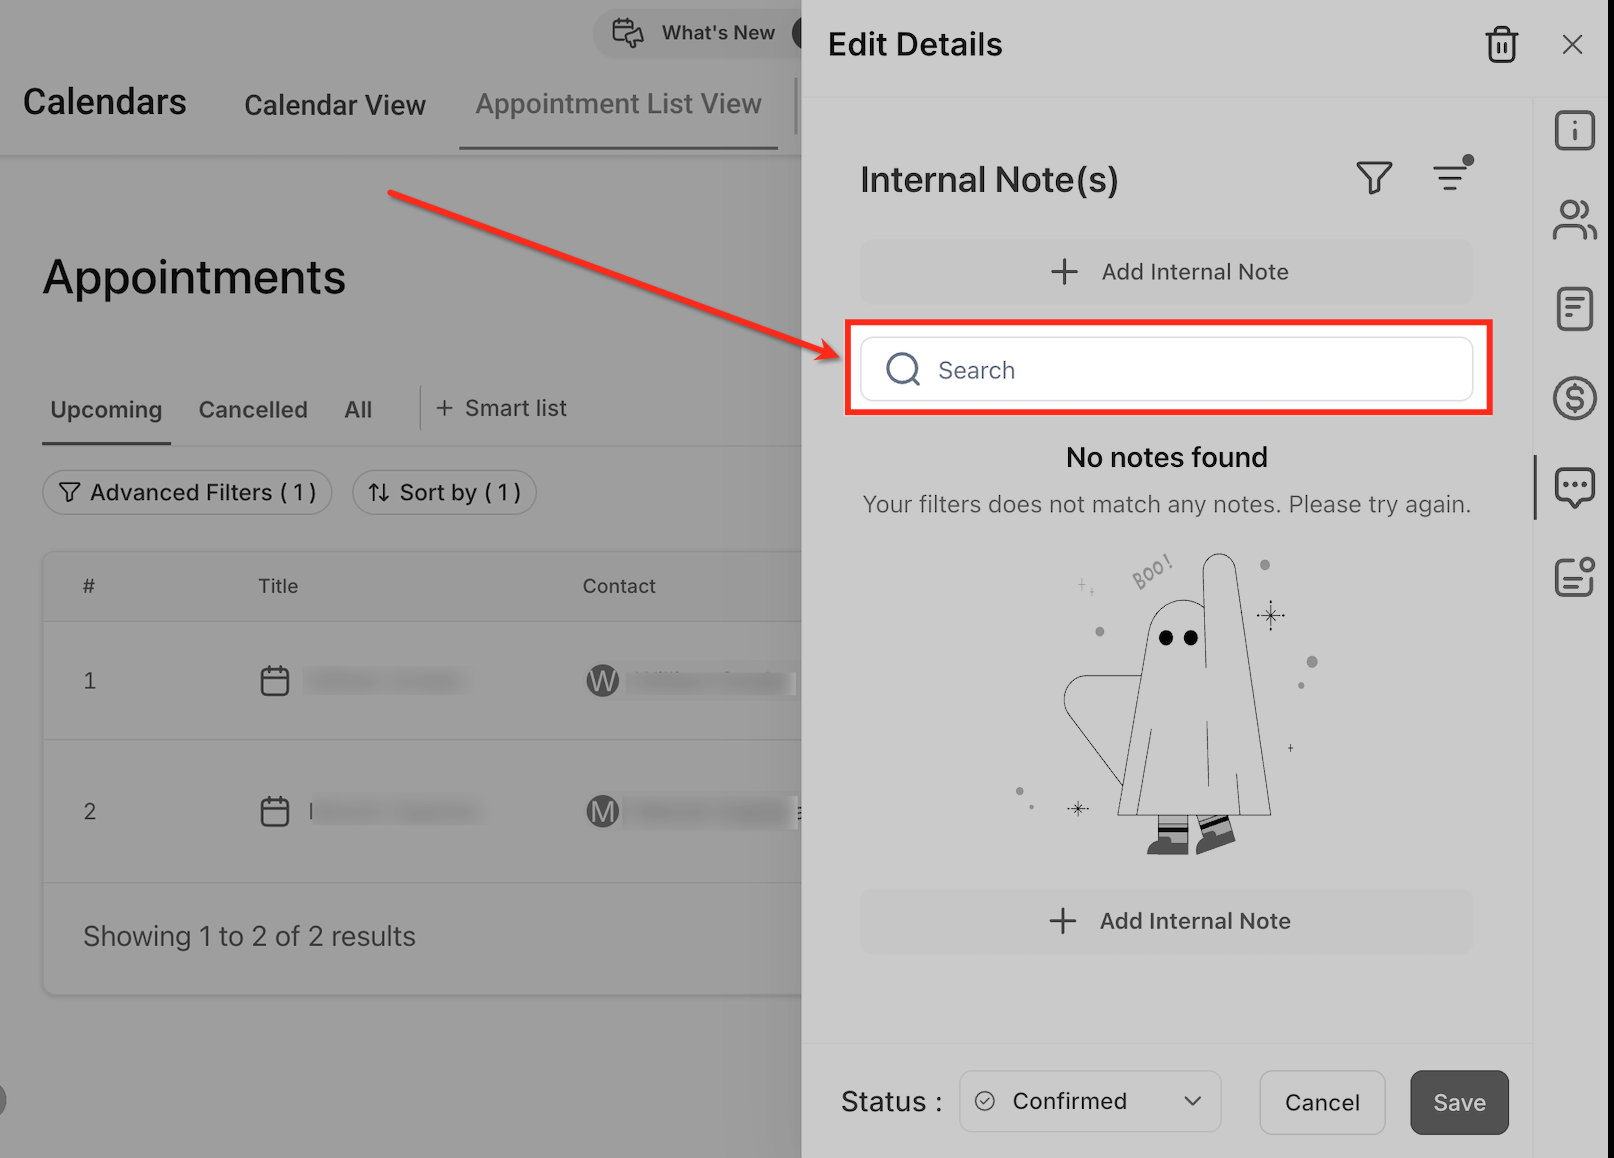
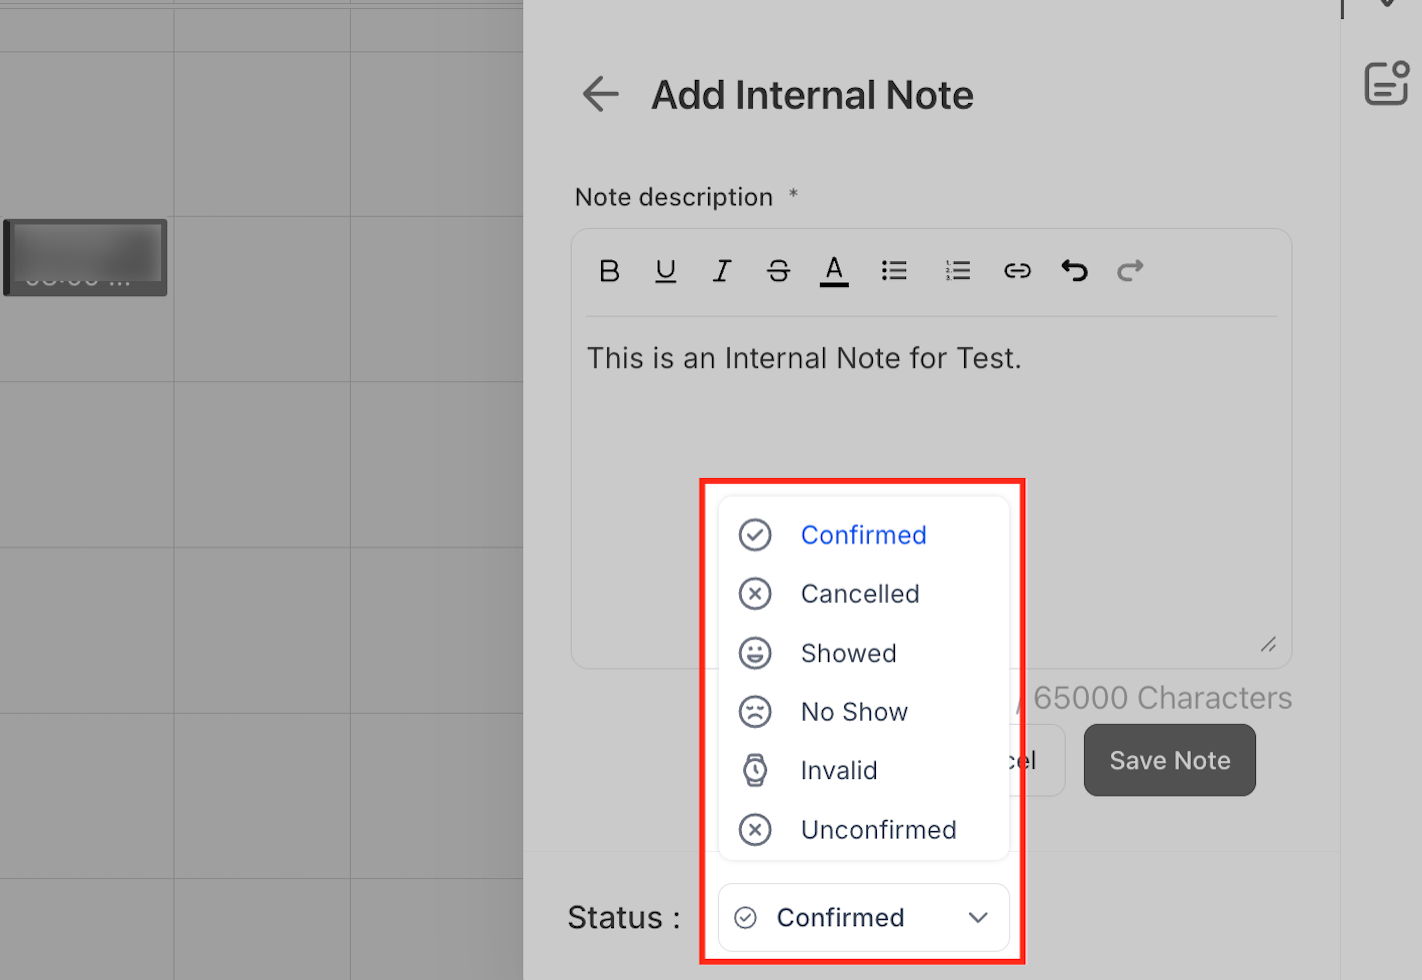
Navigate by status: use the Upcoming, Cancelled, and All tabs, or the Status field in Edit Details, to move between appointments. Changing an appointment's status never deletes its notes.
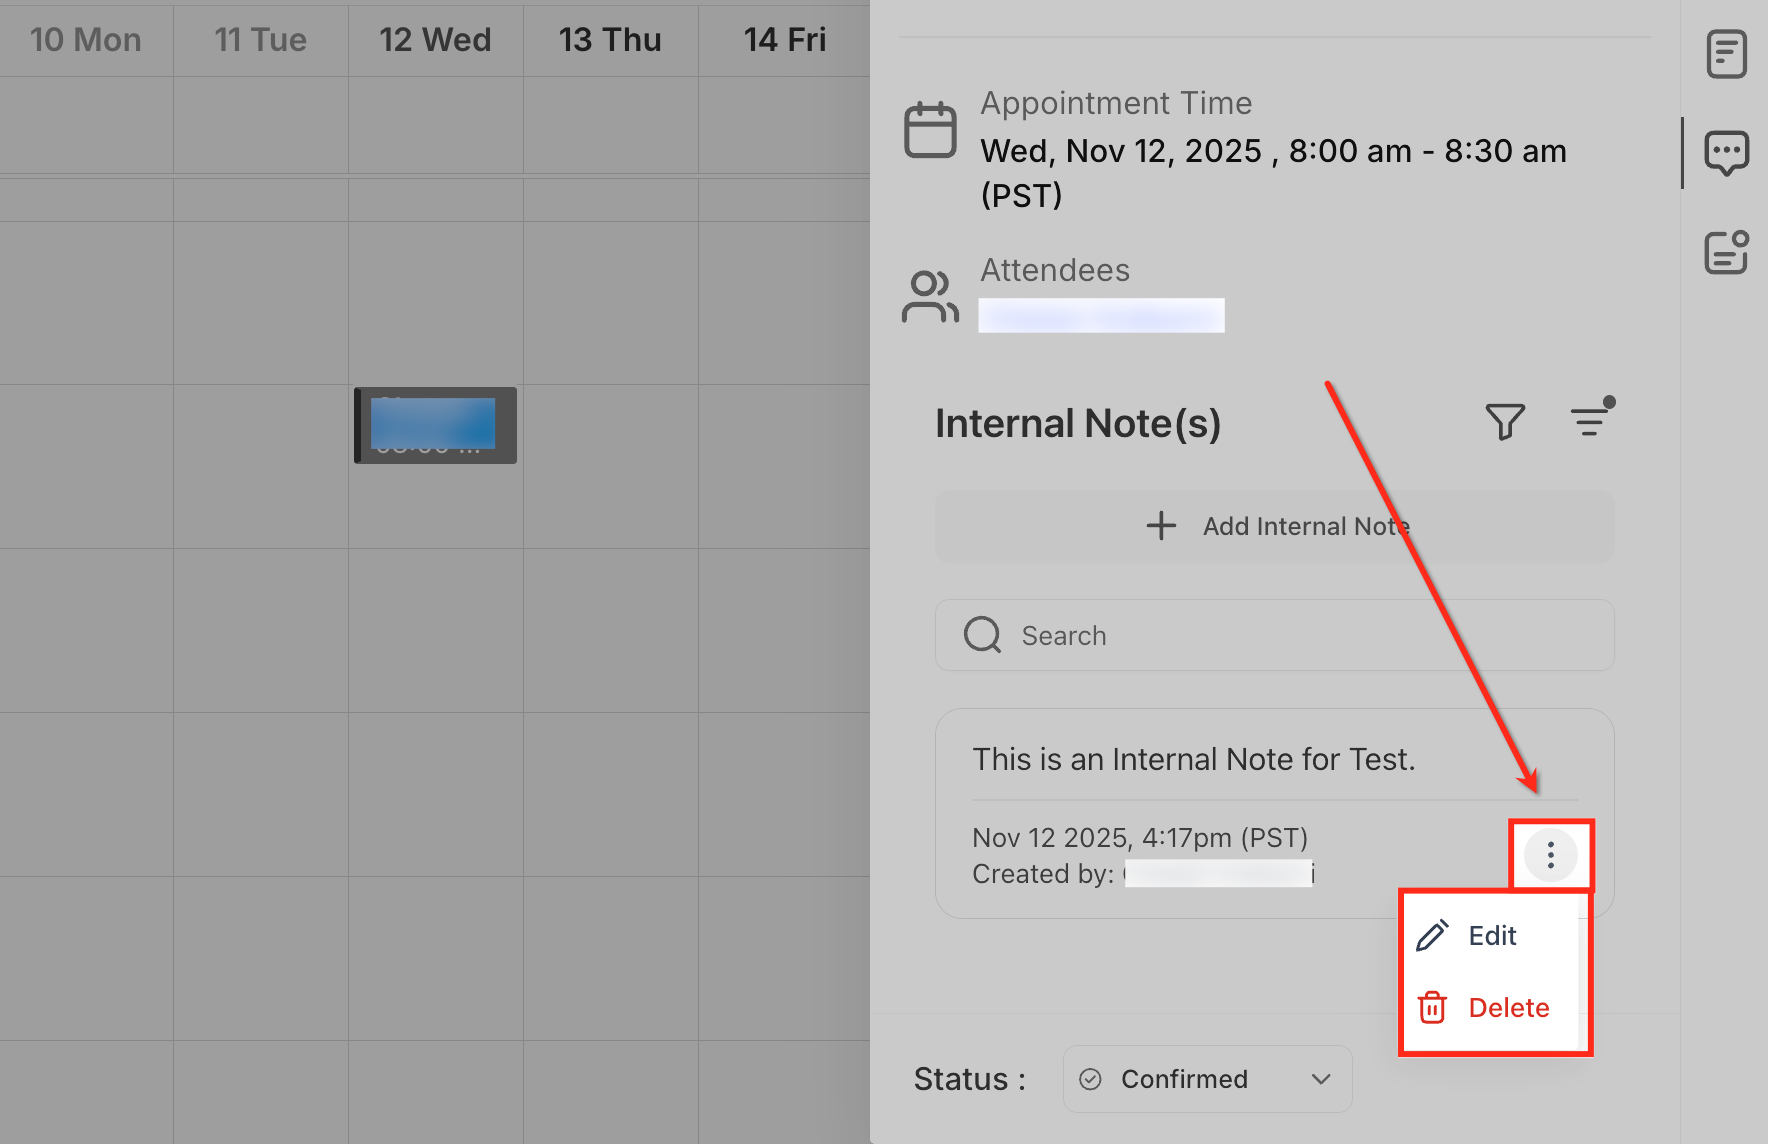
Edit or delete: open the note's ⋮ menu to edit or delete it. Deleting removes the note from the Contact, Opportunity, and Conversation everywhere it appeared, but it can be restored within 30 days.
Notes are tied to a specific appointment instance. If you have a recurring appointment, notes aren't automatically copied to future occurrences, add them on each instance that needs its own context.
Appointment notes can carry patient health information (symptoms, treatment plans, consult recaps). Keep notes factual and relevant to the visit, and remember that anyone with access to the Contact, Opportunity, or Conversation record will see them, so treat them with the same care as any other PHI in your account.
To avoid double-booking, you can connect a calendar to Google Calendar or Microsoft Outlook from My Profile → calendar configuration. Once connected, Aesthetix CRM checks your real-time external availability before letting a patient or lead book a slot. Full setup steps for calendar sync (Google, Outlook, iCloud, Zoom, and similar) live under Connections.
Appointment confirmation and reminder messages (immediate booking confirmation, plus reminders ahead of the visit) are built and edited in Workflows, not in Calendars itself. If you use automated AI booking to fill appointments, keep in mind it only works with native Aesthetix CRM calendars, it does not book against your EMR calendar. See the AI Employee documentation for how automated booking and confirmations fit together.
What's the difference between Calendar View and Appointment List View? Calendar View is built for scheduling based on dates and availability. Appointment List View is built for managing appointments at scale using filters, sorting, and bulk-friendly actions like status updates.
What is a Smart List? A Smart List is a saved appointment view that bundles filters, sorting, and column choices together so you can reuse the exact same setup every time you open Appointment List View, instead of rebuilding it from scratch.
Why don't I see all my appointments in the list? Check three things: the appointment type selected (Meeting, Service, or Rental), any active Advanced Filters, and which Smart List you currently have open. Any of these can hide appointments that technically still exist.
Can I book an appointment for another team member? Yes. In the booking modal, choose their calendar from the dropdown, as long as their calendar is available to you.
Will updating a status to Showed or No Show change anything on my connected Google or Outlook calendar? No. Status updates inside Aesthetix CRM do not push an event update to a connected third-party calendar.
Can I block off time without cancelling existing appointments? Yes. Blocked Off Time only prevents new bookings during that window, it does not affect or delete appointments already on the calendar.
Does an appointment note added on the Contact record also show up on the appointment? Yes. It's the same note referenced in multiple places. Editing or deleting it from the Contact, Opportunity, Conversation, or the appointment itself updates it everywhere.
Do appointment notes sync to my Google Calendar invite? No. Internal notes are for internal use only and never push out to a connected external calendar. If two-way sync is enabled, descriptions added in Google or Outlook can sync into the appointment for reference, but that flow only goes one direction.
Does Aesthetix CRM Calendars integrate with our EMR calendar? No, not directly. Calendars is designed for scheduling calls and consults, such as Patient Concierge or intro calls, rather than clinical or provider schedules managed in your EMR. You can still connect it to Google Calendar or Microsoft Outlook to prevent double-booking on the consult side, while clinical and provider appointments continue to be scheduled in your EMR.
What happens to notes if an appointment is rescheduled or cancelled? Notes stay attached to the appointment record regardless of status. Changing the status to Confirmed, Cancelled, Showed, No Show, Invalid, or Unconfirmed does not remove any notes.
