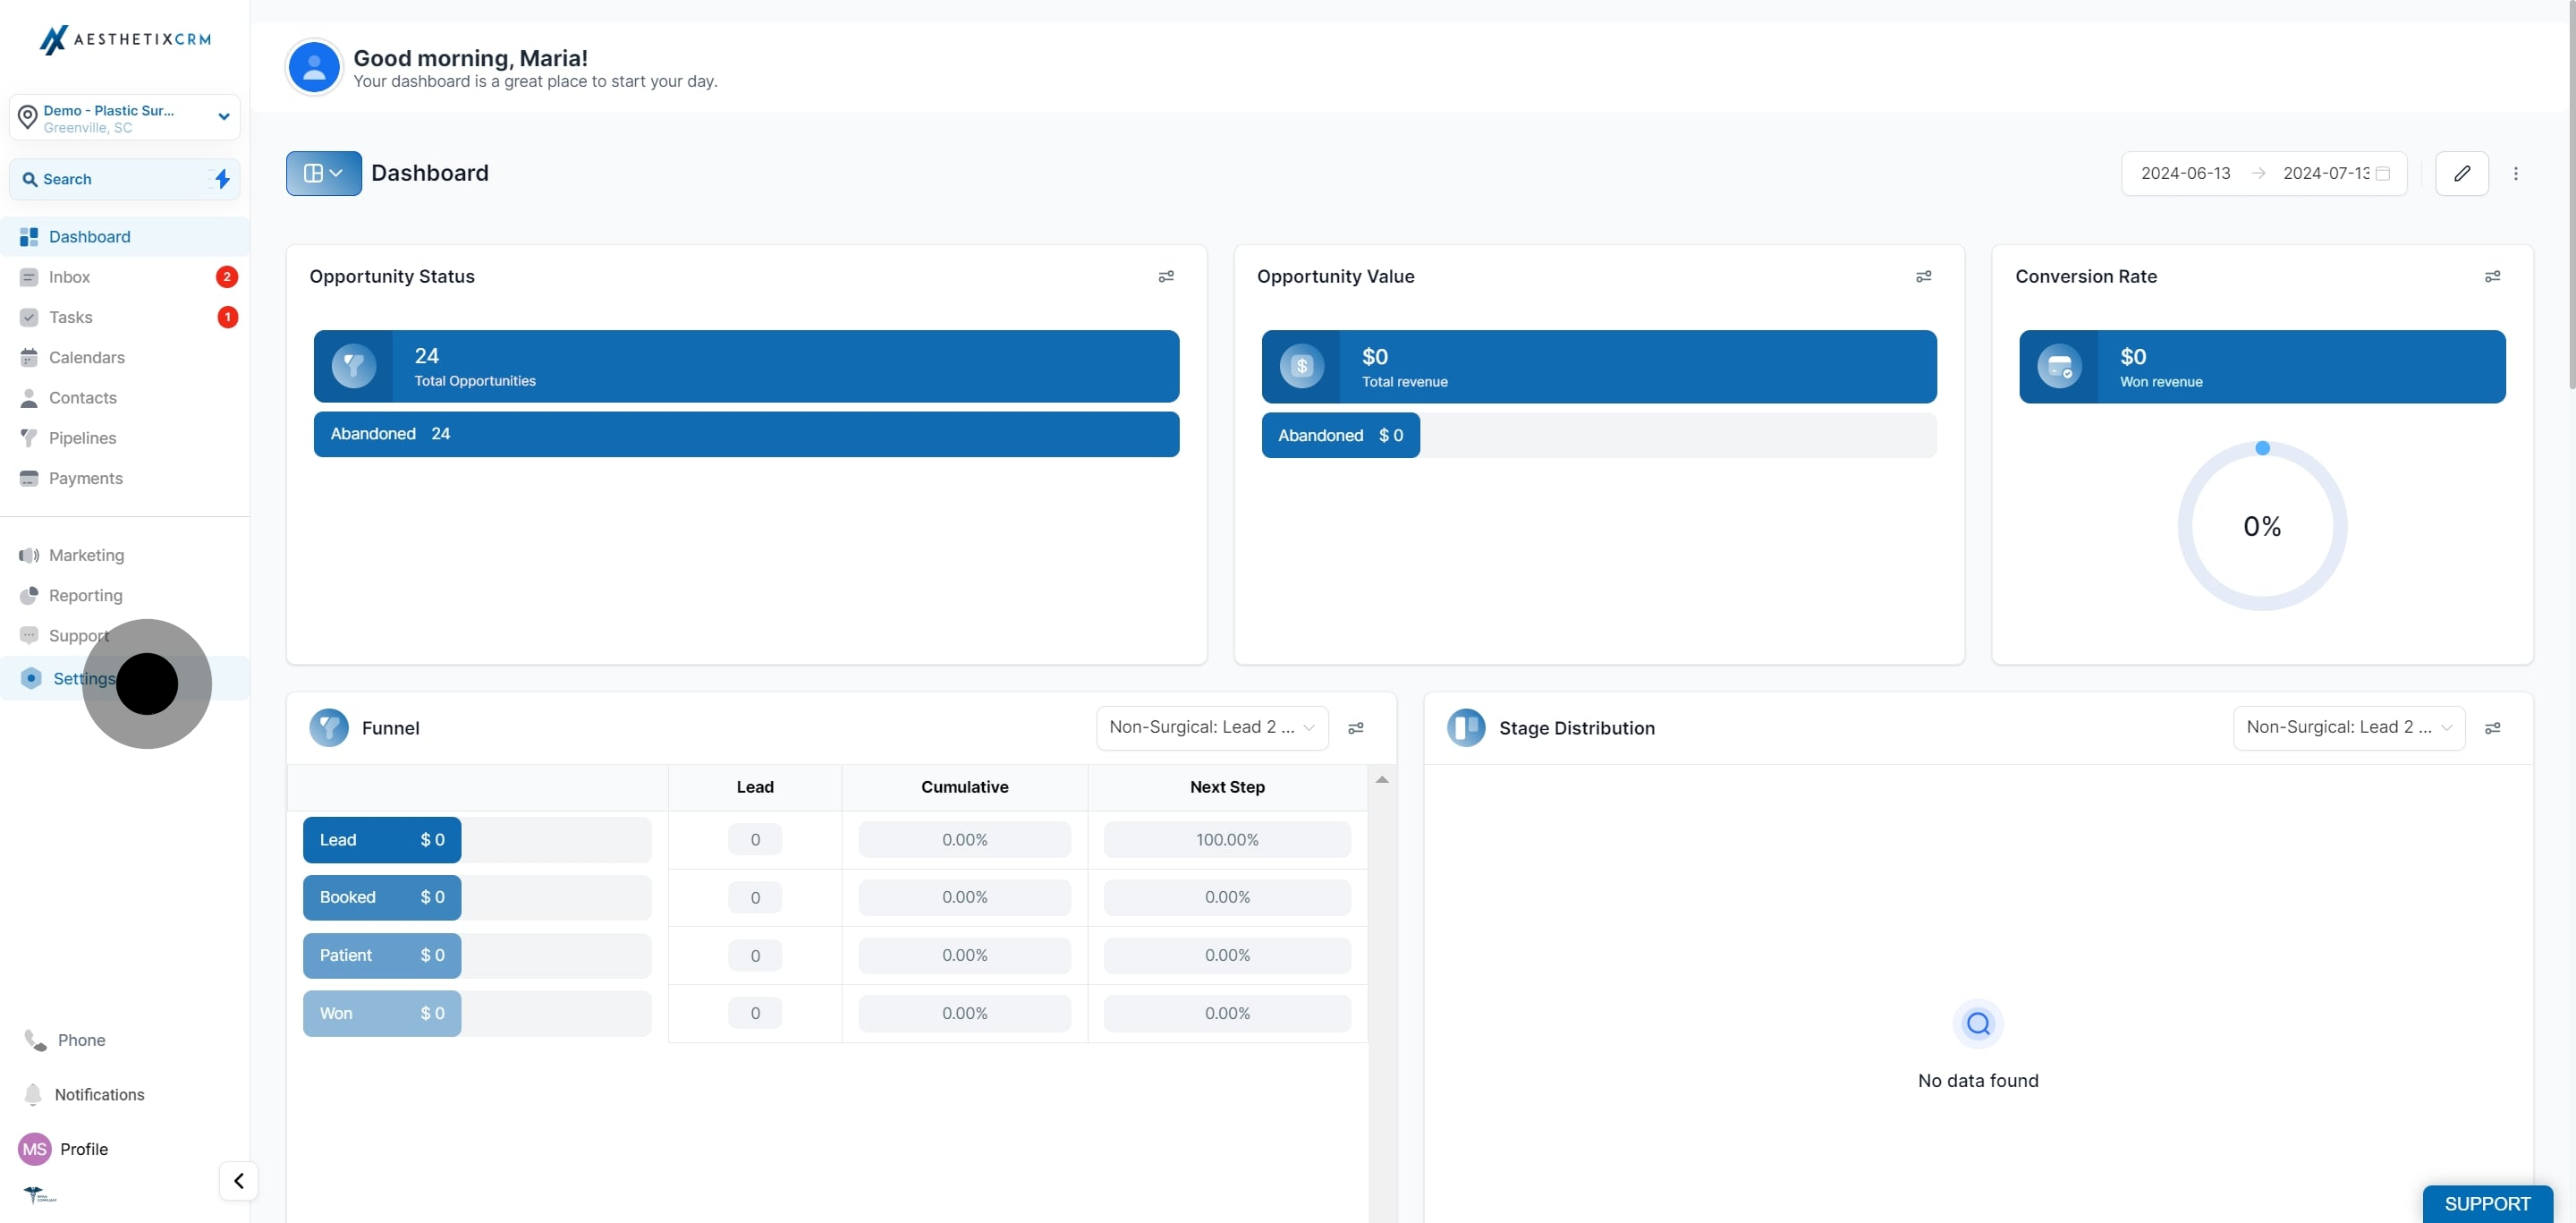
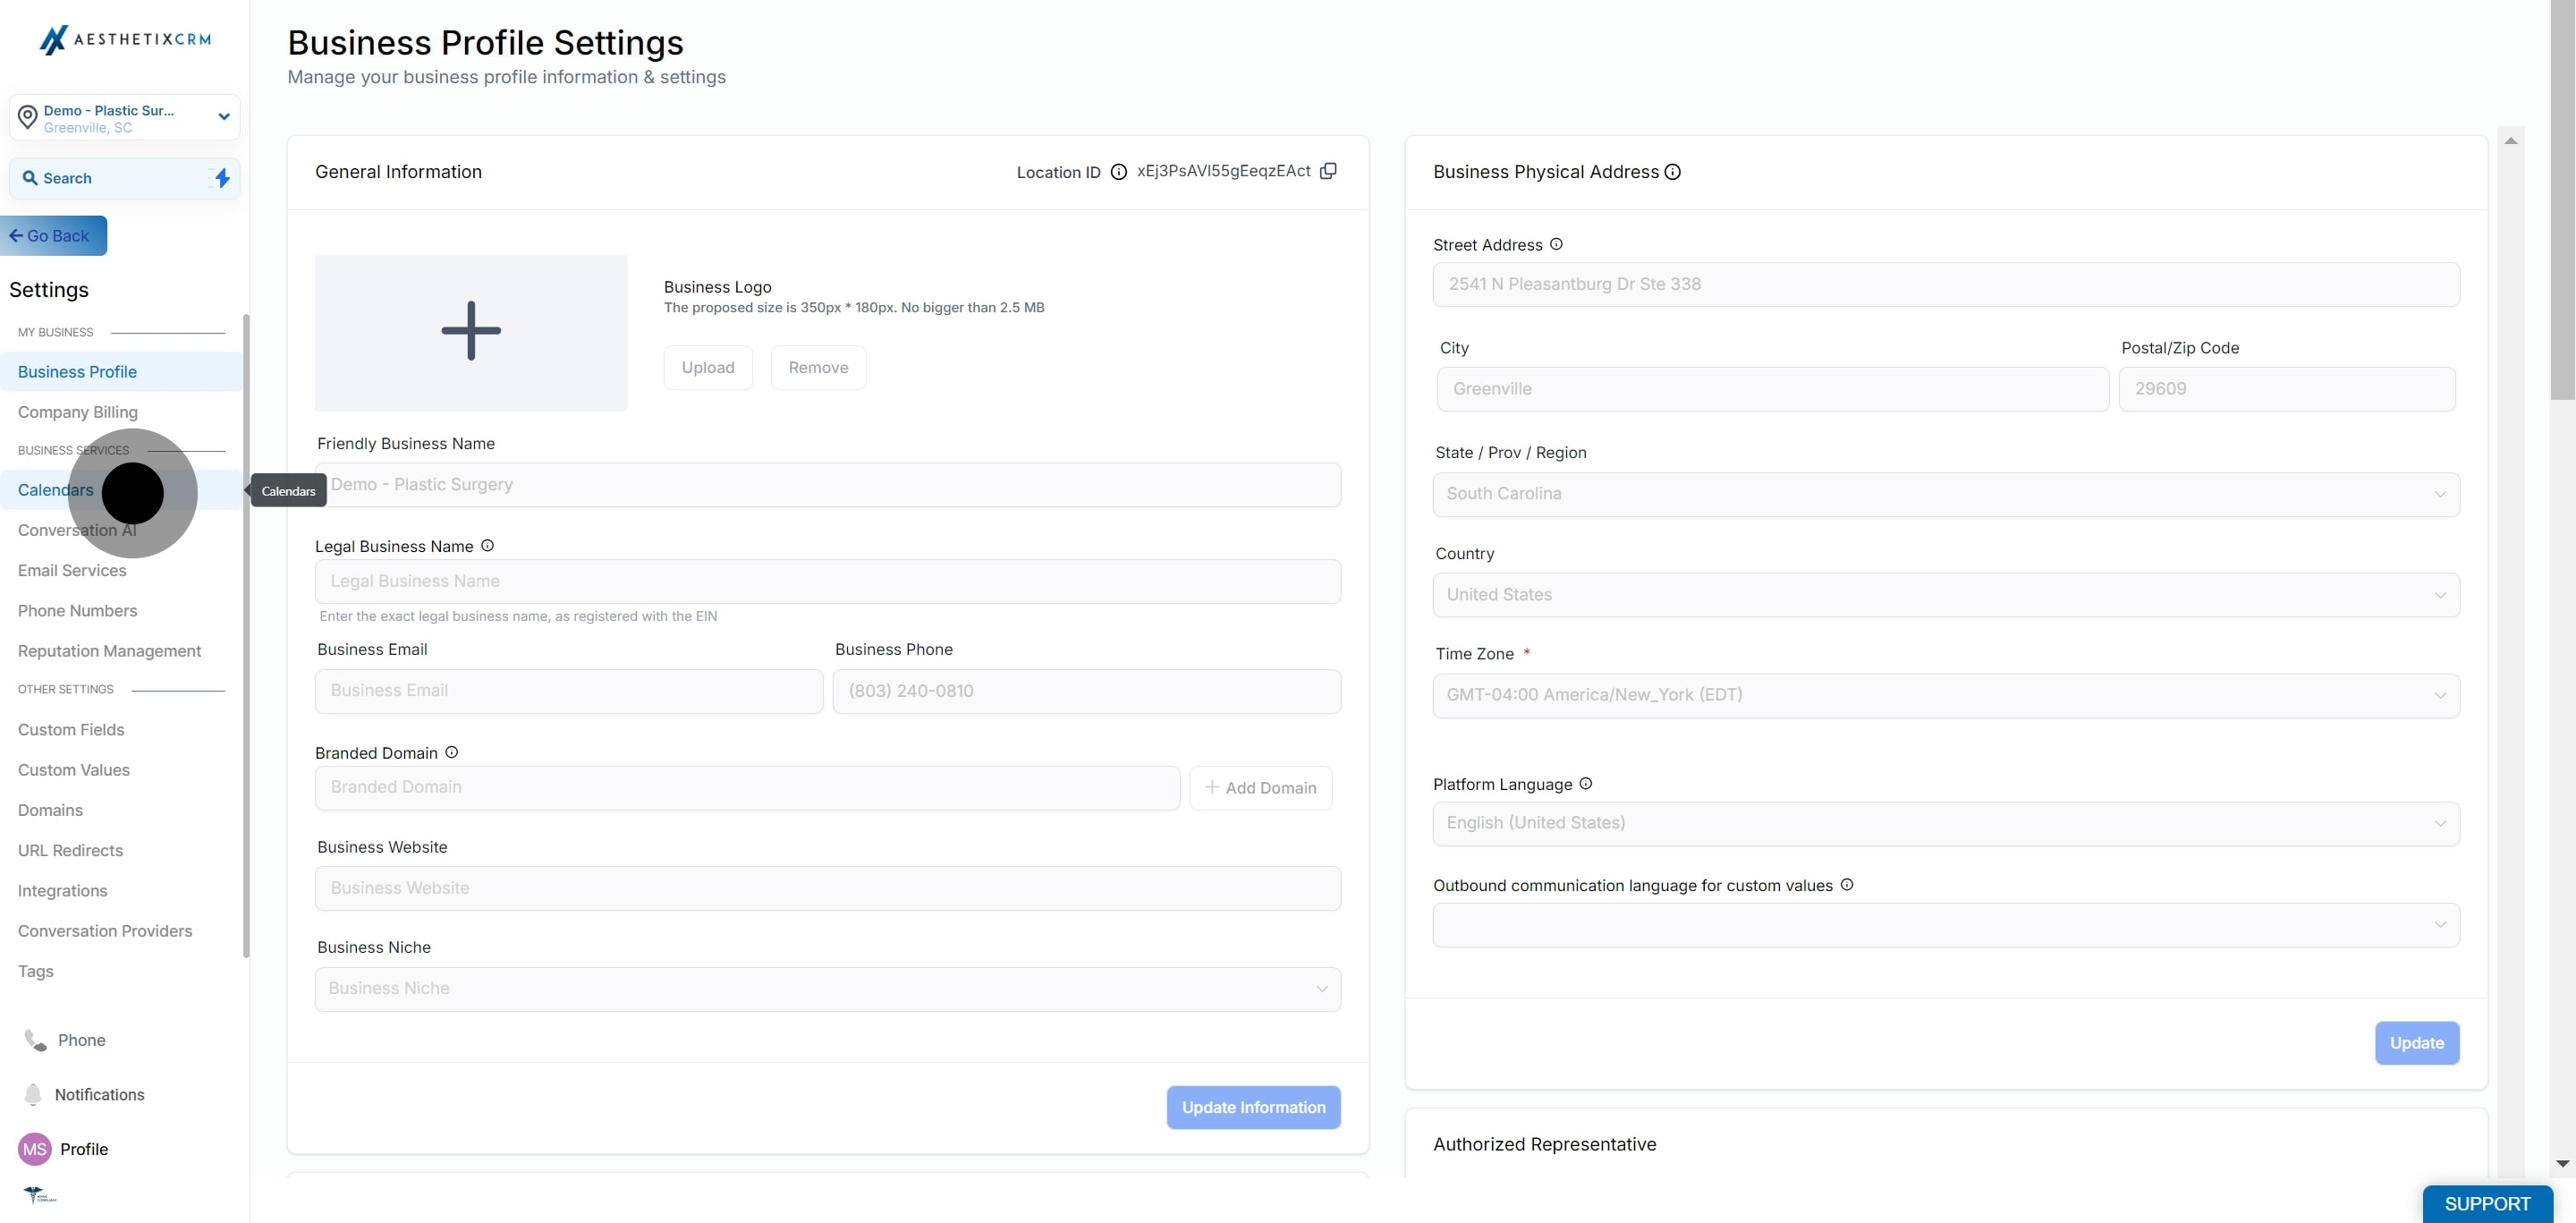
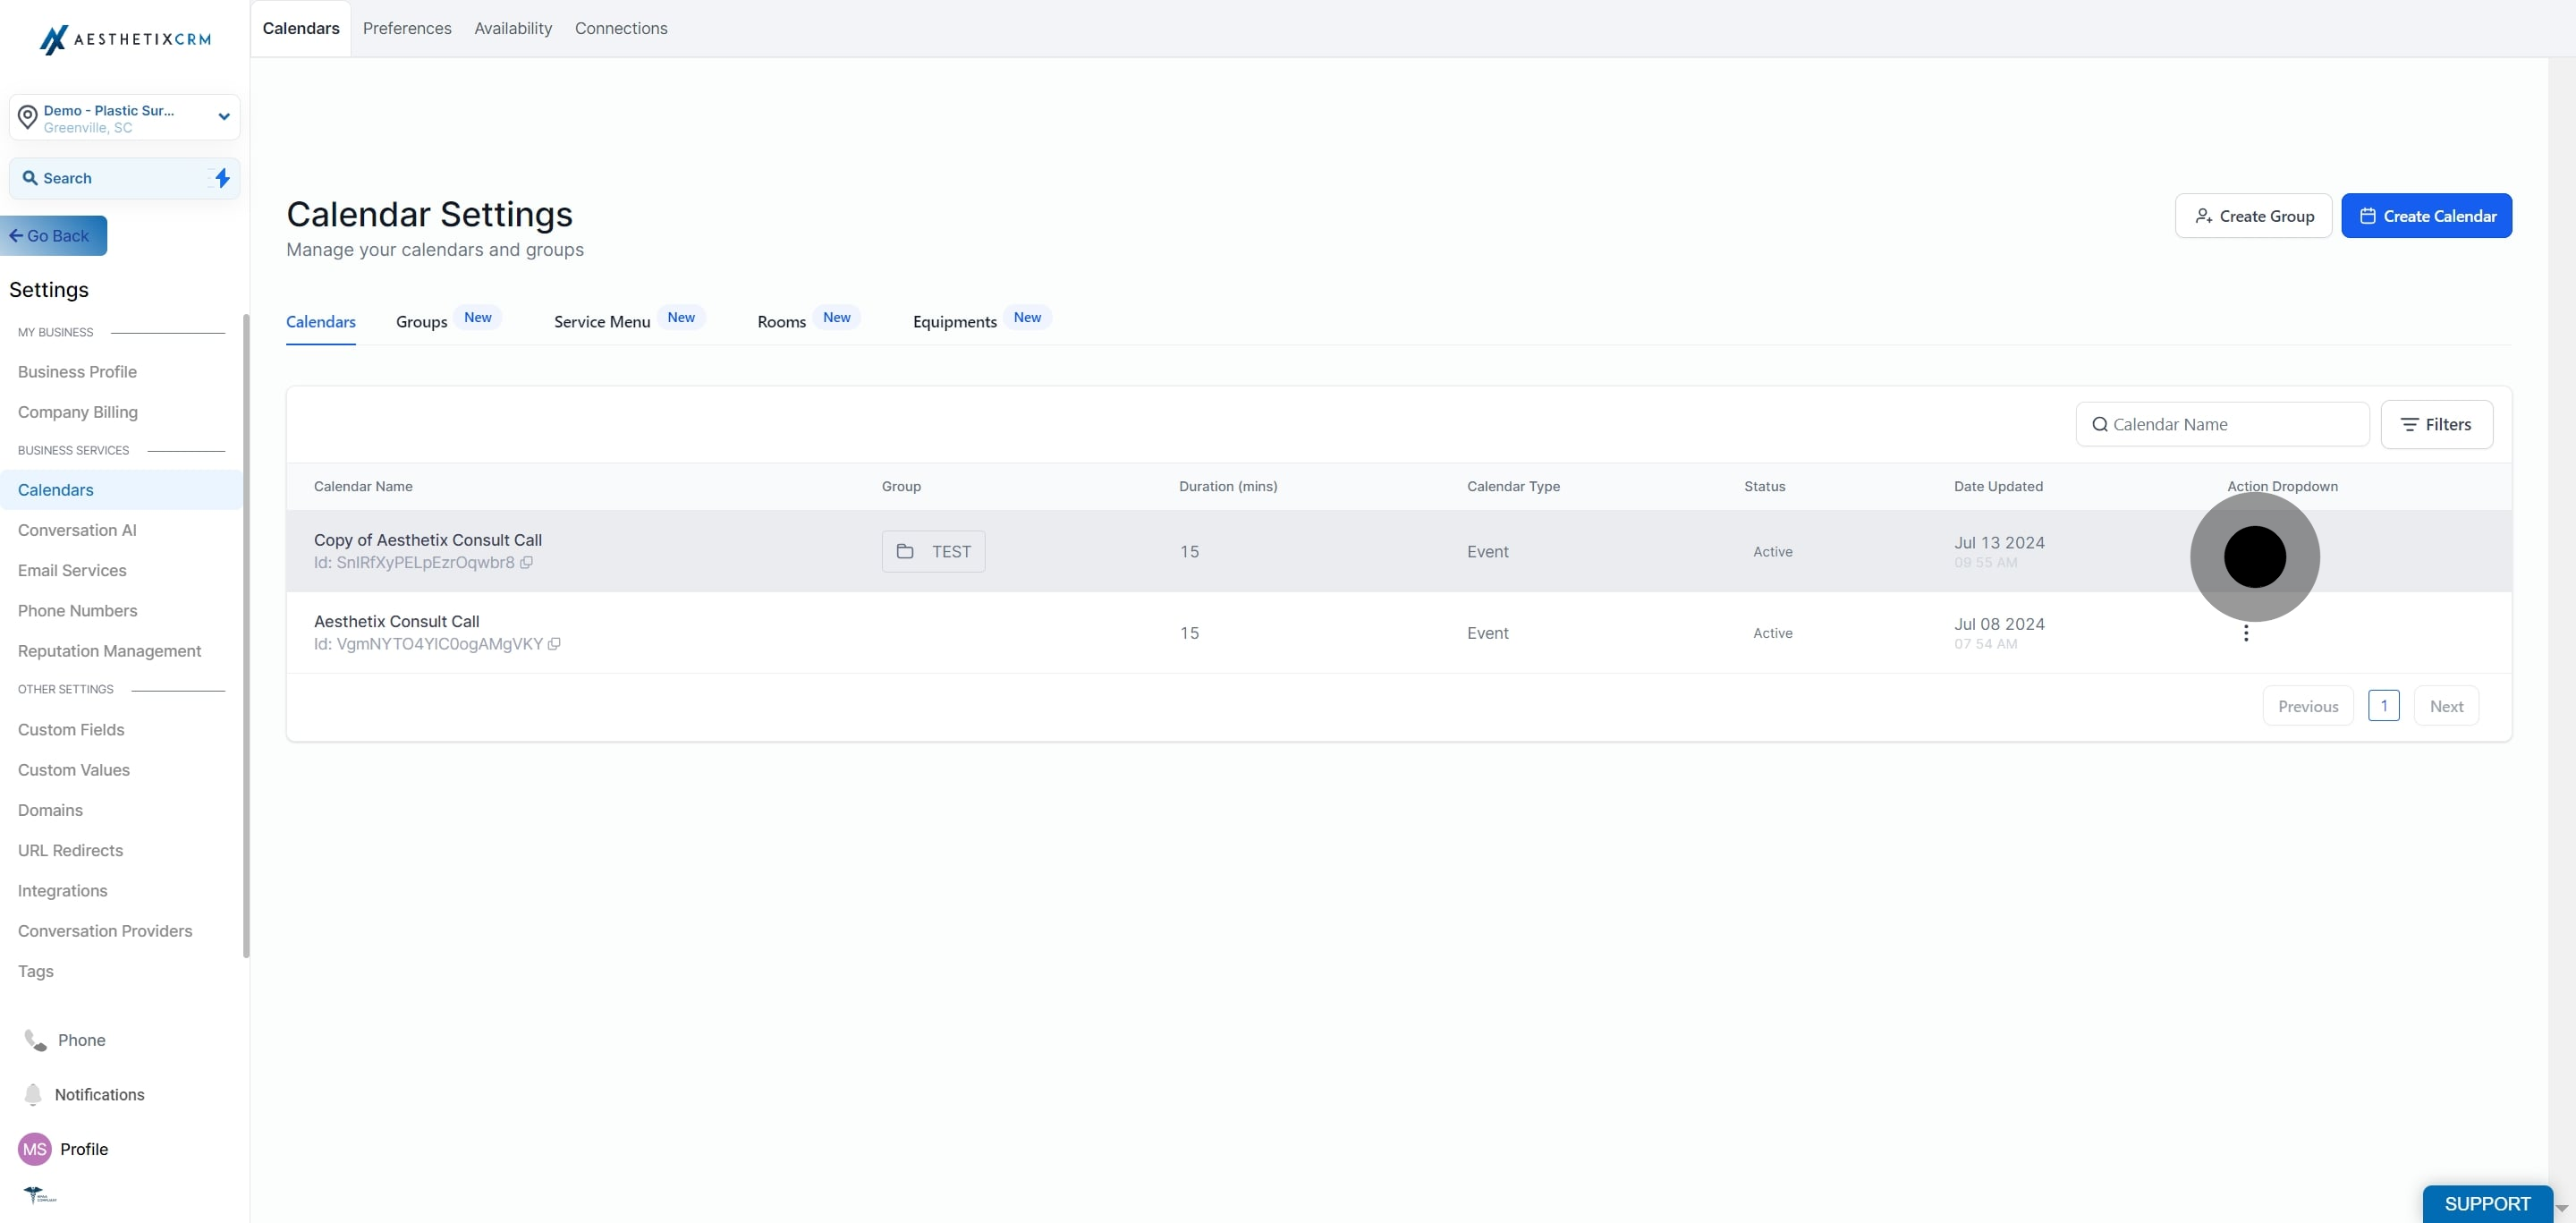
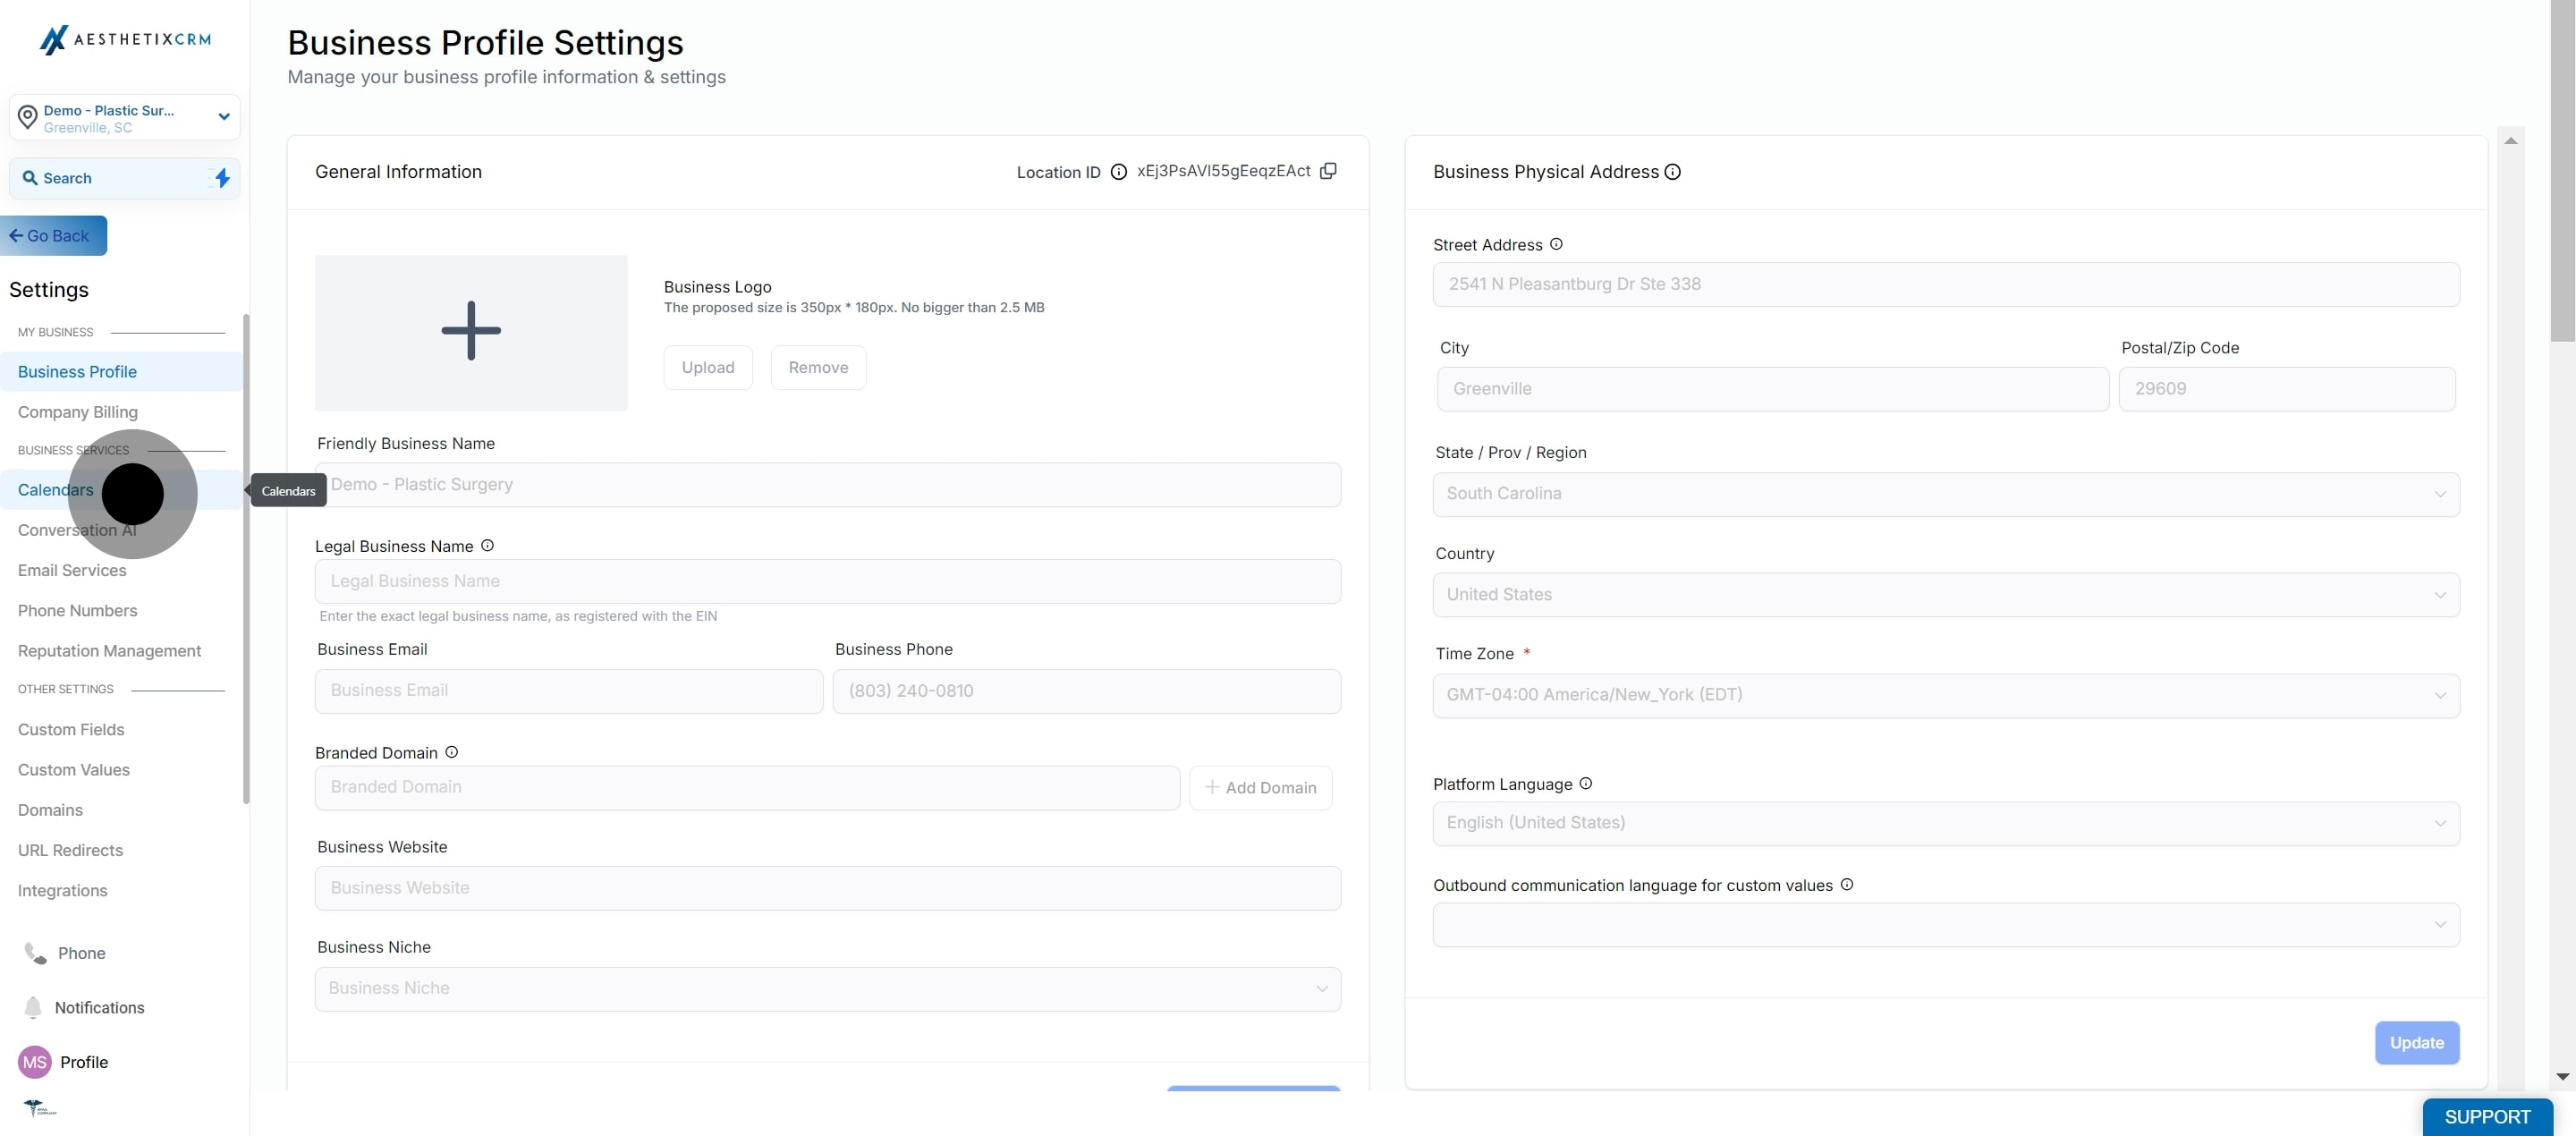
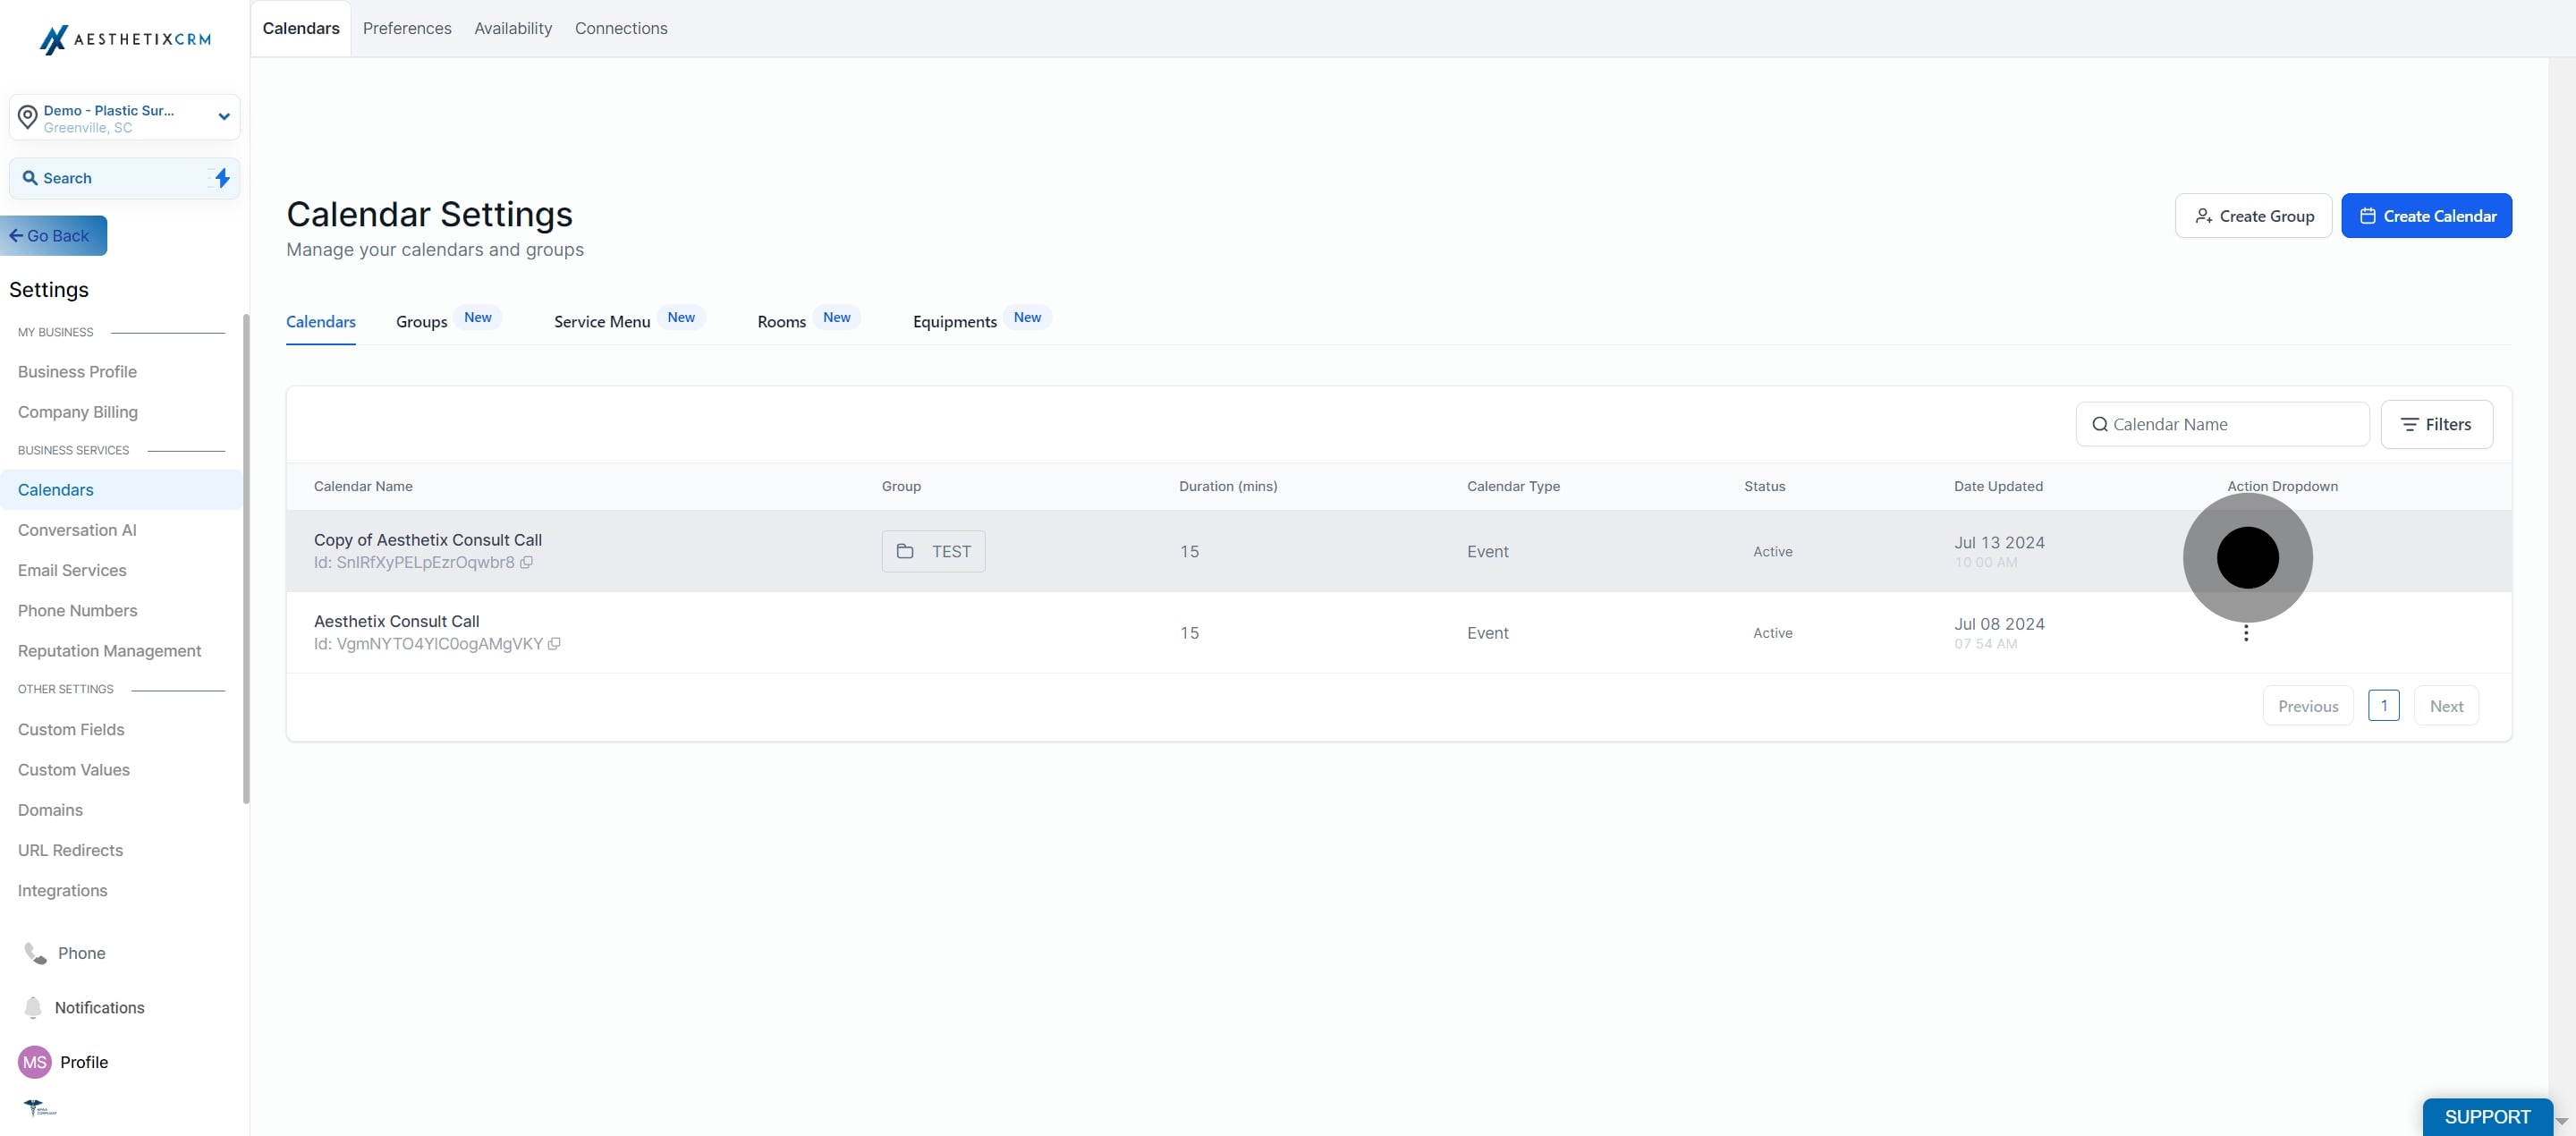
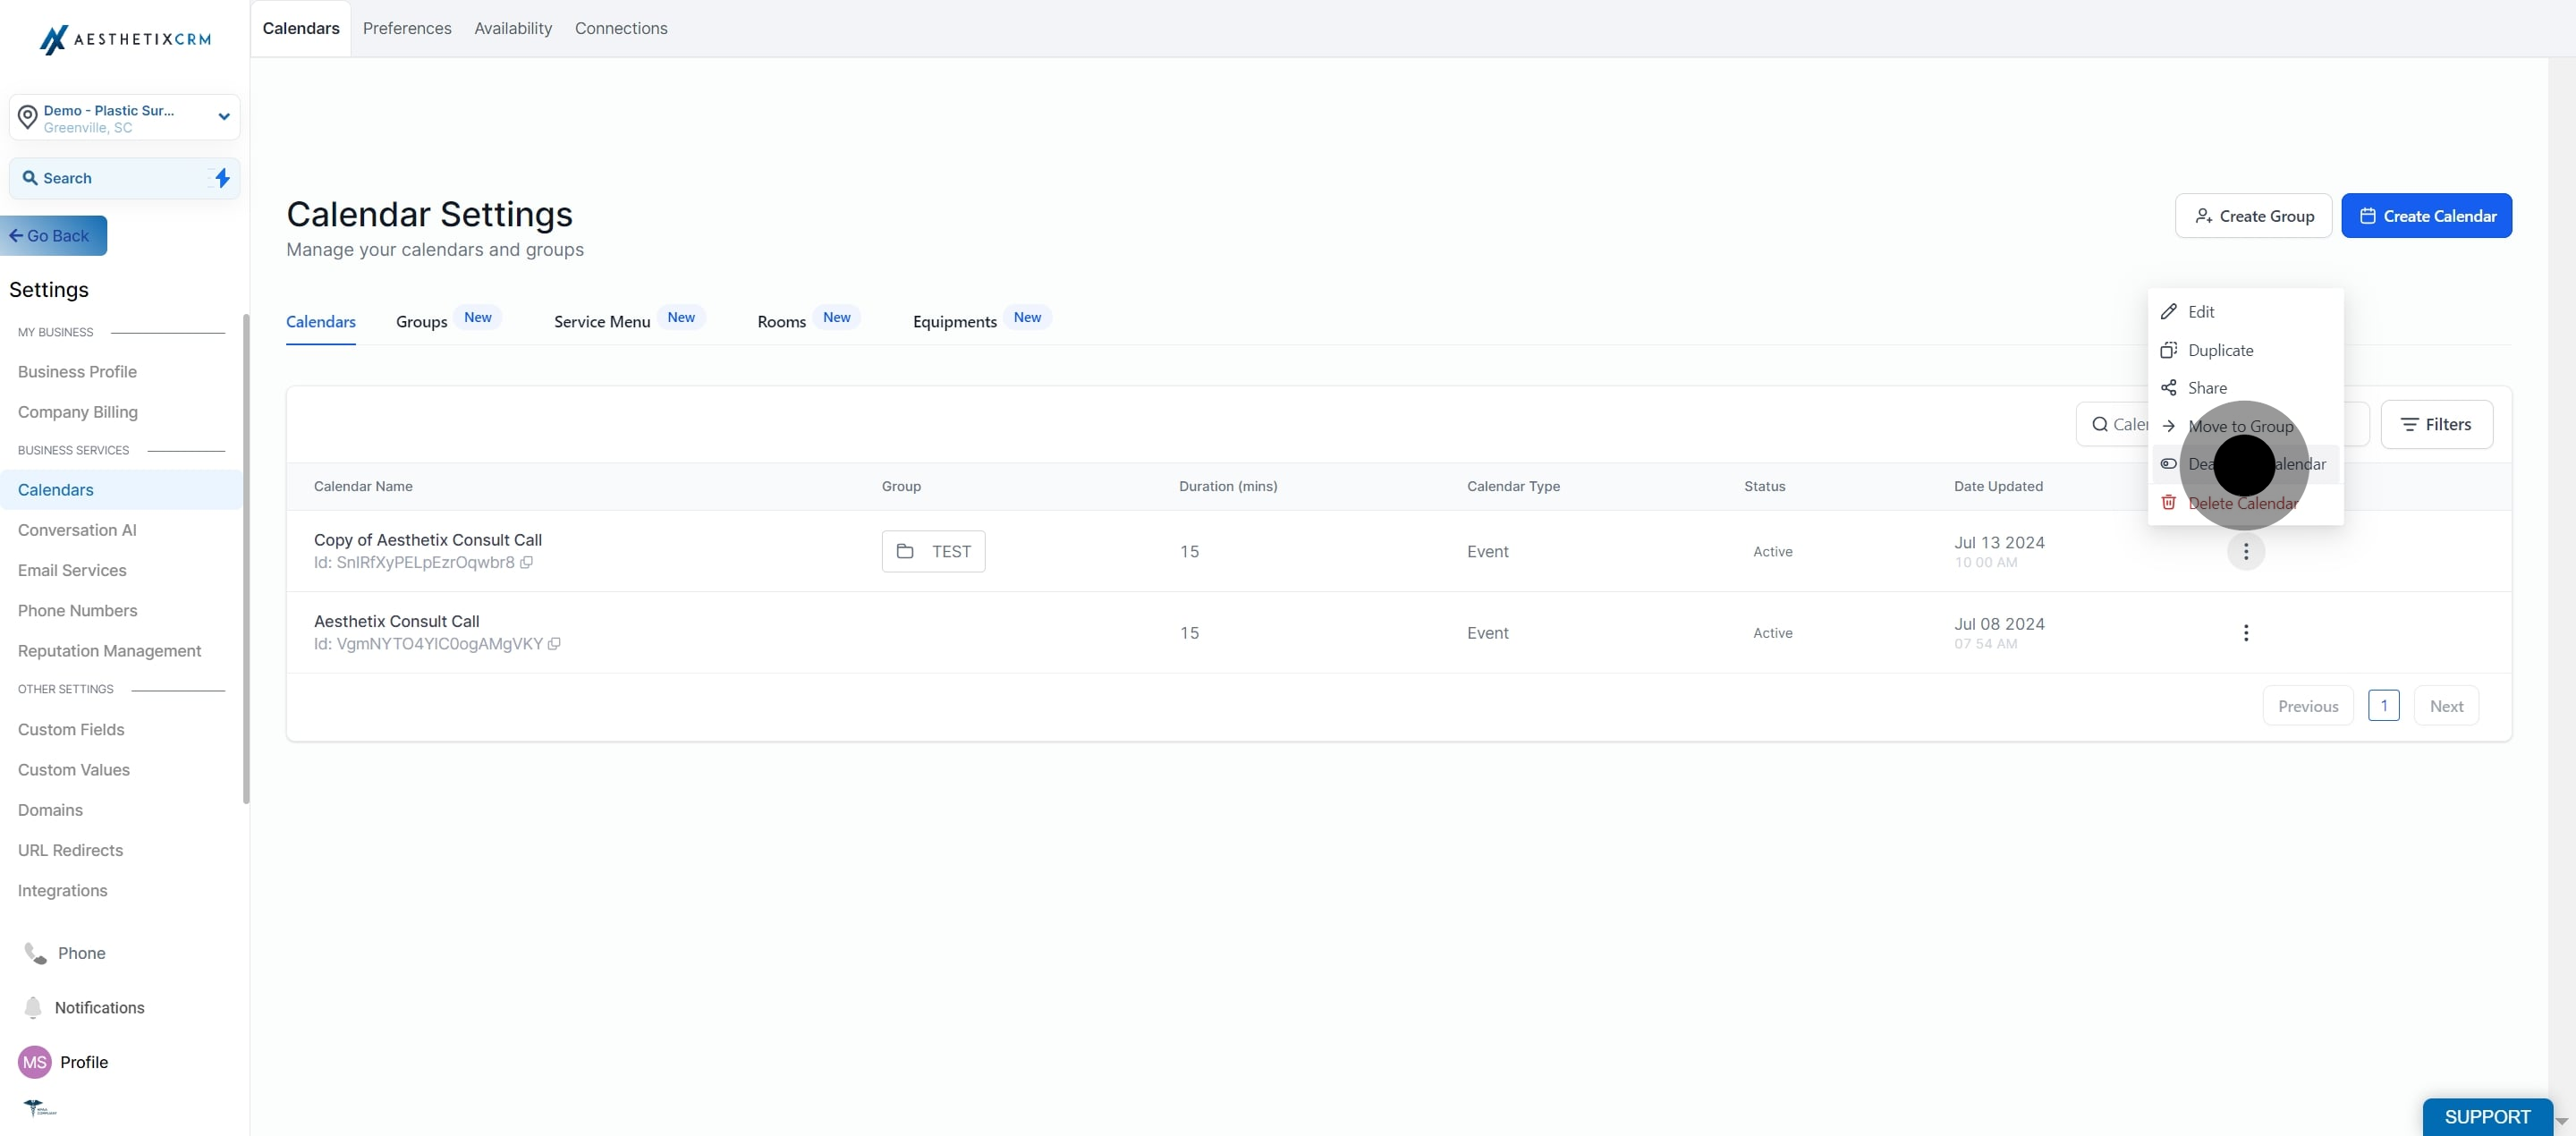
Every calendar in your account, whether it books consults, treatments, or a provider's personal schedule, lives under Settings > Calendars. From there you can edit an existing calendar, clone a working setup for a new provider or service, deactivate a calendar you're not using, or bring back one you deleted by mistake.
To add a calendar, go to Settings > Calendars and choose the calendar type that matches what you're scheduling. Service Calendars are the type most med spas rely on for booking patient appointments; other calendar types available in this collection cover team round robins, classes, and personal schedules. If you already have a calendar configured the way you want it, duplicating it (below) is usually faster than building a new one from scratch.
Some accounts also have access to Calendar Setup Assistant, a conversational setup flow that builds a working calendar by asking you a series of questions instead of requiring you to pick a calendar type and configure every tab yourself. It's an optional, faster path to the same calendar you'd otherwise build manually.
To use Calendar Setup Assistant:
Go to Settings > Calendars and open the calendar workspace.
Look for the Calendar Setup Assistant panel. If it's not there, your account may not have access to it yet, or your user role may be missing the required calendar permissions.
Choose "Create a new calendar," select "Discover what calendars can do" if you want to explore options first, pick a suggested use case, or describe what you need in your own words, for example "set up a calendar for new patient consults" or "create a calendar for me and another provider."
Answer the assistant's follow-up questions as they come up: calendar name, team members, how bookings should be assigned (auto-assigned to an available provider, or left for the patient to choose), meeting location, available days and hours, appointment duration, and buffer time.
Check the booking page preview as it fills in, confirming the calendar name, appointment duration, timezone, and available time slots look right.
Review the suggested setup summary, ask the assistant for changes if something's off, then create the calendar.
Use the test booking option to walk through the booking flow the way a patient would, and confirm the appointment lands on the calendar correctly.
Open calendar settings any time afterward to fine-tune availability, forms, notifications, or anything else the assistant didn't cover.
A calendar built with the assistant is a normal calendar once it's created. It shows up in Settings > Calendars like any other, and every tab covered under Editing a Calendar below still applies to it. Because this feature is rolling out gradually, it may not appear in every account yet; if you don't see it, manual creation through Settings > Calendars works exactly as described above.
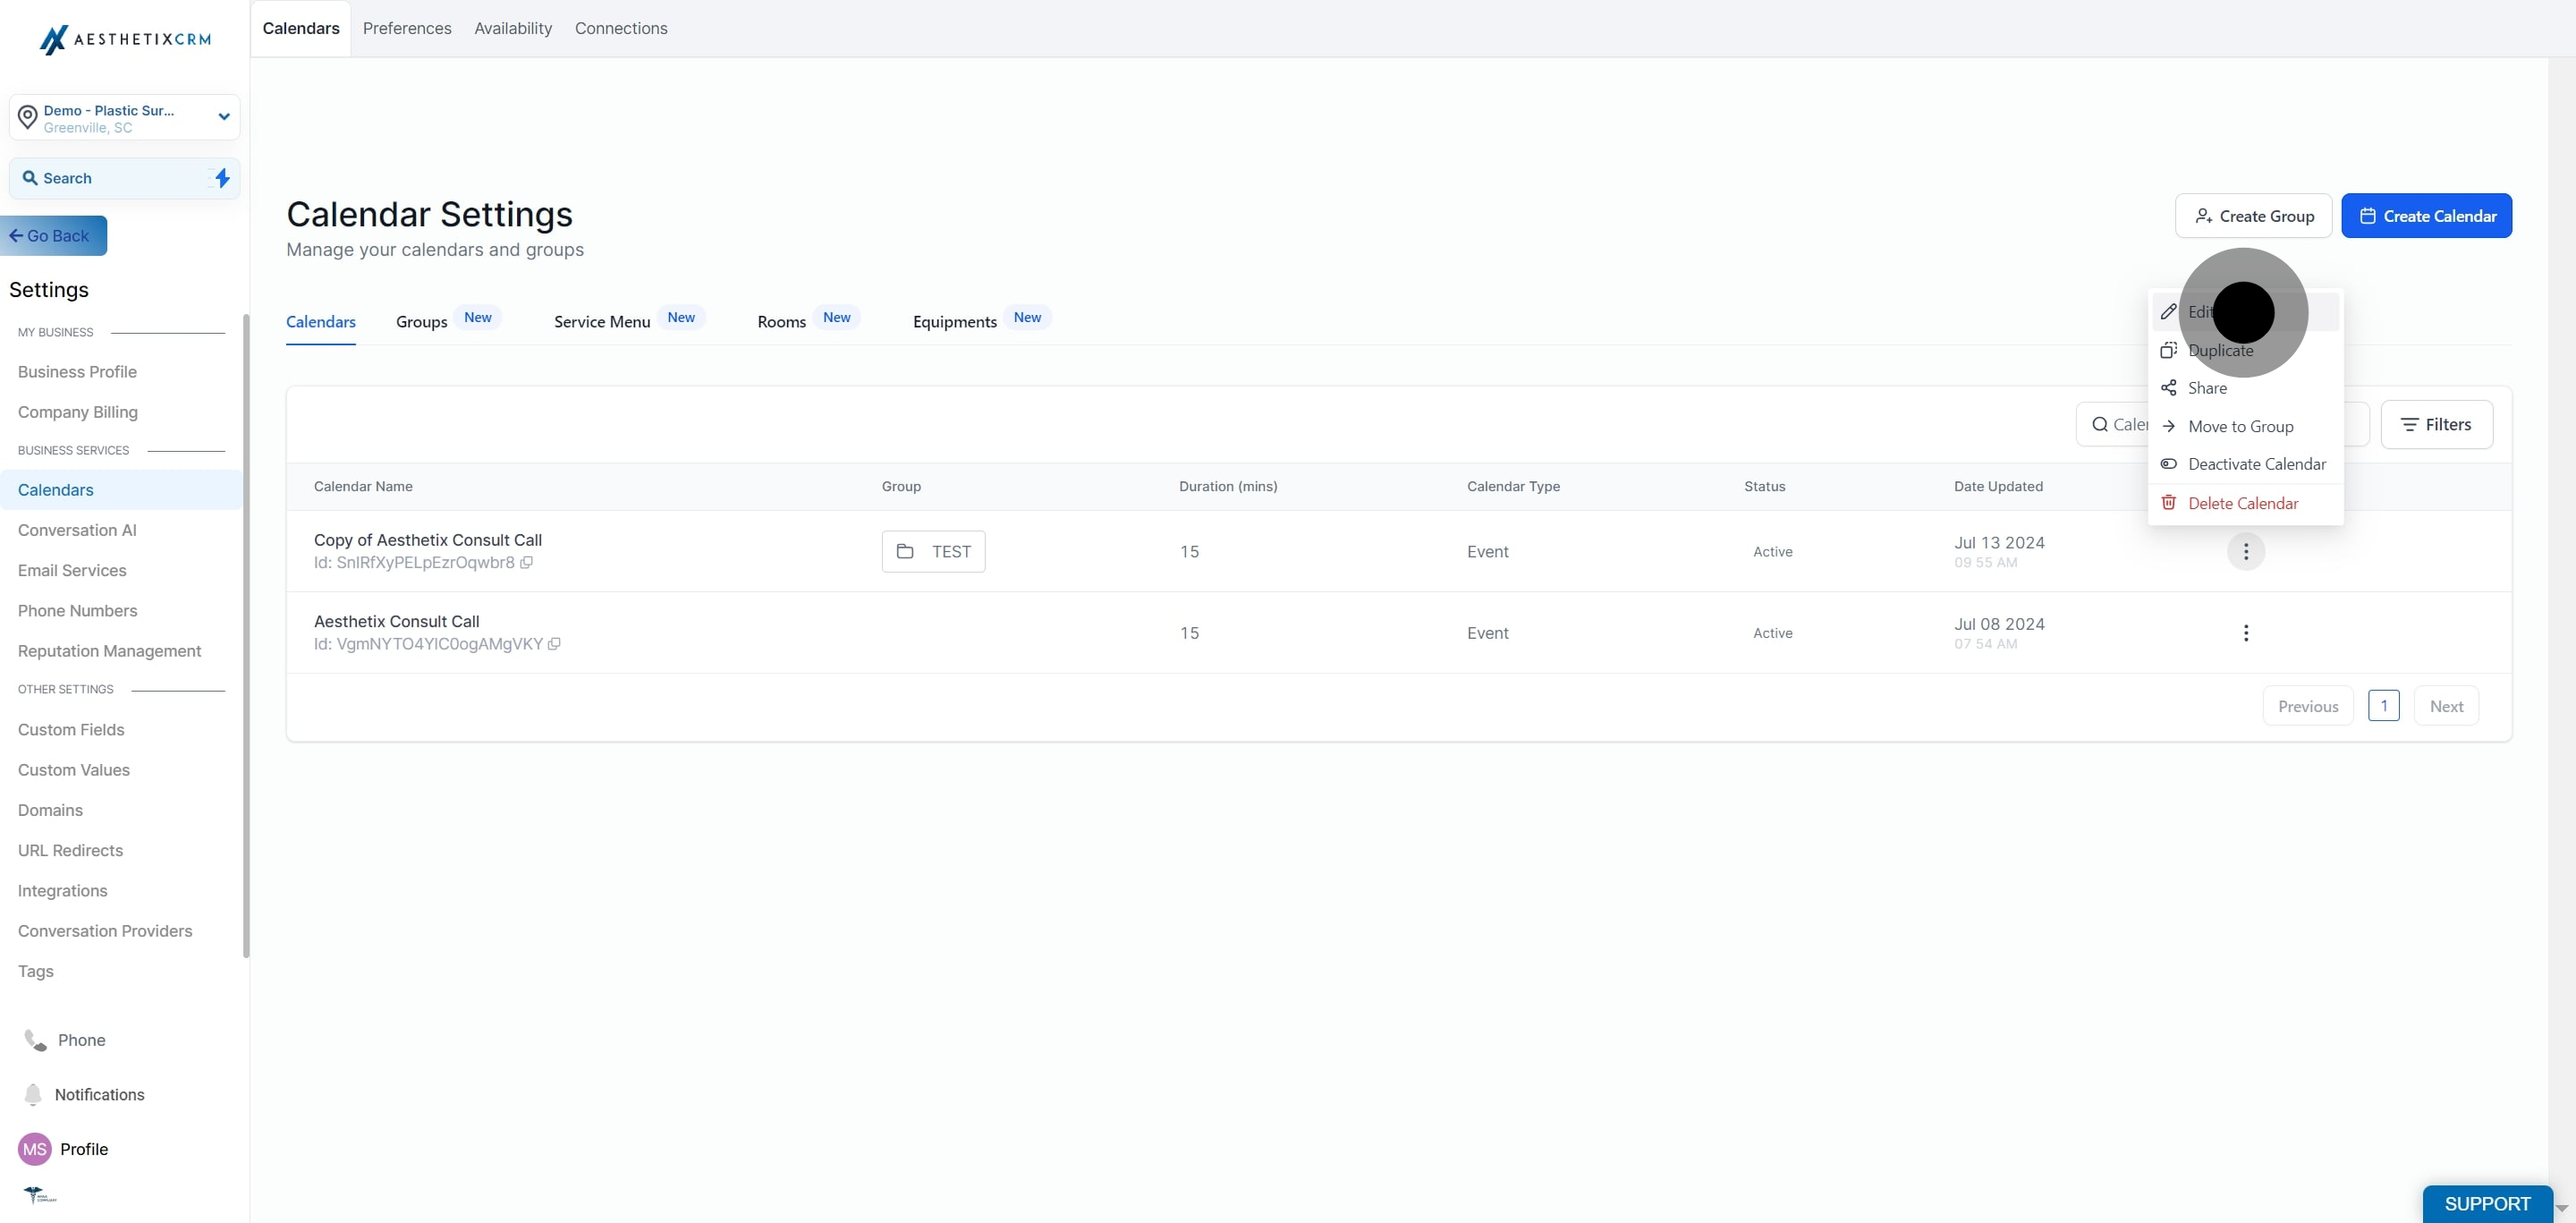
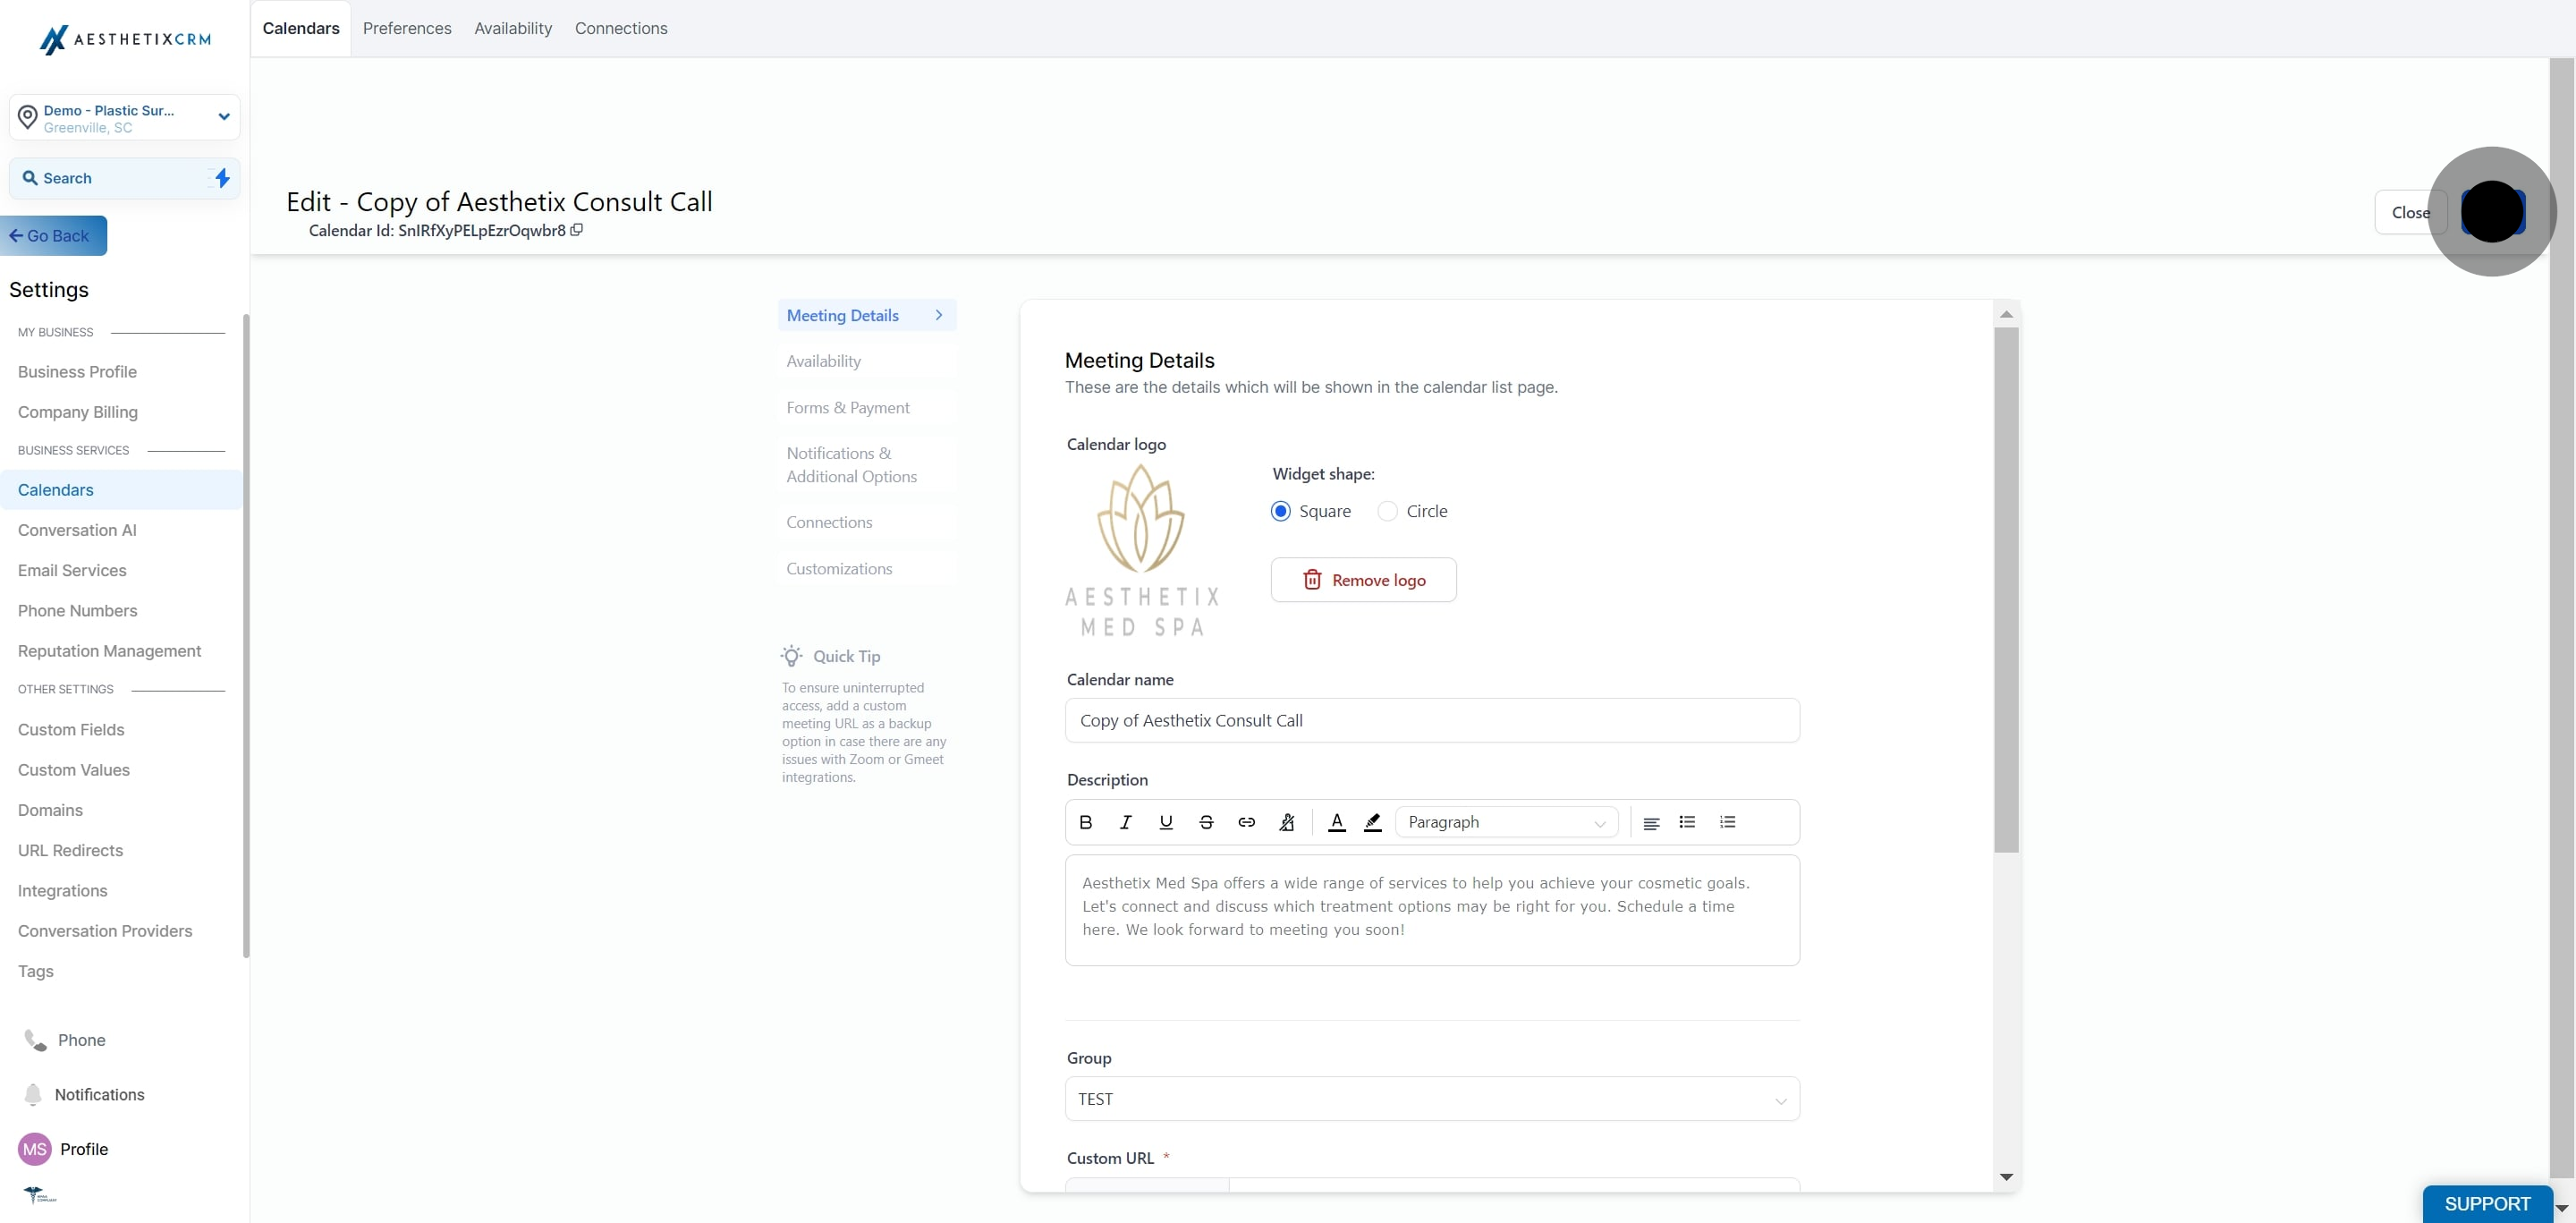
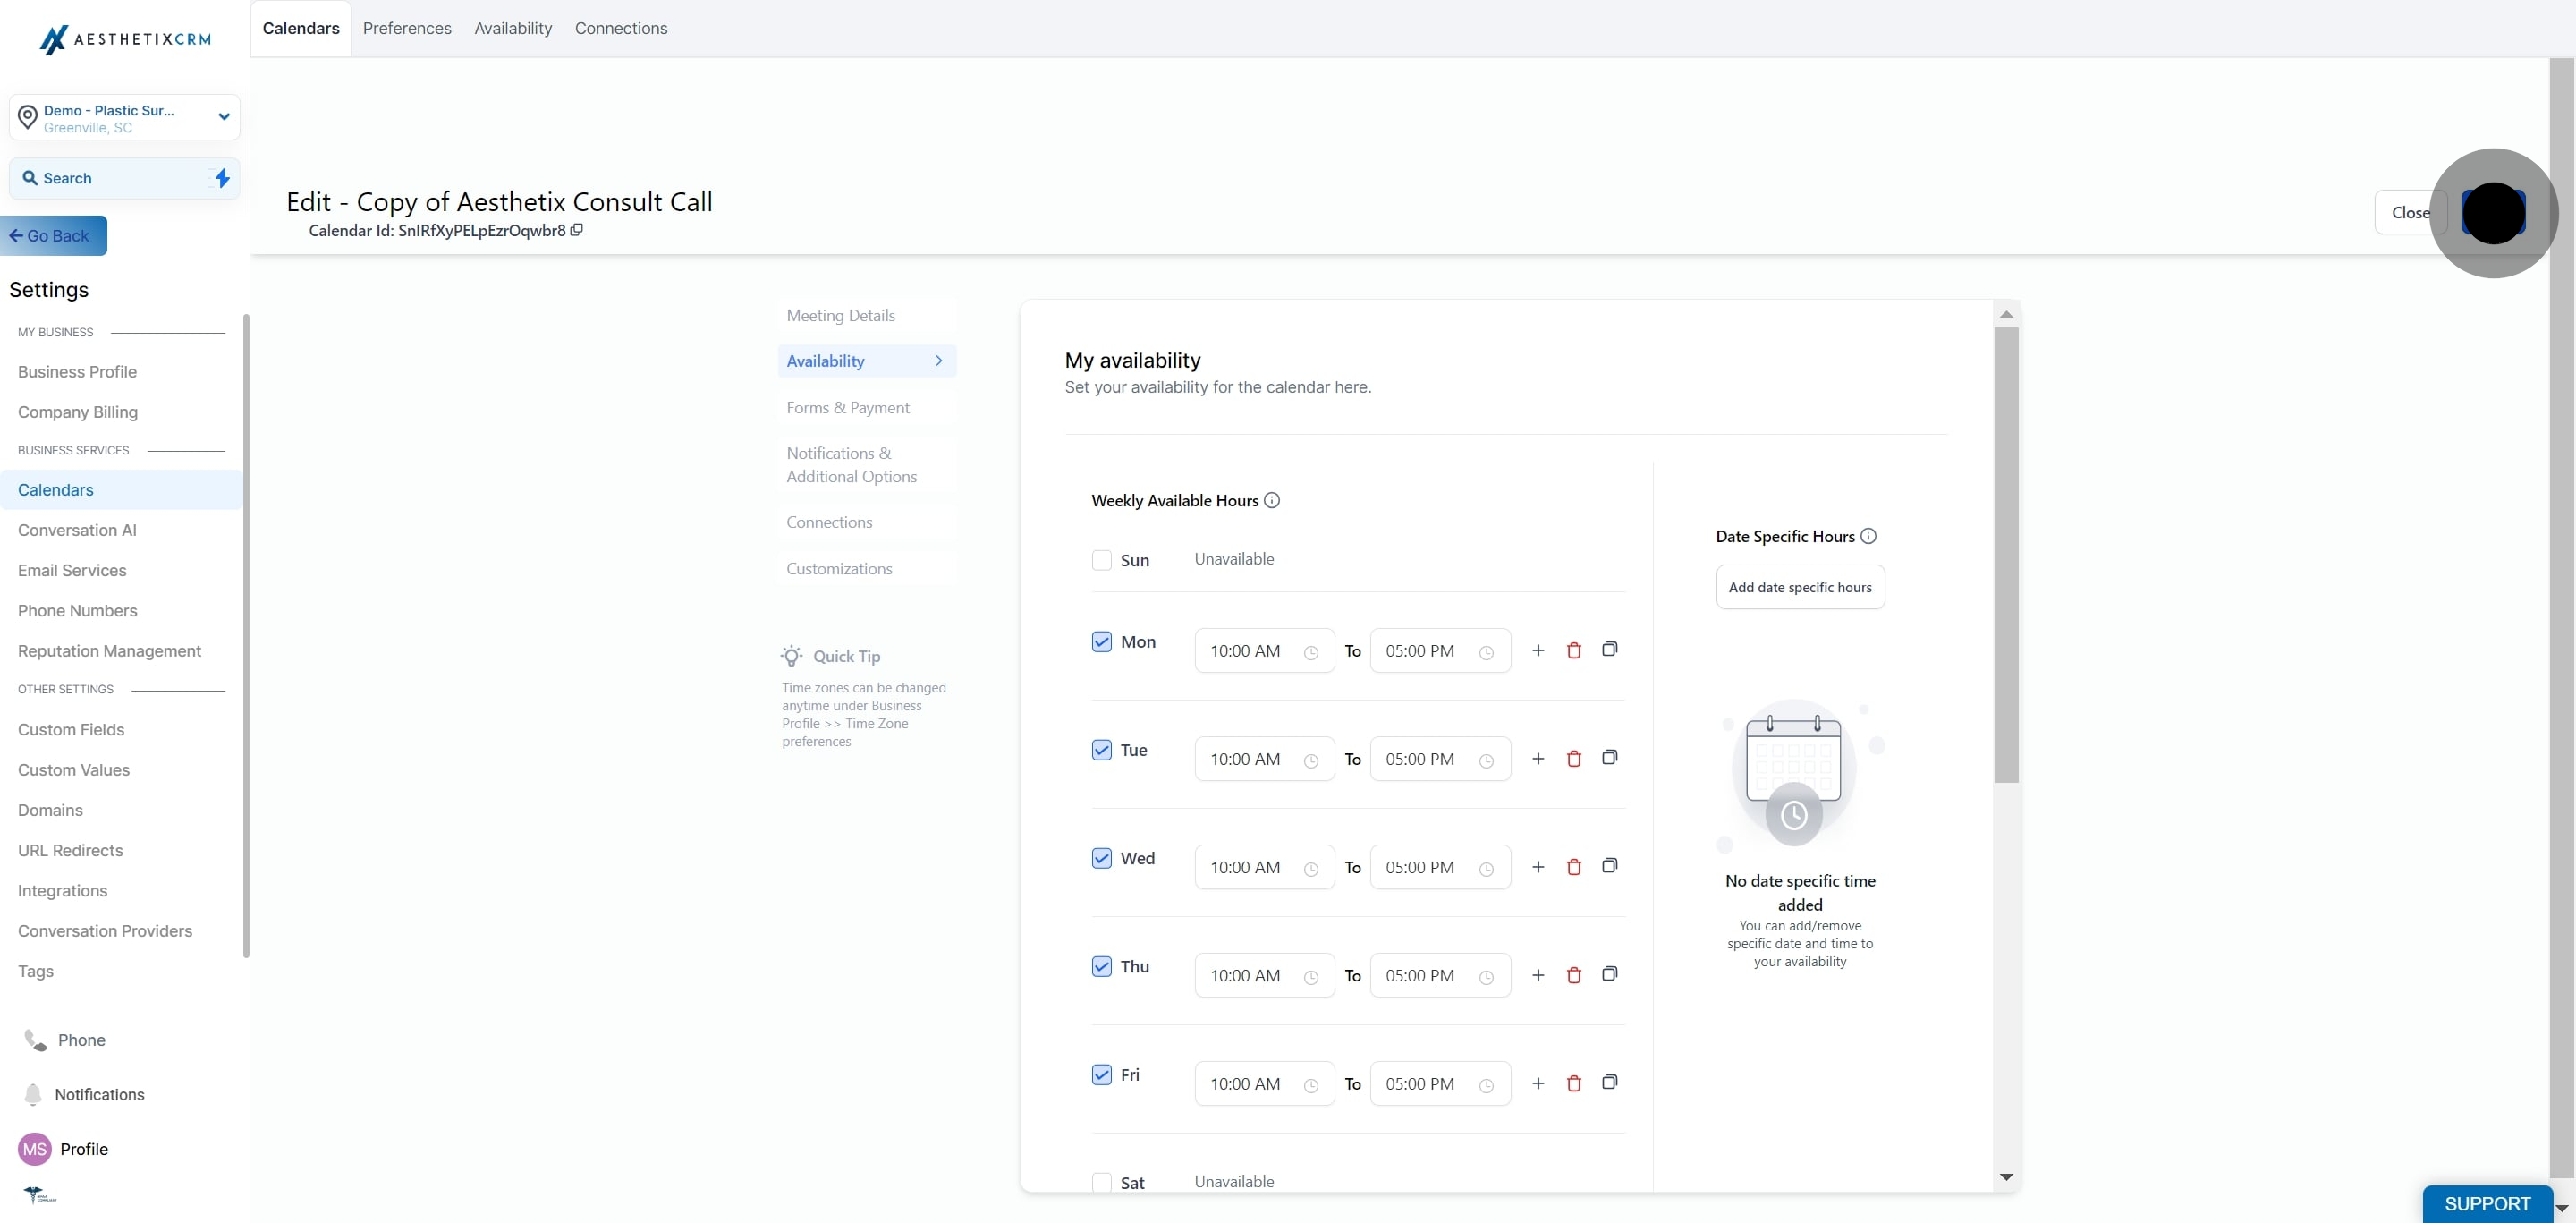
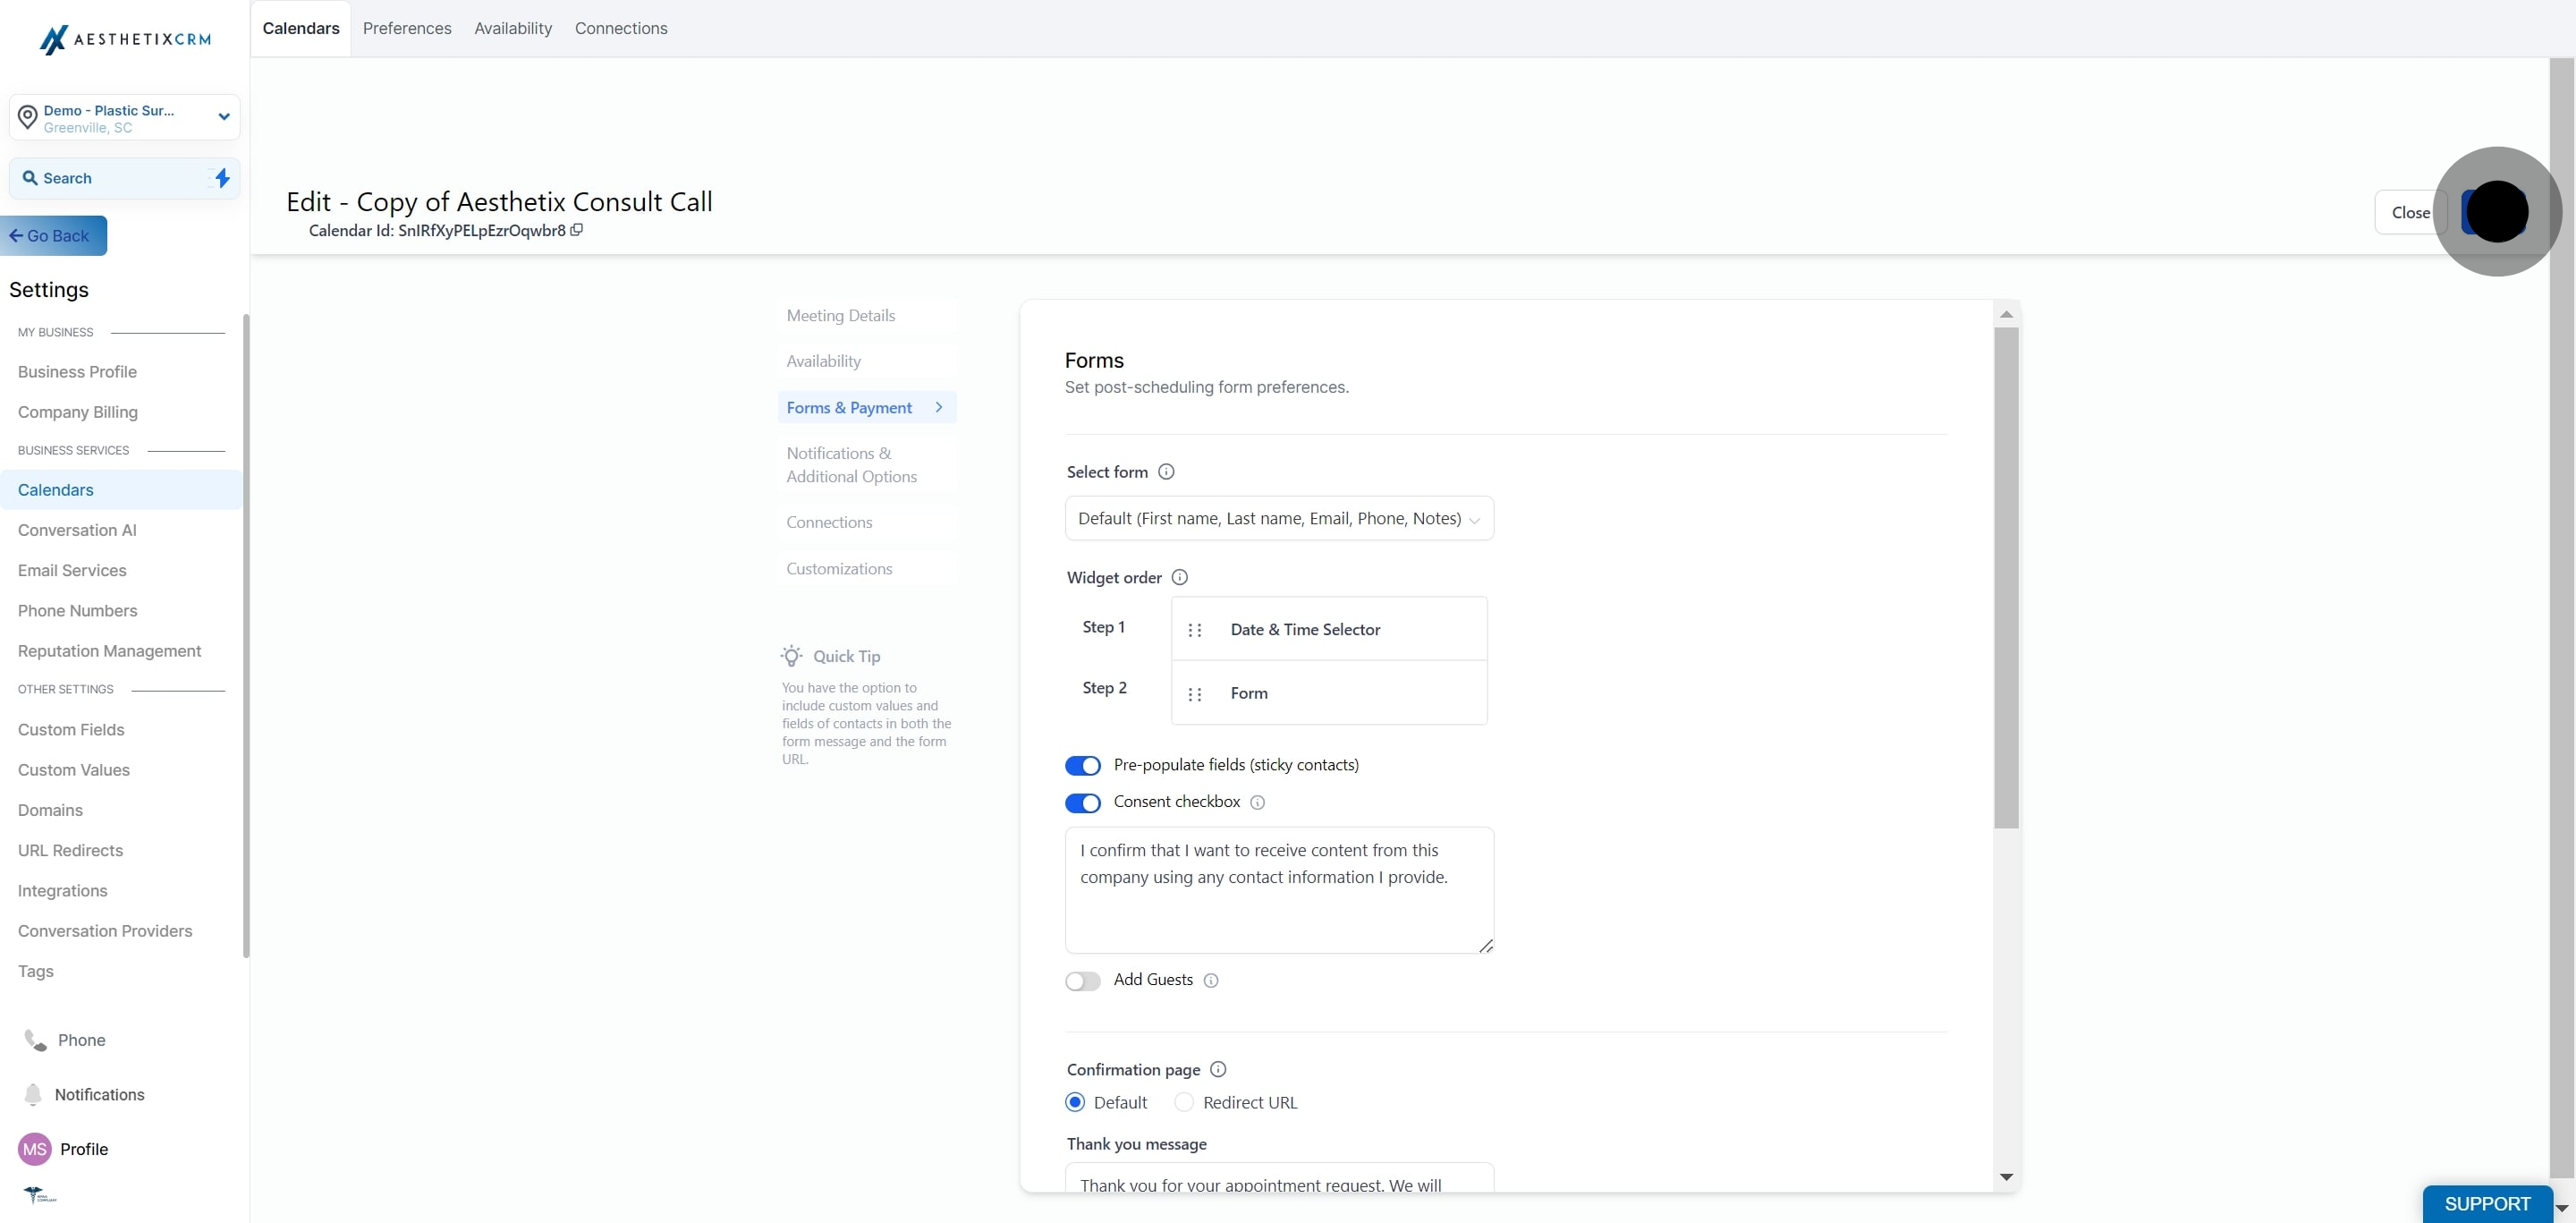
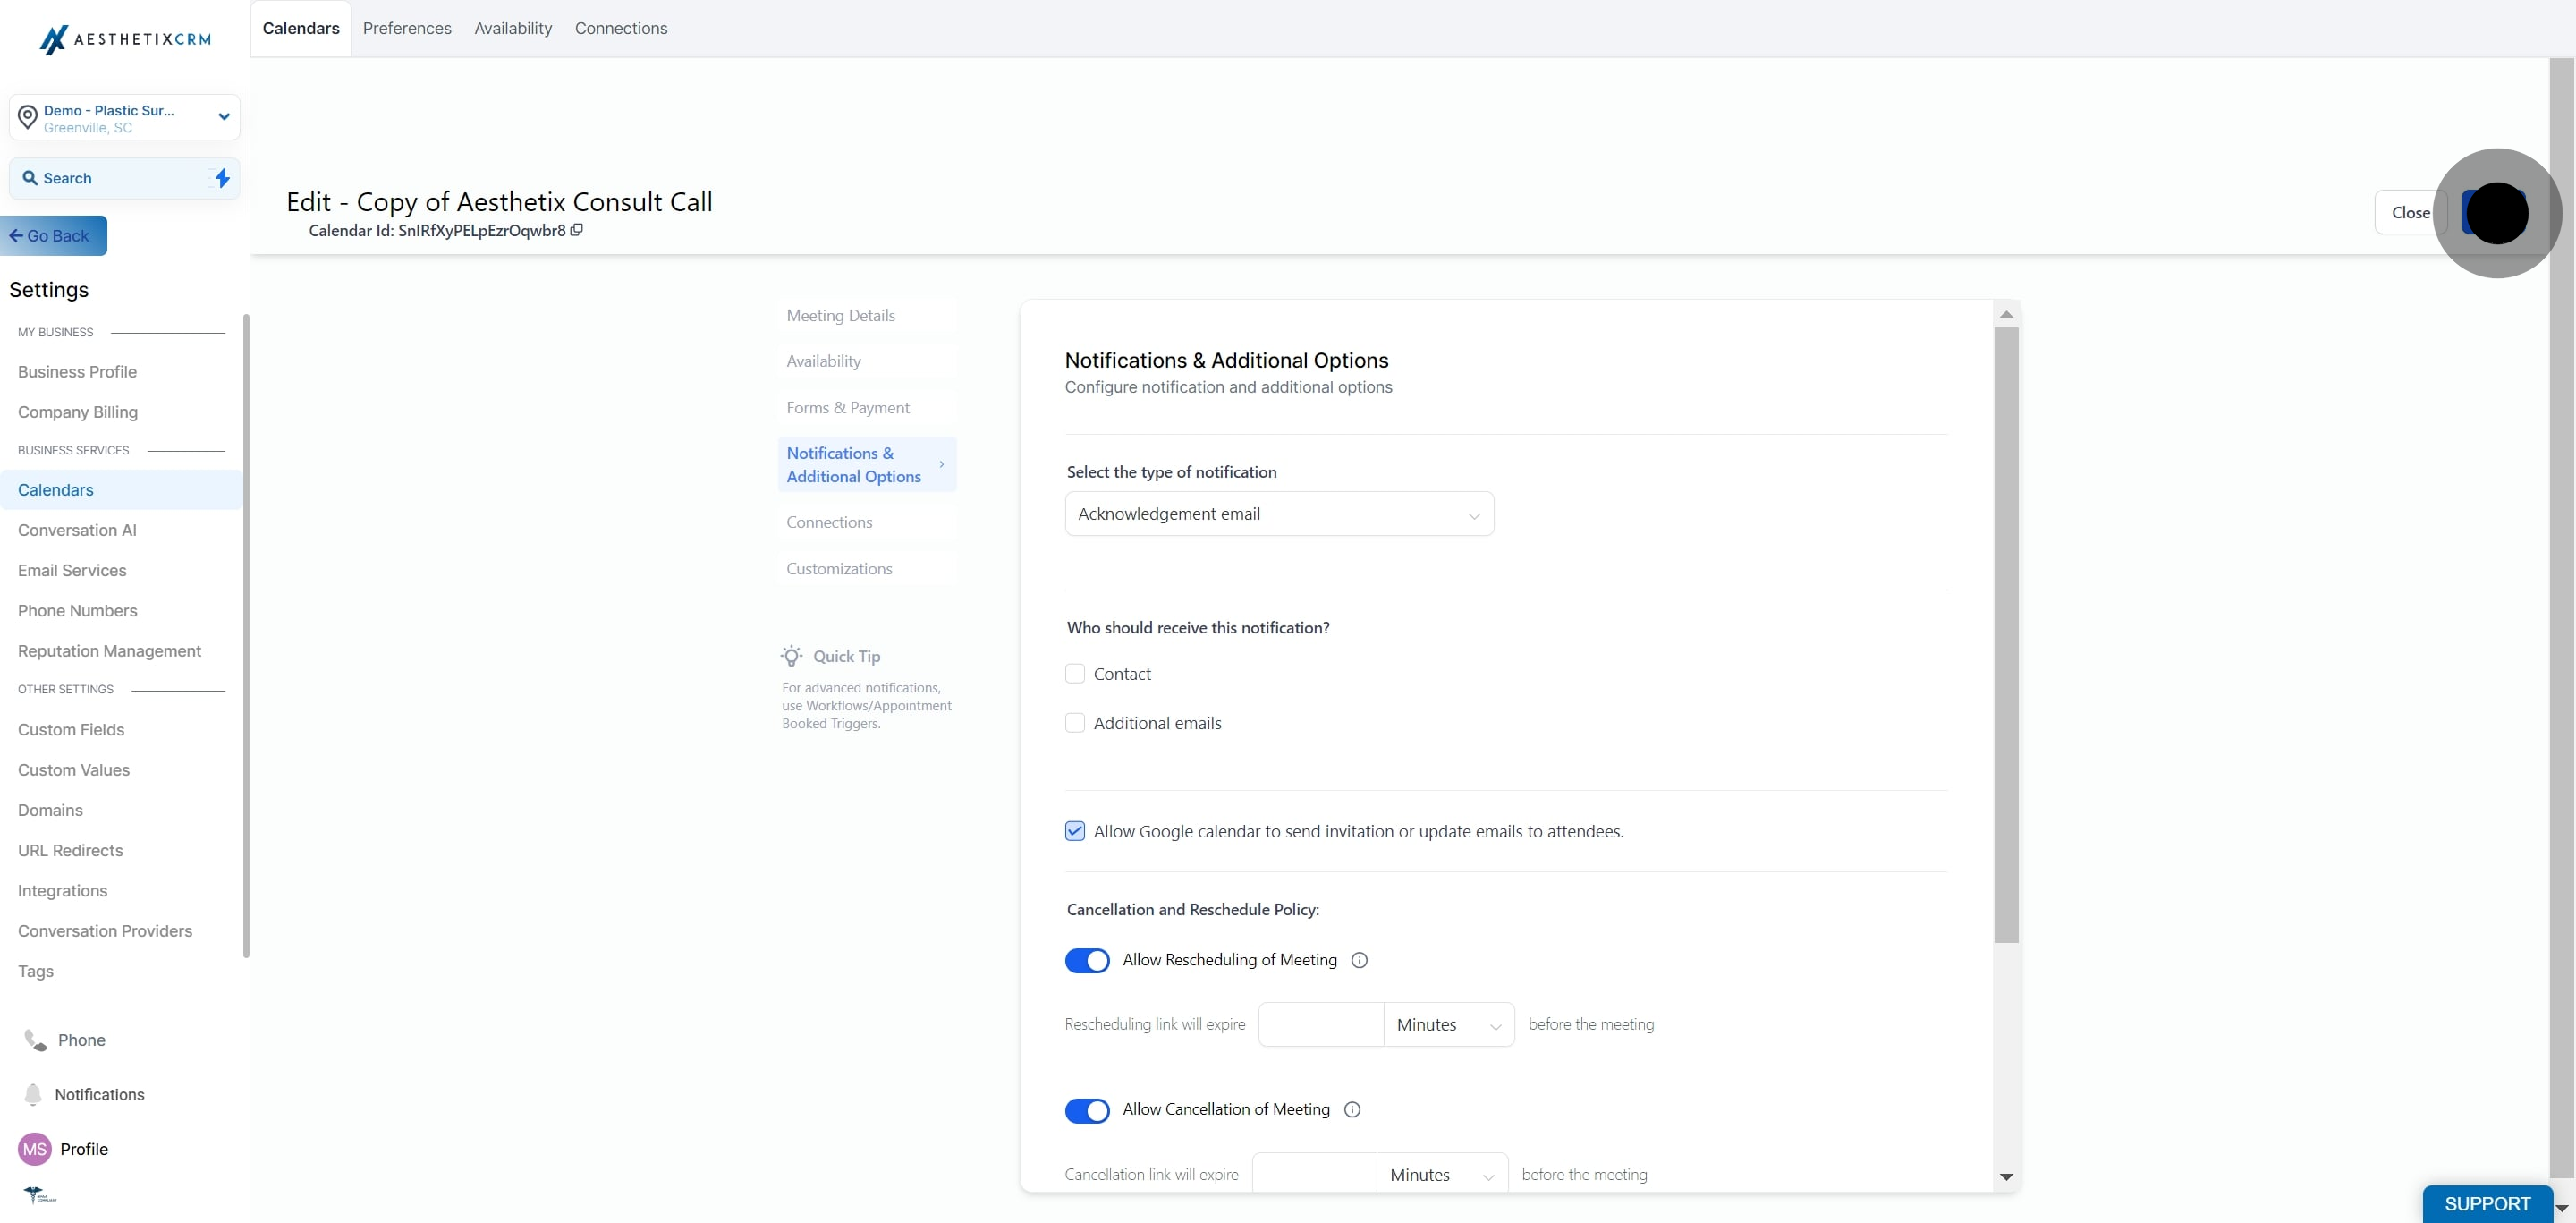
Editing lets you update a calendar's availability, forms, notifications, or connected accounts without disrupting appointments already booked on it.
AX Pay tip: If this calendar collects a deposit or payment at booking, connect it to AX Pay, Aesthetix CRM's built in payment processor, which offers better rates than Stripe. See the AX Pay guide for setup steps.
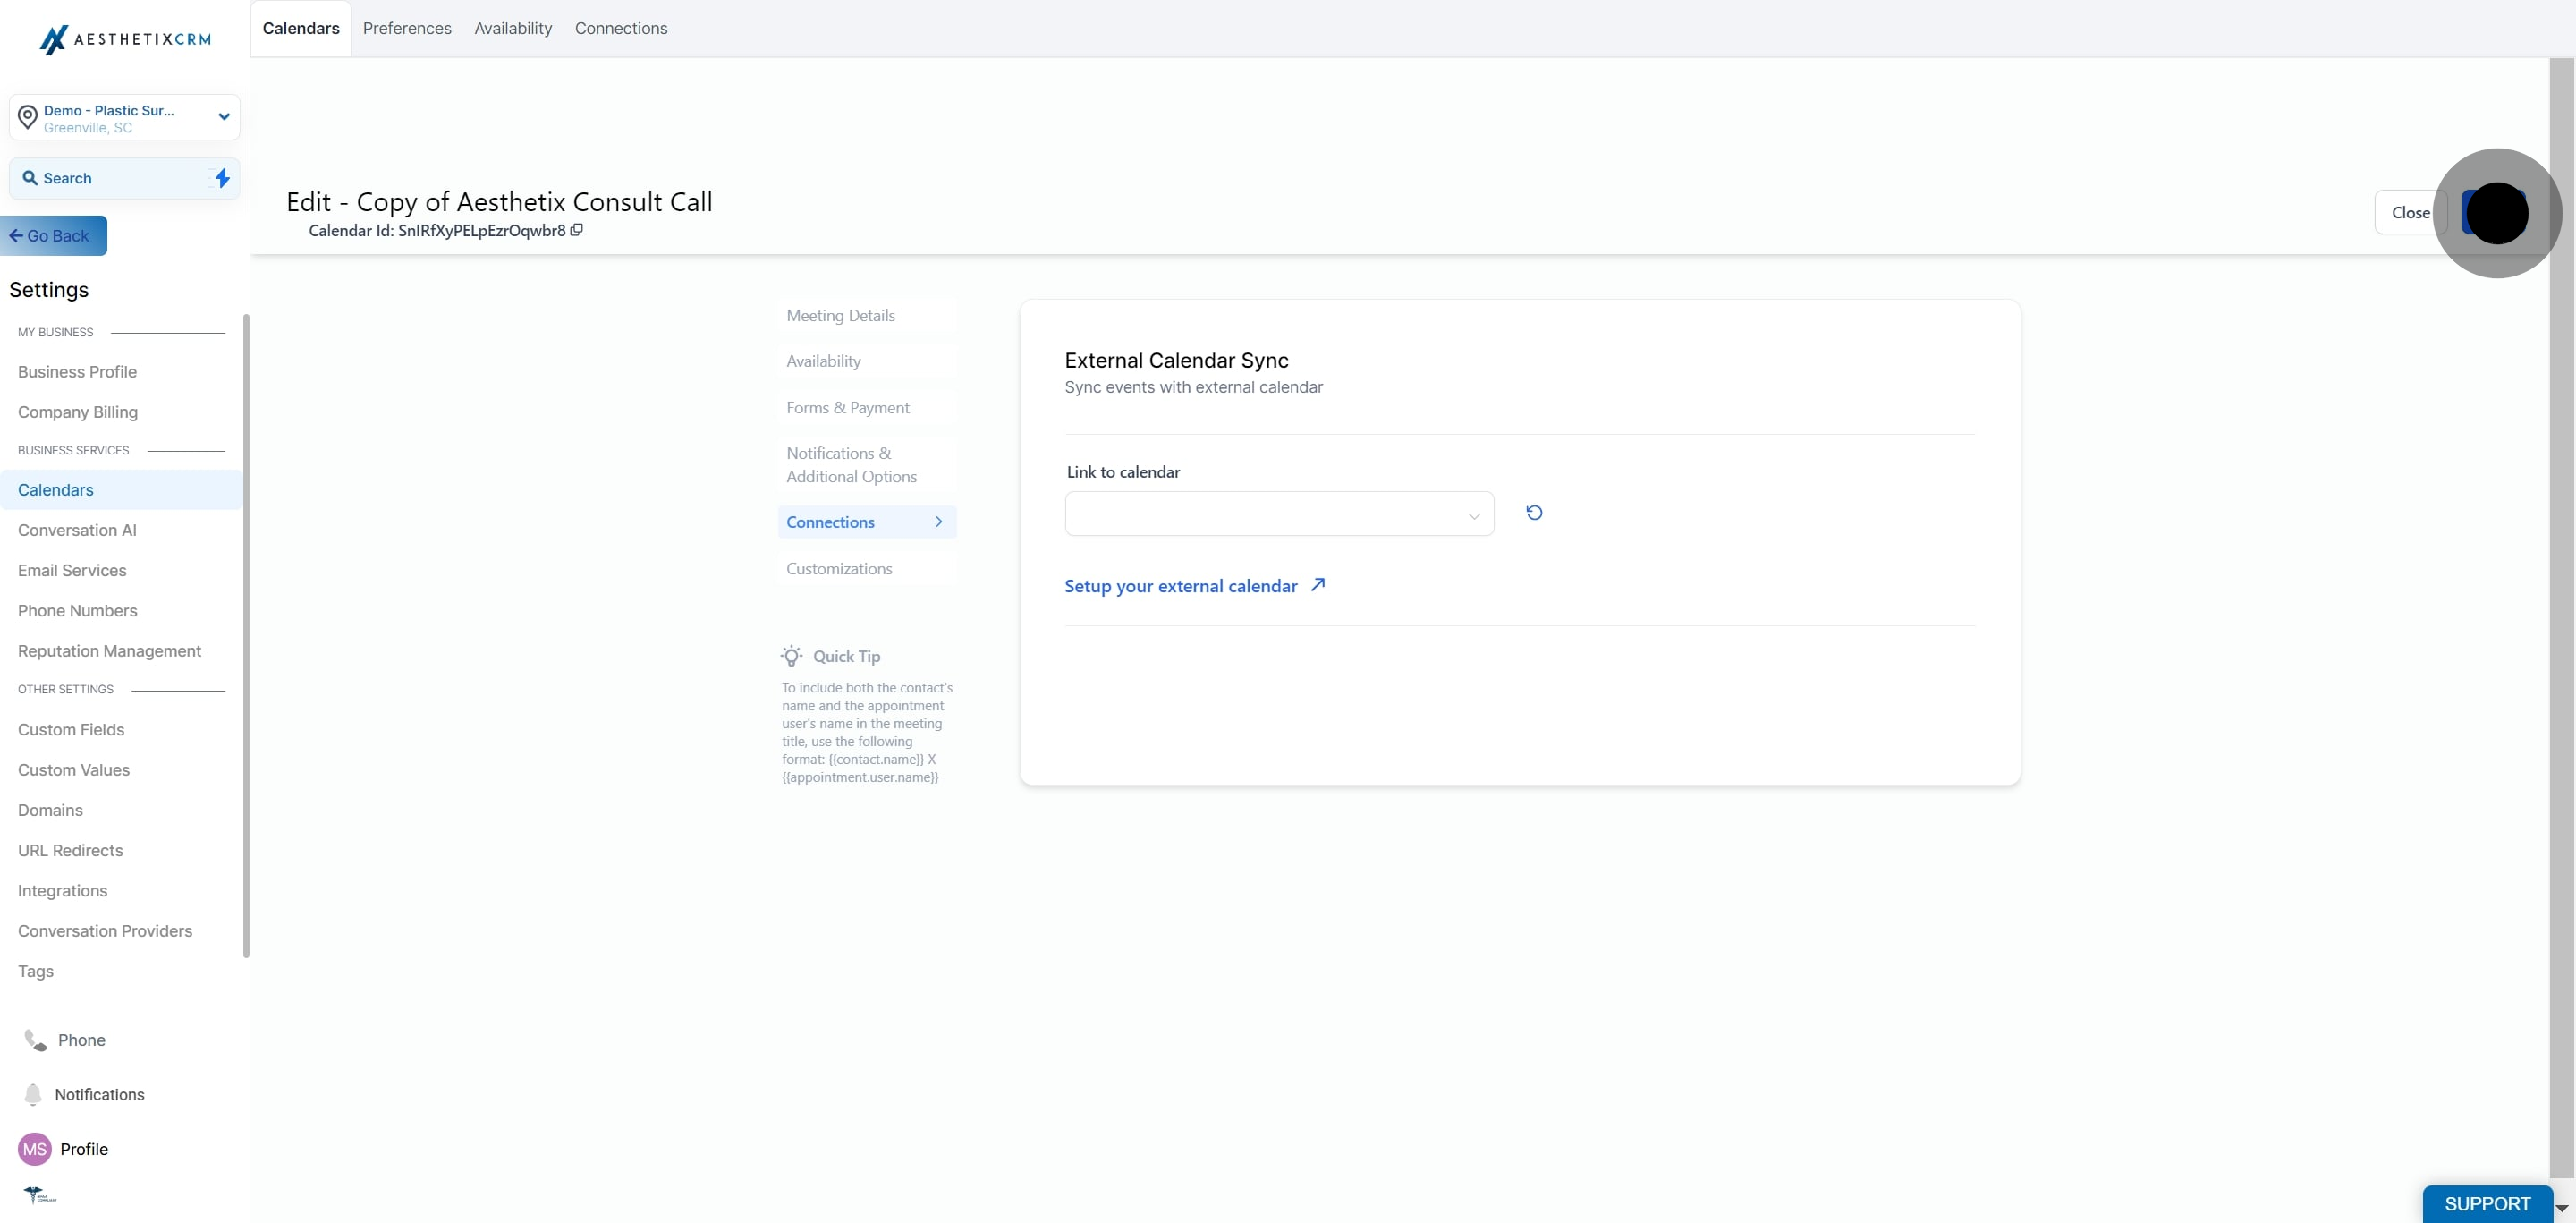
Connections is where a calendar syncs with a provider's Google, Outlook, iCloud, or Zoom account so bookings never double up; see the Connections section of this collection for the full sync setup.
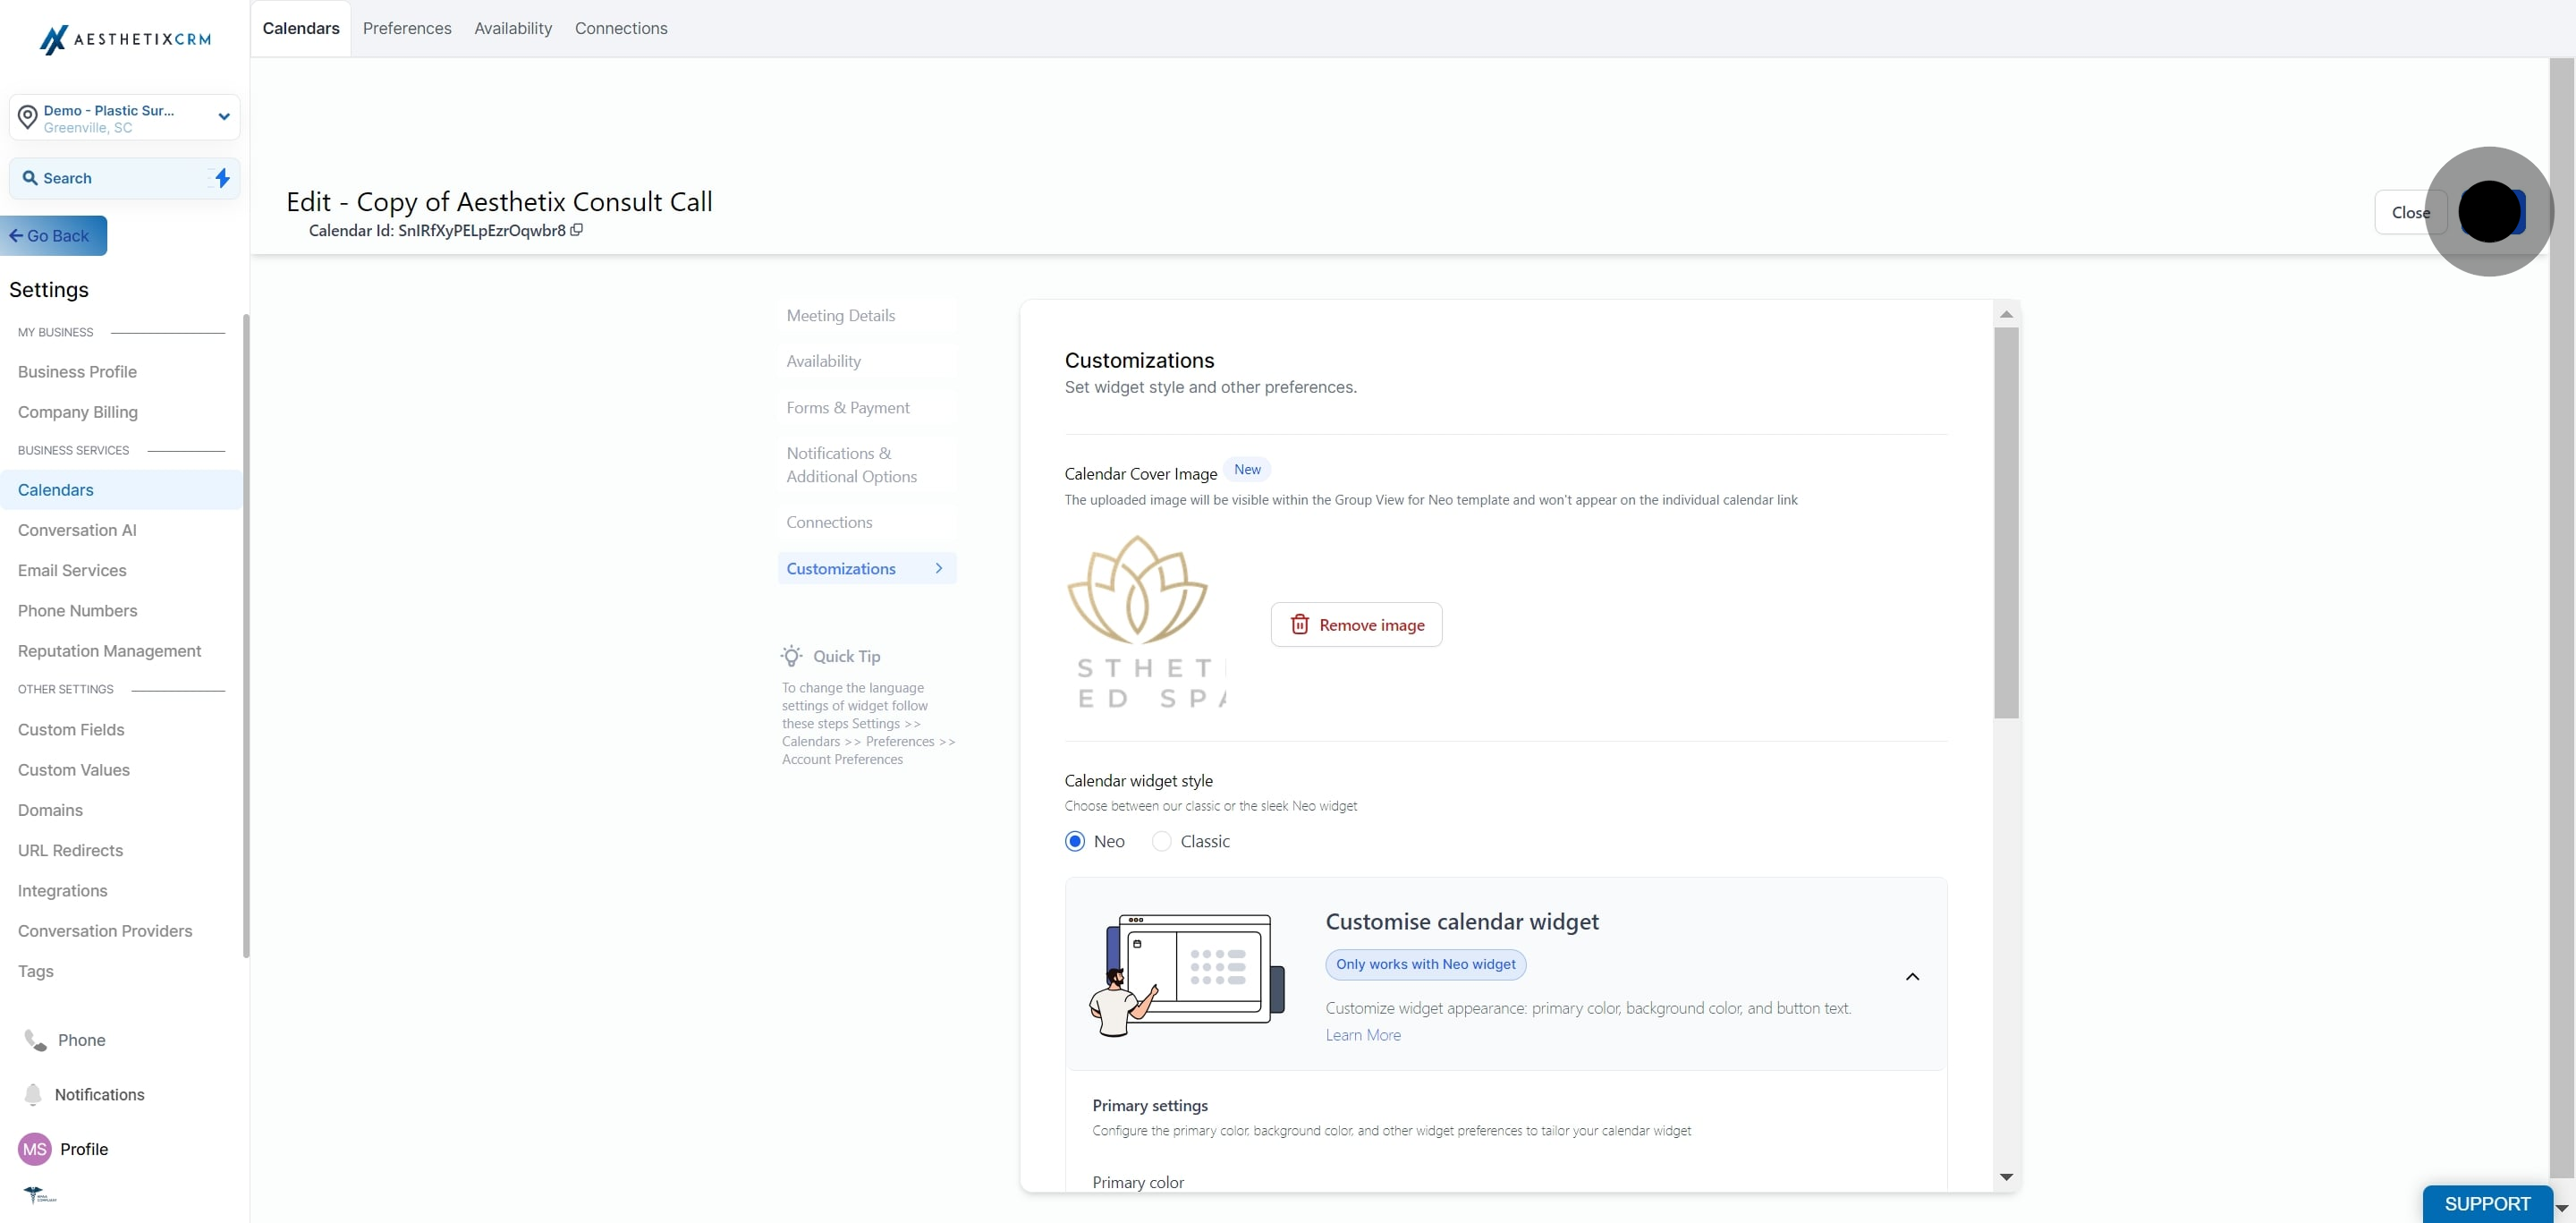
Each tab saves independently, so you can update just the availability or just the notifications without touching the rest of the calendar's setup.
If this calendar's booking form collects patient contact or health information, remember that intake data flows into the contact record like any other PHI; keep who has access to that calendar's forms limited to staff who need it. Intake form design itself is covered under Forms.
Duplicating creates a brand-new calendar that mirrors an existing one's configuration, so you don't have to rebuild availability, reminders, and forms from scratch every time you onboard a new provider, open a second location, or add a seasonal service. It also keeps the booking experience consistent across your practice and helps you avoid missing small but important details like buffer times or cancellation rules.
What gets duplicated:
Category | What carries over |
|---|---|
Meeting details | Calendar logo, name, description, group, meeting invite title, assigned team member and location, meeting color |
Availability | Weekly hours, Look Busy settings, recurring meeting options, slot interval, meeting duration, minimum scheduling notice, date range restrictions, max bookings per day/slot, pre and post buffer time |
Forms & payments | Selected form, widget order, sticky contact pre-population, consent checkbox, guest options, confirmation page, auto-confirm setting, payment settings |
Notifications & options | Email and in-app notifications, Google/Outlook invitations, contact assignment rules, skip-if-assigned setting, rescheduling and cancellation permissions, meeting invite notes |
Customizations | Cover image, widget style, primary and background colors, button text, calendar title/description/details, custom code |
What does not get duplicated:
Calendar name: the copy is automatically named "Copy of [Original Name]." Rename it before publishing so staff and patients aren't confused.
Calendar ID and URL: the duplicate gets its own unique ID and a new booking link (based on the original link with extra numbers appended).
Workflow automations: any workflows or triggers tied to the original calendar are not copied. Reassign or recreate those in Workflows once the new calendar is live.
To duplicate a calendar:
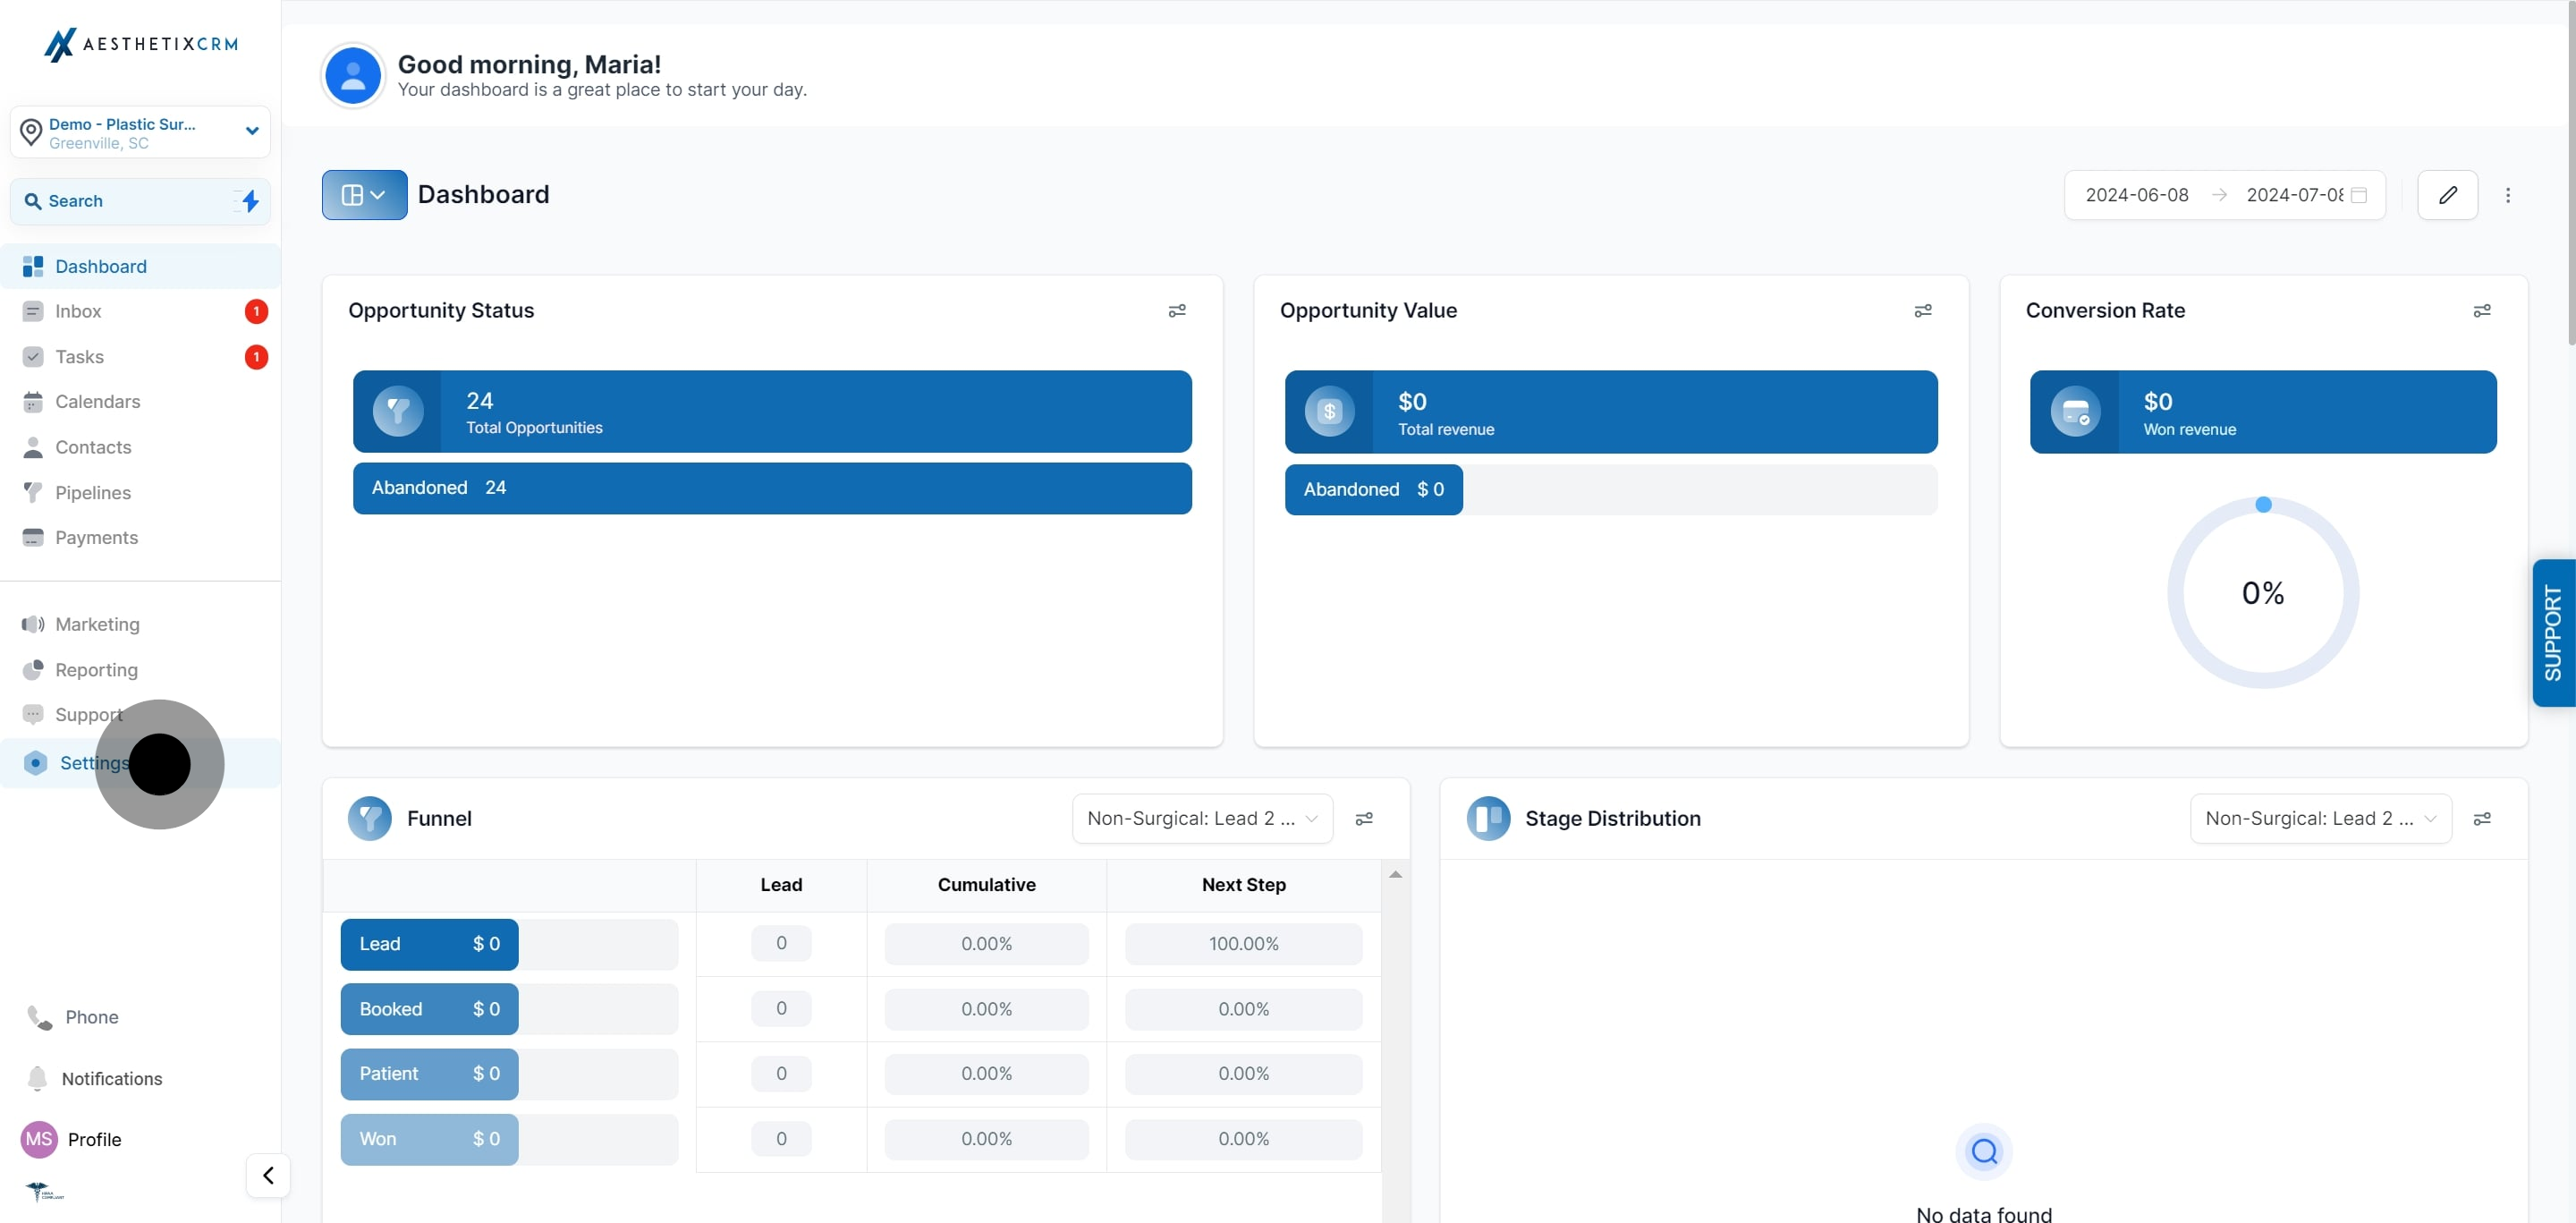
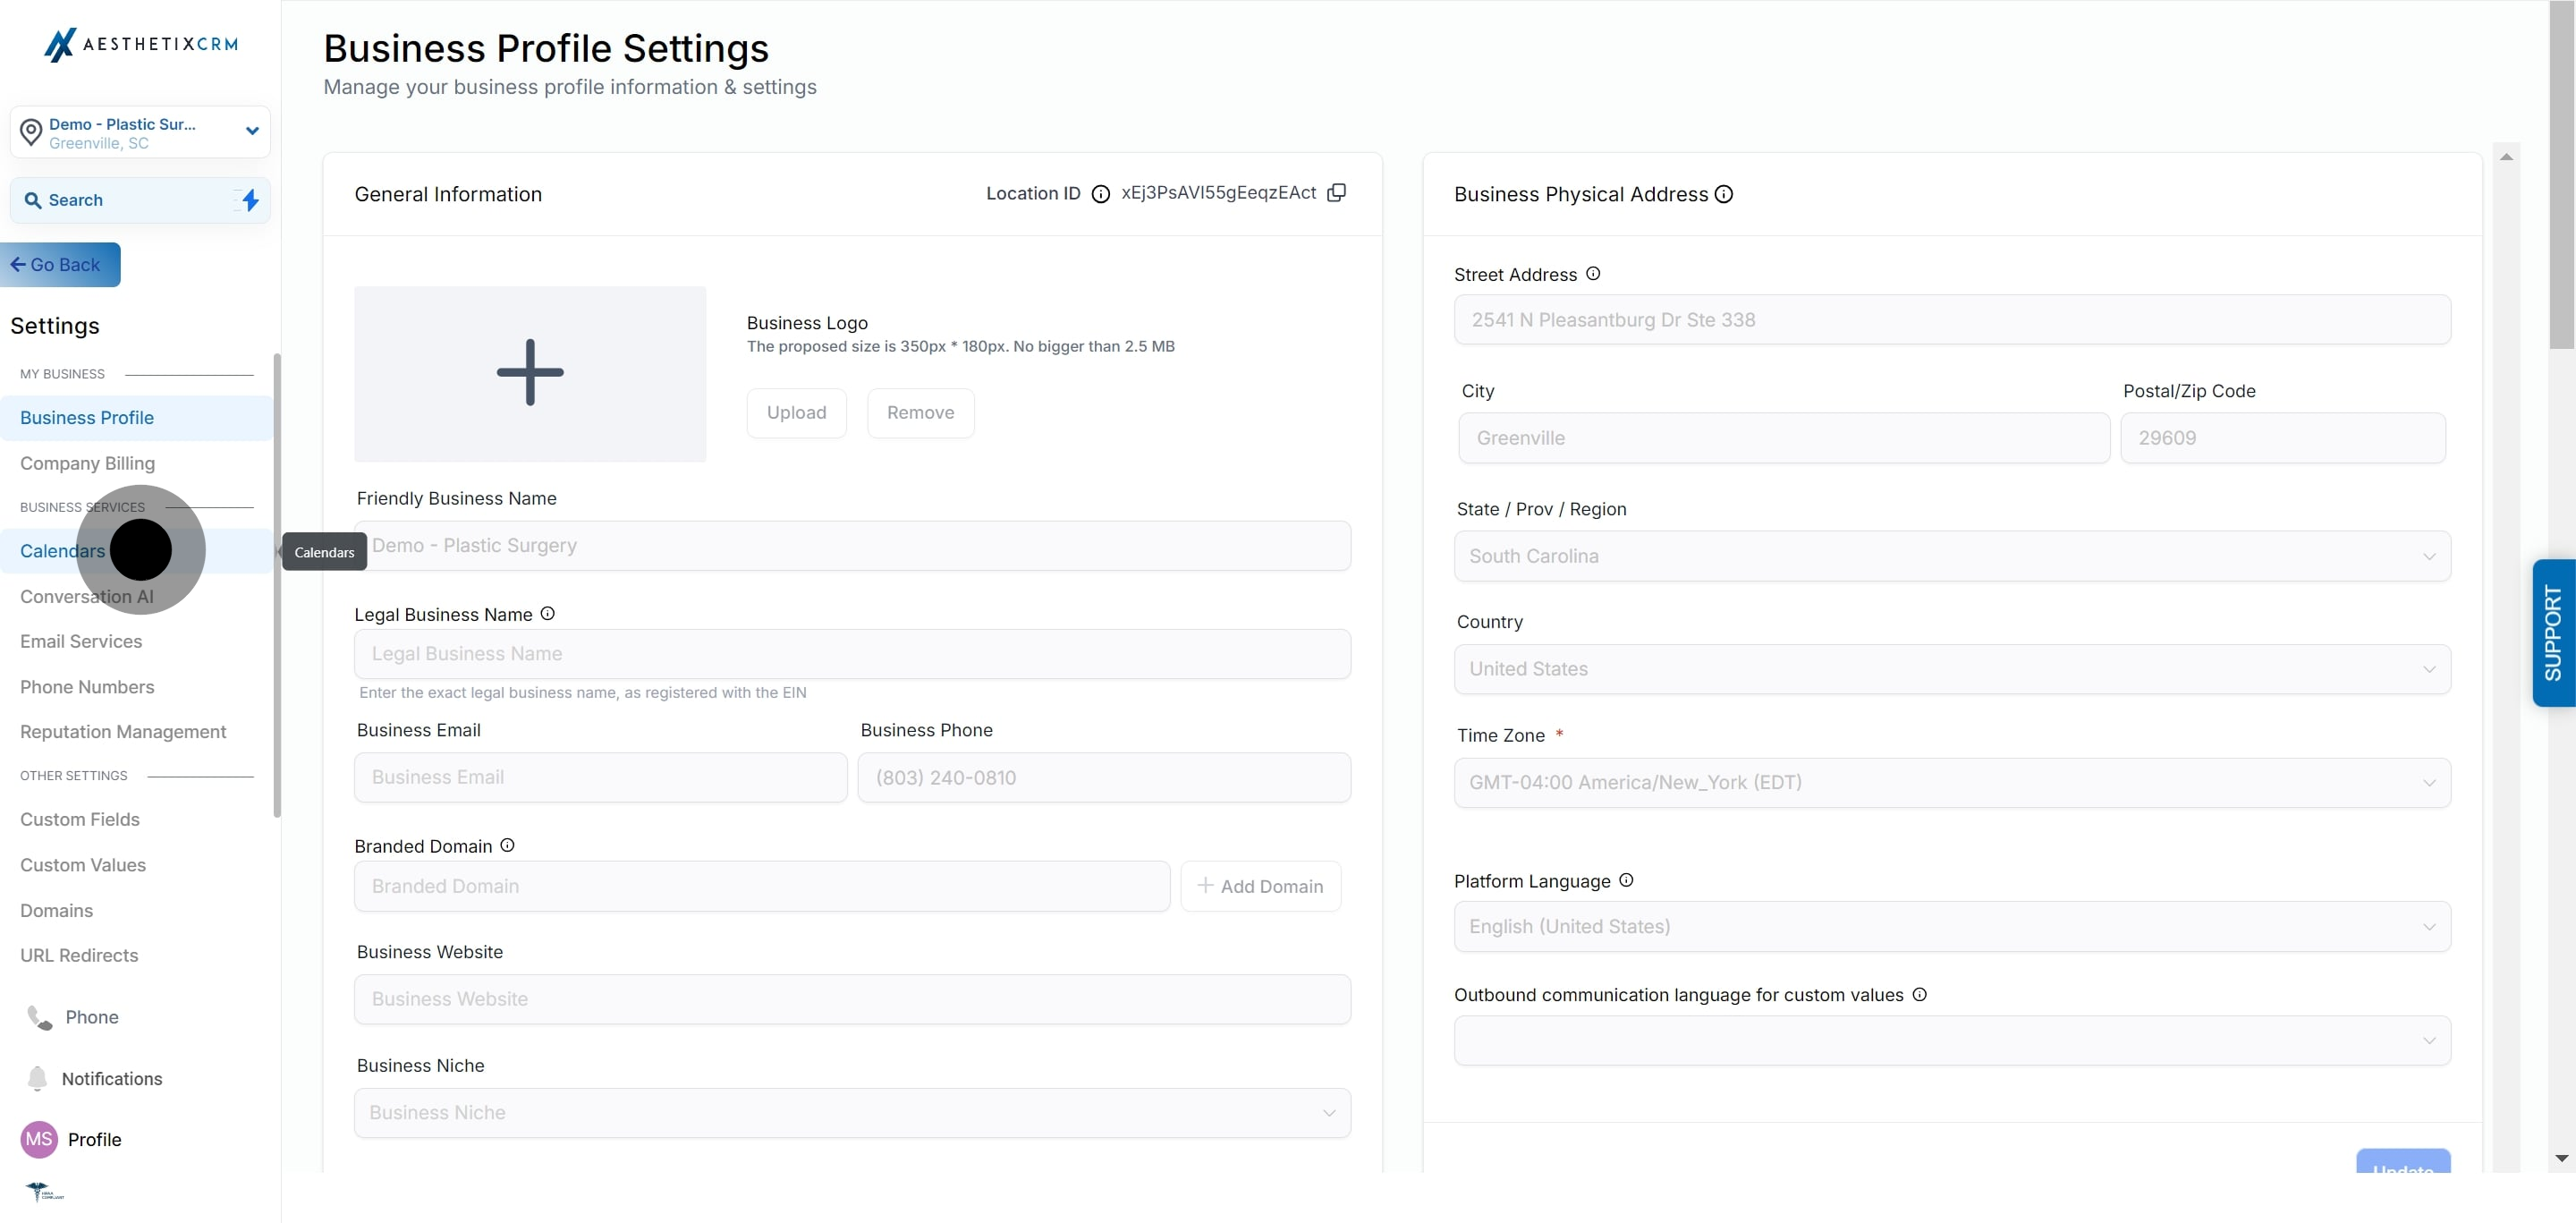
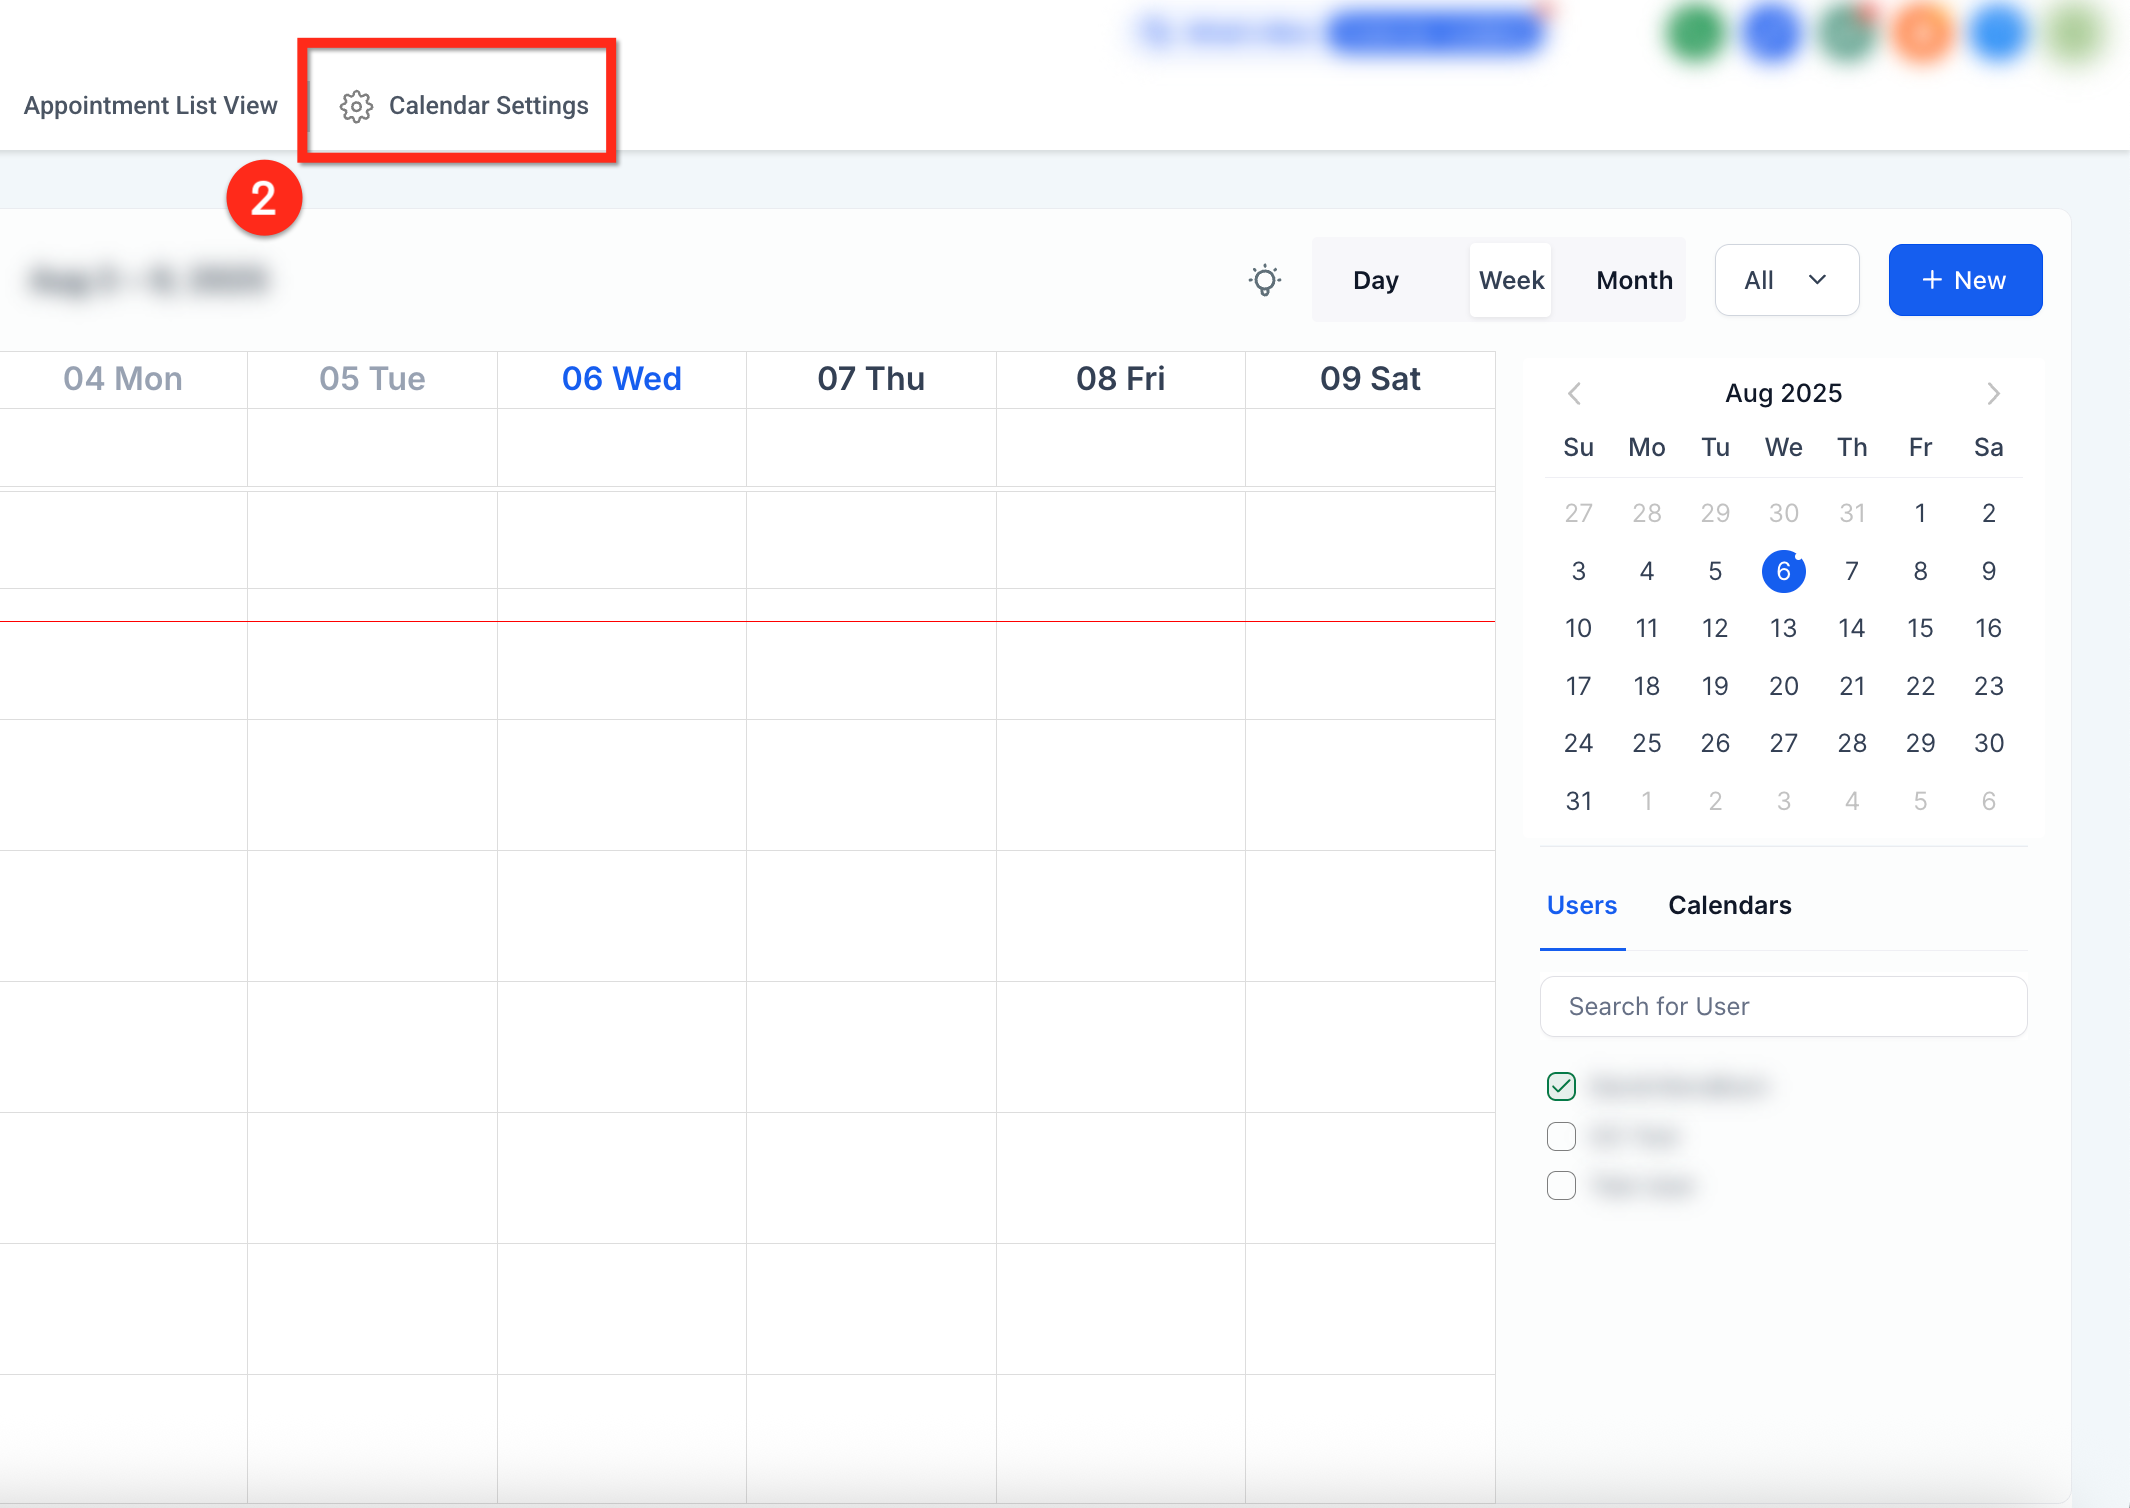
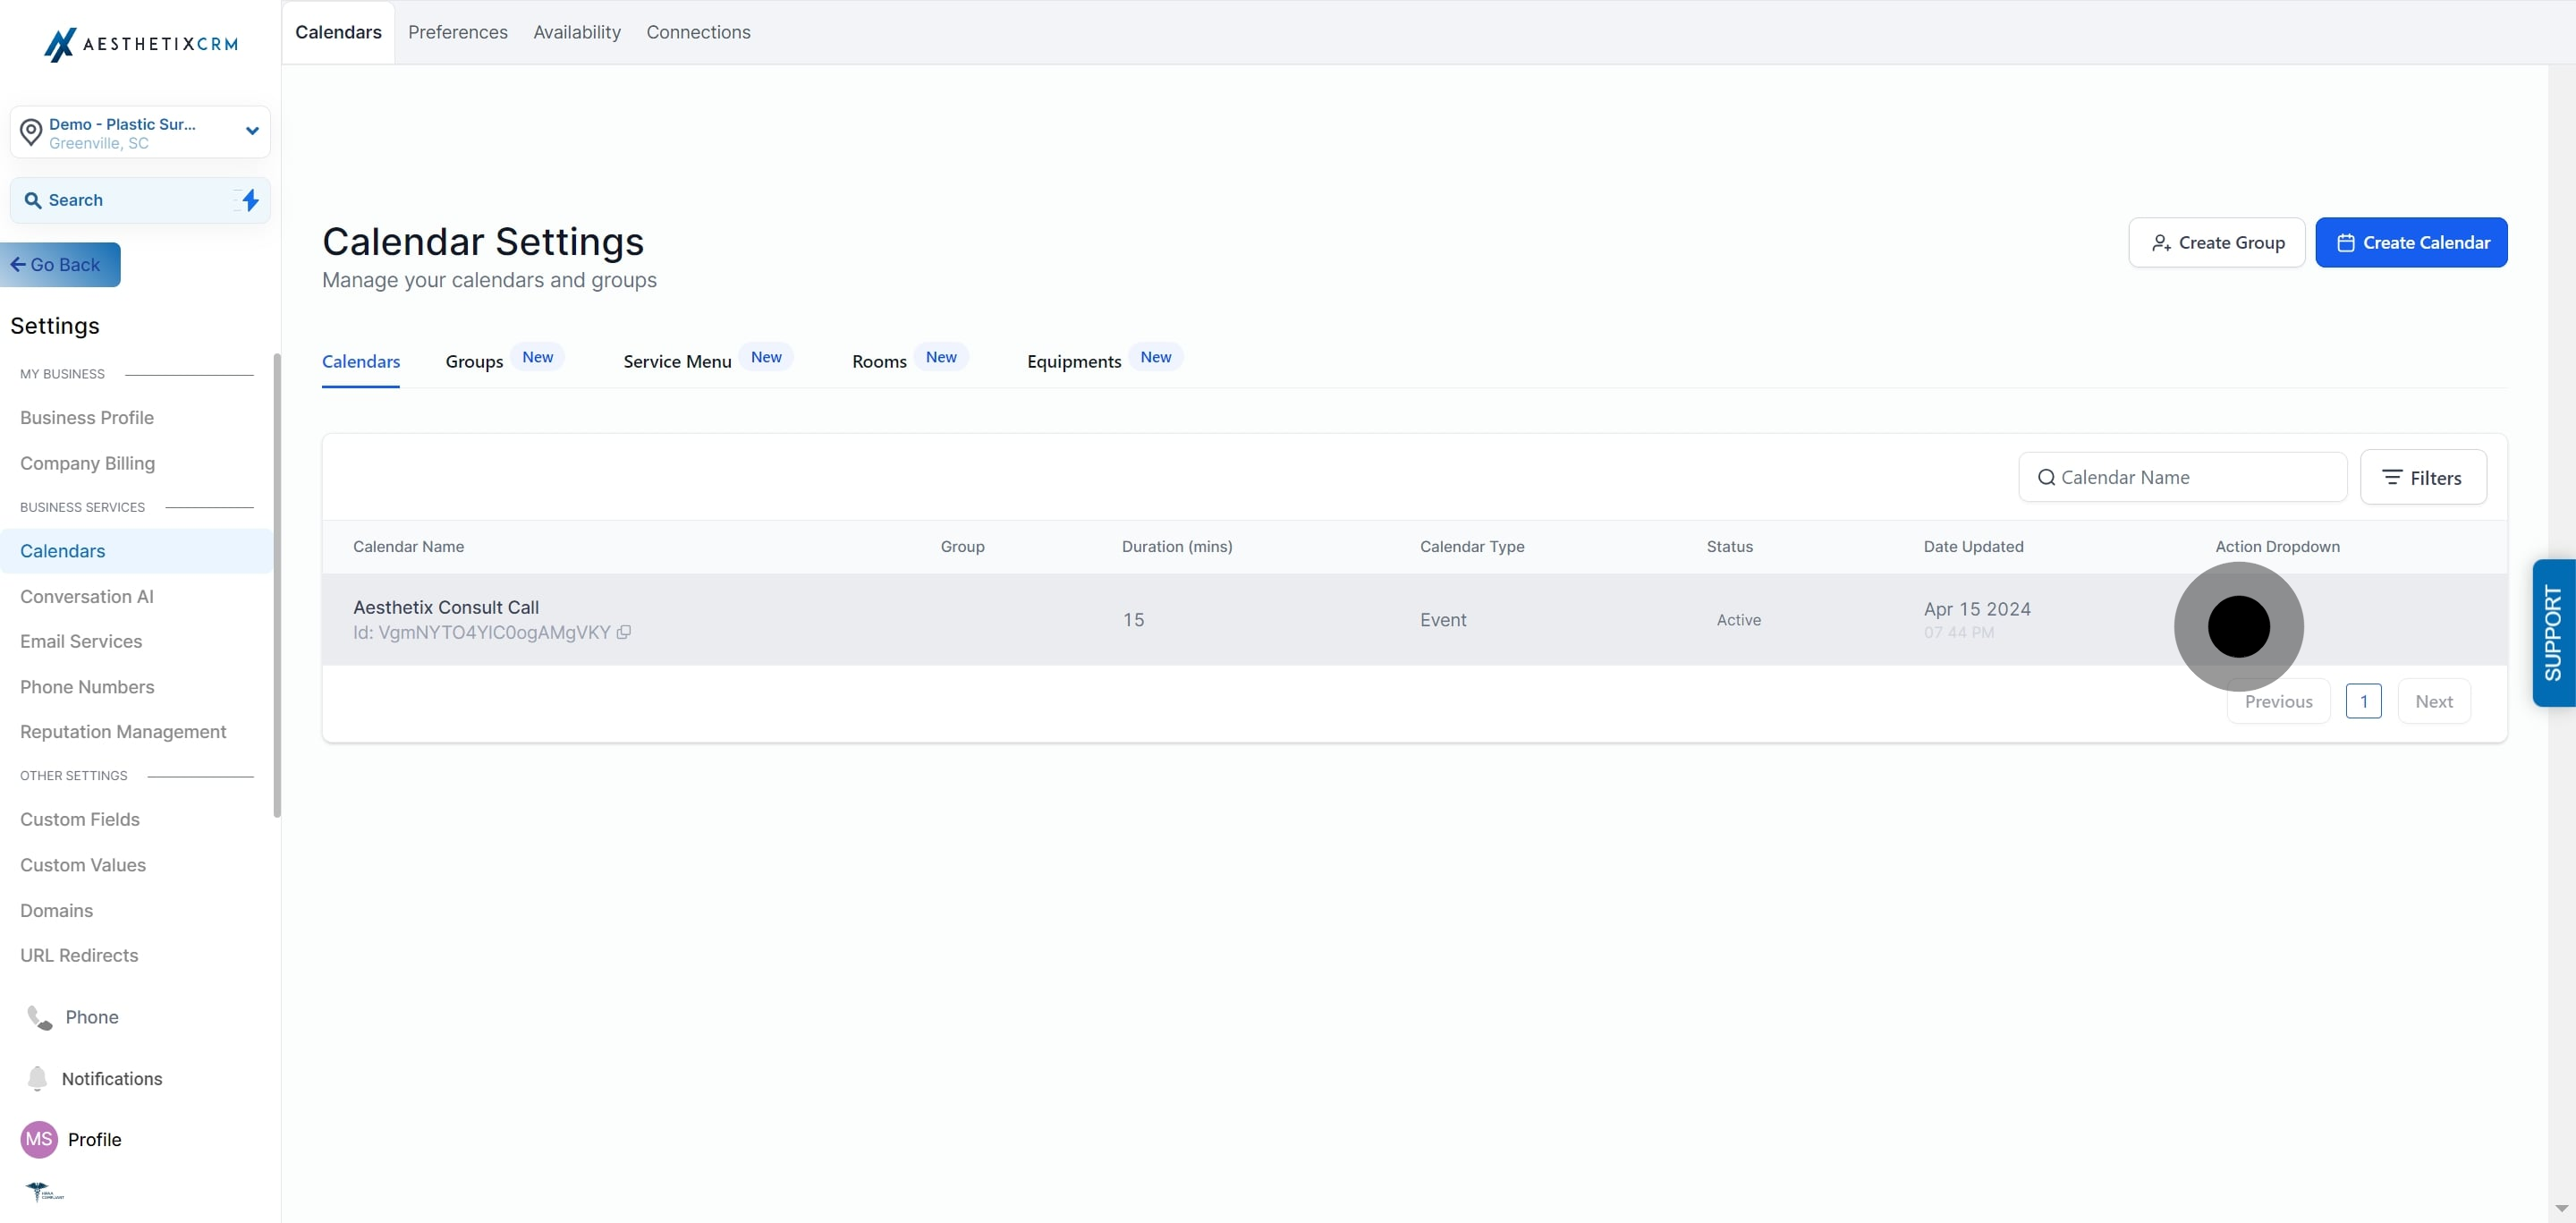
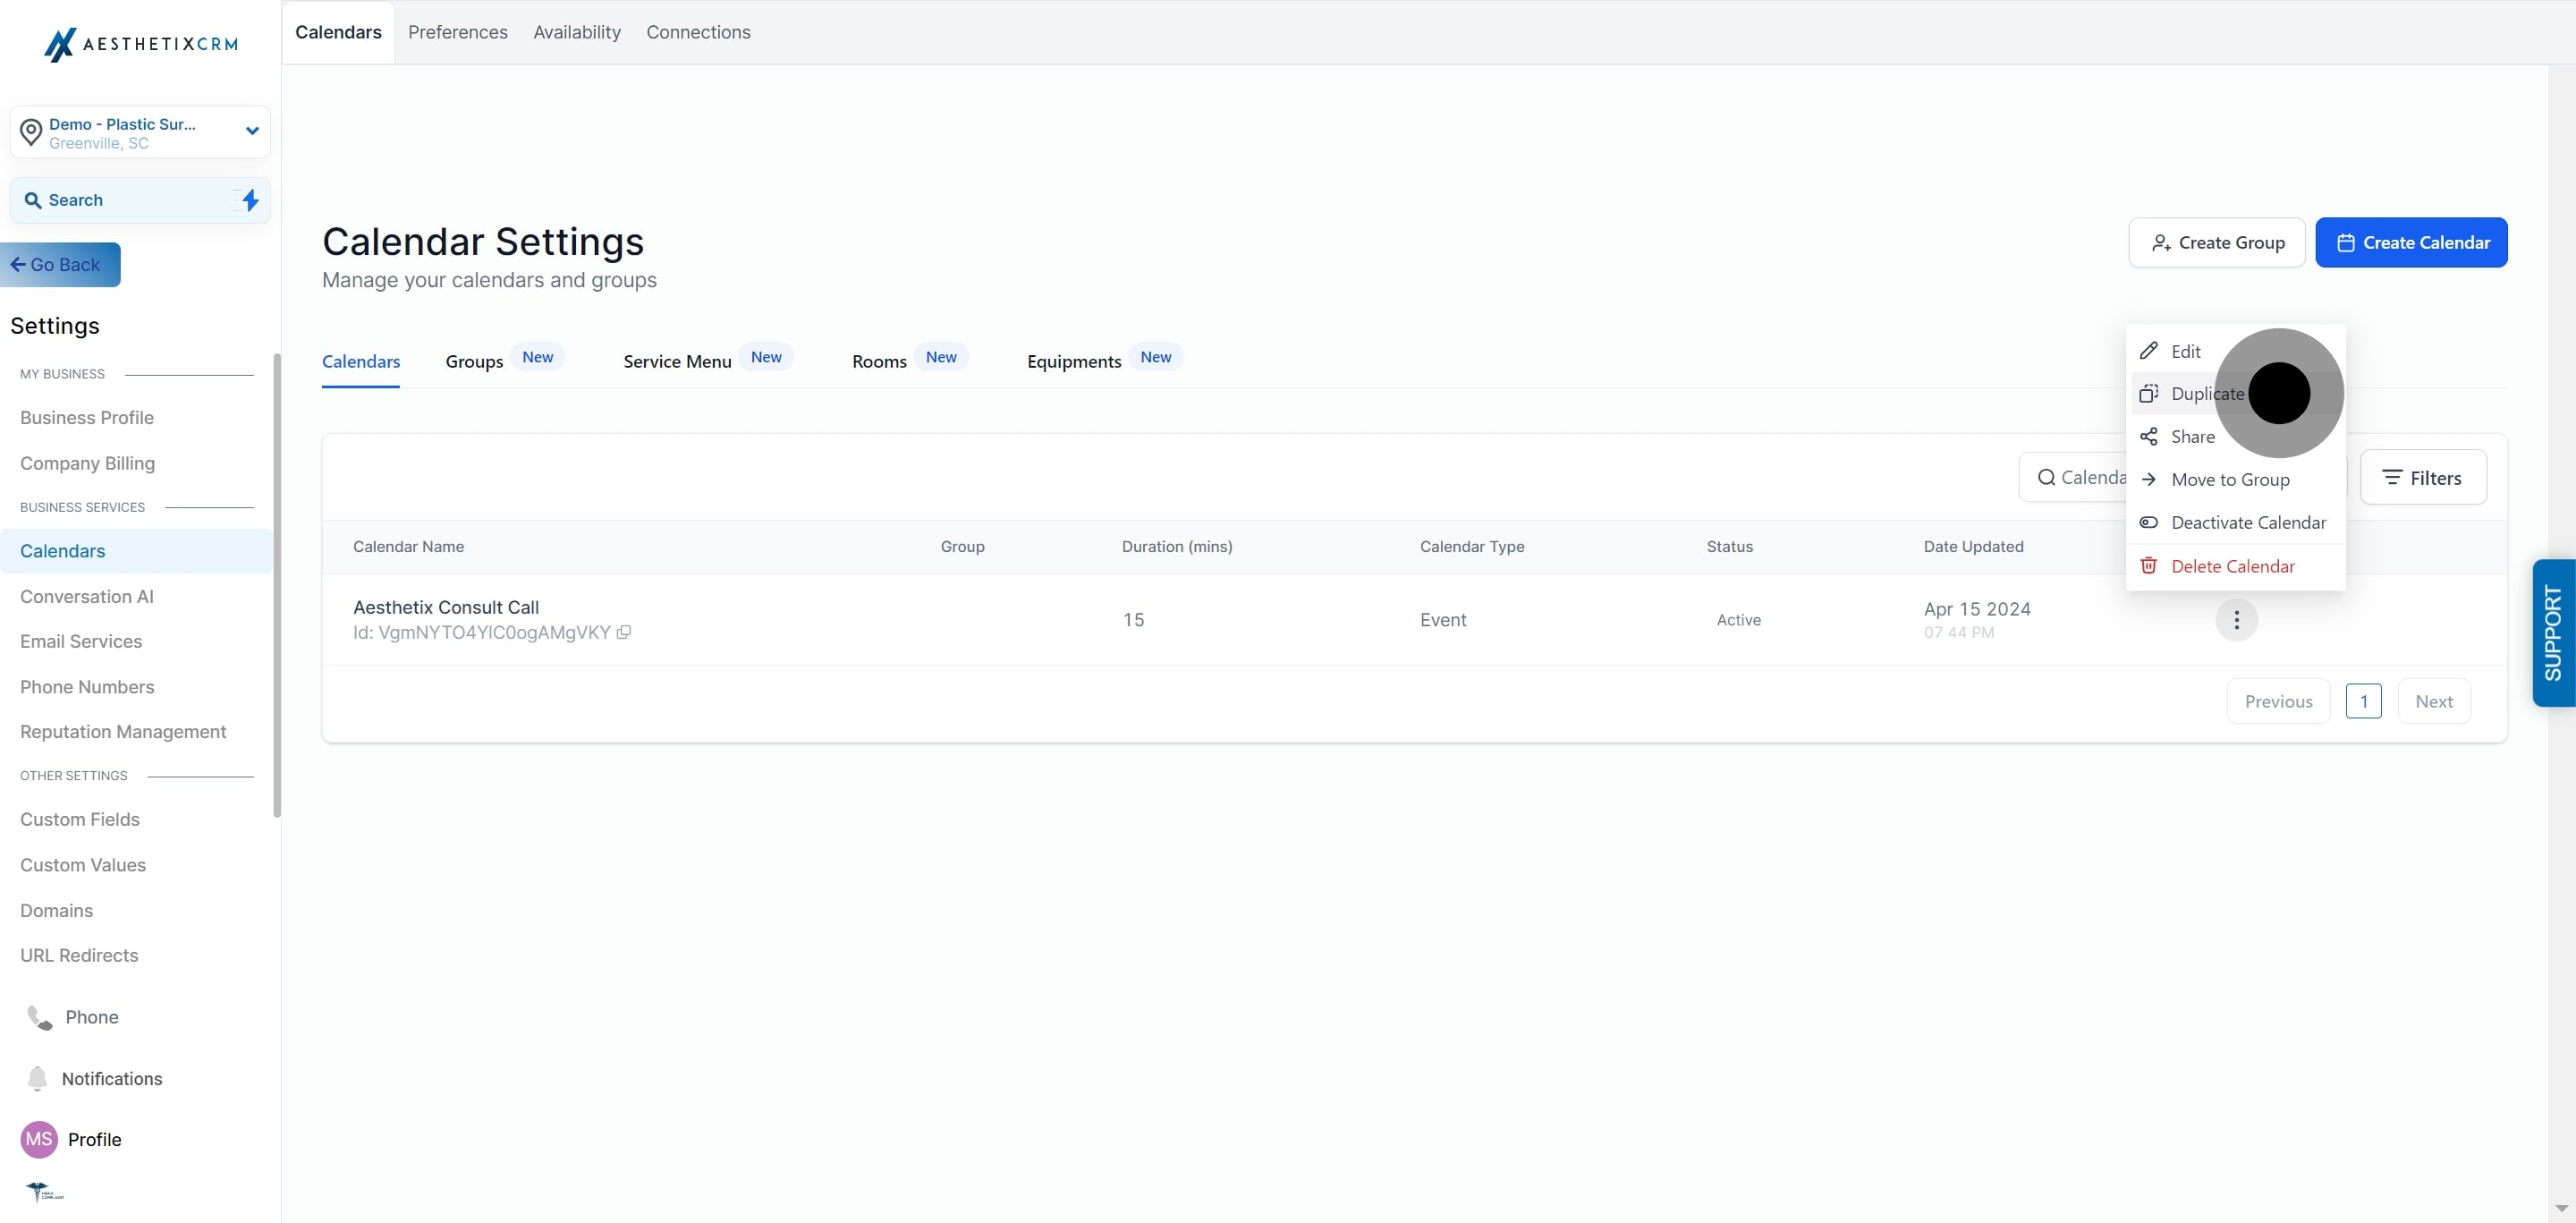
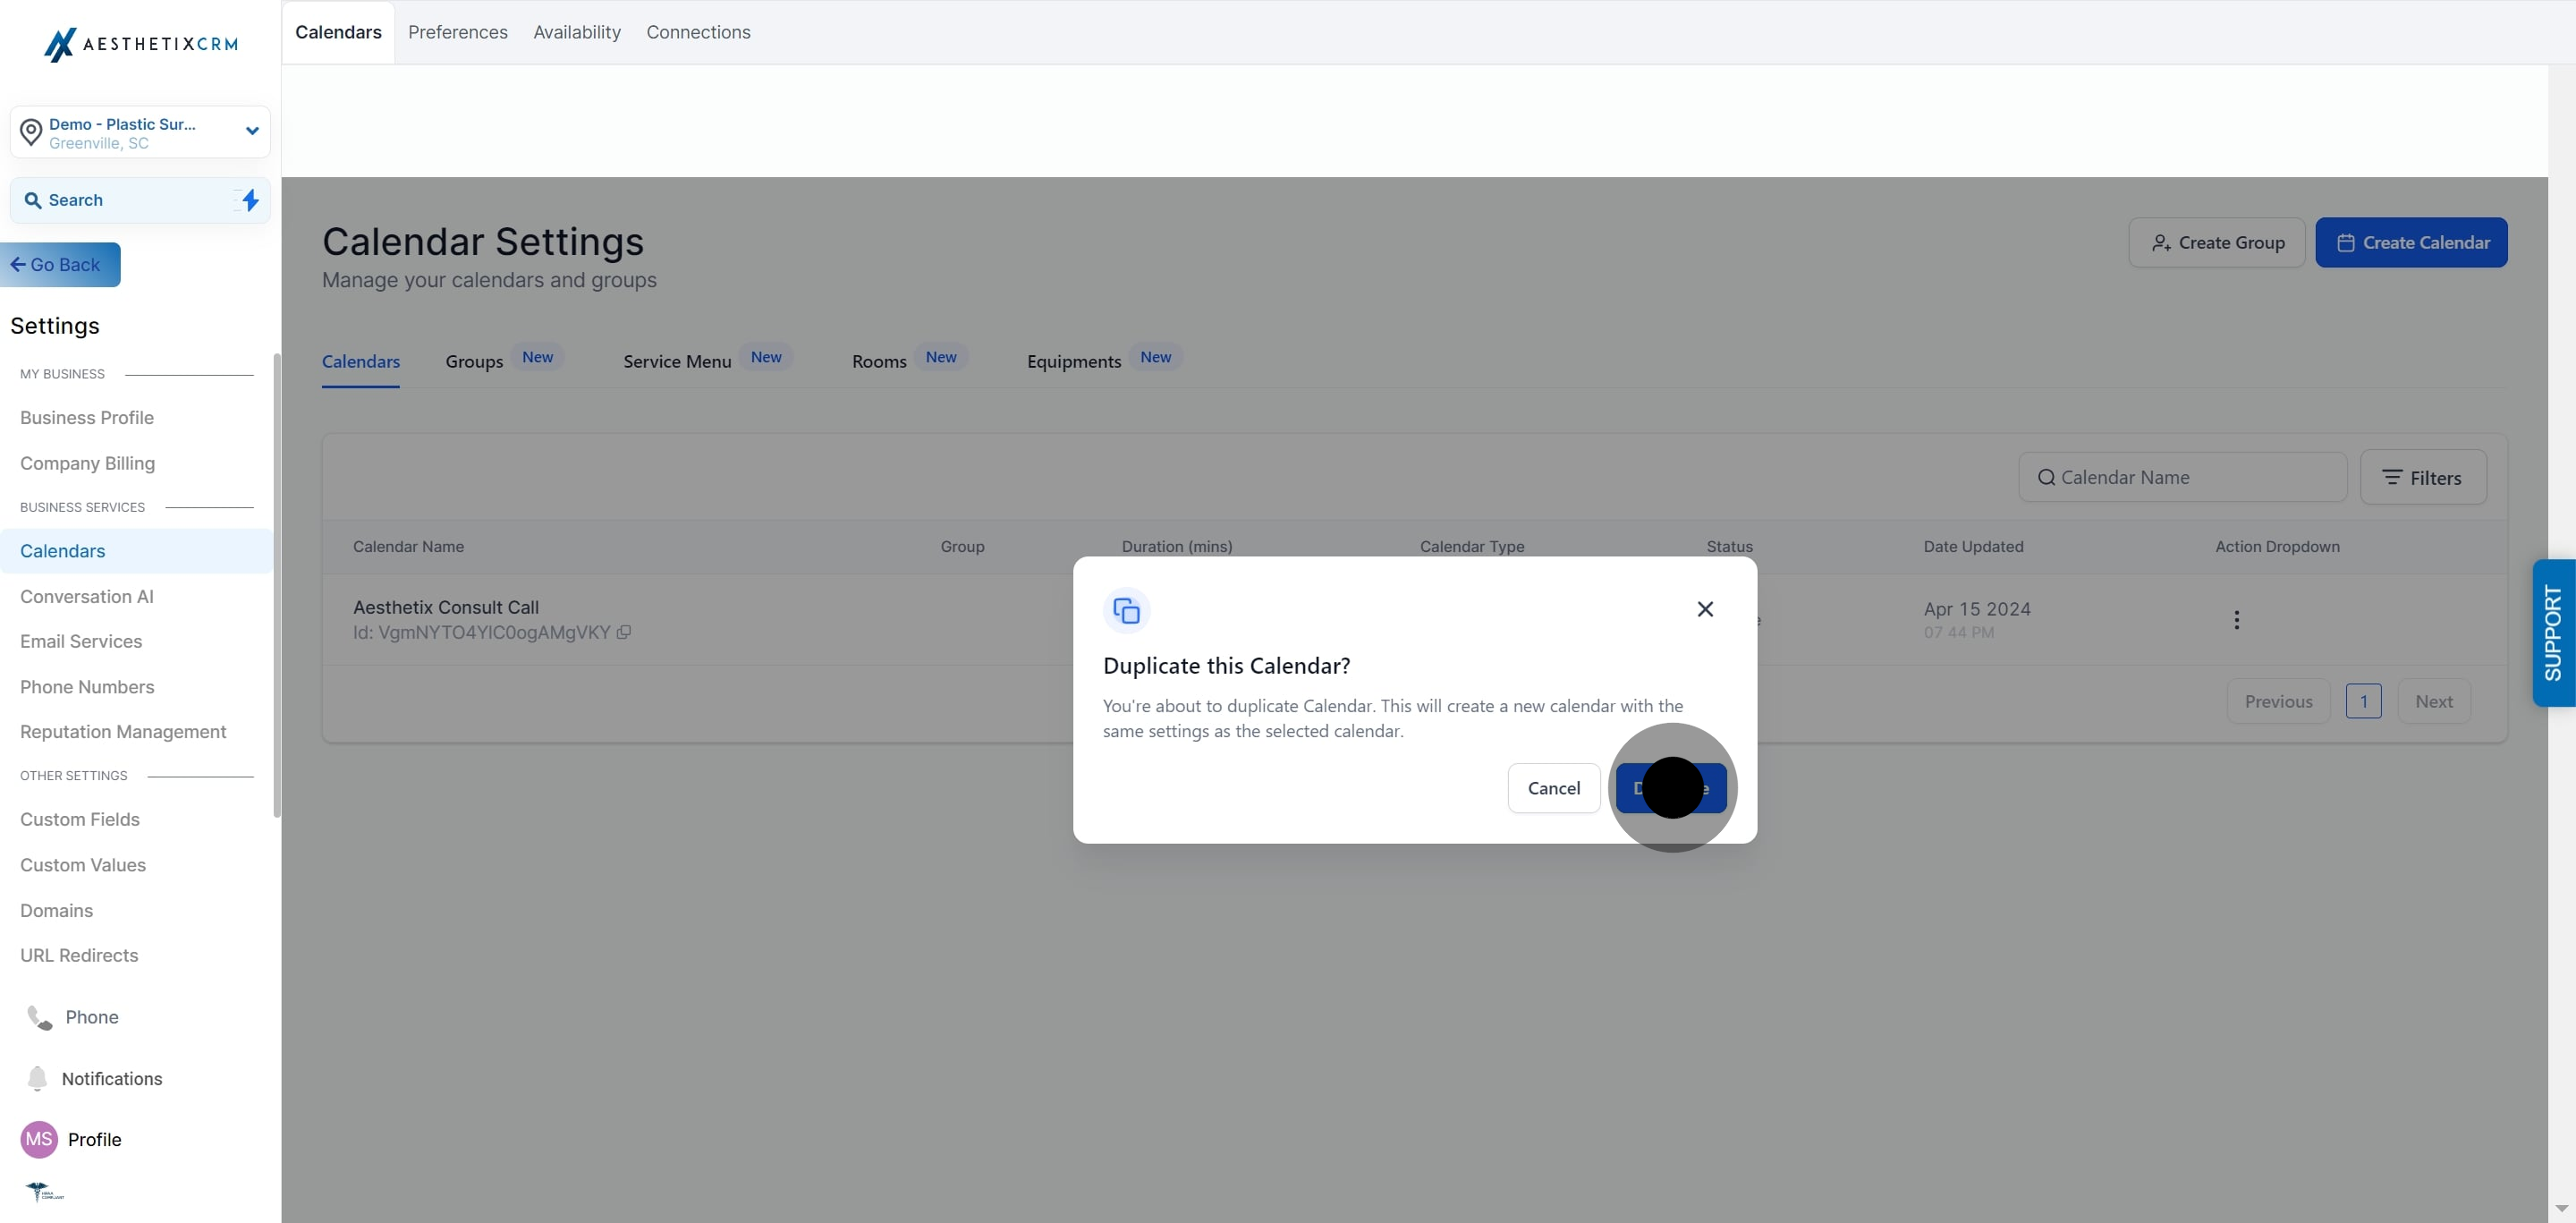
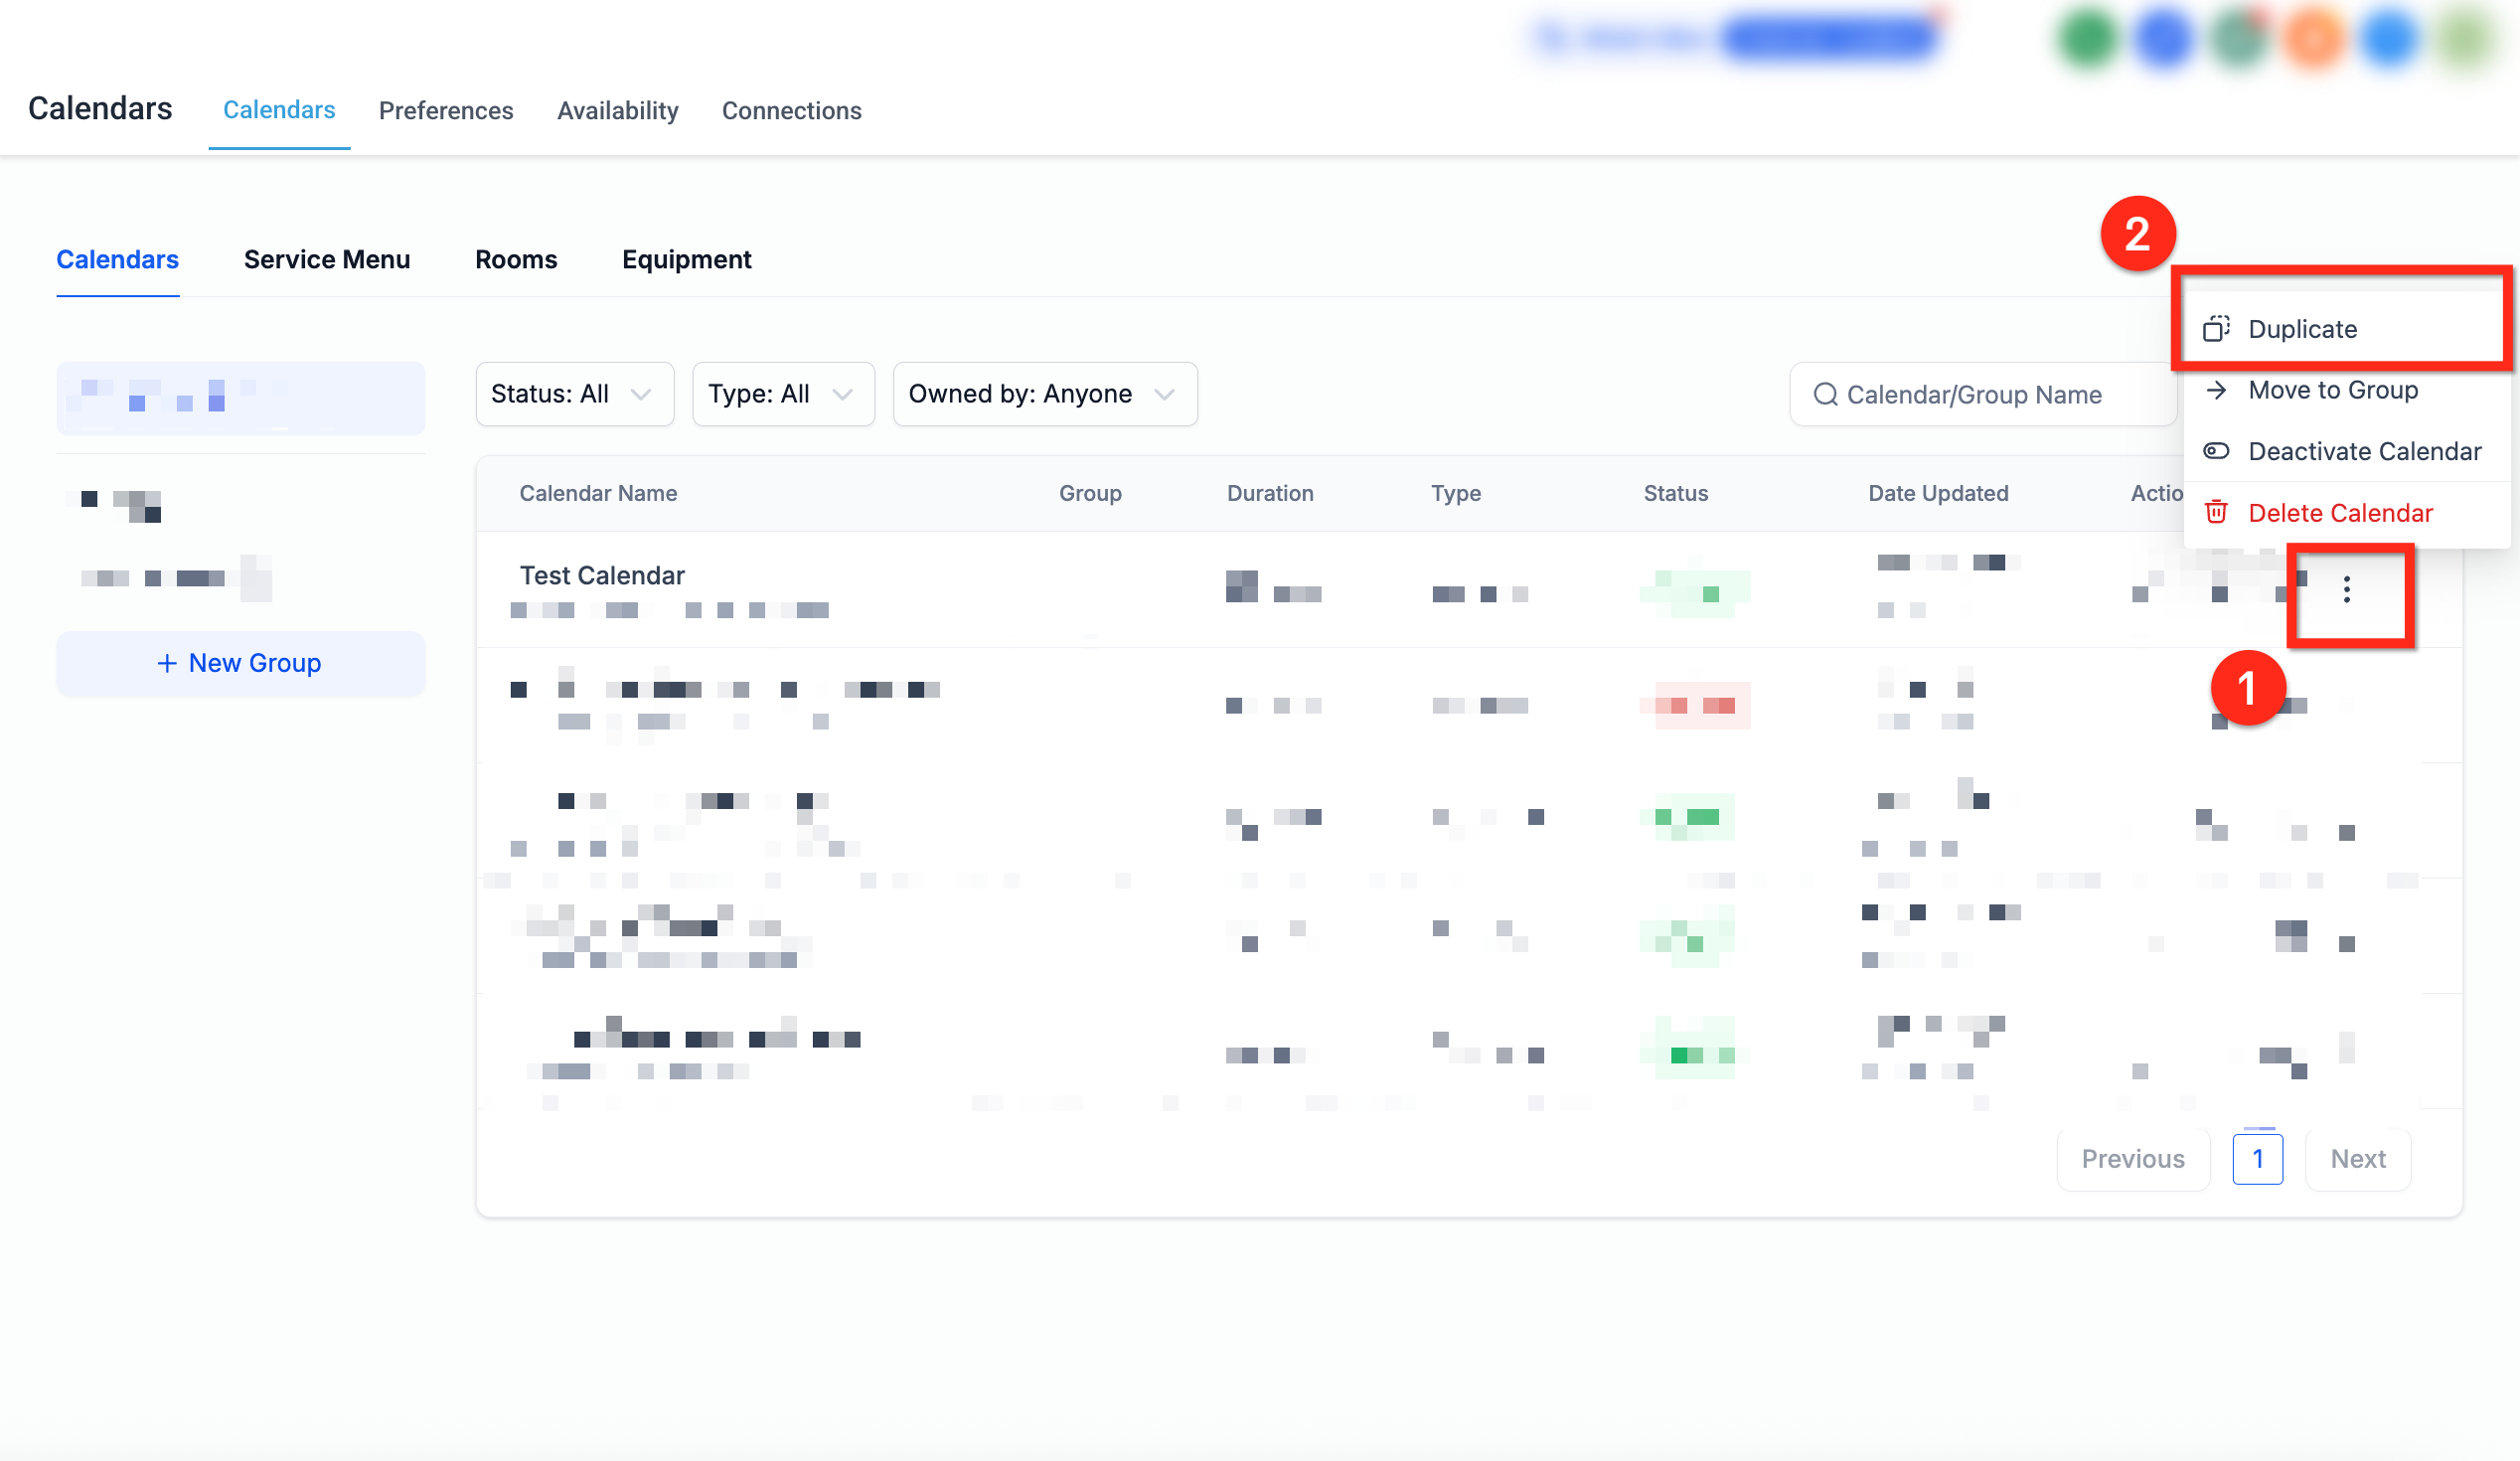
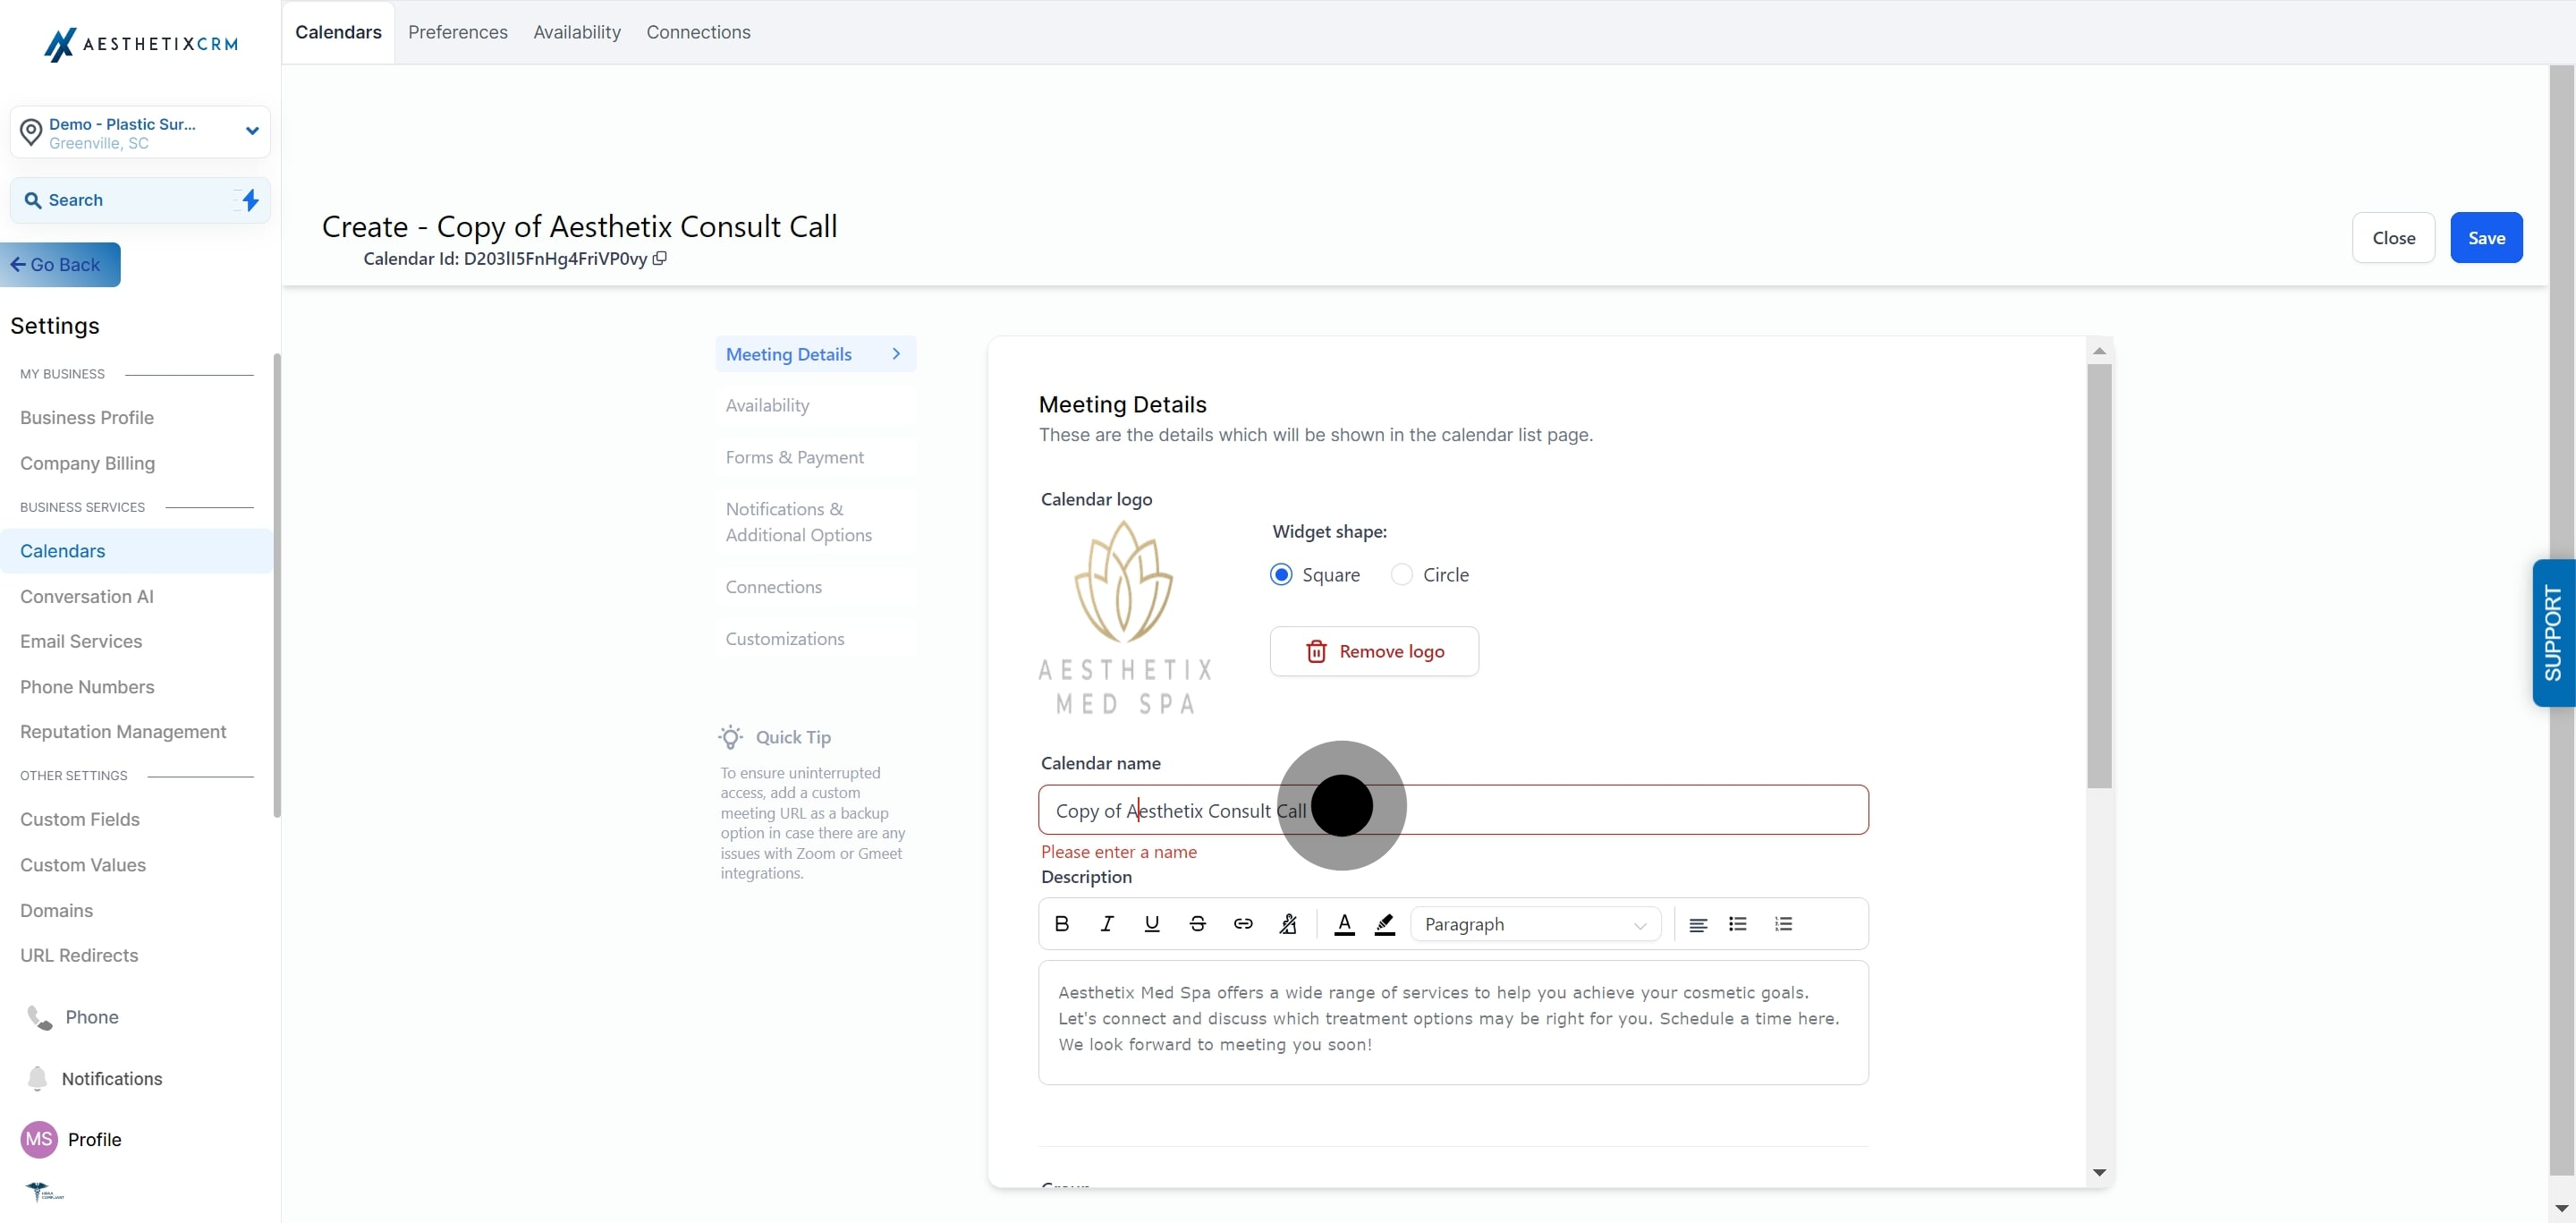
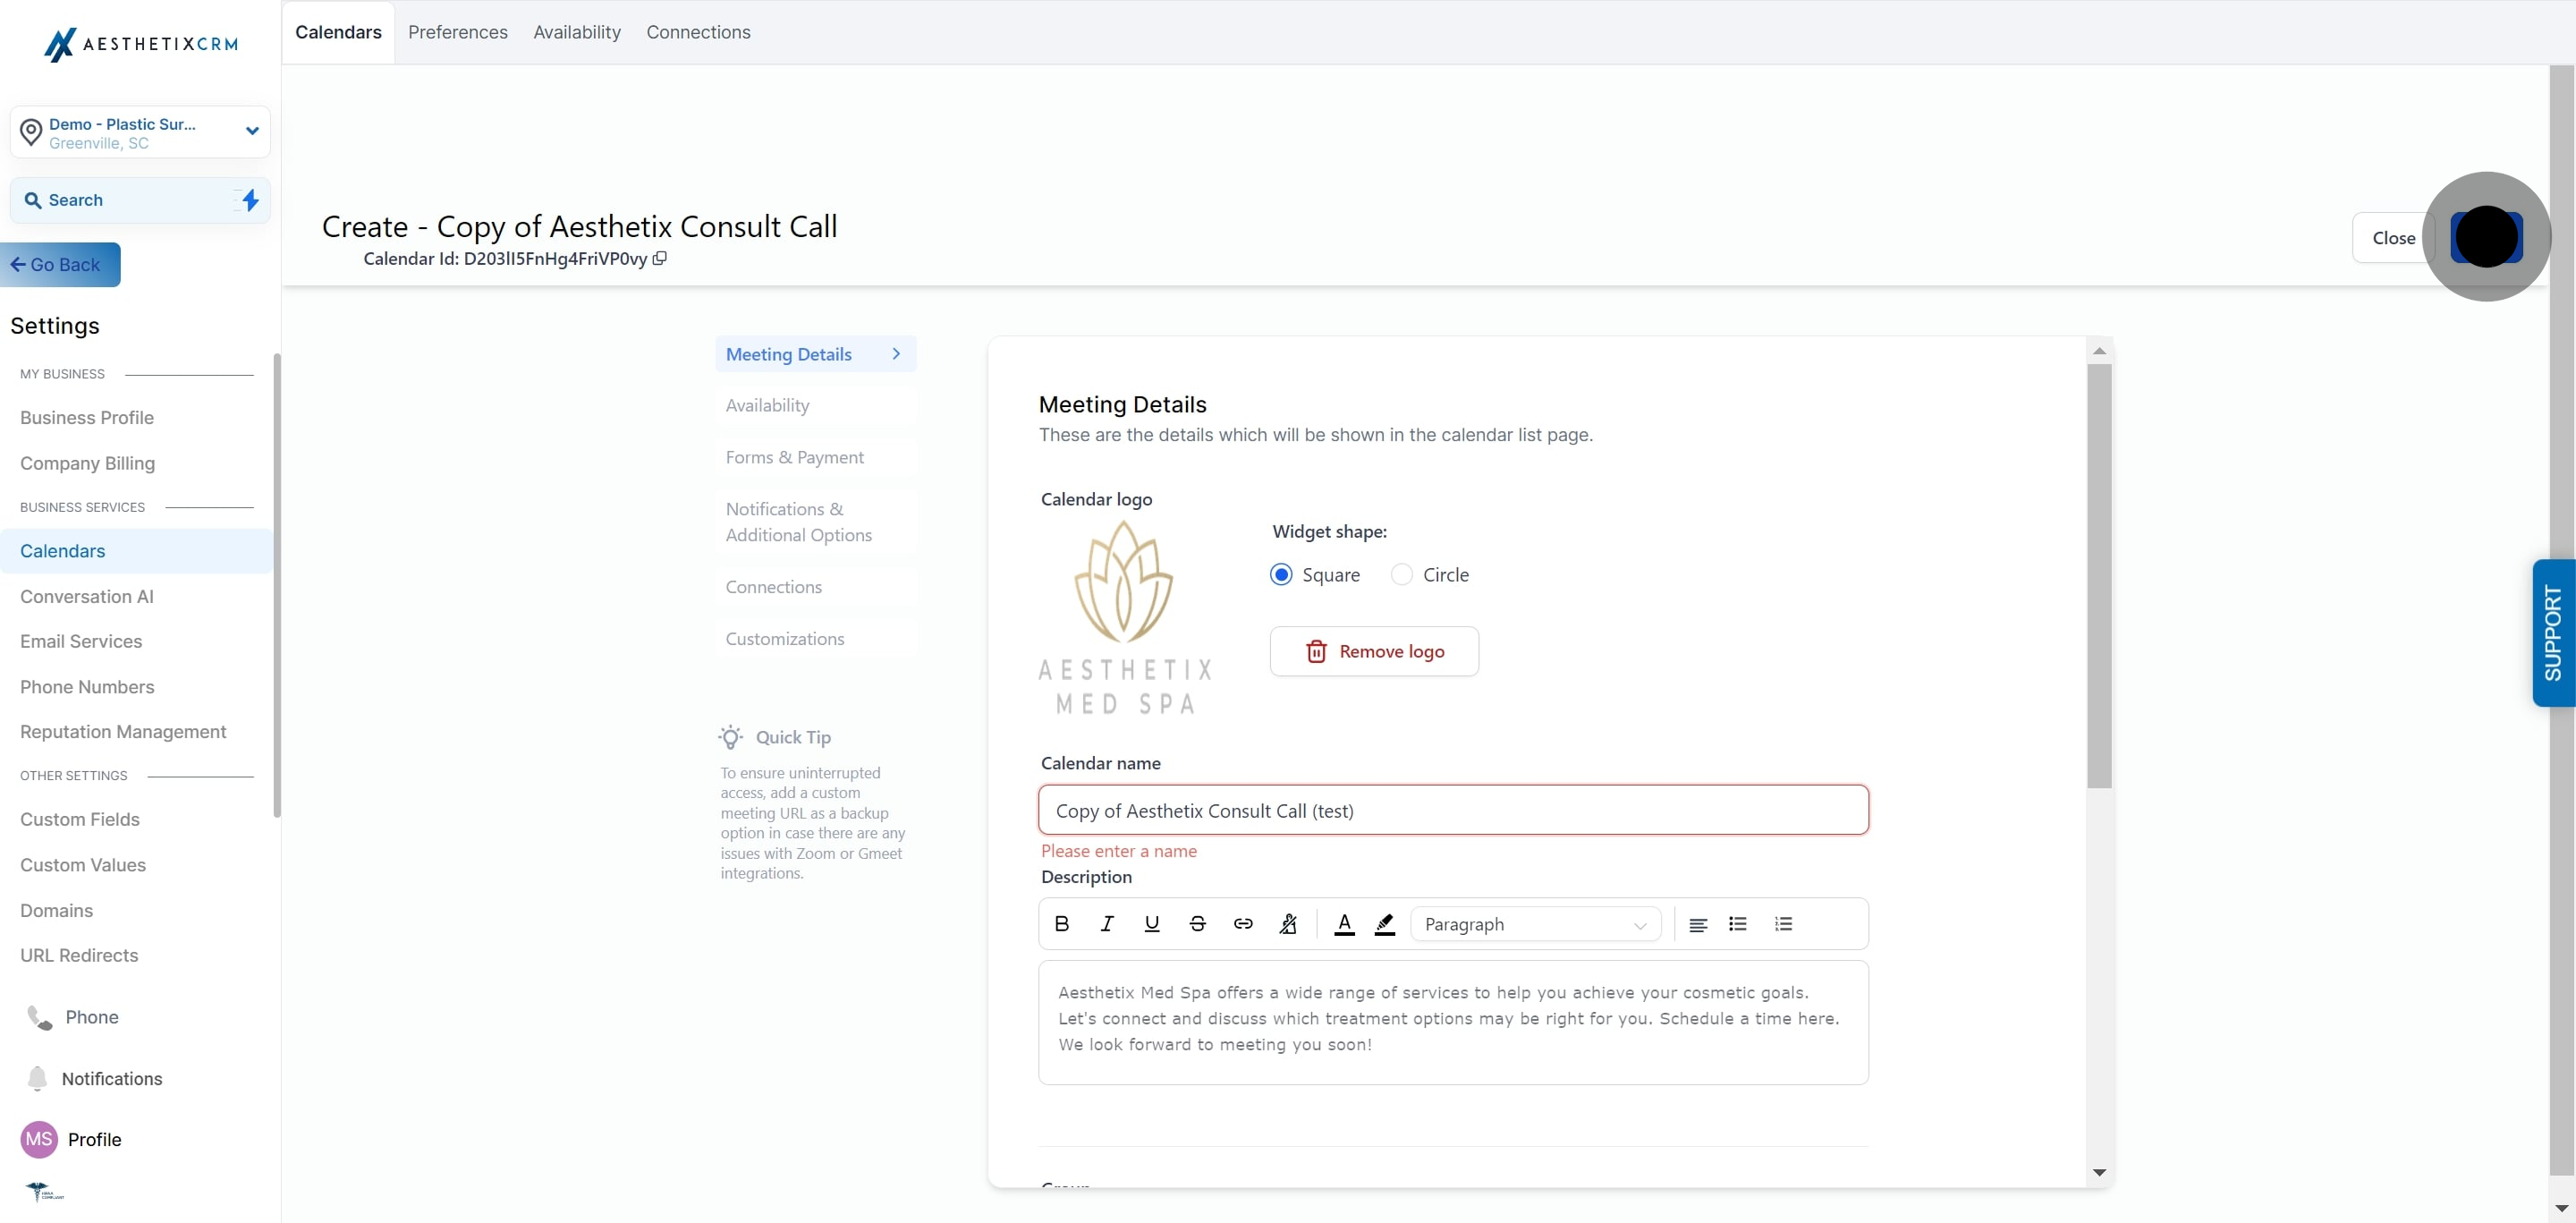
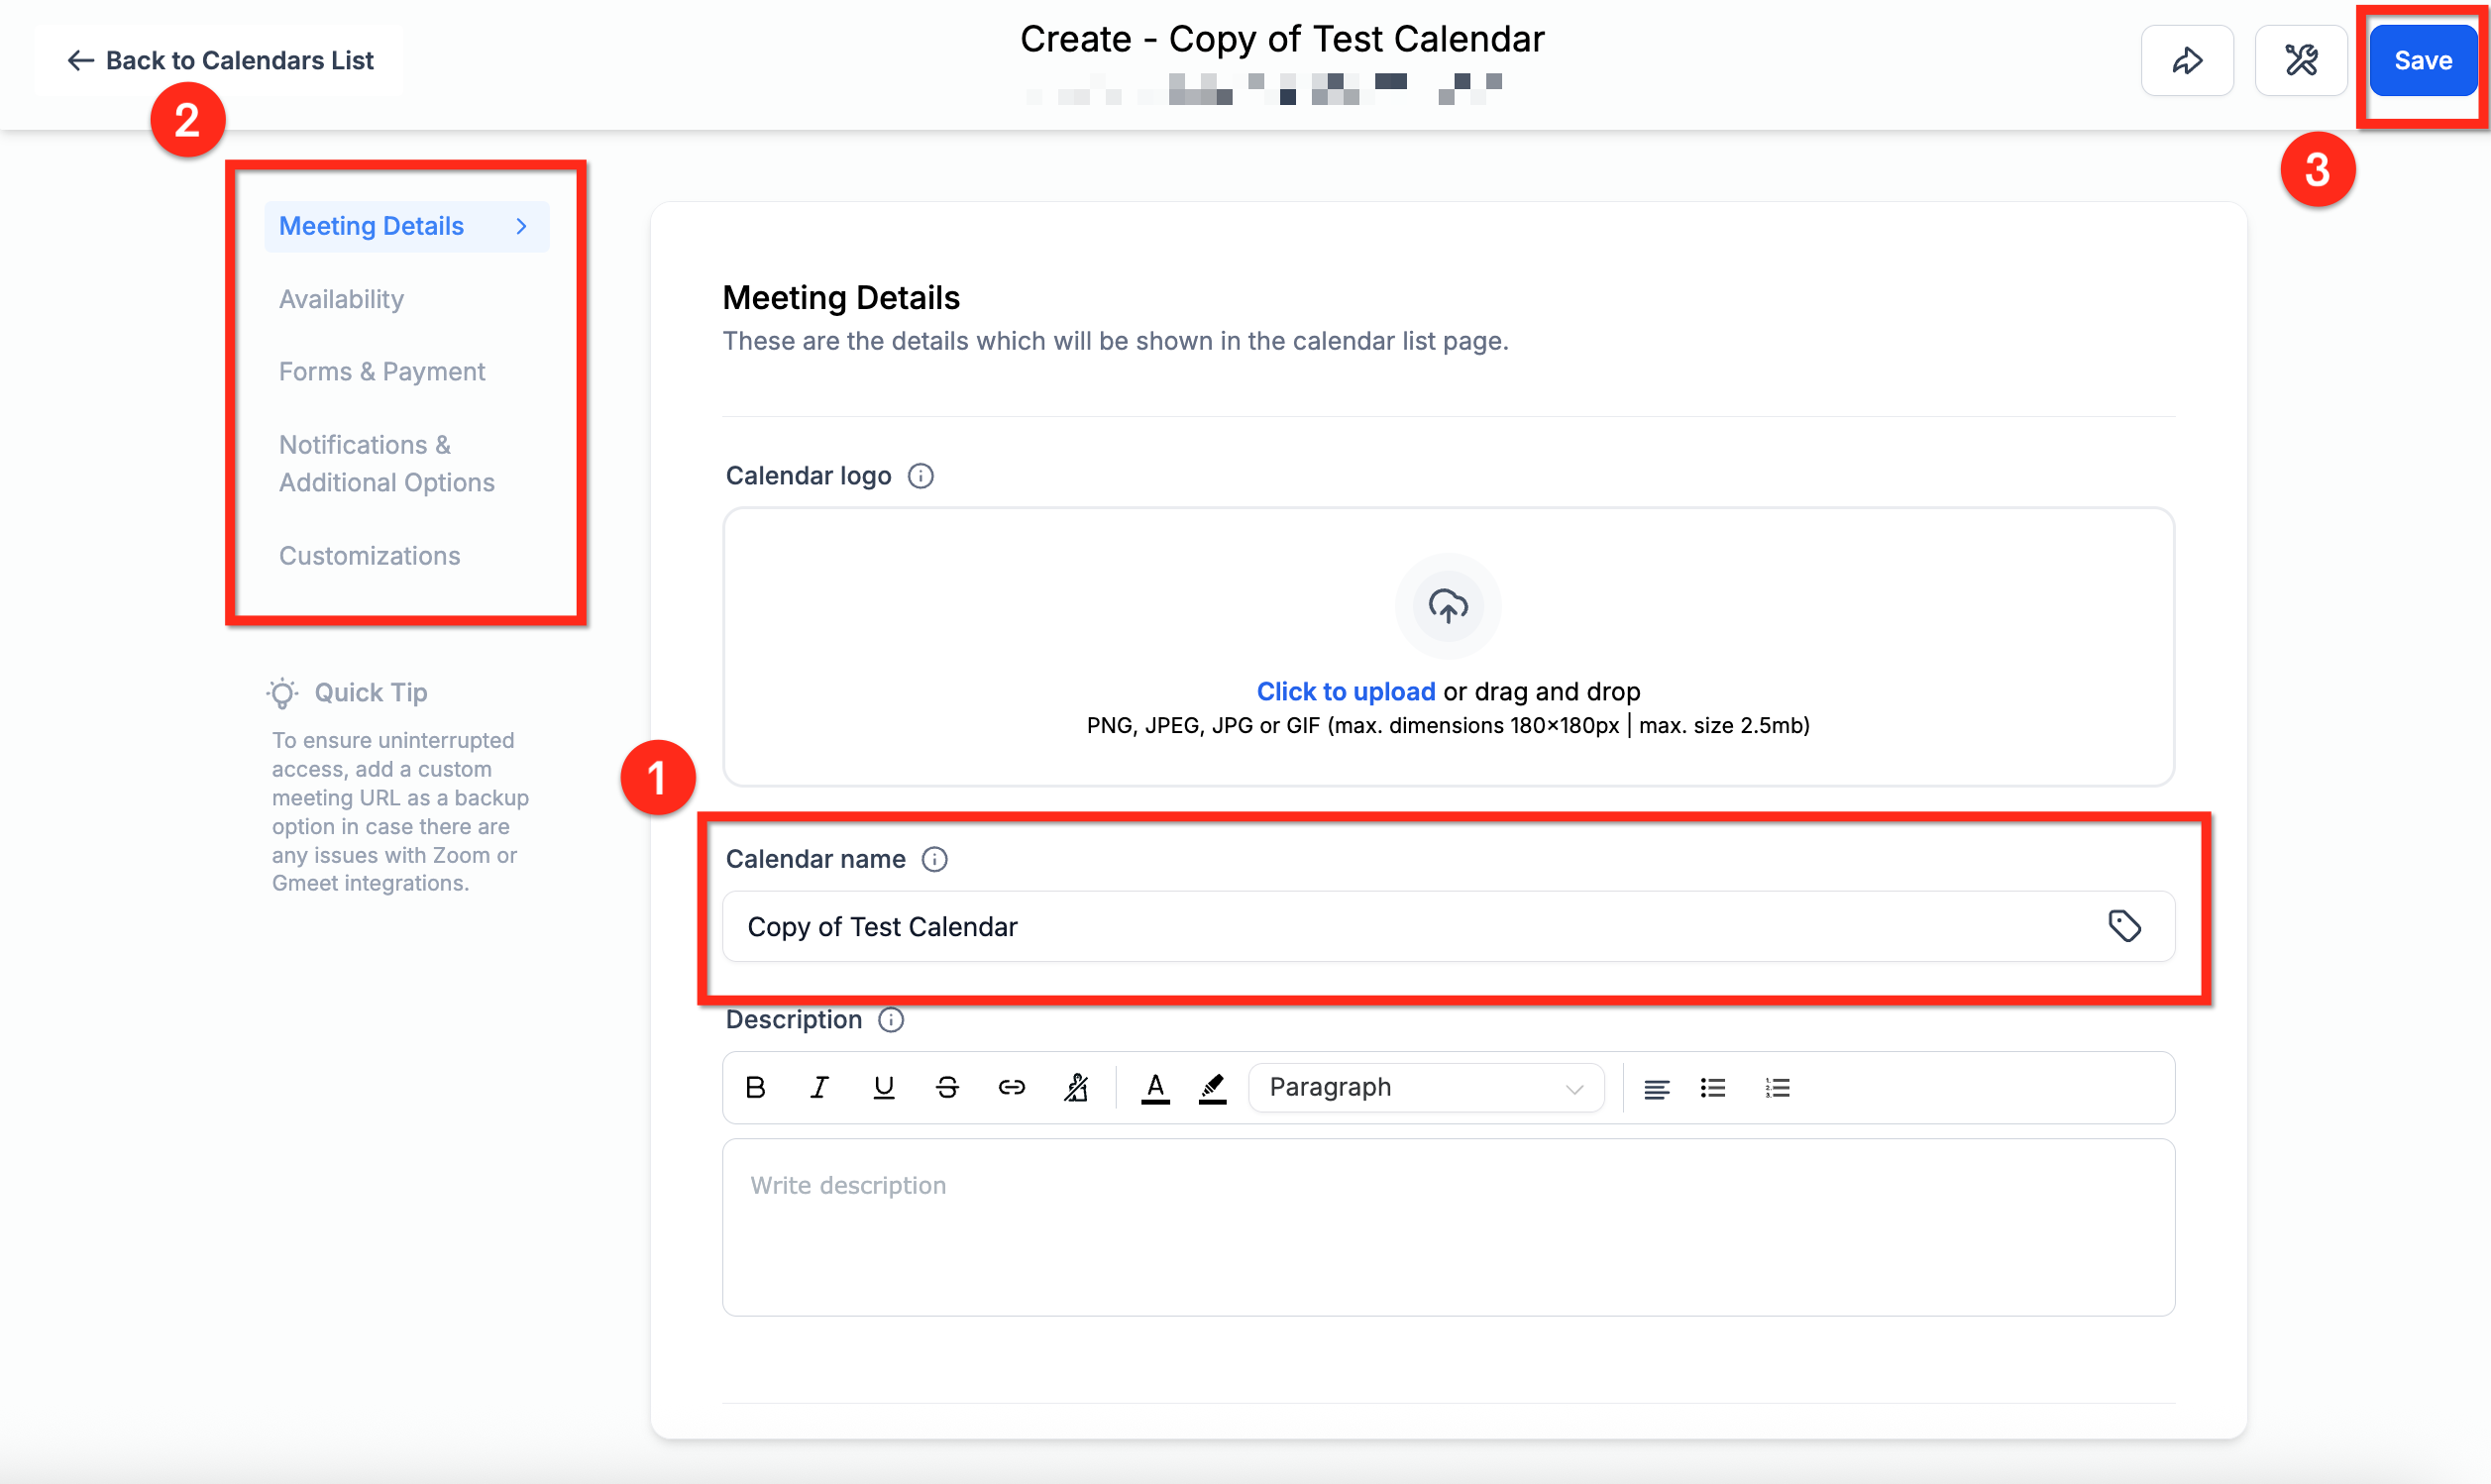
Before you send the new booking link to anyone, open the duplicate and check every tab, availability, buffers, meeting location, and notification templates, to confirm nothing still points at the wrong provider or the wrong location.
Deactivating removes a calendar from your booking pages while keeping its history and past appointments intact, which is useful when a provider is out for an extended period or a service is temporarily paused rather than gone for good.
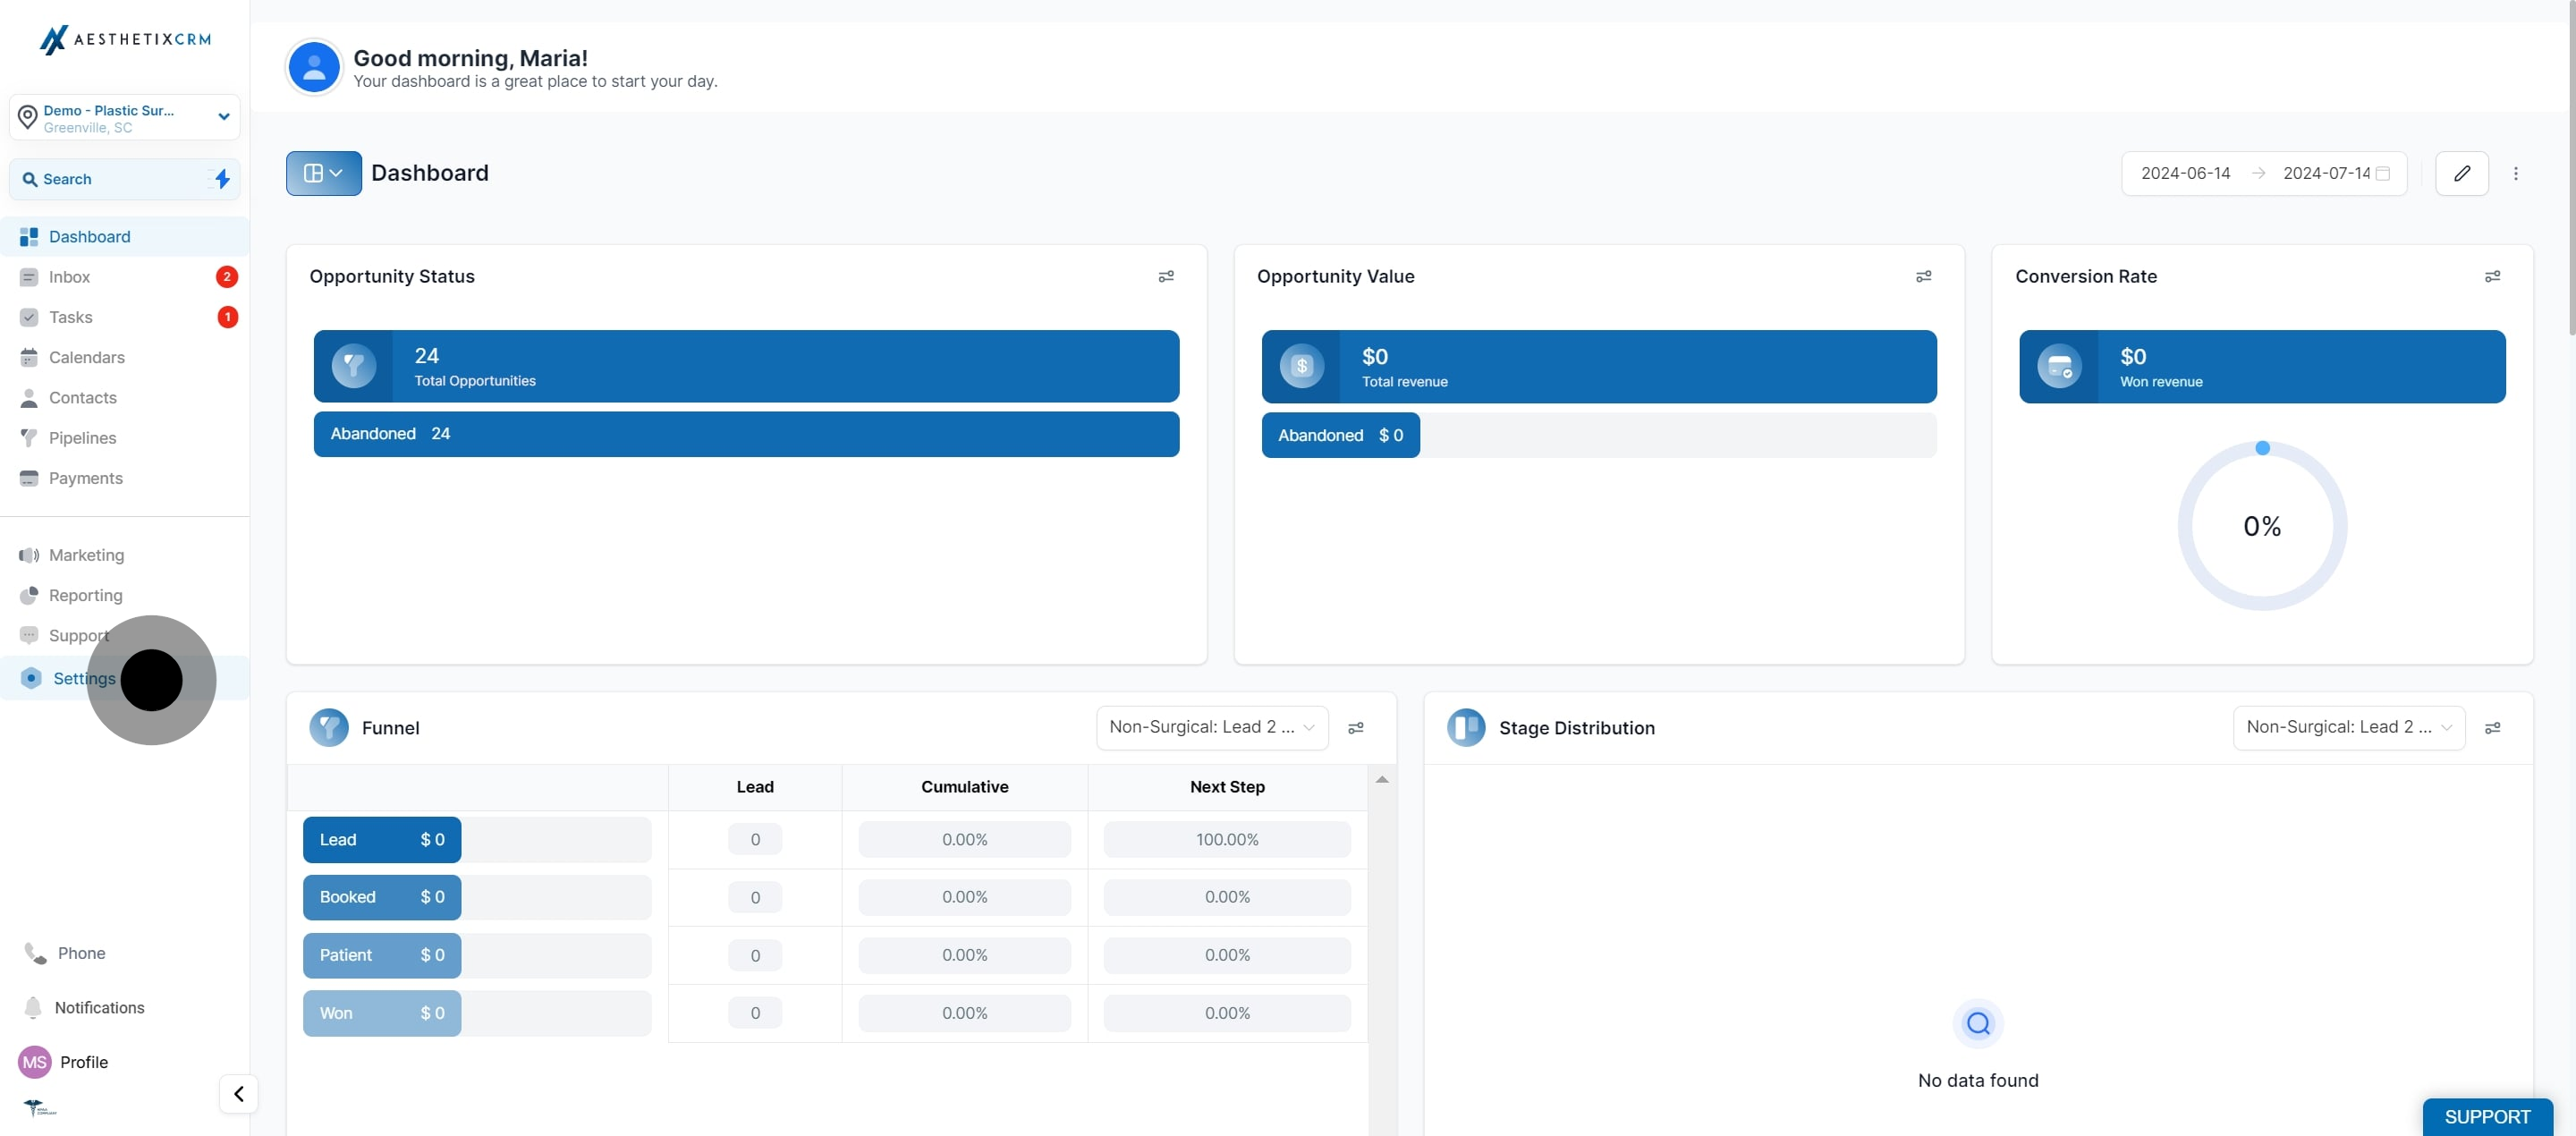
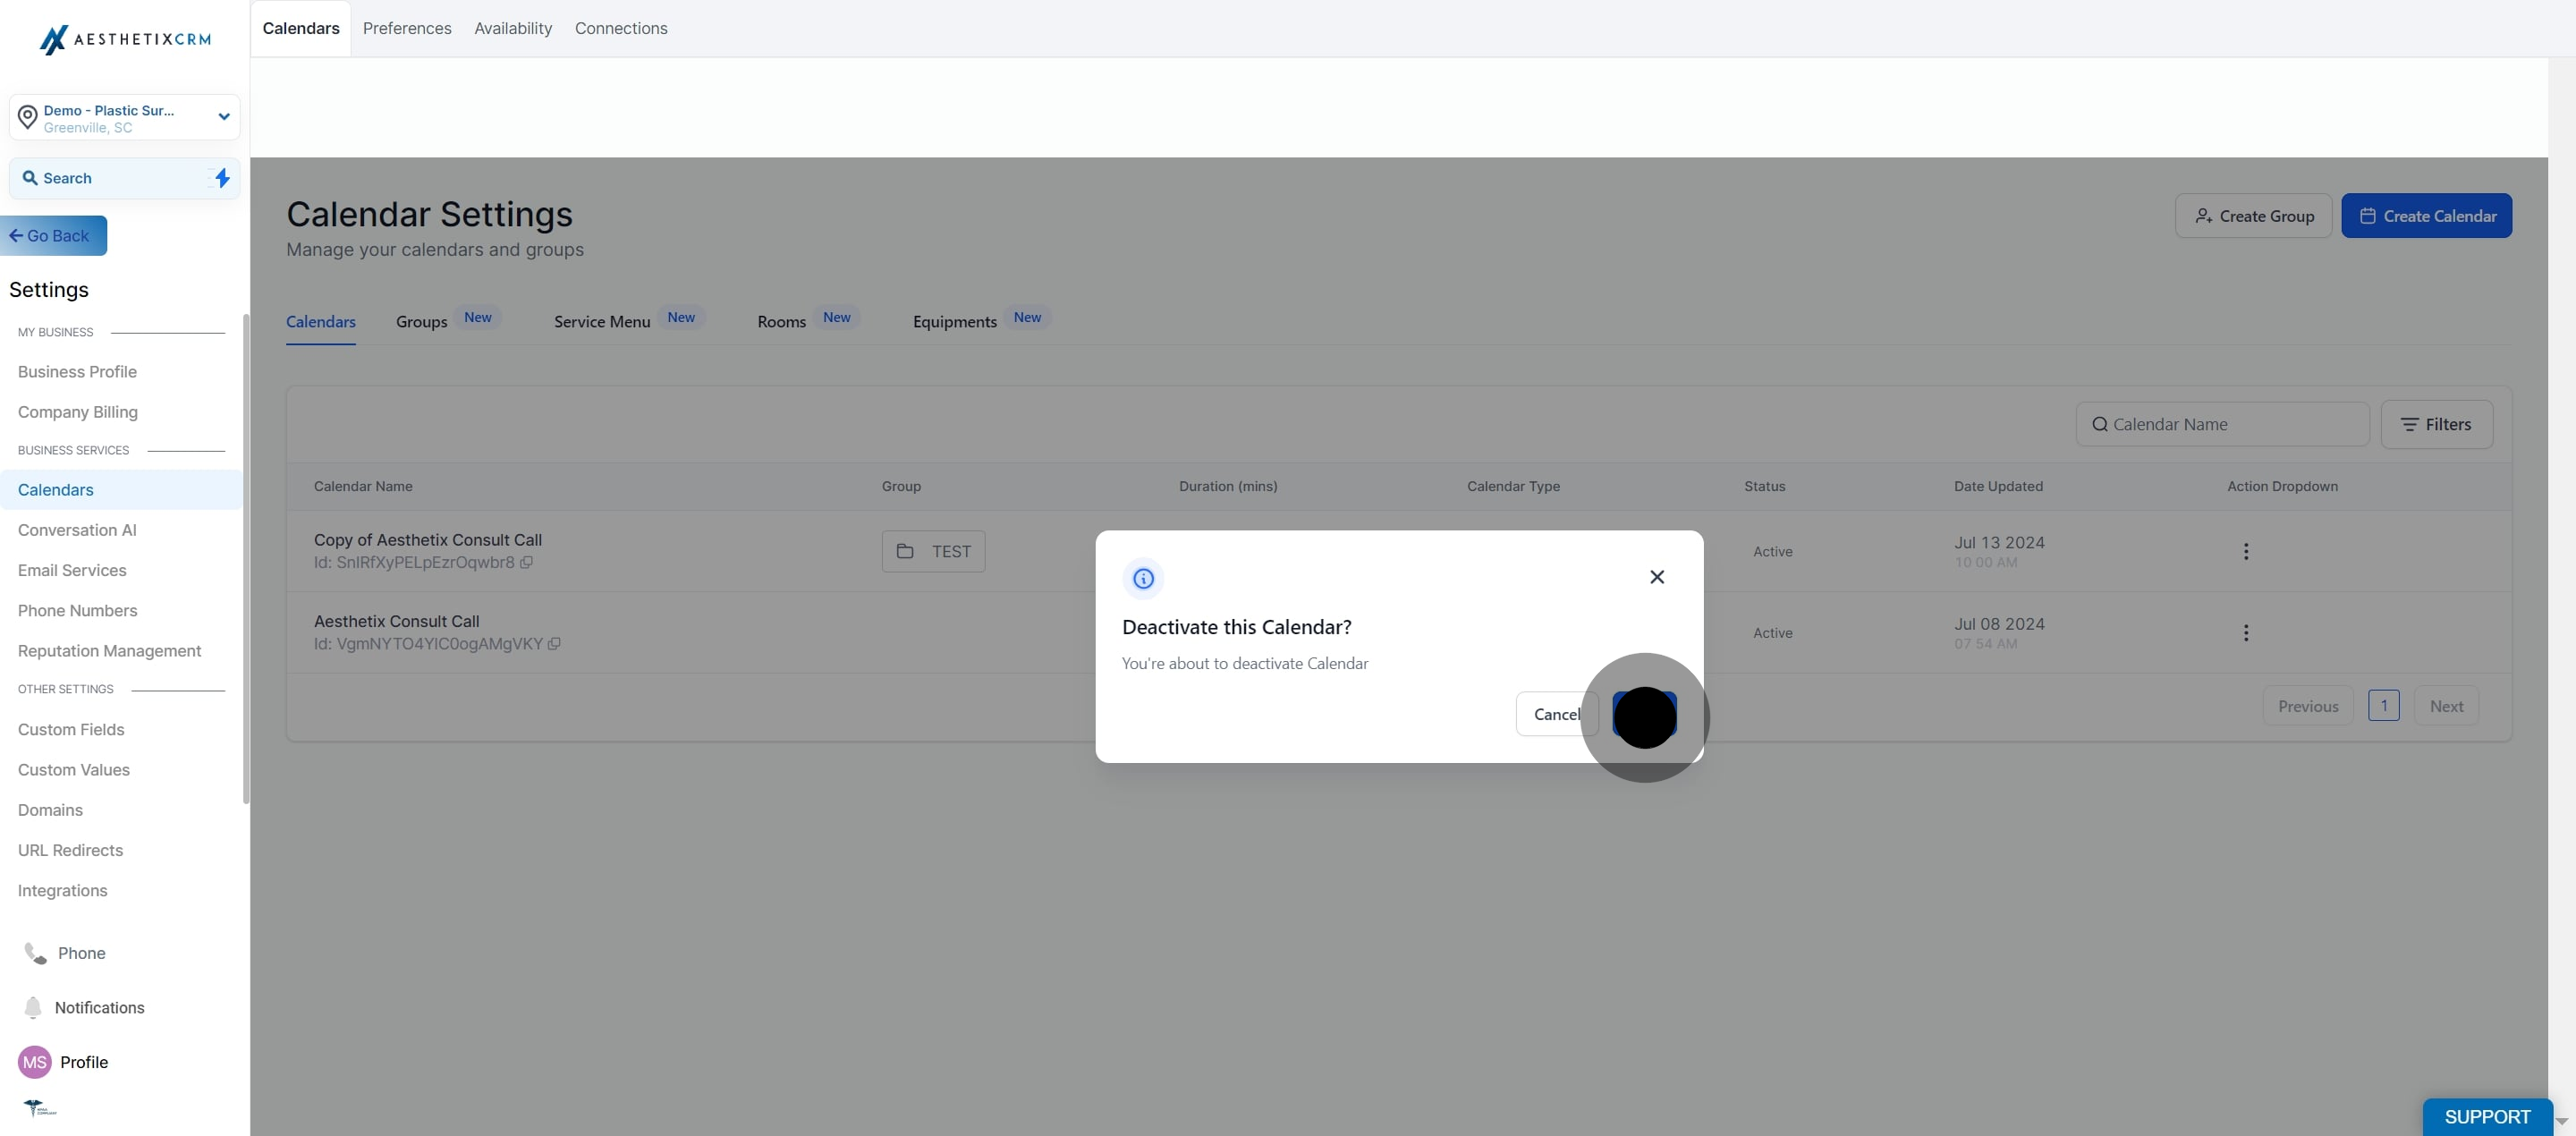
If a calendar gets deleted, either on purpose or by accident, you can recover it along with the appointments that were on it, as long as you act quickly.
Navigate to Settings > Audit Logs.
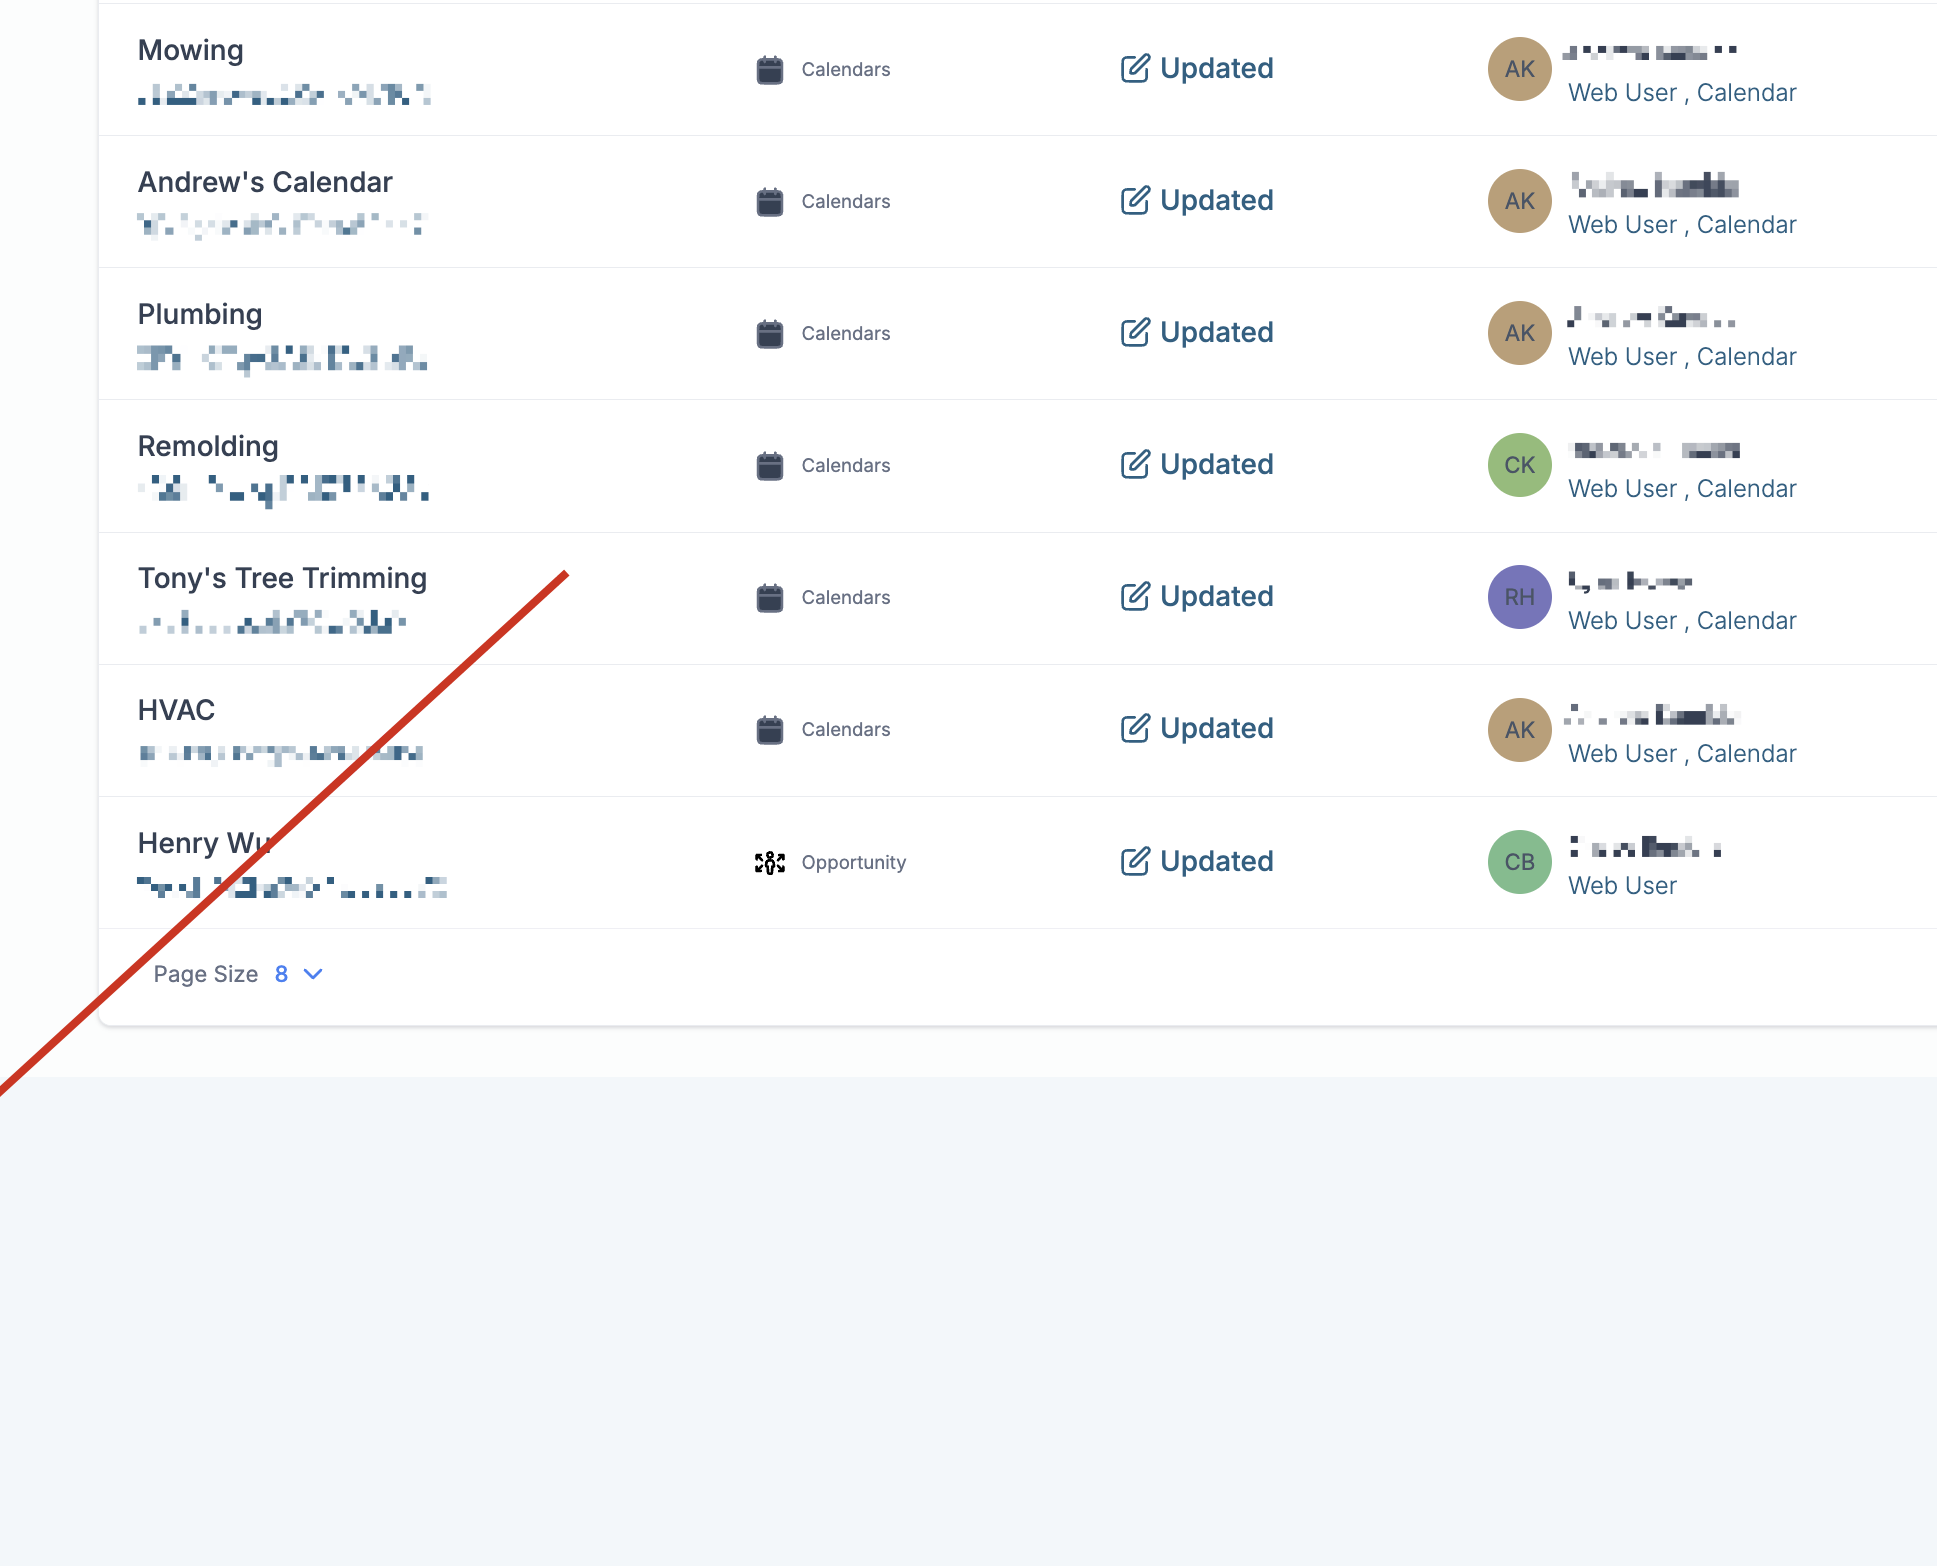
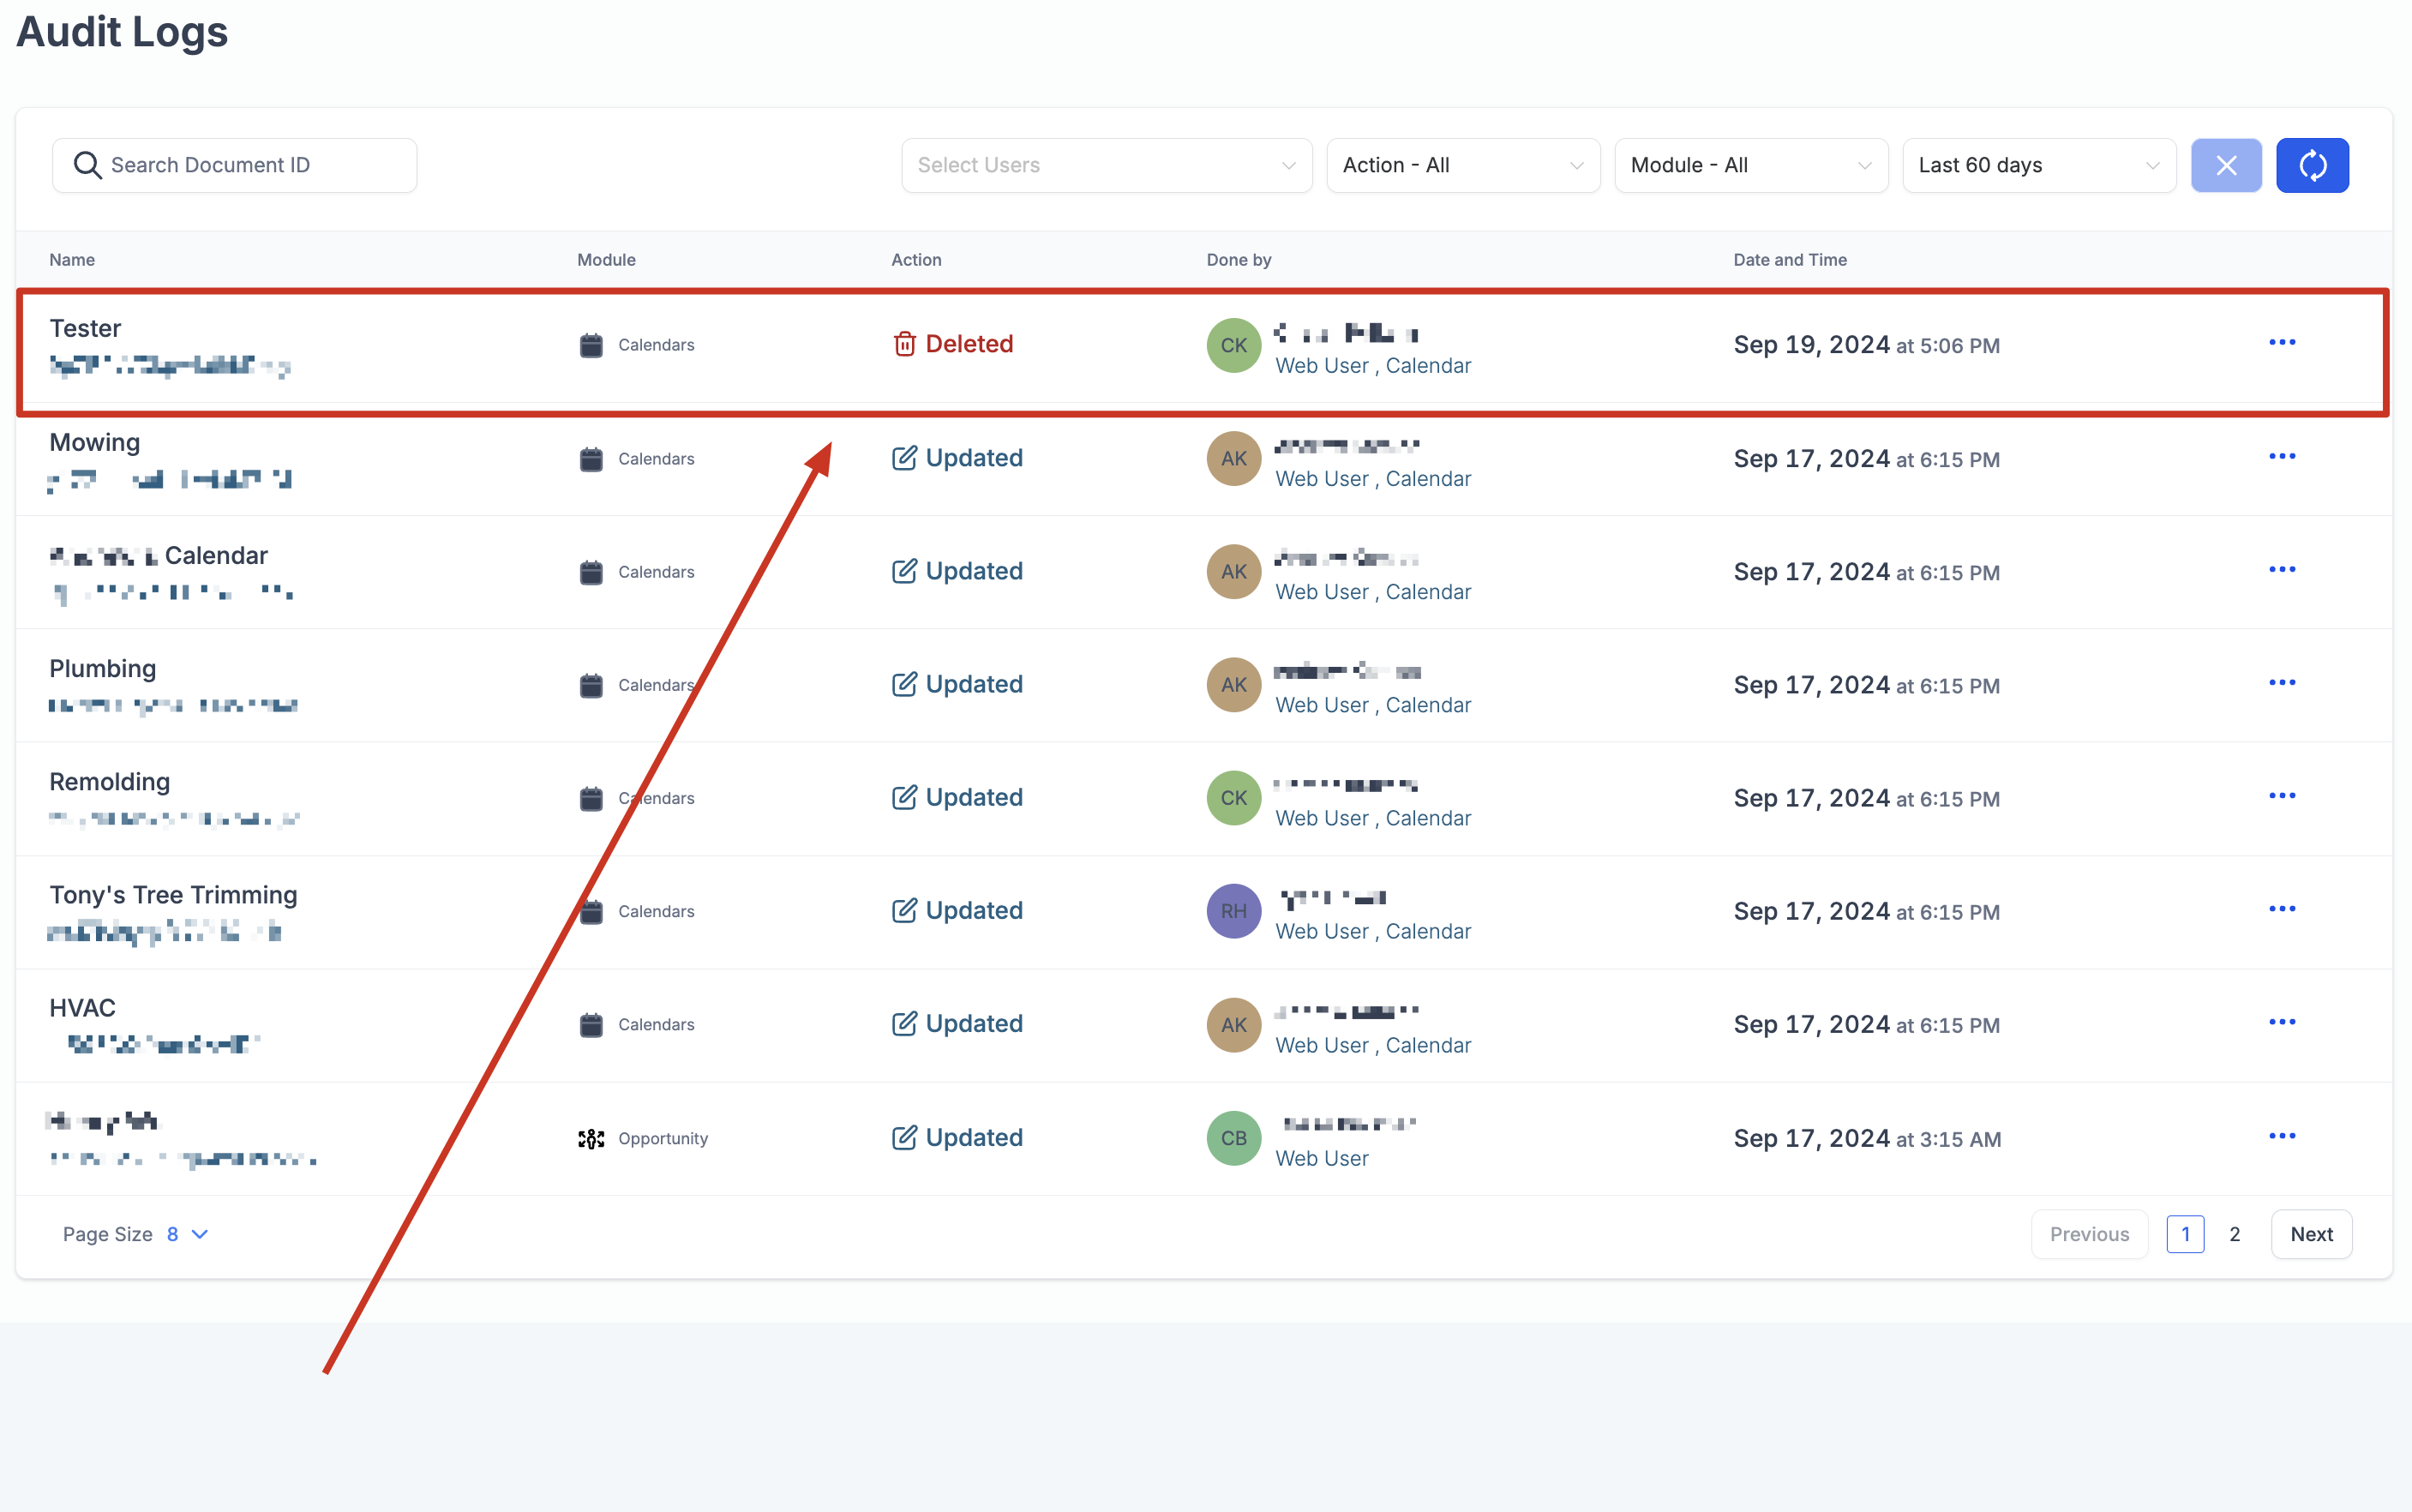
Identify the log entry corresponding to the deleted calendar.
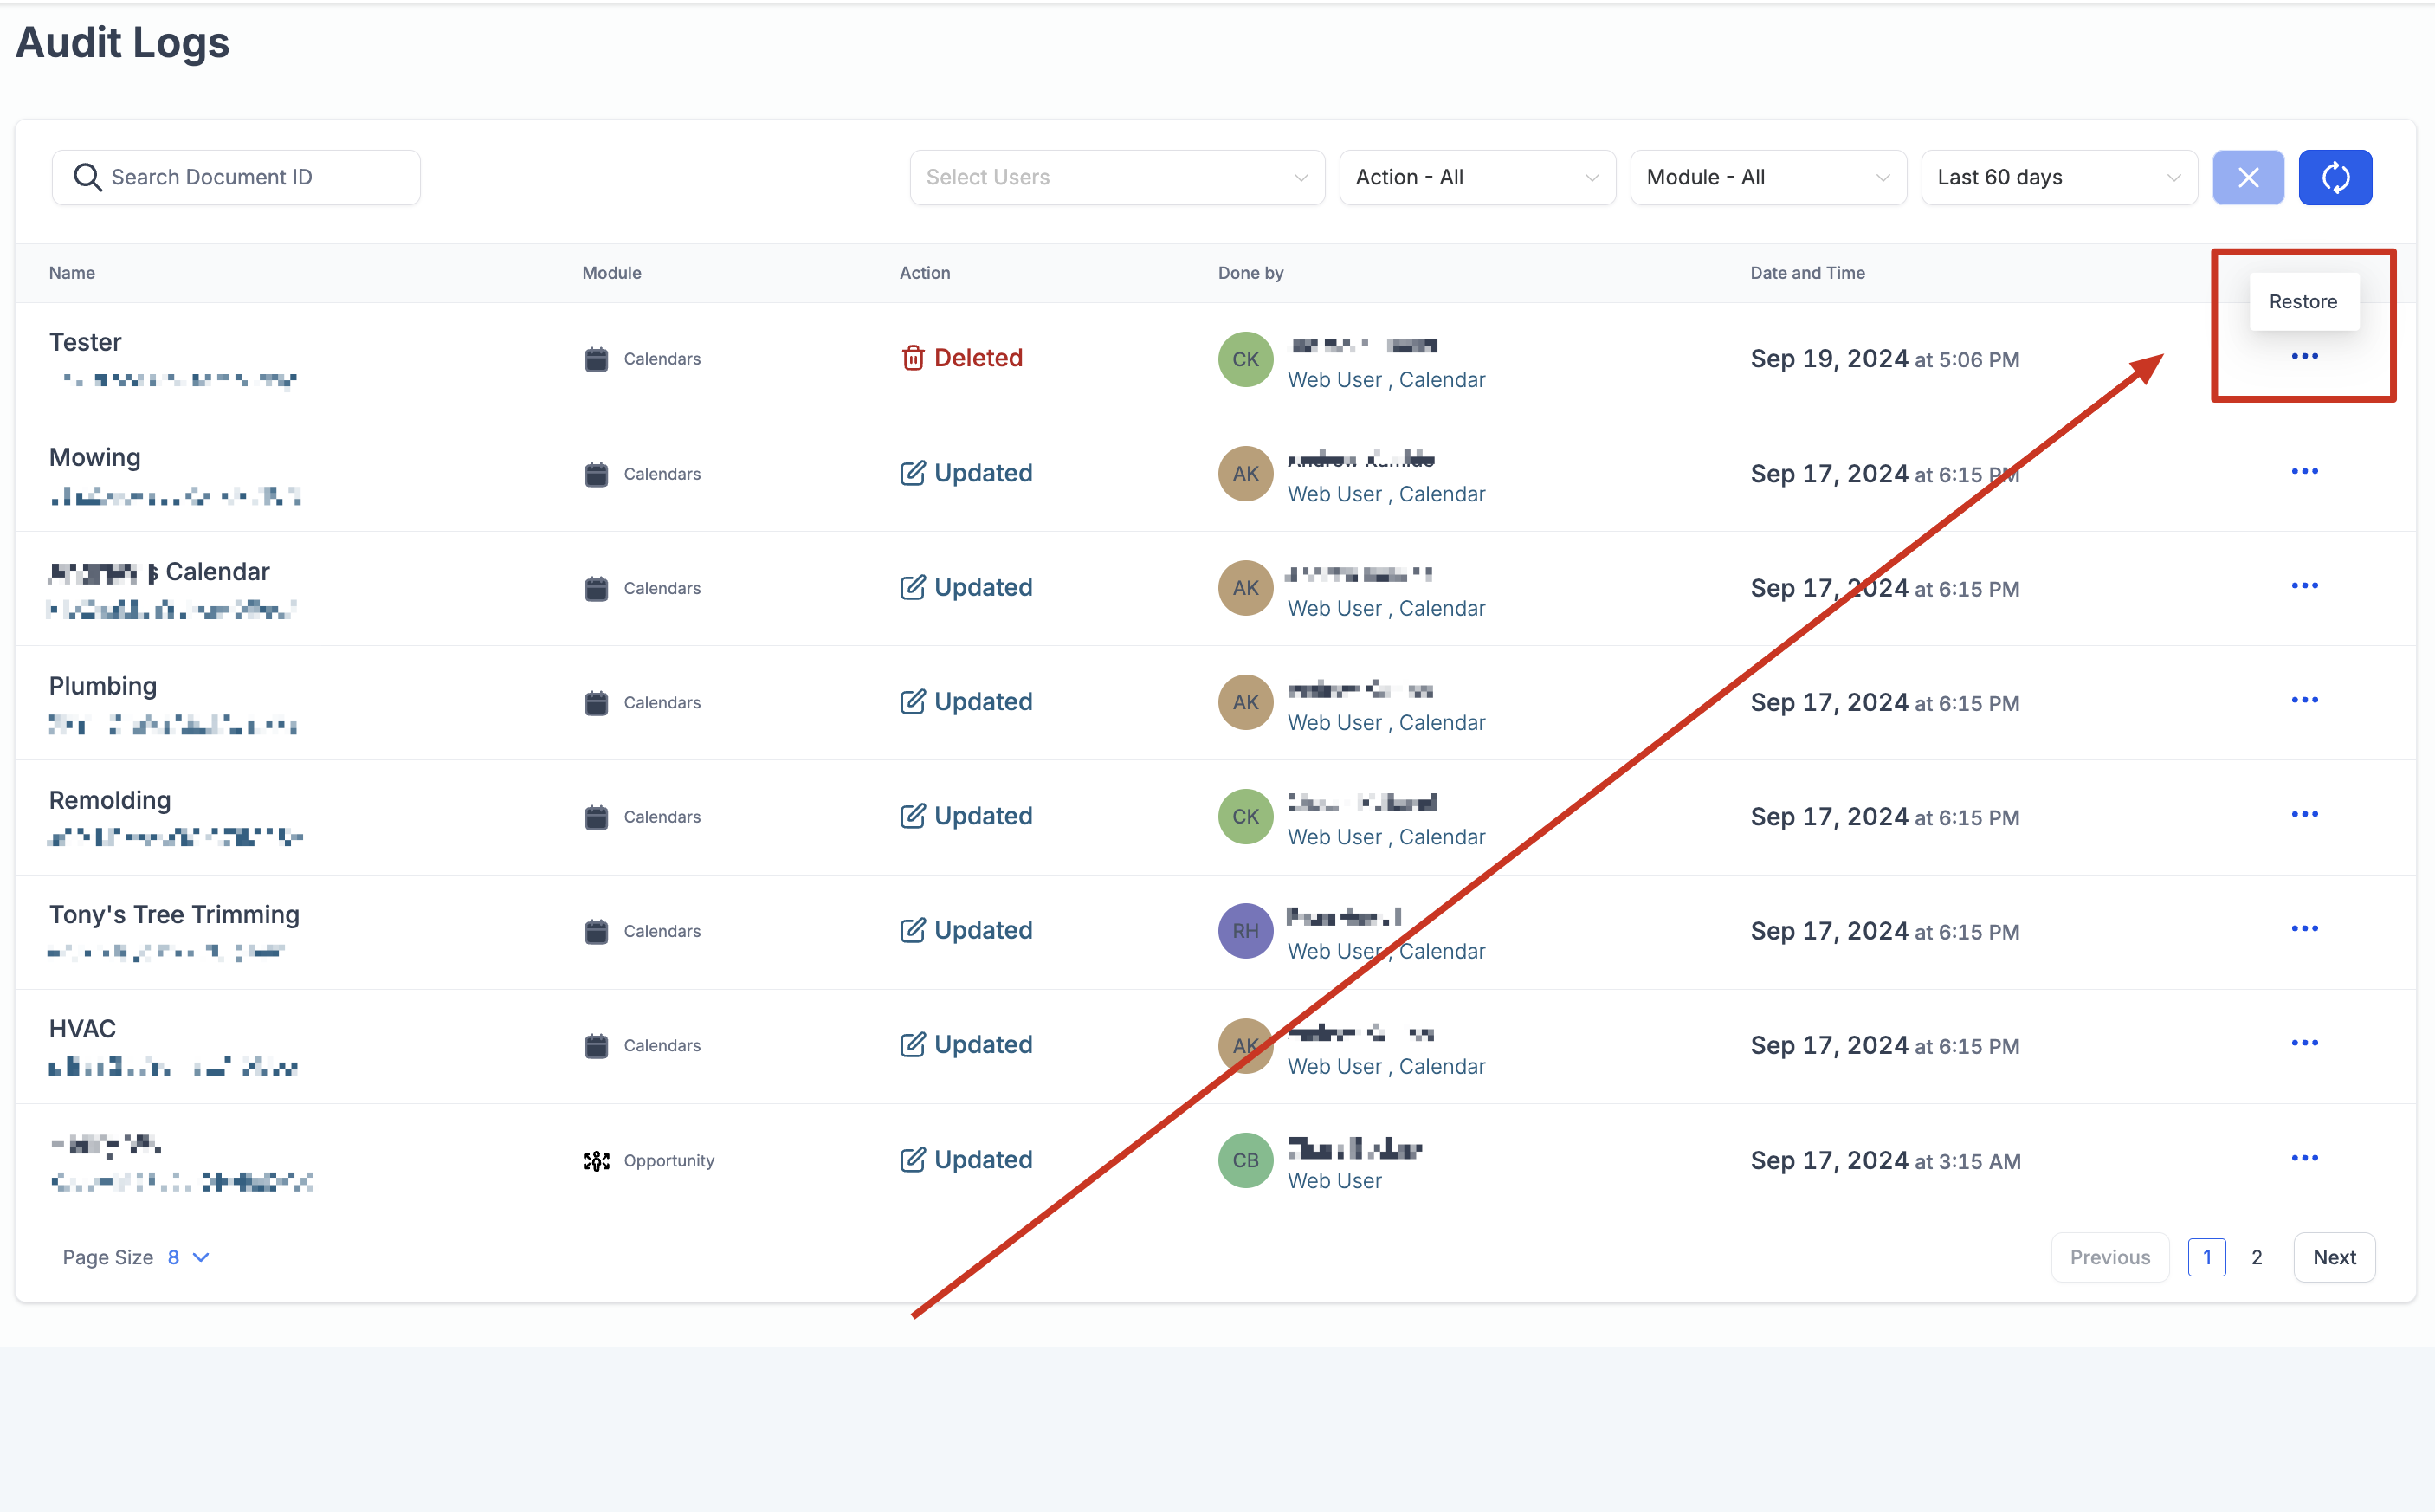
Click on the three dots next to the log entry and select "Restore."
Your calendar, along with all its previously deleted appointments, will be successfully restored.
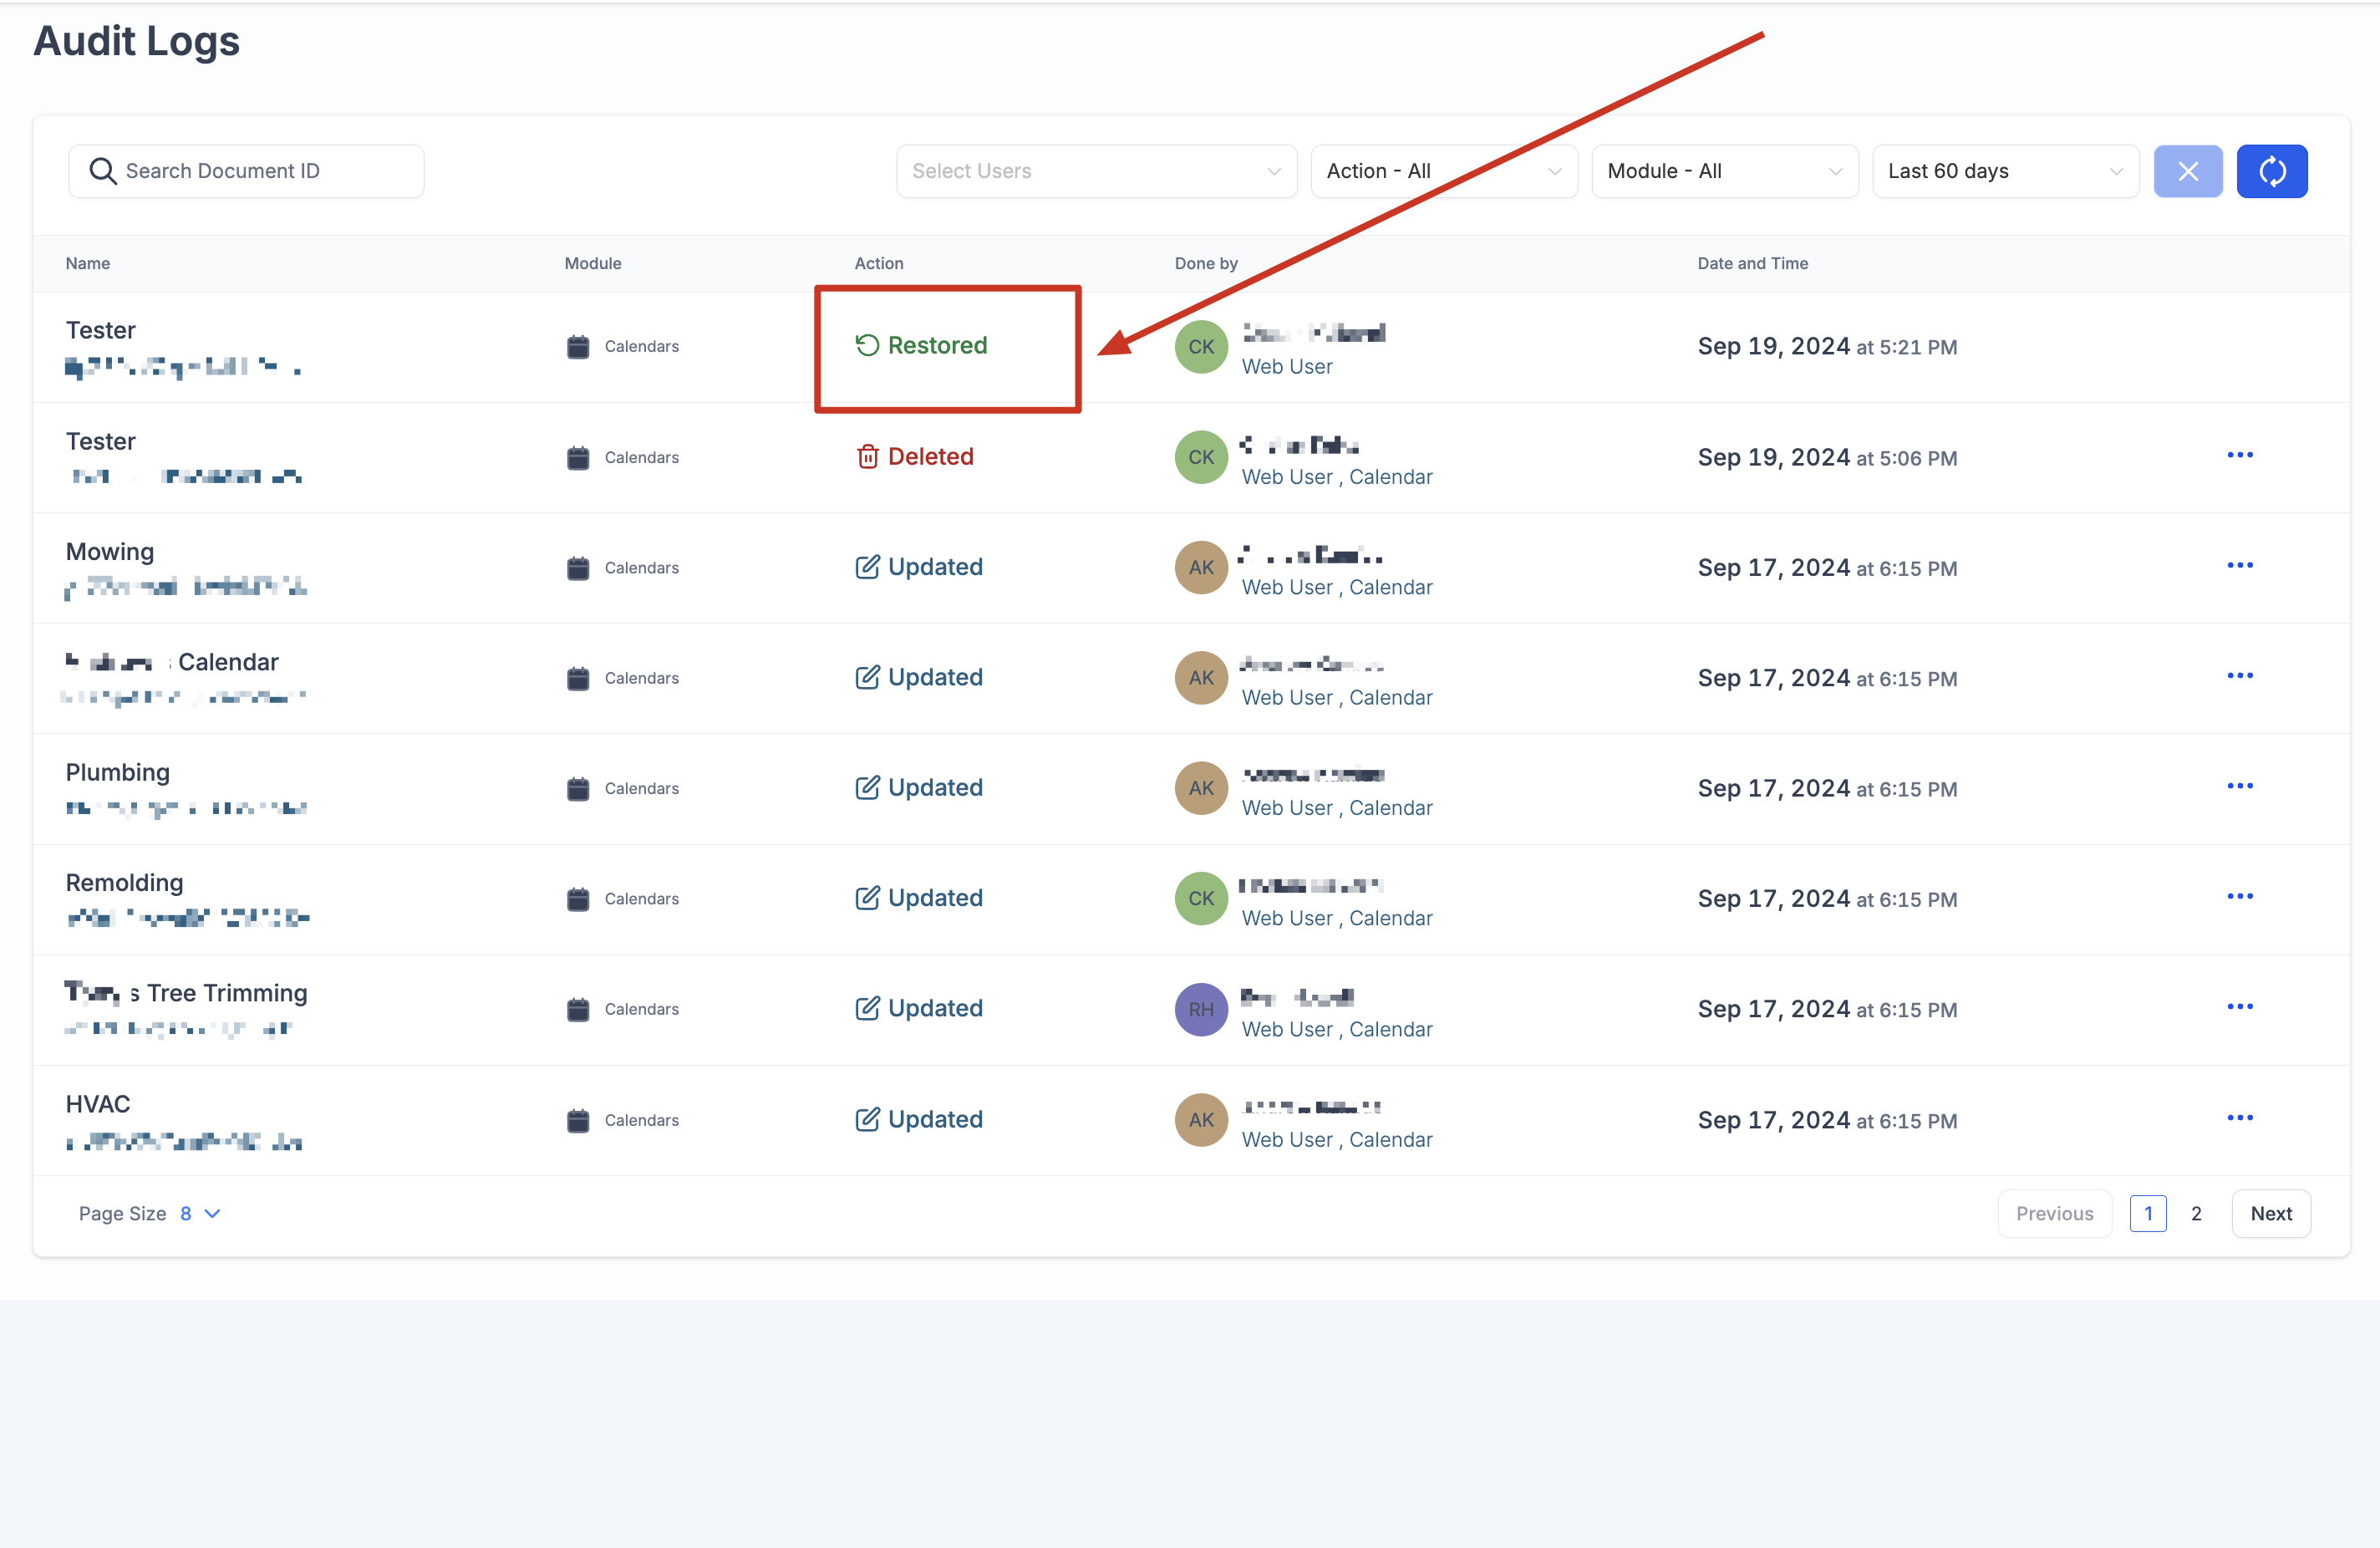
A few important limits to know before you rely on this:
Deleting a calendar also deletes every appointment on it at the same time.
Only appointments deleted within about 30 minutes of the calendar's deletion are restored along with it. An appointment you deleted earlier, on its own, outside that window will not come back.
Audit logs are kept for a maximum of 60 days, so restore a deleted calendar promptly if you need it back.
Example: if you delete a calendar at 10:00 AM, every appointment on it is deleted in that same action and falls inside the 30 minute restore window. But an appointment you deleted separately at 9:00 AM that same day, an hour earlier, is treated as a manual deletion and won't be restored with the calendar.
Can I edit a calendar without affecting appointments already booked on it? Yes. Editing availability, forms, or notifications only changes how future bookings behave; appointments already on the calendar stay as they are.
Can I duplicate any type of calendar? Yes, every calendar type supports duplication and keeps its own type-specific configuration when copied.
Will workflows or automations carry over when I duplicate a calendar? No. Automations tied to the original calendar are not duplicated. Recreate or reassign them to the new calendar in Workflows.
Does the duplicate use the same booking link as the original? No. The original calendar keeps its existing booking link, and the duplicate is issued its own unique link. Update any embeds, emails, or website pages that should point to the new calendar.
Does the time zone carry over when I duplicate a calendar? Yes, the duplicate keeps the same time zone as the original, so appointment times still display correctly for patients.
What's the difference between deactivating and deleting a calendar? Deactivating hides a calendar from booking while preserving its history, so you can reactivate it later. Deleting removes the calendar and its appointments outright, and can only be undone through the restore process, and only within a limited window.
How long do I have to restore a deleted calendar? Restore it as soon as possible. Only appointments deleted within roughly 30 minutes of the calendar's deletion come back with it, and the audit log entry itself is only available for 60 days.
If I deleted an appointment separately before deleting the calendar, will restoring the calendar bring it back too? No. Restoring only recovers appointments that were deleted as a direct result of the calendar deletion. Appointments you removed manually at another time are not restored.
Do payment settings carry over when I duplicate a calendar? Yes, payment settings are copied to the duplicate. Confirm they're still correct for the new provider or service, and consider using AX Pay for better processing rates than Stripe.
Where do I set up Google, Outlook, or Zoom sync for a calendar? That lives in the Connections section of the Calendars collection, not in the Edit screen's availability or forms tabs.
Do I have to use Calendar Setup Assistant to create a calendar? No, it's an optional guided path. You can always create and configure a calendar manually through Settings > Calendars, as described earlier in this article.
Why don't I see Calendar Setup Assistant in my account? It's rolling out gradually, so it may not have reached every account yet. If it's missing, confirm your user role has calendar creation permissions; if you still don't see it, manual setup works the same way it always has.
Can I edit a calendar that Calendar Setup Assistant created? Yes. It's a normal calendar once it's created, so edit it from Settings > Calendars exactly as described under Editing a Calendar above.
