Once you are sending email campaigns, a few tools help you get more from every send: Smart Send finds the best time to deliver, UTM parameters track how your emails drive website traffic, exporting lets you analyze performance outside the platform, and tagging from campaign statistics turns opens and clicks into segments you can act on. This guide covers all four.
These features live in the Email Marketing area under Statistics and the Send or Schedule screen. To turn engagement into automated follow-up, cross-reference the Workflows area and the Contacts area.
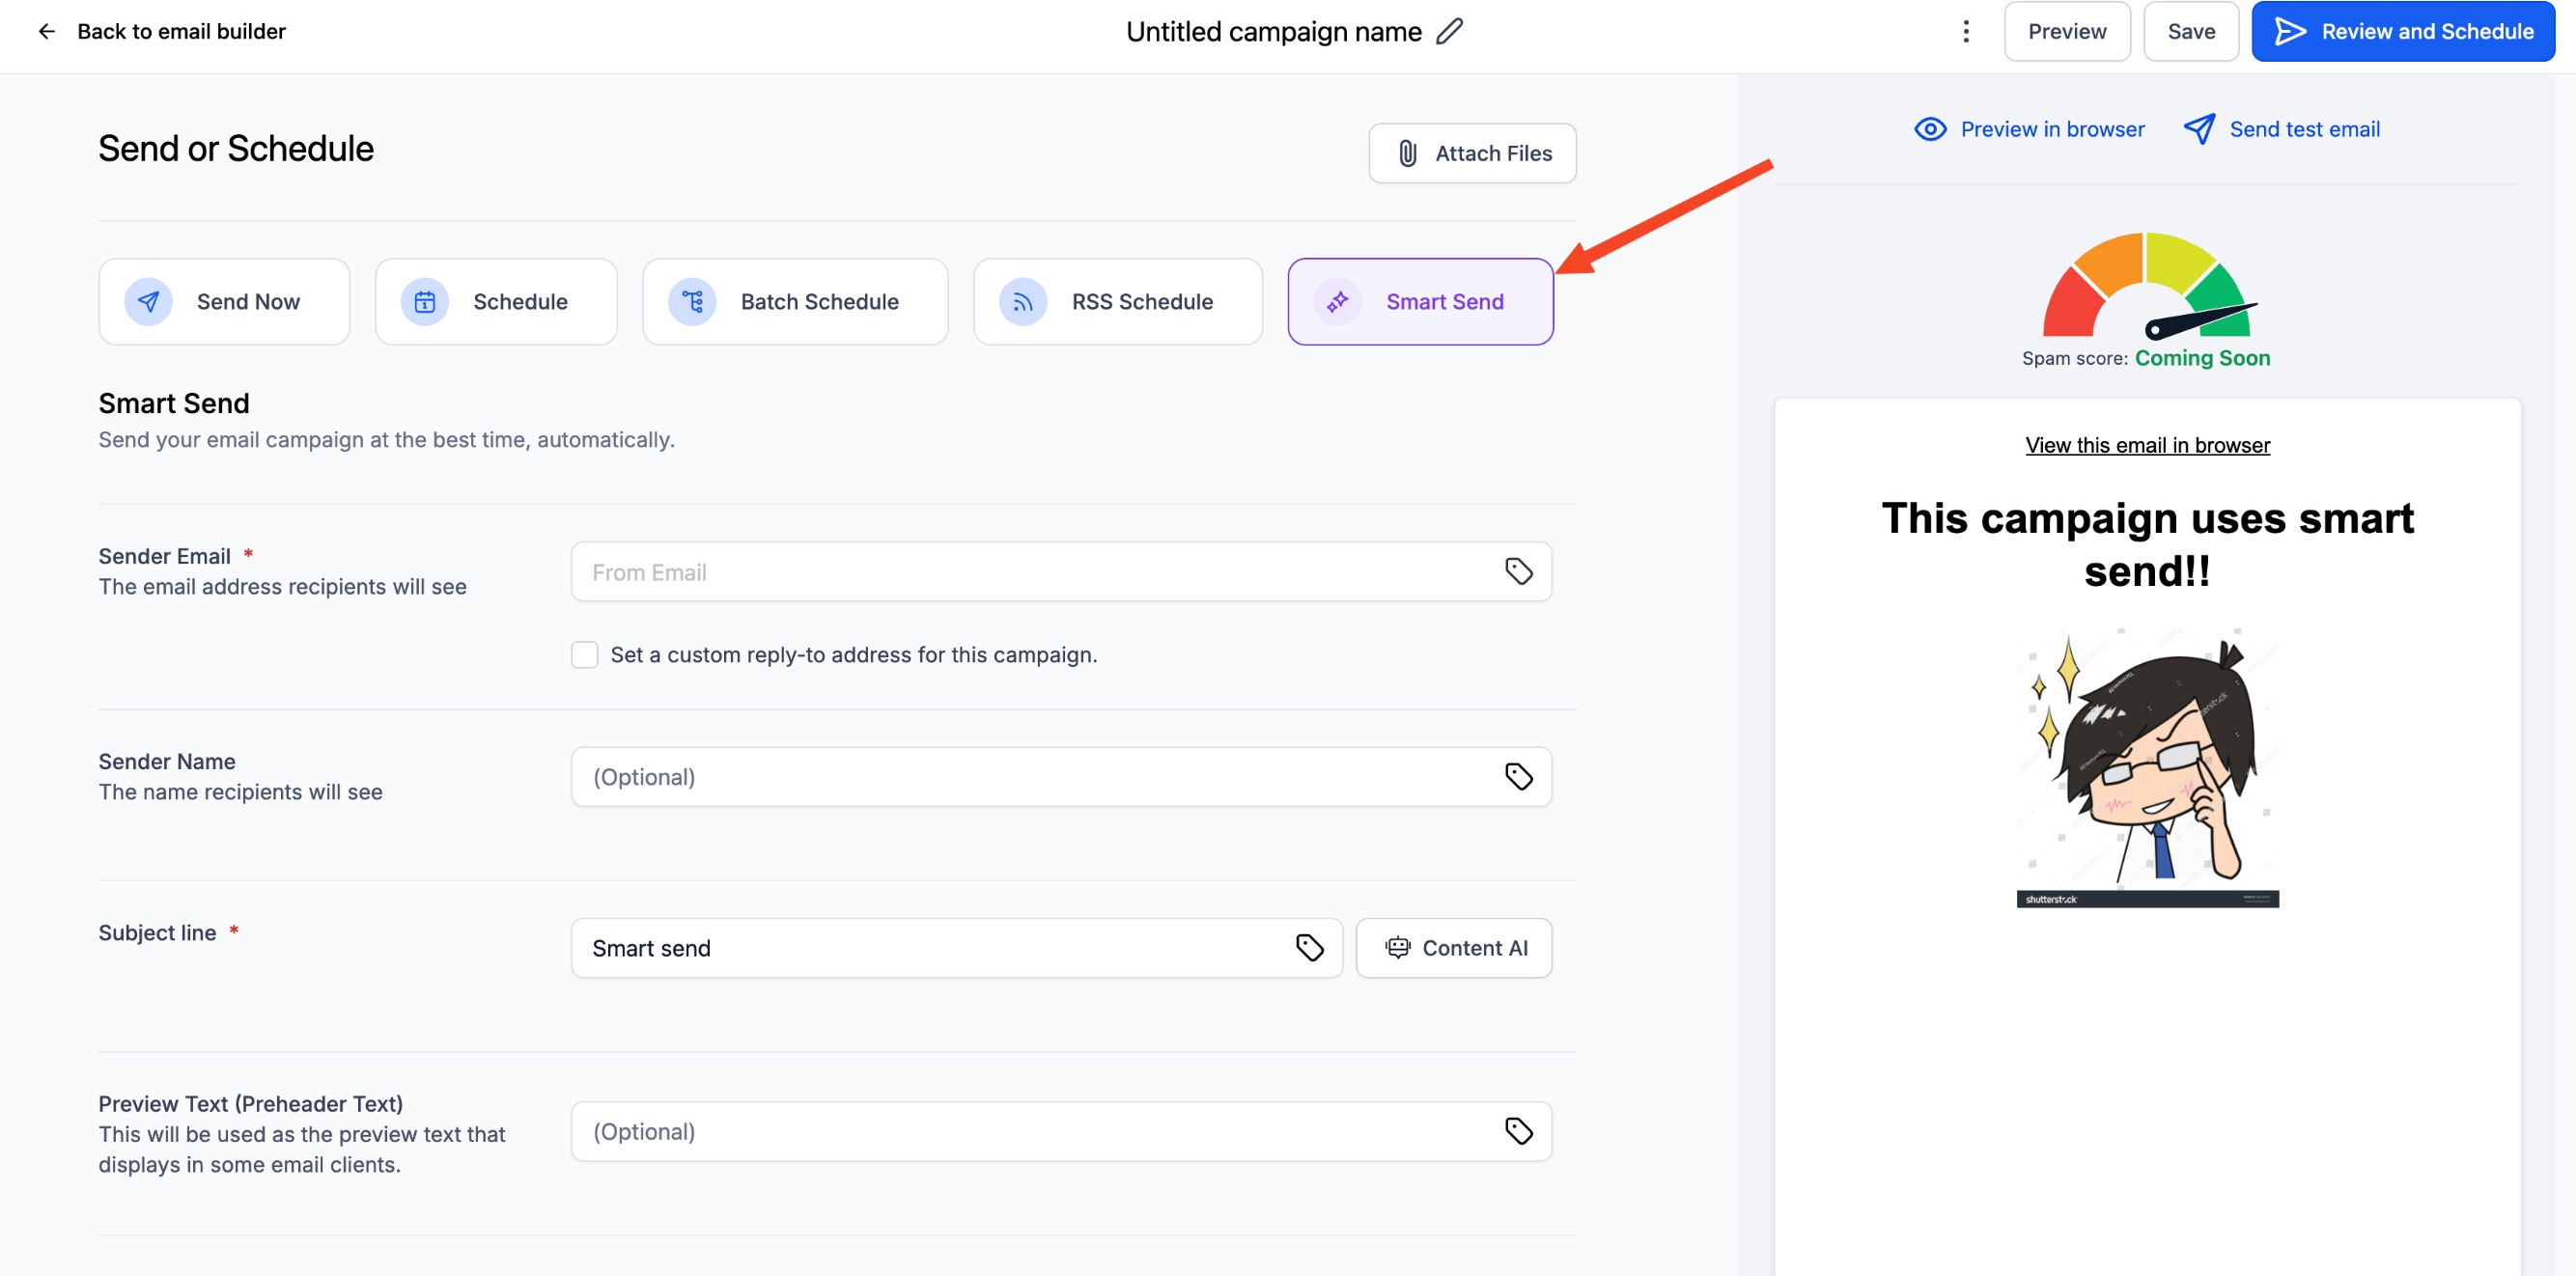
Smart Send takes the guesswork out of "when should I hit send?" It analyzes the last 60 days of recipient engagement, including opens, clicks, and other events, and recommends the single best send time for your campaign. It appears as a delivery option on the Send or Schedule screen alongside Send Now, Schedule, Batch Schedule, and RSS Schedule. You can accept the recommendation or override it with any custom date and time.
Smart Send works only when your account has enough recent data to make an accurate prediction.
At least 1,000 emails delivered from your account in the last 60 days.
The campaign must be created in the Email Builder under Campaigns.
Currently supported for regular email campaigns.
If you have not met the threshold, Smart Send appears greyed out. Keep sending regular campaigns and it unlocks automatically once you cross 1,000 delivered emails.
Smart Send builds a 60-day engagement model that weighs:
Open events by hour of day.
Click events and other interactions to fine-tune predictions for meaningful engagement.
Performance relative to your account's averages, so it avoids recommending historically weak windows.
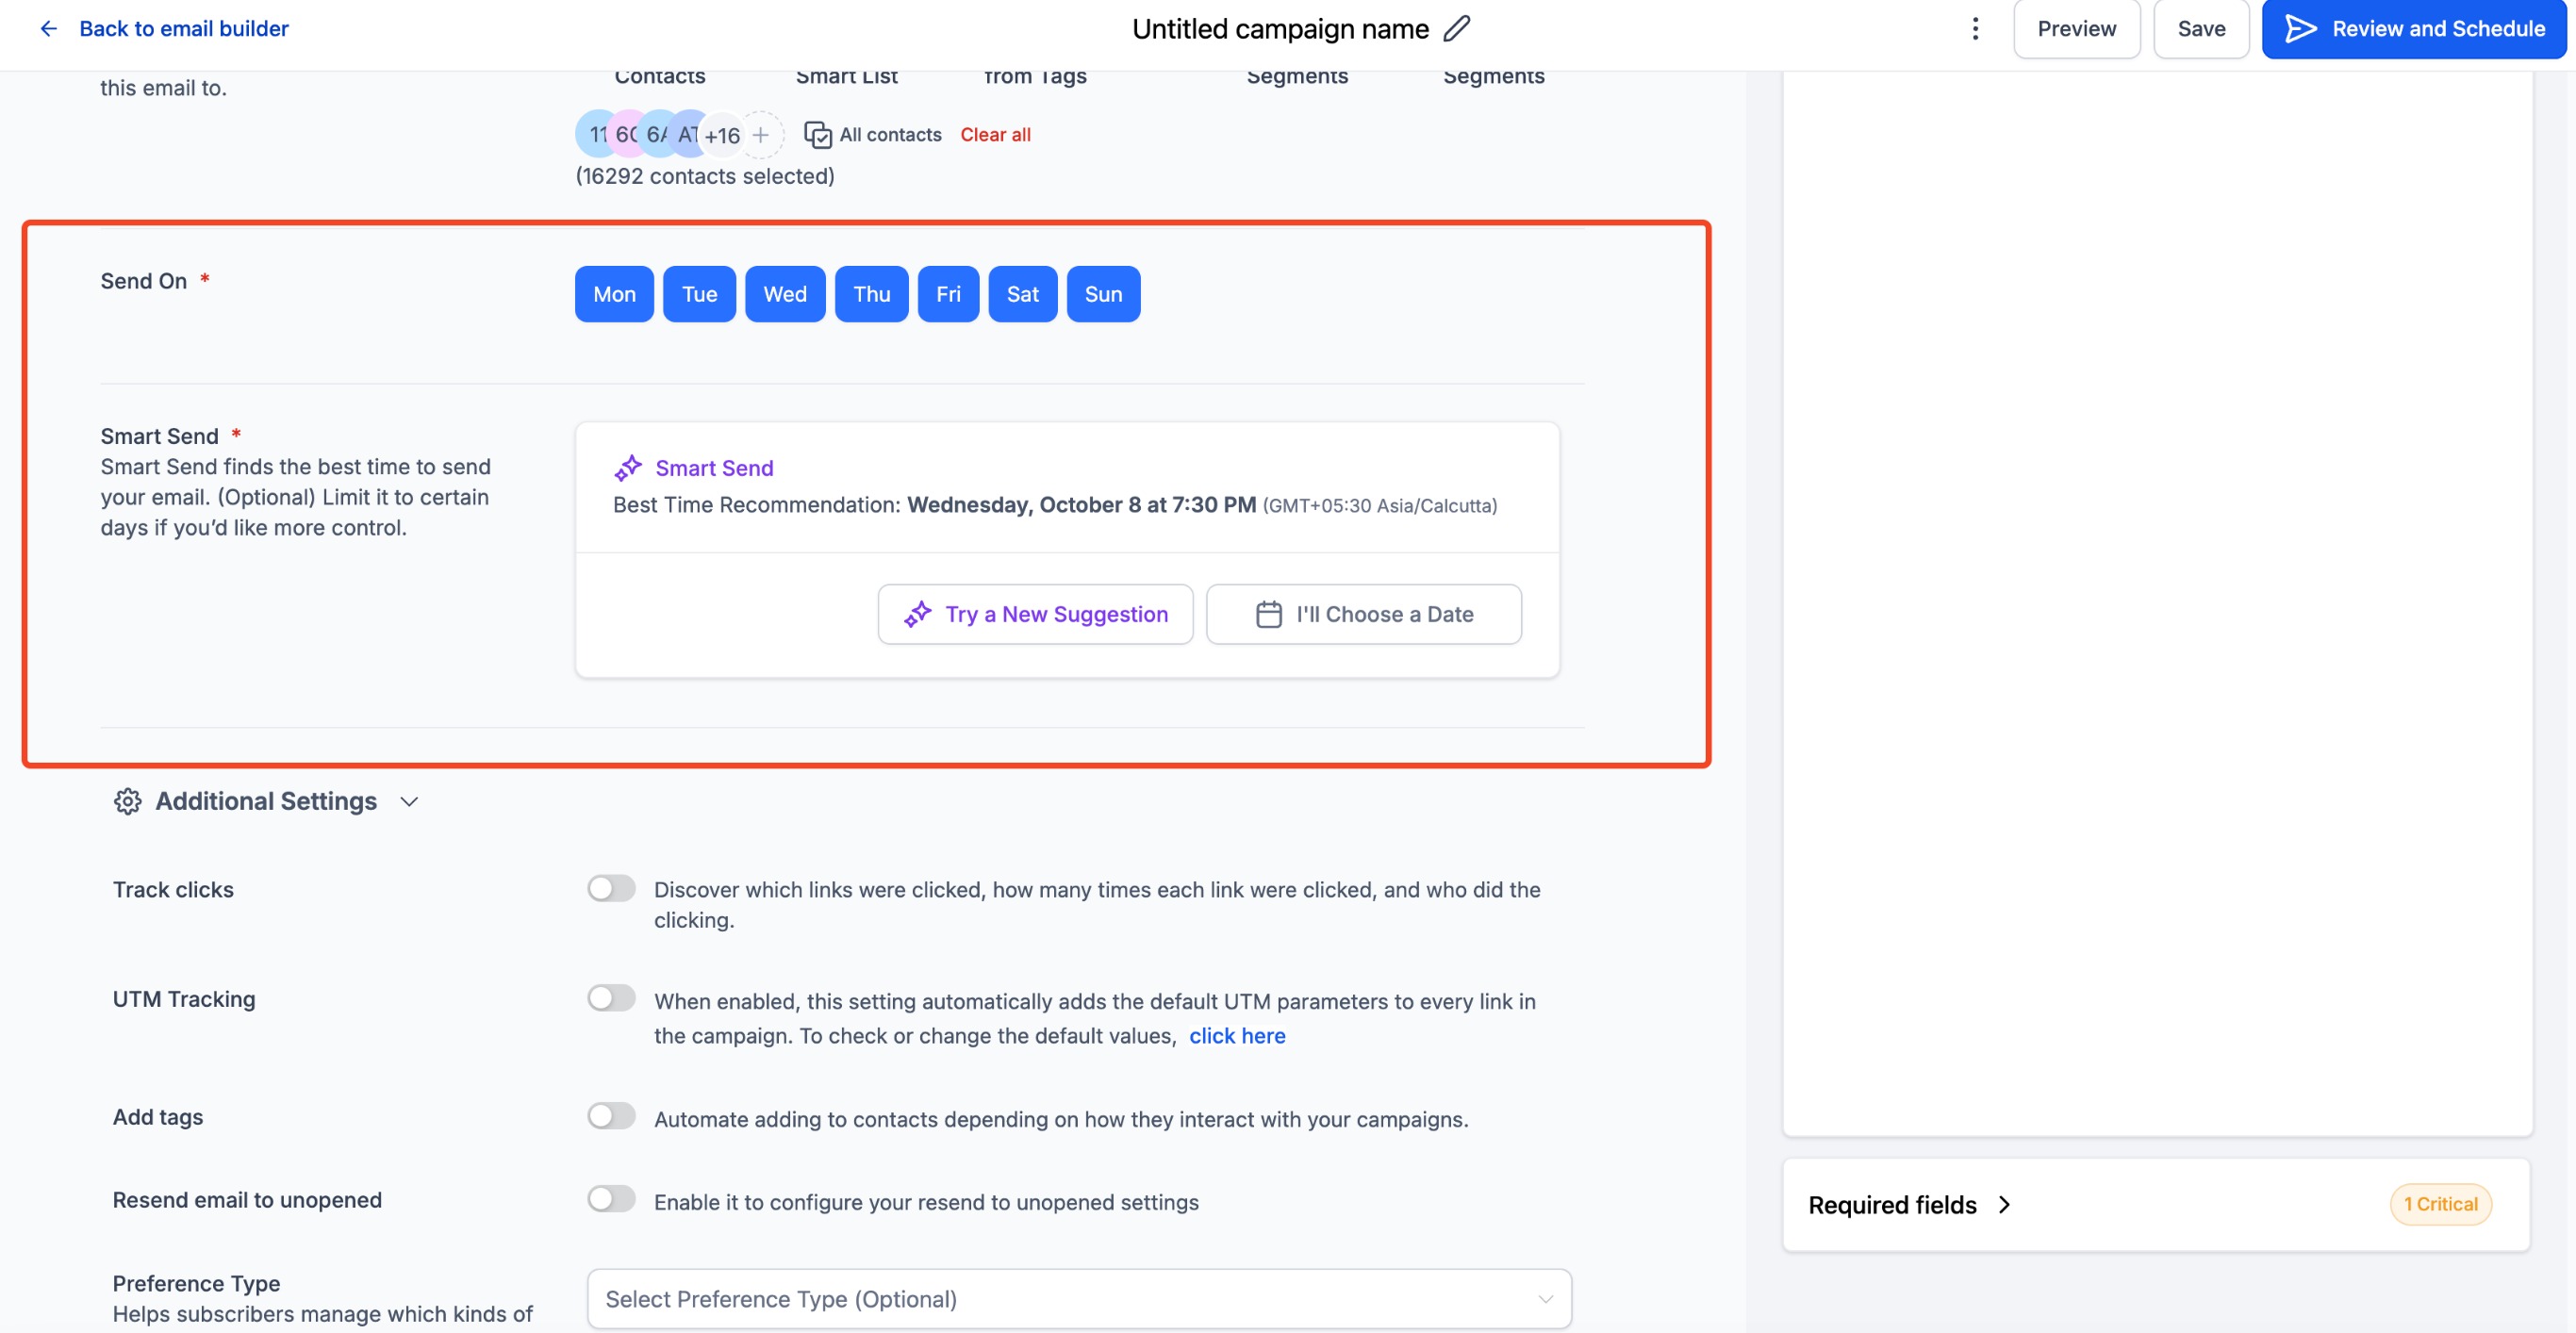
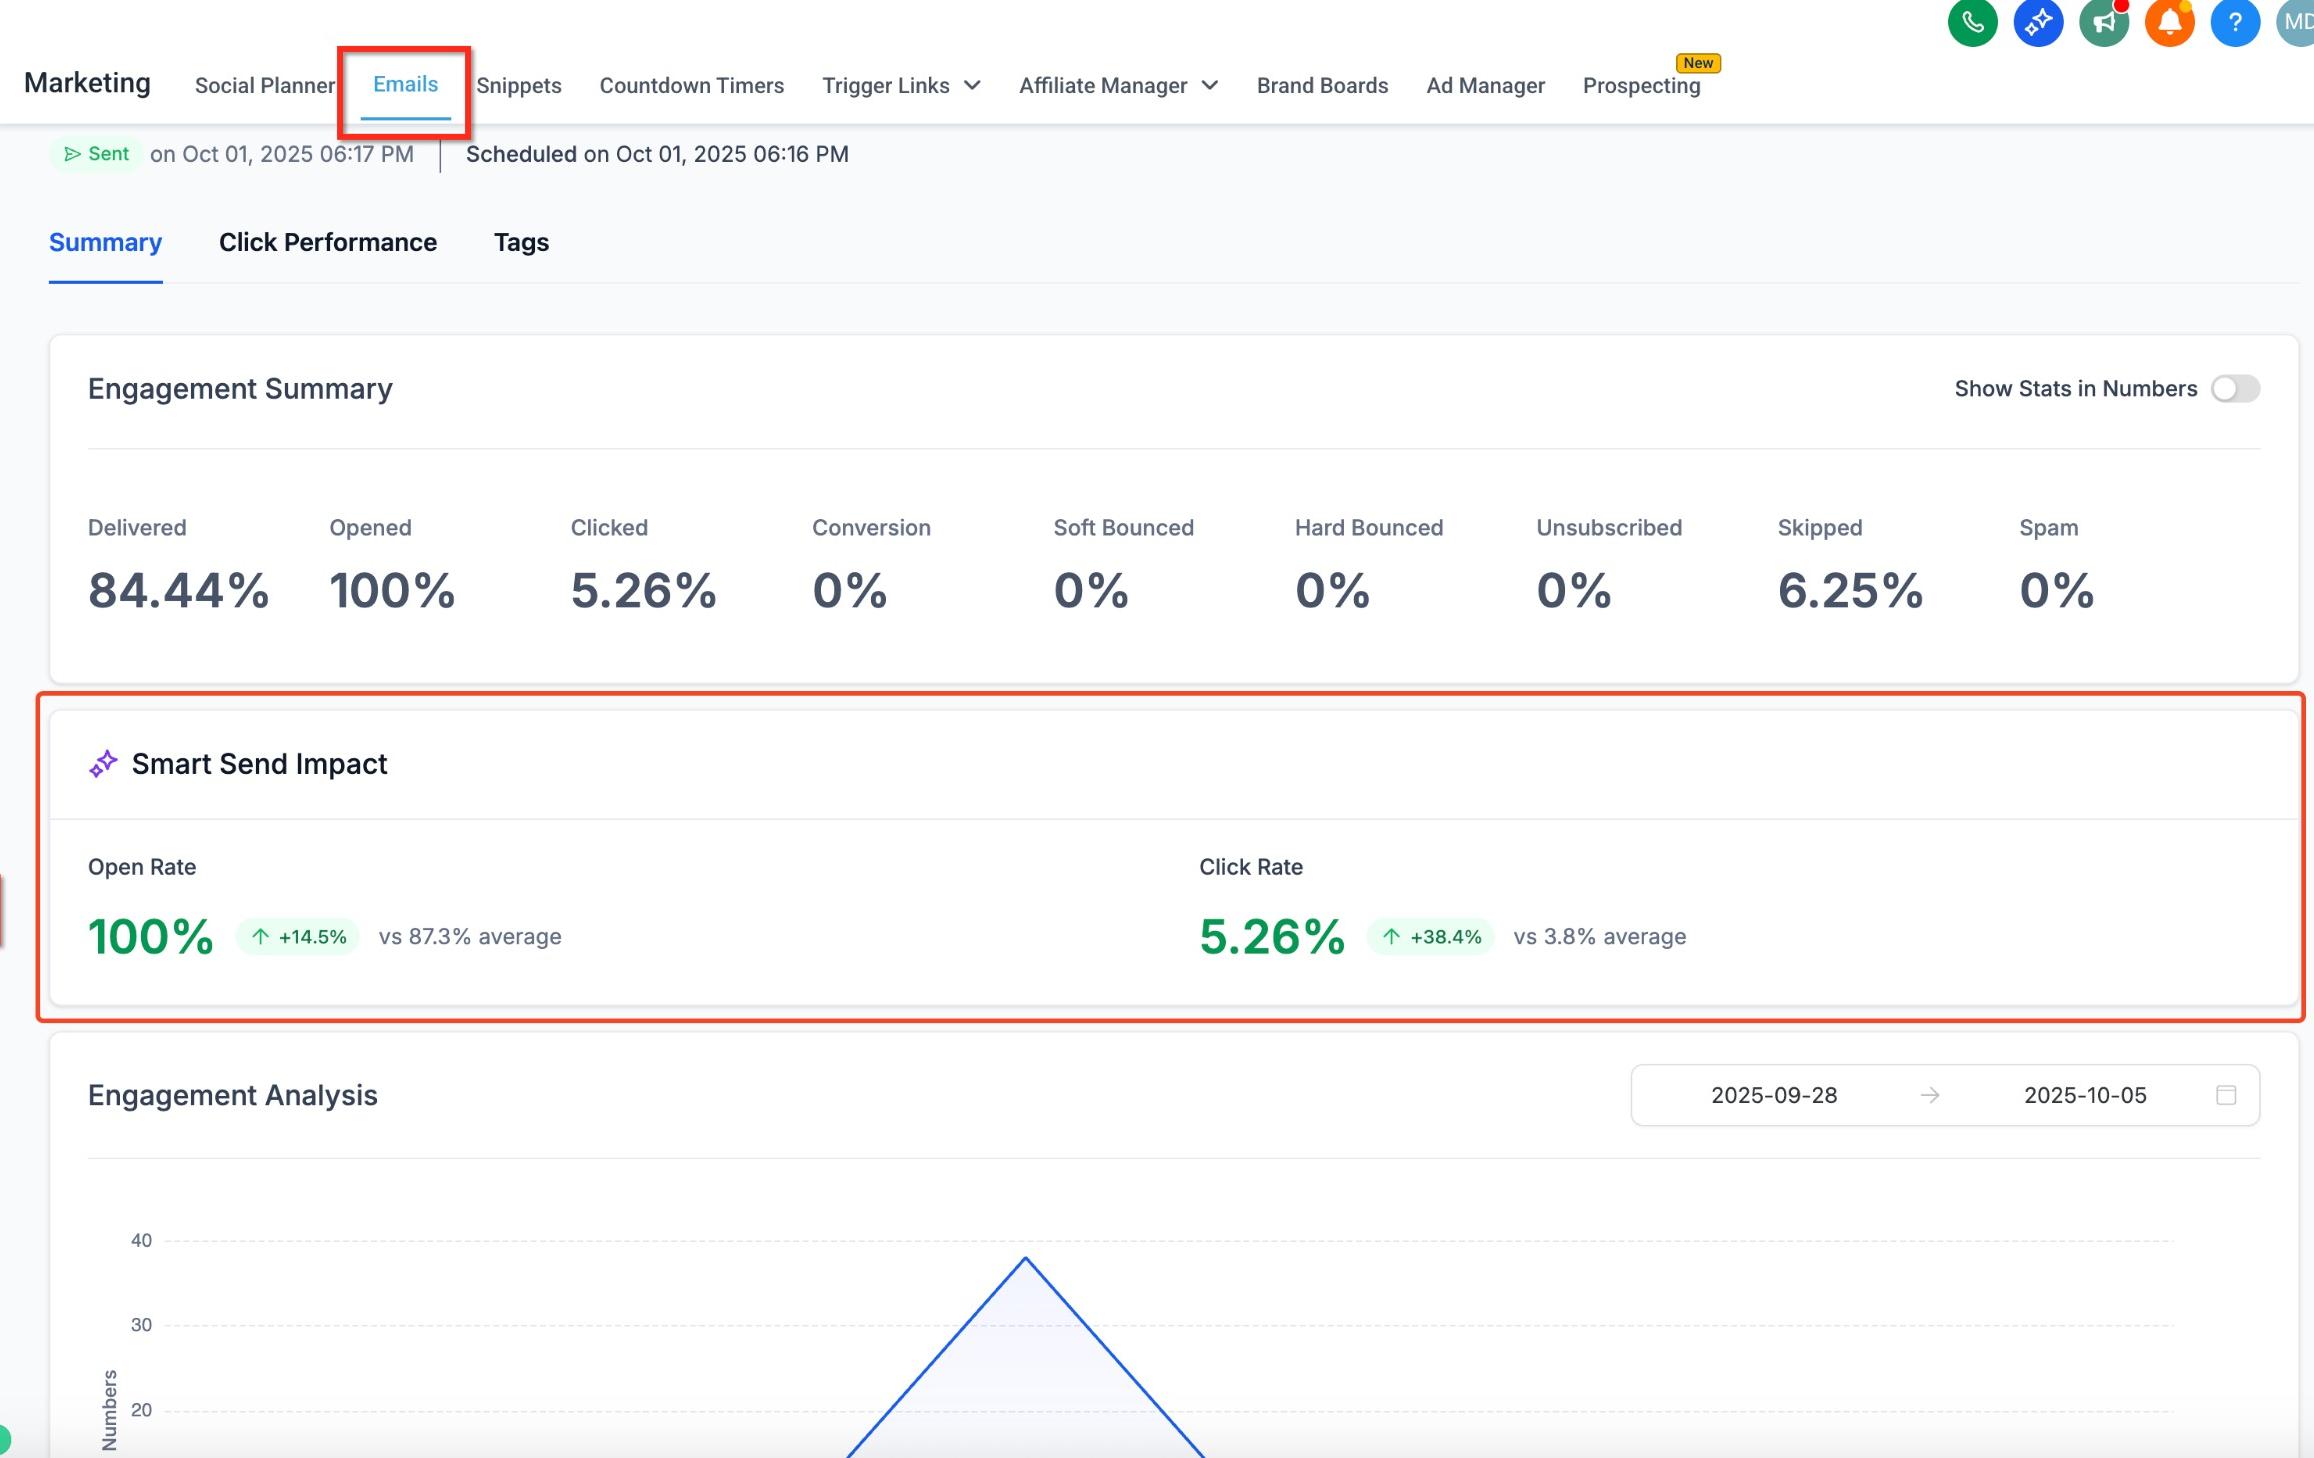
If there is not enough data for a particular hour, Smart Send automatically widens the window until the model meets its confidence threshold. After a Smart Send campaign goes out, the Email Statistics dashboard highlights the engagement lift versus your 60-day baseline, a breakdown of opens and clicks by the recommended hour, and a comparison against manually scheduled campaigns.
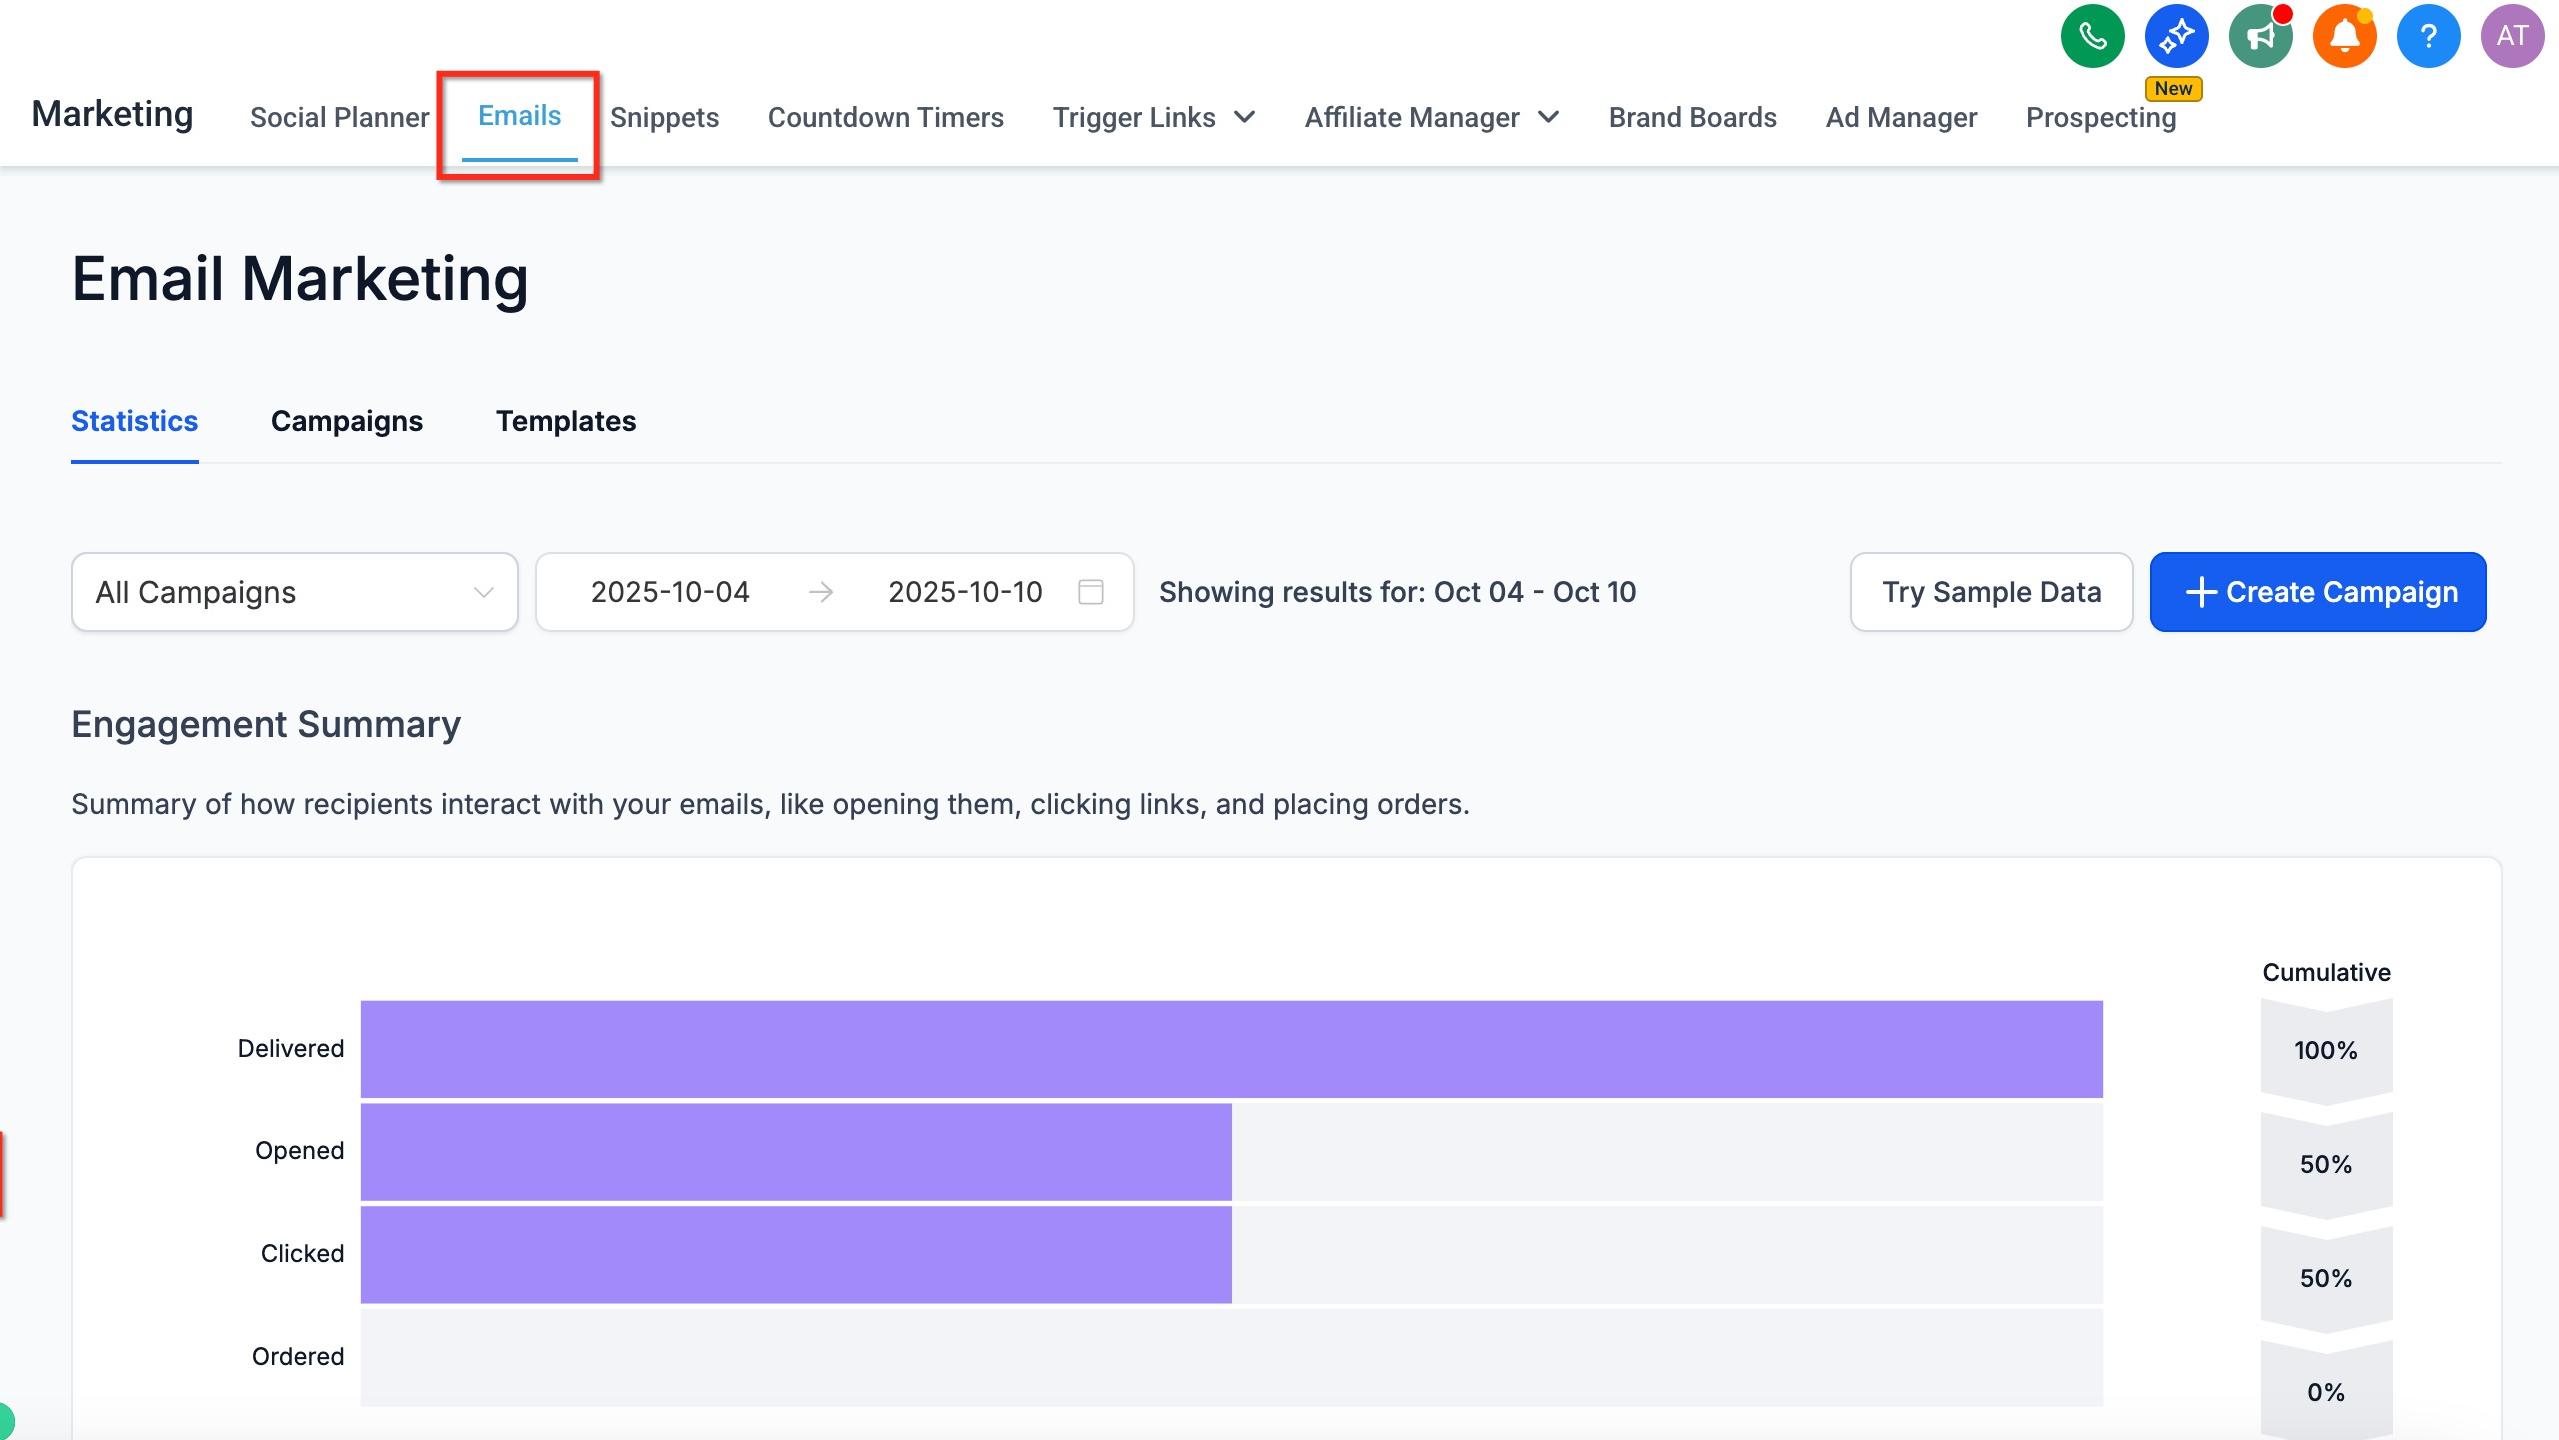
Navigate to Marketing → Emails.
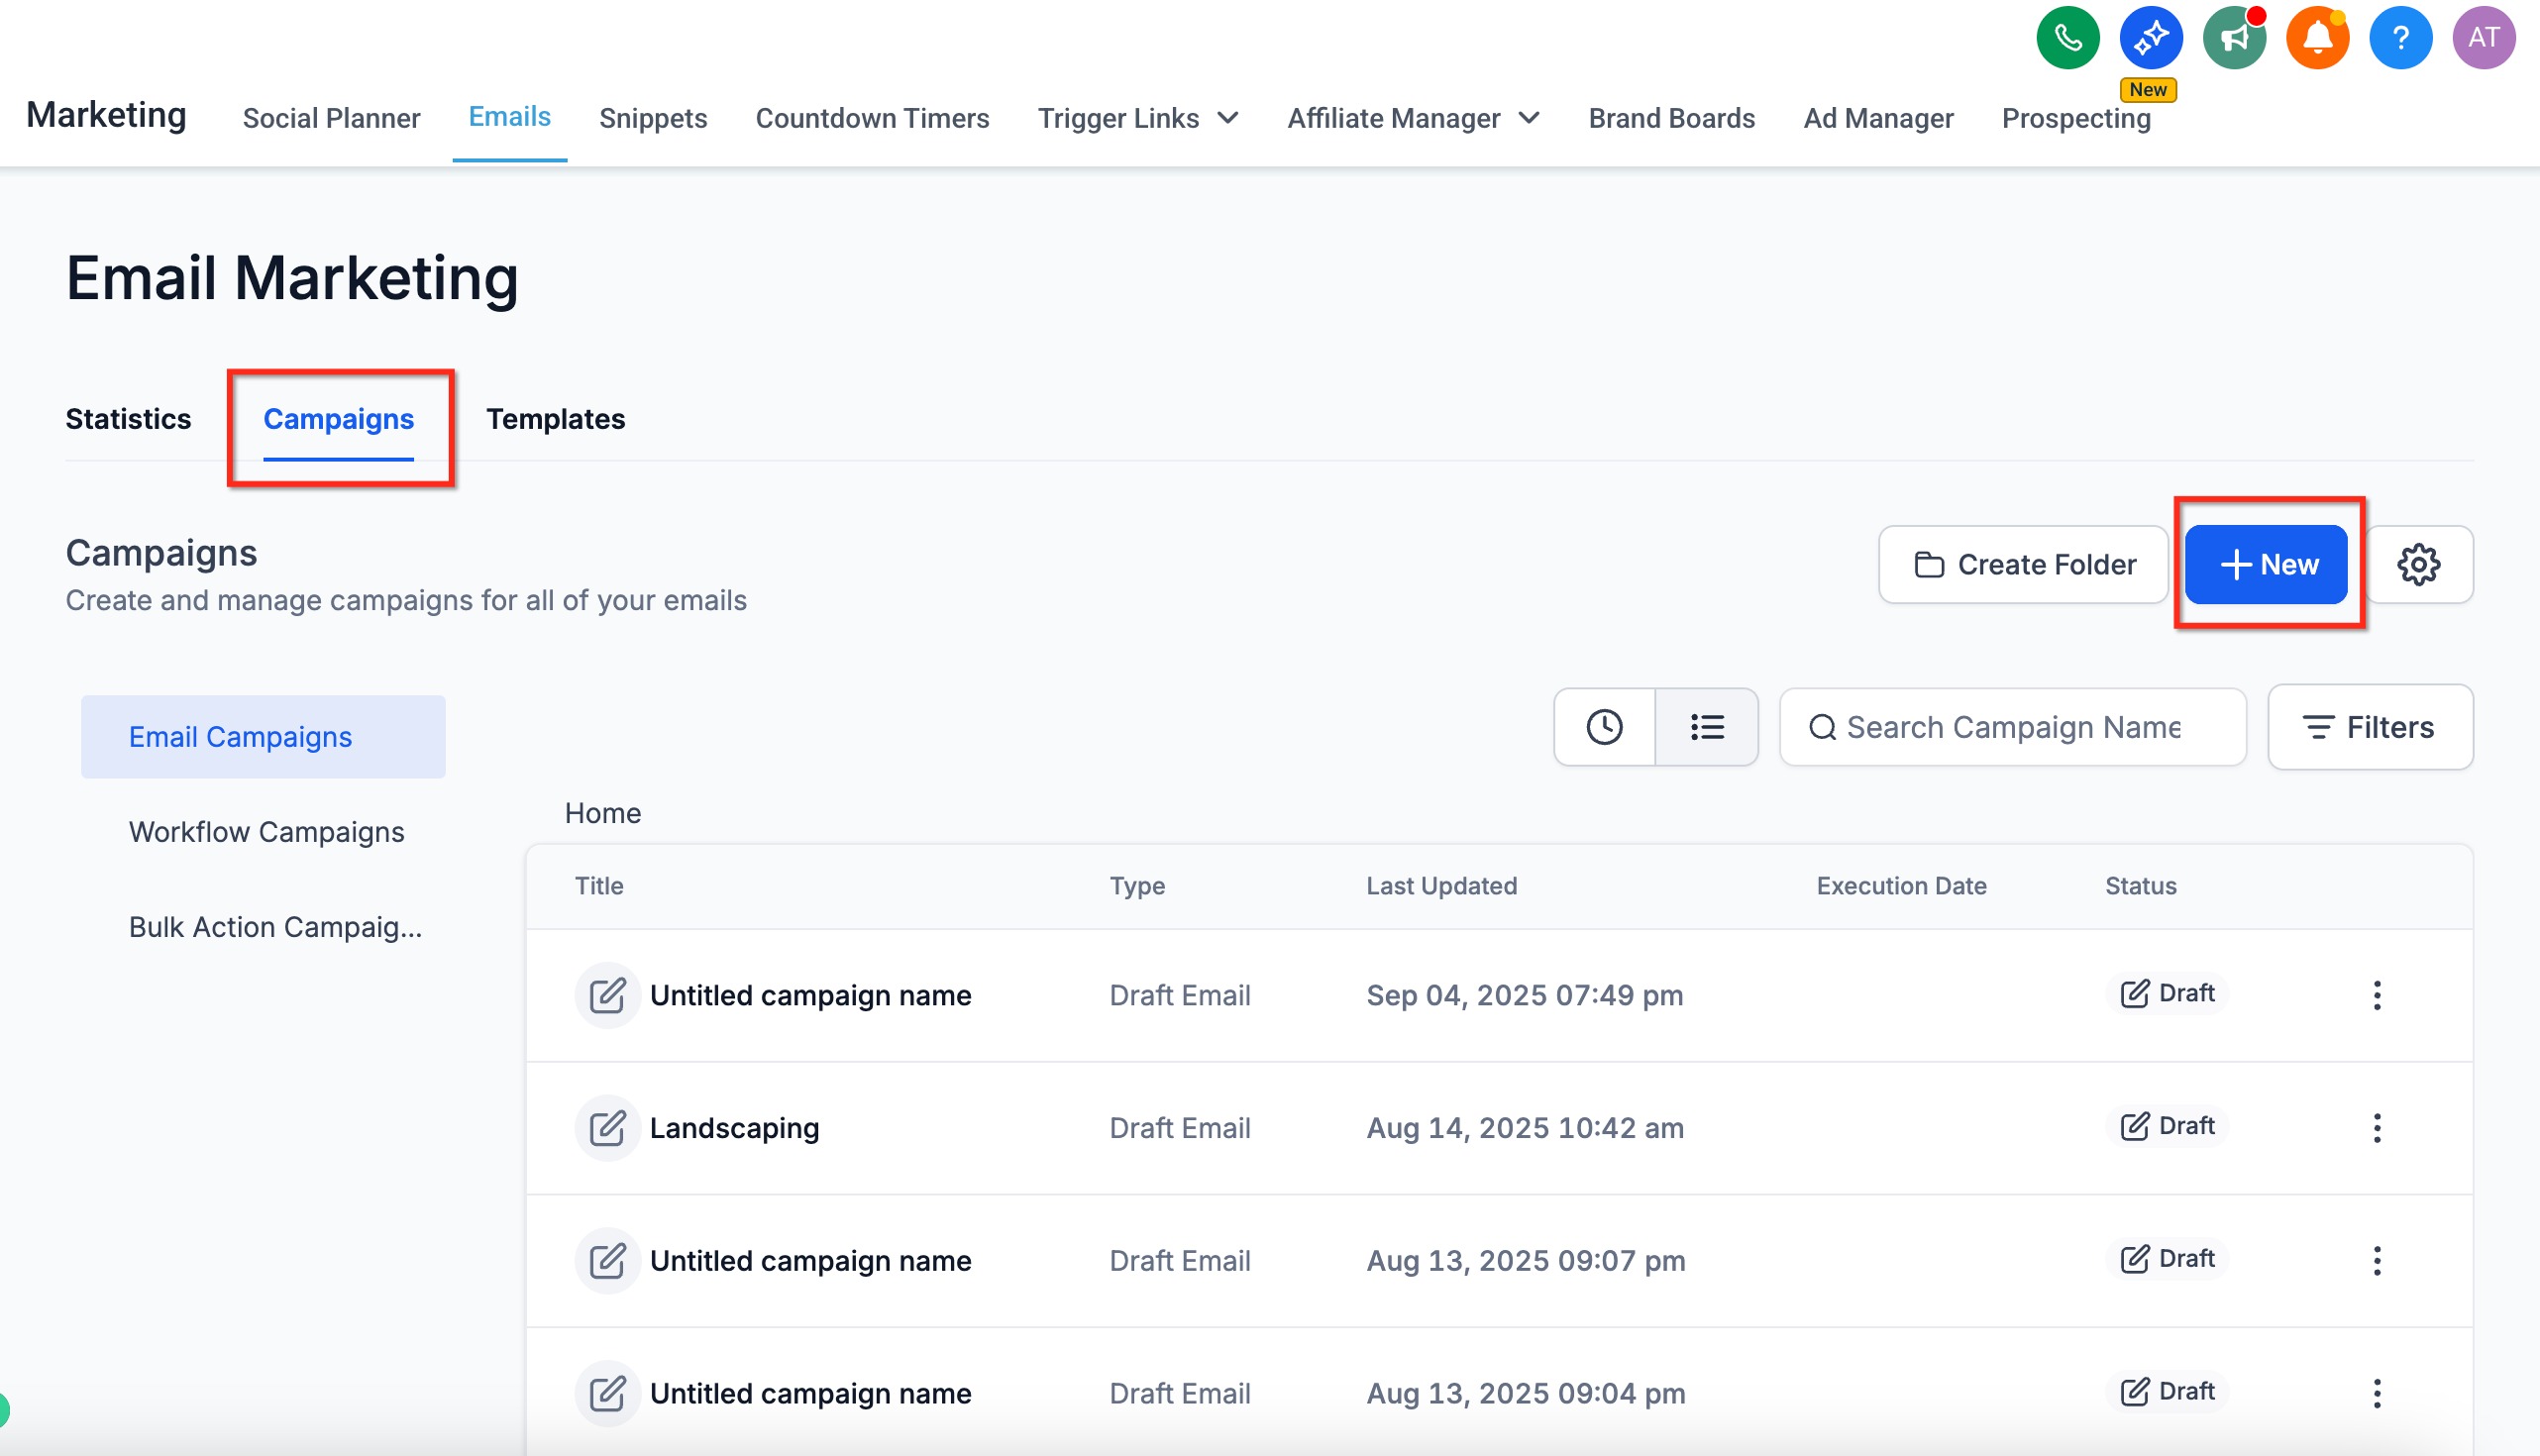
Click Campaigns → Create New Campaign.
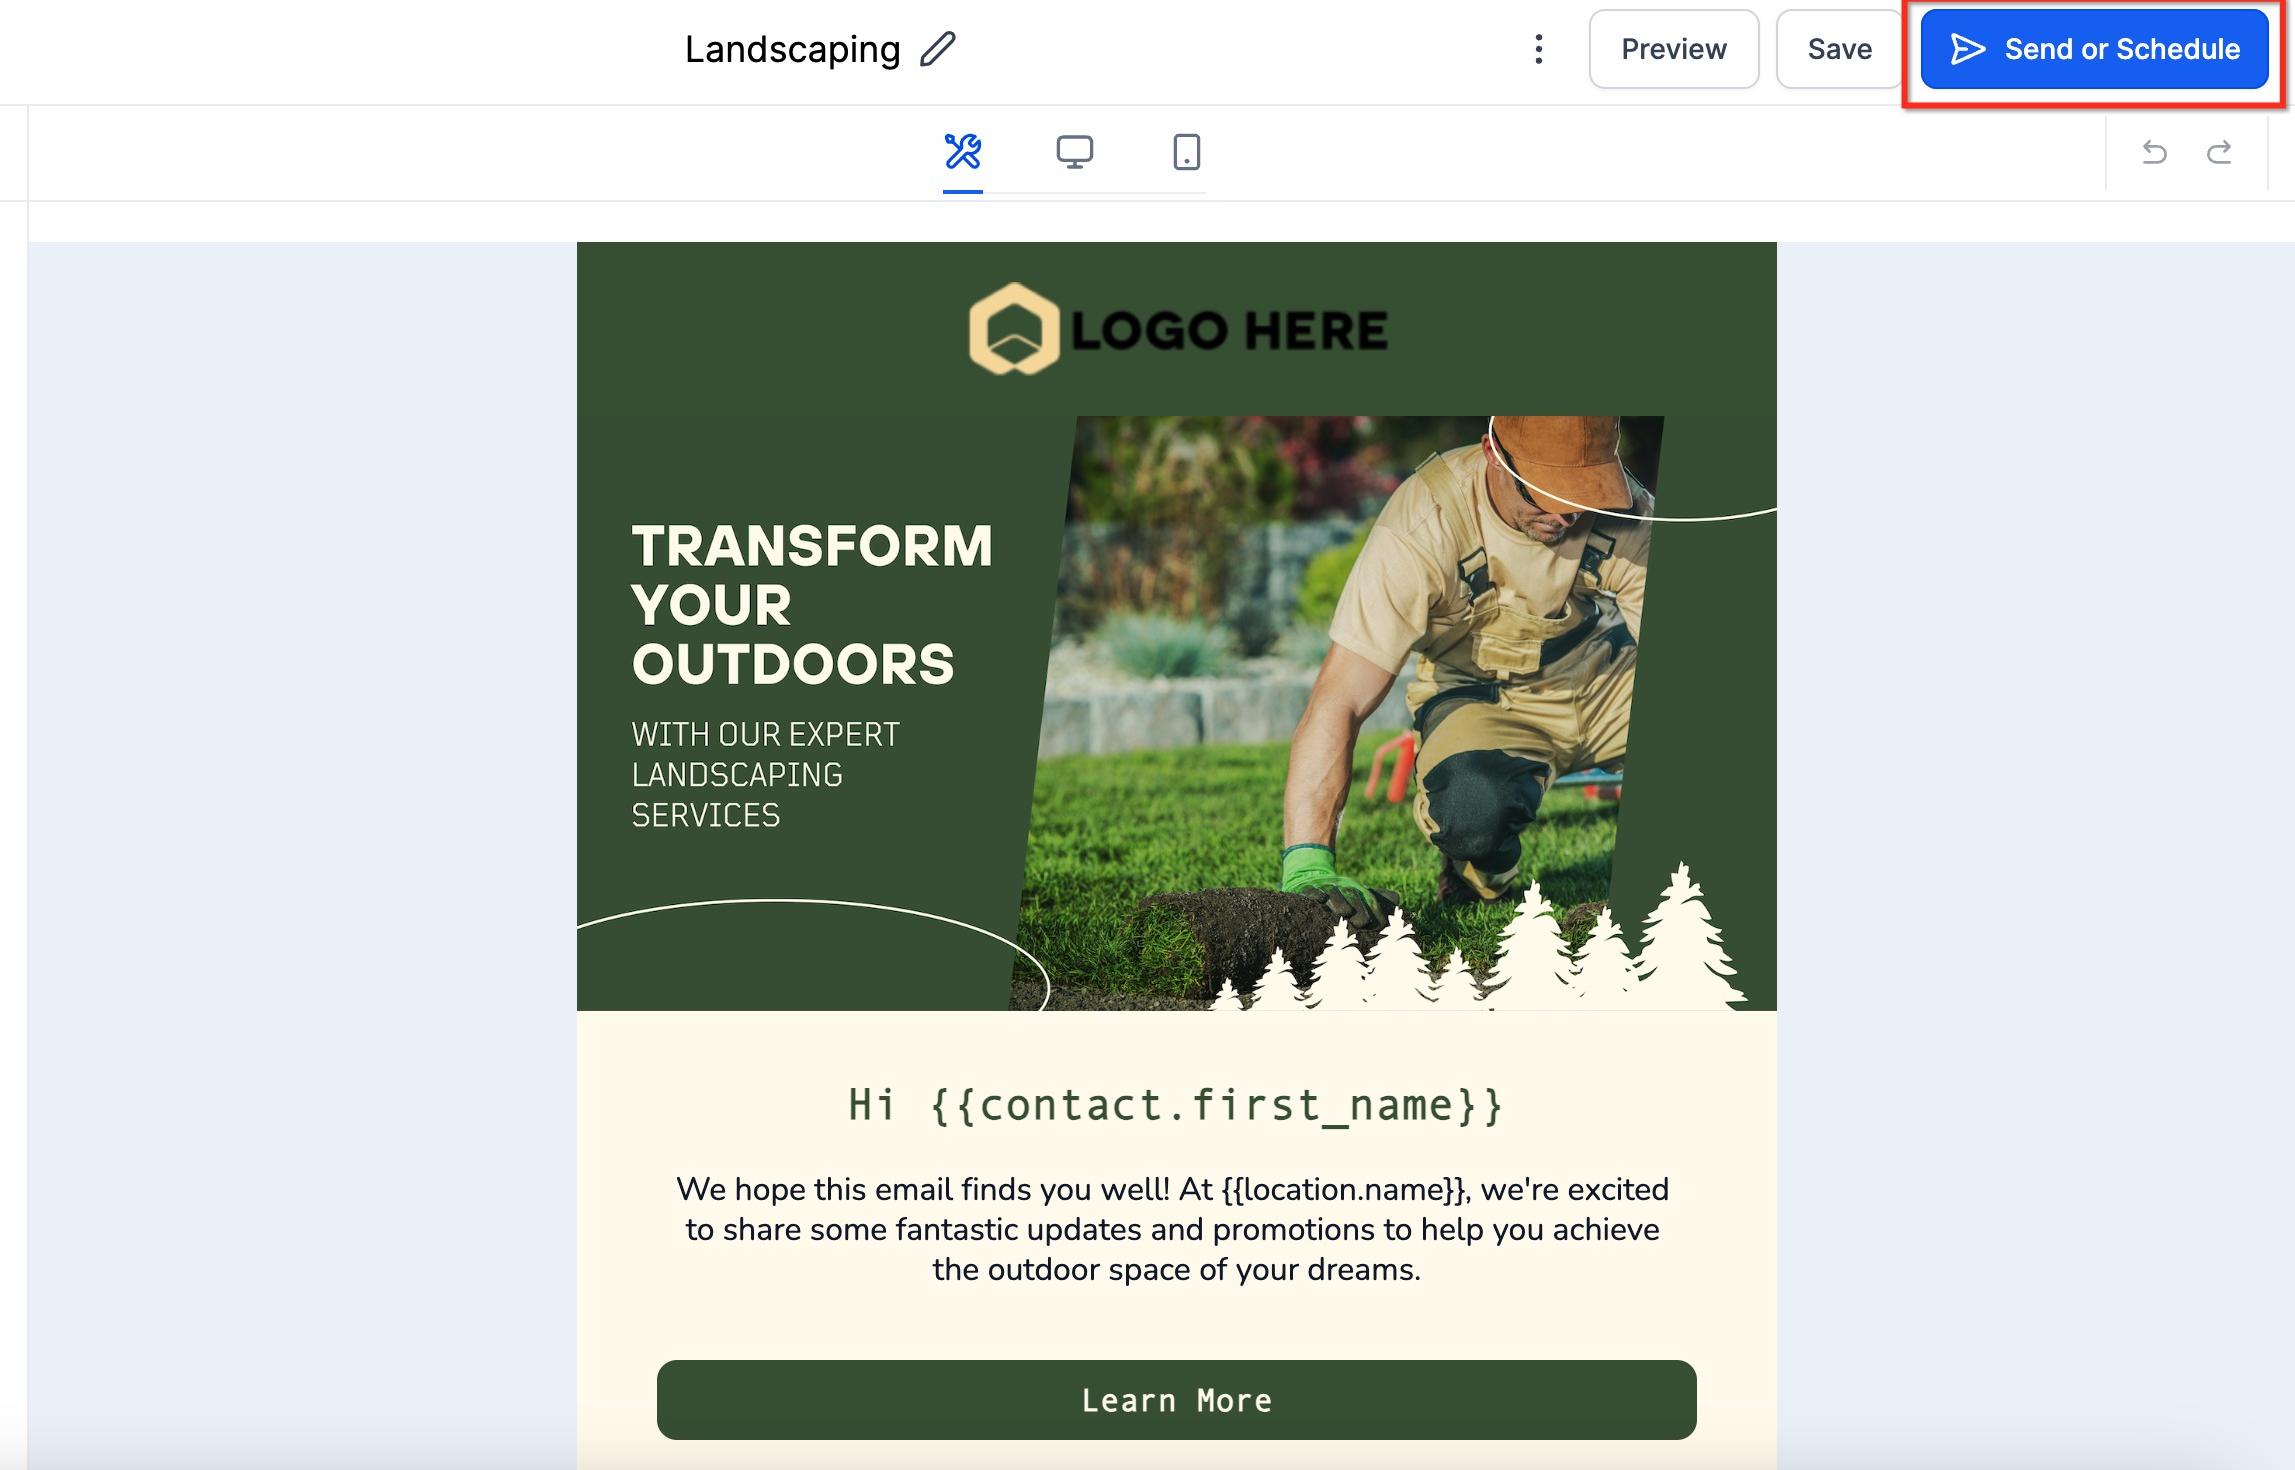
Design your email, then click Send or Schedule.
Choose Smart Send (the fifth delivery option).
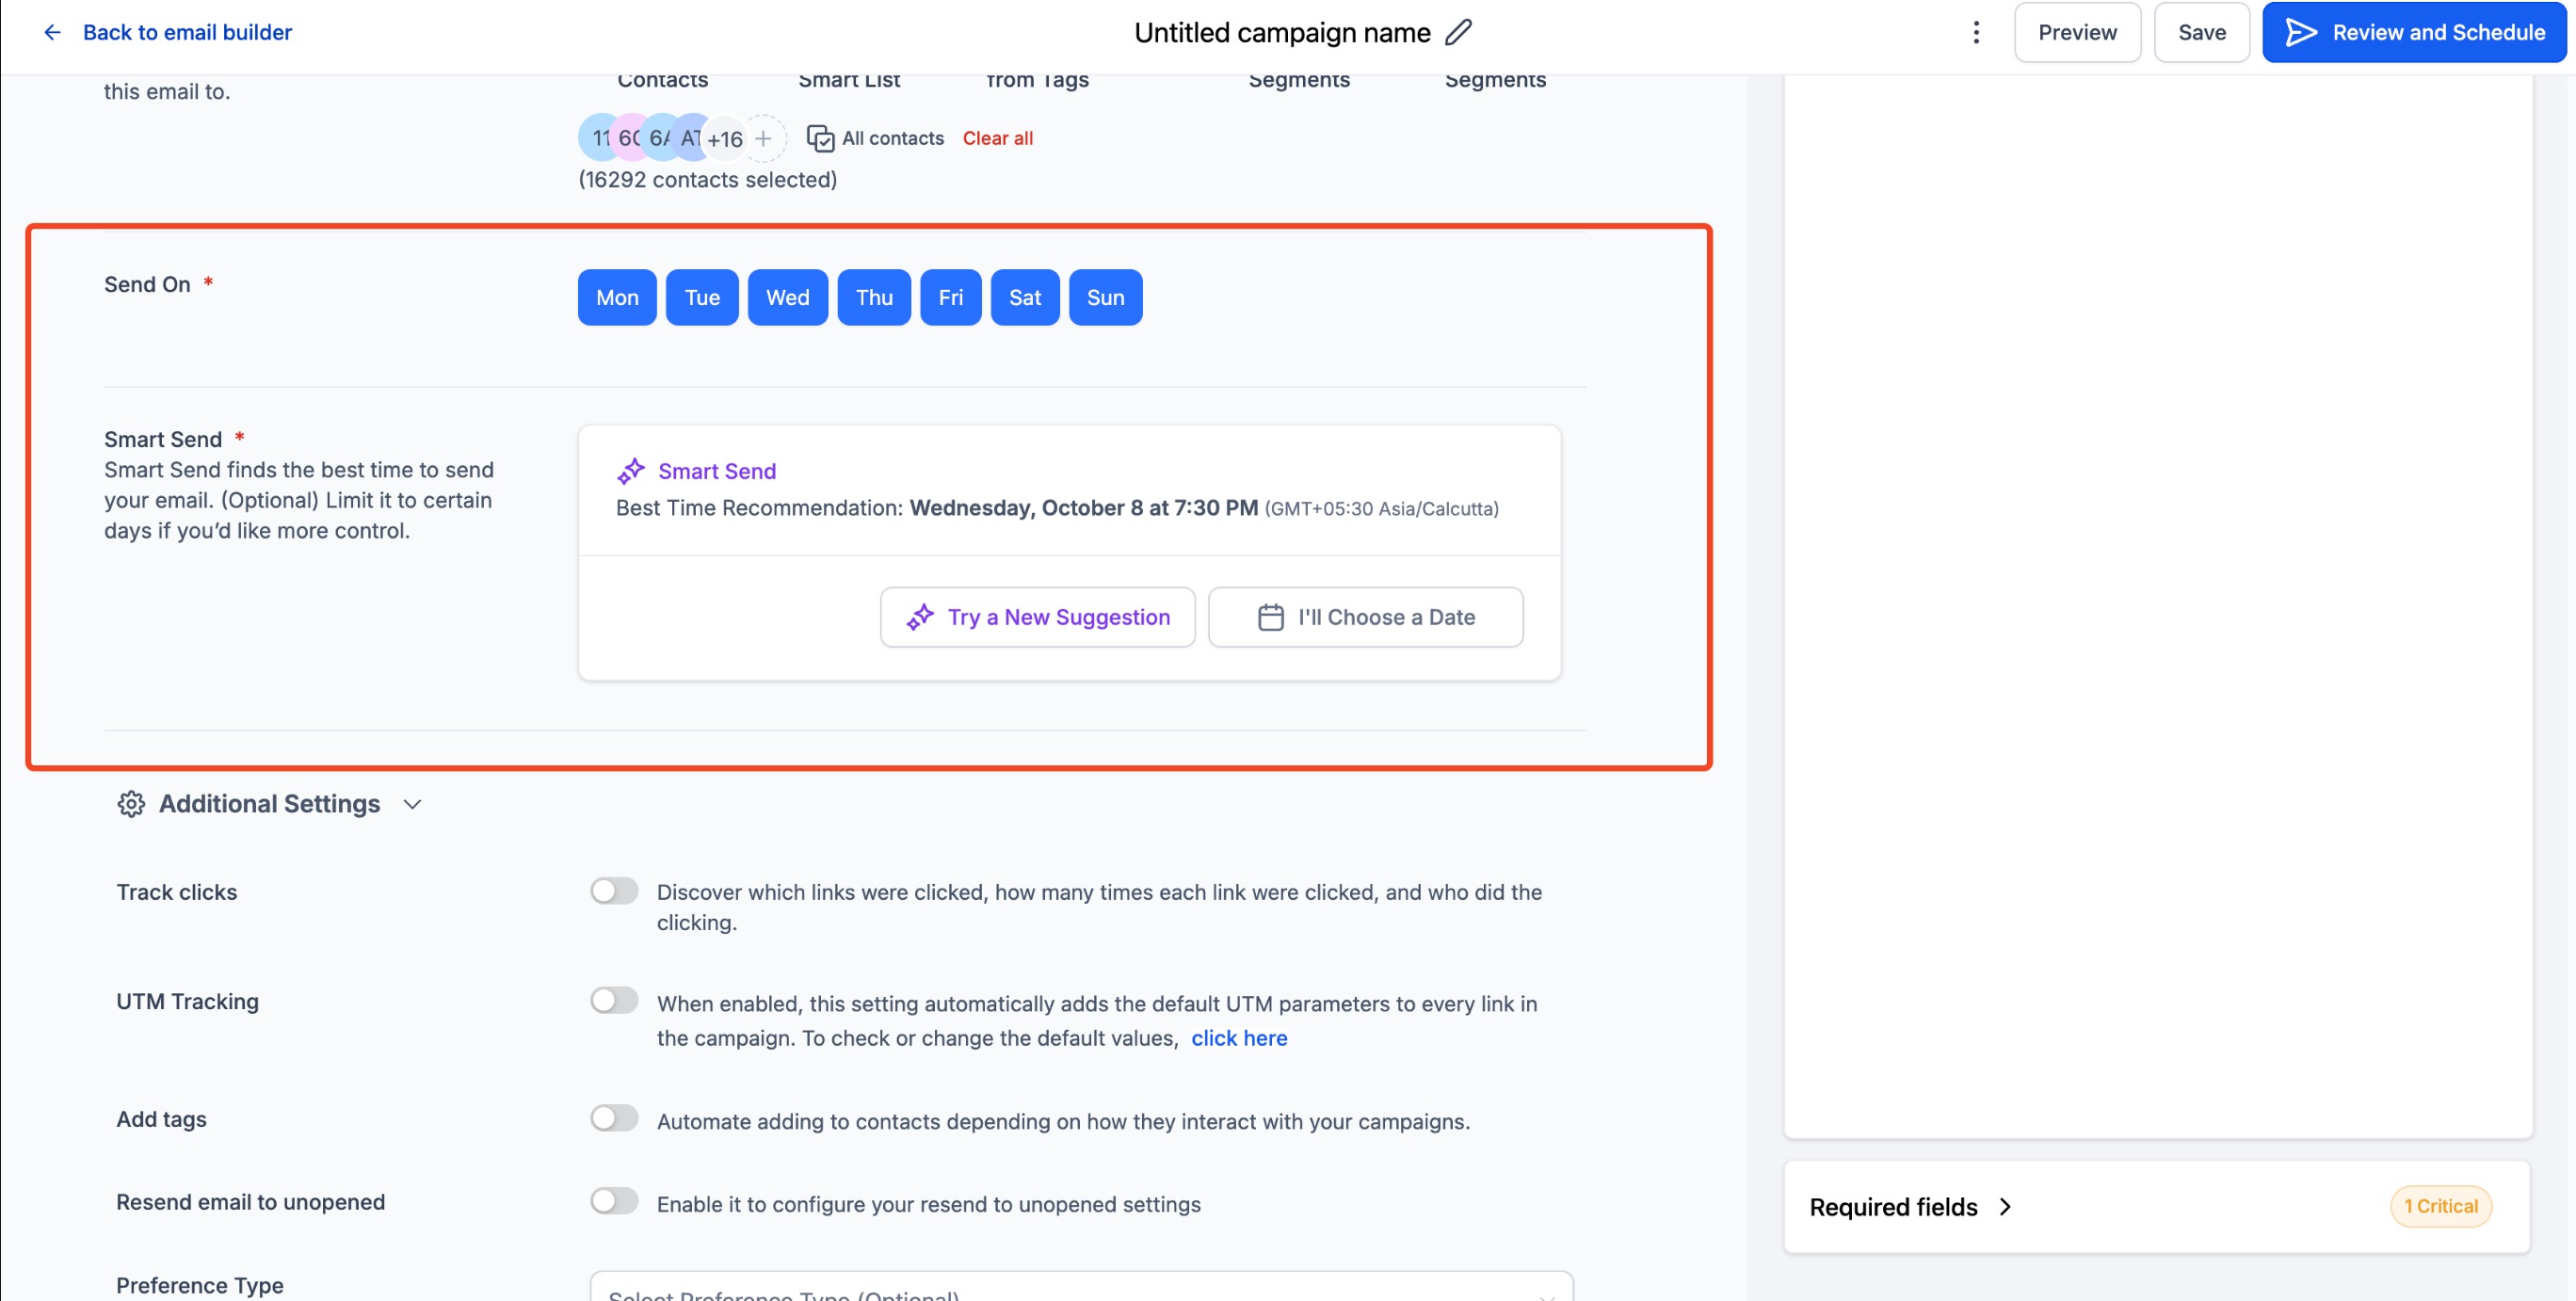
Complete the required fields and click Get Recommendation to display the best send time, then schedule the campaign.
After the campaign sends, review performance in Marketing → Emails → Statistics to see the engagement lift.
UTM parameters are short codes attached to the end of a URL. They help analytics tools such as Google Analytics identify where your website traffic comes from. By adding UTM parameters to your email links, you can see how your campaigns drive site visits and bookings.
Aesthetix CRM supports three UTM parameters by default:
utm_source = email: A required field kept selected by default, used for internal tracking.
utm_medium = email marketing: A required field whose value you can customize. The default is "email marketing".
utm_campaign = Campaign Name (Send Date): An optional field whose value you can choose from the dropdowns.
You can add up to five additional custom parameters by specifying each value as text.
Avoid personal information. Do not put personally identifiable information such as names, addresses, or ID numbers in UTM values. Analytics platforms restrict this data.
Stick to the essentials. Use utm_source, utm_medium, and utm_campaign for clear, effective analysis.
Keep case consistent. UTM parameters are case sensitive. Choose a capitalization rule and use it every time.
Prefer underscores. Use underscores instead of spaces to avoid encoding issues.
Trigger links do not carry UTM parameters in this release.
Incorrect syntax breaks tracking. Links need the correct prefix, such as https://, especially if saved under a custom value.
Test first. Send a test campaign to confirm your UTM parameters work before sending broadly.
Go to the Email Marketing section.
Click the Settings page under Email Campaign.
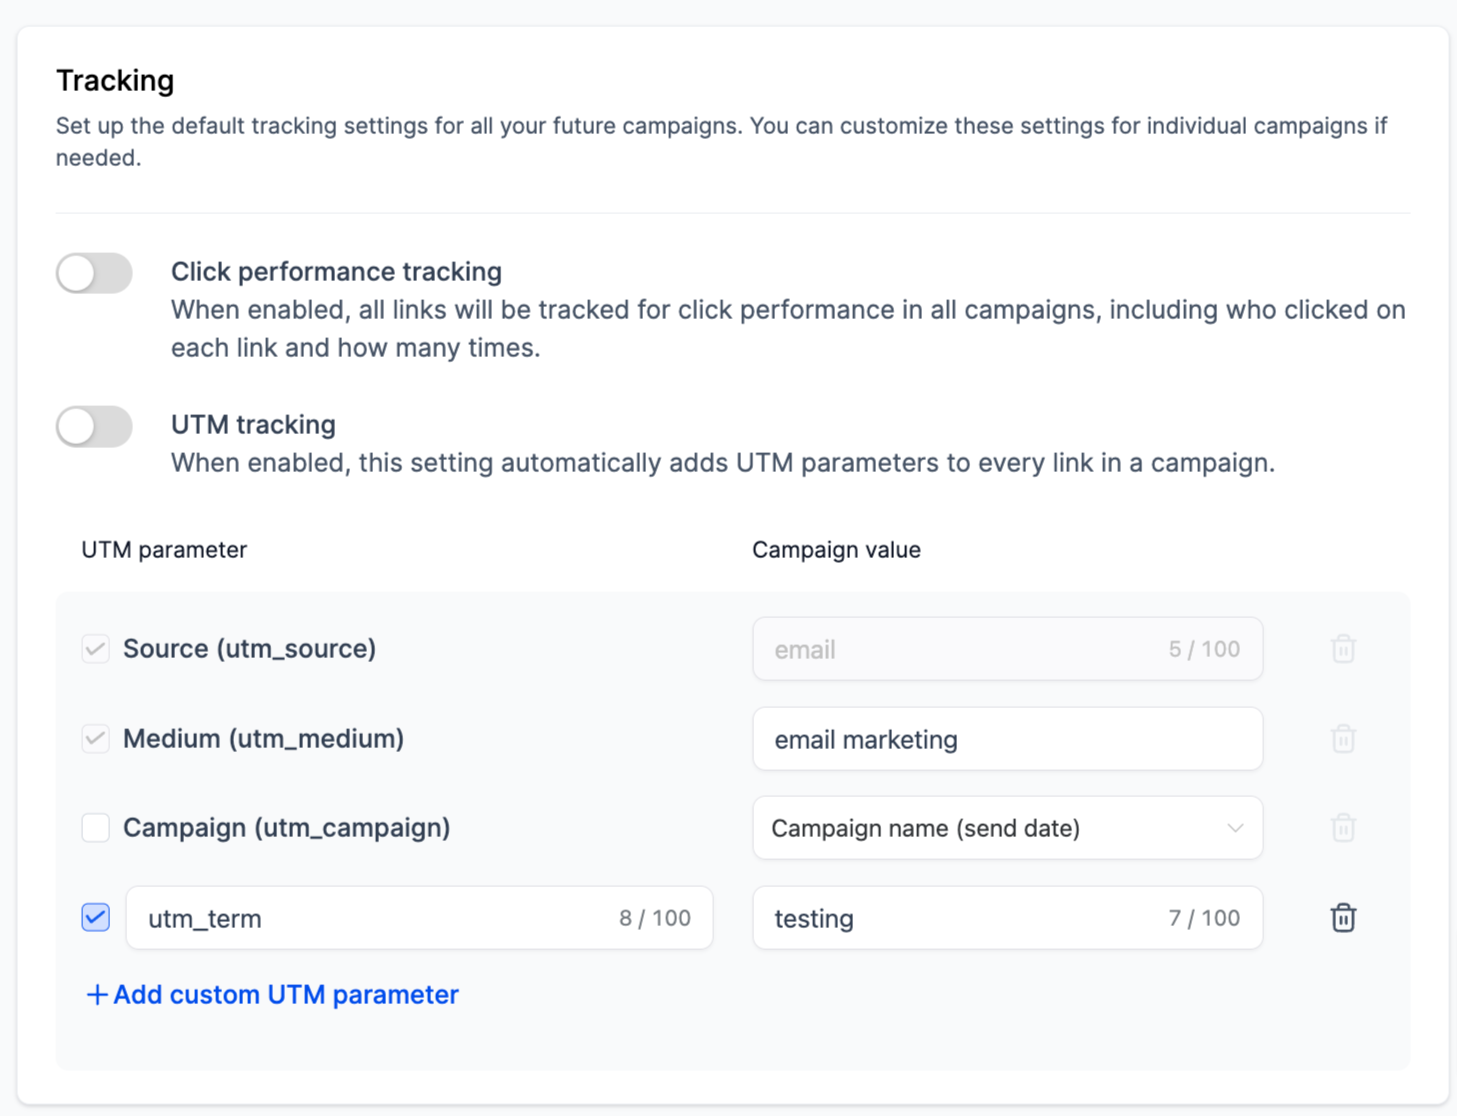
Click the Tracking option to review the default UTM parameters.
Toggle the switch to apply UTM parameters to all campaigns by default.
Edit the values for utm_medium or utm_campaign as needed.
Click Add Custom Parameter to specify additional parameters and their values.
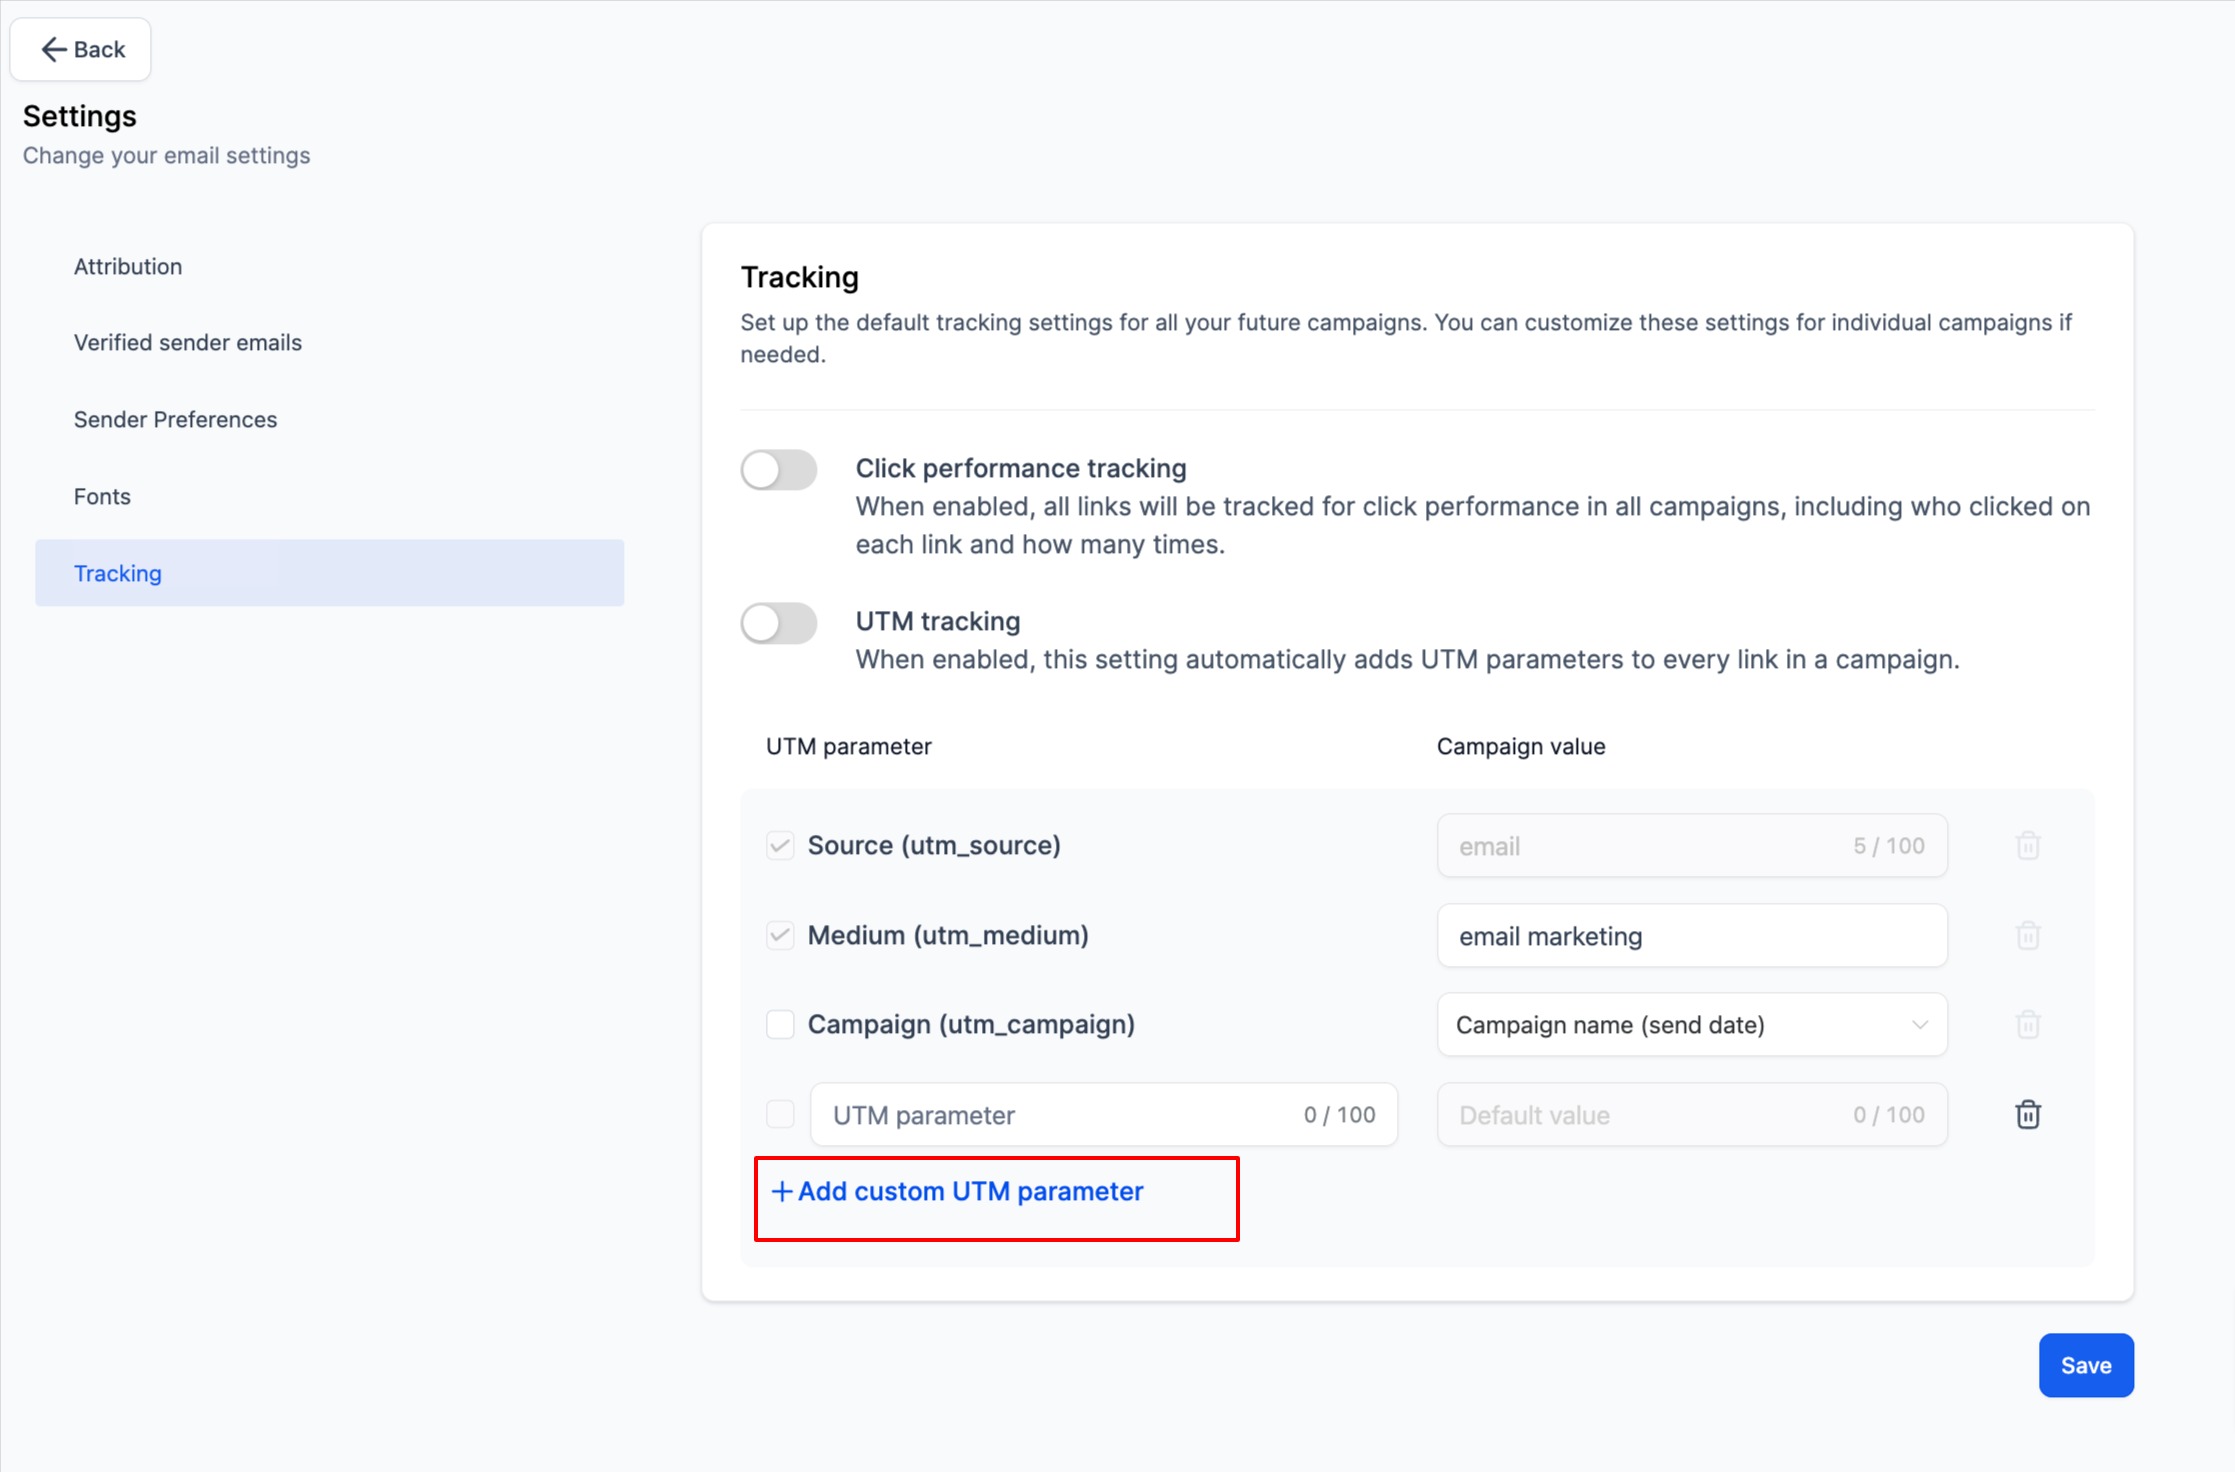
Check the boxes next to the UTM parameters you want to add to your campaigns.
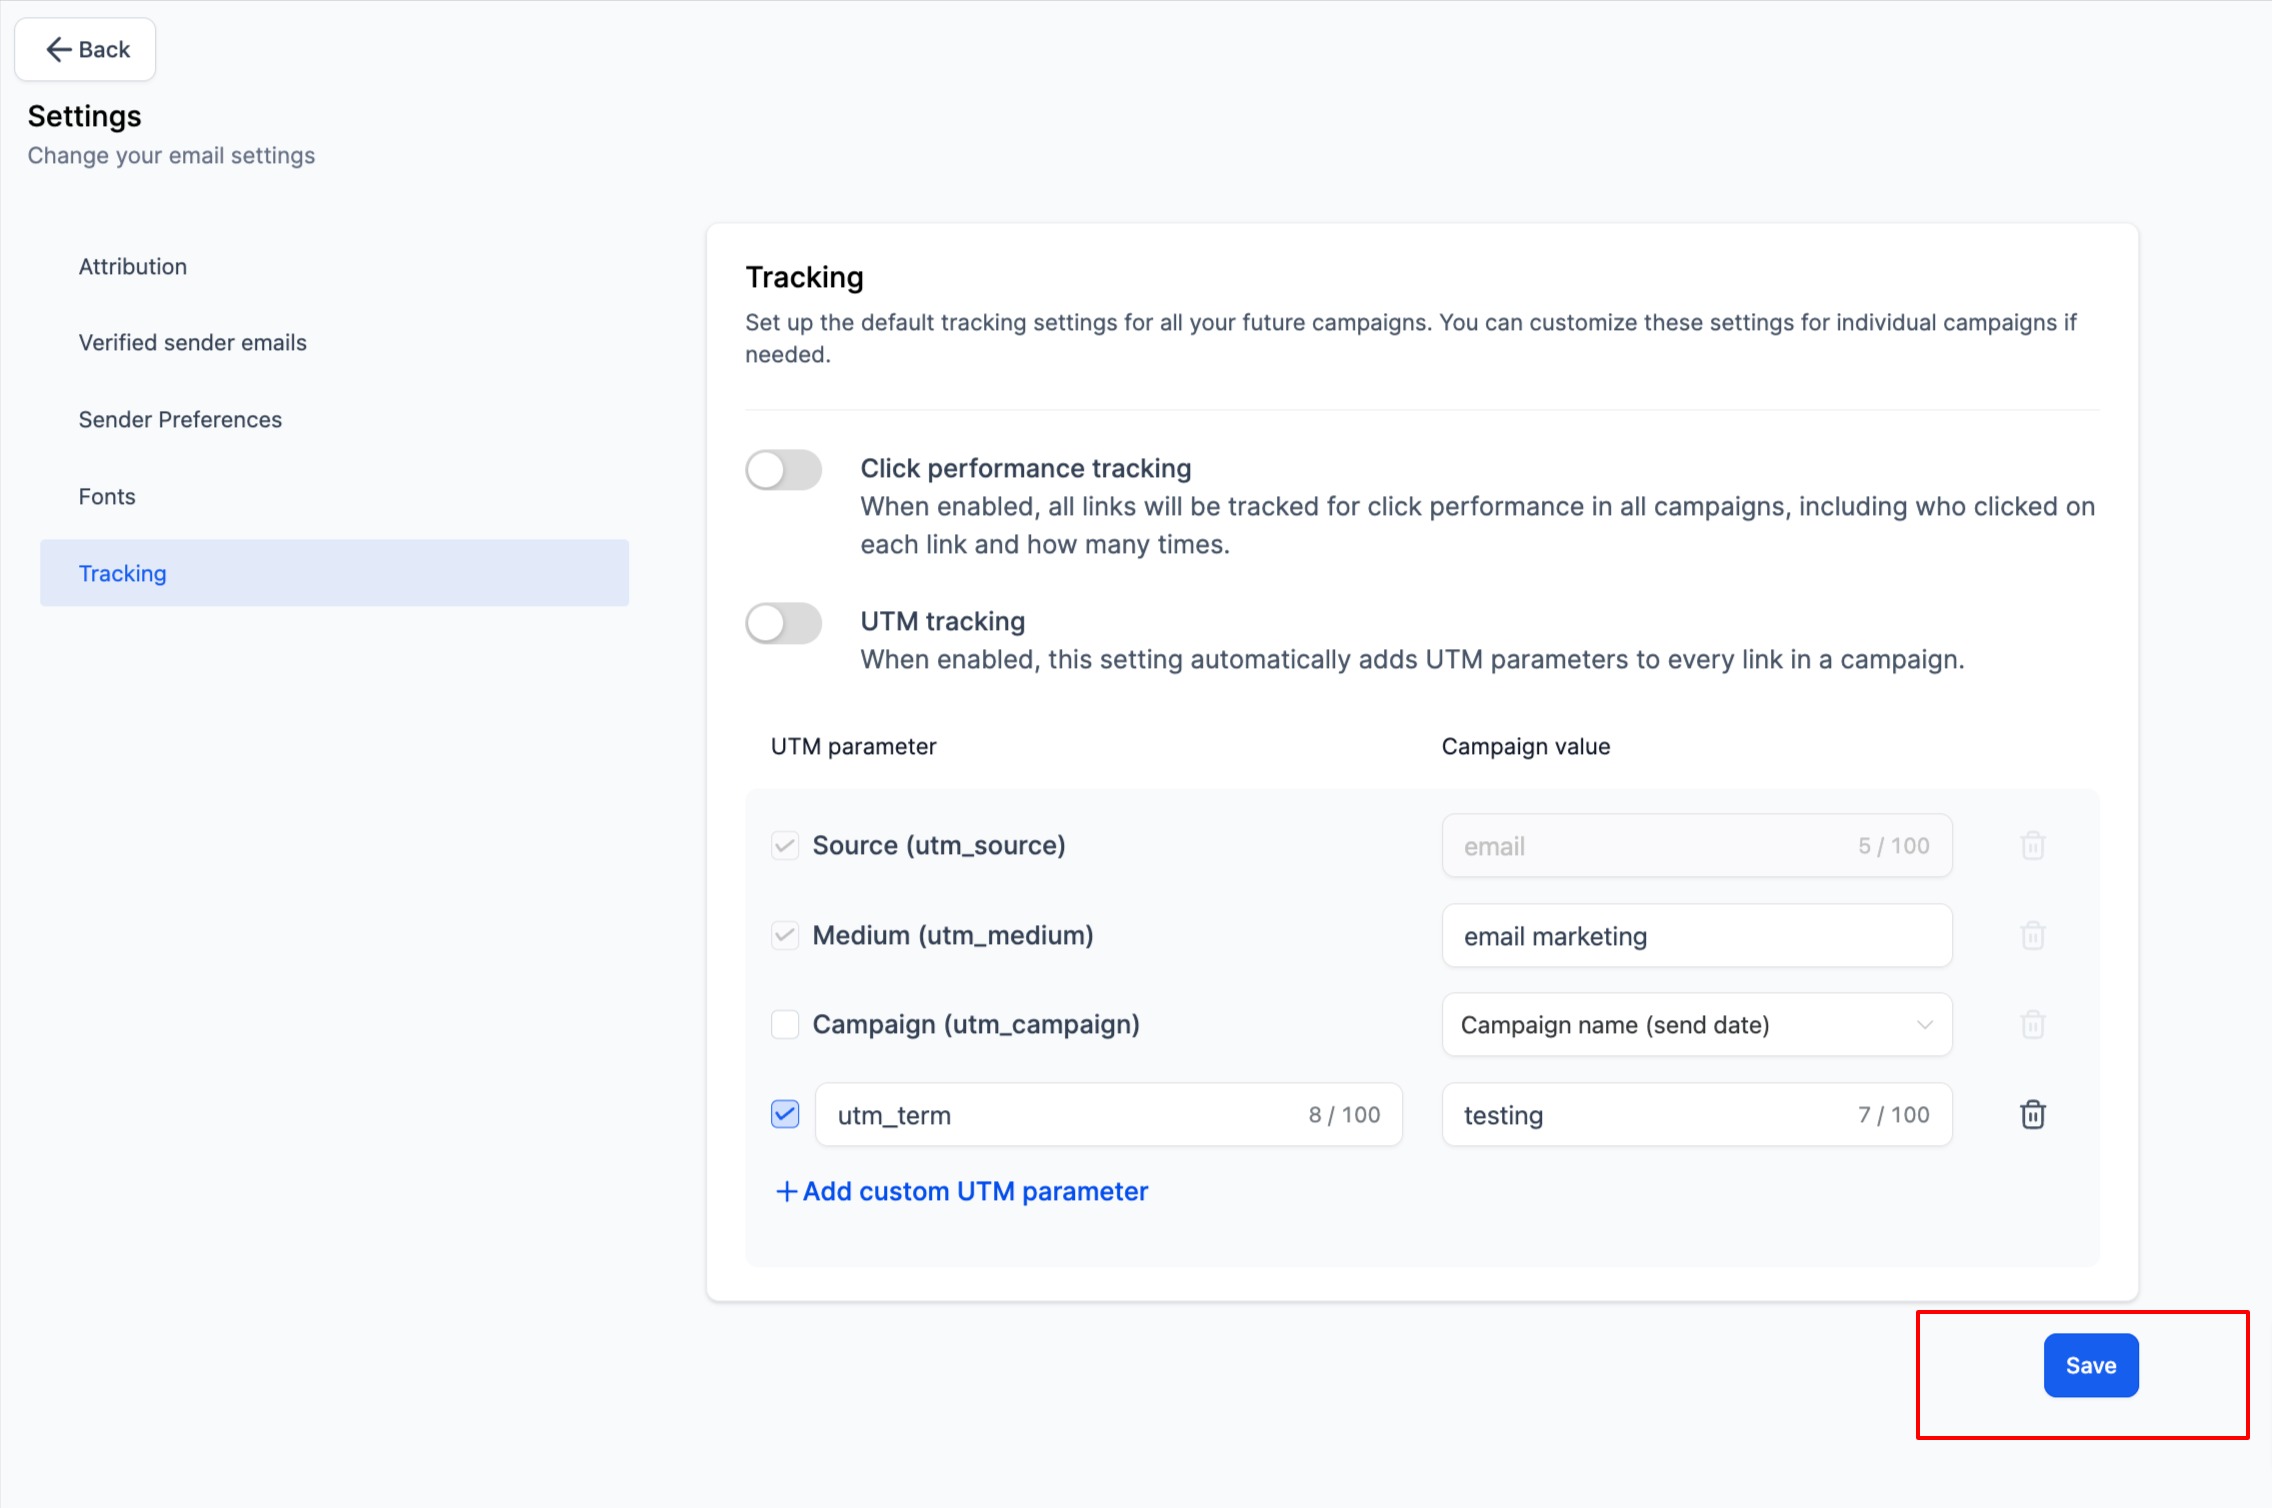
Click Save to apply your settings.
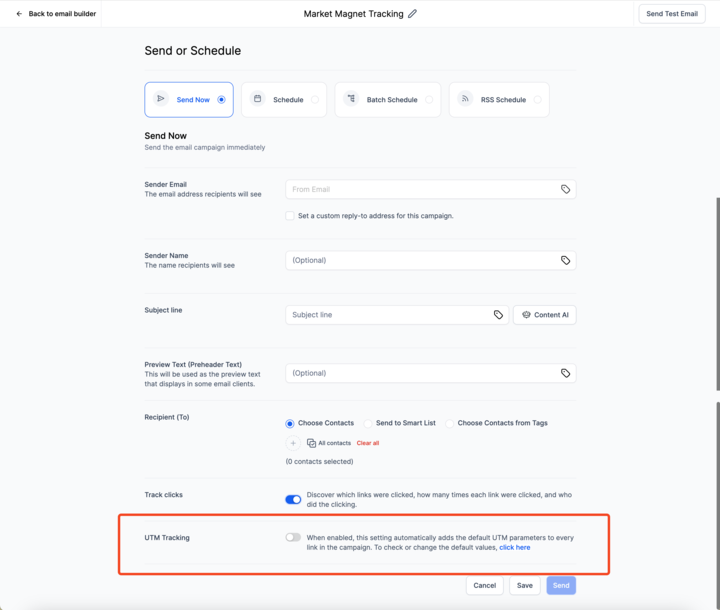
To disable UTM parameters for a particular campaign, turn off the tracking option on the Send or Schedule page.
You can download email performance metrics from the Email Statistics dashboard as a CSV file. This makes it easy to analyze campaign performance, share results with your team, and keep reporting records outside the platform. Exports can include statistics from campaigns, workflows, and bulk email actions, and the download link is delivered securely by email.
Export Type | What It Includes |
|---|---|
All Campaigns | All email activity in Email Statistics, including campaigns, workflows, and bulk sends. |
Email Marketing Campaigns Only | Performance for campaigns created in Marketing → Emails → Campaigns. |
Workflows Only | Performance for individual email actions within workflows. |
Bulk Actions Only | Statistics for emails sent through Contacts → Bulk Actions. |
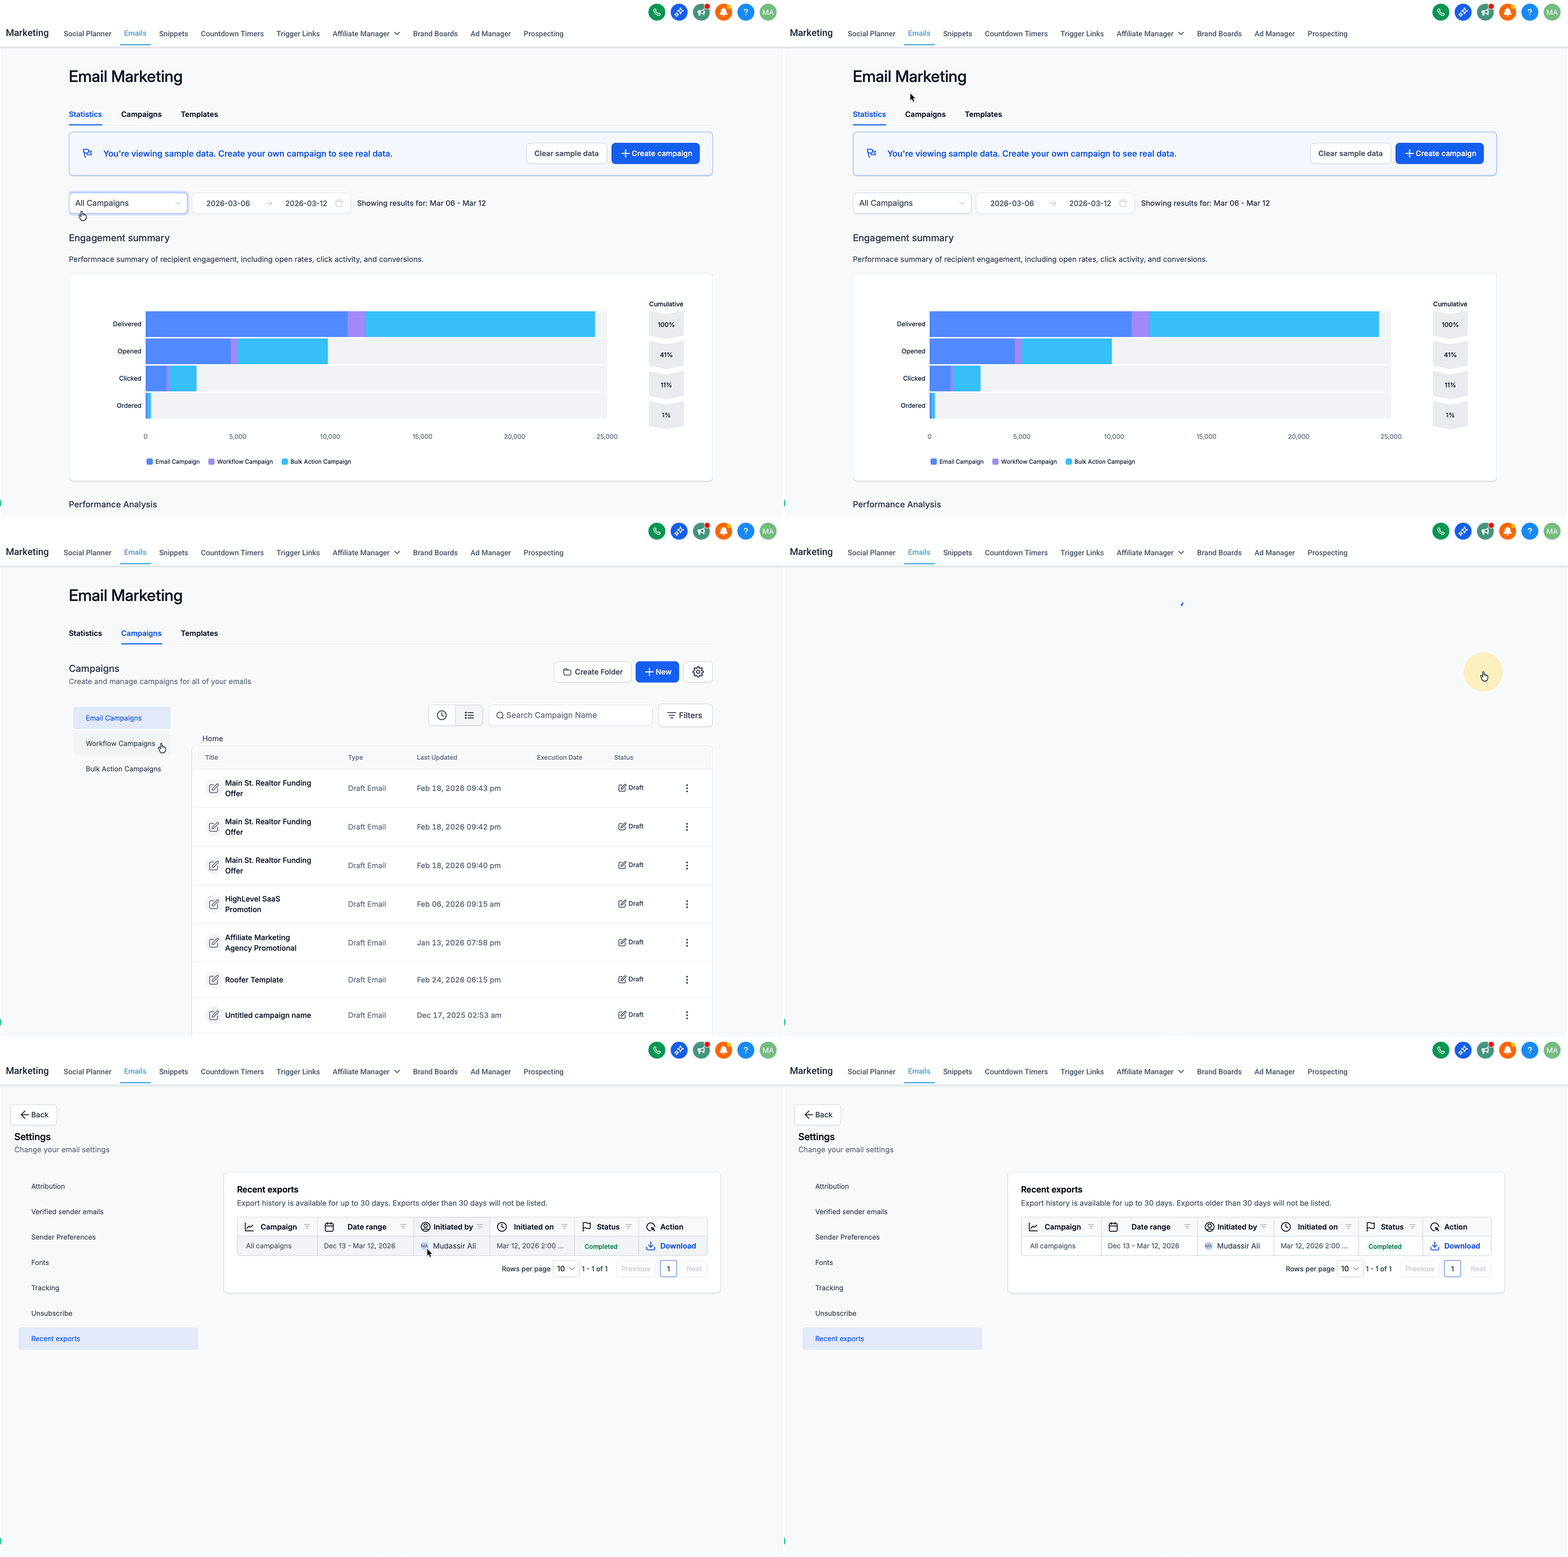
Navigate to Marketing → Emails → Statistics.
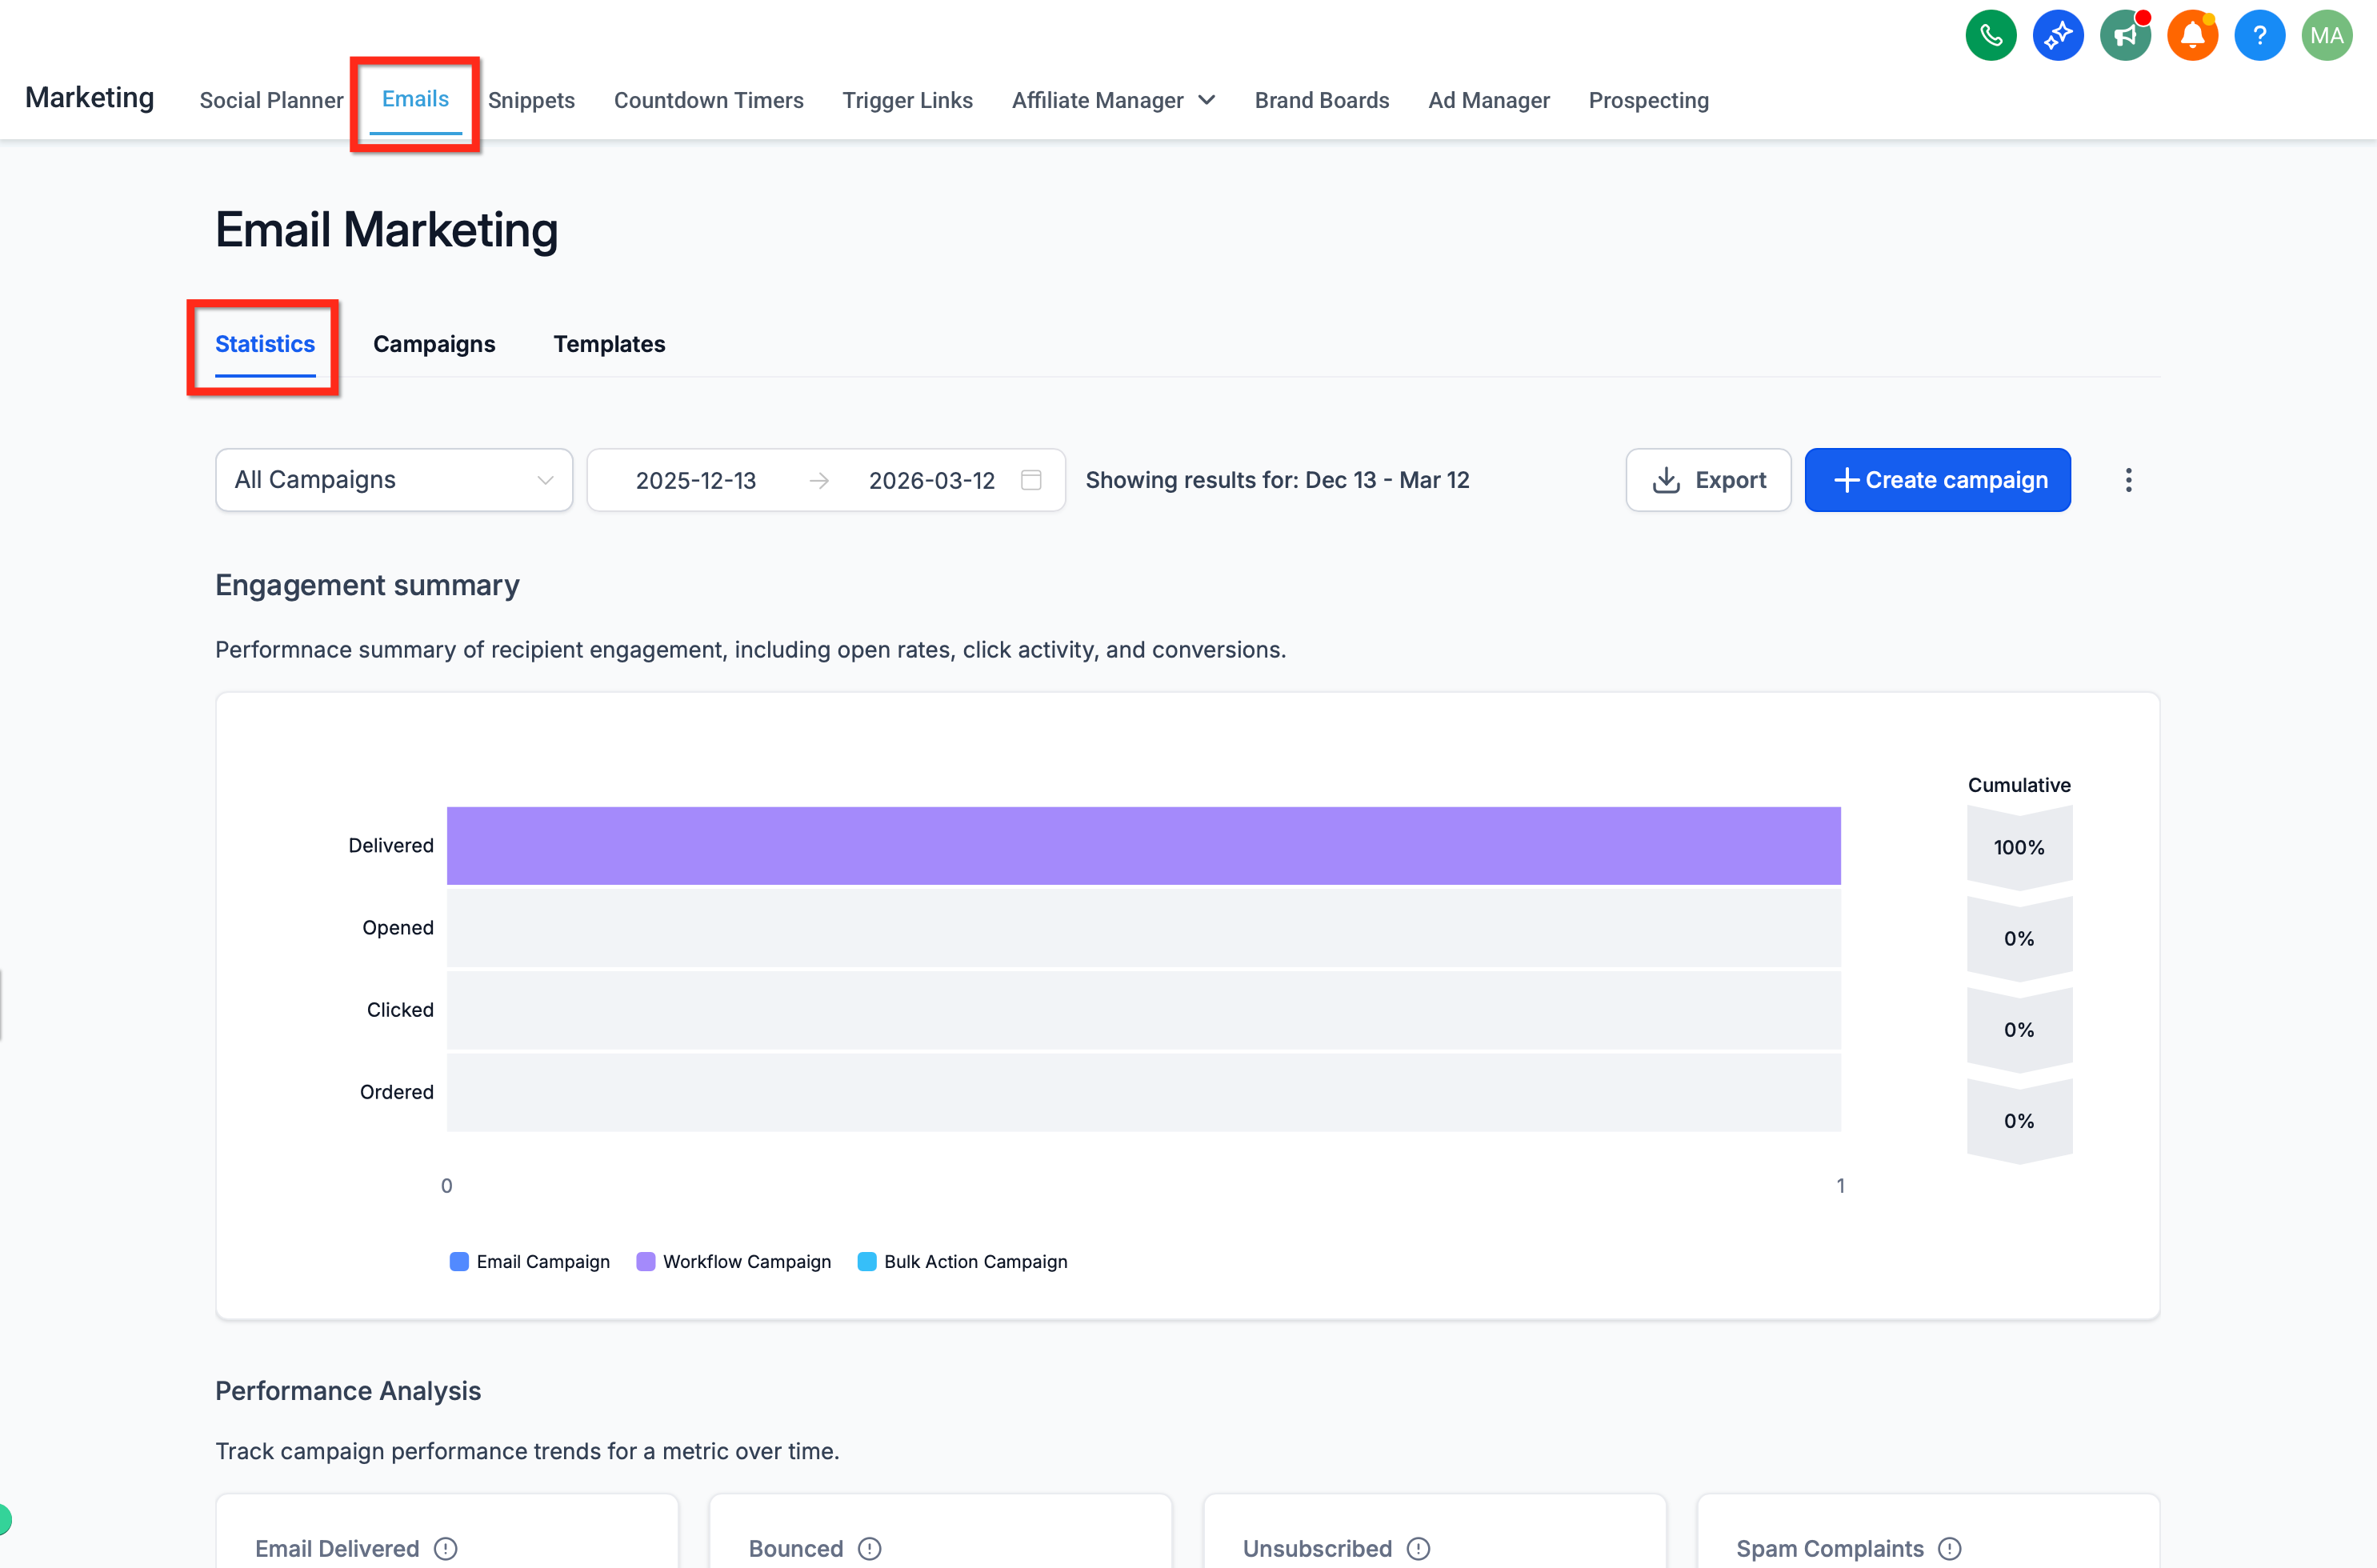
Choose the campaign type and click Export.
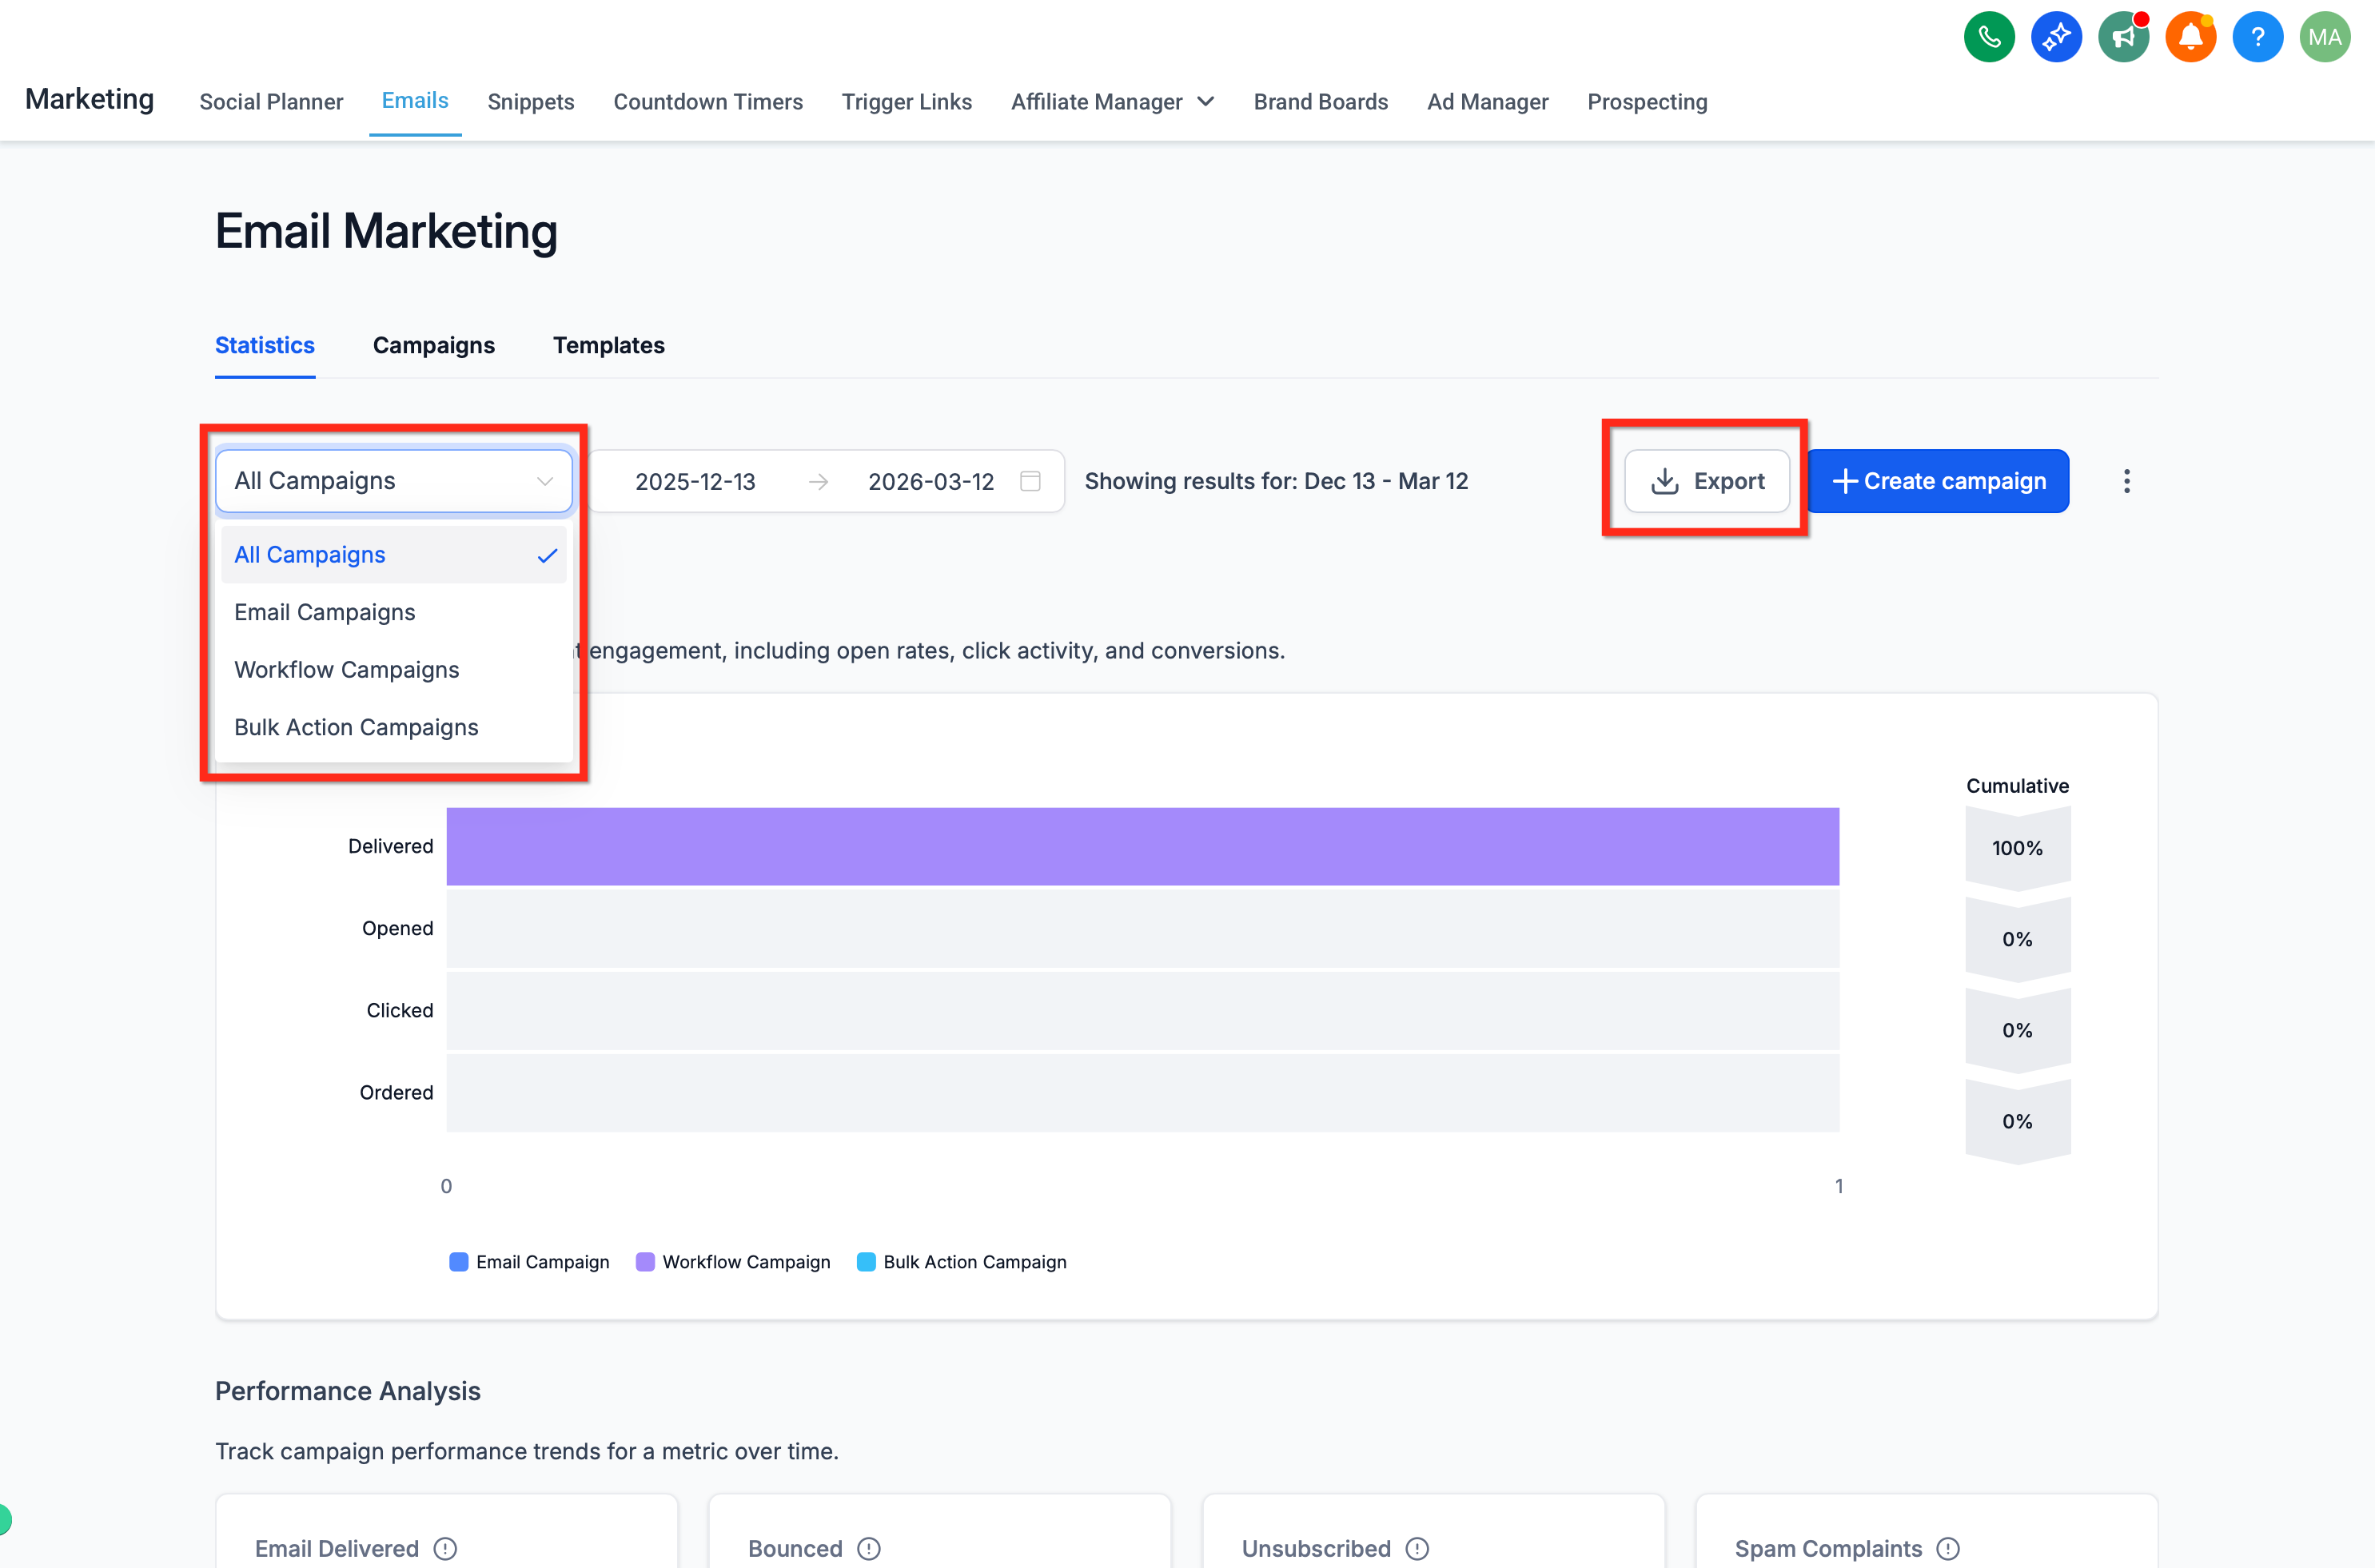
Add the email address or addresses where you want to receive the file, then proceed.
Check your inbox for the message containing the download link to the CSV file.
Open the file to review key metrics such as deliveries, opens, and clicks.

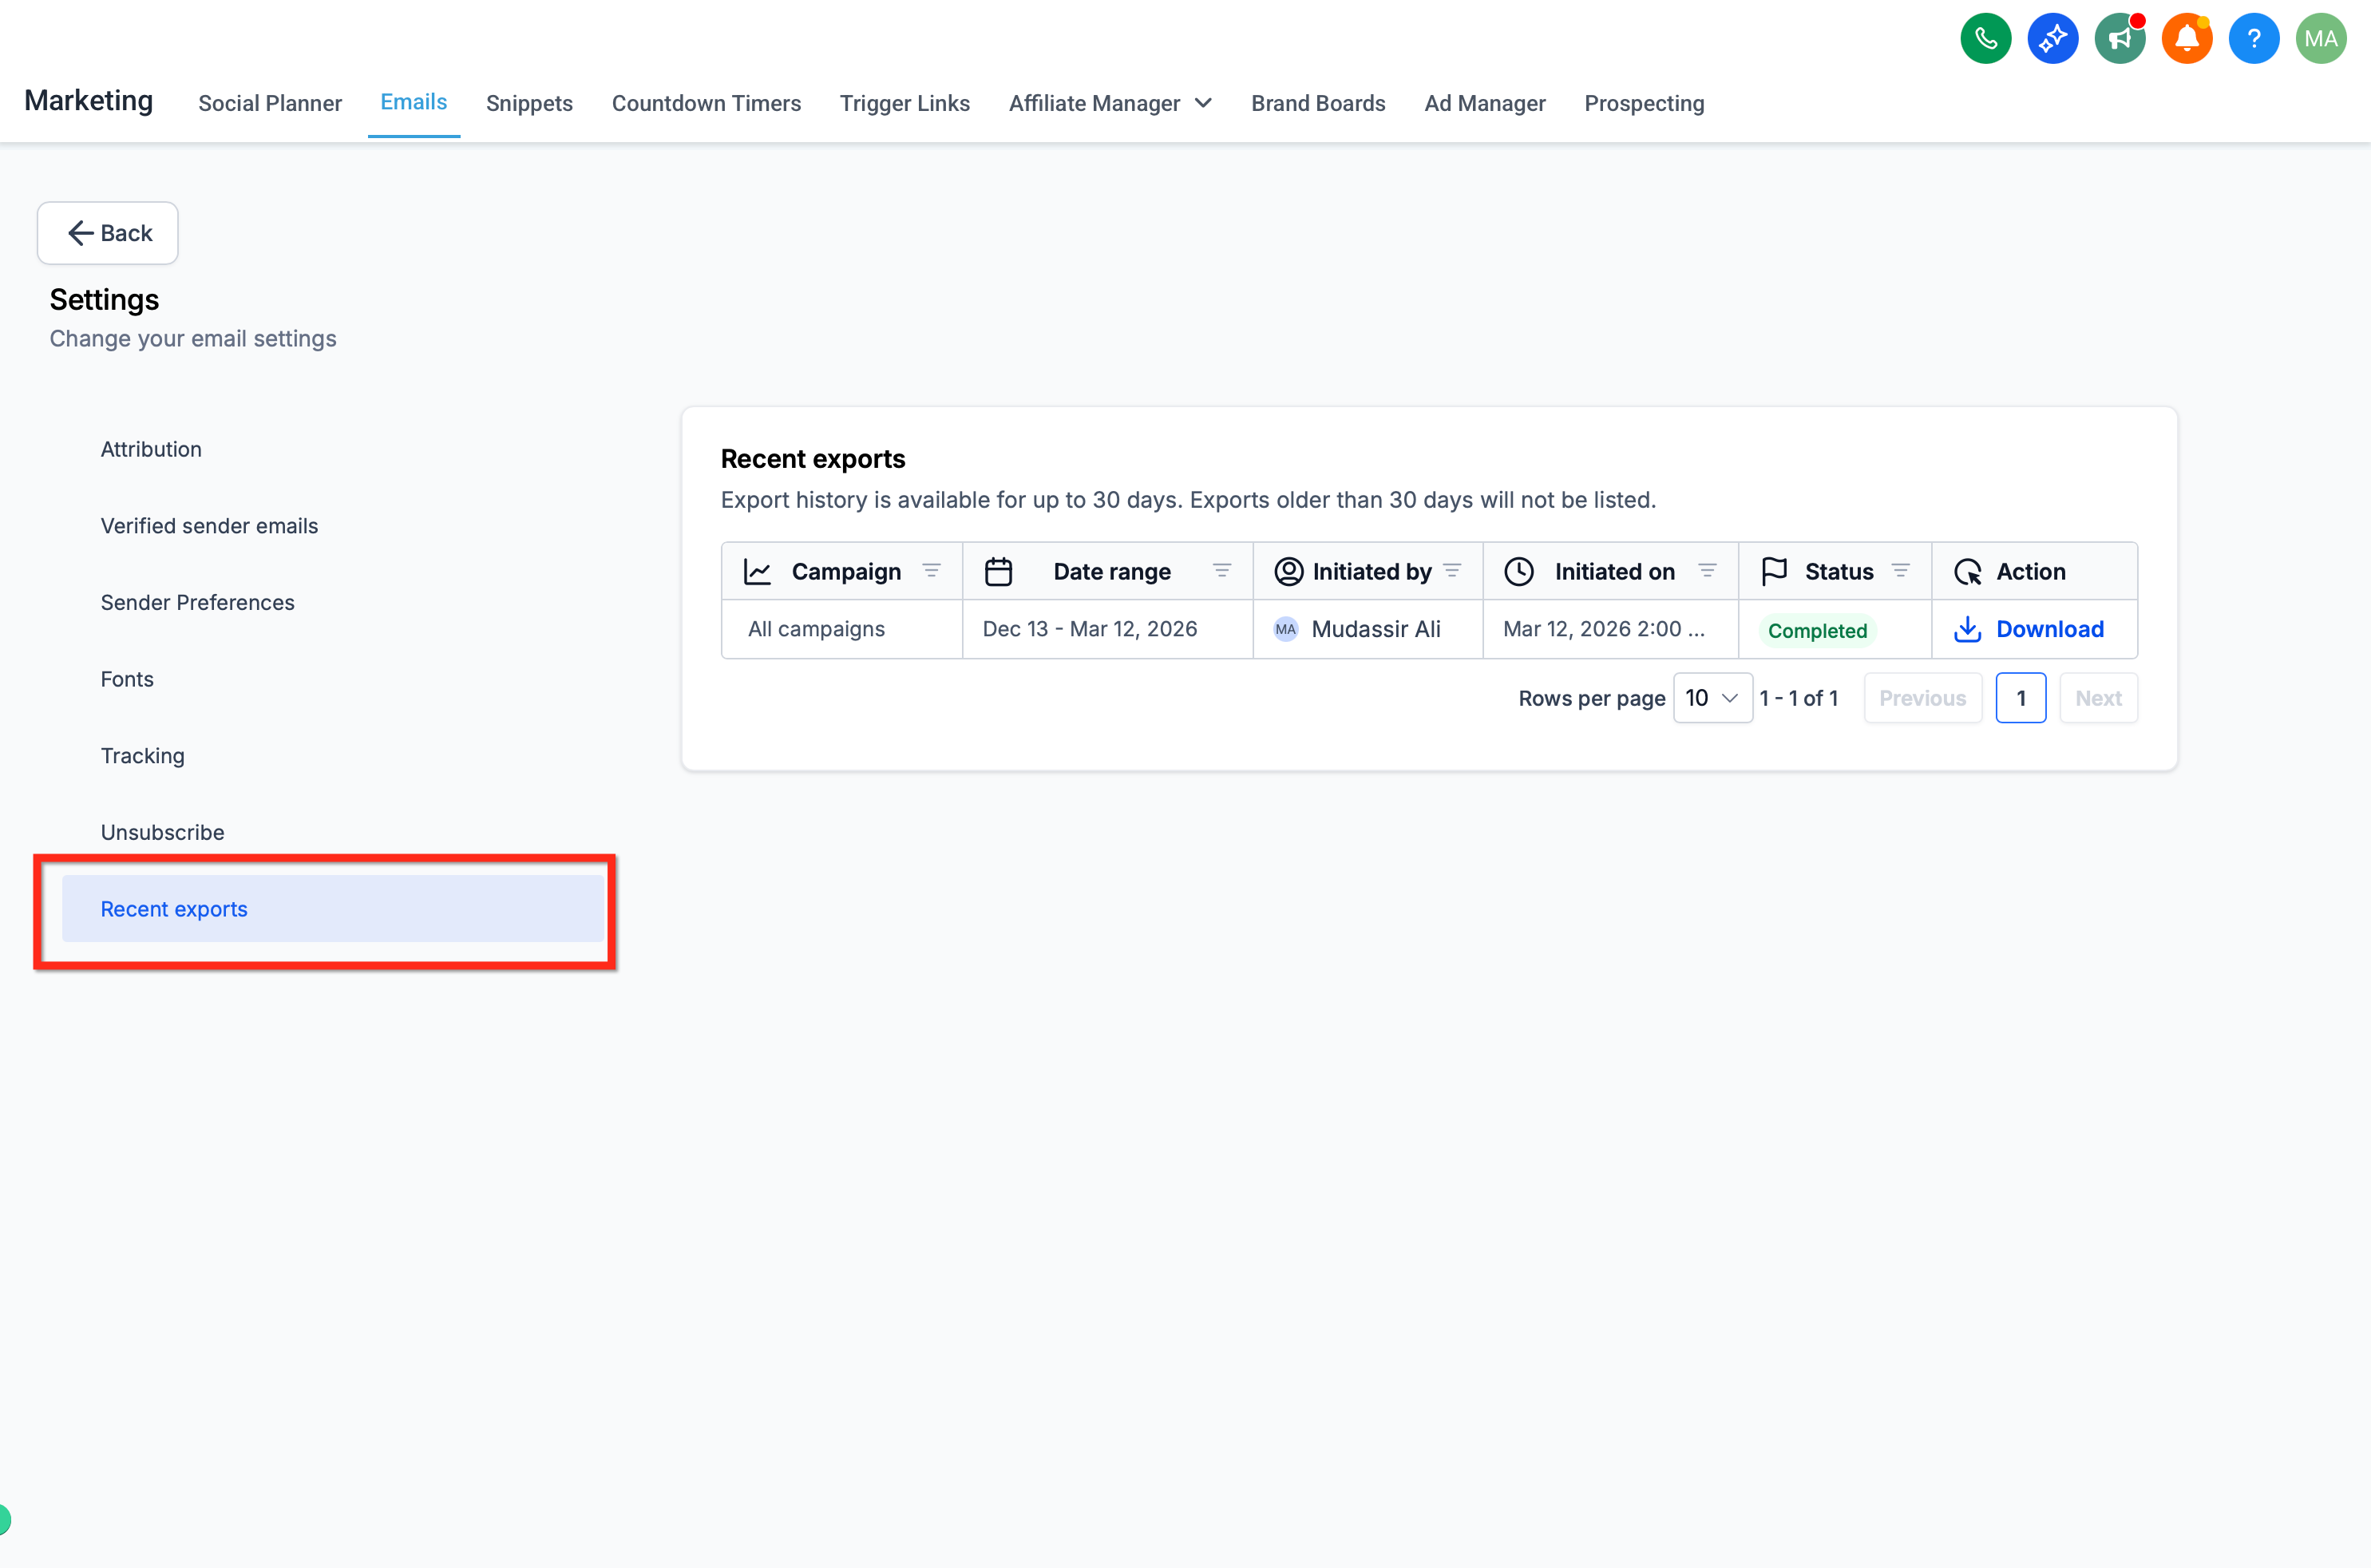
To find past exports, go to Campaigns → Settings → Recent Exports.
The Recent Exports area stores export records for up to 30 days, showing the file, export type, who requested it, the date, and the status. Download links remain valid for 30 days.
You can add tags to contacts based on how they interacted with a campaign, such as opens and clicks, directly from the campaign's statistics page. This lets you instantly segment and personalize follow-ups without setting up tags in advance. With auto-tagging, new contacts who engage with the campaign are tagged automatically in real time.
Go to Marketing → Email Campaigns.
Find a sent campaign and click the three-dot menu, then Statistics.
Click Load More to view interaction data such as Opened and Clicked.
Choose an interaction category, for example Opened.
Select the contacts you want to tag.
Click Add Tags, type your tag, and apply.
In an interaction category such as Opened, select All.
Click Add Tags and enter your tags.
Enable the Auto-Tag Future Interactions toggle.
Manual tagging is visible in Tags and Bulk Actions. Auto-tagged contacts do not appear in the Bulk Actions log but are tagged automatically as they interact. Auto-tagging is not available for invalid contacts or Order Details lists.
What if my account has not sent 1,000 emails in the last 60 days? Smart Send stays greyed out. Use a regular schedule until you meet the threshold, and Smart Send unlocks automatically once you have enough data.
Does Smart Send respect each contact's time zone? Smart Send optimizes at the account level. For per-contact time-zone sending, use the Workflows area with a Wait step set to a date and time.
Can I override the Smart Send recommendation? Yes. You can accept the recommended time or override it with any custom date and time before scheduling.
Do UTM parameters work on every link in my email?
They apply to standard campaign links. Trigger links do not carry UTM parameters in this release, and links must use correct syntax such as an https:// prefix.
How long is an export download link valid? The download link remains valid for 30 days, and your export history is available under Settings → Recent Exports for the same window.
Can I export workflow email performance? Yes. Workflow exports provide performance data at the individual email action level.
Does exporting change my campaigns or contacts? No. Exporting is a reporting action only. It does not modify campaigns, workflows, contacts, or statistics.
Can I remove tags from the campaign statistics page? No. Tagging from statistics only adds tags. Remove tags manually through Contacts or your Tags settings.
Does auto-tagging apply to past interactions? Yes. When enabled, auto-tagging applies to past interactions as well as new ones going forward.
