Aesthetix CRM surveys can collect payments and sell products directly, turning a survey into a two-step order form. This is handy for booking deposits, prepaid treatment packages, membership sign-ups, or event tickets, all captured in the same flow patients already use to answer your questions. You can also add order bumps to present an add-on offer at the point of sale.
Surveys live under Web Tools → Surveys, alongside Forms.
Tip: Before you connect a payment processor, consider AX Pay. It offers better rates than Stripe and integrates directly with Aesthetix CRM, so more of every deposit and package payment stays with your practice. See the AX Pay Overview and Setup Guide.
Collect Payments: Accept a fixed amount or let the patient enter a custom amount (useful for deposits or gift-card style purchases).
Sell Products: Add products with pricing, quantity options, and even subscription plans for memberships or recurring packages.
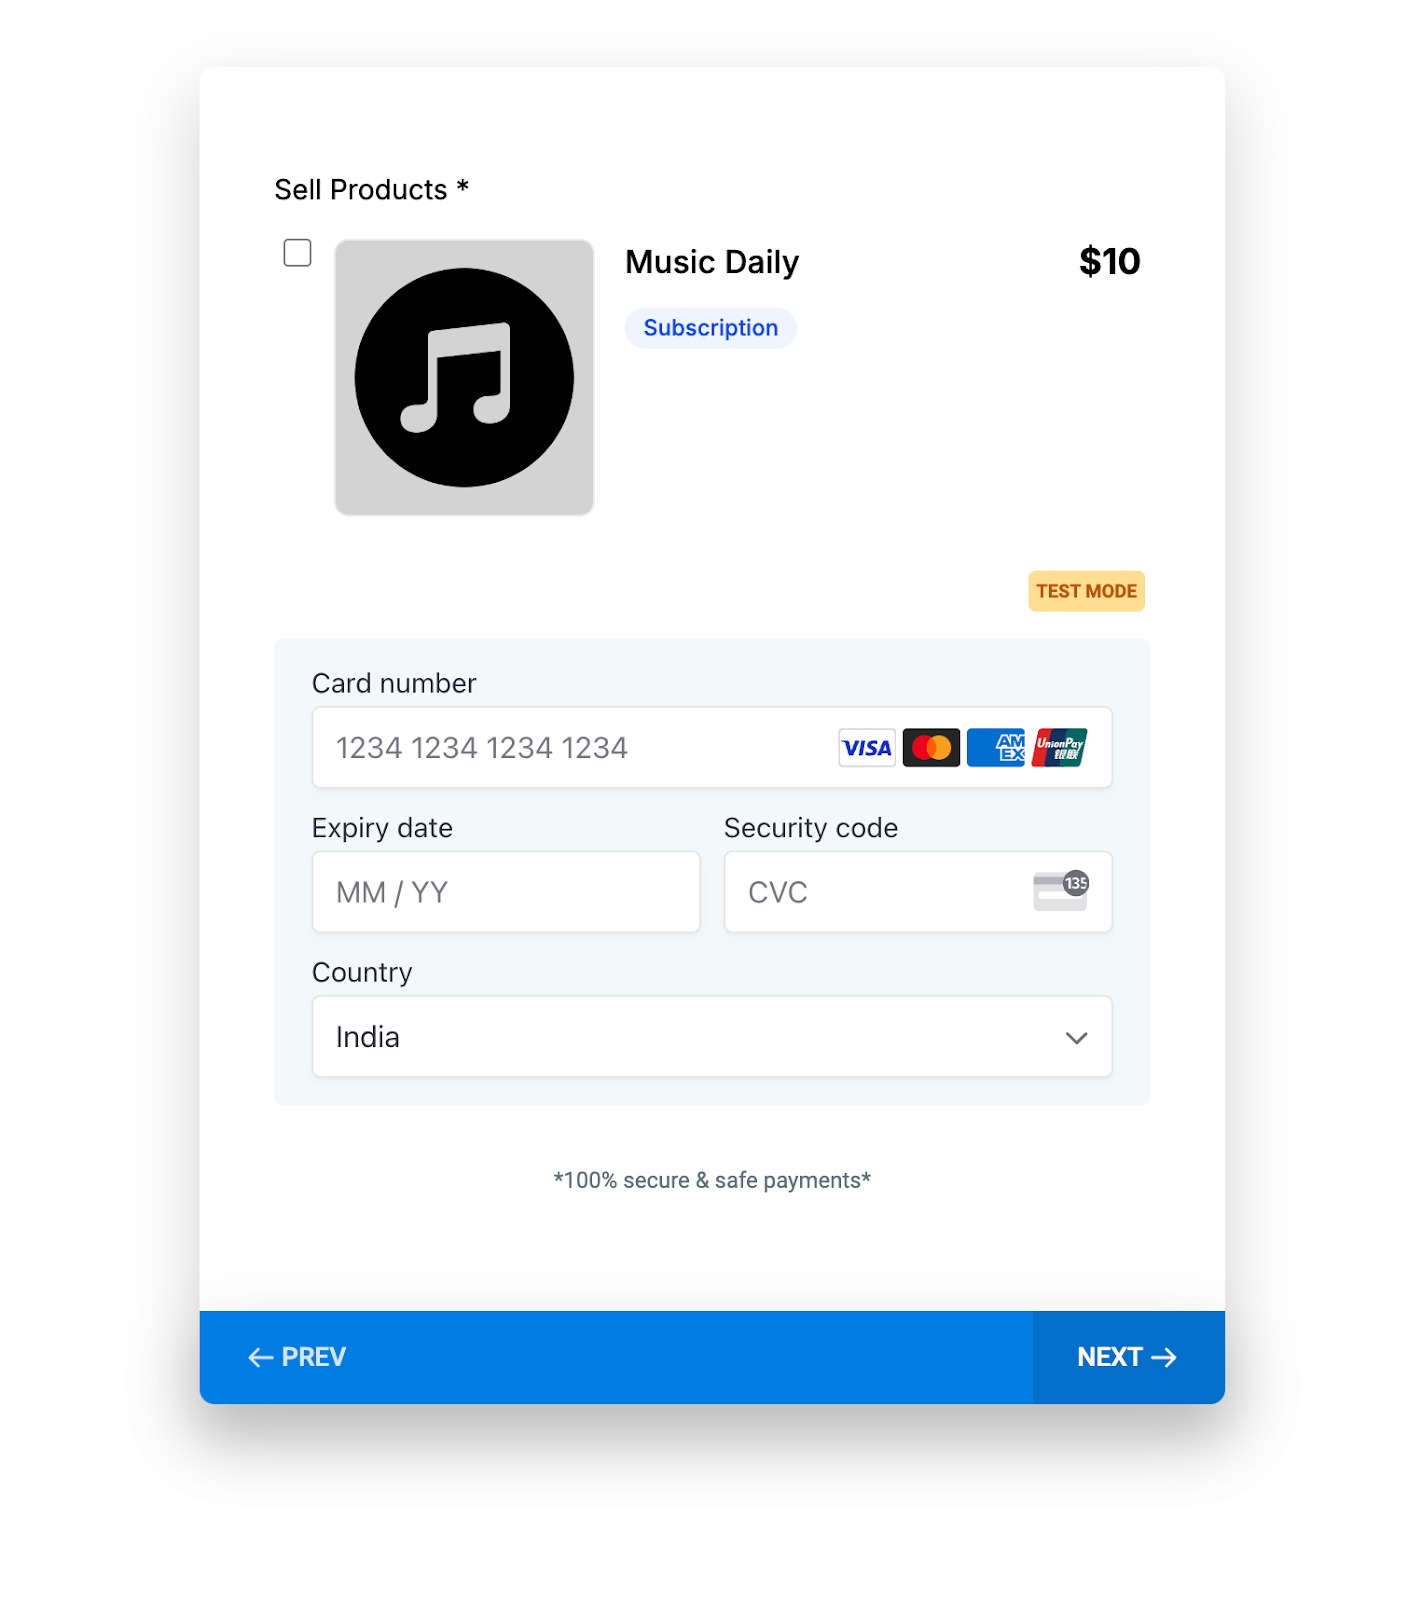
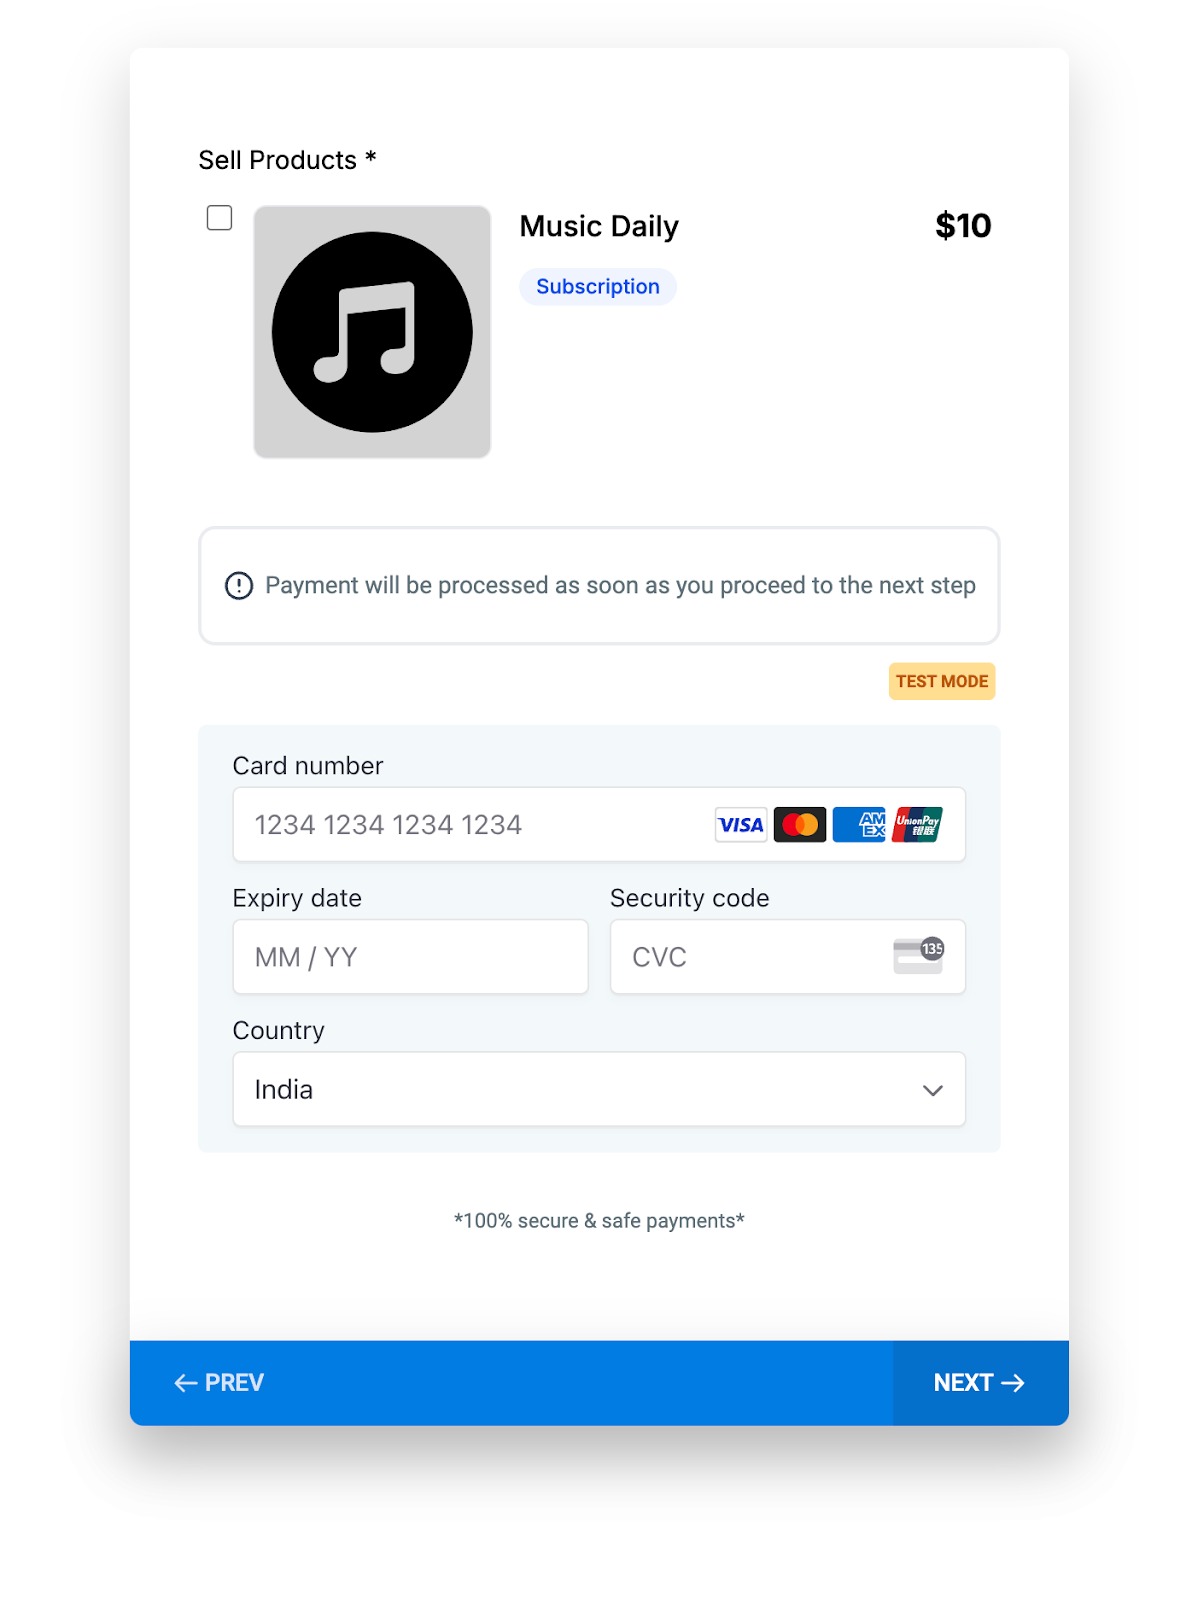
When a payment element is used, the payment is processed immediately as the patient moves to the next step. No extra action is required, and partial contact creation stays on so you still capture the patient's details even mid-flow. A confirmation screen appears on a successful transaction.
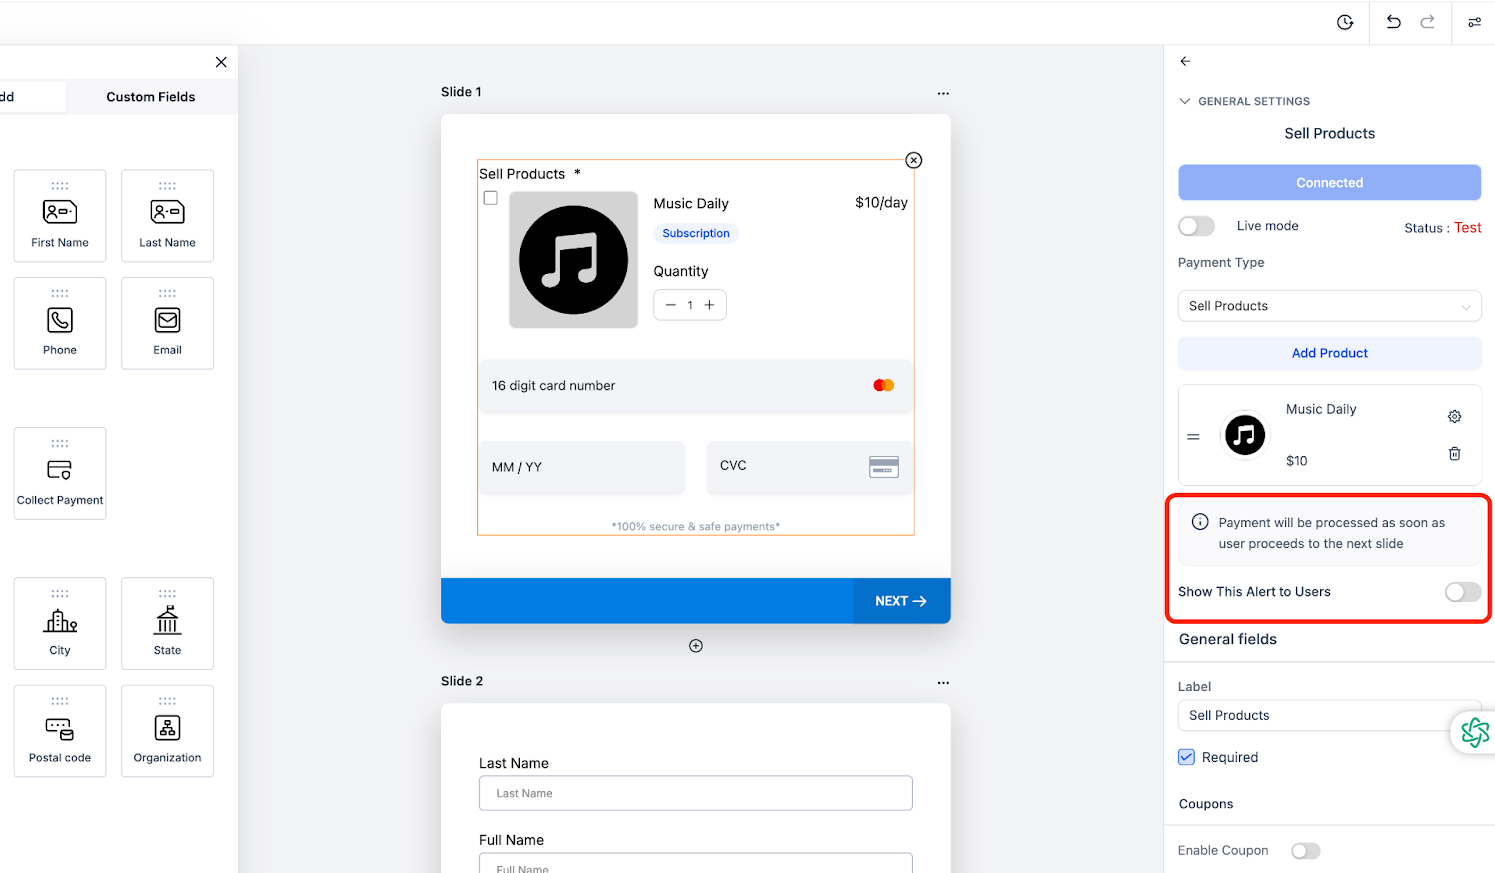
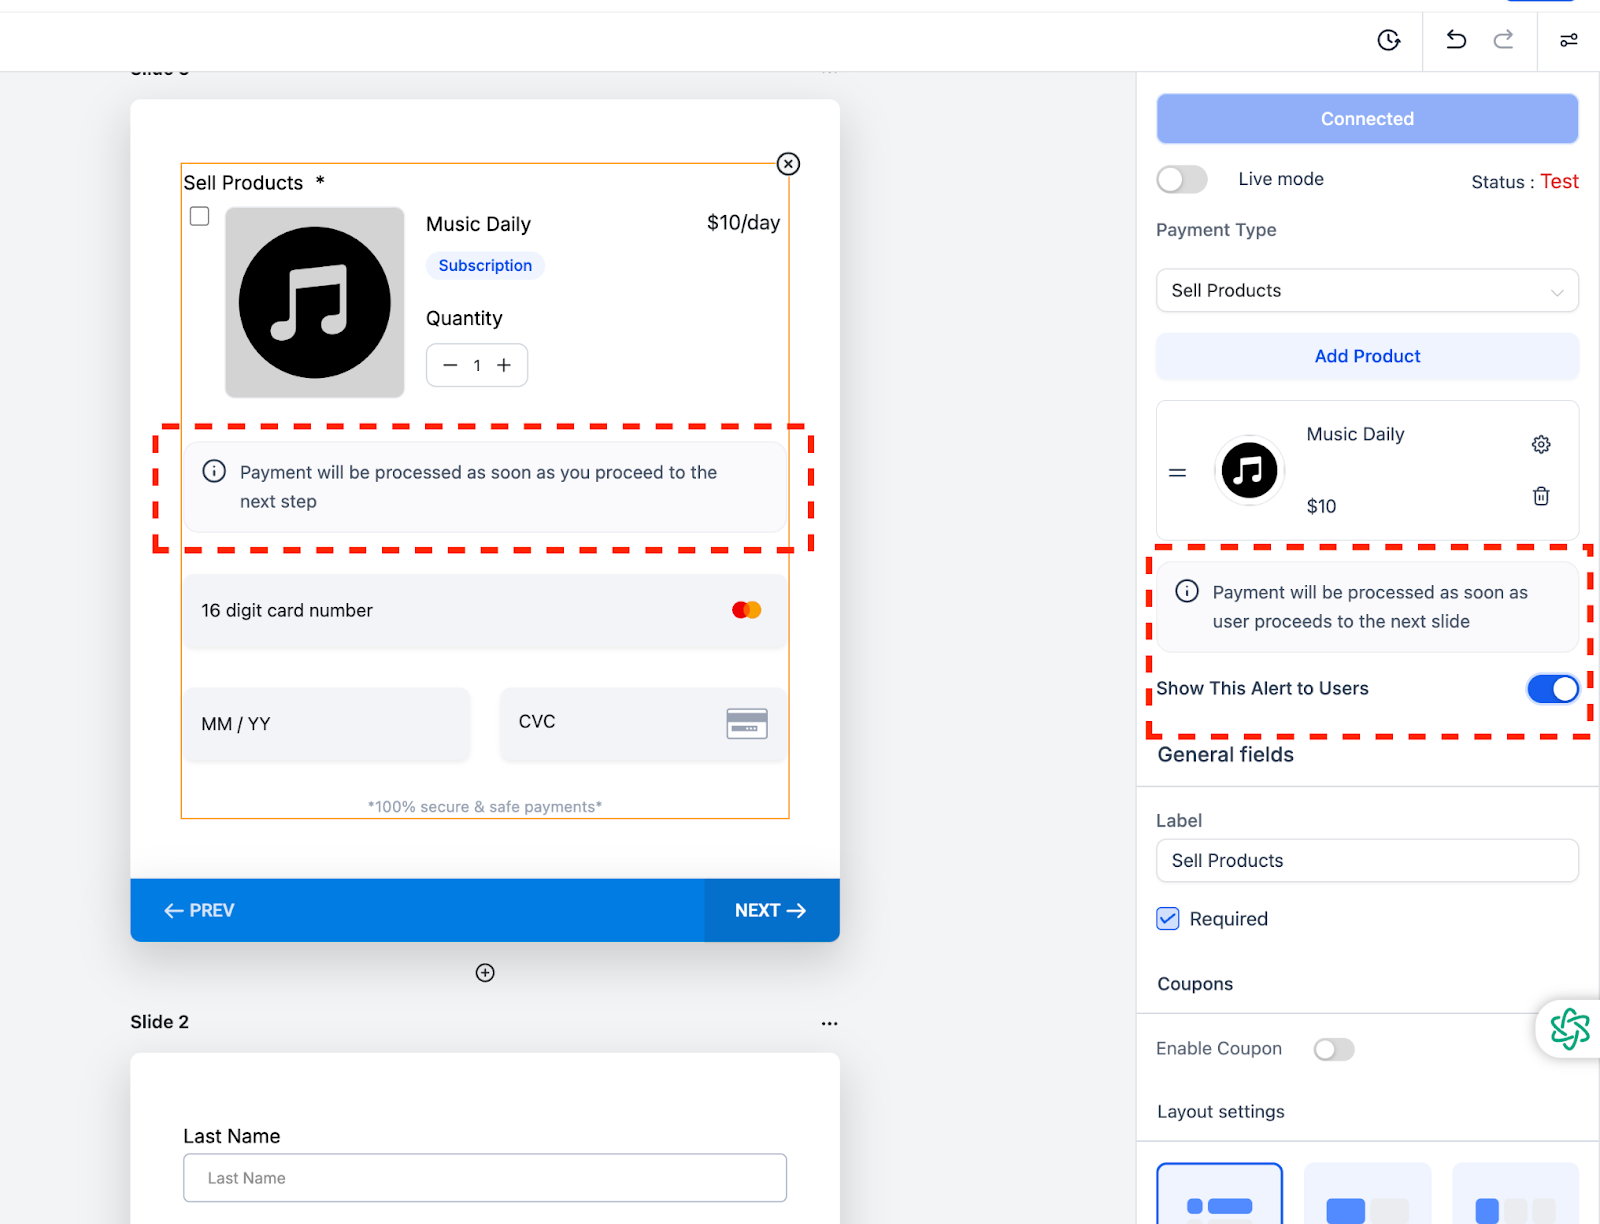
You can also add an optional information box that reads, for example, "Payment will be processed as soon as you proceed to the next step." This alert is fully customizable and can be enabled or disabled.
Surveys that collect payment details or clinical intake information are handling sensitive patient data. Collect only what you need to complete the transaction, avoid putting diagnoses, treatment specifics, or other PHI in product names or highlight text that a patient did not intend to share, and make sure your practice has a signed BAA in place covering the tools involved. Payment card data is processed securely and encrypted by your connected payment provider, so do not add free-text fields that ask patients to type card numbers.
In the survey builder, drag the Collect Payment or Sell Products element onto the survey canvas.
Add your product details, pricing, and any optional subscription plans in the element settings.
Optionally enable the payment alert box described above.
Patients fill in their payment details, click Next, and the payment is processed instantly. A confirmation screen then appears for successful transactions.
Payments are secure and encrypted.
Test your setup in Test Mode first, then switch to Live Mode once everything works as expected.
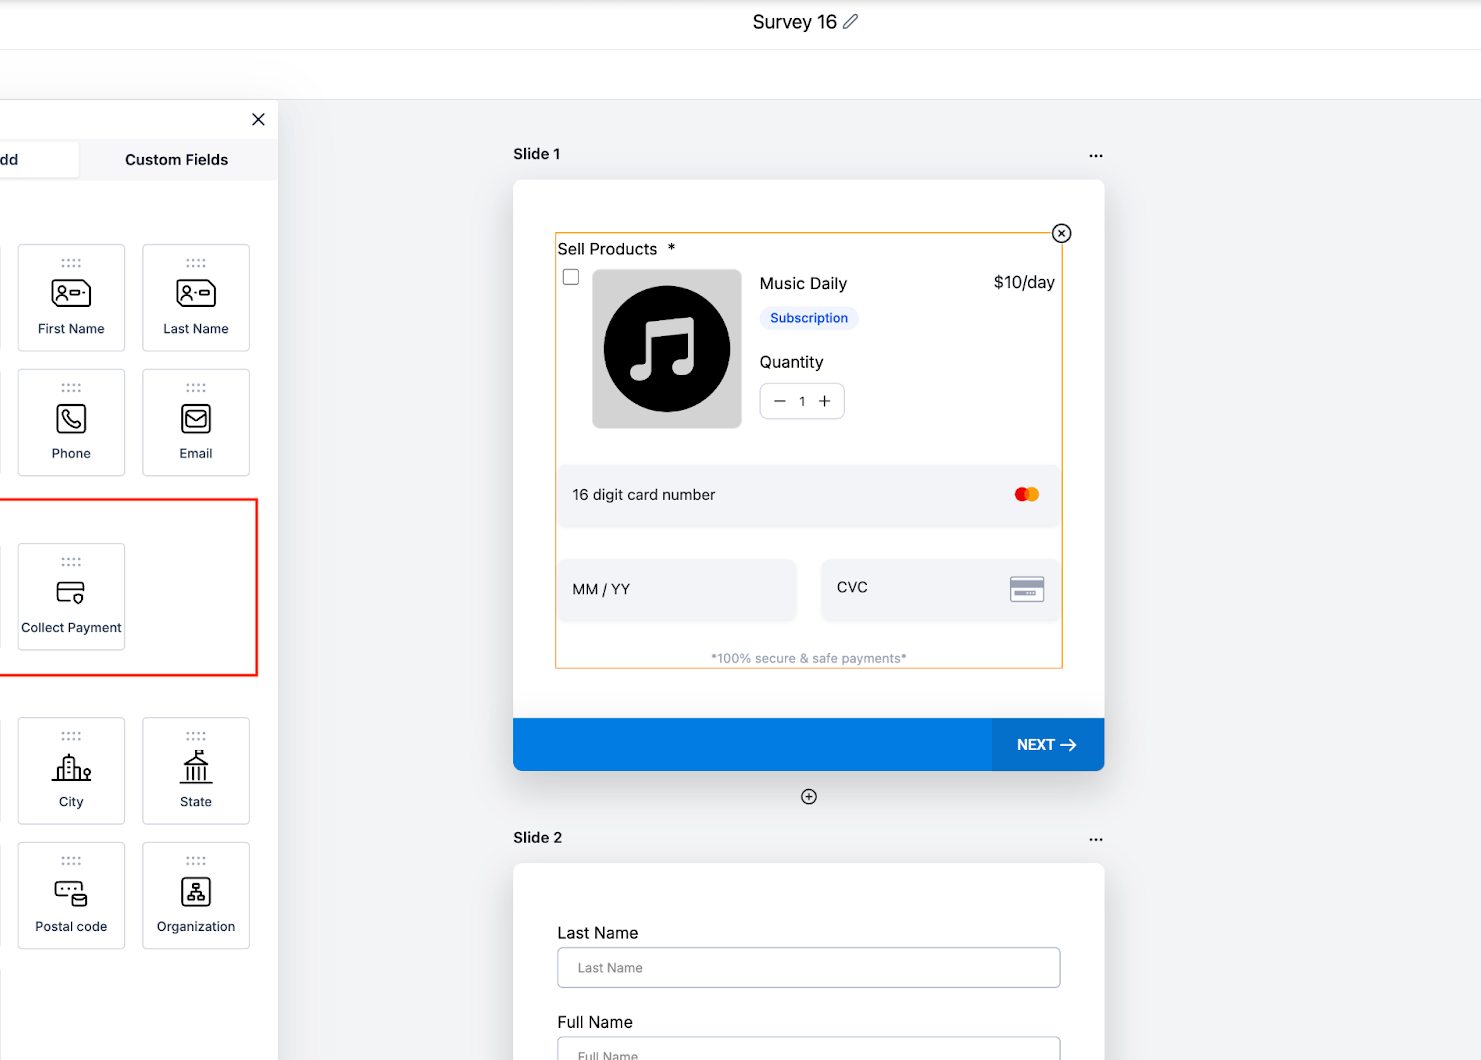
Order bumps embed an add-on offer alongside your main product, letting you present an upsell (for example, a skincare kit alongside a treatment package) without interrupting the flow. Bumps support both Classic and Modern styles, multiple templates, and full visual customization.
Go to Web Tools → Surveys and click Add Survey.
Choose Start from Scratch or select a Template, then click Create.
From the element bar, drag the Sell Products element onto the survey canvas.
Click the Sell Products element.
In the right-side panel, click Add Product.
If you have not created a product yet, click the Click here link to open the product creation page and set one up. If you already have products, use the Please select the product dropdown.
Under Choose Product Type, select Main Product.
Under Show Options, toggle Description, Image, and Quantity on or off.
Click Add Product to insert it.
Click Add Product again.
Create a new product or select an existing one from the dropdown.
Under Choose Product Type, select Bump Product.
Add a compelling headline.
Enable or disable the image. Upload a new one, or let the system pull it from the product record.
Under Order Bump Style, pick Modern or Classic.
Use the Select Template dropdown to choose Template 1, 2, or 3.
In Highlight Text, enter an attention-grabbing snippet (for example, "Add this to your package with one click").
Choose an Icon to display next to the highlight text.
Toggle Show Price or Hide Price for the bump.
Customize the background color, highlight text color, headline color, OTO headline, and OTO text colors.
Under Layout Settings, choose a single, two, or three column layout.
Under Product Selection, allow single or multiple selections.
Toggle Footer Info (for example, "100% secure and safe payments").
Choose to hide or keep the placeholder text.
Click Save in the top-right corner to store your changes.
What payment processors work with survey payments? Order bumps and survey payments work with supported Aesthetix CRM payment processors, including AX Pay, Stripe, and PayPal. AX Pay is recommended for its better rates.
Can I add more than one bump product to a single survey? Yes. You can include multiple bump products in the same survey for multiple upsell opportunities, without disrupting the main product flow.
Can both the main product and a bump product be recurring? No. Only one product per survey can be recurring, either the main product or a single bump product, but not both. This keeps the payment logic consistent.
What happens if I do not include a main product? Bump products will not appear unless a main product is present. Always add a main product first to activate bump product visibility.
What types of surveys can support order bumps? Any survey that includes the Sell Products element can use order bumps.
Can I rearrange or temporarily disable bump products? Yes. You can toggle bumps on or off and reorder them at any time without affecting your main product setup or survey logic.
Can I personalize the design for each bump product? Yes. You can adjust colors, icons, highlight text, and pricing individually for each bump product.
Is patient payment data secure? Yes. Payments are processed securely and encrypted by your connected payment provider. Never add free-text fields asking patients to type card numbers, and make sure your practice has the appropriate BAA in place for handling patient data.
How do I test before going live? Configure your payment element, run submissions in Test Mode to confirm everything works, then switch to Live Mode.
