The Facebook Conversions API (CAPI) connects your Aesthetix CRM data directly to Meta so you can optimize ad targeting, lower your cost per result, and measure outcomes accurately. Instead of relying only on a browser pixel, CAPI sends events server-side from Aesthetix CRM to Meta, which fills the gaps left by ad blockers, cookie limits, and privacy settings.
For a med spa, this means Meta learns which leads actually booked a consult or became patients, so it can find more people like your best patients and spend your ad budget more efficiently.
Sending CAPI events in addition to the standard browser pixel improves your campaigns in several ways:
Improved accuracy: Data is sent directly from the server, bypassing browser restrictions, ad blockers, and cookie limitations for more reliable tracking.
Better attribution: Conversions are tracked across devices and platforms, including users who block cookies, giving Meta more complete data.
Fills pixel gaps: When browser pixel data is blocked or missed, CAPI still records the conversion.
Enhanced optimization: More granular server-side data helps Meta improve targeting and performance.
Privacy compliance: CAPI reduces reliance on client-side cookies.
Efficient budget spend: More accurate data lets Meta optimize your ad spend and improve ROI.
Aesthetix CRM supports two types of Facebook Conversions API events.
Funnel events are sent from a web server to record actions like a visitor viewing a page, adding a product to a cart, purchasing, subscribing, or submitting an application or form. Funnel-event setup is covered in the Facebook Funnel Event Pixel Setup guide.
Lead events report how a lead moves across your pipeline stages. For example, in a Lead to Patient pipeline, leads move from new lead to booked, patient, cold, or not a good fit. With lead events, Aesthetix CRM is the data source and sends that stage movement to Meta.
Facebook conversion leads integration helps your lead ads instant forms optimize for lead quality instead of raw volume. When someone submits the instant form, their contact information syncs into Aesthetix CRM. As each lead moves through your sales funnel, the integration shares the lead status with Meta so Meta can optimize for lead-to-sales conversion.
Your practice is a good fit for Conversion Leads if you:
Use Facebook/Instagram lead ads (instant forms) with field mapping set up in Aesthetix CRM.
Have the 15 to 16 digit Meta Lead ID mapped to your CRM.
Generate at least 250 leads per month.
Can upload data at least once per day.
Have a target lead stage that occurs within 28 days of the lead being generated.
Have a target lead stage with a 1% to 40% conversion rate.
Pipeline Stage Changes are most often used with lead events, but they can also drive Meta CAPI funnel events when the required attribution data is available. For this to work:
The Facebook Click ID (FBCLID) must be captured when the lead first enters your system.
The FBCLID must be stored in a custom field or another accessible location in the CRM.
In the Meta Conversion API workflow action, use Custom Mapping to send the stored FBCLID to Meta.
This lets Meta attribute the conversion correctly even when the trigger is a pipeline stage change.
Without a valid FBCLID (or equivalent attribution data), Meta may not be able to match the conversion event.
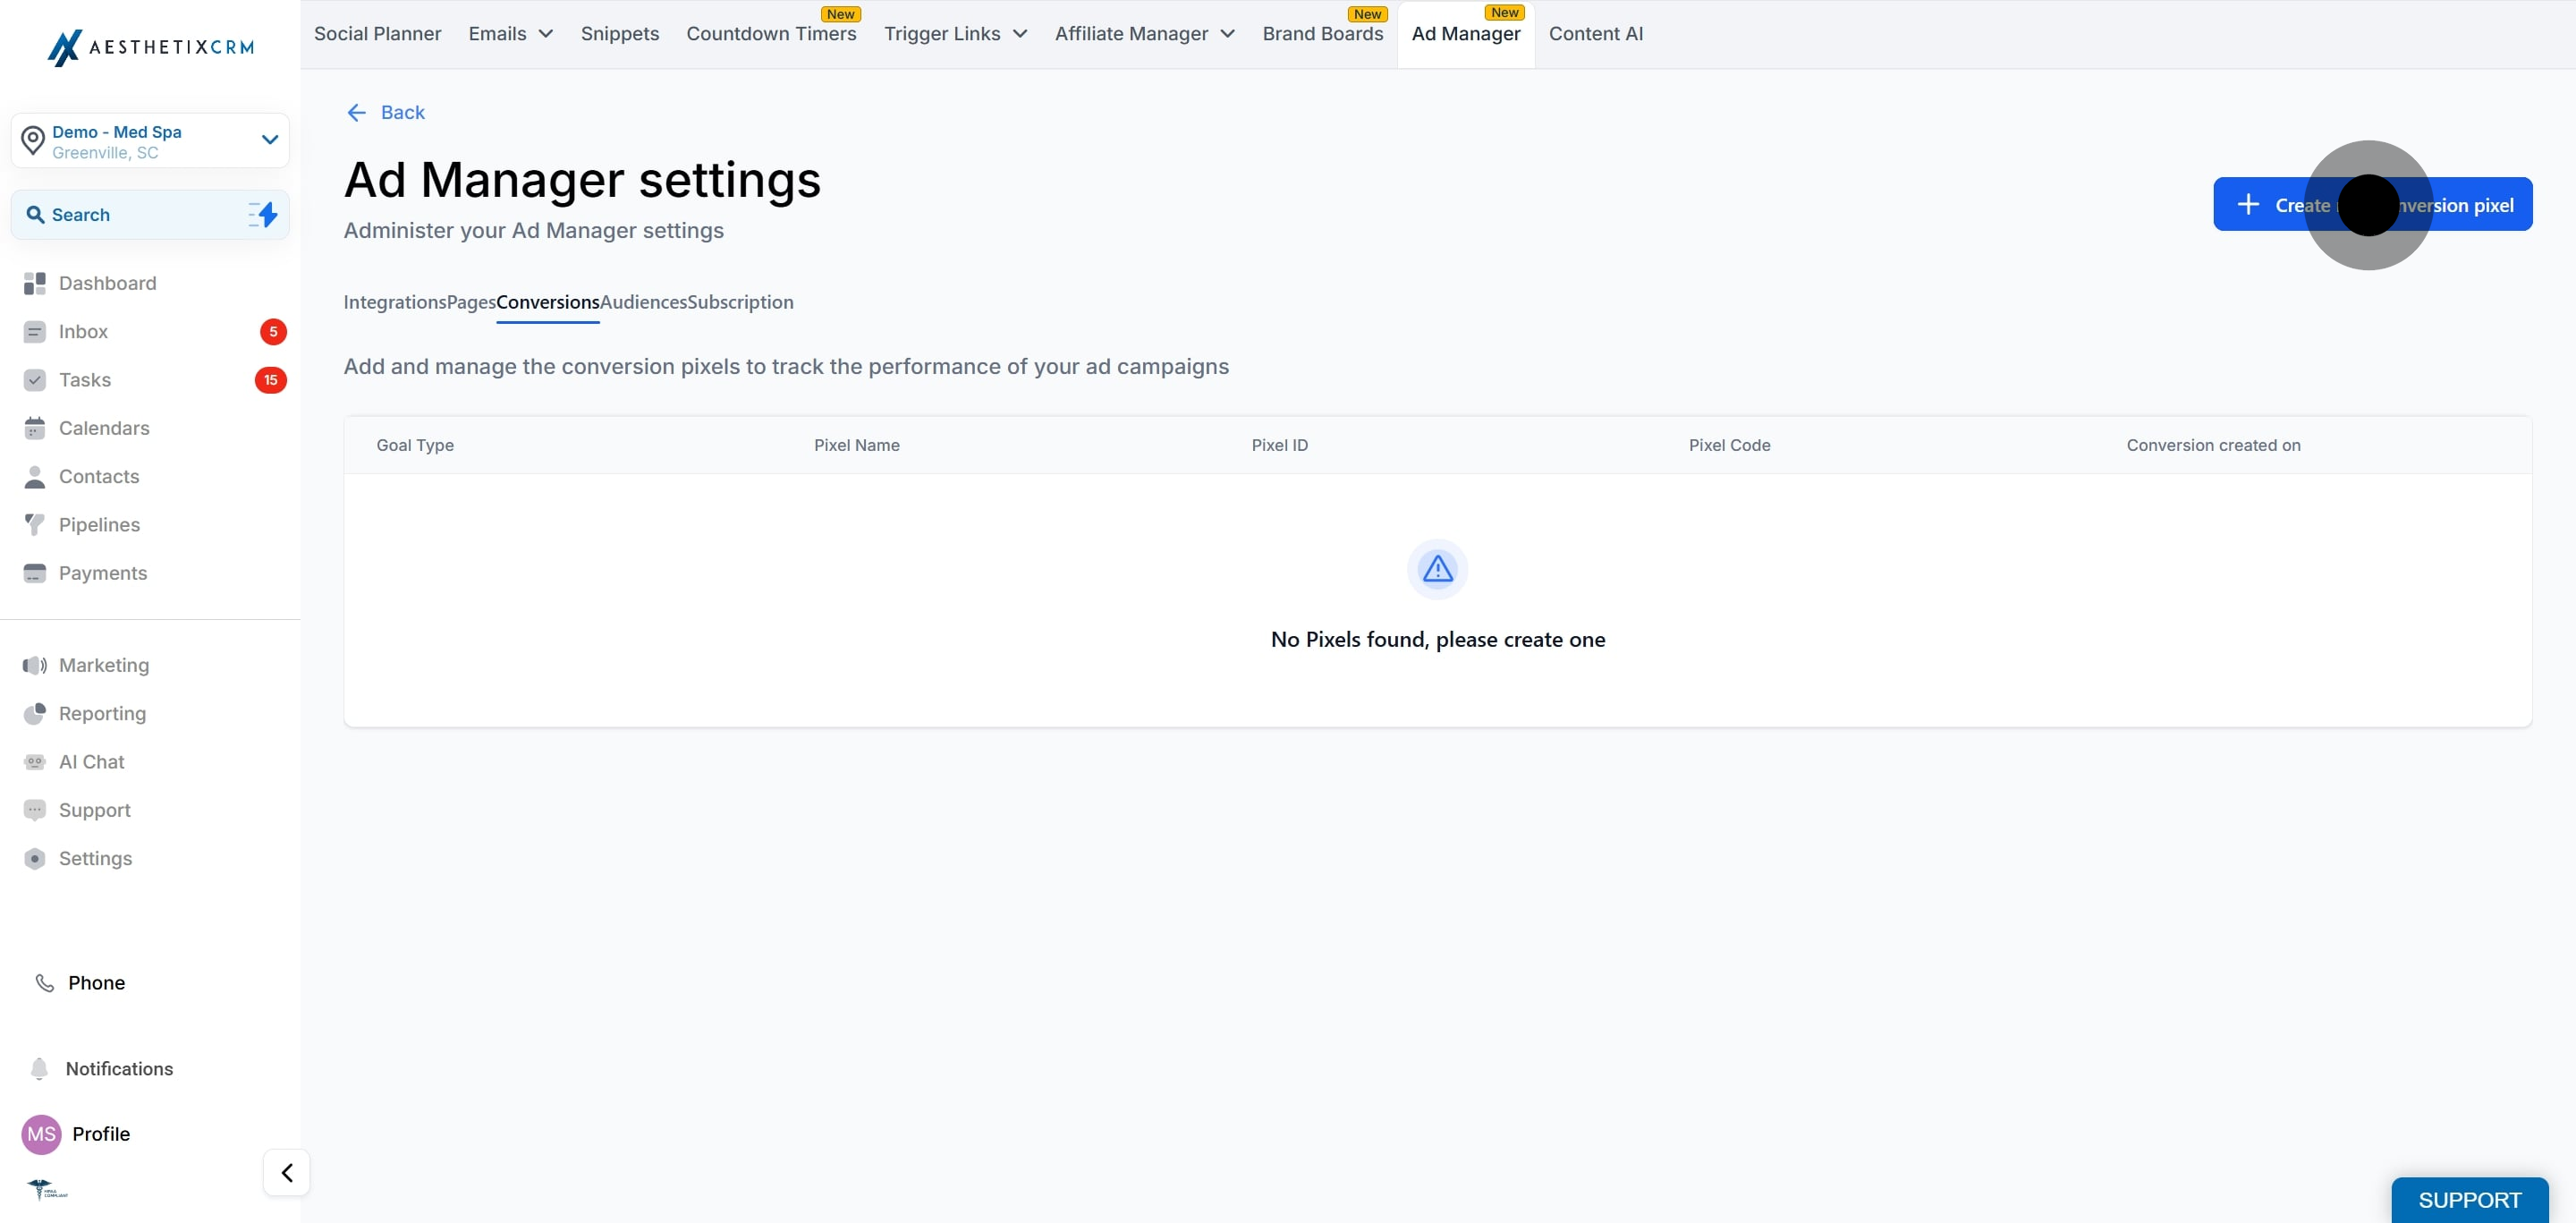
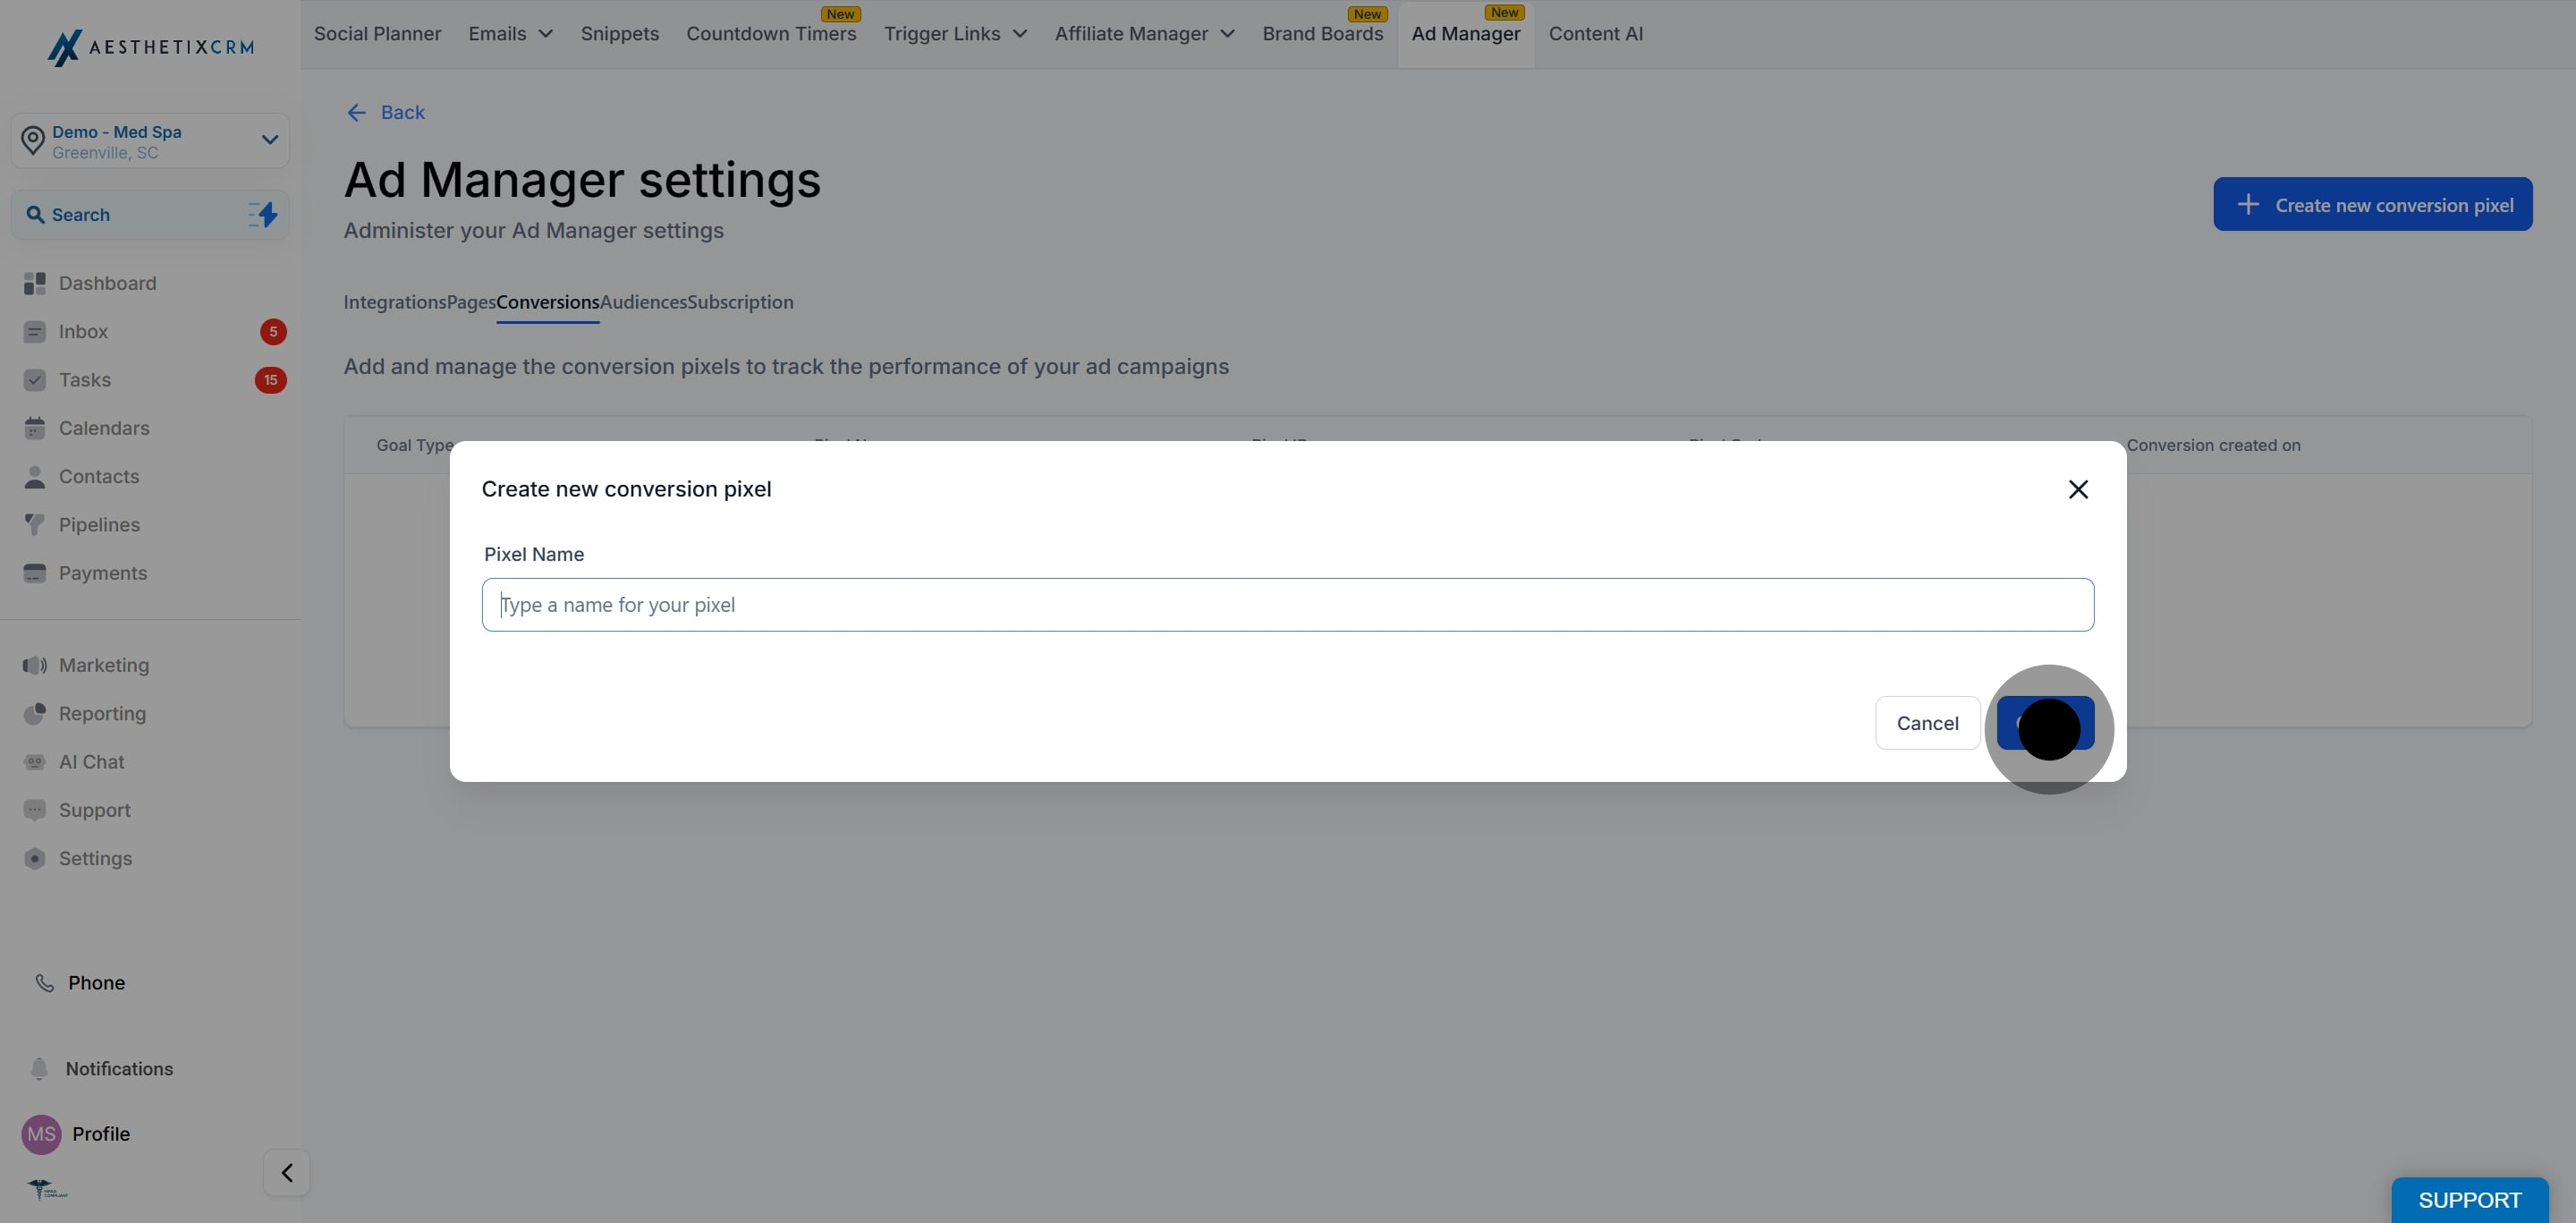
Aesthetix CRM lets you create a conversion pixel right inside Ad Manager. The Pixel ID and code are generated automatically and are used later when you build your CAPI workflow.
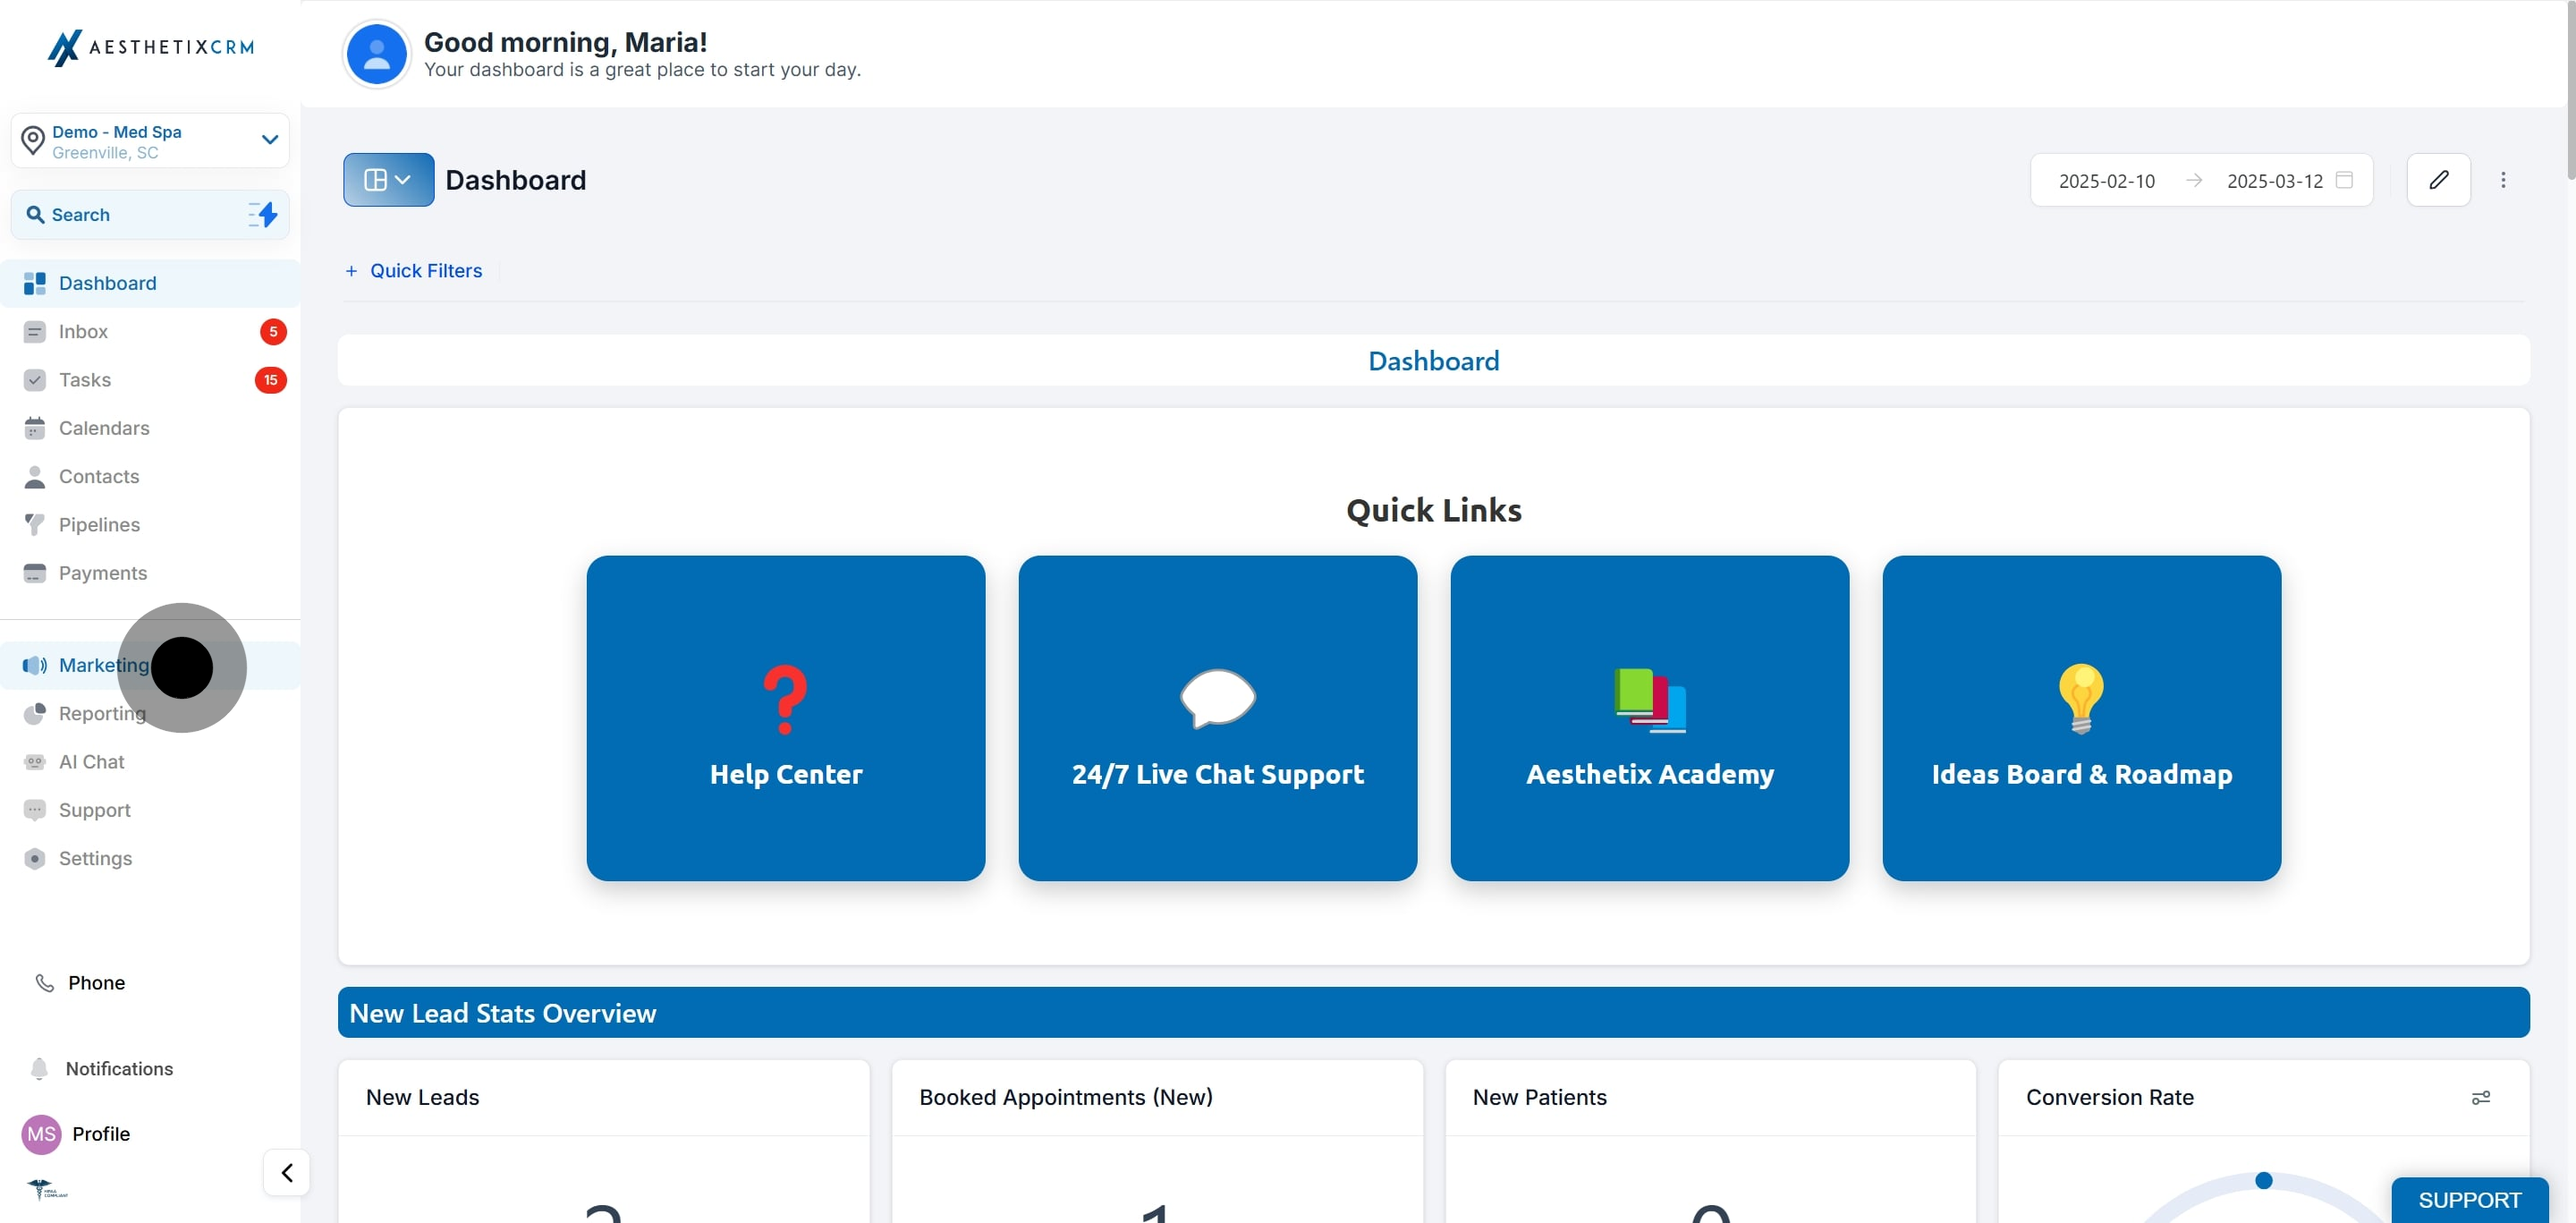
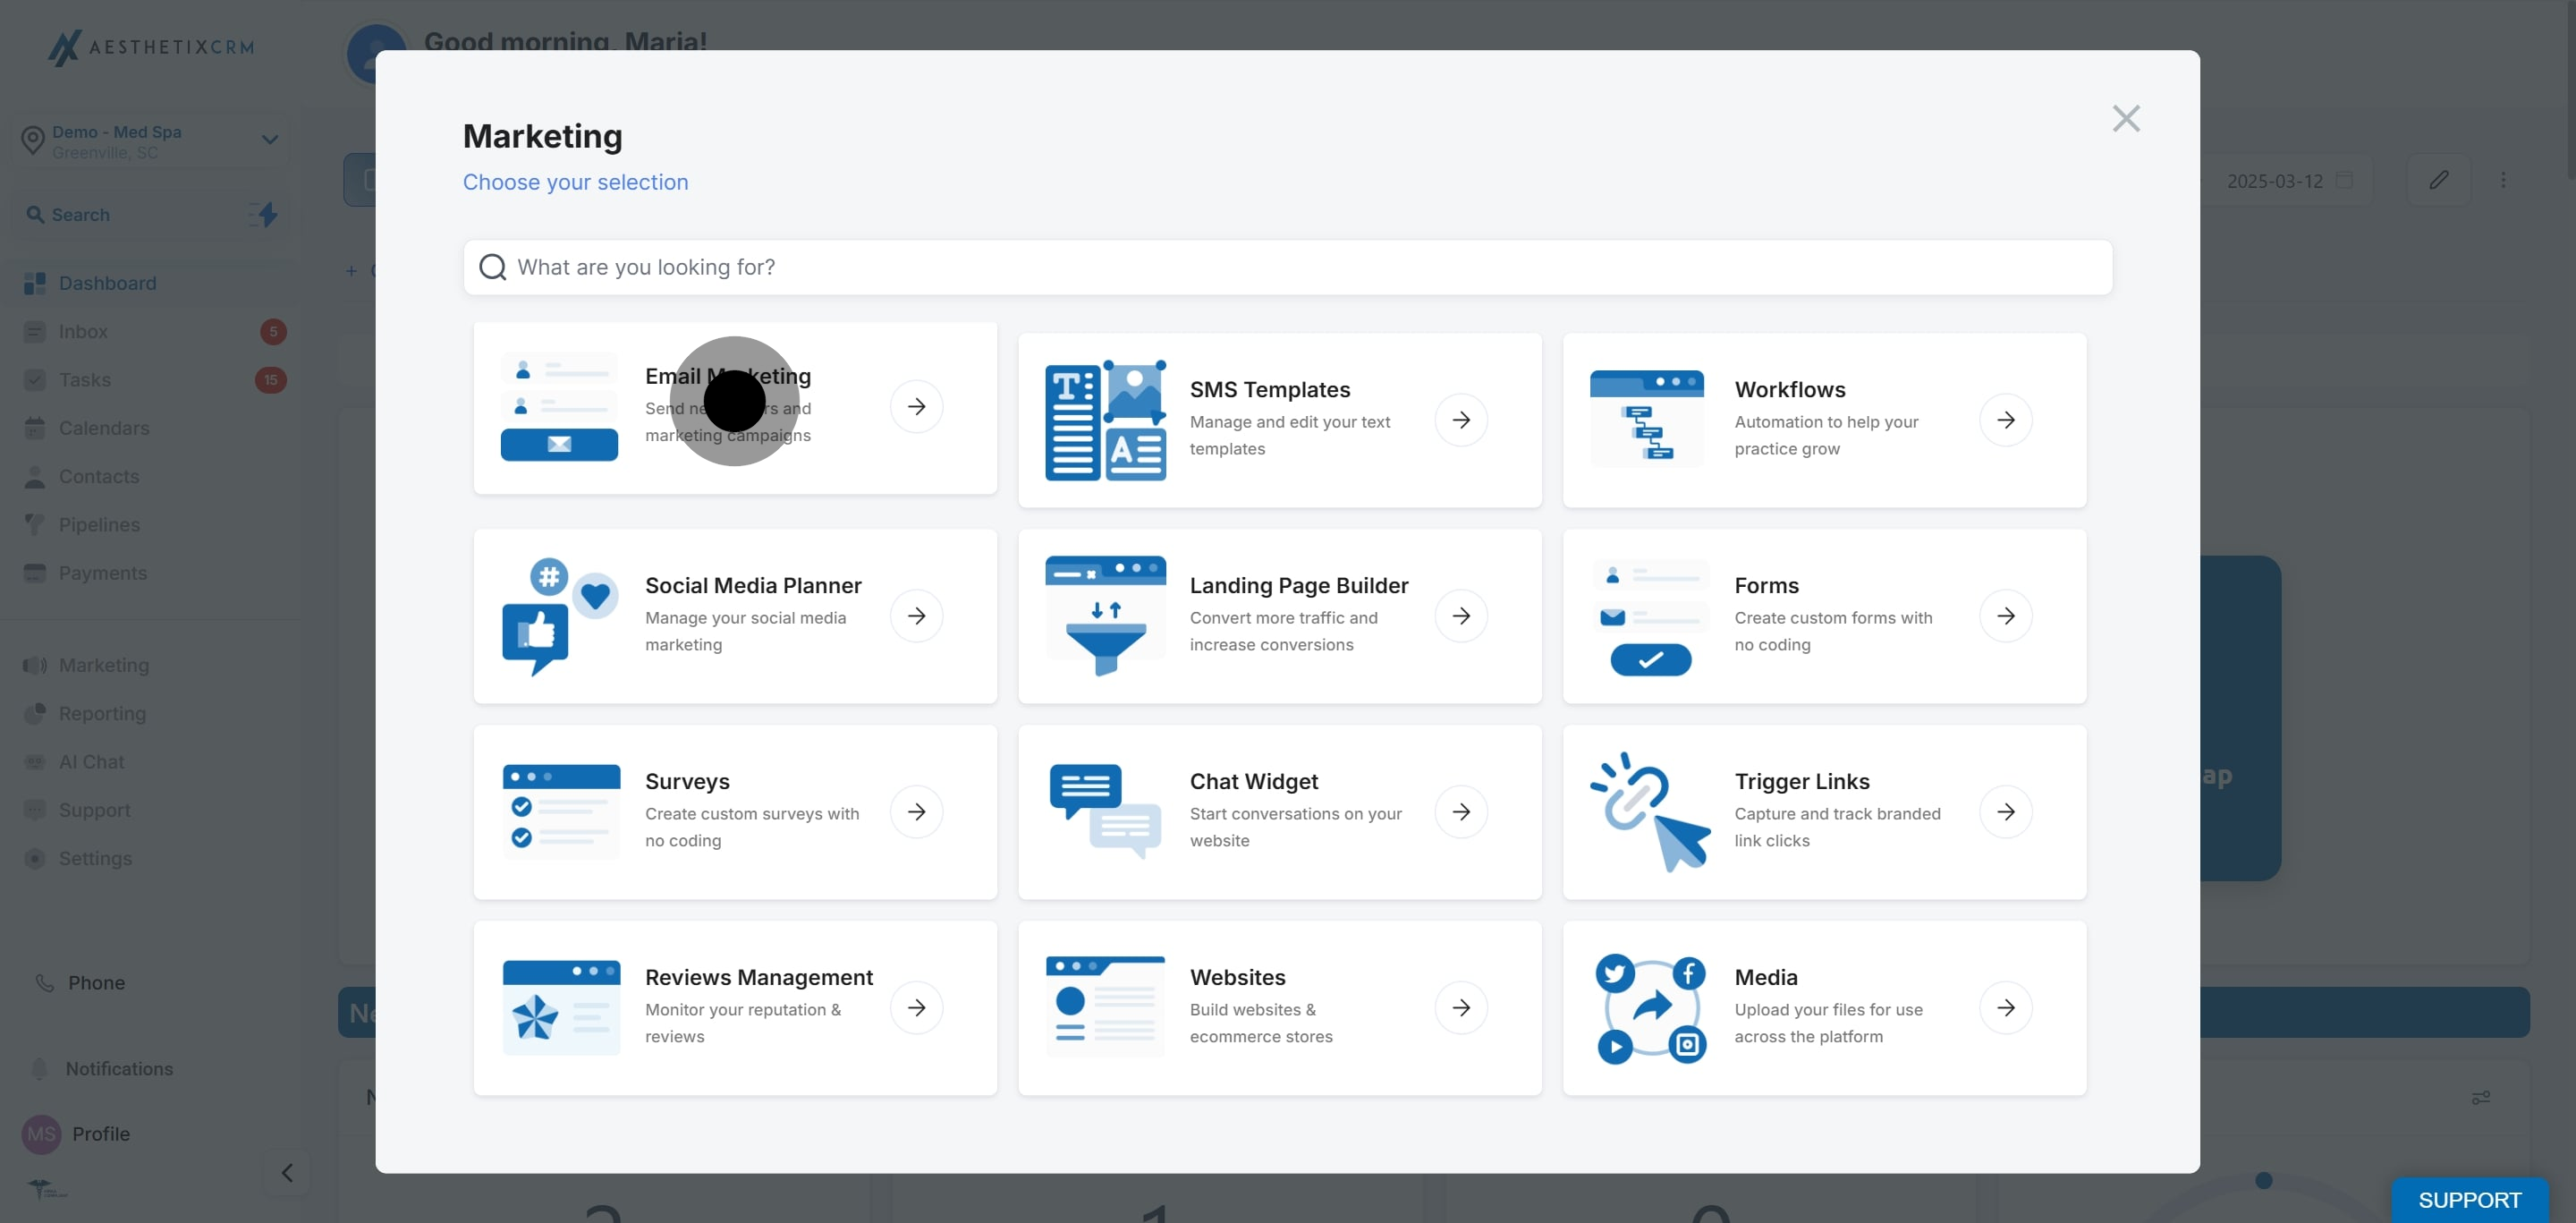
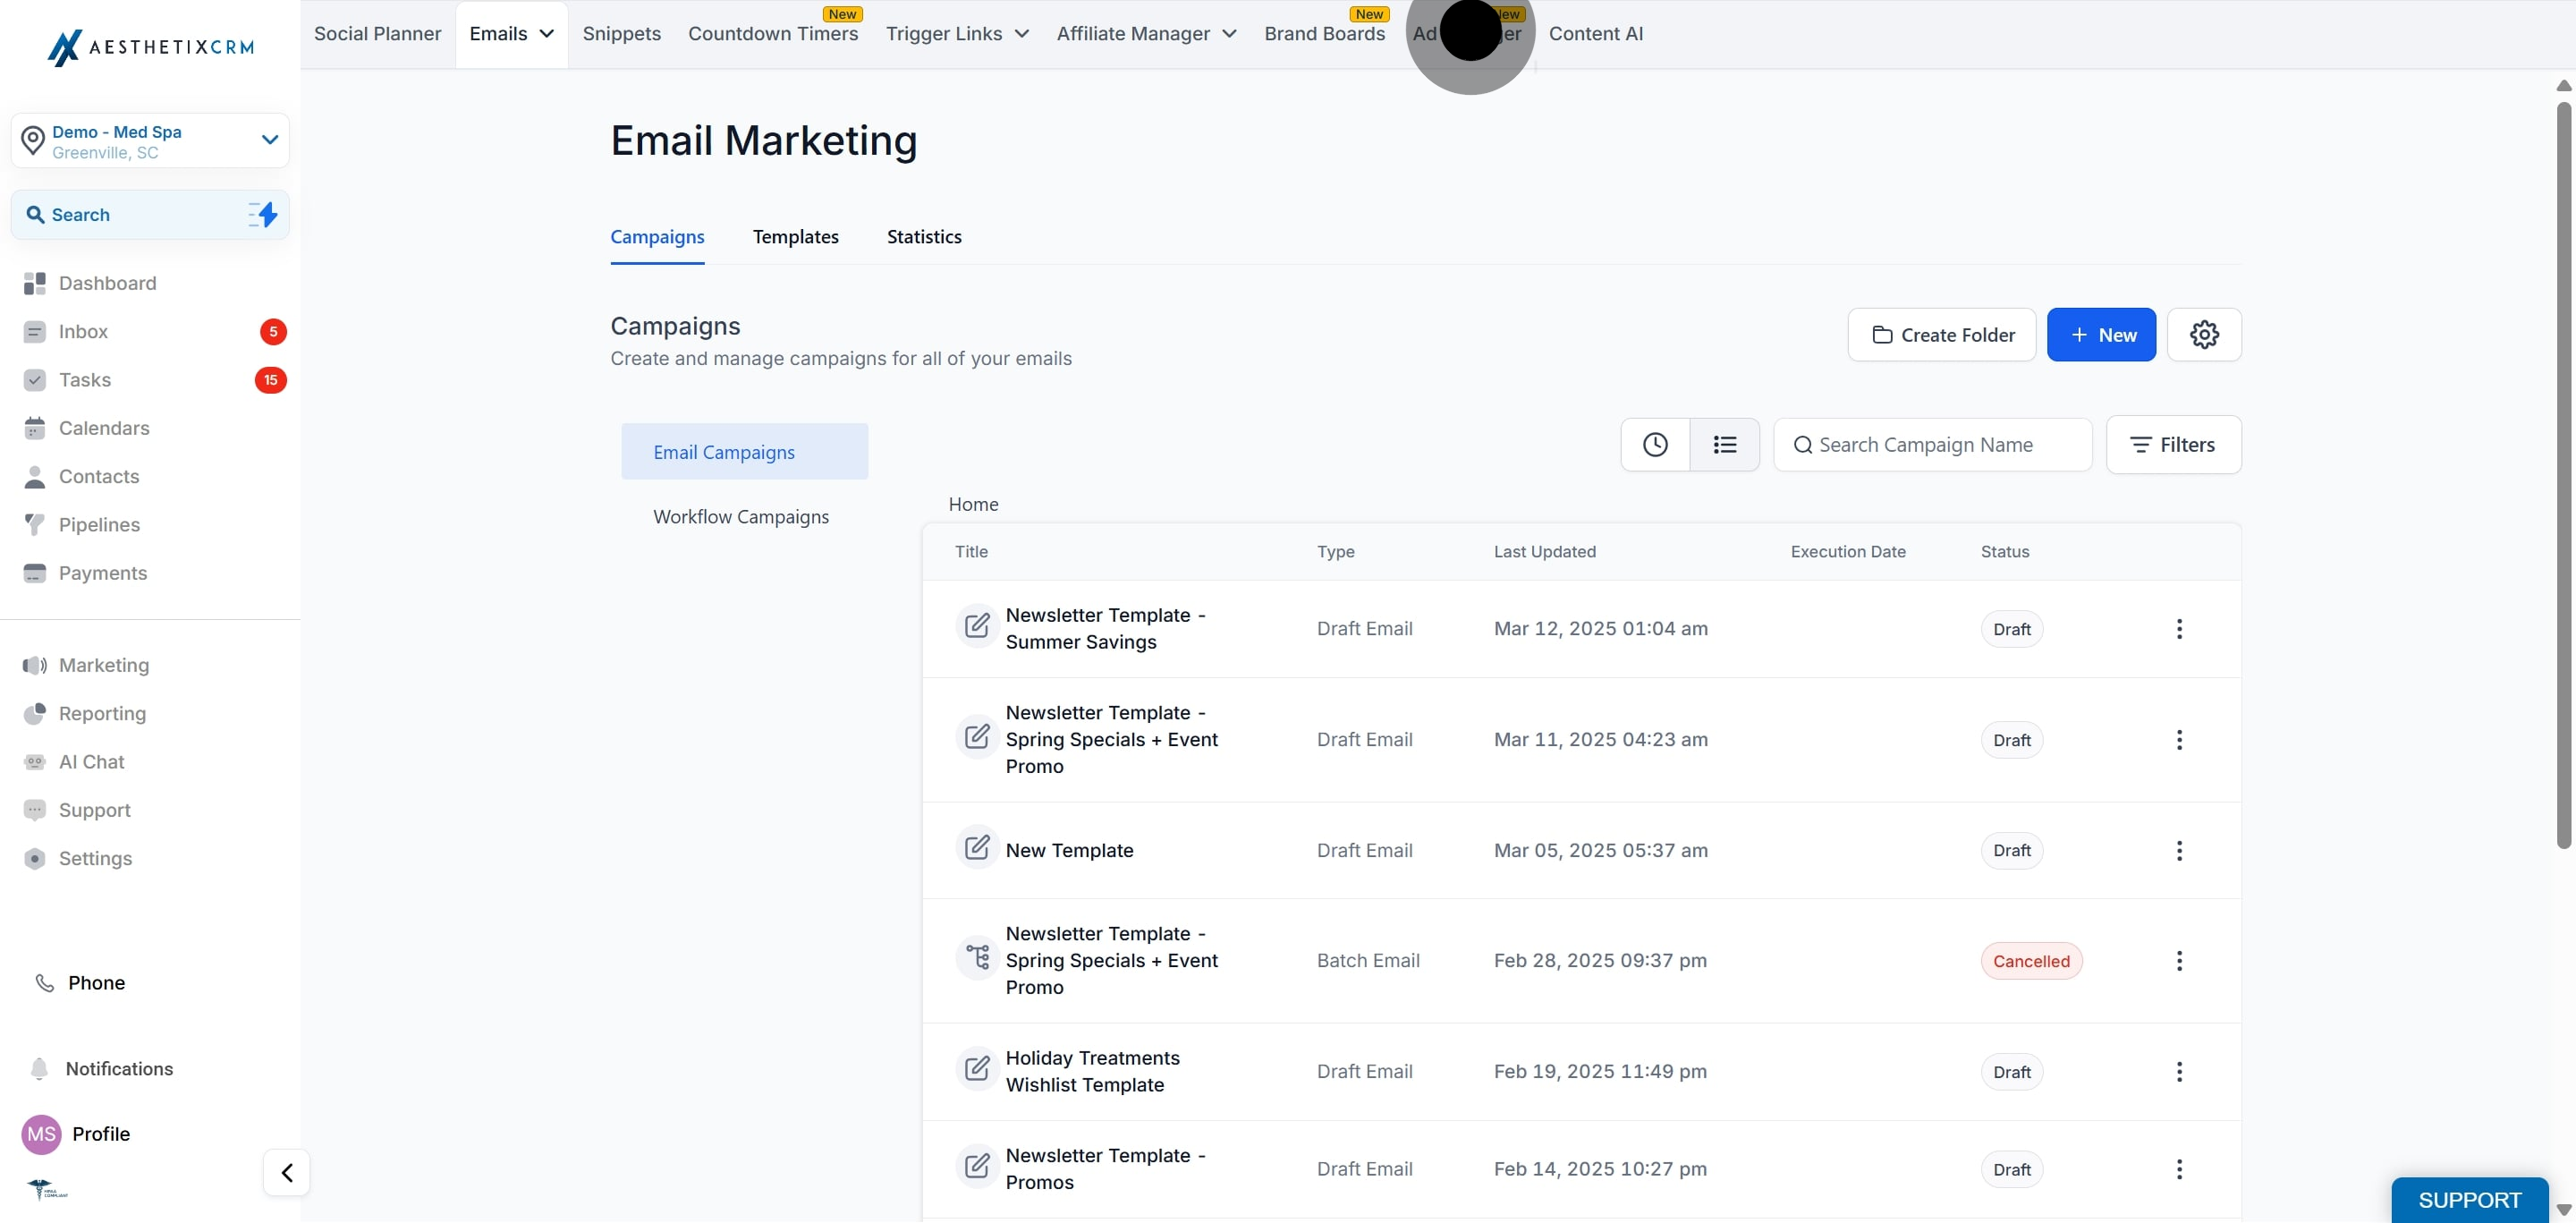
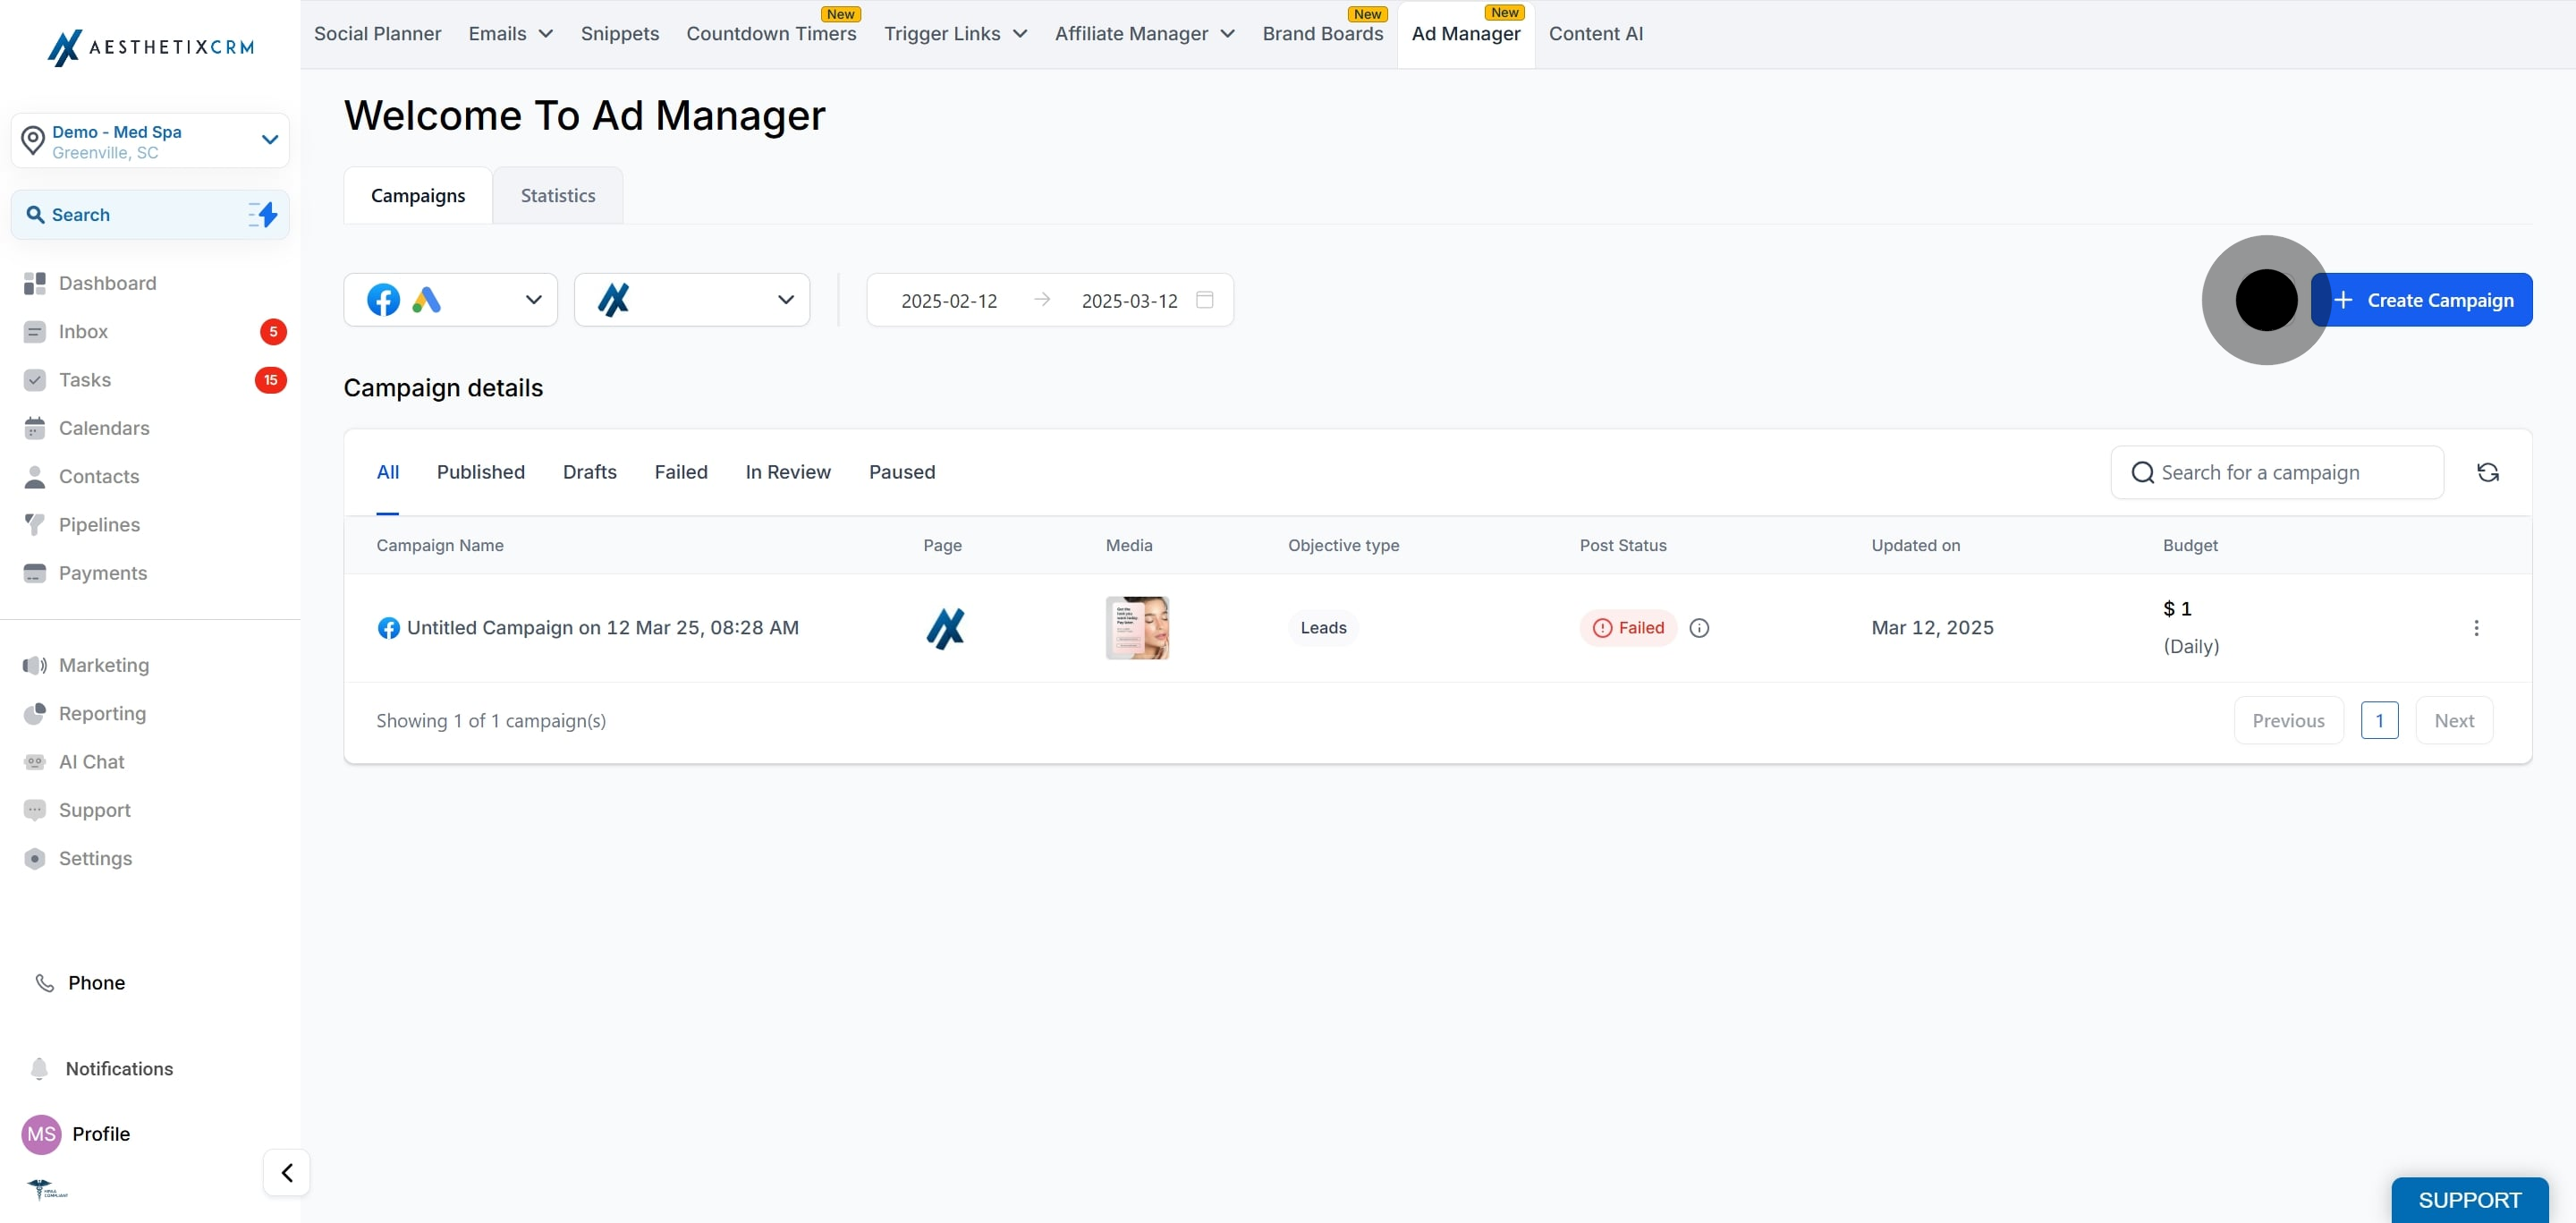
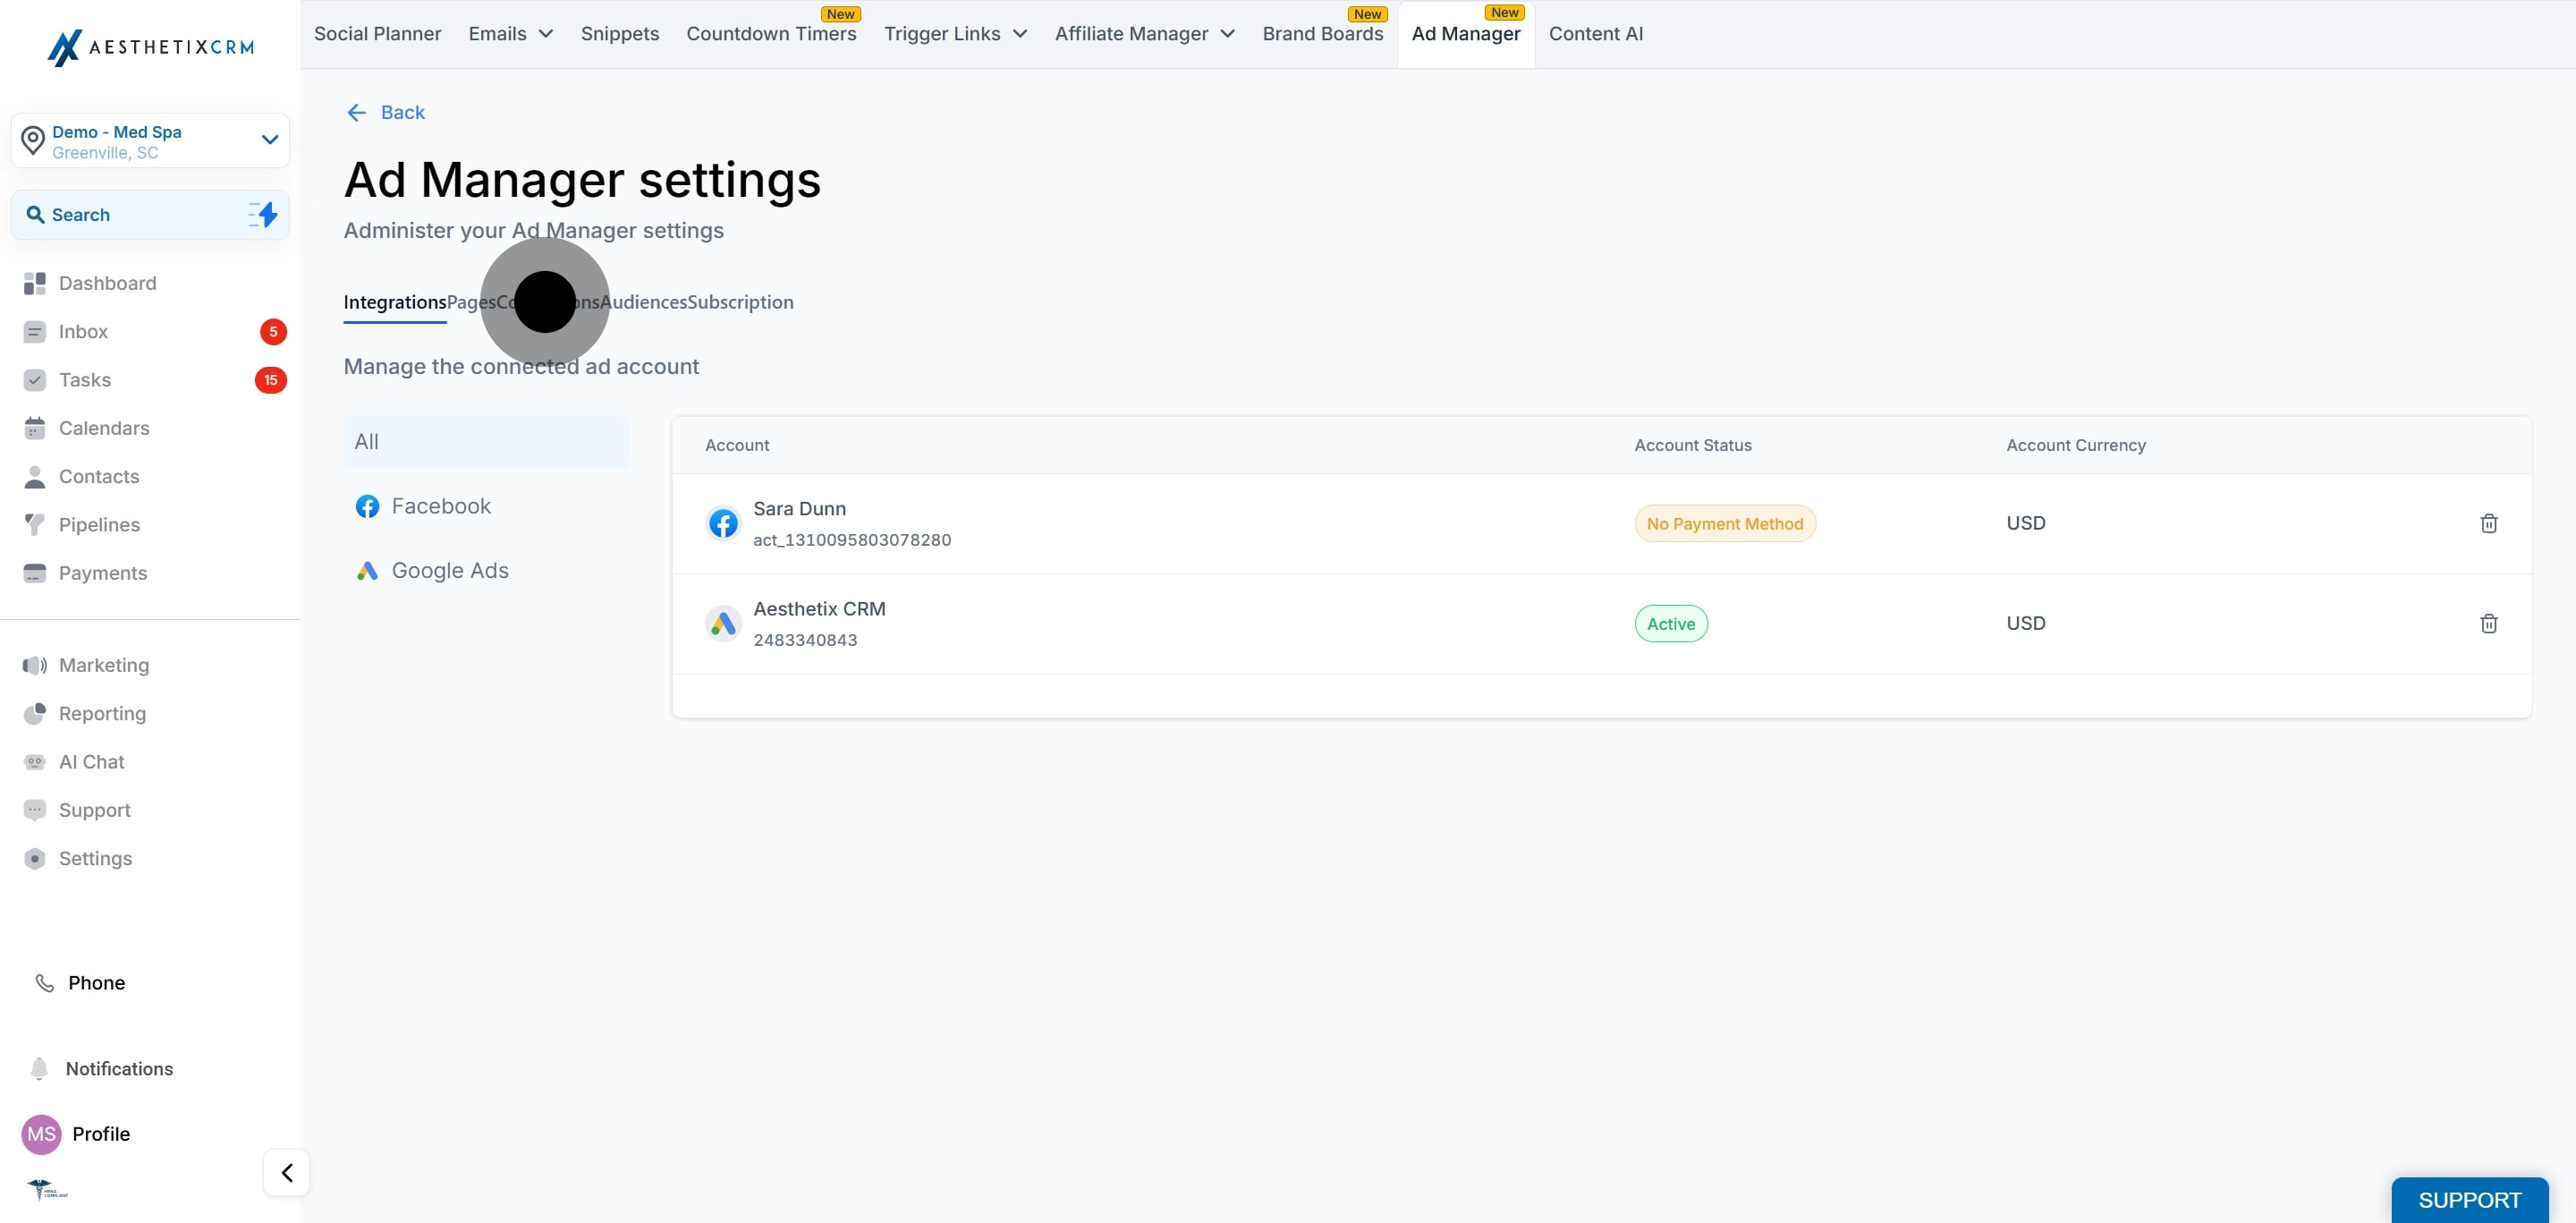
Ad Manager settings has five tabs: Integrations, Pages, Conversions, Audiences, and Subscription. You will work in the Conversions tab.
Under the Conversions tab you can see all pixels brought in from your connected Meta ad account, along with any you create here with the Create new conversion pixel button.
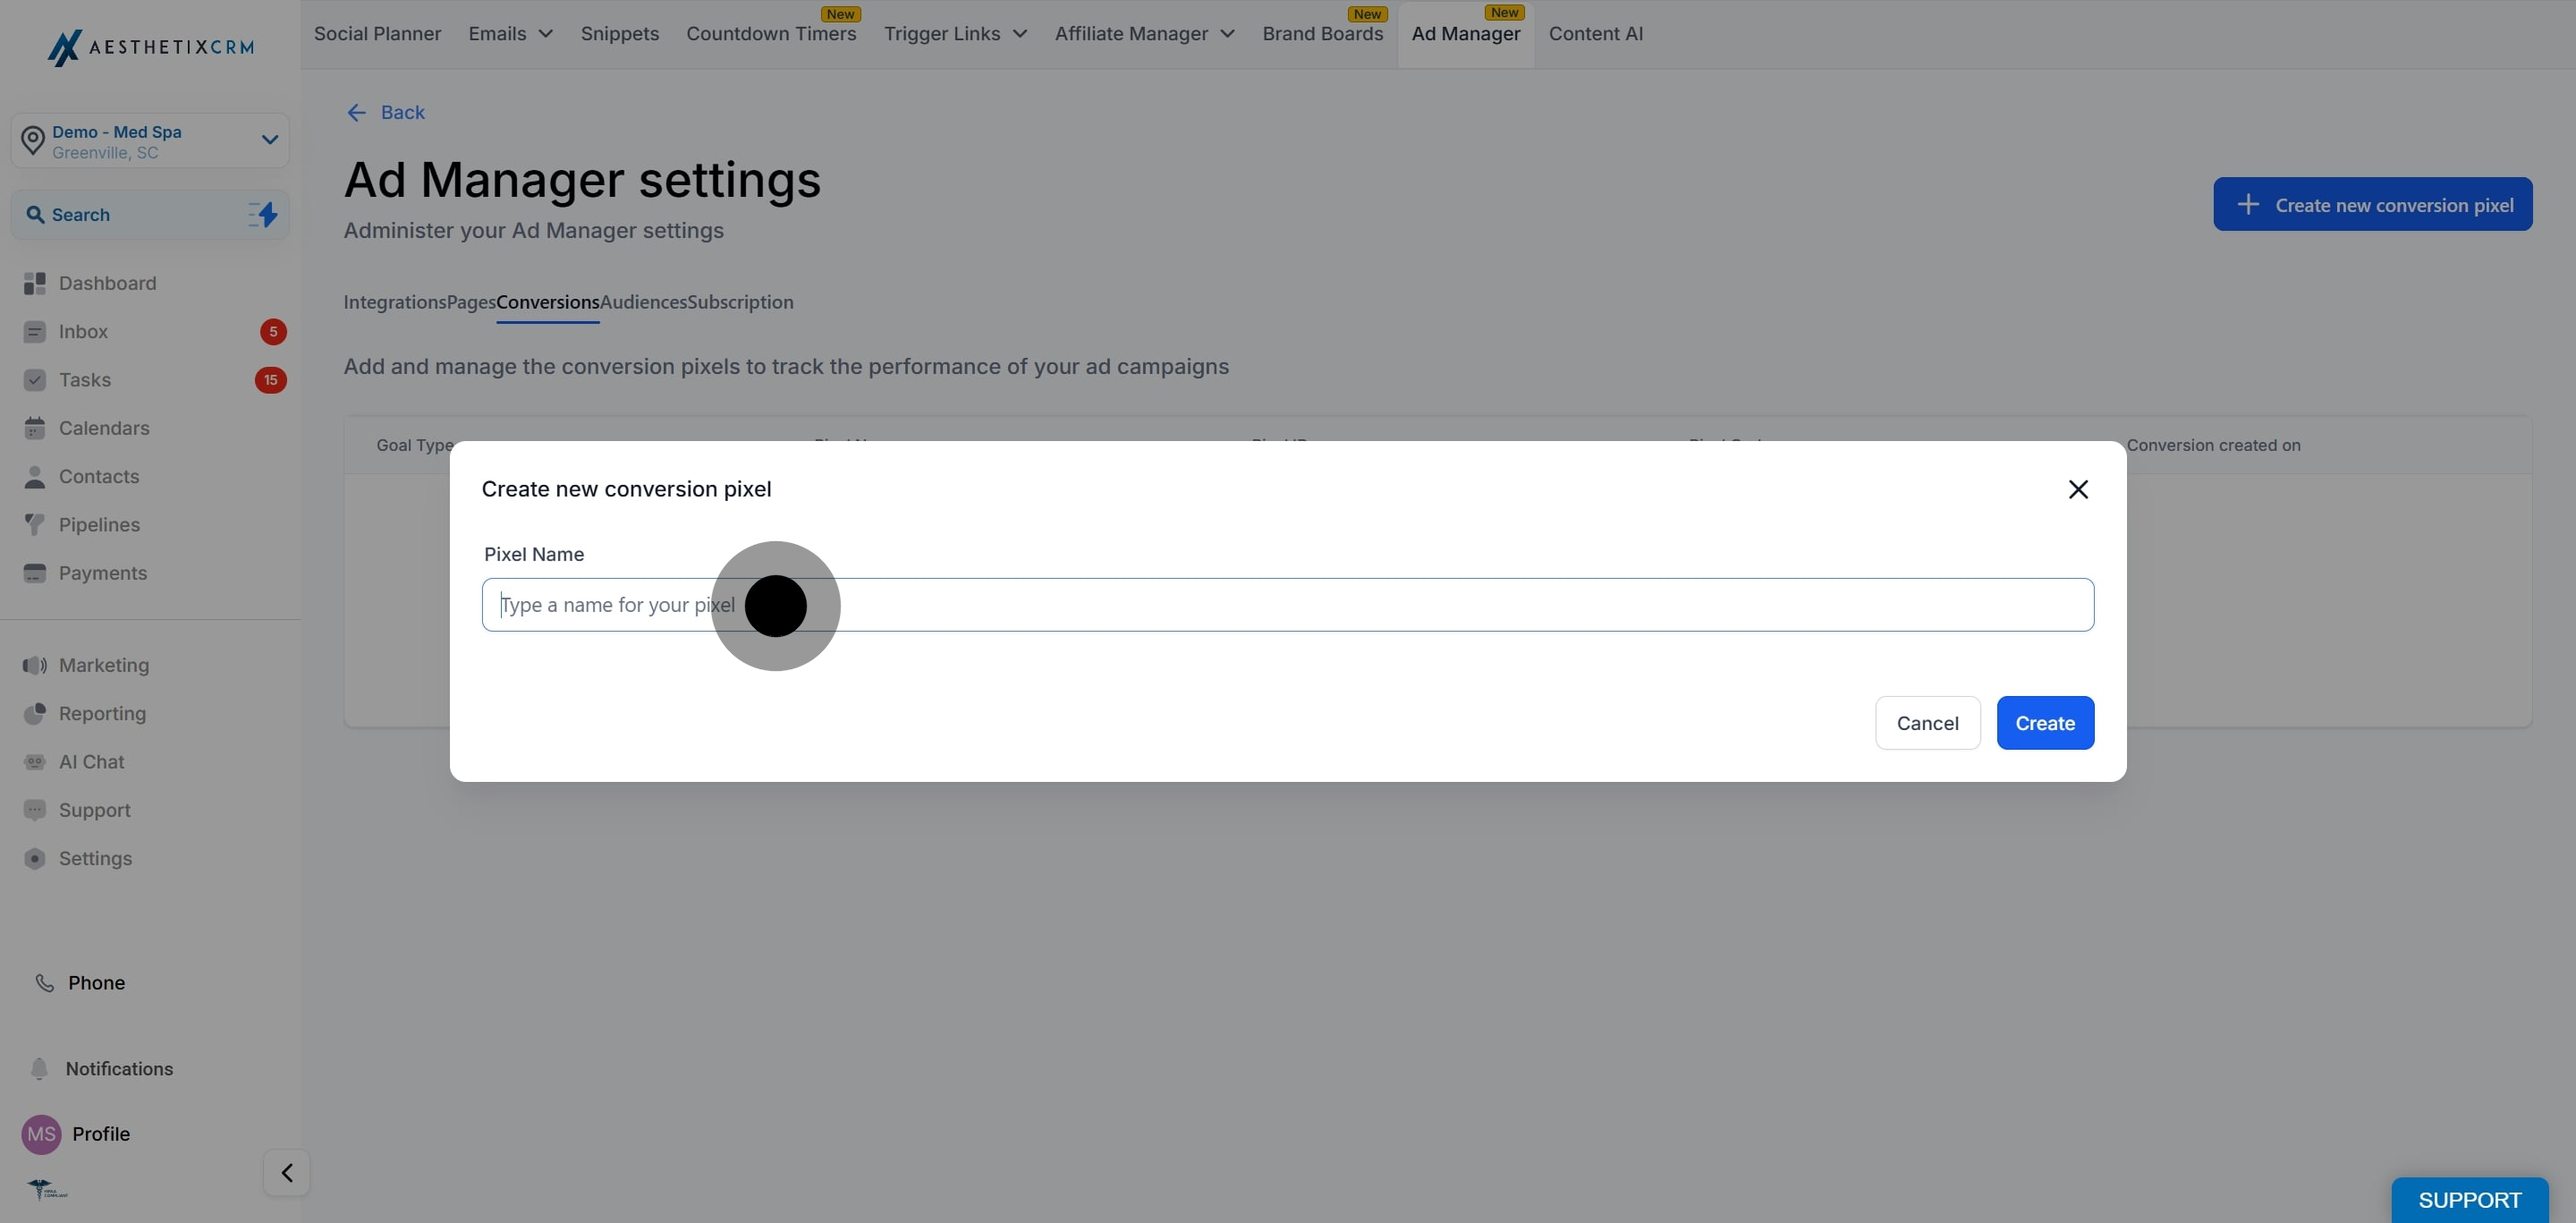
A conversion pixel is a small piece of code that tracks user actions and measures campaign success. Key uses include:
Tracking conversions: Measure actions like purchases, sign-ups, or form submissions.
Ad optimization: Improve ad targeting.
Retargeting: Show ads to users who interacted with your site but did not convert.
ROAS measurement: Track return on ad spend by connecting conversions to ads.
A/B testing: Compare ad variations and improve performance.
Cross-device tracking: Follow user actions across devices for better attribution.
Custom events: Track specific actions like video views or content engagement.
Audience segmentation: Build targeted audiences based on behavior.
After you create a conversion pixel, Aesthetix CRM handles the following automatically:
The Pixel ID and code are generated for you and used when sending CAPI events to Facebook from a workflow.
UTM parameters are created and added to the pixel for effective tracking, so you do not need to configure them.
The Lead Event goal type sends data from a Facebook form lead moving from one stage to another in your opportunity pipeline.
The Funnel Event goal type sends data from form submissions, survey submissions, chat widget replies, and number pool calls.
When a pixel is first created, its goal type shows as Funnel Event, which updates after a successful event is sent based on whether it was a funnel or lead event.
A single conversion pixel can send both funnel and lead events to Facebook without any conflict.
Creating the pixel is only half the setup. You still need a workflow that sends CAPI events back to Meta after a lead is captured or moves through your pipeline. That is done with the Facebook Conversion API (Meta Conversion API) workflow action.
The triggers you can use depend on the event type set in the CAPI action:
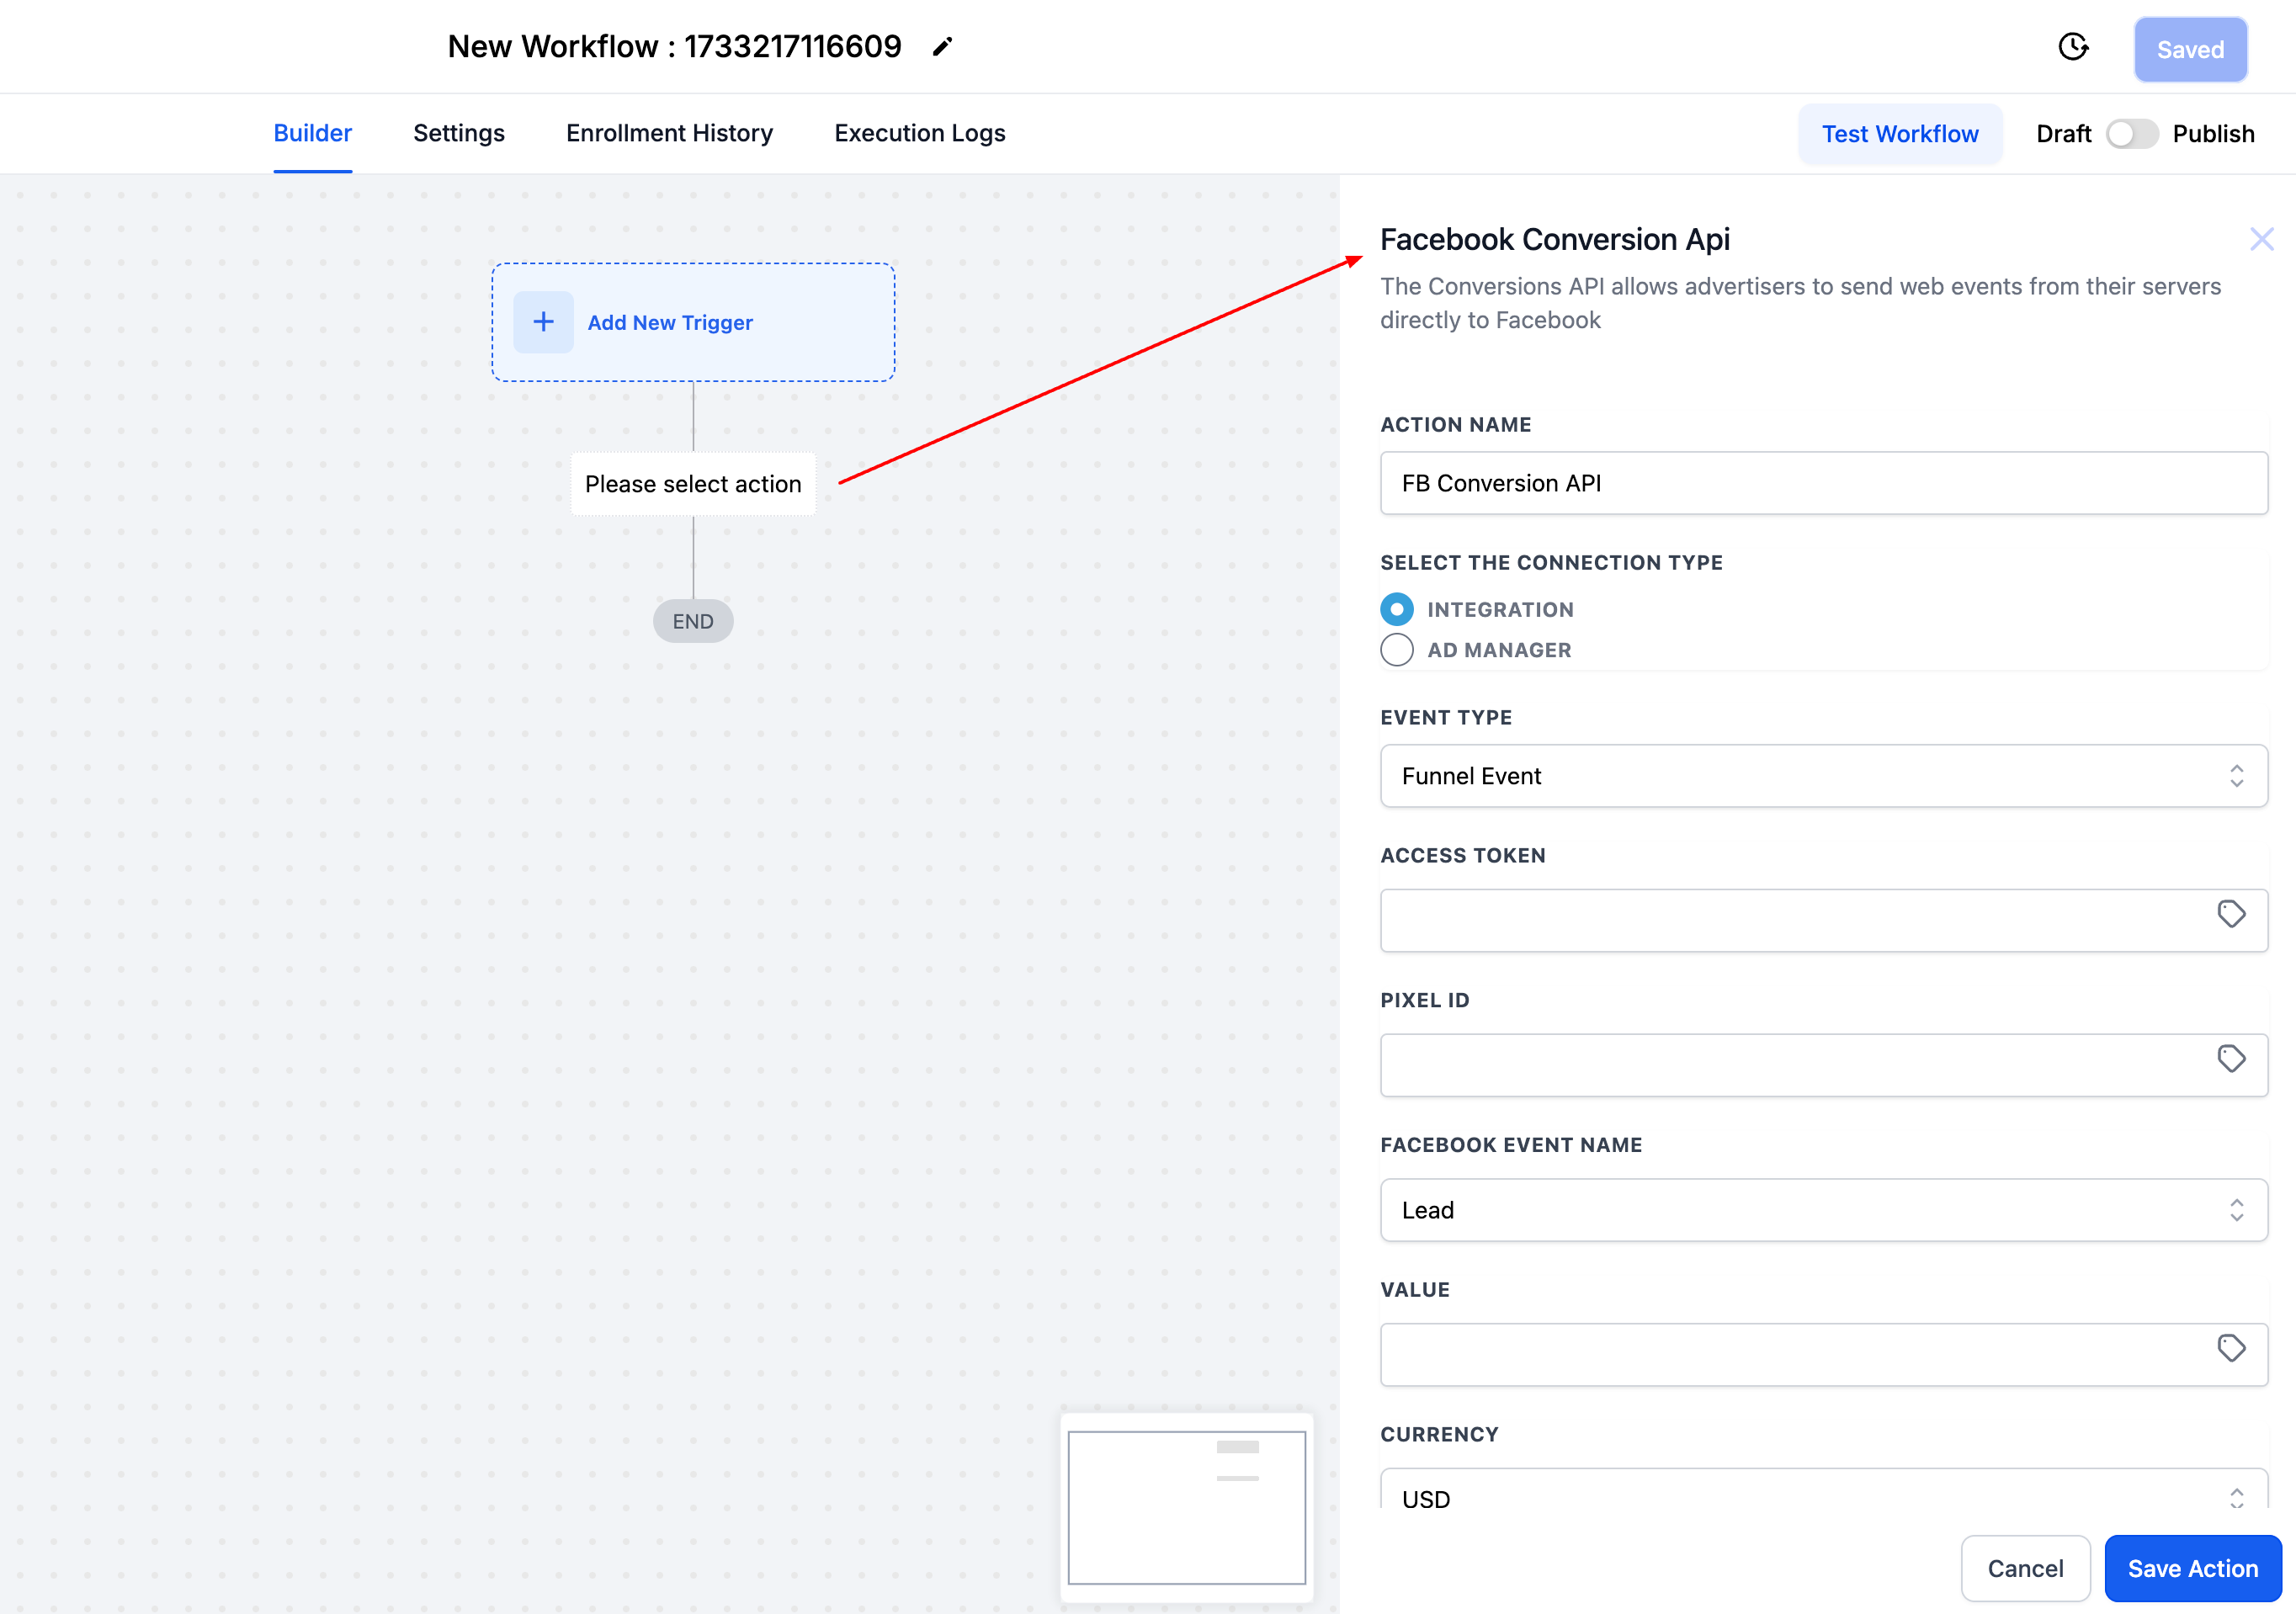
Funnel events: Form Submitted, Survey Submitted, Customer Booked Appointment, and Order Form Submission. For appointments, use Customer Booked Appointment (the booking widget trigger), not the general Appointment trigger.
Lead events: Most commonly triggered by Facebook Lead Form Submission and Pipeline Stage Change (Pipeline Stage Change works when the contact came from a Facebook lead form), though other contact-based triggers can also be used.
Instagram DM events: Any trigger that results in a contact being created in the CRM.
When you configure the CAPI action, you choose one of two connection types:
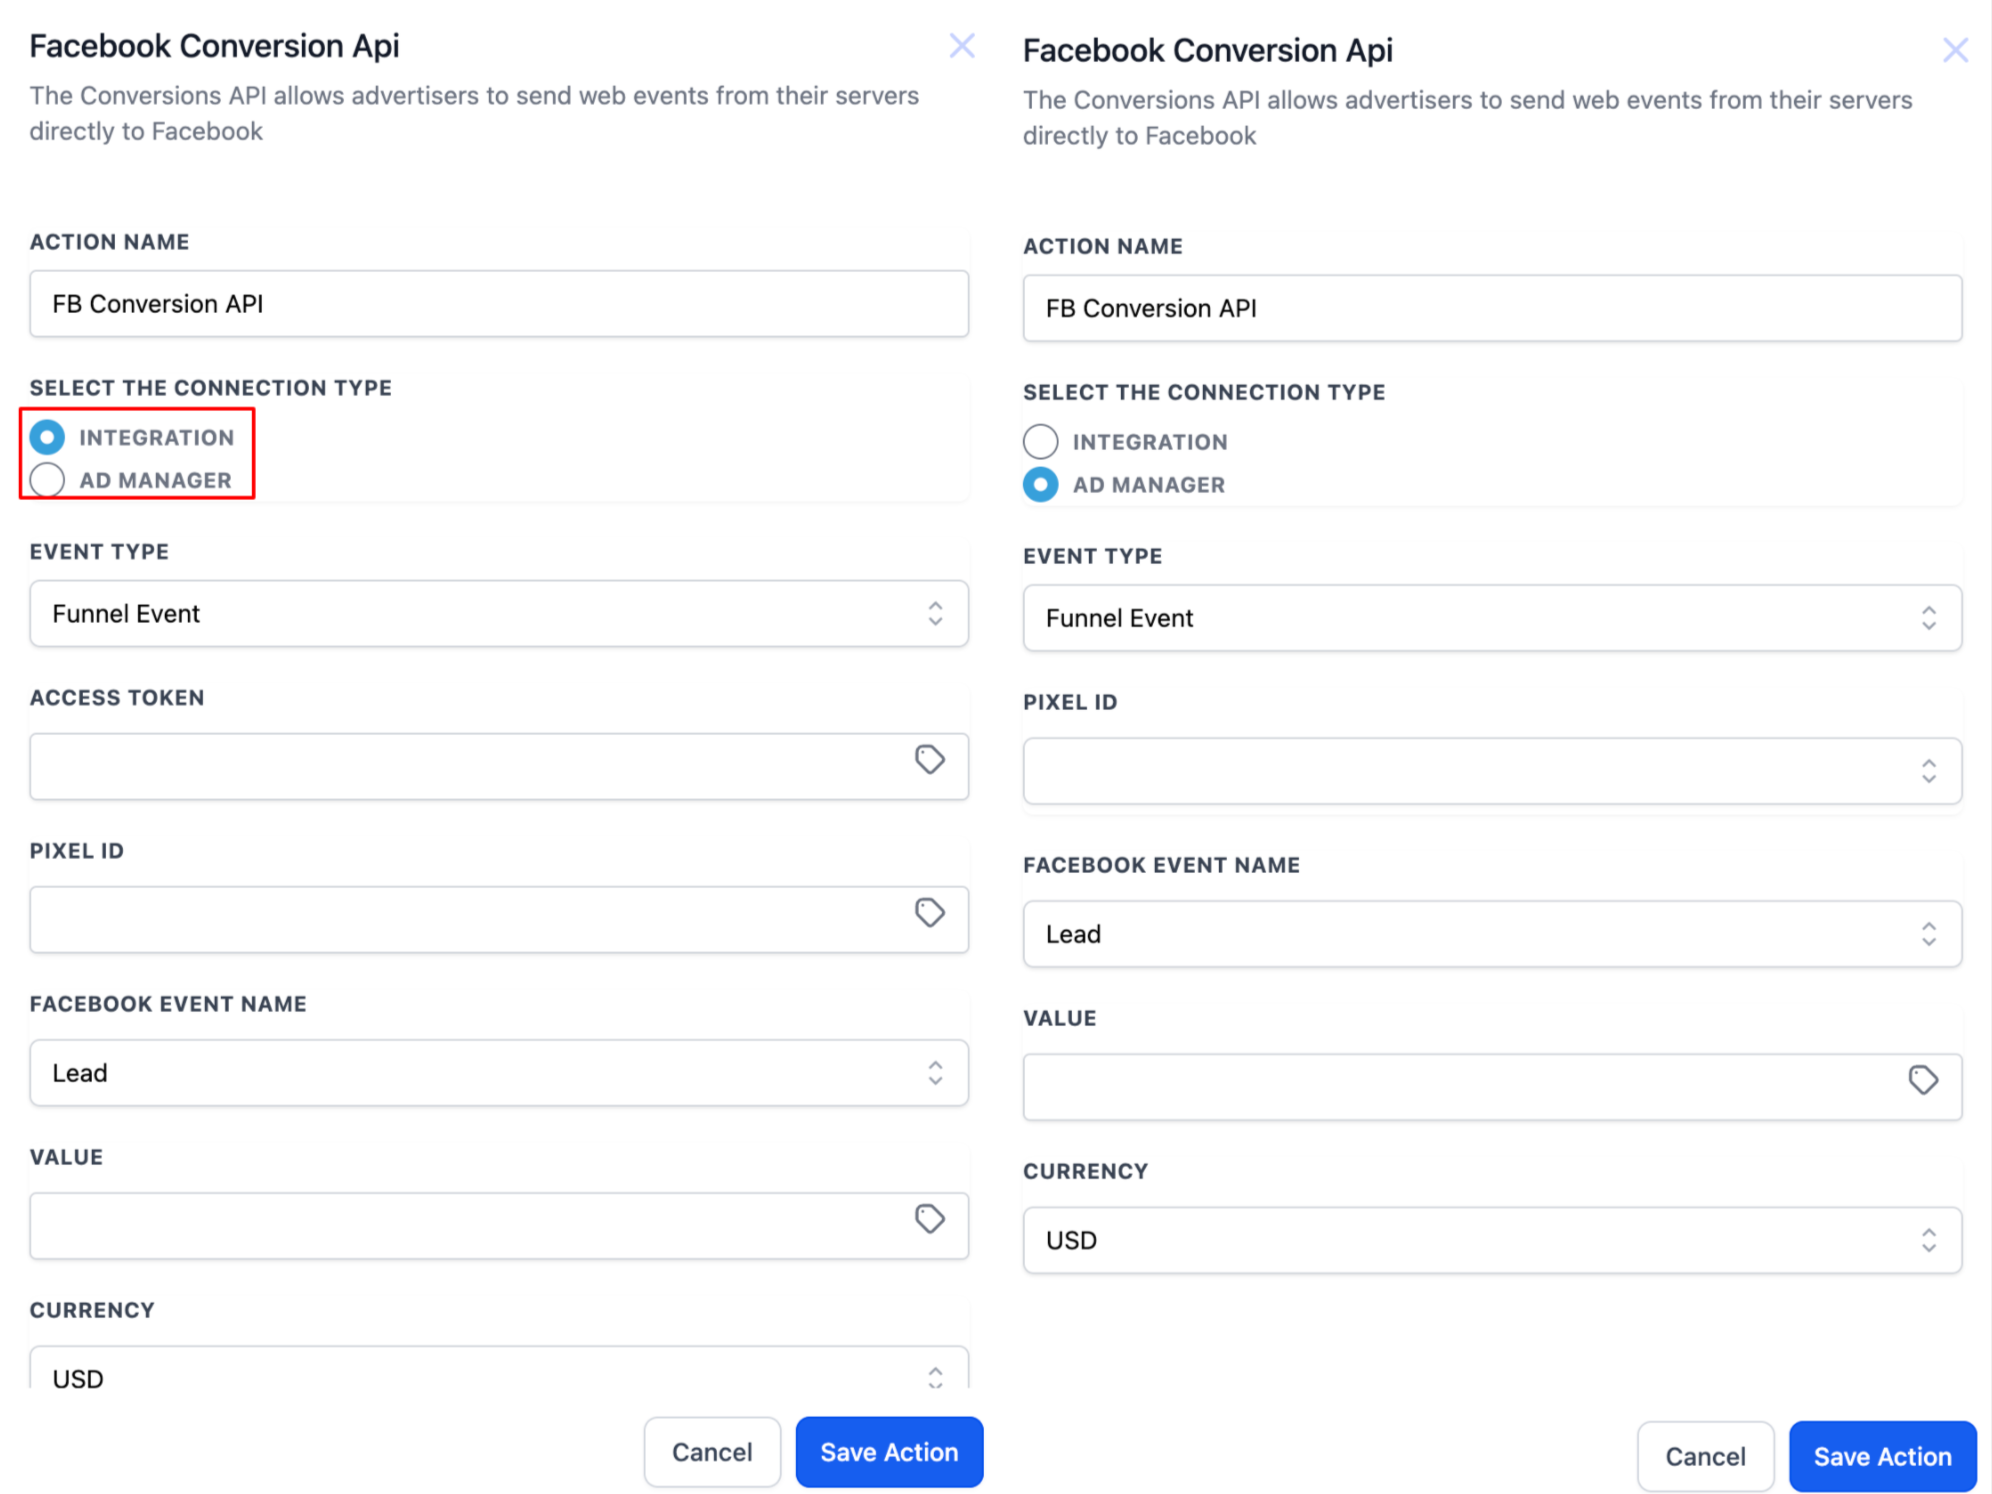
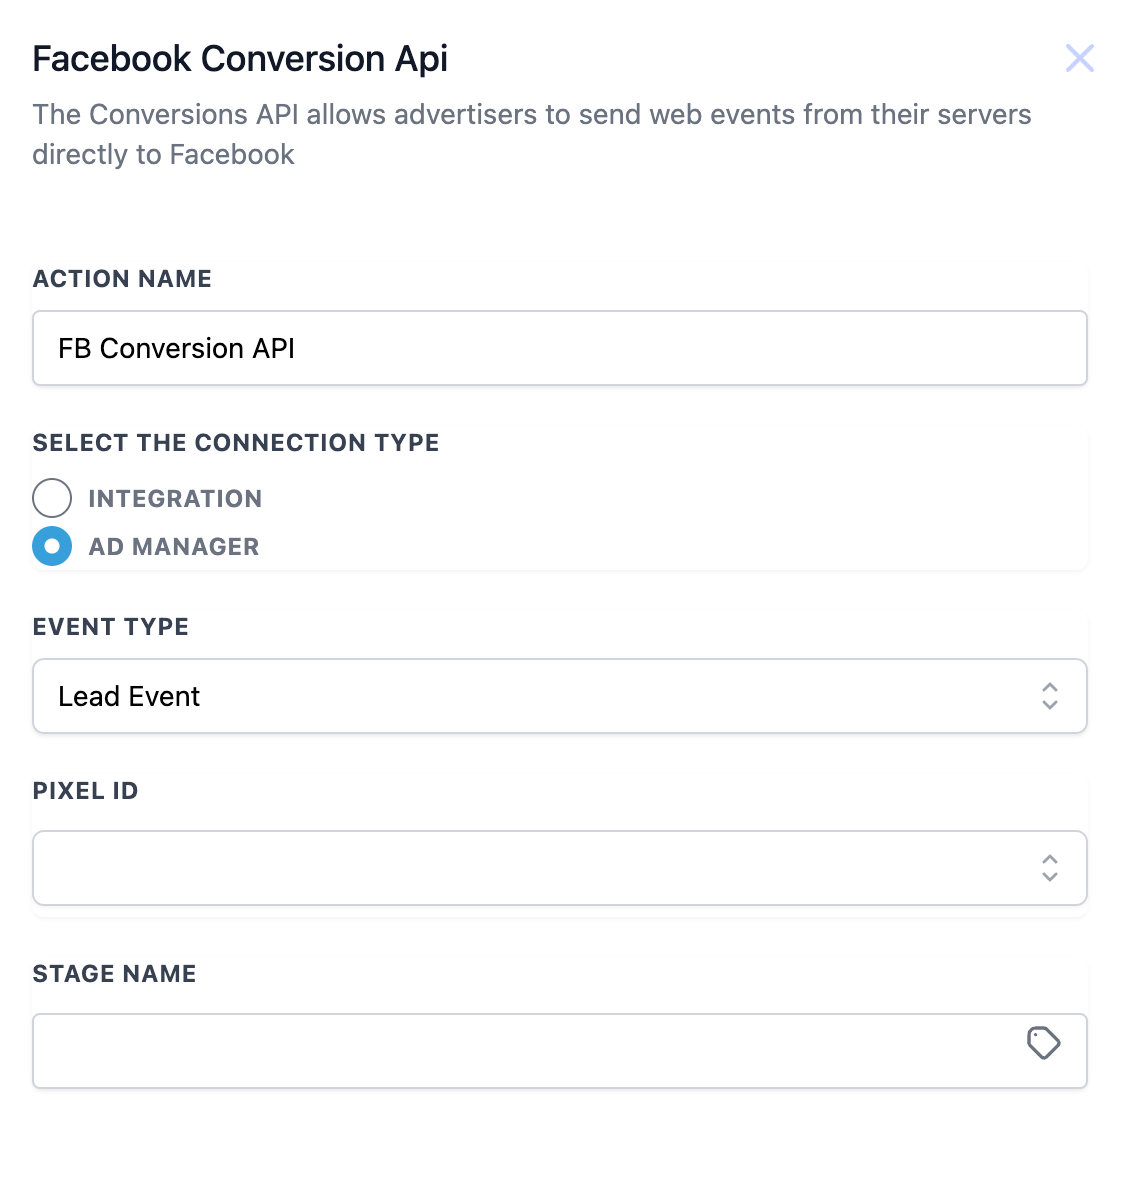
The Integrations connection type uses the fields you configure manually (access token, pixel ID). The Ad Manager connection type was added to save you from constantly switching between Meta and your workflow. With Ad Manager selected:
You select the event type based on your campaign. If your campaign objective is Website Traffic, send a funnel event; if it is Lead Generation, send a lead event; for Click to Direct (Instagram DM) ads, select Instagram DM.
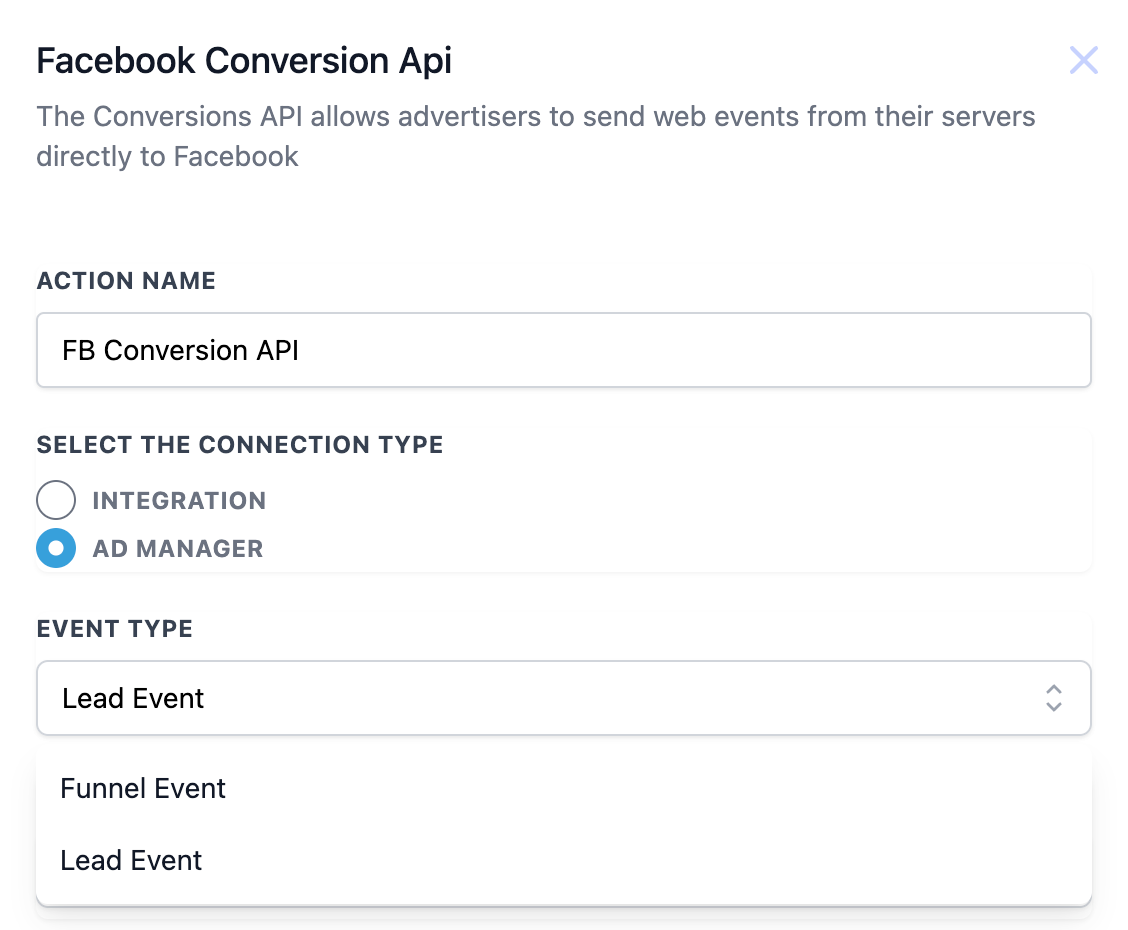
All pixels that are part of Ad Manager are pre-populated in a dropdown, so you do not have to go back to Meta to copy and paste the Pixel ID.
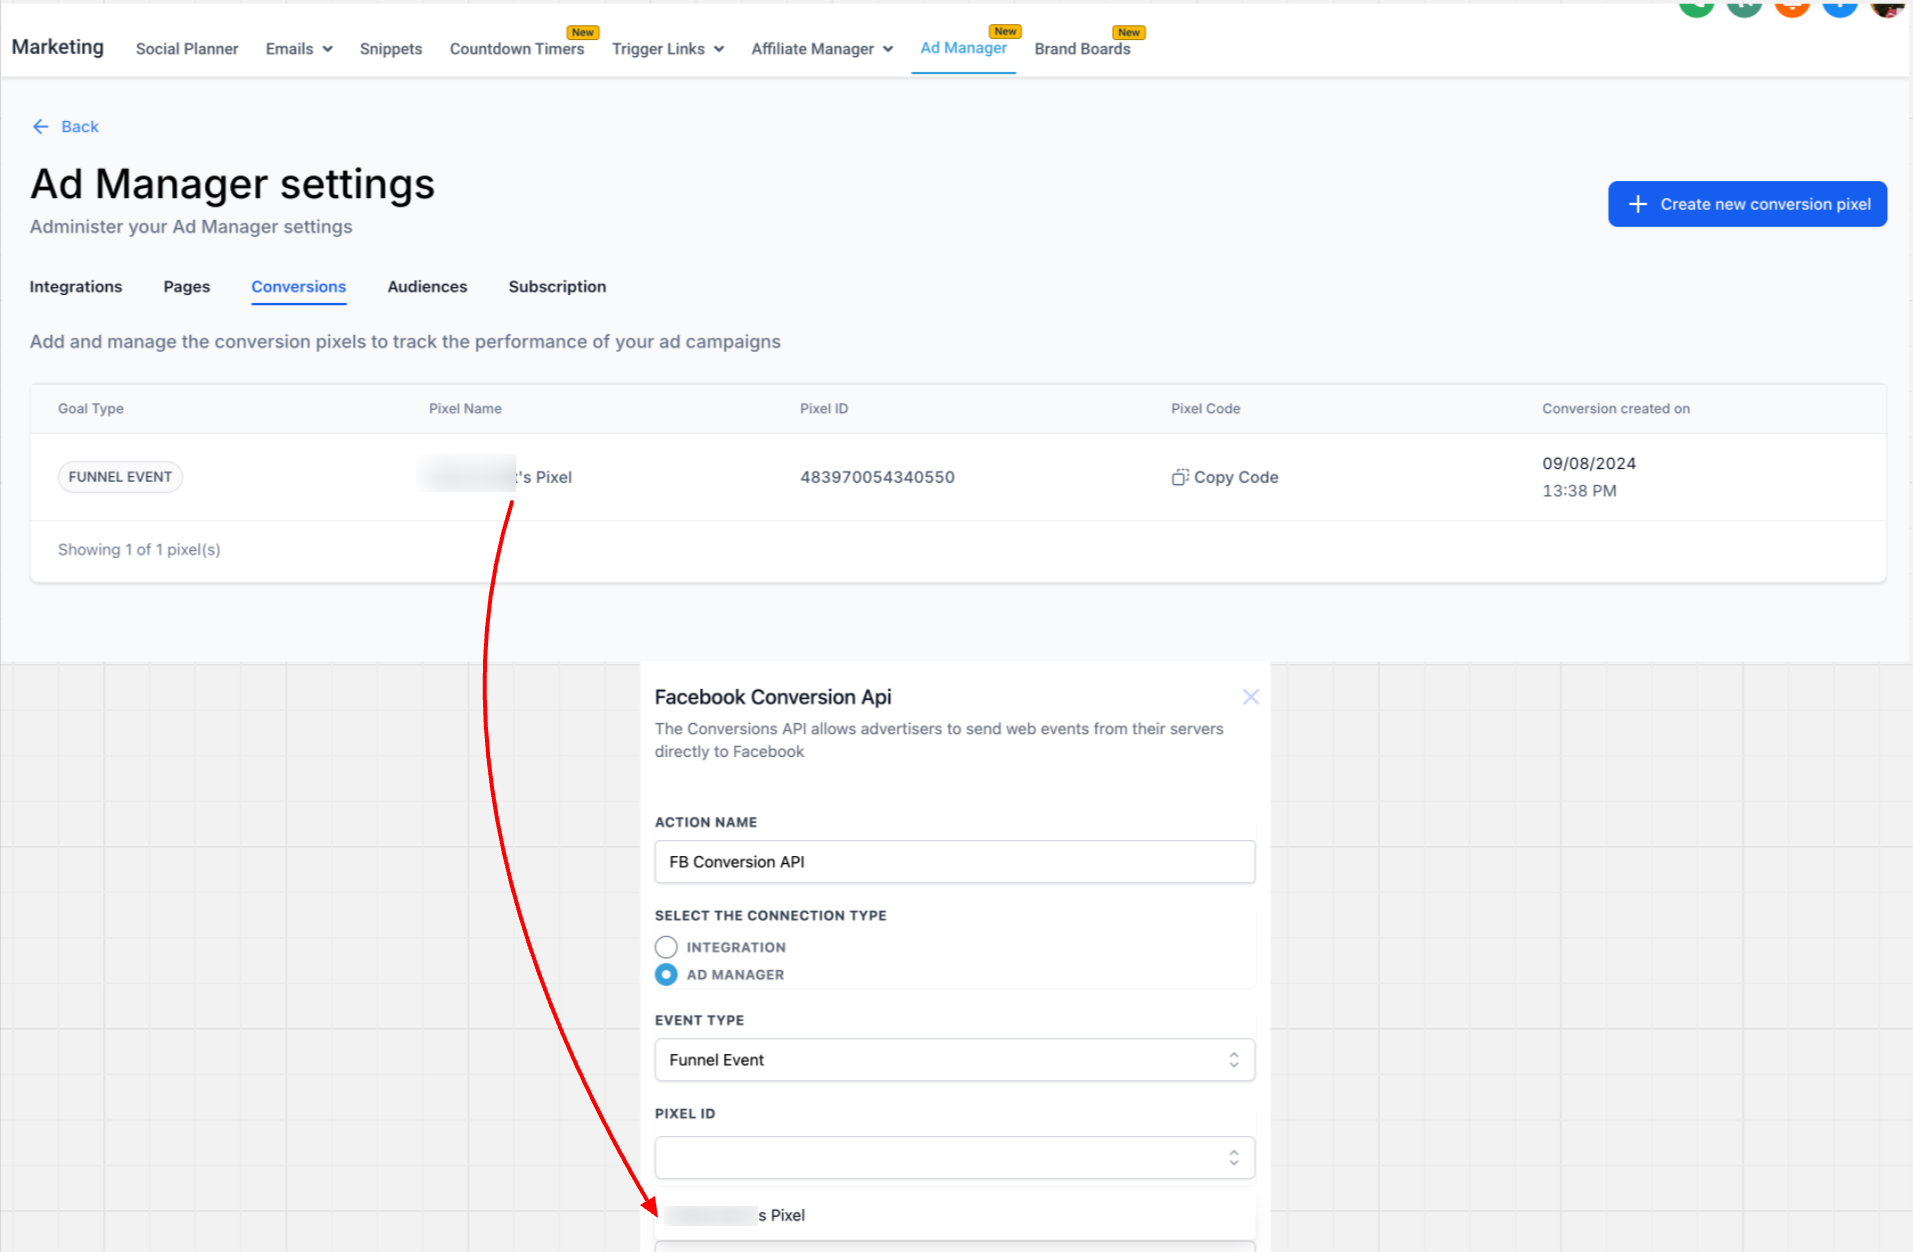
There is no need to generate and add an access token; Aesthetix CRM handles it for you.
For a lead event, the Stage Name should accurately represent your pipeline and pipeline stage for better reporting. Select it with the tag icon to add the custom value of the opportunity pipeline and stage.
When you configure the CAPI action with Event Type set to Lead Event and Stage Name set to Purchase, two additional fields appear:
Value: Supports a static value or a custom field.
Currency: A dropdown that defaults to USD, using the same currency list as funnel events.
These fields are required only when Stage Name is Purchase. If Value and Currency are provided, Aesthetix CRM sends them in the CAPI payload. If Stage Name is not Purchase, any Value or Currency present is ignored.
You can map custom values for Facebook conversion tracking parameters:
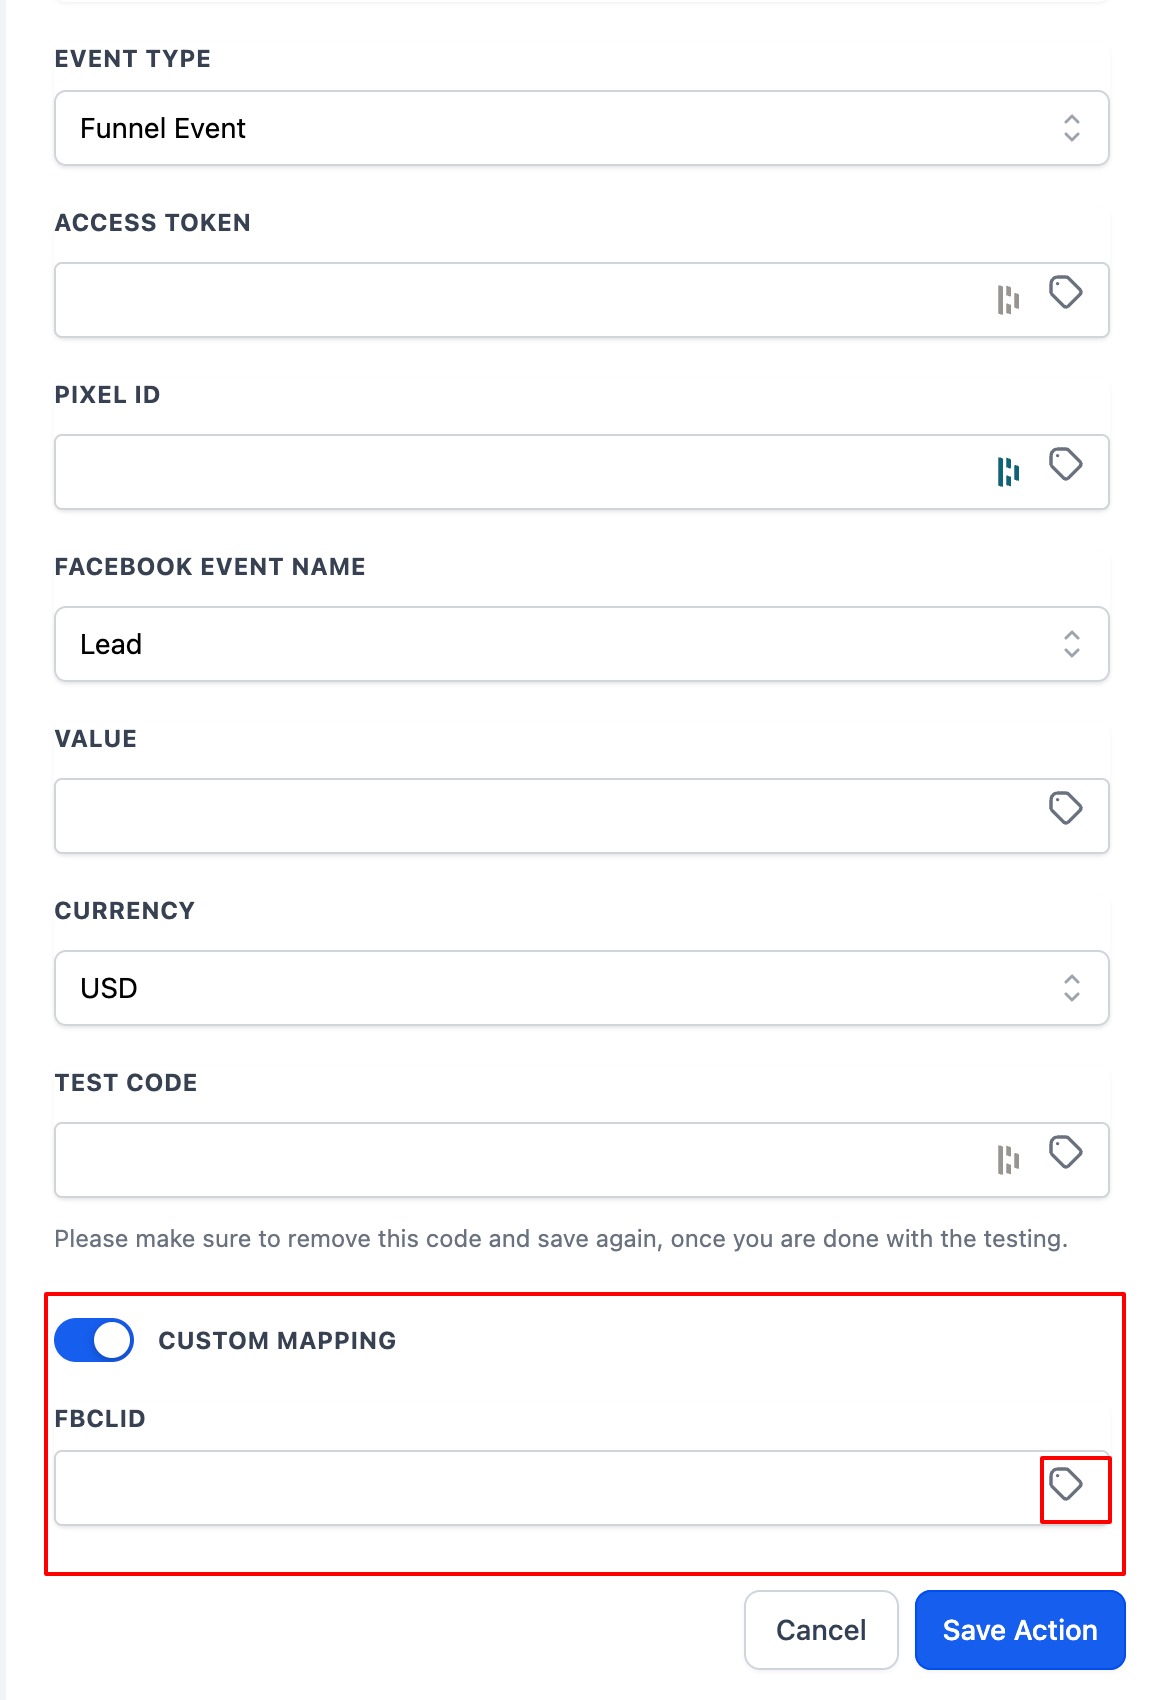
By default, custom mapping is disabled.
Toggle it on to enable custom mapping.
When enabled, you can map FBCLID for funnel events and the Facebook Lead ID for lead events.
If custom mapping fields are provided, they take priority over system defaults.
If left empty, the system continues using its default internal values.
You can also use offline-style triggers such as Call, opportunity status change, or tag with the CAPI action. Aesthetix CRM uses the last available pixel data to send the event, so if an FBCLID is found, the data is sent to the Conversions API.
Example 1: A contact is created from a Facebook form submission, so the first attribution source is Paid Social (Facebook). A workflow with the Facebook Form Submitted trigger will have the FBCLID and send data to CAPI. Later, if that contact converts to an opportunity, you can use an opportunity status trigger to send data to CAPI because the Facebook-form contact still passes the FBCLID.
Example 2: A contact is created from a Google ad, organic Google search, or direct traffic, so the first attribution source is Paid Search (Google) or Direct Traffic. If that contact later fills out a Facebook form, the latest attribution becomes Paid Social (Facebook) with the FBCLID present. A workflow with Facebook Form Submitted followed by the CAPI action will send data to CAPI with the FBCLID.
To optimize for conversion leads, you build two workflows. The first captures the lead and adds it to your pipeline; the second fires on a pipeline stage change and pushes the conversion to Meta.
In Aesthetix CRM, go to Settings > Integrations and confirm your Facebook account is connected with admin permissions. Your Facebook Business Page (one you are an admin of and have full access to) must be integrated and the correct Facebook lead form mapped.


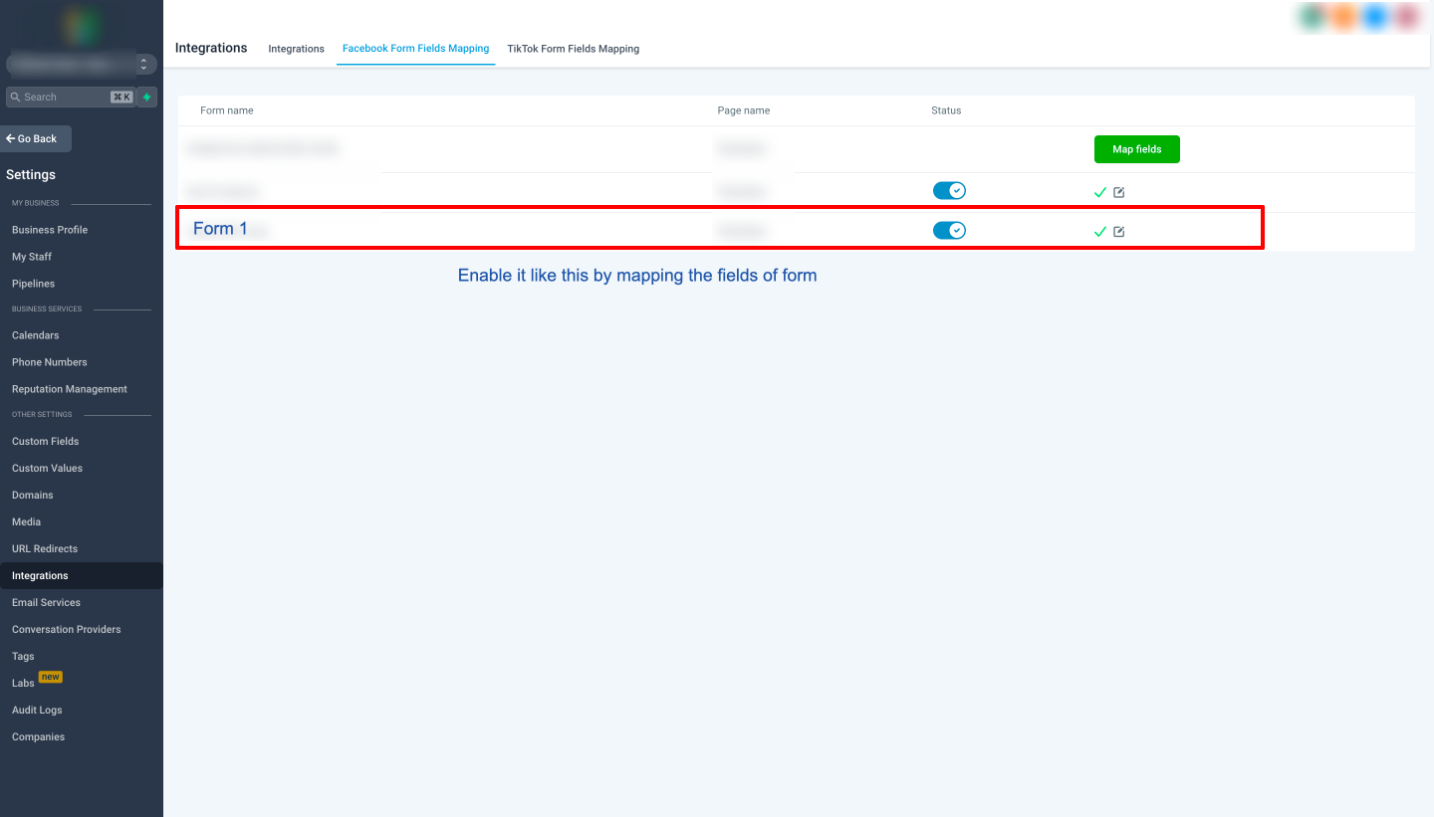
Under Settings > Integrations > Facebook Form Field Mapping, the form should be mapped correctly with its status enabled. Supported custom fields include multiple and single option types.

Keep your Meta Events Manager open in a browser tab and head to Aesthetix CRM.
With your Facebook page integrated, go to Automation > Workflows > Create a new workflow.

Add a workflow trigger and set it to Facebook Lead Form Submitted (if that is the first stage of your conversion flow).

Add a filter to trigger only on submissions to your specific Facebook lead form.

Add the Facebook Conversion API action.

Add the required Access Token, Pixel ID, and Stage Name.

For the Access Token, go to Meta Events Manager > Data Sources > Settings, scroll down, and click Generate Access Token. Copy it and paste it into the action.

For the Pixel ID, go to Meta Events Manager > Data Sources > Settings, scroll down, and copy your Dataset ID (this is the Pixel ID). Paste it into the Pixel ID field.

Add the Create or Update Opportunity action and specify the pipeline and pipeline stage.

Default the Opportunity Name to the lead's full name using the custom value dropper.

Toggle on Allow Duplicate Opportunities for this workflow.

Publish and save the workflow.
Create another workflow. Add the Pipeline Stage Change trigger and a Facebook Conversion API action.

Choose Lead Event as the Event Type and enter the Access Token and Pixel ID. For Stage Name, select the custom value of the opportunity pipeline and stage using the tag icon so it accurately represents your pipeline for reporting.

For the Access Token, generate it from Meta Events Manager > Data Sources > Settings and paste it into the action.
For the Pixel ID, copy your Dataset ID from Meta Events Manager > Data Sources > Settings and paste it into the Pixel ID field.

Save the action, then save and publish the workflow.
Test with the Facebook Lead Ads Testing Tool. Choose the correct page and lead ad form, then create a lead.

The event should be picked up by Events Manager, which can take up to a day.
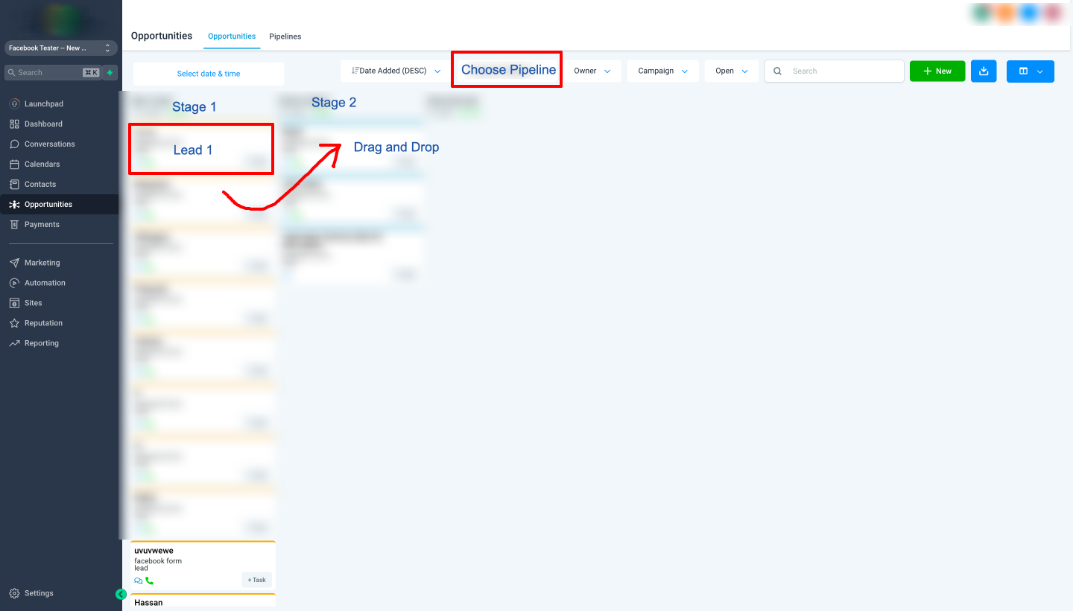
After the test event is sent, go to your opportunity pipeline and move the dummy Facebook lead to another stage configured in the workflow. Confirm the workflow status shows executed and the conversion event appears in Events Manager.
Return to the Settings tab in Events Manager to track the progress of the Conversion Leads integration.
For both workflows, enable Allow Multiple in Workflow Settings.

To send funnel events (page views, form or survey submissions, order forms, booked appointments) rather than pipeline-based lead events, you set up a funnel event pixel and apply the pixel code to your funnel or website, then add the CAPI action with Event Type set to Funnel Event. The full walkthrough is in the Facebook Funnel Event Pixel Setup guide.
Workflows: The Facebook Conversion API action, the Facebook Lead Form Submitted trigger, and the Pipeline Stage Change trigger all live in the Workflows collection.
Funnels: Applying pixel code to your funnel or website for funnel events is covered in the Funnels collection and the Facebook Funnel Event Pixel Setup guide.
Lead events deep dive: For the full conversion-leads build, see the Facebook Conversion Leads Walkthrough.
What is the difference between a funnel event and a lead event?
A funnel event records web actions like page views and form submissions and is sent from a web server. A lead event reports how a lead moves through your pipeline stages, with Aesthetix CRM as the data source. A single pixel can send both.
Should I use a funnel event or a lead event?
Use a funnel event for actions that happen on your funnel, website, or booking widget, such as form submissions, survey submissions, order forms, or booked appointments. Use a lead event when you want to report how a Facebook or Instagram lead progresses through your opportunity pipeline, such as reaching a booked, patient, or qualified stage.
Do I have to create the pixel in Facebook, or can I do it in Aesthetix CRM?
You can create a conversion pixel directly in Ad Manager under Settings > Conversions. The Pixel ID and code are generated automatically for use in your workflows.
Does creating a conversion pixel automatically send data to Meta?
No. Creating the pixel only prepares the conversion asset. You still need to add the Facebook Conversion API action to a workflow so Aesthetix CRM actually sends the conversion event to Meta.
What is the advantage of the Ad Manager connection type over Integrations?
Ad Manager pre-populates your pixels in a dropdown, handles the access token for you, and lets you pick the event type by campaign objective, so you do not have to switch back and forth with Meta.
Which triggers work with lead events?
Facebook Lead Form Submission and Pipeline Stage Change are the most common triggers for lead events, though other contact-based triggers can also be used. Pipeline Stage Change works when the contact originally came from a Facebook lead form.
When are the Value and Currency fields required?
Only when Event Type is Lead Event and Stage Name is Purchase. Otherwise any Value or Currency you enter is ignored.
Why do I need two workflows for lead events?
The first workflow captures the lead and creates the opportunity in your pipeline. The second fires on a pipeline stage change and pushes the conversion to Meta so it can optimize for quality. Together they form a complete conversion-leads system.
Why isn't my conversion showing up in Meta Events Manager?
The most common cause is missing attribution data on the contact. Confirm the FBCLID (for funnel events) or the Facebook Lead ID (for lead events) was captured and is present on the contact or custom field the workflow reads from; without it, Meta cannot match the event back to the original ad interaction. Also confirm the workflow published successfully and check Events Manager, since matched events can take up to a day to appear.
Do I need to set up UTM parameters for the pixel?
No. Aesthetix CRM automatically creates and adds UTM parameters to the pixel for tracking.
Is uploading patient data to Meta a HIPAA concern?
CAPI sends event and identifier data to Meta. Only send the identifiers required for matching, follow your practice's HIPAA policies, and get patient consent. Do not send protected health information beyond contact identifiers.
Does Meta restrict what I can name my conversions or custom audiences?
Yes. Meta applies its own restrictions to custom audiences and custom conversions that contain or imply certain prohibited or sensitive information, including health-related categories. Review your conversion pixel names and any custom audience configuration in Ad Manager to make sure they comply with Meta's requirements before you launch a campaign.
