Online Listings is a Yext powered local SEO tool inside Aesthetix CRM that keeps your practice's core business information consistent everywhere prospective patients search. Your name, address, phone number, and hours are published and kept in sync across 70 or more of the most reputable directories and search sites, which builds backlinks and helps your med spa show up when someone nearby searches for treatments you offer. Instead of logging into each directory separately, you update your details once in Aesthetix CRM and Listings pushes them out.
This guide covers what Listings does, how to run a business scan, how to create and complete your listing, how to sync Google Business Profile and Facebook, and how the healthcare add on adds provider fields. For managing the reviews that come in through Google Business Profile, see the Review Management collection.
Consistent business information across 70+ directories and search sites, so patients always find the correct address, hours, and phone number.
Stronger local SEO through structured backlinks from reputable directories.
One place to update your details, with changes syncing out automatically.
Live visibility into how your listings appear, plus the ability to approve or reject suggested edits about your business.
Before you commit, you can run a business scan to see how your practice currently appears online. The scan checks how consistent and complete your information is across the directory network and highlights where you are missing or inaccurate.
Fill out the scan details form. It is pre populated with your practice's basic information. Verify and correct the details so the scan is accurate.
Run the scan. The tool processes your information and generates a report showing how well your current online presence matches the details you provided.
Review the results. The report summarizes your presence, highlights key metrics, and identifies areas to improve.
Decide whether to subscribe. Use the findings to decide whether Online Listings is worth activating for your practice.
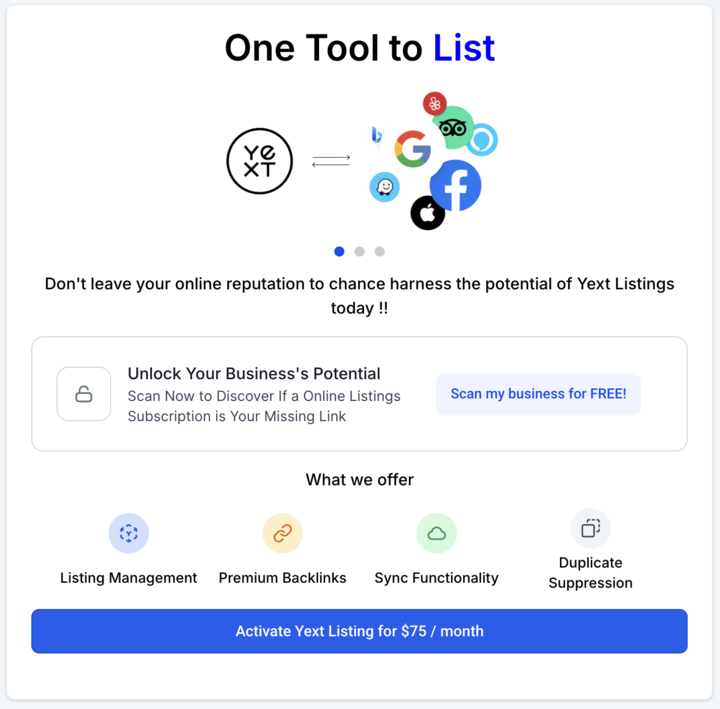
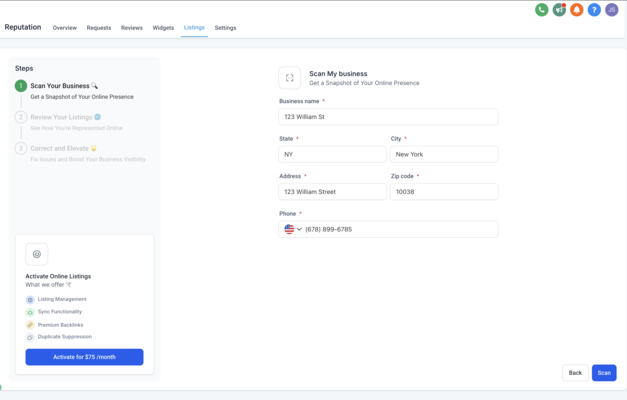
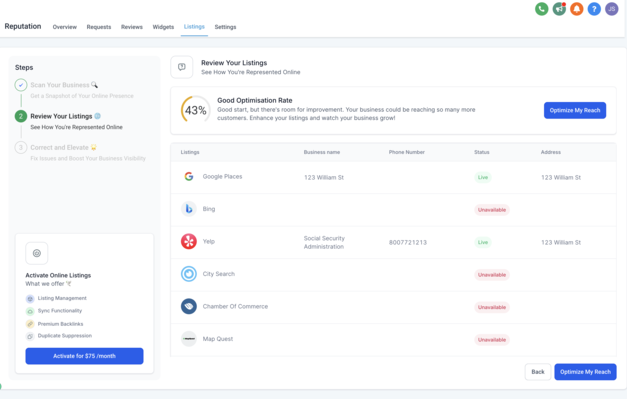
Once you are ready, activate Listings and enter your business information.
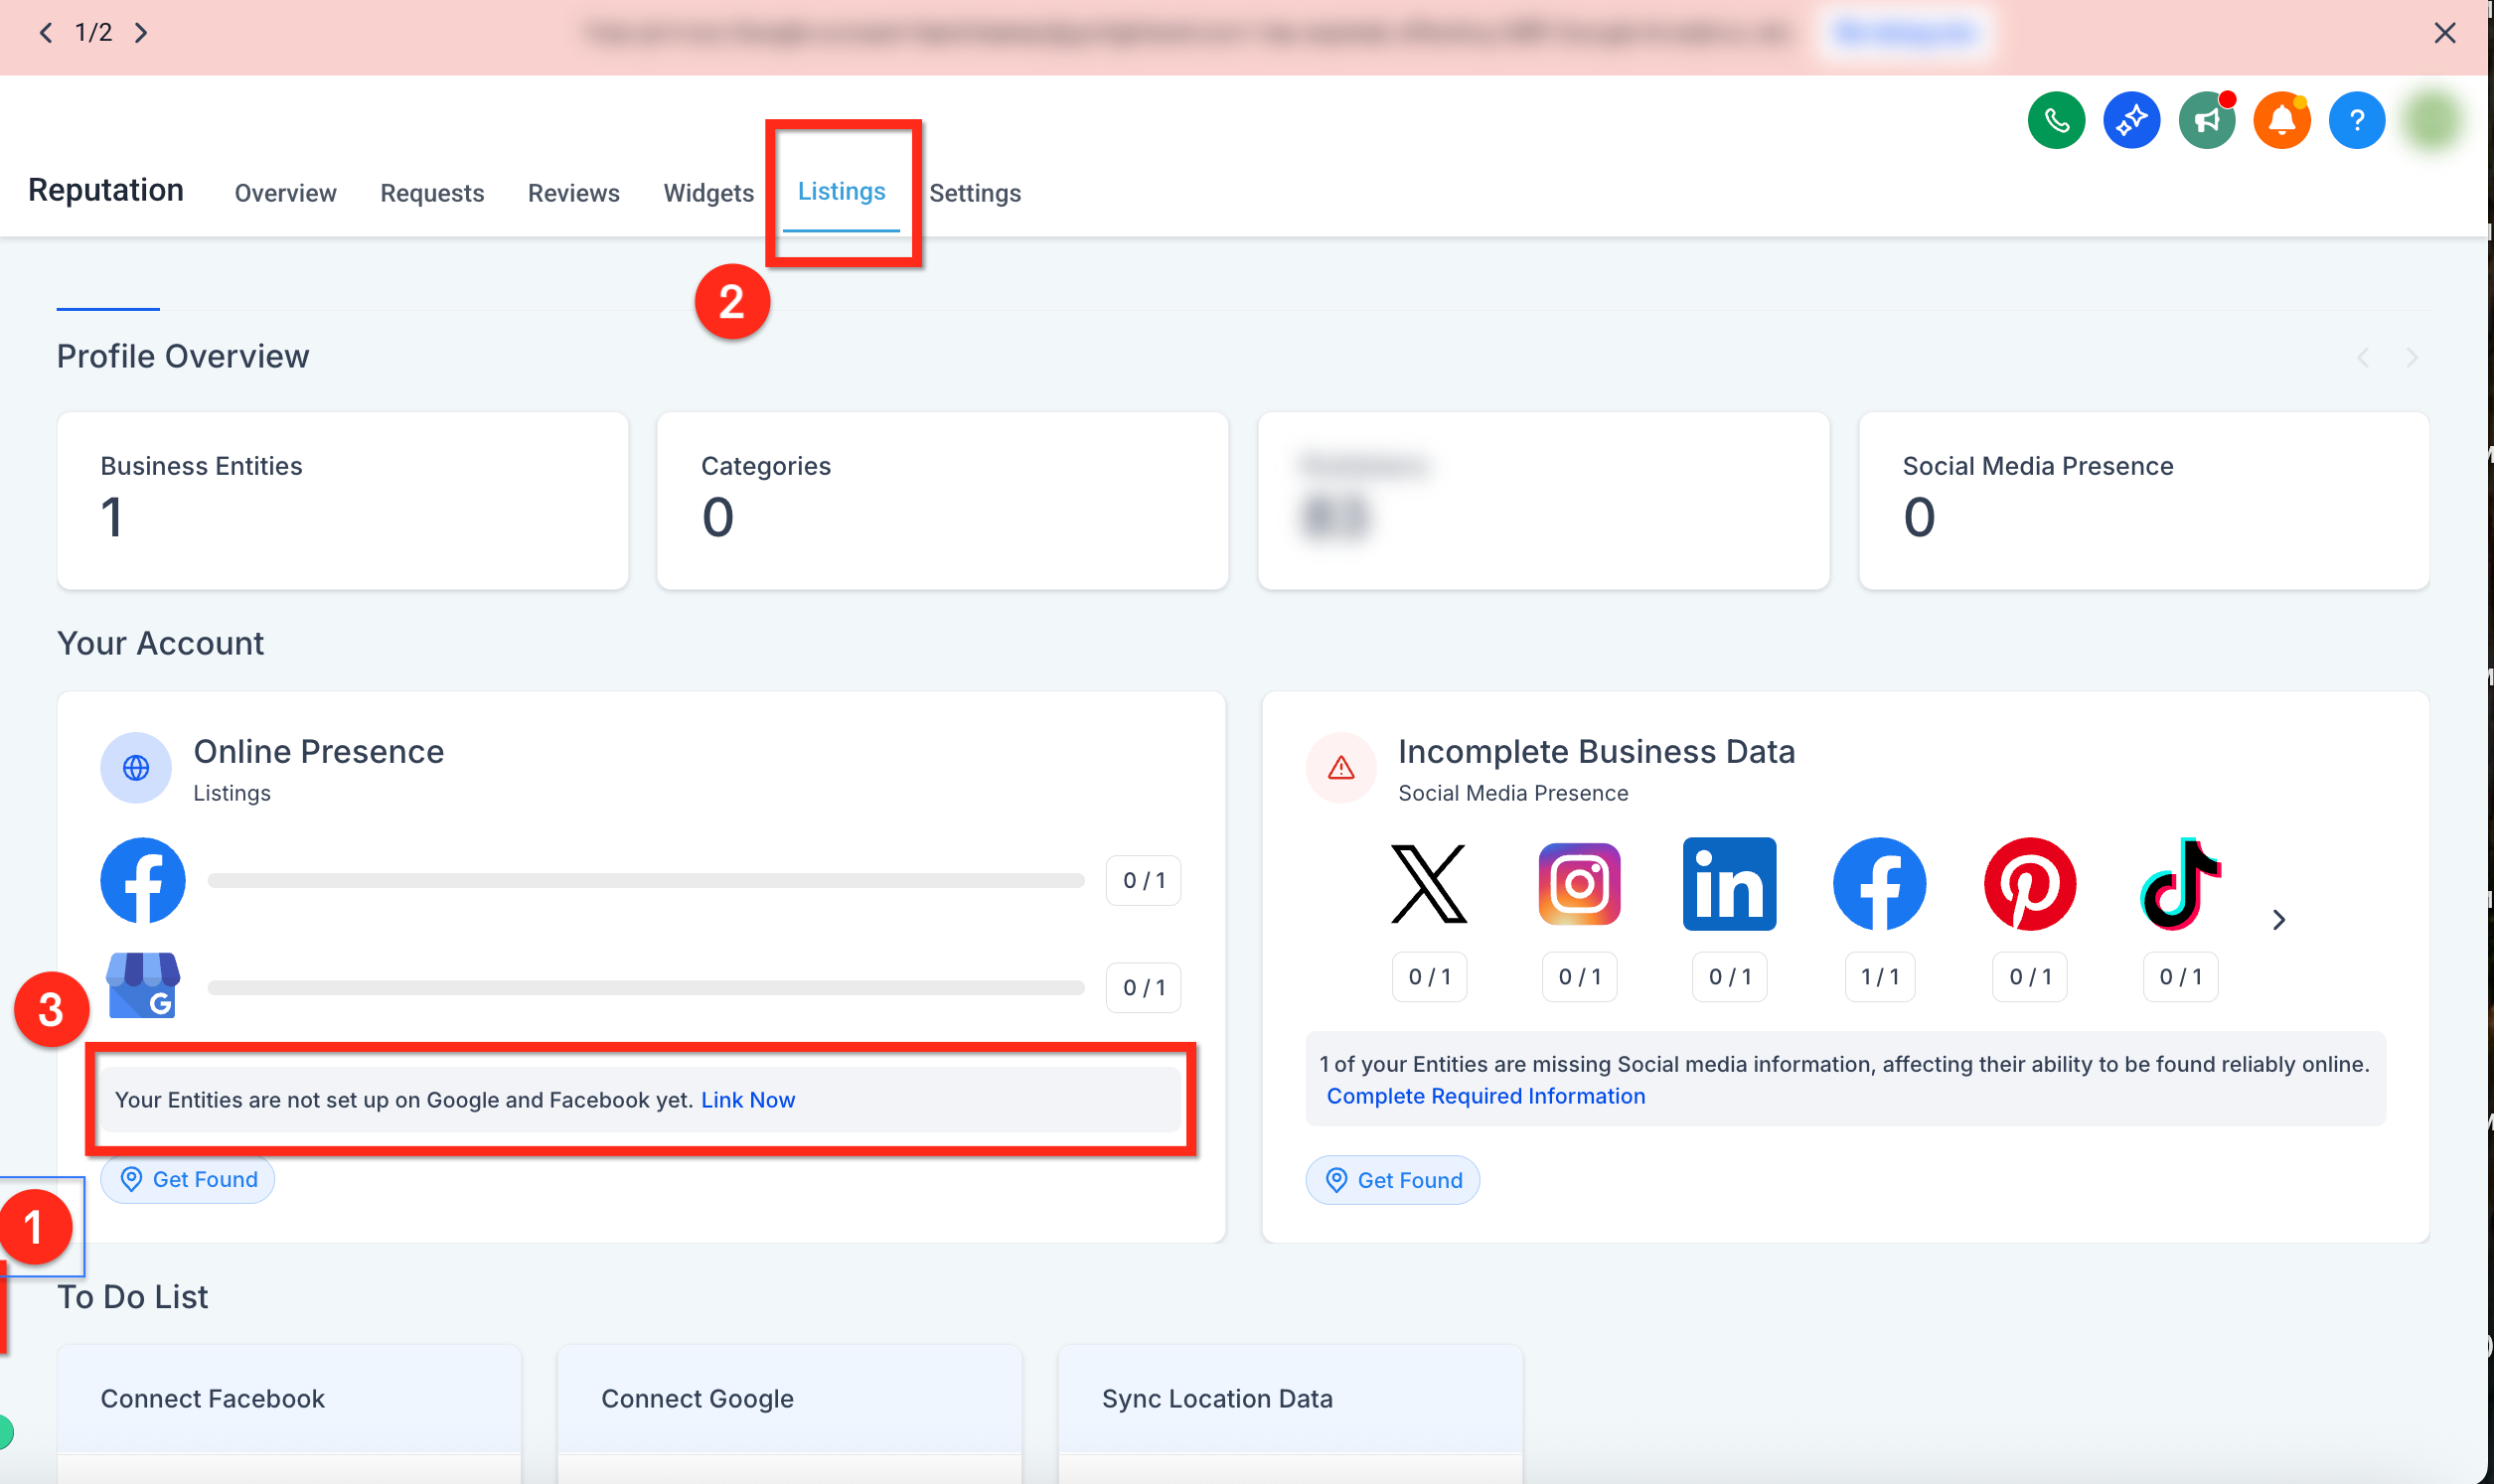
From the left navigation, go to Reputation.
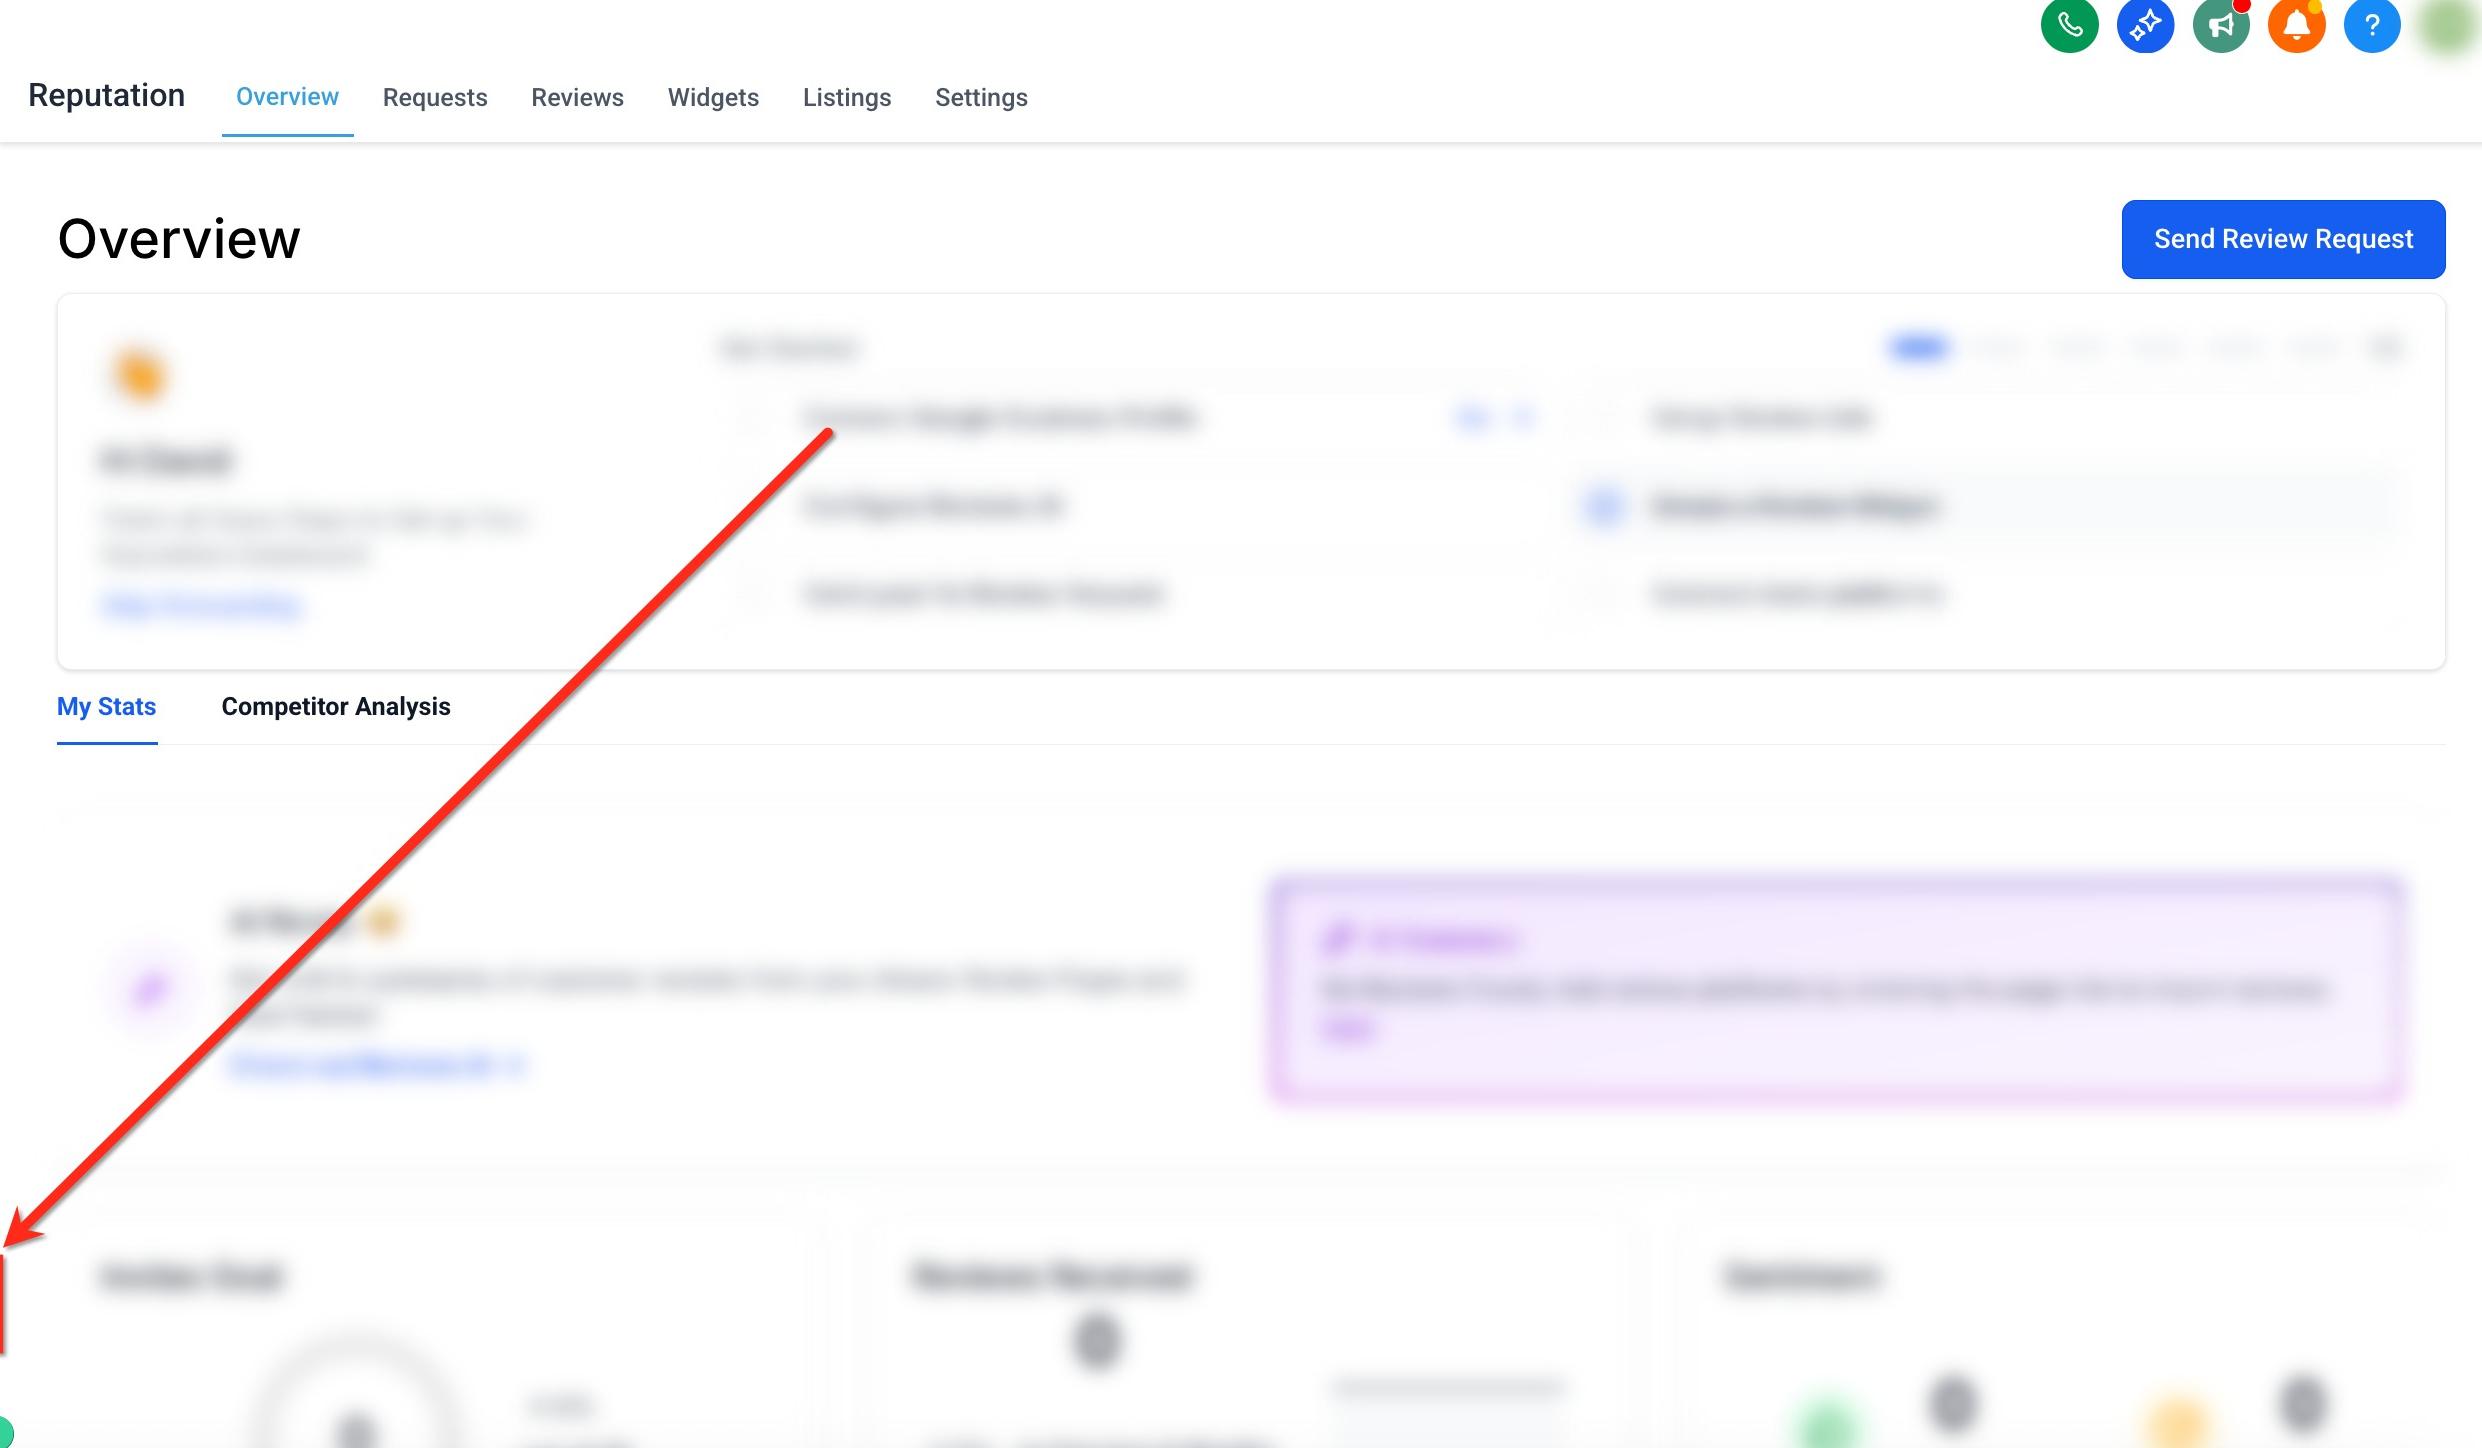
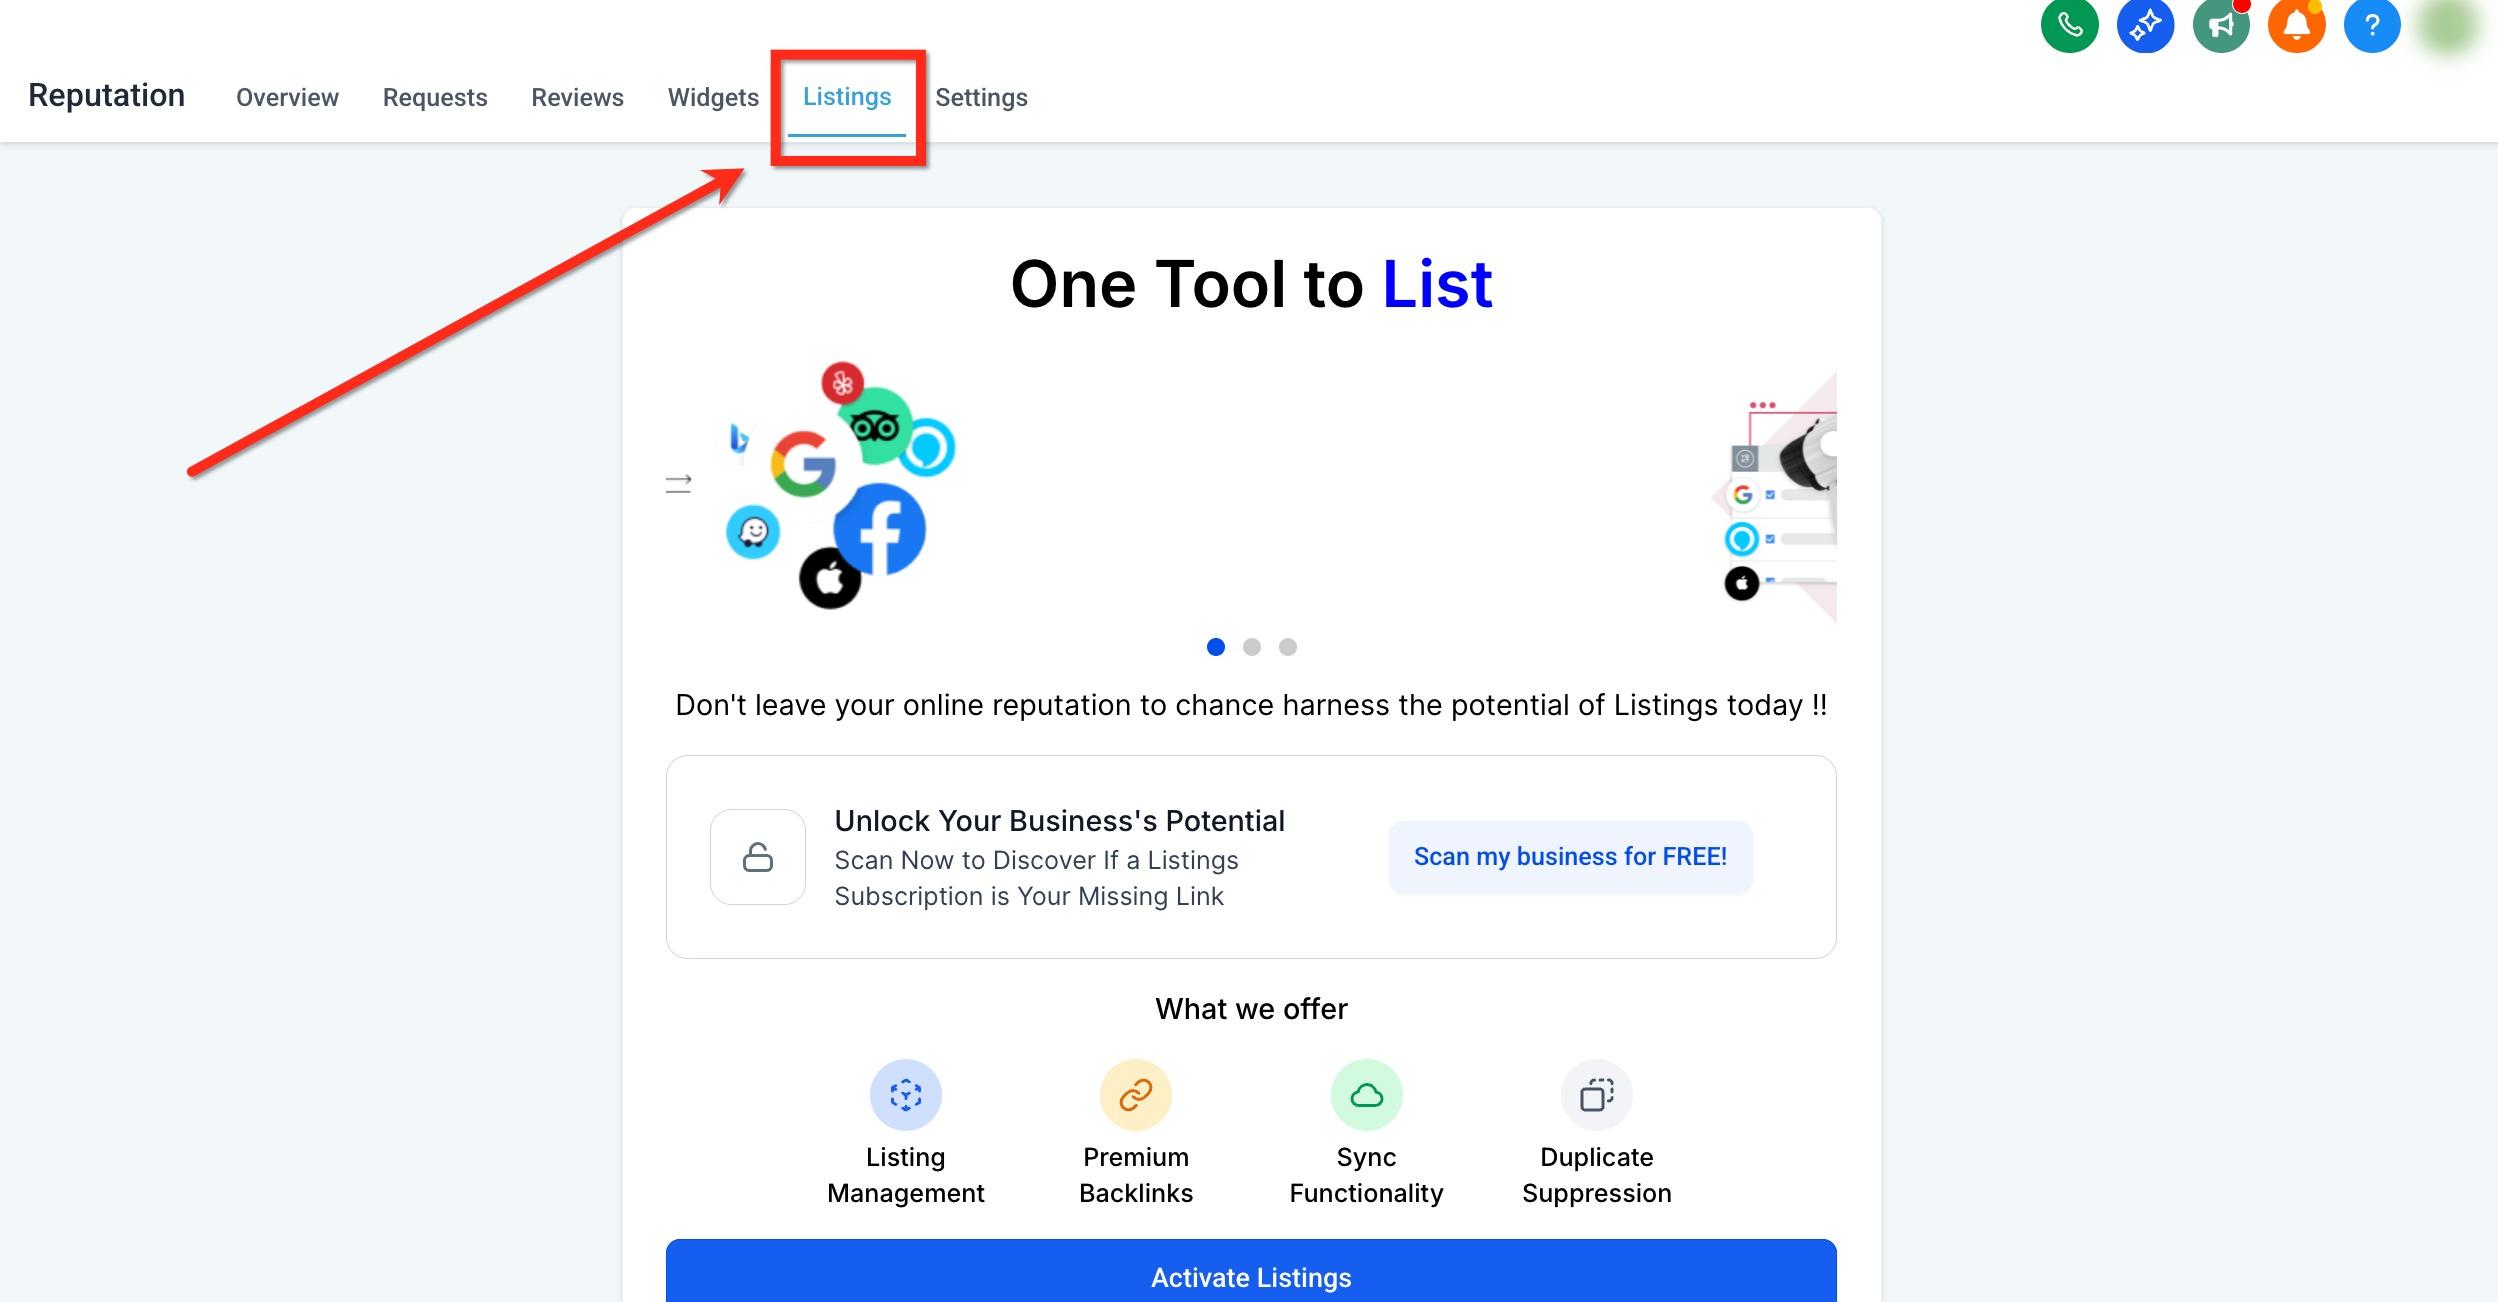
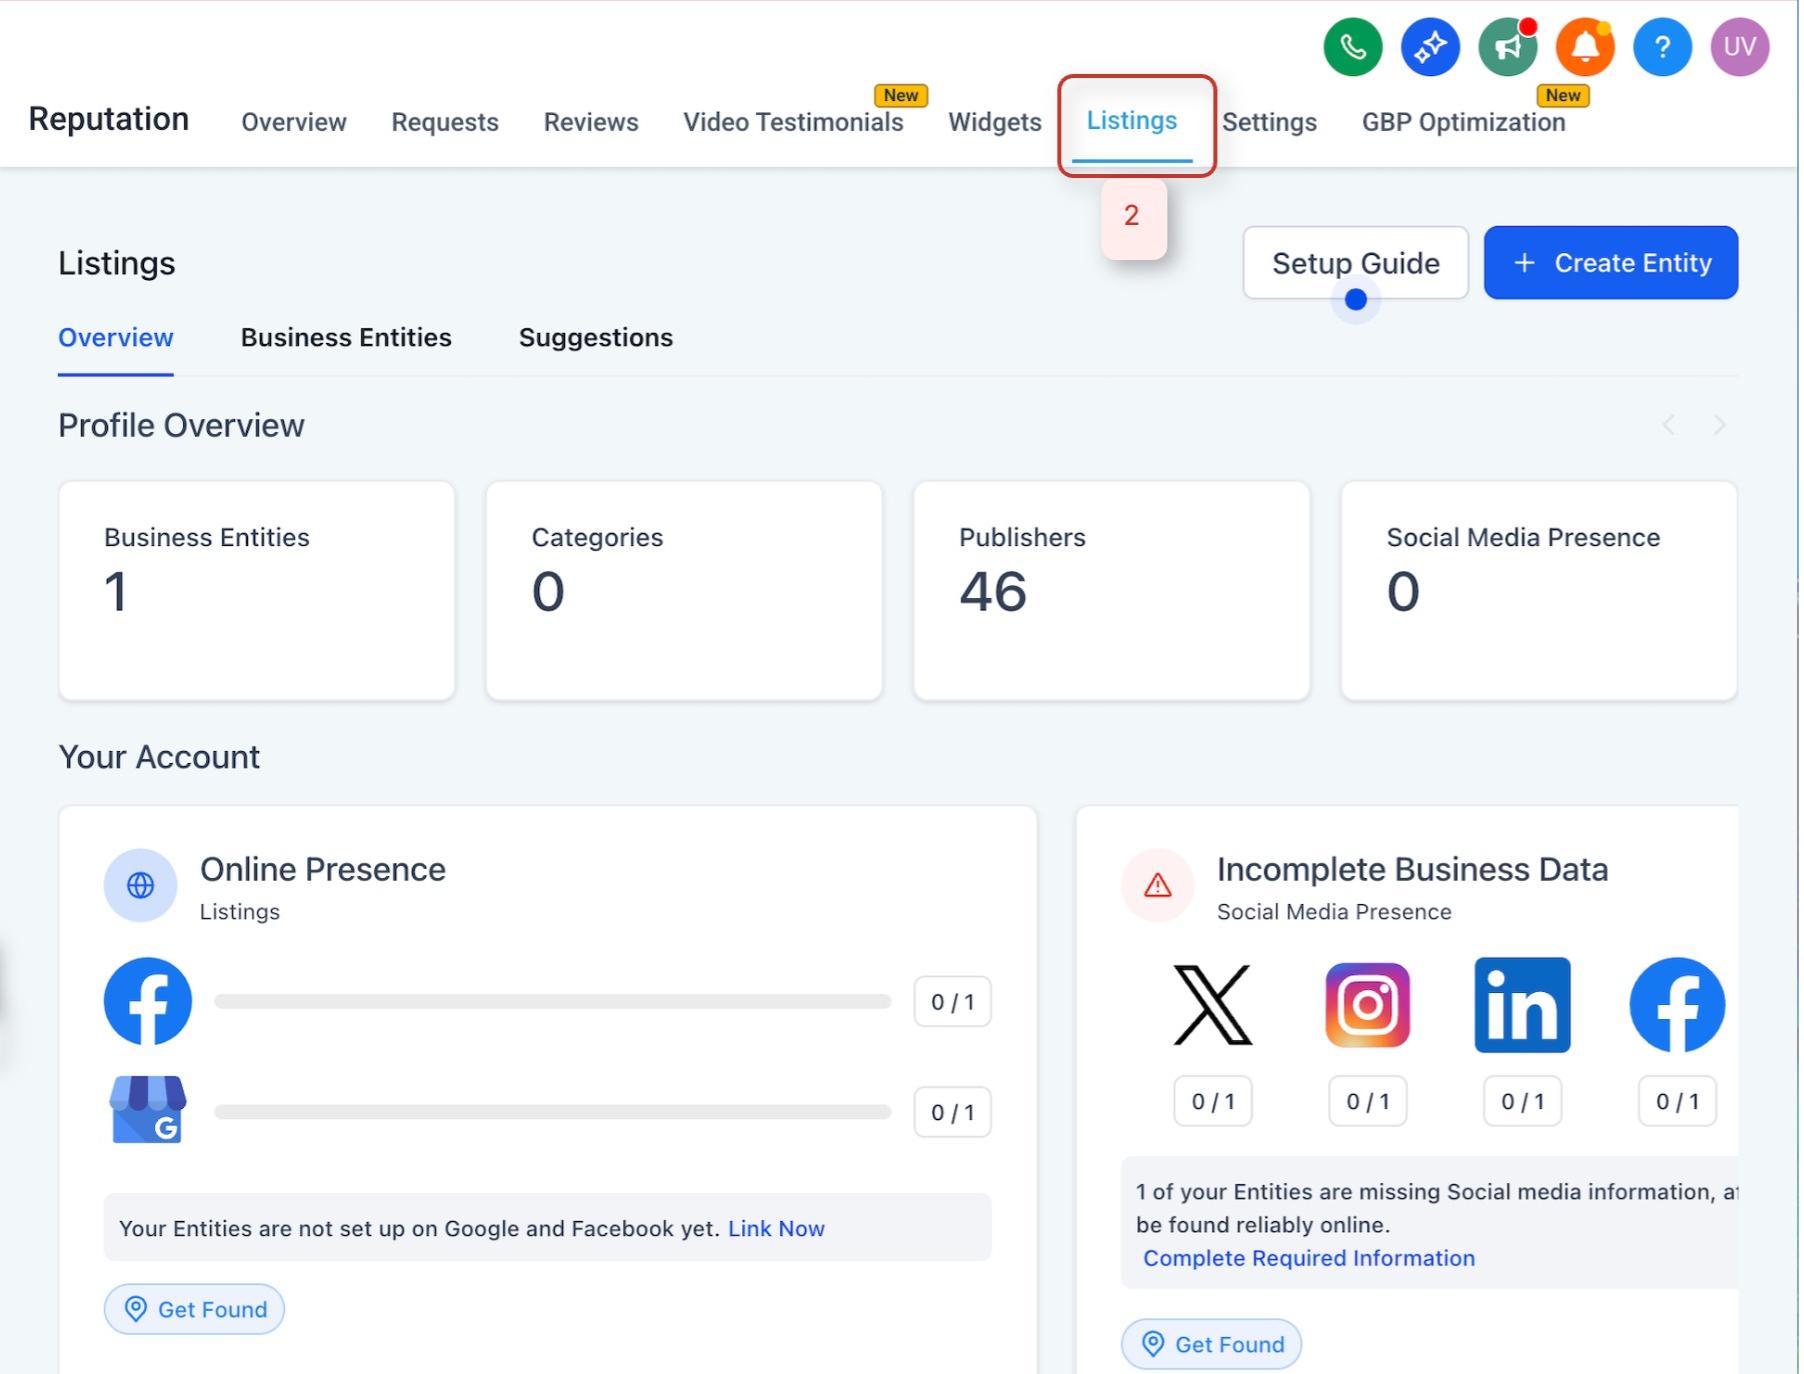
Click the Listings tab at the top.
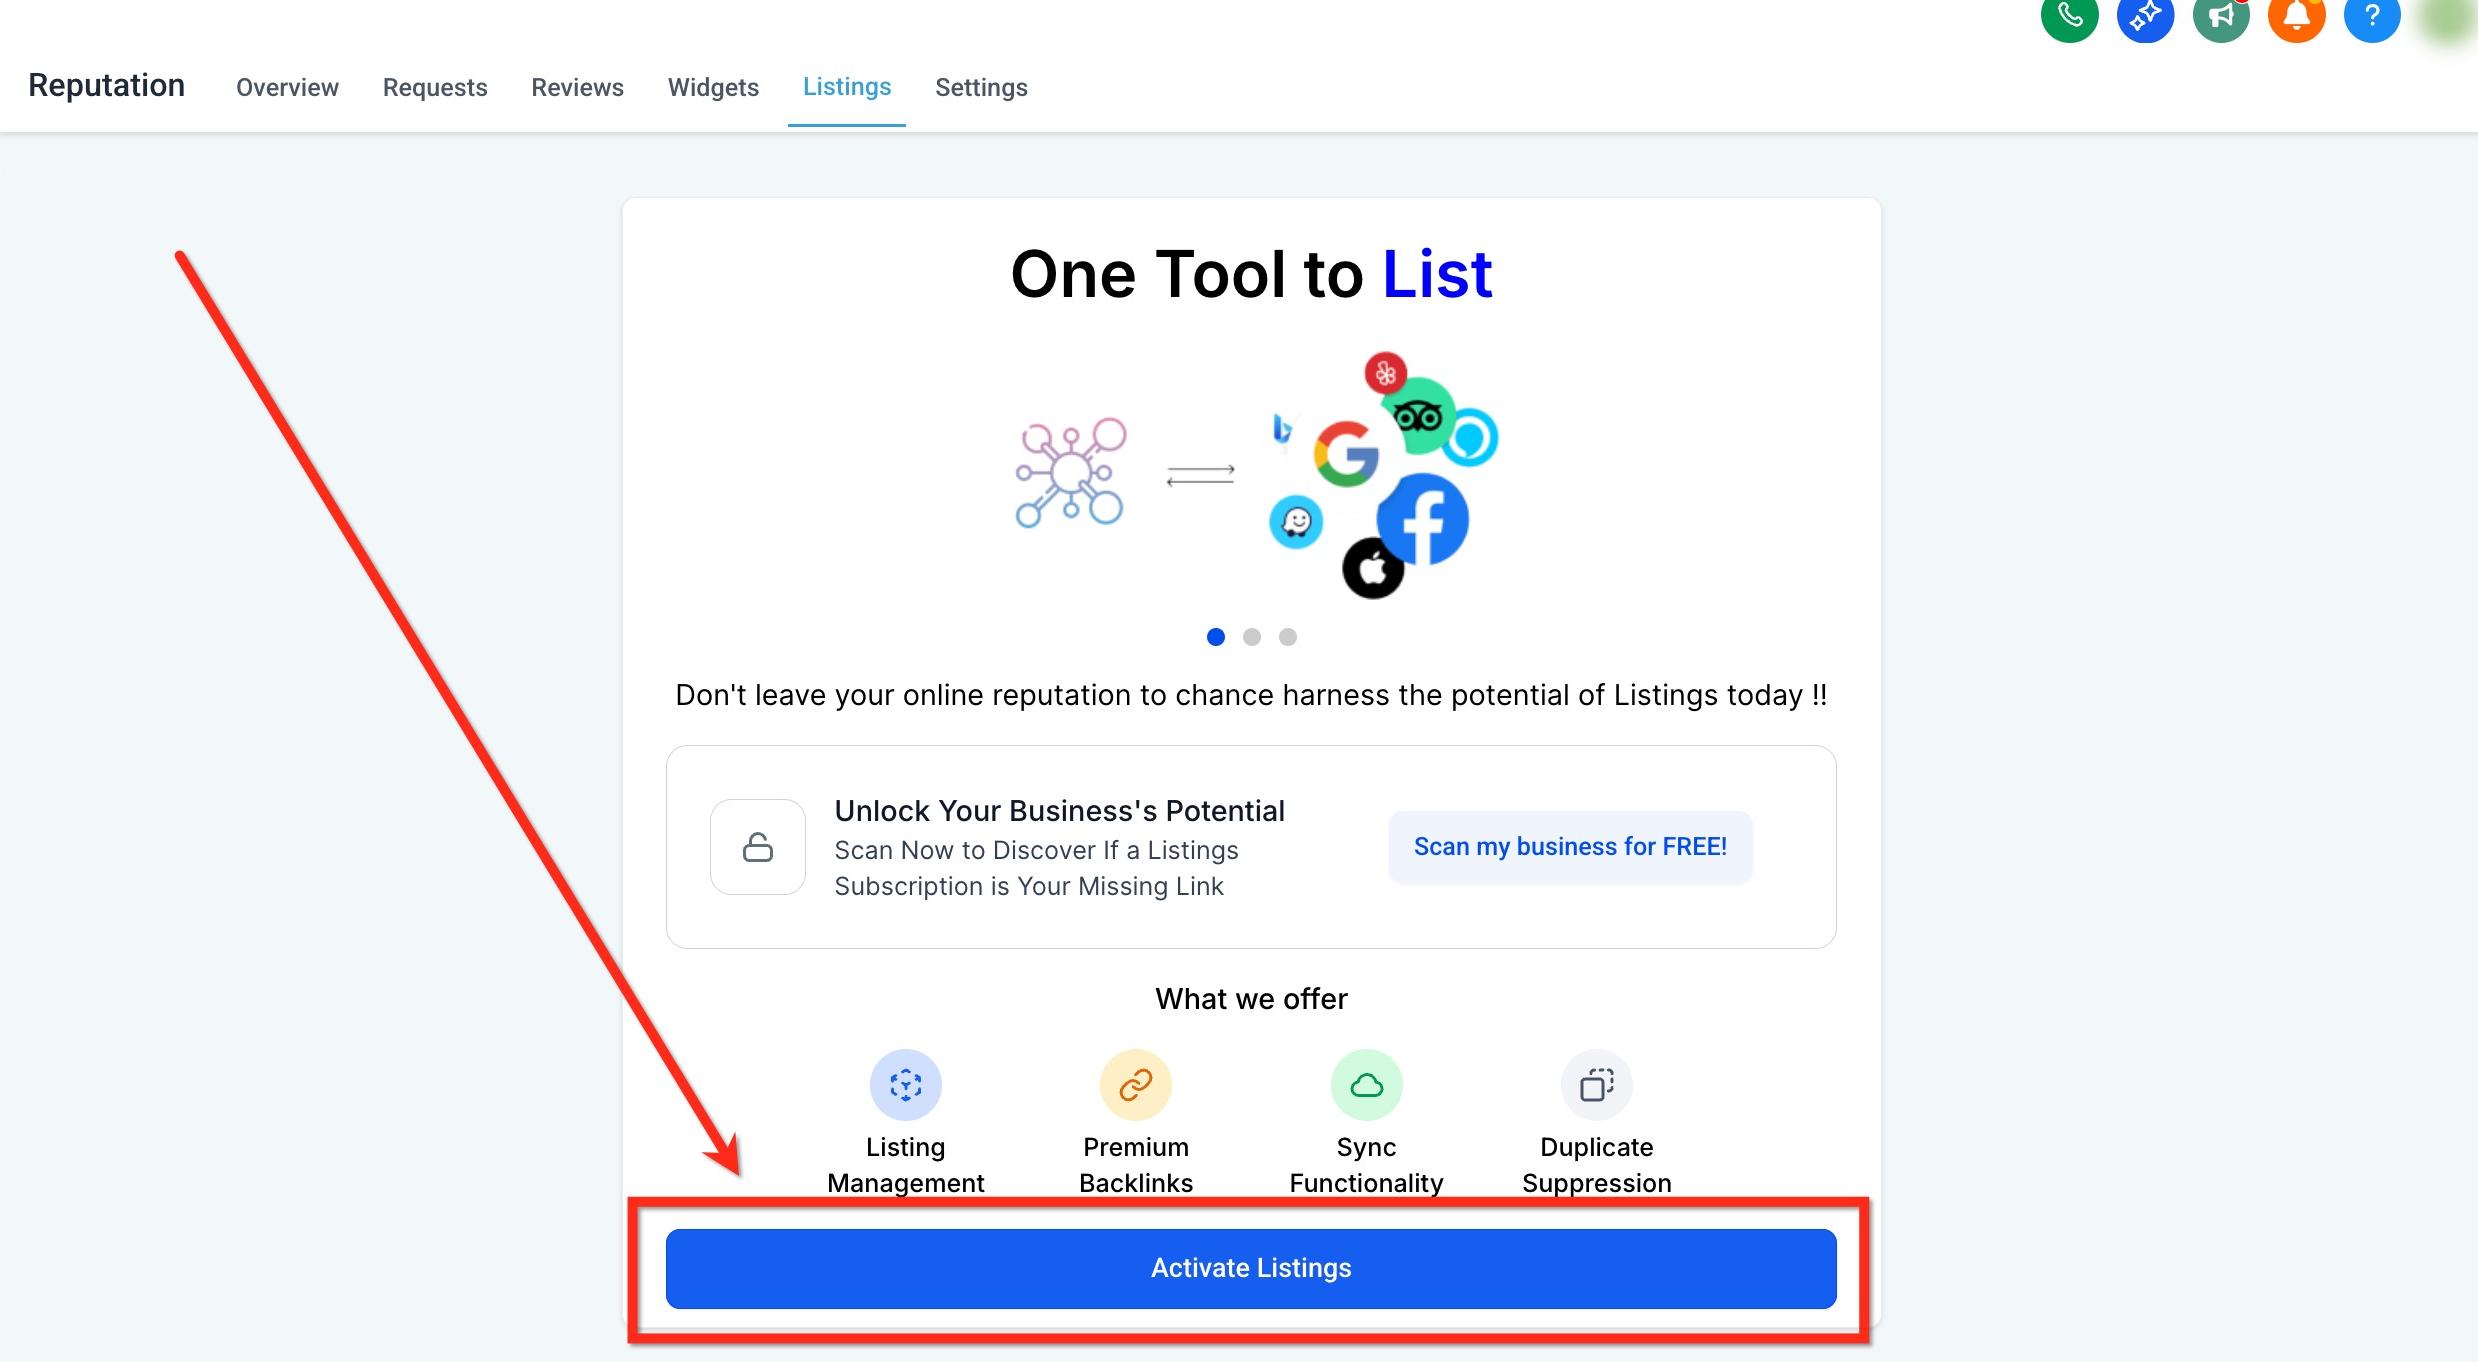
Click Activate Listings.
Fill out your listing information. Accurate details here are what get published to the directory network, so take care with the fields below.
To keep your listing healthy, enter a complete street address including any suite or unit number, a proper business name, a valid phone number, and a valid email. Avoid using a PO Box or placing your postal code in the street address line, since these are the most common causes of a listing that will not publish.
If your listing prompts you to complete required information, you can add your social profiles so they appear alongside your business details.
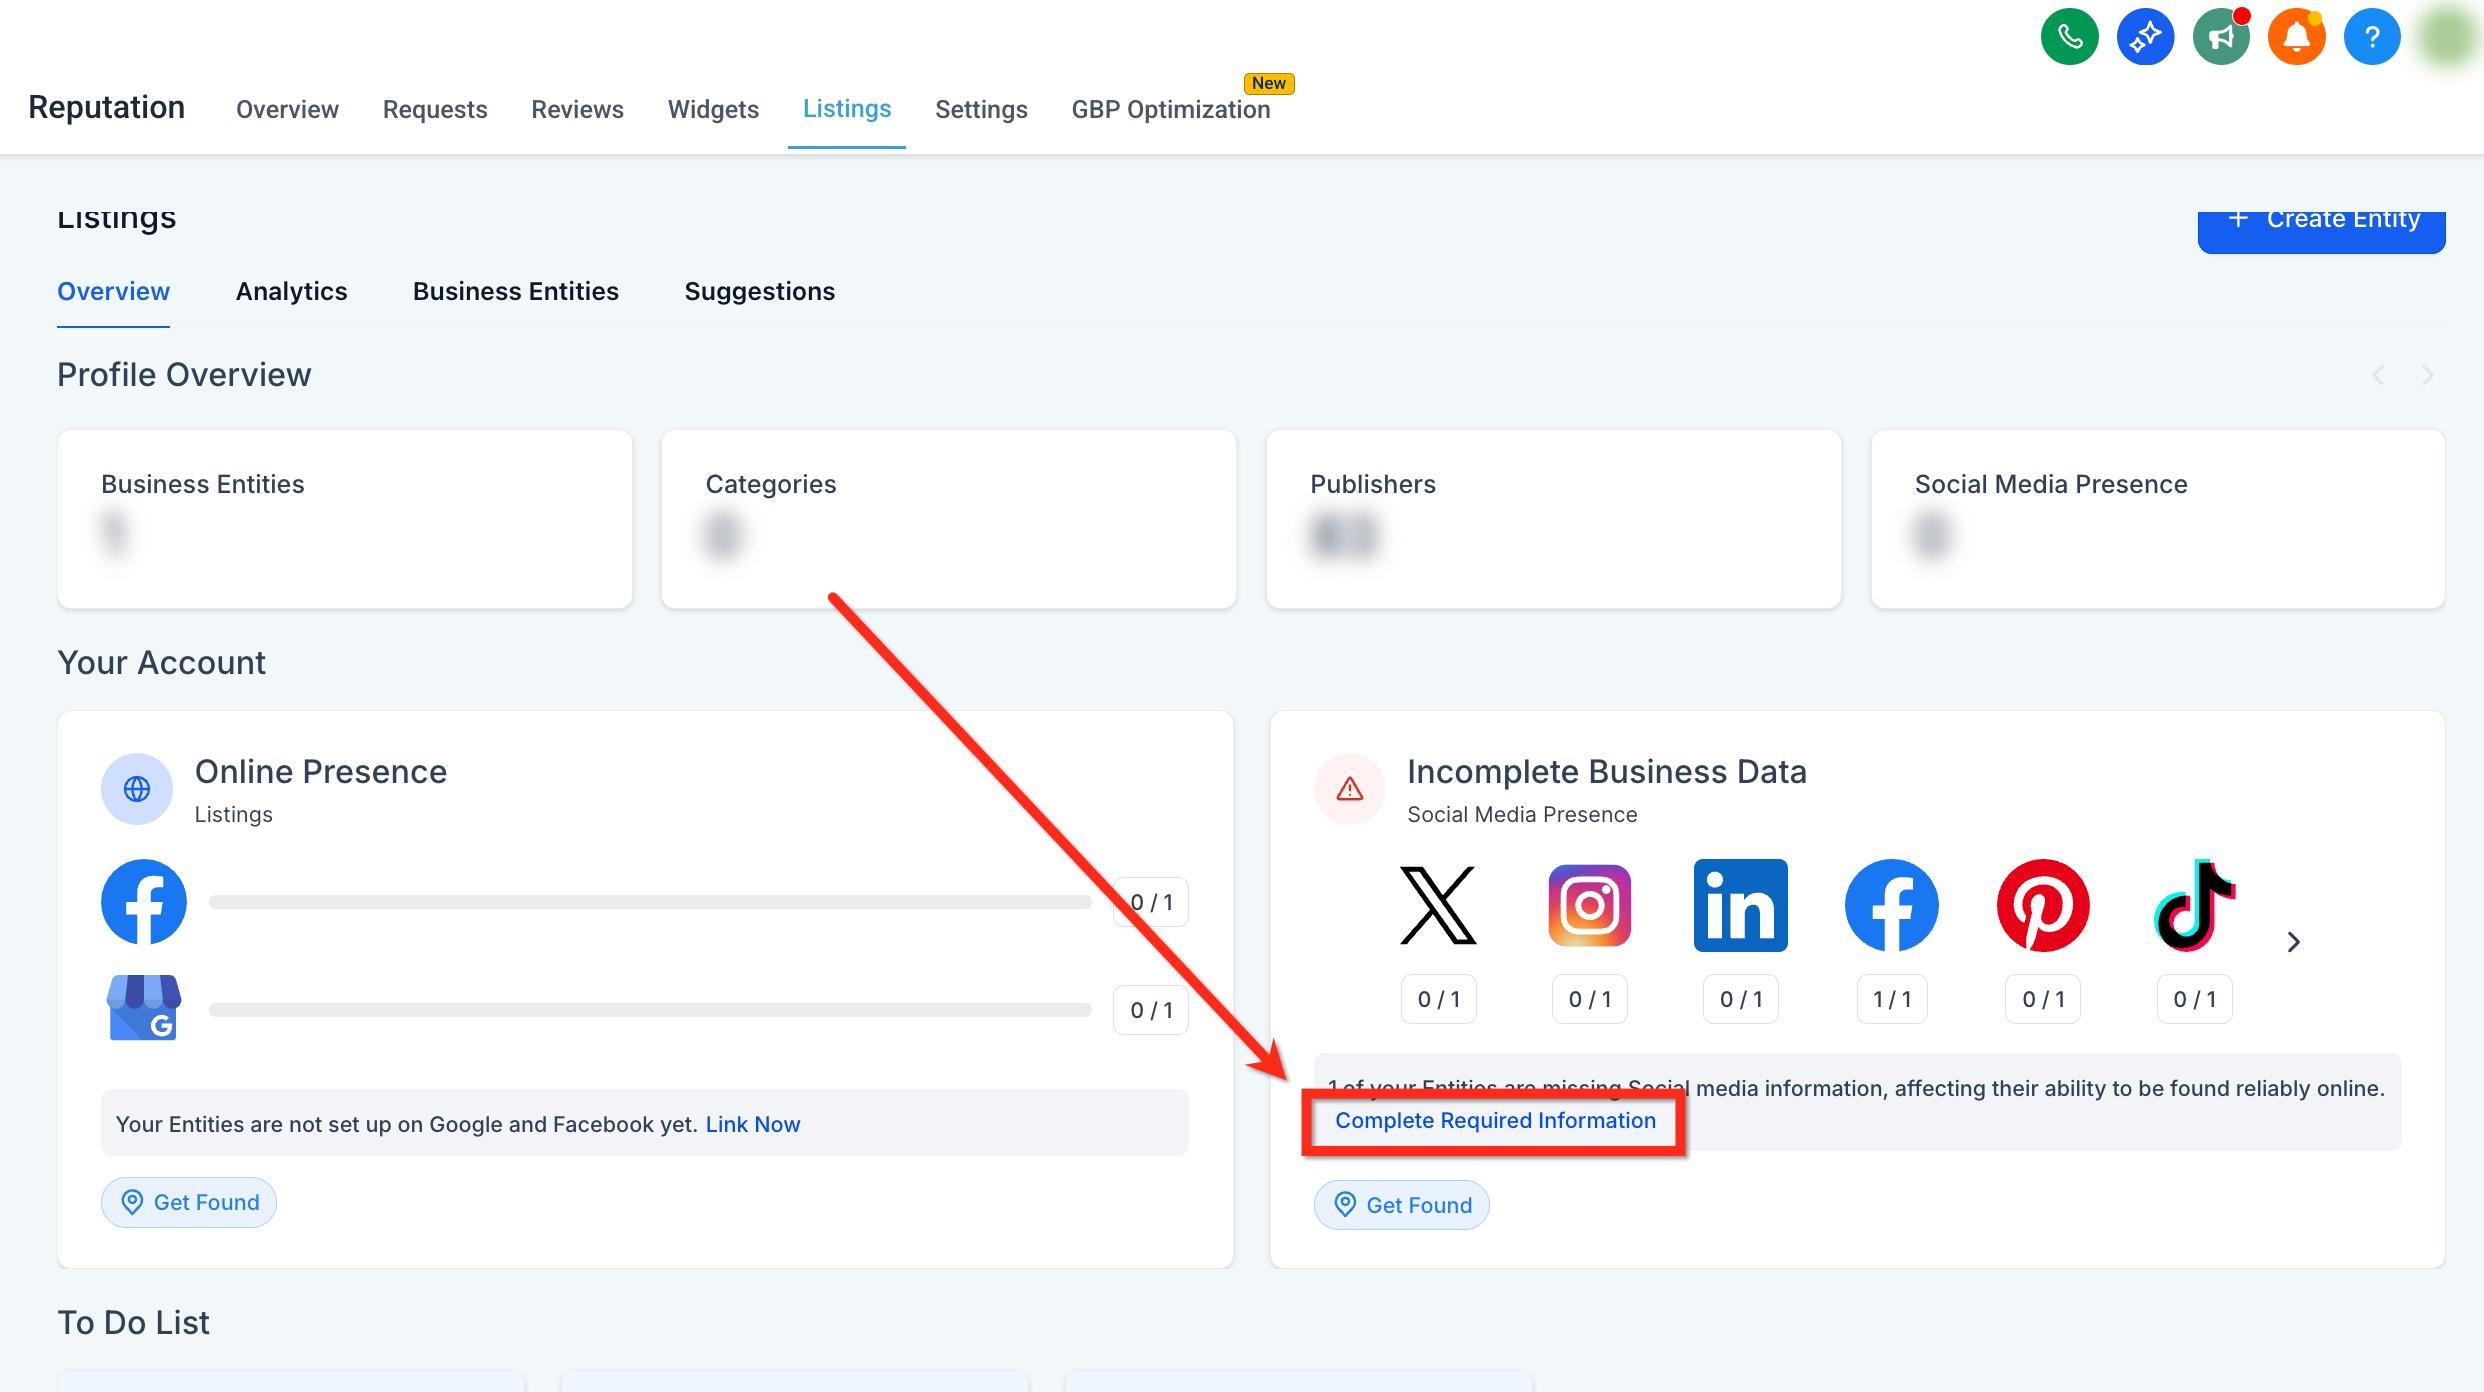
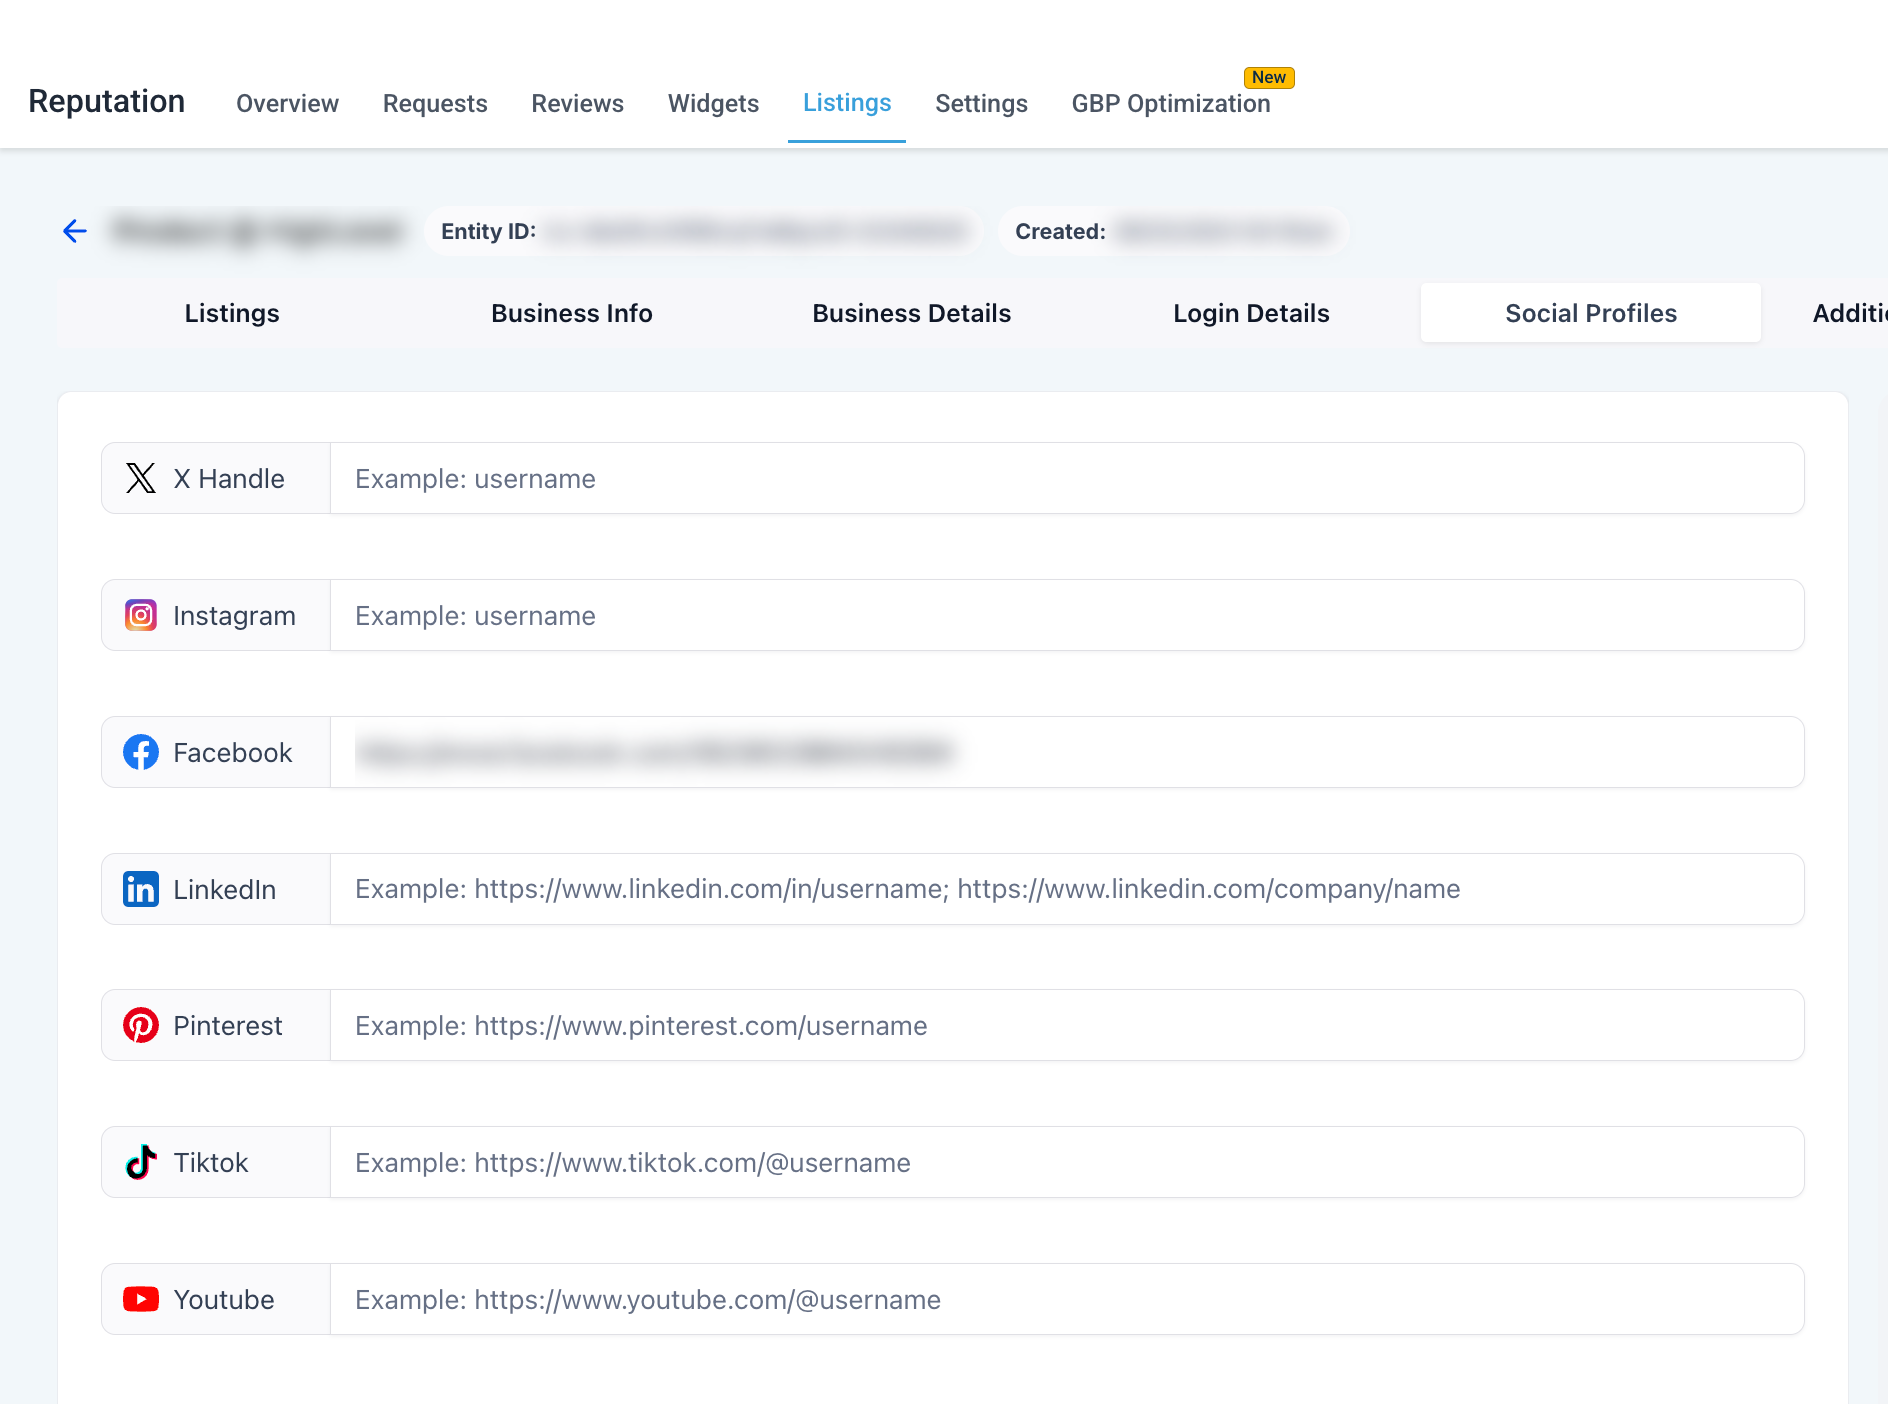
In Reputation > Listings, click Complete Required Information if prompted. This opens the Social Profiles tab.
Enter the relevant links or usernames for your social accounts and save.
Connecting your Google Business Profile and Facebook Page directly inside Listings keeps your hours, address, photos, and reviews in sync across both without bouncing between dashboards.
Before you connect, make sure you have:
Admin or Owner role on the Google Business Profile you plan to connect.
Facebook Page Admin rights on the Page you plan to connect.
Your browser's pop up blocker disabled for the session.
If you already connected Google Business Profile or Facebook in the Social Media Planner, Listings reuses the same authorization, so you will not need to sign in again.
From the left menu, go to Reputation, then click Listings to open the dashboard.
Under Your Account, click the link that reads that your entities are not set up on Google and Facebook yet, then Link Now.
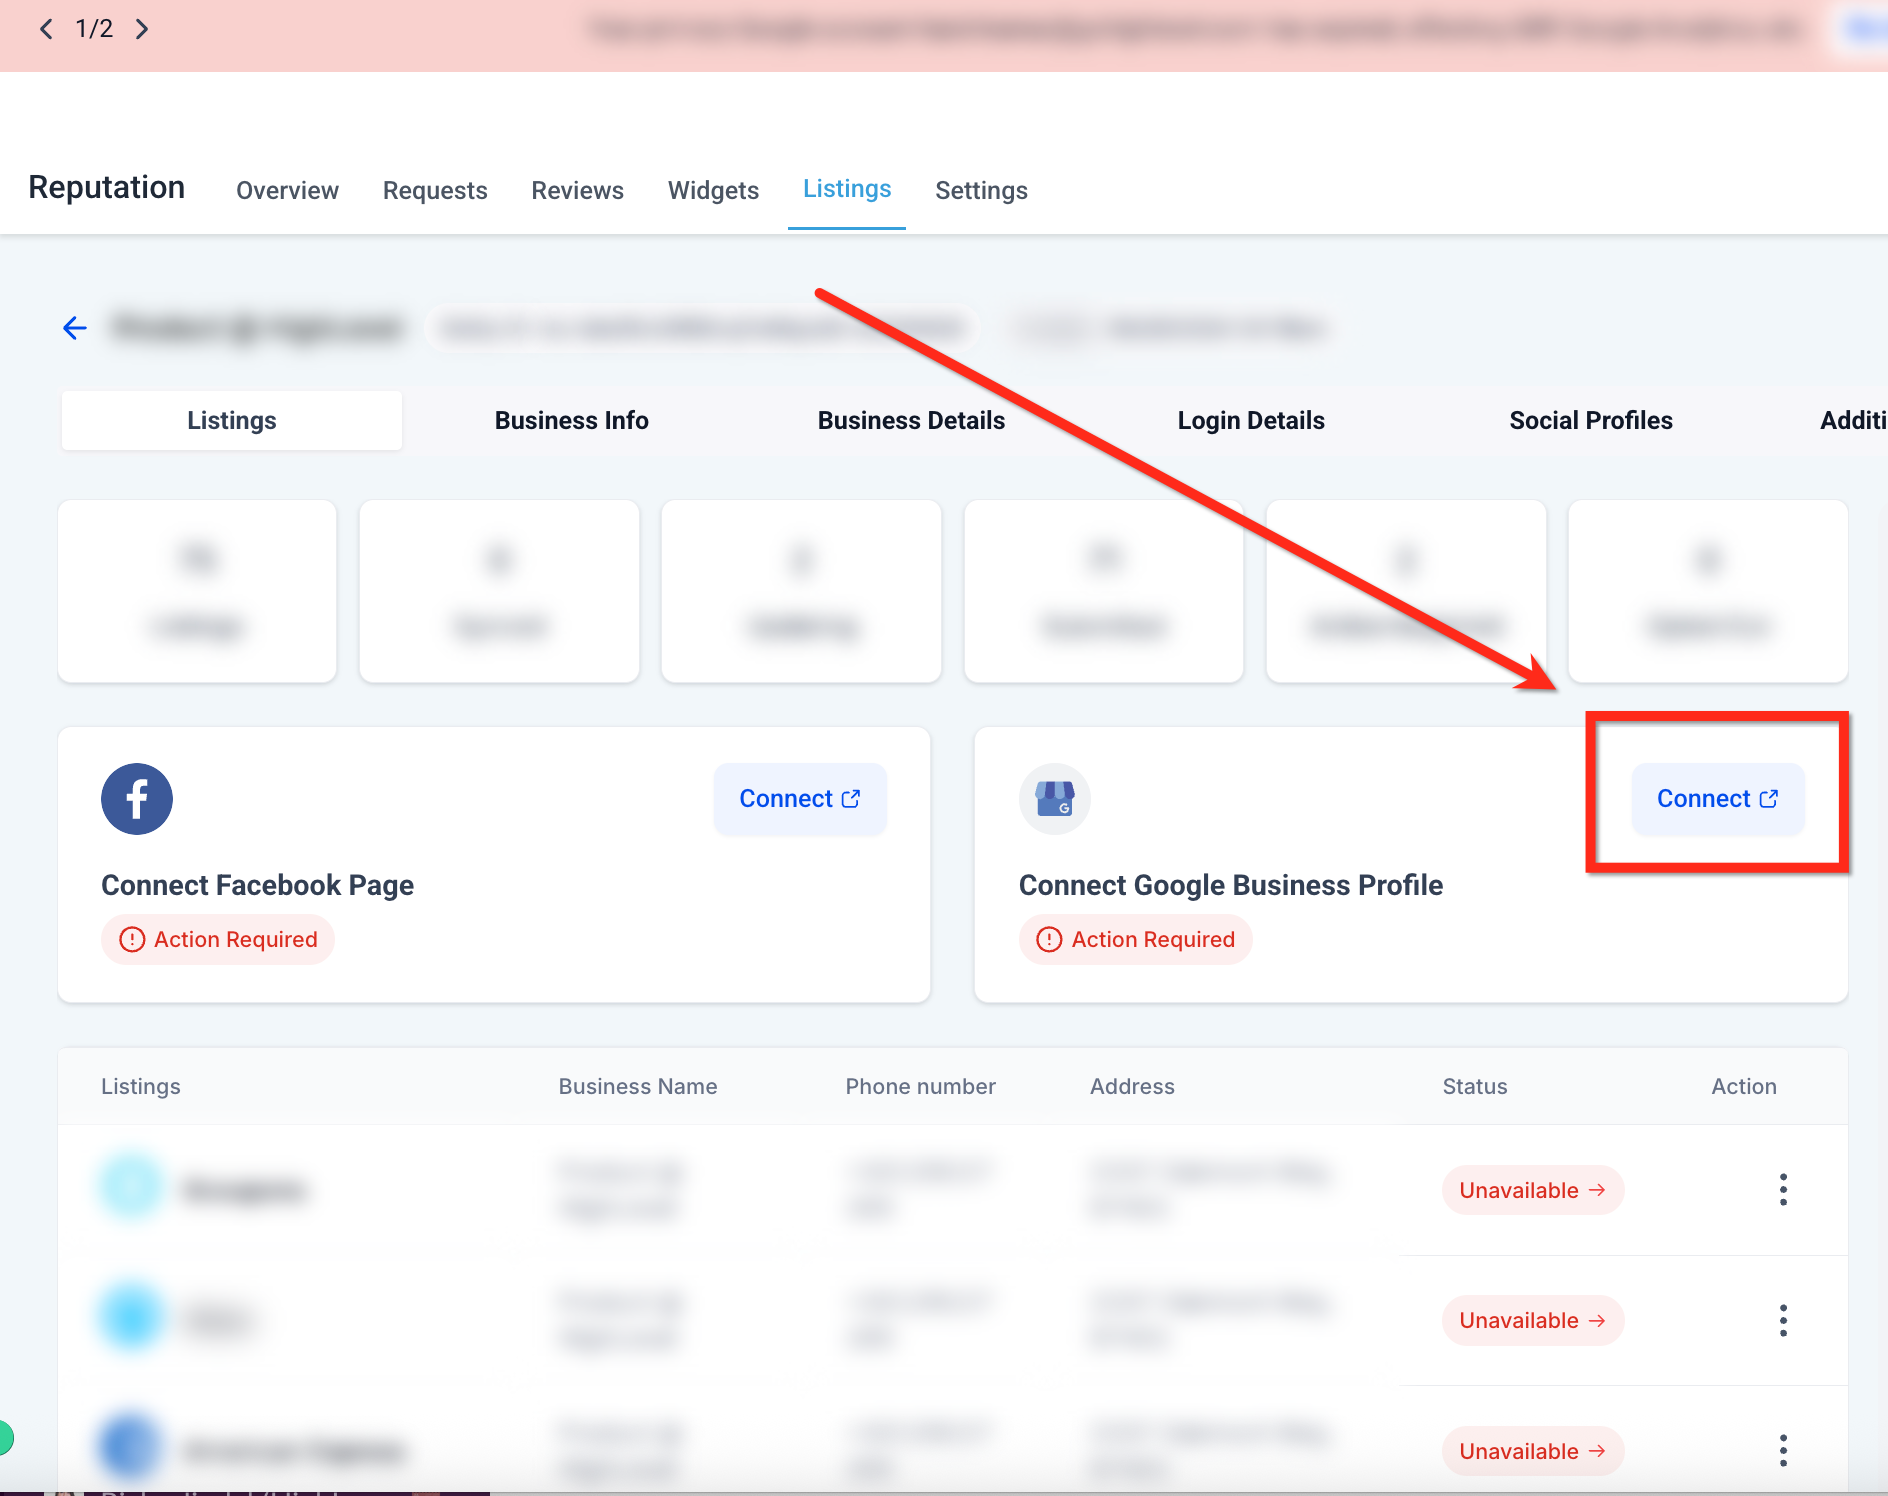
Click Connect next to Connect Google Business Profile. In the Google pop up, sign in with the account that manages your profile and grant access.
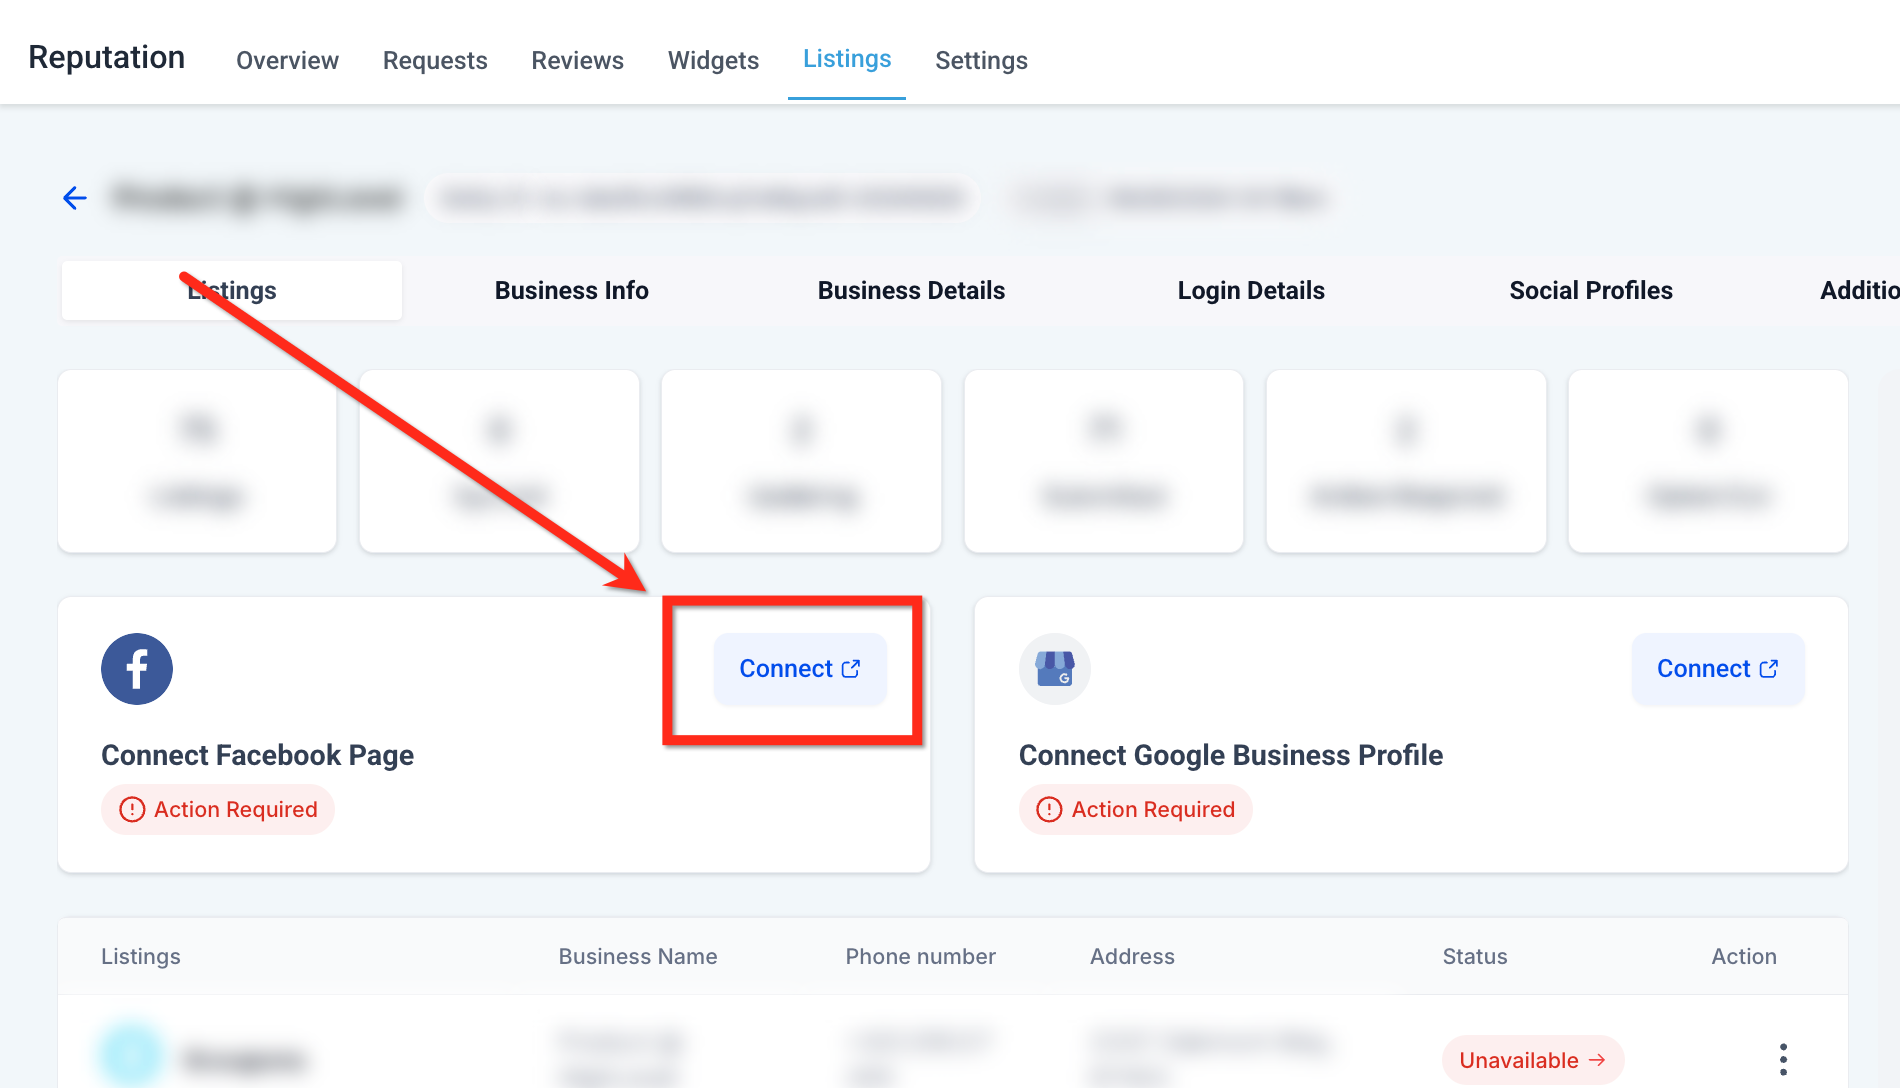
Click Connect next to Connect Facebook Page. In the Facebook pop up, select the correct Page, accept the permission prompts, and click Continue.
Return to the Listings dashboard and confirm a green Connected badge appears next to both Google and Facebook.
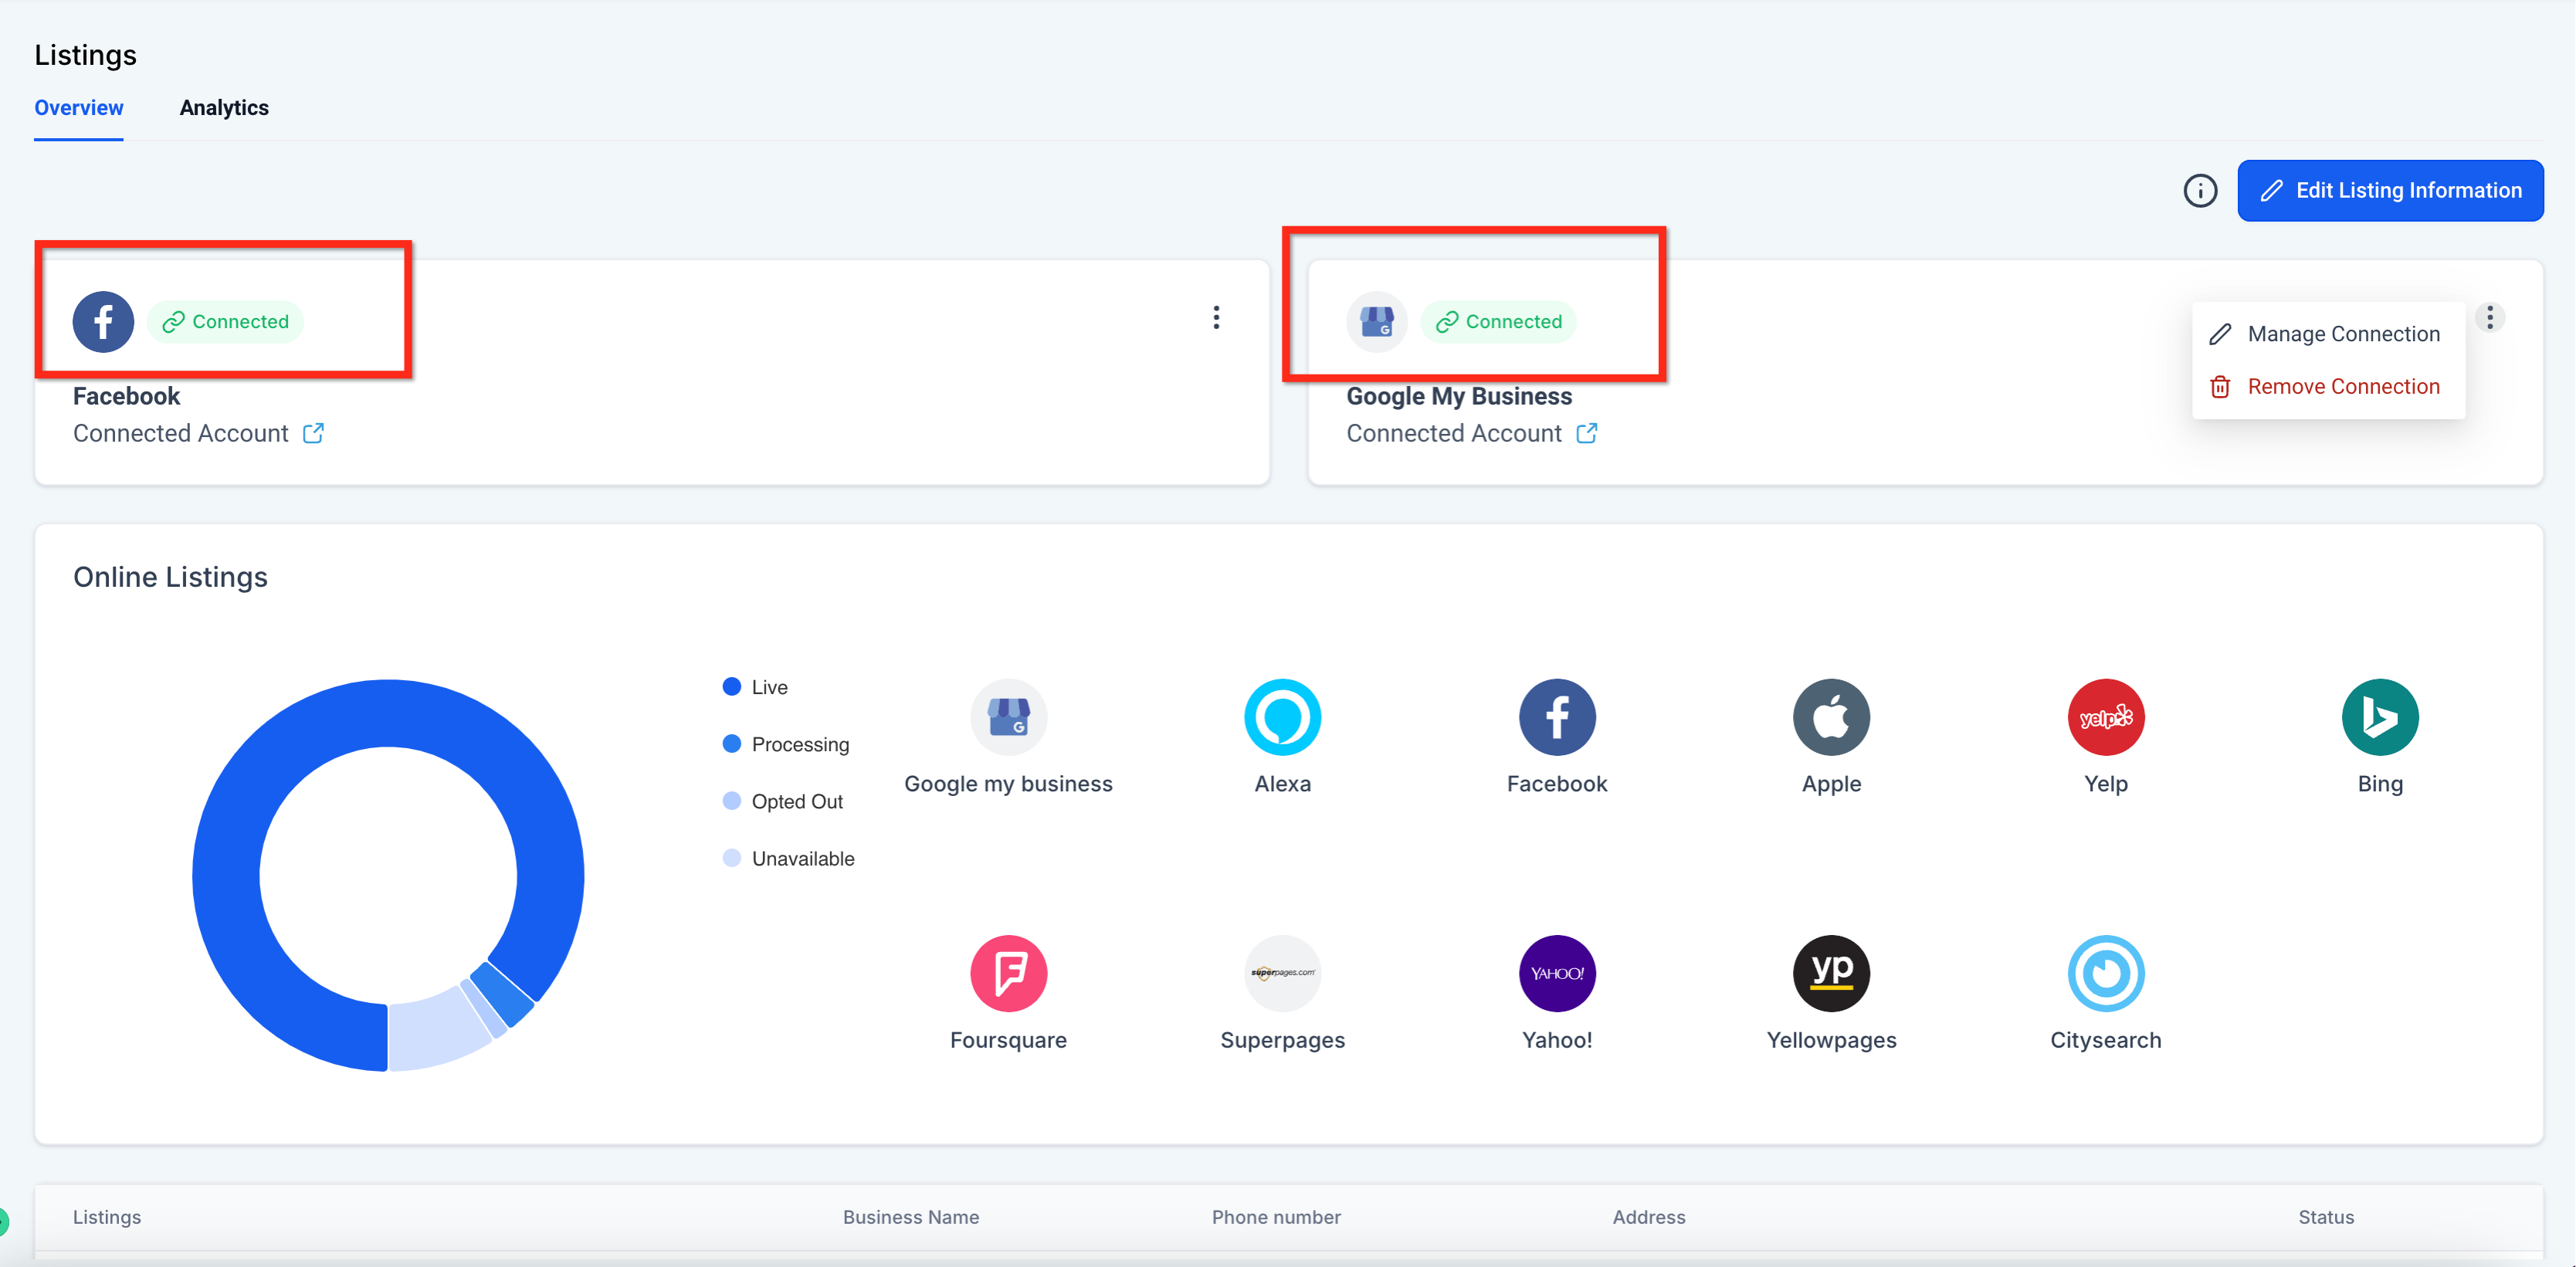
Each location supports one Google Business Profile and one Facebook Page. If you remove a connection, Listings stops syncing that publisher immediately and flags it as Action Required until you reconnect. For managing the Google Business Profile reviews that flow in, see the Review Management collection.
Choosing the right business category is what determines which directories your listing is distributed to and which fields are available. Set your category to reflect your practice before you complete the rest of your details.
For qualifying healthcare businesses, a HealthCare add on upgrades a standard listing into a healthcare aware profile. This unlocks provider and facility fields and distributes your enhanced information to healthcare focused publishers such as WebMD and Vitals, which are exactly where prospective patients research providers.
What the healthcare add on unlocks:
Provider fields for a HealthCare Professional, including NPI, name, practice name, headshot, provider bio, accepting new patients status, insurance accepted, education and training, degrees, conditions treated, and admitting hospitals where applicable.
Facility fields for a HealthCare Facility, including facility name, departments and services, accepting new patients status, insurance accepted, operating hours, and contact and location details.
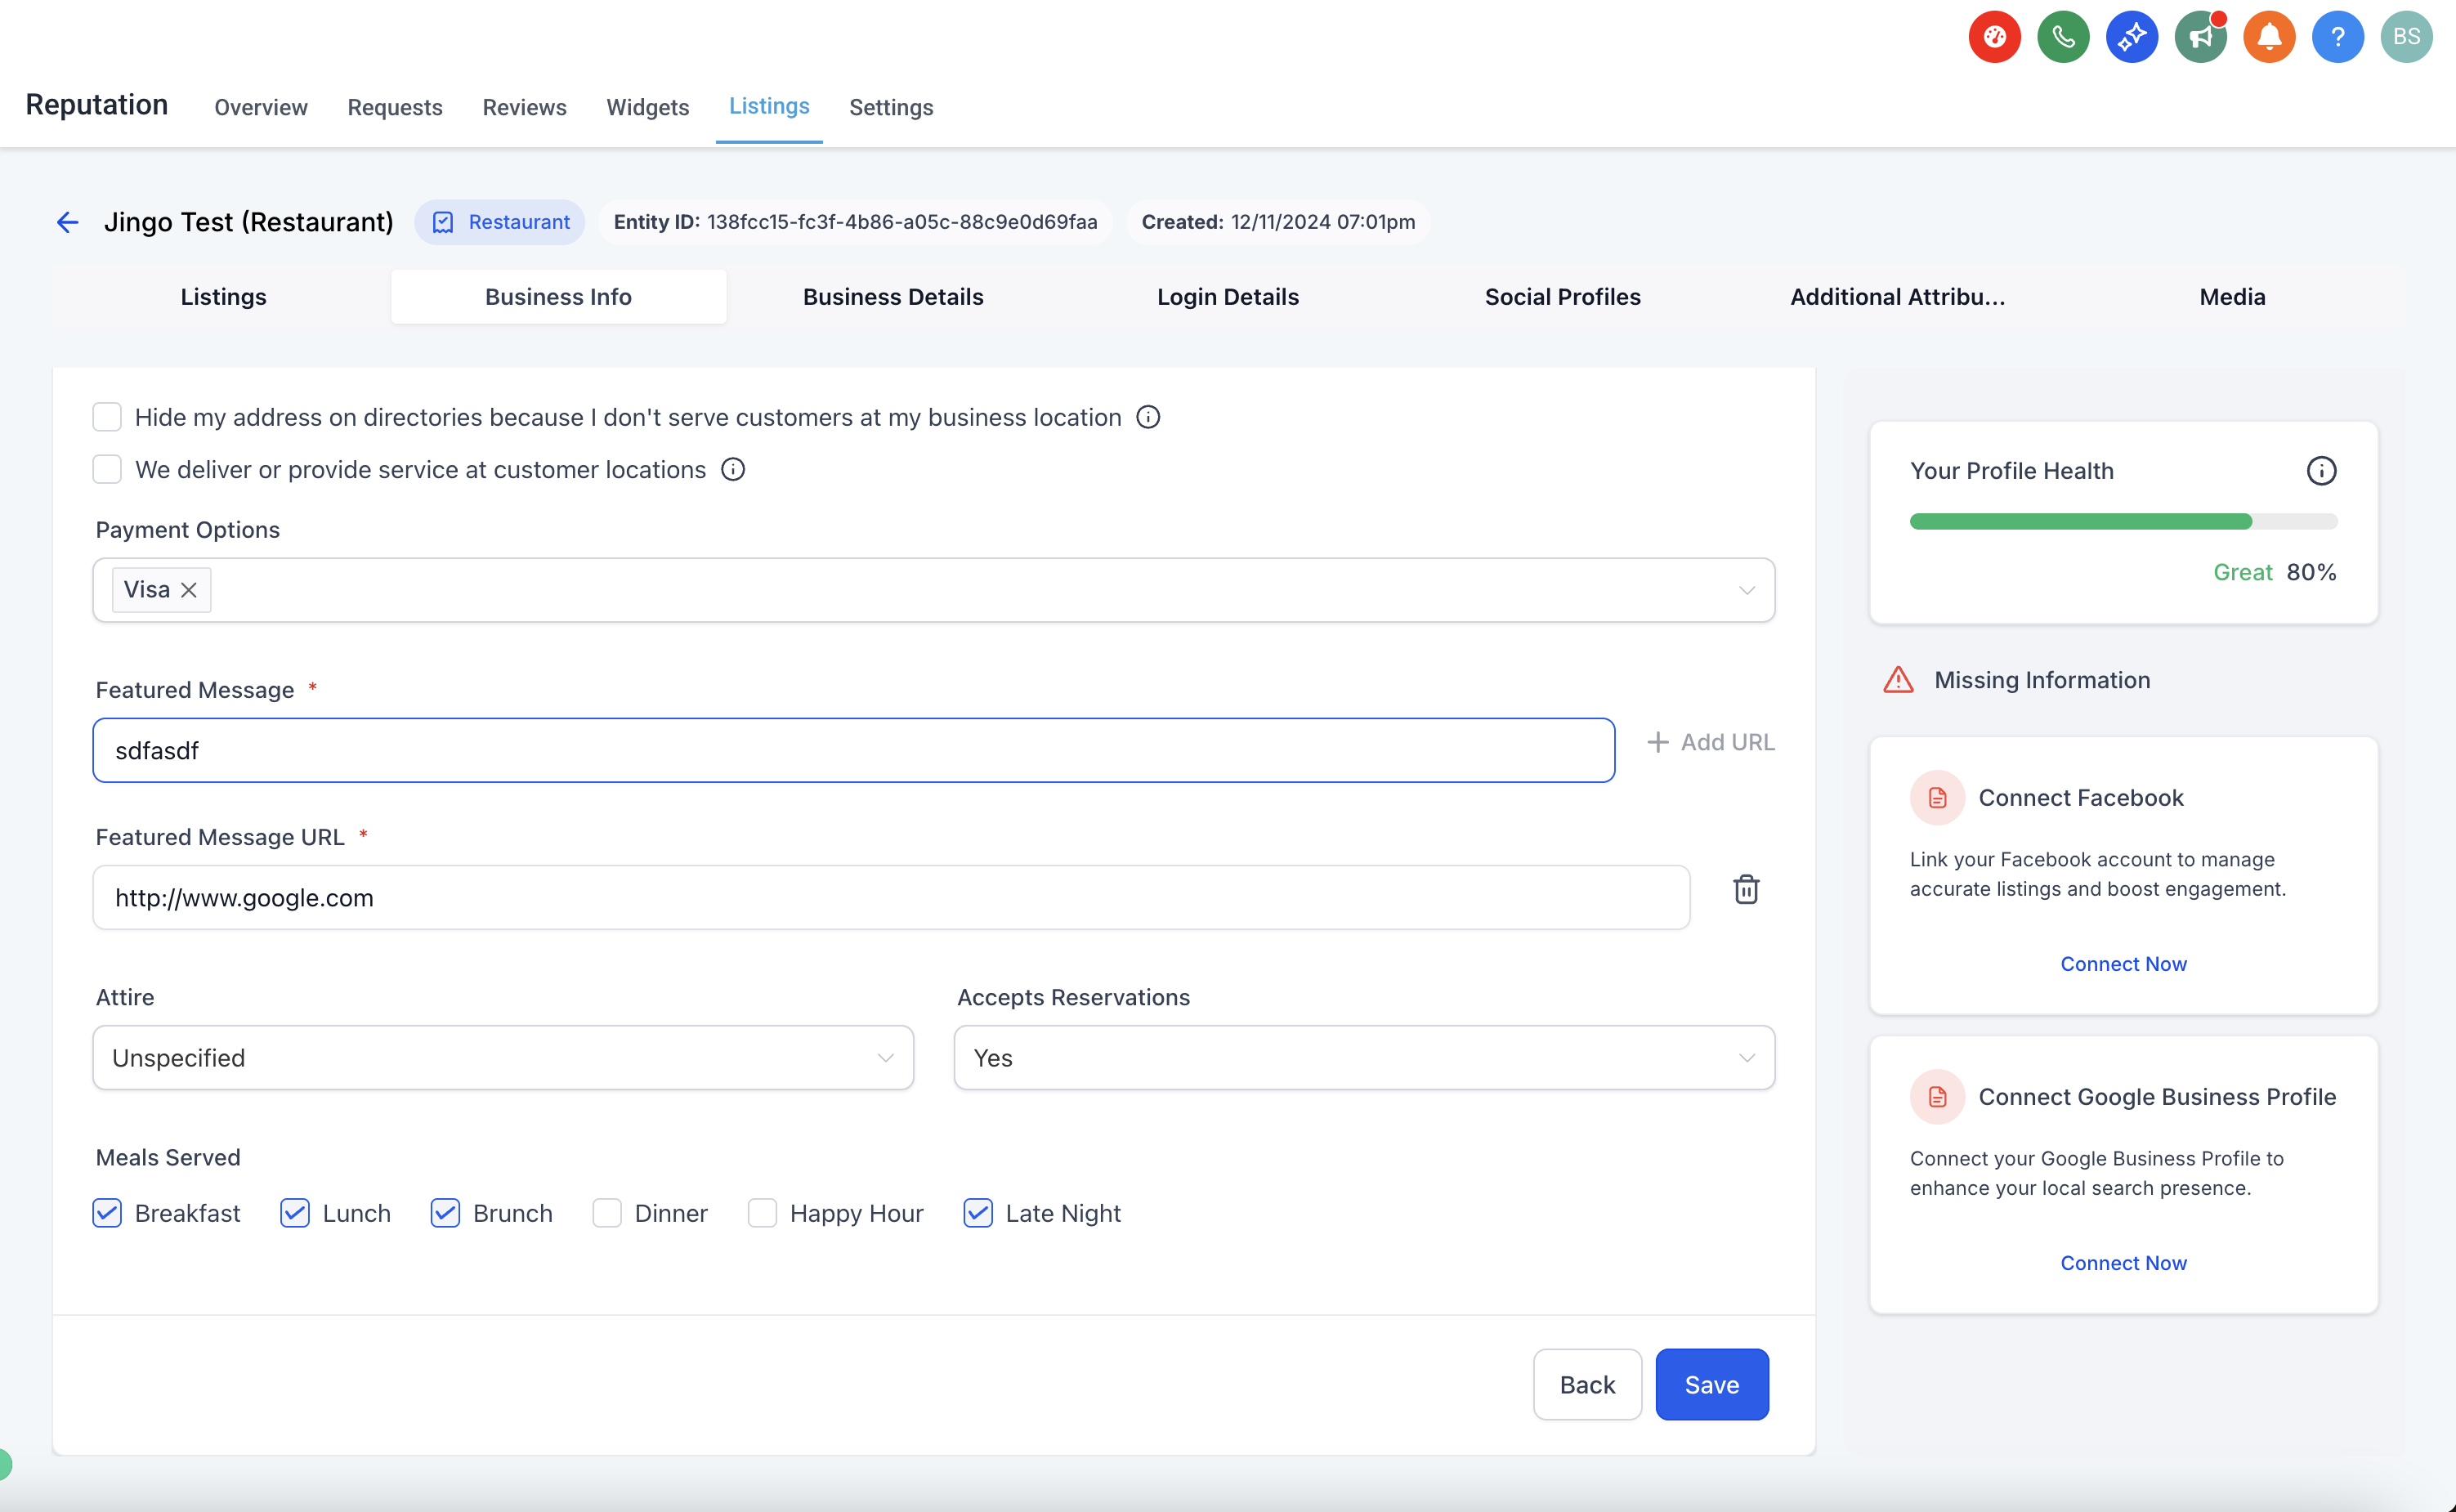
General fields available to any listing, such as accepted payment options and a featured message for timely notices.
In Reputation > Listings, create a new listing or open an existing one and click Edit. Make sure the business category reflects a supported HealthCare category, since the category determines whether the upgrade prompt appears.
After saving the basic profile and category, look for the upgrade prompt indicating the HealthCare add on is available. If you do not see it, recheck the category, make sure the listing has a valid address and phone number, then save and refresh.
Click Upgrade, review the summary, and confirm the transformation to a HealthCare Facility or HealthCare Professional. The profile reloads with the new fields.
Complete the provider or facility fields. For U.S. providers, confirm the NPI is formatted correctly, and make sure names and credentials match official records.
Add your accepted payment options and, if useful, a short featured message.
Click Save or Publish. Distribution to supported healthcare publishers begins automatically, though some publishers take longer to reflect changes.
When completing provider bios and featured messages, keep them factual and general. Do not include any patient information or medical advice, and use official names when listing insurance networks.
Important: Upgrading to a healthcare entity is not reversible. If you choose the wrong type, archive that listing and create a new one with the correct category.
My listing looks wrong, or it is stuck processing or waiting. This almost always means there is a mistake in the information you submitted. Check that the street address includes a suite or unit number and is not a PO Box, that your postal code is not in the address line, that the business name is correct, and that the phone number and email are valid. Log into your listing and correct any errors.
My listing is not live and shows an in review message. This happens when a duplicate listing was found for the same address, phone number, or email. Review your details for an existing duplicate and correct them.
My listing shows a canceled message. This usually means the listing is under a contract with a previous provider that prevents it from being moved. Reach out to Aesthetix CRM Support for help.
The healthcare upgrade prompt did not appear. Confirm the listing category is set to a supported HealthCare category and that the listing includes a valid address and phone number, then save and refresh. If it still does not appear, contact Support.
How long does it take for listings to sync?
Typically 24 to 48 hours, though some directories can take up to a week to reflect changes.
What happens when my business information changes?
Update your details once in Listings and the change is pushed out automatically across all connected directories.
How do my Google Business Profile and Facebook Page connect?
Connect them directly inside the Listings dashboard under Reputation. Sign in to each account in the pop up and confirm a green Connected badge appears next to both.
Does connecting in Listings affect the Social Media Planner?
Yes. Google and Facebook share one authorization, so connecting in Listings also authorizes the Social Media Planner, and connecting there works for Listings too.
Will Listings override profiles I created manually?
It may override manual entries, so where possible let Listings manage your directory profiles to keep everything consistent.
Does my med spa qualify for the healthcare add on?
When your listing category is set to a supported HealthCare category, Aesthetix CRM prompts you to upgrade. The add on unlocks provider and facility fields and distributes to healthcare publishers.
Can I switch a listing's entity type after upgrading?
No. The healthcare upgrade is not reversible. If the category is wrong, archive the listing and create a new one with the correct category.
Where do I manage the reviews that come in through Google?
Review Management handles Google Business Profile reviews and responses. See the Review Management collection for details.
