The Facebook Lead Ads integration lets your practice collect leads directly from Facebook and Instagram ads and have them sync automatically into Aesthetix CRM. When a prospective patient fills out an instant form on your Botox promotion or laser consultation ad, their contact details flow straight into the CRM, where a workflow can text them back, assign them to a coordinator, or drop them into a nurture campaign. Automating this capture removes manual exports and speeds up your response time, which is often the difference between booking a consultation and losing it to a competitor.
This guide covers the prerequisites, how to connect and manage your Facebook Pages, how to map your Facebook form fields to Aesthetix CRM contact fields, and how to troubleshoot leads that are not coming through.
Automated lead capture: New Facebook and Instagram lead form submissions become contacts automatically, with no manual data entry.
Accurate field mapping: Form responses land in the correct contact fields (name, email, phone, and custom fields).
Sync control: Choose to pull in past leads or only new leads going forward.
Workflow automation: Use lead form submissions to launch instant follow-up sequences.
Before connecting, confirm the following on the Facebook side:
Access: You have access to the Facebook Page you are creating lead ads for. See Facebook's help on how to give someone a role on your Page.
Ownership: The same user owns both the Page and the ad account. For business-level integrations, the Page owner and the ad account owner must match.
Permissions: You have Admin (or manage) permissions on the Page and the ad account. The user integrating the Page into the CRM must be an Admin of the Facebook Business Page and have Lead Access Permission to reach lead data (a requirement set by Facebook).
Ad account check: Your Page is connected to the appropriate ad account. Verify this in your ad account settings.
Leads access: You have lead access. Our underlying provider (LeadConnector) needs access to the Facebook Business Manager and Business Page you run the lead ad from.
To check a user's Business Manager role, open Business Manager > Users > People, click the person's name, and confirm the role is Admin or Employee. Remember that the Business Manager role is separate from the Page role; the Page role must still be Admin.
Facebook Lead Ads only sync into certain Aesthetix CRM custom field types. When you create custom fields to receive lead data, use one of the supported types below:
TEXT
LARGE_TEXT
NUMERICAL
PHONE
MONETARY
SINGLE_OPTIONS
DATE
DROPDOWN (single)
RADIO OPTIONS
CHECKBOX
Create these custom fields in your account before you map your form, so the matching destination fields already exist.
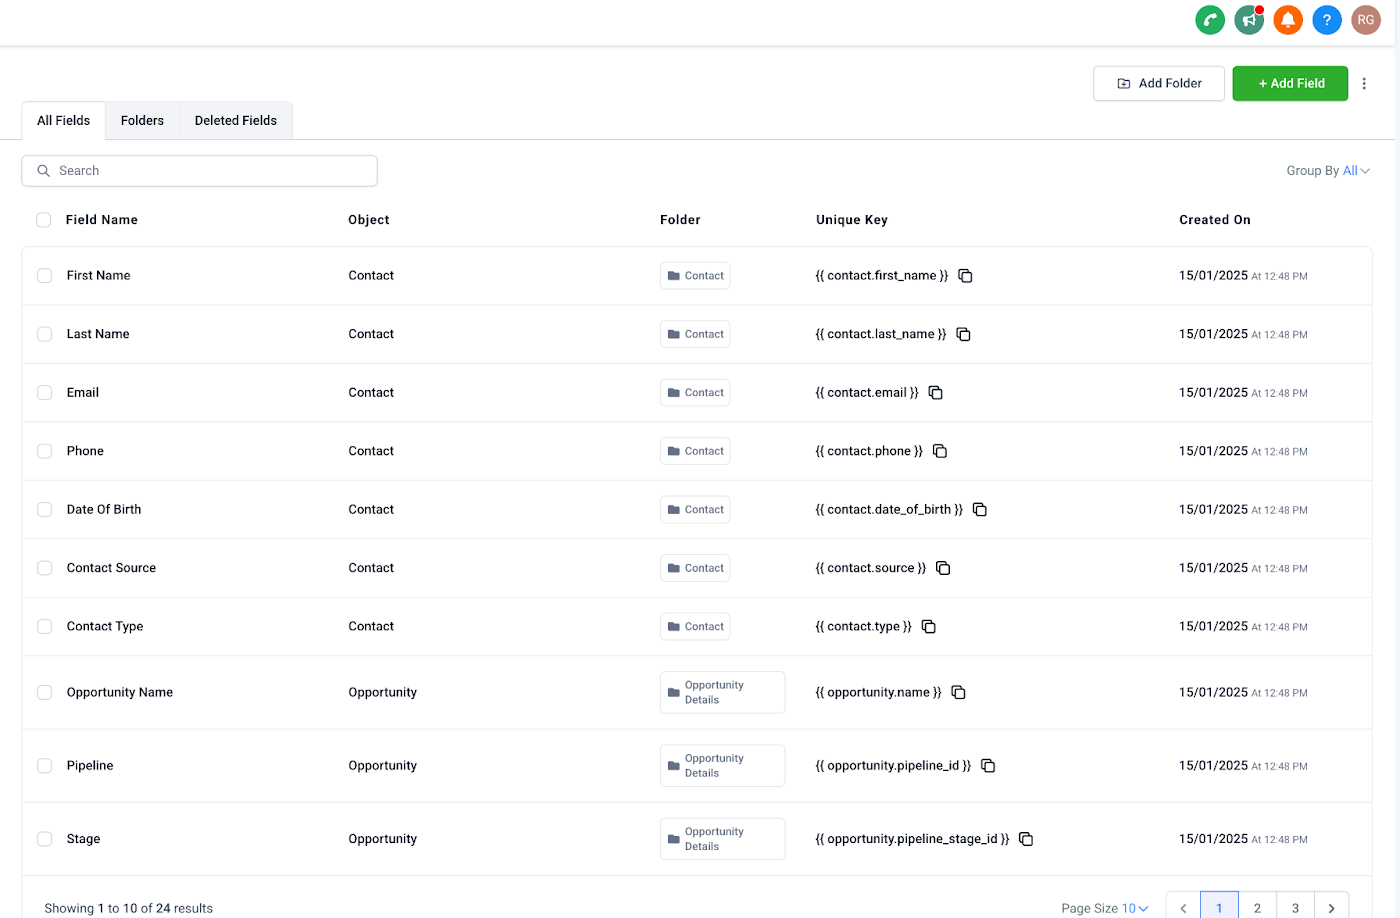
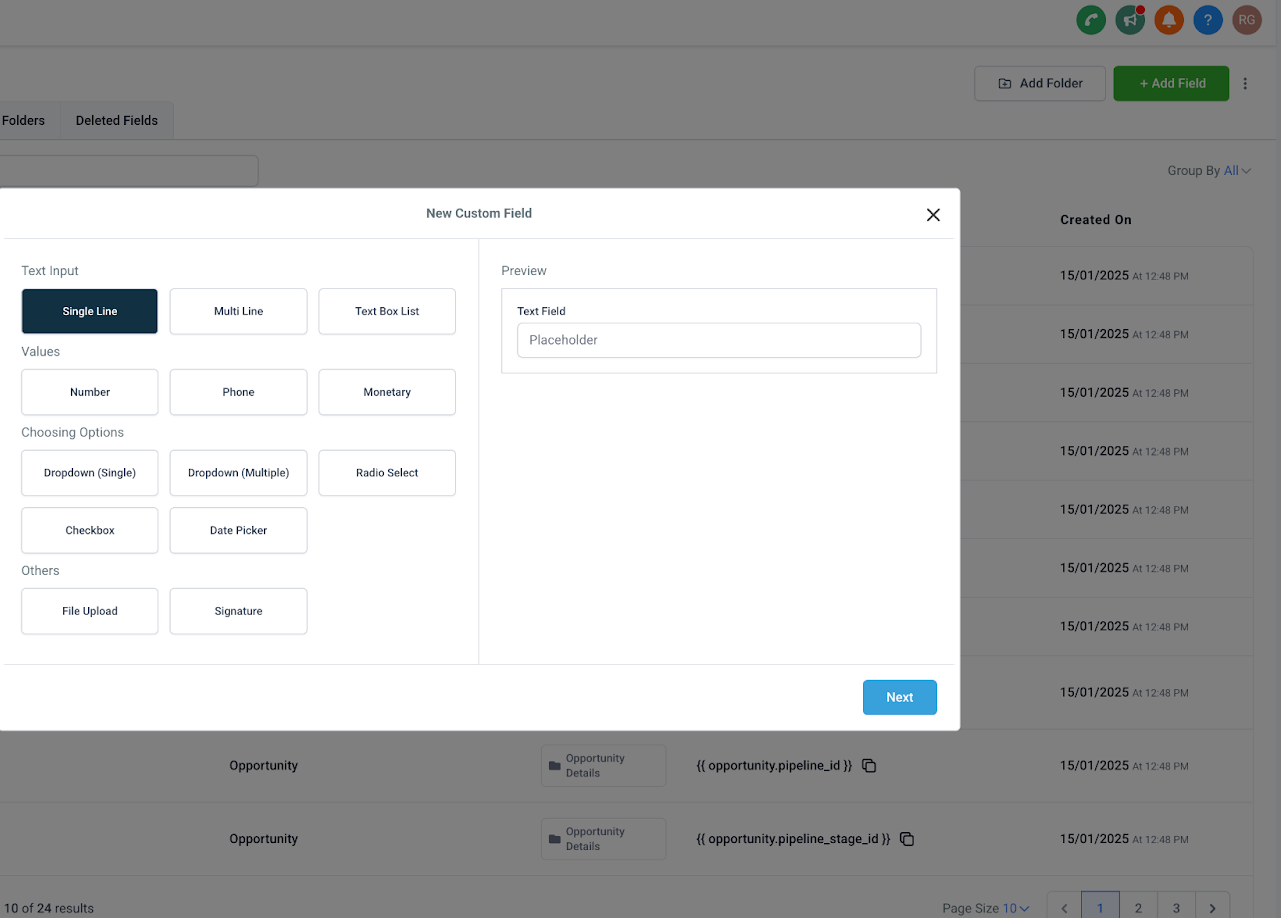
Tip: Avoid renaming field labels inside your Facebook form after it is built, as this can break the mapping on the Aesthetix CRM side.
Only the user who integrates a Page can select it, and that user must have full access to the Page in Facebook.
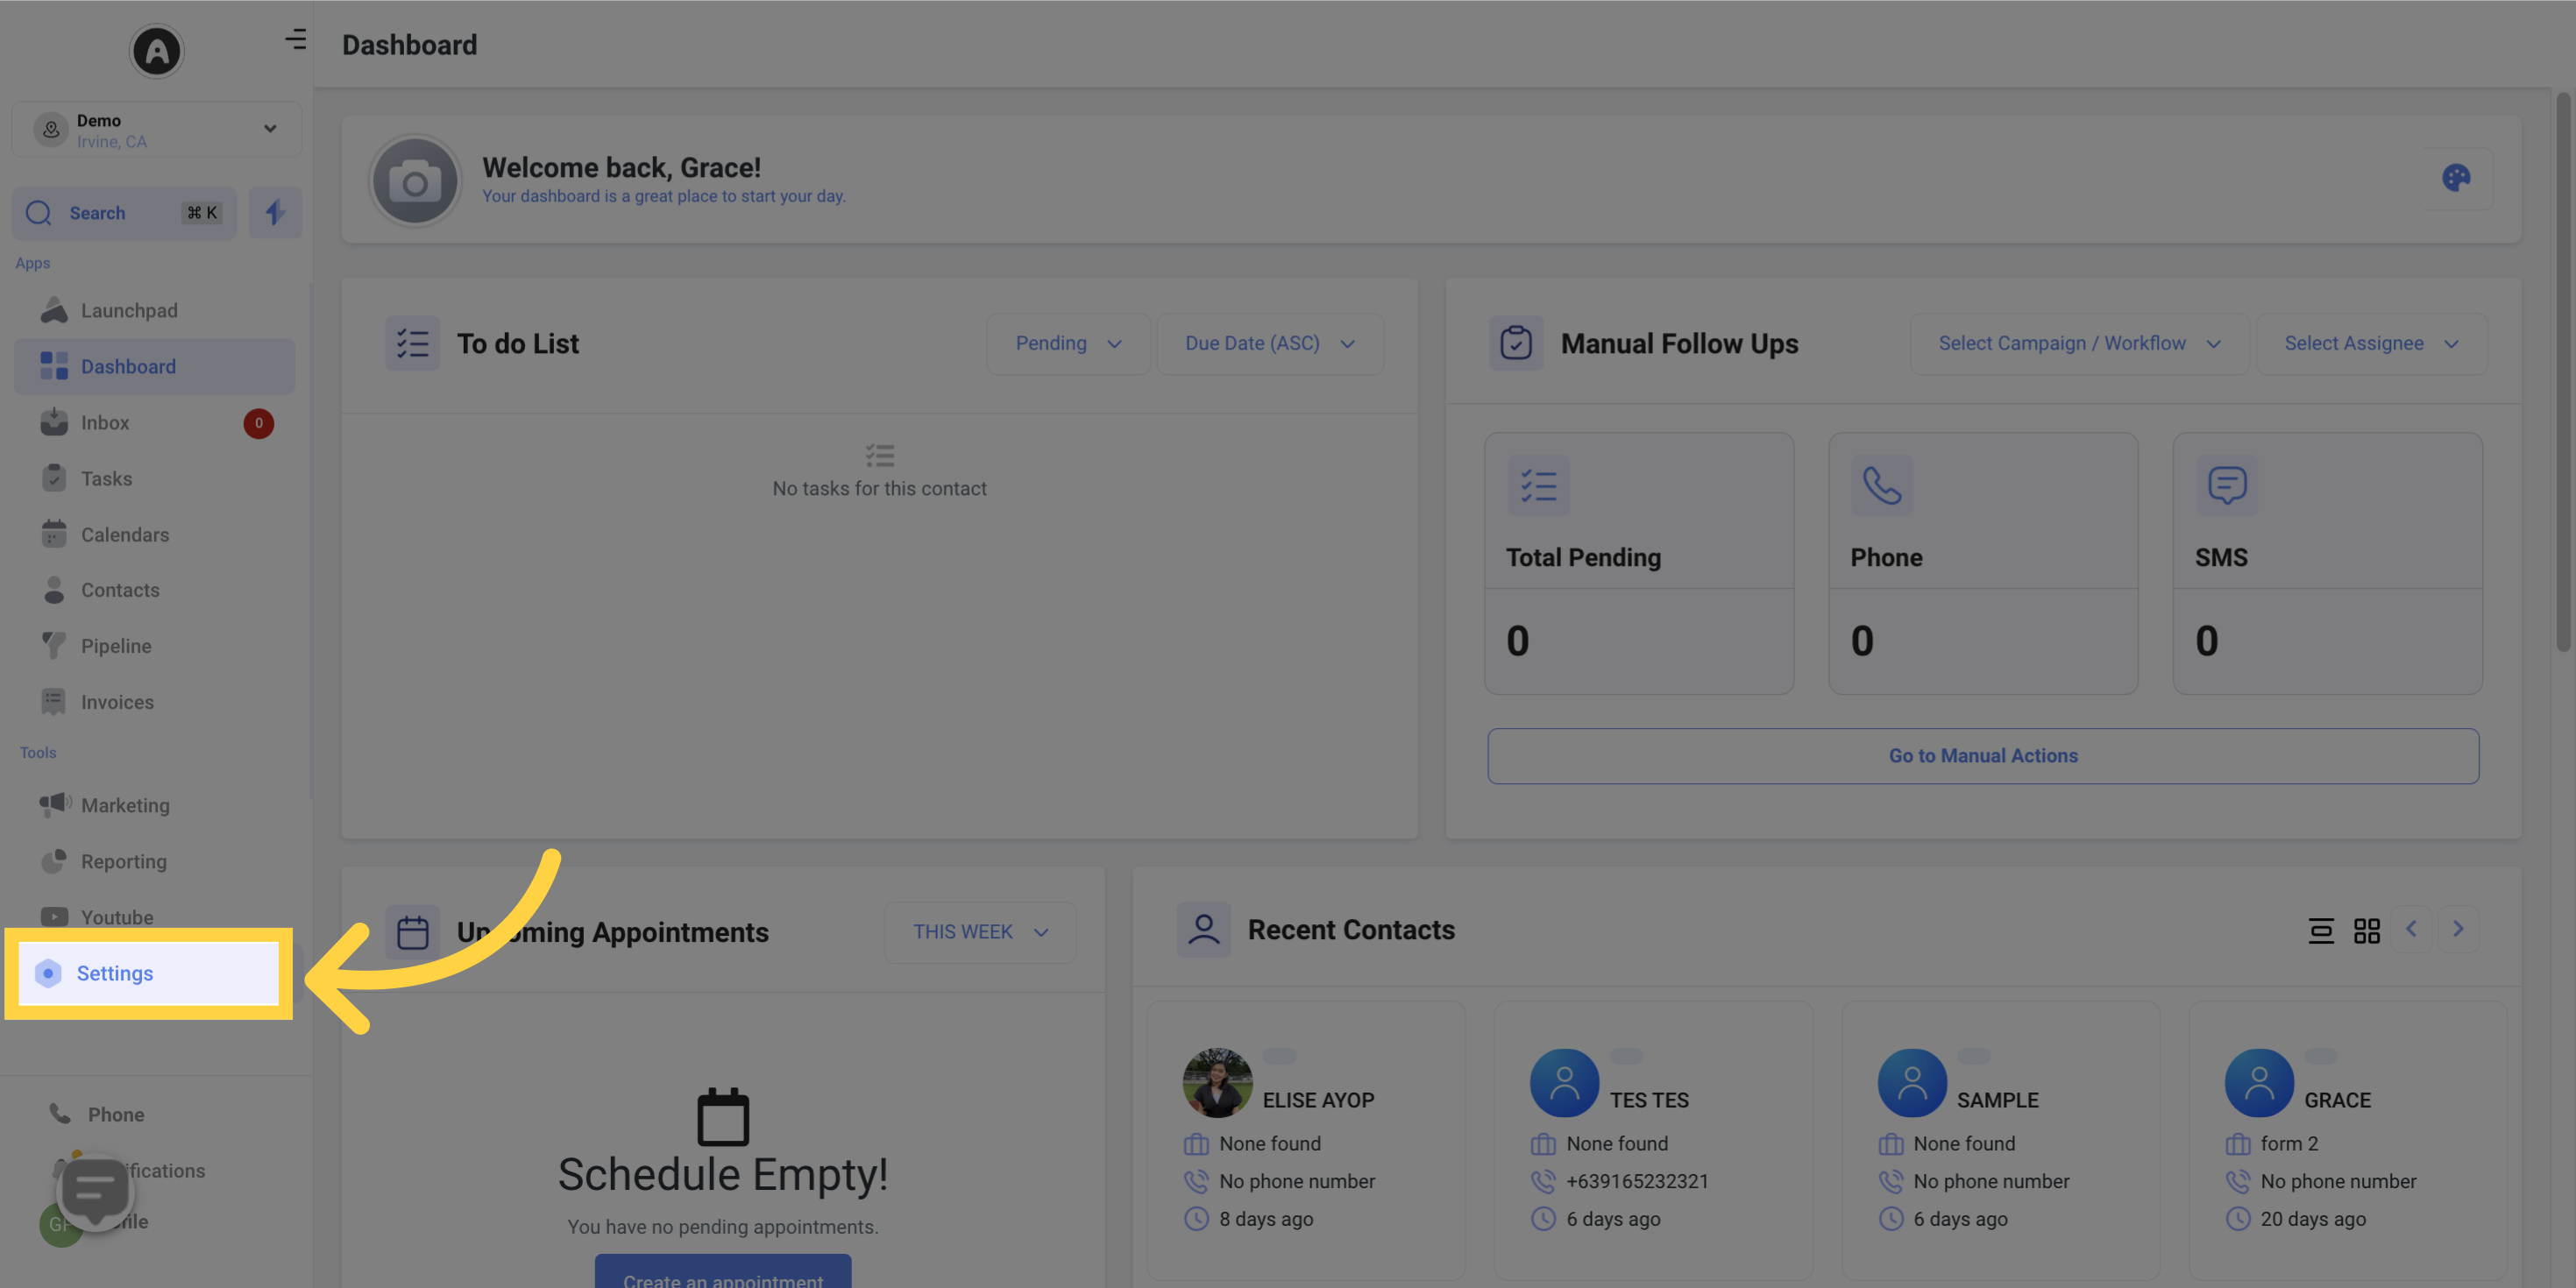
Go to Settings > Integrations.
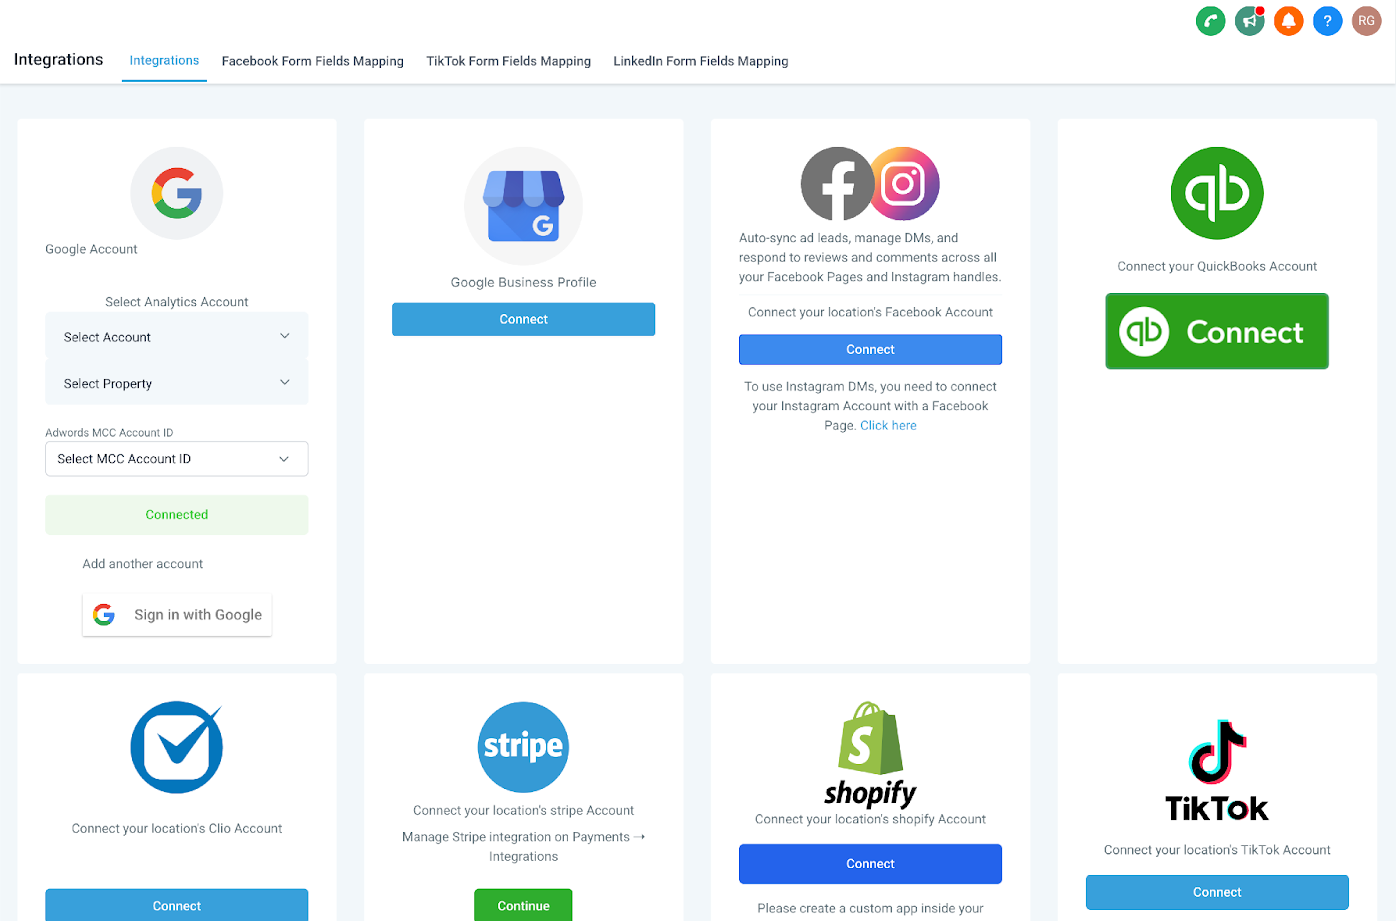
Click Connect under Facebook.
Allow the requested permissions. During this step, Facebook's screen may show the name LeadConnector, which is our underlying integration provider. This screen is expected and safe to approve.

Select the Pages under the account that you want to connect. You can search Pages (and ad accounts, when available) by name to speed up selection. Search becomes available after all Pages load, so accounts with many Pages may take longer to load first.
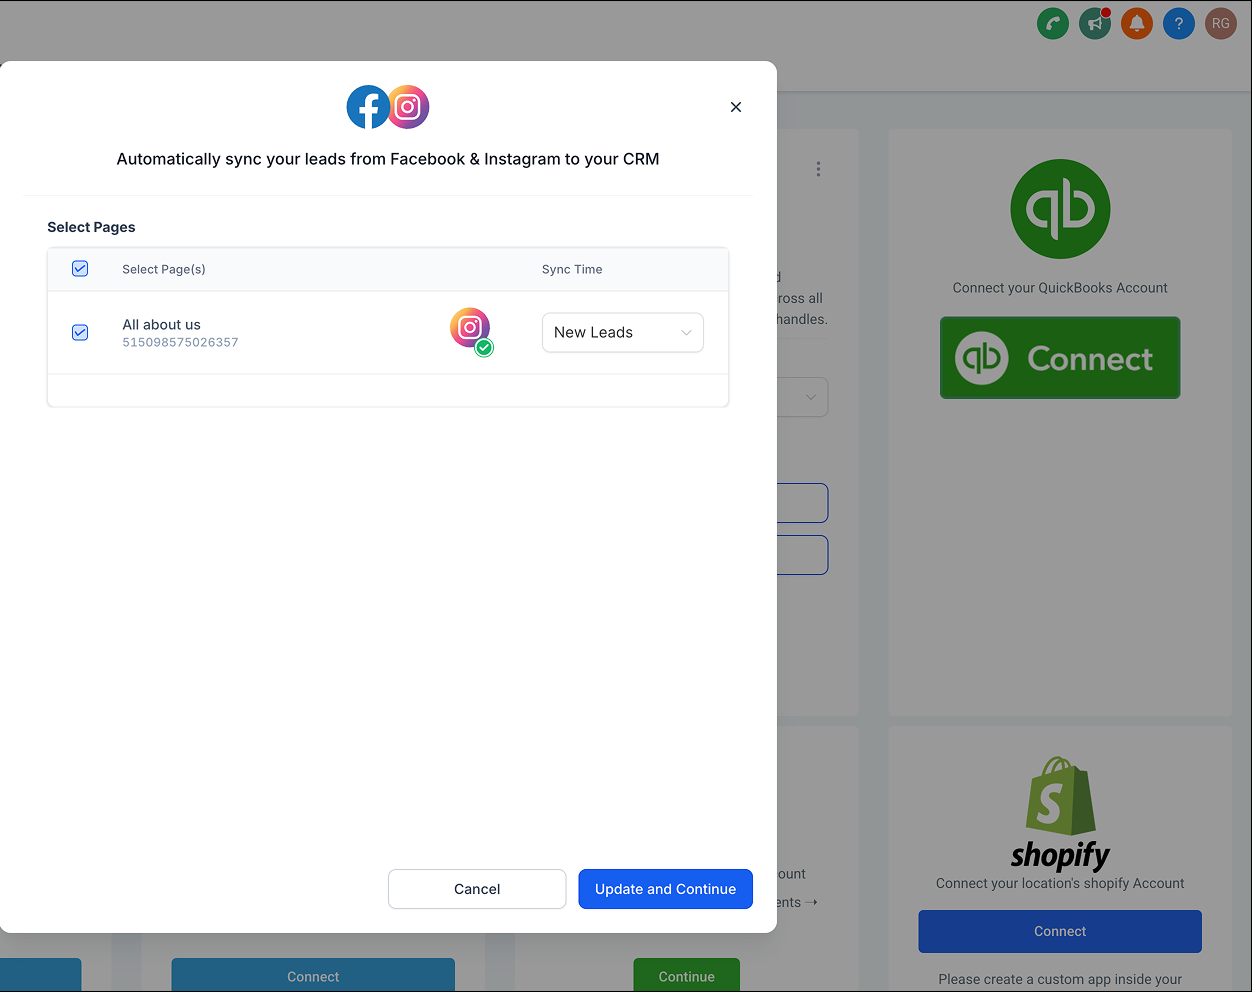
Once your Pages are connected, set up the form and map its fields to your Aesthetix CRM fields (covered in the next section).
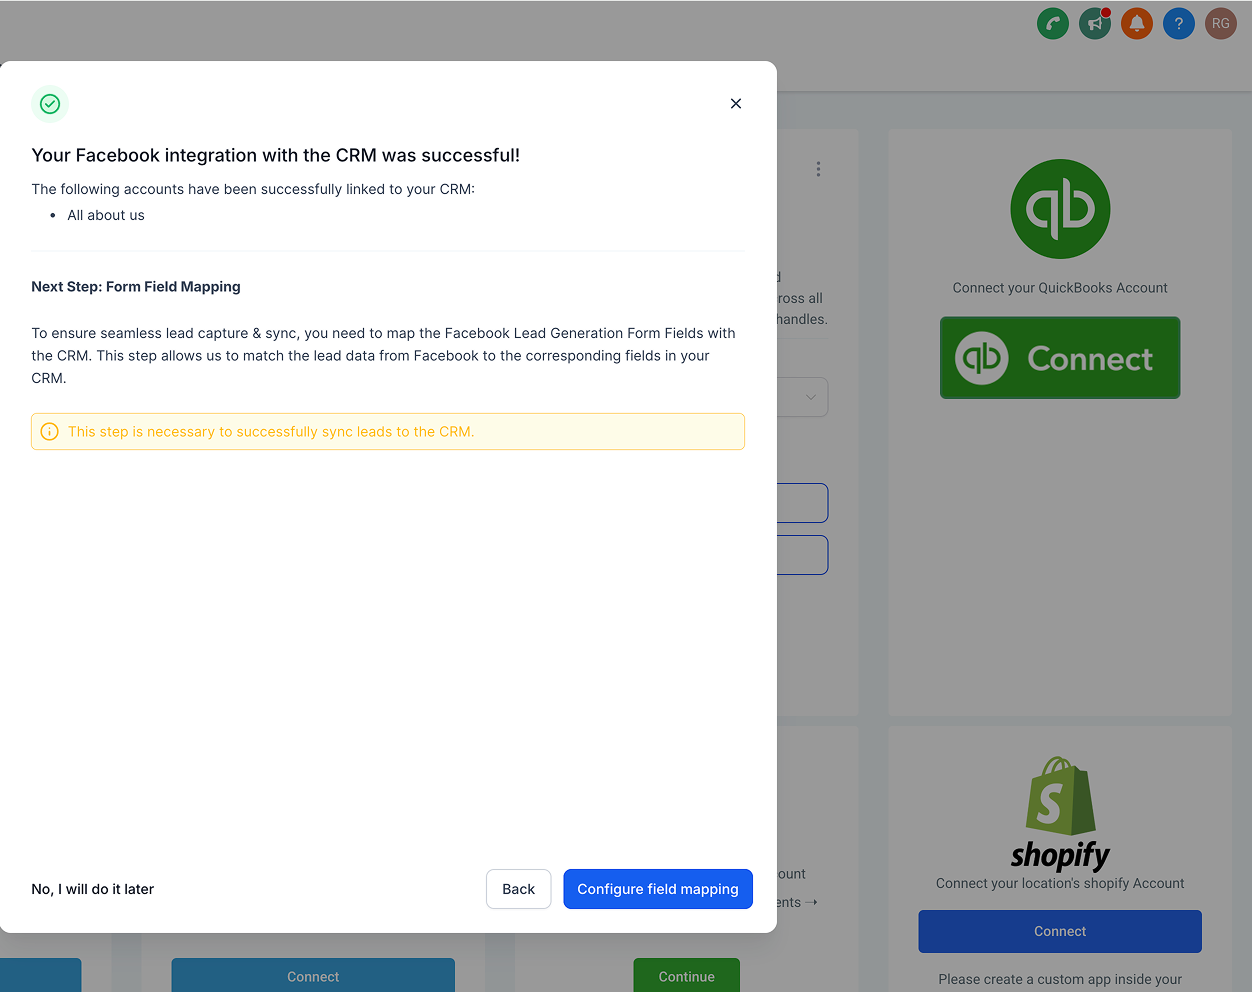
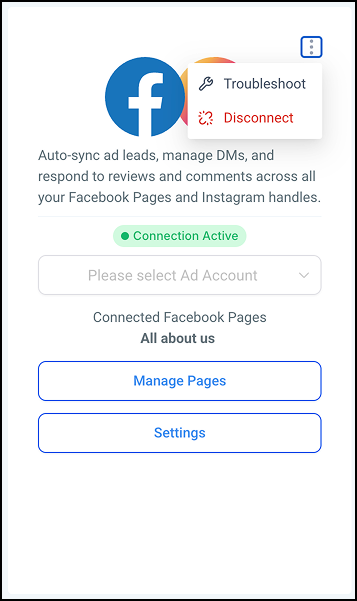
Go to Settings > Integrations, find the Facebook card, click the three dots, and click Disconnect.
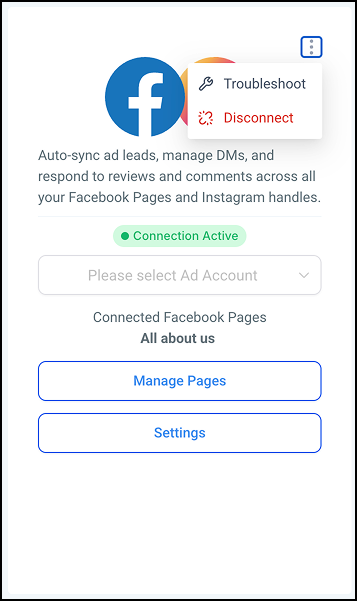
Go to Settings > Integrations, open the Facebook card, click Manage Pages, select the Pages you want to link, and click Update.
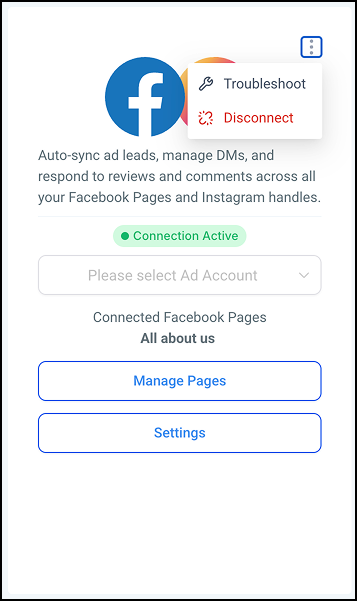
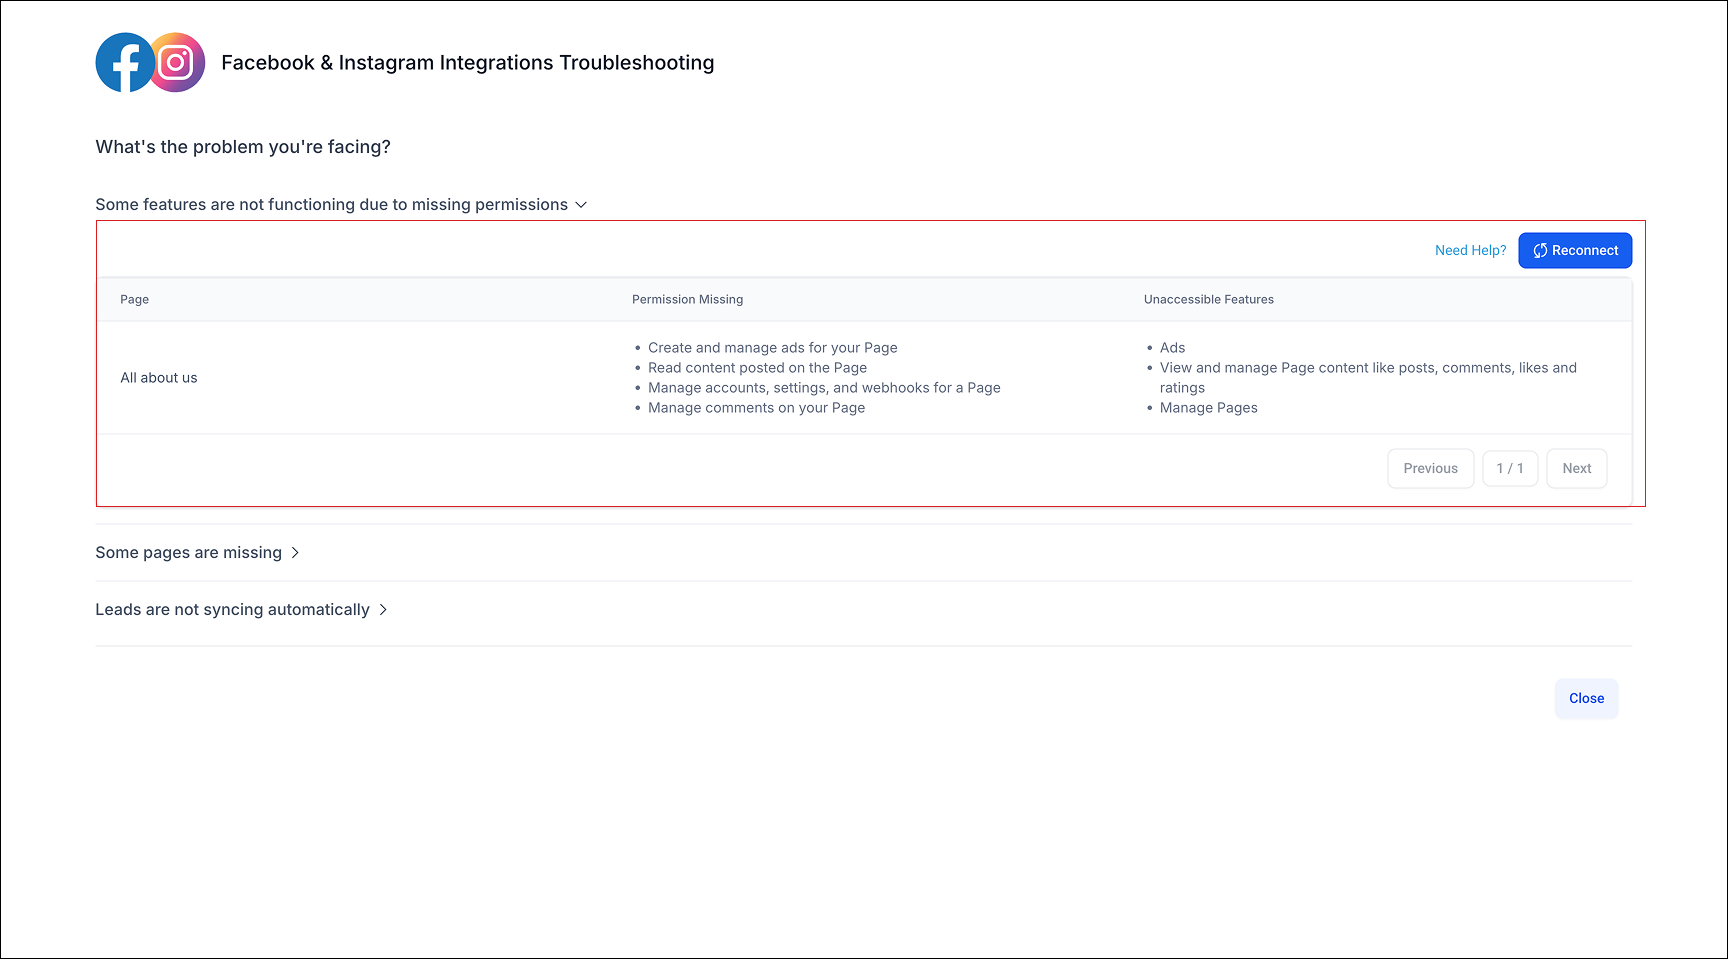
Go to Settings > Integrations, open the Facebook card, and click Troubleshoot. The next screen shows any missing permissions and lets you sync leads manually.
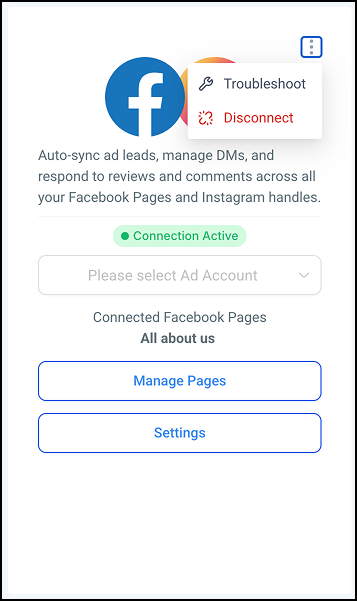
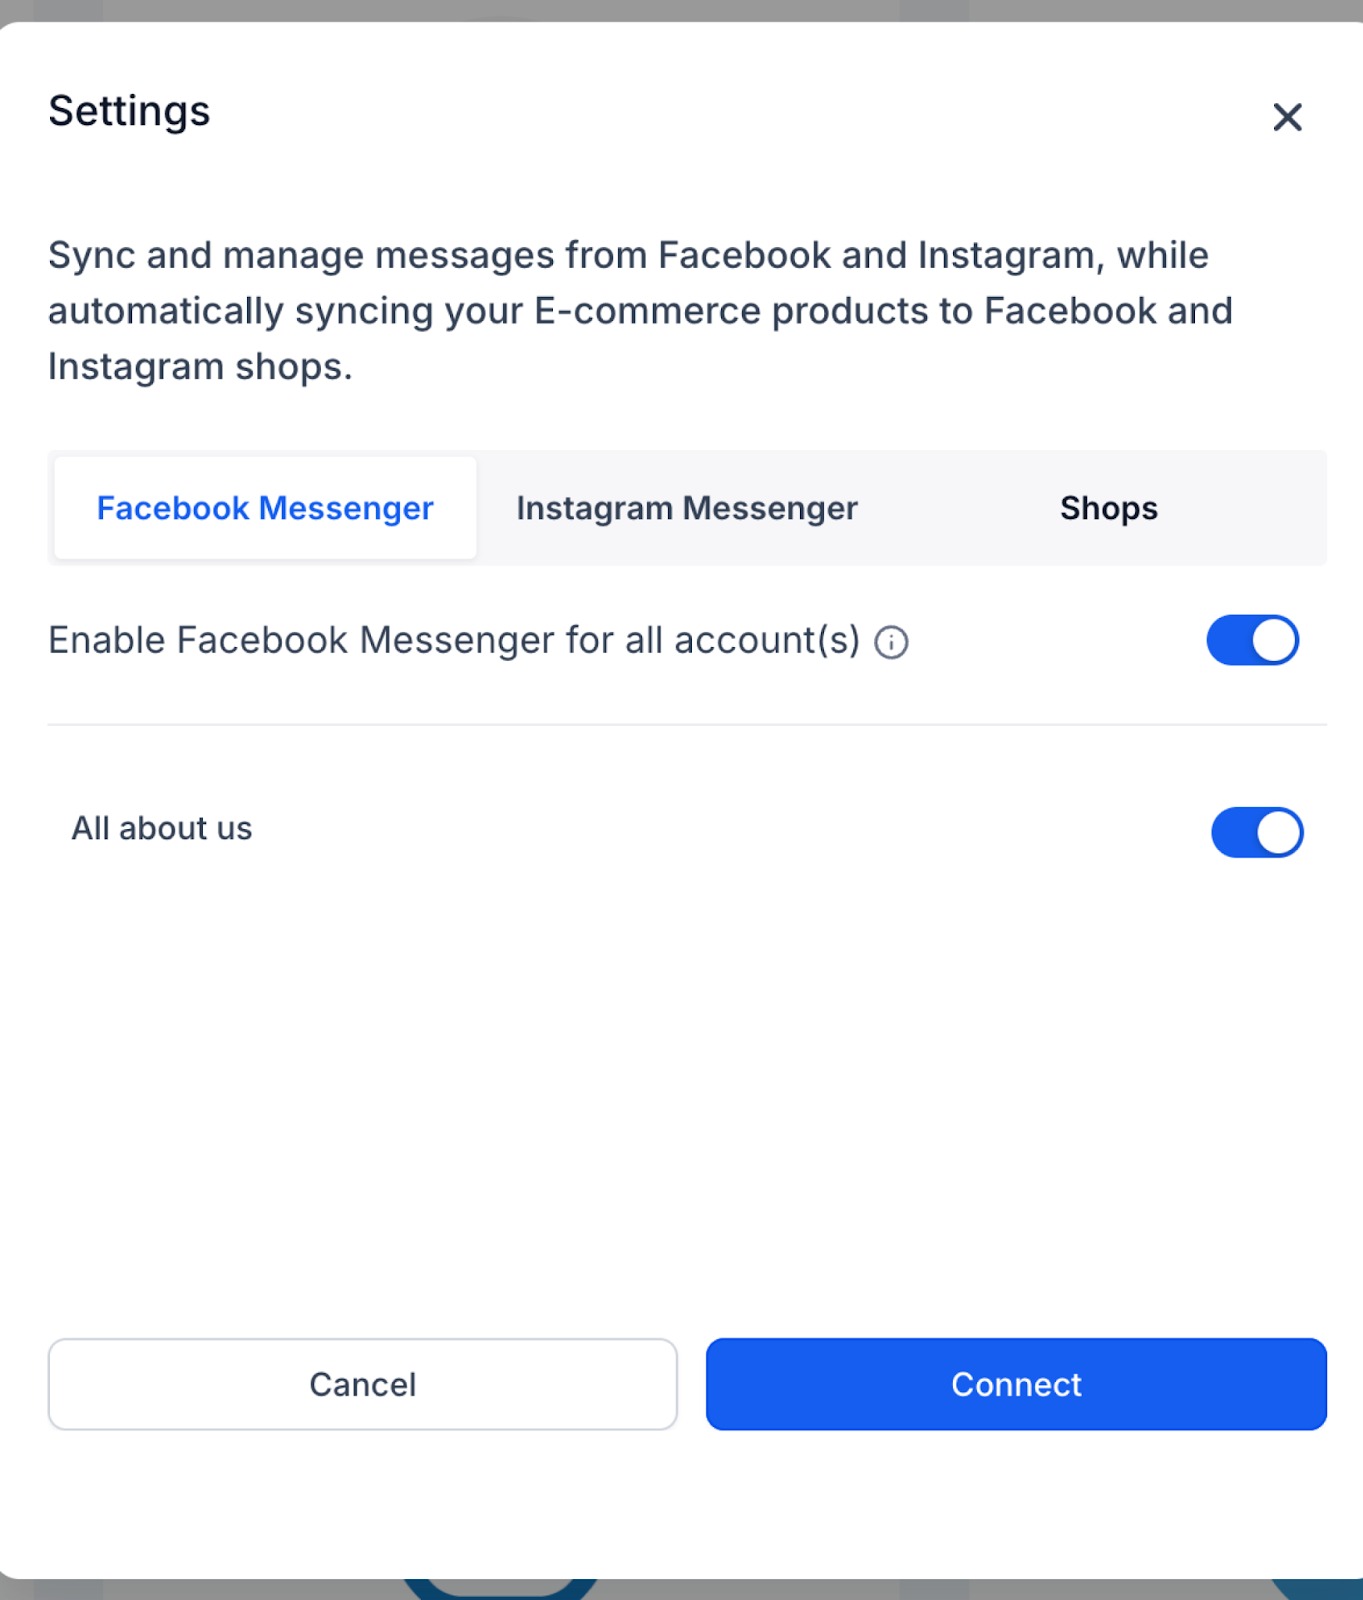
Go to Settings > Integrations, open the Facebook card, and click Settings from the menu. Enable the Facebook and Instagram messenger for each connected Page so those DMs flow into your Inbox.
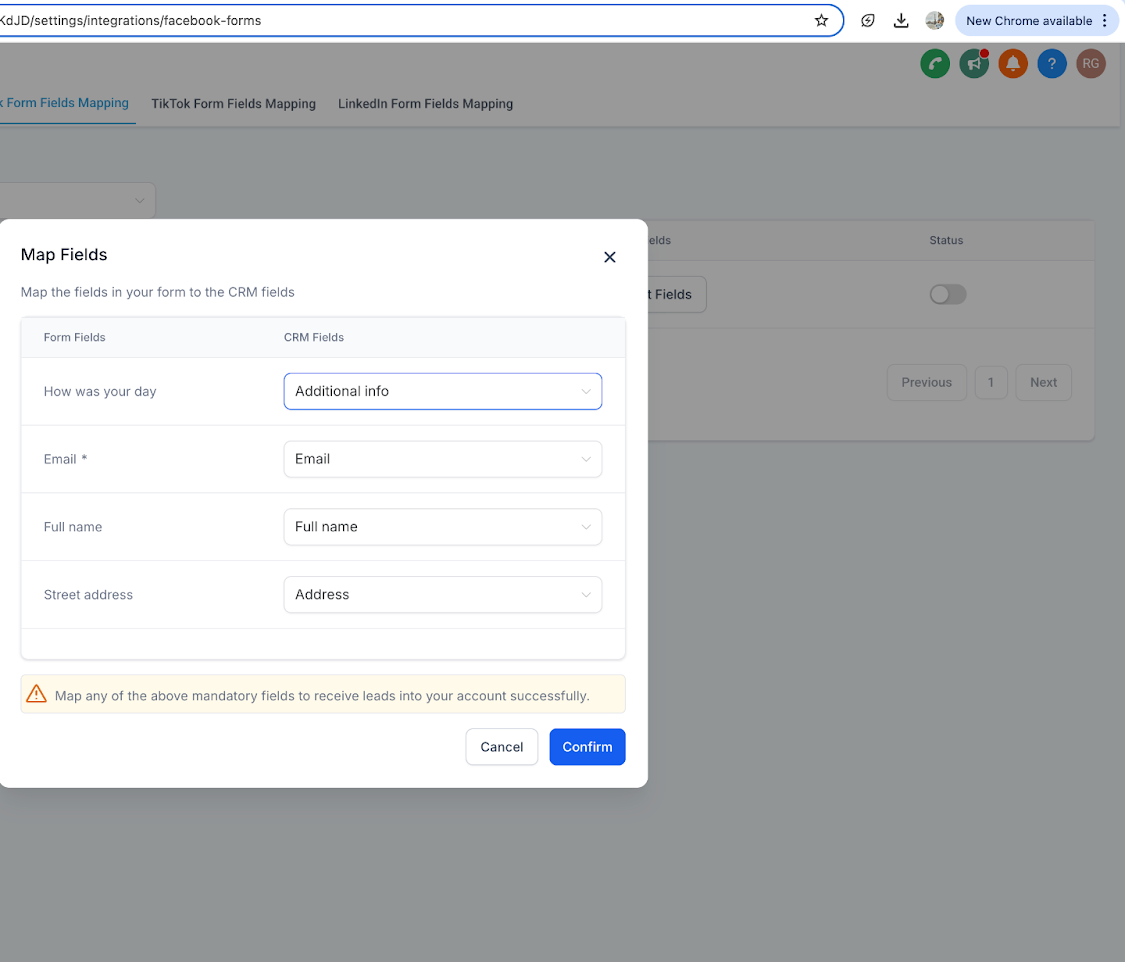
Mapping tells Aesthetix CRM where each Facebook form answer should go. It is essential for a successful integration, so map your fields before you rely on the ad to capture patients. Make sure you have already created the necessary custom fields (see supported types above).
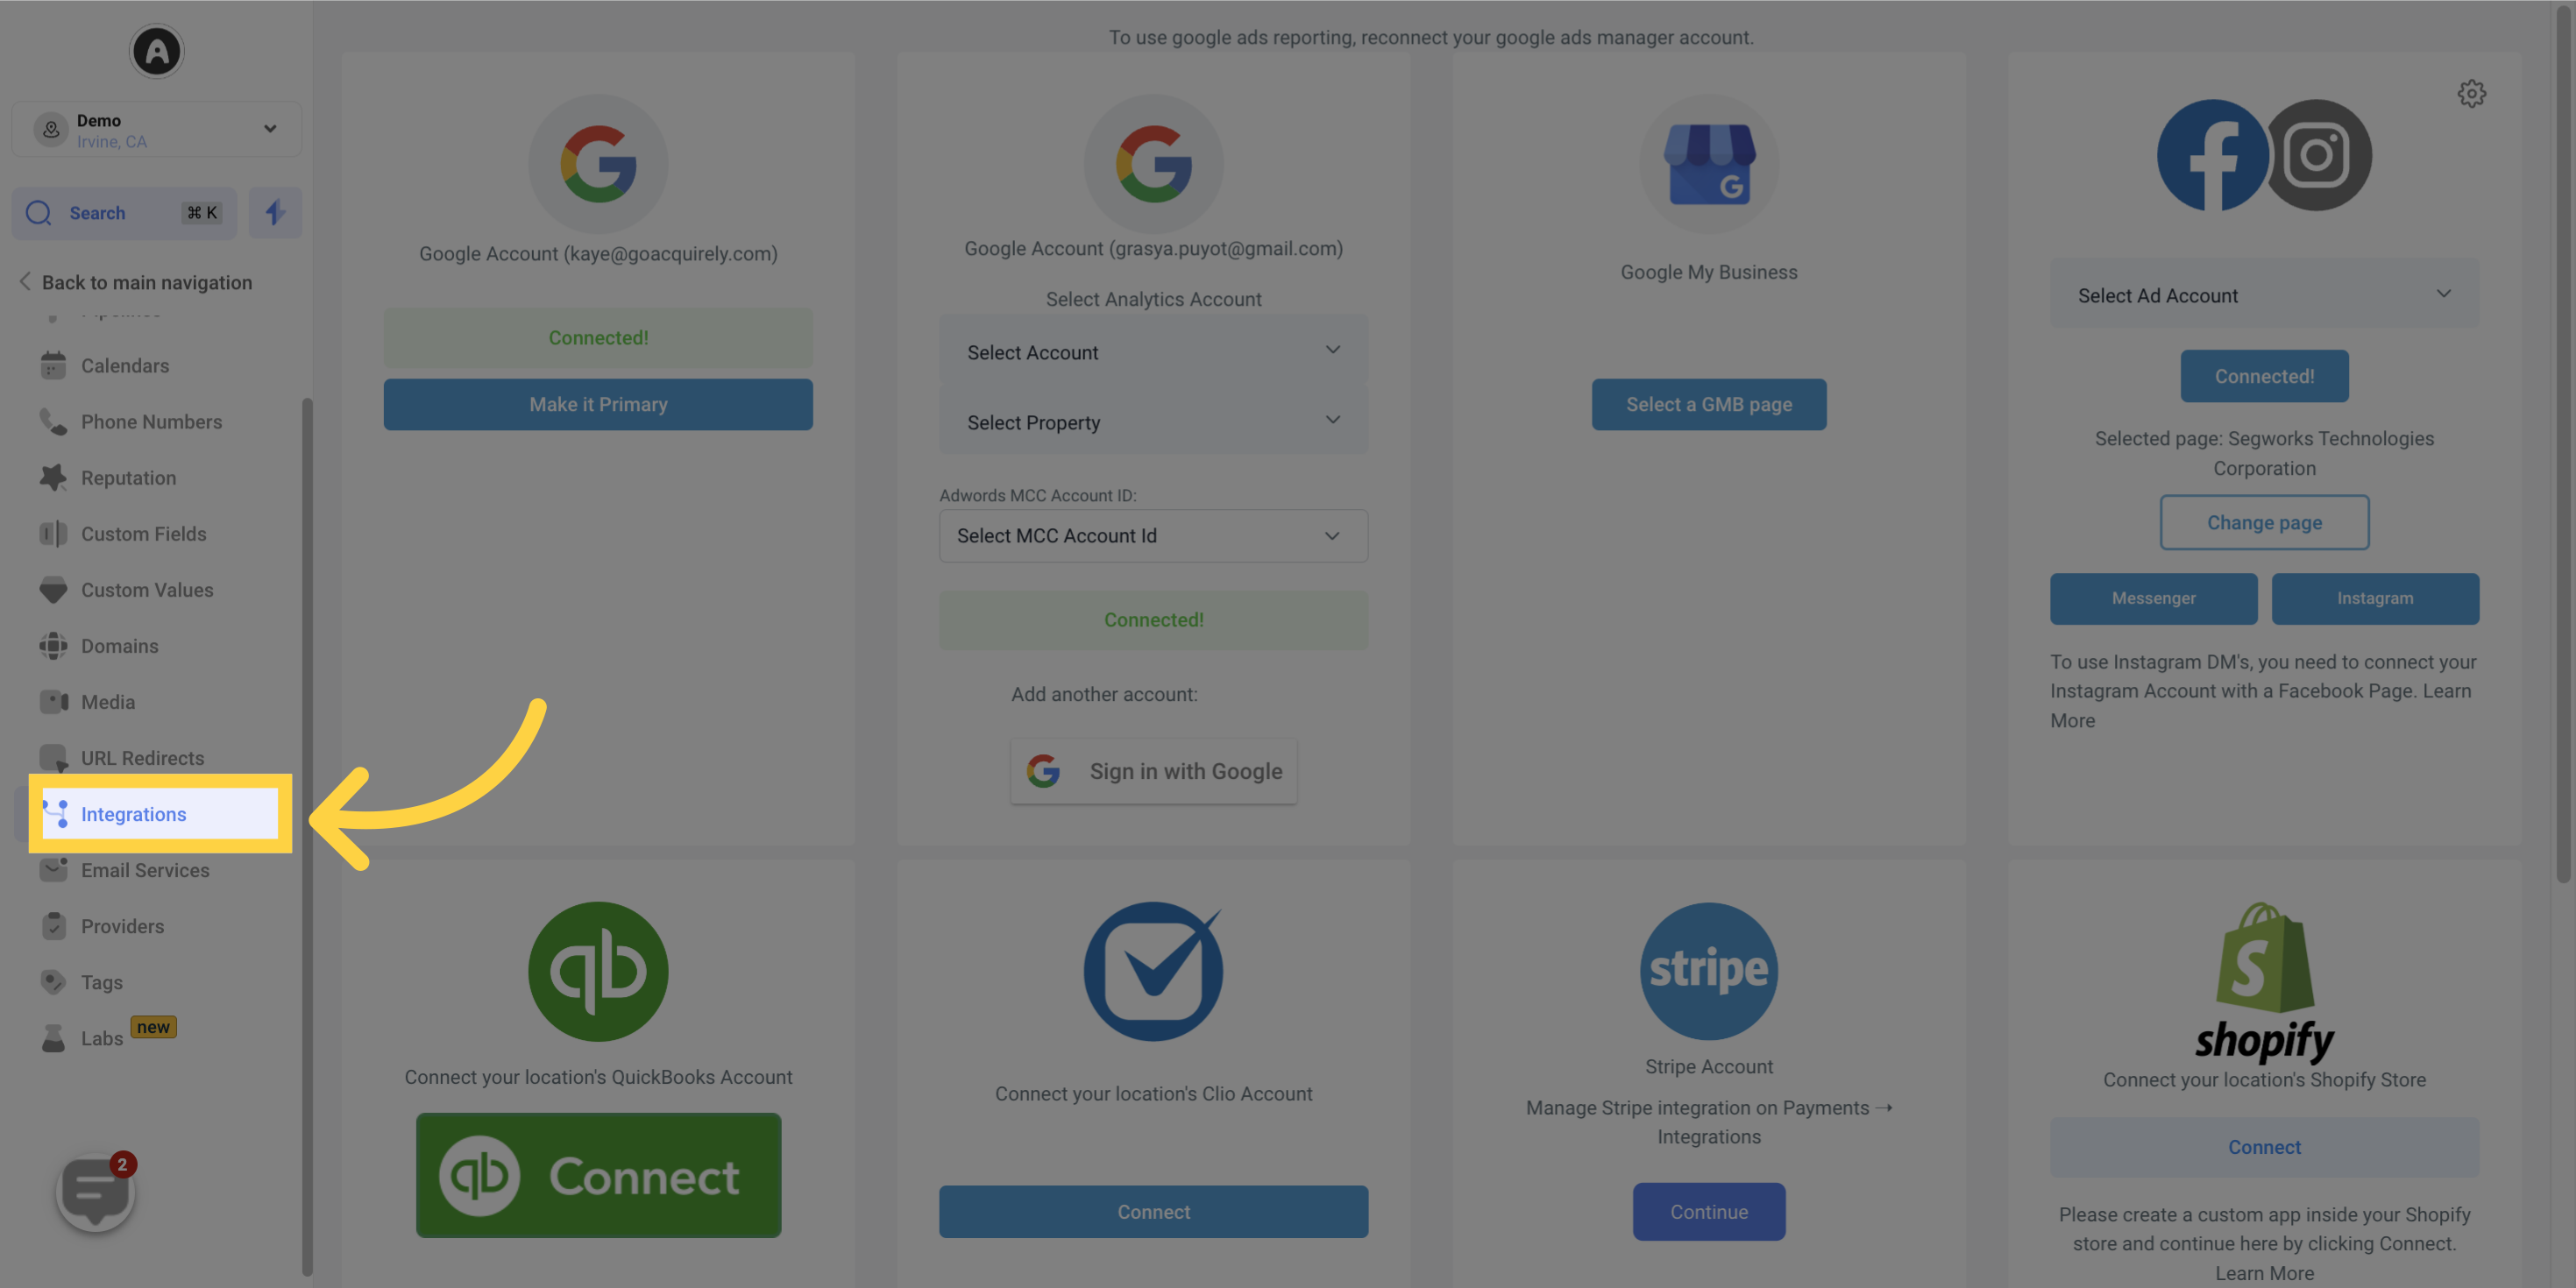
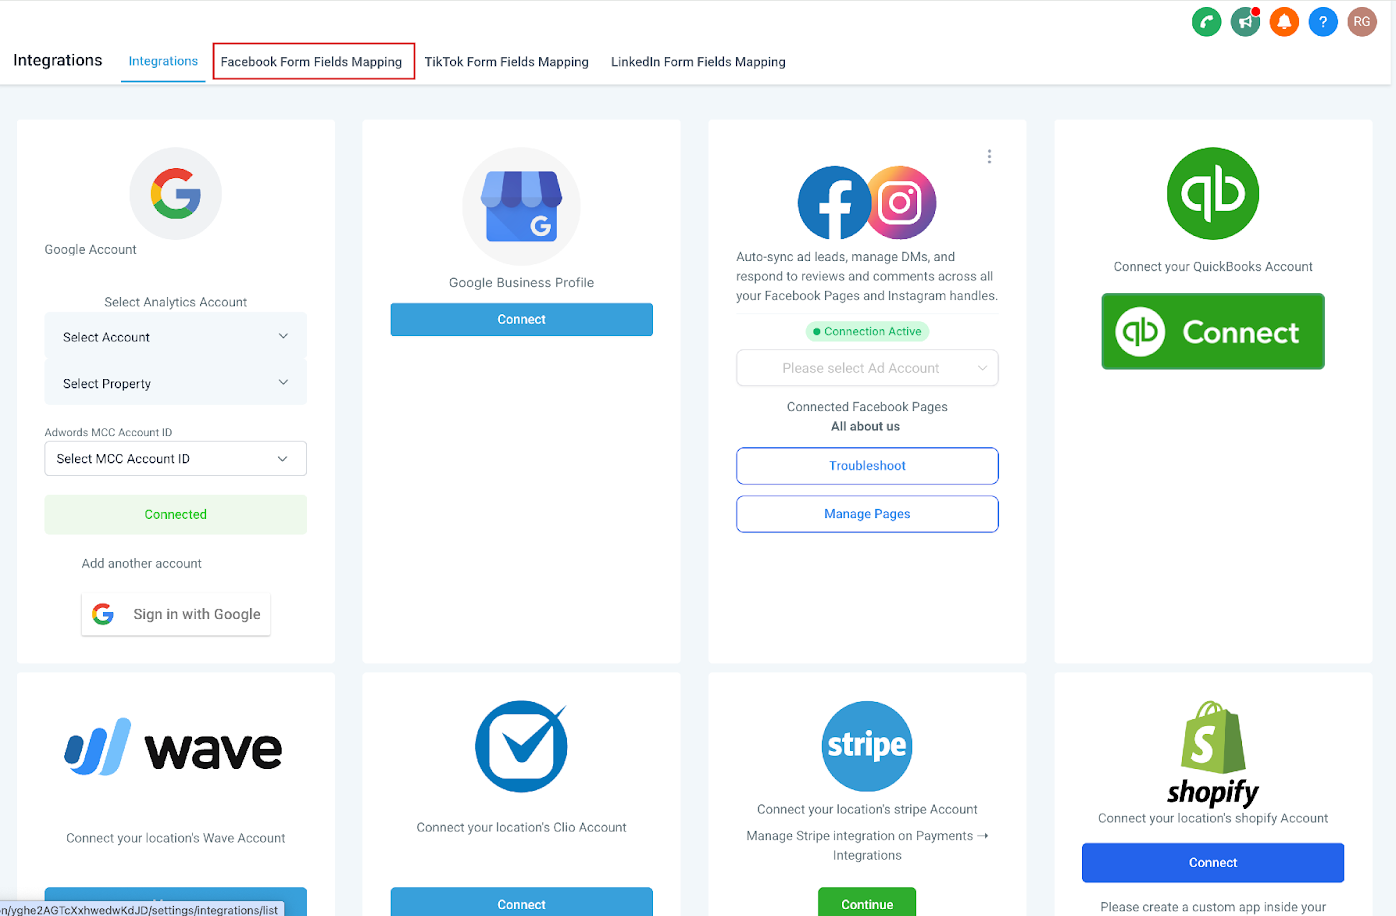
Open the Facebook form field mapping area at the top of the Integrations screen.
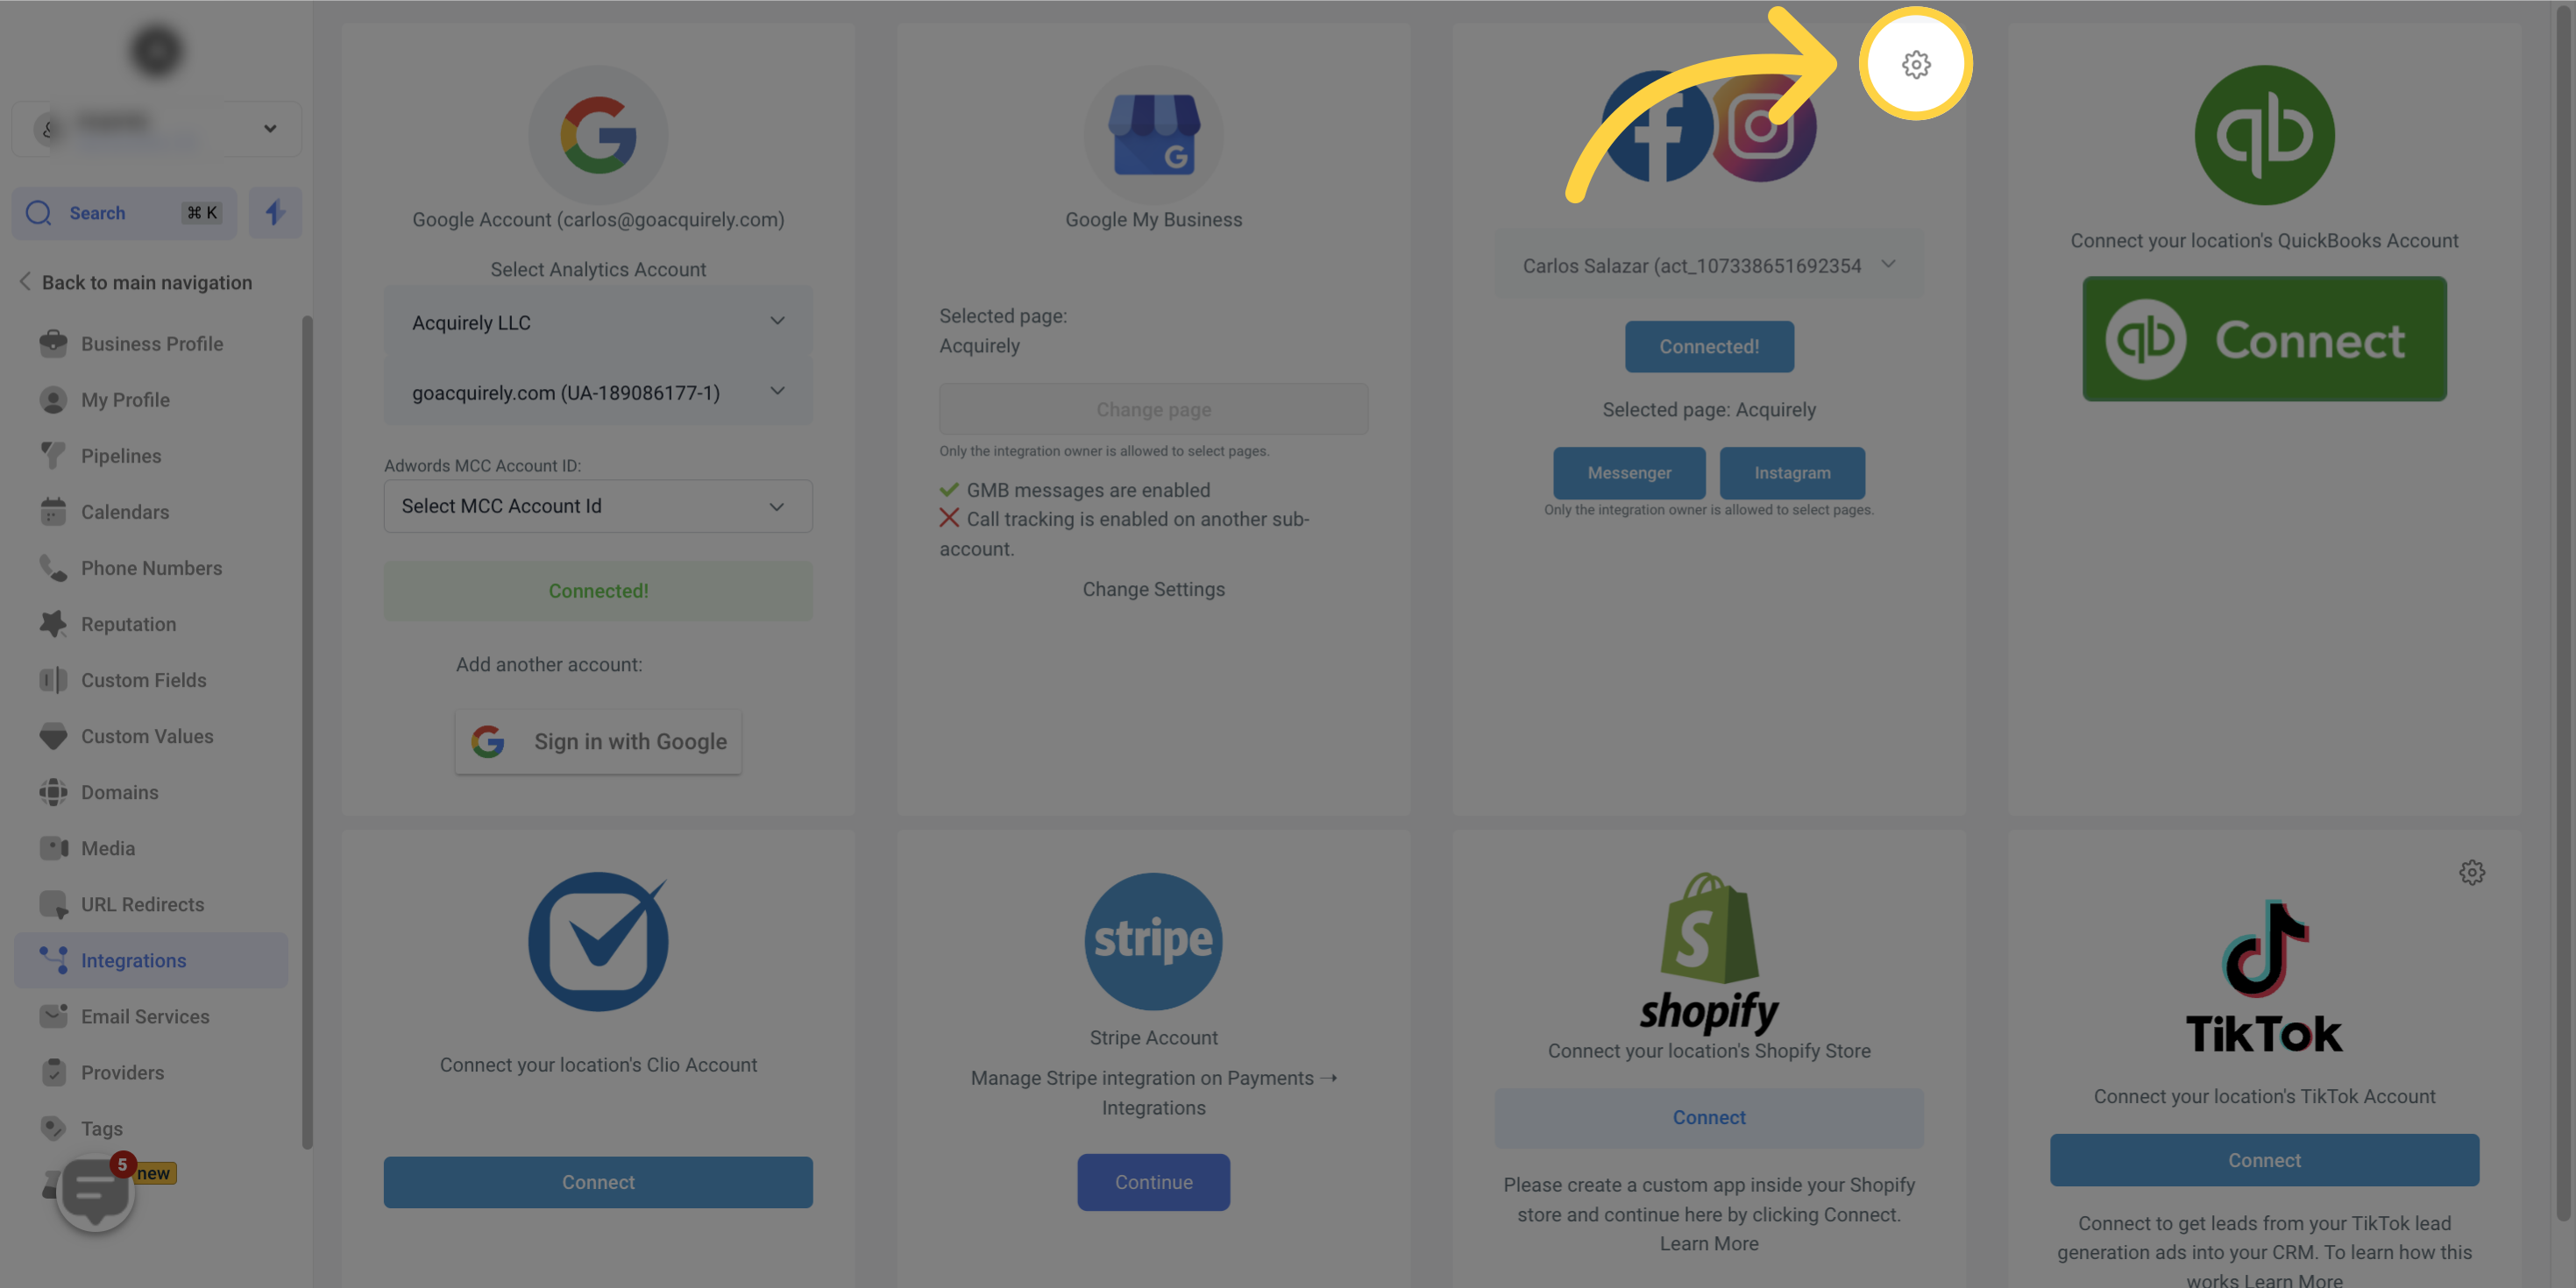
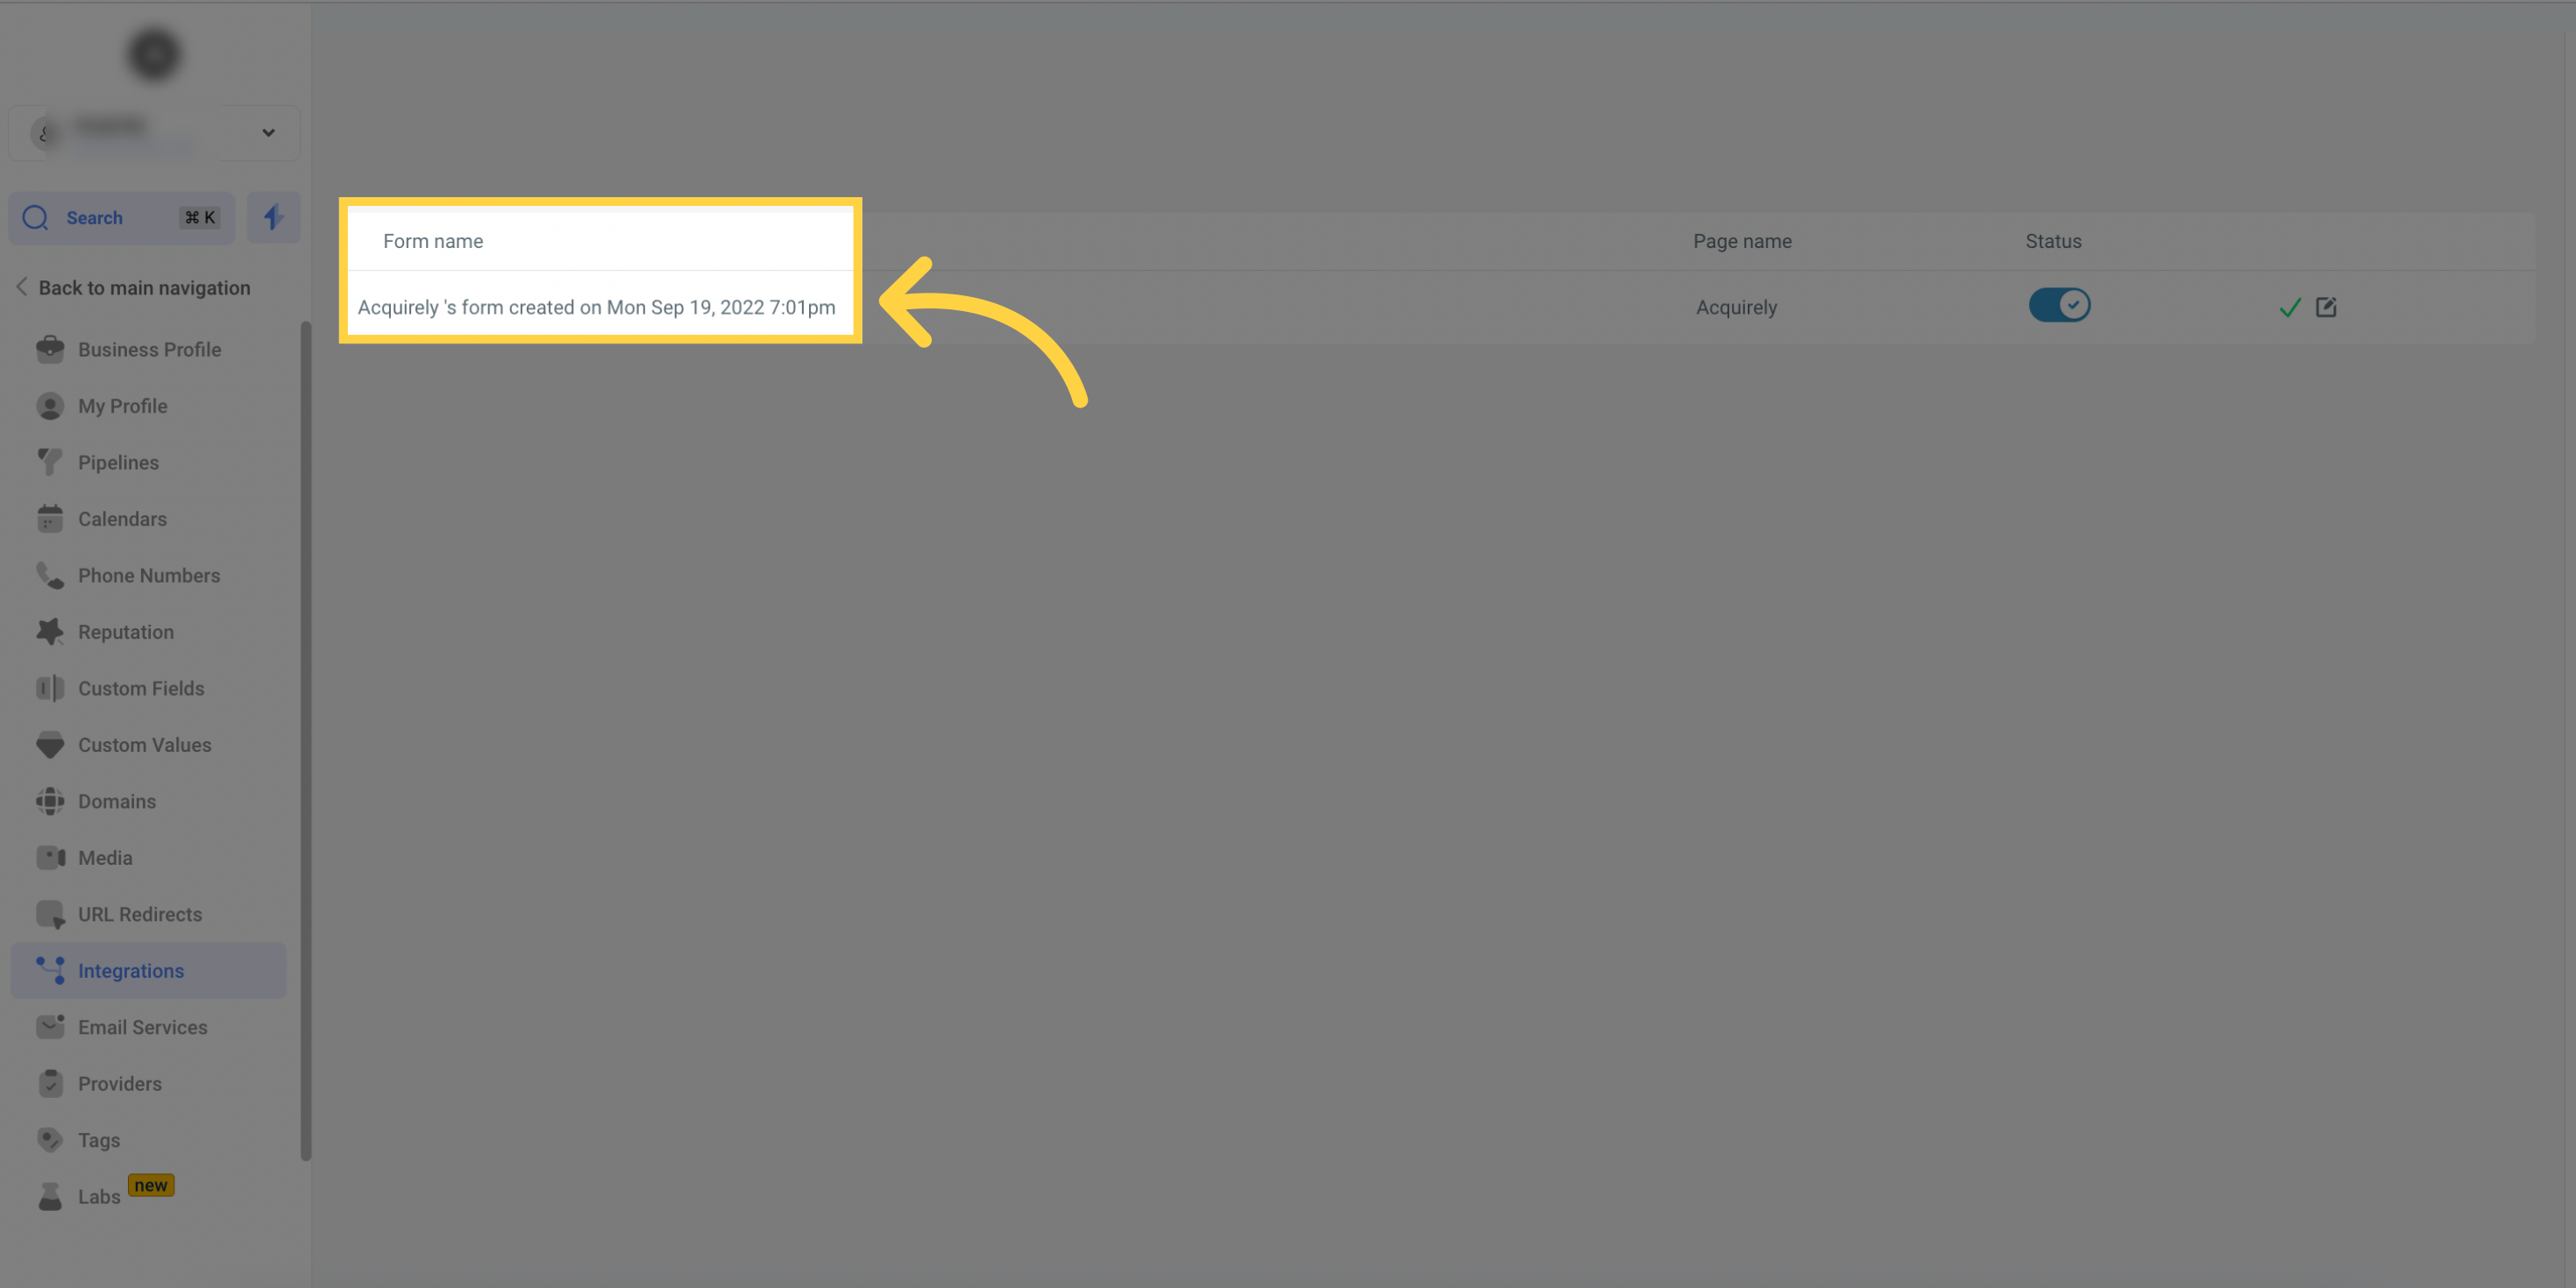
After selecting your account, you see a list of the Facebook forms associated with your connected account. Each row shows a Form Name, so you can identify the form you want to map.
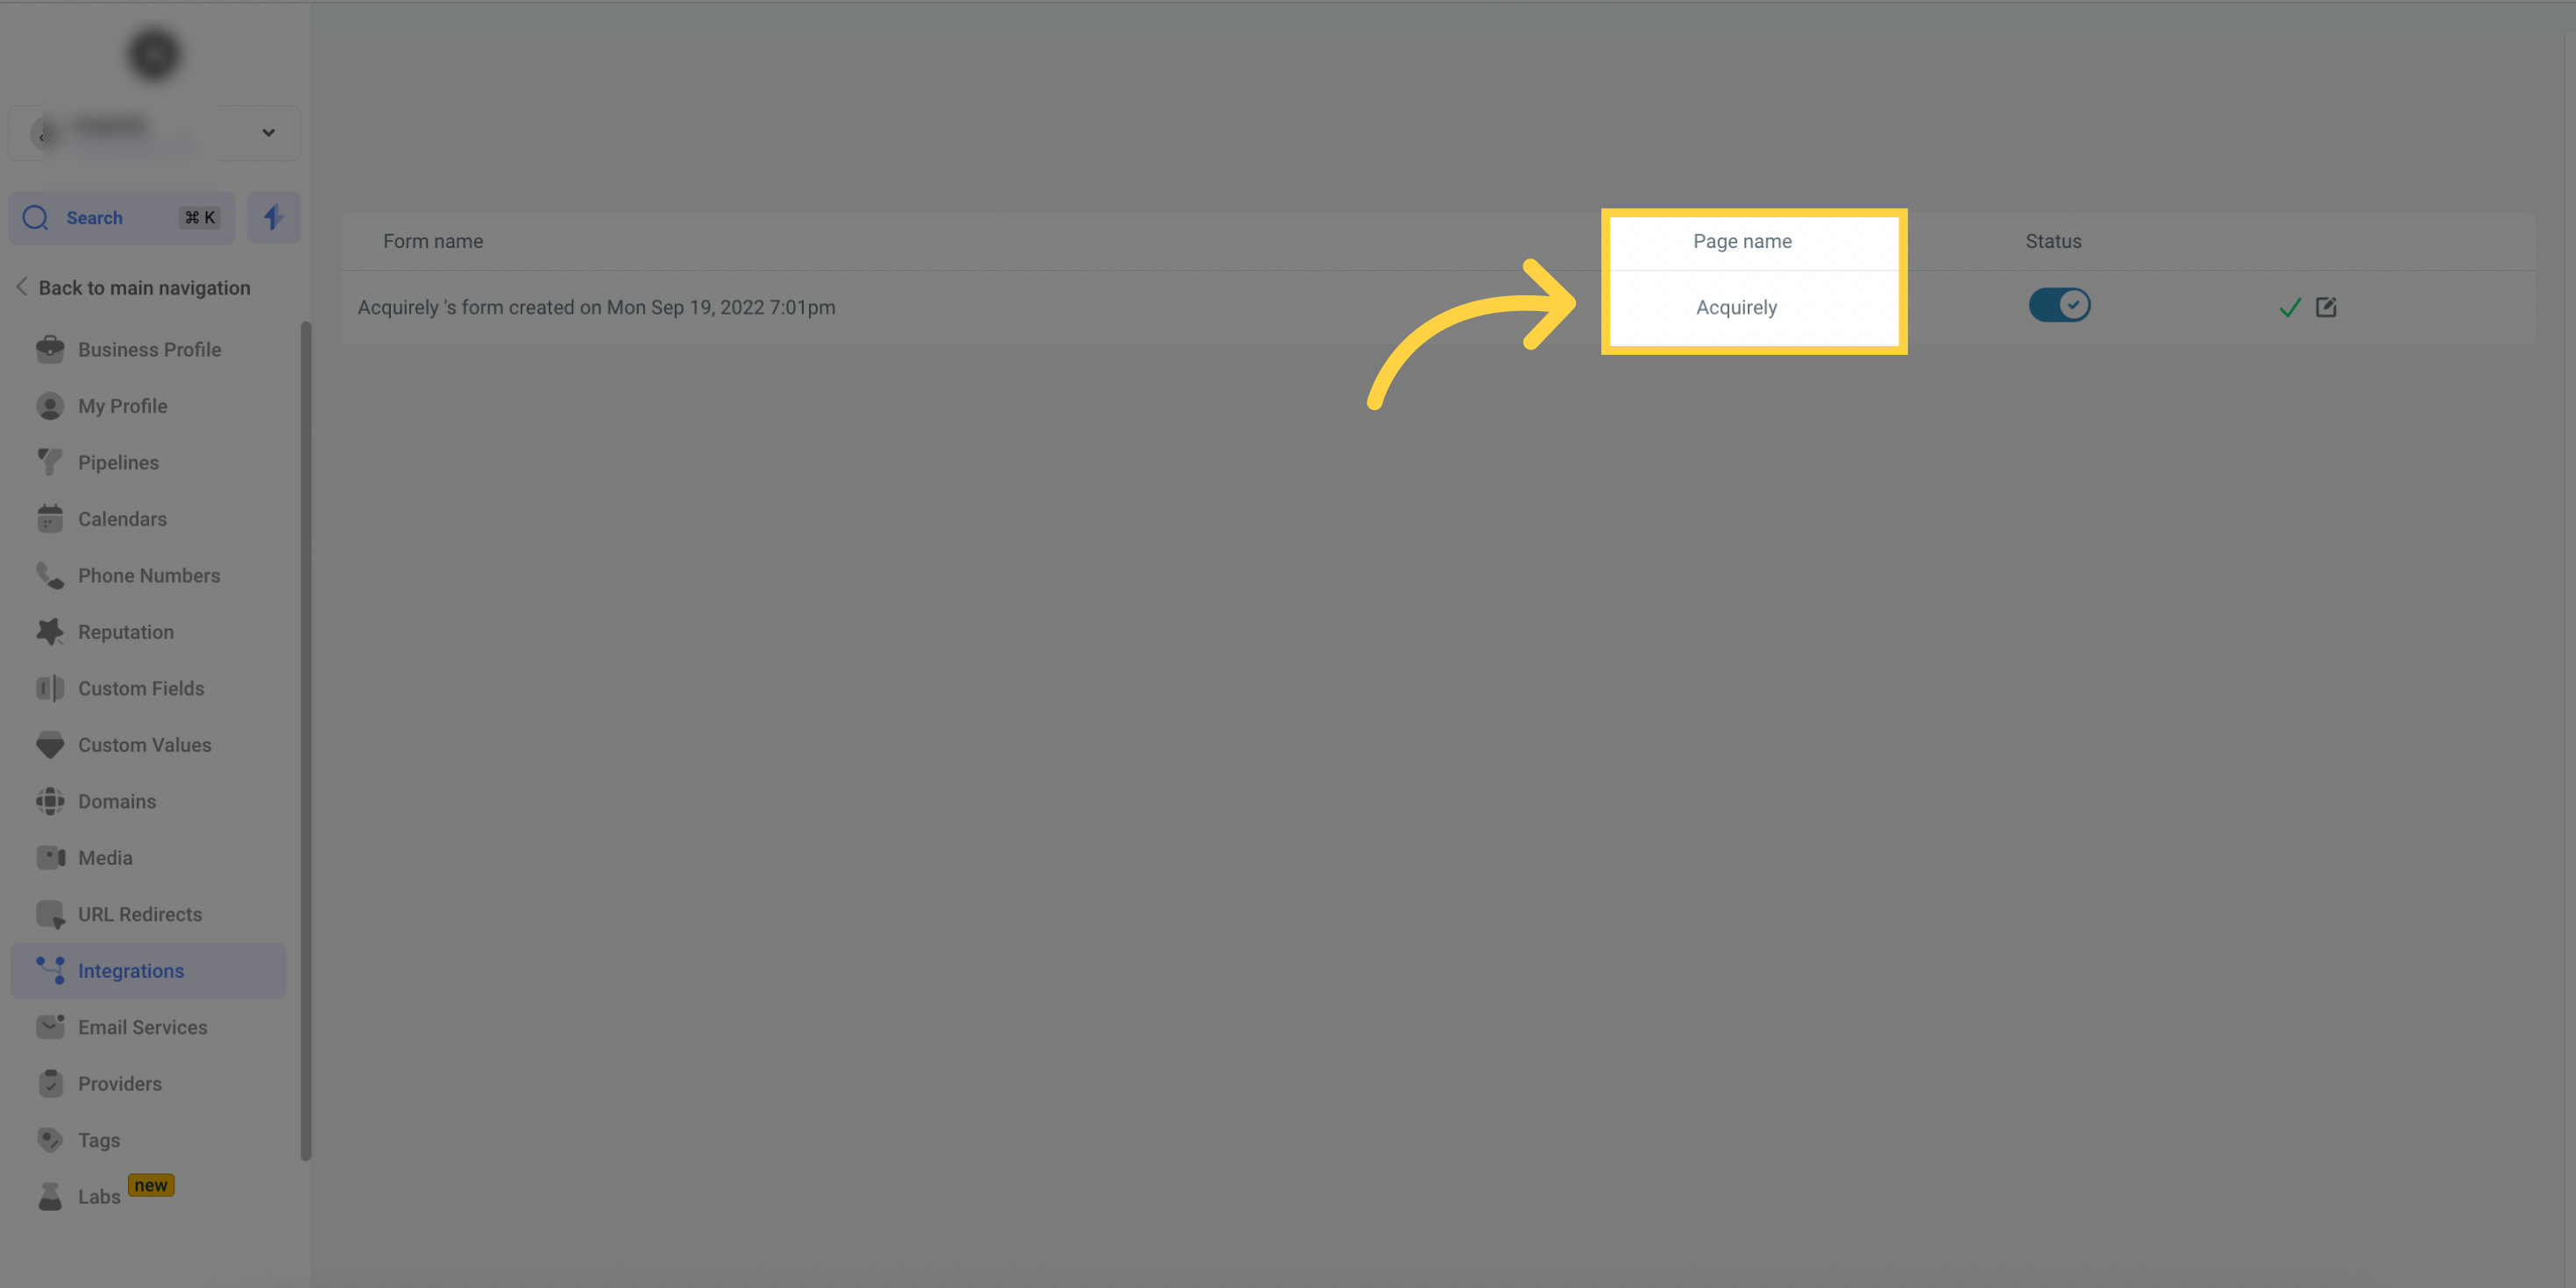
The Page Name column shows the Facebook Page linked to each form, giving you a clear overview of which form belongs to which Page.
Click Map fields on the form you want to configure.
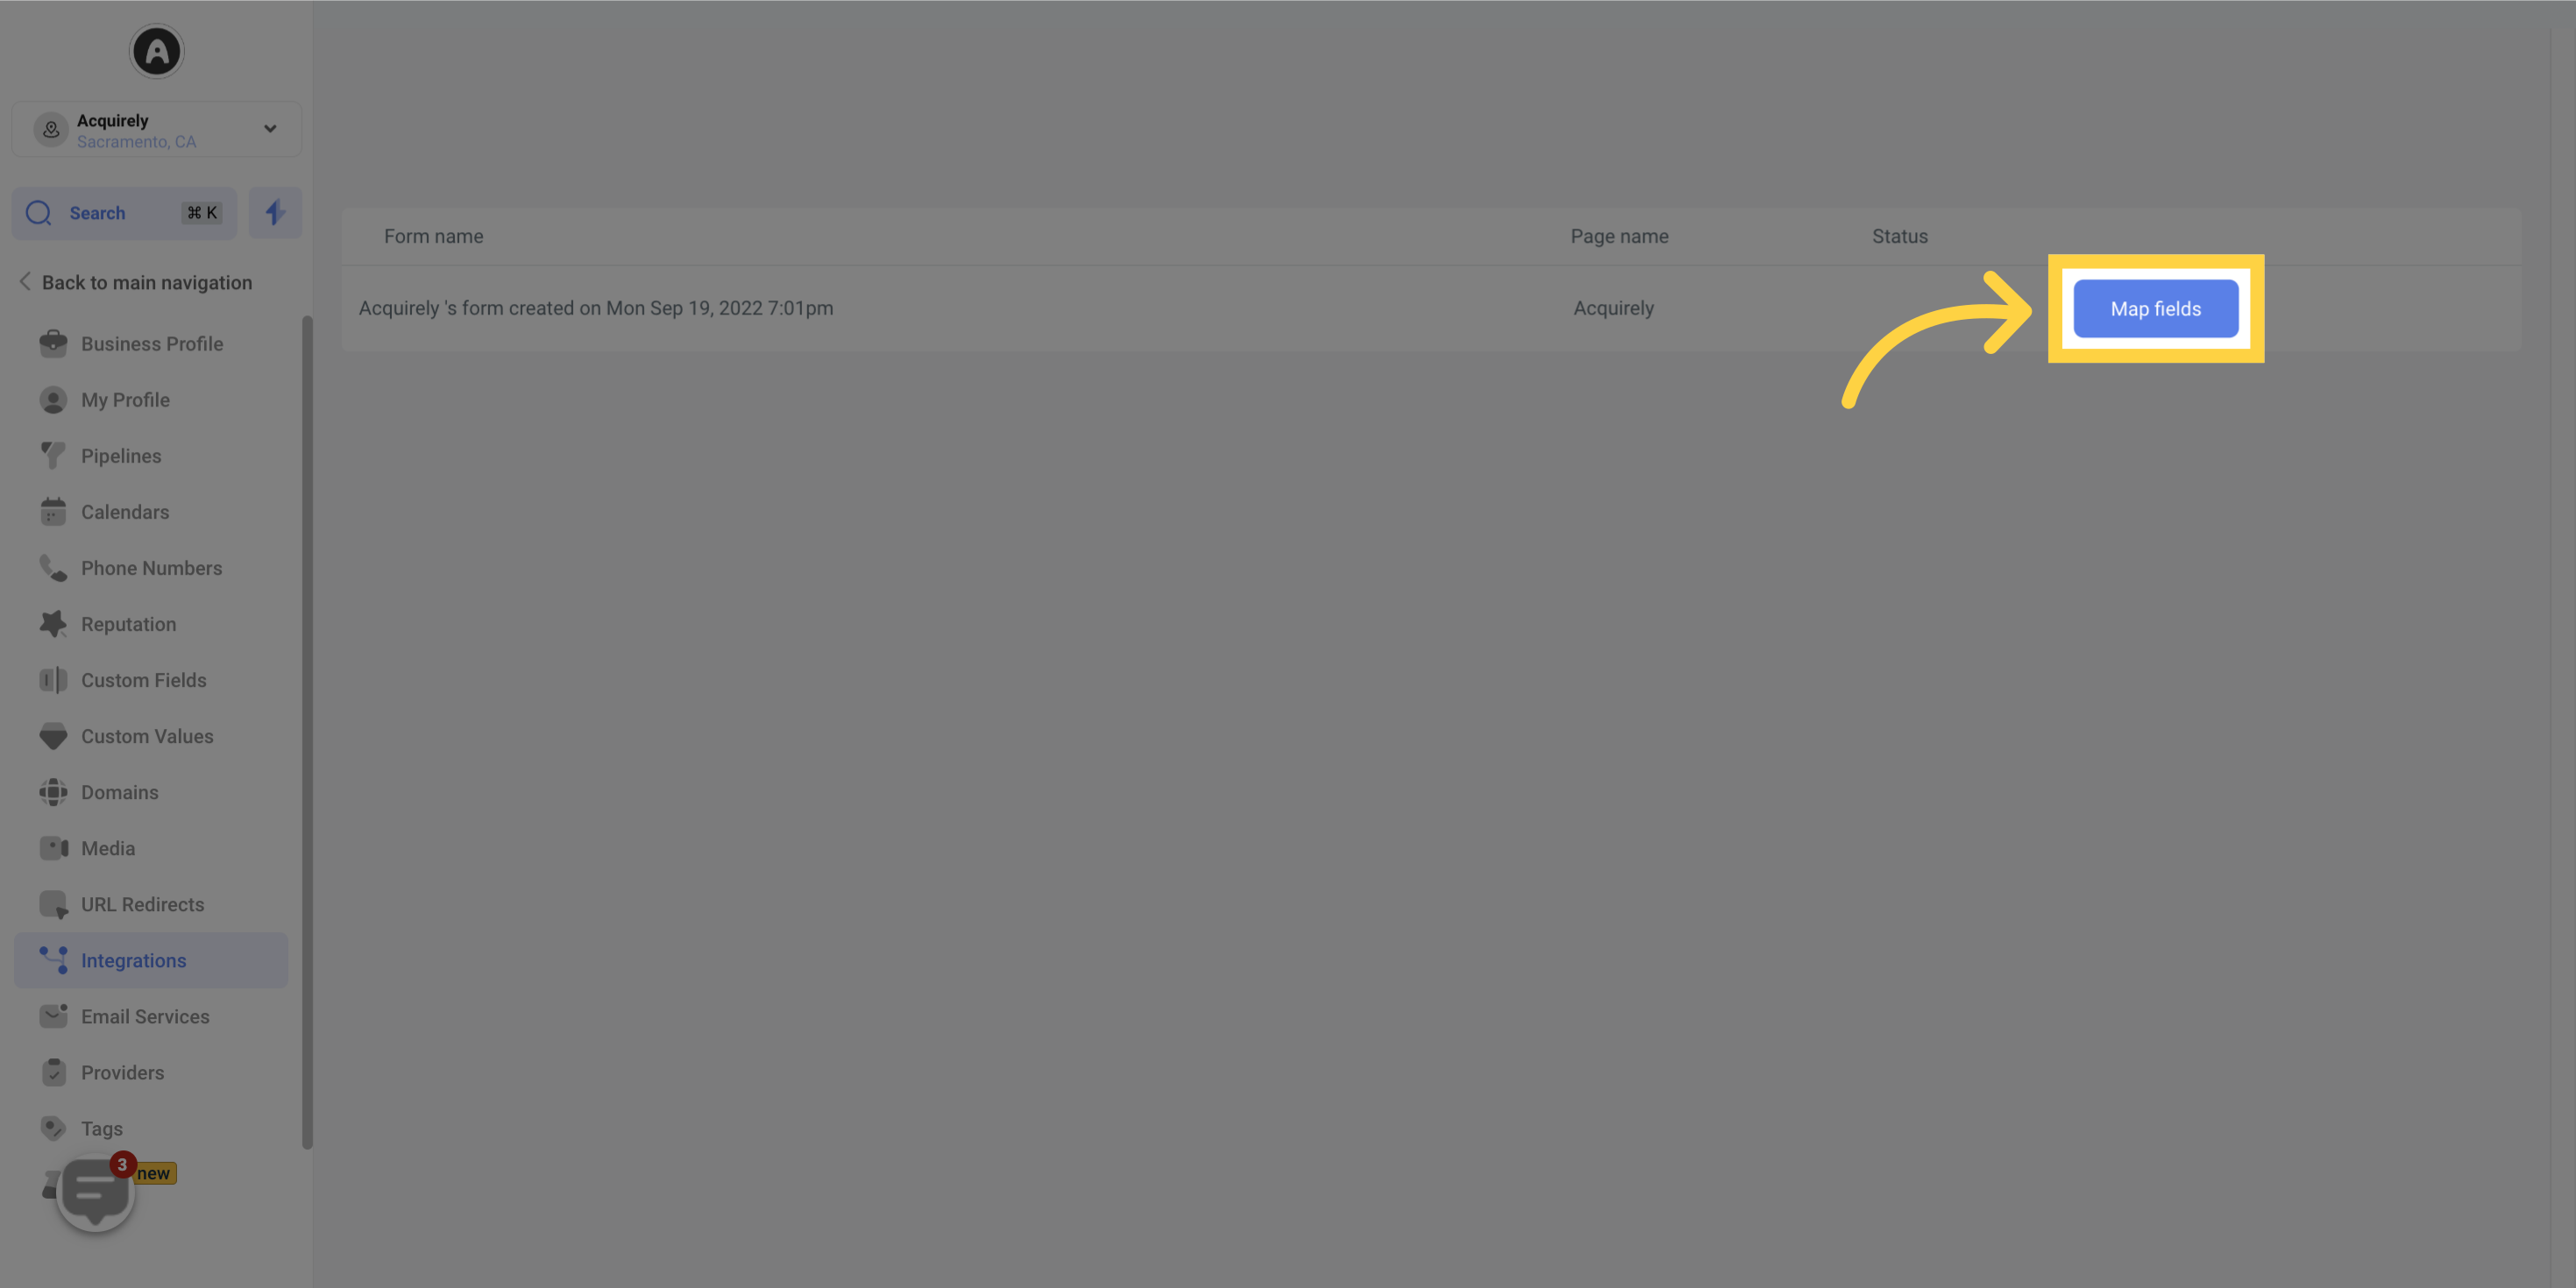
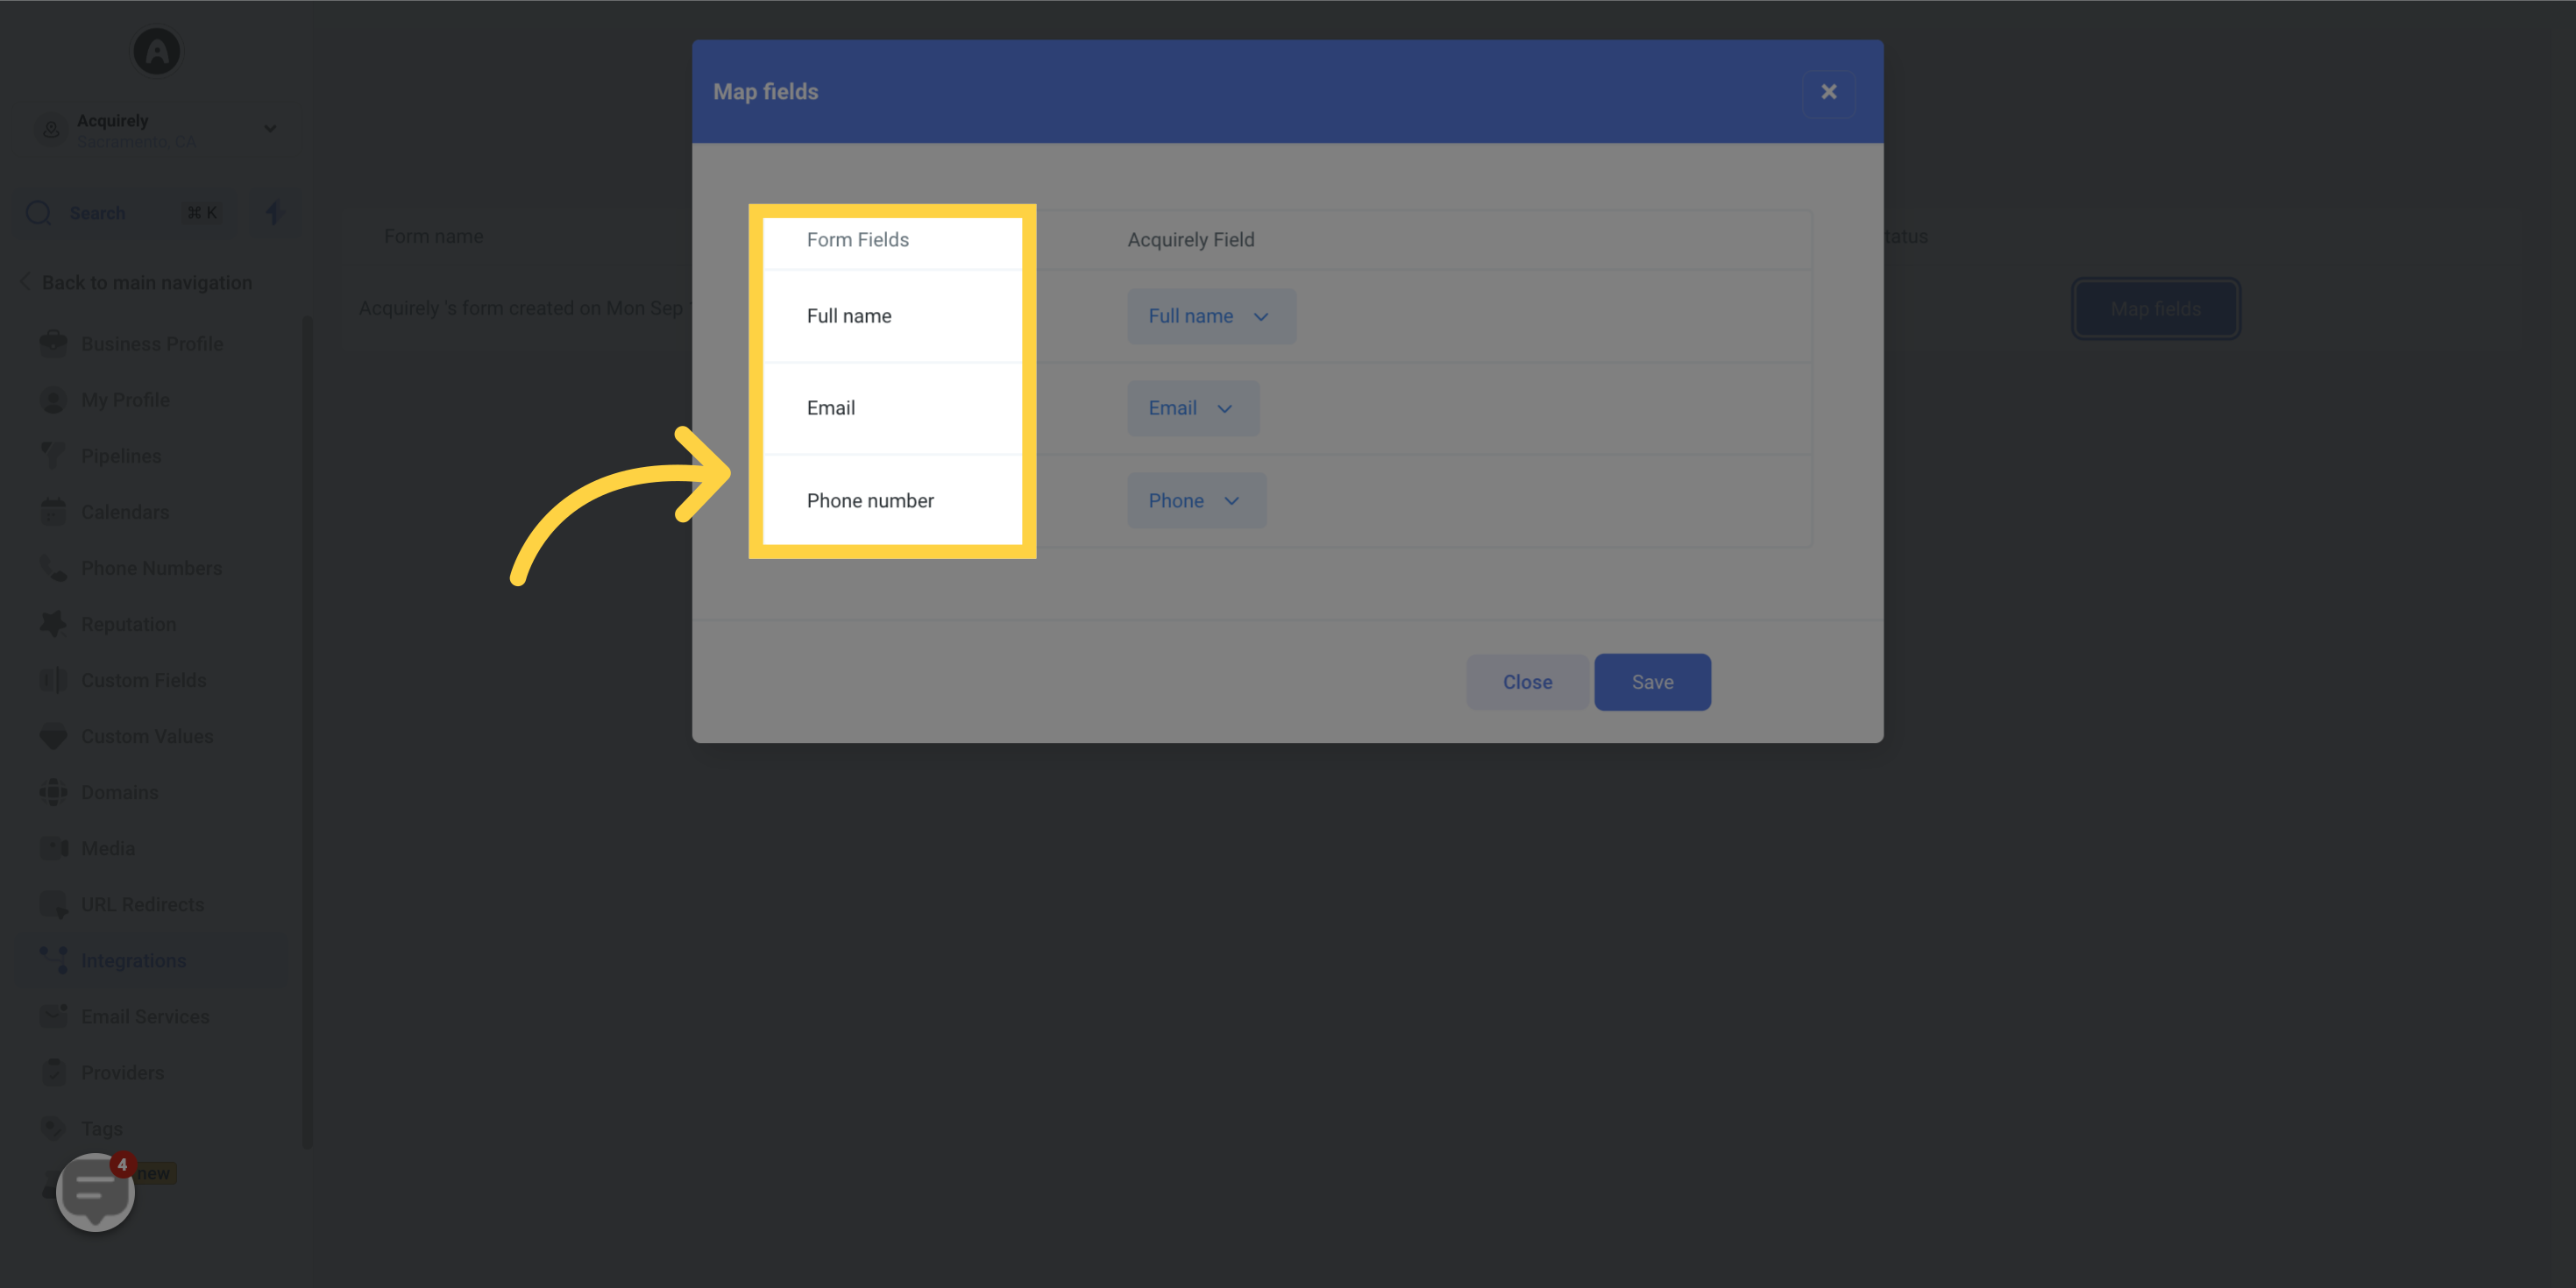
The Form Fields section displays the fields from your Facebook form so you can see every question the form collects.
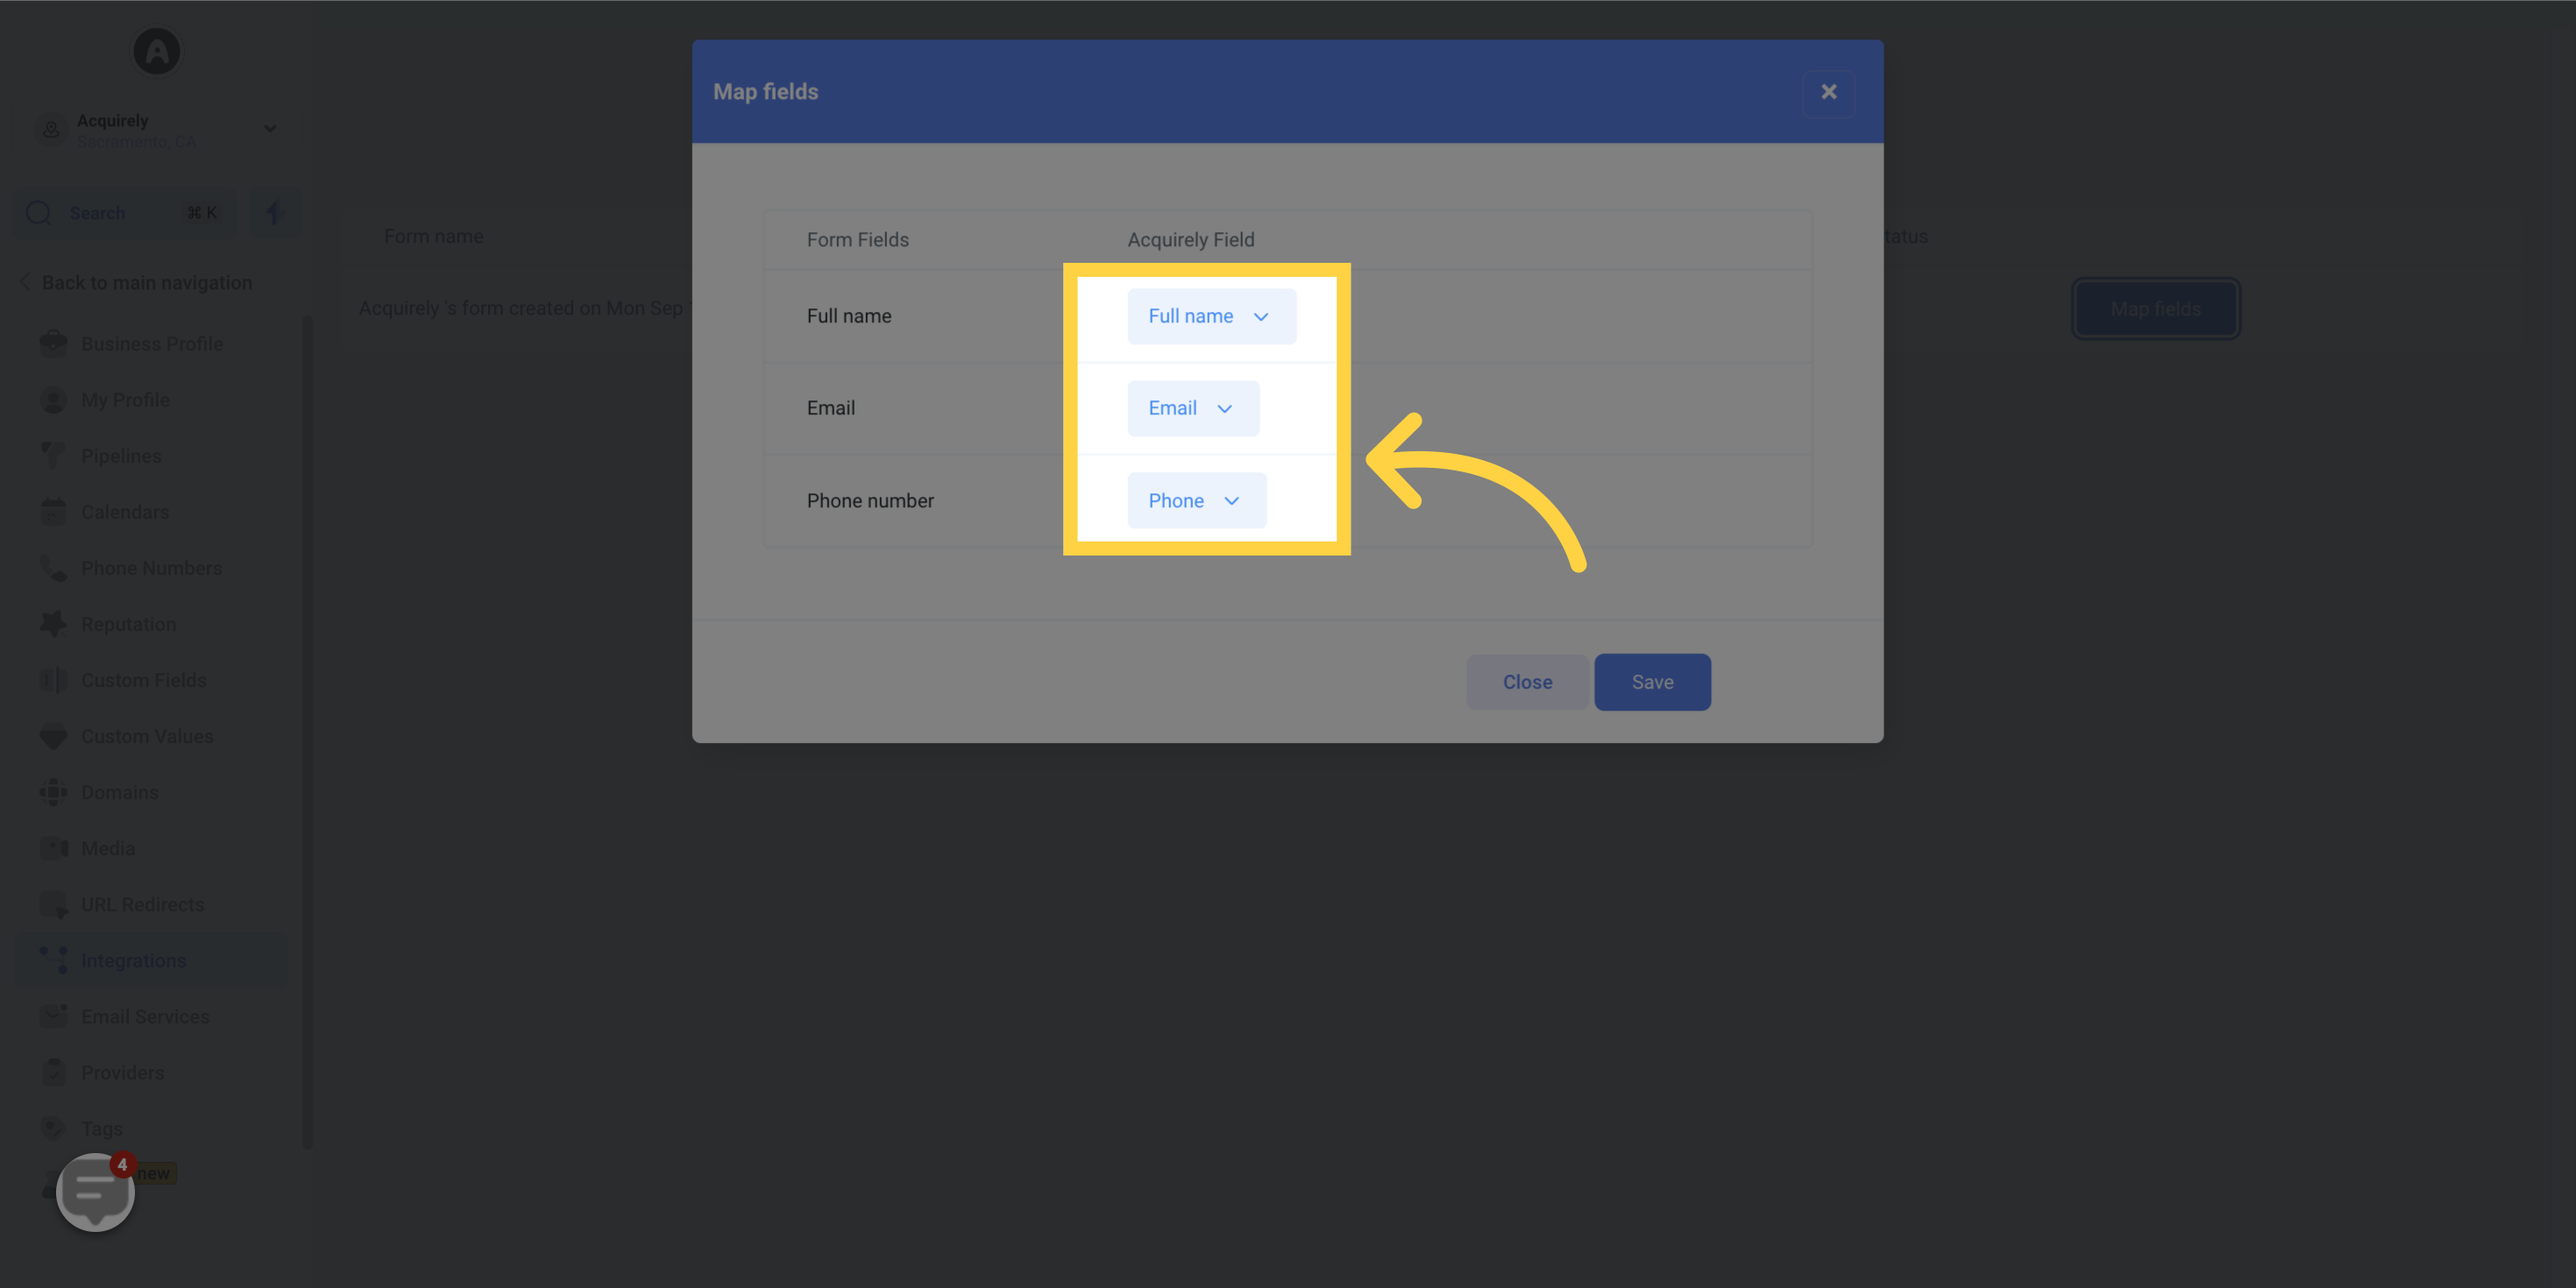
For each Facebook form field, choose the matching Aesthetix CRM field. For example, map the Facebook Email field to the Email field in the CRM. Aligning these correctly ensures a seamless transfer of every lead's data.
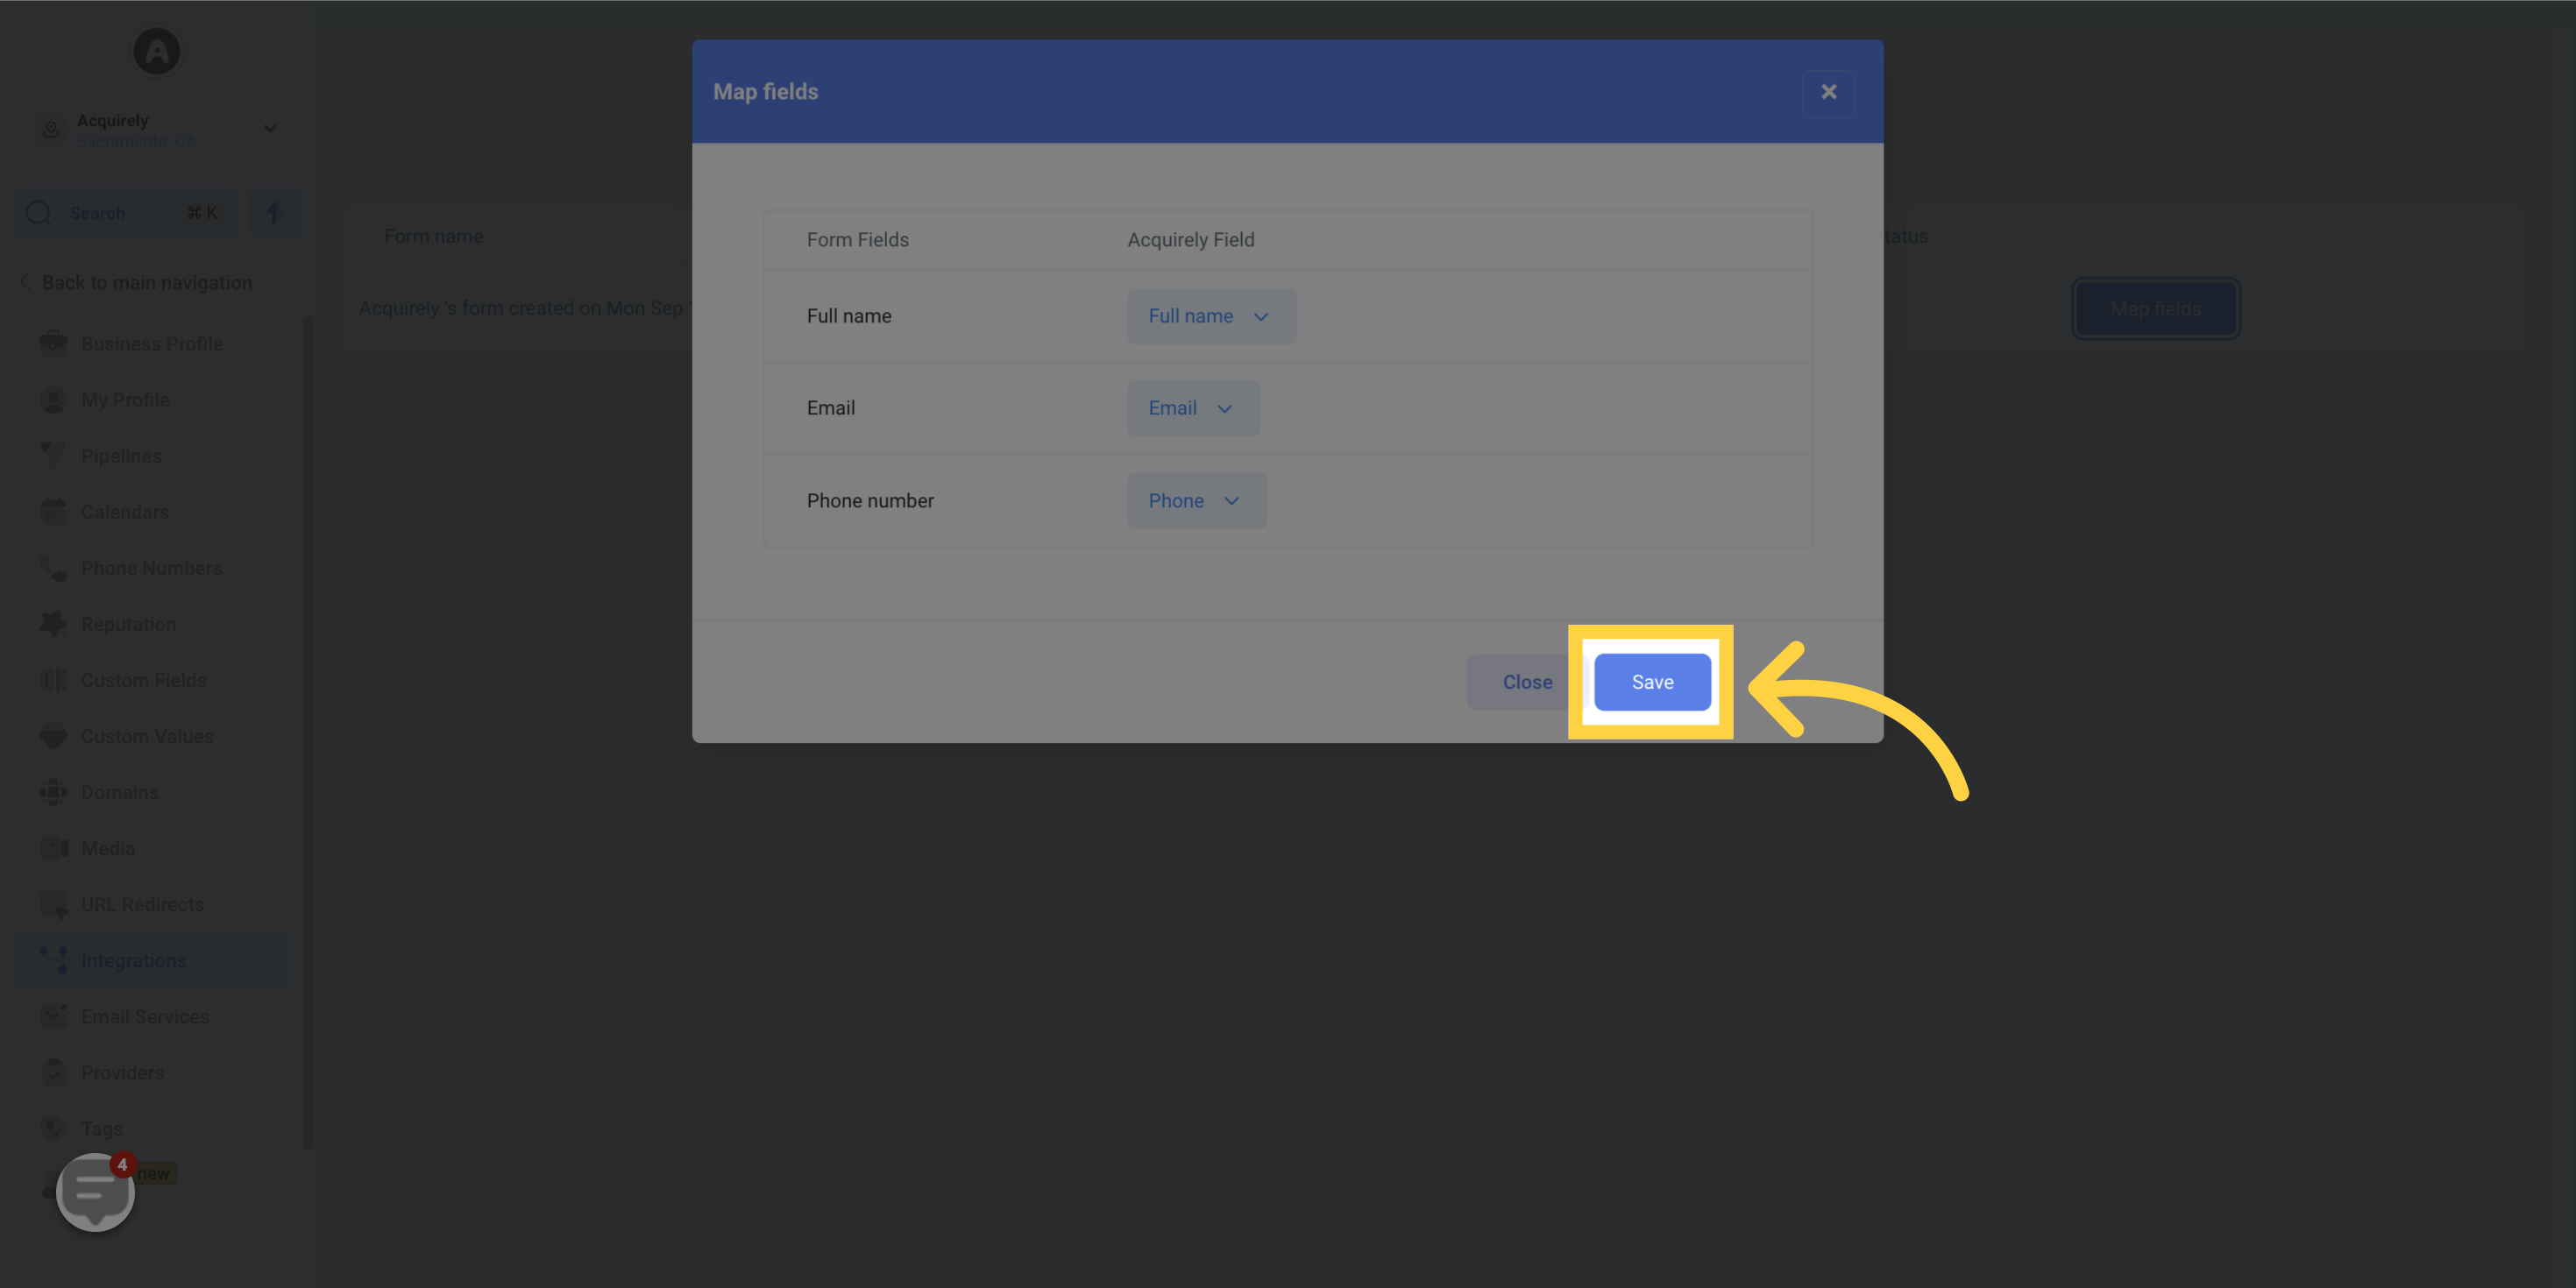
Click Save to store your field mappings so they are ready for use.
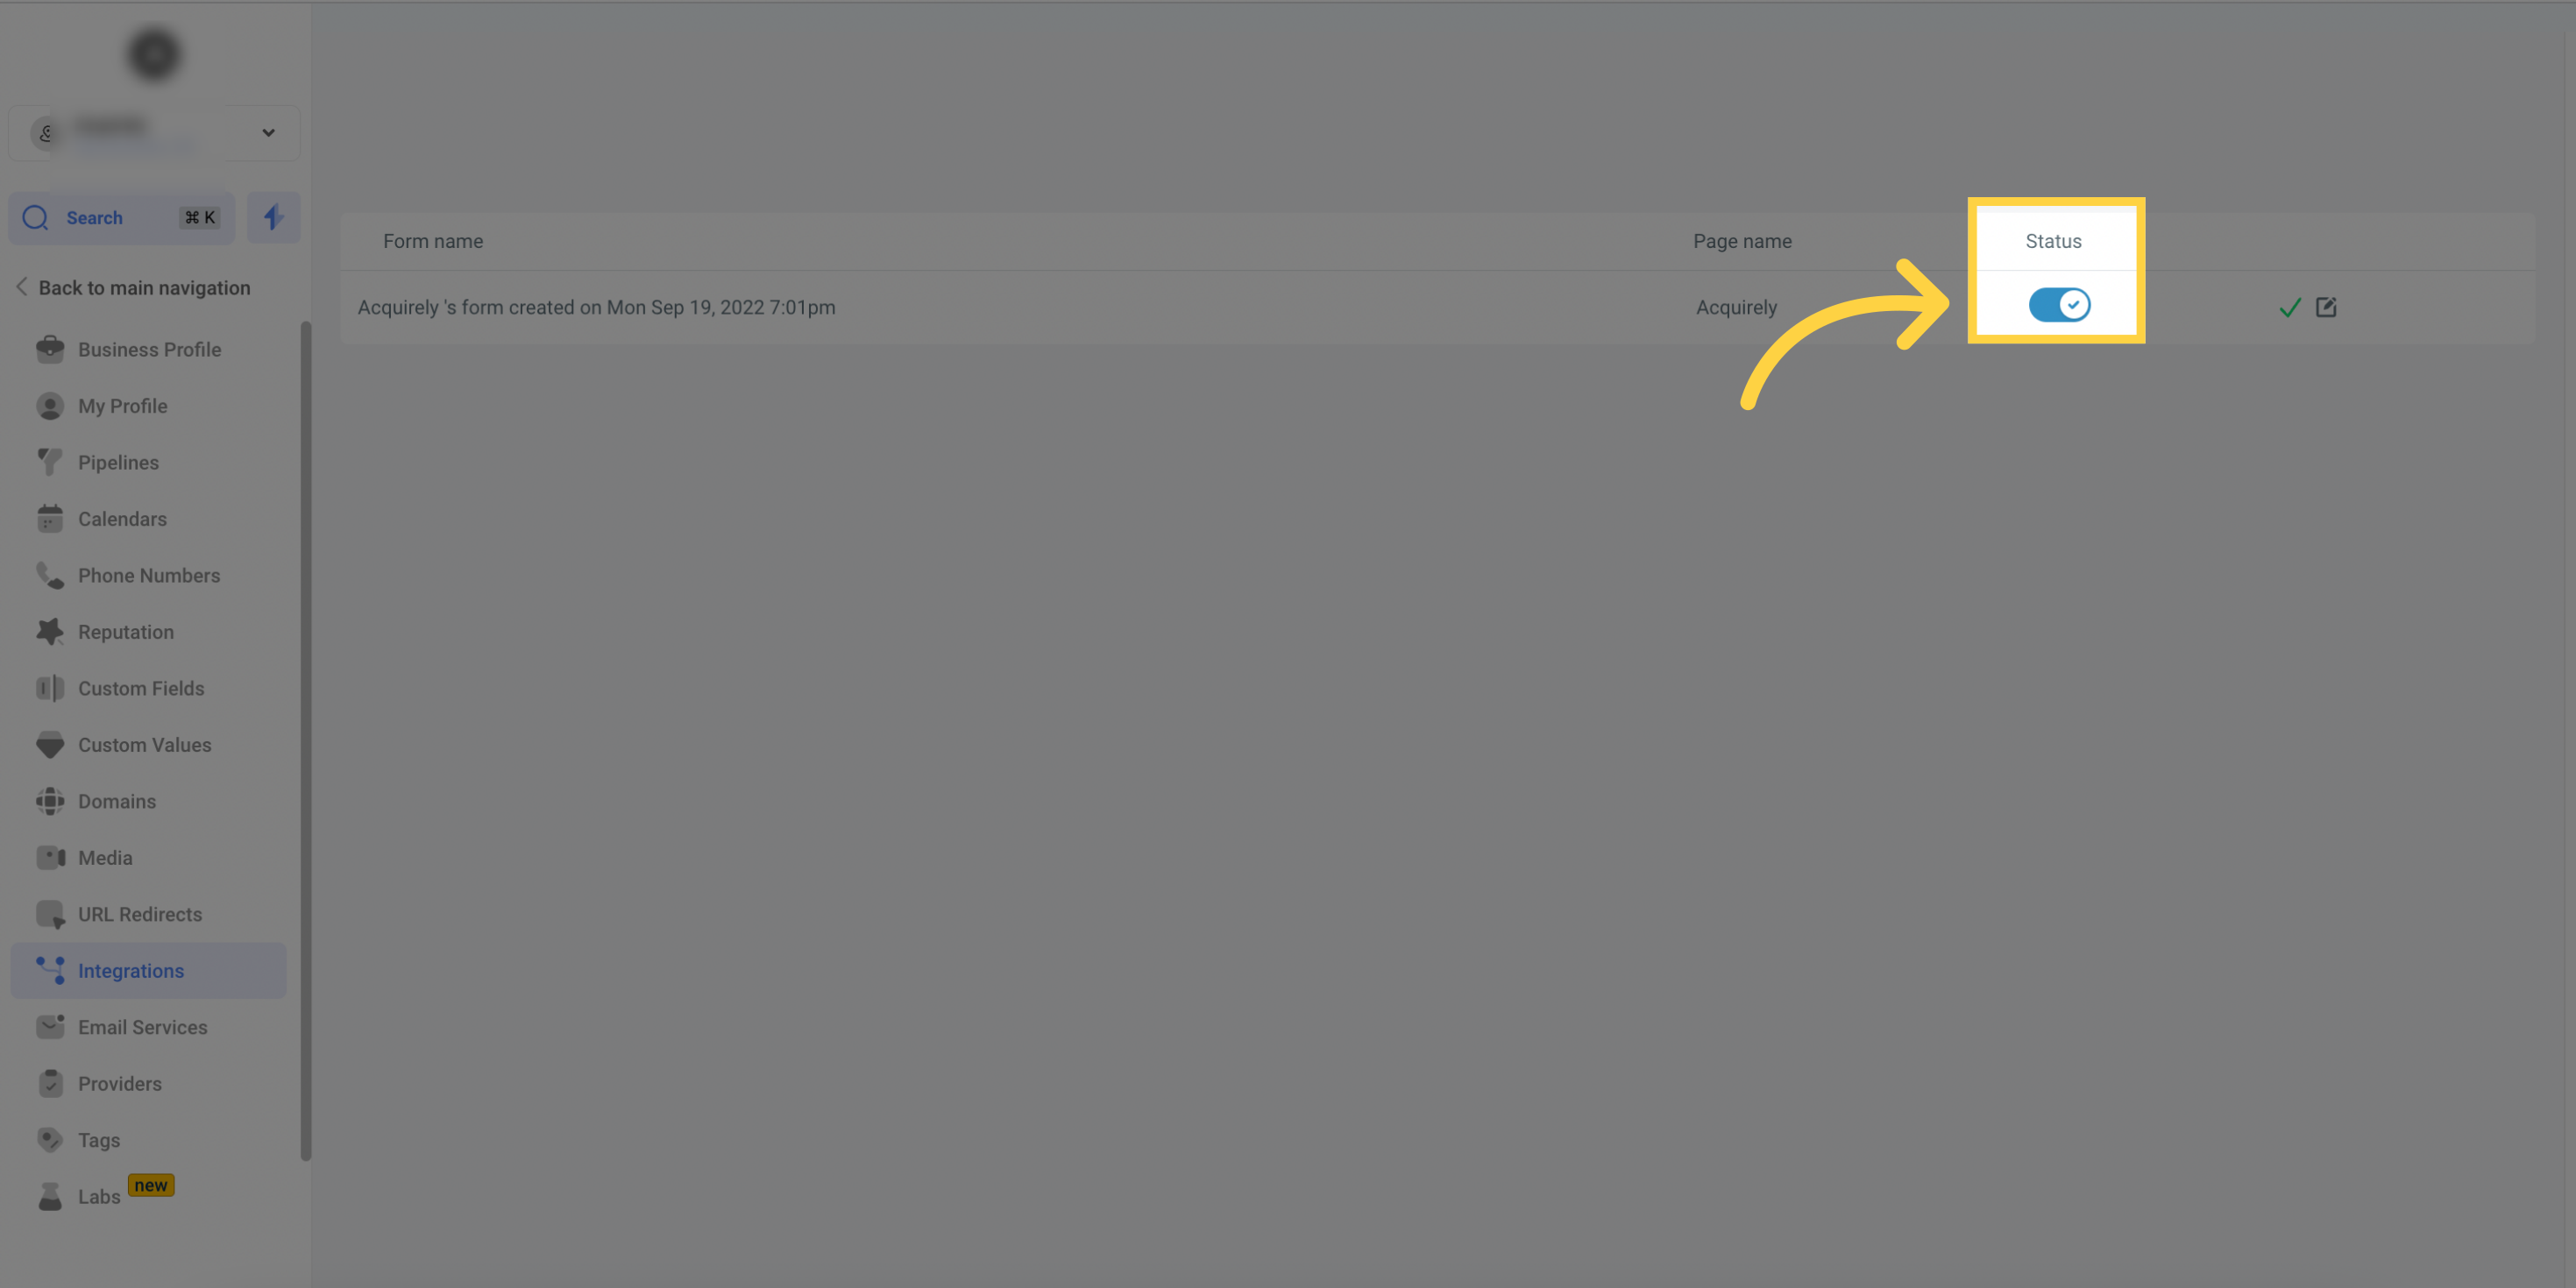
Turn on the Status toggle to enable data transfer between Facebook and the CRM. If you need to change the mapping later, turn the toggle off, make your edits, and turn it back on.
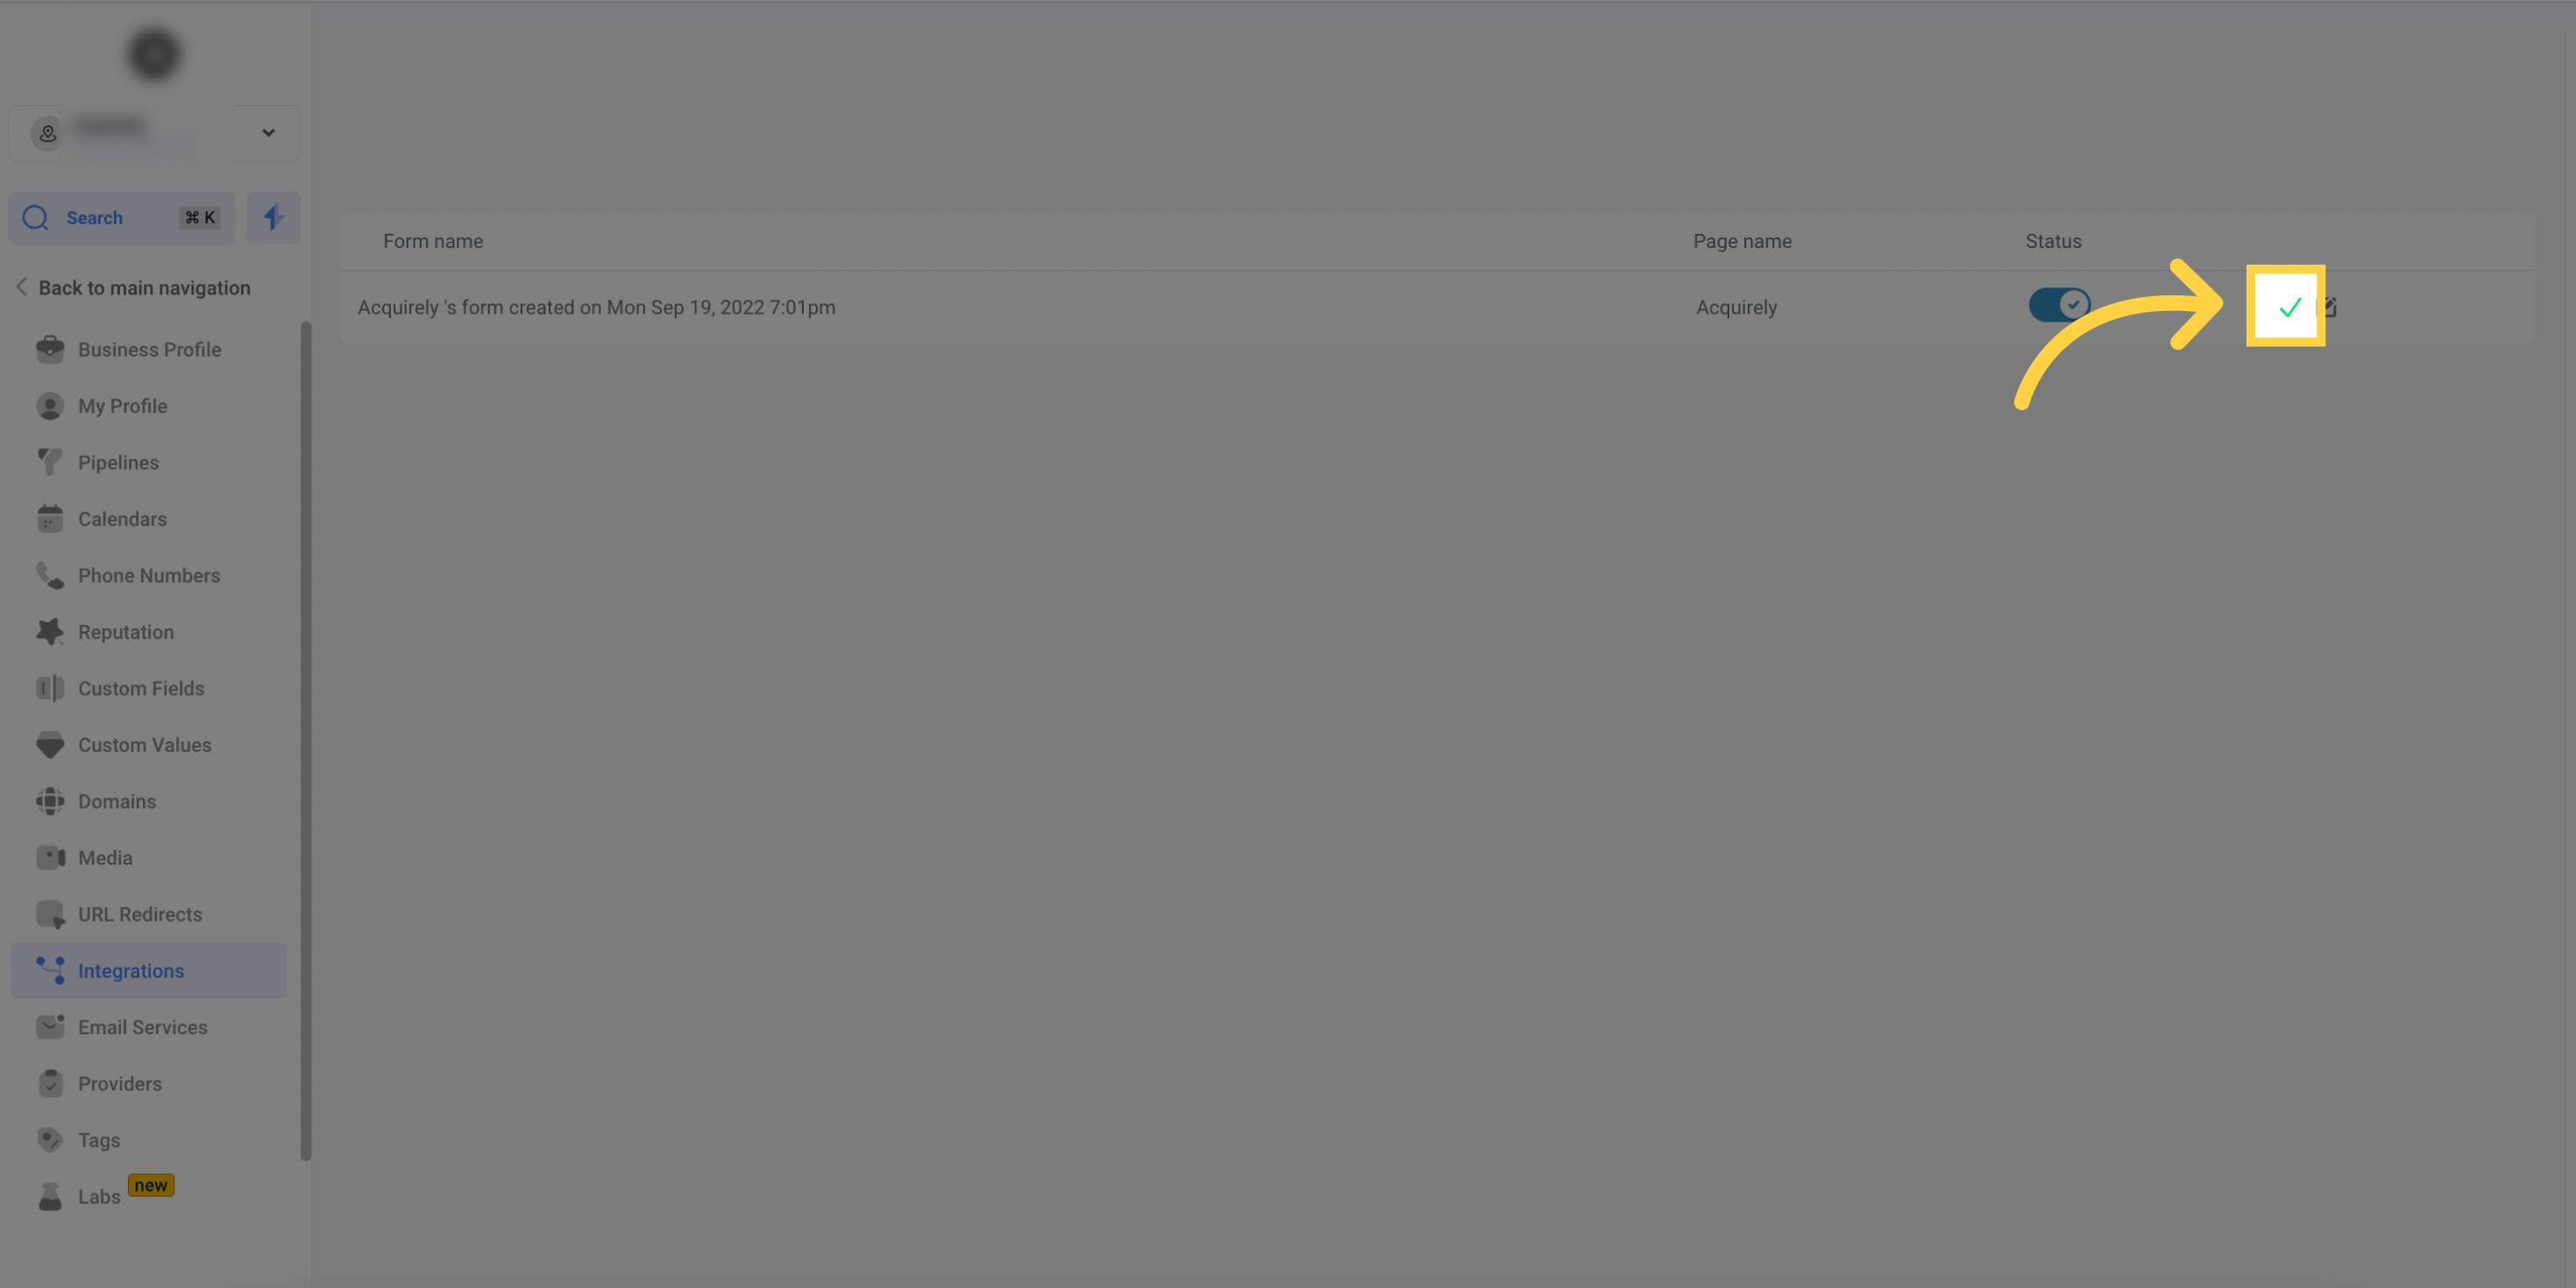
When a form is mapped and working, a green tick mark appears next to it as confirmation.
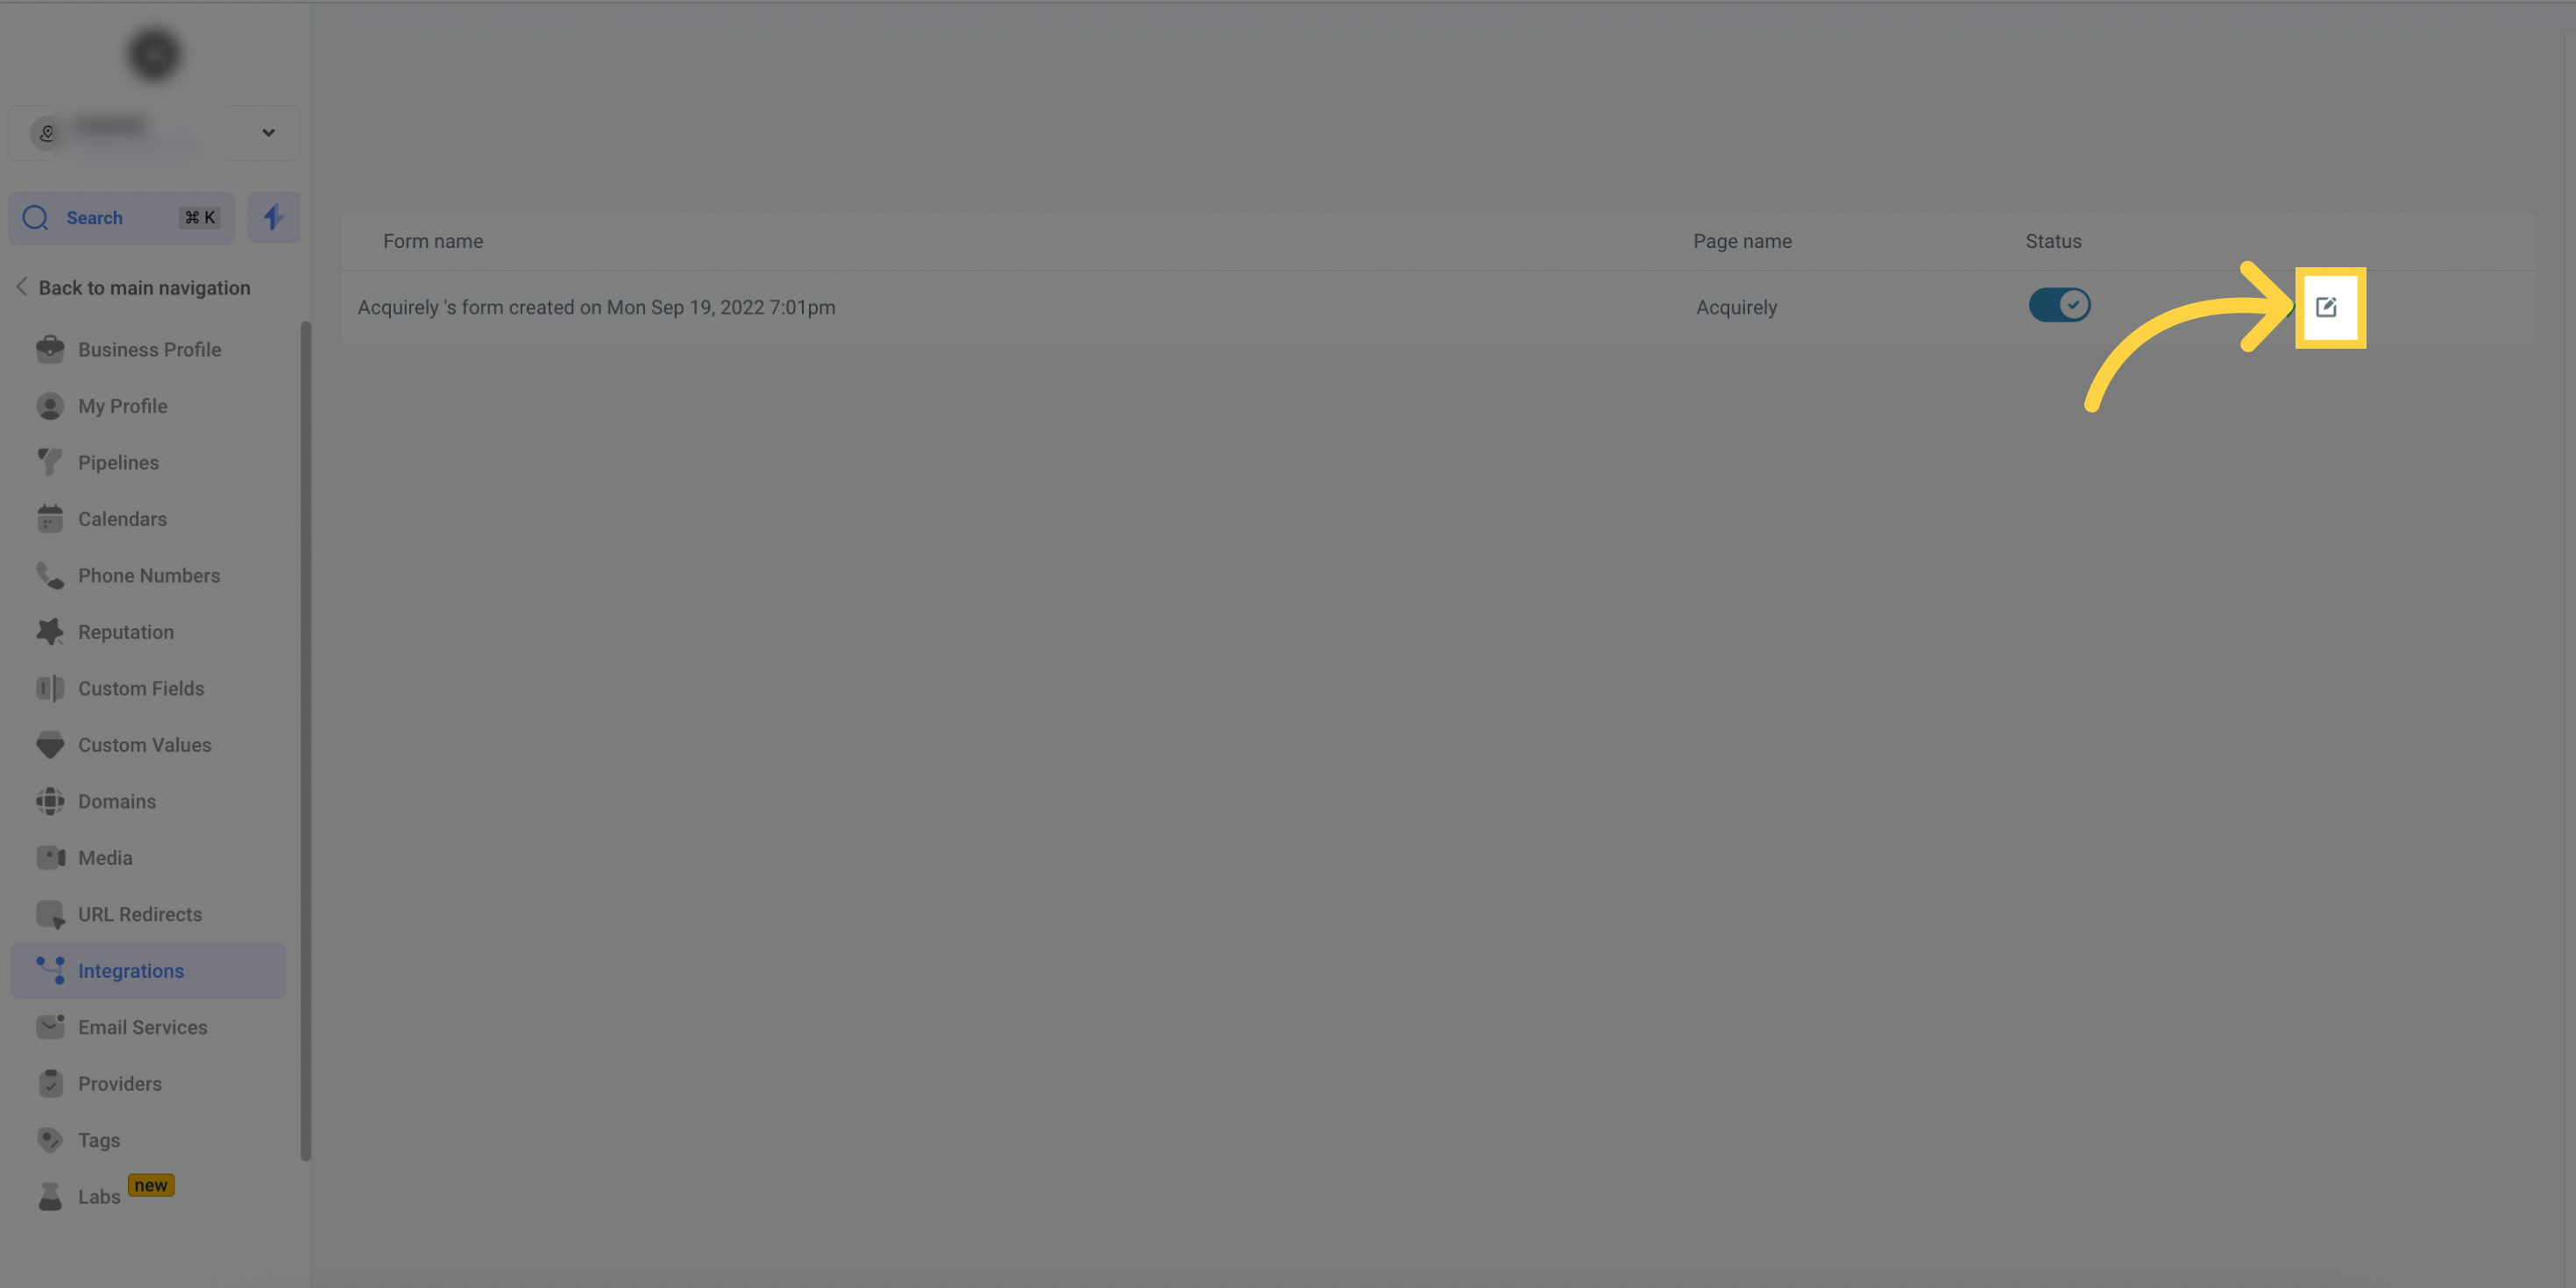
Use the Edit option any time to modify the settings for a mapped form.
To revisit a form, go to Settings > Integrations > Facebook form field mapping, find the form, and update its mapping or deactivate it.
Creating the lead generation campaign itself (choosing Lead Generation, building the Facebook instant form, setting budget and audience, and publishing) happens in Ad Manager. For the full campaign build, see the Ads Manager collection.
When you build an ad and select an existing Facebook lead form as its lead destination, review that form's mapping status before you continue. If any of its fields are not yet mapped, Ad Manager prompts you to connect them to the matching Aesthetix CRM fields before you can publish the ad.
To act on new leads automatically, use the Facebook Lead Form Submitted workflow trigger. It fires the moment a patient submits your connected Page's lead form, so you can send an instant text or email, create an opportunity in your pipeline, assign the lead to a coordinator, or notify your team. Use the Page Is and Form Is filters to target a specific Page and form, and always test the workflow before publishing. For the full trigger setup and recommended actions, see the Workflows collection.
If lead ads are not reaching your account, work through these checks.
Confirm you are an Admin of the Facebook Page.
Confirm the correct lead ad form is selected in Facebook Ads Manager and matches the one in your account.
In Settings > Integrations > Facebook form field mapping, confirm there is a green (or blue) tick next to the form selected in Ads Manager.
Confirm our provider can access your Page.
Once those are verified, use Facebook's Lead Ads Testing Tool to submit a test lead and see whether it appears in your account. When testing, check whether you can locate the App ID 390181264778064. If that App ID does not appear, LeadConnector does not have access, and you will need to grant lead access manually:
Go to Business Suite. (If you do not have access to Business Suite, go to Business Settings, select your business, and skip to step 4.)
Click the dropdown in the top-left corner and choose your business account.
Click Settings in the bottom-left corner, then More Business Settings.
Click Integrations in the left menu, then Leads Access.
Click Assign CRMs. You will see a list of CRM systems integrated with your Facebook Page.
Check the circle next to LeadConnector, then click Assign.
Important: The Page Admin who granted permissions must keep that access, or lead fetching will fail. Also try submitting a test lead with unique contact info, since duplicate details can prevent a new contact from being created.
If you receive an email saying "Facebook connection has expired," the integration has become disconnected. This commonly happens after a password change, a natural token expiration, a de-authorization, a logout, a permission change, or a login from another country without a VPN. To reconnect, go to Settings > Integrations, click the connected Facebook card to disconnect it, then click Connect again, continue as yourself, select the Page, and click Connect Page.
If an admin of a Page also has their business account associated with the same Page, the Page may not appear during integration. The reliable workaround is to add a second Admin to that Facebook Page and have them perform the integration. For the full Page-not-showing walkthrough (including Business Integrations permissions and lead access), see the Meta Troubleshooting: Missing Pages & Instagram DM Access article in this collection.
Why are my Facebook leads not coming into Aesthetix CRM?
The most common causes are missing Admin permissions, a form that is not mapped or not toggled on, or LeadConnector losing lead access. Confirm you are a Page Admin, that the form shows a green tick under Facebook form field mapping, and that LeadConnector is assigned under Leads Access in Business Suite.
Do I have to map fields before running an ad?
Yes. Create your custom fields first, then map each Facebook form field to the matching Aesthetix CRM field and toggle the form on. Without mapping, lead data may not sync correctly.
Which custom field types are supported?
TEXT, LARGE_TEXT, NUMERICAL, PHONE, MONETARY, SINGLE_OPTIONS, DATE, DROPDOWN, RADIO OPTIONS, and CHECKBOX.
Why can only one user see the Page in the dropdown?
Only the user who integrated the Page (and who is an Admin of it) can see it in the Pages dropdown. That user will not see other accounts' Pages in the list.
Can I connect multiple Facebook Pages?
Yes. You can sync leads, conversations, and reviews across multiple Pages, each attributed to its source Page. Use Manage Pages to add or update the connected Pages.
What happens if I rename fields in my Facebook form?
Renaming field labels inside Facebook after the form is built can break your mapping. If you must change a form, review and re-save the mapping afterward.
How do I test whether leads are syncing?
Use Facebook's Lead Ads Testing Tool or submit a real test form with unique contact details, then confirm the contact appears in Aesthetix CRM.
Can I automate follow-up when a lead comes in?
Yes. Use the Facebook Lead Form Submitted workflow trigger to send an instant text or email, create an opportunity, assign the lead, or notify your team. See the Workflows collection for setup.
