Order forms let your practice sell products and services directly through funnels and websites, from a single treatment package to a full skincare product line. This guide covers the payment providers you can use, the types of products you can offer, how to build a product and connect it to a checkout, how to set shipping rates, and how to place a test order before going live.
Aesthetix CRM supports multiple payment providers for selling on order forms:
Stripe
Authorize.net
NMI
PayPal
Square
Tip: Aesthetix CRM offers AX Pay, our own payment processing with rates better than Stripe. See AX Pay Overview and Setup Guide.
A few provider details to keep in mind:
Apple Pay and Google Pay are only supported by Stripe. To show Apple Pay as a payment method, turn on the toggle on the Stripe connection card under Payments → Integrations. Google Pay displays by default (where applicable in the buyer's country) when connected to Stripe.
Stripe also supports card payments, Affirm, Klarna, Afterpay, and ACH Direct Debit as checkout options.
Different recurring products cannot be sold together in a single checkout with any provider. Use an upsell to offer a second recurring product within the same flow.
PayPal does not support purchasing bump products while the patient is buying a recurring product.
You can offer three kinds of products on an order form:
Main (primary) product: The main item you are selling on the order form (for example, a treatment package).
Bump products: Optional add-ons a patient can check while purchasing the primary product (for example, a skincare product added to a package).
Upsell: An offer presented immediately after checkout, purchasable with one click once the patient has bought the primary product.
You can configure setup fees, a trial period, and the number of payments when creating a recurring product under Payments → Products. Those settings apply automatically when a patient buys that product. If a product has a trial period and no setup fee charged before the trial starts, no charge is applied when the order is completed and the amount shows as 0. Charges begin when the trial ends.
You can track all orders under Payments → Orders, subscriptions under Payments → Subscriptions, and manage refunds on the Transactions table.
Before a patient can buy anything, you need a product connected to a funnel checkout page with an order form.
Open the Payments section and select Products to access your product list.
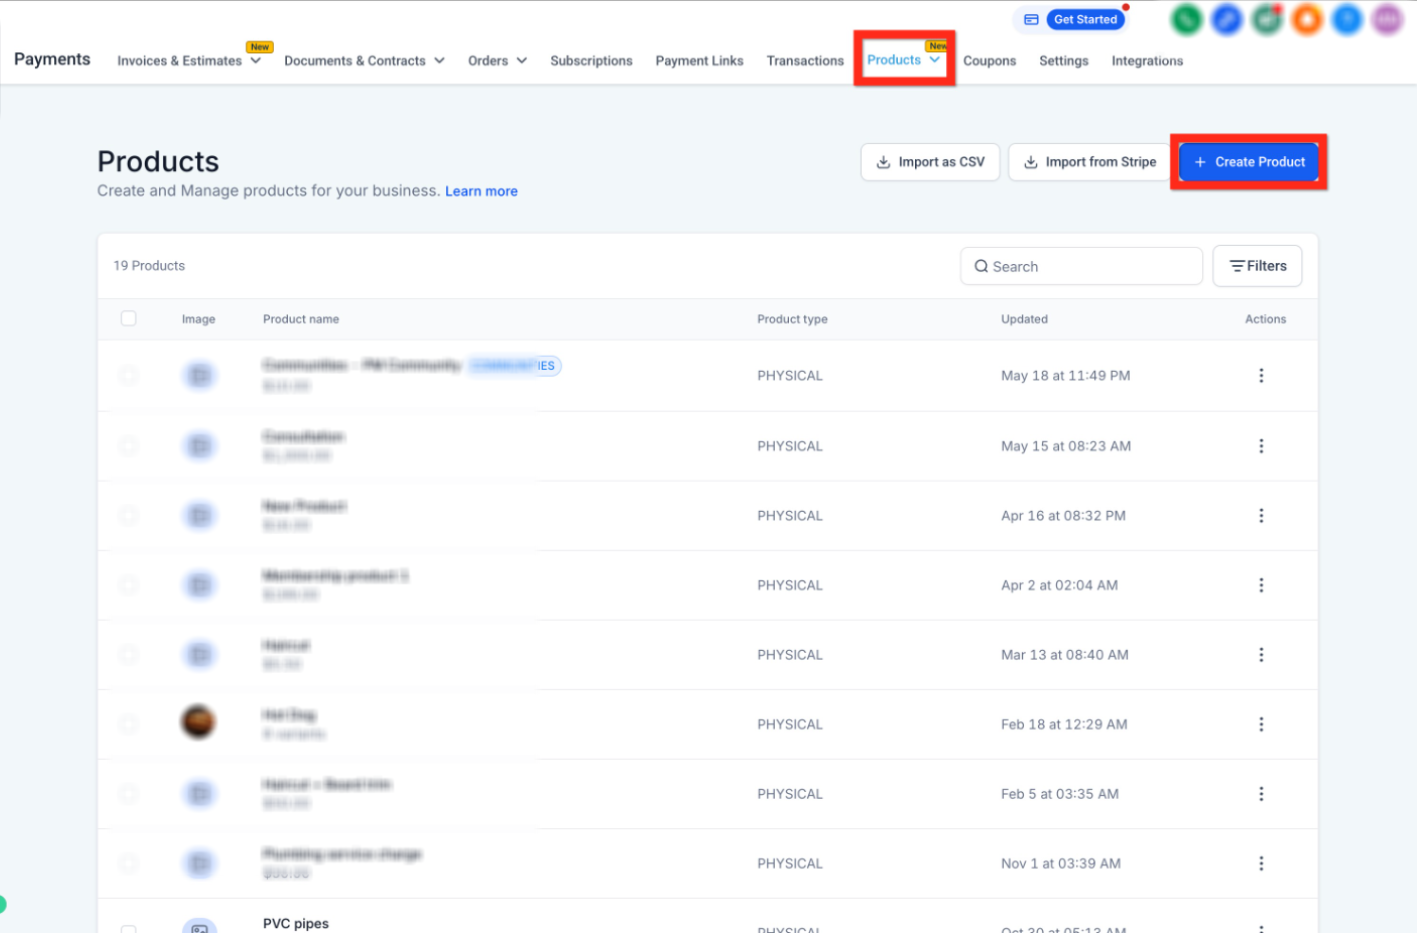
Click Create Product to begin adding a new item.
Enter the product name, add pricing details, include descriptions and images (optional), then click Save.
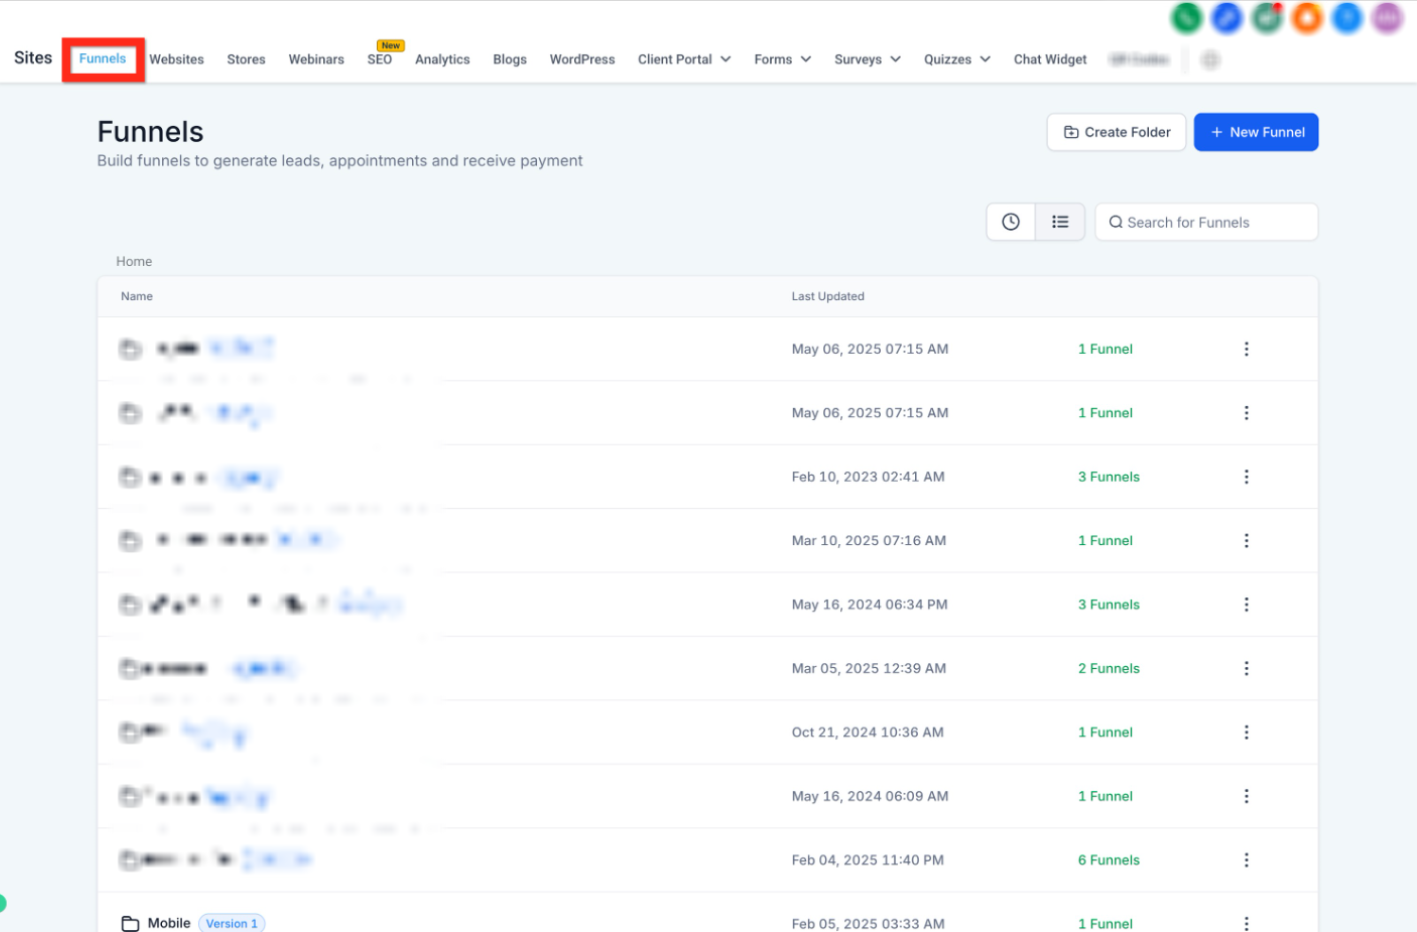
Go to the Sites section and click Funnels to choose where your product will be sold.
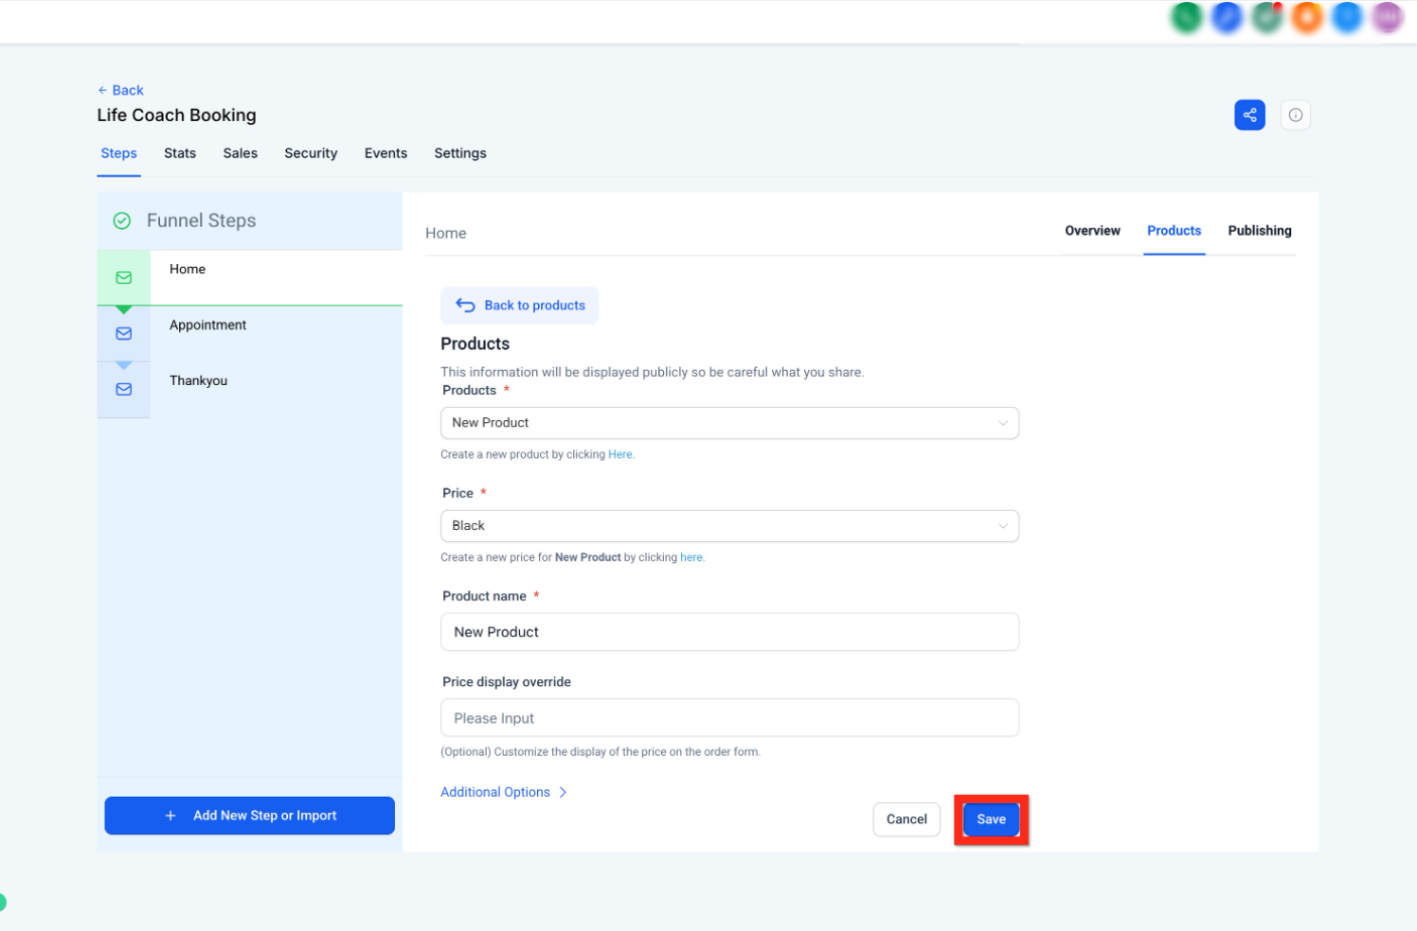
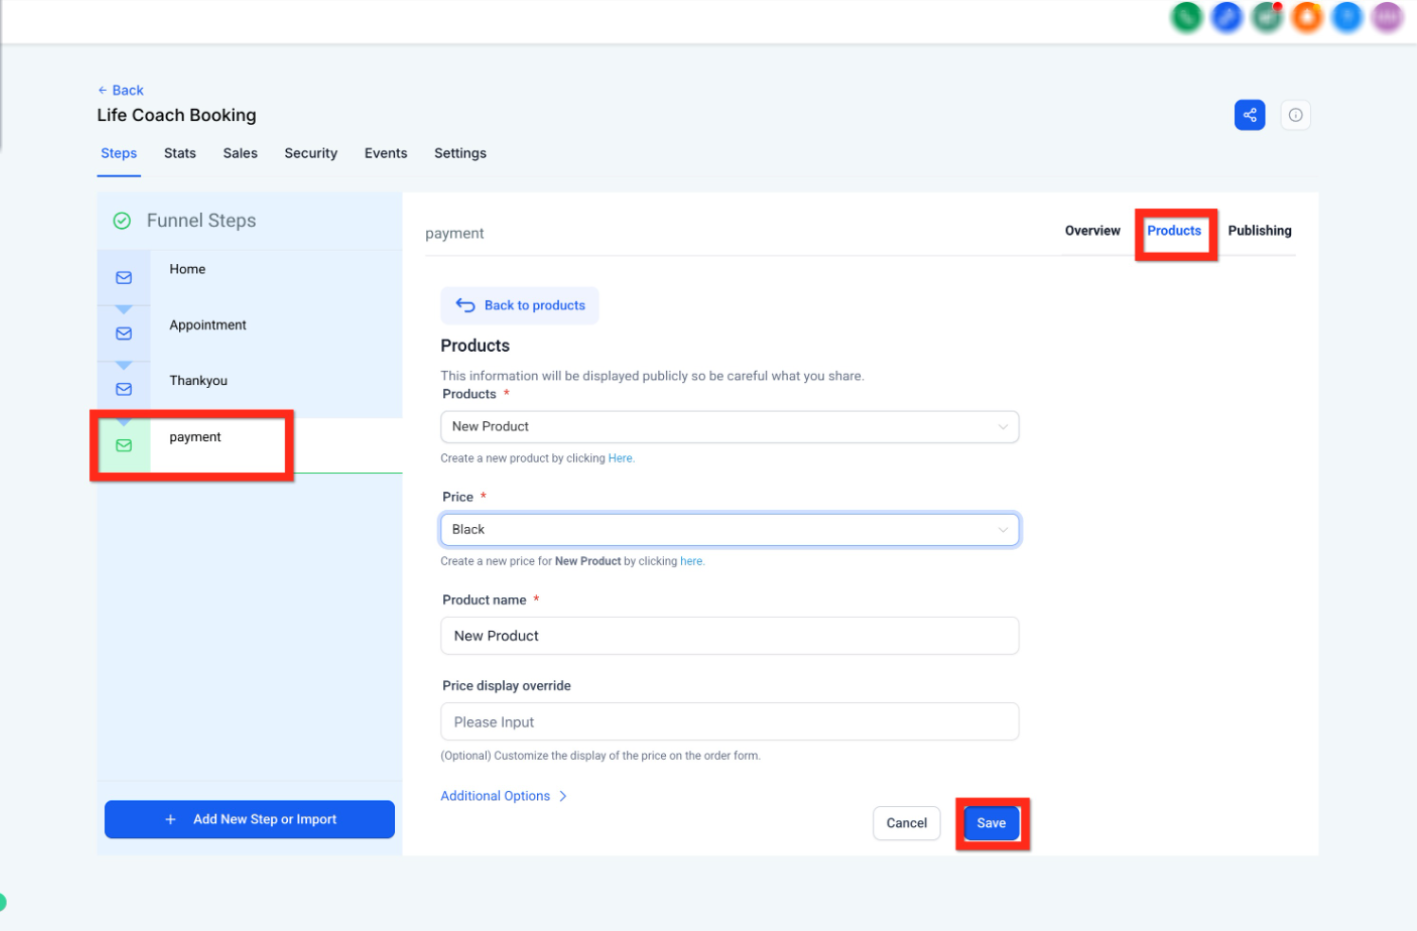
Select a funnel step, open the Products tab, choose your product, select pricing, and click Save.
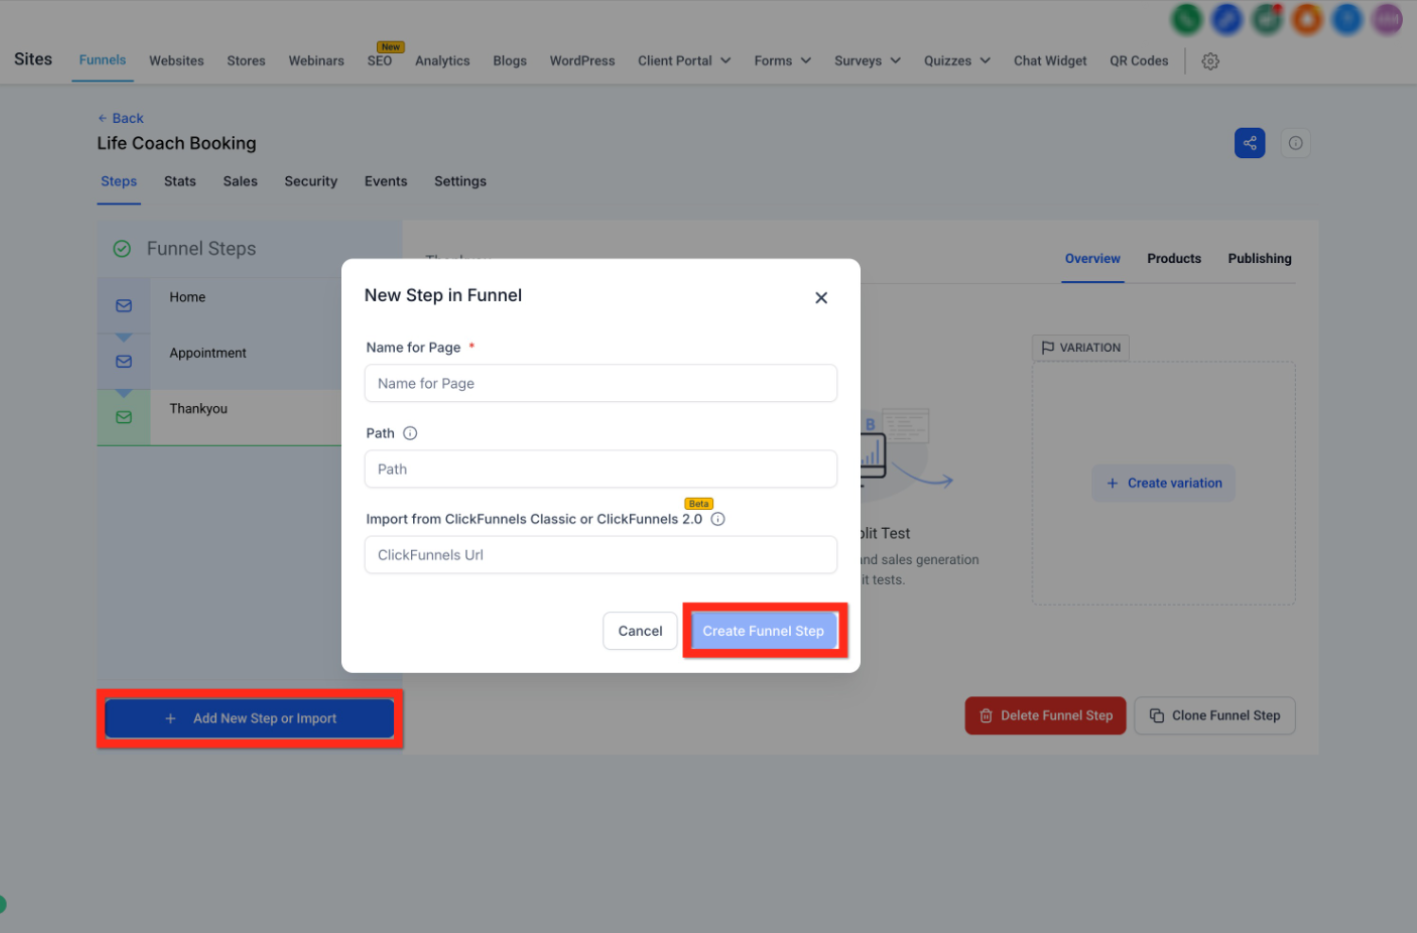
If a checkout page does not exist yet, click Add New Step, enter a page name, and confirm by clicking Create Funnel Step.
Inside the page builder:
Click Elements
Search for "order"
Select 1 Step Order (or 2-step if you prefer)
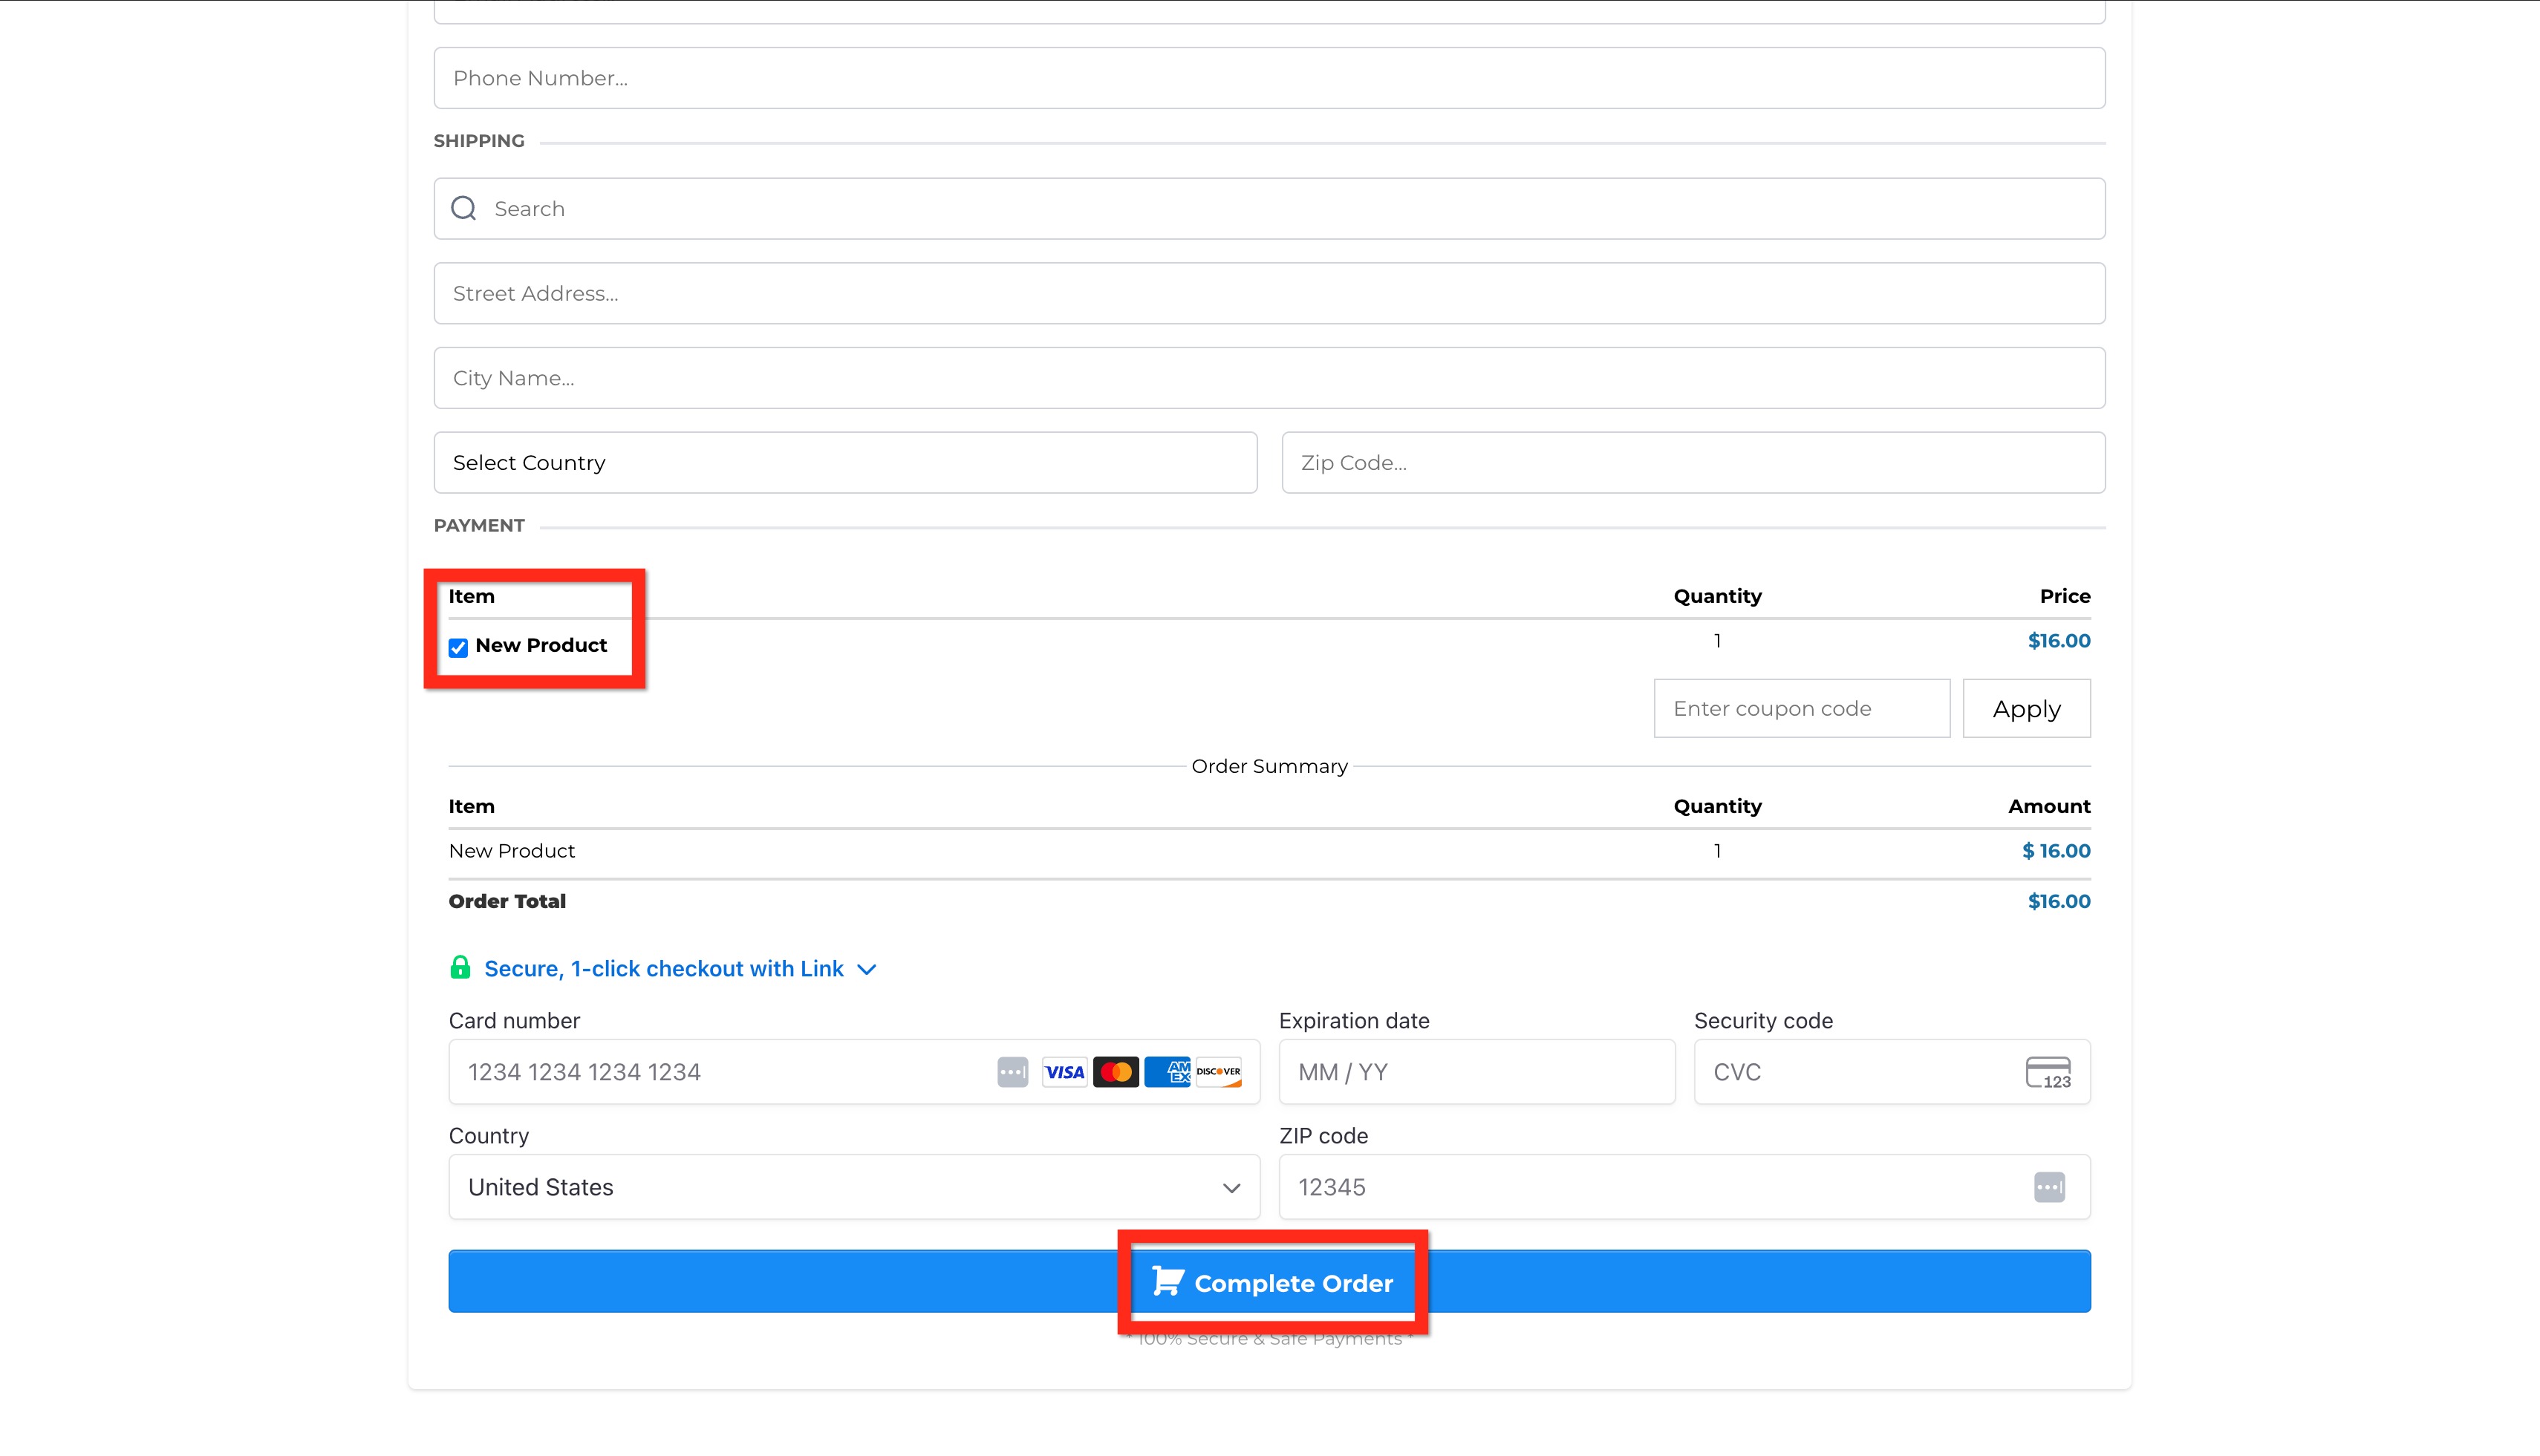
A one-step order form collects all details at once, while a two-step form separates contact information from payment information.
Verify the product appears in the order summary and is selectable before completing setup. Confirm the product is listed, check pricing accuracy, then save and publish the page.
If you sell physical products (for example, retail skincare), shipping profiles let you charge accurate shipping rates. They determine how much patients pay for shipping at checkout, based on zones and rate types. Any product not assigned to a custom profile automatically uses the General Shipping Profile, so every checkout always has a valid rate.
The General Shipping Profile is created automatically for your store and applies to all products not assigned to a custom or app-defined profile. Use it as your fallback for standard rates.
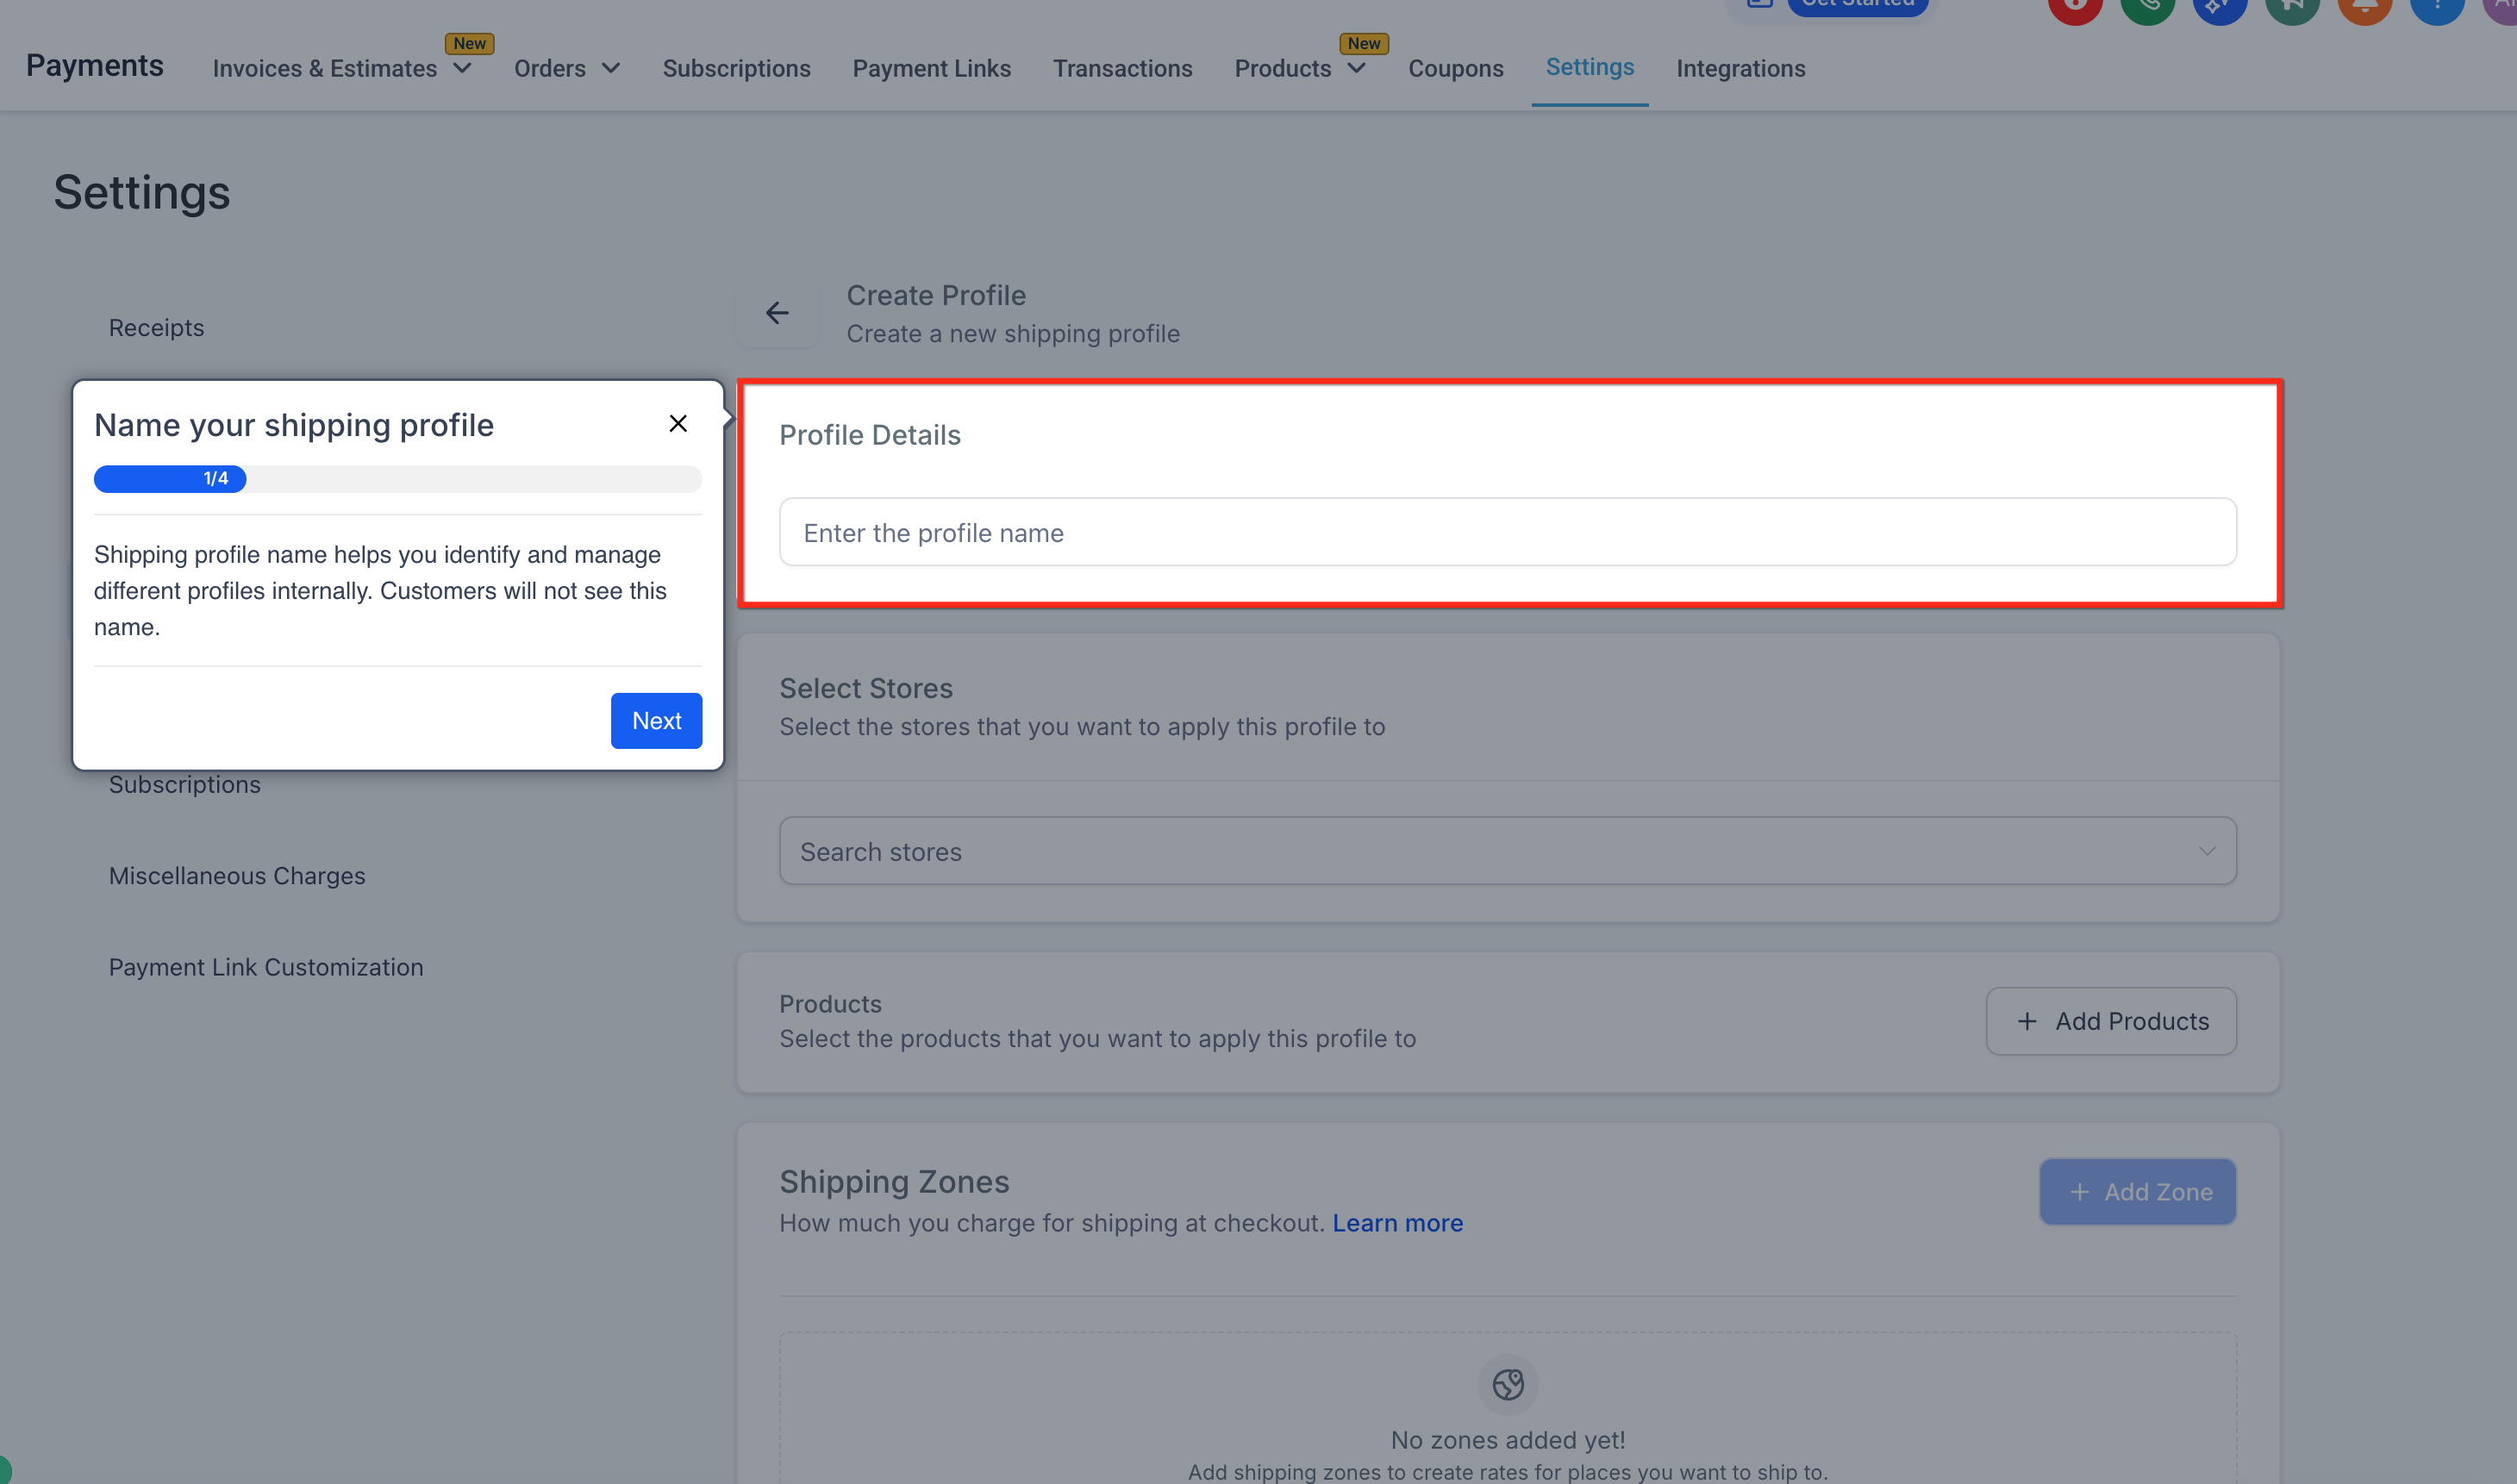
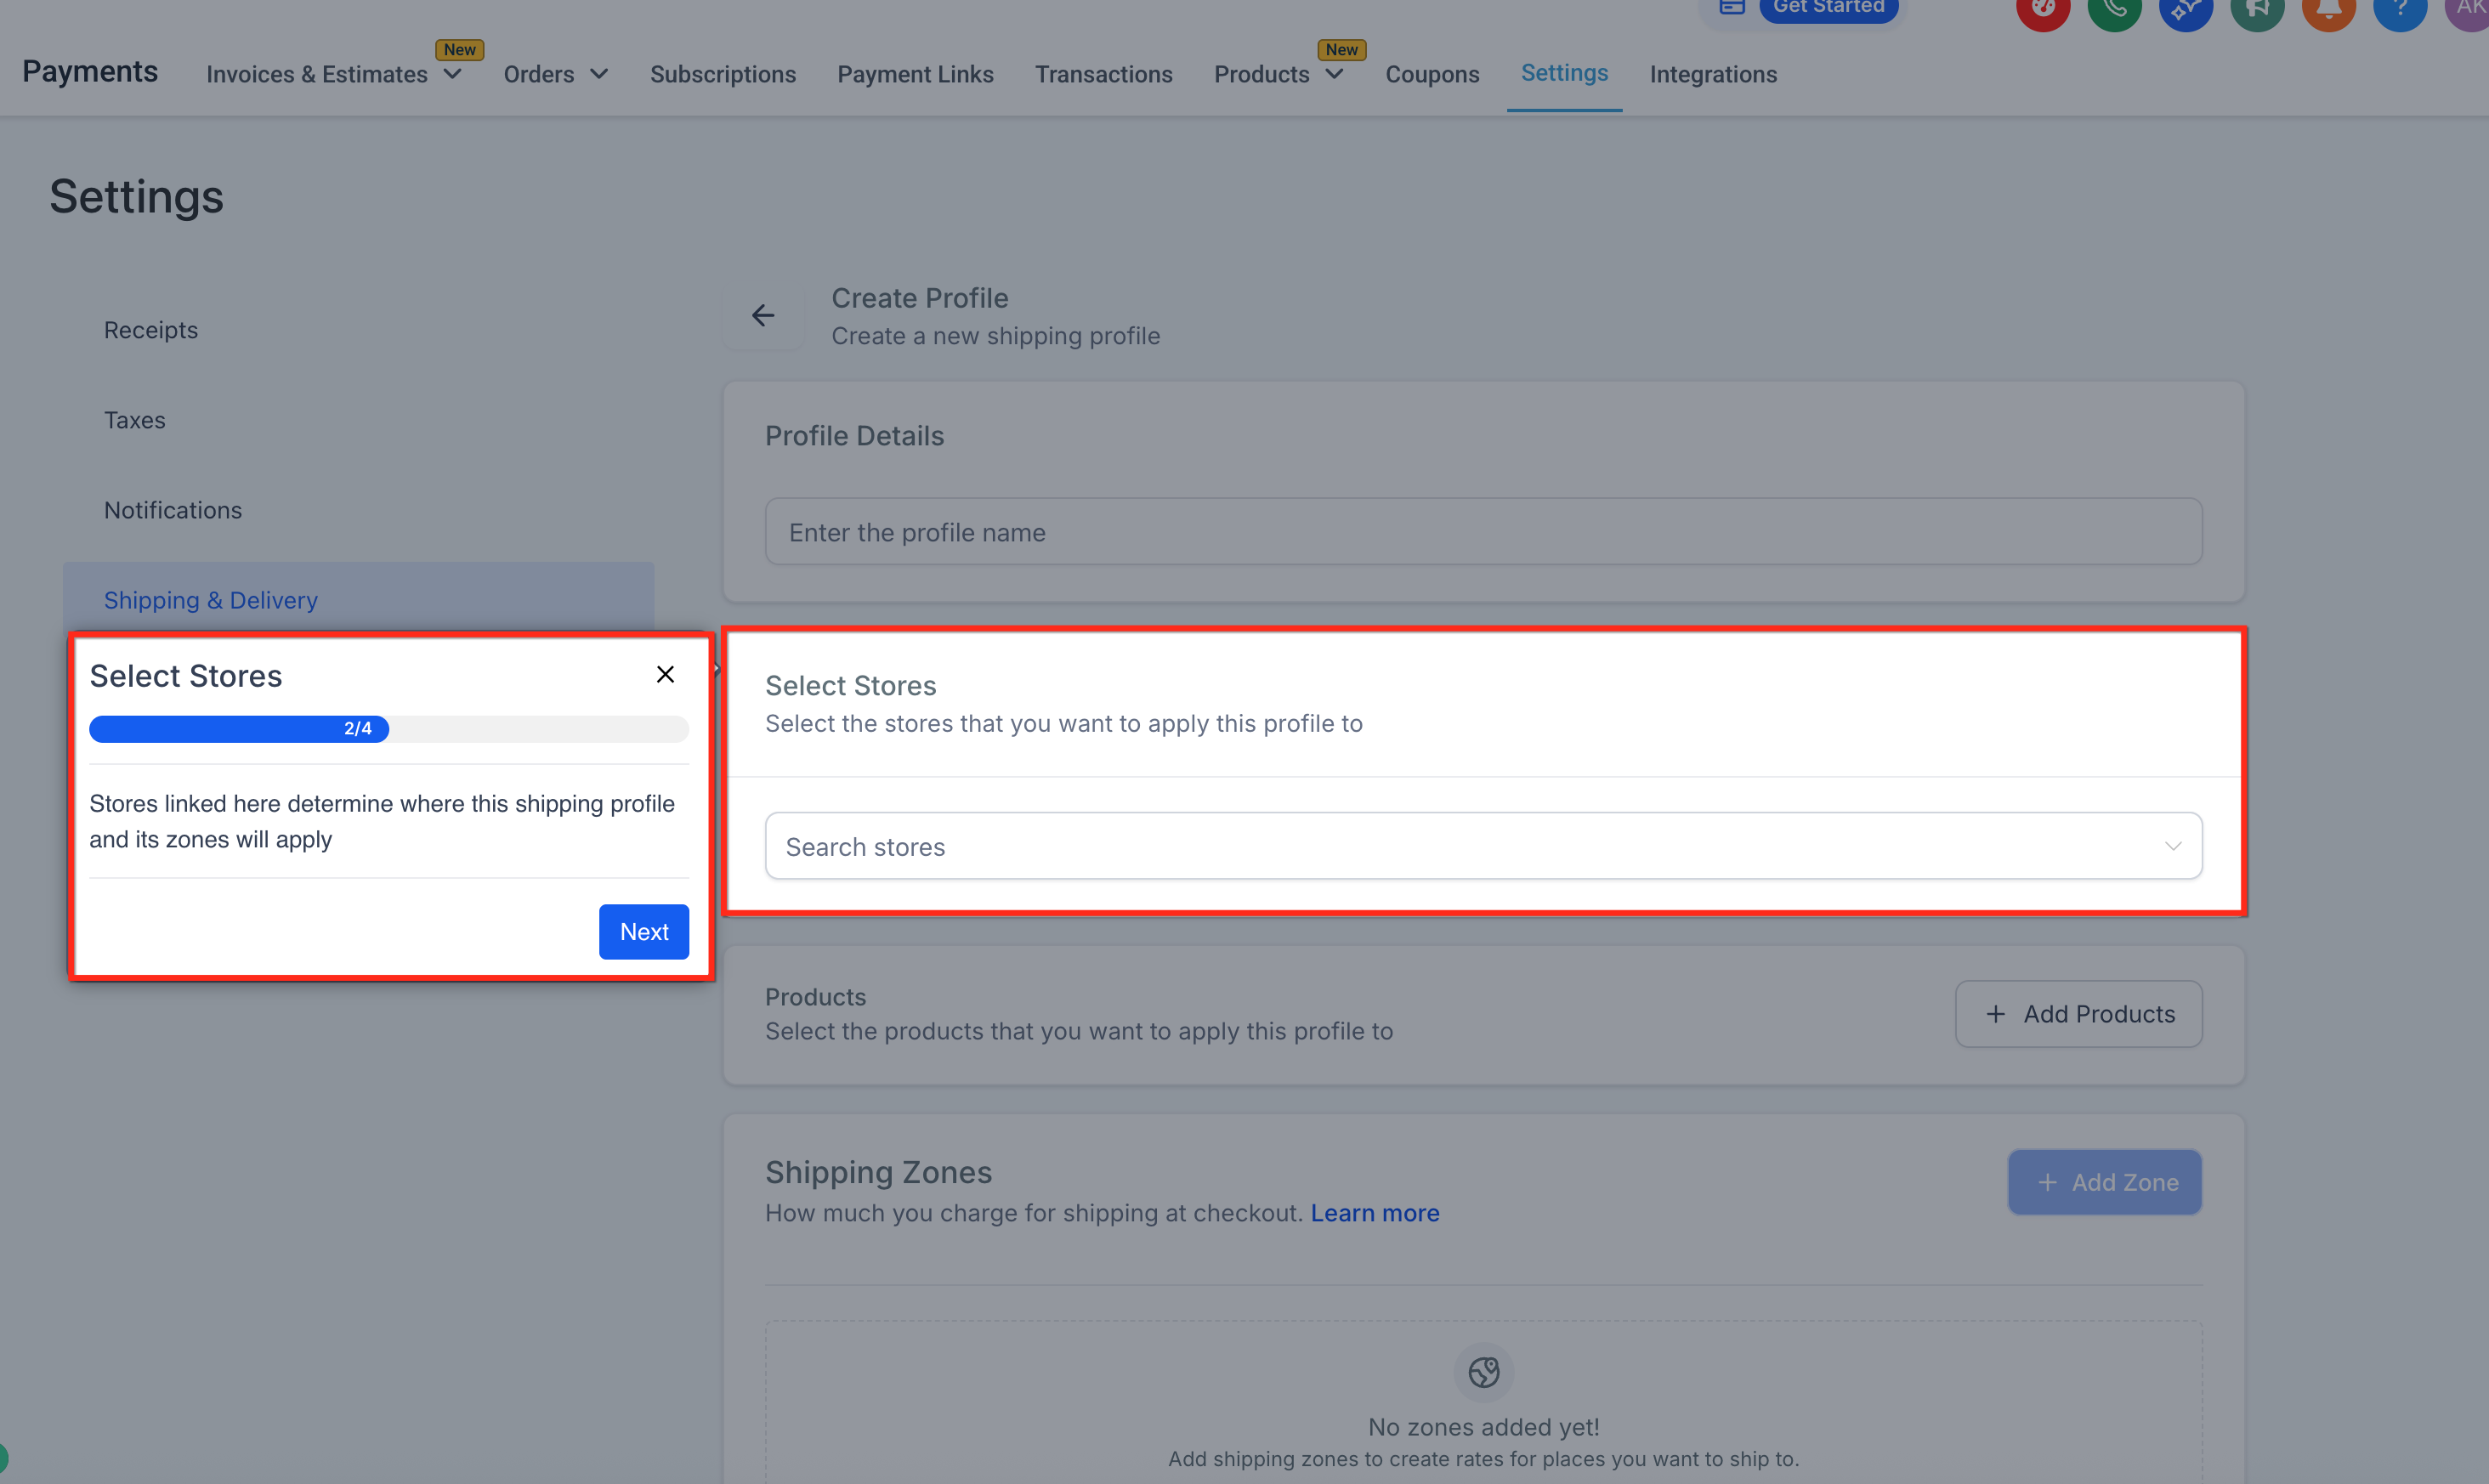
Custom profiles let you charge specific rates for certain products or groups. Each profile can apply to one or more stores, include selected products, define zones by country or region, and use any combination of rate types (flat, price-based, weight-based, or free). A product can only belong to one custom profile at a time, and reassigning it overrides the old profile.
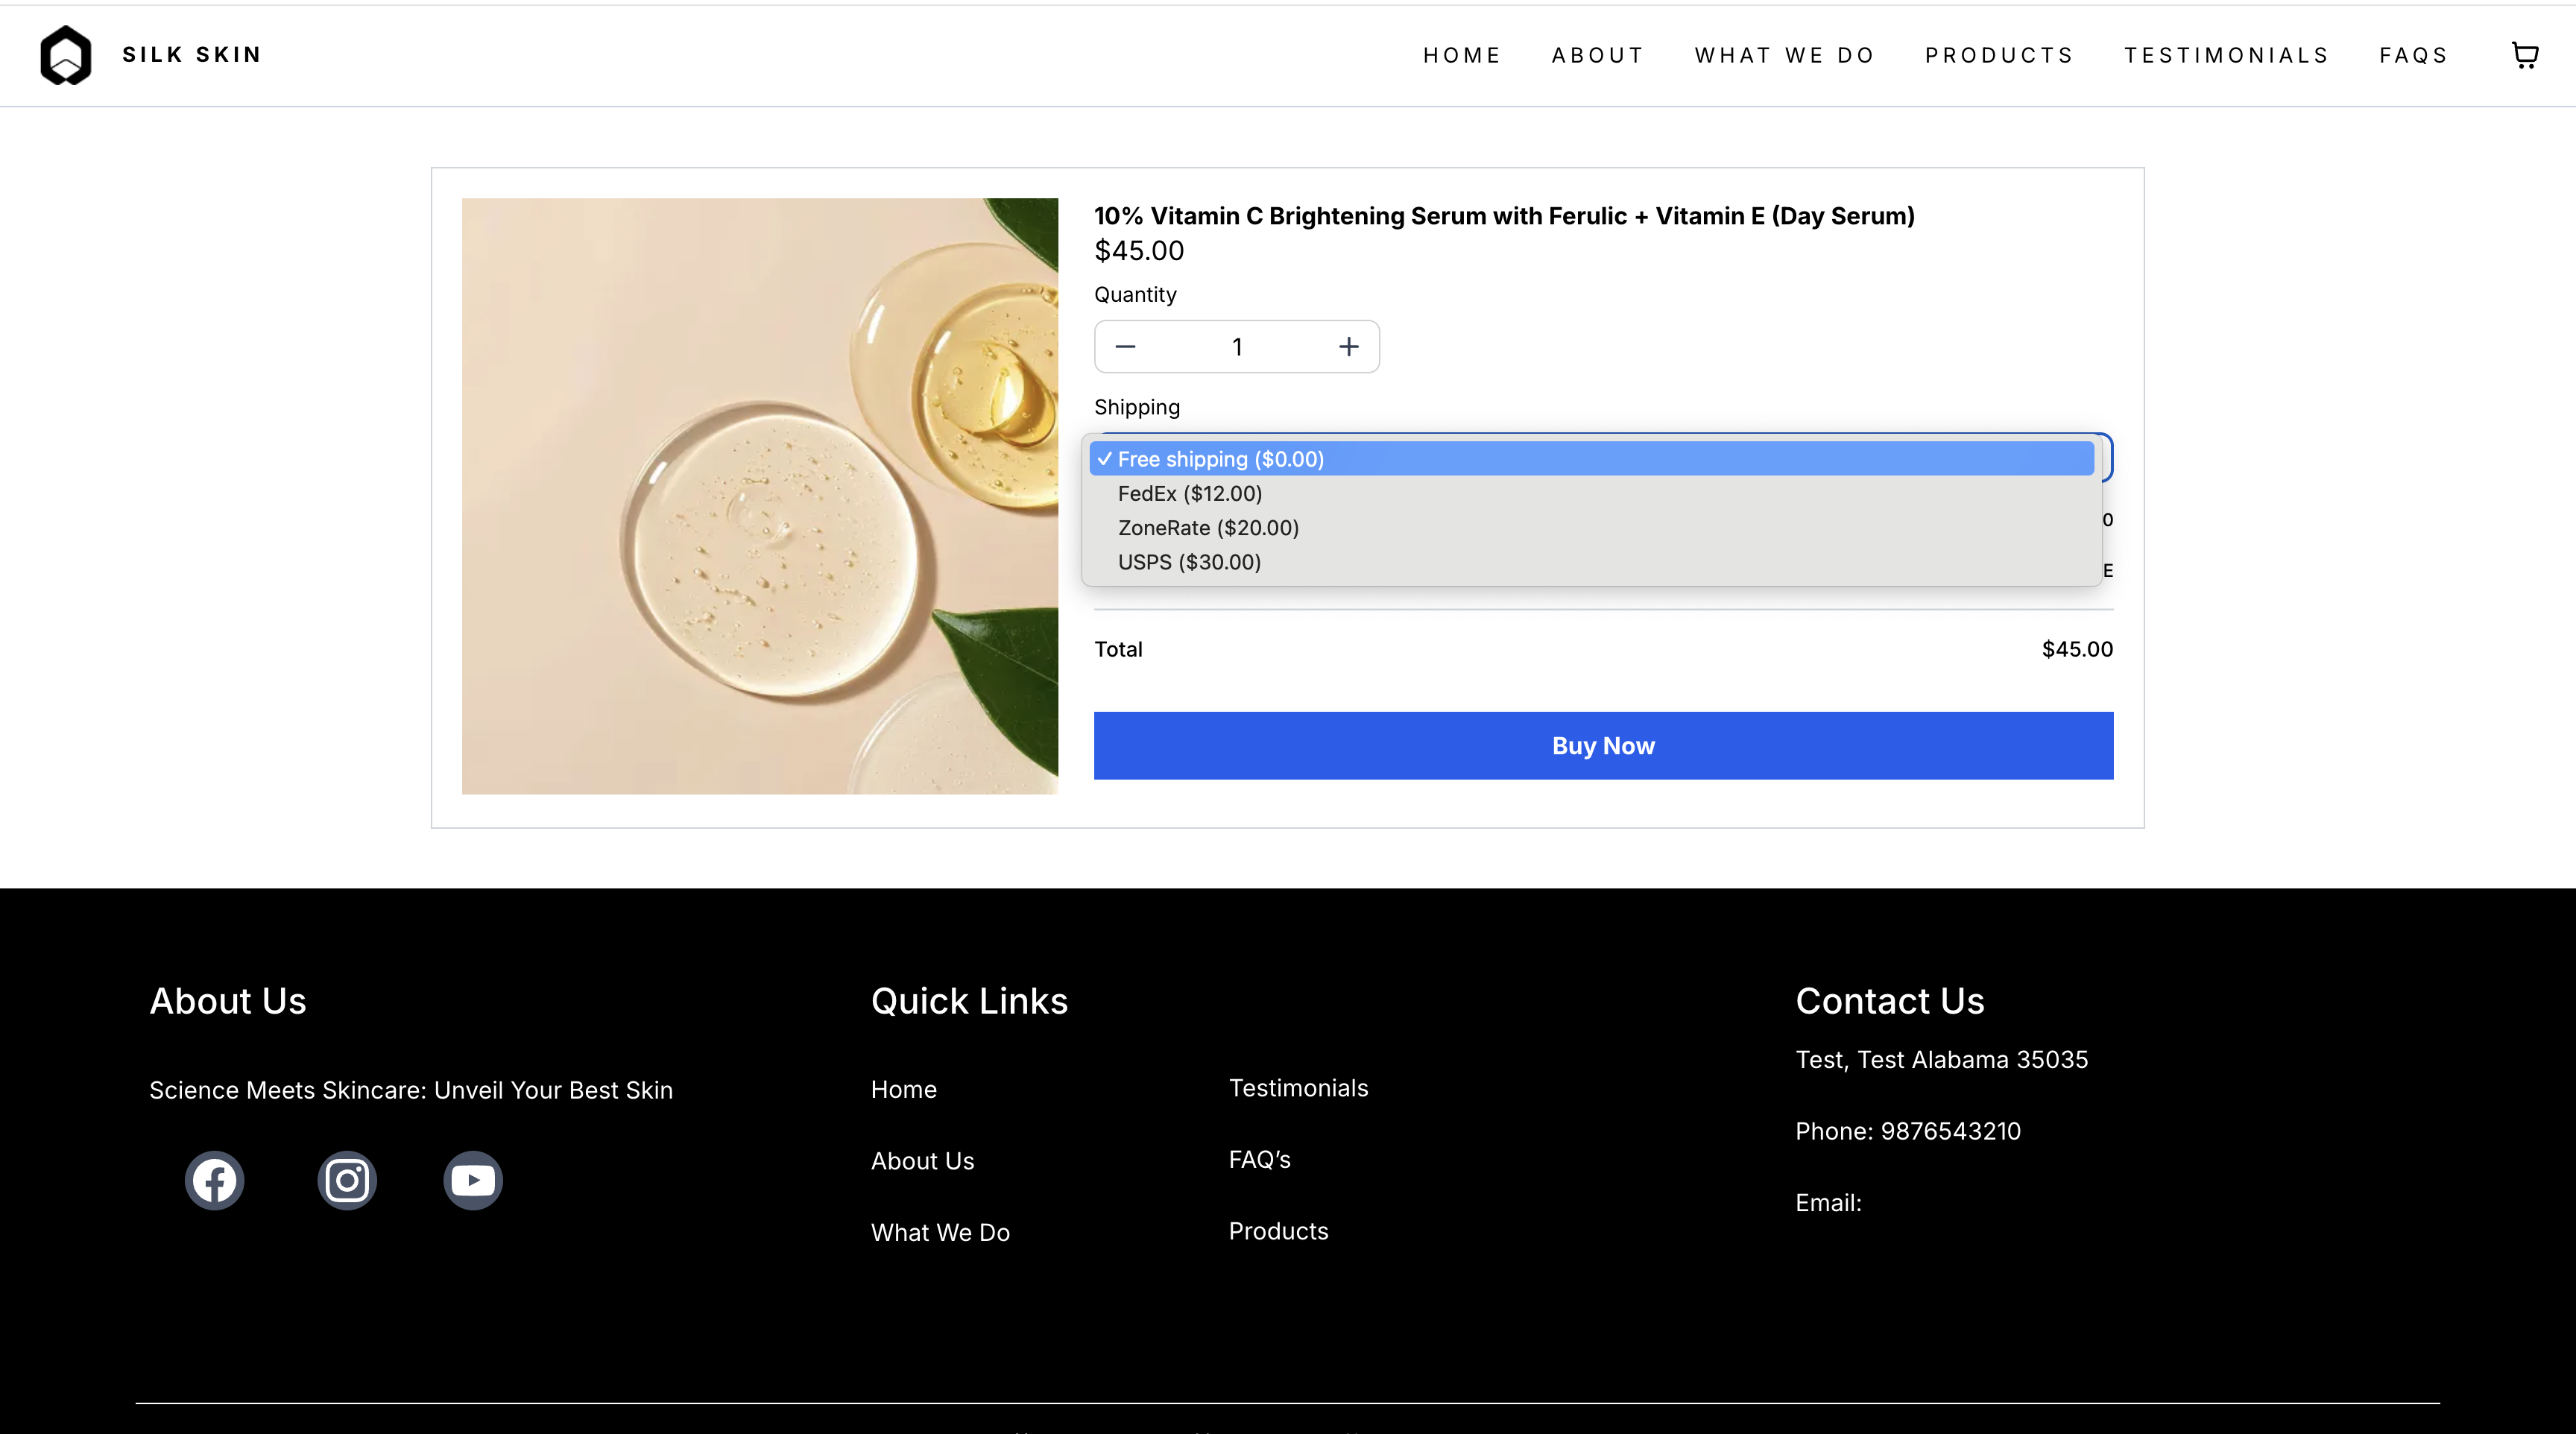
When patients buy items from multiple profiles, a combined total is calculated automatically. If profile names differ, checkout shows a single line called Shipping. If profile names match, the rates combine under that shared name. When multiple shipping options display, they are sorted by price (lowest first) and the lowest-cost option is preselected. If Free Shipping is available, it appears first and is selected.
Go to Payments → Settings → Shipping & Delivery → Custom Profiles.
Click Add Custom.
Enter a unique profile name (for internal use only).
Select the store(s) this profile applies to.
Choose the products or product groups to include.
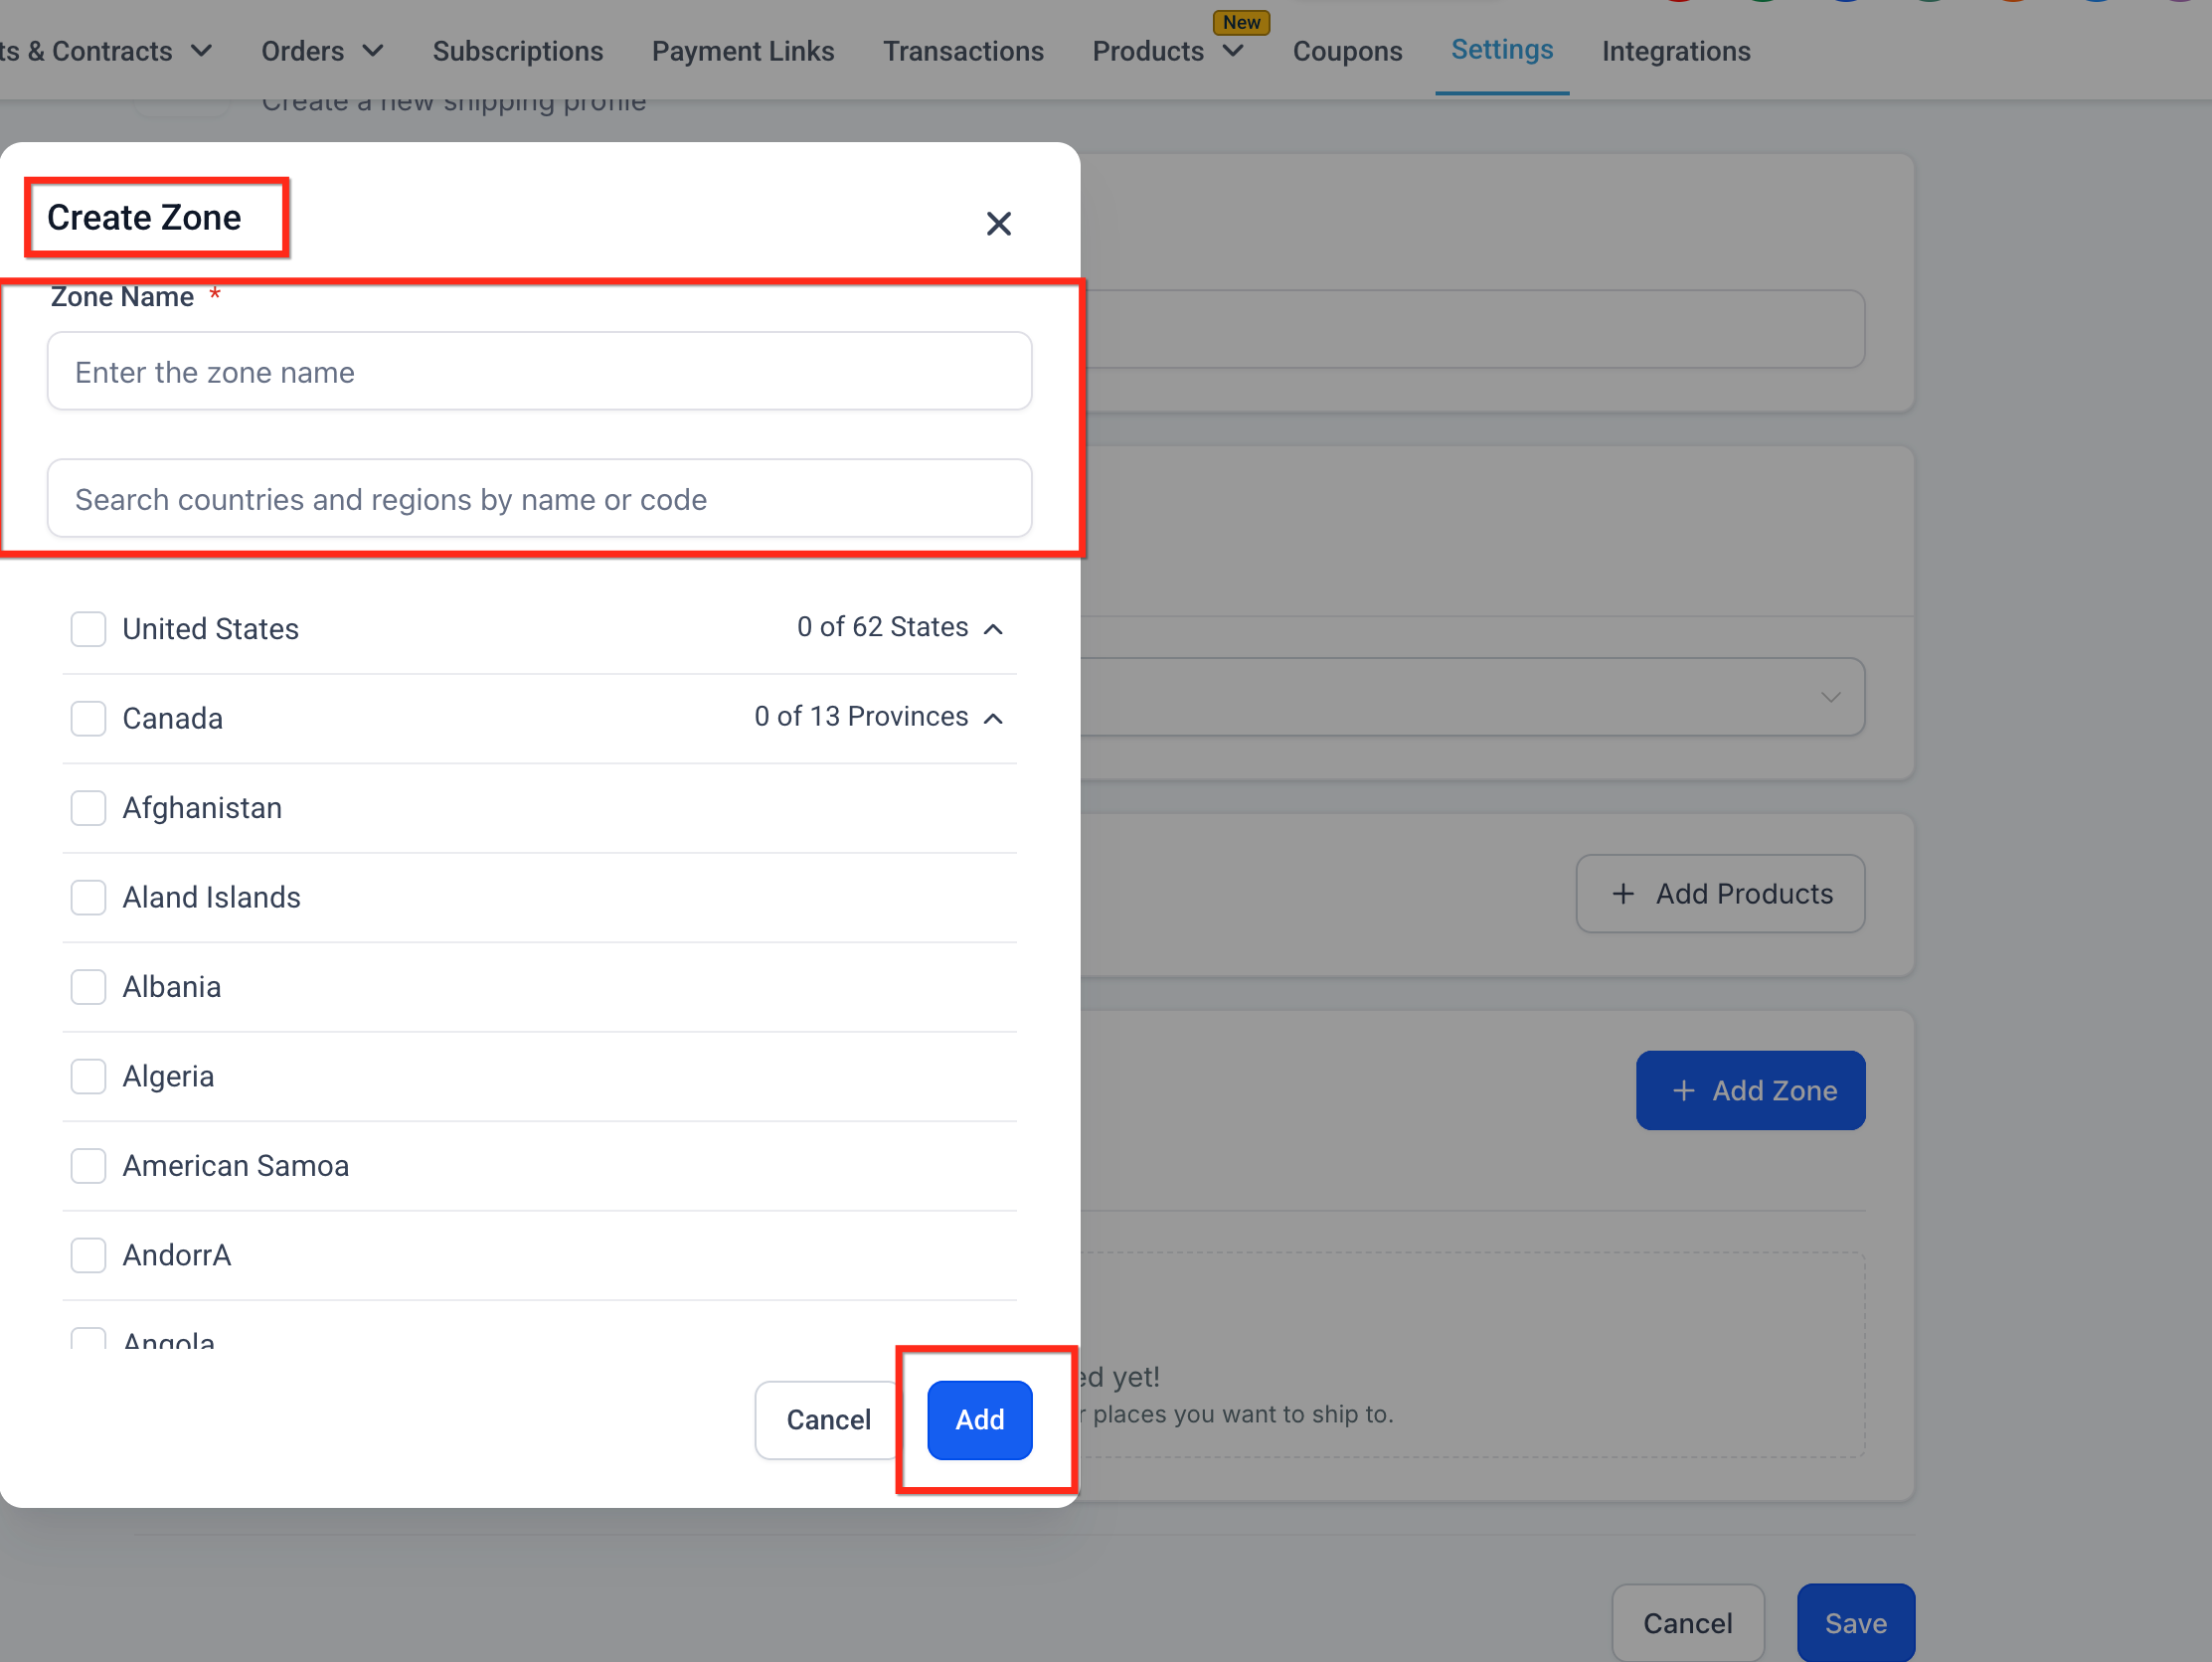
Click Add Zone and select the countries or regions you deliver to.
For each zone, add one or more rate types:
Flat rate (for example, $5)
Price-based (for example, free over $50)
Weight-based (for example, $10 for 0 to 10 lb)
Free shipping
Click Save.
Place a test order to confirm the correct rates display at checkout.
Pro tip: Set up your General Profile first, then layer in custom profiles only for products or regions that need unique rates.
When creating or editing a zone, you can restrict it to specific ZIP or postcodes for hyper-local delivery. Enable Limit Shipping to Specific ZIP/Postcodes, then enter codes using any of these formats:
Single code (for example, 100210)
Comma-separated codes (for example, 100210,122021)
Wildcard prefix (for example, 46* to match all codes starting with 46)
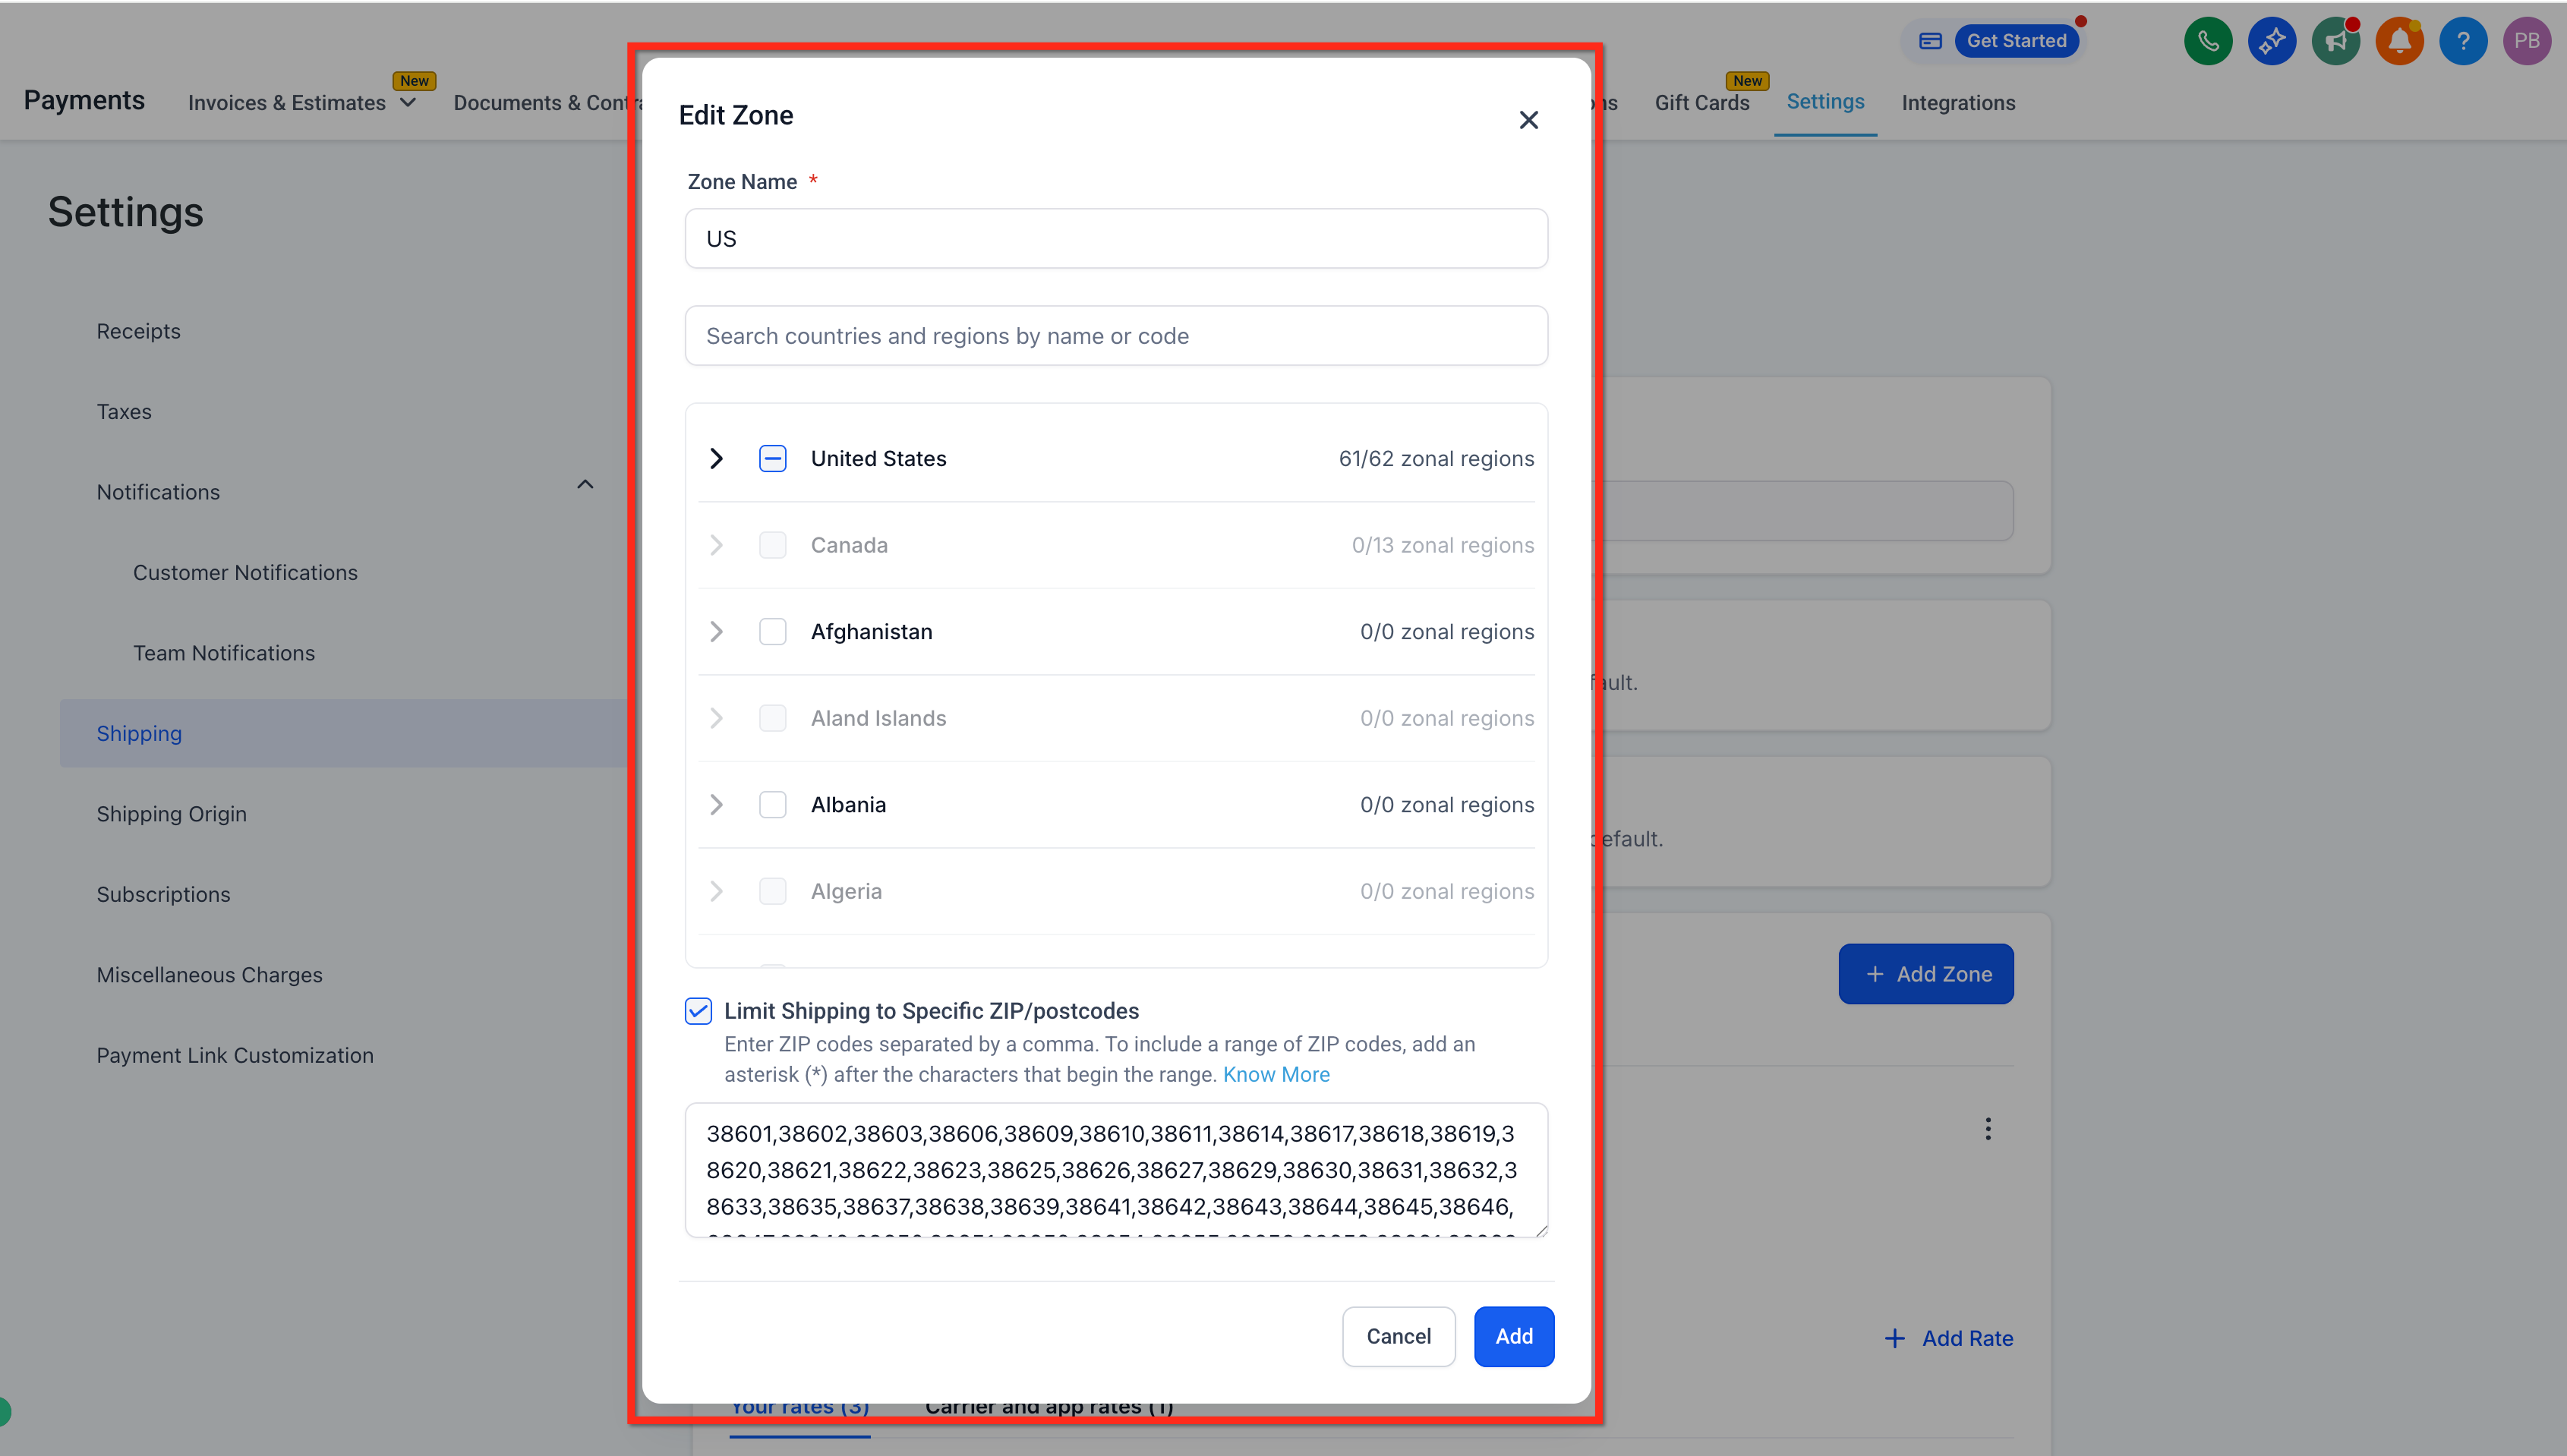
Wildcards are only allowed as a trailing asterisk. The zone cannot be saved if the restriction is enabled but no valid entries are provided, and invalid or duplicate entries are blocked during input.
Placing a test order confirms that checkout, payment integration, shipping calculations, and order confirmations all work, without charging a real payment method. Test before launching your store, after changing payment or shipping settings, and to confirm email and SMS notifications.
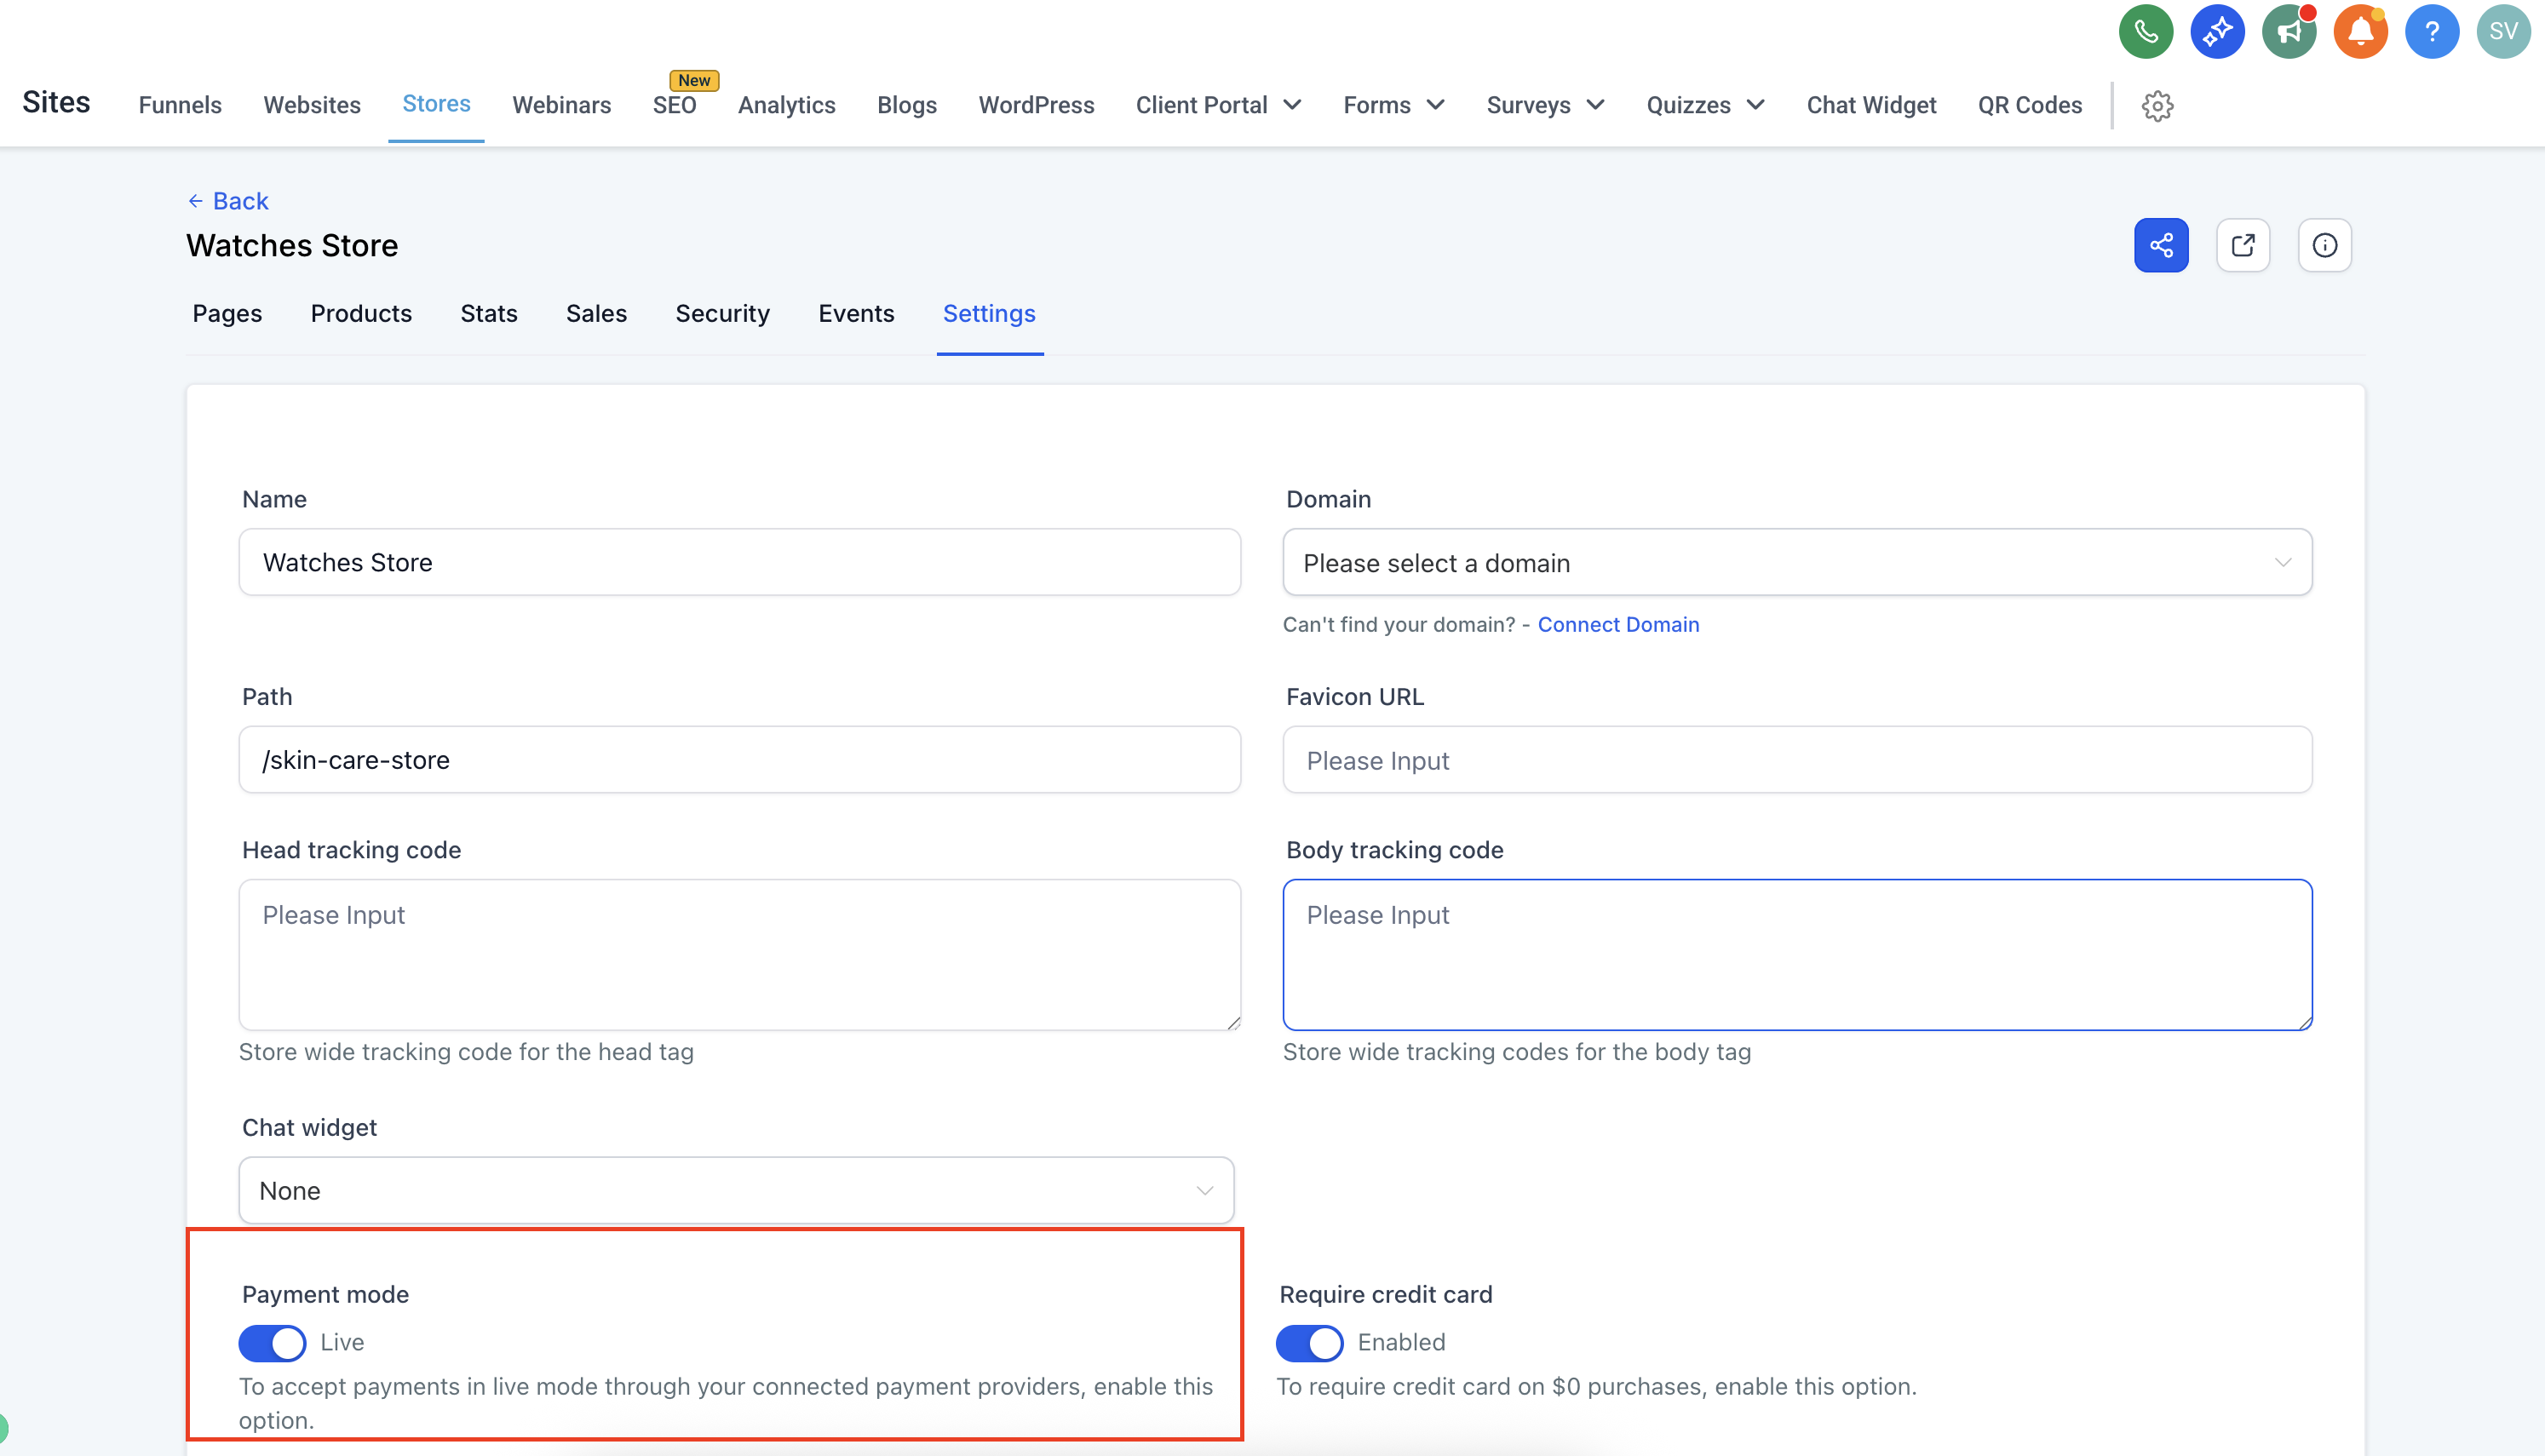
Go to Sites → Stores → Select Store → Store Settings → Payment Mode, toggle Test Mode on, and save.
Navigate to your live store frontend (preview your final store) and add any product(s) to the cart.
Fill out shipping and customer information as if you were a real patient. Confirm that address fields, taxes, and shipping options appear correctly.
With Test Mode enabled, use one of these dummy card numbers (if supported by your provider):
Card type | Number | Expiry | CVV |
|---|---|---|---|
Visa |
| Any future date | Any 3 digits |
Mastercard |
| Any future date | Any 3 digits |
These numbers do not charge anything but trigger the full checkout flow.
Complete the order and check that:
The order shows up under Payments → Orders.
You receive the appropriate confirmation emails and SMS (enable notifications under Payments → Settings → Notifications).
The order status behaves as expected.
After testing, turn Test Mode off and restore any product prices you changed.
Which payment providers can I use to sell on order forms?
Stripe, Authorize.net, NMI, PayPal, and Square. We also recommend AX Pay for better processing rates than Stripe.
Can I sell two different recurring products in one checkout?
No. Different recurring products cannot be combined in a single checkout. Use an upsell to offer a second recurring product within the same flow.
Why is my product not showing in the funnel?
Make sure the product is added under the funnel step's Products tab and saved.
Do I need a funnel step before adding an order form?
Yes. The order form must be placed inside a funnel page.
Can I edit a product after creating it?
Yes. Products can be updated anytime, and changes reflect in connected funnels.
Can two custom shipping profiles share the same name?
No. Each profile must have a unique name to prevent checkout confusion.
What happens if I delete a custom shipping profile?
Products in that profile automatically return to the General Profile.
How are shipping rates calculated for mixed carts?
Rates from all applicable profiles are added together and displayed as one combined shipping line.
Will a test order charge a real card?
No. When Test Mode is enabled and you use the dummy card numbers, no real payment is processed.
I'm not receiving order confirmation emails. What should I check?
Check your notification settings under Payments → Settings → Notifications, and confirm your payment gateway is set up correctly.
